

The_bitter_end
-
Posts
116 -
Joined
-
Last visited
Content Type
Profiles
Forums
Gallery
Events
Posts posted by The_bitter_end
-
-
12 hours ago, vulcanbomber said:
Models always seem to look different in photo's, don't worry about it too much. If it looks fine to the naked eye, it generally is!
I use wood glue to stick the planks; as it is slow to dry, little dabs of cyano along the length helps to hold the planks in place while the wood glue dries.
There is usually some left over deck planking, but not enough to completely planks the lower deck. I only plank immediately below the hatches on the lower deck as this area is all that you will see.
Great tips! I am itching to do it but I dont think I will be planking the centre of the lower deck. I am anticipating making alot of mistakes and I dont want to run out of planking for the upper decks. It does bother me that it wont be happening but I have told myself that the tiny amount you can see through the hatch grating wont be worth risking running out of planking material for.
I have read so many build logs and different opinions on this subject so Im a little confused but what is your opinion on the best way to show caulking on deck planks? I was leaning toward just marking the edges with soft pencil.
-
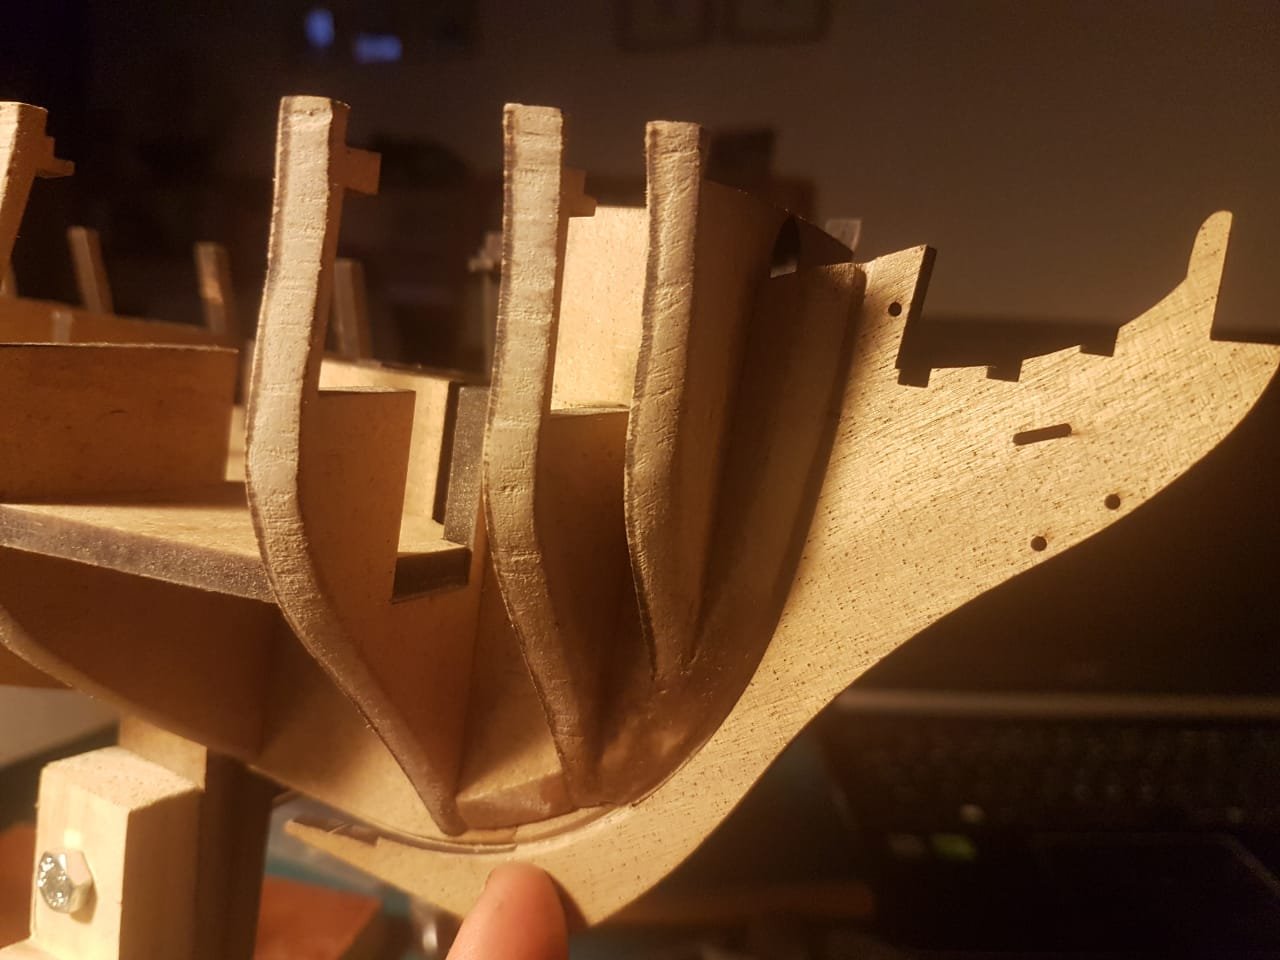
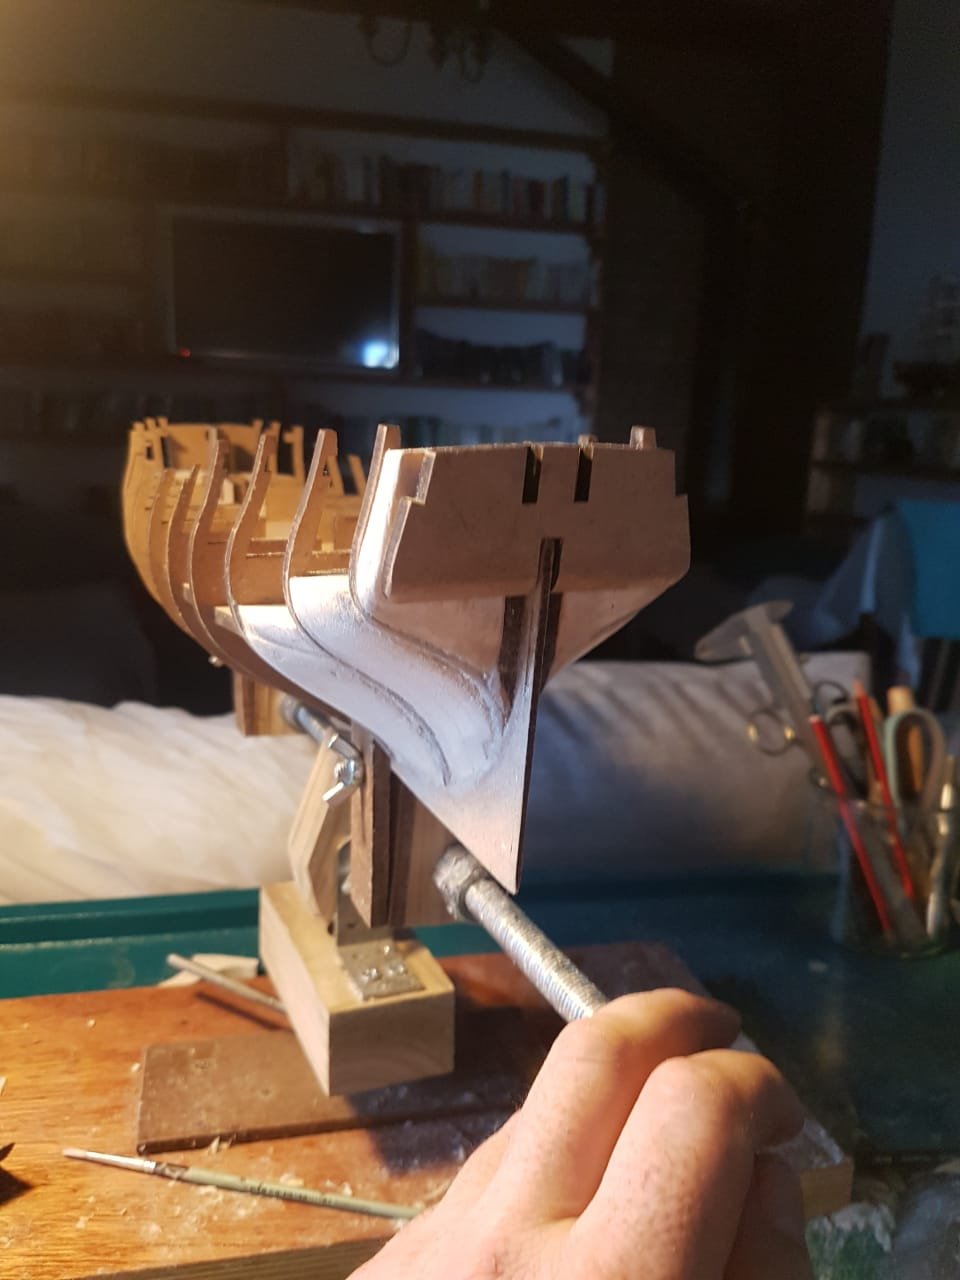
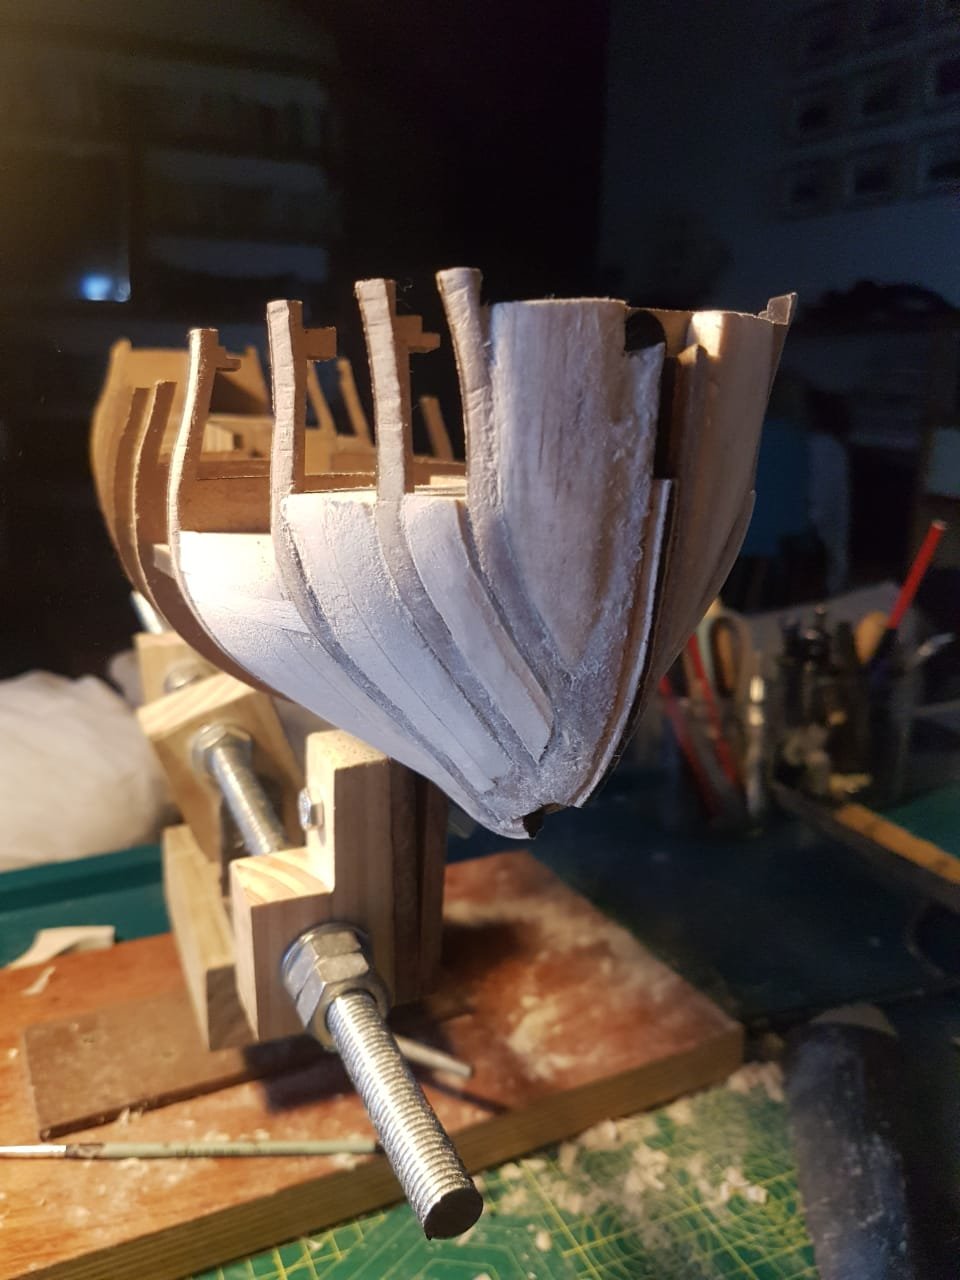
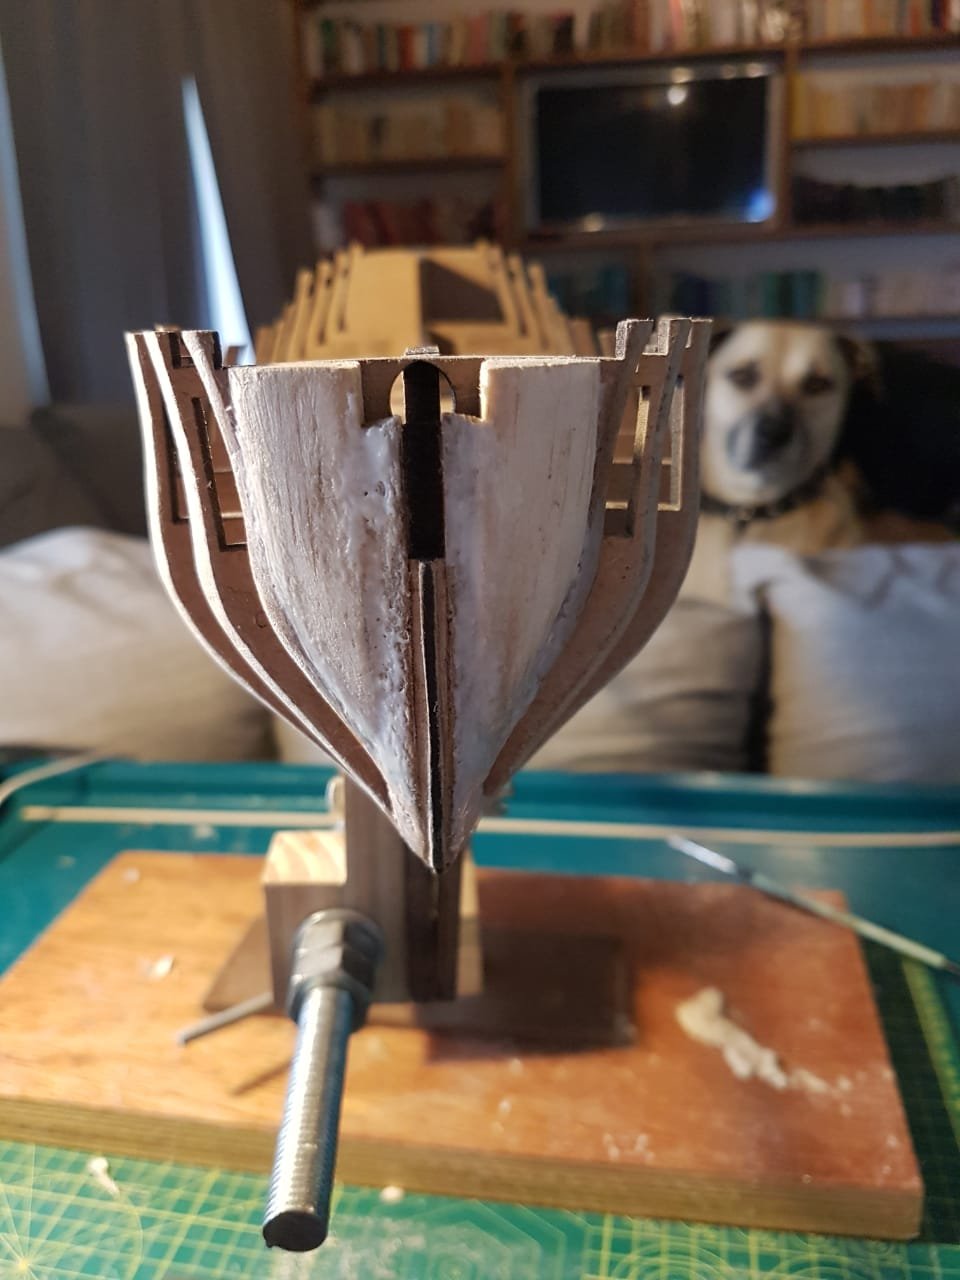
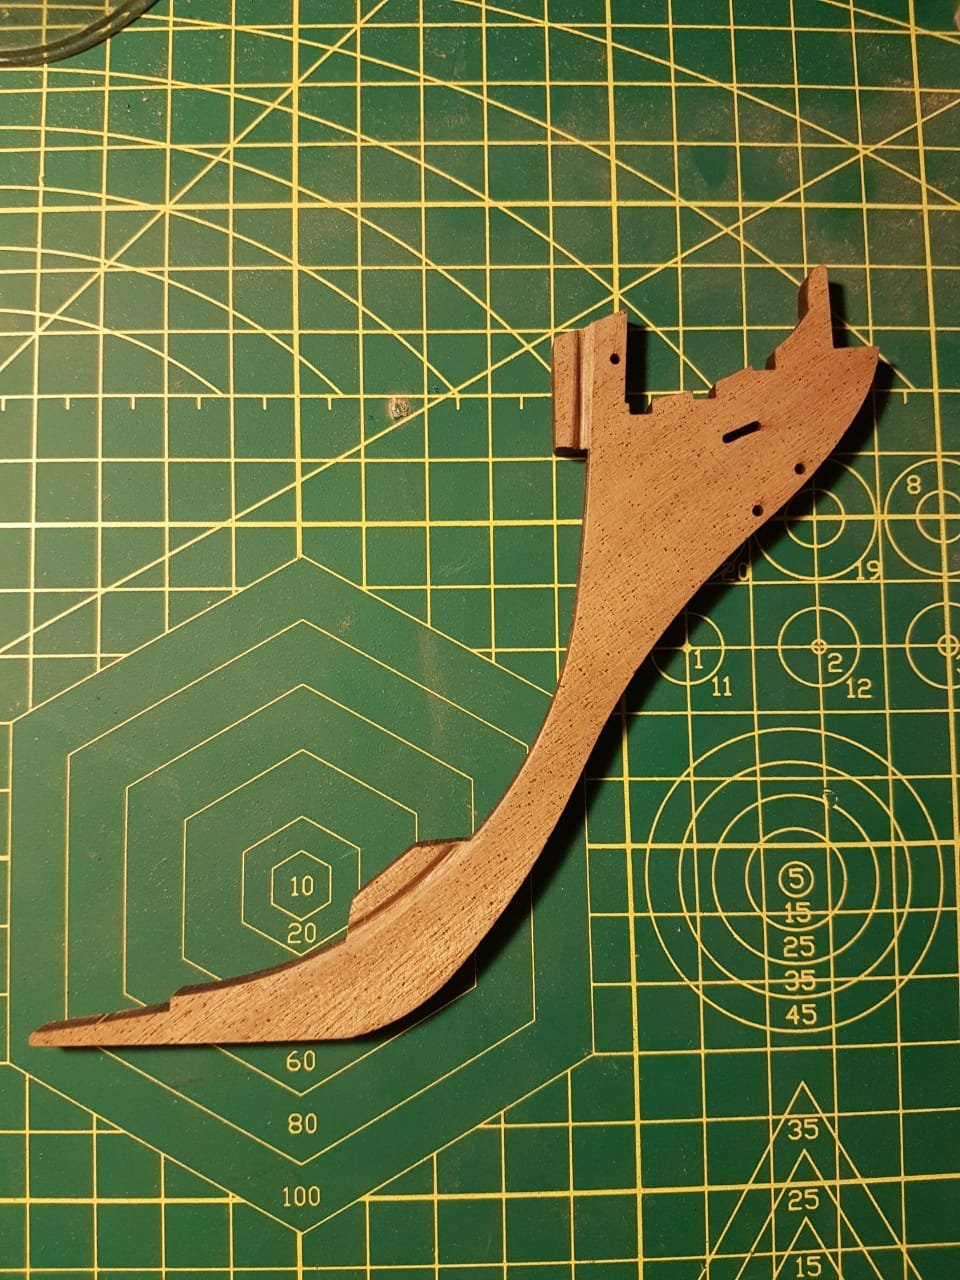
Day 6
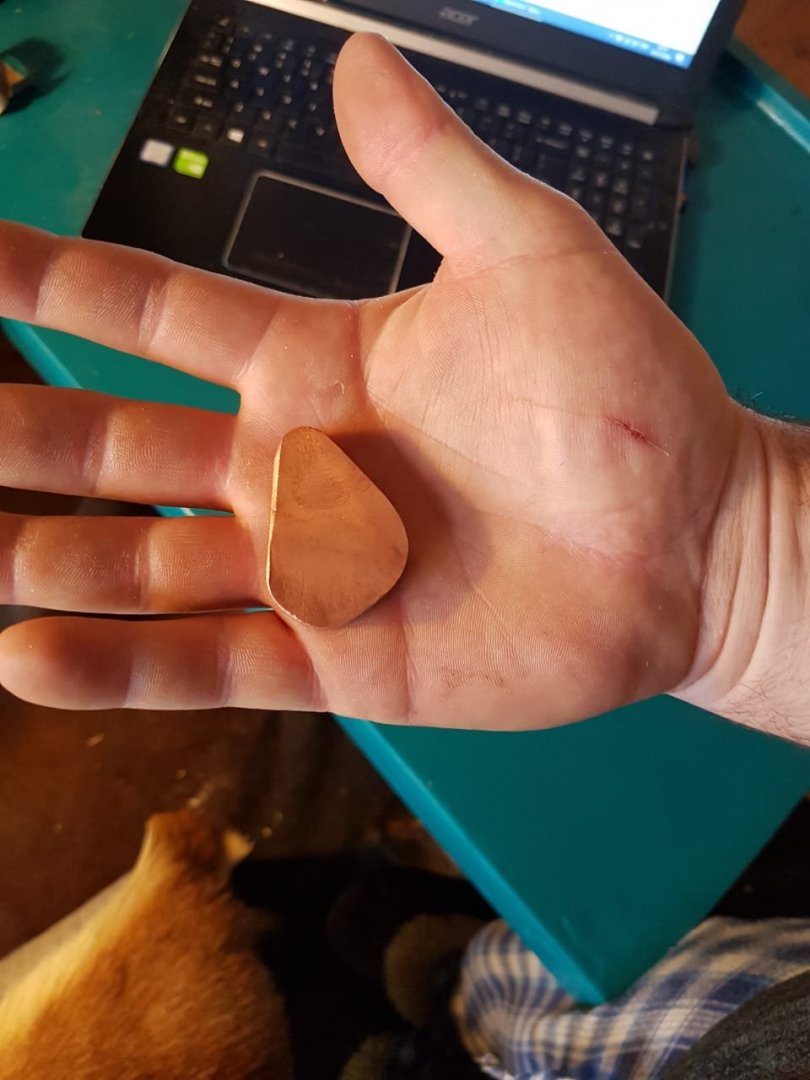
Finally completed, the balsa fillers. This did present some challenges, firstly I only had one 8mm sheet of balsa so I had to stack, glue and cut up to 5 layers at a time. The glue I used made this stack of wood very hard to cut and shape but I am happy with the result. I also had a fraction too little wood to complete the filling I wanted to do. you will see that the area above the lower deck between BHS 10/11 and 3/4 are not completely filled. I had to make do with what I had and my remote location make getting more very very difficult.
For some reason the photos make this work look slightly asymmetrical but i cannot for the life of me see this in reality.
Again, this is my first build and I would appreciate any criticism. specially the kind that I would want to hear before planking over this.
A big thank you to you guys who have helped me so much up to this point.


- JpR62, egkb, vulcanbomber and 1 other
-
 4
4
-
On 10/6/2019 at 2:29 PM, SpyGlass said:
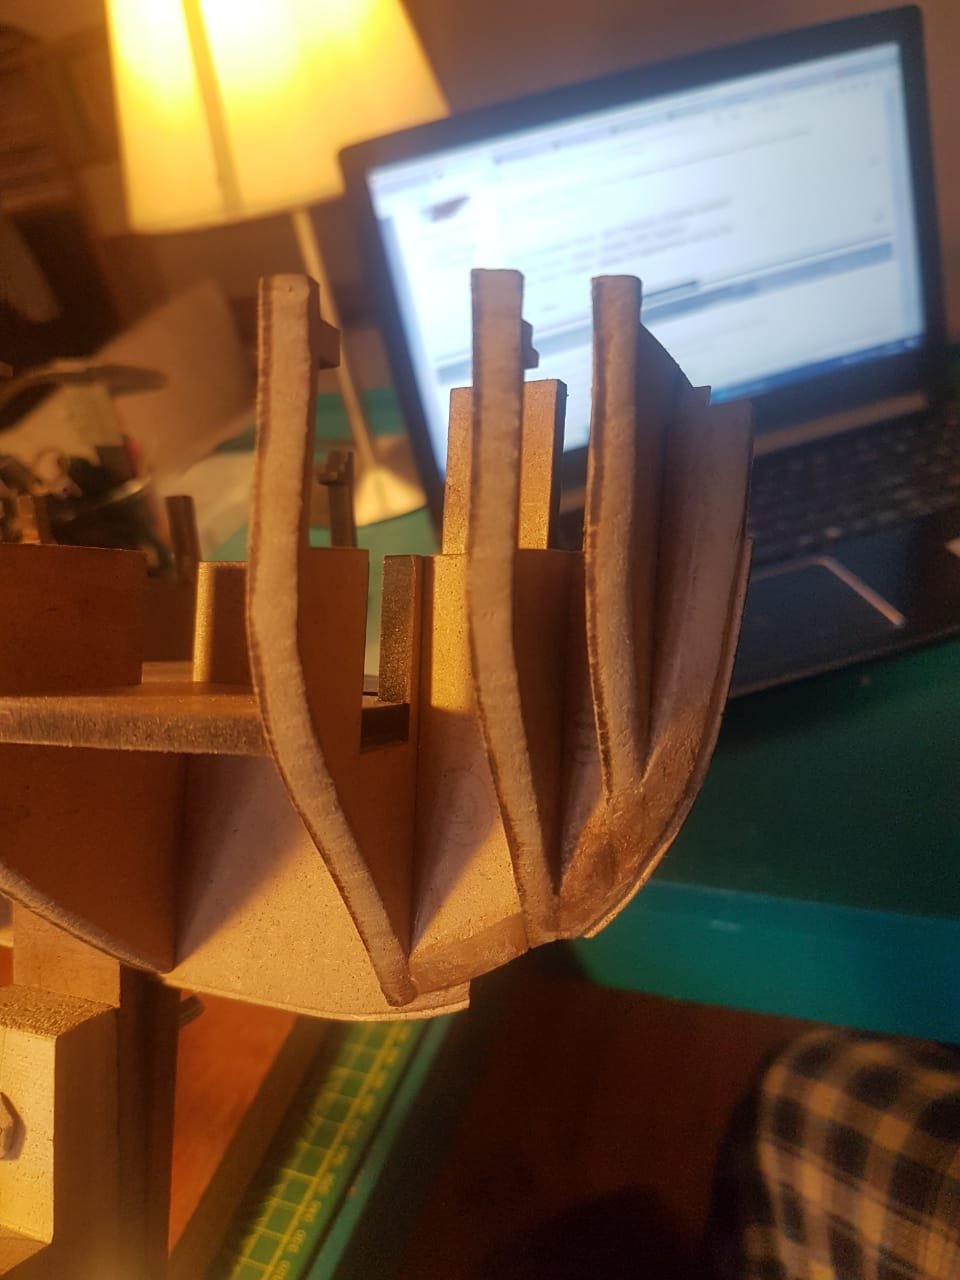
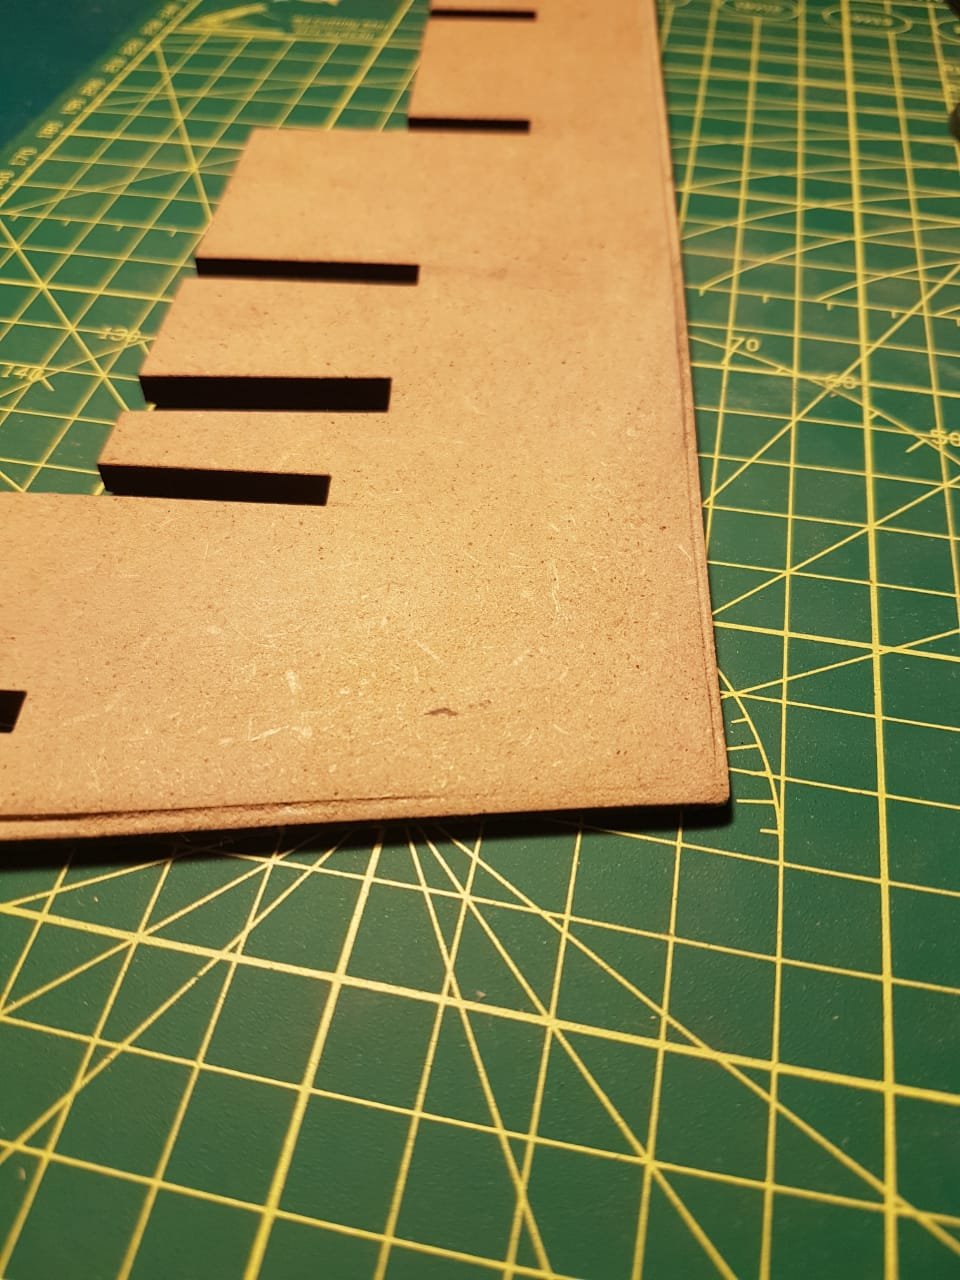
AND now the gunport strips
This is where shaping and reashaping really pays off
Refer to this
Pegasus/fly gunport strip which is a subset of much more in my log which was lost in " The Great Crash"
- the strip sets are overlong - but by how much actually depends upon how "tight" your fairing is at the bow
- Obviously a bit of build variation in BH placing can make a difference but
- Dont touch the jigsaw joint itself - when the halves line up it keeps everything on both sections in line
- The concensus is - and what I have always done - is move the joint back till about 1.2 mm - the tongue then just touches BH 9 and the stern bit lines up fine.
-
this pic shows the position( though i undid the joint to sort the top out )and ther is one on the log reference

- My crucial line up is that the main mast seen through the adjacent gunport is as the plans -sheet 6 if you extend the line of the mast
- You will find that the foremost port probably will have a BH overlap - depending upon your feirceness of fairing
- But the fore part of the strip wil be over long and the bowsprit hole will need recutting
- The strips need to be bent in two directions to show the lovely curves of teh vessel - steam the only way to go
- And the bottom of teh strips are a **** to get to lie in a nice curve
So down to actual work
first steam and fit steam and fit - and then do it again .
This is a Fly being PRE BENT this is NOT fixing just shaping The red arrows point to where the vertical curve is being pushed in
 And after a few cycles - you can end up with the strips looking like this ( the fore strip is the really difficult one. But when bent like this they will just sit in place without any force


NOTE THE S " shaped aft edge and though the strip has been shortened - the bow sprit hole has not been reshaped yet .
The S shapes are put in by clamping scrap to push in the curves - see log refernce pics and above
I think I will pause here - it ook me a few months to get this far so it may take you a day or two! I will see if i can find any more old pics
Hi Spy!
I started replying to you and then got an urge to check out your link again which navigated me away from this page and my reply so Im starting again..
Thank you so much for your attention to detail and help. your work is great to see and you are potentially saving this kit from my ignorance. You preempted almost all of my questions.
I do have 2 rookie questions for now, Im sure I had more but for now they are gone.
1. What kind of glue do you use for the hull planking and gun ports.
2. Is there enough excess wood in the kit to plank portions of the lower deck? i would love to as you suggested but I am worried about having insufficient timber and getting caught. This is South Africa so getting new planking will be a nightmare.
I am about to start leveling bulkhead No. 9 as per your warning. That will be my sole task for the night, its been a long day.
Adios! Haiko
-
18 hours ago, vulcanbomber said:
Spyglass has given some very good help there.
I, too, use a standard kettle to steam the planks - just watch the steam on your fingers!
It is also very important, like Spyglass mentions, to make sure the planks are completely dry before fixing to the ship. I used to steam and place in the evening so that they would be well and truly dry by the next evening. Take your time and you should do fine.
Hi Vulcan
This is great input. I might just make a custom steaming tube. Just because I enjoy crafting this kind of thing. The keel clamp in my photos is one of those things. I like these minor challenges. Regardless I will be sure to work with completely dry planks and exercise all the patience I have.
Cheers Haiko
-
Day 5
I opted to begin with Balsa wood fillers for this build. I mostly did this because it is my first build and I felt it would be a good learning exercise. I have limited beginners advice at this point other than to work as slowly as possible. I probably wont be getting a Nobel prize for physics for pointing this out but its obviously much harder to build back up a piece of wood that has been cut back too much than it is to just shave a hair more off to make things fit. I also filled some of the gaps with a wood glue and balsa dust mix. I found that the balsa dust doesnt actually work nearly as well as the MDF dust for this application.
It is also worth repeating the fact that some of the BHs are not entirely level where the deck will be installed. SpyGlass was kind enough to point this out to me and I found that BH No. 9 was slightly raised for this. I would suggest that and sort of variation in alignment be corrected before beginning with fillers or you will end up doing double work.
This is my progress so far. for the record it really bothers me that the work looks so sloppy on the photos but in reality it isnt THAT bad and the shape seems decent. I think this will provide a solid base for planking and the somewhat messy appearance will not affect the final product at all. (for those that are interested the handsome fellow supervising progress is one of my 5 dogs, Cobra)
-
18 hours ago, vulcanbomber said:
Yes, pre-bending the strips will help a lot. I used steam to heat them up where they needed bending, it helps when they are supple and less are likely to snap. place them against the hull while they are hot and hold in place until cooled using pegs, rubber bands and anything else that will help.
There are lots of tutorials on hull planking on MSW, but the one I used as a guide when I made my first build was 'Simple Hull Planking For Beginners' which can be found here: http://modelshipworldforum.com/ship-model-framing-and-planking-articles.php
Don't forget, we are here to help, and no question is a silly question!
Vulcan! Good morning sir
Thank you for this advice and the link. I have already started using it for the creating on filler blocks. I will be referencing it plenty in the future.
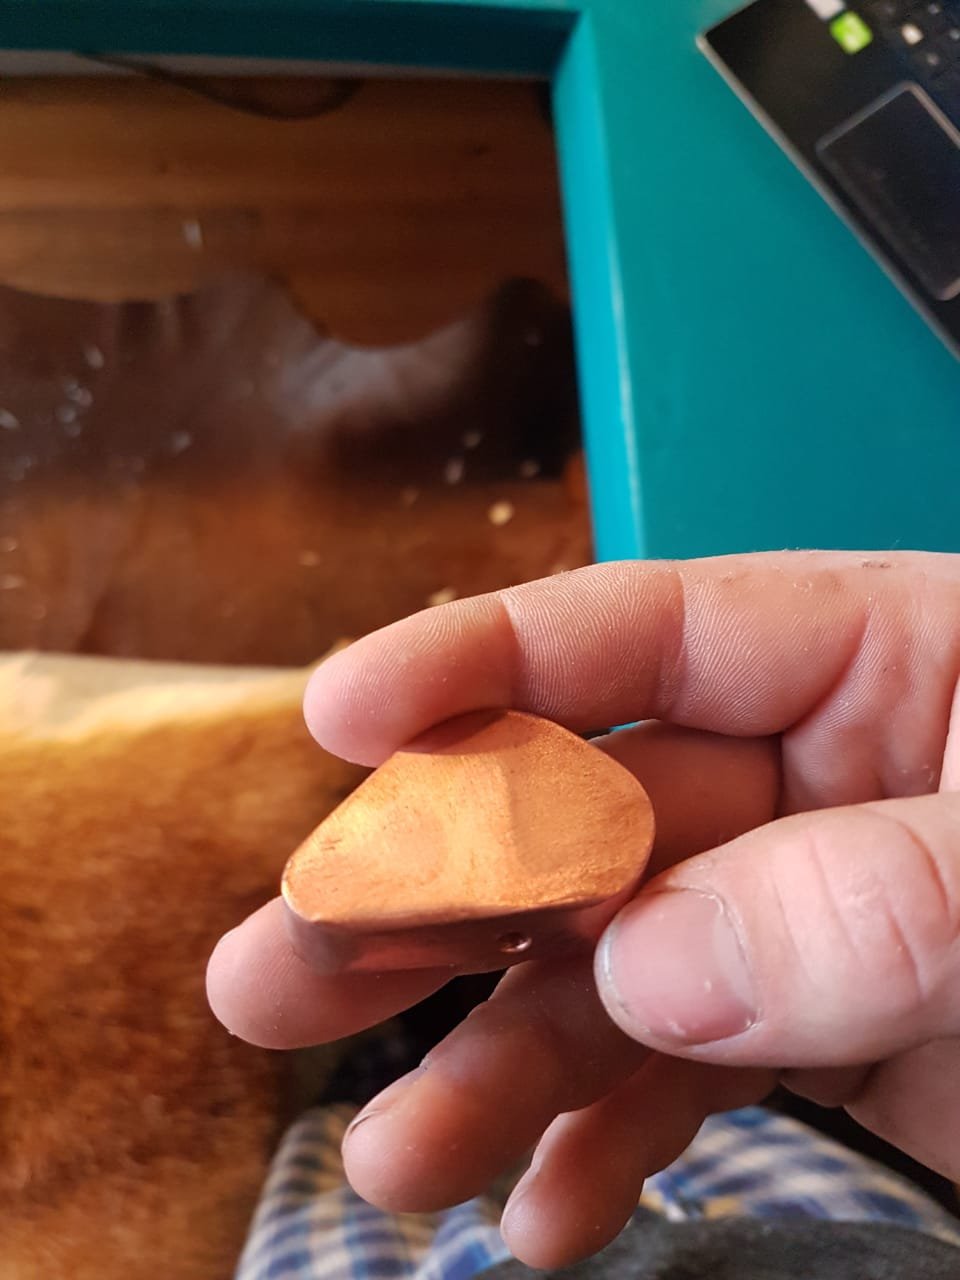
I forged a copper head to go onto an adjustable soldering Iron for plank bending. Do you know anything about this method? is steaming superior and if so what is the best method to steam a plank.

I will be sure to test the "no stupid questions theory to its limits!
-
9 hours ago, SpyGlass said:
And hello vulcan - it was your Fly build many many moons ago which restarted my modeeling - I still have bits i stole from your log !!
Top of the morning to you Spy!
Thanks again for helping me through this build. Your advice has saved me several times already. I will definitely not fit the walnut stem until all the planking is done. I love the Idea of bending around the bow(excuse my sloppy use of nautical terms, I got them from working on oil rigs which isn't quite nautical college.)
I ended up deciding to start with the balsa infills. Not so much because i feel they are needed but rather because i feel like they are a good skill building exercise. I would like to one day(in the distant and theoretical future) do scratch build and this seems like a perfect baby step to start teaching me about shaping etc.
Dont worry I wont attempt to craft a double plank rabbet, I can only imagine the complications that could create. Your first planking looks beautiful. It almost seems a shame to cover it. On a vaguely related note, when I get to the gun ports, is the optimal order of installation as follows: Deck, deck planking, gun ports and THEN first hull planking? also you said in your build log that the gun ports dont fit. I unfortunately didnt fully understand the correct fix for this? must I shorten the ports and then recut the puzzle joint.
I will do my utmost to follow your planking/rabbet guid but you may have to tolerate alot more questions when I get there. It seems prudent to ask your views on wood filler at this point. do you stick to a glue/sawdust mix or do you use actual fillers on your work.
Its good to know that I am making decent progress, I am very lucky to be in a situation where my time is my own between 1730 and 0800 every night. Please tell me if the quality of my work is not where it should be and I will be sure to take a step back and slow down.
I hope you have an outstanding day.
-
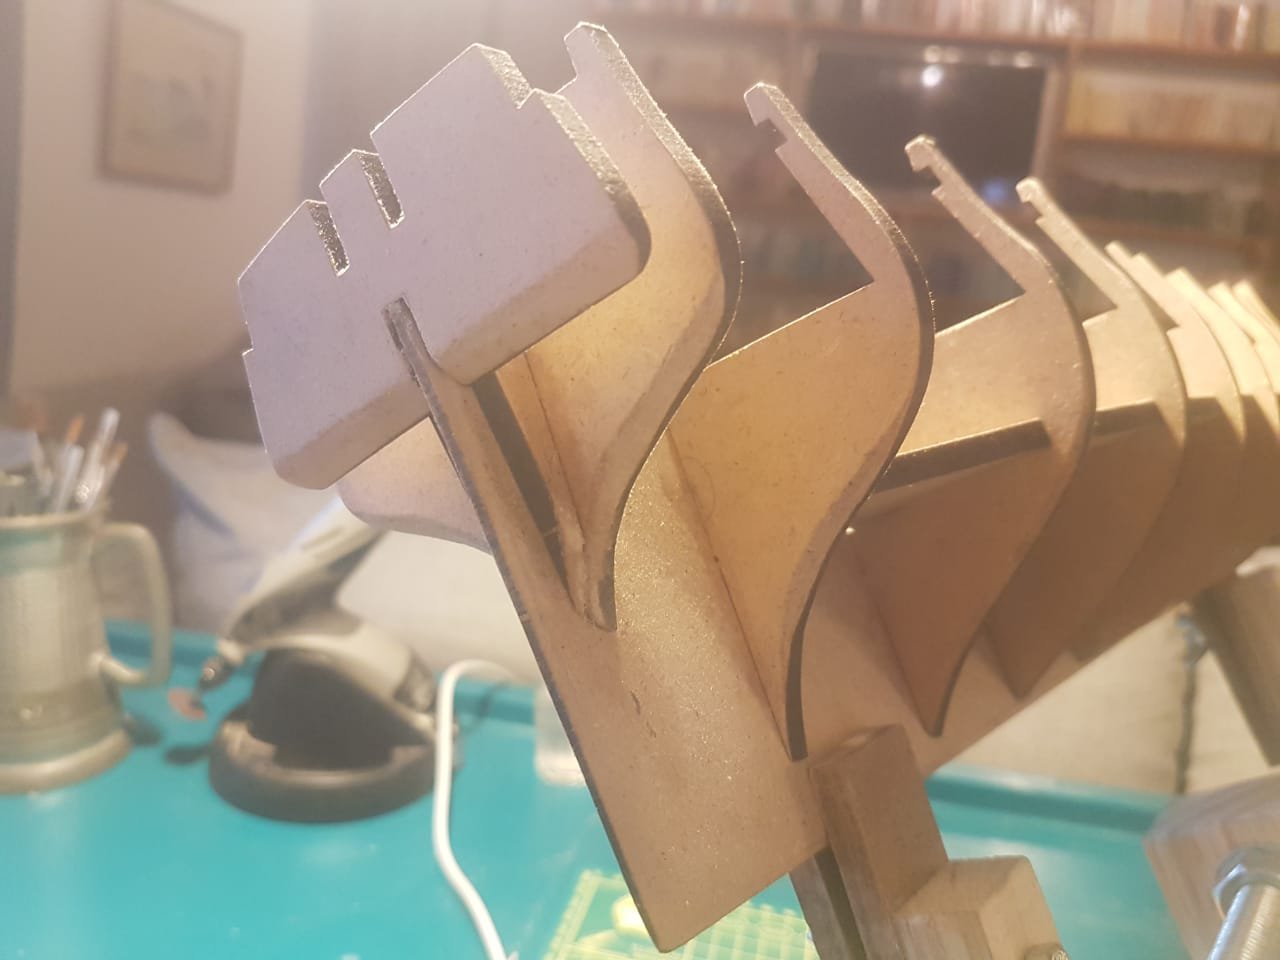
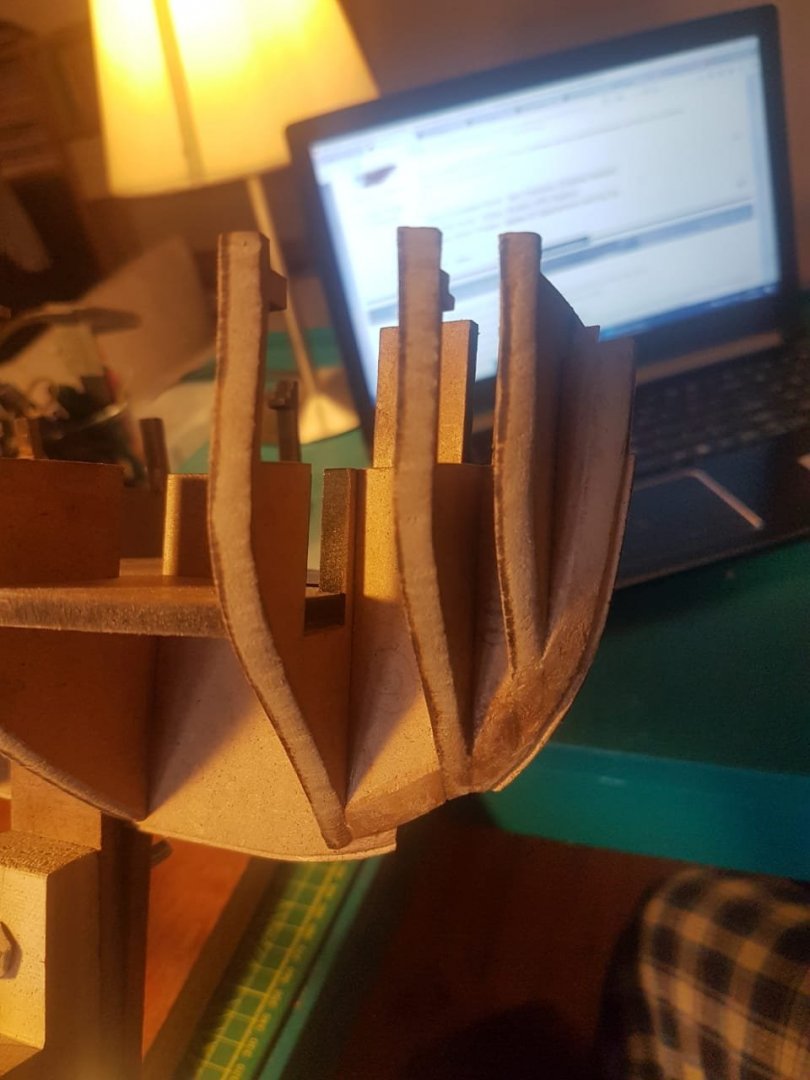
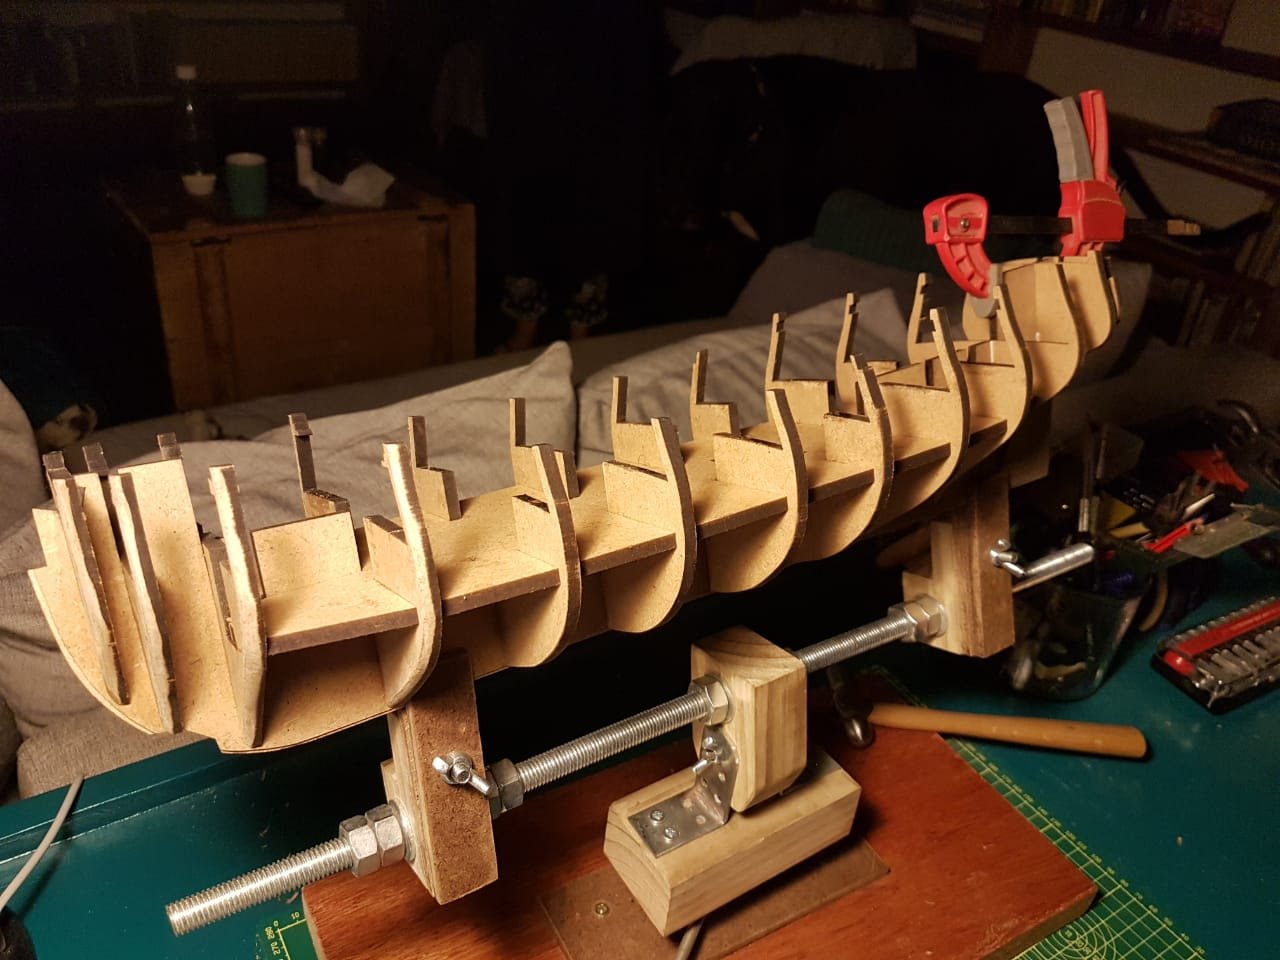
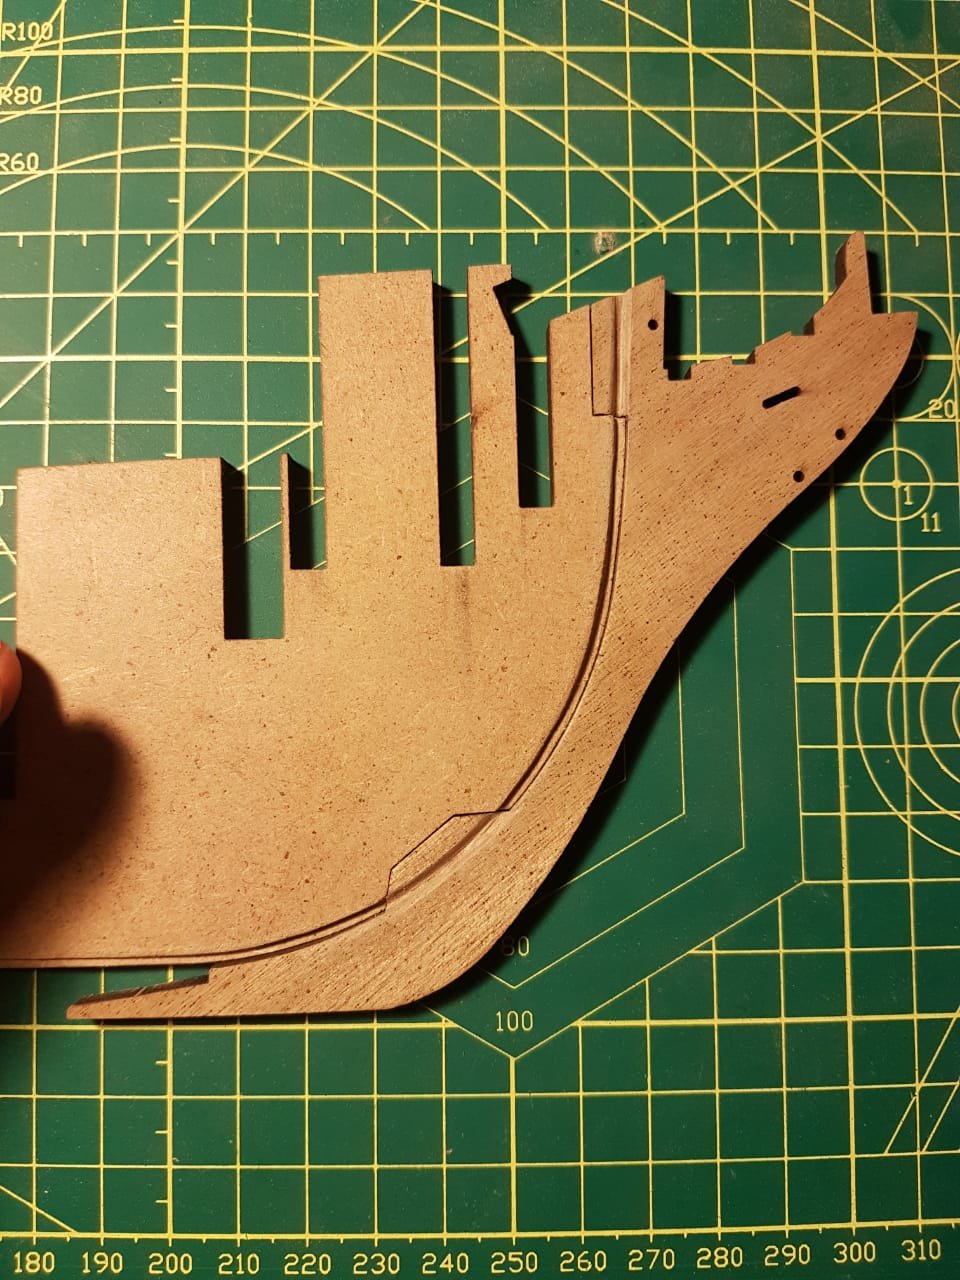
Day 4
Progress has been slow but enjoyable and I am learning, mostly by error, all the time.
At this stage I increased the fairing on the bulkheads as suggested although I probably still need to increase the fairing on the stern BHS. I have also shaped and fitted the blocks. My next step is to install the balsa fillers, I am hoping these will give me a better idea of how the lines will run and assist with further fairing.
I do have some concerns about the bap between the rabbet and BH 2/3 as pointed out with my grubby singer in the photo below. Is this going to be a problem when planking?
I was also wondering what your views are on using standard hardware store woodfiller to fill small gaps around the balsa wood etc when Im done(all stuff that will ultimately be planked over.

- GrandpaPhil, chris watton and egkb
-
3
-
7 hours ago, SpyGlass said:
Mounting sort of fall into two categories
A cradle of some type where the model just sits in and that can take many forms
Or a pedestal mounting which needs to be fixed to the vessel.
Some people put screws into the keel
I use bolts or threaded rod which has advantages i find
BUT it must be done early in the build preferably f before any gluing is done but can be done any time befor first planking
I drill and reinforce holes for the rod or bolts and fit in captive nuts see my logs for more detail
and
REMEMBER to at least temporarily fix the walnut keels bits before drilling the mounting holes - its MURDER tryin to line them up later !!
On a related subject I use temporary dowels to hold stem, stern and keel pieces in place . and if you do that you find the stand fixings can be used to hold the walniut keel bits in place/
You might like to try it. I do it mainly to be able to take off the walnut bits to enable free sanding of the hull without damage to those bits
Hi again Spy
As much as I like the look of the mounts you did I think for a first build it is best that I don't complicate things too much and I just go with the cradle option, this is mostly because Im a complete newbie and Ive already glued the bulkhead pieces in place. . I will definitely do this for my next build.
I will however take your advice on pre-pinning the keel portions in place once I have sorted this balsa issue out.
-
9 hours ago, vulcanbomber said:
You are making good progress.
As Spyglass says, make sure you fair the bulkheads well, Use a strip of the planking and hold it against the bulkheads and you will see where more fairing is needed to get a nice smooth curve. The more time you spend here getting the shaping right, the easier it will be later on in the planking.
Edit: You might find adding some balsa in between the fore and aft bulkheads will help when planking.
Hi Vulcan!
Thanks for the encouragement. Funnily enough my first question for the day was going to be about the balsa between bulkheads. You have answered my question for me. I will begin with that this morning after my post. I think it will also give me a better idea if my fairing is correct.
cheers
Haiko
-
1 hour ago, Jaager said:
Jolly,
If you have any ambition to go to scratch building, get as much and more of what Haiko is offering as you can even unrealistically handle.. Work a deal and use specie even.
This is especially true if what is being offered is 4x4 or 8x4 (or your domestic equivalent of those dimensions). If your living situation is limited, long term rent a small storage unit.
Debark, seal all cut ends ( surplus house latex paint will do if gobbed on super thick - a piece of Bounty will do for a brush) - sticker between pieces. Find a storage unit location
that is not prone to termite or carpenter ant invasion. Maybe spread Borax fabric softener on the floor - kills roaches - maybe other beasties react against it too - study up.
There is also a local species of Buxus there, see if you can get a bunch, a big bunch.
If you do come over to the dark side, you will probably always regret it if you miss this. Think Scrooge McDuck in his vault of gold or Smaug in his.
Get with your fellow countrymen who share this interest and pool your efforts.
Let me add some of my perspective on this. I come at this from POF in the 1:48 to 1:60 range of scales. It is difficult to grasp just how much wood it takes to fully frame a ship at these scales.
An impressive amount winds up as saw dust. Tackling a liner will give you a real appreciation for the stress on the treasurer who had to come up with the money to pay for a real one or the sawyer who had to obliterate a forest to supply the wood needed.
Hi Jaager
This is actually a very valid point. I do a fair amount of carpentry and the moment you cut anything other than a dead straight plank the wastage is remarkable. I can only imagine what that must be like when you a cutting hundreds of curves that must all be perfect.(Im guessing a fair amount of the wood winds up in the bin too when mistakes are made).
Luckily for old Jolly I hope to farm here for a long time and there is a almost limitless amount of wood here for him whenever he would like it.
- Canute, mtaylor and Jolley Roger
-
3
-
9 hours ago, Jolley Roger said:
Well, guess more wood for us SA locals!
I'm definitely interested in your offer.
I have an old Dremel Drill Press that is gathering dust, if this is something you would be interested in?
.jpg.080612e8be6f3cb2c848d51476907319.jpg)
.jpg.dbb1c73cd35e2543fa430e3352dfa25c.jpg)
Good evening sir!
Thank you so much for your kind offer. I would love to give the drill press a good home.
If you would like to come out to the farm and choose your trees and wood you are most welcome to. This is a guest farm so there is plenty of room if you would like to stay the night. Alternately I can just pick and choose a load of good stuff and meet up with you next time I'm in Cape Town, which should be fairly soon.
I am still working my way through your build log. A really great experience so far. I am highly impressed by your work.
- mtaylor, Jolley Roger and Canute
-
3
-
5 hours ago, SpyGlass said:
Thats not at all bad - i think you will need a bit more fairing at stem and stern BHs - i try to ens up with just a trace line of marker on the ulk head.s Oh I forgtot to add my oterh good tip use the deck or even the deck offcut as a guide to the amount need to be take off the BHs - if you have the deck fitted - temporarilly or permamnently then you can eyeball the angle neded on the BH from above to match the deck edge.
If i remember one of the BHS towards the stern is a teeny bit proud of the run at bulwark level - run a strip along to check the lie .
Oh and its a good time to at least rough shape the blocks in between the end fore and aft bulkheads-

I temporary fit them buy positioning and running a drill through boh and use a drill bit as a dowel, Then you can mark on the block the curve on the " unchamfered" edge of the bulkhead which is a wonderful guide to shaping the block
great progress
if you havent glued yet - or even if you have - NOW is the time to decide your mounting method and position
Hi again Spy
I took you advice and did quite a bit more fairing, particularly on bulkheads 1, 2 and 3 using the negative of the deck sheet to guide me. That was a great suggestion.
I took a look at what you said and you are entirely correct. BHS No. 9 is about 1mm higher than the rest. I will be attending to this tomorrow morning once the evenings glue has dried.
I also shaped the blocked now as suggested...a pretty challenging task. I think I will need to make further changes to their profile as I begin planking. I am having a really hard time visualizing exactly how planking will lie so I dont want to make any changes I cat fix just yet.
Is there somewhere specific that I can look at mounting methods? I didn't consider it AT ALL.
Thank you for your encouragement and patience. It is hugely appreciated.
-
12 hours ago, Vane said:
If you want to do a very detailed and high quality model, my number one tip is to buy alot of sandpaper and really use it everywhere on every piece on every side and make sure perfect fits.
Hi Vane
Thank you for taking the time to give me this advice. I will follow it as far as humanely possible. I have a pile of 600,1000 and 1200 grit paper that I will put to good use. Keep an eye on this build and hopefully you will see improved surface condition from now on.
-
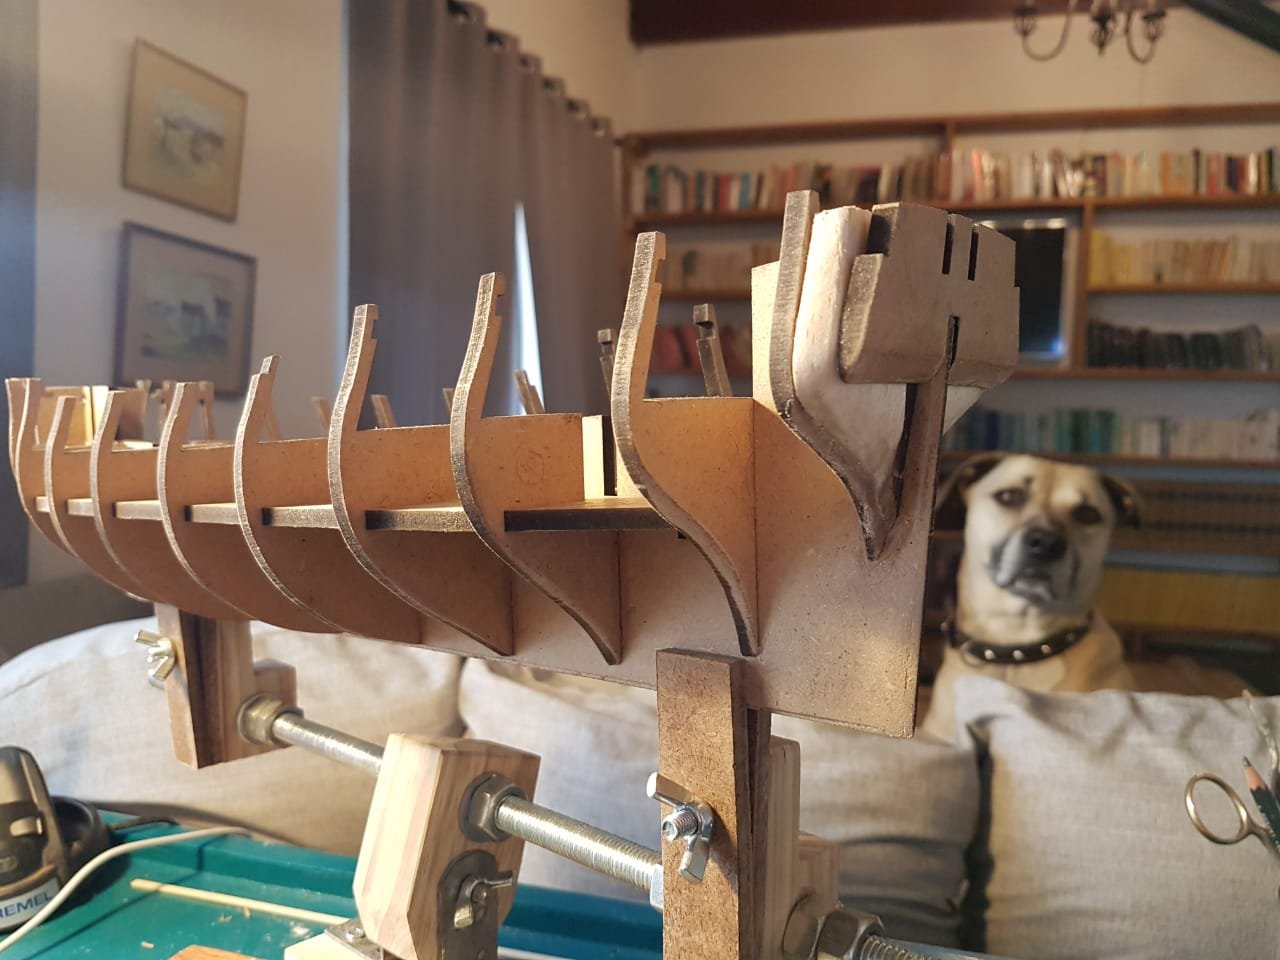
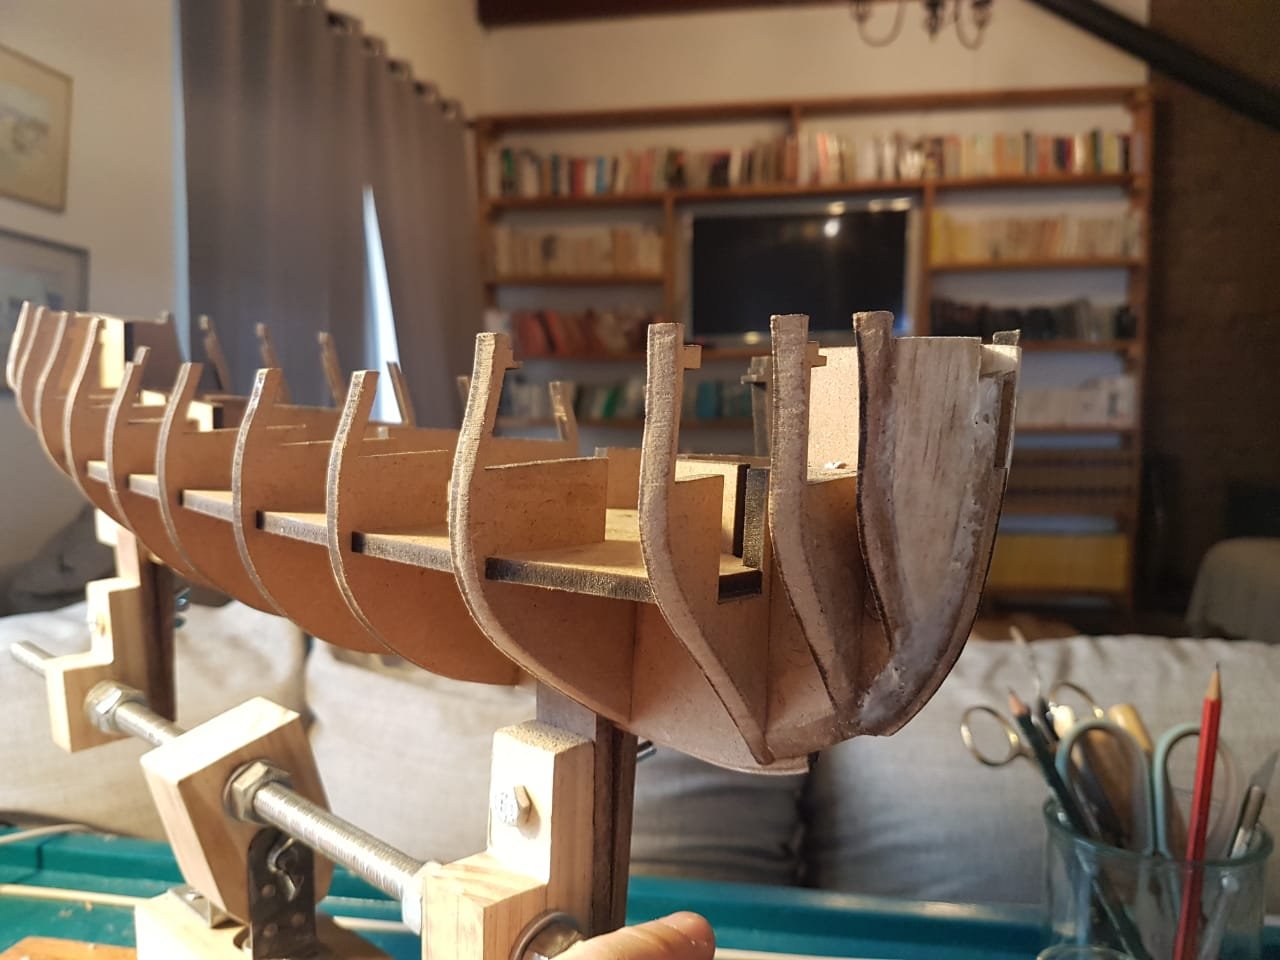
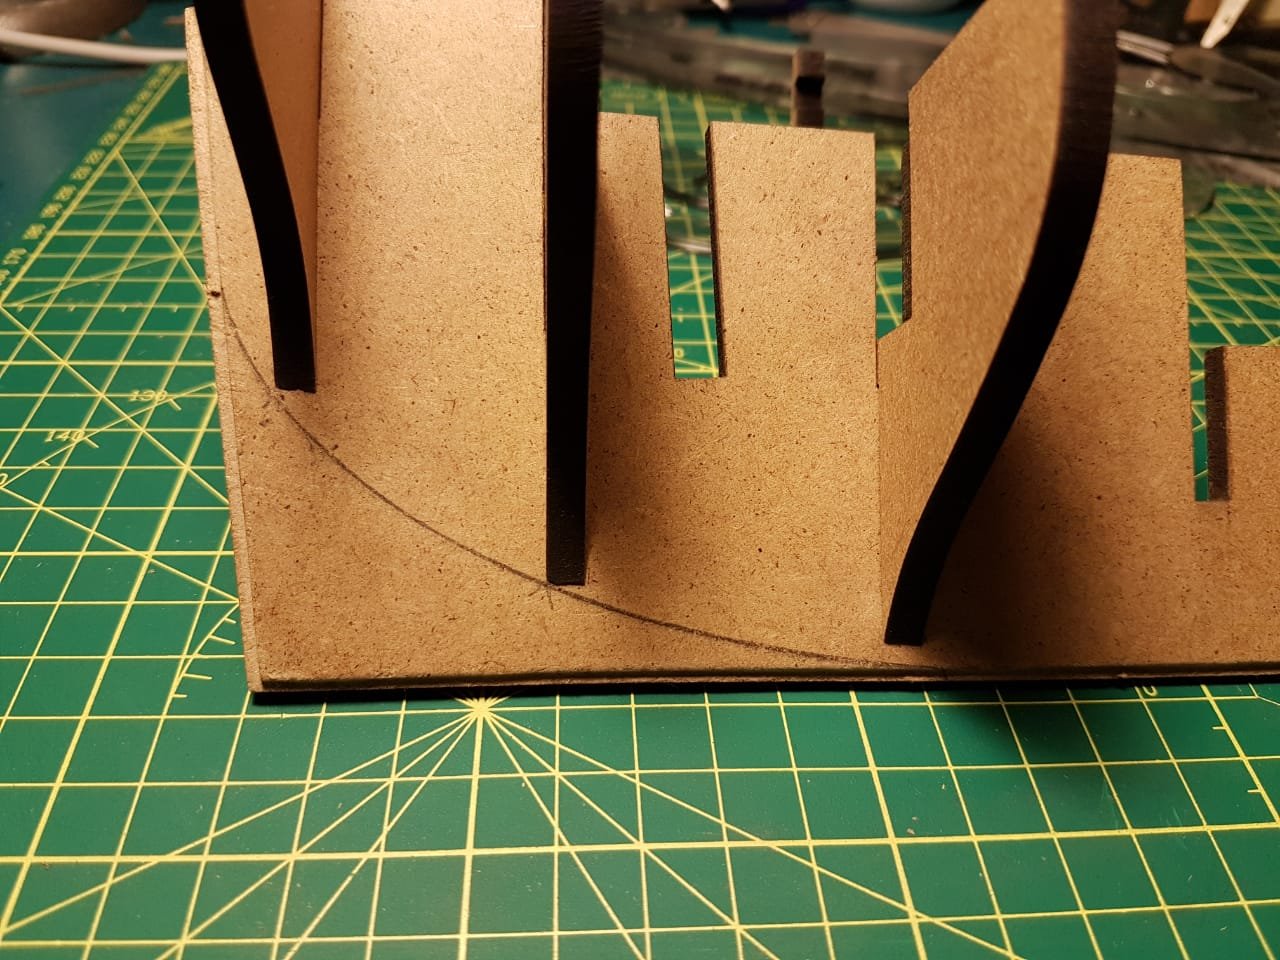
Day 3 (Evening)
At this point I faired the bulkheads.
Predominantly bulkheads 1 to 4 and 10-13. I did this by dry fitting all bulkheads and then removing and shaping one at a time(repeatedly) until i got a reasonably tapered angle for the planking. I suspect there will be some modification as I go. In addition to this I also sanded all the laser cut surfaces a small amount to allow better glue adhesion.
I then dry fitted the lower deck. My suggestion to a newbie like myself at this stage is to clean up and sand all mating surfaces as best as possible. I found it to be a hang of a tight fit. After cleaning it up a bit the deck went in somewhat more easily. However once I was satisfied with everything and I had glued the bulkheads in and started to fit the deck things got somewhat panicky because I was really struggling to get the lower deck in and the glue was starting to dry....SO...make sure that everything goes together without effort or you may regret it.
Another minor observation is that I fitted and glued bulkheads 3-10 first, then seated and glued the lower deck. I found this to allow me just a little more space to work on the lower deck and then fitted the remaining bulkheads.
The plan for this morning is to tidy up the work a bit and fit and shape the "plank termination" pieces as far as possible
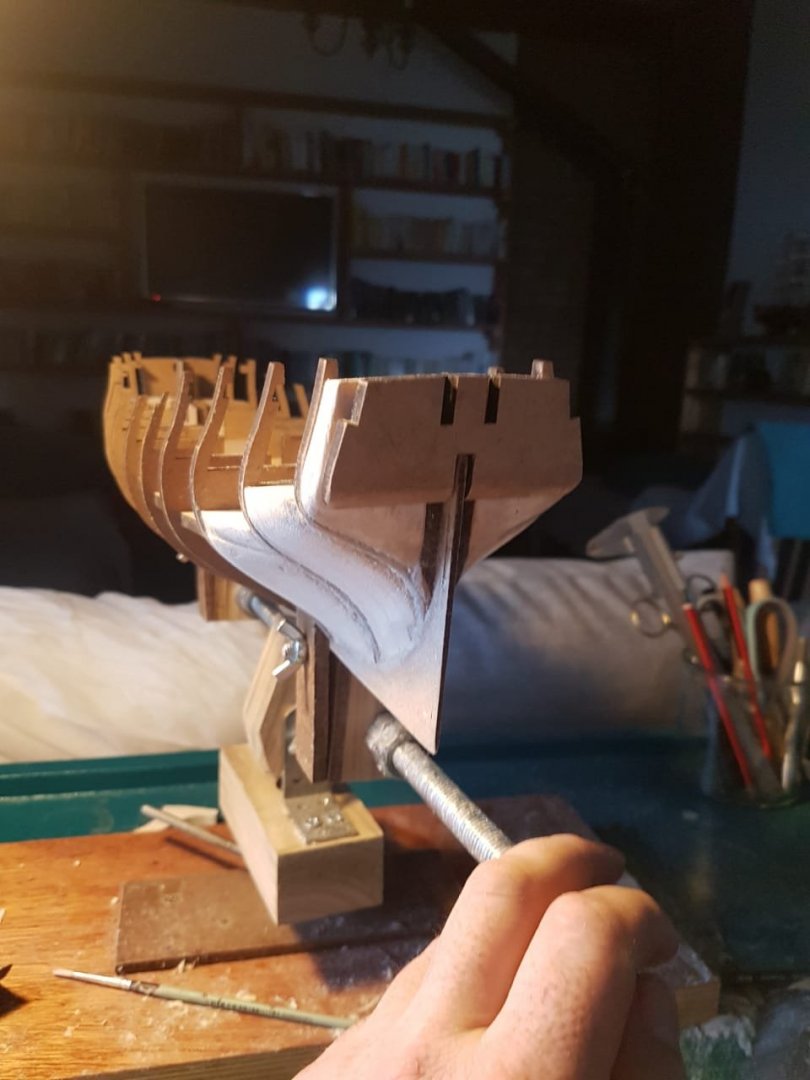
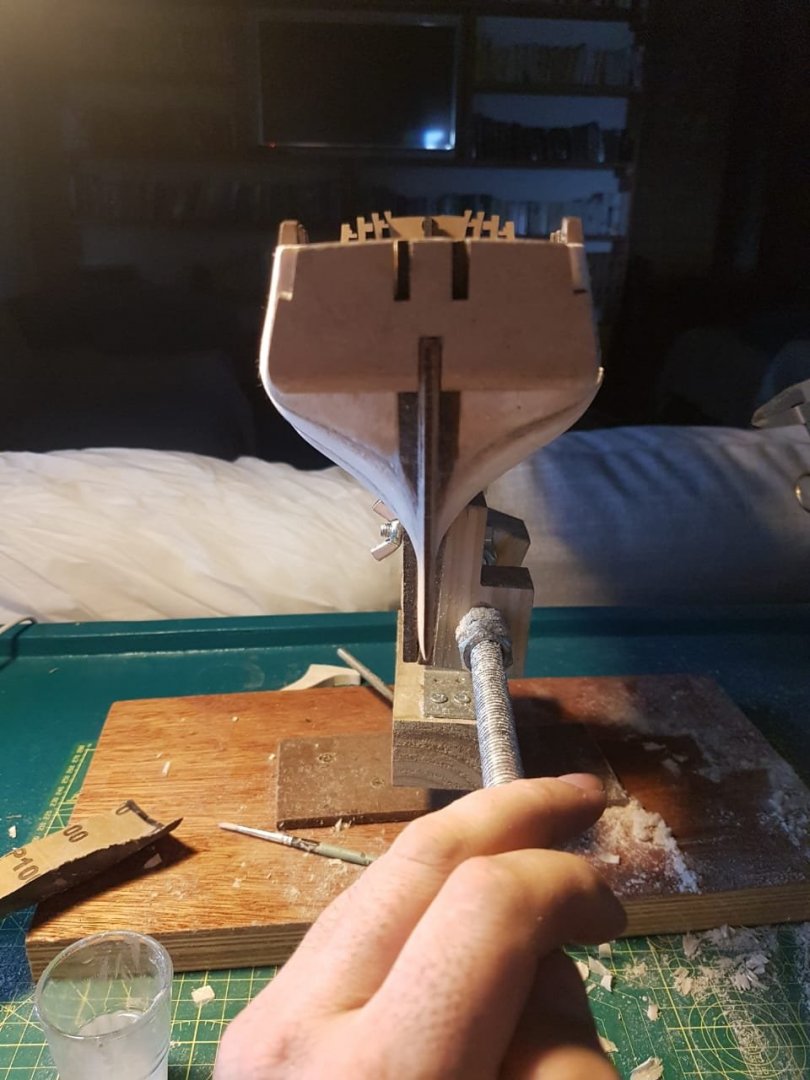
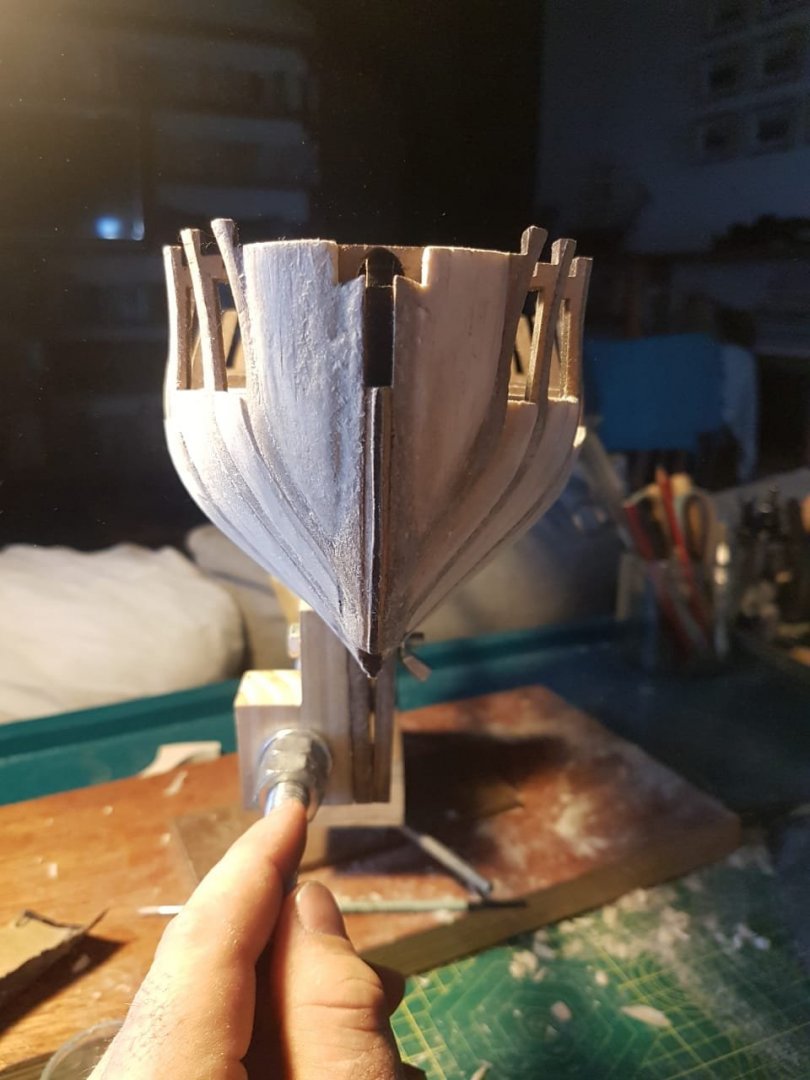
This is the progress so far, excuse the rather odd keel clamp. It looks strange but works a charm. PLEASE tell me if you see something wrong here, Even the smallest detail. I am here to learn.
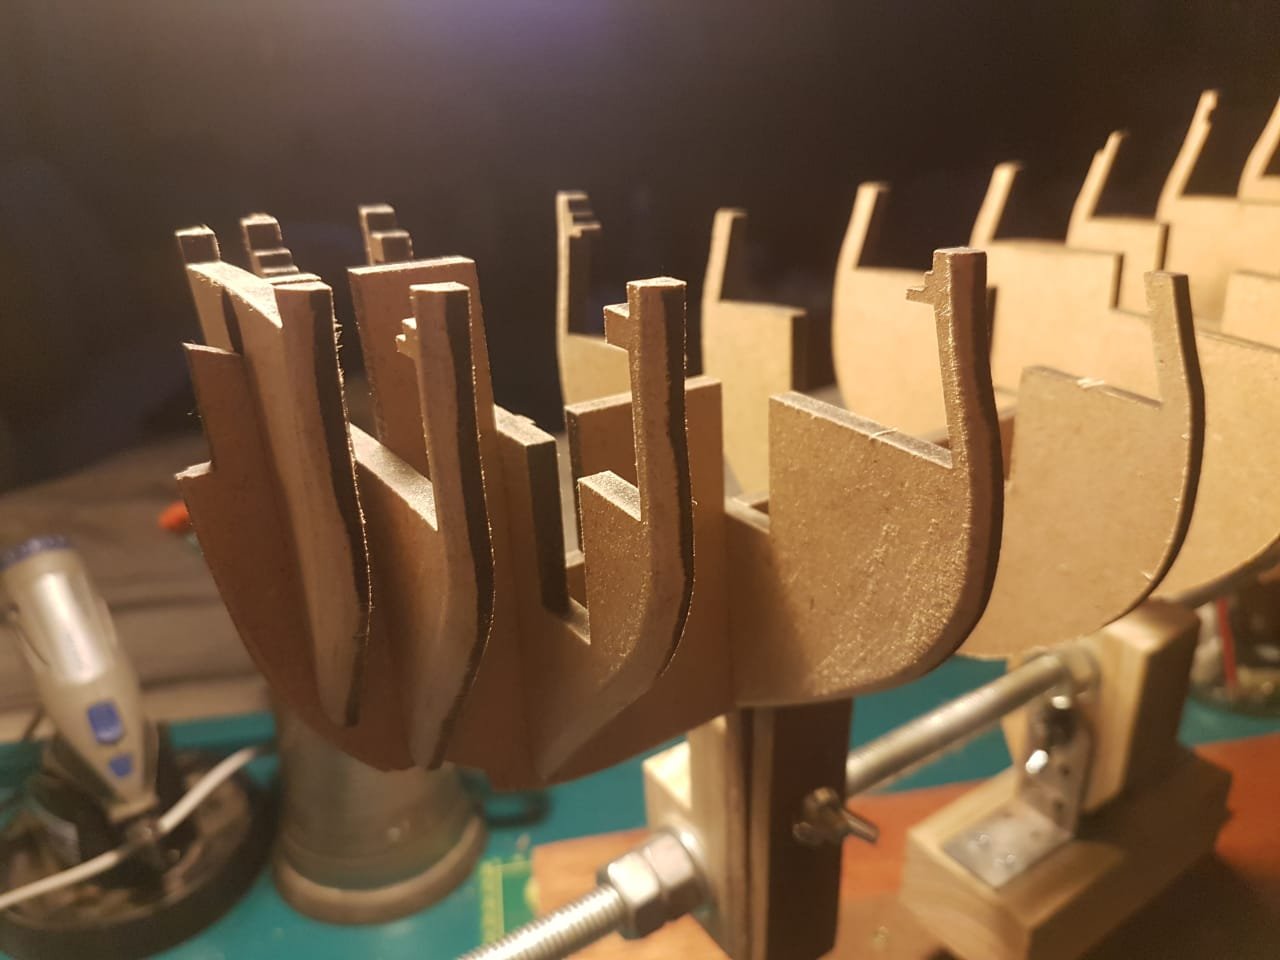
PS. I realise that my Rabbet lines need some correction But I have decided to attend to this as I begin planking. I suspect that the rabbet is a somewhat "fluid" structure which in some places was not needed at all(particularly on the keel in the bearding area(i think)), some places where it should remain cut at 90 degrees and some places where it should taper in at a currently unknown angle. ...
-
5 hours ago, SpyGlass said:
Bitter end your numberd questions = quick and messy reply i have terrible internet
1 Eventully when they are mounted you use a planking strip to check the curve of the hull over the bulkhead and sand/ shave
But i do a fair amount before gluing the bulk heads I mount them unglued with decks ect to hold them fairly firm
Then using one of the long " stanley knife - style break off blades" trim the edge of the buklhead of holding the blade equidstant from the BHs before and after its not accurate byt gets a lot of the initial stuff off
2 fixing points I should have said mounting points - i drill and fit for threaded rods to mount onto pedestal
3 i cut the rabbet so the plank could lie into it -same applies to edges of all rabbetss they are not square cut
4 yes - technically i suppose the bearding limne rusa sling the bottom of the bulkhead - cutting off teh corners for and aft
I actually bring the planking to a point halfway roughly between that bearding line and the keel edges and indeed then just smooth it in so you get a run onto the thinning bit of the keel
Good morning Mr. Glass!
Perfect explanations again. I came close to doing all this correctly as you will see in my next post. I just need to modify my rabbet somewhat to take away the 90 degree corner.
thanks, Haiko
-
6 hours ago, SpyGlass said:
Yea that looks right At the stem just take the stern edge of the keel down to just a bit over the stern post less two second planking thicknesses so that you just end up with the second planking jussst a teeny bit proud of thestern post and you can sand those strips flush
Well Explained!
-
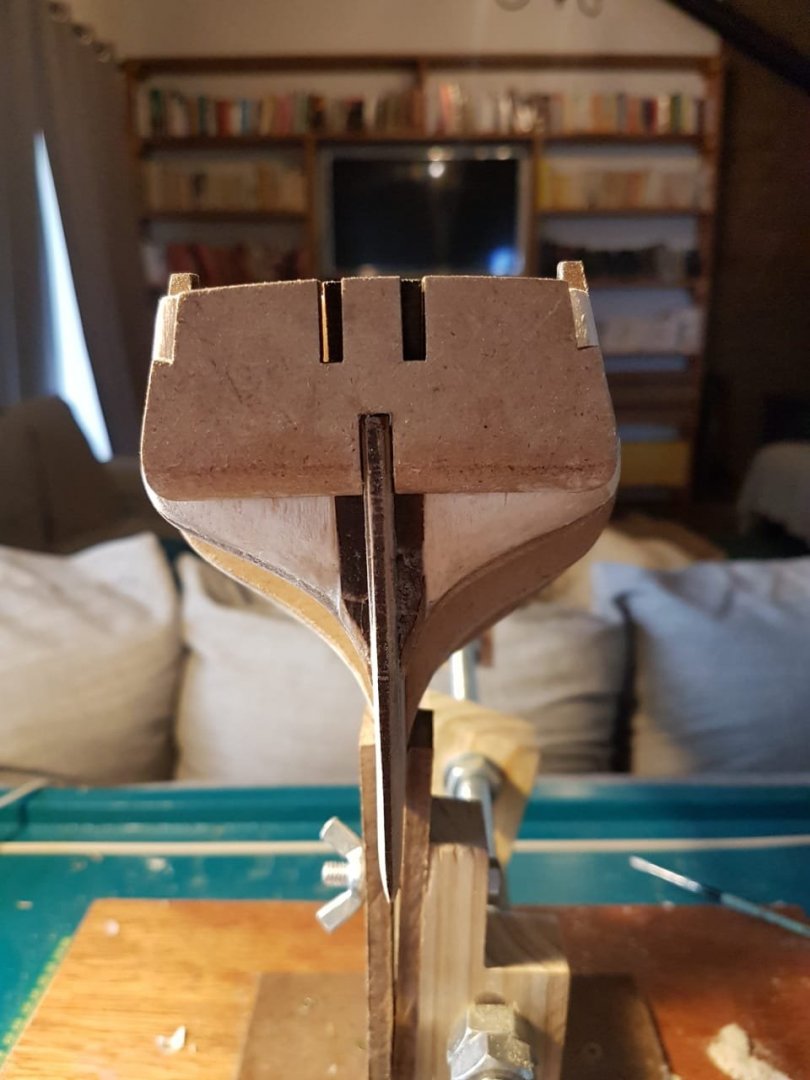
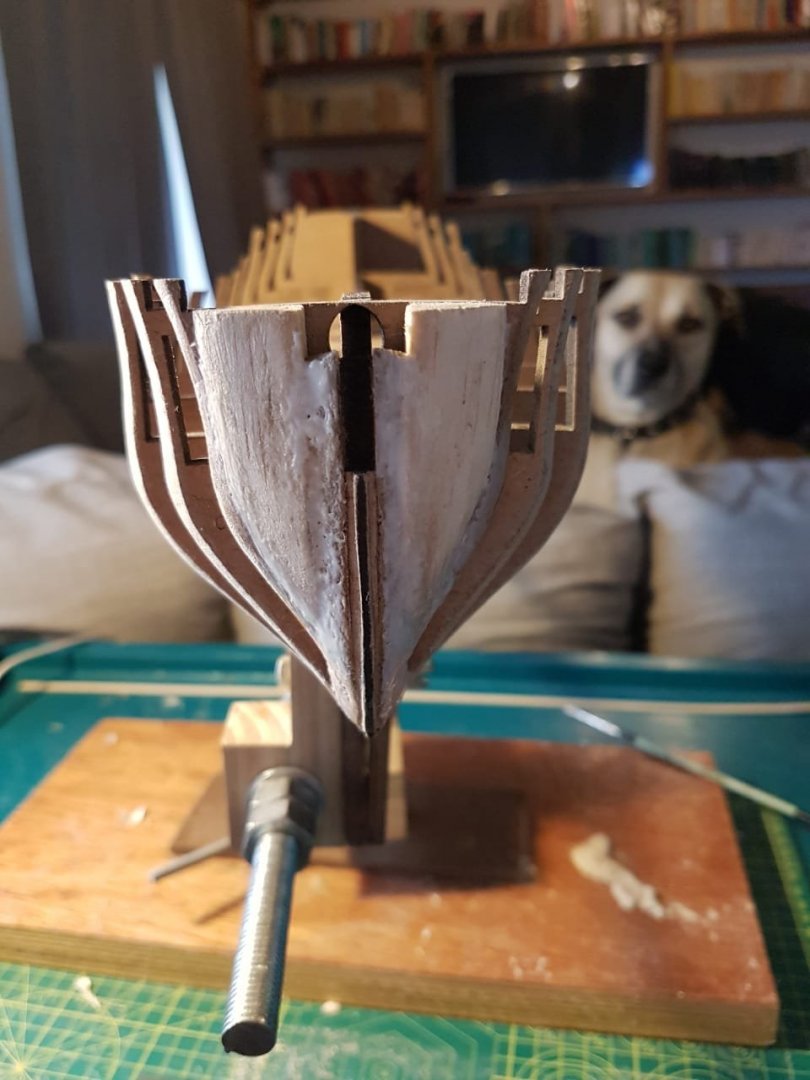
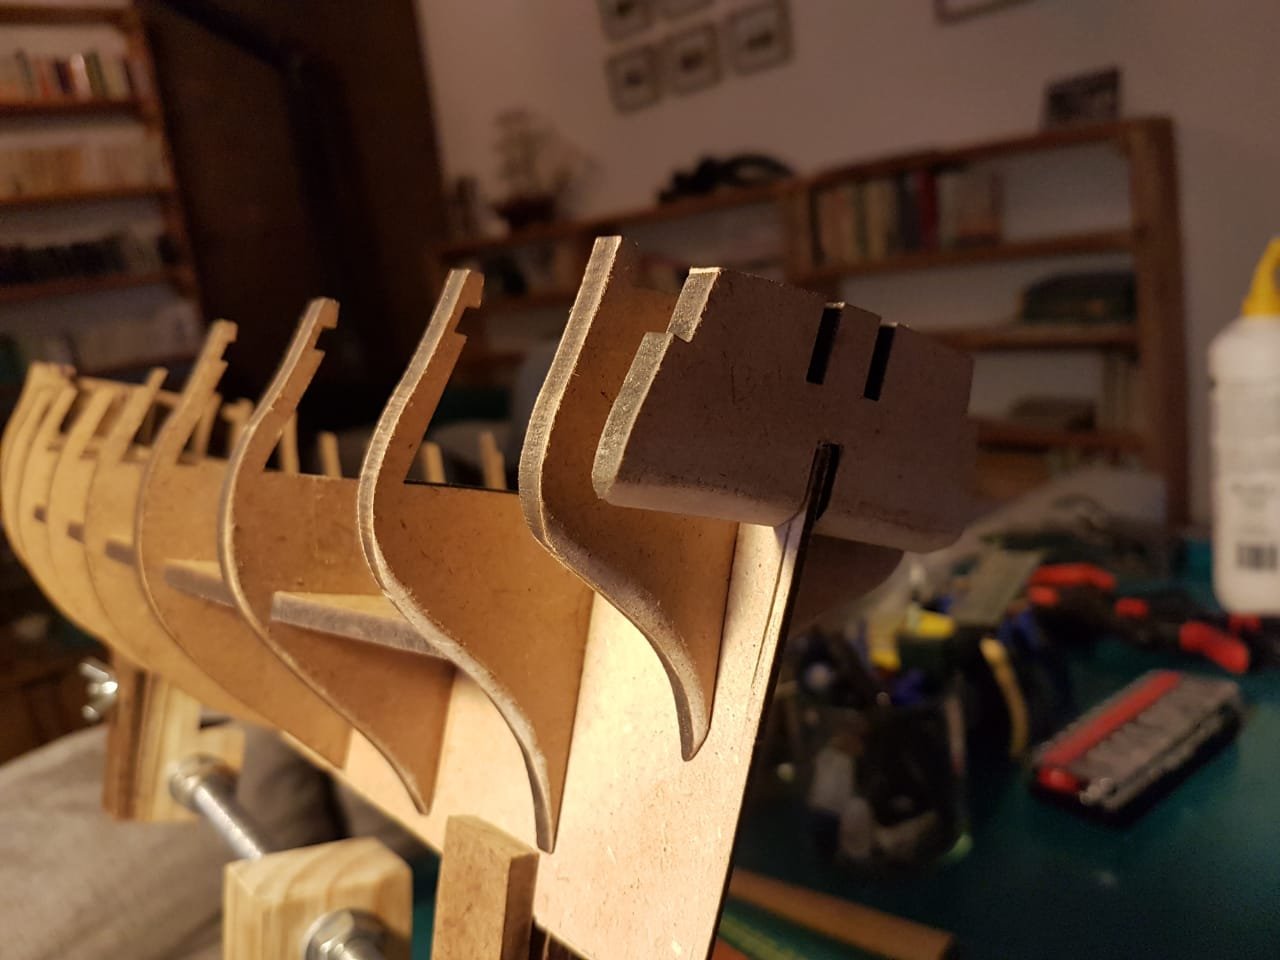
Day 3 (morning)
I have now tried to take on as much advice as possible(bar the mistakes Ive already made...sorry Chris)
I have sanded down from the bearding line to the stern. I am not entirely sure if this is a sufficient amount of sanding. I am erring on the side of caution at the moment and i just sanded down to the rabbet line that I cut at the stern which was 1.2mm deep on both sides.

I also cut the groove suggested into the stem. Again I am not sure if this is correct. Please advise if you have any input.


-
6 hours ago, Vane said:
Considering its your first model, I wouldnt get stuck on extra details like that. Just follow the instructions and put the bulkheads into the frams and start the first layer of planking. You will learn as you go along and when you do your next kit you can start trying to raise the level of quality.
Hi Vane
Thank you for your message. I cant really argue with you on this, you are totally right. I will however try and explain my somewhat poor logic....I want to try and really focus on very tiny detail on this build, even the things that dont really matter or wont be seen so that I can get maximum training value out of this for future builds that are more complex. I may well end up following your advice when I realise just what ive bitten off but for now im going to be as German as possible about this process.
-
7 hours ago, SpyGlass said:
Chris is right - he designed the kit !!
Just initial points - if you are going to copper her then it is pointless getting too wrapped up in the rabbet along the main keel
The bottom of the bulk heads should be shaped - I mark the edges of the bulk heads for the 4 or 5 BHs fore and aft along the edge facing midships and shape to just leave that edge untouched
Sort your fixing points out !!
There are two main things I would suggest about Pegasus here ( and Fly of course is identical)
My log pegasus log Shows this though most of the log was lost
But My pickle log https://modelshipworld.com/topic/8650-hm-schooner-pickle-by-spyglass-caldercraft-164-scale/?do=findComment&comment=267216
Covers the ground illustrating with some pics of Pegasus
1 Its really handy to create a "rabbet" at the stem - it really helps when planking. You create a false rabbet by chamferring the fore edge of the keel and then the extra keel bit completes the rabbet - but need a rabbet across the "tongue"and top section

2 But getting the stern shaping right makes life sooooo much easier .
The main issue is bring two planking layers into the stern post - dont try - chamfer in the first layer before reaching the edge of the keel and LOOK how steep an angle the aft Bulkhead edges need to be

Good Morning Spygalss!(it is 0504 here)
This is all starting to make sense. And I am genuinely warmed by the willingness of this community to help me. The detail you have put into this respose makes all the difference. THANK YOU!
I do still have a couple of questions, which I hope you font mind answering. I know exactly what you are saying about the fact that I should be too worried about the rabbet as I am going to be coppering the Hull anyway. However I really want to get every single step as perfect as possible so I can learn for future projects. I am in no rush to get finished. I am a very patient man and I live in a very remote place with not much to do after the sun goes down.
1. I think I understand what you mean about leaving the one edge untouched on the bulkhead but how do you determine how much to take off on the other edge?is this just something that you eyeball as you go along?
2. What do you mean by "sort your fixing points out? are you referring to the contact surface between the first layer of planking and the bulkhead section?
3. I notice that you cut the rabbet for the stem at slope and not at 90 degrees(i dont know if this makes sense?) By the time I read this post I had already cut a rabbet at 90 degrees on the false keel should I cut it back to a slope? I know that I was probably not meant to cut a Rabbet at all but I have sort of crossed that bridge already.
4. Thanks again for that tip on bringing the first planking up the the bearding line on the stern. Am I correct in saying that these planks just get sanded so that they taper smoothly to the false keel?
Regards
Haiko
-
Day 2 updates and questions.
Progress is very slow but I am really enjoying finding my feet.
I have cut the rabbet(1.5mm "high" and 1.2mm "deep", leaving a strip of untouched wood down the middle of the false keel 2.5mm wide) and marked the bearding lines(just a fraction below the bottom edge of the last 3 bulkheads) and Pre-fitted the bulkheads. this leads me to my questions for the day.
Do the Rabbet lines in the photos below look correct? I cut the rabbet lines at a 90 degree angle but I see some examples(like in the example so kindly posted by Richard above) where they are cut away at a slope.
I realise that I still need to taper the stern from the bearding line to the edge of the false keel(I hope that's correct)
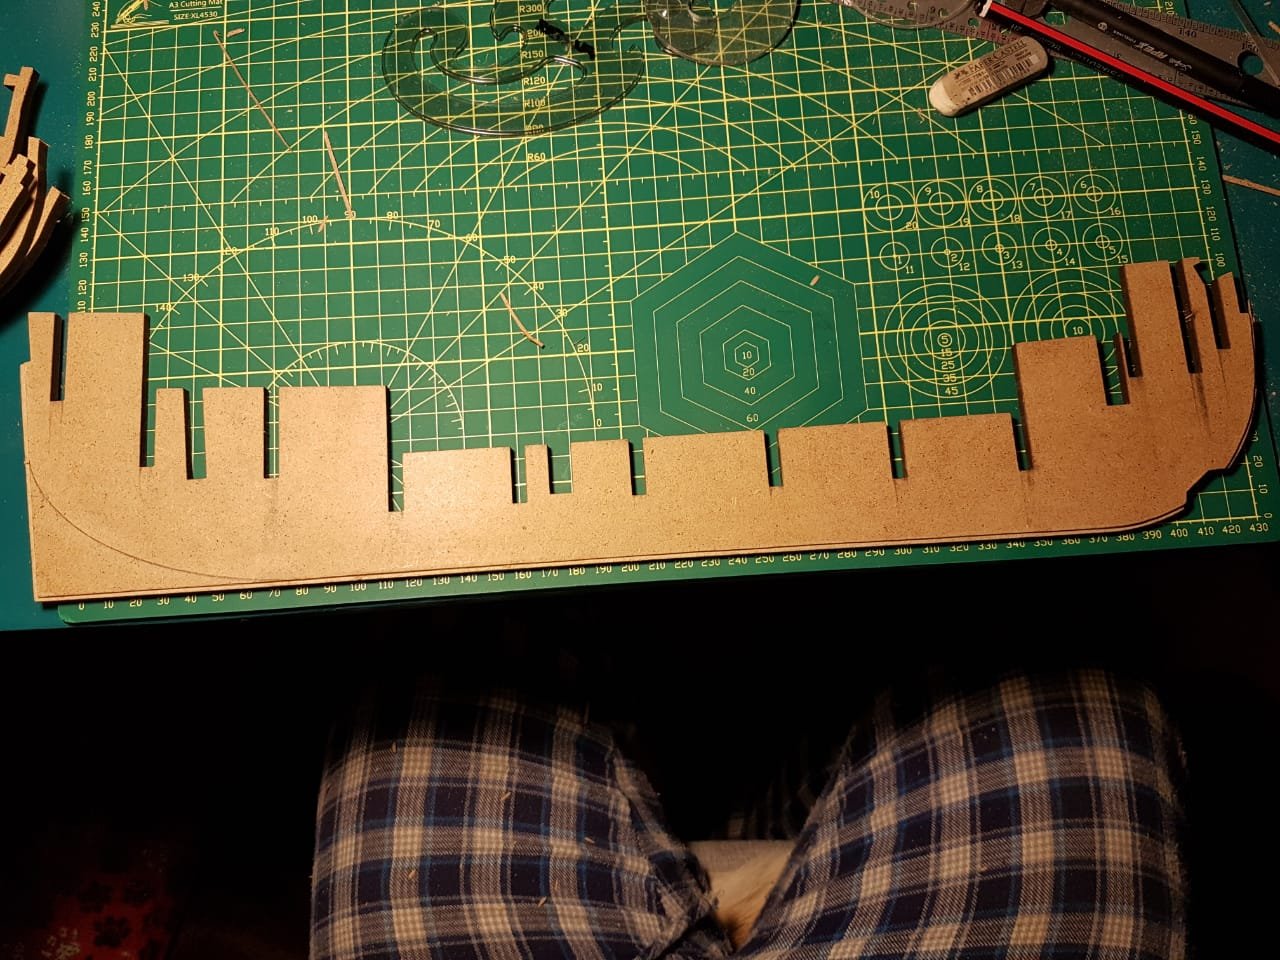
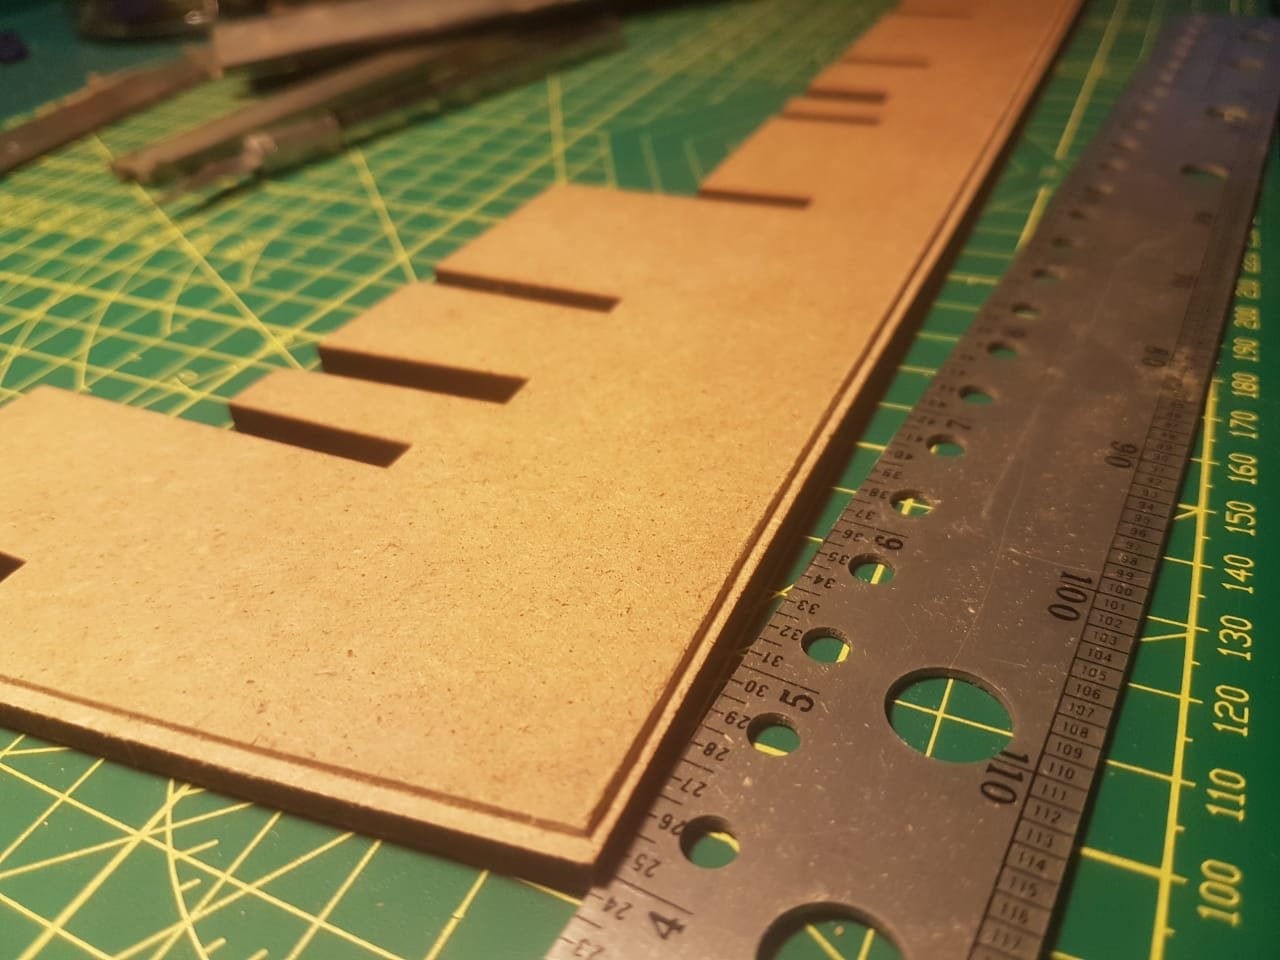
My second and third questions are as follows. Is the bearding line marked correctly? Do i need to cut back the lower edges of the bulkheads so that they follow the same contour as the bearding line?
- GrandpaPhil and Retired guy
-
2
-
15 hours ago, chris watton said:
No rabbet, like almost all European kits, Pegasus is double planked. Most US kits are single planked, which allow for a rabbet. There are patterns that glue to what would be the rabbet positions. A proper rabbet would not work so well with double planked kits, as the first planking would most likely take up all of the space in the rabbet slot, due to the angles and bevels involved.
Hi Chris
Thanks for your input! I feel like you might be right about this. What does however confuse me is why the likes of SkipW, Blue Ensign and Landlubber Mike went for the rabbet line. I am totally new to this so I dont know if that is just a design choice or if there is a "correct" way.
EDIT- I just found out that you designed this model. I find myself quite amused by what Just happened "you MIGHT be right Chris" 😂😂
😂😂 sorry about that. No further questions.
Cheers, Haiko
-
6 hours ago, Jolley Roger said:
Hi Haiko,
Looks like the SAPO came through after all, hope the customs duties wasn't too rough!
I have come across two build logs that have reference to the rabbet and bearding process, hope it helps:
HMS Pegasus by SkipW - Amati/Victory Models - Scale 1:64
HMS Pegasus by Landlubber Mike - Amati/Victory Models - Scale 1:64
Hi again!
Customs duty ended up being zero Rand. I only had to pay 15% VAT, which seems fair seeing as I didn't pay tax in Europe
Thanks for getting those links for me. I will be bookmarking both and going through them in fine detail immediately.
-
Sorry about the delayed response, I just got back in.
That is perfect. That is sort of what I was hoping.
thanks again!


HMS Pegasus by The_bitter_end - Amati/Victory Models - 1:64 scale
in - Kit build logs for subjects built from 1751 - 1800
Posted
Good morning again Spy
I agree with you. I did some test with CA and I think there are a few very limited places where it is a great help(almost like a pin) but generally it does more harm than good in the hands of someone like myself.
Im off to check your log on the matter of the angle of the stern strips right now.
You presume correctly, although I would return my matchsticks to the manufacturer if they were that thin. It took a large amount of buggering around to get the deck to dry fit without breaking something in the process.
I was thinking about what you said about the order of the work and it is quite logical to do it in the following order as you said.(this is just me thinking out loud here)
1. install and fair bulkheads(essential so that you have the basic shape that the deck will lie over.
2. install gun deck(i dont think you could even get it in with the gun ports in place)
3. install gun ports, attempting to do this after planking would result in some major adjustment of planks or a messy junction between the gun port panel and the planking.
4. at this point you could either install the hull planking or the deck planking. My inclination is to do the first hull planking(it doesnt matter if that gets a bit grubby, then the deck planking and then the second planking. I feel this order would keep the visible parts of the build as clean as possible.
I asked Vulcan this question too but what is your opinion on the best way to do plank caulking for the decks.