MORE HANDBOOKS ARE ON THEIR WAY! We will let you know when they get here.
×


PhillH
-
Posts
61 -
Joined
-
Last visited
Content Type
Profiles
Forums
Gallery
Events
Everything posted by PhillH
-
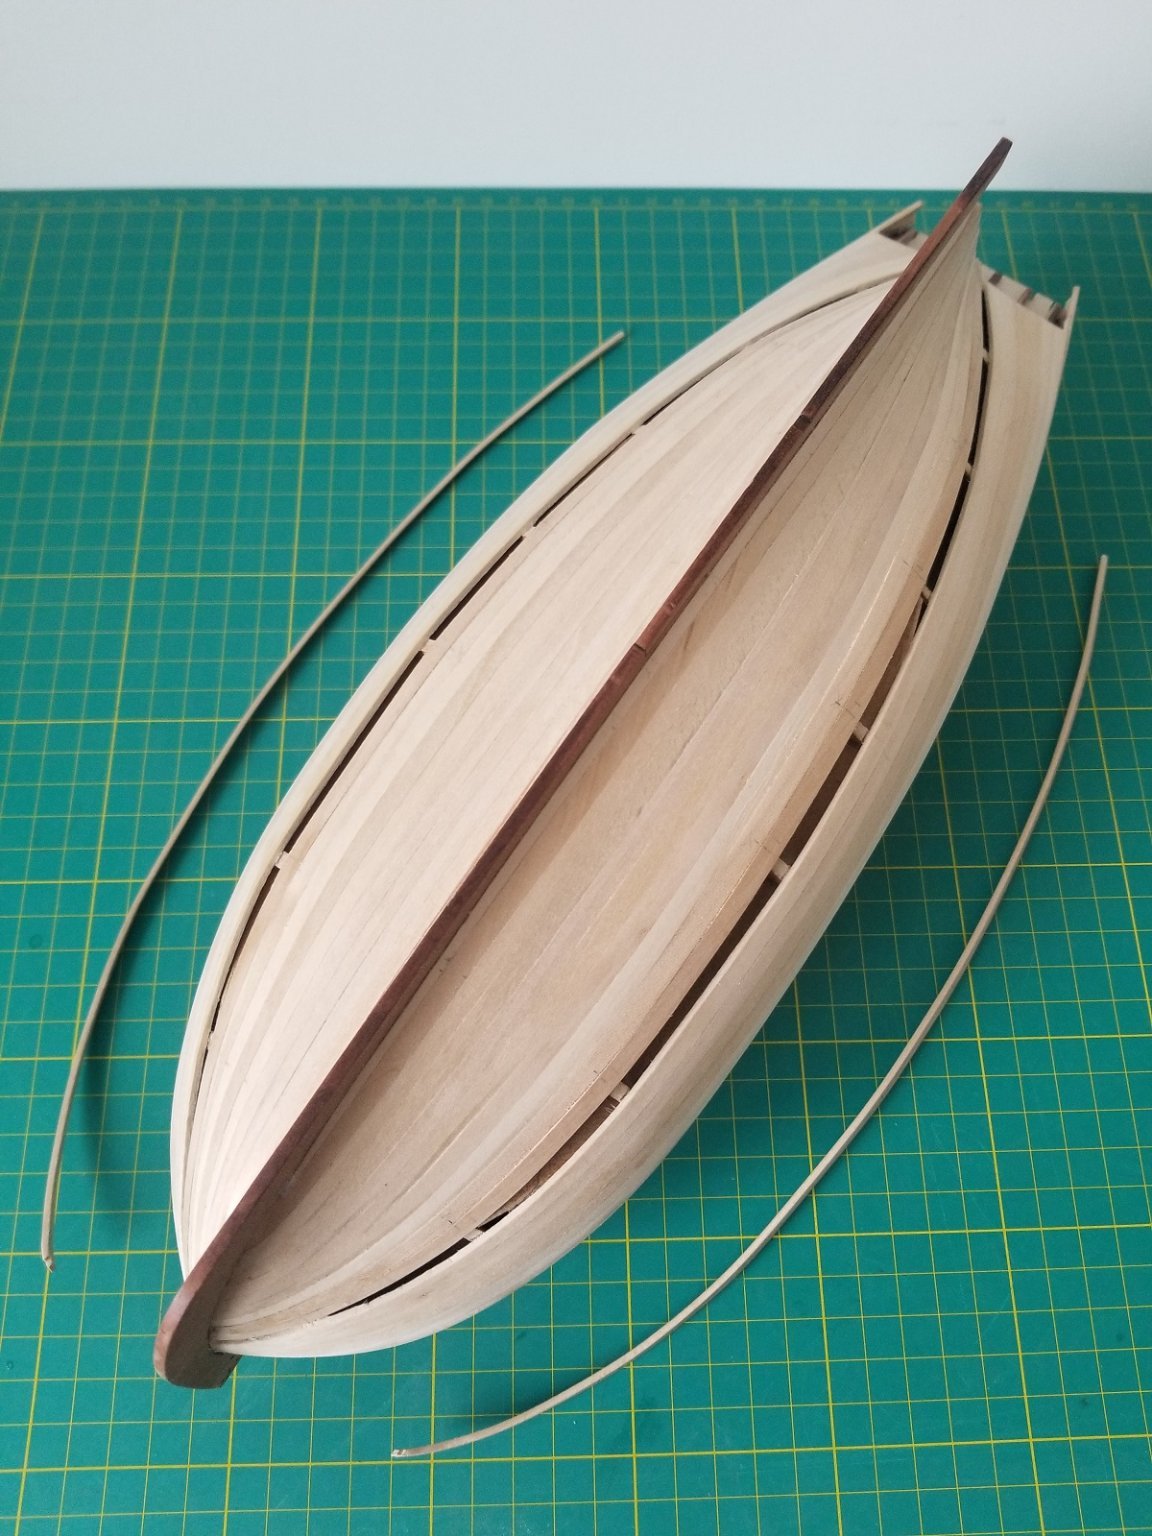
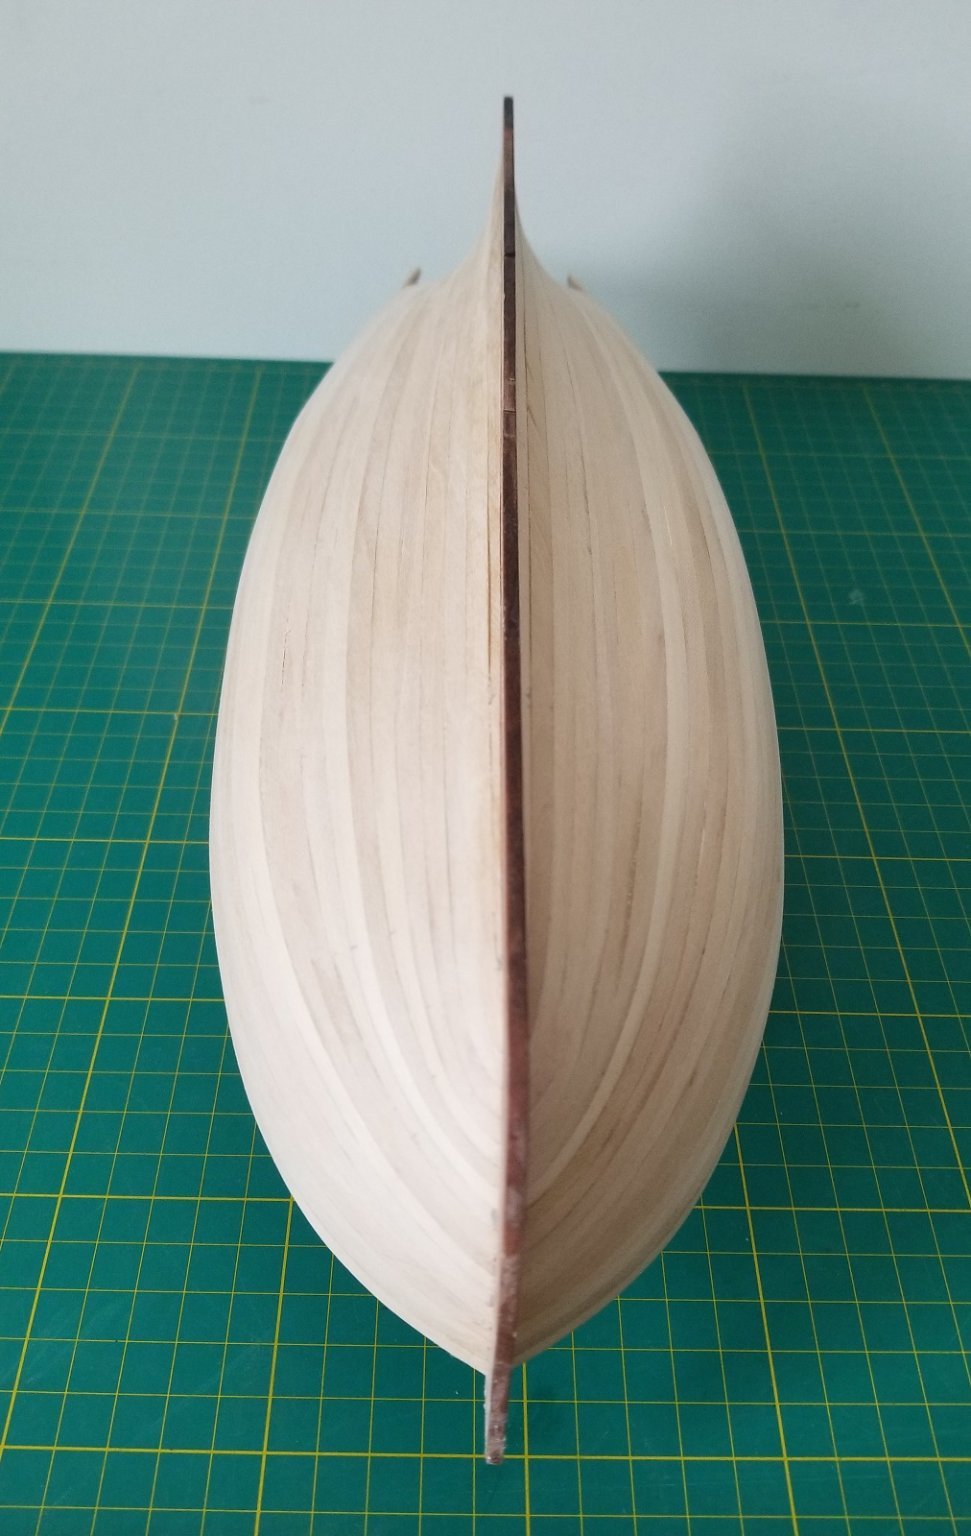
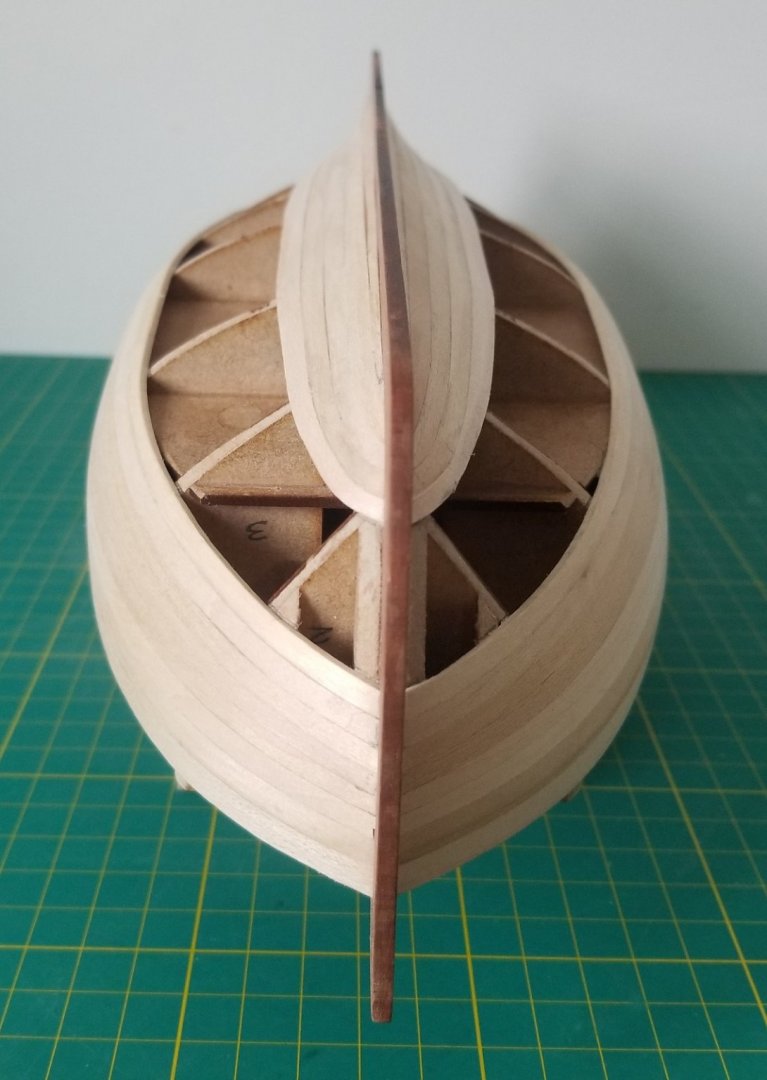
Due to spring finally arriving and the garden requiring many jobs time in the shipyard has been limited, but I have been busy recently fashioning planks and fitting them. Finally, the last pieces in the jigsaw are ready to fit into place. The first planking is now completed except for the top 4mm strake which I will fit once most of the scraping and sanding has been done as I am concerned it could get snagged during that process. Phill


-
Best wishes for the future of Vanguard models Chris, your kits are already the gold standard and your inovative ideas never cease to amaze me. I have Sphinx on my list as James' build looks amazing but now you tempt me with a hint of a (really) big one. I will need bigger house. Phill
-
I agree with your decision to make the wooden oars Derek they look excellent in the natural wood. Where do i send my order for a set ? Phill
- 725 replies
-
- 2
-

-

-
- vanguard models
- speedy
- (and 1 more)
-
They look great Derek. Knowbody would know now they are painted what they are made of. Phill
-
Sorry to hear of the accident Chris I wish your wife a speedy recovery. Phill
-
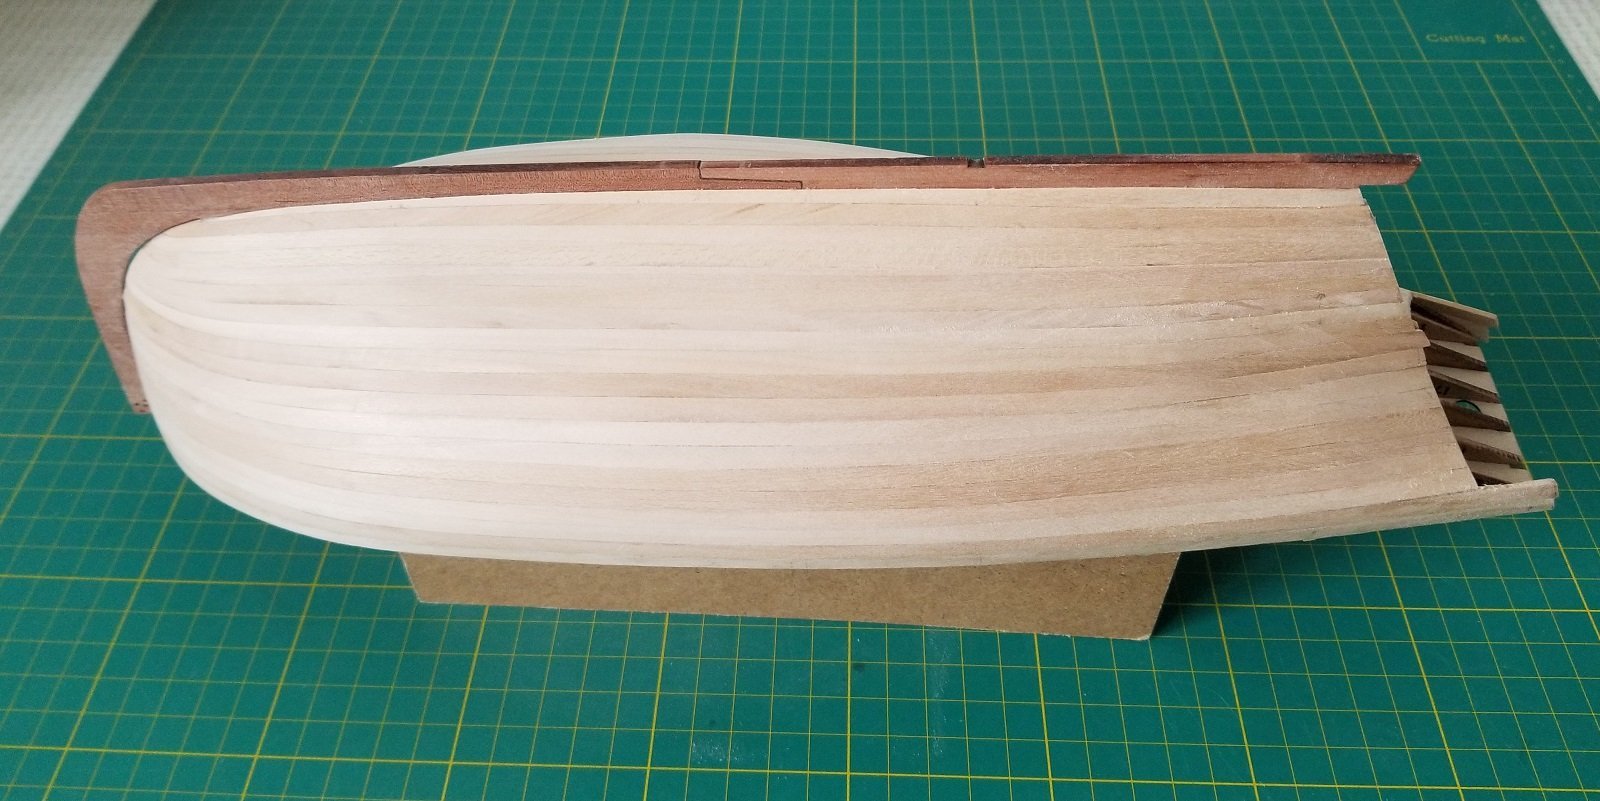
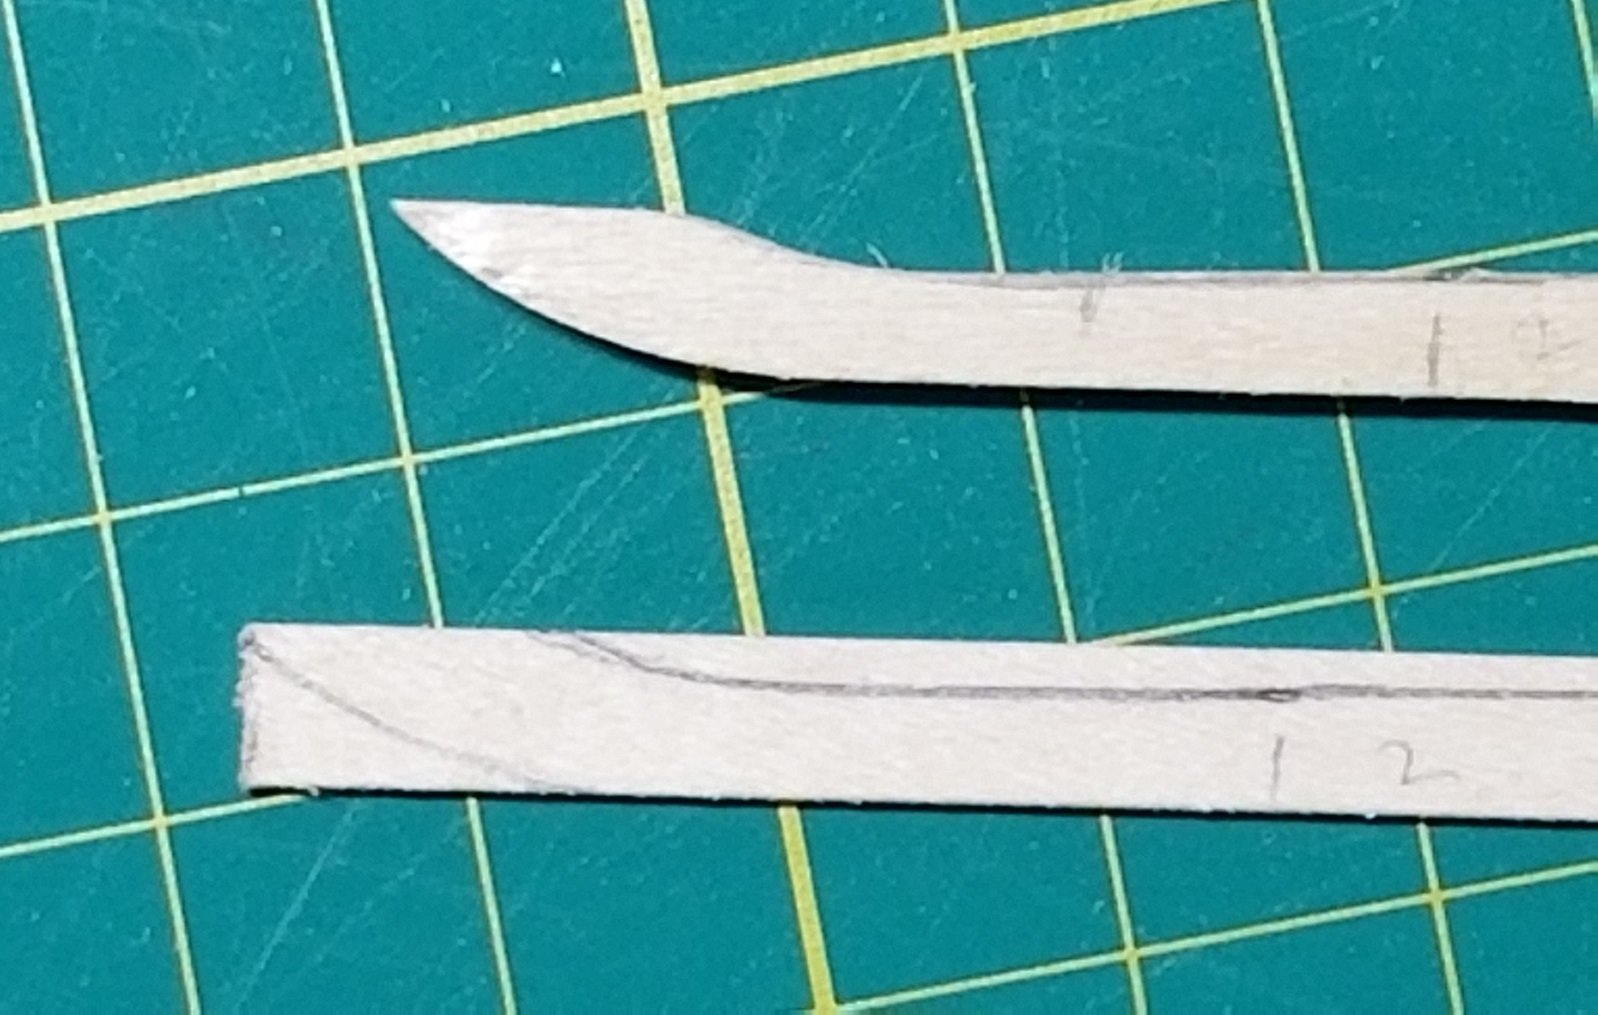
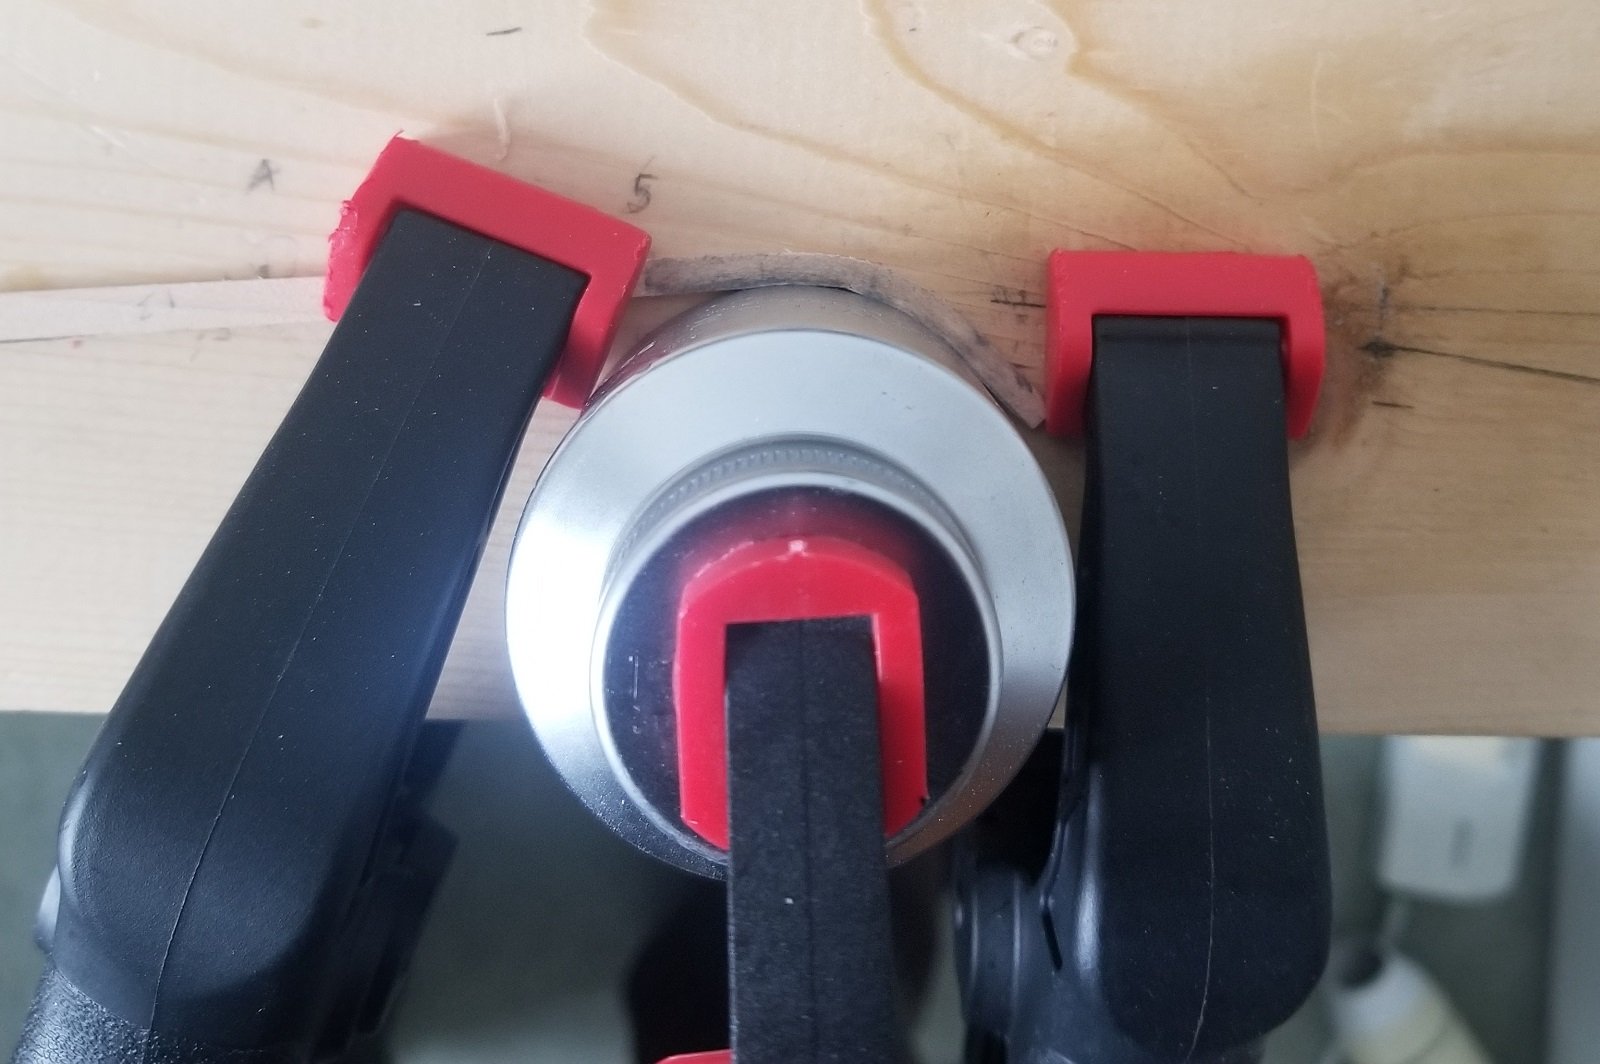
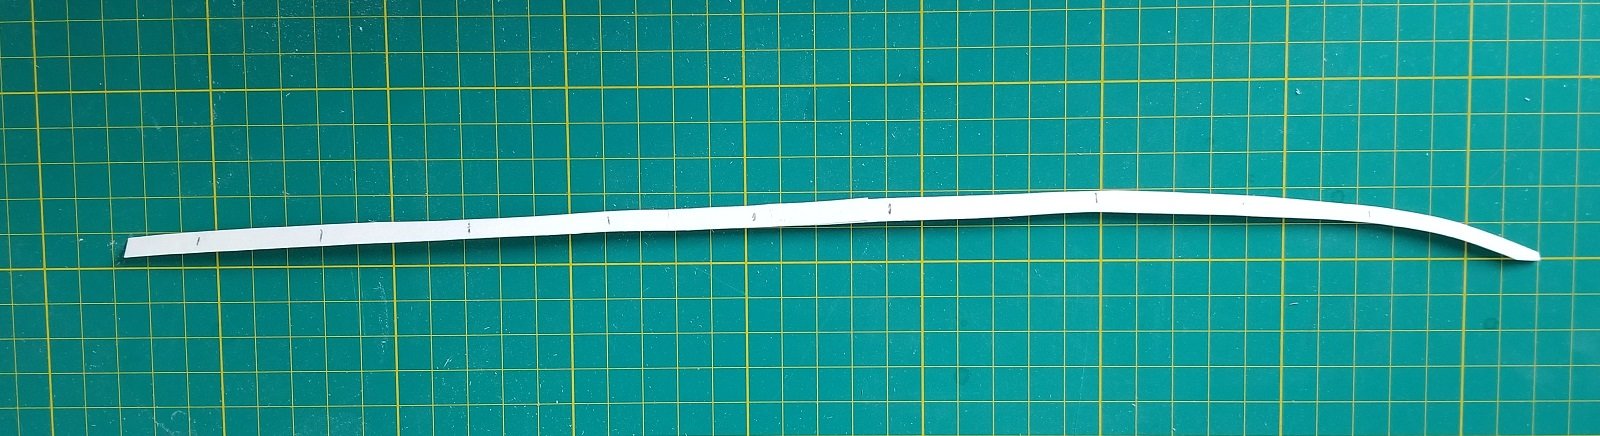
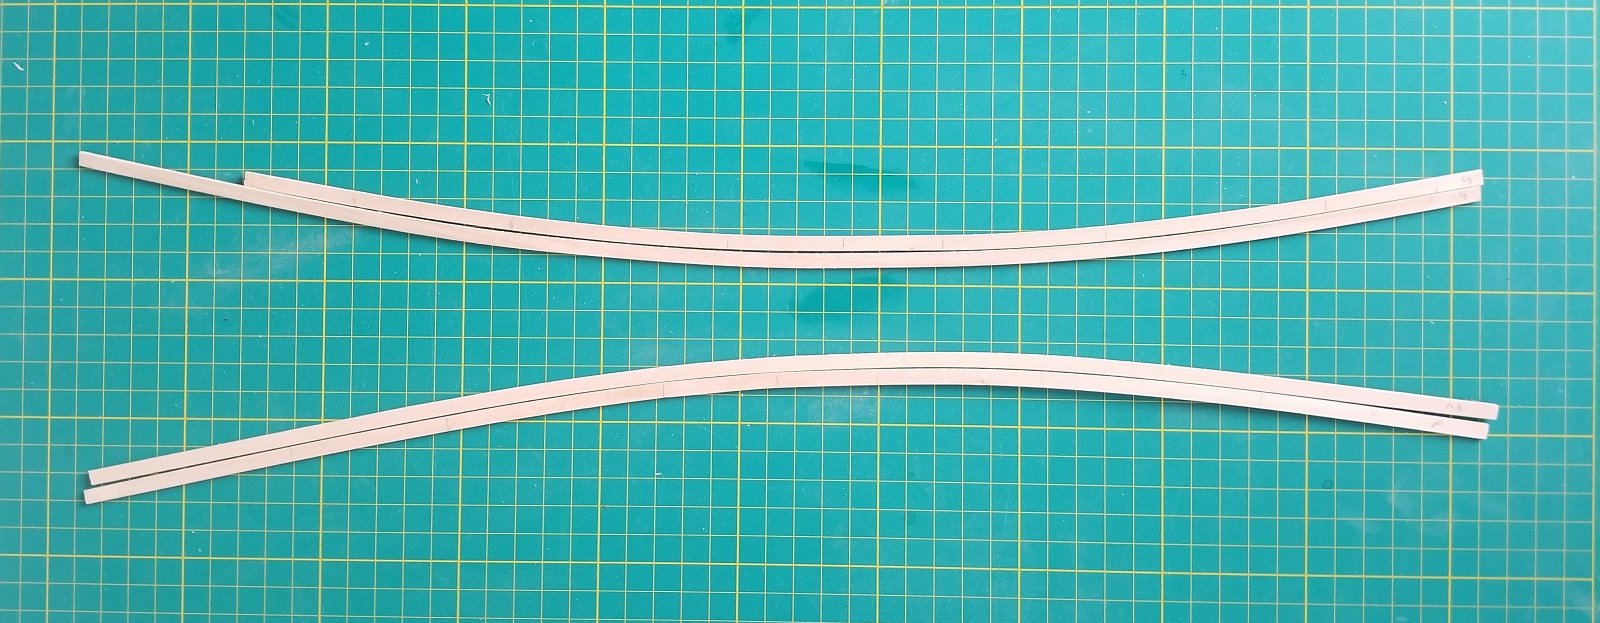
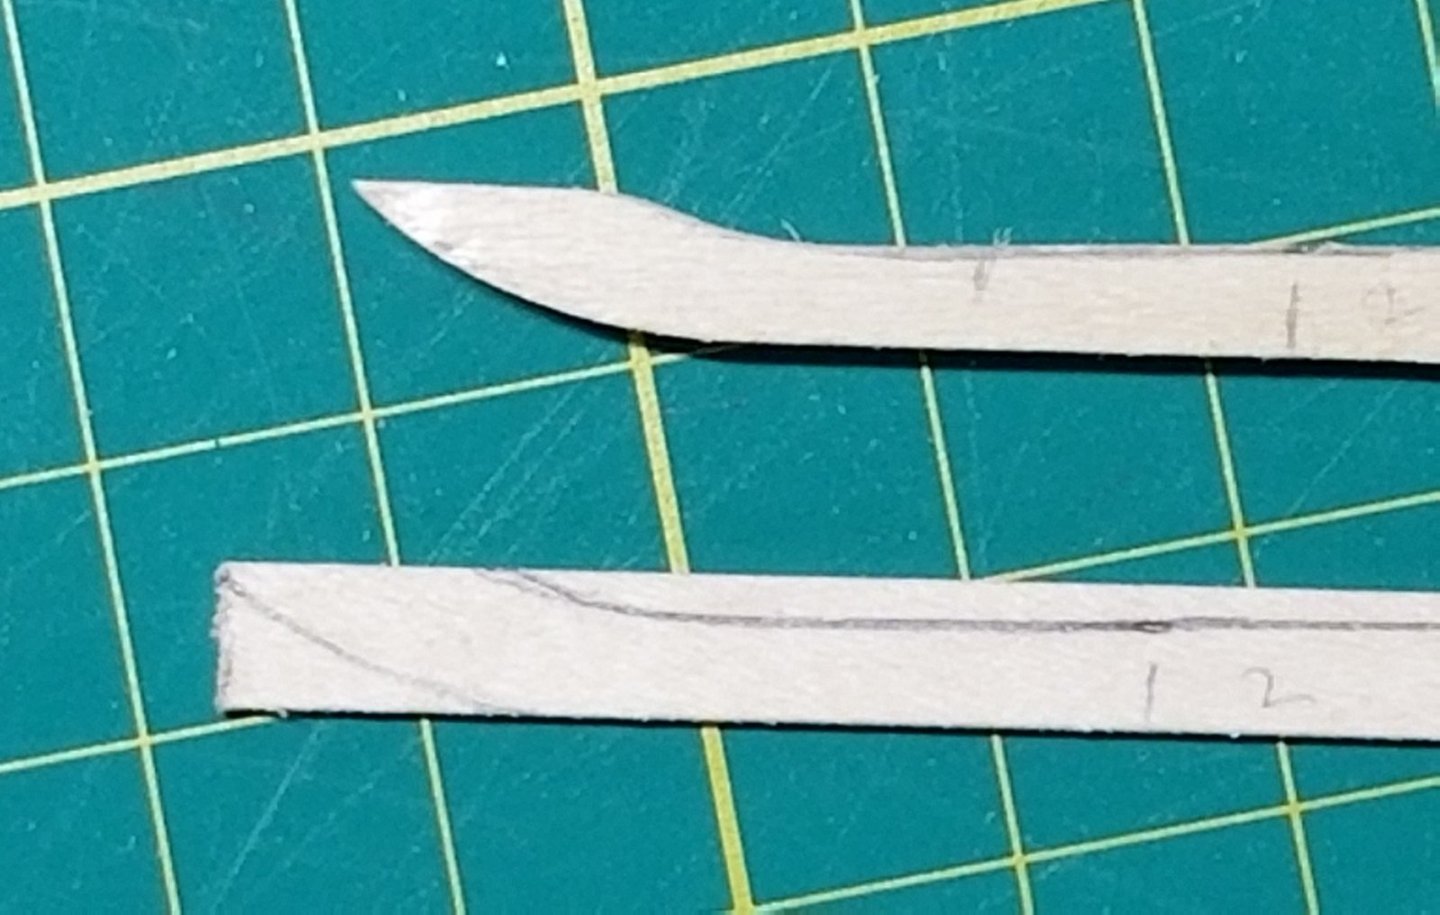
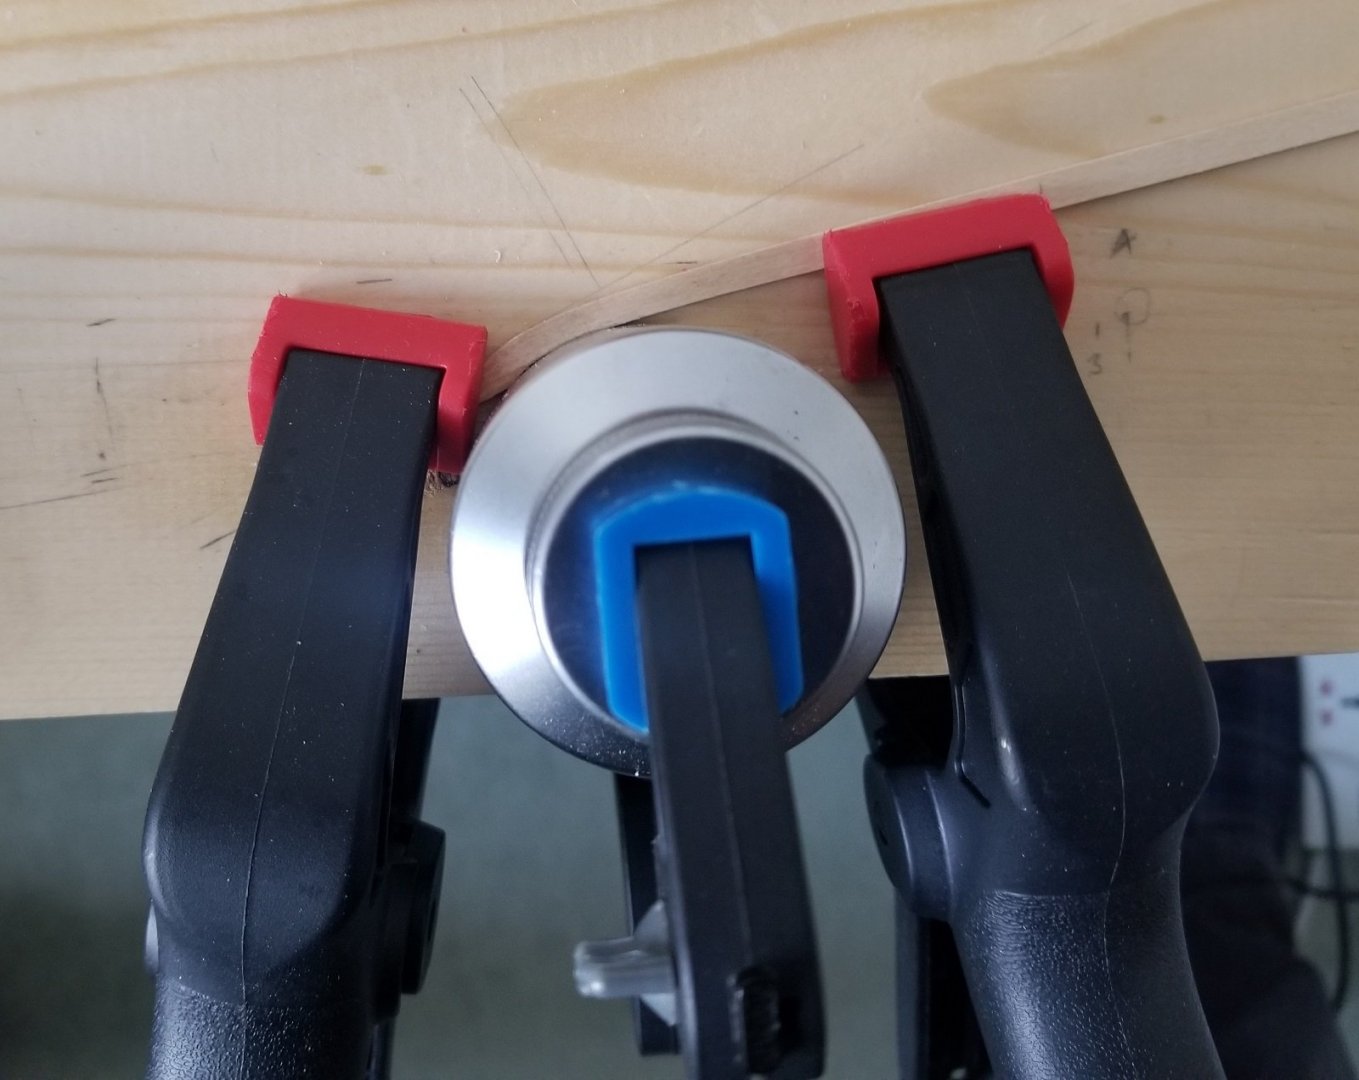
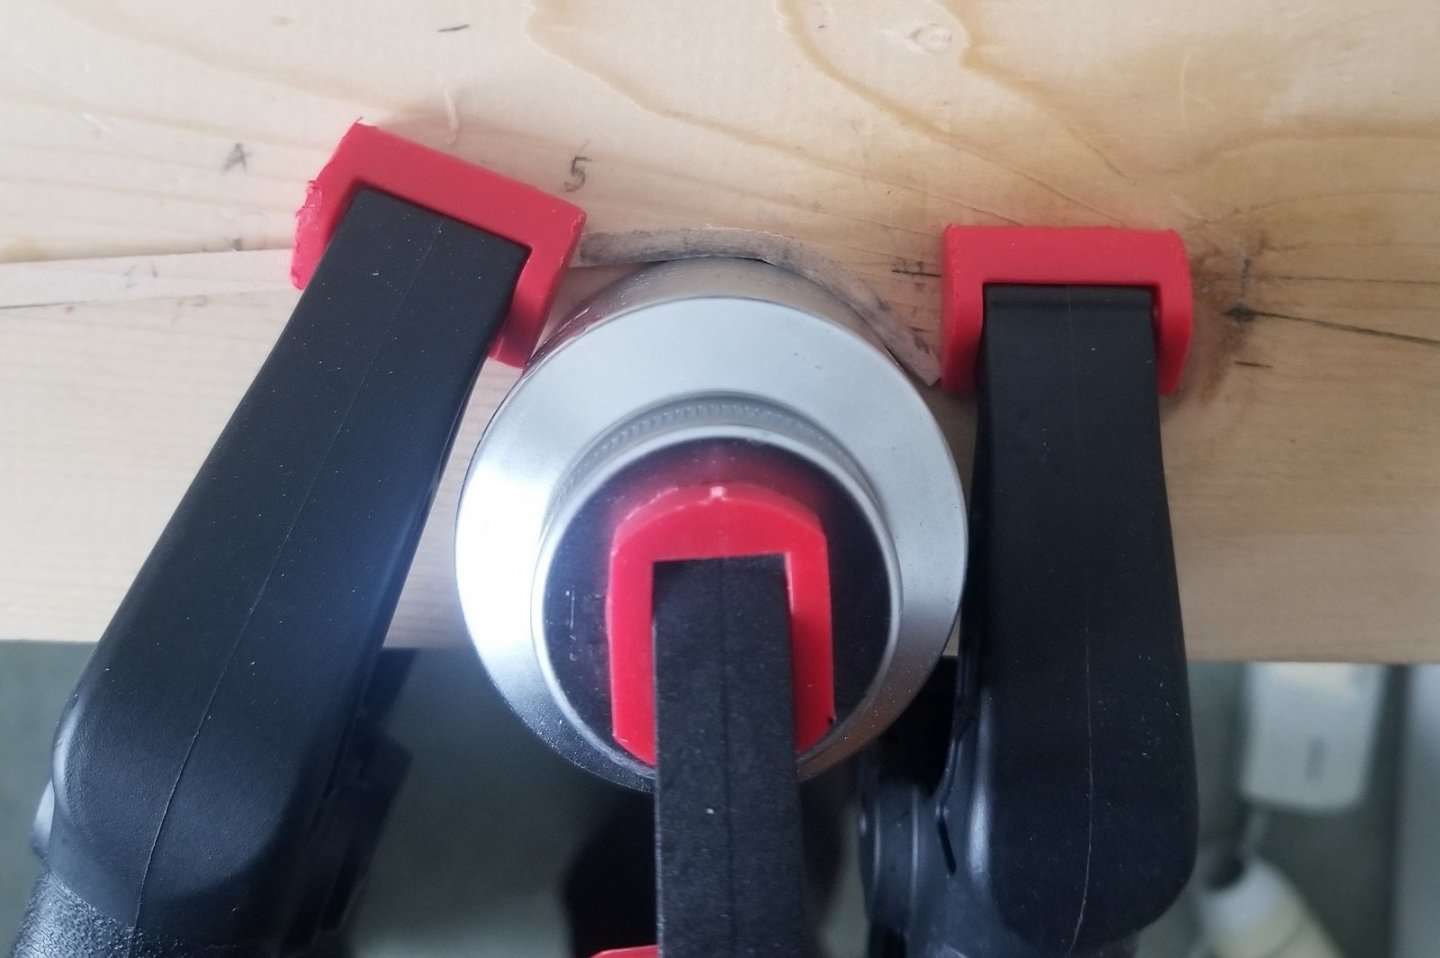
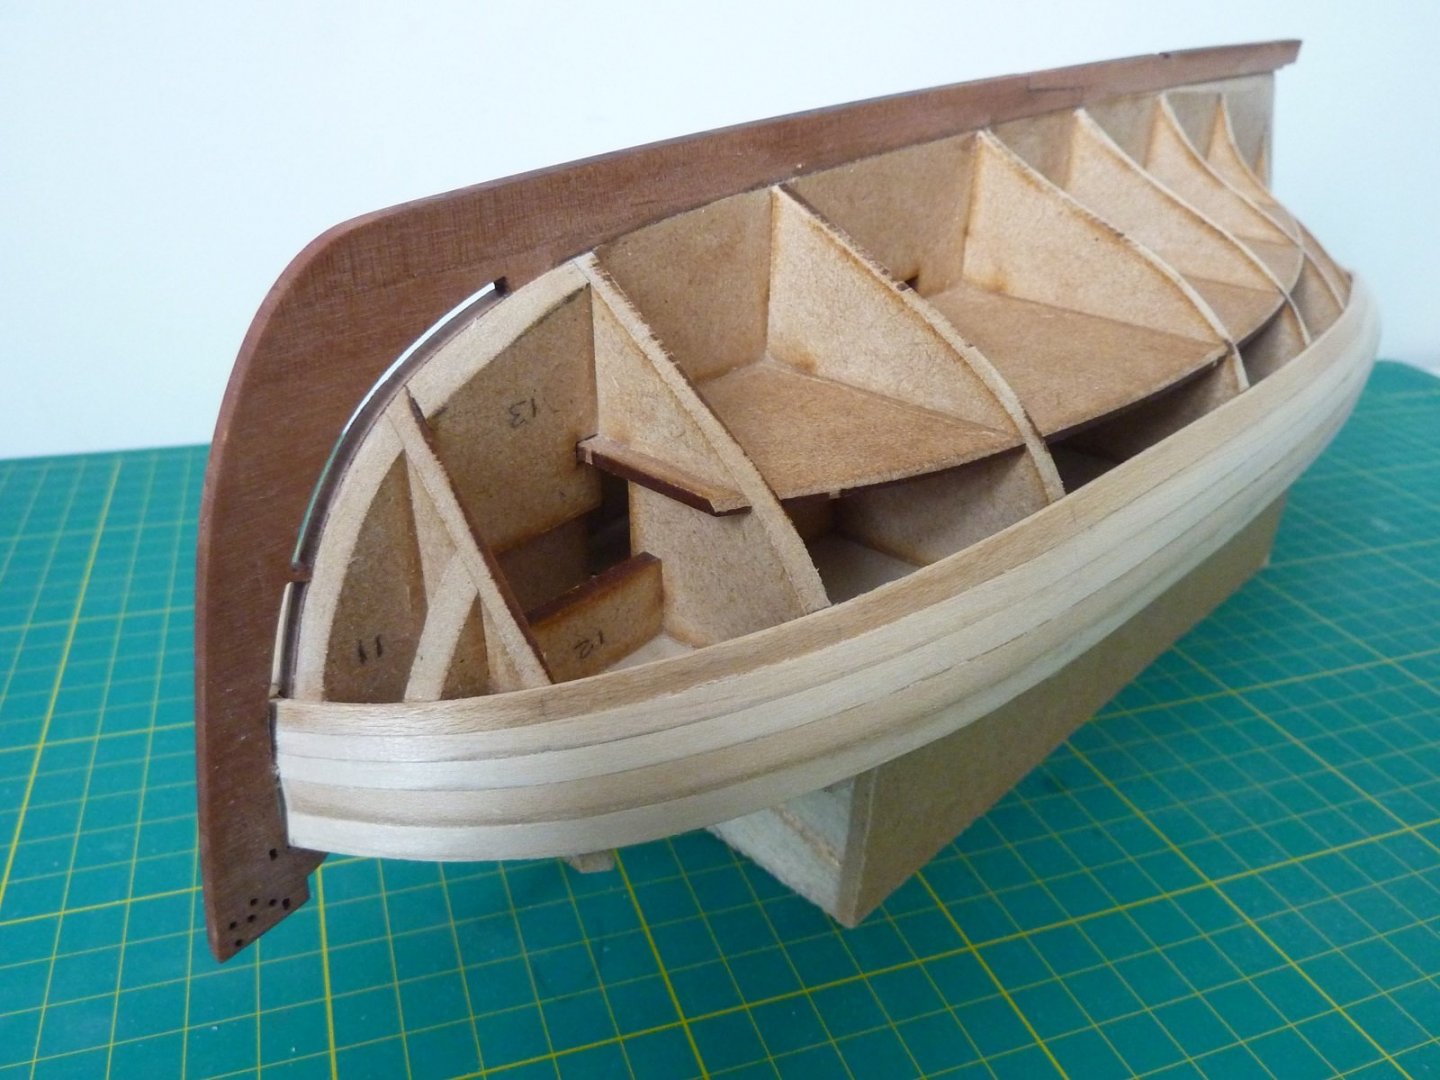
A bit of an update on progress so far. I decided to fit the garboard strake and then work up from there as well as down towards it. The garboard strake was quite narrow, and I ran it as far as the rabbet slot in the stem. The next plank to the garboard strake required a lot of edge bending in order to fit into the slot. There are only 5mm Lime planks supplied but I found that by cutting the plank to make best use of the plank width I could create some bend into the plank before applying edge bending and thereby get a tight bend more easily. Plank as cut from stock shown before adding edge bending. I found that a large socket provided a useful former to create the additional bend. The subsequent lower planks were thinned down to just over the required width and the socket used again together with a soaking in boiling water to achieve the required bend. I thinned the plank width down for the first 2 bulkheads only which gave me the opportunity to cut off the end if the bending when awry and then restarted further down the plank. I also found that cutting the planks out slightly oversize allowed me to sand down the inner edge to the final width and remove any element of misshaping that may have occurred during the bending. Progress so far with just 6 more planks either side to go now. Phill

-
I cover all ranks from Admiral to Ordinary seaman here Theodosius so no problem there 🙂 Phill
-
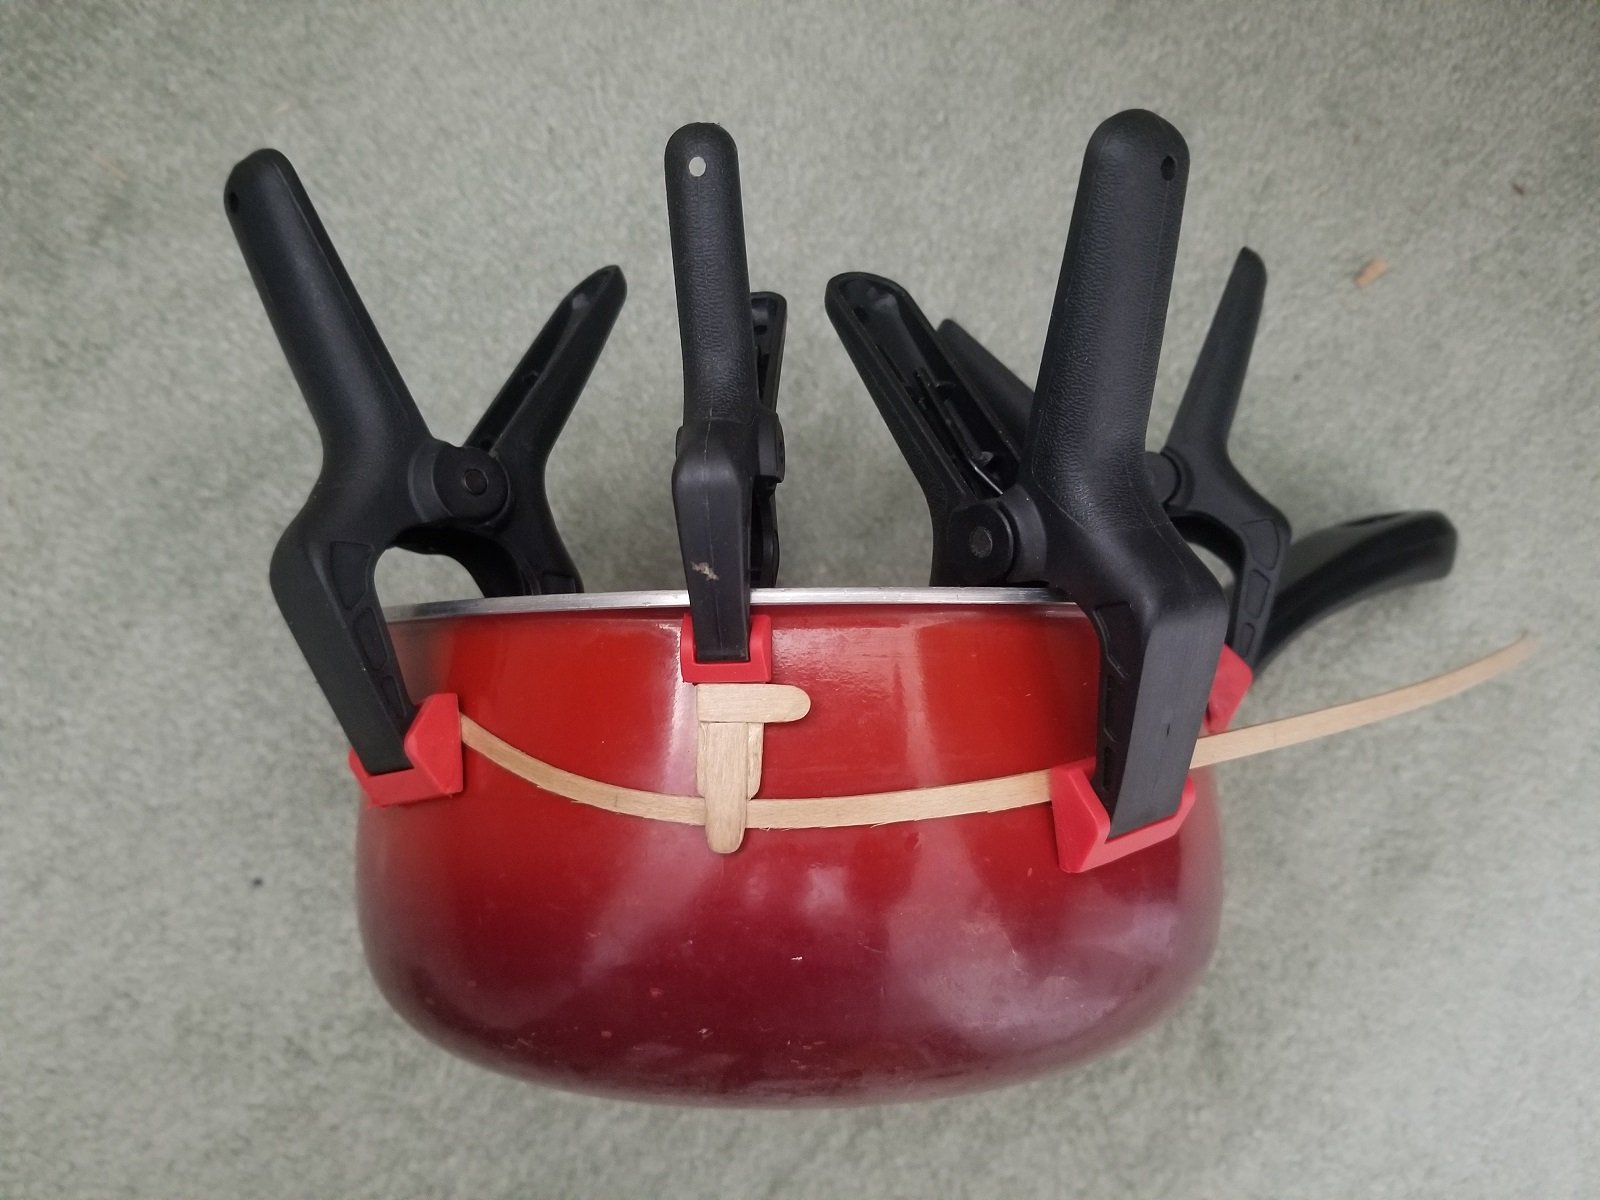
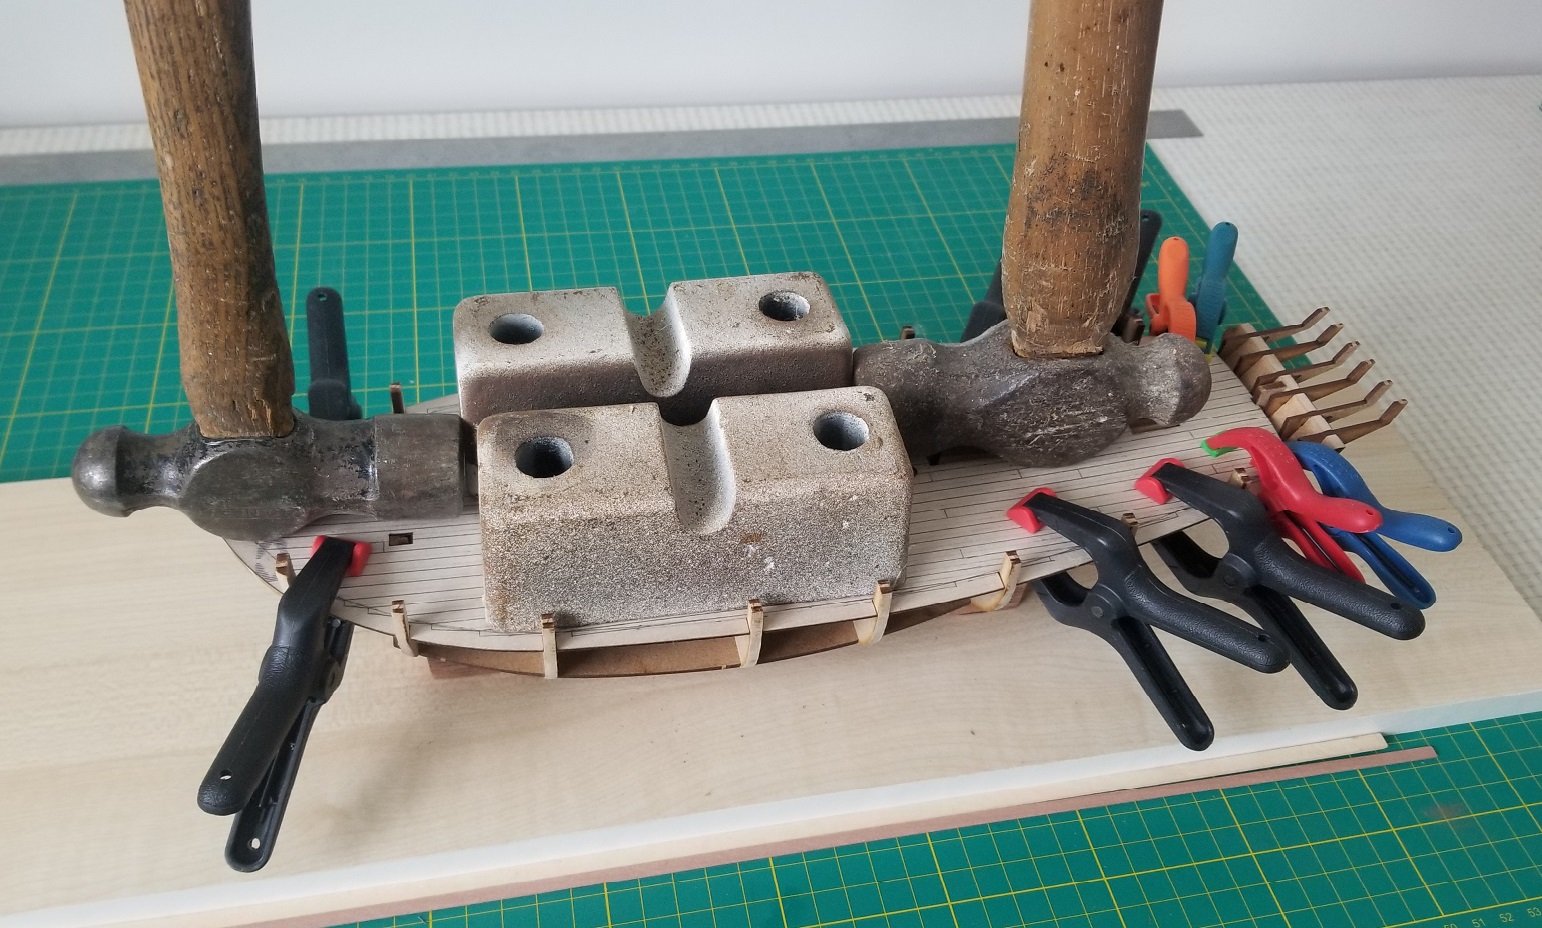
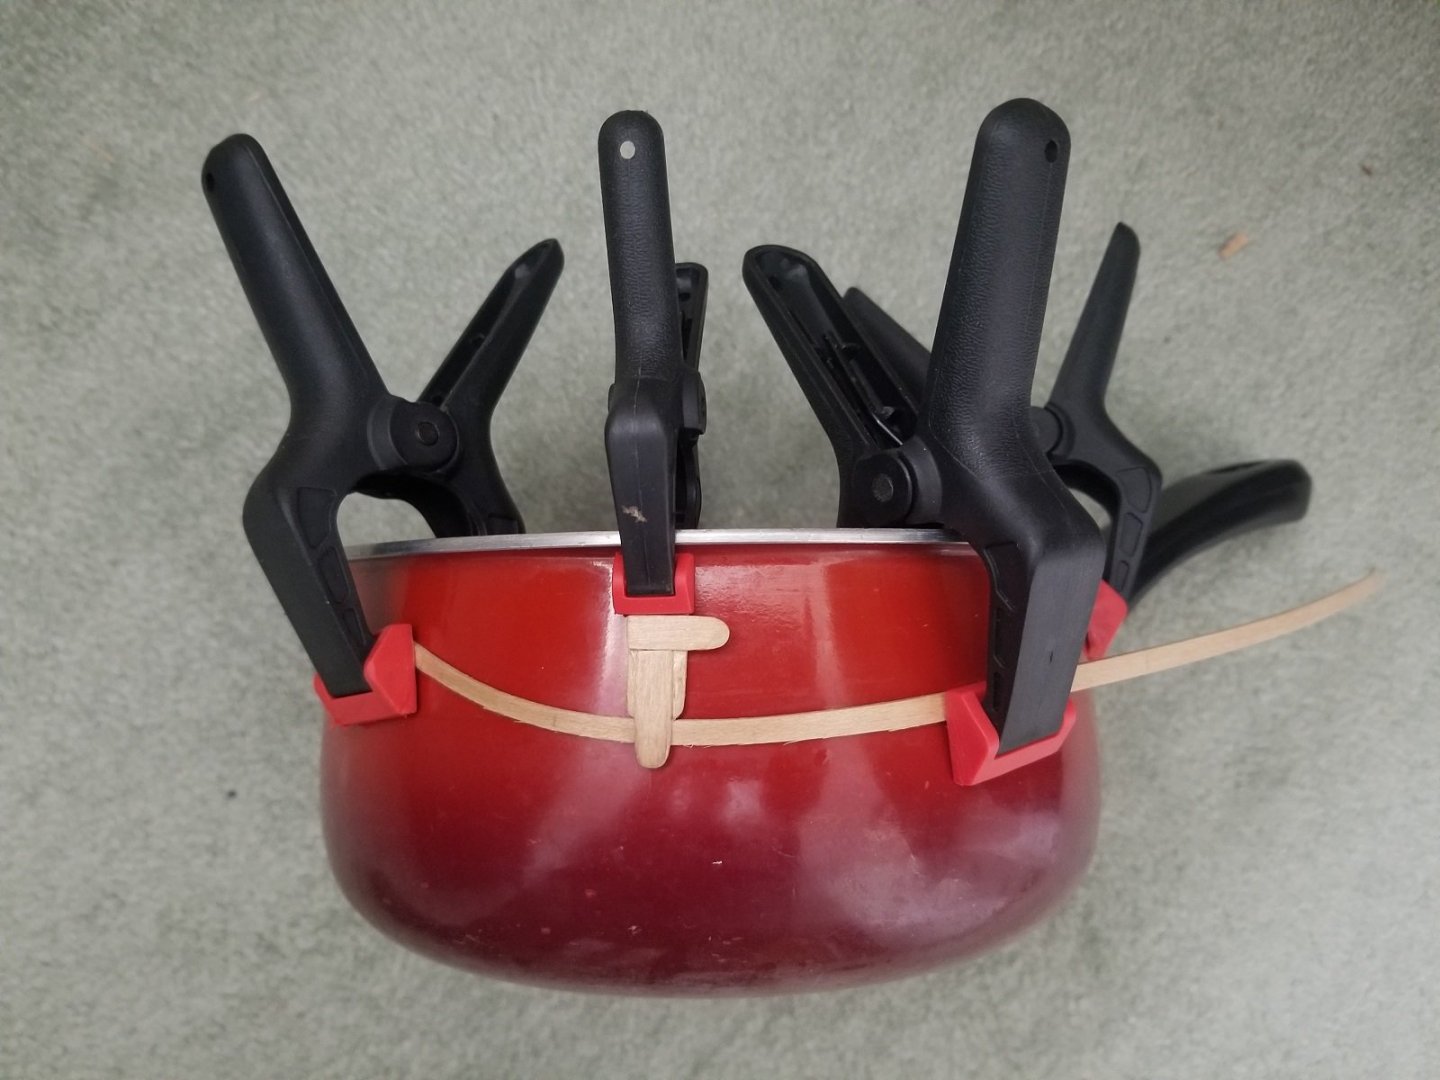
Thanks for the support Theodosius and Maurice and to everyone for the likes. Theodosius, I found that I could apply the edge bend to a plank but when it came to adding some curve to go around the bows some of the originally applied edge bend would disappear. The only way I found to reapply the missing edge bend was to use a saucepan and plenty of clamps. As I use items in the house, I am now constantly appraising them for their possible use in plank bending. Phill
-
I am slowly getting to grips with edge bending and bending the planks so that they sit easily on the frames. I found that cutting out a rough cardboard template of the plank provides a good basis on which to bend the plank initially. I prefer to get the plank seated naturally on the frames rather than force them and then rely on glue to keep them in position. This has resulted in the need to employ one or two odd items to assist in the bending. I have now fitted 5 planks to each side and will probably fit the garboard plank and its adjacent plank next and then recheck my tick strips to ensure my calculations are still OK before continuing with the planking. Phill

-
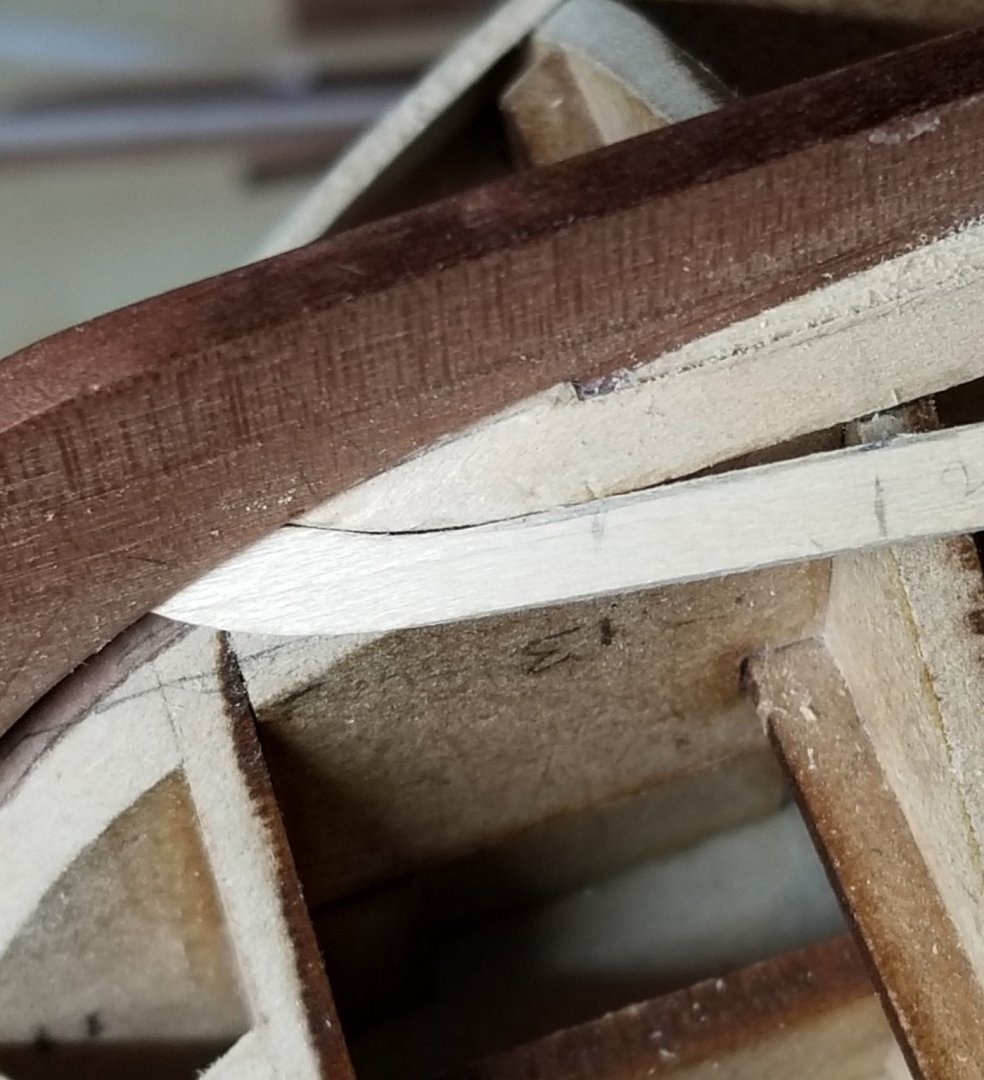
Thanks for the likes. I have used one of the second layer planks to check the shape of the garboard plank. The front end of which looks like it will be very pointed. I will carry on laying a few more planks before coming back to this. Phill


-
That is looking really good, I can see that I am going to have to get some quadhands further into my build as they appear very versatile. Phill
-
That is fantastic looking deck. Phill
- 607 replies
-
- 2
-
-
- winchelsea
- Syren Ship Model Company
- (and 1 more)
-
I have now fixed the matching starboard plank. and the second plank on each side was then added. Neither of these first two planks were tapered. I now plan to line out the remainder of the hull using tick strips before adding the next planks. Phill
-
Thanks captain hook slow but steady is the plan.
-
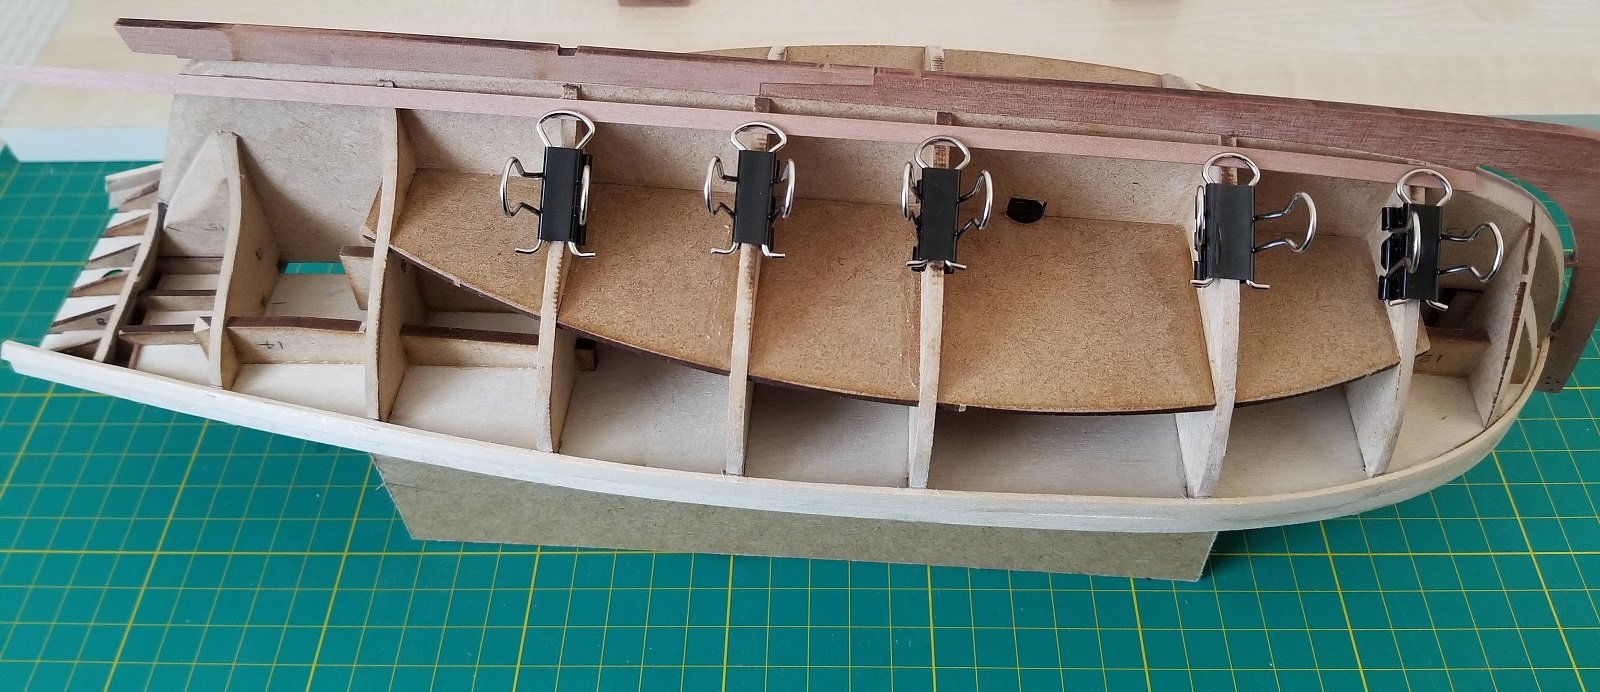
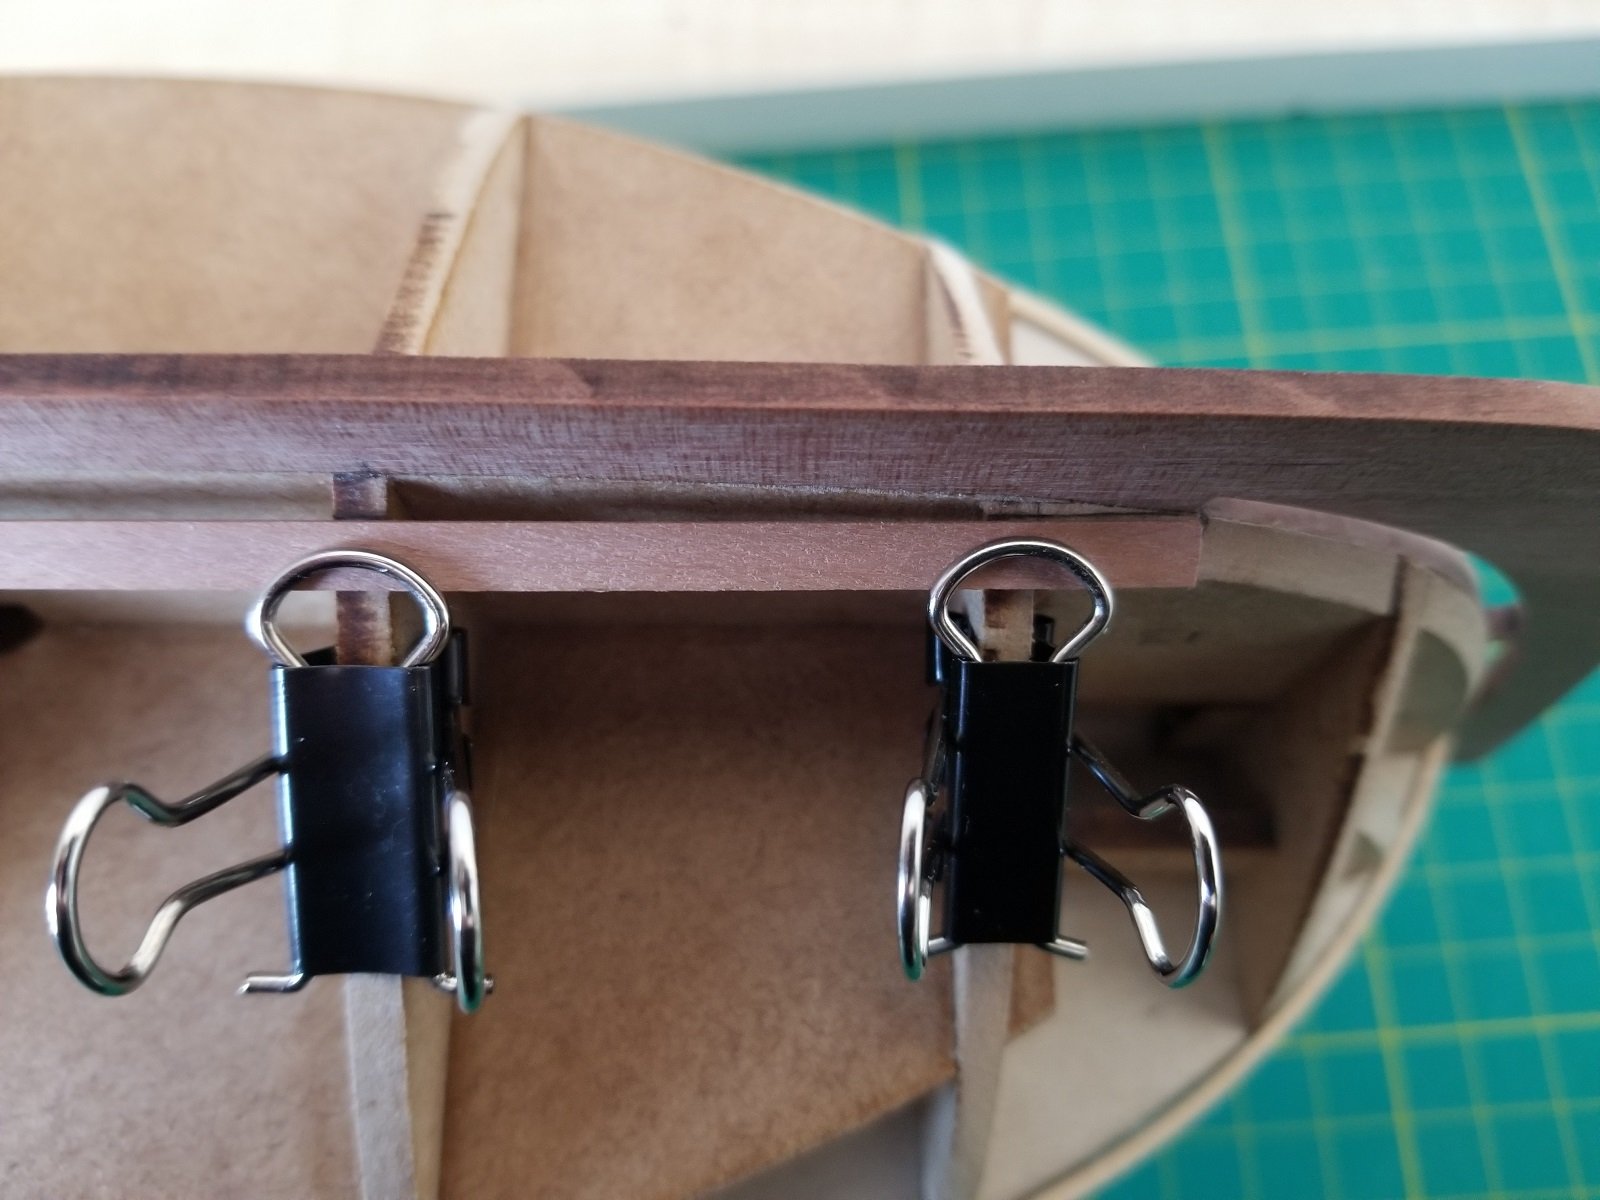
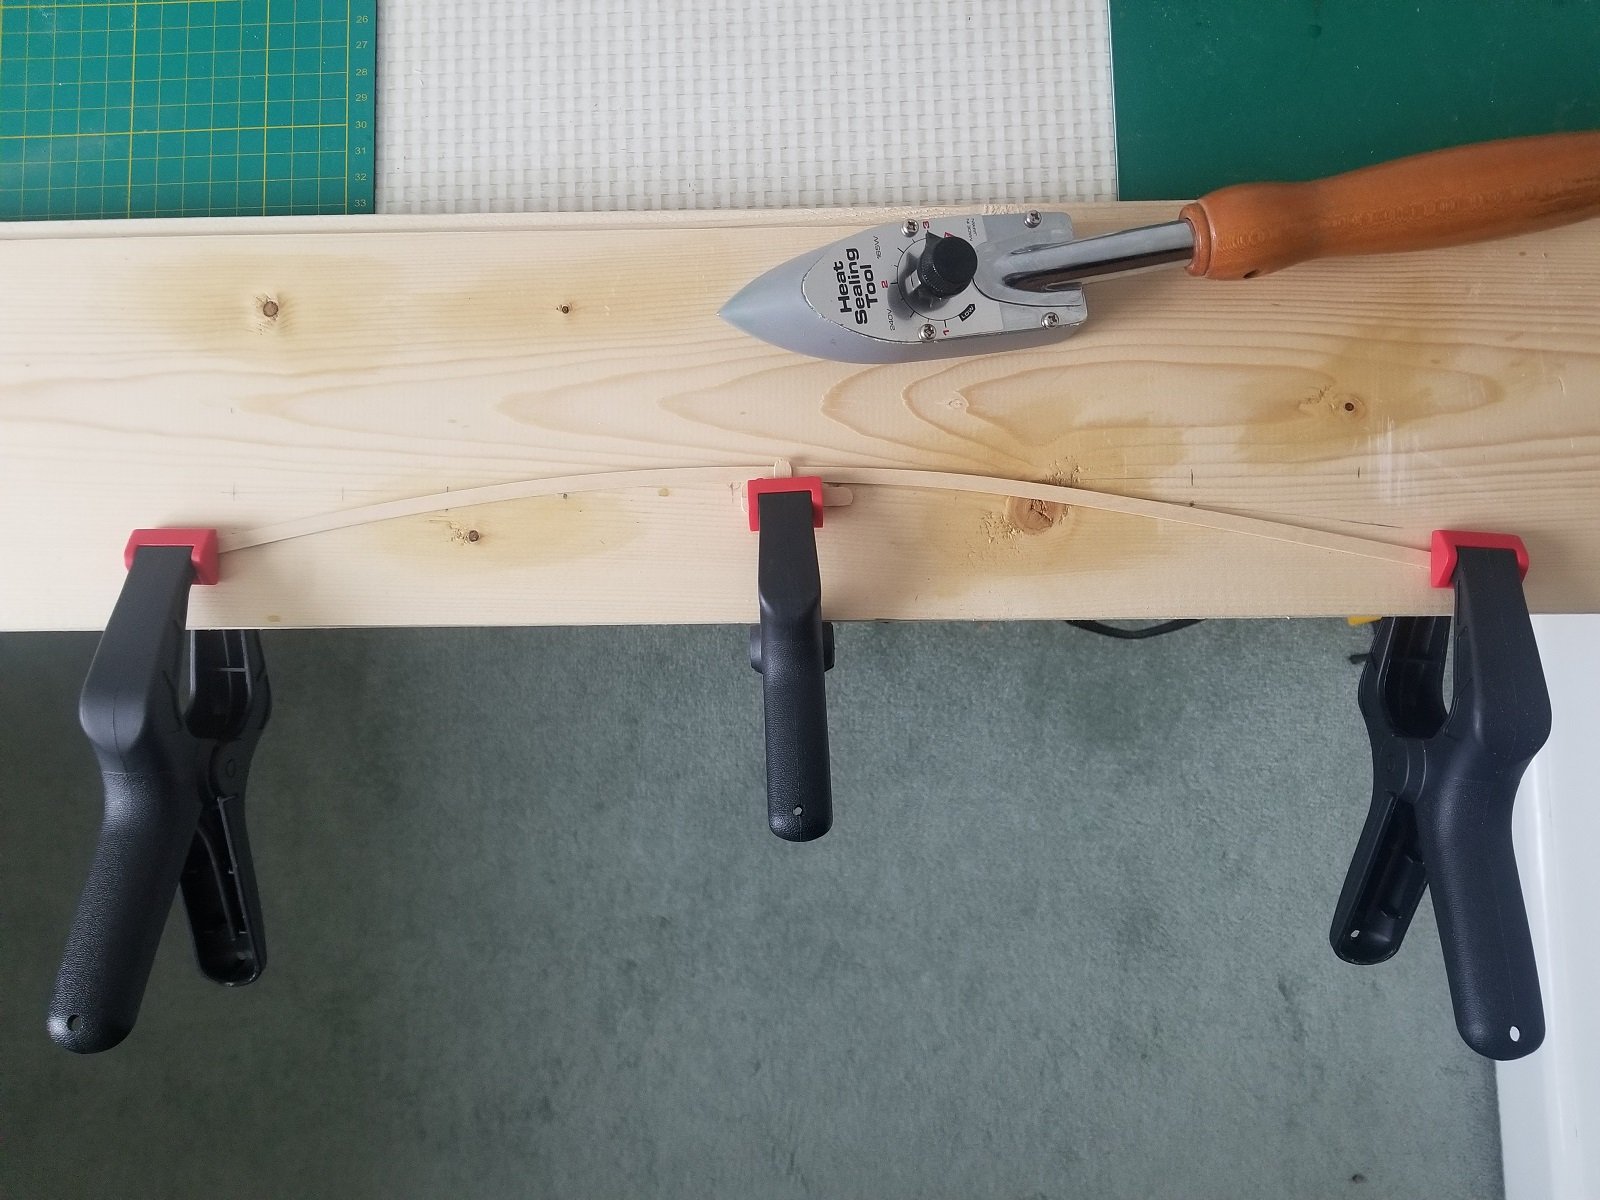
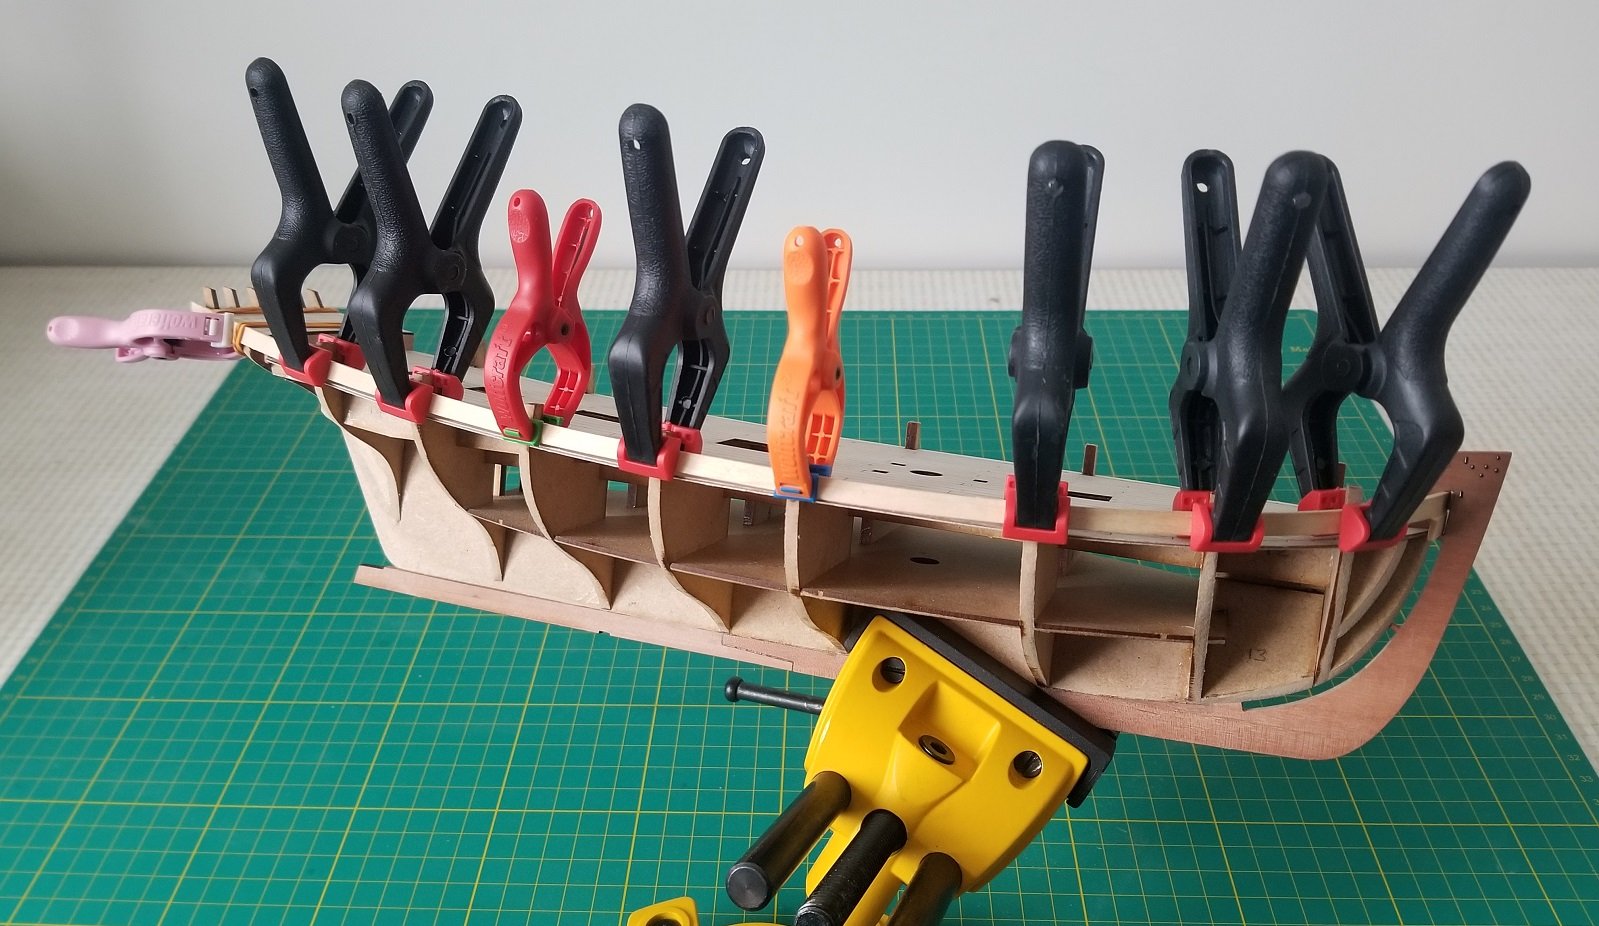
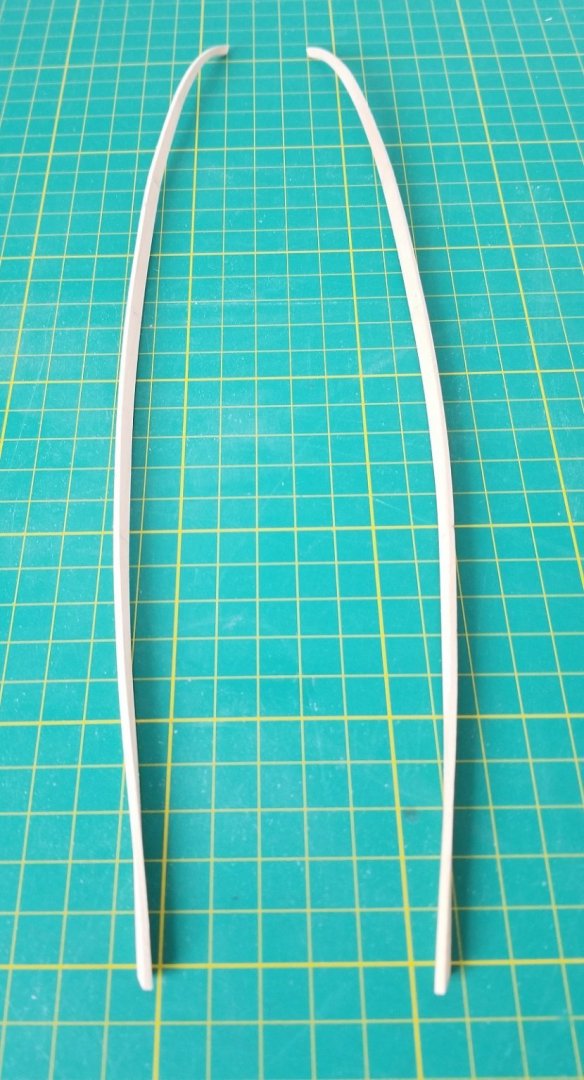
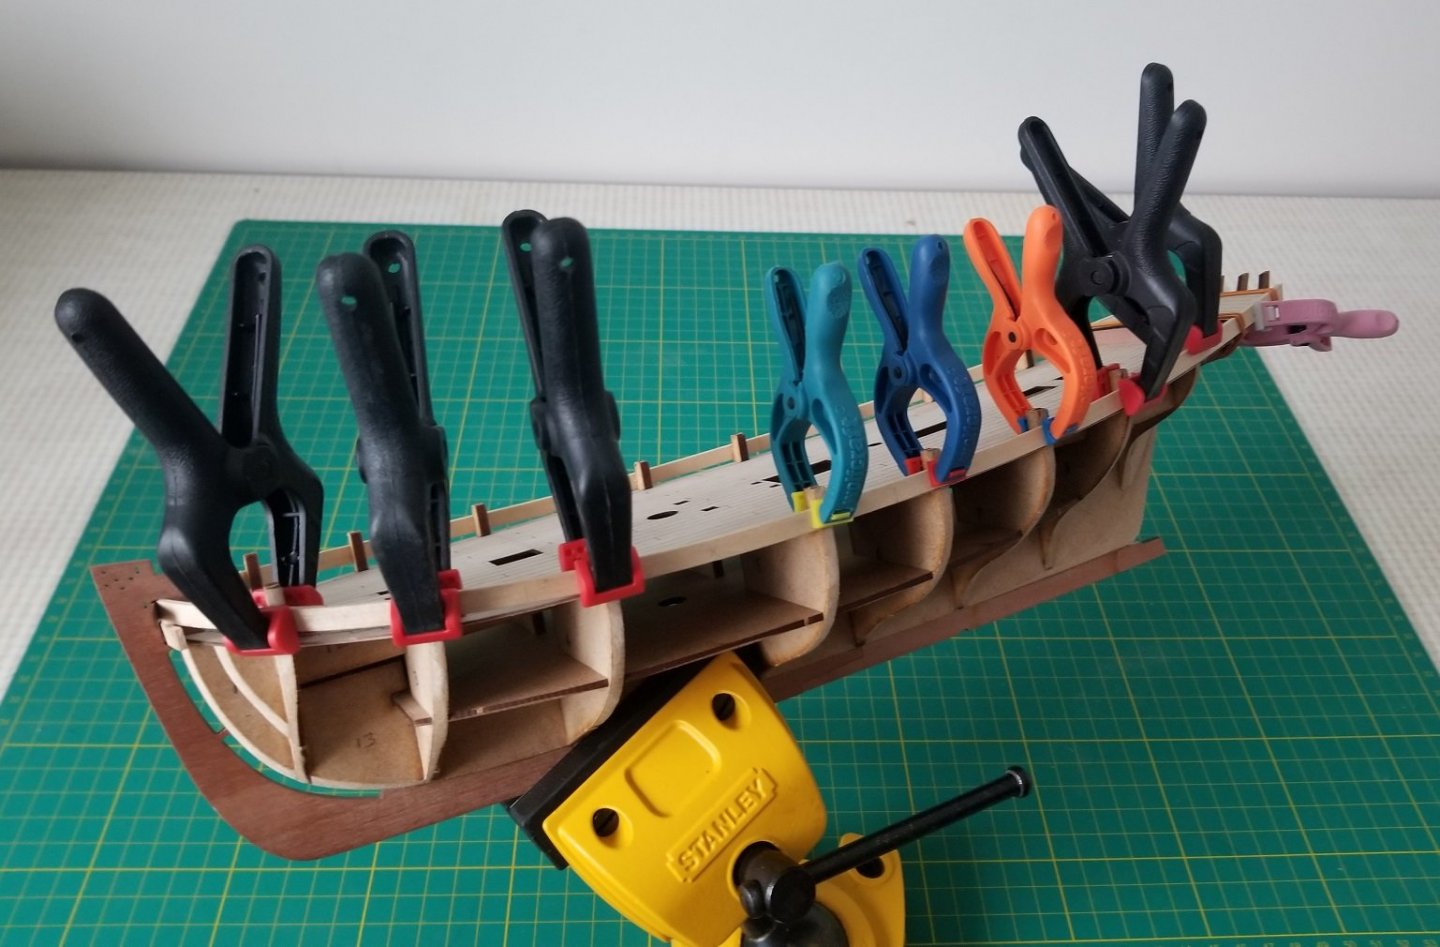
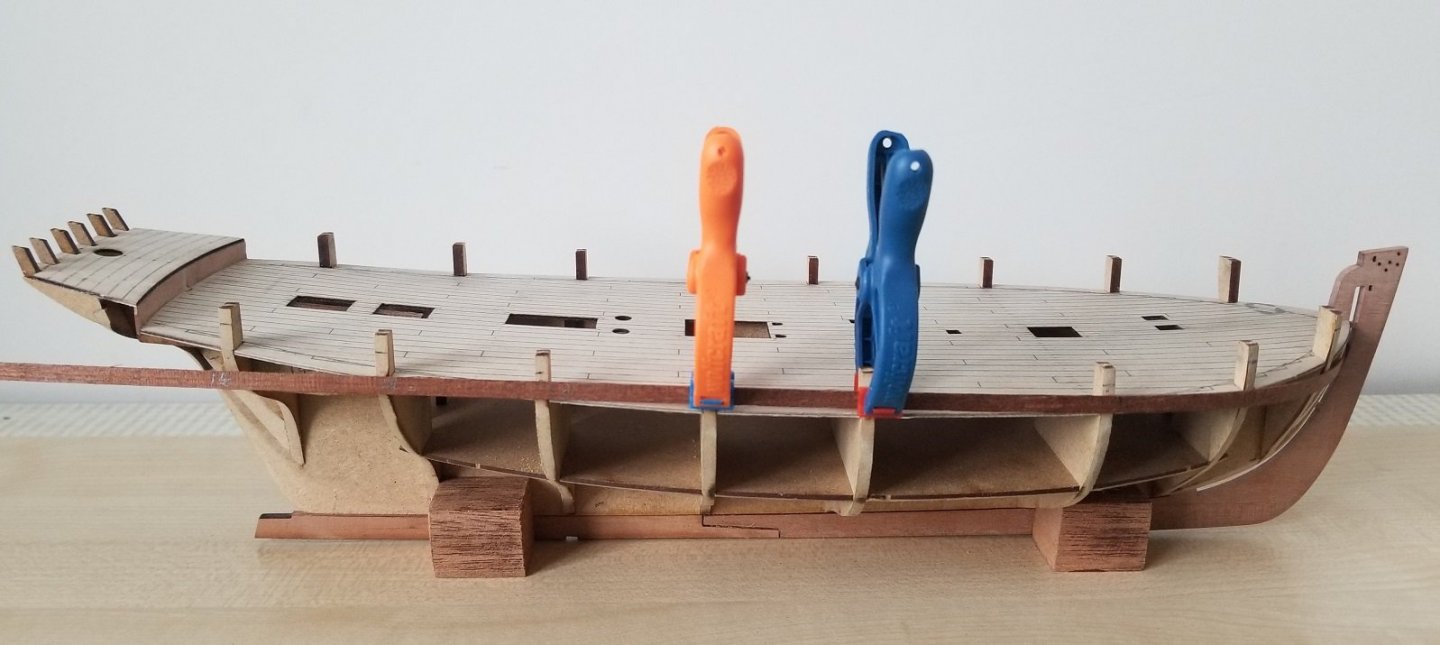
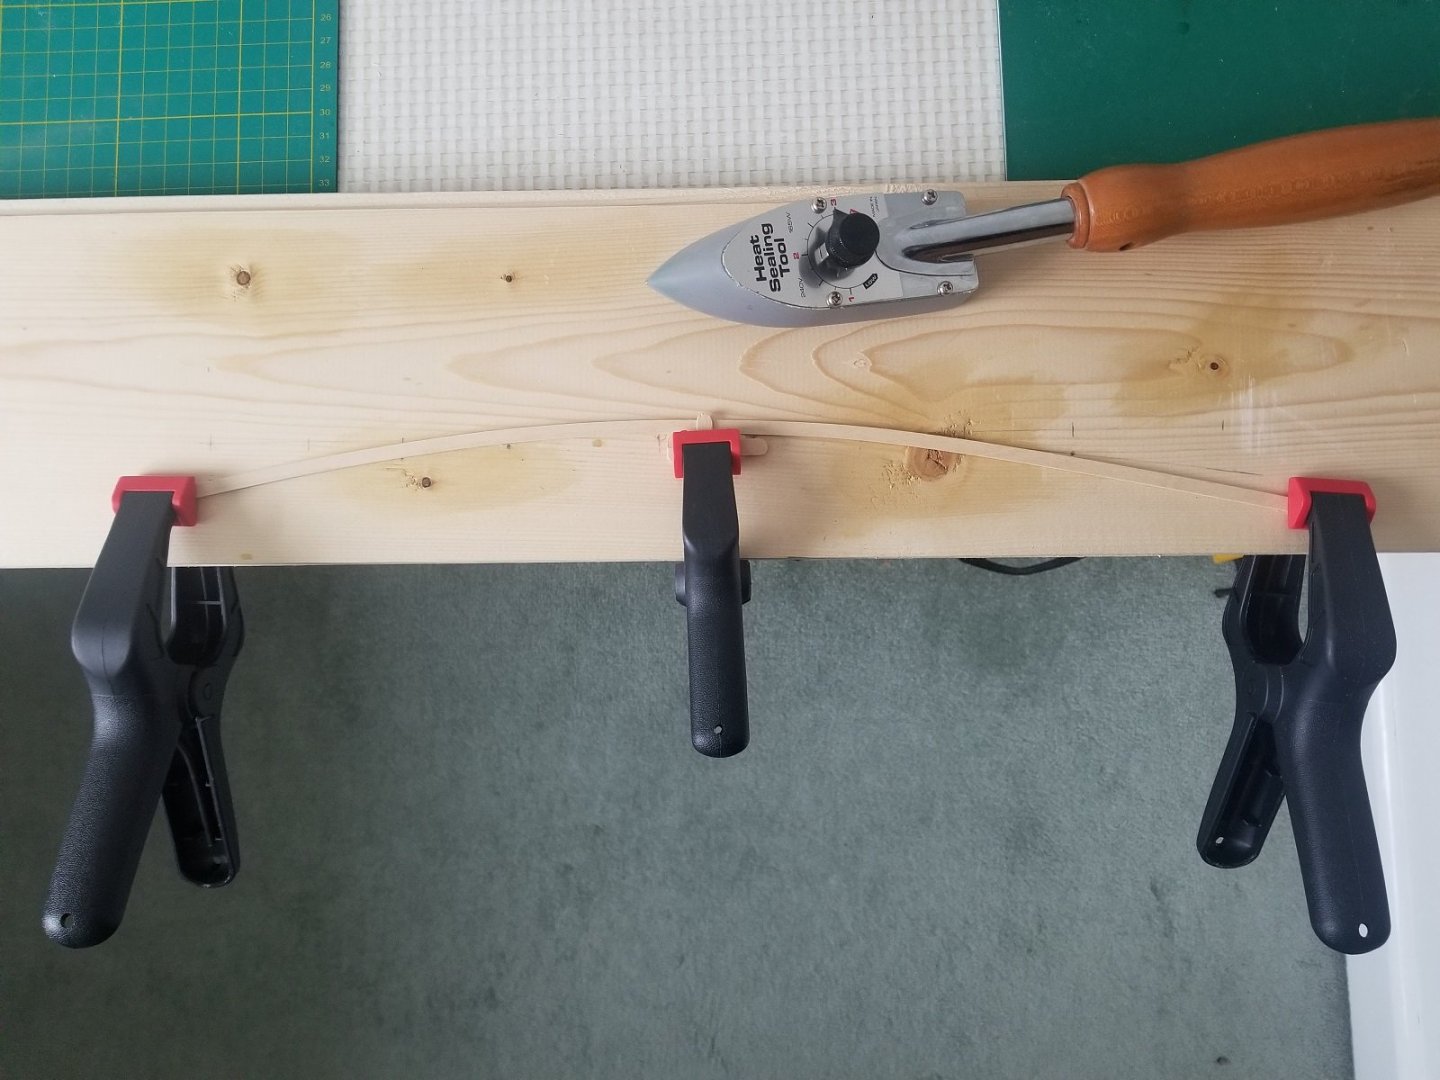
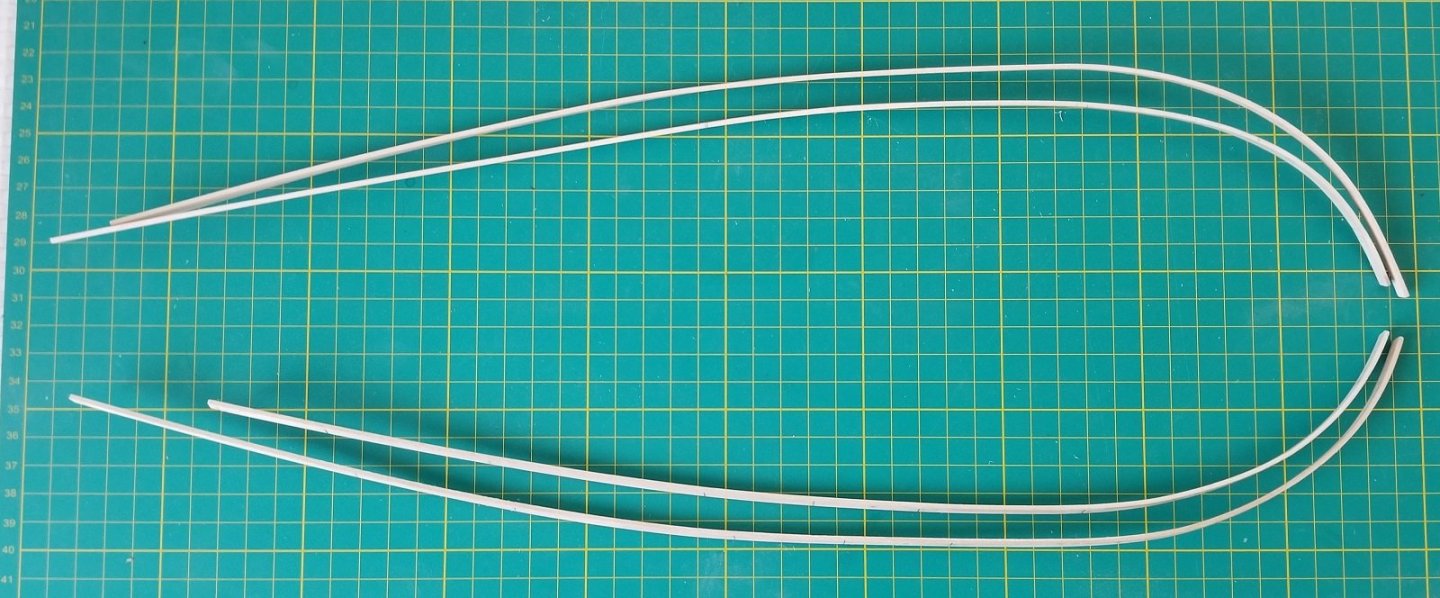
The first “master" plank is fitted 4mm down from the top edge of the bulkheads. I marked this position on all the bulkheads and then clamped a very thin plank to bulkheads 4 and 5 at the desired position. As this plank was bent around the bulkheads it was obvious that quite a lot of bending would be required to accommodate the sheer and the curve around the bows. You can see this at the bows. The finished plank should fit into the top of the rabbet slot in the stem. To get an idea of how much bending is required I marked the position of each bulkhead on the test plank and measured the vertical distance from the desired position at each bulkhead. I took these measurements and transferred them onto an old bit of pine that would be used for bending and this gave me the desired final bend of the plank. I then used these marks to overbend the plank and used a small iron to heat the plank using the methods explained by Chuck on his YouTube page. After the plank had cooled, I released it and was pleased to see that it came close to the marks I had originally made. I trial fitted it to the bulkheads and noted where more or less bend was required and then repeated the heating to get the correct shape. After refitting and getting the required curve I bent the plank for the other side and then the second plank for each side was bent to the same shape. With the planks now bent to take in the sheer it was necessary to apply some bend for the plank to run around the bulkheads and into the stem rabbet. This was achieved by wrapping the plank around an old paint kettle and applying the iron again. With the planks shaped to fit as close as possible I fixed the first port plank using a spacer at the stem and plenty of clamps. Phill


-
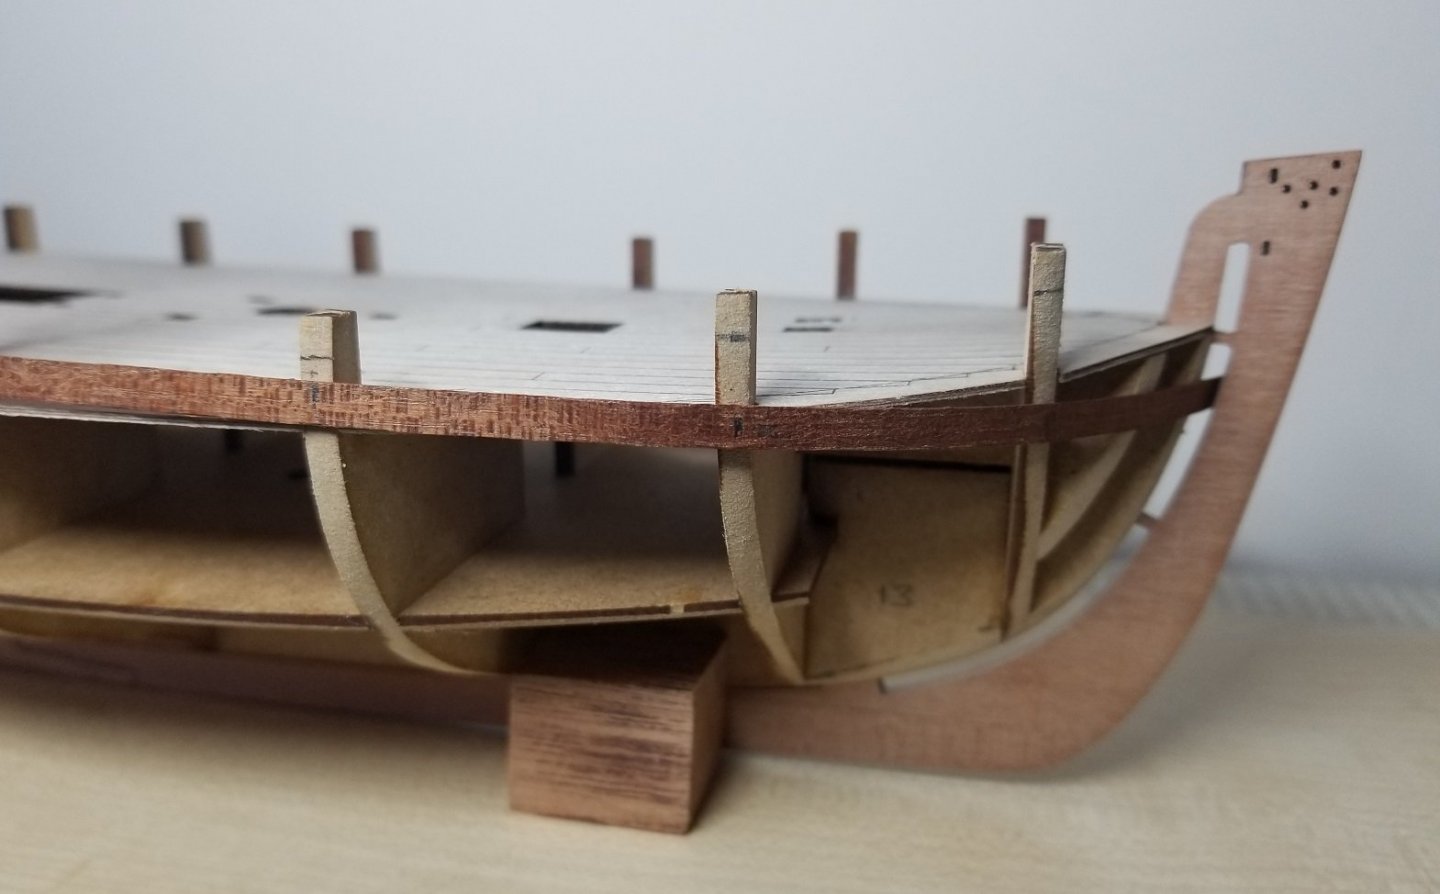
After much sanding I think I have everything faired nicely. The next stage is to fit the keel and stempost but before doing this I checked to see if the two layers of planking would fit into the slot at the stem as others had noted they had trouble in this area. I found that the two planks did not fit, and it appears to be because the first planking is 1.6mm rather than the designed 1.5mm. To overcome this, I increased the width of the slot until I could fit the first and second planking in and hopefully this will make things easier during planking. The keel and stem were then glued in place. I am now re-reading everything I can find on planking and watching Chucks videos before commencing with the next phase. Phill

-
Thanks Jeff and thanks for the likes. Phill
-
Fantastic detailed work it is a pleasure to watch over your shoulder. Phill
-
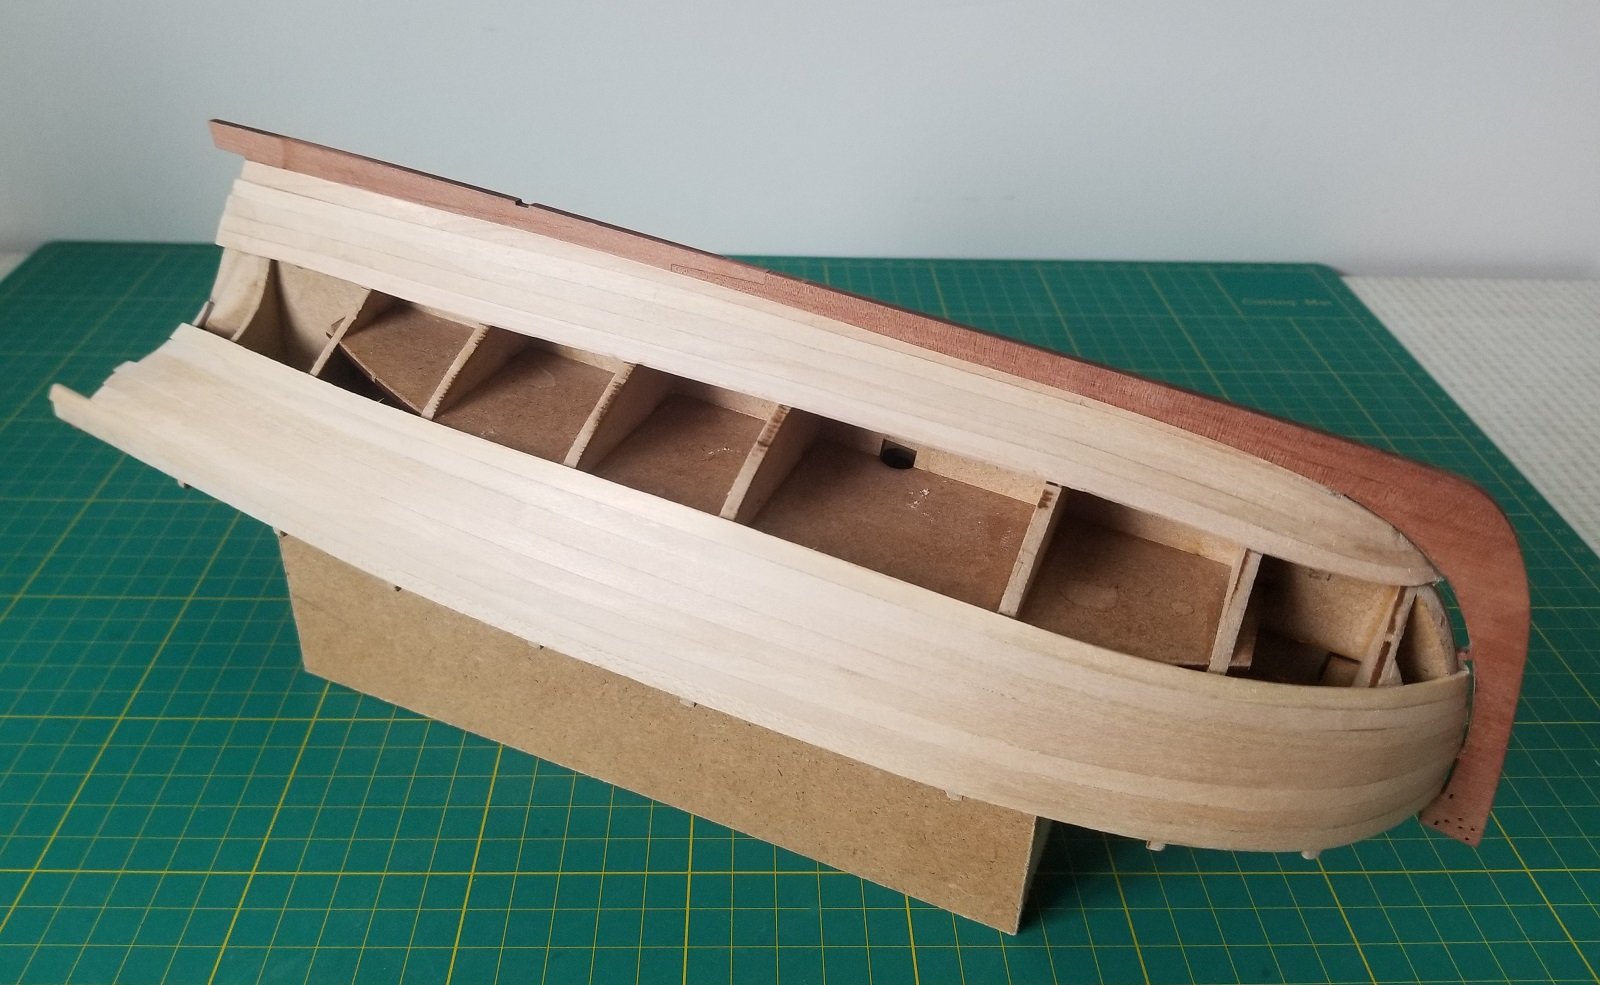
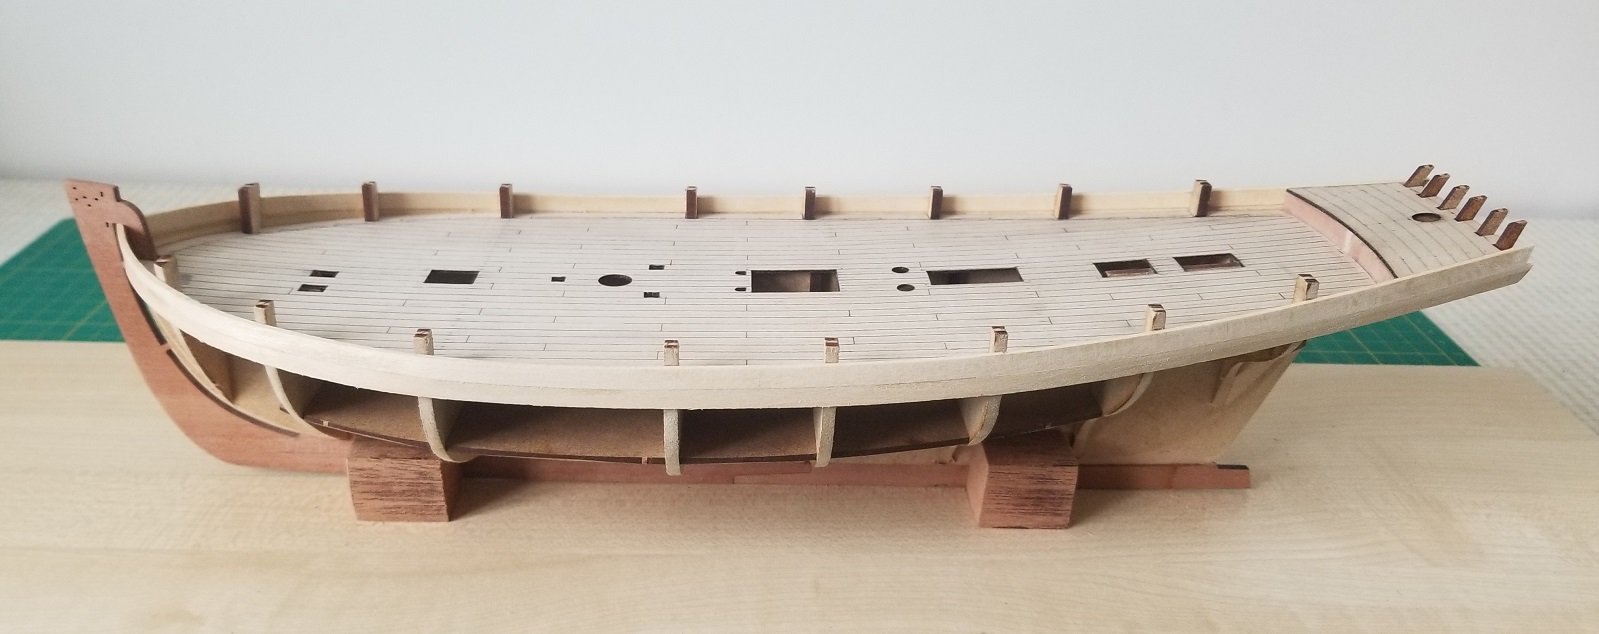
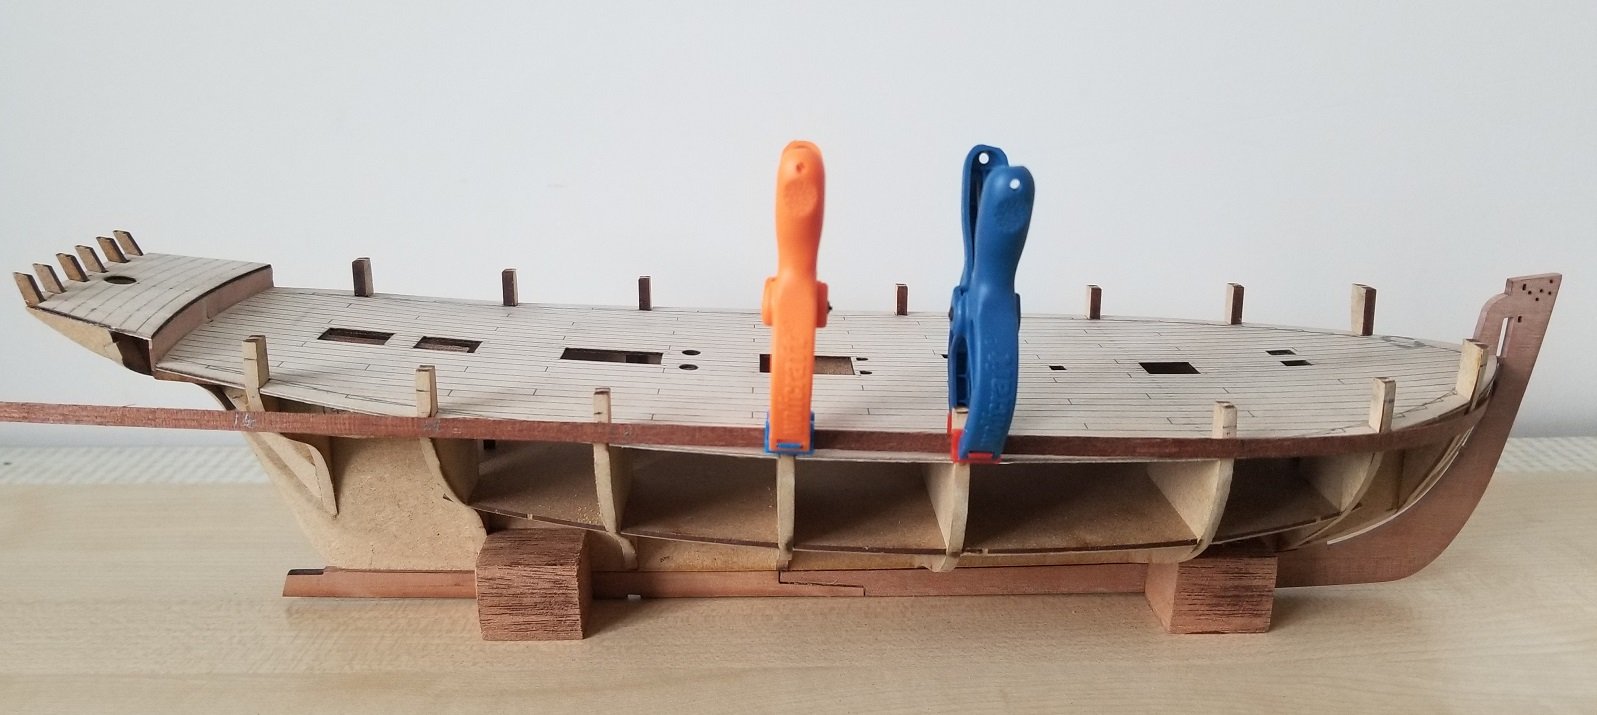
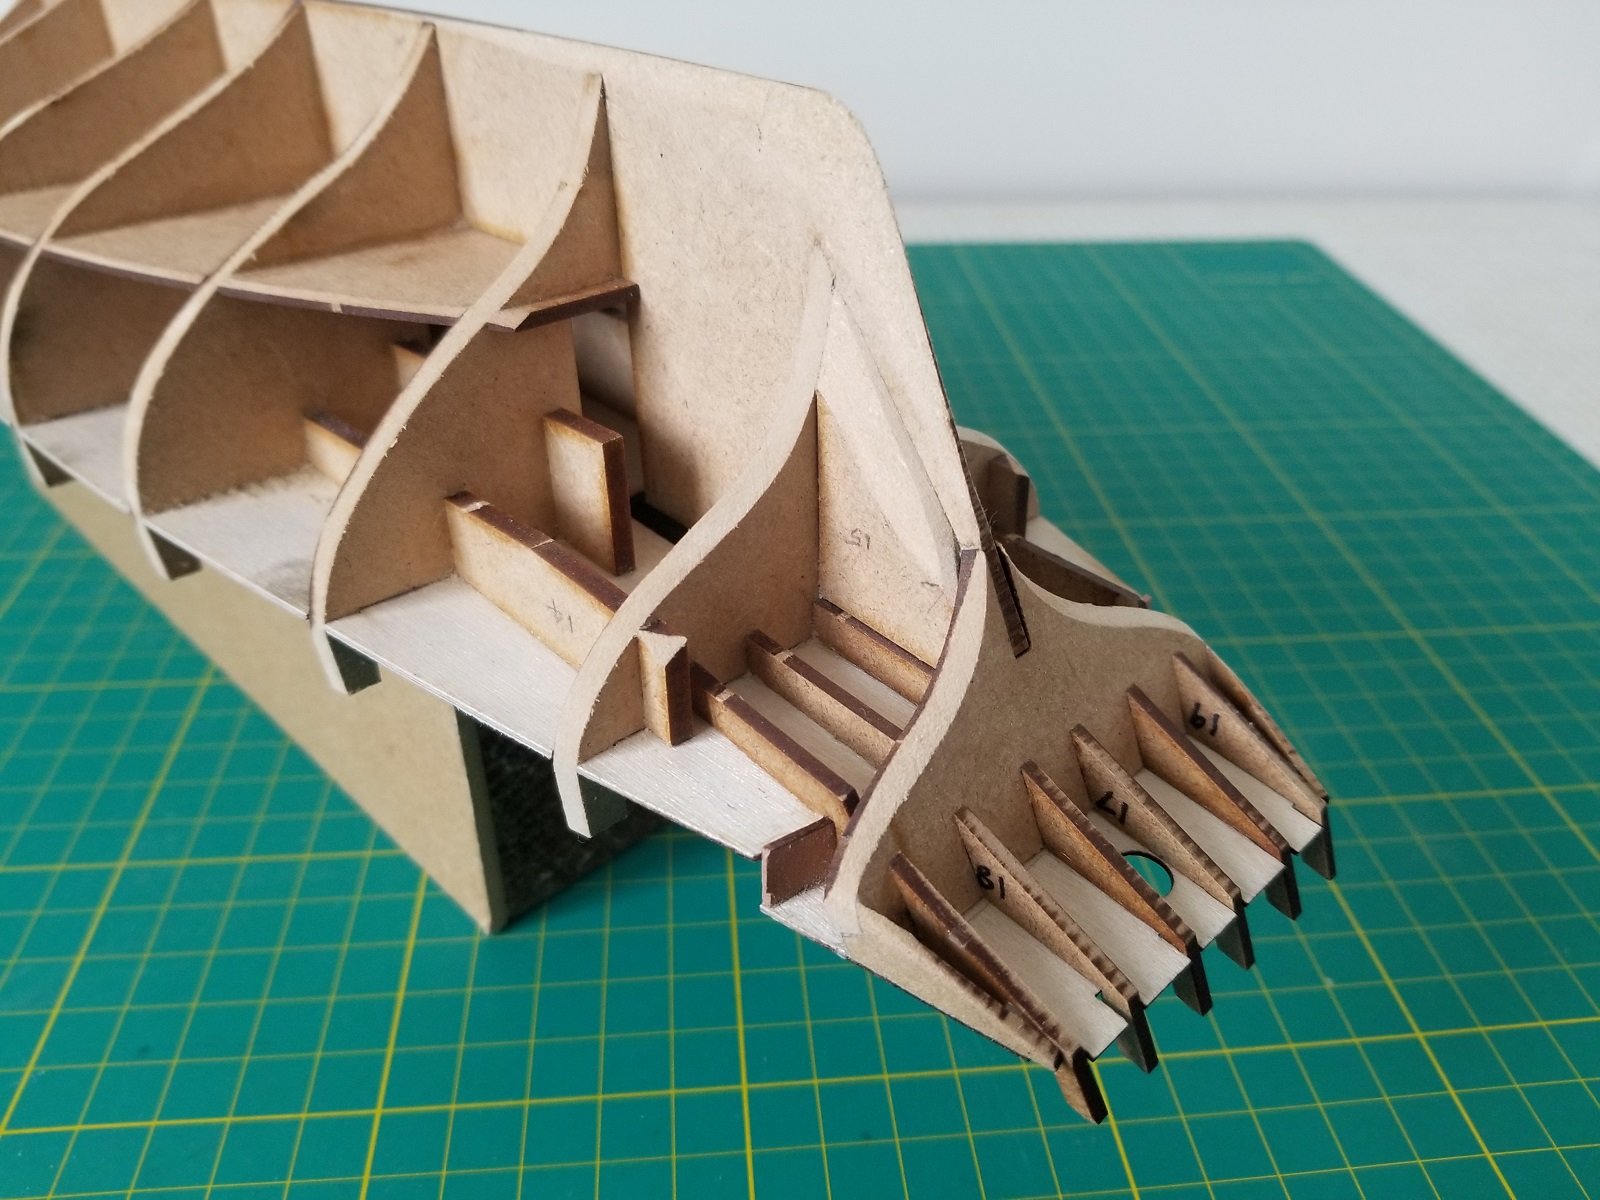
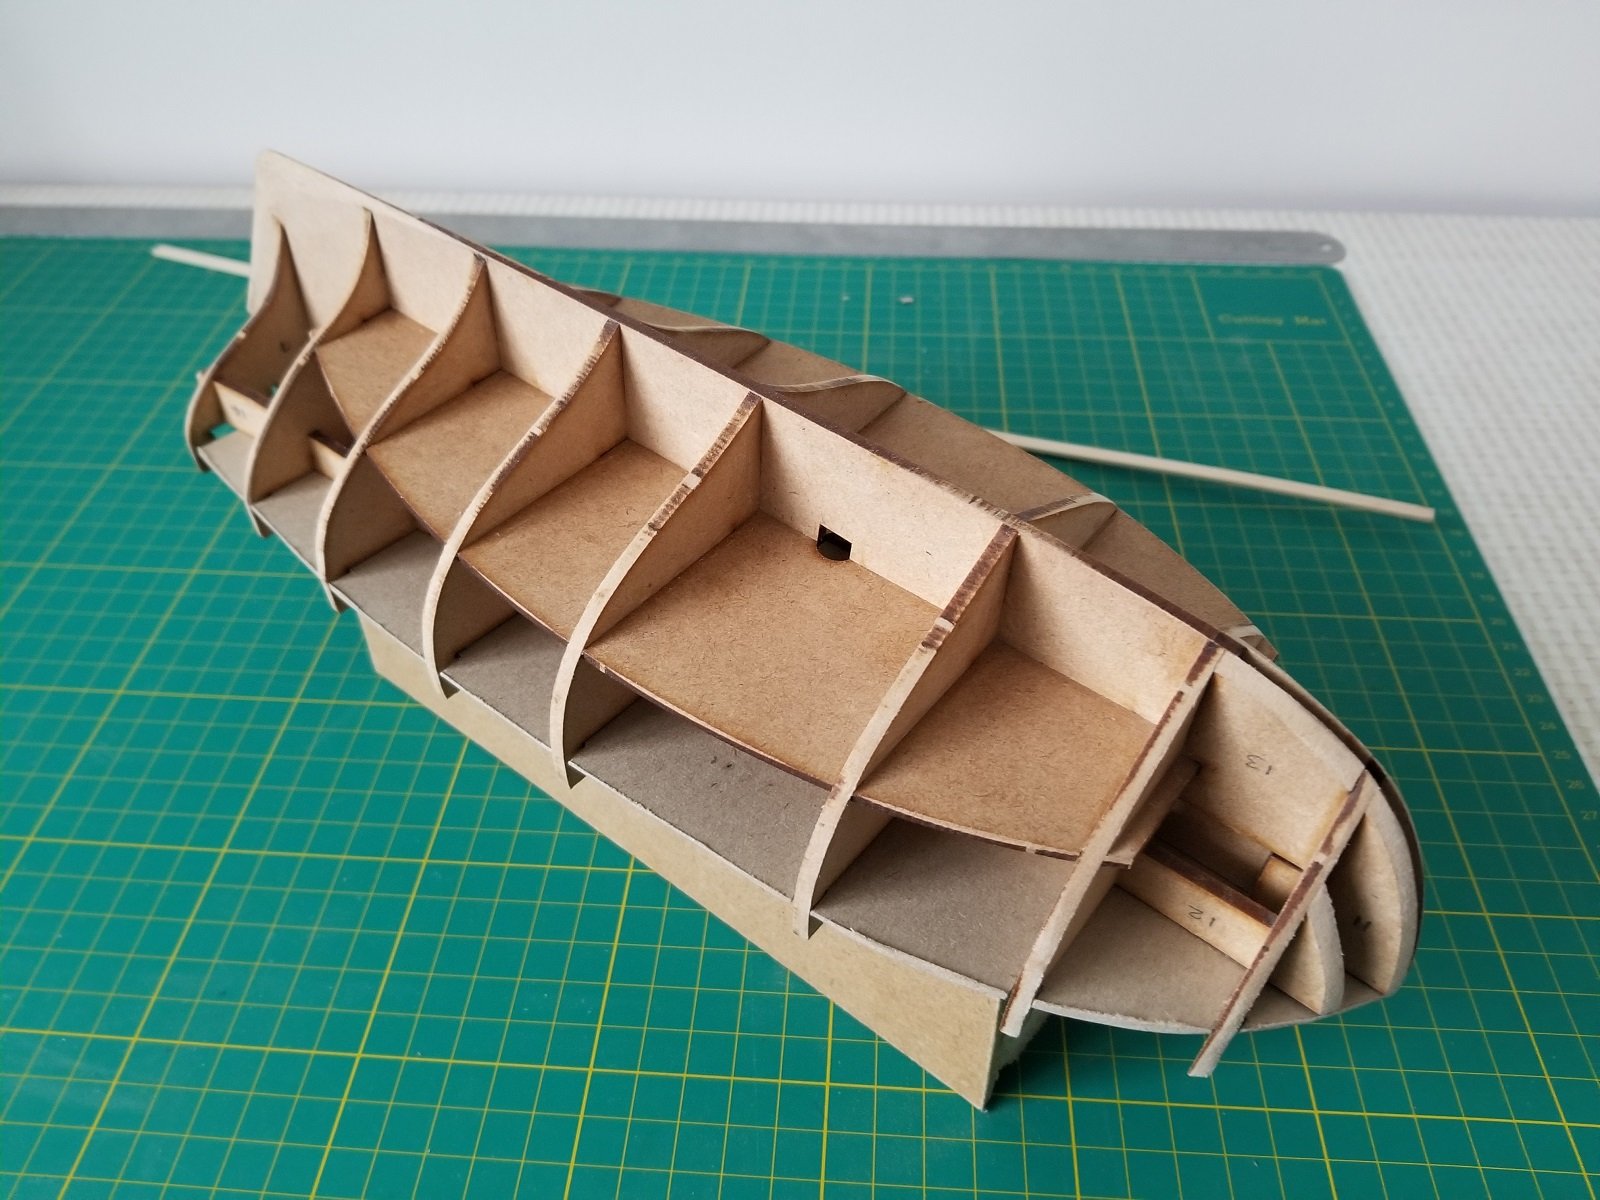
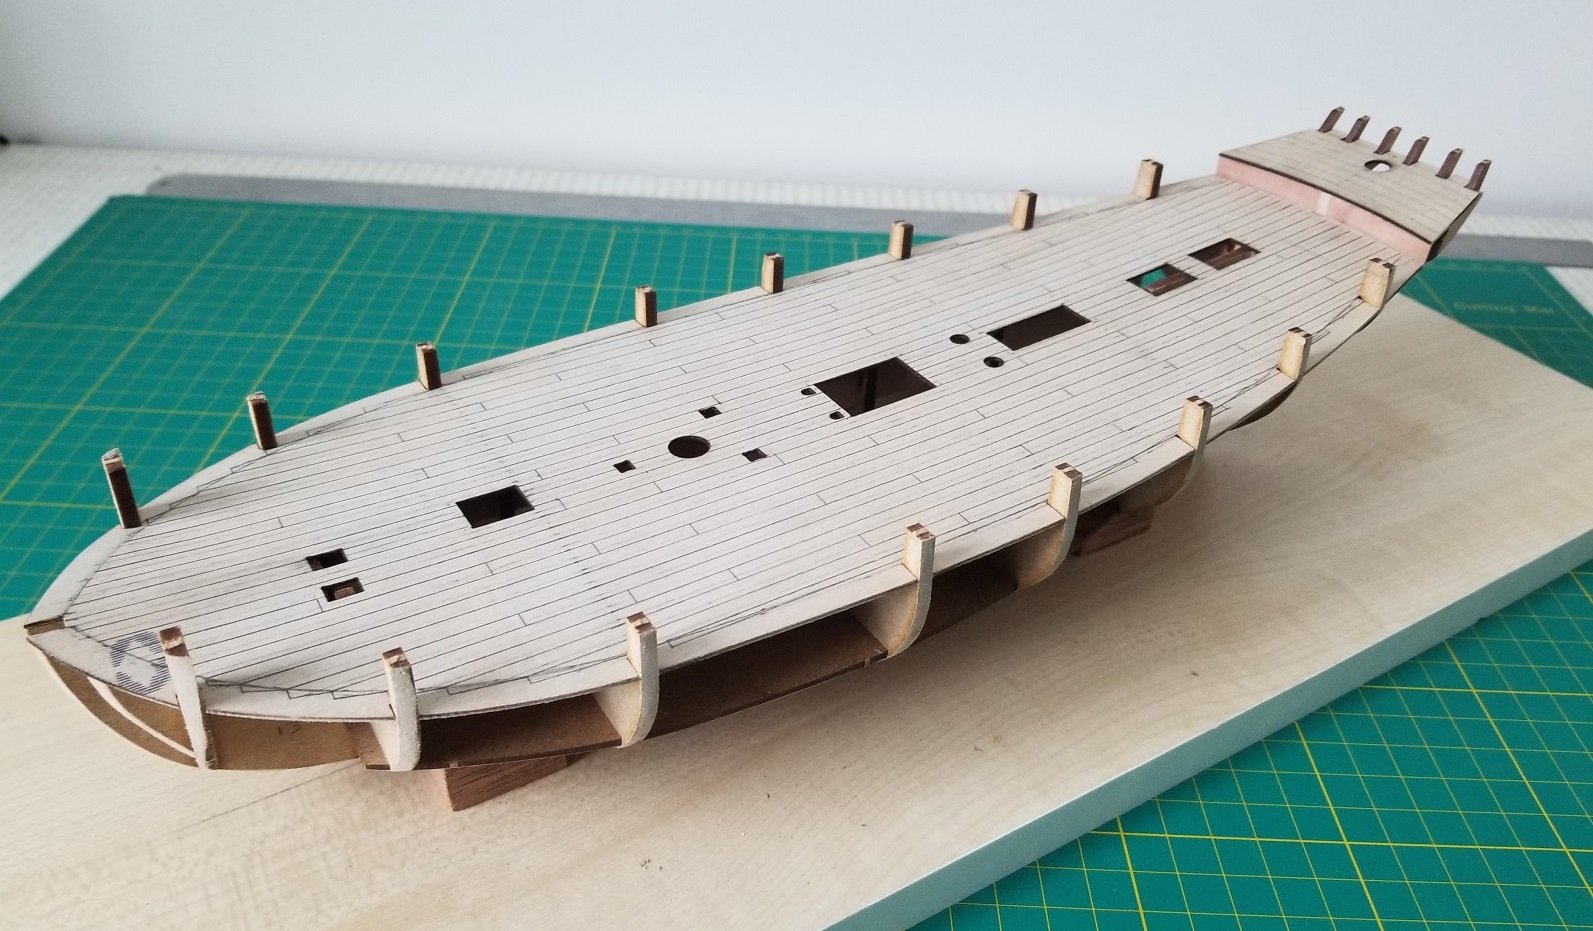
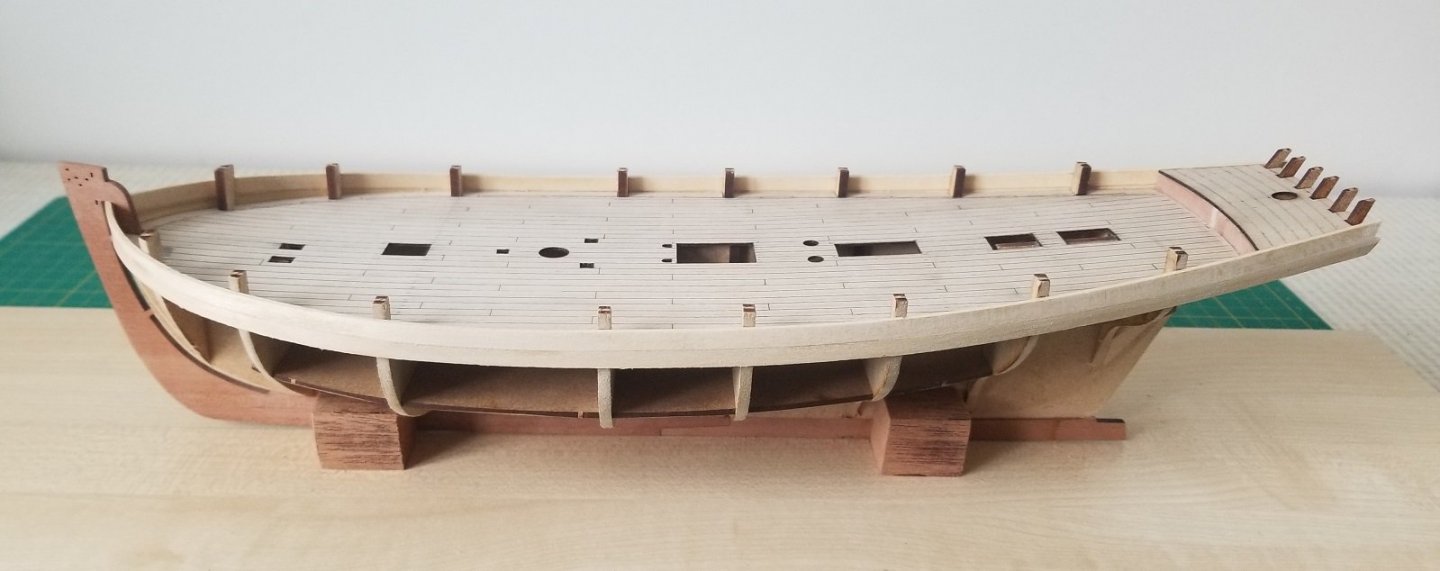
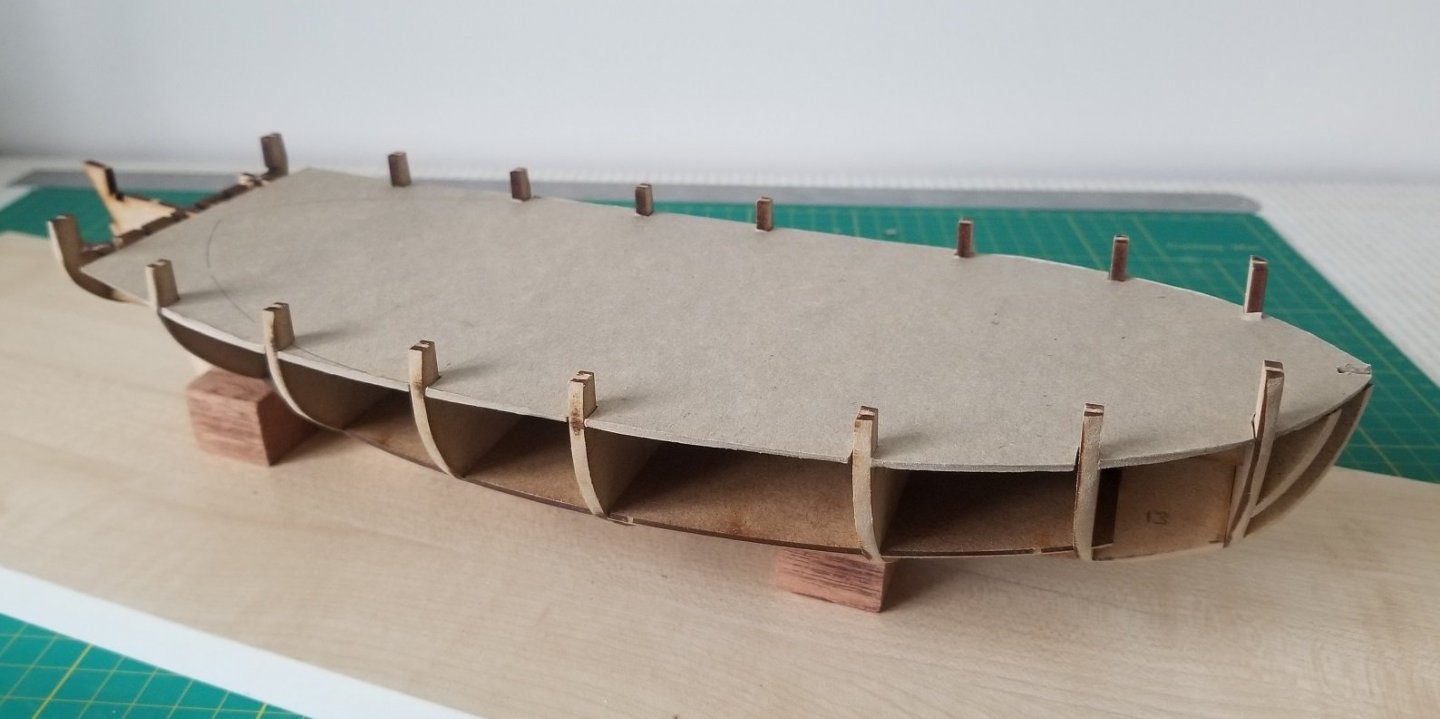
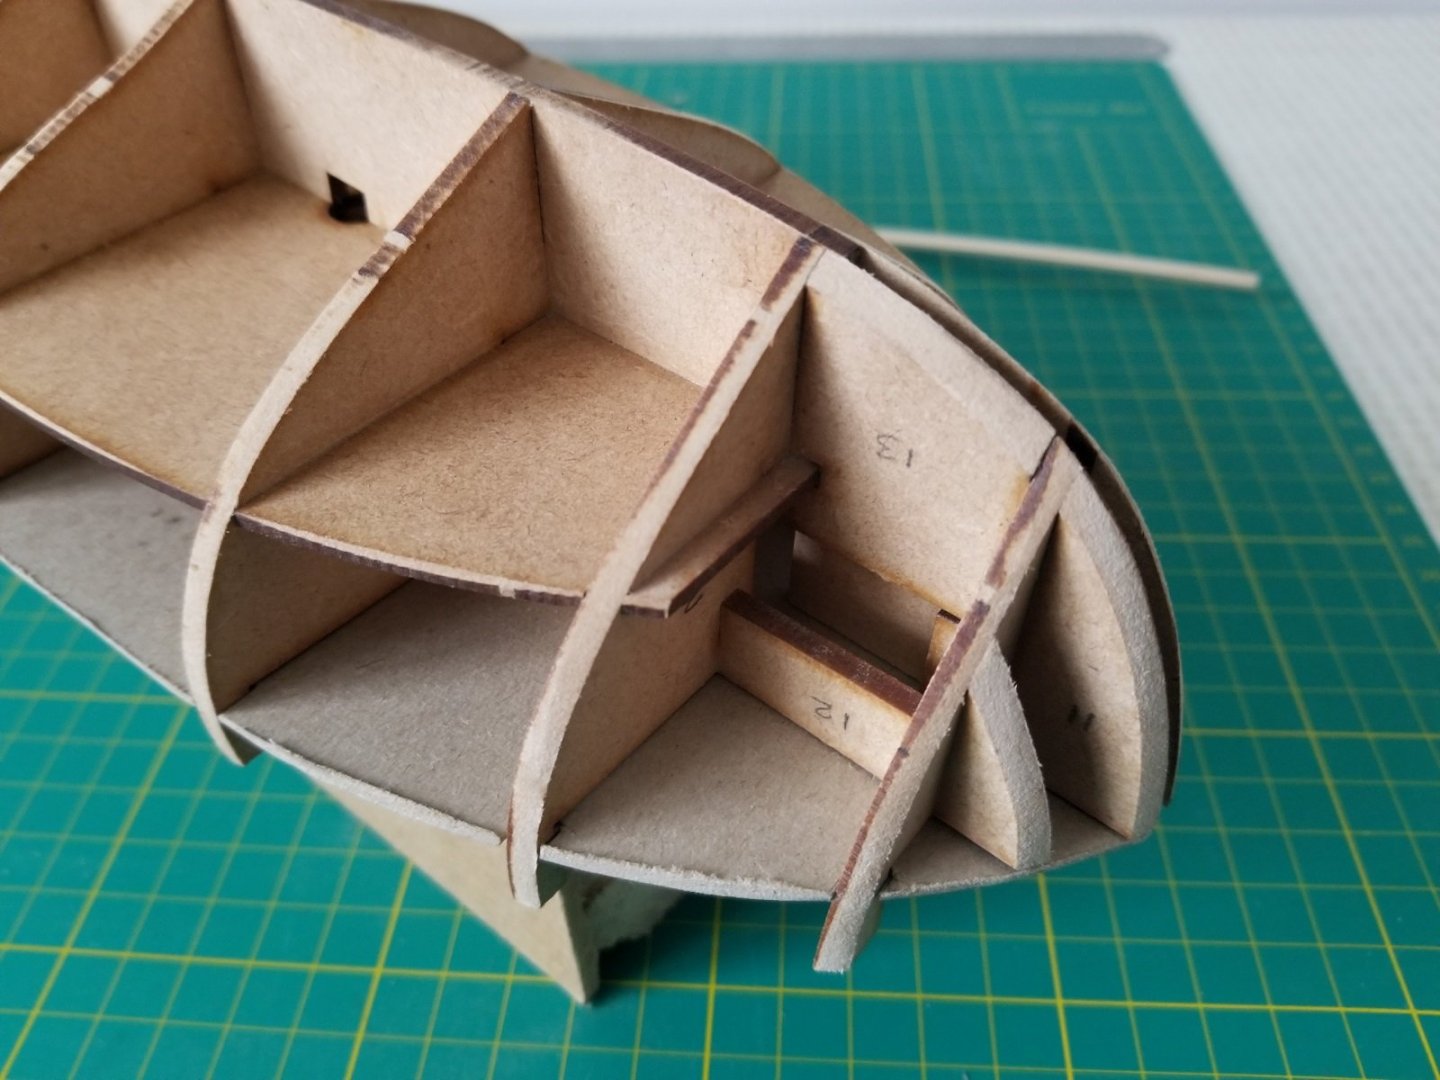
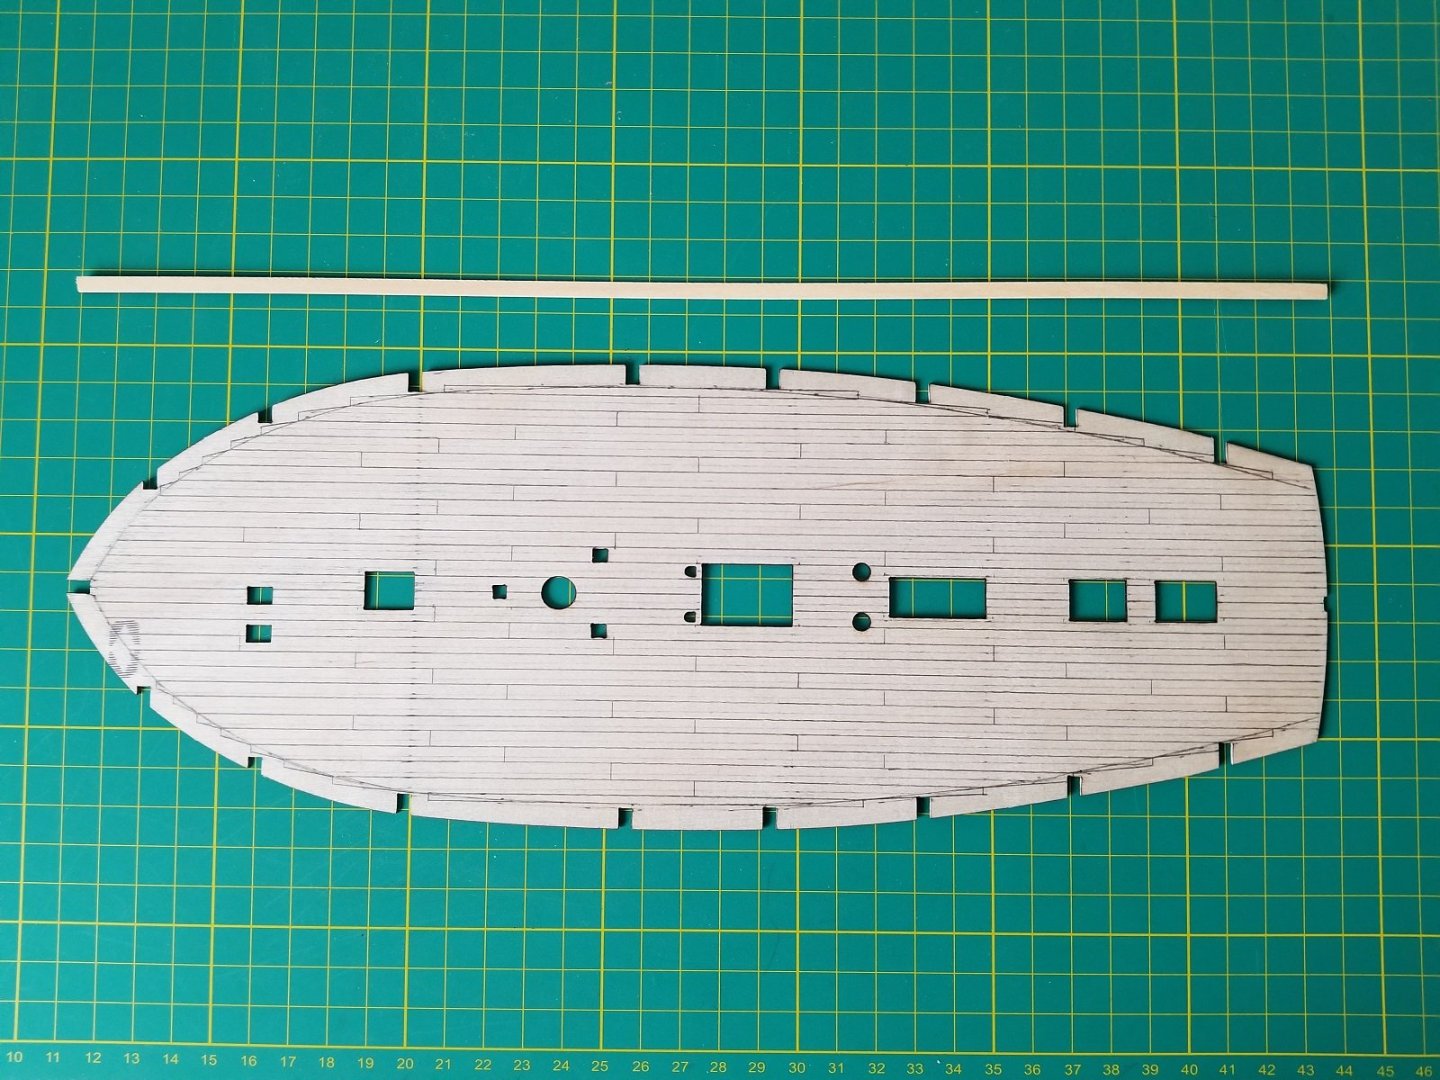
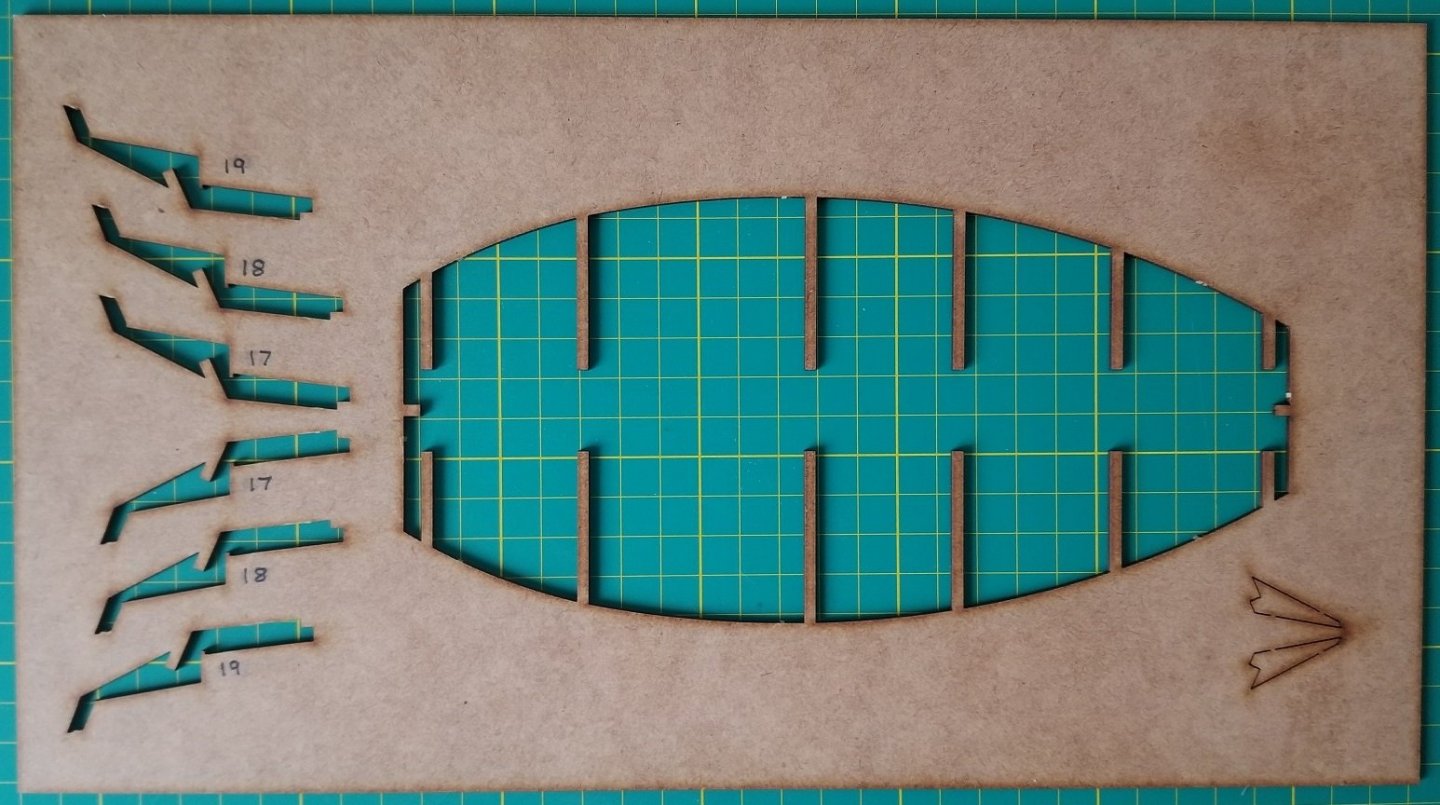
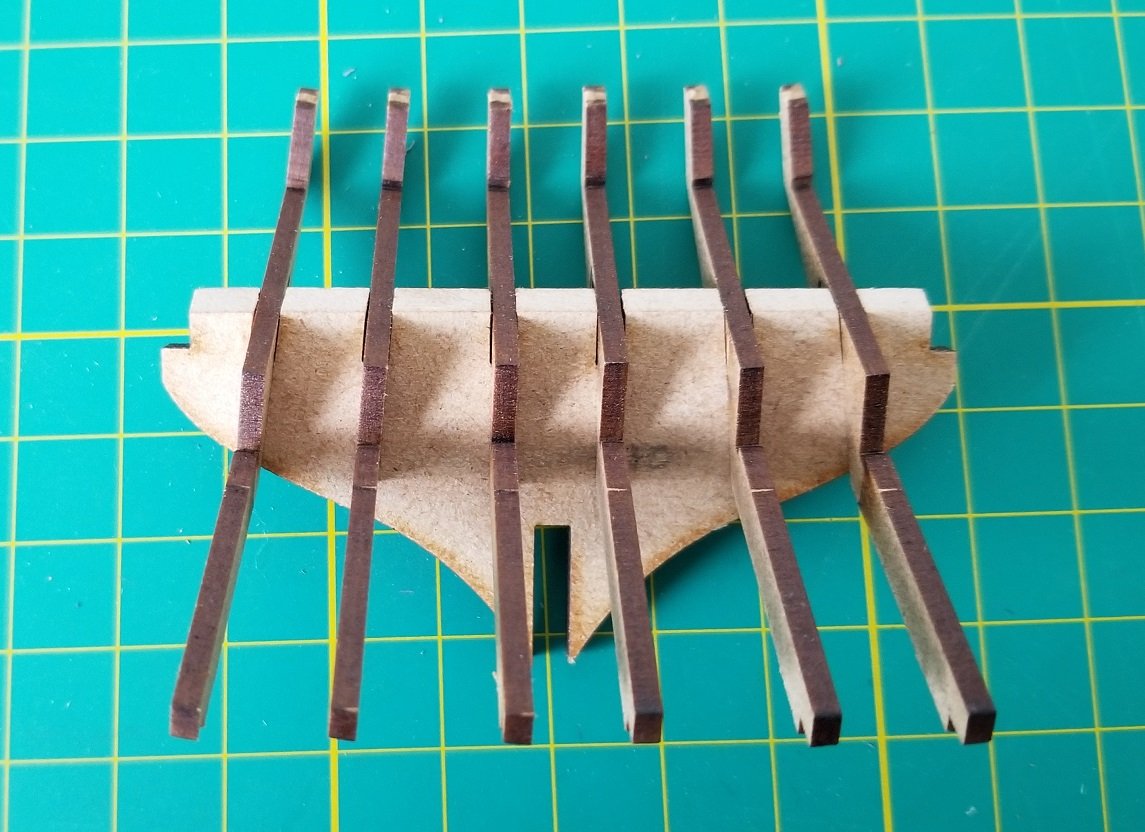
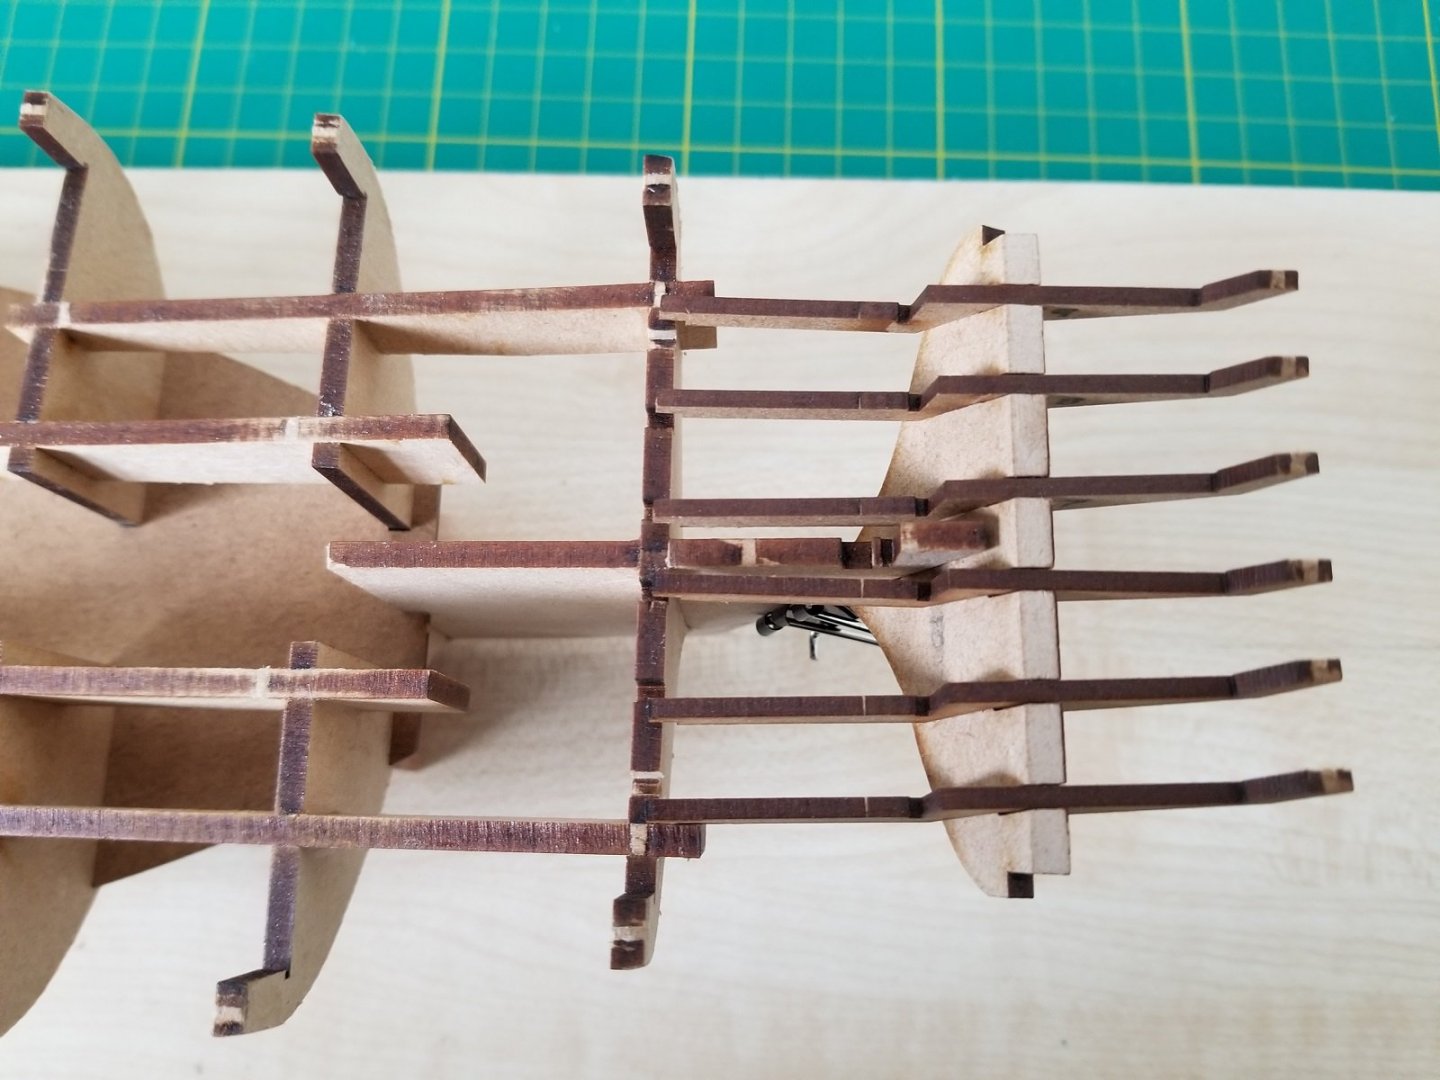
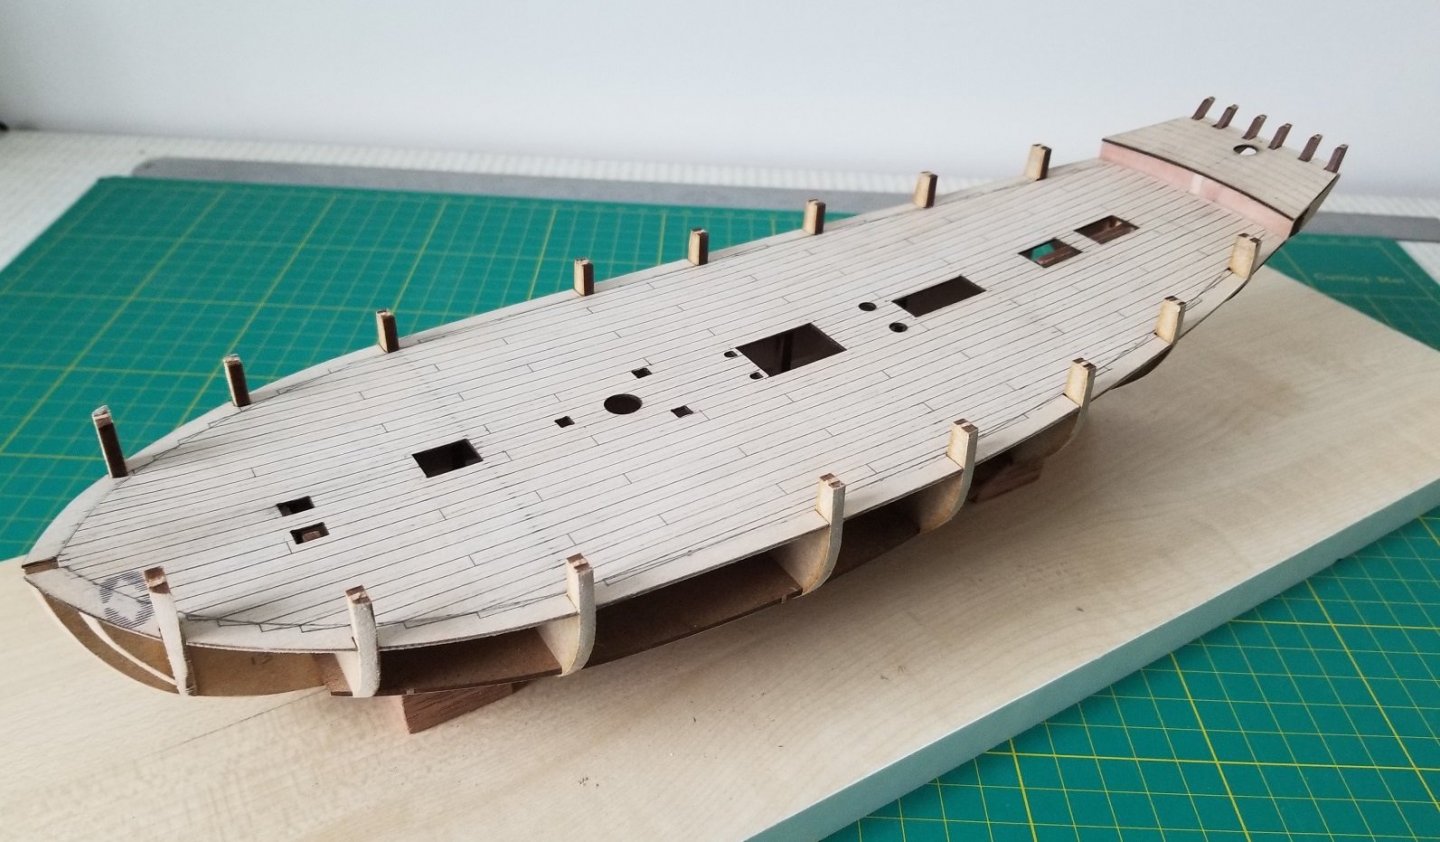
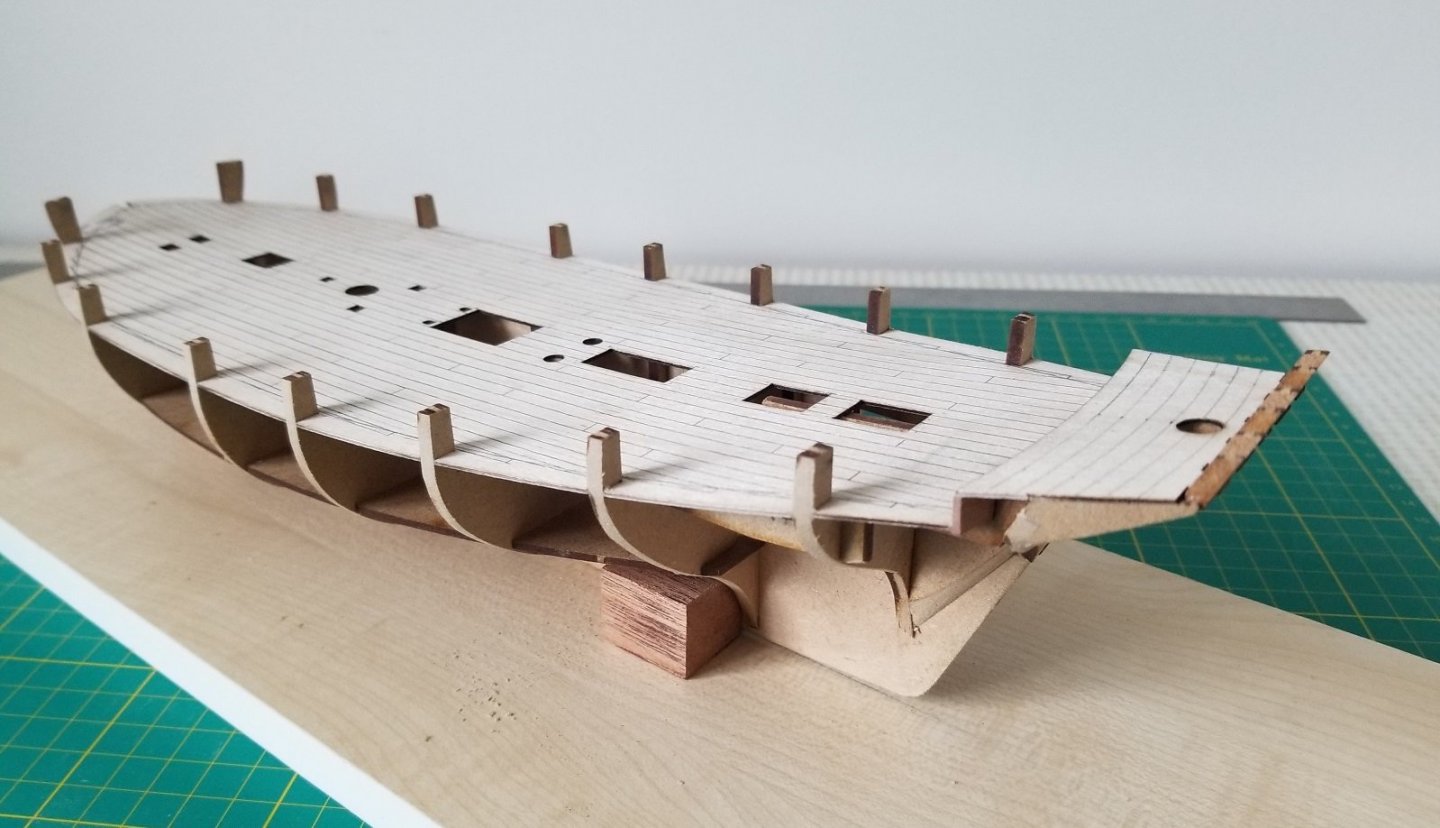
Before starting the fairing, I cut out a temporary cardboard deck to get a better impression of the deck curvature. I also created a jig to hold the structure steady whilst doing the fairing and planking. This was simply a piece of timber with two pieces of MDF glued to the sides. The MDF was cut to the sheer of the deck using the shape of the bulkhead securing pattern parts 12. I carried out the initial fairing as far back as possible. I found that at the bows the front of the bulkhead securing pattern part 12 required a significant amount of fairing to get a clean run with a test plank. Having done as much fairing as possible without the transom frames fitted, I then sketched out the run of planking for the deck and transferred it to the false deck to assist in planking later in the build. Whilst doing this I noted that the kit provides 30 off 300mm lengths of boxwood planking and as 2 will be required for the rudder platform deck, I will have 28 remaining for the main deck. The main deck however is 26 planks wide plus a bit so I will not have enough timber remaining to create a waterway as it is longer than 300mm on each side. To get around this I have followed what BE did and have ordered a sheet of box from which to cut the waterway. This however is 1.5mm thick so will need some sanding down to the plank thickness of 1mm. The transom frames are aligned differently on their host sheet from what is shown in the manual, so I removed them and compared them to the drawing in the manual before marking on their part numbers. There are very subtle differences between the parts so close inspection is required. I have added a picture of the host sheet with the part locations for anyone else who may be building in the future. You will see that they are laid out in a logical fashion with 19 being the outer frames and 17 the inner. The transom frames have also been changed from the first edition as the ends are now 'L' shaped, rather than 'U' shape slots. I found that the slots in bulkhead 9 for the outermost frames were a little snug, so I used a flat needle file to loosen up the fit. I chose to slot the transom frames into the rear most bulkhead 10 and then slot that bulkhead in place whilst guiding the front ends into bulkhead 9. The transom frames have a slight splay on them which provides some challenges with alignment into frame 9. With a little squeezing however, they fitted in fine. I then added the stern planking patterns (15) and finally the false deck. Which required a selection of clamps and any heavy items to hand to ensure it sat flat on the bulkheads. Once the deck had been fitted, I added the rudder platform bulkheads and finally the rudder platform and stern filling patterns. Fortunately, the weather has warmed up, so it is back out to the garage to complete fairing the aft bulkheads to ensure a good run for the planking. Phill


-
Thanks VTHokiEE its good to finally be aboard.
-
You have created a beautiful model Tim and a very informative build log, I just hope that mine turns out half as good. Phill
- 436 replies
-
- 2
-
-
- vanguard models
- alert
- (and 1 more)
-
I recall BE having the same dilema and eventually moved the shroud fixings under the cathead. Phill
- 436 replies
-
- 3
-
-
- vanguard models
- alert
- (and 1 more)