realworkingsailor
-
Posts
3,251 -
Joined
-
Last visited
Content Type
Profiles
Forums
Gallery
Events
Everything posted by realworkingsailor
-
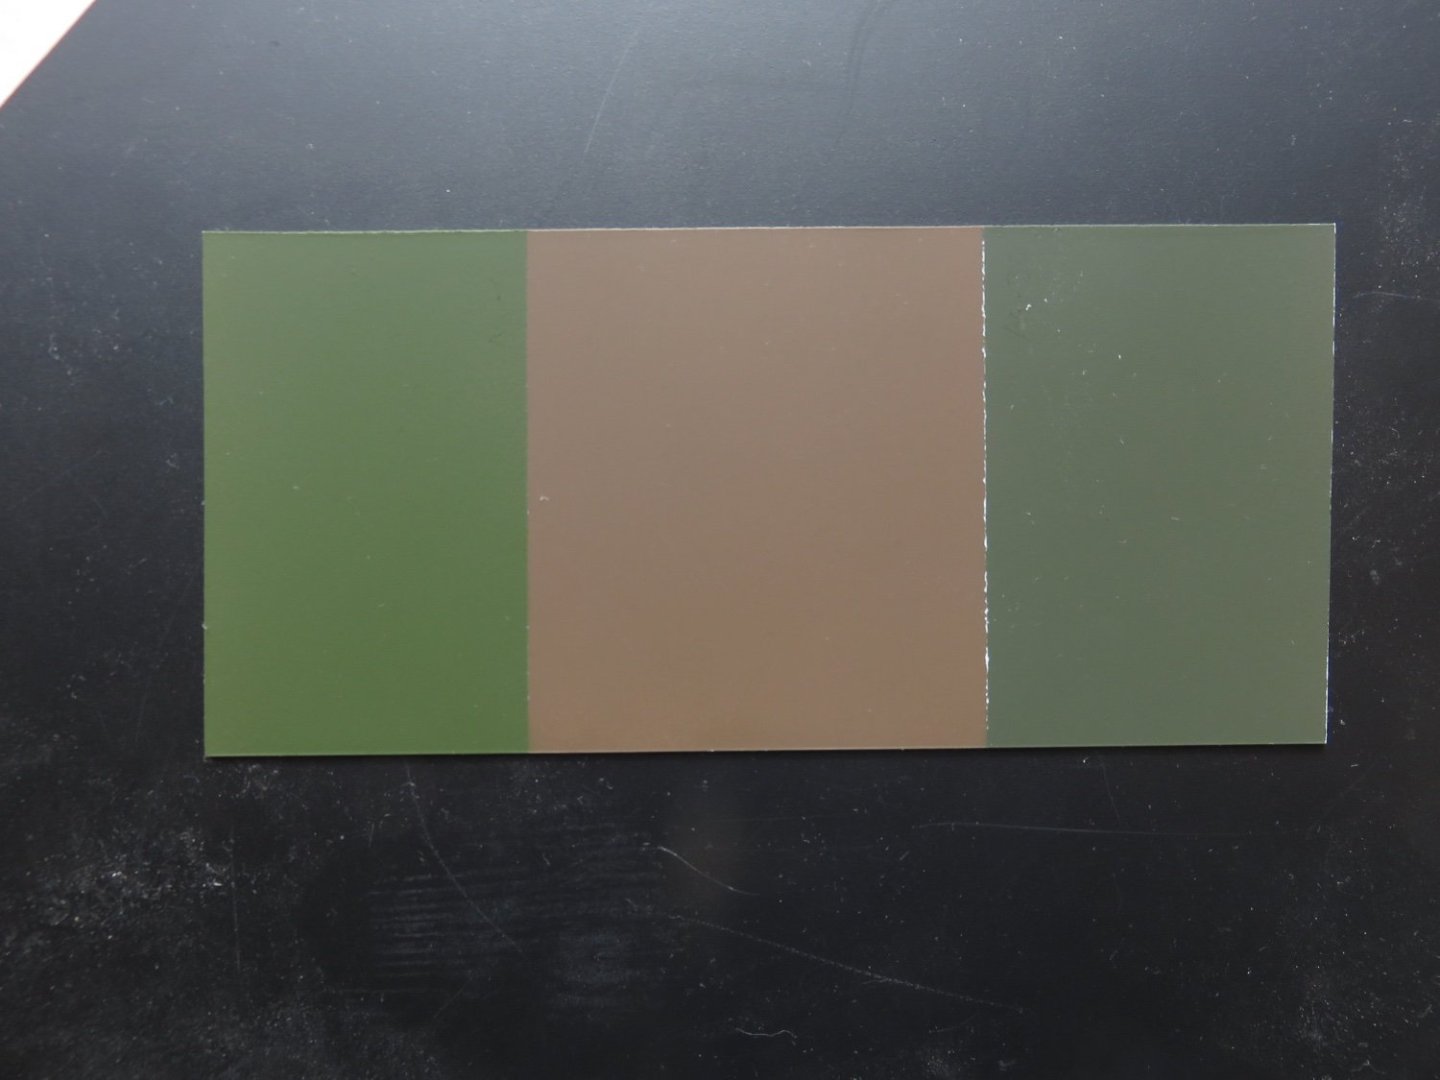
 Thanks everyone for your comments and feedback. I think it's safe to say we've all settled on the lighter/bluer shade of grey, and I'm happy with that choice. I'm going to throw a couple more paint chips at you all, although this time it's a quick comparison of greens. The natural lighting is flat again today, but should still be adequate. The first option for green. This is the same green that was voted (unanimously) the favourite when I was building my Wellington. It looked good against the dark earth colour, but in the flat light, against the two greys, it comes up a little brown. This is the second option for green. It definitely shows as green in the flat light, and shows well agains the grey(s). In bright light in can look a little olive, but it seems a better match for the green on the museum bird in the article in my previous post. Just for a laugh, here's the paint sample I posted for my Wellington (the green chips above were cut directly from this sample piece): Sure changes the way those greens show, although if I remember correctly, that was in indirect sunlight. Anyway, I'm still interested to hear what everyone has to say. Andy
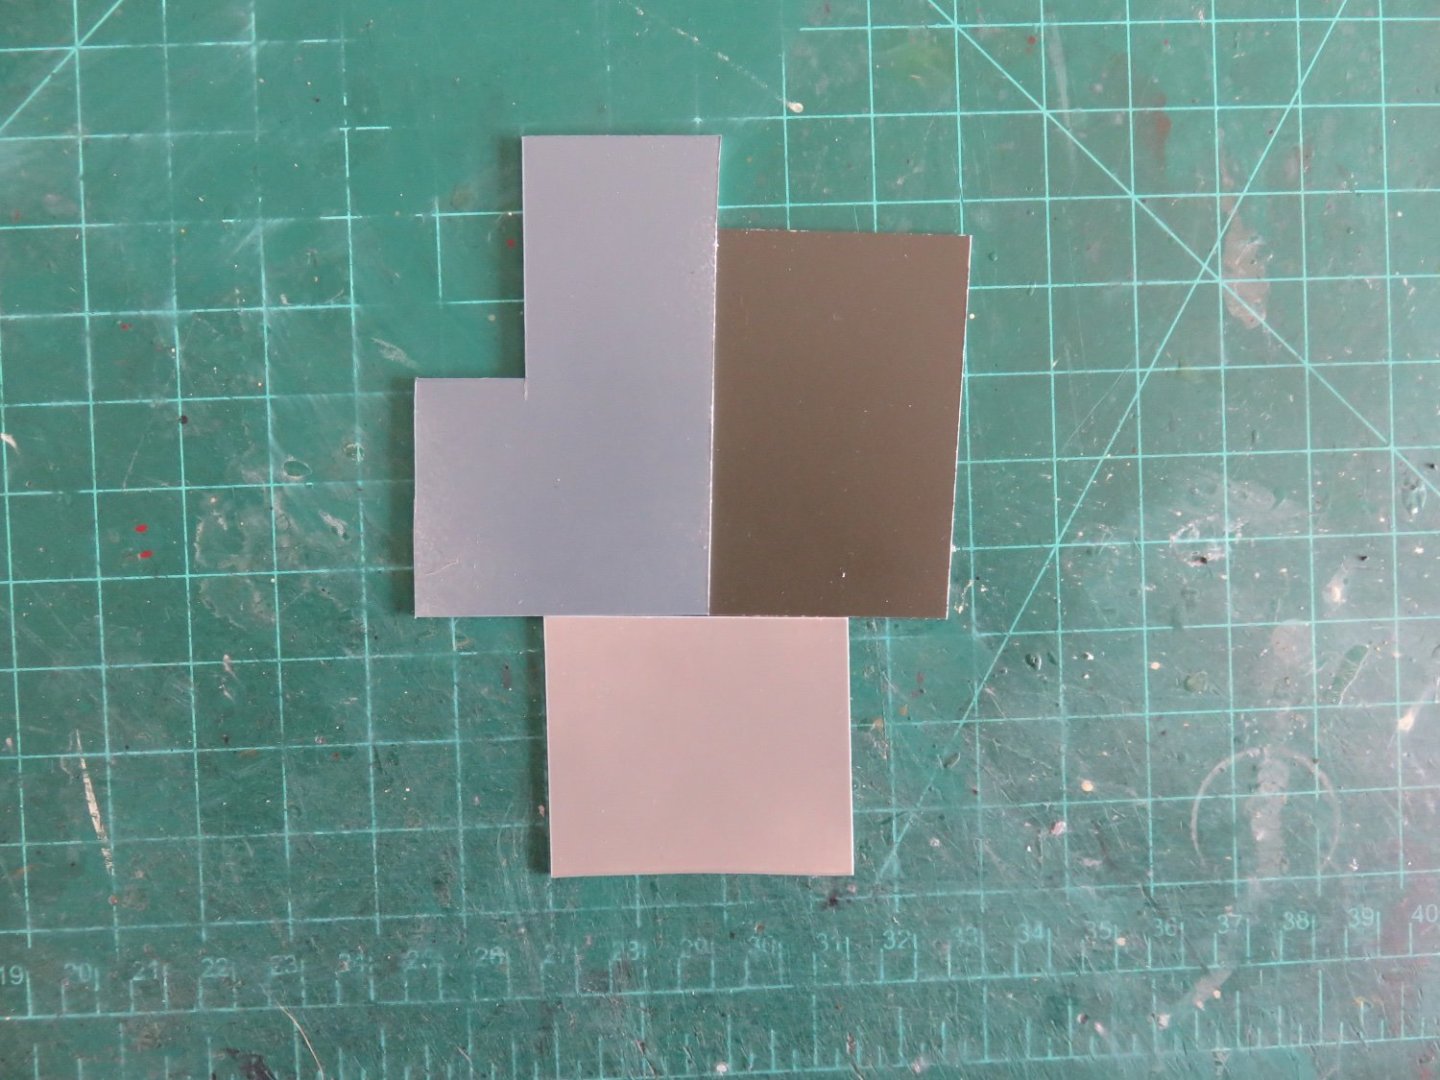
-
LOL, nah, no traps, besides I’m not yet allowed to do any heavy lifting! 😜 To be honest, I still have no preference, nor do I have any conclusive evidence to support one shade of grey or the other. I did find some well lit photos of preserved Typhoon MN235 at the RAF museum: https://warbirdsnews.com/aviation-museum-news/hawker-typhoon-back-on-display-at-raf-museum-london.html While the dark grey on MN235 is pretty well spot on for the blue/grey option, I’m not certain how accurate it may be. The article above includes a fairly extensive historical timeline for the airplane, including repaintings (1972 and 1994). Lacking further references for these events I can’t determine if the painters used the correct paint, what was on hand, or, for later repainting, just copied what had been done before. Andy
-
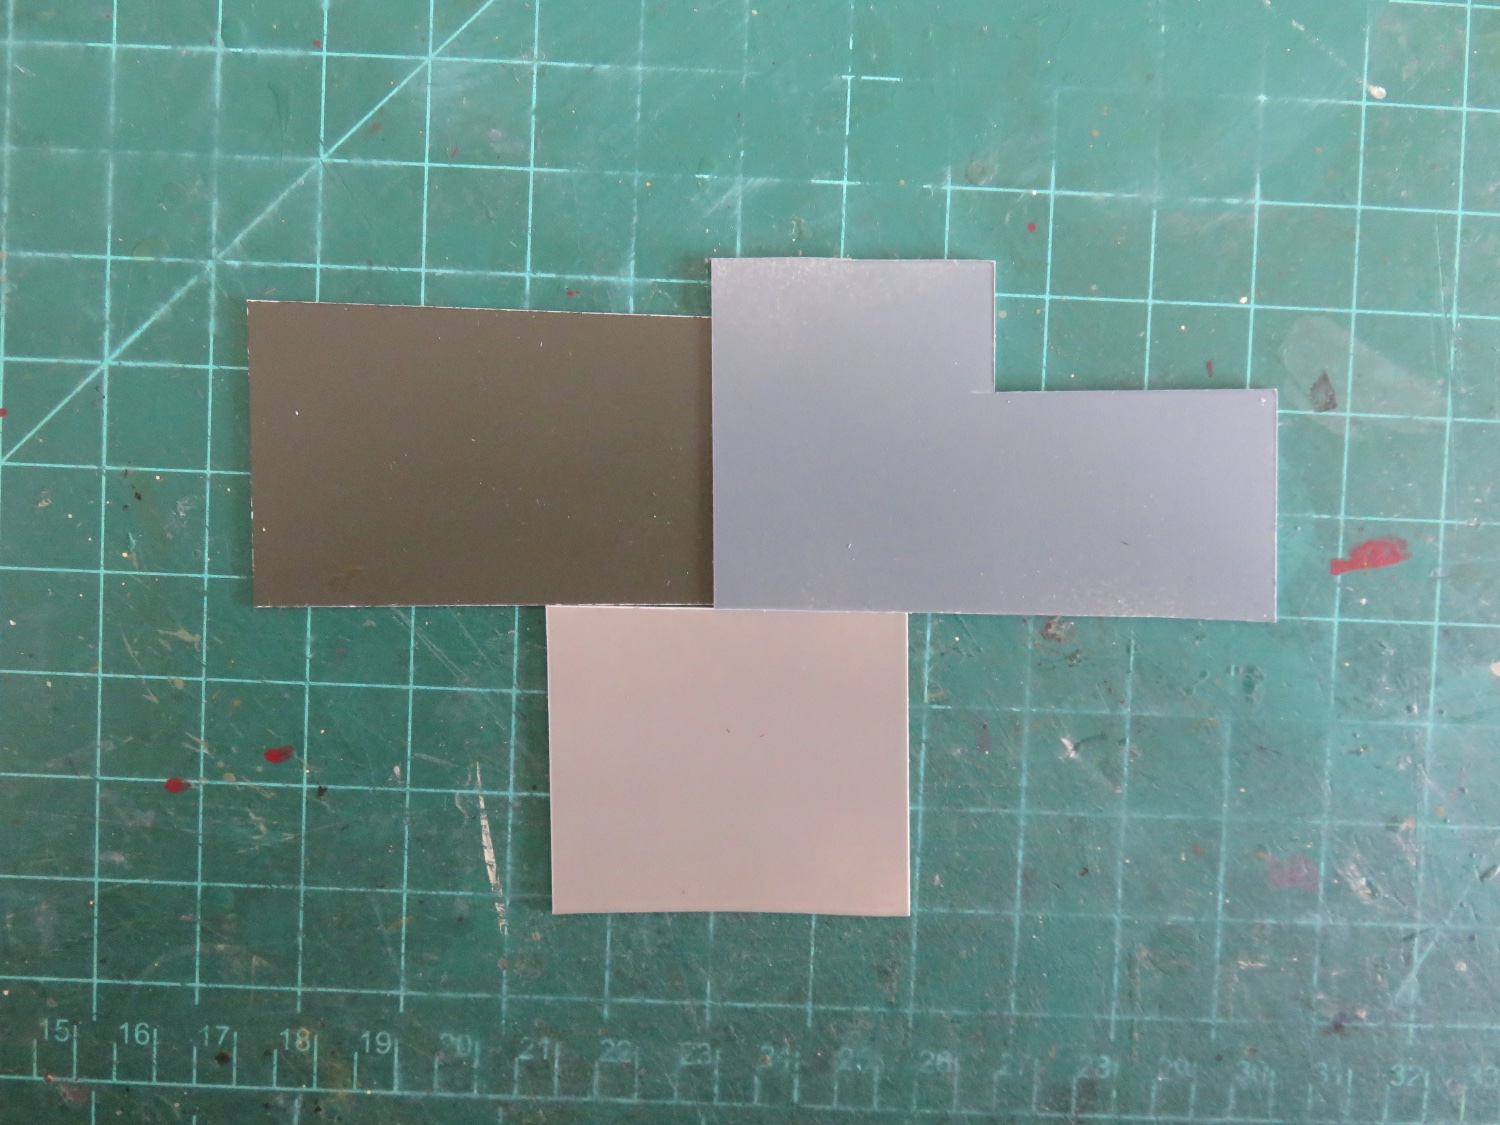
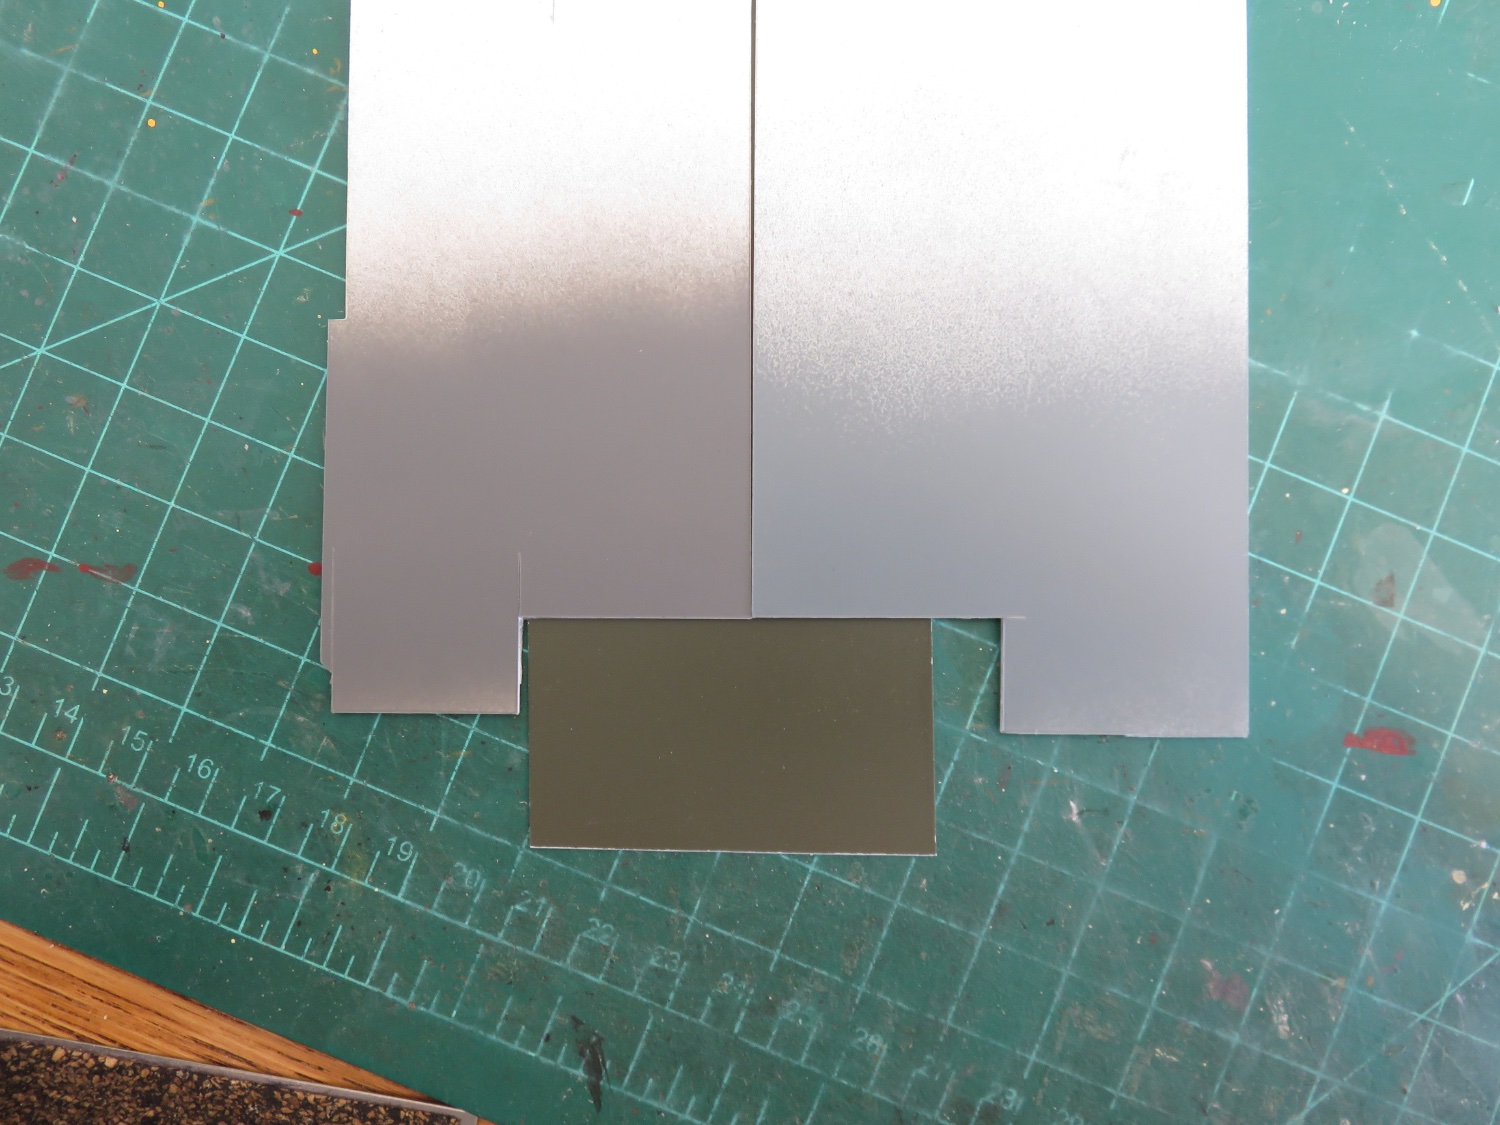
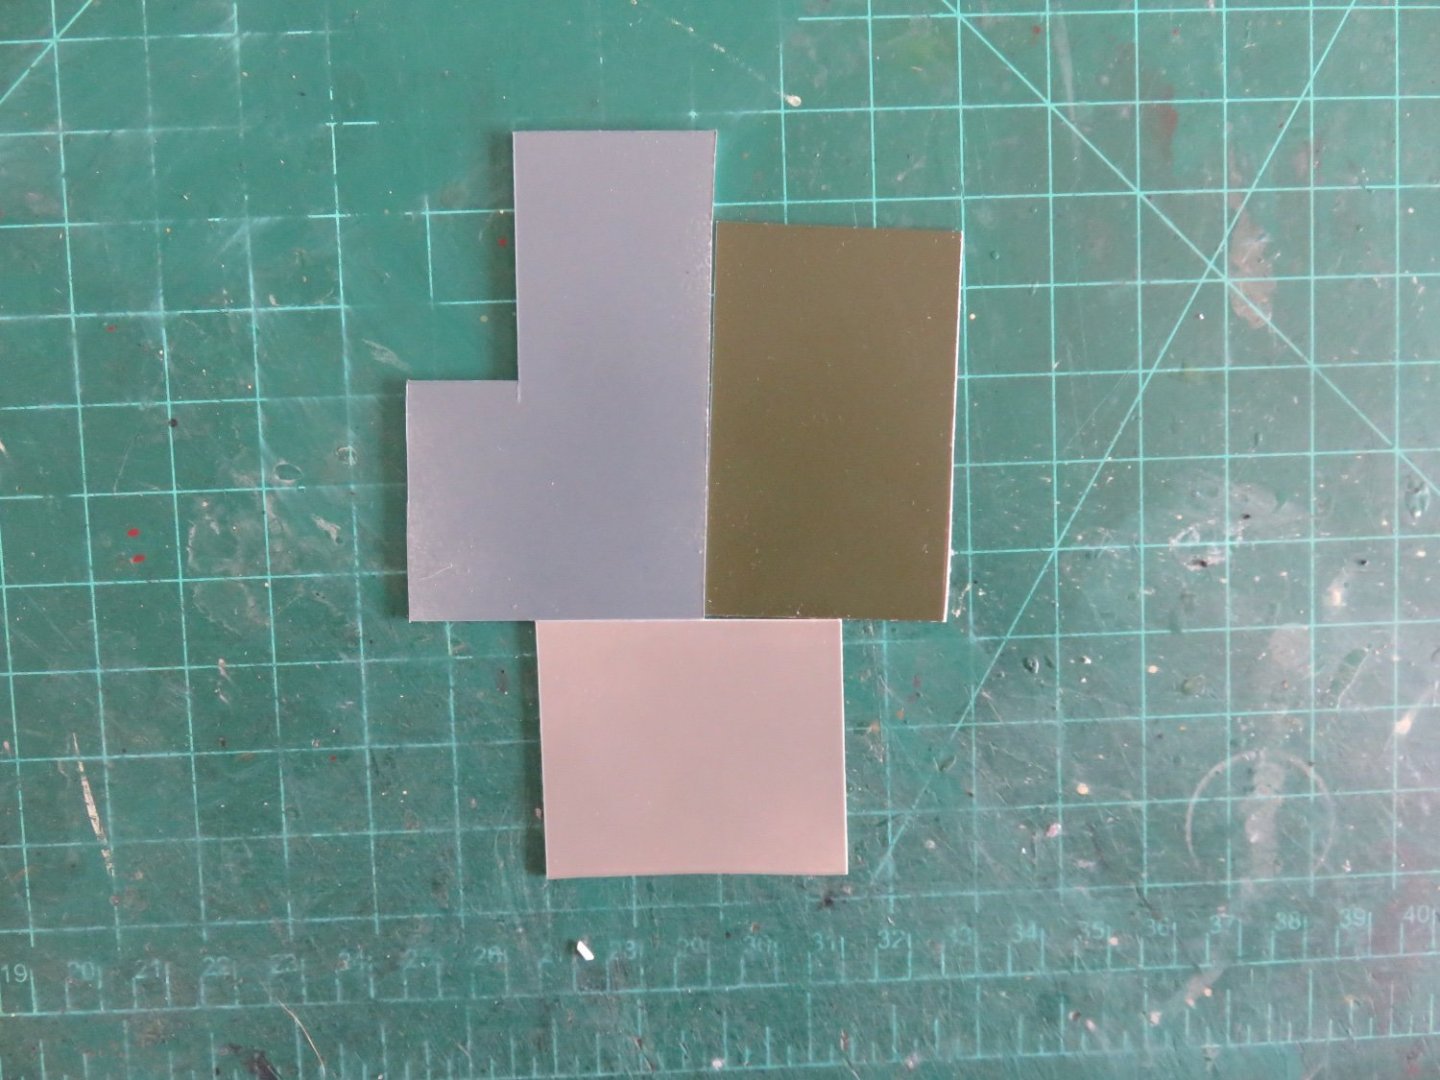
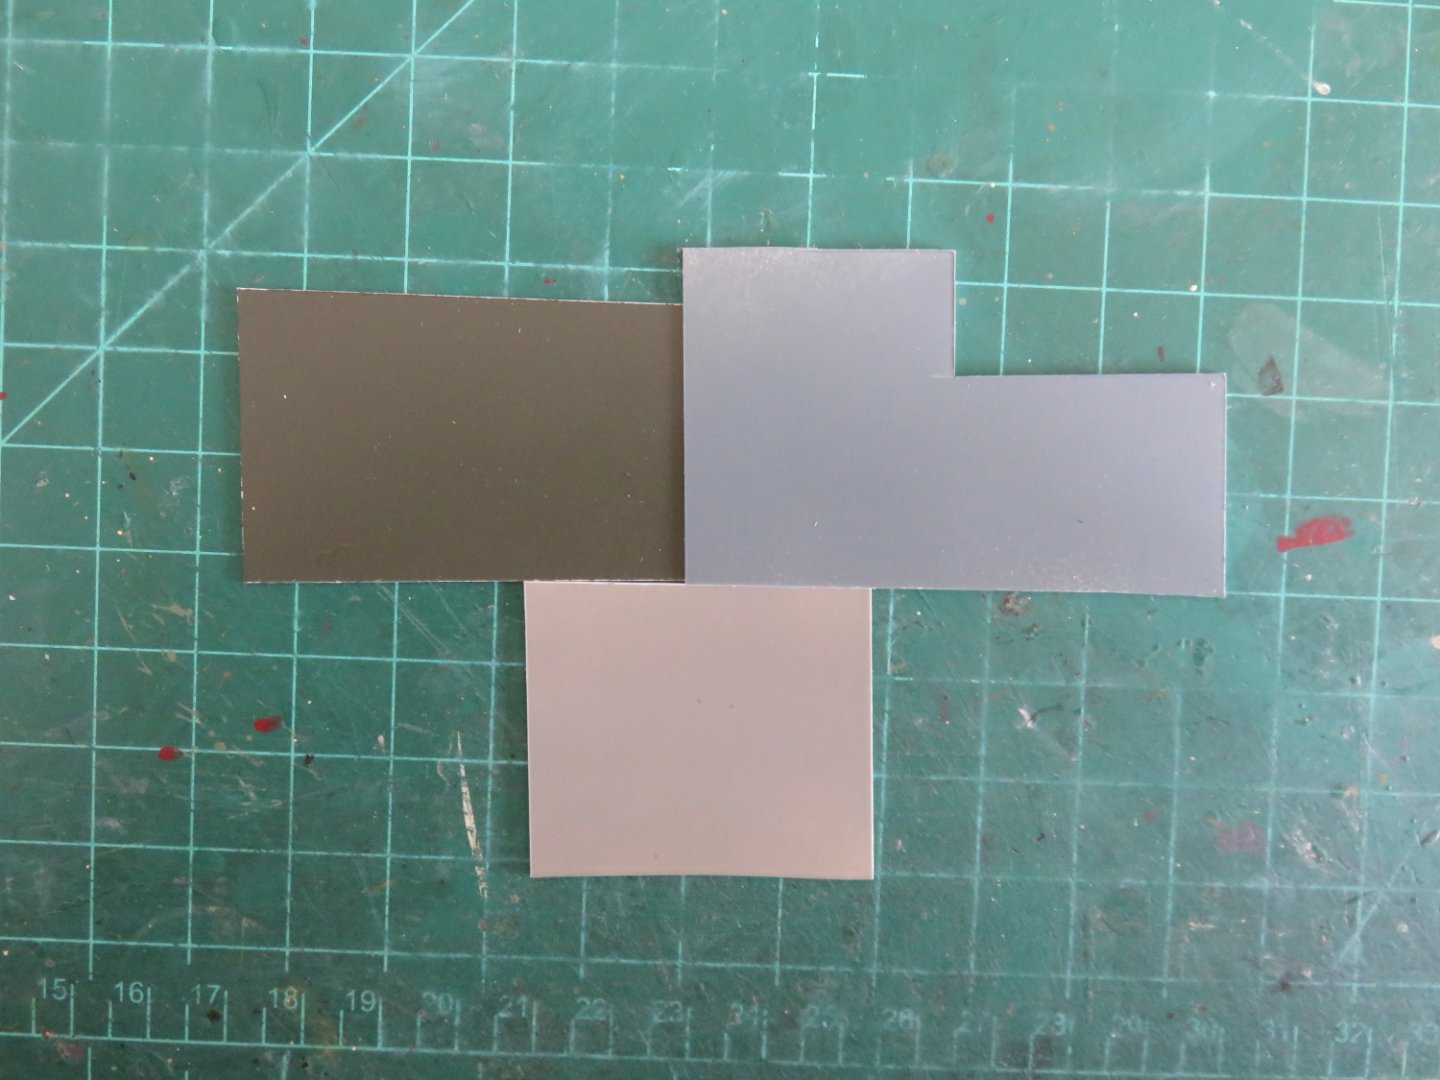
Thanks everyone for all the feedback! One thing I like about this forum, there's no shortage of help if you're willing to ask! Although I am very inclined to agree with the major opinion that the blue/grey preferred, I am going to run the test one more time to be certain. The light today is much flatter than yesterday's, and I've cut off the unpainted sections of plastic. I've also sprayed a small swatch of medium grey (the underside colour), for an additional comparison. First up the darker grey: The contrast with the green is a little more pronounced this time around, and there's a fair contrast with the lighter grey underside colour. Next up the bluer grey (and the popular choice): Again, the contrast with the dark green is still good, not quite as much with the underside colour, though. For reference here is yesterday's photo: Let me know what you all think, if the light or the addition of the light grey panel changes your opinion(s) any. Andy


-
I had the opportunity, on one occasion to be in Toronto harbour, just prior to the CNE air show. For whatever reason, they landed the Lanc at Toronto island airport. It’s one thing to hear a Lanc pass by at a distance, it’s quite another to have it roaring by directly over your head! Andy
-
All opinions welcome! I am leaning in the direction that you, @Egilman and@Edwardkenway have suggested. The more I look at it under different light conditions, the more “correct” the bluer grey seems. I’m wondering if the darker grey might be more appropriate for some of the early war Coastal Command or FAA aircraft (Sunderlands and whatnot). Andy
-
Thanks EG! I find sometimes colour photos can be somewhat tricky, as time can play havoc with film pigments (to say nothing of the lighting). And sometimes the colourists can be a little sneaky too! I think there are too many variables when it comes to comparing with photos. Obviously the best option would be to find the original paint formulation. Lacking first hand confirmation, it comes down to a gut reaction: which option looks the best. Hopefully a few more people will chime in with their opinions, I’m still undecided. 🤔 Andy
-
Looking forward to seeing your club Lanc build! As to the RAF/RCAF, all it takes is a little research, (and maybe a little luck). There’s a good selection of aftermarket options (like decals), that can easily alter a stock British (or American) airplane into a Canadian one. But manufacturers are not totally deaf either, for instance Airfix’s new 1/48 Avro Anson comes from the factory with Canadian markings (among others). Andy
-
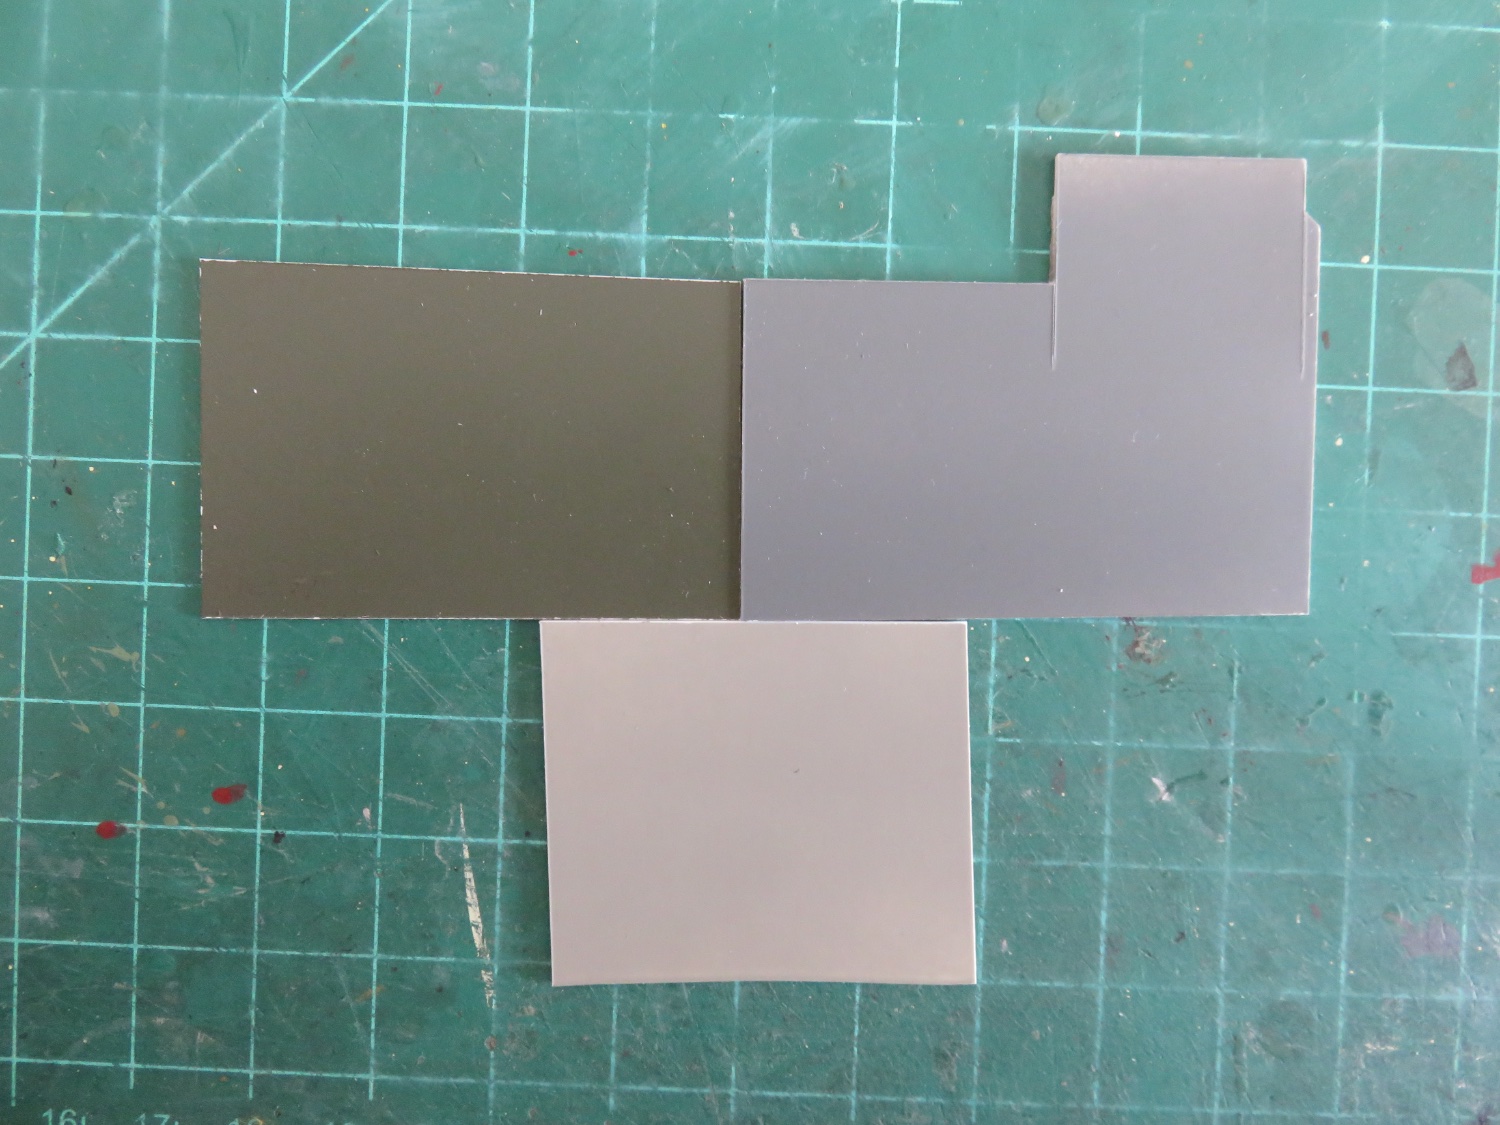
Thanks Everyone! Did I mention my paint arrived a few days ago? Anyway, I'm looking for some opinions. I need some help with determining the better shade of dark grey for the camouflage scheme. I've run a couple of test panels for evaluation. Both grey colours are from the same manufacturer and both are classified as "RAF Dark Sea Grey" (although different formula numbers). The one on the left is slightly darker, and the one on the right seems slightly bluer. The dark green (at the bottom) is the same as I used on my Wellington bomber. I initially thought this would be a cut and dry decision, but I find myself waffling. So I figured I'd see what everyone else thinks. Andy

-
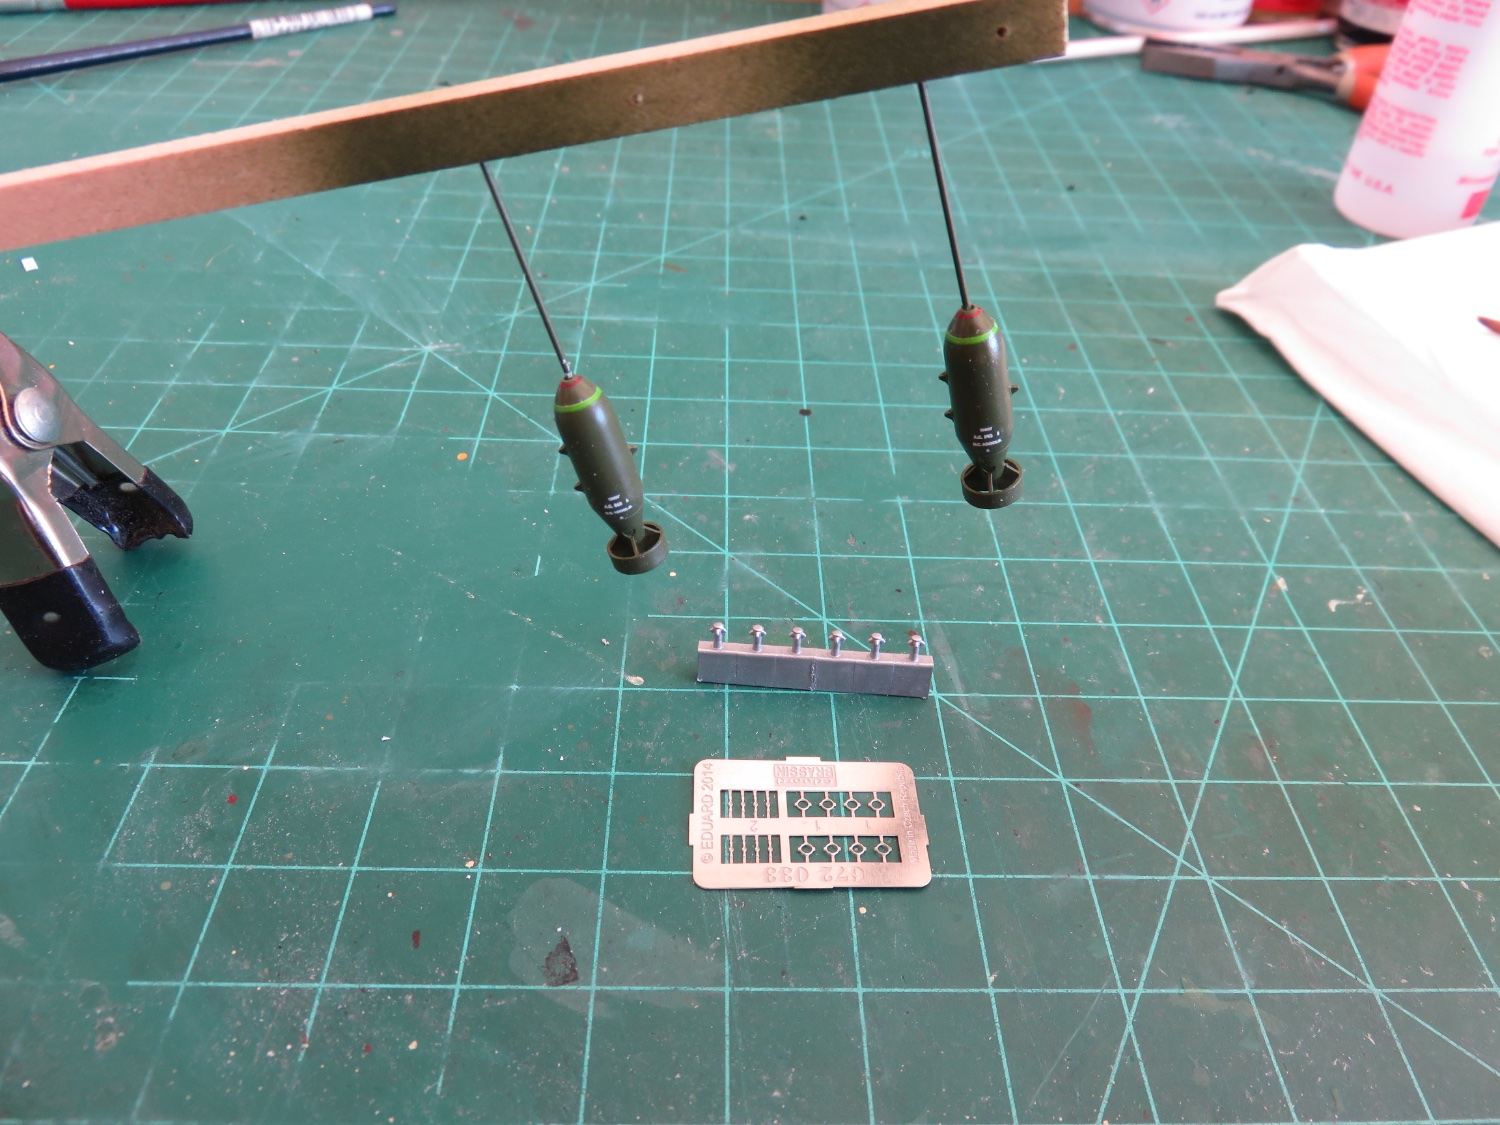
So, I went fishing today, and caught a couple of 1000 pounders... I thought of describing my activities today in a more direct fashion, but it might put me at odds with various government security organizations should they happen to stumble upon my build log....🤪 Still waiting on bits and pieces (it may be another week, I don't know), but I will keep trying to stay busy, even if it's only messing around with small parts here and there.... Andy

- 146 replies
-
- 12
-

-

-
Thanks guys! I’m in another waiting phase on the build, I did get my paint yesterday (finally!), but I’ve gone about as far as I can while I wait for the part(s) I ordered on the weekend. Also still waiting to see if Airfix has sent me the replacement landing gear legs, maybe they’re in the mail, I dunno…. Yeah…. Something like that… Andy
-
Can’t wait to see this project develop in your very capable hands! Andy
- 648 replies
-
- 6
-
-
- Indefatigable
- Vanguard Models
- (and 1 more)
-
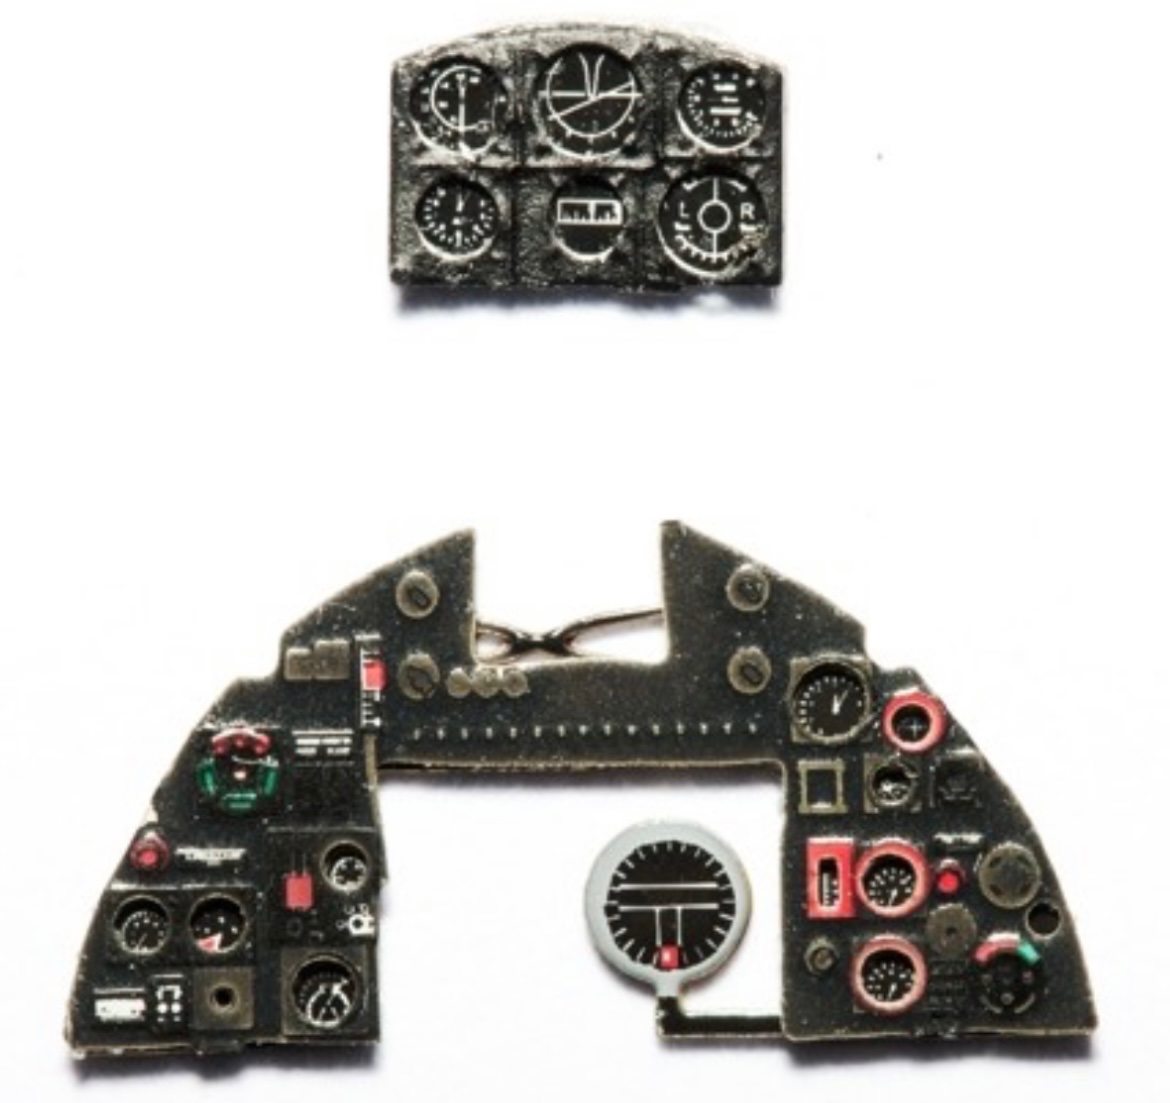
Not so much generic as uninspiring. In the lower “legs” of the plastic instrument panel piece, Airfix did manage to mould in some raised detail (which you then cover with a blank decal for some reason). It seems like they could make their instrument panels a little better, they just choose not to. Probably for the sake of keeping things simple for less experienced modellers. Andy
-
Hmmmm…. OOOooooh….. Blech 🤮…… Decision Made! Just ordered the replacement instrument panel from Yahu Models. 😁 Andy

-
I think one could write a doctoral thesis on the multitudes of hobby paint lines and cross references, and still not have everything sorted out… As you alluded to, the best bet seems to be to stick to one or two (or three) paint lines that offer a decent enough range of colours, that you’re comfortable working with, and are happy with the “close enough” option for colour selection. Andy
- 332 replies
-
- 10
-
-
Ahhh, I see what you’re saying! Here’s a reference I use: https://www.sunwardhobbies.ca/humbrol-paint-colour-selection-chart At the very least, it has the colour name alongside the reference number. Andy
-
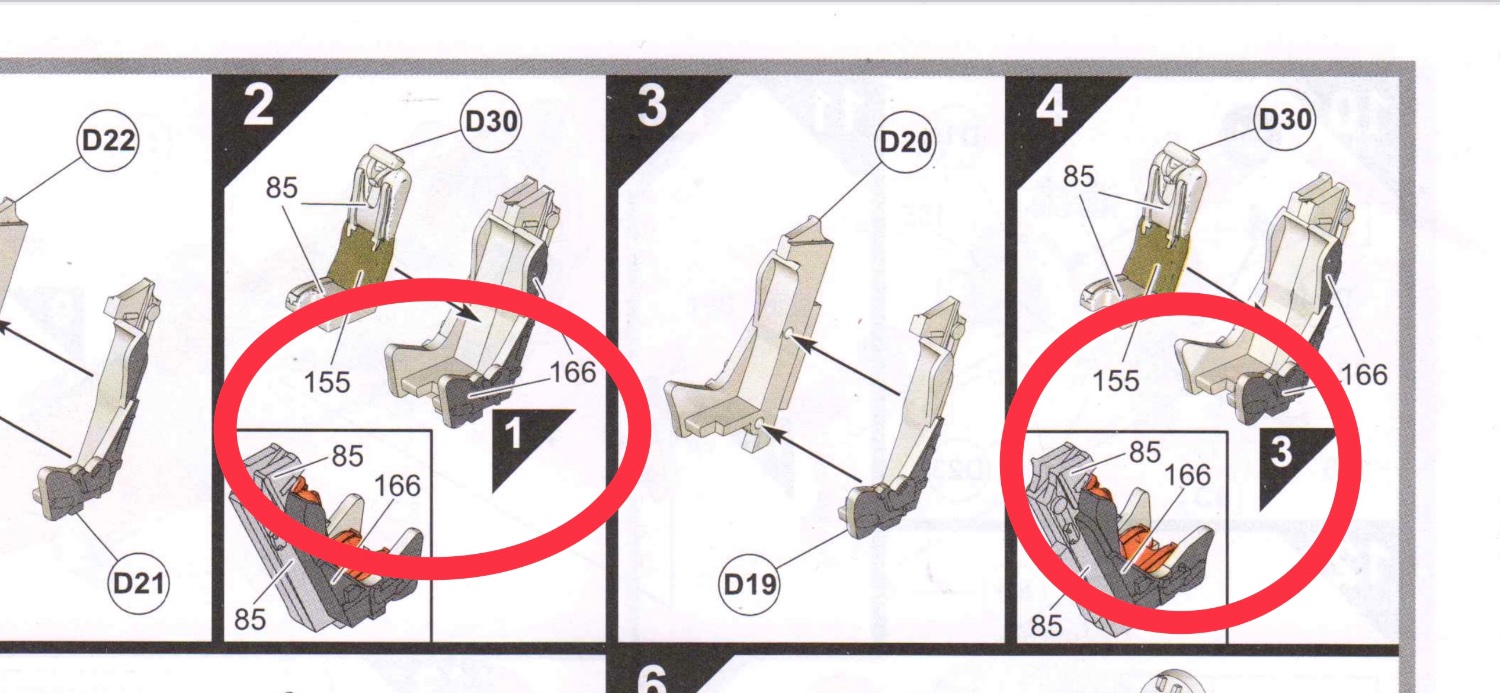
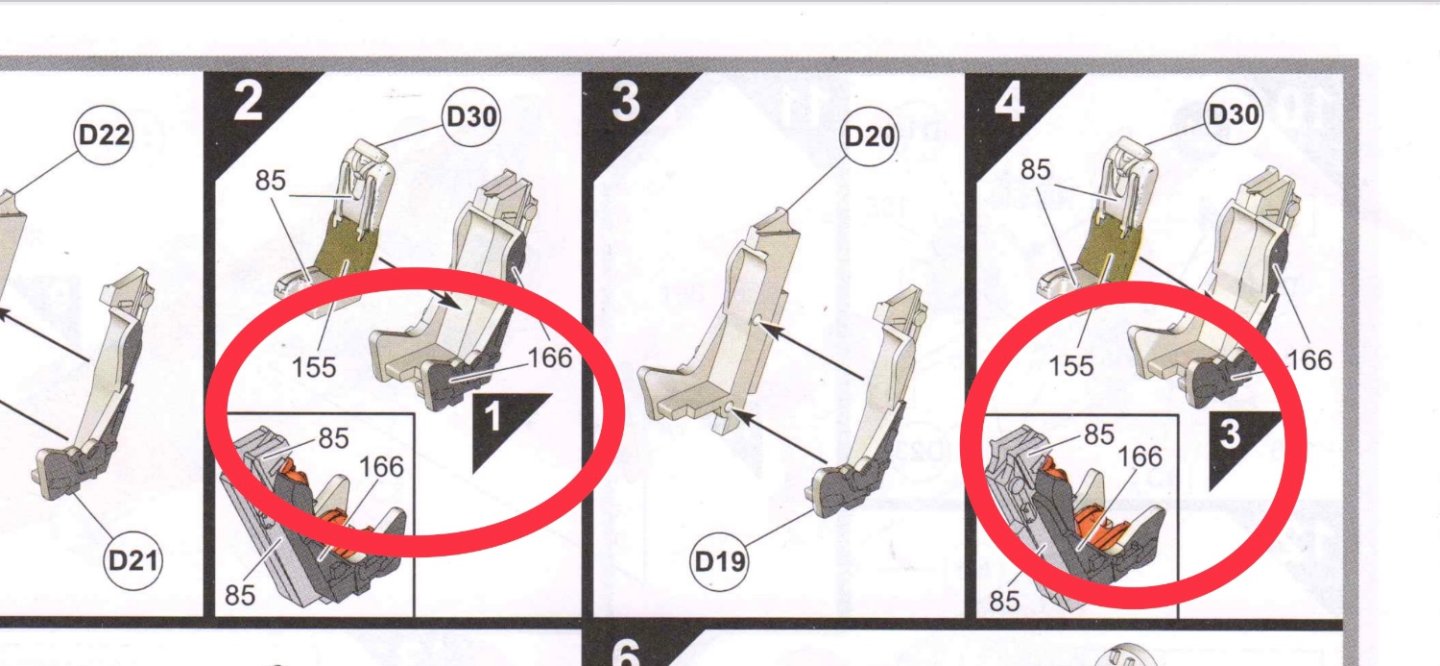
Airfix usually has colour call-outs in the instructions as well. Look for uncircled numbers in each step. This is a sample image of the 1/72 Buccaneer instructions (Scalemates doesn’t yet have the 1/48 instructions posted). I’ve circled in red some of the paint call-outs: Hopefully that helps! The numbers in triangles refer to previous assembly steps, and the circled ones are part numbers. Andy
-
A small update on my build, as I am still waiting on my paint order to arrive. I have begun doing what I can with the materials at hand. The good thing is I can get a fair bit of this prep-work done so that when the time comes for assembly, I won't be waiting around for the paint to dry. For now the inside of the fuselage has been painted. Some of the details have been picked out in black and gunmetal. I may will probably add a pinprick of red where the various knobs and levers should be. The detail is quite indistinct, given the small scale and mostly won't be visible. I've also been picking at the piece that makes up the cockpit floor and landing gear bay. Not much else to really show at this moment, until my paint shows up, and the slowest game of e-mail tag (with Airfix) gets resolved.... Andy
- 146 replies
-
- 12
-
-
Well, Canada Post is hijacking my paint shipment, so please feel free 😁 Hanging around Scalemates, I’ve taken the opportunity to look through the instructions for all of Airfix’s recent 1/24 offerings (Typhoon, Spitfire, Hellcat), quite frankly they look almost overwhelming! Andy
-
I think there’s a joke about all that a P-47 pilot has do when he’s attacked by the Luftwaffe… Duck down and run around the fuselage to avoid getting hit…. 🤪 Andy
- 146 replies
-
- 10
-
-
-
From what I read, Davidson was using a different airplane, MN957 (F3 N). I can only assume his regular plane was down for maintenance. On May 8th 1944, they were conducting operations in France, in preparation for the coming invasion. Davidson’s (replacement) plane developed engine trouble and he was forced to crash land. He evaded capture and ended up with the French resistance, even fighting alongside them, until liberation in September 1944. There are a number of stories of other Typhoon pilots similar to Davidson’s. Sadly, many do not have such happy (or adventurous) outcomes. Mossip’s story is one of them. On his last mission in March ‘45 (also in a different plane), after attacking a train he was observed to crash into some high tension wires, and was killed as a result. Andy
- 146 replies
-
- 11
-

-
-

-
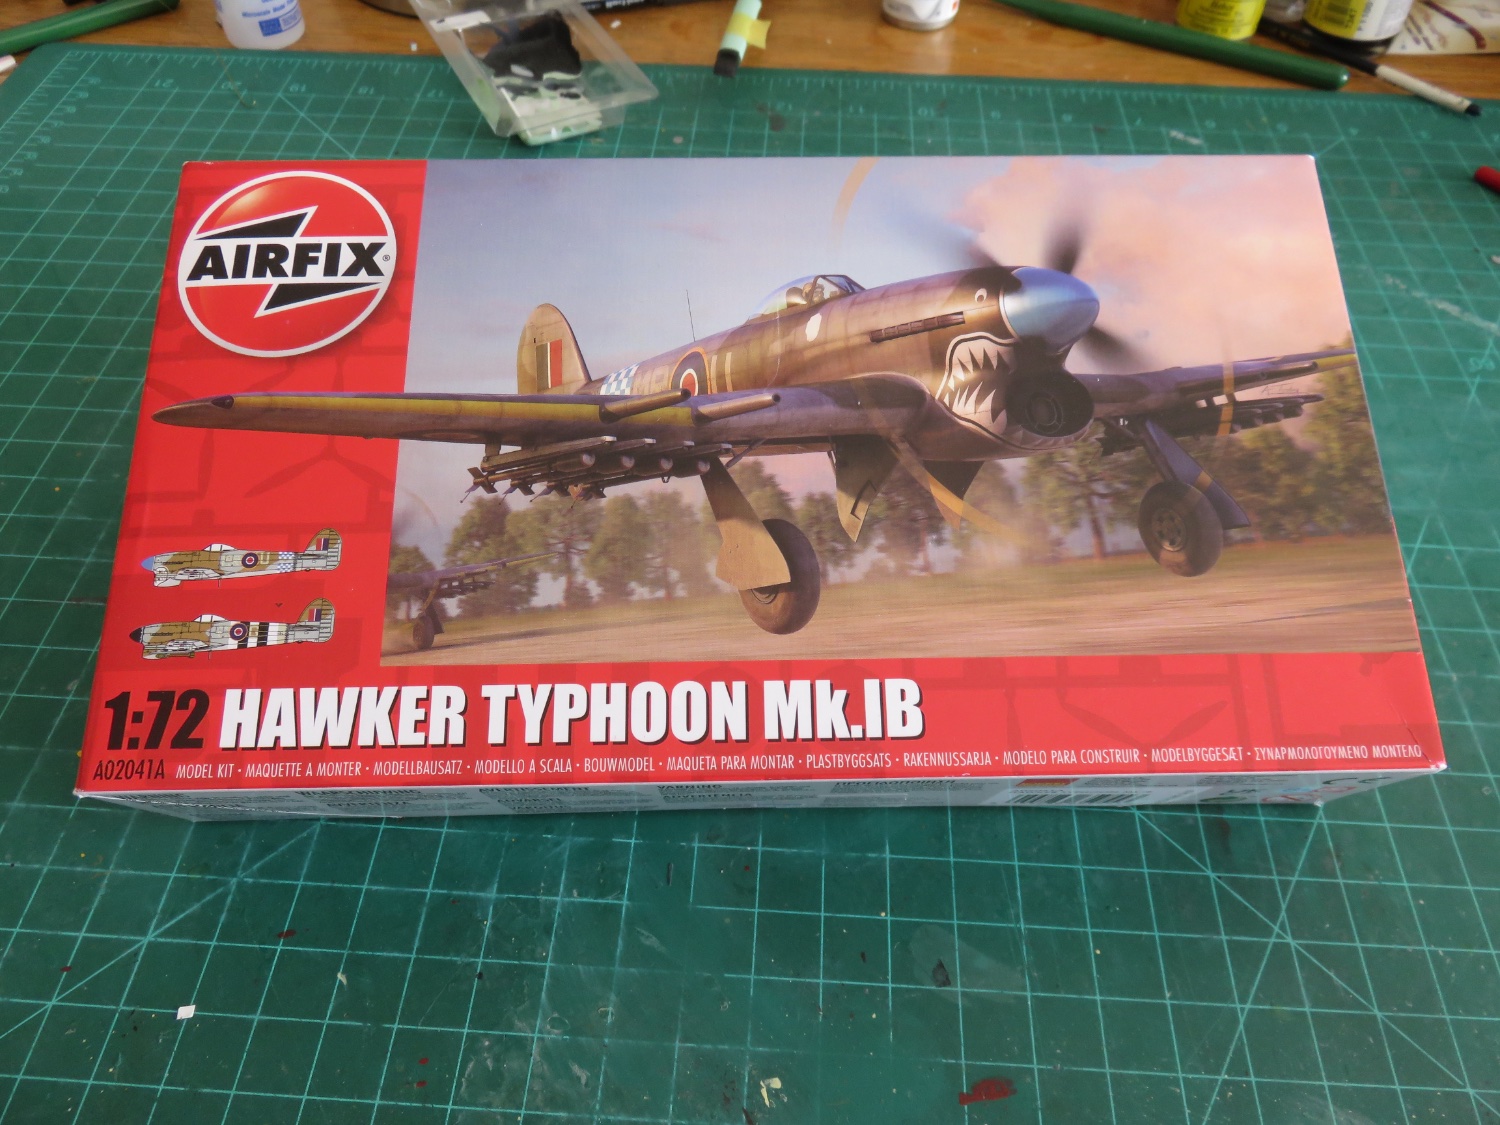
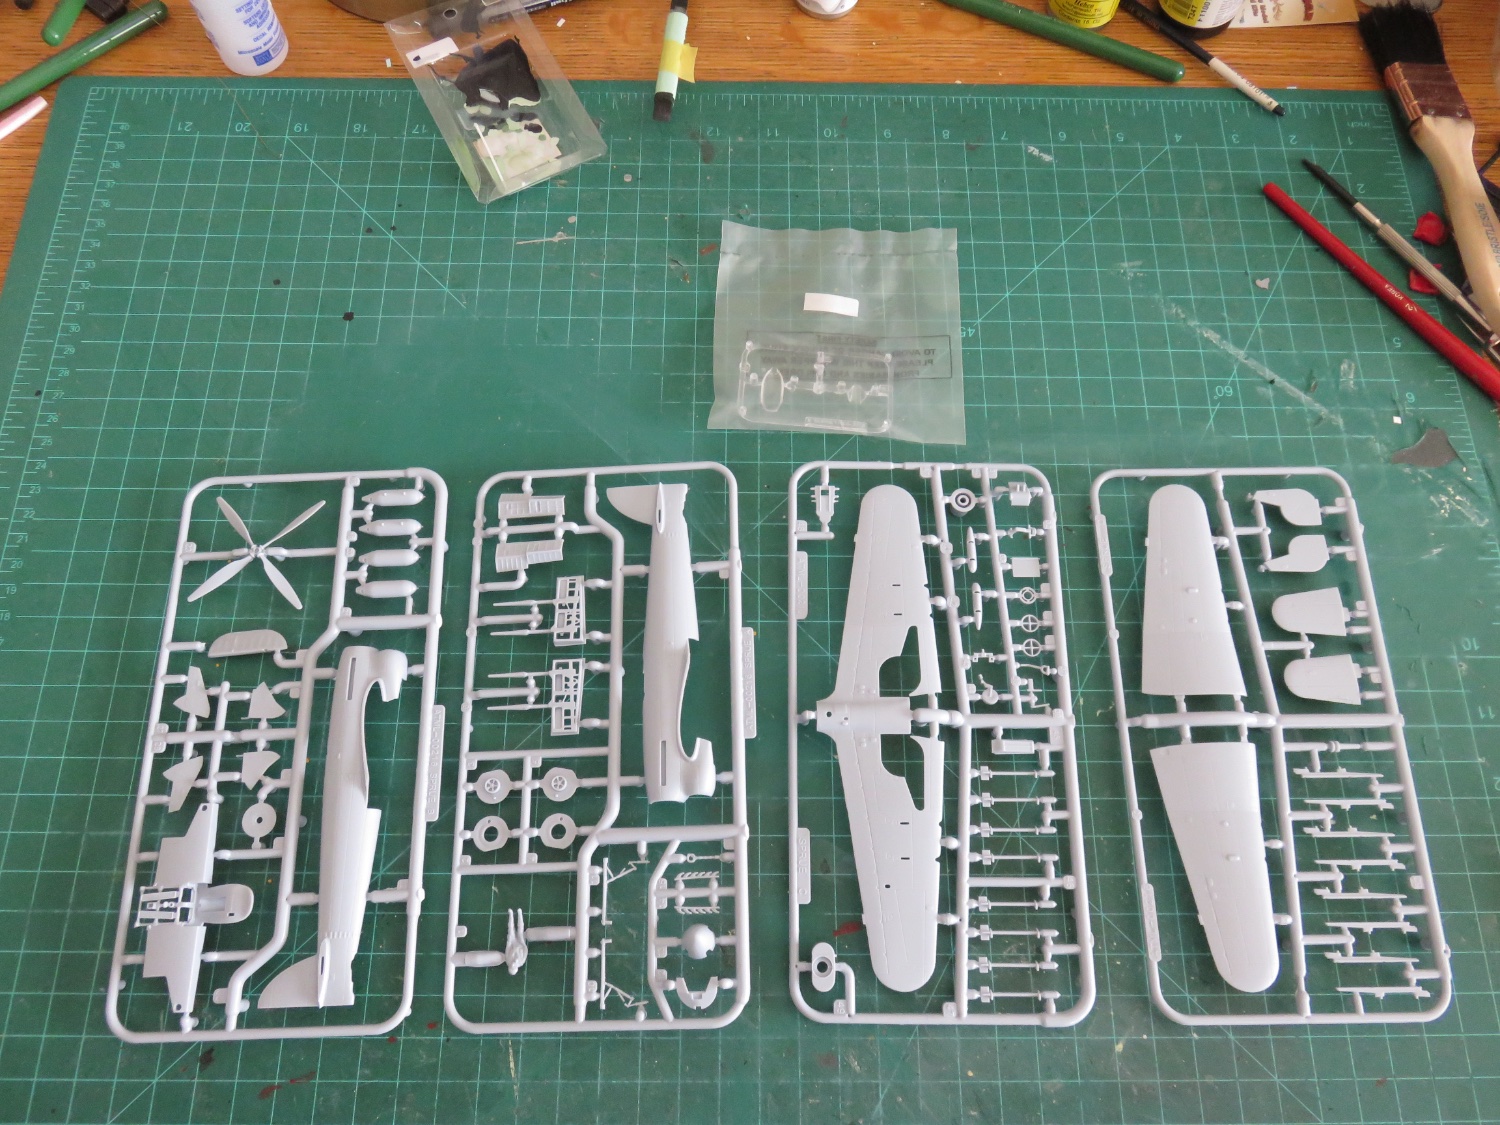
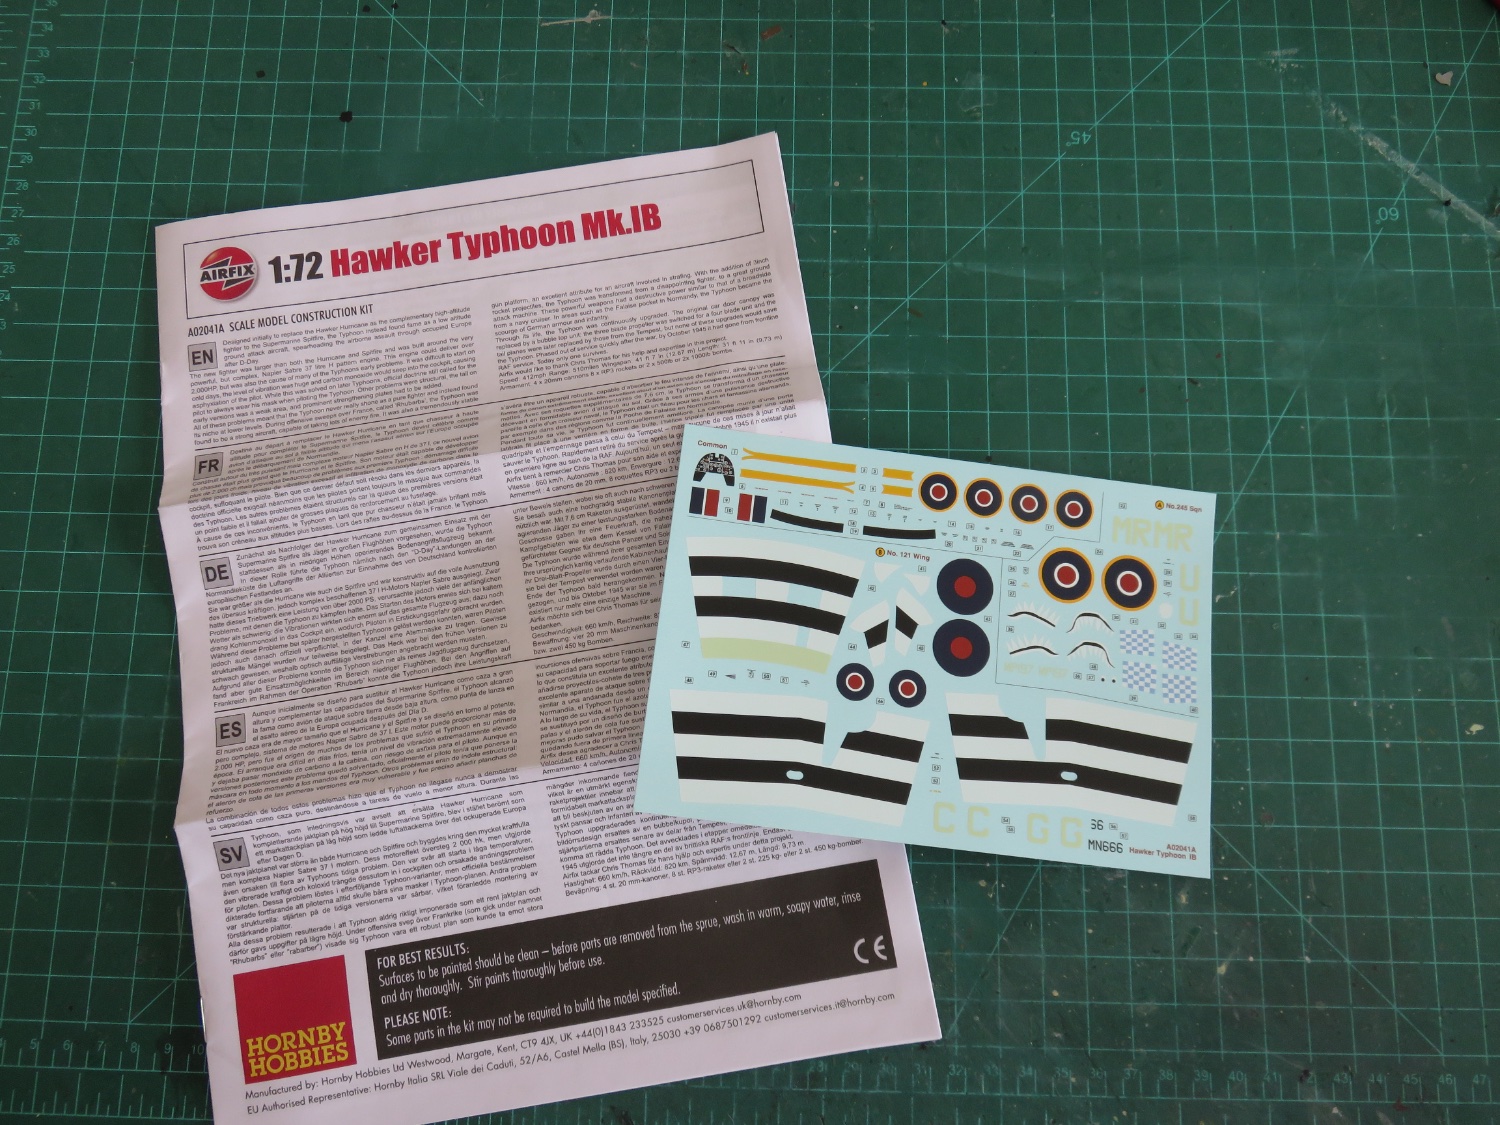
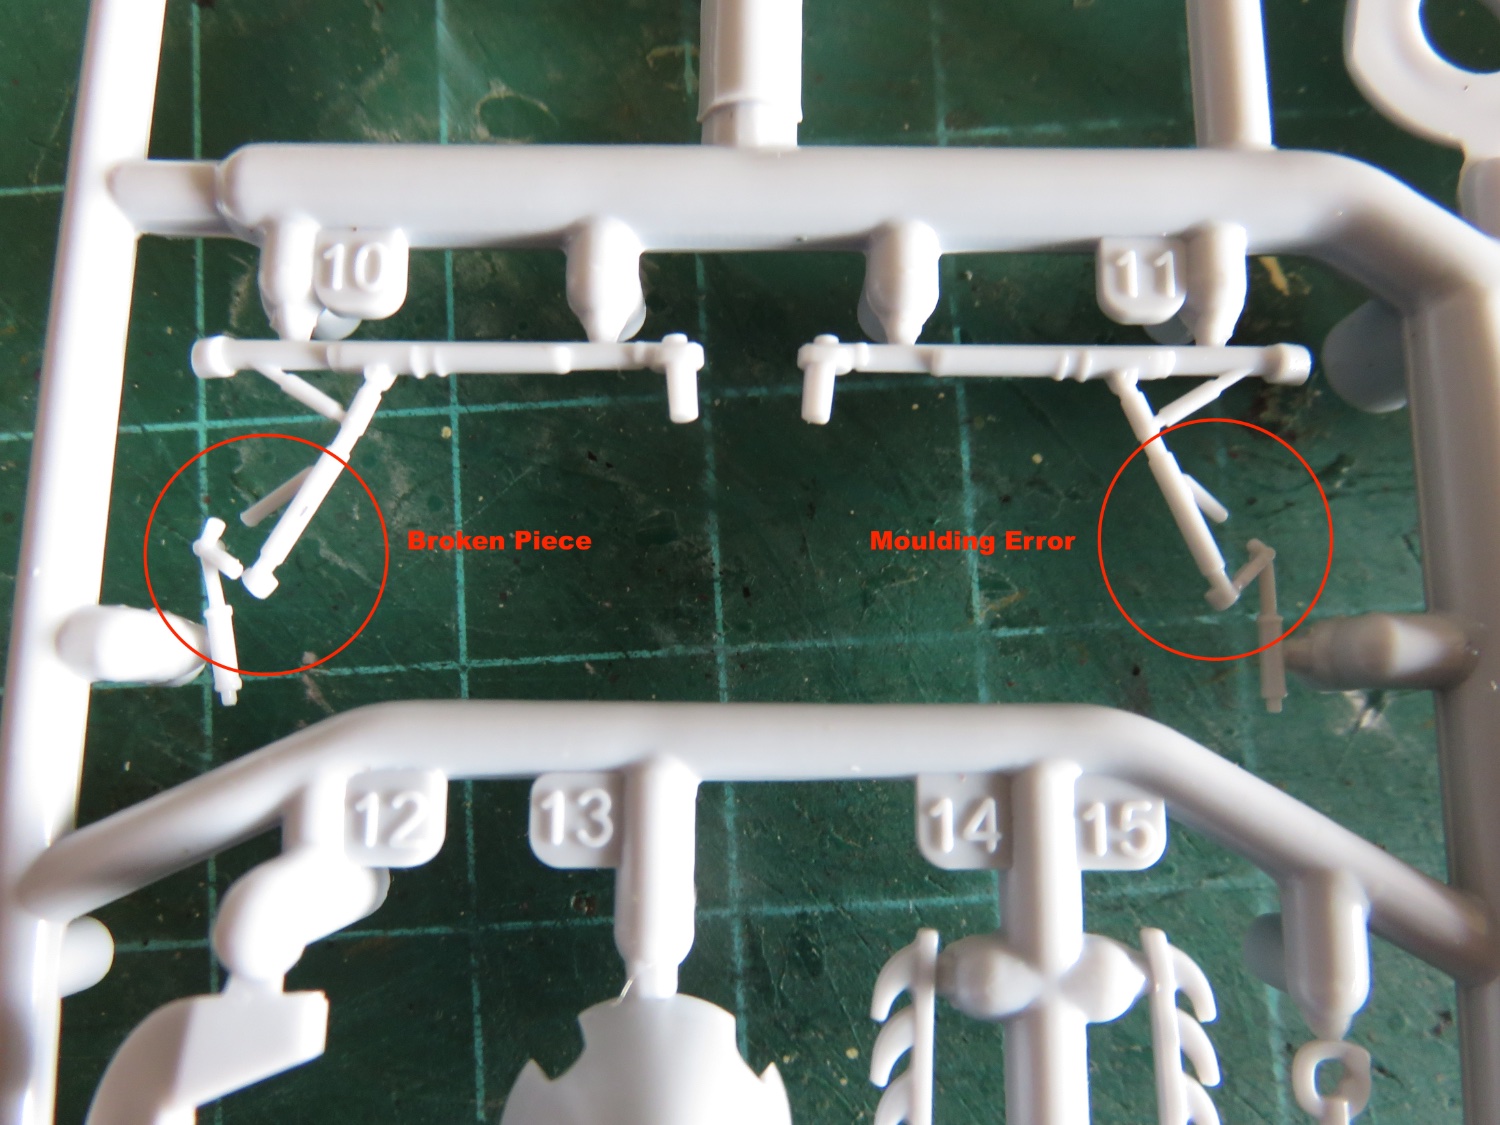
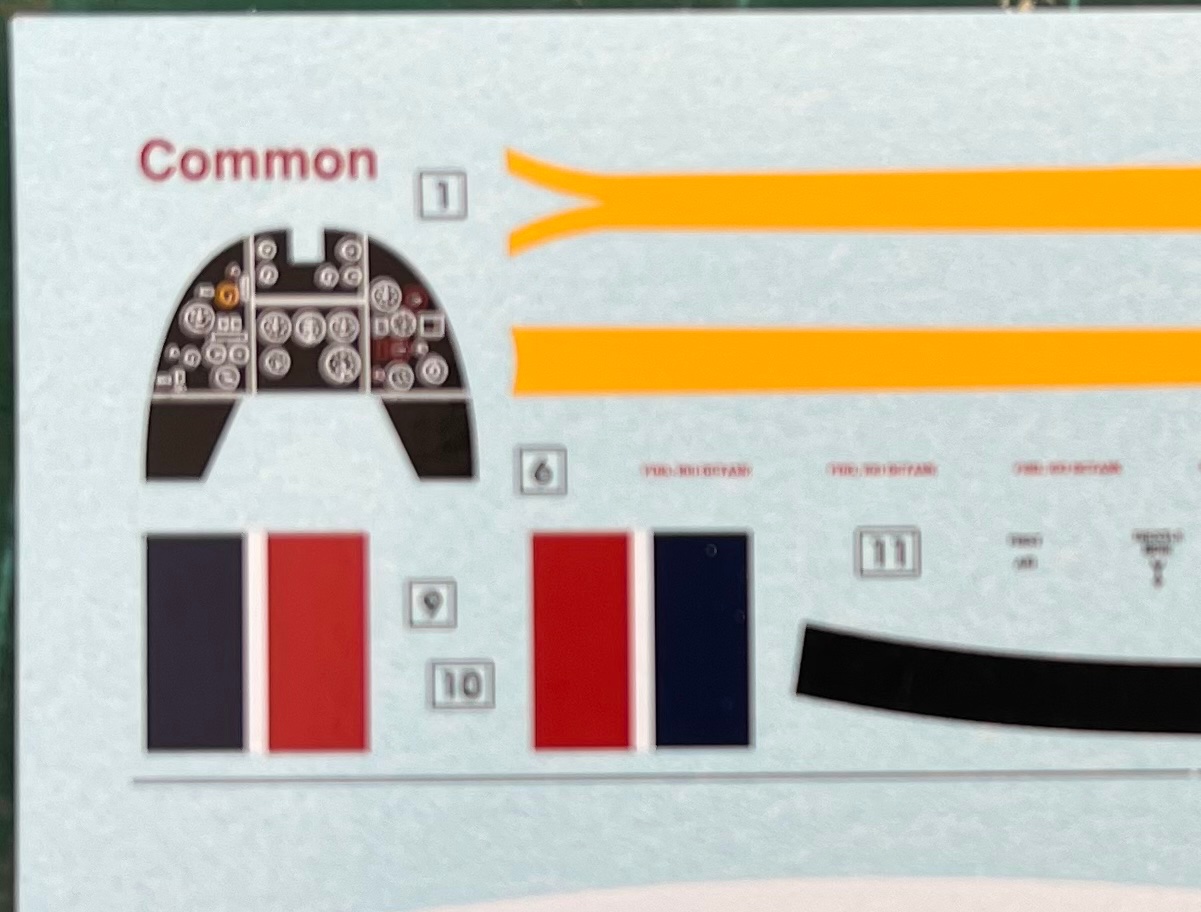
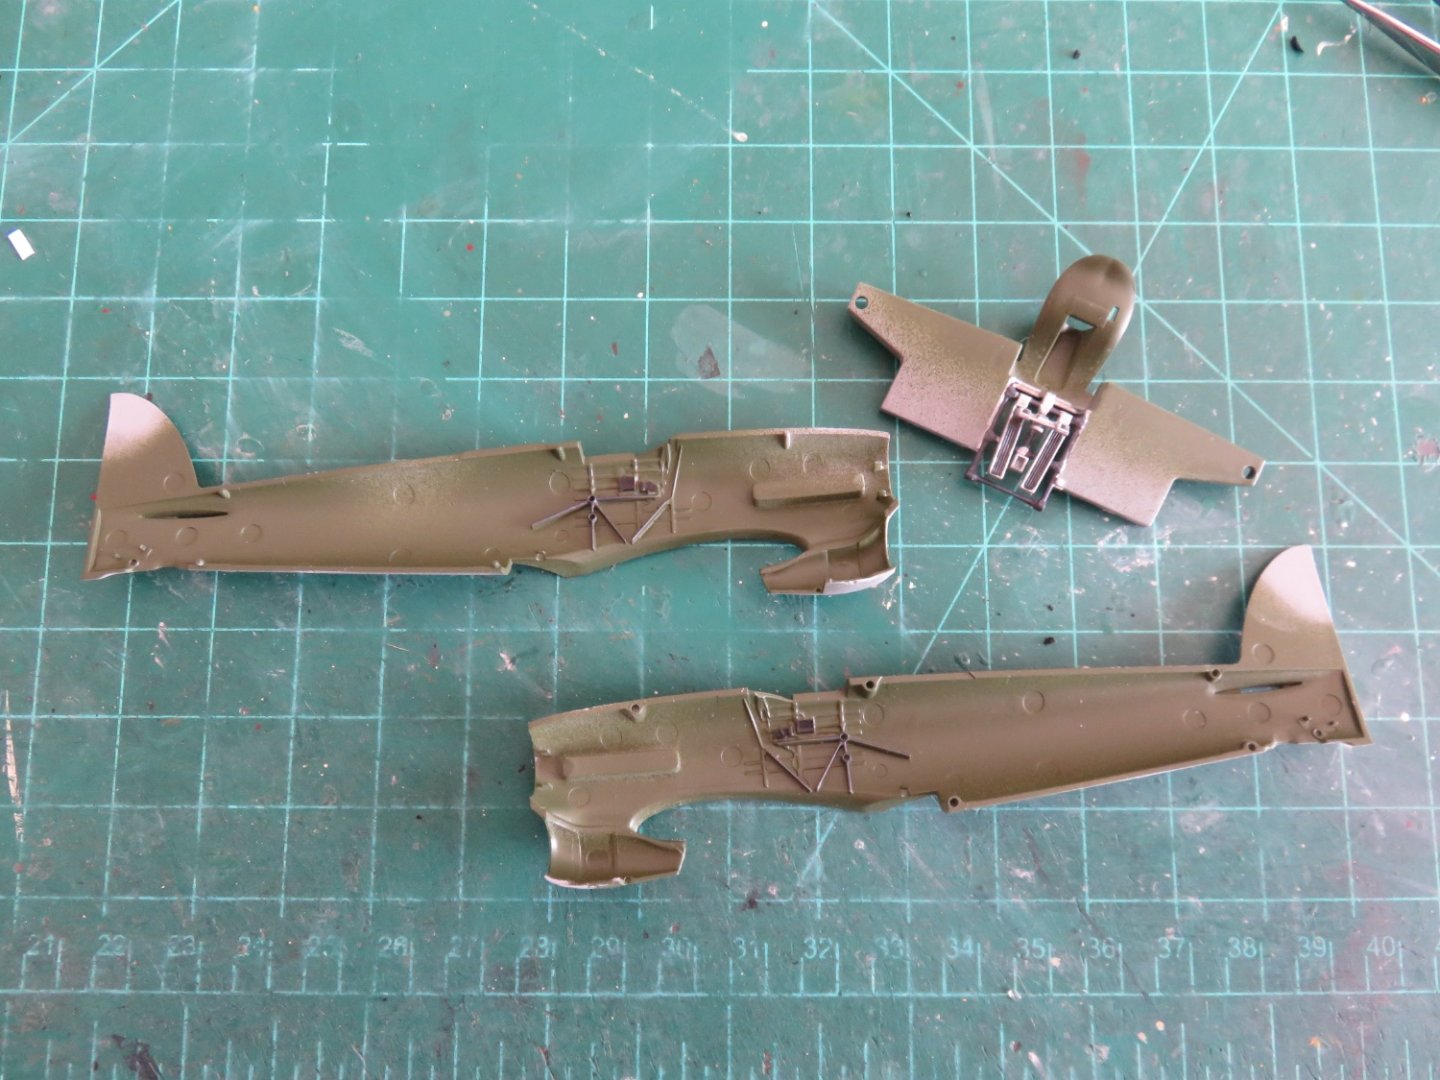
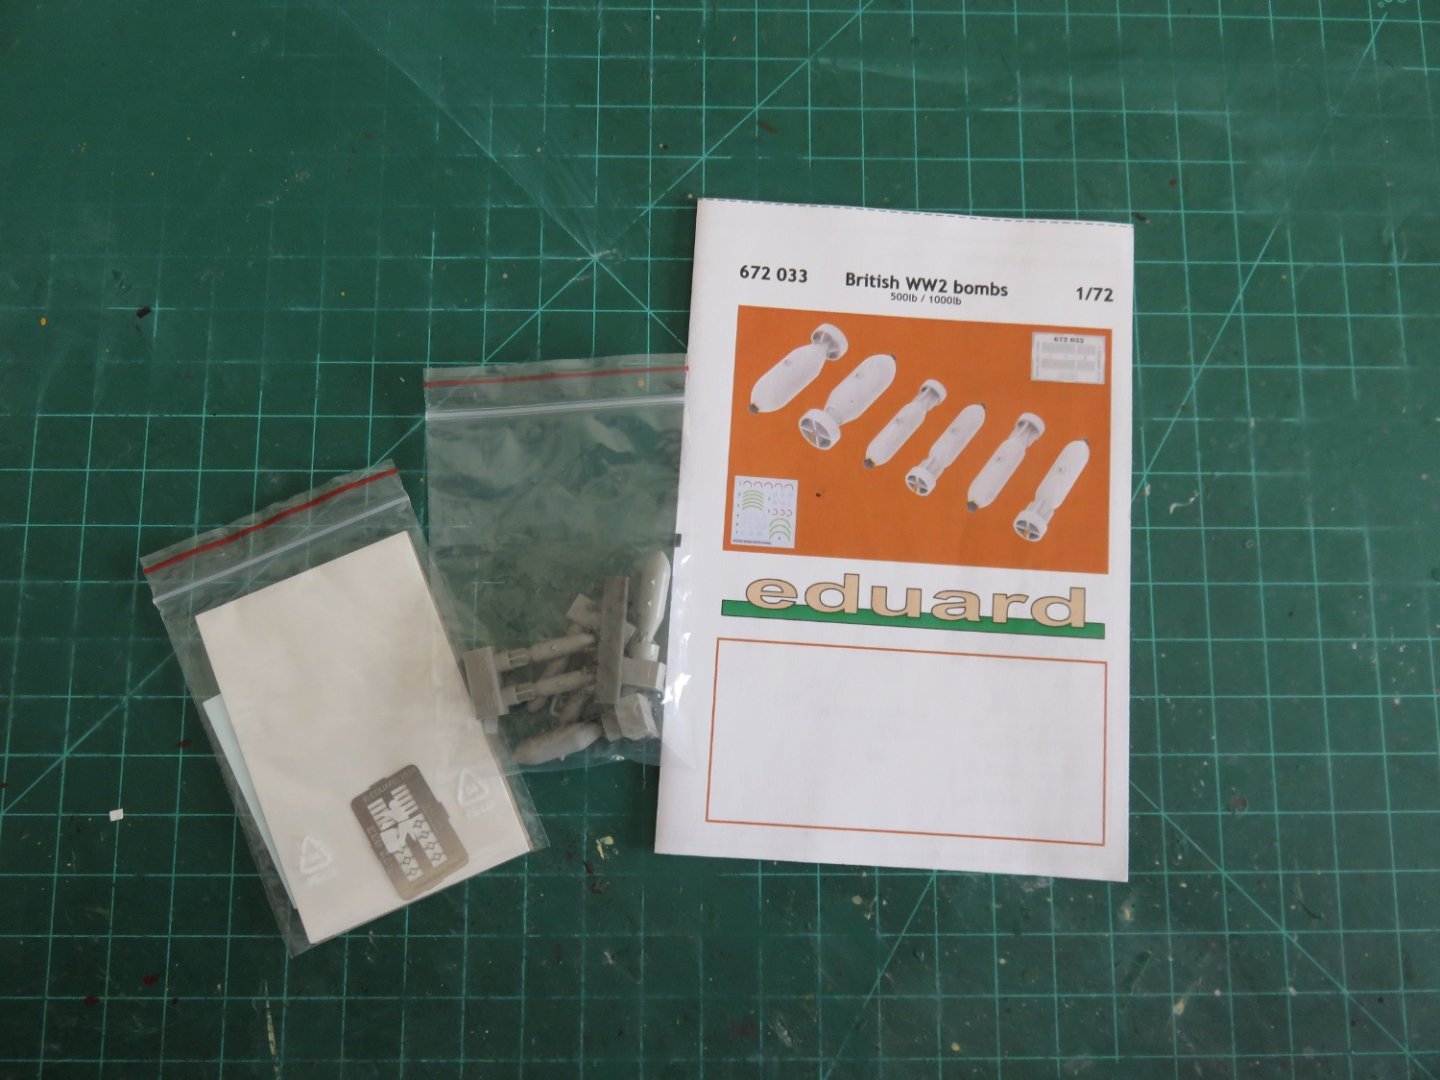
Ok, so it's time to let the cat out of the bag, so to speak. Or maybe just time to get my modelling backside into gear. For my next airplane model I've opted for another 1/72 kit from Airfix (they're a bit addictive, to be honest): A 2019 rebox from a tooling released in 2013, the kit originates somewhere near the beginning of Airfix's current resurgence. The overall detail is quite good, albeit somewhat clunky in odd places like the pilot's boarding step. I may be tempted to scratch build a replacement out of some bass. The kit is comprised of four sprues moulded in the typical grey plastic found in many Airfix kits, along with one small sprue of clear parts. The clear parts appear to be well cast, and for the most part the grey plastic parts are crisply moulded with minimal flash. I did discover a couple of issues with the landing gear parts. The first issue I found, one part was broken on the sprue. This must have happened during the picking/packing phase as there was no sign of any wear and tear on the box or anywhere else, the second issue was a short shot on the opposing landing gear leg. I've highlighted the errors here in this detail picture: I have been in some form of contact with Airfix's spares department and I hope to have this issue resolved soon-ish (at this current moment in time they claim to be dealing with an overwhelming number of e-mail requests for spares. As I have no contrary evidence I have to take them at their word, and will give them the benefit of the doubt). Otherwise the kit comes with the usual A4 instruction booklet and decals from Cartograf: The two included paint schemes are for Typhoon MN666 (C G) flown by 121 Wing Commander Charles Green out of Le Fresne-Camilly, France in June of 1944 (In the Canadian Sector inland from Juno Beach), as well as MP197 (MR U), part of 245 Squadron. The later is quite interesting as it was the only known Typhoon to be painted with a shark mouth. From November 1944 to March 1945, "Sharky" was flown by Harrison "Moose" Mossip, a Canadian. I plan to deviate from both of these schemes. I did a little research and have decided to give a go at painting mine up as a proper Canadian Typhoon. In my case, it will become MN518. Initially assigned to 143 Wing Commander Robert Davidson, (and marked "R D"), it was reassigned to Wing Commander MT Judd, after Davidson went missing in May 1944. Under Judd it was re-marked "M J" and served as his airplane through the summer of 1944. Some careful decal surgery should allow me to create the necessary letters for this plane, and I can print the registration number myself, as I did with my Hurricane. I am also planing on painting the aircraft as it would have appeared later in the summer of 1944, after the order had been given to begin removing the invasion stripes and repainting the camouflage. In my case the stripes will only be applied on the lower surfaces only. Also, to add to the fun, all the Canadian Typhoons in 143 Wing were equipped with bombs, not rockets. Airfix does provide a couple of bombs in the kit, but I happen to have a nice resin set from Eduard (that came as part of pack of goodies for my Wellington). So I'll be using these bombs instead: I can honestly say I have not seen too many bomb equipped 1/72 models in my online searches. I can understand, as the rockets are a more interesting feature, but at least this way, mine will stand out a bit from the rest of the pack. With any luck my parts issue will be resolved, and I've just ordered the necessary paints, so construction will begin shortly. I've seen a number of these kits build online, and they do produce some excellent models. Hopefully mine will live up! Andy


- 146 replies
-
- 12
-
-
It is a safe place to sell MODEL SHIPWAYS in Amazon
realworkingsailor replied to Gus M's topic in Wood ship model kits
The other side of that coin, there are people who buy stuff at retail prices then turn around sell it on Amazon at a huge markup. Trying to pull the same scamy stunt as concert ticket resellers…. This guy offers a good explanation: Andy -
US 6” gun by RGL - FINISHED - Panzer Concepts
realworkingsailor replied to RGL's topic in Non-ship/categorised builds
Pictures are great, but you just can’t beat hearing those old engines run: Andy- 235 replies
-
- 10
-
-
US 6” gun by RGL - FINISHED - Panzer Concepts
realworkingsailor replied to RGL's topic in Non-ship/categorised builds
If you take a quick trip into the history of Holt tractors, the first machines that Holt built were all wheeled tractors. The tracks were a later development driven by the need to spread the tractor’s weight out over a greater surface area when working soft ground. The other option was to use massively large diameter and width drive wheels, which would have been impractical. So as a development of a four wheeled machine, a steering clutch was unnecessary. Holt did eventually buy the patent for a steering clutch system (from Richard Hornsby & Sons), in 1912. This did enable Holt to eventually do away with the front tiller wheel, but likely any manufacturing development would not have come early enough for government requirements driven by WW1. Andy- 235 replies
-
- 10
-
-
I used Testors Glosscote in a rattle can, although any gloss finish applied with an airbrush could work, as long as the subsequent layers of paint will adhere to it. Taking this even further, when masking for different colours, seal the masked edge with the first colour before switching to the second colour. If something is going to bleed under the tape, it may as well be the colour you want, rather than the colour you don’t. Andy