-
Posts
3,271 -
Joined
-
Last visited
Content Type
Profiles
Forums
Gallery
Events
Everything posted by realworkingsailor
-
Looking forward to seeing your club Lanc build! As to the RAF/RCAF, all it takes is a little research, (and maybe a little luck). There’s a good selection of aftermarket options (like decals), that can easily alter a stock British (or American) airplane into a Canadian one. But manufacturers are not totally deaf either, for instance Airfix’s new 1/48 Avro Anson comes from the factory with Canadian markings (among others). Andy
-
Thanks Everyone! Did I mention my paint arrived a few days ago? Anyway, I'm looking for some opinions. I need some help with determining the better shade of dark grey for the camouflage scheme. I've run a couple of test panels for evaluation. Both grey colours are from the same manufacturer and both are classified as "RAF Dark Sea Grey" (although different formula numbers). The one on the left is slightly darker, and the one on the right seems slightly bluer. The dark green (at the bottom) is the same as I used on my Wellington bomber. I initially thought this would be a cut and dry decision, but I find myself waffling. So I figured I'd see what everyone else thinks. Andy
-
So, I went fishing today, and caught a couple of 1000 pounders... I thought of describing my activities today in a more direct fashion, but it might put me at odds with various government security organizations should they happen to stumble upon my build log....🤪 Still waiting on bits and pieces (it may be another week, I don't know), but I will keep trying to stay busy, even if it's only messing around with small parts here and there.... Andy
-
Thanks guys! I’m in another waiting phase on the build, I did get my paint yesterday (finally!), but I’ve gone about as far as I can while I wait for the part(s) I ordered on the weekend. Also still waiting to see if Airfix has sent me the replacement landing gear legs, maybe they’re in the mail, I dunno…. Yeah…. Something like that… Andy
-
Can’t wait to see this project develop in your very capable hands! Andy
- 648 replies
-
- Indefatigable
- Vanguard Models
-
(and 1 more)
Tagged with:
-
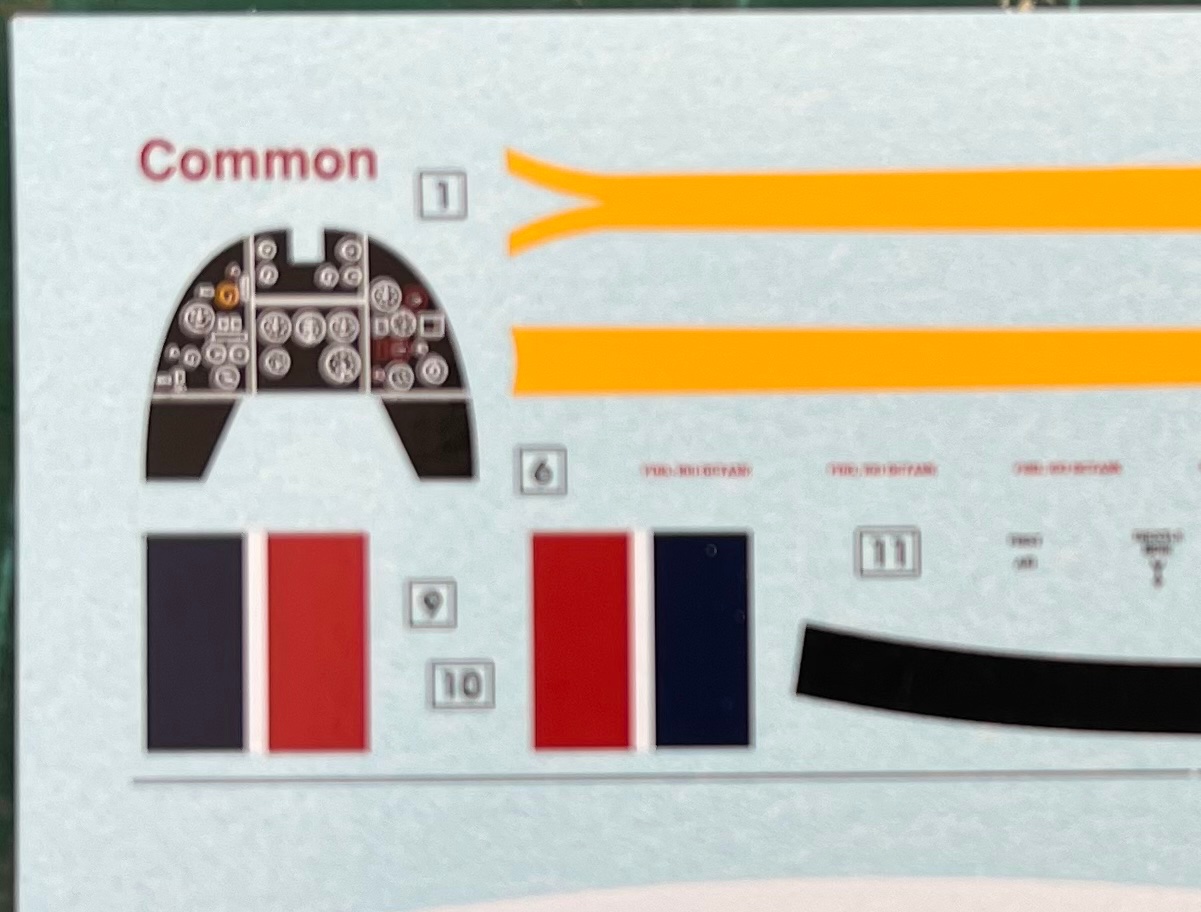
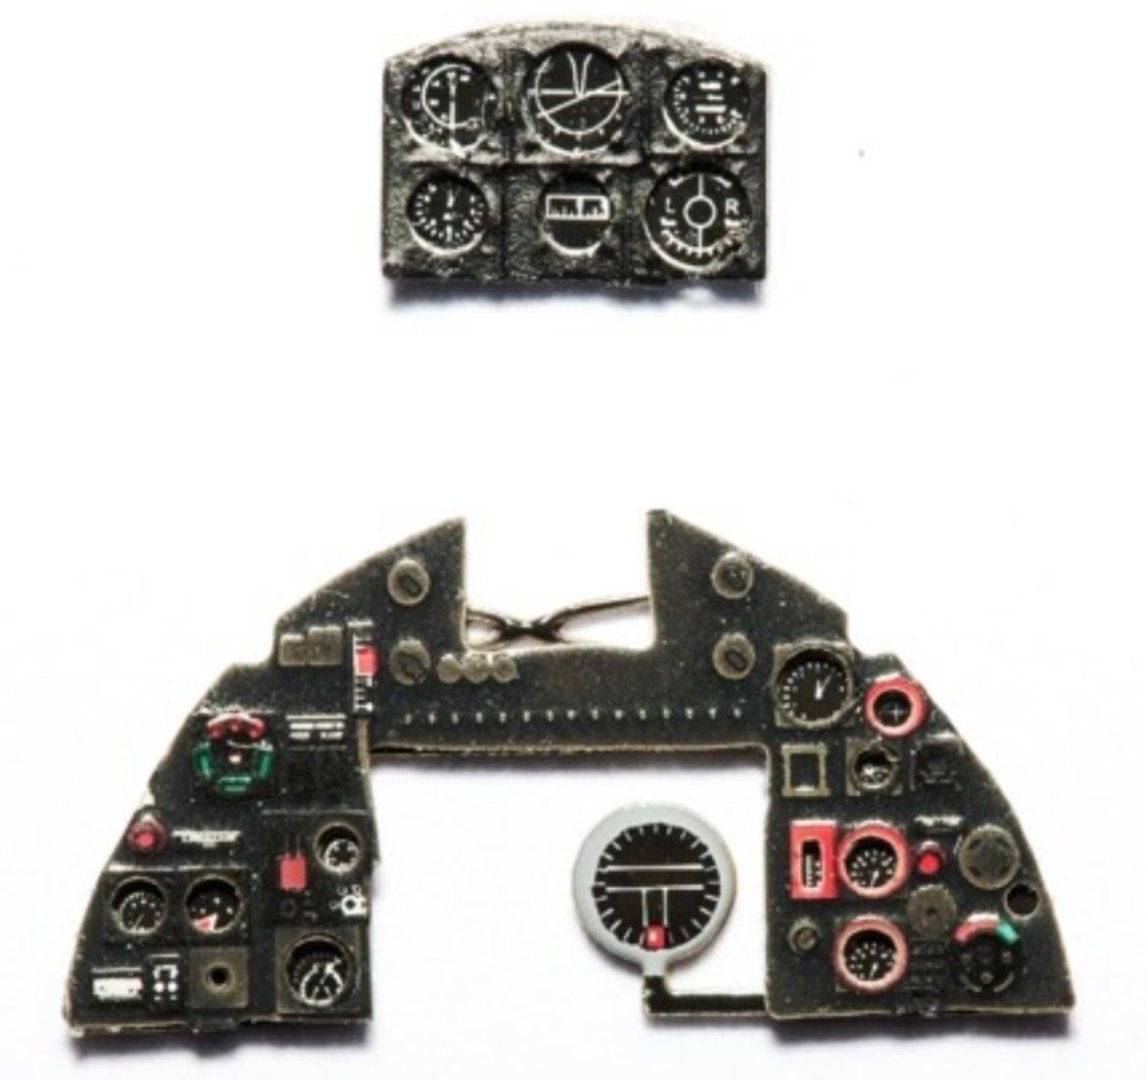
Not so much generic as uninspiring. In the lower “legs” of the plastic instrument panel piece, Airfix did manage to mould in some raised detail (which you then cover with a blank decal for some reason). It seems like they could make their instrument panels a little better, they just choose not to. Probably for the sake of keeping things simple for less experienced modellers. Andy
-
I think one could write a doctoral thesis on the multitudes of hobby paint lines and cross references, and still not have everything sorted out… As you alluded to, the best bet seems to be to stick to one or two (or three) paint lines that offer a decent enough range of colours, that you’re comfortable working with, and are happy with the “close enough” option for colour selection. Andy
-
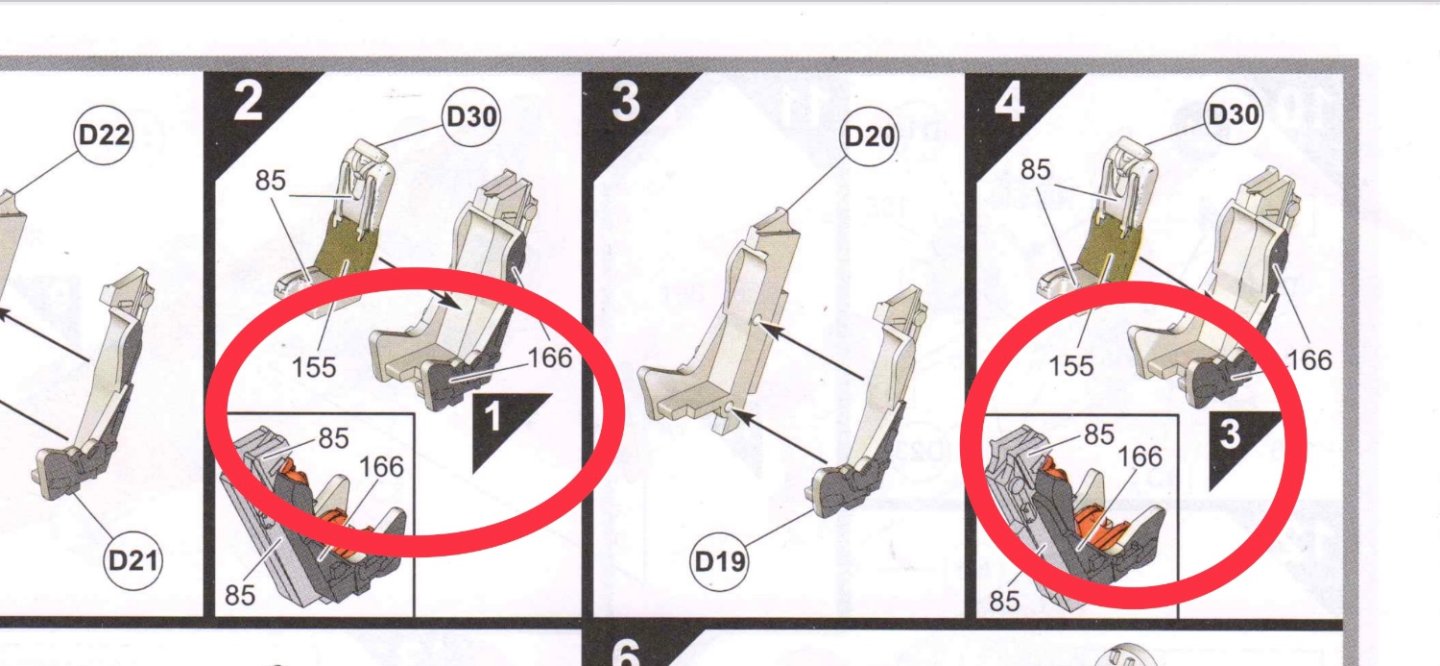
Airfix usually has colour call-outs in the instructions as well. Look for uncircled numbers in each step. This is a sample image of the 1/72 Buccaneer instructions (Scalemates doesn’t yet have the 1/48 instructions posted). I’ve circled in red some of the paint call-outs: Hopefully that helps! The numbers in triangles refer to previous assembly steps, and the circled ones are part numbers. Andy
-
A small update on my build, as I am still waiting on my paint order to arrive. I have begun doing what I can with the materials at hand. The good thing is I can get a fair bit of this prep-work done so that when the time comes for assembly, I won't be waiting around for the paint to dry. For now the inside of the fuselage has been painted. Some of the details have been picked out in black and gunmetal. I may will probably add a pinprick of red where the various knobs and levers should be. The detail is quite indistinct, given the small scale and mostly won't be visible. I've also been picking at the piece that makes up the cockpit floor and landing gear bay. Not much else to really show at this moment, until my paint shows up, and the slowest game of e-mail tag (with Airfix) gets resolved.... Andy
-
From what I read, Davidson was using a different airplane, MN957 (F3 N). I can only assume his regular plane was down for maintenance. On May 8th 1944, they were conducting operations in France, in preparation for the coming invasion. Davidson’s (replacement) plane developed engine trouble and he was forced to crash land. He evaded capture and ended up with the French resistance, even fighting alongside them, until liberation in September 1944. There are a number of stories of other Typhoon pilots similar to Davidson’s. Sadly, many do not have such happy (or adventurous) outcomes. Mossip’s story is one of them. On his last mission in March ‘45 (also in a different plane), after attacking a train he was observed to crash into some high tension wires, and was killed as a result. Andy
-
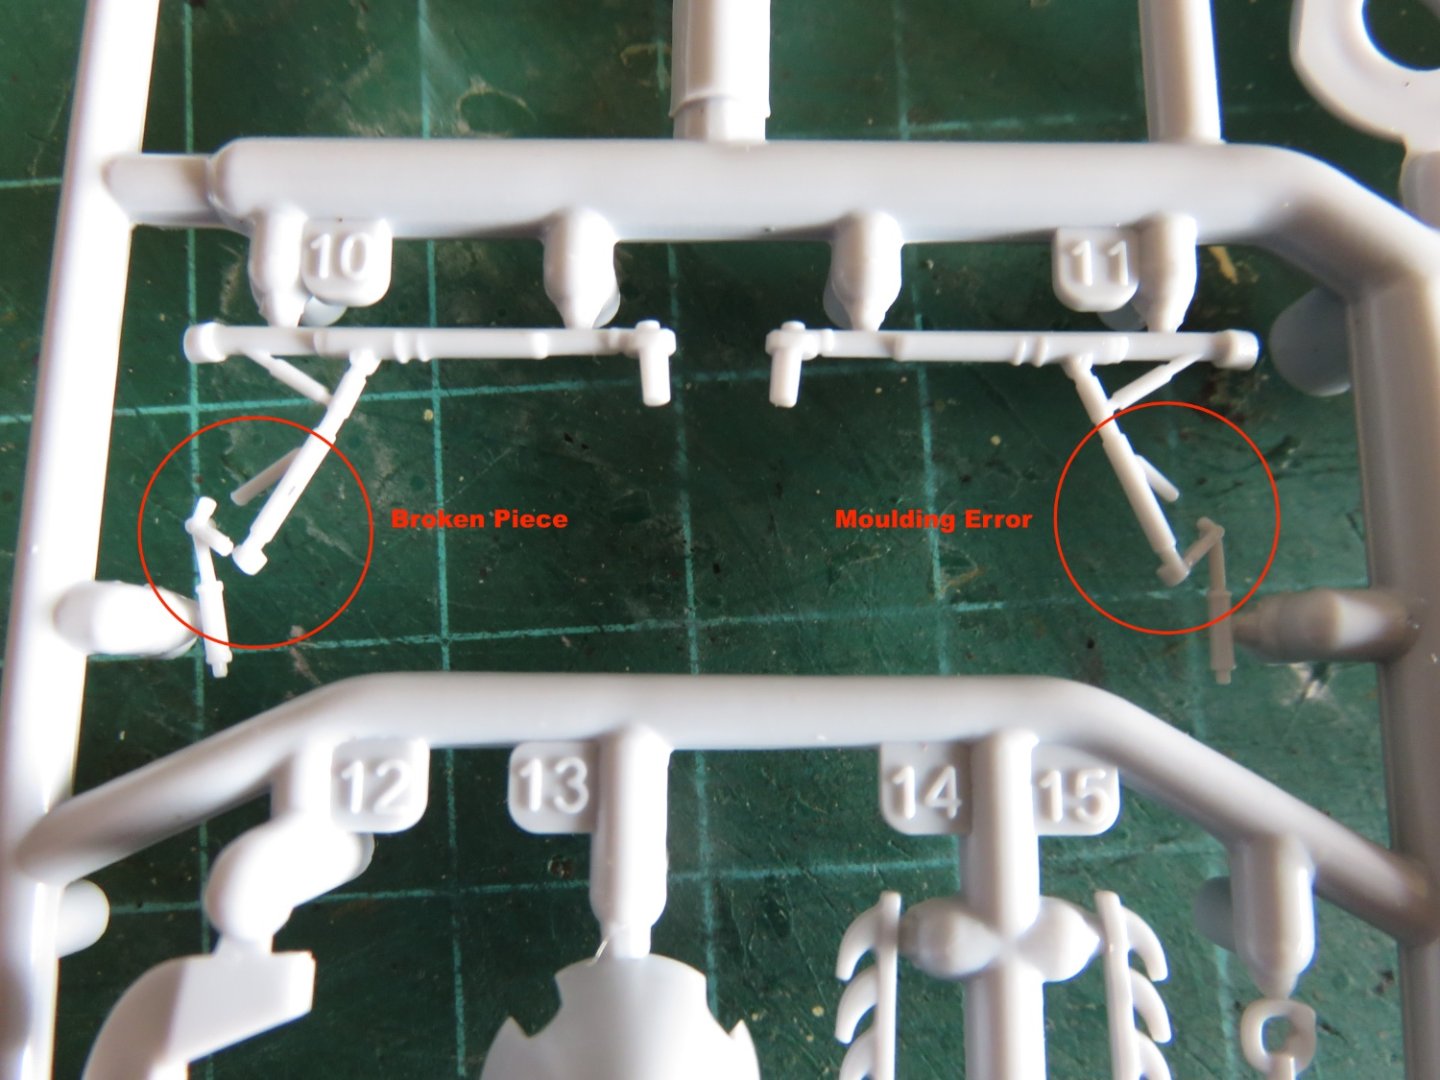
Ok, so it's time to let the cat out of the bag, so to speak. Or maybe just time to get my modelling backside into gear. For my next airplane model I've opted for another 1/72 kit from Airfix (they're a bit addictive, to be honest): A 2019 rebox from a tooling released in 2013, the kit originates somewhere near the beginning of Airfix's current resurgence. The overall detail is quite good, albeit somewhat clunky in odd places like the pilot's boarding step. I may be tempted to scratch build a replacement out of some bass. The kit is comprised of four sprues moulded in the typical grey plastic found in many Airfix kits, along with one small sprue of clear parts. The clear parts appear to be well cast, and for the most part the grey plastic parts are crisply moulded with minimal flash. I did discover a couple of issues with the landing gear parts. The first issue I found, one part was broken on the sprue. This must have happened during the picking/packing phase as there was no sign of any wear and tear on the box or anywhere else, the second issue was a short shot on the opposing landing gear leg. I've highlighted the errors here in this detail picture: I have been in some form of contact with Airfix's spares department and I hope to have this issue resolved soon-ish (at this current moment in time they claim to be dealing with an overwhelming number of e-mail requests for spares. As I have no contrary evidence I have to take them at their word, and will give them the benefit of the doubt). Otherwise the kit comes with the usual A4 instruction booklet and decals from Cartograf: The two included paint schemes are for Typhoon MN666 (C G) flown by 121 Wing Commander Charles Green out of Le Fresne-Camilly, France in June of 1944 (In the Canadian Sector inland from Juno Beach), as well as MP197 (MR U), part of 245 Squadron. The later is quite interesting as it was the only known Typhoon to be painted with a shark mouth. From November 1944 to March 1945, "Sharky" was flown by Harrison "Moose" Mossip, a Canadian. I plan to deviate from both of these schemes. I did a little research and have decided to give a go at painting mine up as a proper Canadian Typhoon. In my case, it will become MN518. Initially assigned to 143 Wing Commander Robert Davidson, (and marked "R D"), it was reassigned to Wing Commander MT Judd, after Davidson went missing in May 1944. Under Judd it was re-marked "M J" and served as his airplane through the summer of 1944. Some careful decal surgery should allow me to create the necessary letters for this plane, and I can print the registration number myself, as I did with my Hurricane. I am also planing on painting the aircraft as it would have appeared later in the summer of 1944, after the order had been given to begin removing the invasion stripes and repainting the camouflage. In my case the stripes will only be applied on the lower surfaces only. Also, to add to the fun, all the Canadian Typhoons in 143 Wing were equipped with bombs, not rockets. Airfix does provide a couple of bombs in the kit, but I happen to have a nice resin set from Eduard (that came as part of pack of goodies for my Wellington). So I'll be using these bombs instead: I can honestly say I have not seen too many bomb equipped 1/72 models in my online searches. I can understand, as the rockets are a more interesting feature, but at least this way, mine will stand out a bit from the rest of the pack. With any luck my parts issue will be resolved, and I've just ordered the necessary paints, so construction will begin shortly. I've seen a number of these kits build online, and they do produce some excellent models. Hopefully mine will live up! Andy
-

It is a safe place to sell MODEL SHIPWAYS in Amazon
realworkingsailor replied to Gus M's topic in Wood ship model kits
The other side of that coin, there are people who buy stuff at retail prices then turn around sell it on Amazon at a huge markup. Trying to pull the same scamy stunt as concert ticket resellers…. This guy offers a good explanation: Andy -

US 6” gun by RGL - FINISHED - Panzer Concepts
realworkingsailor replied to RGL's topic in Non-ship/categorised builds
Pictures are great, but you just can’t beat hearing those old engines run: Andy -

US 6” gun by RGL - FINISHED - Panzer Concepts
realworkingsailor replied to RGL's topic in Non-ship/categorised builds
If you take a quick trip into the history of Holt tractors, the first machines that Holt built were all wheeled tractors. The tracks were a later development driven by the need to spread the tractor’s weight out over a greater surface area when working soft ground. The other option was to use massively large diameter and width drive wheels, which would have been impractical. So as a development of a four wheeled machine, a steering clutch was unnecessary. Holt did eventually buy the patent for a steering clutch system (from Richard Hornsby & Sons), in 1912. This did enable Holt to eventually do away with the front tiller wheel, but likely any manufacturing development would not have come early enough for government requirements driven by WW1. Andy -
I used Testors Glosscote in a rattle can, although any gloss finish applied with an airbrush could work, as long as the subsequent layers of paint will adhere to it. Taking this even further, when masking for different colours, seal the masked edge with the first colour before switching to the second colour. If something is going to bleed under the tape, it may as well be the colour you want, rather than the colour you don’t. Andy
-
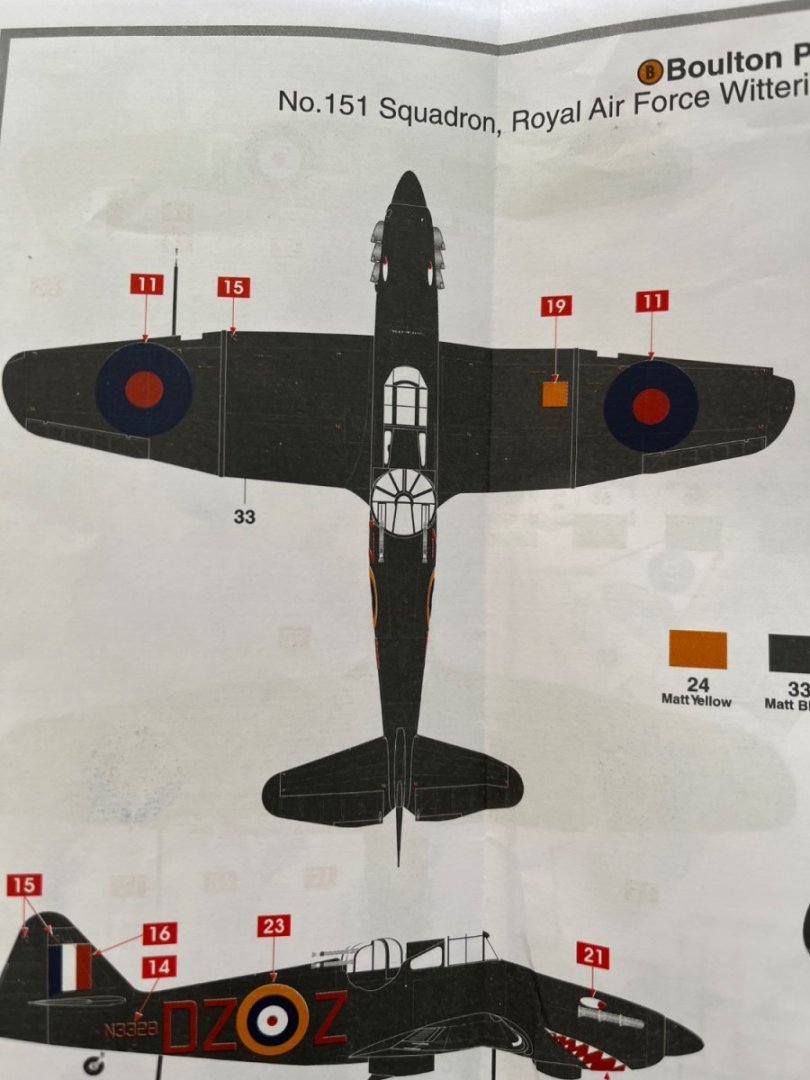
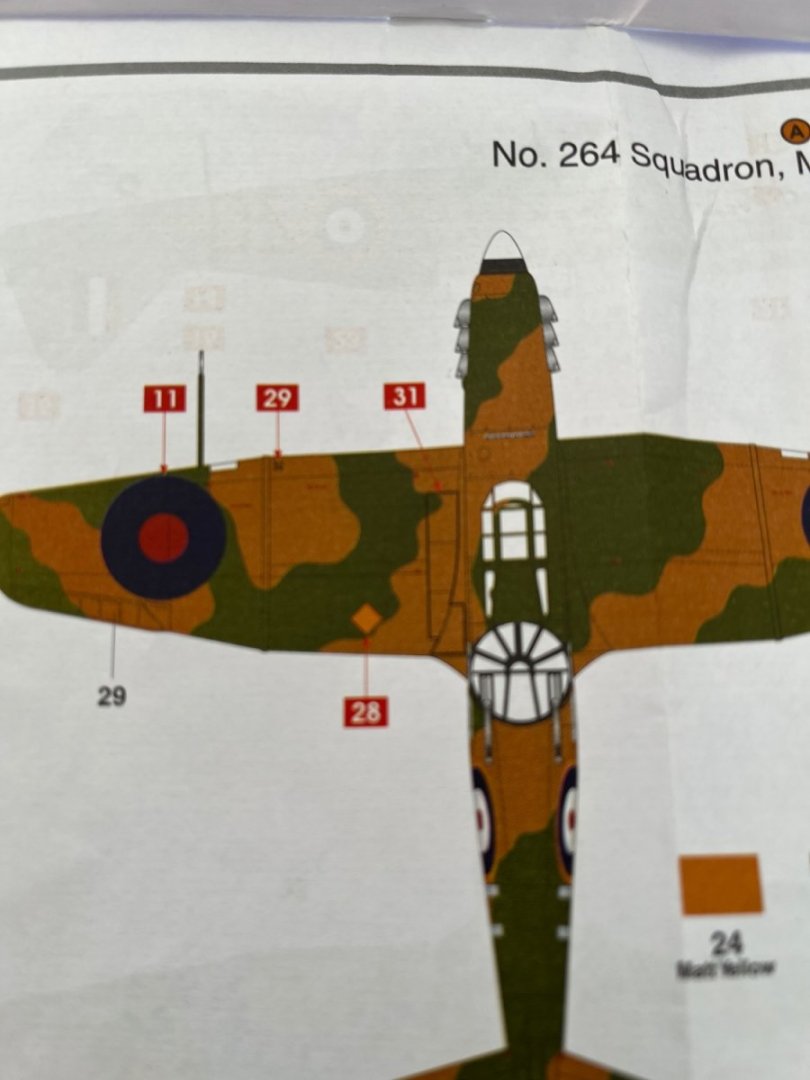
Very interesting, I did not know what that yellow patch was all about. I assumed it was possibly some early iteration of the fighter command stripes seen on the leading edge of later war fighter planes’ wings. As for its location, I will again plead ignorance, I just followed the Airfix instructions, so if there’s an error, it’s theirs. 😜 Oddly enough, the day colour scheme does have the yellow patch on the left: Perhaps because of the second man in the turret, it wasn’t as critical were it was as long as either the gunner or pilot could see it. Thanks for your kind words! Andy PS: As to the aircraft/aeroplane, being Canadian, not sure which side of that fence I’m supposed to land on… 😆
-
Thanks guys! Every day my shoulder is getting better, I would say I’ve recovered better than 95 percent of my range of motion. I have another follow up appointment at the beginning of March, hopefully I’ll be given the go ahead to be able to start lifting things again. Yeah, the turret had its moments, and there were more than a few occasions where I ripped all the tape off and started over again. The biggest help, I think, when it comes to masking, is after taping, make the first coat clear gloss. It will seal the edges of the tape (so there’s no colour bleed later on), and won’t fog the plastic. Andy
-
Thanks guys! I’m kinda torn between the fun of keeping it a secret, and the excitement of announcing what it is. Suffice it to say, it’s an airplane from later in the war, and I’m thinking of chancing mucking about with the decals to reflect an aircraft of the RCAF. (Even though one version of the included decals schemes was actually flown by a Canadian during the last winter of the war, it was still an RAF aircraft). Andy
-
Thanks, once again, everyone for the kind comments and likes! Well, this proved to be a rather quick little build, especially with the simplified paint scheme. Applying the multitude of stencils proved to be the most time consuming task. Had I the proper materials (and a little bit of practice under my belt), I would have tried maybe adding some chipping and done other weathering effects to beat up the paint a little bit, but I only have pastels on hand. I may add tome brownish burn streaks from the exhausts, just to liven things up a little bit, but for all intents and purposes, I think I will call this build done!. To me, the all black makes for a rather striking, and not often seen (unless you google "Airfix Defiant"), paint scheme, and that shark mouth really stands out! Unlike it's contemporaries, the Hurricane and Spitfire, the Defiant had an underslung radio antenna. One fixed arial was located between the main landing gear, a second arial was located just forward of the tail wheel, with an antenna wire strung between them. The rear arial would retract when the landing gear was extended (for obvious reasons). I'm happy I went with the "unprototypical" green landing gear bays... notice the numerous stencils 🤪 I'm also glad I diverged with the turret interior colours as well, the small details around the gun stand out nicely. You can see how "girthy" Defiants were in order to accommodate the turret. Notice how the plane widens as it goes aft of the engine. All in all, this was another great kit offering from Airfix, the turret definitely added a bit of interest to the build, enough to keep a more skilled builder occupied! For the same reason, I wouldn't suggest this kit for a first time builder. The detail level is in keeping with all the more recent offerings and there were no real fitment issues. I think I will be taking a bit of a break from building for a short while (until my fingers start to get itchy), but I have one more 1:72 airplane lined up, as well as some figures to try my hand at painting. If nothing else a little time is needed to catch my breath. I hope to see you all at my next build! Andy
-
I’m in! You did a great job on your Buffalo and FM-1 builds, I’m sure this one will be phenomenal as well. Having recently subjected myself to the test of patience that is Eduard origami, I can say that it is, for the most part, a worthwhile exercise. Shame about all those ejector pin marks, though, especially for such a recent tooling, and a full interior. Looks like you’ve got it handled, hopefully a smooth build from here on out! Andy
About us
Modelshipworld - Advancing Ship Modeling through Research
SSL Secured
Your security is important for us so this Website is SSL-Secured
NRG Mailing Address
Nautical Research Guild
237 South Lincoln Street
Westmont IL, 60559-1917
Model Ship World ® and the MSW logo are Registered Trademarks, and belong to the Nautical Research Guild (United States Patent and Trademark Office: No. 6,929,264 & No. 6,929,274, registered Dec. 20, 2022)
Helpful Links
About the NRG
If you enjoy building ship models that are historically accurate as well as beautiful, then The Nautical Research Guild (NRG) is just right for you.
The Guild is a non-profit educational organization whose mission is to “Advance Ship Modeling Through Research”. We provide support to our members in their efforts to raise the quality of their model ships.
The Nautical Research Guild has published our world-renowned quarterly magazine, The Nautical Research Journal, since 1955. The pages of the Journal are full of articles by accomplished ship modelers who show you how they create those exquisite details on their models, and by maritime historians who show you the correct details to build. The Journal is available in both print and digital editions. Go to the NRG web site (www.thenrg.org) to download a complimentary digital copy of the Journal. The NRG also publishes plan sets, books and compilations of back issues of the Journal and the former Ships in Scale and Model Ship Builder magazines.


