DanielD
-
Posts
624 -
Joined
-
Last visited
Content Type
Profiles
Forums
Gallery
Events
Everything posted by DanielD
-
 Wow, 12 boats? I didn’t know that! I’ll have to get some more.
 -
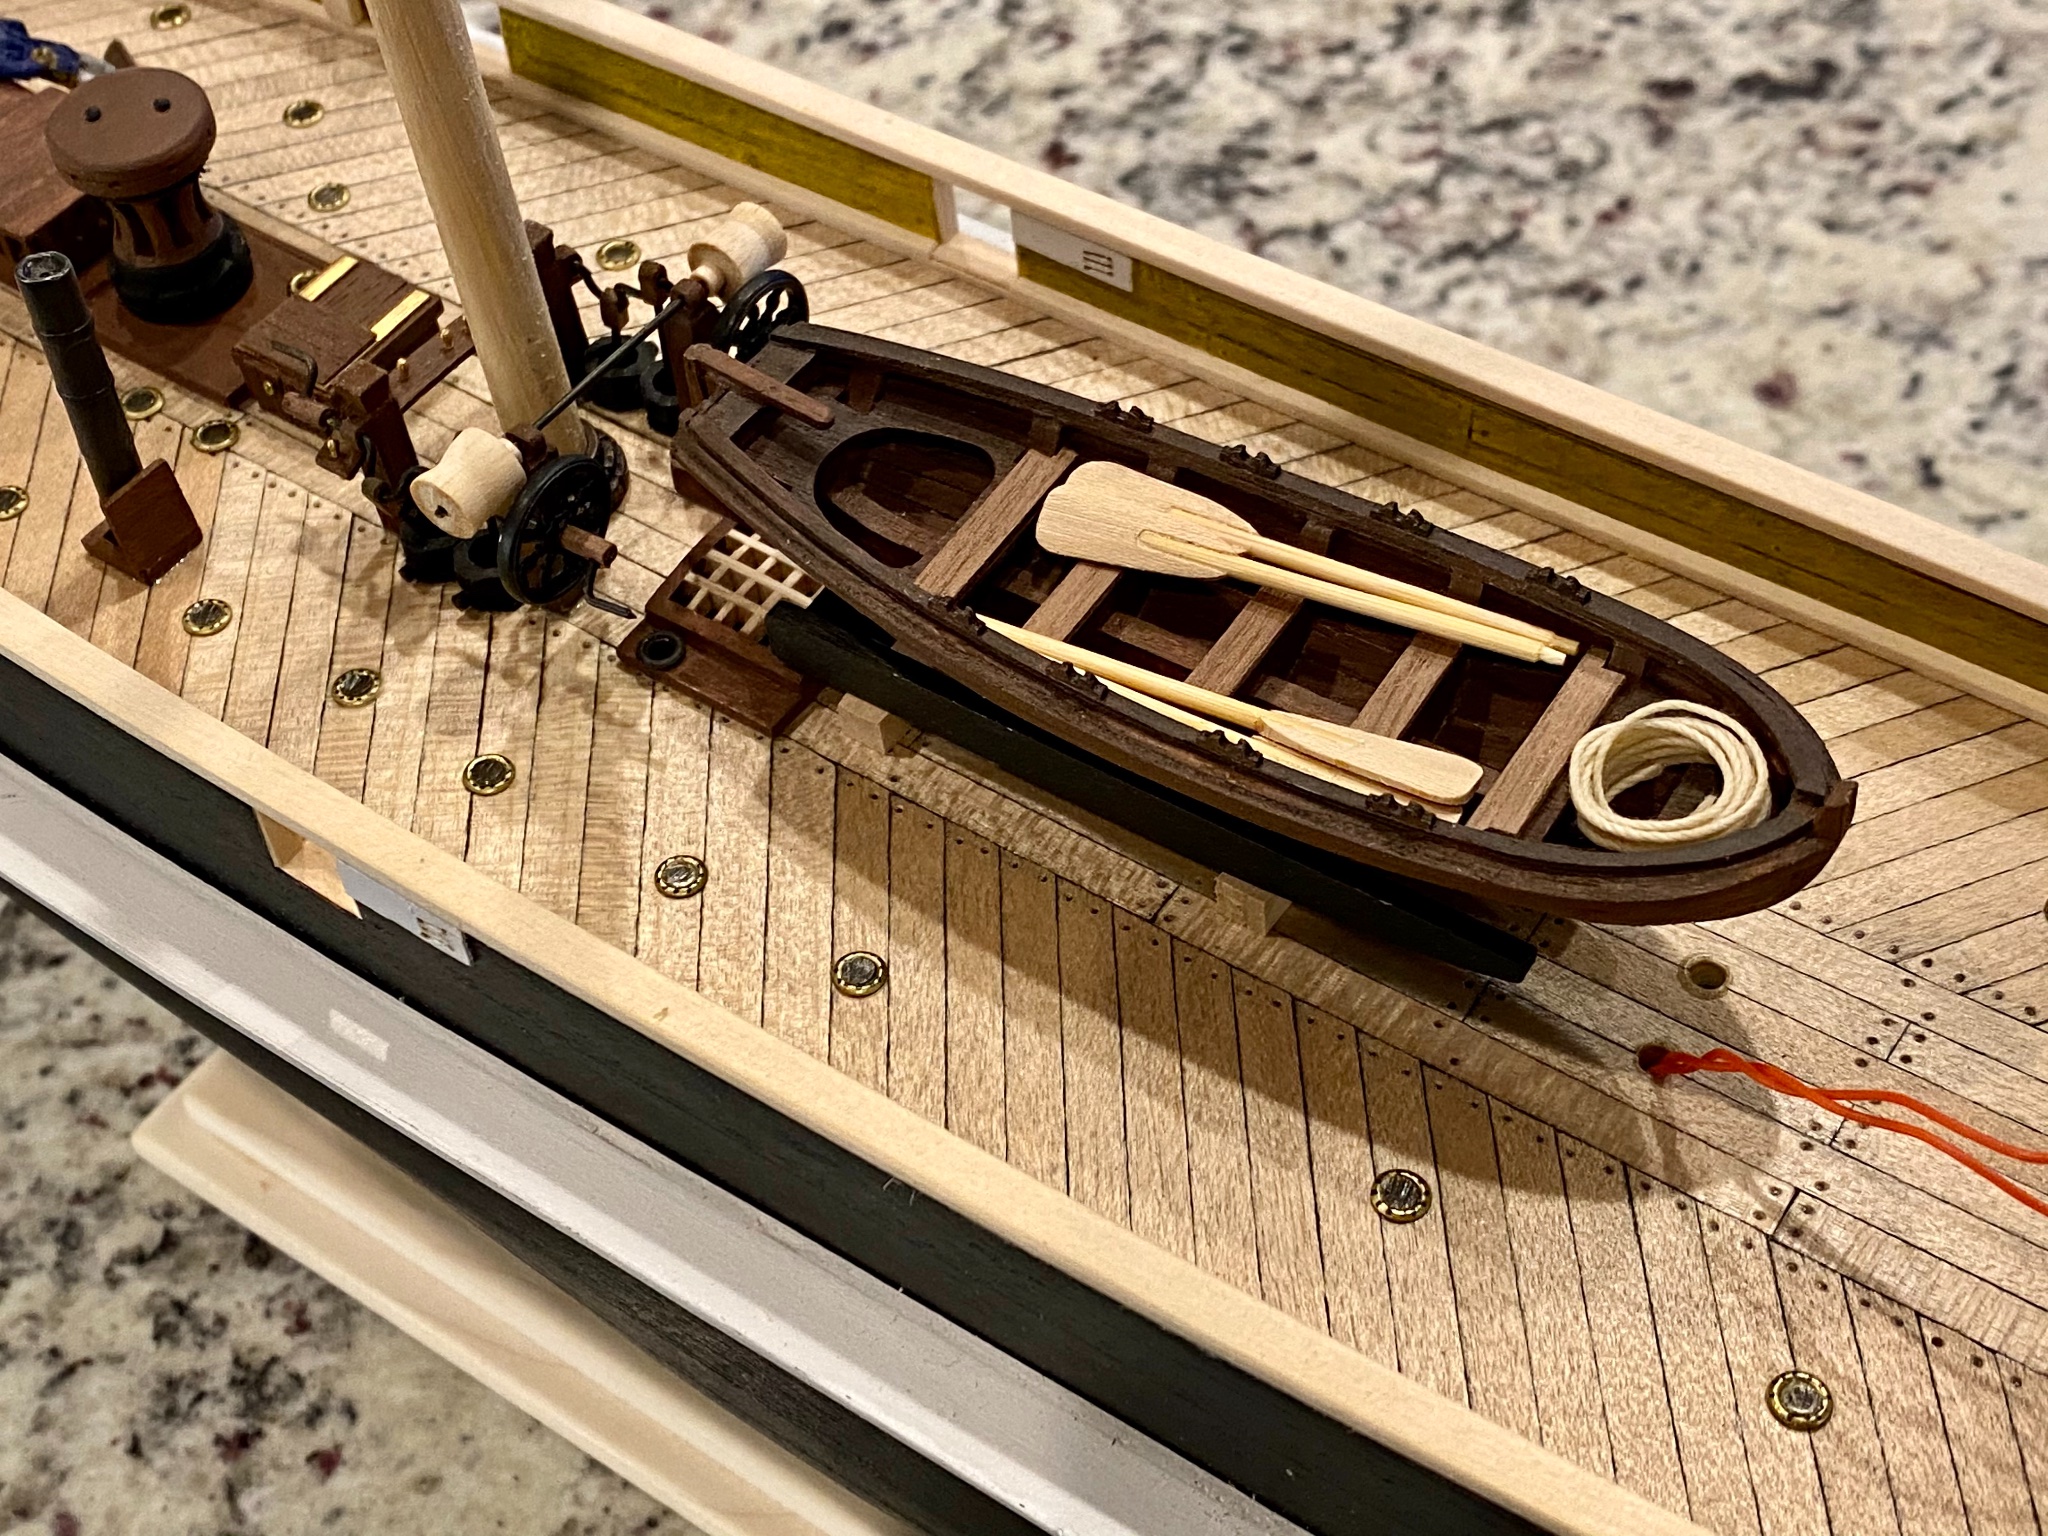
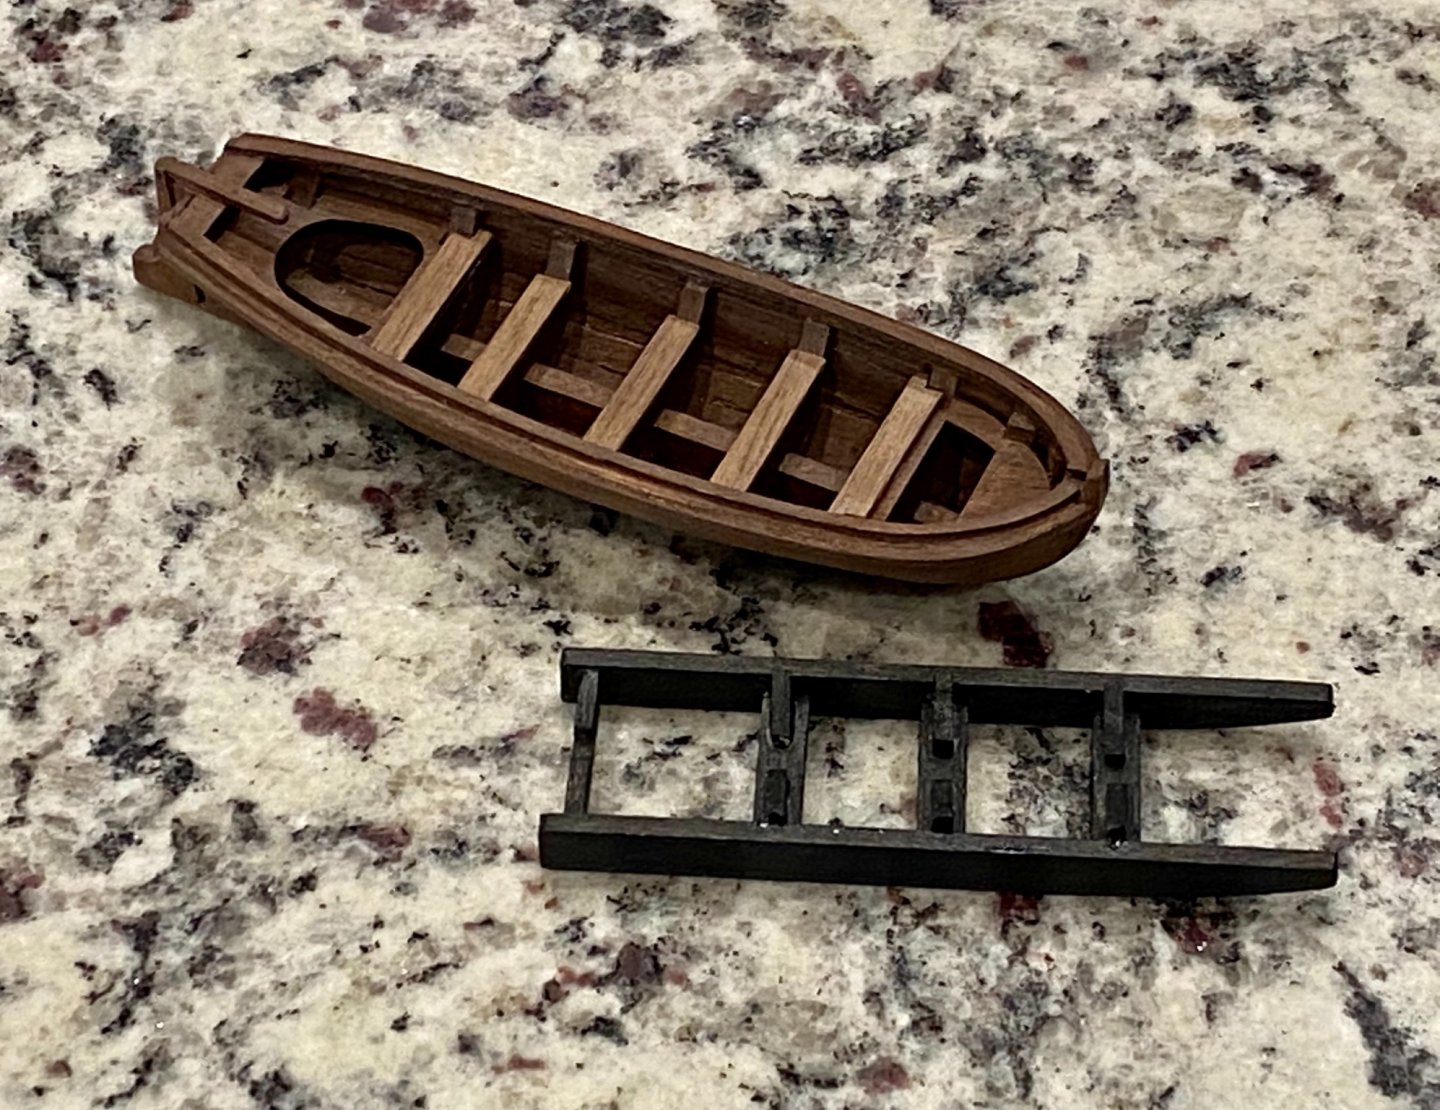
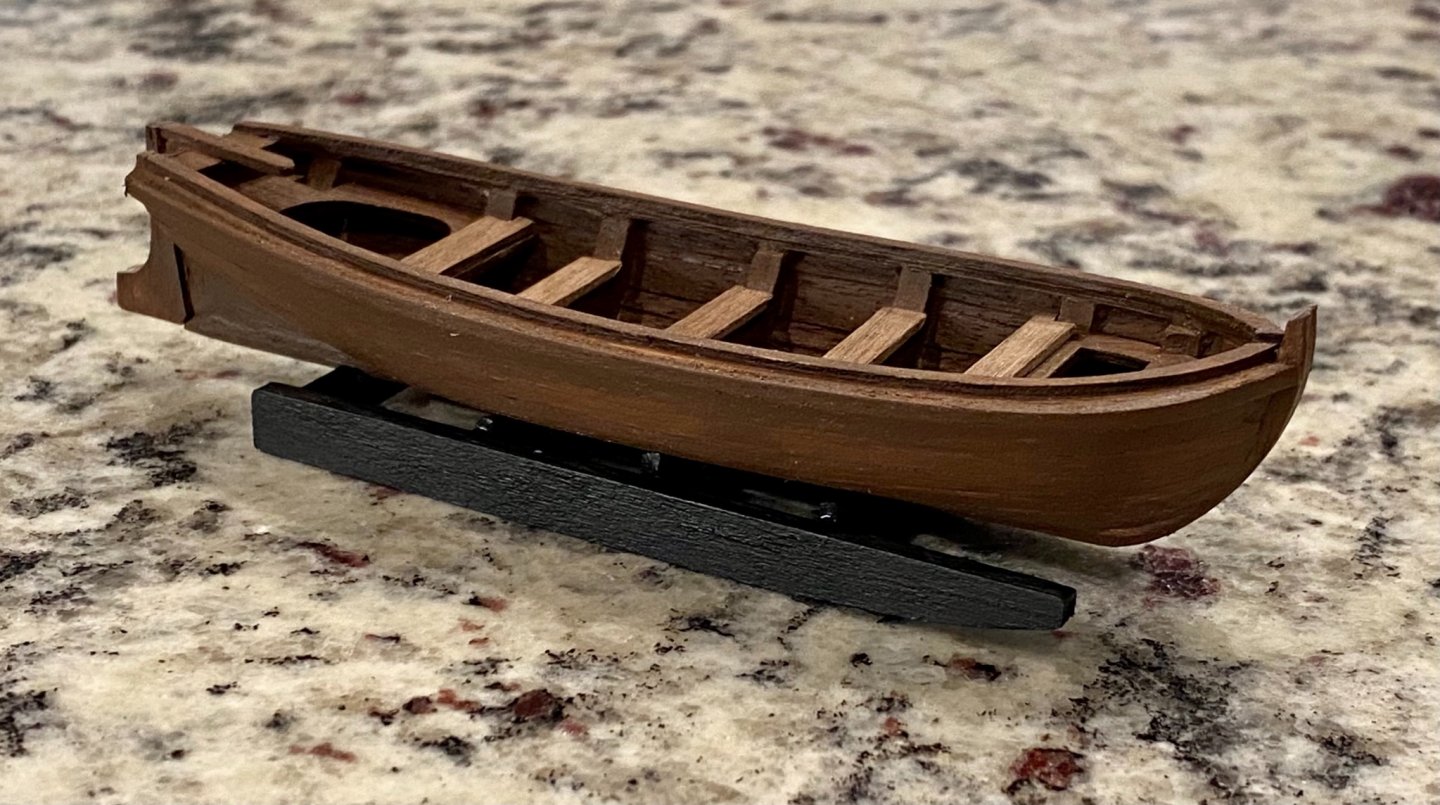
While building this small boat, the instructions are a little shy on the length of the oars, actually, the instructions just say craft an oar. I went looking for 1800’s oar examples and I came across a formula on how to set the length of the oar. I had no idea that such a formula existed. 1/2 the boat beam, times 3 plus 6”. I converted the 6” to mm and in my scale (1/75)...6*25.4/75=2mm. The beam of my small boat is 32mm, so ((32 / 2) * 3) + 2 = 50mm. I made the length of my oars 50mm, and I think they match the scale of the small boat perfectly.

-
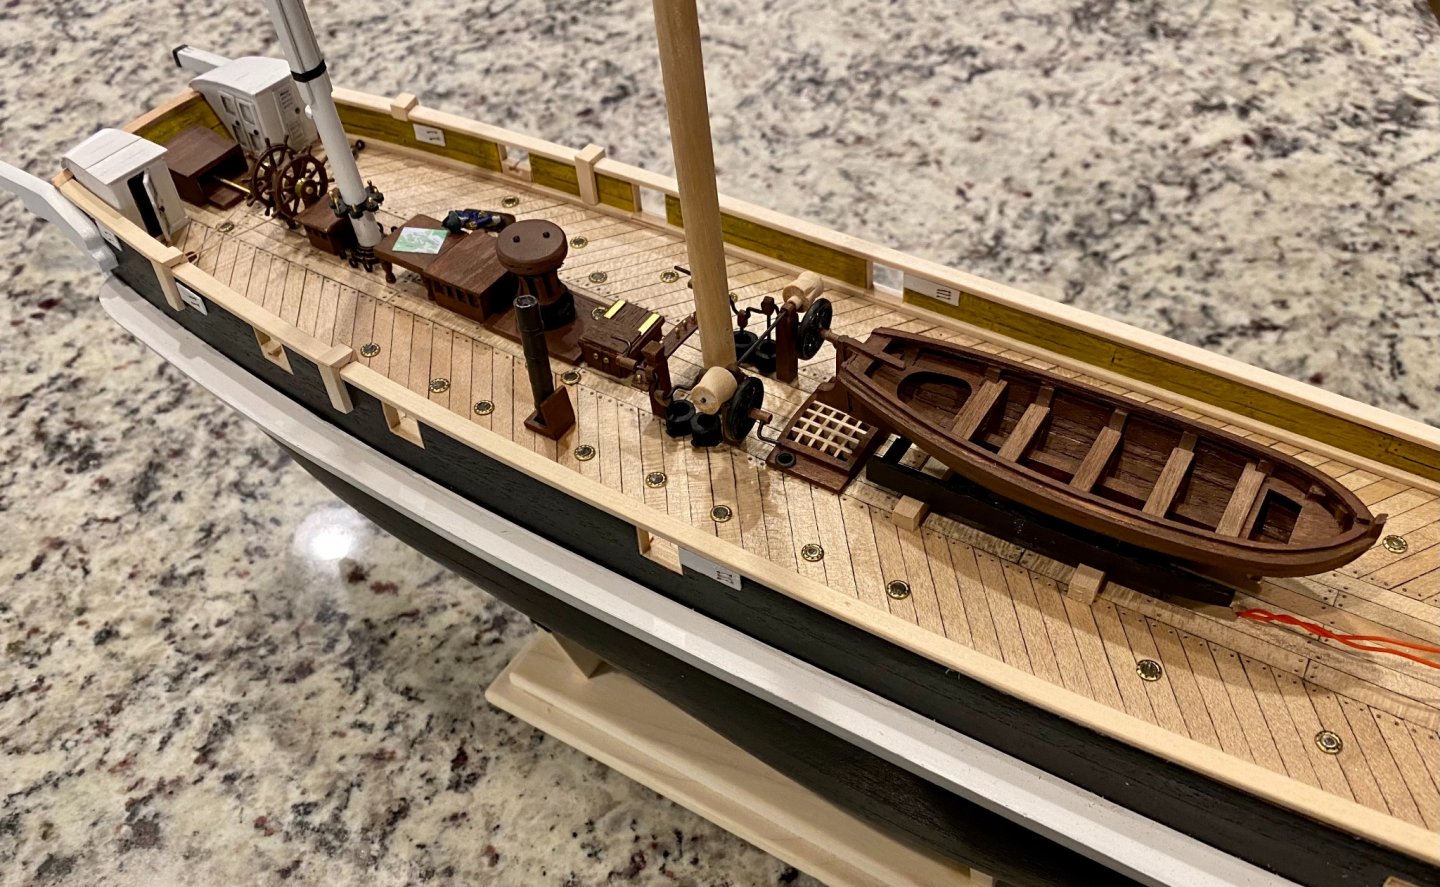
Today in the shipyard, I took a break from the Terror and tried my hand building a small boat. In this case, I built a Kolderstok small boat, which is nearly the exact size as the cast metal small boat included in the Terror kit. This will be the first of three life boats that I'll include on this model, well...maybe four, we shall see. Also, I built a sled, similar to the one that is described on Dr. Betts building Terror website. I think it will be a nice addition to this kit.
-
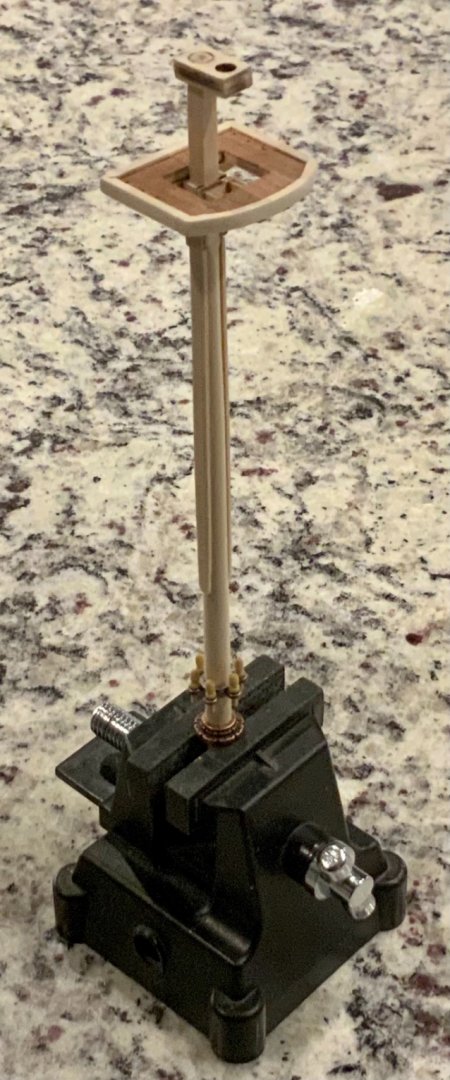
A little more work happening in the shipyard, today with the smoke stack for the steam engine. I was not happy with the version of the stack that came in the kit with the seams nearly 1mm thick. At the same time, I don’t really have anything around the yard that will lend well to a new stack. So I took the kit version and sanded down the seams to just a hint of what they were and then chemically blackened it with a new trap door at its base.

-
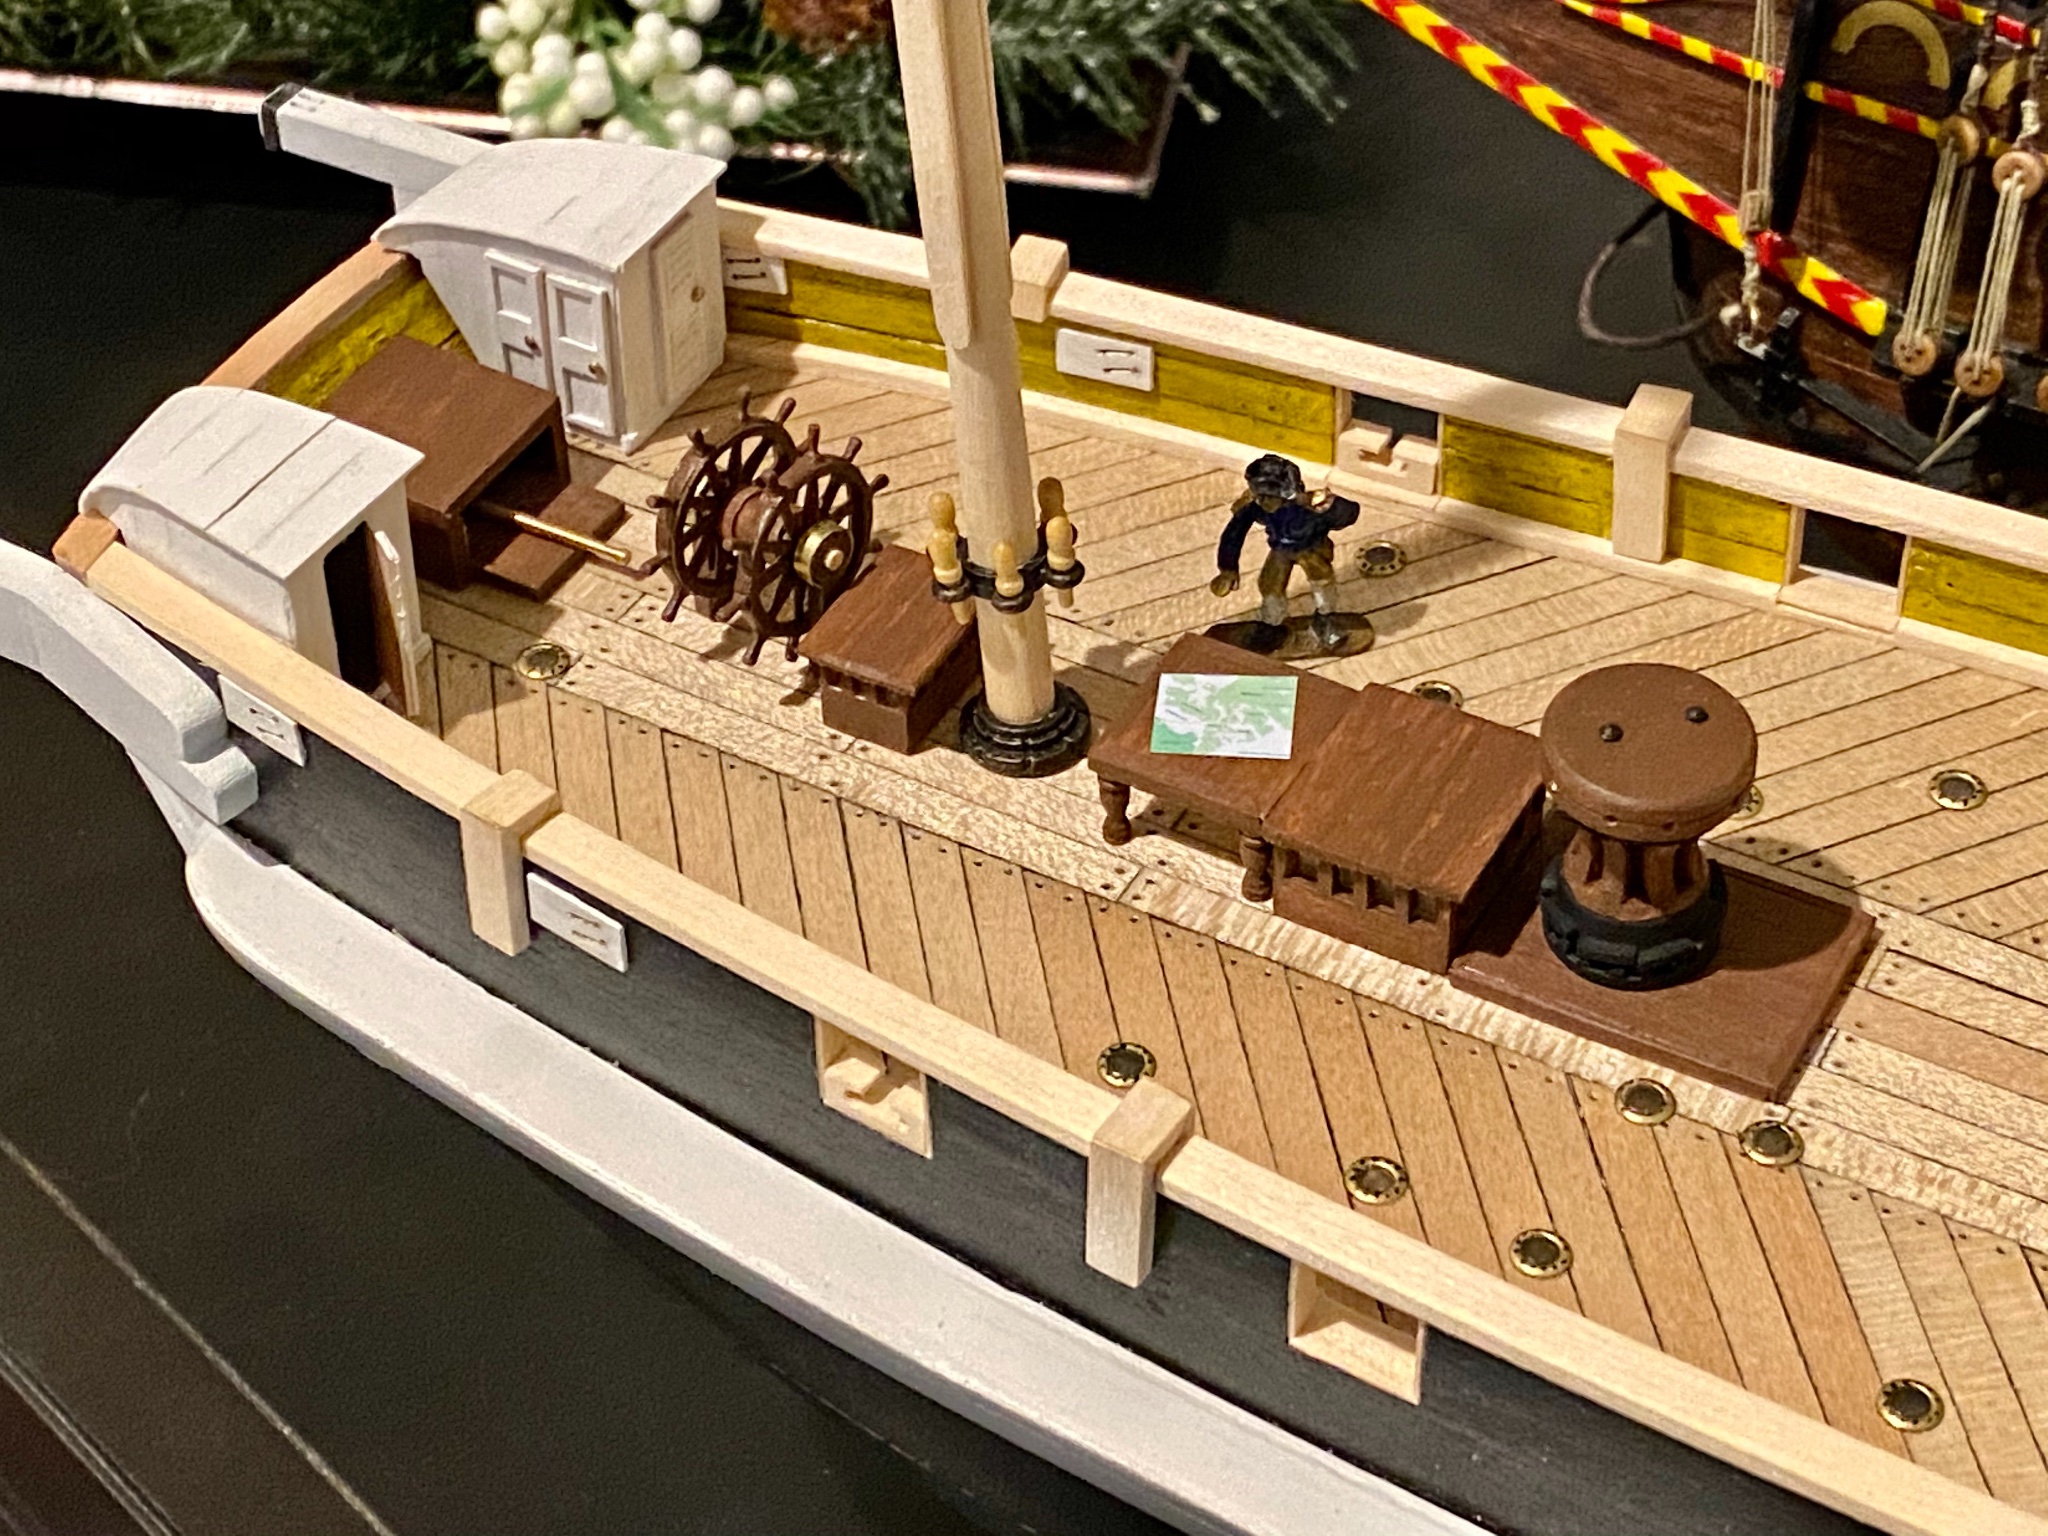
In the shipyard today I finally hooked up the tiller/rudder to the wheel. Took a bit to get the shives to work smoothly, but works great in the end. To make the thread pull easily through the shive, I waxed a heavy thread, put through the hole of the shive, then pulled the string back and forth several times lightly sanding the hole and getting some wax rubbed in. Once I did this step, the finished thread/rope now pulls easily, almost as if there was a real pulley installed. Thanks for looking everyone. FullSizeRender.mov
-
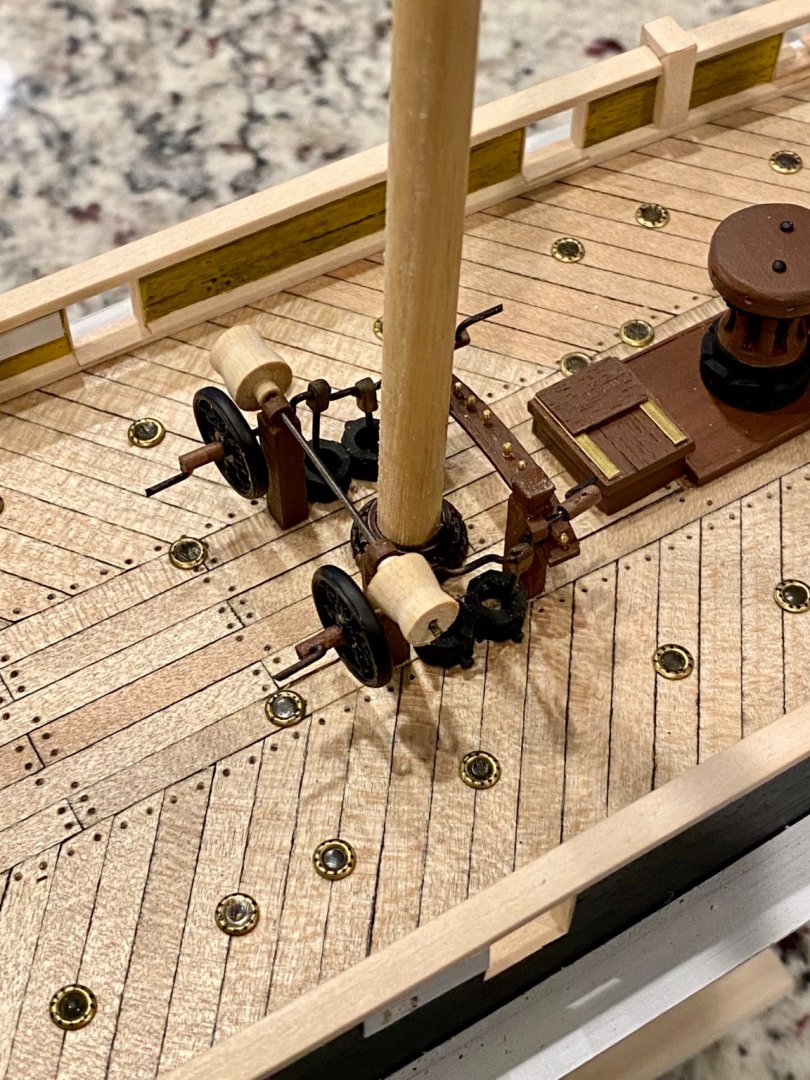
Finally finished with the mid ship pumps and winch drums. Was a chore but finally succeeded in getting the pump drive shaft working. Now onto something else IMG_2452.MOV
-
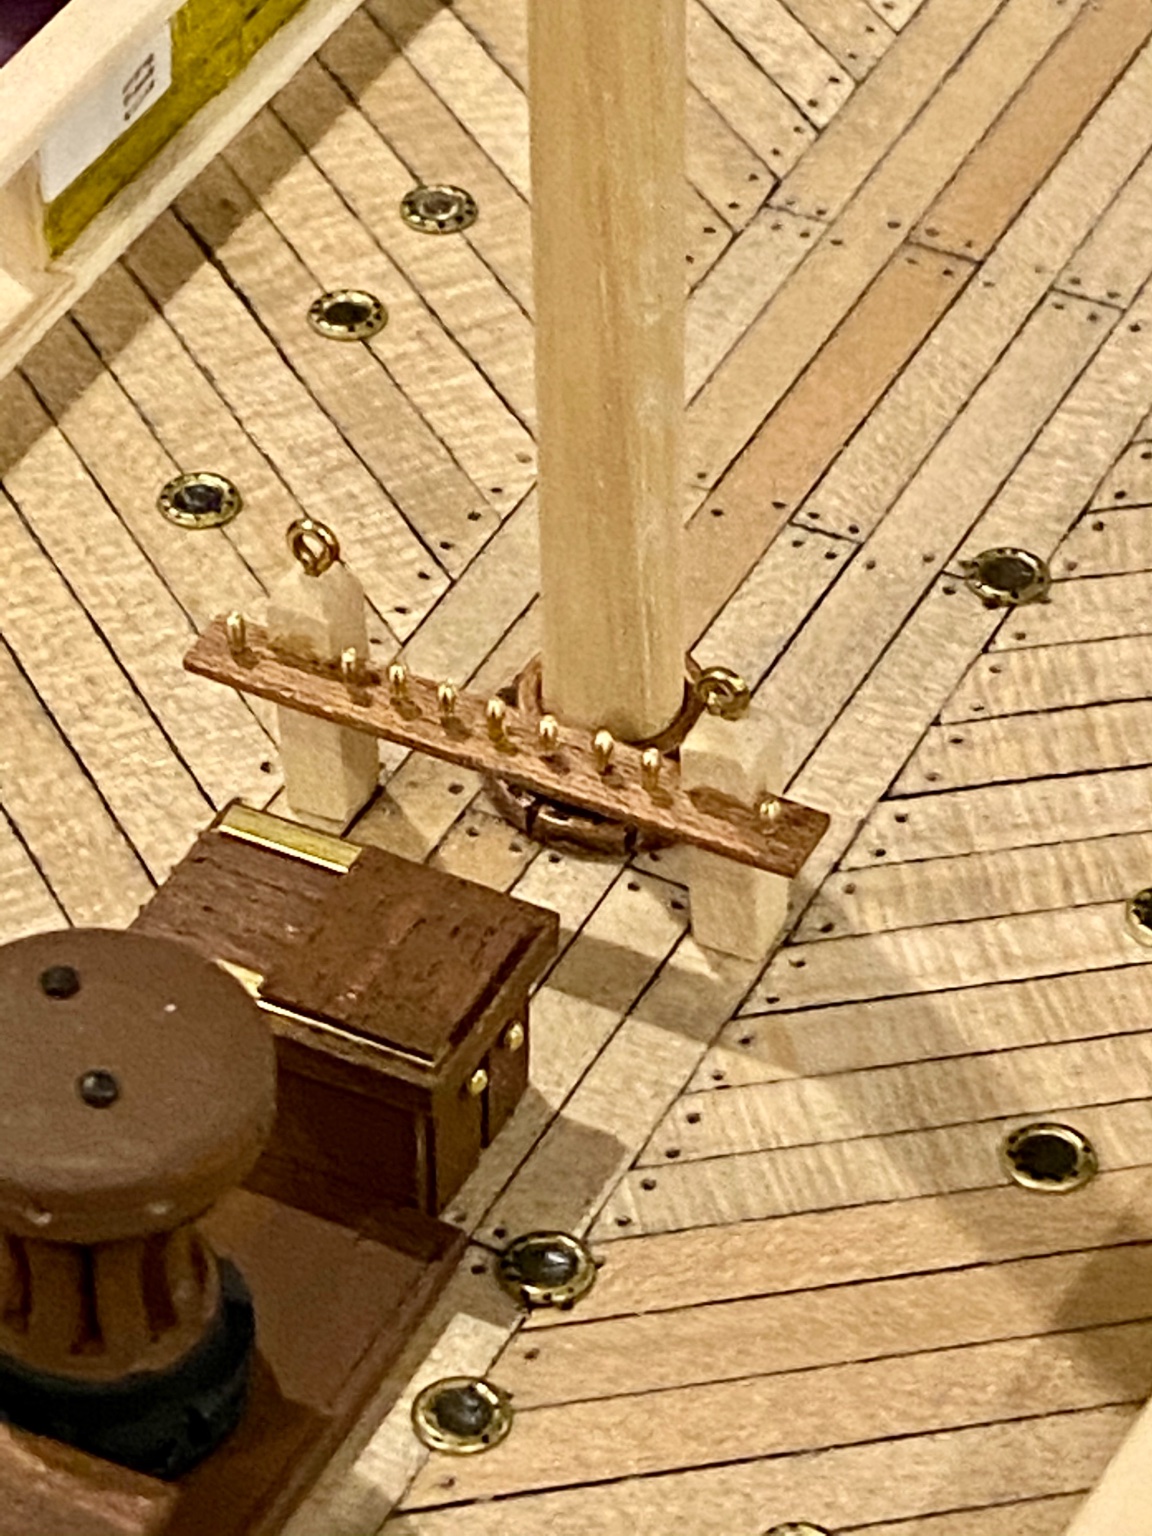
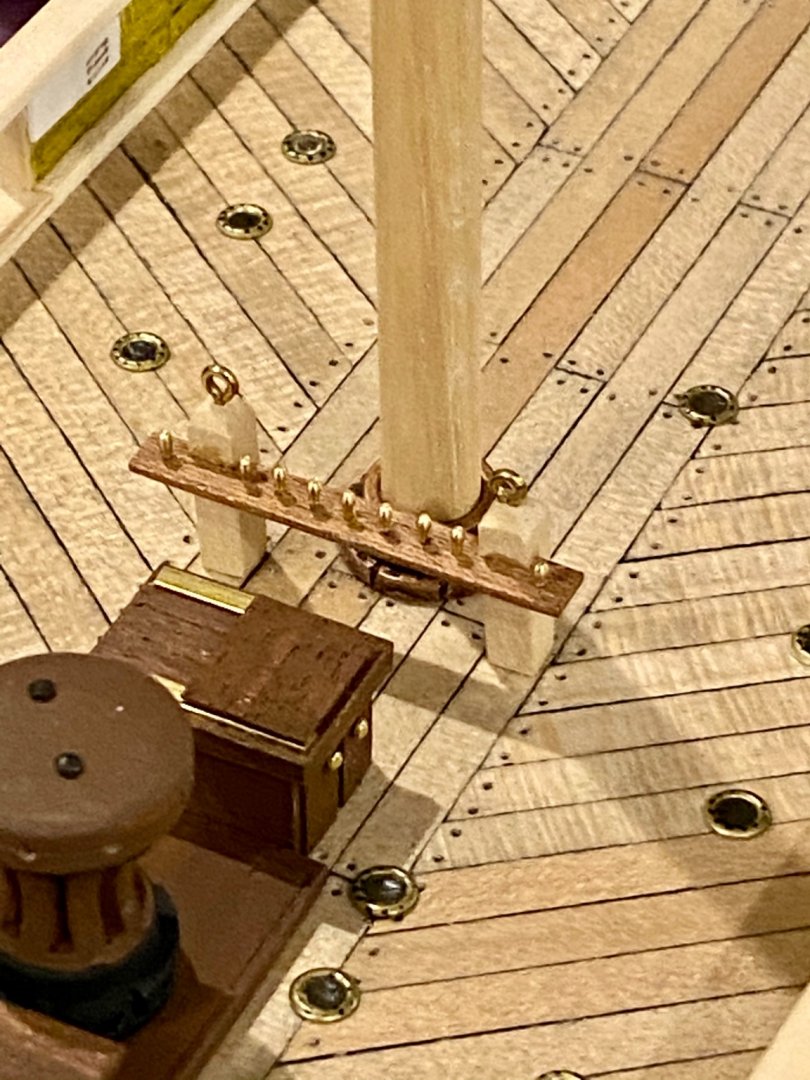
Keith, I discovered my error while building my second fife rail, the one with the curve. However, I had already drilled holes in the deck for the first posts and to put the rail on the other side of the posts without hitting the mast, i would have a couple spare holes in the deck. I decided to leave the posts where they were with the rife on the "wrong side." I know its incorrect, but still looks better then what the kit says to do. I hope to finish all this gear around the main mast soon, its delicate work and im ready to move on... One question, in the original drawings around the main mast there are some short lines, several dashes. What are these lines meant to depict? Tie downs maybe?
-
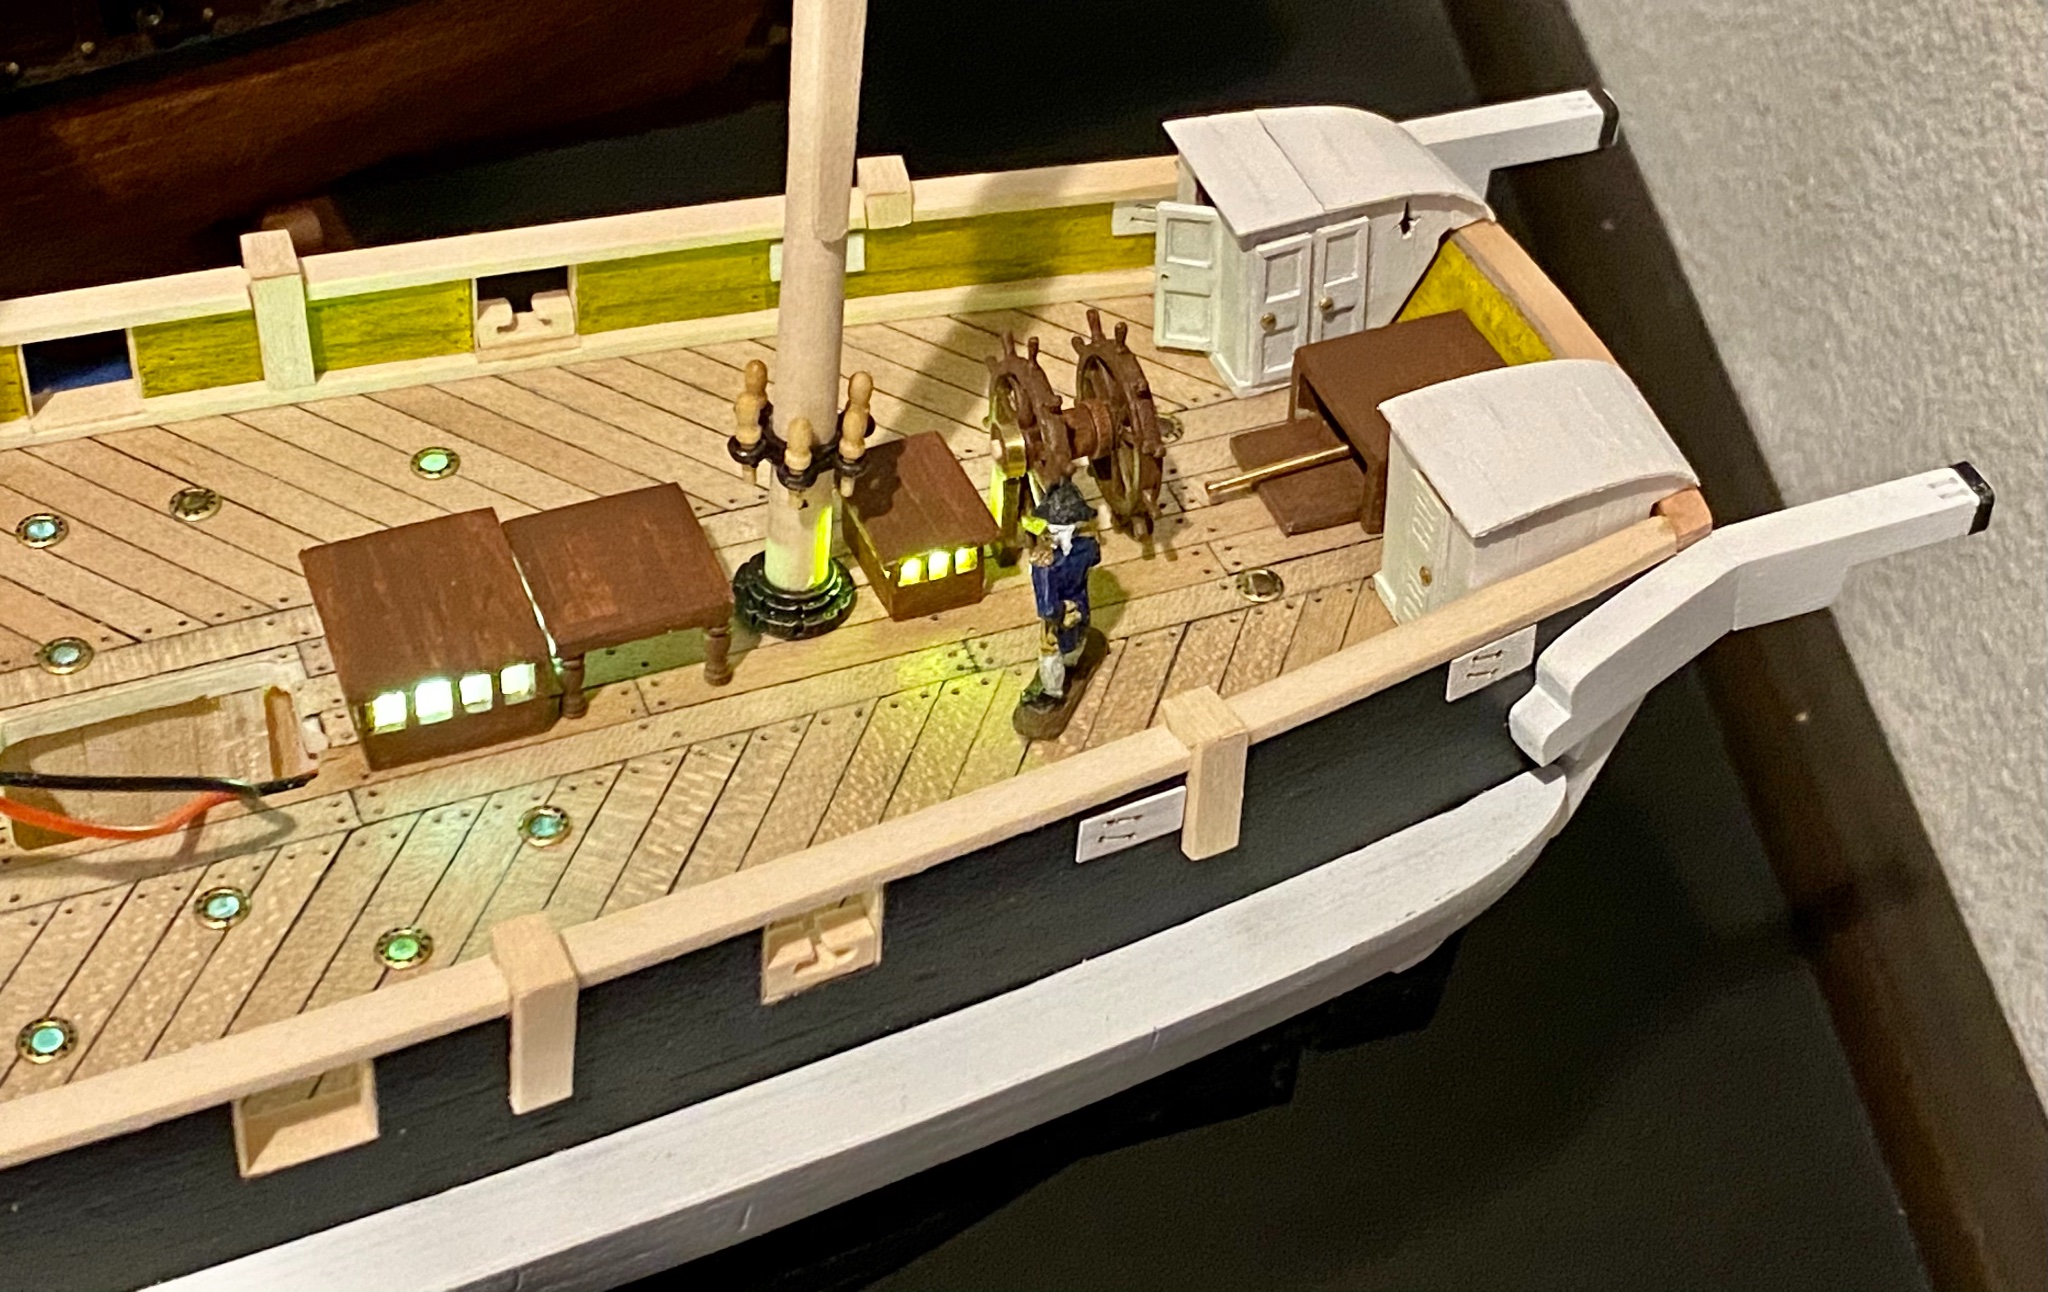
It’s been a few days since my last post, I ran into a bit of trouble. While working on the pumps mid ship, I drilled through the deck and wouldn’t you know it, I hit one of the electrical wires to 1/2 the ships lighting. So with half of the ship not working as designed I was a bit disheartened. It took a bit, but I was able to remove one deck plank without damaging it or the planks around it. I then found the broken wire, and performed micro surgery with a soldering iron through just 5mm of space, repaired the wire, and reinstalled the plank. All is back to normal and progress can begin again.
-
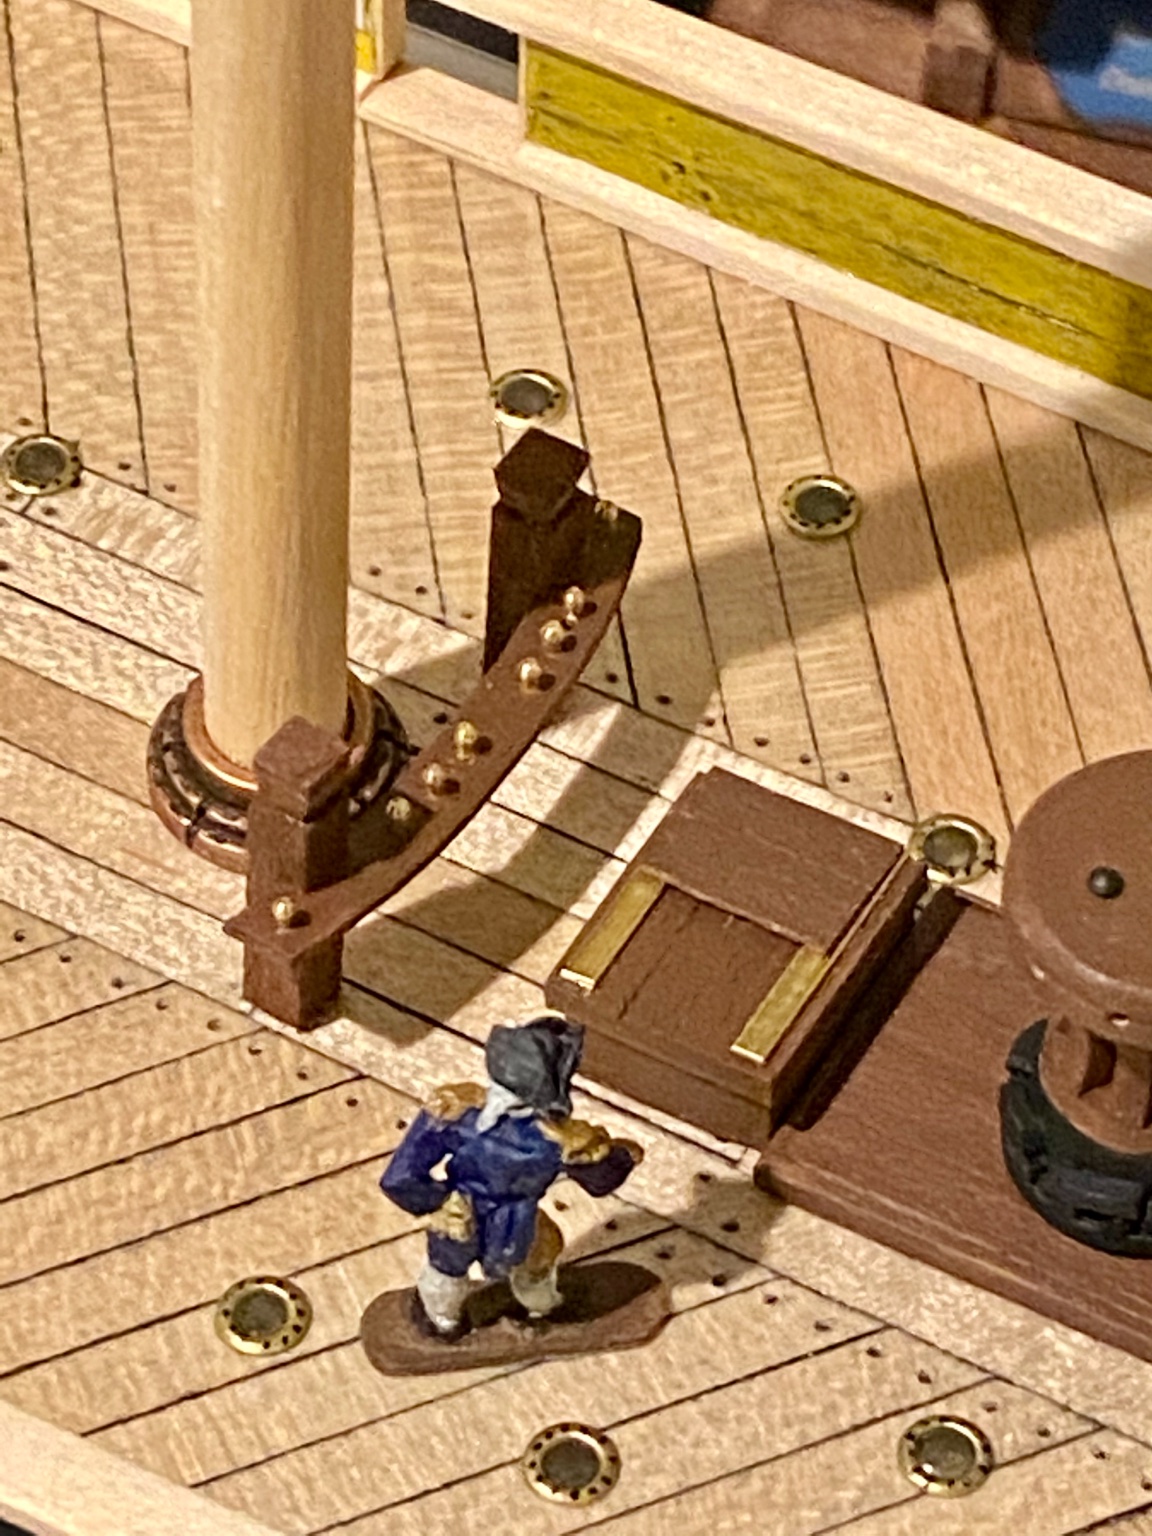
Today was a day of, well, fixing a couple things before moving forward. I updated the mid ship pin rail to have a curve, more like the real Terror and less like the kit. I changed up the pin rail at the base of the mizzenmast, my first one was store bought and using the belaying pins that came with the kit; however, these pins are just way too big for this model, so I hand made a new version for the 5mm pins I’m using for this build. Also started the paint job on the mizzenmast and a few touch ups along the way. Thanks for taking a look everyone. My next task is to make the bands that go around the mast. The bands for the Terror are metal, not rope. What have you used to represent these metal bands? I’ve heard black construction paper works... thoughts or other options? If you used paper, what thickness works best?


-
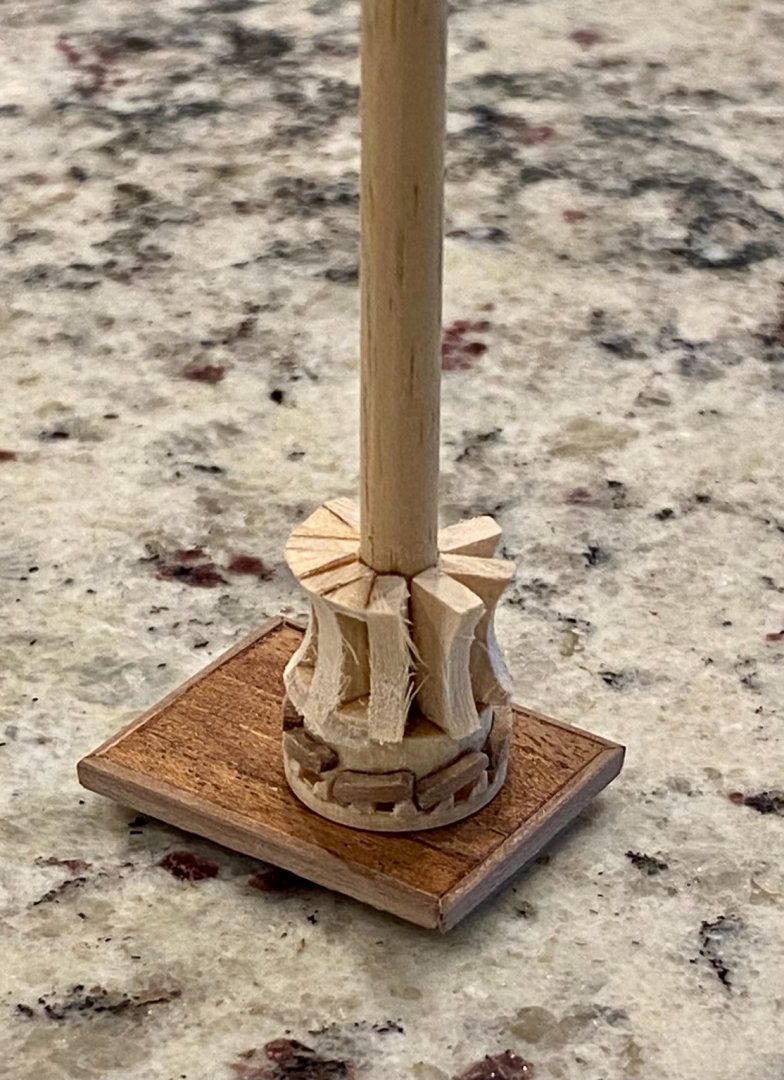
Keith, many thanks for the pictures! They really do help. I will go review Matthew Betts work again (I’ve looked at it so much I think I can recite it verbatim, not really, but if feels that way sometimes), before I remake my set. I’m also not happy with my hatch just forward of the capstan. In Dr. Betts build log, the two hatches are different height, I think this is an easy fix and will make the necessary adjustments. i did get a pair of flywheels, but I’m not happy with them. I like the ones you have so I will try to get a pair of those. Last time I attempted to get a pair from Ozark, there was something that made me think I was looking at the wrong part, I thought it was too small. But hard to tell as there was no actual dimensions. So I went to my local model train store and found something I thought I could make work... alas, it’s not working out well. I’m nearly finished with my capstan, just want to square out the holes for the handles, but still working out how I’m going to do that. I made the head (top) of the capstan in one piece on my lathe, basically not split so couldn’t make square cutouts like Dr. Betts did on his. i echo your comment on the close up images, one minute I think things look great, then I take a close up to post on the log, and I find each dust partial and every minute flaw looks like a huge blunder. oh, and I love what you did with the crank handle, looks like the real thing. i don’t like how OcCre mounted the pump shaft, both you and the other Keith mounted on the side of the post. What did you make the bracket out of? Well, that’s what I get for never having set foot on any kind of sailing vessel, I am just now learning how all this stuff works. Again, thanks for all the info, I appreciate your help.
-
Keith, I bought my belaying pins, as well as most of my supplies, from ageofsales.com. They have always been fast shipping and great on the phone when I have a question. They are in California, not sure if they ship international, but worth a look. I noticed the curved pin rack last night after I finished the one I made, but it’s not glued in so I already planned to redo it. I’m confused about all the stuff going on around the main mast, the pumps, the other equipment just forward off the mast... I’m just not clear what I’m trying to make. I did a bit of research last night, but hard to research something when you don’t know what a device is called or what it does... for example, in the original drawing in your previous post, the device that has two (what looks like thread spools) just forward of the main mast. What is this piece of equipment? What is it used for? Oh, and I hope you had a good new year!
-
Well, I built my first pin rack with 5mm brass belaying pins. They are the correct scale for this model, but very small, not sure how useful this will be😬. The wood pins supplied in the kit are 10mm and way too big. A compromise might be 8mm brass pins as clearway is doing; however, I would need to order more at a cost of about $30 US. Just not sure it’s worth it, so will try to make the ones I have work. Now for a little stain...
-
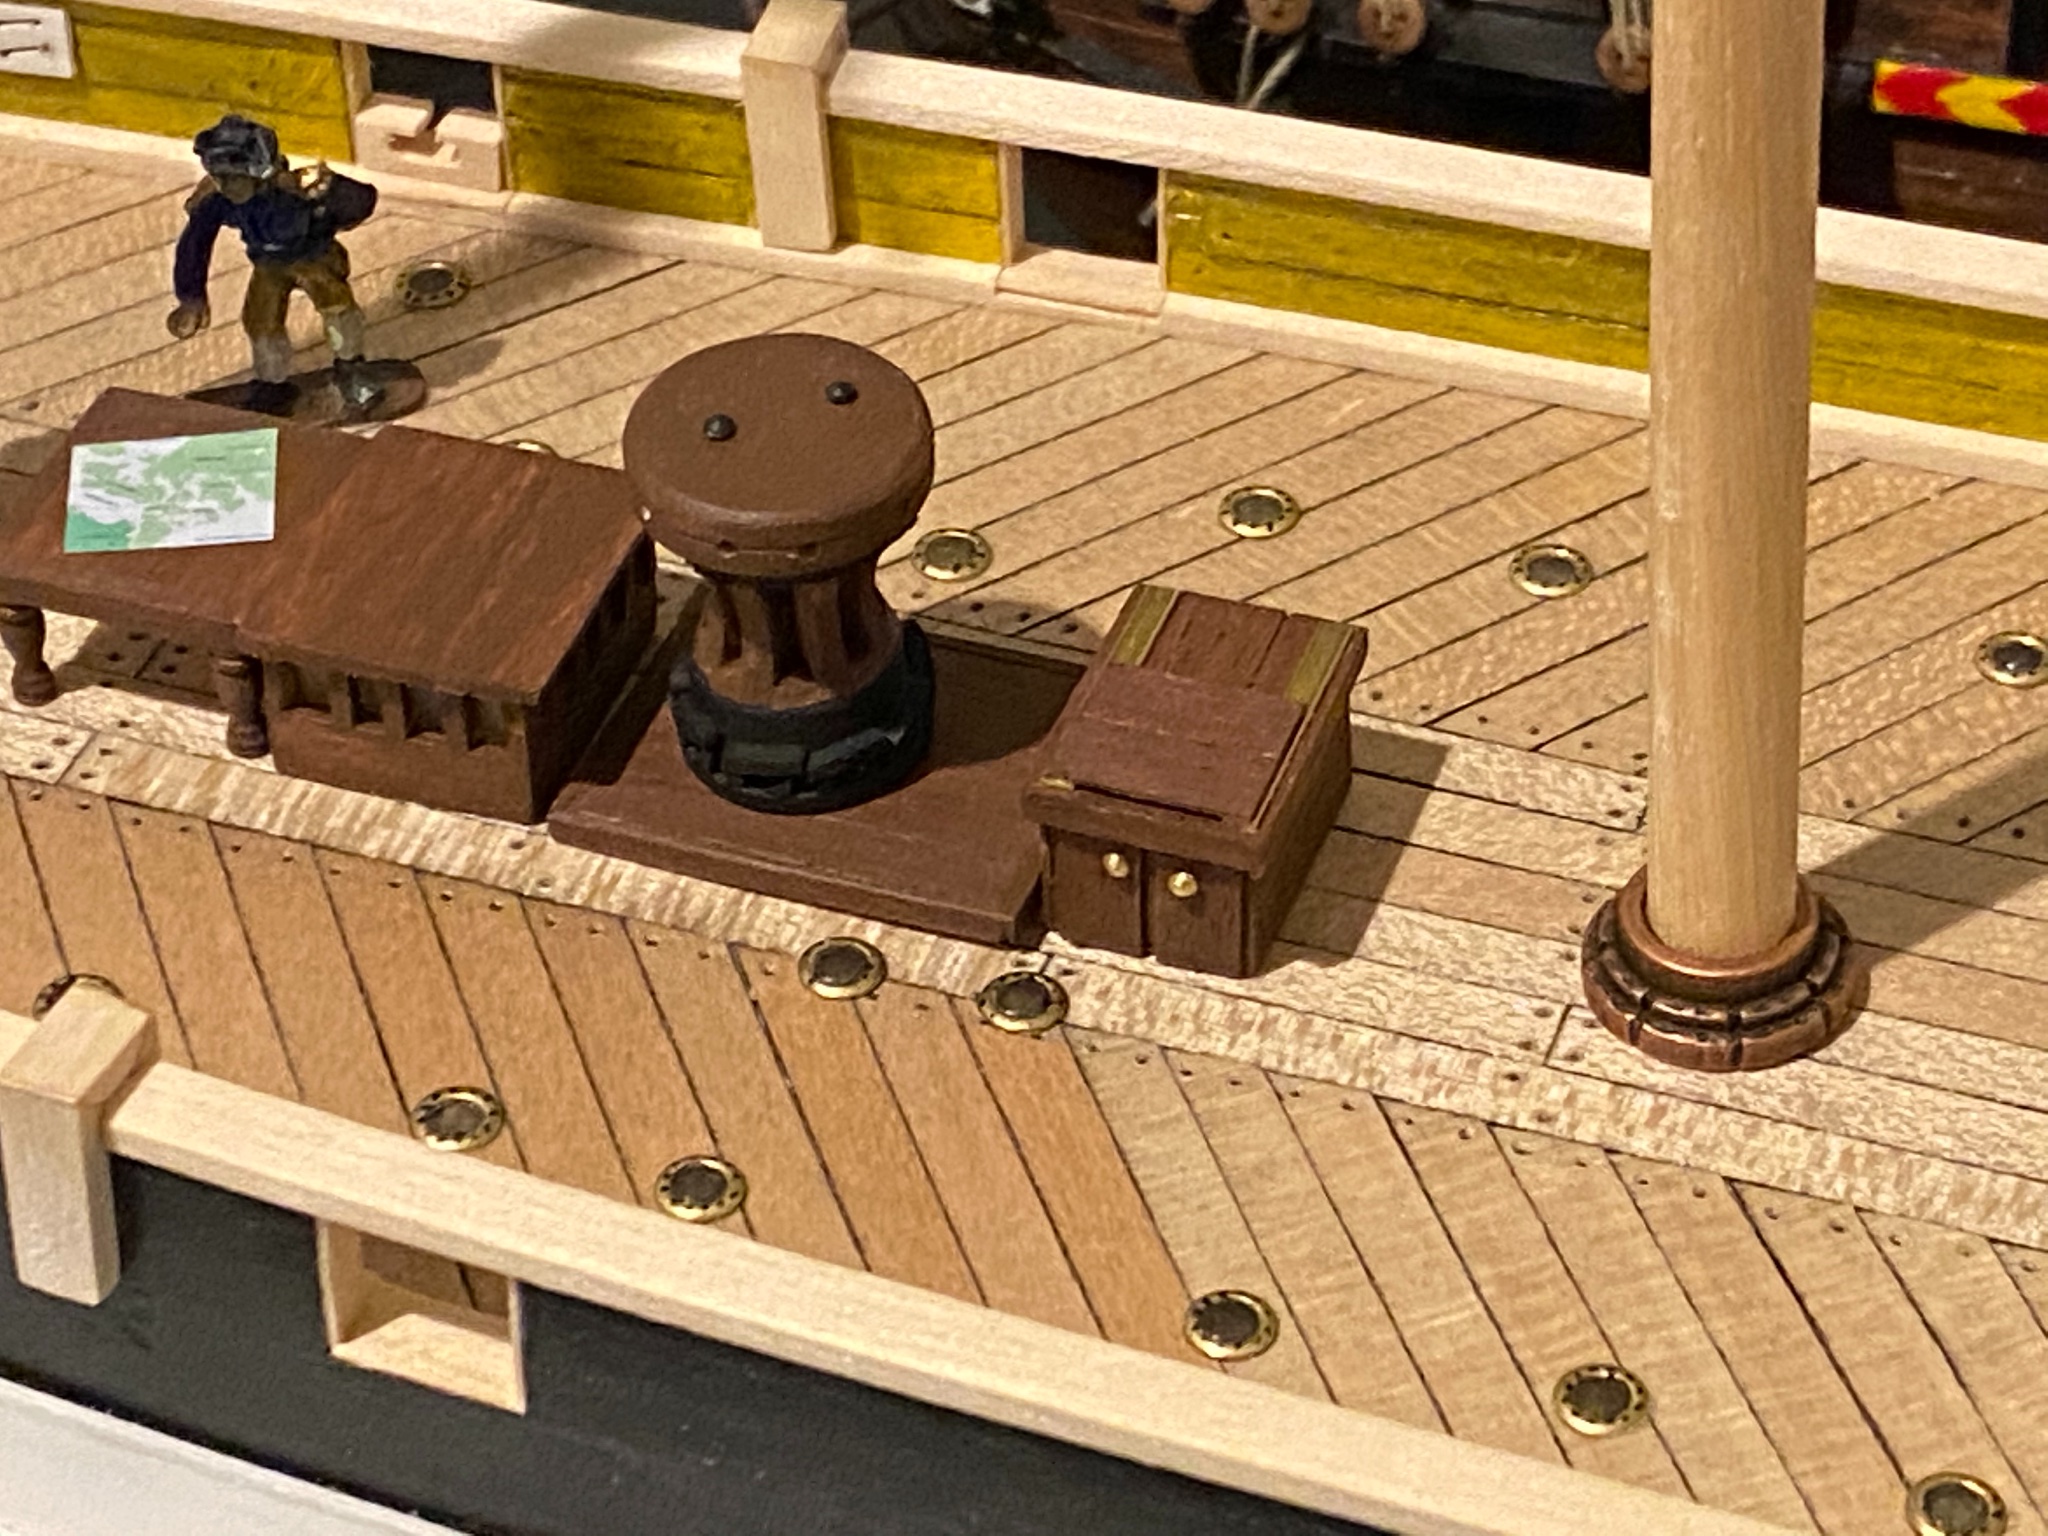
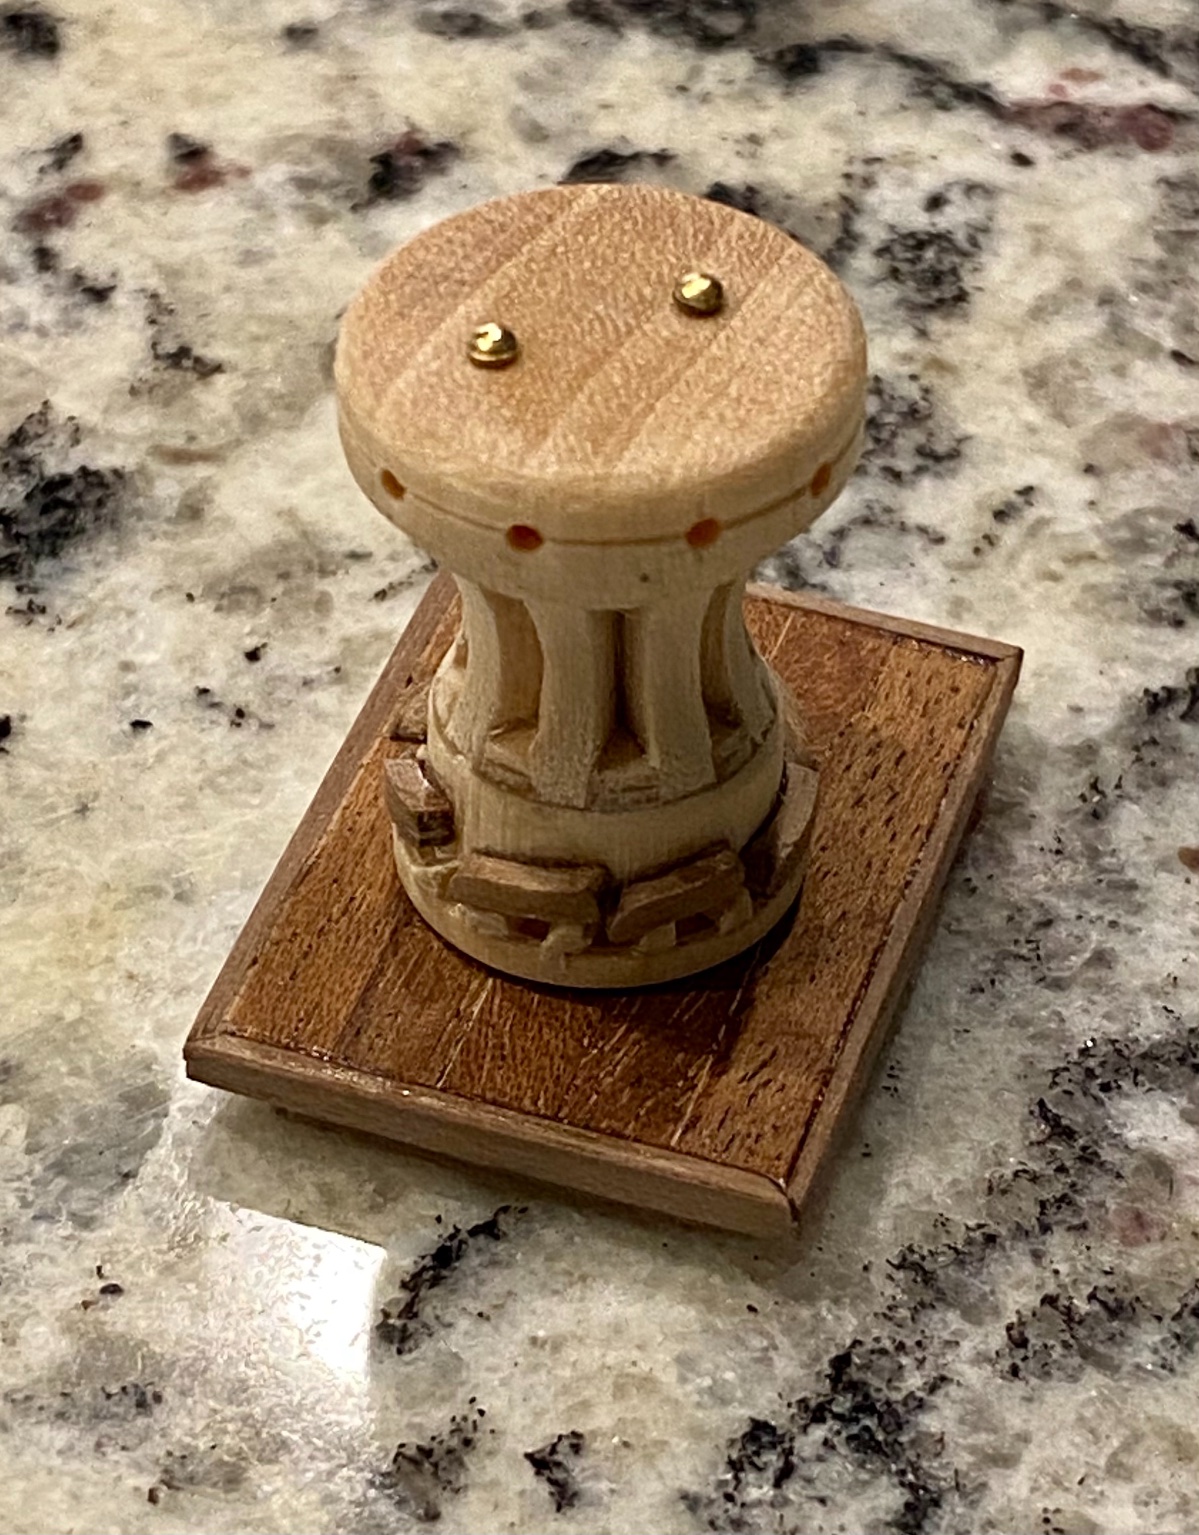
Today in the shipyard was all about the Phillips Capstan. I hope I did it justice, but I see I might need to sand her down a little, might be a mm or two too tall. But I’m not making another one...

-
Hmmm, me thinks you must be a commercial pilot, maybe I saw that somewhere...I love to fly, grew up around small aviation most of my life and I flew fairly regularly for about ten years. Then life happens. We still have two or three airplanes in the family, but I don’t fly anymore, my wife is not a fan. The only flying these days is commercial to a destination, a few years ago to Hawaii and before that to Calgary when we spent a couple weeks in Banff national park, most beautiful.
-
Arild, welcome aboard! Nothing has changed with the yellow on the inside of the bulwarks so what you see is just a trick of the light. I took this picture late yesterday so lighting could have been an issue. Be sure to read through (and’s follow) Clearway and KeithS Terror builds as I have learned much from them. While you are going for more out of the box build, there are a few easy changes you can make to be a more realistic representation of this great ship. Again, welcome aboard.
-
Keith, I purchased some 5mm brass belaying pins which I believe are more accurate to the scale of the ship, but my first attempt to use them was unsuccessful. Meaning, they appeared too small with only 1 mm above and below the pin rack. As such, I'm evaluating my options. I guess I could use thinner material to make the pin rails, but not sure how strong that will be. Also, the width of the pin rail may be an issue. What size of belaying pins are you using? I think I saw somewhere that you (or the other Keith) were going to use 5mm pins. My next project is to build an all new not from the kit capstan. I've been avoiding this project as I'm not sure where to start or how to proceed. All part of the learning process. After all, it only took me three editions of the deck skylights to get a version that I was happy with.
-
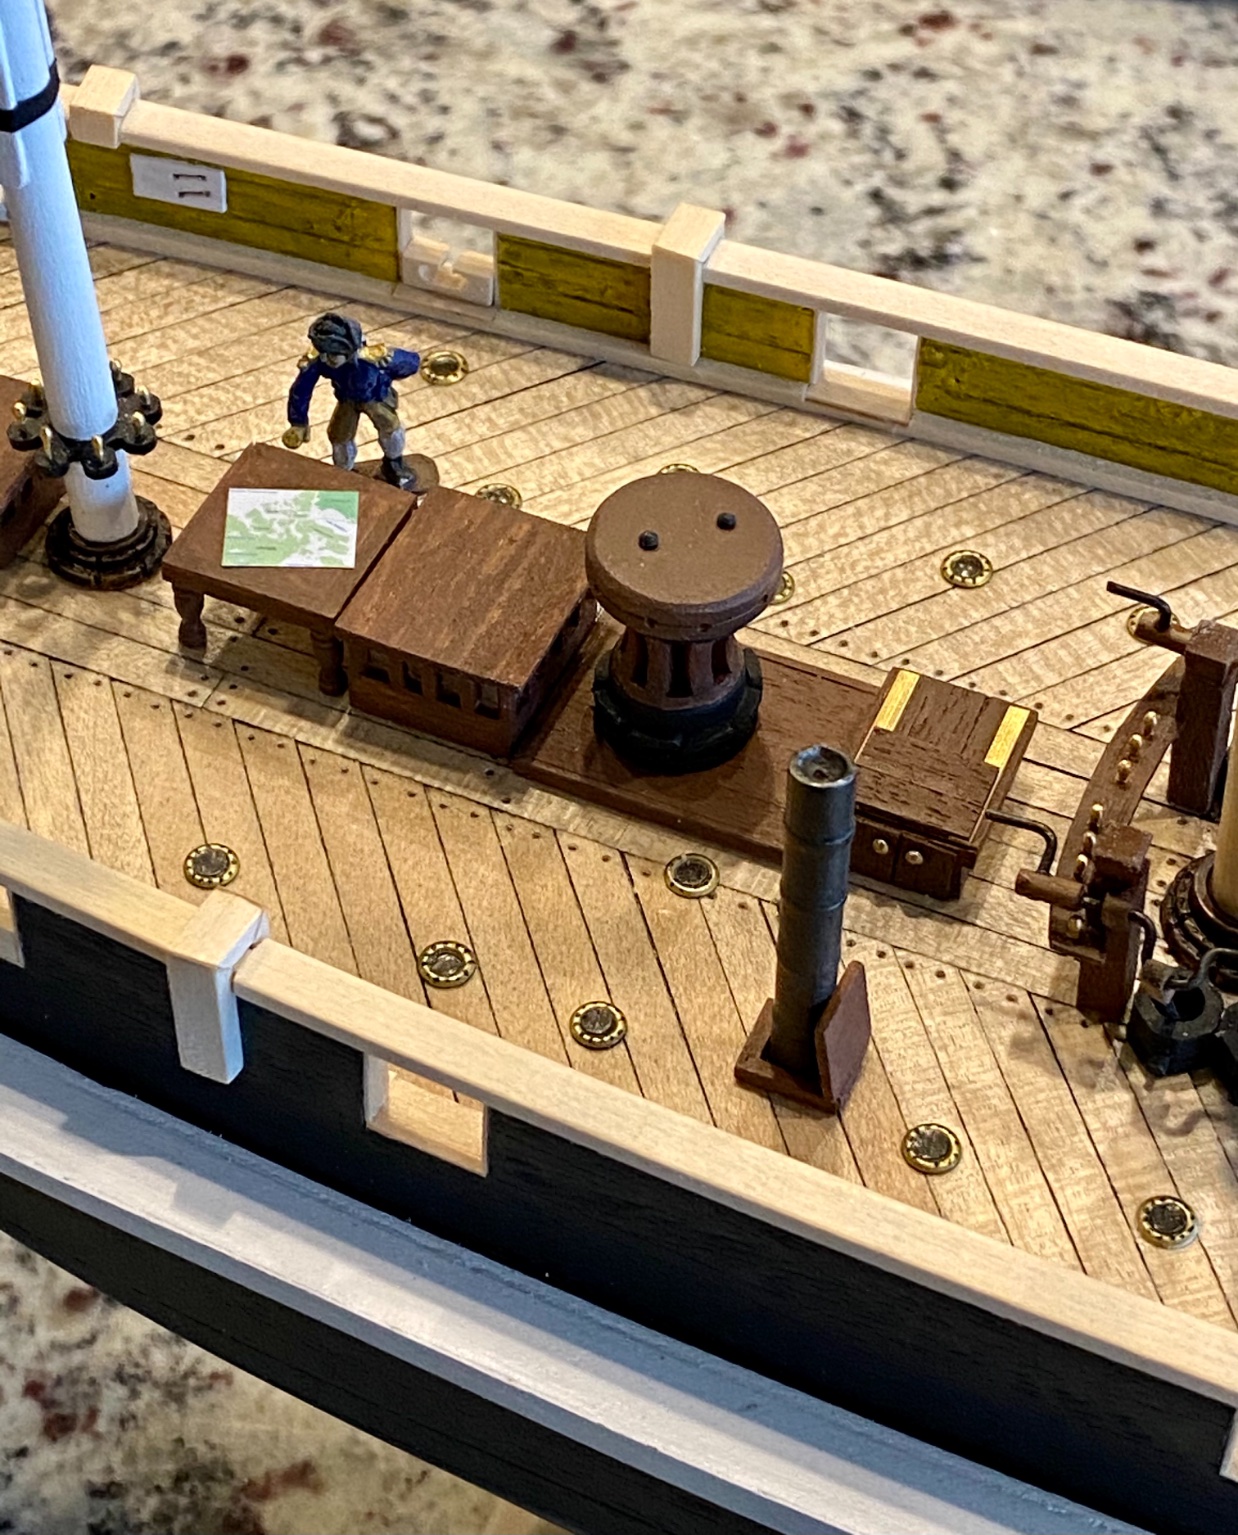
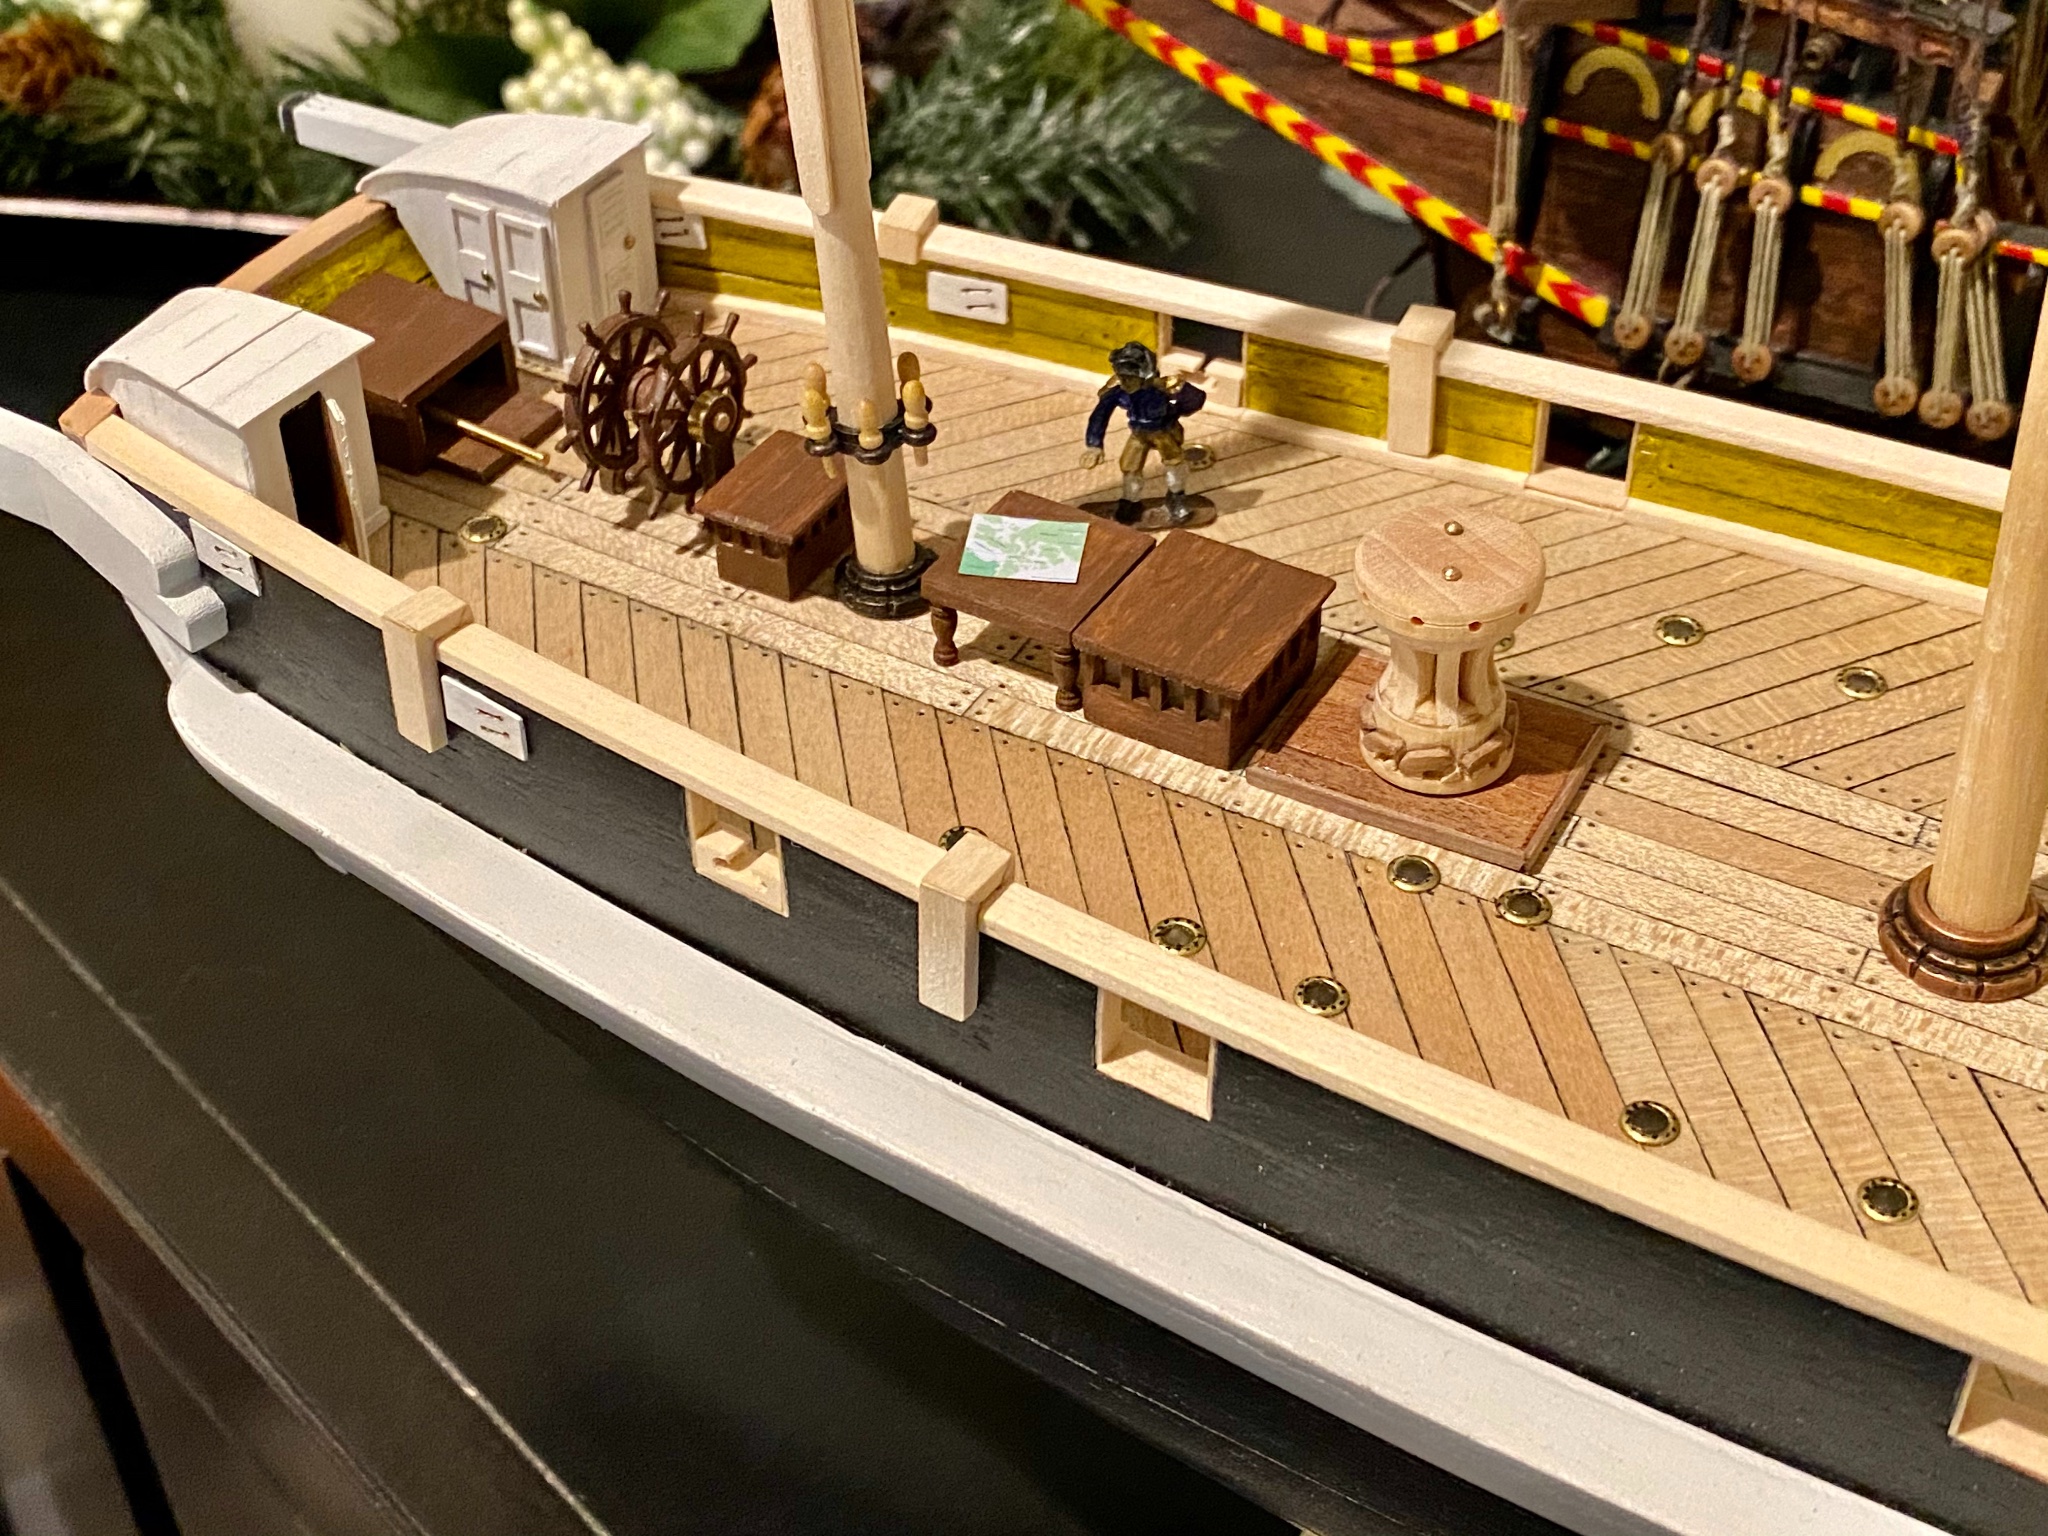
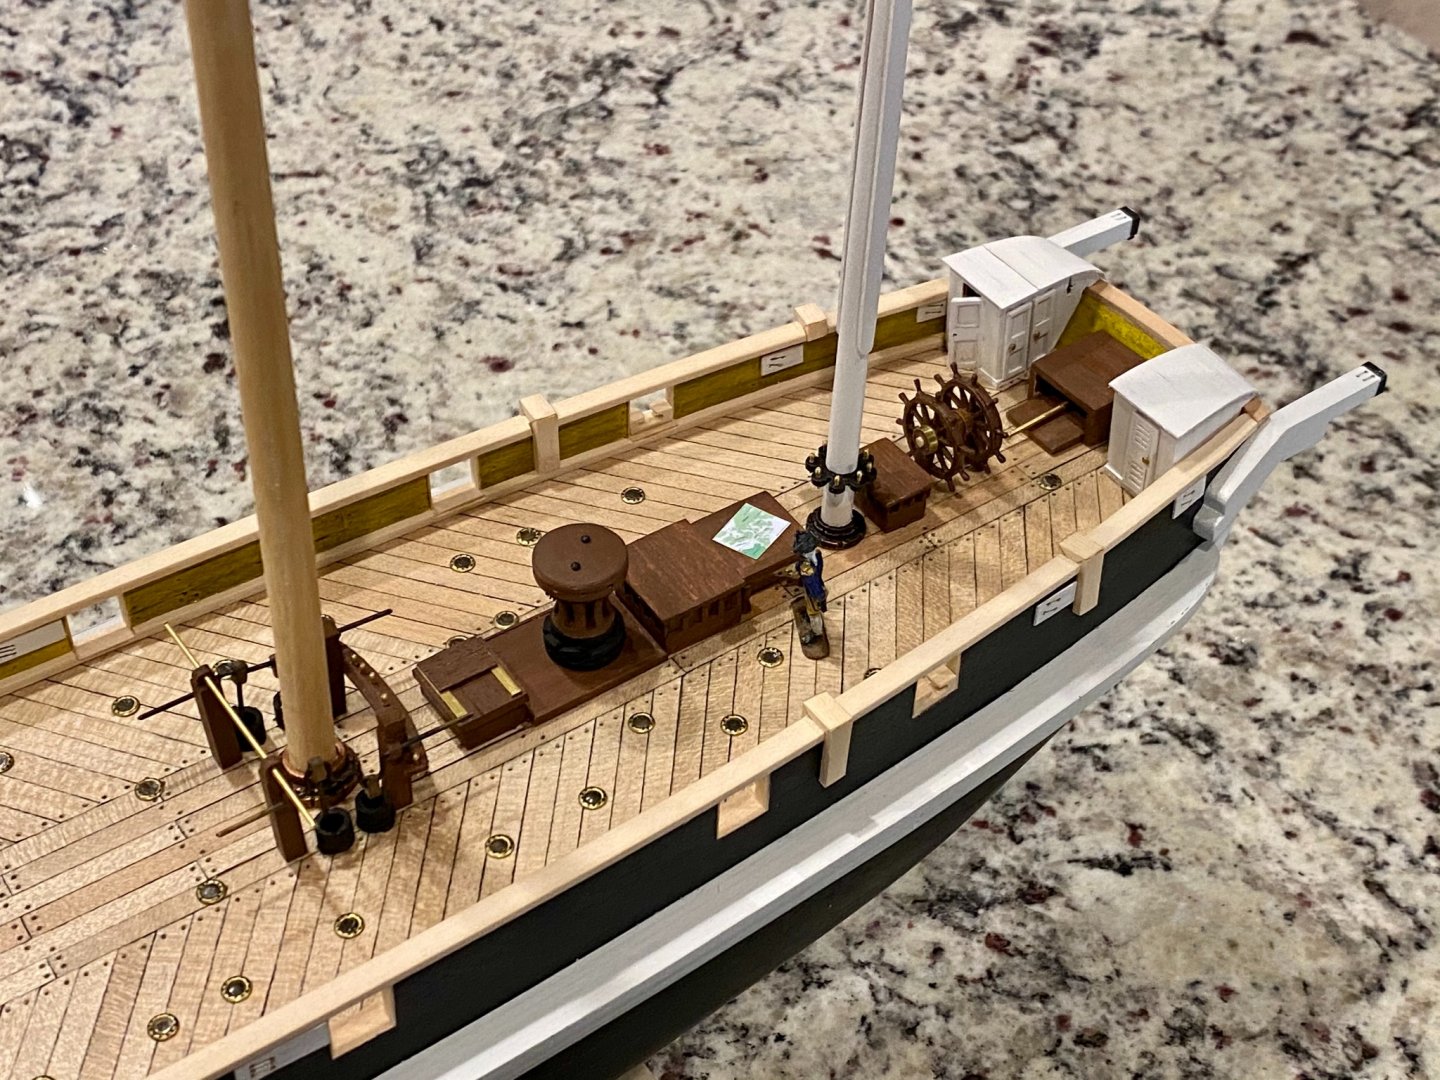
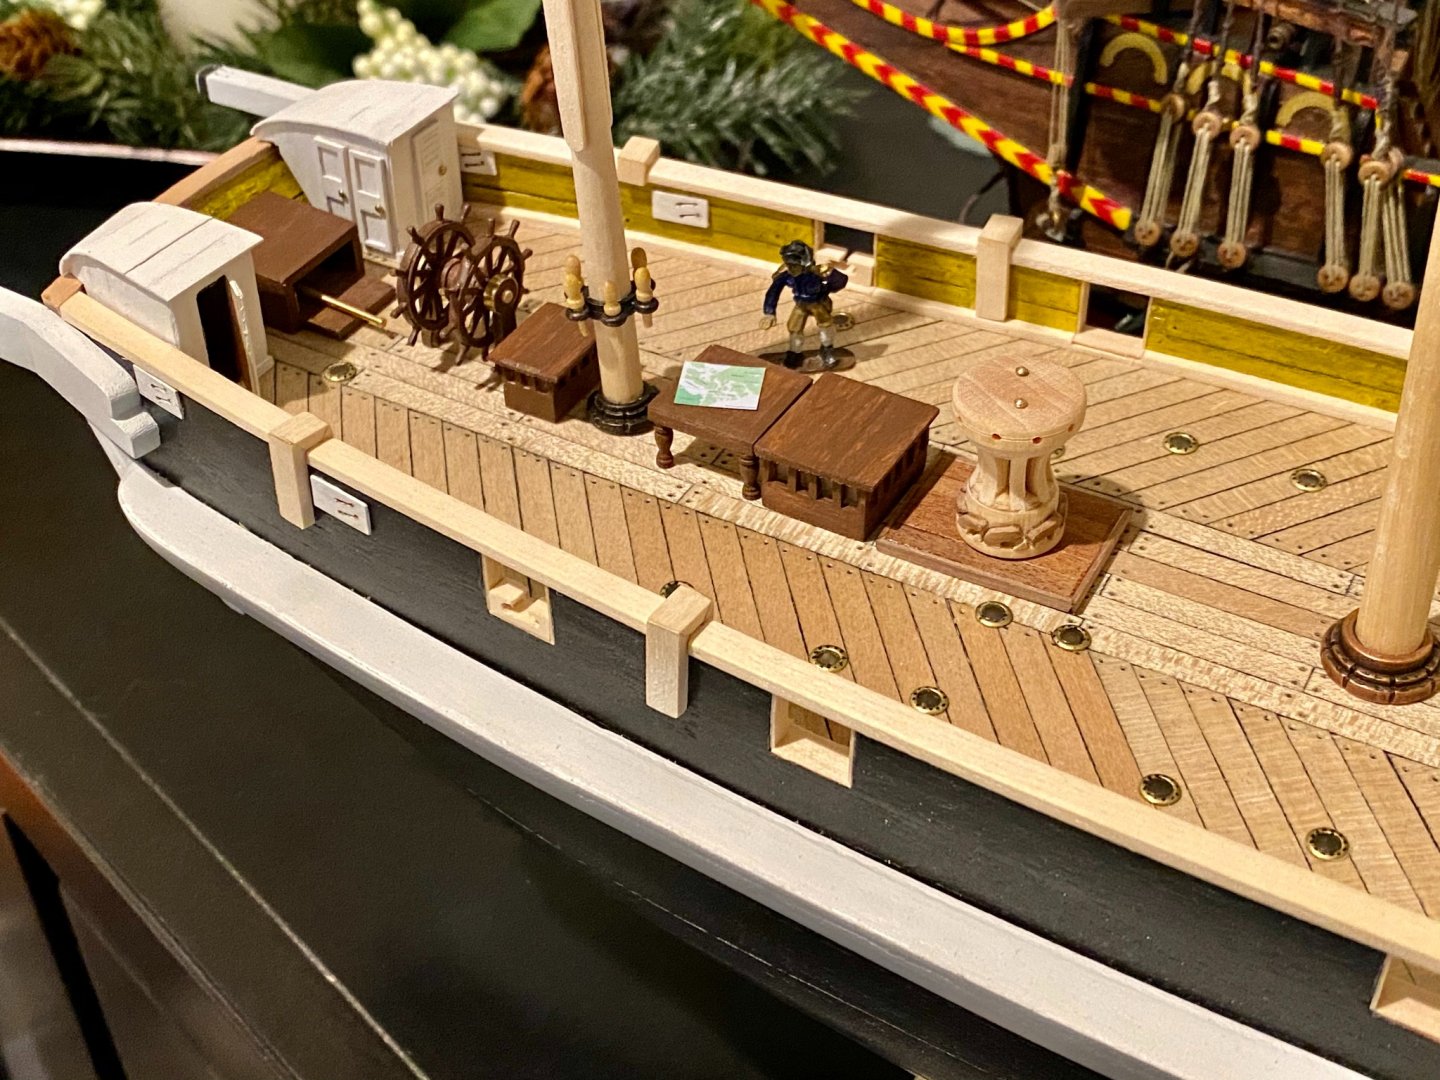
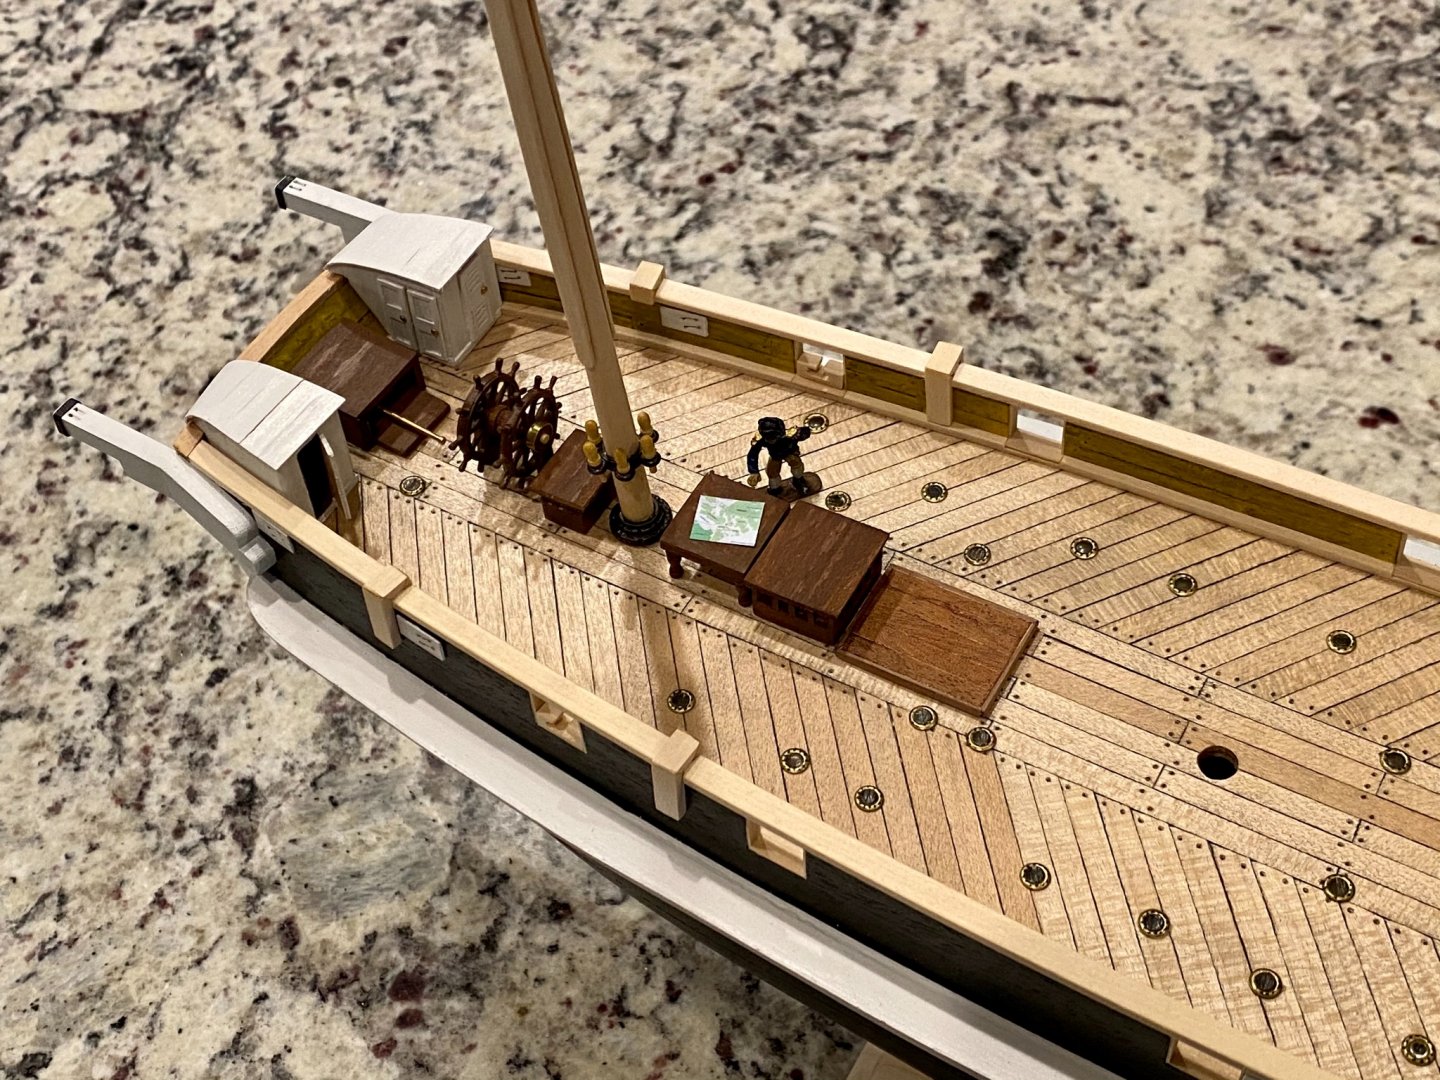
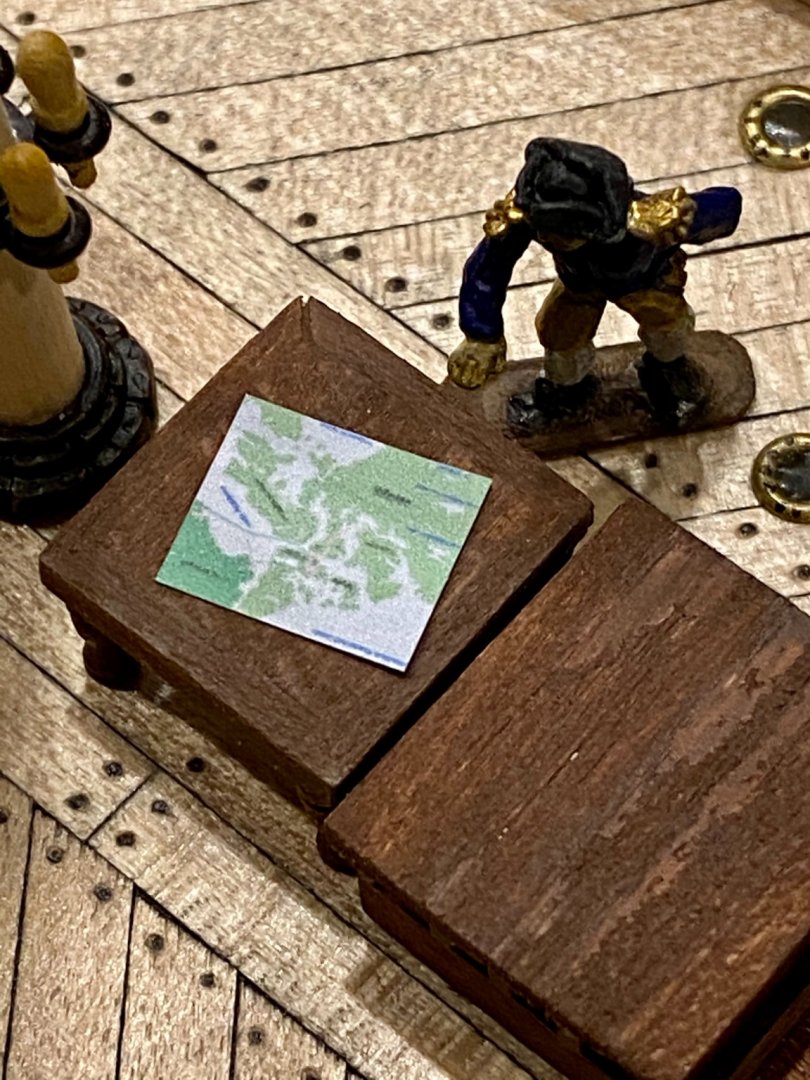
Today’s challenge, build the battery cover, aka the base of the capstan. Getting it to fit correctly and snap in place was a bit of a chore, but a nice fit in the end. Oh, and I imagine the work table was a place to review charts as well as work on equipment. My wife suggested placing a map on the table. So I printed a small map of Terror Bay...
-
Keith, thanks! I missed that detail. Thankfully I have nothing glued, so won’t be a problem to fix. So no hoops above the trestle tree, are the battens needed? Also, without the top, how does one attach the upper shrouds? Just planning for future rigging problems...
-
Oh, and happy new year everyone! 🎉 🎊
-
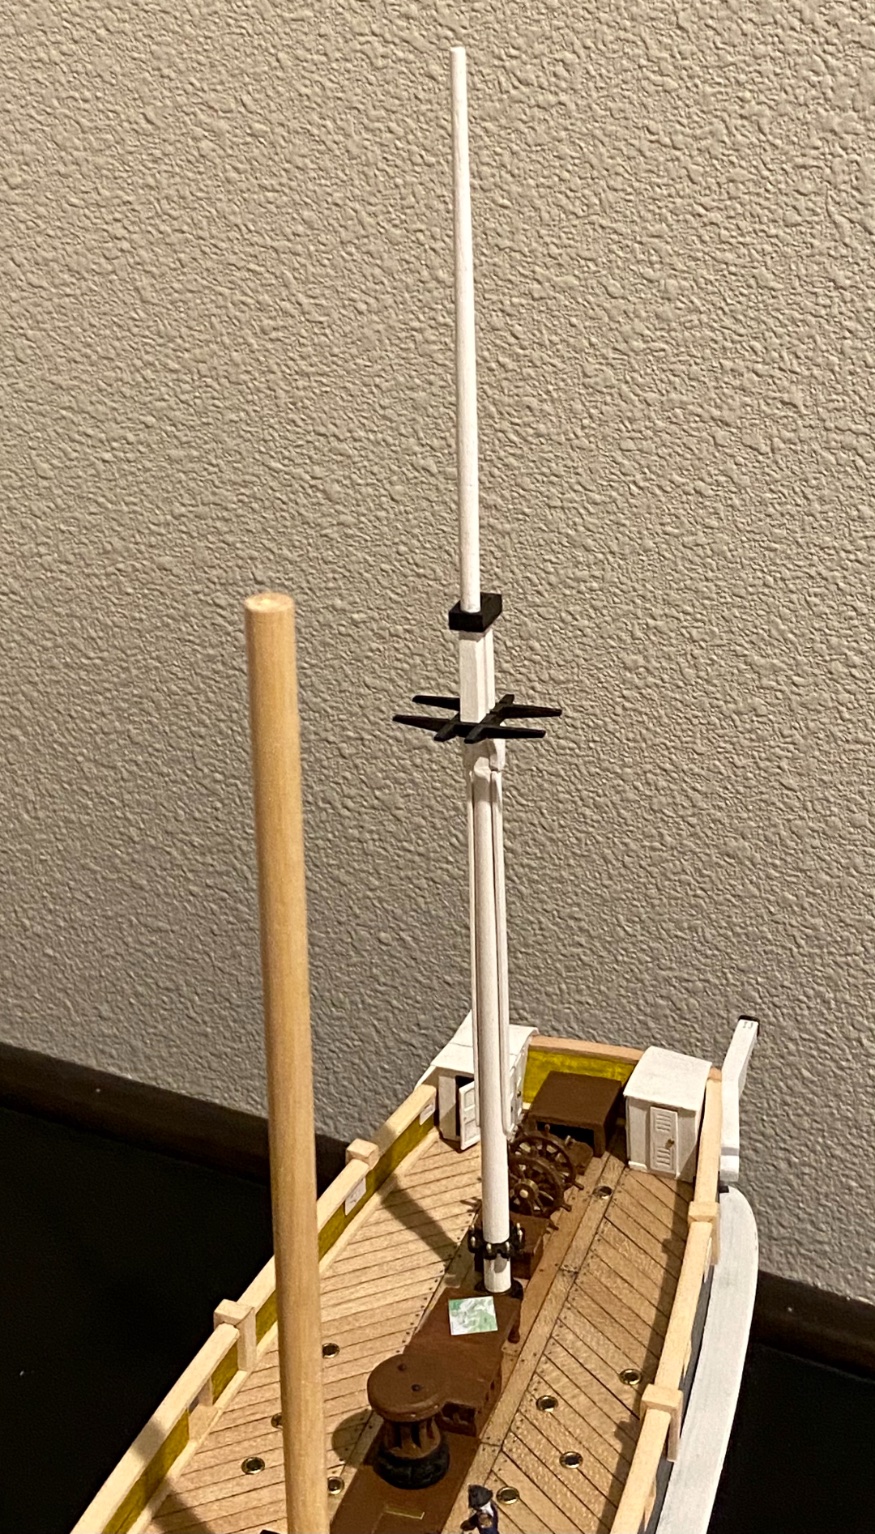
Good evening everyone, I’ve started work on the Mizen mast following James Lee’s instructions. Most things make sense, thanks to both Keith’s (clearway and KeithS) great examples. My question is regarding the battens, the eight small strips of wood above the hounds, with a length of 3/5 up the head, with the purpose to “protect the rigging from touching the iron hoops or chafing the mast head.” Does this mean that there should be a at least two, maybe more, hoops above the hounds? OcCre’s plans do not show this, no surprise, but should be easy enough to add if that is what should be there. Keith and Keith, is this how you understand this phrase?