HOLIDAY DONATION DRIVE - SUPPORT MSW - DO YOUR PART TO KEEP THIS GREAT FORUM GOING!
×


DanielD
-
Posts
645 -
Joined
-
Last visited
Content Type
Profiles
Forums
Gallery
Events
Everything posted by DanielD
-
 Finished the steel work on the starboard side and included a video of the propeller in action. IMG_2357.MOV
-
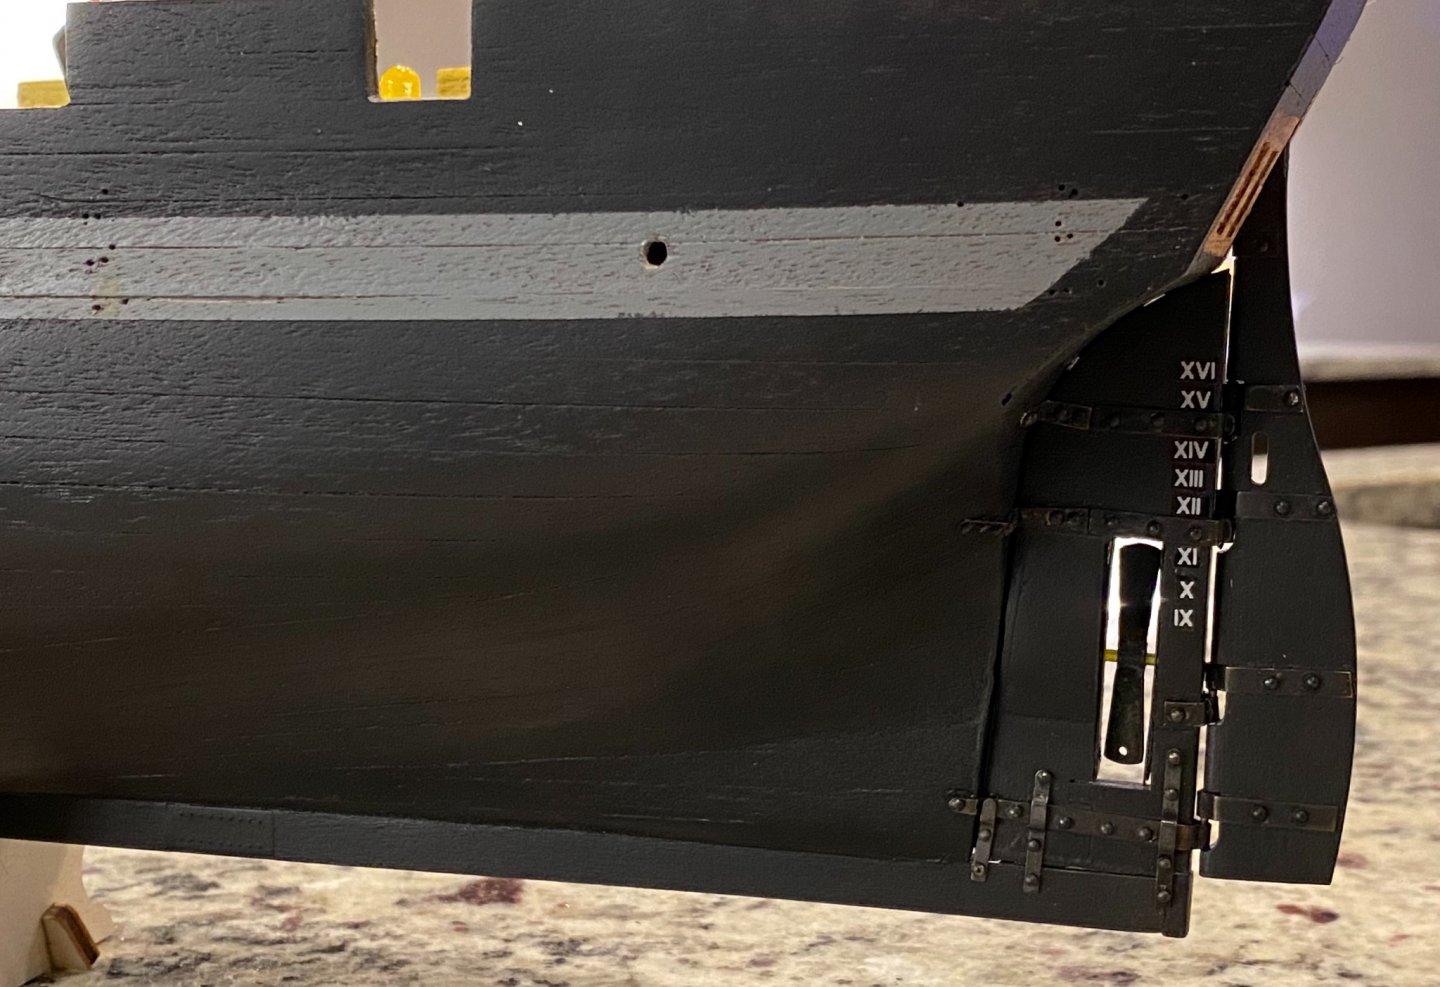
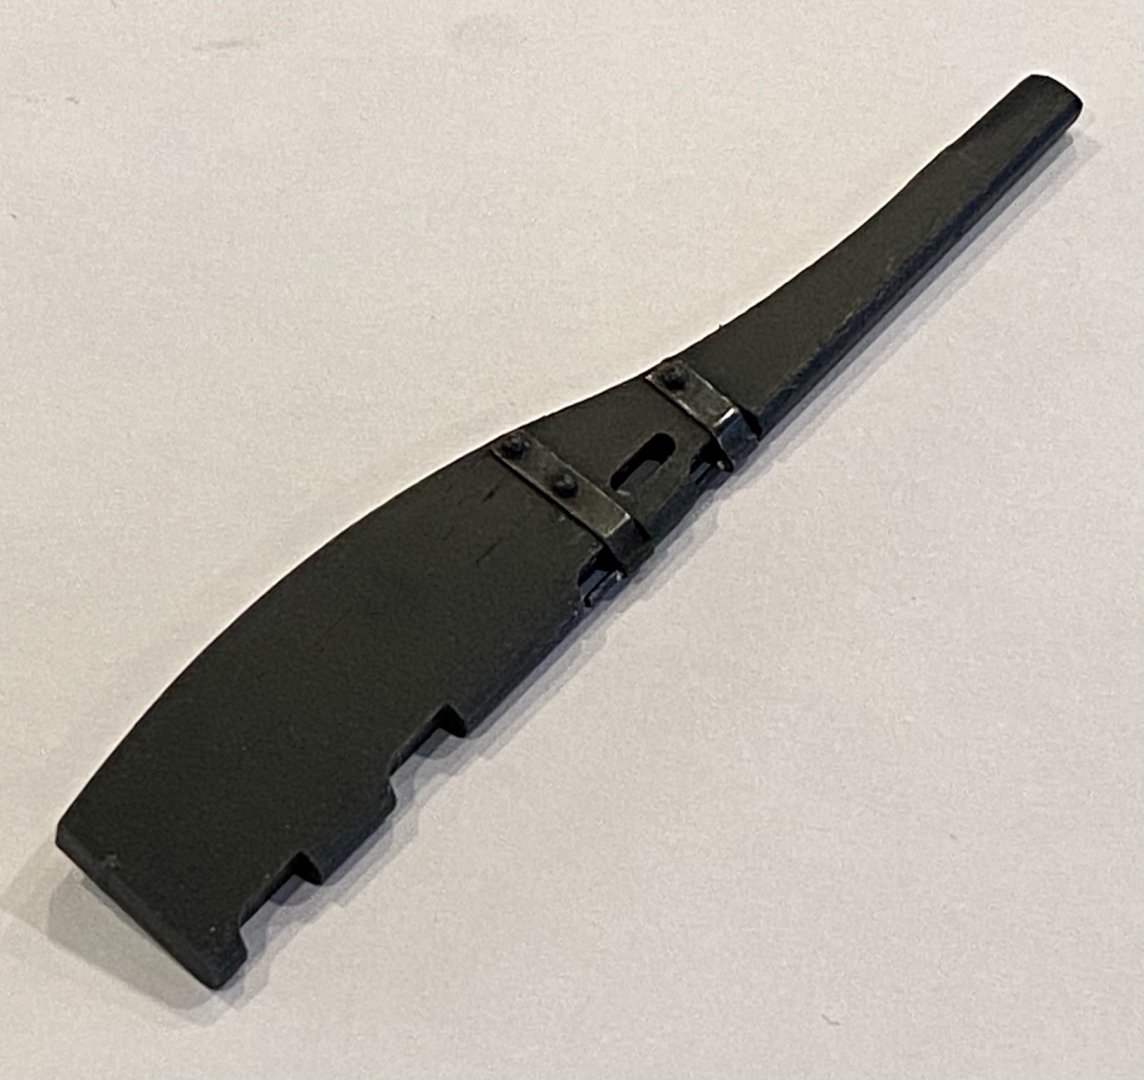
More rudder work today. I think this should finish up the port side. Tedious work, but I’m happy with the outcome.
-
HMS Terror by Broden - OcCre - 1:75
DanielD replied to broden's topic in - Kit build logs for subjects built from 1801 - 1850
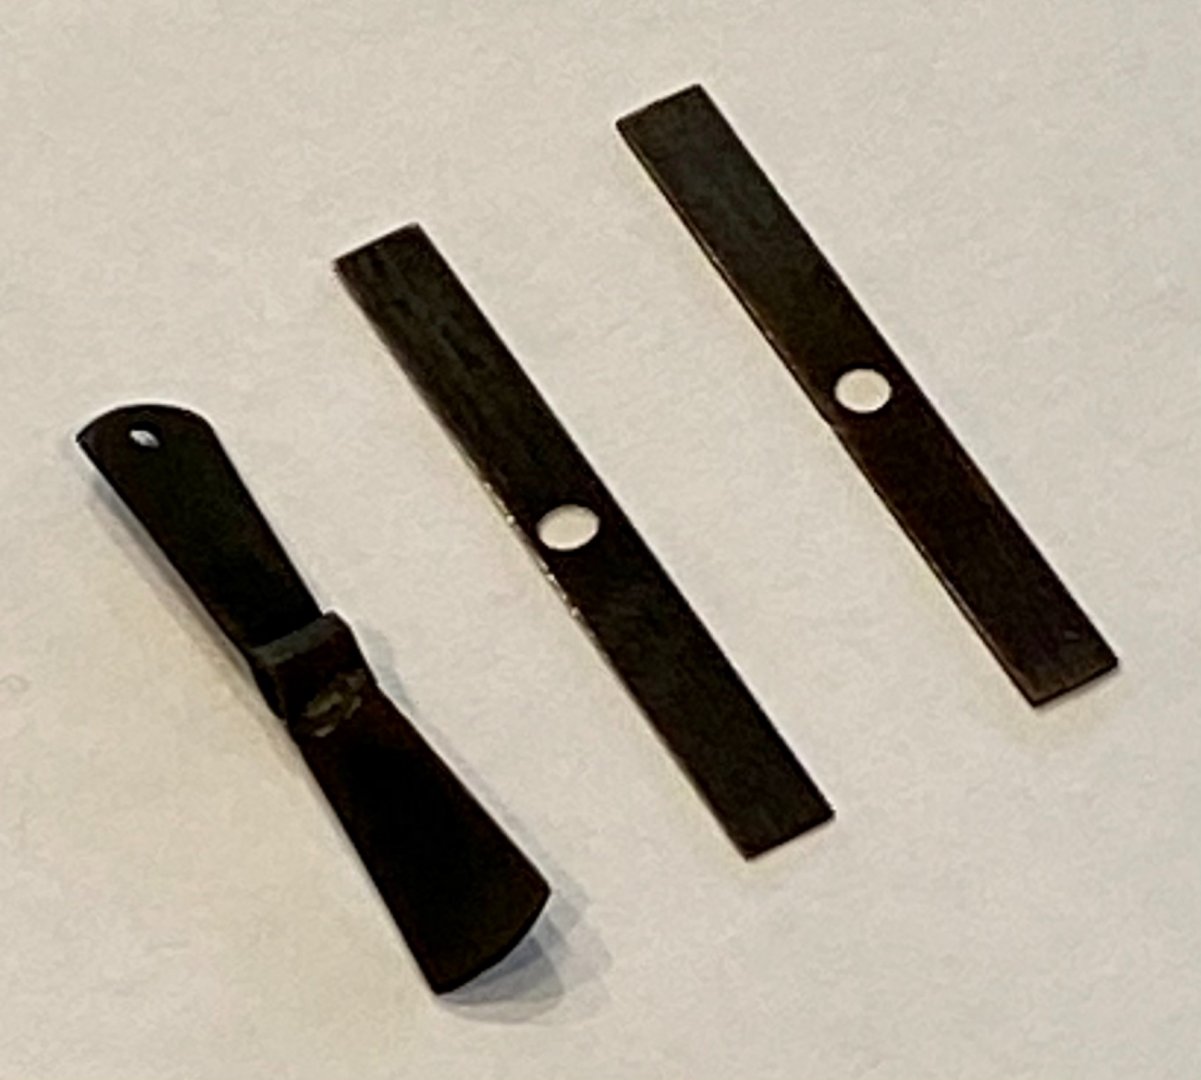
Broden, I have experienced similar difficulty learning how to blacken the exact parts you are working on now. For me, I cleaned the metal with the exact Dremel setup you have with a spinning wire brush, then right into the chemical bath. Once the metal turned black (a couple of minutes), I then moved into a water bath to stop the chemical reaction. After a little rinse, I placed on a paper towel to dry. Once dry, I lightly brushed off the "powder" on the metal, leaving a black finish. So far, working well. By the way, nice job on your Terror. -
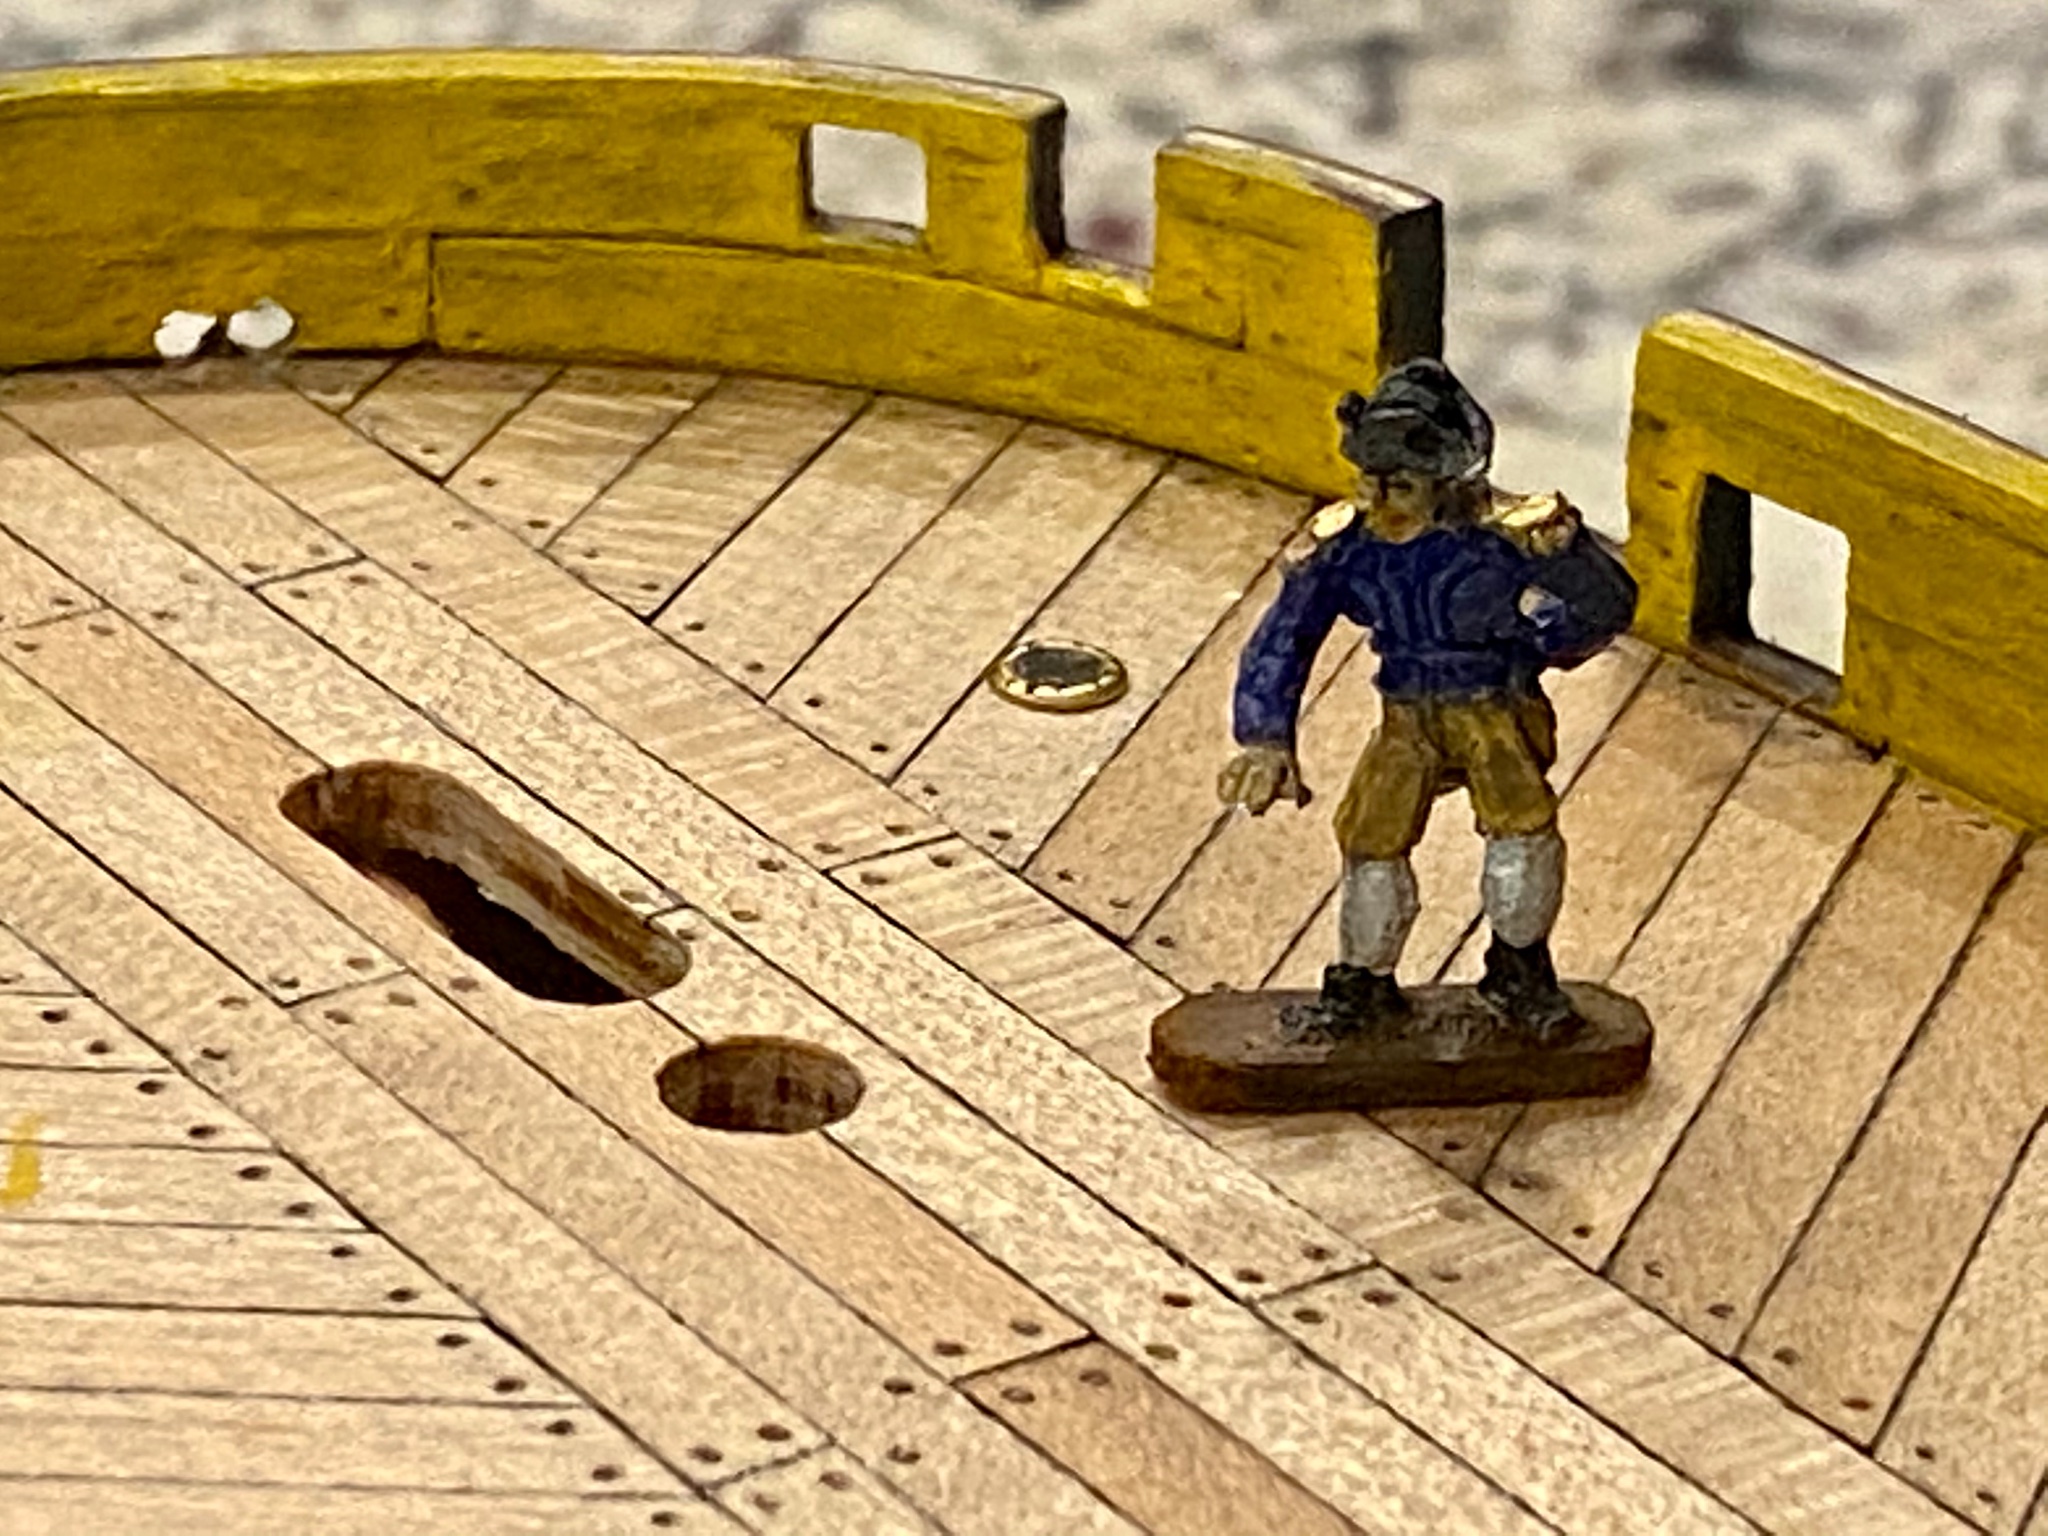
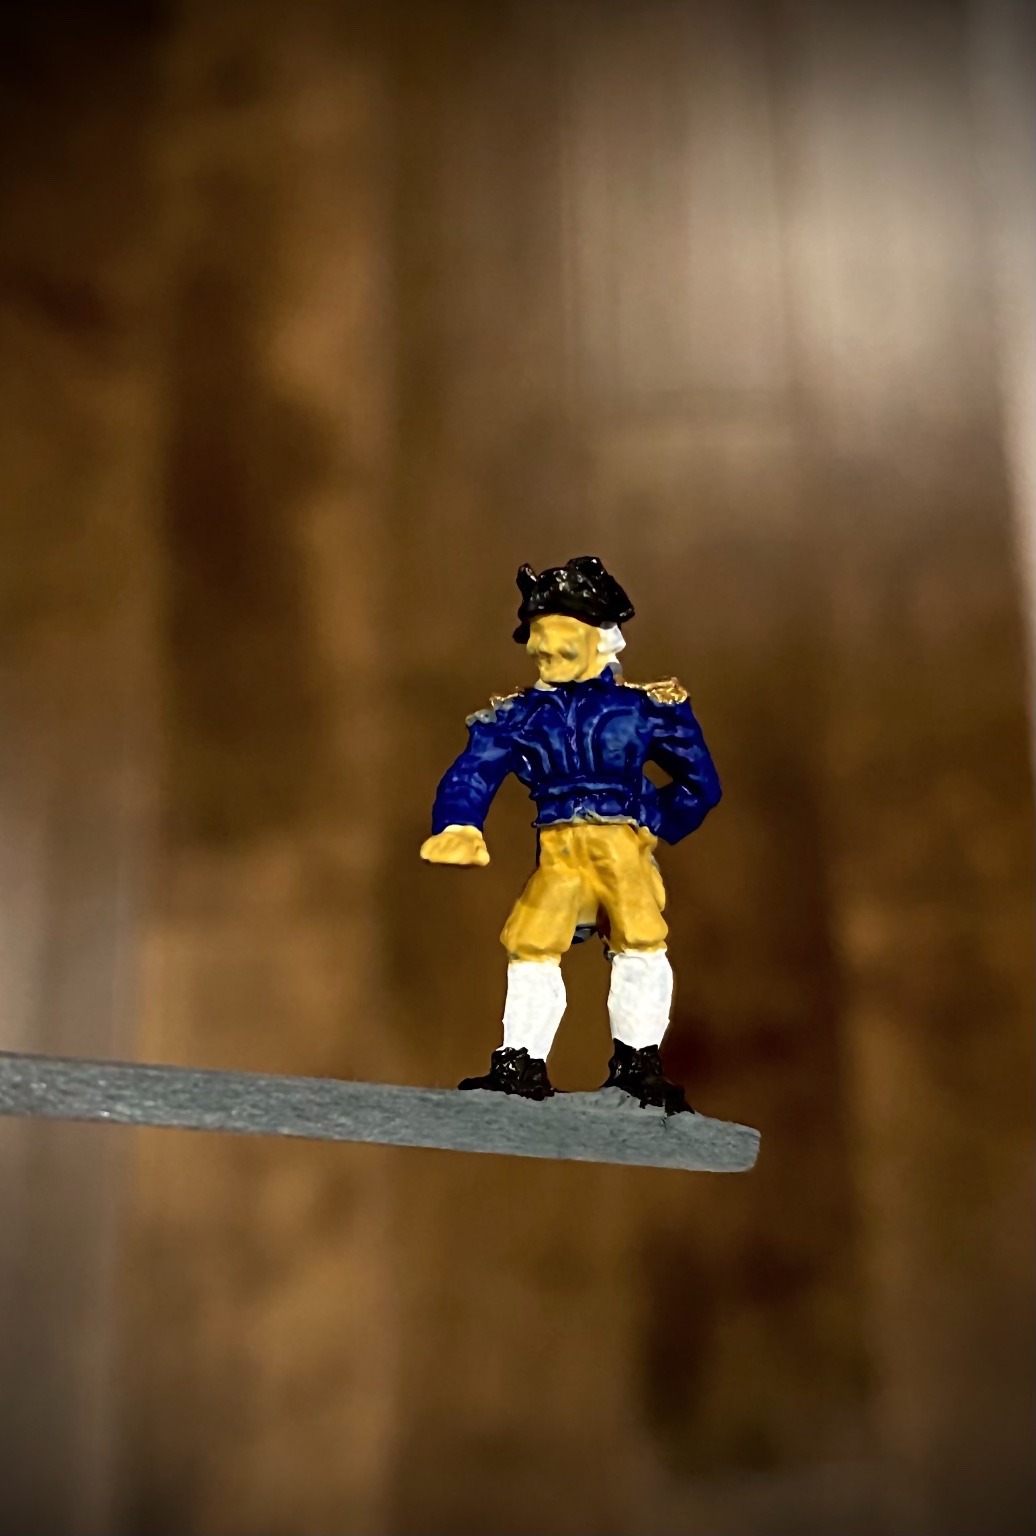
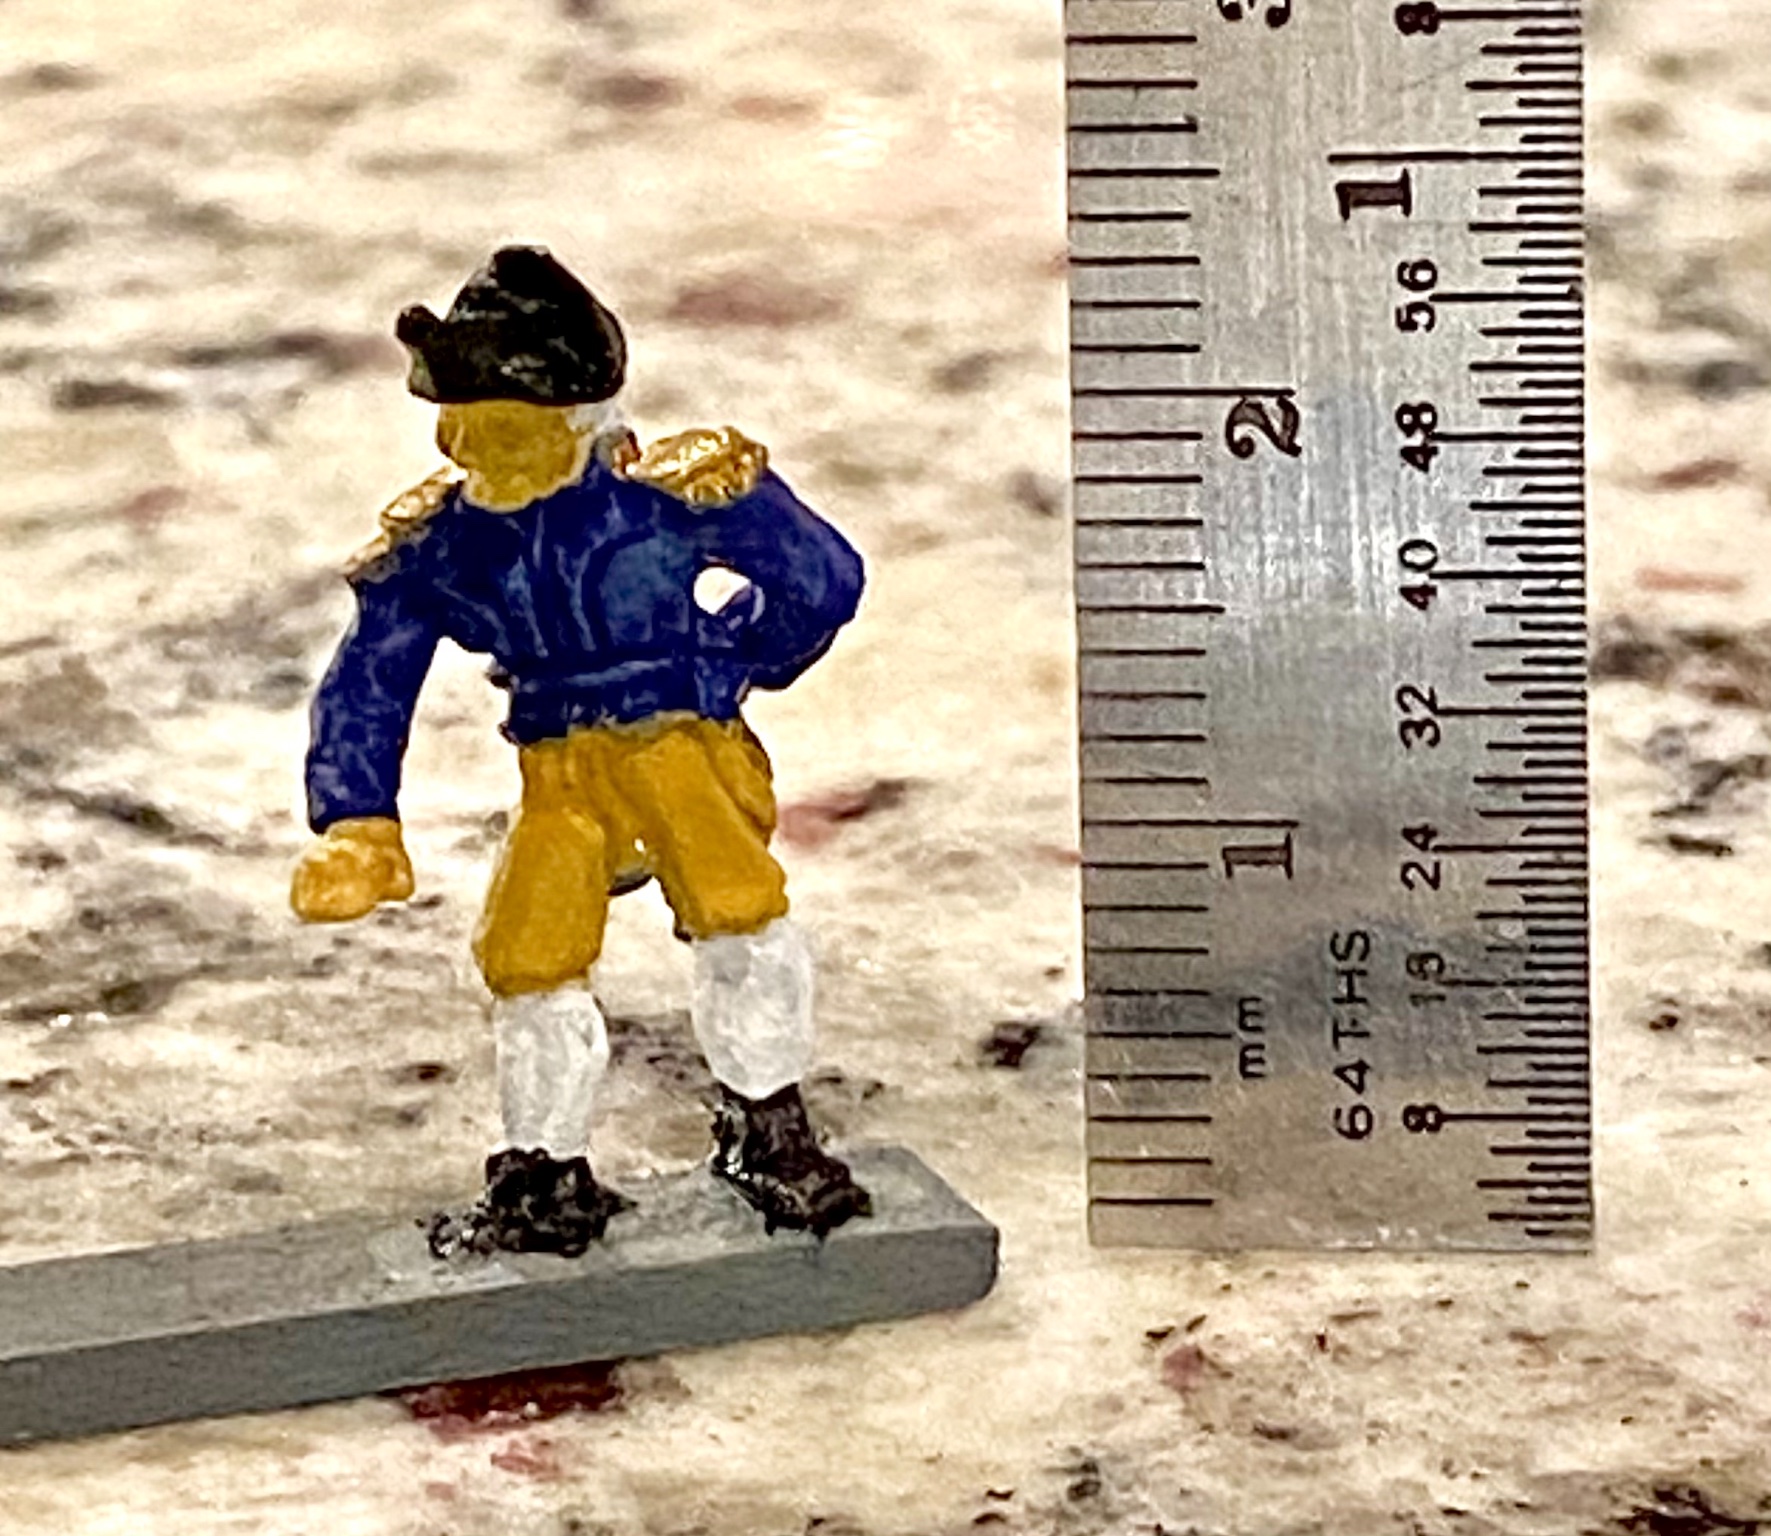
Tonight I’m trying my hand at painting, in miniature scale. This captain is just 22mm tall. I still have some washing to do, but the base coat is down.


-
Well, chemical blackening is a pain...but the black metal look is very nice. Will probably look better on background that is not black.
-
Today I’m experimenting with chemical blackening, my first time trying something like this. I hope to hone my skill in this with technique with all the rudder hardware. We shall see...
-
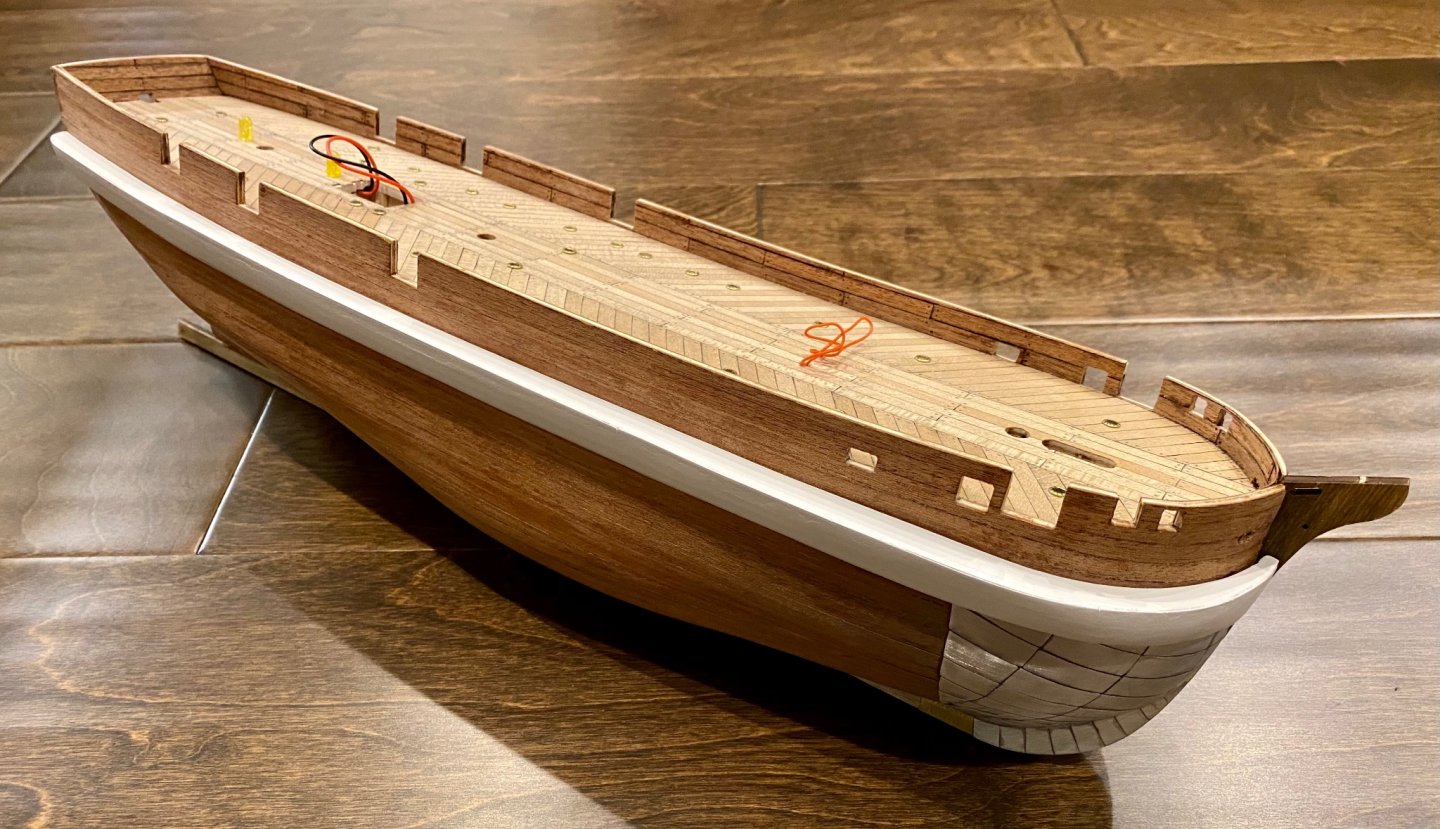
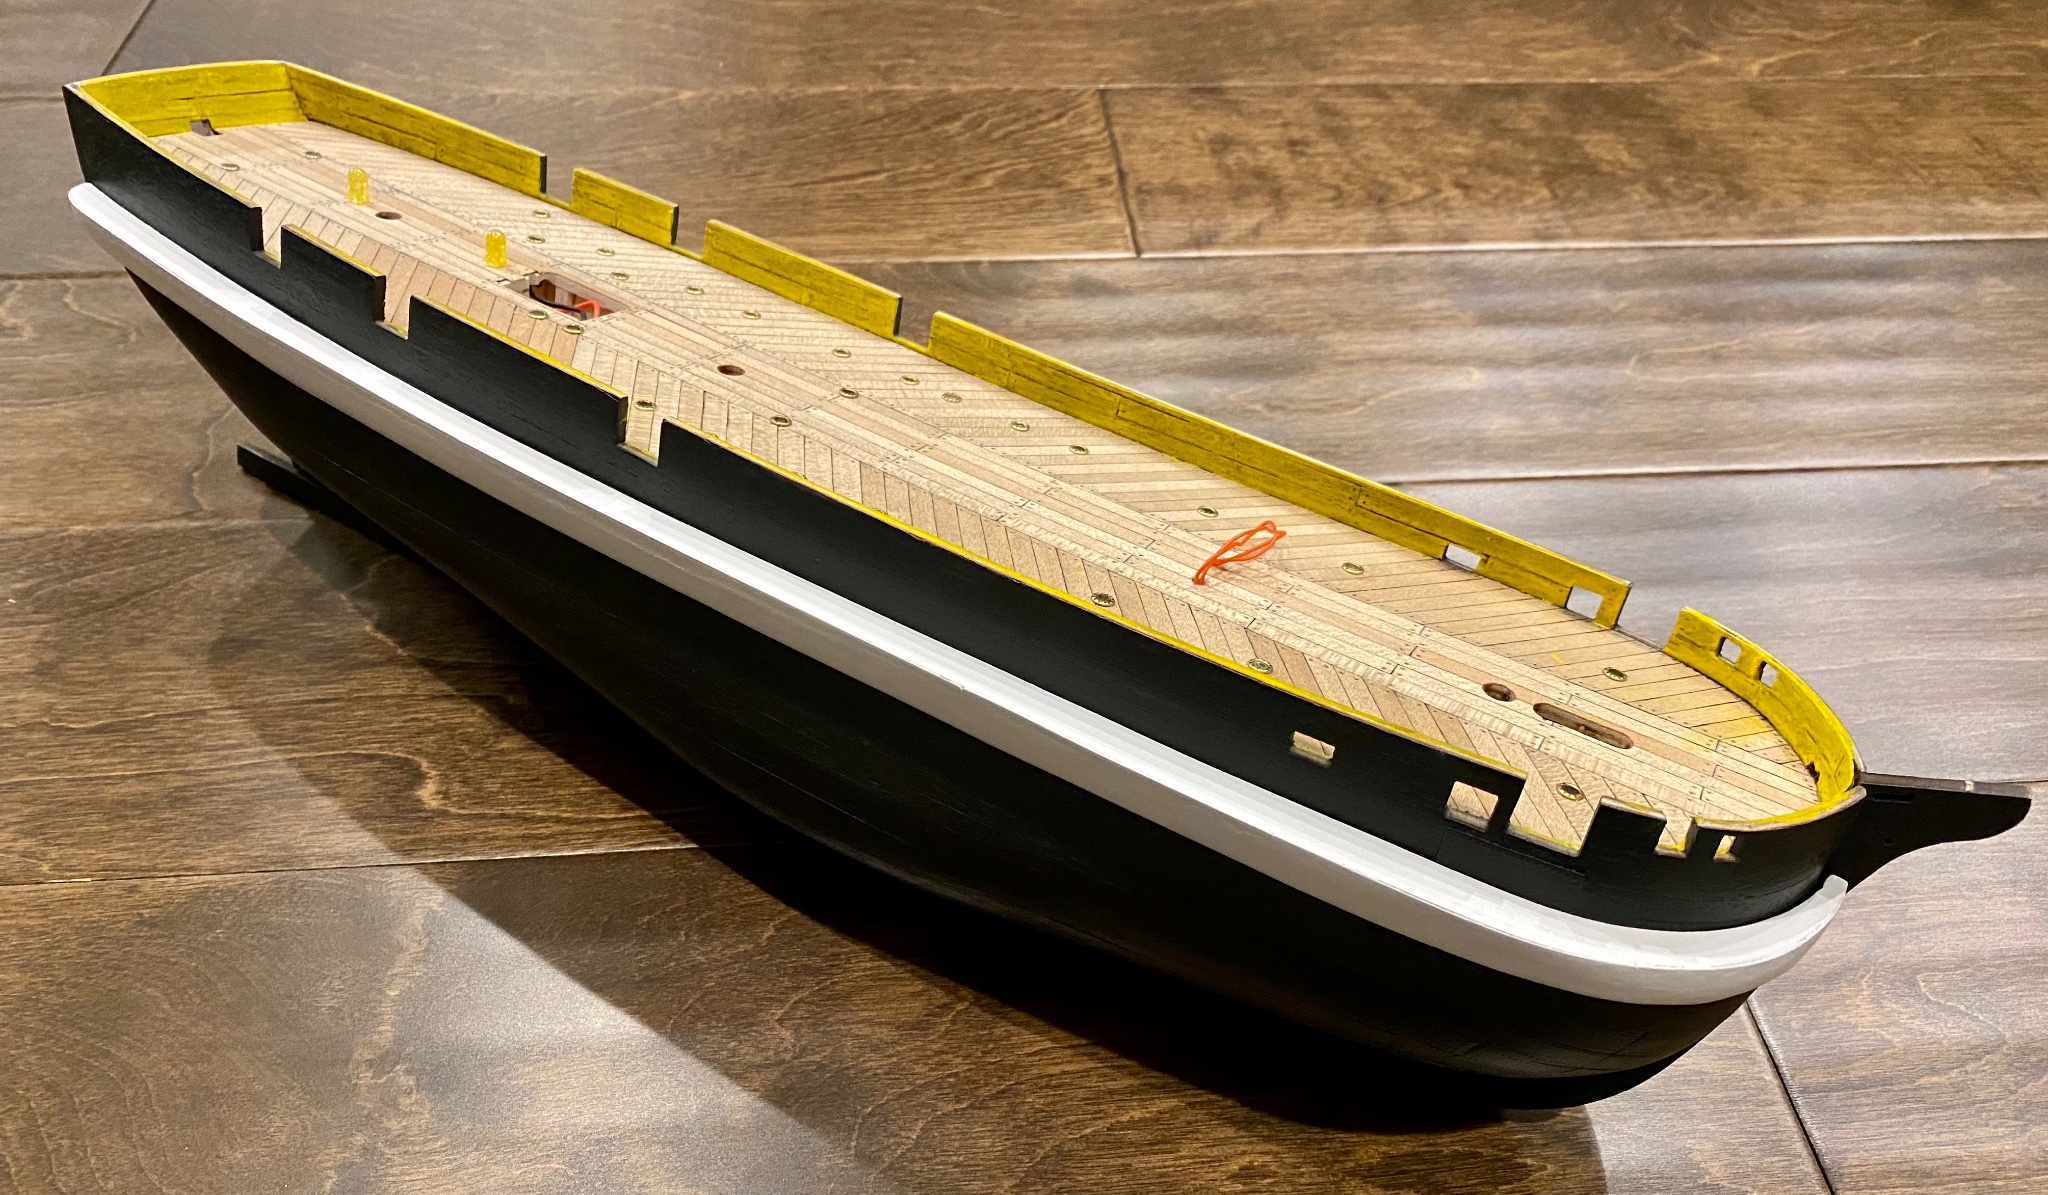
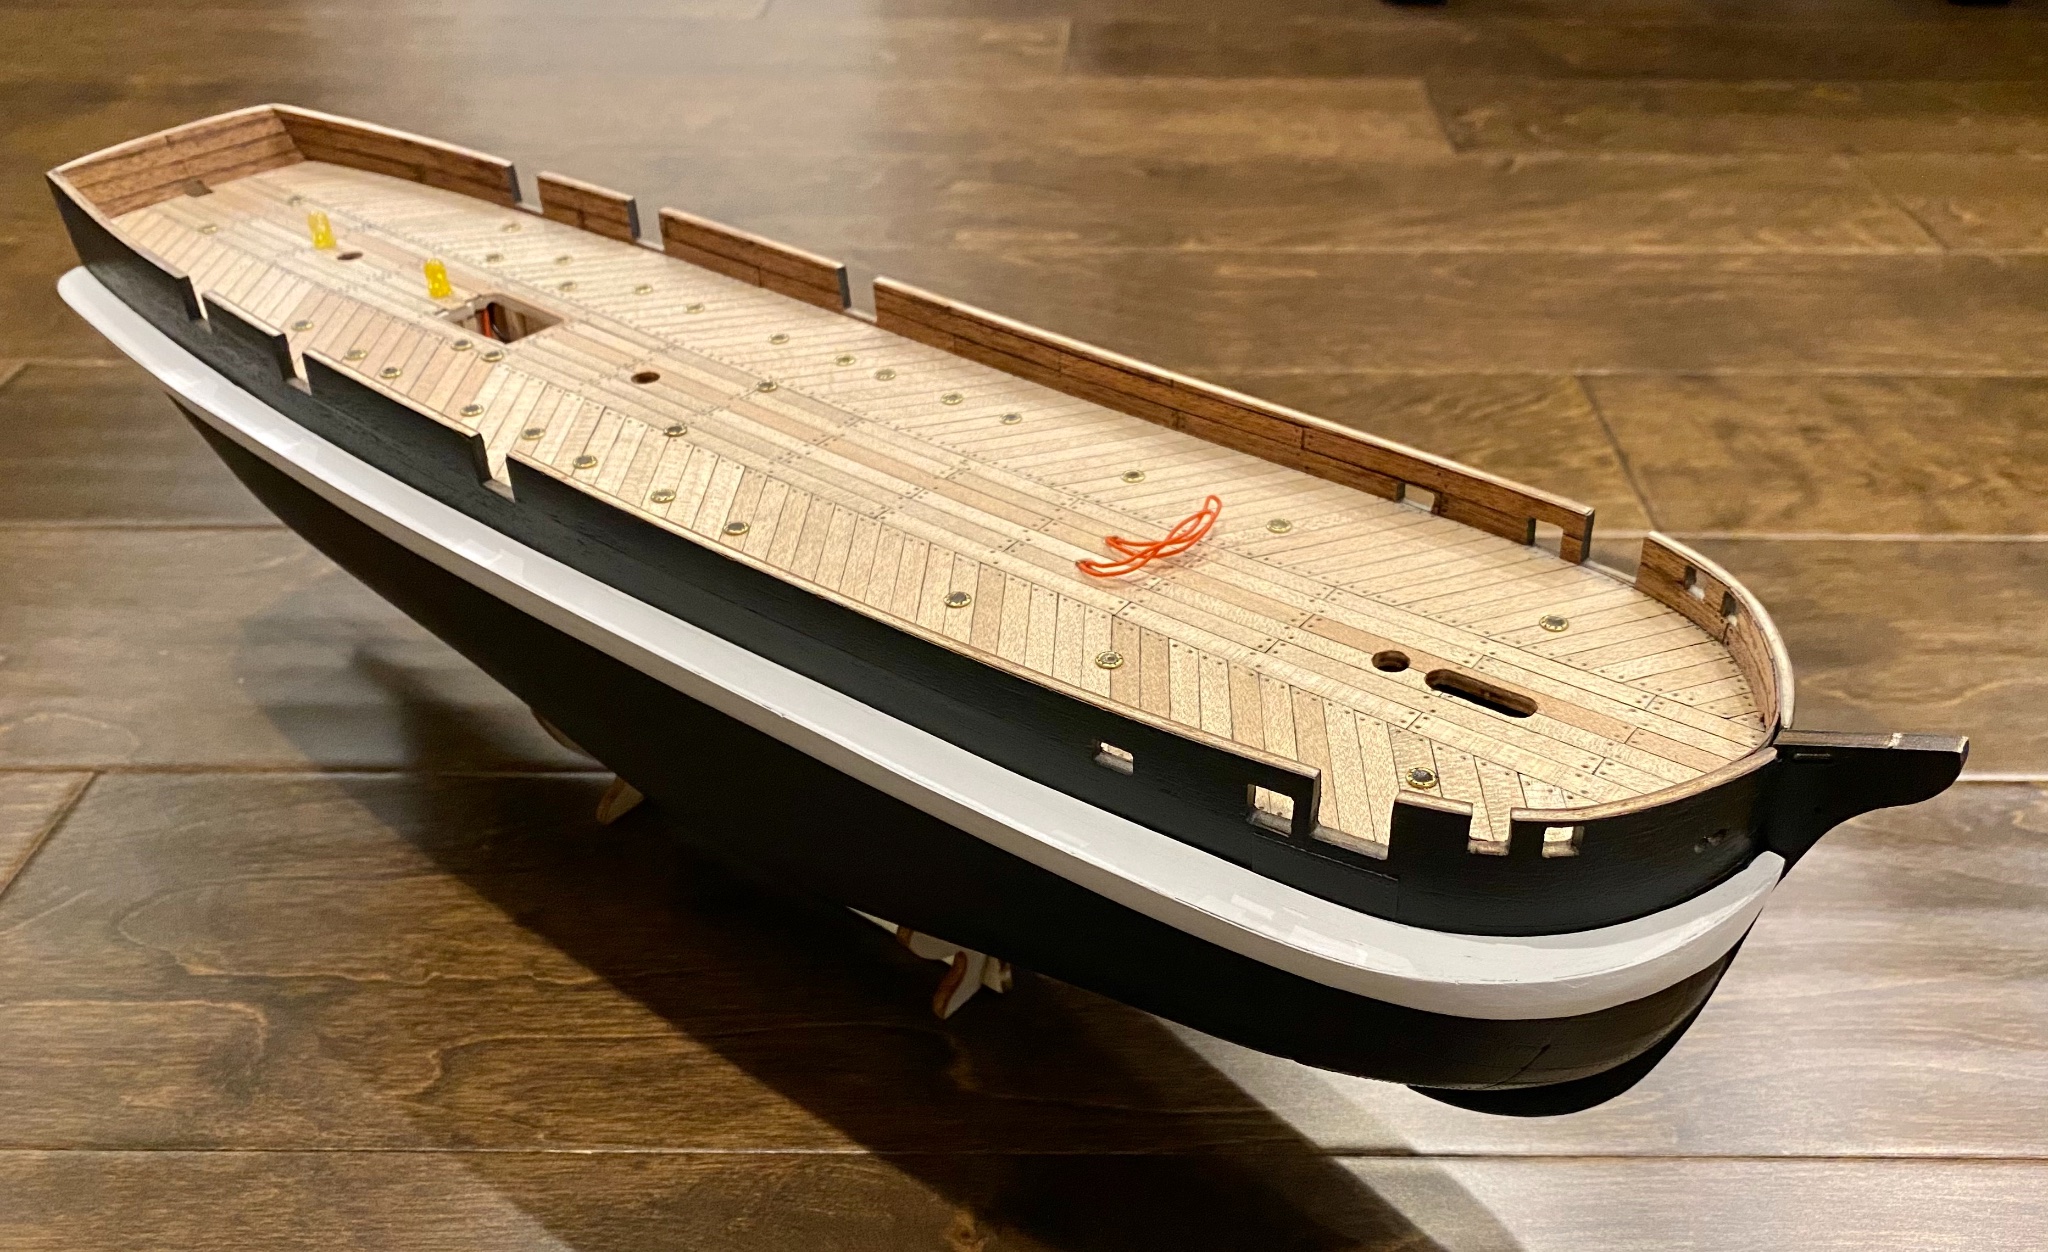
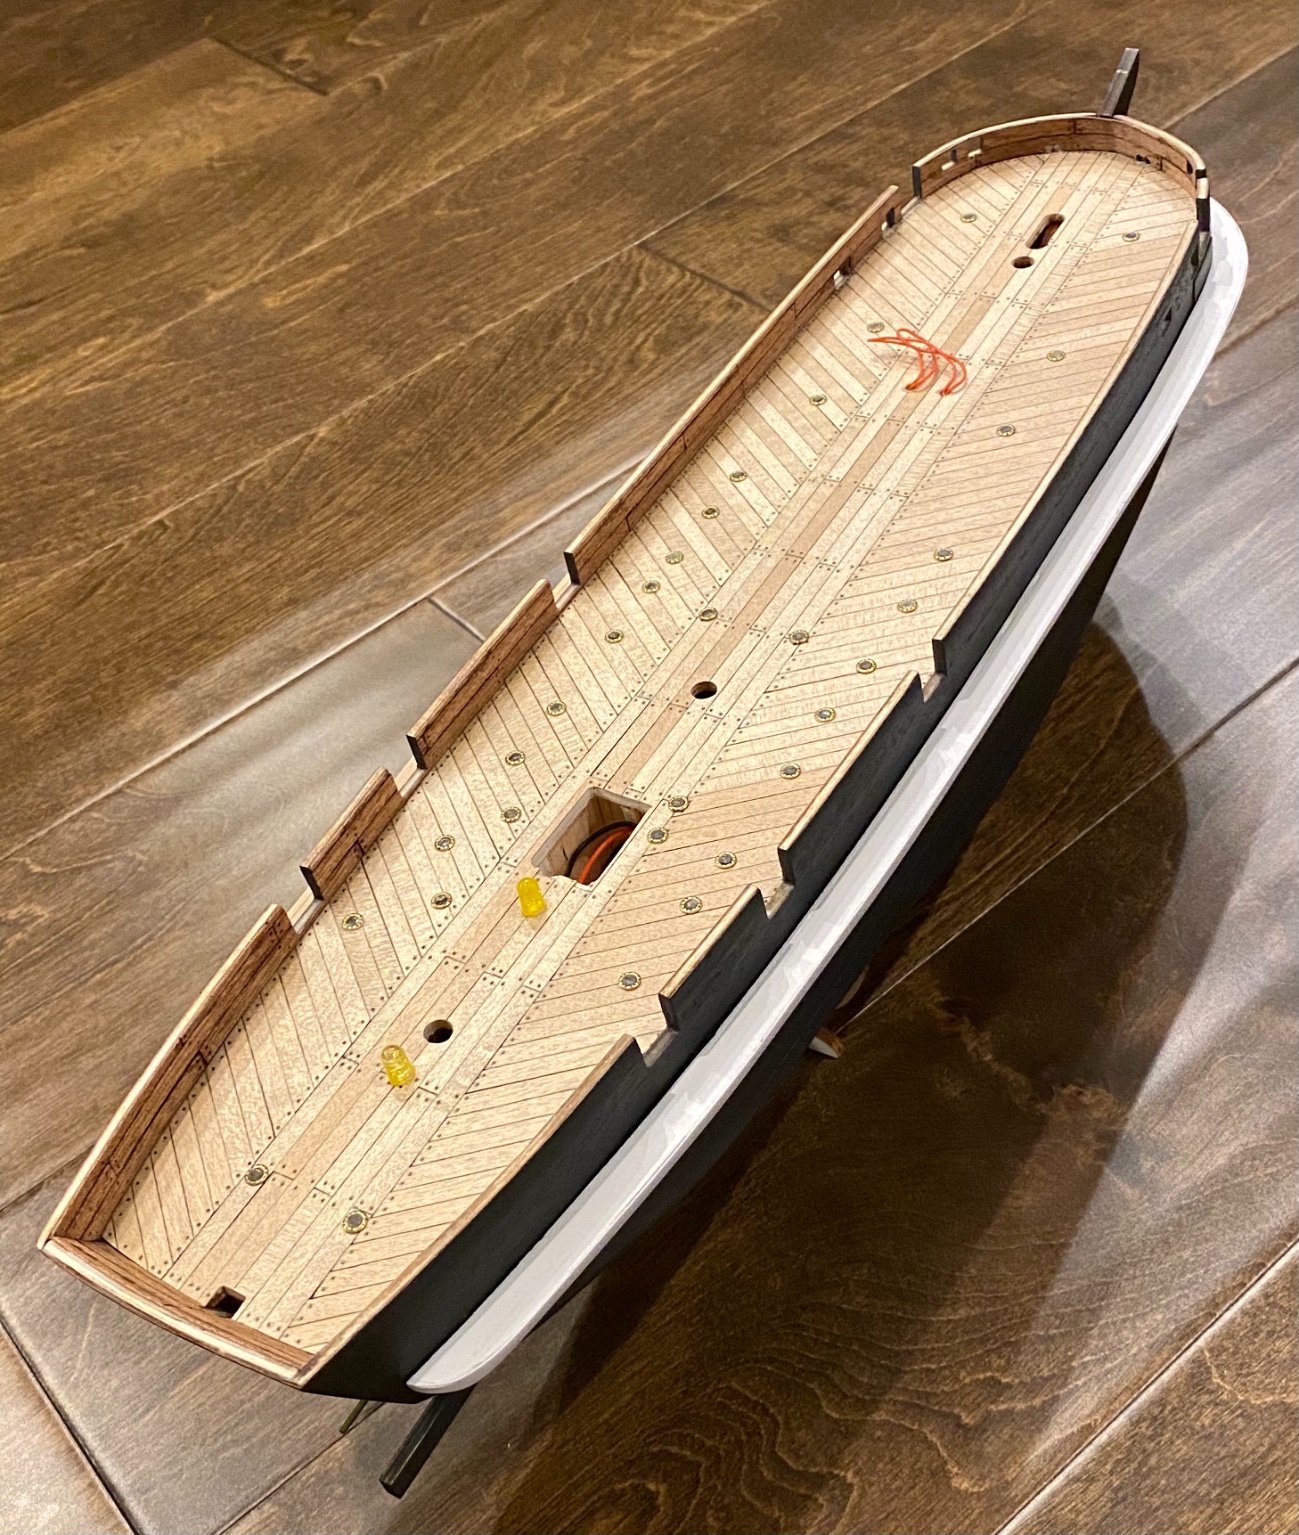
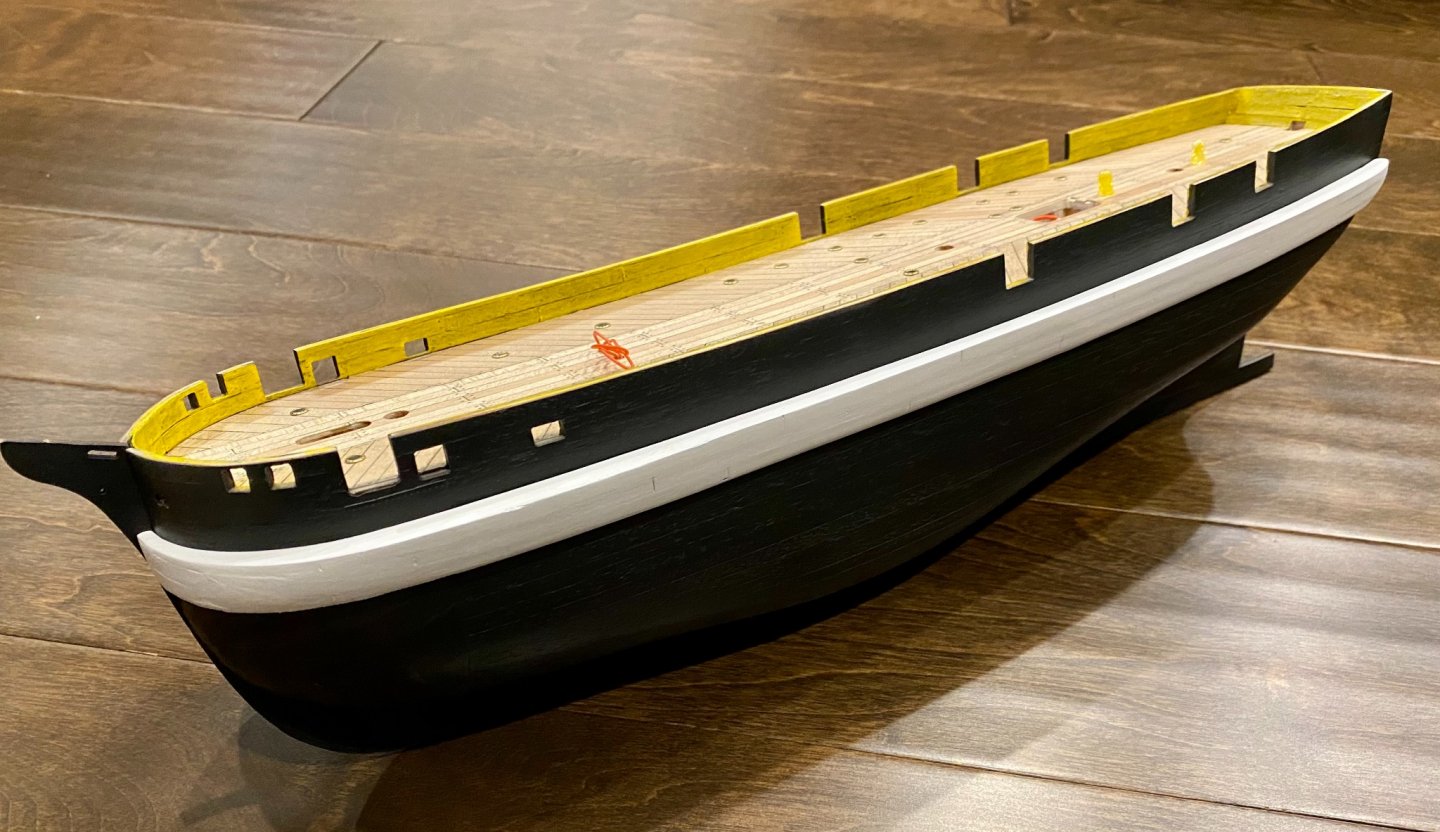
Well, I had hoped to get more done today, but painting white takes so many coats to look good. Also painted the inside of the bulwark yellow then added a black/grey wash to bring out the details of the wood and nails.

-
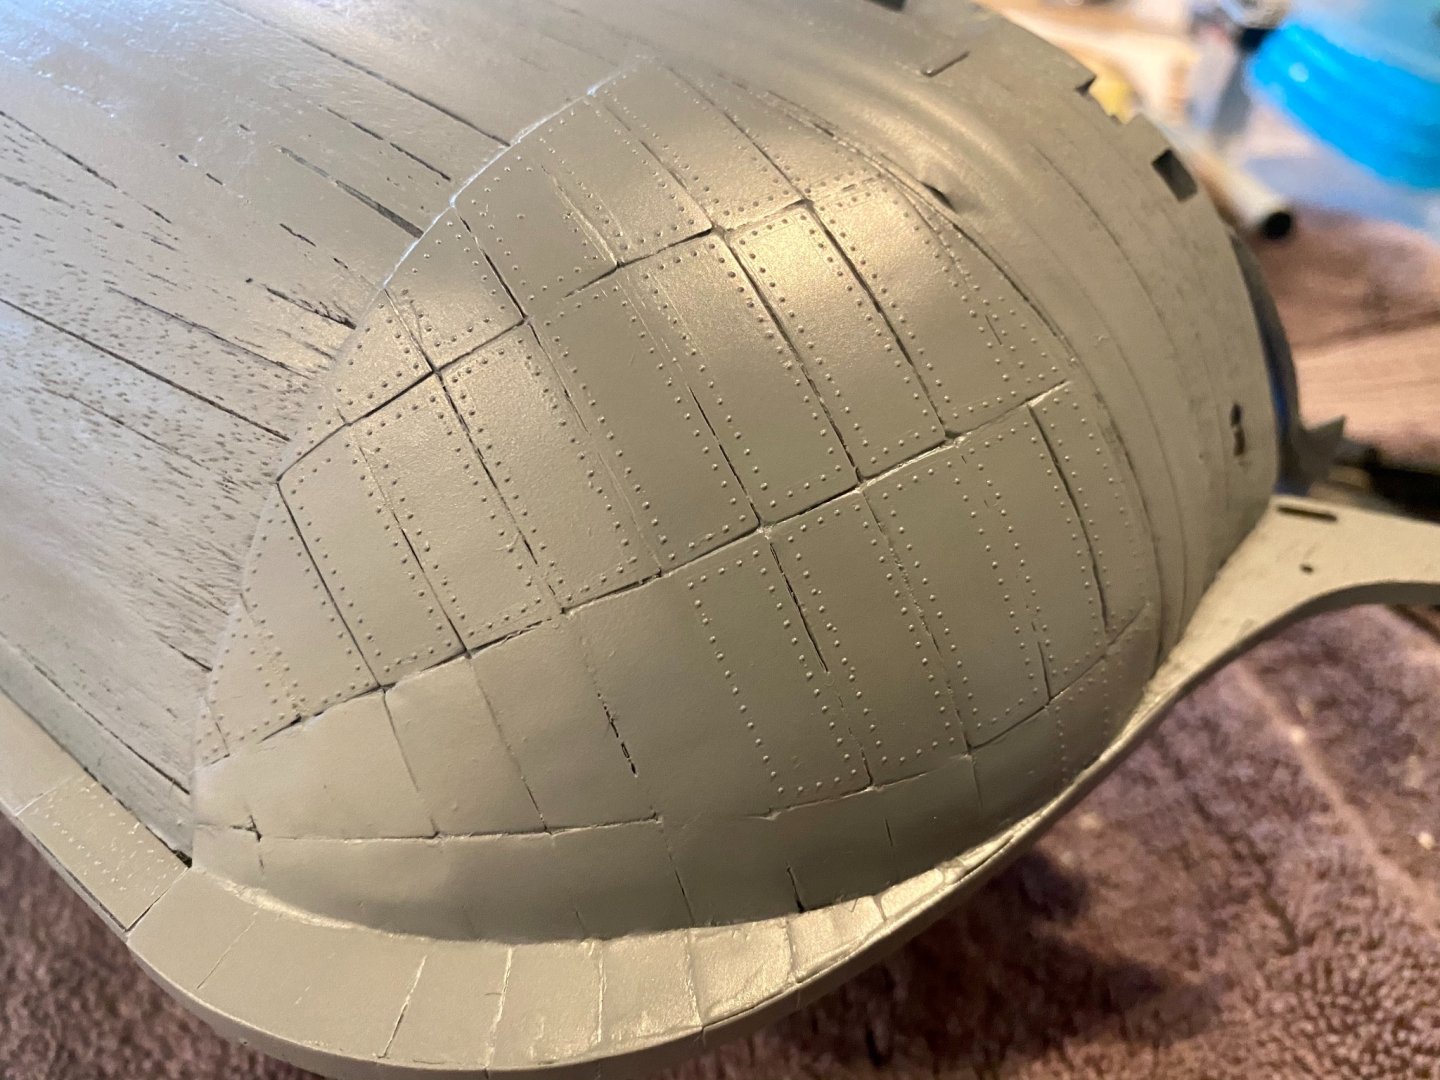
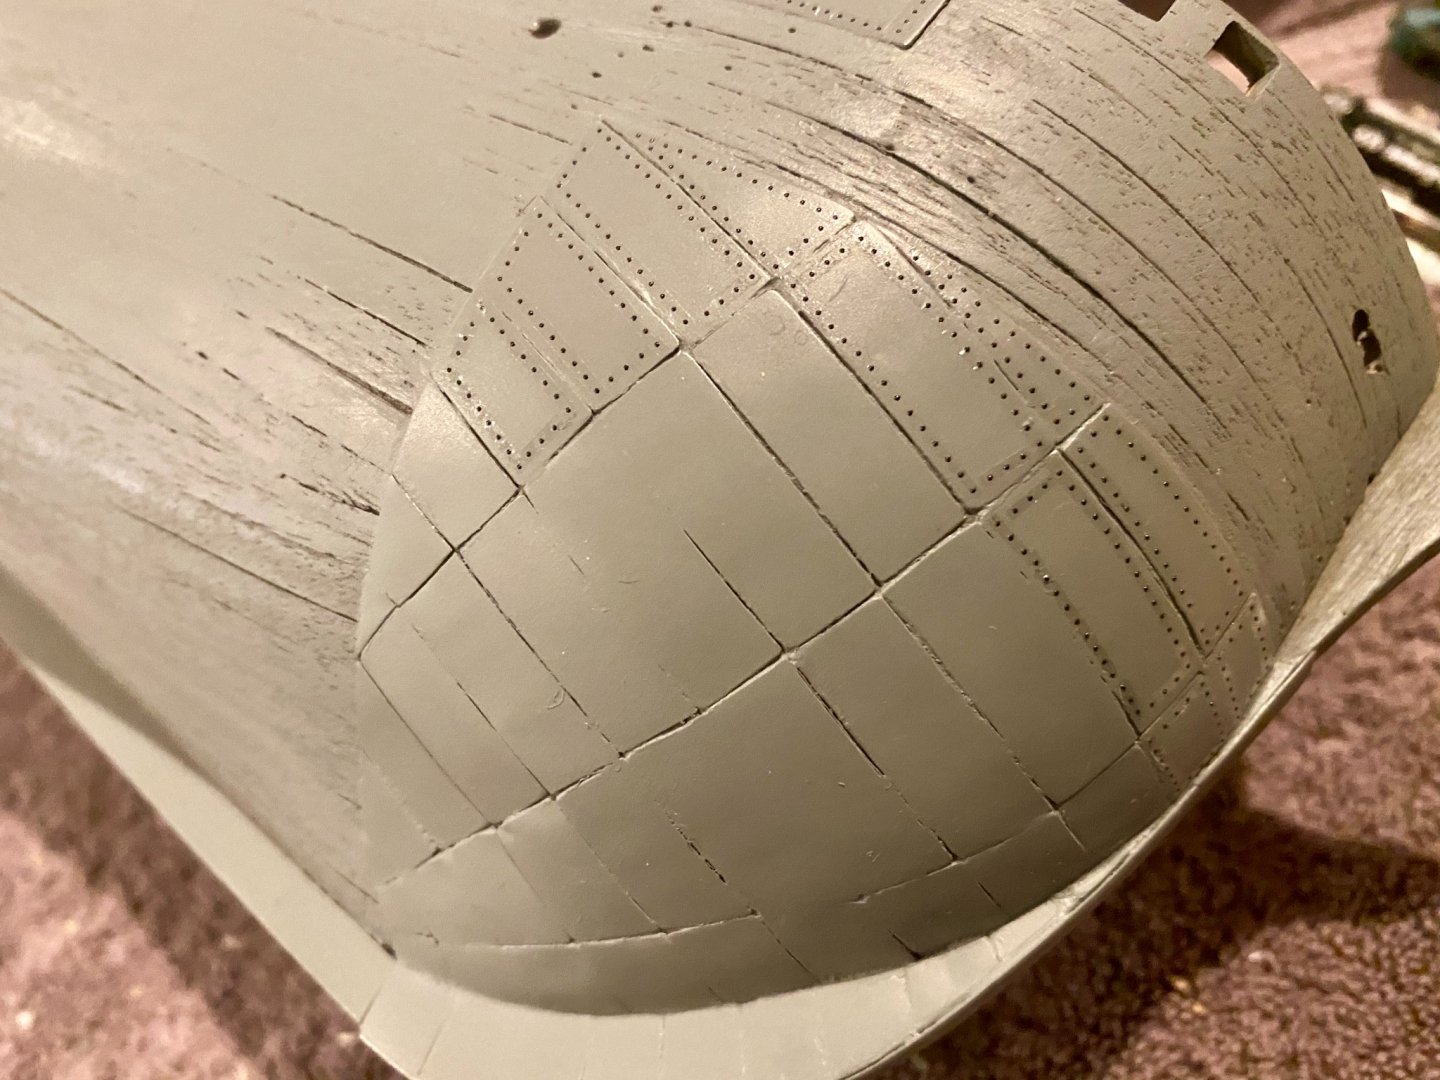
More progress today. Finished the tedious riveting project and was able to get the hull painted black.


-
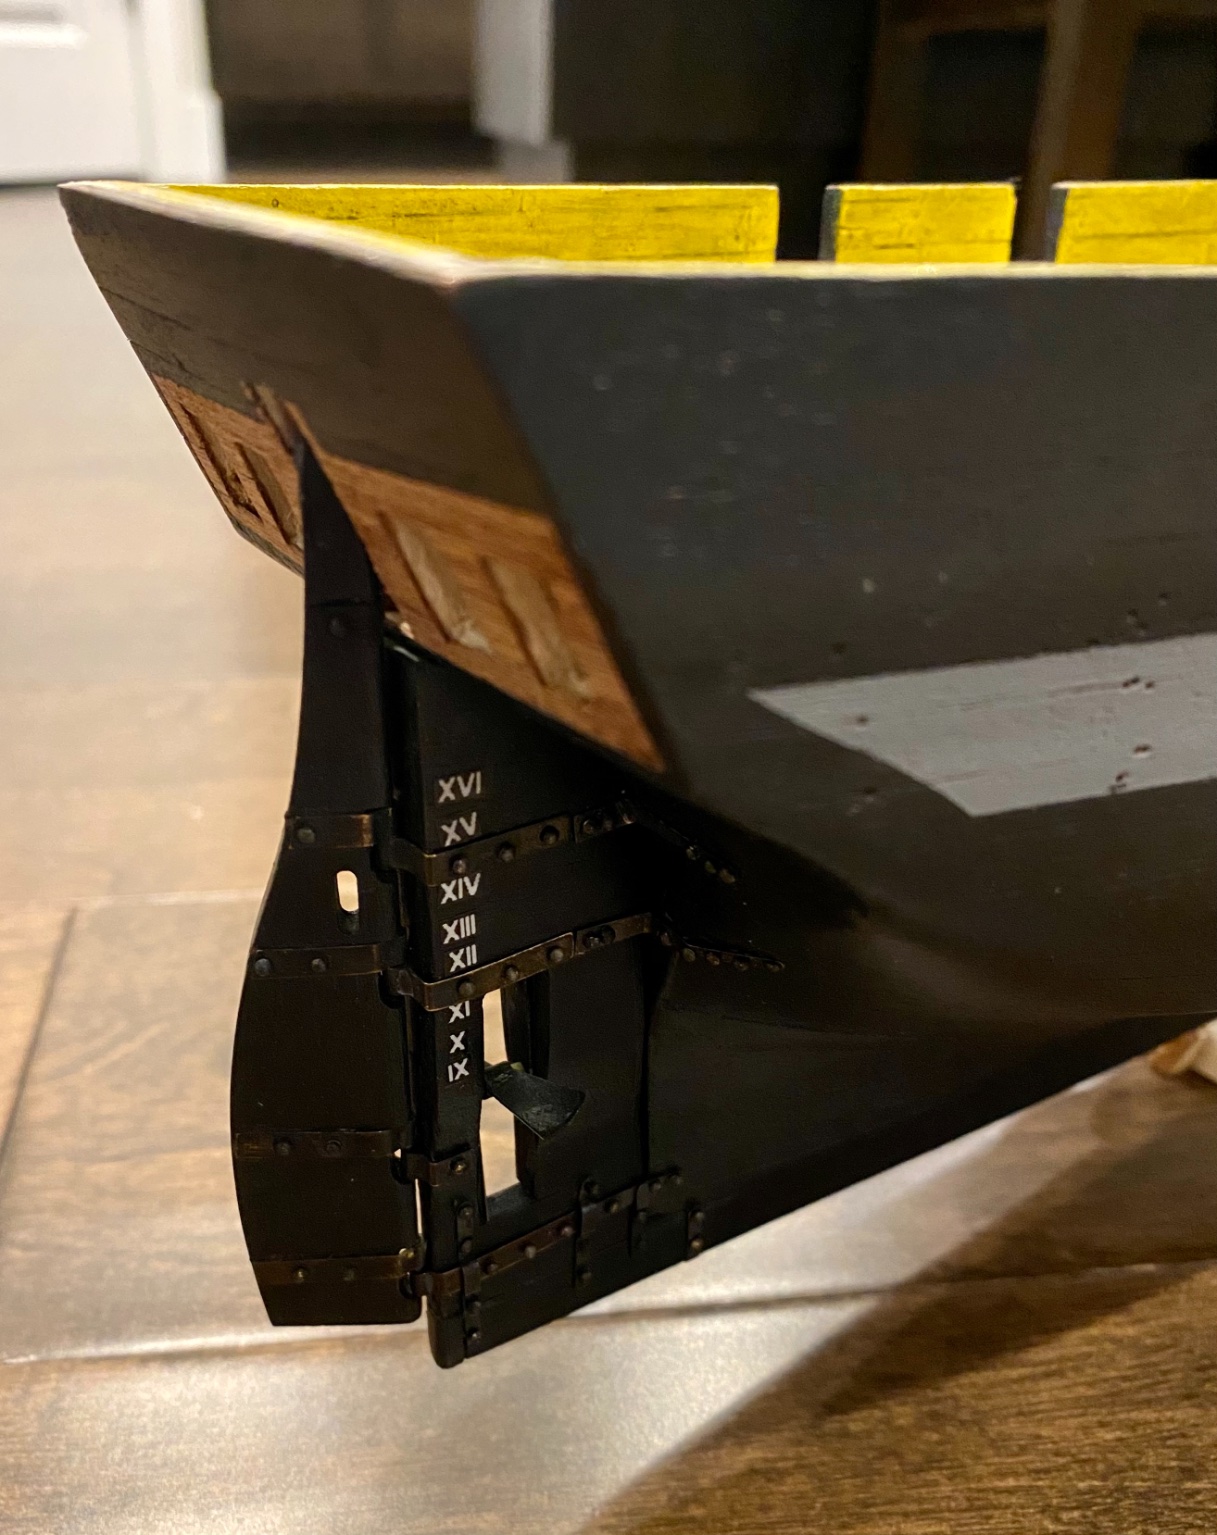
Thanks for all the support! Here is the starboard side, all rivets finished. Now to do the port side. I think I’m seeing crosseyed.
-
Keith, I am also looking for a flywheel for the pump on the Terror. I’ve found one, but I’m not happy with it as the spokes are straight. I would love to find one with curved spokes like on your model. Do you know the manufacture and/or part number for the one you found? Or a website...
-
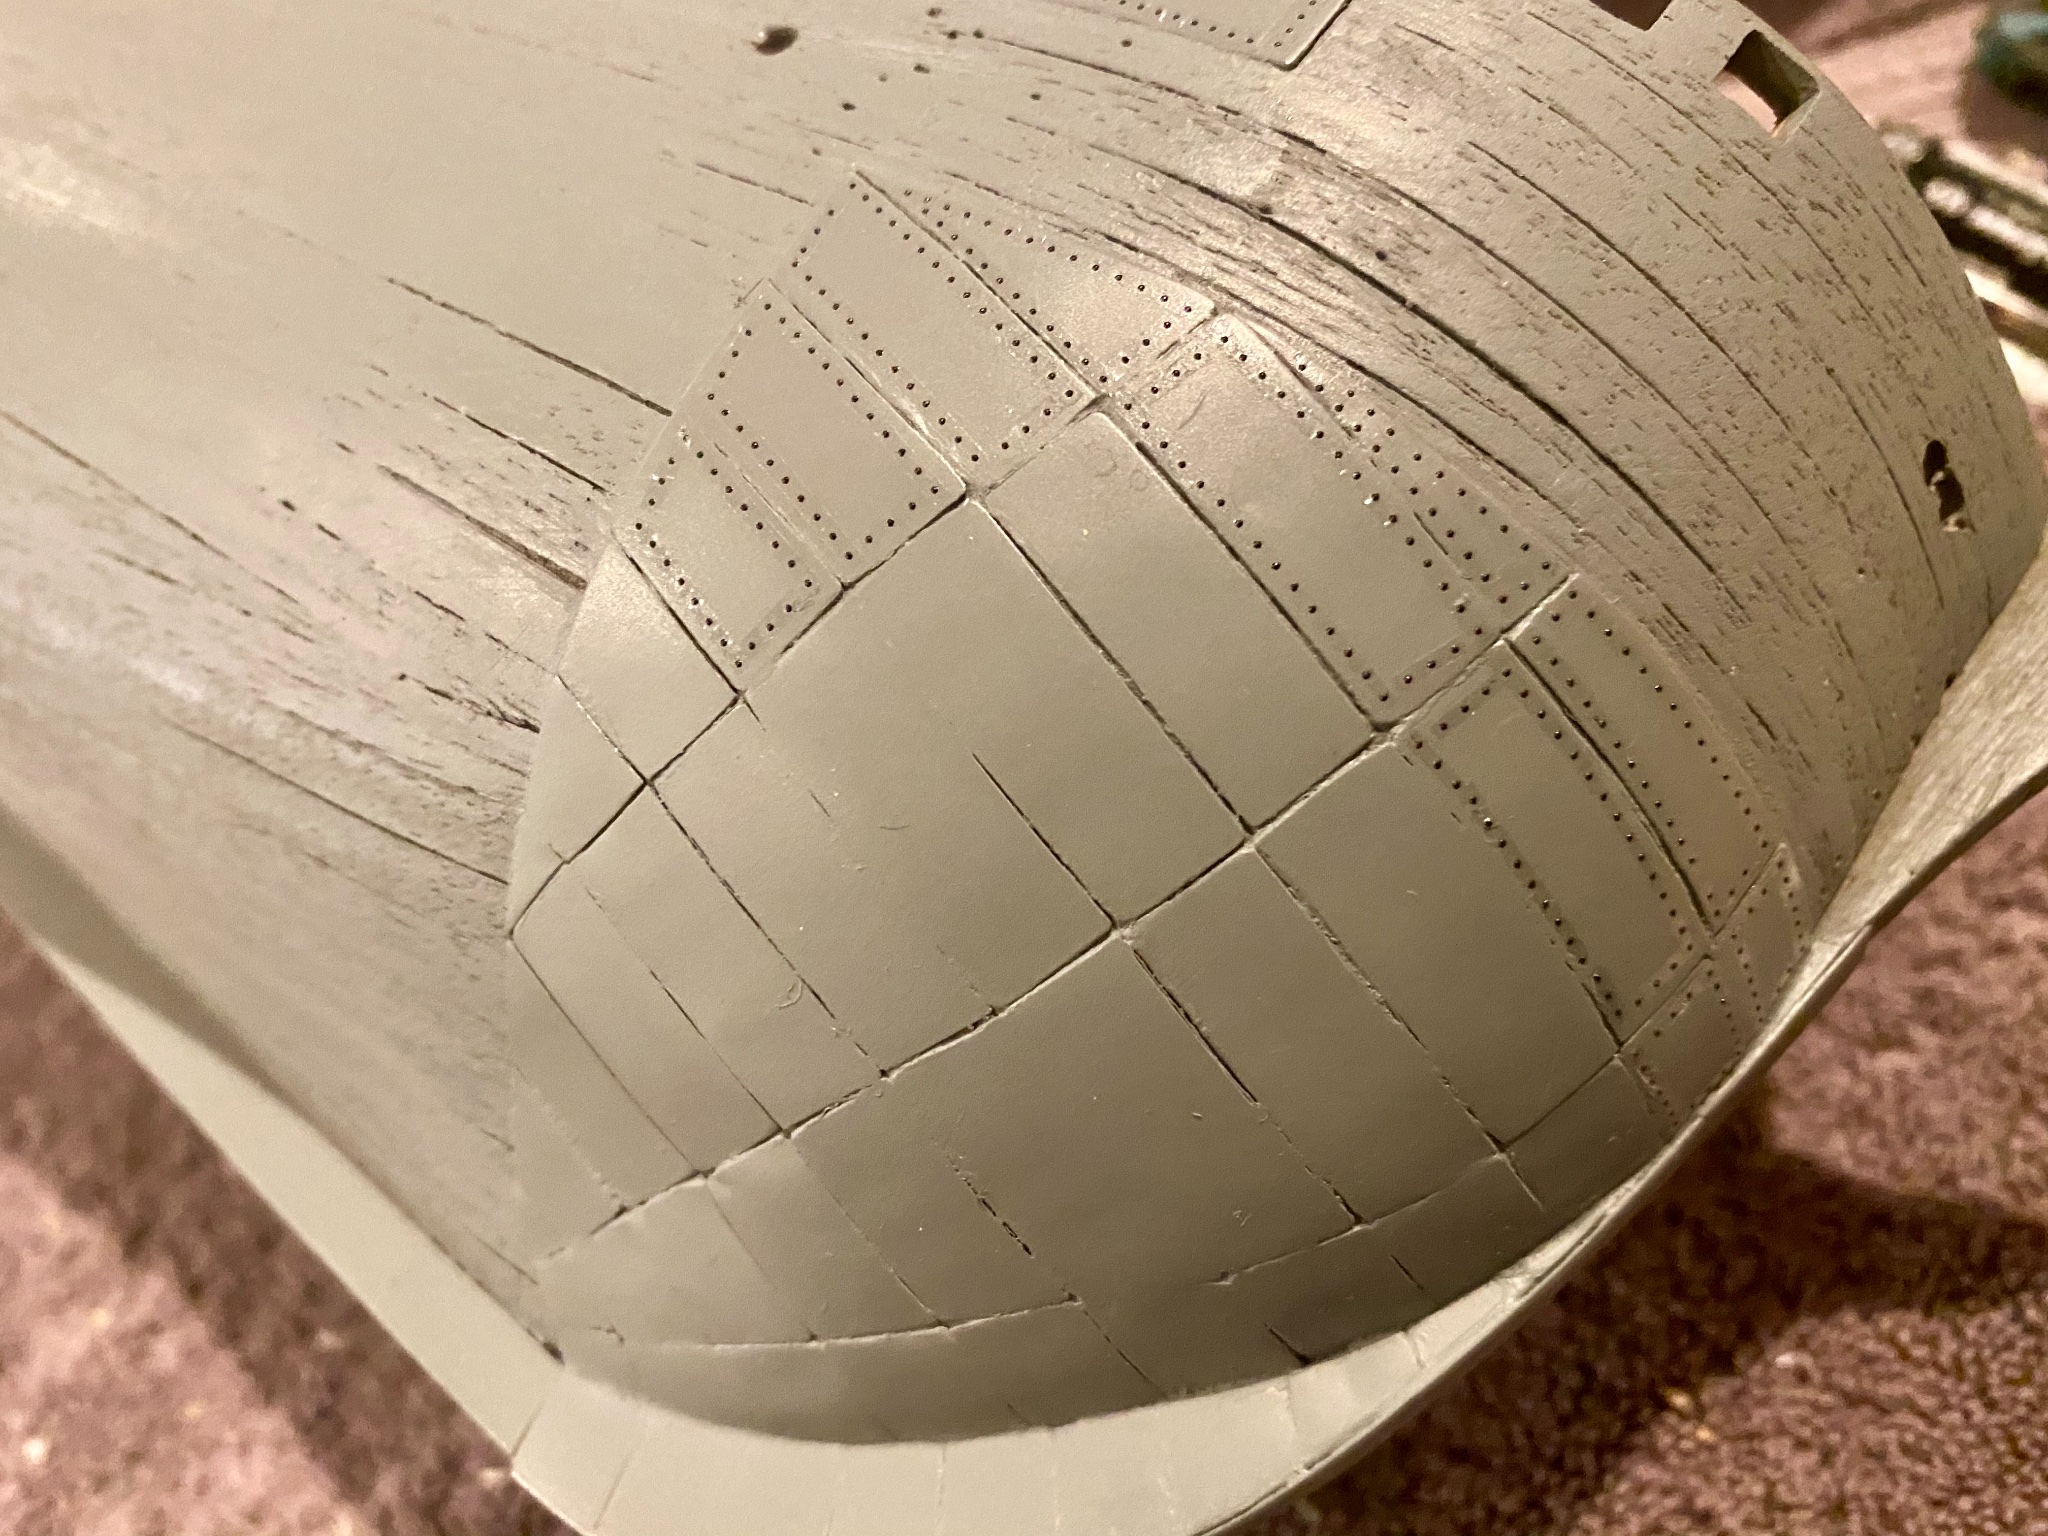
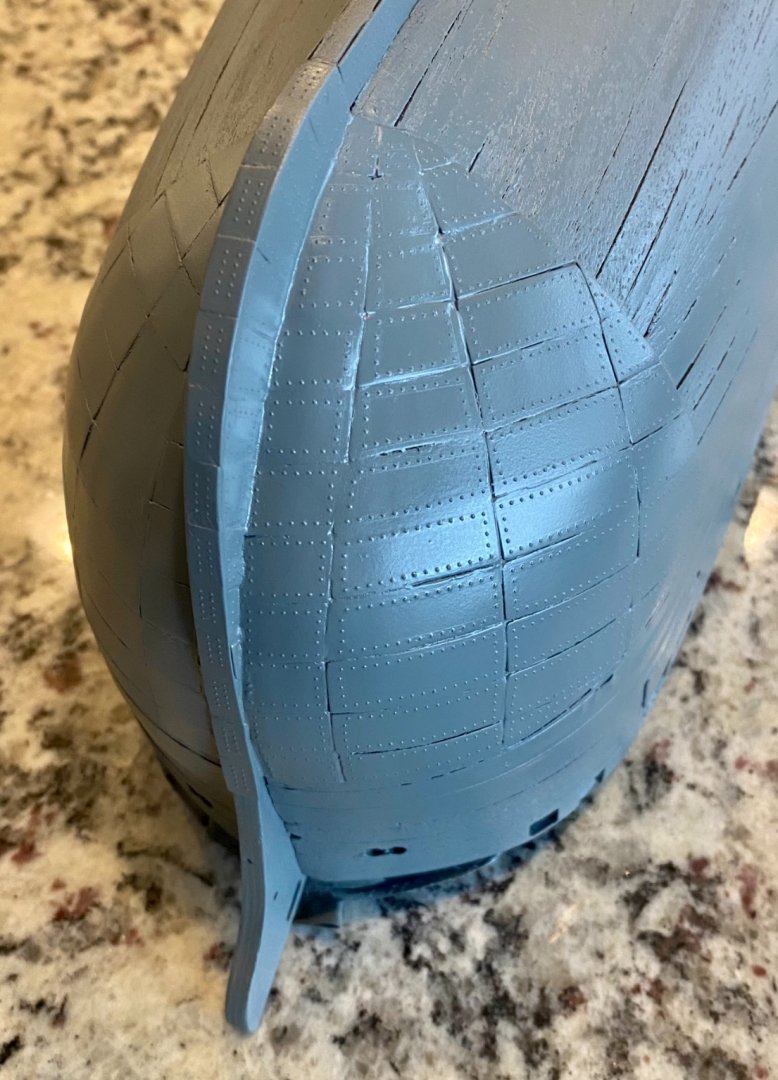
Update: the rivet project is progressing, slowly... to protect the rivets already placed, I have to add a light layer of primer to “seal” the rivets in place, then add more and more and more rivets.
-
For the rivets I’m stealing a technique from the model railroad playbook, using 3D printed rivets on a decal. When I place them on the plates and then paint over them, the effect is very nice (in my opinion). Here are some rivets I have just installed and some I did a few days ago that have been primed for black paint. I will admit, the process is tedious.
-
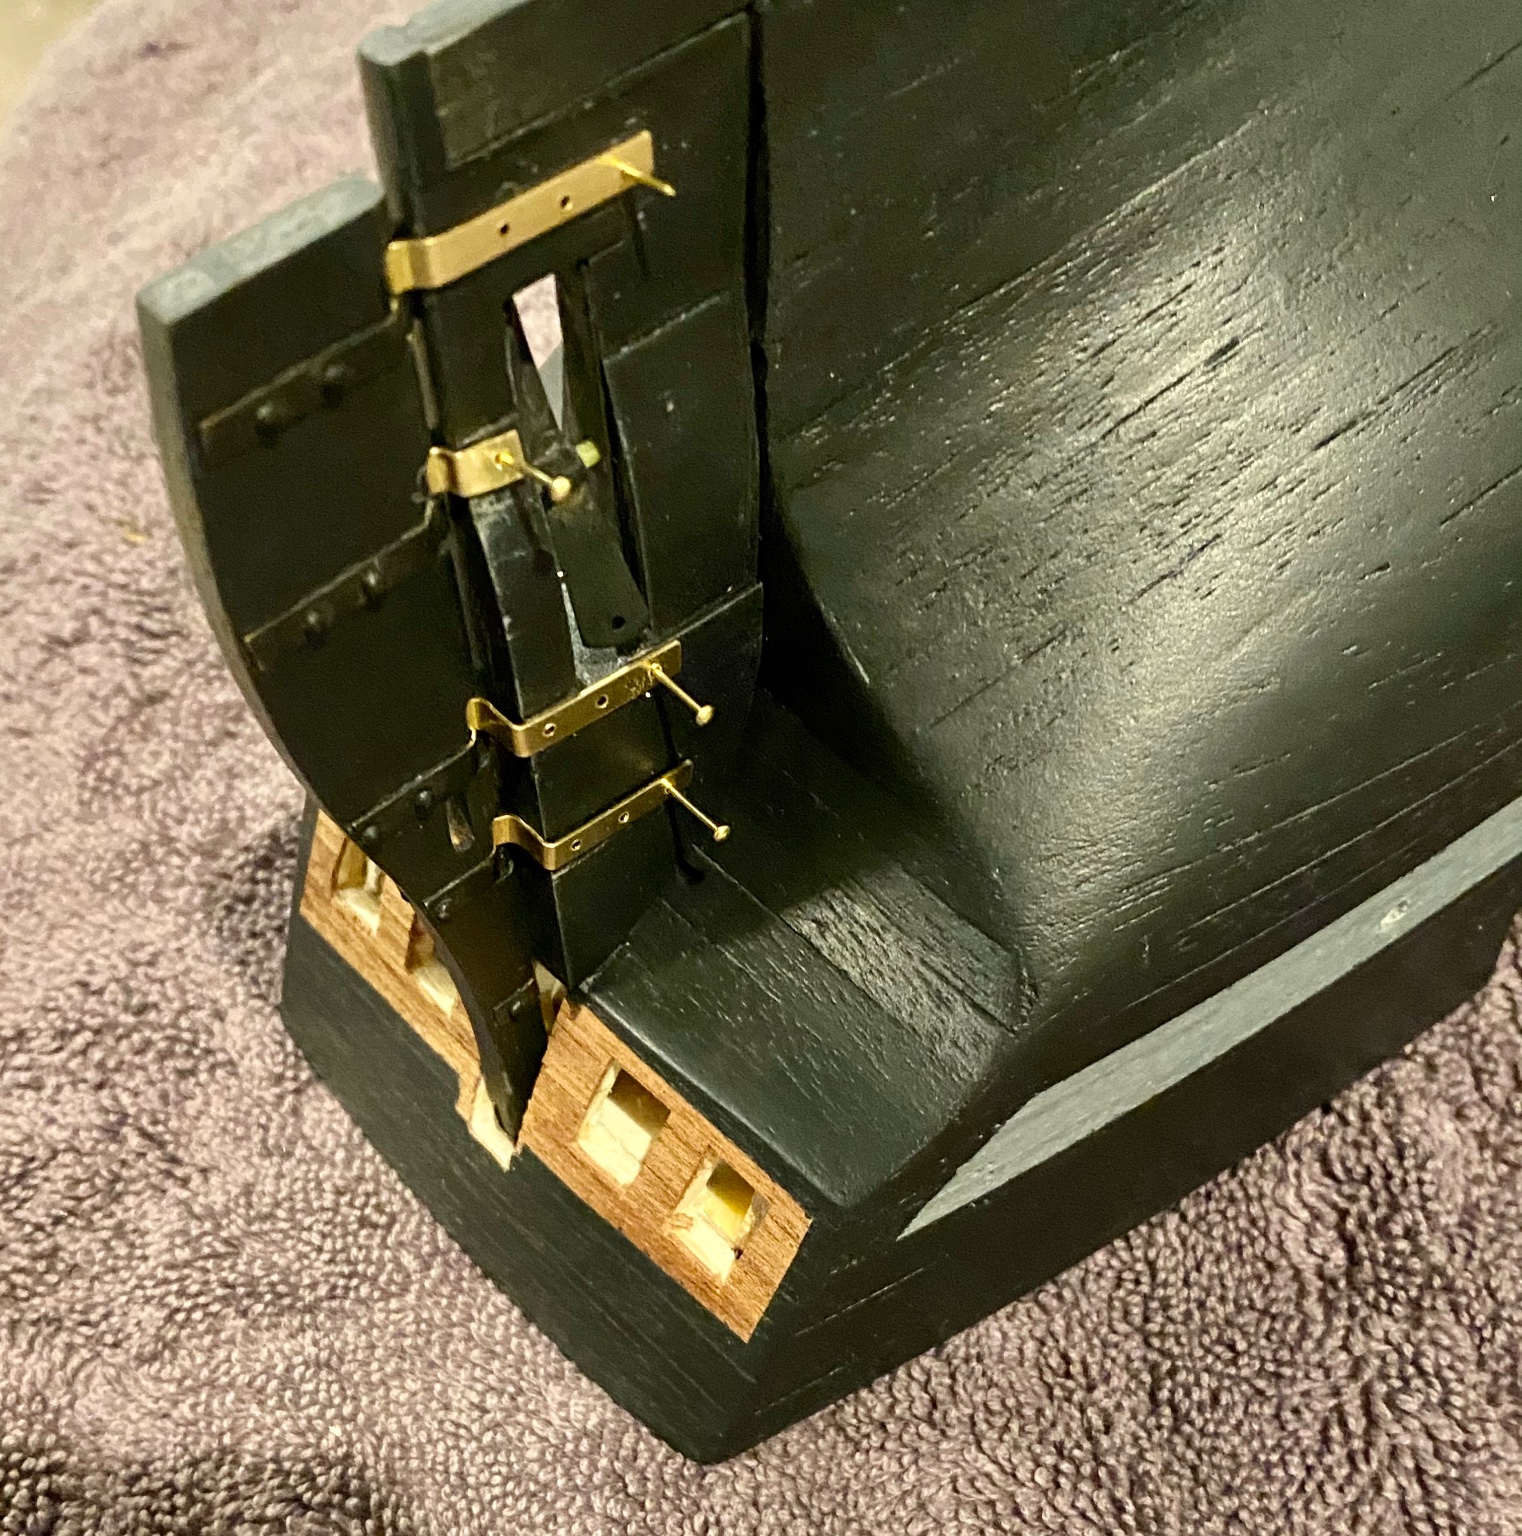
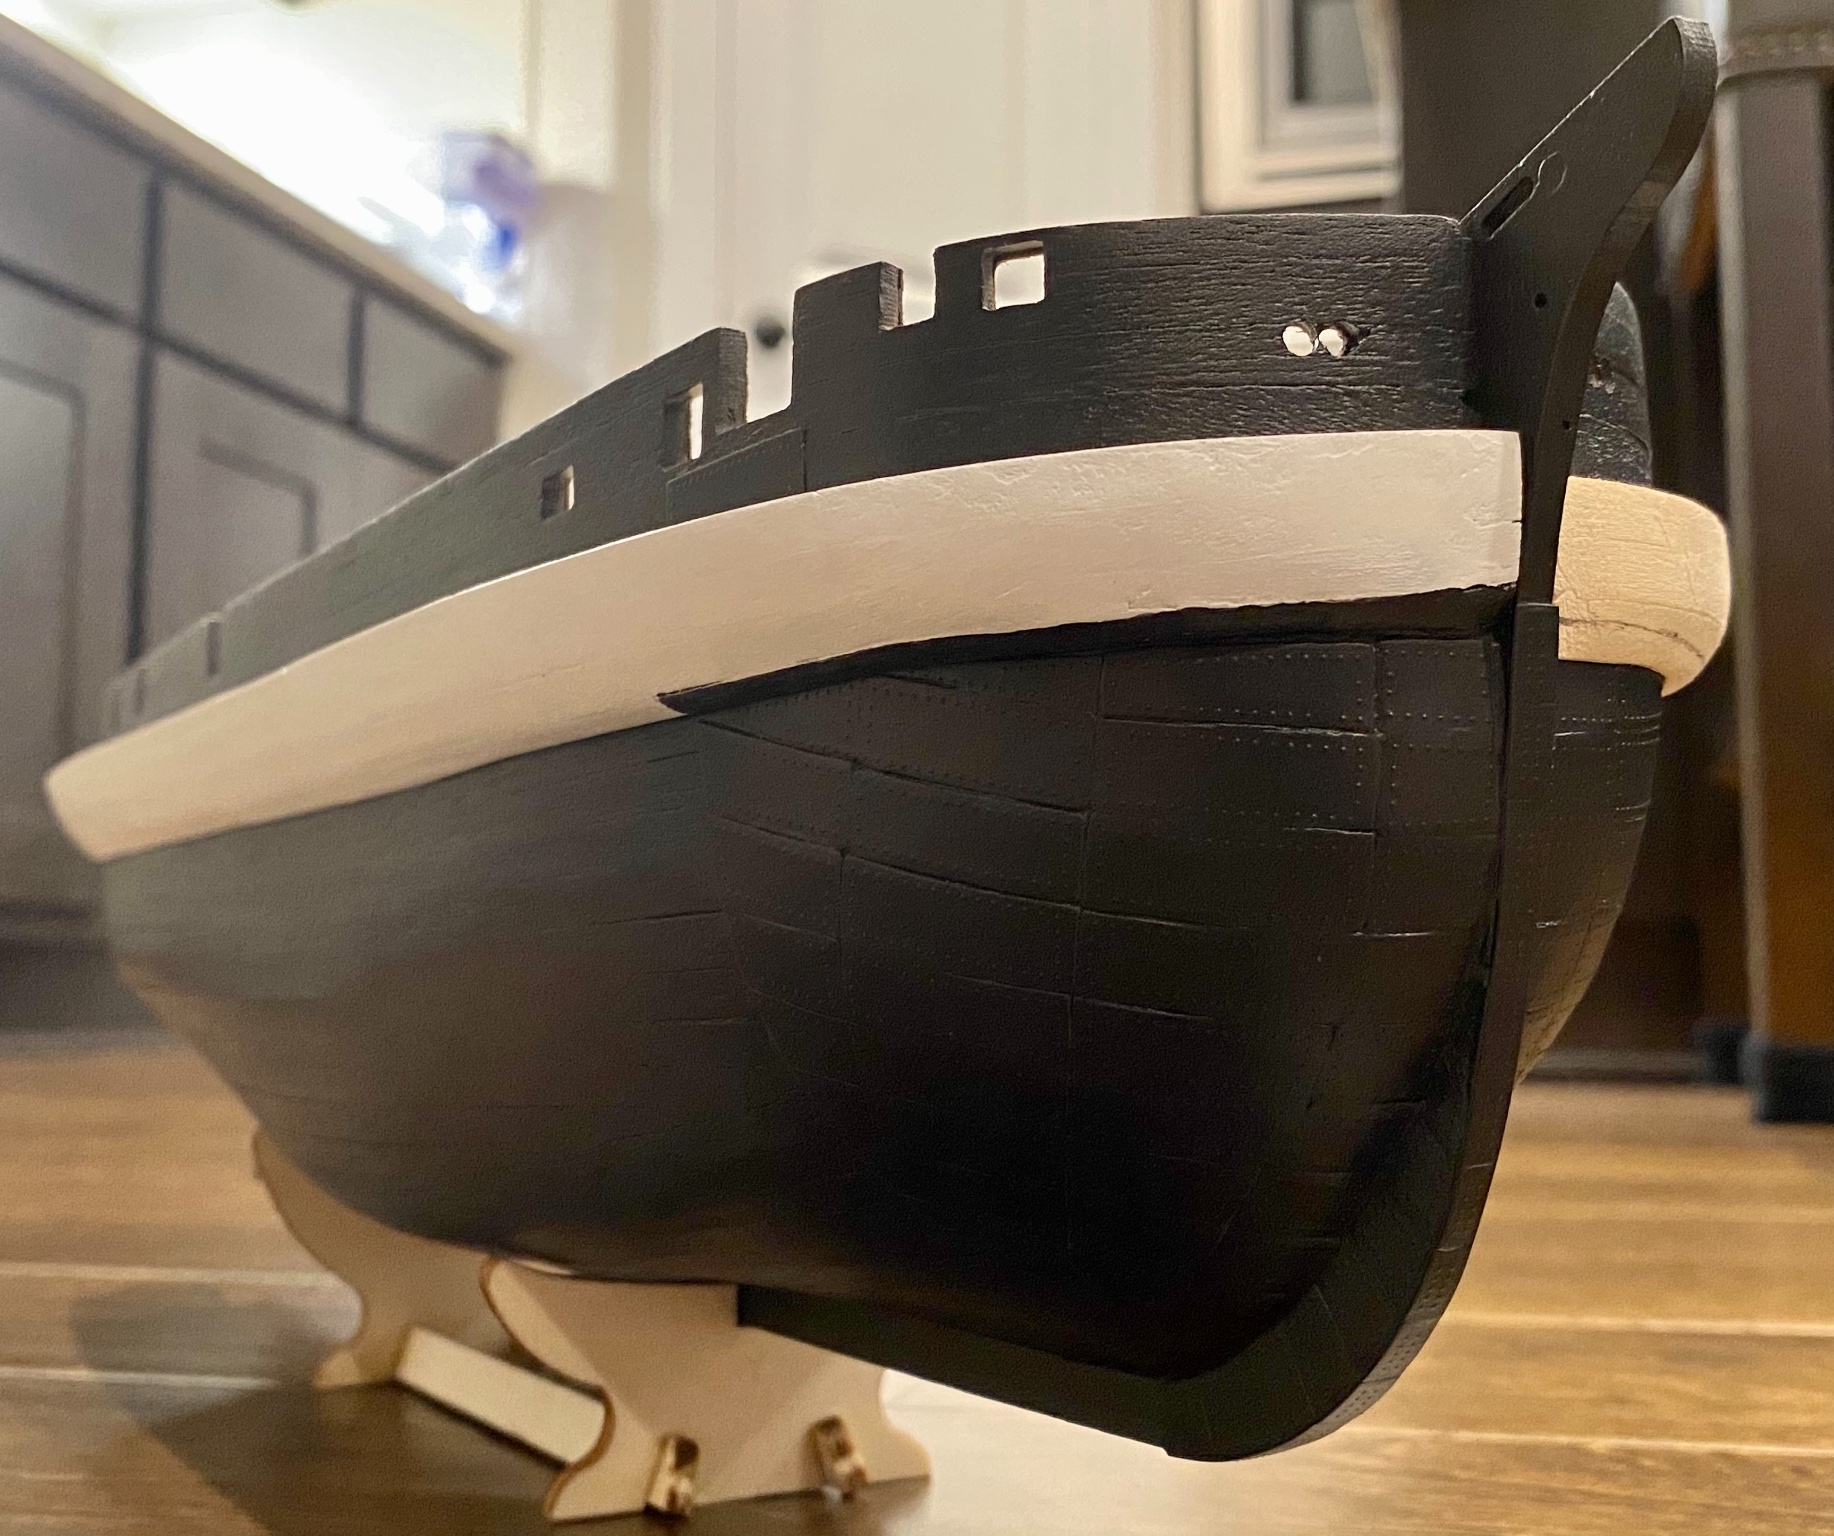
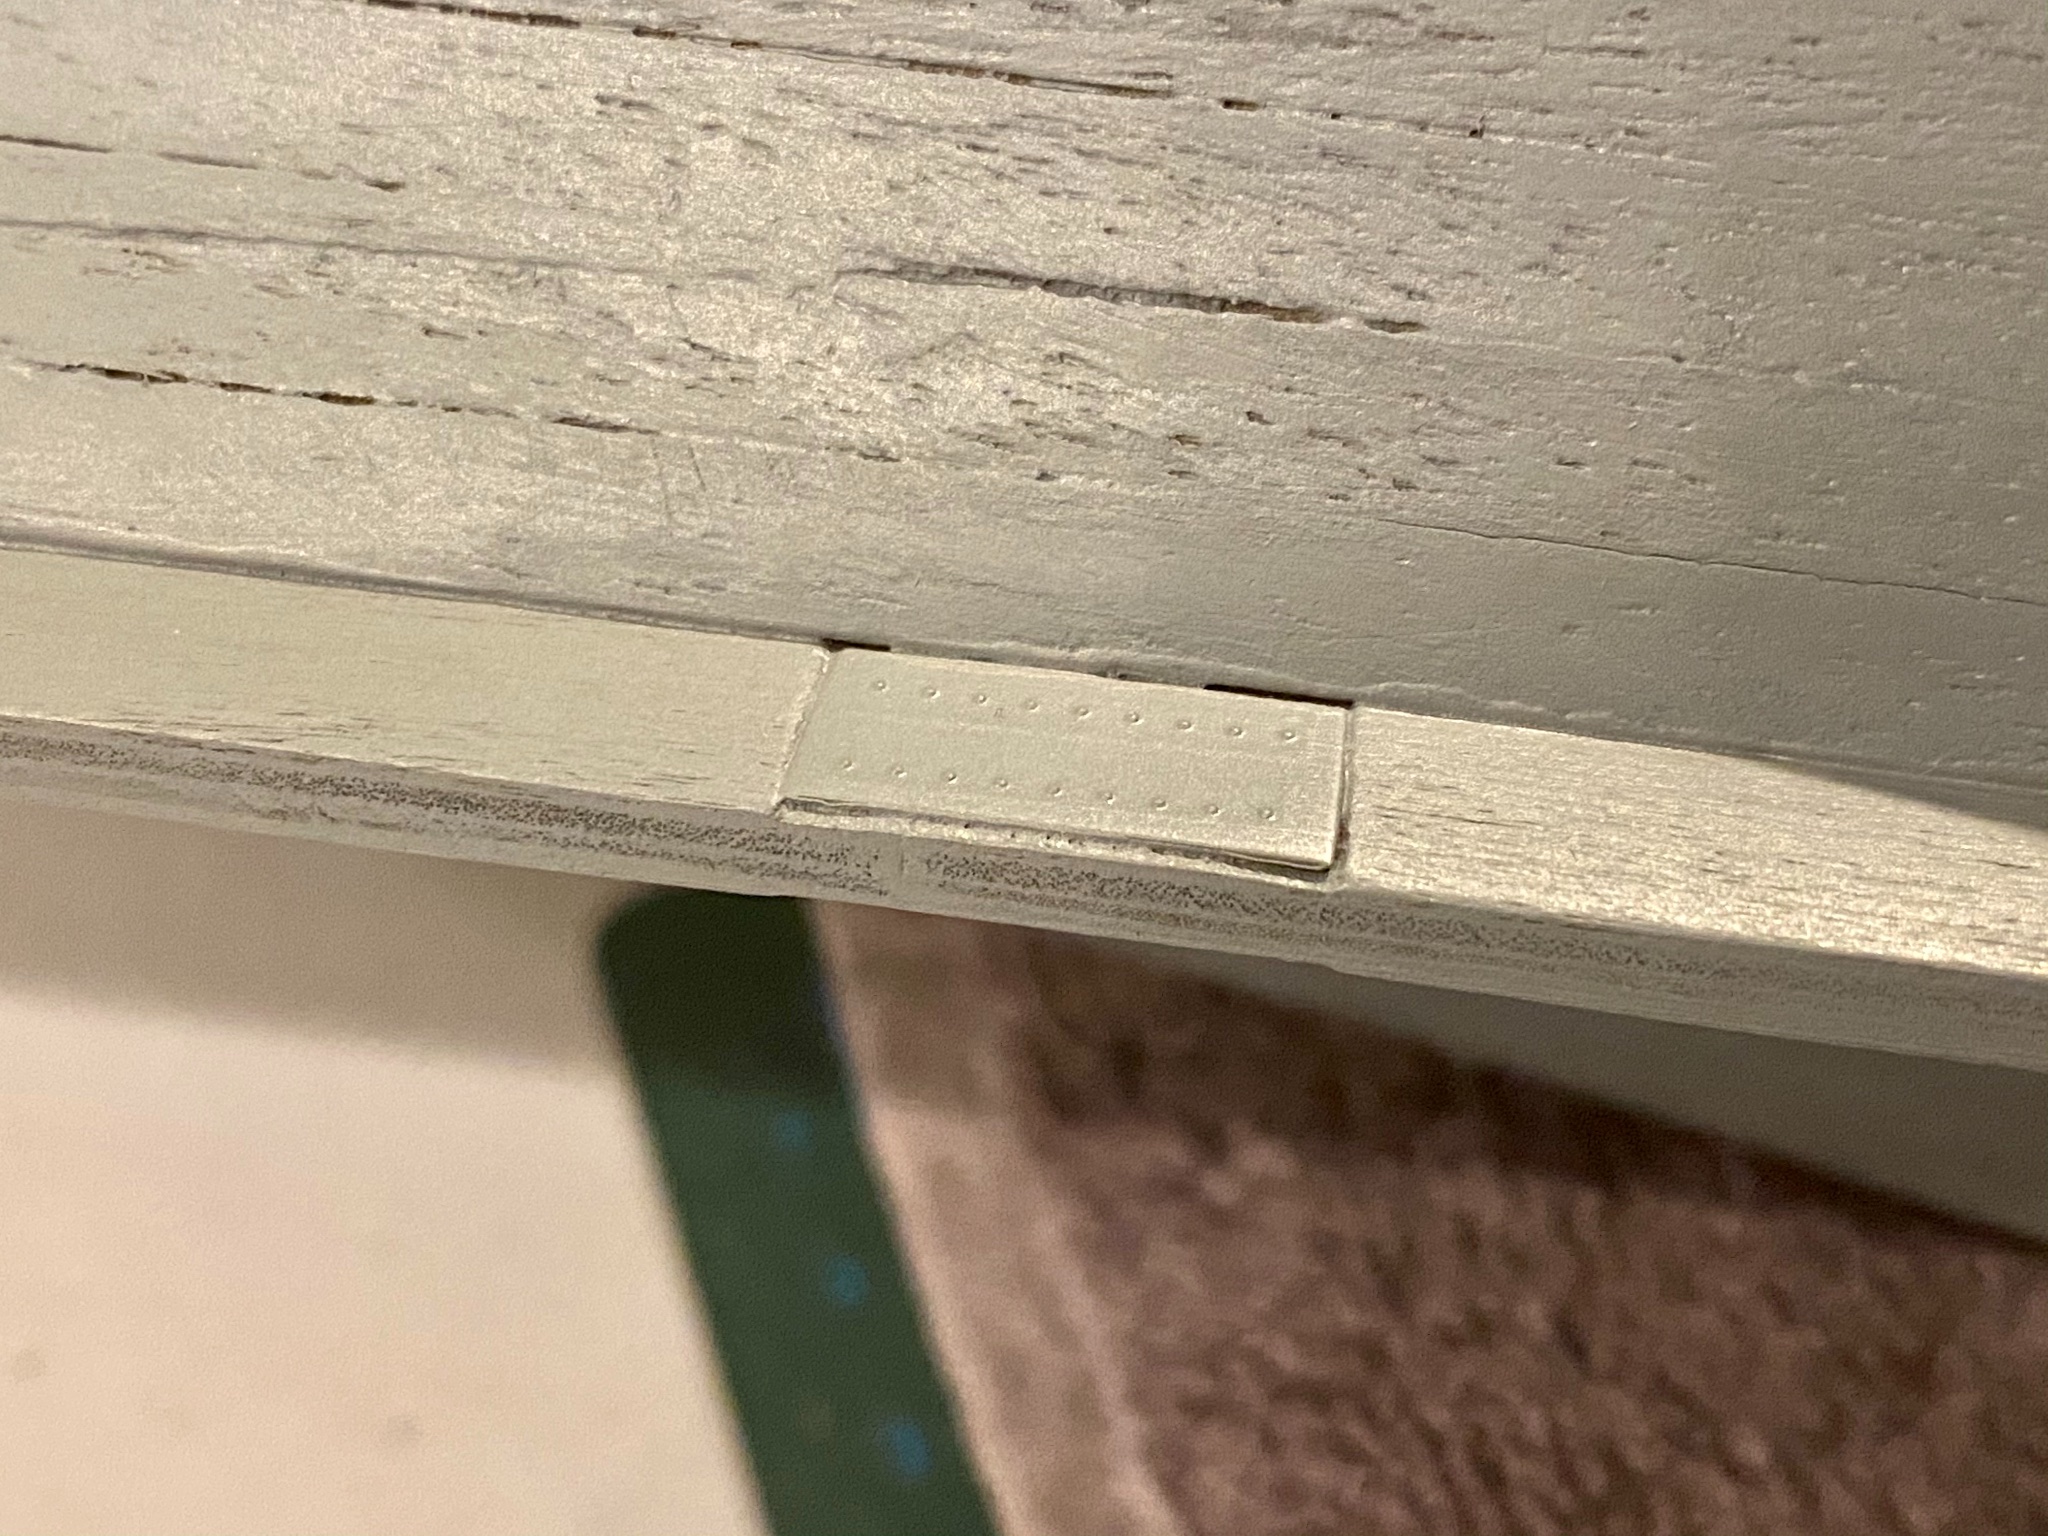
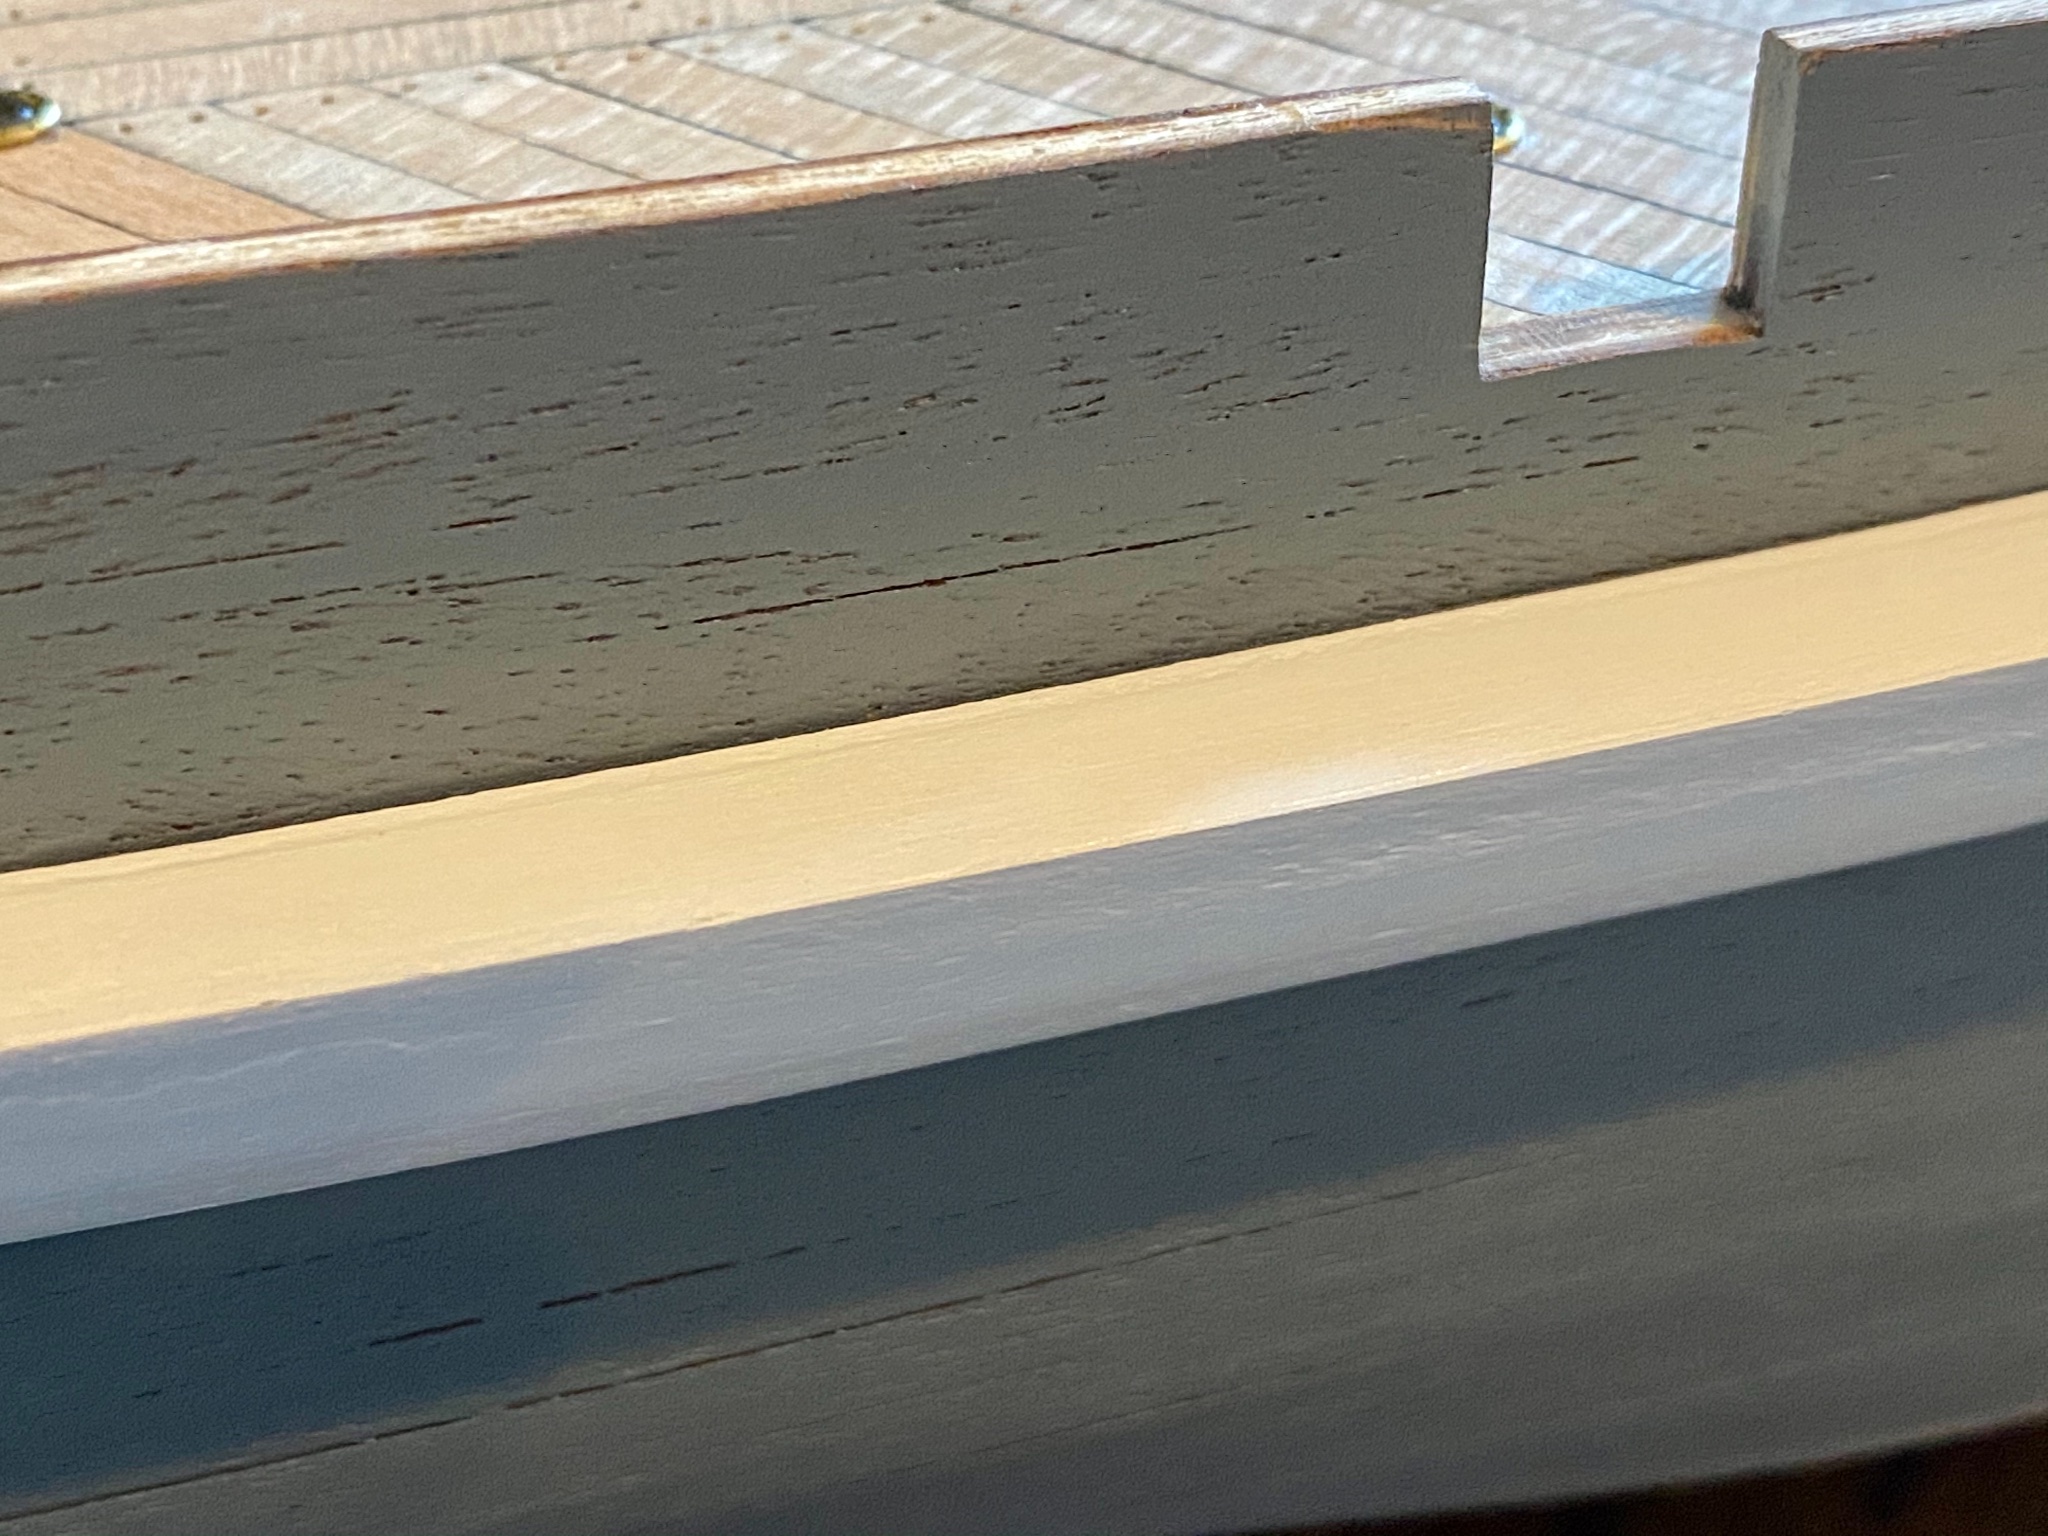
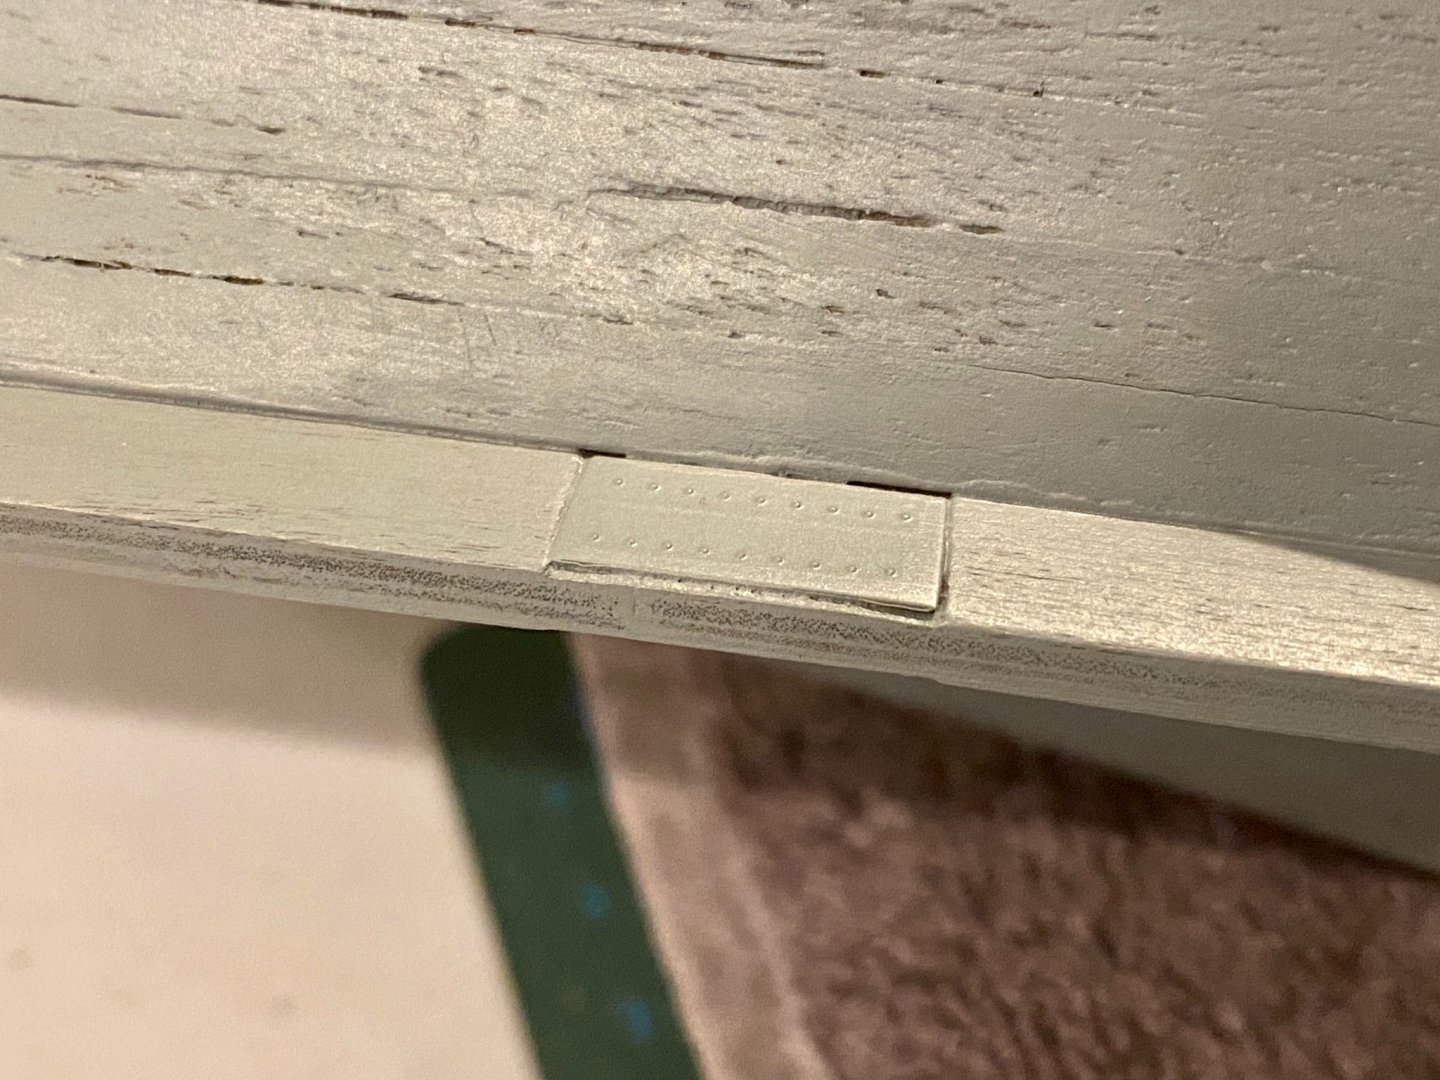
Keith, you are very observant! I guess a couple of pictures as well as an explanation is in order. I built the chock channels temporarily “removable.” This is only my second wood ship and I’m still working on my skills, painting being one of them. My goal with these chocks is to be able to paint clean lines between the white of the chocks and the black of the hull. I’m sure you have already figured out that white is particularly hard to paint and cover well, needing several coats, at least for me. As such I have not yet permanently attached the chocks to the hull. When I built them, I placed parchment paper between the hull and the new construction, which allowed me to easily form the curves against the hull as well as remove them for shaping, sanding and painting. During construction I drilled alignment holes which I then installed dowels in the chocks so that they align every time in perfect place when installed on the hull. I will eventually permanently glue down the chocks, not too distant in the future, just as soon as I have the hull painted. Below, the chocks sitting without the hull; the hull primed and ready to install the rivets on the armor plates with the chocks installed; and a close up with the effect I’m looking for, clean paint line between the hull and the chocks.

-
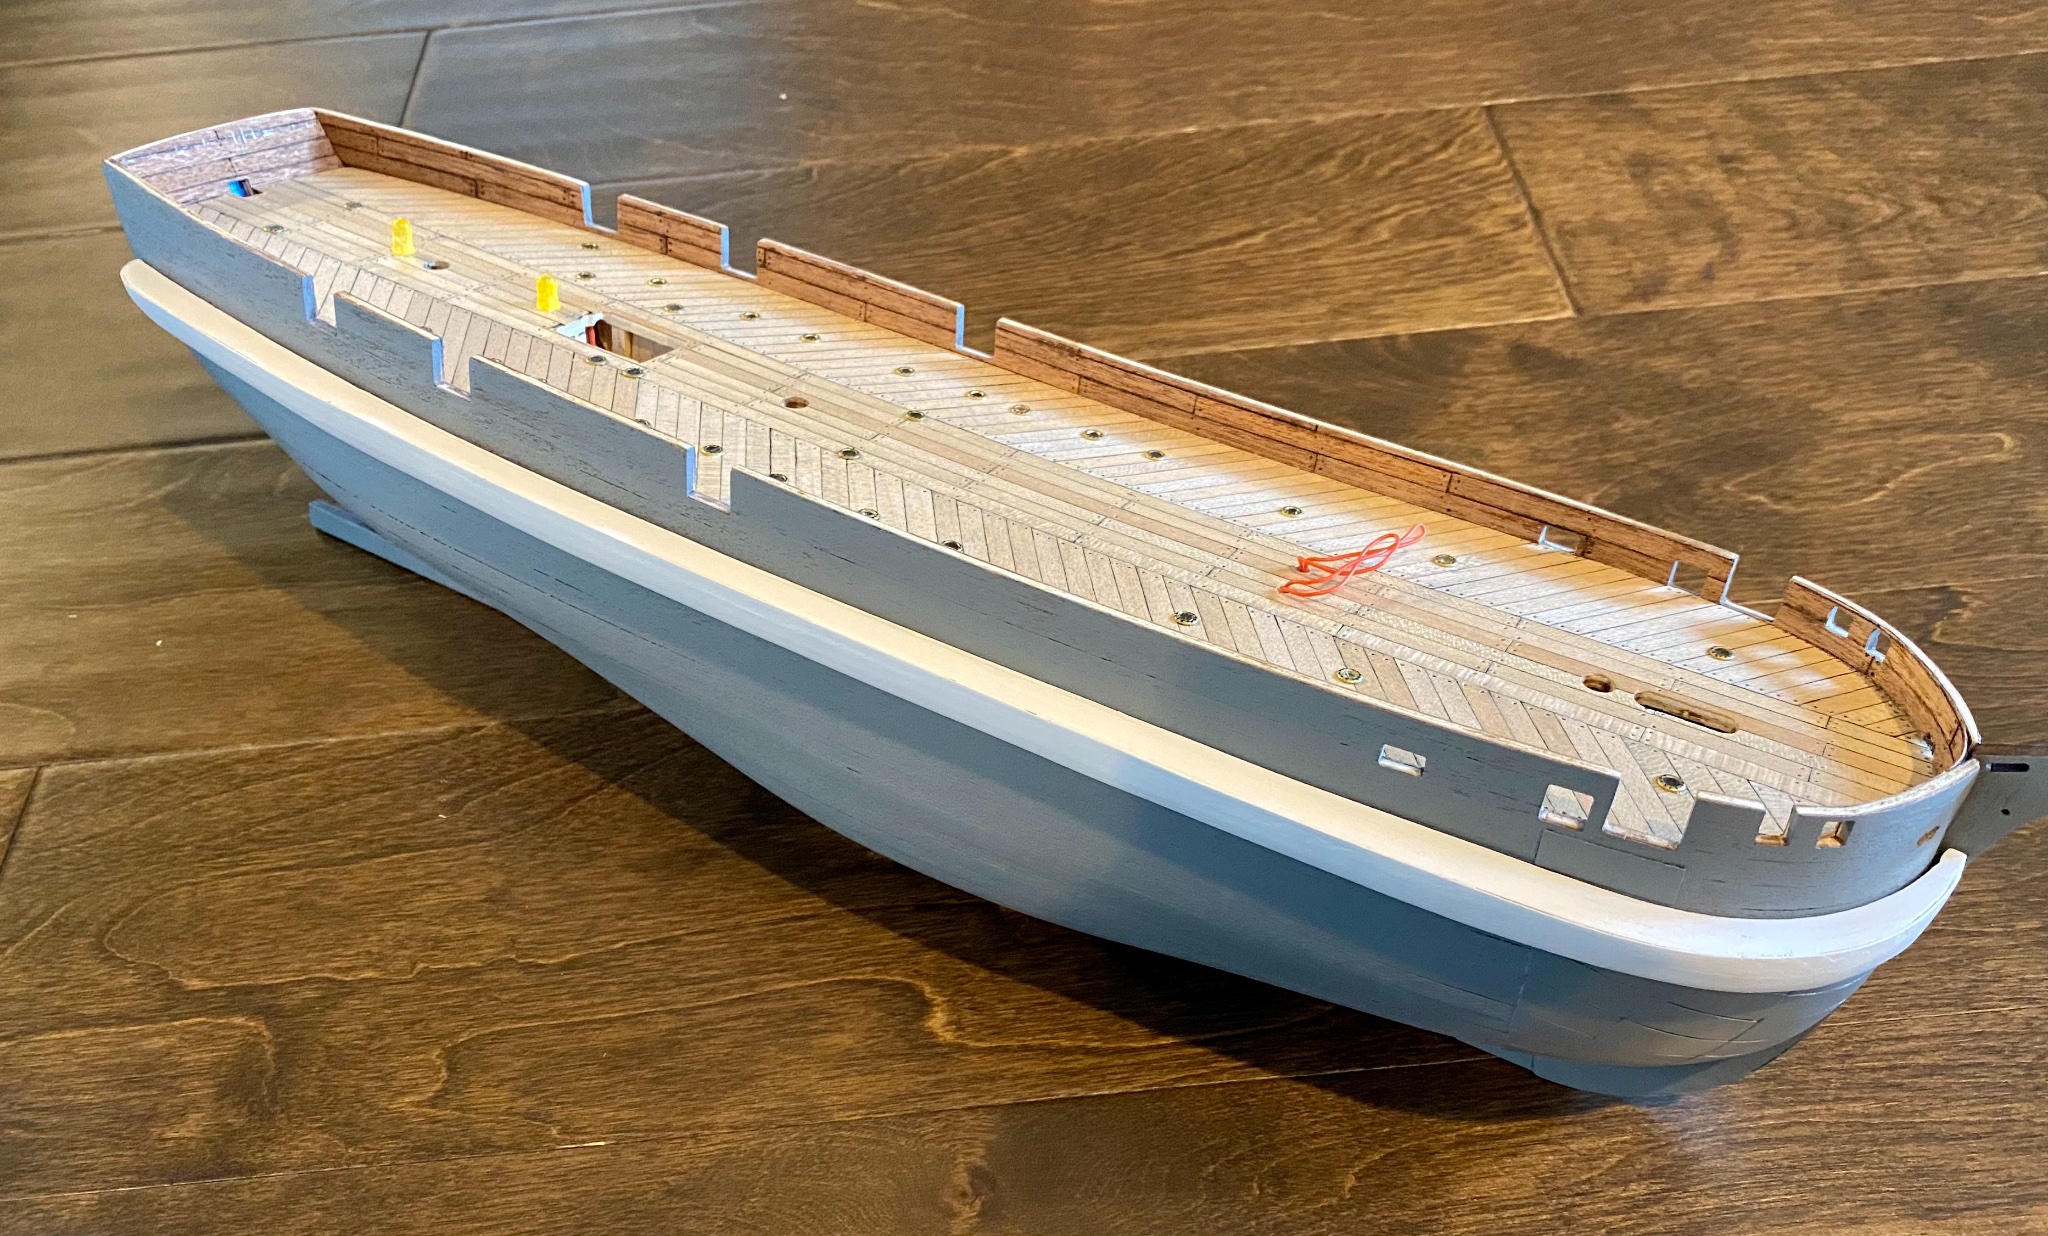
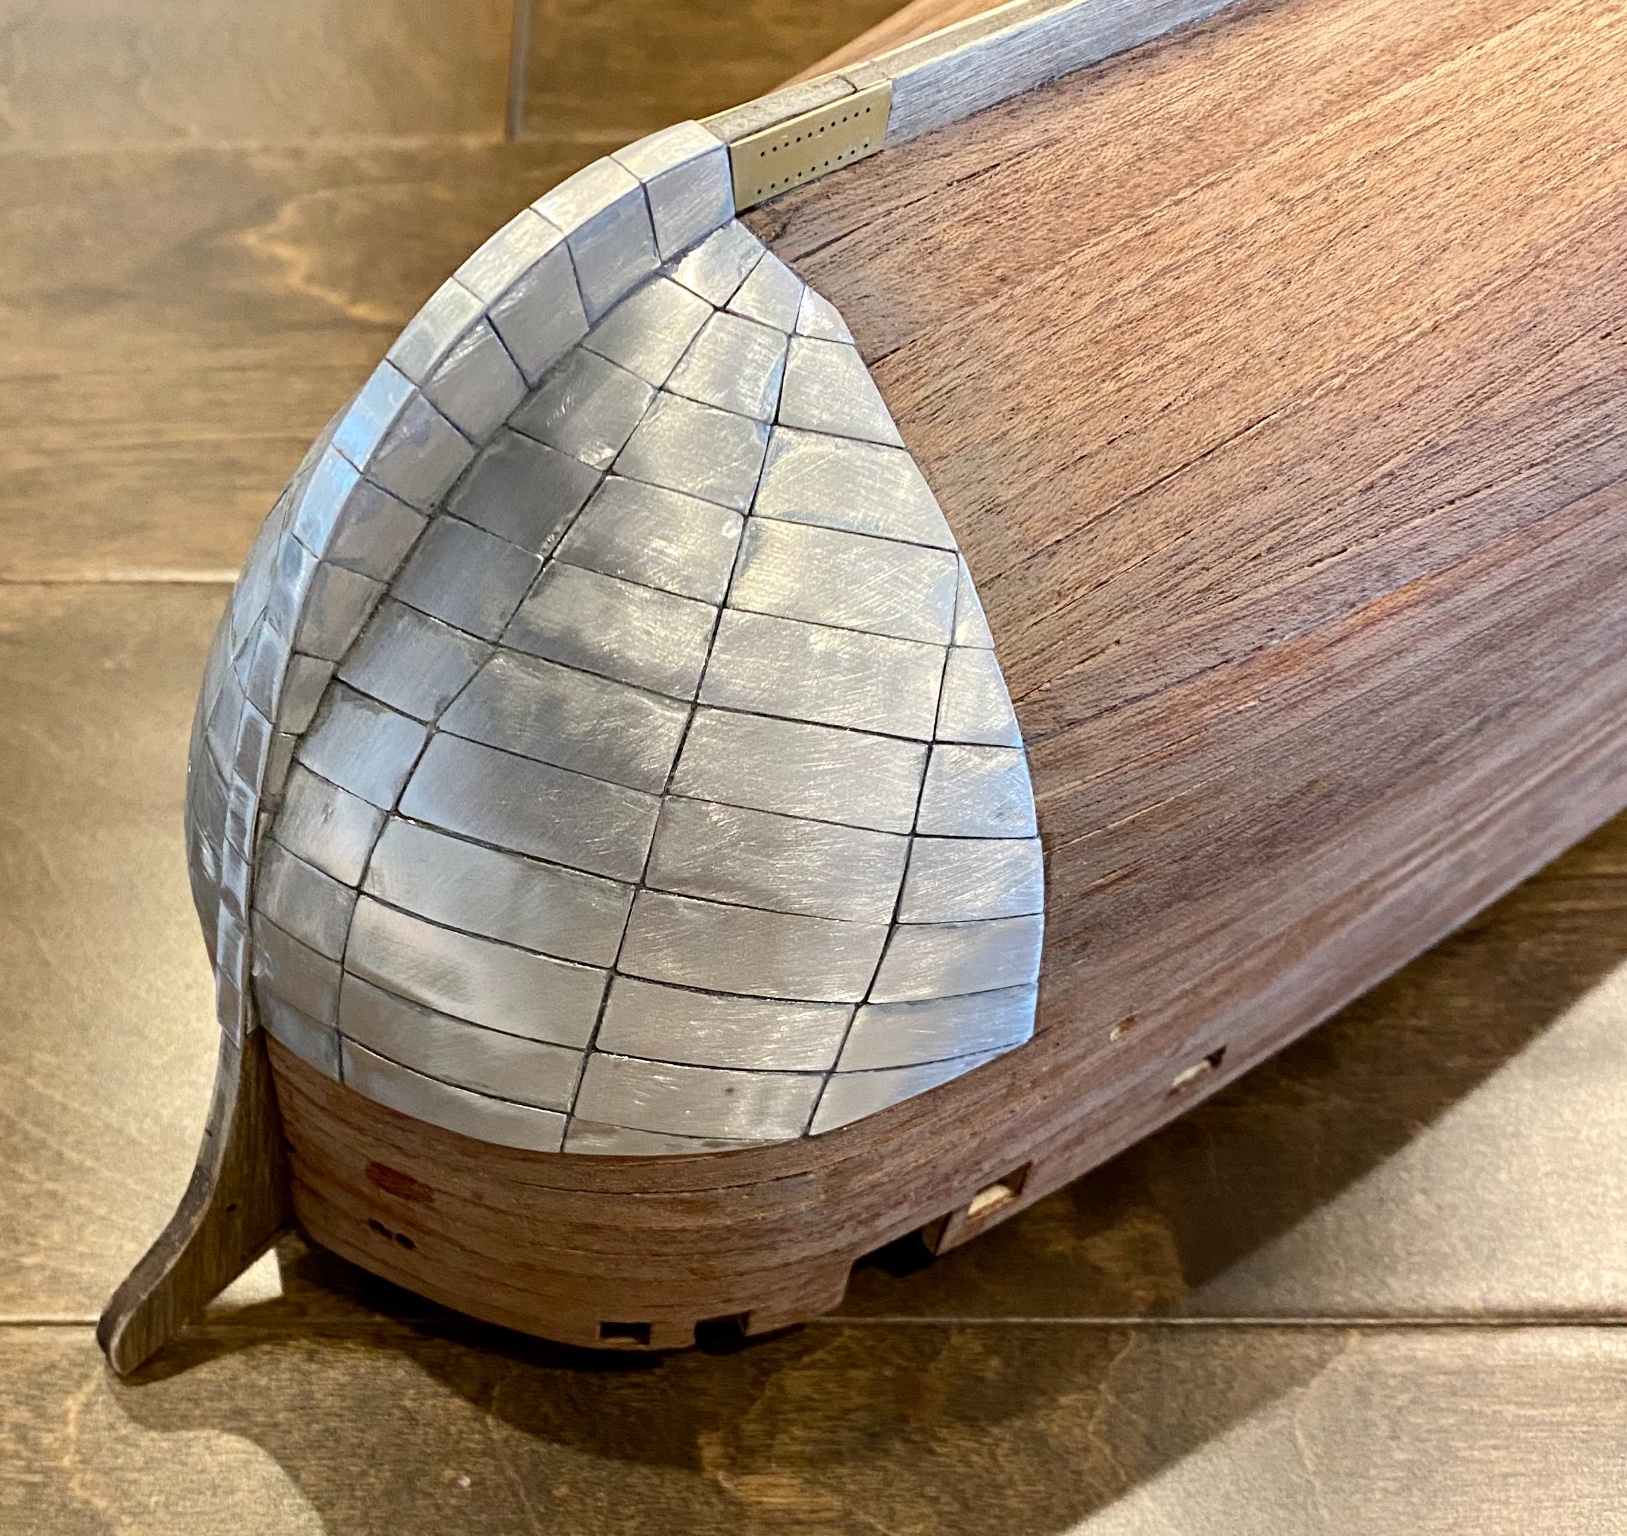
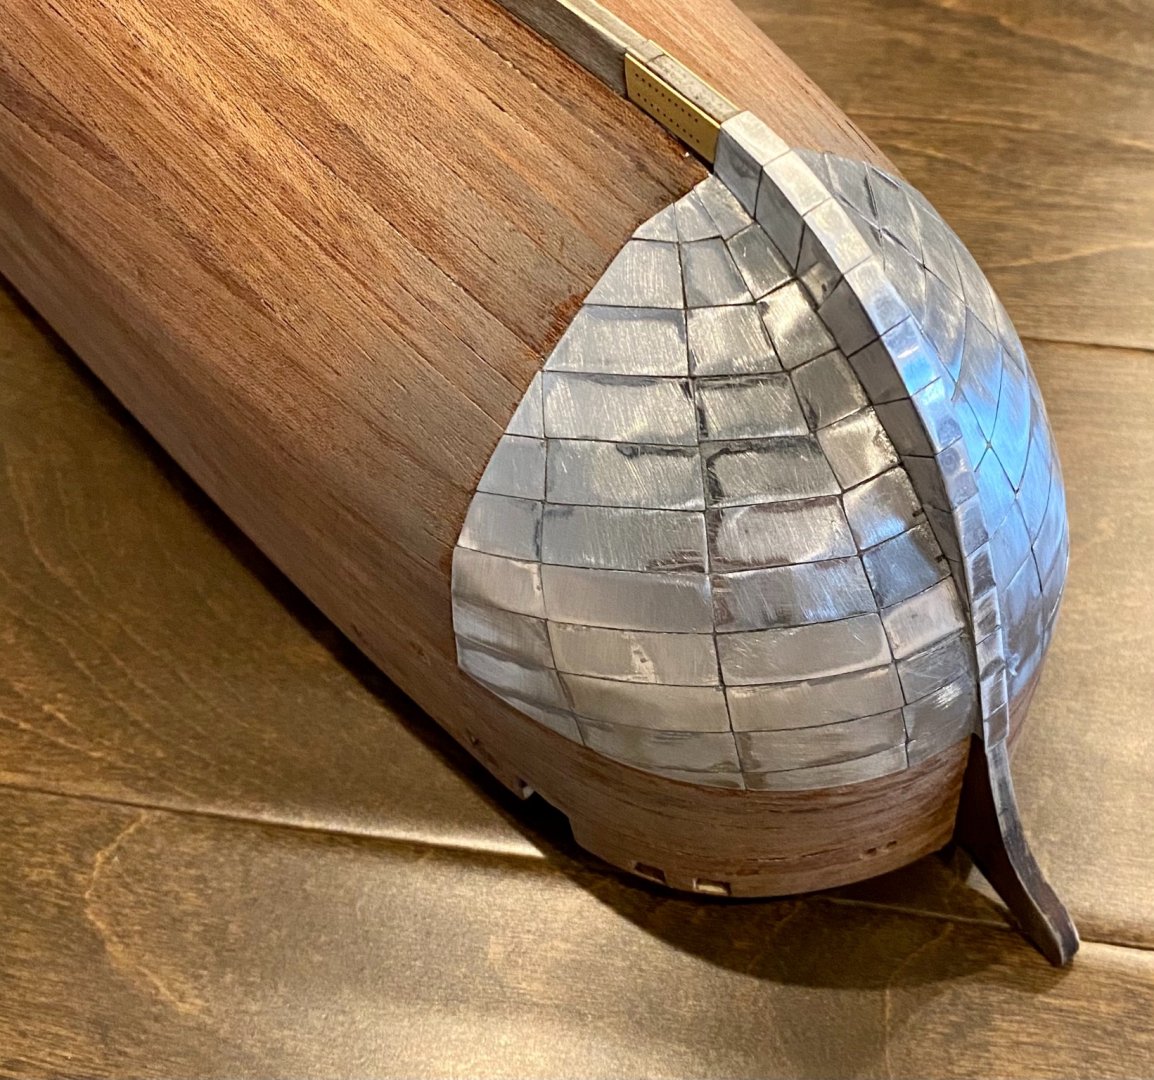
Finally finished the installing the plating. A little more cleanup and some primer before starting the rivet project...

-
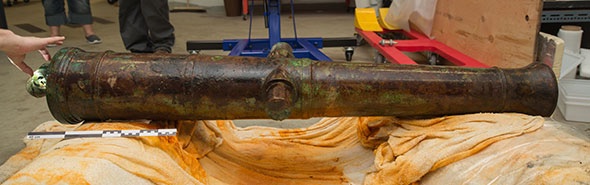
Well, here is what I found about the cannons on the HMS Erebus and likely on the HMS Terror. A brass 6-pounder cannon from the wreck of the HMS Erebus. Image: Parks Canada (see image below) We know that the Terror and the Erebus were similarly fitted, so I will go with a set of 6 pound 1:75 scale cannons, if I can find them for the period. I admittedly know nothing about cannons, so any help or ideas (from anyone) on period cannons and the base they rest on would be much appreciated.
-
This is a very good question and I admit that I don’t know the answer. I’ll do some more research and see what I can find.
-
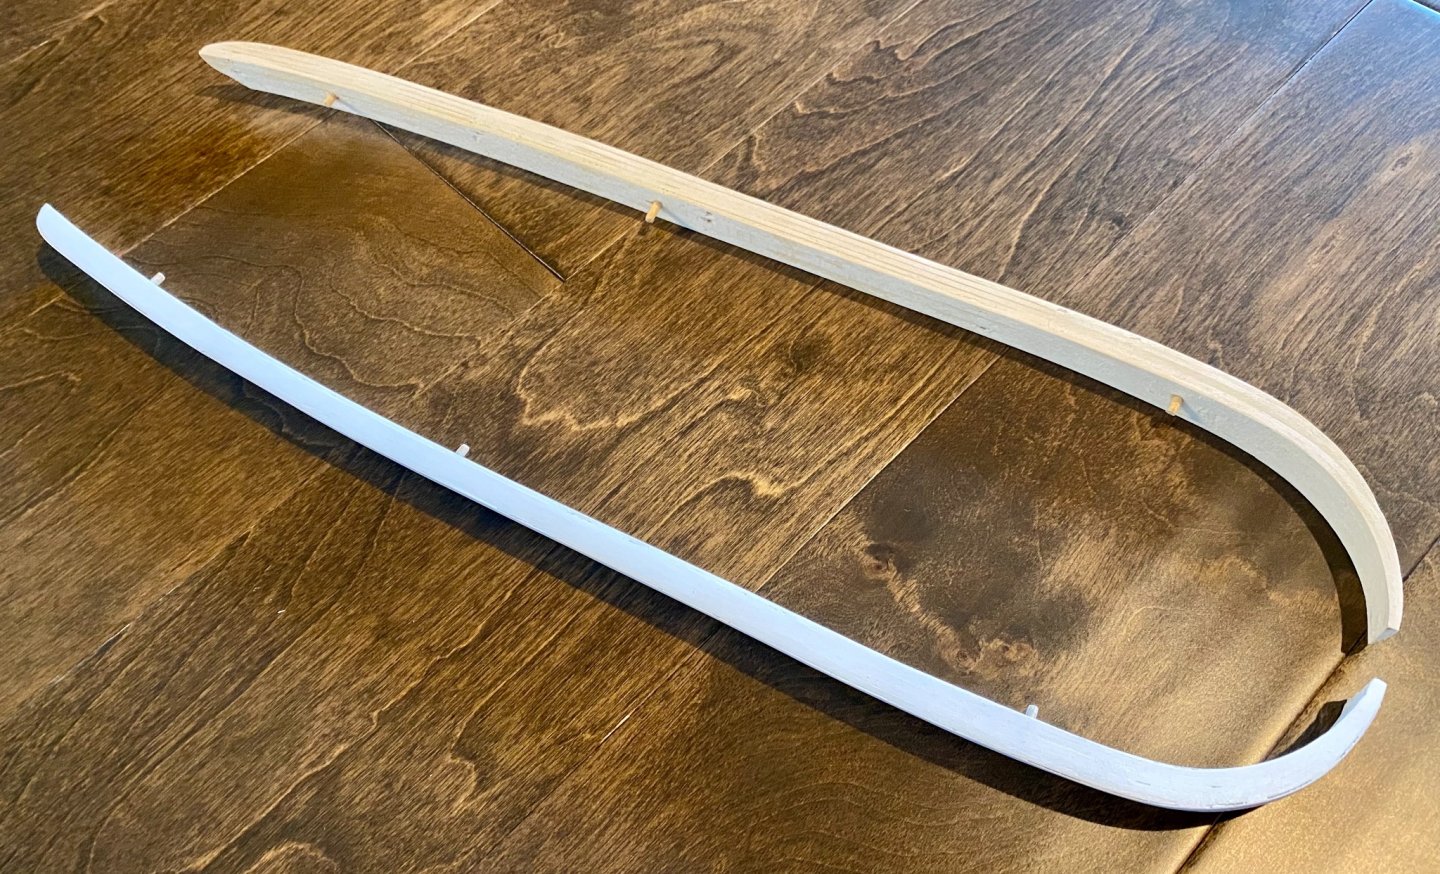
Well, today didn’t go as planned. I got side tracked with one project, then another, and before I knew it, I was painting the starboard chocks (ice bumper). I’m happy with the results so far.