HOLIDAY DONATION DRIVE - SUPPORT MSW - DO YOUR PART TO KEEP THIS GREAT FORUM GOING! (89 donations so far out of 49,000 members - C'mon guys!)
×


Mirabell61
-
Posts
7,409 -
Joined
-
Last visited
Content Type
Profiles
Forums
Gallery
Events
Everything posted by Mirabell61
-
 congrats Kevin, your Hercules is a very fine tugboat, well done, also thanks for your conclusion notice Nils
 -
Thank you Phil, for your input, I took a look at the Columbia WLV604 lightship per WW-web. A nice Vessel, perhaps we shall see a model of her here at MSW someday. Nils
- 299 replies
-
- 4
-

-
- lightship
- Feuerschiff Elbe 1
- (and 1 more)
-
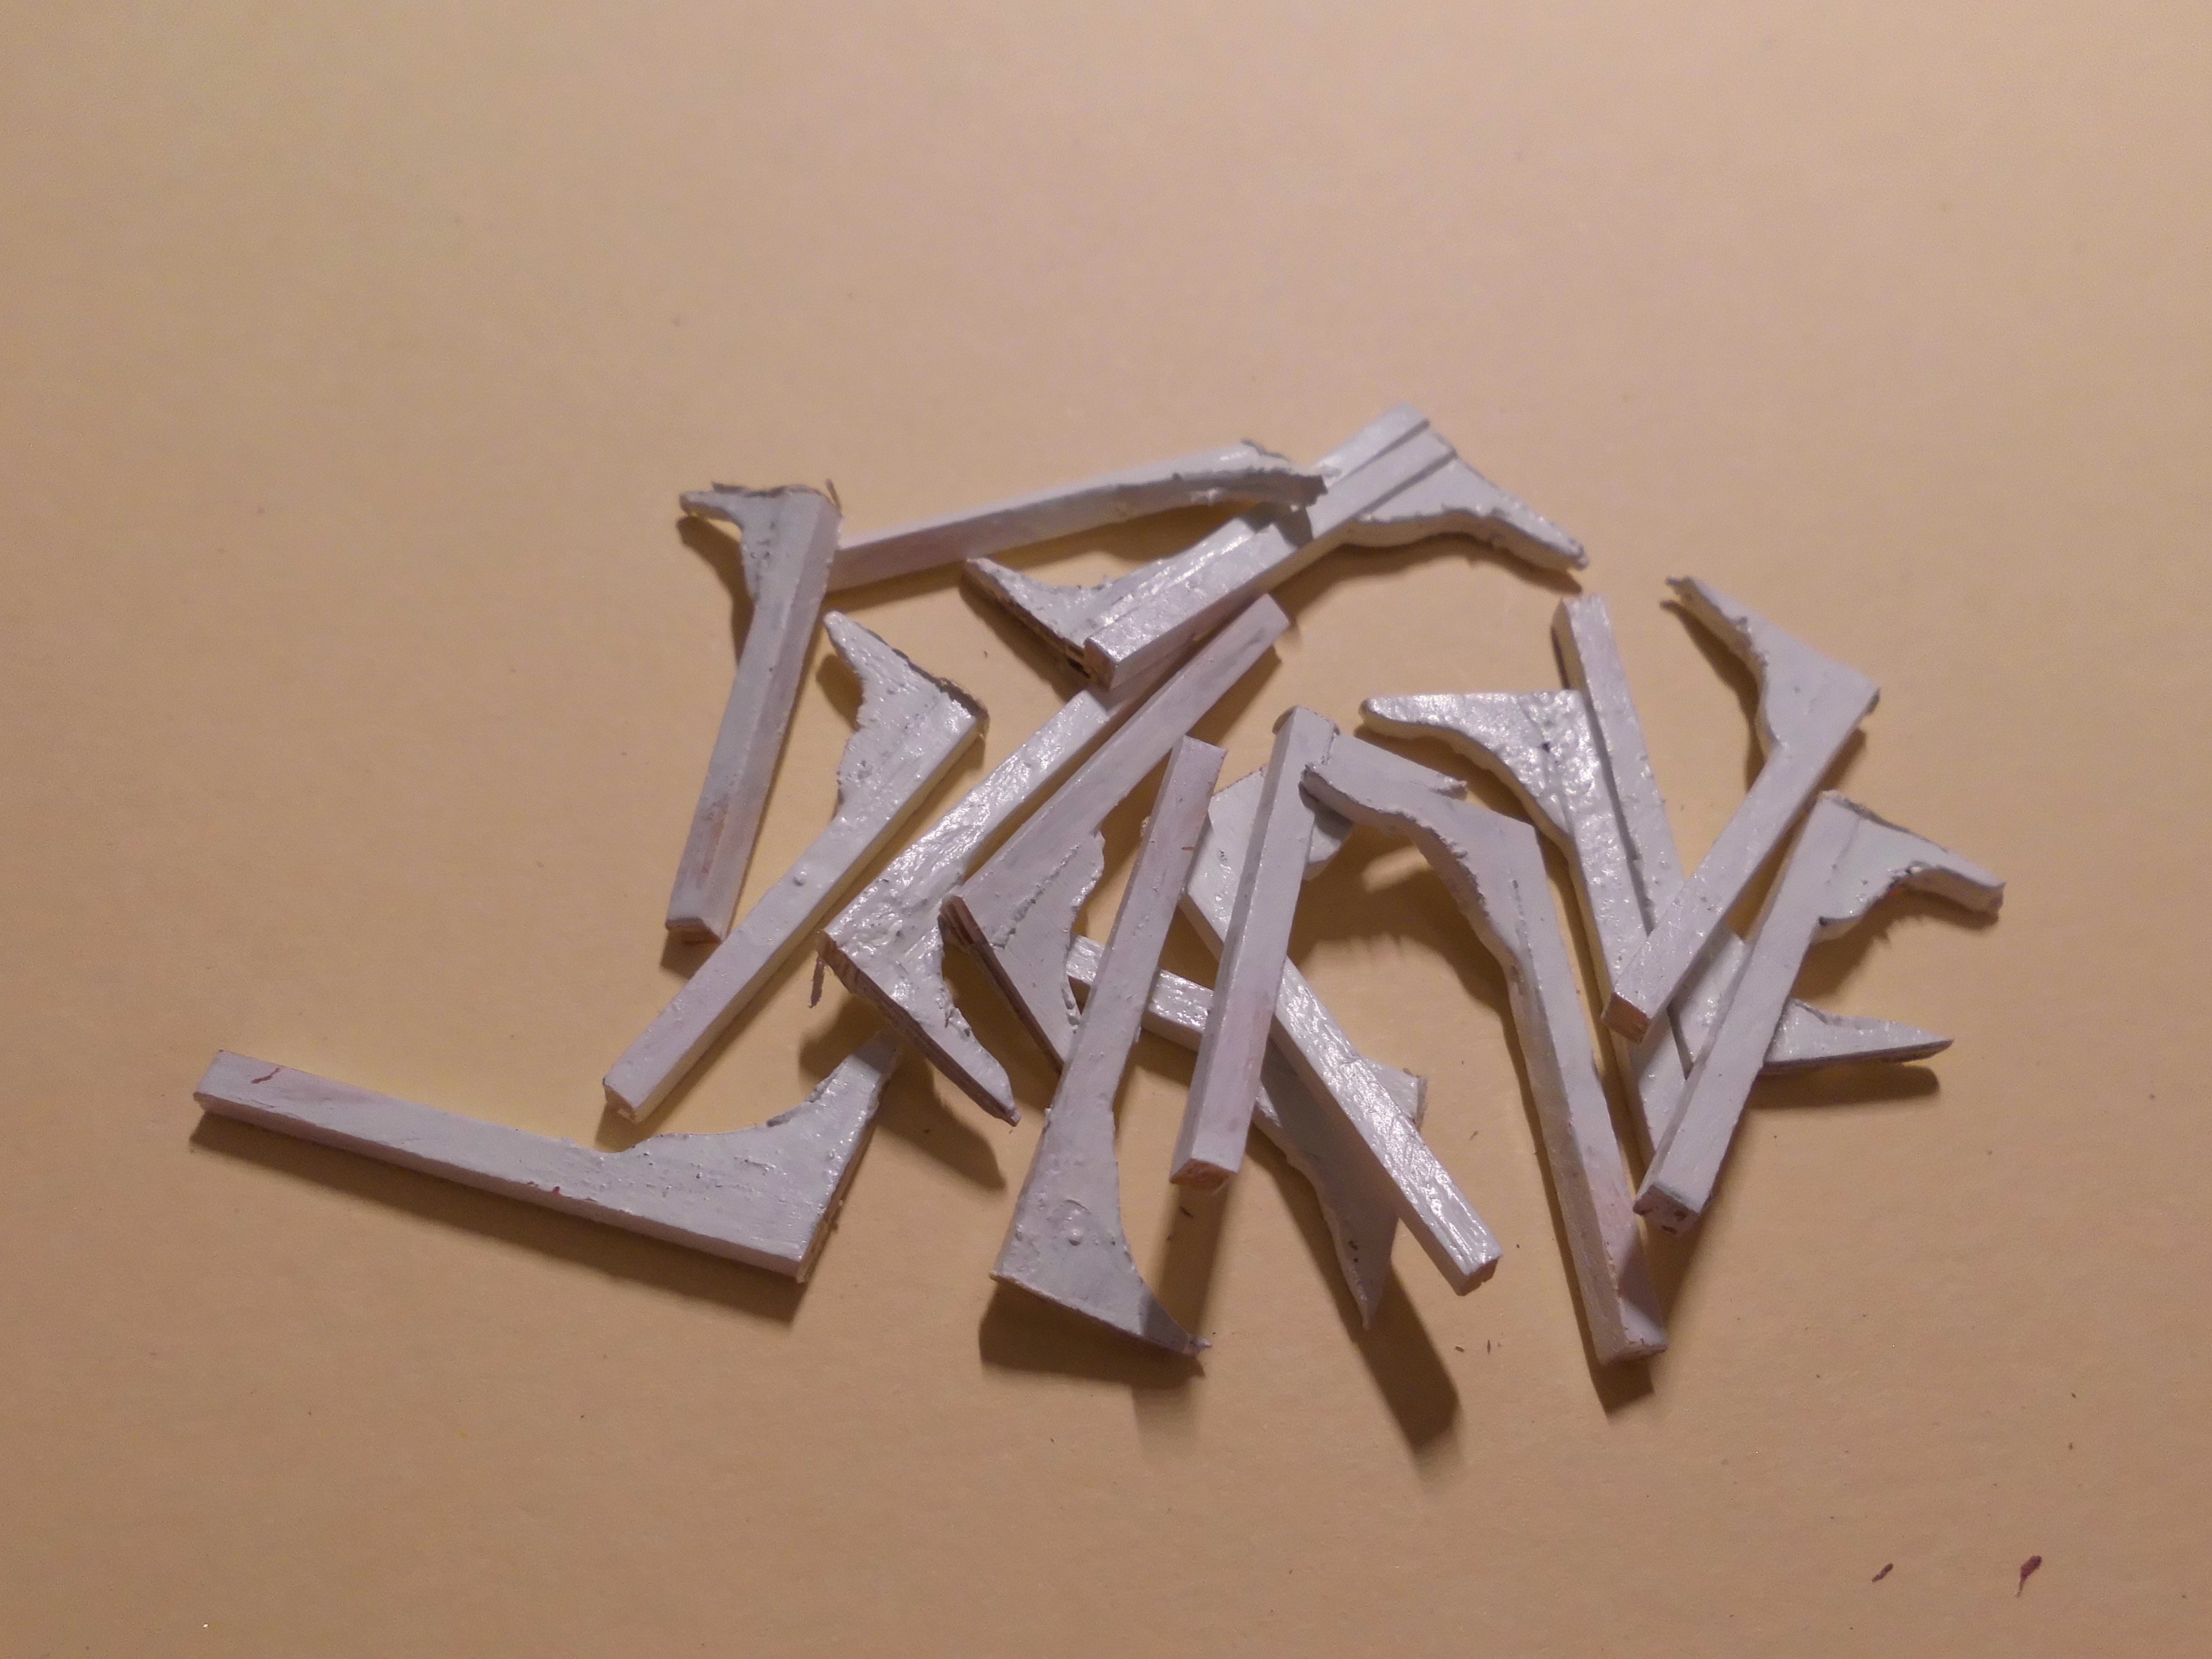
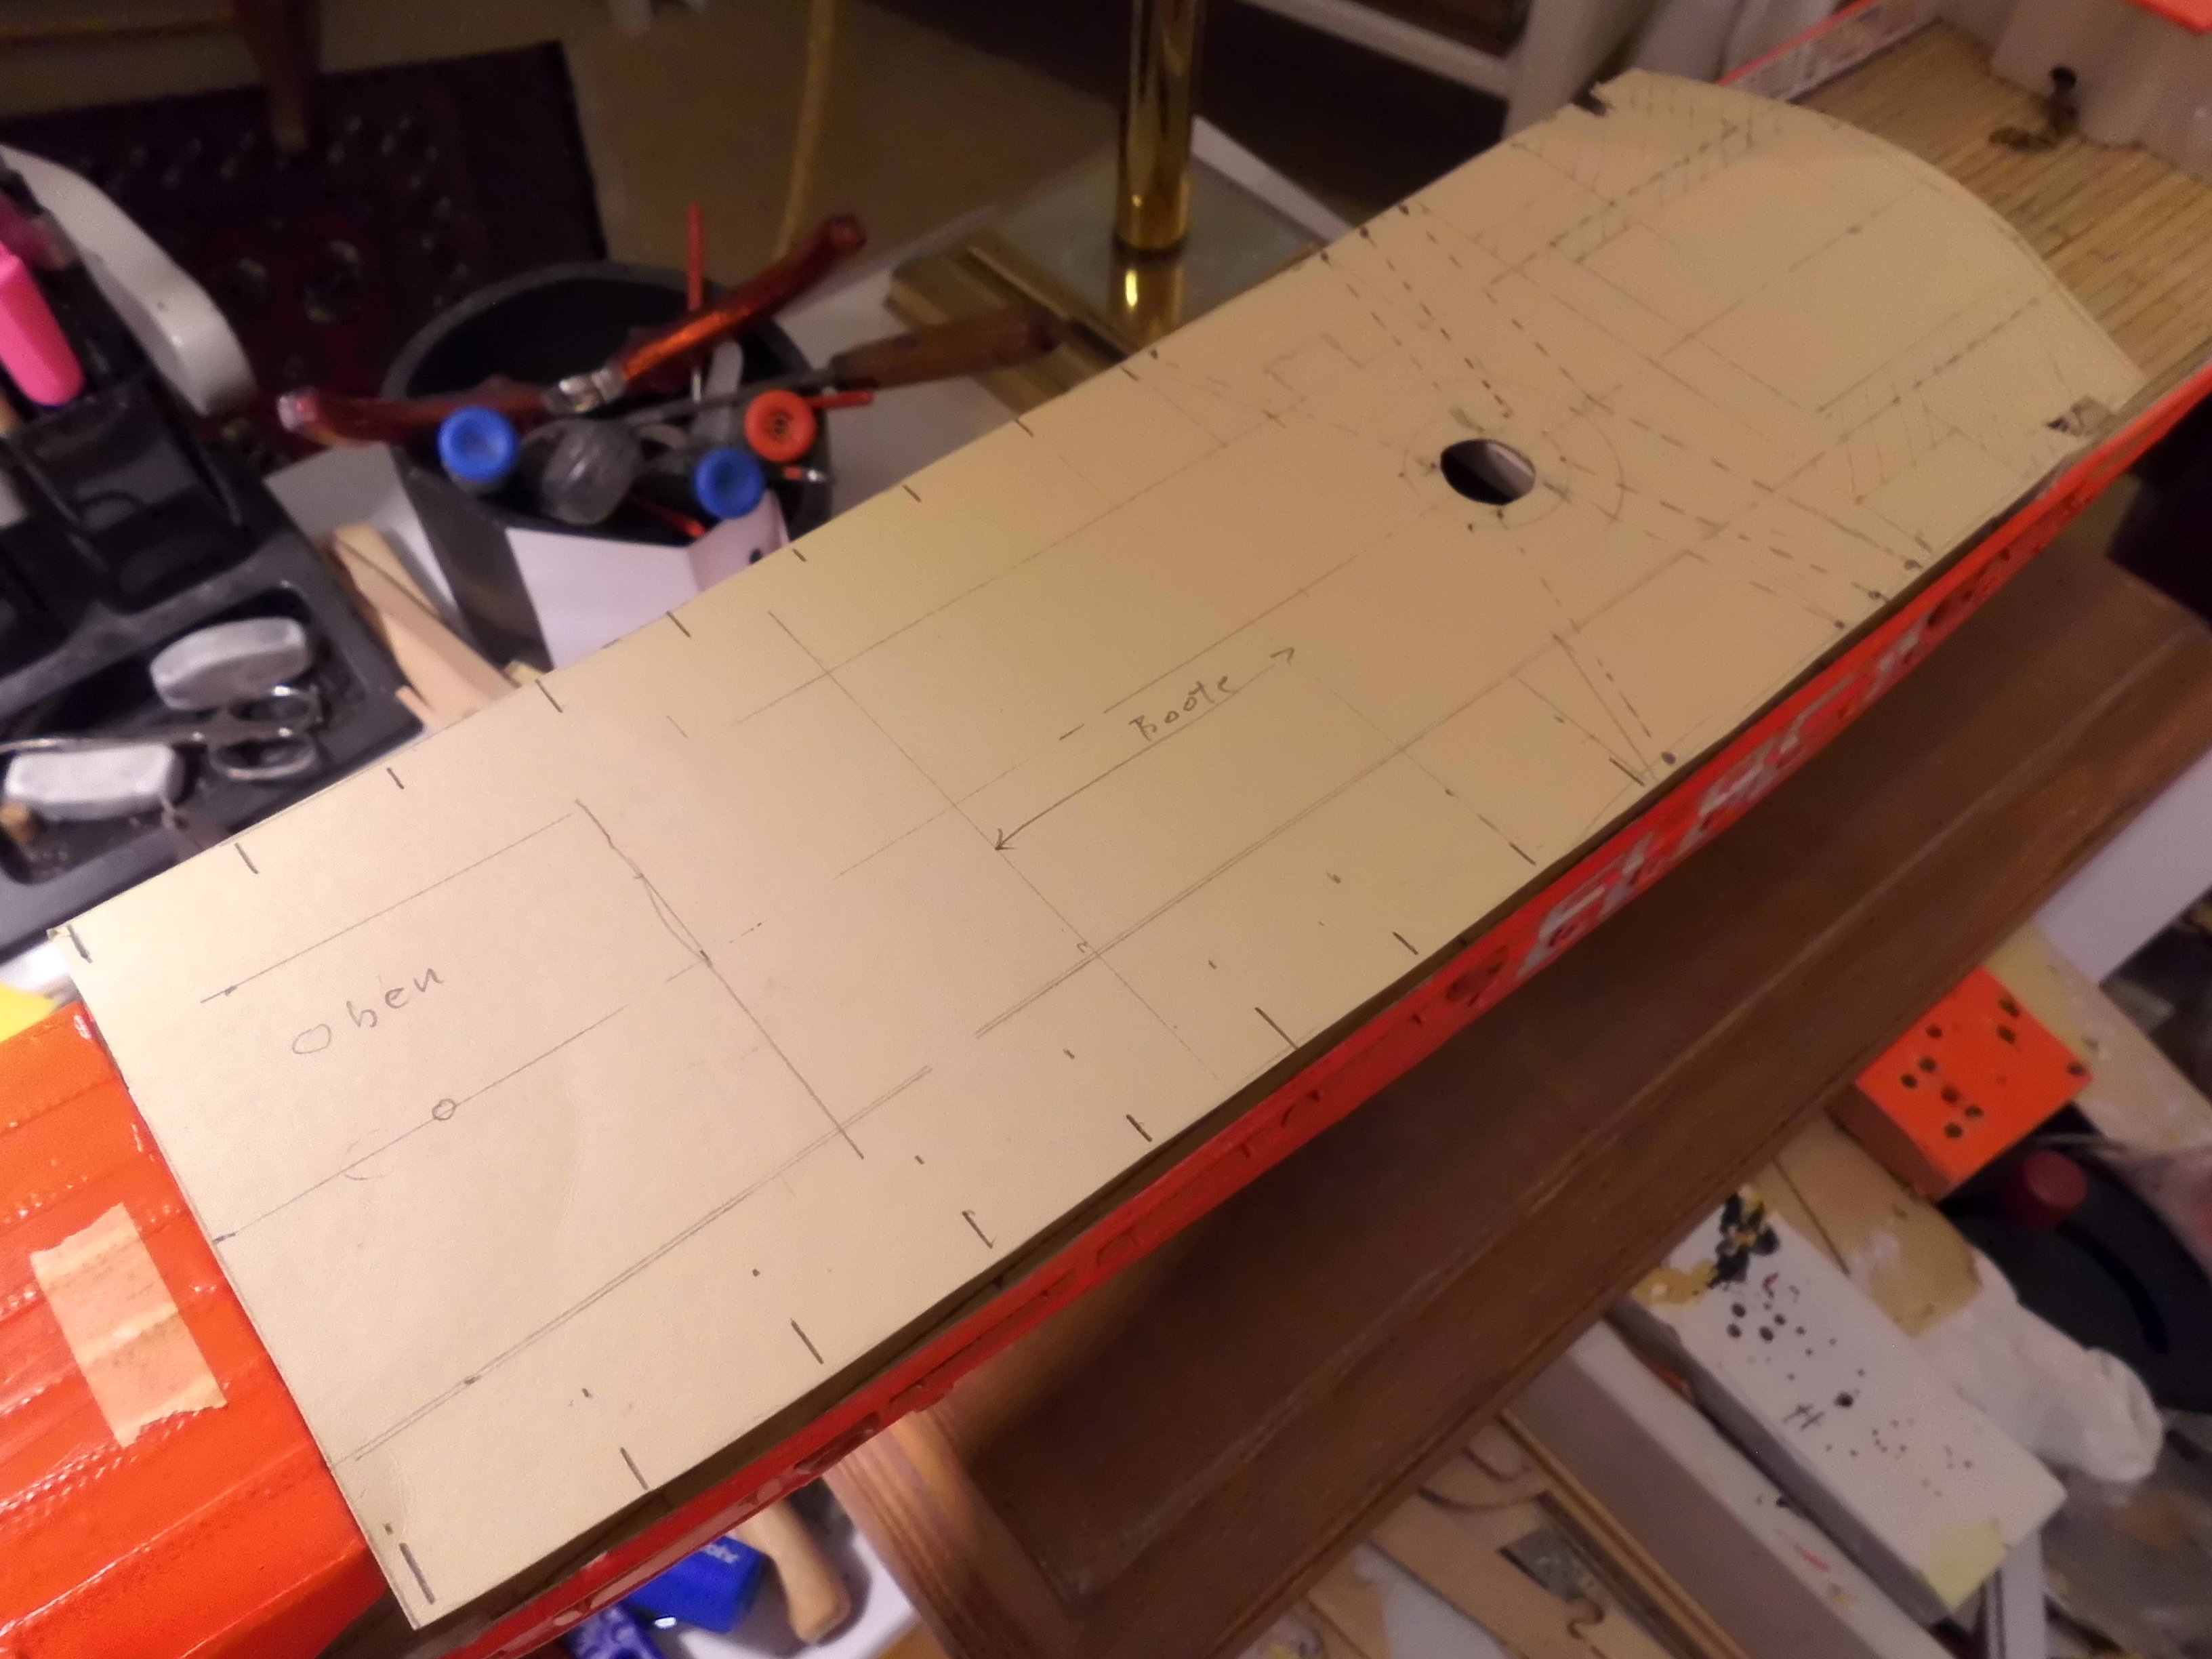
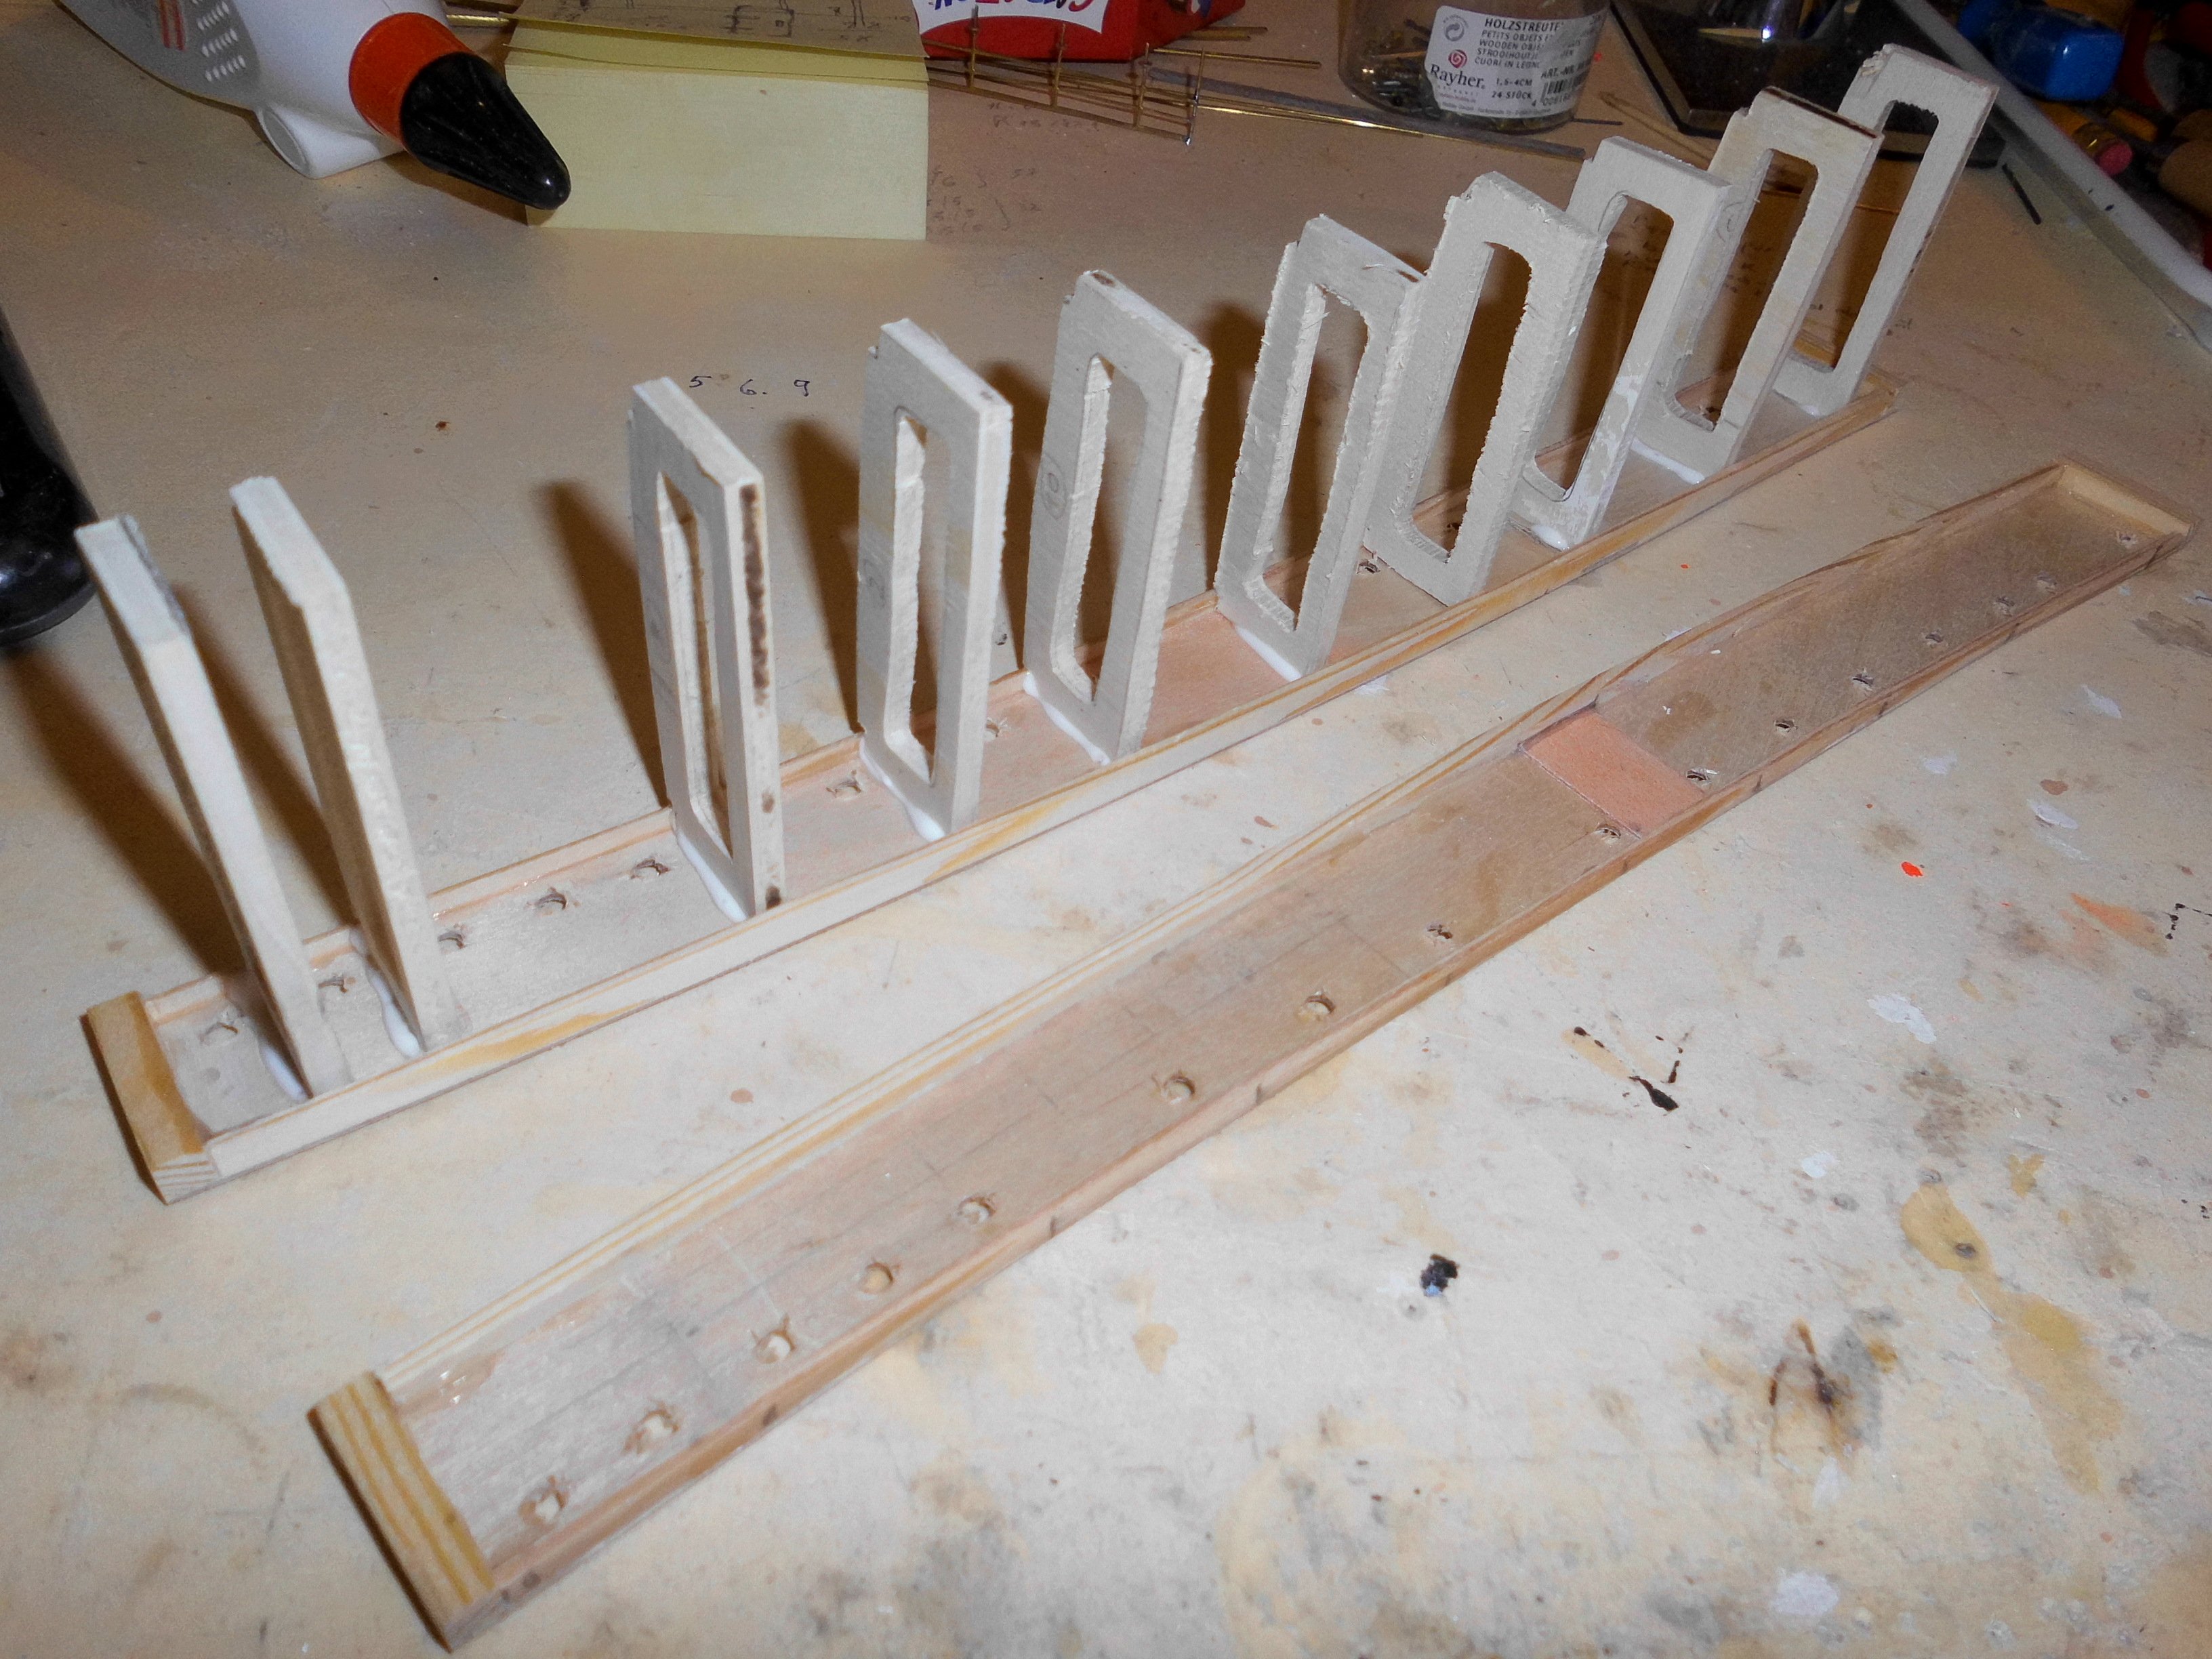
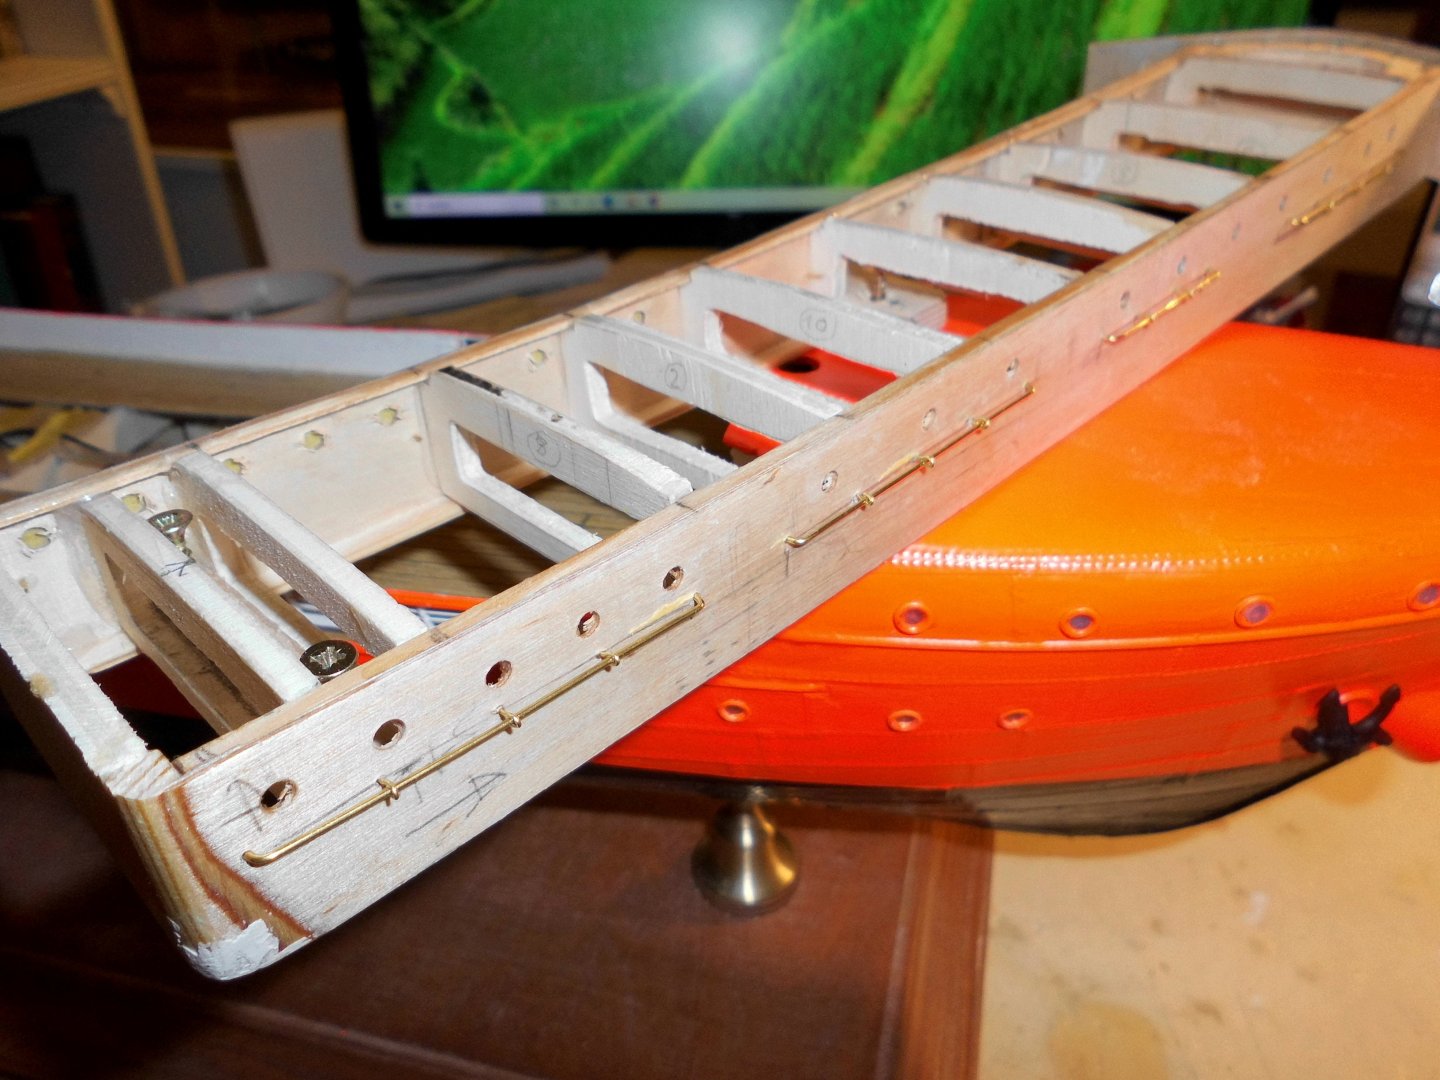
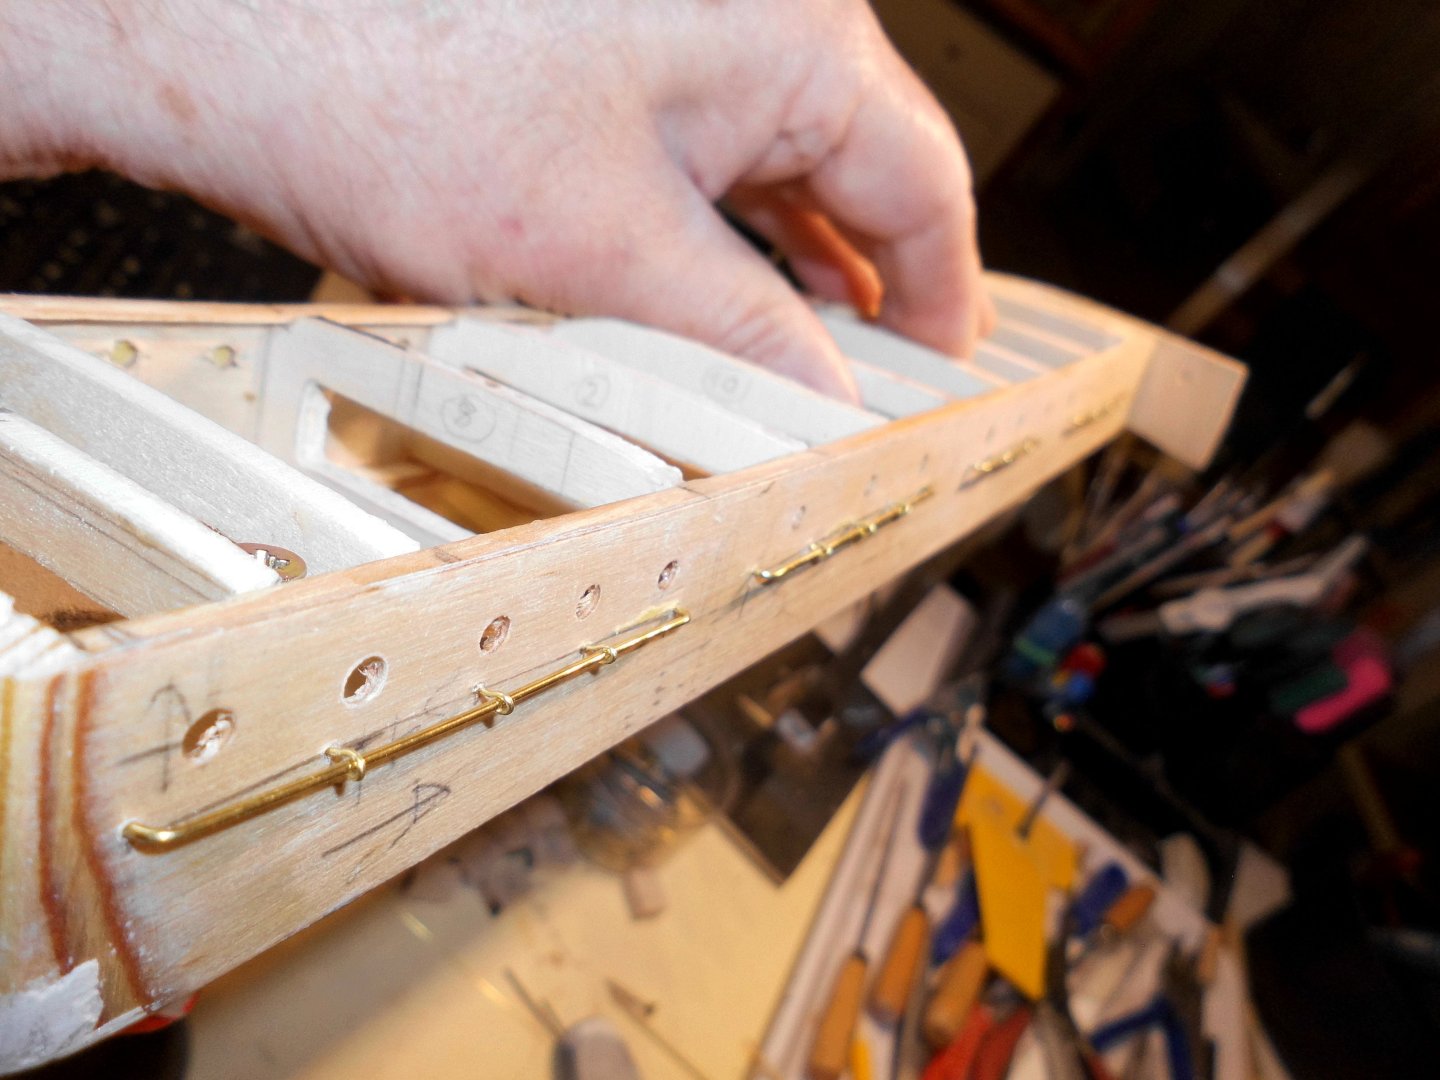
many thanks for your words Andy, you`re right, I also sometimes make a decision on a certain build sequence and start preparing to the intended thing, but after thinking it over twice I recognize that if I would do so, there is no more access to an item that lays behind or under the section I`m planing to do. So foot on the brake before continuing. For example, before the boatsdeck is placed, I have to make sure that the ship`s bollards are near to the appropriate fairleads and the footpoint-fastening positions of the lighttower stays are placed so that they do`nt interfere with other items, and that the stairs to the boats deck are clear form what is to be mounted items above later on. For mounting the boatsdeck to the long deckhouse and to install a number of supports along the length, I decided to make a bunsh of wooden supports which have slight overhight so that the can be tuned to precise fit when mounting. In this case I refraigned from making a brass framework to mount on. Nils these are the 20 wooden supports for the boatsdeck. 2mm pine squarebars with ply-knees a template for the boatsdeck, for evaluating positions etc. the boatsdeck has a shere and a longitudinal curving. The standovers (port and starboard side ) need to be supported and fastened to bulwarks below and deck above. Before that the 0,8 mm ply deck needs to be planked, like the main deck below. All must be in accordance in what I wrote in the beginning of this post


- 299 replies
-
- 7
-
-
- lightship
- Feuerschiff Elbe 1
- (and 1 more)
-
Thank you John, I`m evaluating the boats deck and how it can be mounted with all those side supports to be fitted in .... Nils
- 299 replies
-
- 4
-
-
- lightship
- Feuerschiff Elbe 1
- (and 1 more)
-
L'Amarante by marsalv - 1:36 - POF
Mirabell61 replied to marsalv's topic in - Build logs for subjects built 1501 - 1750
Wonderful work Marsalv, it is a pleasure to watch your work Nils -
very nice painting Valeriy, it looks great BTW. those are the colors of the Laeisz flying P-liners Nils
-
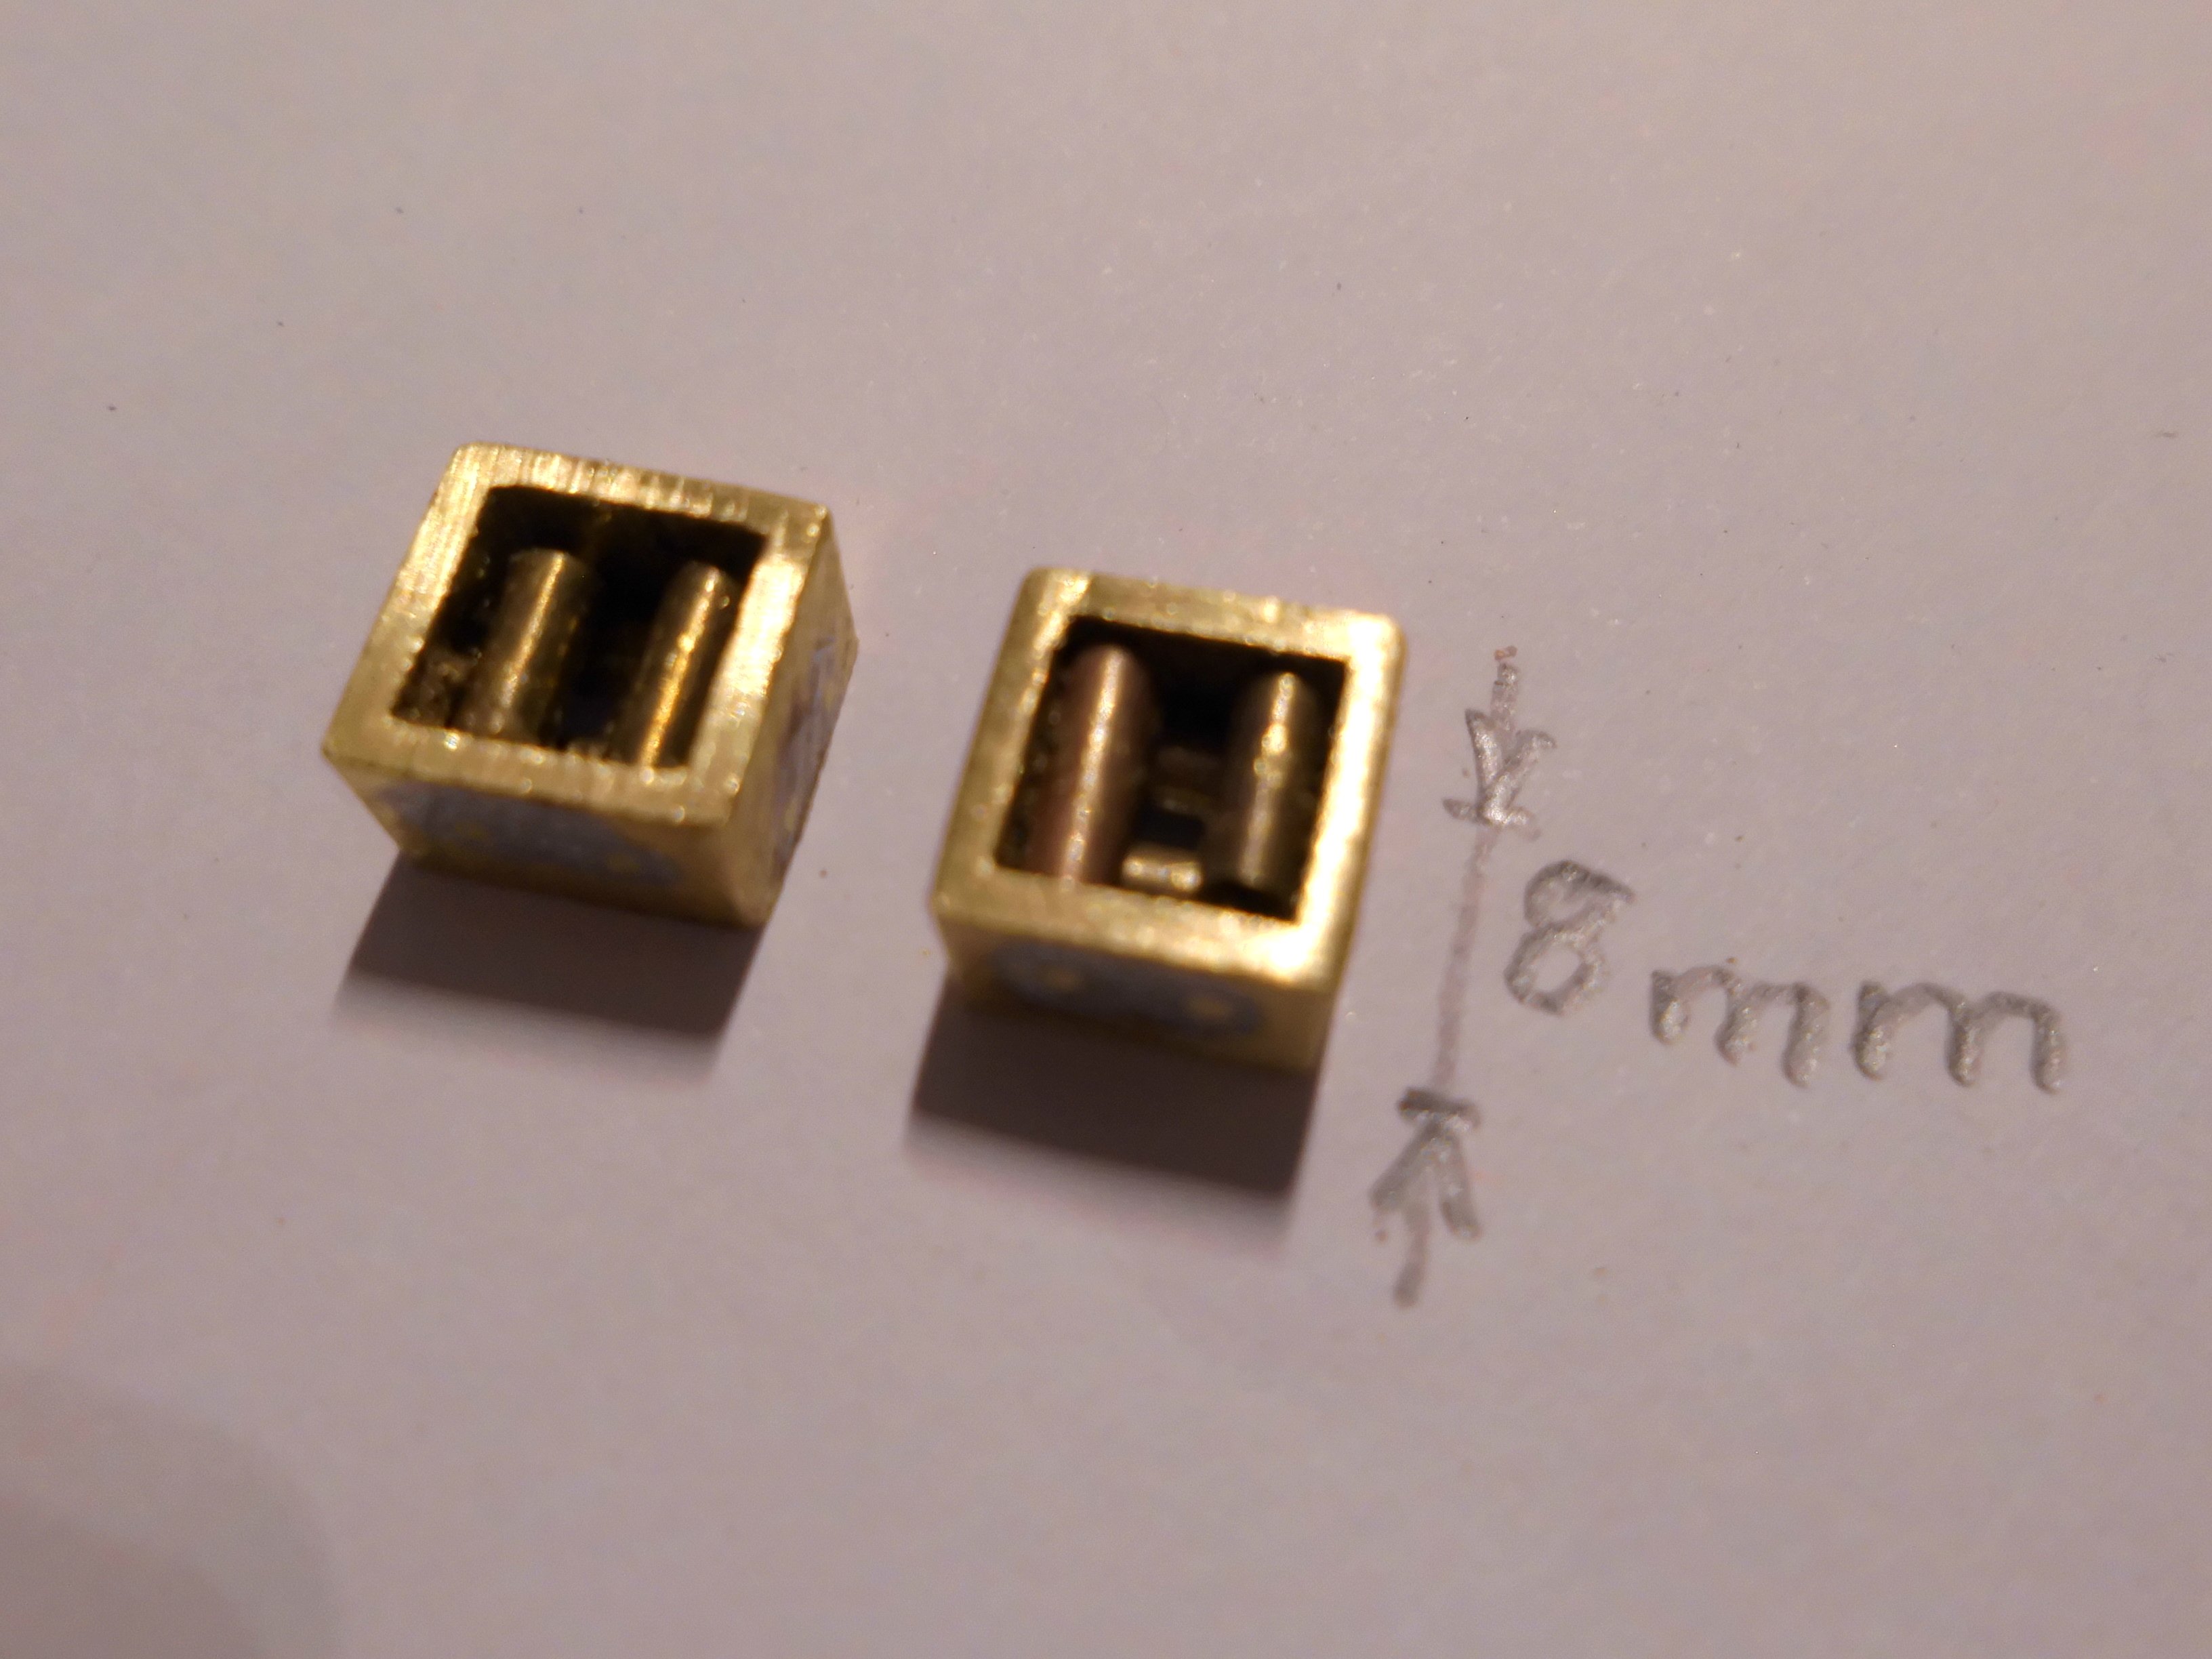
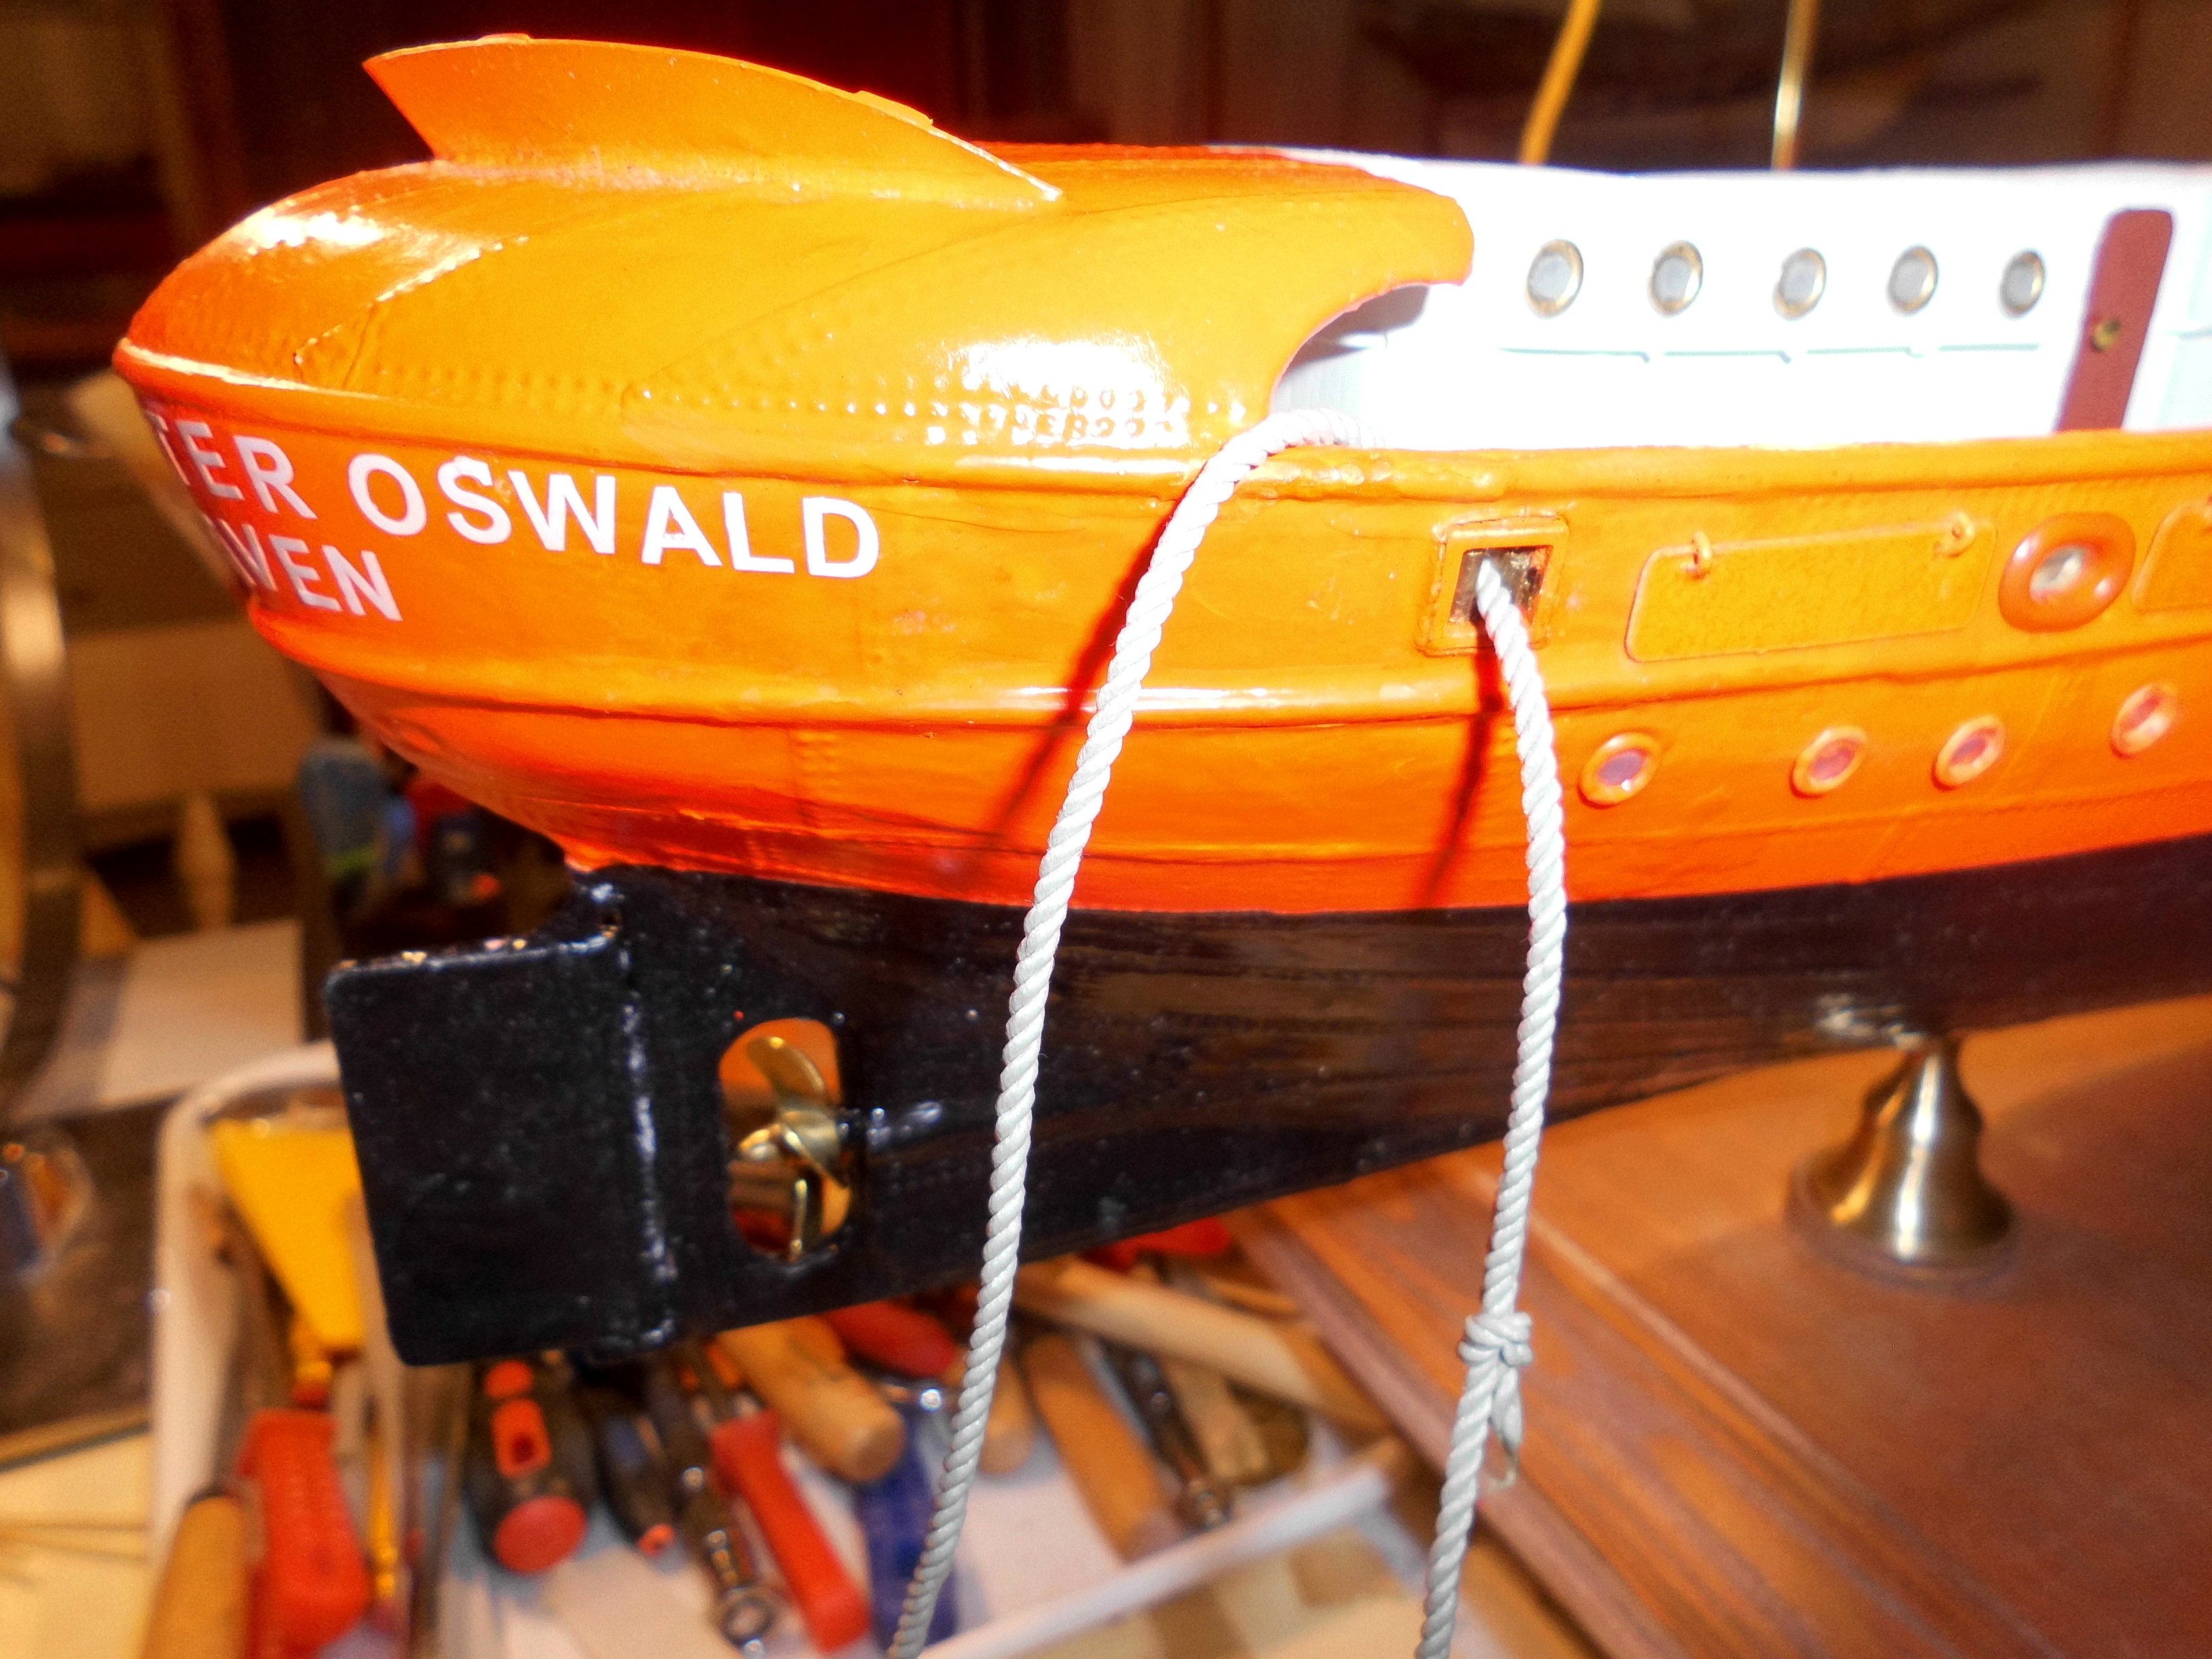
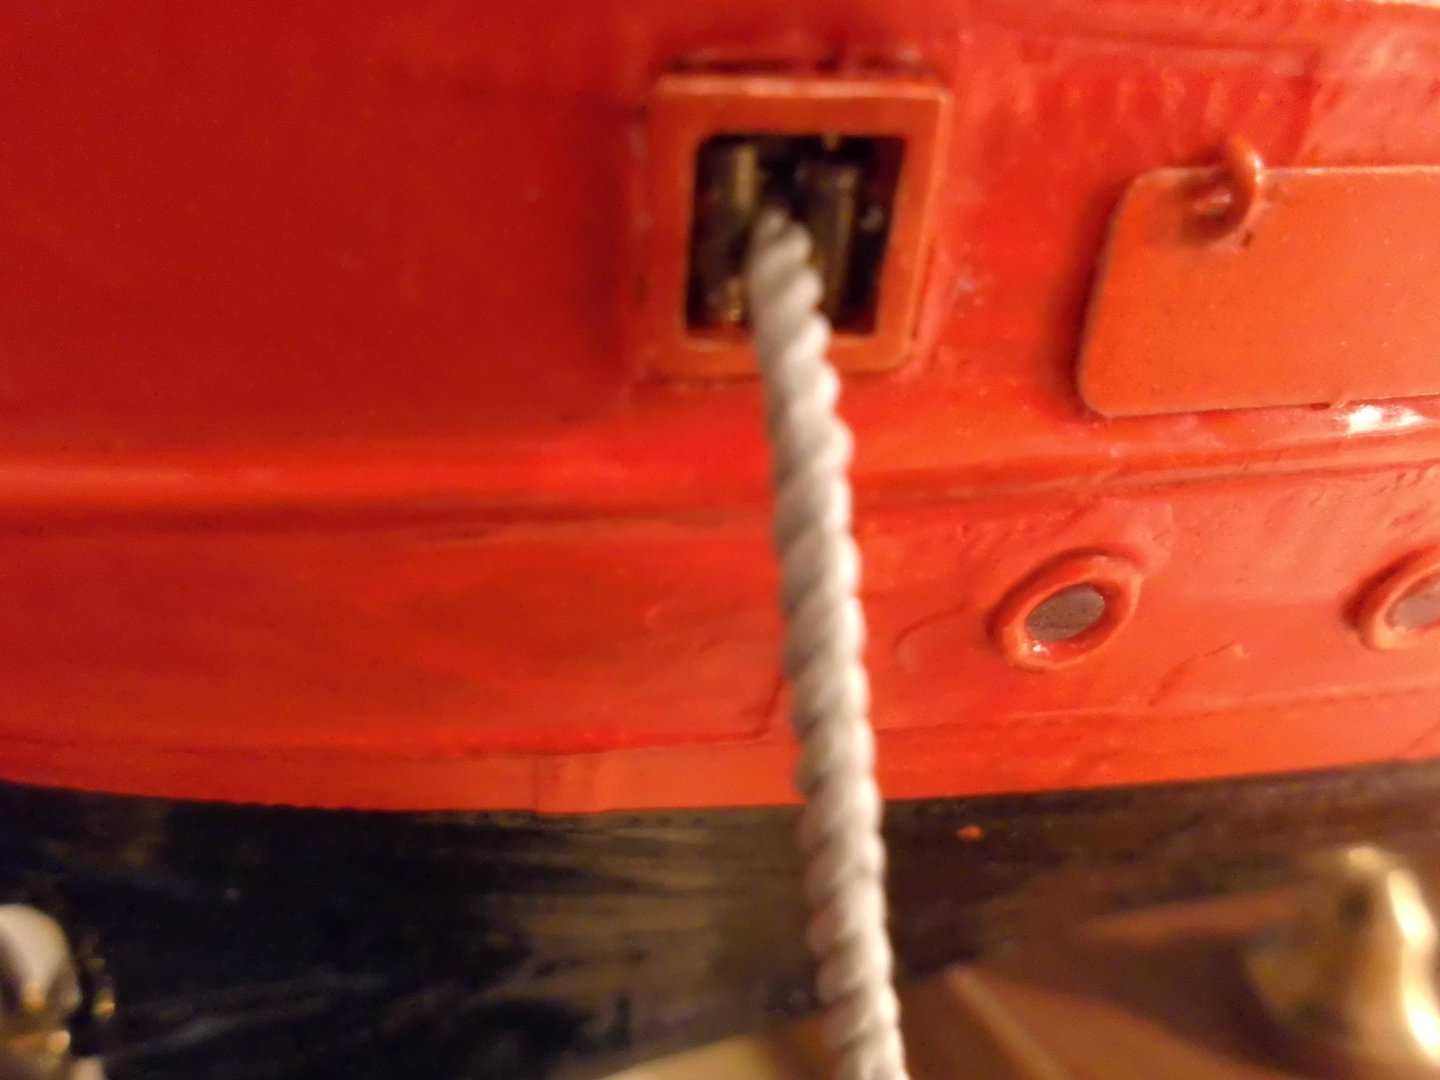
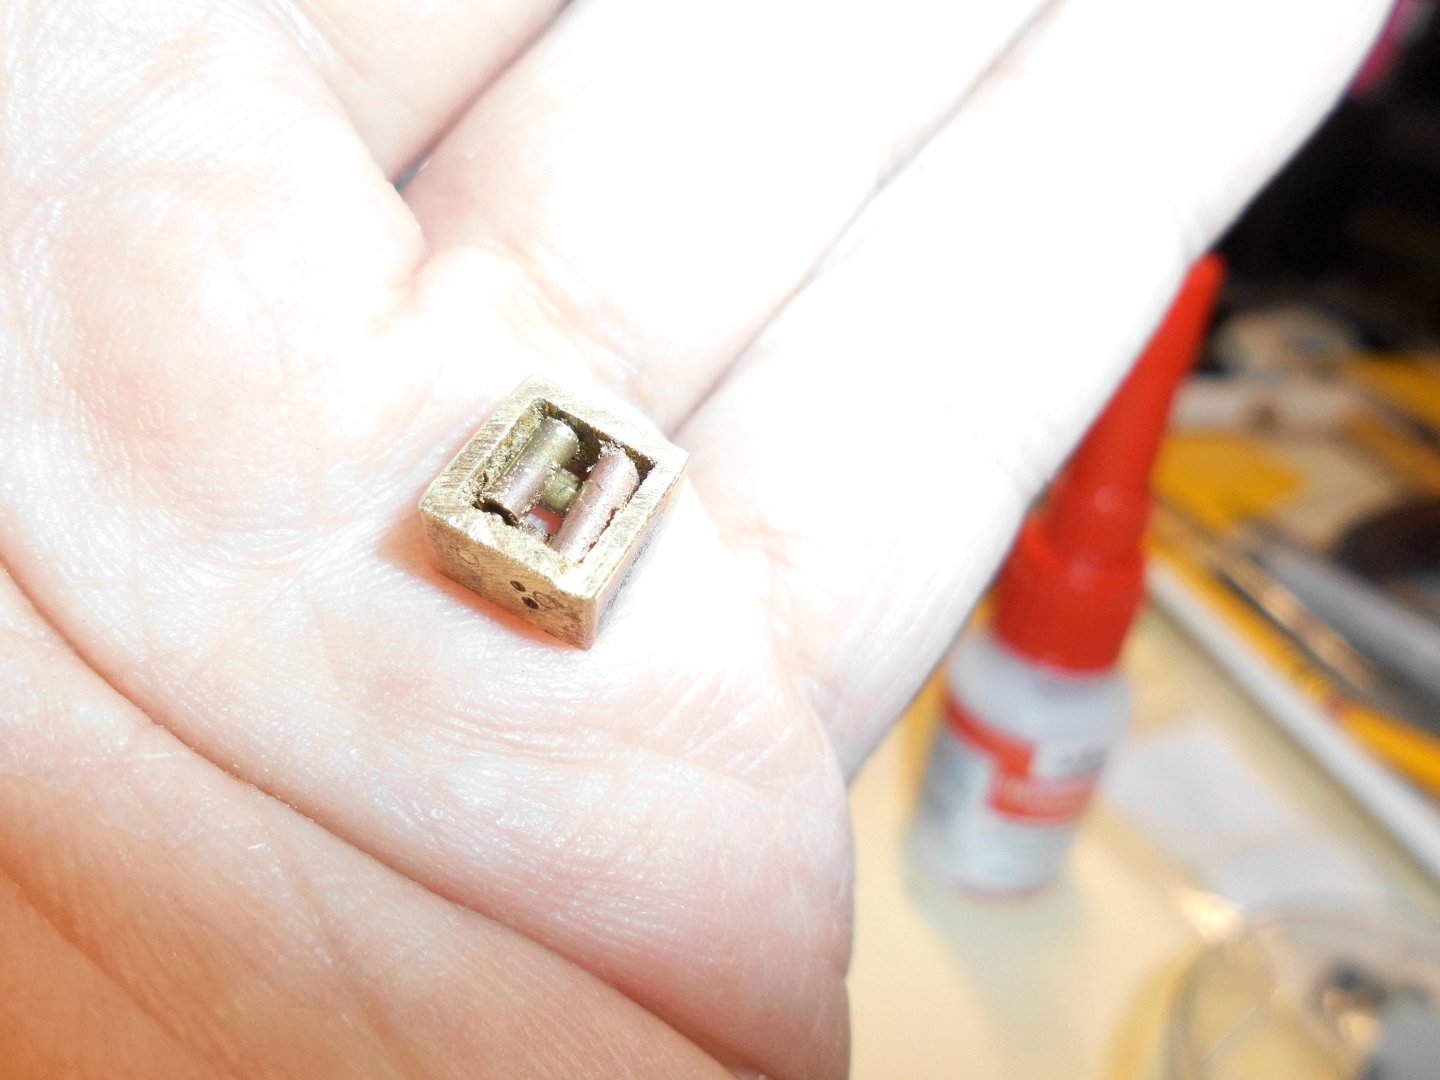
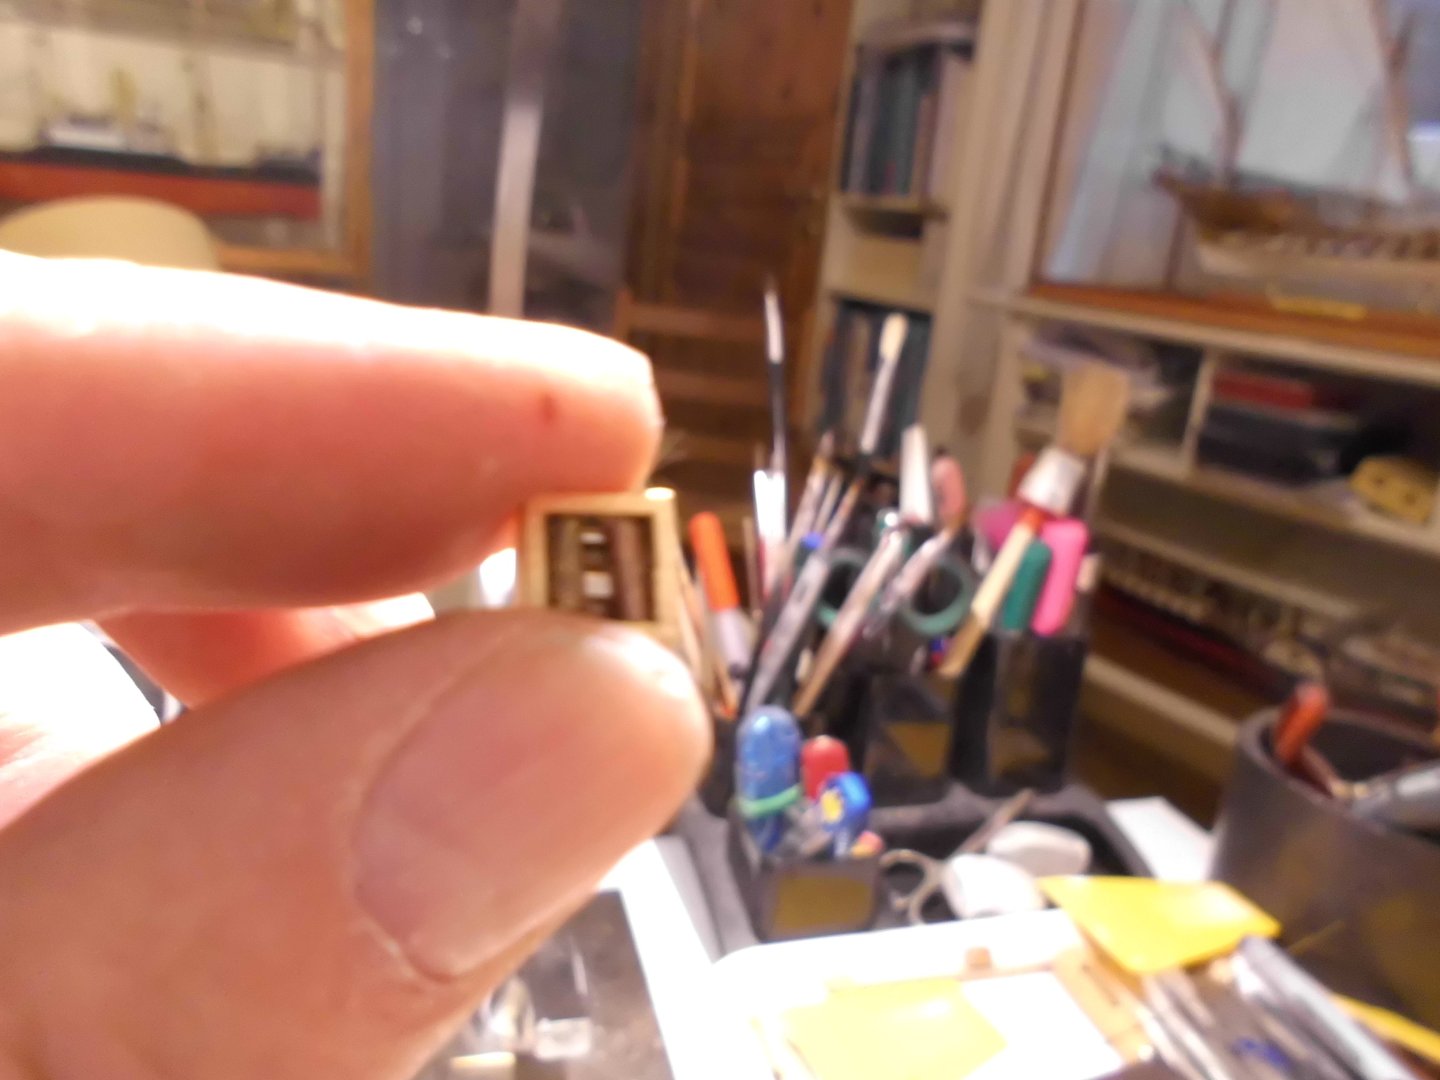
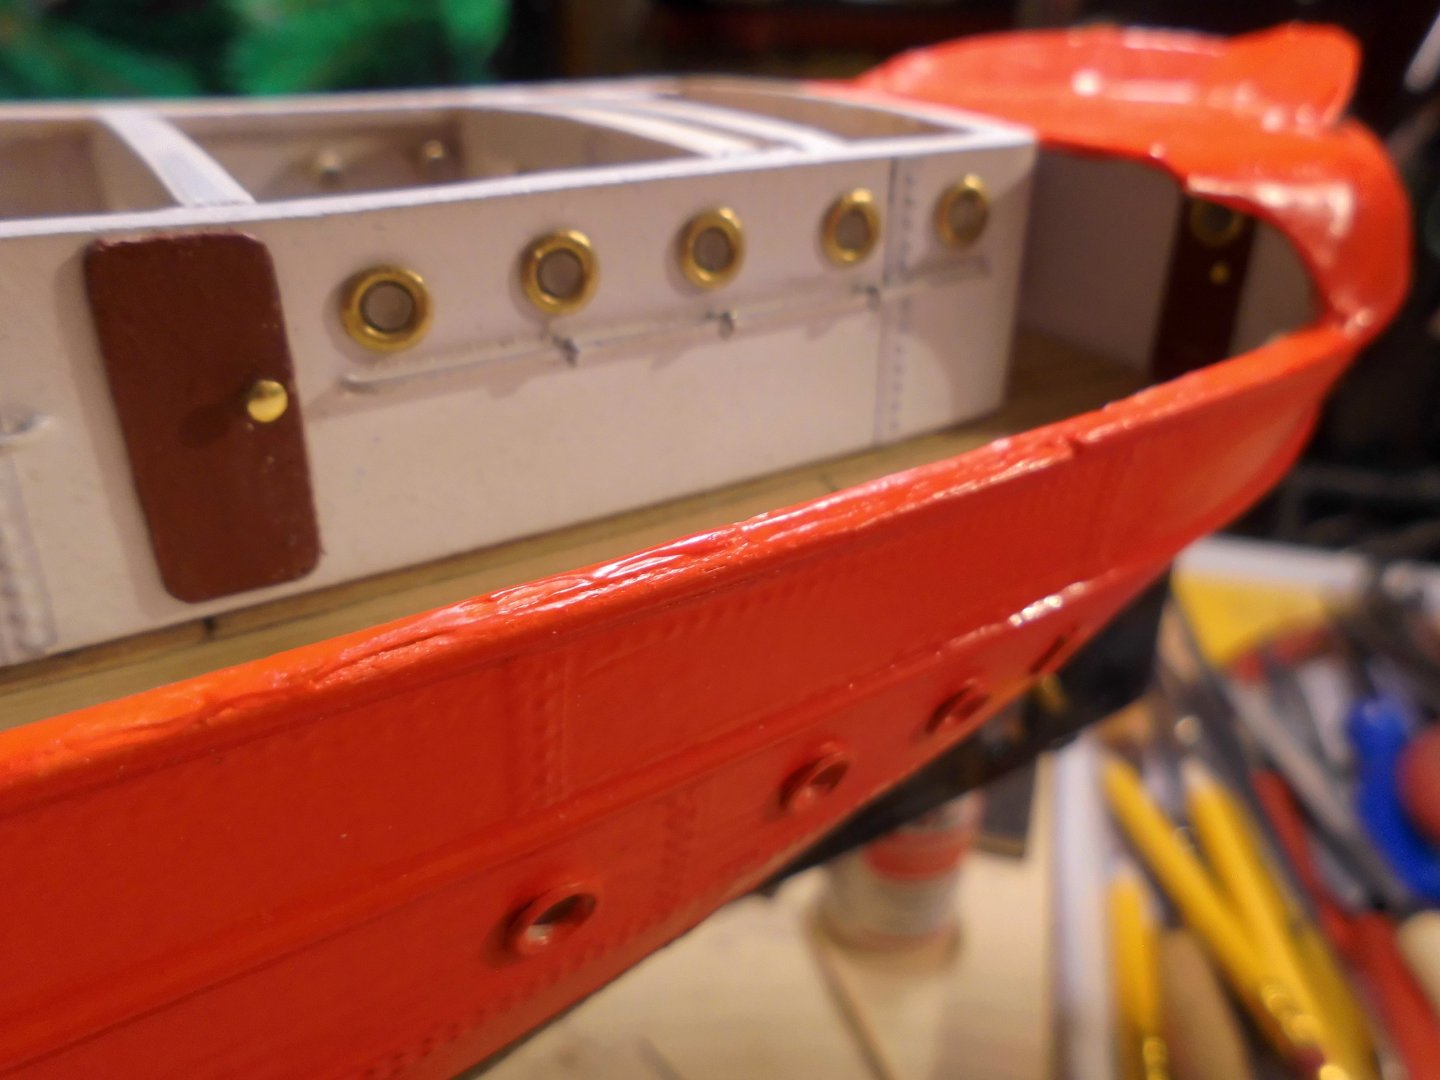
Hi Hermann, I found 8 line fairleads, like the silver one shown in the last pics. They are brass pessed and nickel plated. So I merely had to determin the length and cut off the surplus materil. Painting in hull color. The two aft brass roller fairleads were more tricky due to the small dimensions, but it worked out OK. They are full workable and can handle a at maximum) a 2mm polyester mooring rope. They were mounted in square cut outs in the bulwark Nils made from 8 mm brass squaretube, each with 4 rollers working on soldered in 0,8mm axiles in two separated layers behind each other


- 299 replies
-
- 12
-
-
- lightship
- Feuerschiff Elbe 1
- (and 1 more)
-
Hi John, I think its always a task to find a solution in model ship building, that makes out the "spice" of this hobby. You will find a good solution that gives you satisfaction on restoration of this beautiful model. The long poop-deck is also shown on the "Padua" fourmaster, flying P-liner, (now still sailing as Krusenshtern, Russian cadett training ship ) Nils
-
thanks John, I hope I`ll get the other one done as well as the prototyp, hopefully it will not take so long .... Nils
- 299 replies
-
- 5
-
-
- lightship
- Feuerschiff Elbe 1
- (and 1 more)
-
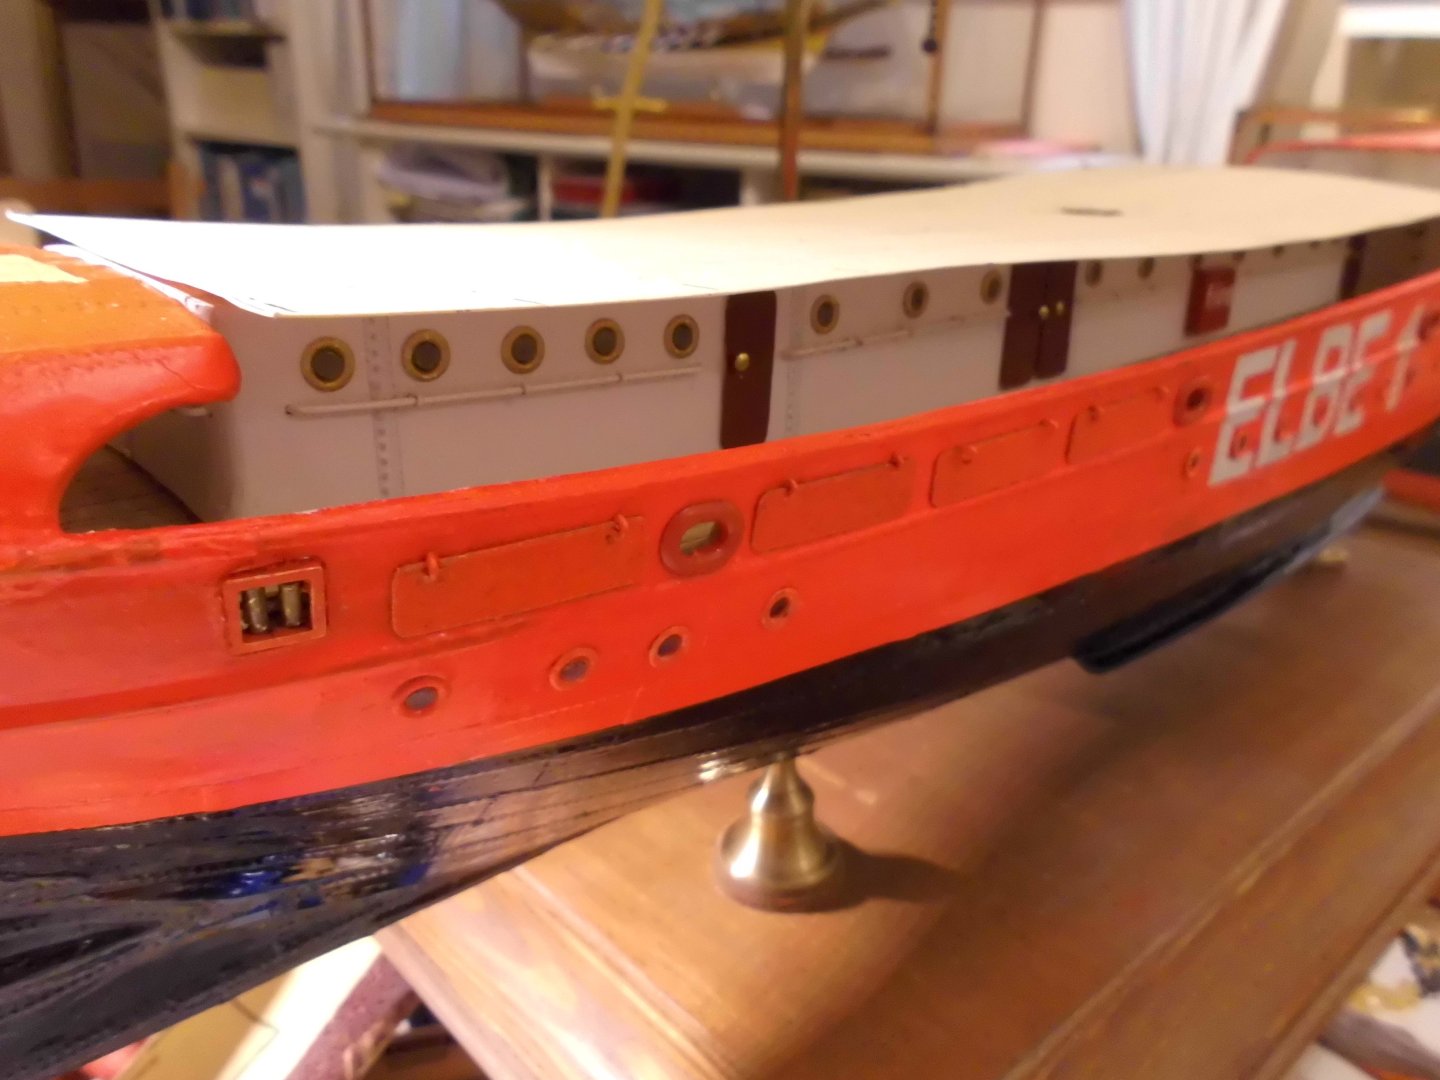
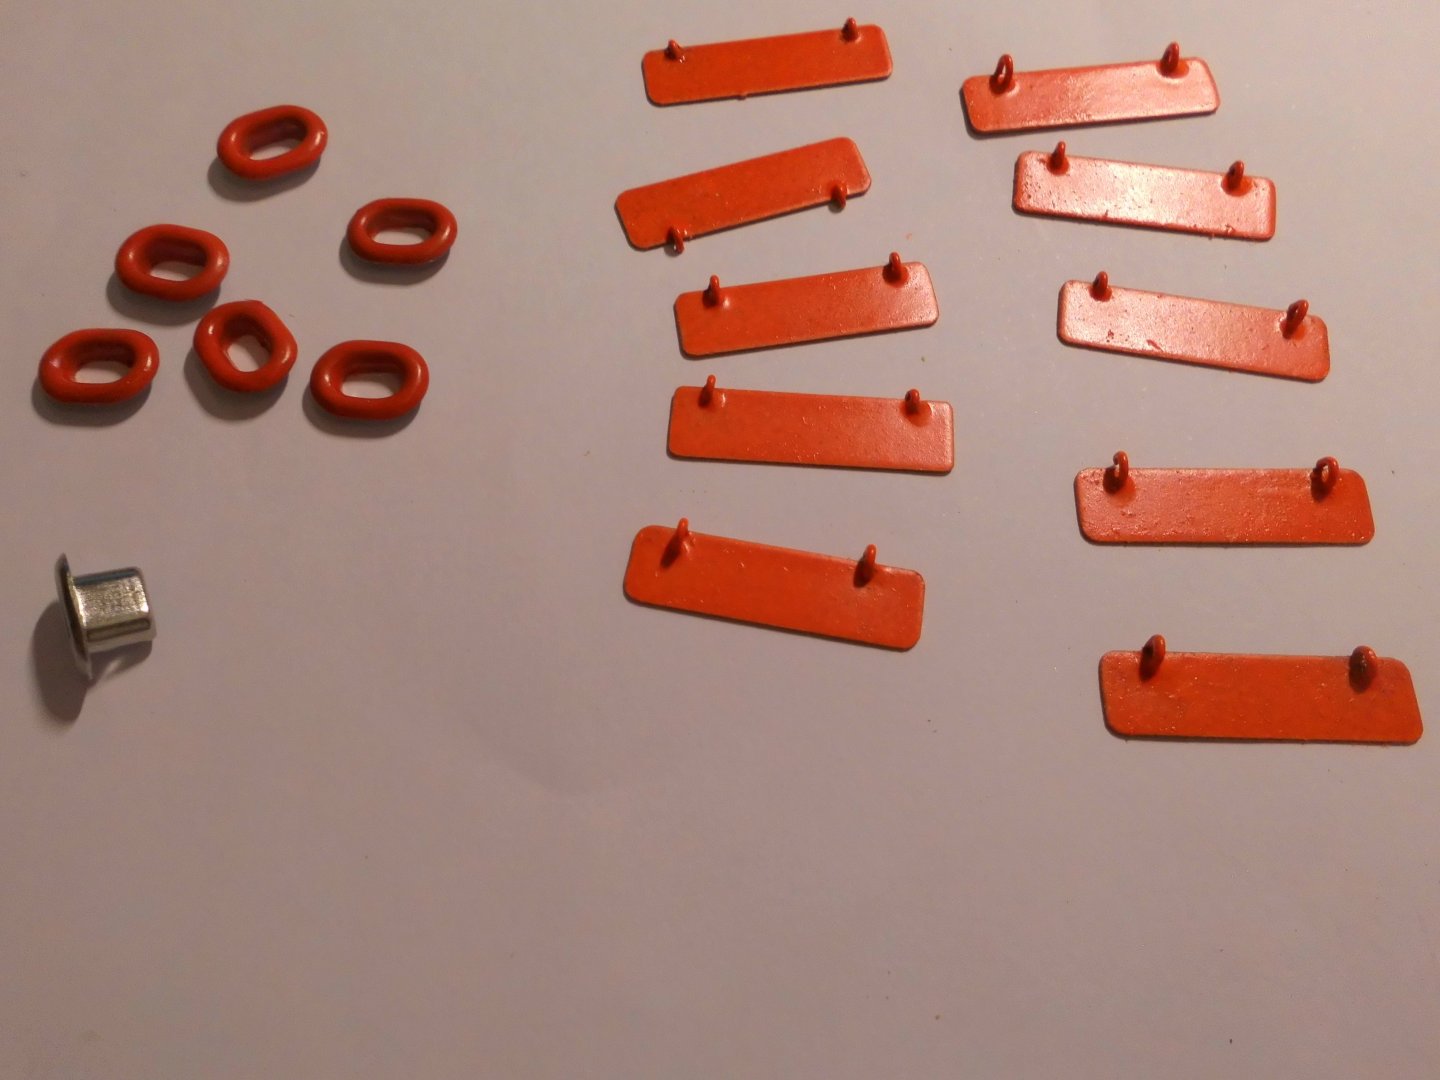
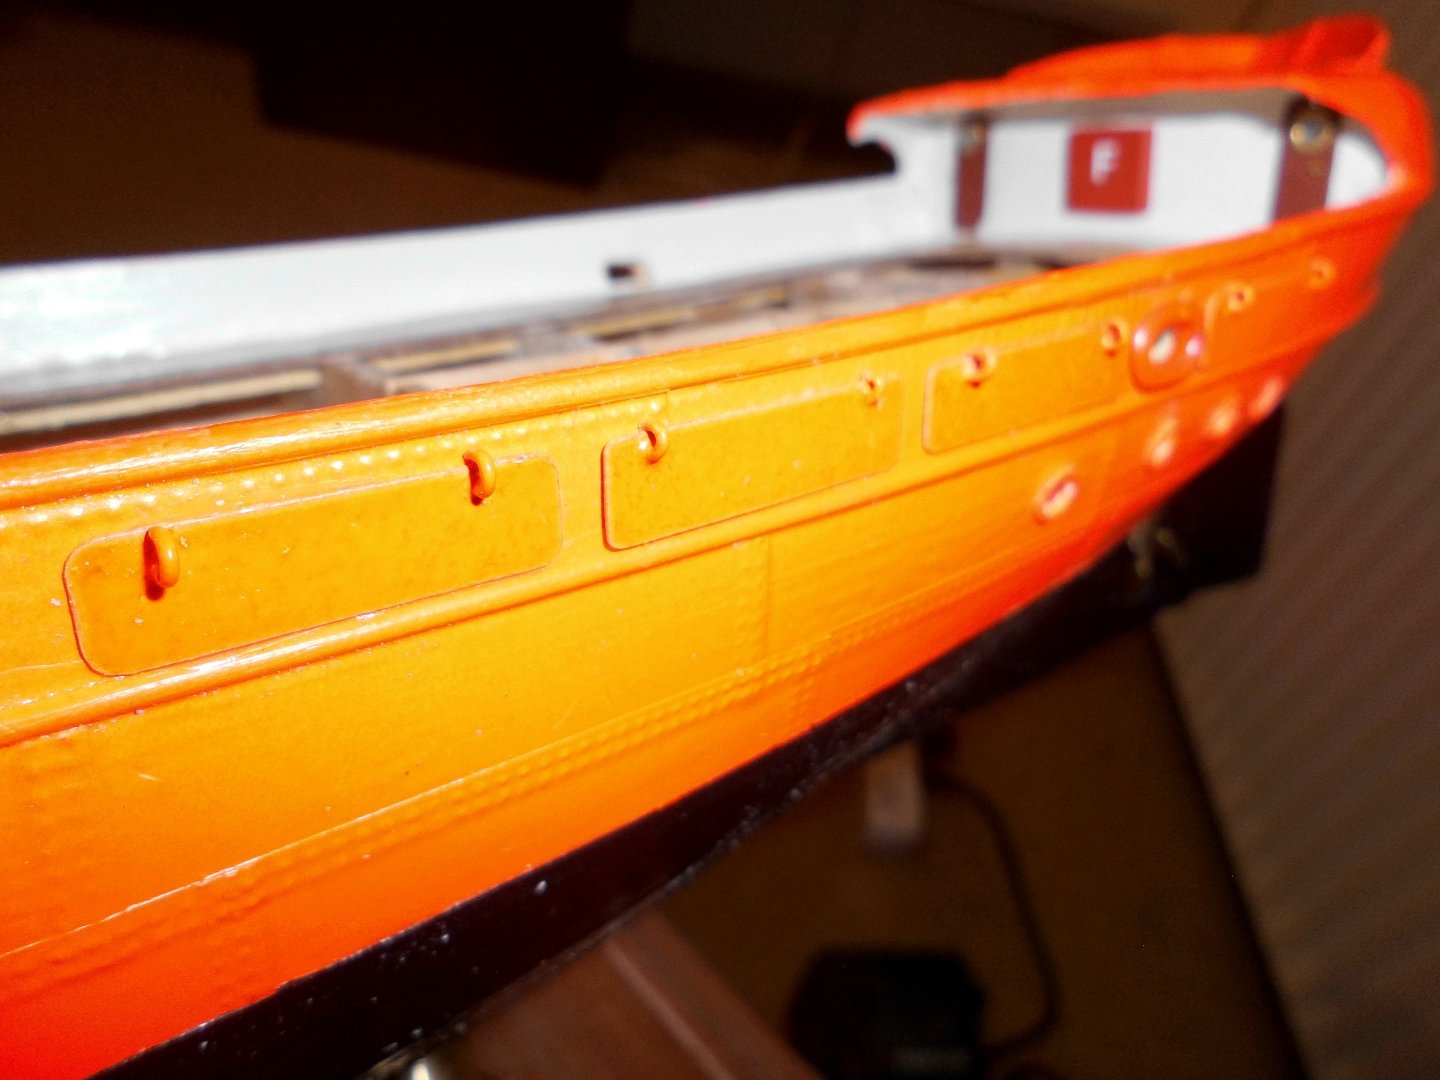
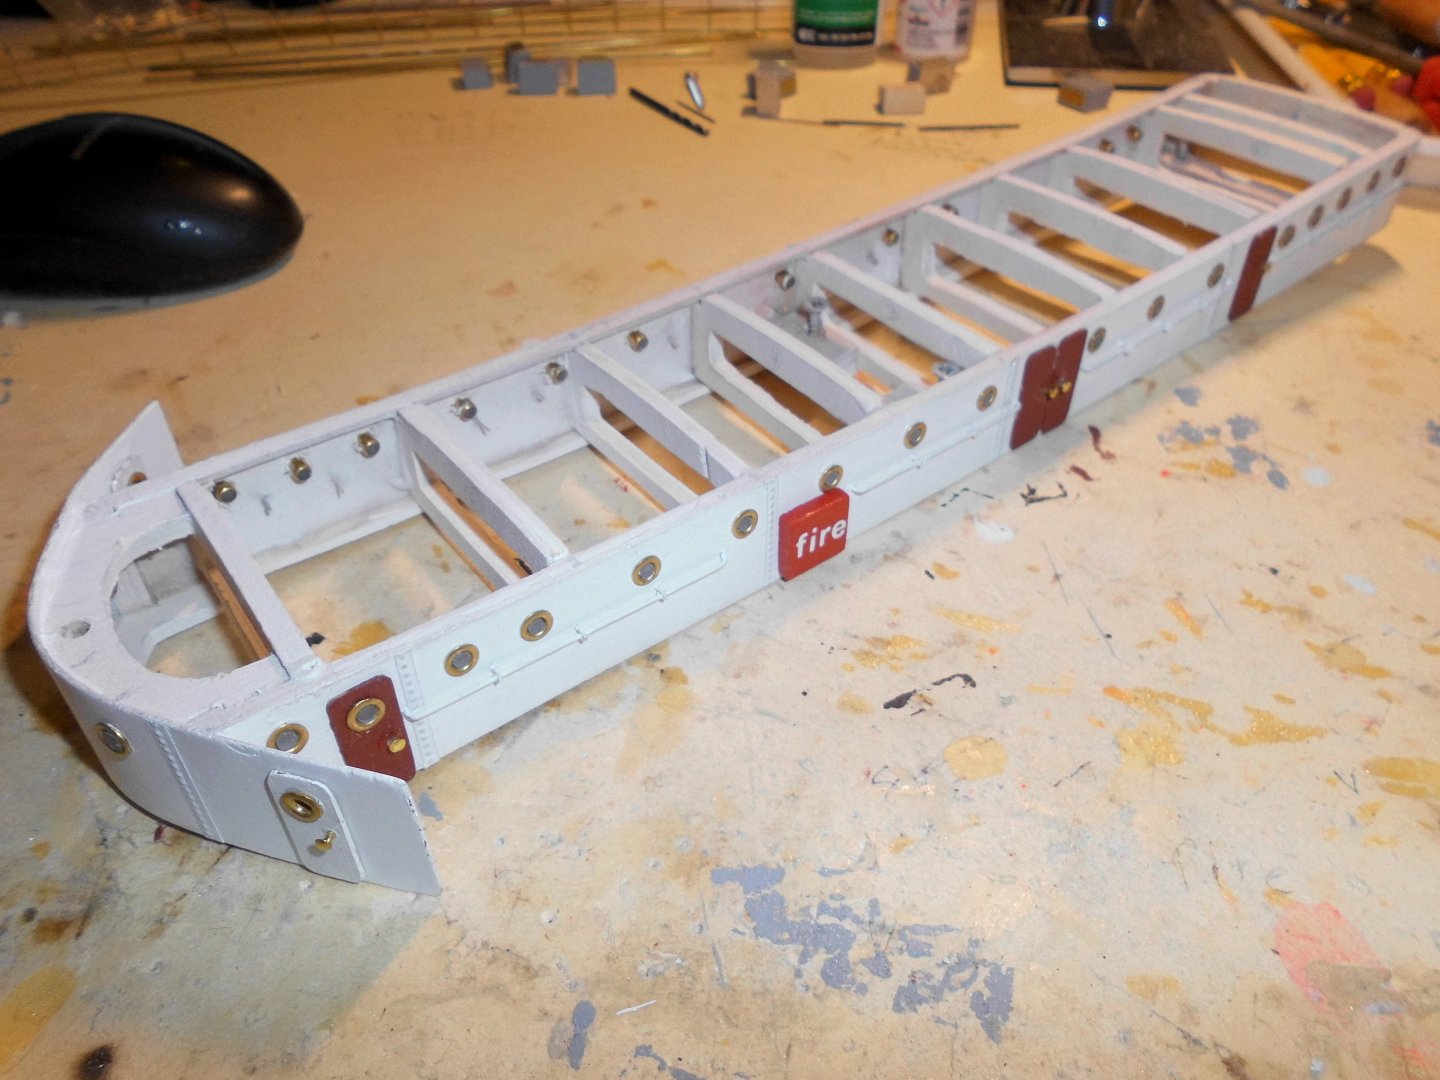
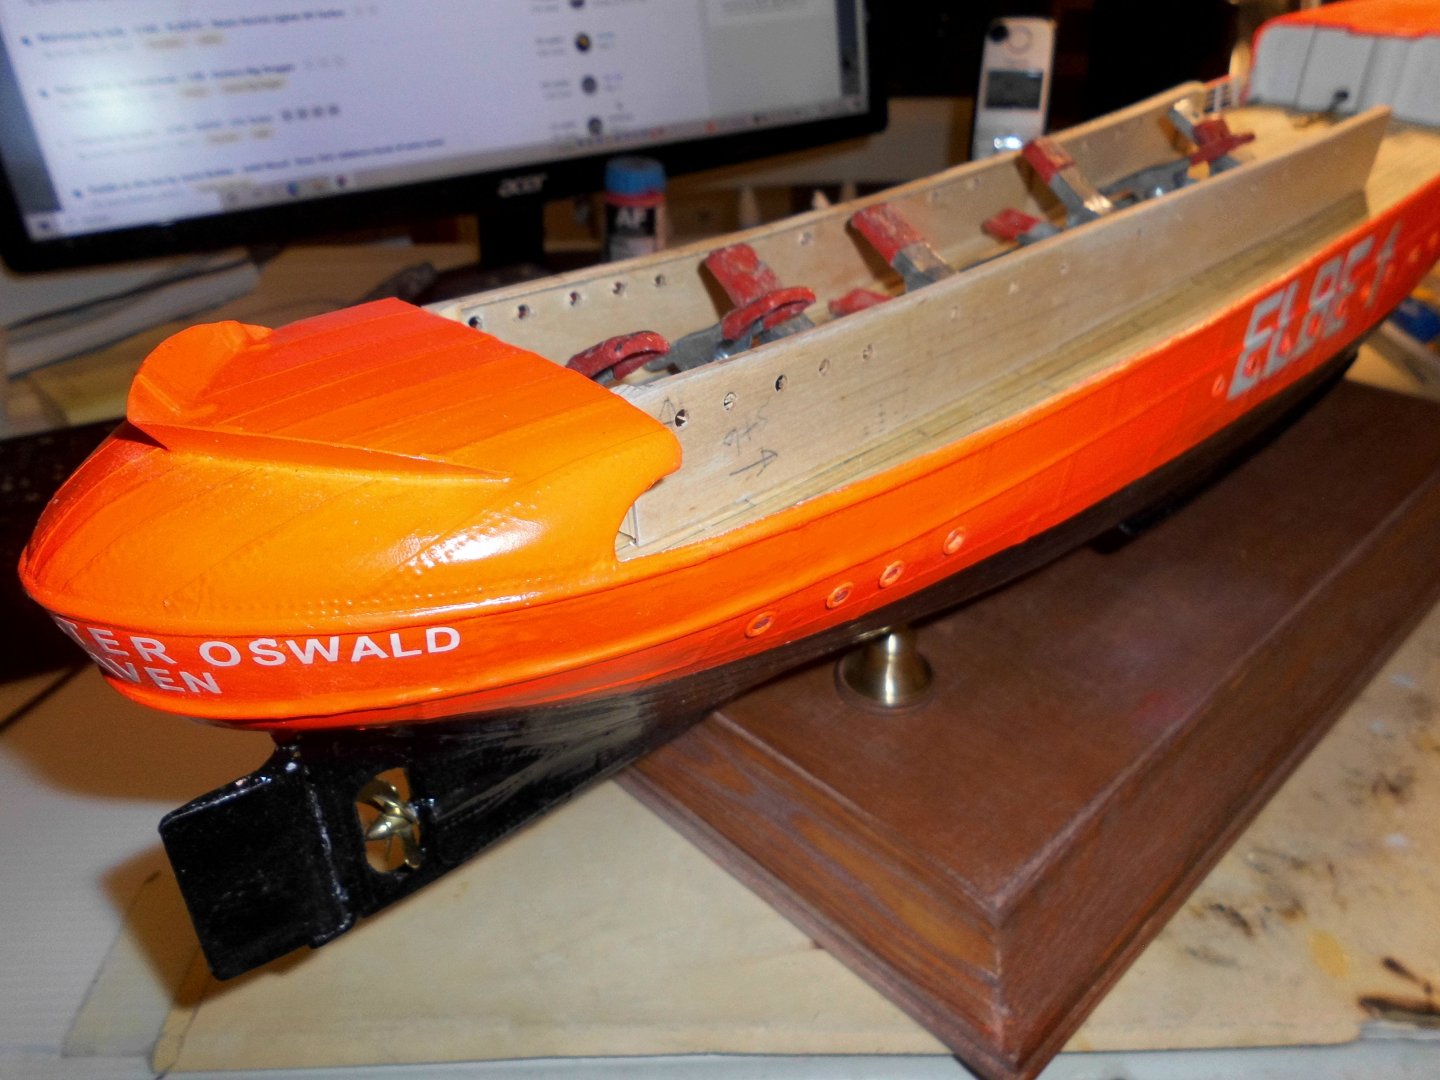
Update made the six line-fairleads and the shutter flaps of the freeing ports. Quater- both sides aft there will be a crossed-rolls fairllead, I`m working on the prototyp out of 8mm square brass tube and fitted with 4 crossed rolls. This little bugger has taken me a few hours to make and to put together (soldering in the rolls axises) the freeing port shutter flaps and the line-fairleads. The pressed brass nickel plated fairleads are shortened so that they come flush at the inner side of bulwarks the workable rolls are from small brass tube, the axis are from 0,8mm brass wire I refrained from cutting break through openings into the bulwark (for stability reason ) the hinged shutters Nils

- 299 replies
-
- 10
-
-
- lightship
- Feuerschiff Elbe 1
- (and 1 more)
-
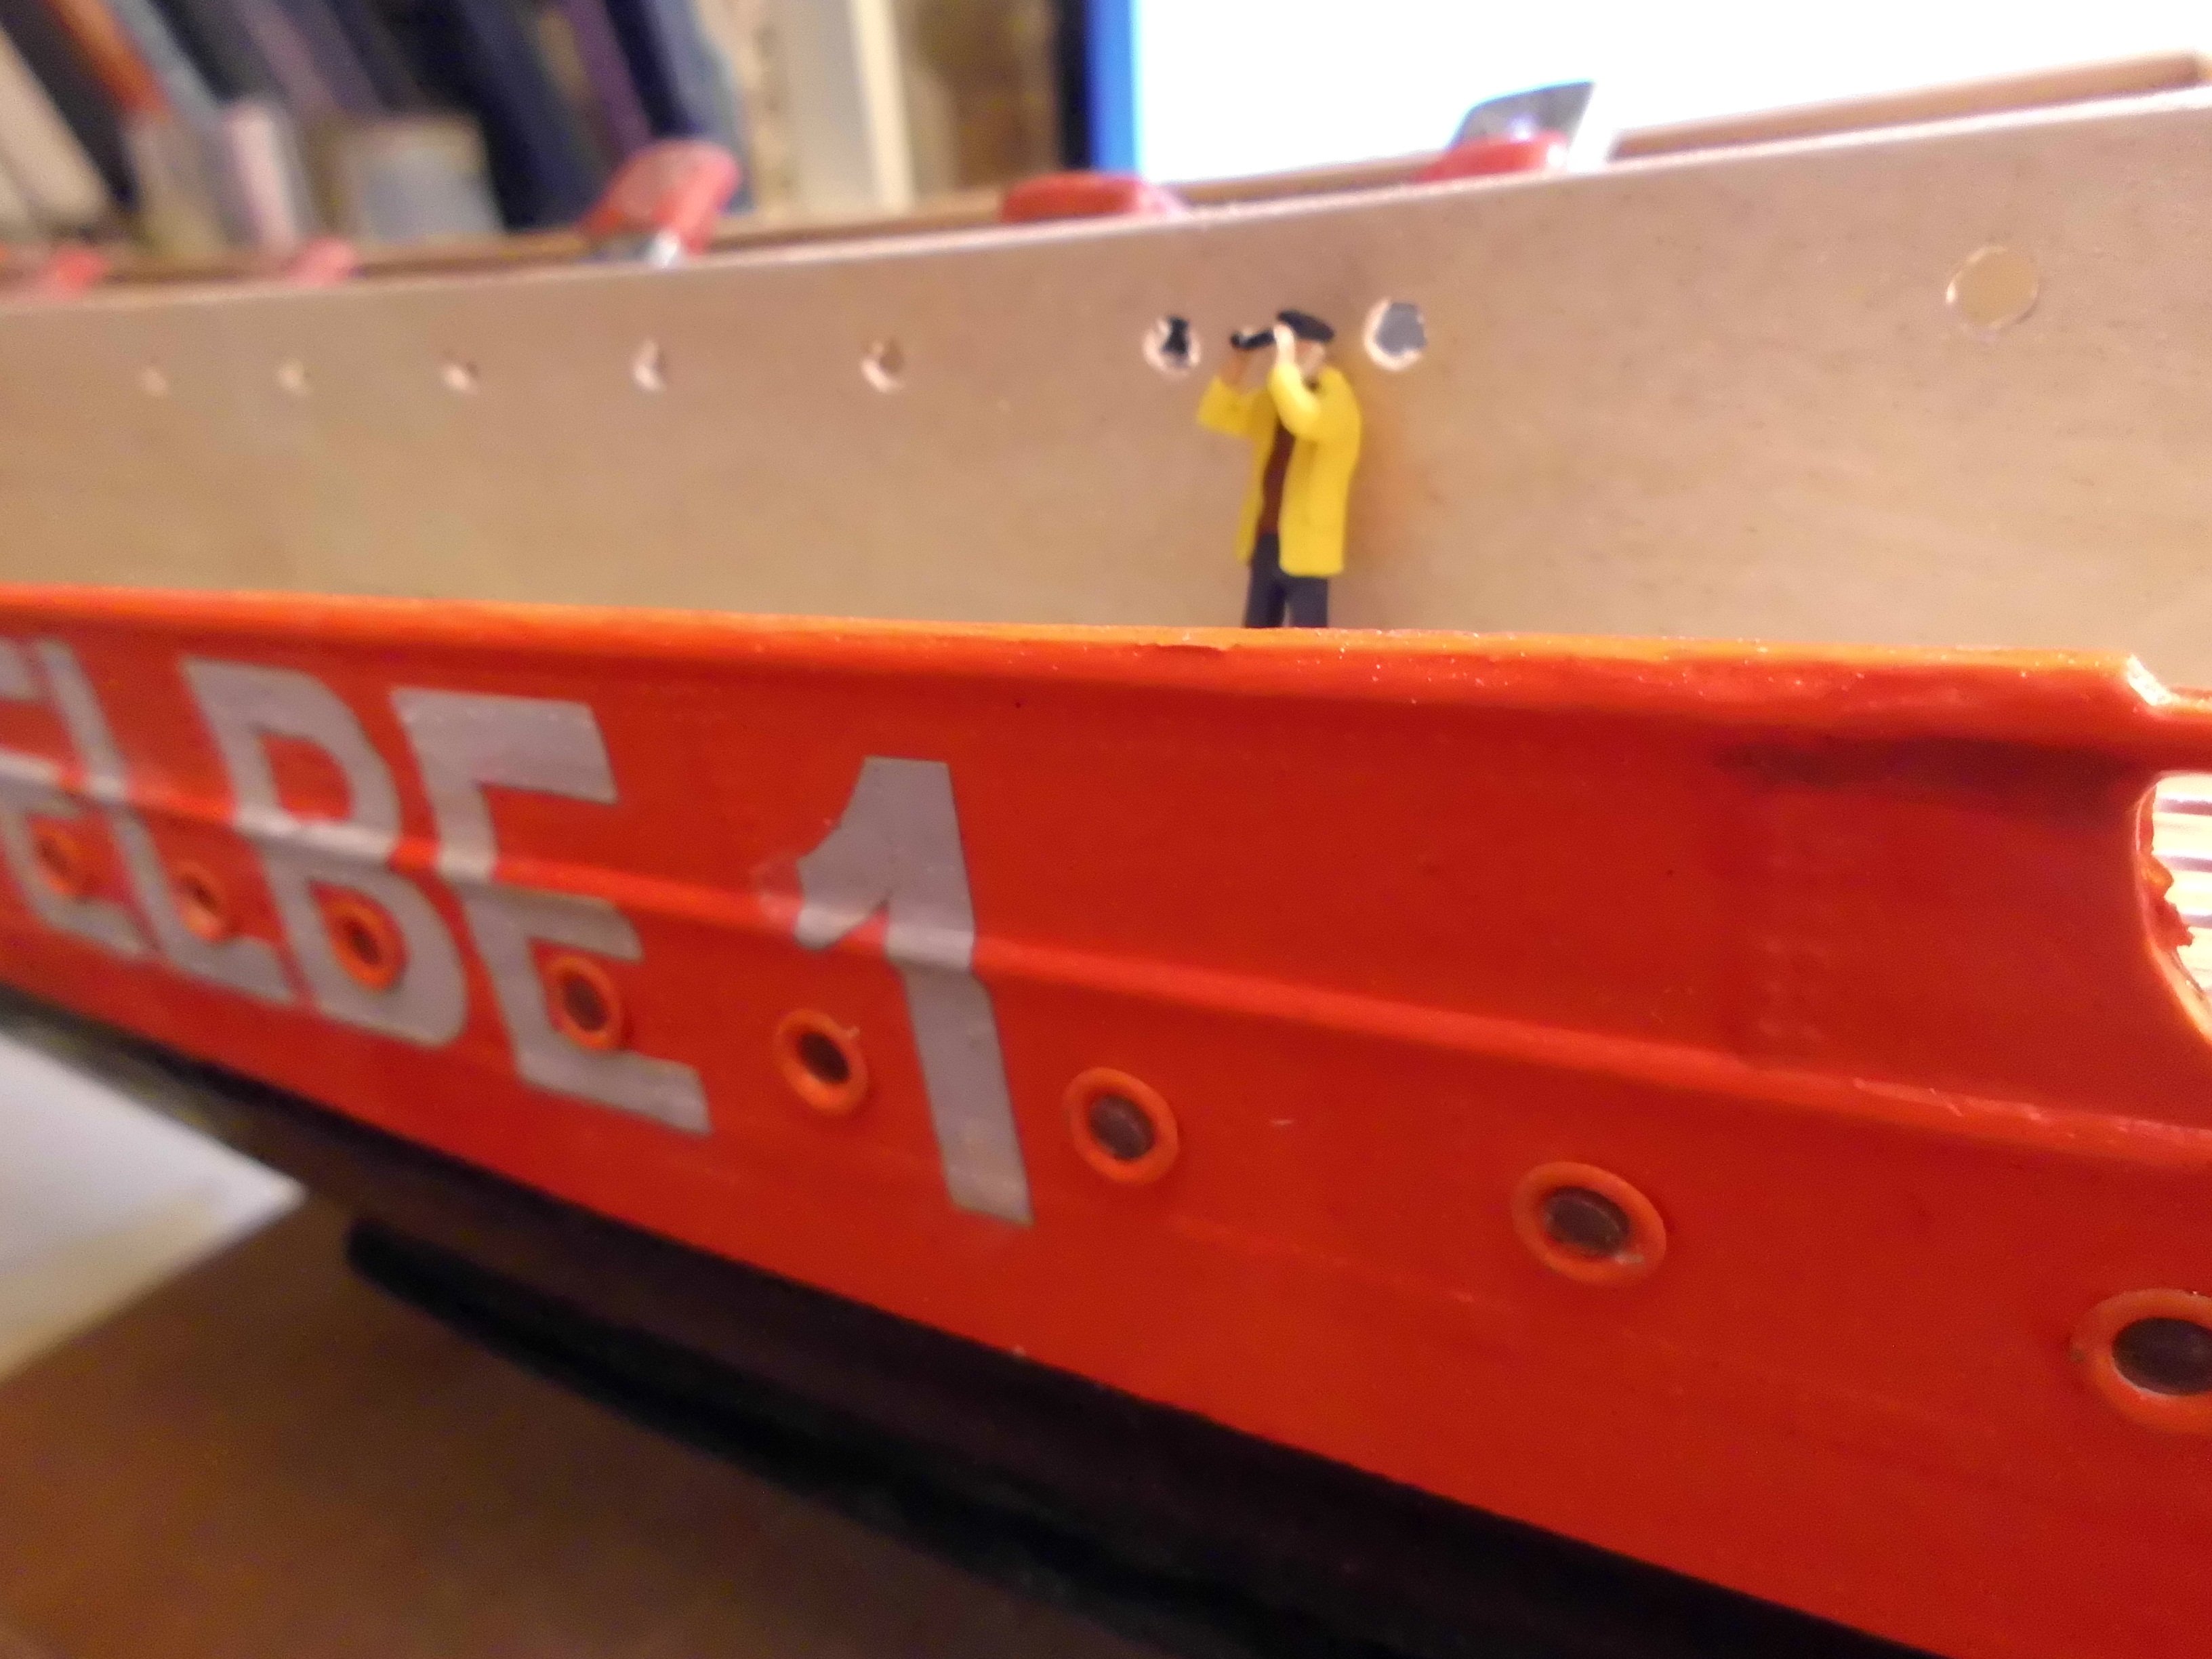
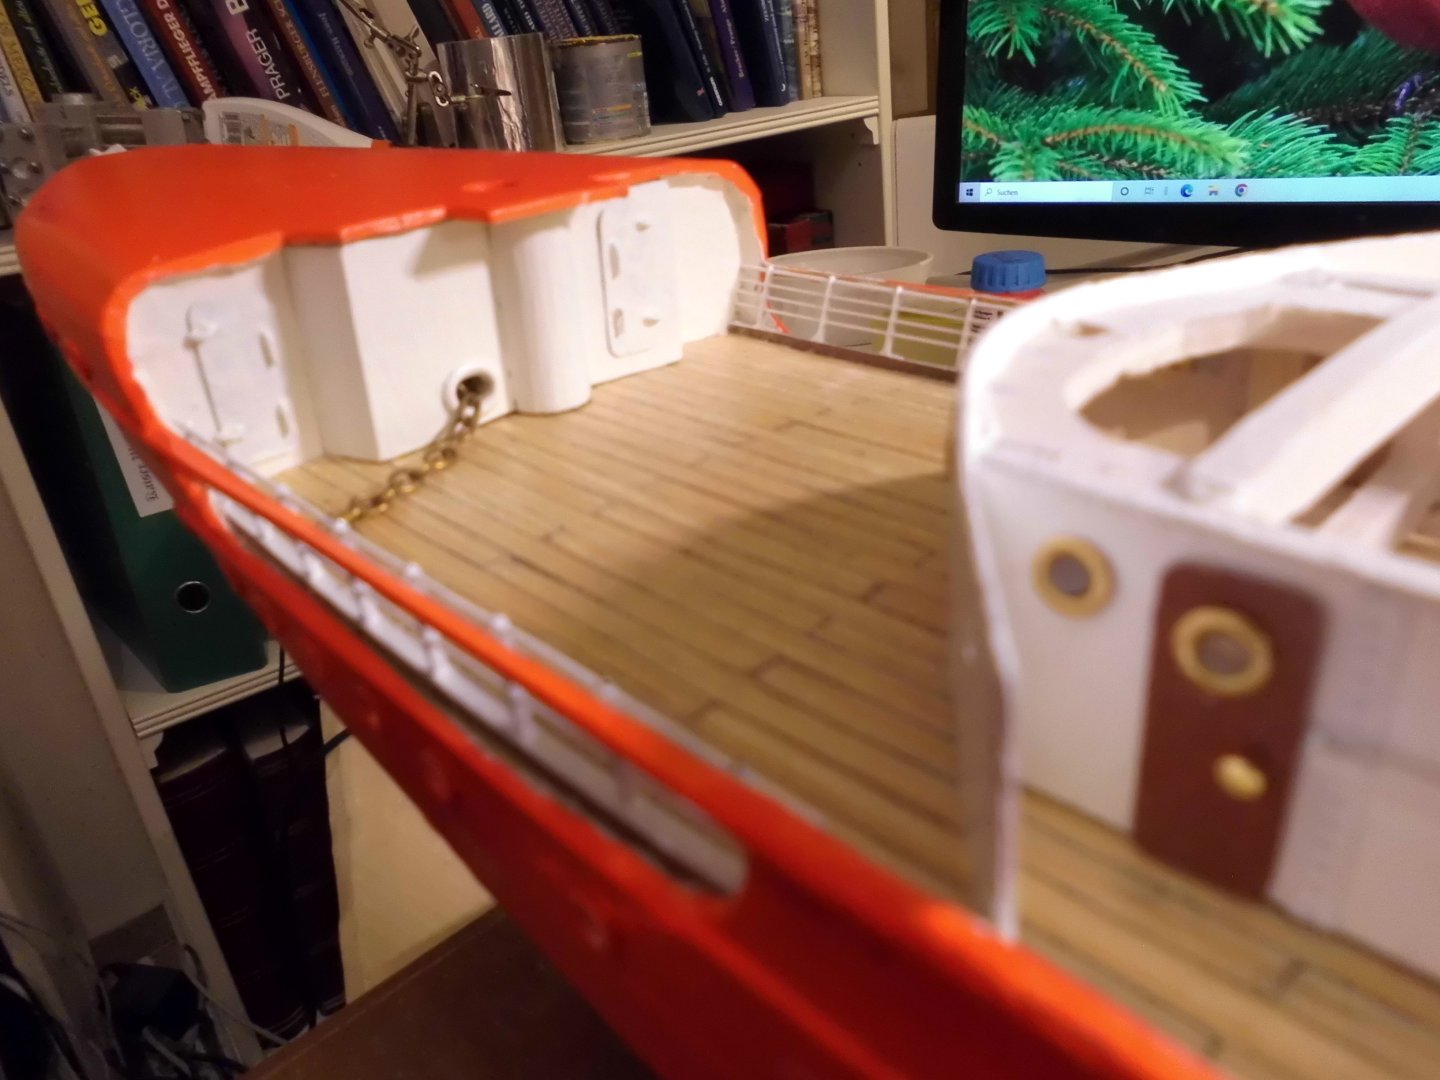
thanks Vezett, Keith, Jack and John, You all are right, I was expecting comments on that, but the answer is simple: I only had one white capital letter "F" so that went to the wallbox at the rear bulkhead, I still had enough small white letters to spell "fire" on the other boxes. Also the would not have been enough space on the boxes to spell the appropriate German word. In german maritme fitting out the engl. language is international and quite common anyhow. I am OK with that. Nils
- 299 replies
-
- 8
-
-
- lightship
- Feuerschiff Elbe 1
- (and 1 more)
-
Eberhard, I found some 1:160 "shapeways" figurines, they are more expensive than Preiser though ... perhaps some surgery necessary Hope the link works https://www.shapeways.com/marketplace/miniatures/figurines?q=&sort=popularity&facet[pdcId][]=141&facet[pdcId][]=342&facet[price][min]=1&facet[price][max]=2500&facet[price][from]=1&facet[price][to]=2500 Nils
-
good job on the figures Eberhard, I suppose that you did`nt find suitable ones in Scale "N" 1:160 Nils
-
Thanks John, so far so good, now comes the fitting out part and the boatsdeck. The lighttower mast is basicly done already but not painted yet. The soldering of the fragile frontmast in brass will probably be the most difficult thing on this ship, as well as the two ships work / lifeboats. I think I`ll make the boats with silicone mold and raisin cast ( I did`nt see these for purchase anywhwere) One problem I have, is that all has to be addopted from pics and the web, because I did not buy the buildplan in the beginning, and the plan with side view and frameplan out of Helmut Thomas`s publication is missing all the details, also in bird`s view, on the boats deck, and of course the dimensions in order to scale them down to 1:87 Nils
- 299 replies
-
- 5
-
-
- lightship
- Feuerschiff Elbe 1
- (and 1 more)
-
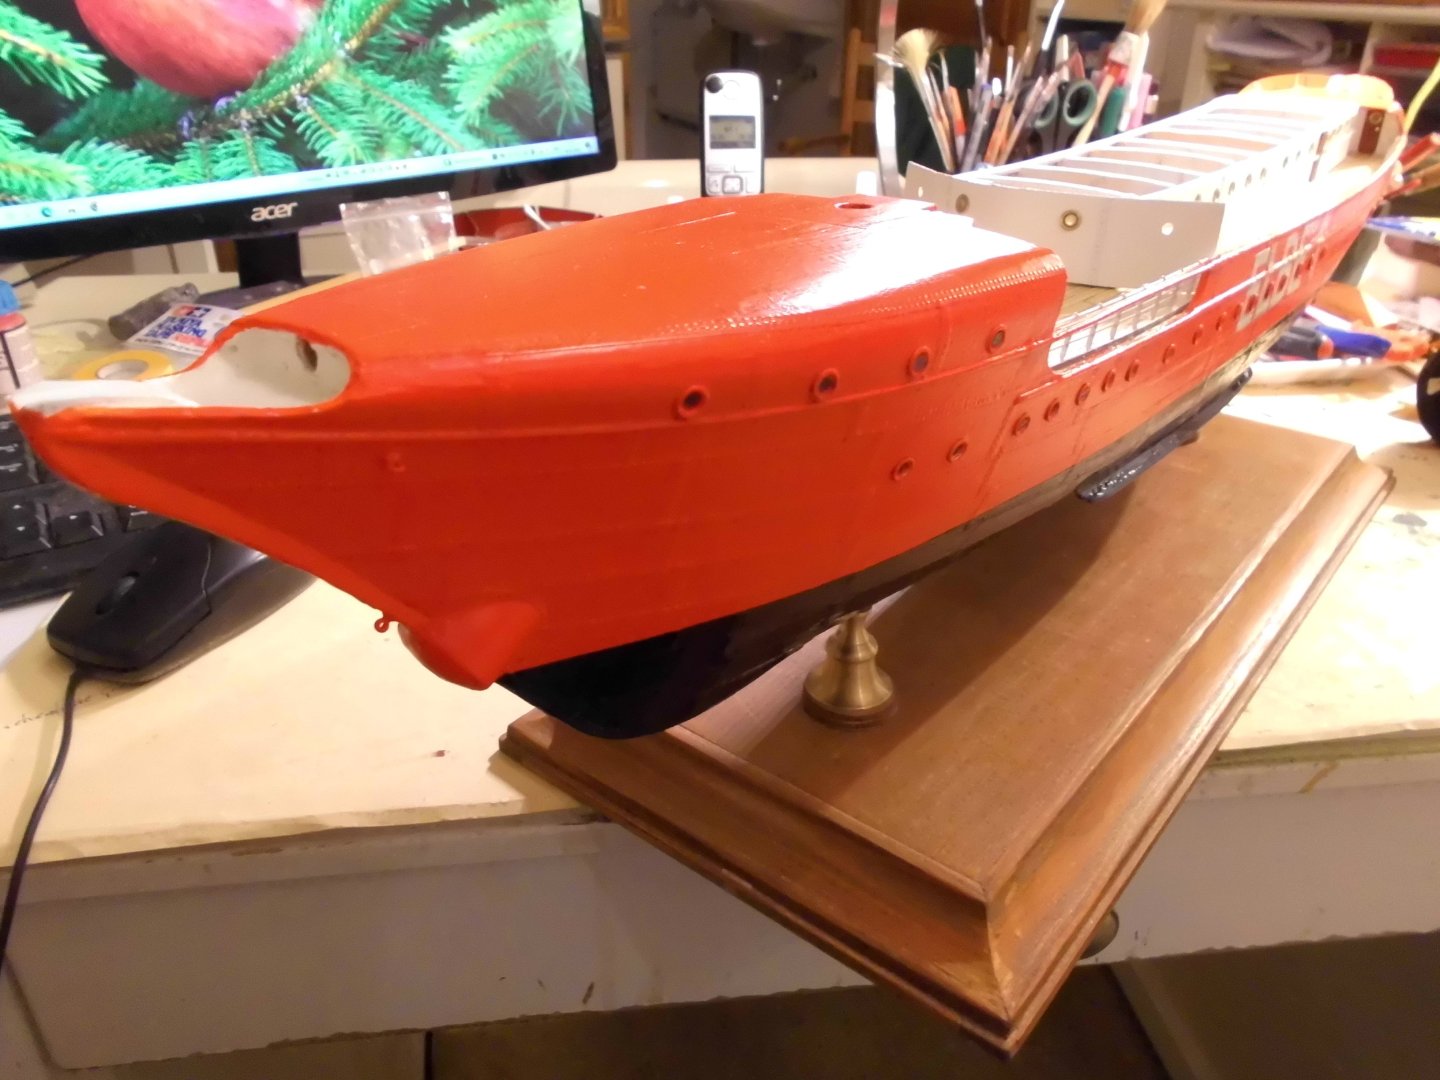
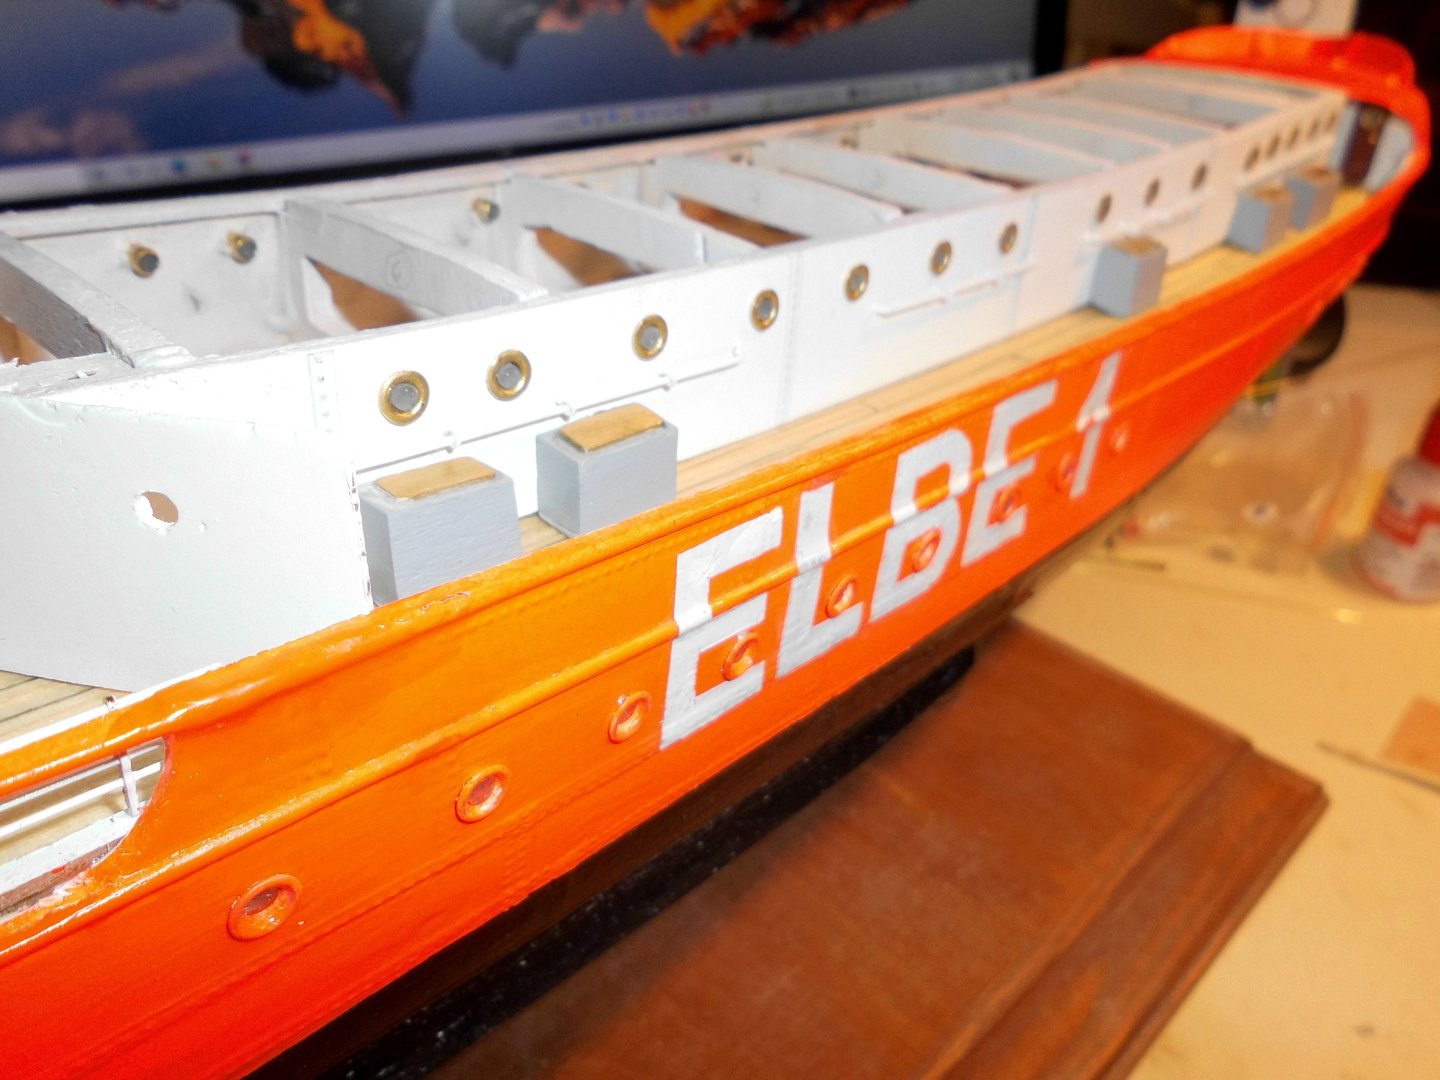
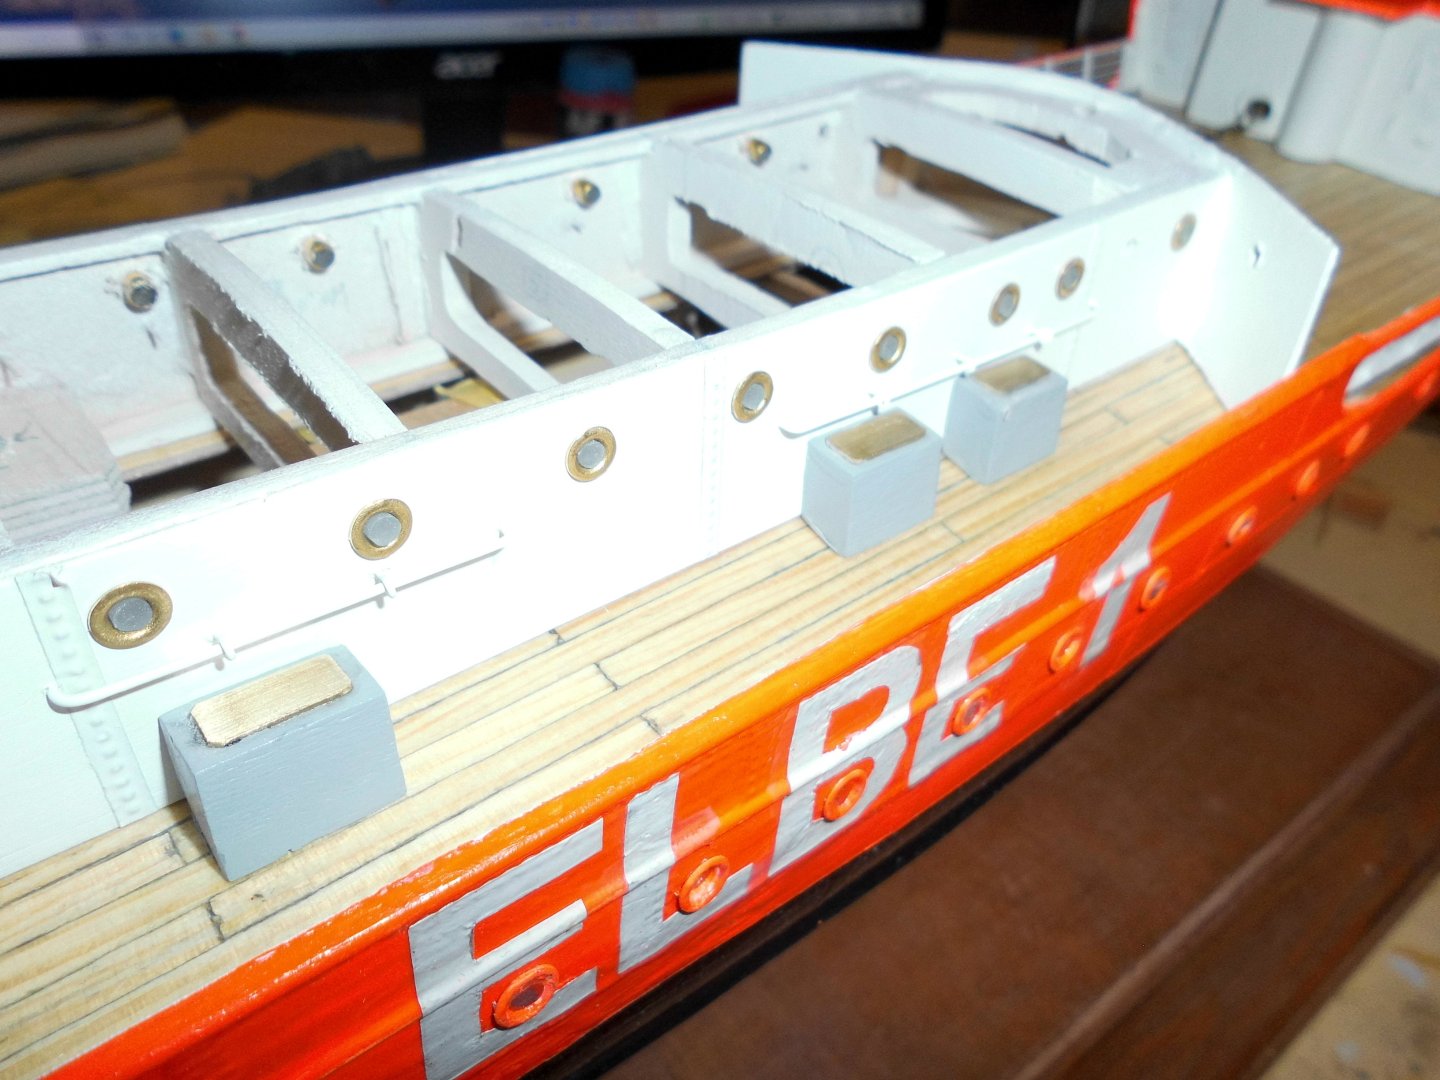
Update all portholes with glassings, all doors with doorknobs and wall boxes for rolled up fire hoses are mounted to the deck housing Nils

- 299 replies
-
- 13
-
-

-

-
- lightship
- Feuerschiff Elbe 1
- (and 1 more)
-
Update made the removeable deck-house together with hand rails and lightshafts with seatight hinged covers. After primering painting the deckhouse portholes were inserted. Also the aft bulkhead was fitted out with two doors and portholes therein .... Slowly its getting shape Nils the making of the deckhouse the handrails are from brass wire. There are 5 screws that position and hold down the deckhouse to the deck Dechhouse with portholes there are 10 lightshafts around the deckhouse, The doors will be next


- 299 replies
-
- 13
-
-
-
- lightship
- Feuerschiff Elbe 1
- (and 1 more)
-
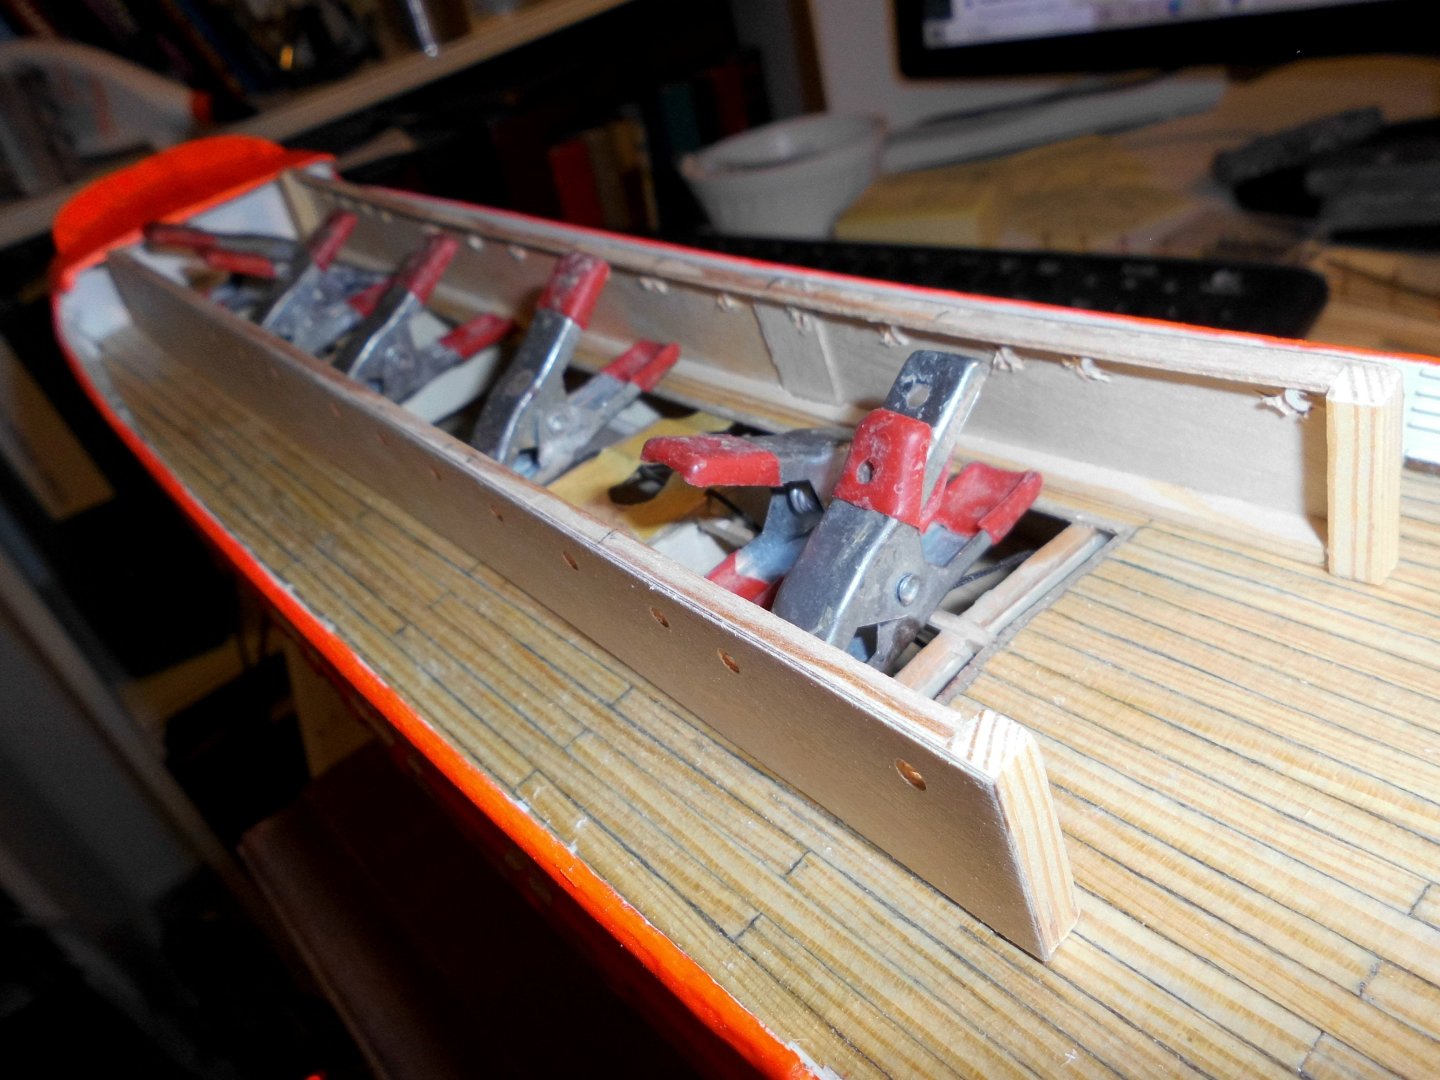
Hi Keith, right keith, I have a whole bunch of the clamps in that size and they look weard, I have built many ships with them already .... The portholes will be of pushed-in rounded face brass tube-rivets. The size and "glassing" will be a number smaller that the other side hull ones Nils
- 299 replies
-
- 5
-
-
- lightship
- Feuerschiff Elbe 1
- (and 1 more)
-
thanks Michel, I`ve started with the long deck house today with 16 positions for portholes on each side Nils

- 299 replies
-
- 14
-
-
- lightship
- Feuerschiff Elbe 1
- (and 1 more)
-
Hello Ralf, welcome to MSW and I wish you a pleassant stay with our comunity Greetings from Glinde (Schleswig-Holstein) Nils
-
beautiful jobstart on the planking Keith, I like thr lines of your yacht nicely done Nils
-
Thats a beautiful model John, I wish you all the patience and success to get her "afloat" again Nils
-
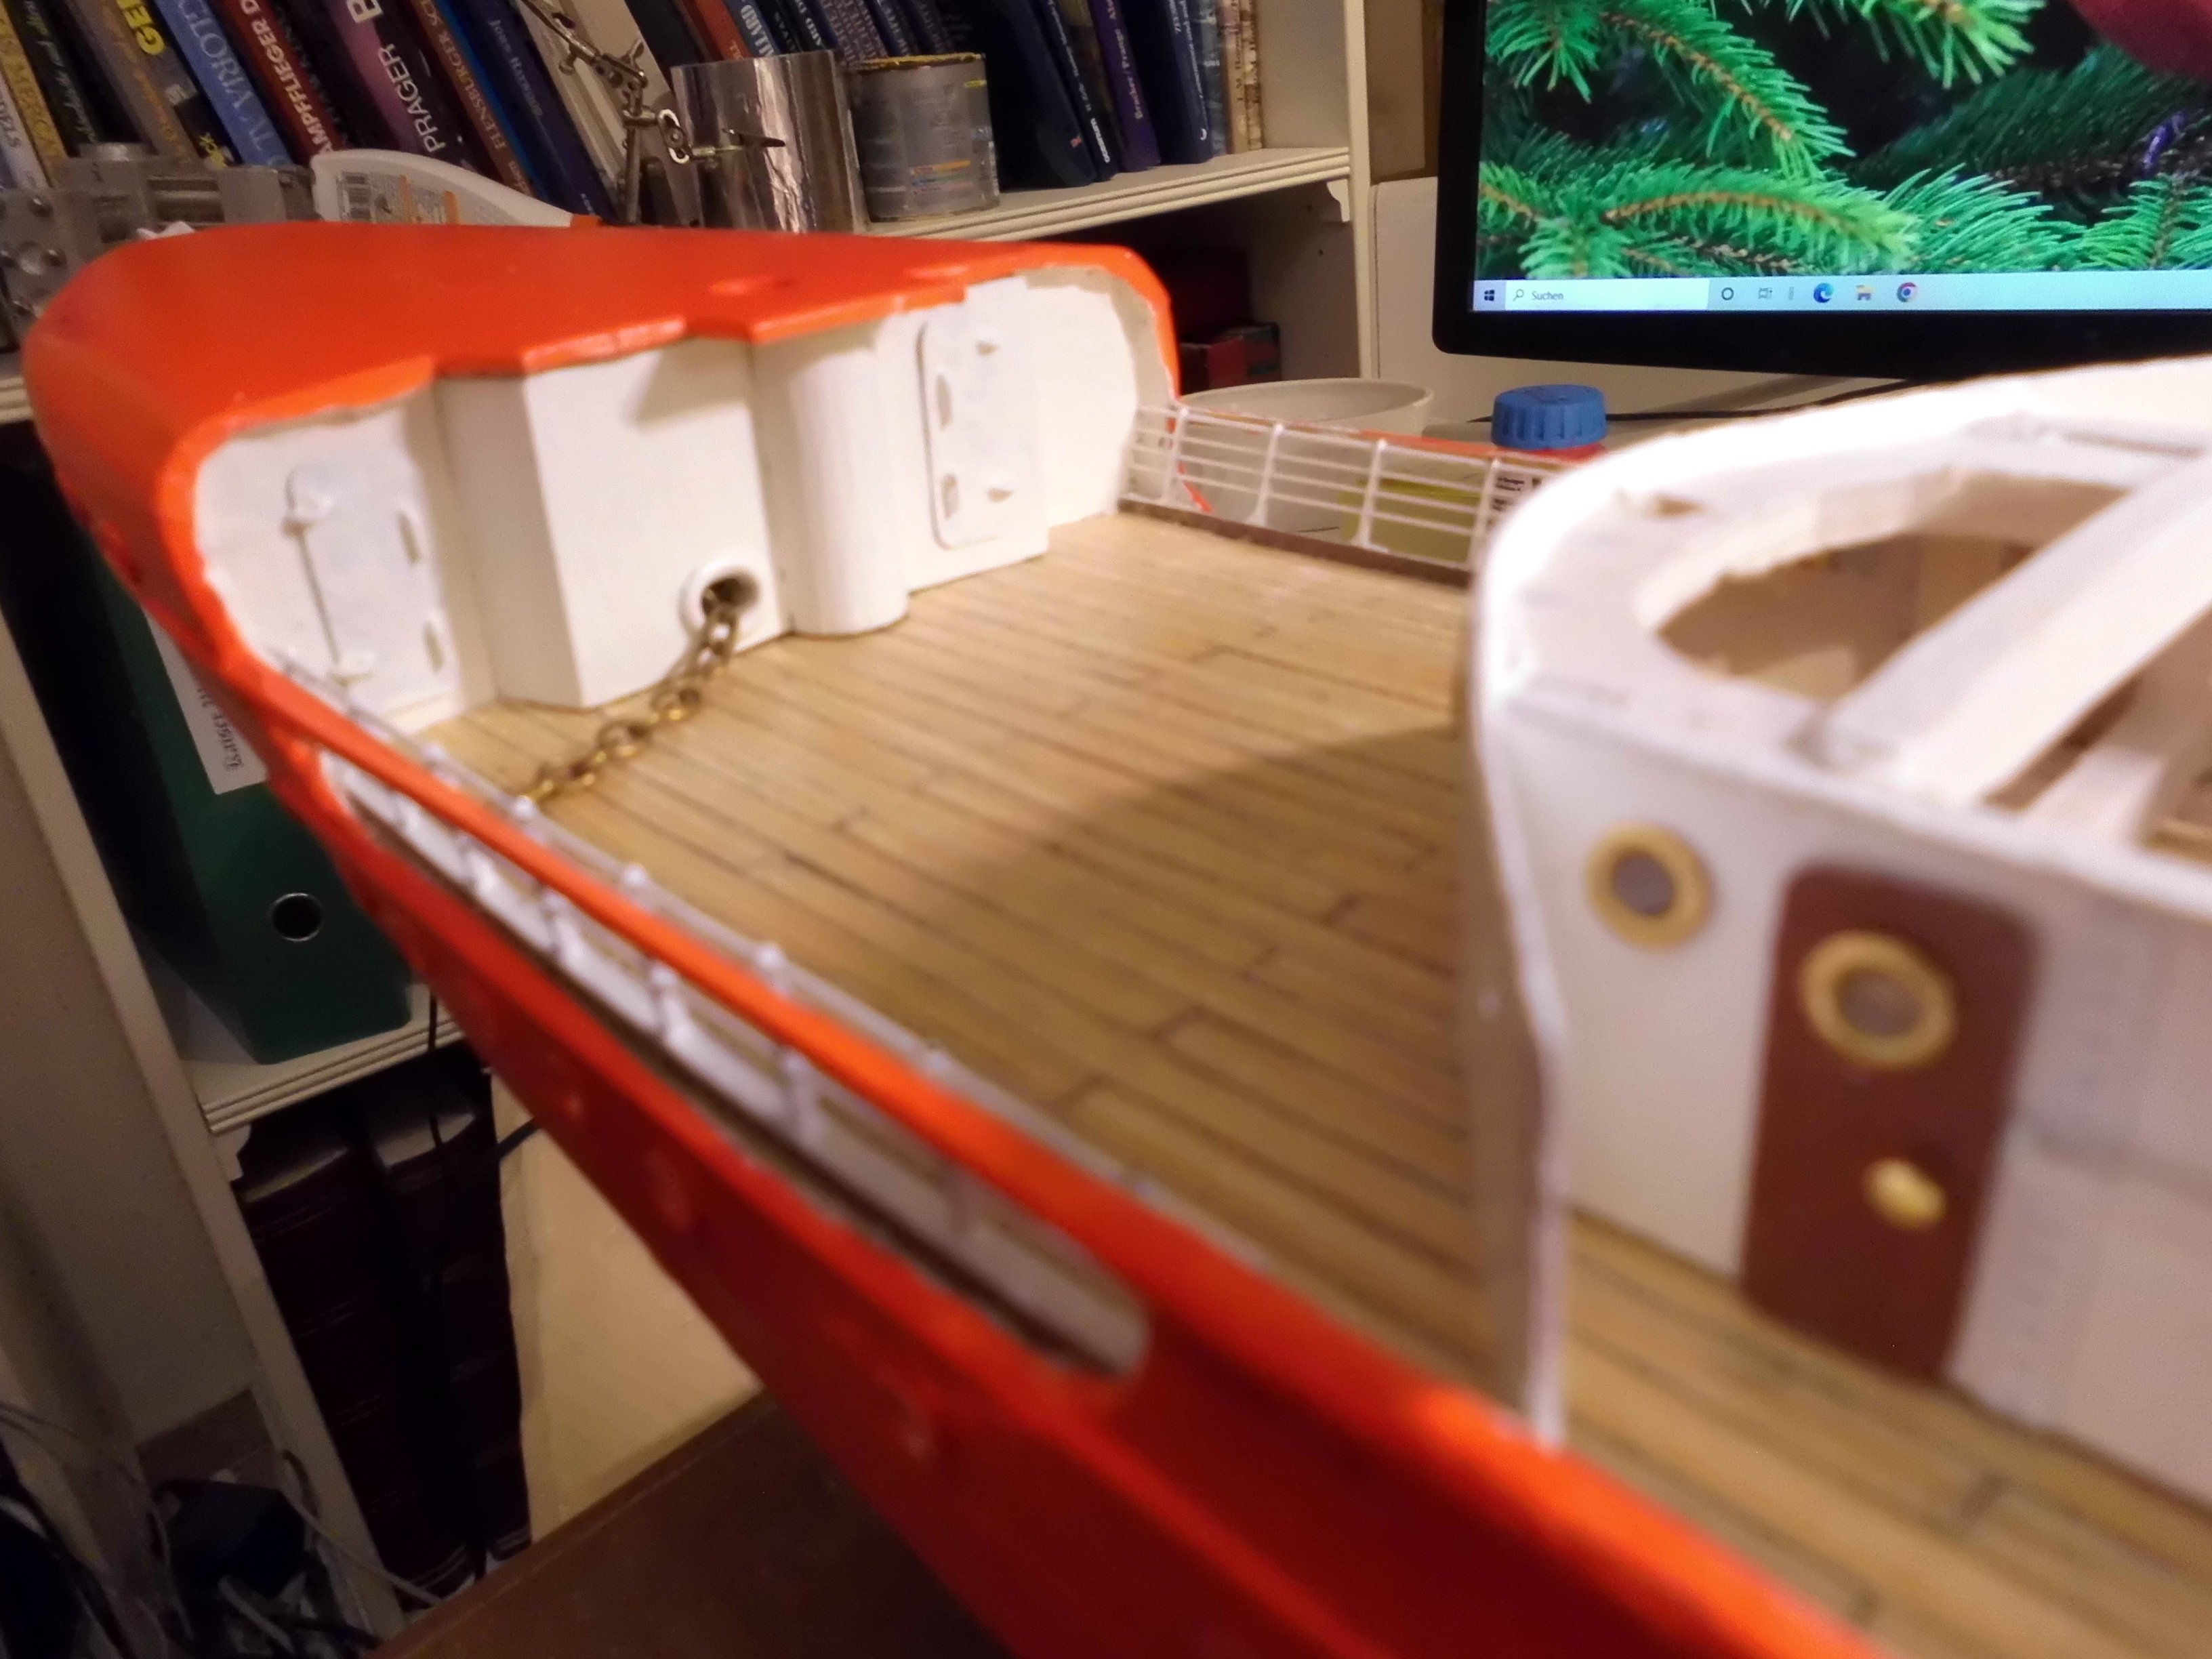
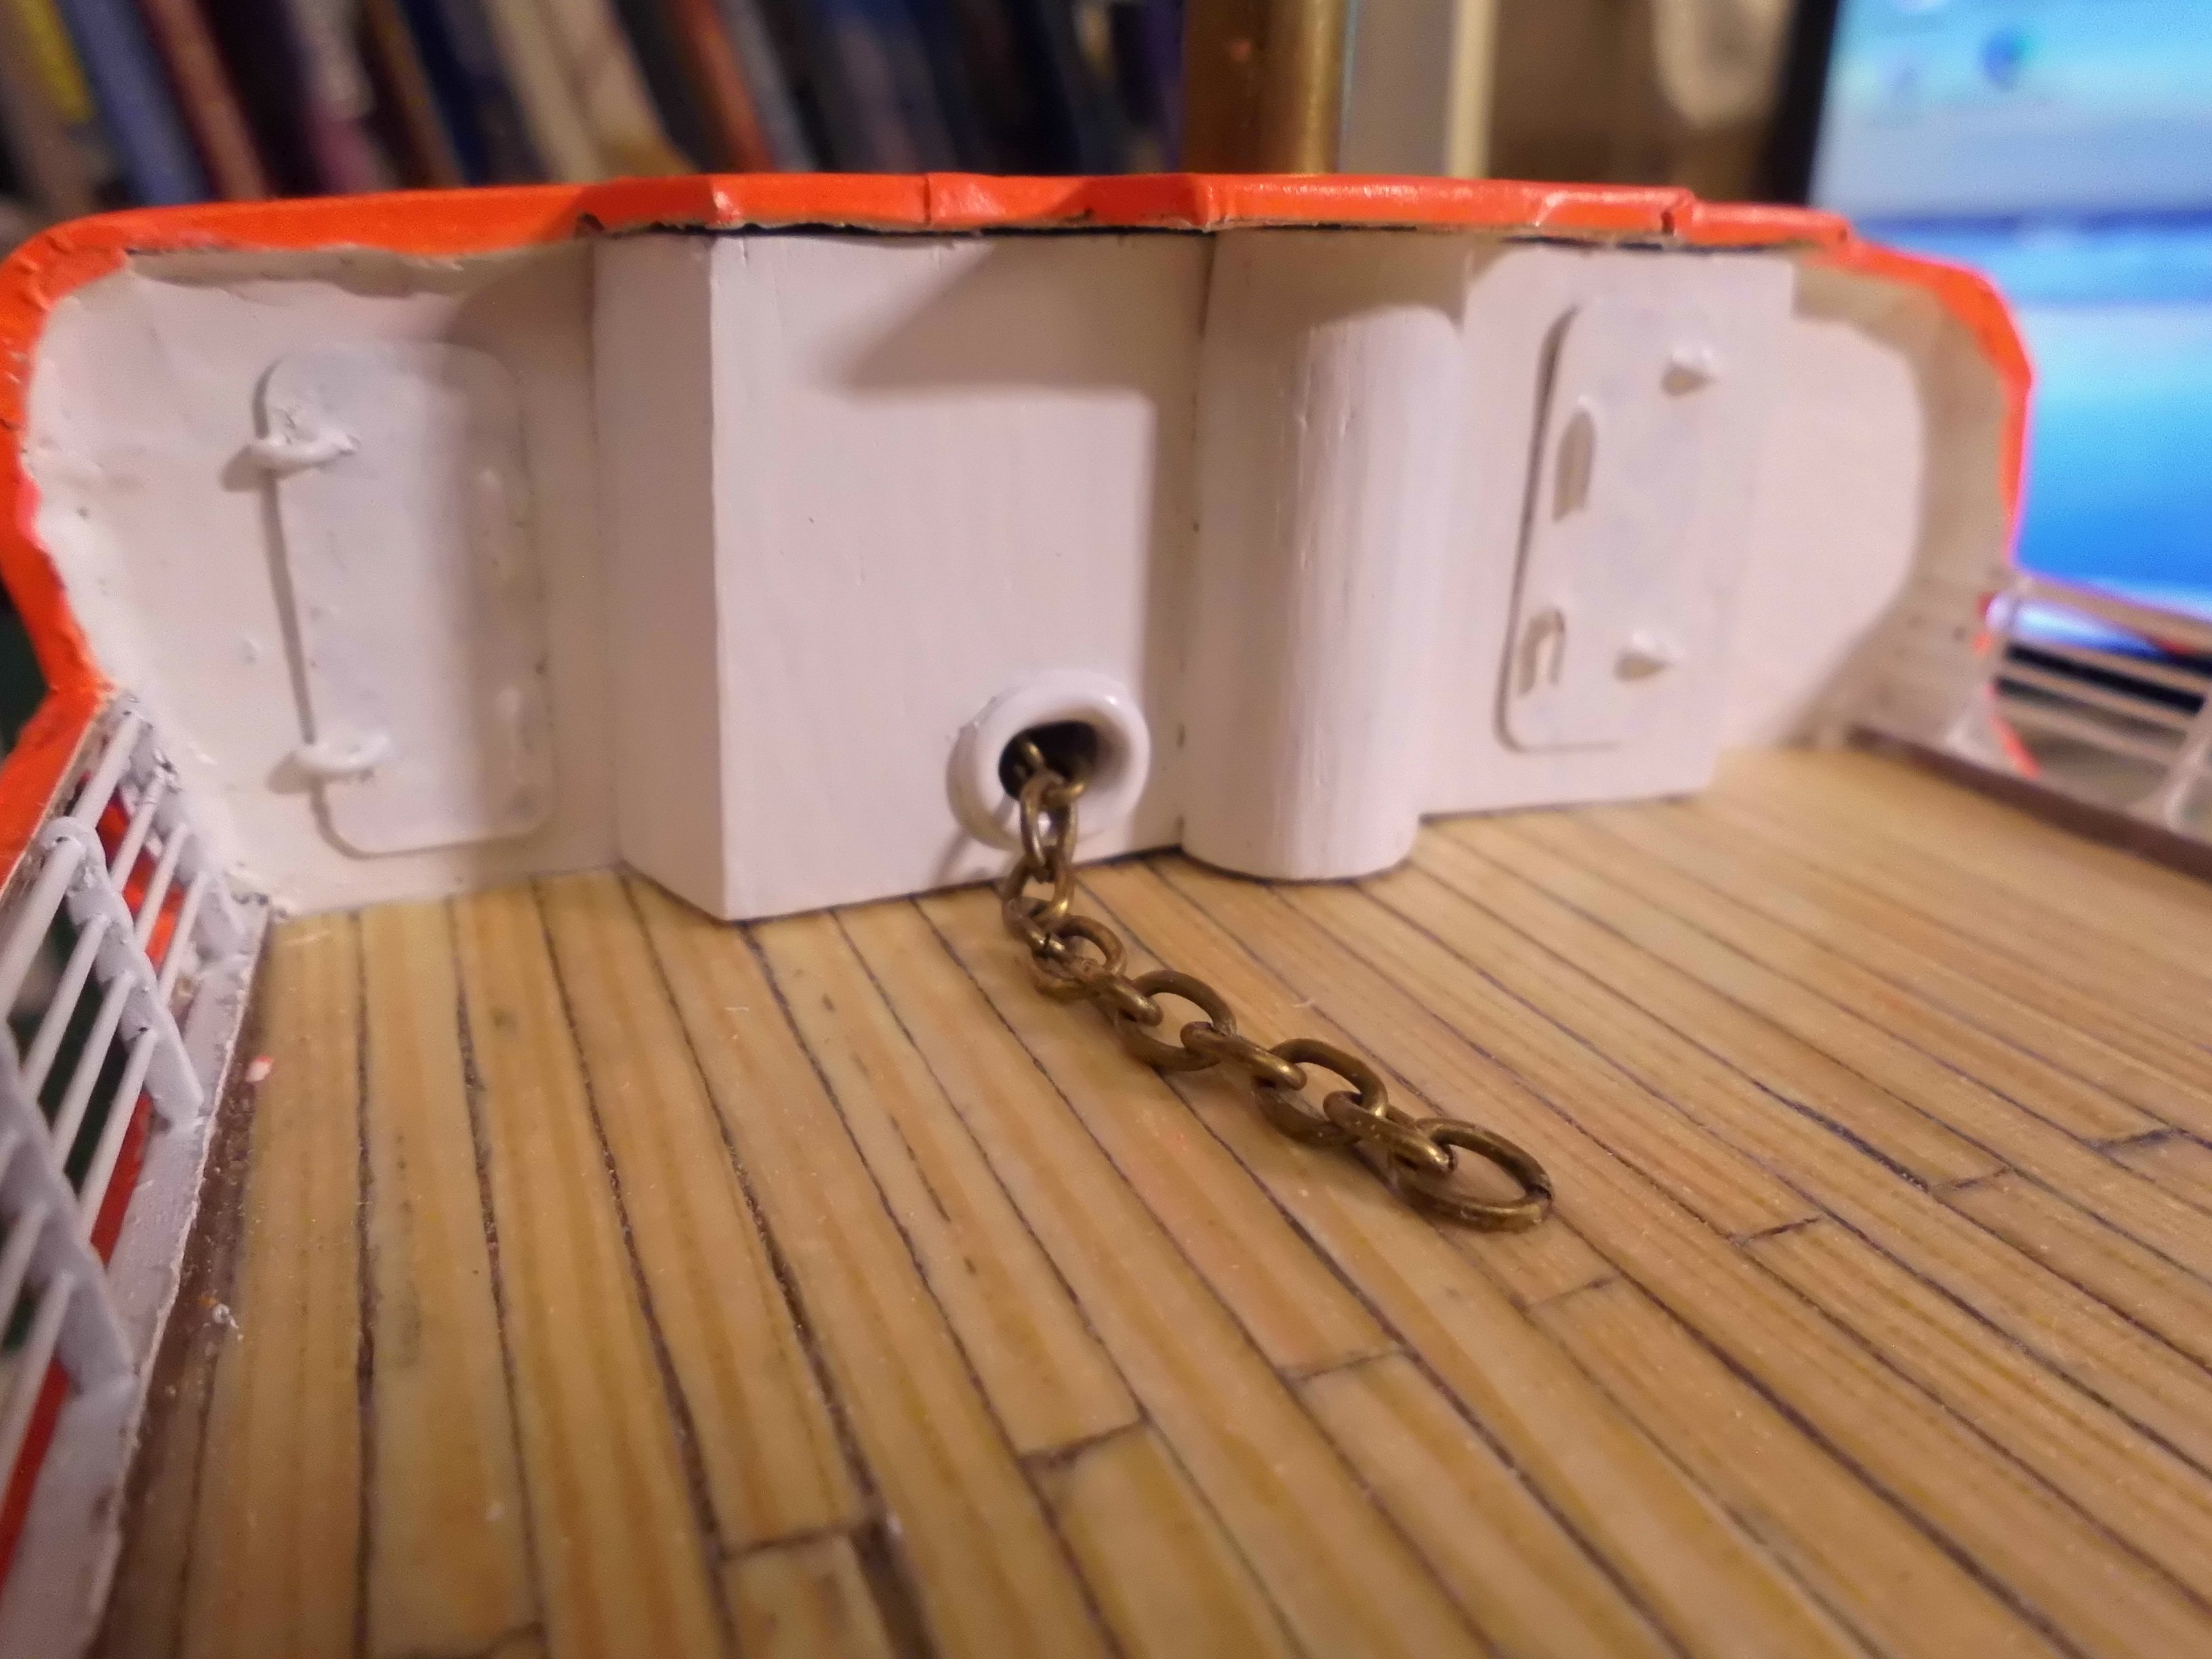
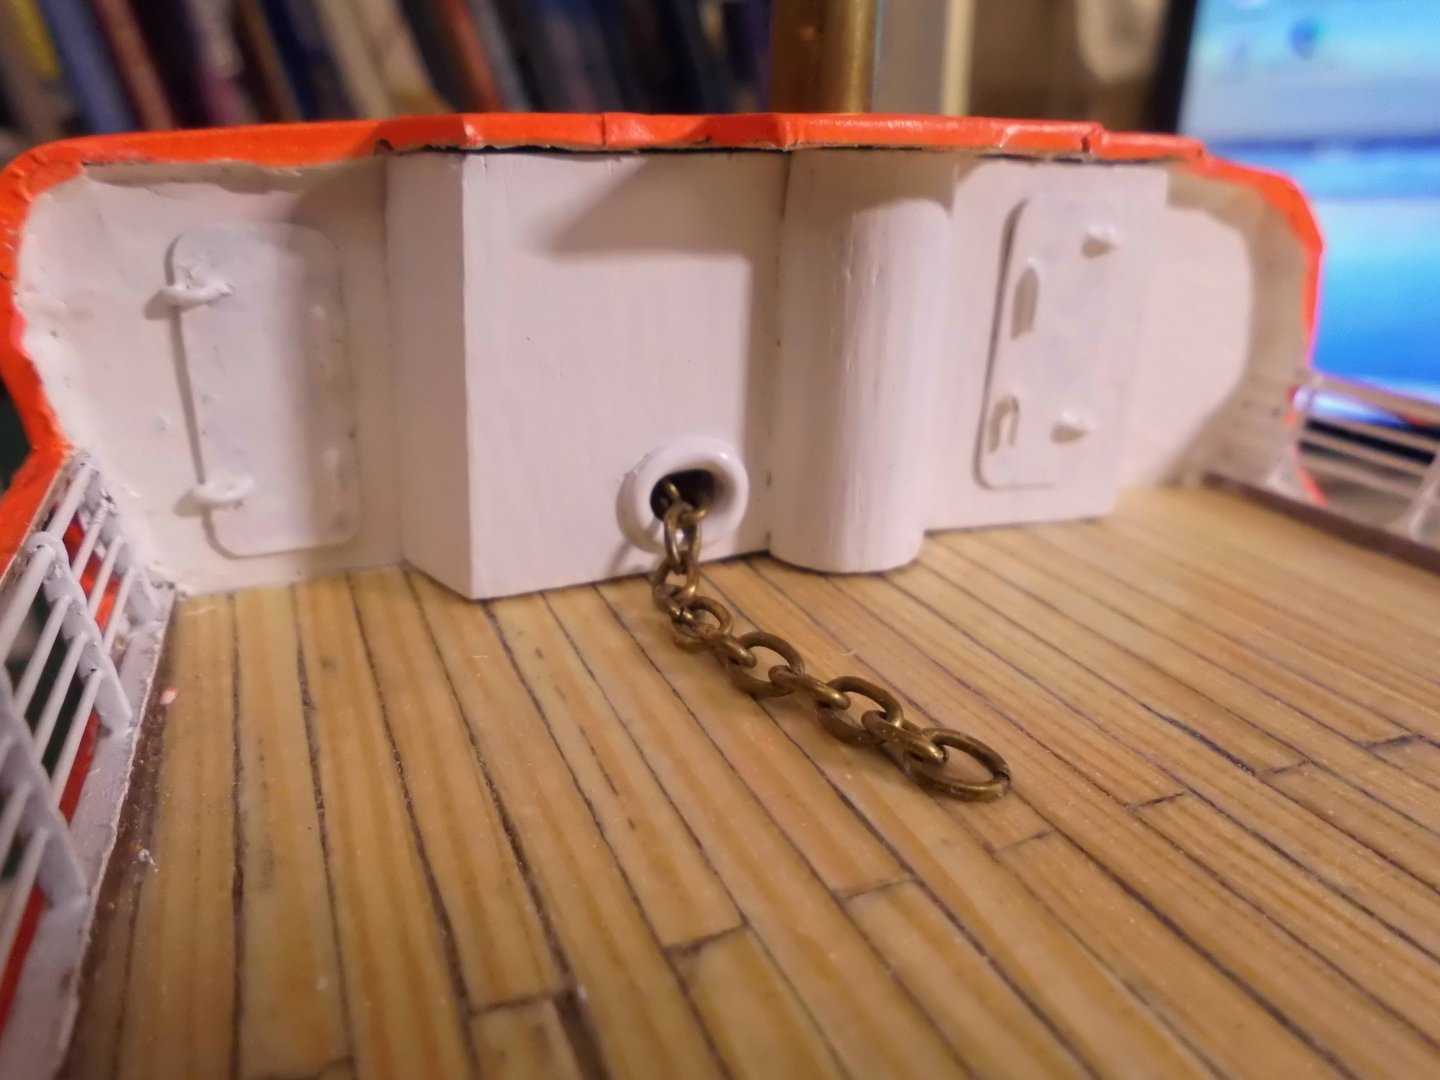
Update made the updated forecastle bulkhead and support for the front mast, also the seawater tight access doors. The mushroom-anchor chain end will be connected to the ringspring buffer element on deck Nils
- 299 replies
-
- 11
-
-
- lightship
- Feuerschiff Elbe 1
- (and 1 more)