Rick310
NRG Member-
Posts
837 -
Joined
-
Last visited
Content Type
Profiles
Forums
Gallery
Events
Everything posted by Rick310
-
Thanks George! Really appreciate your input! Rick
- 360 replies
-
- Flying Fish
- Model Shipways
-
(and 1 more)
Tagged with:
-
Thanks Jared, still have to make a second one which for me, always seems harder! Rick
- 360 replies
-
- Flying Fish
- Model Shipways
-
(and 1 more)
Tagged with:
-
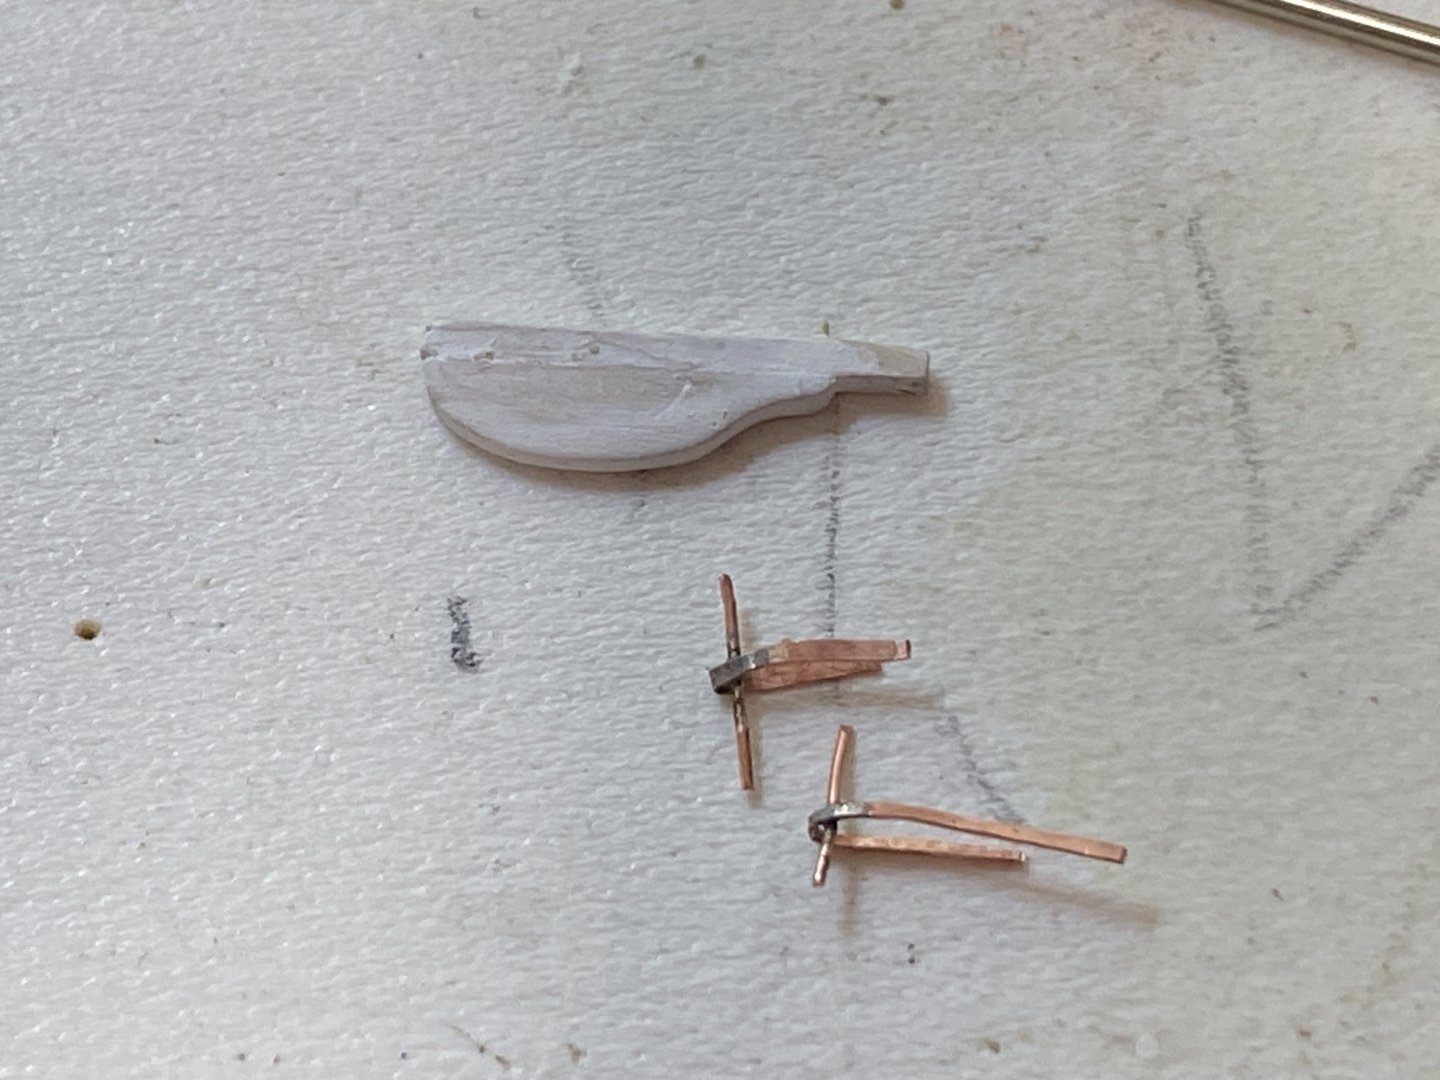
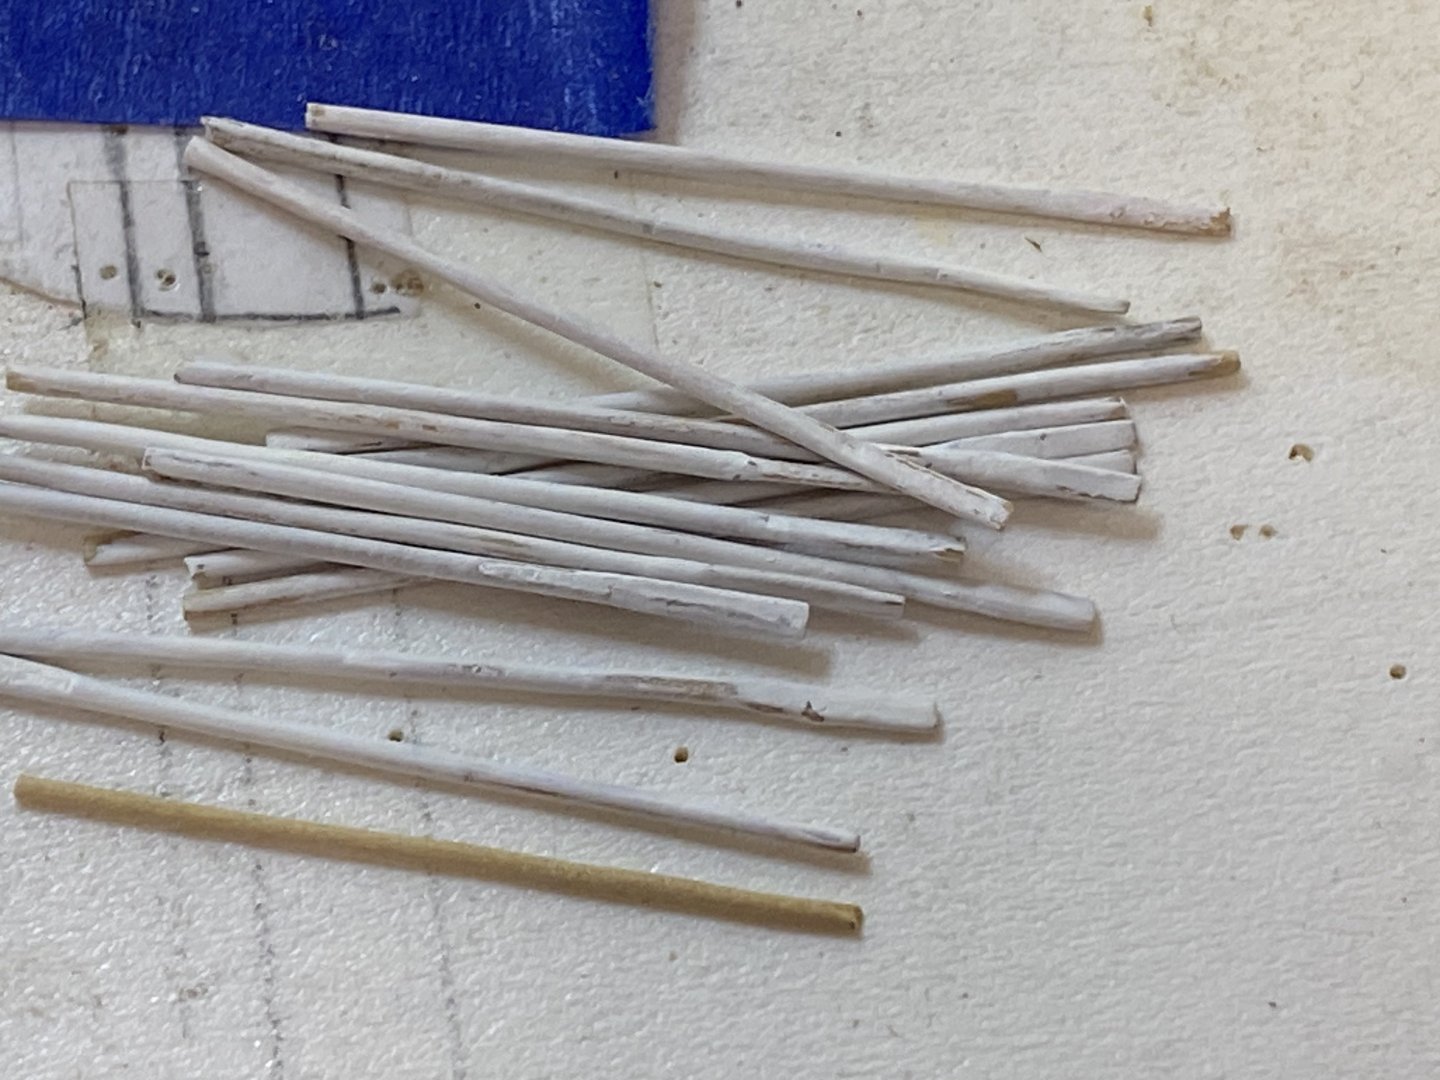
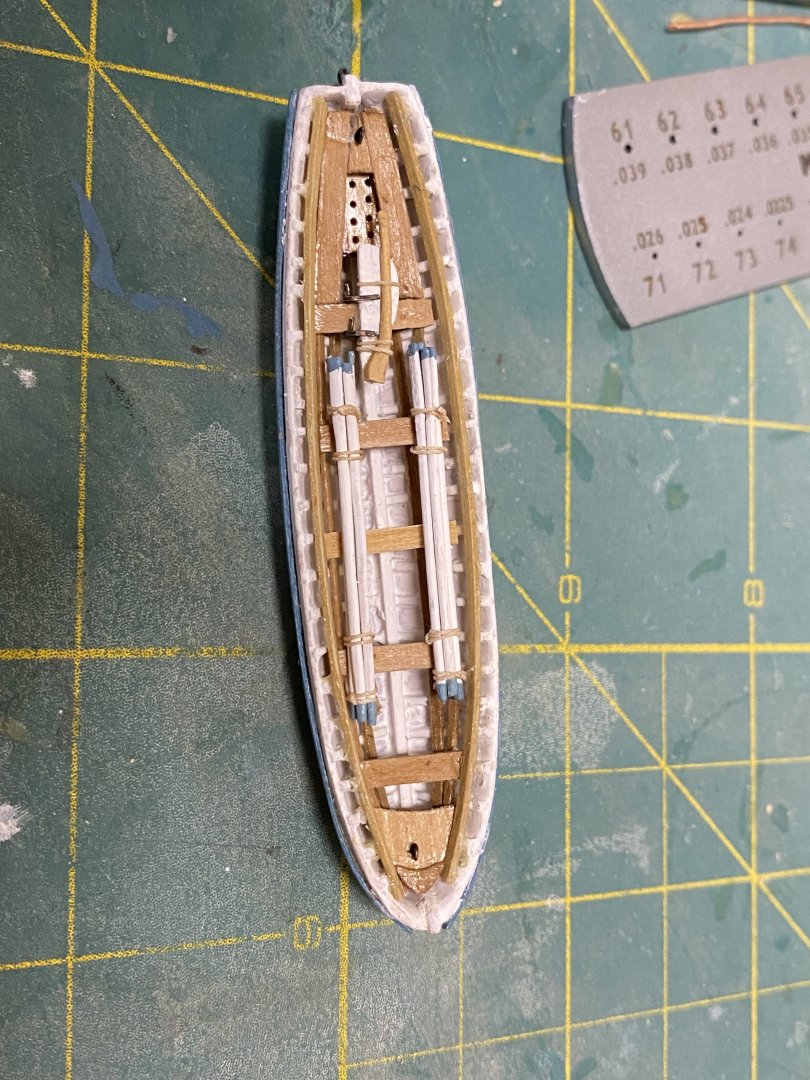
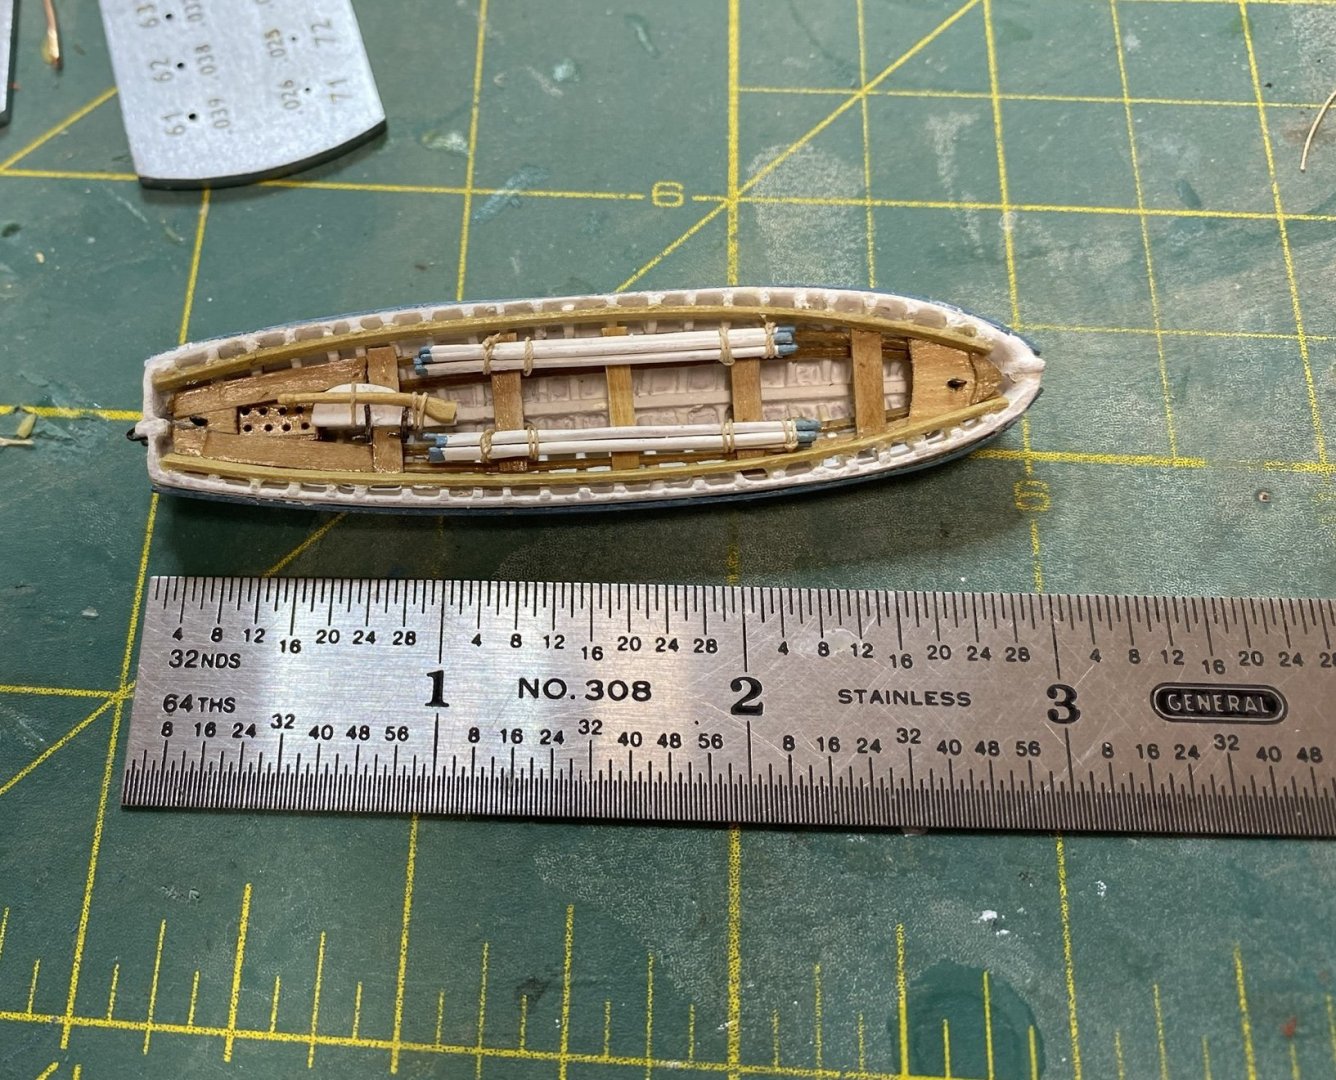
Finished the first quarter boat. The grating was made as before with boxwood and cherry. Not at all happy with the result. The holes and spacing are much too large but opted not to remake it as it’s not very visible. Will do better next time. The rudder and tiller were carved out of boxwood and the oars were made per EdT. Small strips of boxwood were drawn through a draw plate from Byrnes model machines and it worked really well. This was the first time I was able to successfully use a draw plate. The first one I had from Micromark didn’t work at all with wood. I read somewhere that the Byrnes draw plate was made specifically for wood. The last 3 oars were made from AYC , which was much easier to draw and produced straighter oars. I chose a length of 10 feet (1 1/4 inches) for the oars. This looks about right. One end was then marked at 1/4 inches for the blade and squeezed with parallel pliers. This also worked well with no need to soften in hot water first. The blades were then soaked with cyano to stabilize the fibers, filed to shape and painted flat white. The handles will be painted blue-3/32 and the blades- 1/16, again copying EdT’s Young America. Hinges for the rudder were made from 28 ga copper wire hammered flat for the strap with a straight length of 28 ga wire, soldered for the pins. These were bent around the edge of a metal ruler that was the same thickness as the rudder and blackened. The spacing for the davits is 2 1/2 inches based on the spacing of the eyebolts, which is shorter than shown on the plans. This was governed by the quarter boat, where the eyebolts could be placed on the model. The aft davit will be between the first and second deadeyes on the mizzen channel, and the forward davit just aft of the freeing port. Hopefully this will work well and is a compromise between the plans and the paintings. I will make the other quarter boat at another time as I am anxious to get on with the rigging. Finally, the davit brackets were finished and mounted to the hull and the spars for the davits made, again using AYC, drawn through the draw plate, tapered and stained with Ipswich pine and satin wipe on poly. I’m going to attempt to make the padding from some very old silkspan.
- 360 replies
-
- Flying Fish
- Model Shipways
-
(and 1 more)
Tagged with:
-
Really coming along nicely Keith Really enjoy following your build!! Rick
- 732 replies
-
- Lula
- sternwheeler
-
(and 1 more)
Tagged with:
-
Coming along nicely! Glad you painted the bowsprit black. Rock
- 204 replies
-
- Flying Cloud
- Mamoli
-
(and 1 more)
Tagged with:
-
Thanks George! I’m using your model as the example for the placement of the davits! Pretty sure I will do the same. Rick
- 360 replies
-
- Flying Fish
- Model Shipways
-
(and 1 more)
Tagged with:
-
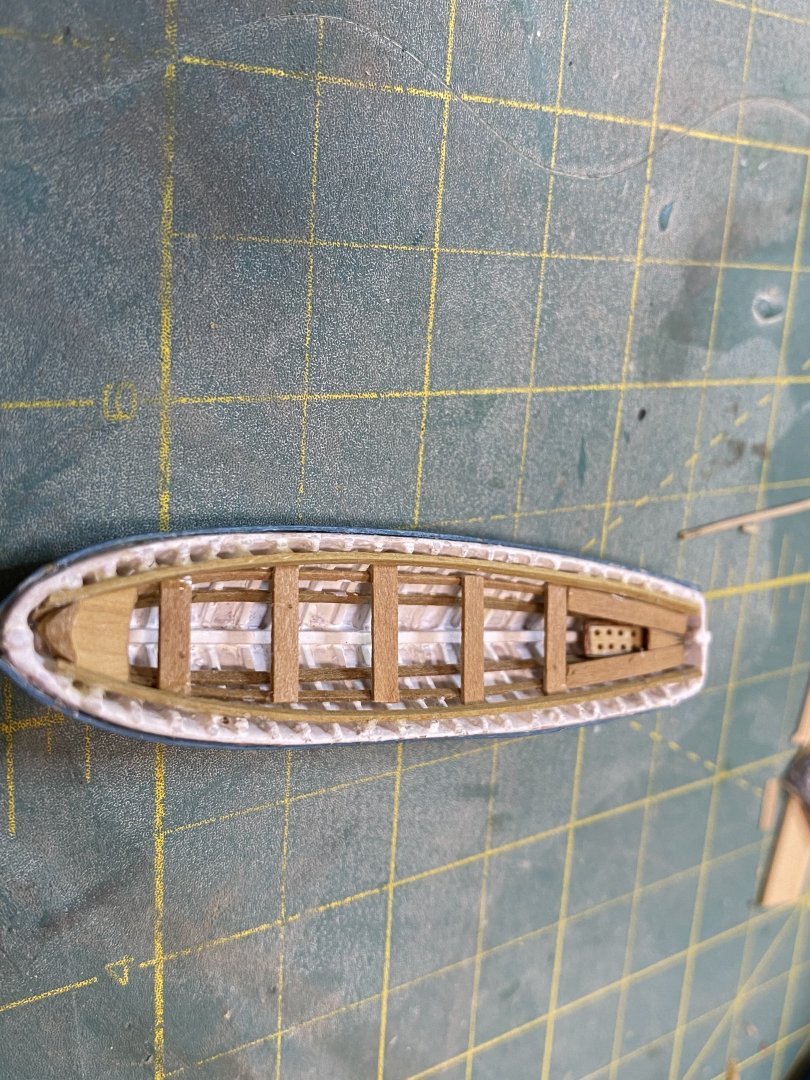
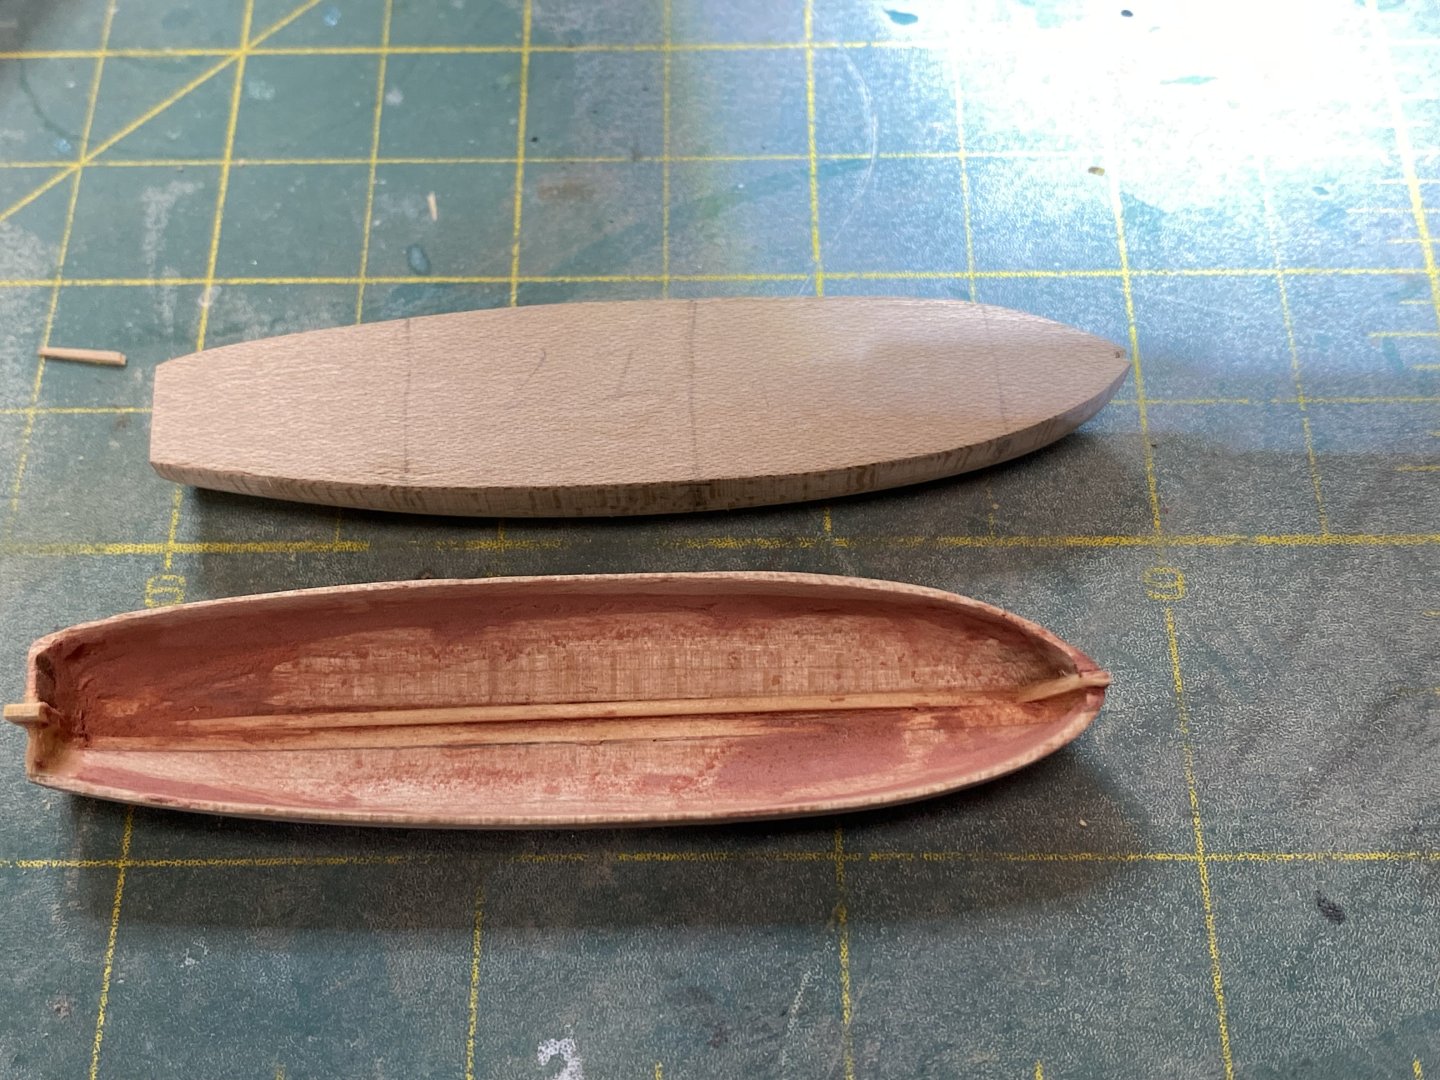
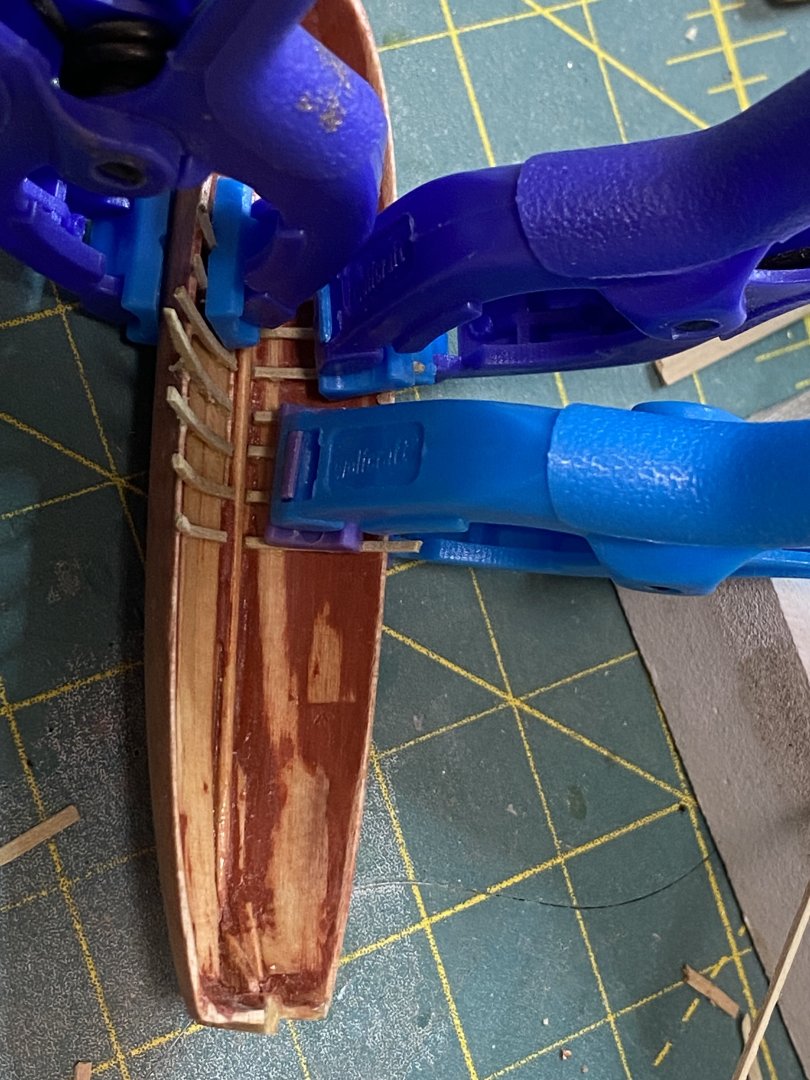
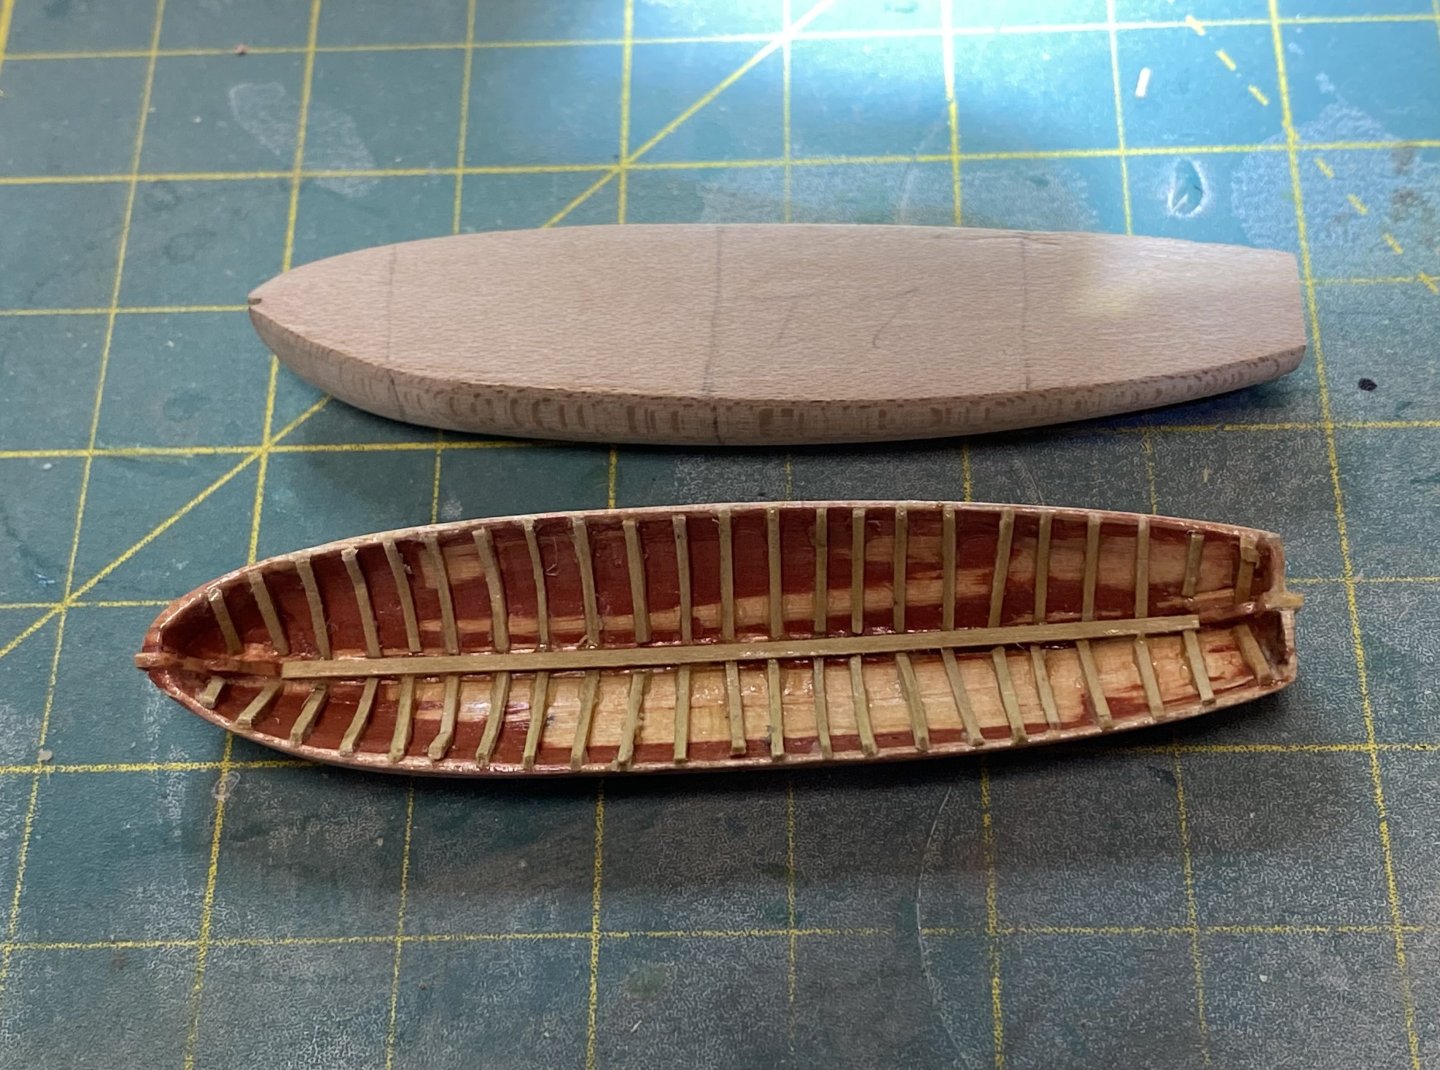
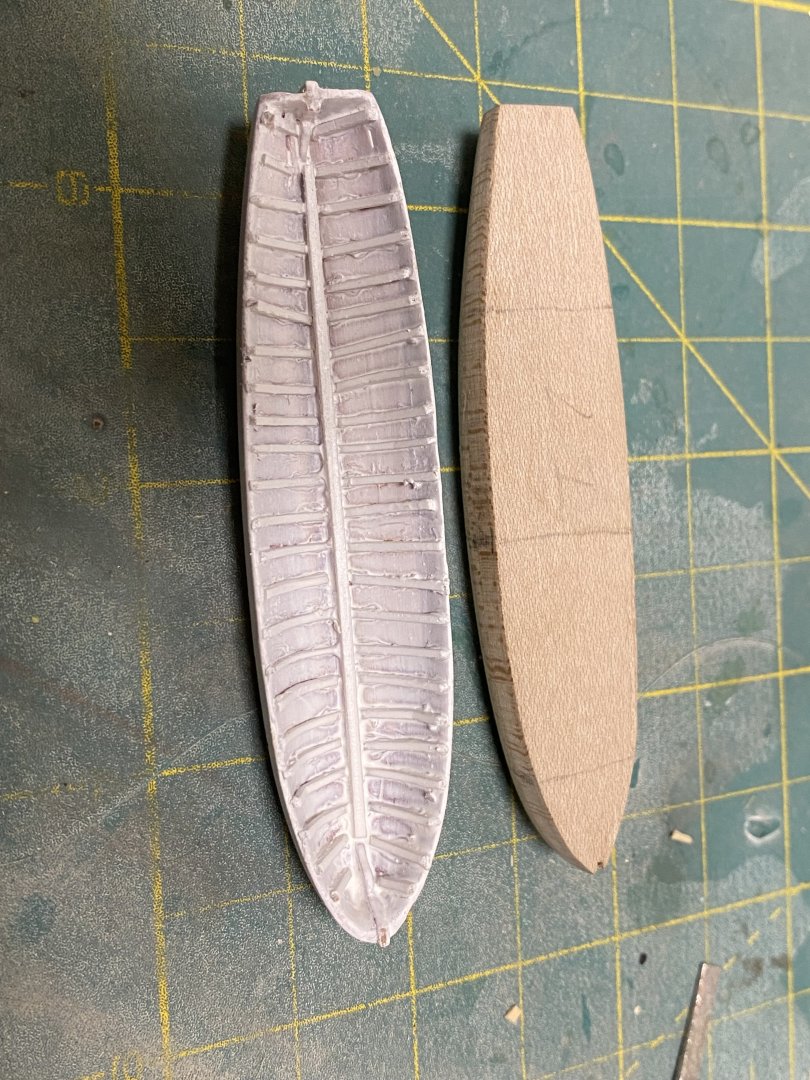
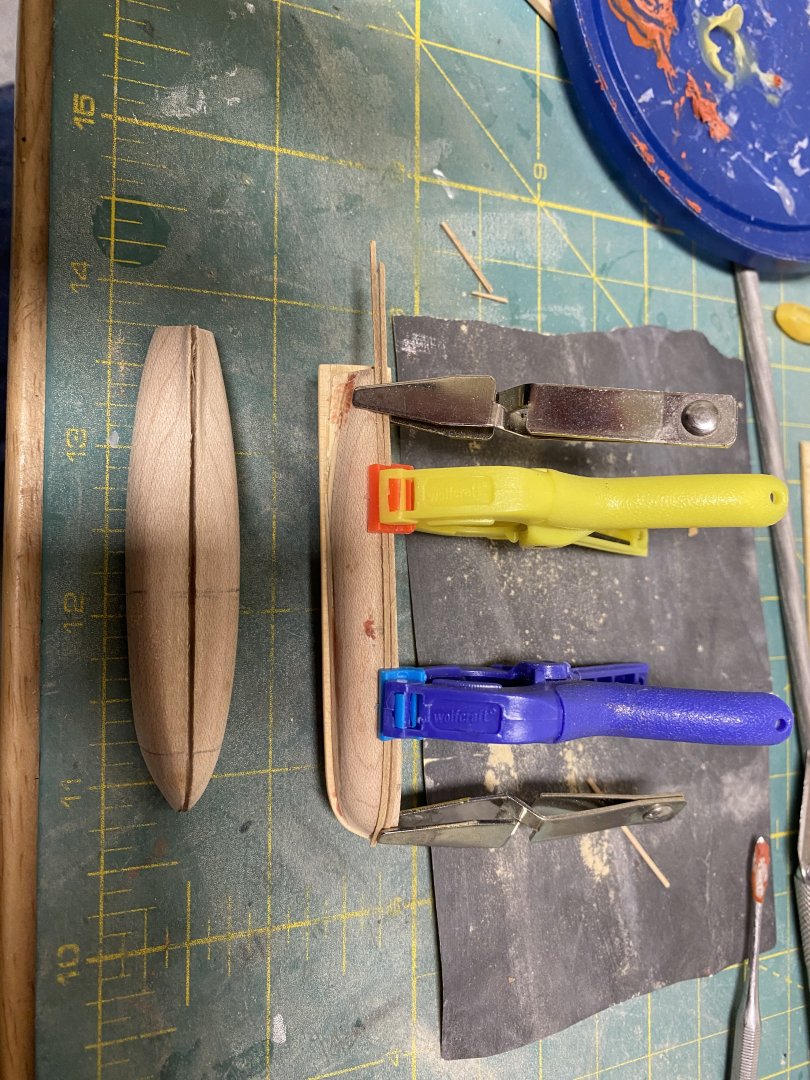
I was just about ready to start rigging the mizzen mast when it occurred to me that I needed to make a decision about where the davits for the quarter boats were going to be located and the brackets installed. My concern is that the davits and the davit guys will interfere with the run of the main topsail brace and the main course sheets. The plans place the davits forward of the mizzen channels and looks to possibly be in conflict with the running rigging. In this position, the davits could be swung inboard, which would allow the quarter boats to be stored inboard. This position is also shown on the Flying Cloud model at the Boston museum of Fine Art, and EdT’s extraordinary model of the Young America. Alternatively, both the Buttersworth painting and the China Trade painting show the aft davit between the 2nd or3rd deadeyes on the mizzen channel. This would obviously prevent the quarter boats from being stored inboard. According to Campbell, in his book the China Tea Clippers, some ships kept the quarter boats on the davits for the voyage, triced up high. In any event, I need to know the exact spacing between the davits to accurately place the forward davit brackets. This meant having a quarter boat to measure from. Therefore I decided to go ahead and make one of these boats now and not wait until the rigging was completed as previously planned. I had already made 5 boats (see prior post), 3 of which were mounted on the foreword deck house roof. The 2 remaining boats are for the quarter boats if I decided to use them. I attempted to cut one of the boats in half on the table saw ( bad idea as it is not symmetrical and the smaller half had to be shimmed). These were then caved out and glued to the keel, stem and stern post. Very small strips of boxwood, for the ribs, approximately 1/32x1/32, were cut on the table saw with absolutely no consistency. These were glued to the inside of the bulwarks and clamped. Note in the pictures the liberal use of Bondo to get curves that would not break the ribs when glued. The boat was then painted flat white. I also made the rubbing strakes which were soaked in water and clamped to the hull and when dry, painted blue to match the other boats. The rest of the interior will be made of boxwood and stained with Ipswich pine. My wife and I are off on a short vacation, which gives me time to decide where to place the davits. Decisions decisions! Does anyone have any thoughts?
- 360 replies
-
- Flying Fish
- Model Shipways
-
(and 1 more)
Tagged with:
About us
Modelshipworld - Advancing Ship Modeling through Research
SSL Secured
Your security is important for us so this Website is SSL-Secured
NRG Mailing Address
Nautical Research Guild
237 South Lincoln Street
Westmont IL, 60559-1917
Model Ship World ® and the MSW logo are Registered Trademarks, and belong to the Nautical Research Guild (United States Patent and Trademark Office: No. 6,929,264 & No. 6,929,274, registered Dec. 20, 2022)
Helpful Links
About the NRG
If you enjoy building ship models that are historically accurate as well as beautiful, then The Nautical Research Guild (NRG) is just right for you.
The Guild is a non-profit educational organization whose mission is to “Advance Ship Modeling Through Research”. We provide support to our members in their efforts to raise the quality of their model ships.
The Nautical Research Guild has published our world-renowned quarterly magazine, The Nautical Research Journal, since 1955. The pages of the Journal are full of articles by accomplished ship modelers who show you how they create those exquisite details on their models, and by maritime historians who show you the correct details to build. The Journal is available in both print and digital editions. Go to the NRG web site (www.thenrg.org) to download a complimentary digital copy of the Journal. The NRG also publishes plan sets, books and compilations of back issues of the Journal and the former Ships in Scale and Model Ship Builder magazines.


