Rick310
-
Posts
833 -
Joined
-
Last visited
Content Type
Profiles
Forums
Gallery
Events
Everything posted by Rick310
-
You are right Jared, the rigging is complex. I have to think several steps ahead so as not to paint myself in a corner! I just started rigging and it is a slow process! I’m also scared to death that I will snag something and break it! Keep up the good work, slow and steady! Rick
- 431 replies
-
- 1
-

-
- Flying Fish
- Model Shipways
- (and 2 more)
-
Those rails are nicely done George! Great job of city the stern rail out of sheet! Rick
-
Clipperfan, do you have a photo of the painting? Rick
-
I found rigging the bowsprit a challenge. Hopefully the rest will be easier, although not sure about that! Rick
- 200 replies
-
- 1
-
-
- Flying Cloud
- Mamoli
- (and 1 more)
-
This is such a great build Keith!! You are doing a magnificent job!! Rick
- 732 replies
-
- 4
-
-

-
- Lula
- sternwheeler
- (and 1 more)
-
Thanks Valerie! Really impressive!! Rick
-
Such amazing work!! How did you cut out the brass frames? Rick
-
George, I think the prop could be raised to eliminate drag when sailing. The prop/hub came out great!! Rick
-
George, that really looks great!! Well Done!’ Rick
-
Thank you Keith , George and Rob for your input! Much appreciated! Keith, is the blackening solution you use called Birchwood Casey Blue? Rick
- 360 replies
-
- 1
-
-
- Flying Fish
- Model Shipways
- (and 1 more)
-
Keith, George, thanks for the tip. From now on, I’m going with wire. Rick
- 360 replies
-
- 2
-
-
- Flying Fish
- Model Shipways
- (and 1 more)
-
Keith, thank you so much for your input! I read your post and it never occurred to me to use annealed wire. Much stronger than copper and should be easier at my scale 1/96. Plus the advantage of using wire closer to the correct scale! Rick
- 360 replies
-
- 2
-
-
- Flying Fish
- Model Shipways
- (and 1 more)
-
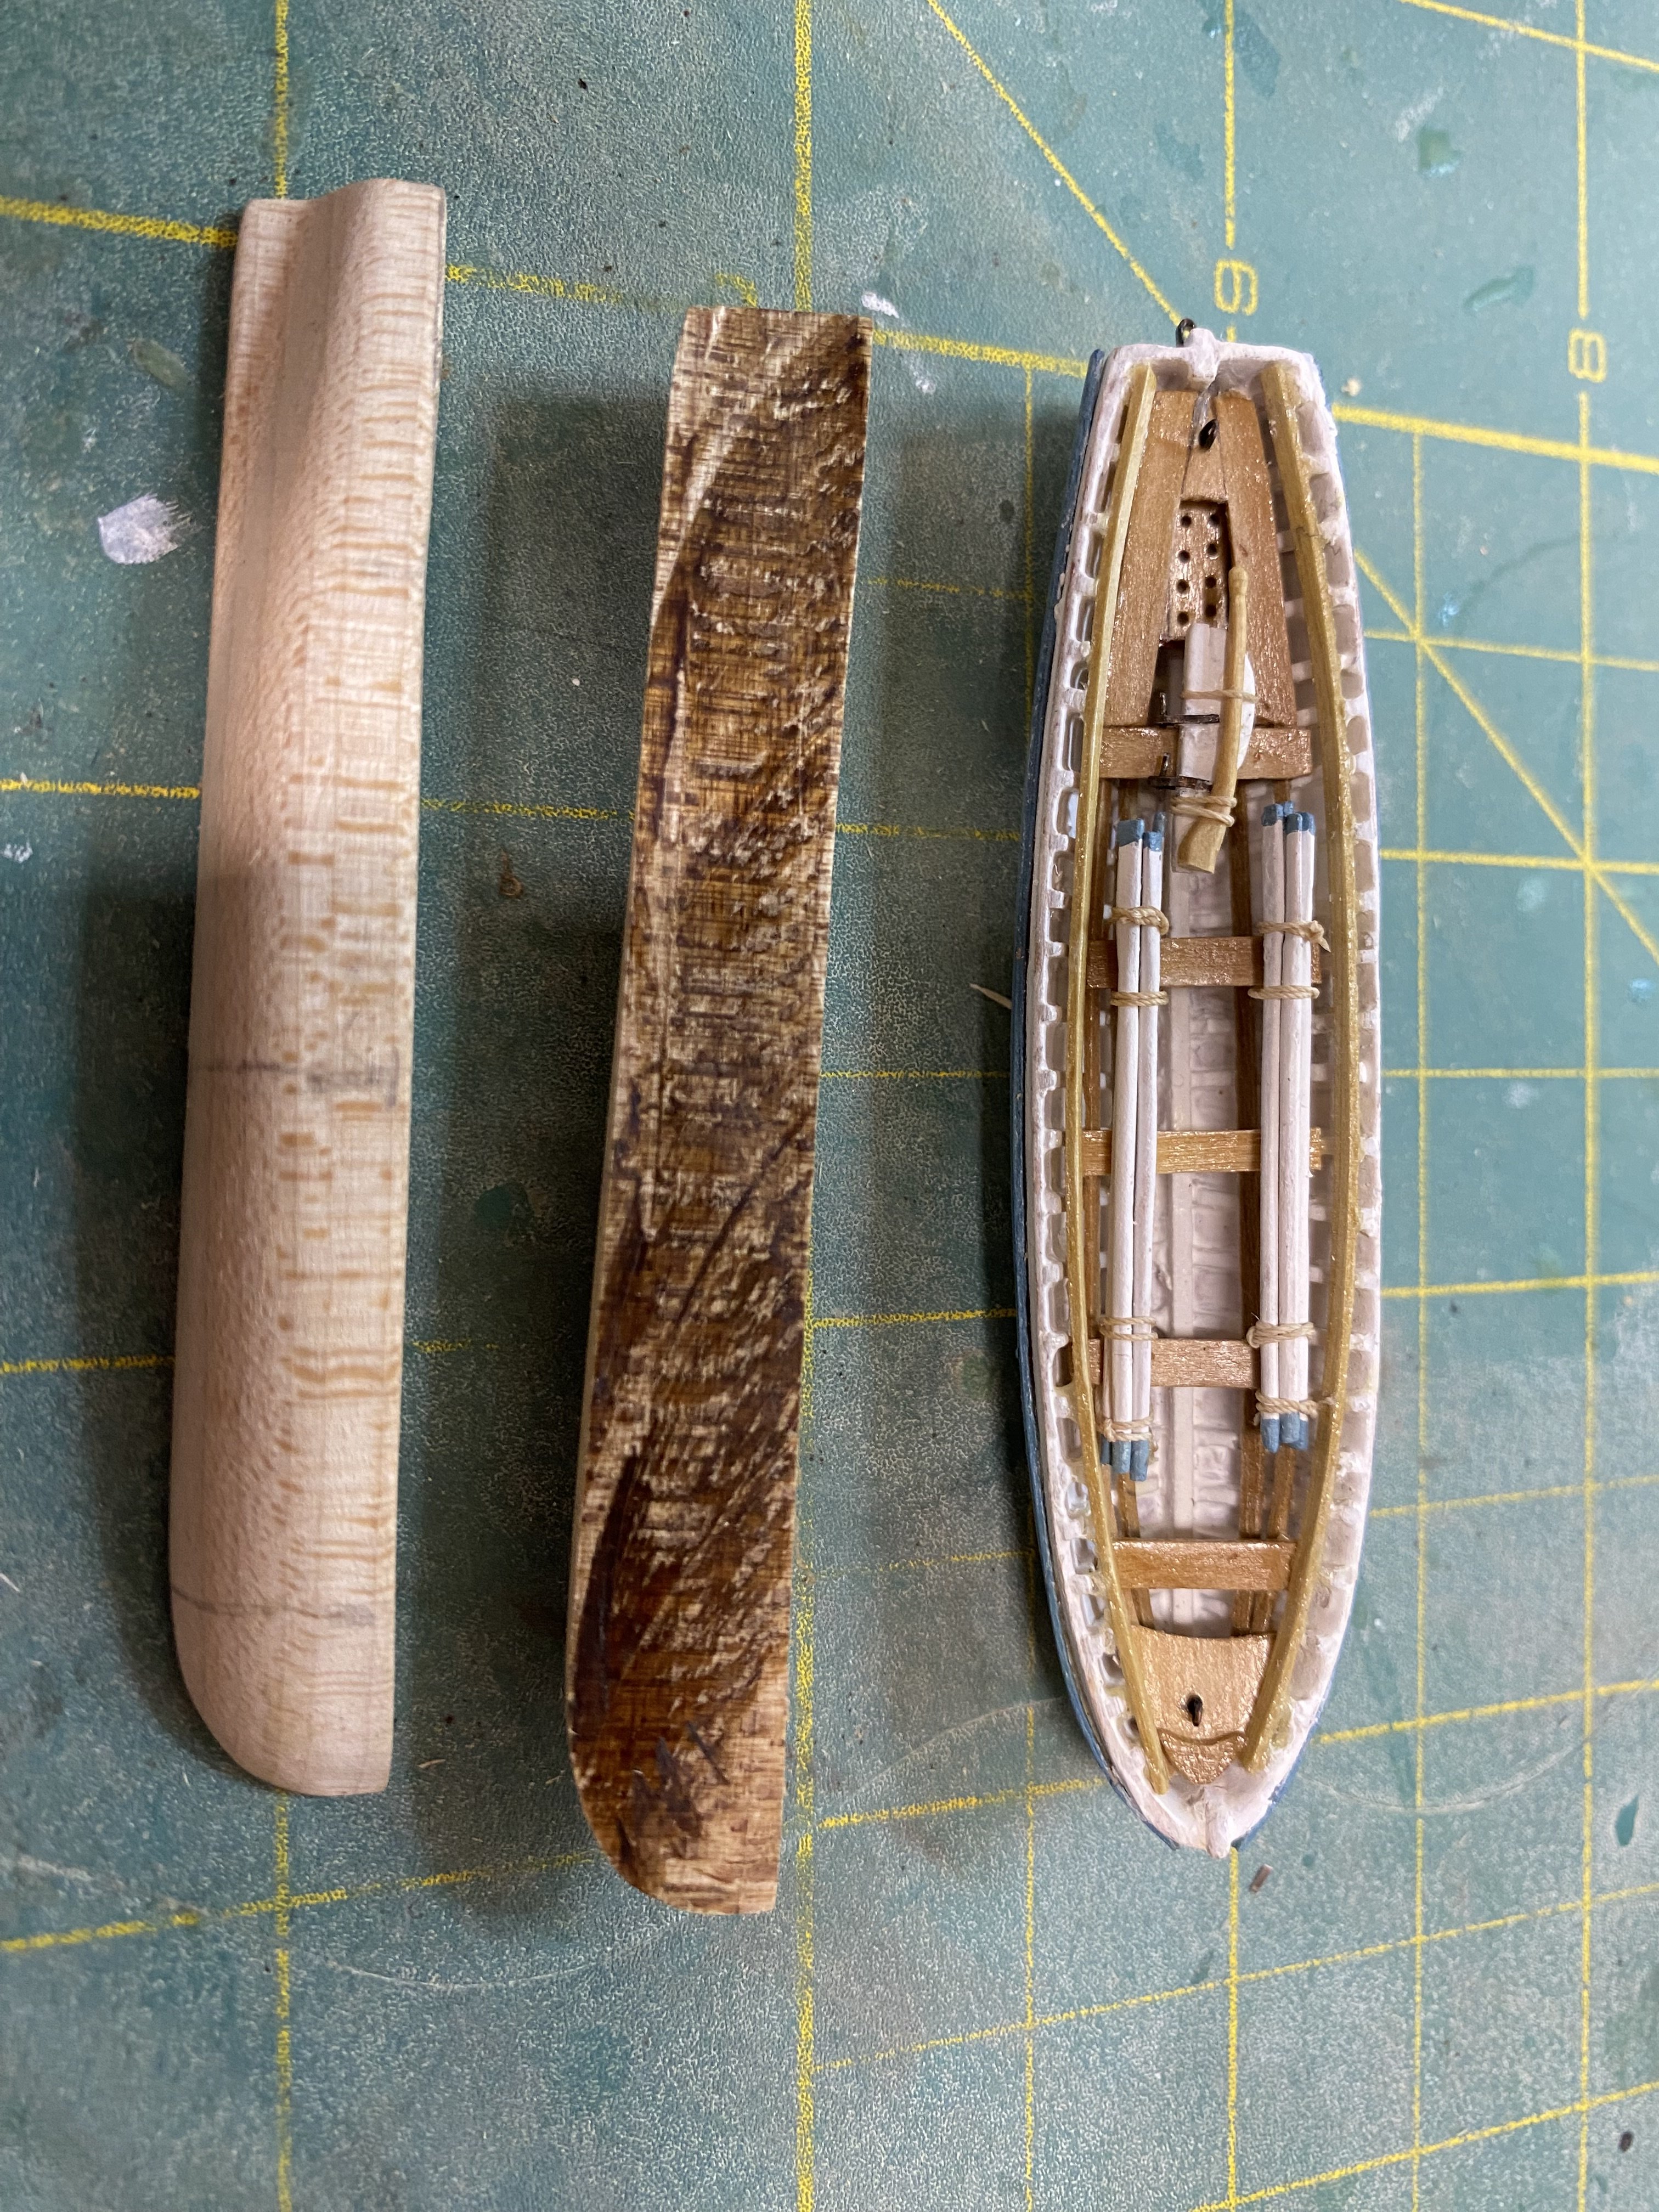
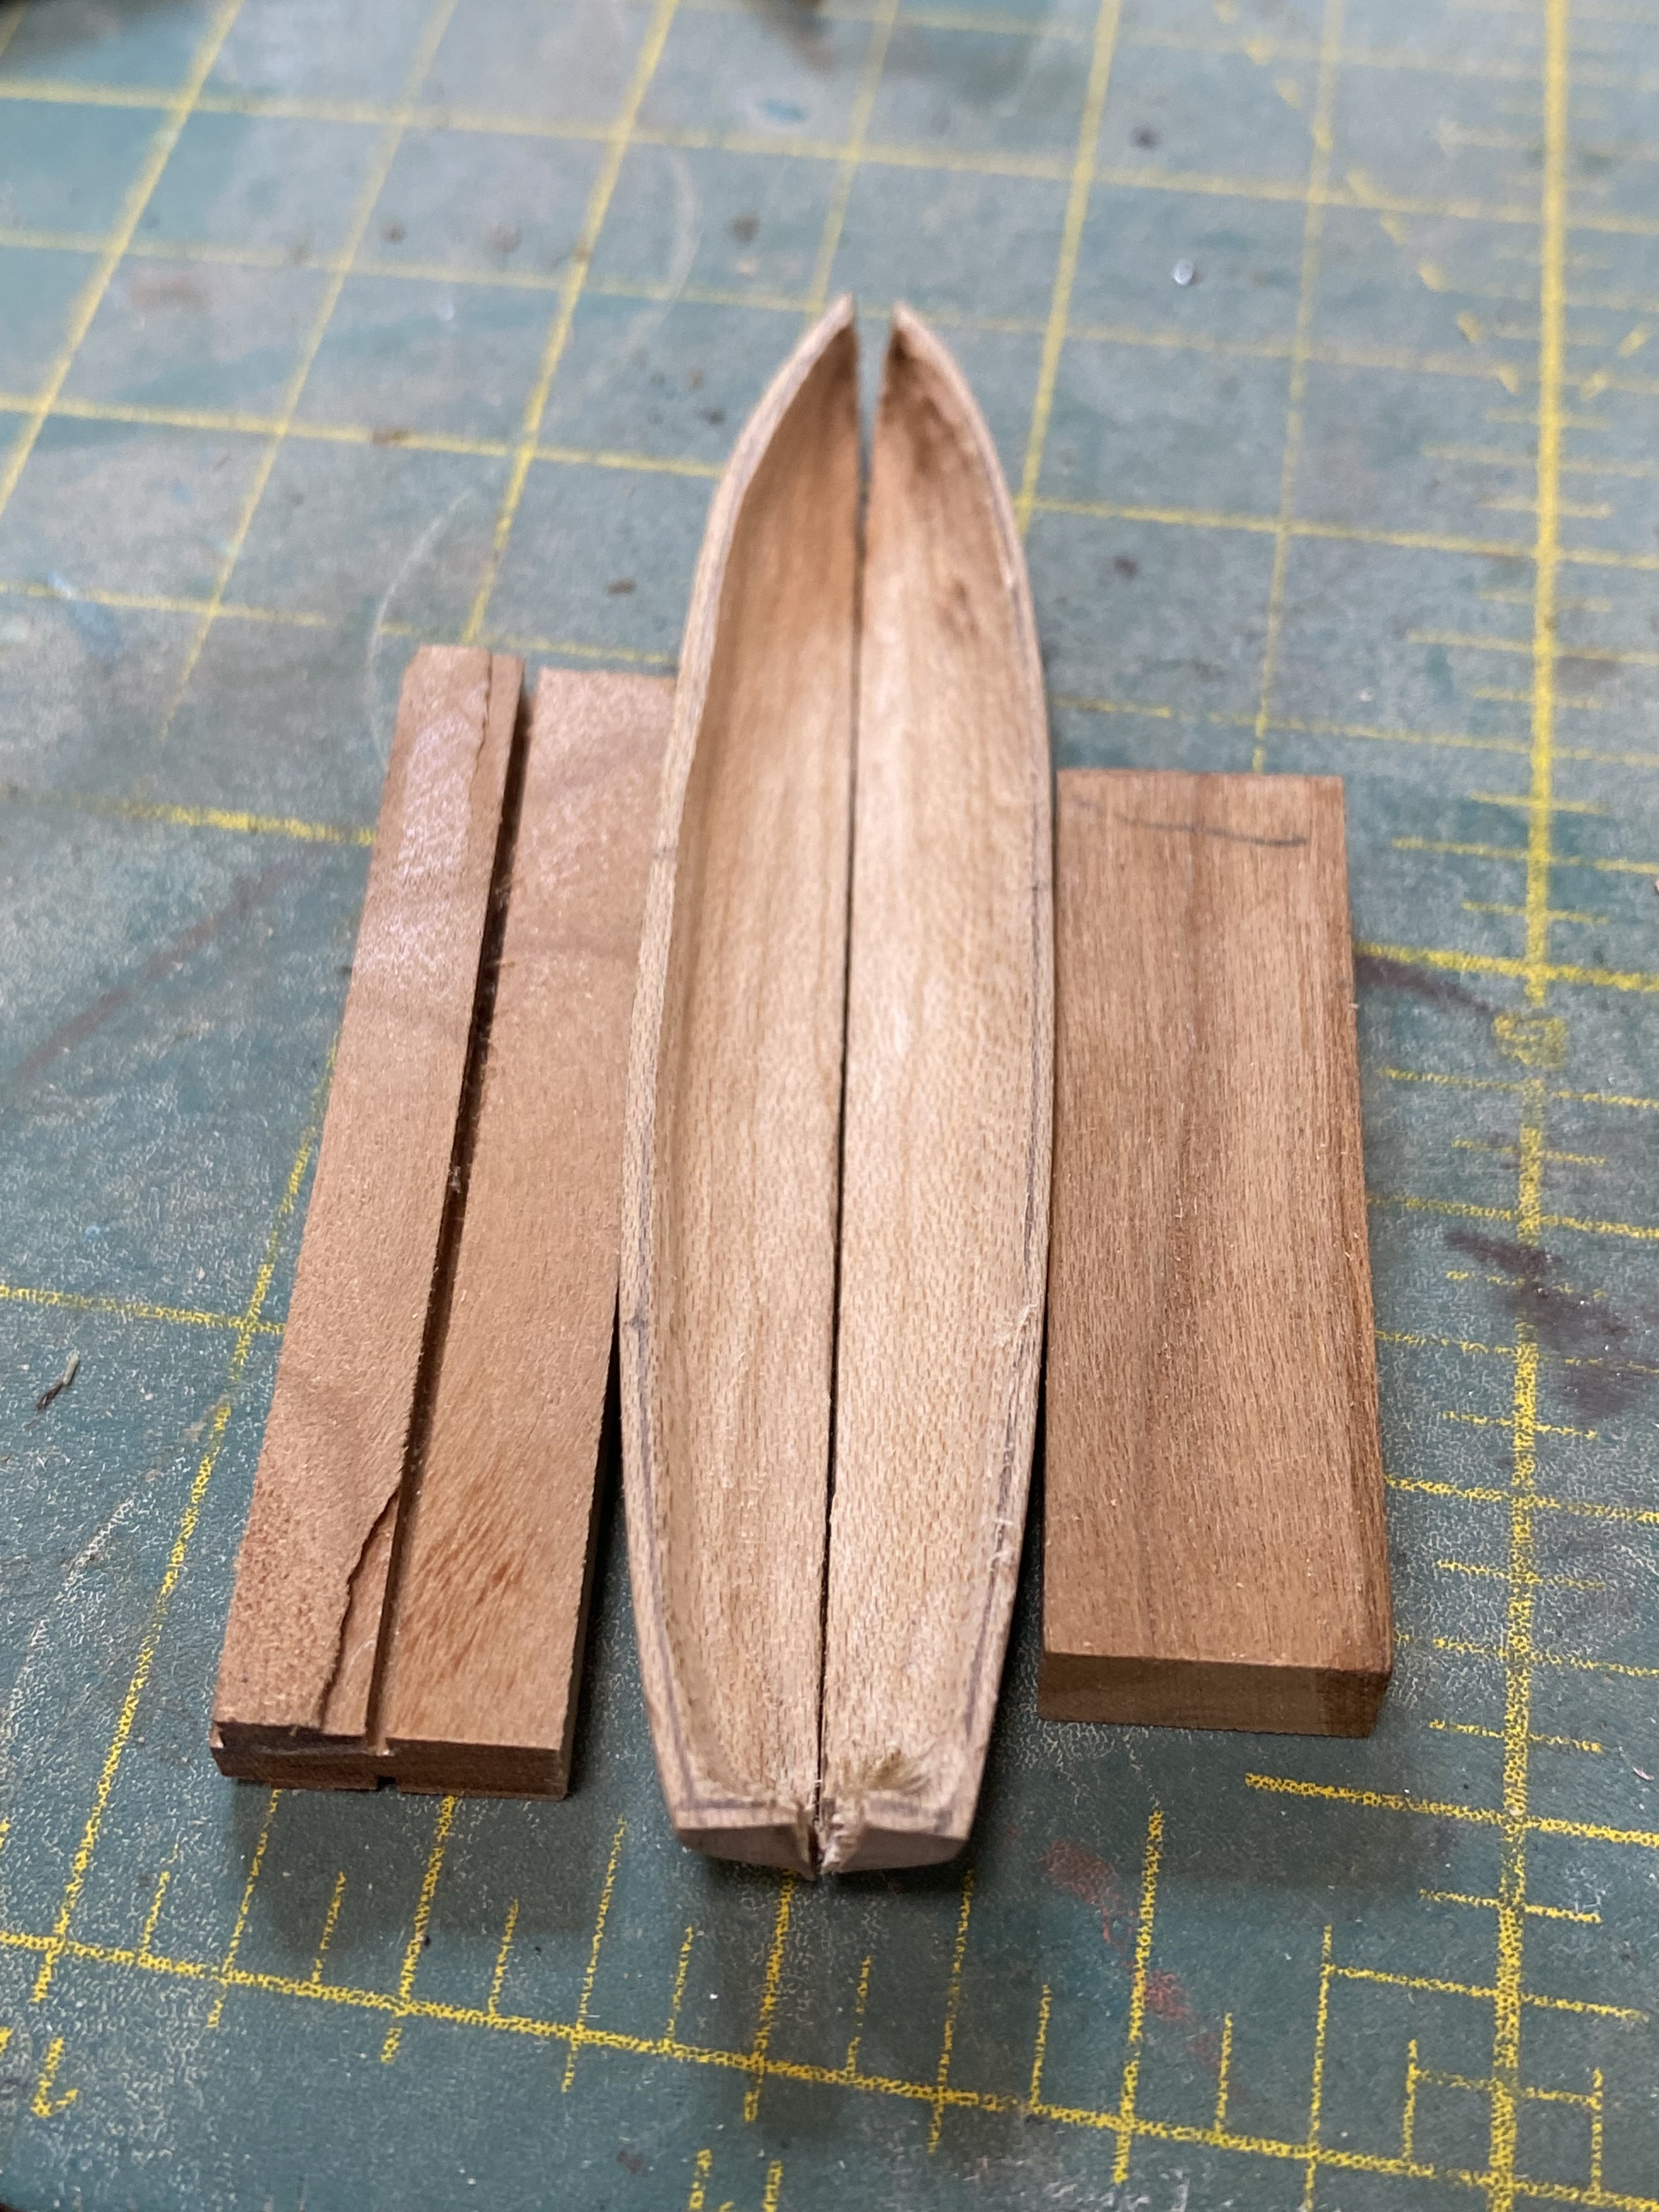
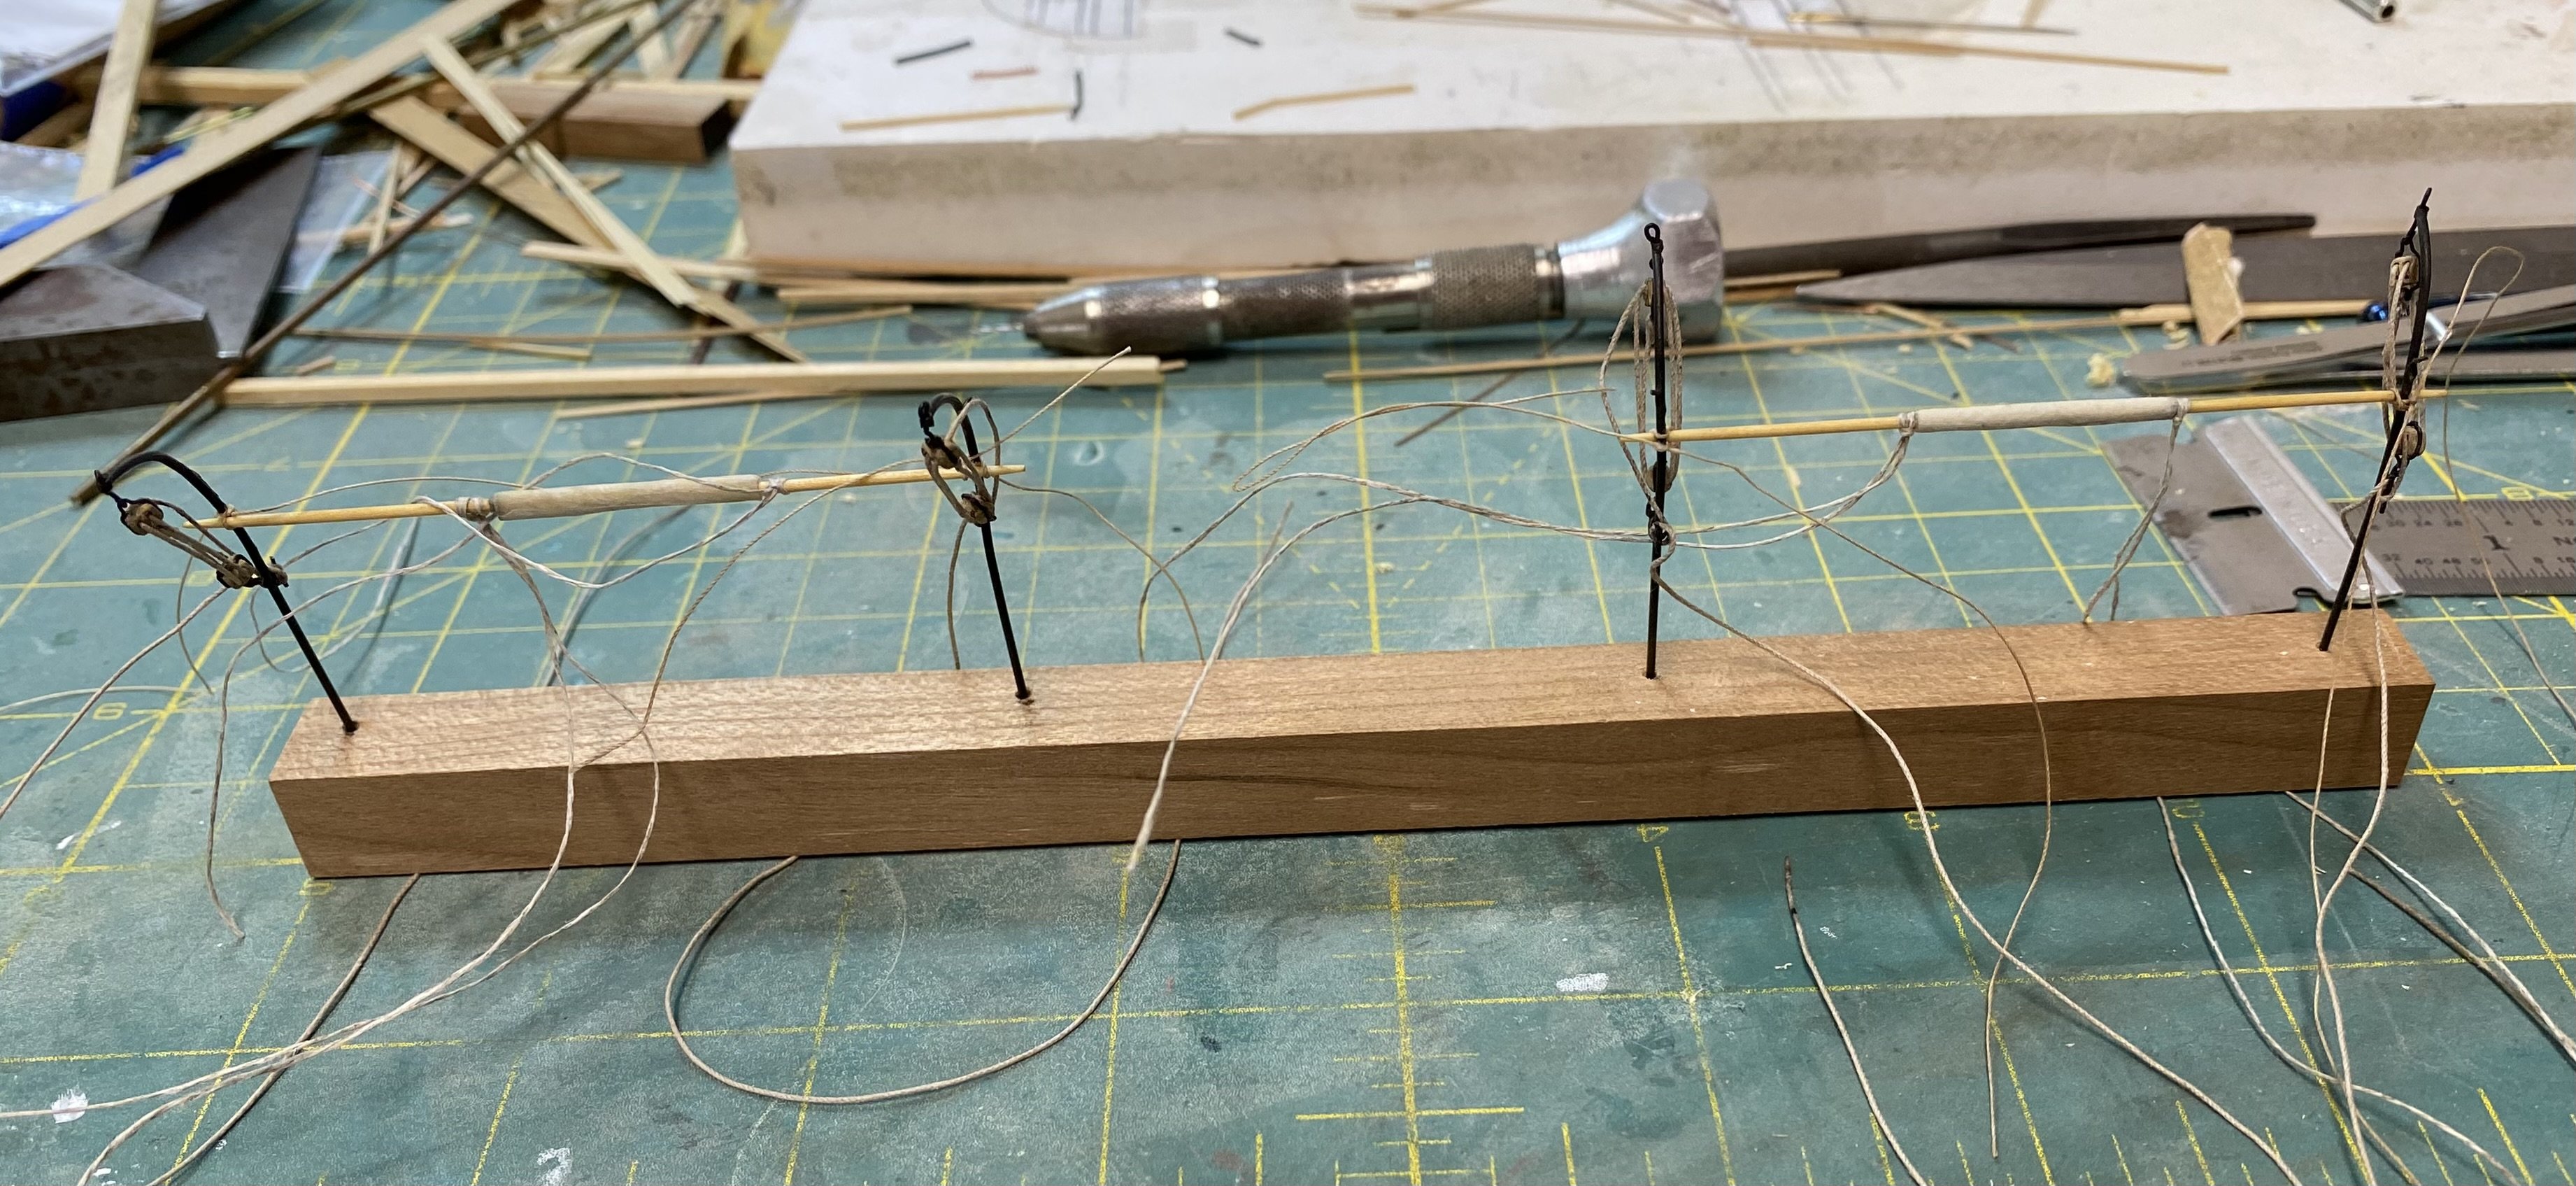
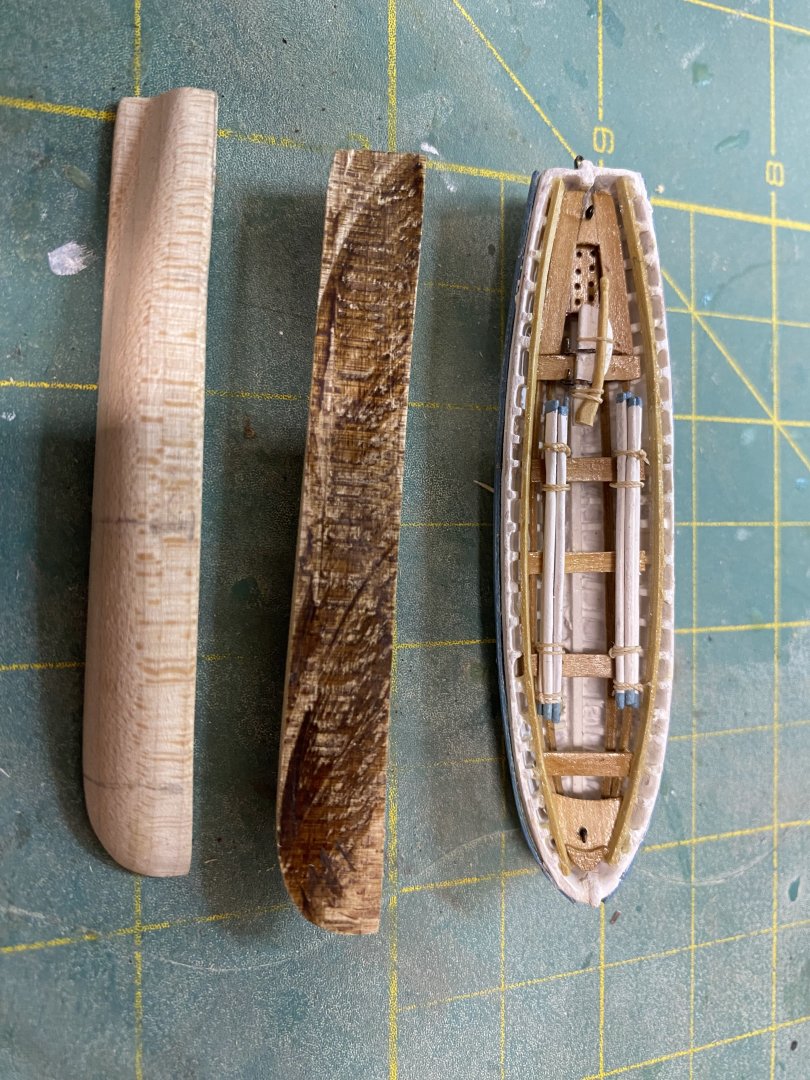
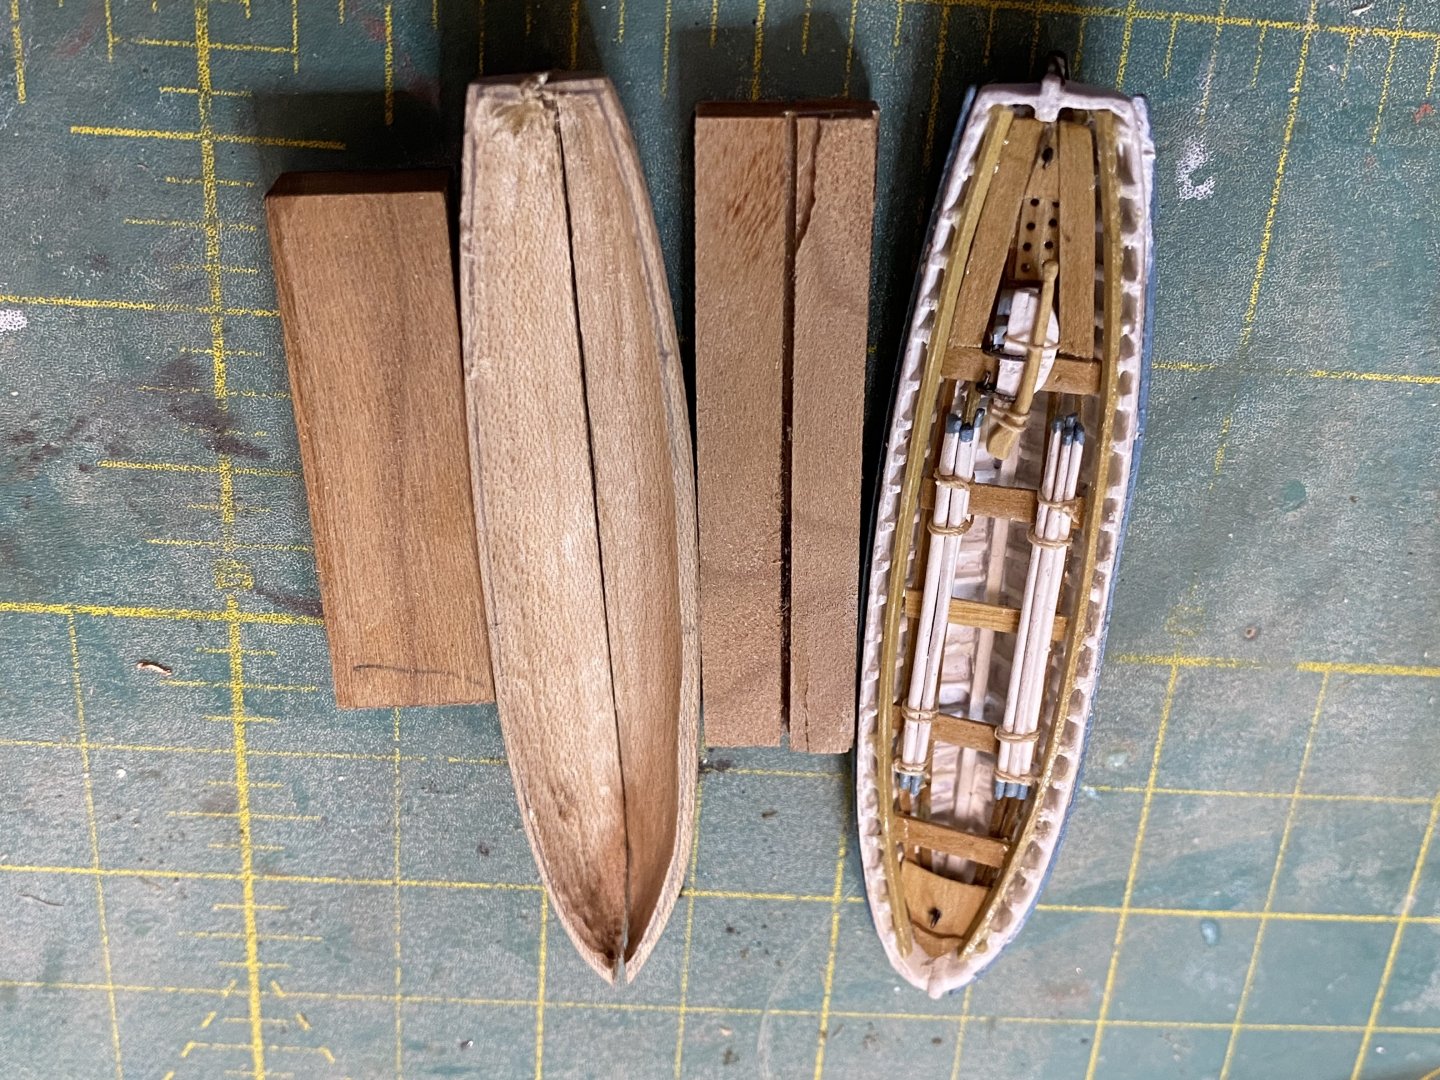
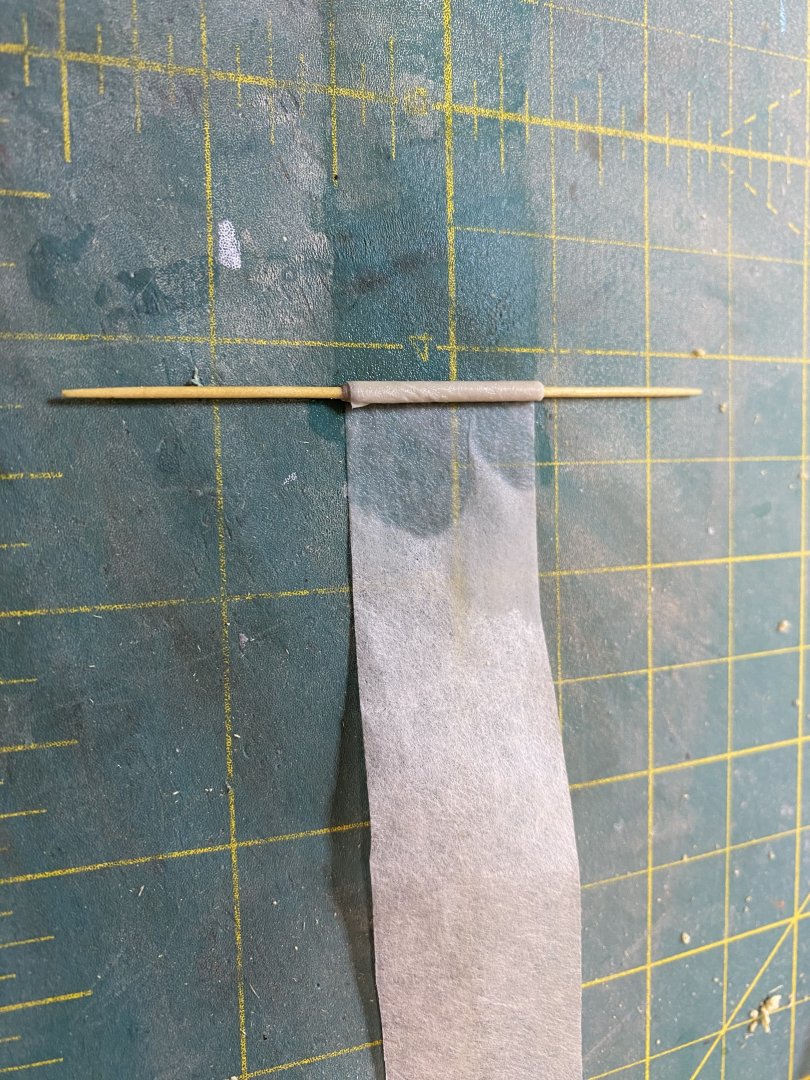
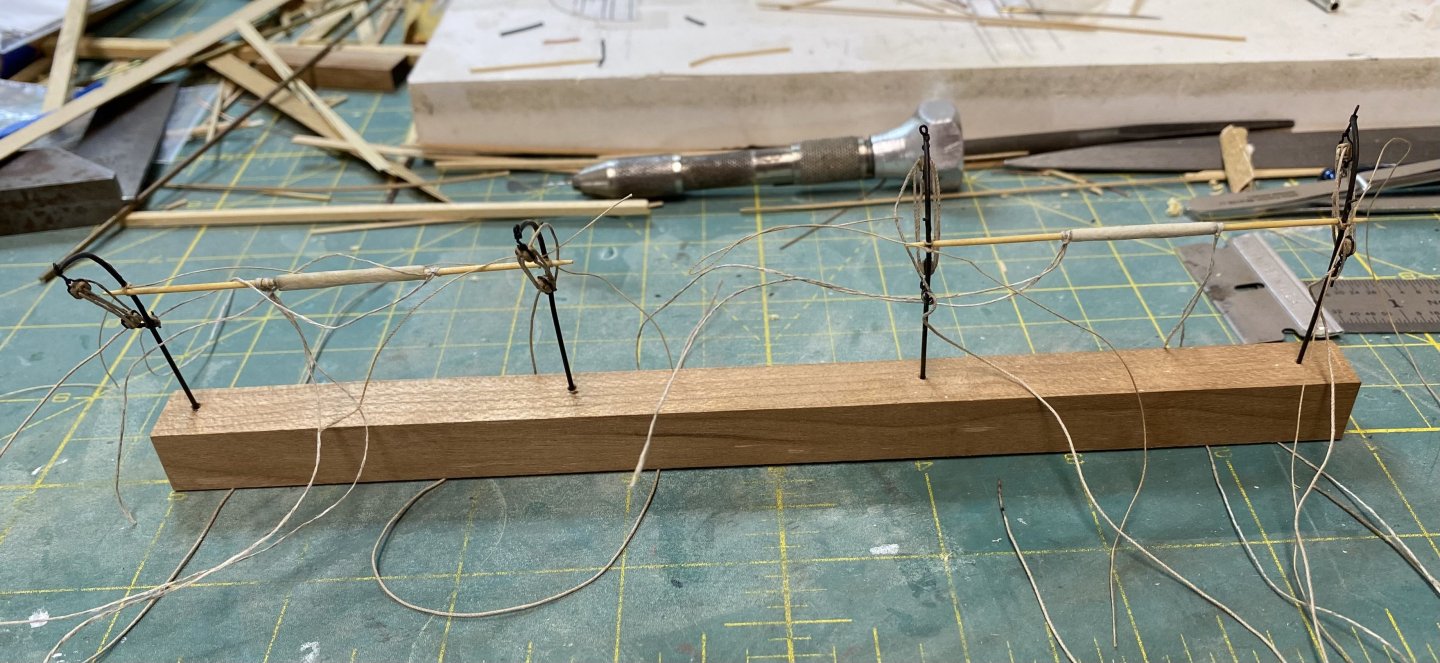
Before starting the rigging, it occurred to me that I should check the plans and insure that all blocks and pre rigging were complete. This has been a long and occasionally frustrating process as I’ve had to constantly refer back to the rigging plans for the size and location of blocks , eyebolts and line. Even with frequent checks, I am constantly finding errors that need to be corrected. Because I finished the mizzen top first, I found myself using the same size blocks for the fore and main tops, which is wrong because those blocks are larger, except for the mizzen brace and bowline blocks on the main top which are smaller. Very easy to get confused, and I’ve had to correct more than a couple of mistakes. I’ve also started to add some of the running rigging lines, which will be difficult to access once the masts and shrouds are in place. I am using Syren blocks and rigging line which are really well made! The blocks are stropped with 26 ga. Copper wire. As I previously posted, the 28 ga copper wire breaks to easily and many of the blocks already stropped with the 28 ga wire have broken and had to be replaced with the 26 ga copper wire. The hardest blocks to strop are the 2 mm blocks and my causality rate is probably close to 50% between dropping them and crushing them. Because I decided to include the bowlines, I’ve spent a considerable amount of time deciding where the blocks should go on the main and fore masts. These locations are not given in the plans, or in any reference source I have available, except for the fore bowlines which run to the jib boom and back to the forecastle. These lines are easily seen on the model of the Flying Cloud. The runs of the other lines are obscured by the sails. I’m placing the bowline blocks where it seems logical to me. I also started the second quarter boat. This time I made a jig to cut the boat in half on the table saw. This was well worth the effort as it cut the boat into equal halves. I also hollowed out the insides and will glue the halves to the keel. Finished rigging the davits with their spars. Padding was made from silkspan. These have been set aside until the rigging is completed

- 360 replies
-
- 8
-
-
- Flying Fish
- Model Shipways
- (and 1 more)
-
Lynn, glad to hear that you decided to continue with your build. I too, reached a point in building the Flying Fish, where I was almost scared to continue as nothing was coming out as good as I had hoped for. I eventually decided to either finish the build or get rid of it, as it was only collecting dust. Since then, I have continued to learn and improve. All the things I was not satisfied with at the time, I don’t notice now! Be patient, have fun, learn when to remake a part or know when “good enough is good enough!”. Rick
-
Very nice!! Rick
-
Great job on the rudder George! Very realistic! Rick
-
Beautiful work!! Rick
-
Thanks George! Really appreciate your input! Rick
- 360 replies
-
- 1
-
-
- Flying Fish
- Model Shipways
- (and 1 more)
-
Thanks Jared, still have to make a second one which for me, always seems harder! Rick
- 360 replies
-
- 1
-
-
- Flying Fish
- Model Shipways
- (and 1 more)