Rick310
-
Posts
833 -
Joined
-
Last visited
Content Type
Profiles
Forums
Gallery
Events
Everything posted by Rick310
-
Looks great Keith! Rick
-
Wonderful build, beautiful result!! Very impressive!! Rick
-
Looking very nice!! Rick
-
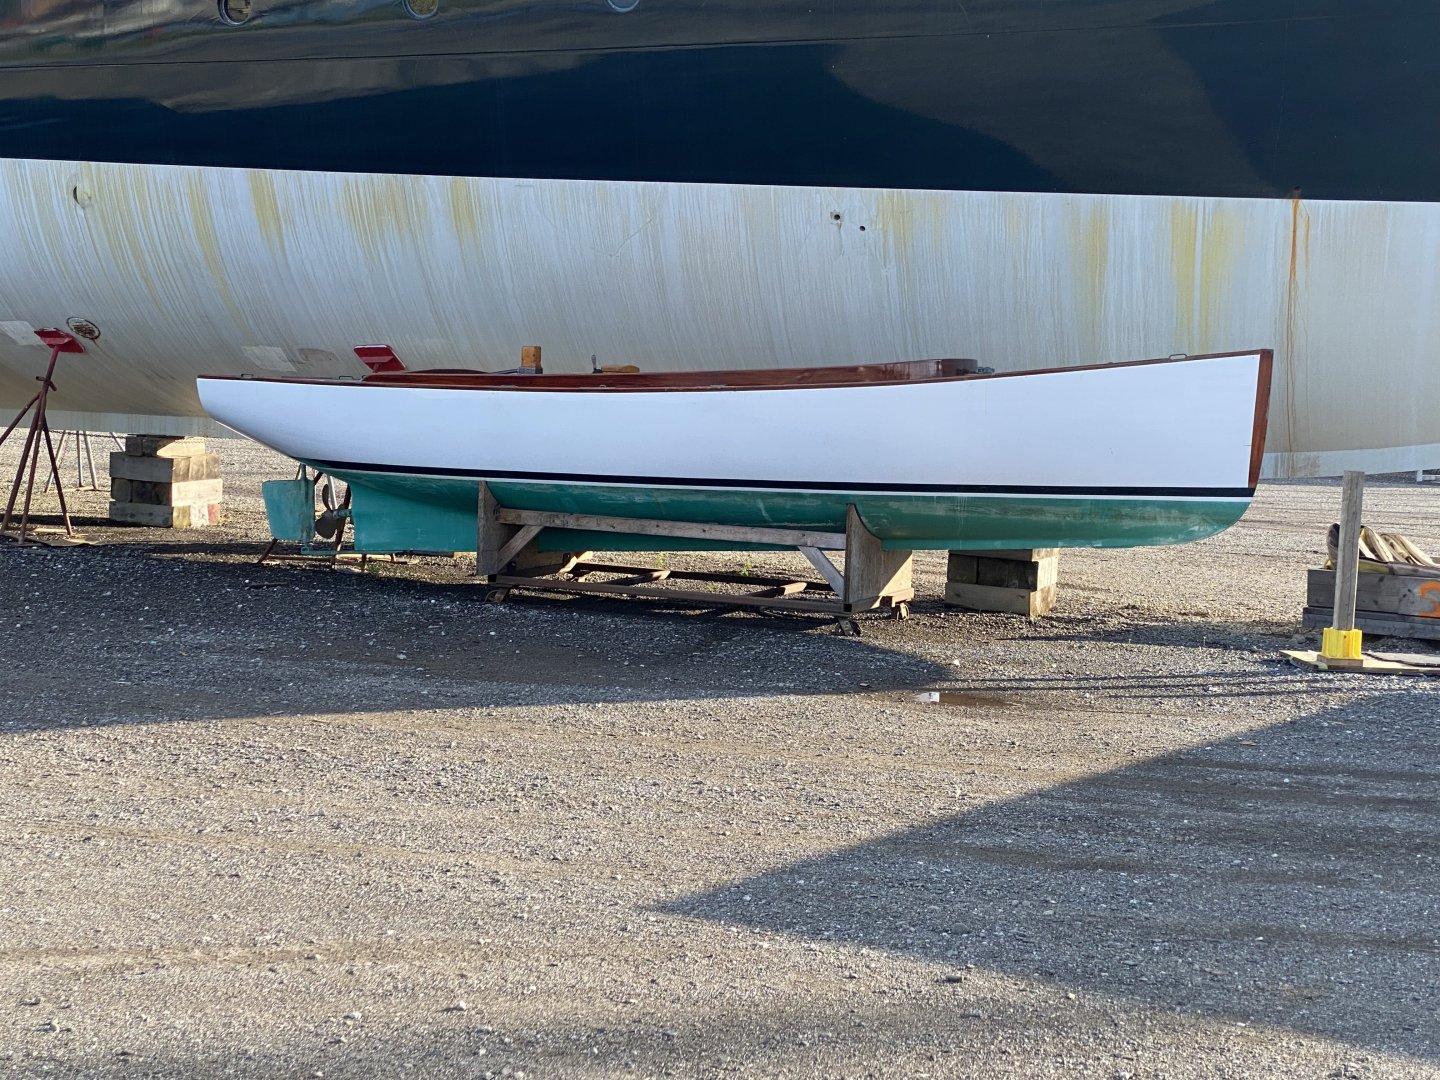
Very cute! Rick
-
I think there are 2 cranes, port and starboard, with the ends pushed together. Rick
-
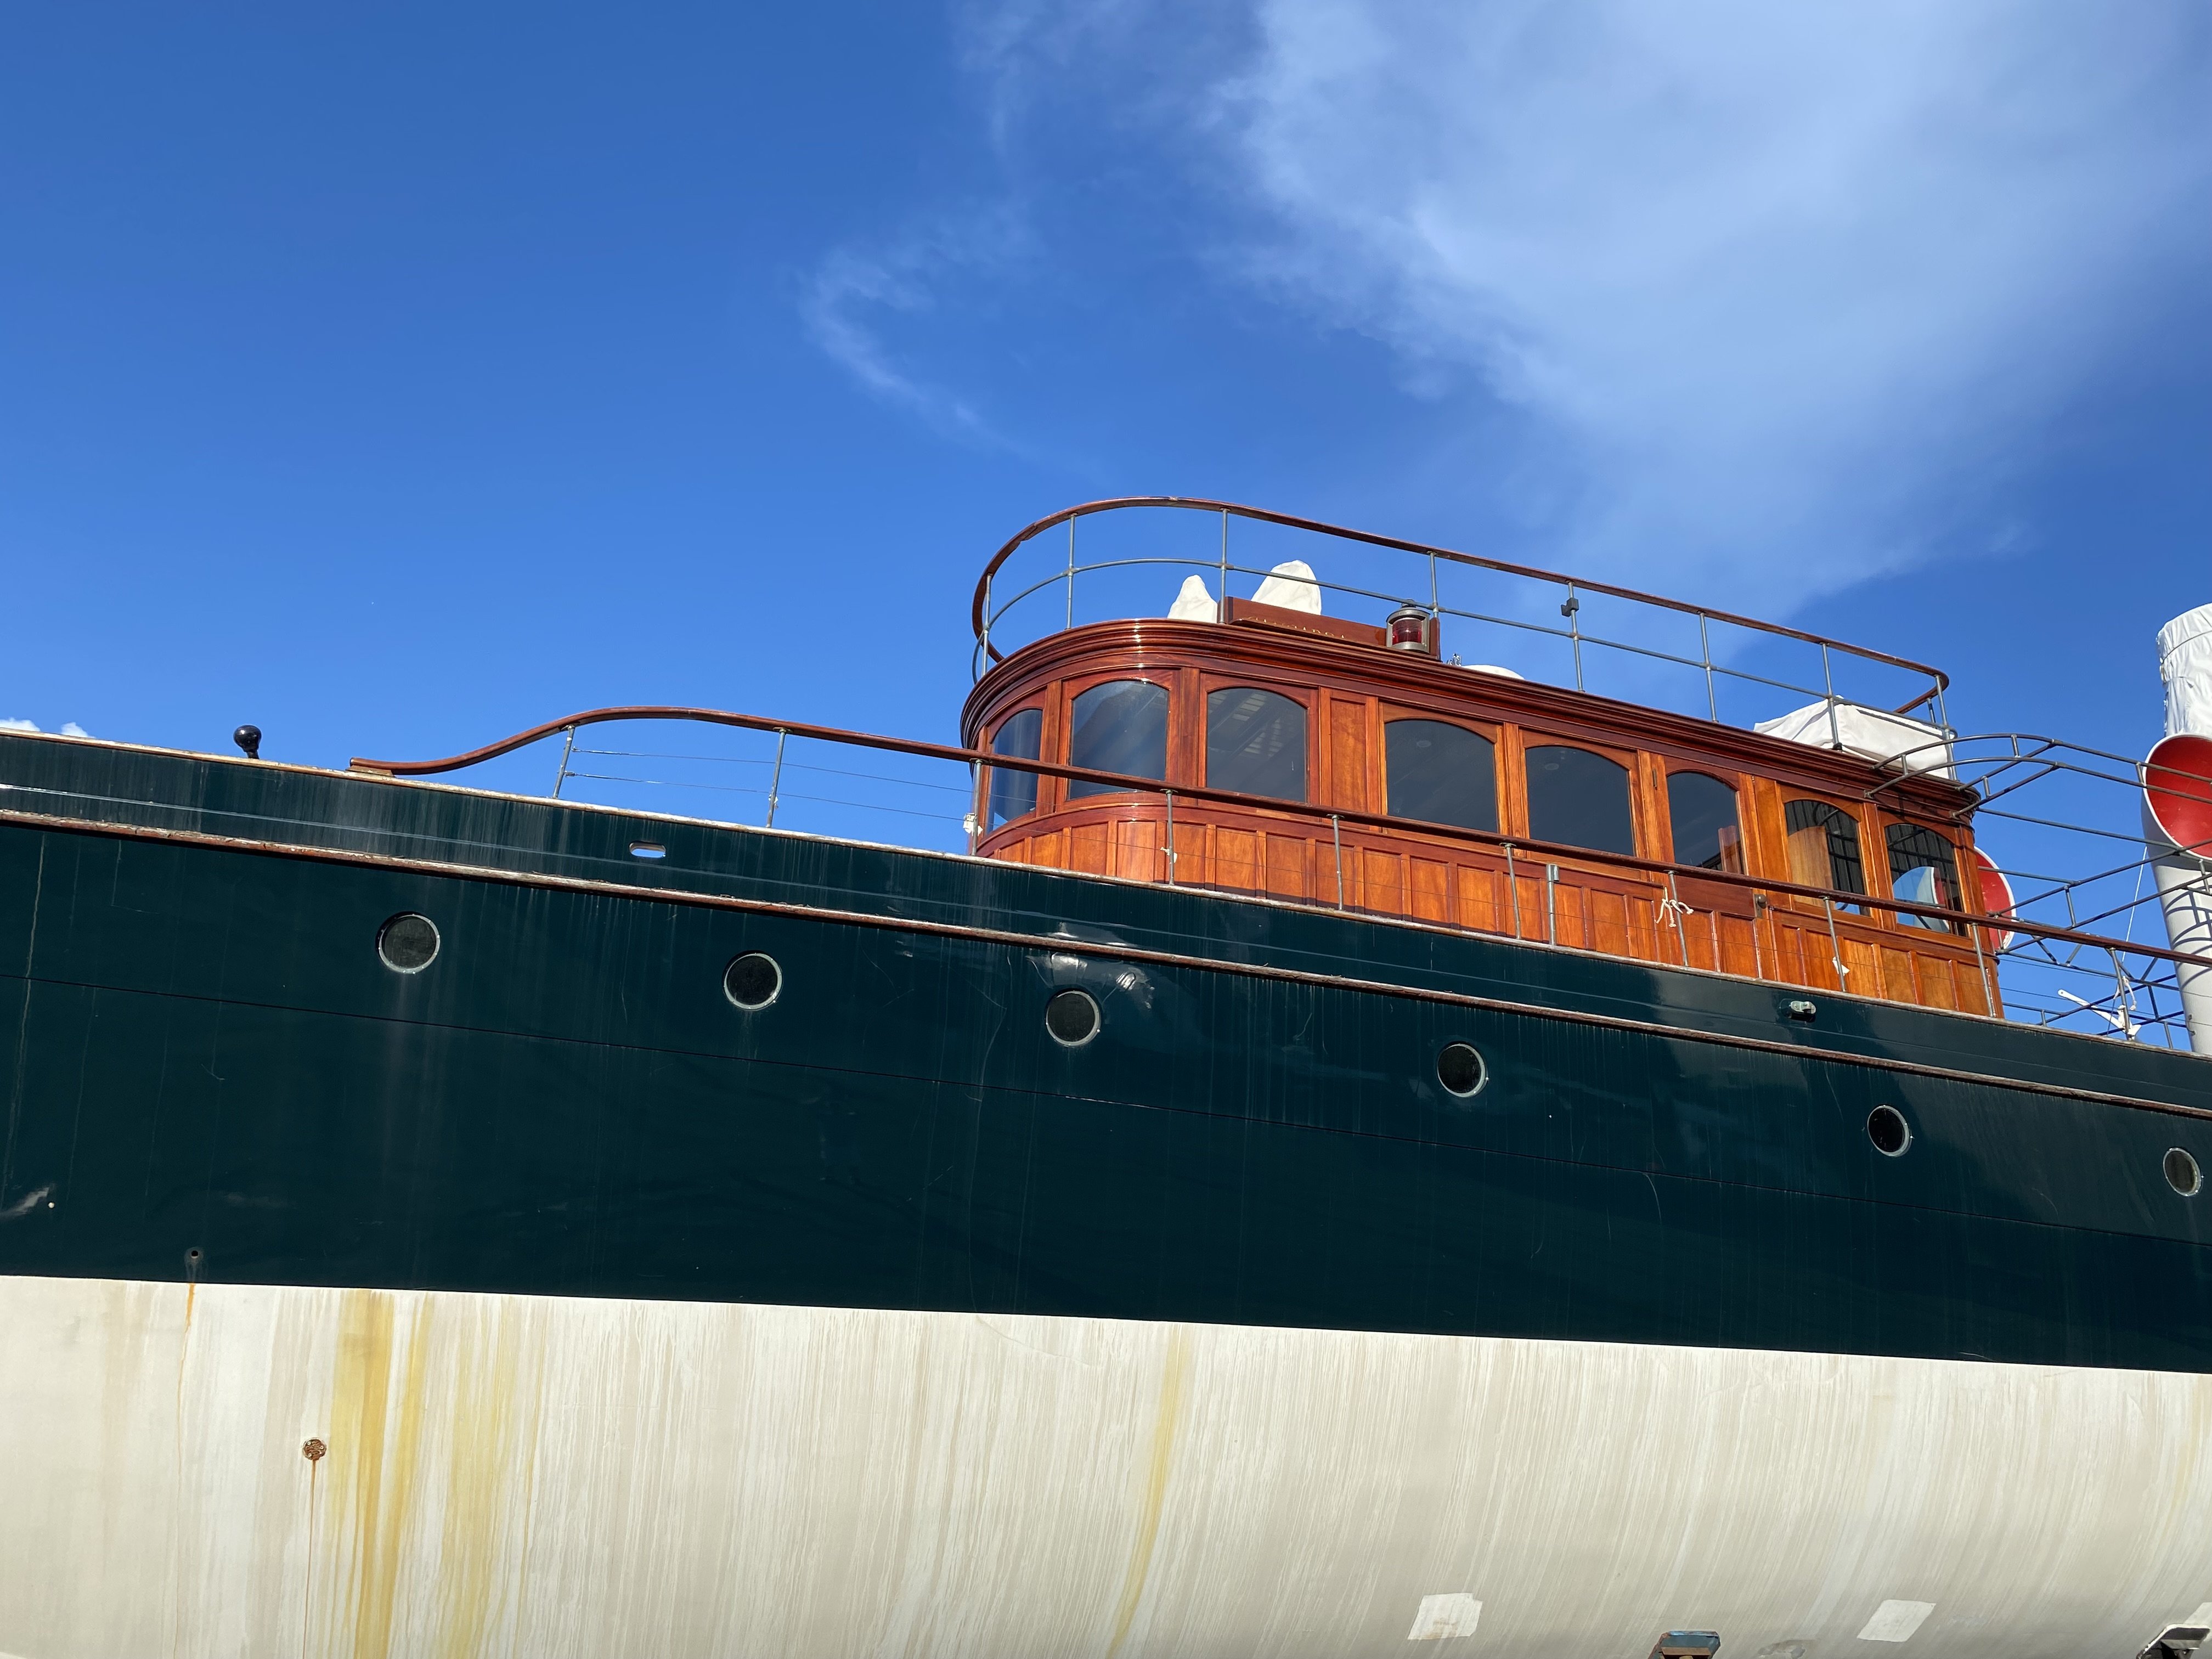
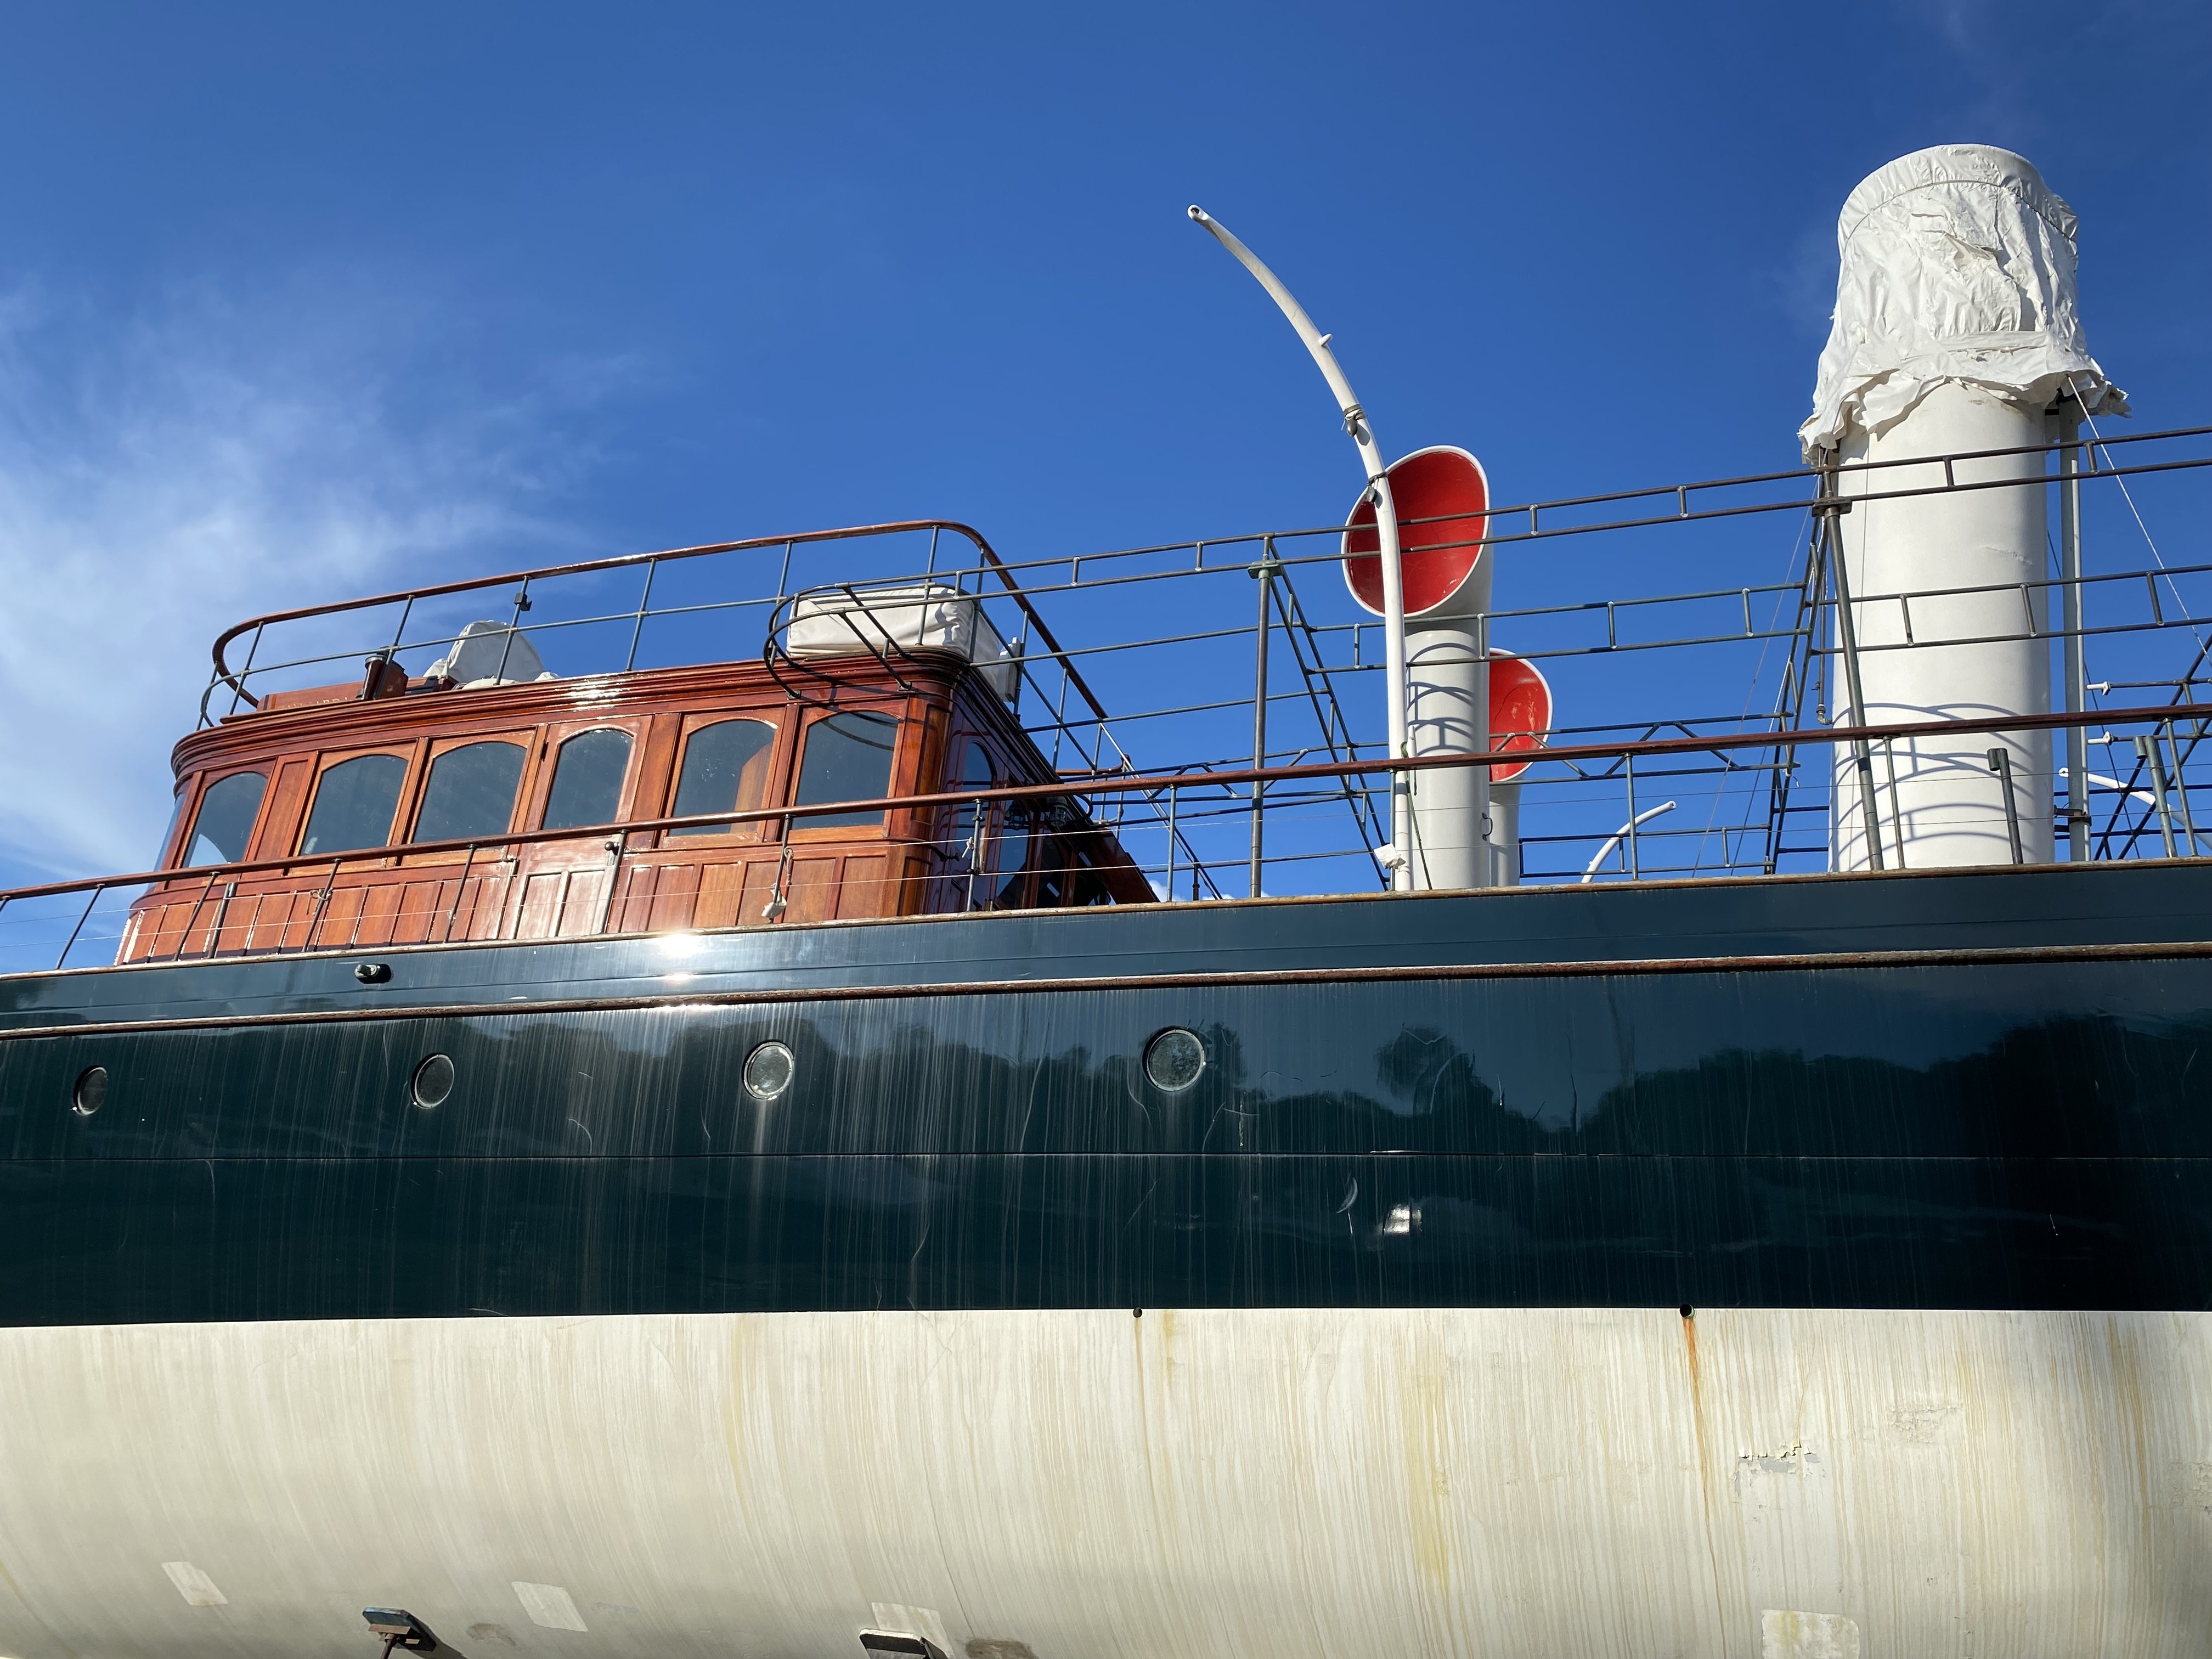
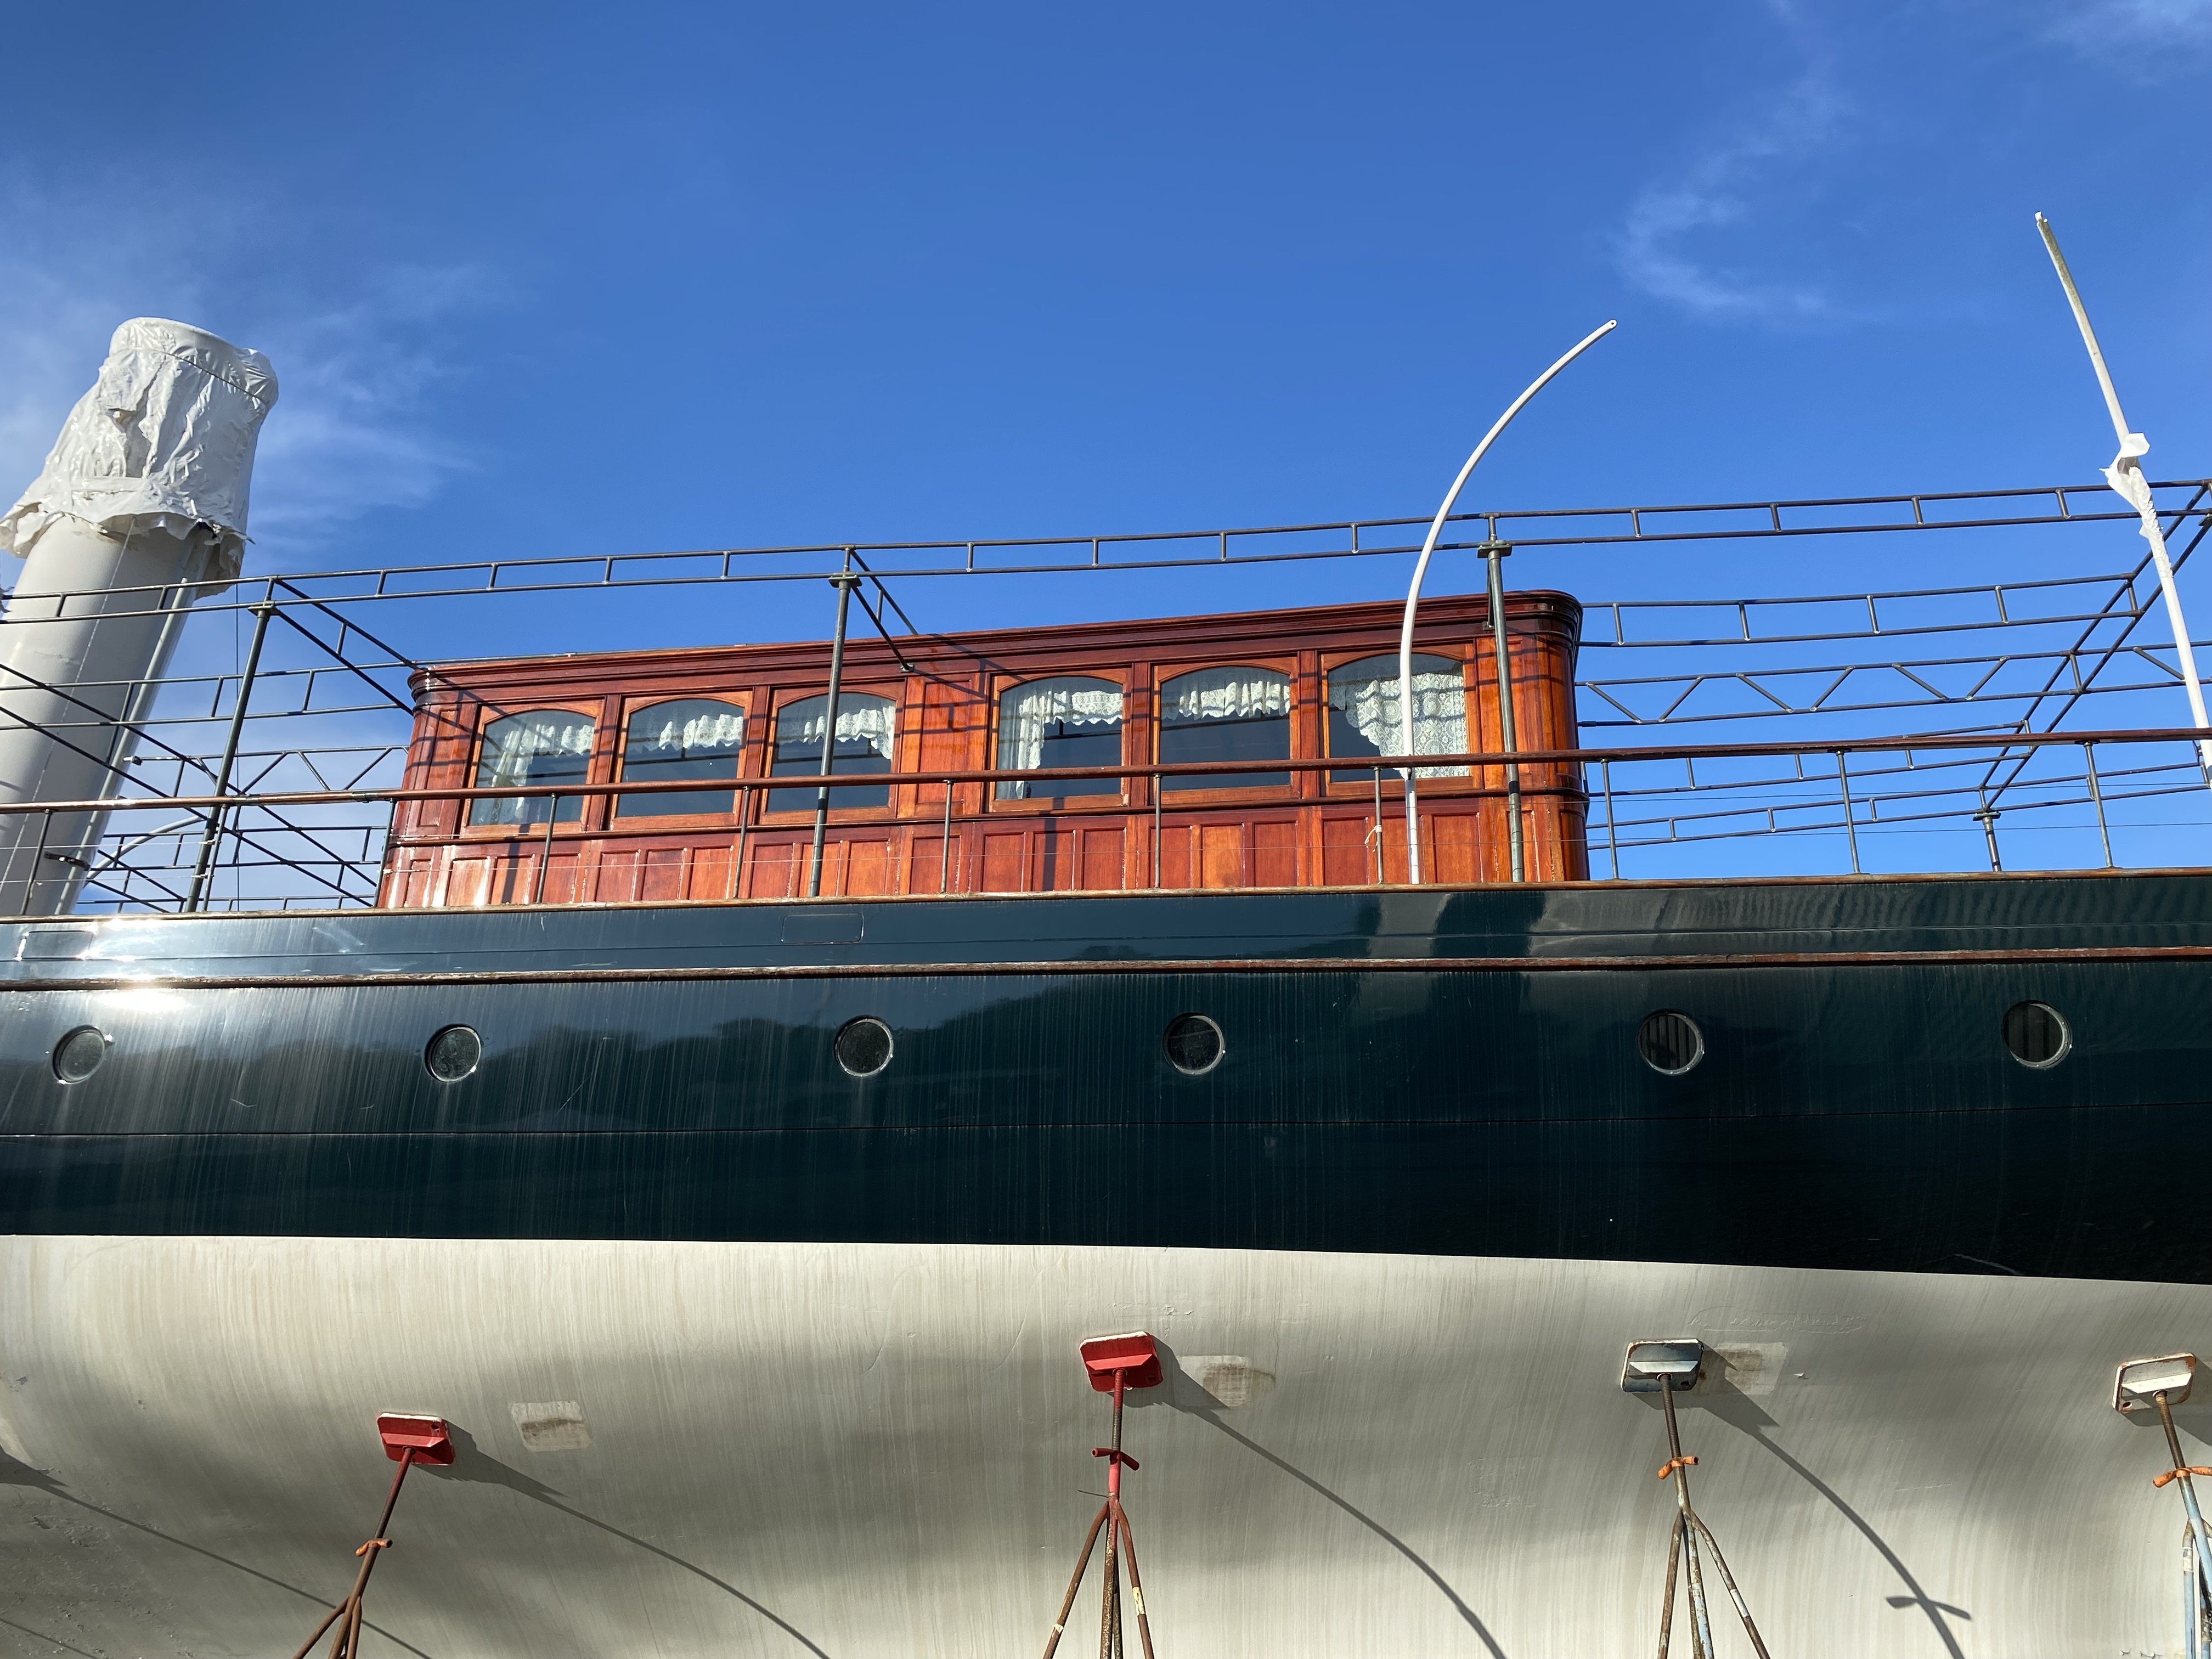
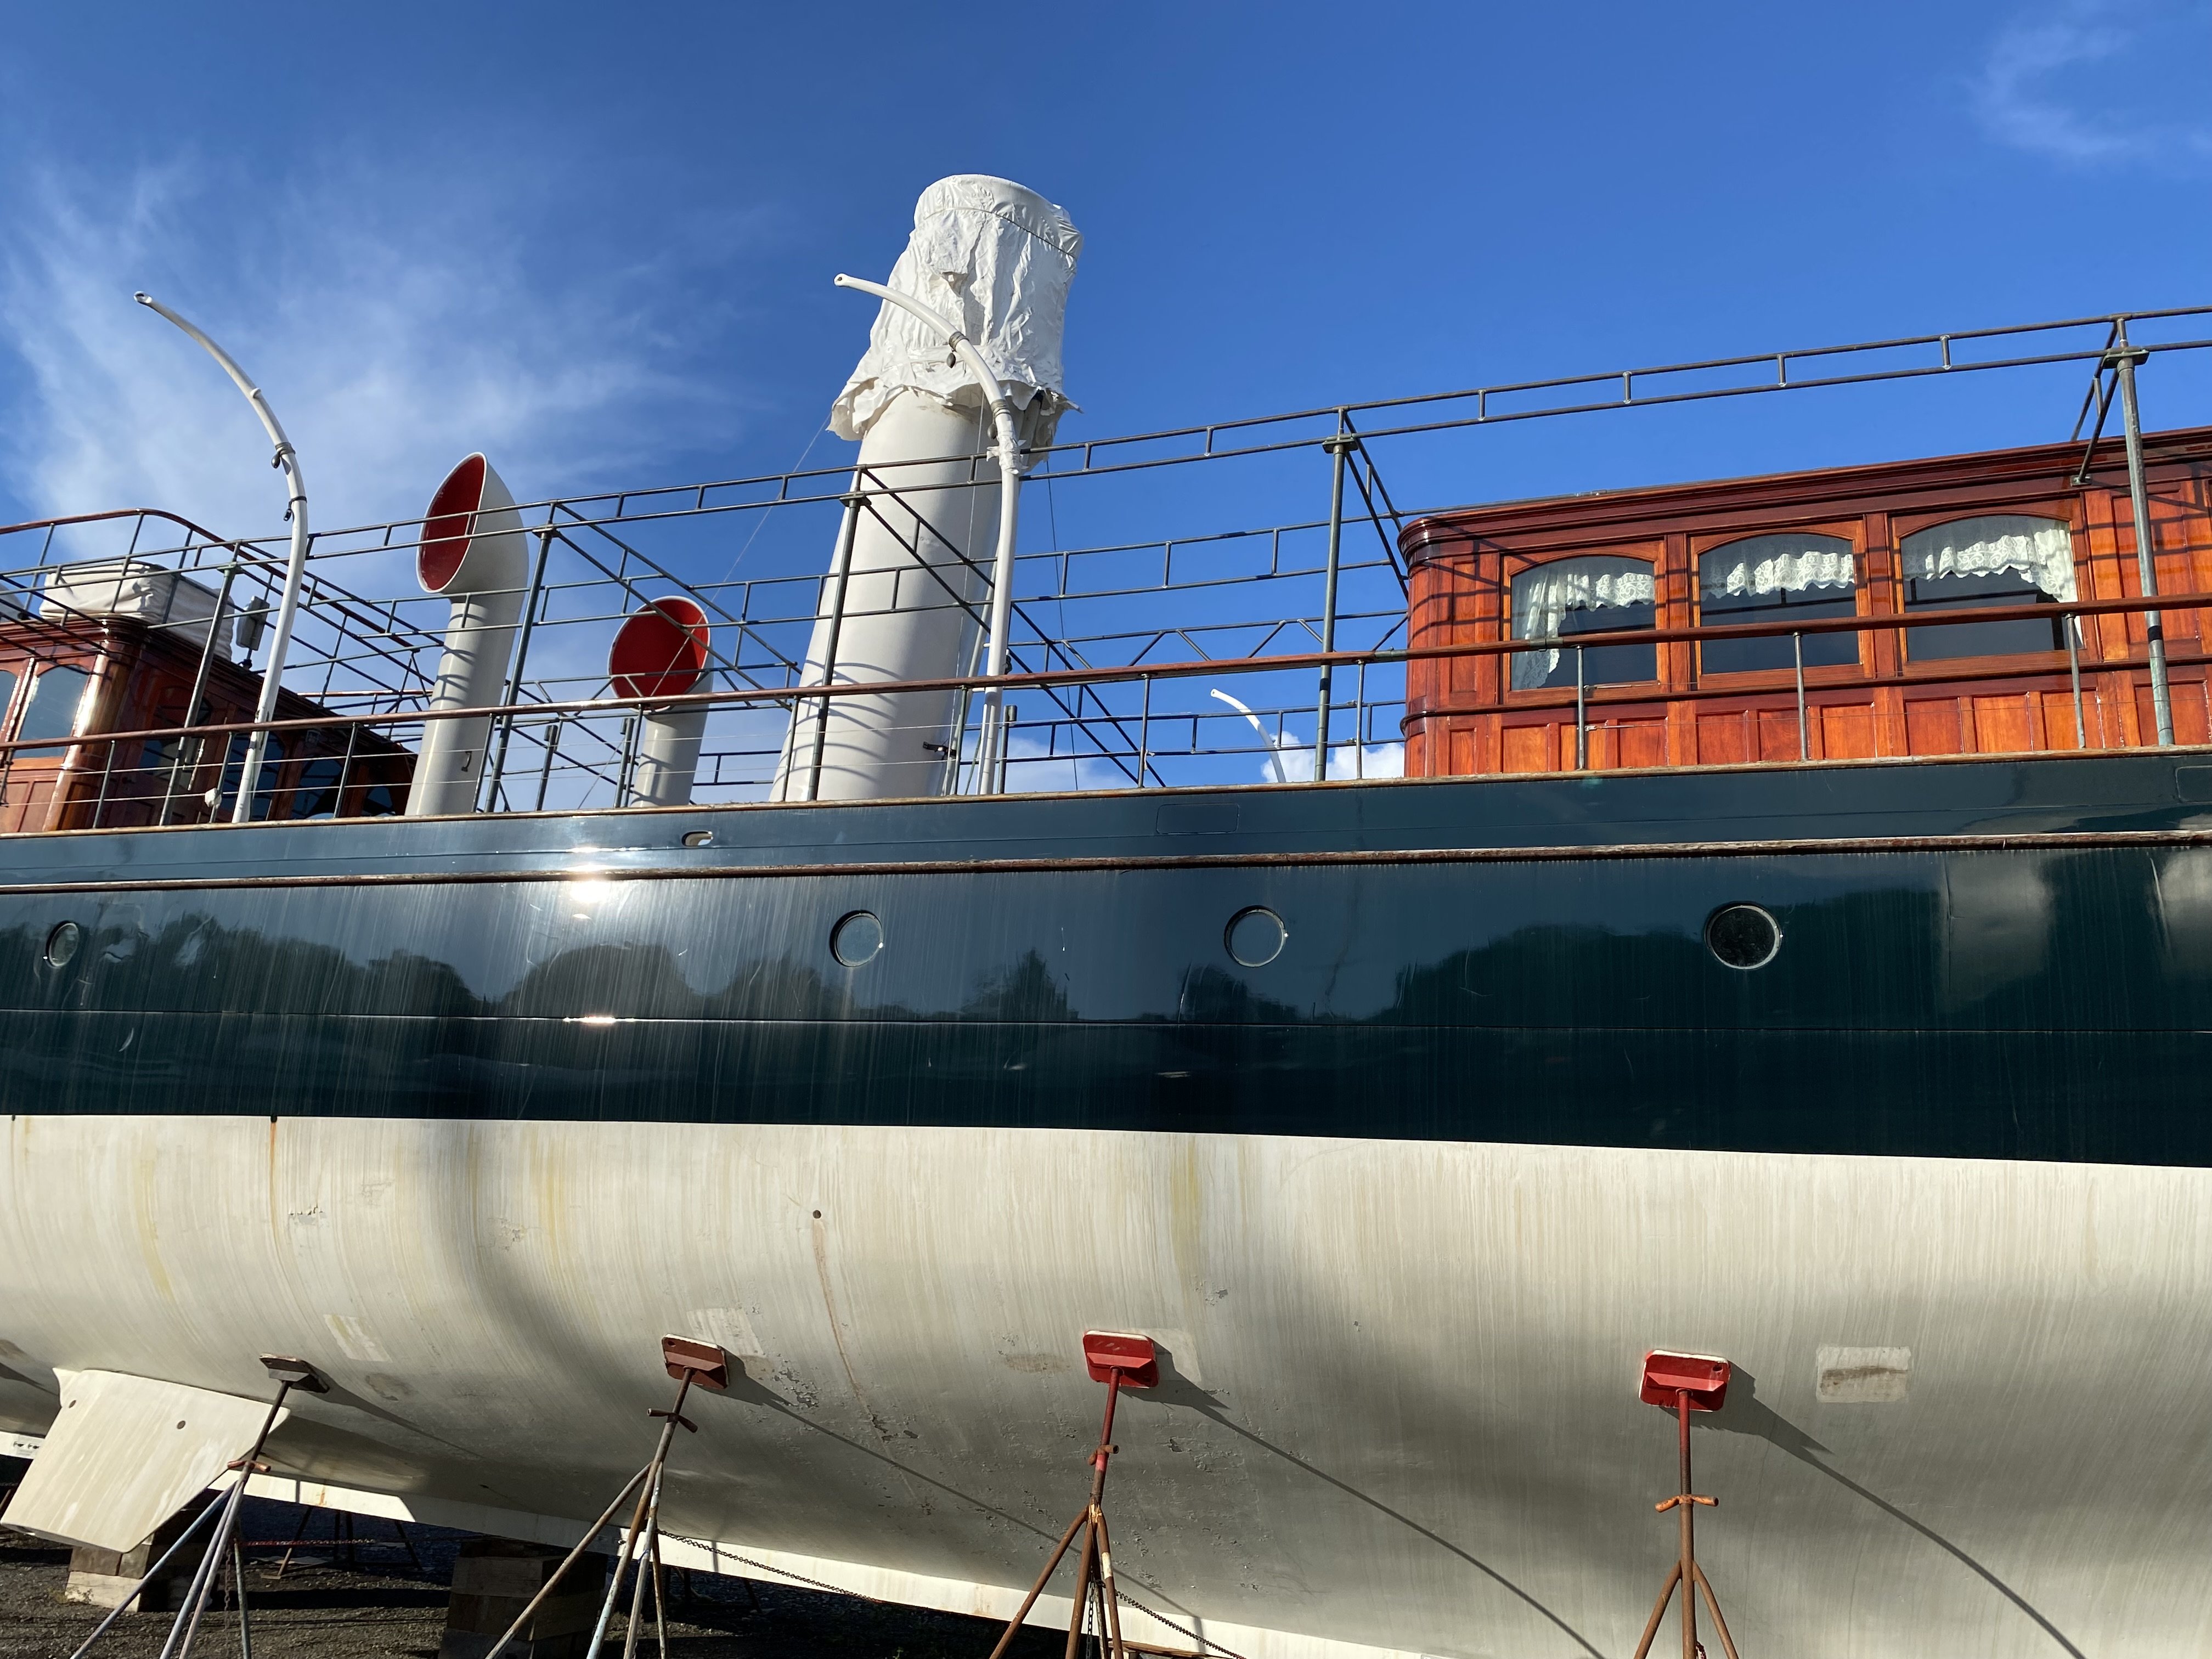
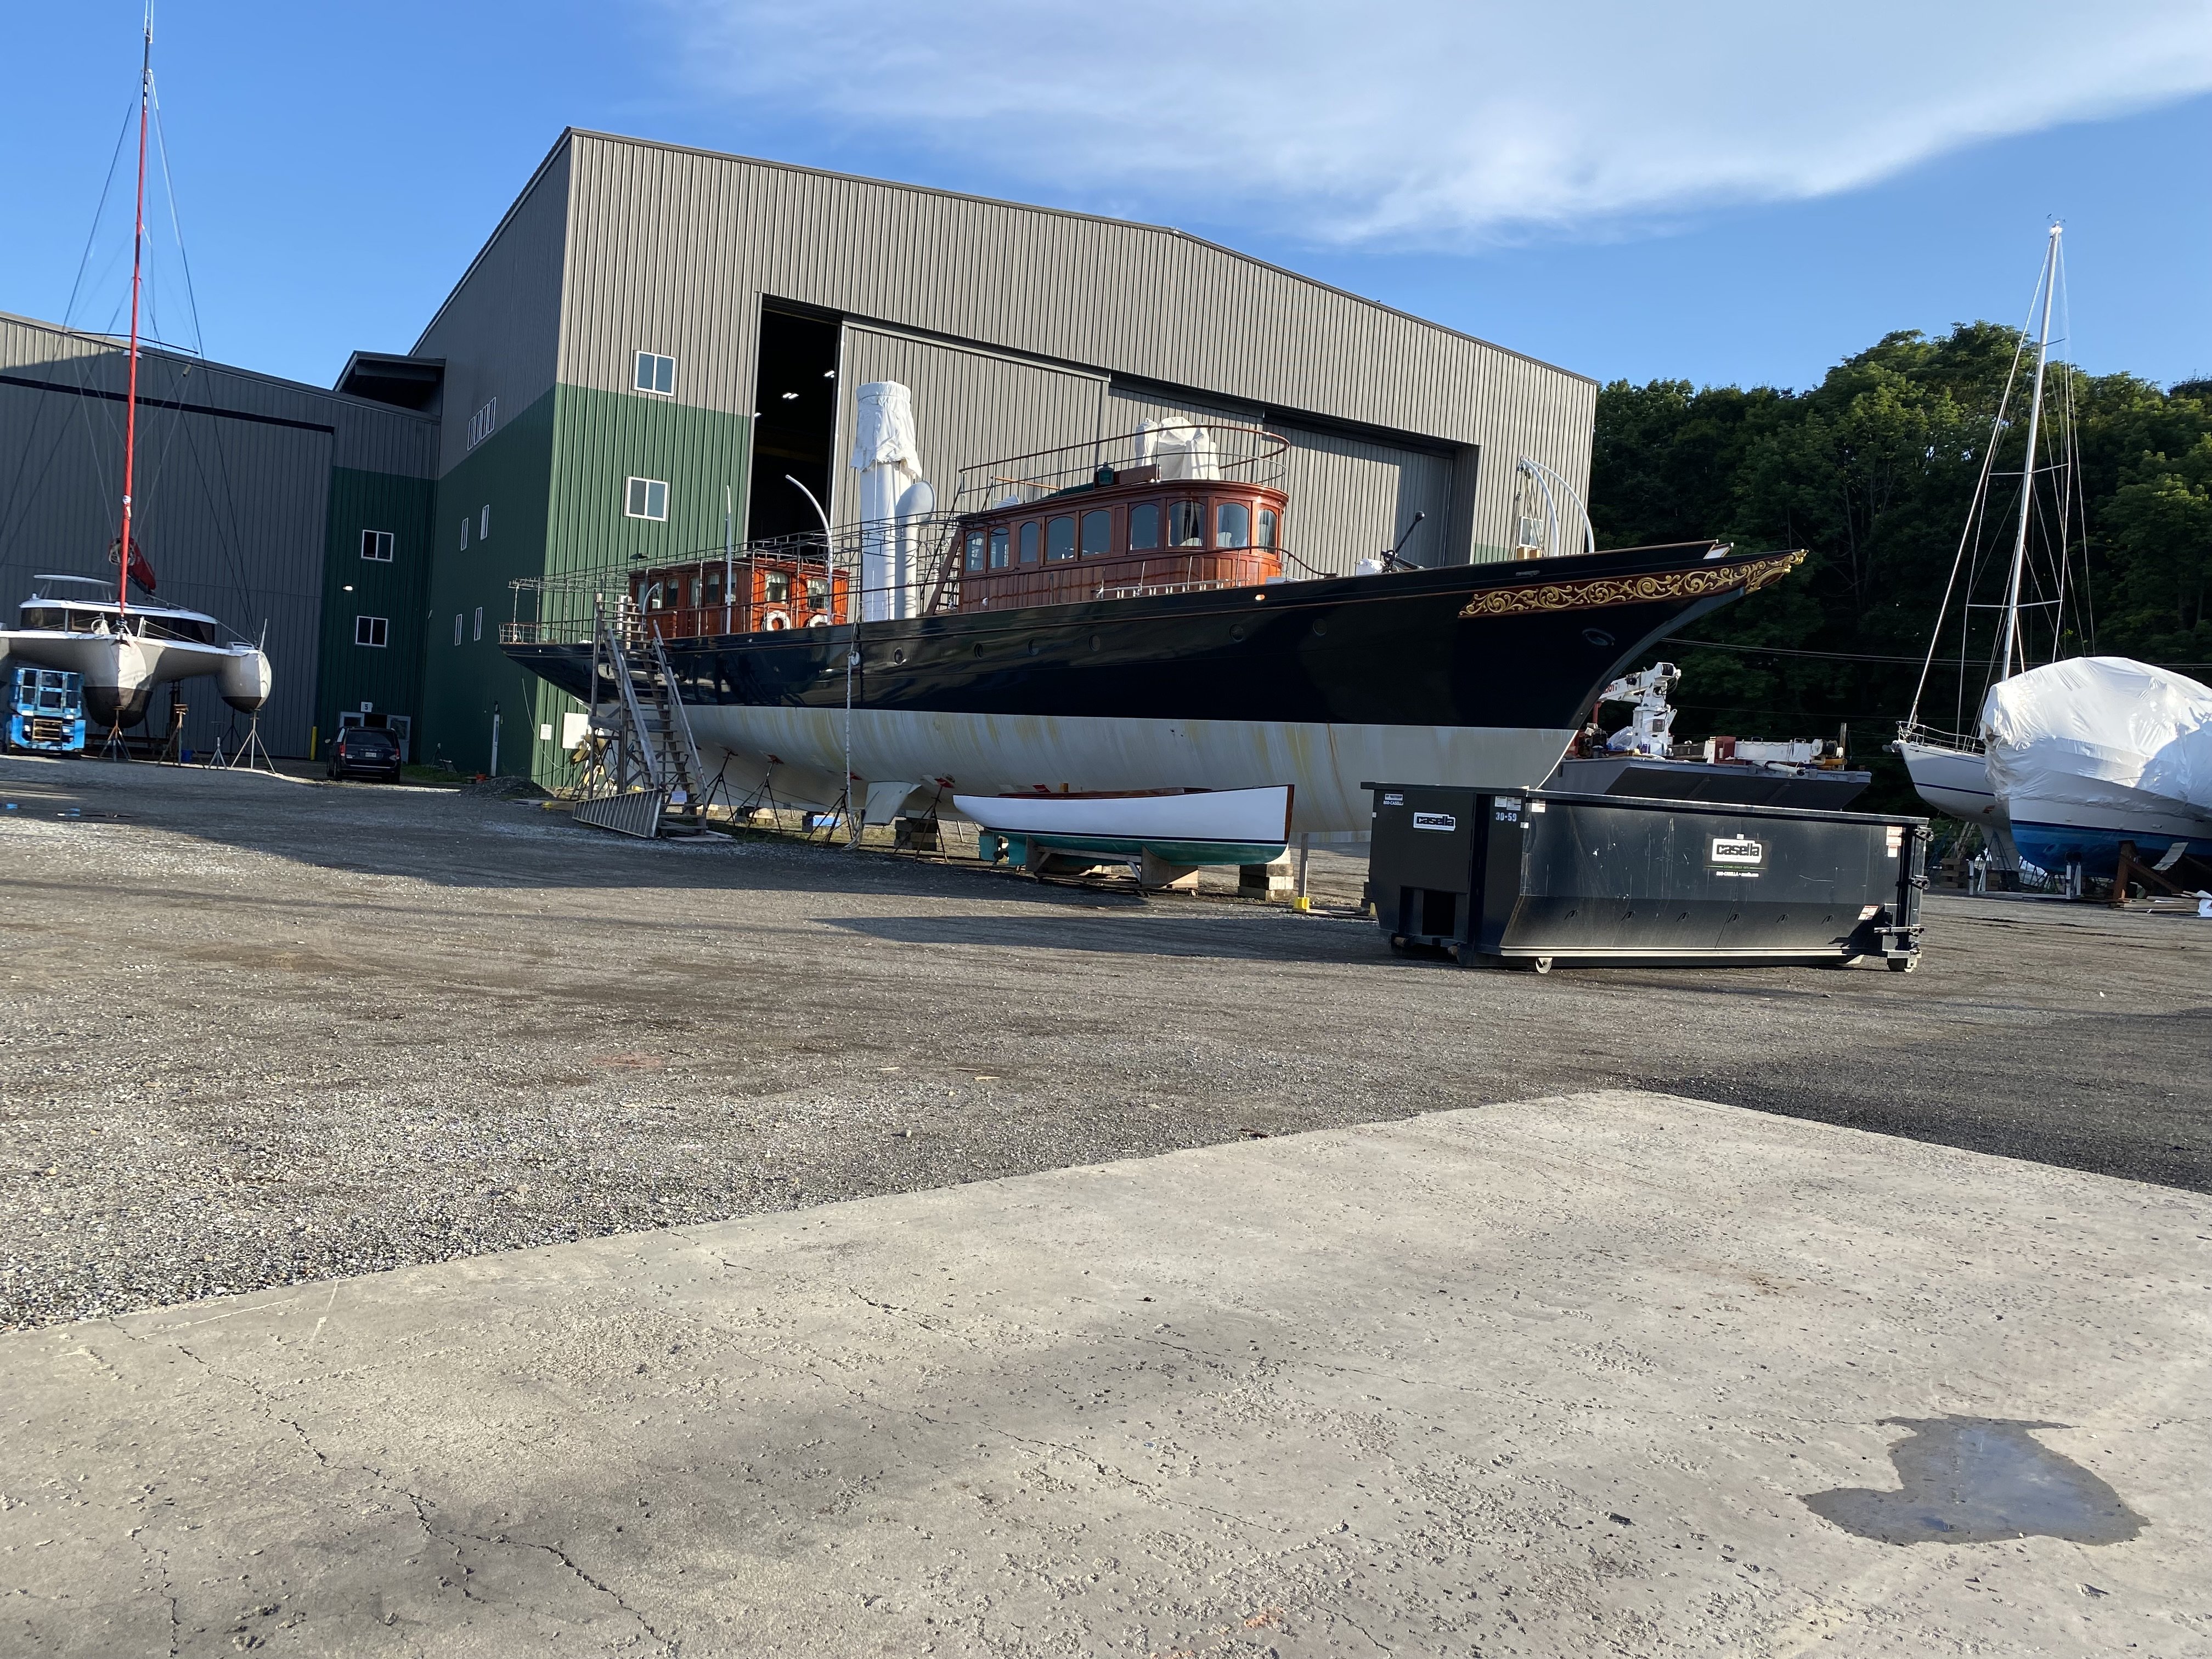
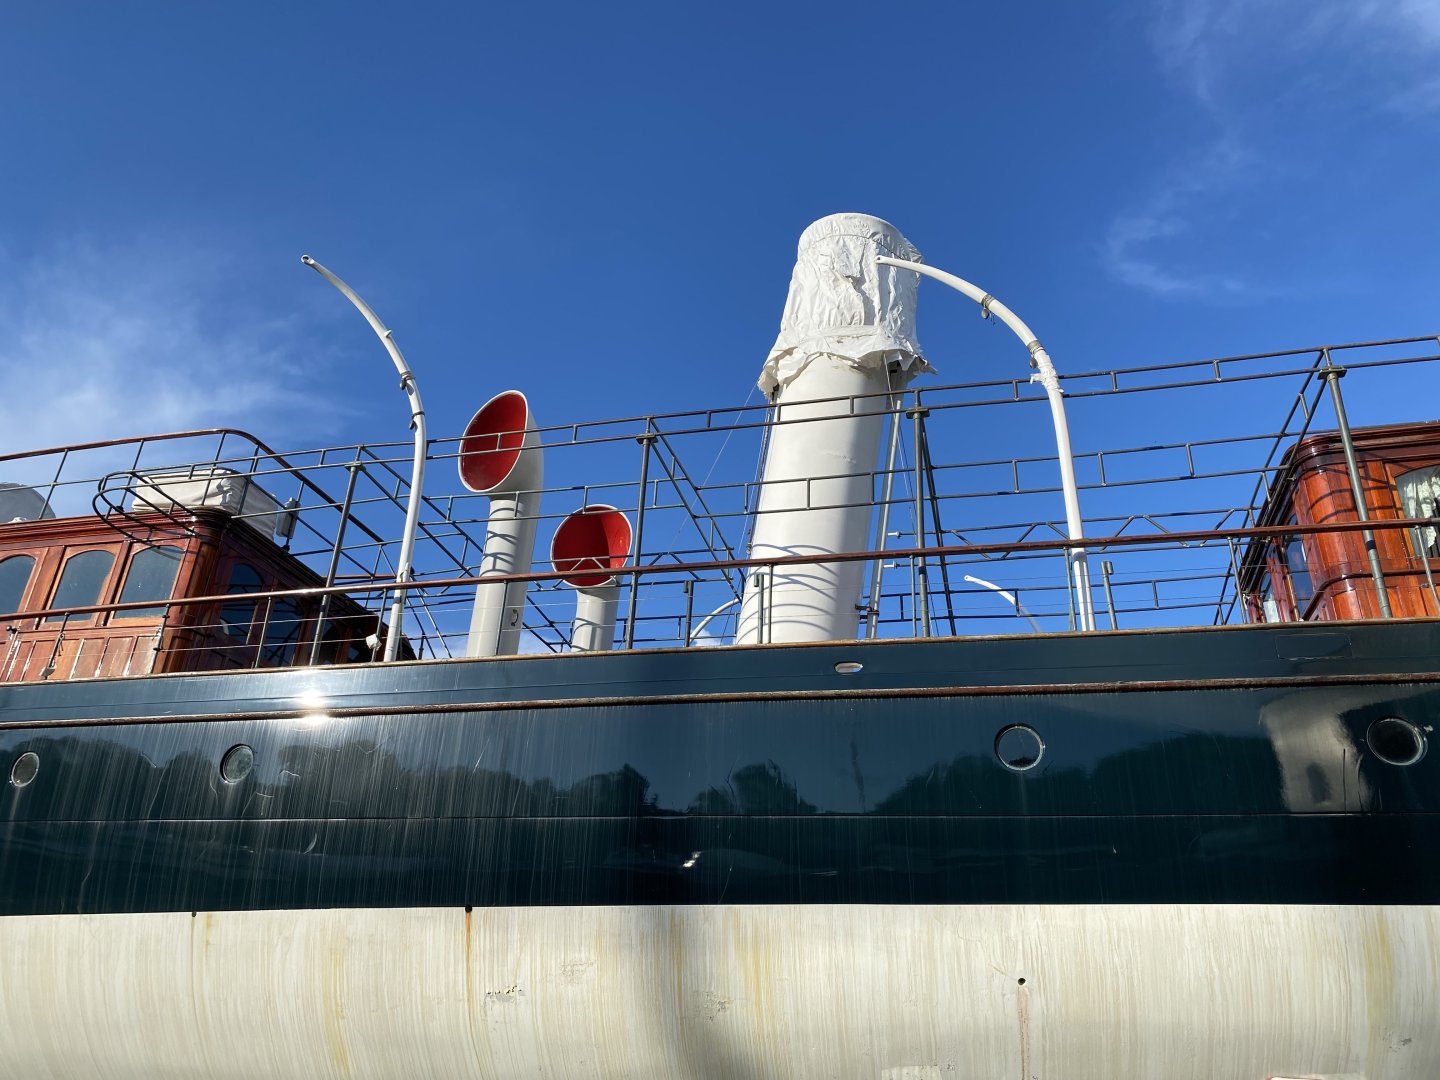
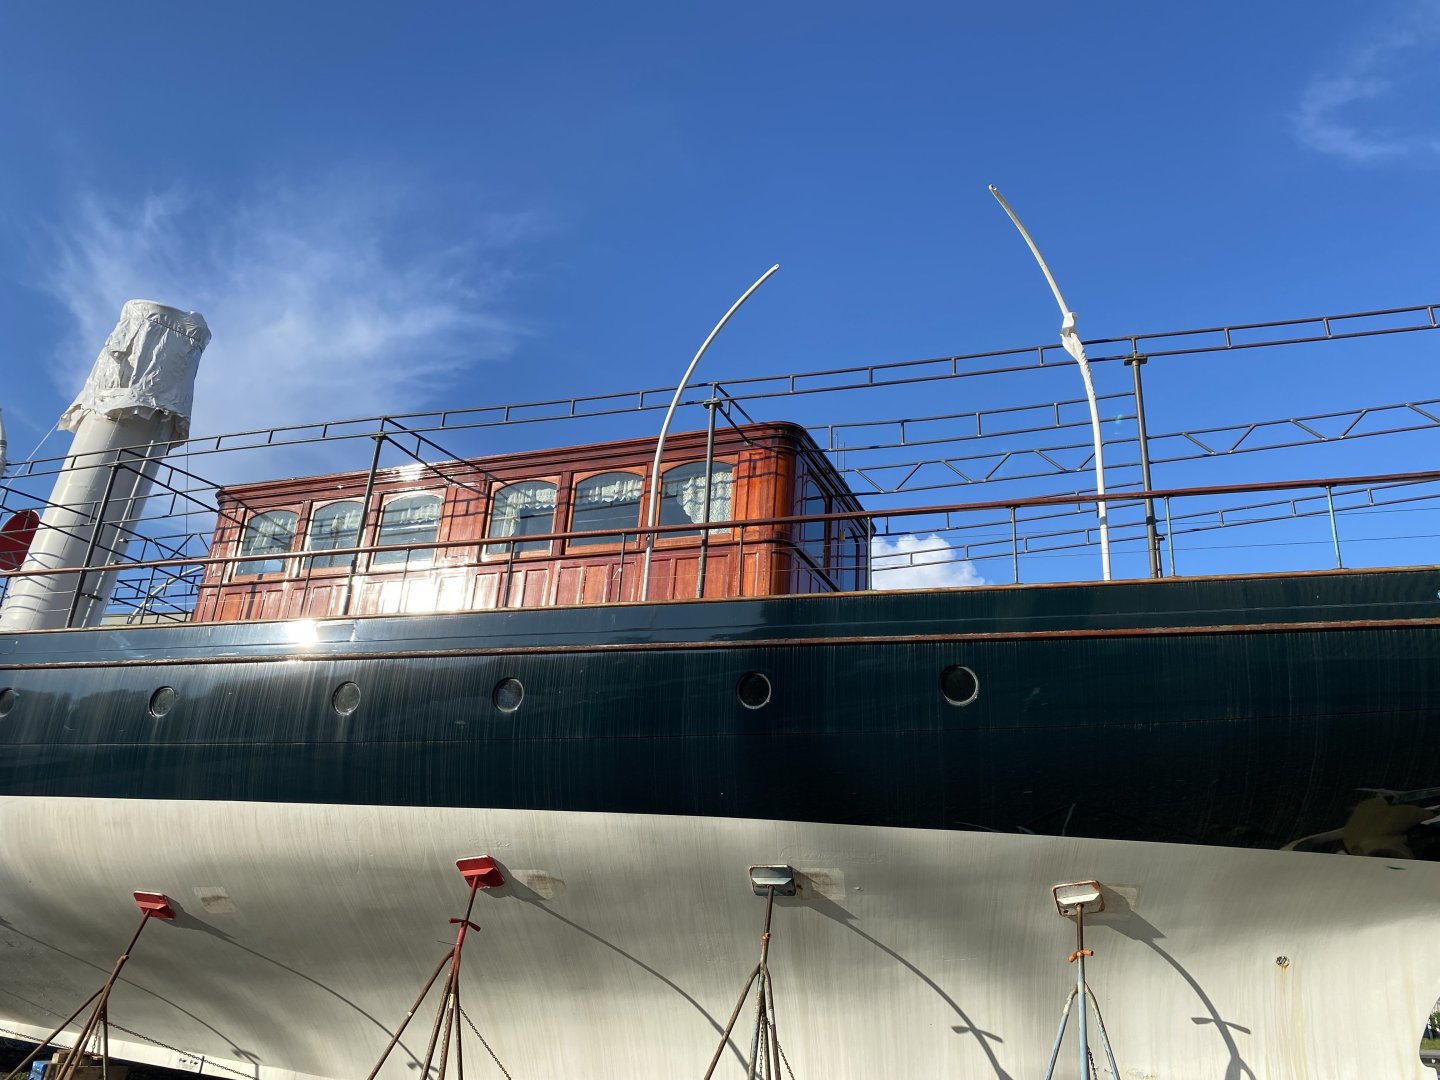
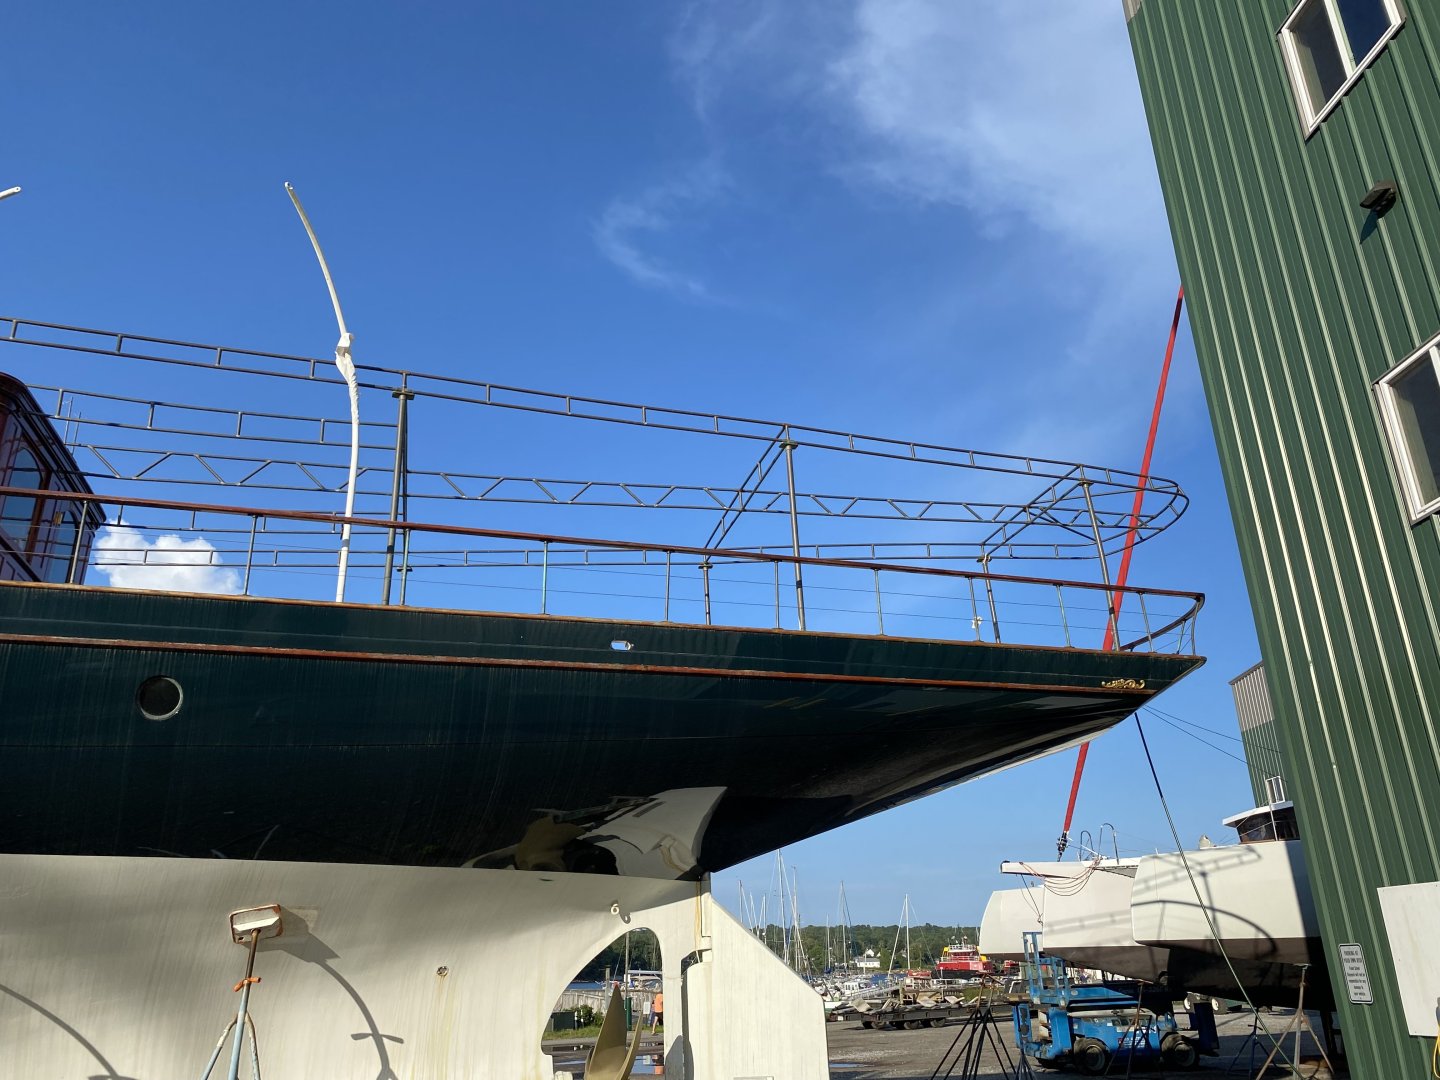
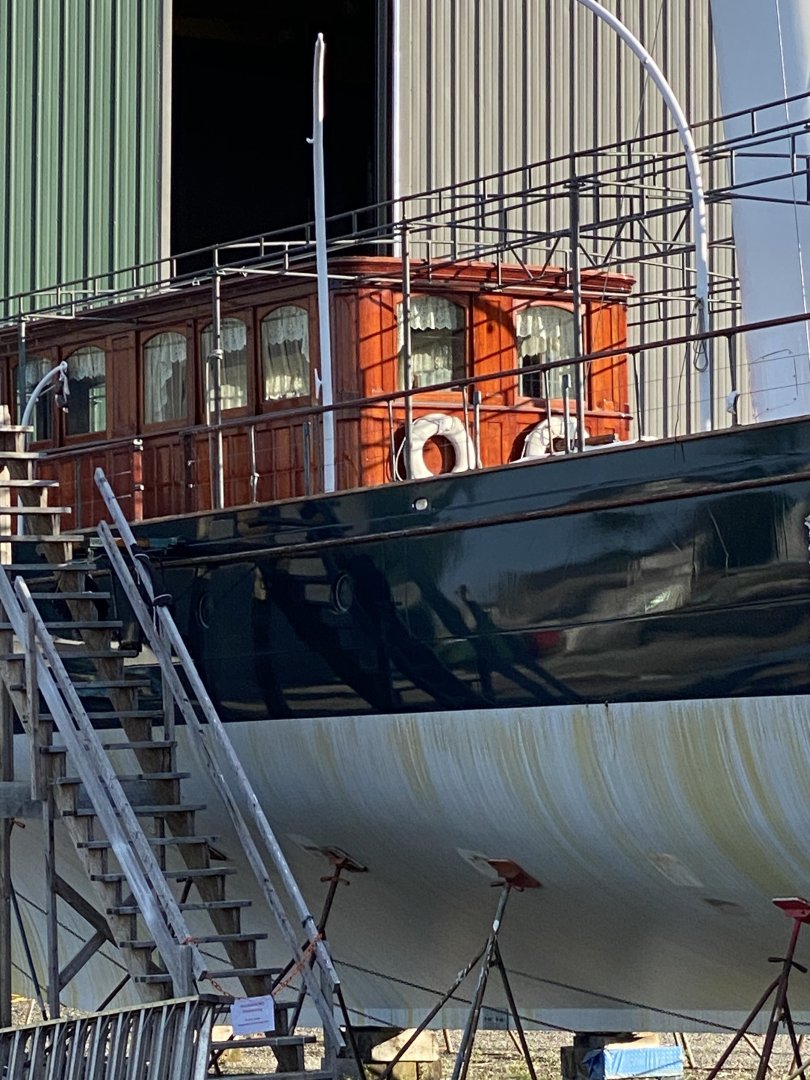
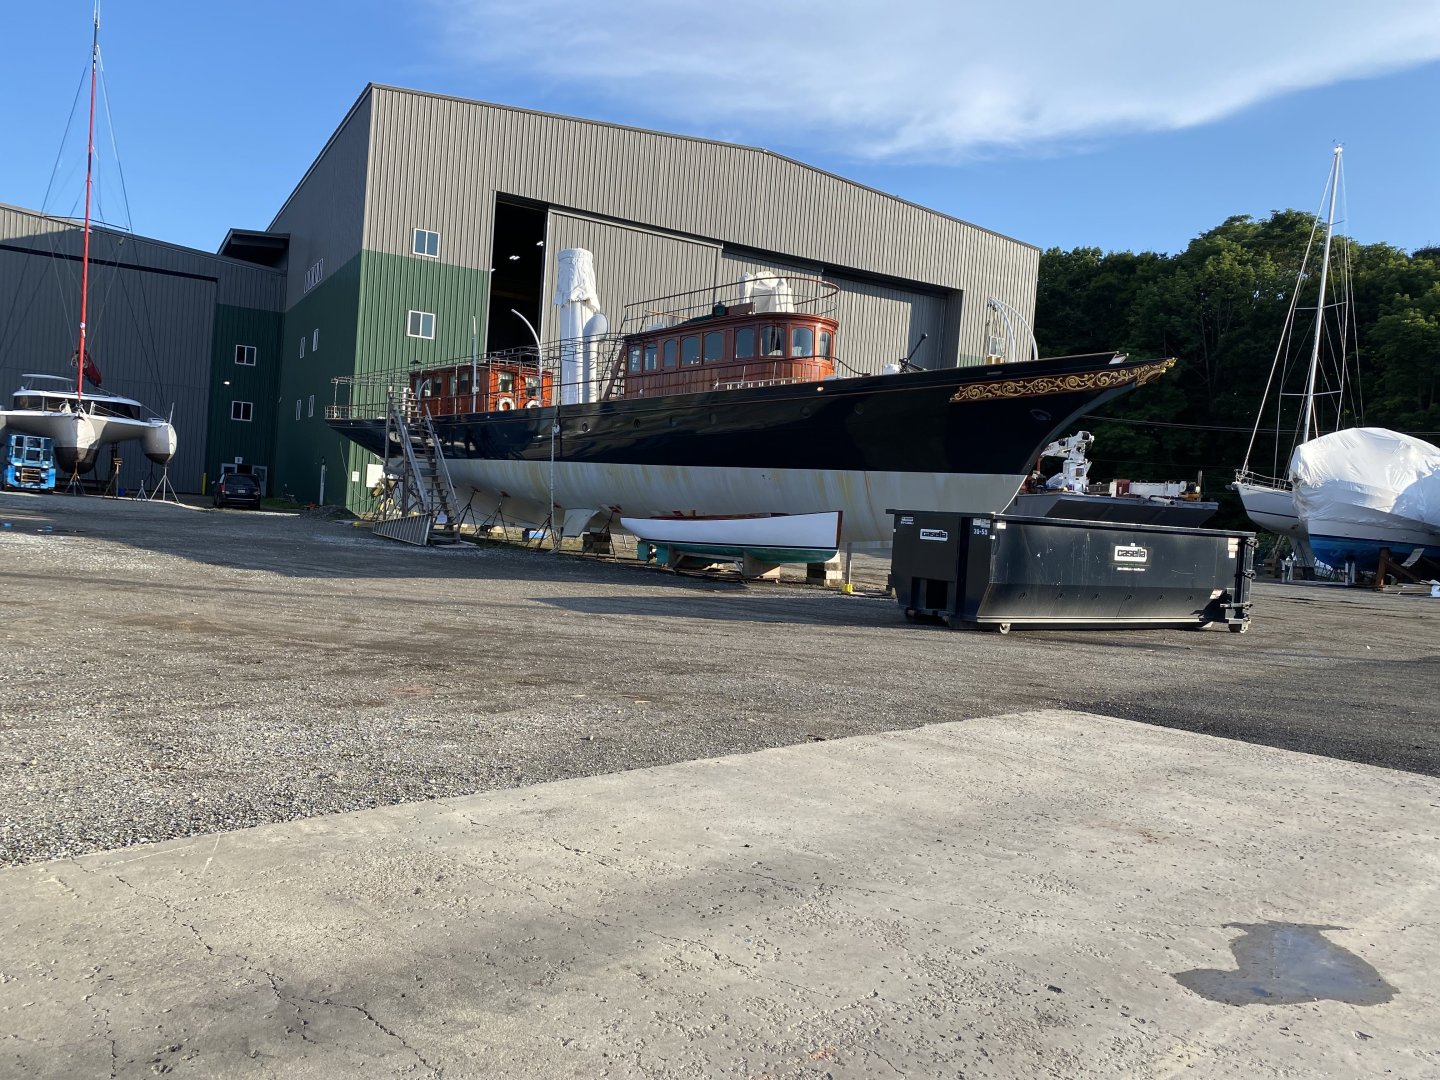
Keith, unable to get back on board Cangarda per the new owners. I think the tops of the cabins are probably painted white and not canvas. I tried to get a picture of the anchor craziness, If I see a worker on board, I’ll ask him to take pictures. Rick

-
Rich, to raise the topsail for furllng, would necessarily mean having to loosen the chain sheets of the topsail first before the sail could be raised. Much simpler and faster to lower the topsail yard first so the reef points could be drawn up to the yard by the reef tackle and then furl the sail. Rick
-
Agree Rob, Her topsail yards have been lowered to the lowest reef points, her reef tackles are pulled in tight and the billowing part of the topsail will be furled on top of the yard. The crew is in the process of furling the topsails. To furl the topsail, the yard has to be lowered first, therefore the billowing sails. What a great picture!!! Rick
-
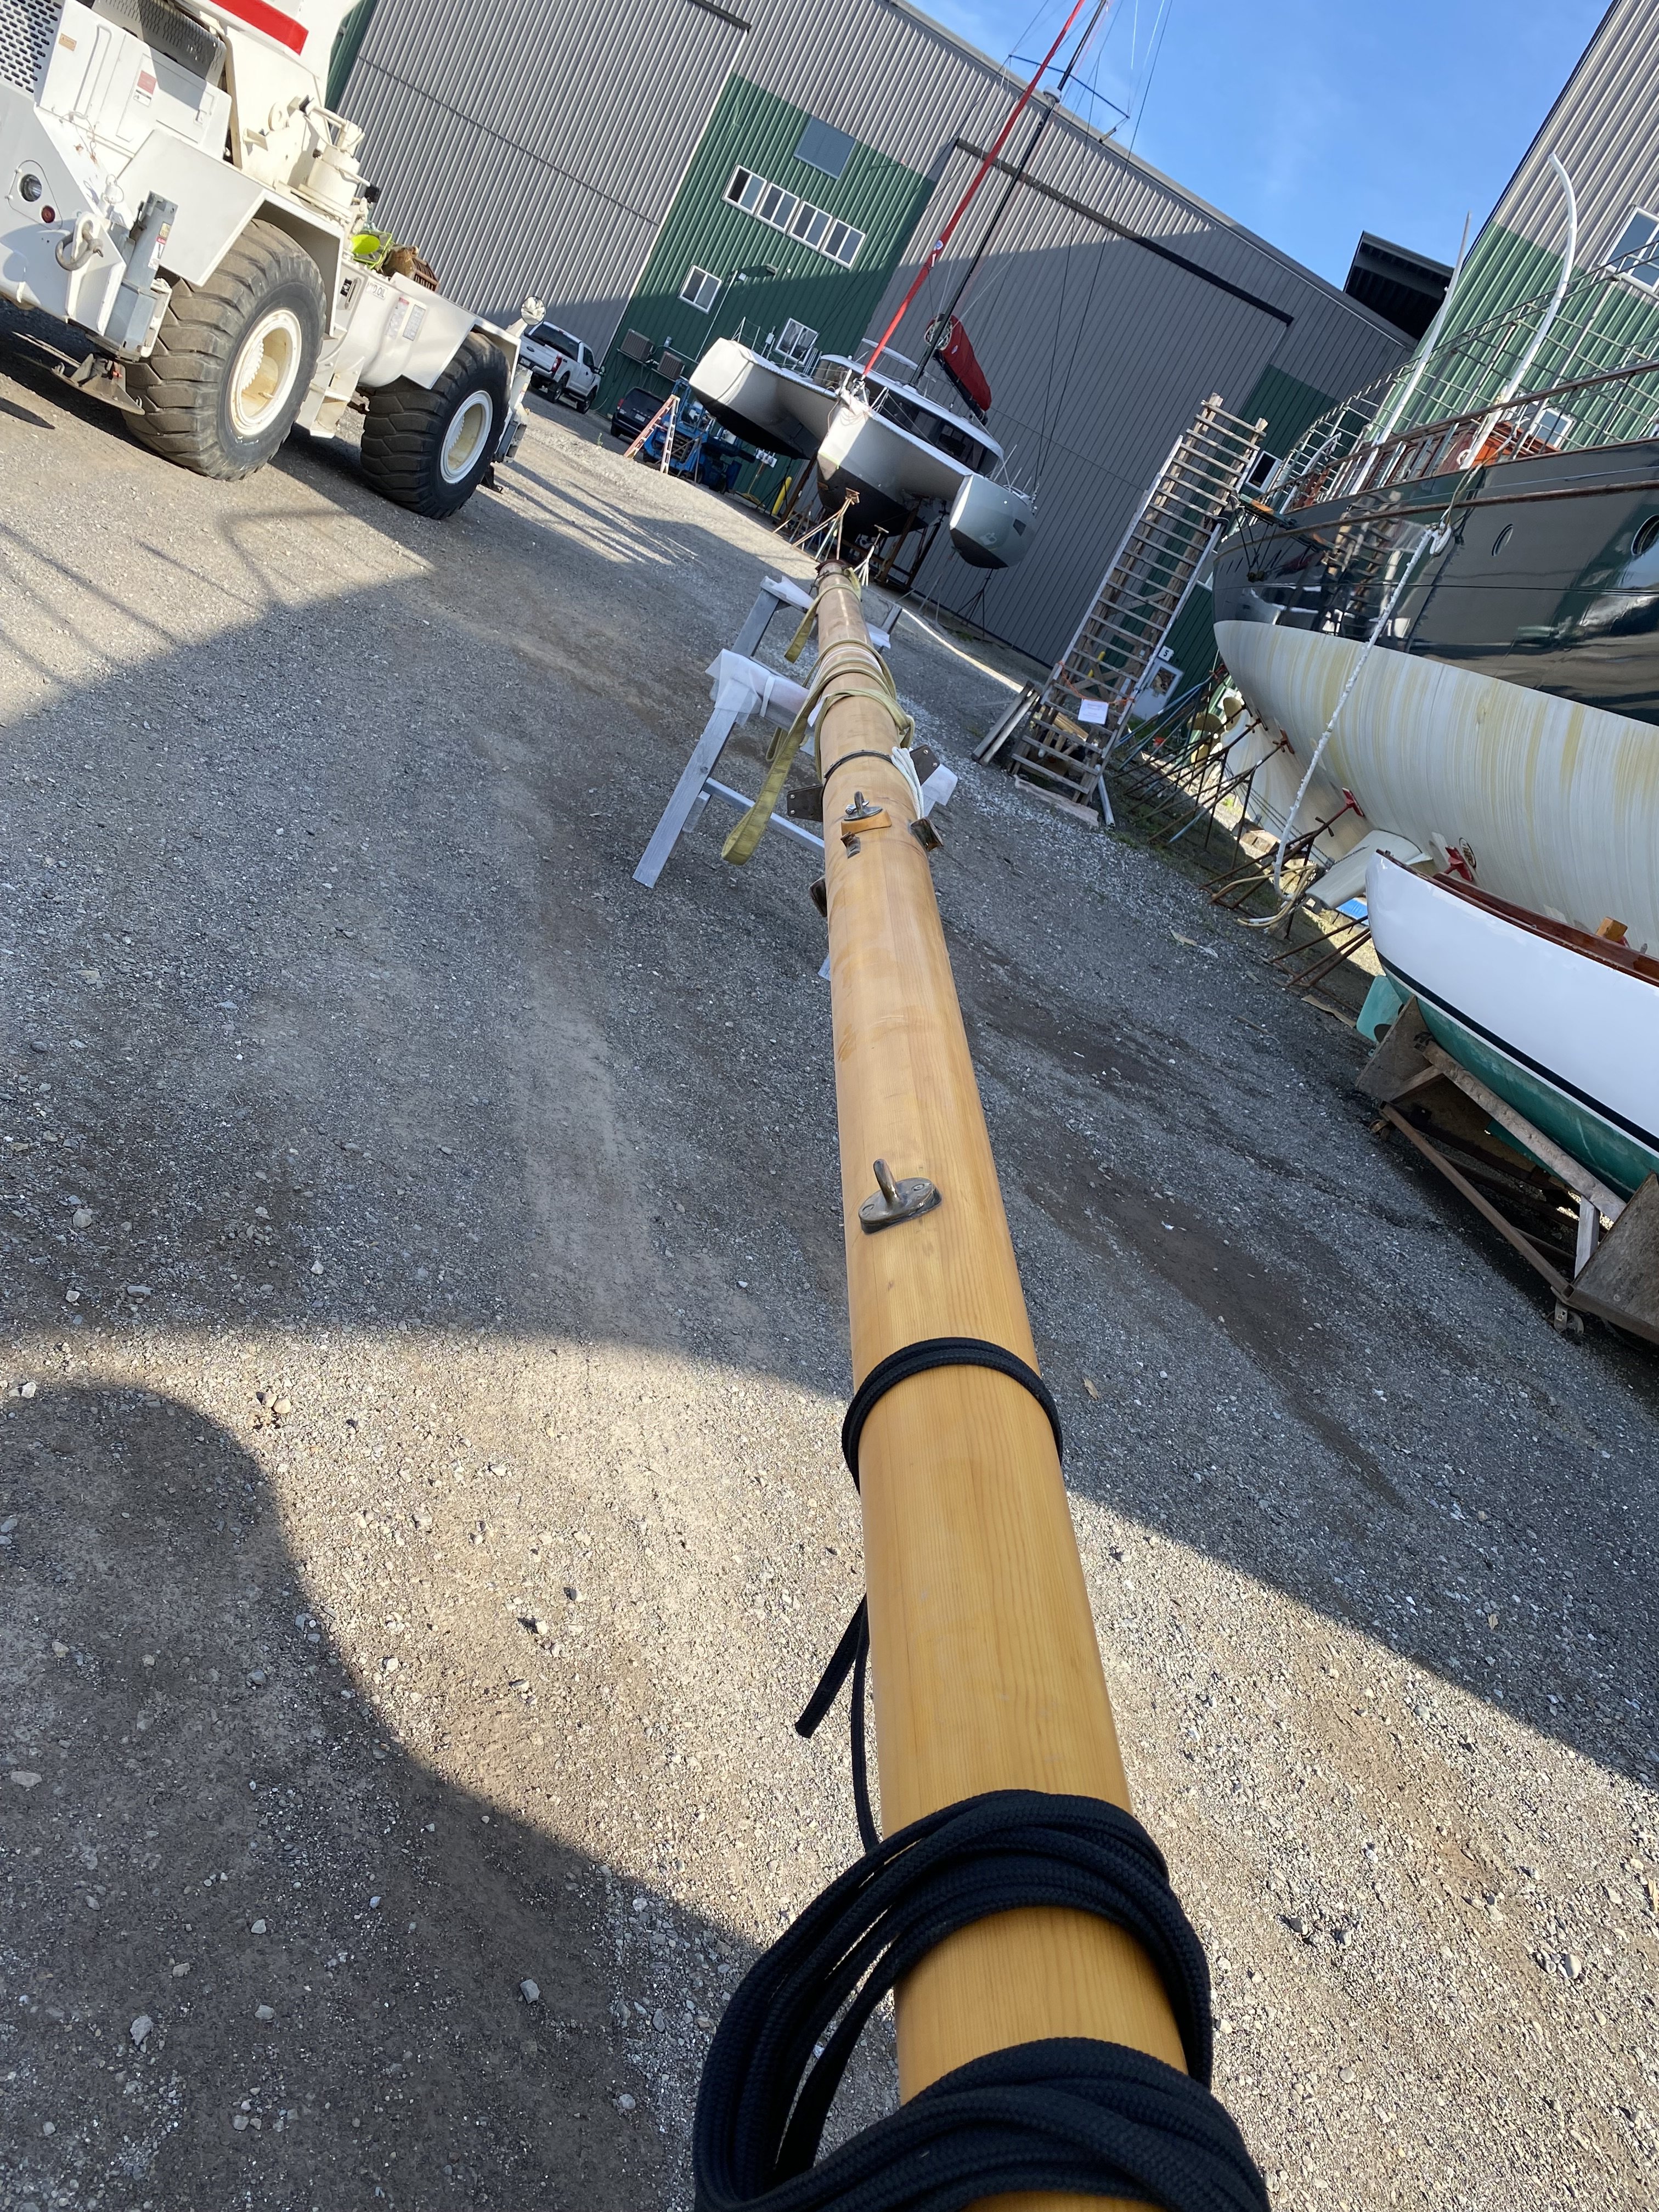
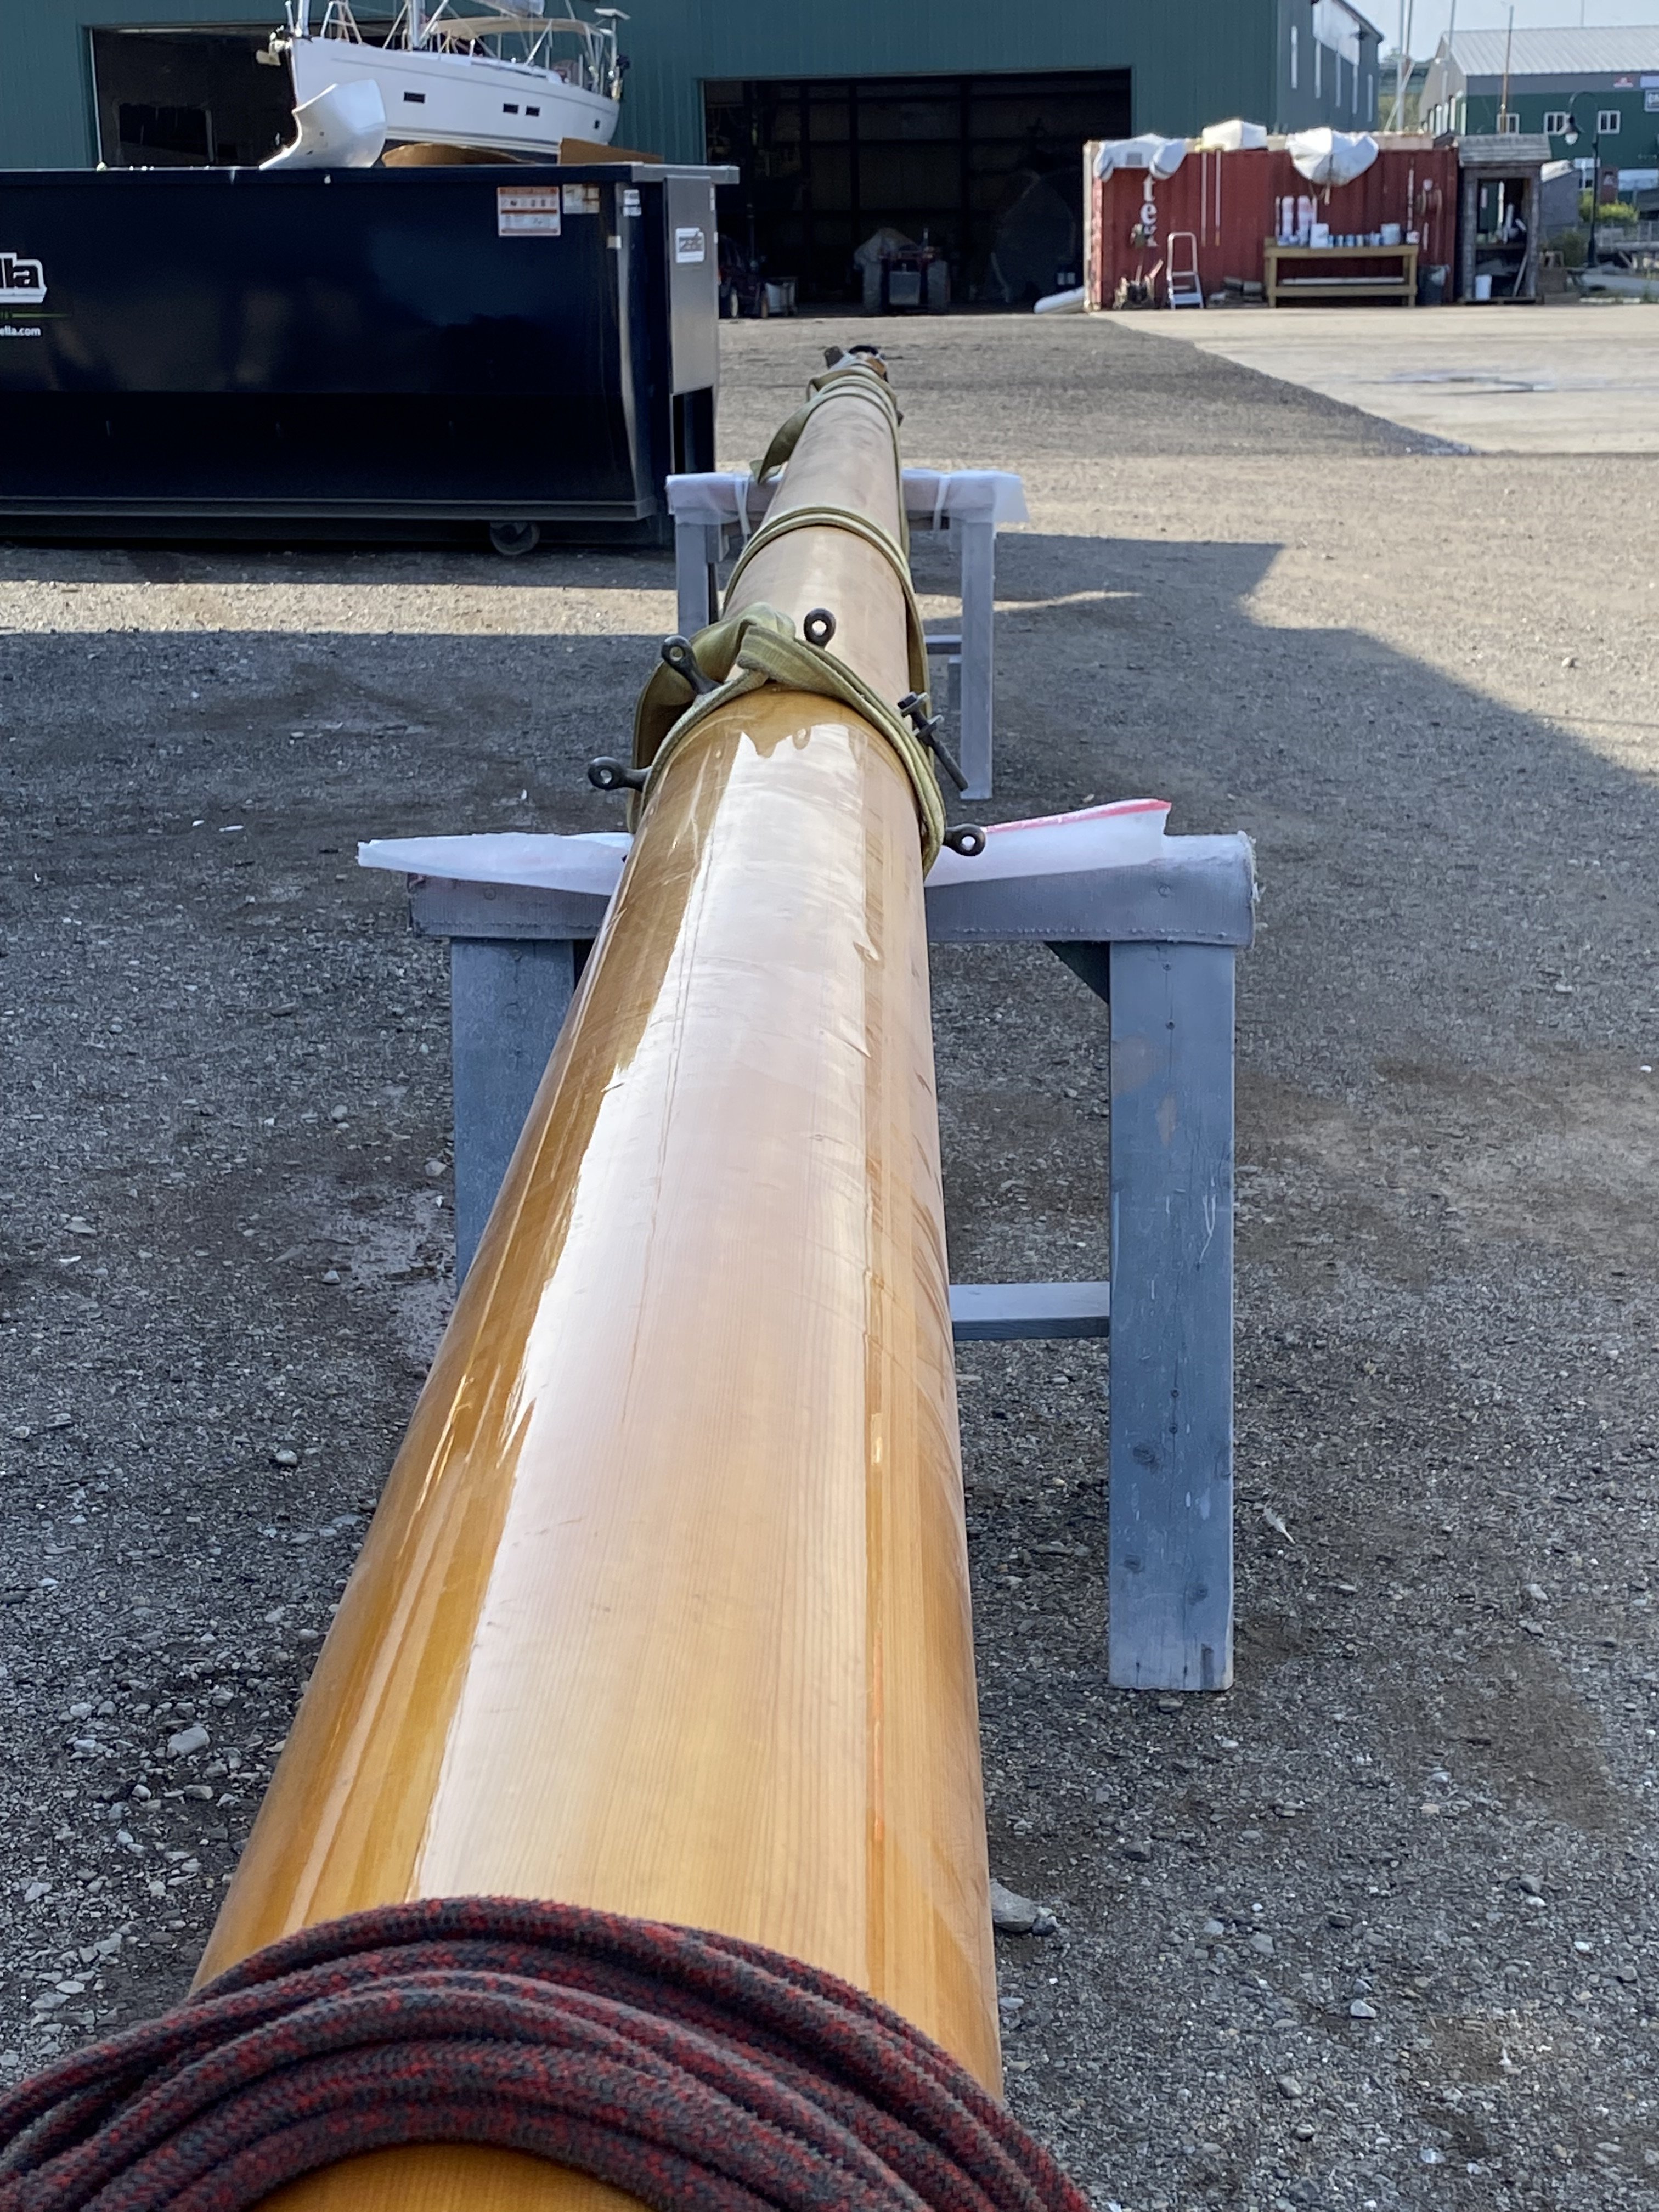
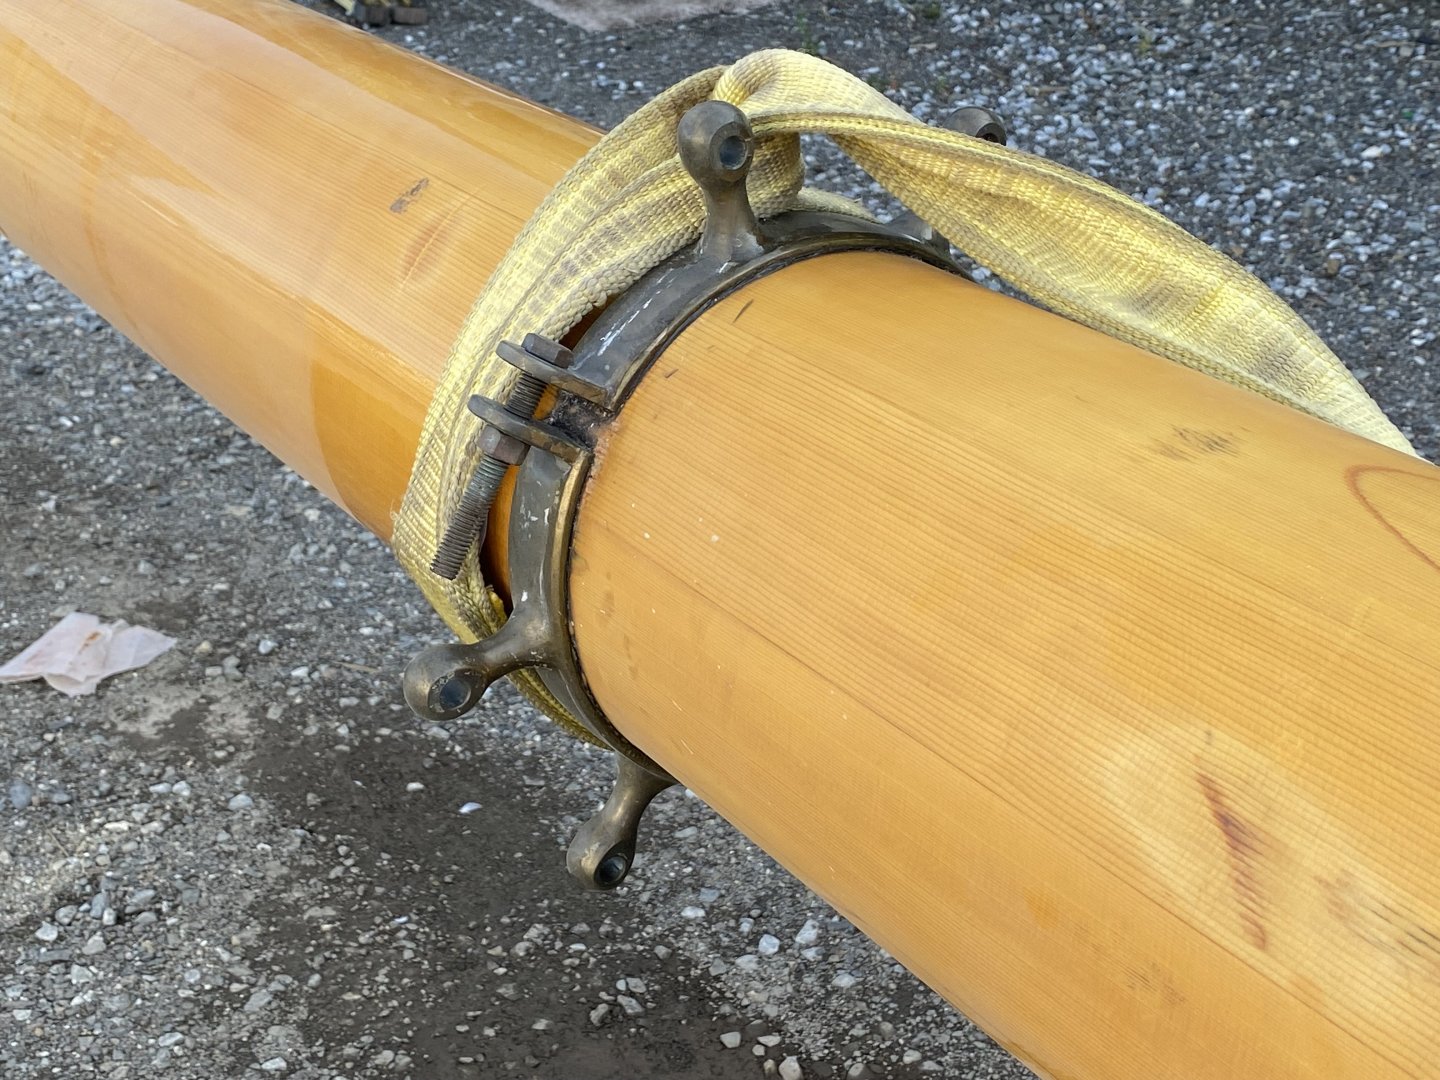
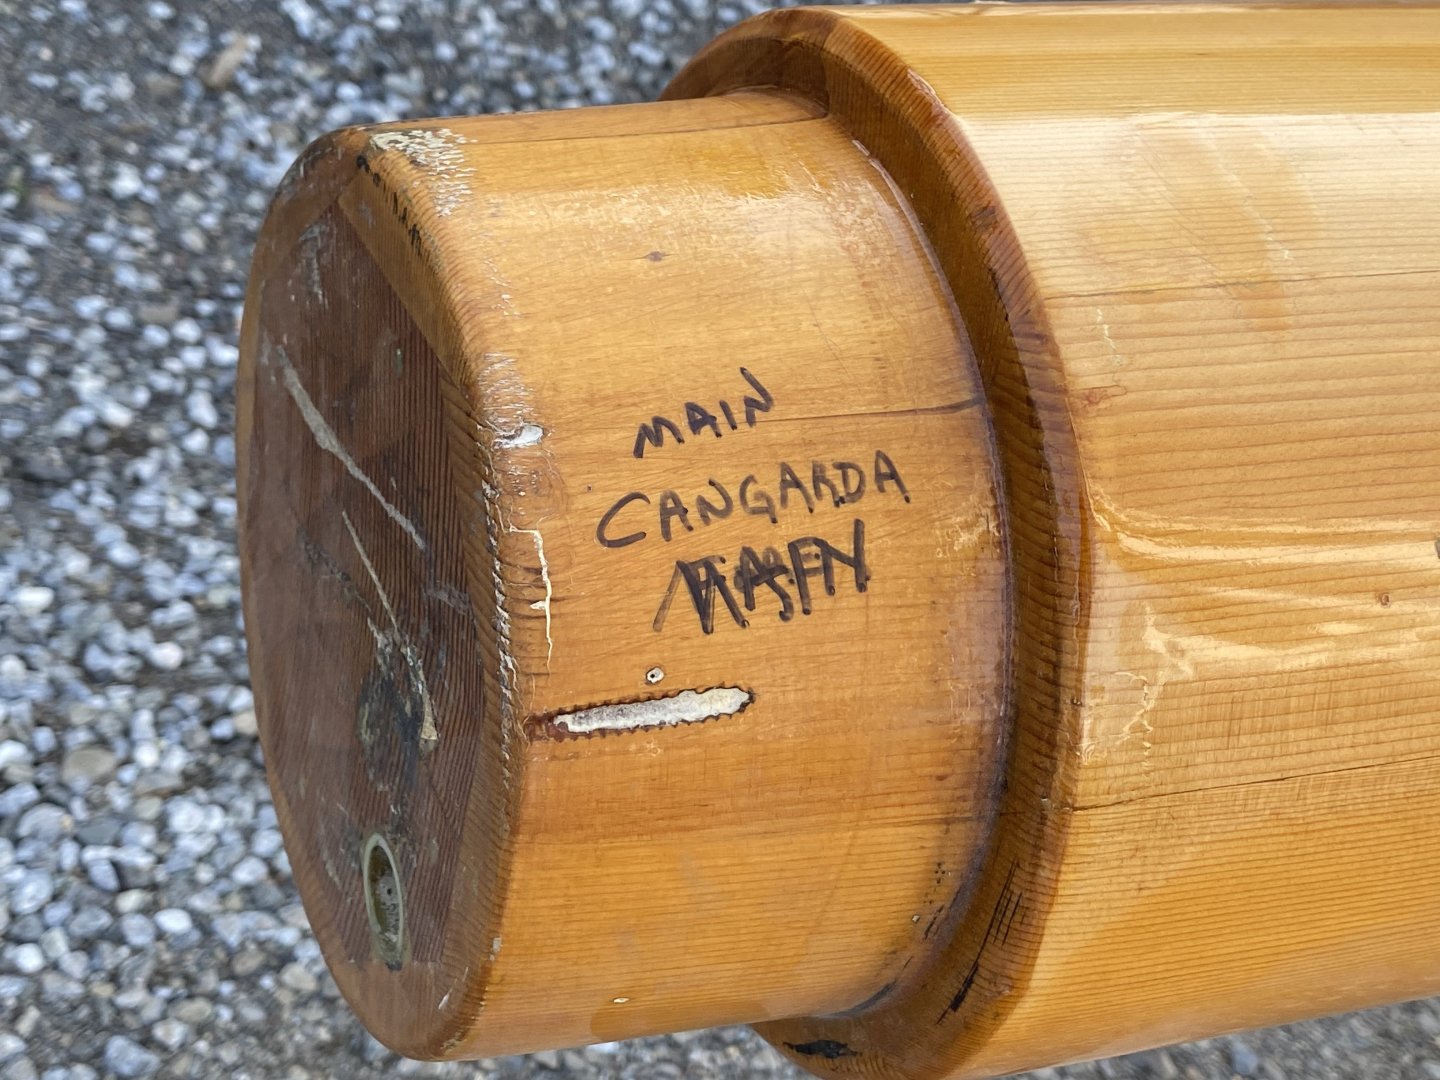
Keith, trying to get permission to go on board Cangarda. In the meantime, here are some pictures of the main mast. Rick


-
Beautiful job on the hull, George! Are you using basswood for the planking and what is the thickness of the 2nd layer of planking? Rick
-
Rich, Rob, In reference to the location of the water closets/ companionways on the Flying Fish, I think the location and design make sense. Possibly the companionways were up against the aft end of the forecastle, as seen on other ships. It doesn’t make sense for the water closets to be below deck where they would be difficult to access for the crew working on deck. As no one knows for sure, I assume that Ben Langford, Erik Ronnberg, and the others who worked on the 1979 revision of the Flying Fish plans, resorted to placing them in a common location. Don’t underestimate the knowledge and experience these people brought to this reconstruction. While each ship was unique as far as hull design, and to some extent, the rigging ,ect. deck equipment was fairly standard in function and location. This doesn’t mean that there weren’t differences. Keep up the good work!! Rick
-
Beautiful!! Great technique! Rick
-
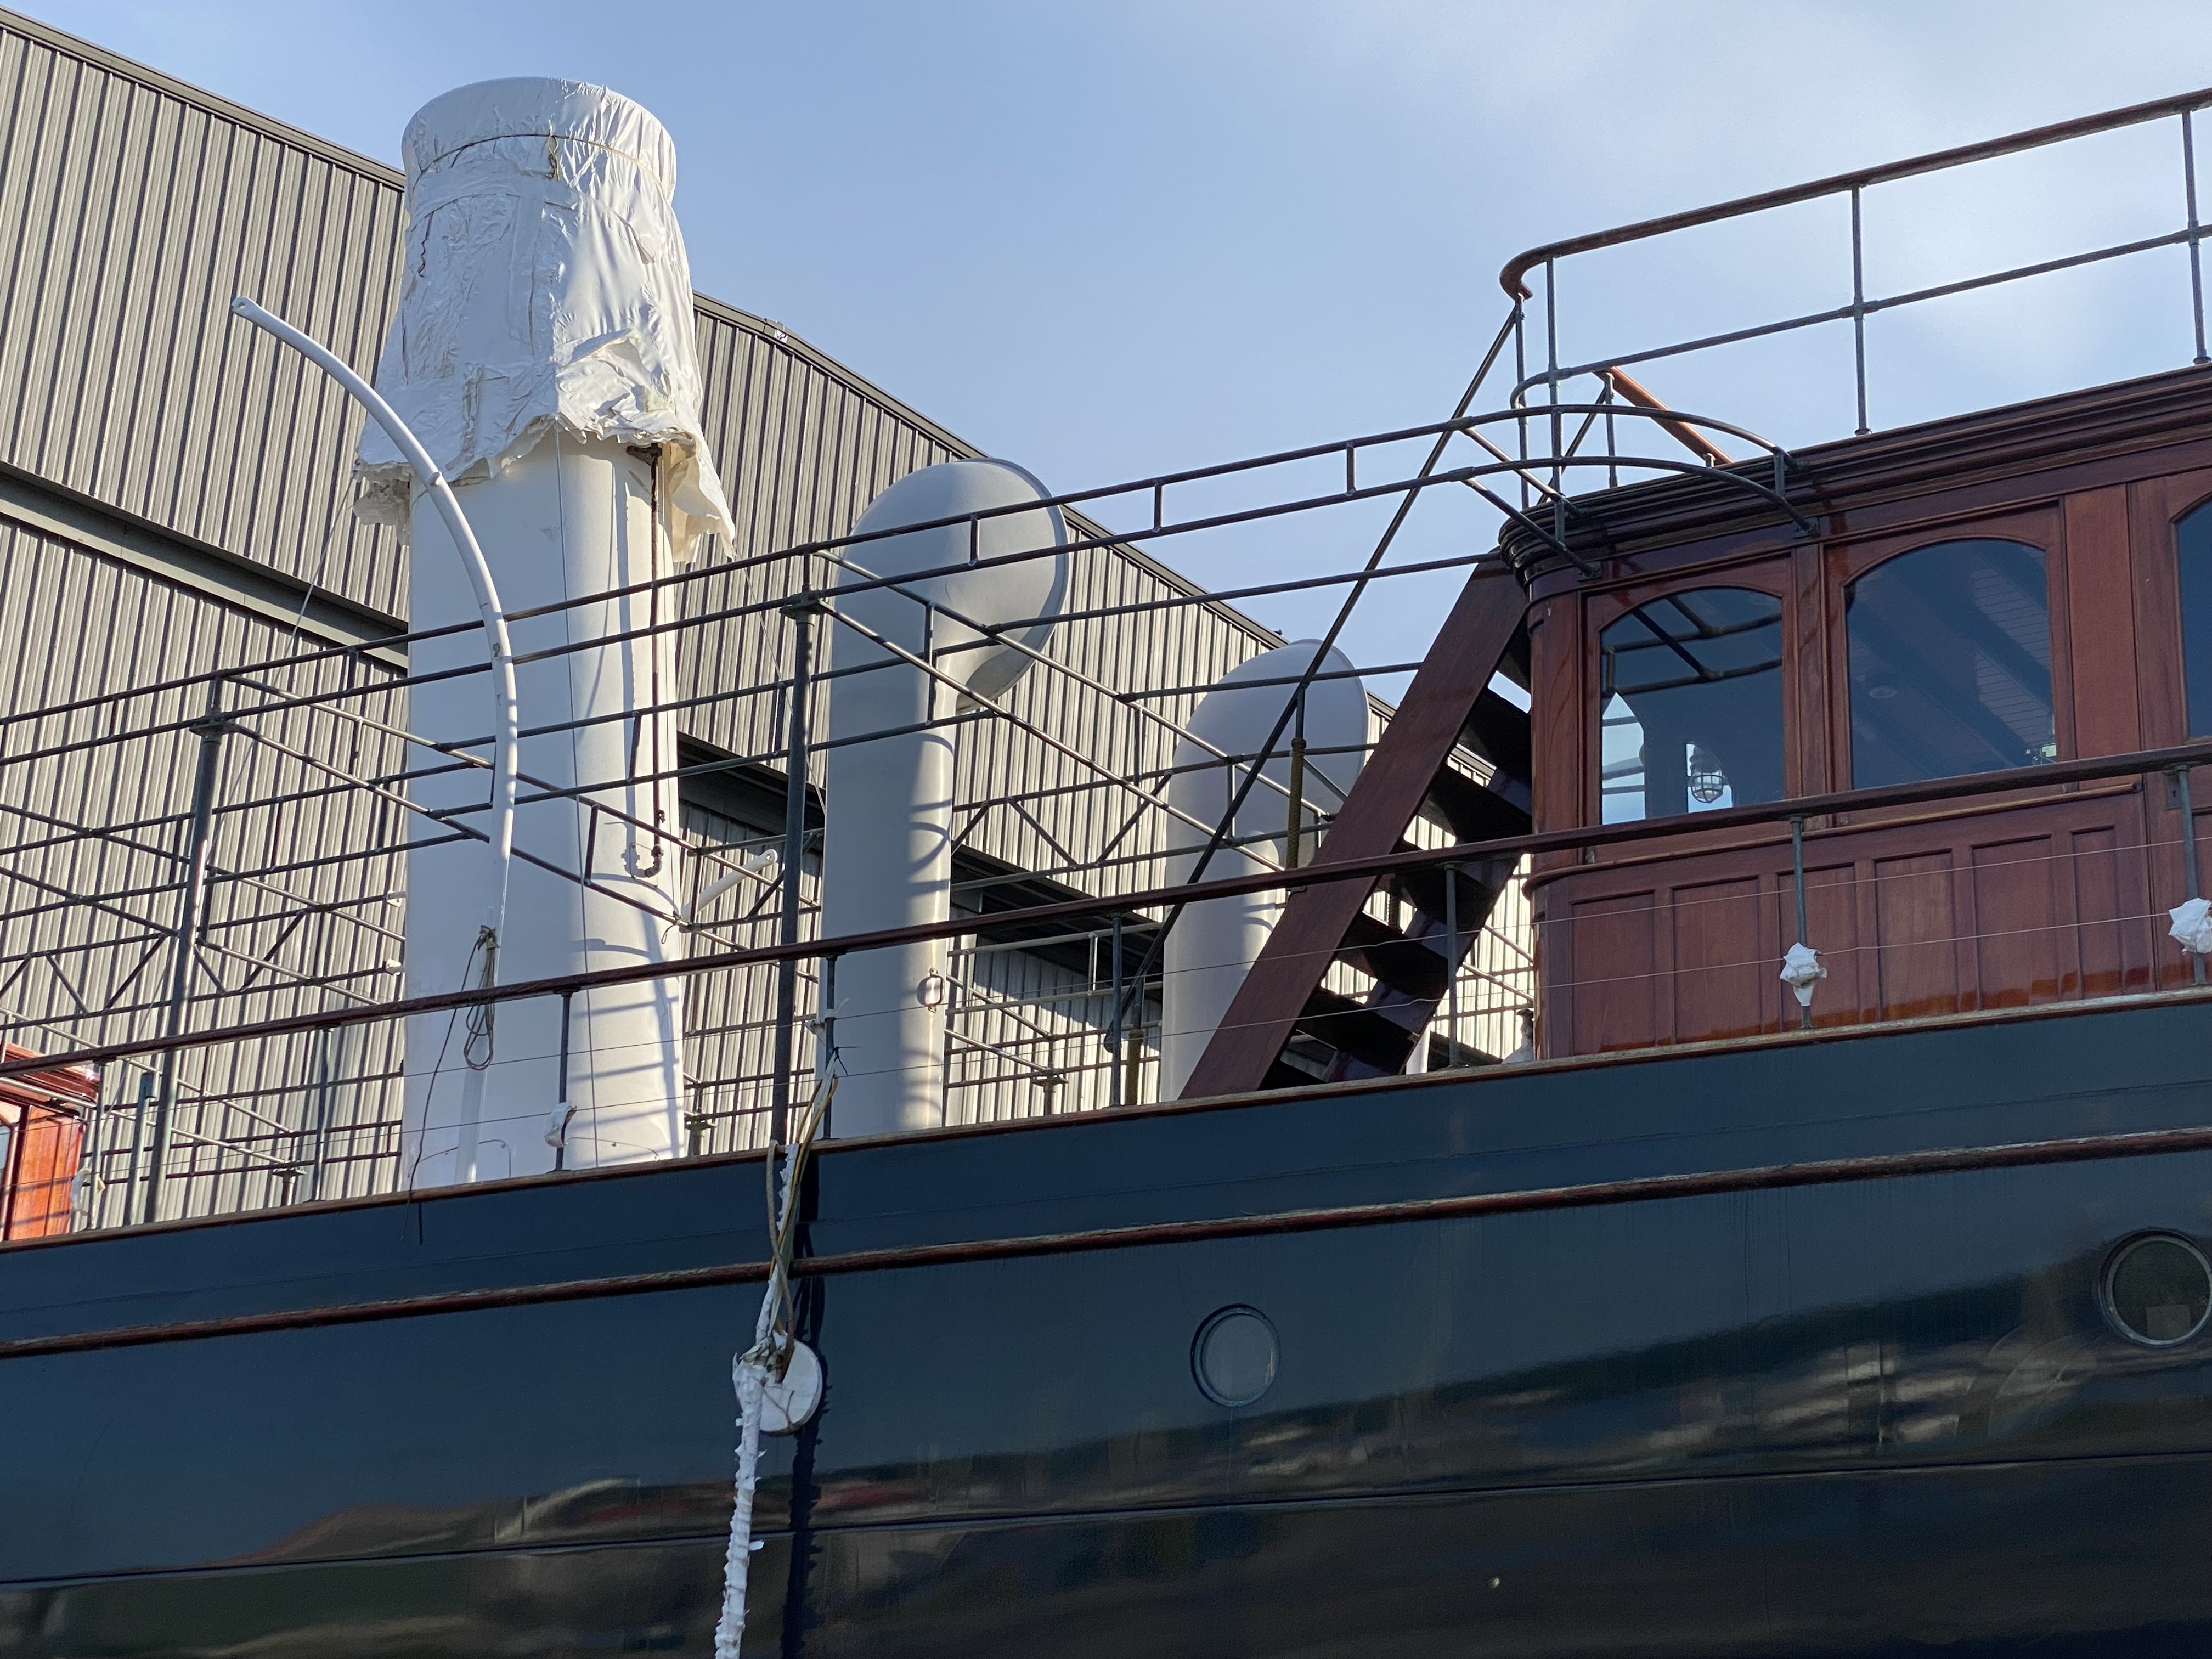
Keith, some more pictures of Cangarda. Tried to focus on the metal frame work for the awning (Bimini?). I have a feeling that she will be departing soon. If there are any other photos you need, especially on board, let me know and I’ll see if I can get back on board, or at least get to the top of the stairs.


-
Incredible work as usual Keith! Always fascinating to see how you tackle each step! Rick
-
Thank you Rich for the follow up. If it should ever be shown to the public, I would very much like to meet you and view it with you if you can make it to Boston. I live in Maine, so getting to Boston is not difficult. Rick
-
Thanks you ClipperFan for your kind words and encouragement! I too am at a loss about Buttersworth’s work. While I believe his paintings are incredible, there are features in his paintings that make me question the accuracy, such as a furled sail on the forestay on the FF painting, and his painting of the Westward Ho, he depicts both Spencer sails and staysails set at the same time. Maybe this is correct? As far as the bow of the Flying Fish, I also wasn’t sure how to model it and ended up trying to come up with something that was close to the painting. Rick
- 360 replies
-
- 1
-

-
- Flying Fish
- Model Shipways
- (and 1 more)
-
Great pictures ClipperFan!! Where is the half model located? Is it possible to go see it? I completely agree with you that unless proven otherwise, McLean’s descriptions should be considered accurate. Rick
-
USS Cairo by Zetec - FINISHED - 1/50 scale
Rick310 replied to Zetec's topic in - Build logs for subjects built 1851 - 1900
WOW!! Great job!! Rick -
Thanks Rob, I take inspiration from your work! Rick
-
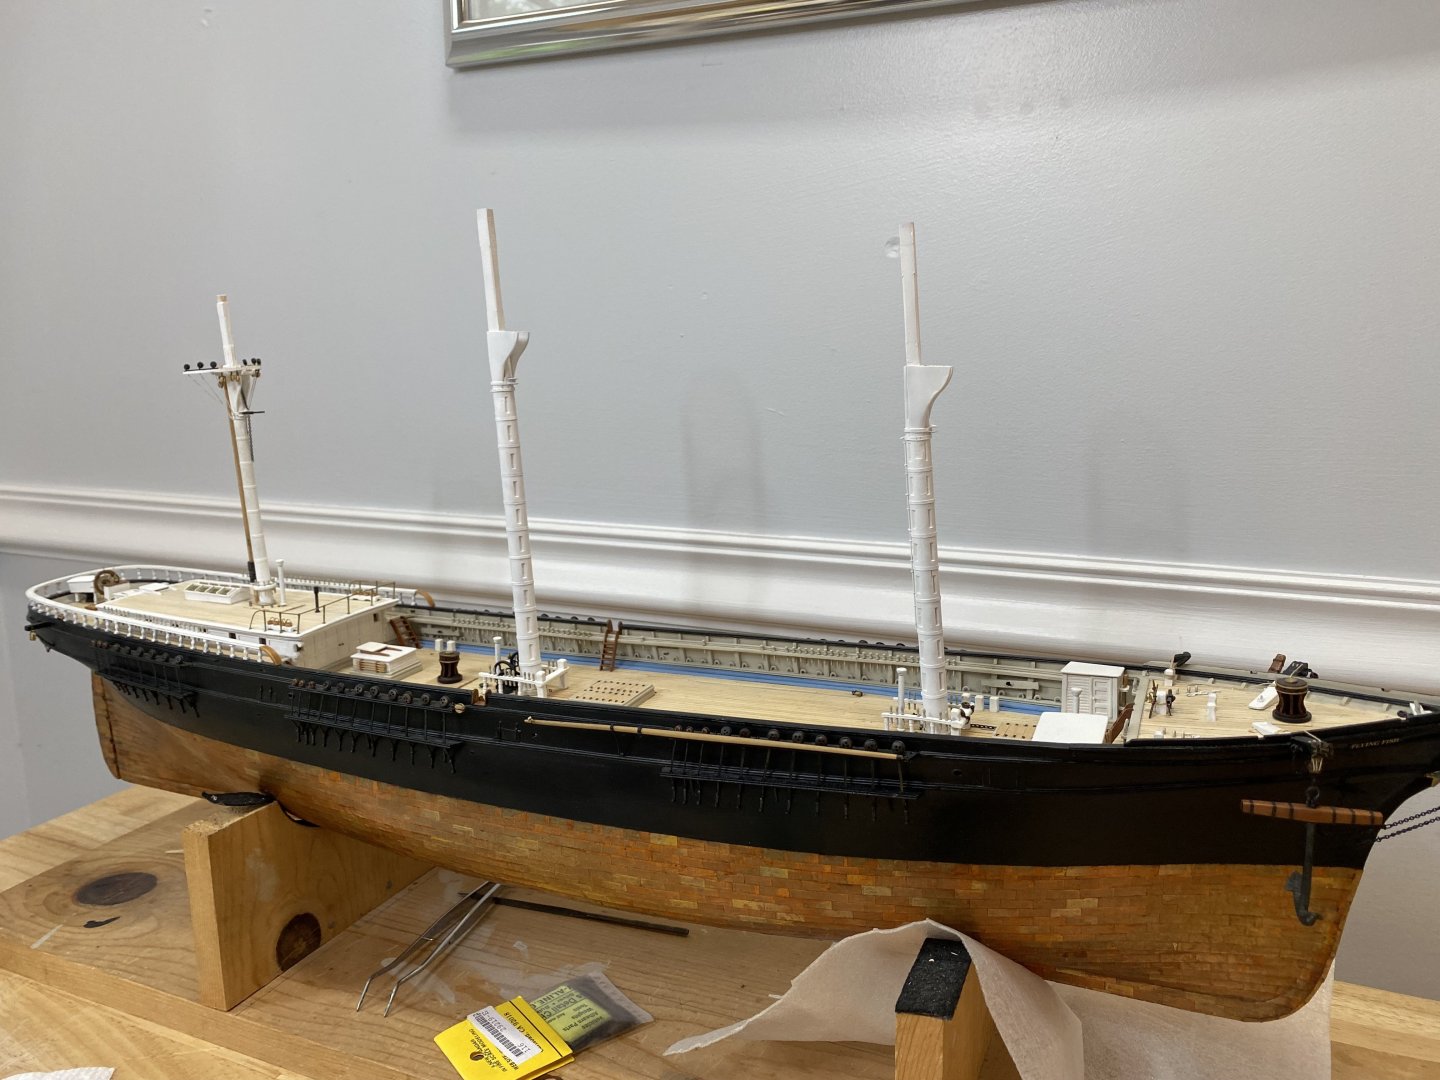
Thanks George, really anxious to start rigging. Rick
-
Coming along really well Keith!! It’s a very interesting subject! Rick
-
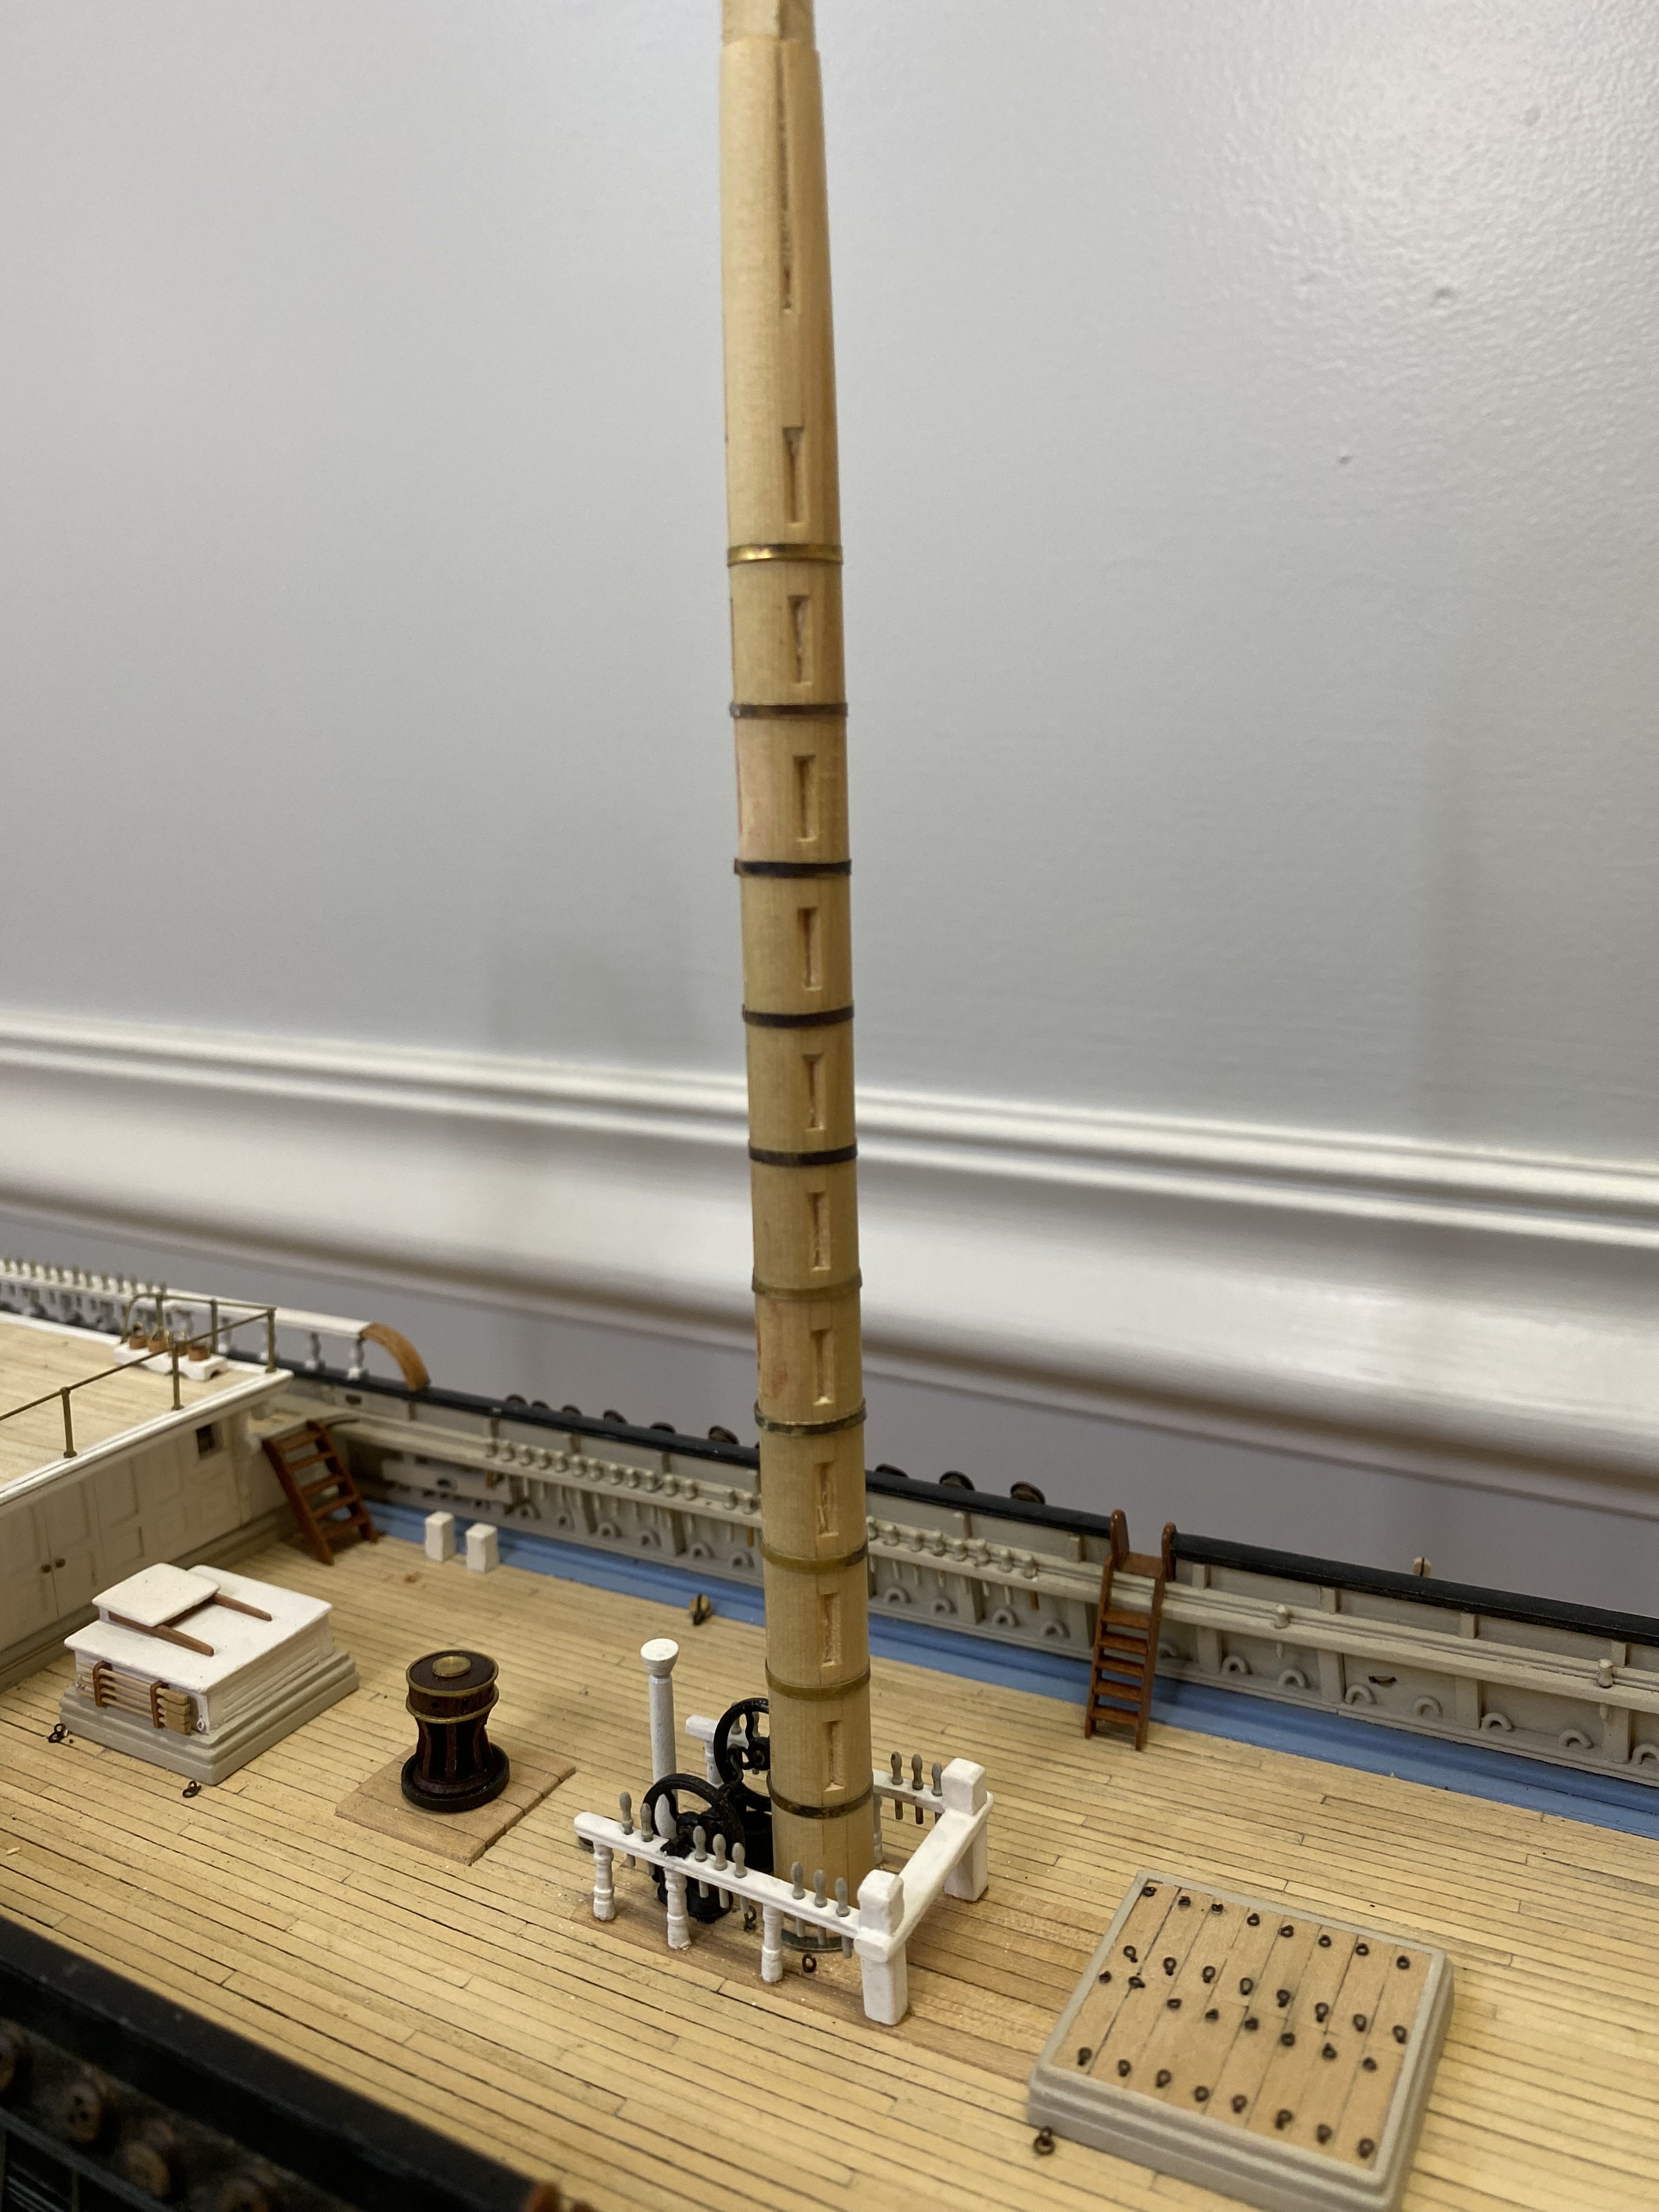
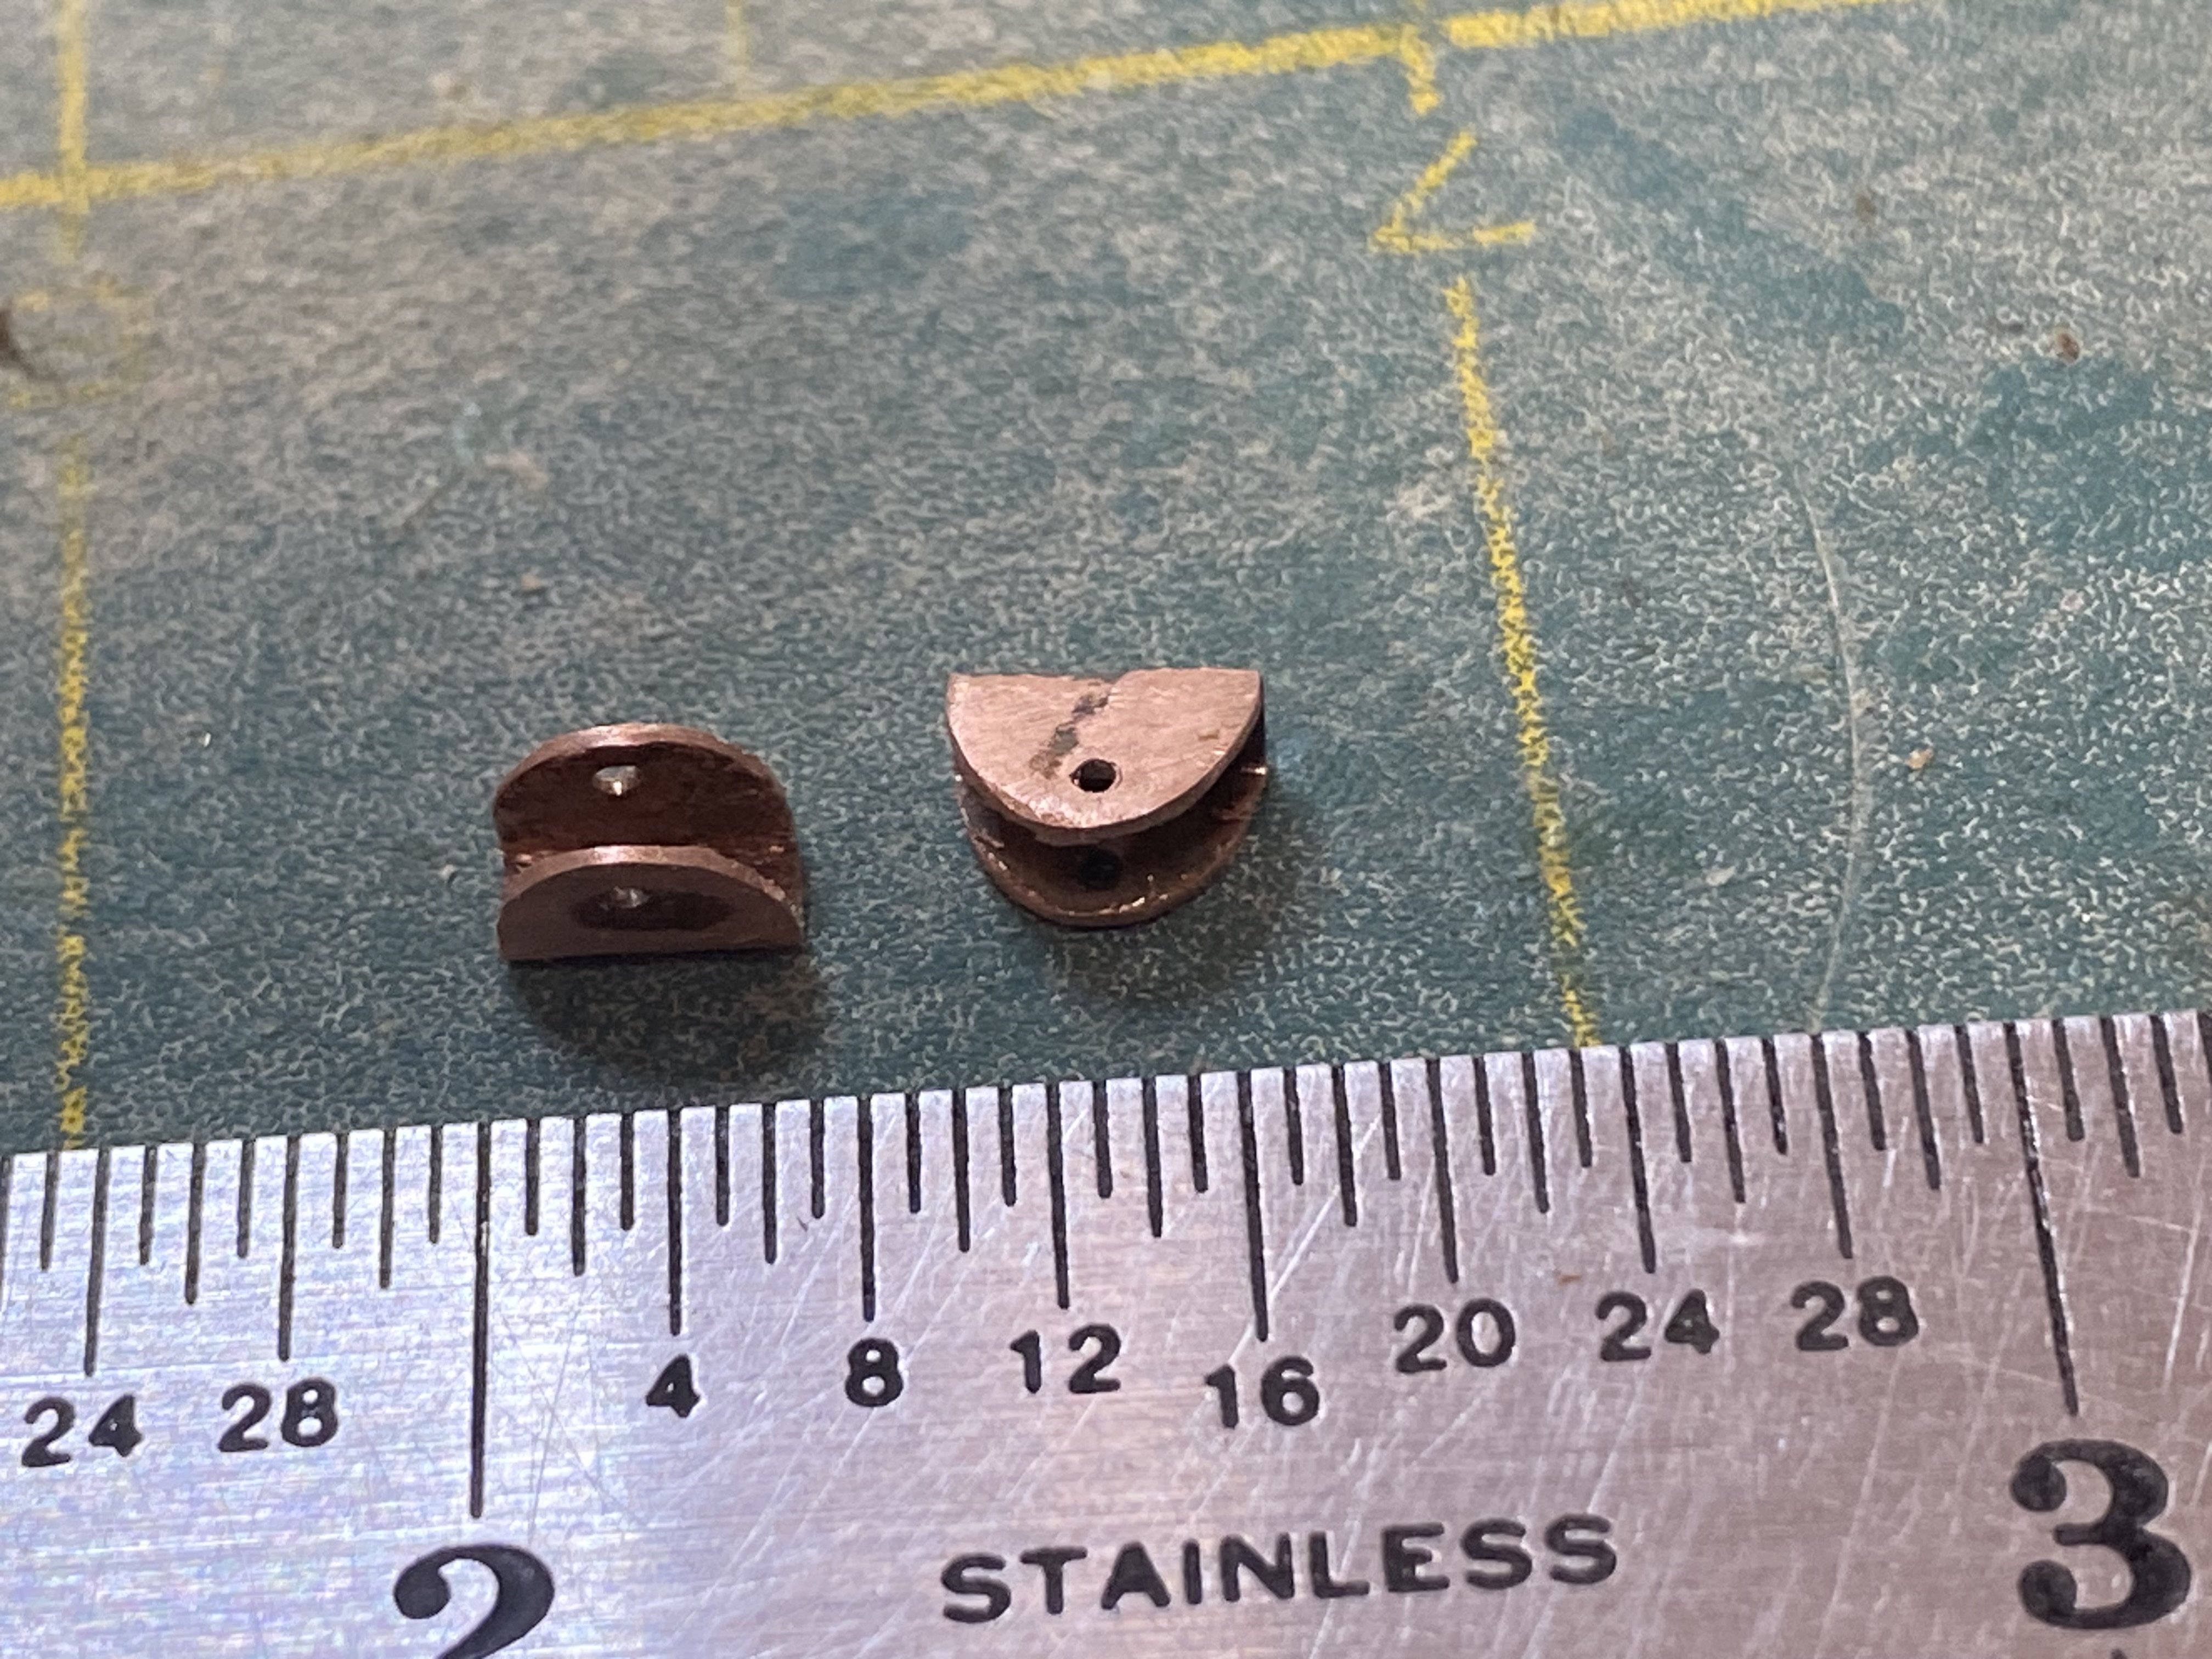
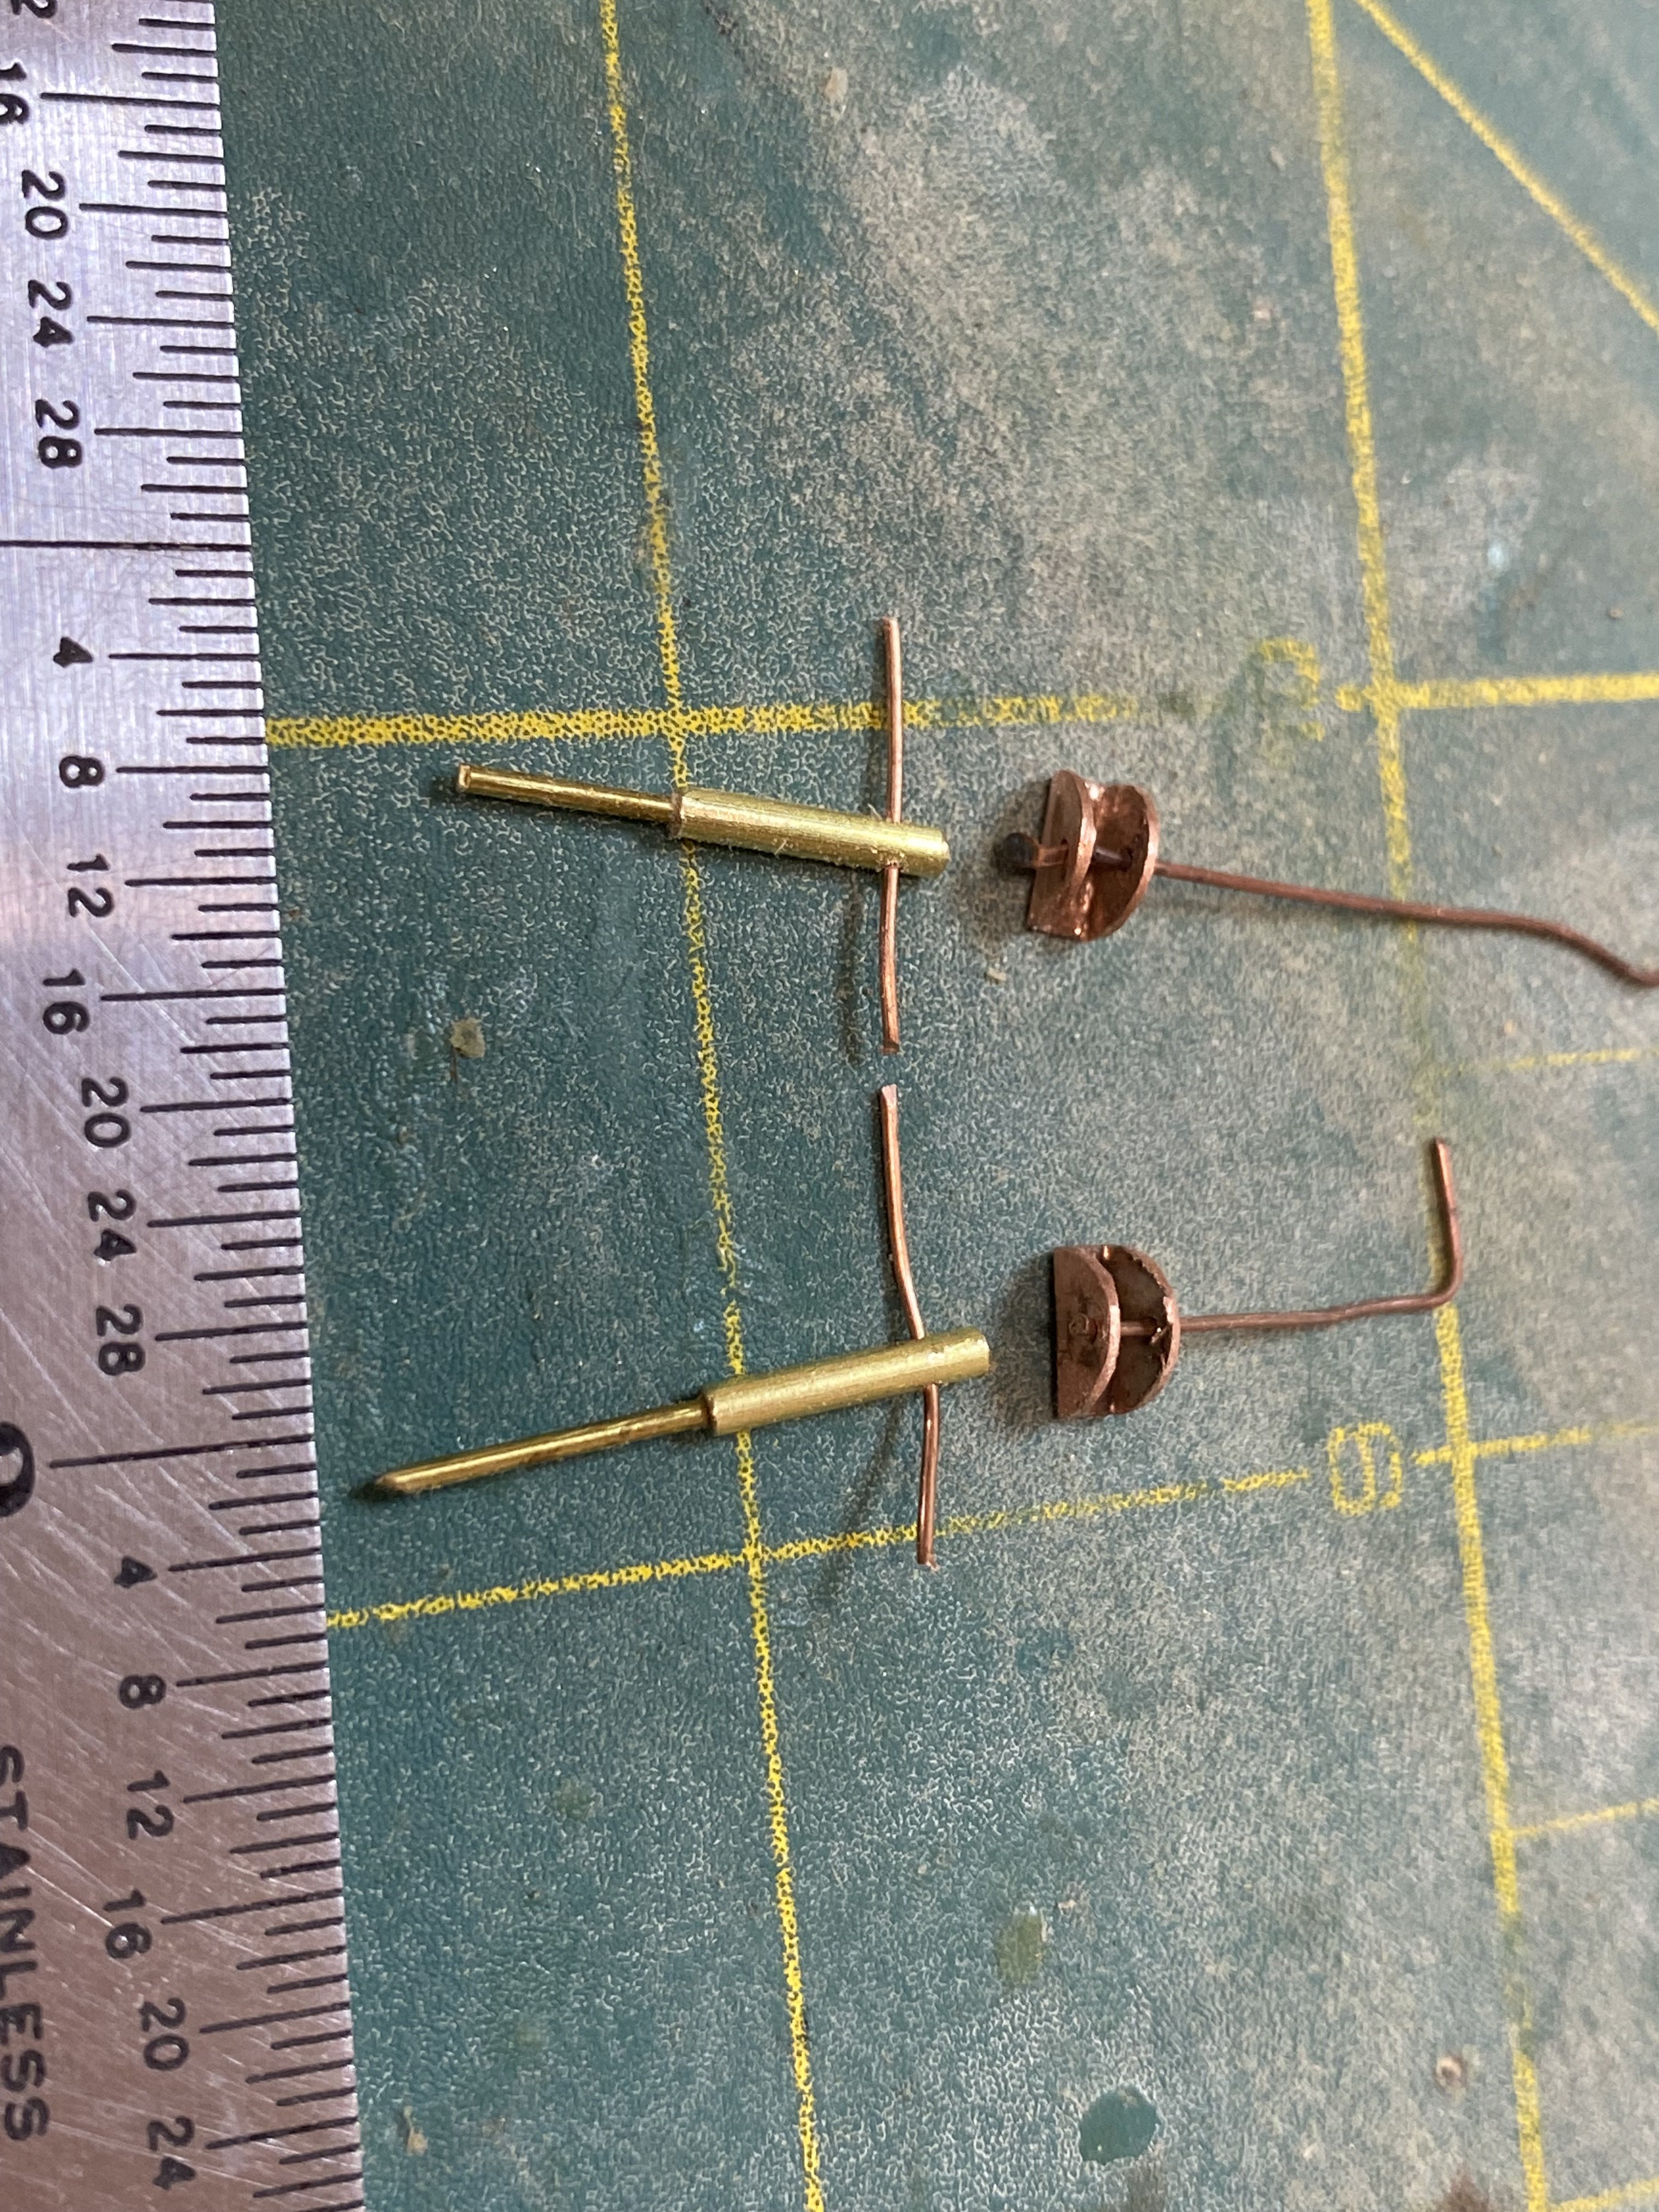
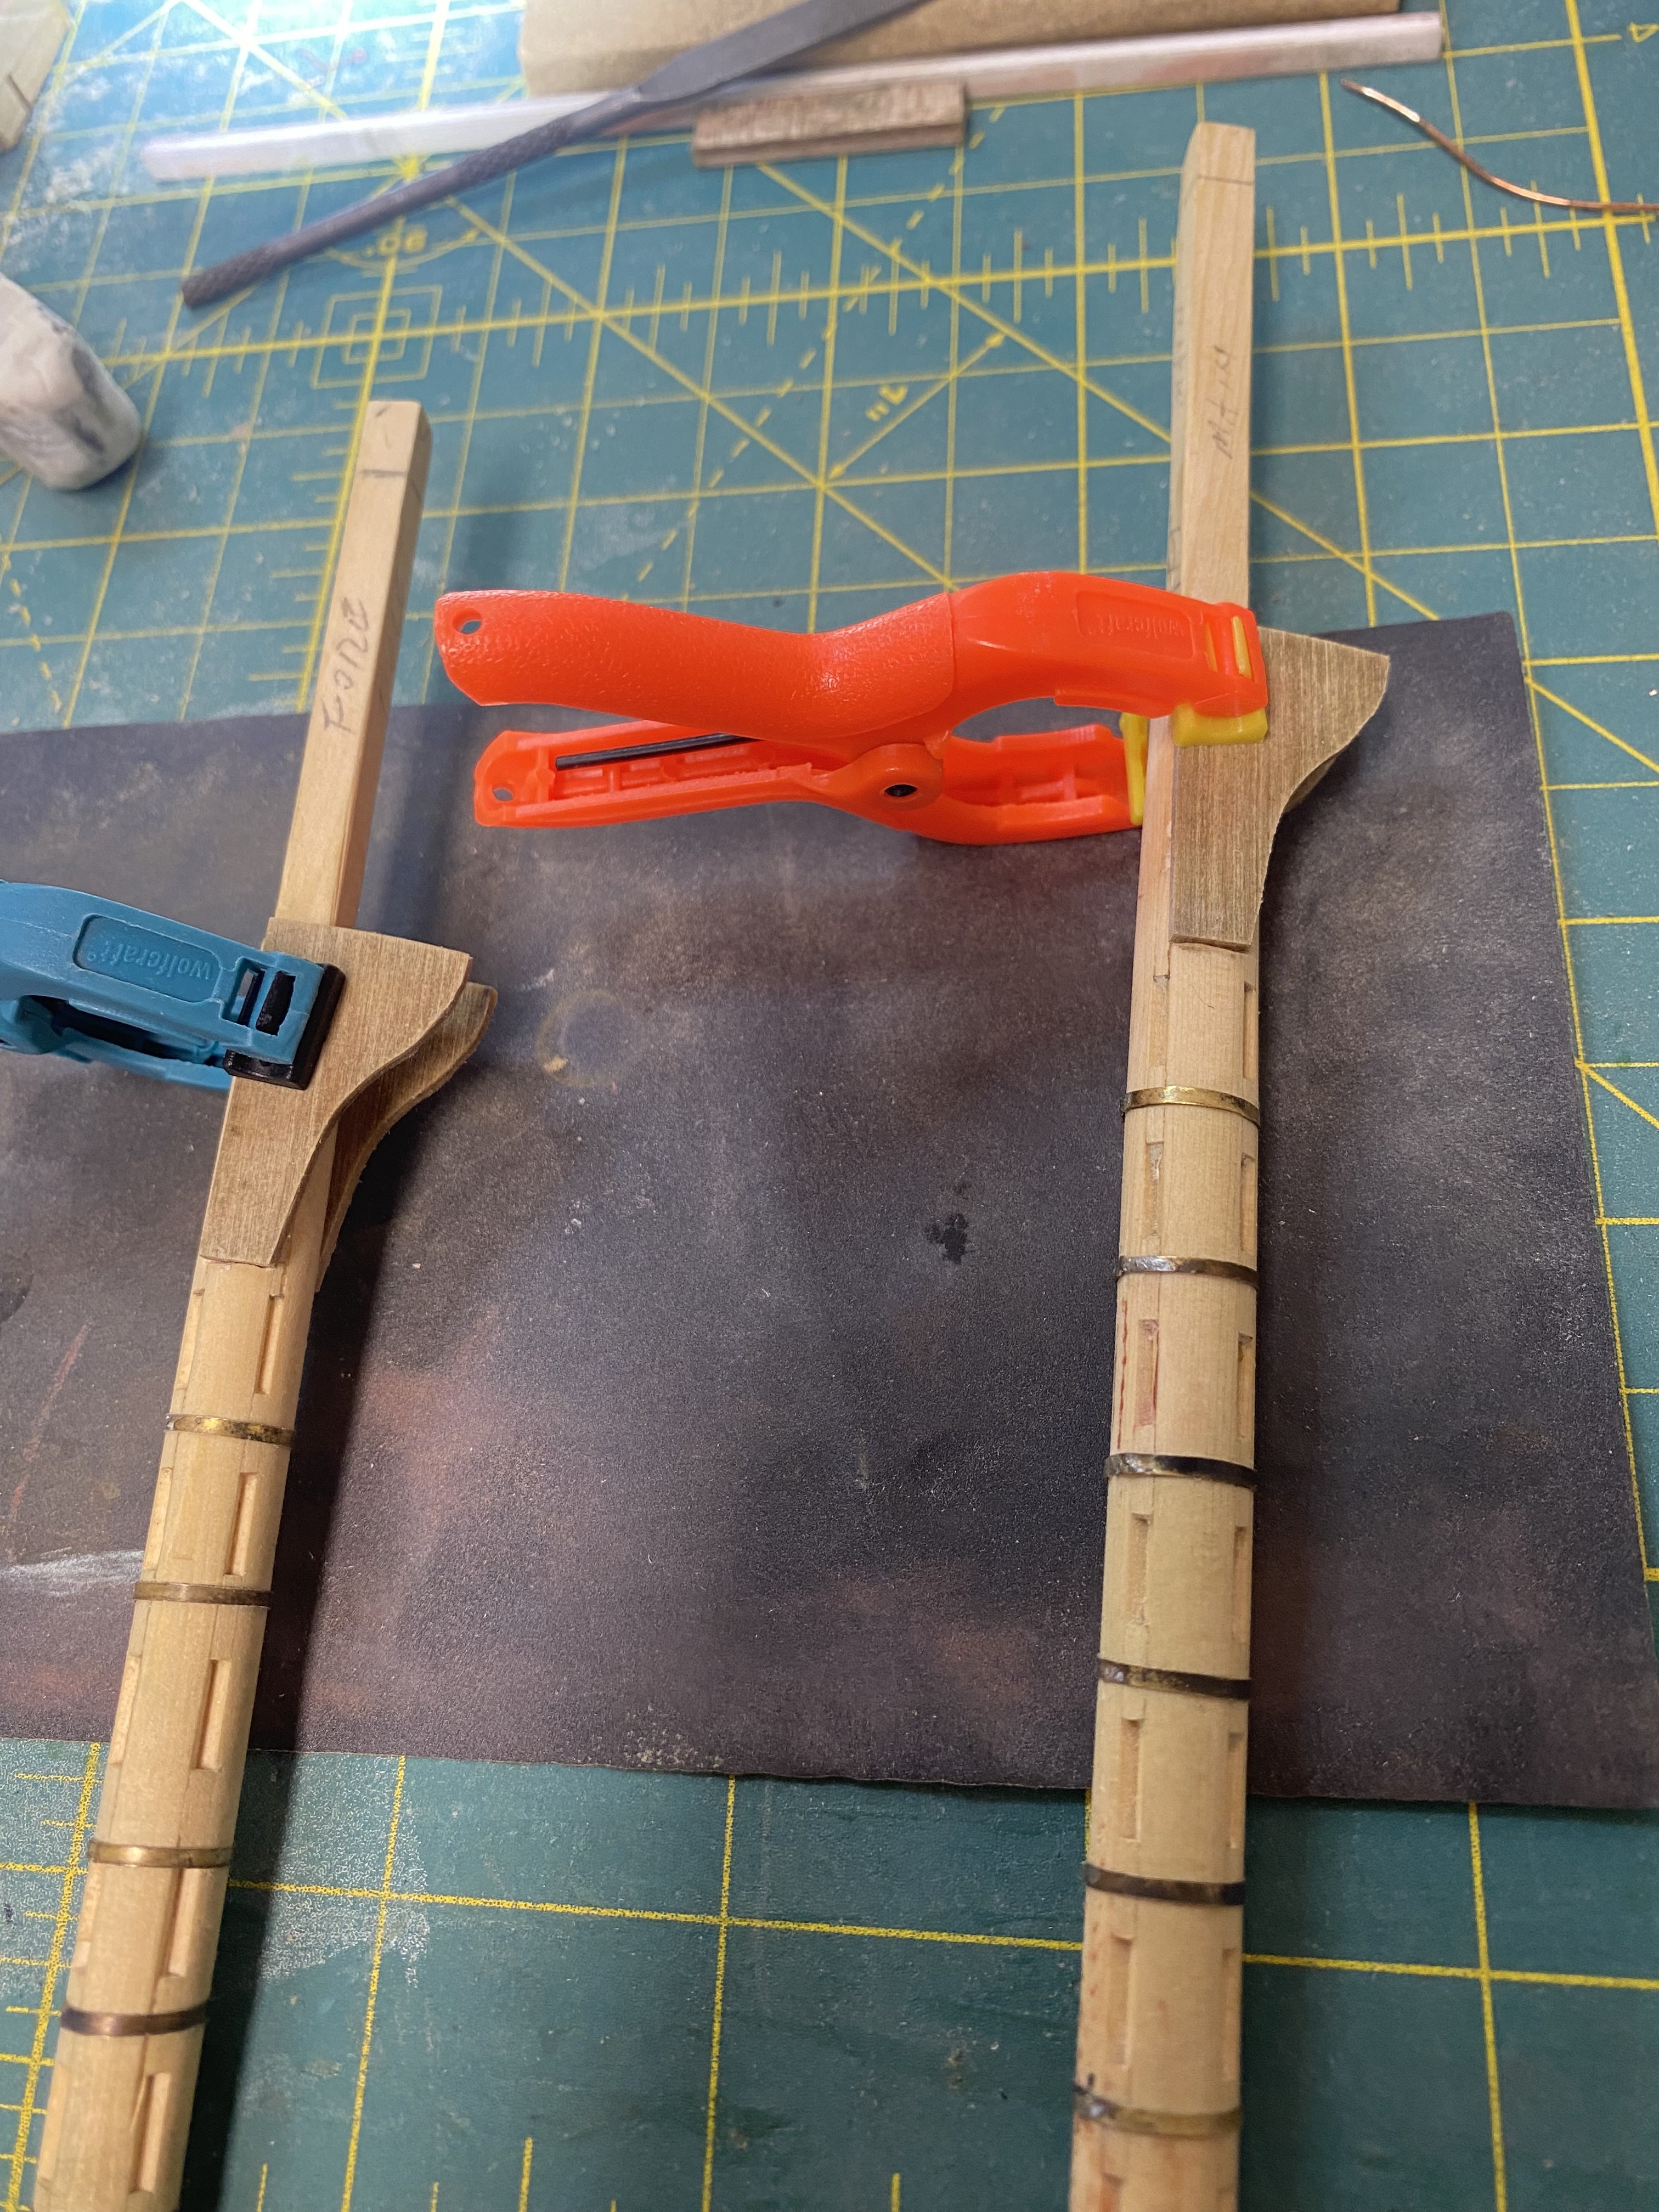
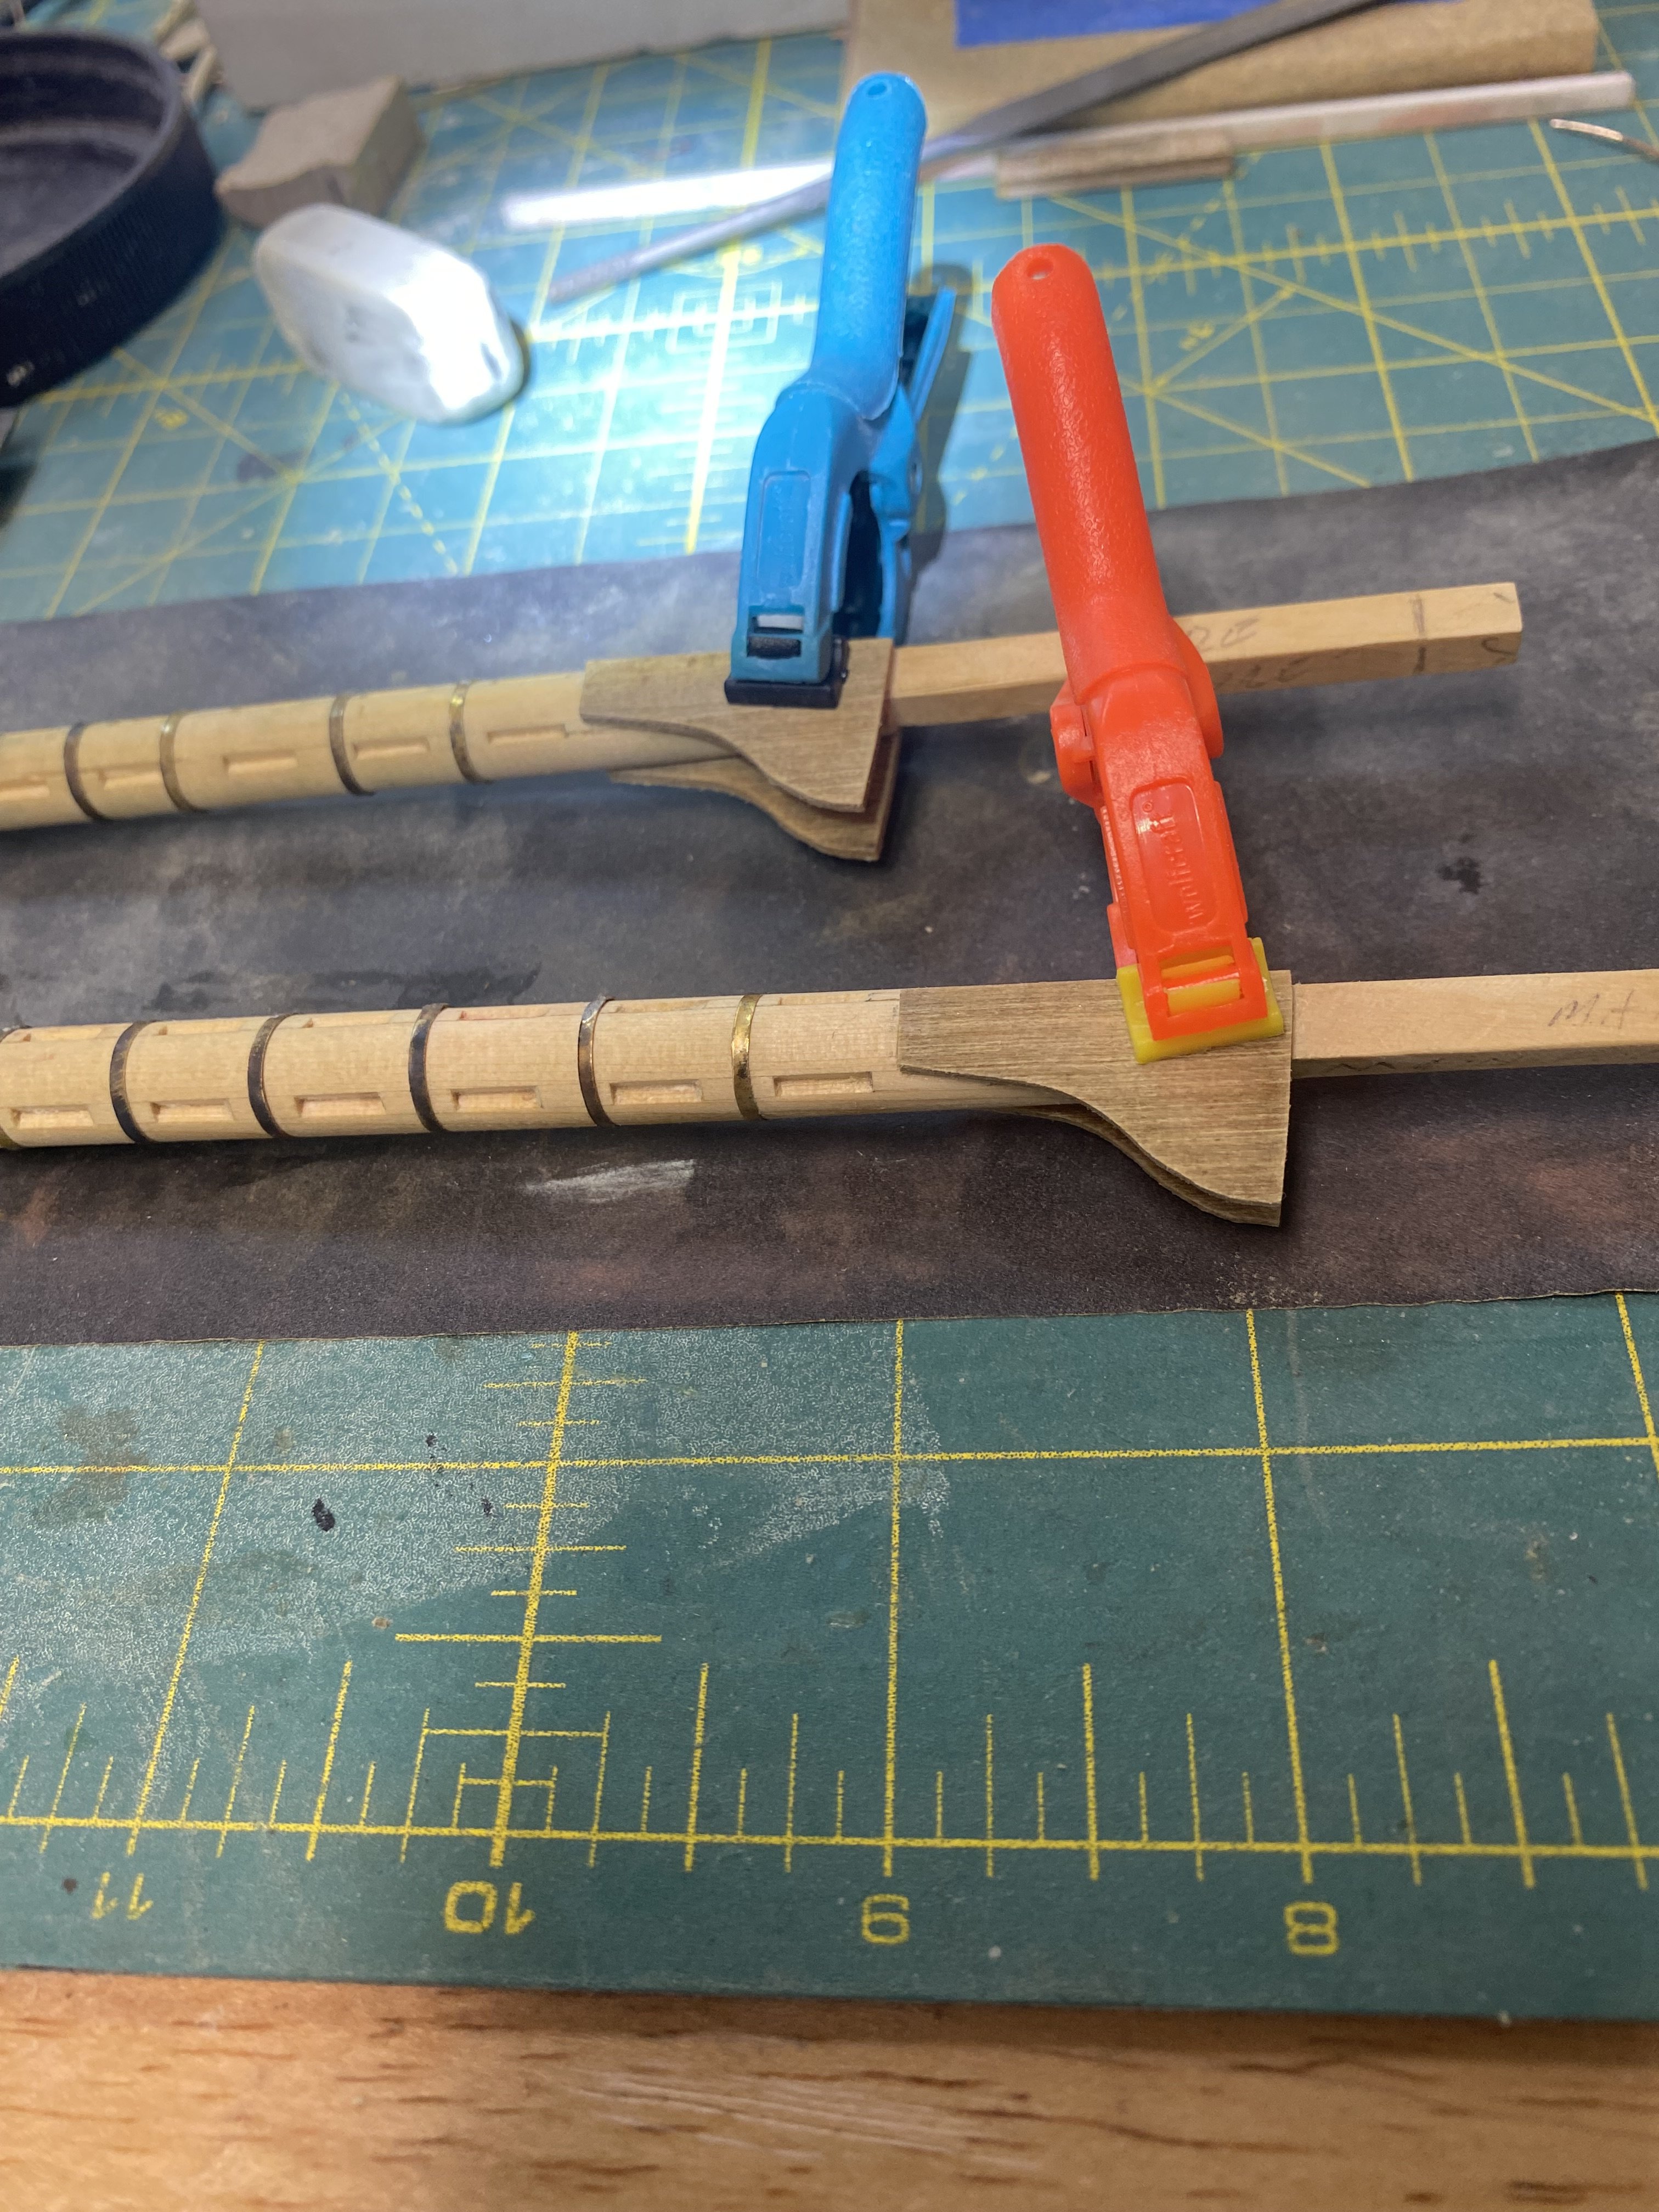
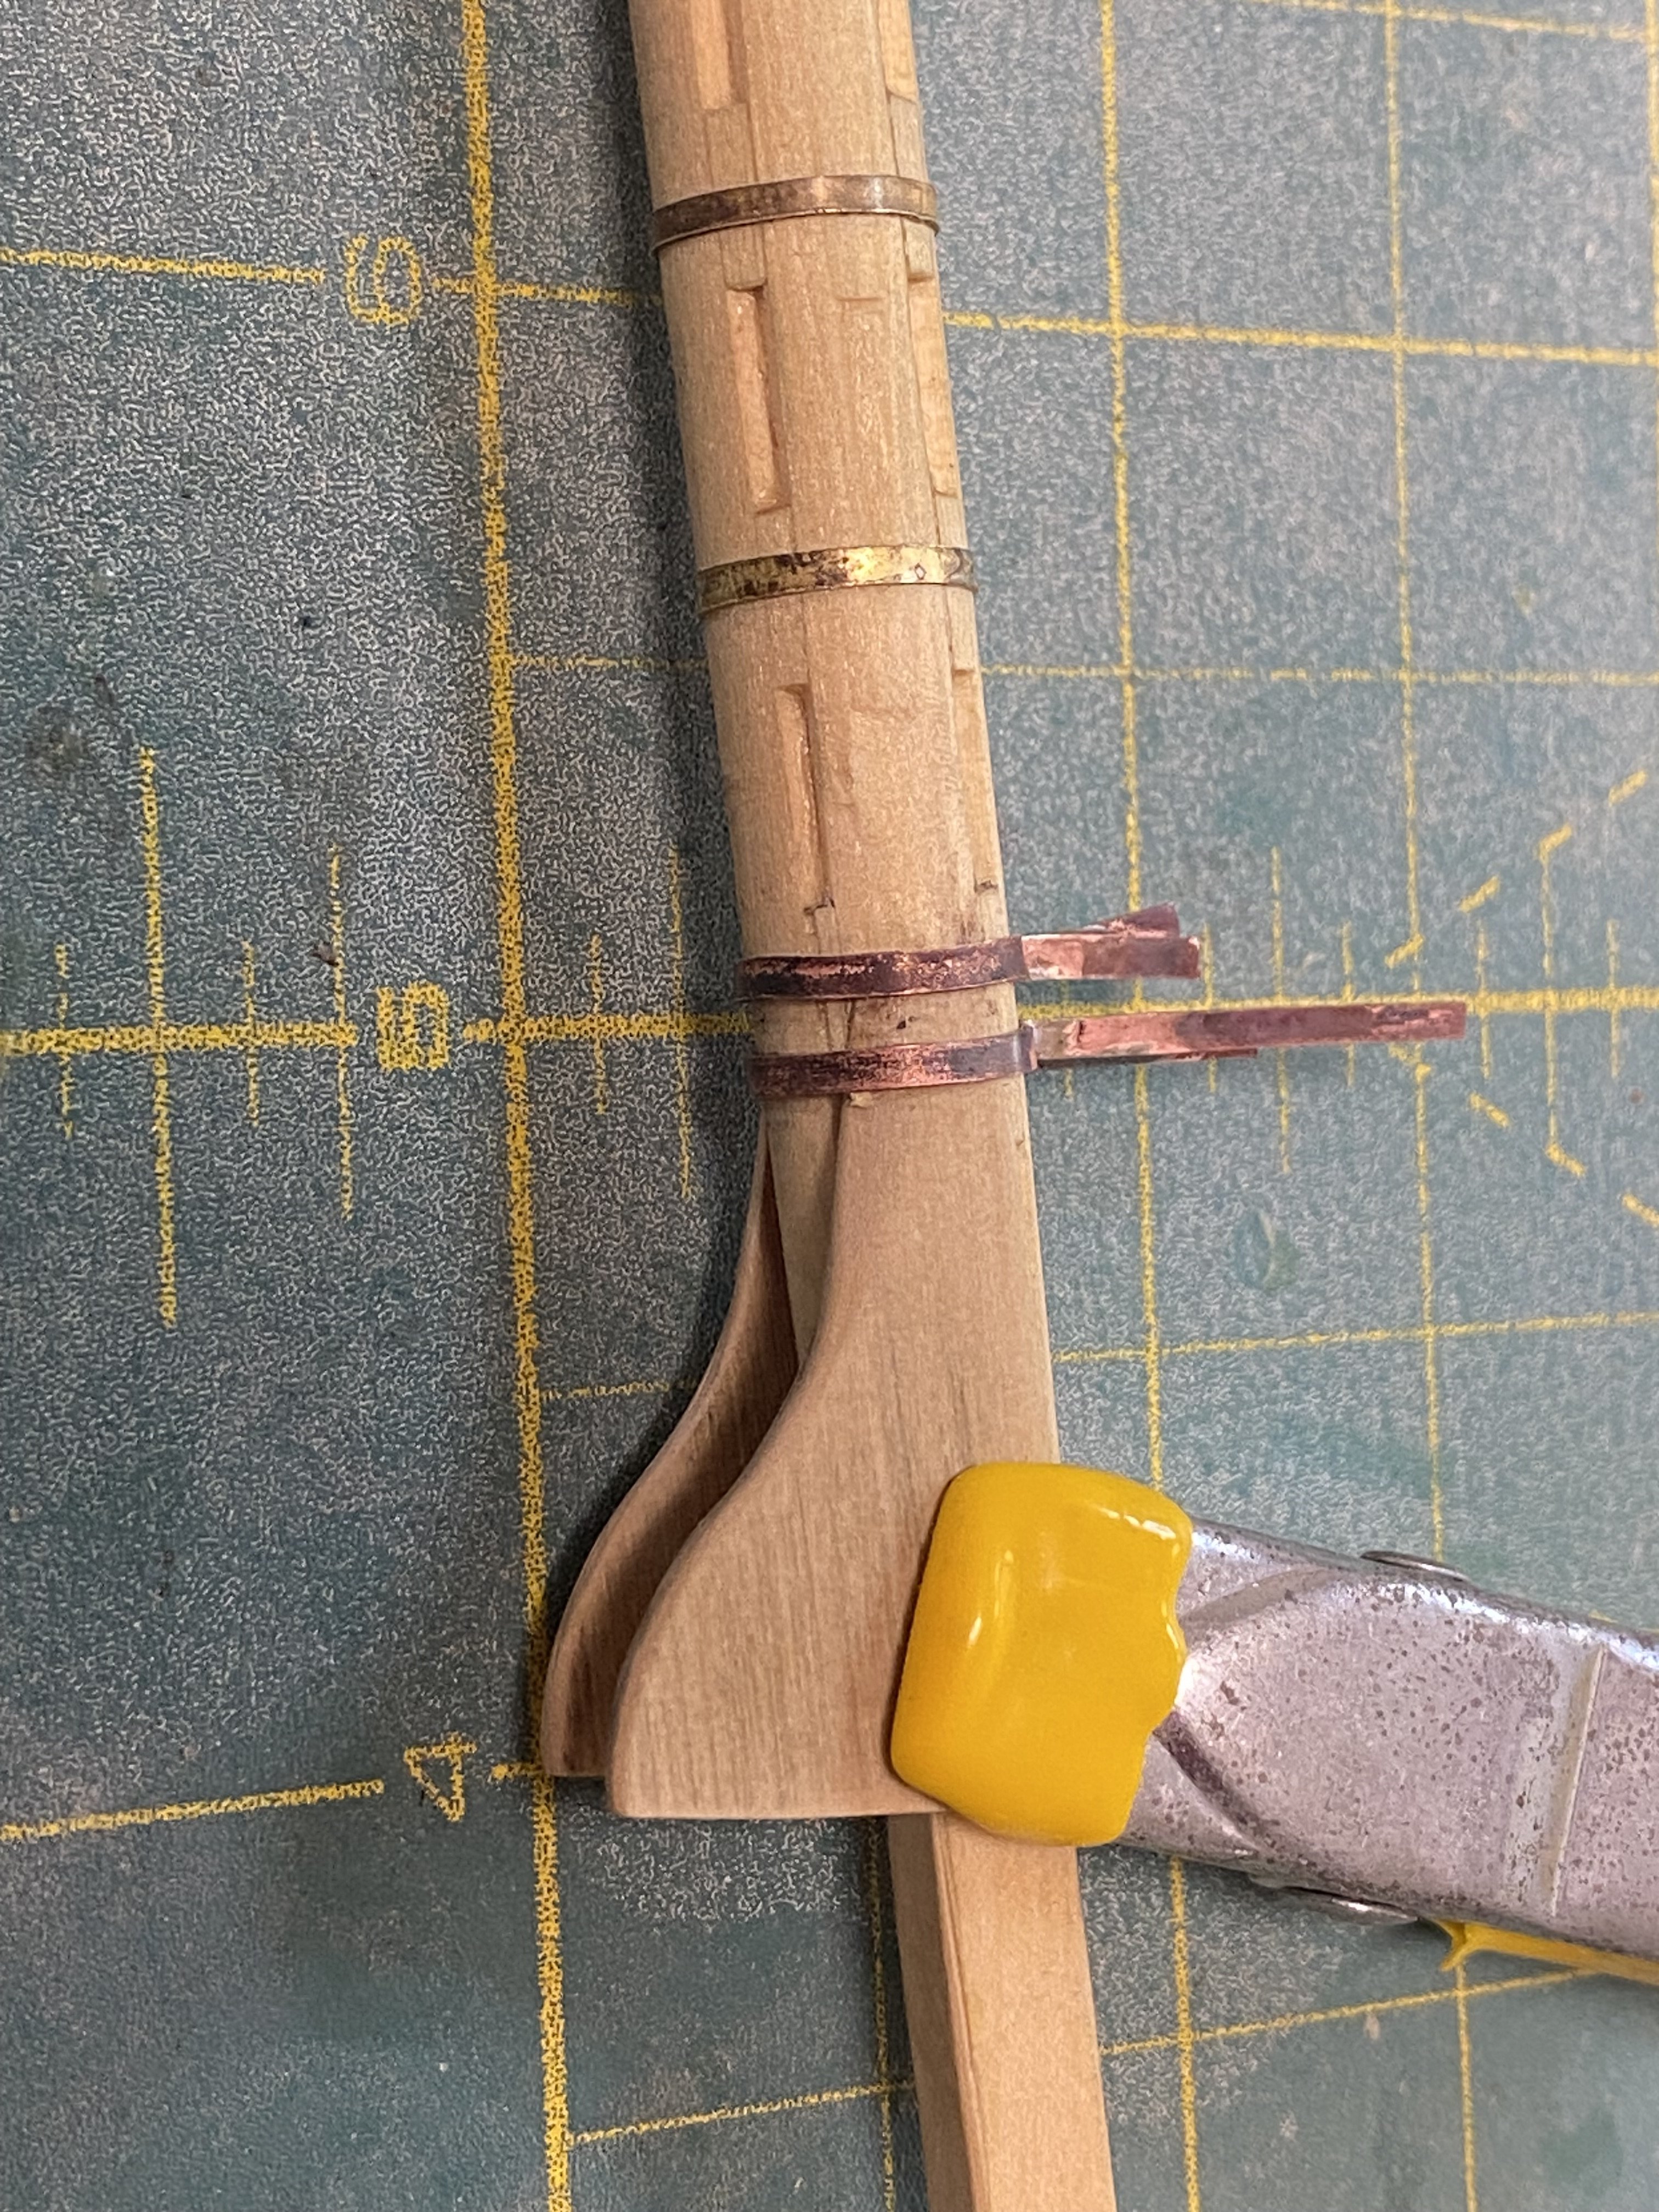
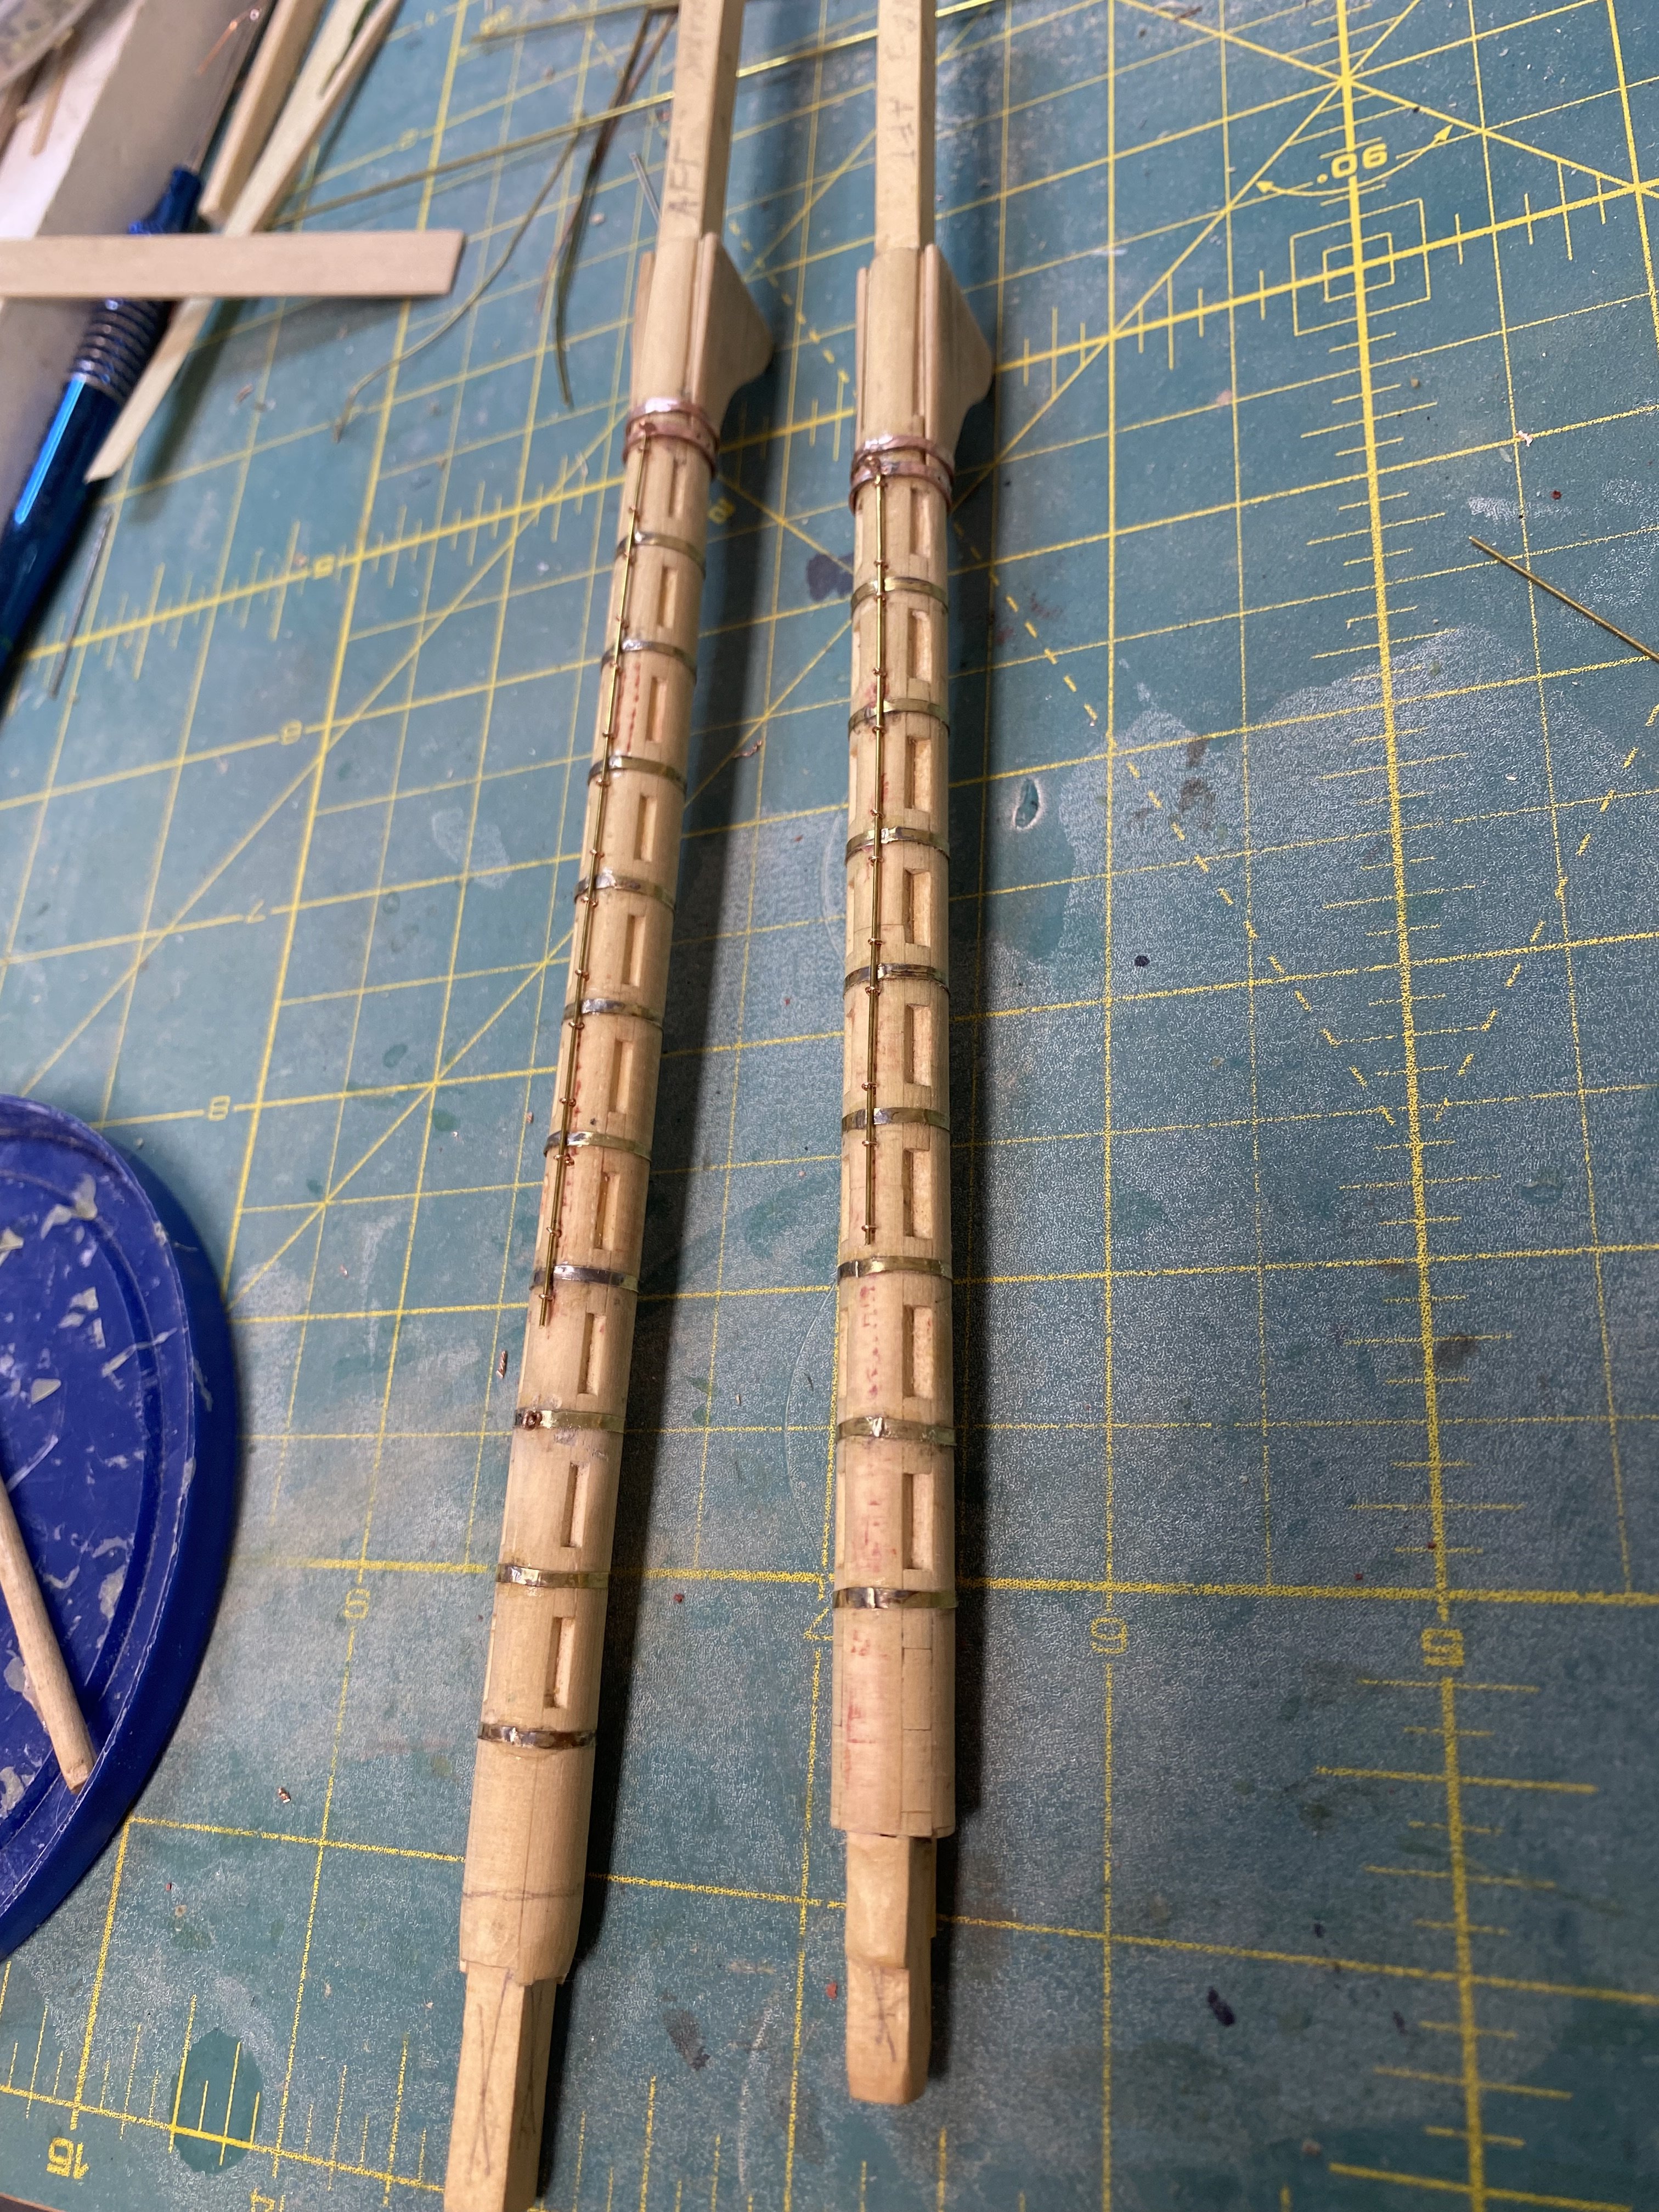
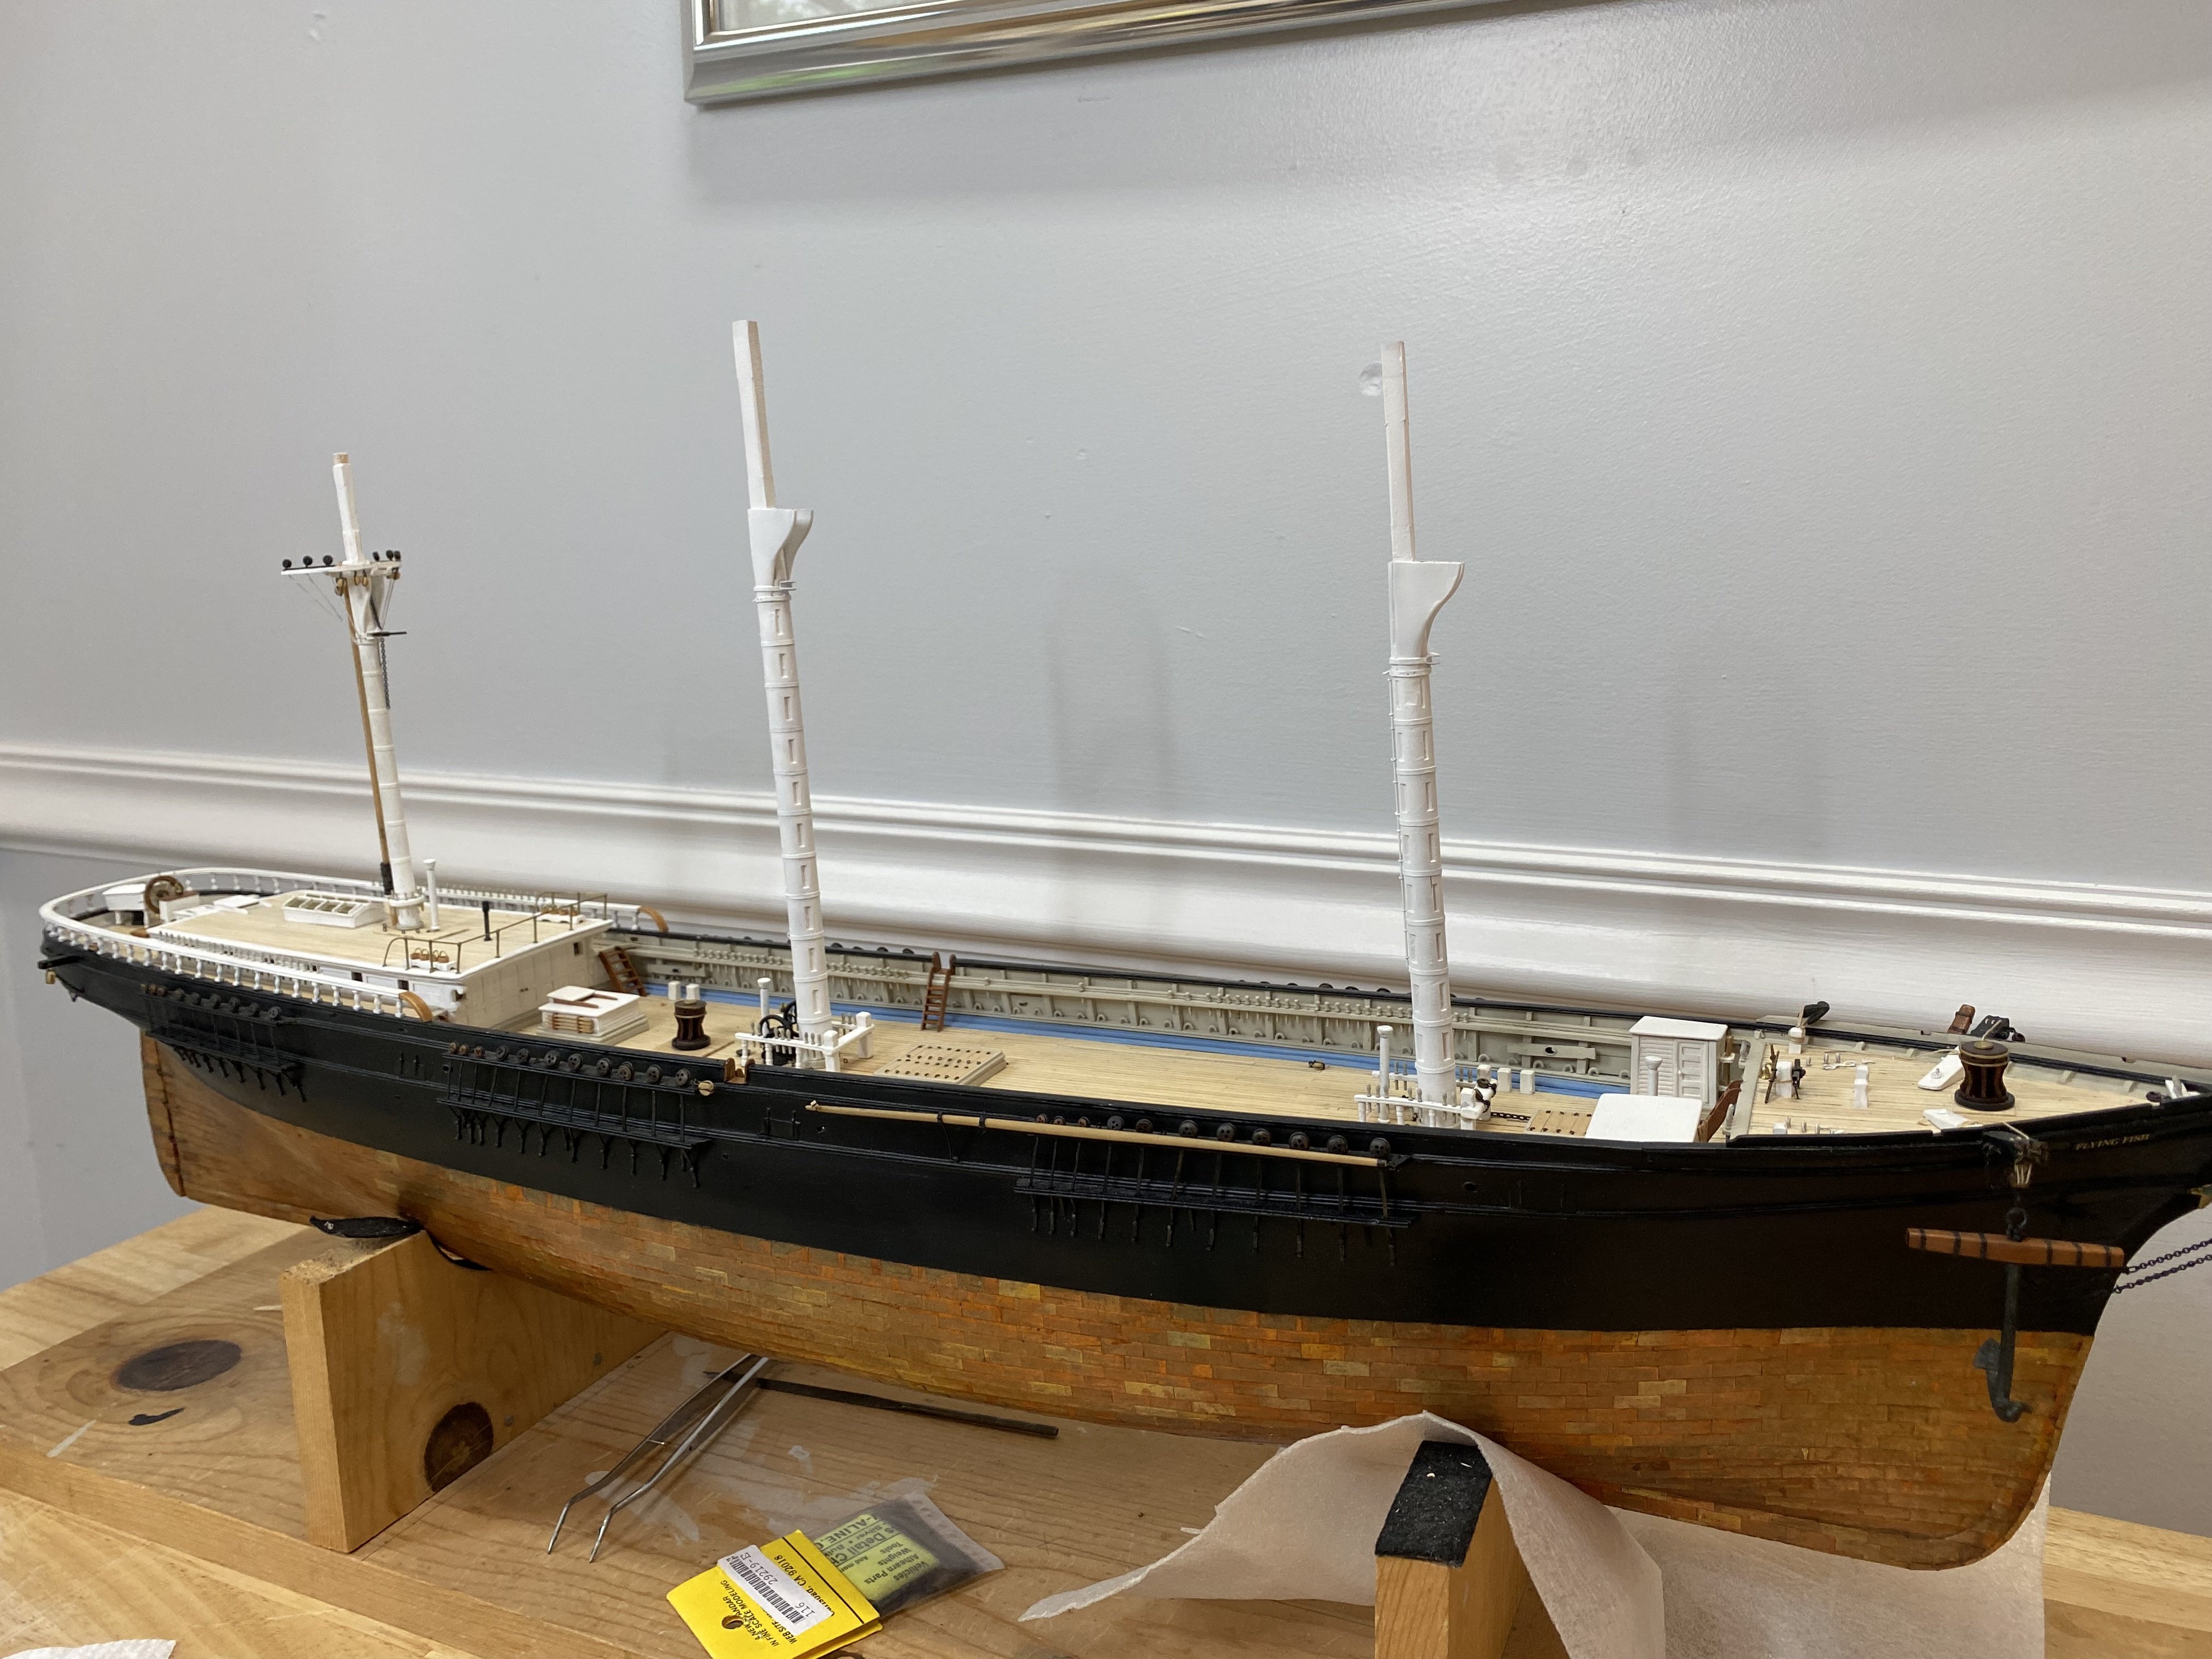
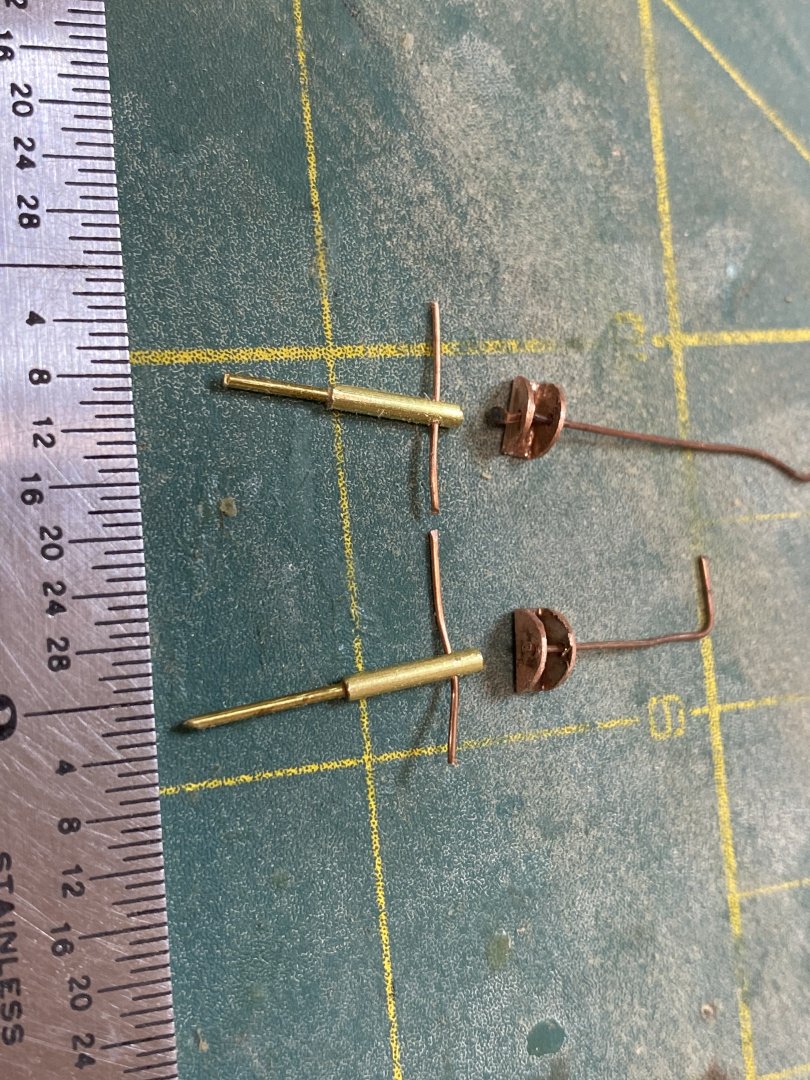
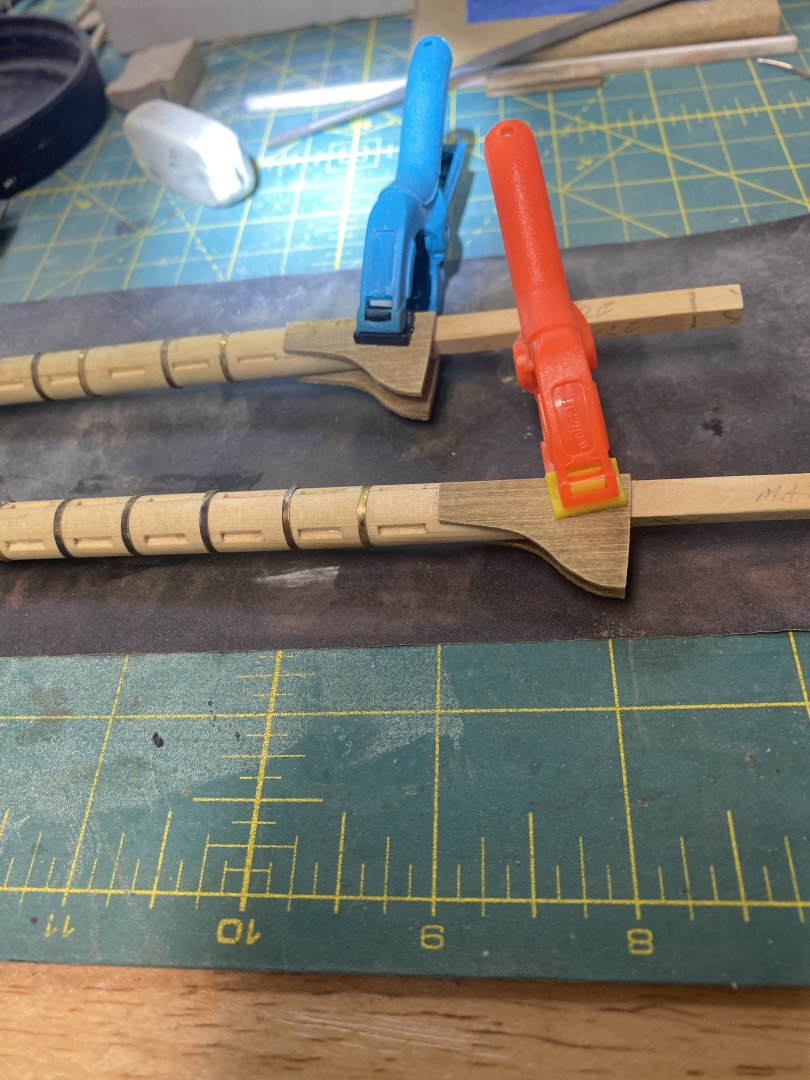
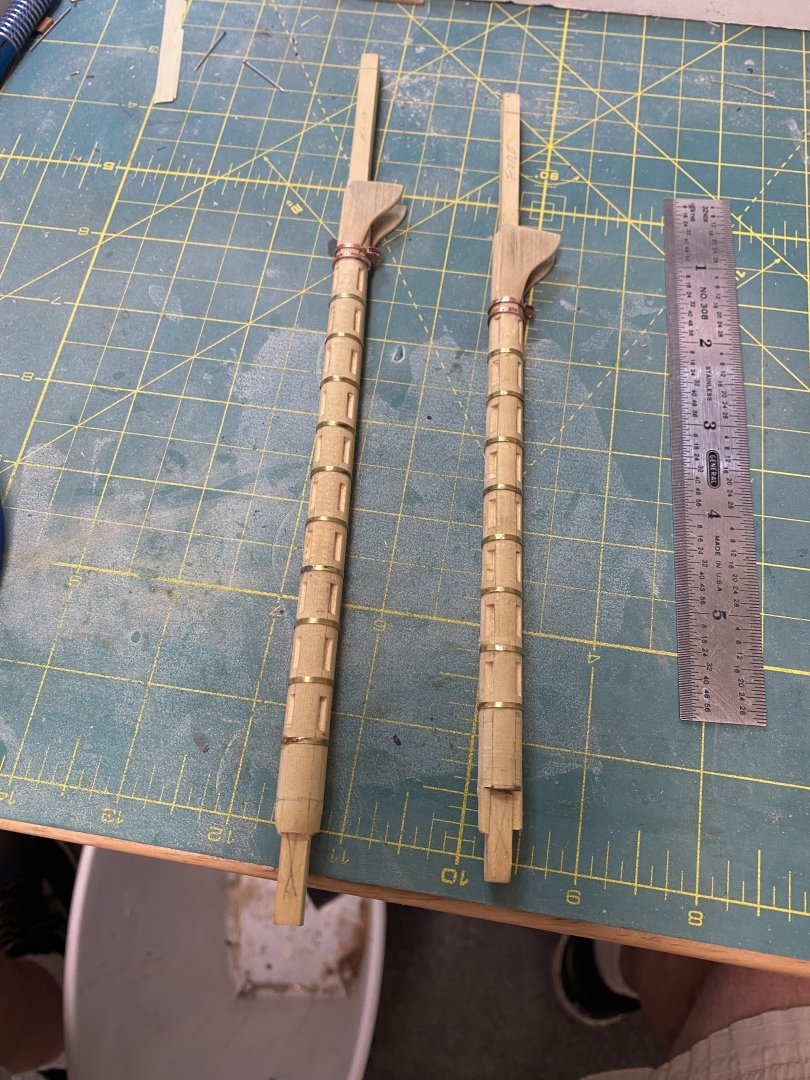
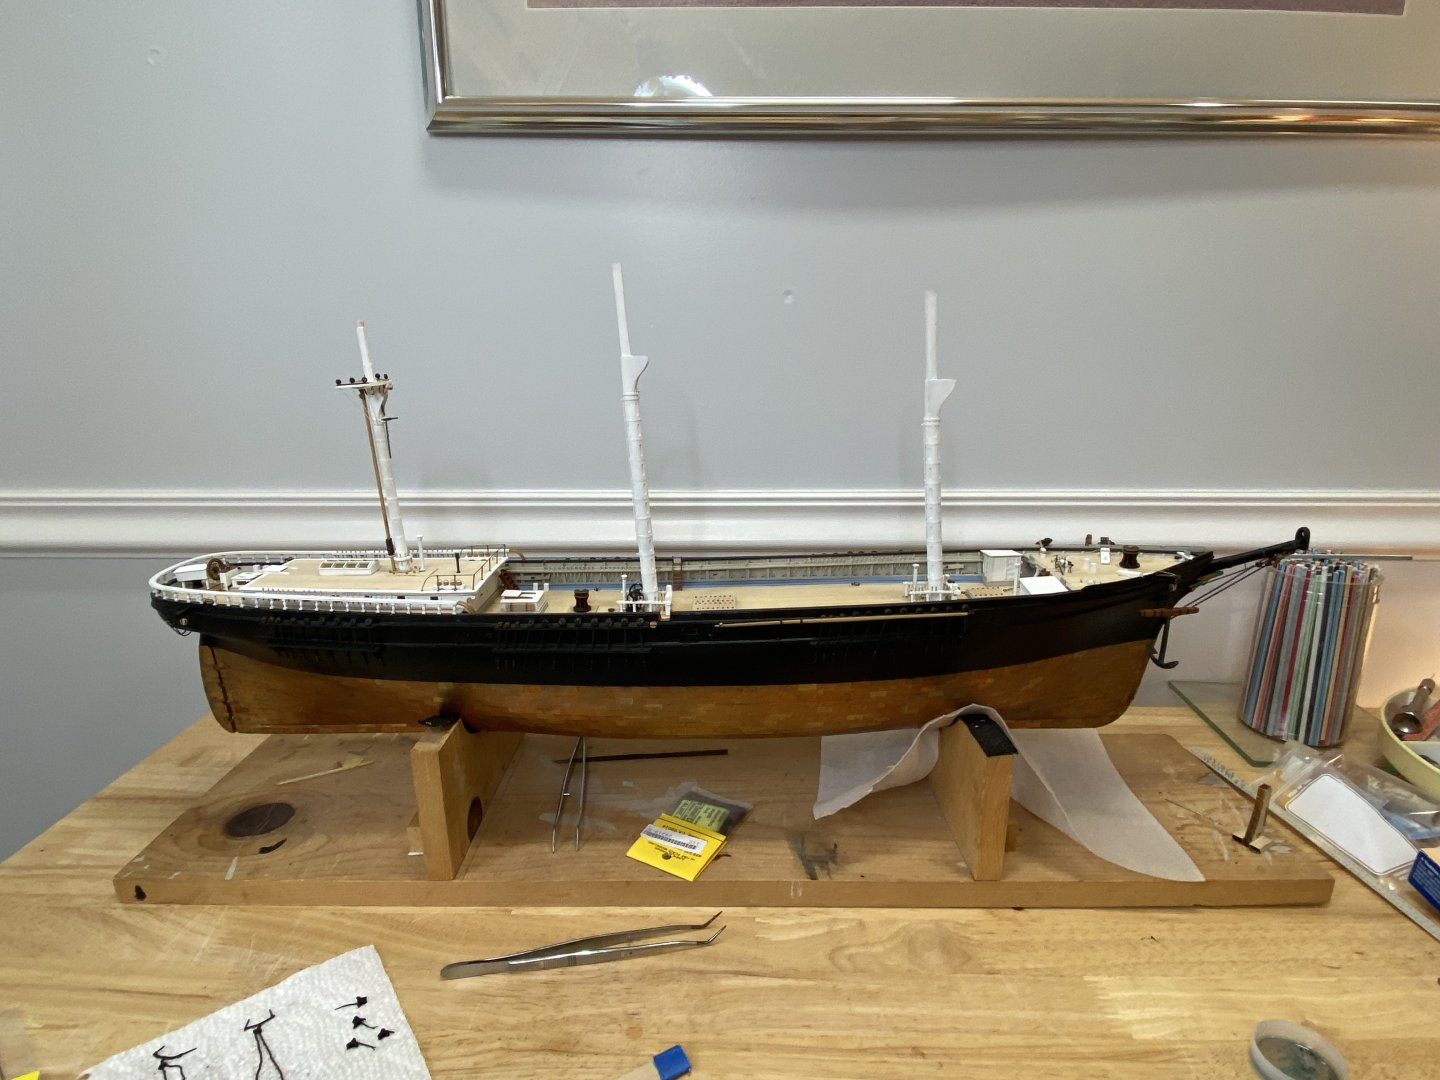
Finished the lower main and fore masts. The mast bands are .05 brass, approximately .055 inches in width. The futtock band and the lower yard truss band are .02 inches thick copper, approximately 1/16 inch wide. These were made with the hounds clamped in place, then when the hounds were glued and shaped, the bands were pushed the into place. The jackstay eyebolts are28 gauge copper, formed around the .02 inch diameter brass rod used for the jackstay. All eyebolts and block straps will be made with 26 gauge copper wire from now on. I’ve had a devil of a time with the 28 gauge copper wire breaking when blocks are put in place. I know this is out of scale, but it’s not that noticeable and the 26 gauge copper wire seems to be significantly stronger. The lizard and the bullseye for the mizzen stay are 2.5 mm ( approximately 3/32 or 9 scale inches). These are the smallest ones I could find that are commercially available . The upper bullseyes are smaller and I will try to make them. now, onto the tops and top masts.


- 360 replies
-
- 3
-
-
- Flying Fish
- Model Shipways
- (and 1 more)
-
She is really looking good George! You’re doing a great!! Rick
-
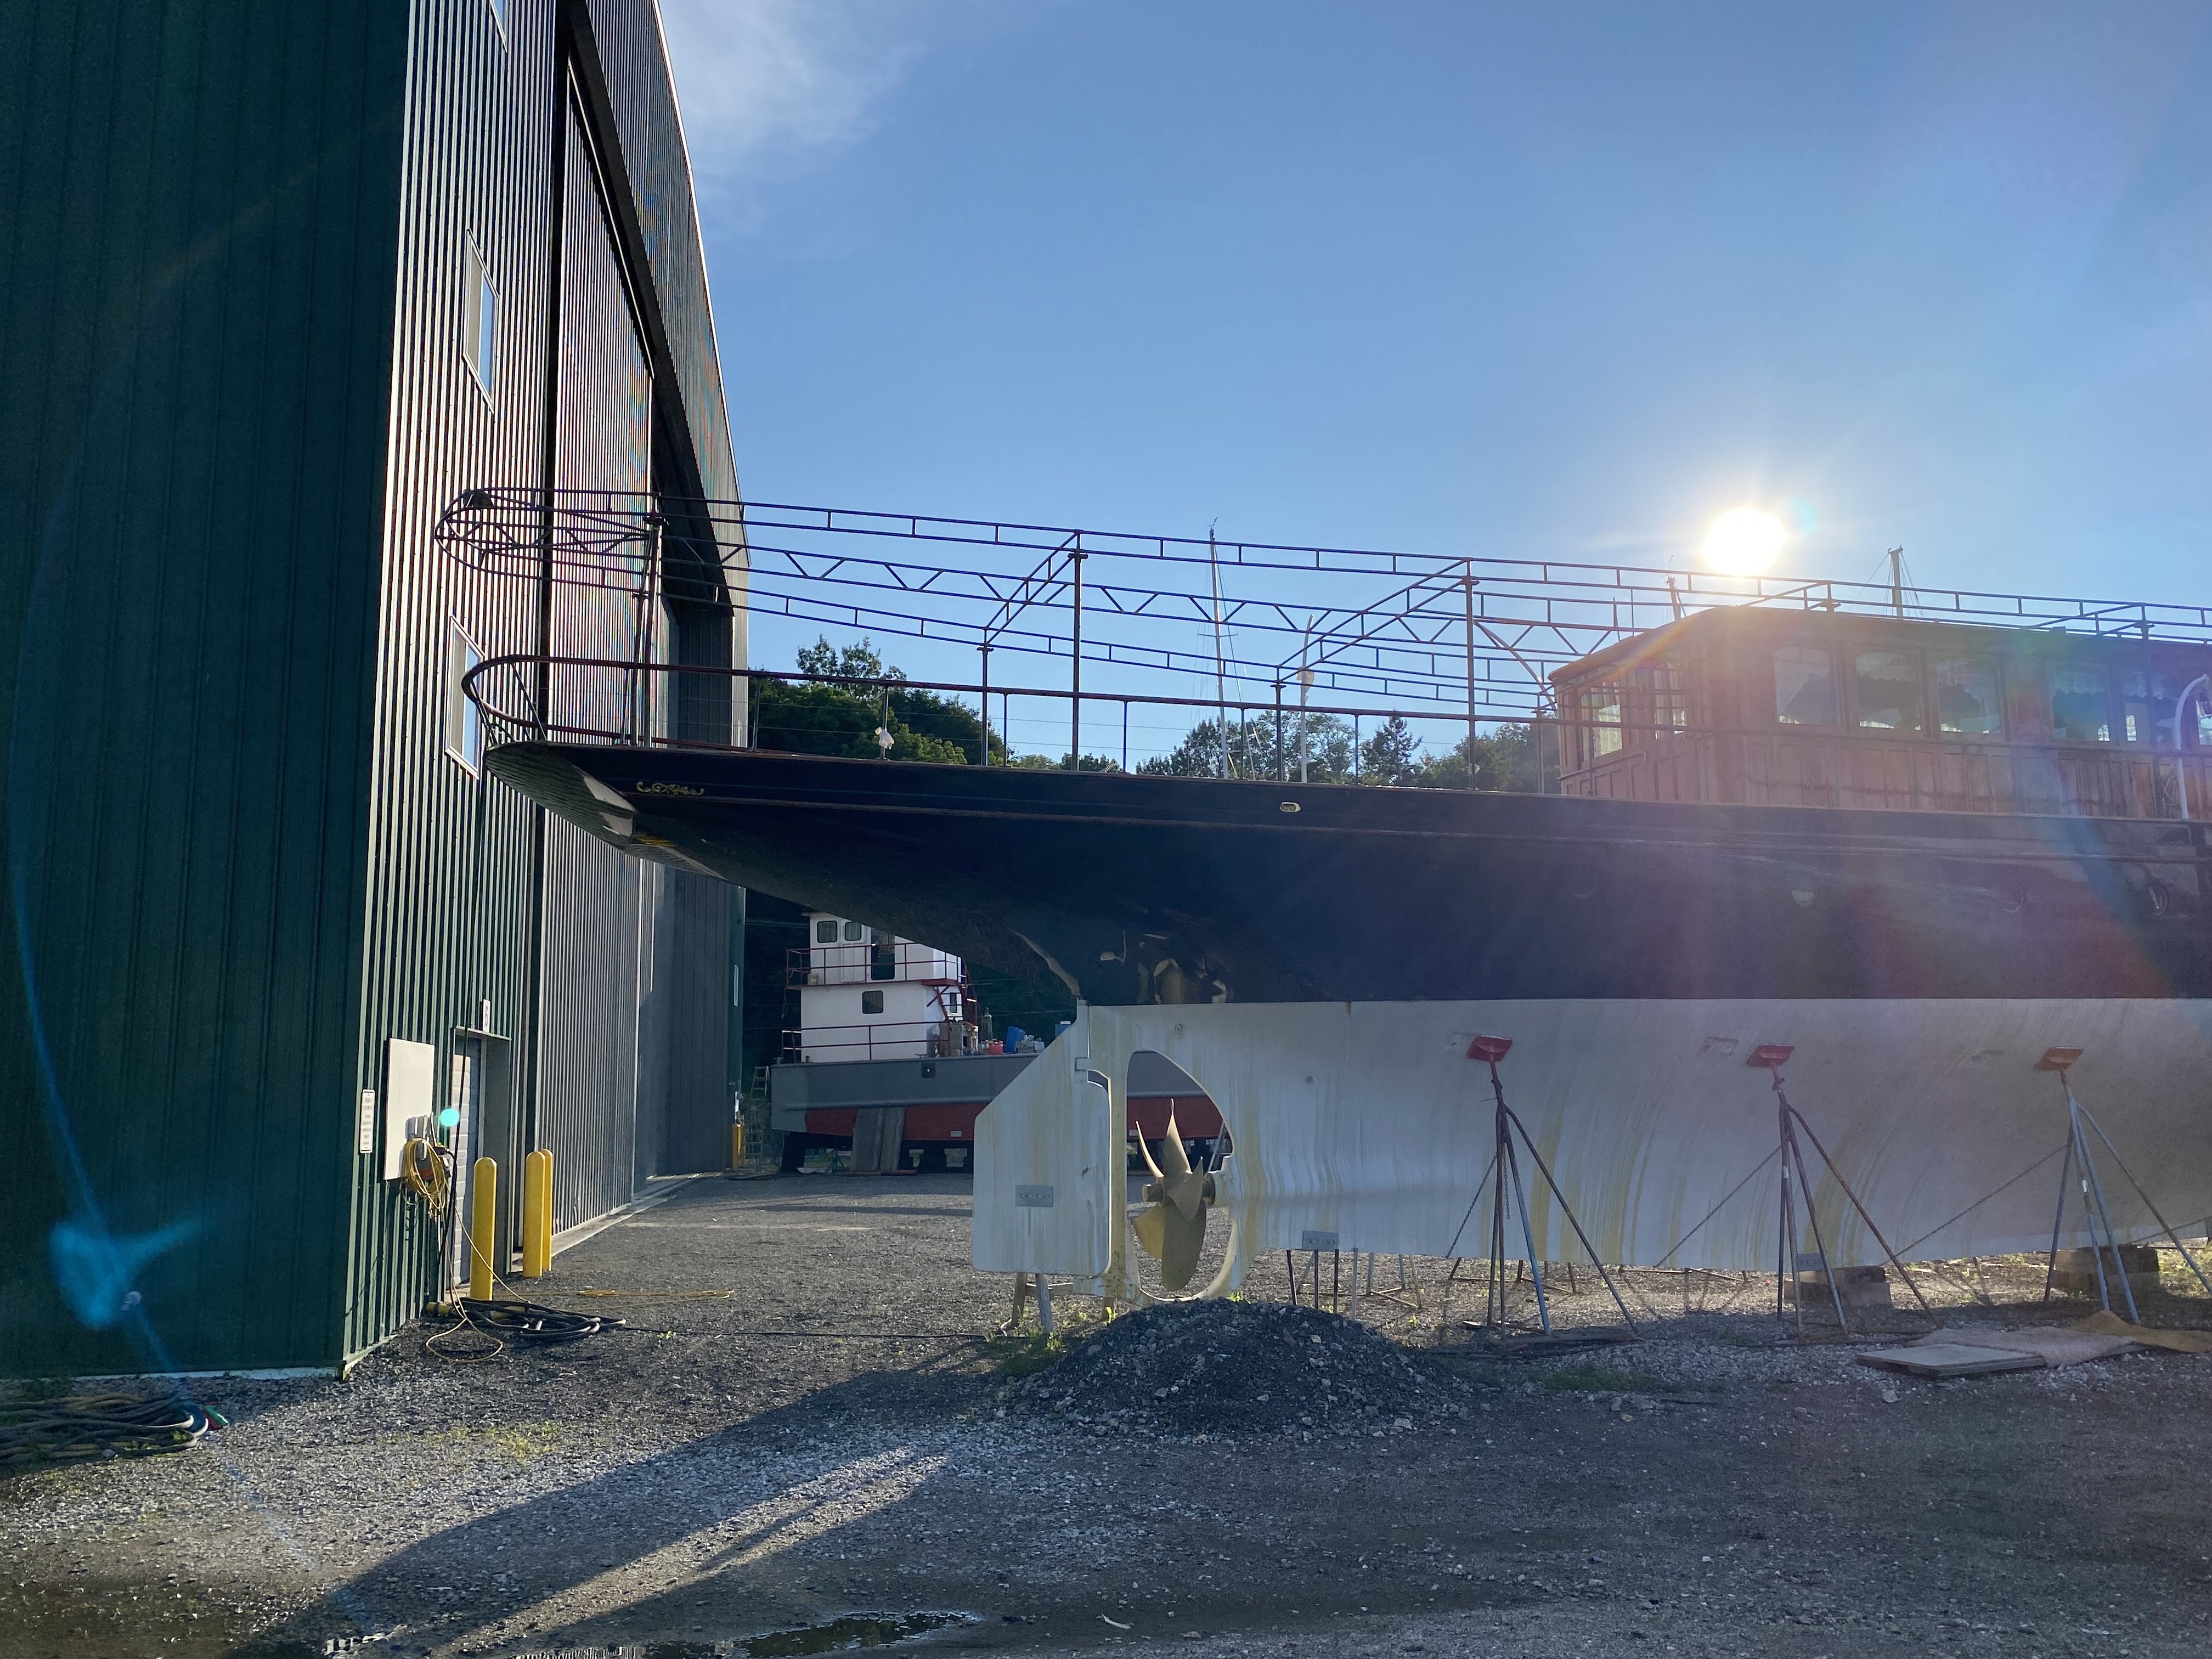
Keith, just heard today that Cangarda has been sold and will be shipped to Turkey. Sad to see her go, but glad she won’t be going to the scrap heap. Rxk