HOLIDAY DONATION DRIVE - SUPPORT MSW - DO YOUR PART TO KEEP THIS GREAT FORUM GOING! (Only 13 donations so far - C'mon guys!)
×


John Ruy
-
Posts
1,566 -
Joined
-
Last visited
Content Type
Profiles
Forums
Gallery
Events
Everything posted by John Ruy
-
 Oh yes! There are curved sections. I will have to soak some of the frame sections, before adding the stanchions and cap rail. And yes on the beer 🍺 LOL 😆 But only after the work is completed, I don’t what to think about the rework the next morning. It’s hard enough to keep the sheer correct sober. 🤪
- 238 replies
-
- 2
-

-

-
- Robert E Lee
- steamboat
- (and 3 more)
-
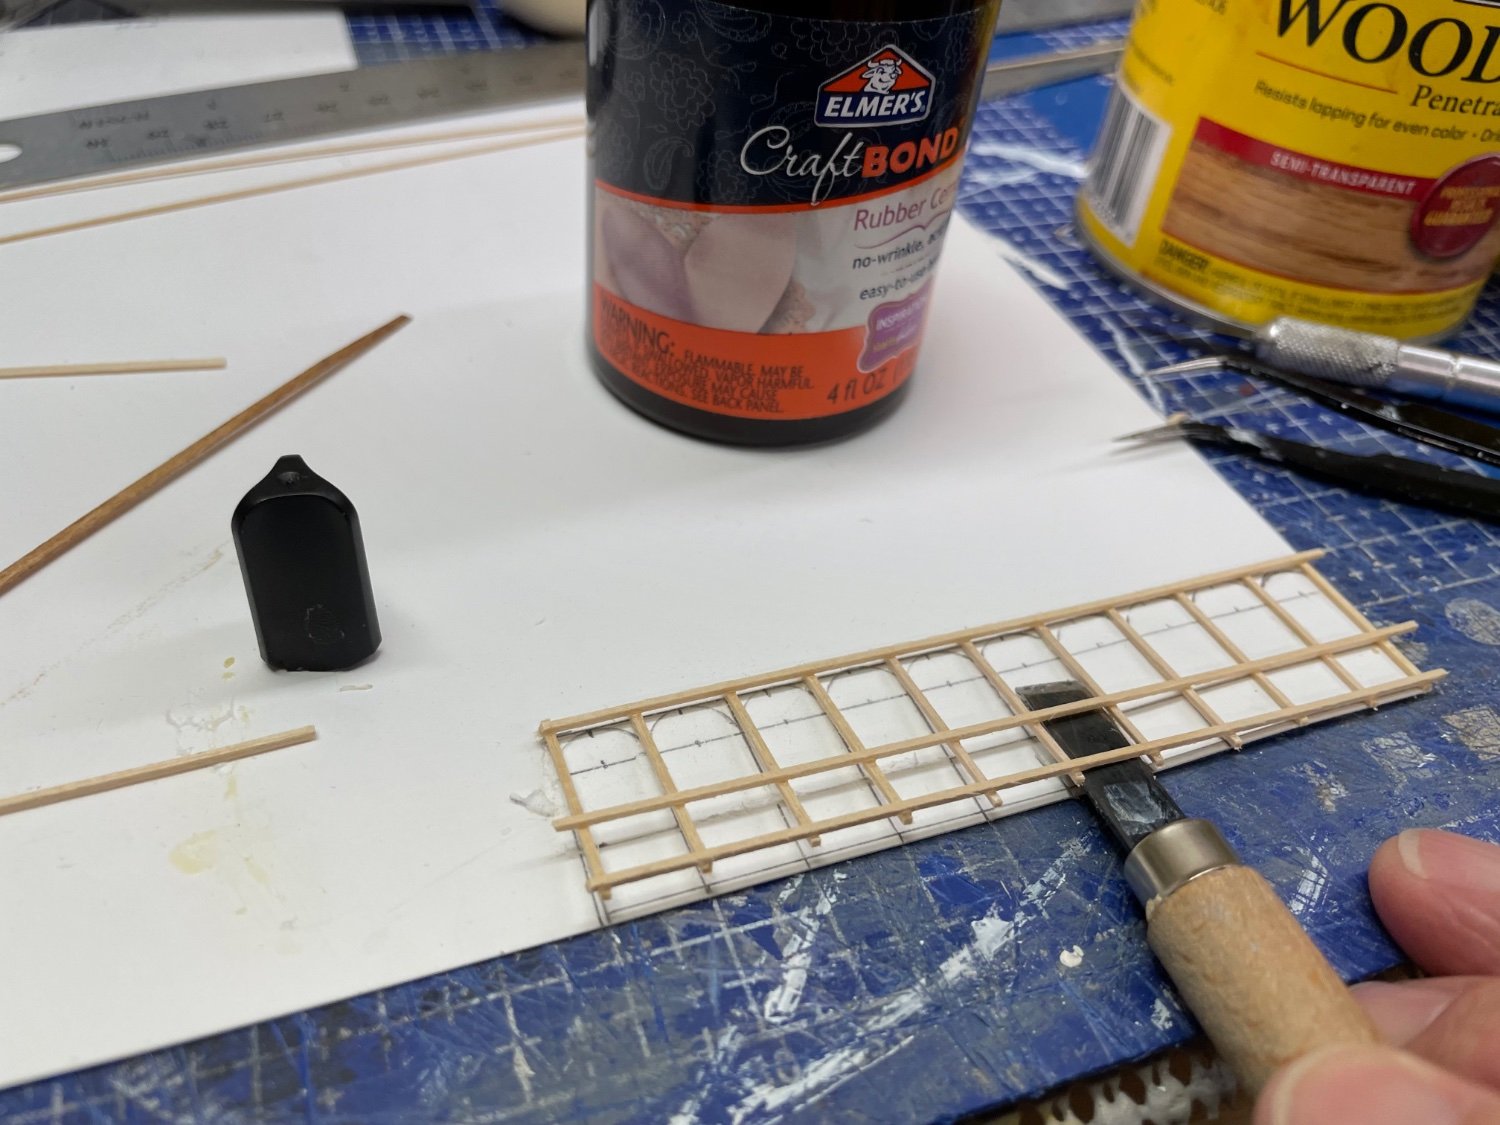
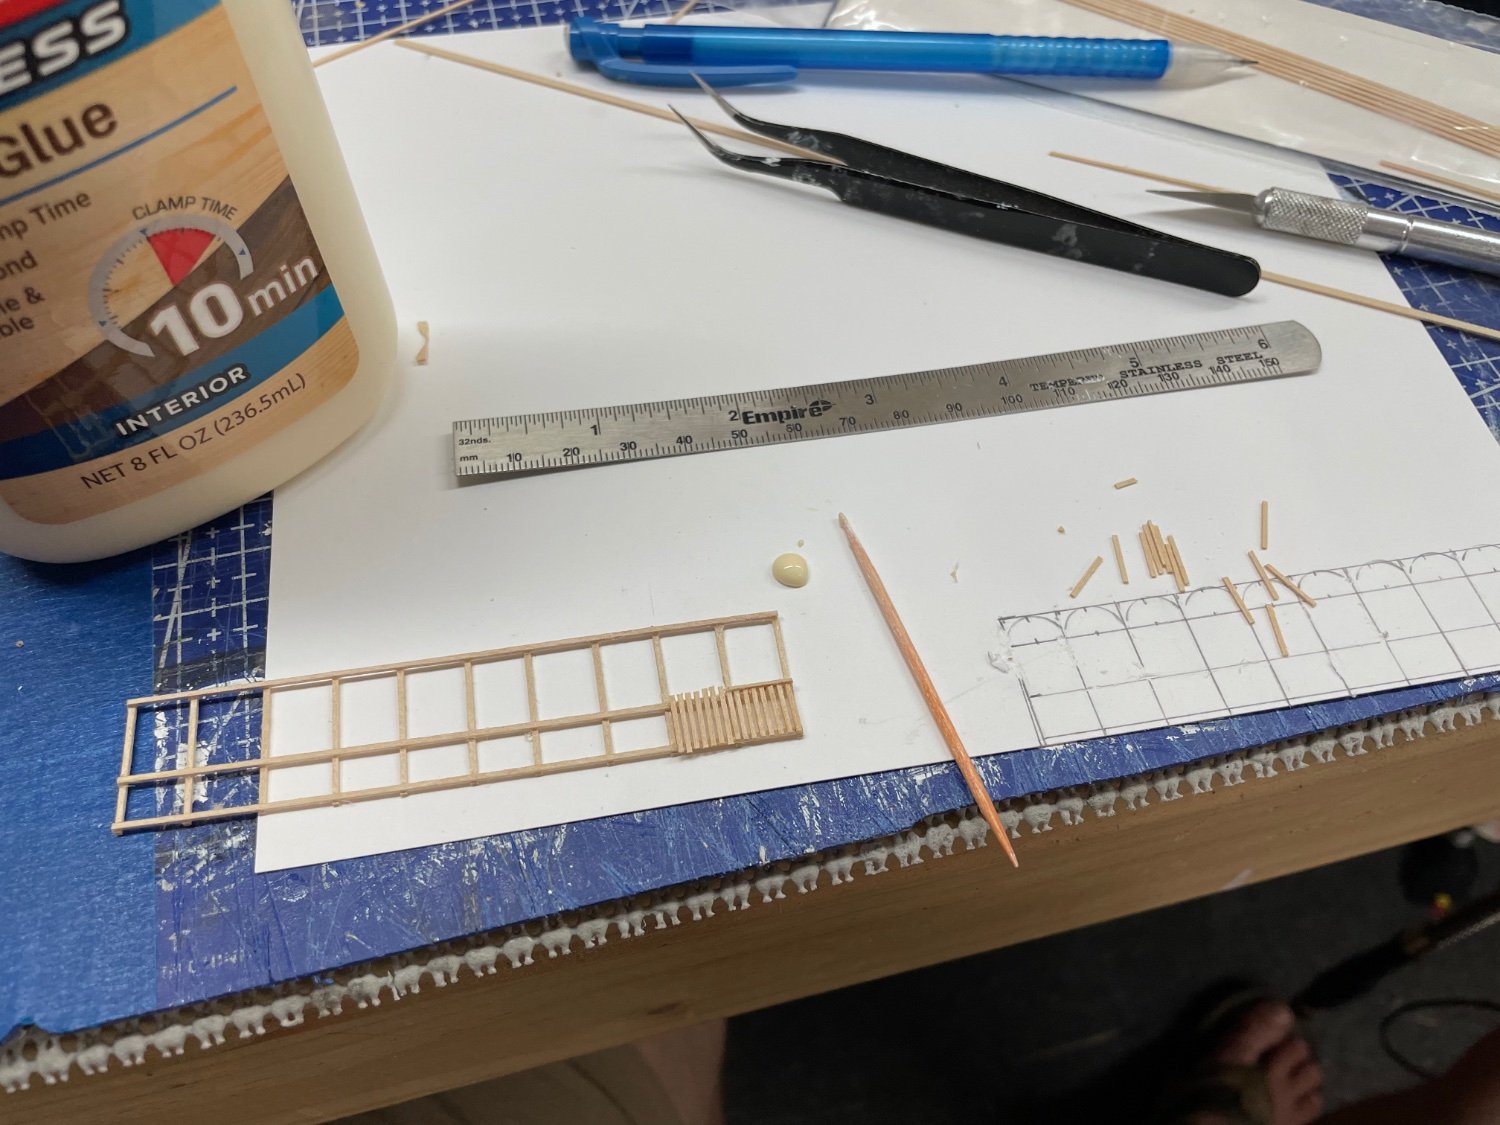
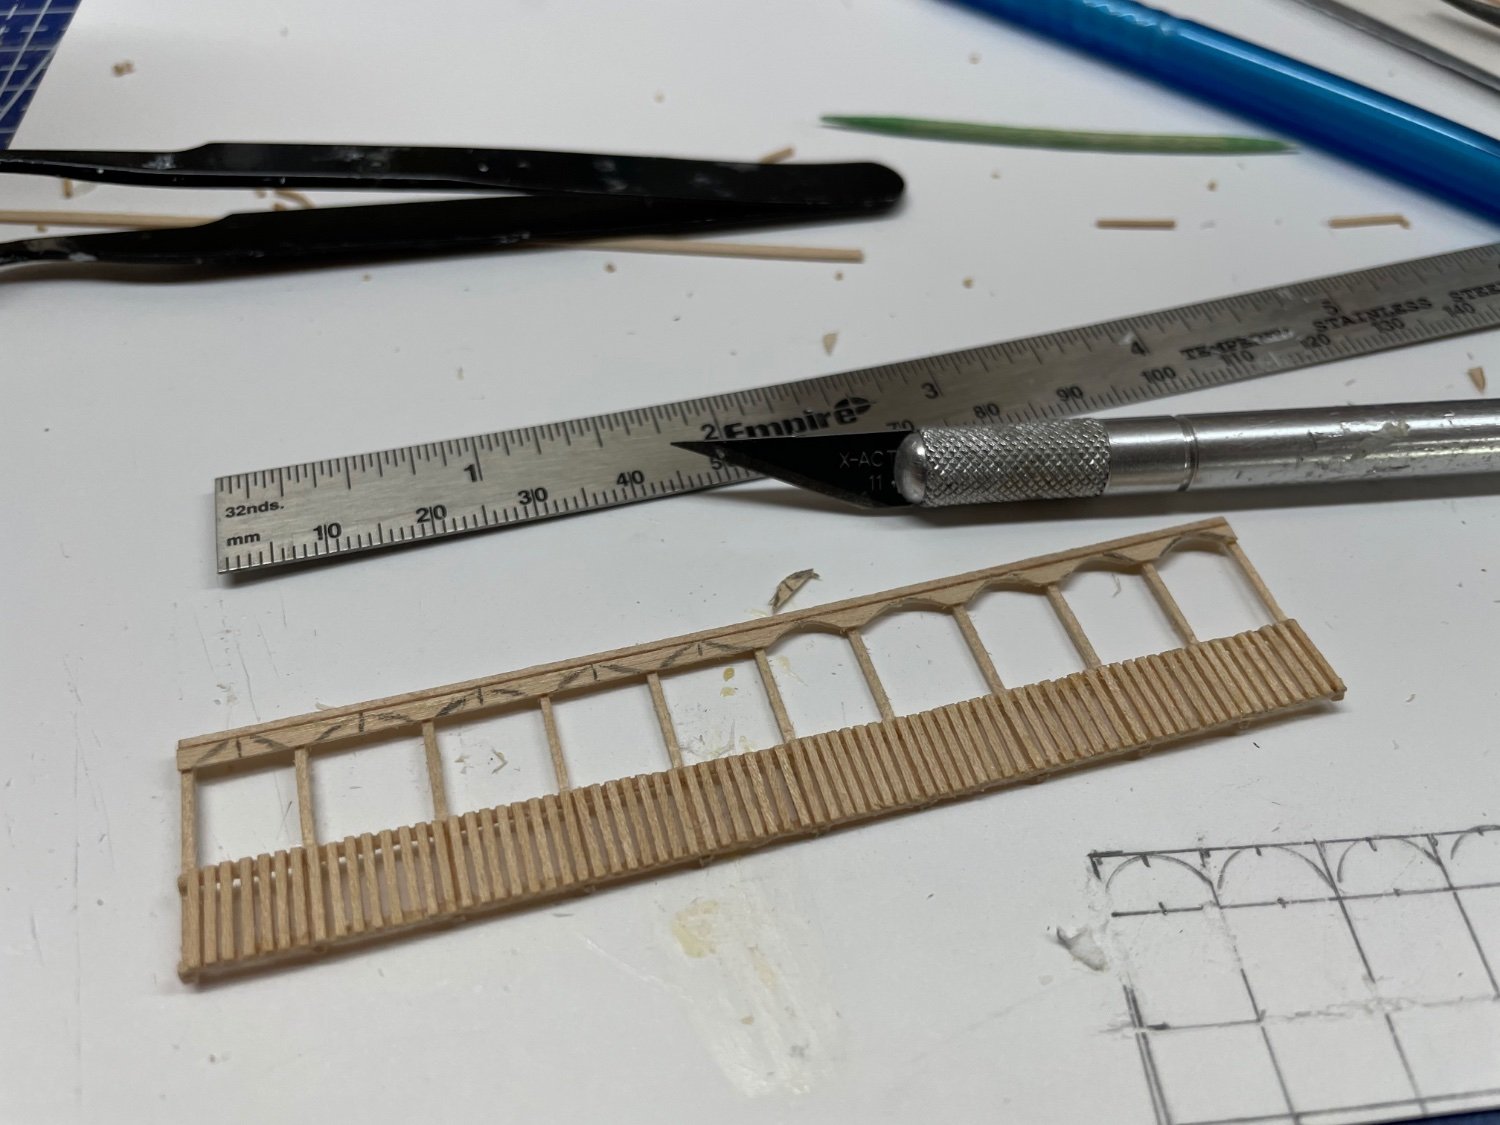
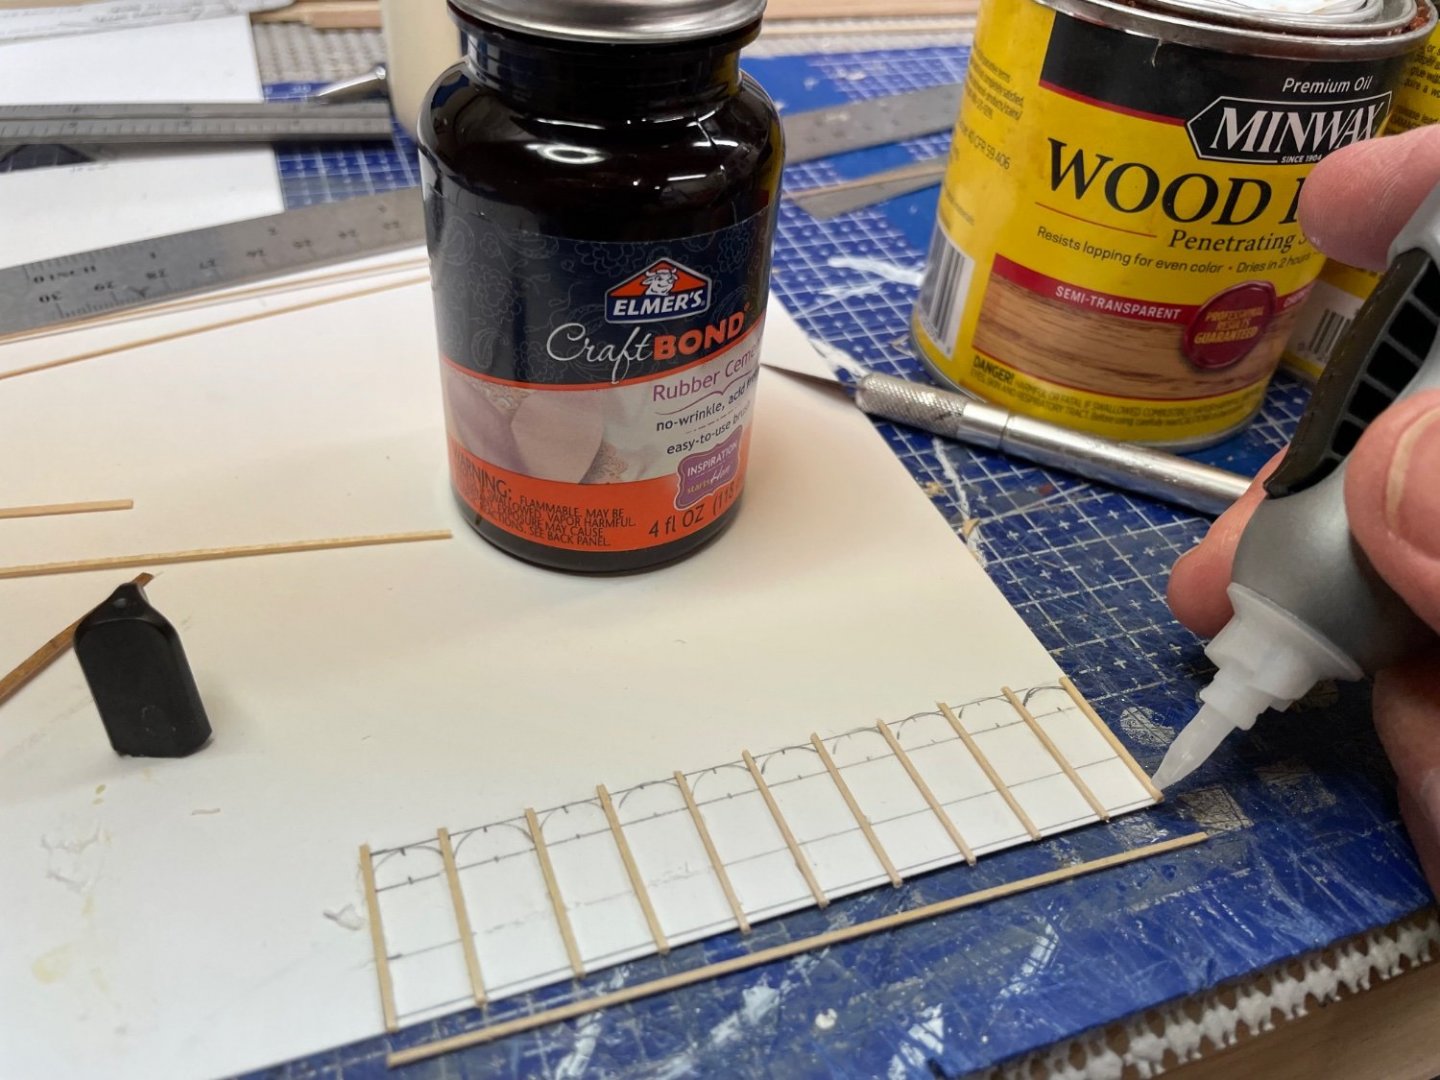
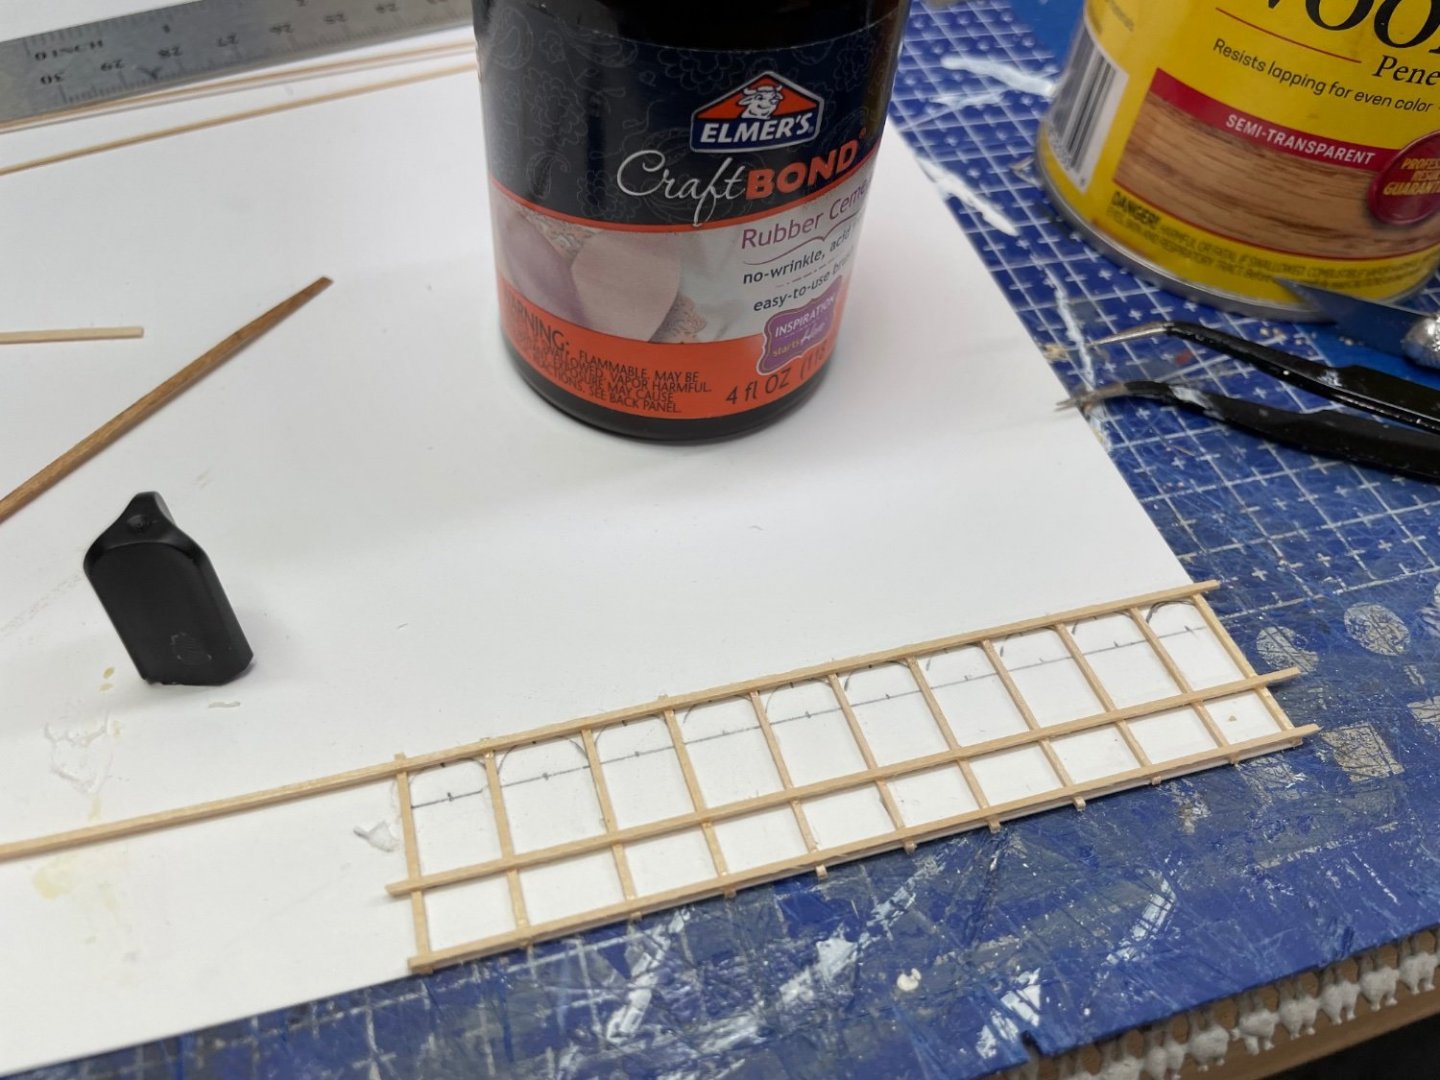
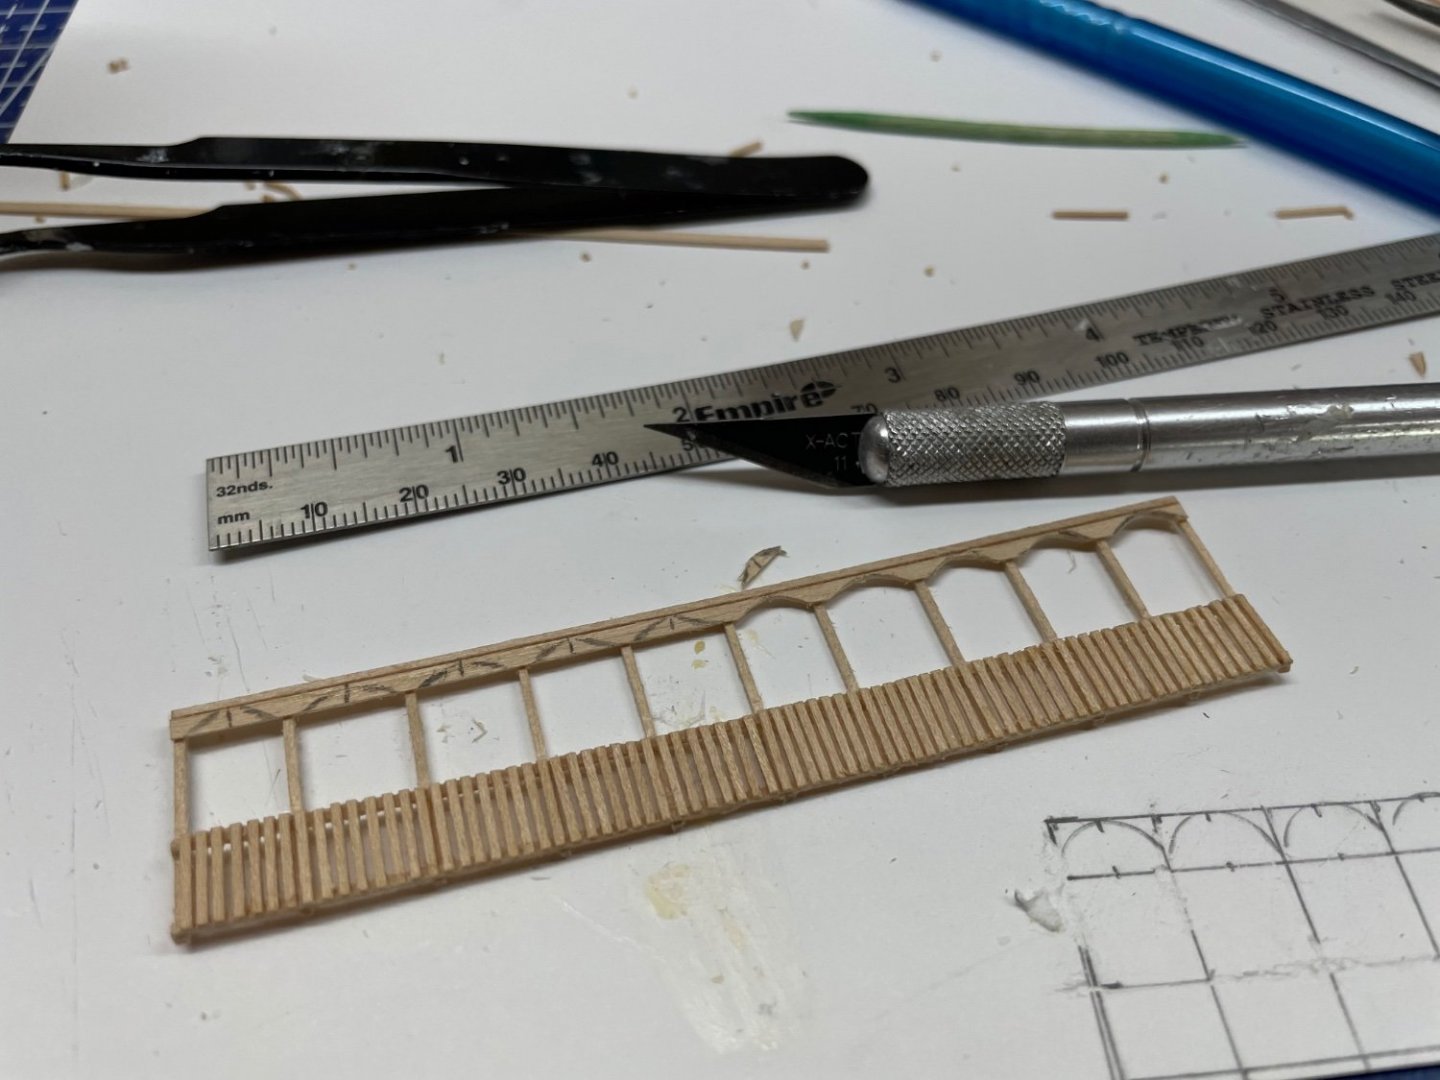
Railings continued… Used rubber cement to affix vertical posts to template. Used gel ca glue to attach horizontal rails. Removed new frame frame from template. Attached rail stanchions and trimmed. Attached and shaped drapery. Painted railing flat white, Stained and affixed rail cap. Attached rail section between Boiler deck and Hurricane deck. Rinse and Repeat… 1 of 20 sections completed for the Boiler deck. I will need to build another 30 sections of rail only (no drapery) for the Hurricane and Texas decks. Onwards 🍺


- 238 replies
-
- 10
-
-
- Robert E Lee
- steamboat
- (and 3 more)
-
Thanks, I worked on those stairs a long time. Yep, Railings lots of railings. 😆 Hopefully, I won’t go mad in the process. LOL 😂
- 238 replies
-
- 1
-
-
- Robert E Lee
- steamboat
- (and 3 more)
-
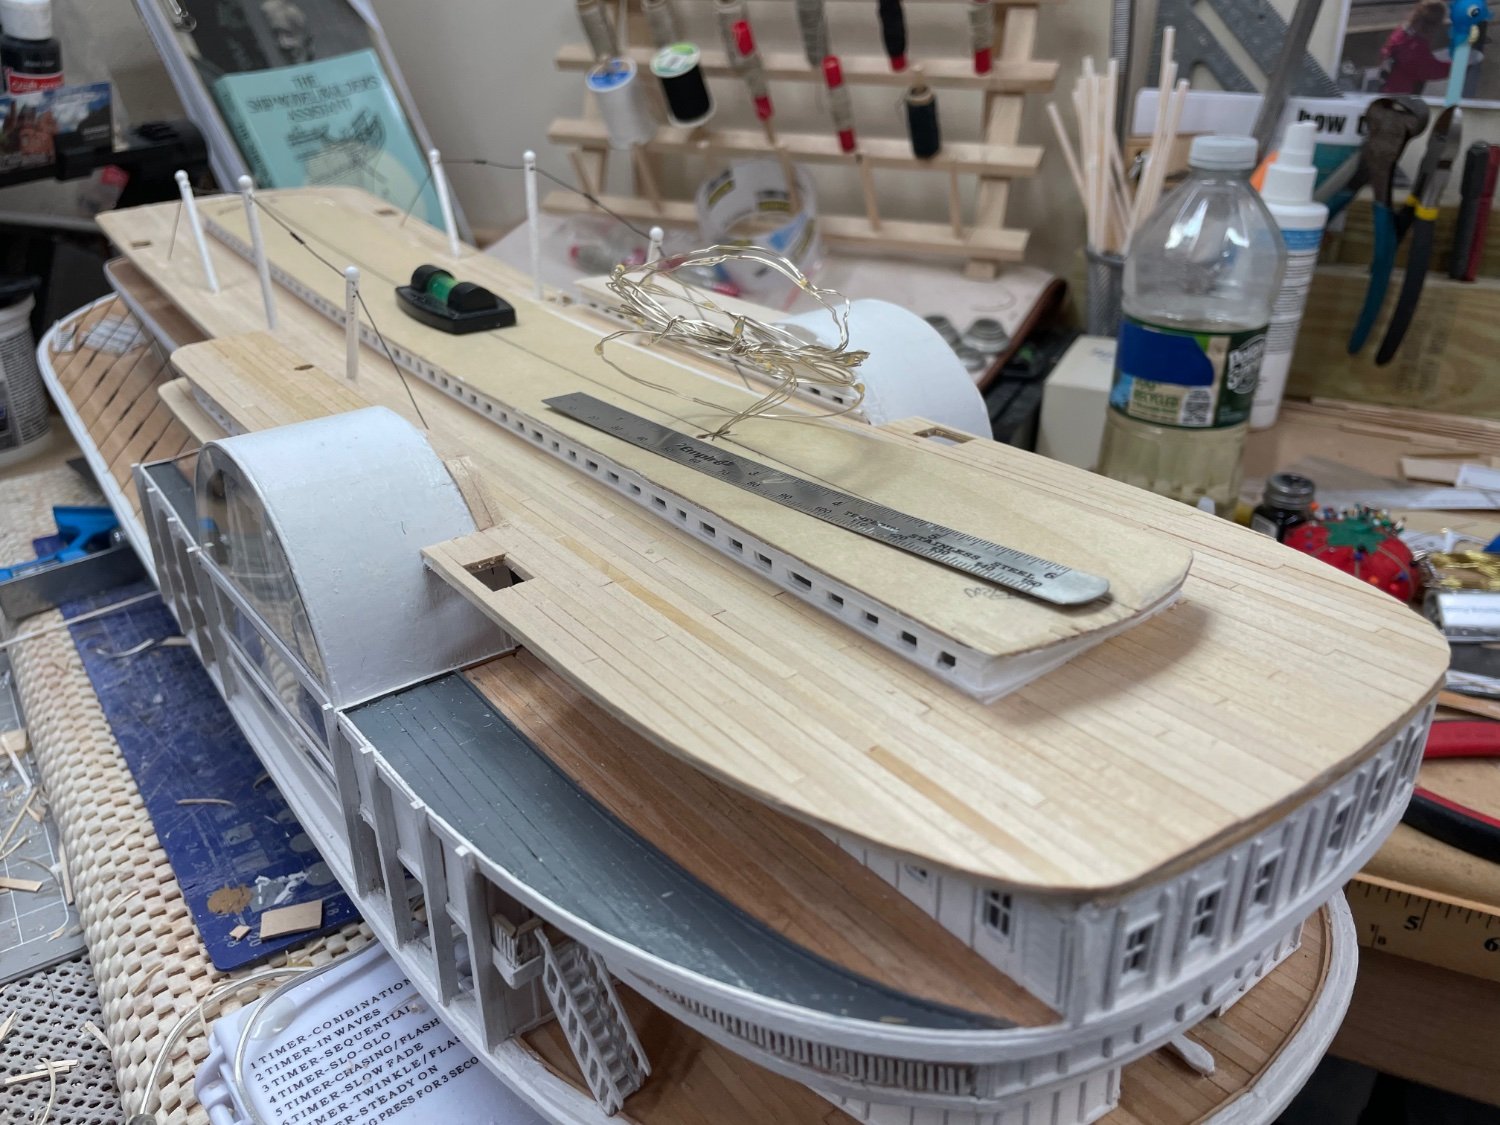
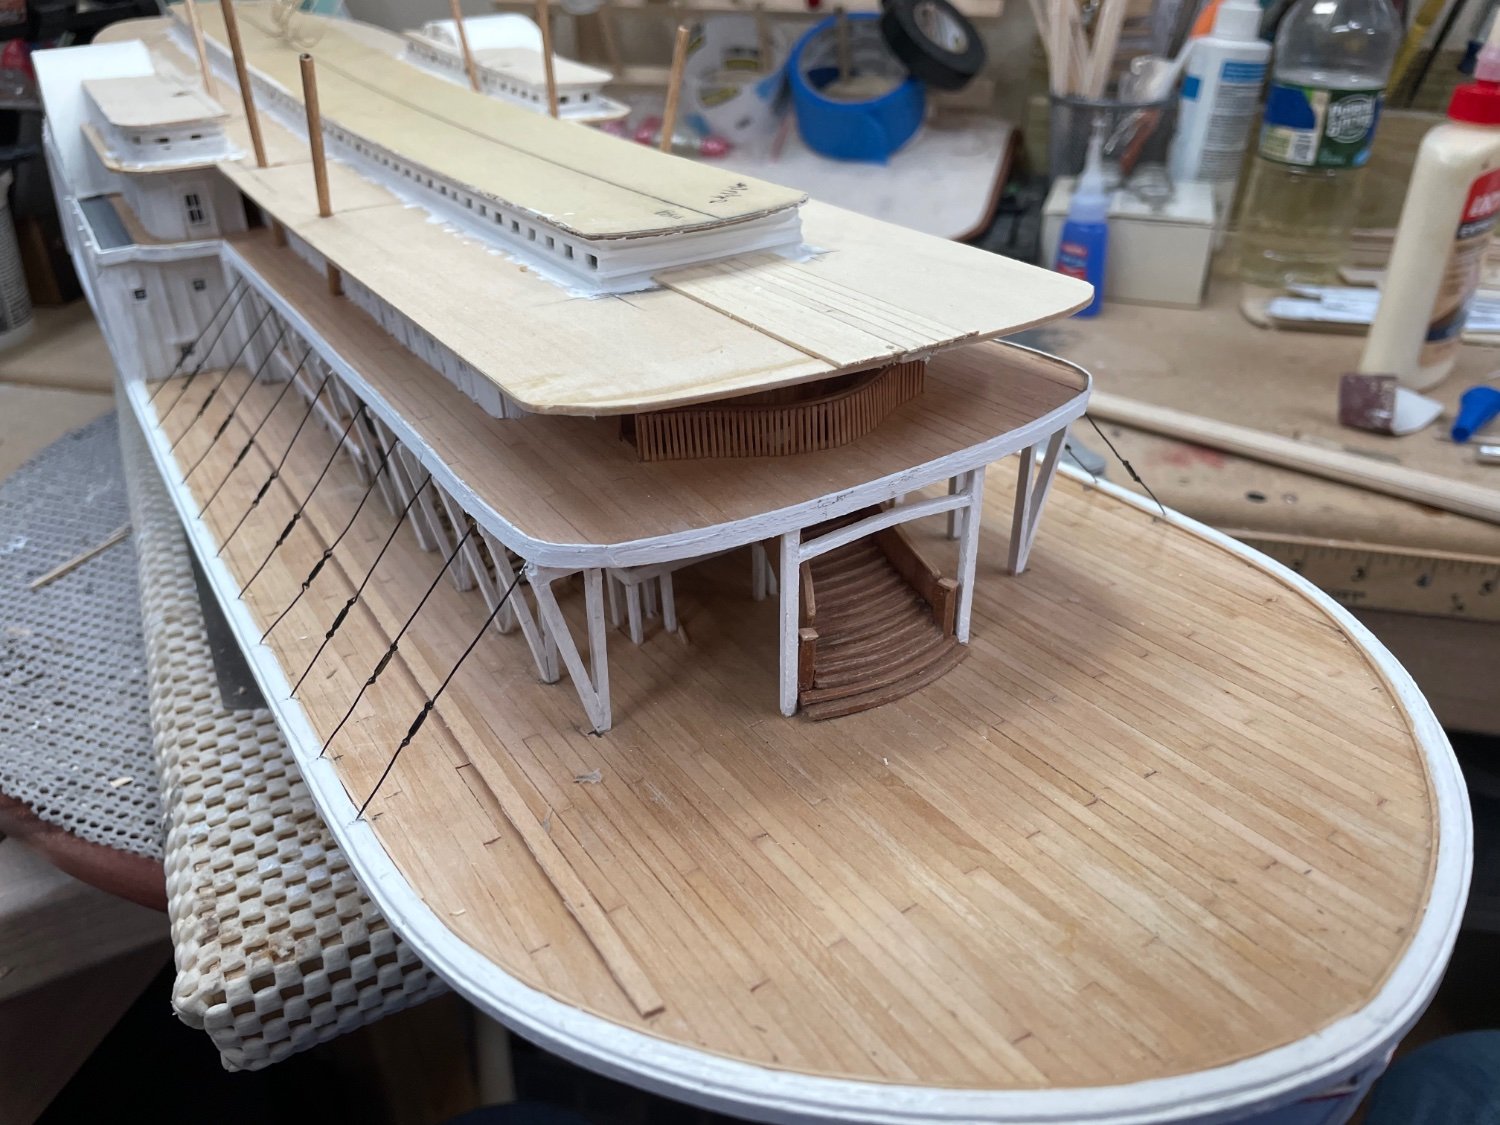
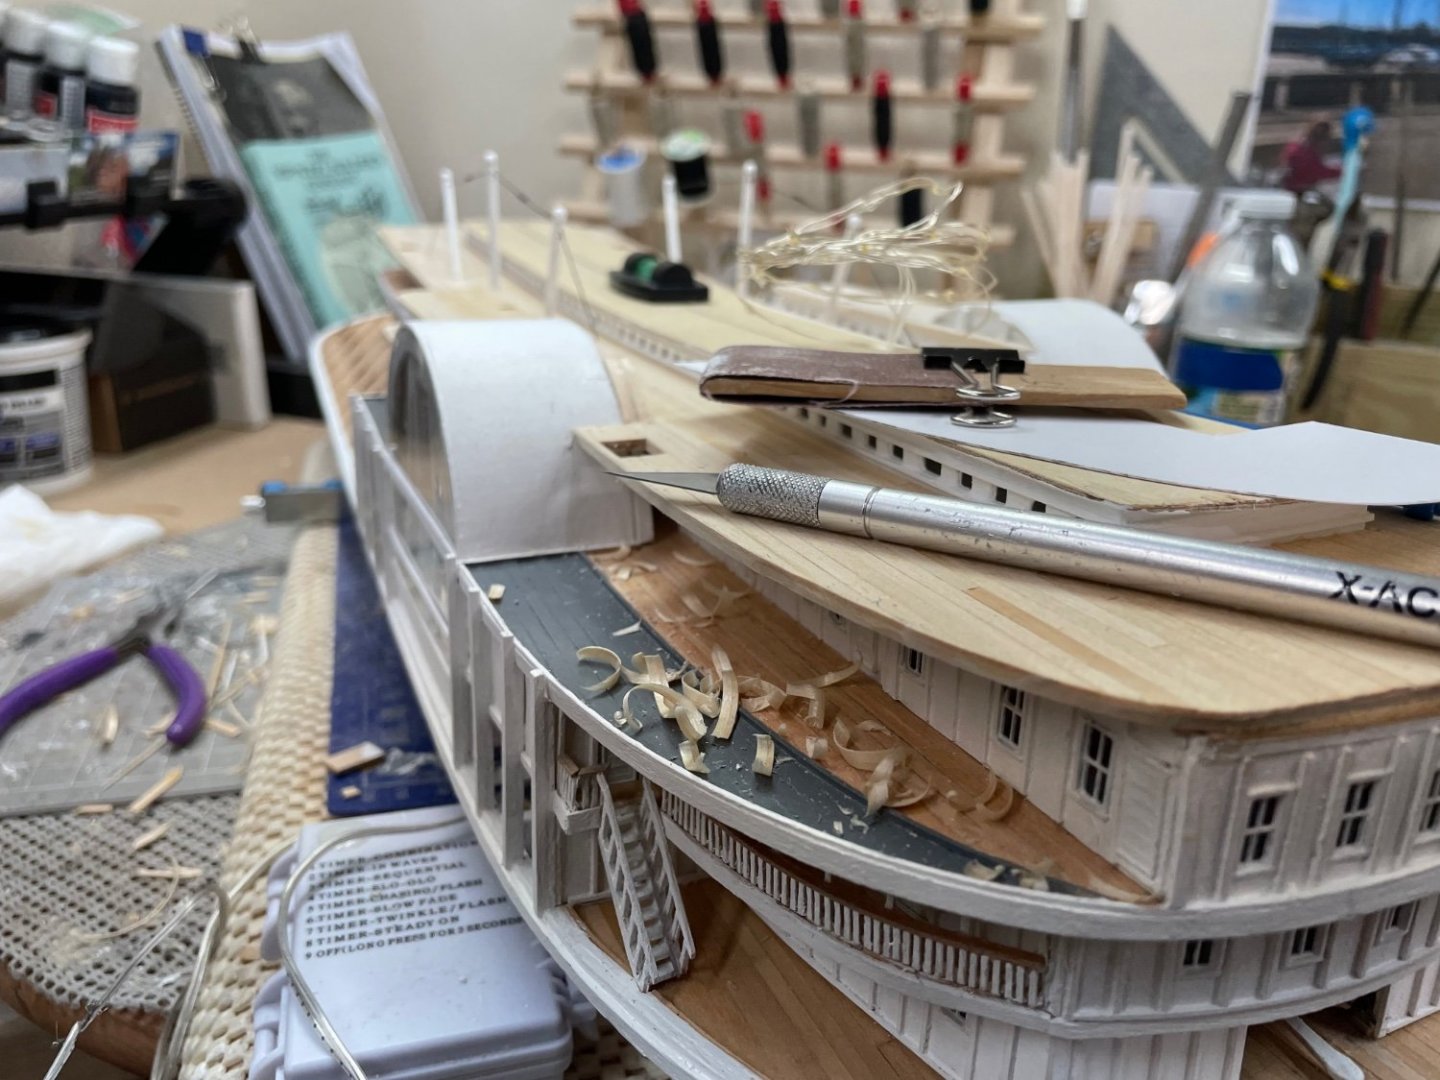
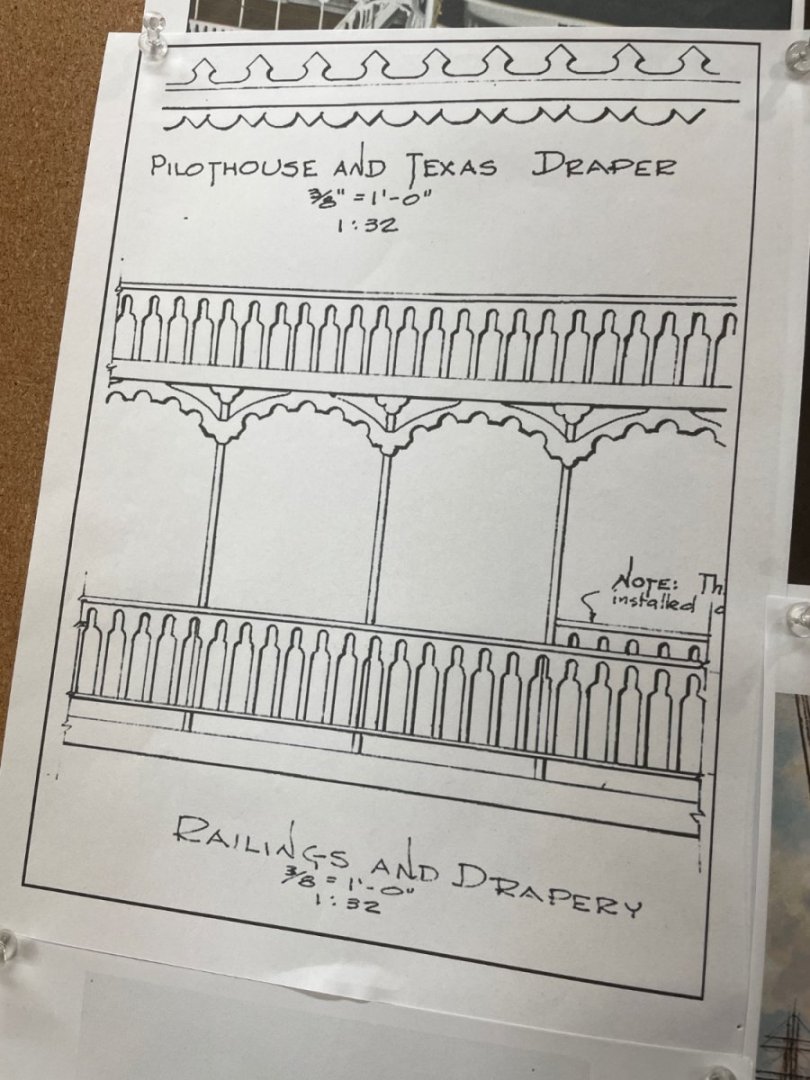
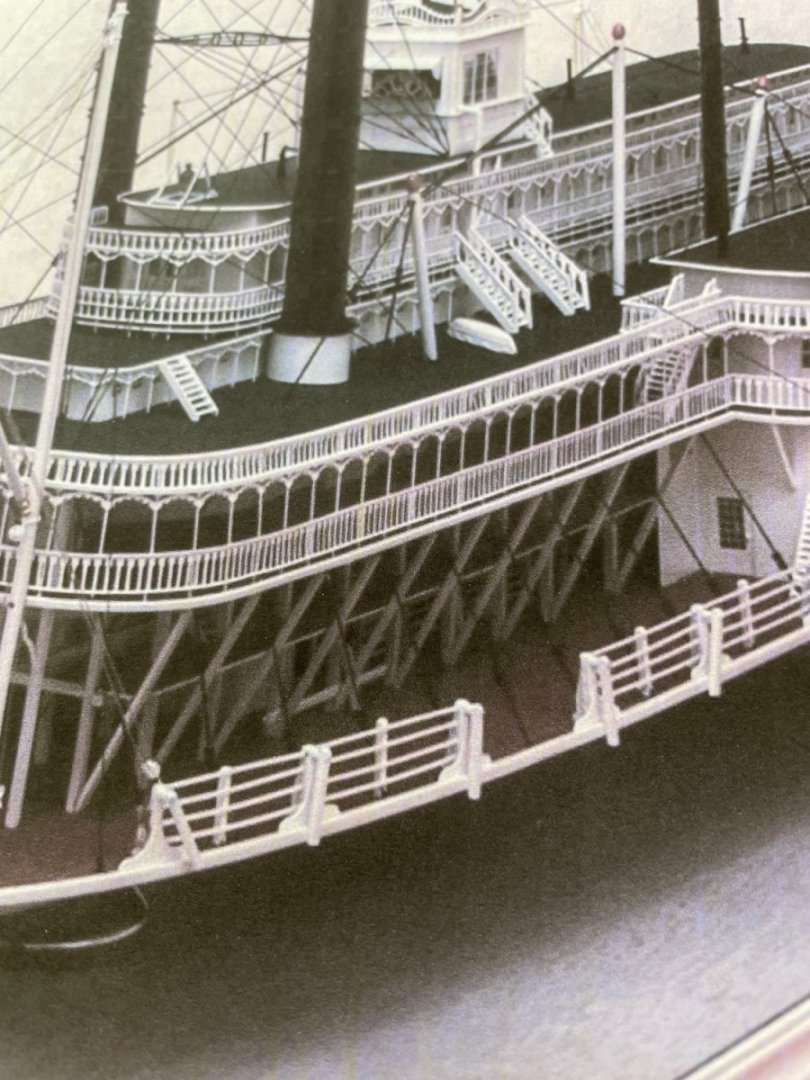
Hurricane Deck completed… Trimmed up deck edge to mirror the starboard side. Hurricane Deck stained and sealed with satin polyurethane. Time to start thinking 🤔 about the railings and drapery. Photo from a build log posted on Ships of scale… Robert E Lee built by Peter Voogt. https://shipsofscale.com/sosforums/threads/paddle-steamer-robert-e-lee-scale-1-96-scratch-build-by-the-alan-l-bates-drawings-completed-build.5362/page-13 Now we are talking about some serious micro carpentry 🔨 😆 Onwards 🍻


- 238 replies
-
- 9
-

-
-
- Robert E Lee
- steamboat
- (and 3 more)
-
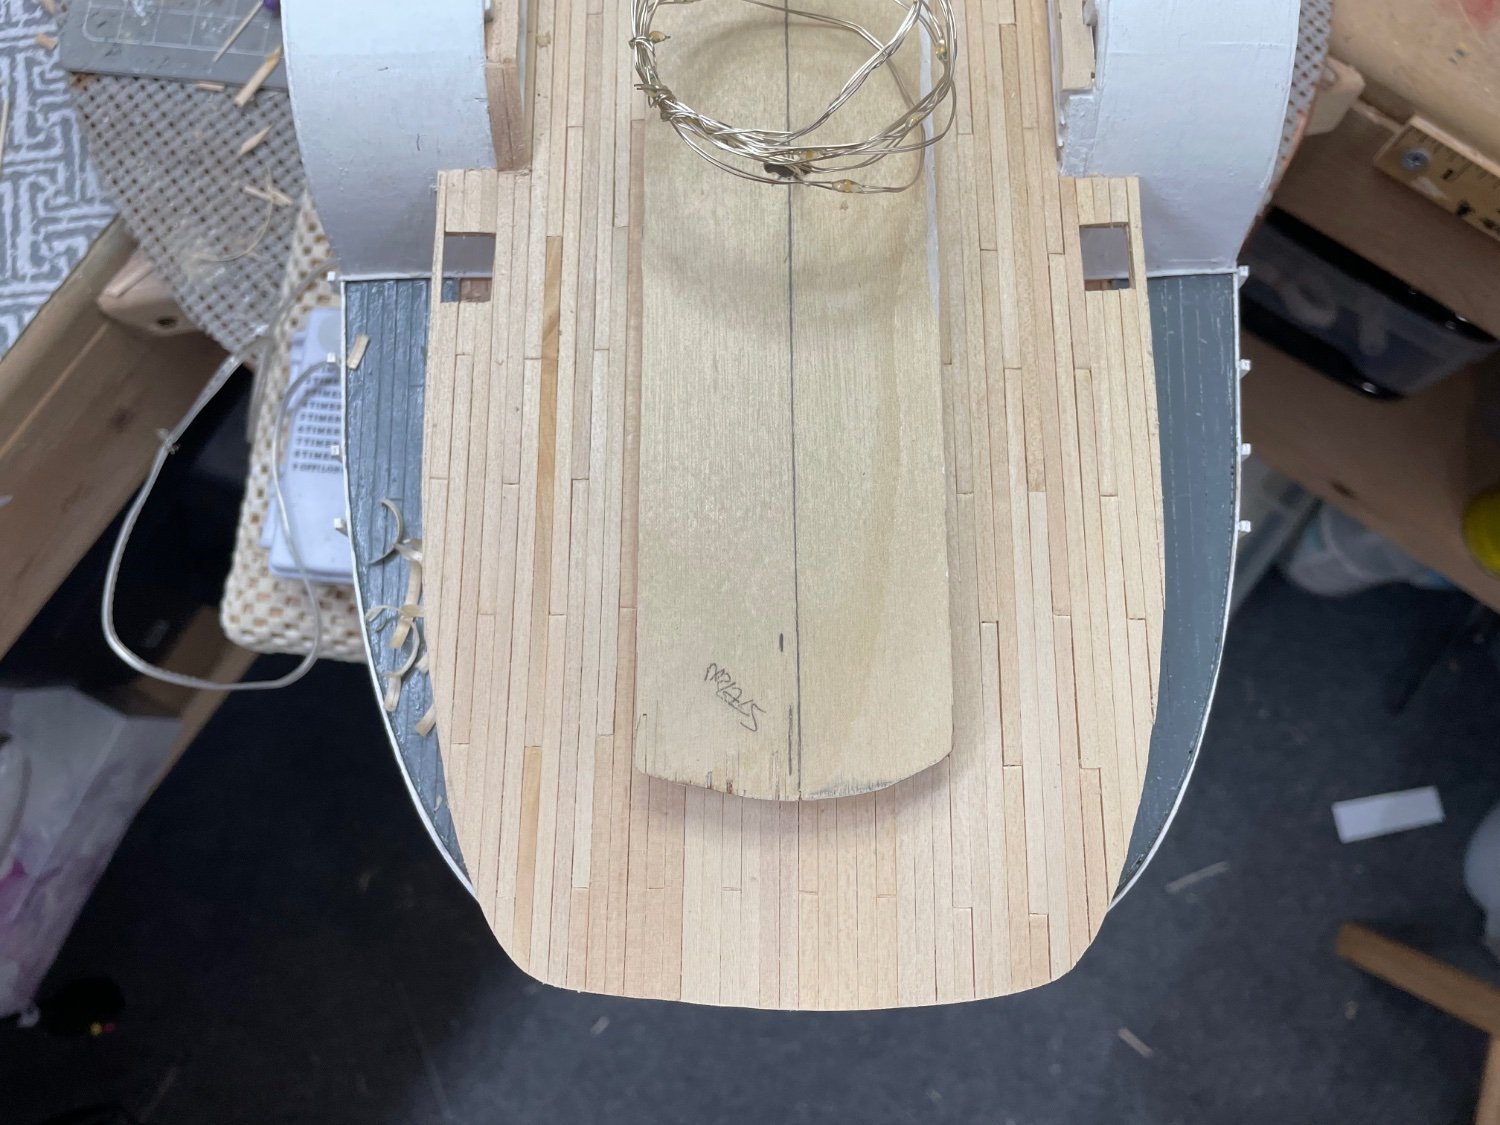
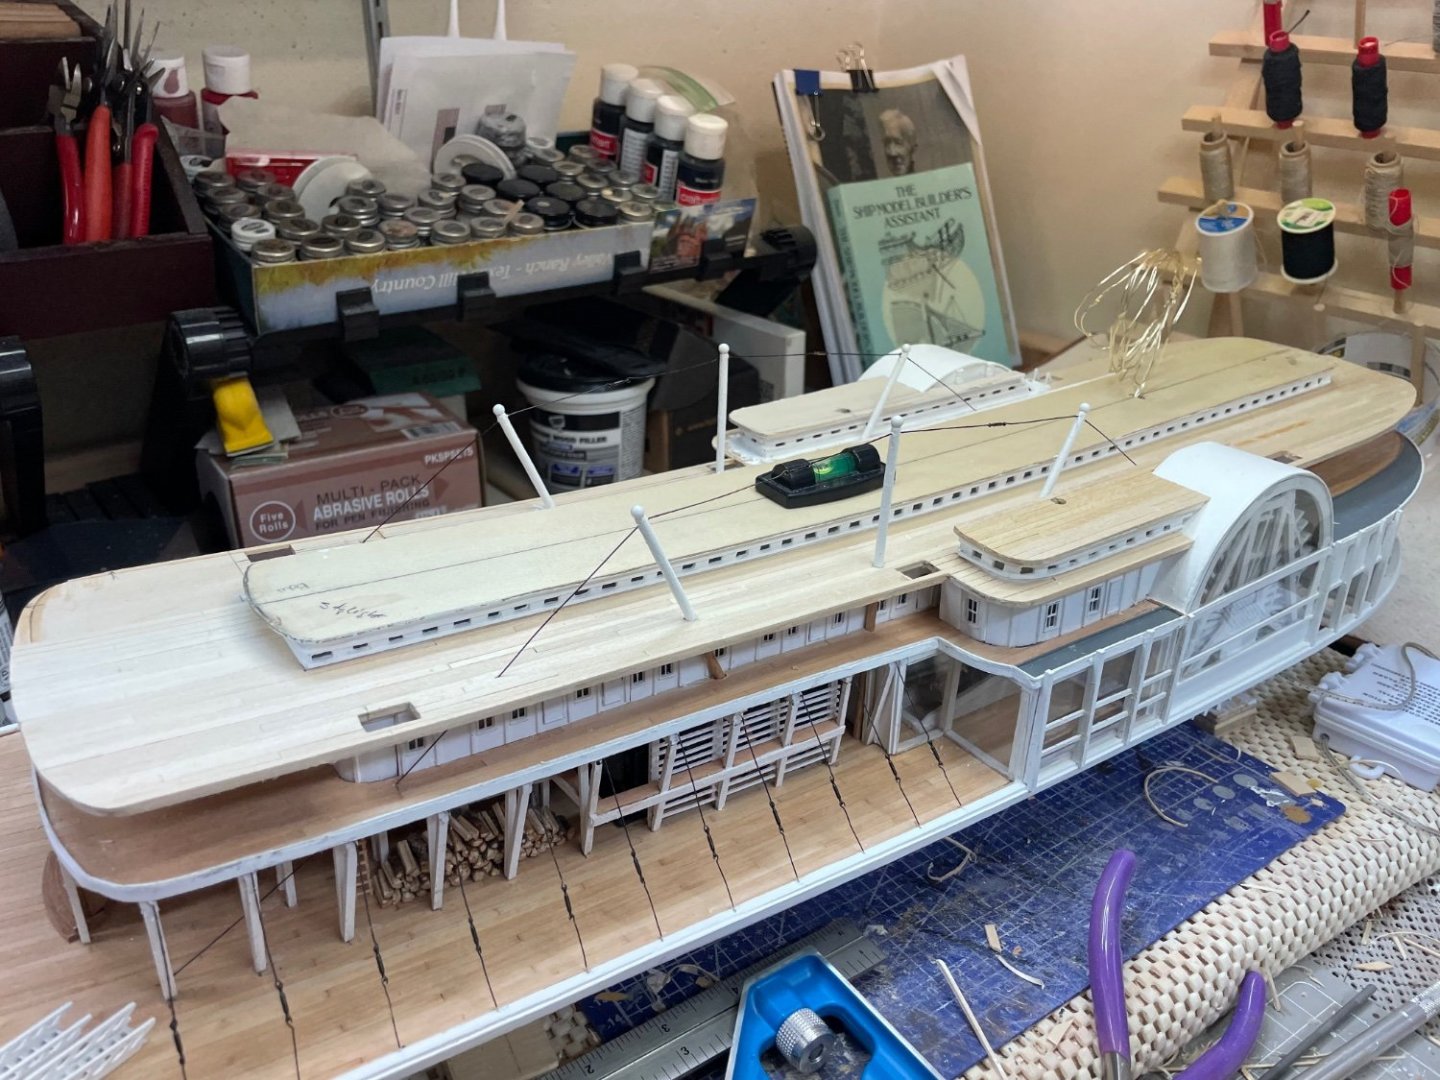
Completed Hurricane Deck Planking… Ready for staining, after a good sanding. Cheers 🍻

- 238 replies
-
- 6
-
-
- Robert E Lee
- steamboat
- (and 3 more)
-
Tom, Oh how I know what you mean about OCD. But, that’s what drives us to perfection. Close to it any way. 😆 Nice work on the bulwarks, color is perfect. Looking forward to your new coppering process. 👍 John
- 200 replies
-
- 3
-

-
-
- Whaling Bark
- Charles W Morgan
- (and 1 more)
-
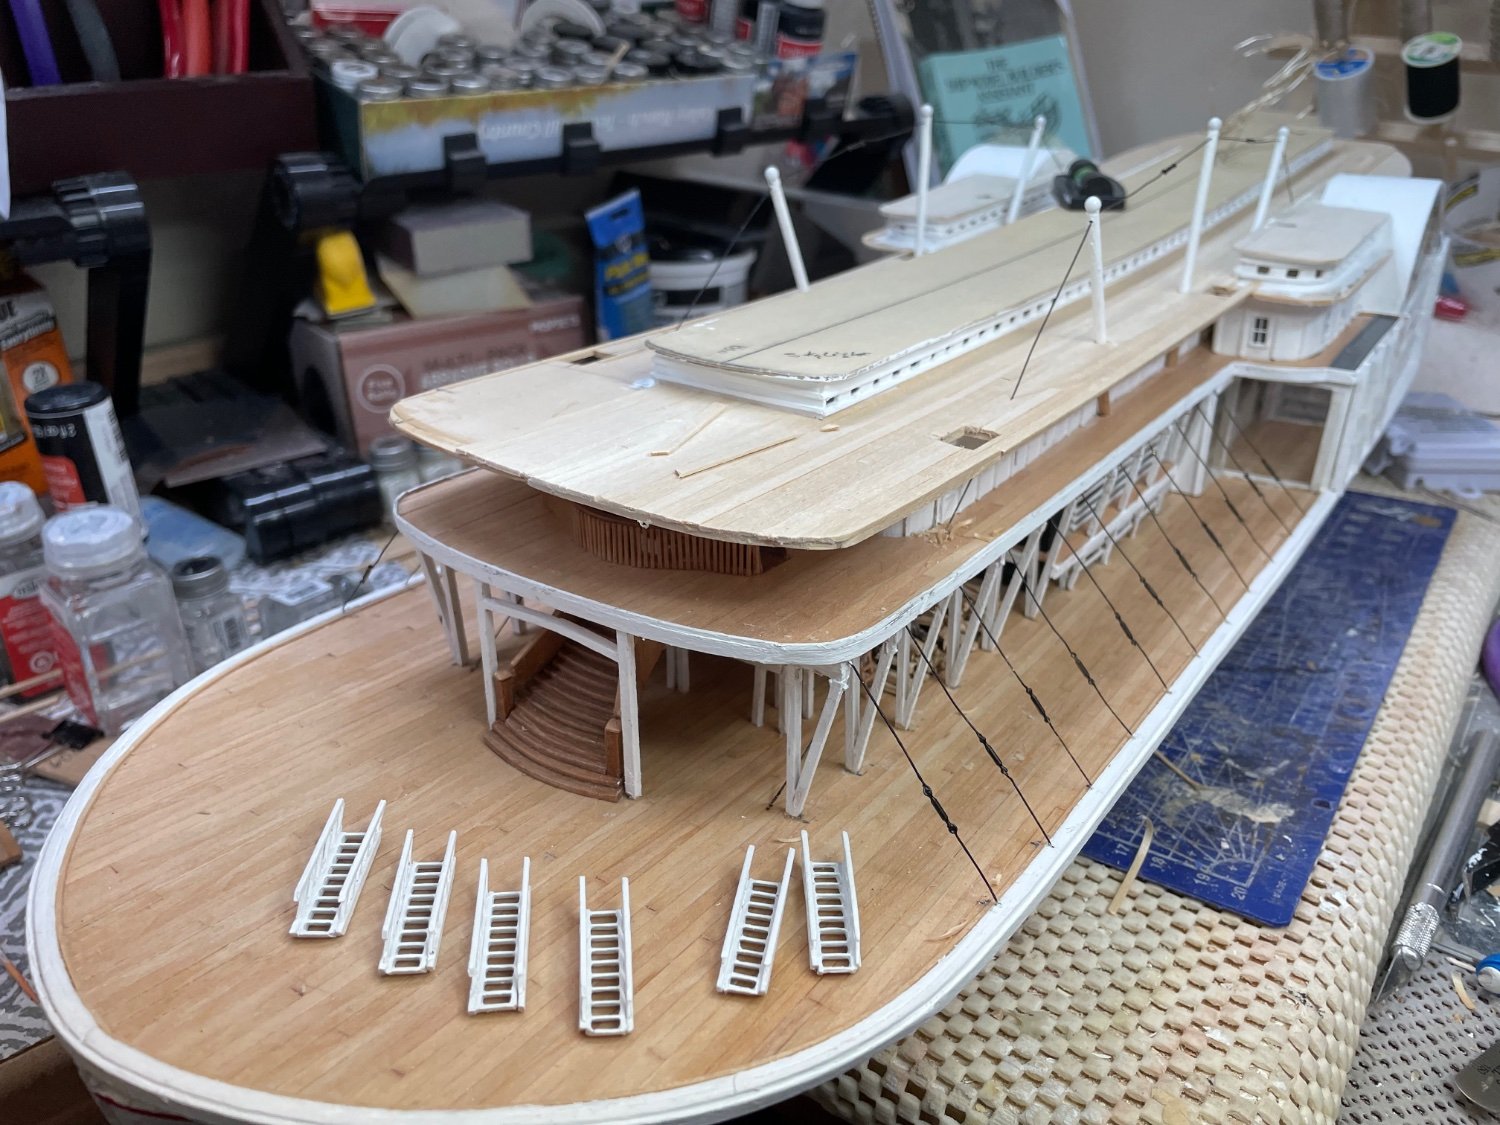
Companionway Stairs completed… Companionway Stairs completed ready for installation between the Boiler Deck and the Hurricane Deck, once the planking is completed on the Hurricane Deck. 😎 Cheers 🍻


- 238 replies
-
- 10
-
-
- Robert E Lee
- steamboat
- (and 3 more)
-
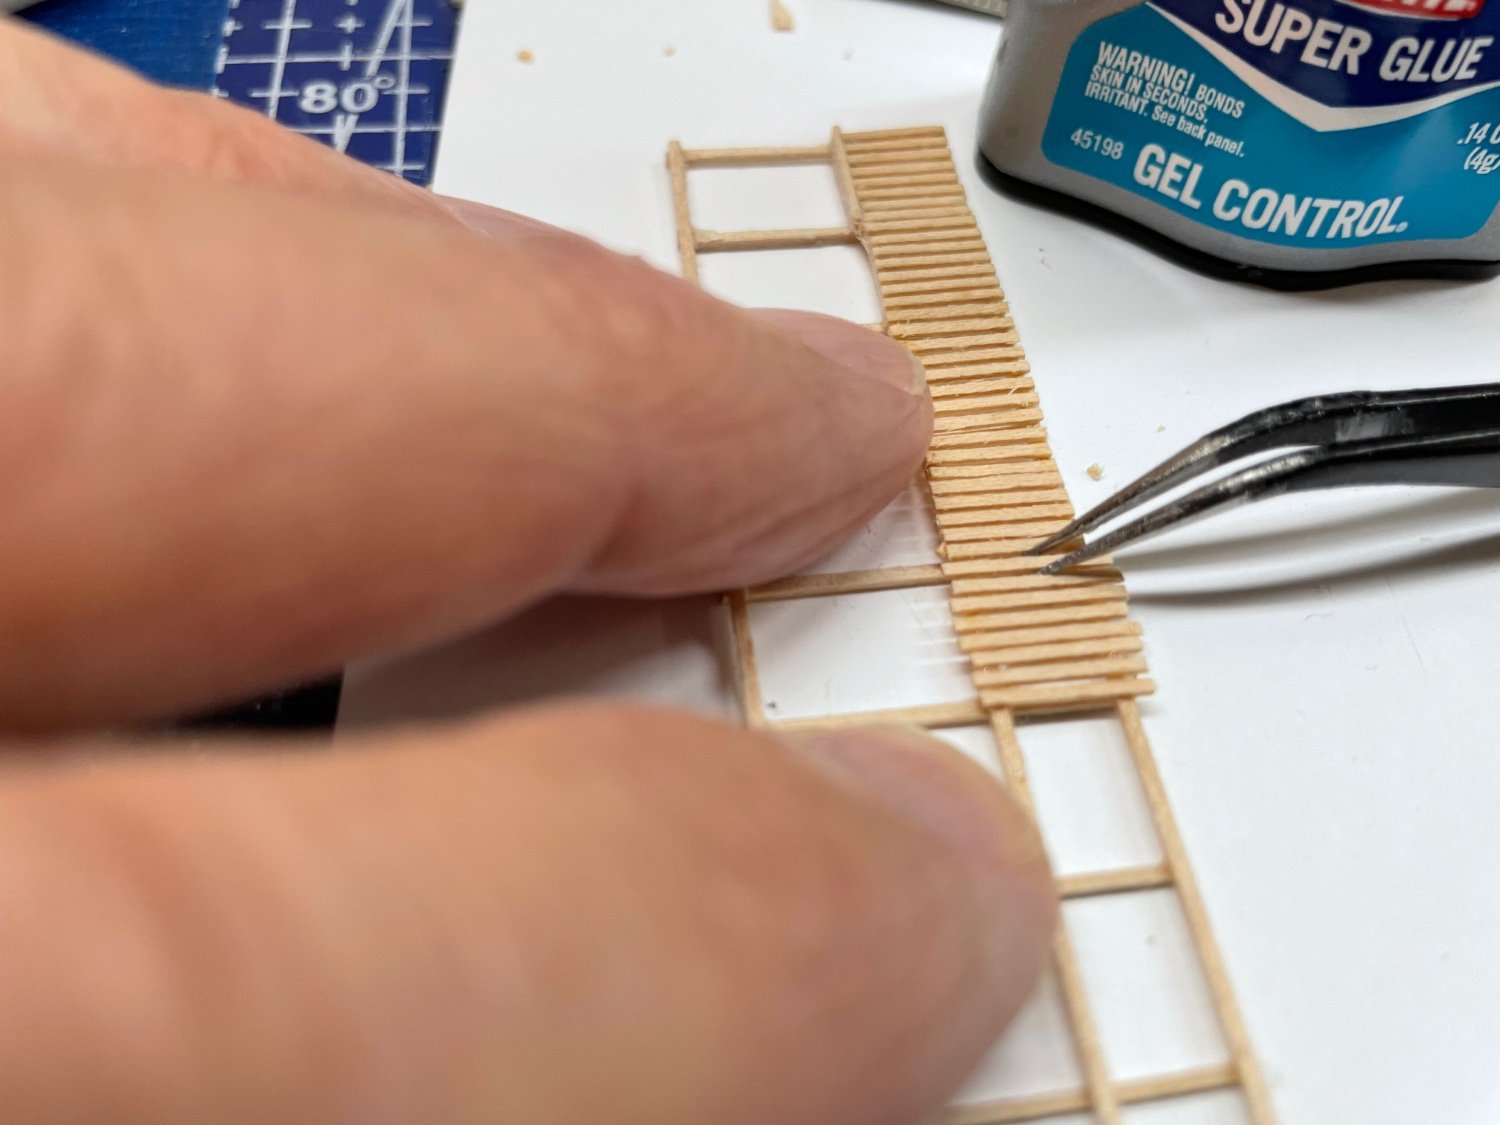
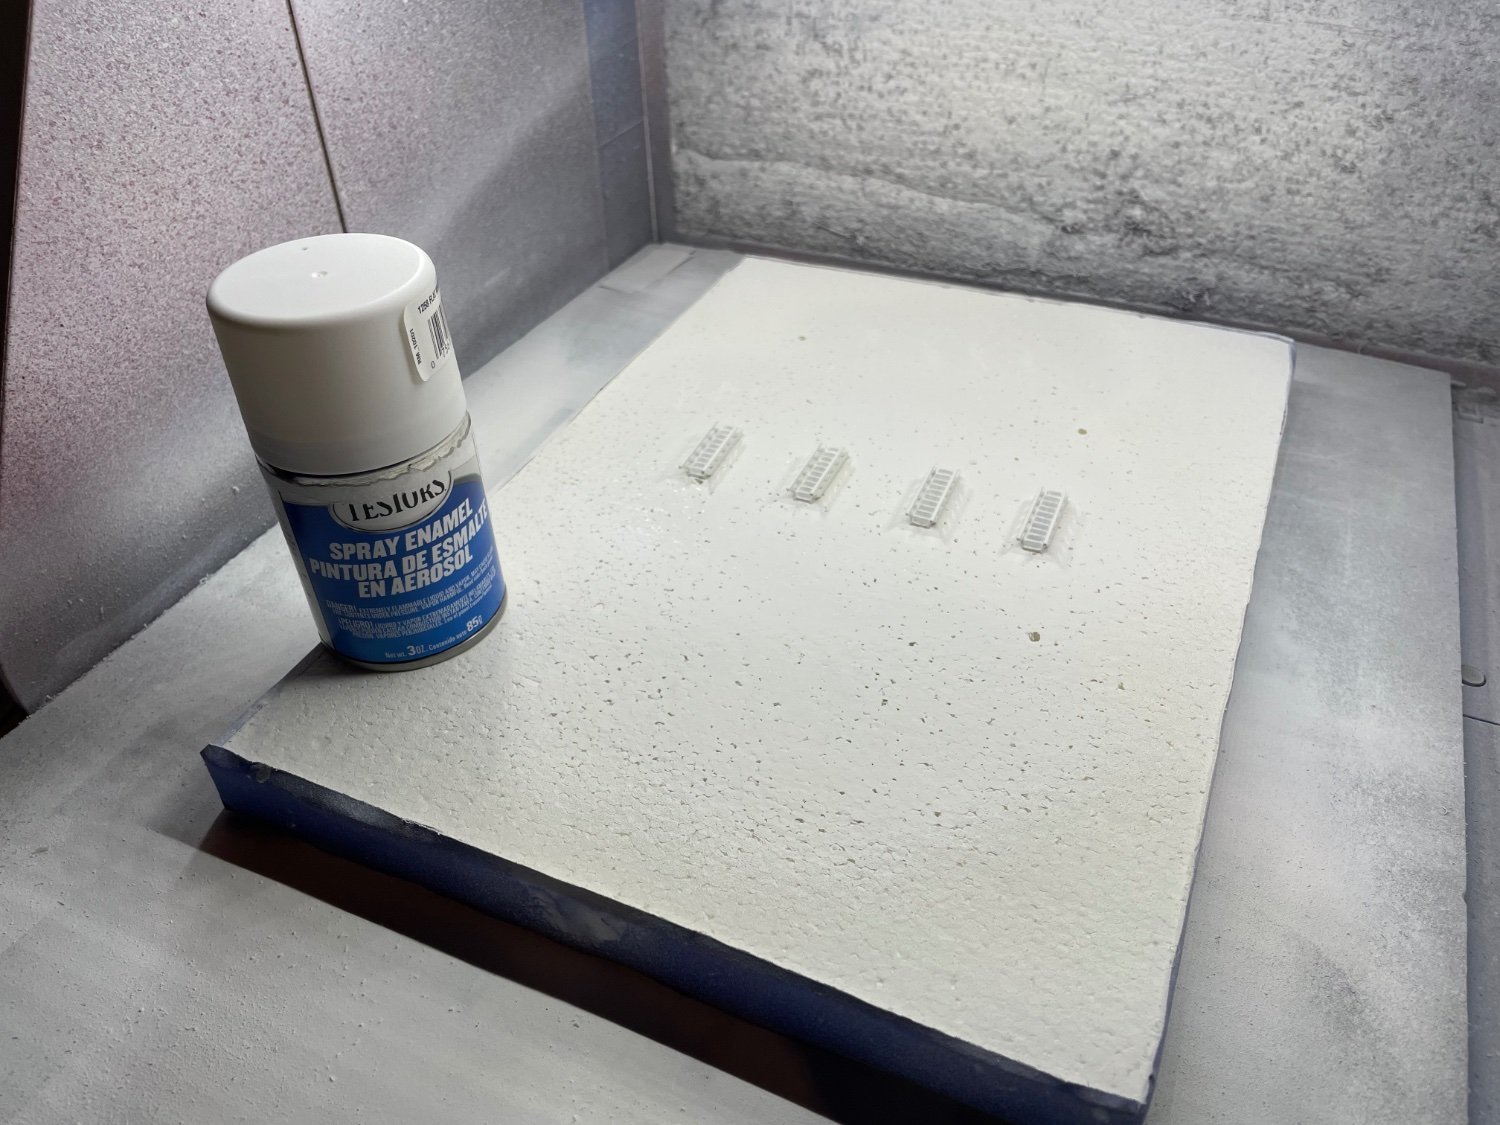
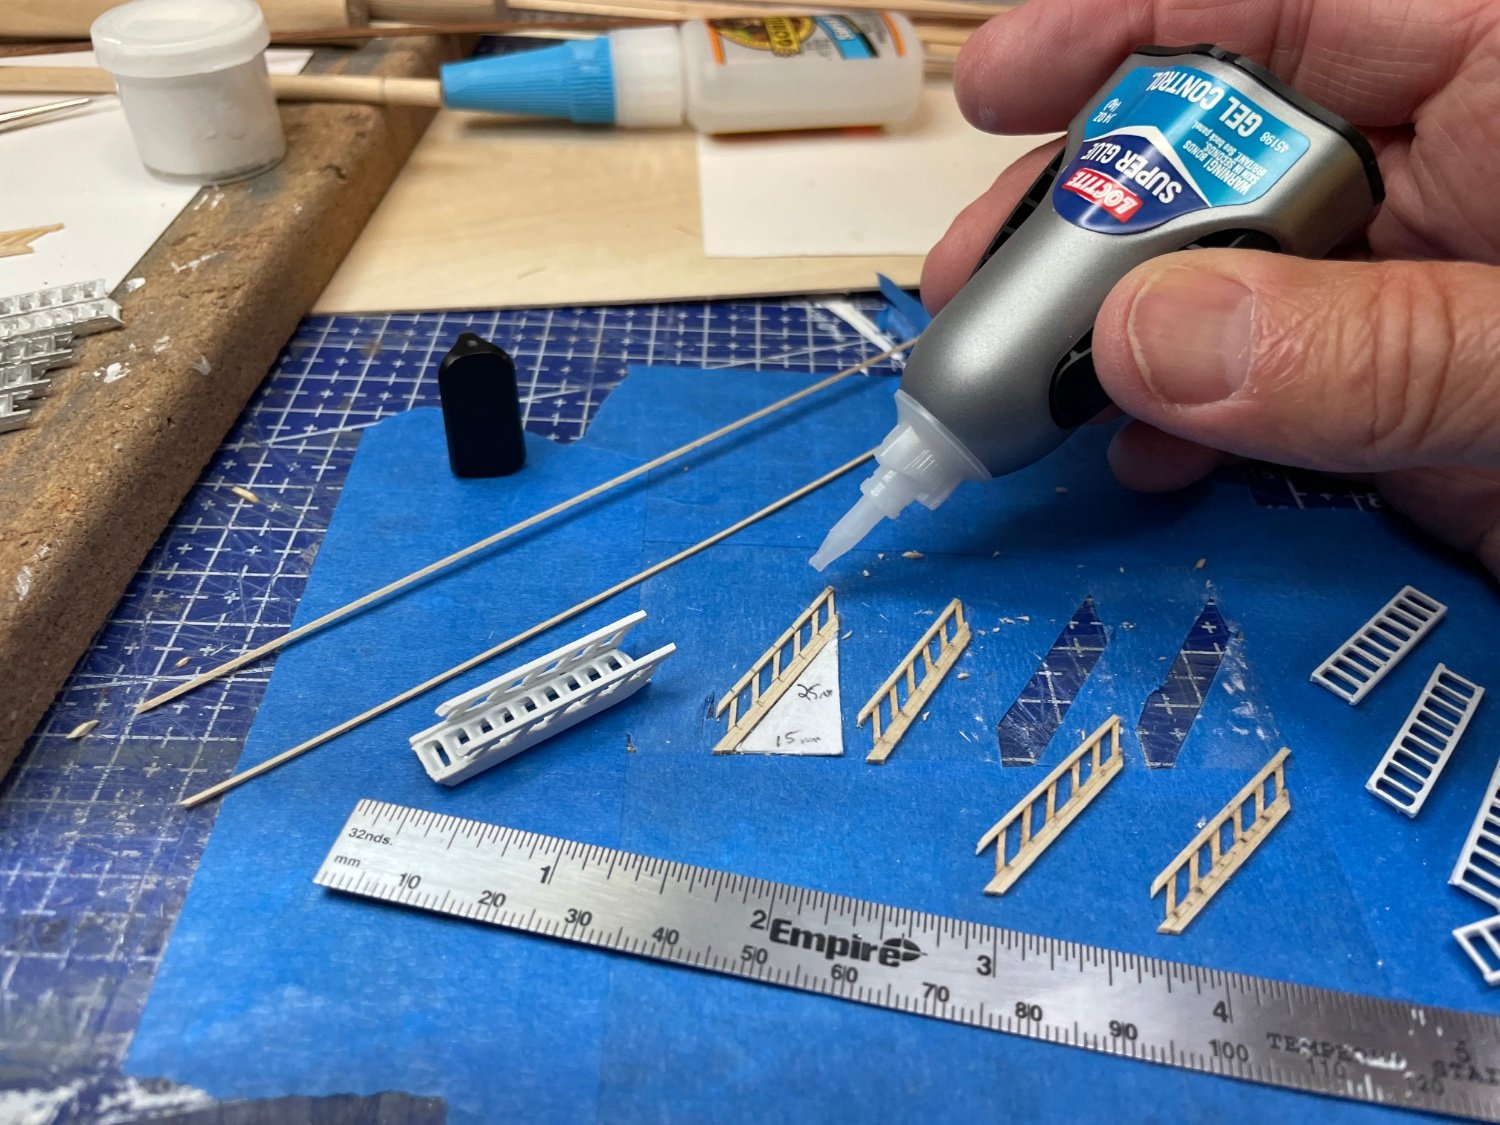
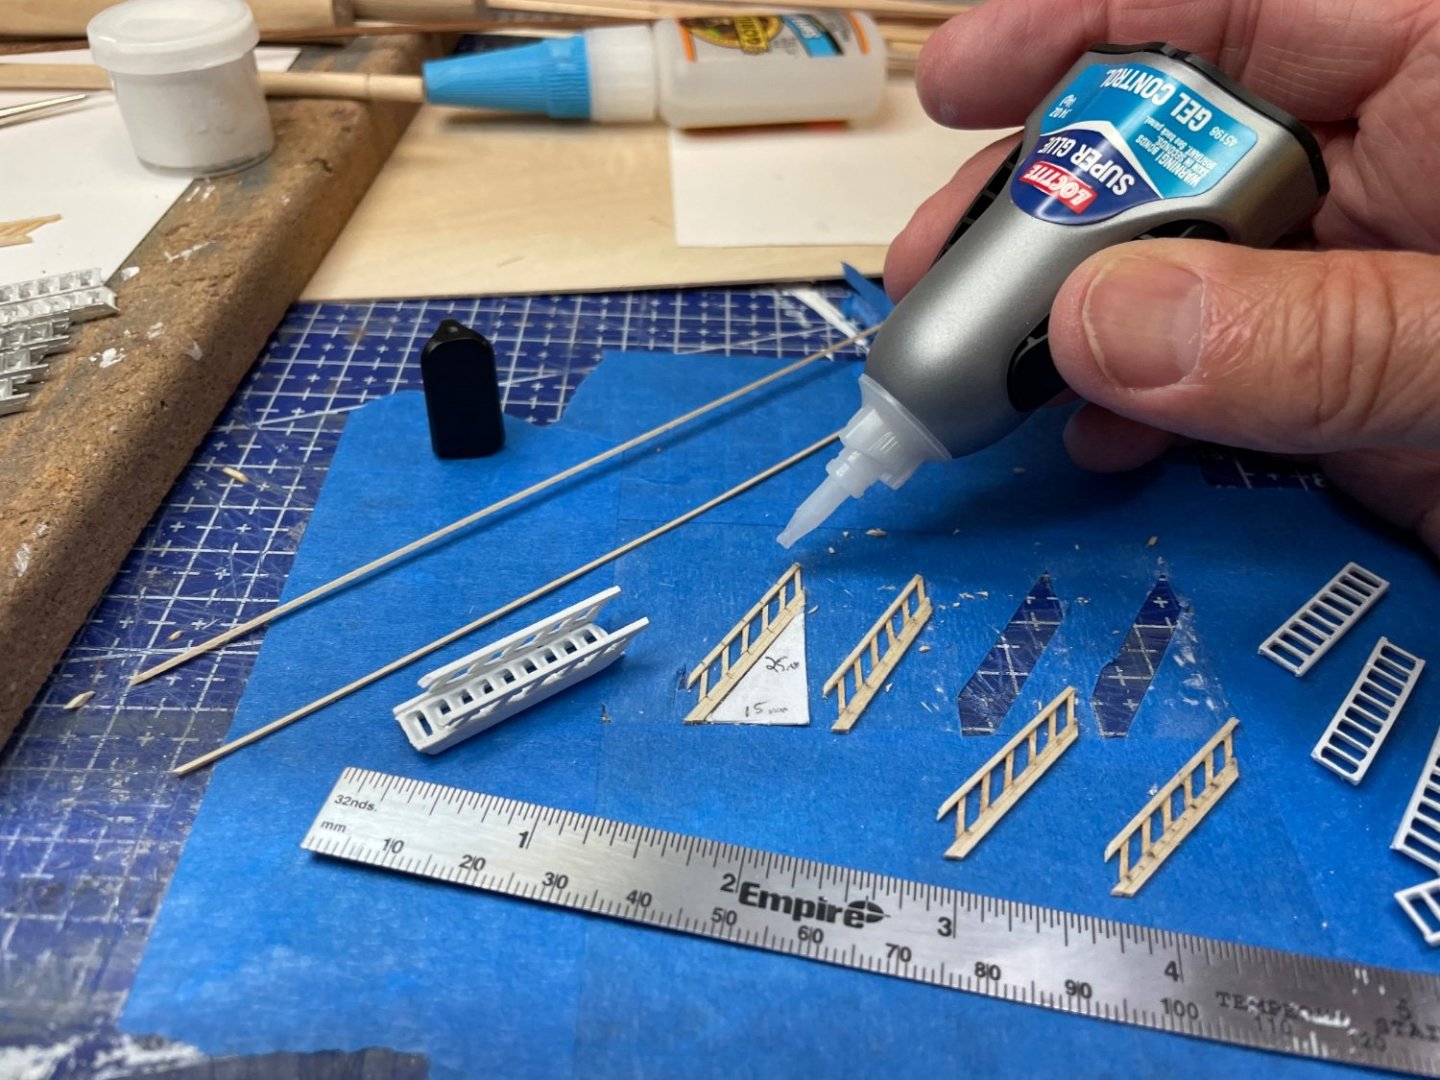
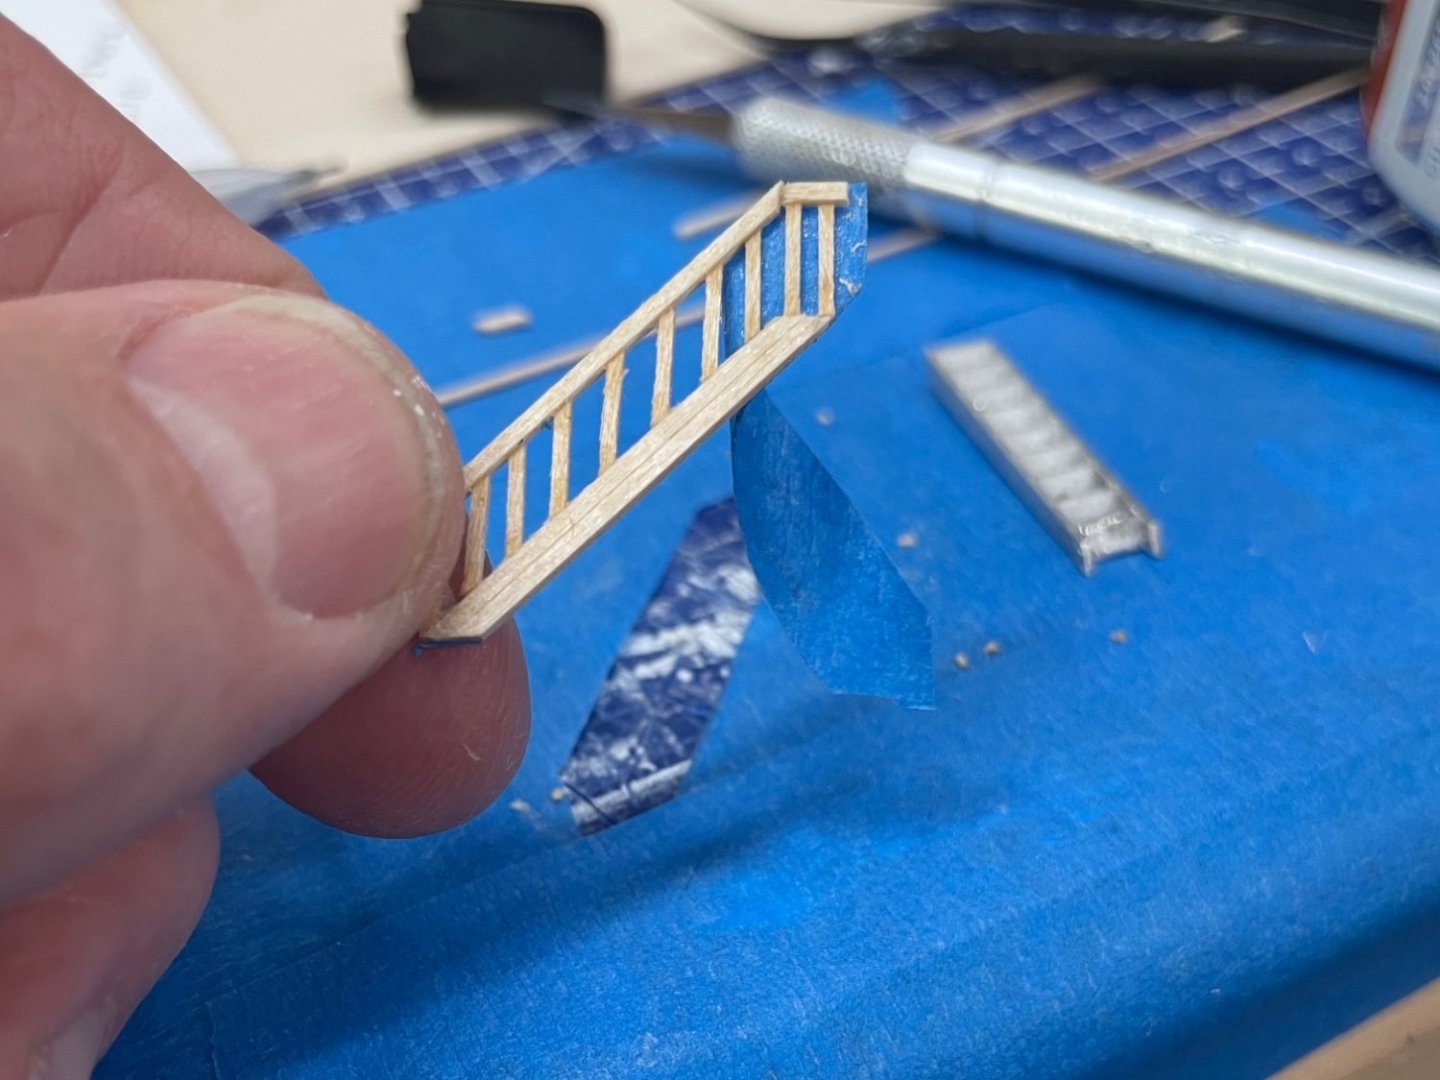
Railings continued… I have found the backside of blue masking tape to be the best clamping for these tiny builds. Gel CA glue is best to keep gluing minimal and not run on to the tape. Once the glue dries, I cut out the railing peel off the tape. I am find Testors Flat White Enamel spray cans work best for painting this micro carpentry. 😆 Onwards… 🍻
- 238 replies
-
- 7
-
-
- Robert E Lee
- steamboat
- (and 3 more)
-
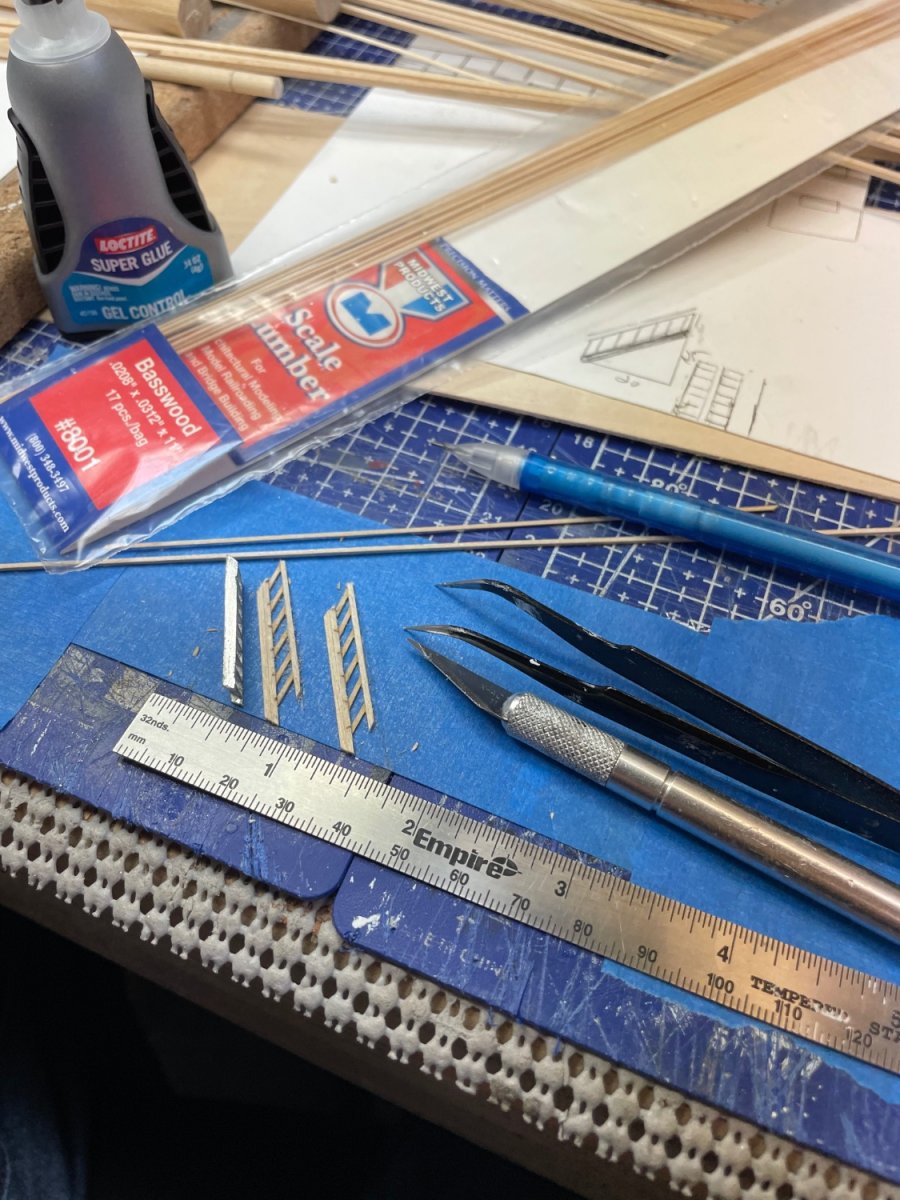
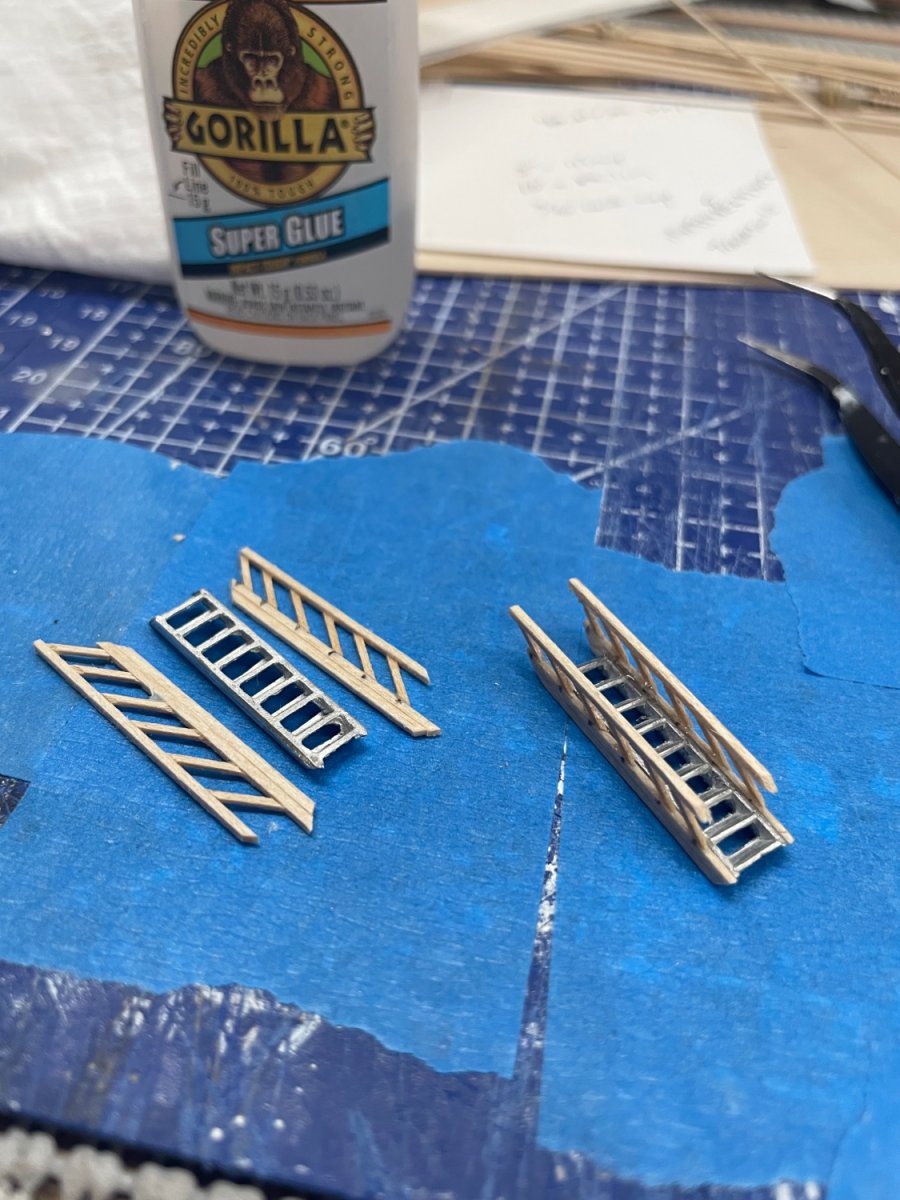
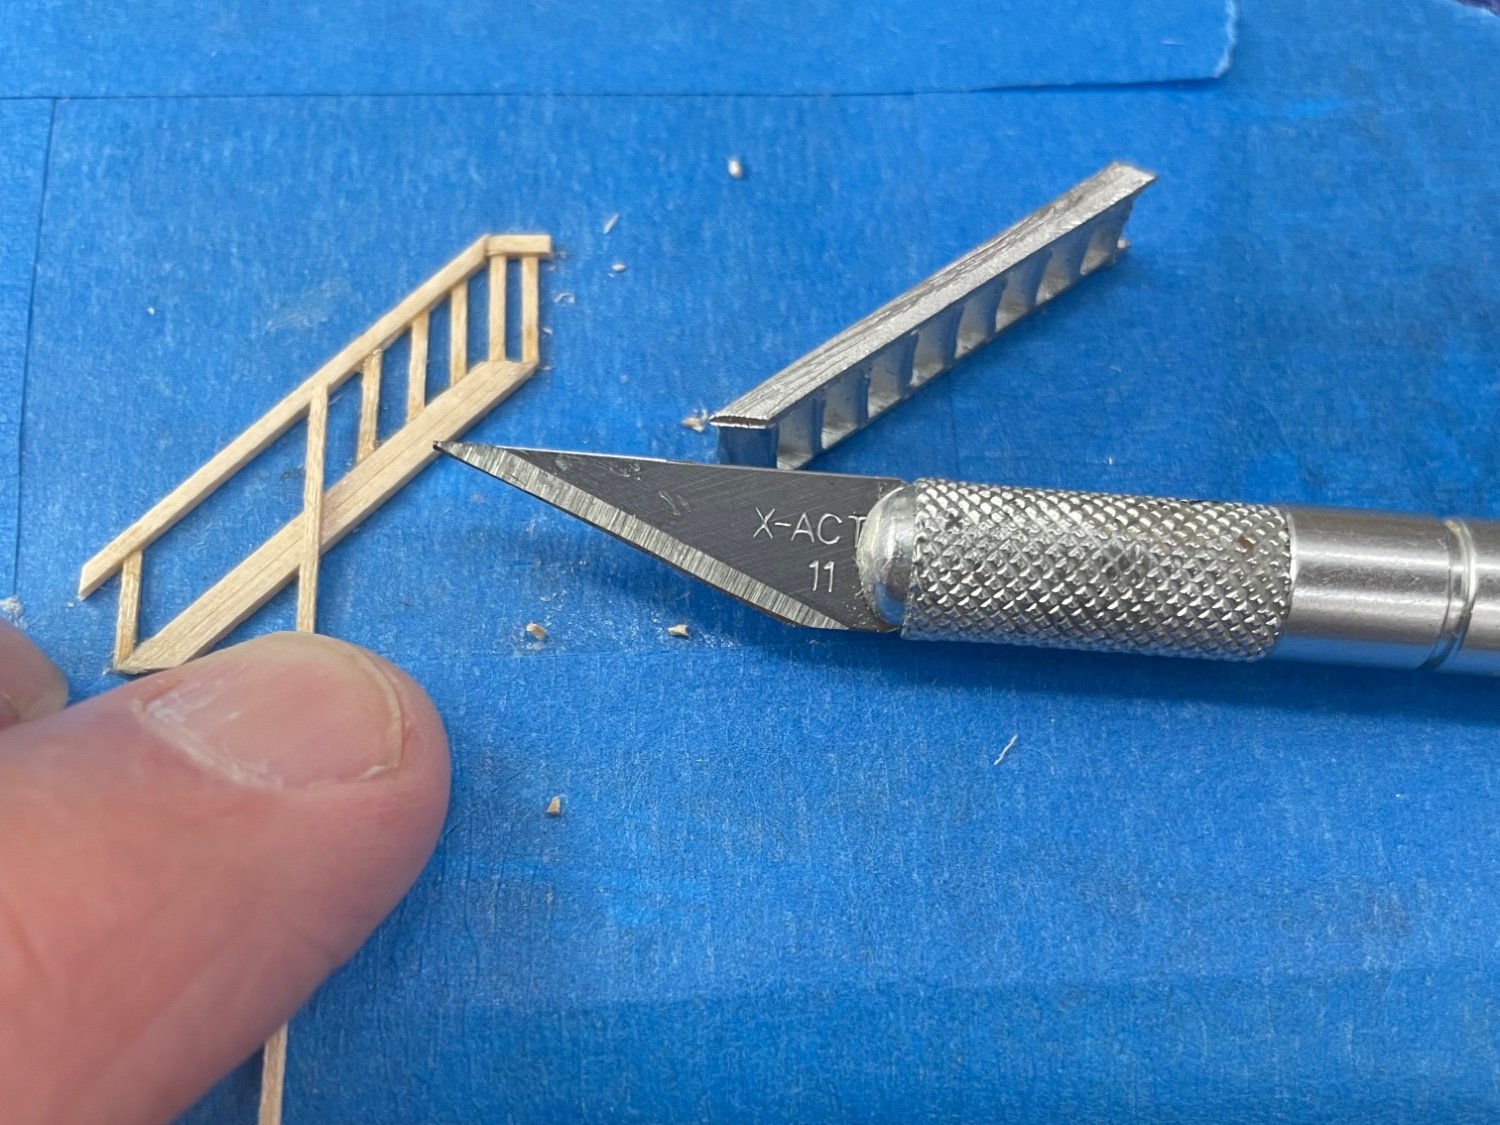
Companionway Railings… Building Railings… Metal steps provided in the kit. 1 of 6 Completed… Maddening! Worst than Paddle Wheels. 🤪 I am sure the next 5 will go a bit smoother. Cheers 🍻


- 238 replies
-
- 8
-
-
- Robert E Lee
- steamboat
- (and 3 more)
-
Awesome work Yves… Not only is this an impressive model, but your attention to detail and enhancement of this kit is incredible. Nice! 👍 John
-
Tom, Glad I could help… Speaking of warships, when you get ready to paint the hull of your CWM you’ll want to consider the era you wish to represent. These Whalers were painted to look like a warship (i.e. White stripe and mock Gun Portals) to keep the natives of the South Pacific from attacking their vessel. 😎 Your Morgan is looking Great! John
- 11 replies
-
- 1
-
-
- Charles W Morgan
- anchor chain
- (and 1 more)
-
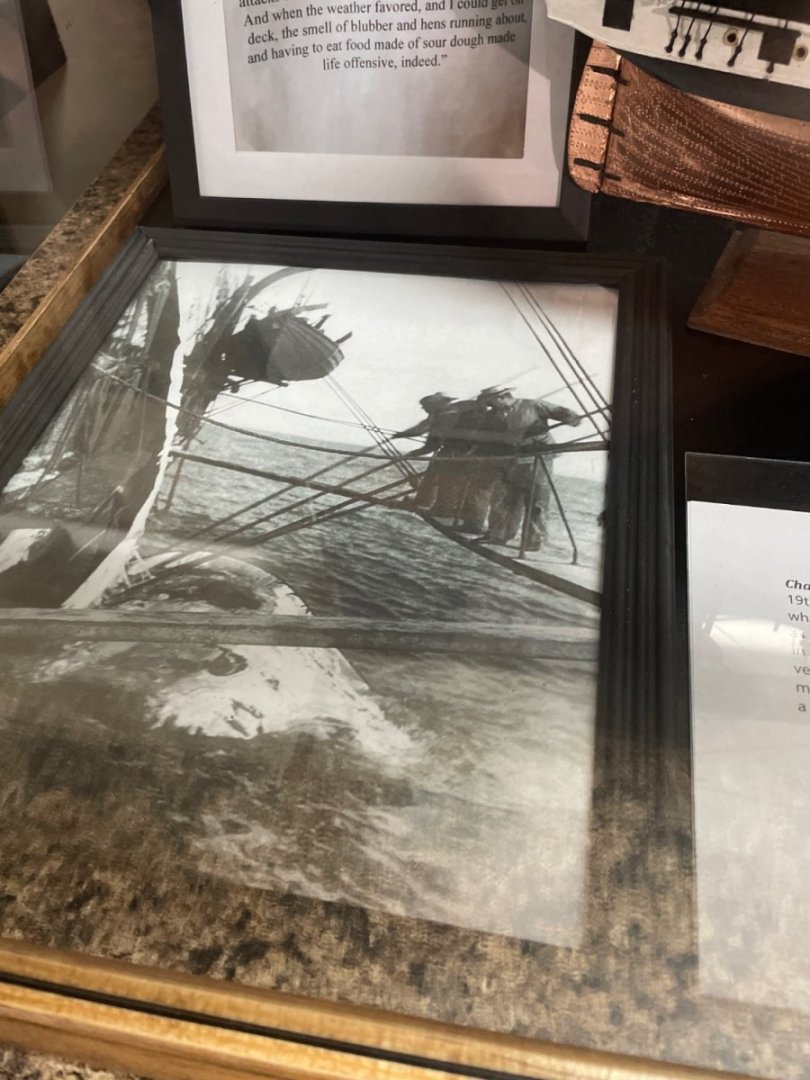
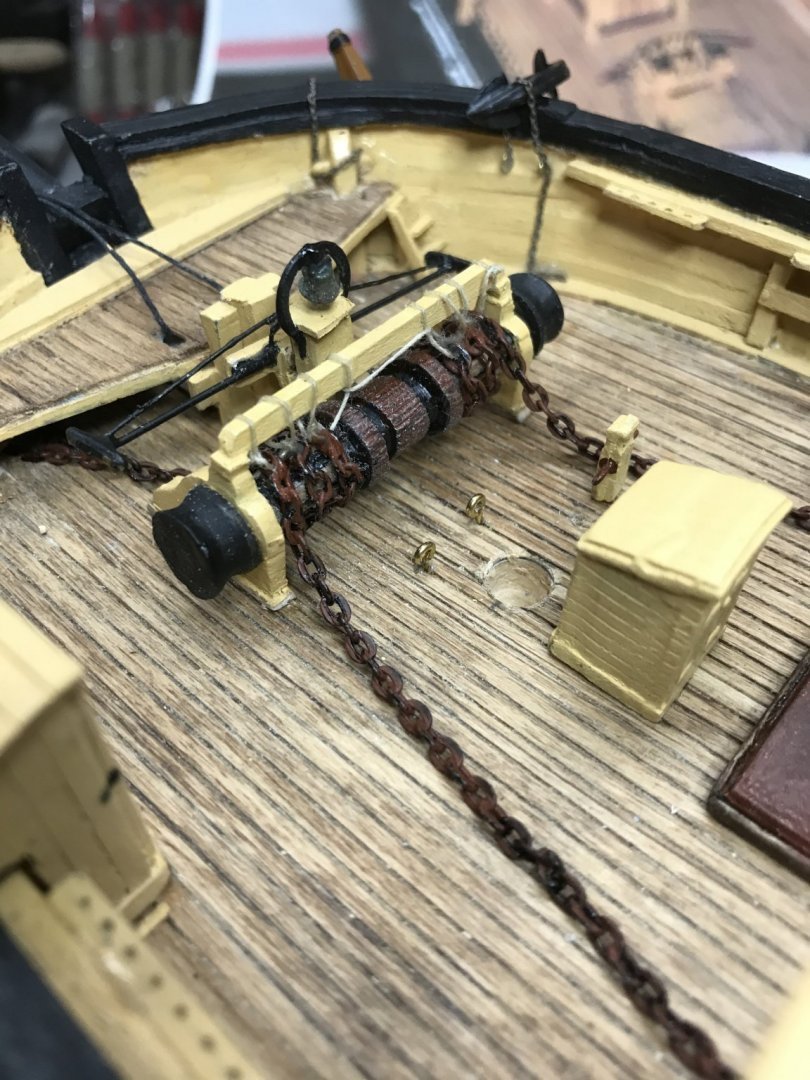
Tom, Are you referring to the hawse pipe on the starboard side? I believe the fluke chain was used to tie up the harpooned whale by its Fluke along side the whale ship. I have this photo in my display case. You can see the Fluke Chain hanging in the water toward the bow just past the stowed whaleboat. John
- 11 replies
-
- 3
-
-
-
- Charles W Morgan
- anchor chain
- (and 1 more)
-
Finished up Hog Frames… Started working on Companionway Railings. 🧐 Cheers 🍻


- 238 replies
-
- 9
-
-
- Robert E Lee
- steamboat
- (and 3 more)
-
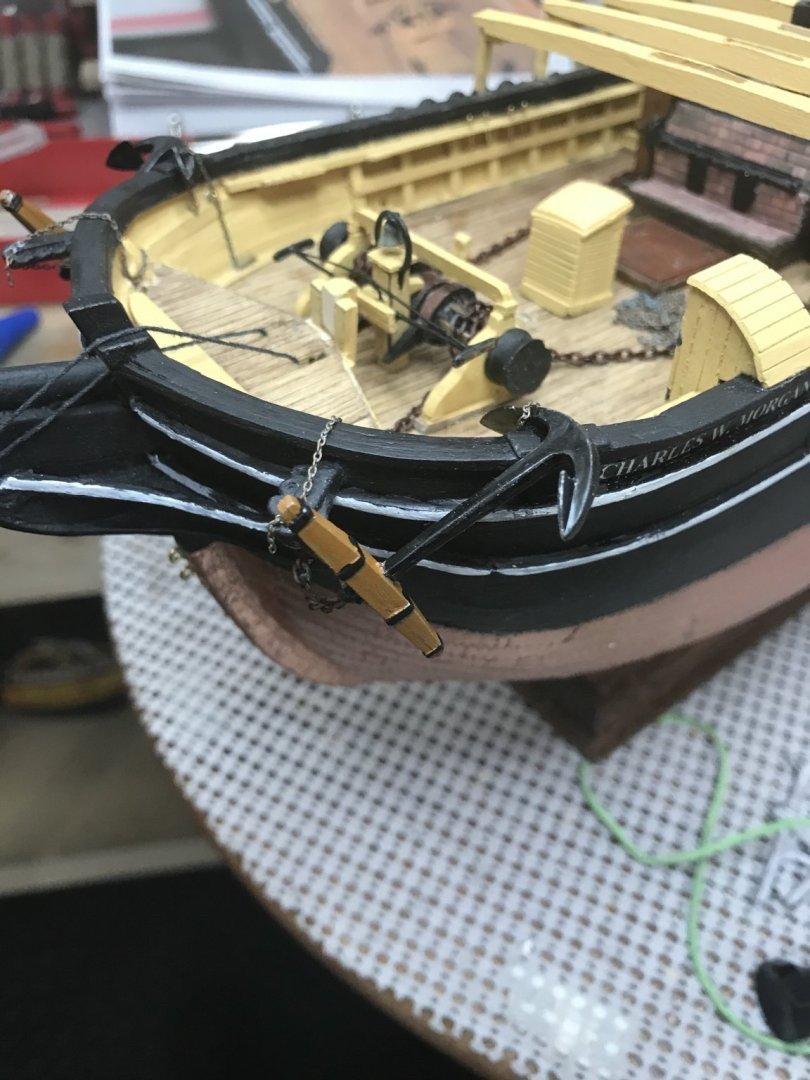
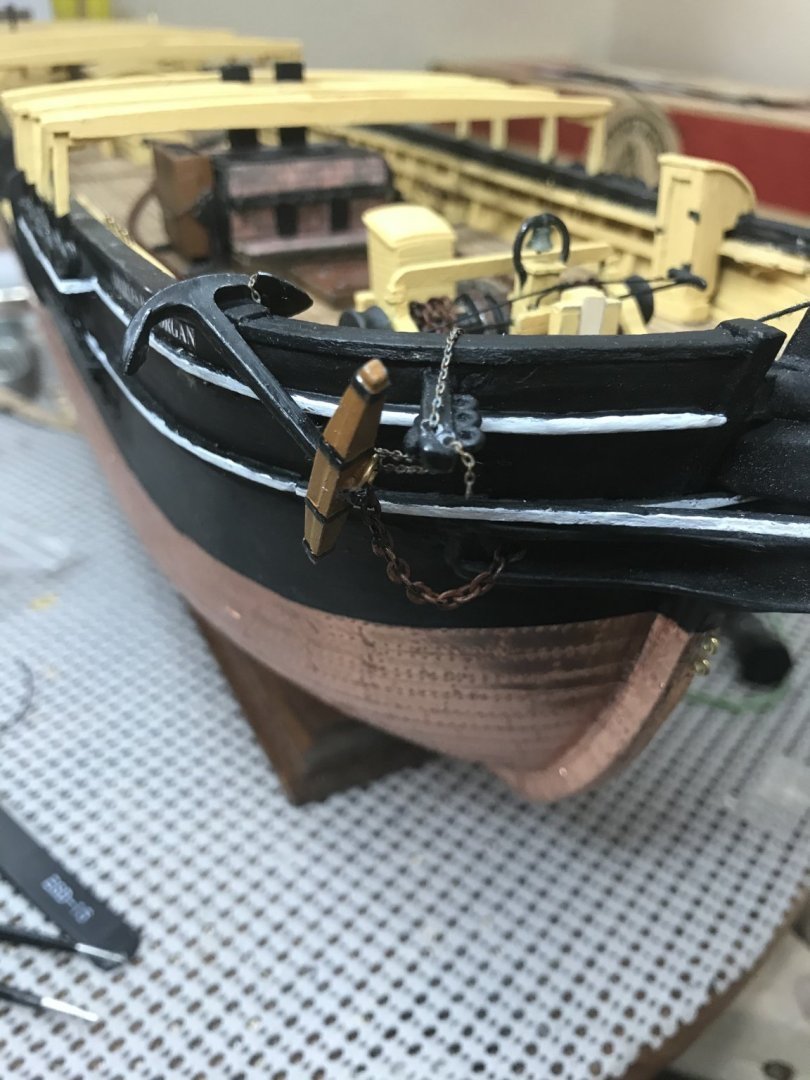
As I recall my CWM plans from The Marine Model Company only showed one anchor drawn. However, I researched the anchor rigging extensively and determined there should be two and how they should be rigged from the anchor chain to the stowing of the anchor on to the bulwarks. I don’t recall any specific sources of the information there were many. 🤪 Here are a couple of photos of the result from my CWM build that might be helpful.
- 11 replies
-
- 3
-
-
-
- Charles W Morgan
- anchor chain
- (and 1 more)
-
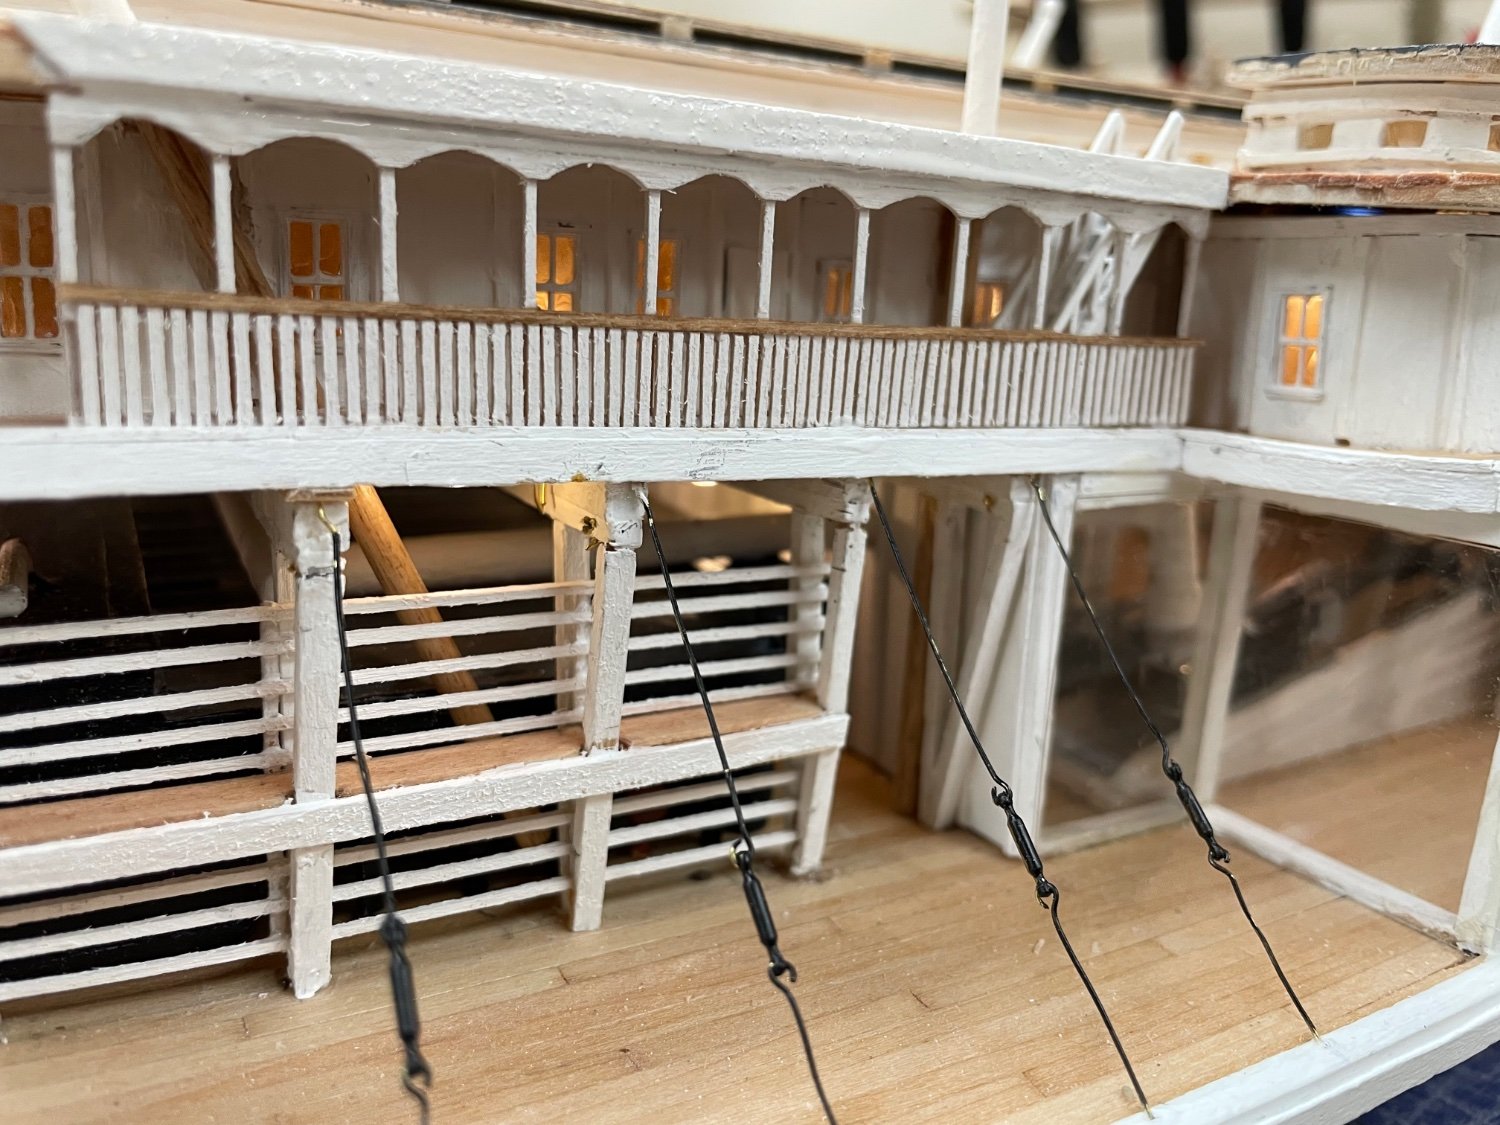
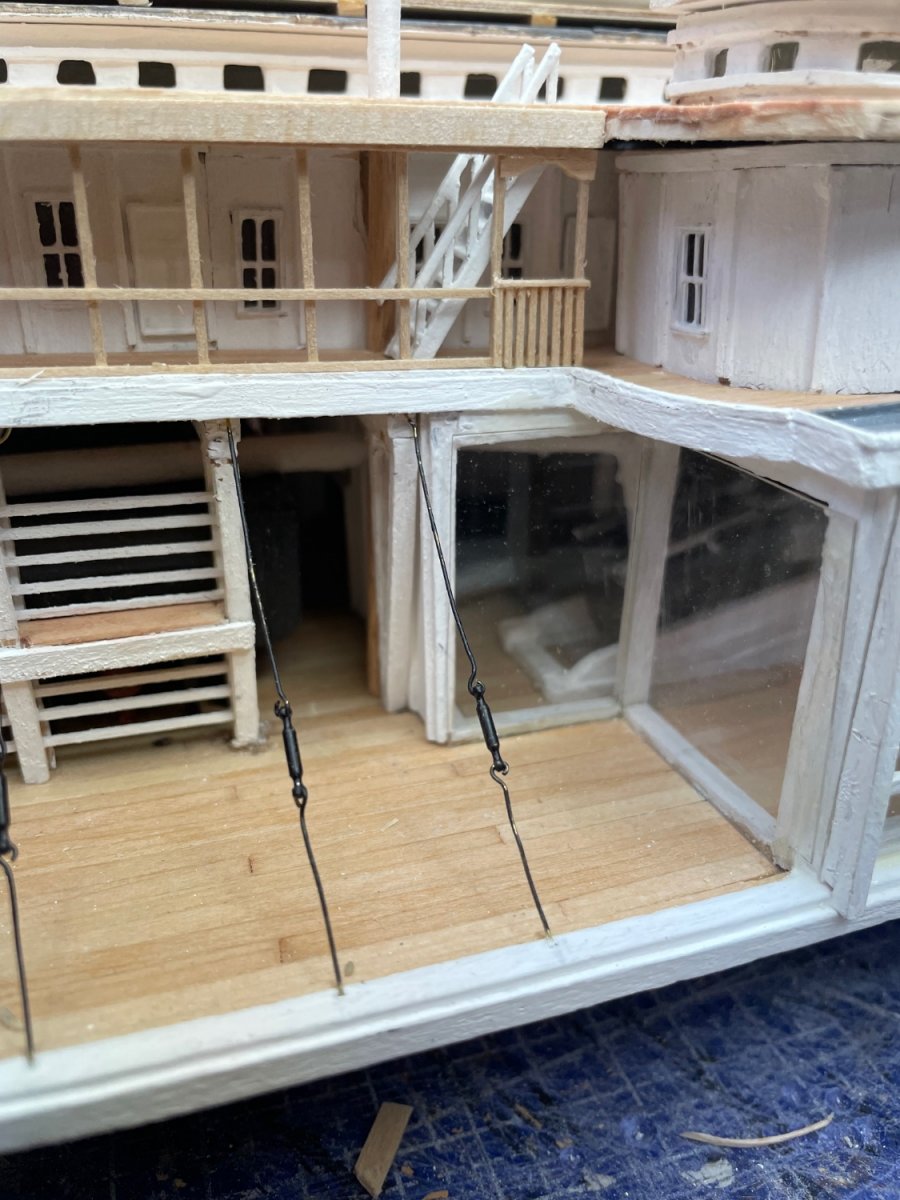
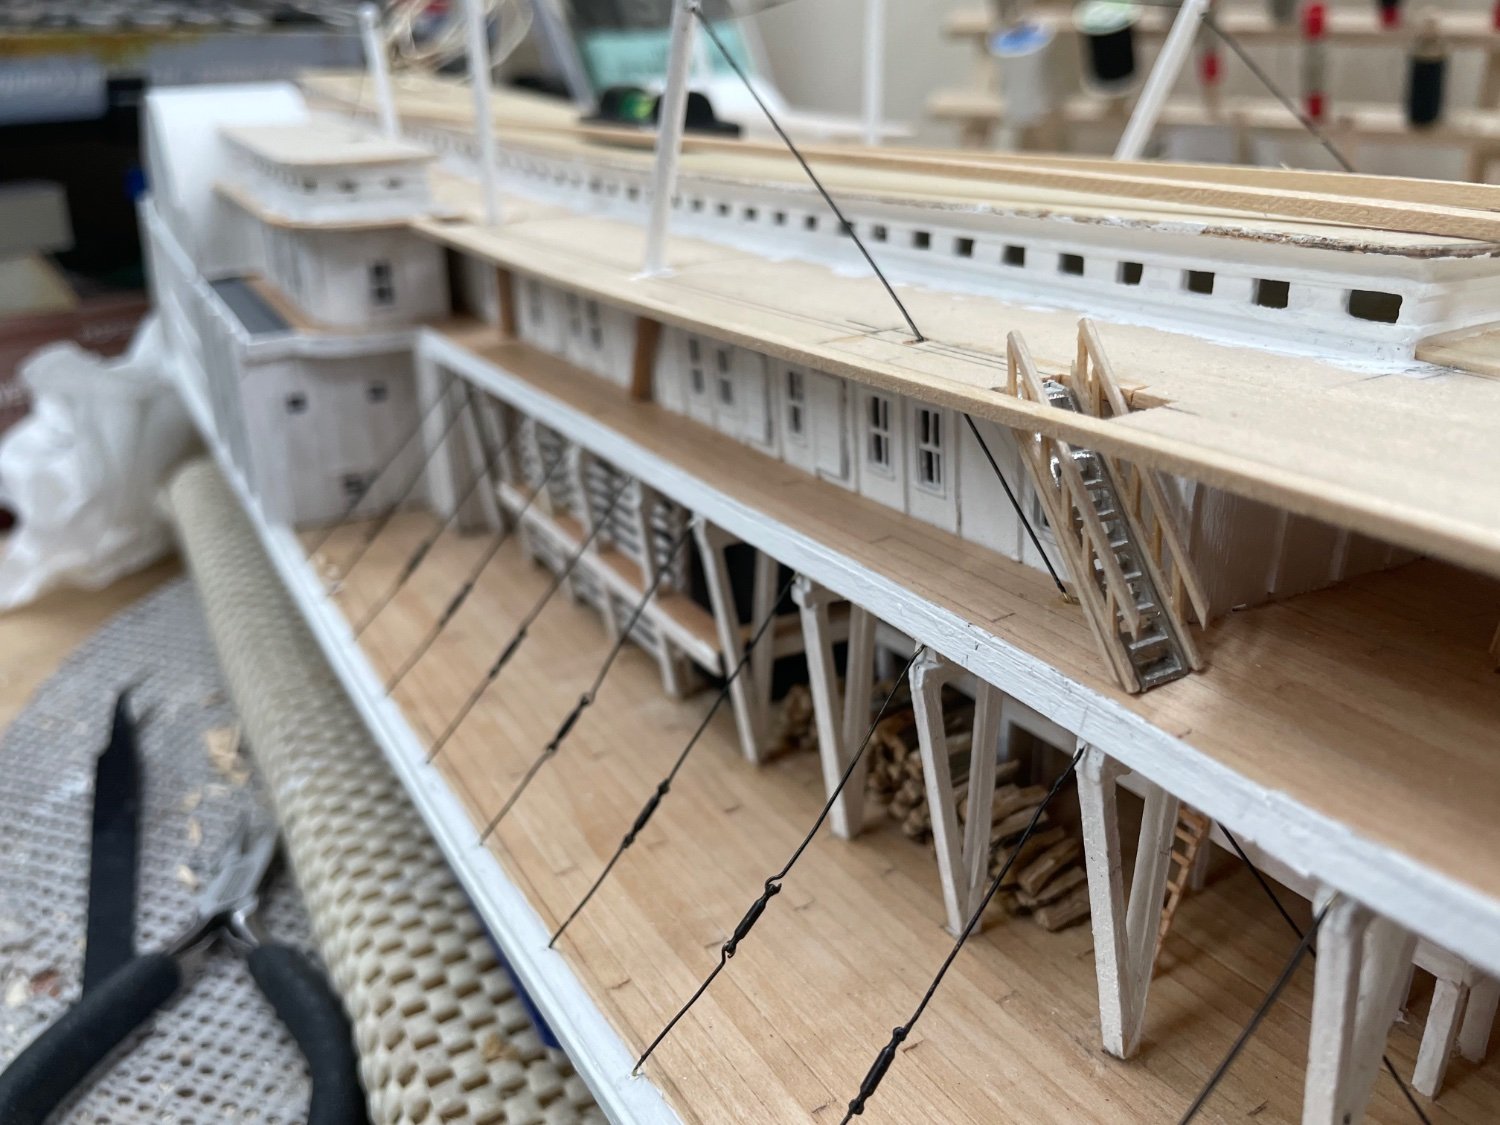
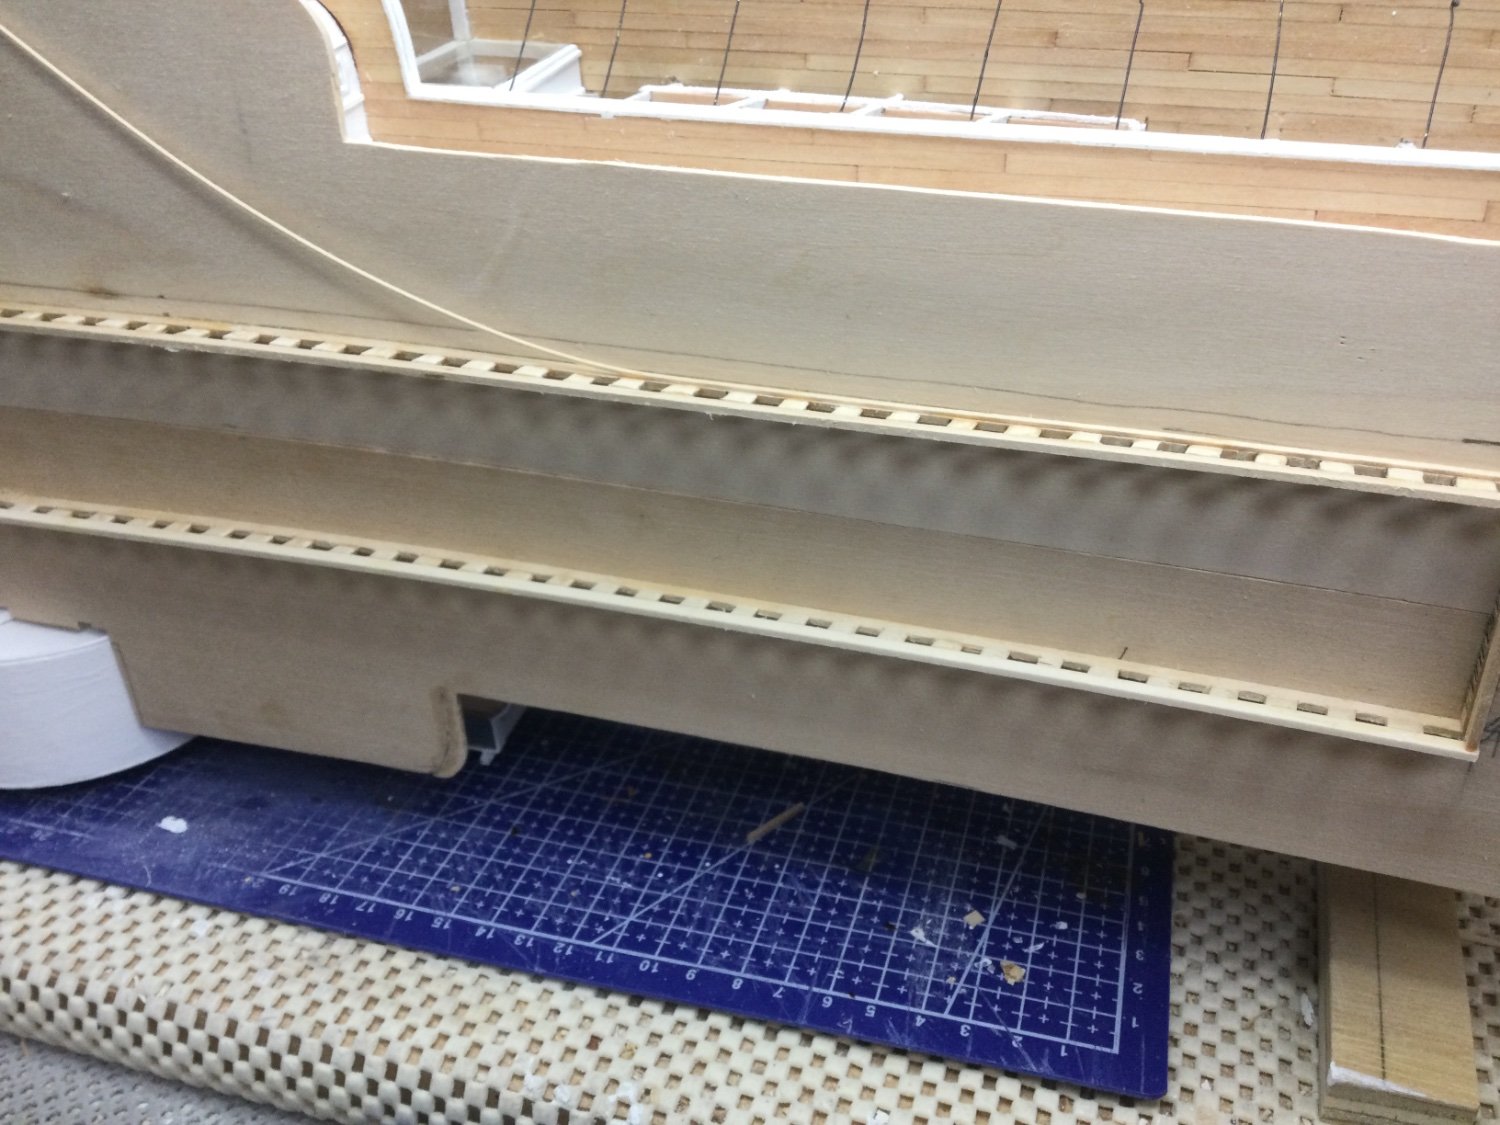
Those are part of the steel truss systems used to strengthen these massive Riverboats. Steam and steel, 1870 technologies.
- 238 replies
-
- 4
-
-
- Robert E Lee
- steamboat
- (and 3 more)
-
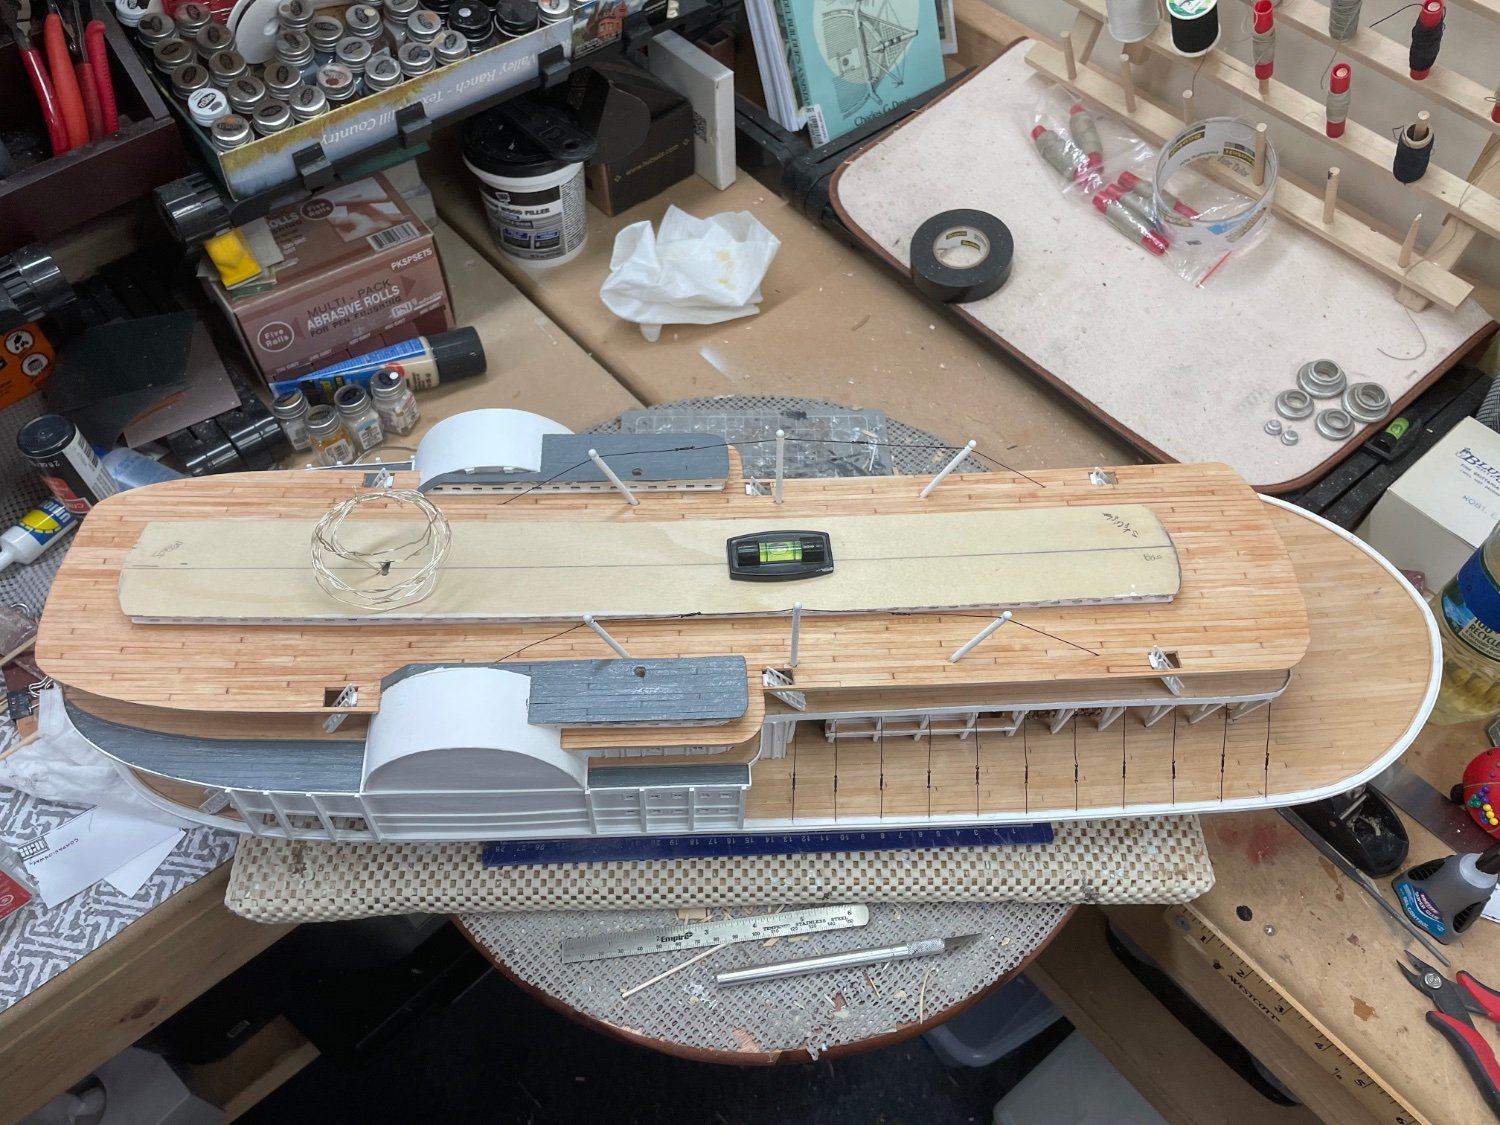
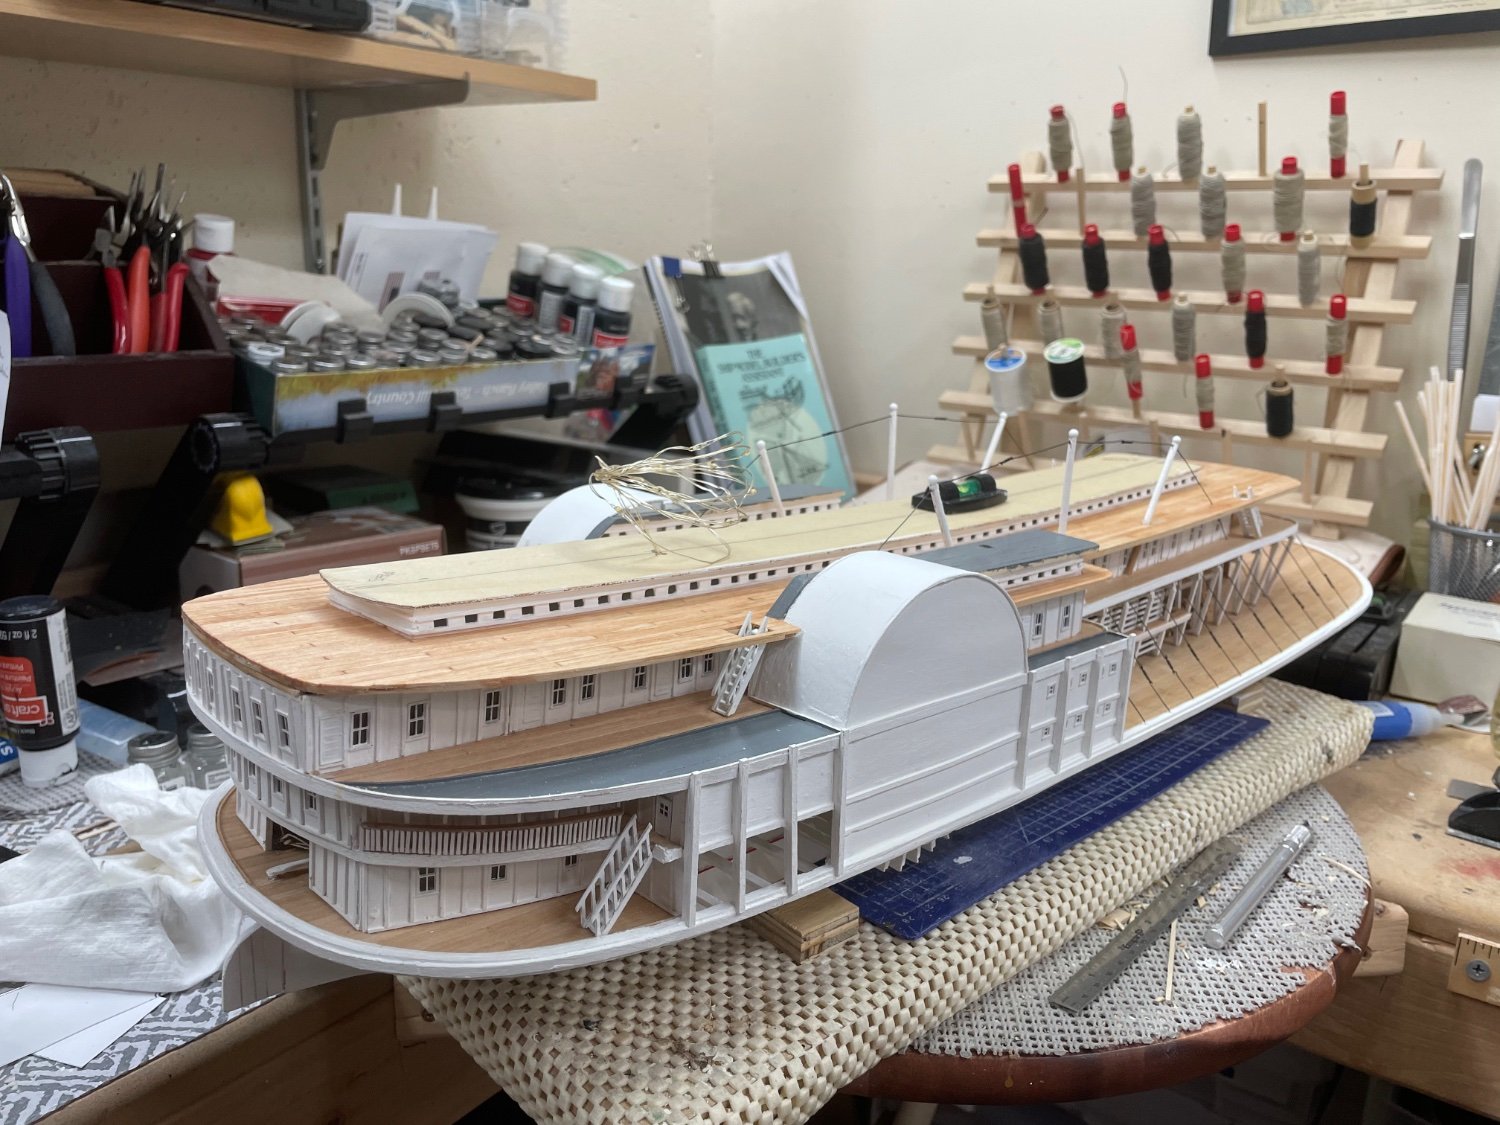
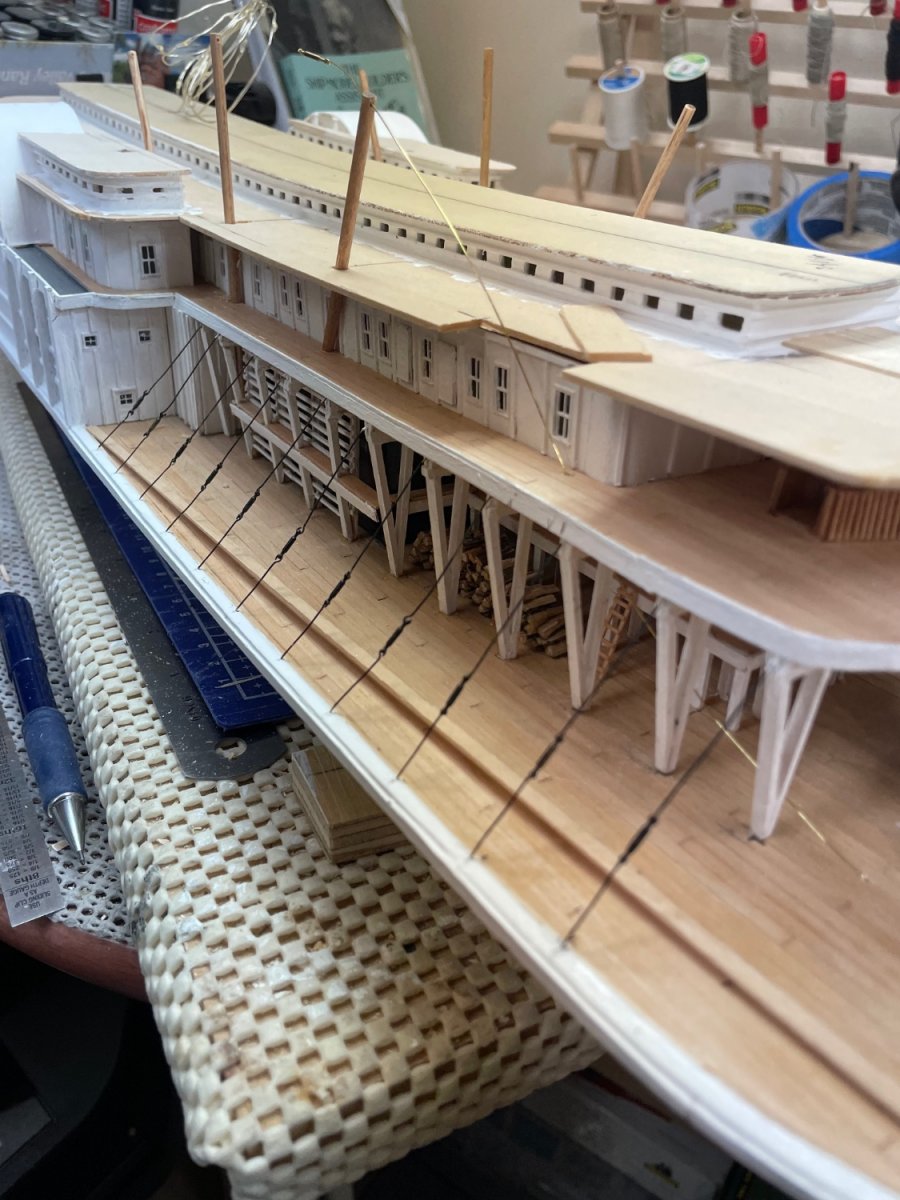
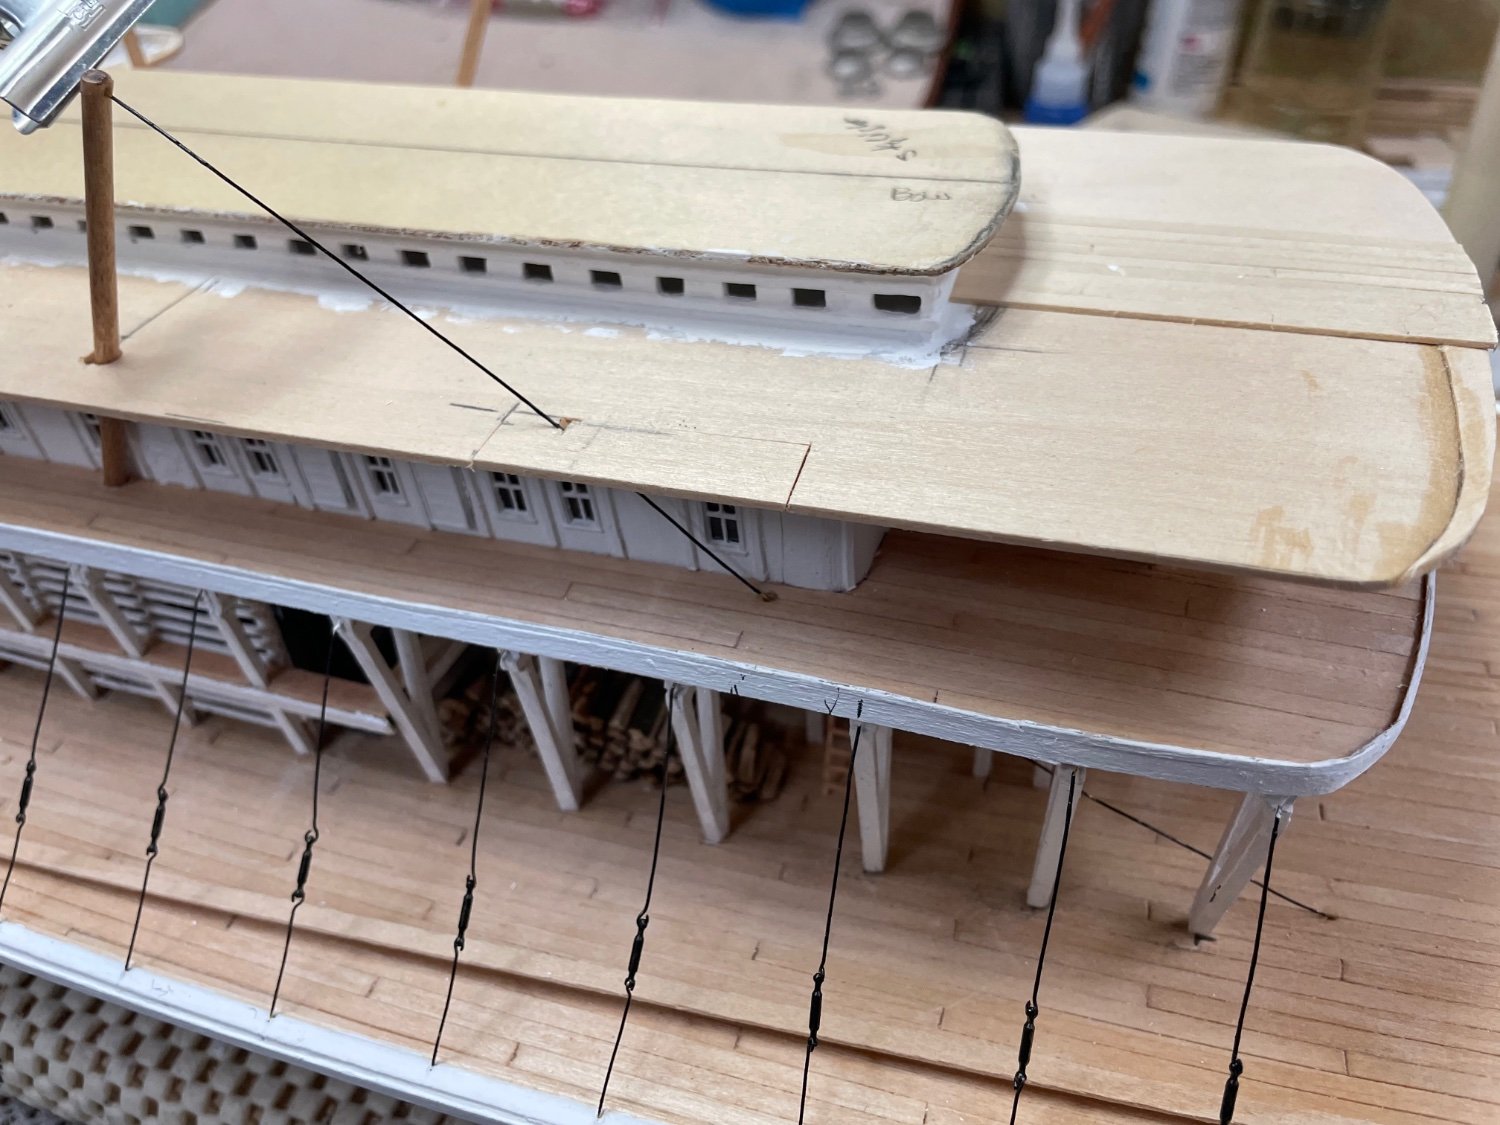
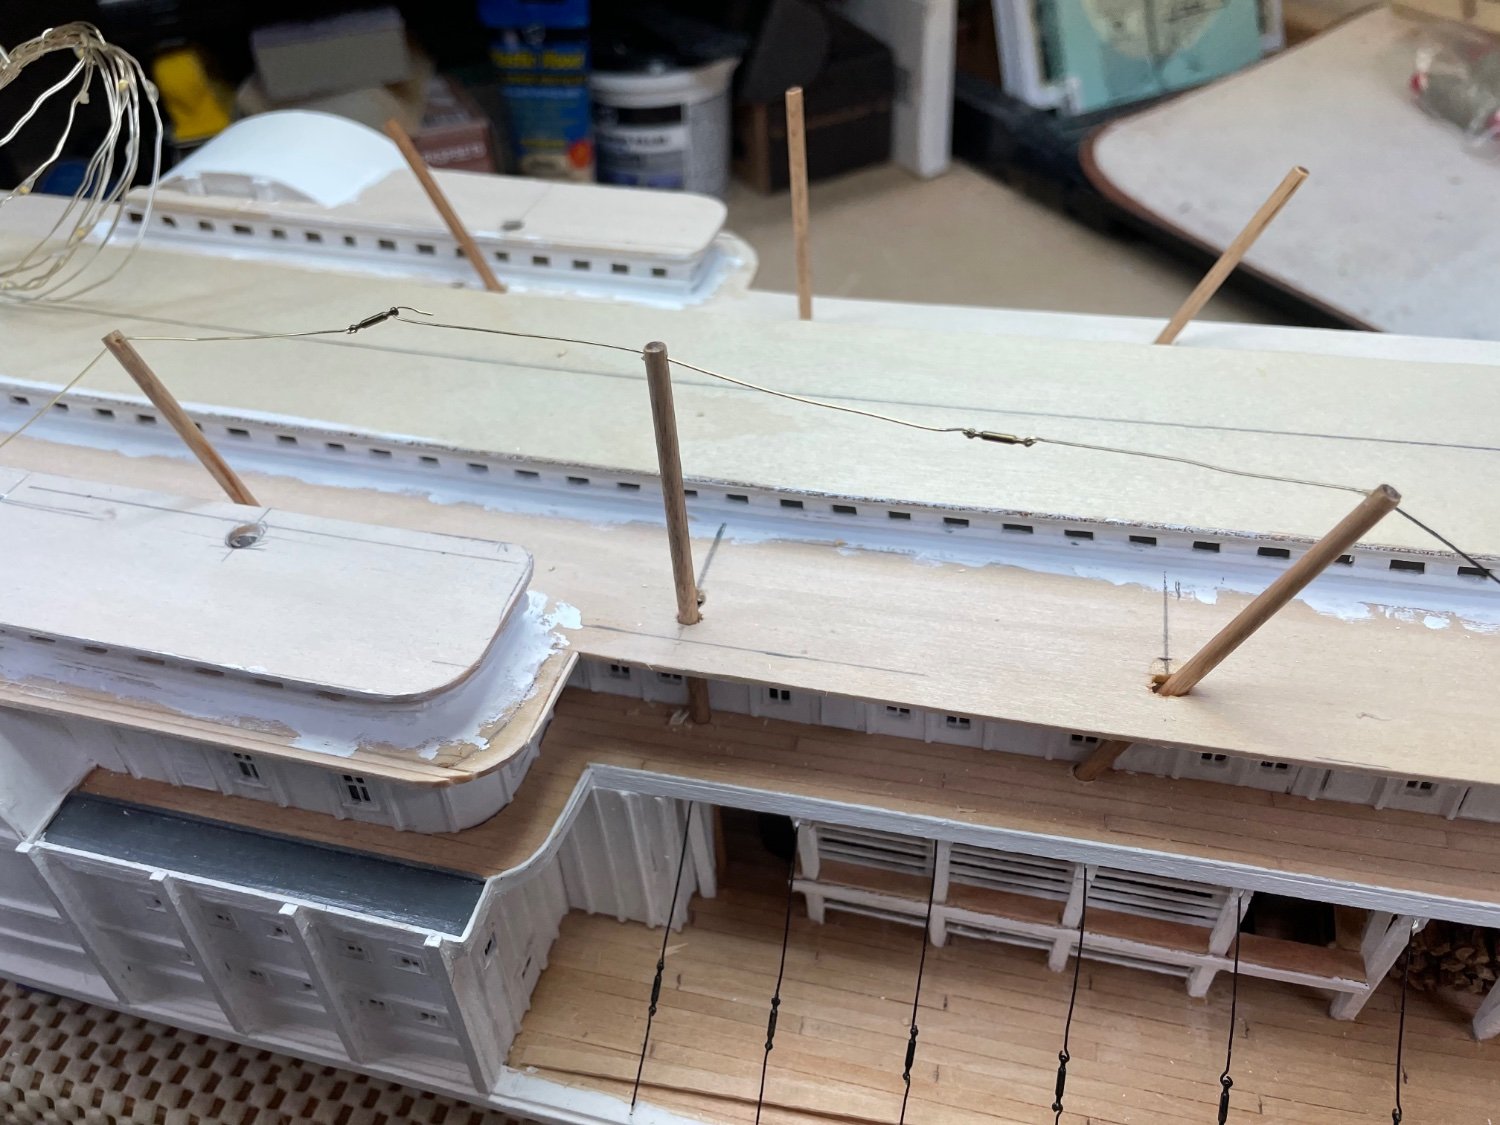
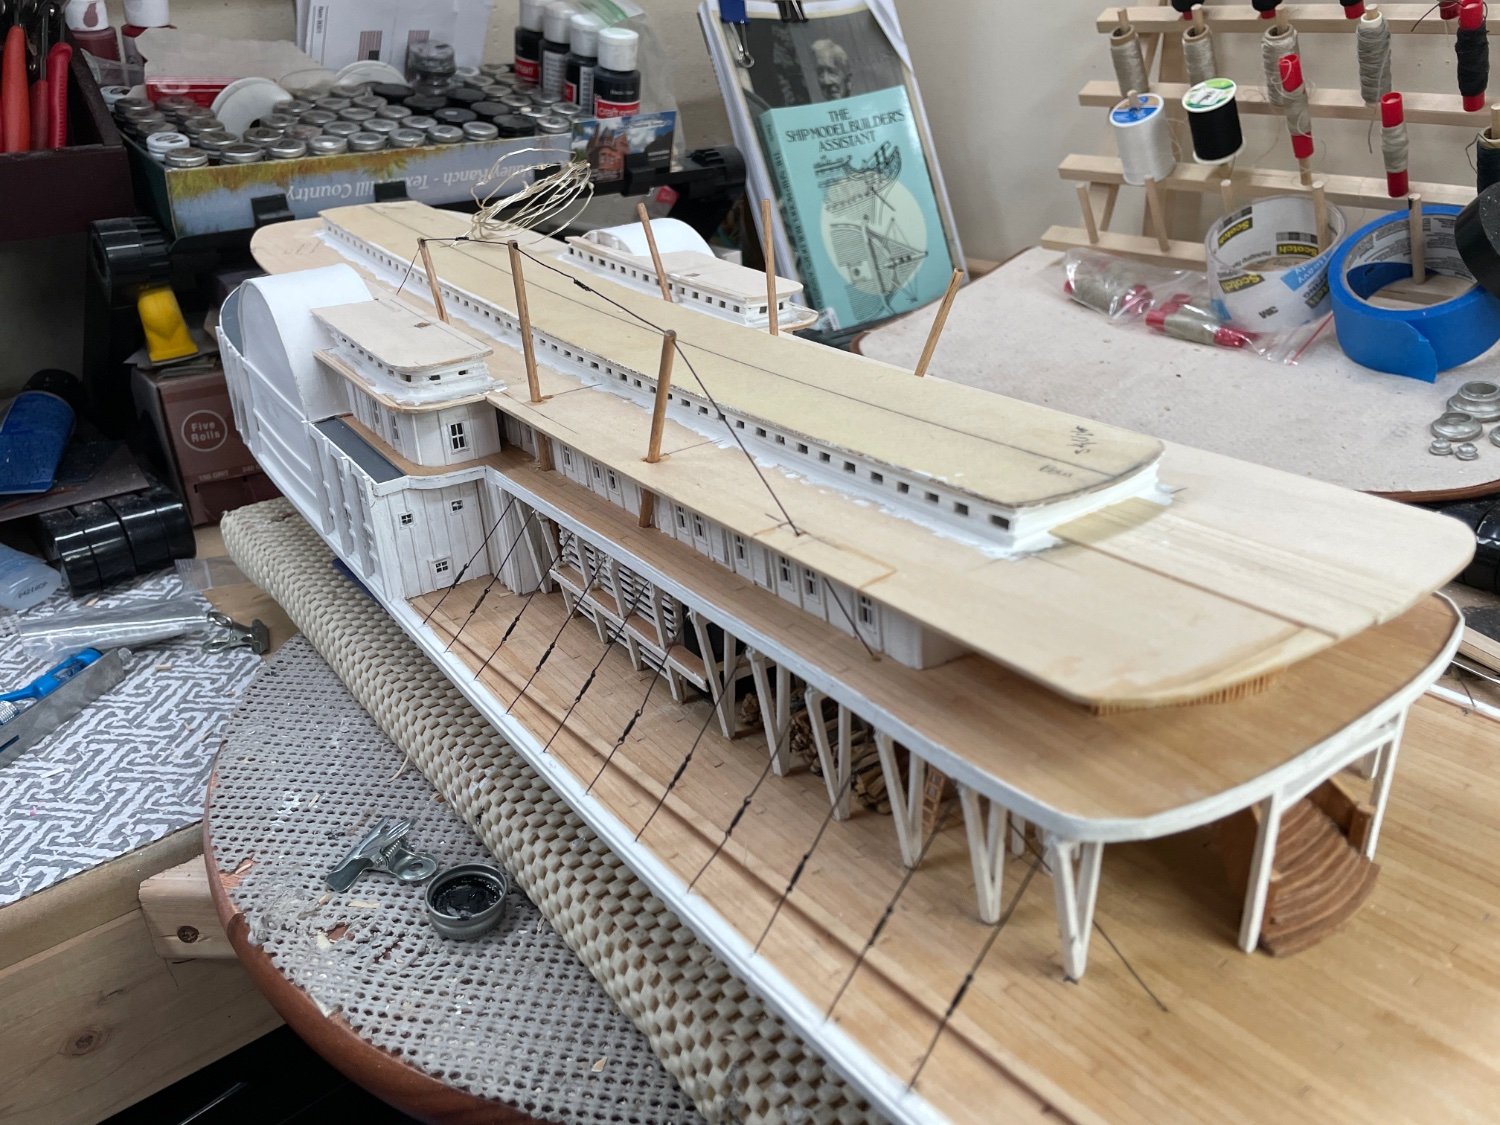
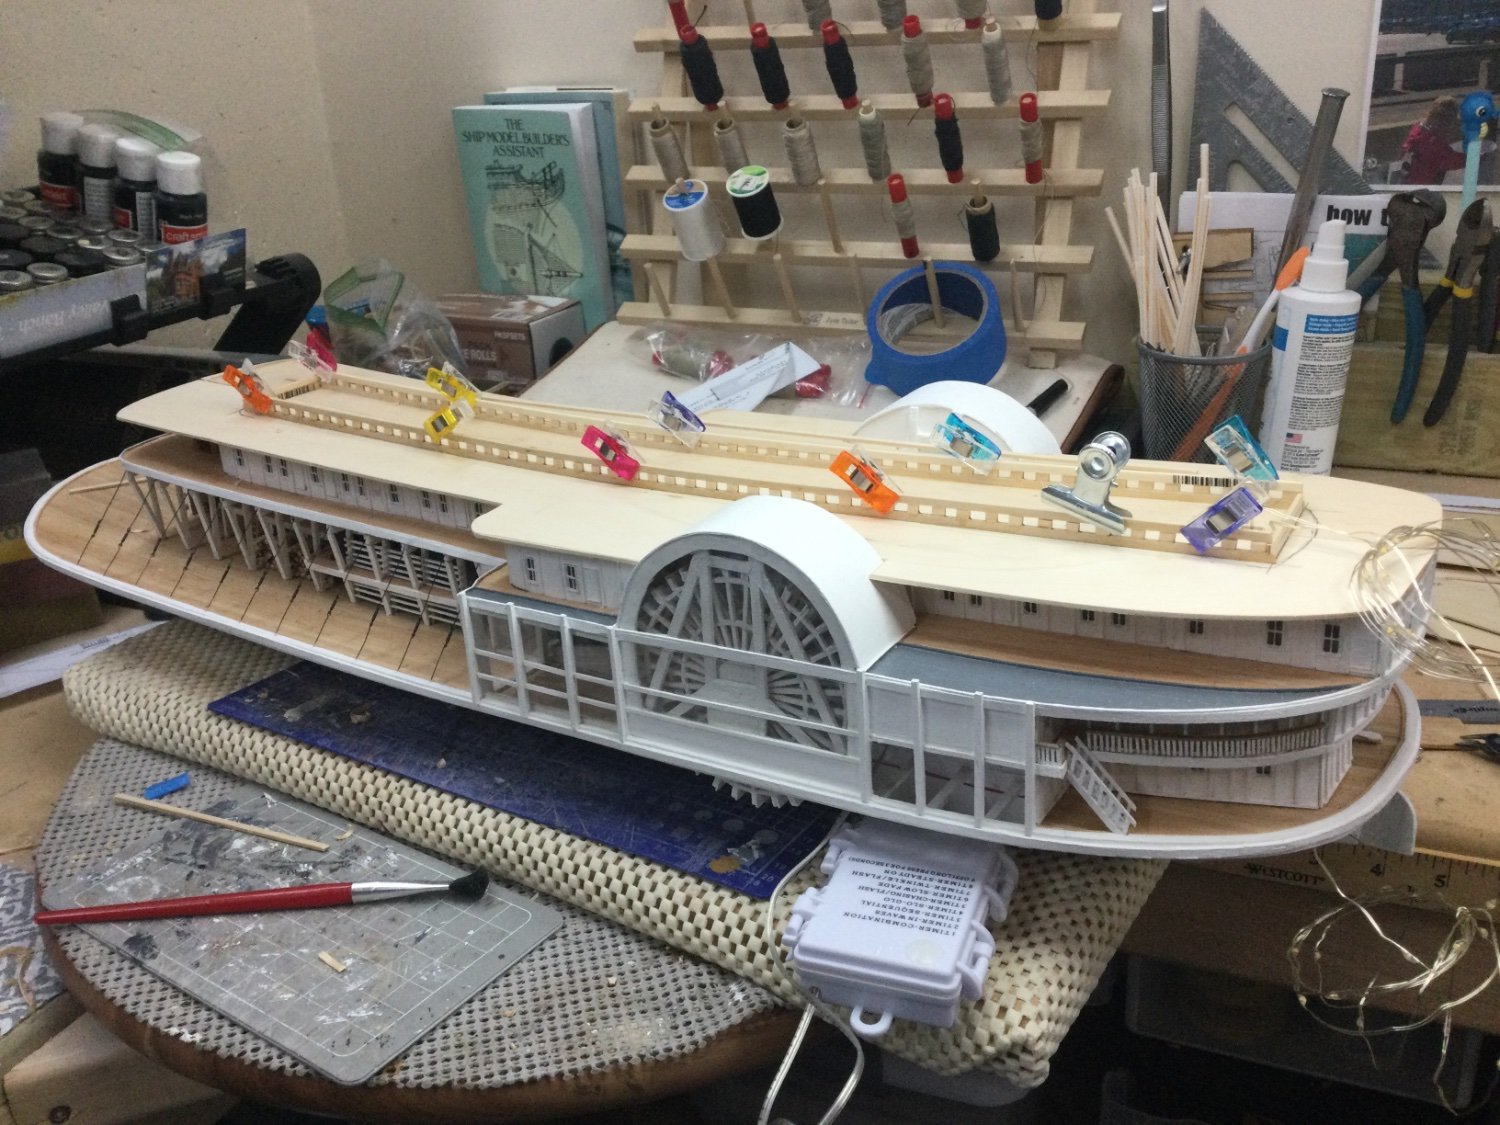
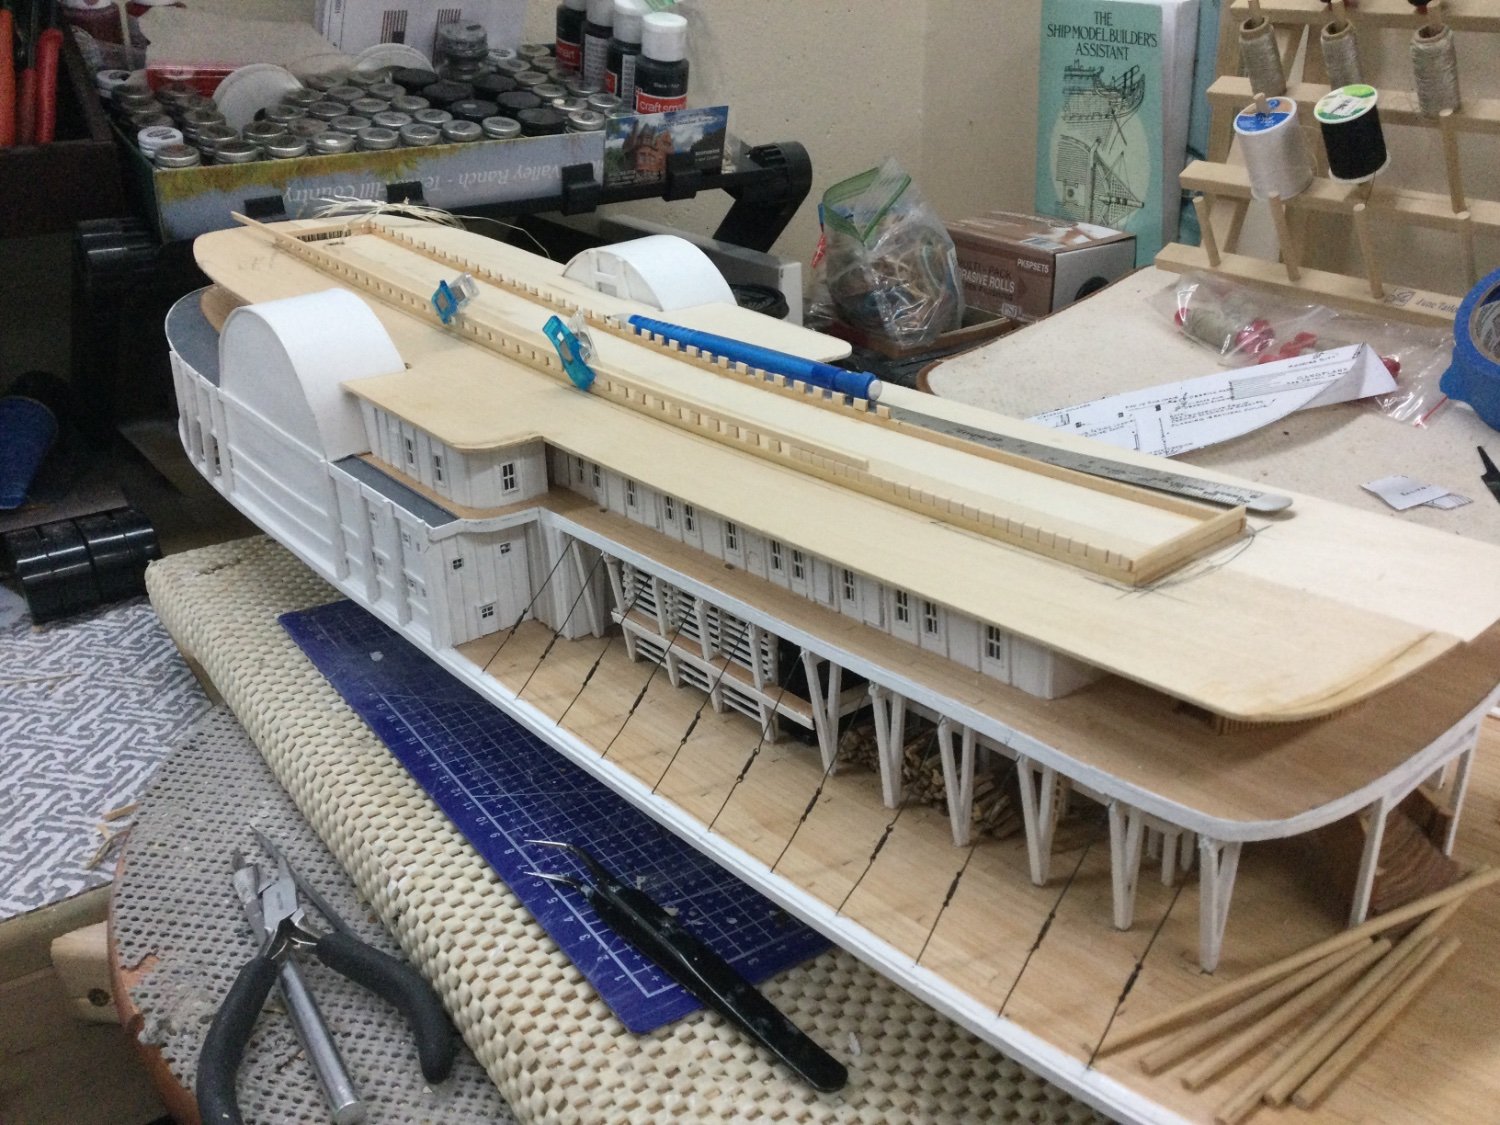
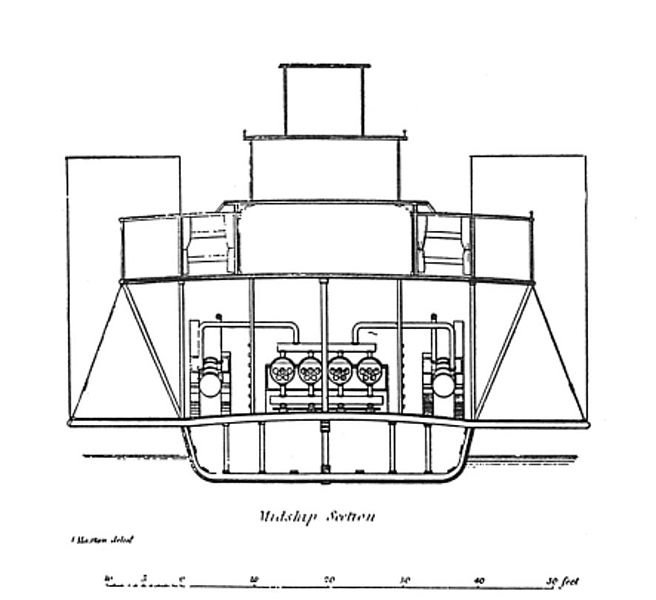
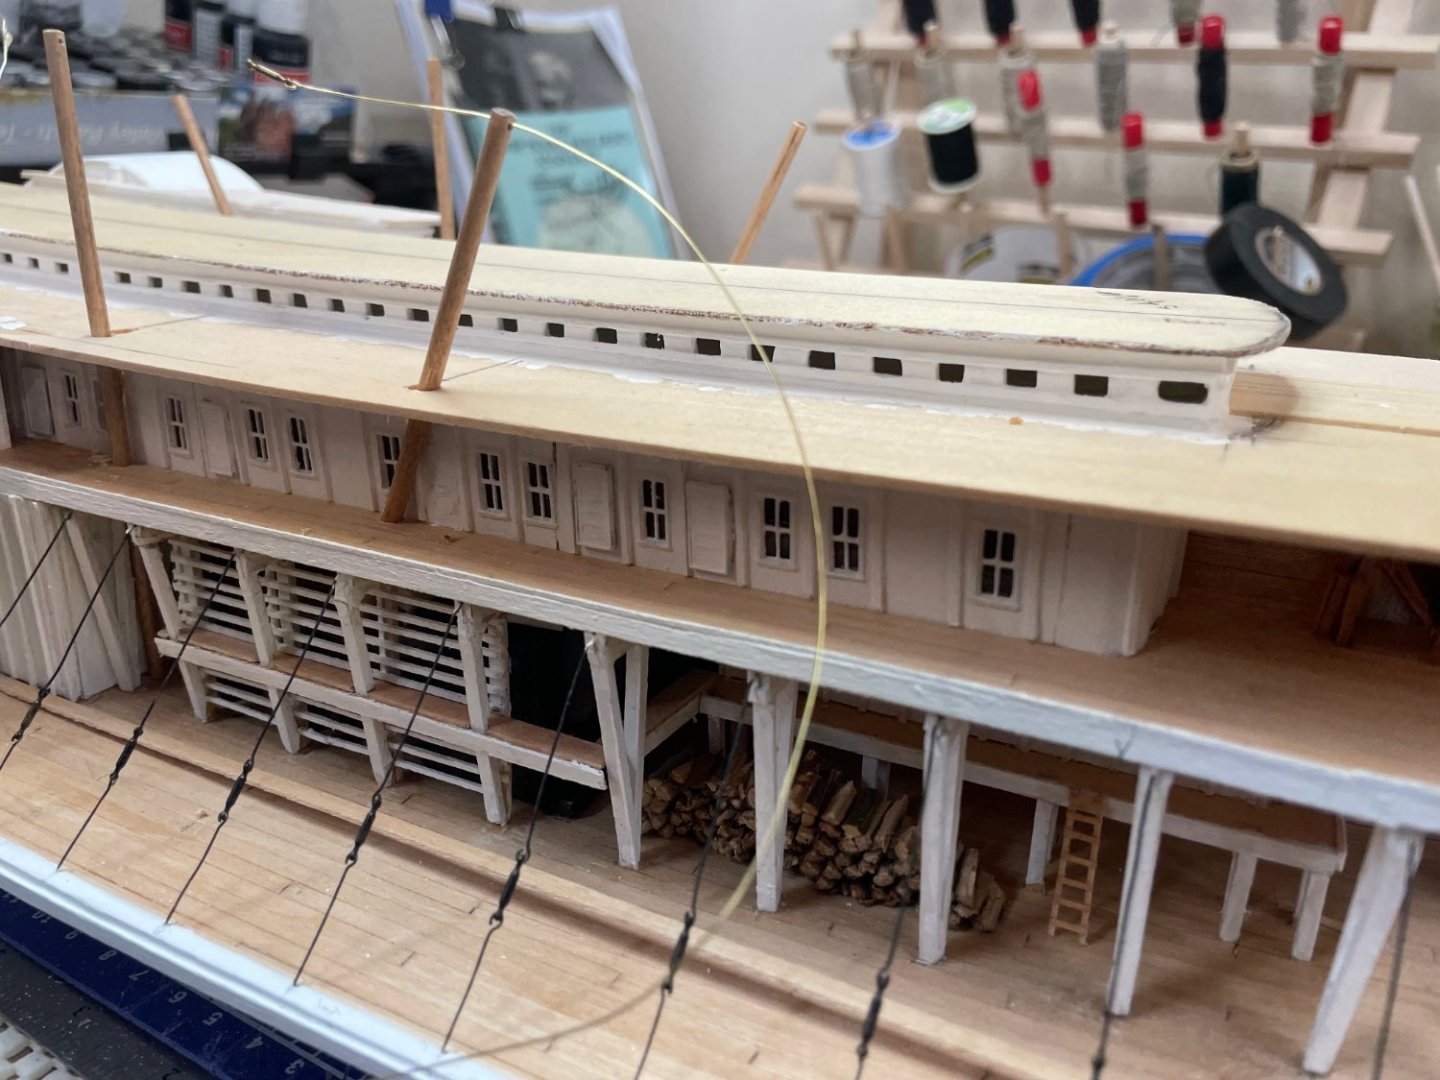
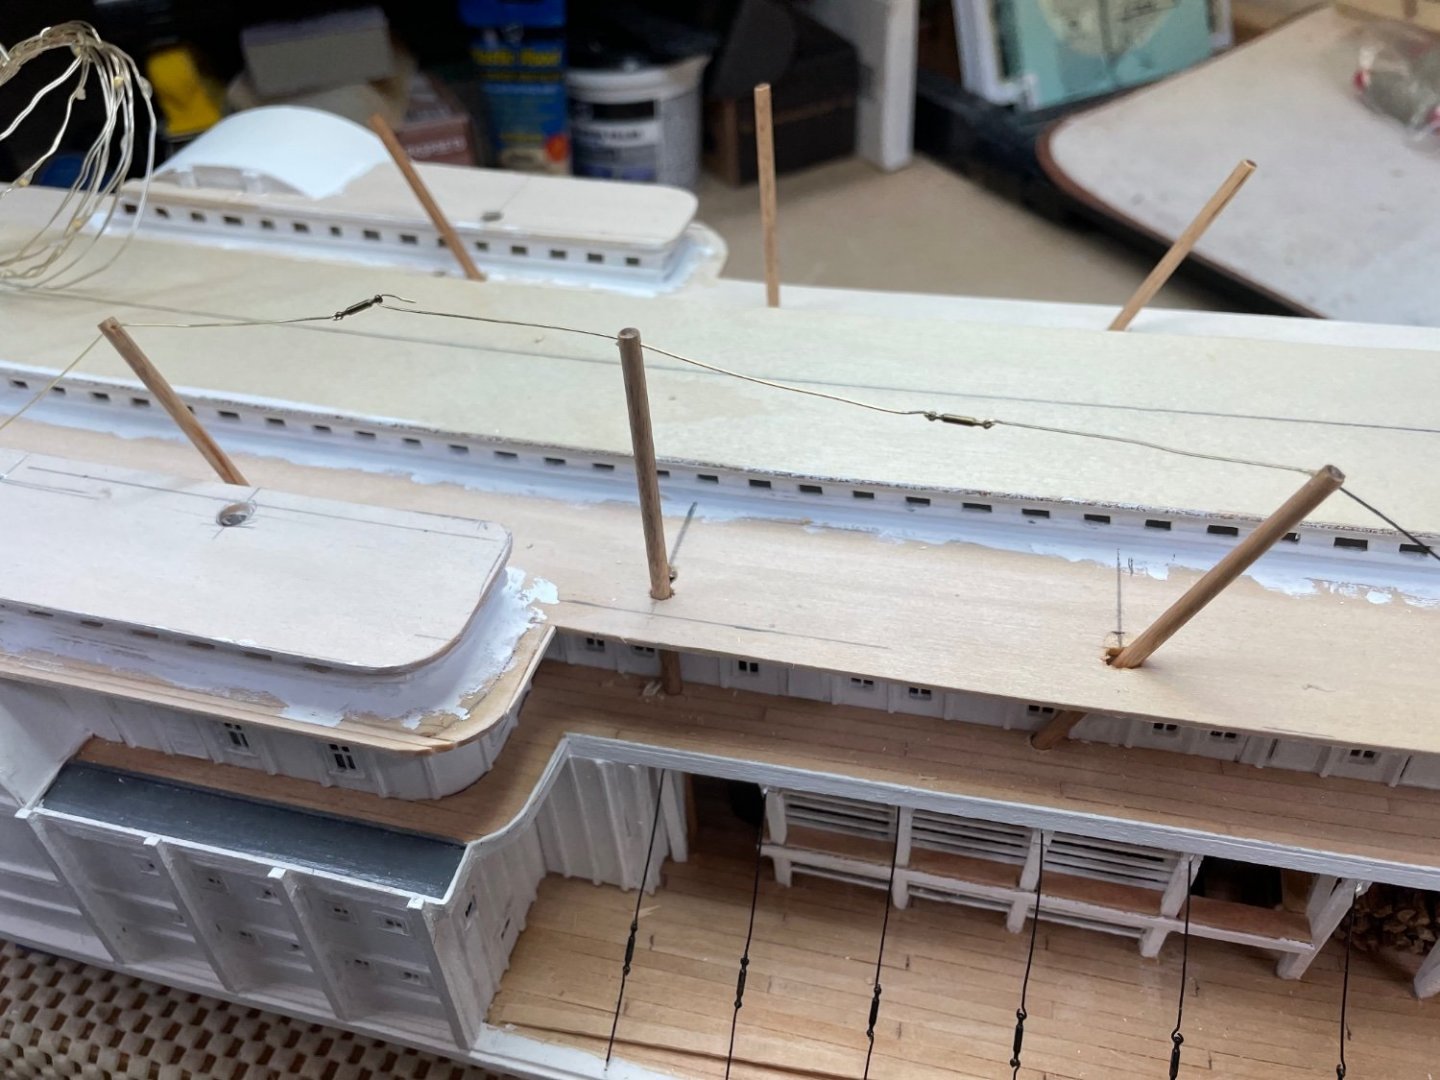
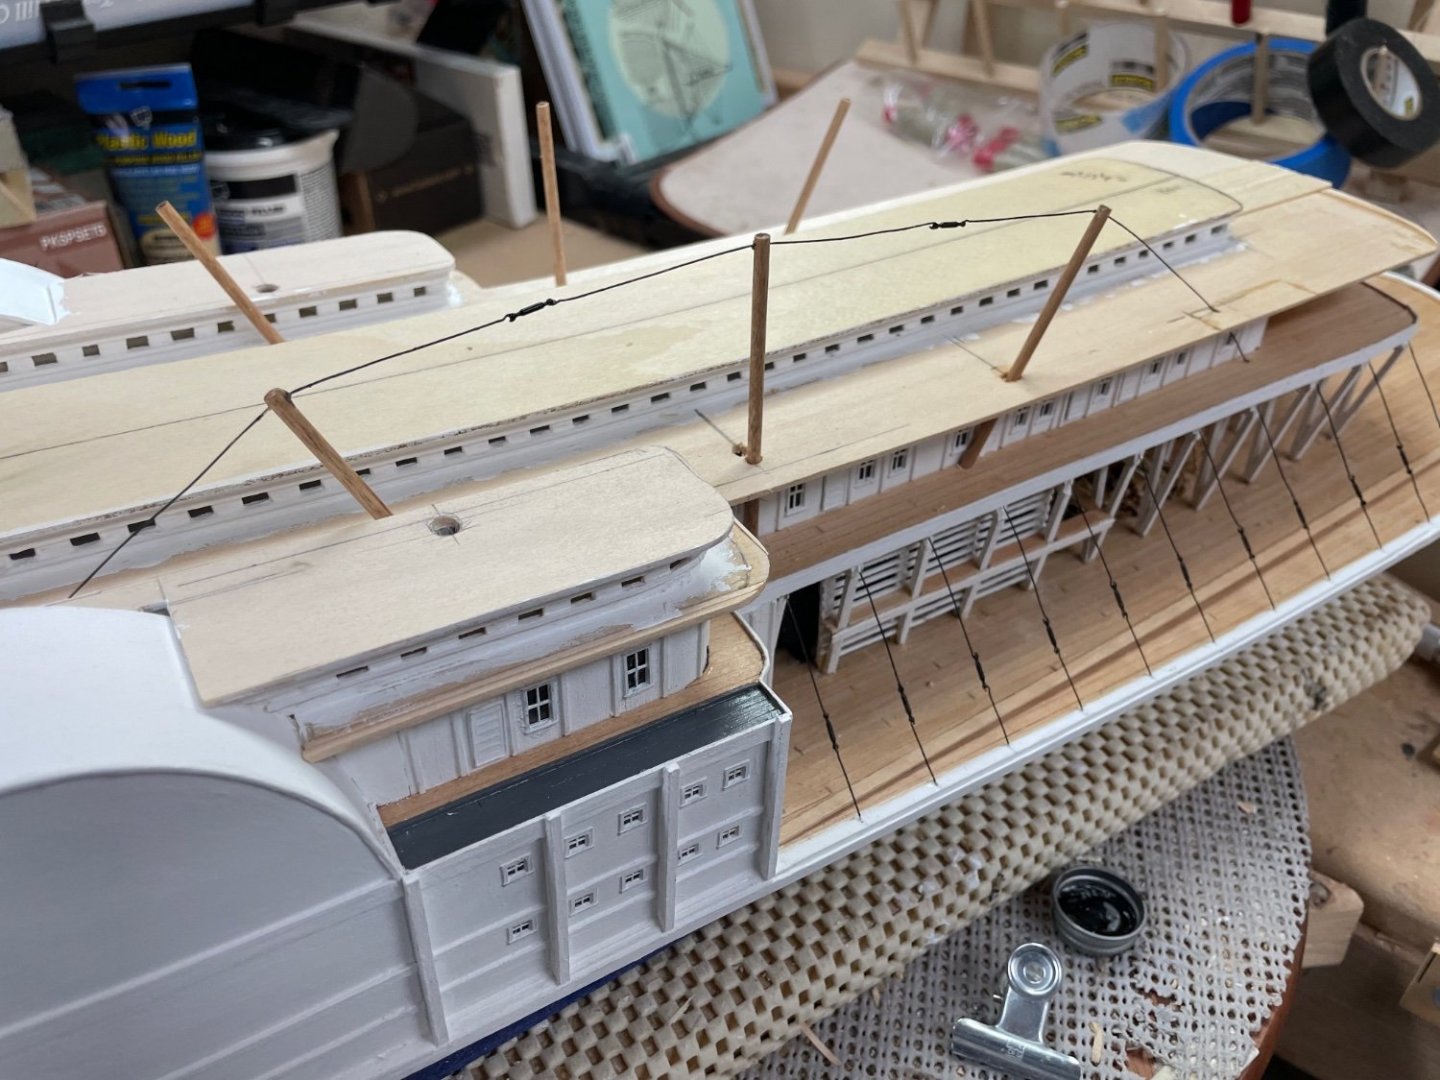
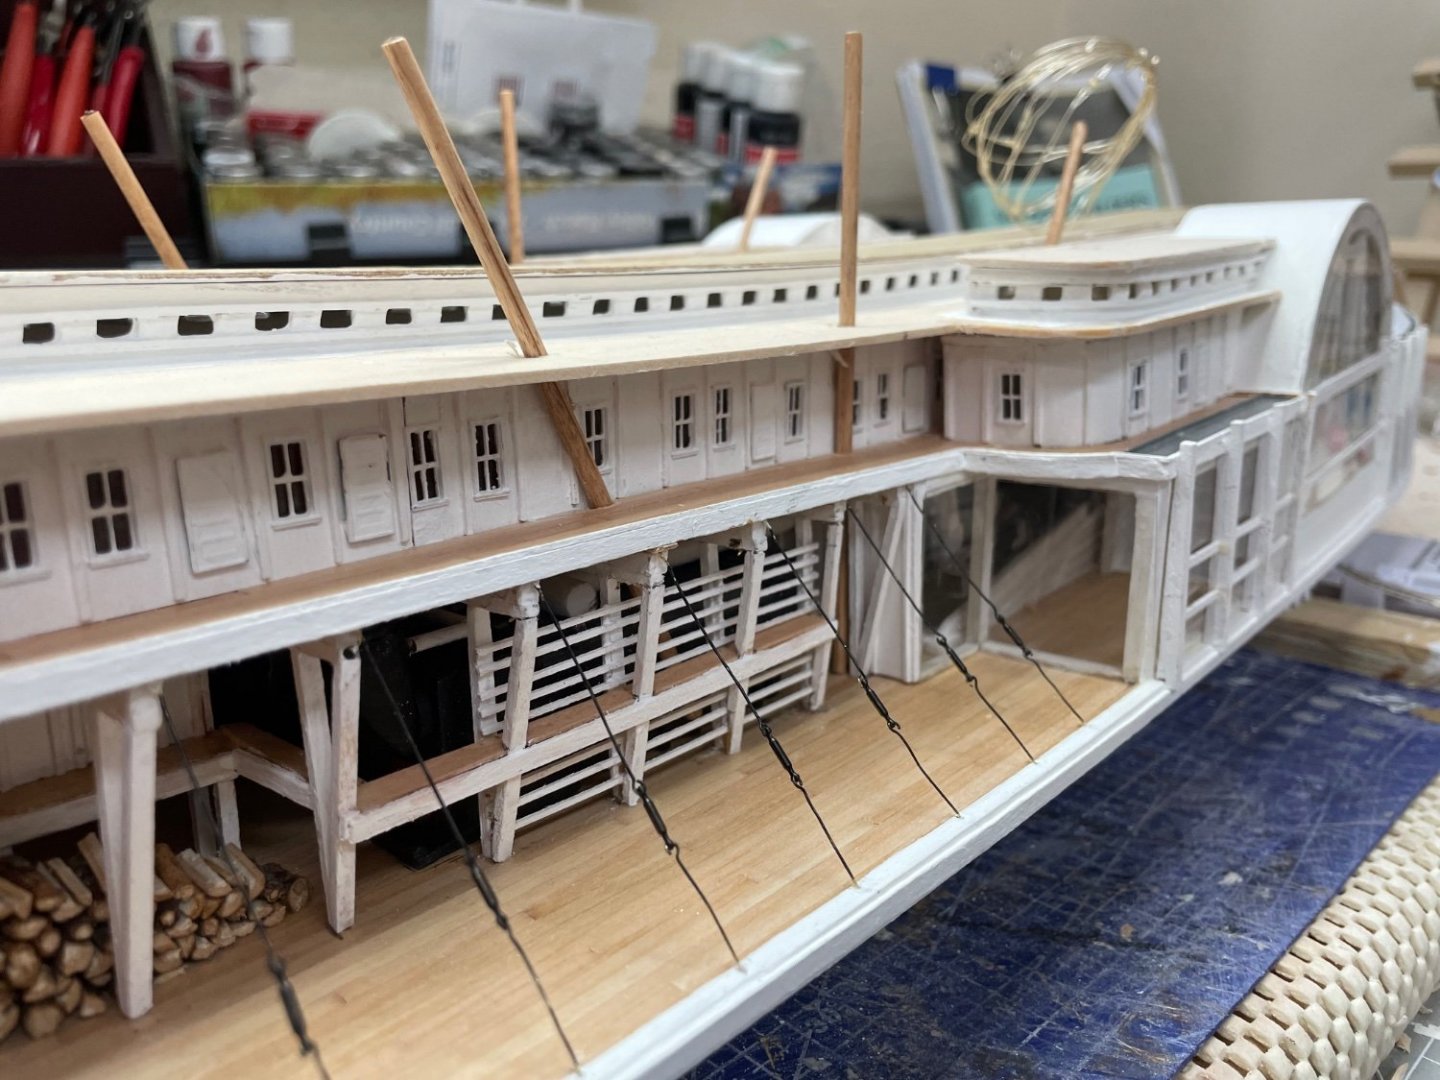
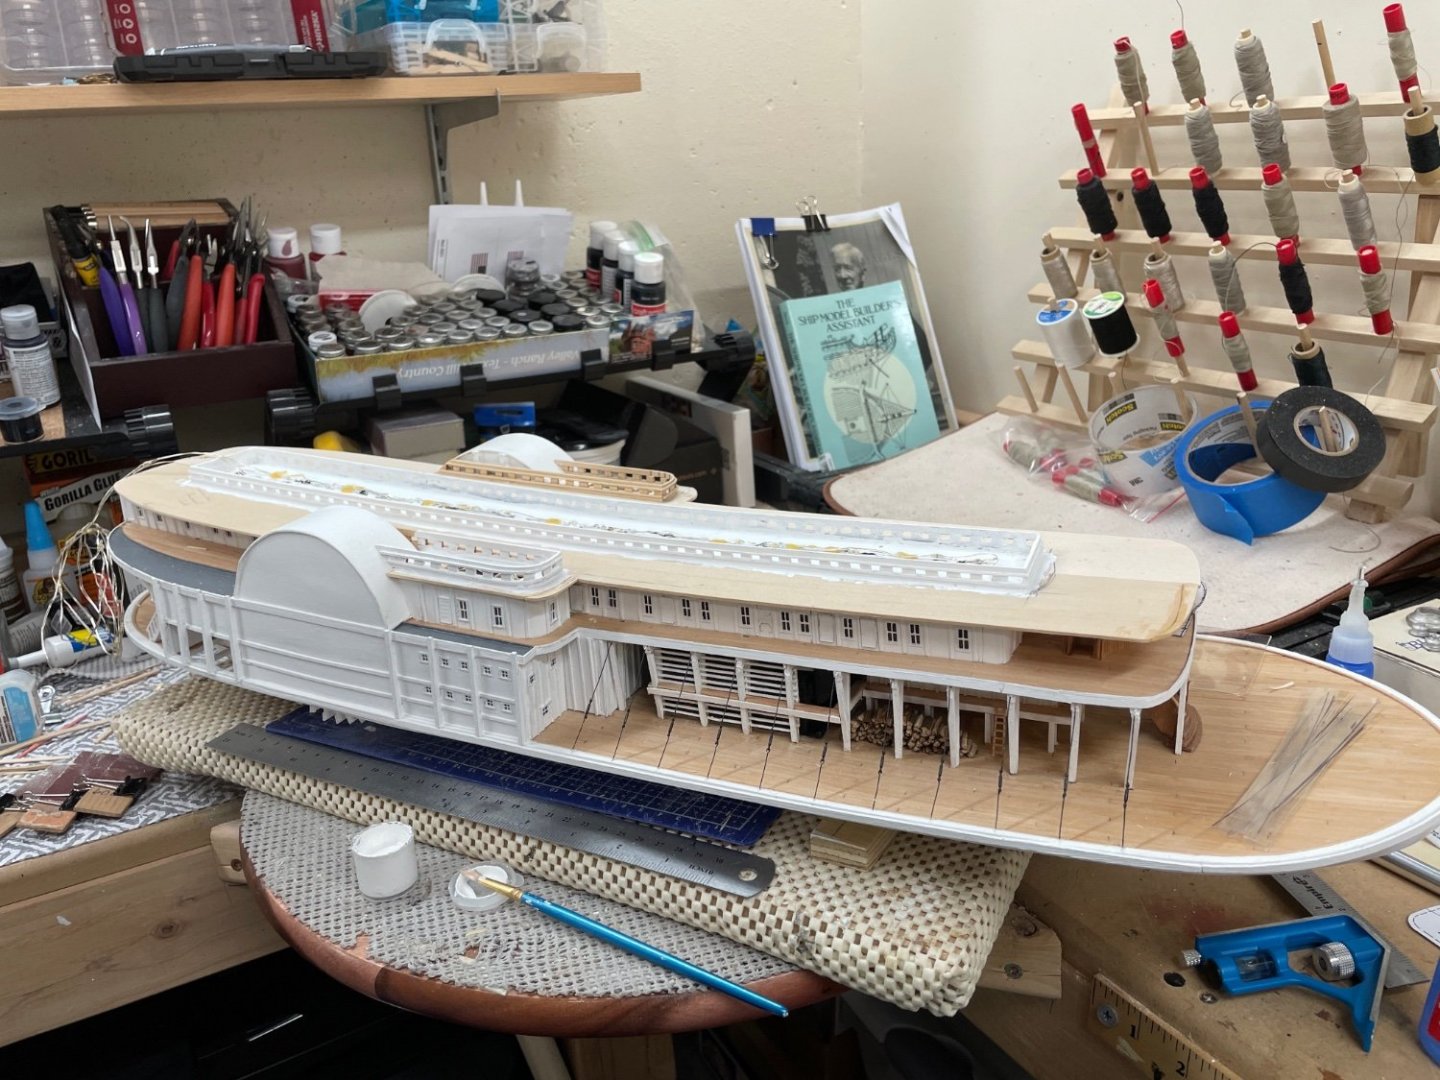
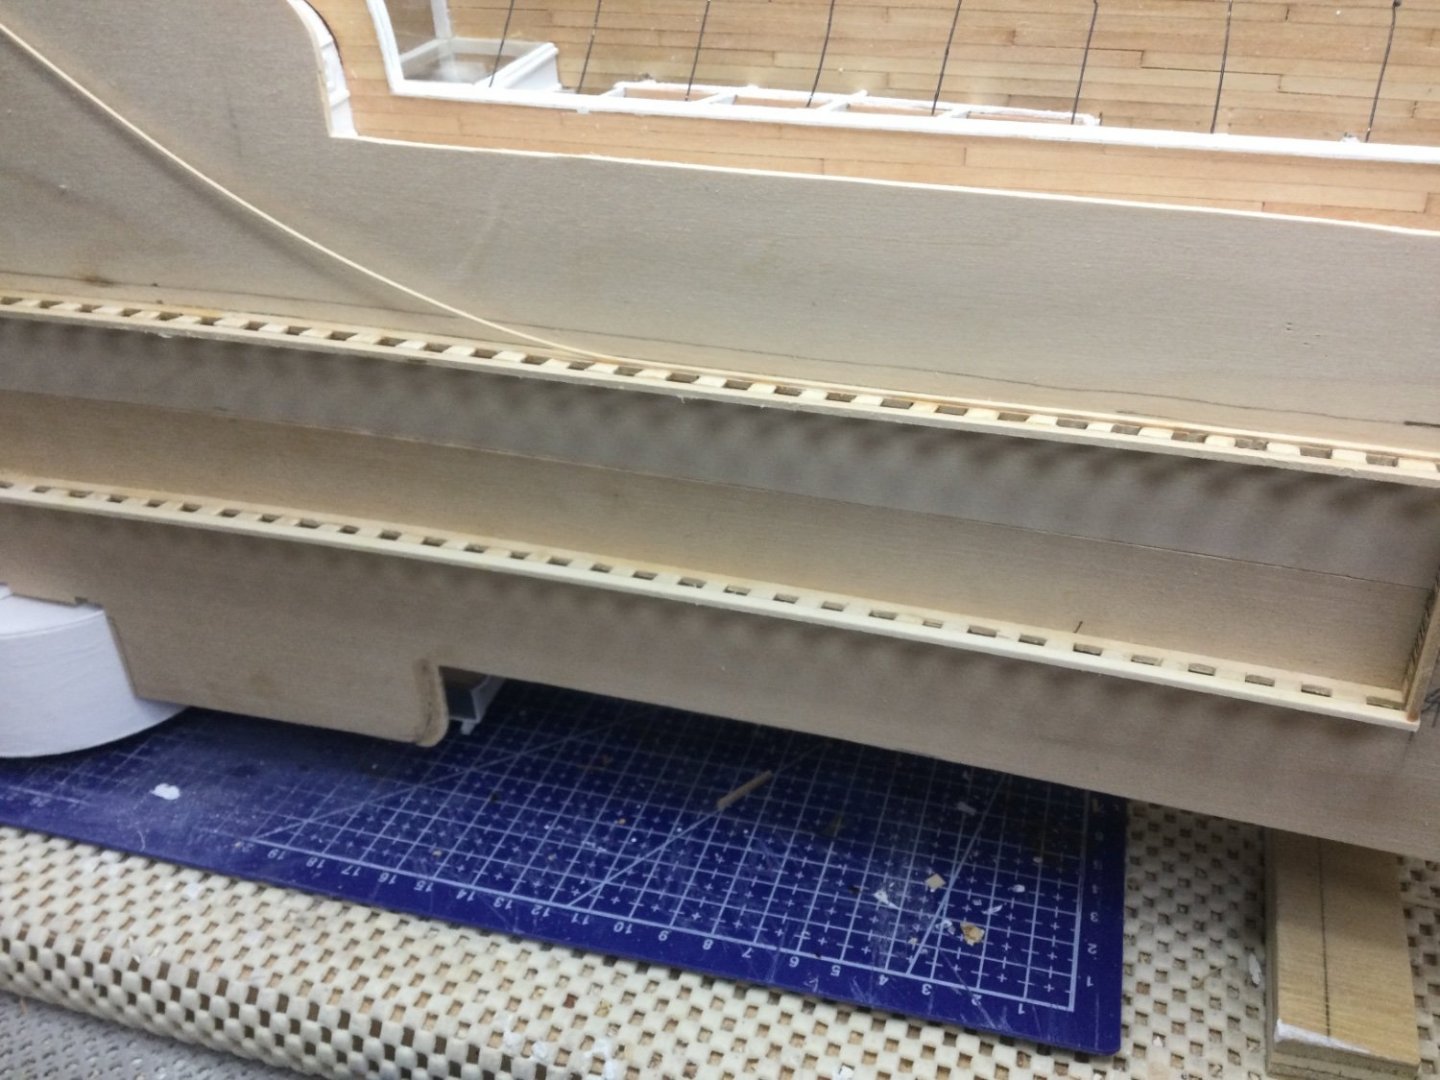
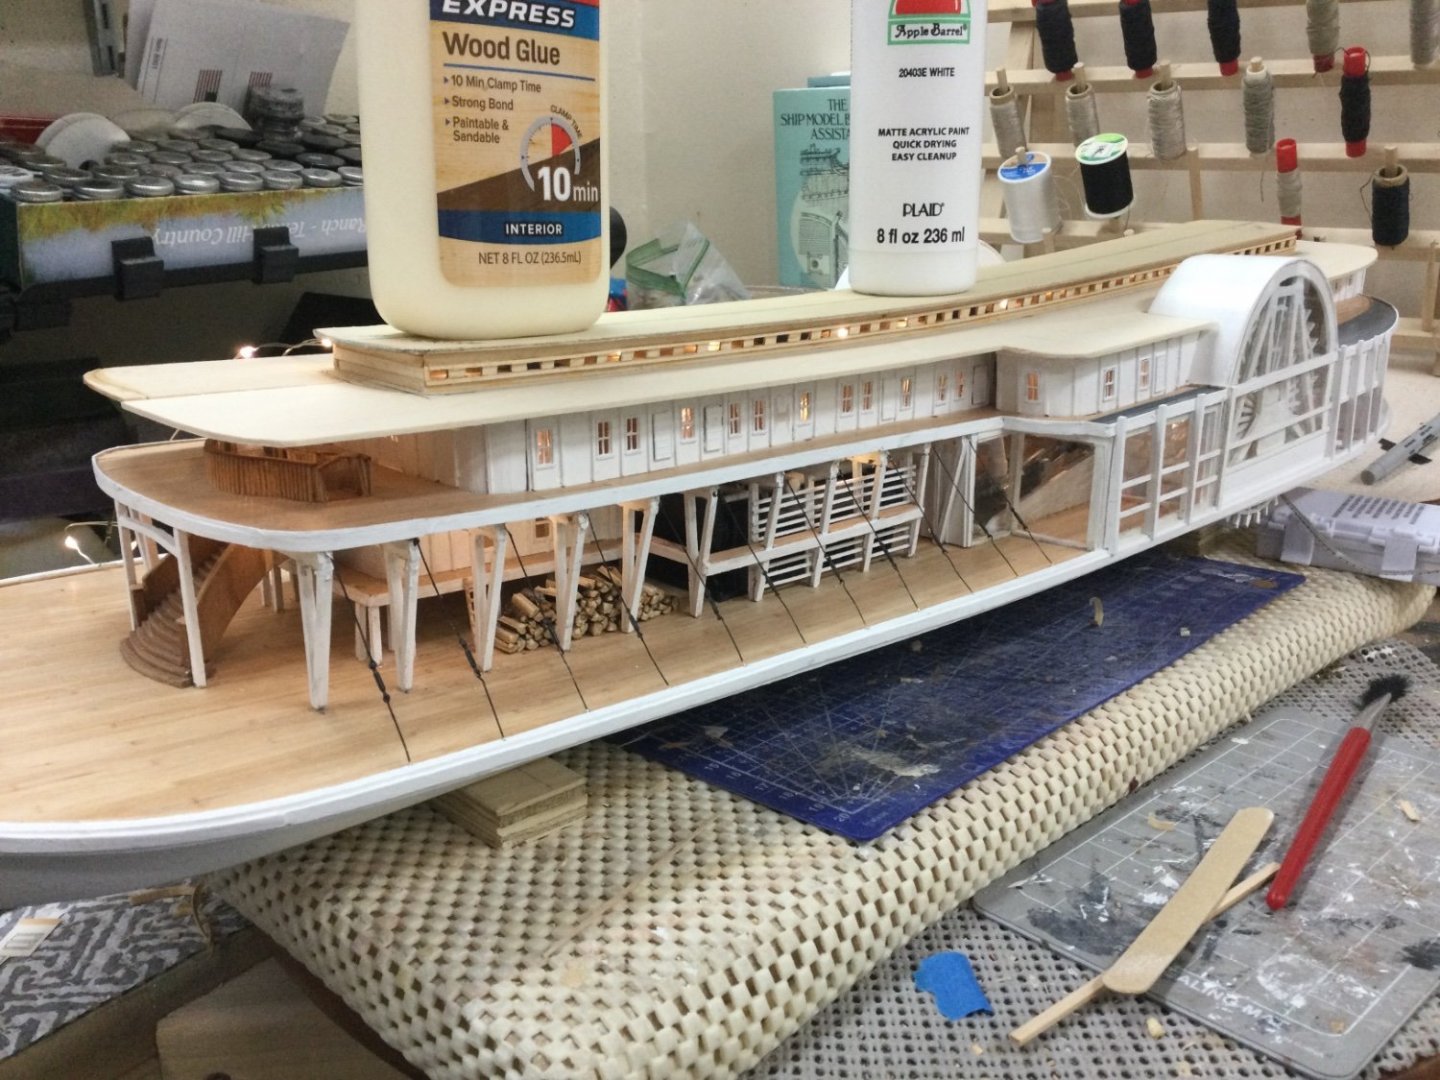
Hog Chains… To forestall hogging and sagging, since about 1850, the hulls of wooden river boats were held in shape by a system of wire trusses, called "hog chains". These were not chains at all, but rather iron rods 1 to 2.5 inches in diameter, which ran from strong points in the hull to vertical timbers, called "hog posts, which looked like masts, rising above the hull. Tension on the hog chains was adjusted through the use of turnbuckles. Generally the hog posts which carried the chains did not rise above the cabins on Mississippi River-style steamers, however here the hog posts are clearly visible rising above the superstructure of the Robert E Lee. Should the hog-chains break, the hull would come out of tension, and start sagging on the ends. This was called being "hogged". In some cases the sagging on the ends would be so great that a boat's hull would break in half. Accidents such as running aground were the kind of things that could cause hog-chains to break. Using brass wire to create the hog chains. Starboard side Hog Chains installed. That was easy, NOT. 🤪 Port side up next… 🍻


- 238 replies
-
- 9
-
-
-
- Robert E Lee
- steamboat
- (and 3 more)
-
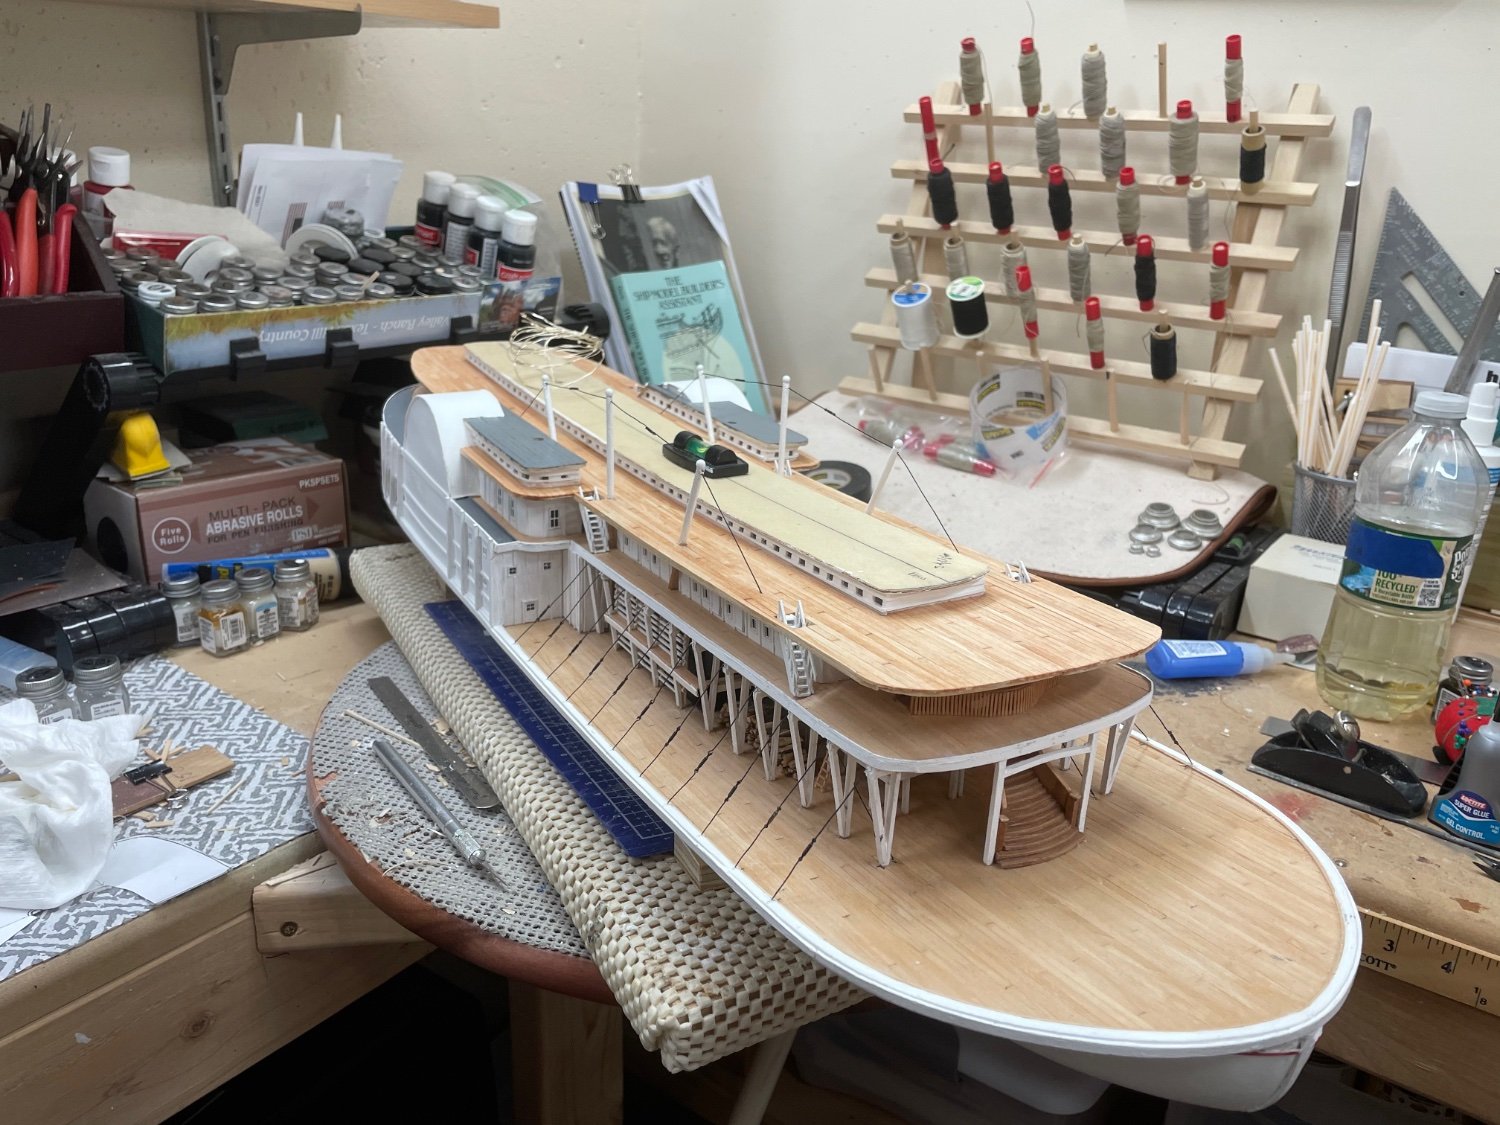
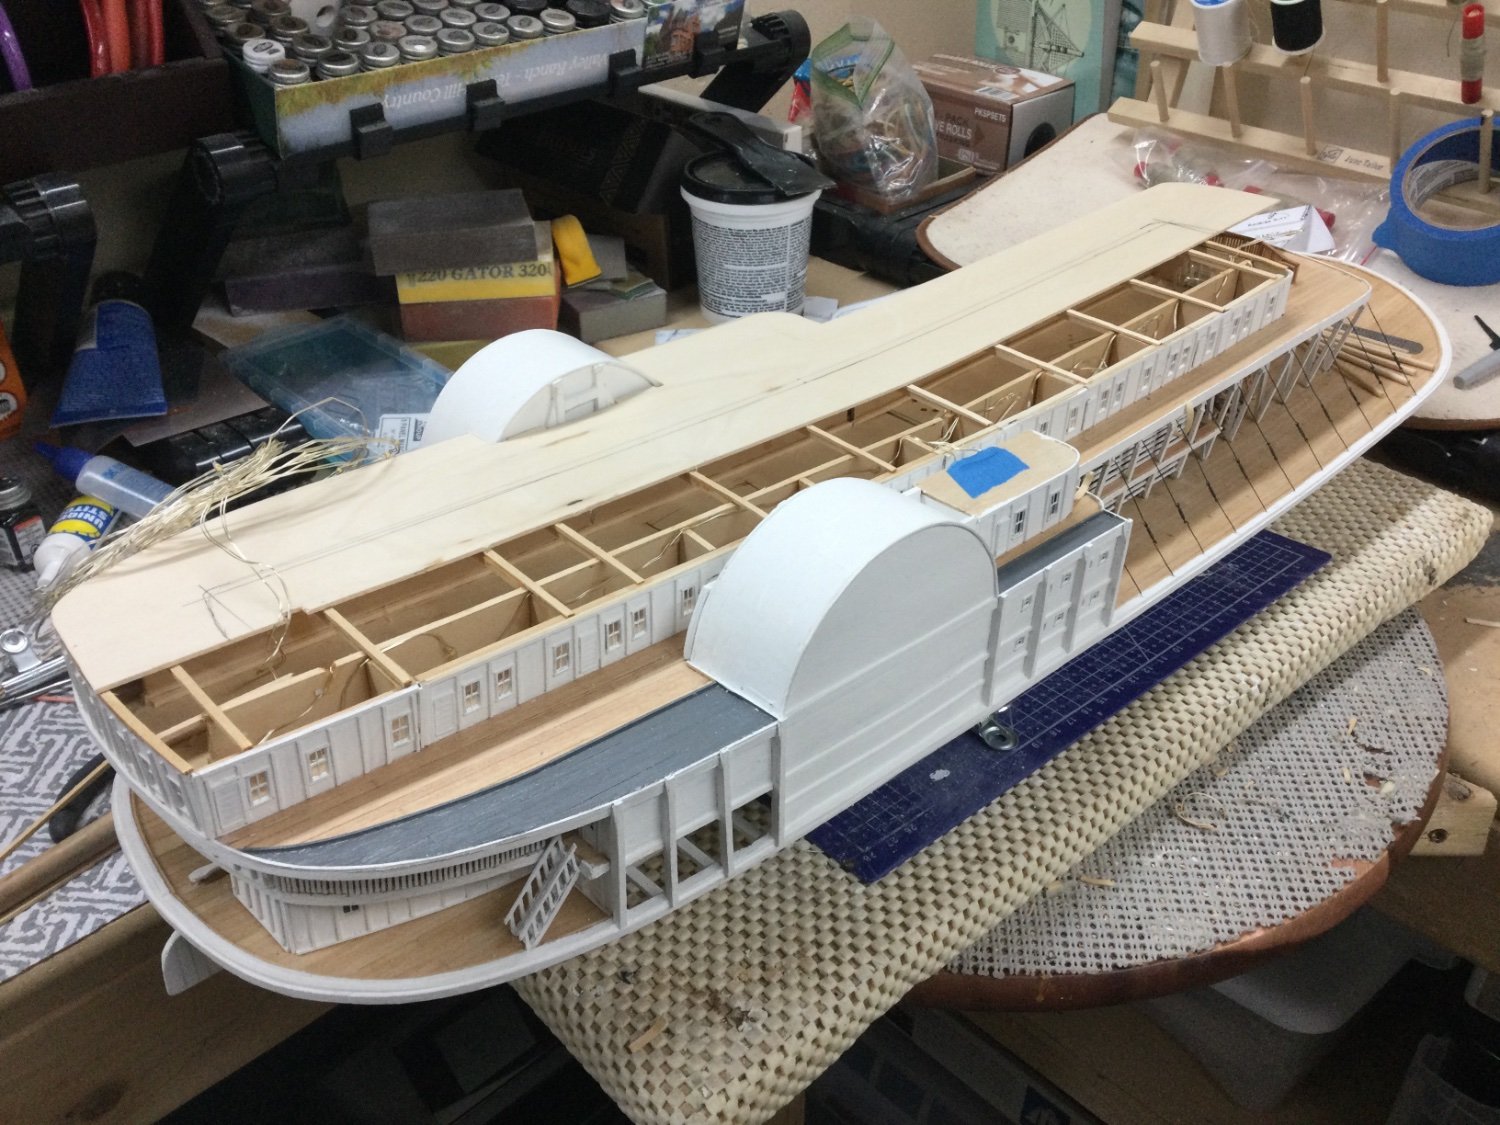
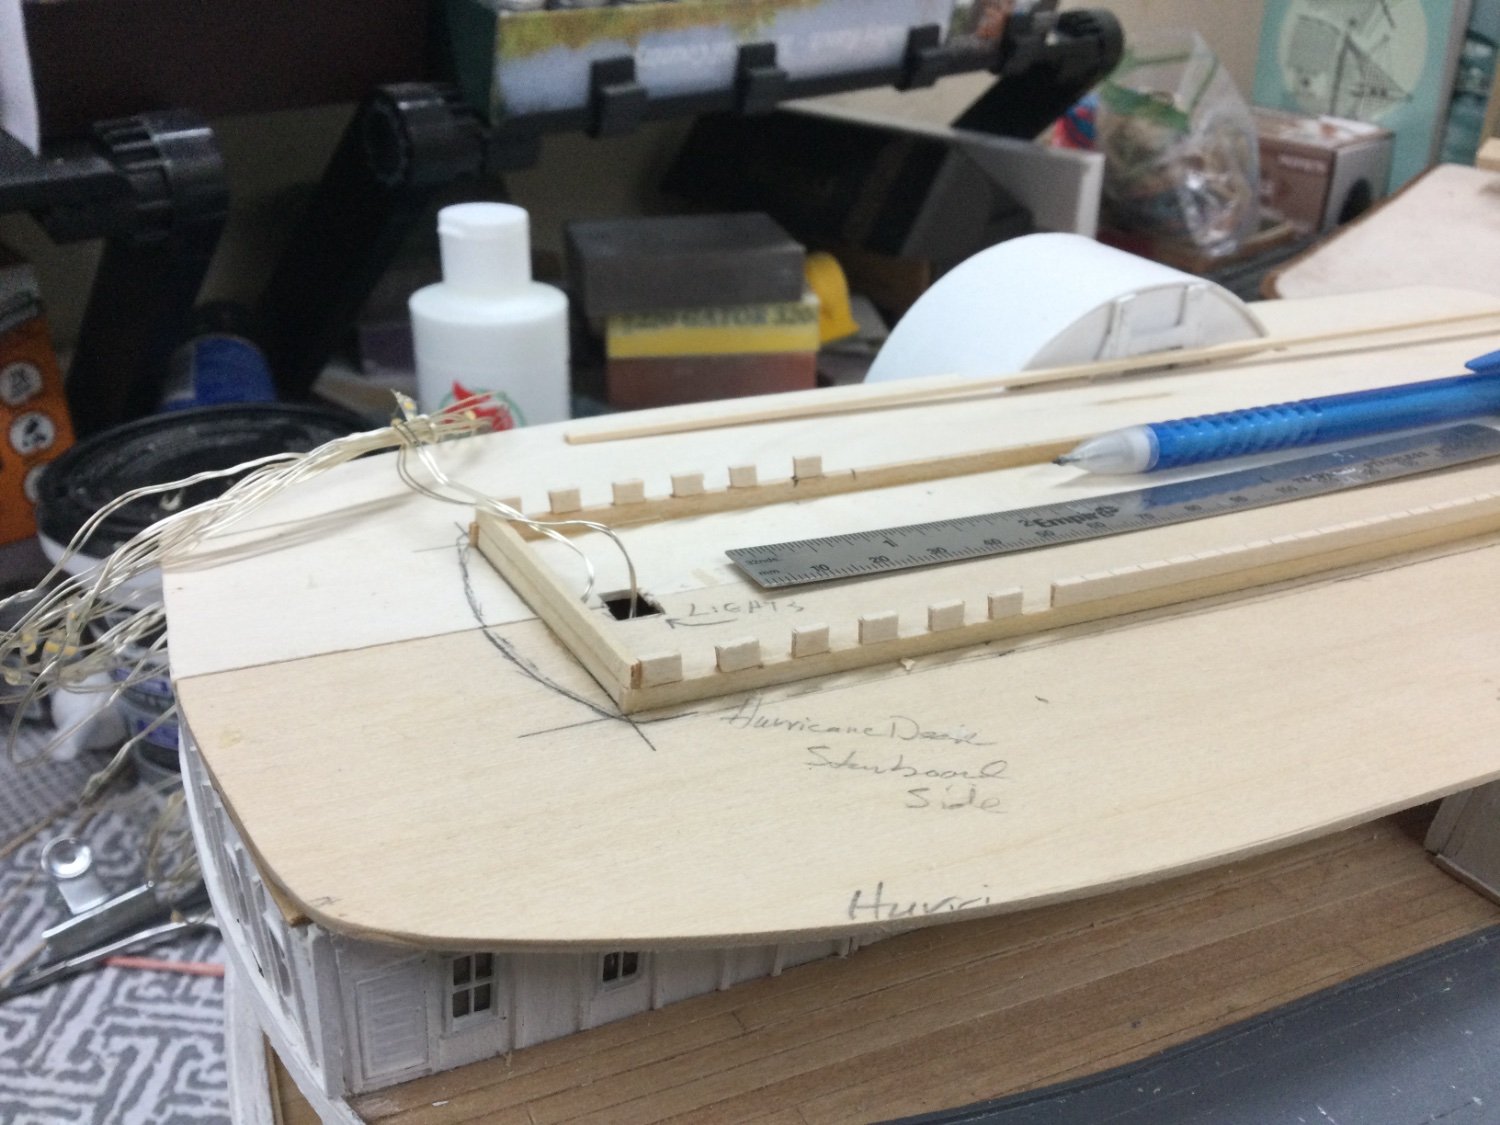
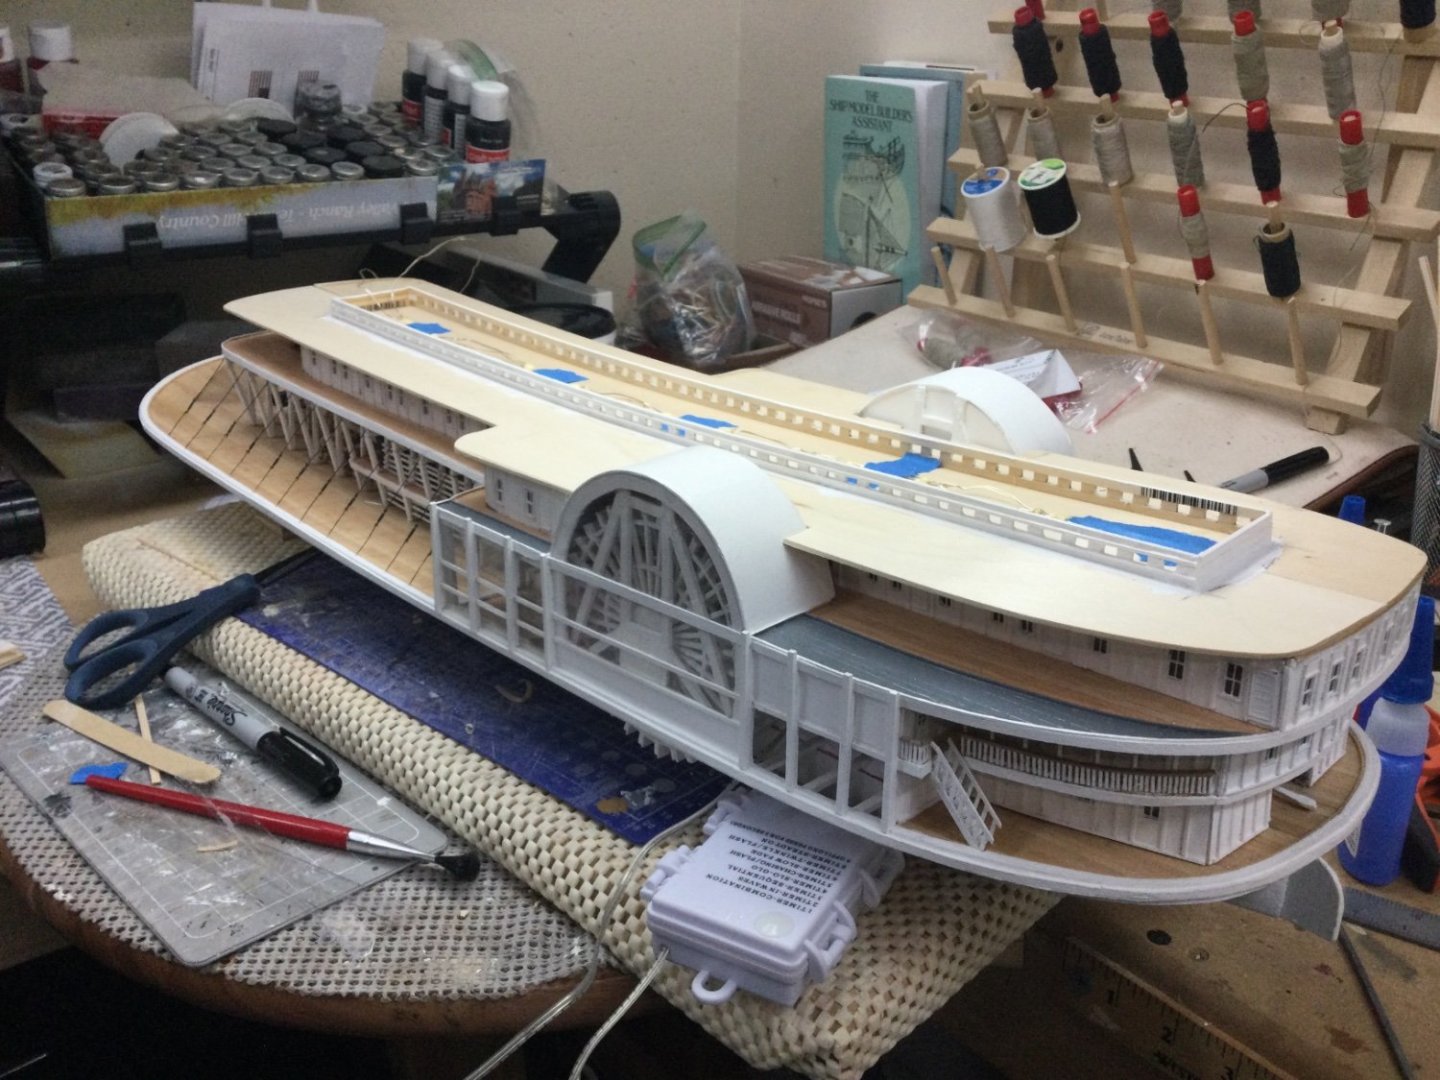
Skylight/Transoms sub decked… Also installed the Hog Frames. Time to start planking the Hurricane Deck. Cheers 🍻

- 238 replies
-
- 5
-
-
- Robert E Lee
- steamboat
- (and 3 more)
-
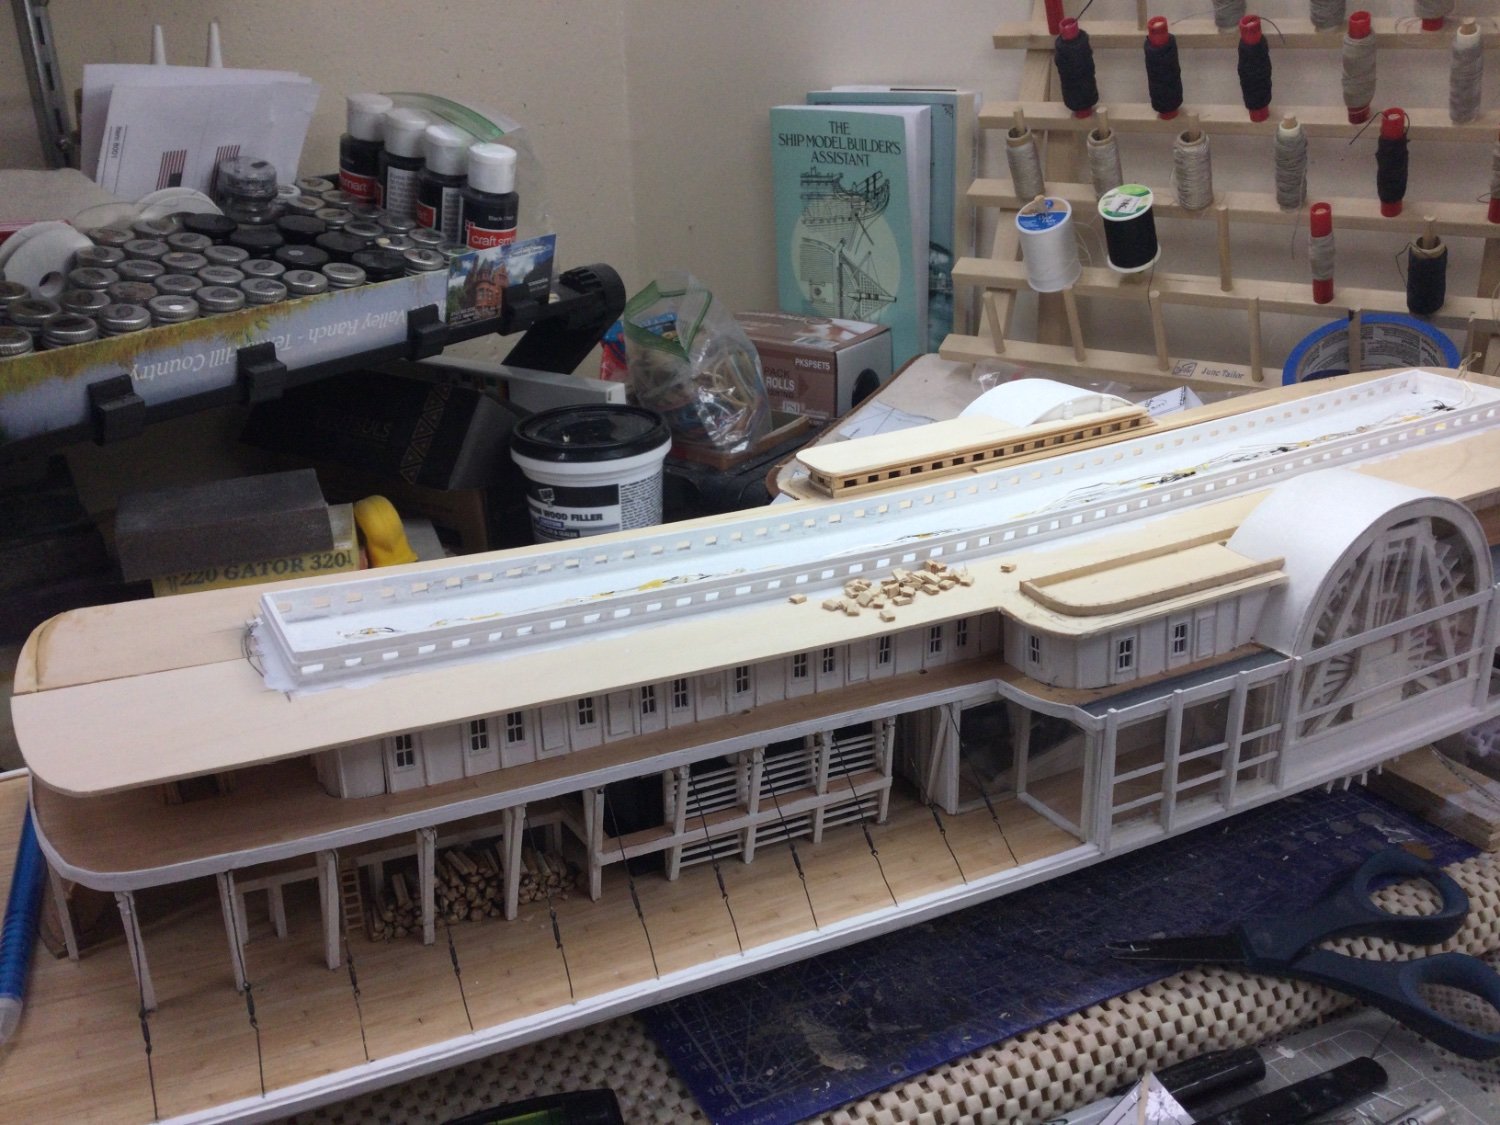
Skylights/Transoms completed… Back to painting… Steady as she goes. 😎
- 238 replies
-
- 8
-
-
-
- Robert E Lee
- steamboat
- (and 3 more)
-
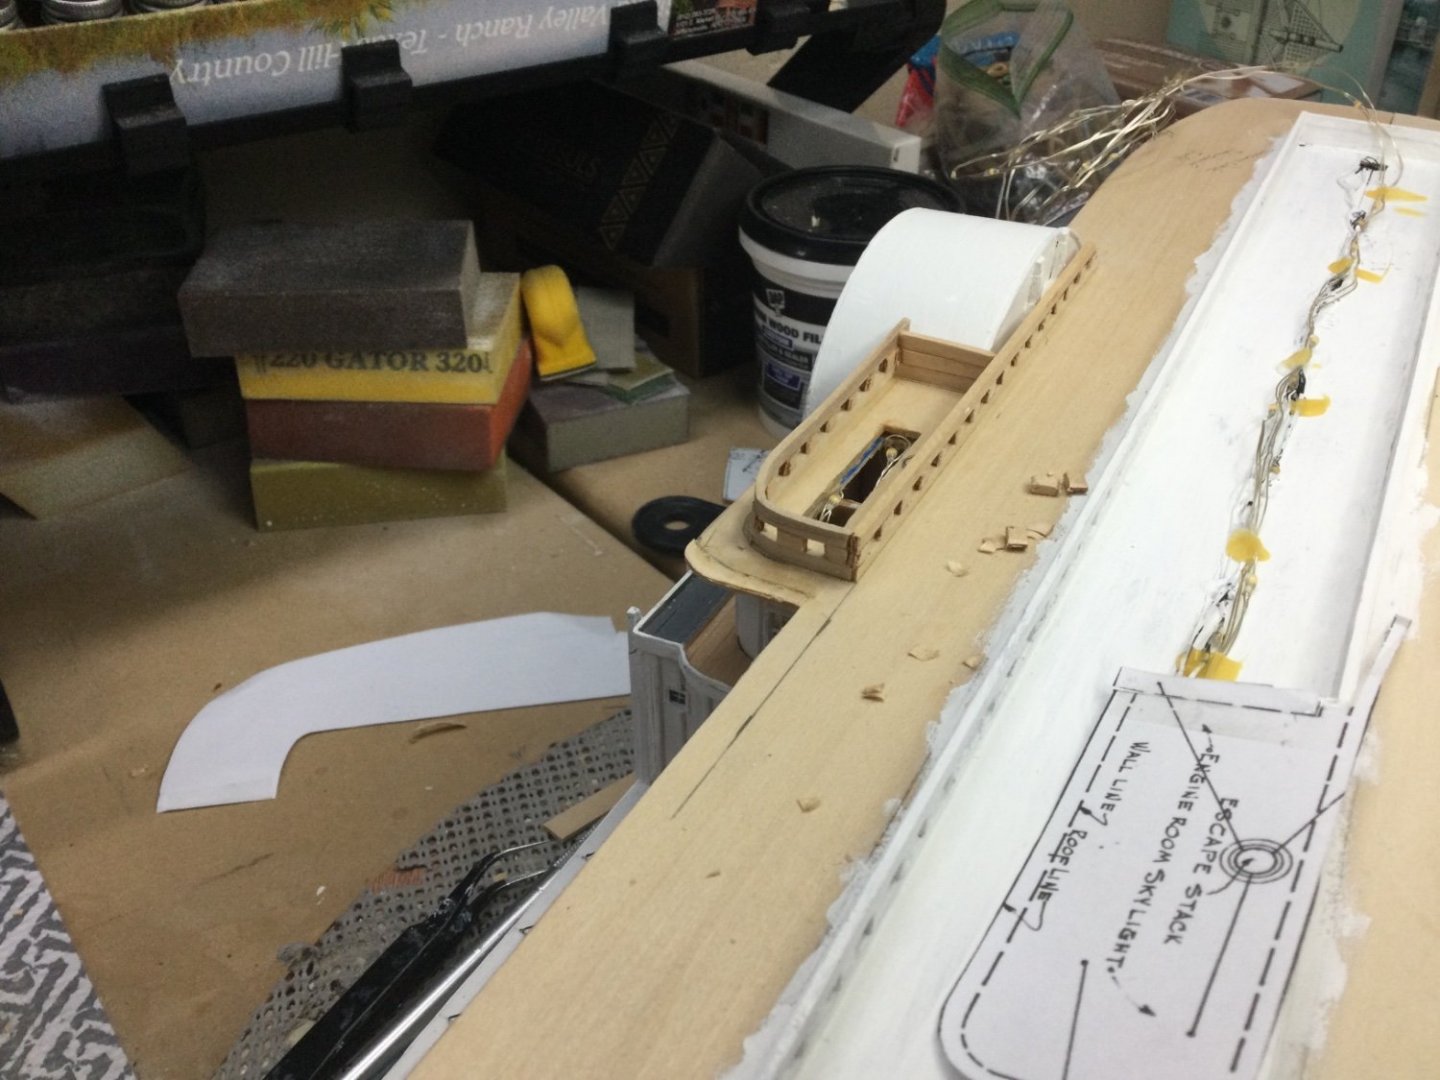
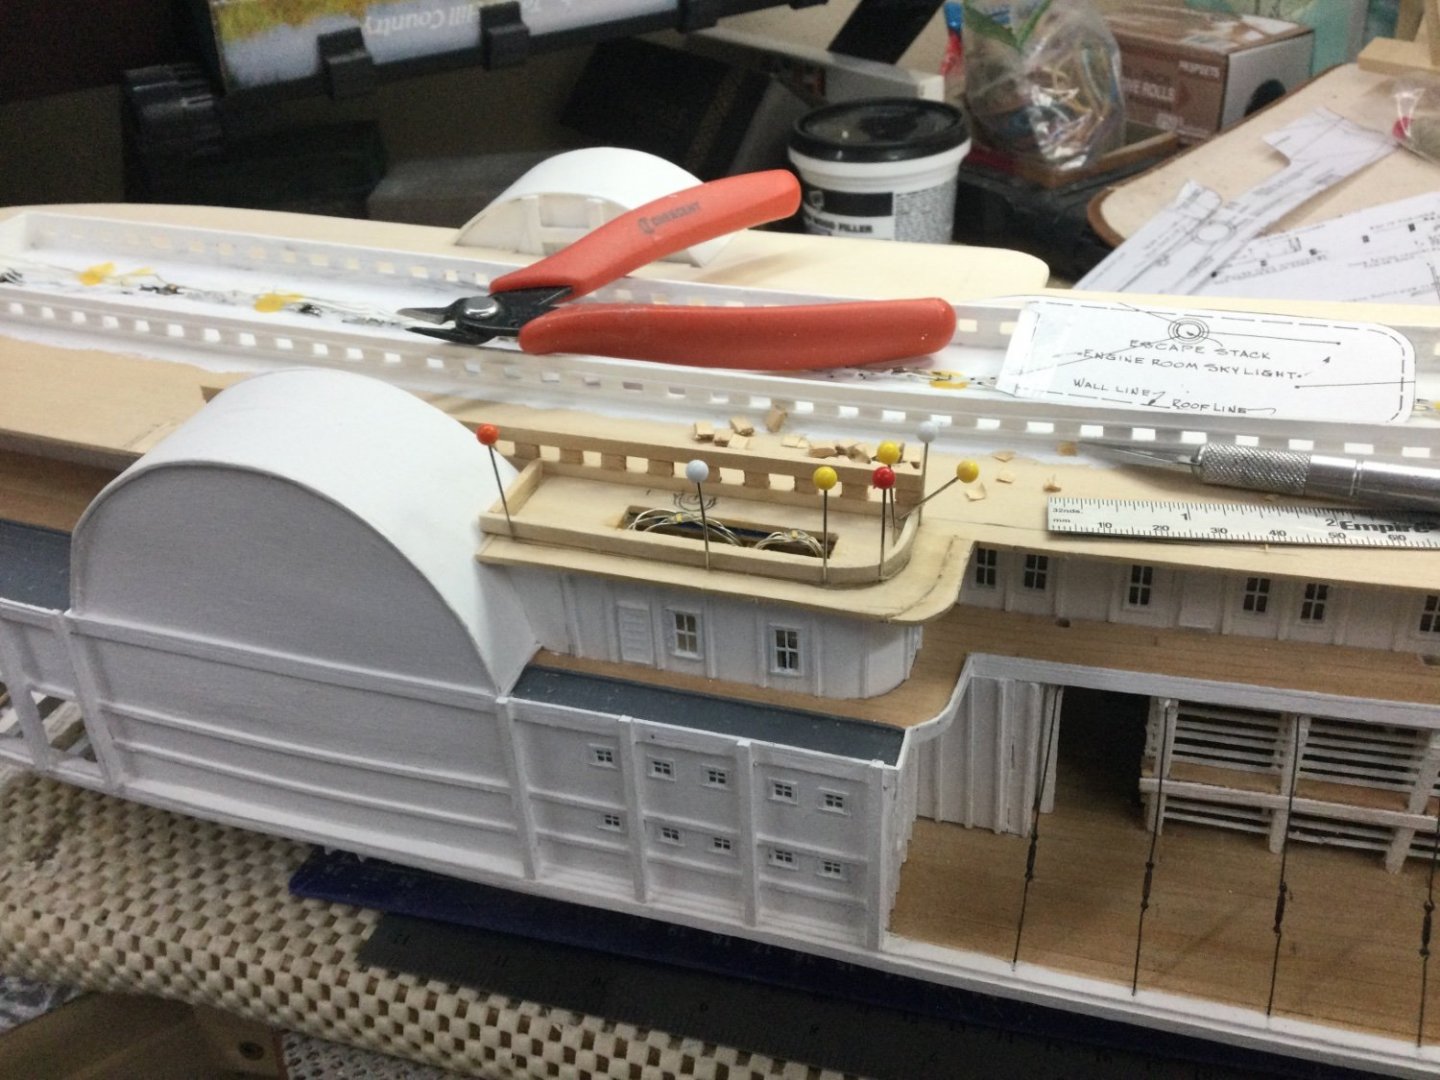
Engine Room Skylights… Starboard Skylight completed. Working on the port side. 😜 Onwards… 😎


- 238 replies
-
- 10
-
-
- Robert E Lee
- steamboat
- (and 3 more)
-
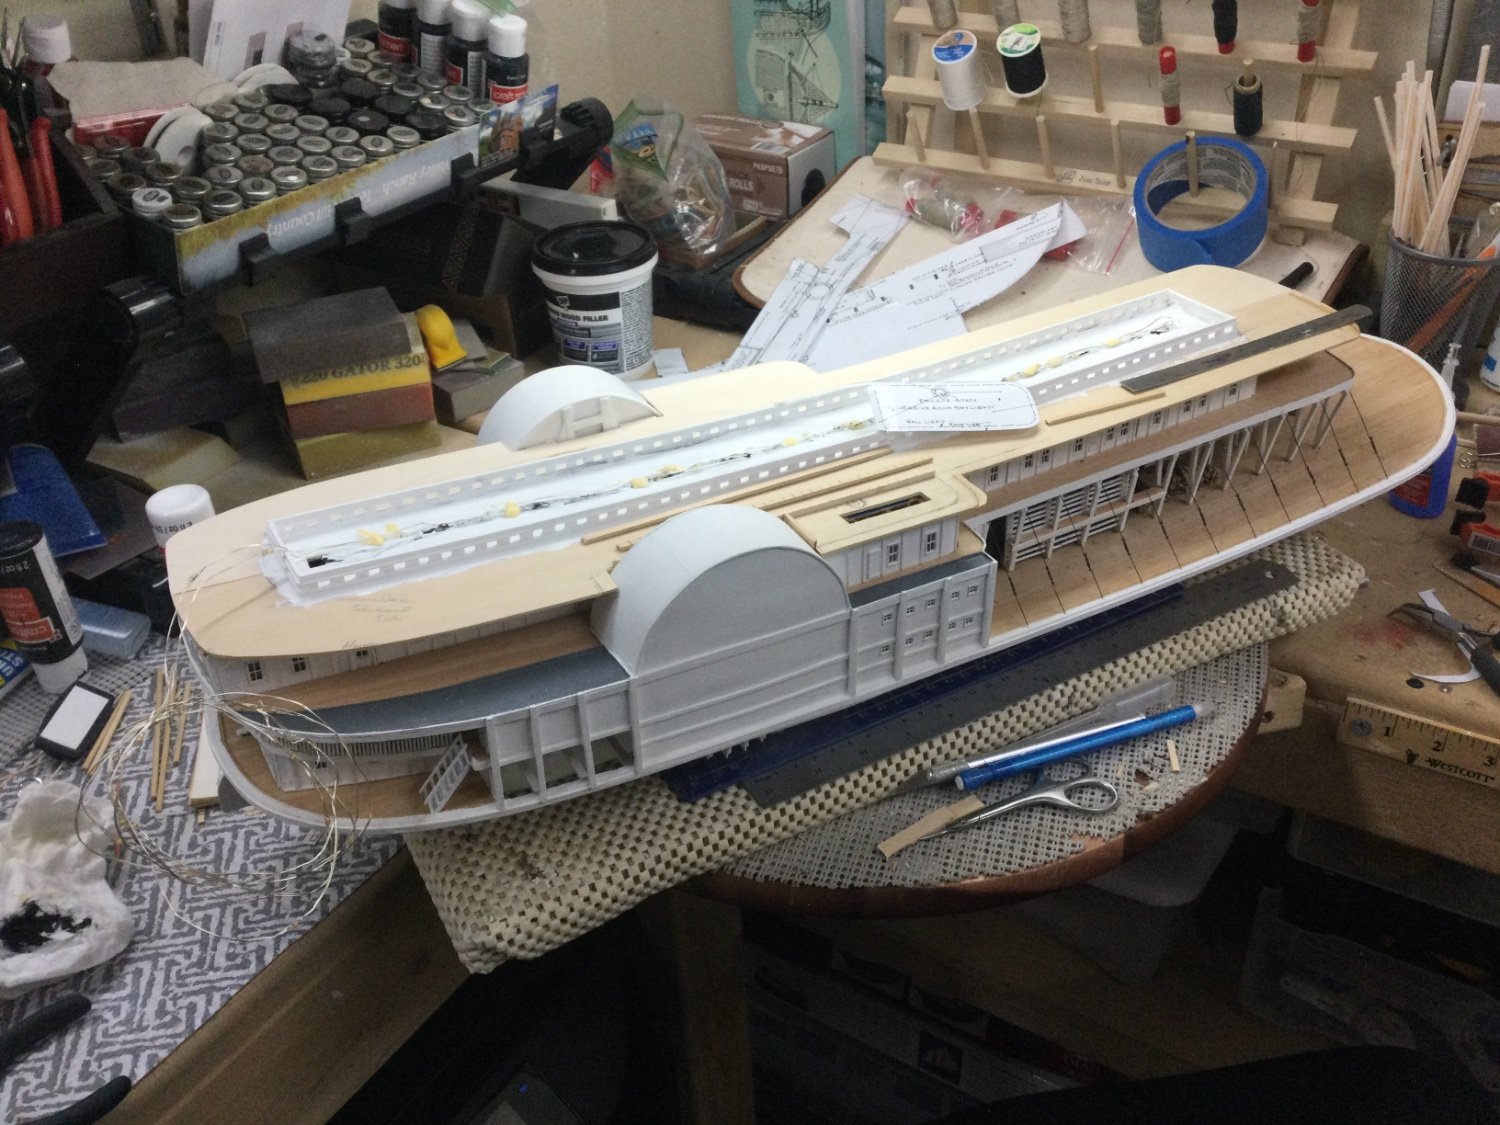
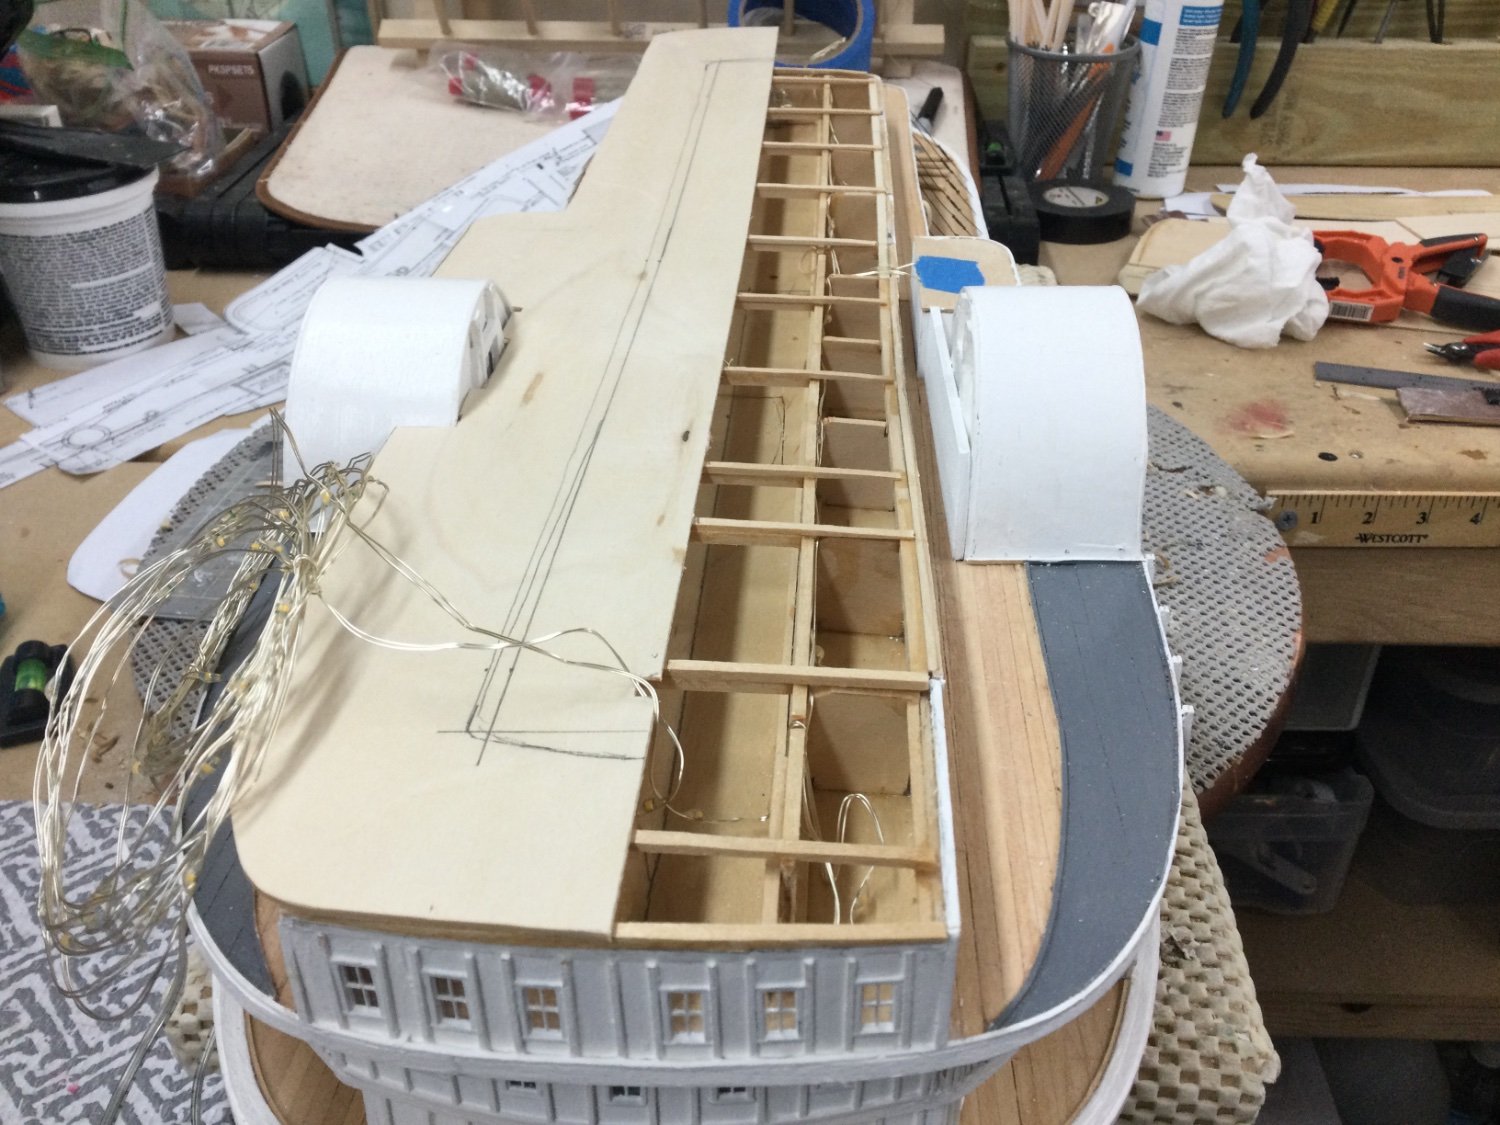
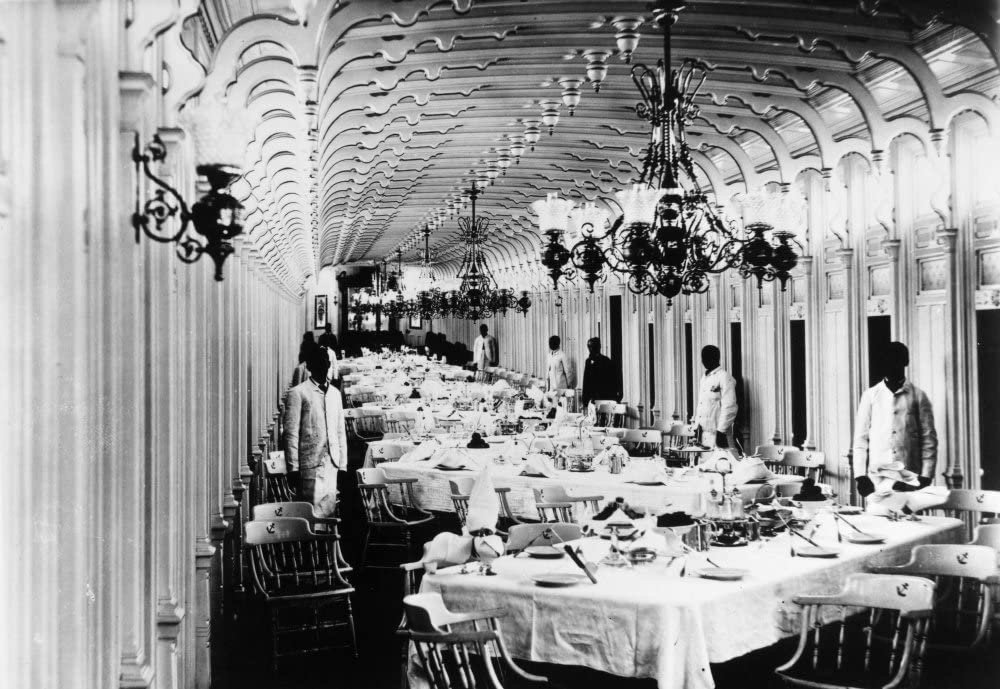
Saloon Skylights… The skylights on the hurricane deck were above the Grand Dinning Hall. Skylight/Transom Windows framed out. 1/32” strips for molding… Chandeliers hung inside the dinning hall. 😎 Almost ready for the Texas sub-Deck… Cheers 🍻

- 238 replies
-
- 10
-
-
- Robert E Lee
- steamboat
- (and 3 more)