HOLIDAY DONATION DRIVE - SUPPORT MSW - DO YOUR PART TO KEEP THIS GREAT FORUM GOING! (Only 13 donations so far - C'mon guys!)
×


John Ruy
-
Posts
1,566 -
Joined
-
Last visited
Content Type
Profiles
Forums
Gallery
Events
Everything posted by John Ruy
-
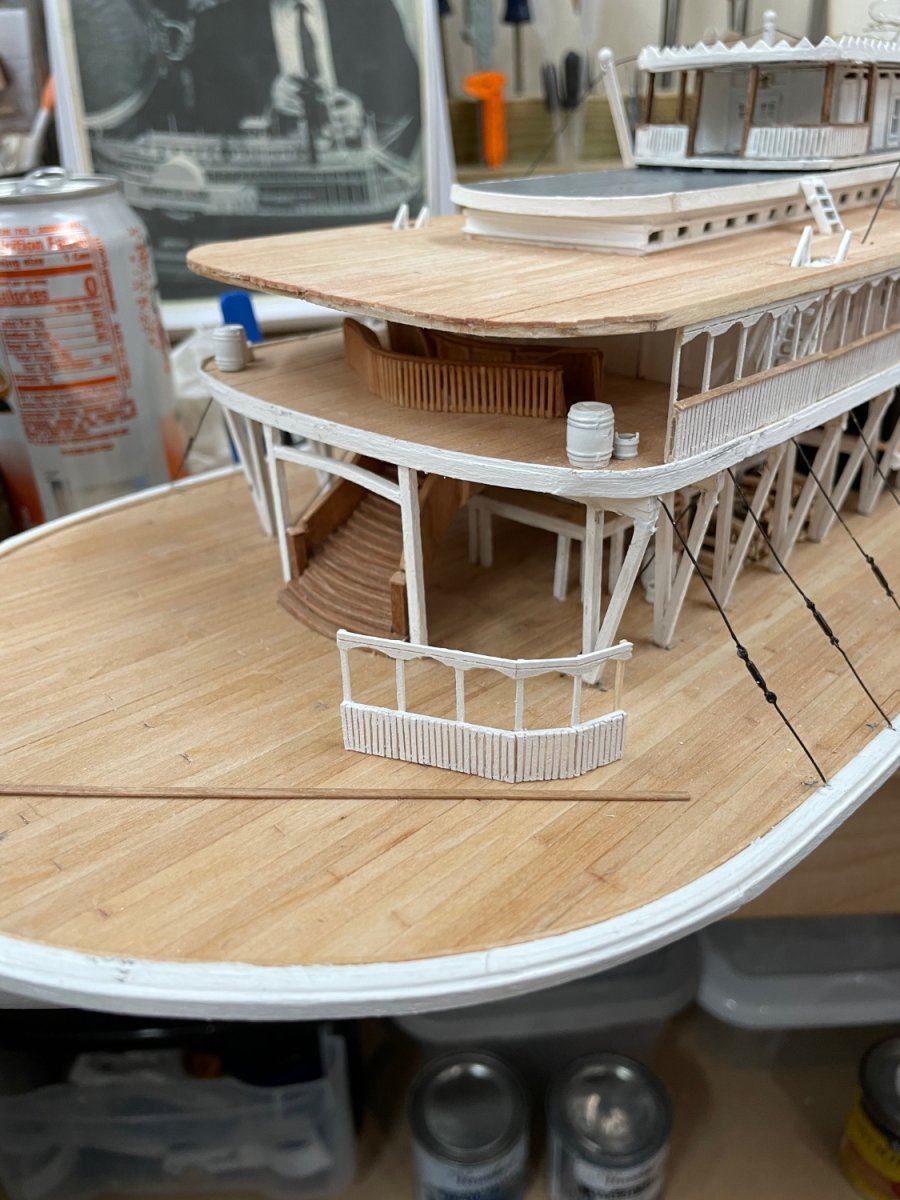
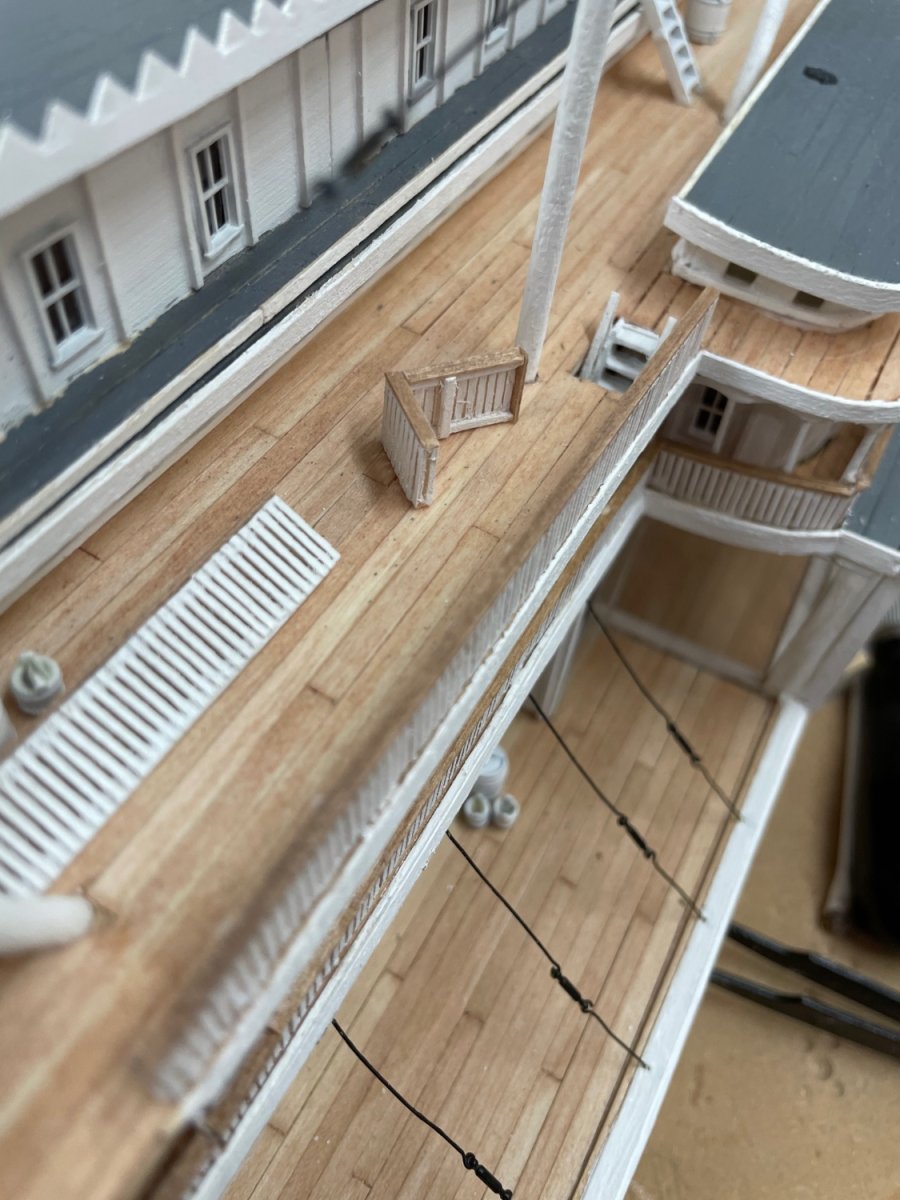
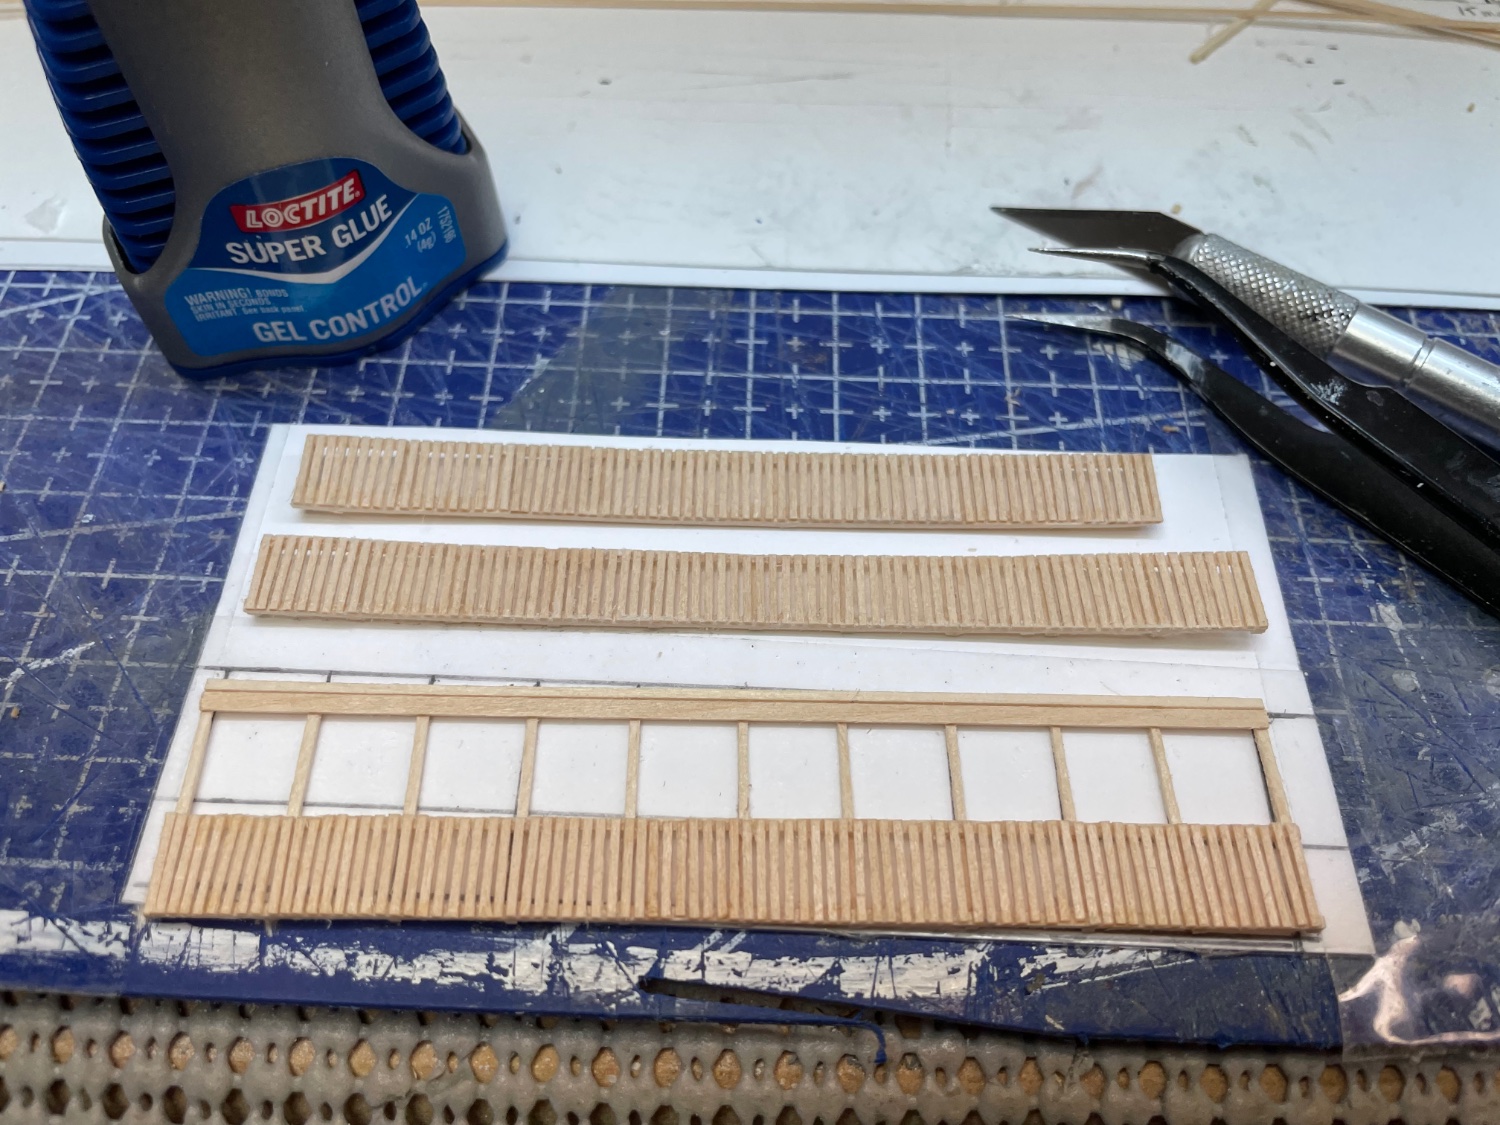
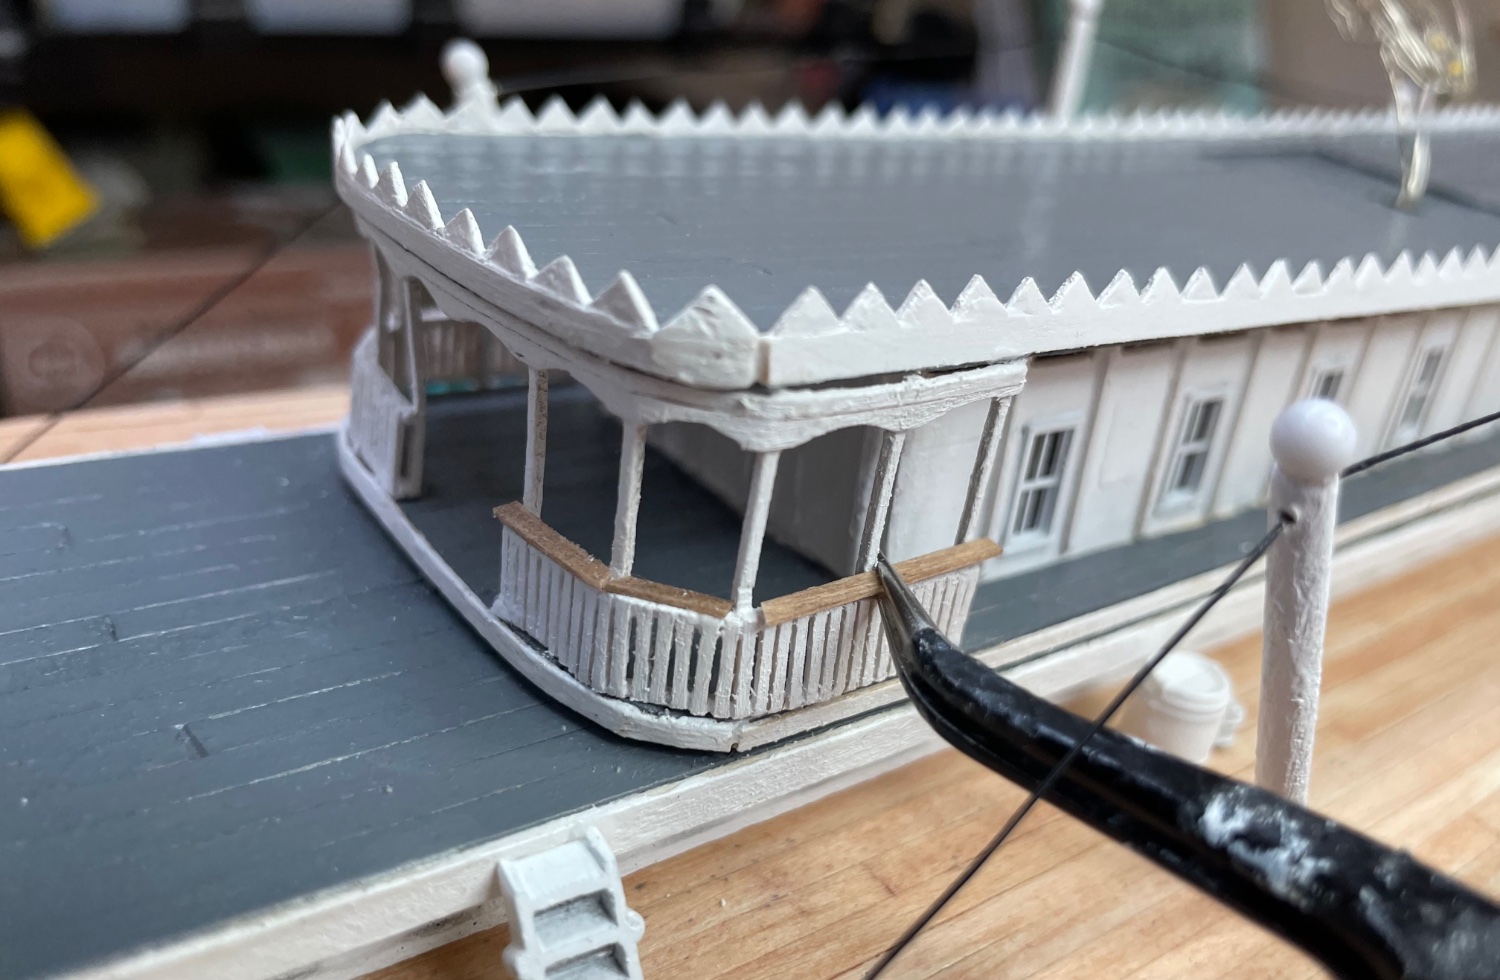
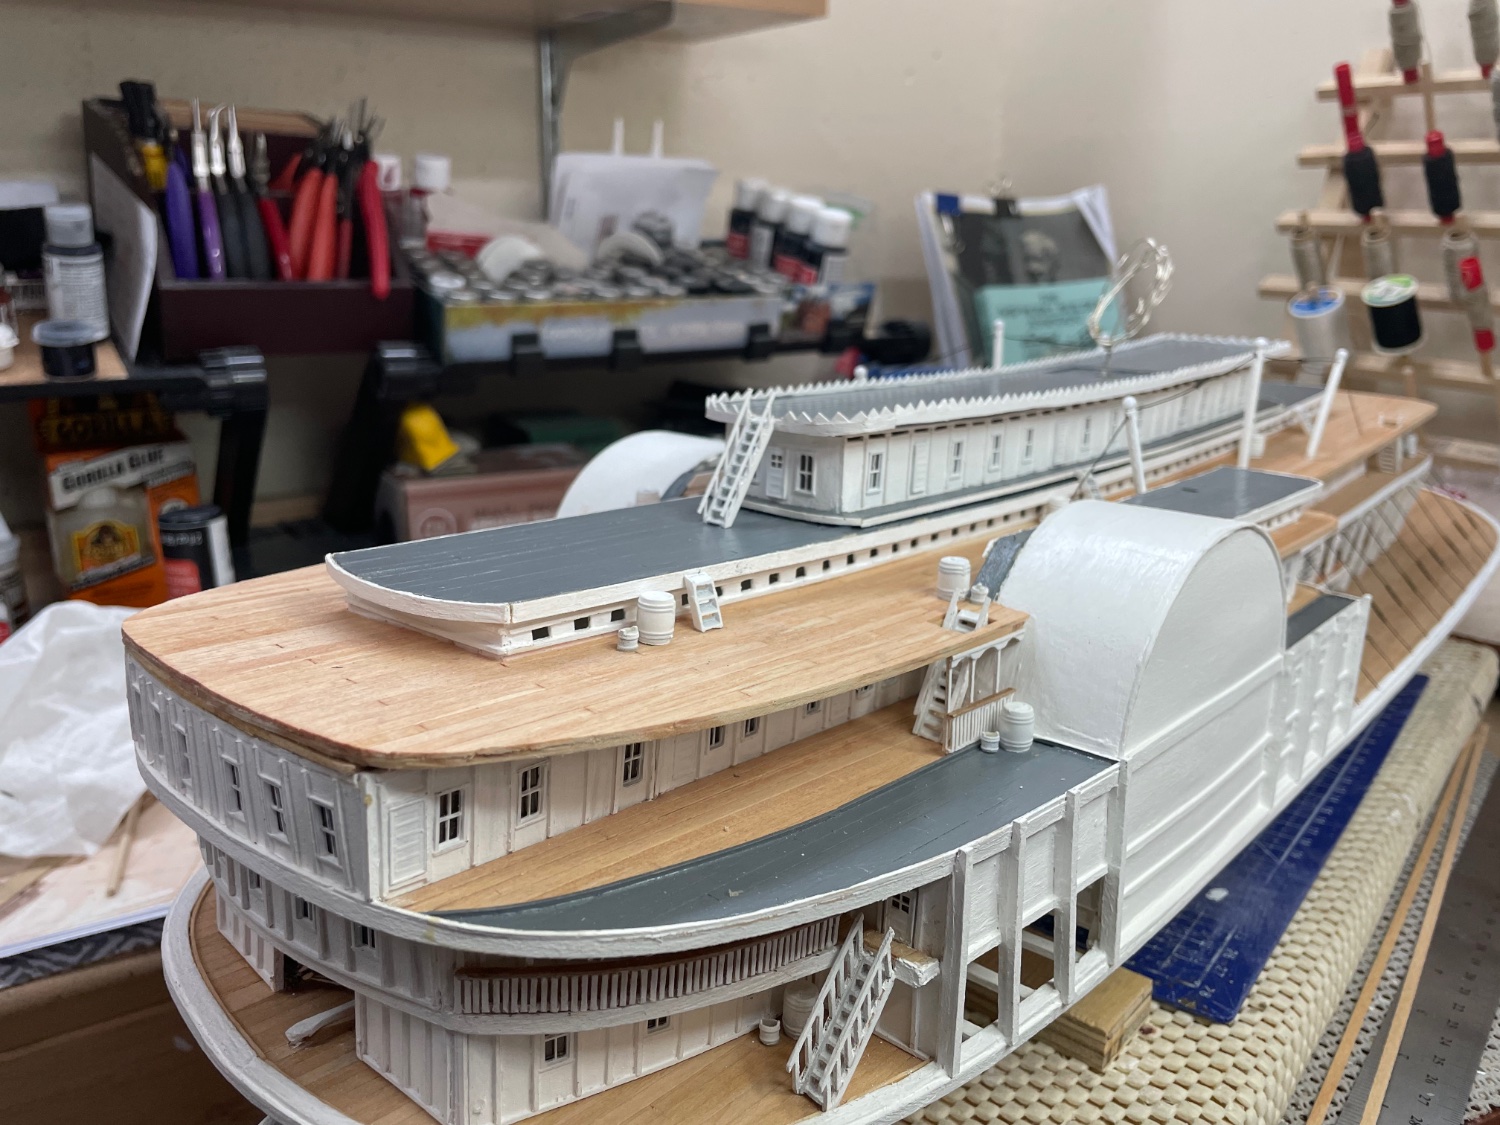
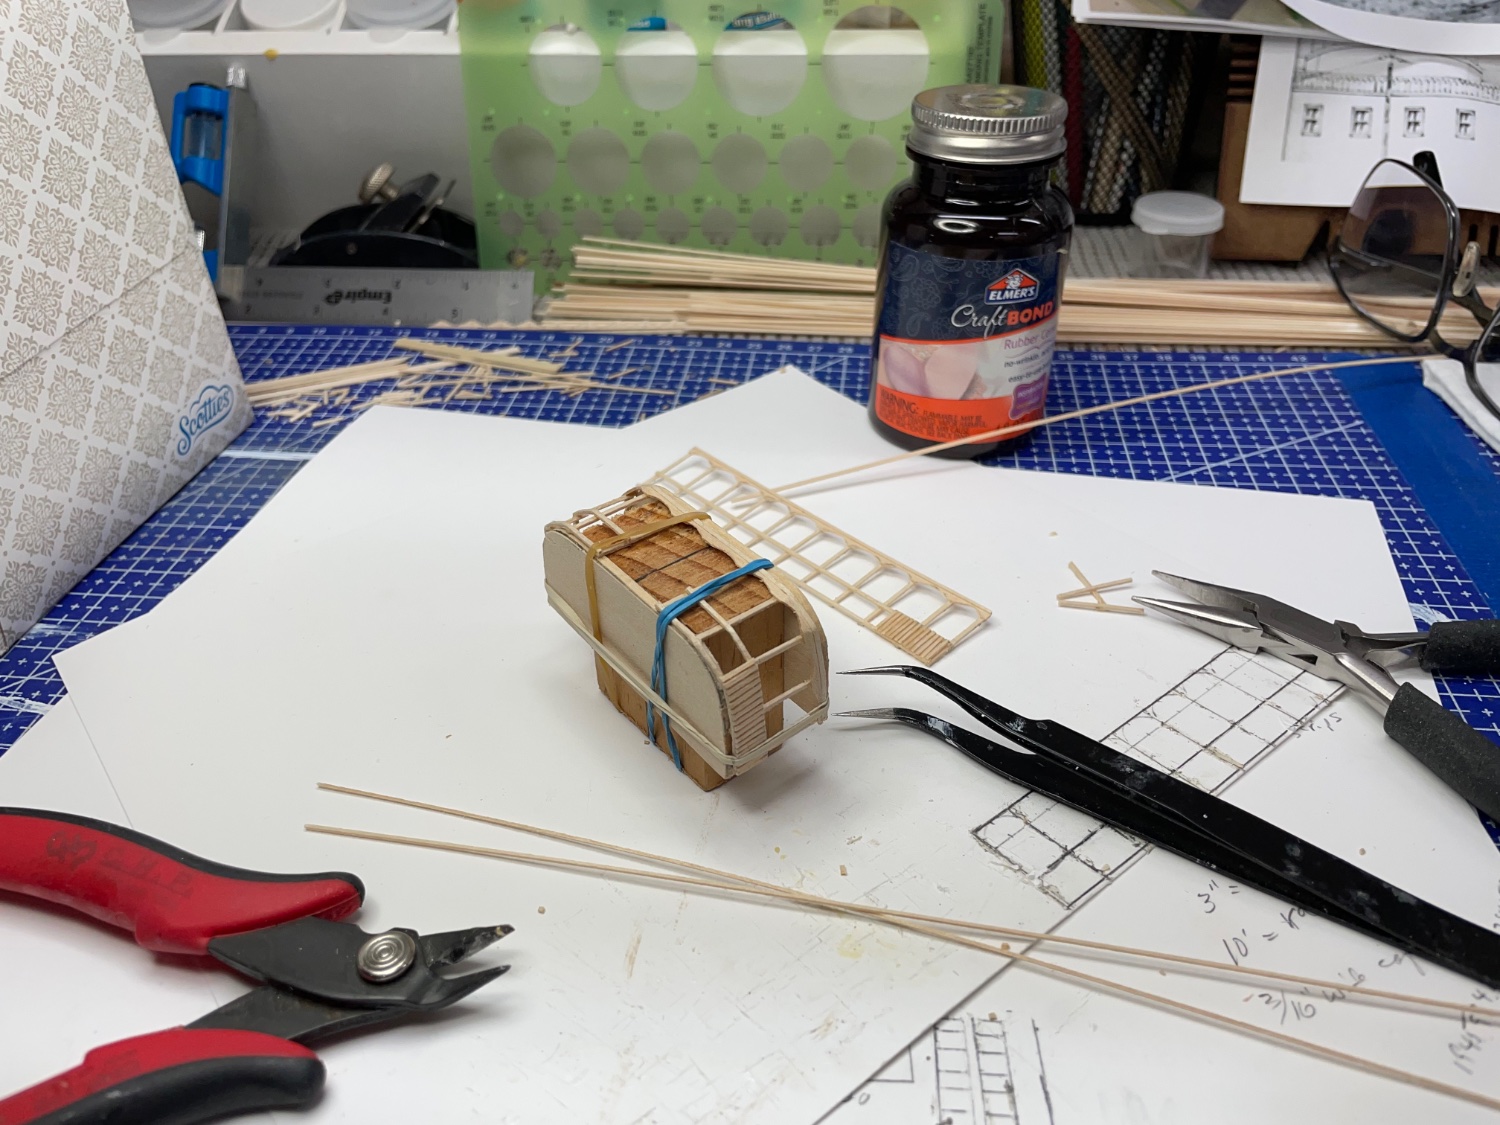
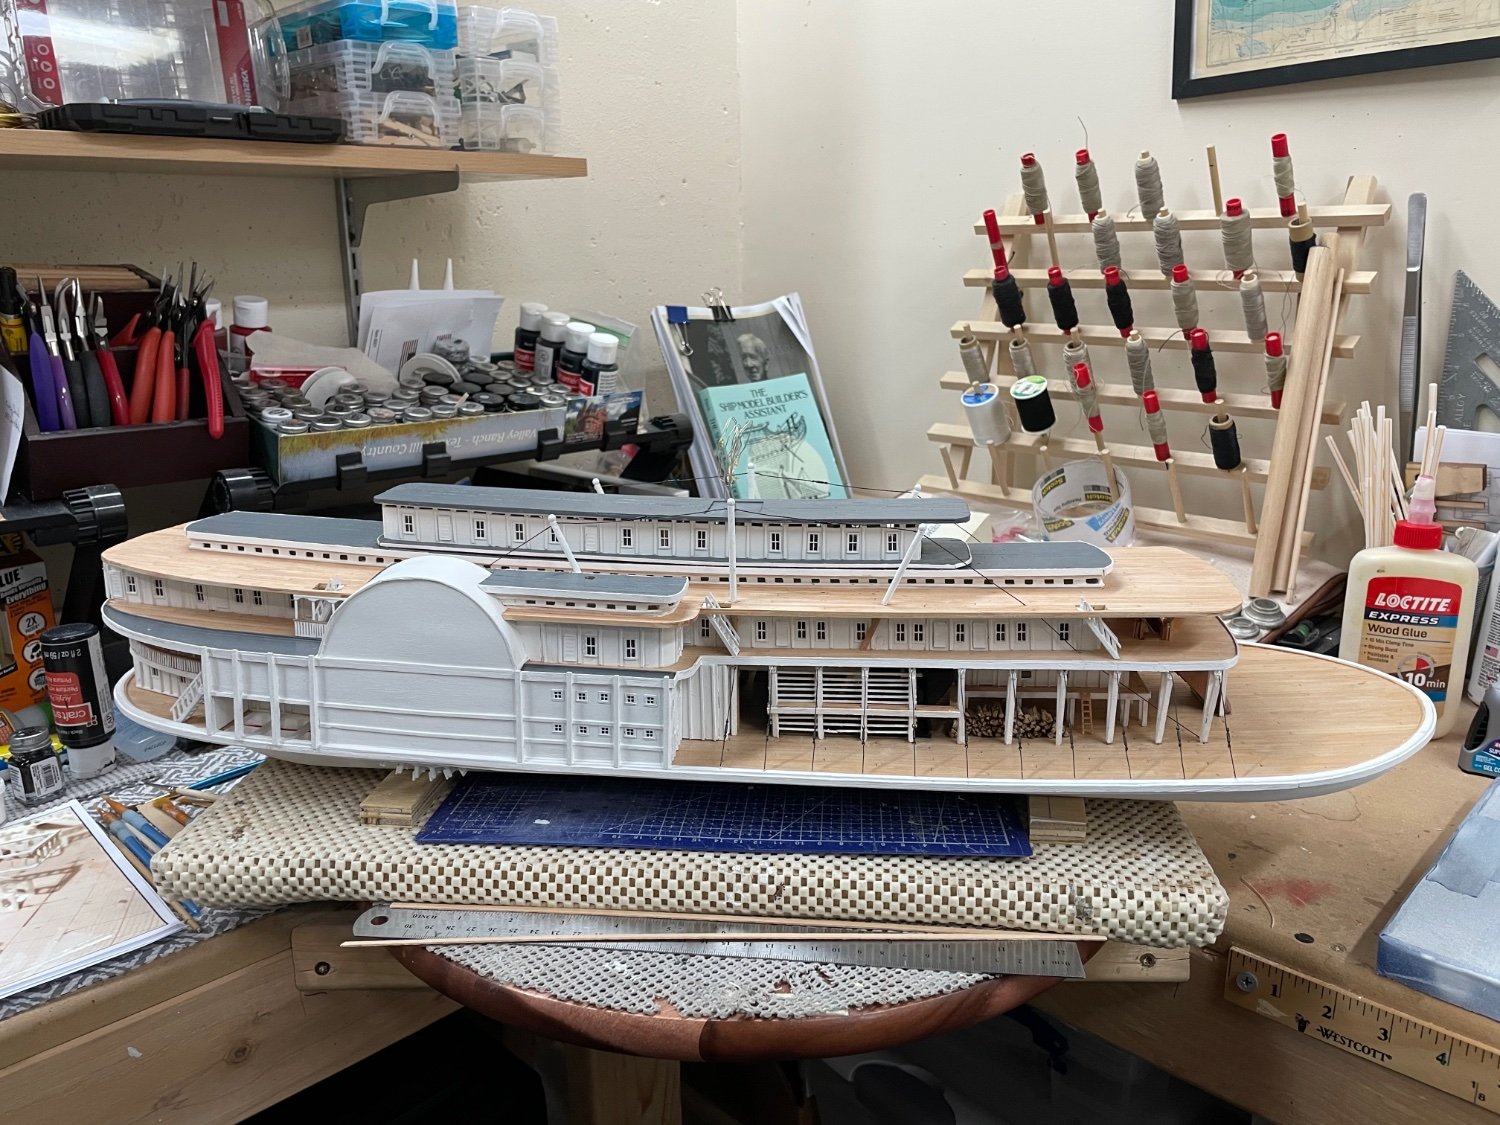
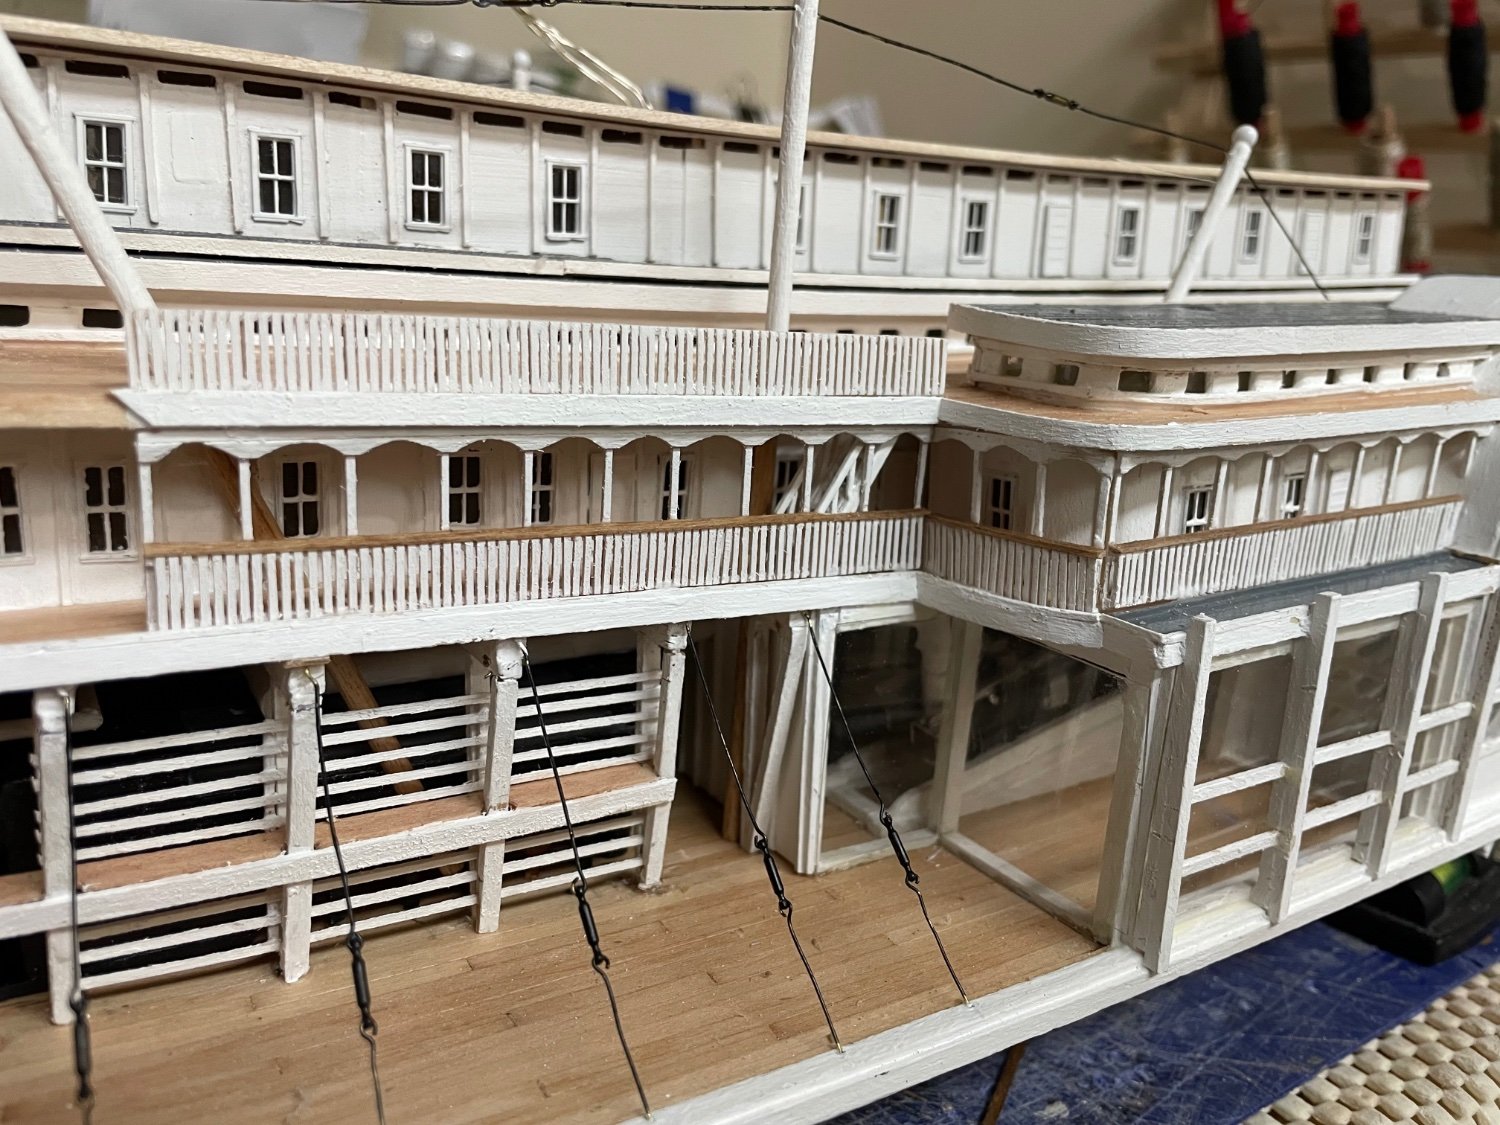
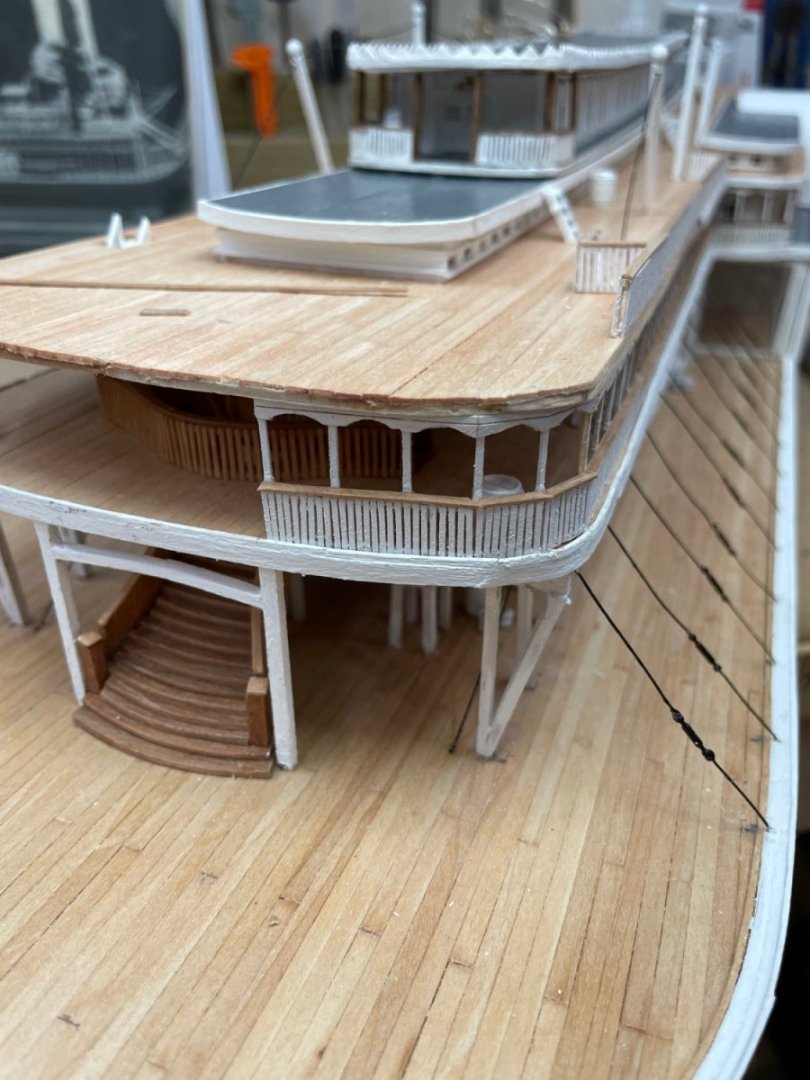
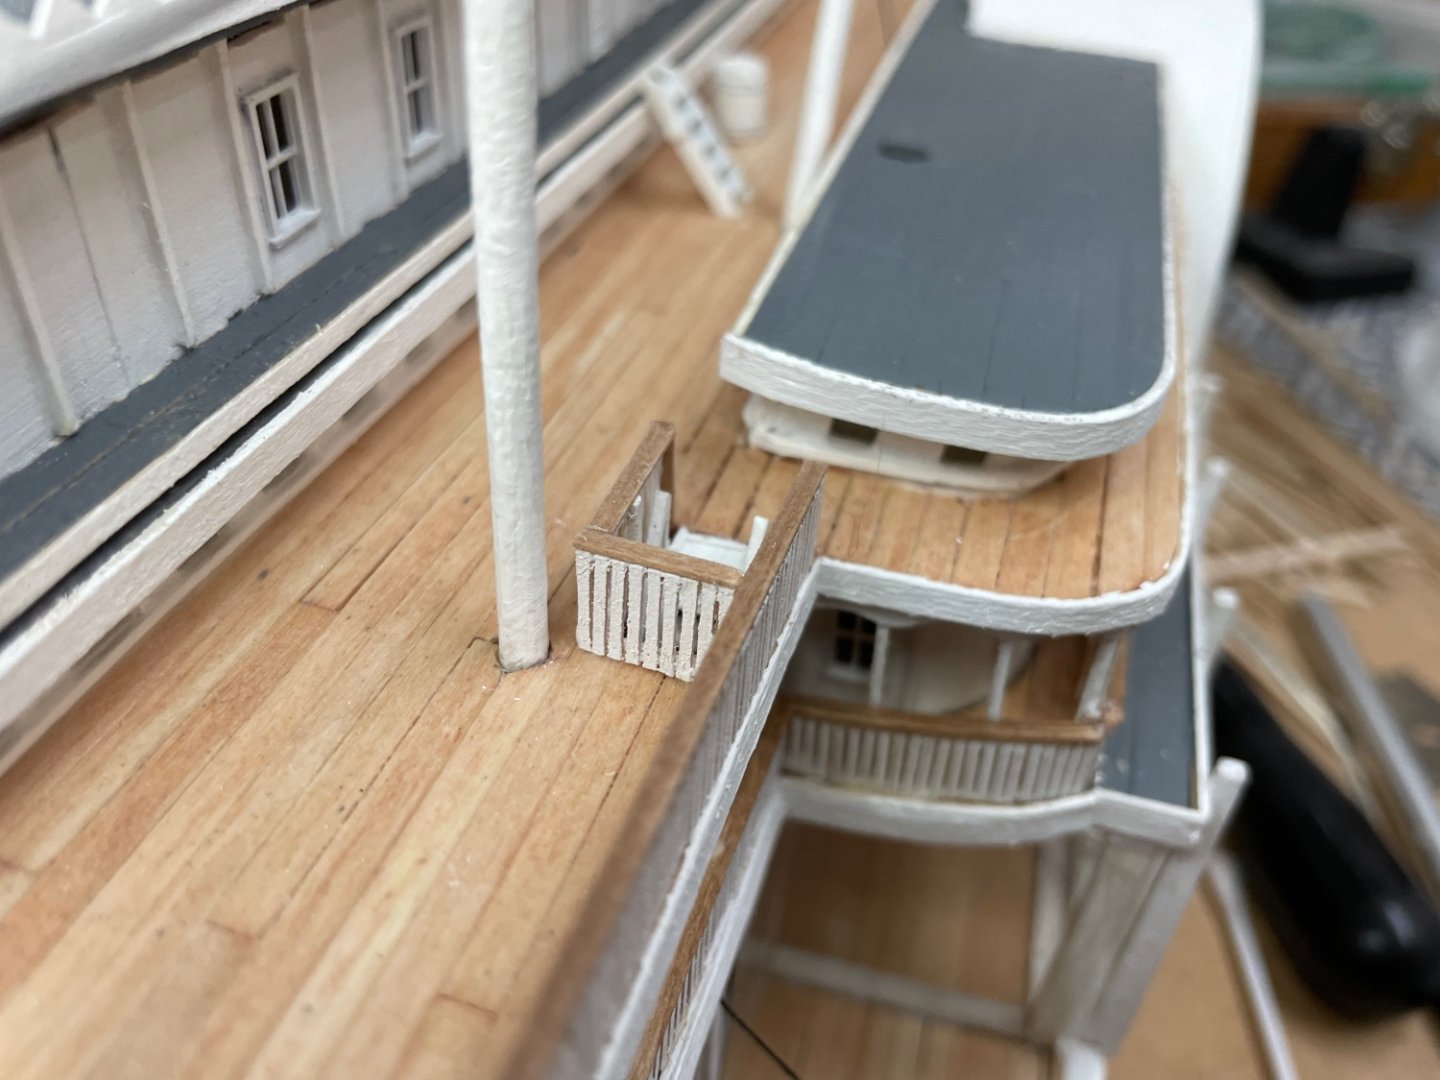
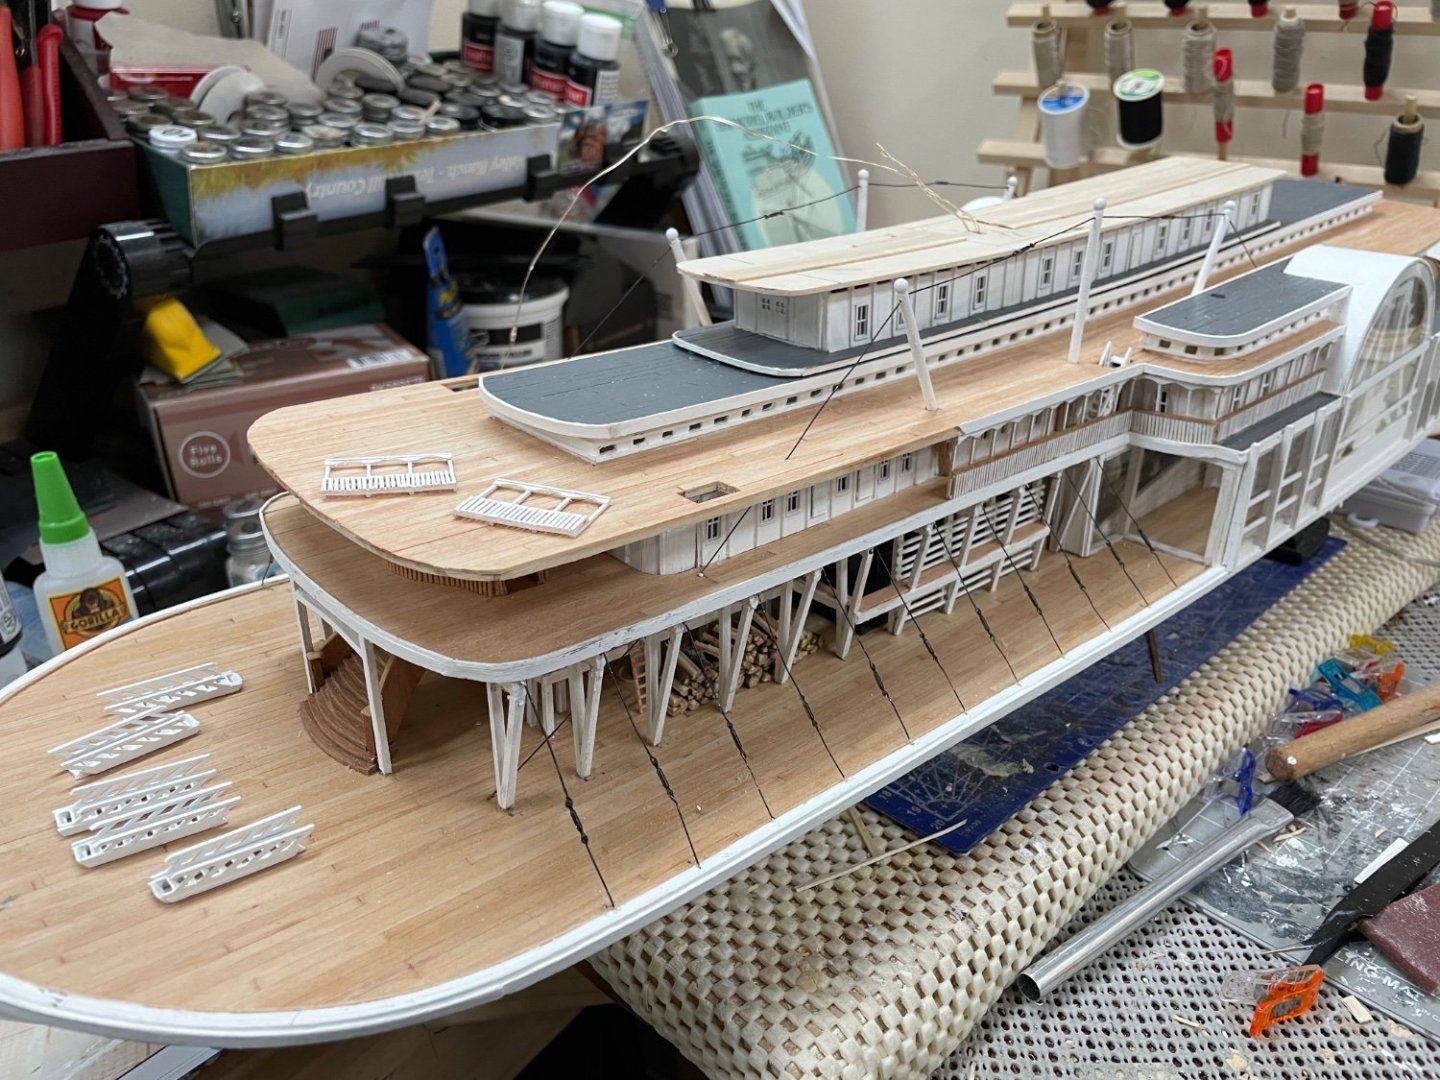
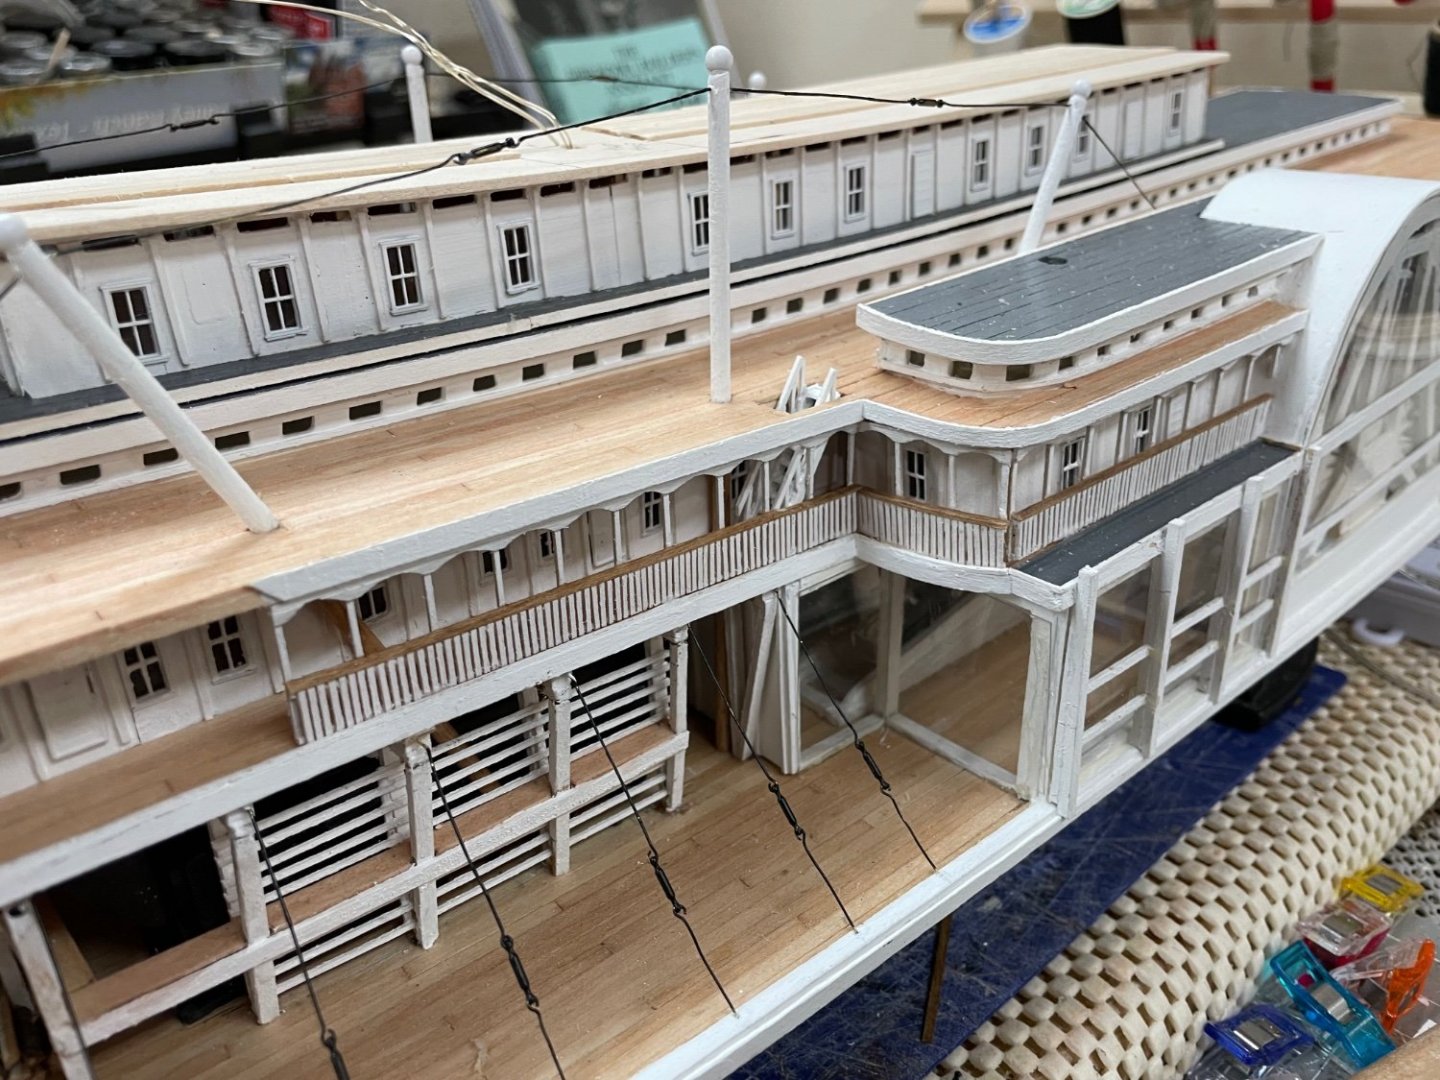
 Railing progress… Someone asked earlier about curved railing sections? Progress! First section of curved railing installed. First Stair Guards on the Hurricane Deck. 😎 A good day aboard the Robert E Lee. Cheers 🍻
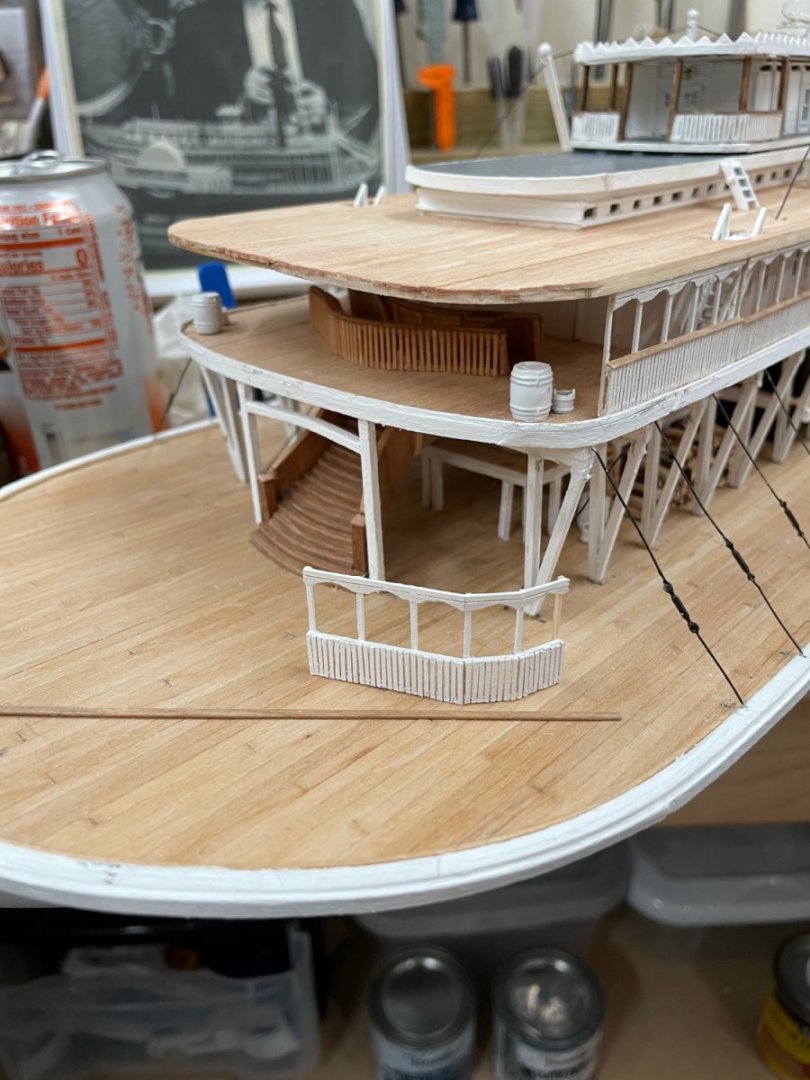


- 238 replies
-
- 10
-

-

-
- Robert E Lee
- steamboat
- (and 3 more)
-
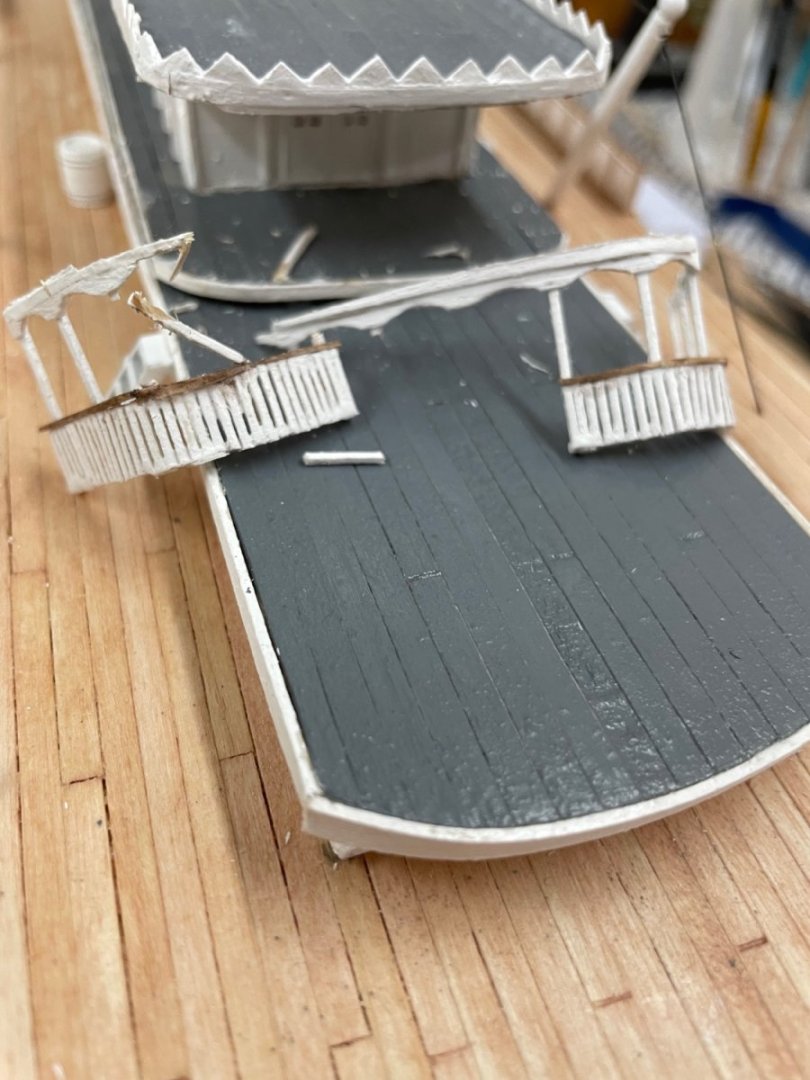
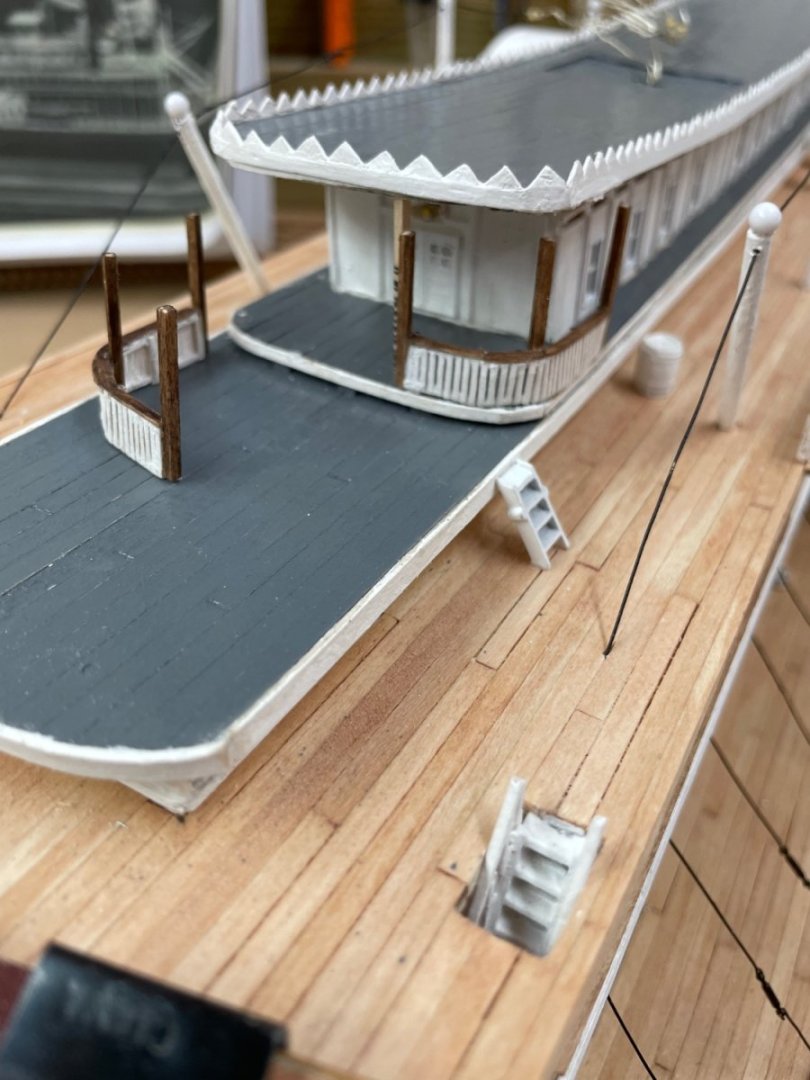
Front Porch Railing 2.0… I’m not happy with the Texas Porch. Railings on the left are collapsing. It needs heavier posts. DEMO Time… Save the railings. 🤪 Added posts… Much better… Yeah! OCD makes for perfection. 😆
- 238 replies
-
- 6
-
-
- Robert E Lee
- steamboat
- (and 3 more)
-
Thanks David, I appreciate your input. I followed your Bluenose build and am referencing it as I proceed. I was aware of this issue as I assembled the Stern and will keep this in mind going forward. I am currently using the rail piece as a guide to shape the stern and hopefully avoid the issue. It does look like I will need to widen the rail, reshape the stern narrower or both. Thanks again for the heads up, I will keep an eye 🧐 on the planking in this area. Cheers 🍻

- 282 replies
-
- 6
-
-
- Bluenose
- Model Shipways
- (and 1 more)
-
Inboard Transom planking… Transom completed… Cheers 🍻

- 282 replies
-
- 4
-
-
- Bluenose
- Model Shipways
- (and 1 more)
-
Railing progress… Three more sections ready for paint. Cheers 🍻

- 238 replies
-
- 7
-
-
- Robert E Lee
- steamboat
- (and 3 more)
-
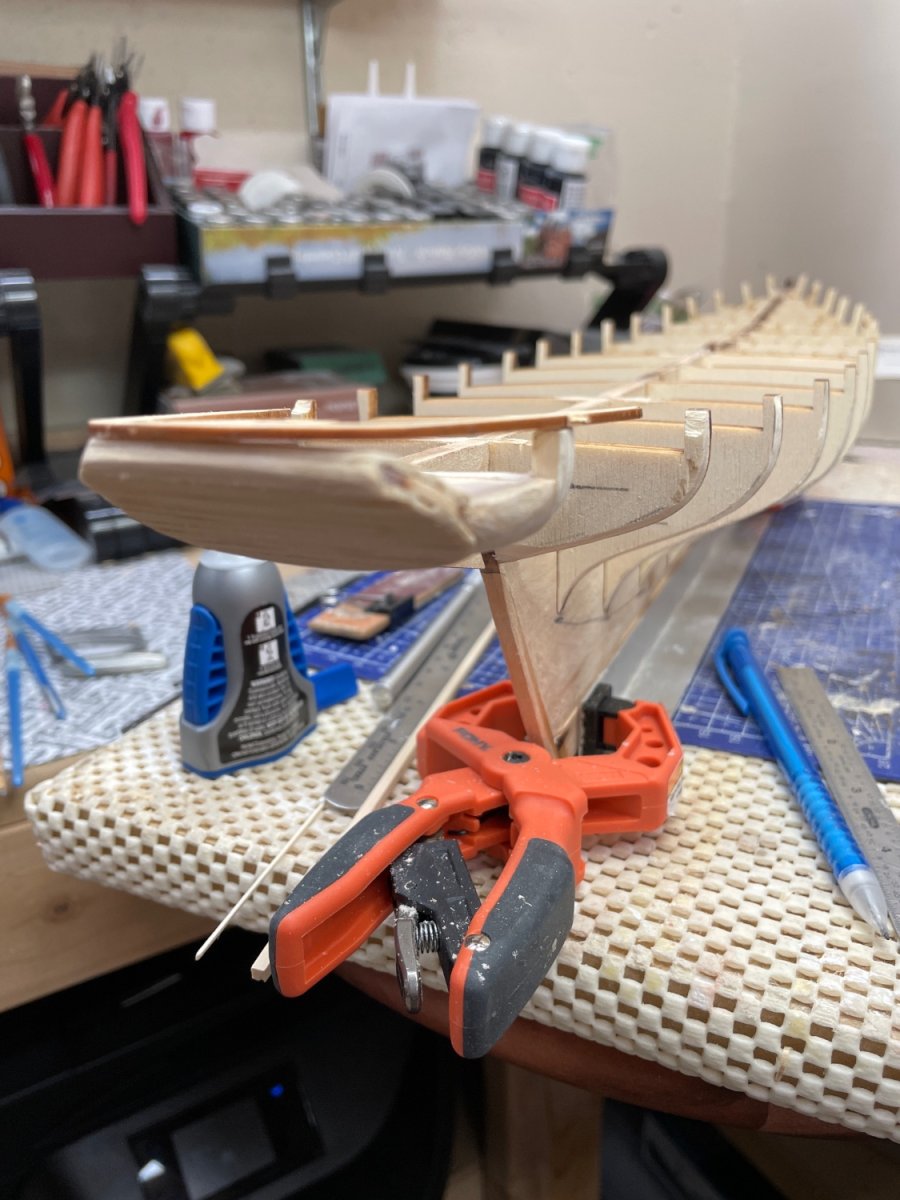
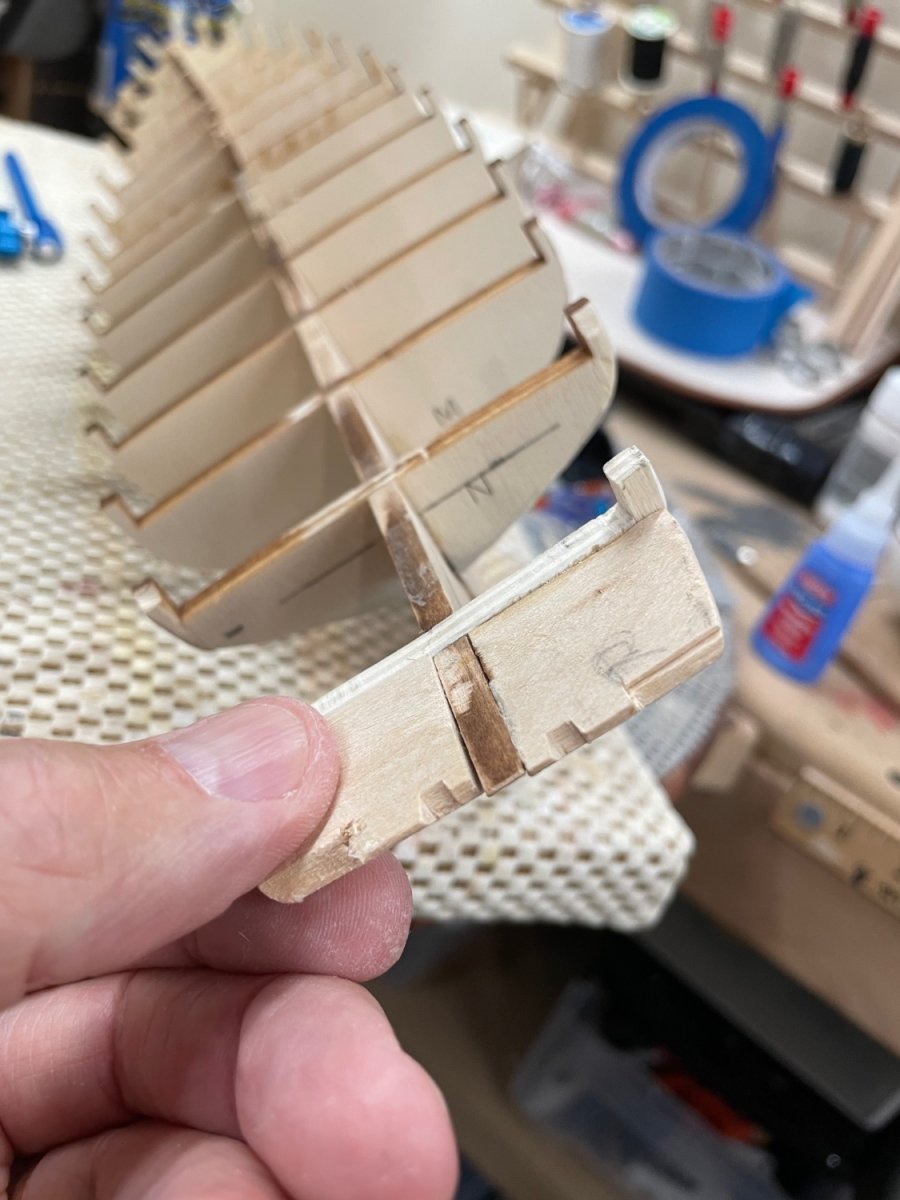
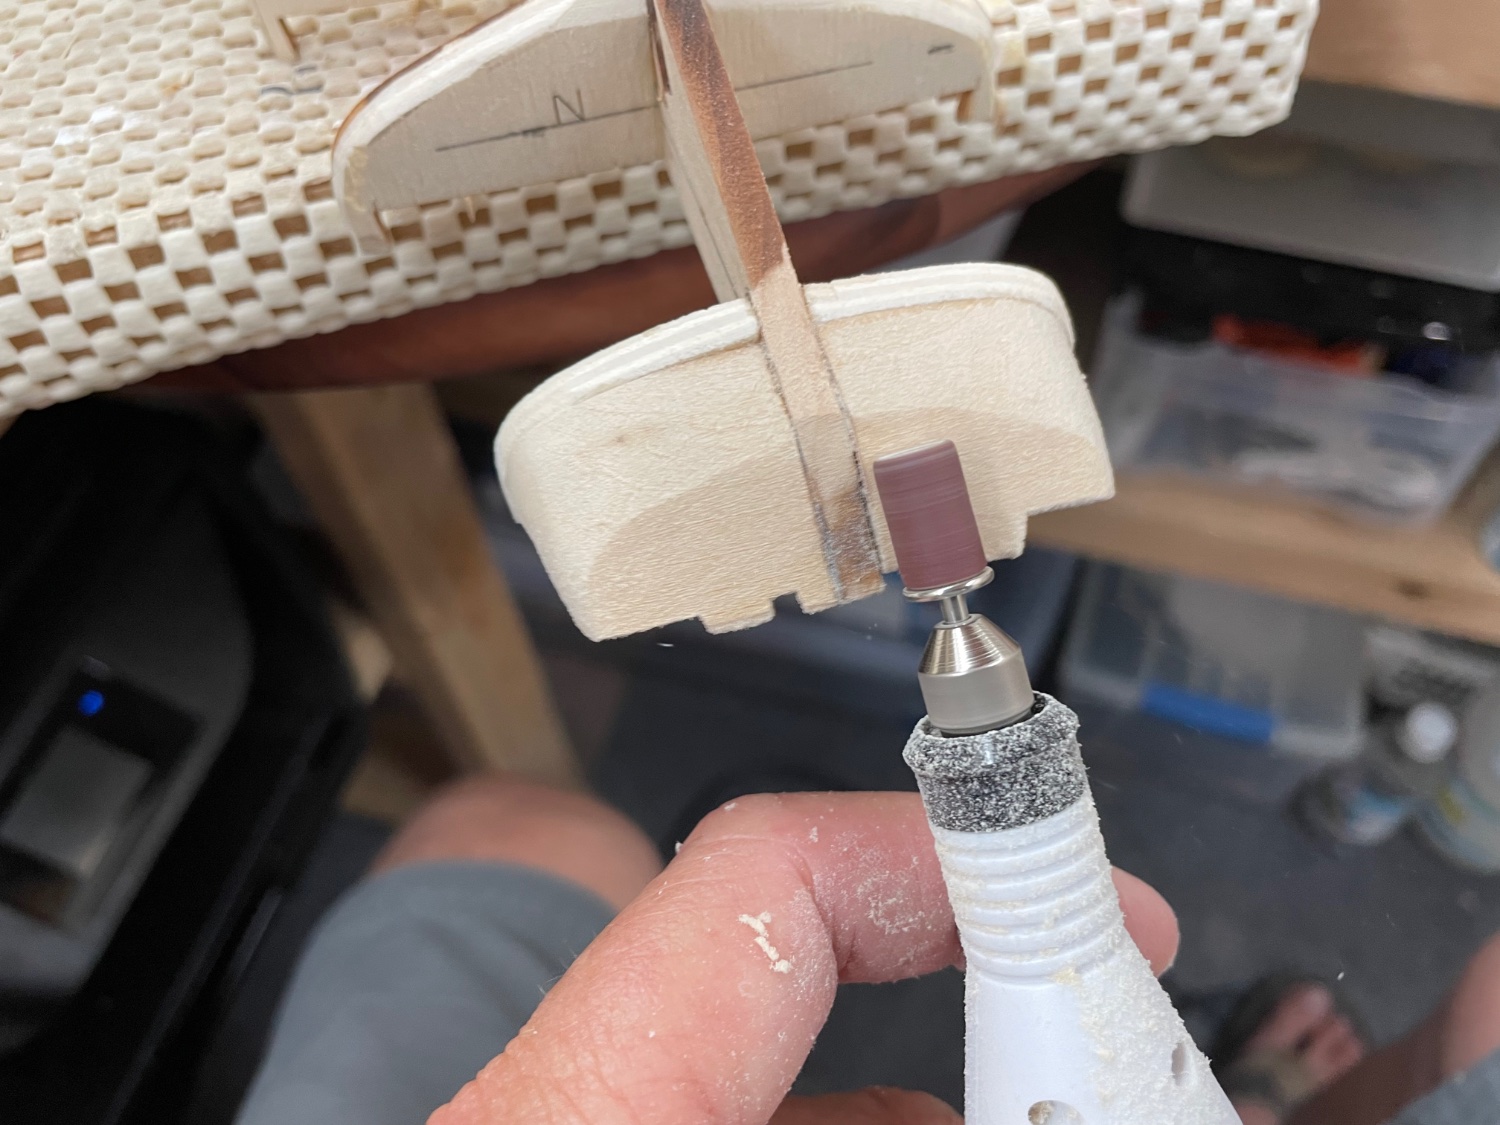
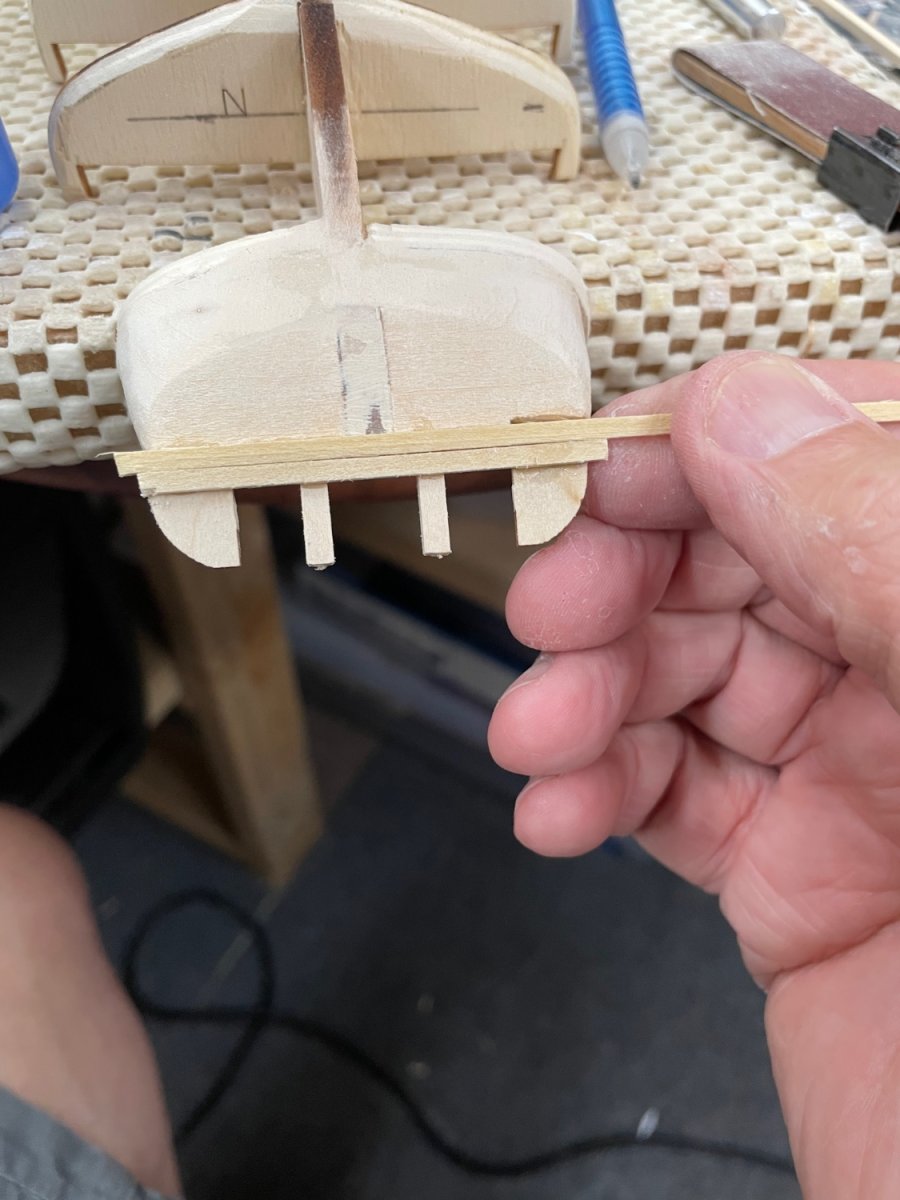
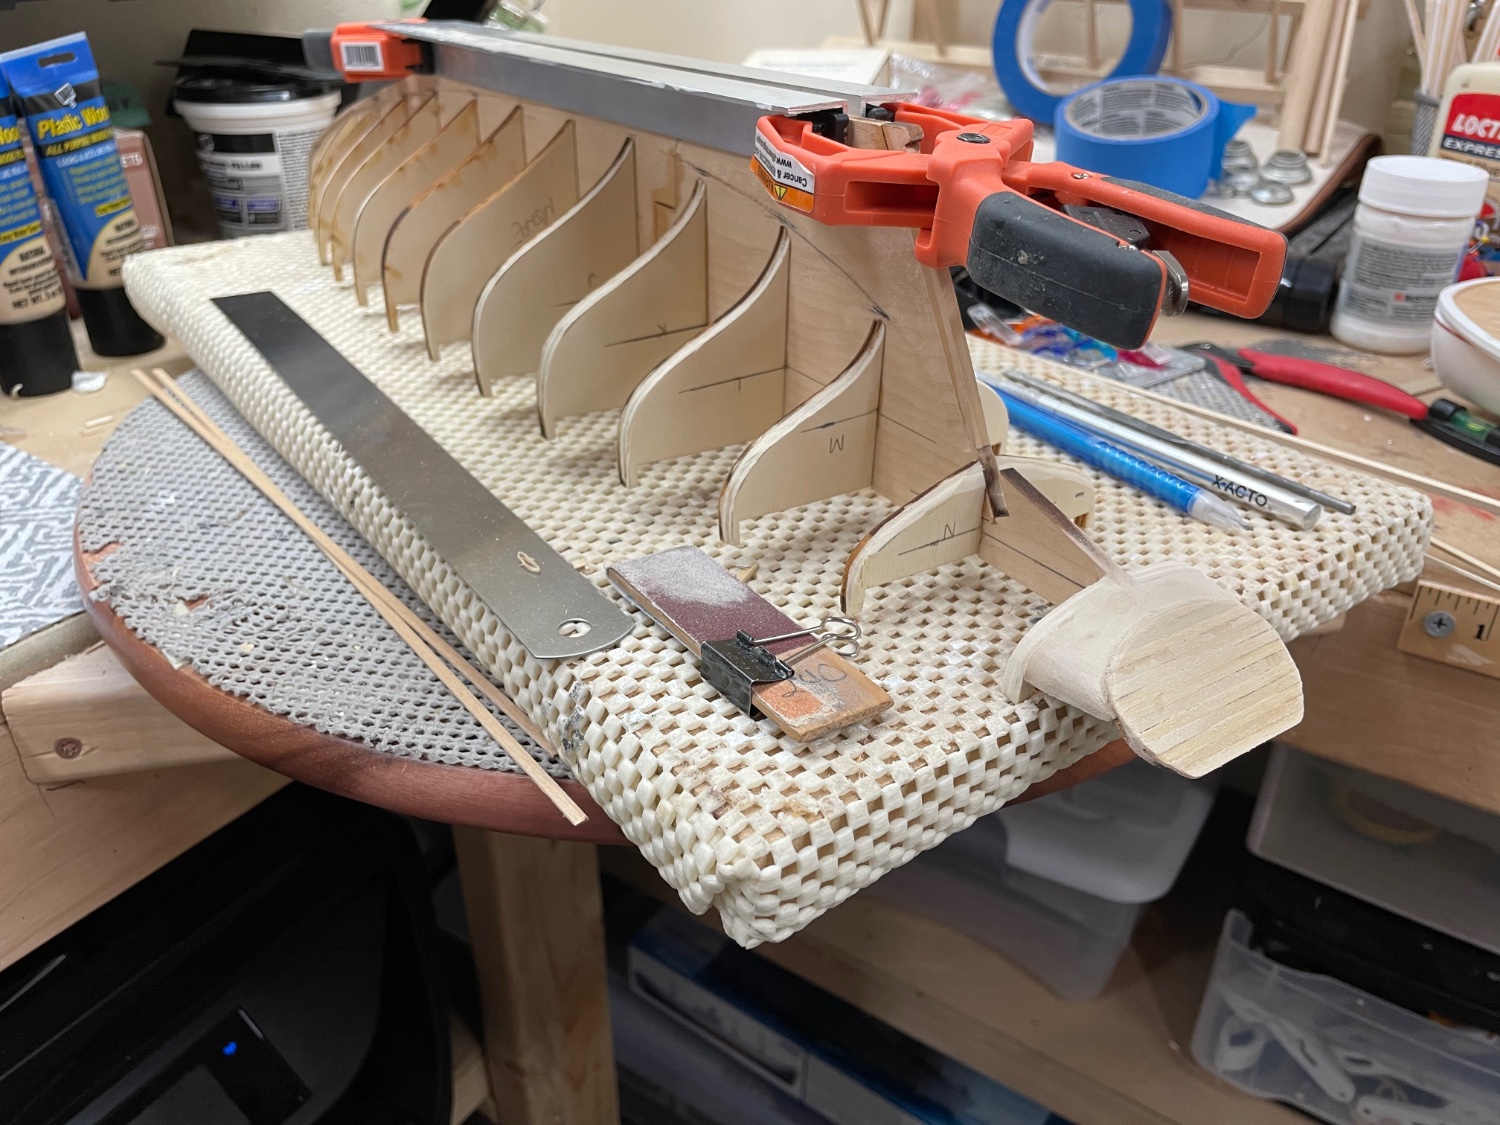
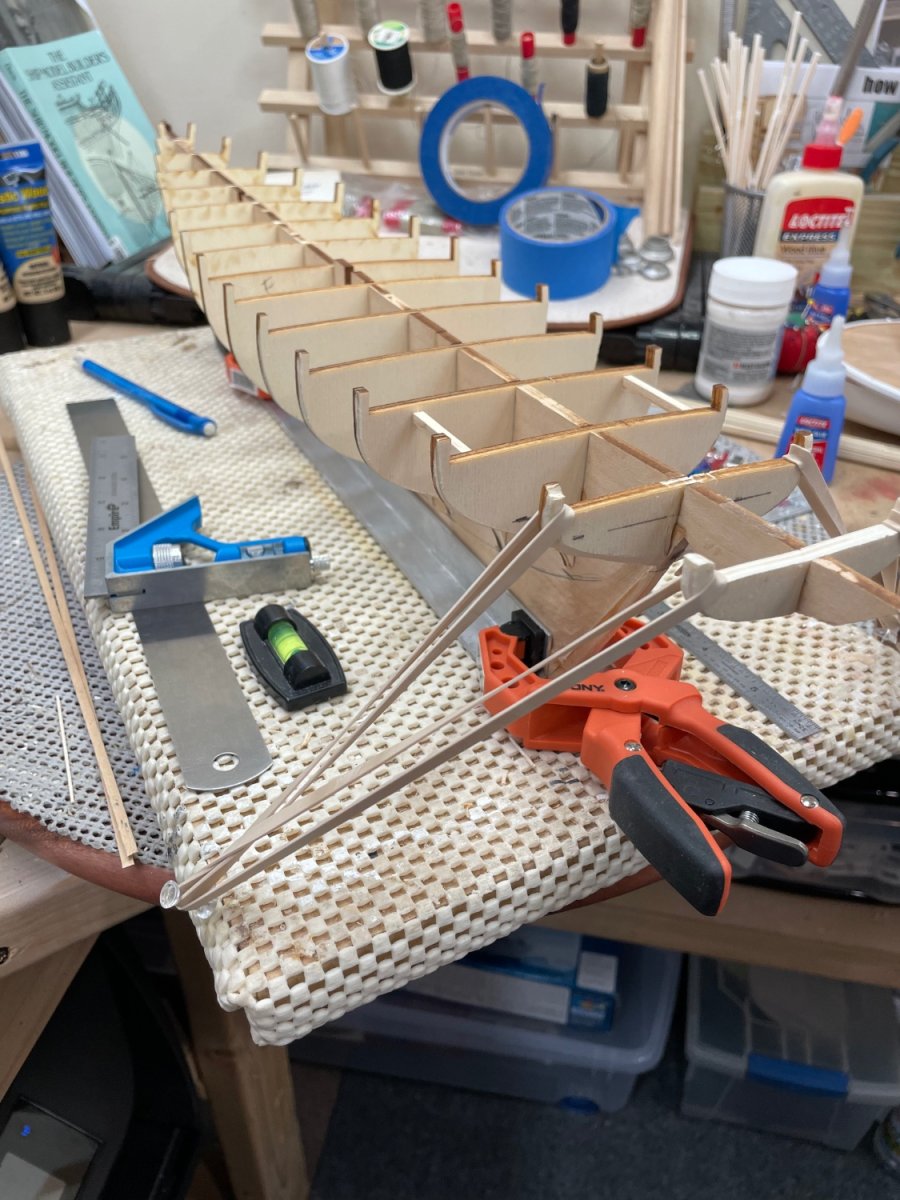
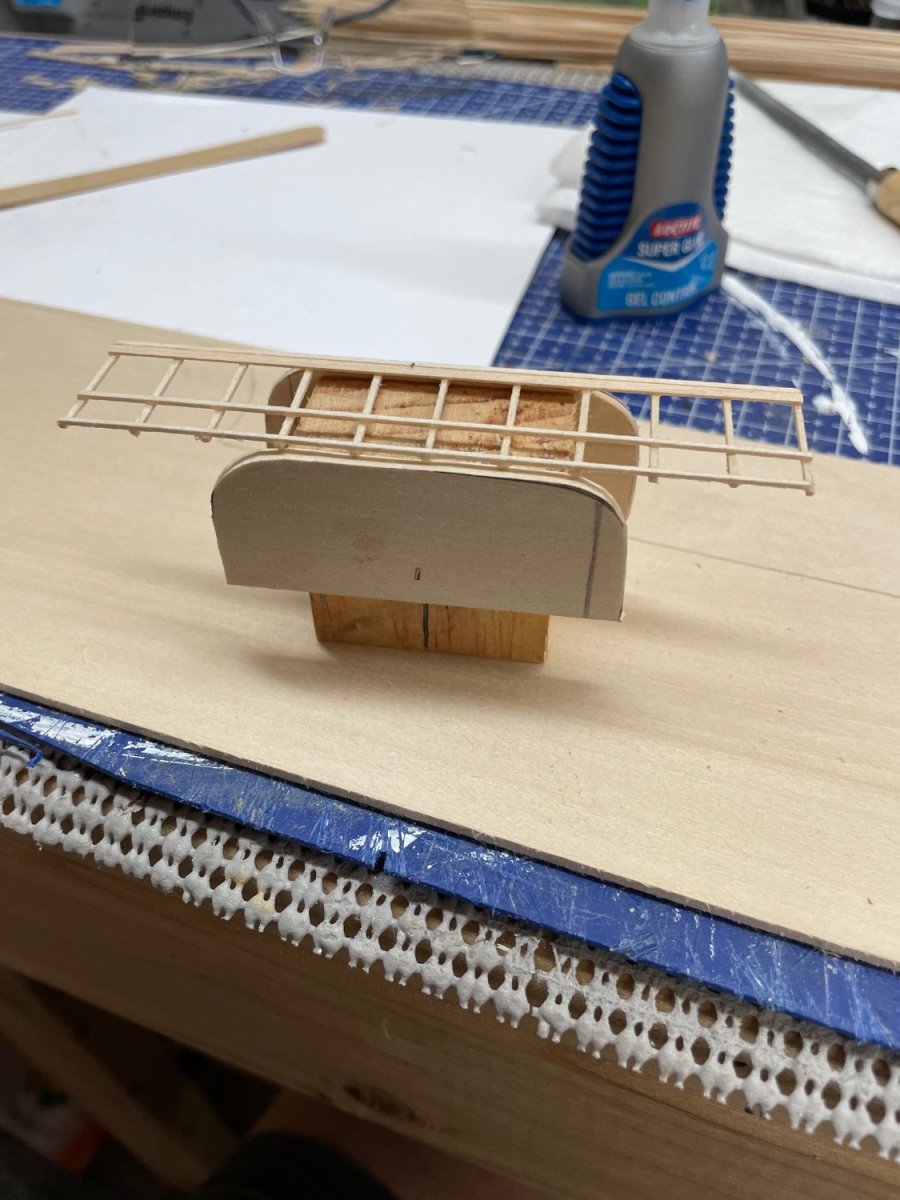
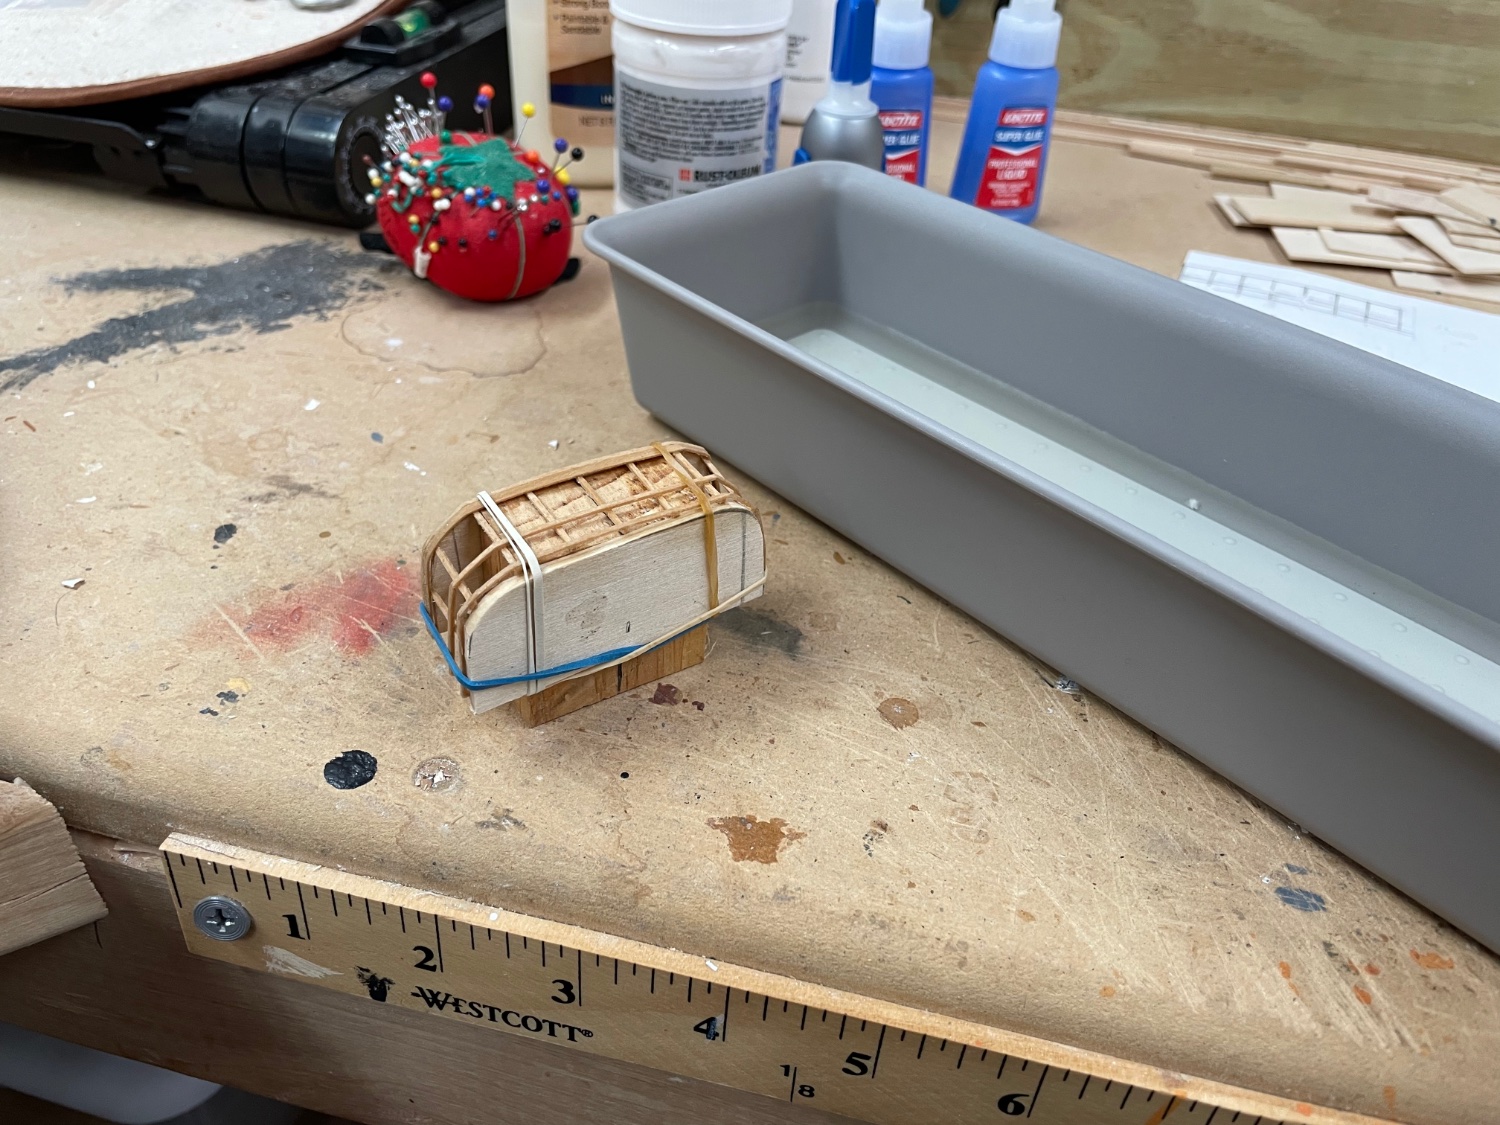
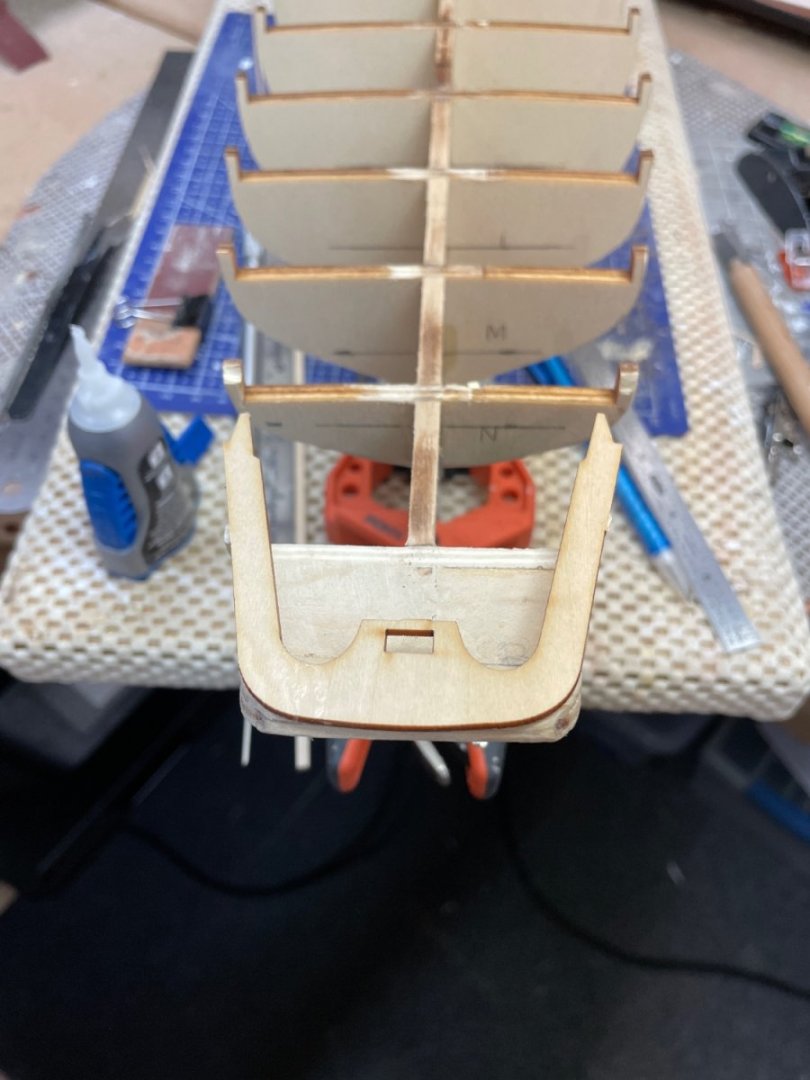
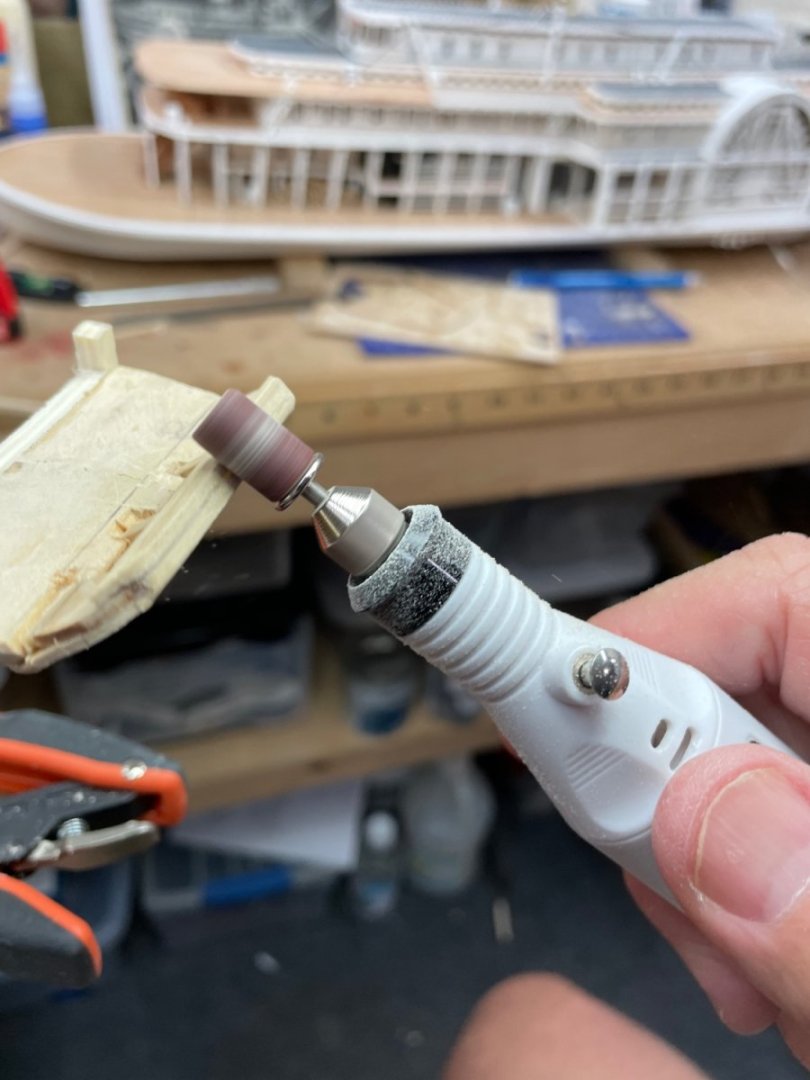
The Stern… After aligning and gluing all of the bulkheads in place, I began the work on the stern section. The blocks had been shaped nicely by the previous owner. Shaping of the stern blocks… Added the stern framing pieces and started planking the stern. Stern planking completed. More sanding required to get this right. This is my third schooner and it still feels difficult. But then if it were easy, it wouldn’t be a challenge. 🍻 Lots more detail to come before planking. Onwards 🍻


- 282 replies
-
- 7
-
-
- Bluenose
- Model Shipways
- (and 1 more)
-
Good eye… I need you guys taking a close look at my work. Keeps me alert, never saw that one. Maybe this box is worth something with its obvious miss print. 😆 Welcome aboard!
- 282 replies
-
- 2
-
-
- Bluenose
- Model Shipways
- (and 1 more)
-
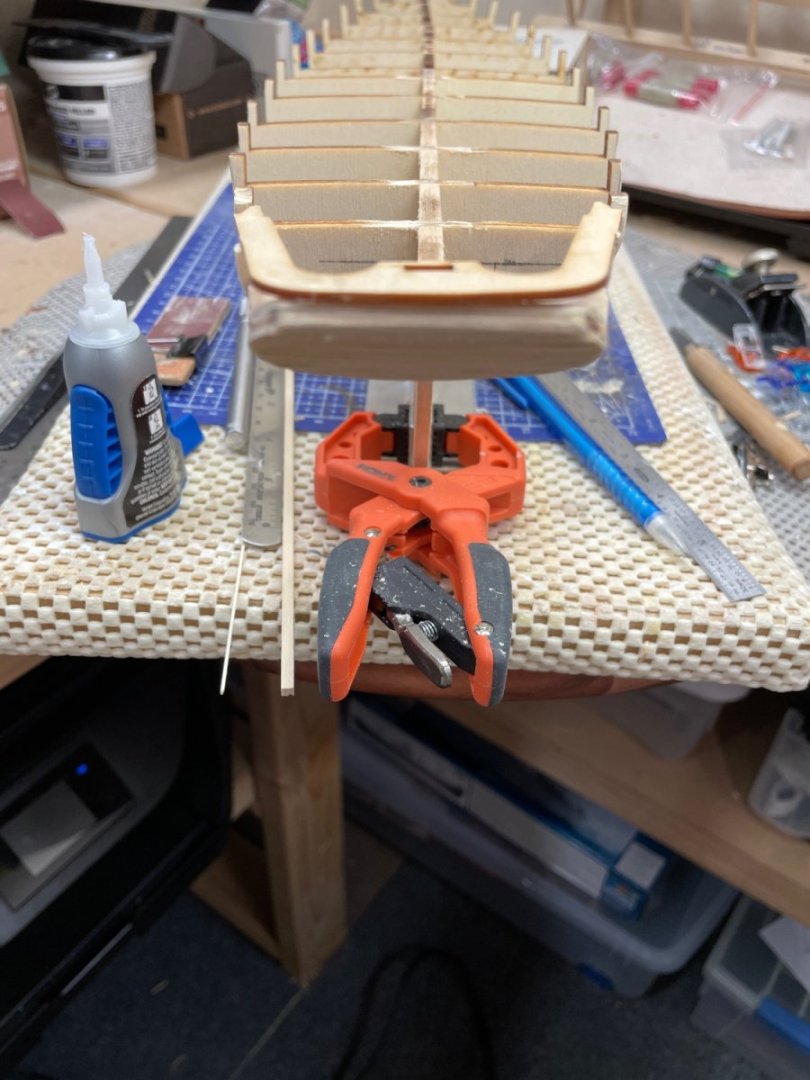
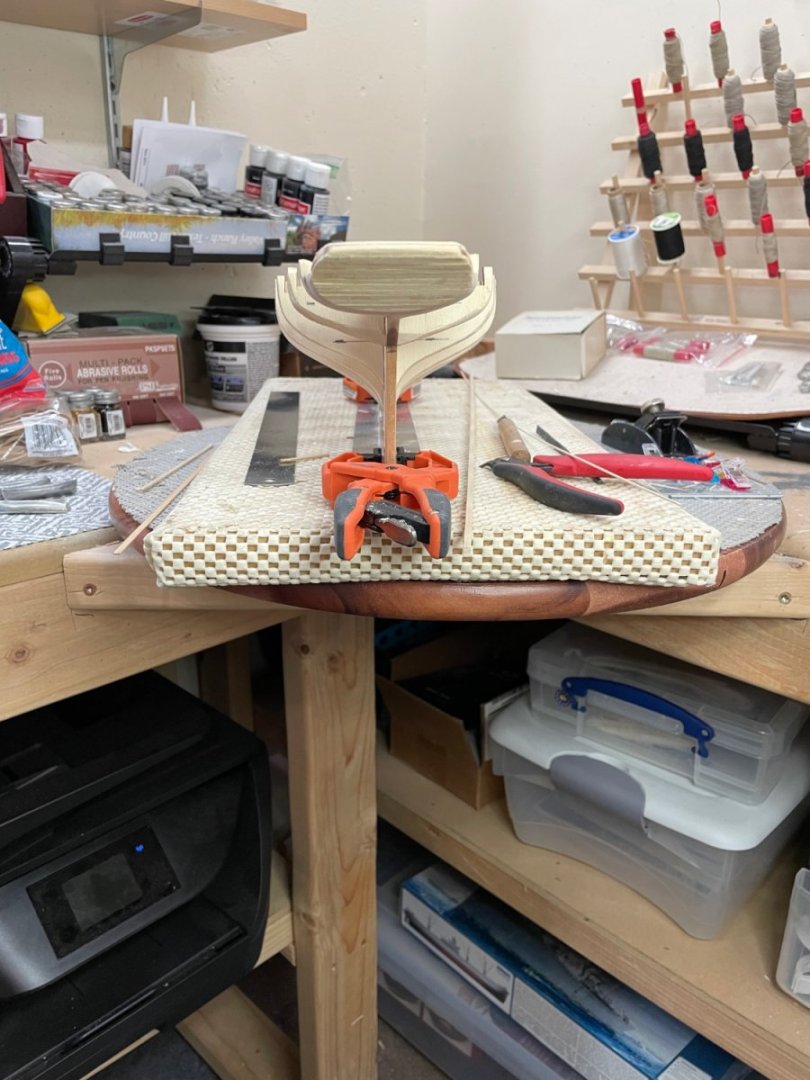
Gluing Bulkheads in place… Good first day… Cheers 🍻

- 282 replies
-
- 5
-
-
- Bluenose
- Model Shipways
- (and 1 more)
-
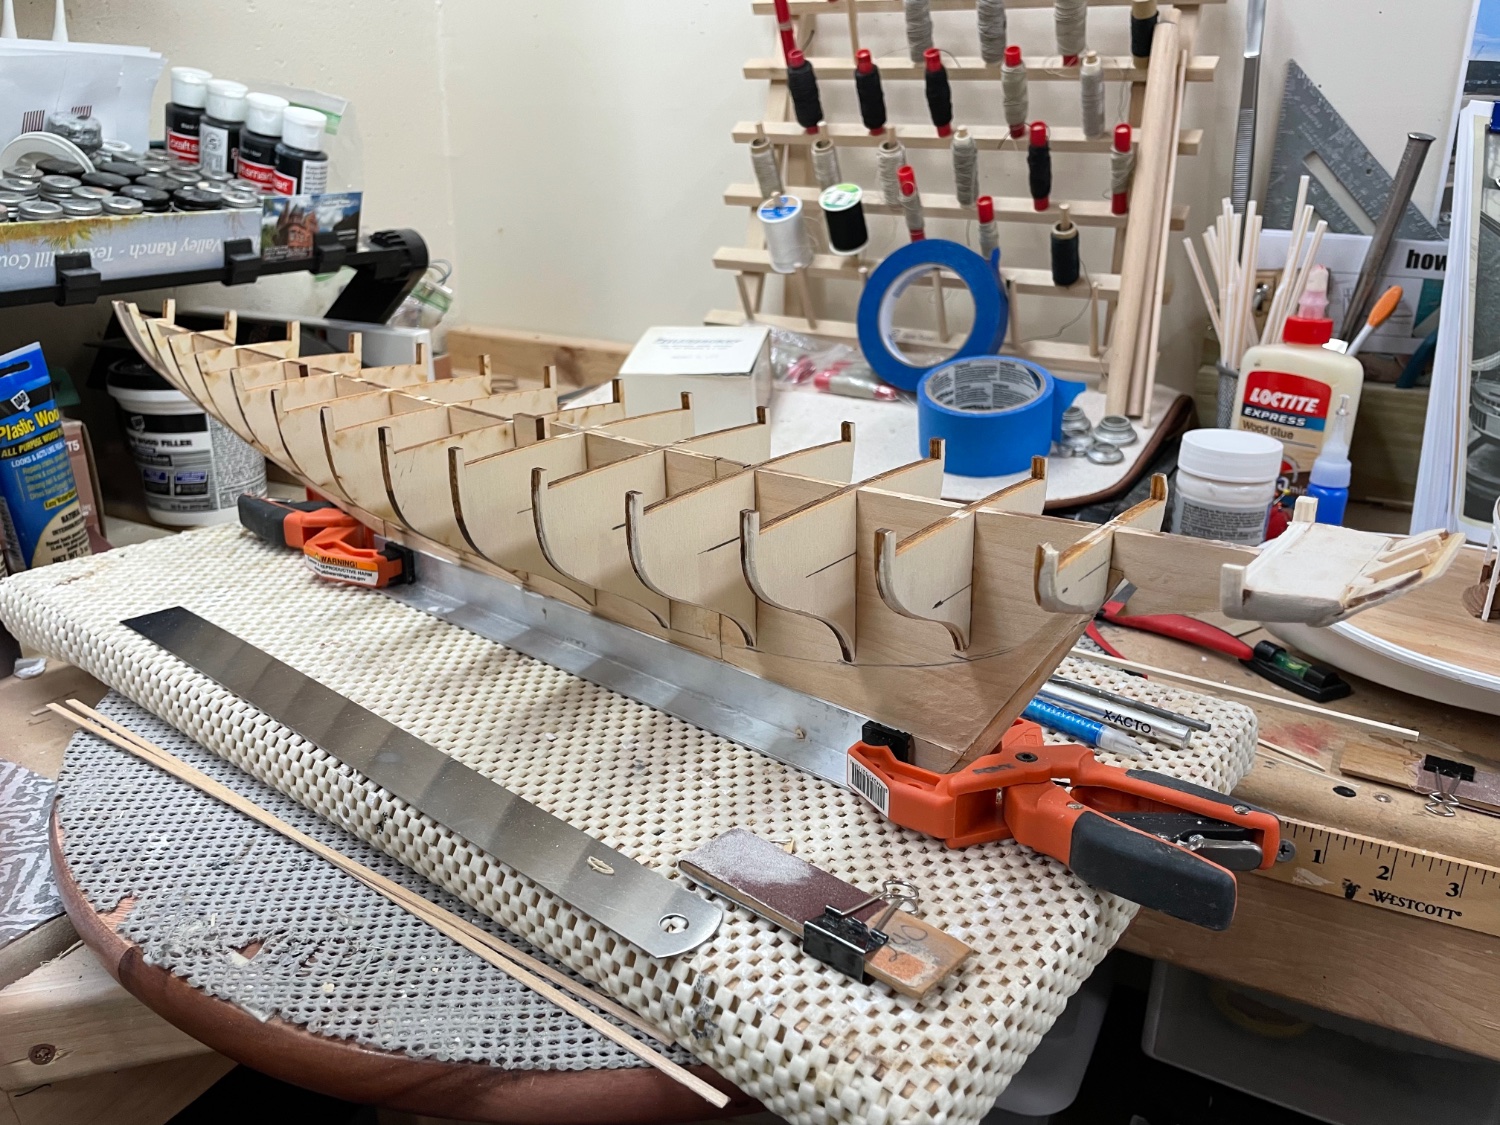
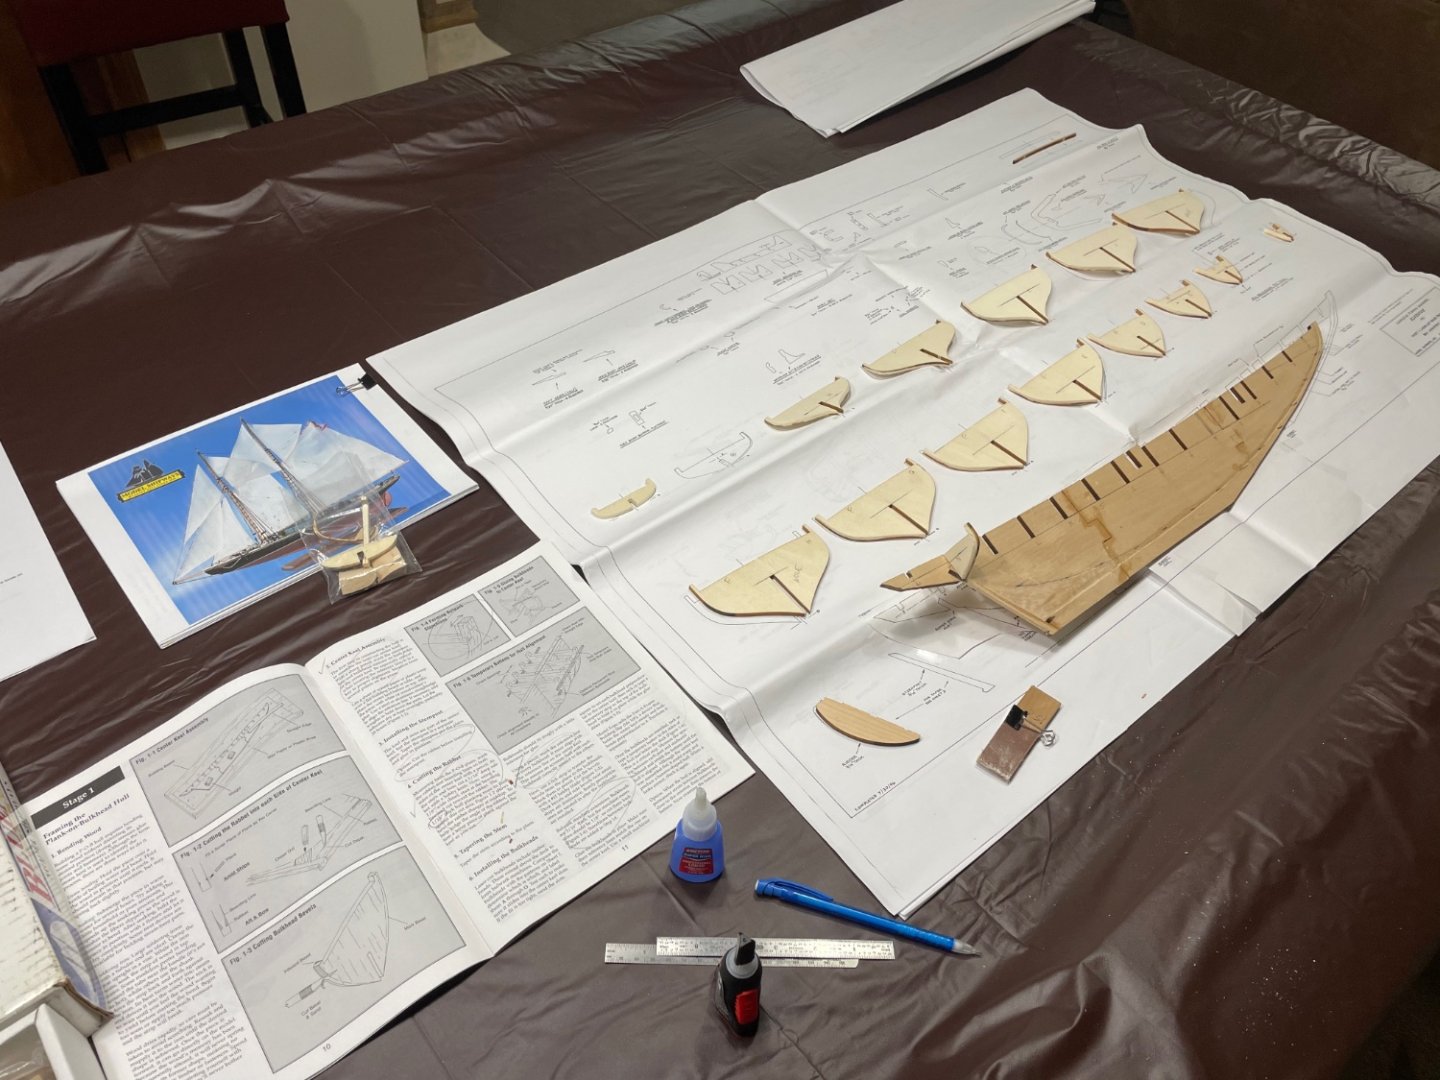
Day 1 - Blukheads fitted… Next step gluing the bulk heads in place. I will need to jig up a frame to insure the bulkheads are square and aligned prior to gluing and then I’ll fair up the framing before planking. Cheers 🍻
- 282 replies
-
- 2
-
-
- Bluenose
- Model Shipways
- (and 1 more)
-
Ok… I need some respite from railings 😆 I will continue steady progress on this build and have started a new day job The Bluenose, here is a link to my other build log if you would like to check it out. https://modelshipworld.com/topic/32549-bluenose-canadian-fishing-schooner-by-john-ruy-164-scale-model-shipways-kit-no-ms2130/
- 238 replies
-
- 4
-
-
- Robert E Lee
- steamboat
- (and 3 more)
-
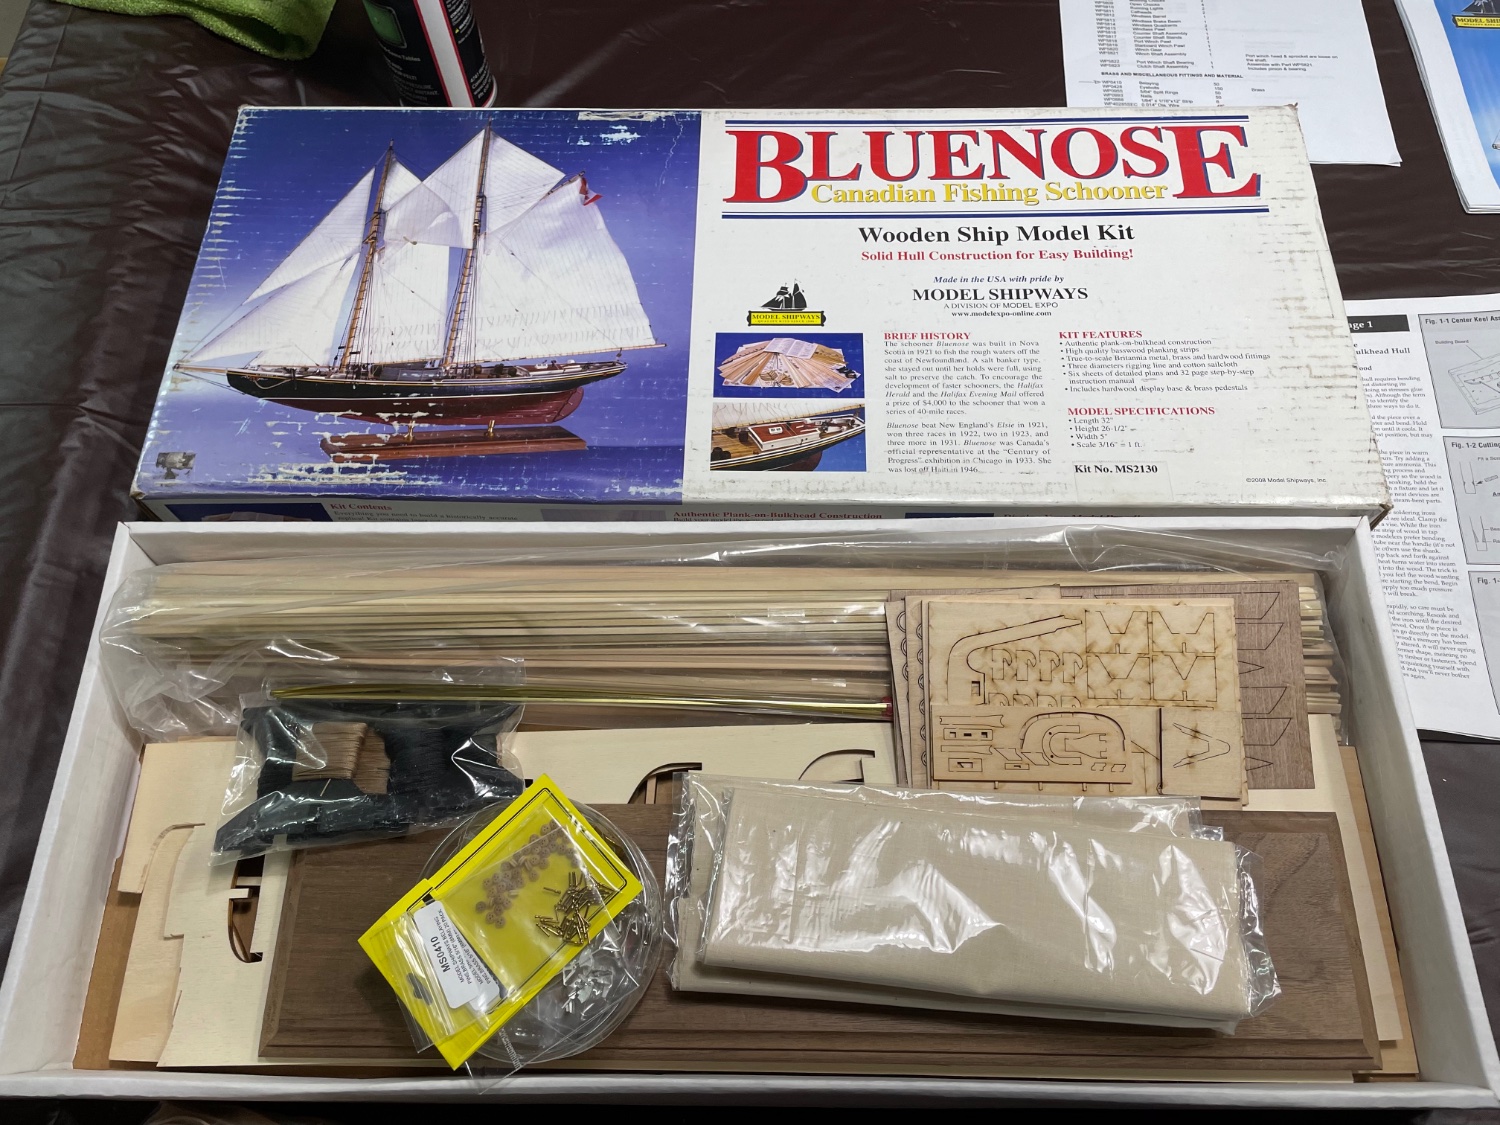
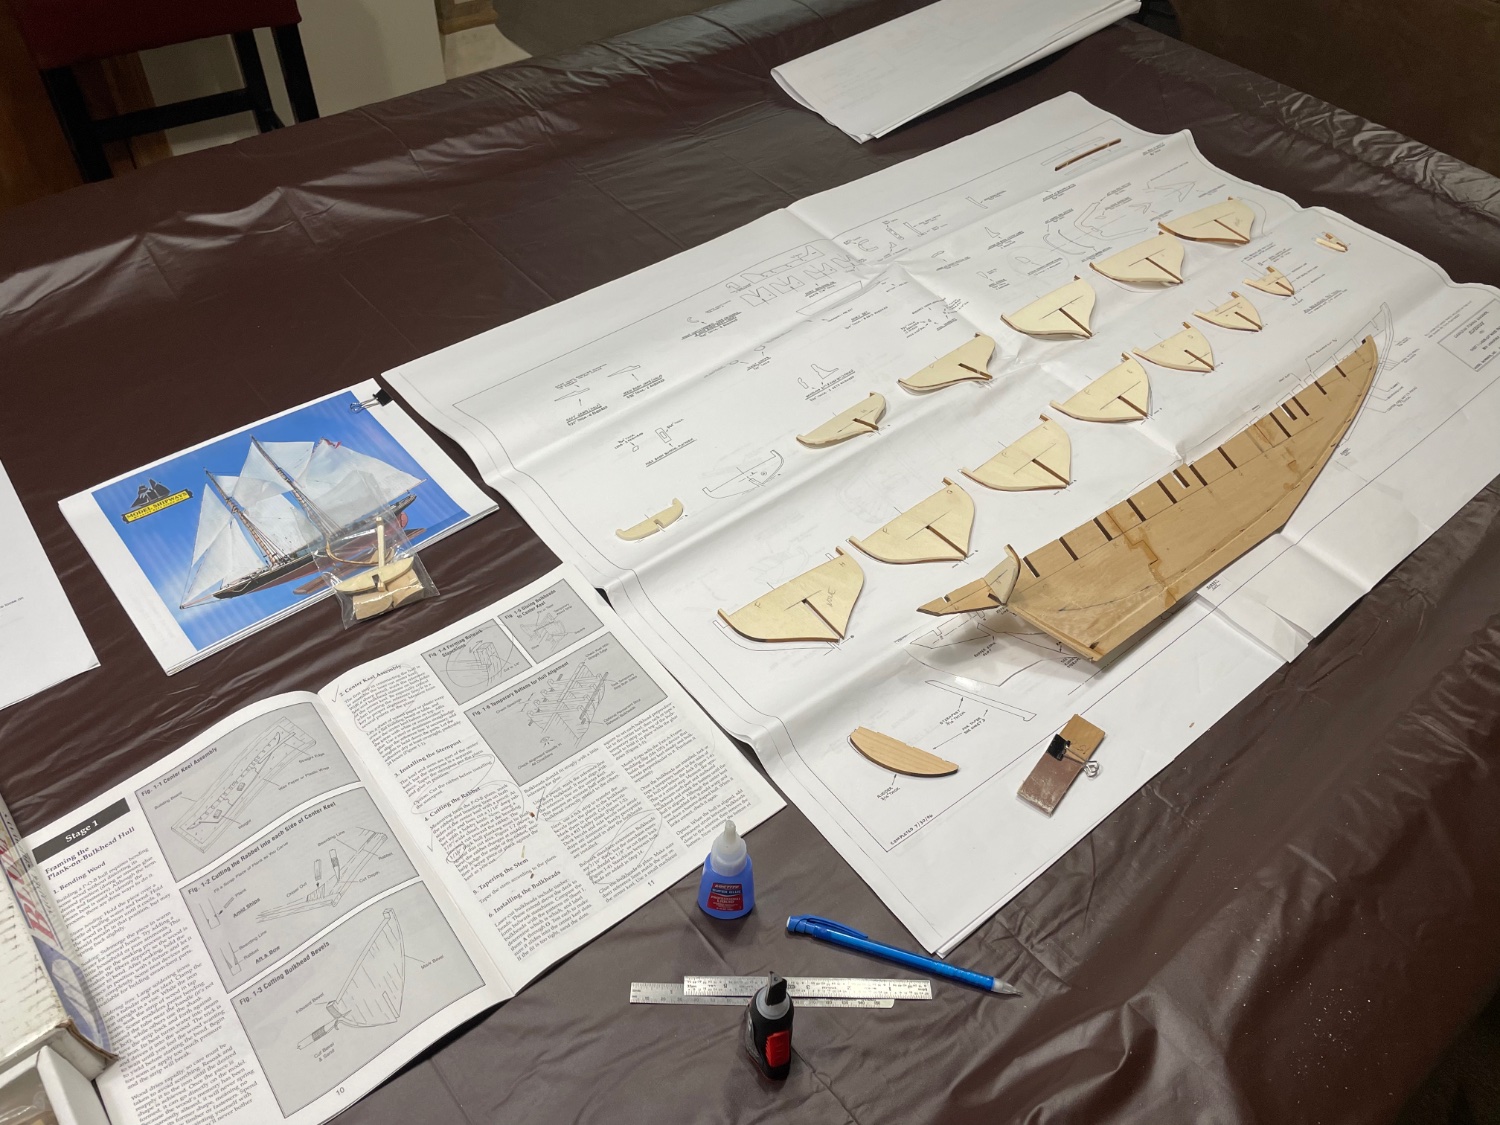
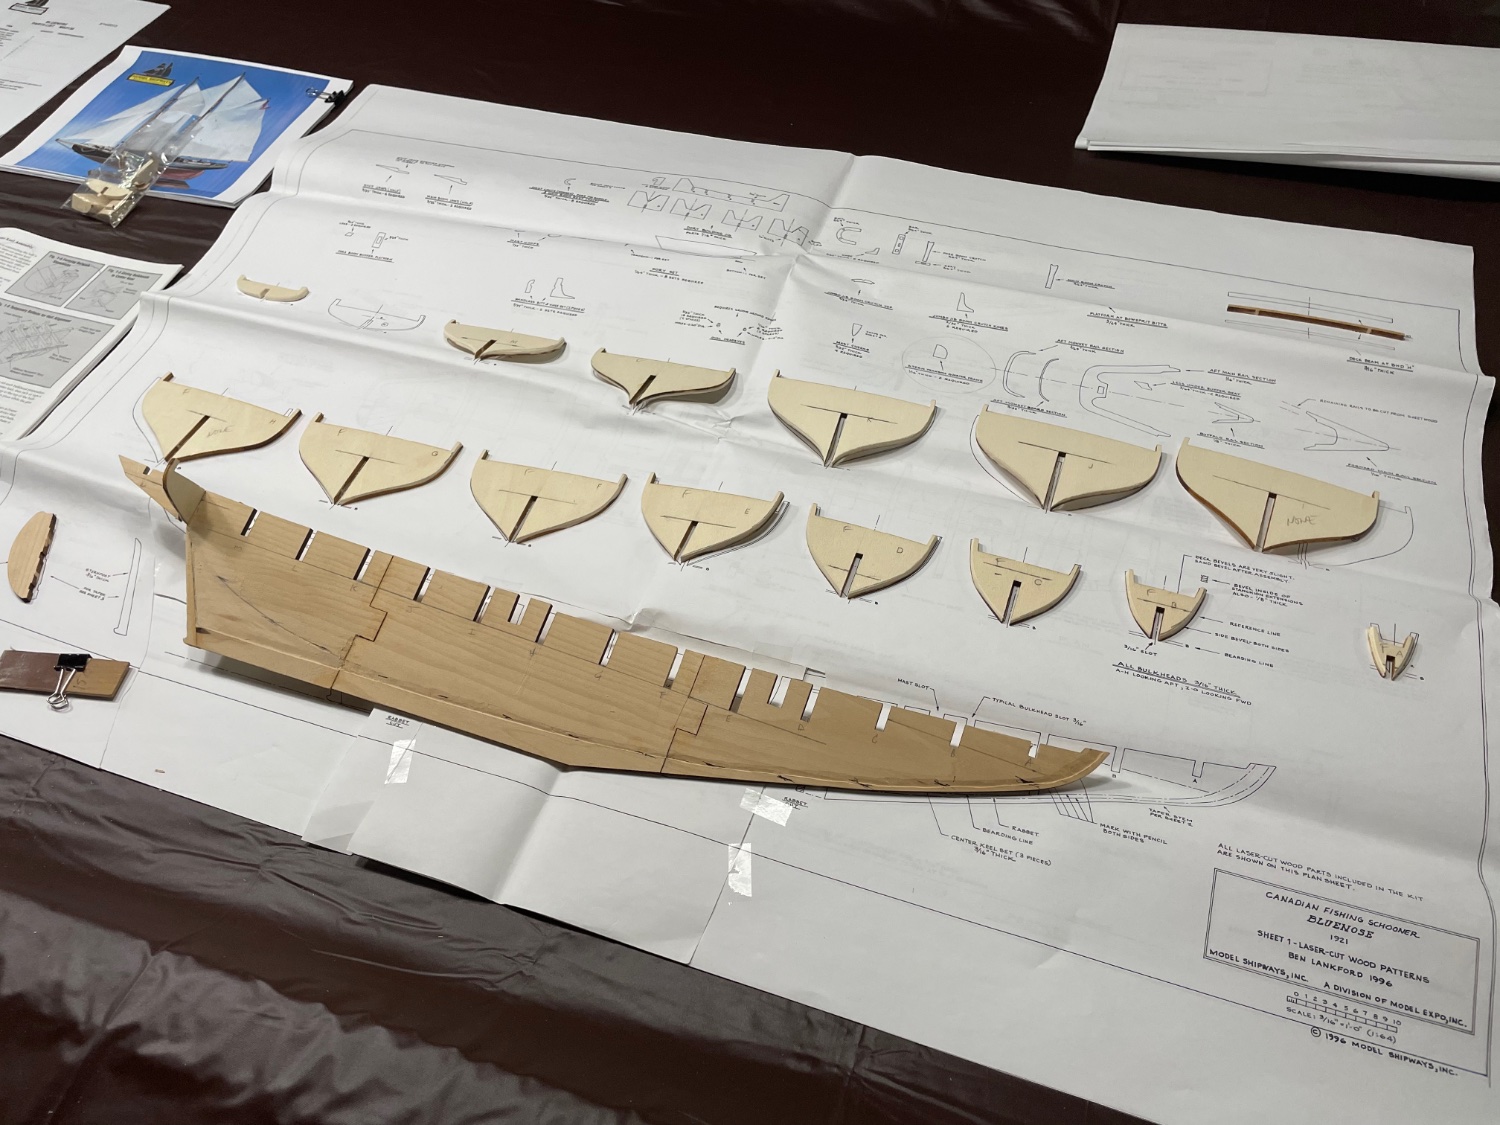
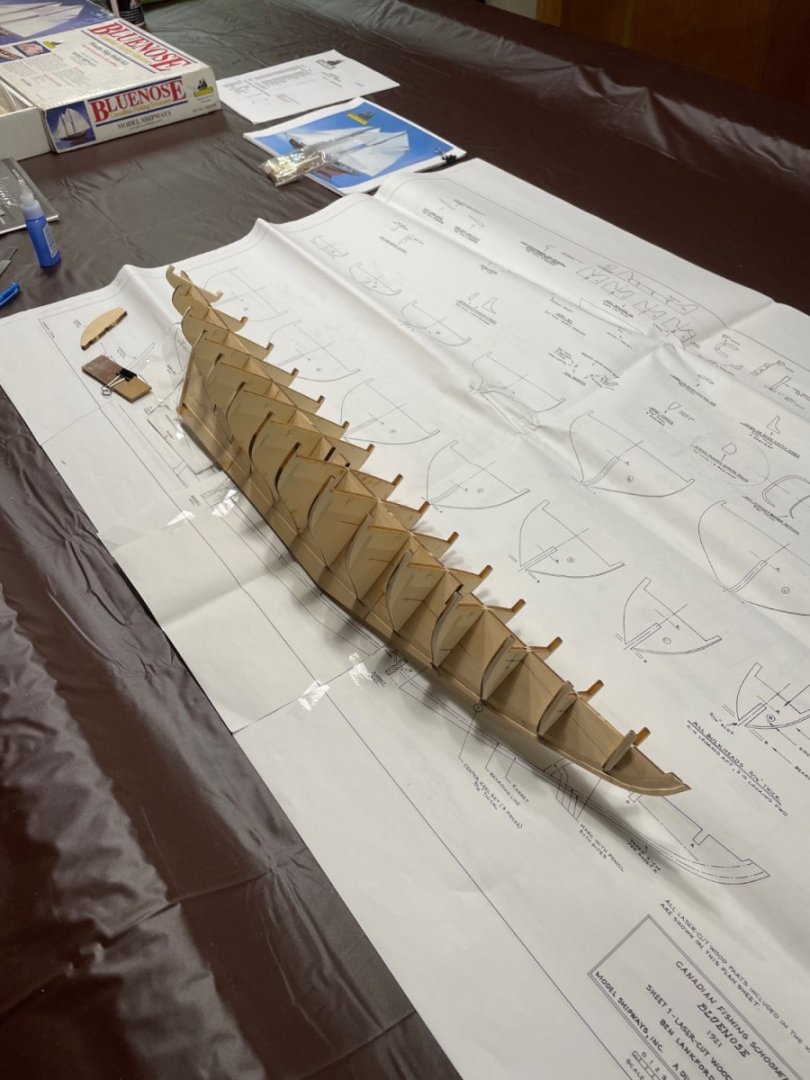
One of my eBay finds out of my stash. I have decided to break up the marathon task of building railings on the Robert E Lee. I will continue building those railings in the evening as I wind down the day. Here is a link to my Robert E Lee Build My new day job will be the Bluenose Canadian Fishing Schooner by Model Shipways. This kit was purchased for just 78.00 including shipping on eBay. The previous owner had started this kit. The kit was only missing some of the deadeyes and belaying pins. Those were easily sourced from Model Expo and are on order. Today I have laid her out to determine what has been started, the work is salvageable. Previous owner had only progressed to step 5. I have also assembled the 3 piece Keel and started the work of smoothing out the bulk head tapers and Rabbit Joints cut by my predecessor. I have been wanting to build the beautiful schooner since I first saw a model of her in the Bluenose Hotel in Bar Harbor, Maine. Plan to visit Nova Scotia next summer and see The Bluenose II among other things Canadian. Wish me luck, I am hoping my skills are now up to the task of doing her justice. Cheers 🍻


- 282 replies
-
- 7
-
-
- Bluenose
- Model Shipways
- (and 1 more)
-
Yes… the drawings indicate they are to be painted White. I would have thought red, but white seems to be the color for everything.
-
Finishing up the Texas Porch… Top rails added… Upper trim work filled and painted. Railings are getting easier, but very time consuming. 🤪 Cheers 🍻


- 238 replies
-
- 7
-
-
-
- Robert E Lee
- steamboat
- (and 3 more)
-
I thought they might be… Good luck with your research 🧐 I know how conflicting these things can be.
-
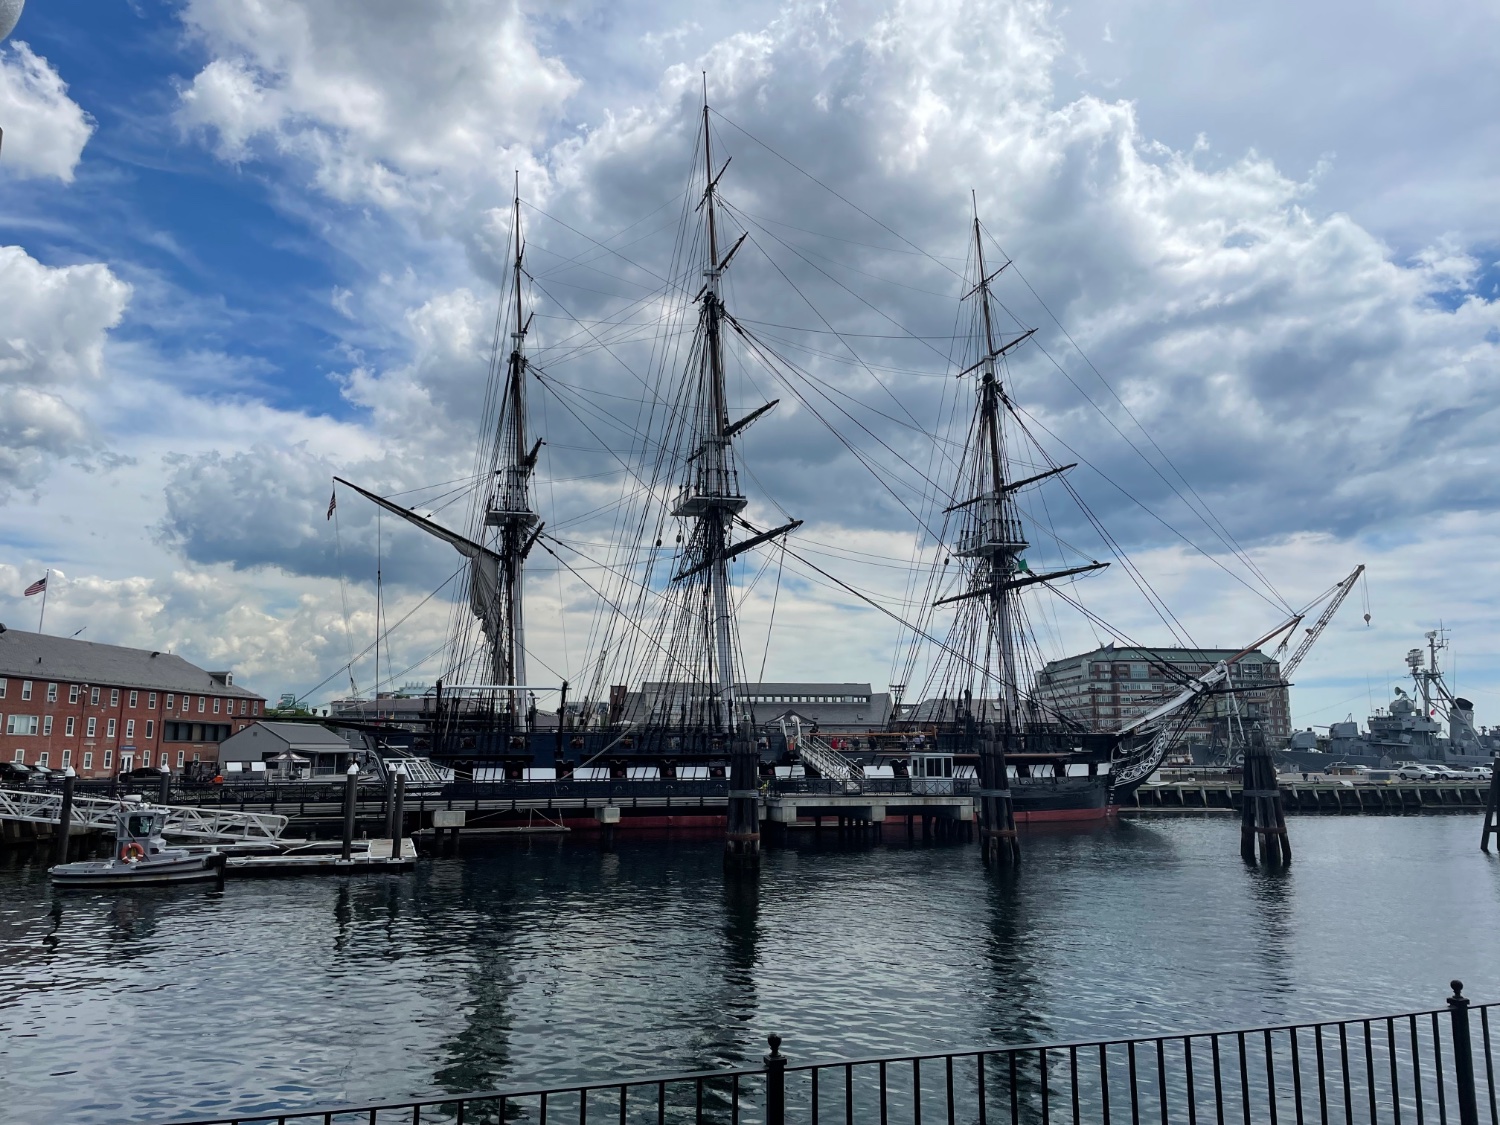
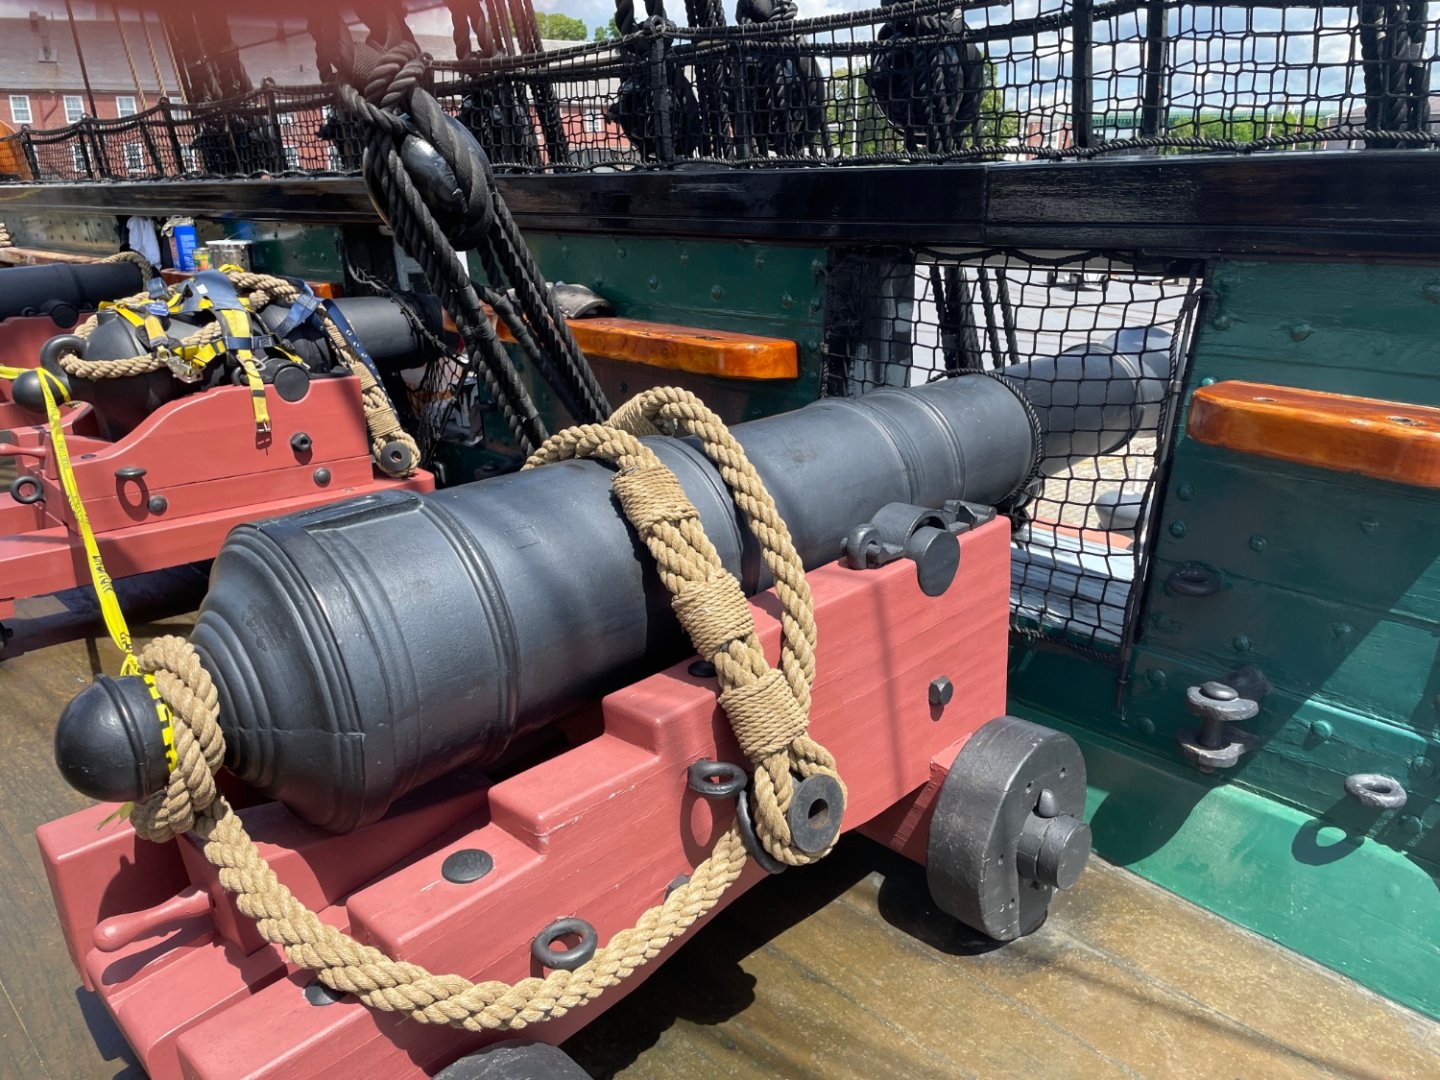
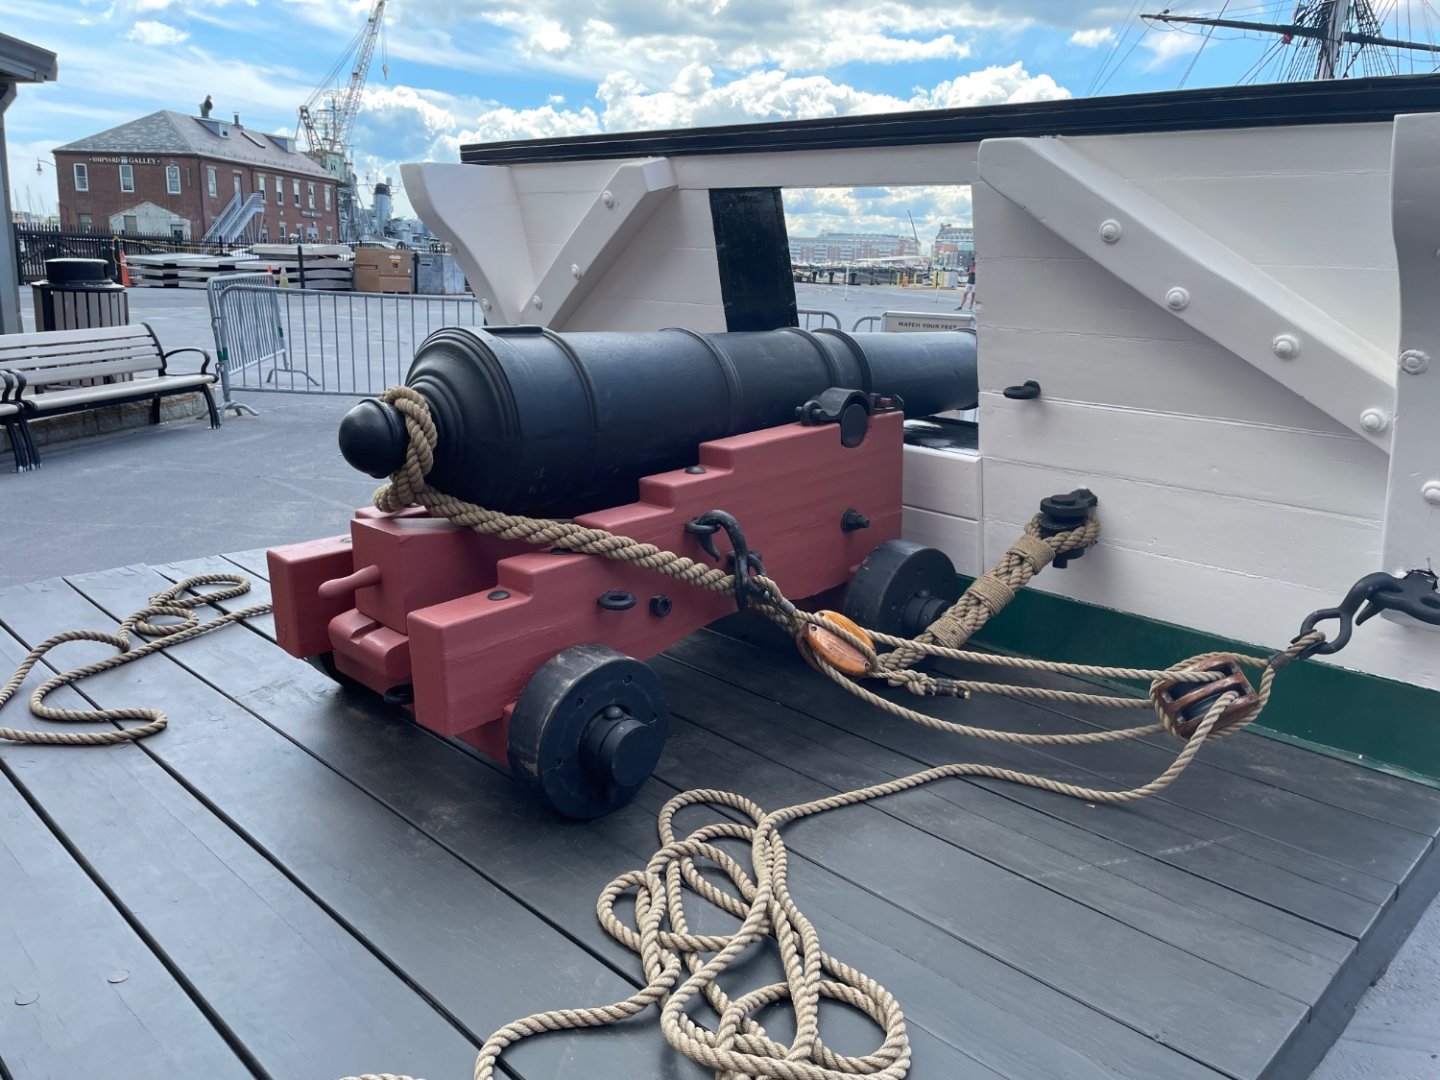
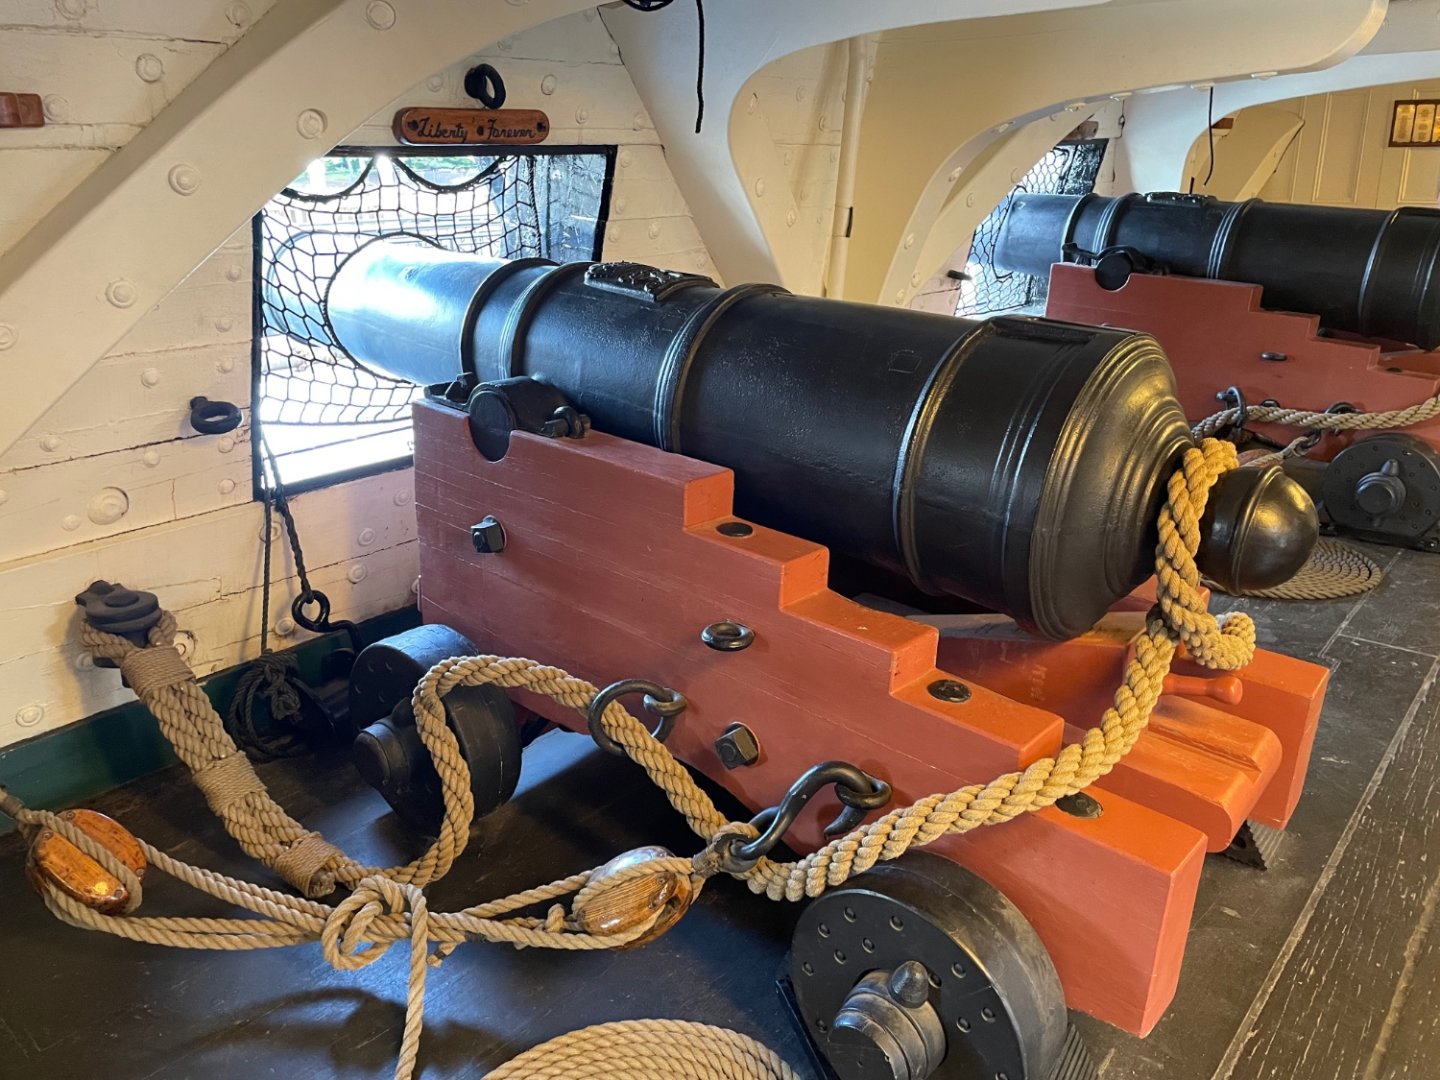
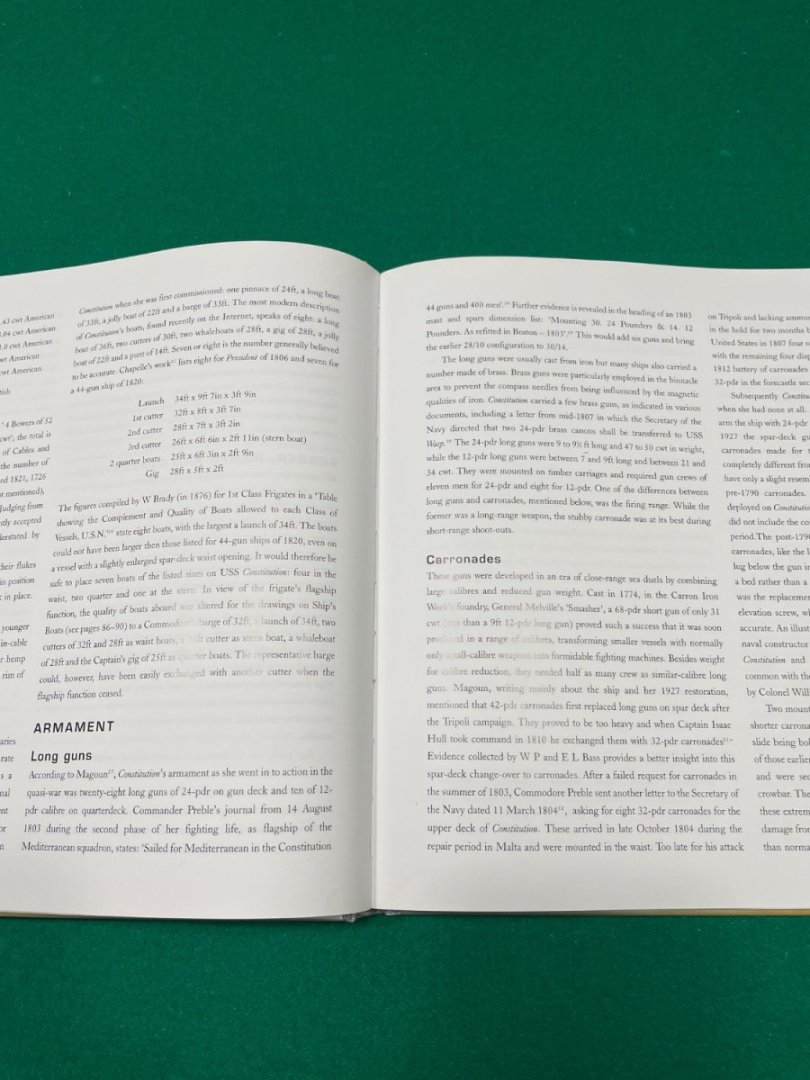
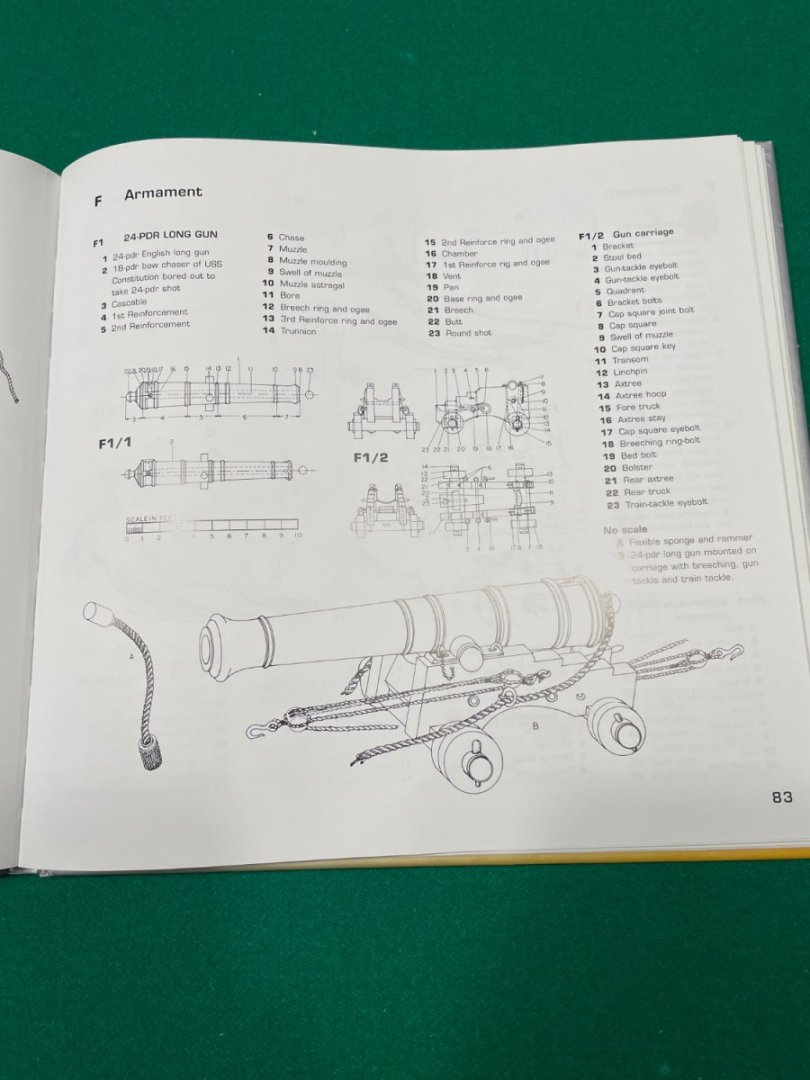
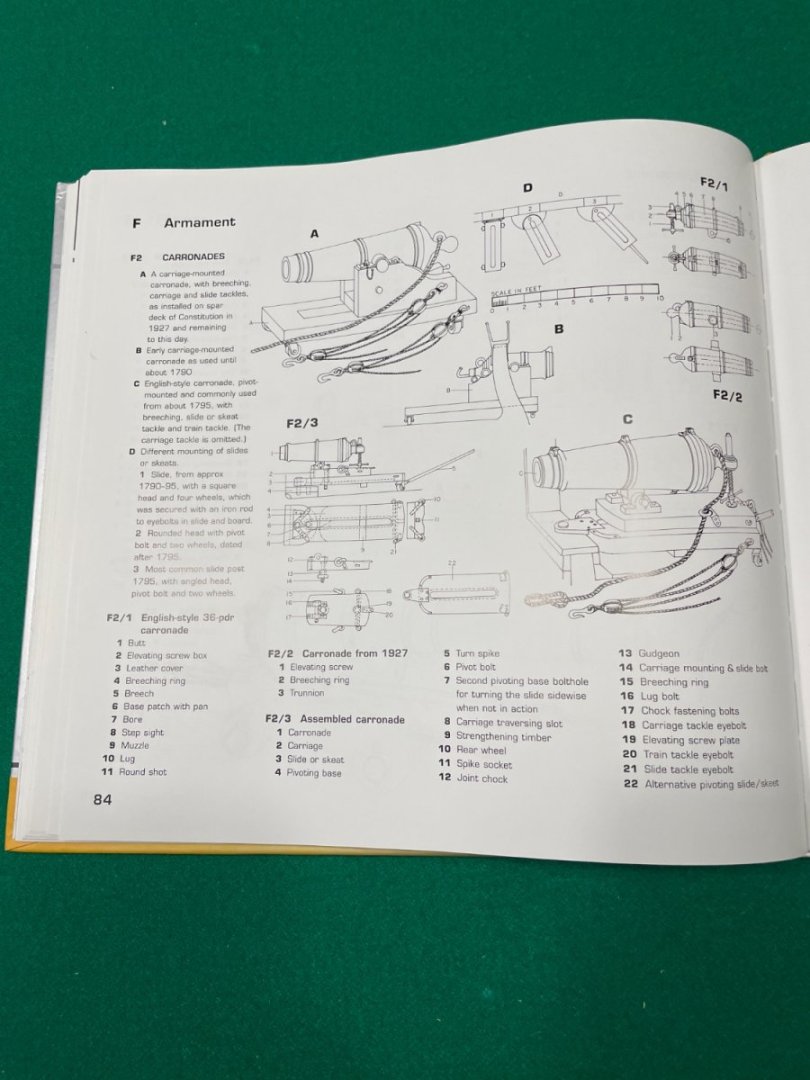
Not sure, this just might muddy the waters for you. I recently was aboard in Boston Harbor. Took these photos of the cannons in her current restored condition as a preserved national treasure. This one on Display at the entrance. She is beautiful and still stands tall and proud today. 😎

-
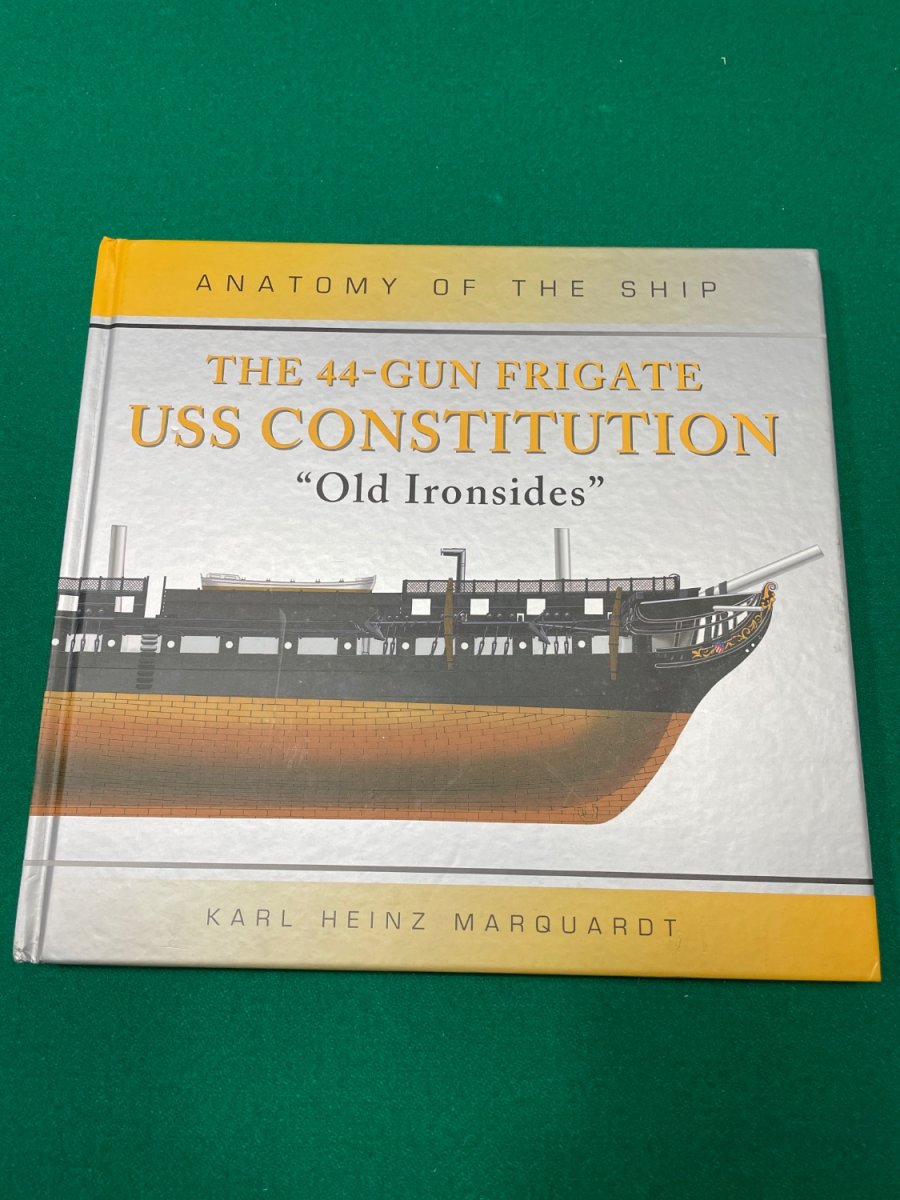
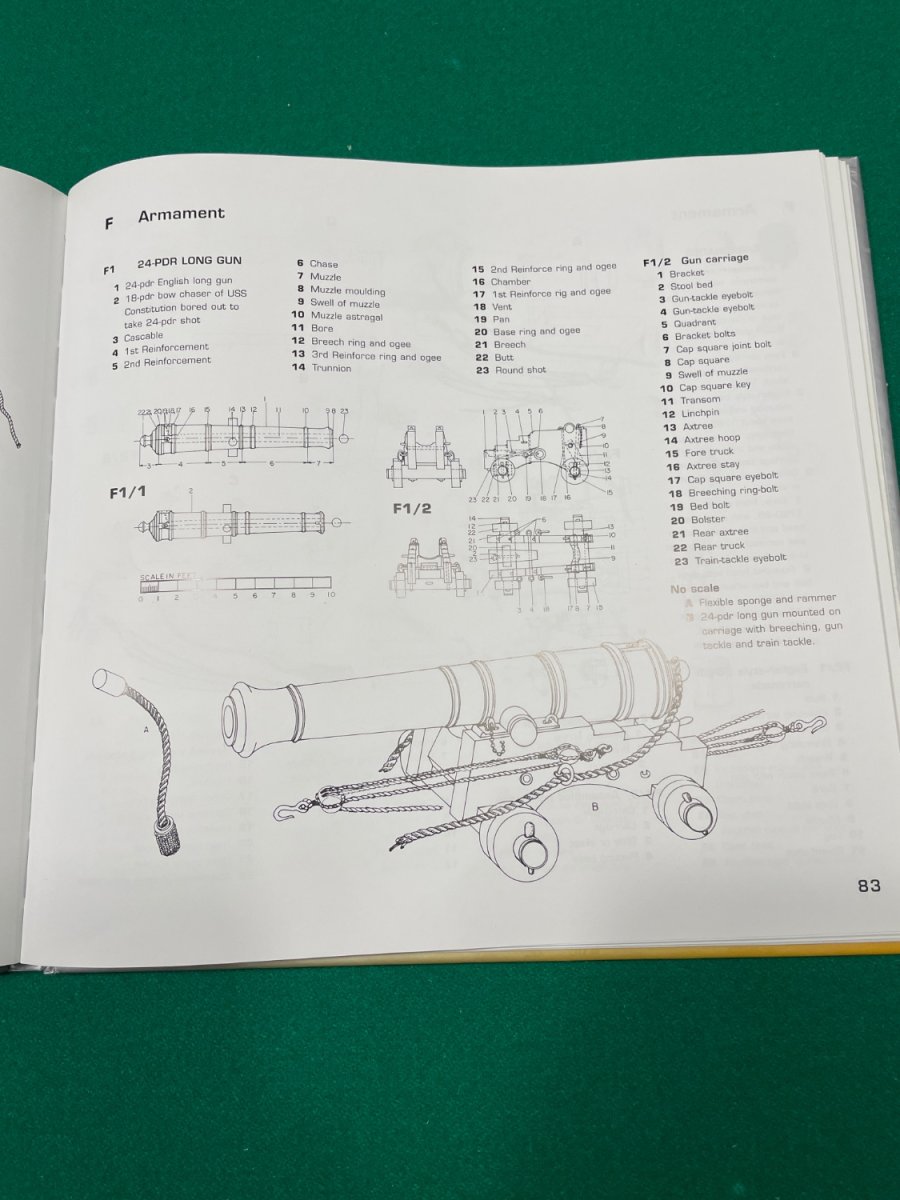
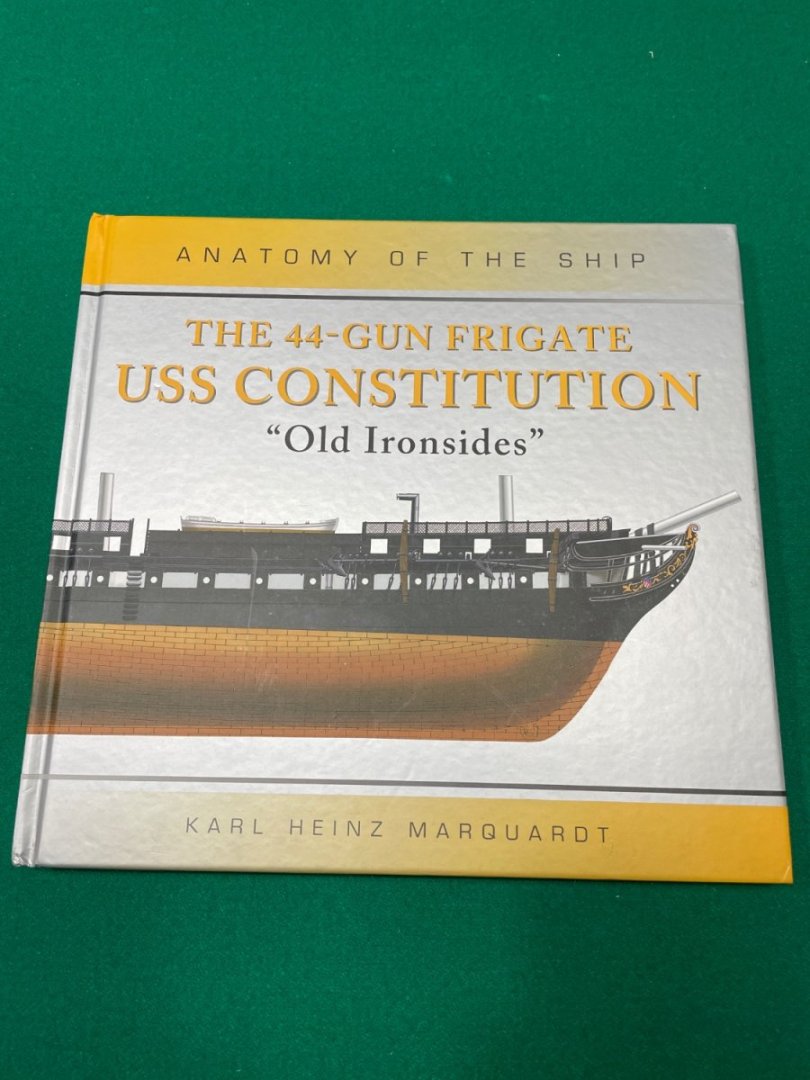
Anatomy of the ship by Karl Heinz Marquardt. Everything you need to know about the USS Constitution…
-
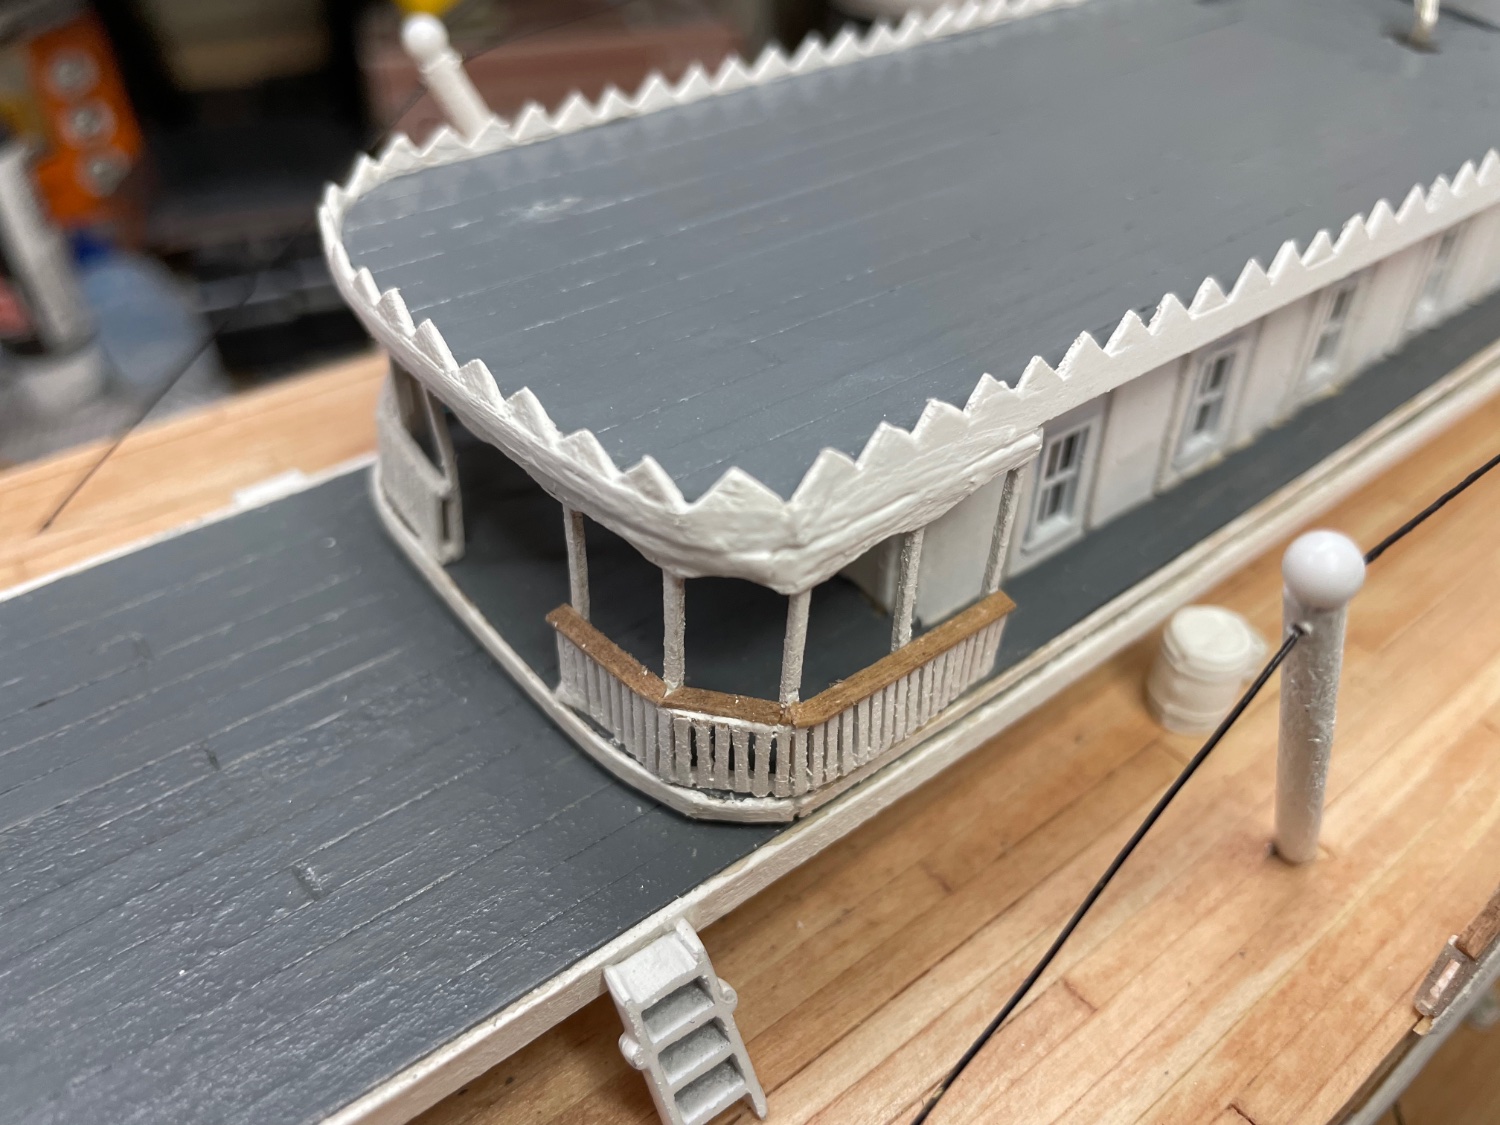
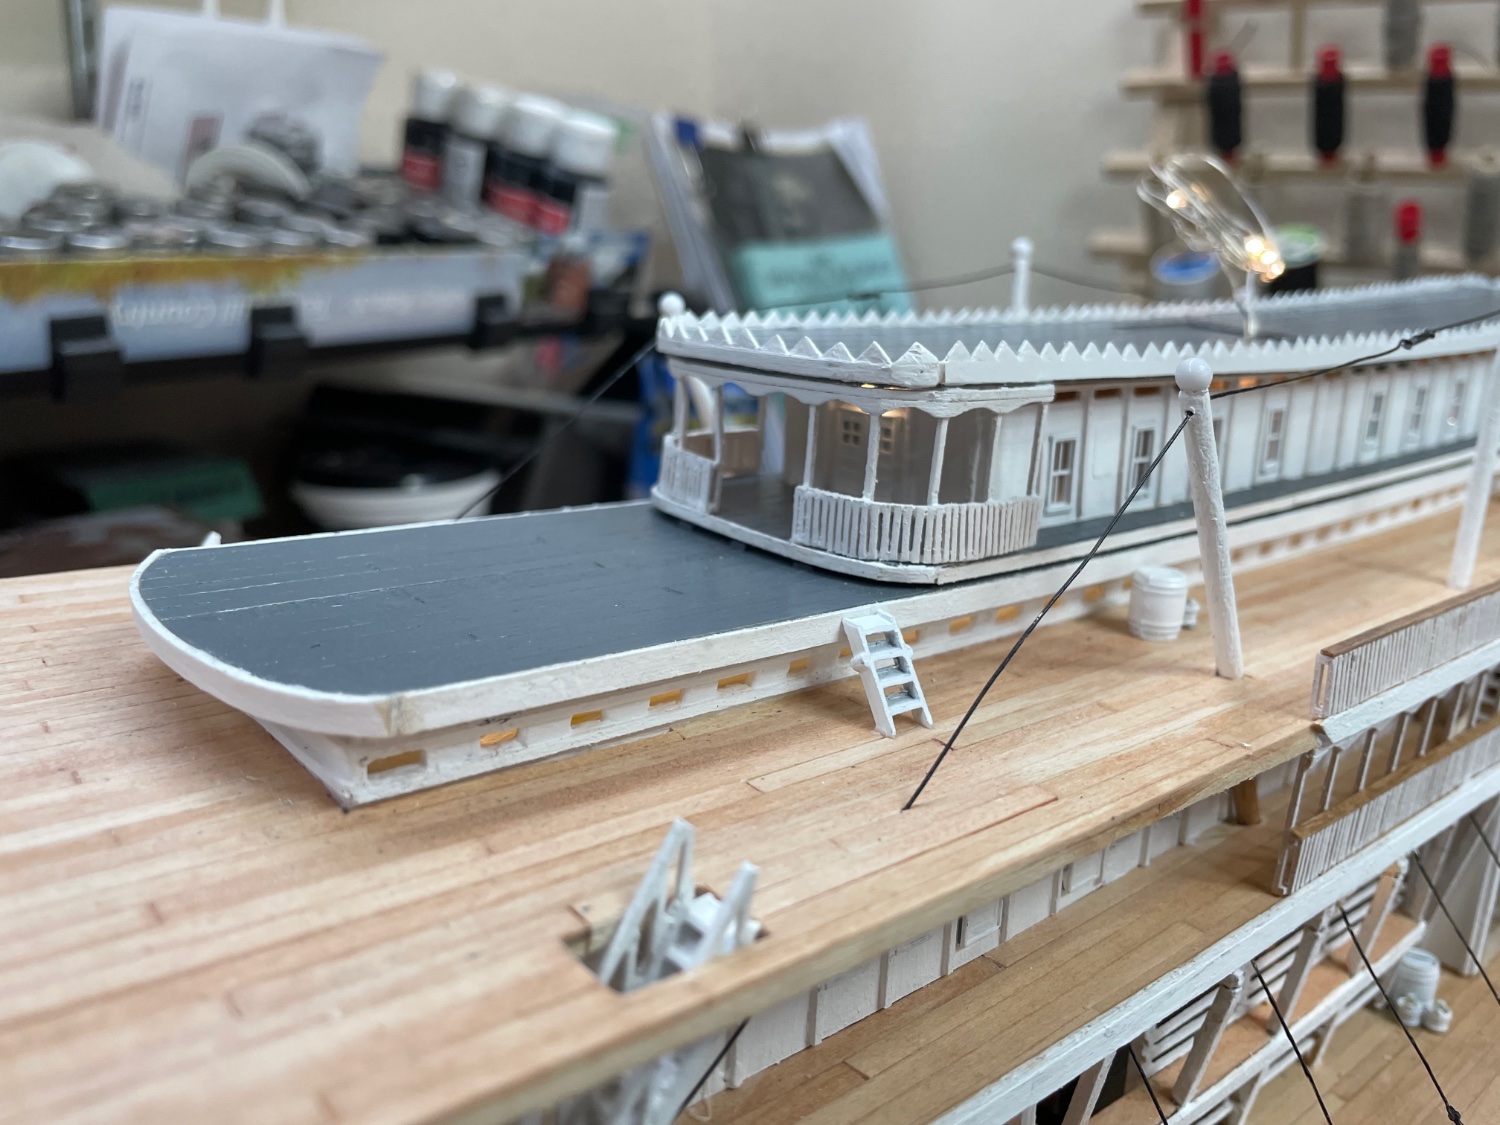
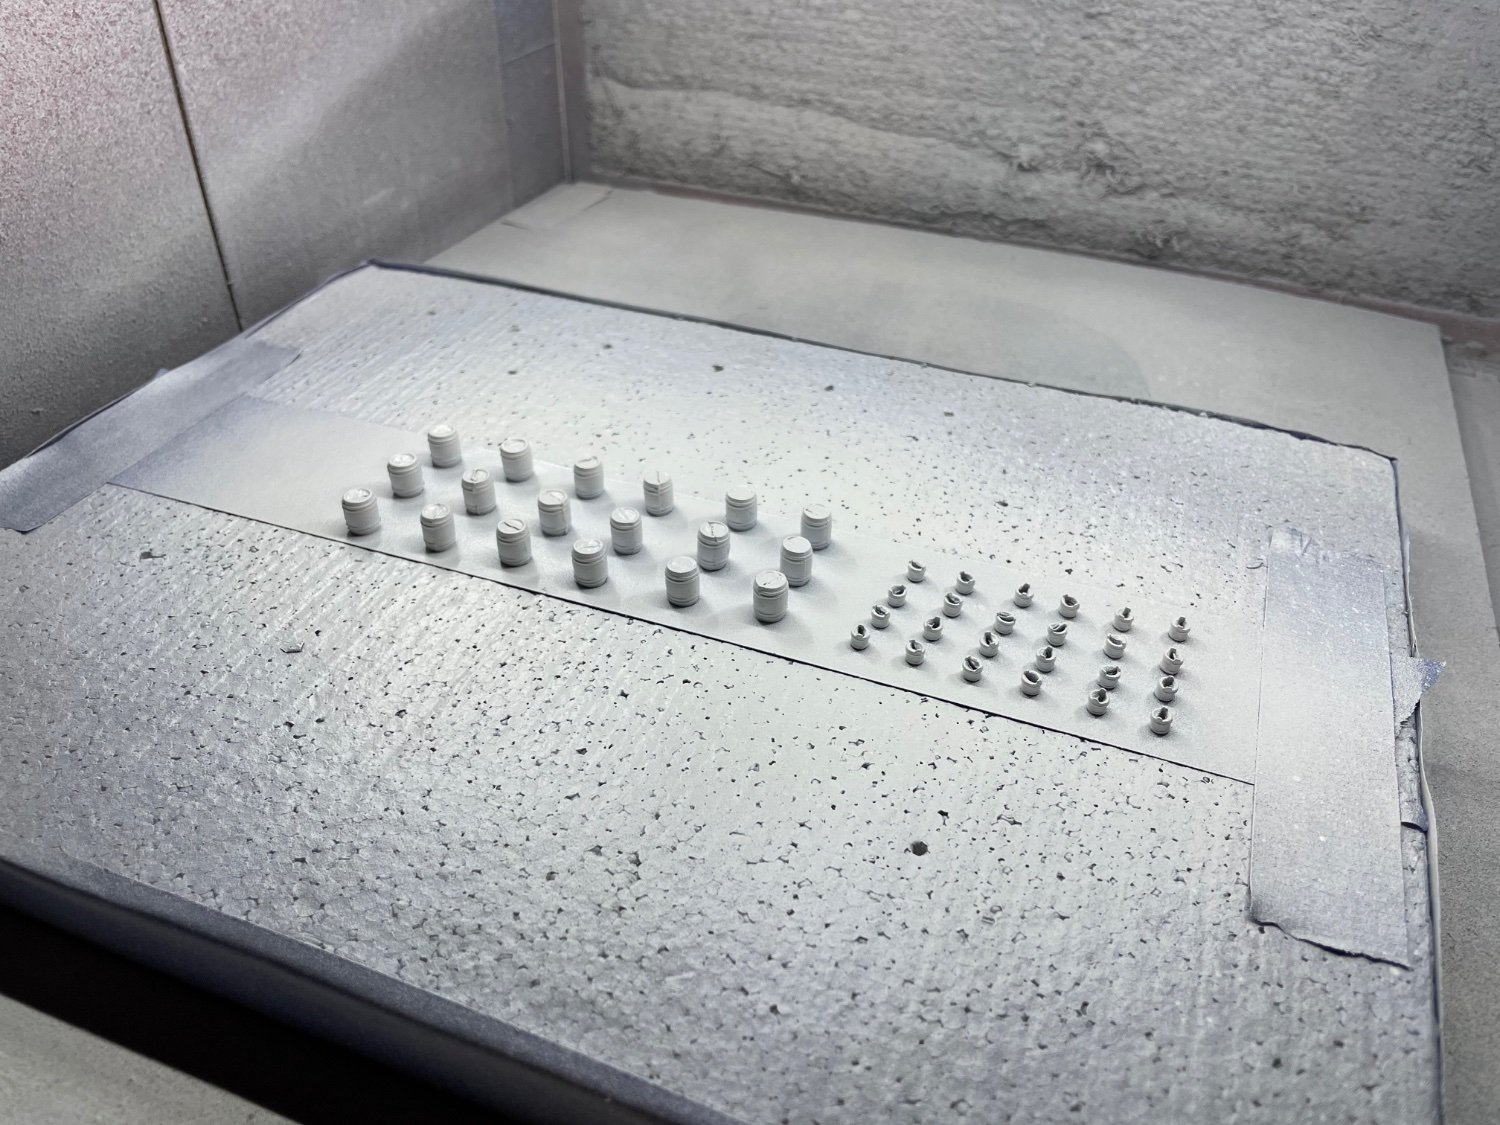
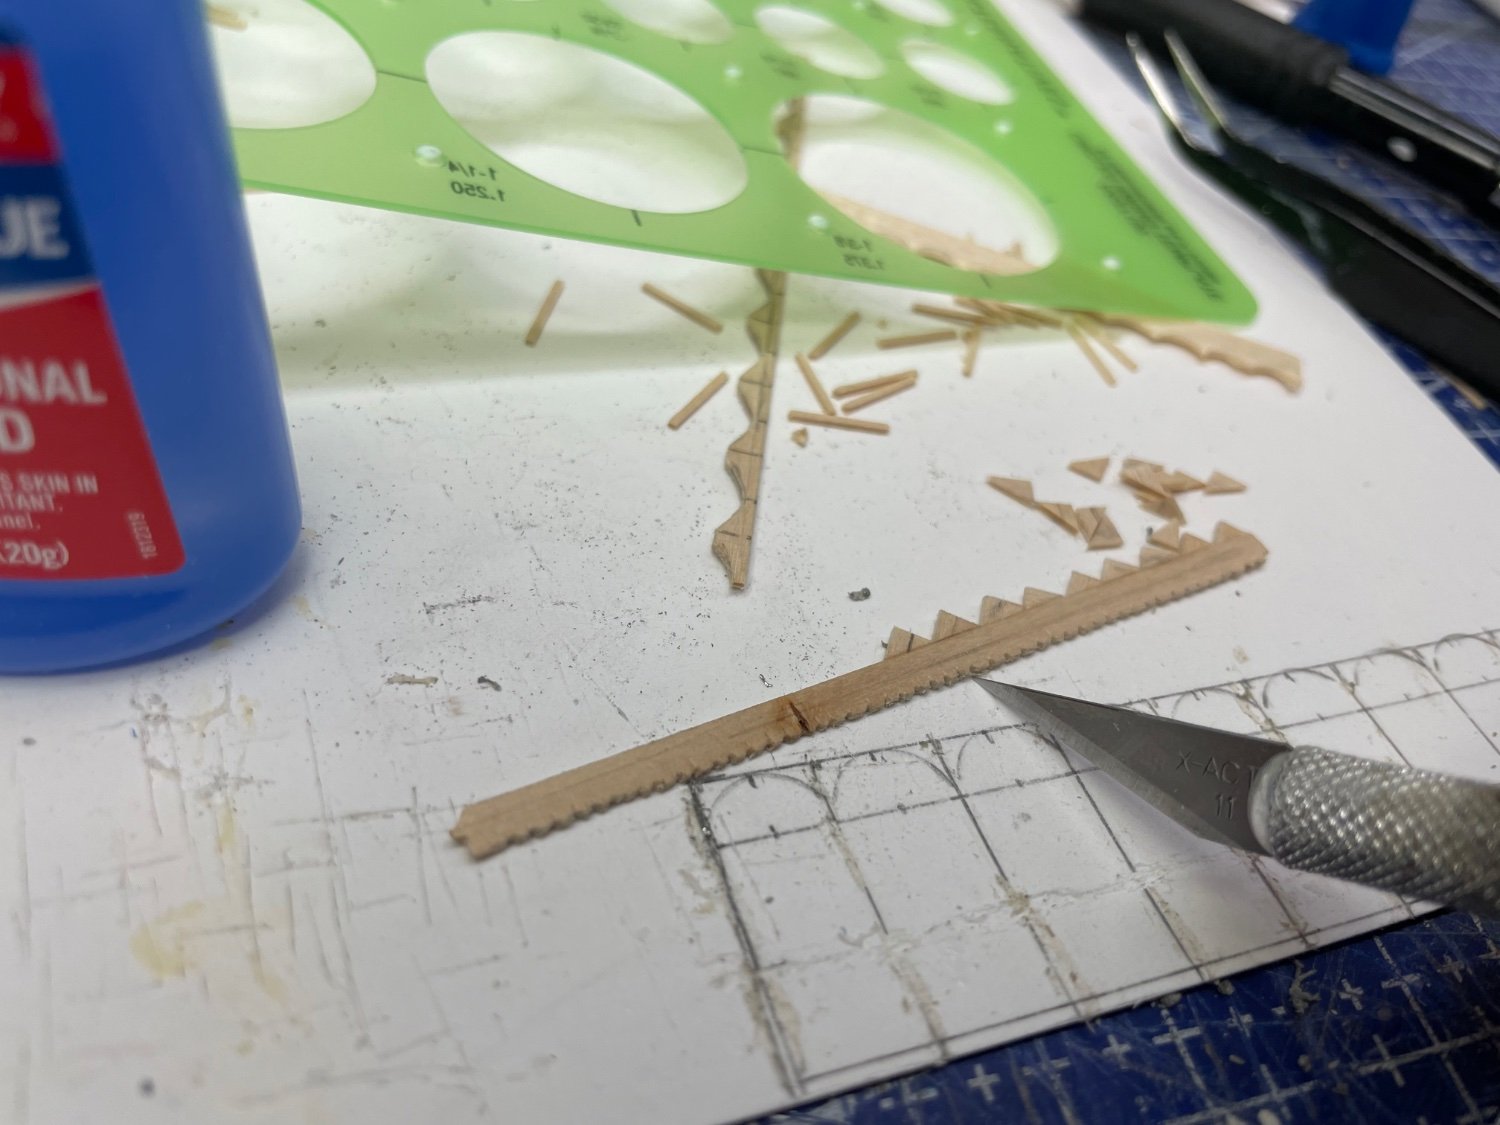
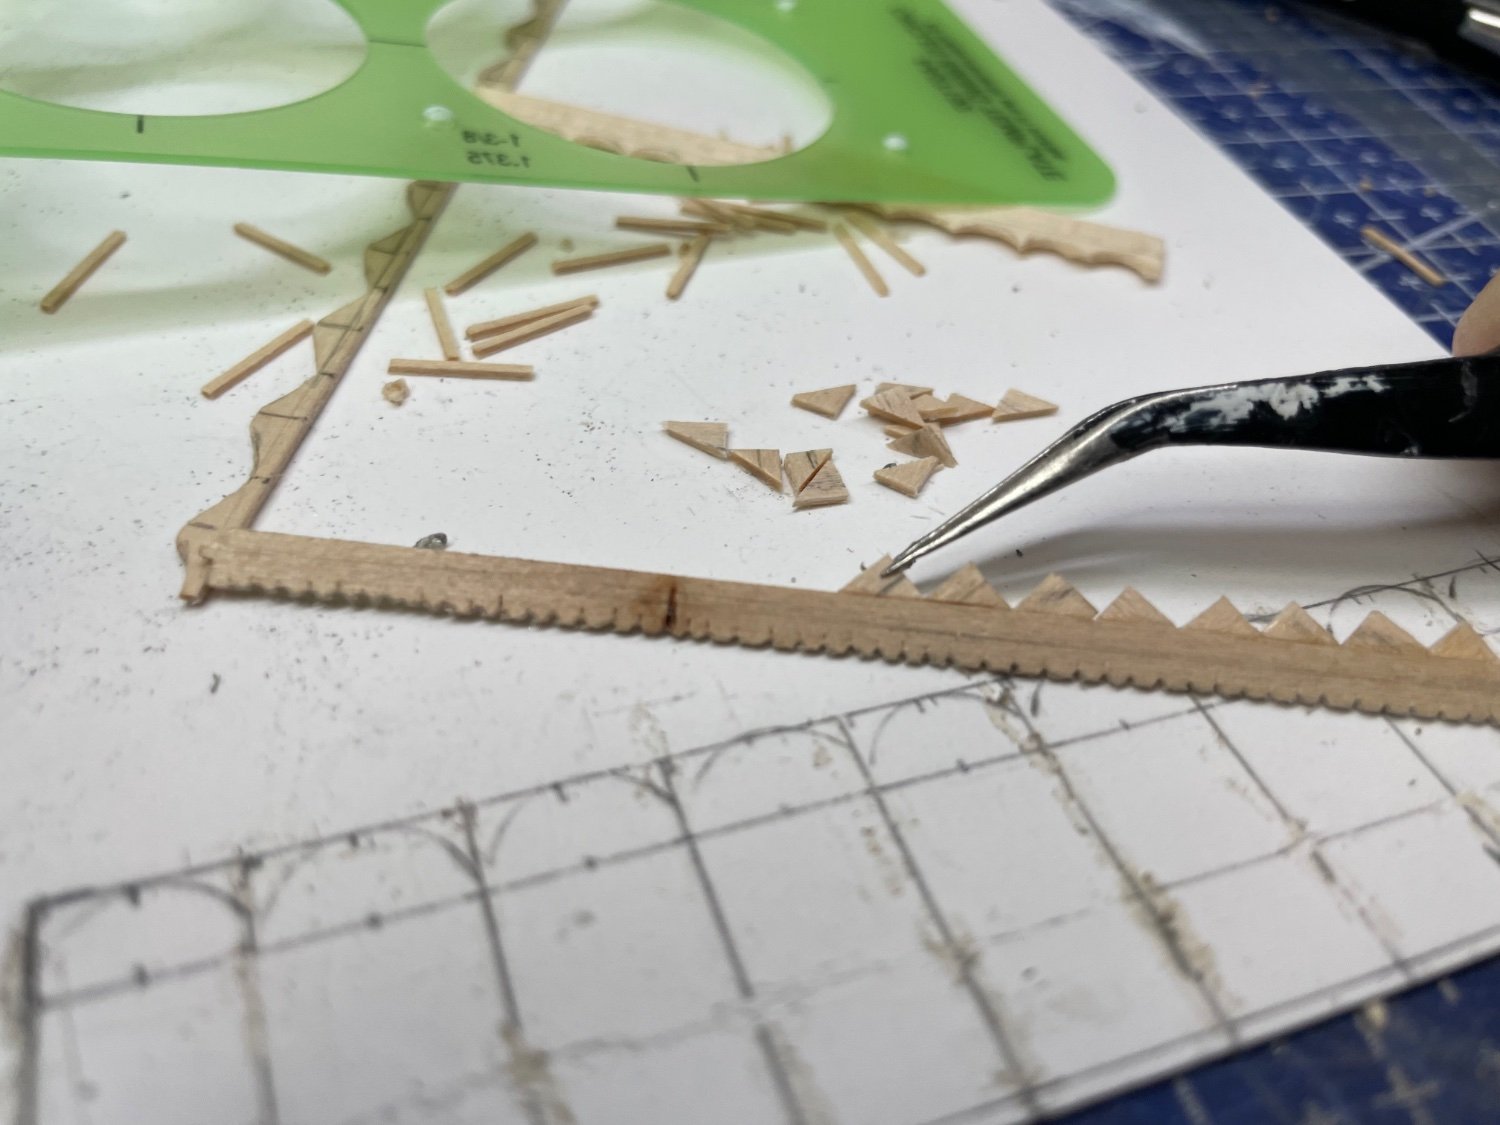
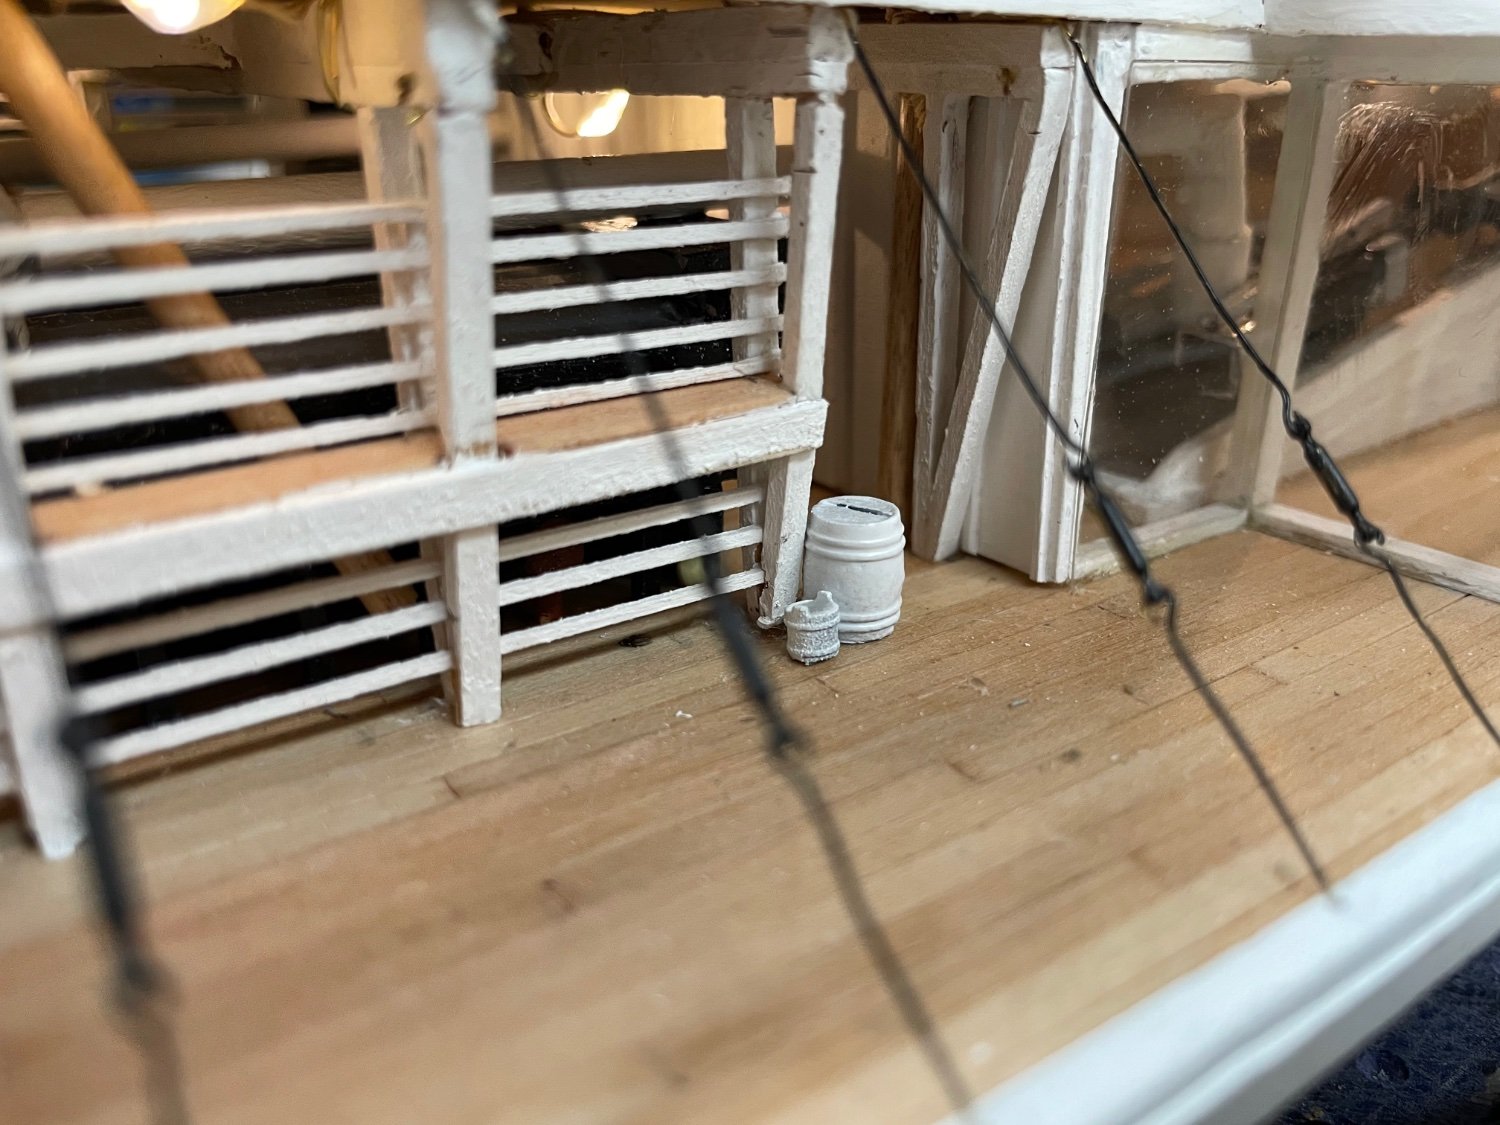
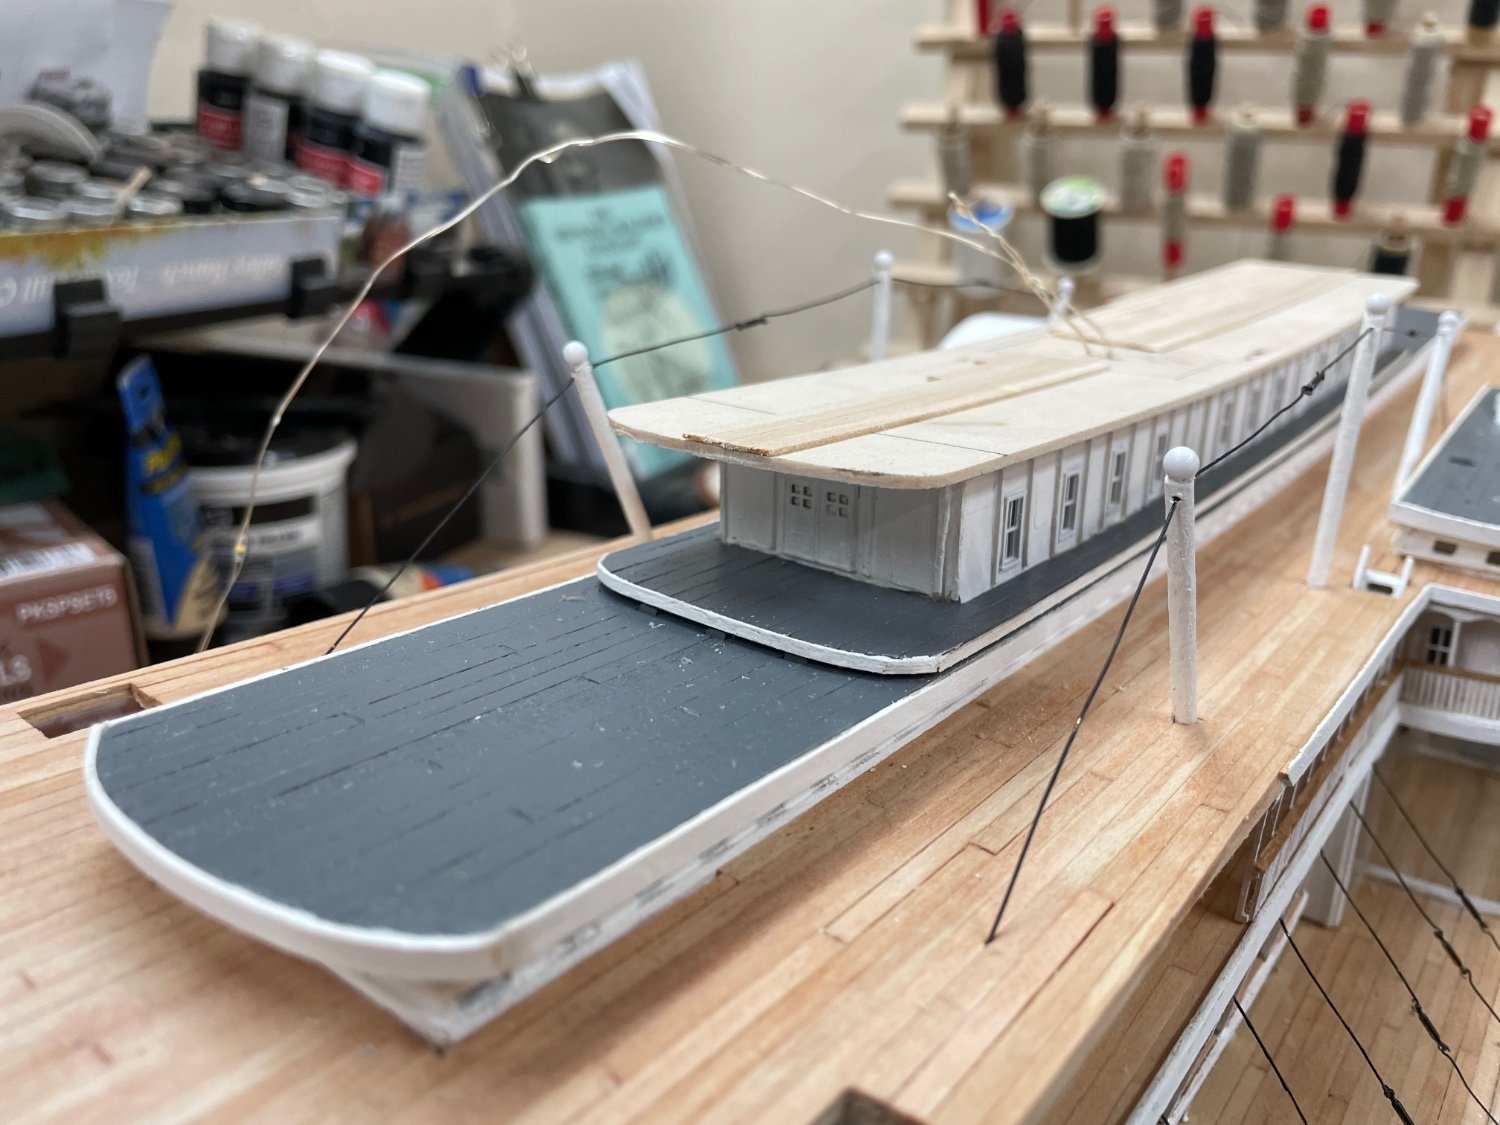
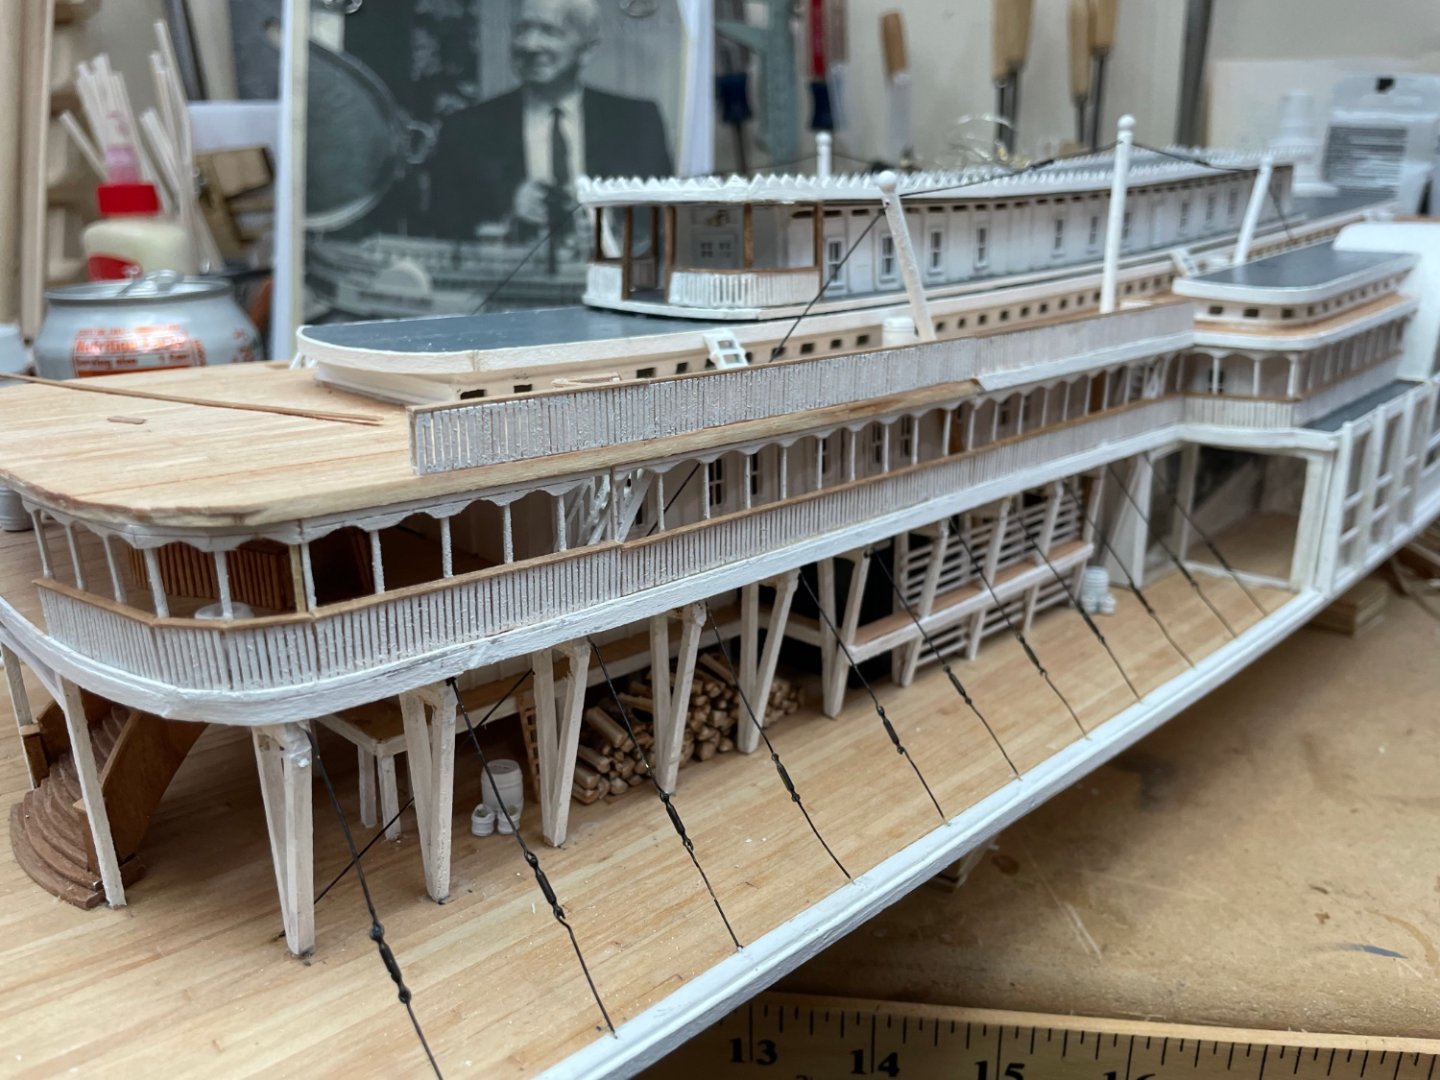
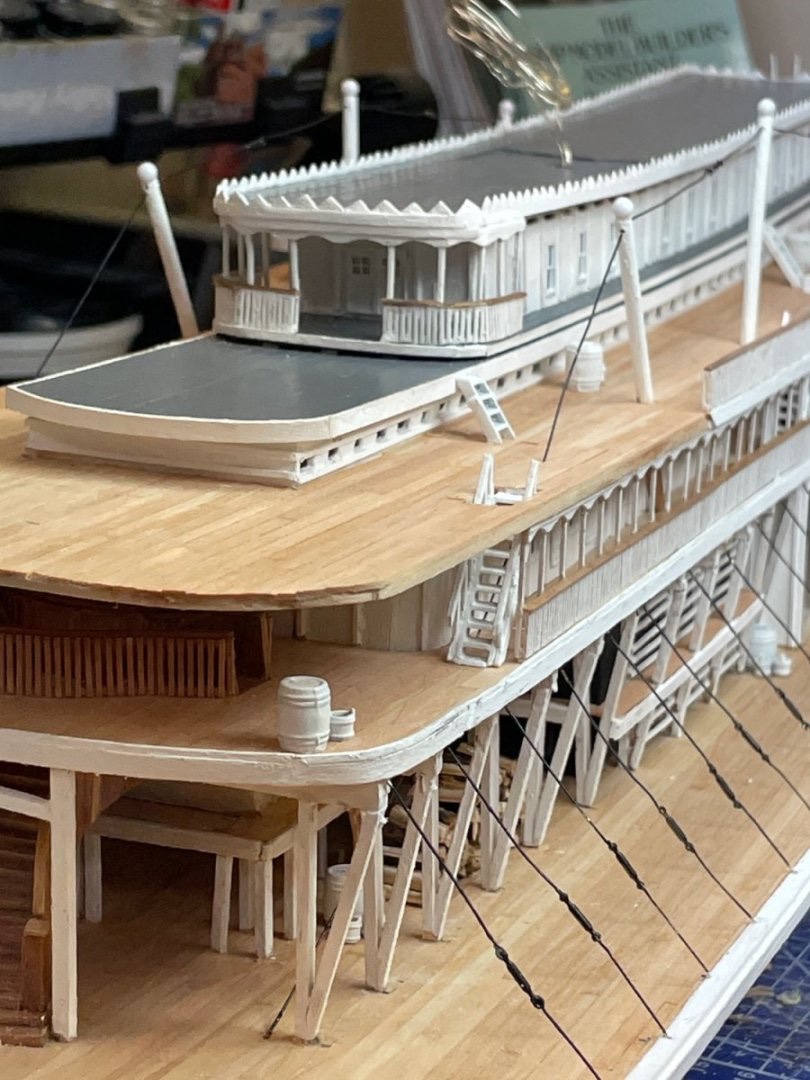
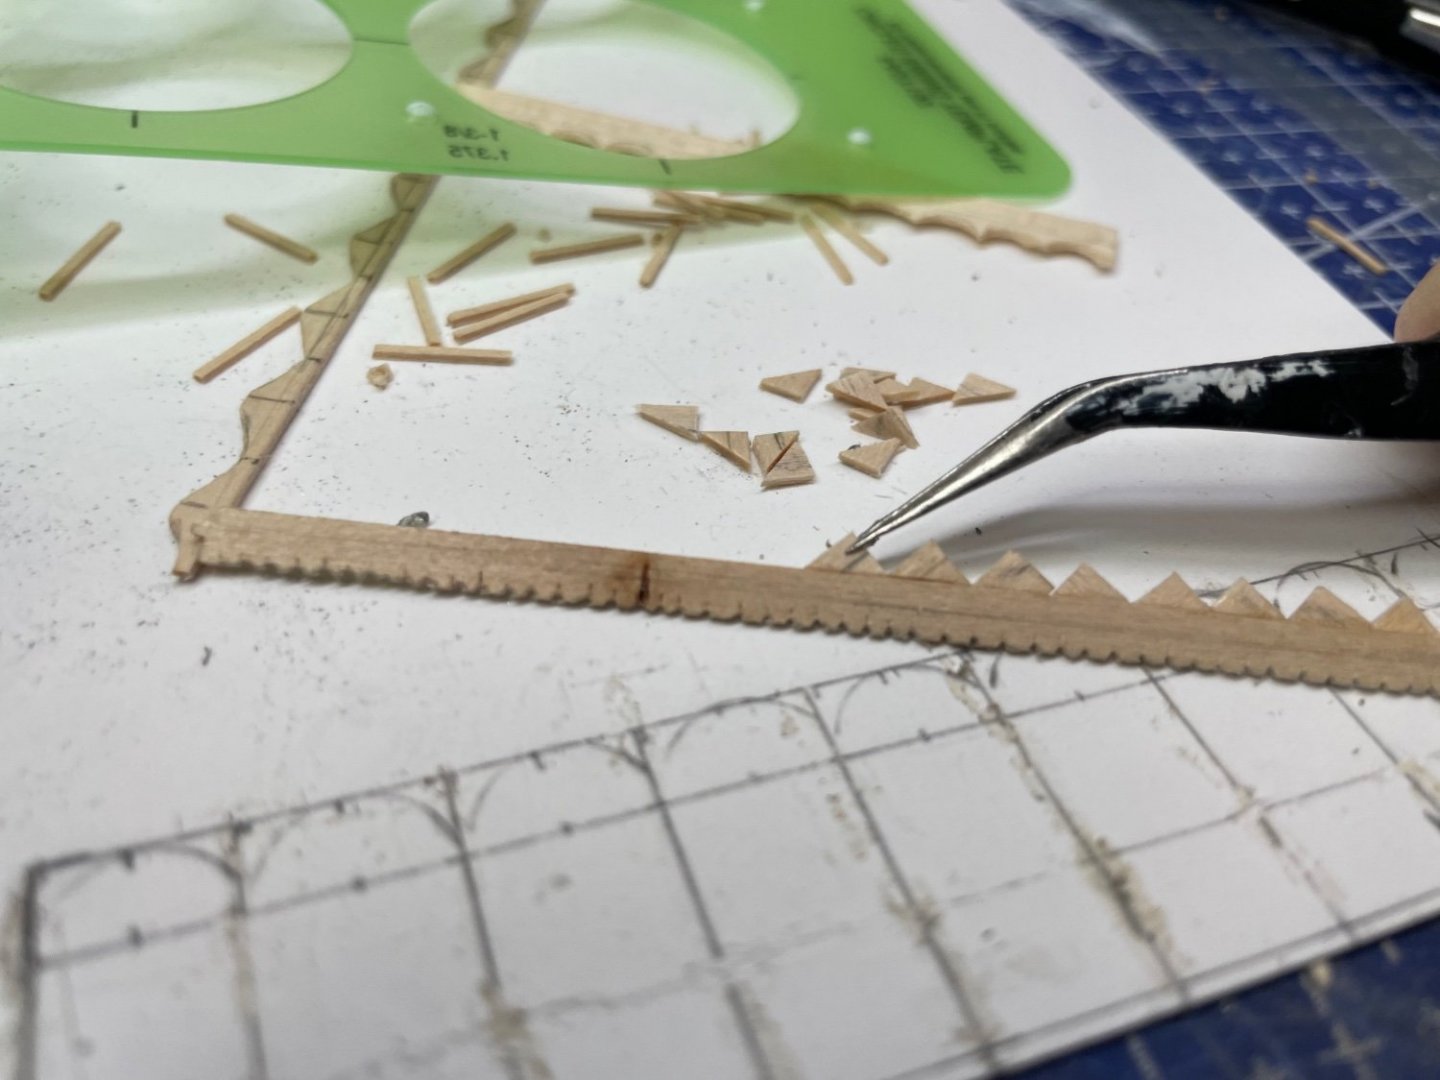
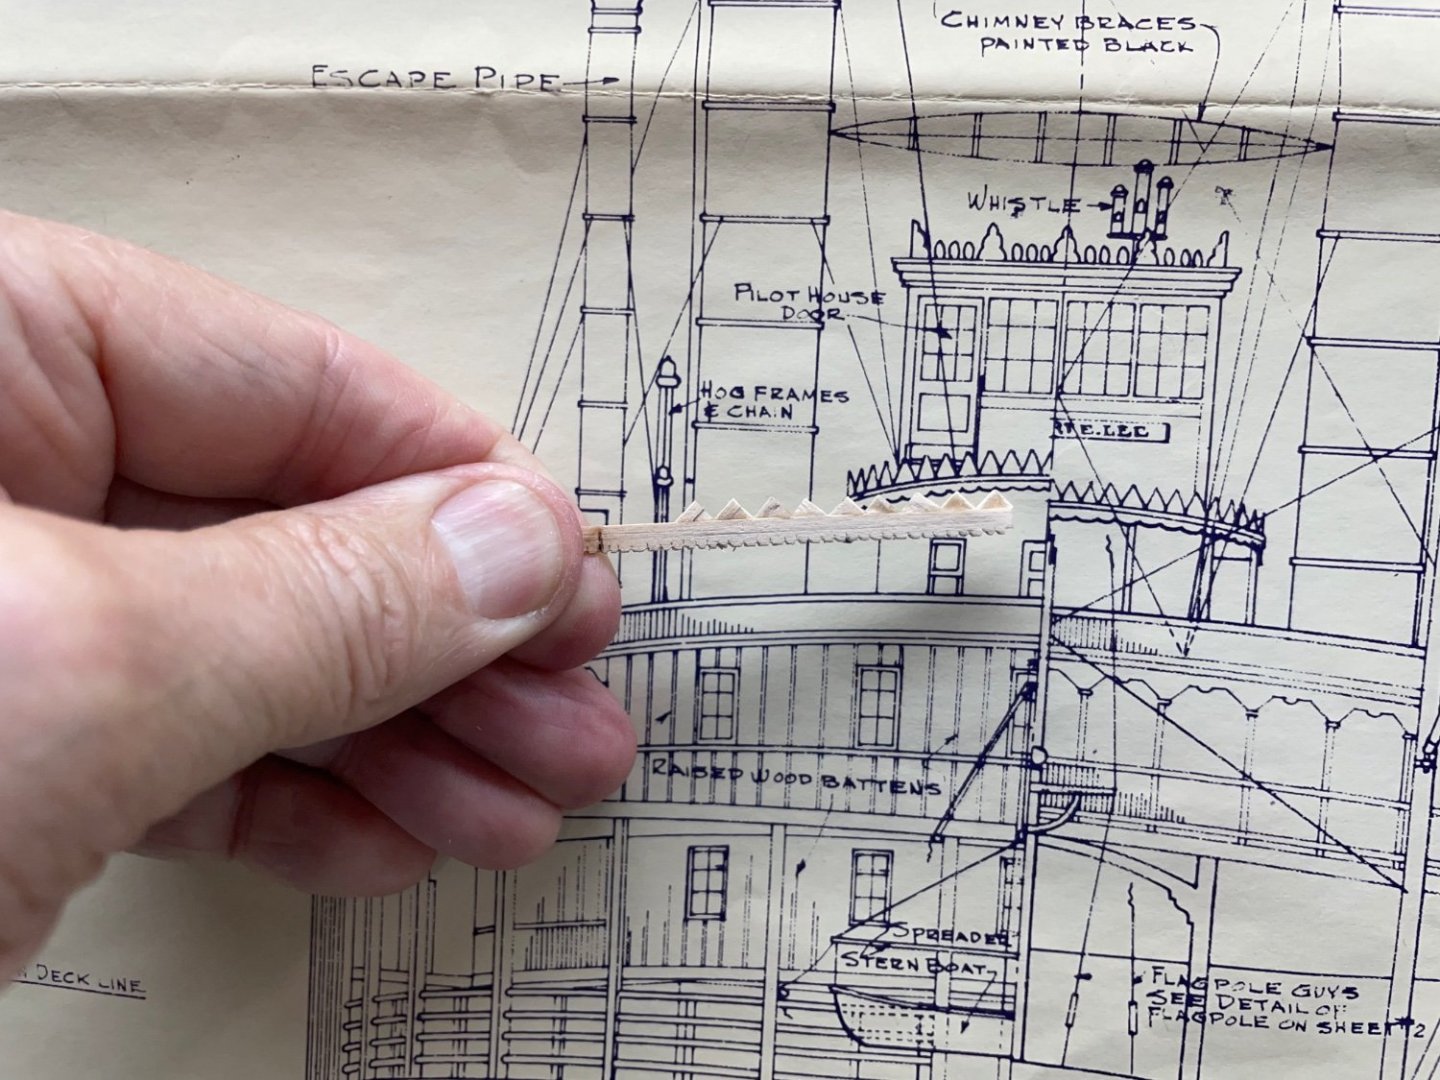
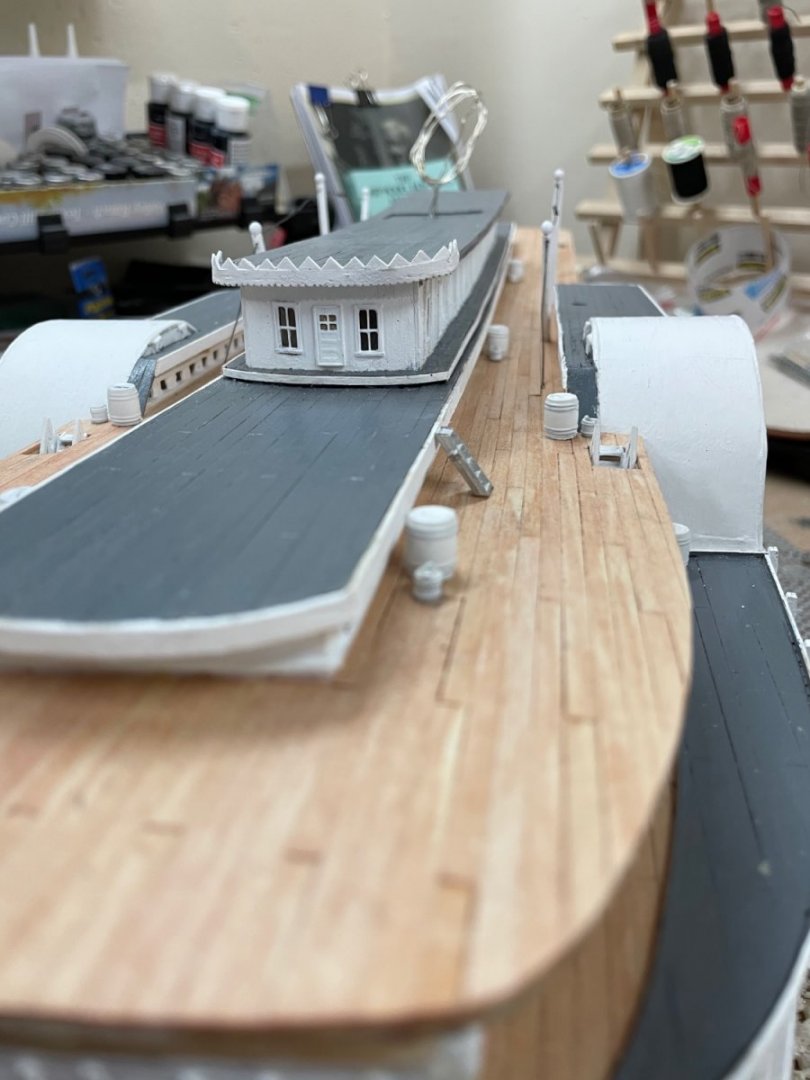
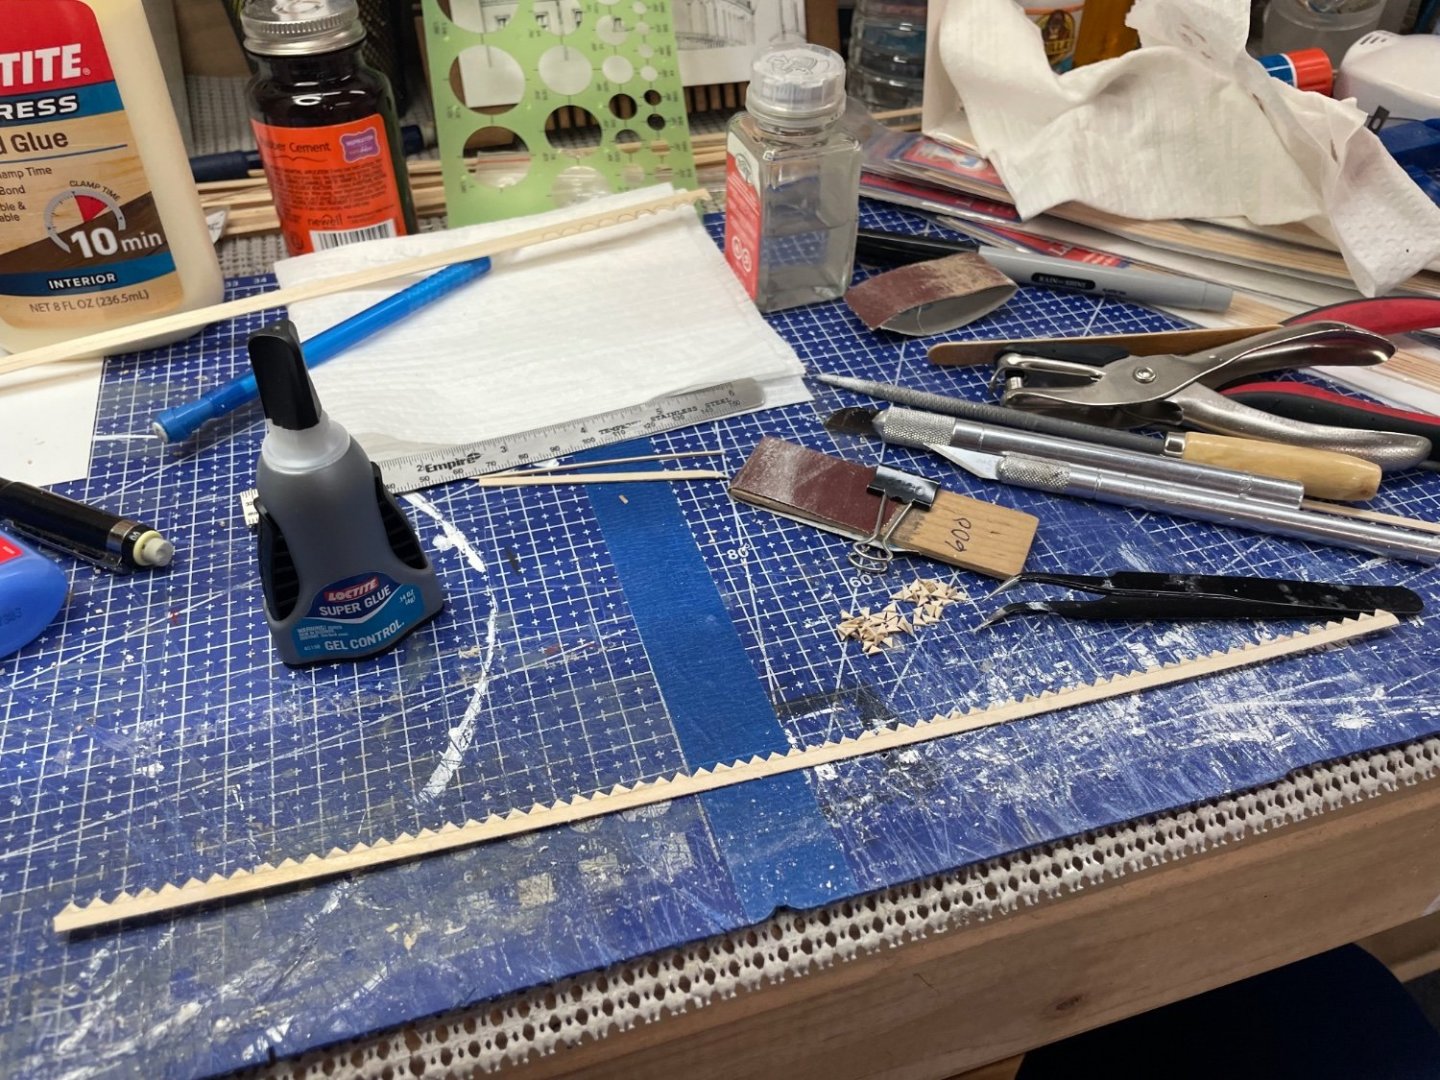
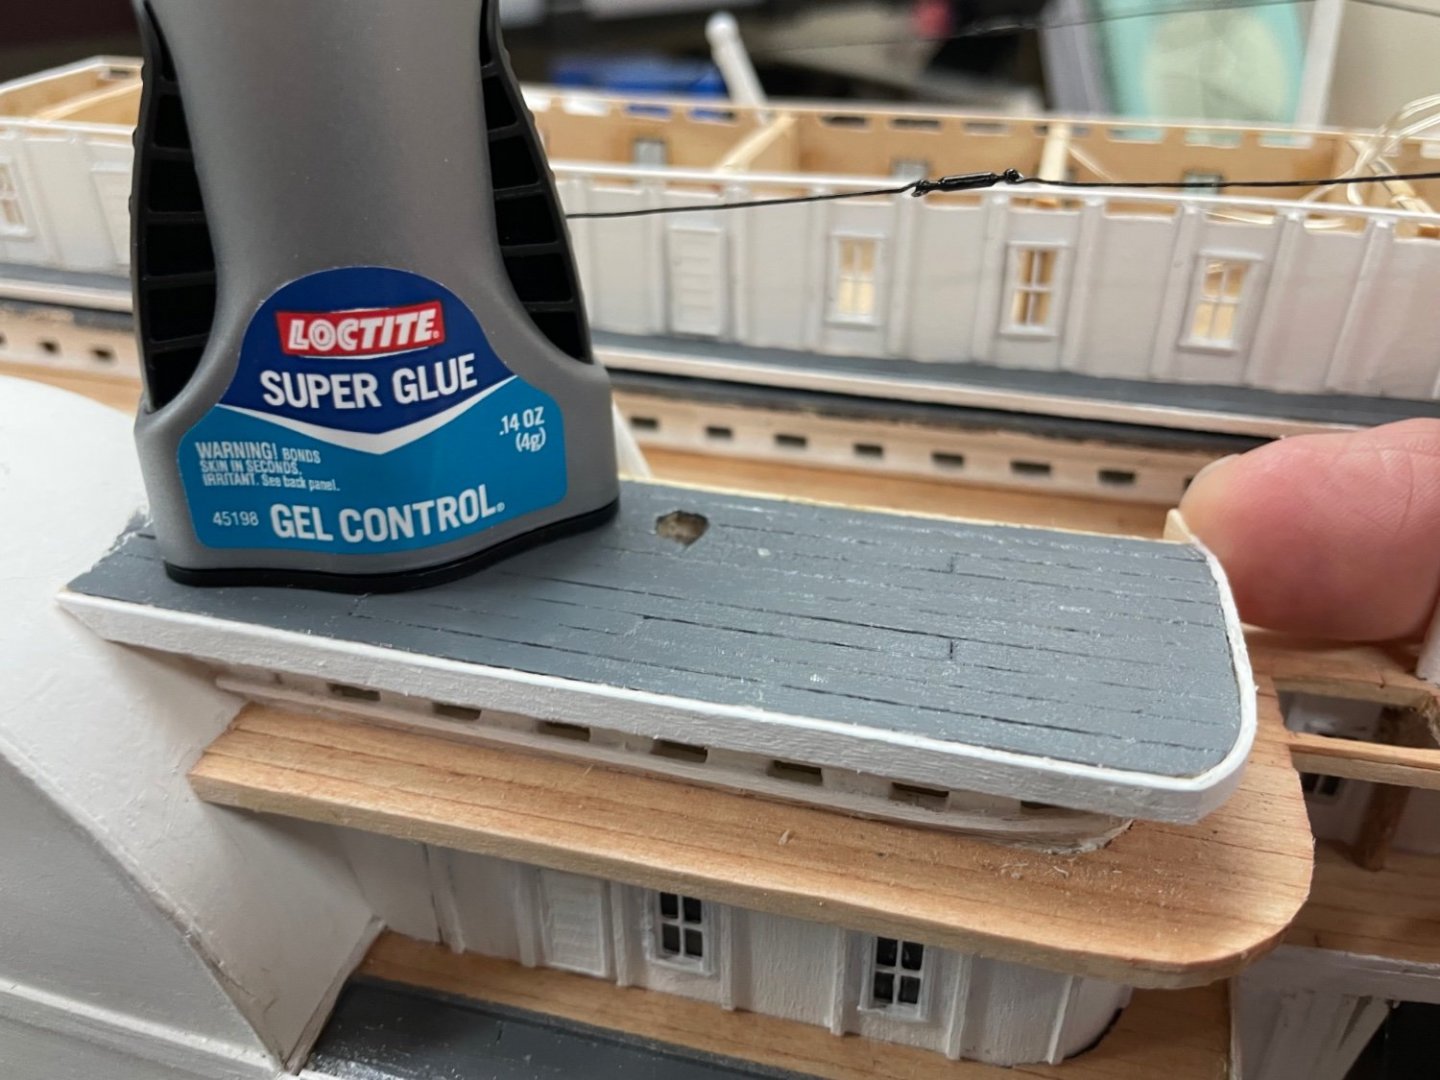
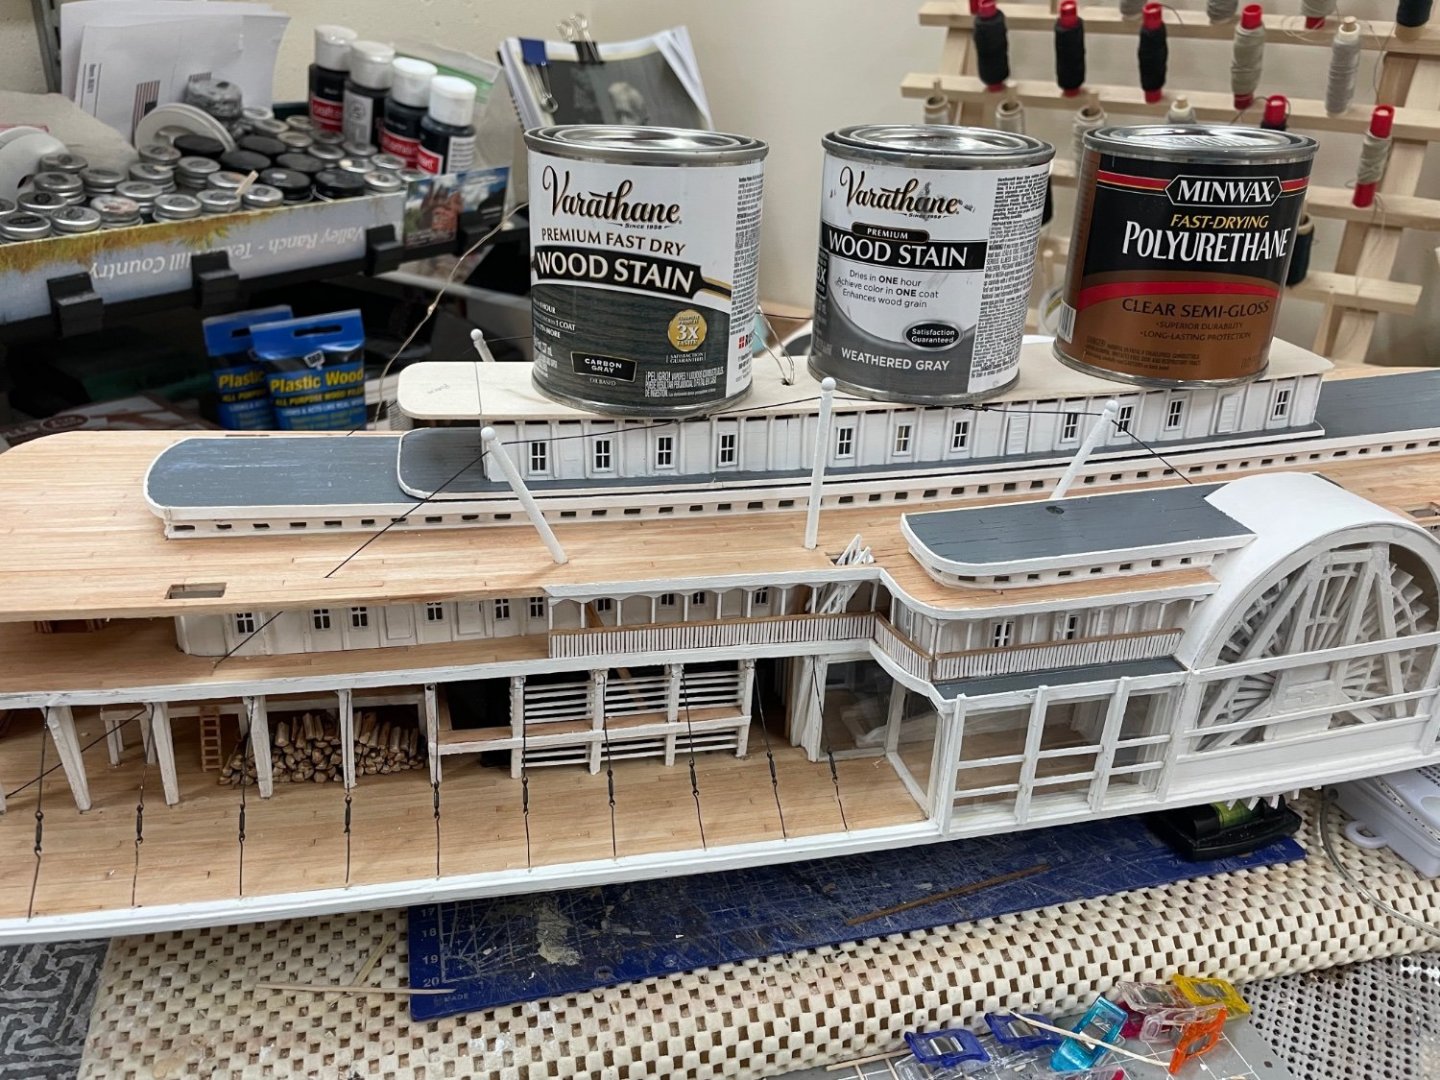
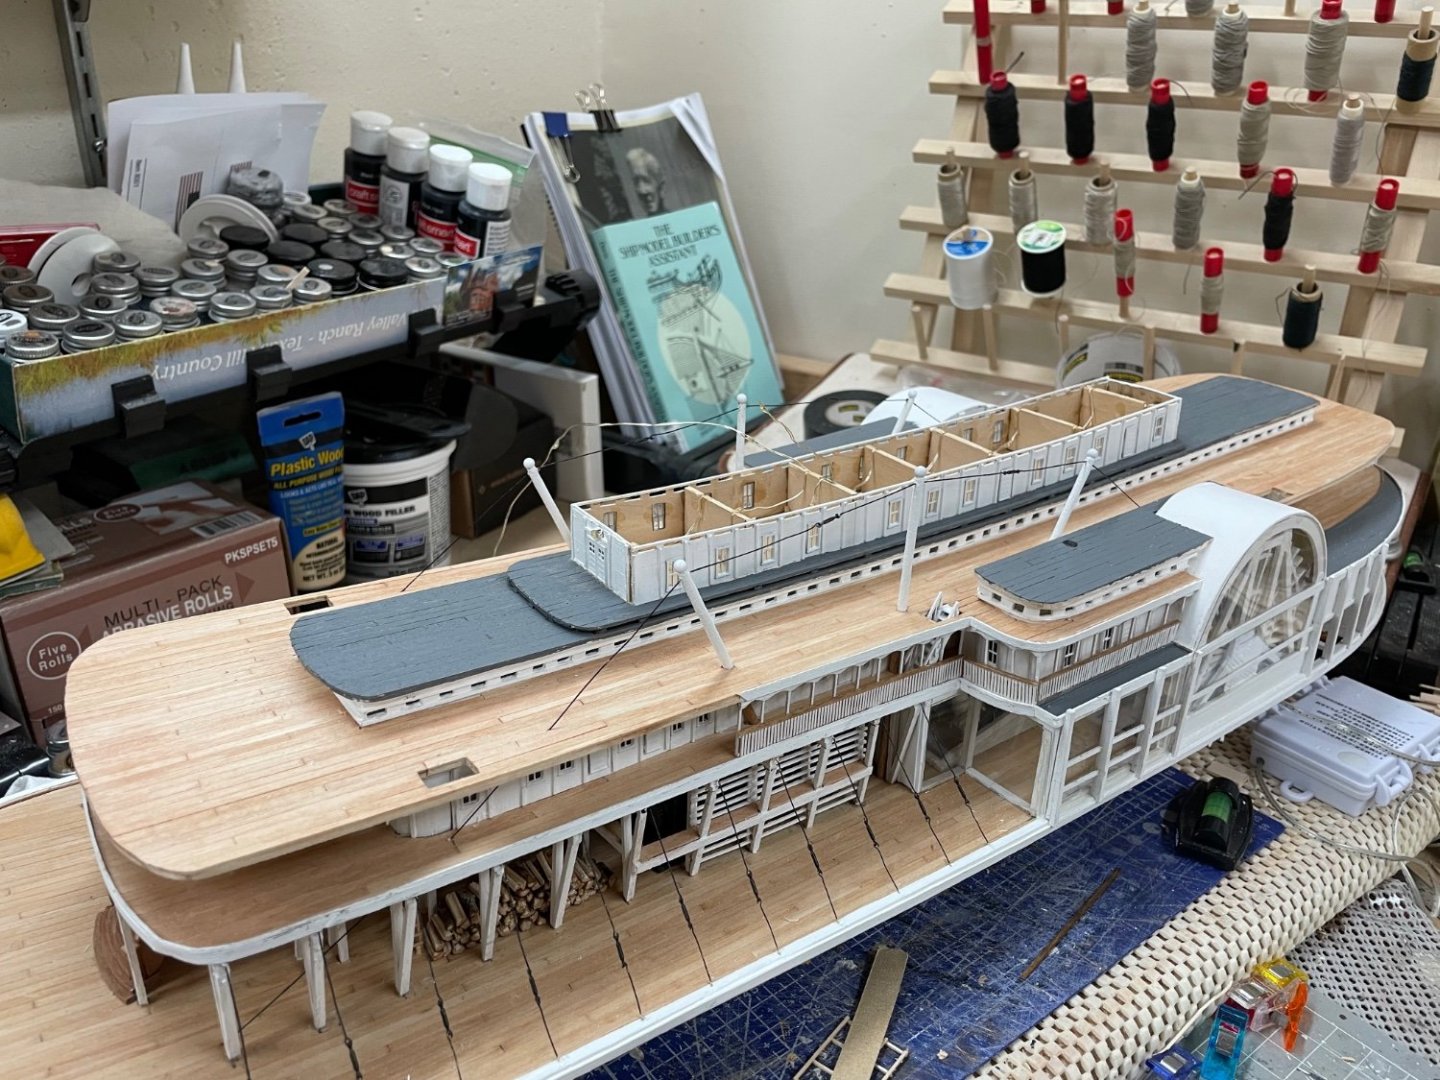
Detailed Fire Systems… Water barrels and buckets supplied in the kit. Britanian Metal…. Painted white per instructions. Texas roofing painted gray… Trim Detail for the Texas Roof… Placement of Fire barrels and buckets… Onwards with roof trim and railings. Cheers 🍻


- 238 replies
-
- 12
-
-
-
- Robert E Lee
- steamboat
- (and 3 more)
-
She is looking really good, Ron. 👍
-
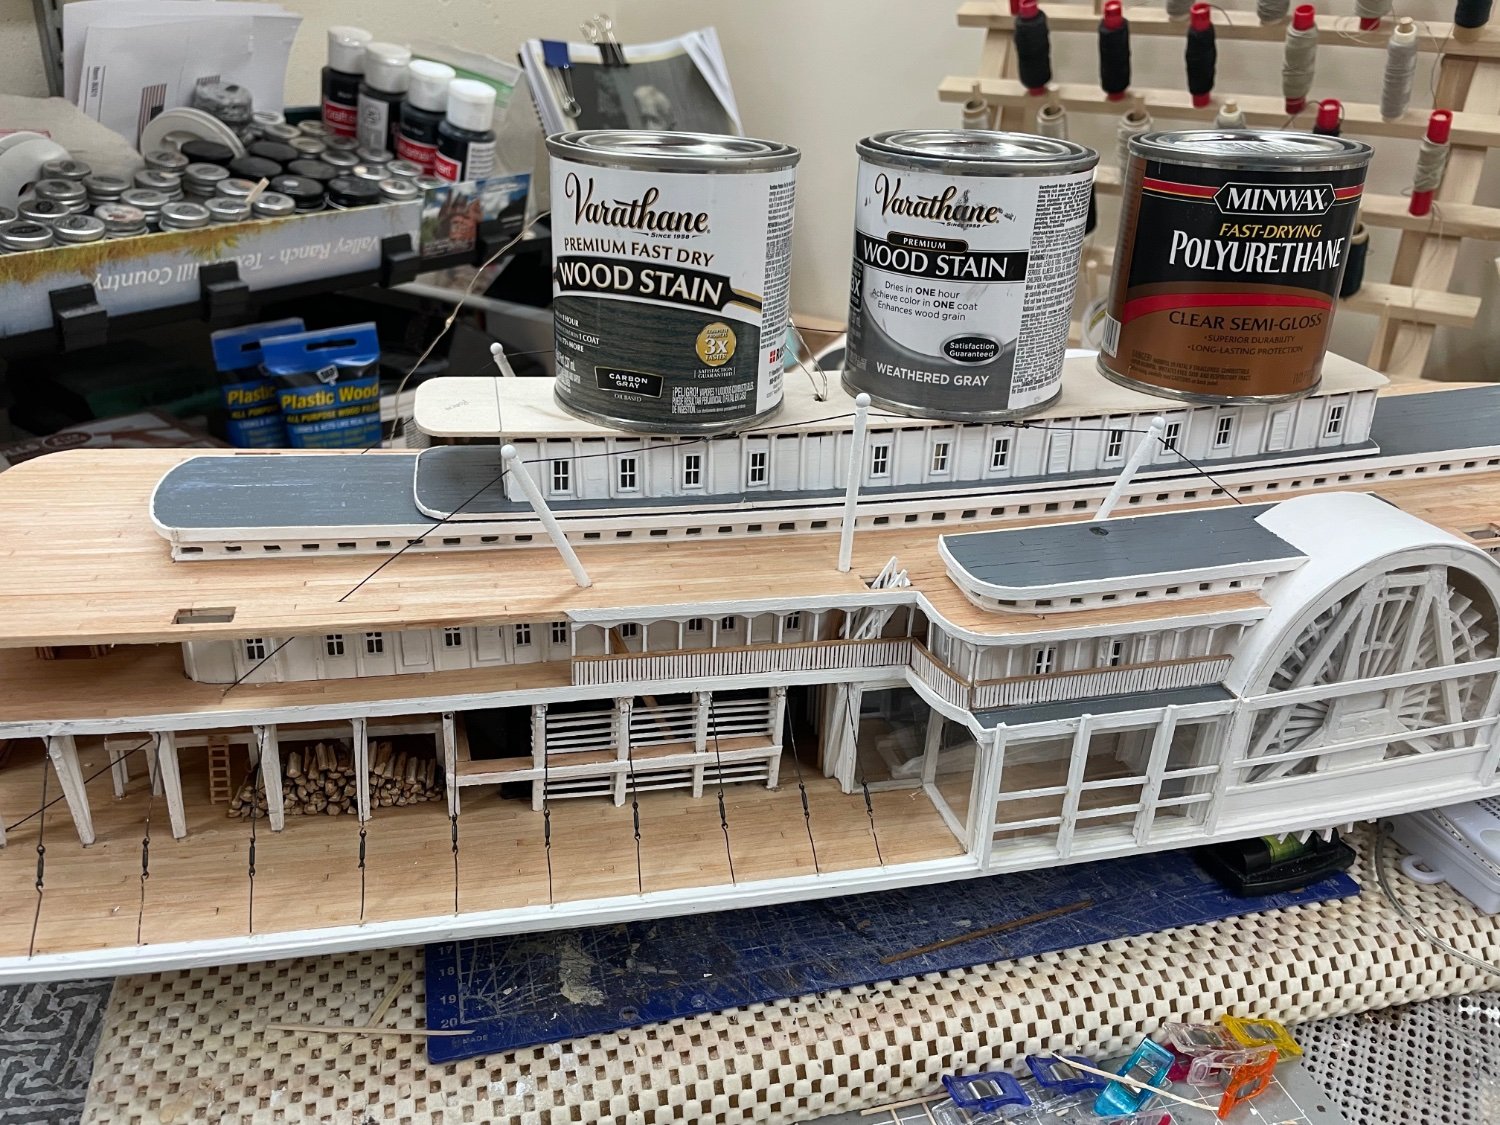
Thanks Glen, The Texas Deck was new to me. Pursuing this build has led me to a lot of historical research as well. Yes very interesting indeed. 🤔 The Industrial Age is definitely as fascinating as the Age of Sail. The eras do overlap several decades. https://en.m.wikipedia.org/wiki/Texas_(steamboat) Here is a link for others, Texas was a word synonymous with Grand or Large. These steamboats were certainly a Grand site to see on the river. Thanks again for your comment and welcome aboard. Lots more detail coming up. Cheers 🍻
- 238 replies
-
- 4
-
-
- Robert E Lee
- steamboat
- (and 3 more)
-
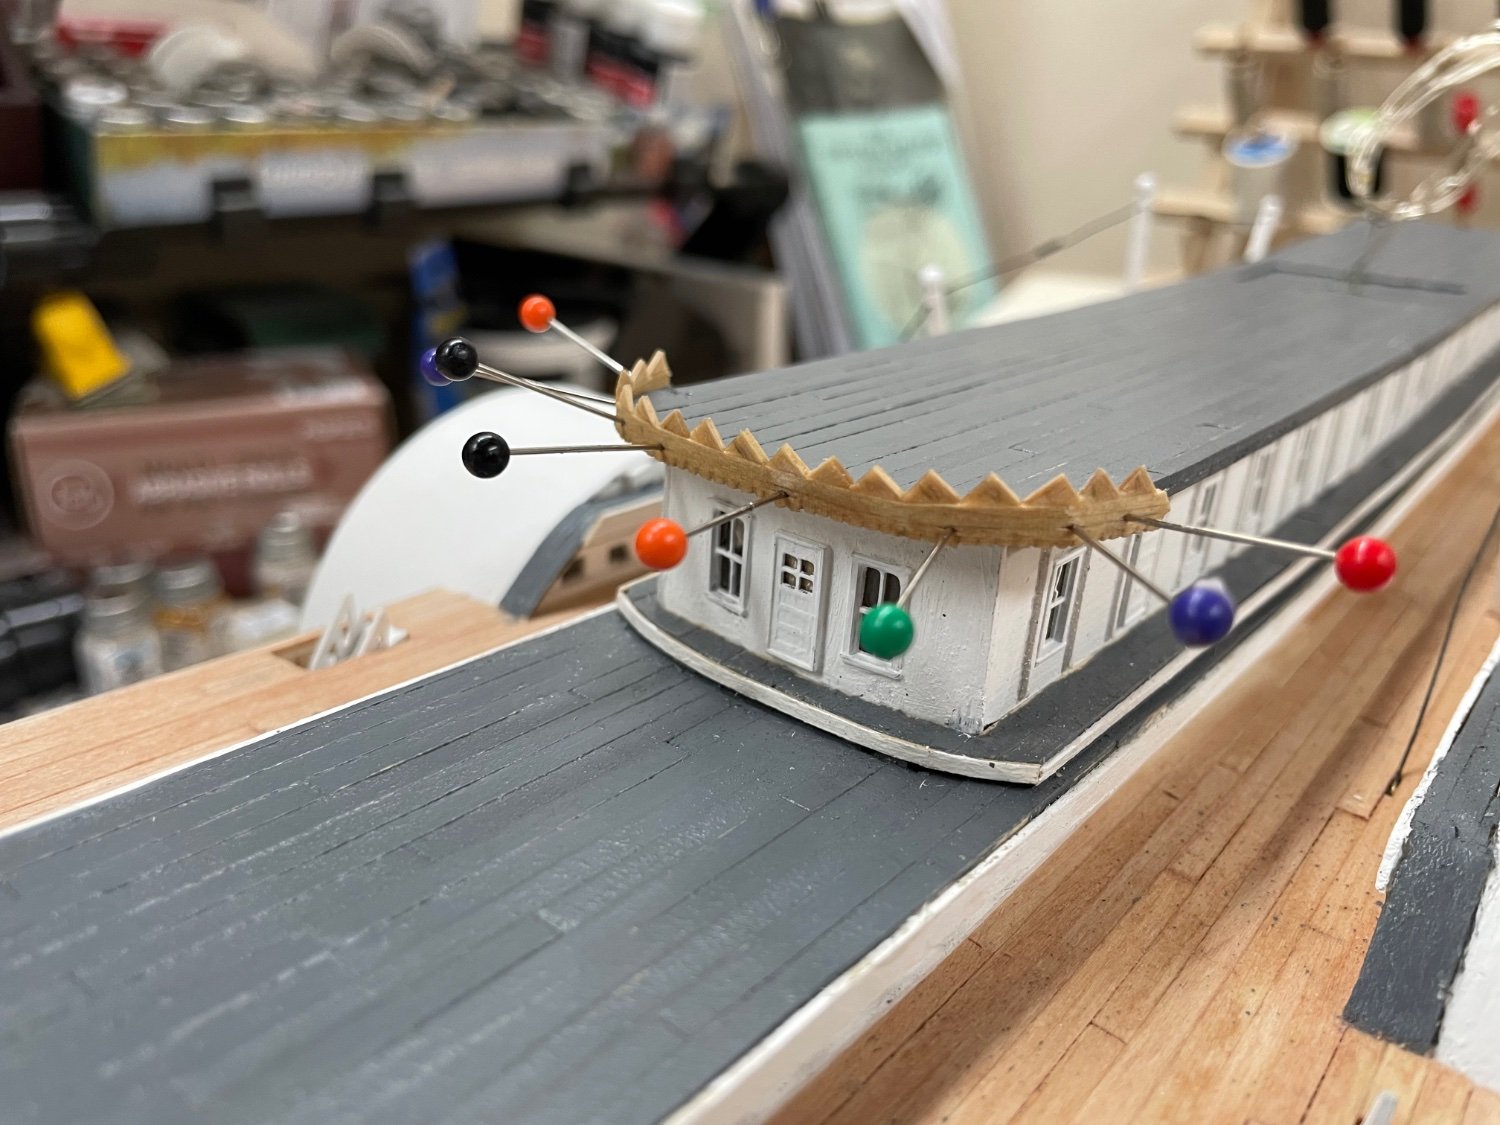
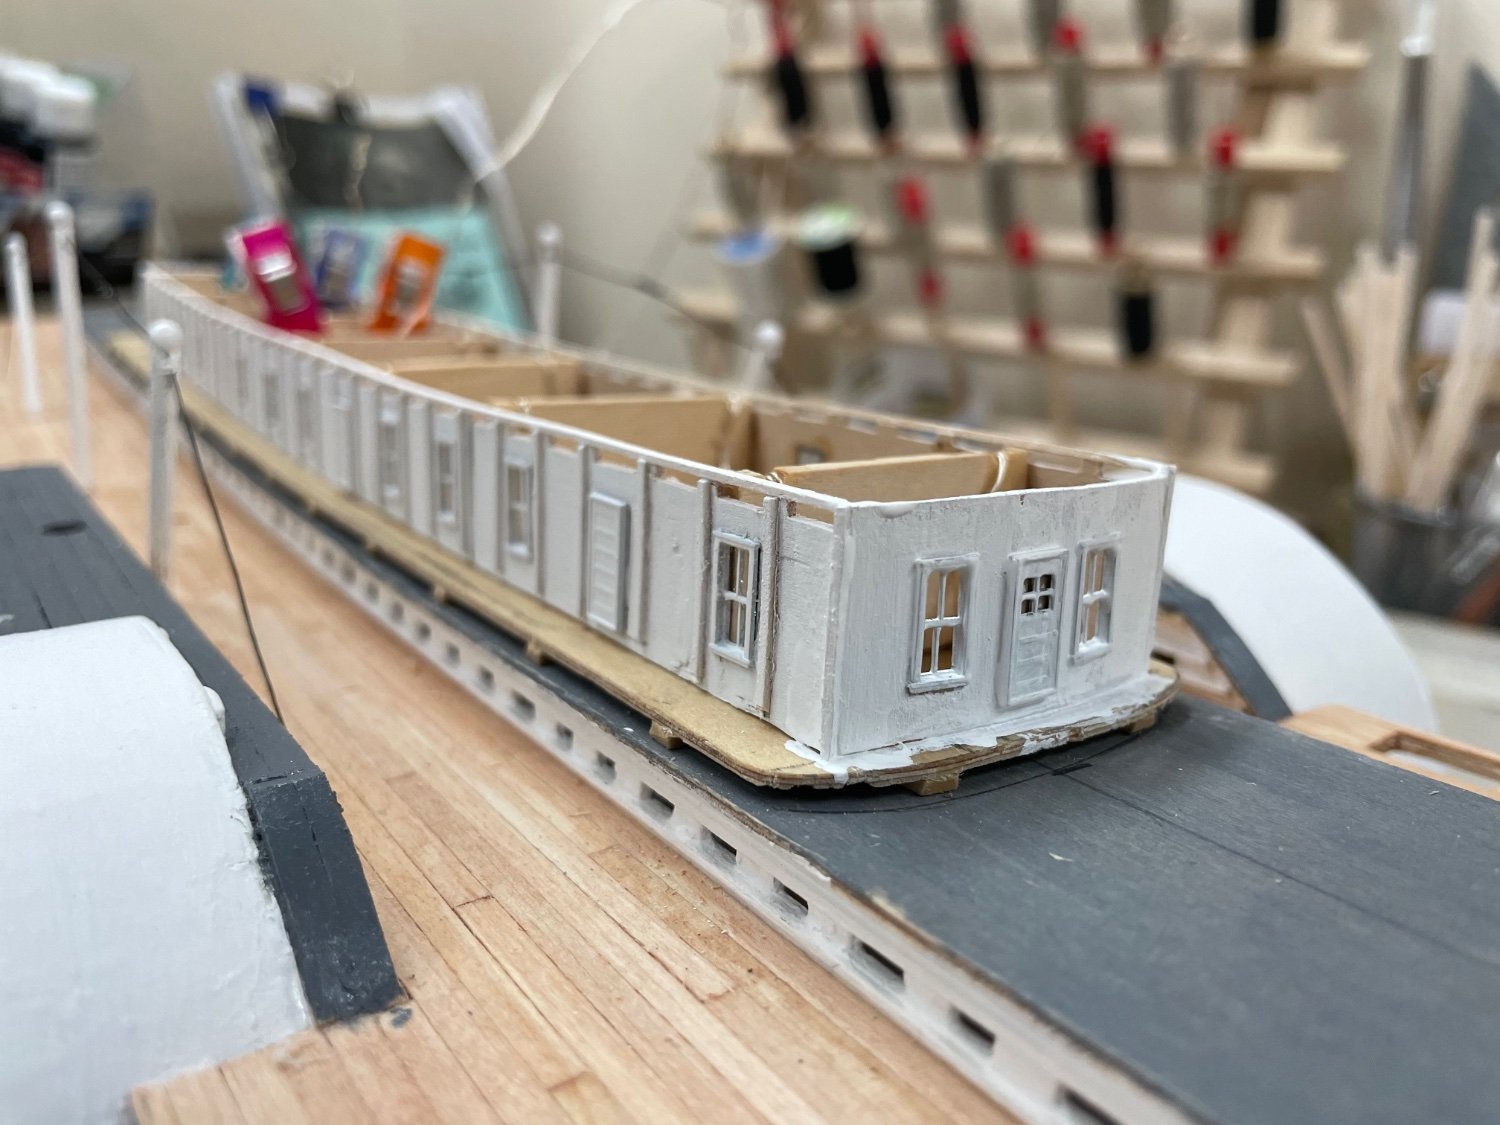
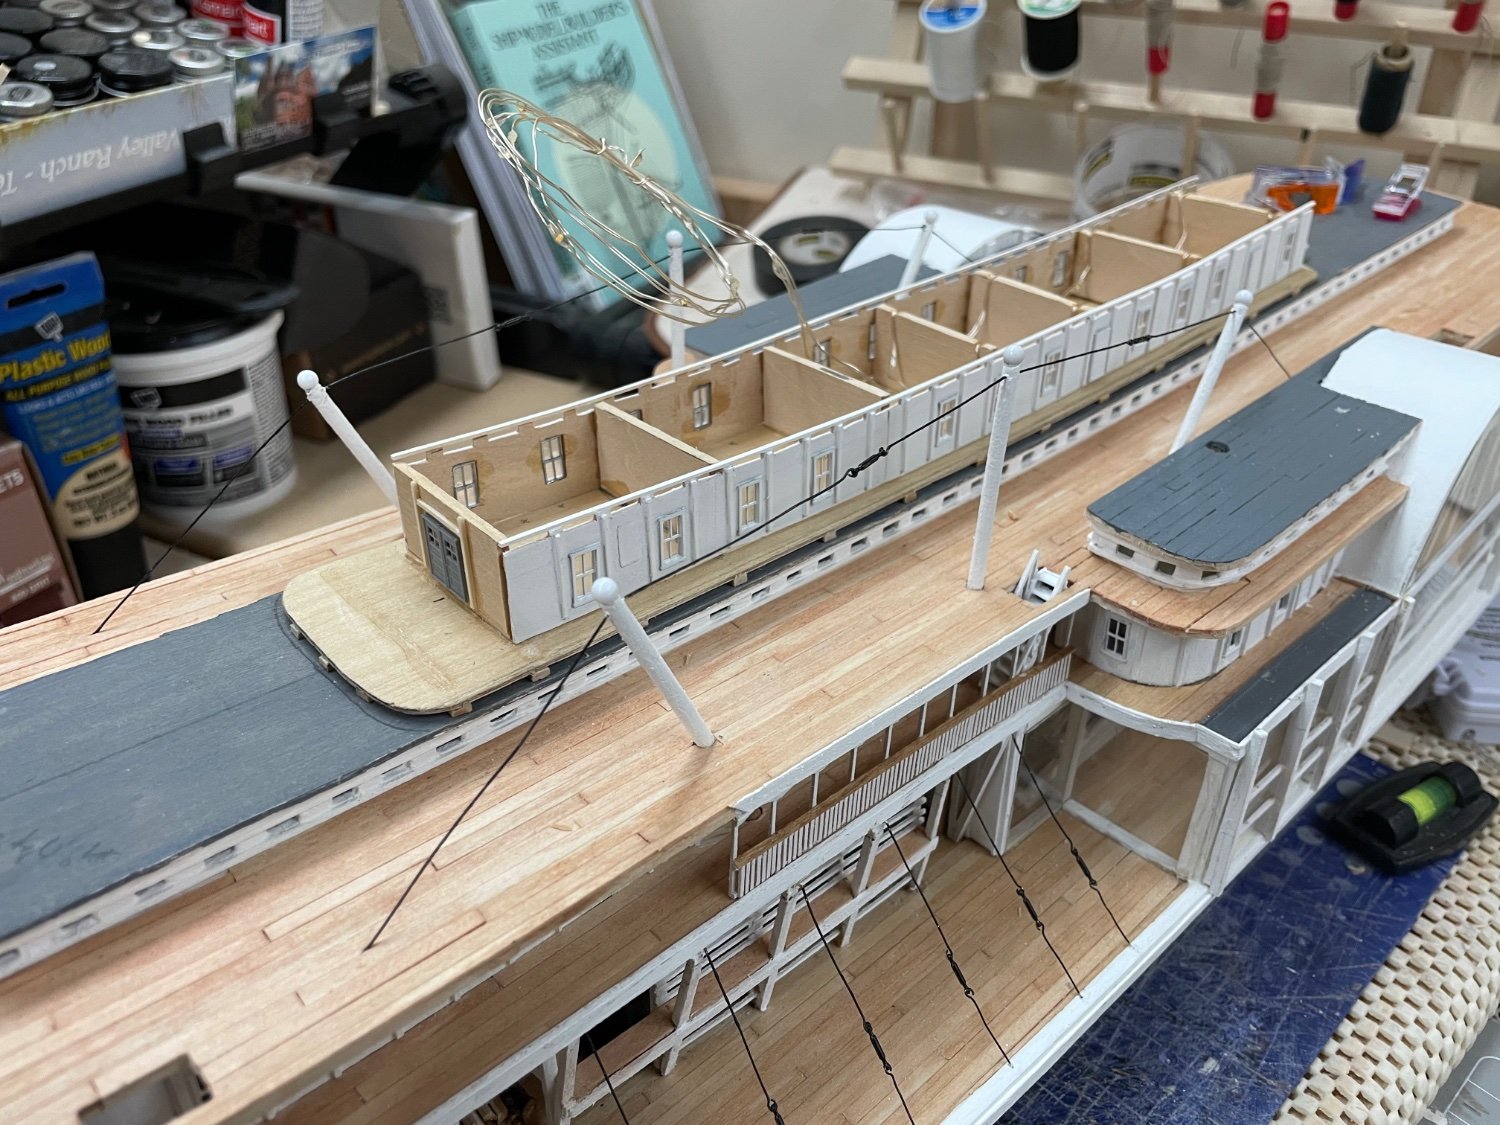
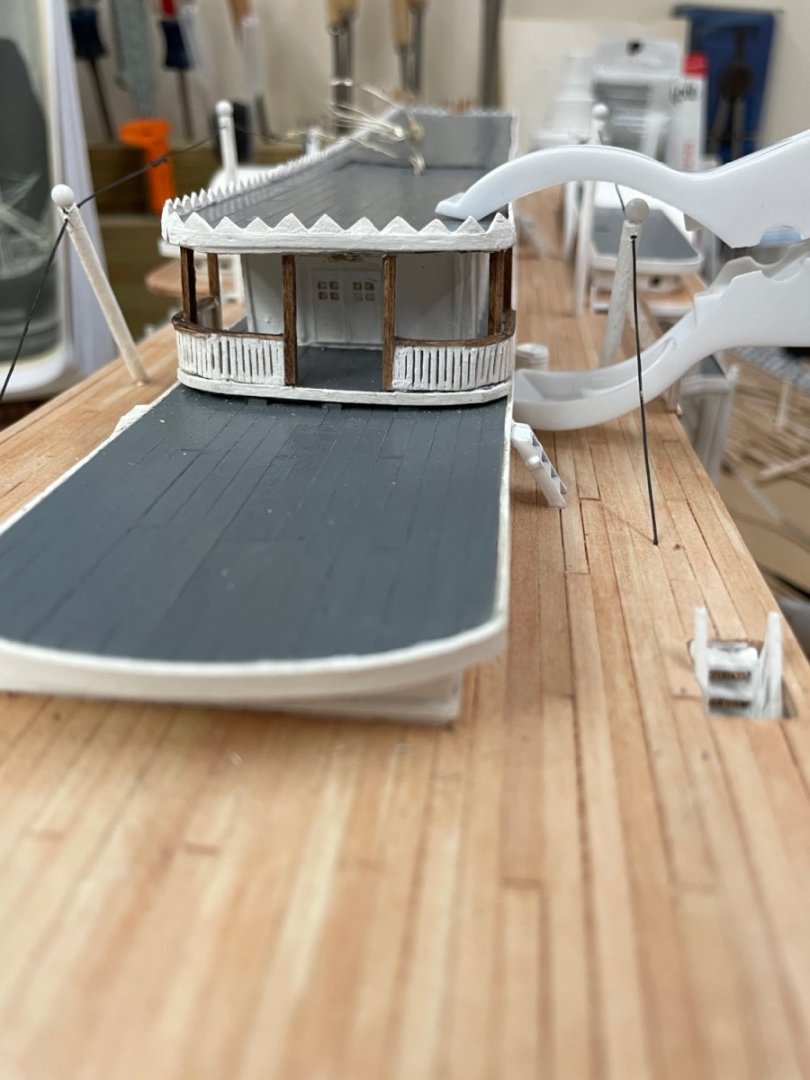
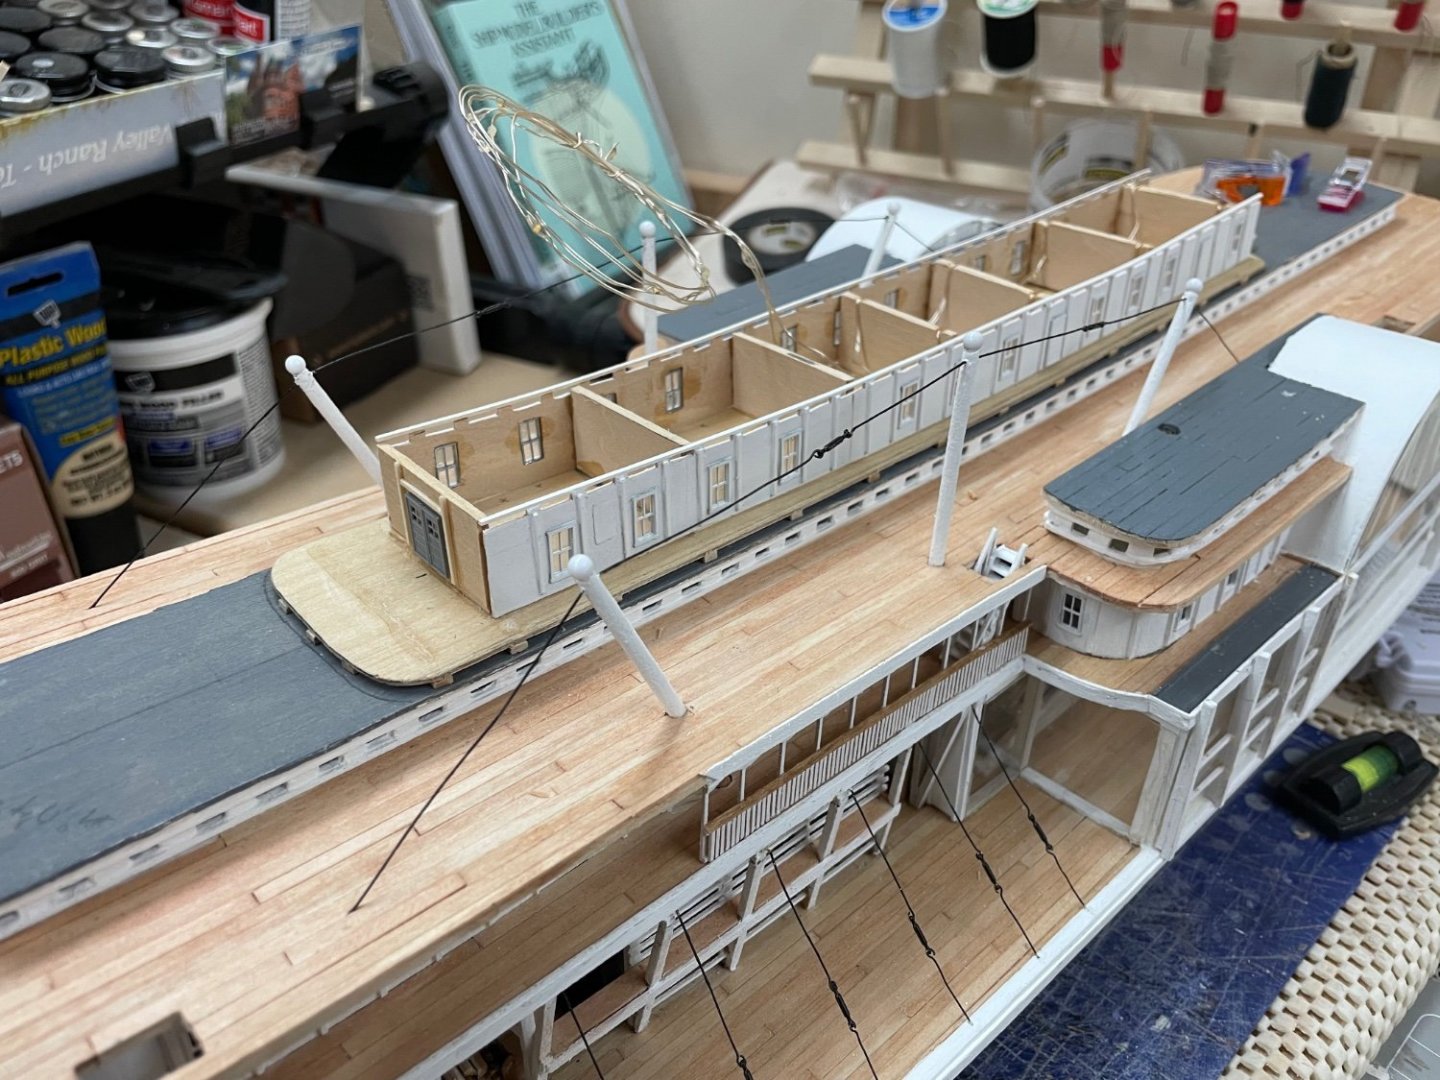
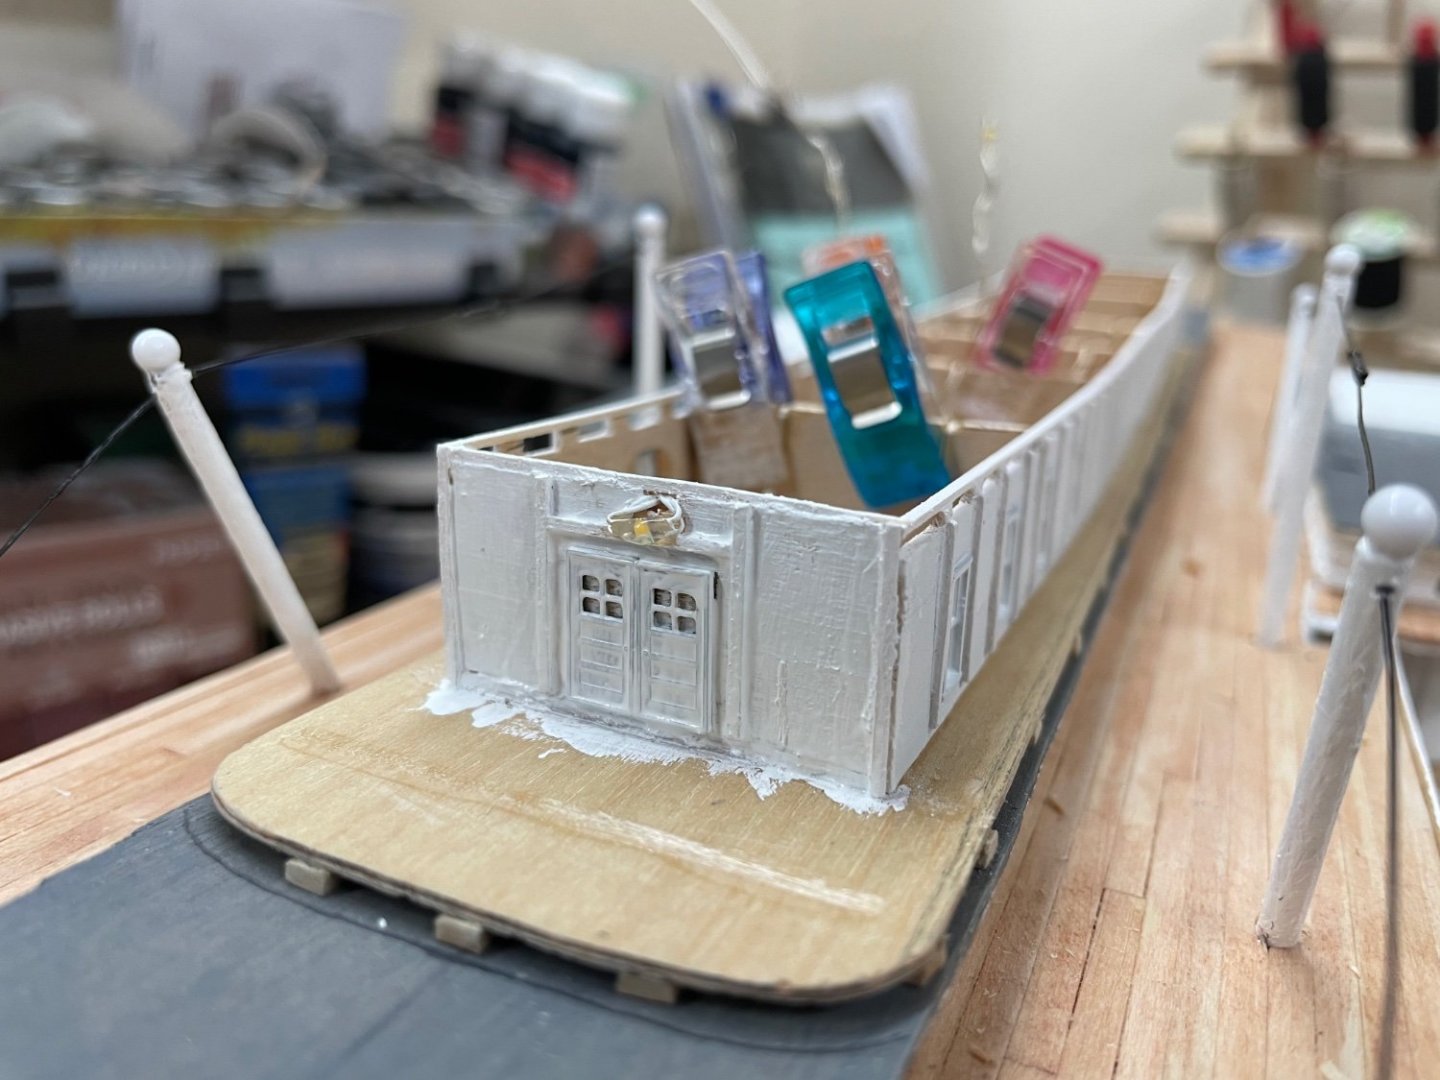
Crew Quarters and Texas Deck… The Texas Deck mounted on the skylight roofing. Added the roofing edge detail. Glued down the Texas roof. Planking another roof on the Texas. Continuing to build railings. Lots of detail work in these railings, windows and transoms. She is coming along… Later 😎


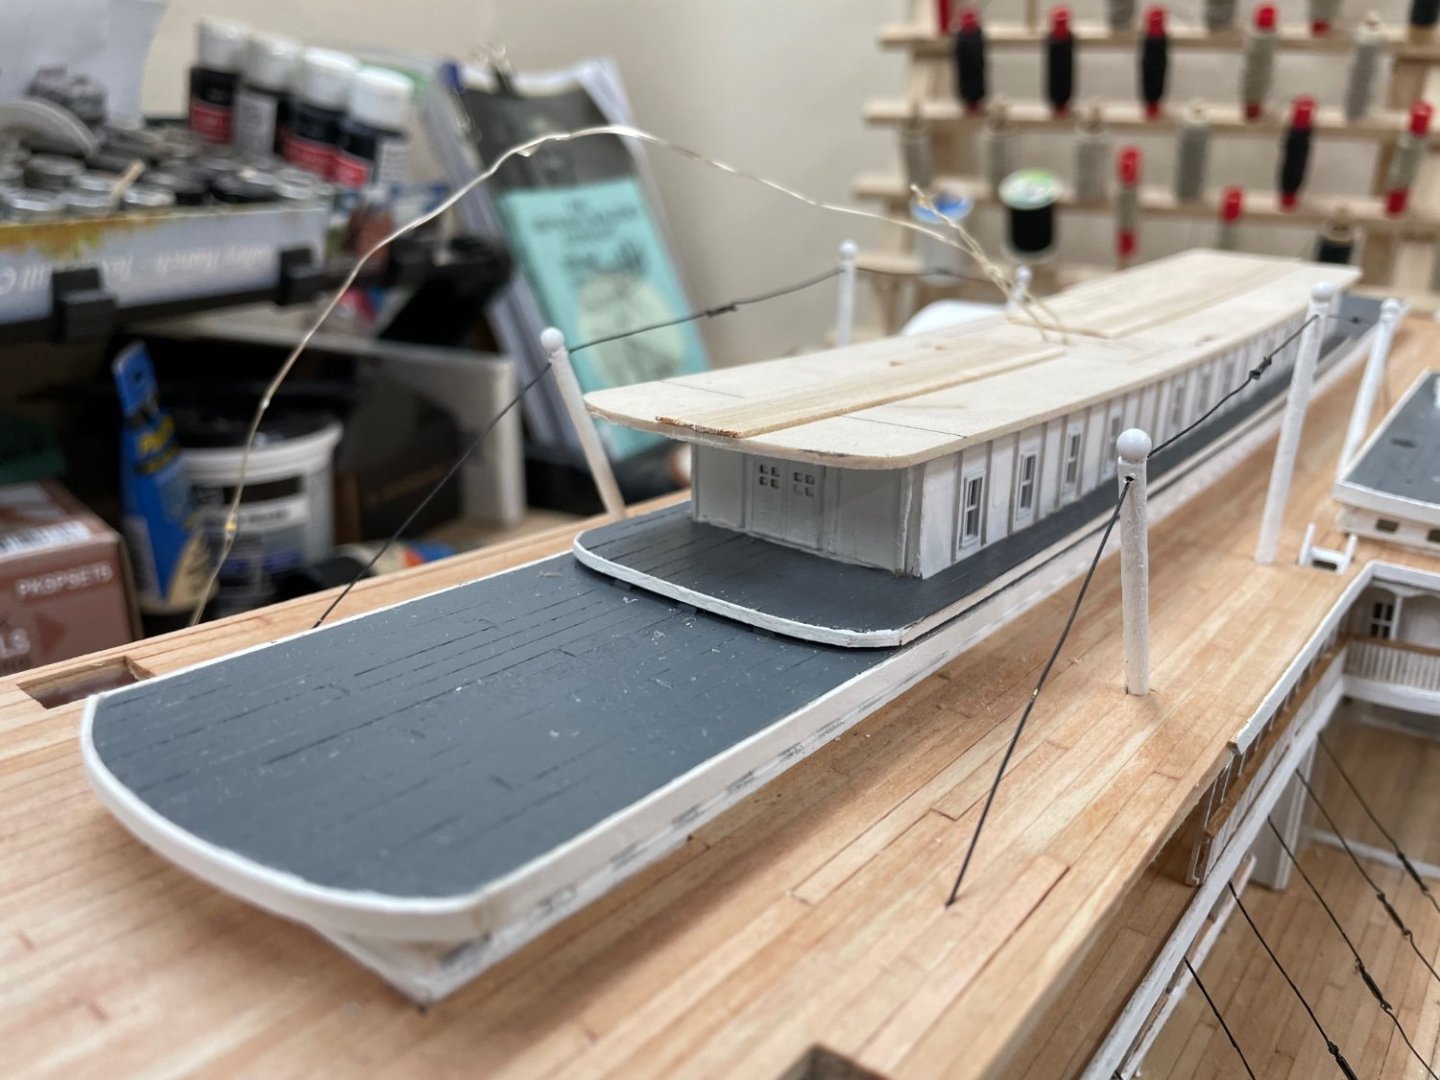
- 238 replies
-
- 12
-
-
-
- Robert E Lee
- steamboat
- (and 3 more)
-
Excellent work Yves… Perfection is very elusive to those closest to their work. 🤪 You have the right goals and your work is excellent my friend. 👍
-
Hi Tom, I know it’s early on your process but, will there be a coating, once you have completed the coppering, to keep it this shiny? Do you plan to give it some weathering or patina? Nice work… John
- 200 replies
-
- 2
-
-
- Whaling Bark
- Charles W Morgan
- (and 1 more)
-
Nice work John… I’ll be following along, nice to see another steamboat build. 🍻 John