John Ruy
-
Posts
1,585 -
Joined
-
Last visited
Content Type
Profiles
Forums
Gallery
Events
Everything posted by John Ruy
-
 Thanks, My wife already thinks I am a mad scientist in the basement. LOL 😆 My laughter is becoming some what maddening. Just saying…
 -
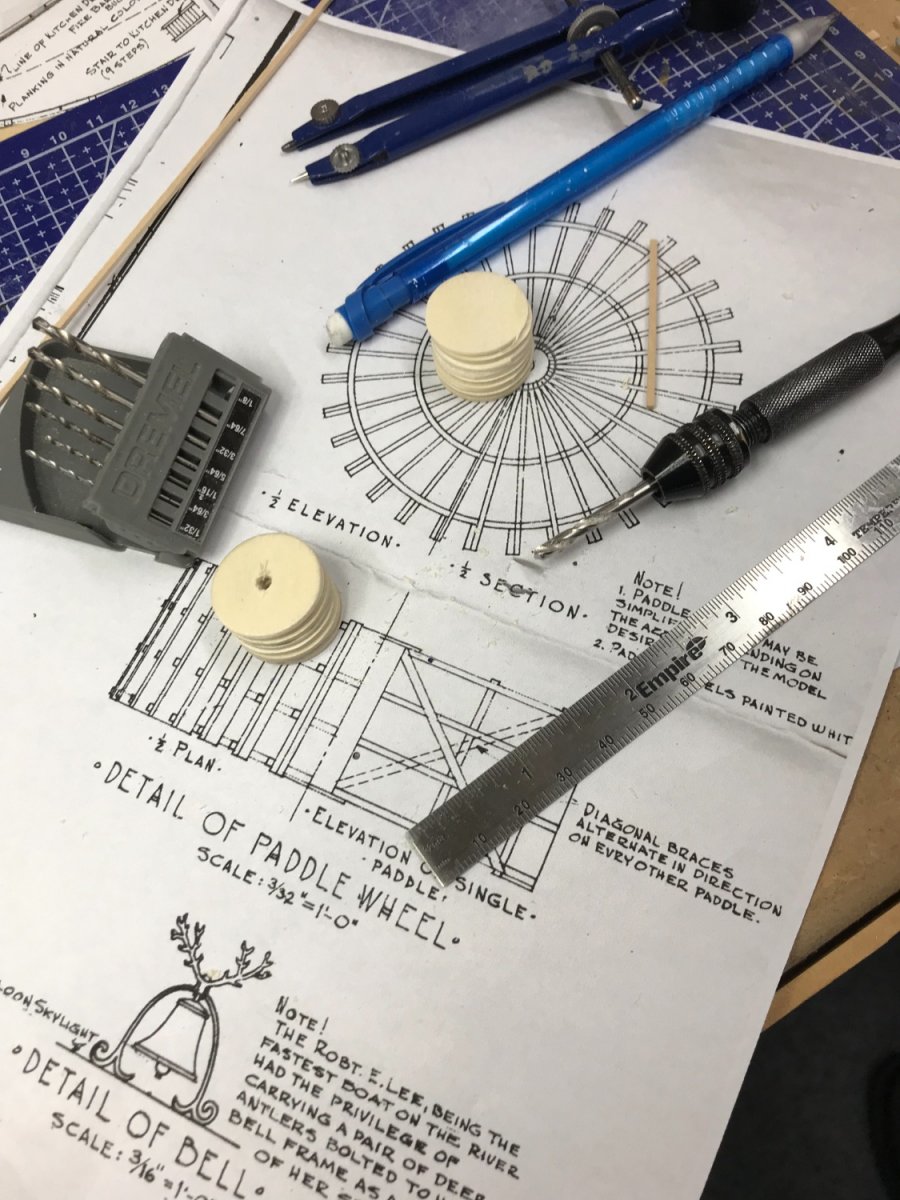
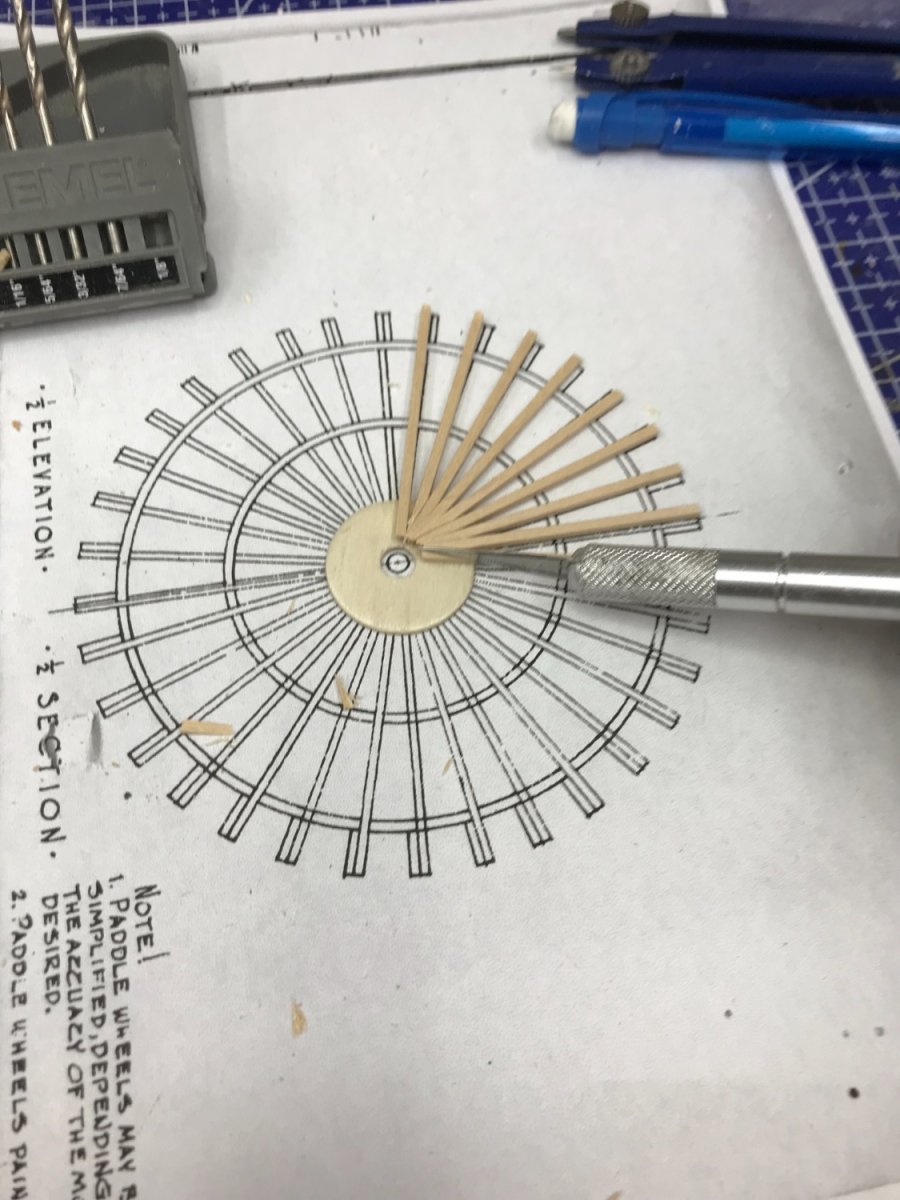
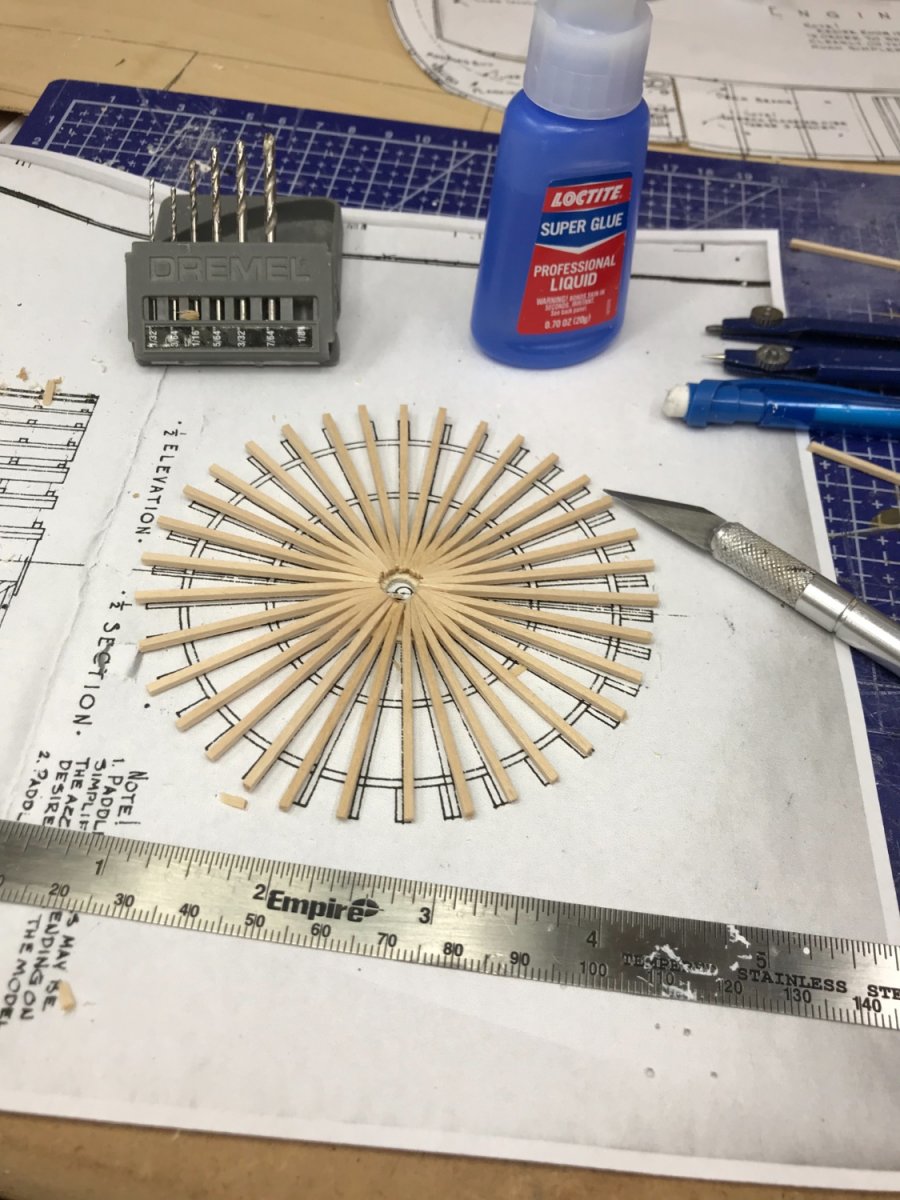
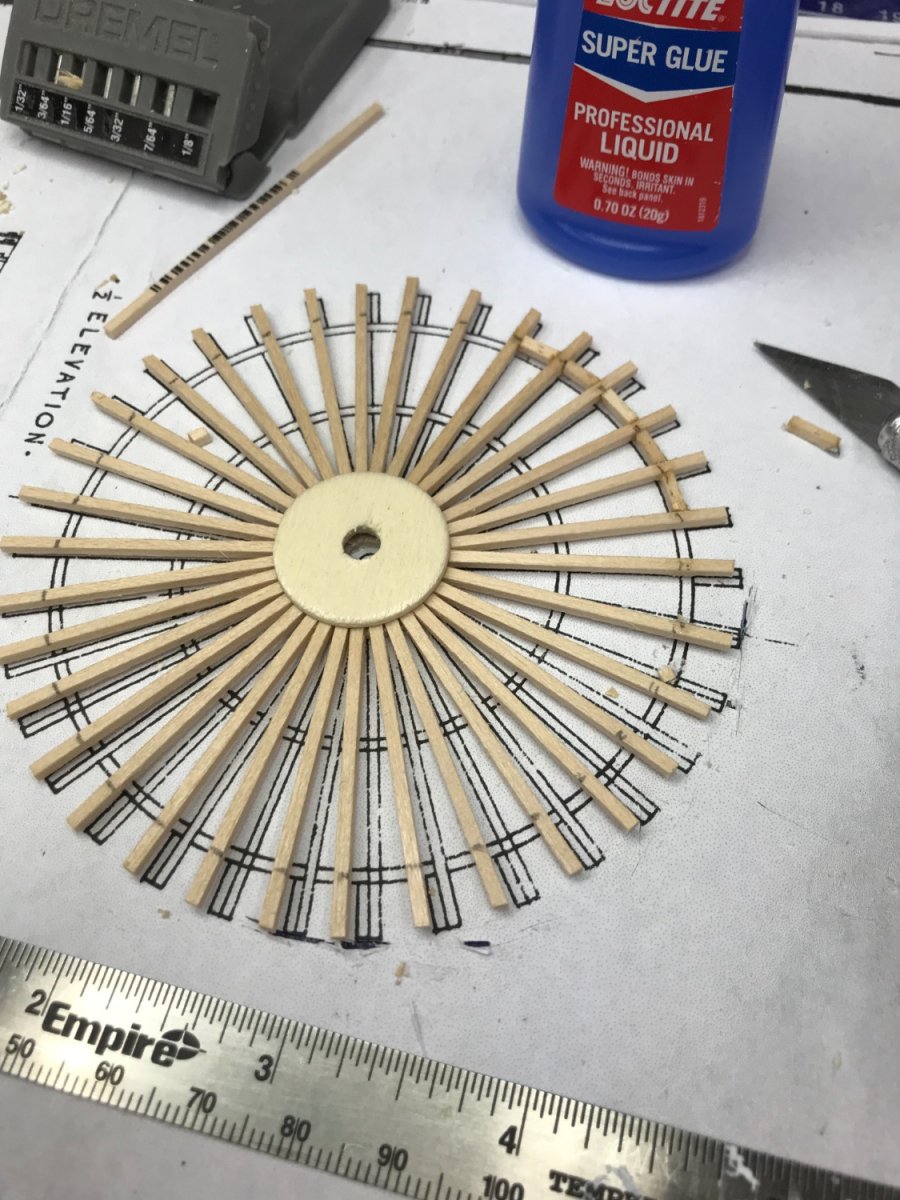
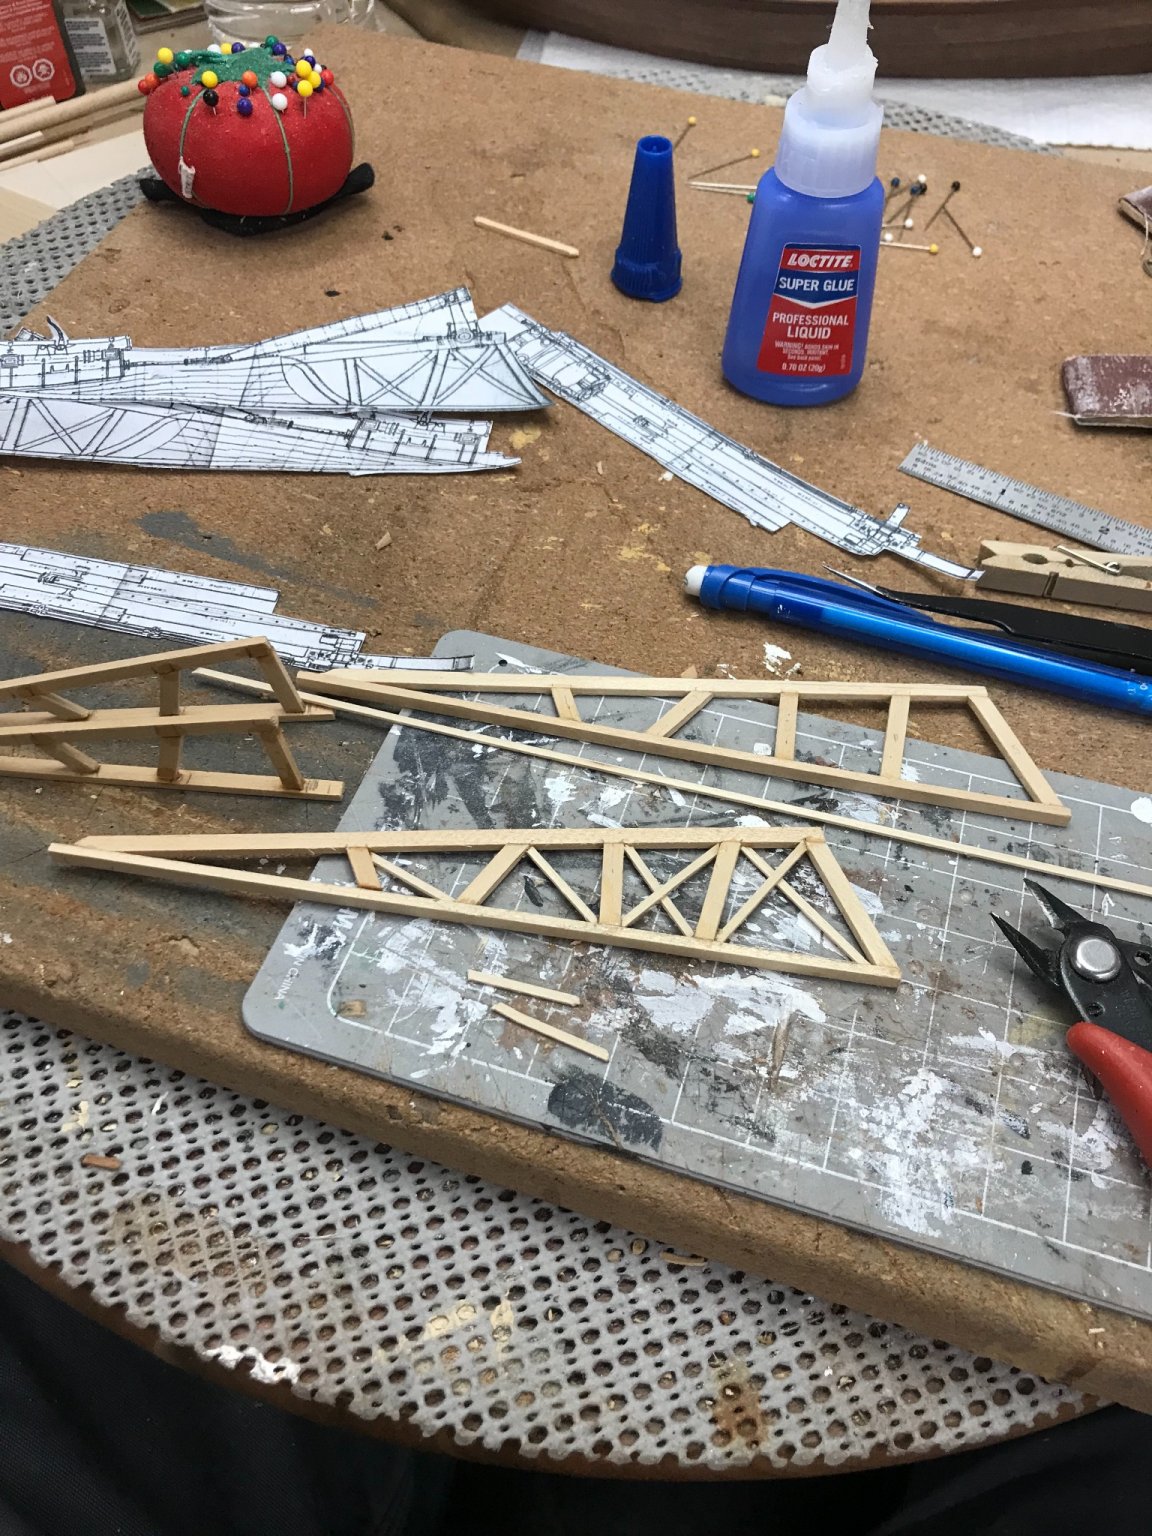
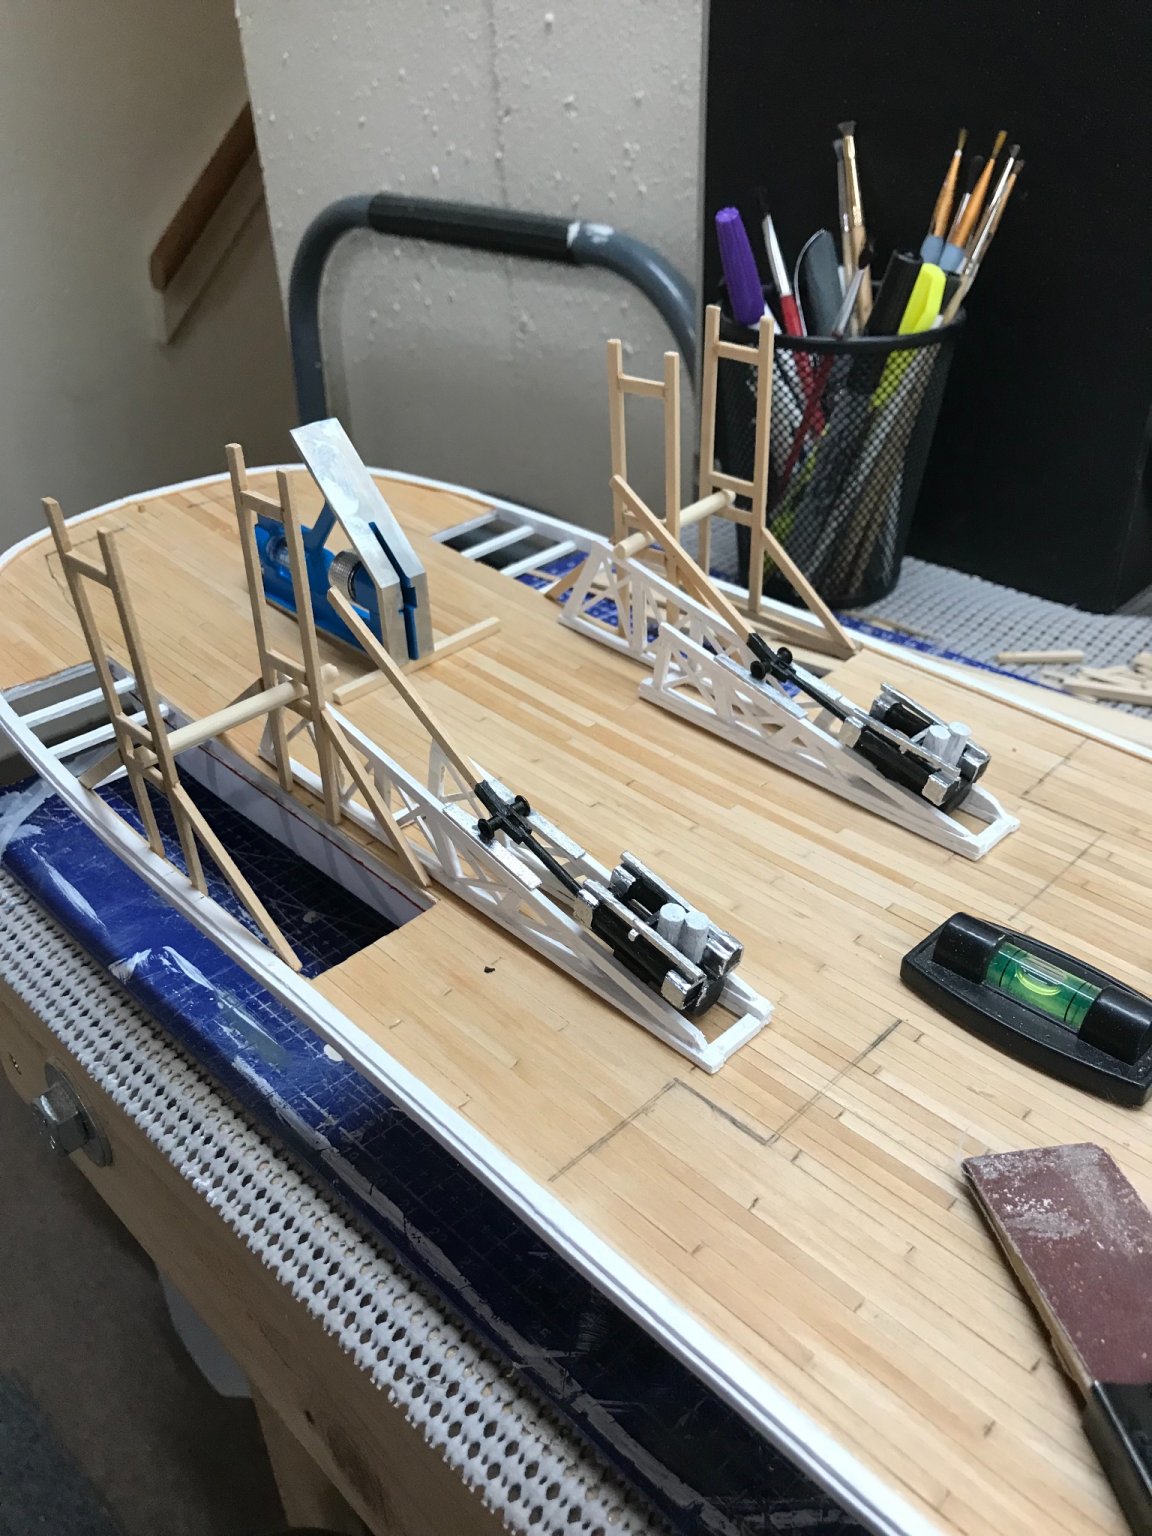
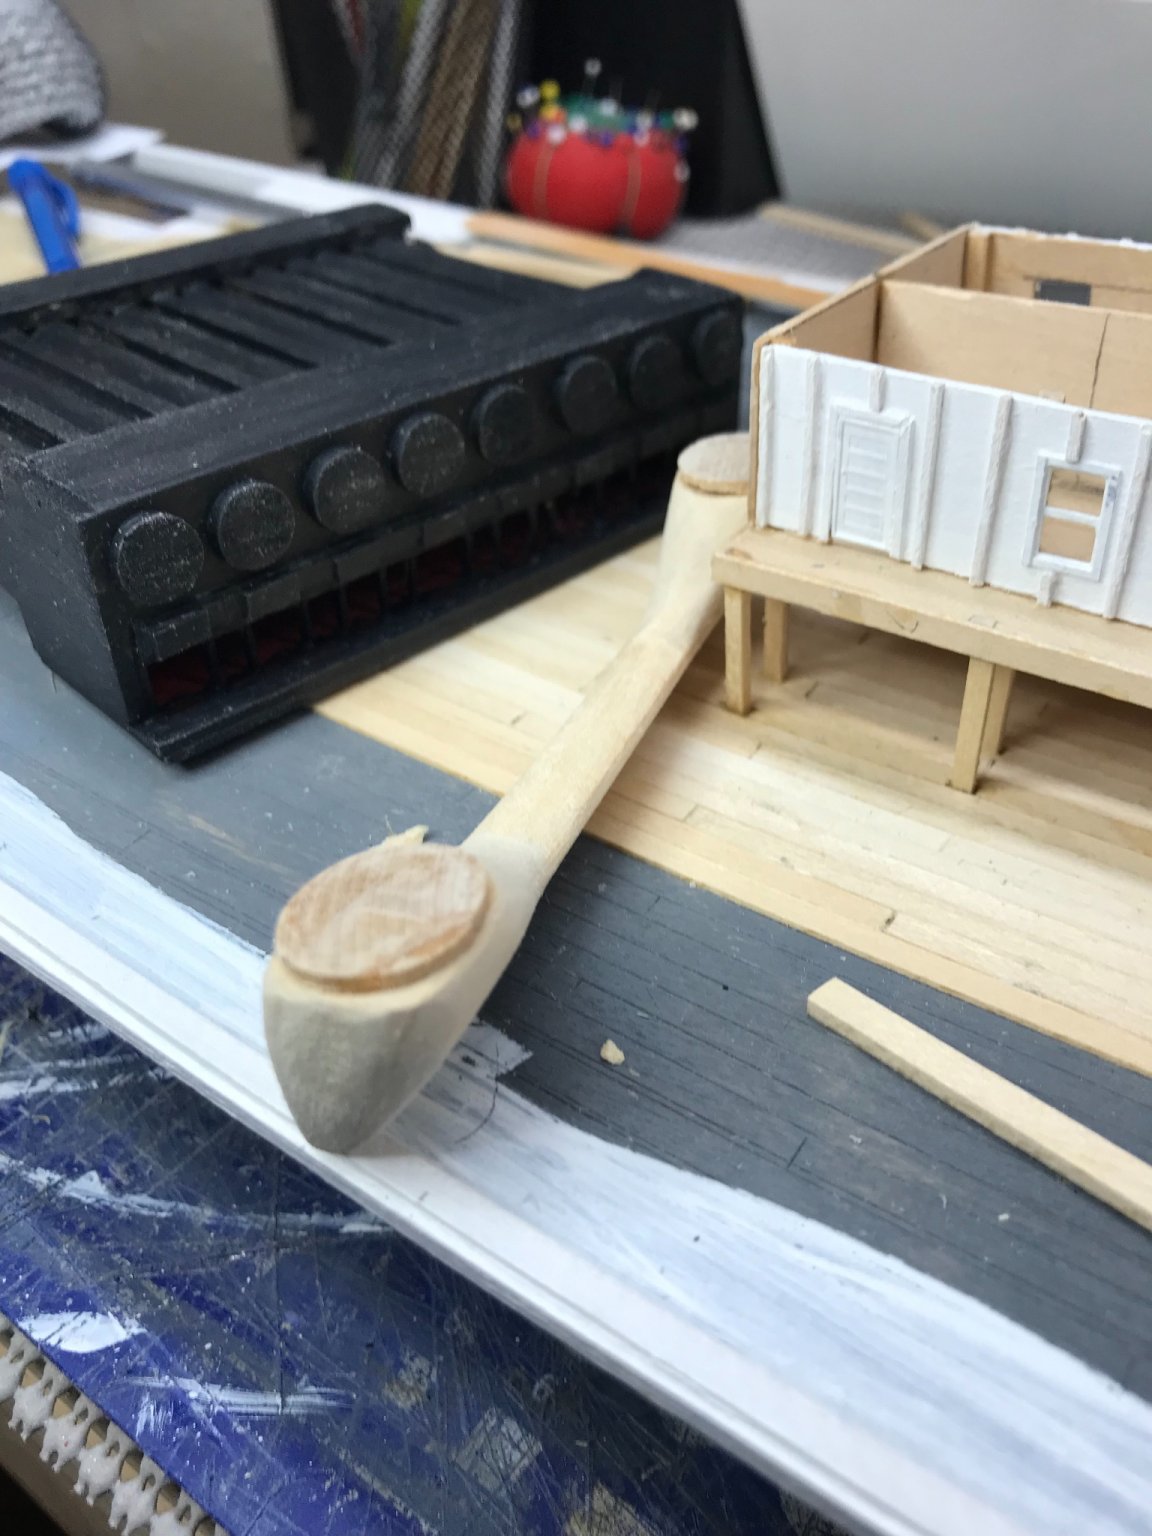
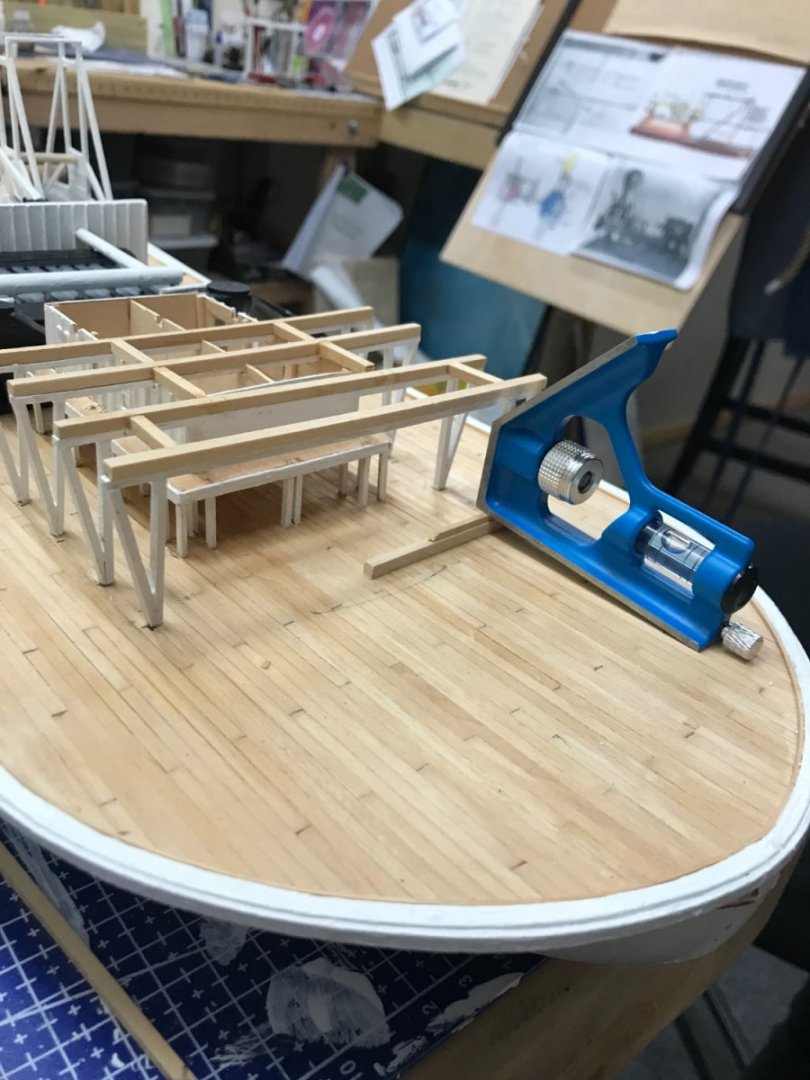
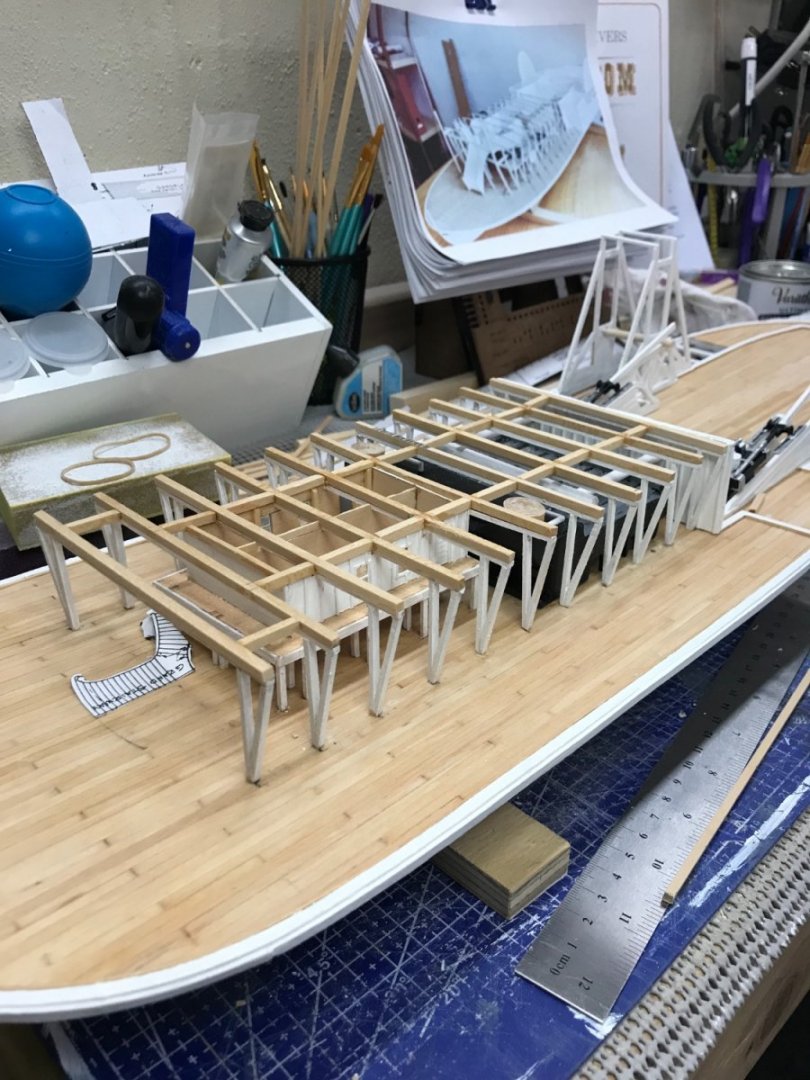
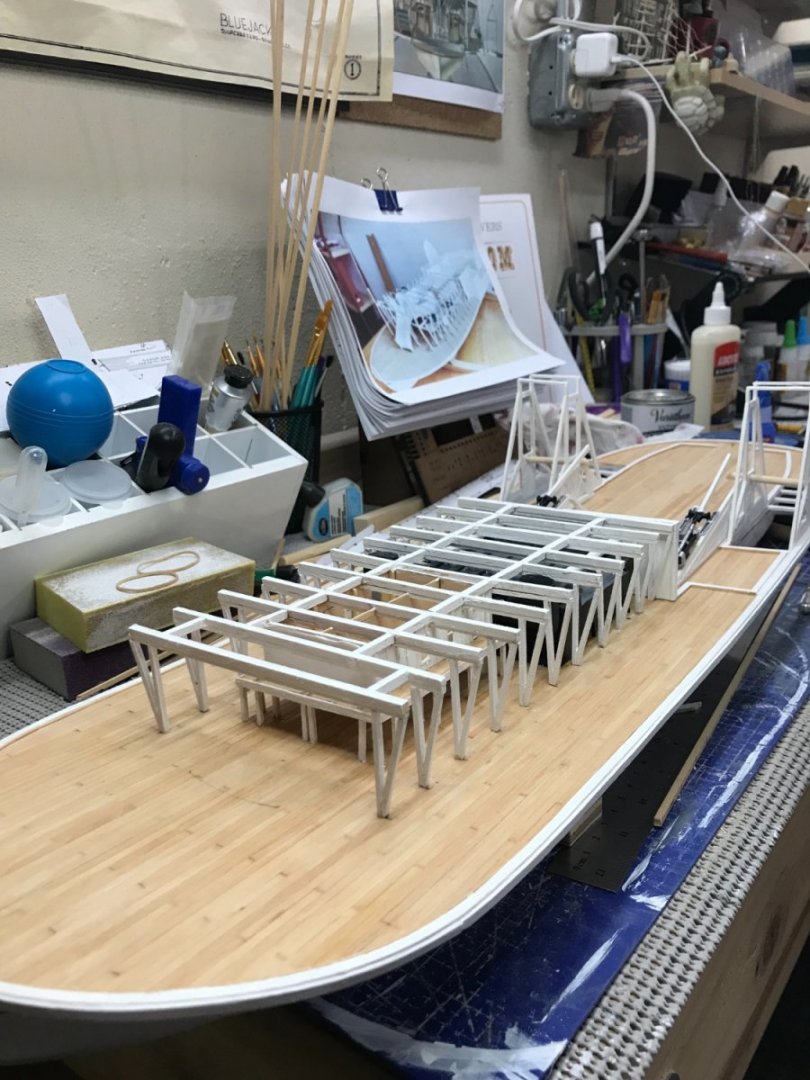
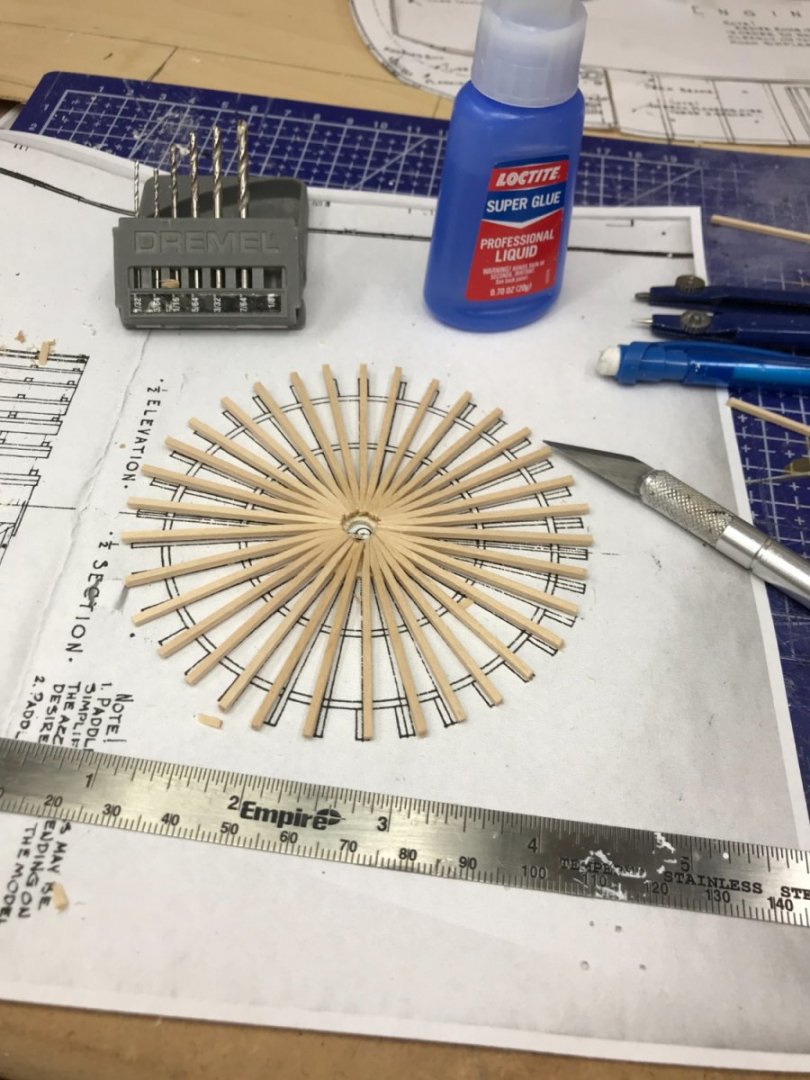
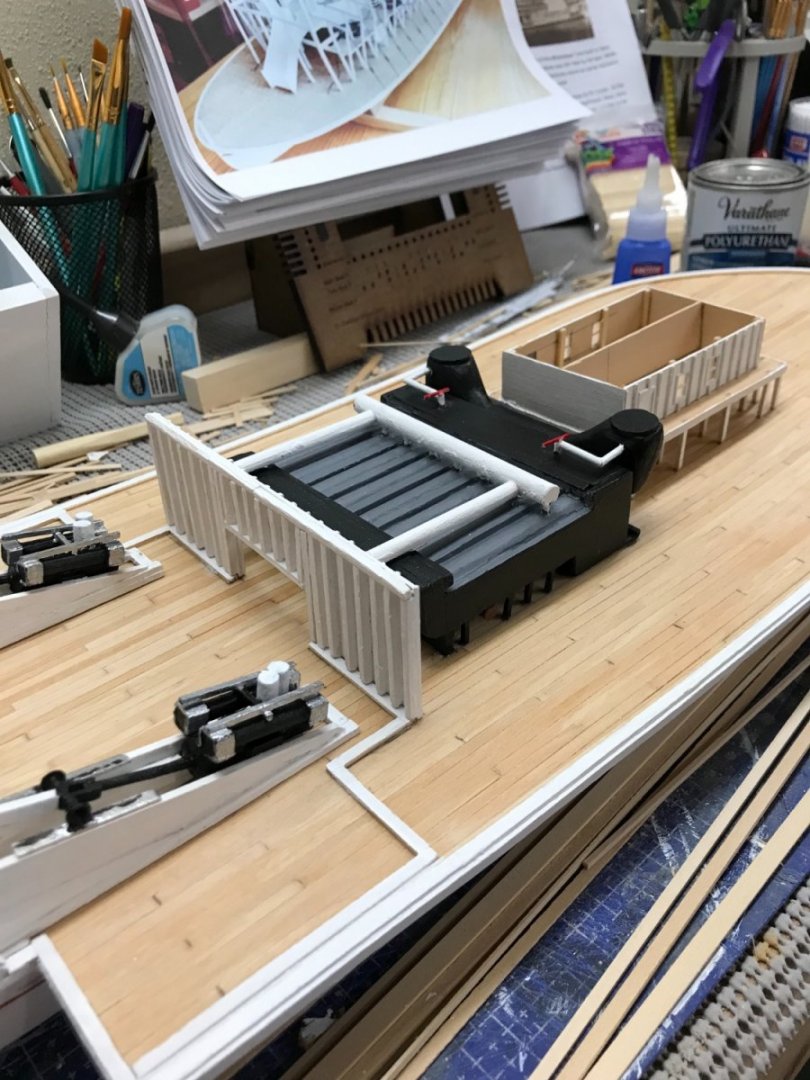
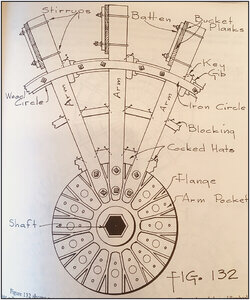
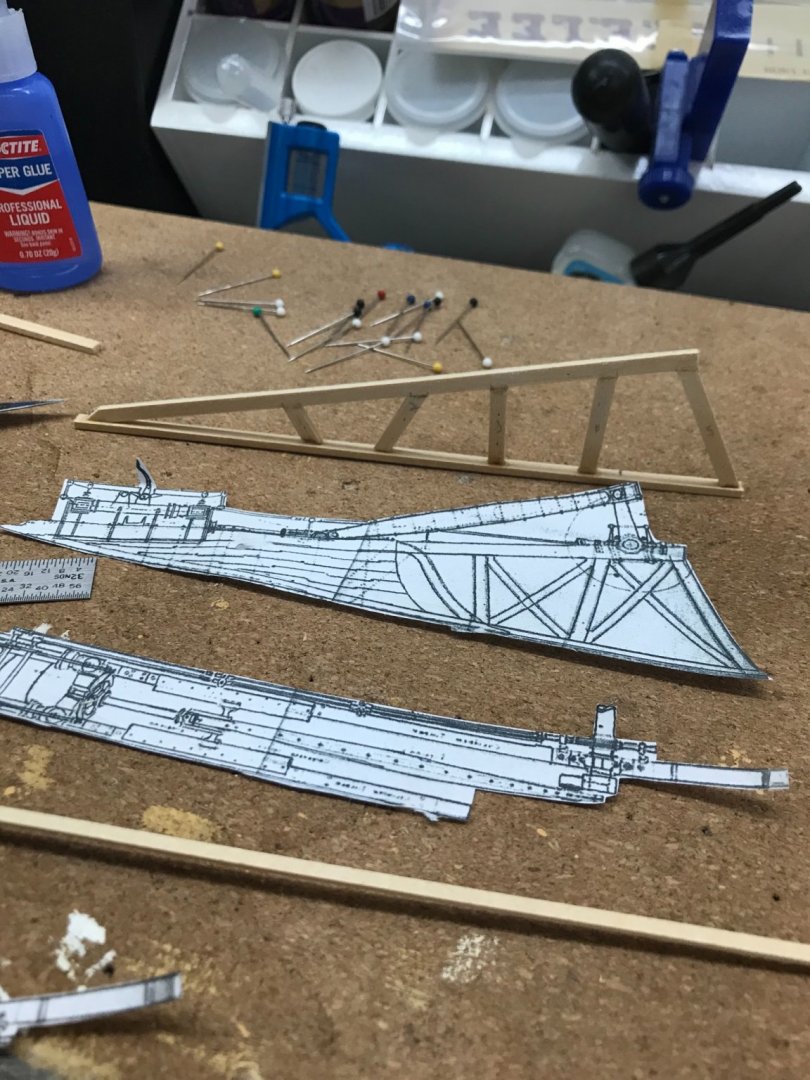
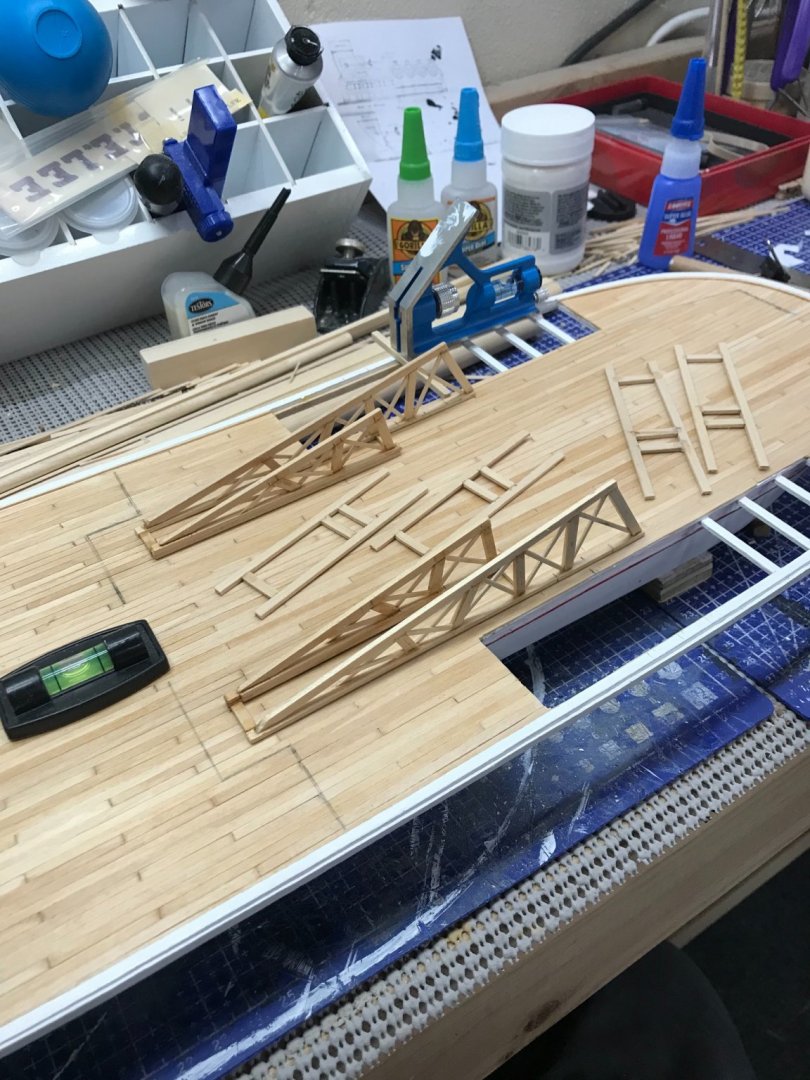
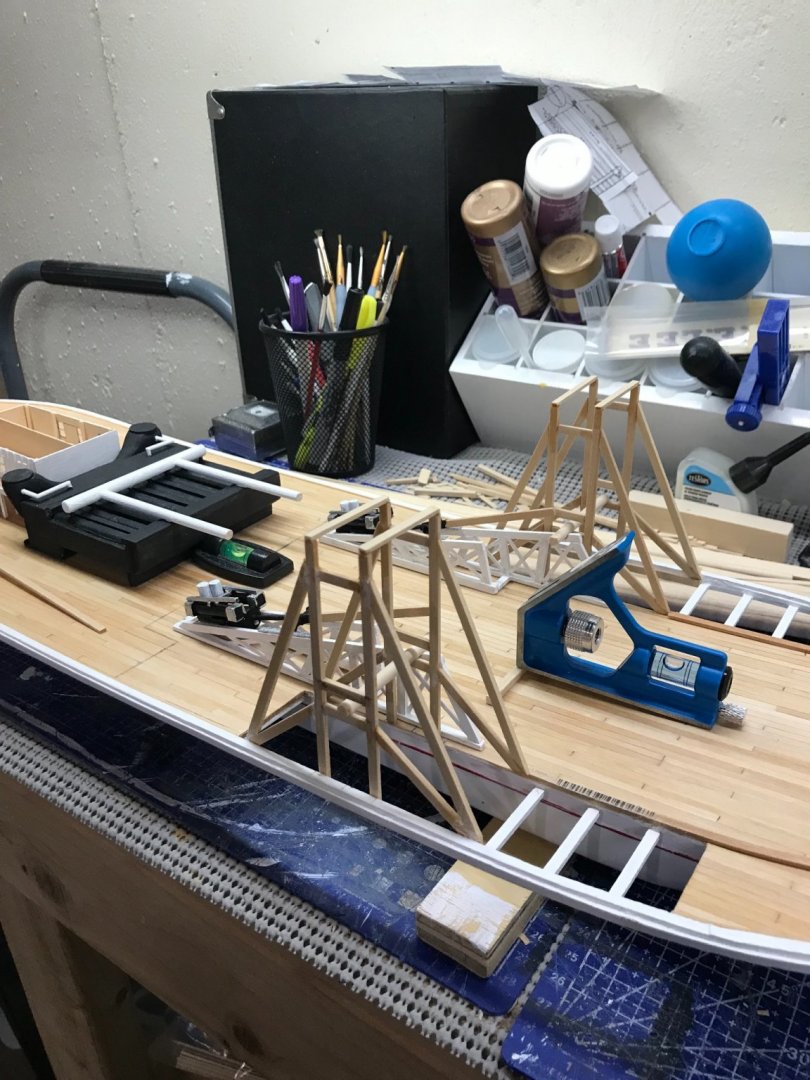
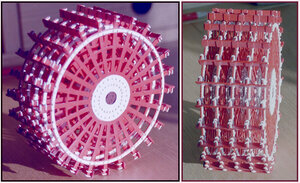
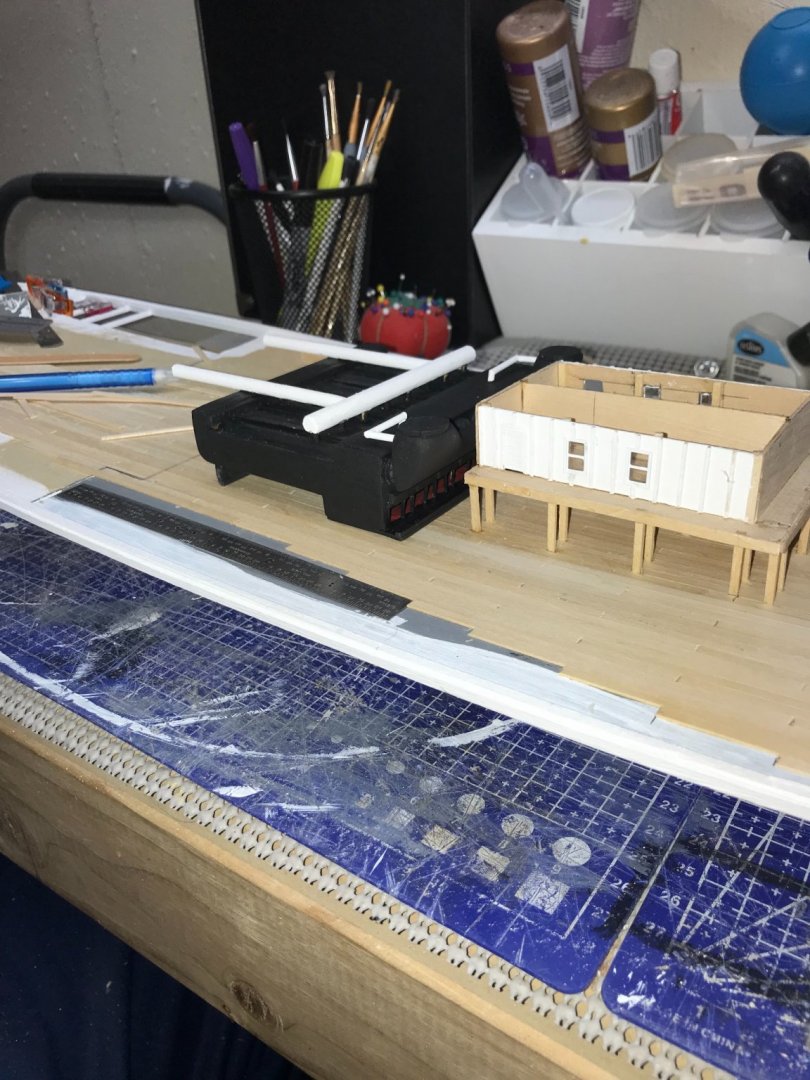
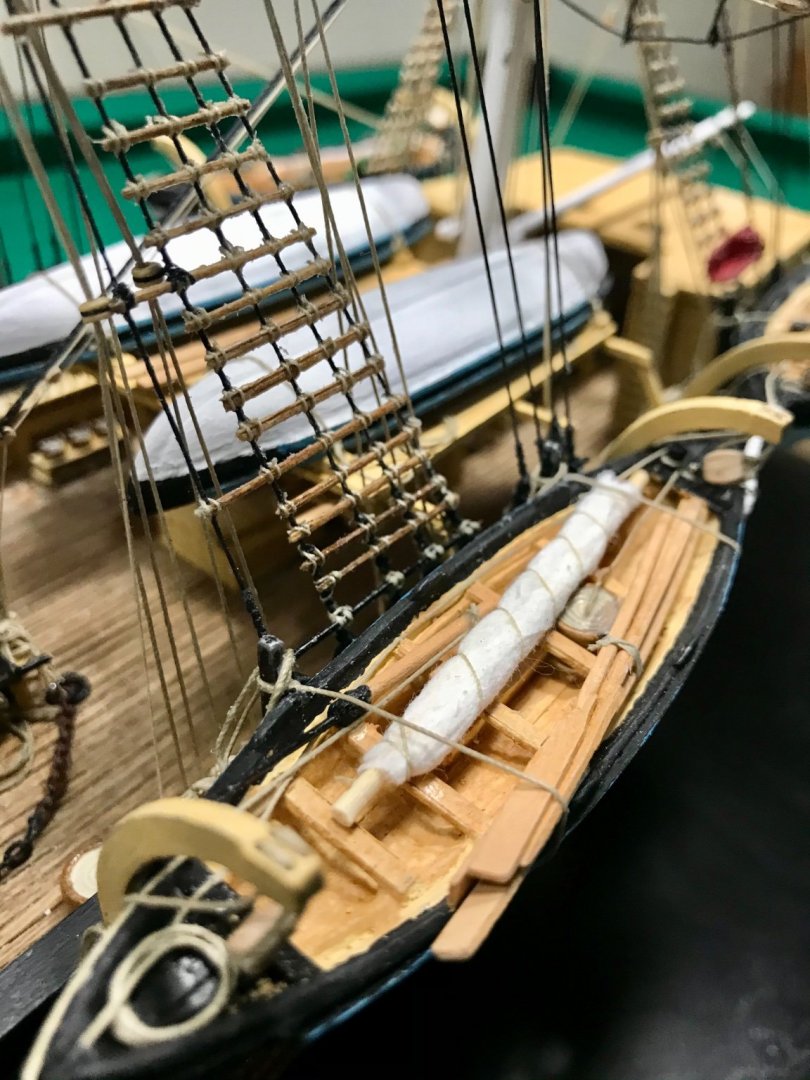
Post and beam supports… Now that the forward boiler deck supports are in place, I will need to work on the paddle wheels prior to building the walls of the engine room to support the aft boiler deck. Got a good start on the paddle wheel construction. I will need eight of these. This will take some time. 😆 Cheers 🍻


- 238 replies
-
- 9
-

-
- Robert E Lee
- steamboat
- (and 3 more)
-
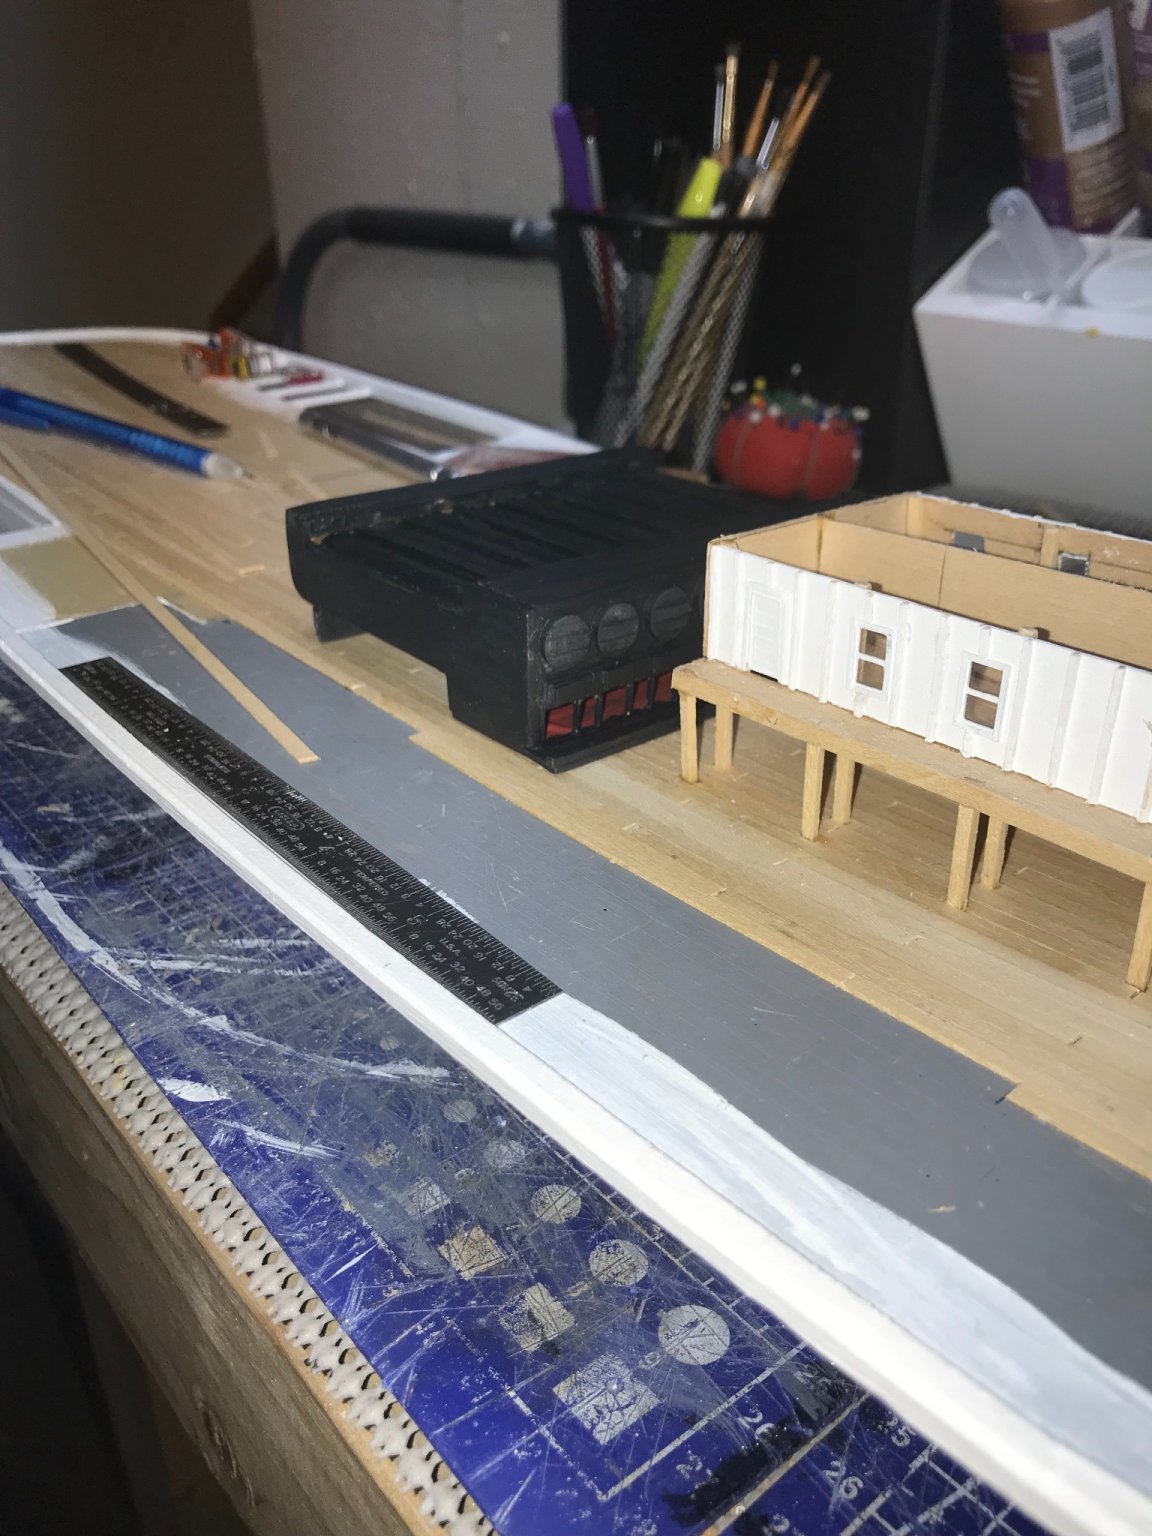
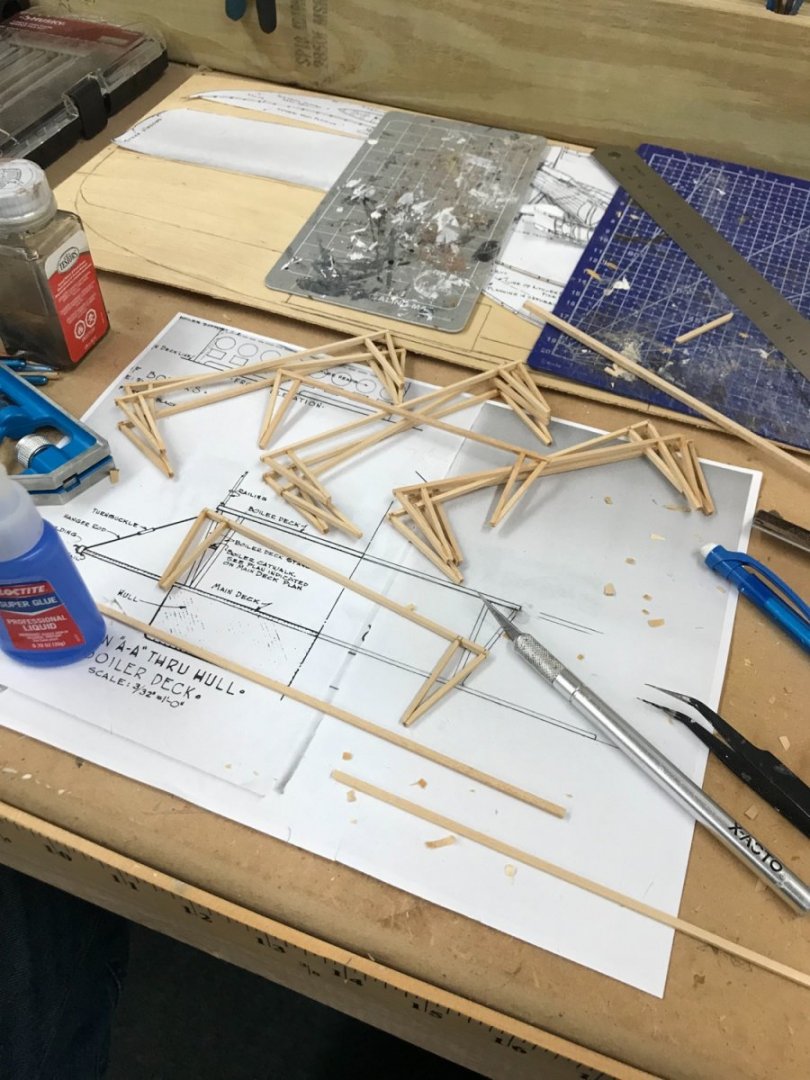
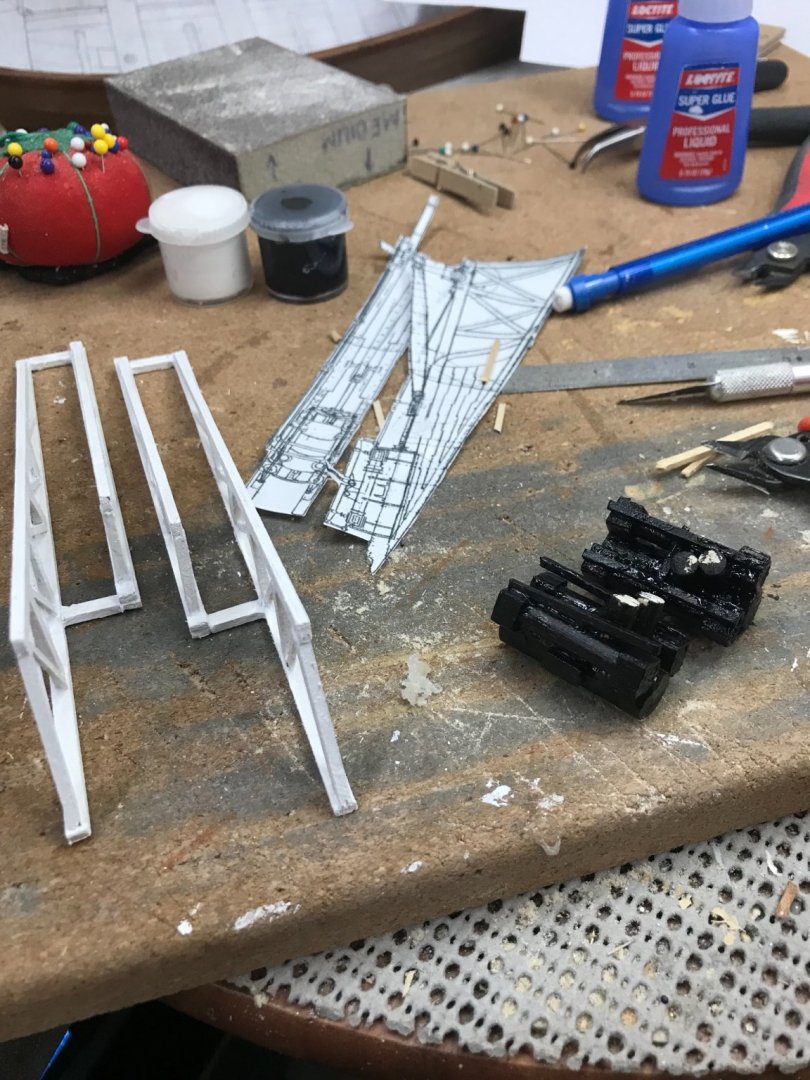
Stacking Timber… Corrected the engine supports. They look much better now. Starting some wall construction for the engine room. Also stacked a few Timbers to better support the Wheel Shafts. Boiler detailed and placed. Now I can start the Boiler Deck supports. Still looking at those paddle wheels, they are intimidating. 😬 My Engine Room Cyclopedium is on the way should have it tomorrow. Then I can look at detailing out this Engine Room. 🧐 Happy New Year, Stay Safe out there. Cheers 🍻


- 238 replies
-
- 12
-
-
- Robert E Lee
- steamboat
- (and 3 more)
-
I asked Travis (curator at Howard Steamboat Museum) about any information they may have specifically on the building of The Robert E Lee, it was originally built in the Jeffersonville shipyard. Travis told me that all of the shipyard information had been given to the Lilly Library at Indiana University in Bloomington, IN. I will be contacting them to try to get information regarding the Robert E Lee’s construction, specifically engine room details. I’ll give it a shot anyway, if not I have got lot of pieces to put together a reasonable facsimile. 😆
-
Talked to the museum curator today and have a copy of Engineroom Cyclopedium on the way. Travis said he makes up 3 copies of the engineroom and steamboat Cyclopediums every year, they are copies of Alan Baits book with a spiral binding to allow for better layout. They have two copies left of each, if anyone wants them. Give the a call and they can mail them out for the costs listed above.
-
If you guys have any information specifically related to the Robert E Lee engineroom, I would love to have any leads. I plan to build the Steamboat with a viewable engineroom and would like make it as accurate as possible for 1870. Thanks again for the lead on the museum. Cheers
-
Yes… Thanks guys, I emailed them this morning. Seems Capt Bates left his books to the museum and they are making copies in spiral bindings for sale. The book $25.00 Tax (Indiana 7%) $ 1.75 Shipping (USPS) $ 8.55 Total due HSM $35.30 I am calling this afternoon to order it. Thanks for your help…
-
That one is currently unavailable. I did find a copy of The Steamboat Cyclopedium on eBay for 20.00. I had just missed the Engine Room Cyclopedium from that same seller. Any other source of detail on 1870s Steamboat Engine Rooms would be helpful.
-
Hello All, I am trying to find a copy of “the western rivers engine room cyclopedium by alan l. bates”. If you have a copy of this book and are willing to part with it, I would like to purchase it. Please let me know via PM. Thanks John Ruy
-
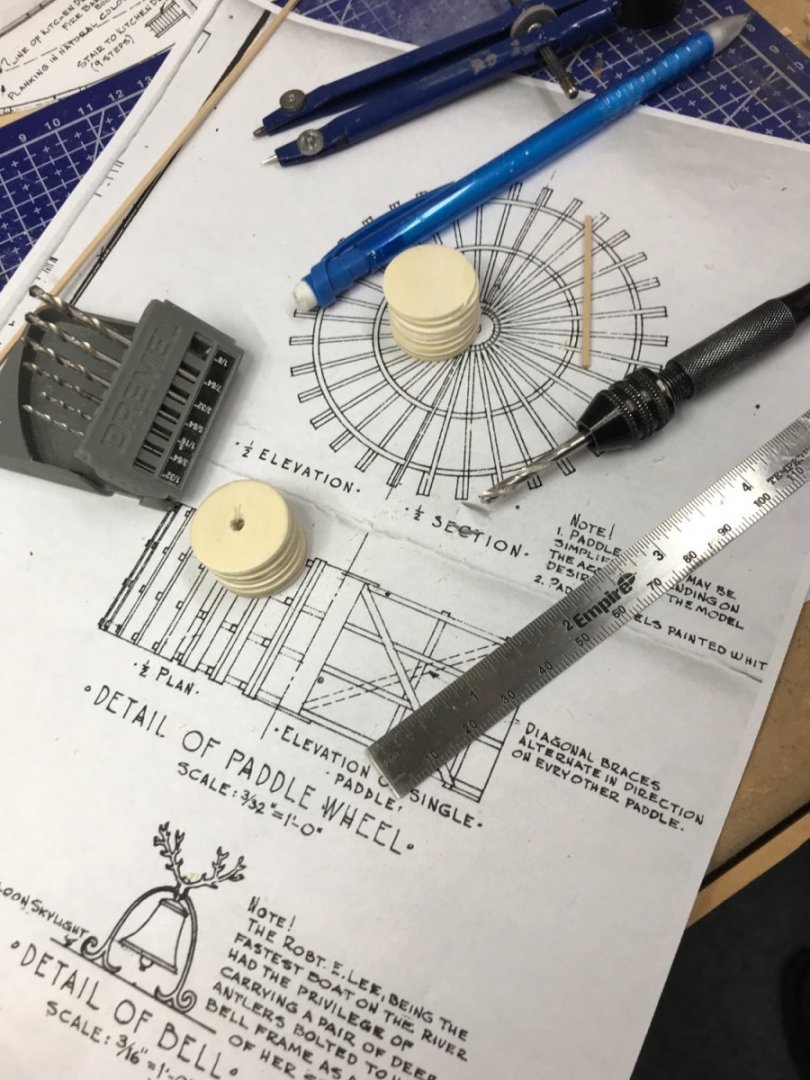
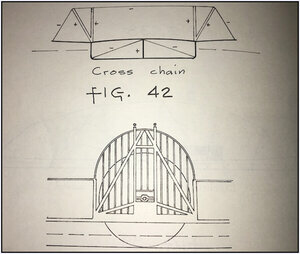
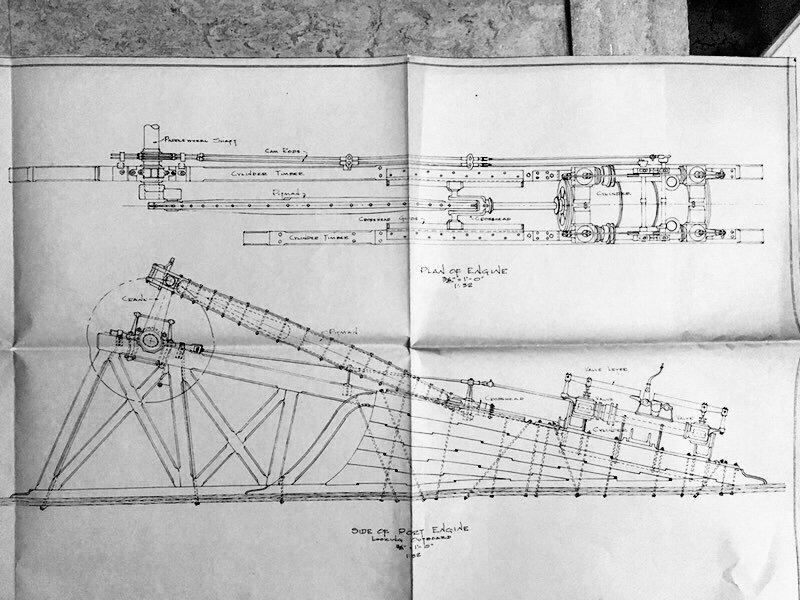
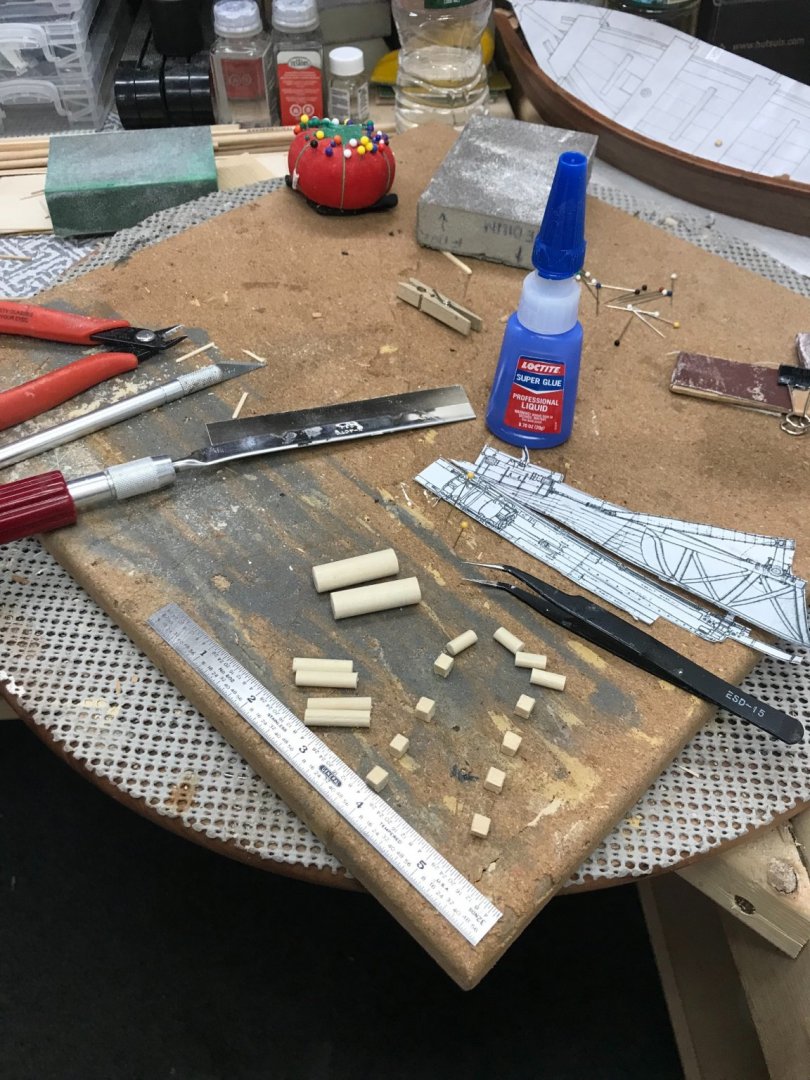
Thanks Cathead, I do prefer accuracy over Aesthetics. Thanks for pointing out my misinterpretation of the drawings and giving me the correct info. I can some times head down the wrong path. Your comments help me interpret this drawing a bit differently. 🧐 I now see heavy timbers stacked under the wheel shaft. Thanks again, I don’t mind the rework. Can’t wait for the Cyclopedium. In the mean time keep a close eye on me. John Coming up… Paddle wheels. 😆
- 238 replies
-
- 6
-
-
- Robert E Lee
- steamboat
- (and 3 more)
-
@Cathead Here is the link to a scratch build I am referencing. https://shipsofscale.com/sosforums/threads/paddle-steamer-robert-e-lee-scale-1-96-scratch-build-by-the-alan-l-bates-drawings-completed-build.5362/ In this log they reference the Alan Bates drawings. I am hoping there is more to reference the interior of the engine room, since I intend to make it viewable. 😎
-
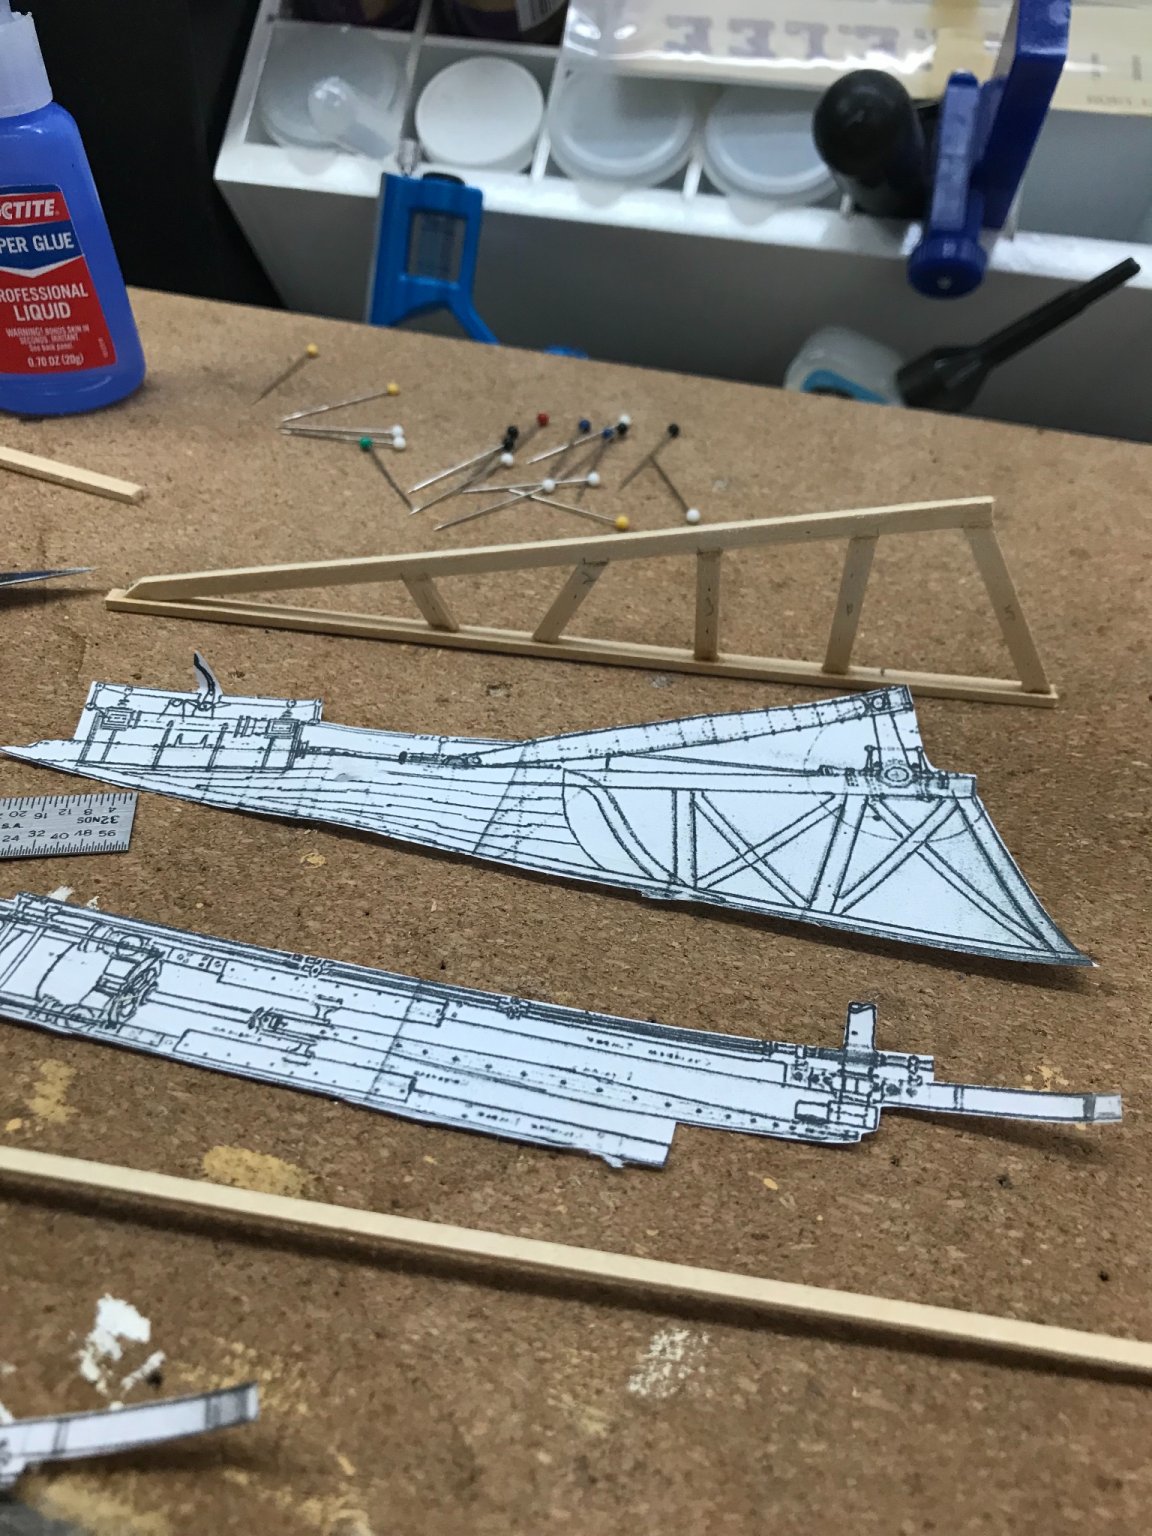
Thanks… Below are the drawings I am working with. I am going to frame out the main engine room so I can leave one side open to view the engine room and paddle wheel. I have a copy of The Western River Steamboat Cyclopedium by Alan Bates coming and hope I can detail the engine room layout from that as a reference. I couldn’t find a copy of the Engine Room Cyclopedium, still searching for that one. I thought the open trestle style would be 1870 period.
- 238 replies
-
- 3
-
-
- Robert E Lee
- steamboat
- (and 3 more)
-
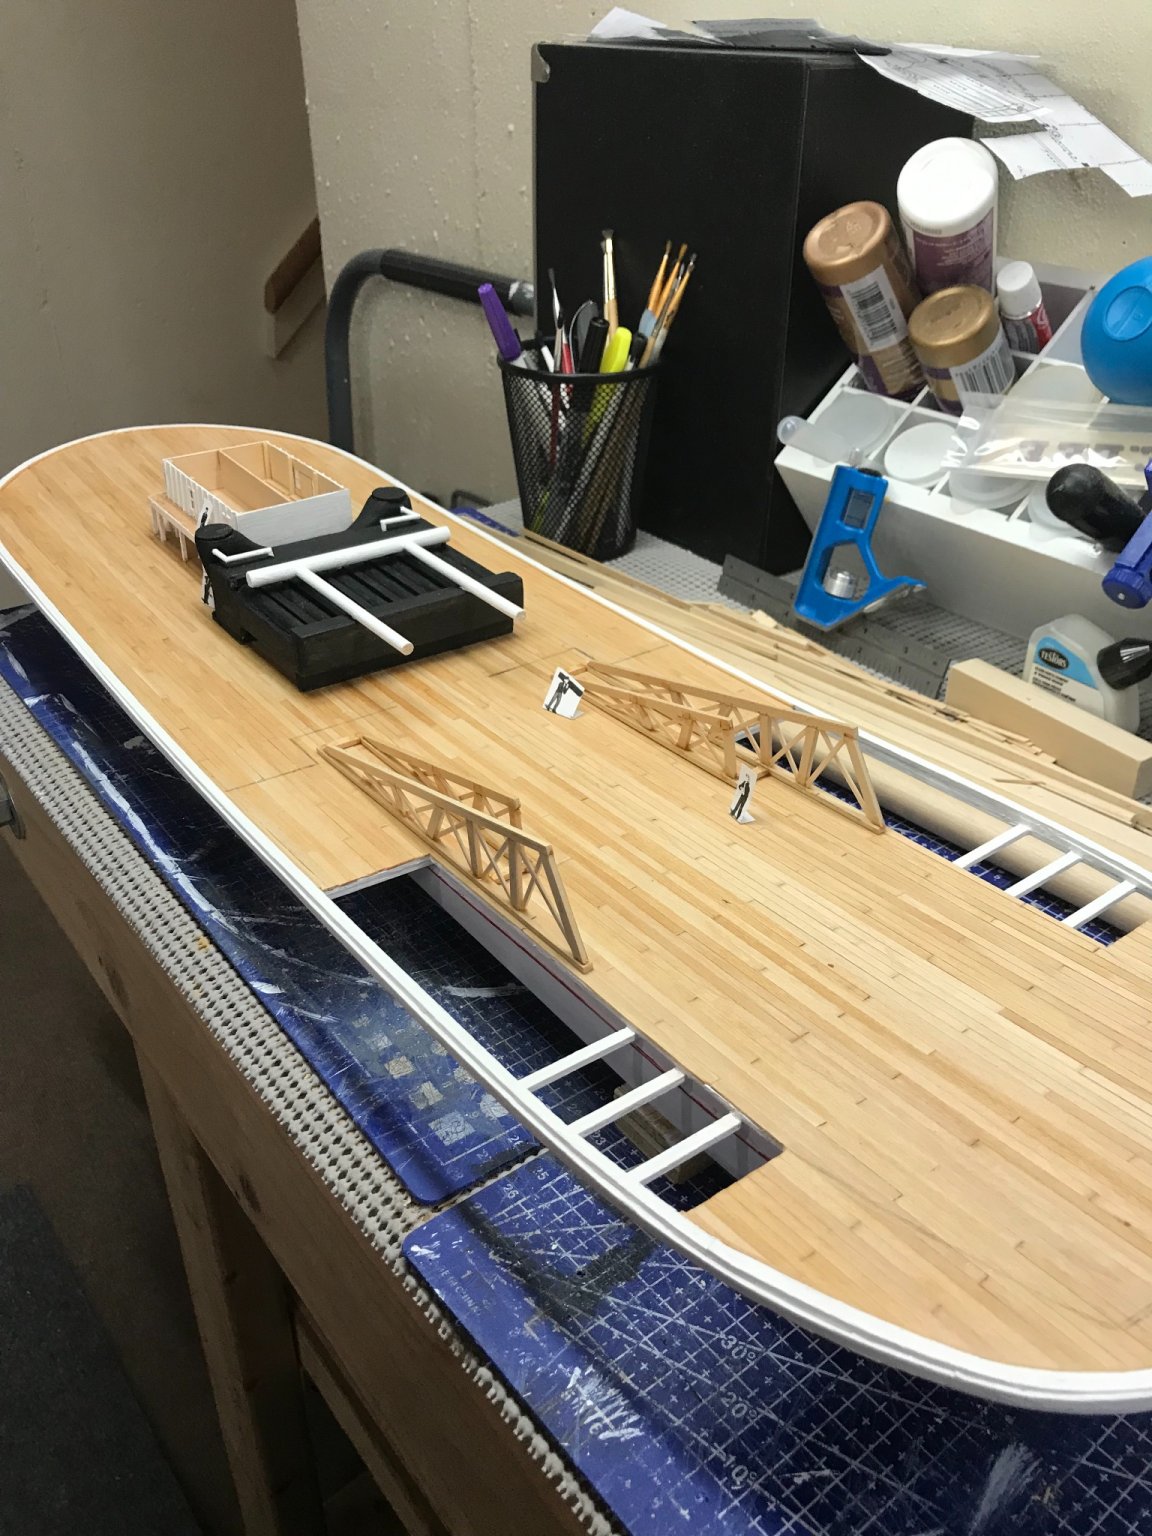
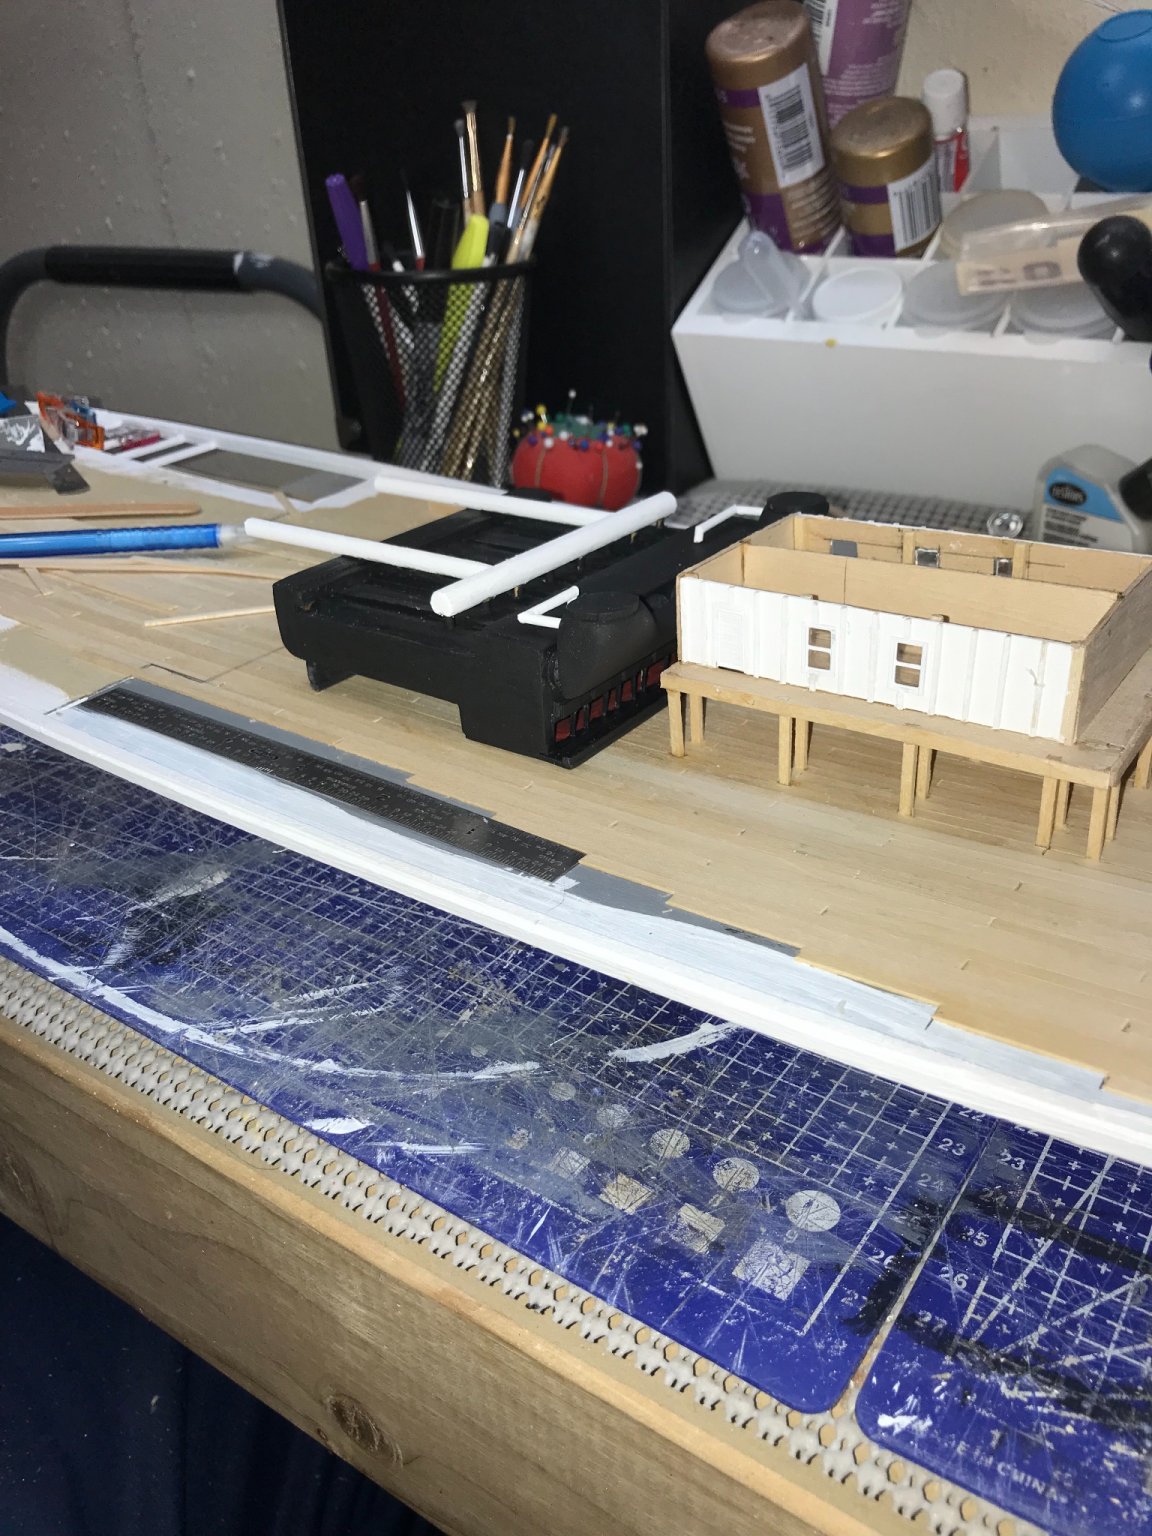
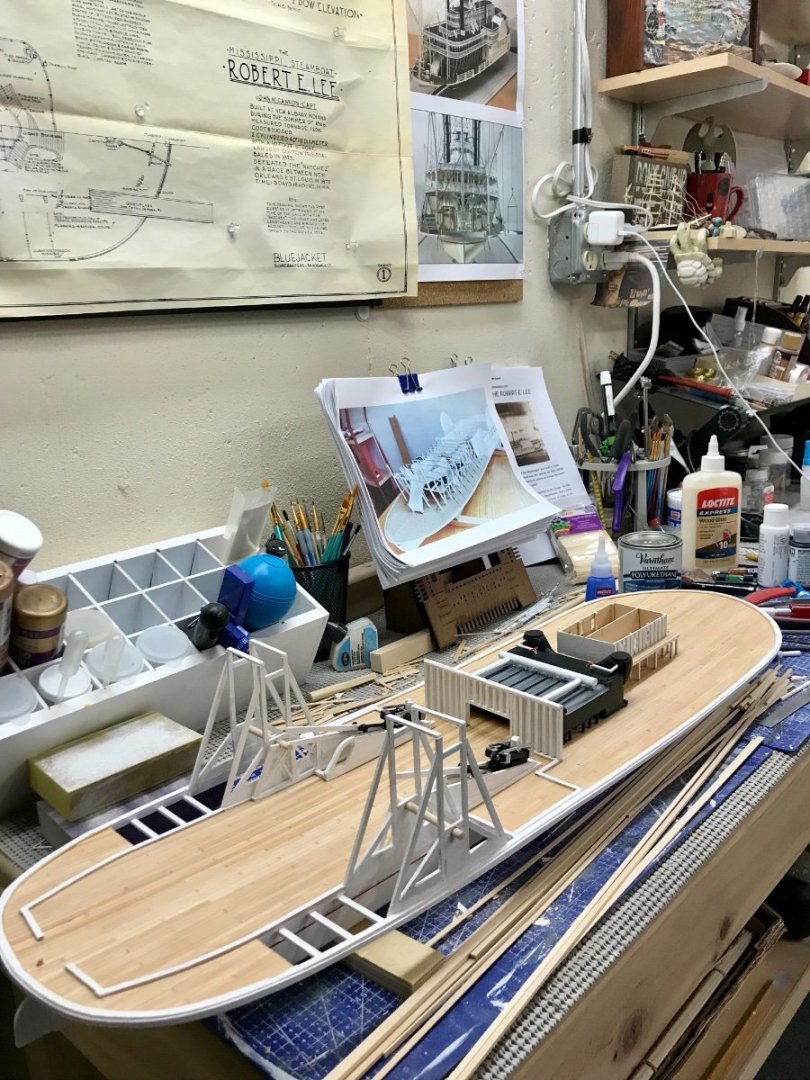
MainDeck furnishings, paddle wheels, engines, etc… Finished up the hull trim, before proceeding with everything on deck. Scratch building the infrastructure for the transmission of steam power to the massive paddle wheels. couple of cutouts to give some perspective of just how massive this steamboat really is. 😆 started working on the framing around the paddle wheel housing. Steam engine parts. These pieces of wood will become the steam cylinders driving the paddle wheels. Two steam cylinders ready for installation. Steam engine transmission structure completed. A little micro Carpentry. 😆 Progress on the engine room, lots of details coming. 😎 Inspiration photo only, massive paddle wheels coming up … later… 🍻


- 238 replies
-
- 9
-
-
- Robert E Lee
- steamboat
- (and 3 more)
-
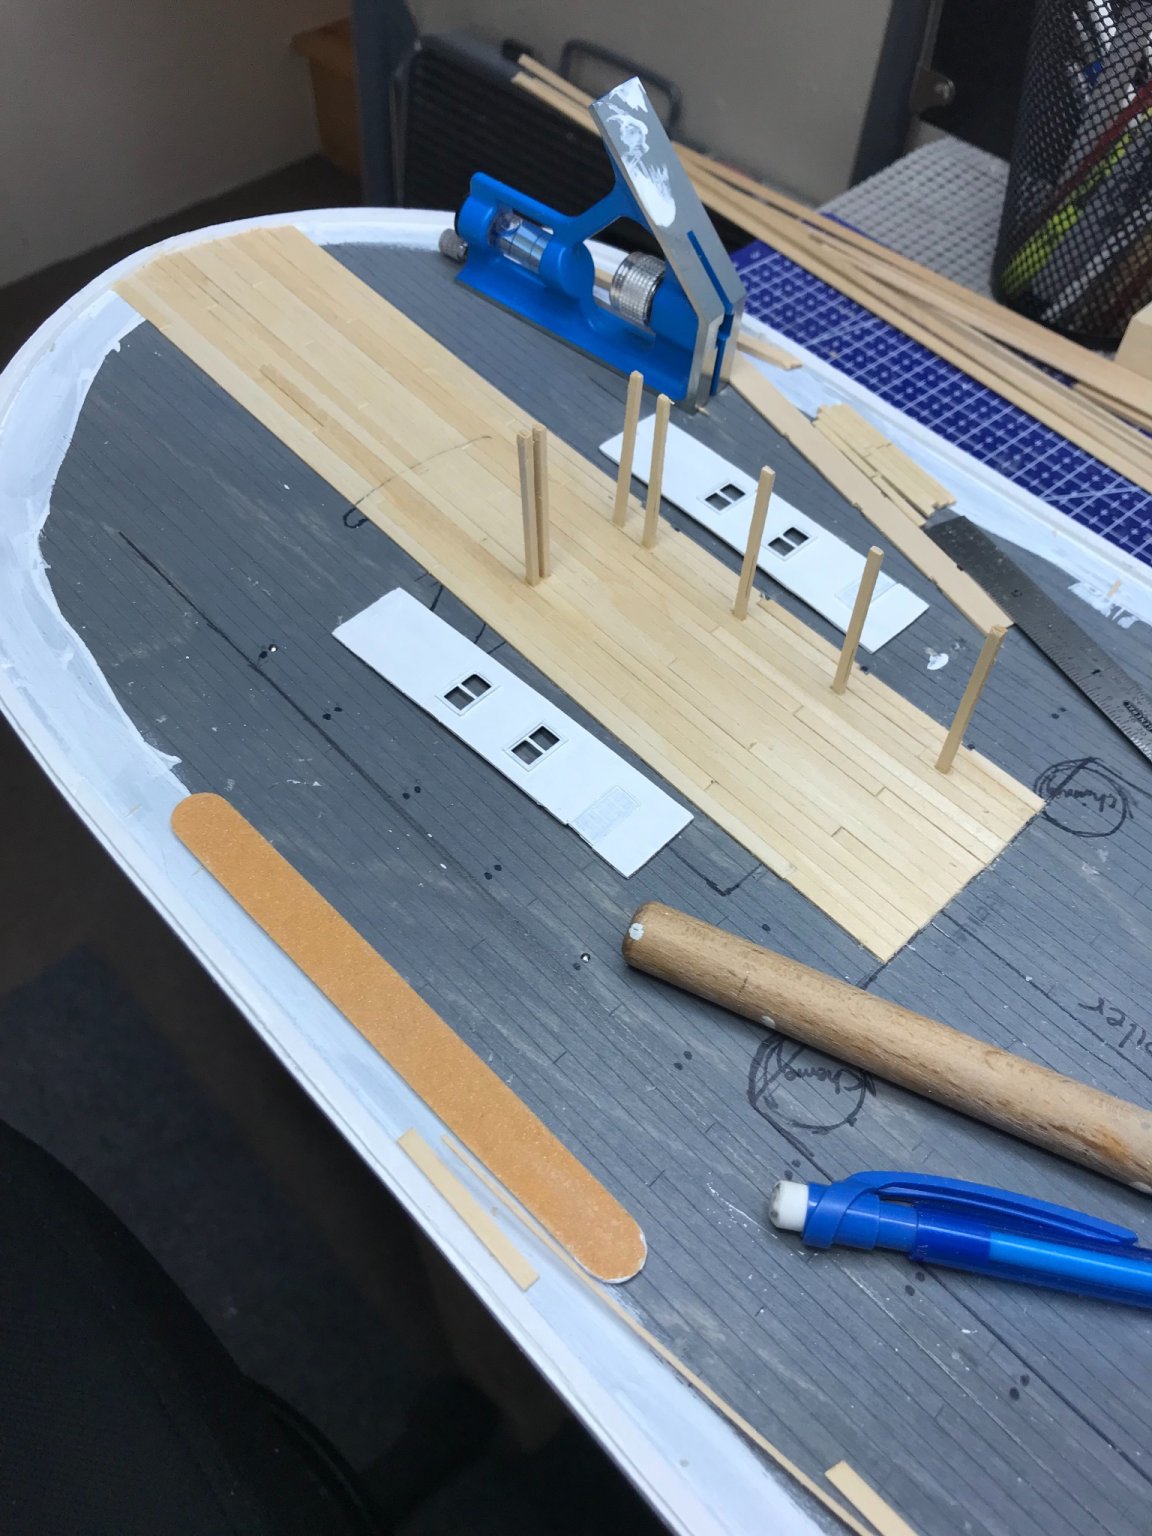
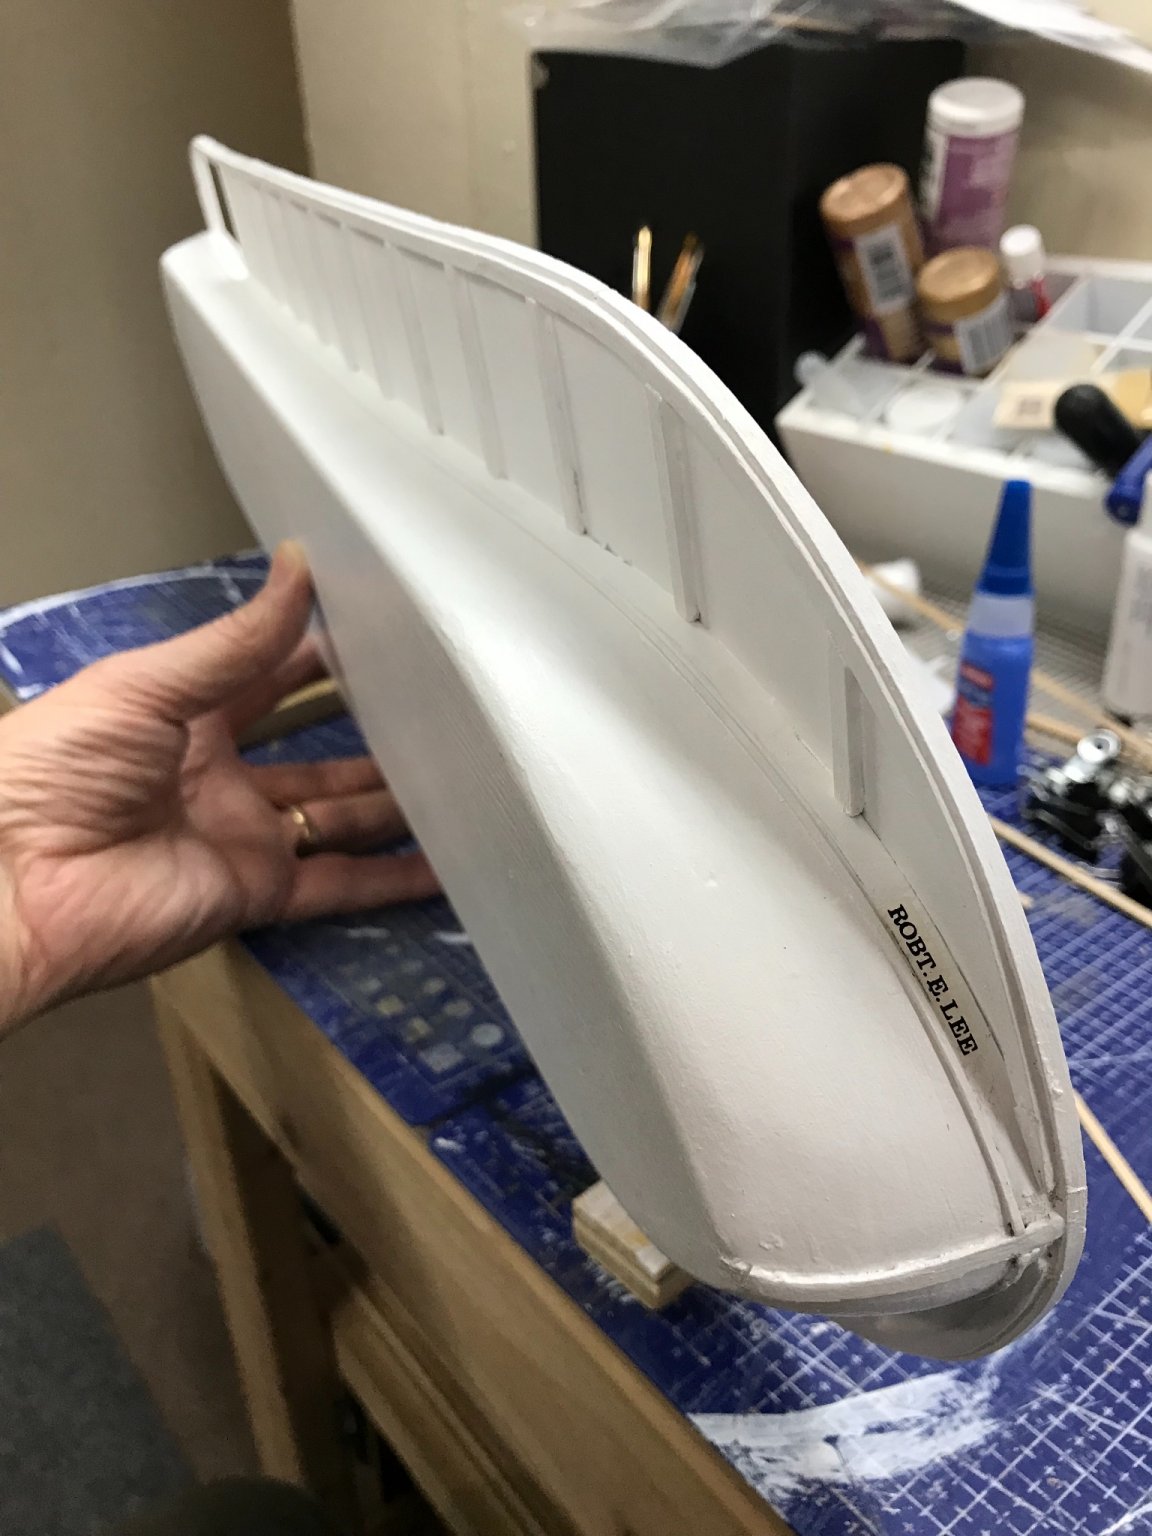
Main Deck planking continues… 1/32” x 1/8” basswood strips, cut into 4” pieces and staggered 1”… 🤪 Finally, completed deck planking. 😎 Stained with a light cherry to keep the natural wood look. I will coat this with satin Poly to seal it. Now! I can move on to the details of the Main Deck furnishings. Boiler Deck supports, engine room walls, paddle wheels and engines. More detail coming with the boilers and steam pipes as well. Cheers 🍻


- 238 replies
-
- 7
-
-
- Robert E Lee
- steamboat
- (and 3 more)
-
Looks good Ron. 👍 Good detail with the hinges and rope.
-
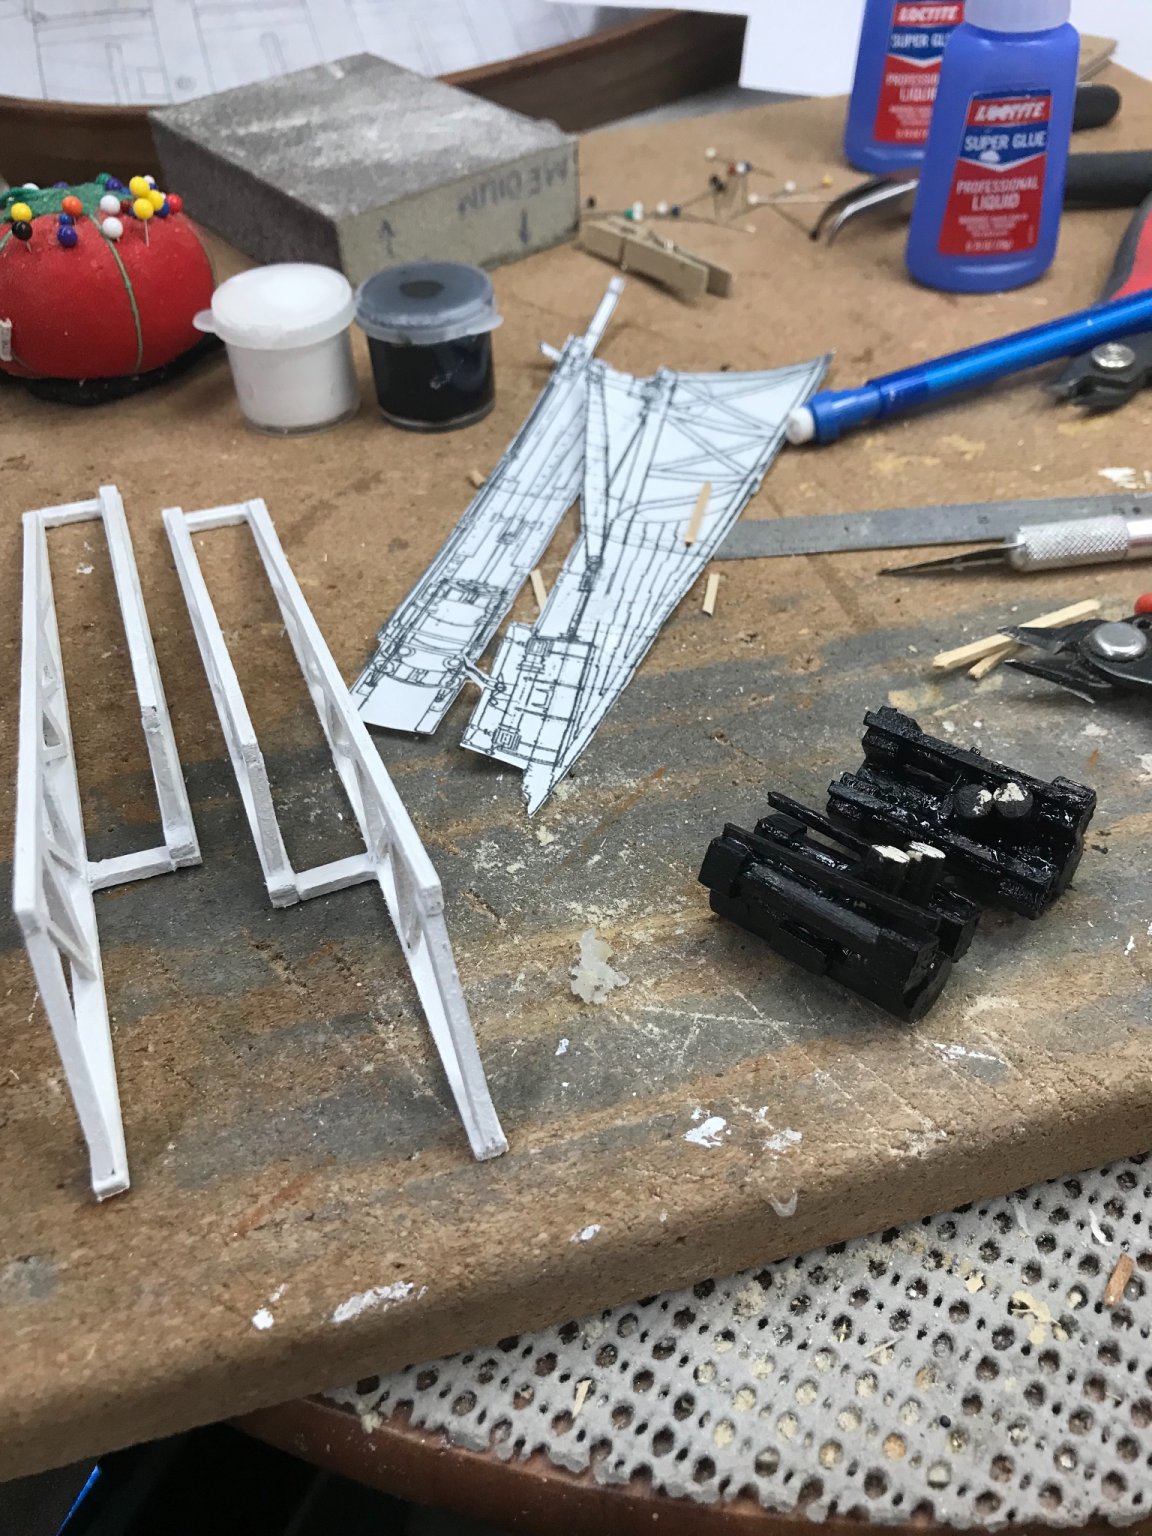
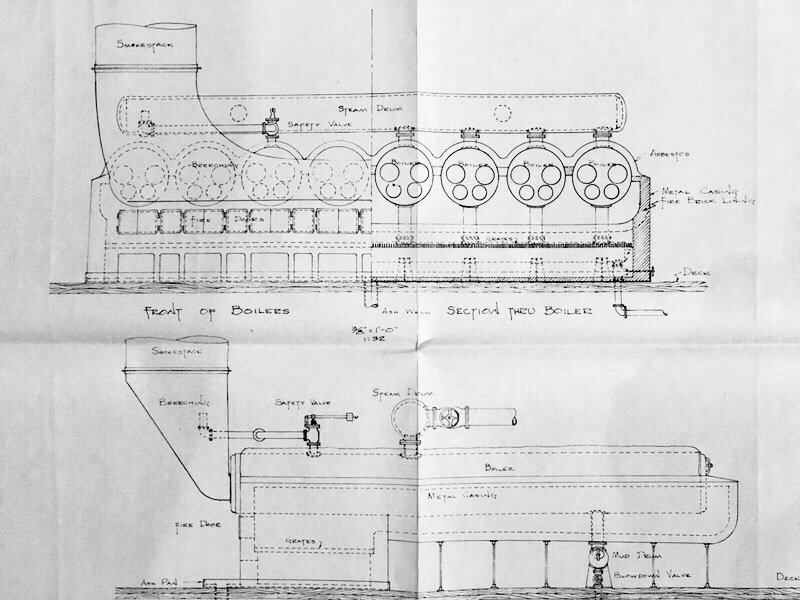
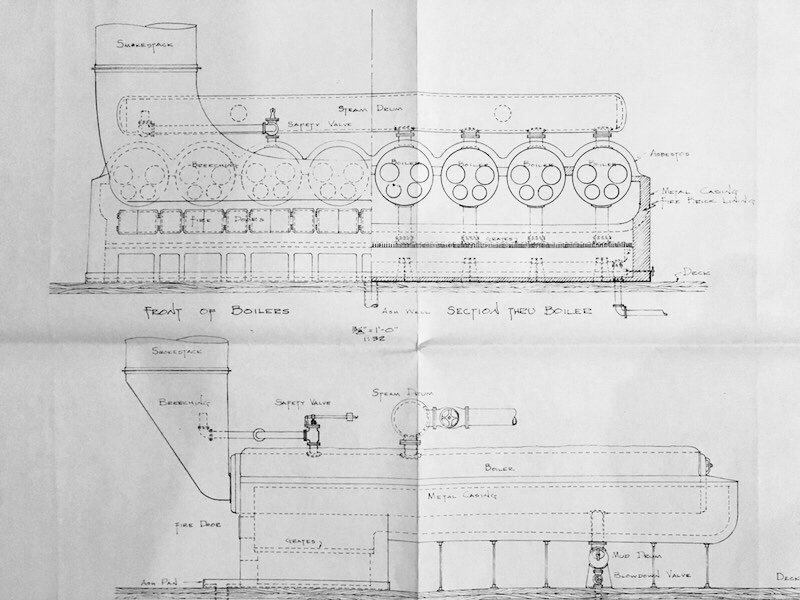
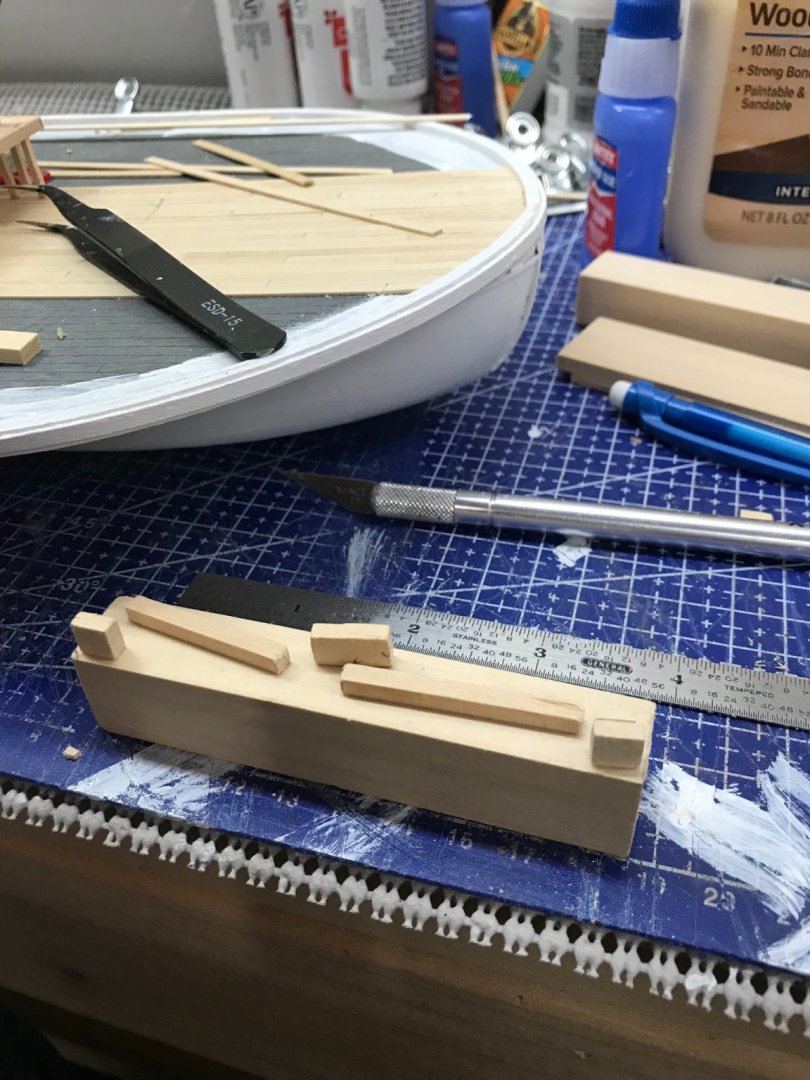
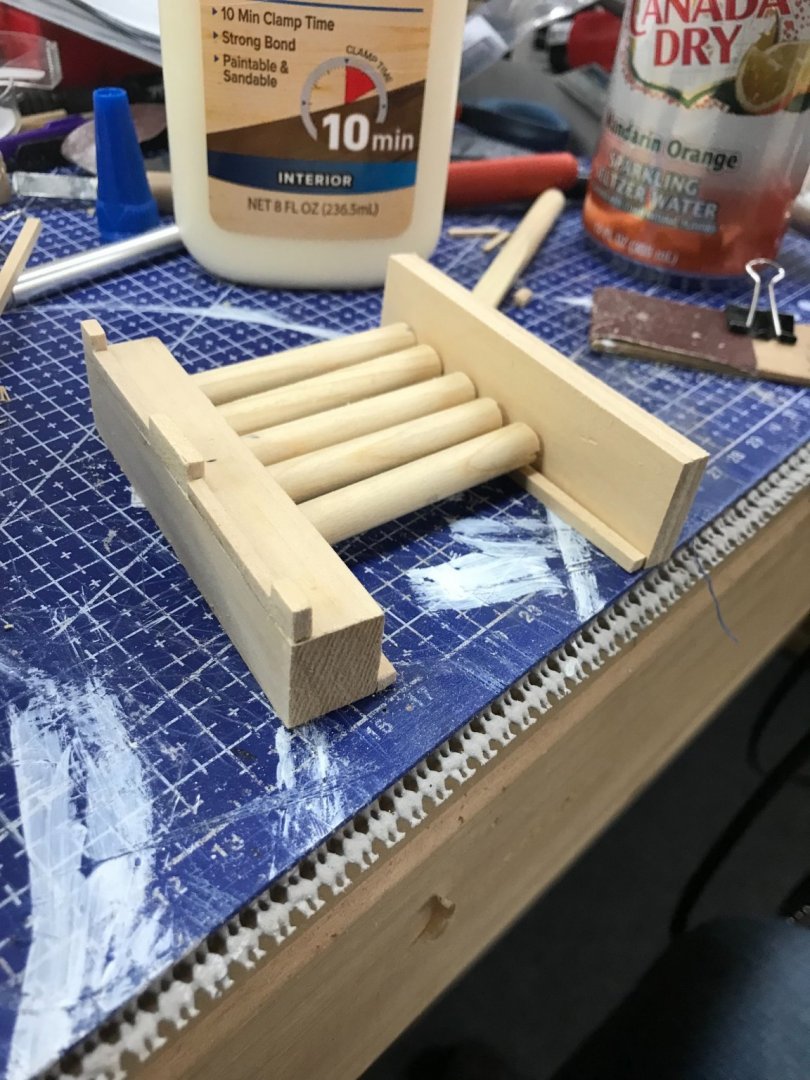
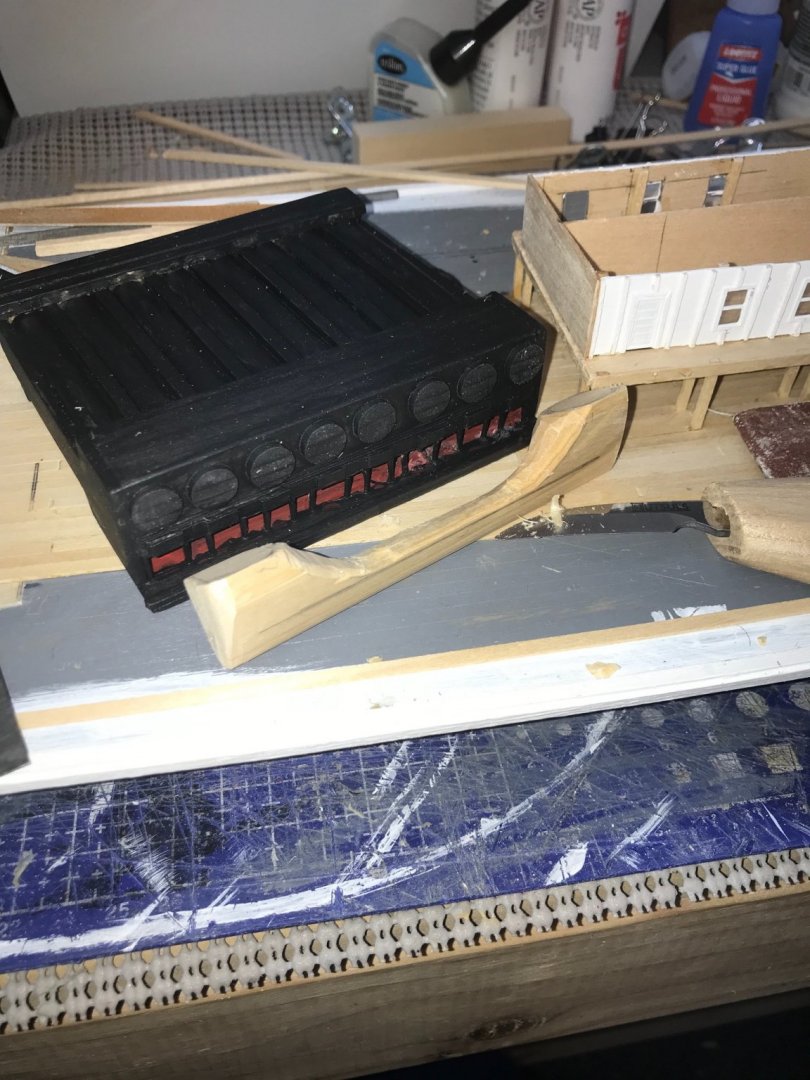
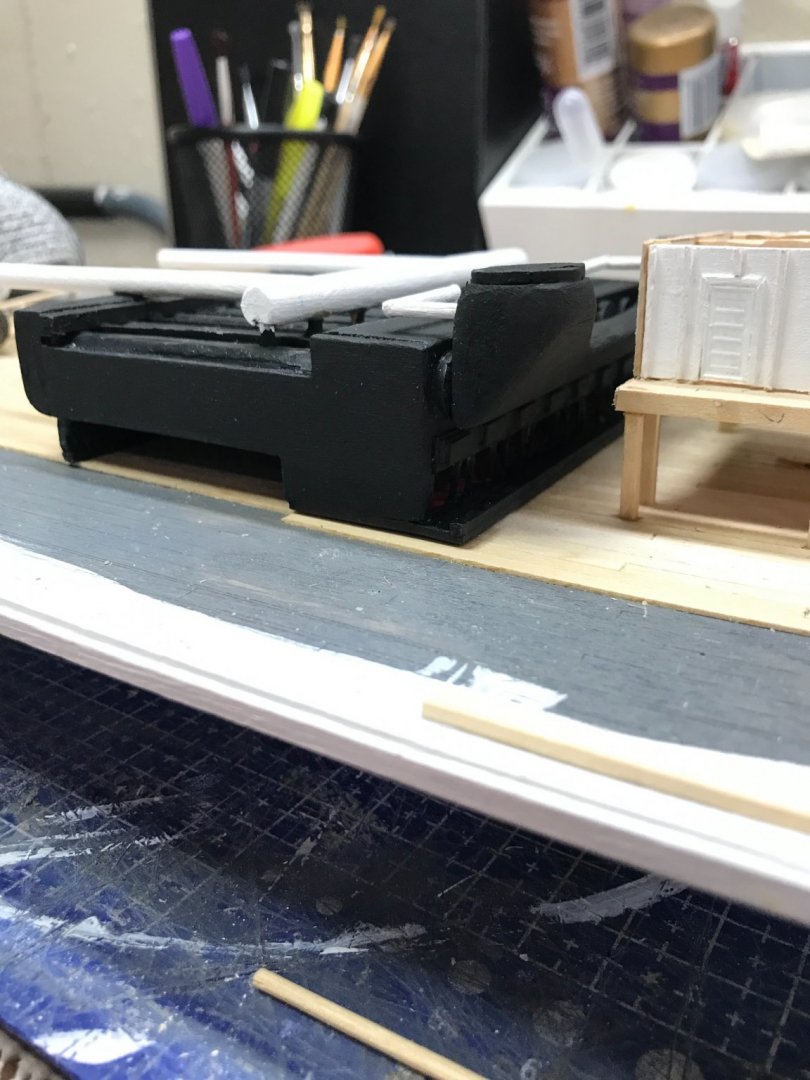
Boilers… The Robert E Lee had twin high-pressure steam engines; cylinder bores 40 inches (101.6 cm); stroke 120 inches (304.8 cm); eight iron boilers each 46 feet (14.02 m) long and 27 inches (68.6 cm) diameter, working steam pressure 120 lbs. Here is a drawing of the boilers I grabbed from the internet. These boilers were quite massive, to say the least. Scratch building the boilers… Wood blocks and dowels… shaping the metal casting… Boilers and fire box all set… Adding the breaching duct to smoke stacks… Steam Drum and safety valves added. Two steam pipes are headed to the engine room for the massive steam engines. More deck planking to do and the work on the paddle wheels and engines will begin. Cheers 🍻


- 238 replies
-
- 8
-
-
- Robert E Lee
- steamboat
- (and 3 more)
-
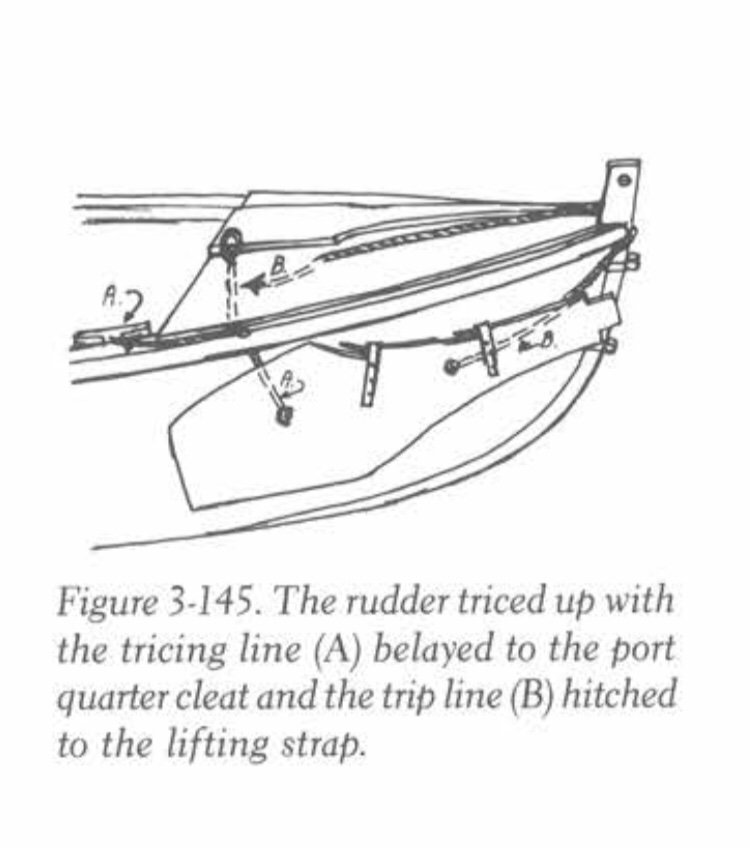
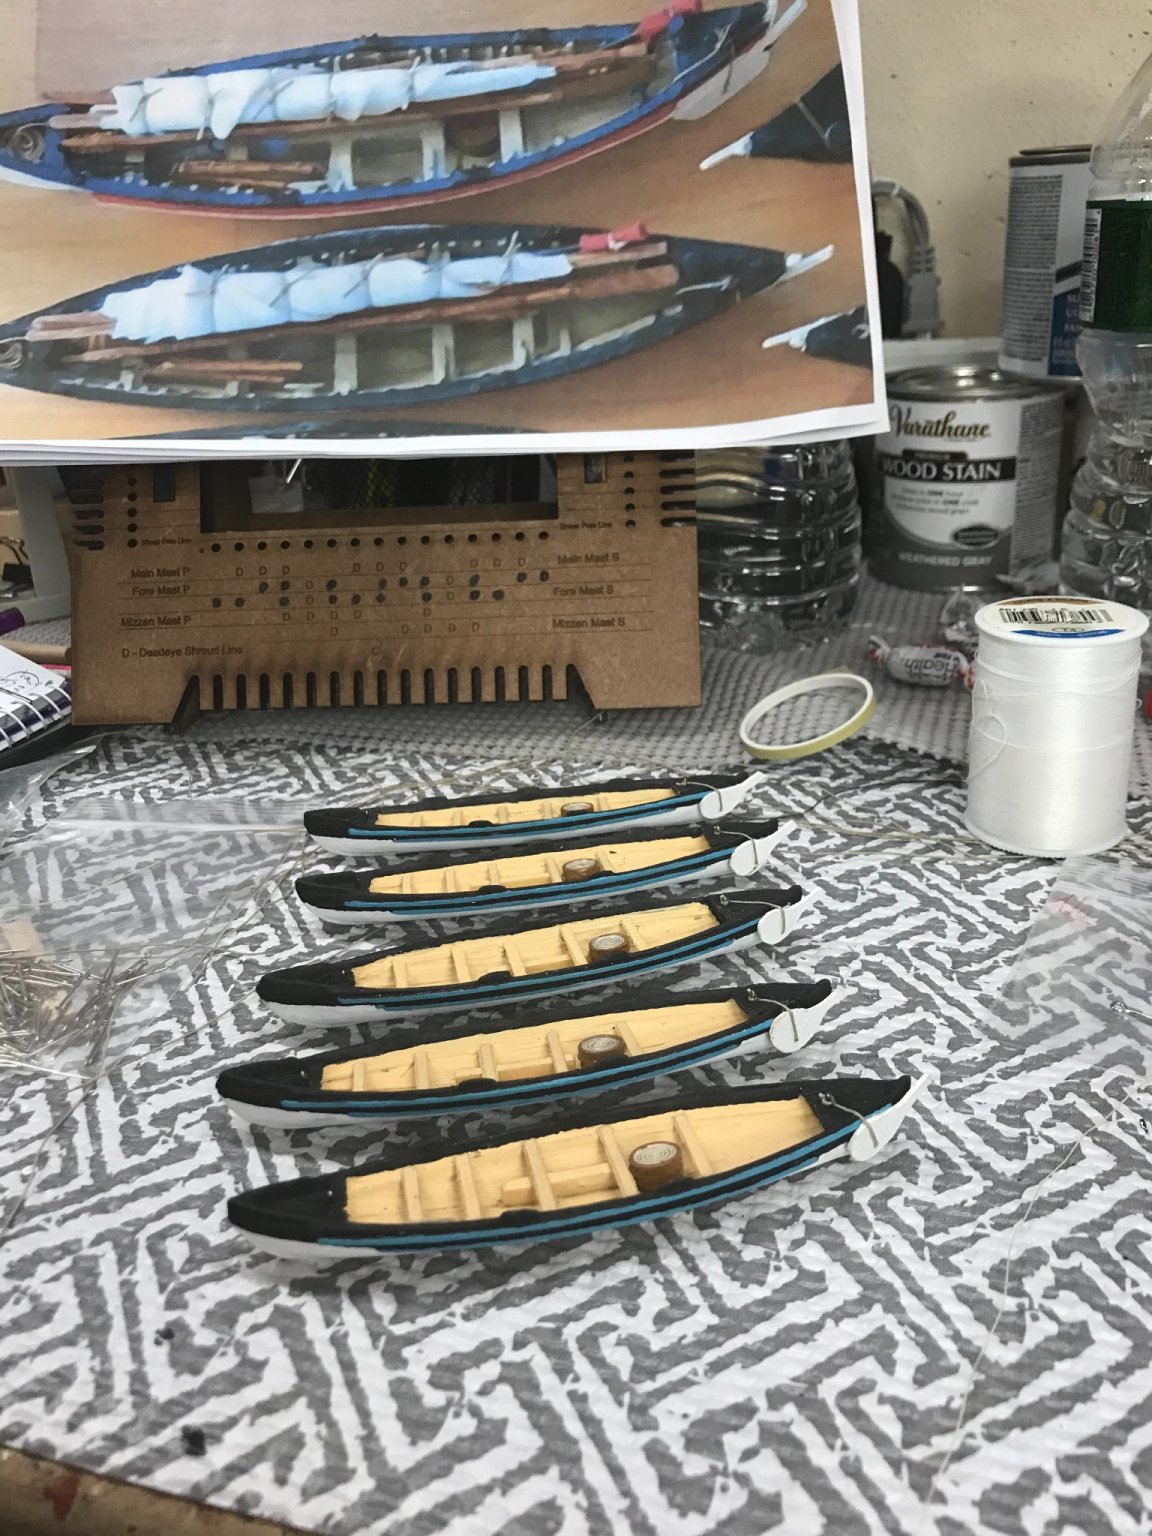
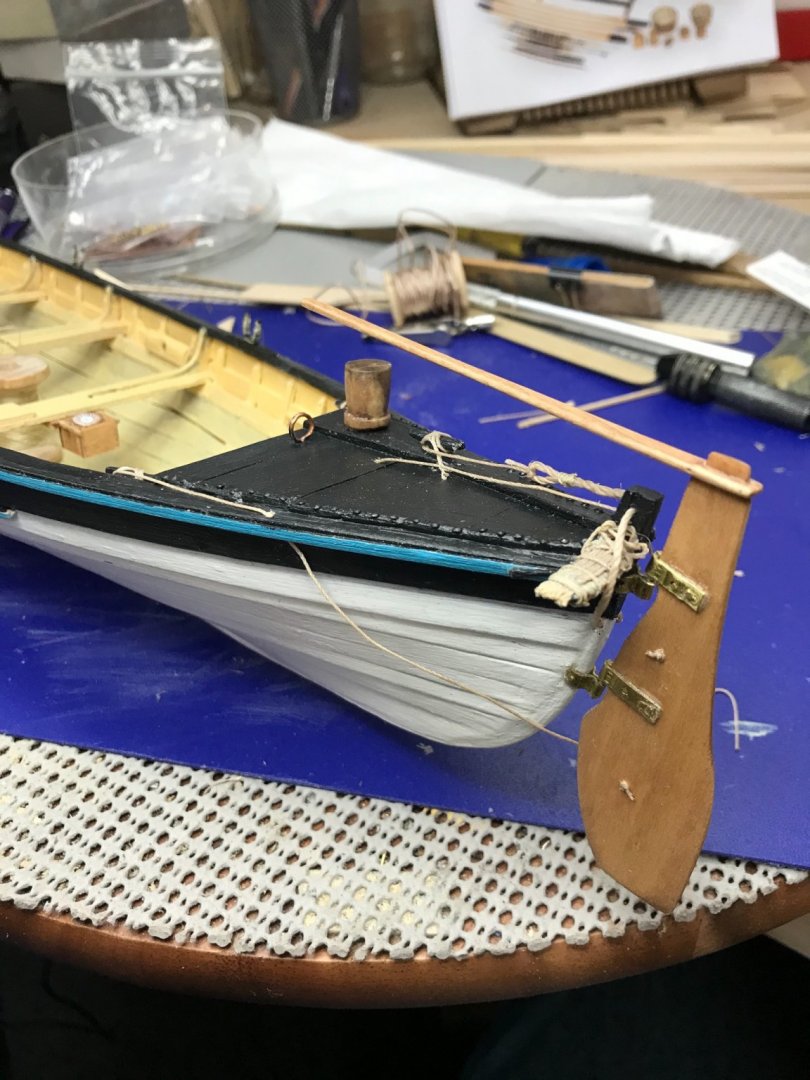
Ron, Here is a photo of my MS Whaleboat build. They would remove the tiller and pull the rudder up out of it’s hing with the rope across the stern. Swing the rudder around with a second rope attached lower on the rudder. Here is how I did the smaller scale CWM Whaleboats. Your boats are a bit larger scale you may want more detail. I worked the rigging around the Davits, however I did have to repair some. 😆 I would definitely wait and mount the Davits and boats as a lay step. Hope this helps. John


-
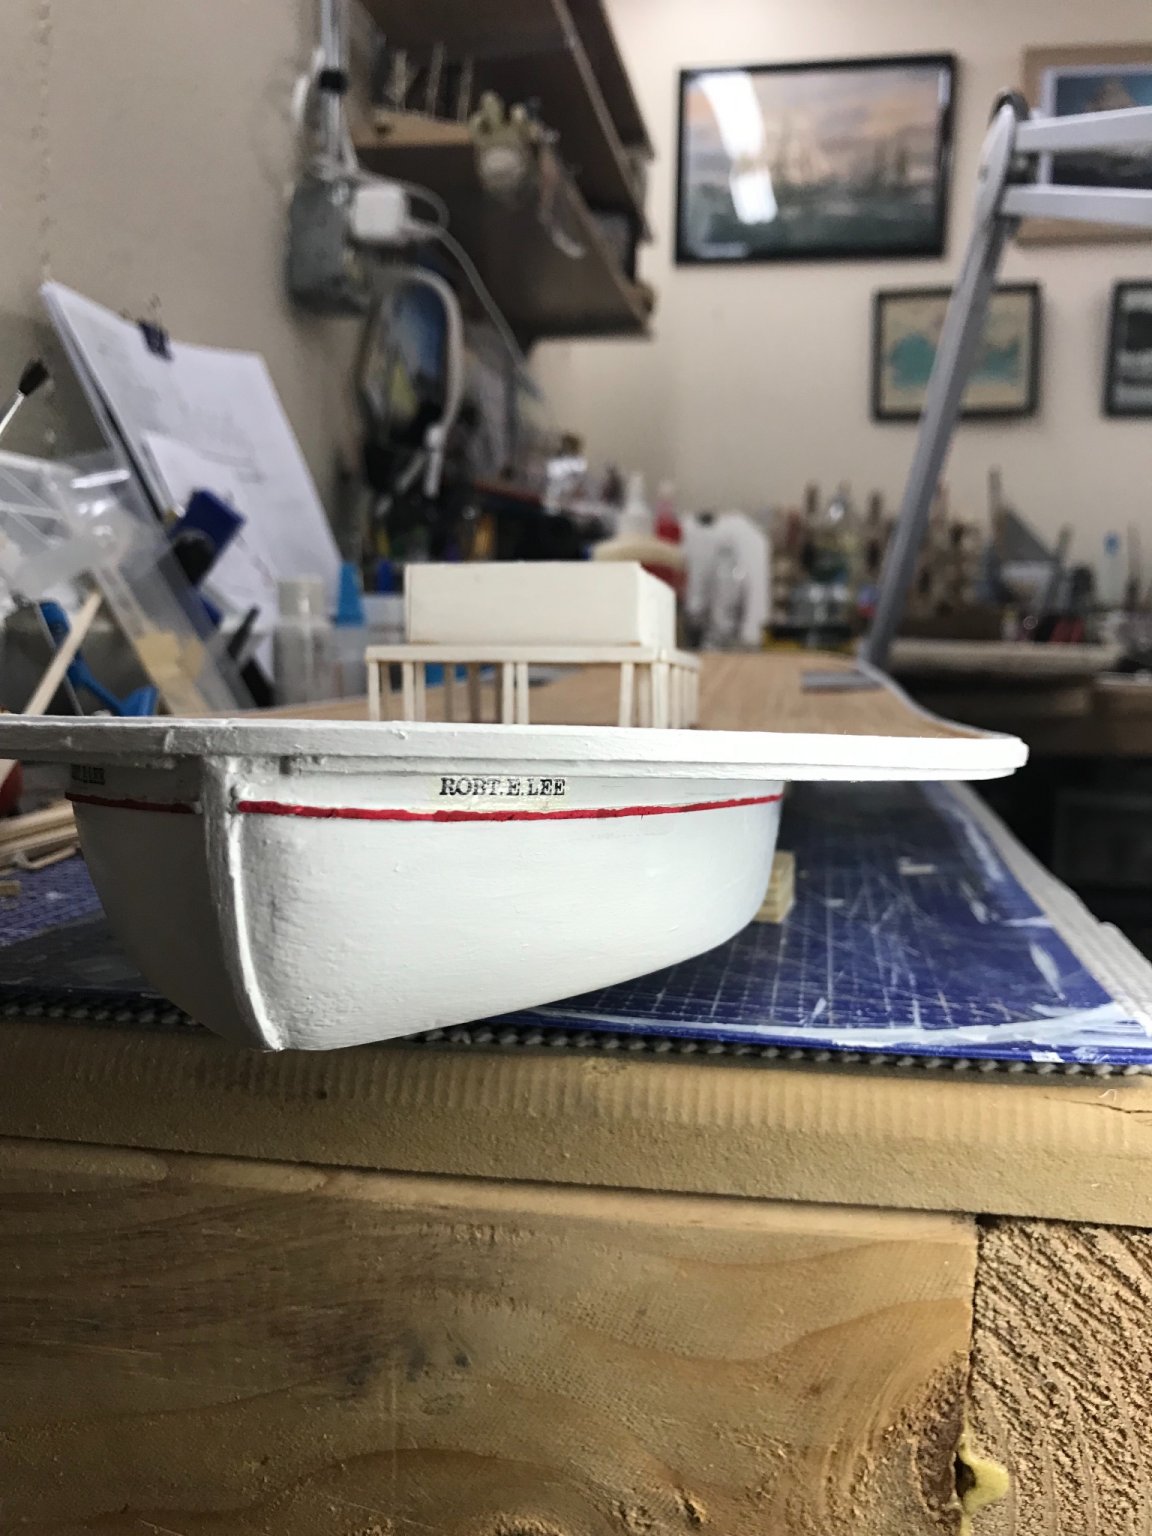
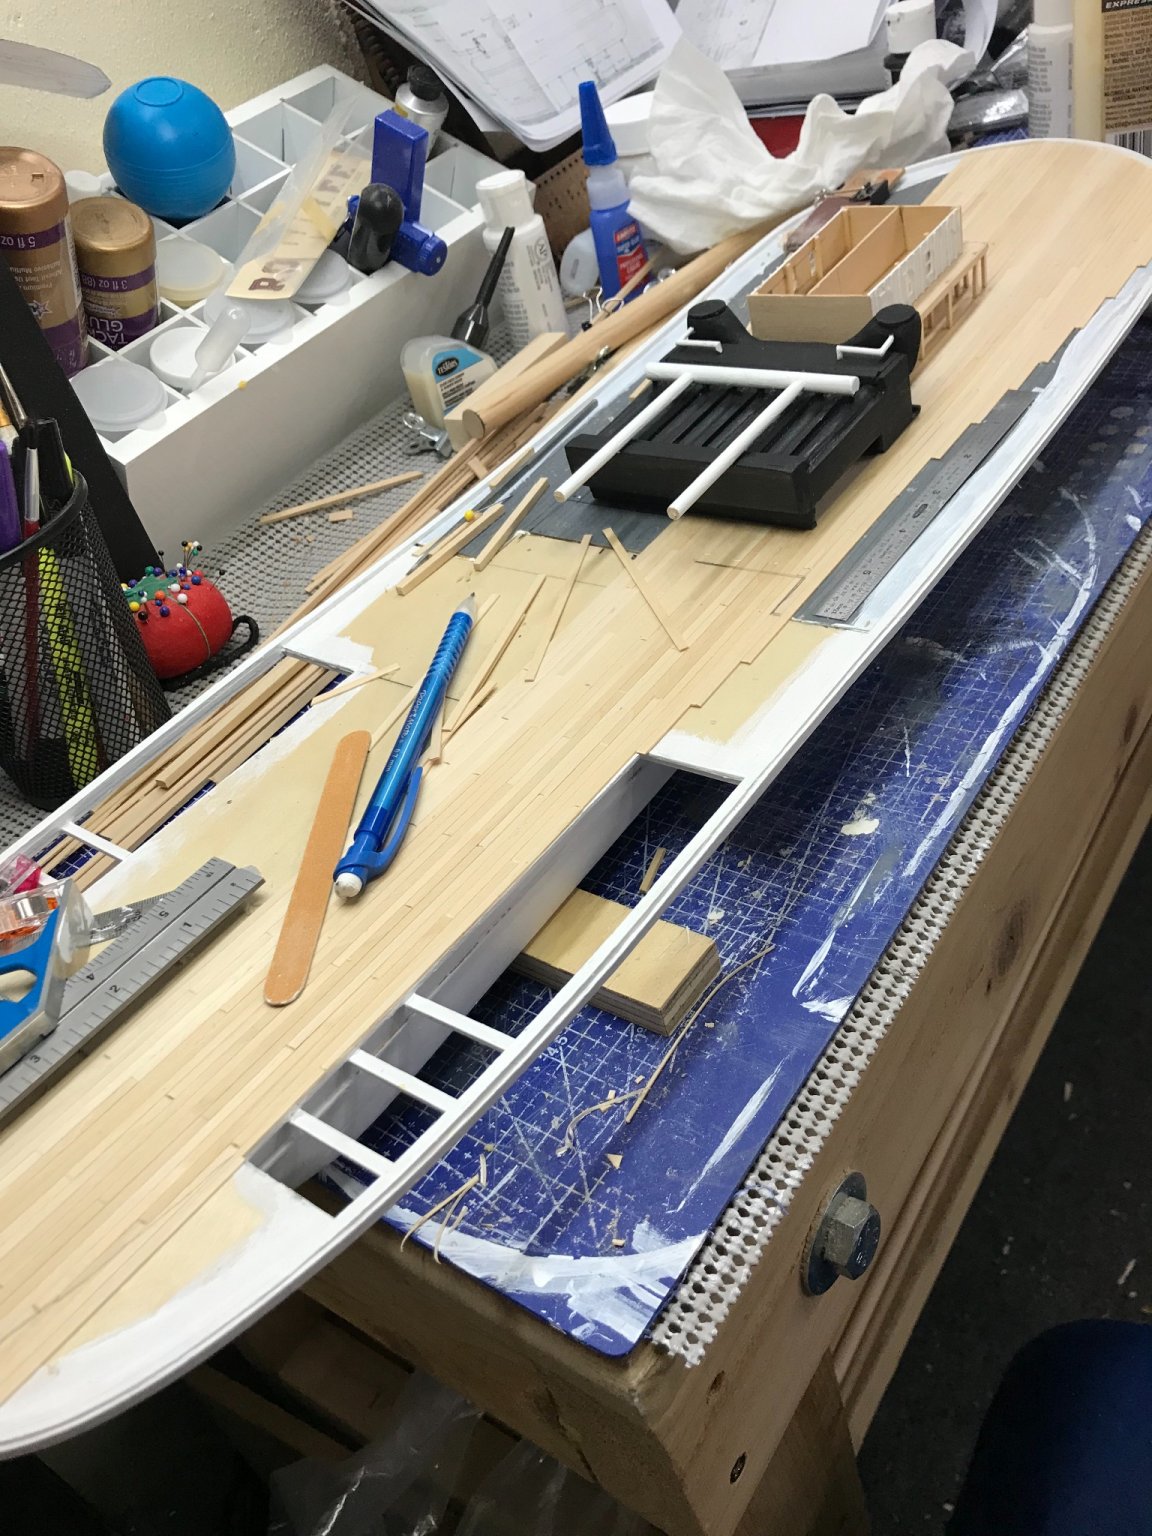
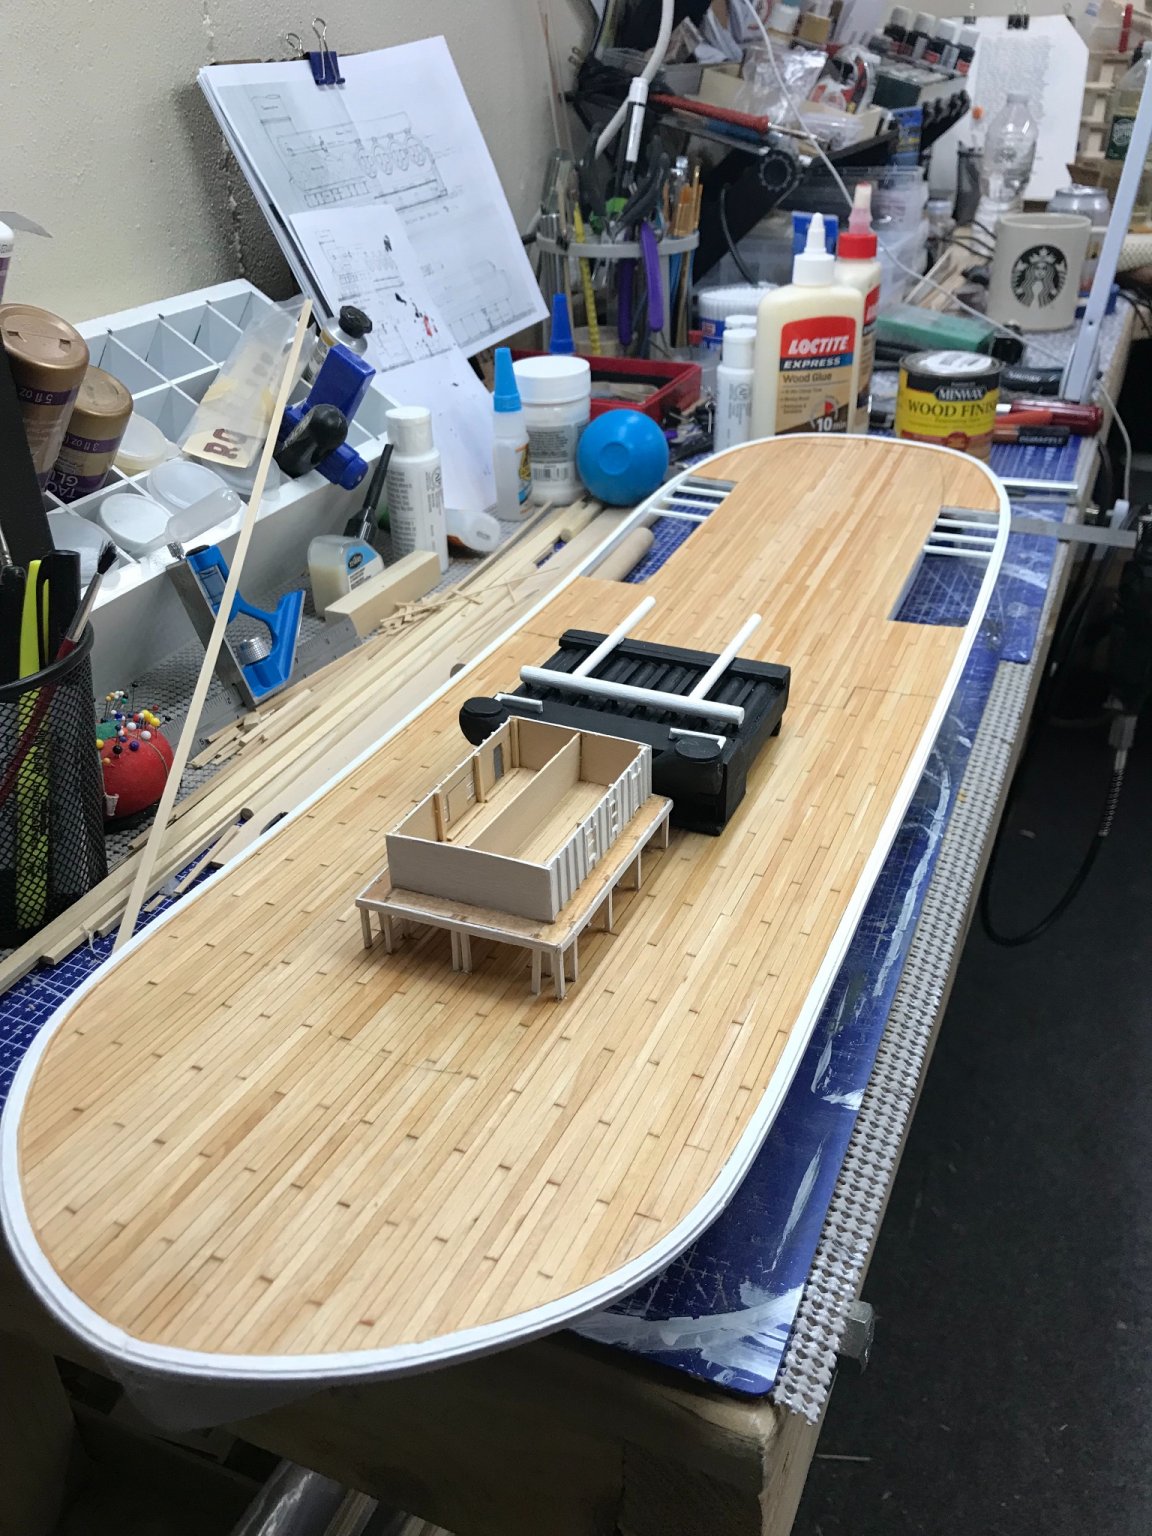
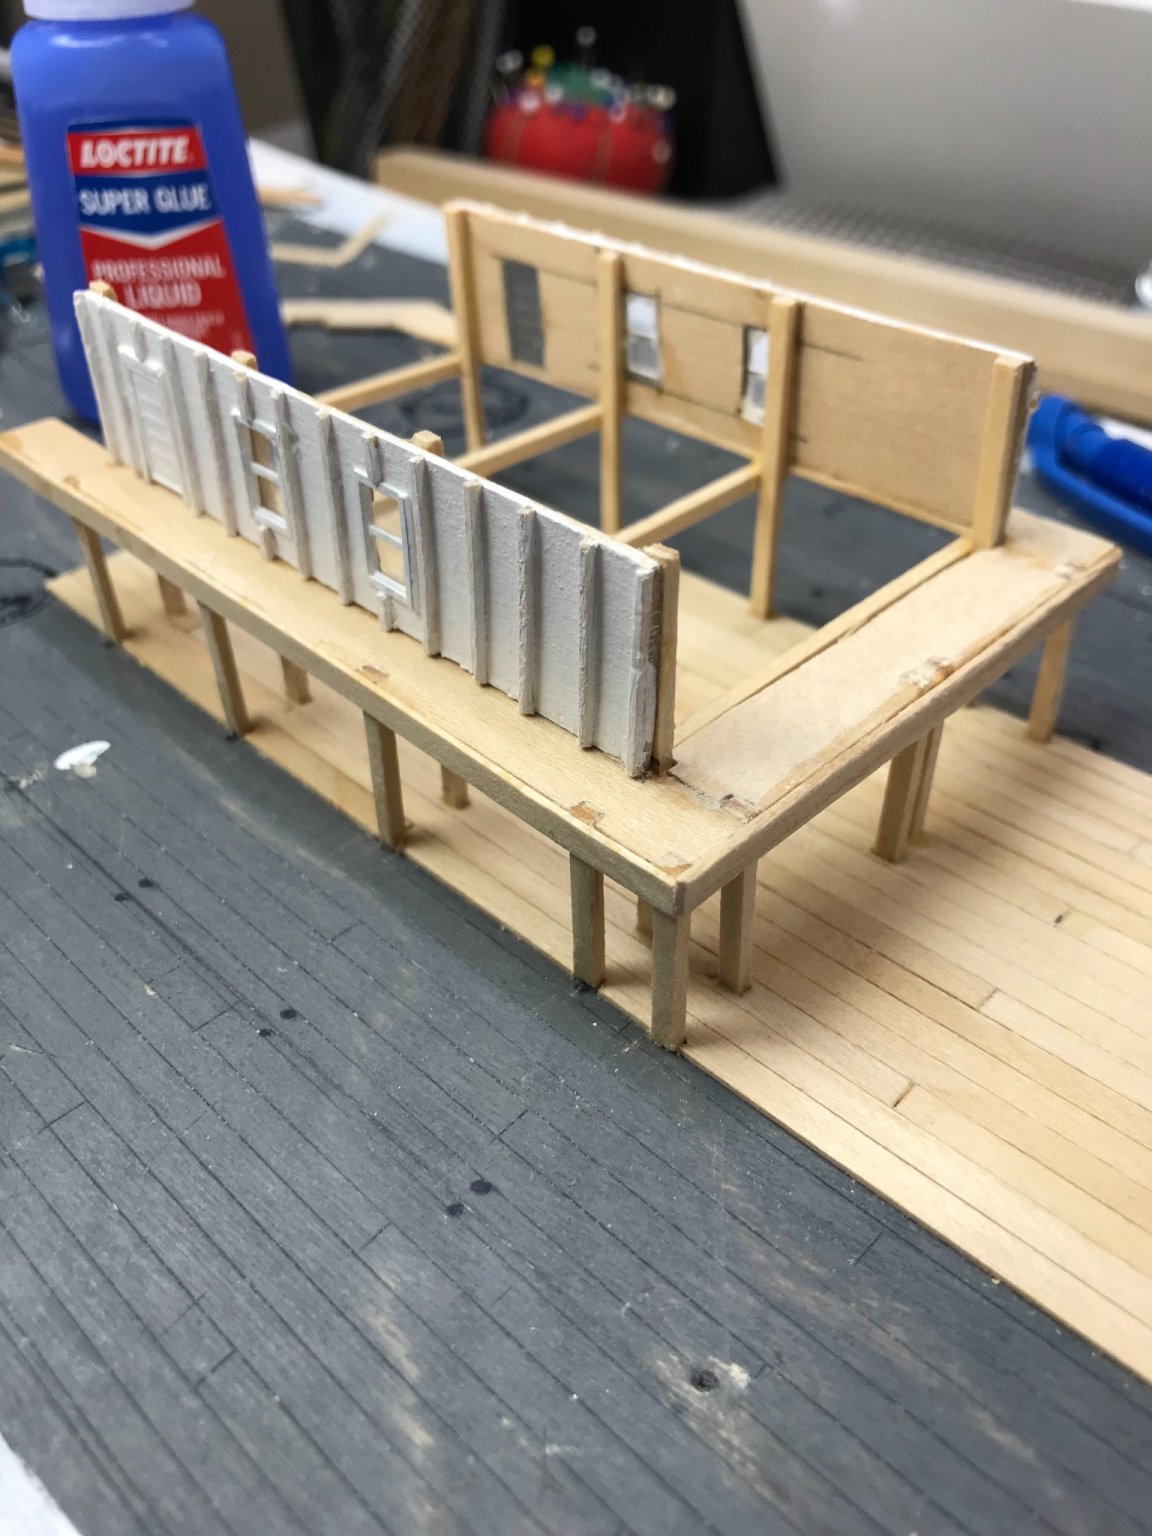
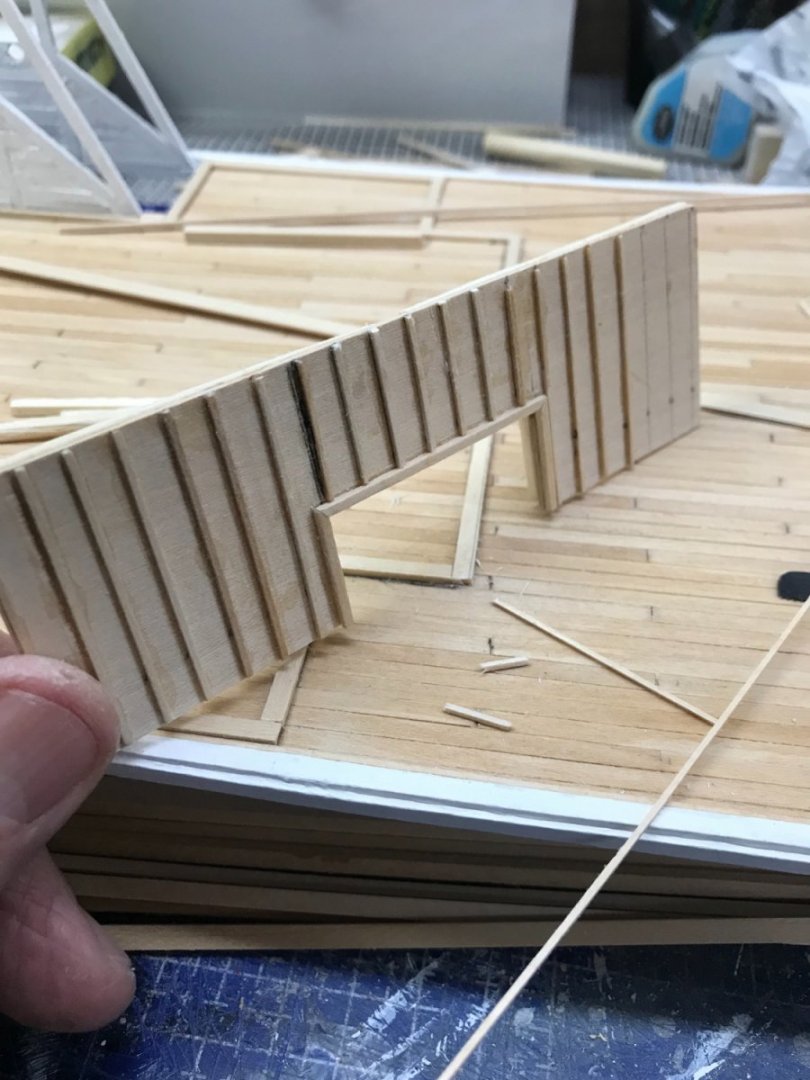
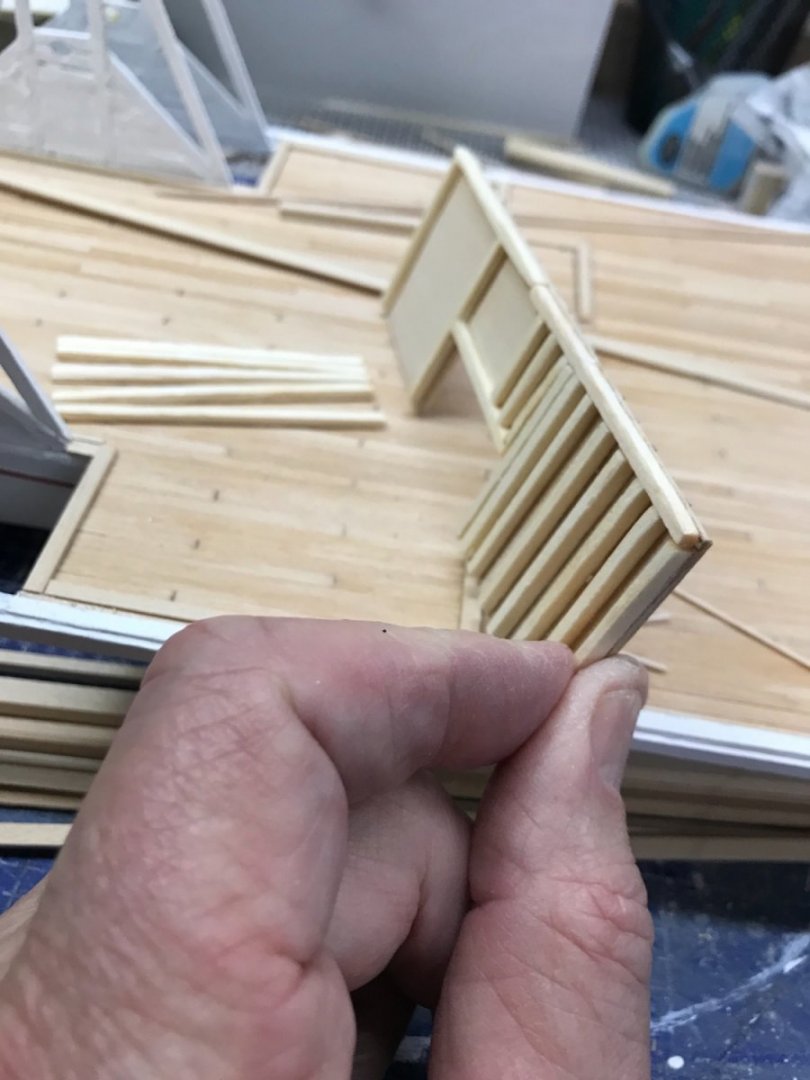
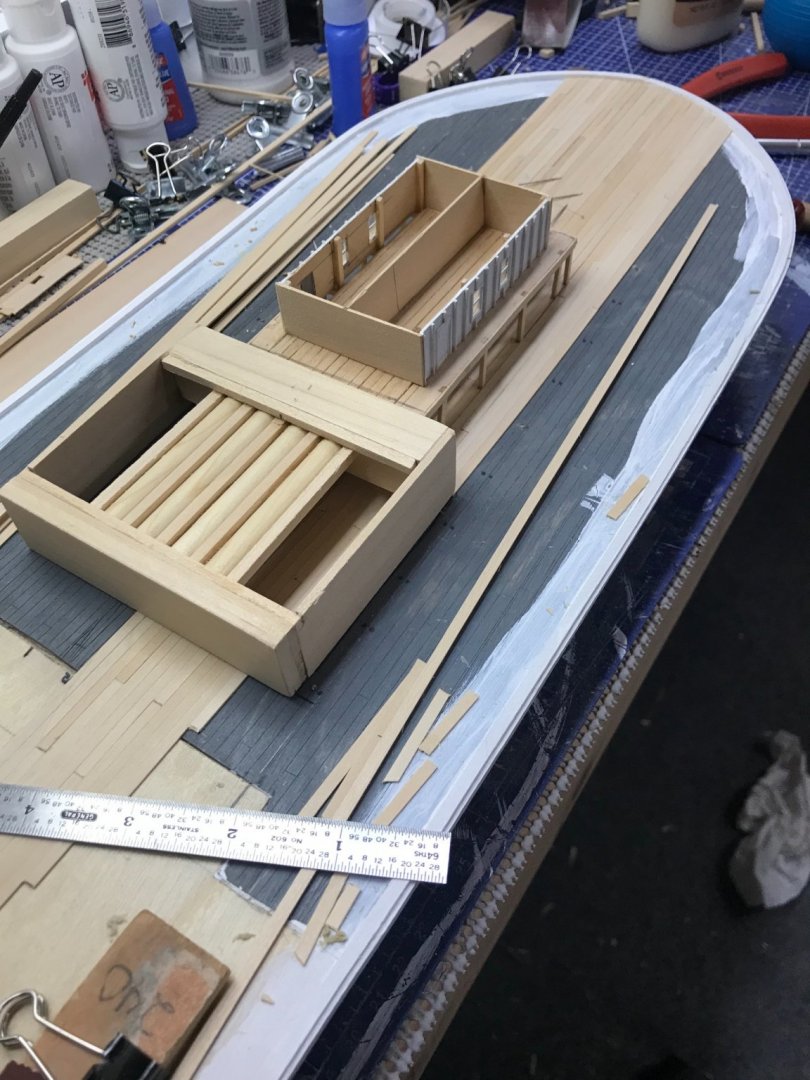
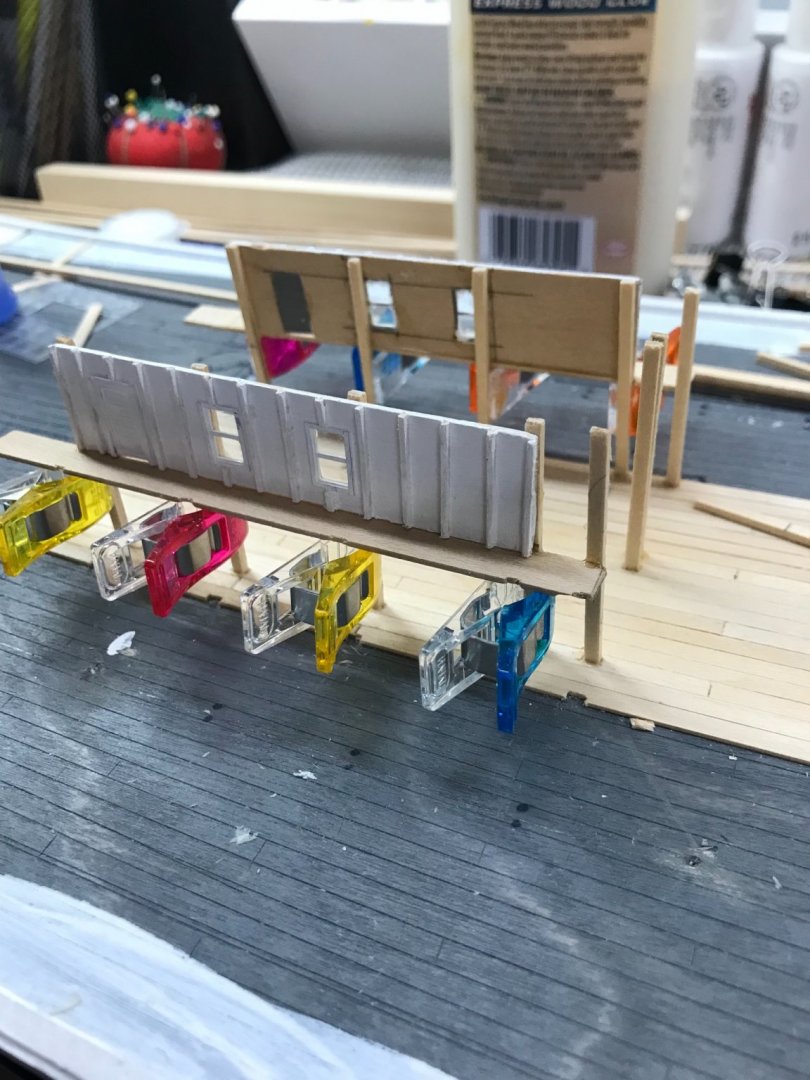
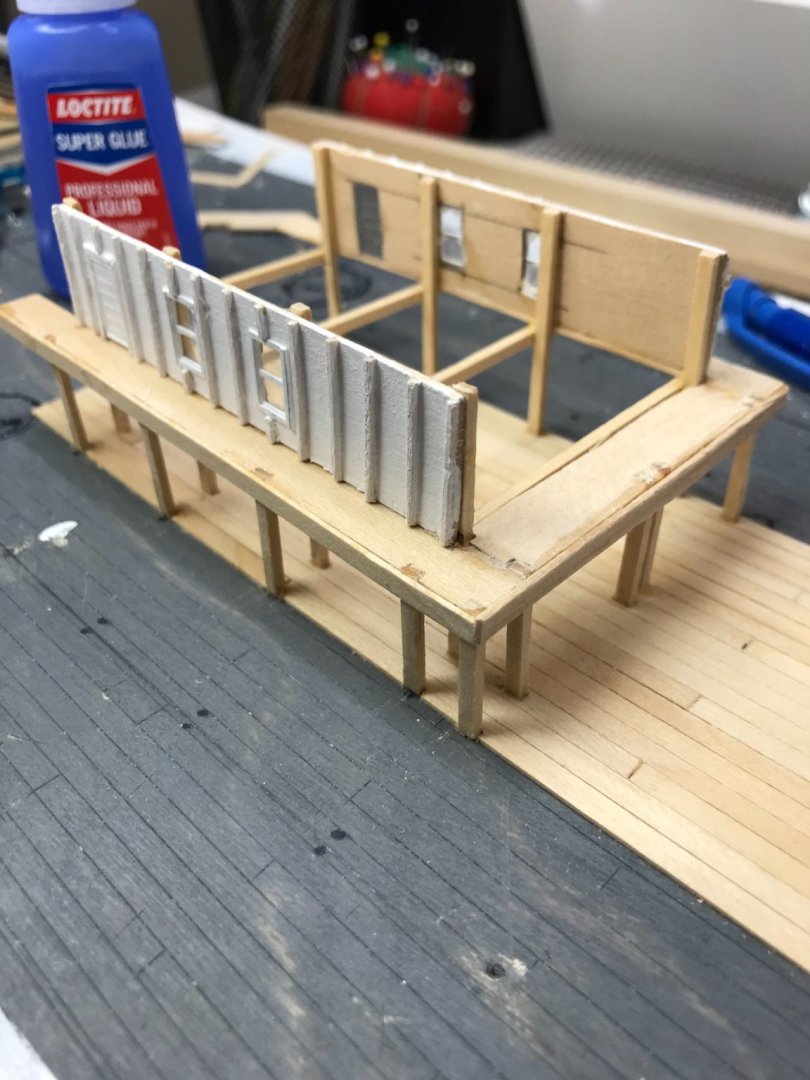
Forward Cabin continued… Forward cabin completed with Catwalk post and beam structure holding it up off the Main Deck. Fire Wood and Coal for the boilers were stored under this cabin. The remainder of the Forward Deck was used to transport cargo to multiple ports up and down the Ohio and Mississippi Rivers. On to planking the forward deck, then I will progress toward the stern with the boiler, engine room, Paddle Wheels, etc… Talk about micro Carpentry! WOW 😯 I’ll be back… 😎


- 238 replies
-
- 9
-
-
- Robert E Lee
- steamboat
- (and 3 more)
-
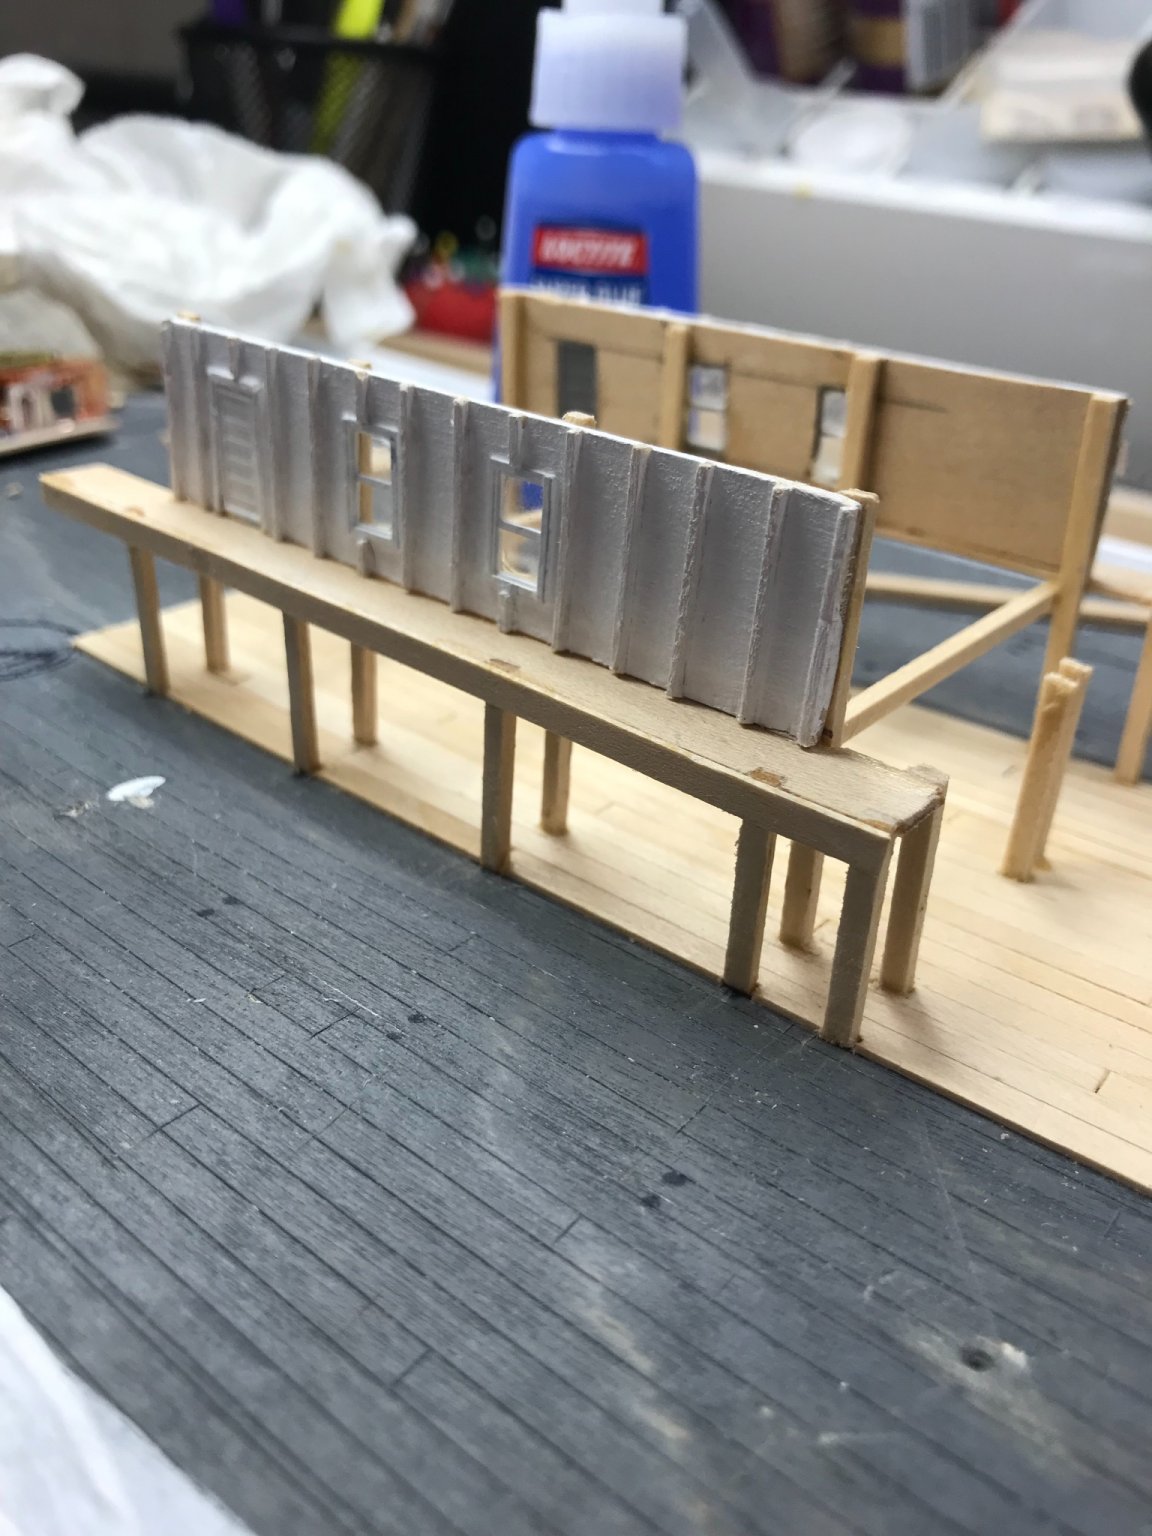
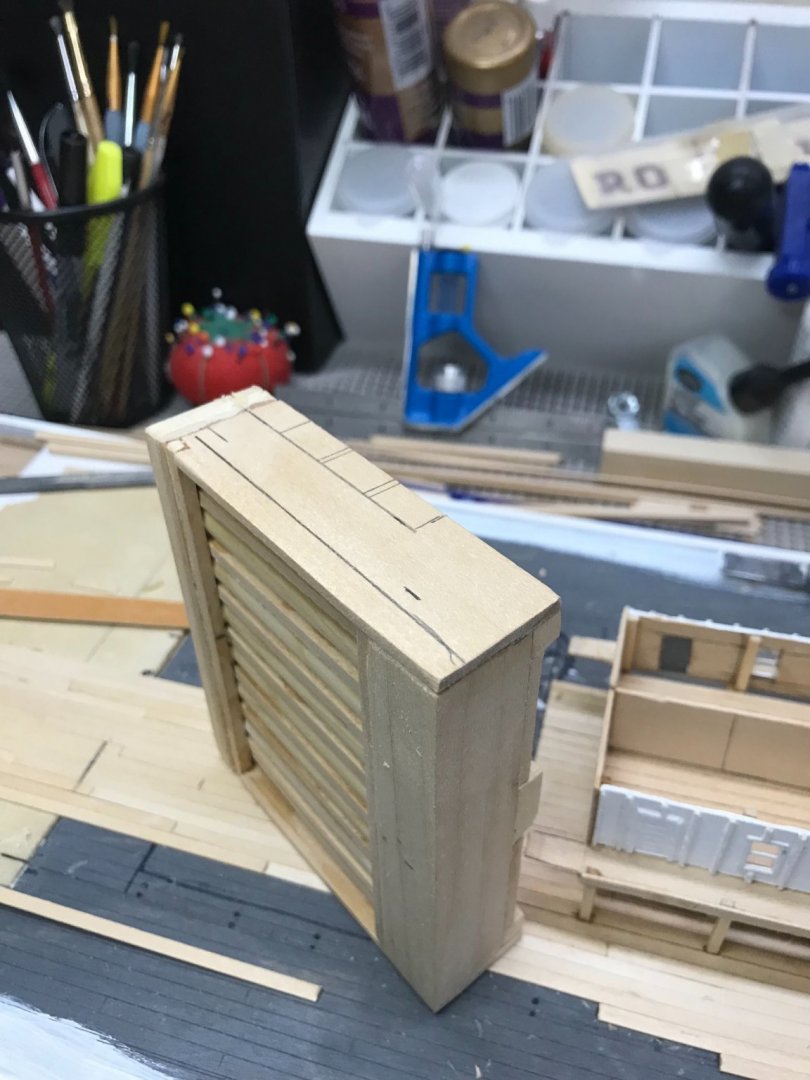
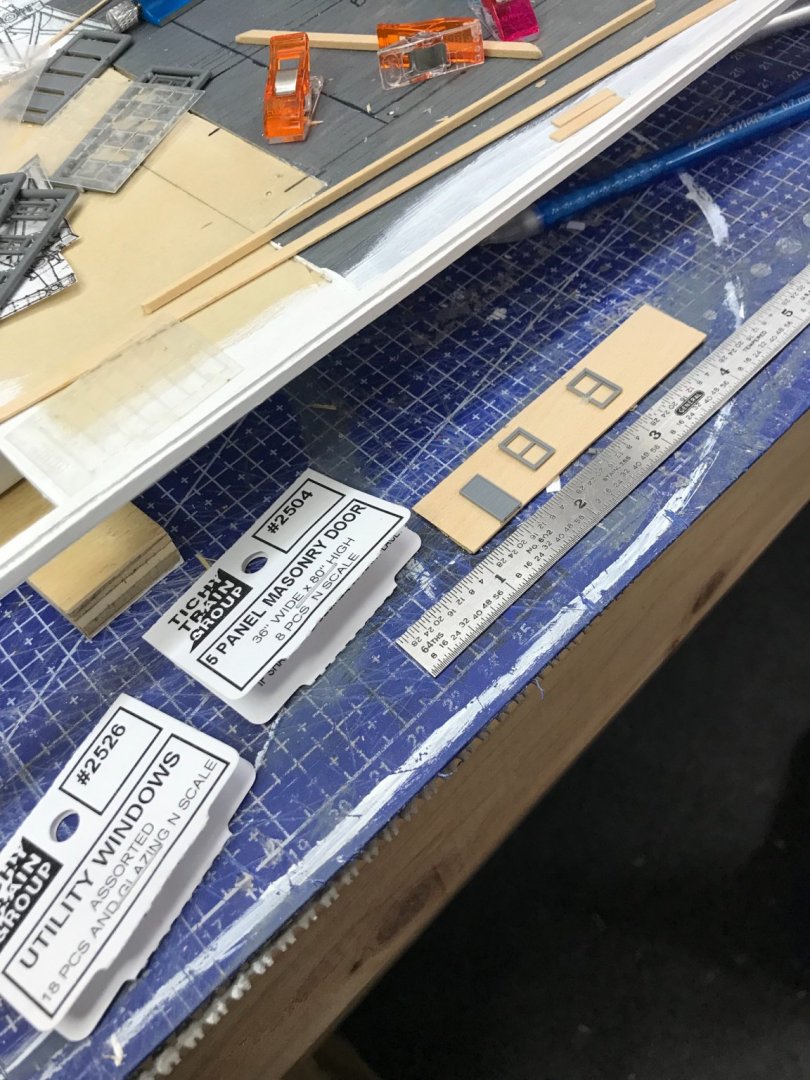
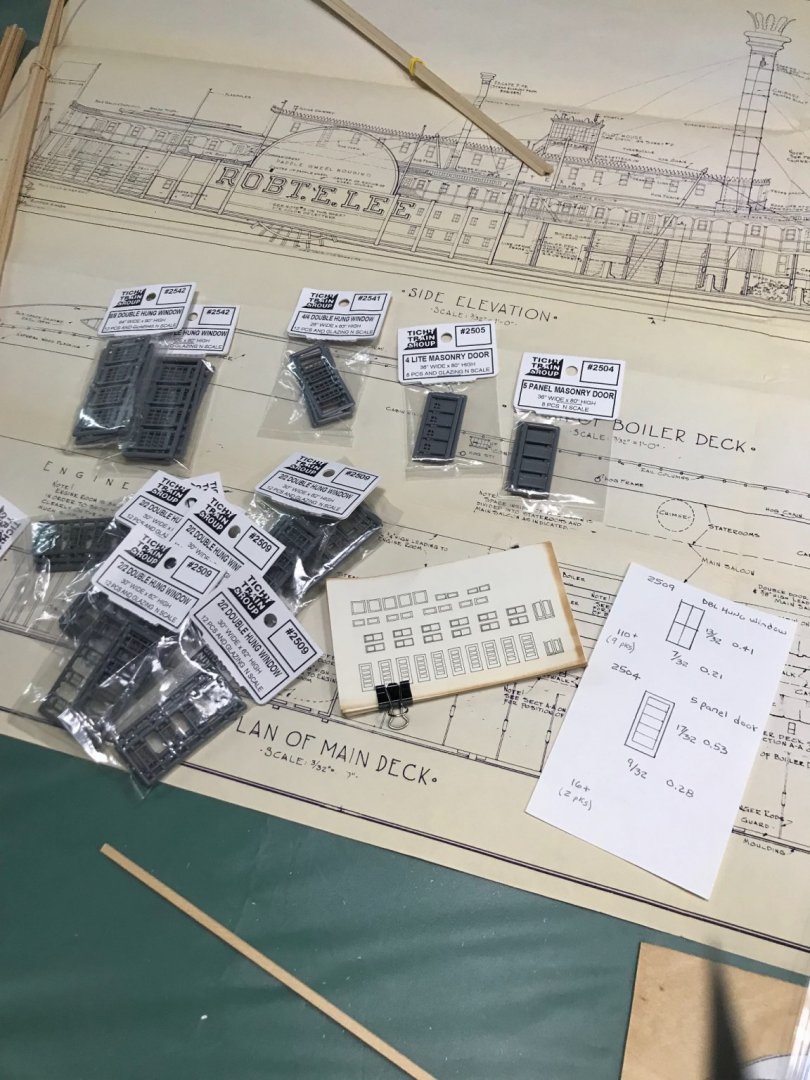
Forward Cabin on the Catwalk… Fortunately, the previous owner of this kit research and collected N scale windows and doors. This is a great enhancement over the paper templates provided. 😎 Cutting out 1/32 material for installation of doors and windows in the Cabin on the Catwalk. I am going to have to paint that door 🚪 wood color to help it stand out. 🧐 Moving on… 🍻


- 238 replies
-
- 8
-
-
- Robert E Lee
- steamboat
- (and 3 more)
-
Looks like all I have to do is give the engine room a bit of a steampunk feel. 😆 A cat walk and guard rails here some pipes there. The trick will be to not overdo it. 😂 Onwards…
- 238 replies
-
- 5
-
-
- Robert E Lee
- steamboat
- (and 3 more)
-
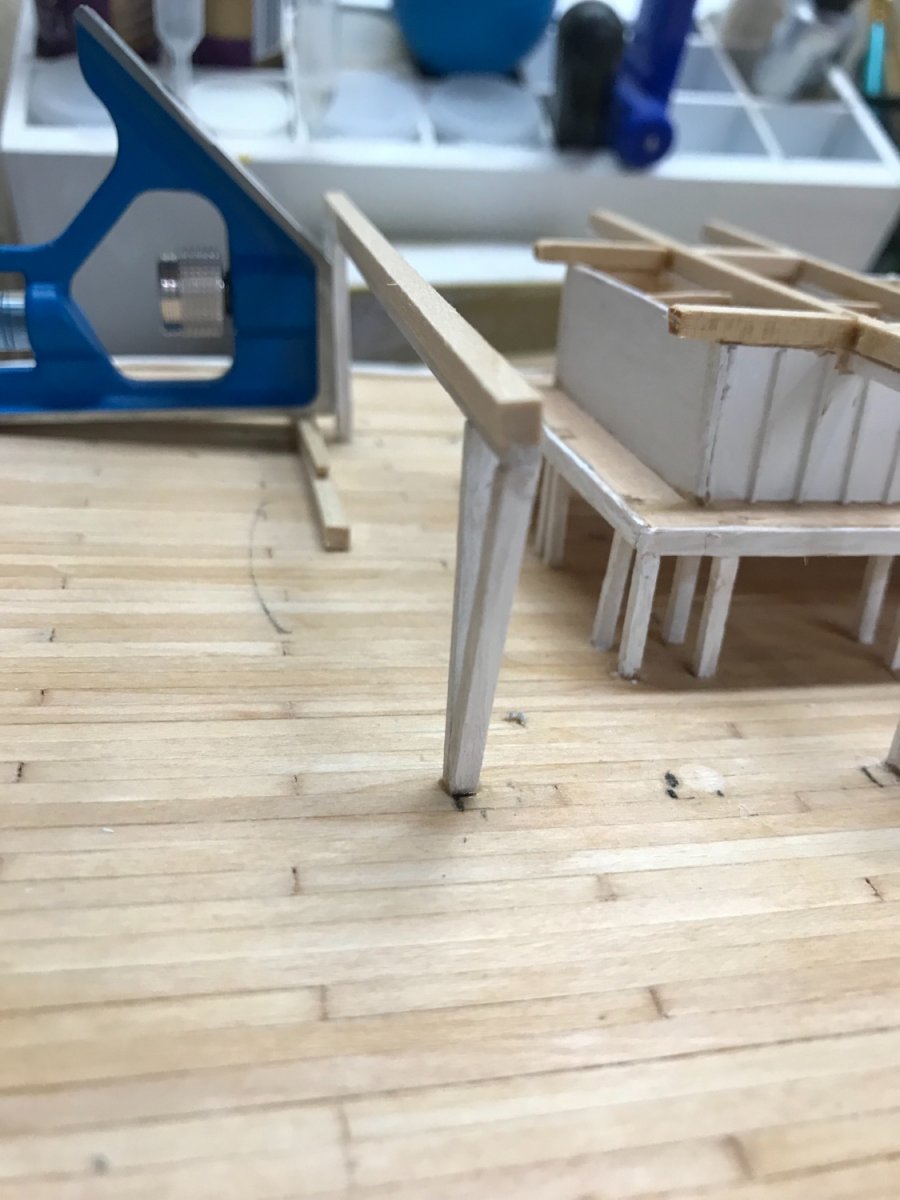
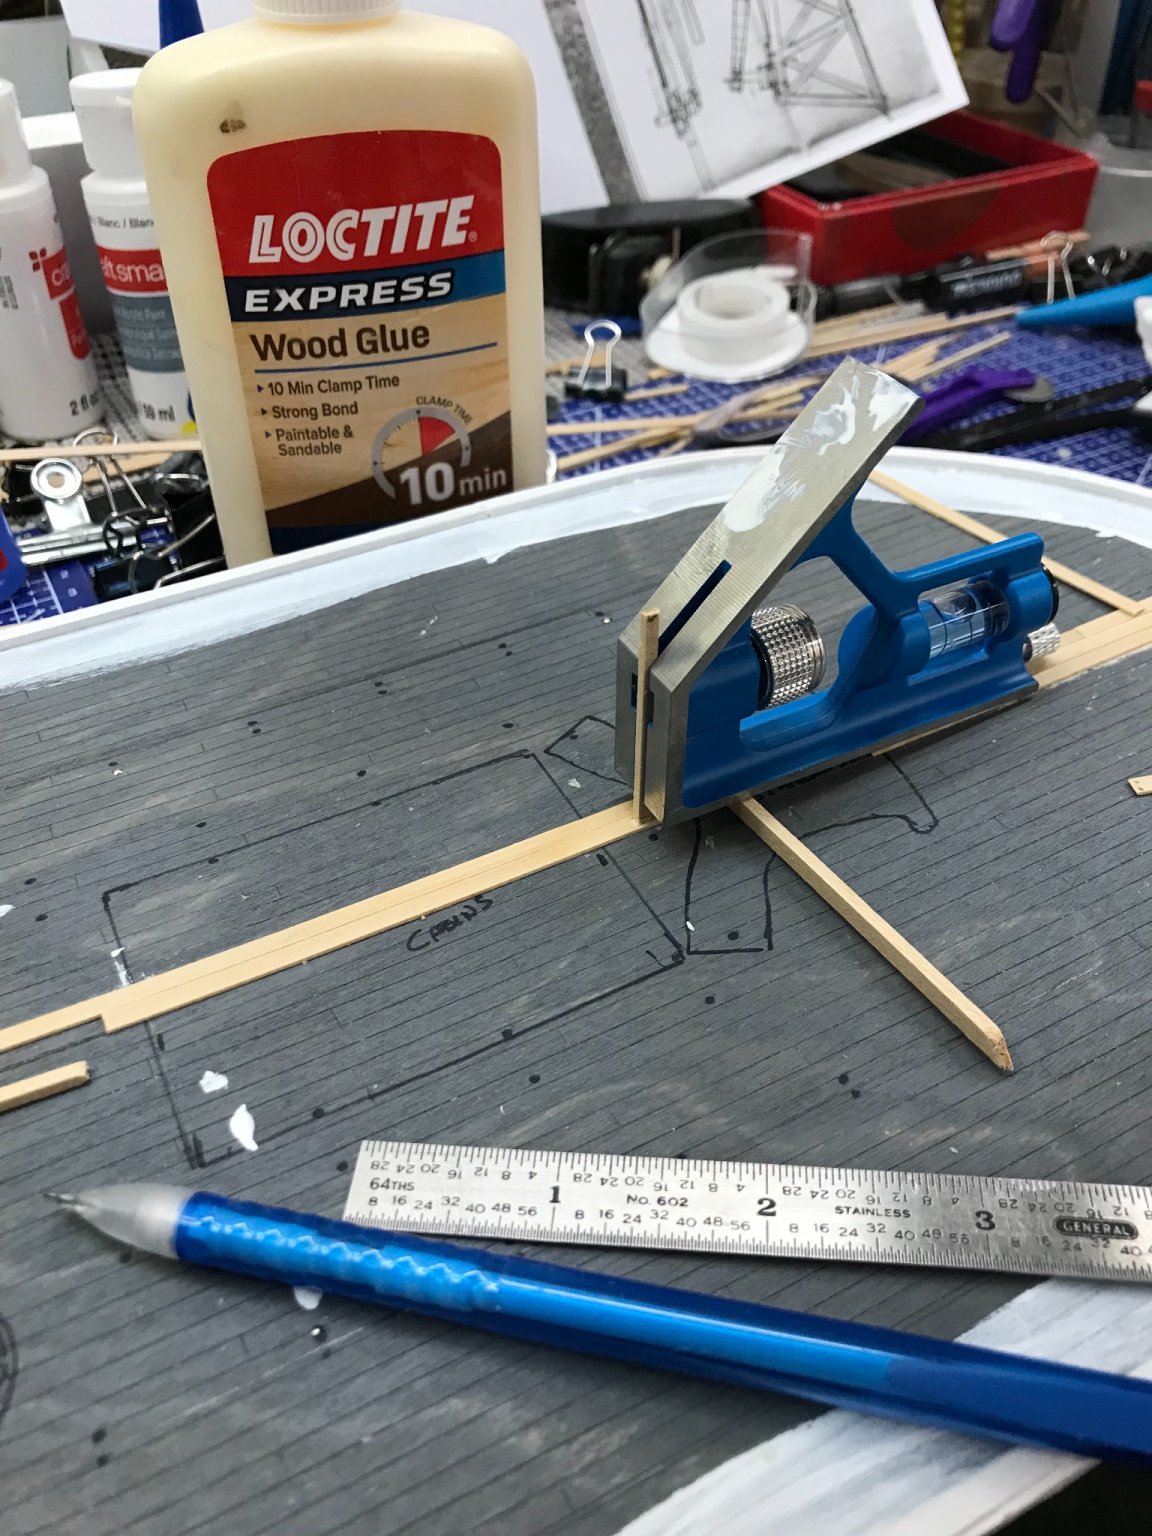
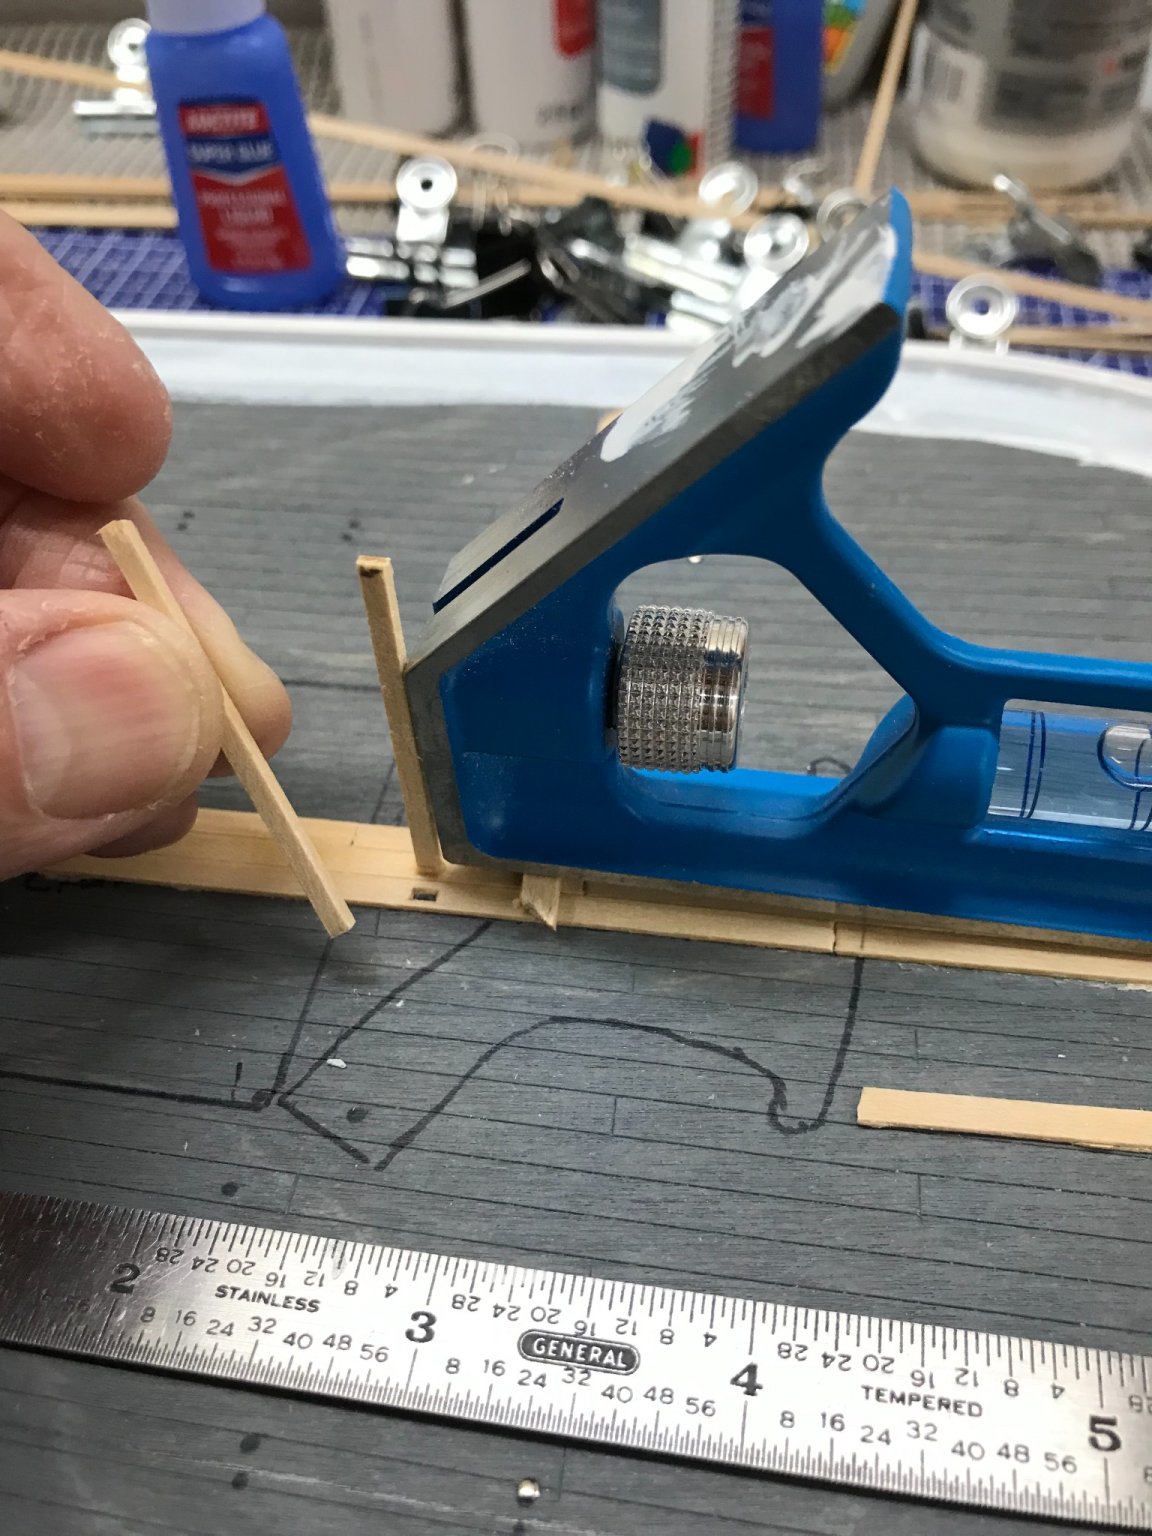
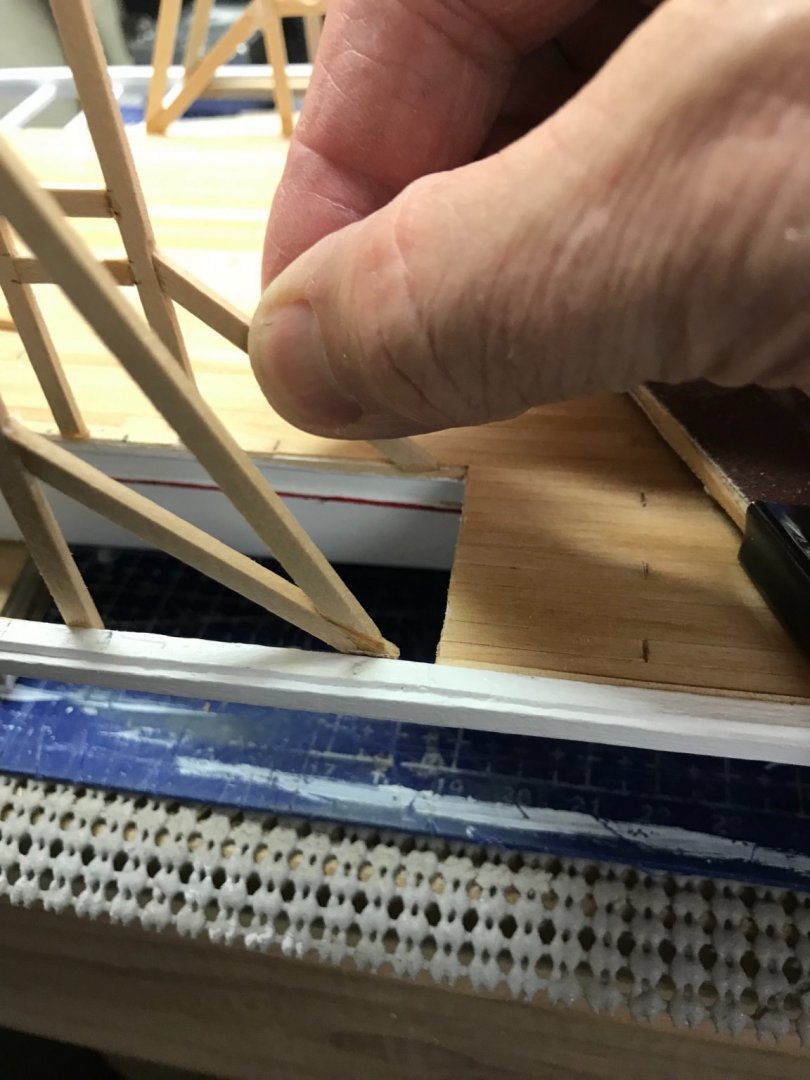
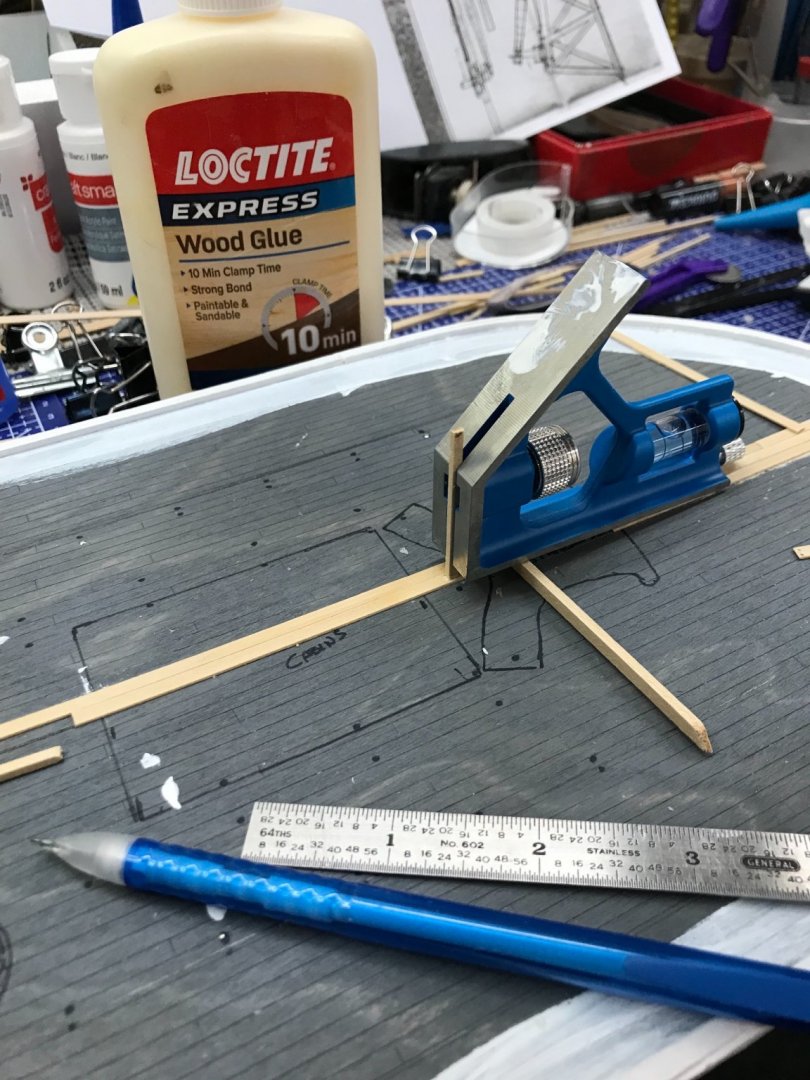
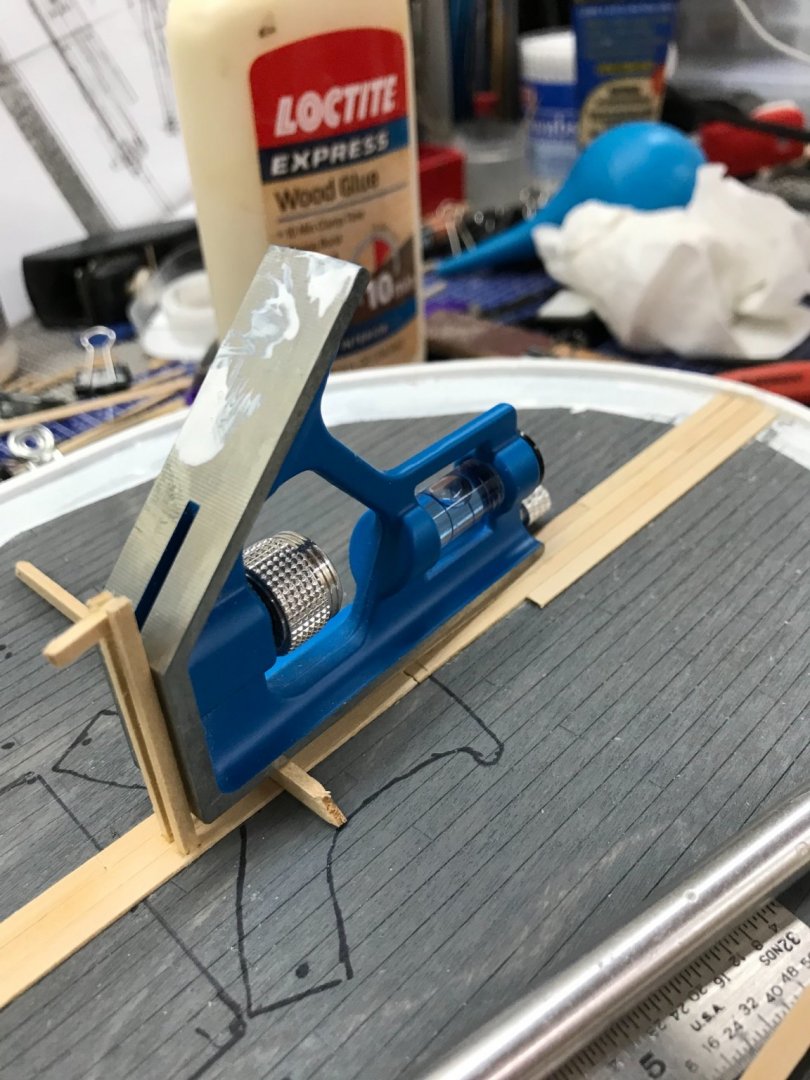
Main Deck continues How to set a post plumb on an un-level surface. Inlayed the posts in the planking This is going to take a while. Later 😎

- 238 replies
-
- 7
-
-
- Robert E Lee
- steamboat
- (and 3 more)
-
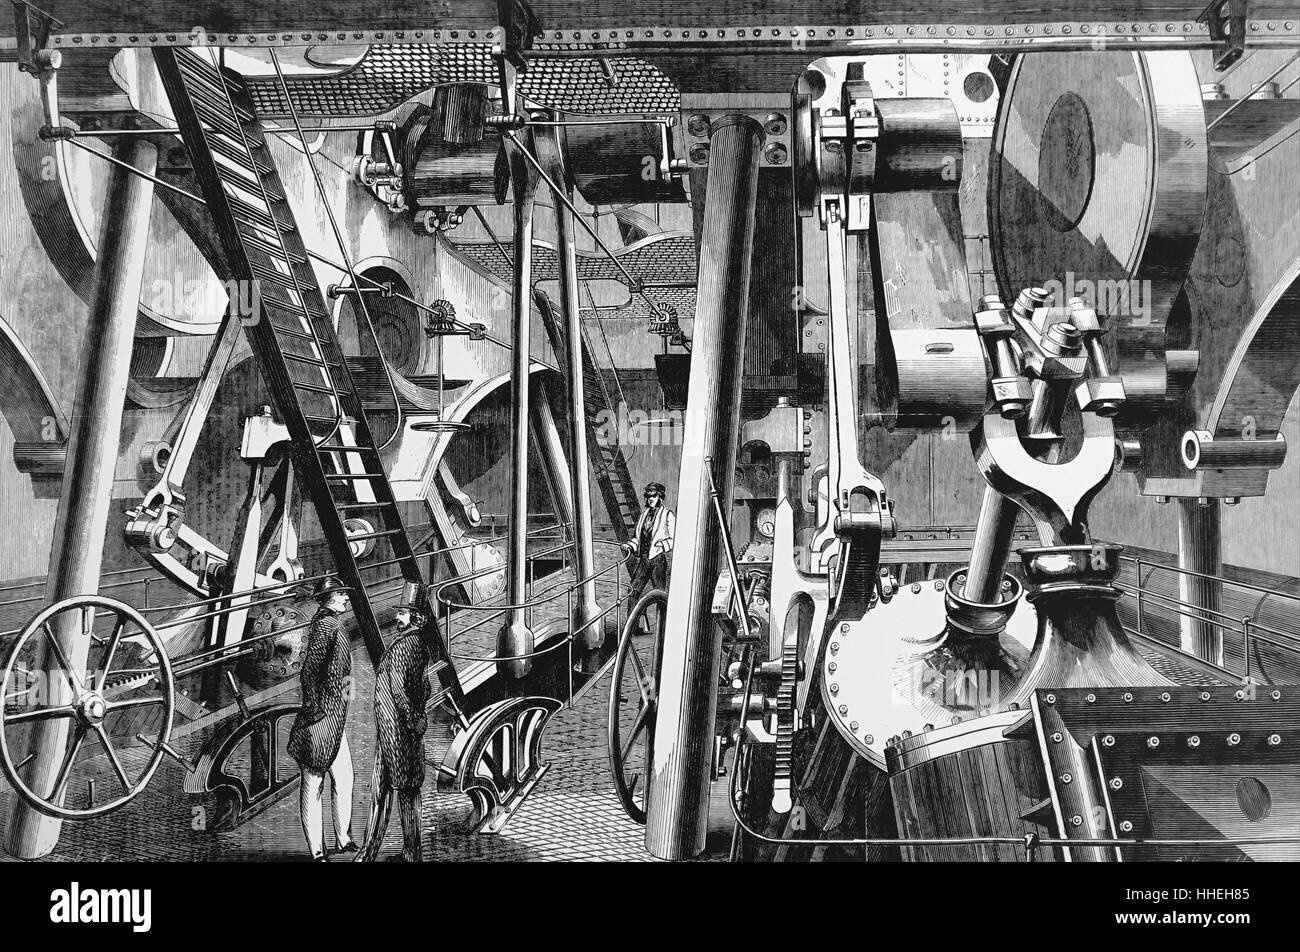
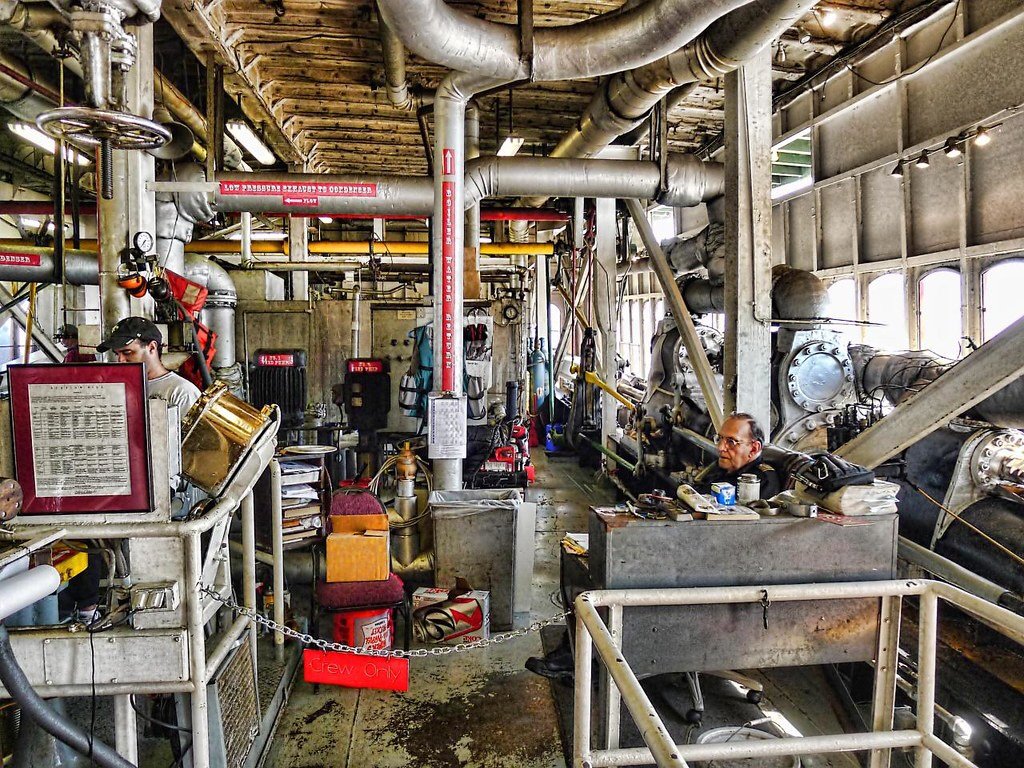
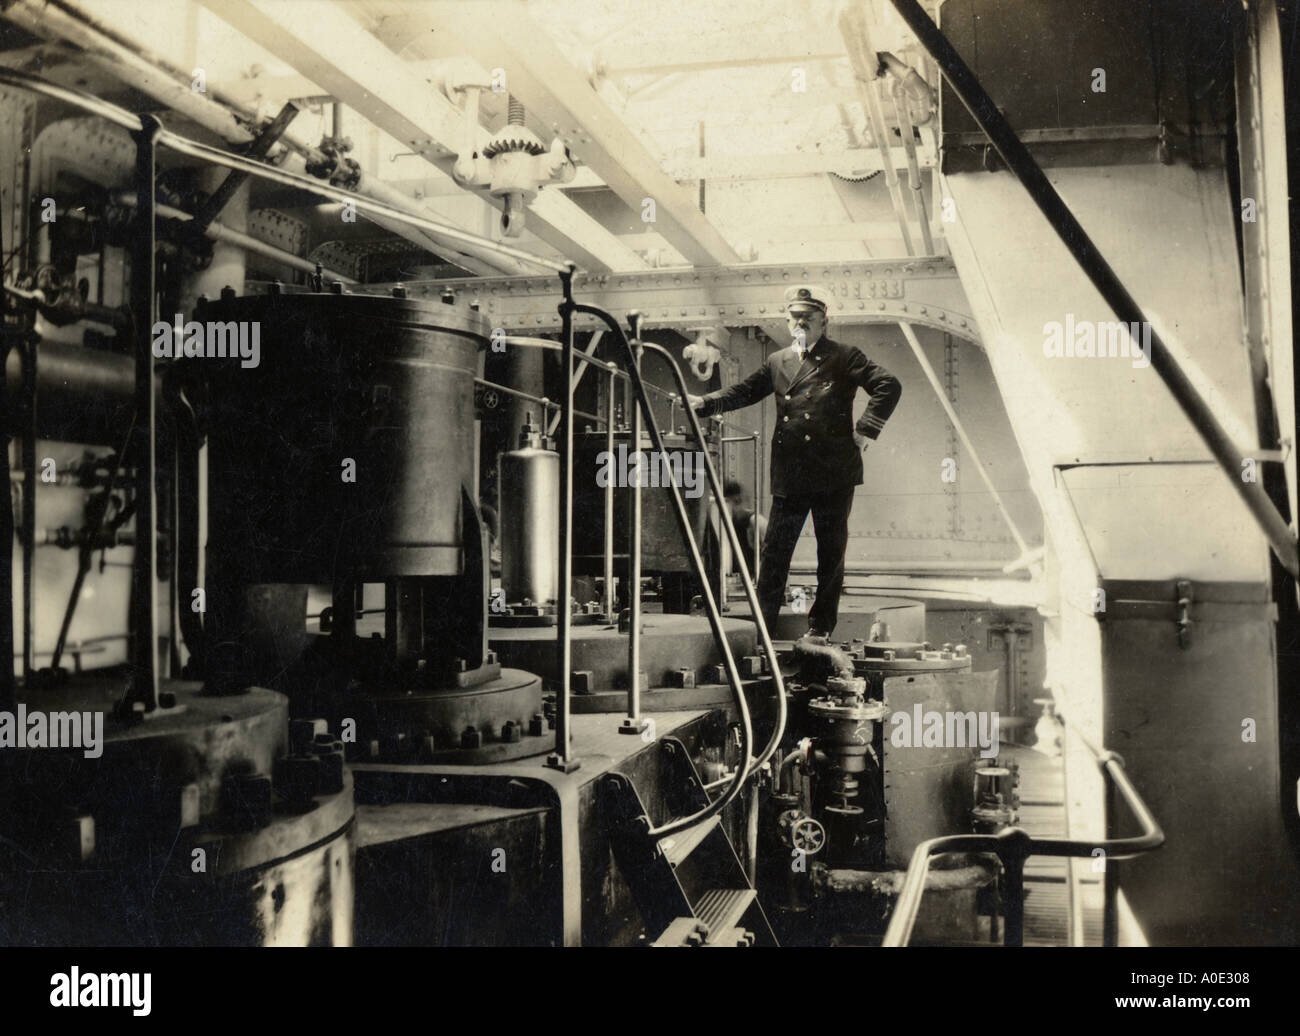
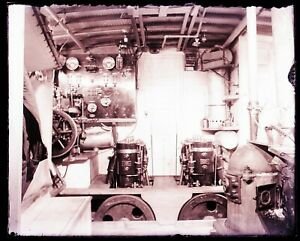
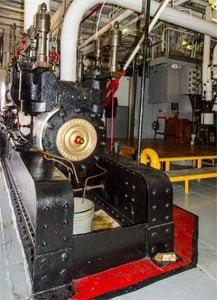
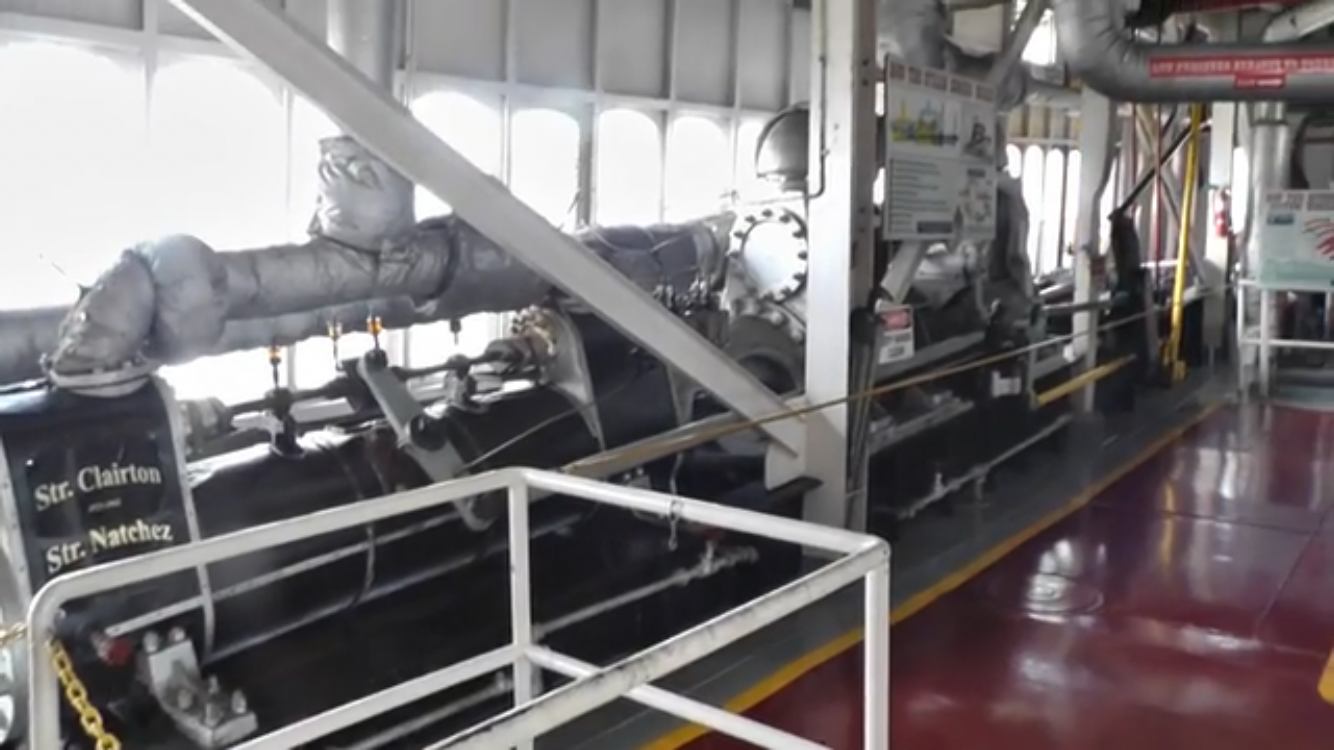
Thanks for sharing your research. Now that I have decided to open up some walls to view the Engine Room, I going to need to get a sense of what that room looked like in the 1870s. All I have so far is in the following photos. These rooms are probably to modern. I am imagining pipes valve and pressure gages, etc… If you have any reference to the engine room it’s self I would appreciate it. I just don’t want to view two steam engines sitting in an empty room. Your thoughts… Thanks
- 238 replies
-
- 4
-
-
- Robert E Lee
- steamboat
- (and 3 more)
-
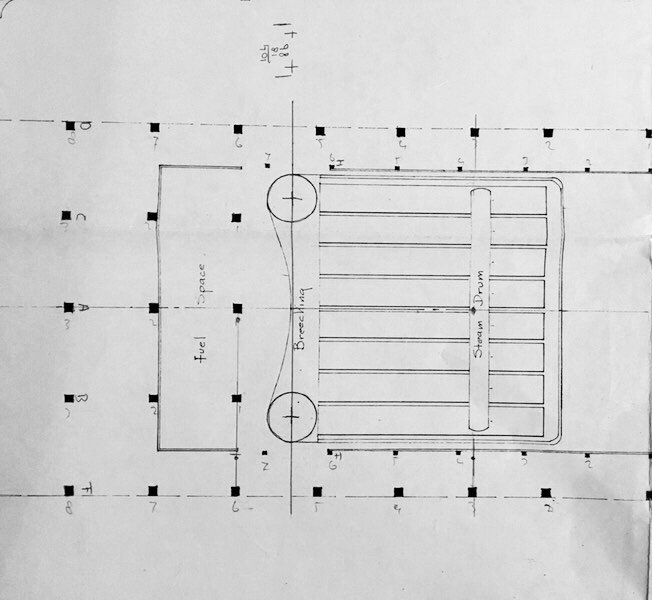
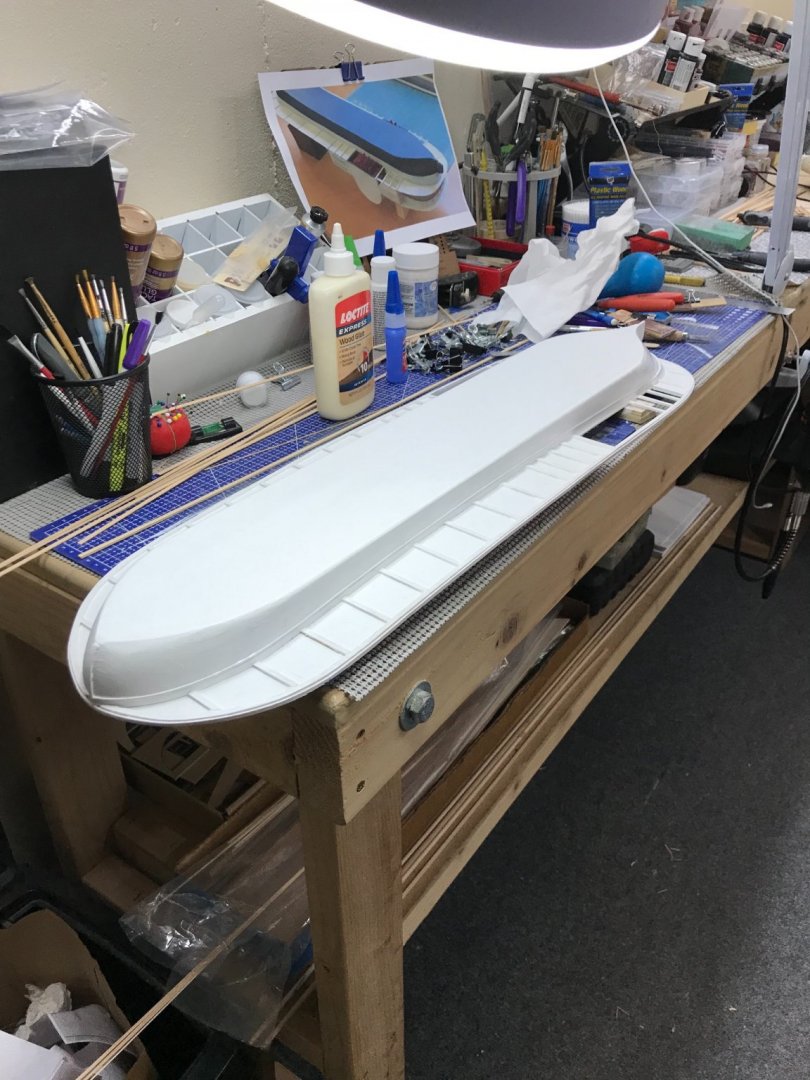
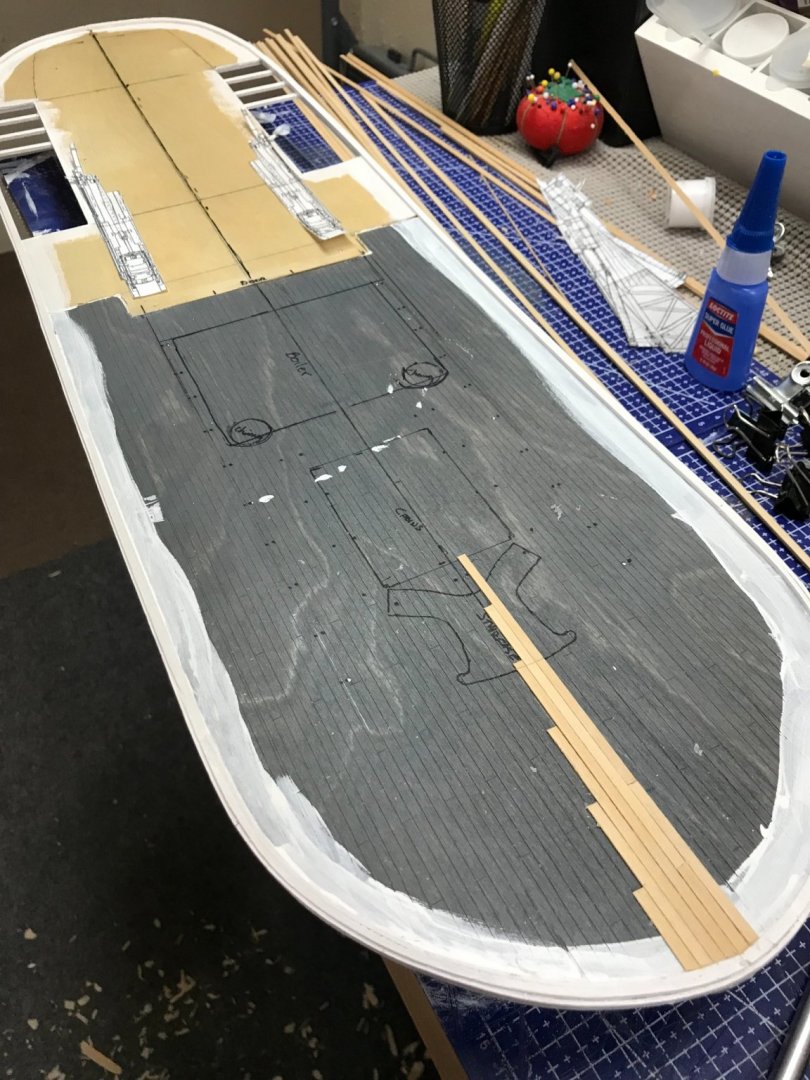
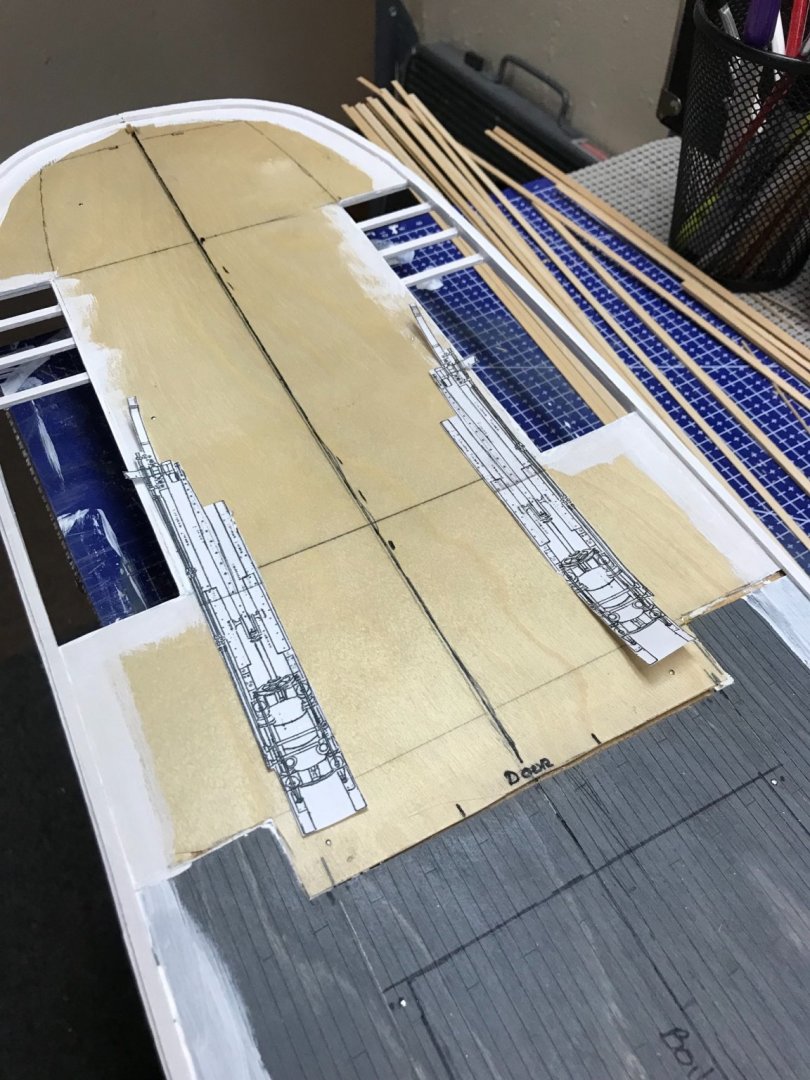
Hull painting… Final color coat airbrushed… Original water slide decals from the kit still in good shape, after all these years in storage. 👍 Main Deck… Started planking the Main Deck. @md1400cs provided a link to a scratch build of the Robert E Lee on another forum. https://www.modelbouwforum.nl/threads/mississippi-paddlesteamer-robert-e-lee-1-96-scratch-build.271285/ The images from that build will be very helpful, although it does raise the bar. 🧐 found this drawing of the Steam Engines. The challenge now is to detail out the engine room and leave enough walls open to view the engine room. I am also going to need to add lighting. Things just got interesting 🤔 Here is the engine room layout. Modified the port engine drawing to scale, also scanned and flipped the drawing to give me a starboard engine as well. Now all I have to do is build a couple of paddle wheels with engines. We will see how it goes… 😆 Cheers 🍻


- 238 replies
-
- 8
-
-
- Robert E Lee
- steamboat
- (and 3 more)
-
@mtaylor This build log of The Robert E. Lee Steamboat is in the 1801 to 1850 category, it was built in New Albany, Indiana in 1866. I am building it as she appeared in 1870 for the “Great Race” against the Natchez. Can this build log be moved to 1851 to 1900? Thanks John