John Ruy
-
Posts
1,585 -
Joined
-
Last visited
Content Type
Profiles
Forums
Gallery
Events
Everything posted by John Ruy
-
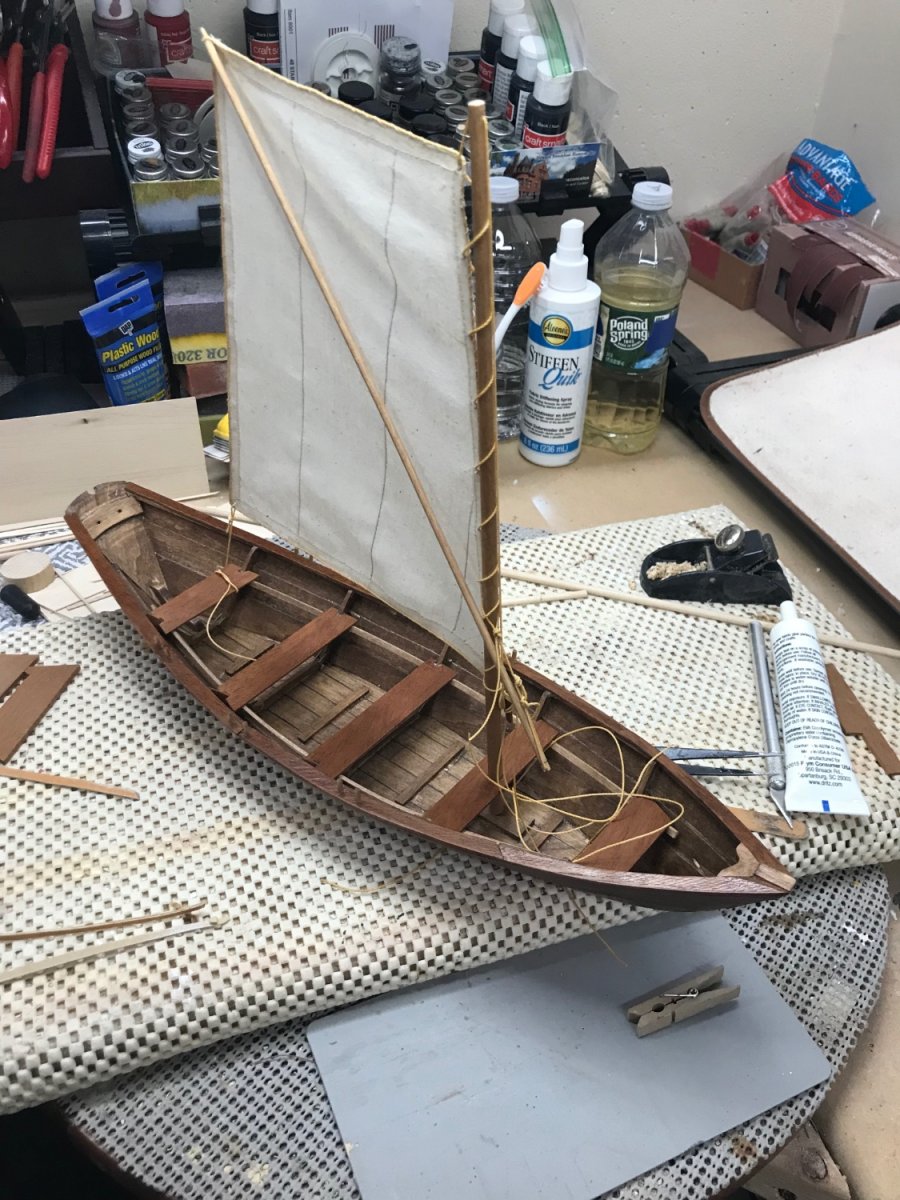
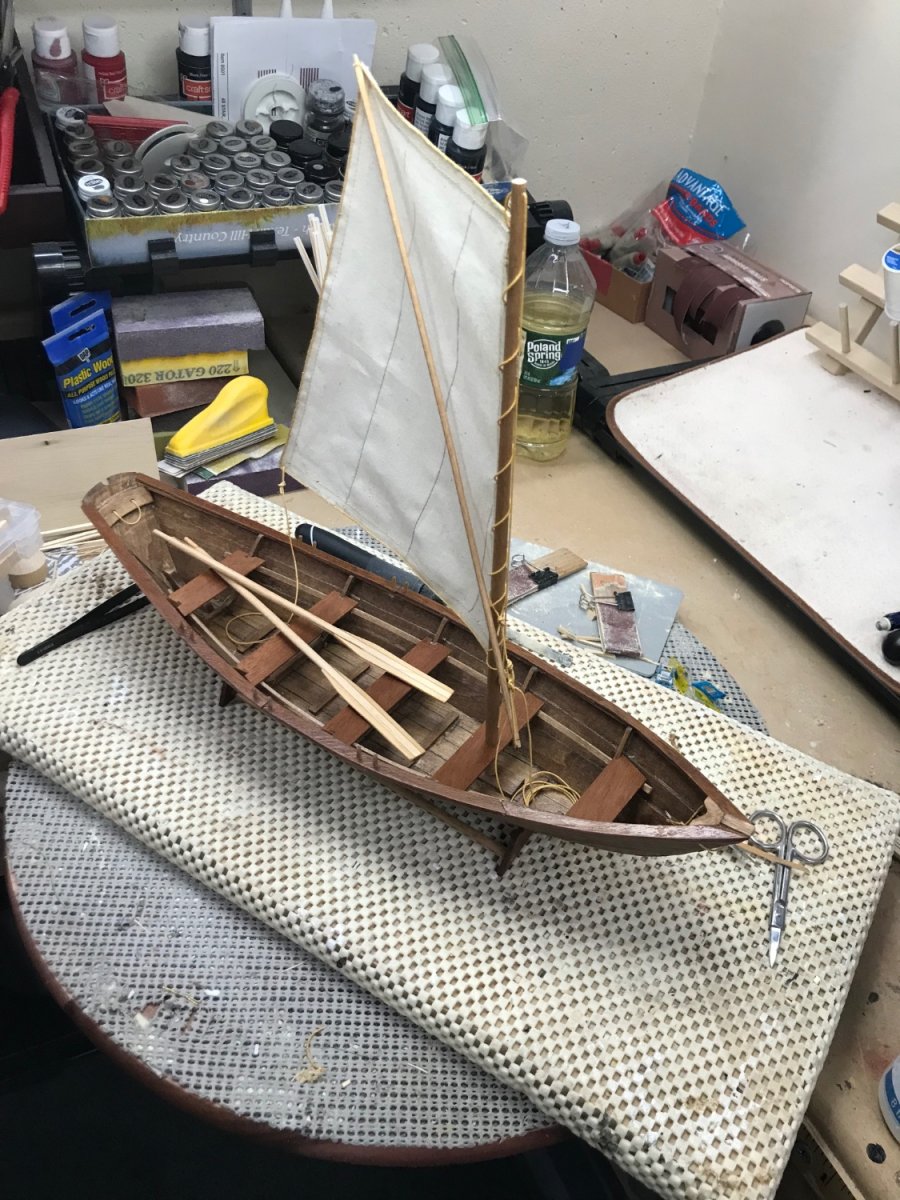
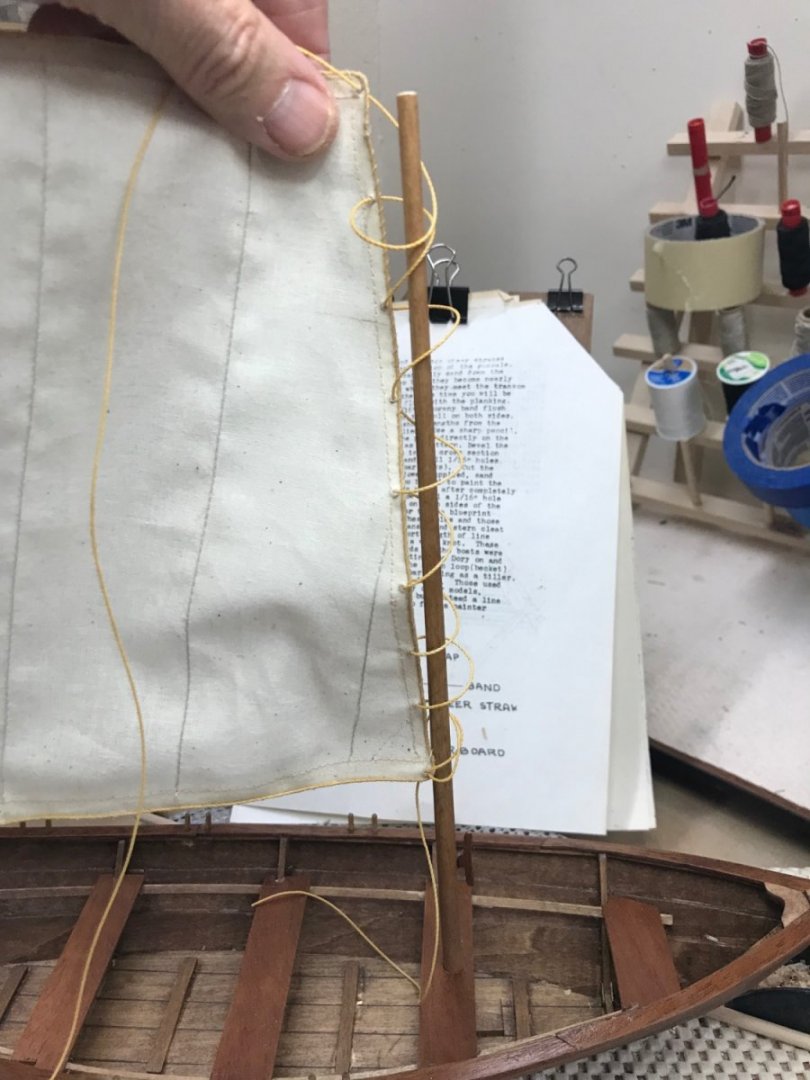
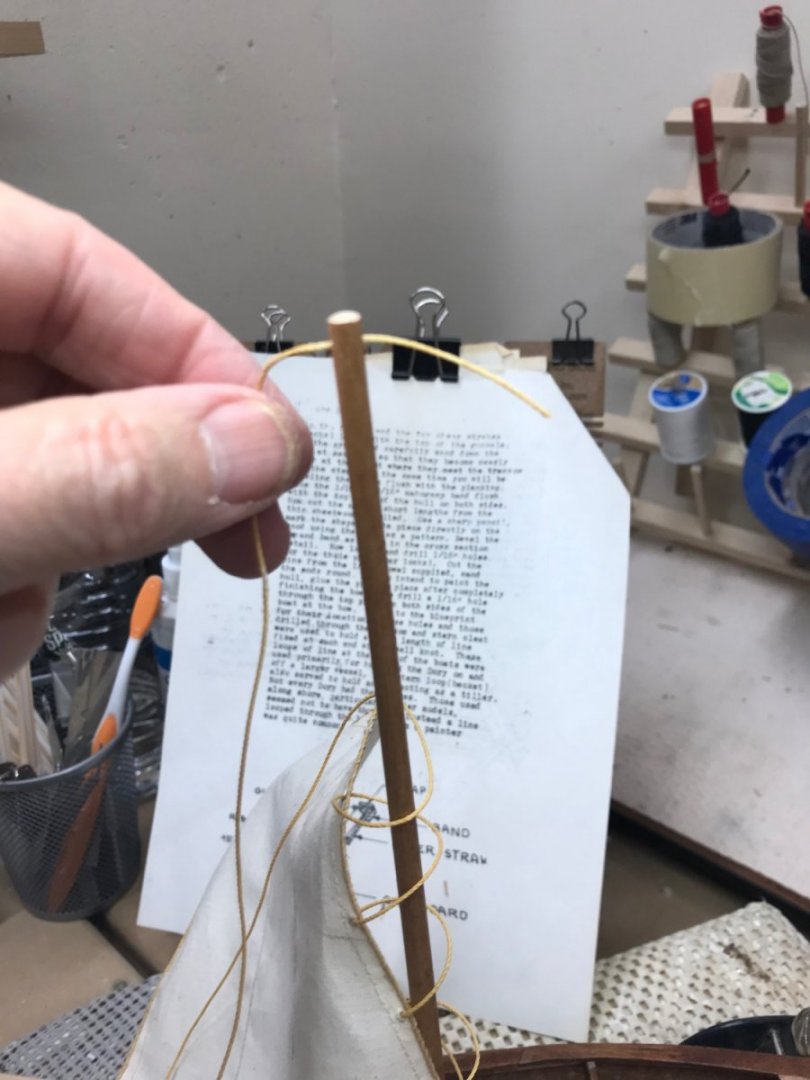
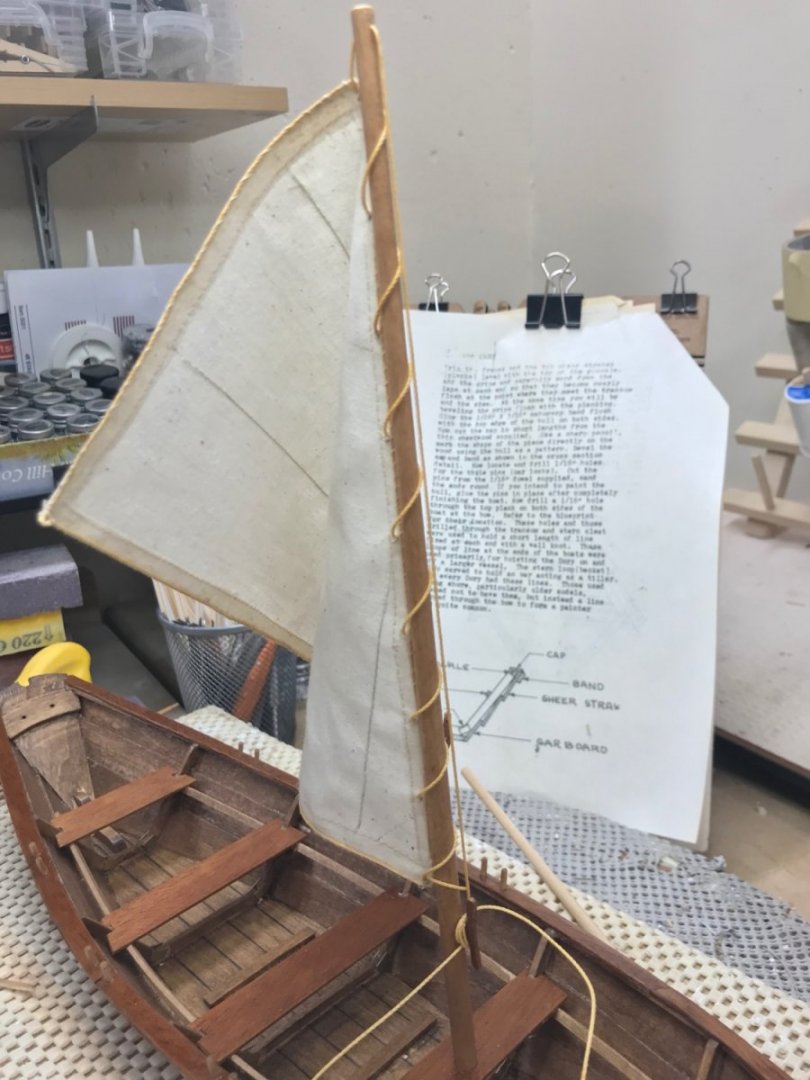
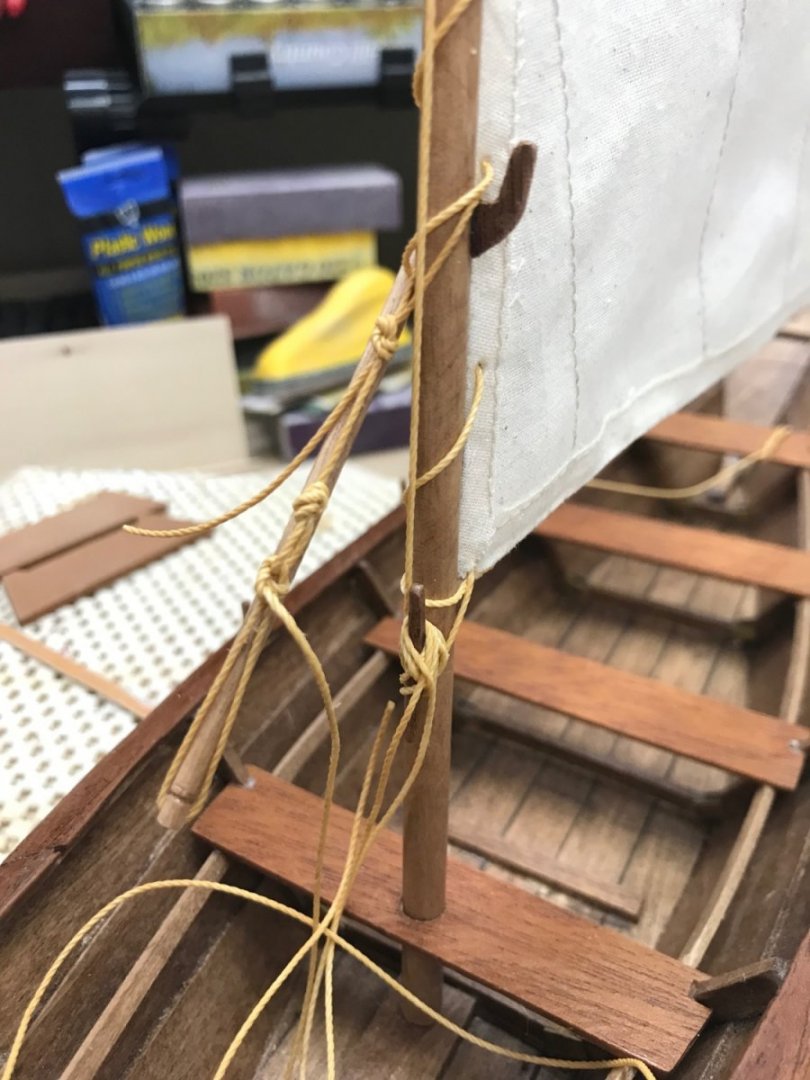
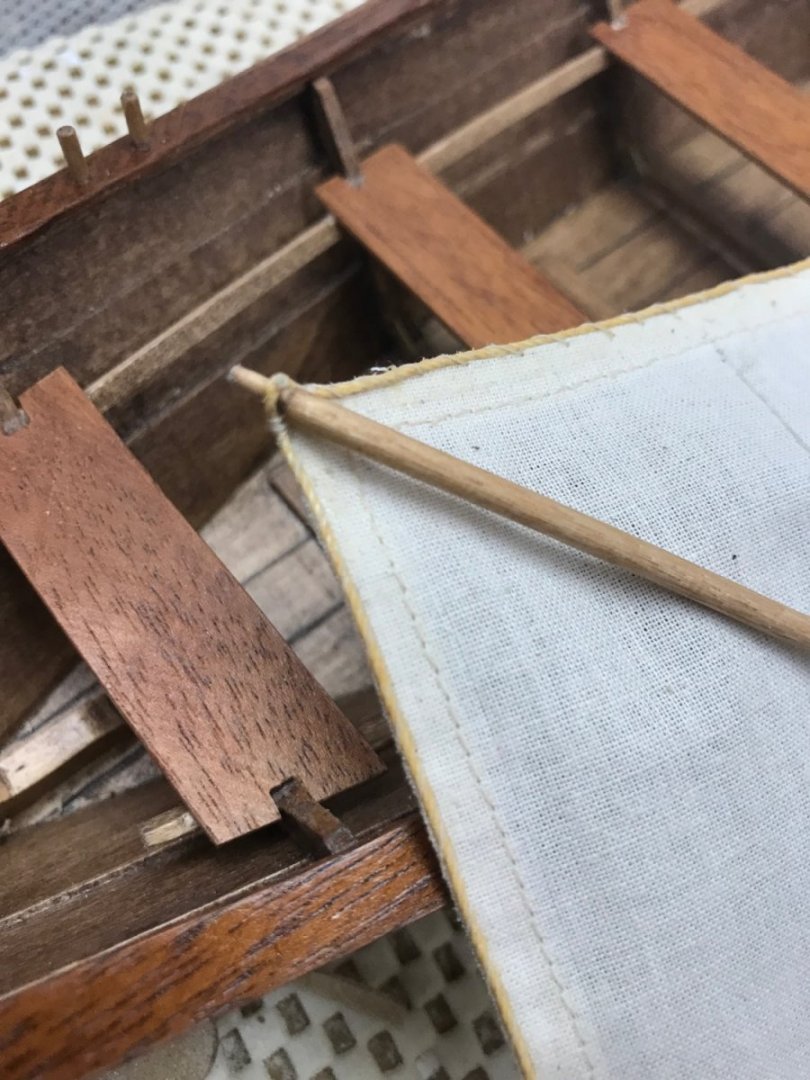
 Rigging… Lacing and tying off the sail to the Mast. Note the Snotter used to tighten up the sail with the Sprit Pole. Sail set and ready to run for home with a “boat load”of fish. The sail on “The Dory” was generally used to head home after a day fishing. Rowing out in the morning and Sailing with the wind in to shore. The Dory is finished. Nice little kit, a lot of fun to build. Now I can put a bit of Maine History on the shelf. 😎 Cheers 🍻
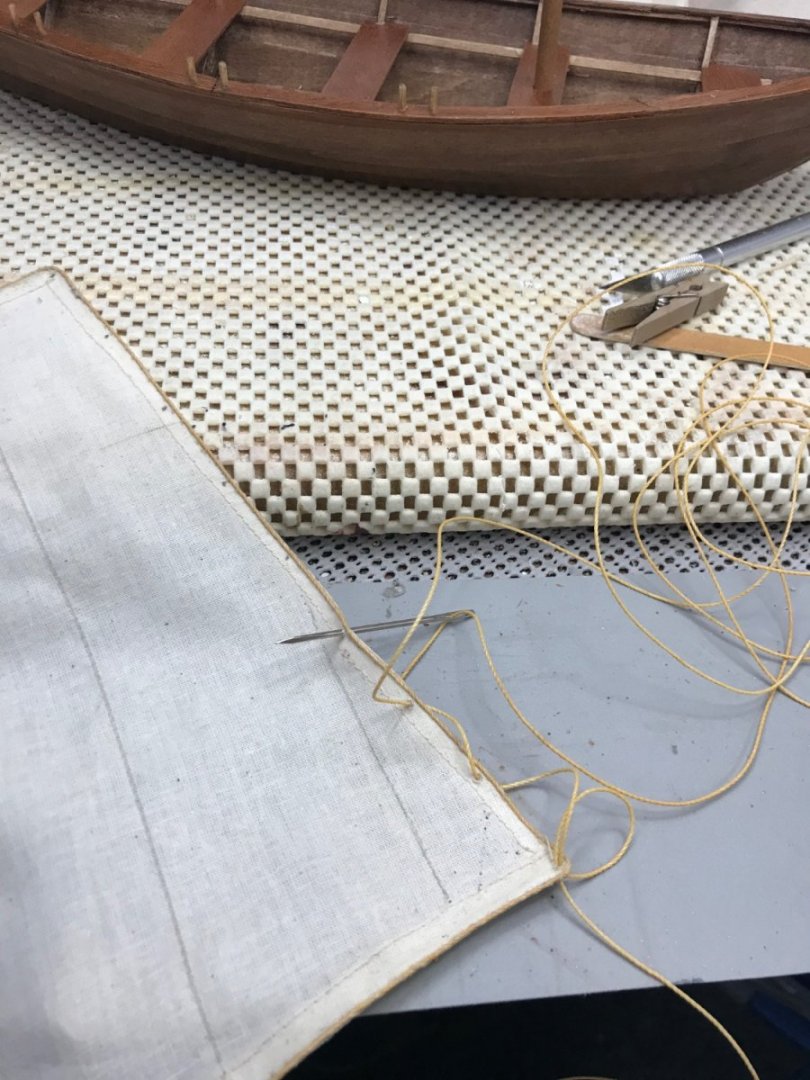


- 22 replies
-
- 7
-

-
- Laughing Whale
- Dory
- (and 1 more)
-
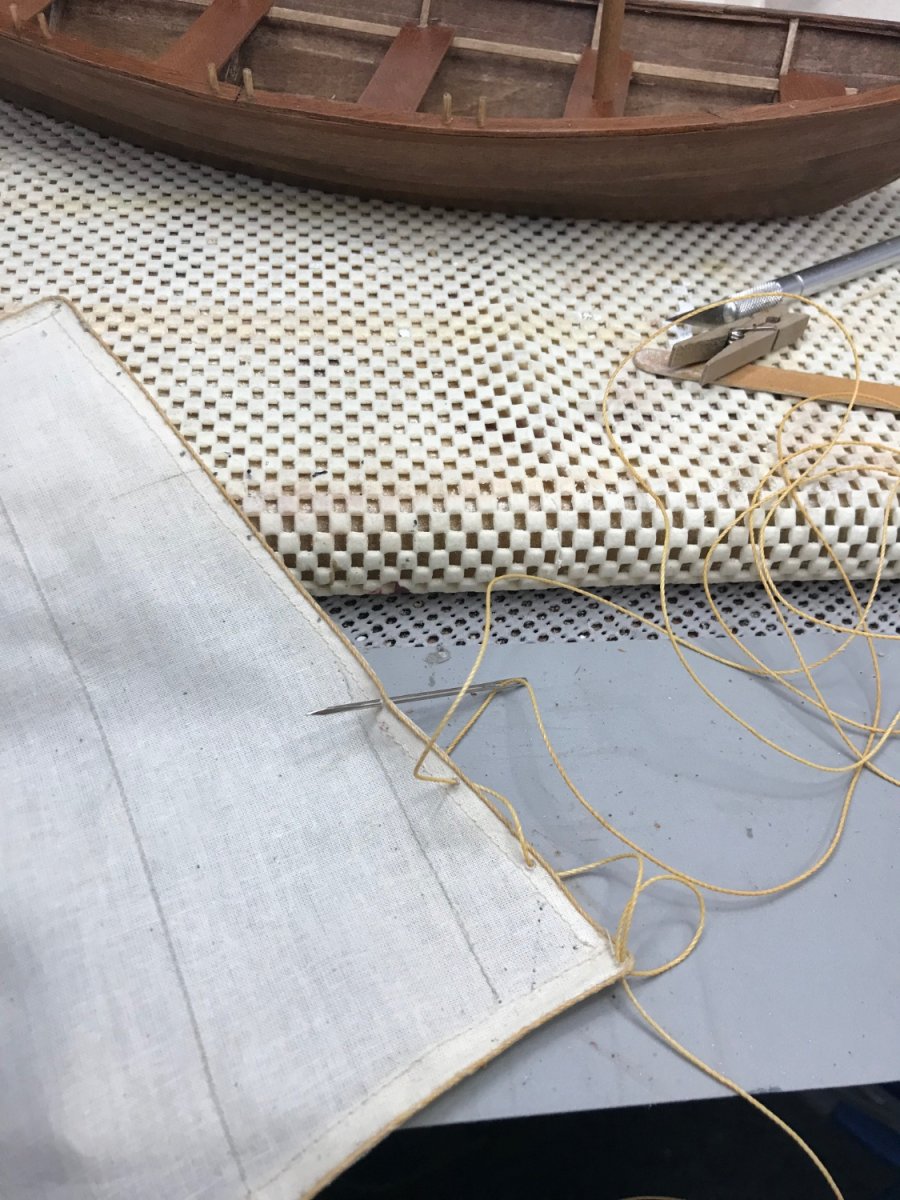
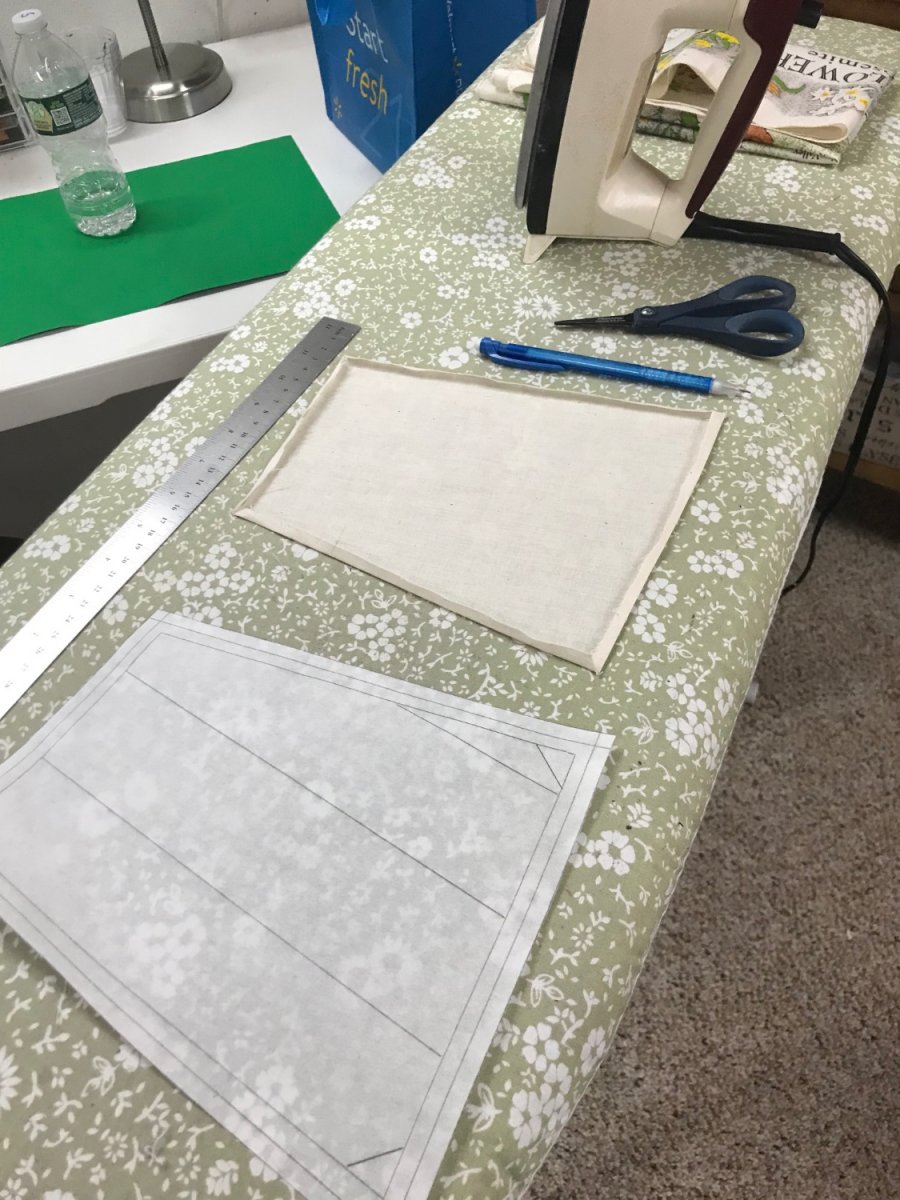
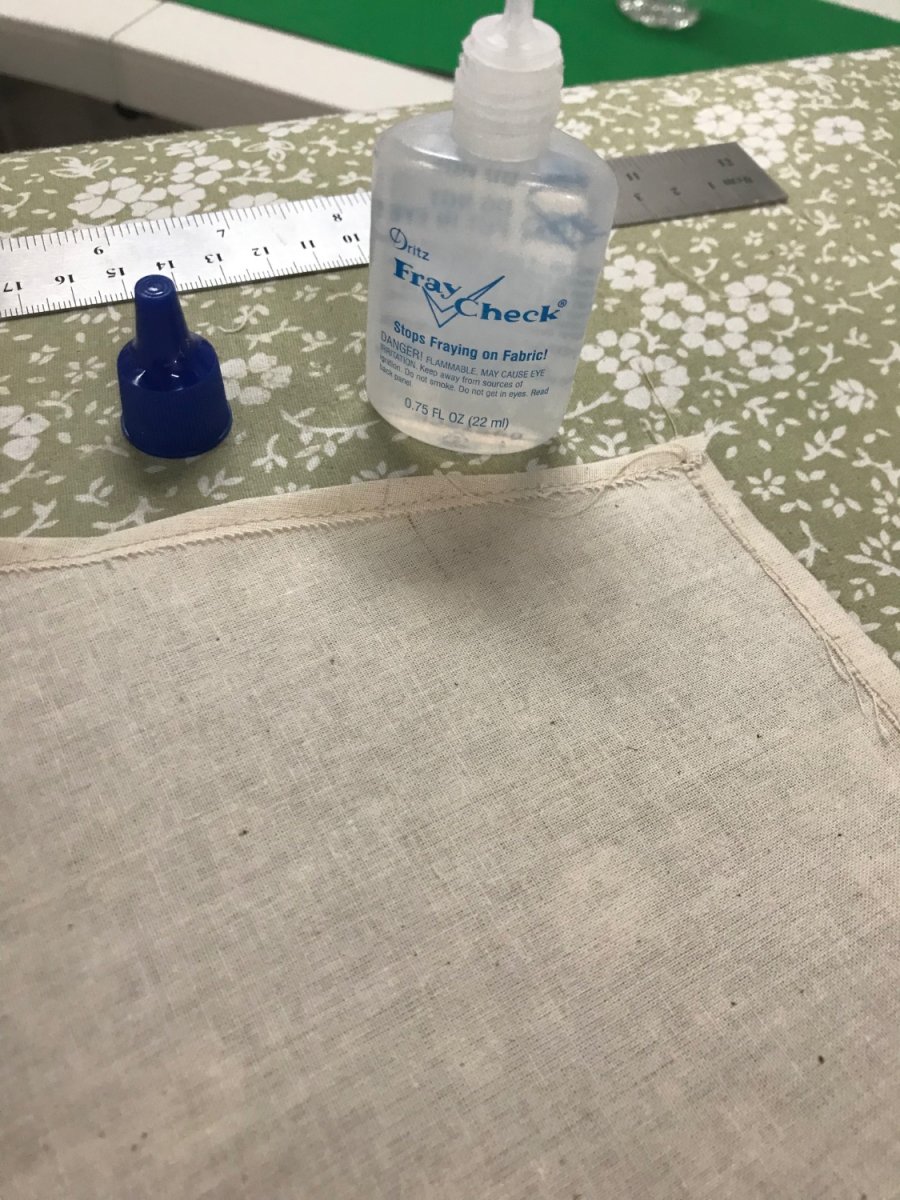
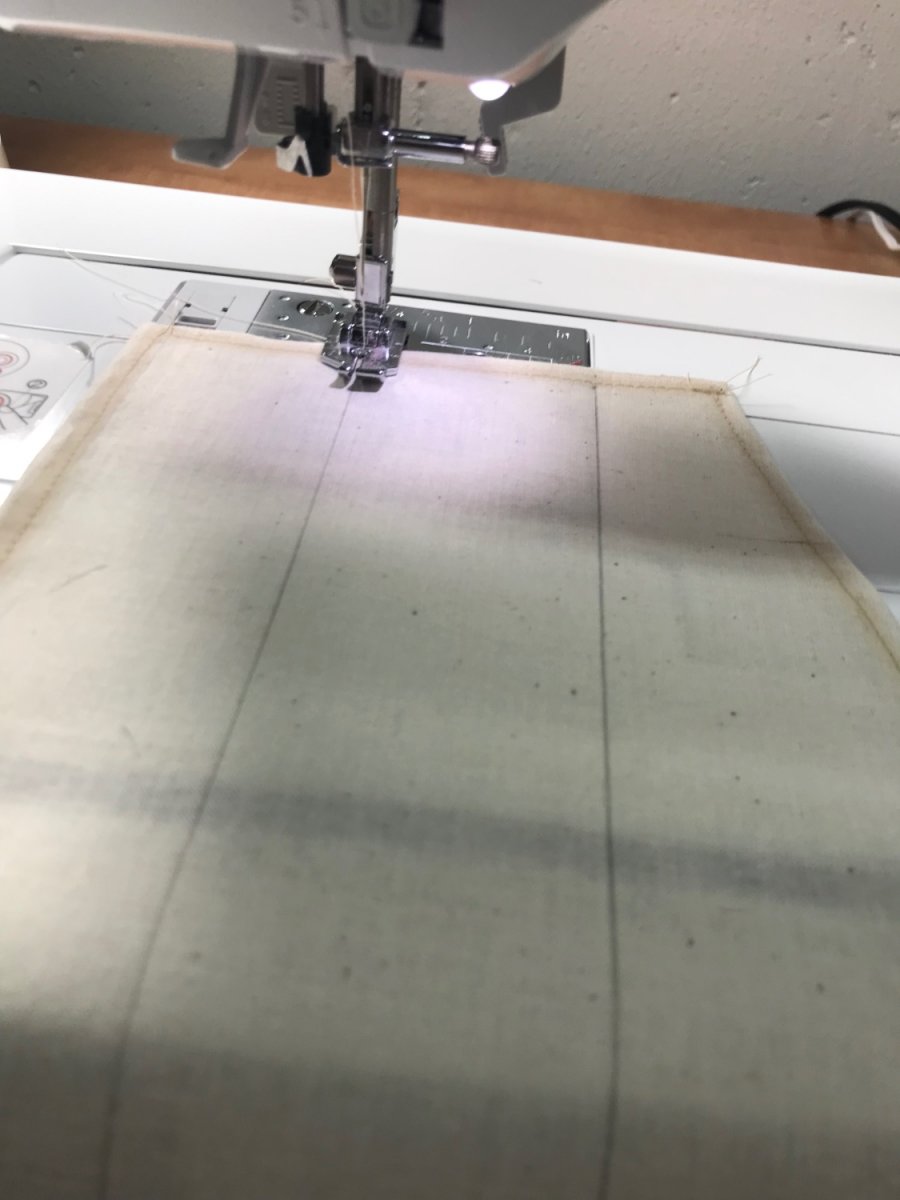
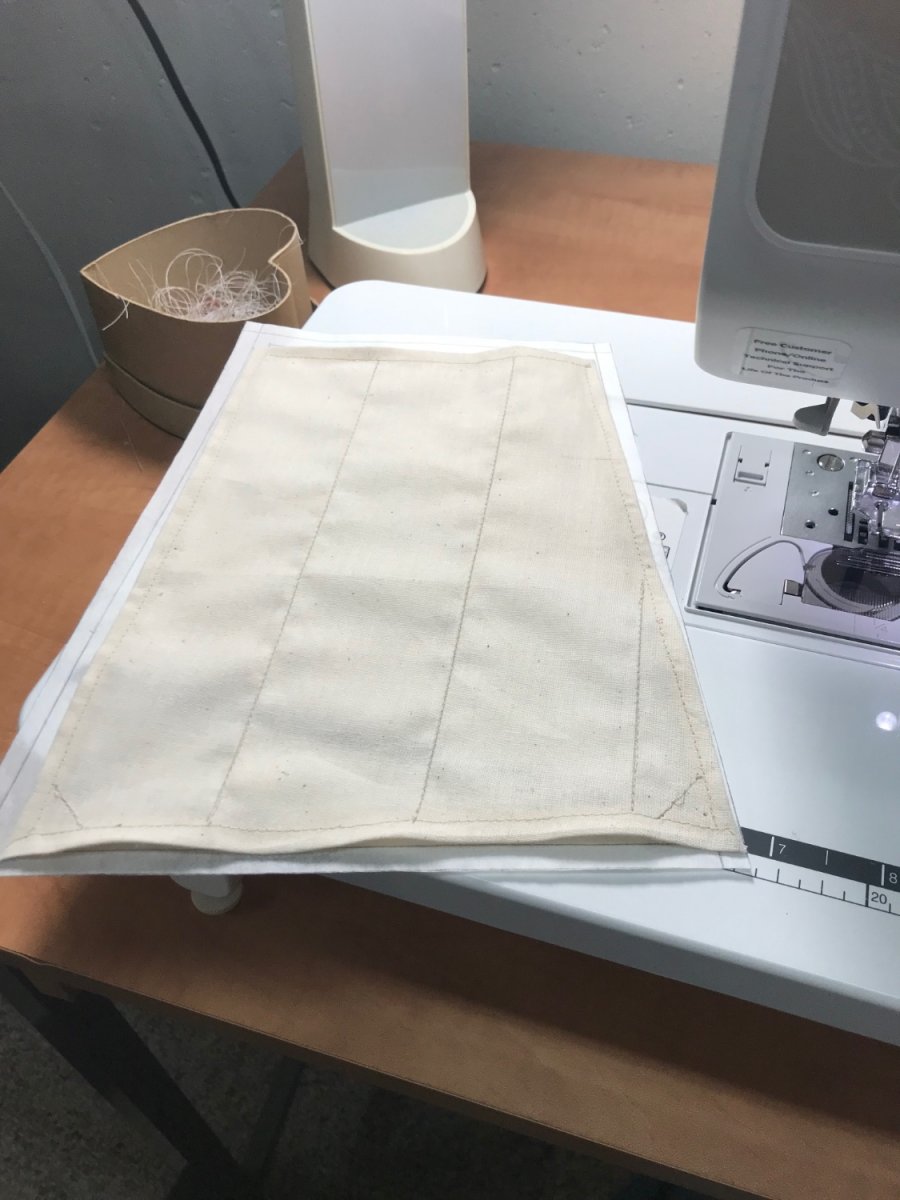
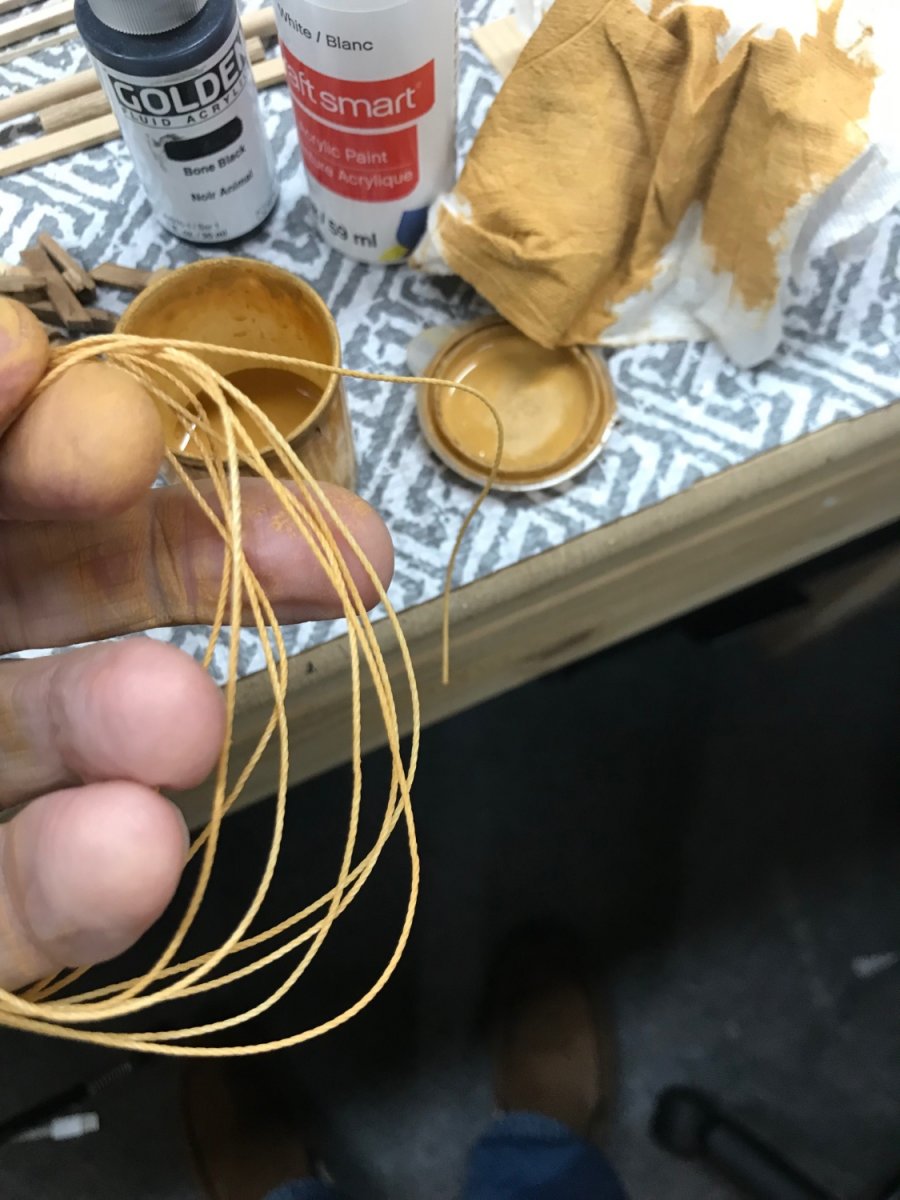
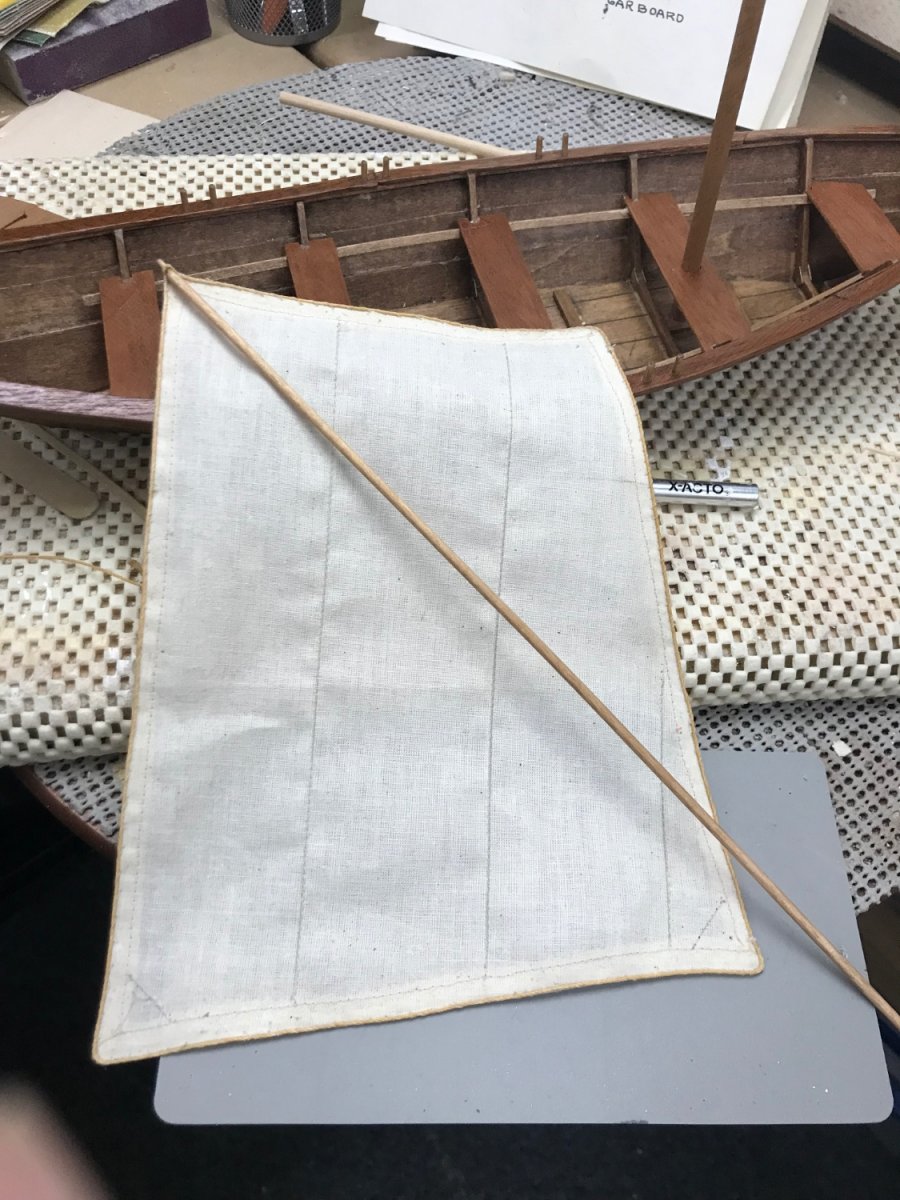
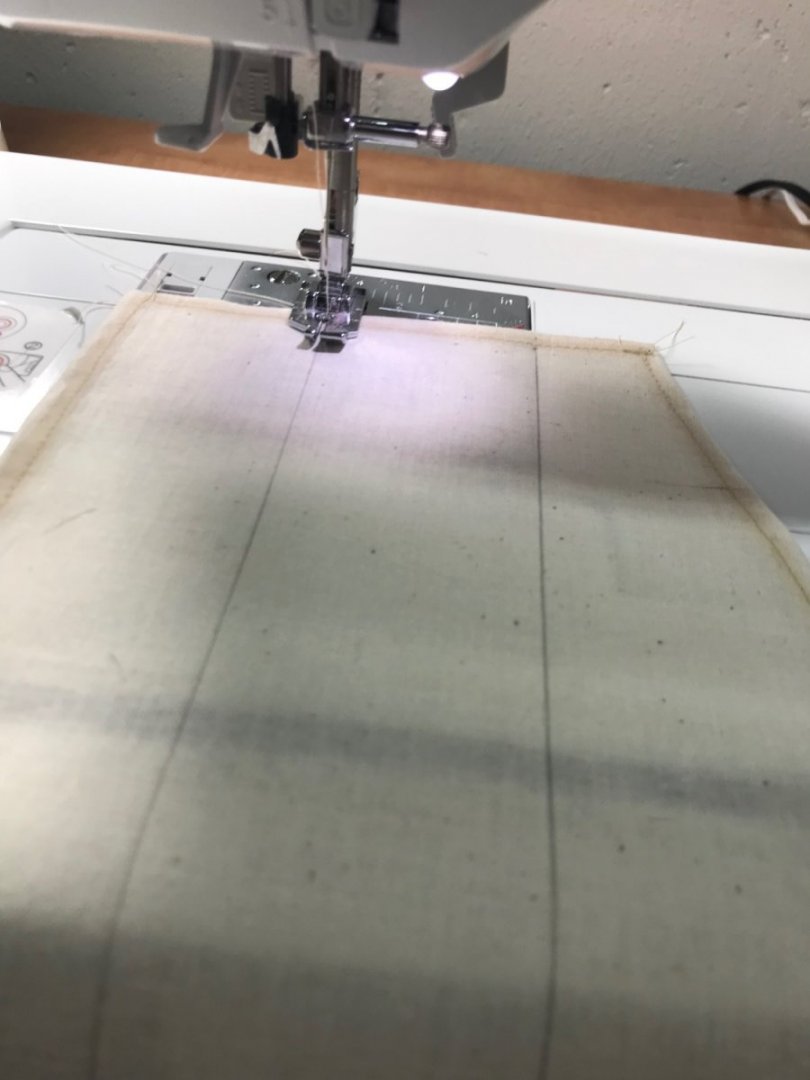
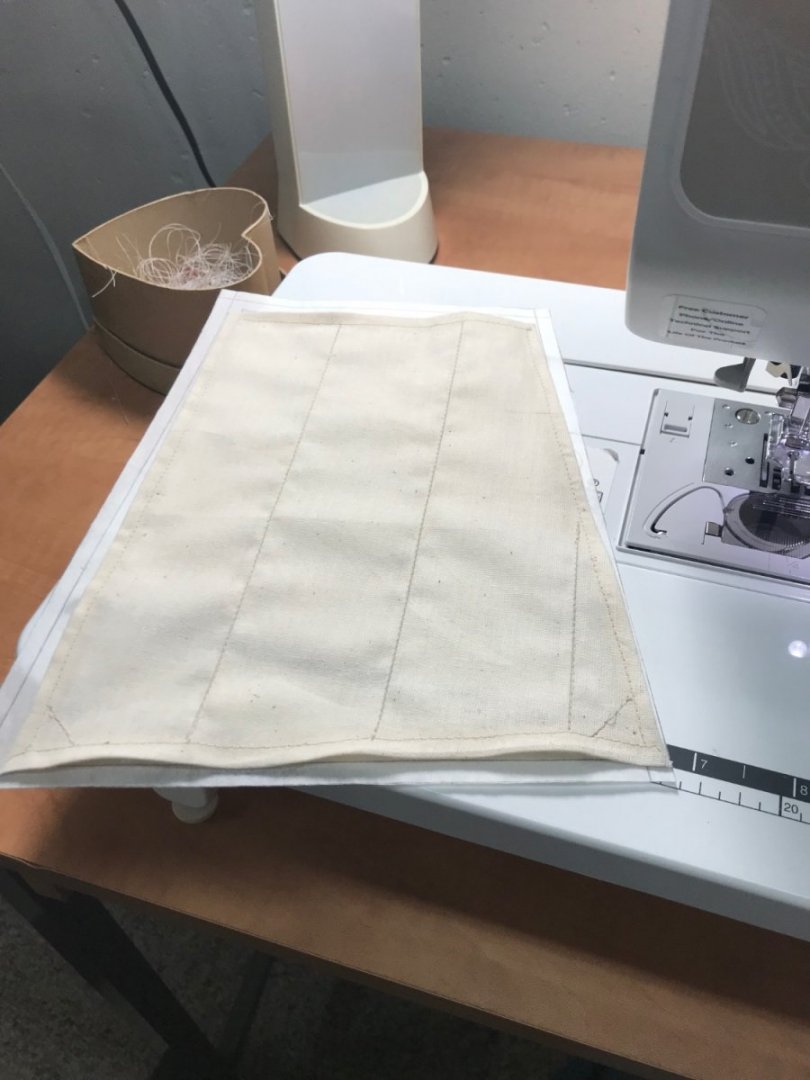
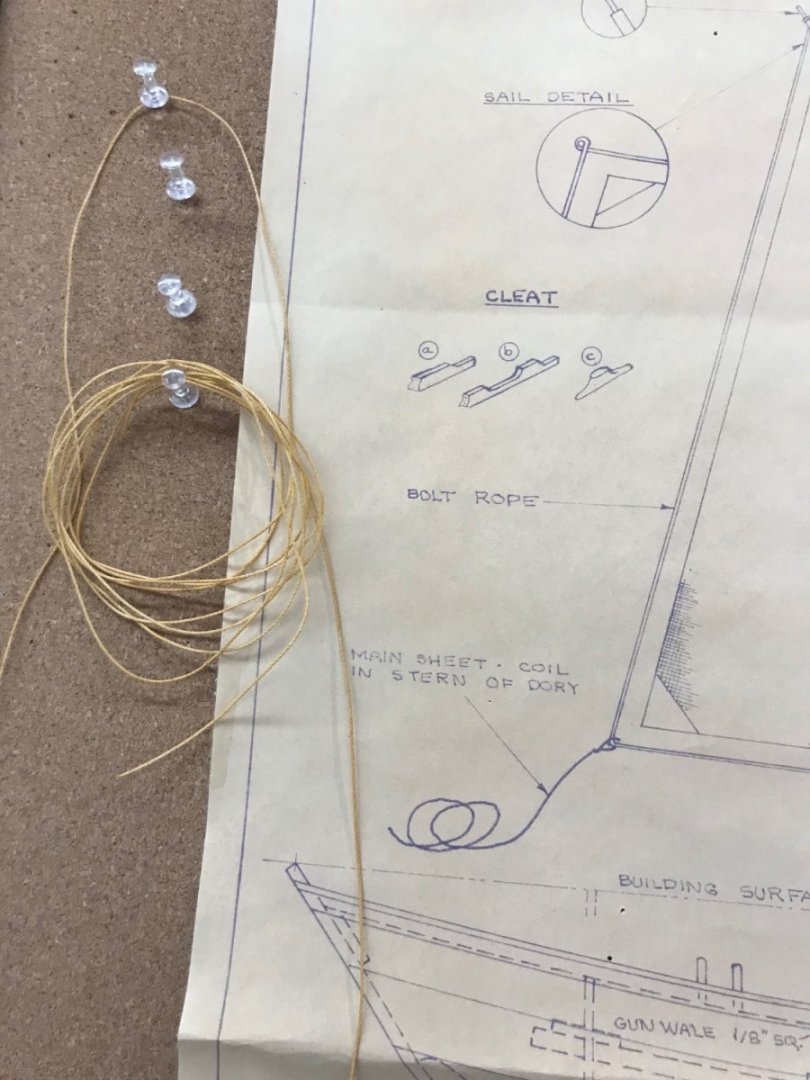
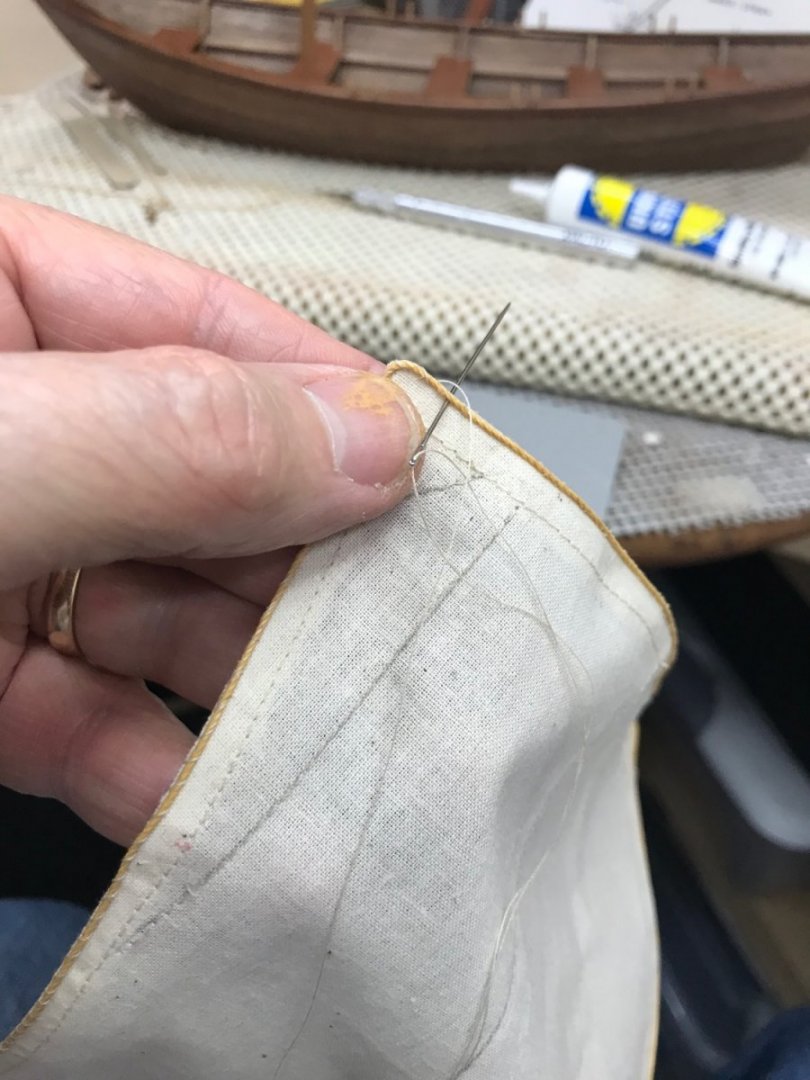
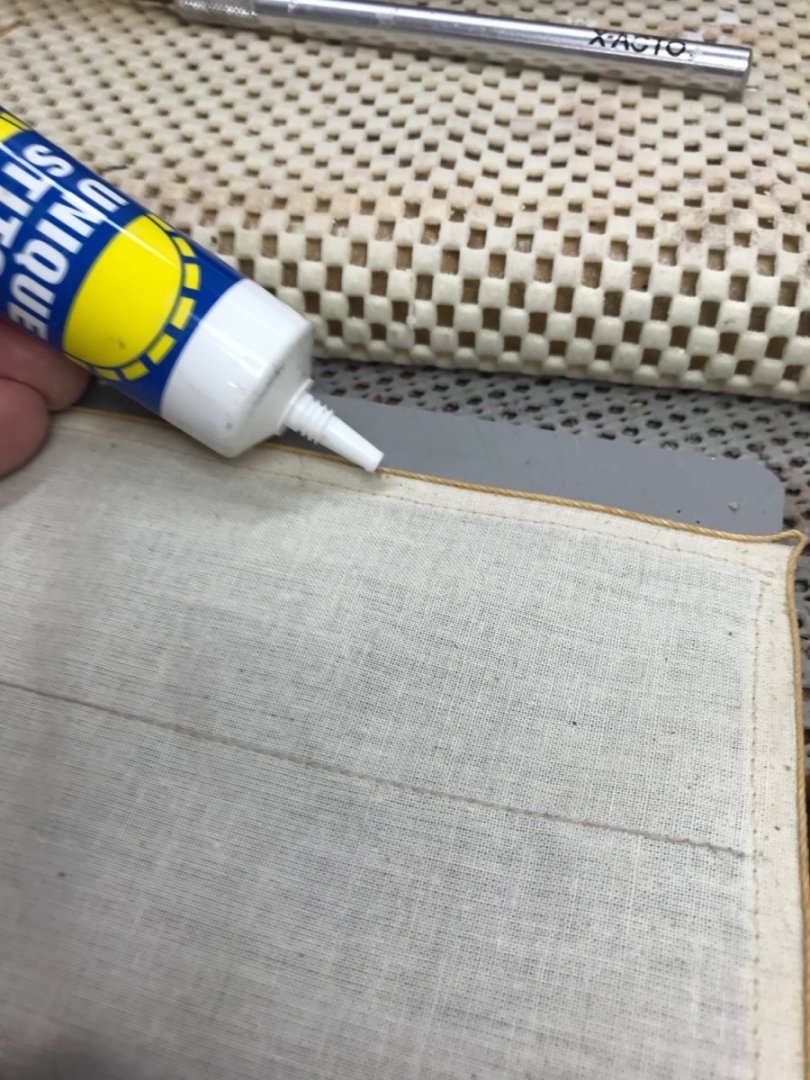
Sewing the Sail… Traced a pattern from the blueprints. Ironed and folded over the edge seams. Cut out the corner overlap. Sewed the 1/4” seam around the edge. The used Fray Check before trimming. Marked sheet seams with pencil. Sewed sheet seams and corner tabs. Colored white rigging rope supplied in the kit with custom mix of acrylic paint to look like Manila Rope. Glued on Bolt Rope. Then whip stitched the Bolt Rope in place. Sail completed and ready to set. Getting close…Cleats, Rigging and Oars left to build. That’s all… 😆 Later… 🍻


- 22 replies
-
- 7
-
-
- Laughing Whale
- Dory
- (and 1 more)
-
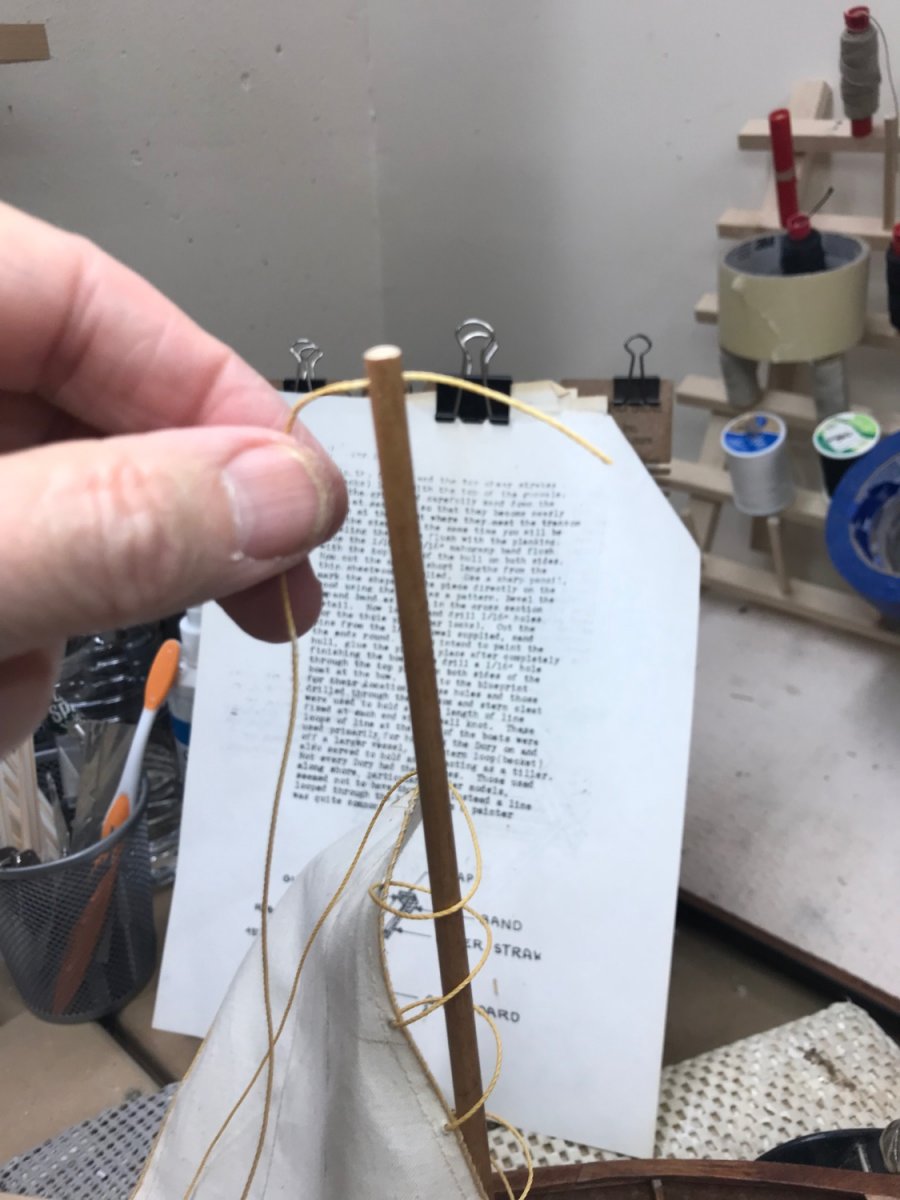
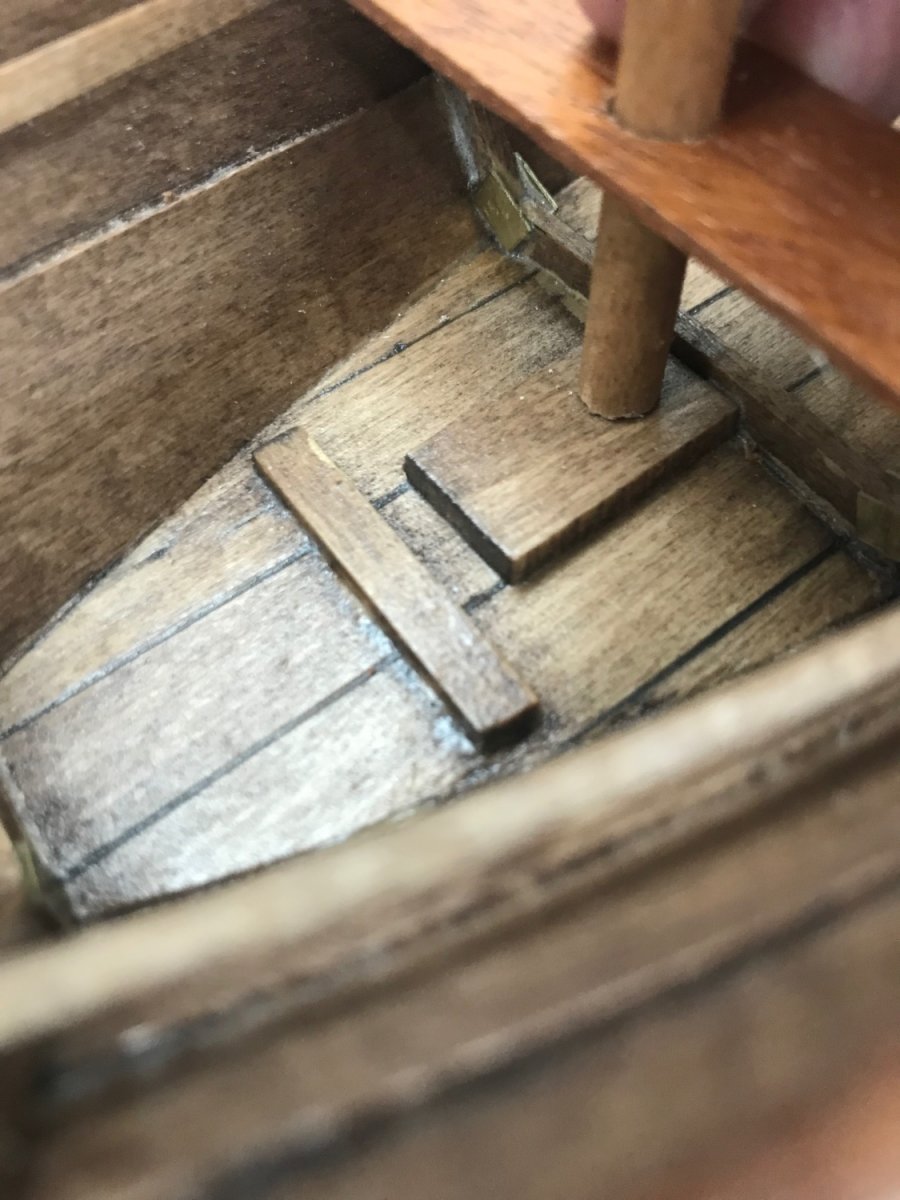
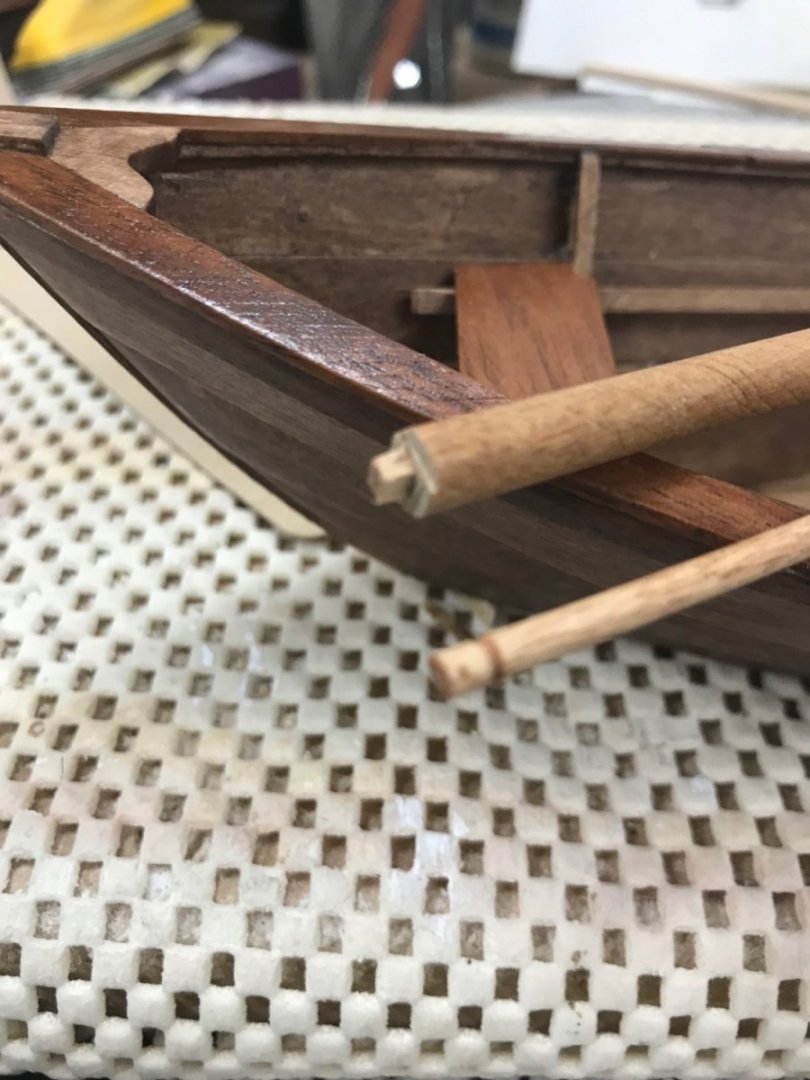
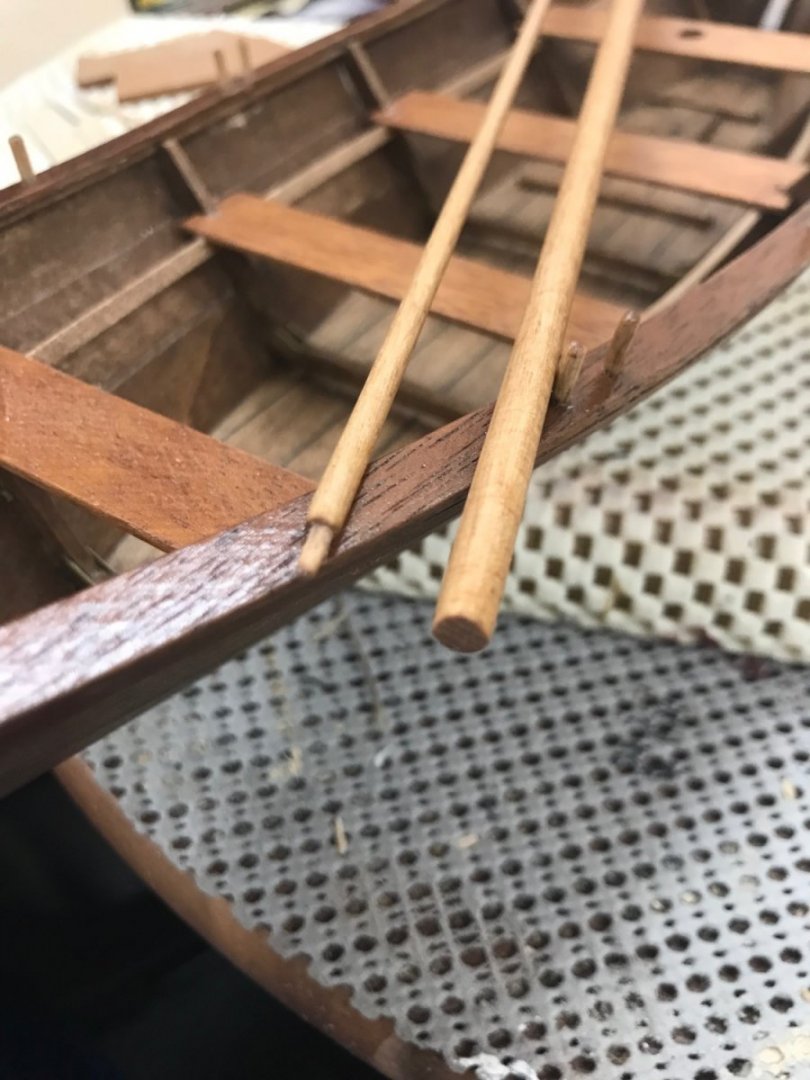
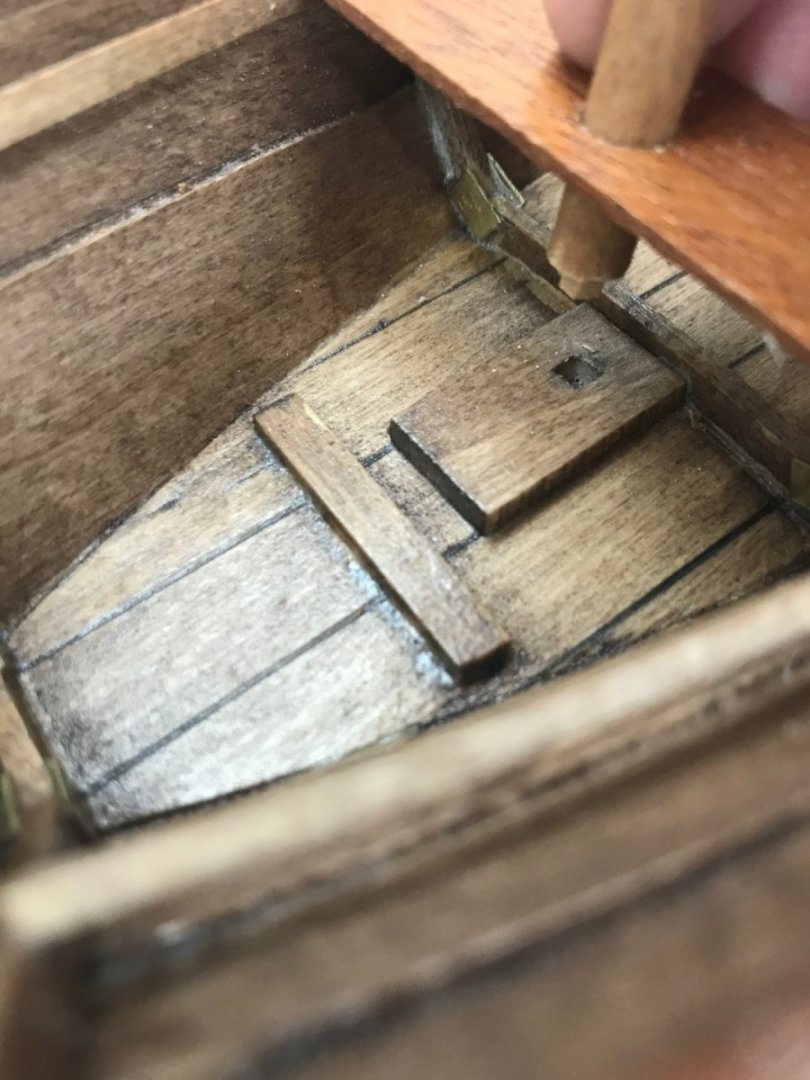
Mast and Sprit… Shaped Mast and Sprit Pole ends. Placed Mast into Mast Step… One Step closer… Cheers 🍻


- 22 replies
-
- 6
-
-
- Laughing Whale
- Dory
- (and 1 more)
-
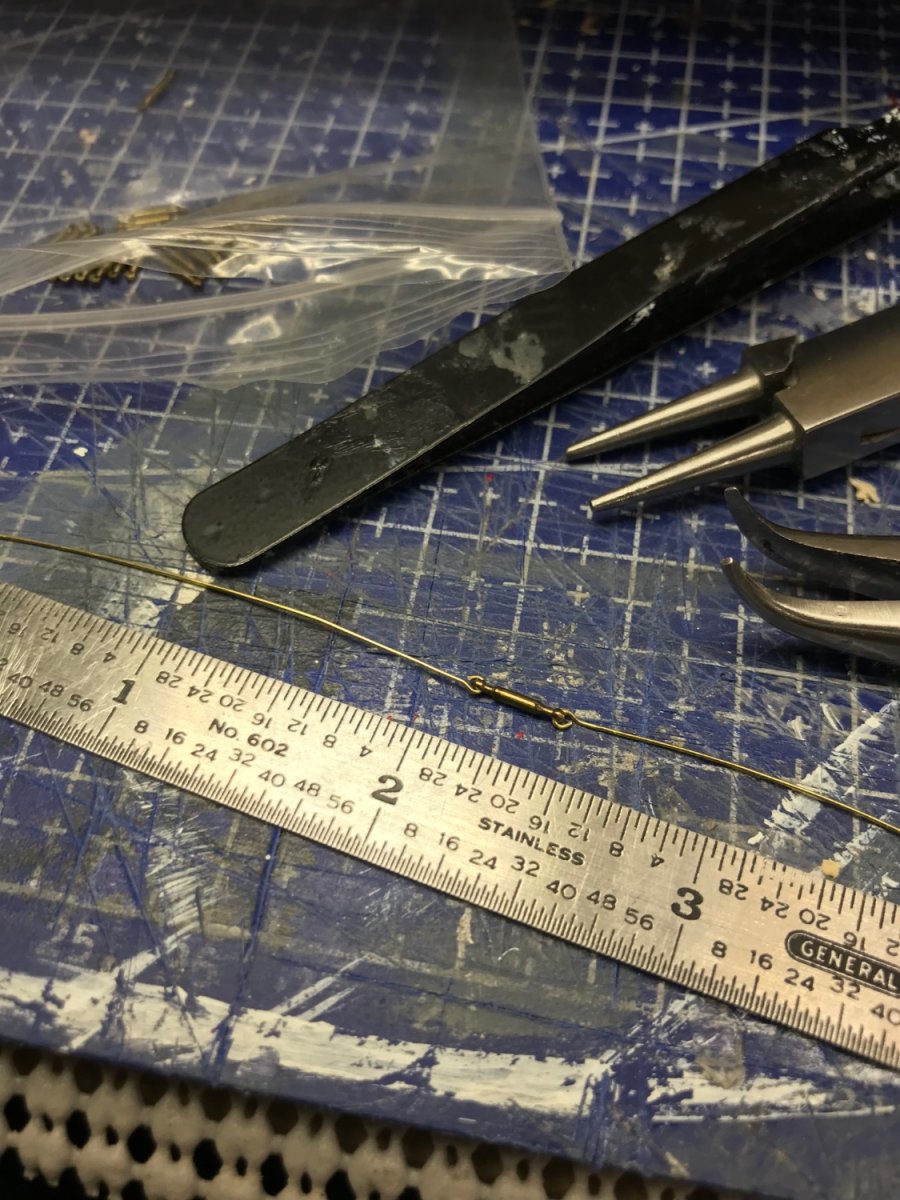
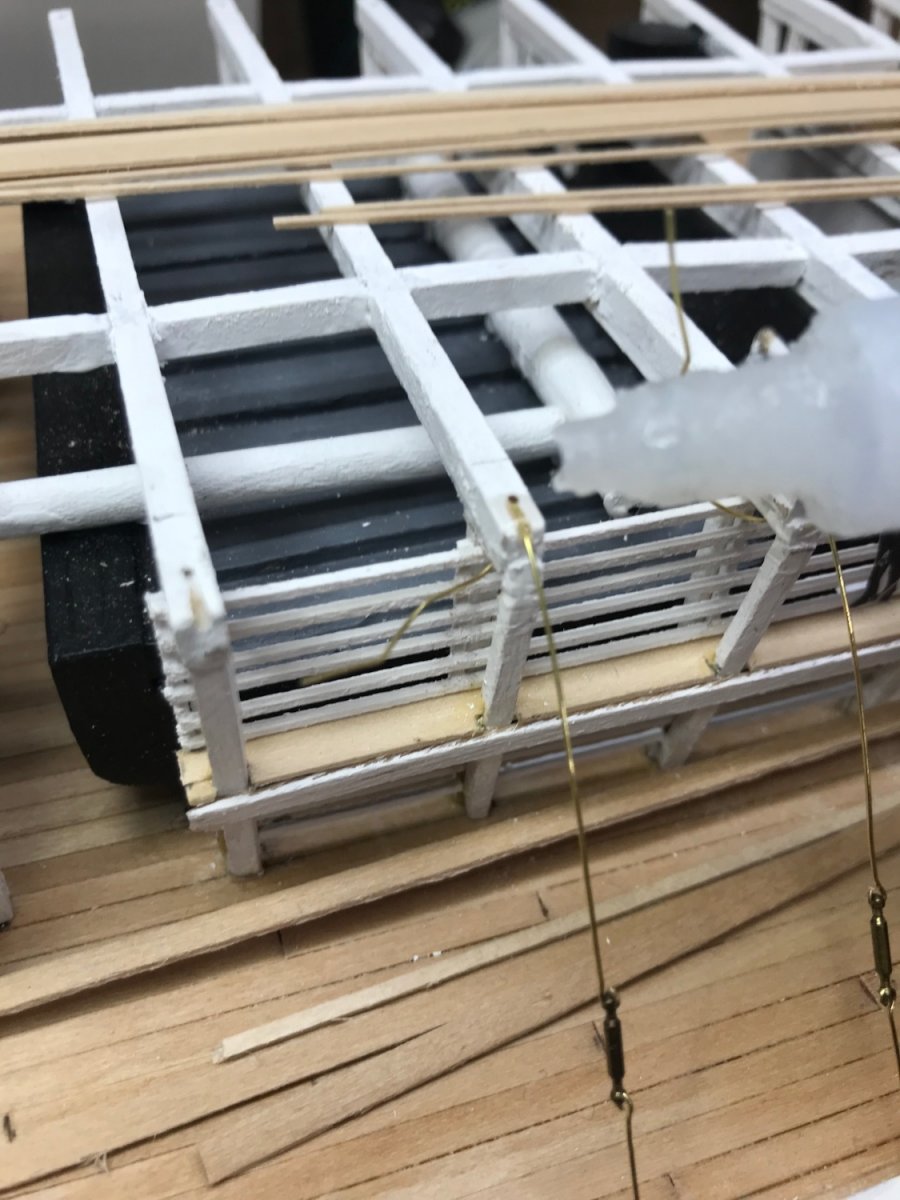
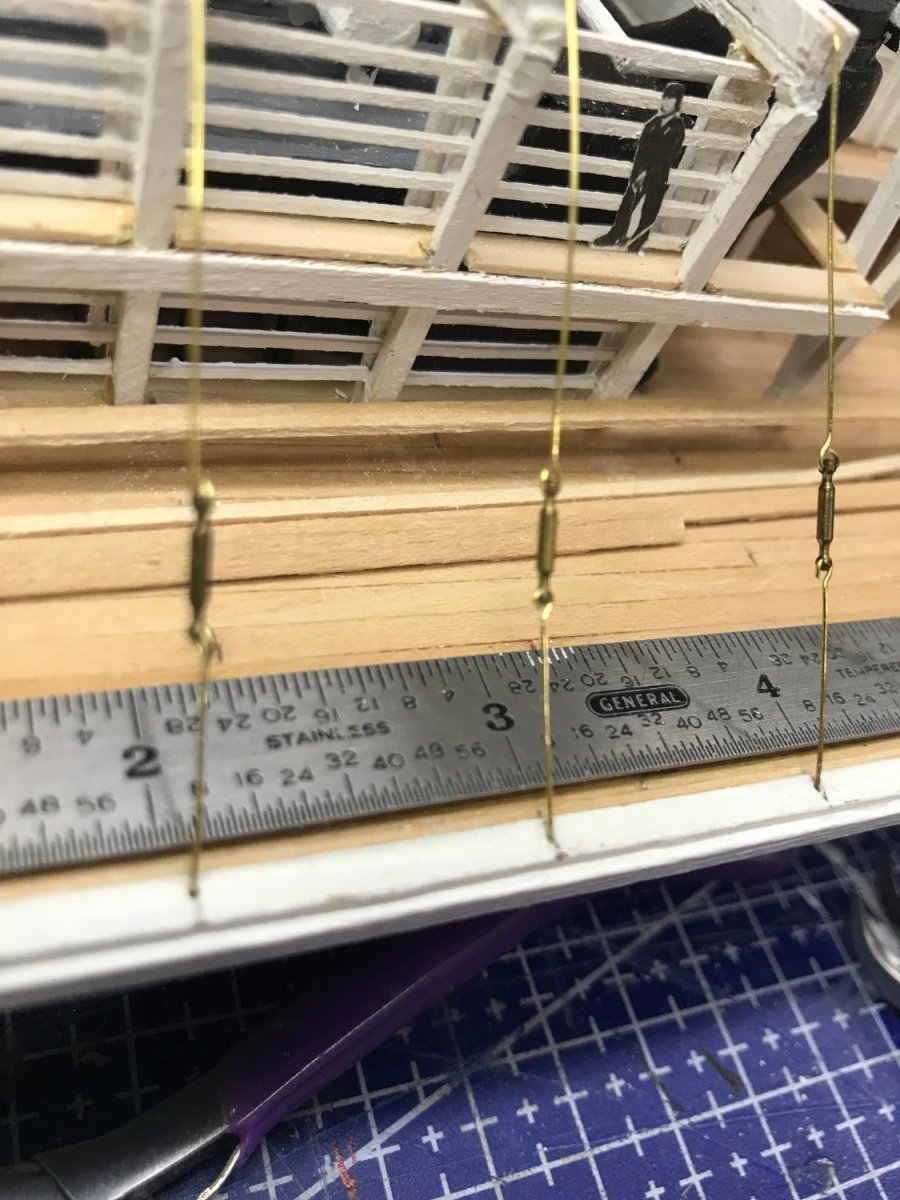
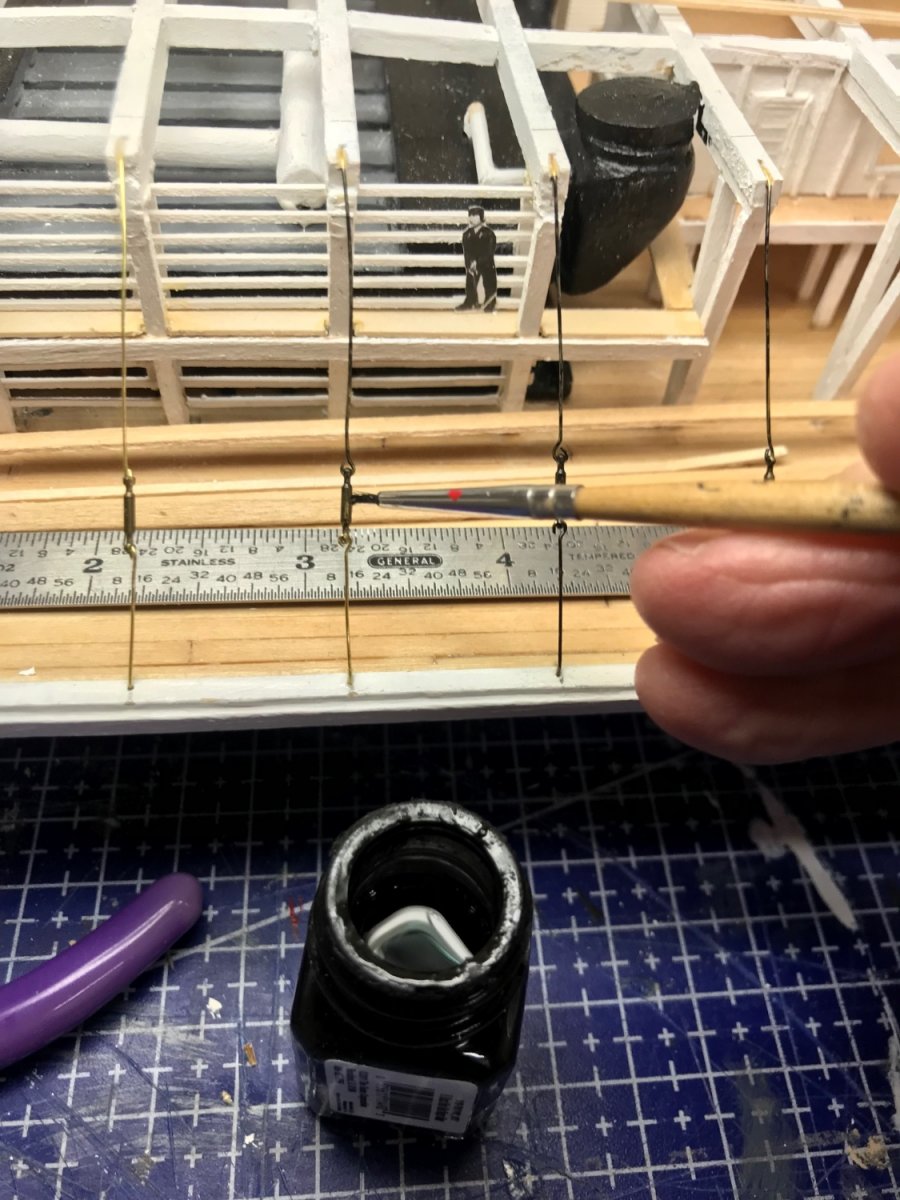
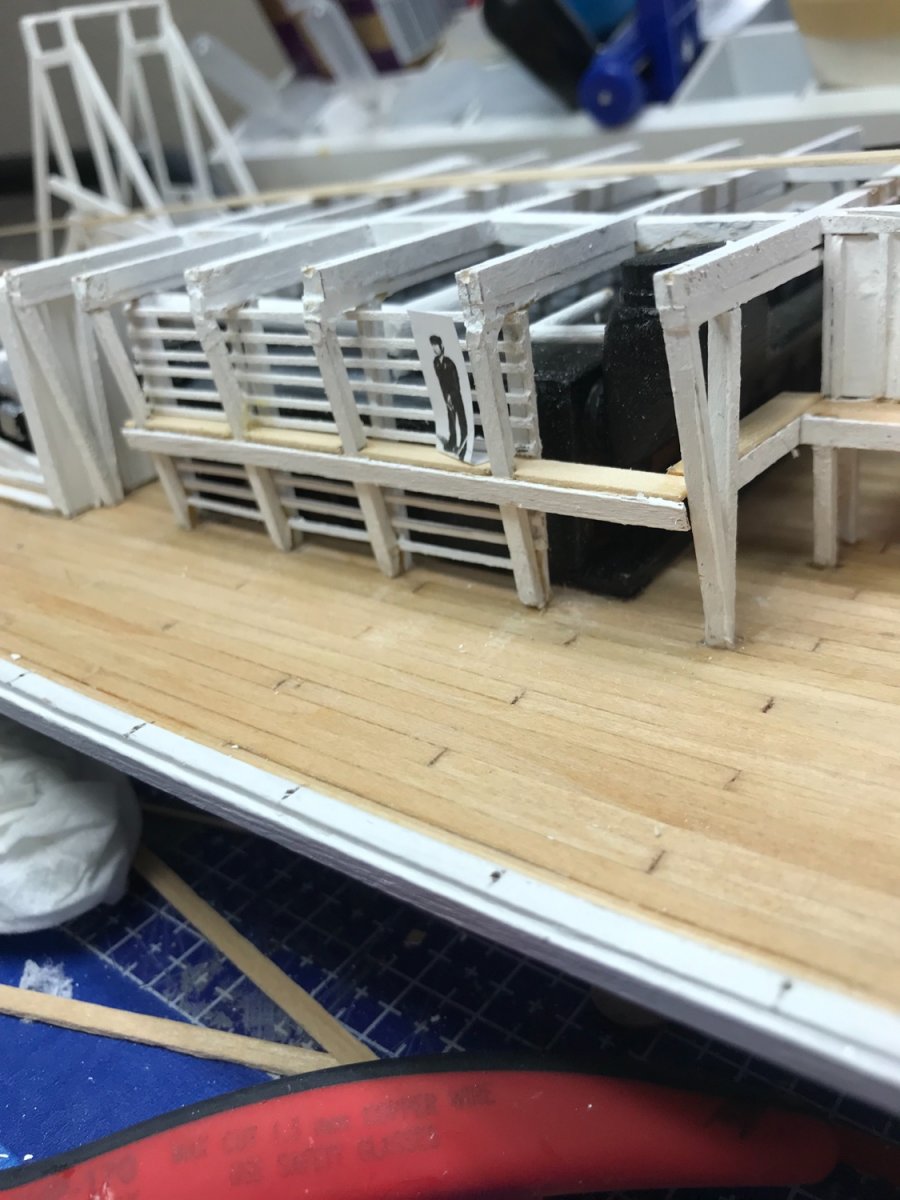
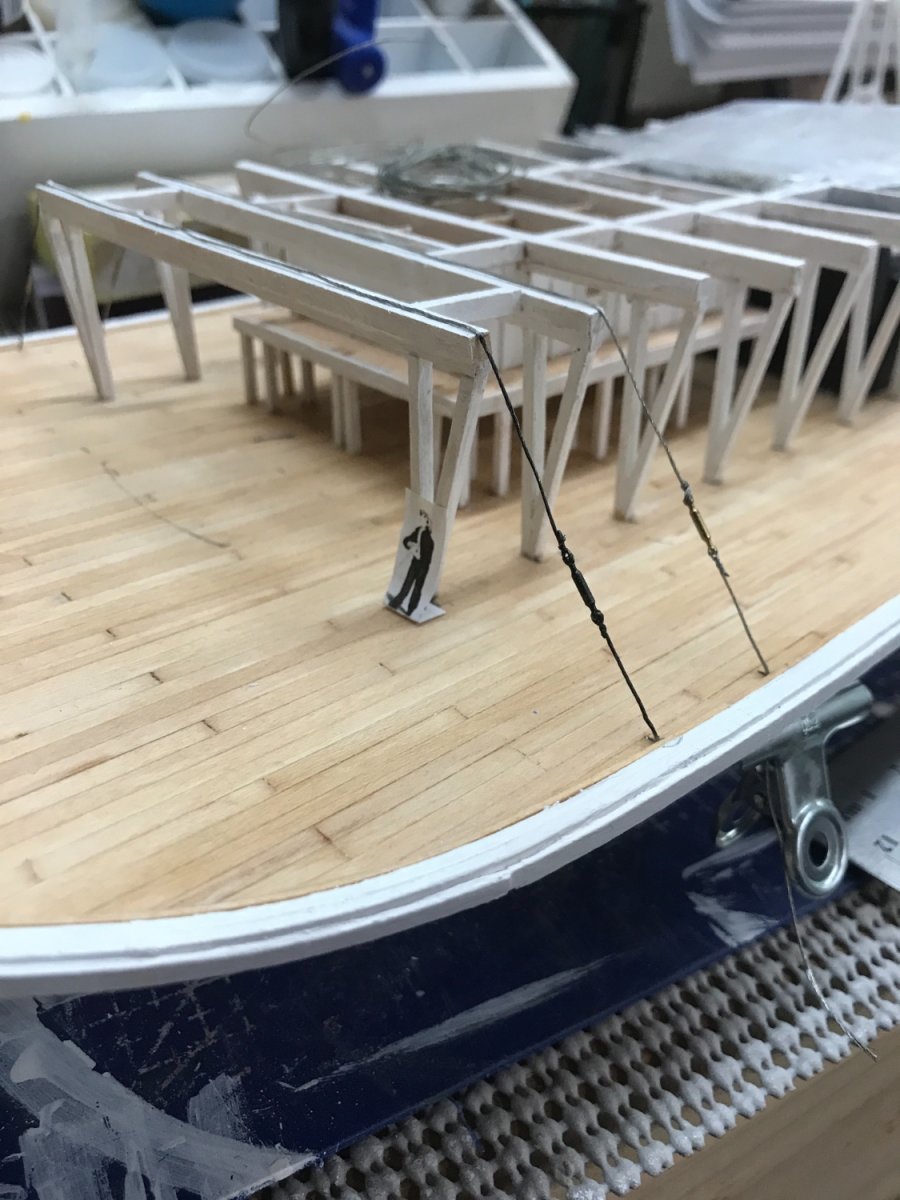
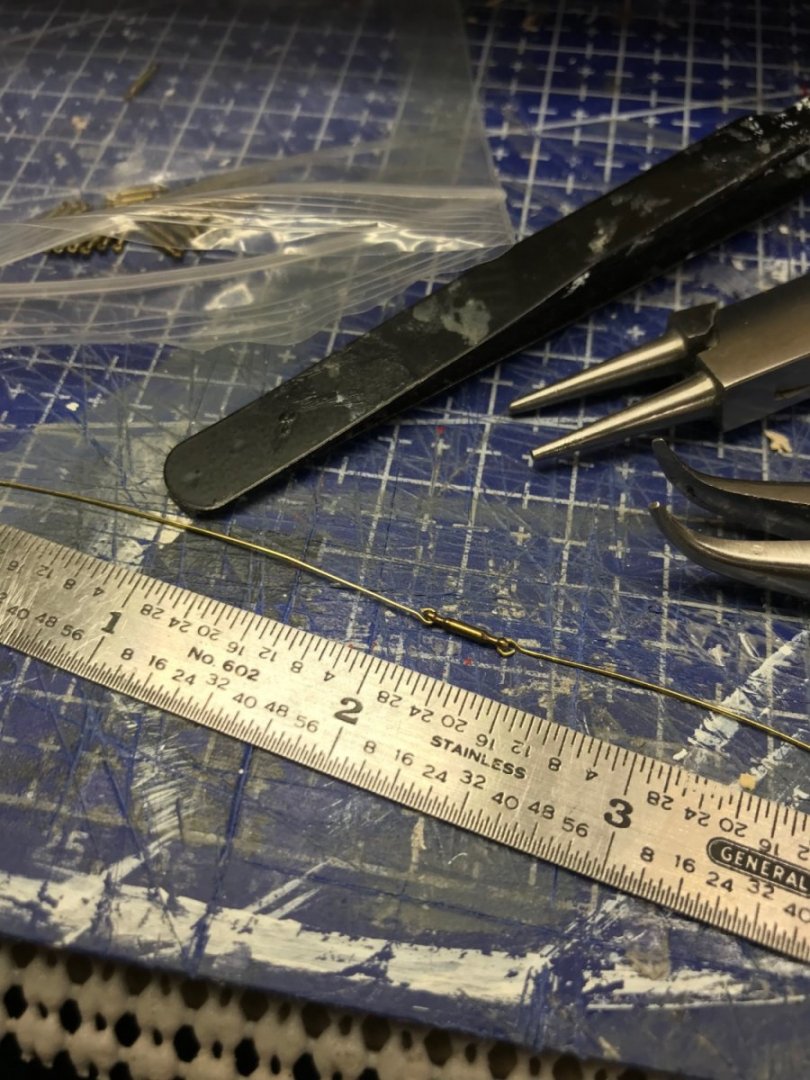
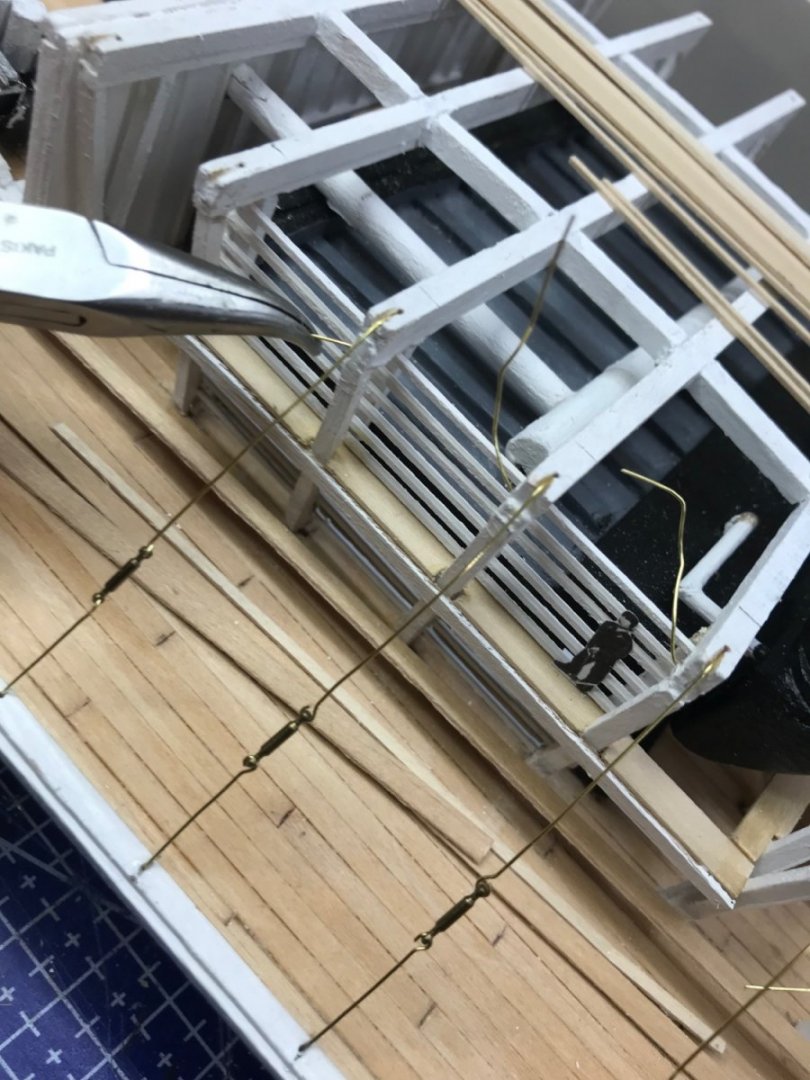
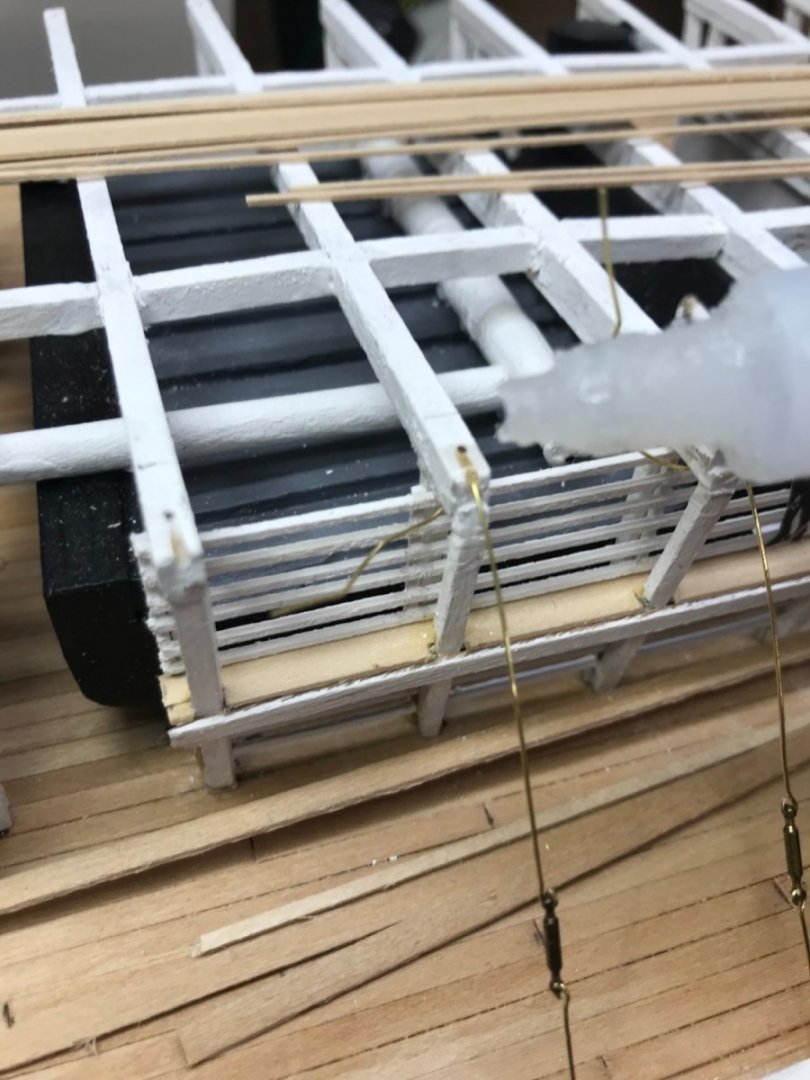
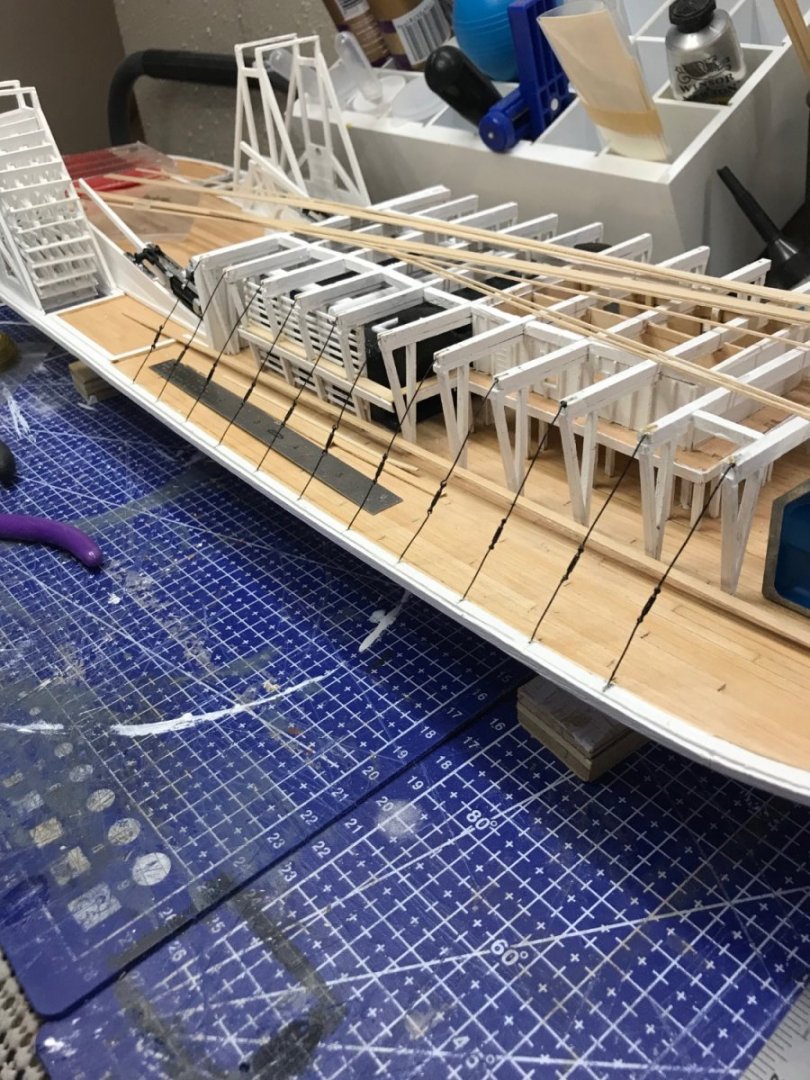
Hanger Rods and Turn Buckles… These rods were used to support the Main Deck as it was cantilevered beyond the hull. Turn Buckles we’re supplied in the kit by Bluejacket. Good quality brass castings. I decided to use fine brass wire vs. the stranded wire I had used on the first two earlier in the build. The stranded wire will be more more appropriately used as the Hogging Chain and Stack guy wires later. Attaching the hanger rods… Setting the rods with CA glue… Painting the rods flat black… Starboard side Completed. Cheers 🍻


- 238 replies
-
- 5
-
-
- Robert E Lee
- steamboat
- (and 3 more)
-
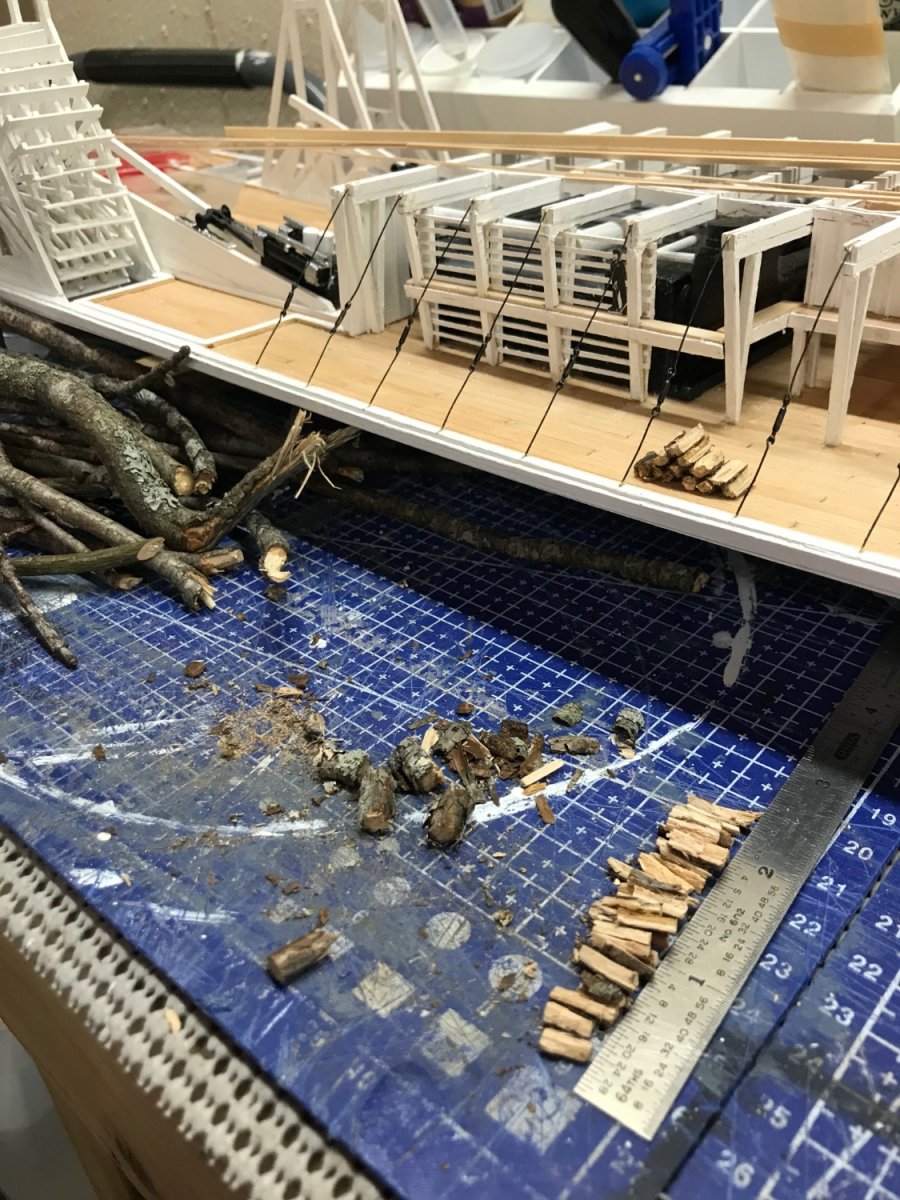
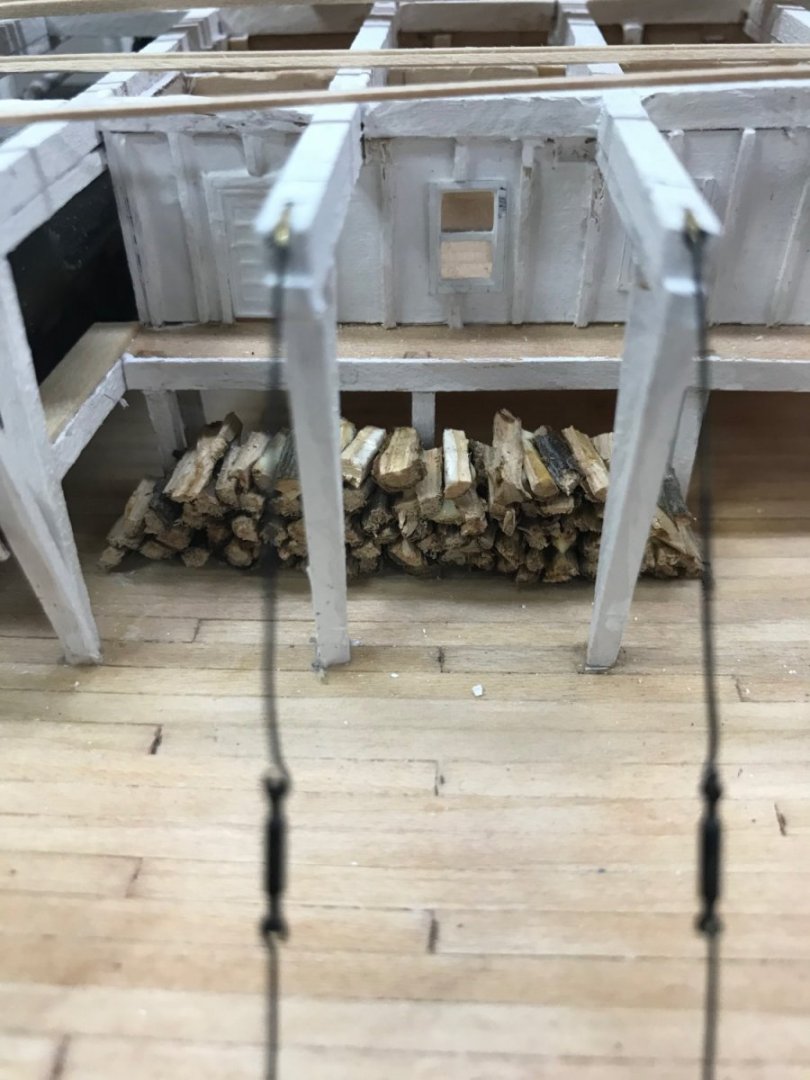
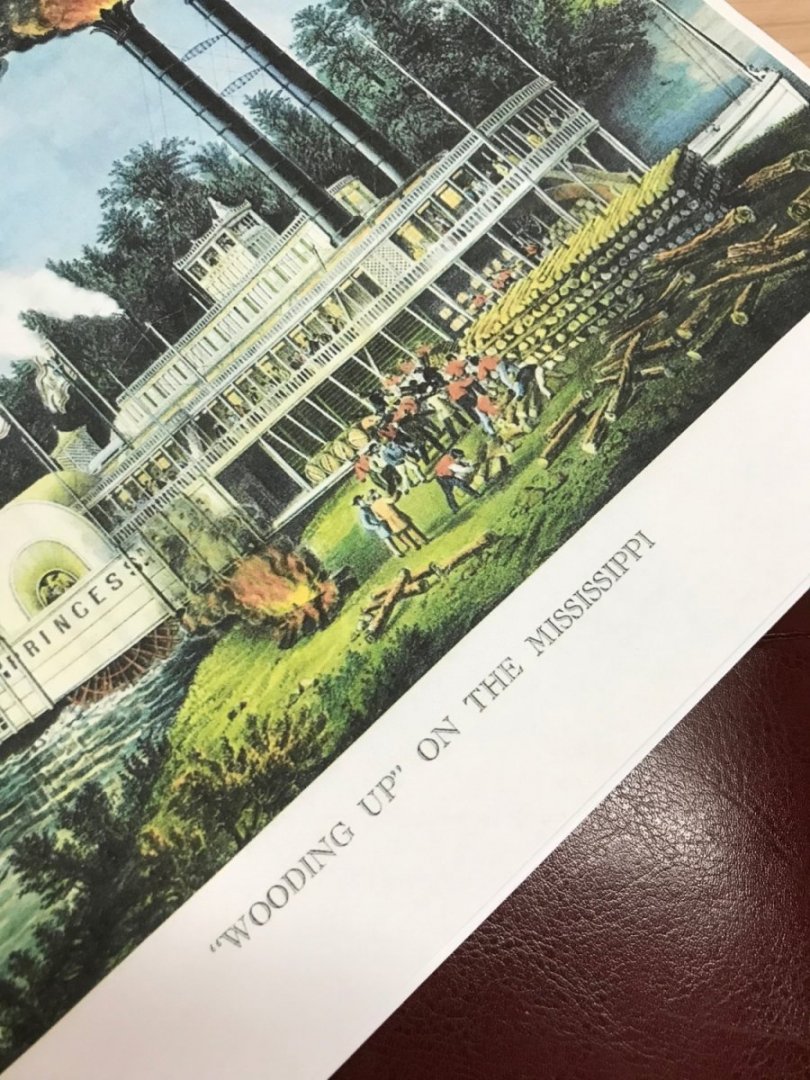
Ho Ho He He Ha Ha,.. I am not sure weather I survived without becoming a bit Obsessive. I have now taken up Cutting Twigs into 3/8” pieces and splitting them into firewood. 🤪 They call this “Wooding Up” on the Mississippi. 😆 Those Steam Boilers consumed a forest to transport goods and passengers. Several stops to “Wood Up” were made between New Orleans and St. Louis. Onwards… 👍

- 238 replies
-
- 7
-
-
- Robert E Lee
- steamboat
- (and 3 more)
-
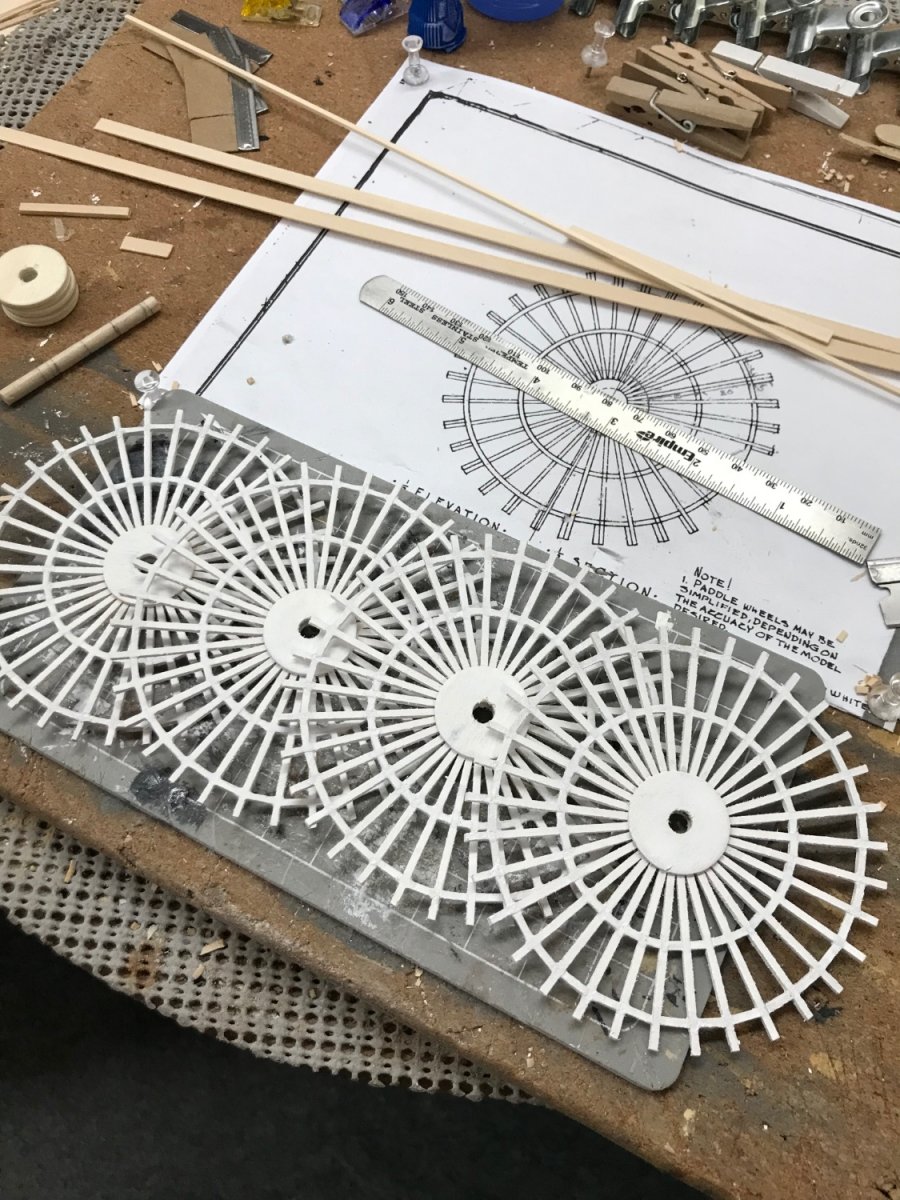
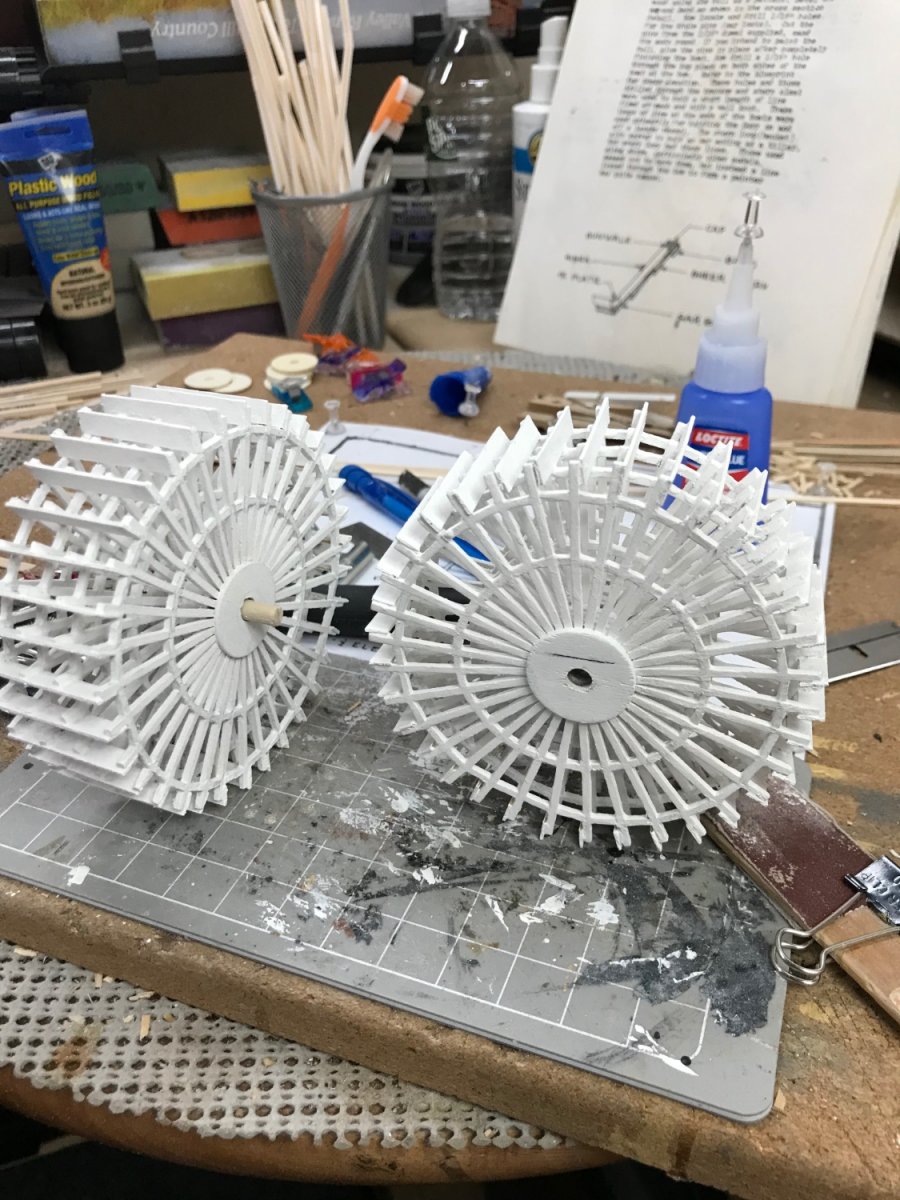
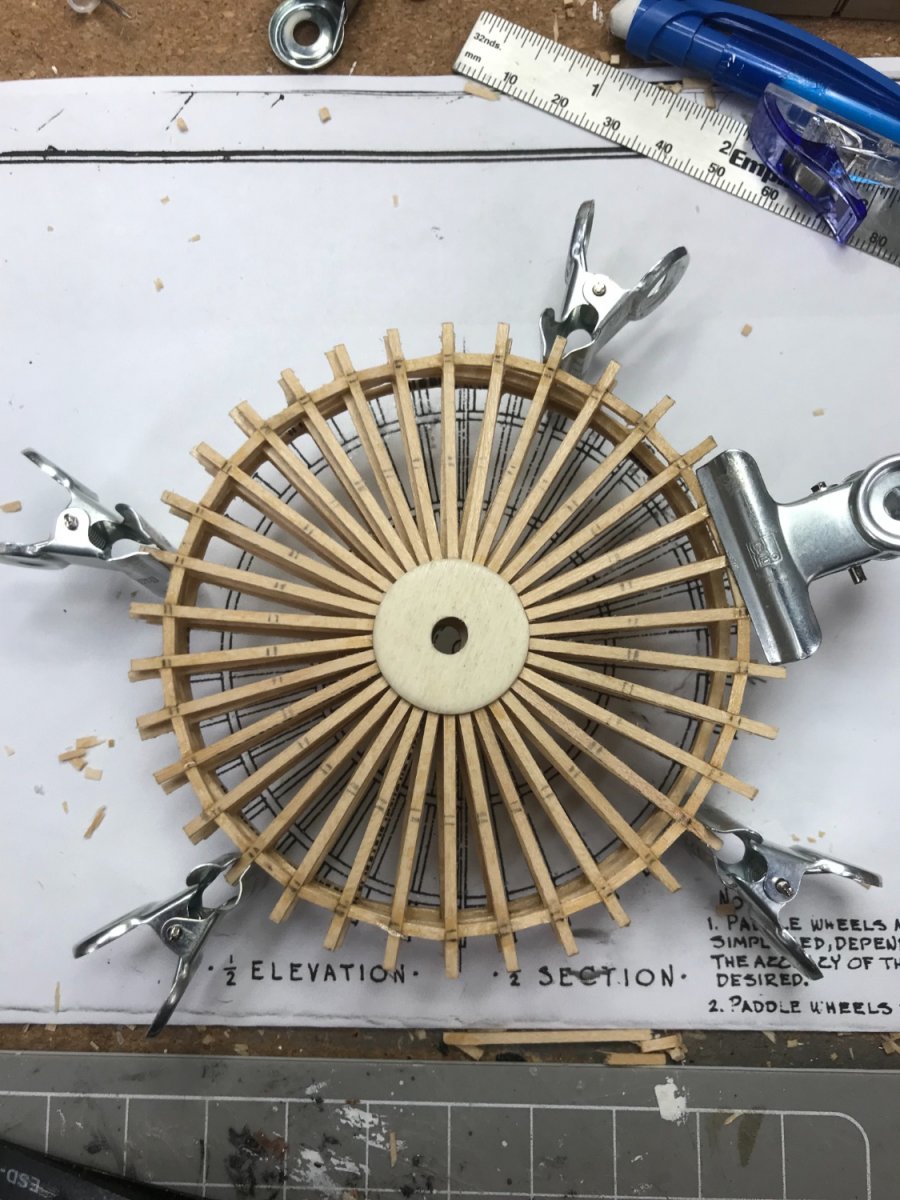
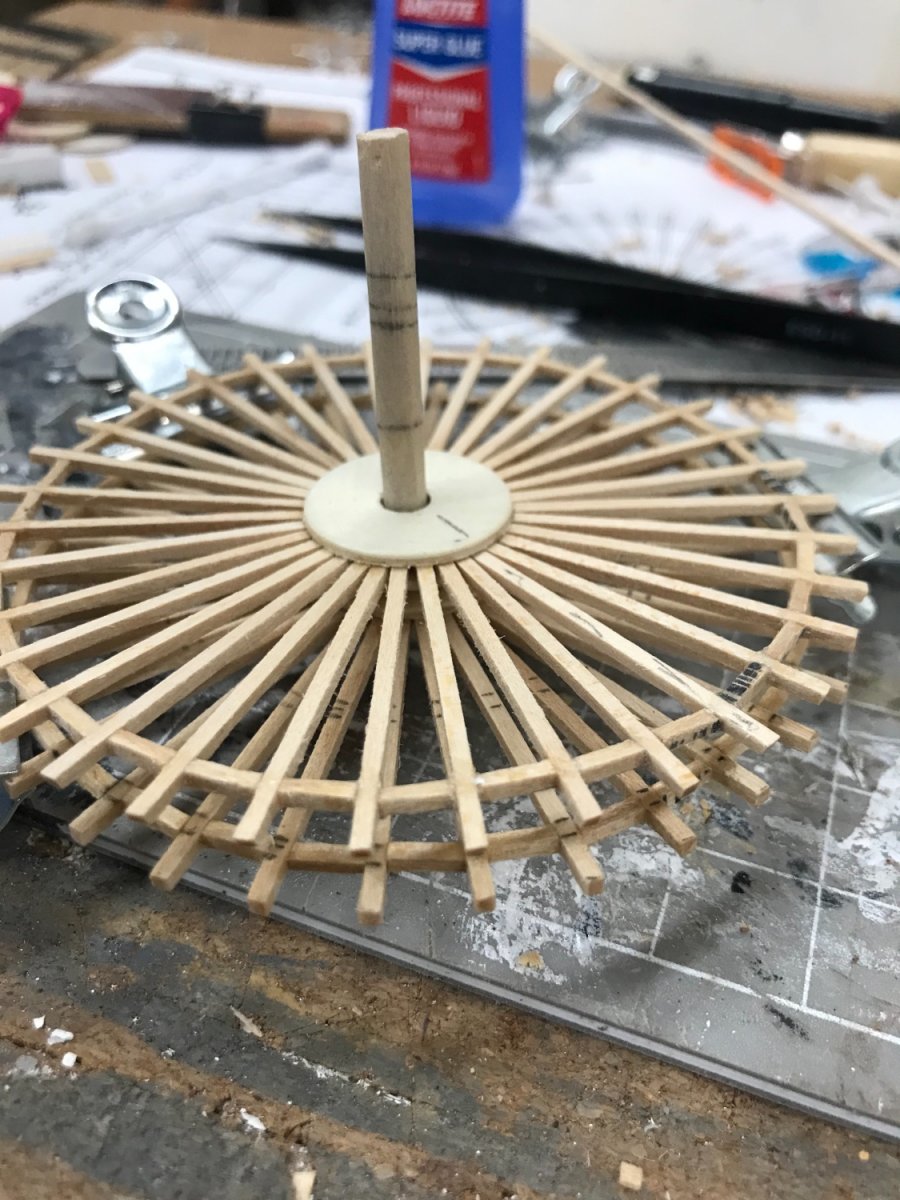
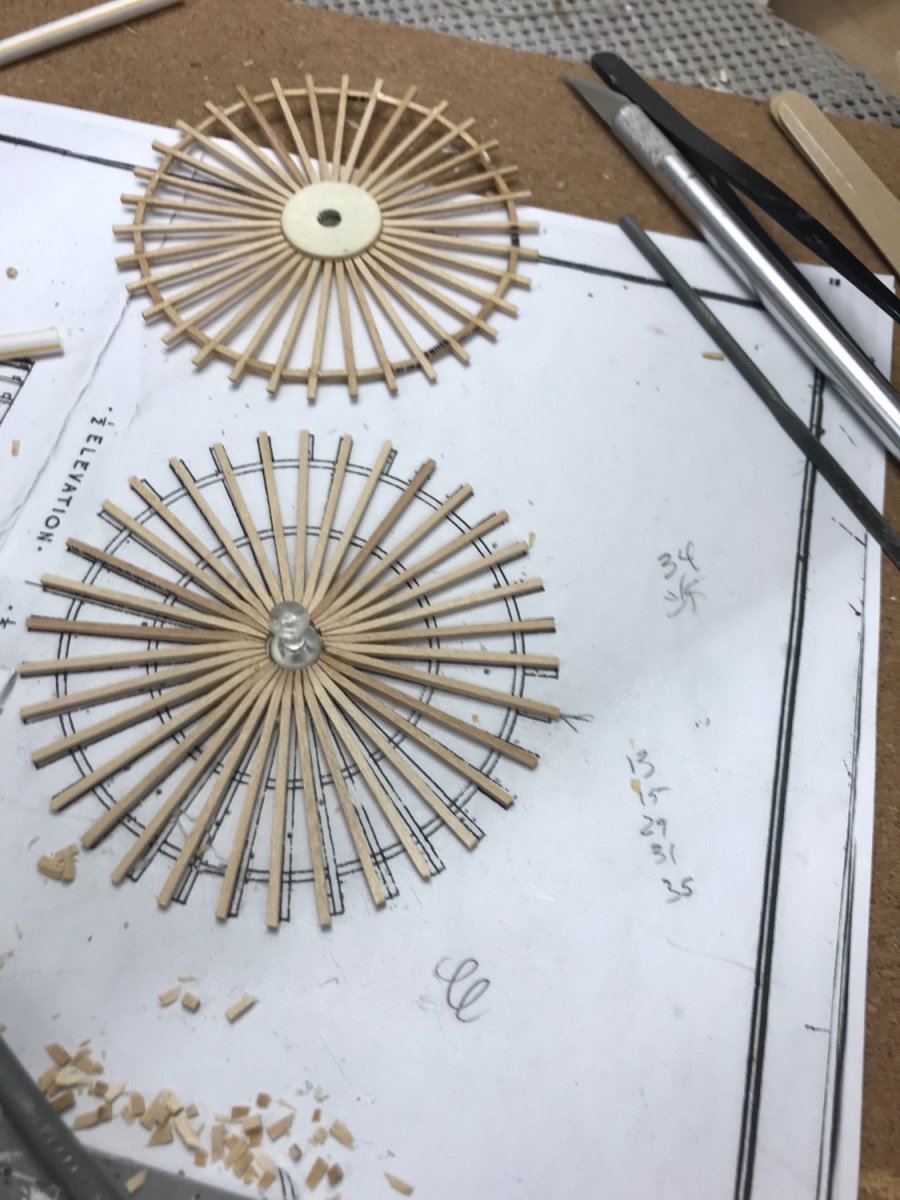
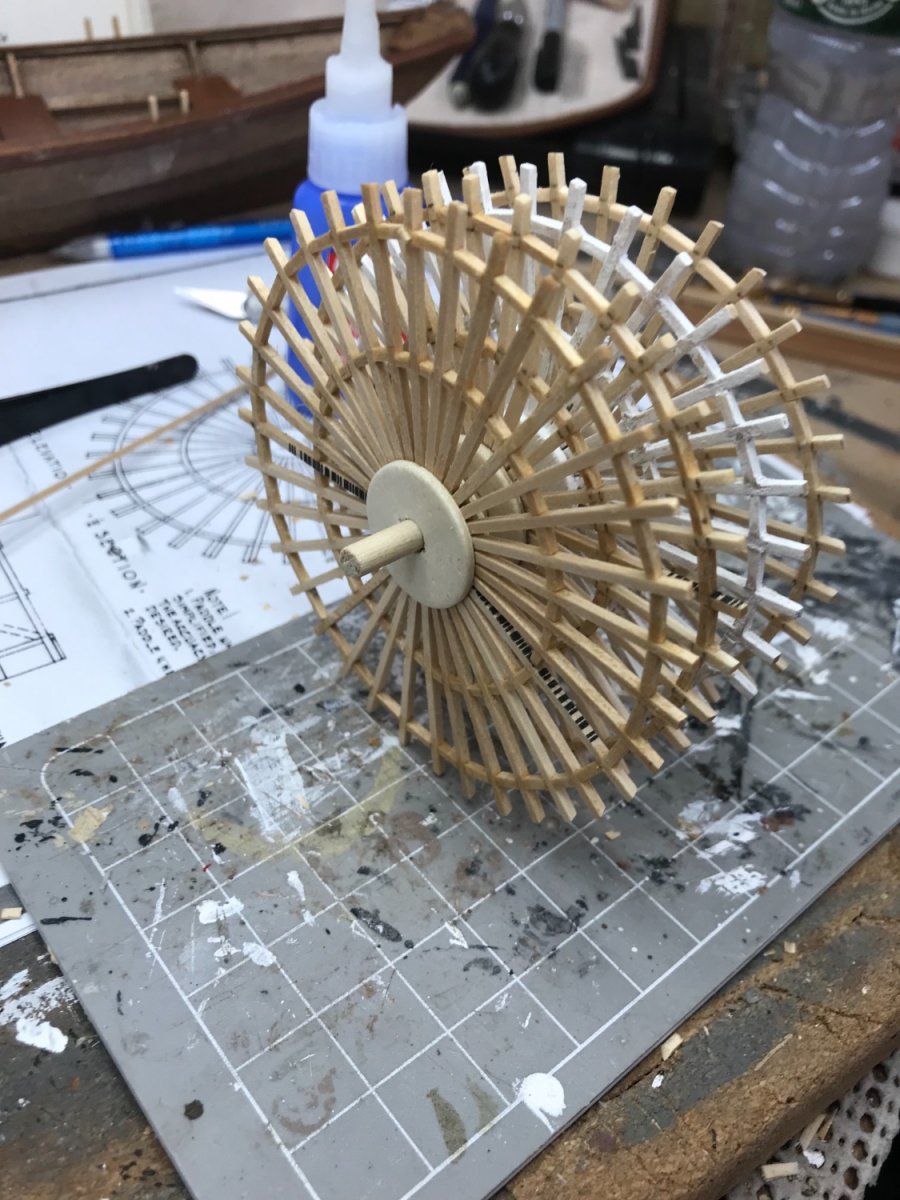
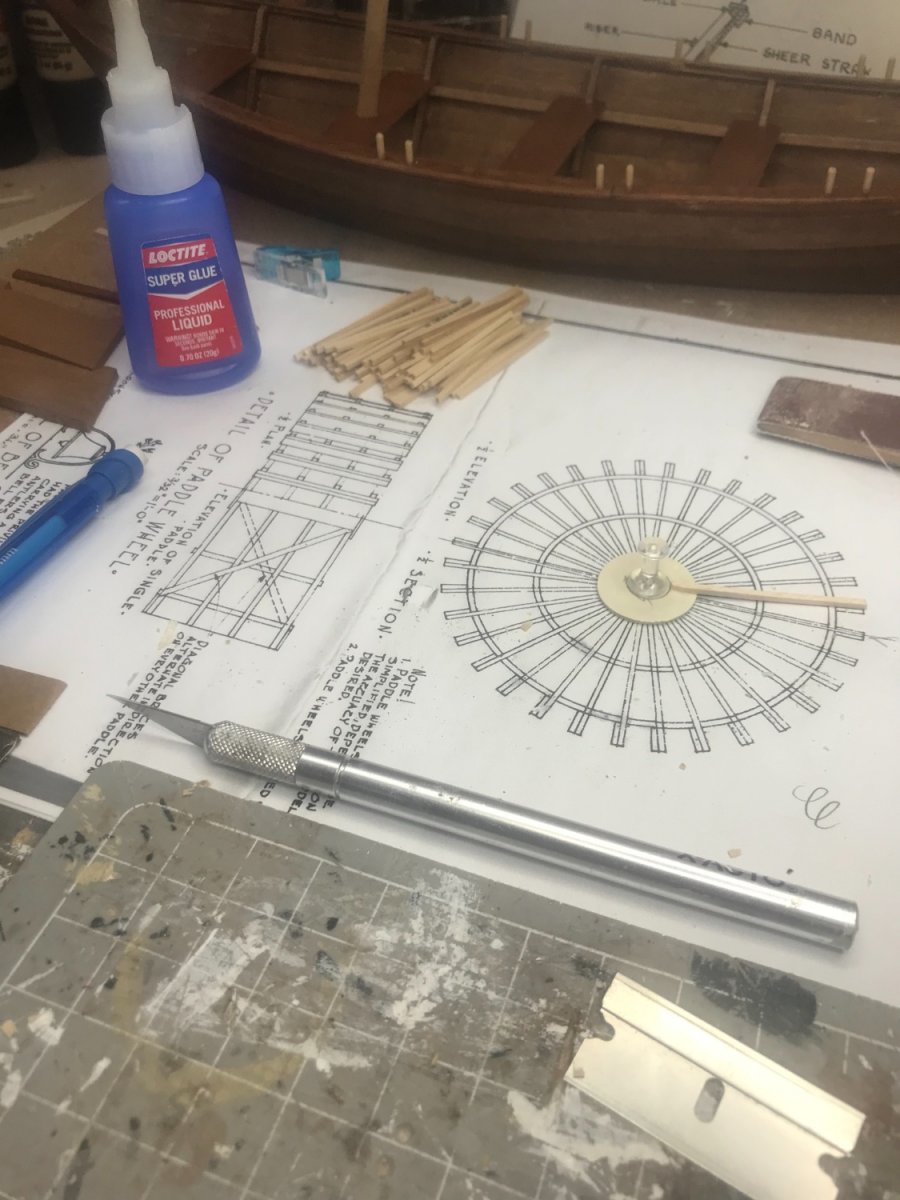
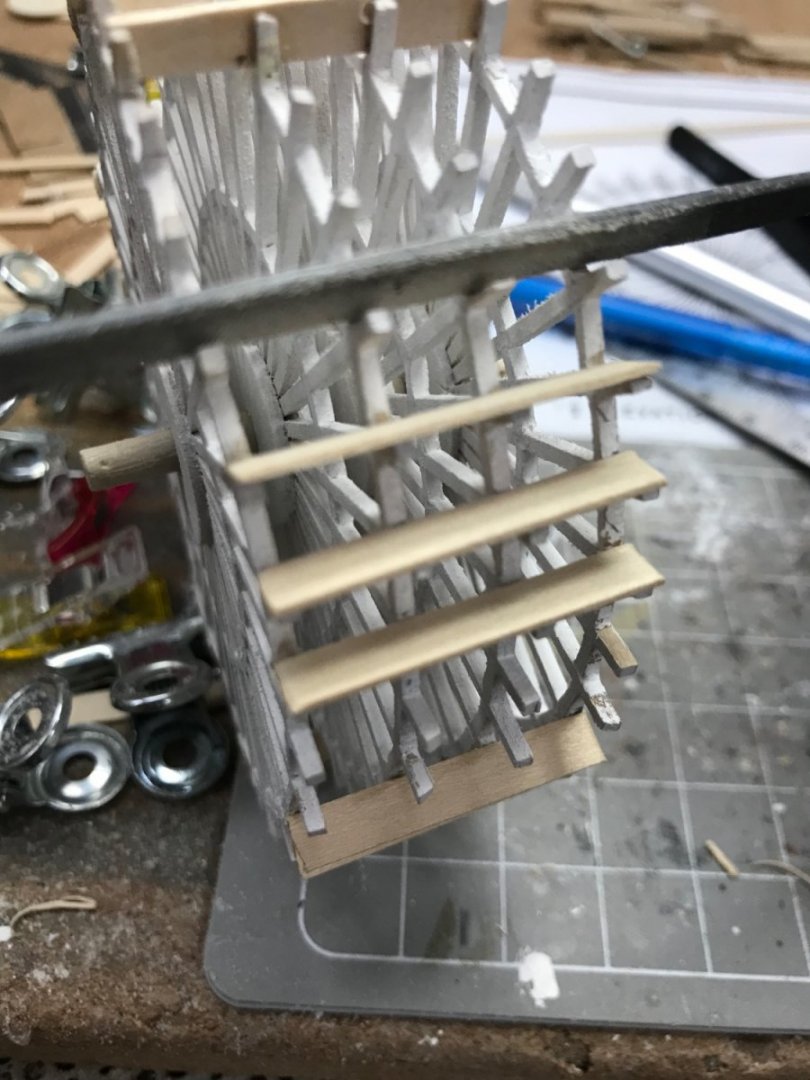
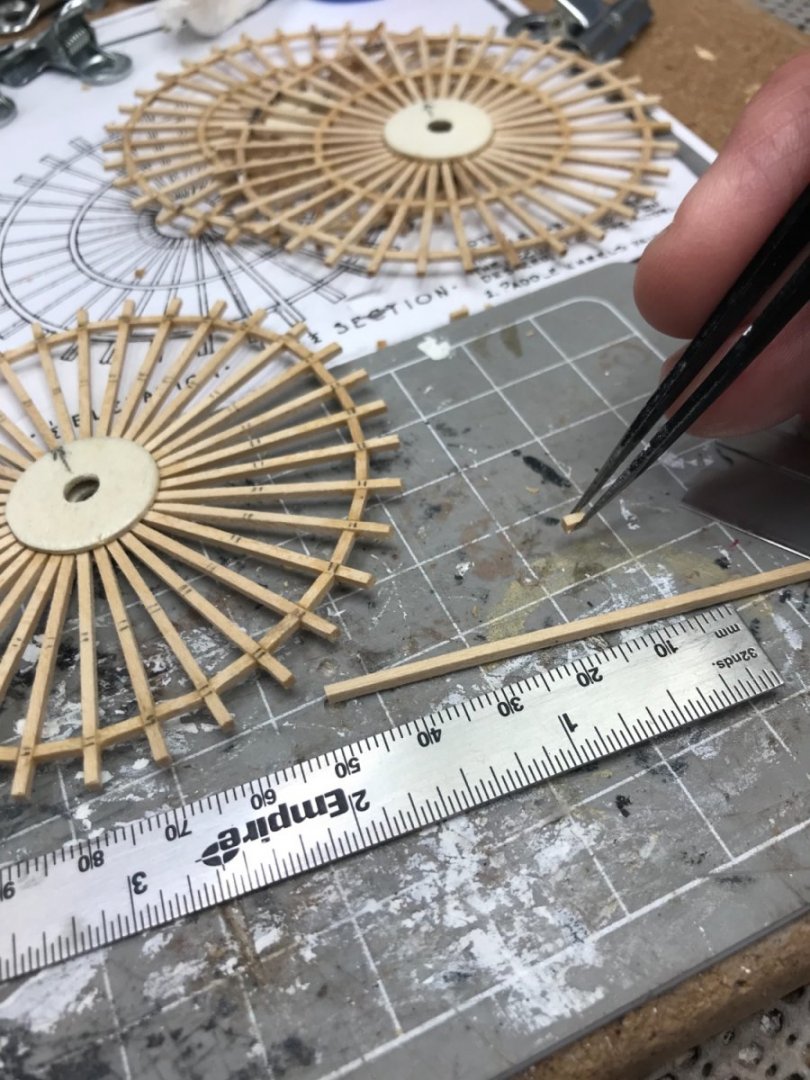
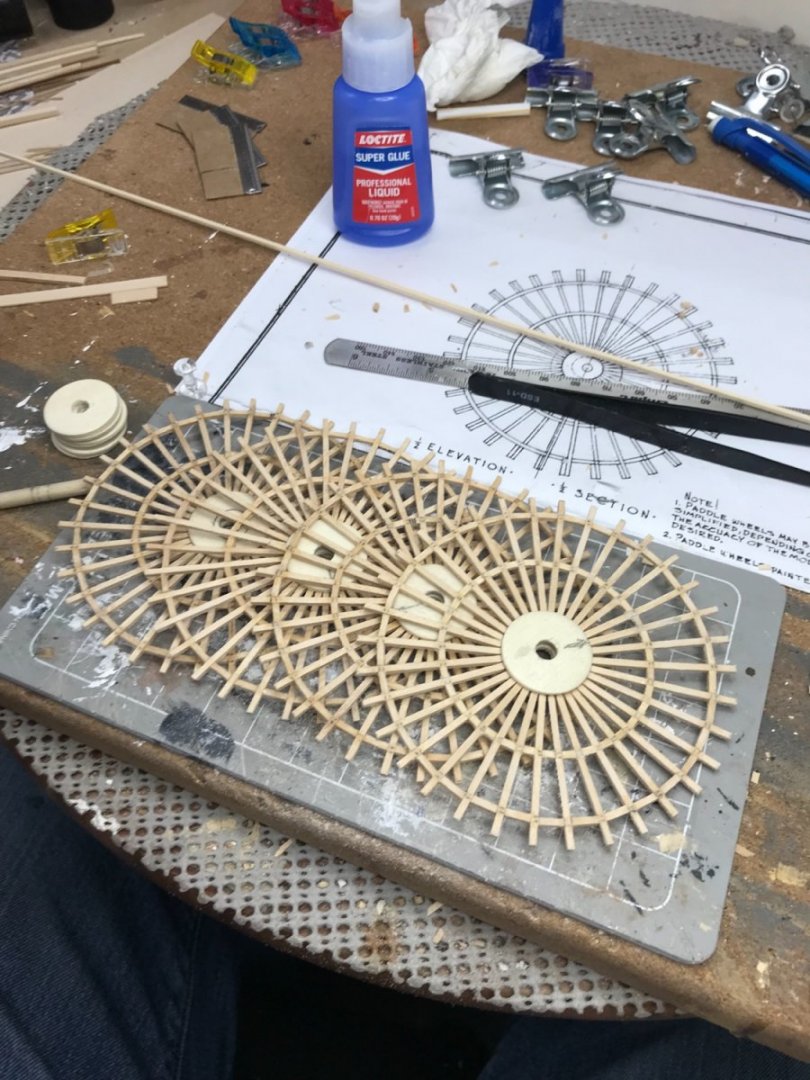
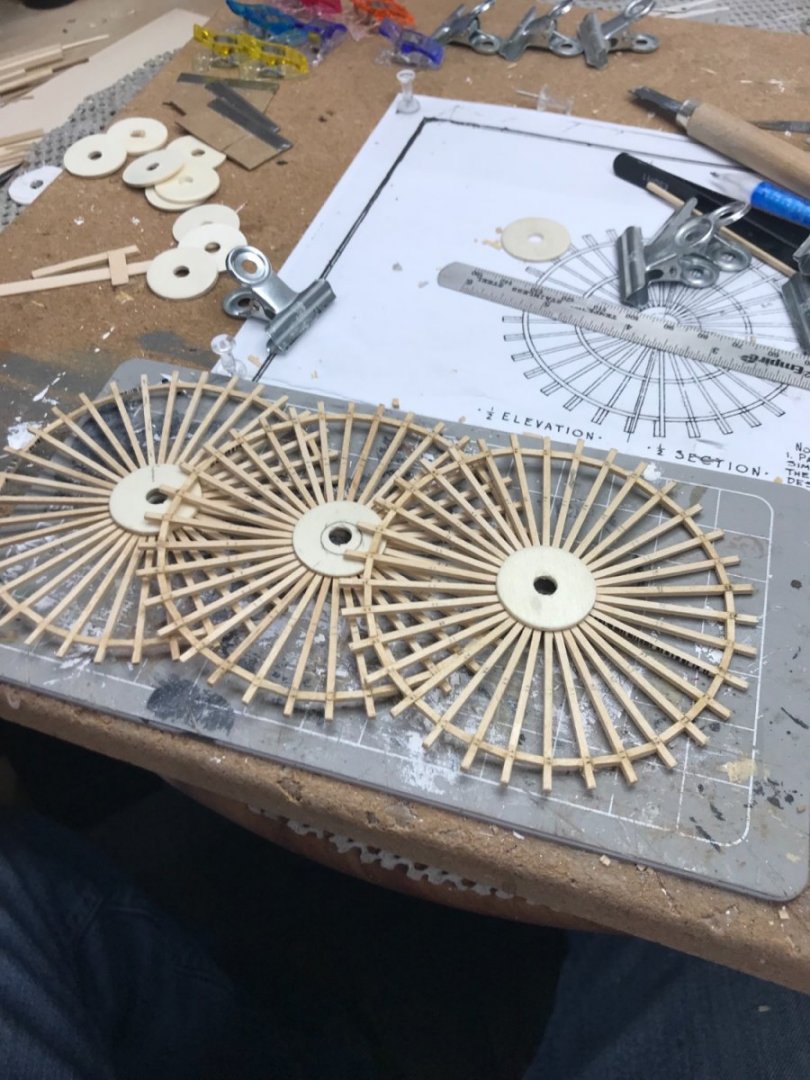
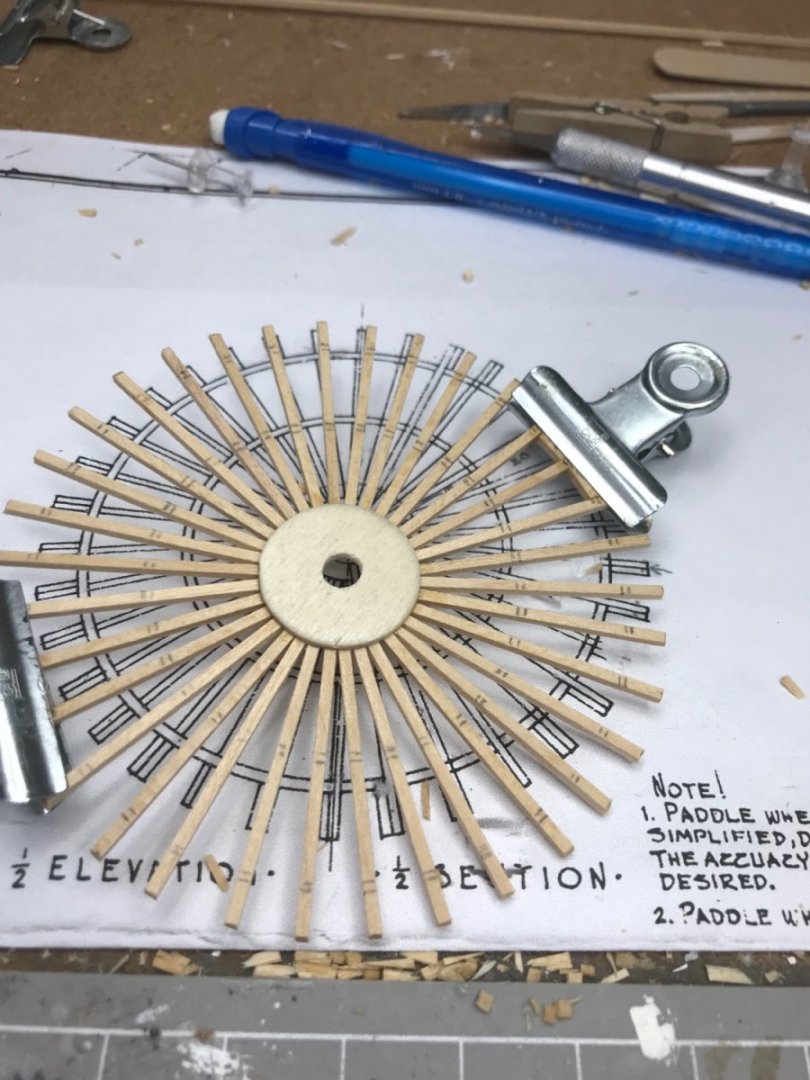
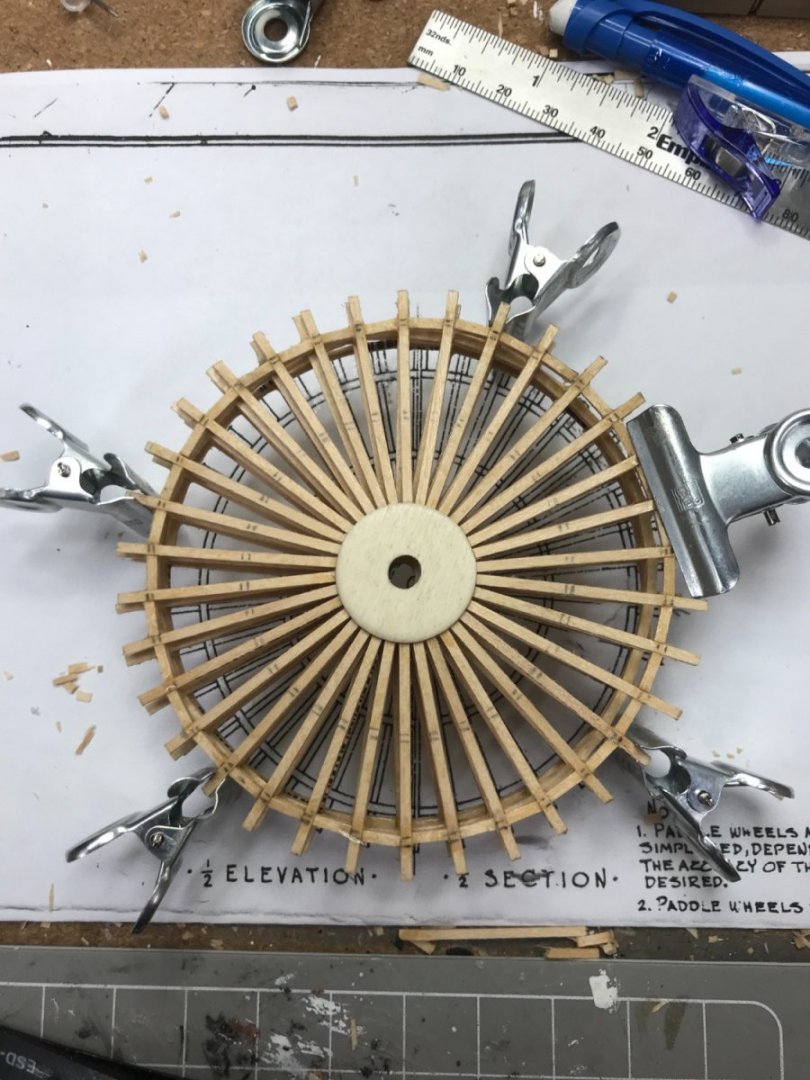
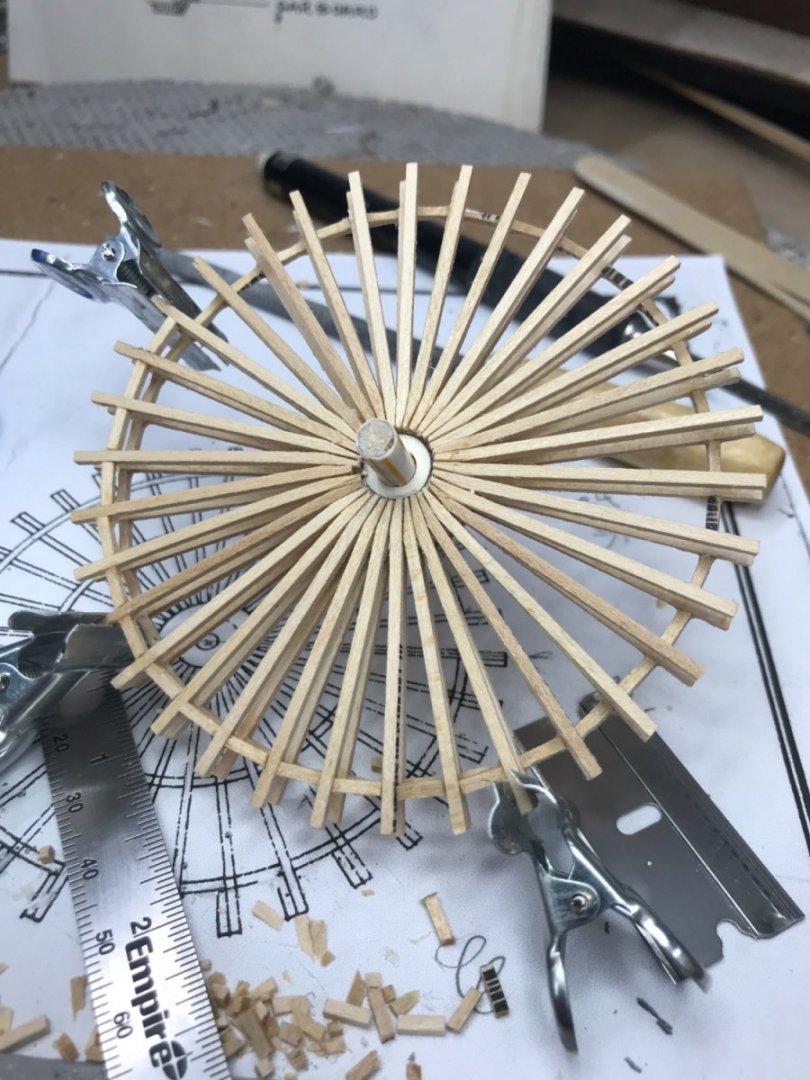
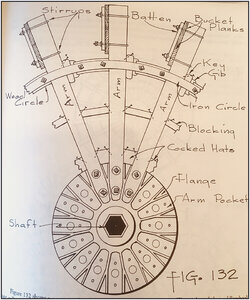
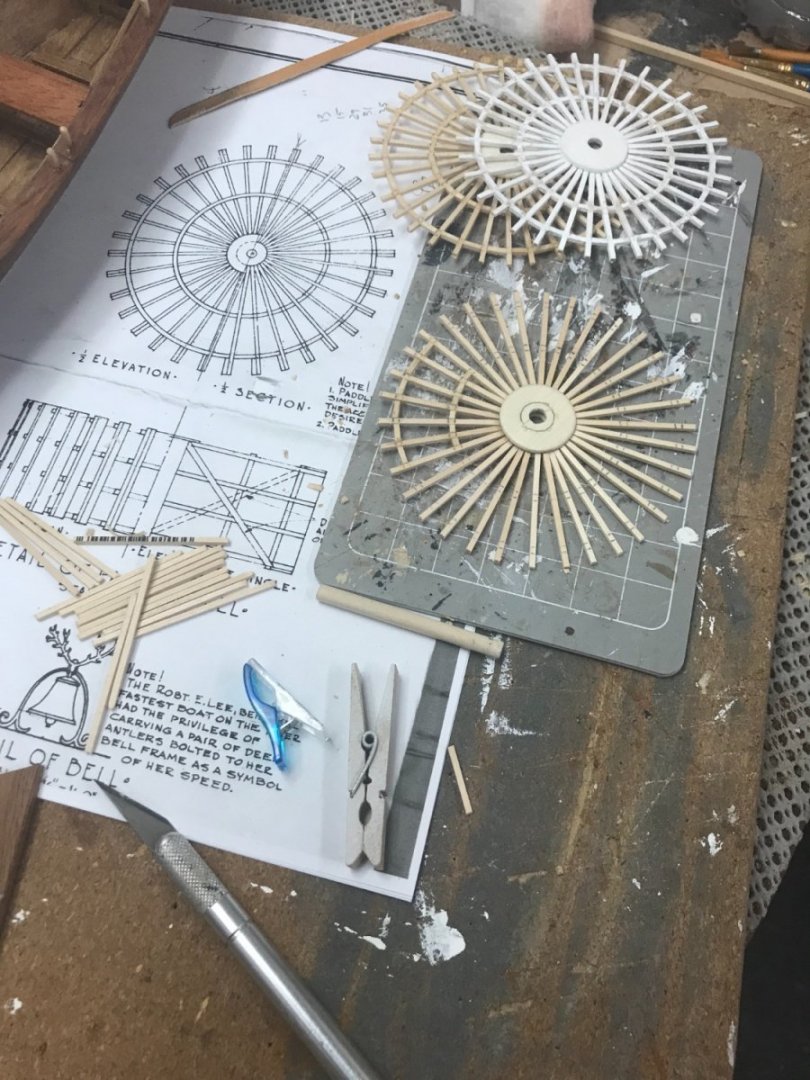
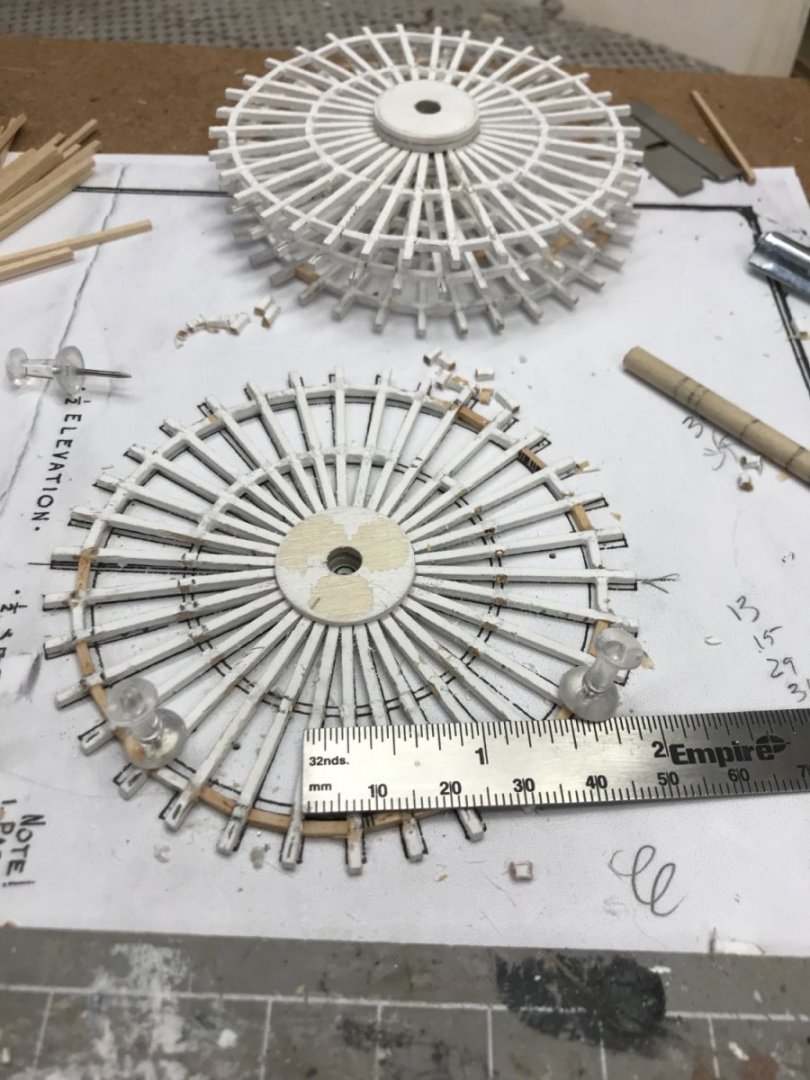
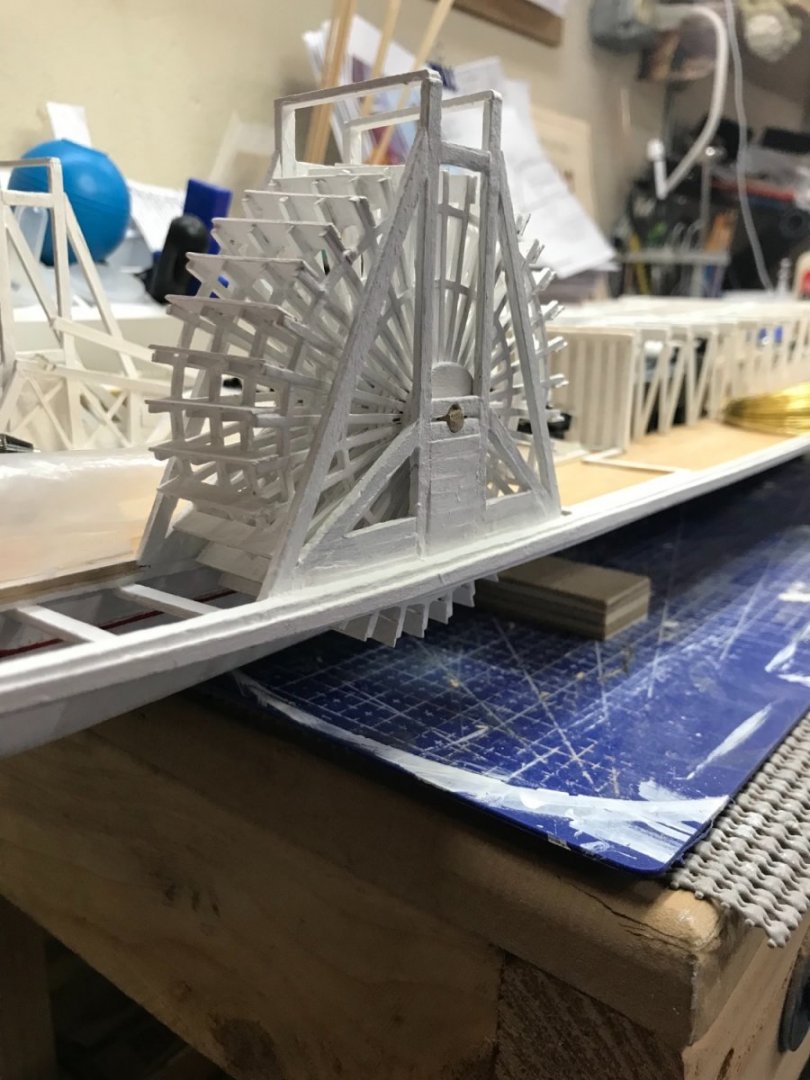
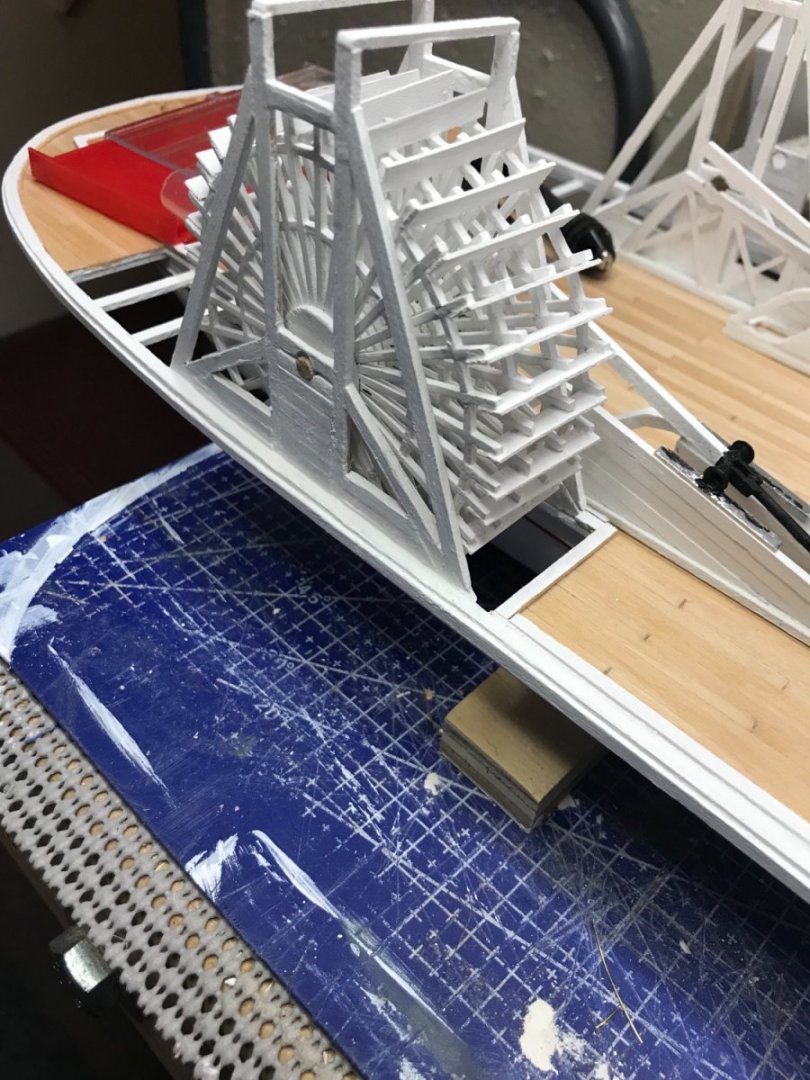
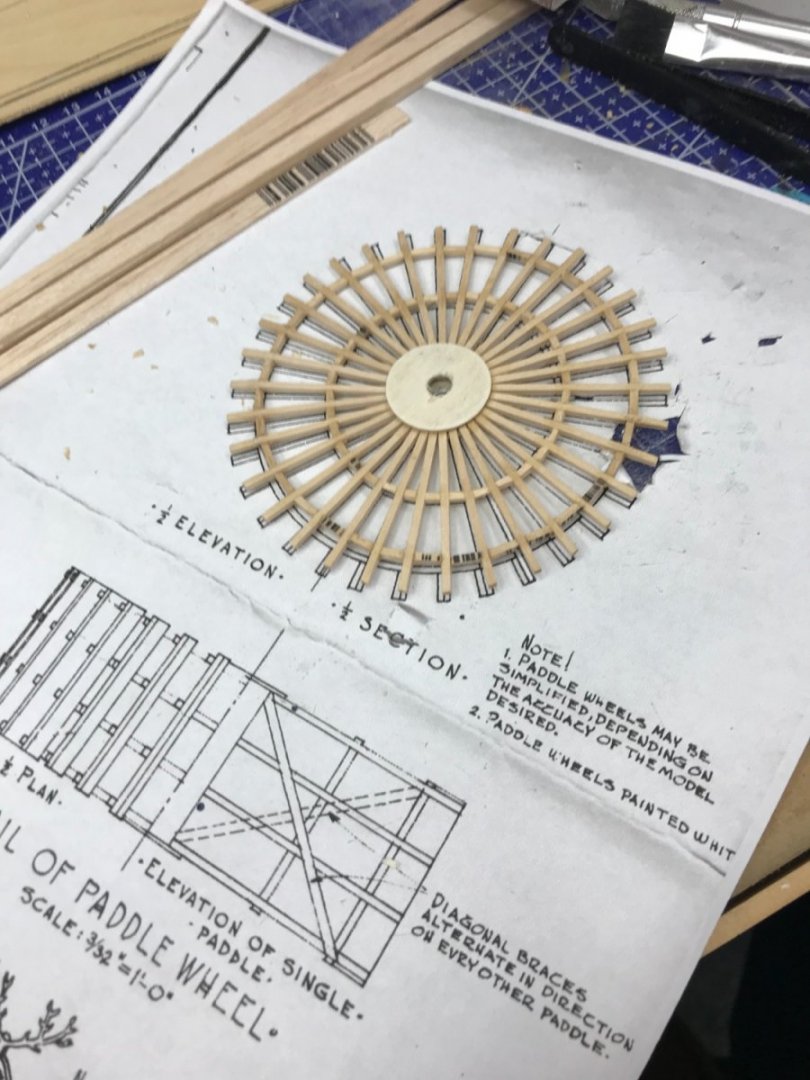
Paddle Wheels… Ready for assembly… Posts are lining up pretty good. Some filing to get paddles a bit better aligned. Painting… The Robert E Lee had two paddle wheels, each 38 feet in diameter and 17 feet wide. The second one was definitely built a bit straighter than the first one. Paddle Wheel 2.0 will be the one left viewable, the other will get a full Wheel Housing built over it. 😆… Paddle Wheels completed. 👍 Cheers 🍻


- 238 replies
-
- 8
-
-
- Robert E Lee
- steamboat
- (and 3 more)
-
Tom, Not sure how tame my process was, very intense. 😬 All I can say is take your time and be very accurate. 👍
- 238 replies
-
- 3
-
-
- Robert E Lee
- steamboat
- (and 3 more)
-
Paddle Wheels continued… Cutting 3 mm blocks… Sanding after CA glue has set… Sanding excess glue… Ready for paint… Onwards… 🍻


- 238 replies
-
- 5
-
-
- Robert E Lee
- steamboat
- (and 3 more)
-
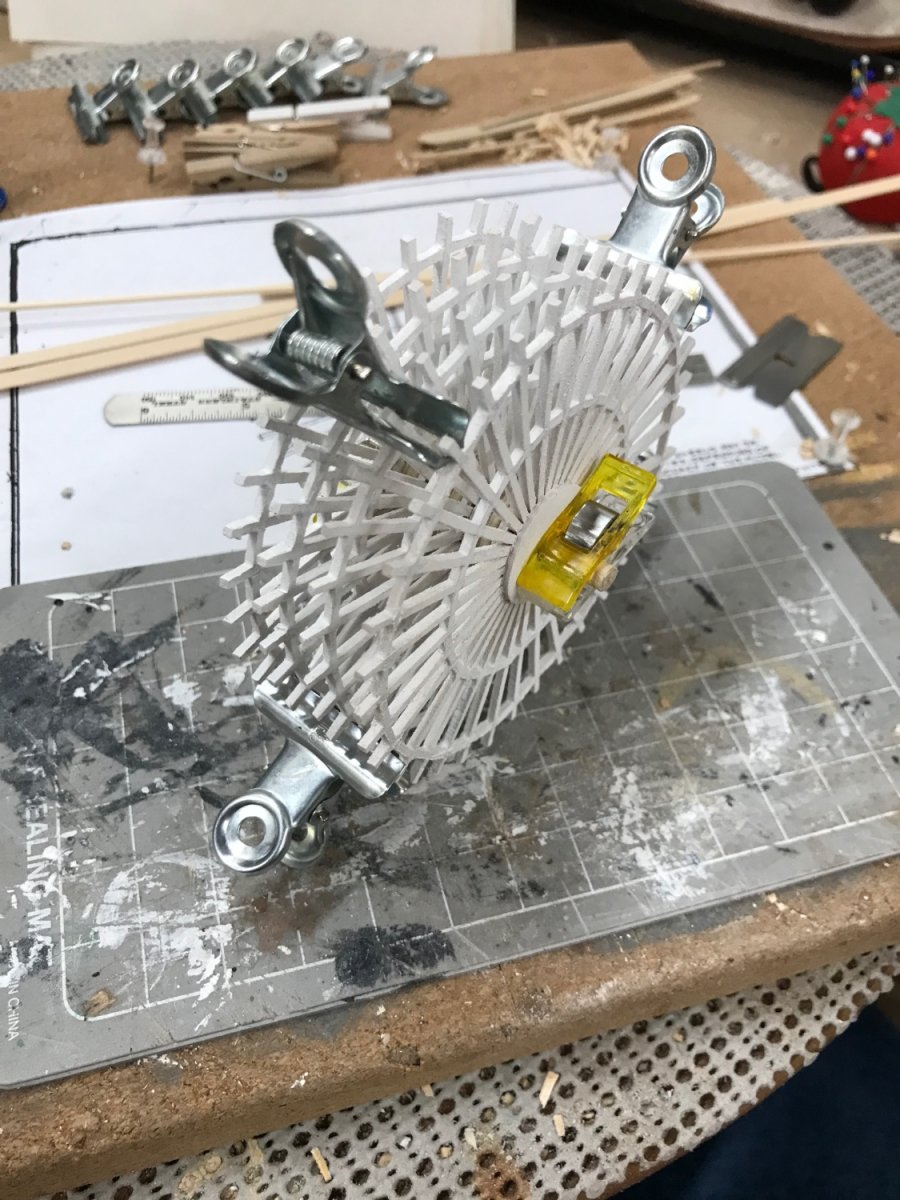
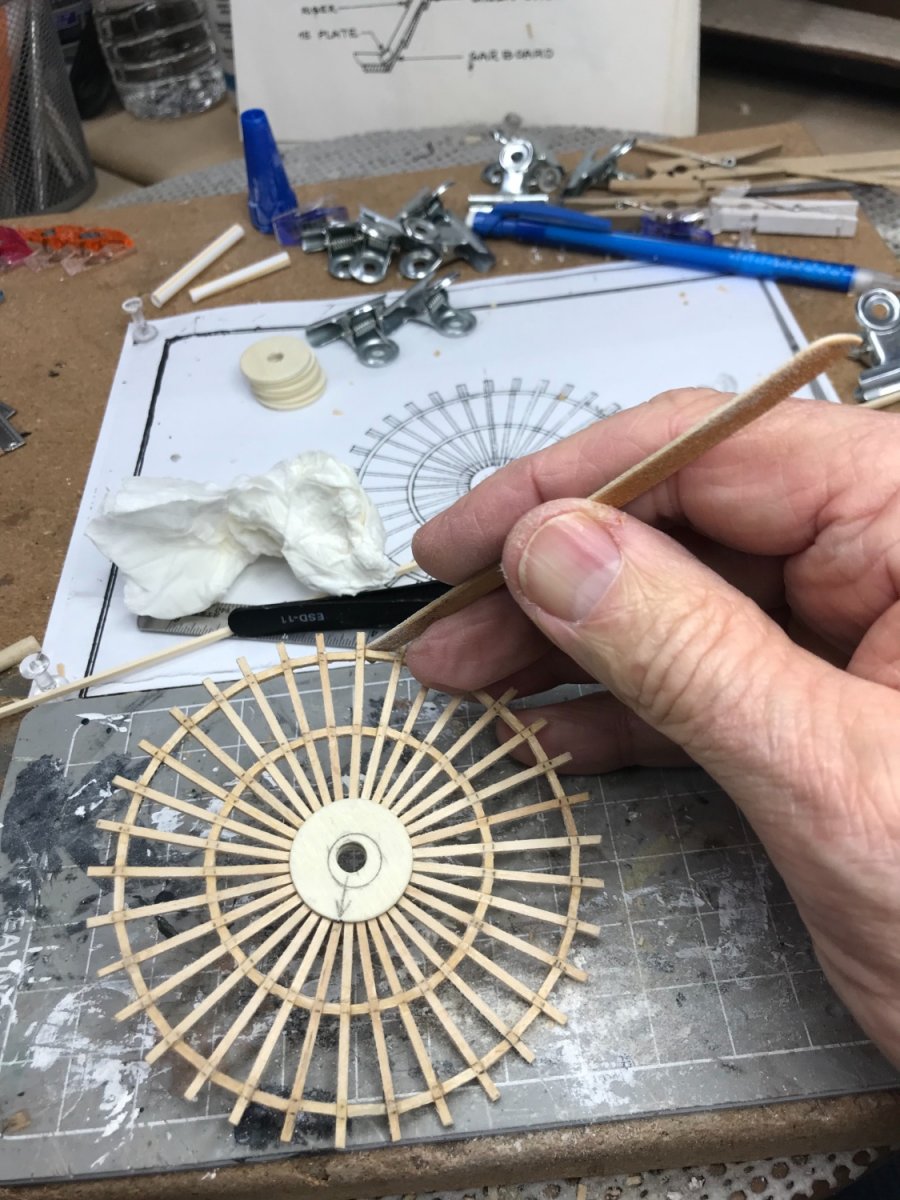
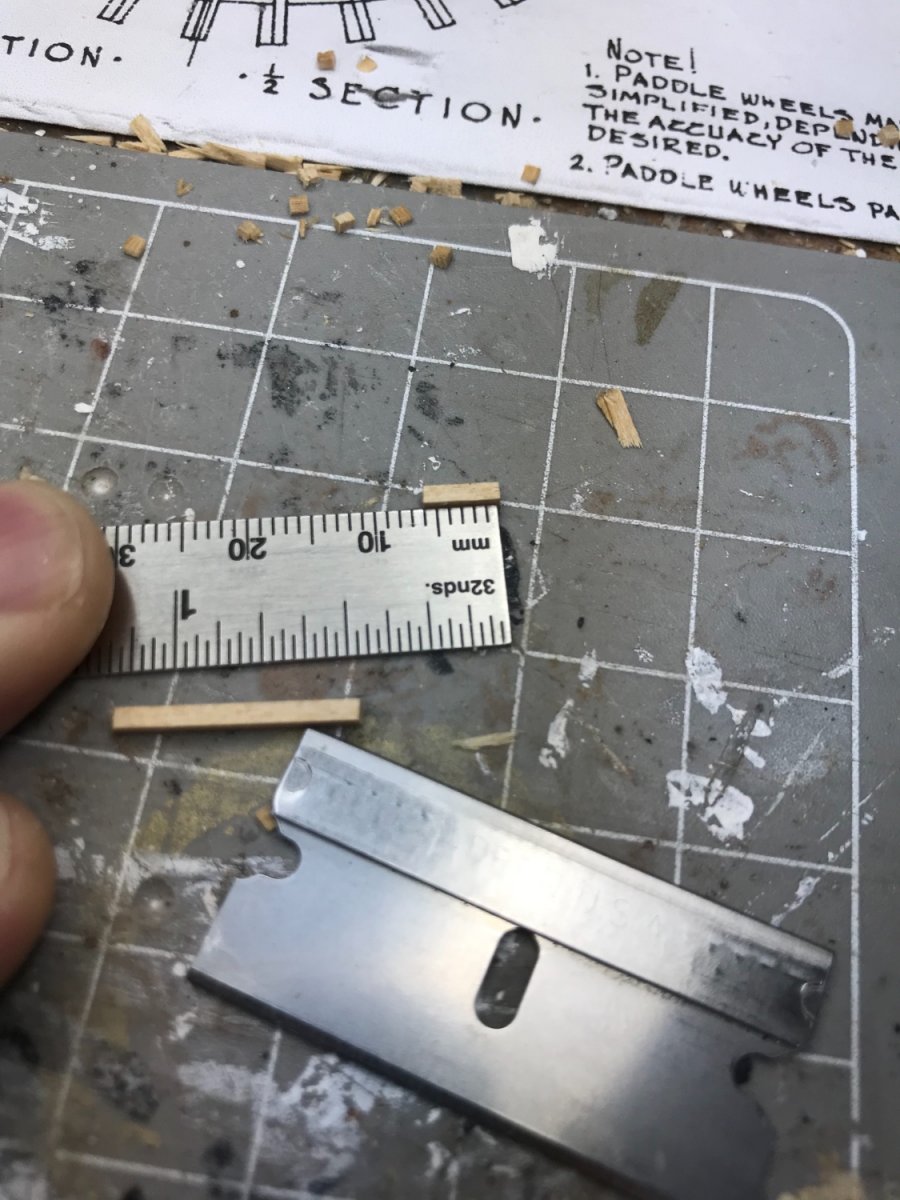
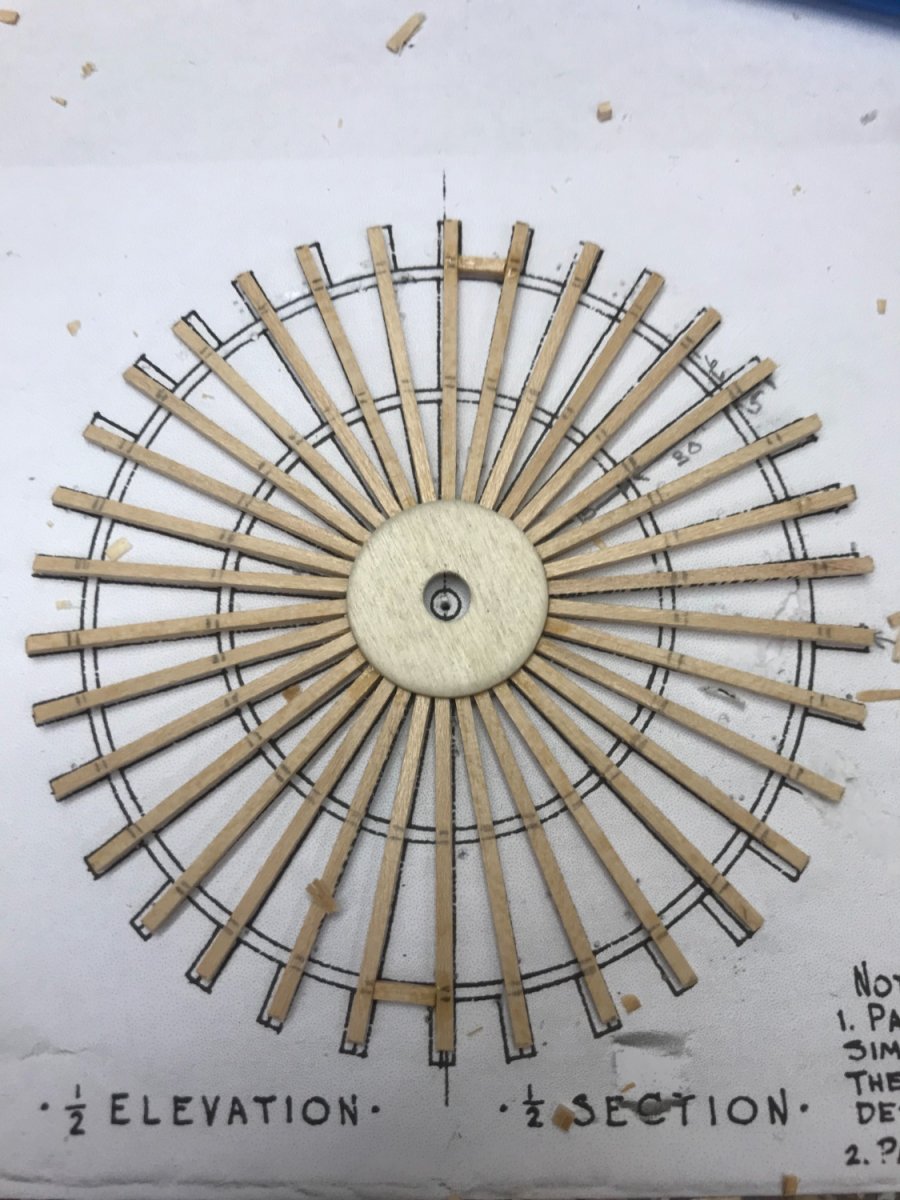
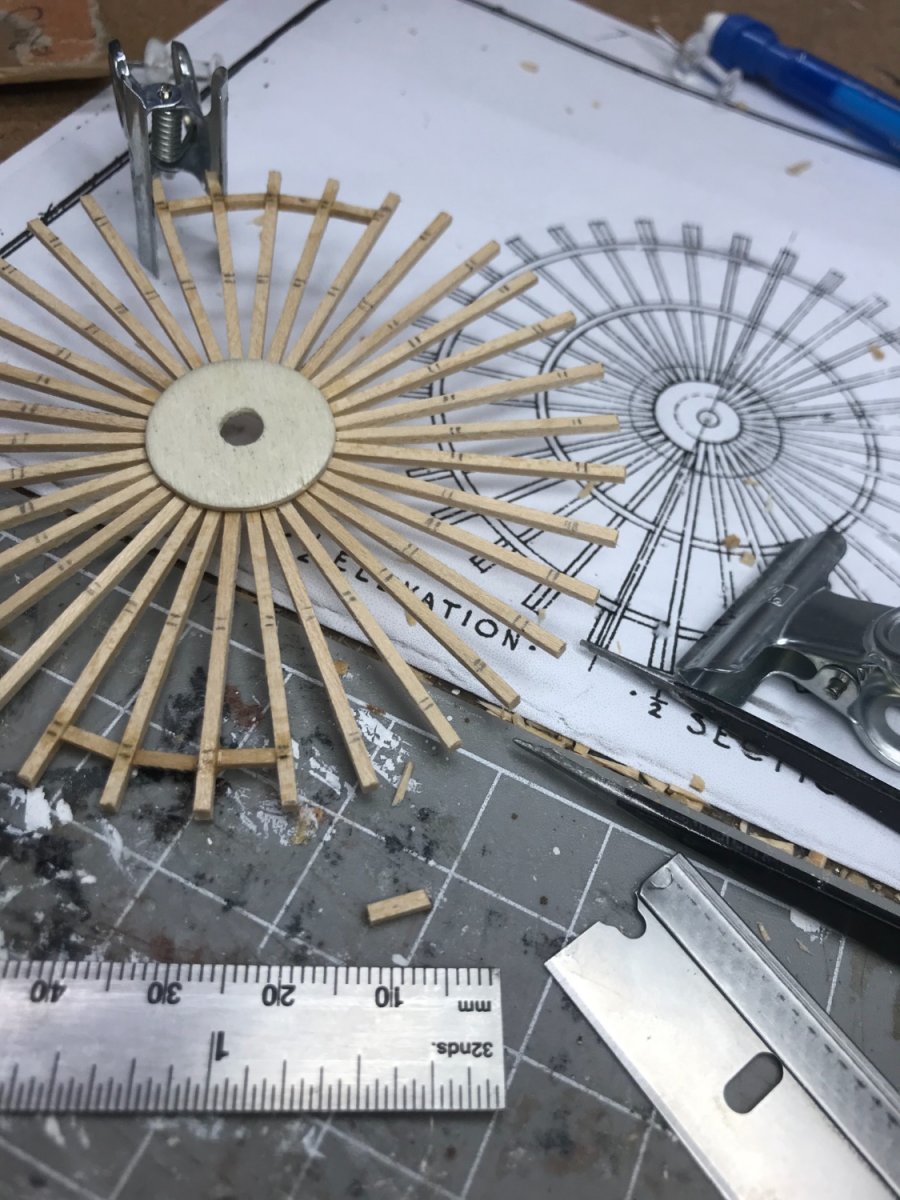
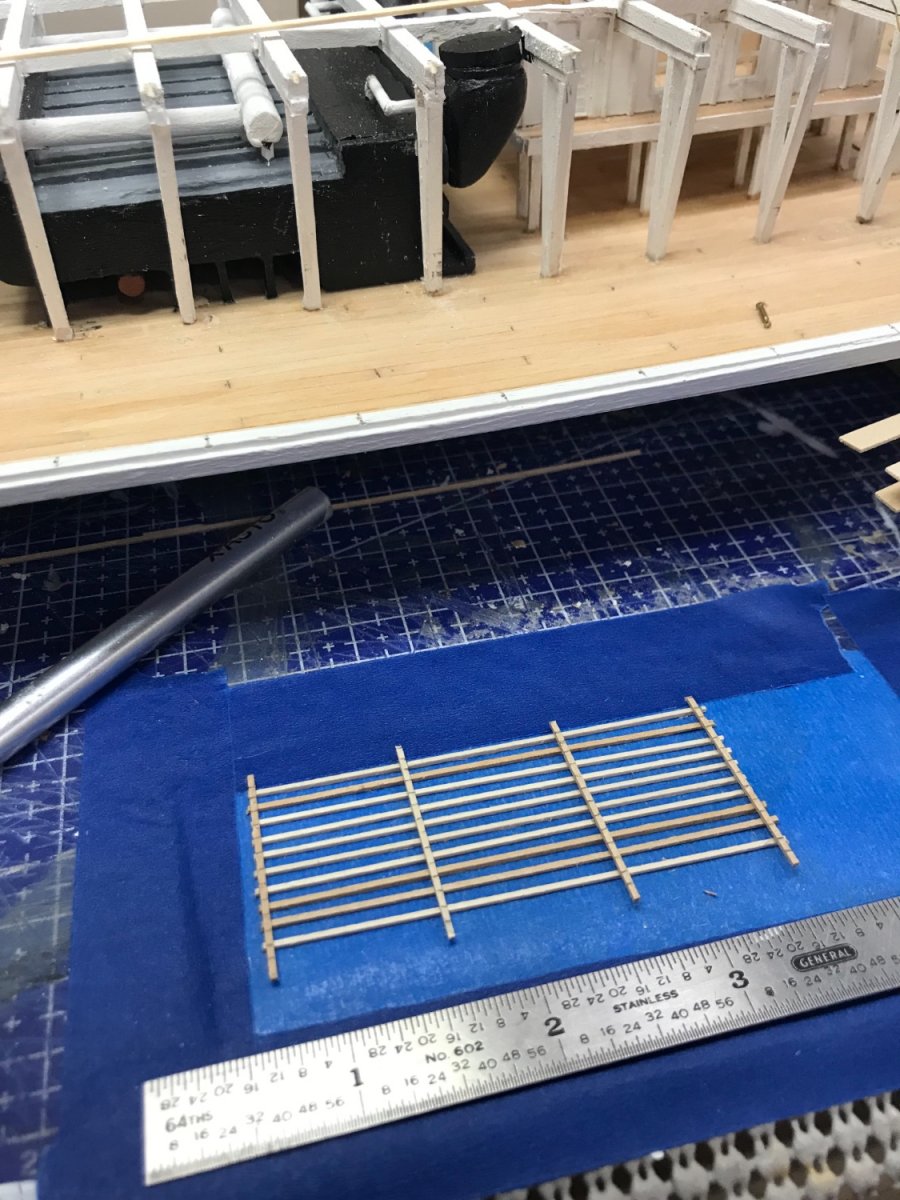
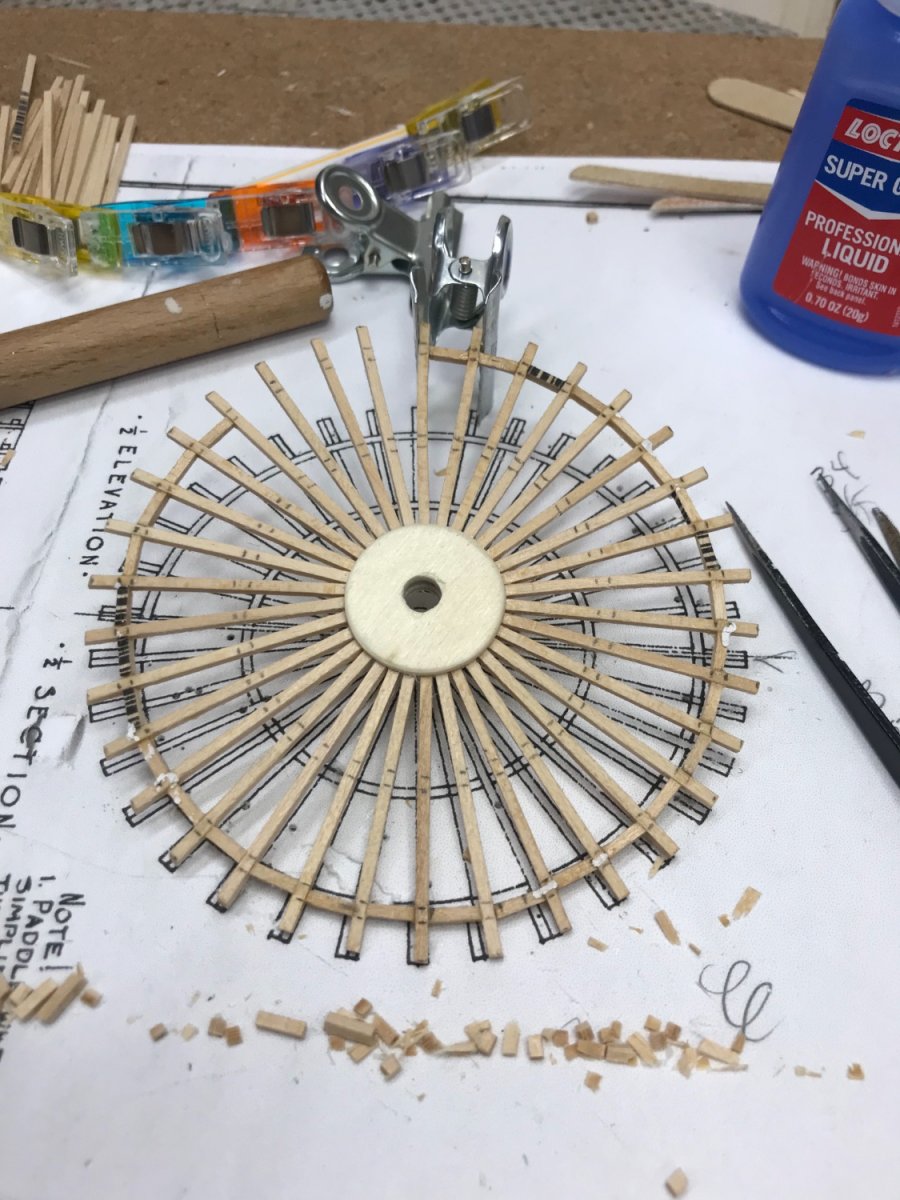
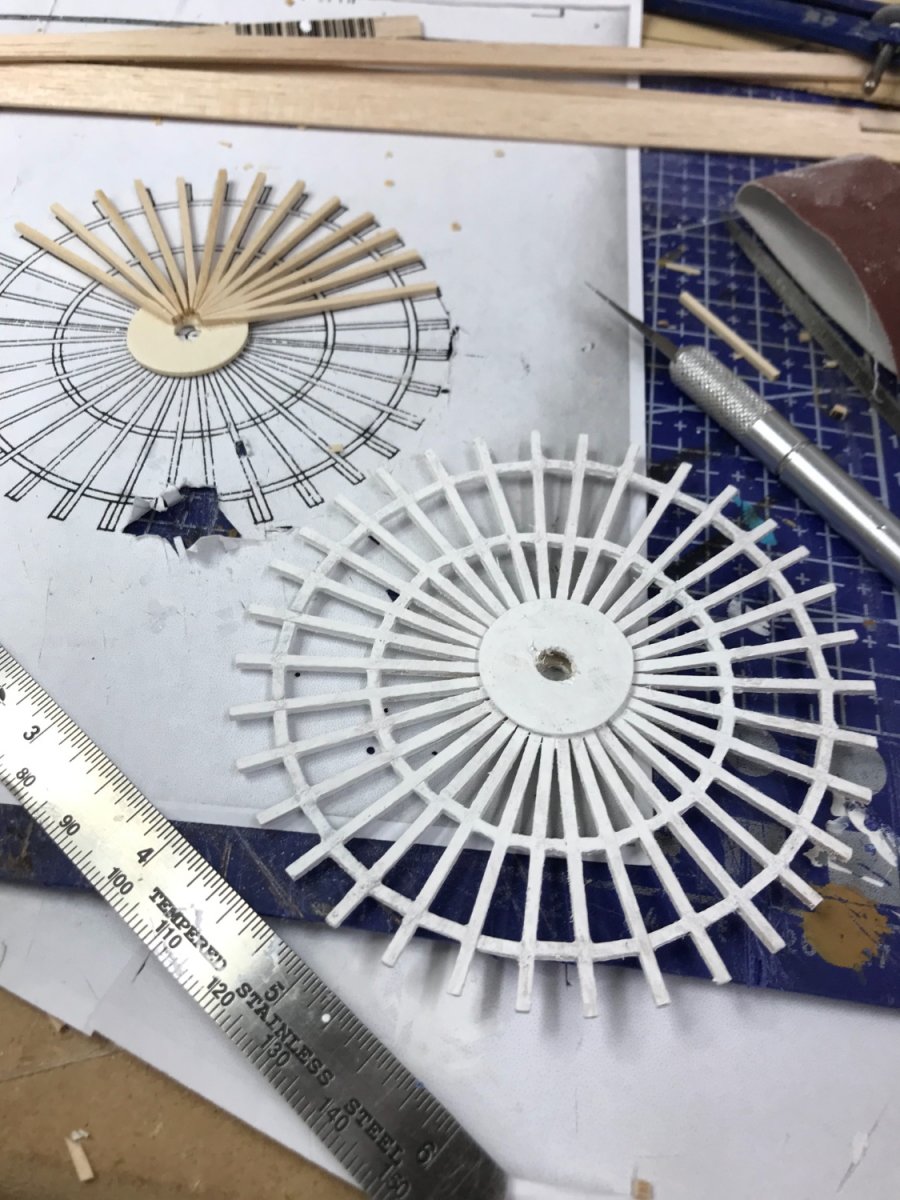
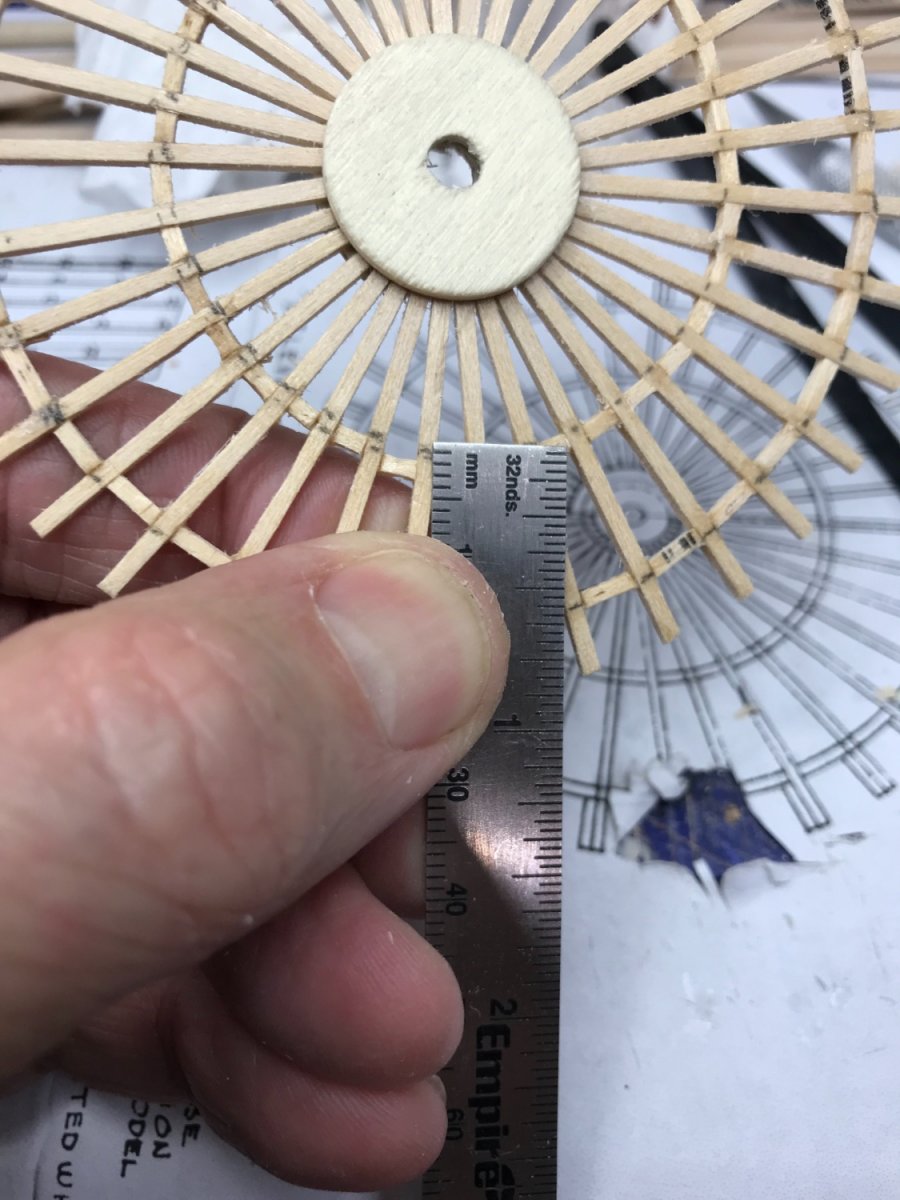
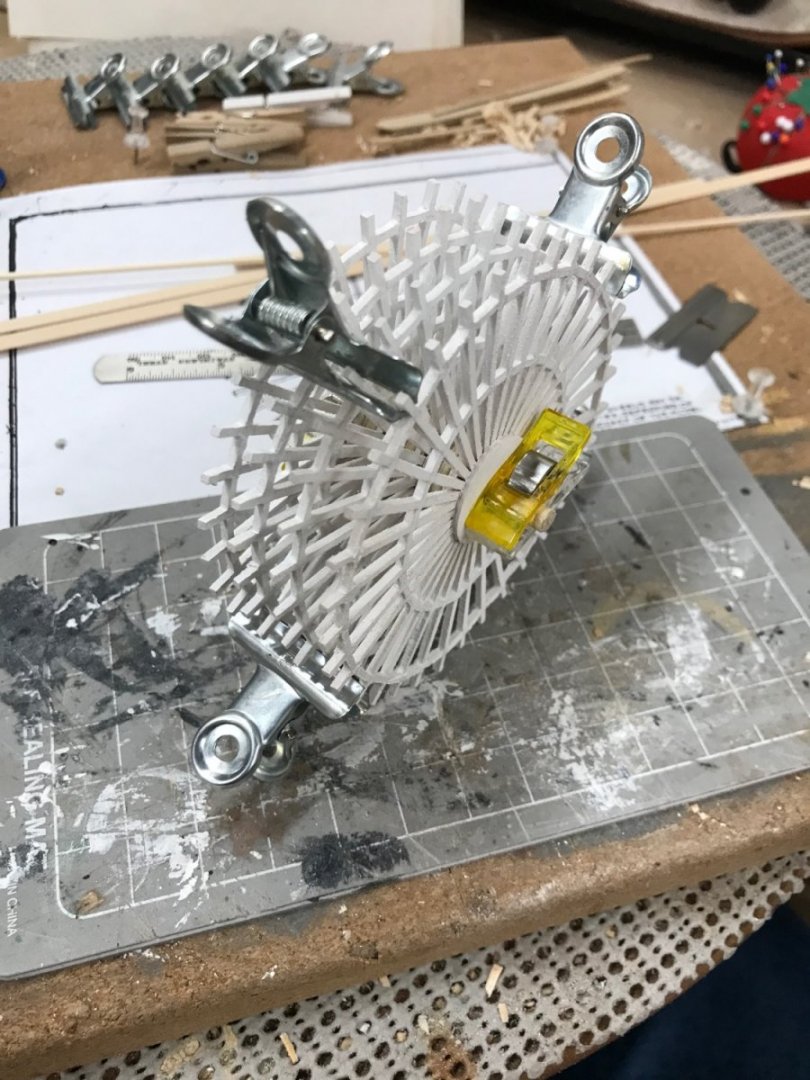
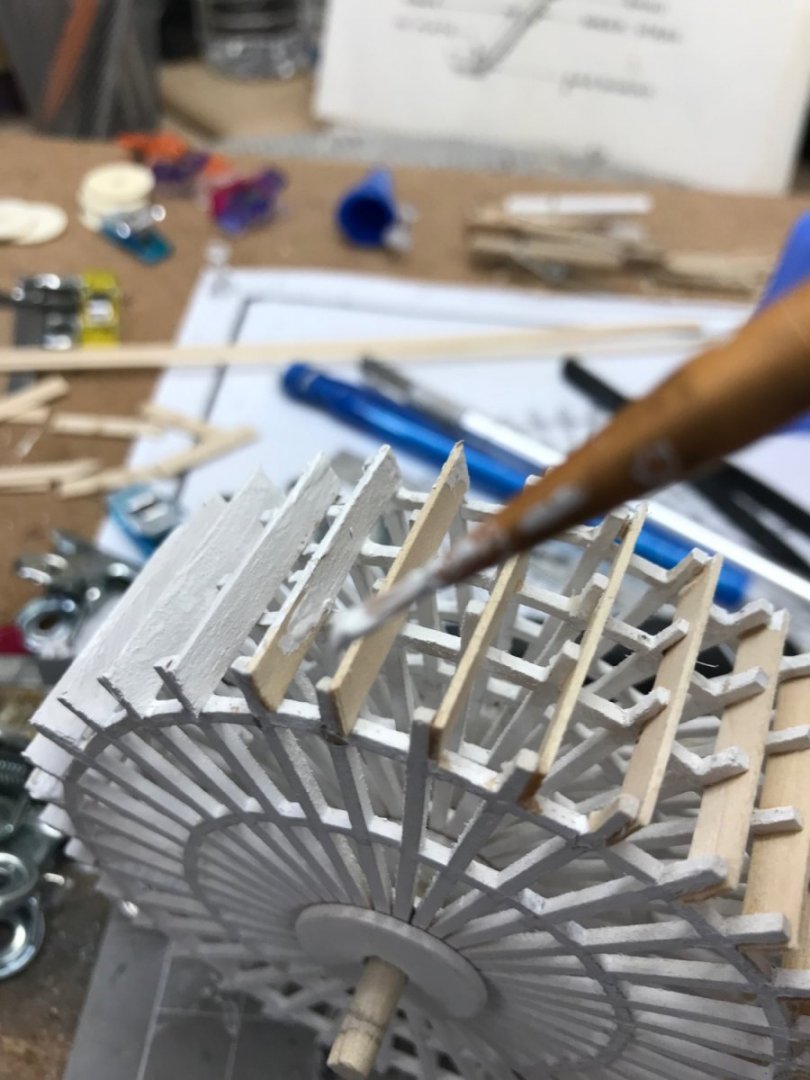
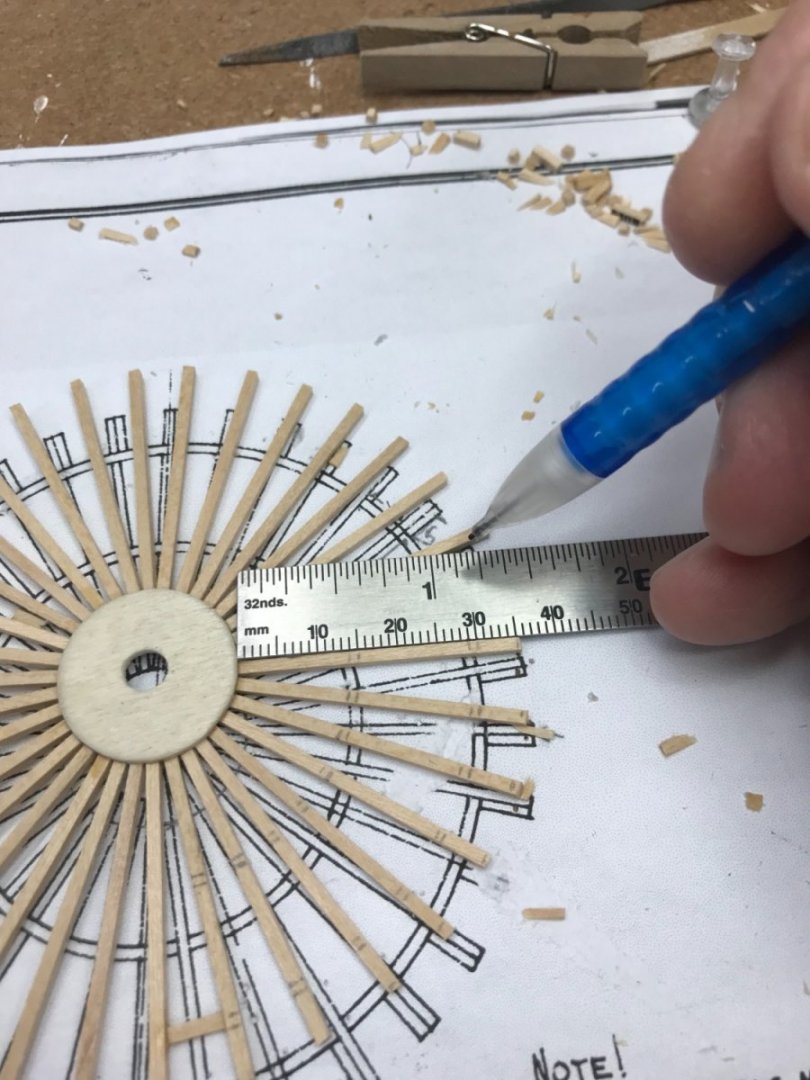
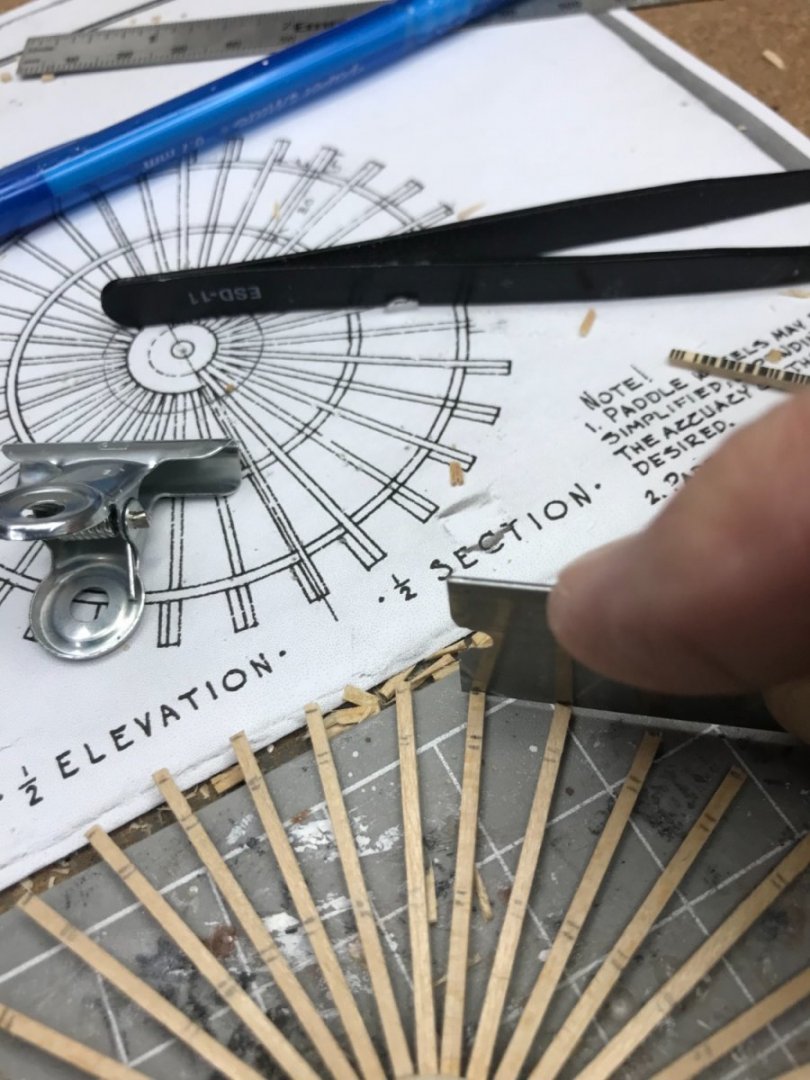
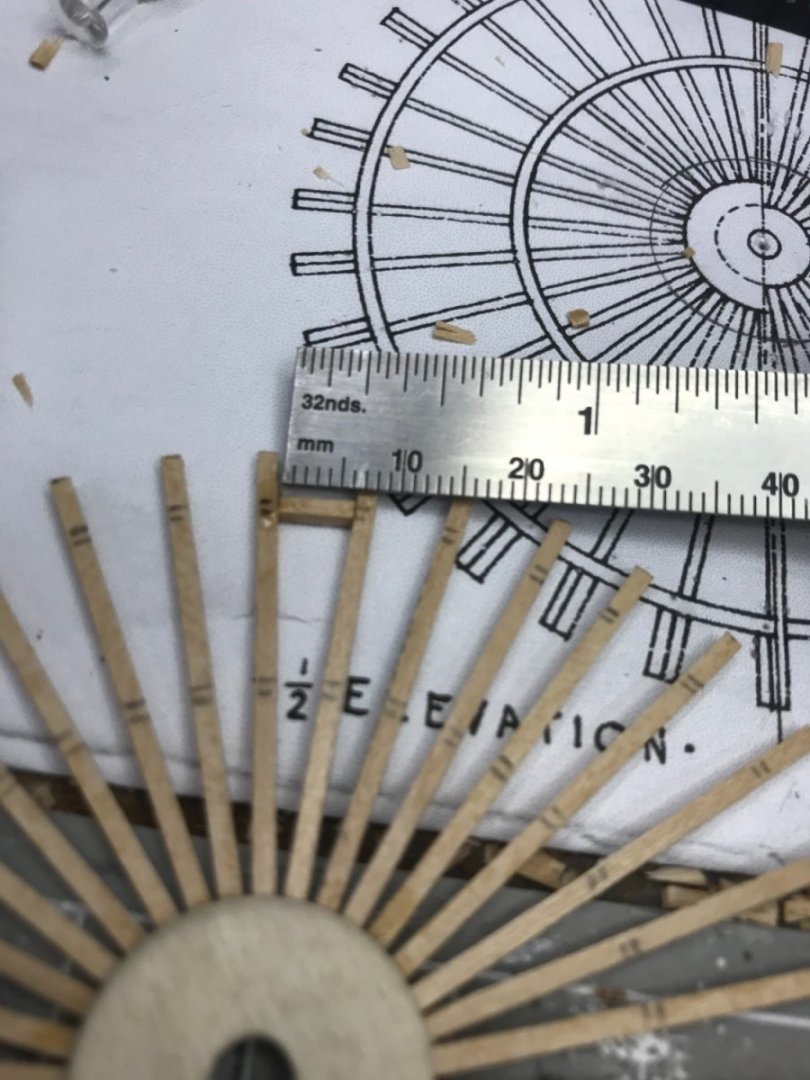
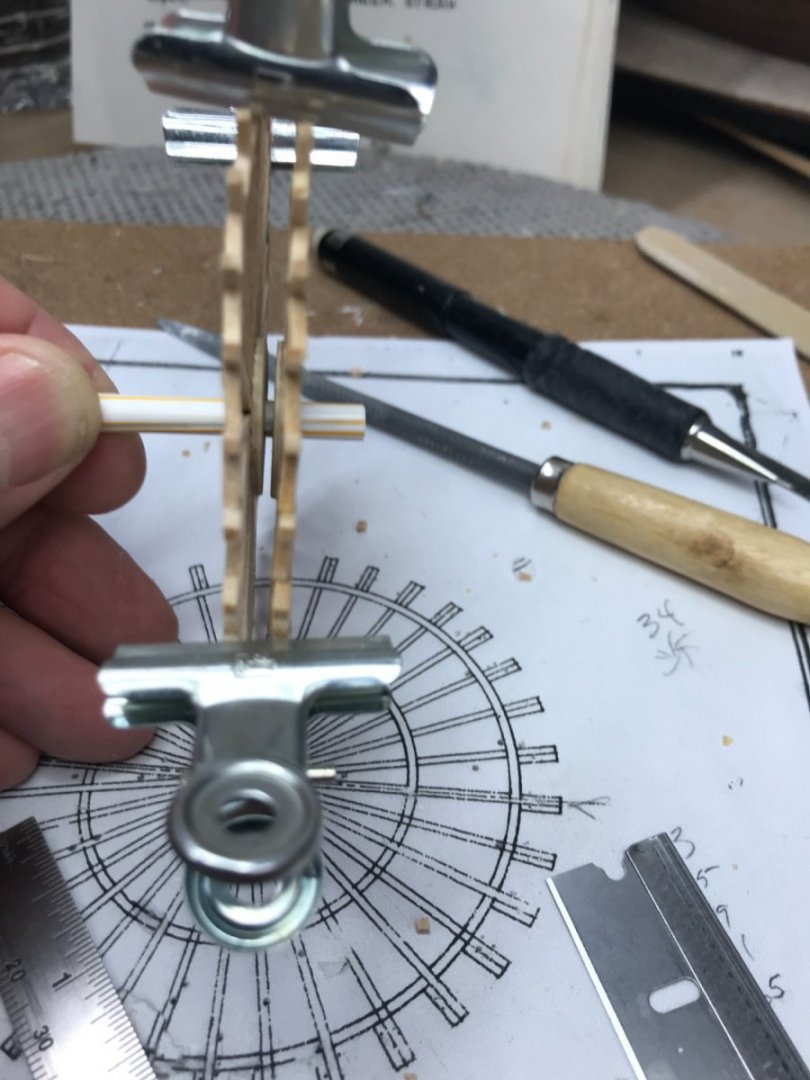
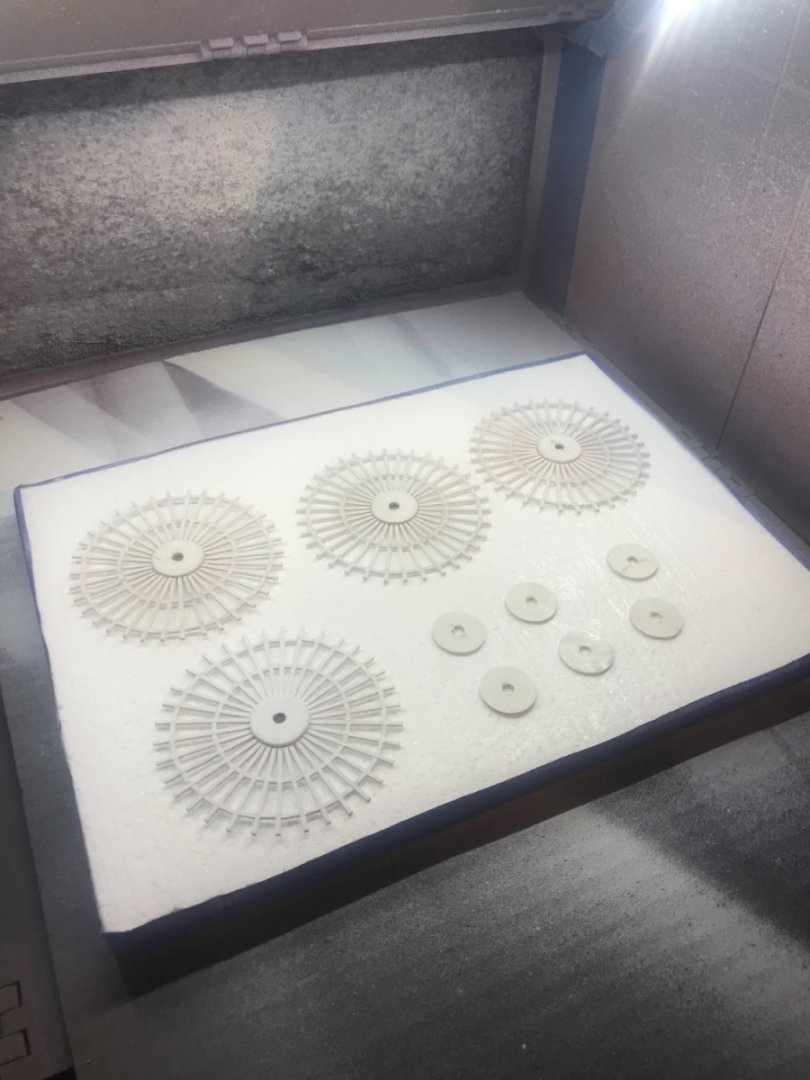
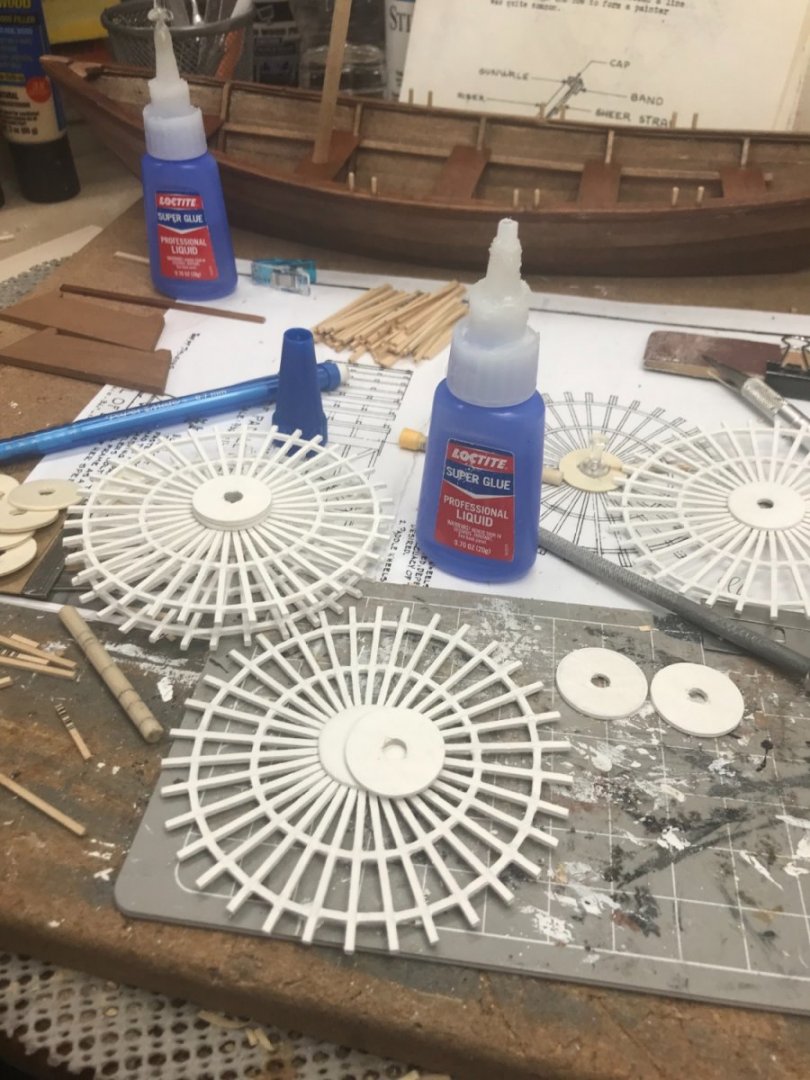
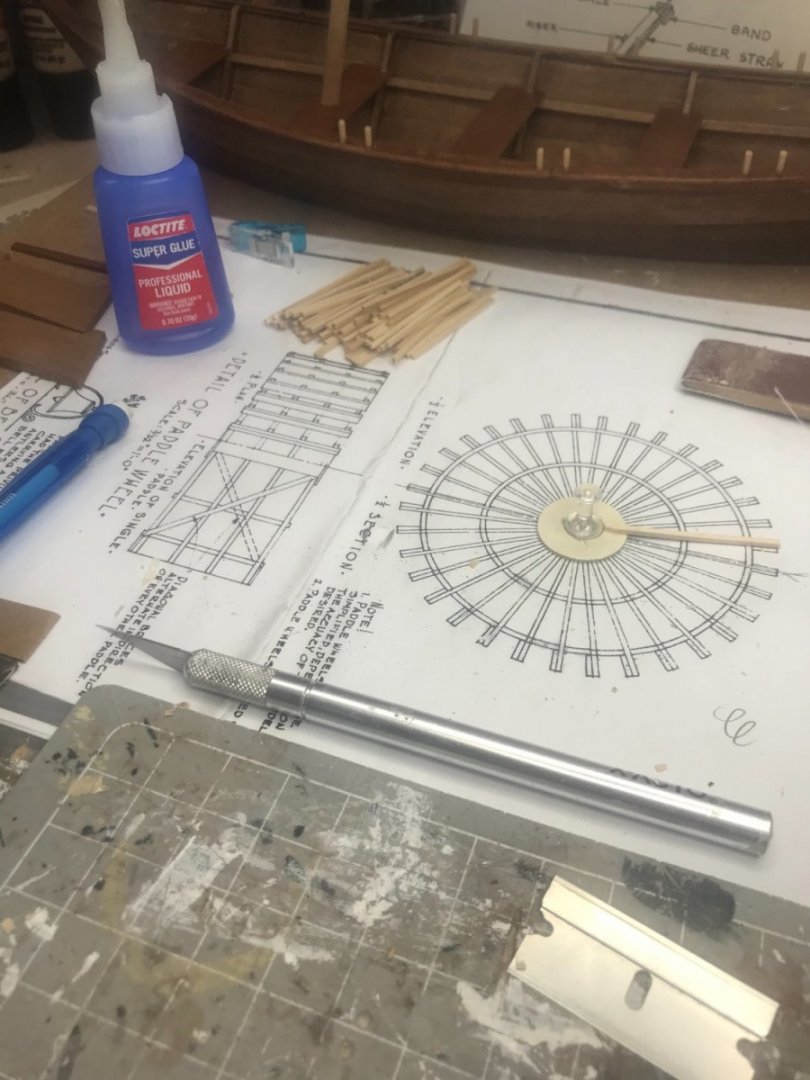
Paddle Wheels continued… Finally, got this figured out and one more to go. Thought I would document the steps to get this far on the last one, now that I know what works. Installing the spokes on the hub using CA Glue. Be very careful to align with the template accurately. Marking the spokes for the blocks. Trimming the spokes to proper length. Cutting 6 mm blocks. VERY CAREFULLY, cut 1/16 basswood strips with ends that MUST be Square with the proper angle to set the spokes properly. Magnification required. 🧐 Verifying the spacing between each spoke to be 6 mm (not 6.25 mm) after gluing and clamping. Note the block in the top photo had to be trimmed. The block in the bottom photo did not need trimming. Started with blocks on opposite sides of the wheel. Clamped the wheel flat as I continued around with in both directions. I got better at cutting these blocks. Used a single edge razor blade as It is stiffer than an Exato Knife. That’s it… Easy Peezy just repeat until you go insane. 😆 Still need to do the tiny center blocks and the paddles. Thought y’all mighty get a kick out of this detail. You might not want to try this at home. LOL 😂 But then again you might like the challenge of scratch building a paddle. Some of you already have. Onwards 🍻
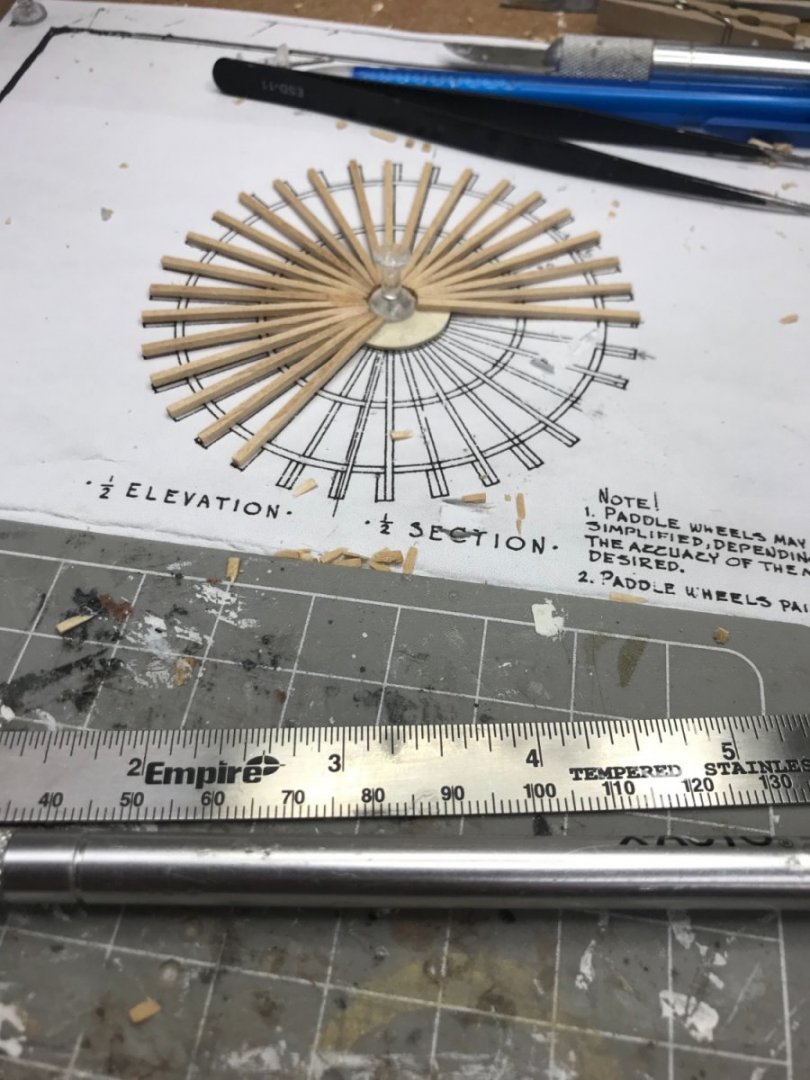

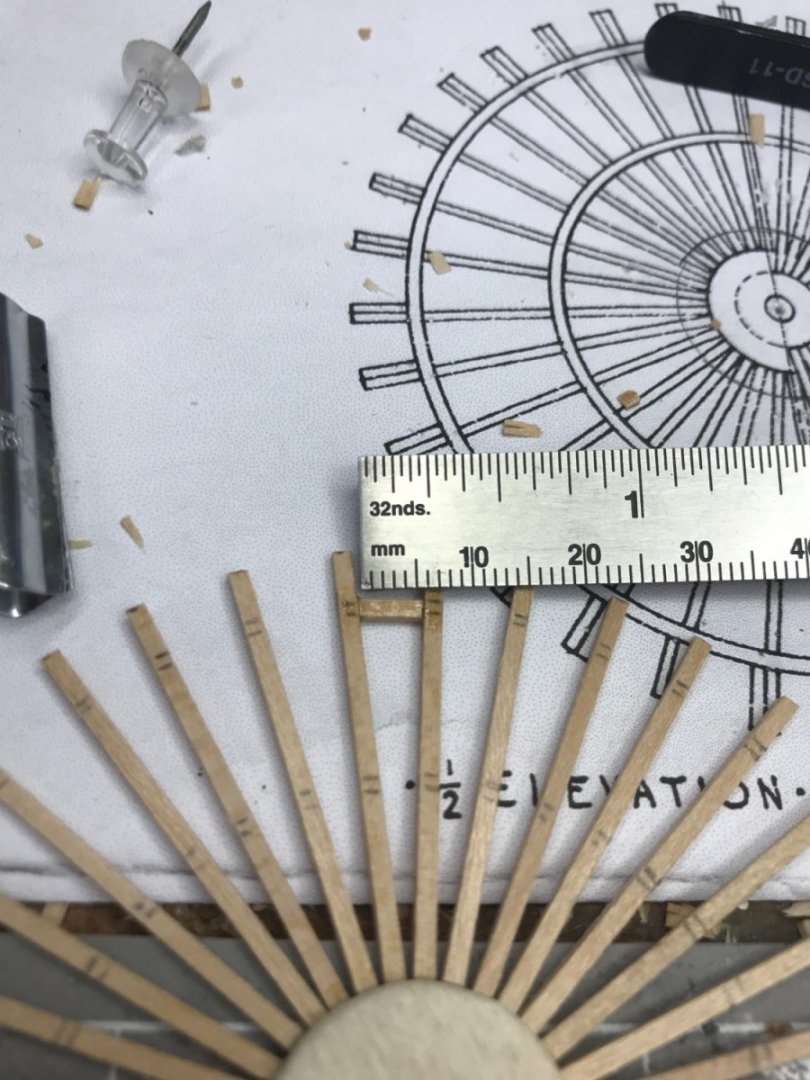


- 238 replies
-
- 9
-
-
- Robert E Lee
- steamboat
- (and 3 more)
-
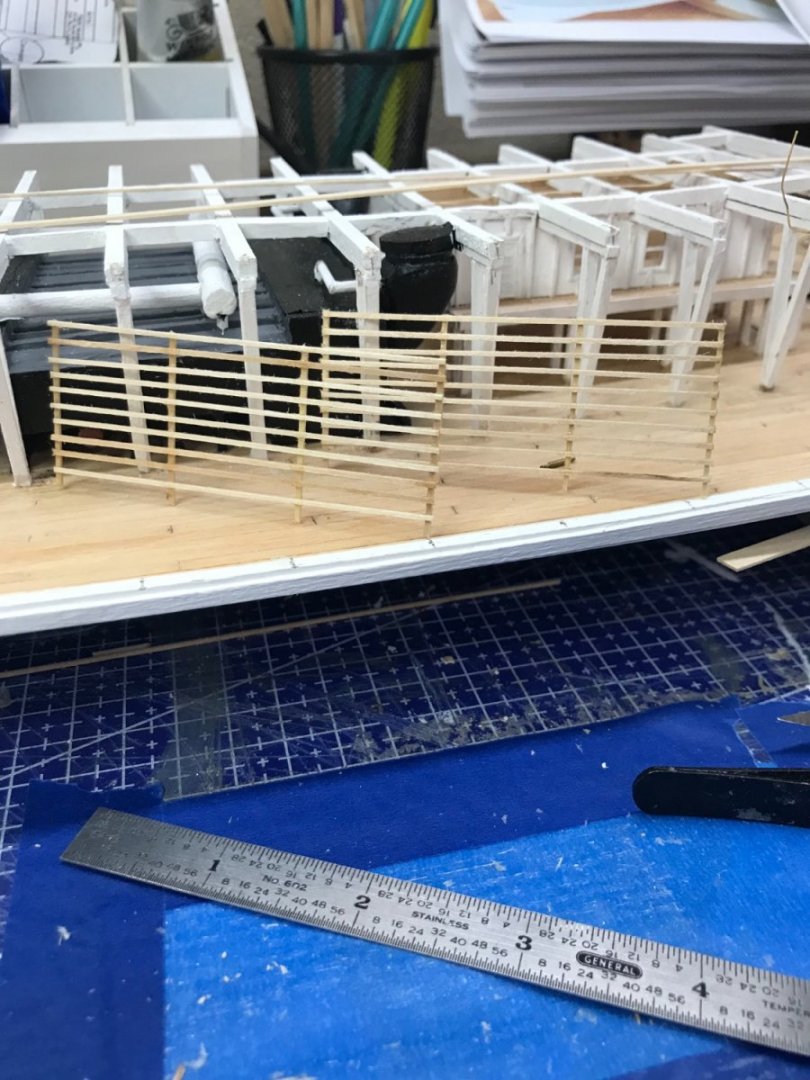
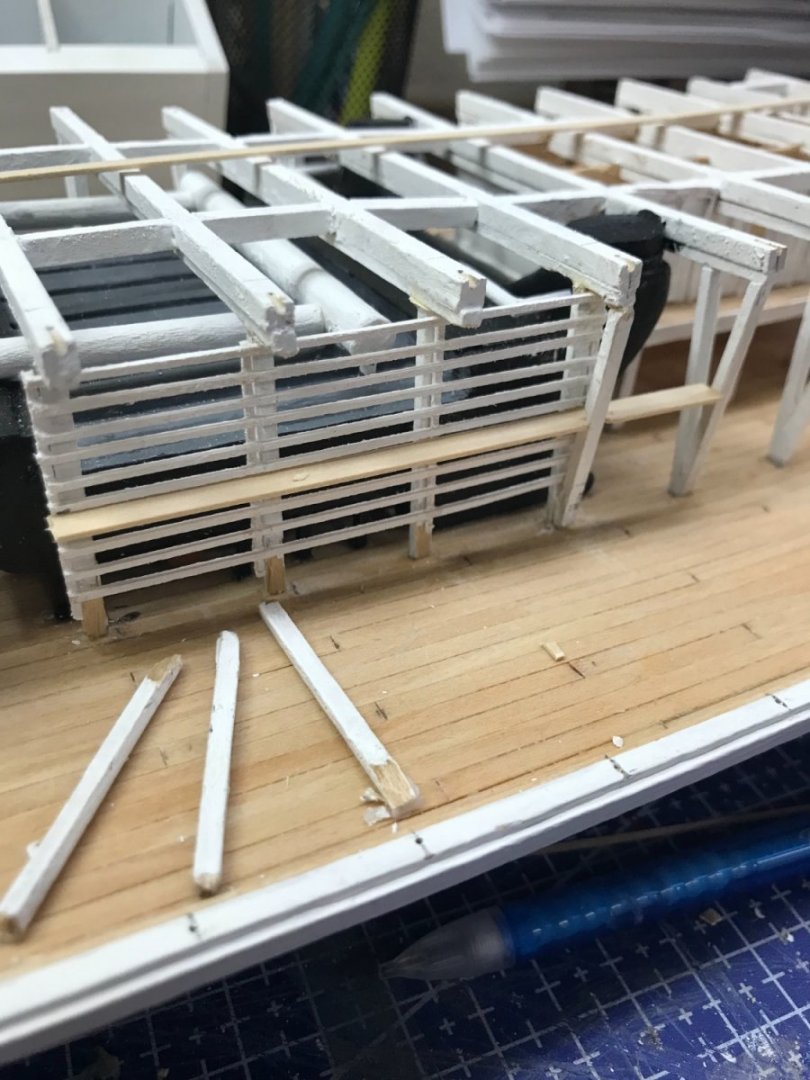
Boiler Catwalk continued… Starboard side Catwalk completed. Cheers 🍻


- 238 replies
-
- 8
-
-
- Robert E Lee
- steamboat
- (and 3 more)
-
Thanks… Don’t we all on MSW… 👍 Steady as she goes, Don’t give up the Ship! 🧐
- 238 replies
-
- 1
-
-
- Robert E Lee
- steamboat
- (and 3 more)
-
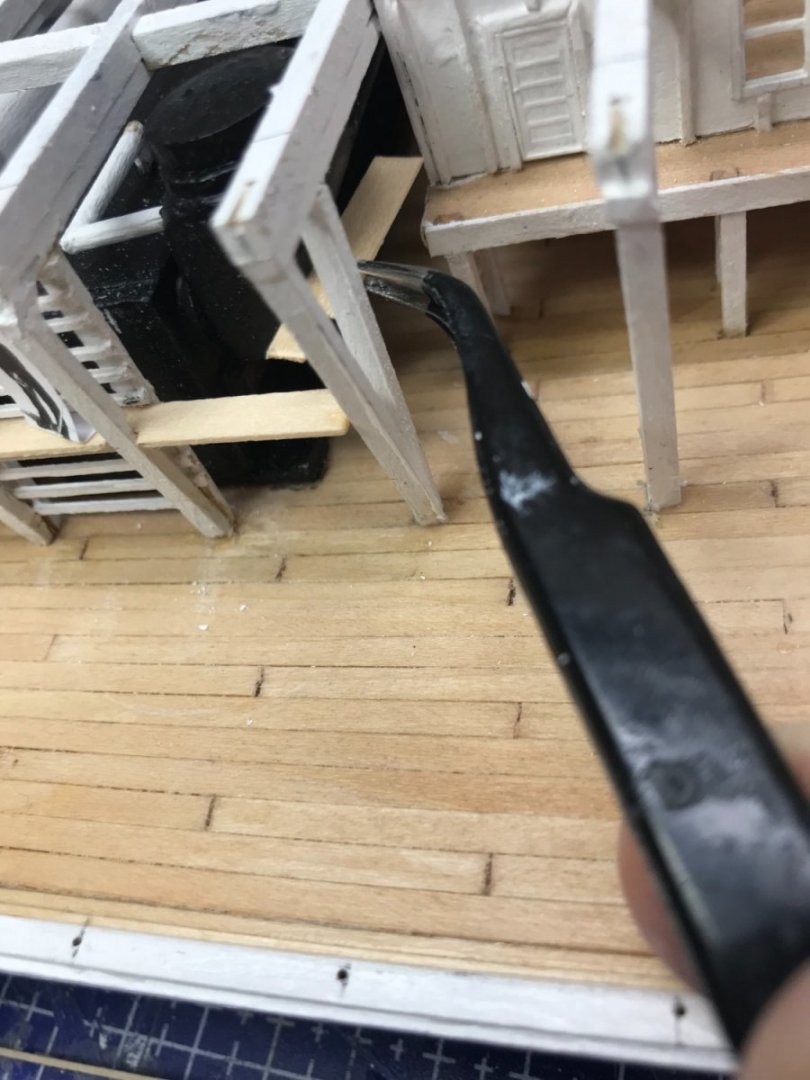
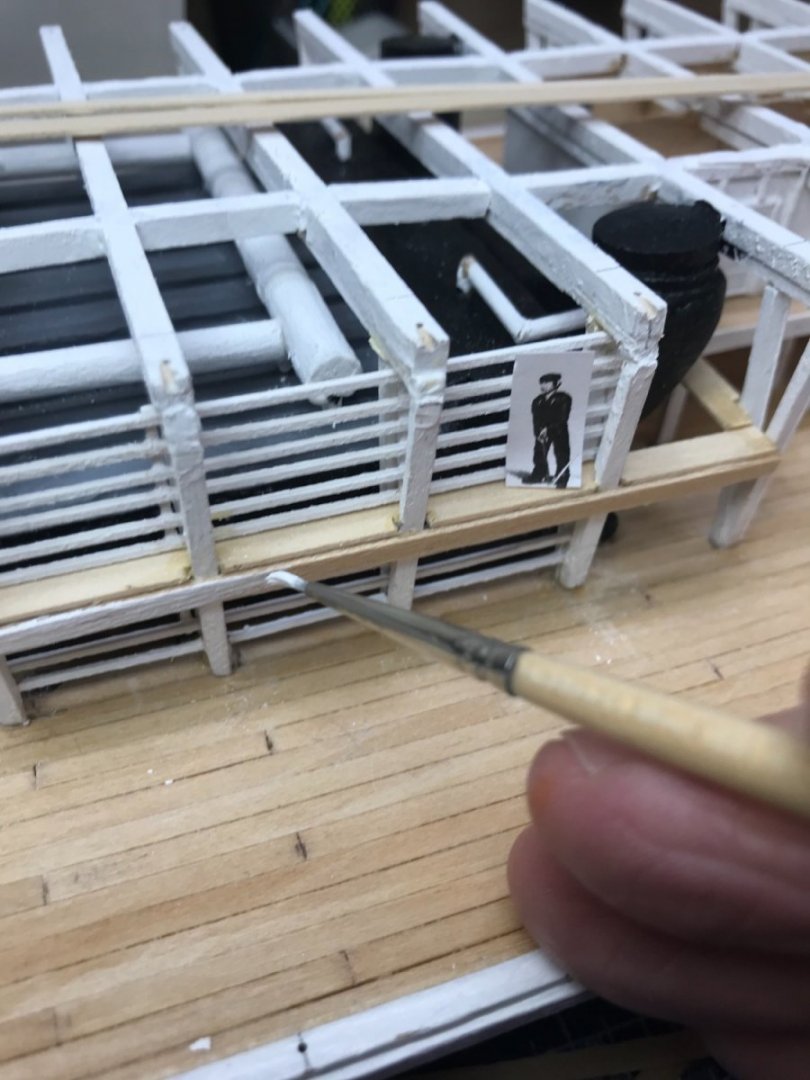
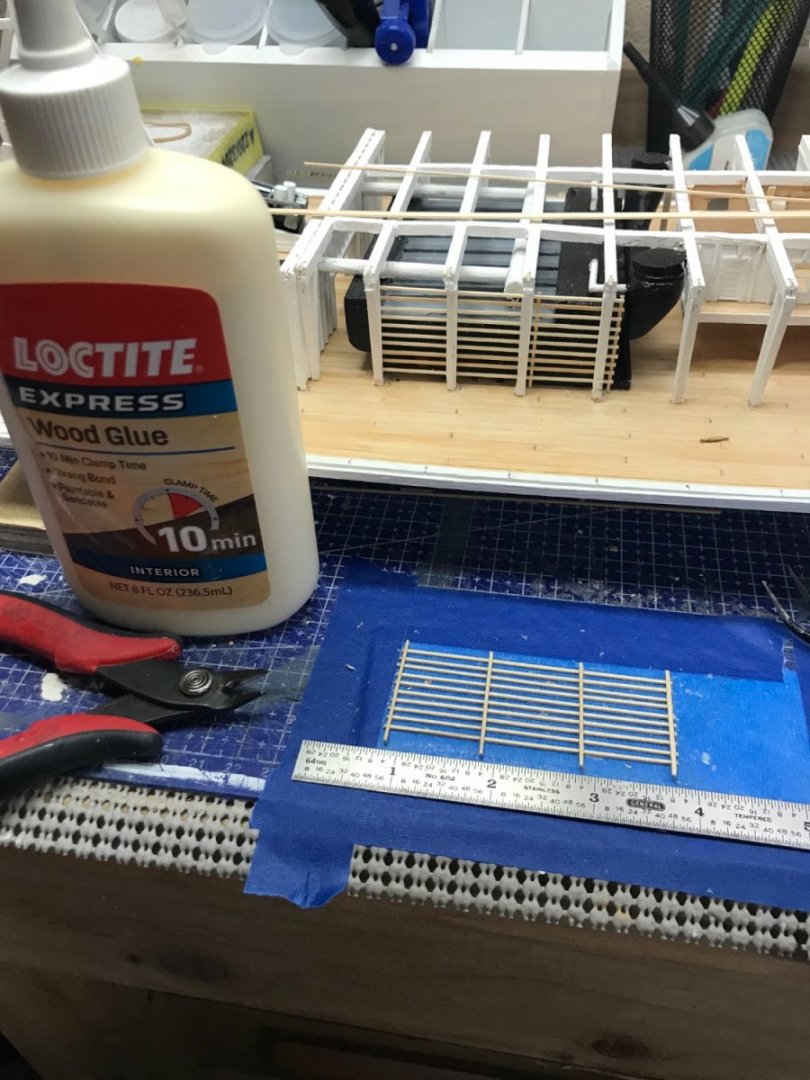
Boiler Guard and Catwalk… Boiler Guard constructed of 1/32 materials. Two Boiler Guards completed ready for paint. Cutting in Boiler Guards and Catwalk. Nice break from those Paddle Wheels. Work continues on the Paddle Wheels. Thanks again to @Cathead and @yvesvidal for the tips On Paddle Wheels. Onwards 🍻

- 238 replies
-
- 7
-
-
- Robert E Lee
- steamboat
- (and 3 more)
-
Easier said than done. 🧐The hubs are spacing the wheels. As you can see here I will have to revisit the blocking and adjust. Thanks for your suggestion, I will leave the hub off one side so I can lay the next wheel directly on this one. Tedious but doable, I think. 🤔 I will let you know how it works. 👍
- 238 replies
-
- 6
-
-
- Robert E Lee
- steamboat
- (and 3 more)
-
Agreed… I have noticed that when I cut the blocking, it must be square to minimize the twist in the arms. Careful measurement to 6 mm and precise clamping of each piece may get the results I am looking for. The problem with that is there are 34 arms, 68 blocks cut from 1/16” basswood. Multiple that by 8 wheels for 2 Paddle Wheels . 🤪 But who’s counting. Did you find any particular techniques useful in minimizing the misalignments? Thanks
- 238 replies
-
- 1
-
-
- Robert E Lee
- steamboat
- (and 3 more)
-
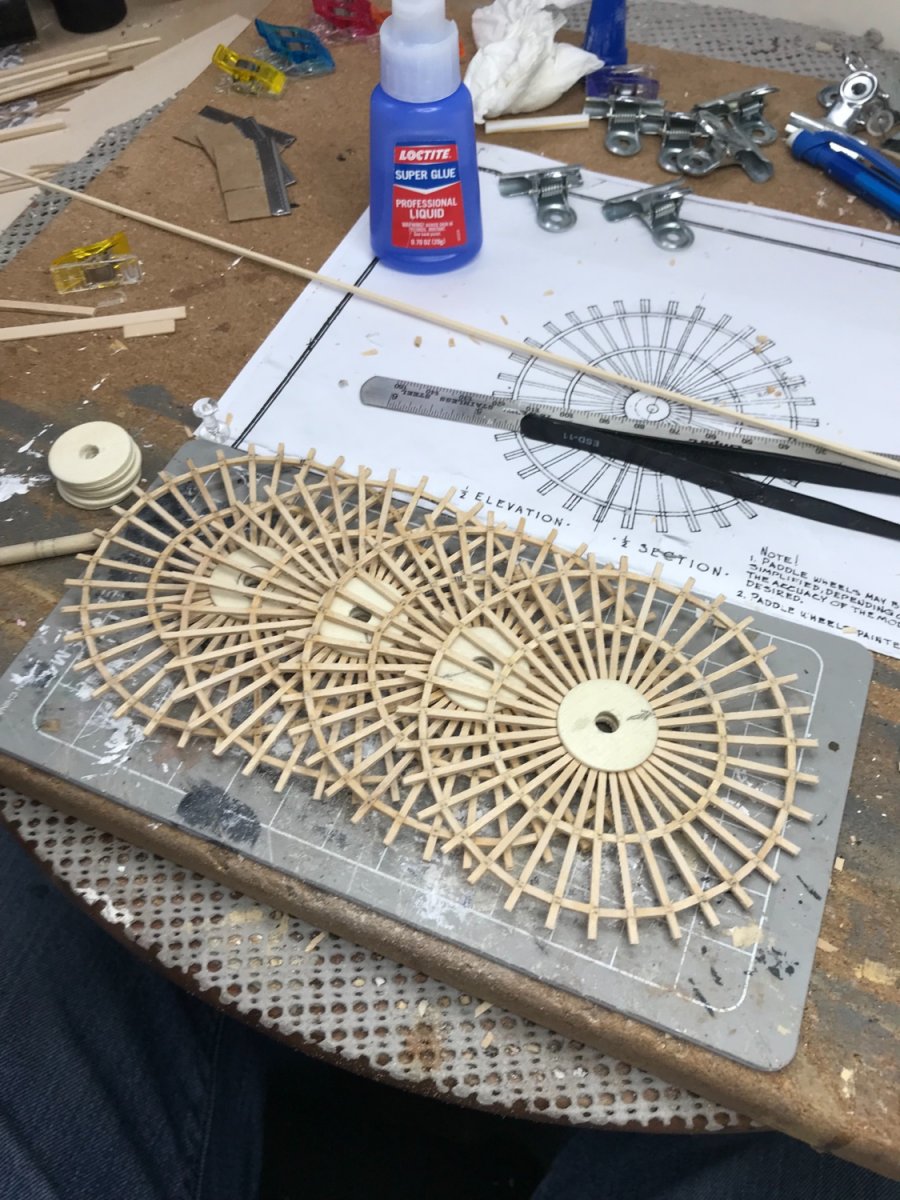
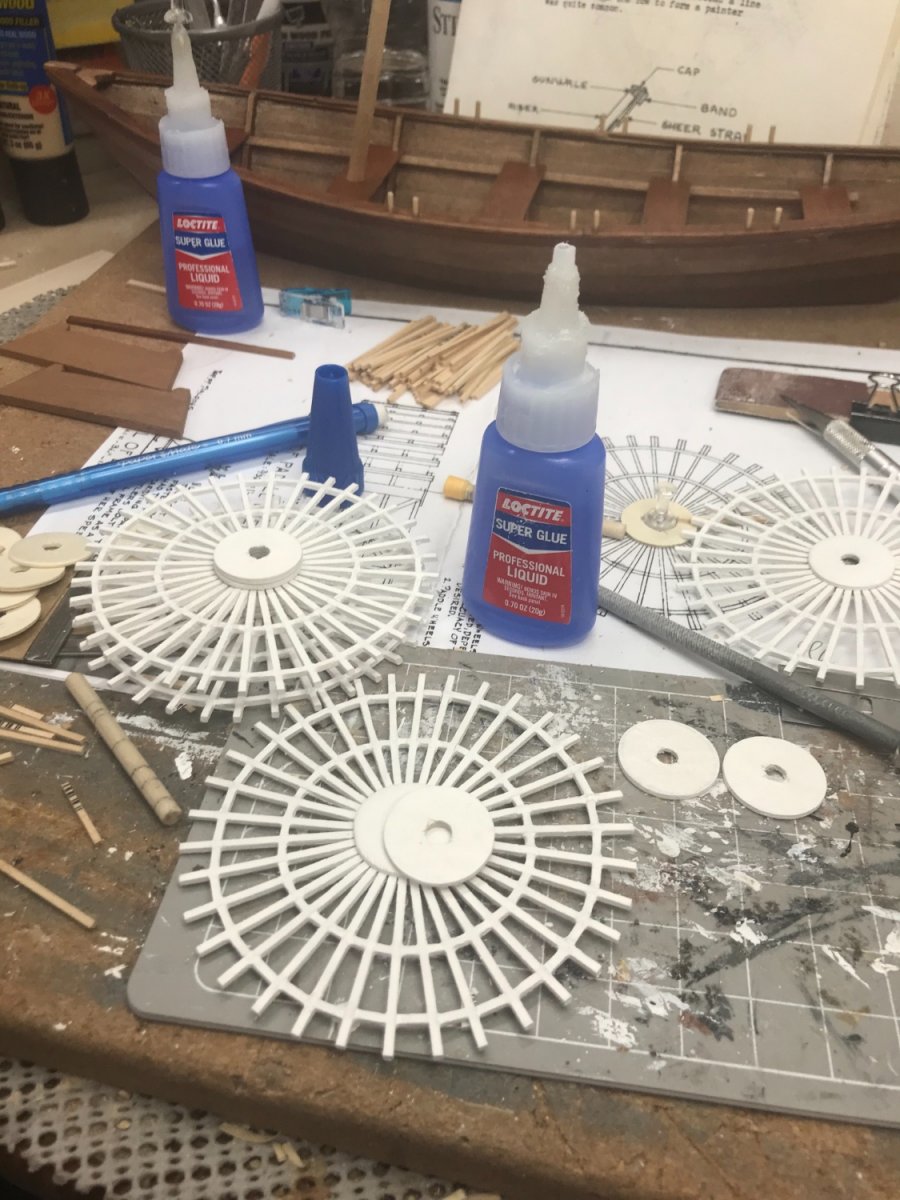
Paddle Wheels… Thought I would share some progress I have made on the paddle wheels. Albeit rough to say the least. 4 of 8 wheels assembled… Airbrush painted before final assembly. Determined spoke alignment was not accurate enough to proper alignment of the paddles. (Quite Maddening 🤪) Spent hours adjusting the spacing to “exactly” 6 mm. Results were minimally acceptable. Fortunately once the housing is completed the misaligned paddles will not be seen. But, I will know they are there. 😆 There is that OCD, AGAIN! I plan to leave side panels off to make the engine room and paddle wheel viewable from one side. That said, I will build another set of wheels more carefully and accurately. We will see how I do before I decide to remake the first one. That is if I don’t go insane. Wish me luck. 🍻

- 238 replies
-
- 11
-
-
- Robert E Lee
- steamboat
- (and 3 more)
-
Sorry to hear this Ron, some times things look better in a photograph than they do in real life. Glad you are taking the time to do it right. Good luck with your repairs, sometimes we have to step back and take another look. Repairs are a necessary part of this hobby, it always leads to perfection. I know, been there done that. 🍻
- 294 replies
-
- 1
-
-
- charles w morgan
- model shipways
- (and 1 more)
-
Looking great Ron, stepping those masts properly should not be rushed. Good job!!👍
-
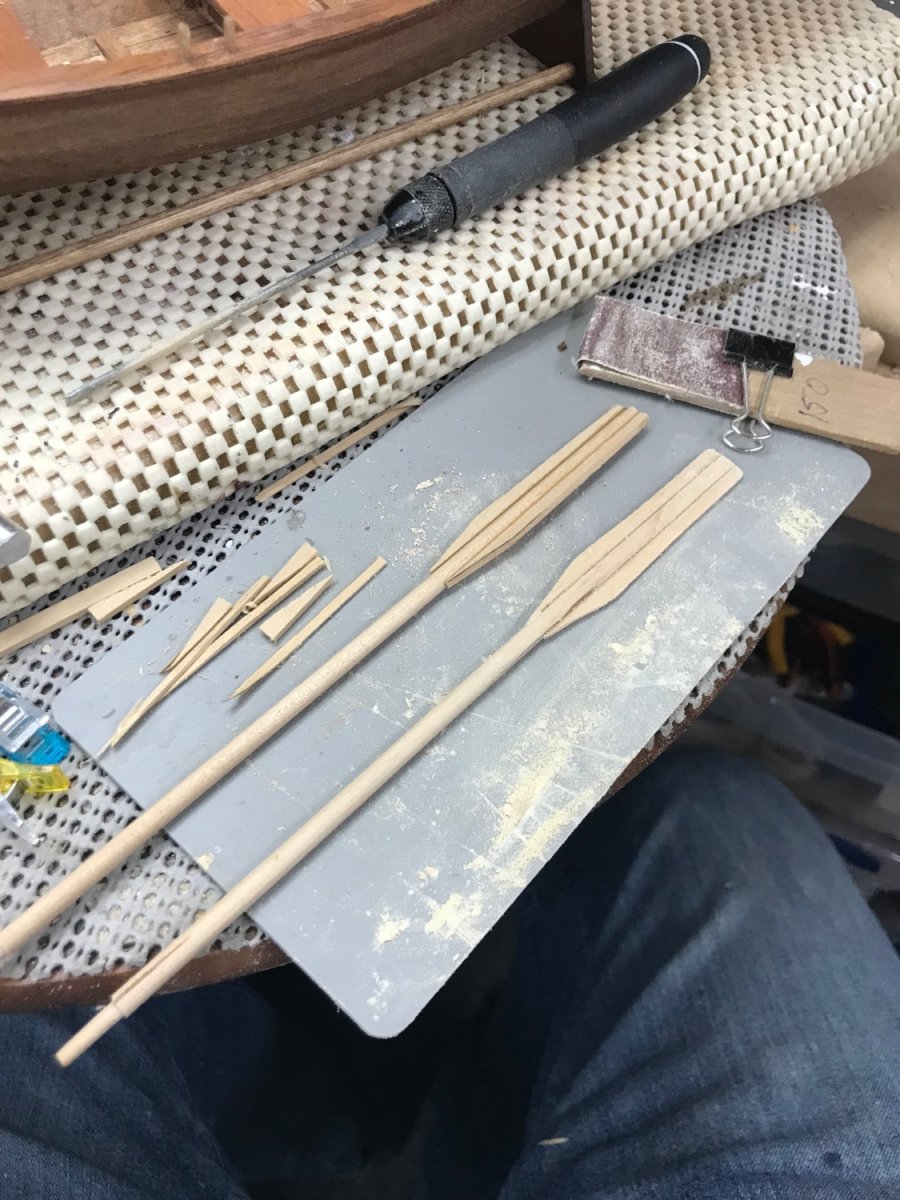
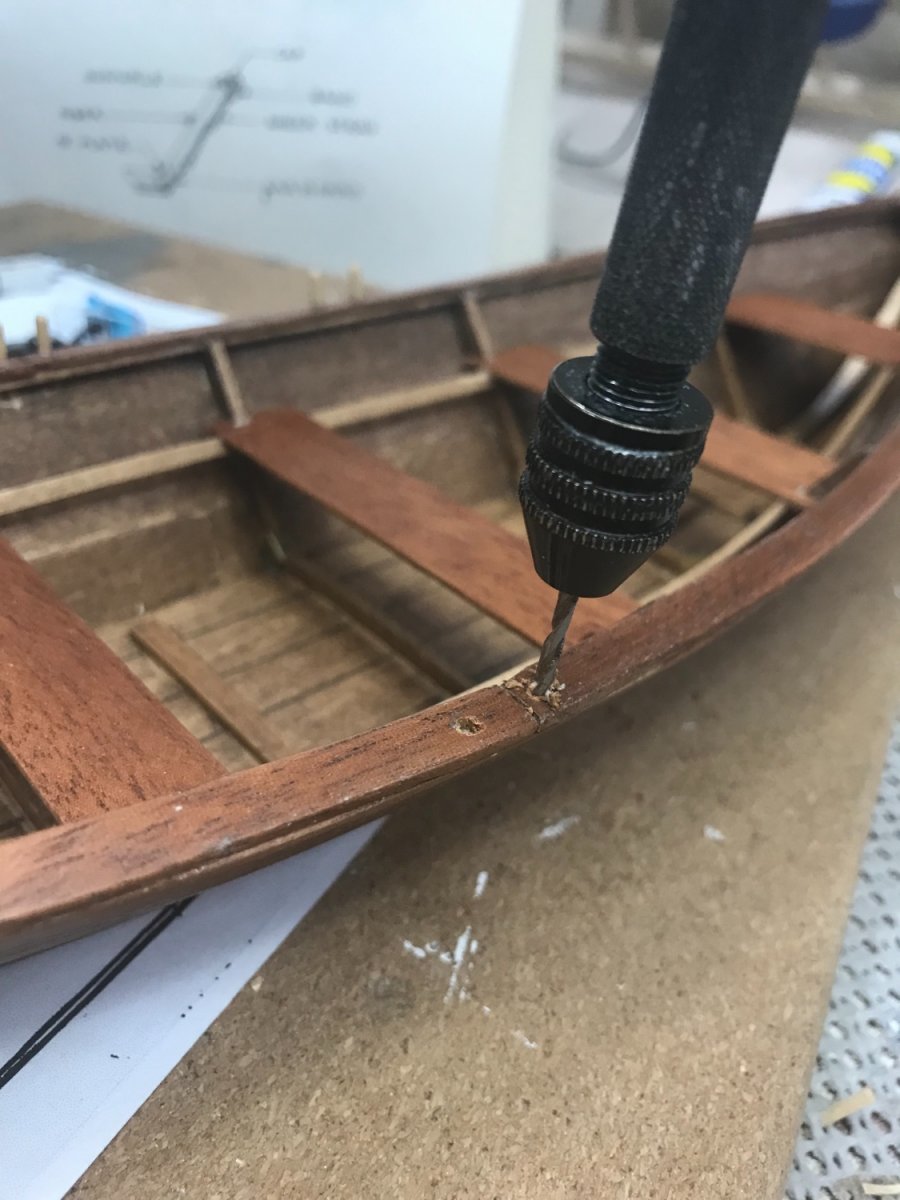
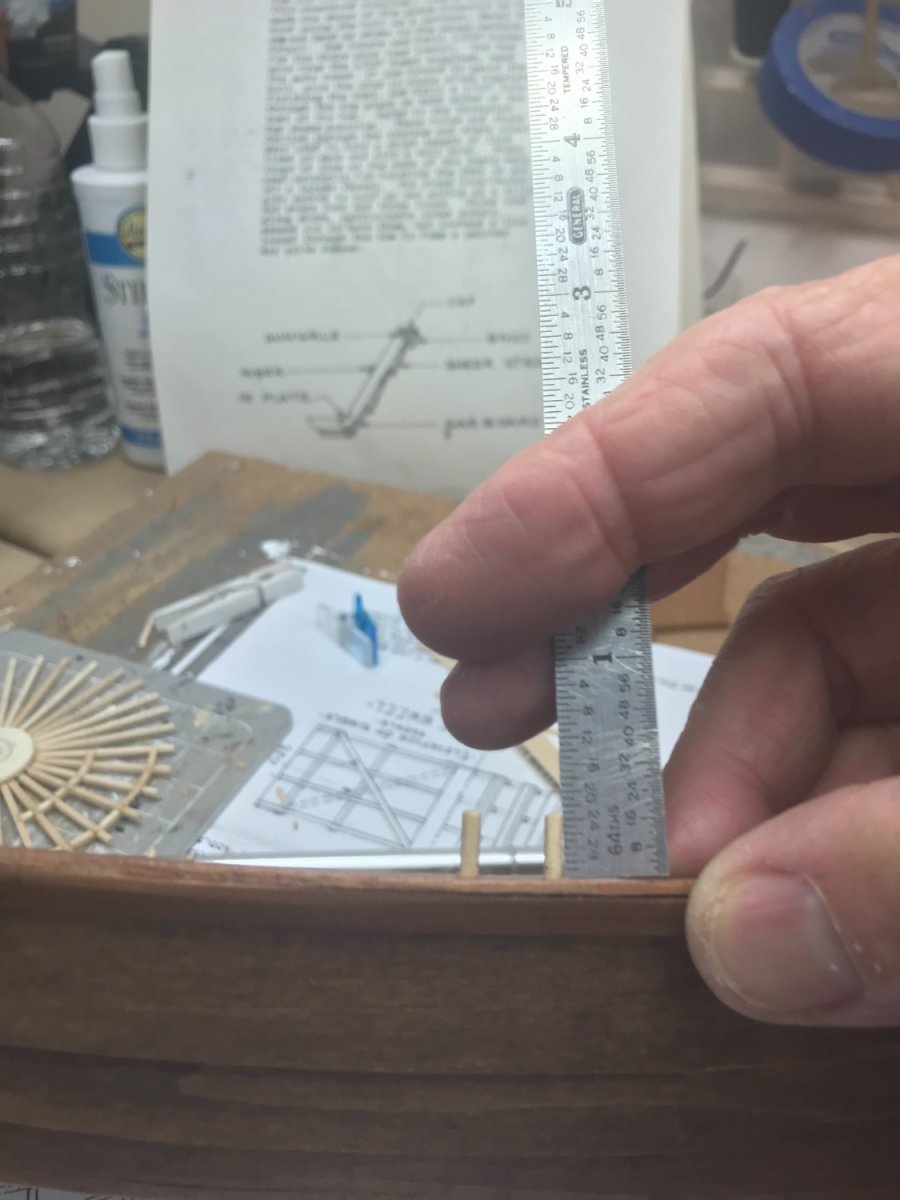
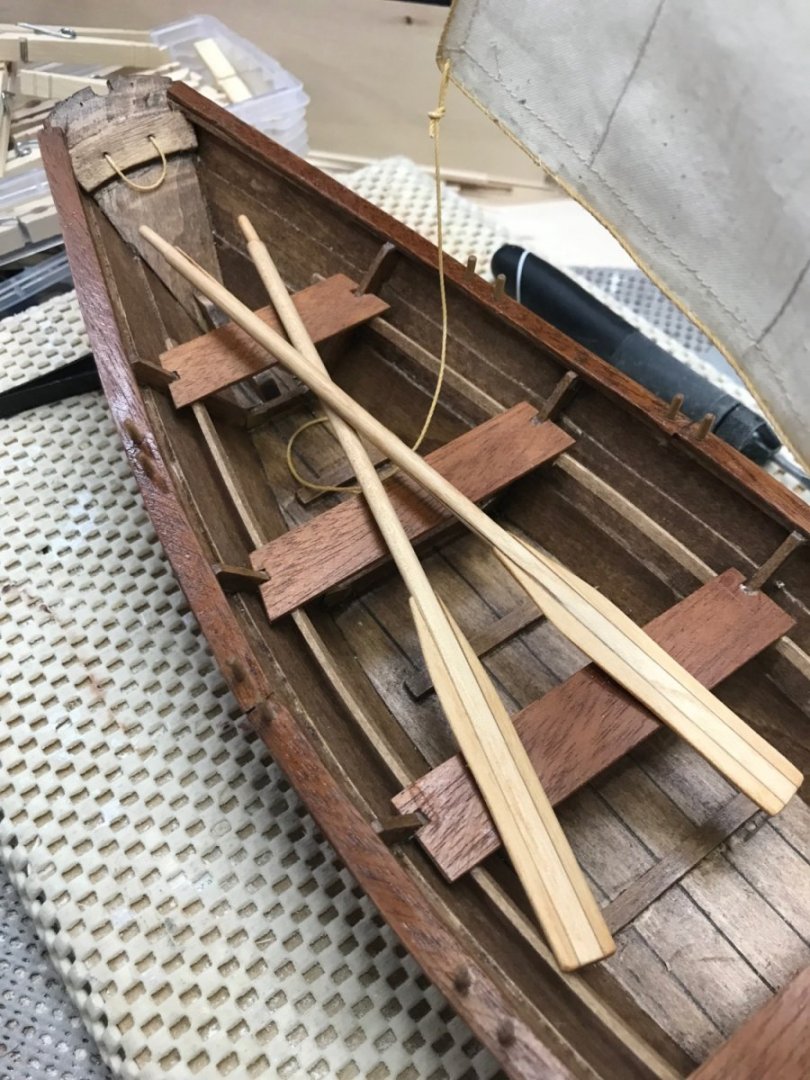
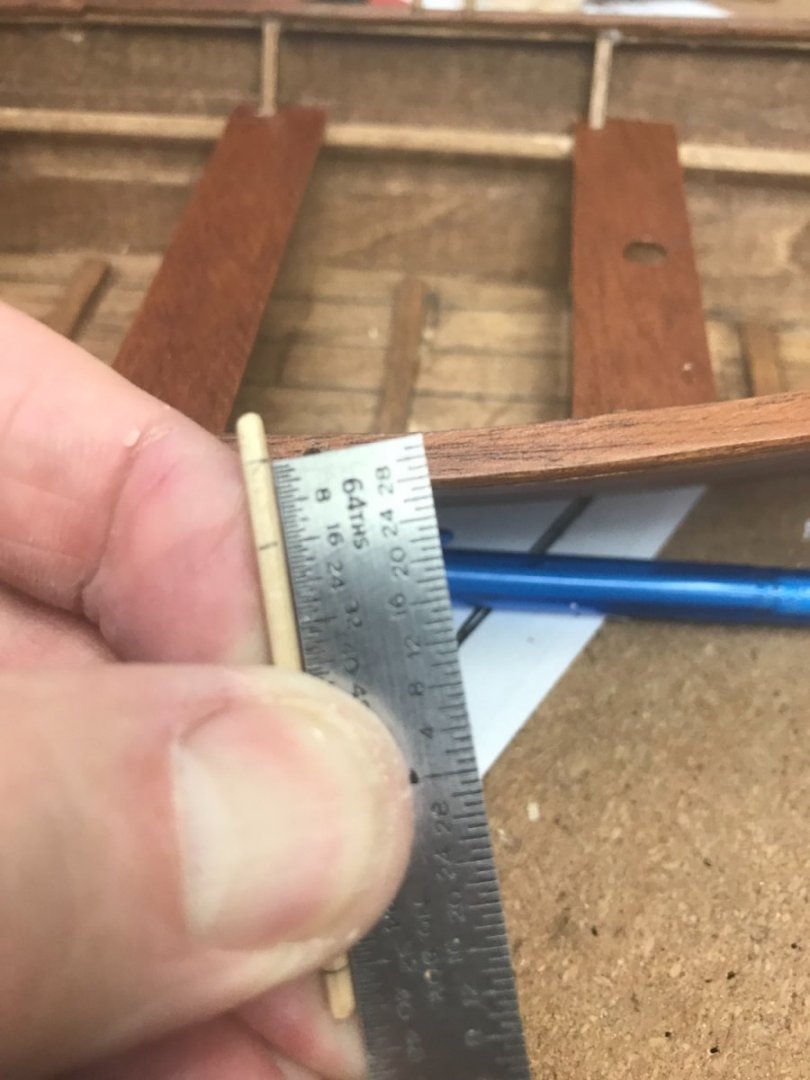
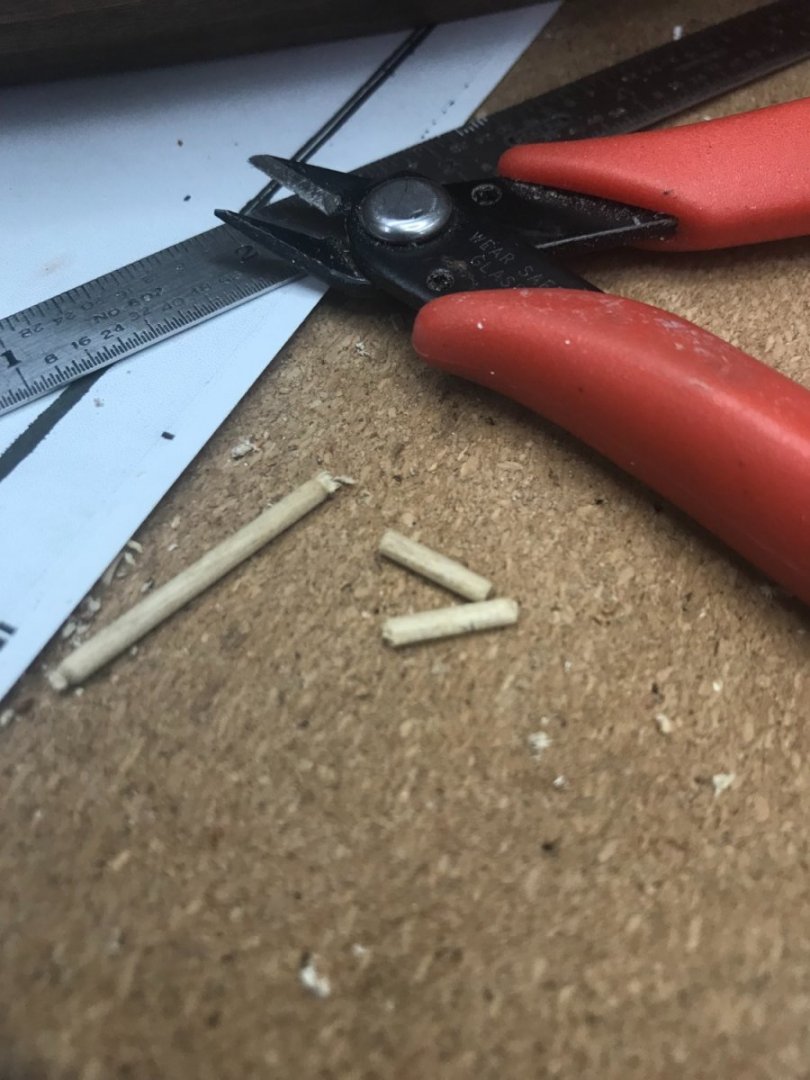
Thole Pins… Drilling into the Mahogany Cap Rail to place the oar locks. Marking the depth of the hole. Marking 1/16” dowel rod… Cut then sand round the edges, leaving 1/4” above the rail. Oar Locks complete… Cheers 🍻


- 22 replies
-
- 3
-
-
- Laughing Whale
- Dory
- (and 1 more)
-
Glad to see you back at it. sit back and enjoy the ride is exactly what I plan to do… Should be a good ride at that. 😎 Really looks good so far. Excellent! 👍
- 200 replies
-
- 2
-

-
-
- Whaling Bark
- Charles W Morgan
- (and 1 more)
-
Hanger Rods with Turnbuckles… Installed some Hanger Rods with the wire and turnbuckles supplied in the kit. Painting them flat black enamel. Work continues on the Paddle Wheels. Cheers 🍻

- 238 replies
-
- 7
-
-
- Robert E Lee
- steamboat
- (and 3 more)
-
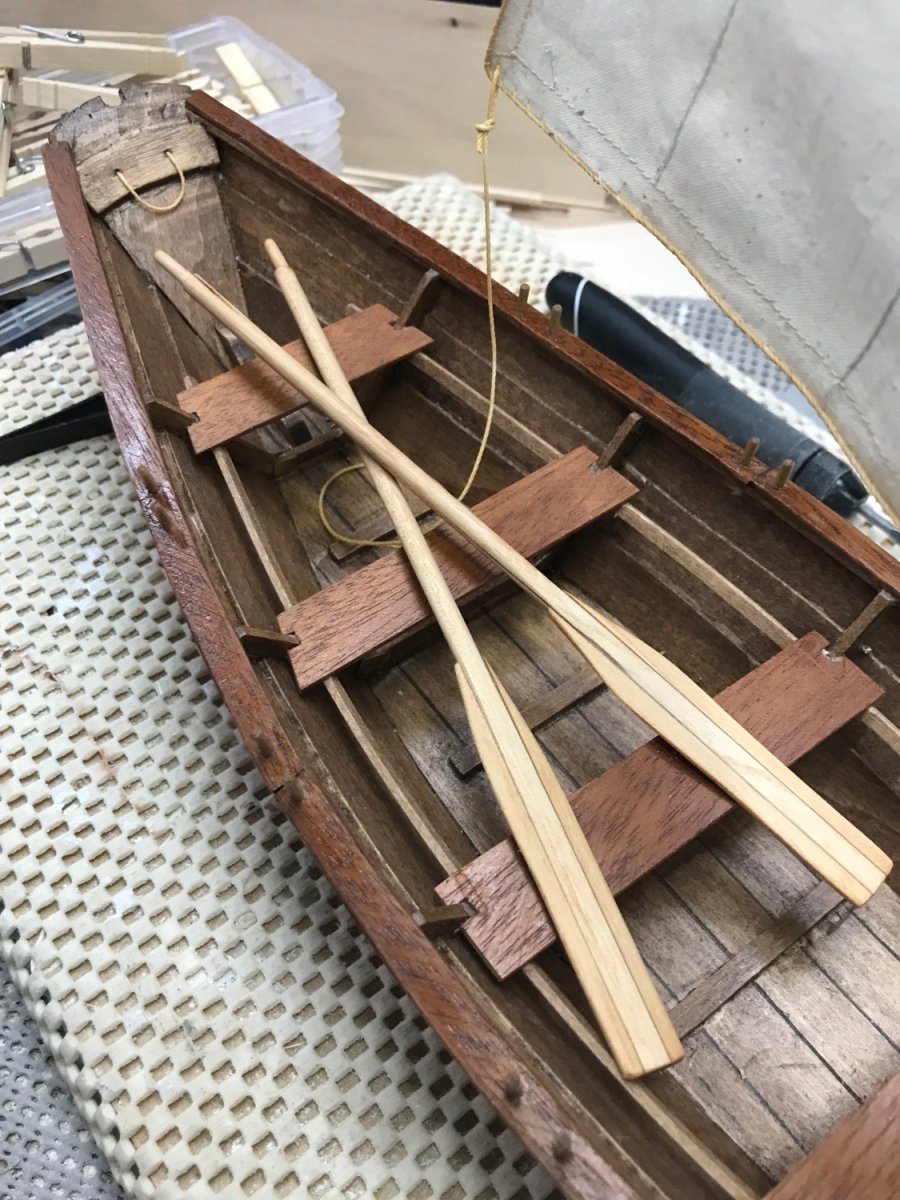
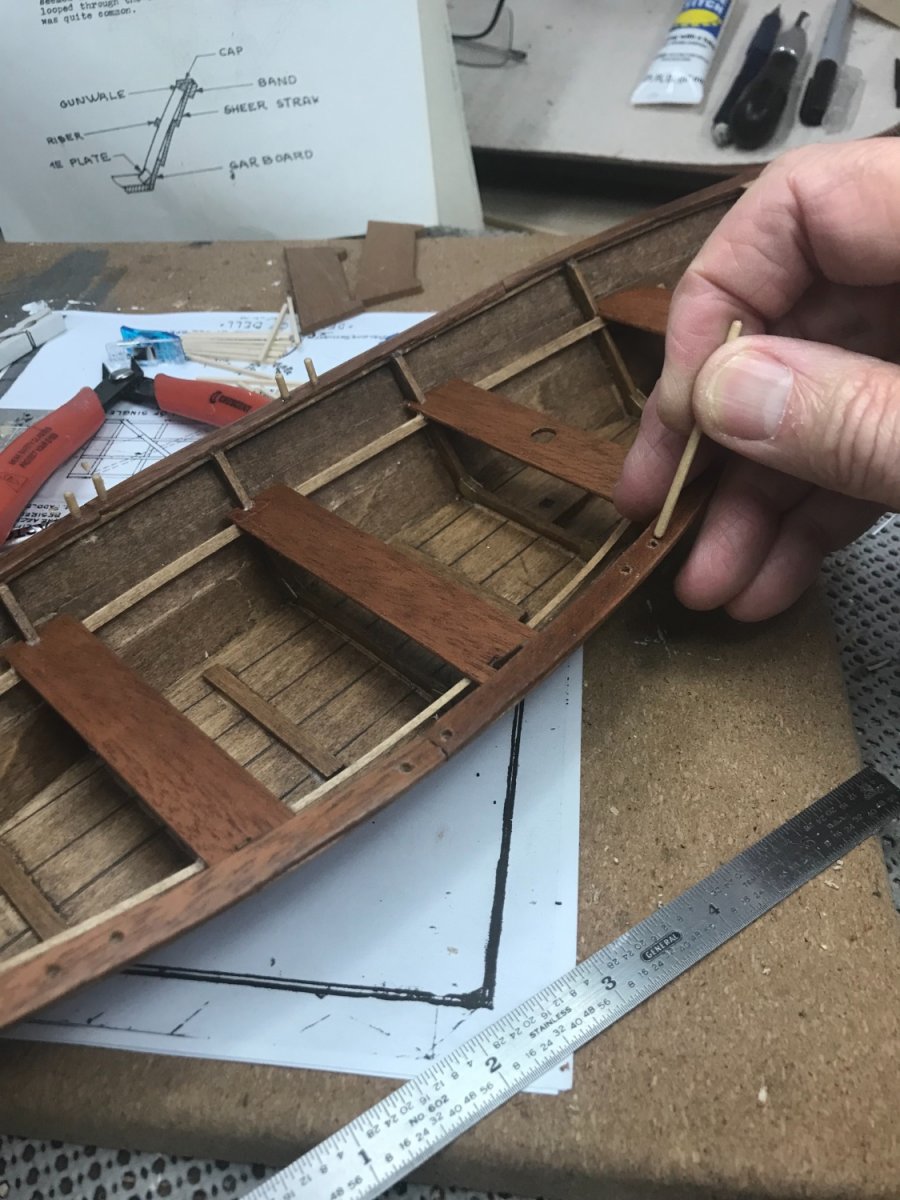
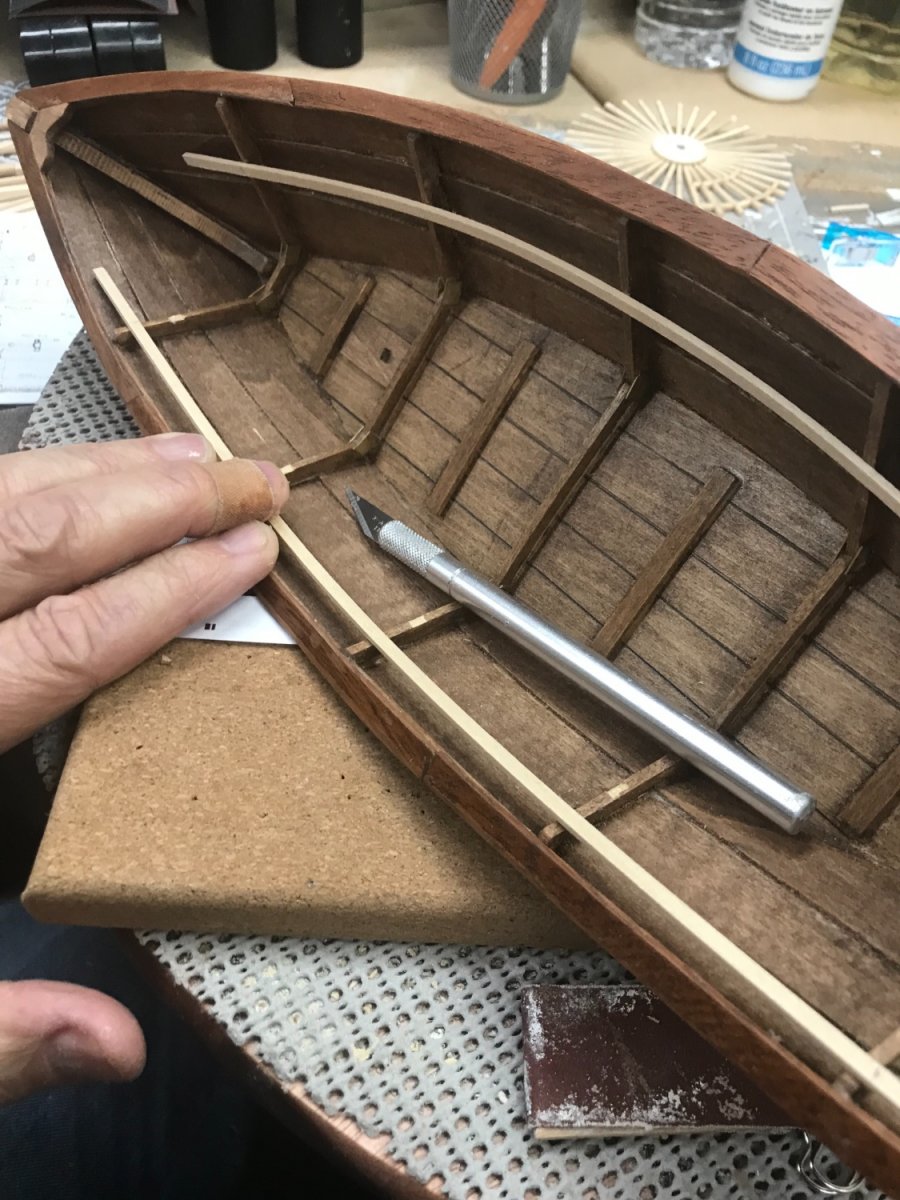
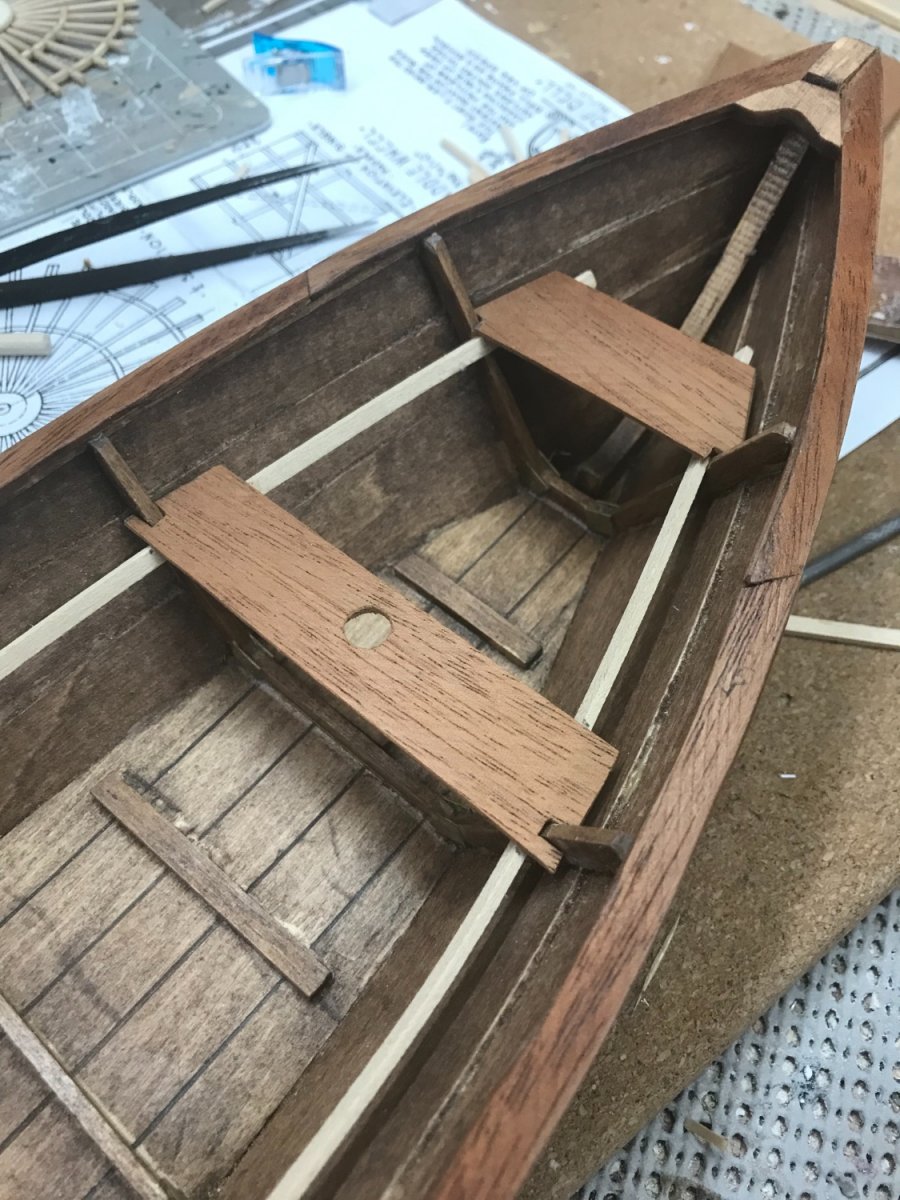
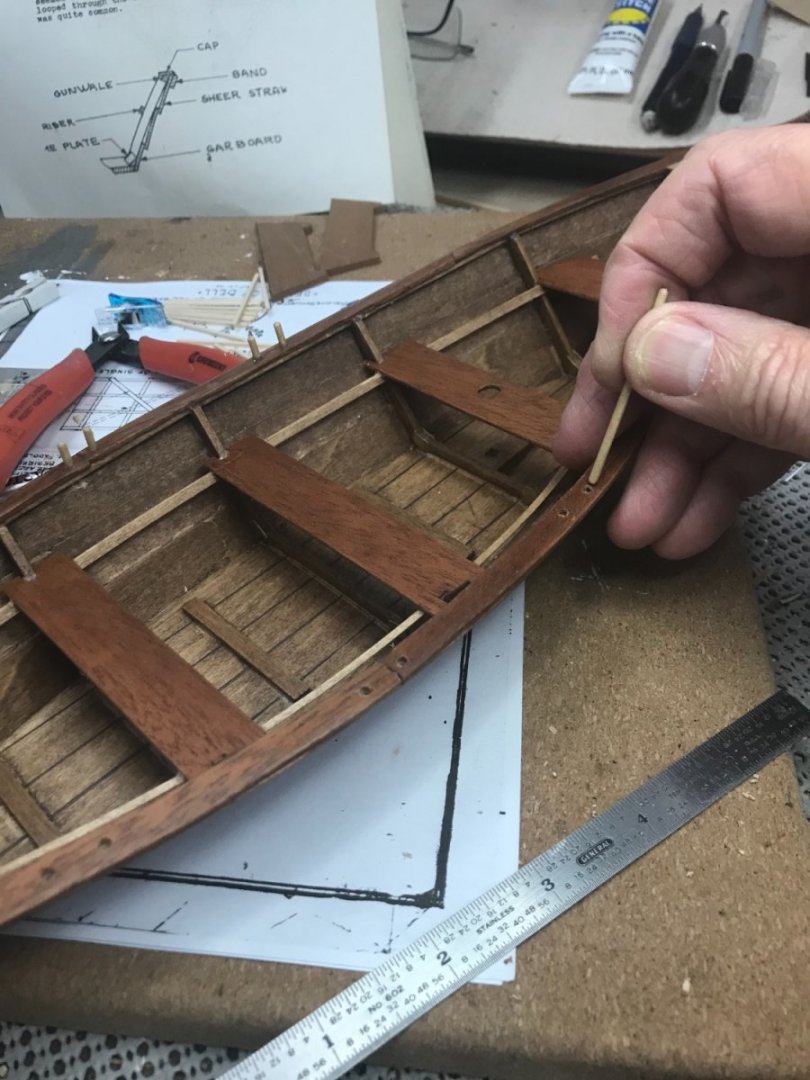
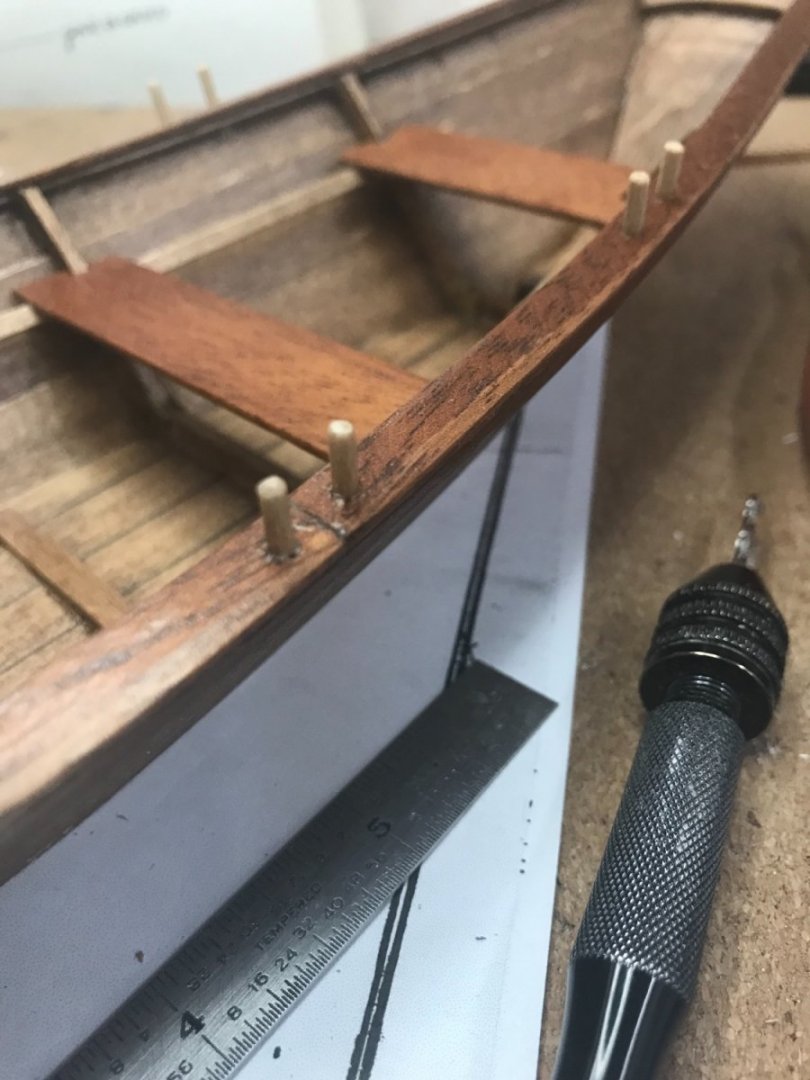
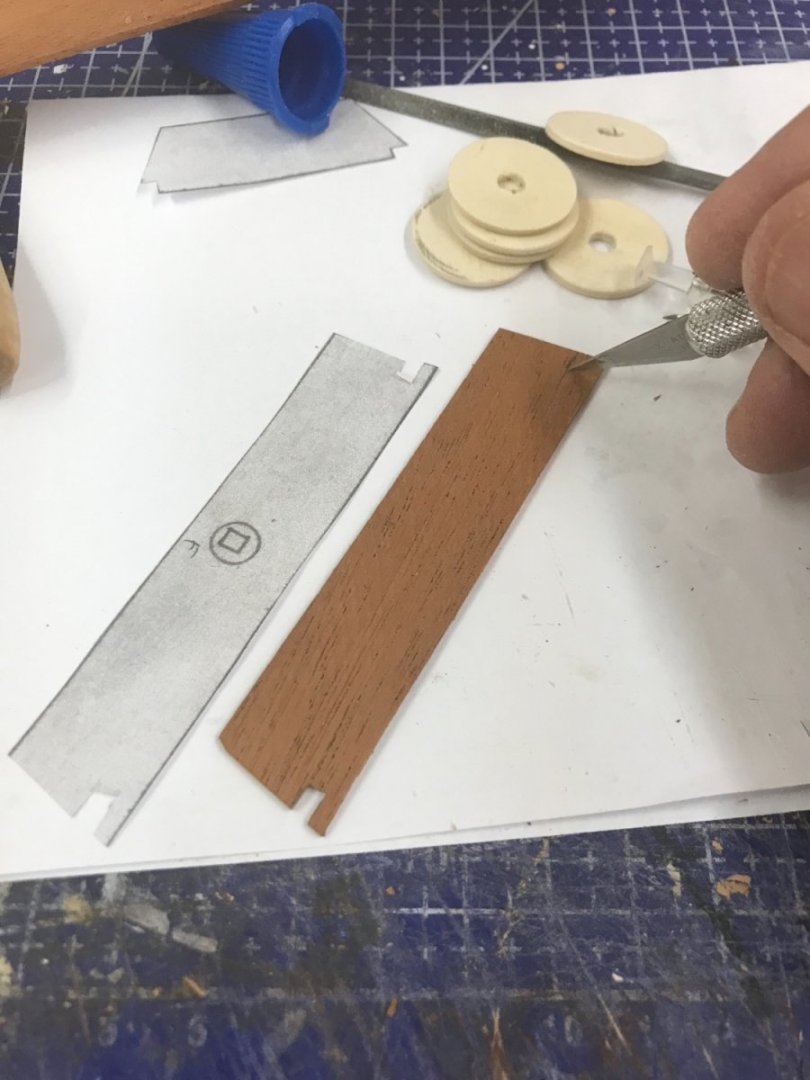
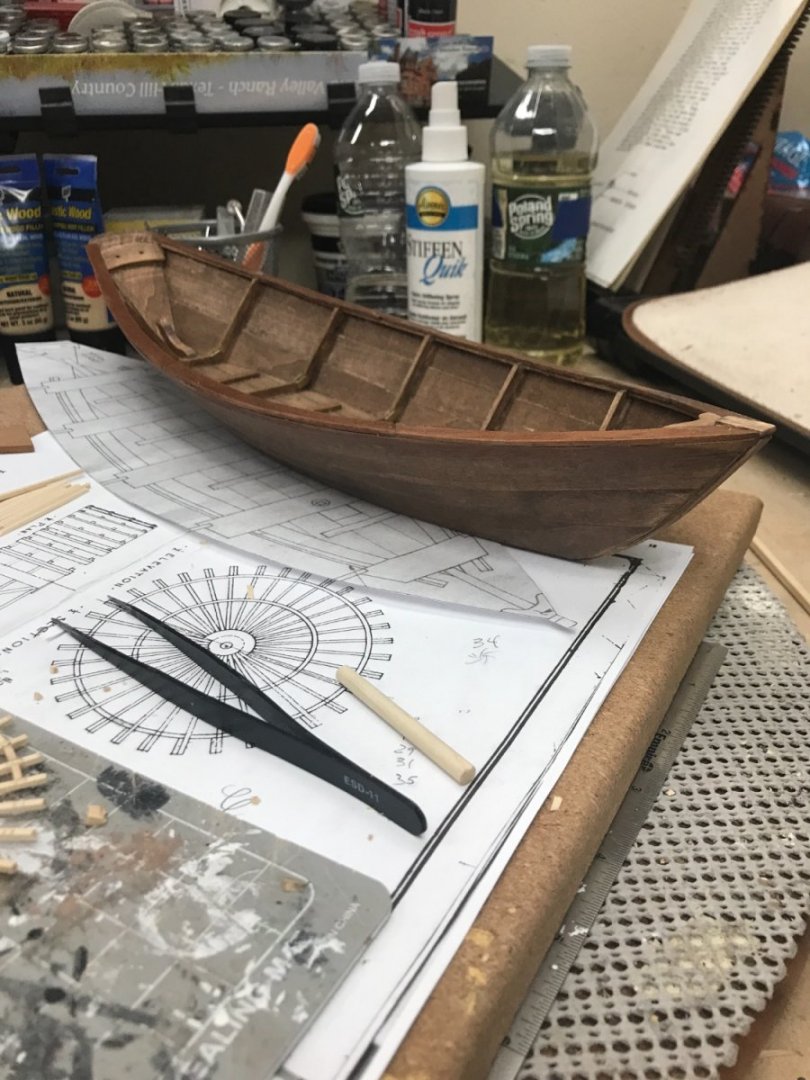
Seat Risers… Notched the framing slightly to provide flat gluing surface for the seat riser. Now the Seats, these would be normally removable so the Dory could be stacked on deck with other Dories Used copy of drawing to cut out seats. Seats are complete…. Oars, Mast and Sail still ahead. Later… 😎


- 22 replies
-
- 5
-
-
- Laughing Whale
- Dory
- (and 1 more)
-
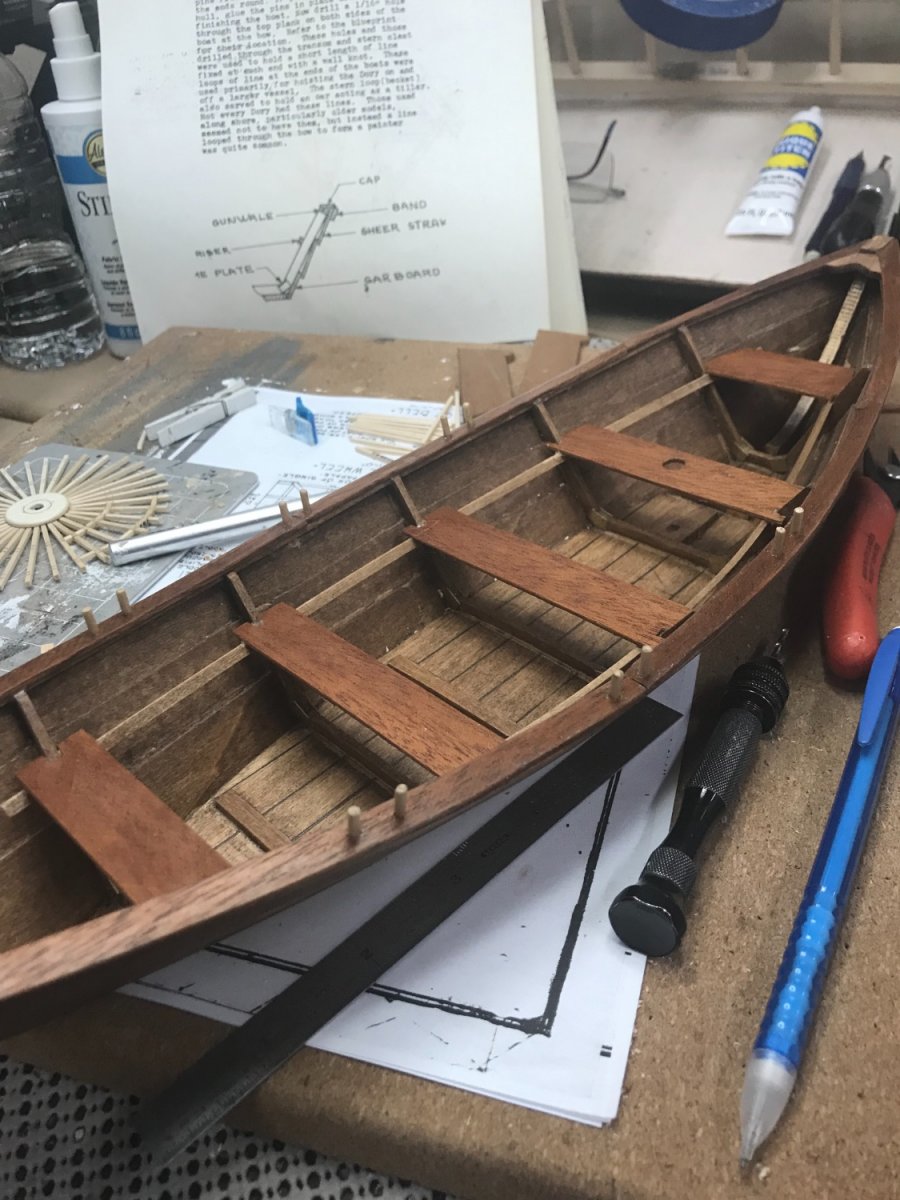
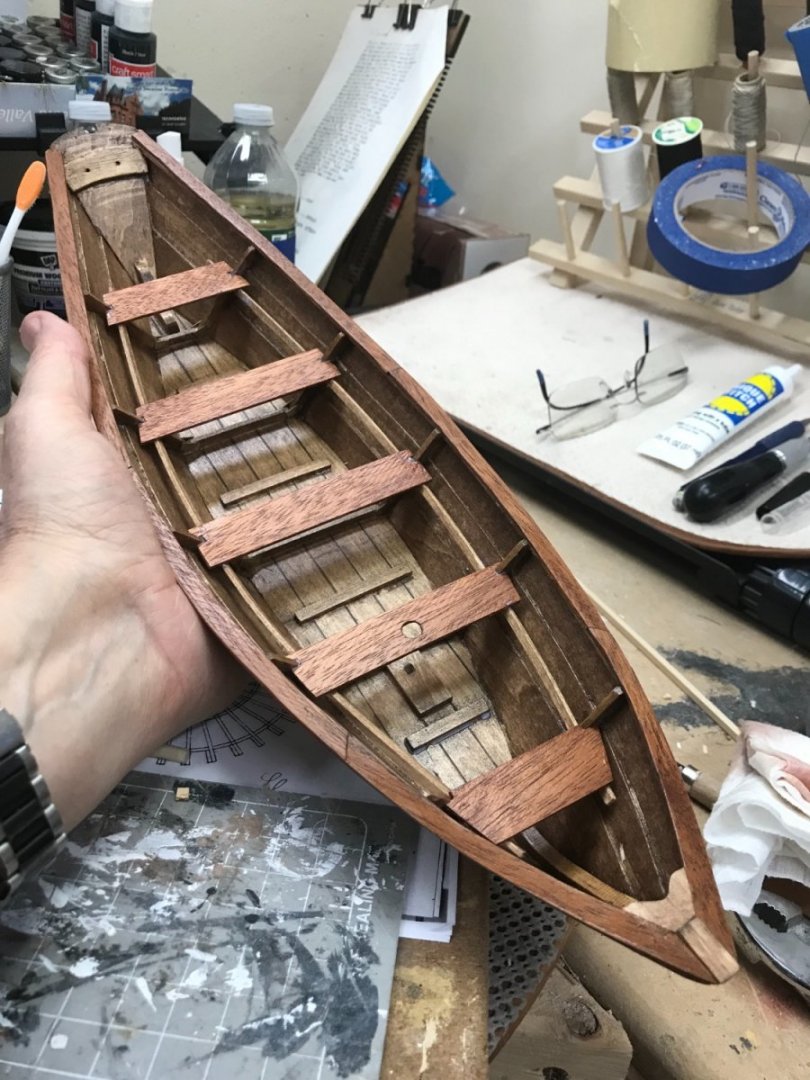
Hull completed… I think 🤔 it’s time to take a break from maddening 😆 paddle wheels and work The Dory. It’s been on the back burner for a while. Cheers 🍻
- 22 replies
-
- 4
-
-
- Laughing Whale
- Dory
- (and 1 more)
-
Paddle Wheels… Correcting to 1mm… Time for paint… 1 of 8 complete… Onwards. 🤪


- 238 replies
-
- 8
-
-

-
- Robert E Lee
- steamboat
- (and 3 more)