John Ruy
-
Posts
1,585 -
Joined
-
Last visited
Content Type
Profiles
Forums
Gallery
Events
Everything posted by John Ruy
-
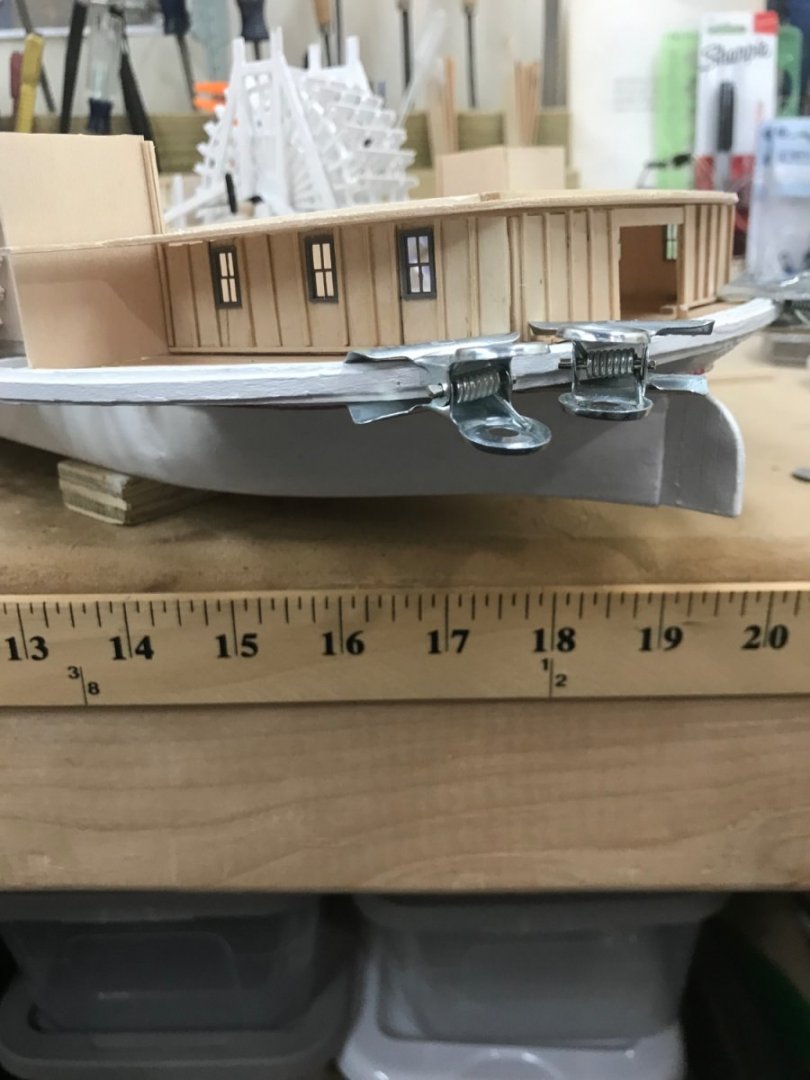
 Thanks, I’m using an iPhone. However, I did discover that resizing the iPhone photo to a landscape aspect ratio did allow for the proper upload you see on this post. Thanks for your compliment on my railings. Got to get this right, there are so many Victorian influences in the design of these floating hotels. John
- 238 replies
-
- 3
-

-
- Robert E Lee
- steamboat
- (and 3 more)
-
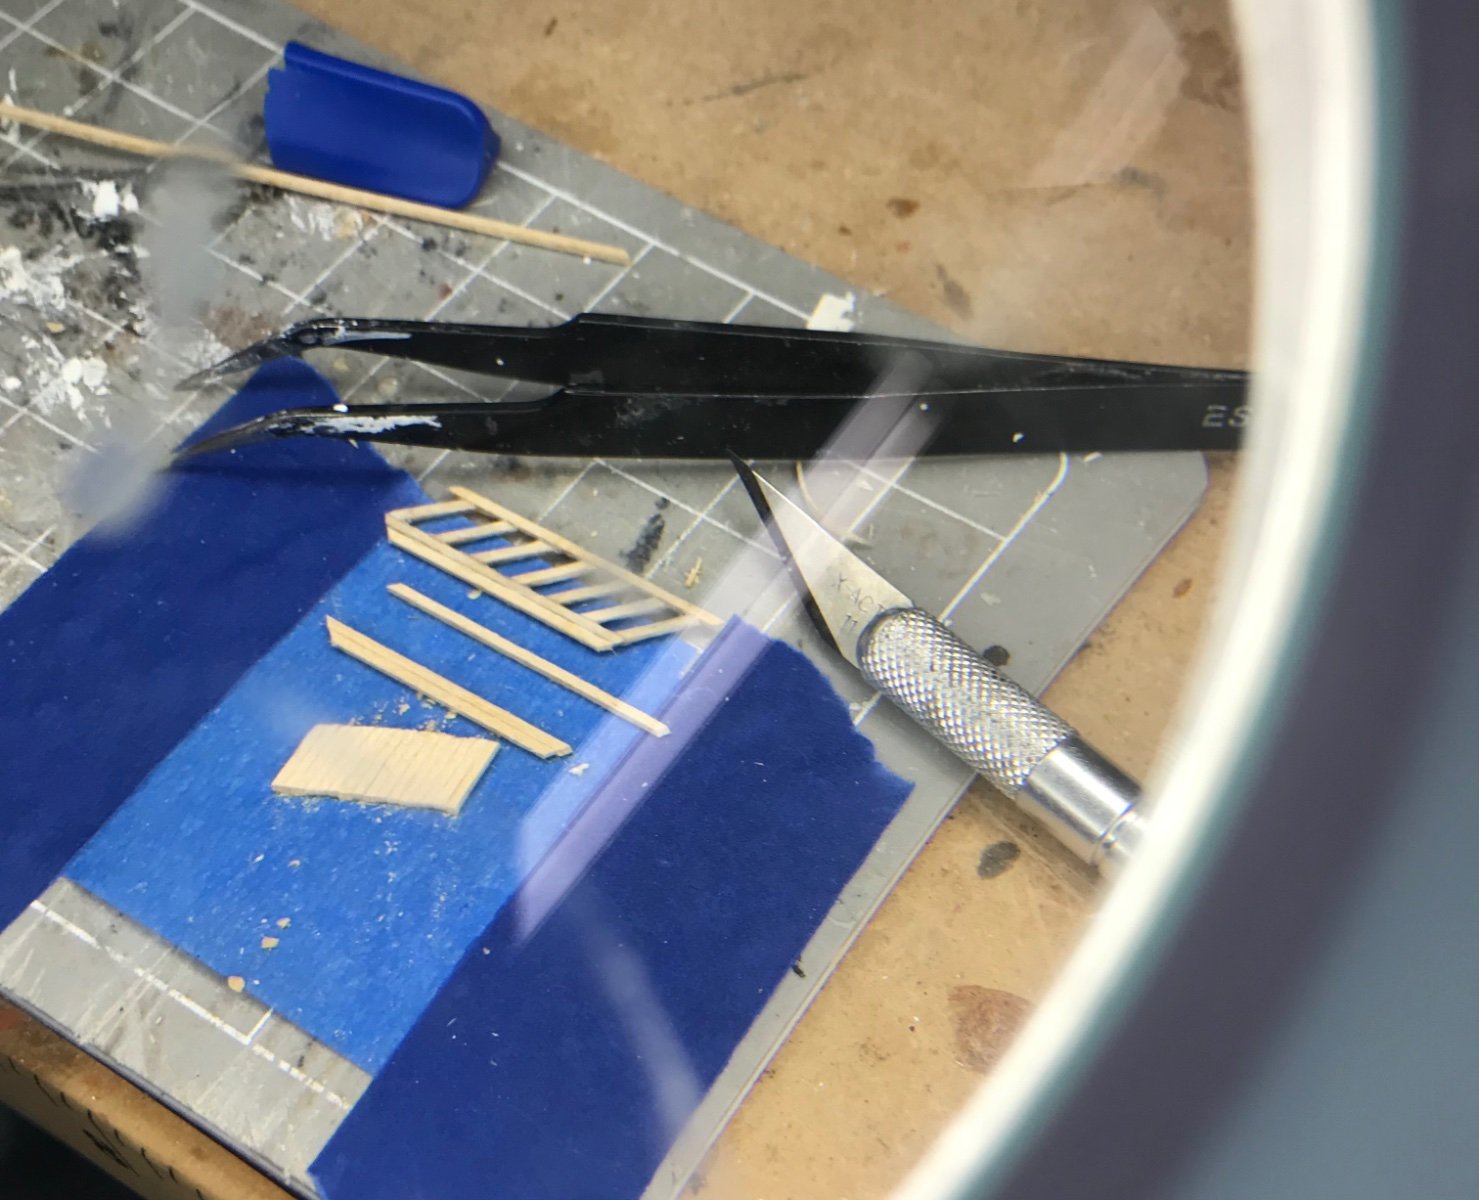
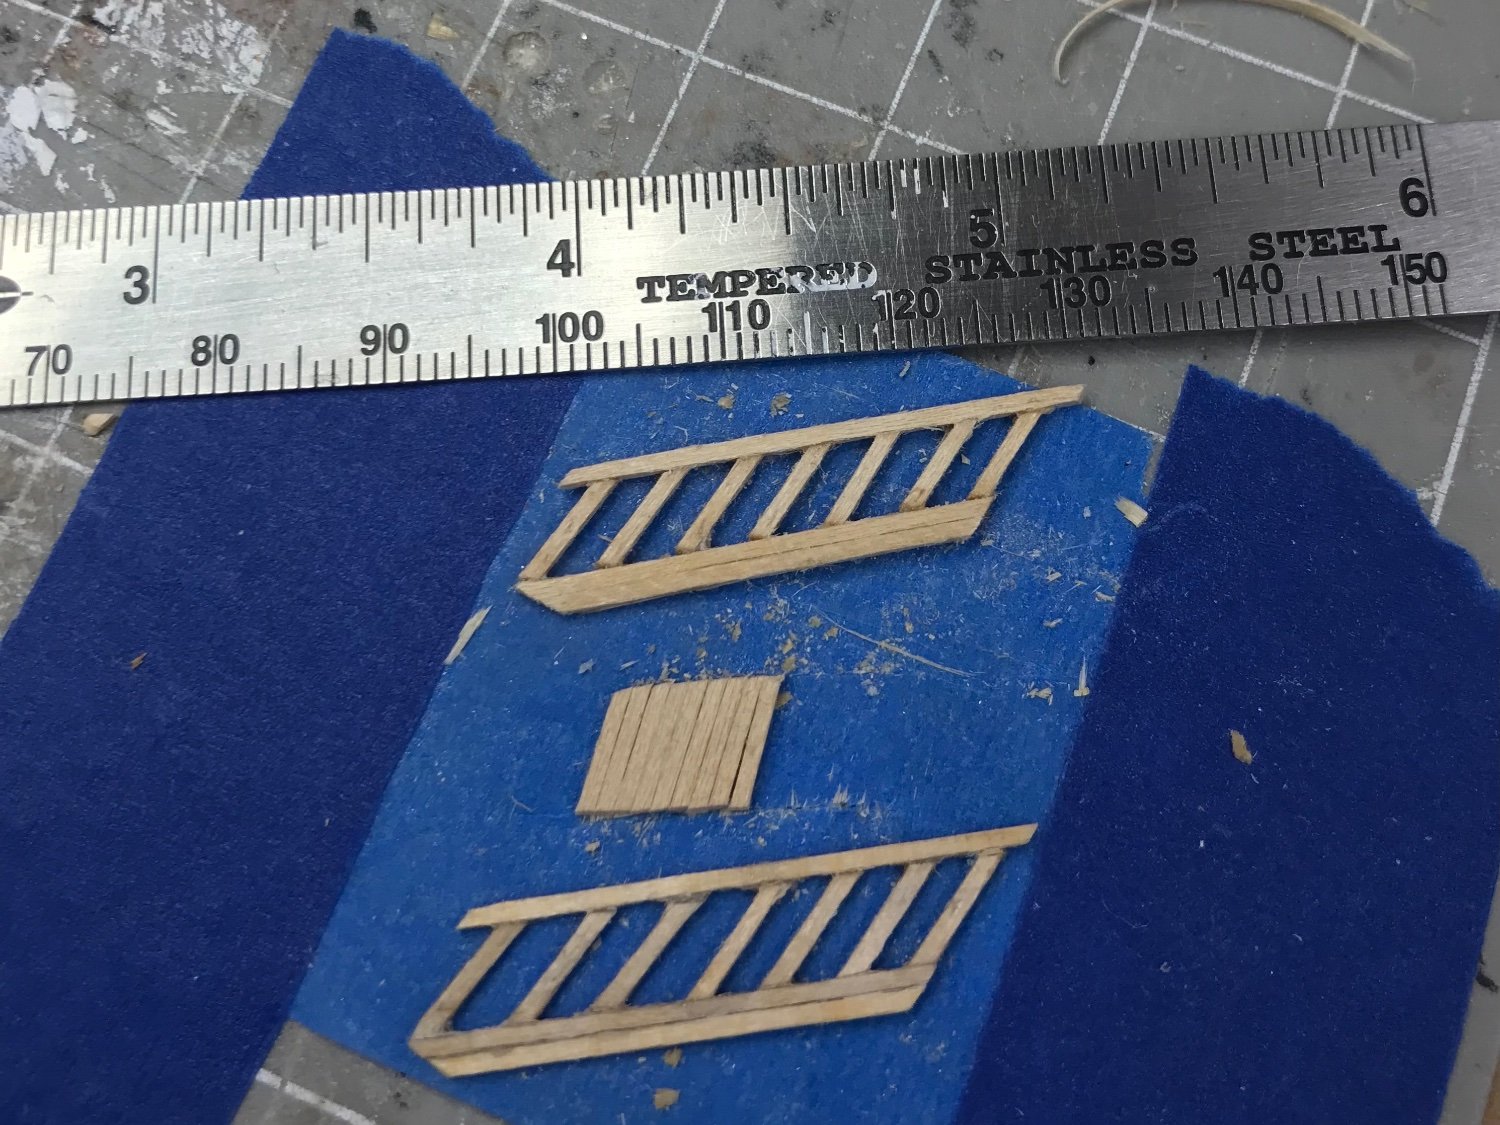
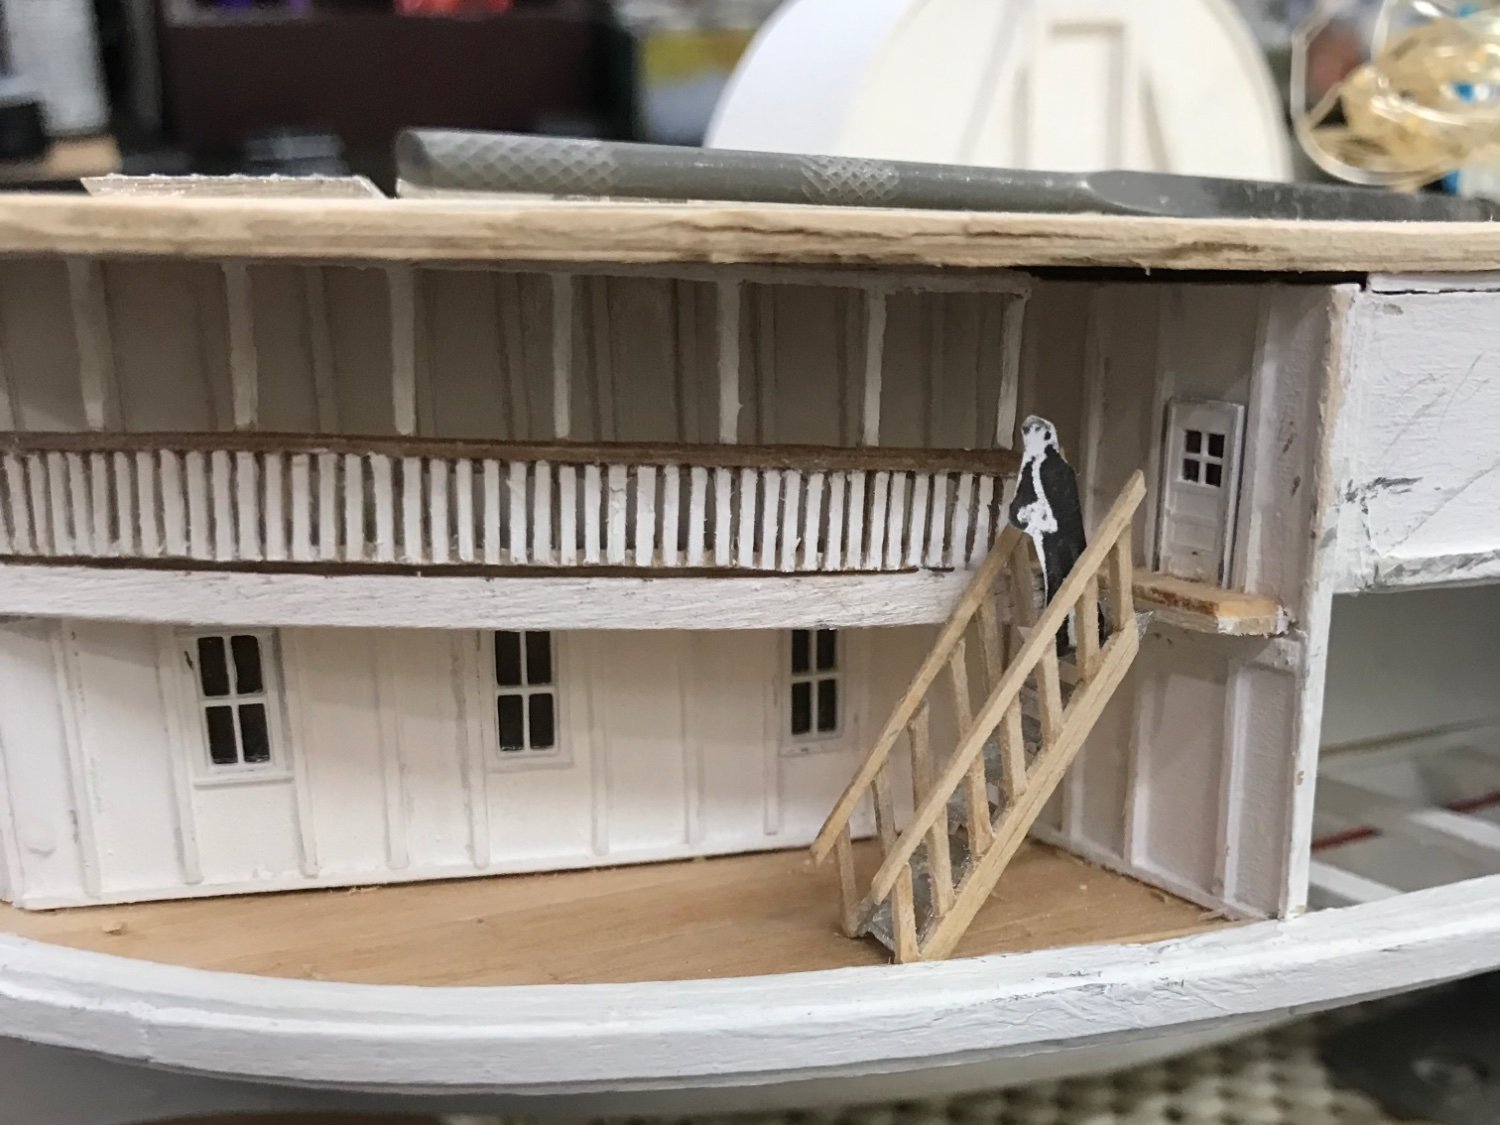
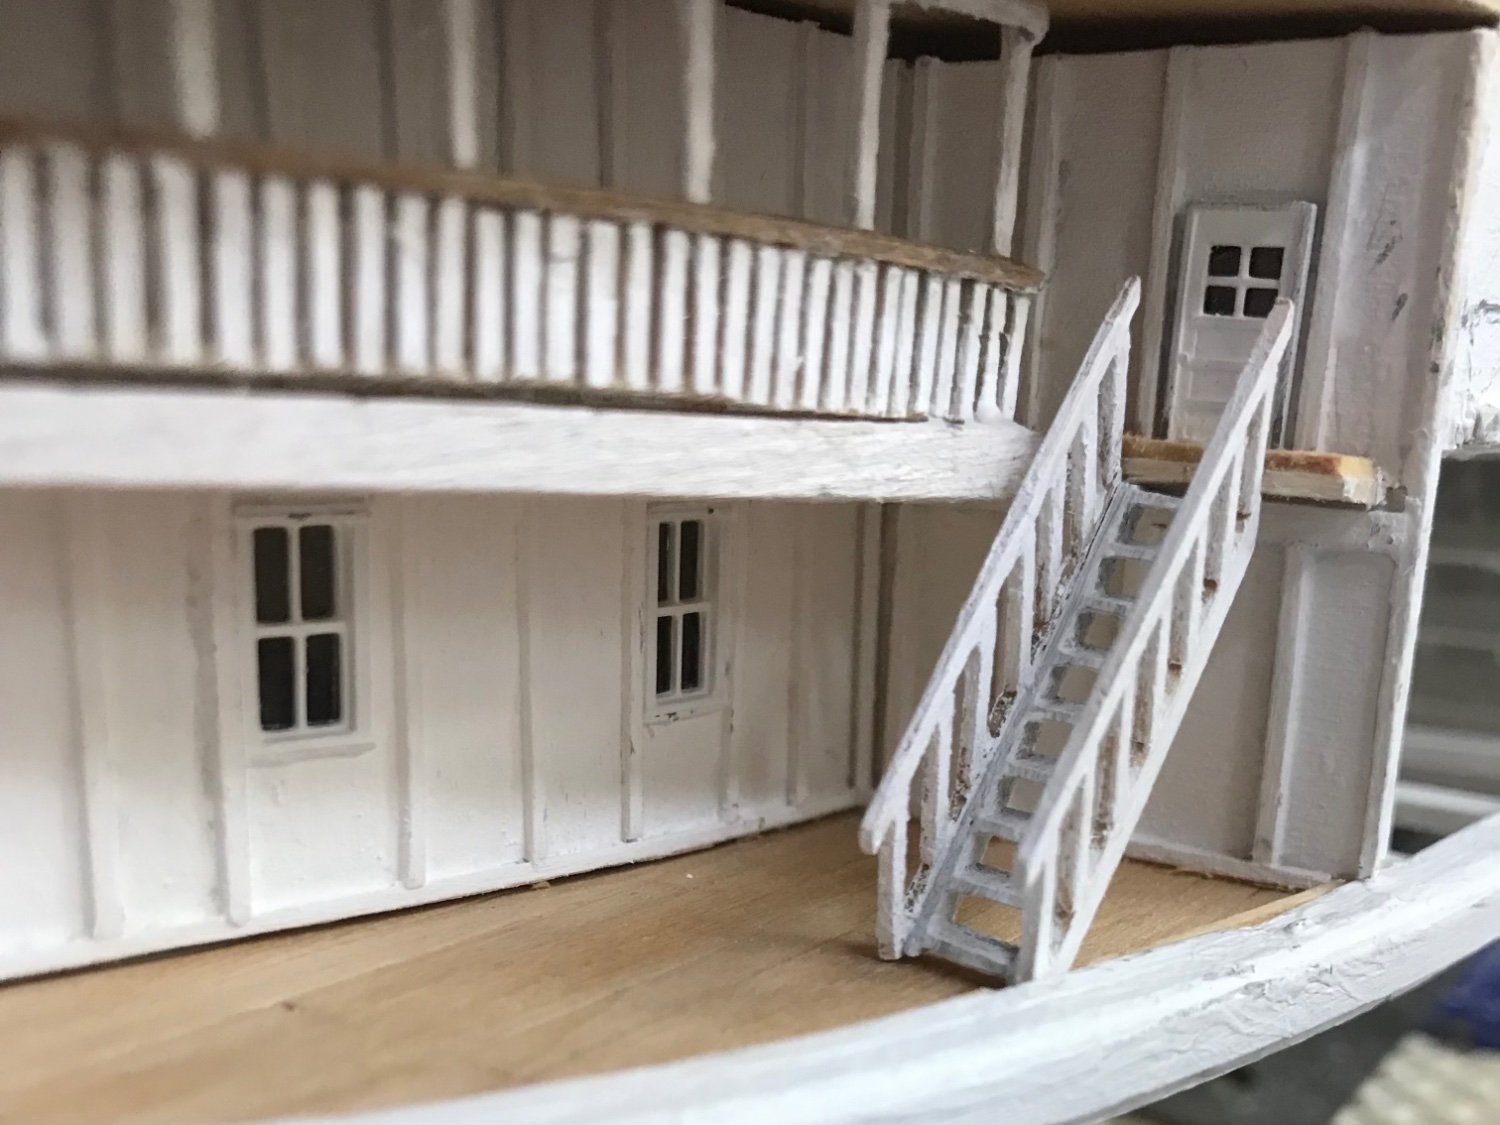
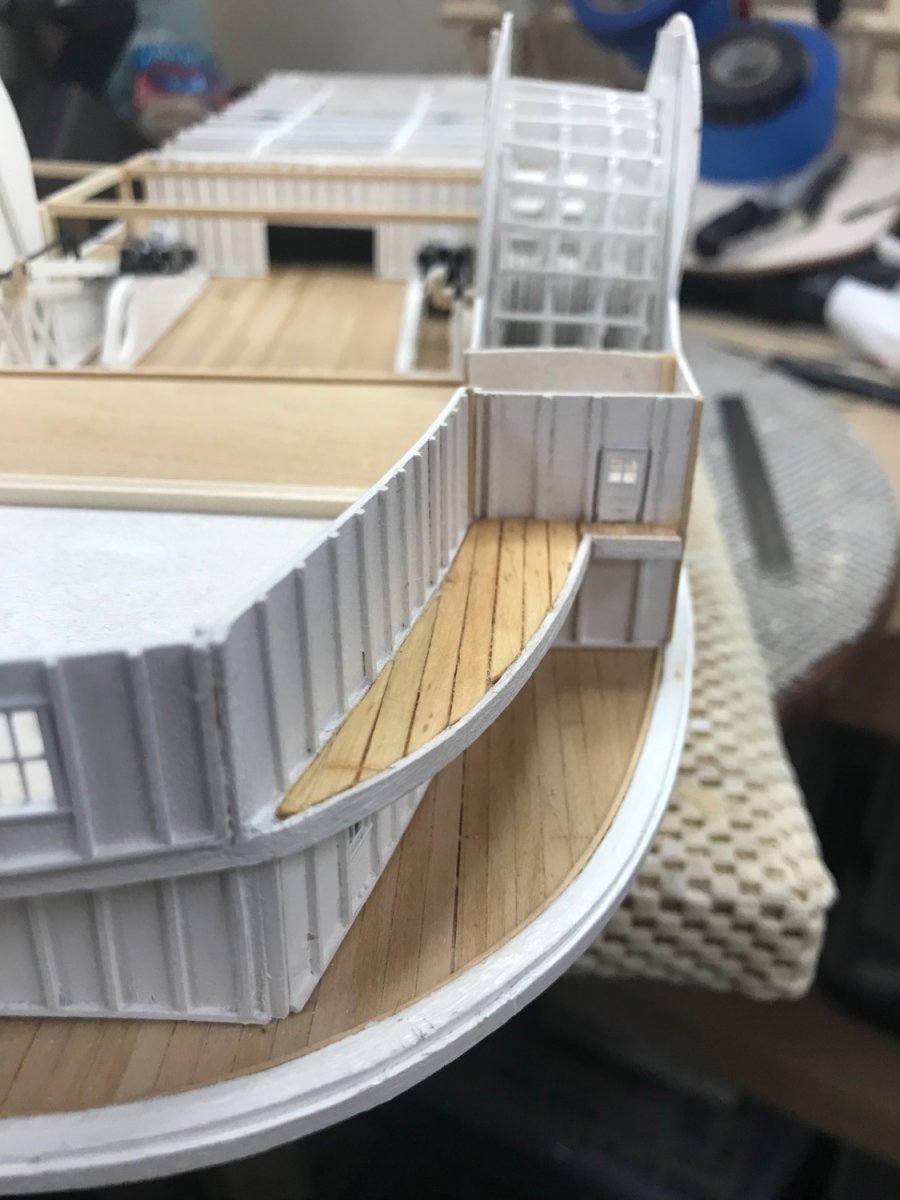
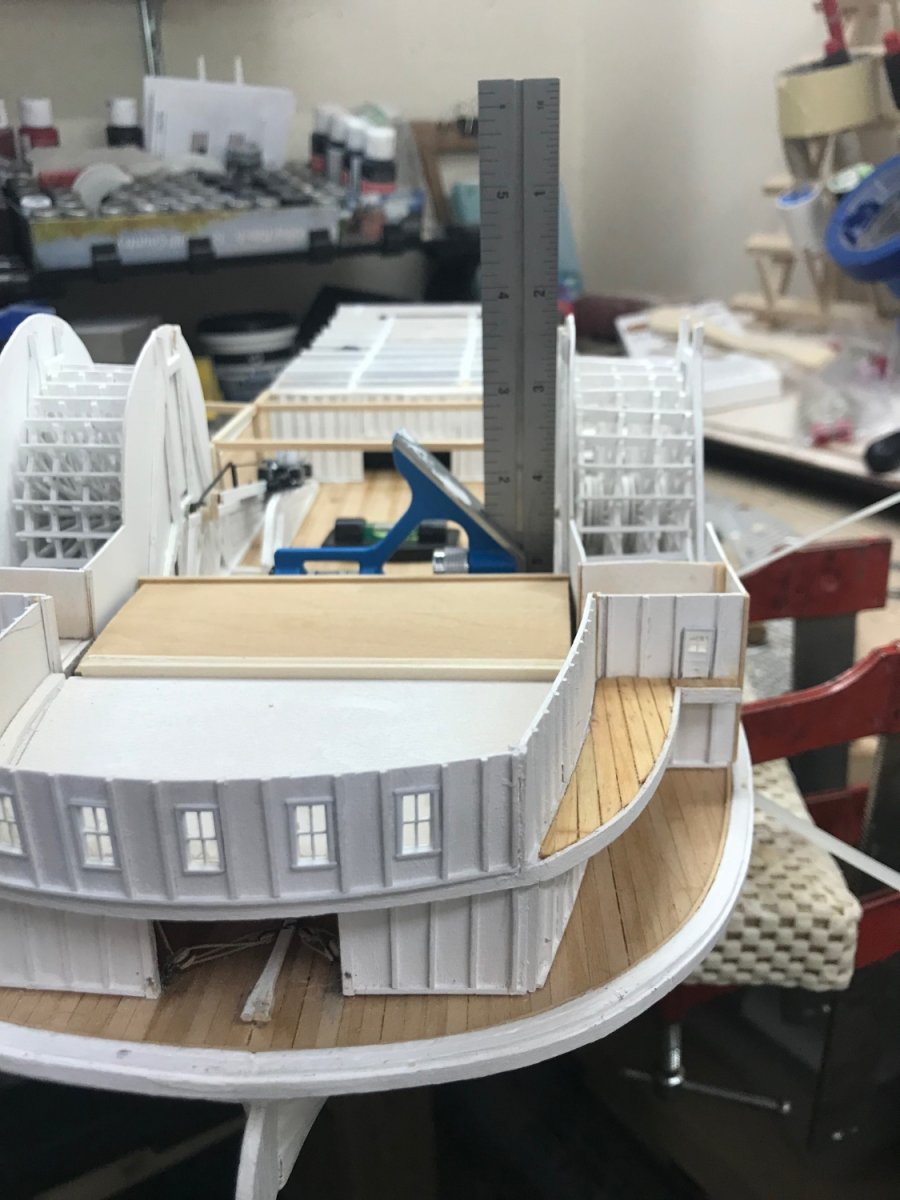
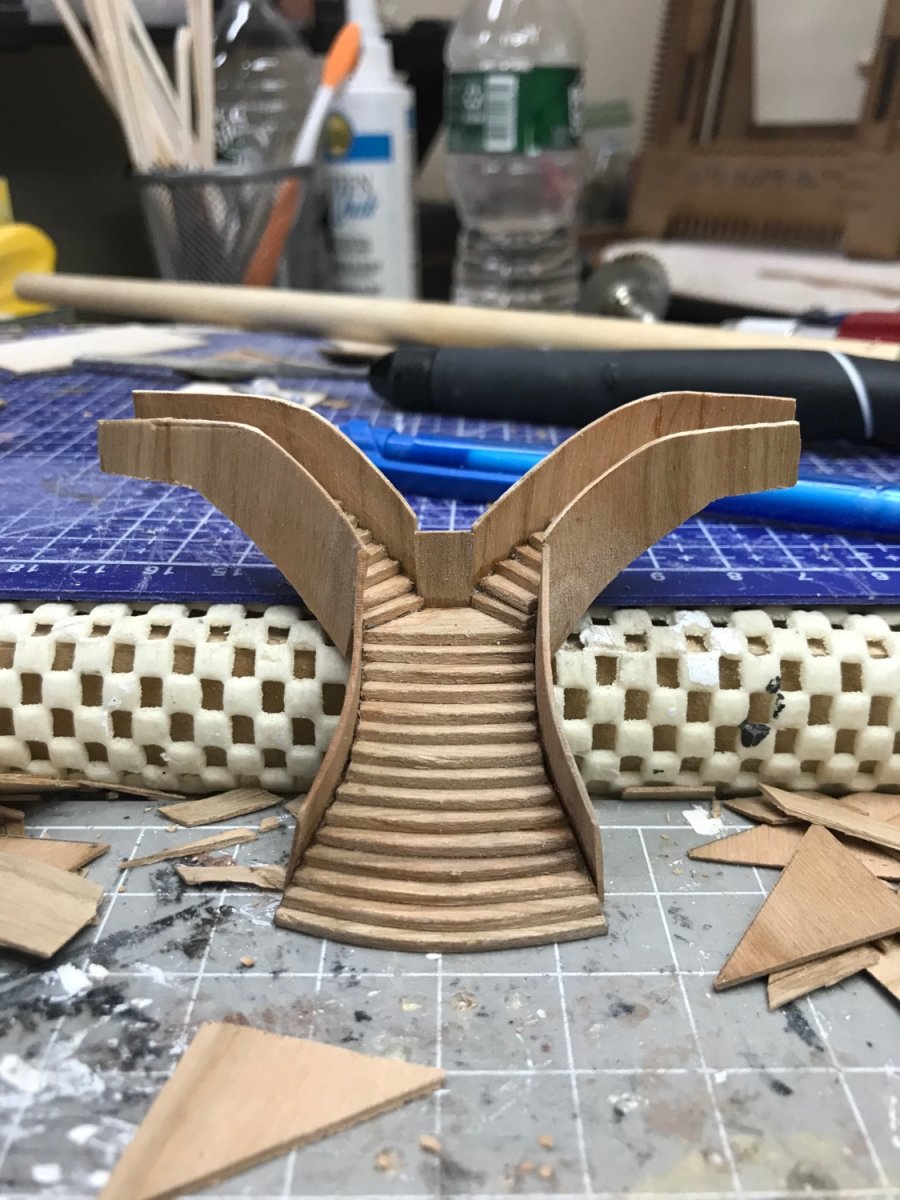
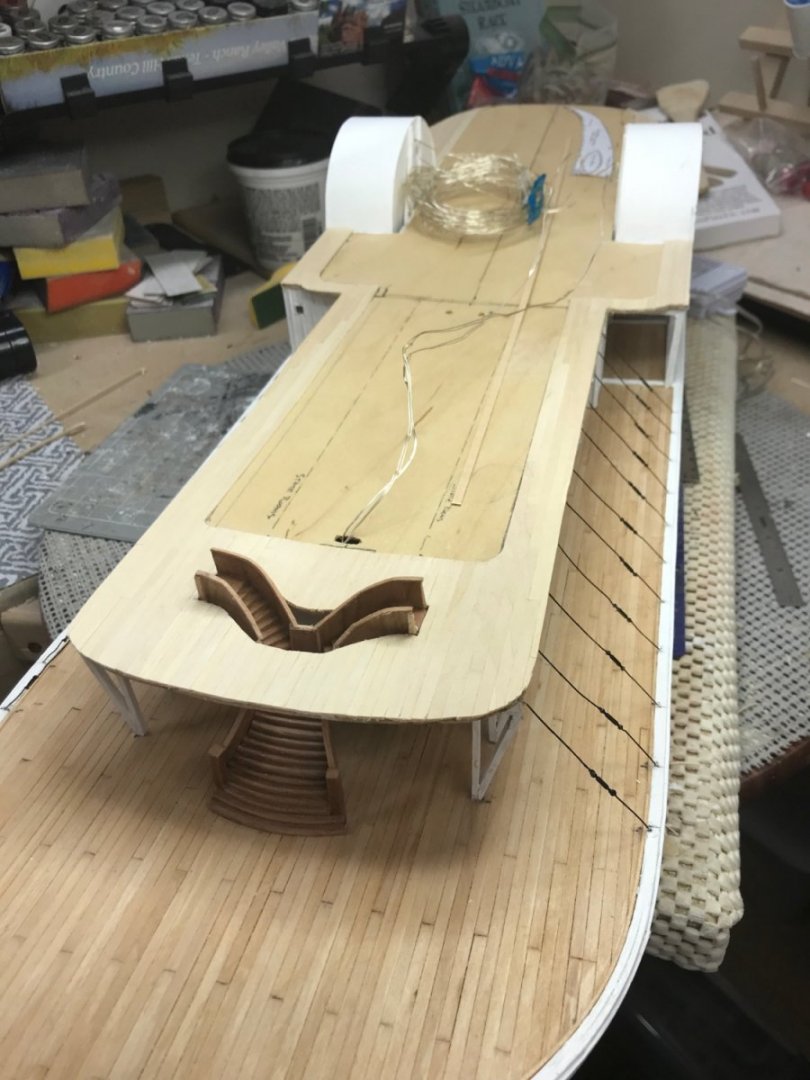
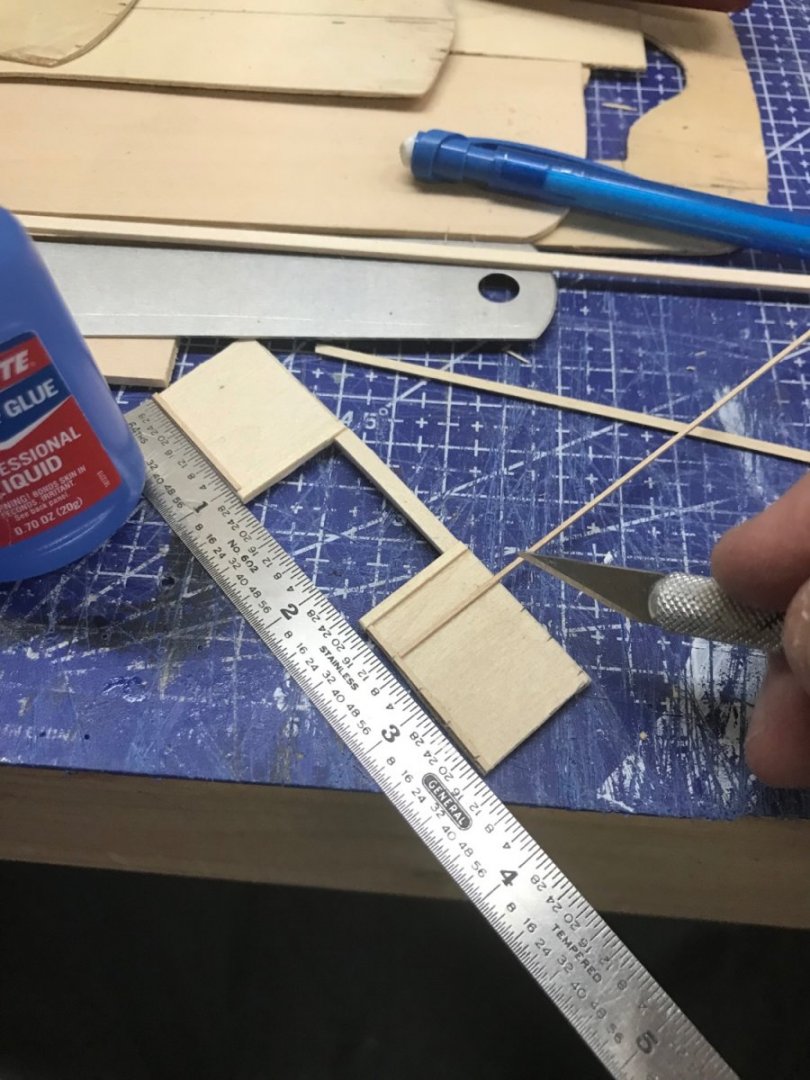
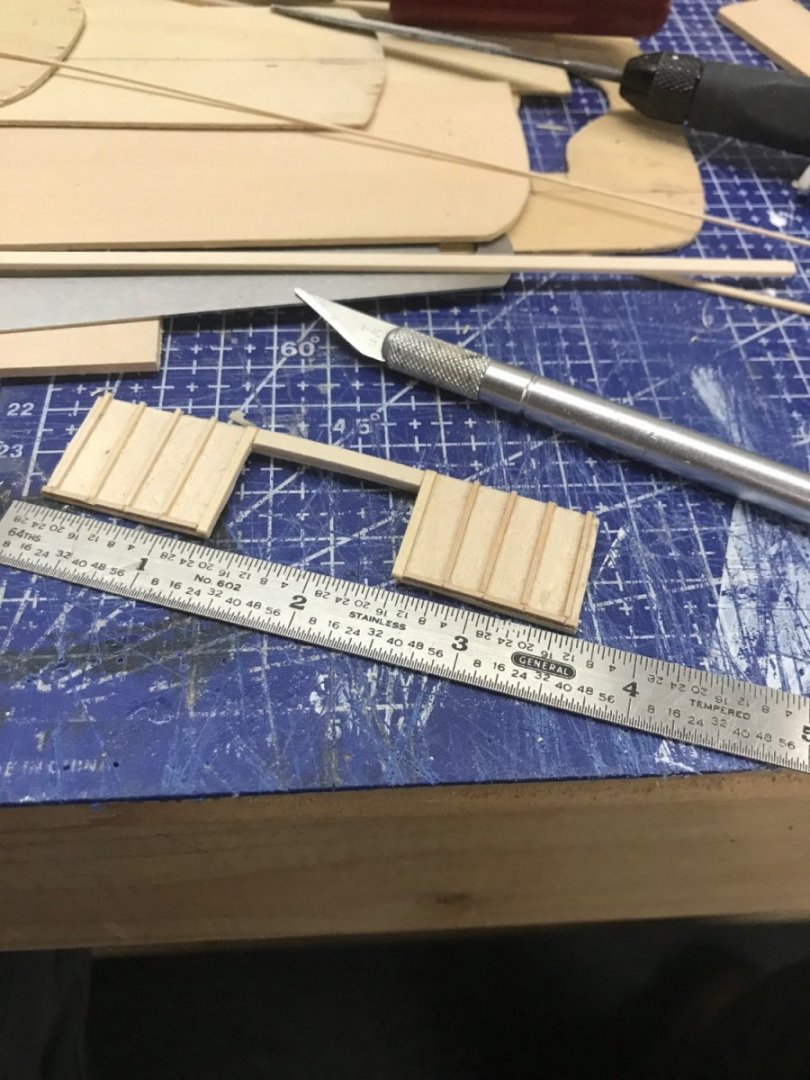
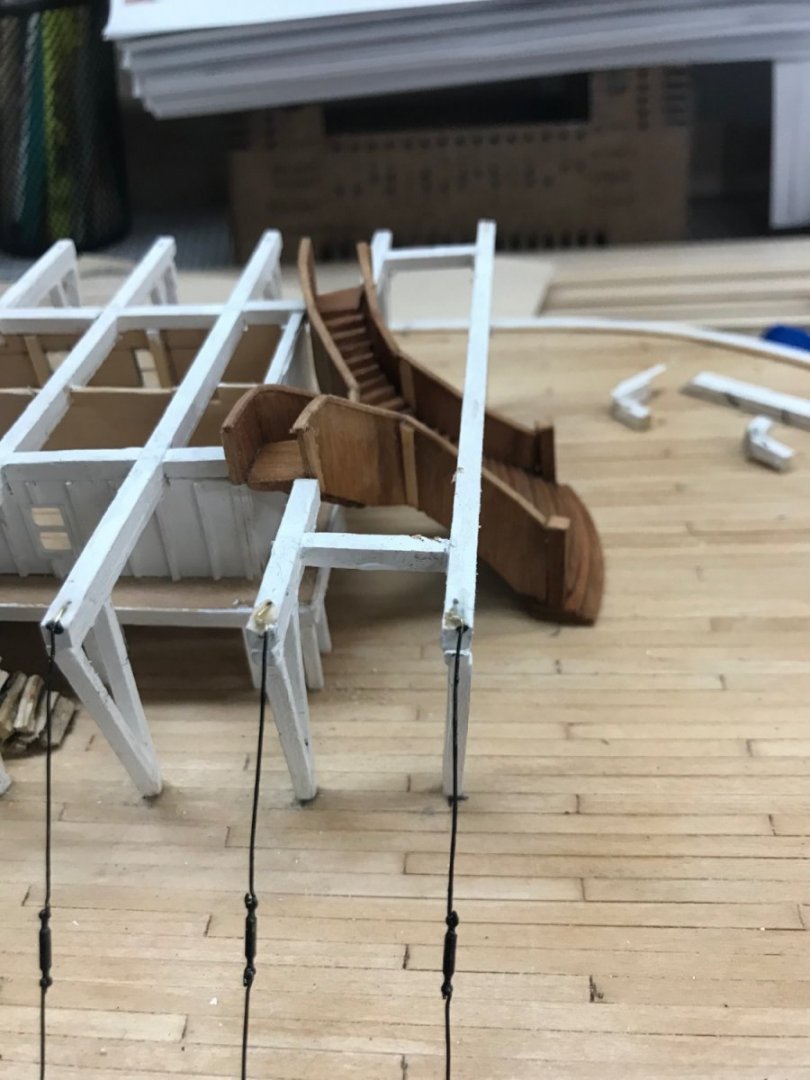
Rear kitchen deck stairway. Back to the Boiler Deck… 🍻


- 238 replies
-
- 6
-
-
- Robert E Lee
- steamboat
- (and 3 more)
-
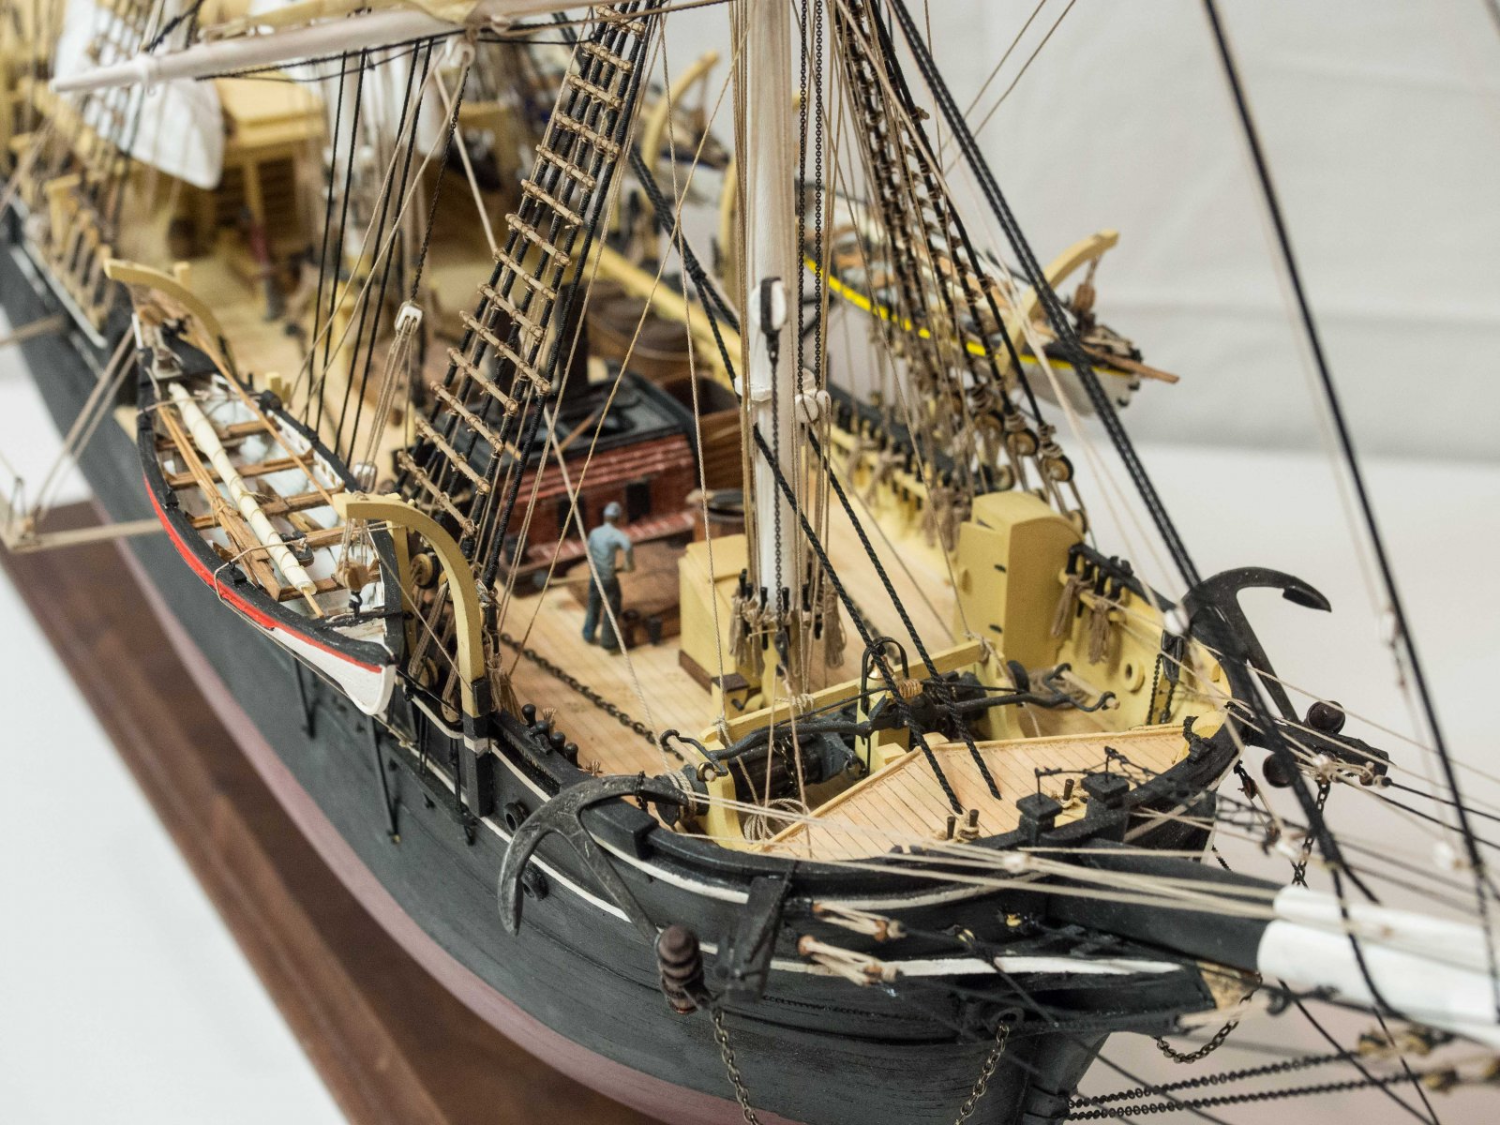
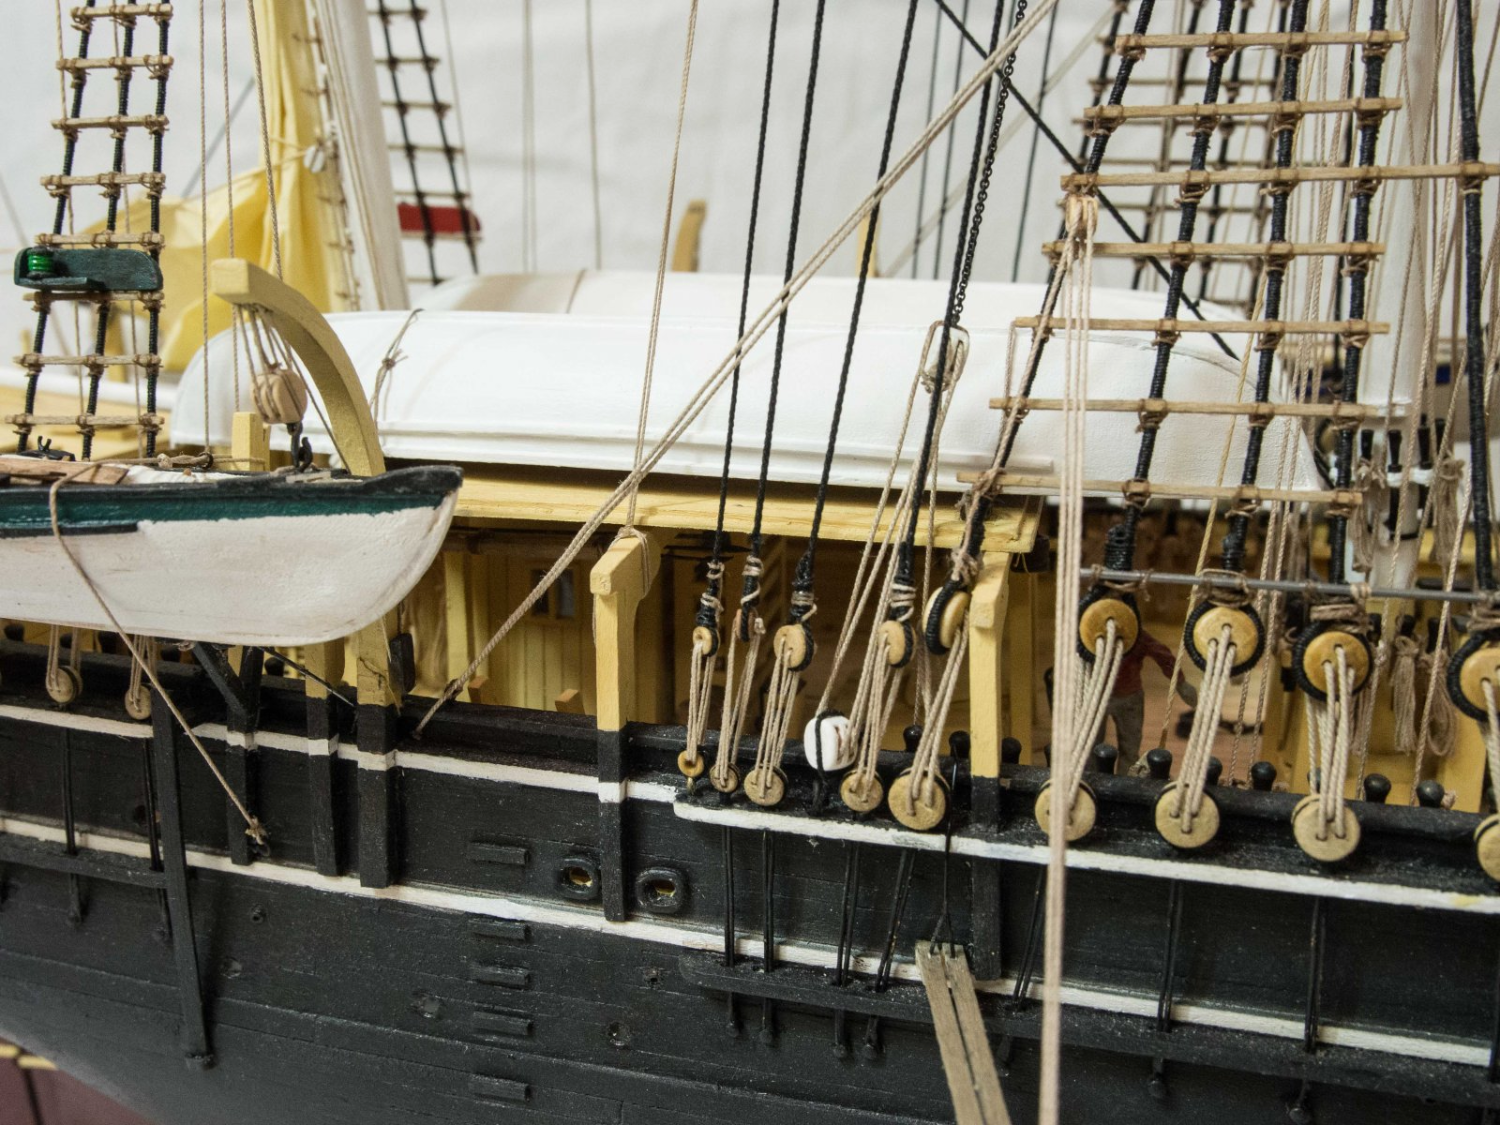
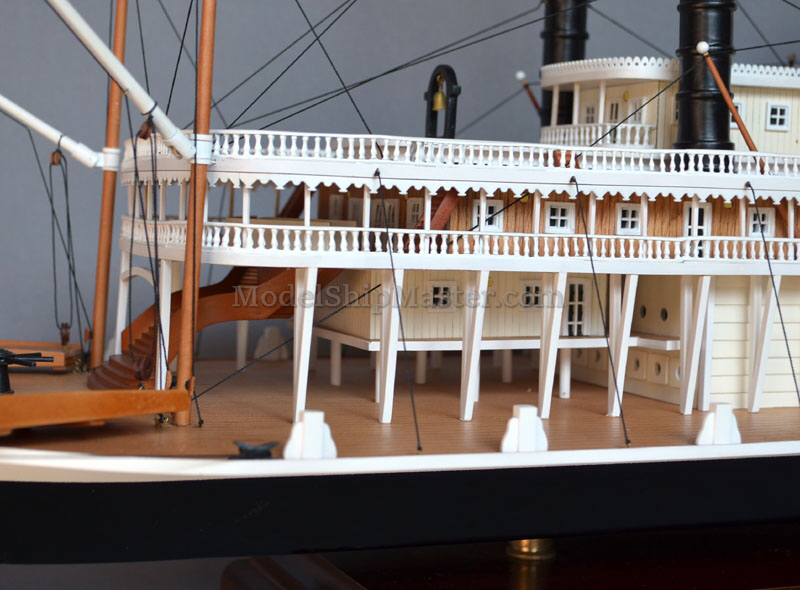
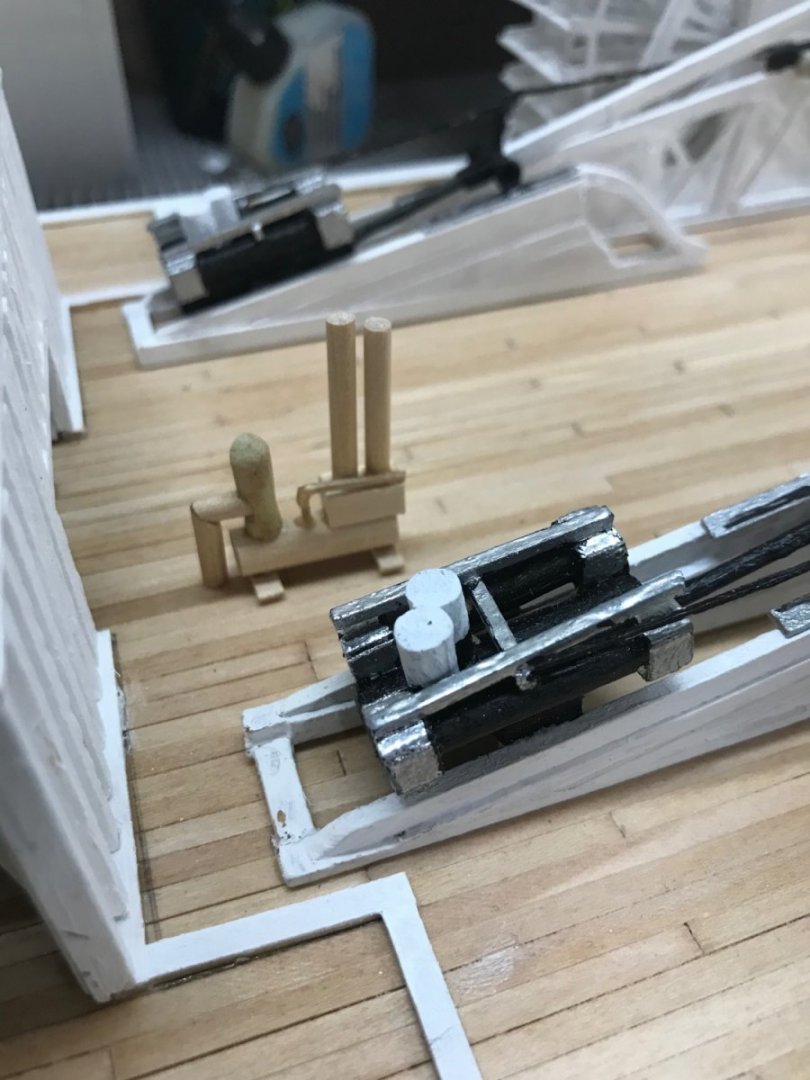
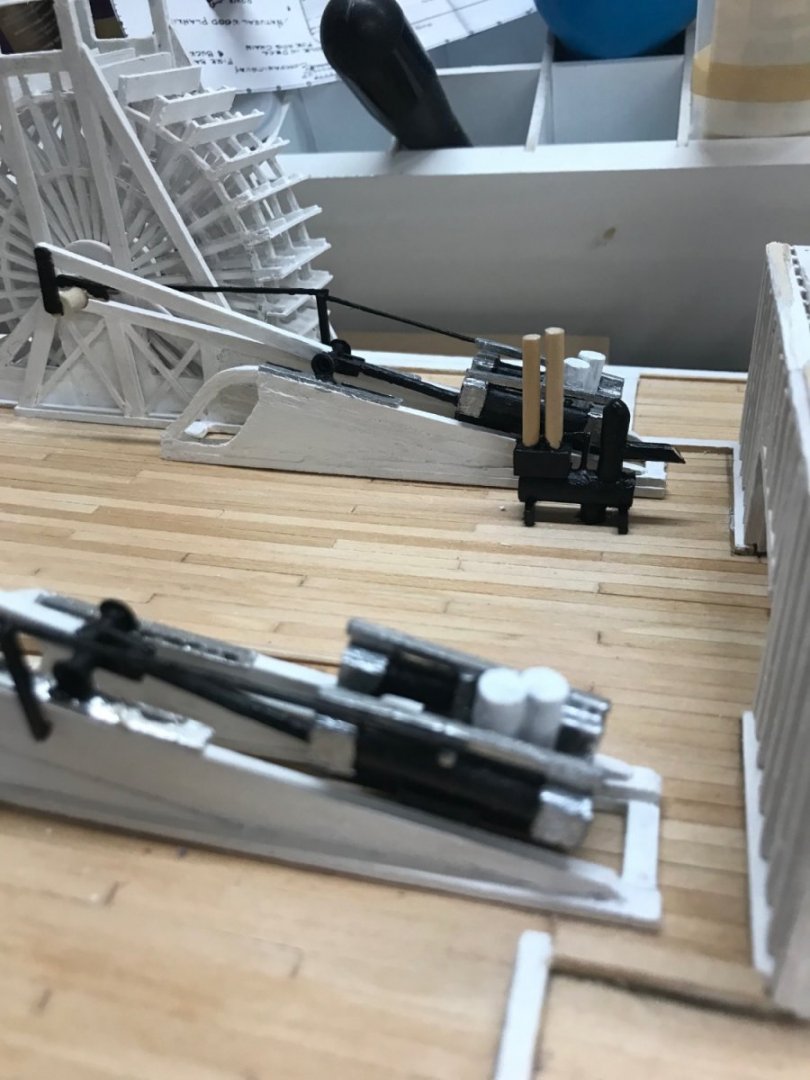
Ron, I did not place the skids on my version. I they were not indicated on my drawings. However, these photos of other models show them to be black. Hope this helps… BTW… I just posted these pics by copy and paste instead of “add files”. It worked without the rotation.


- 294 replies
-
- 1
-
-
- charles w morgan
- model shipways
- (and 1 more)
-
I am having the same trouble posting photos. Hopefully, one of the moderators will pick up on the issue. I am not sure who to contact. Your shroud battens are looking good. 👍
-
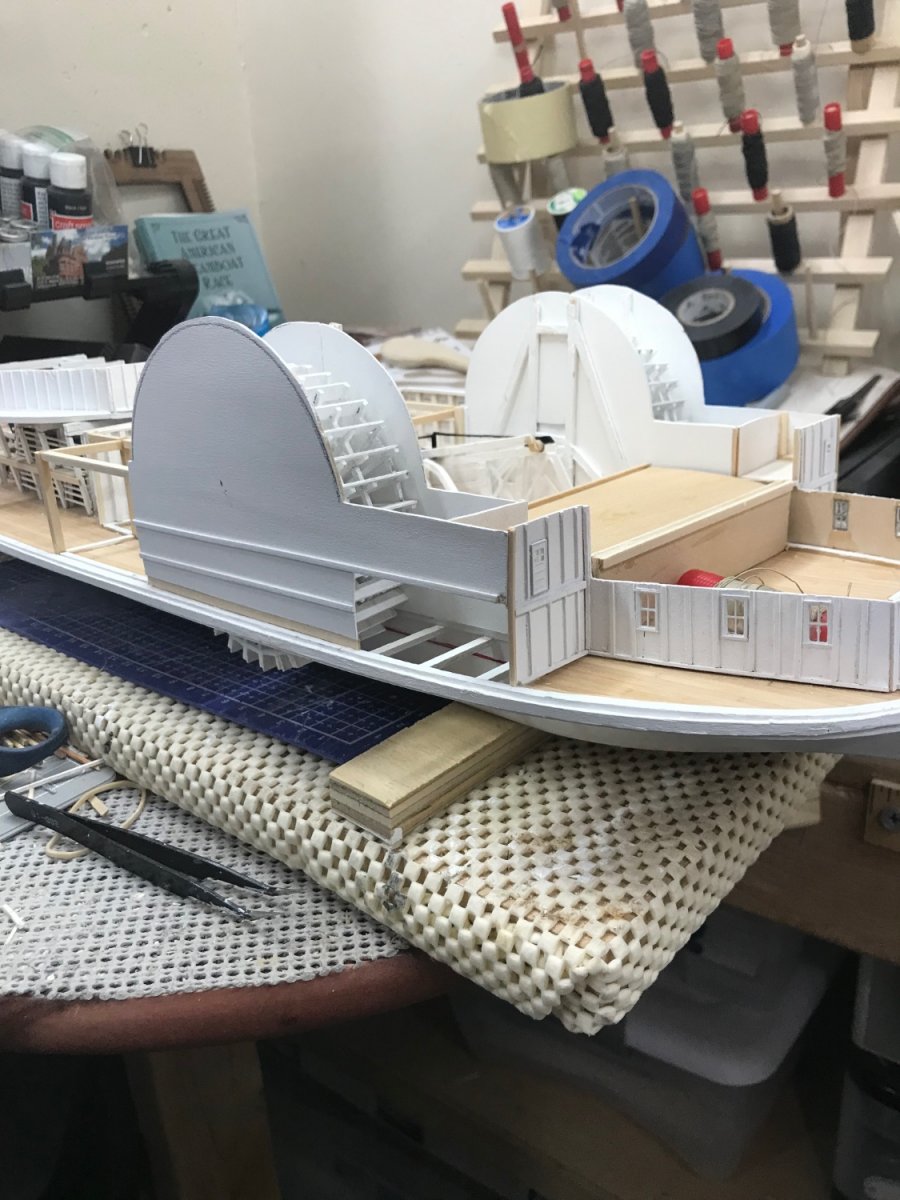
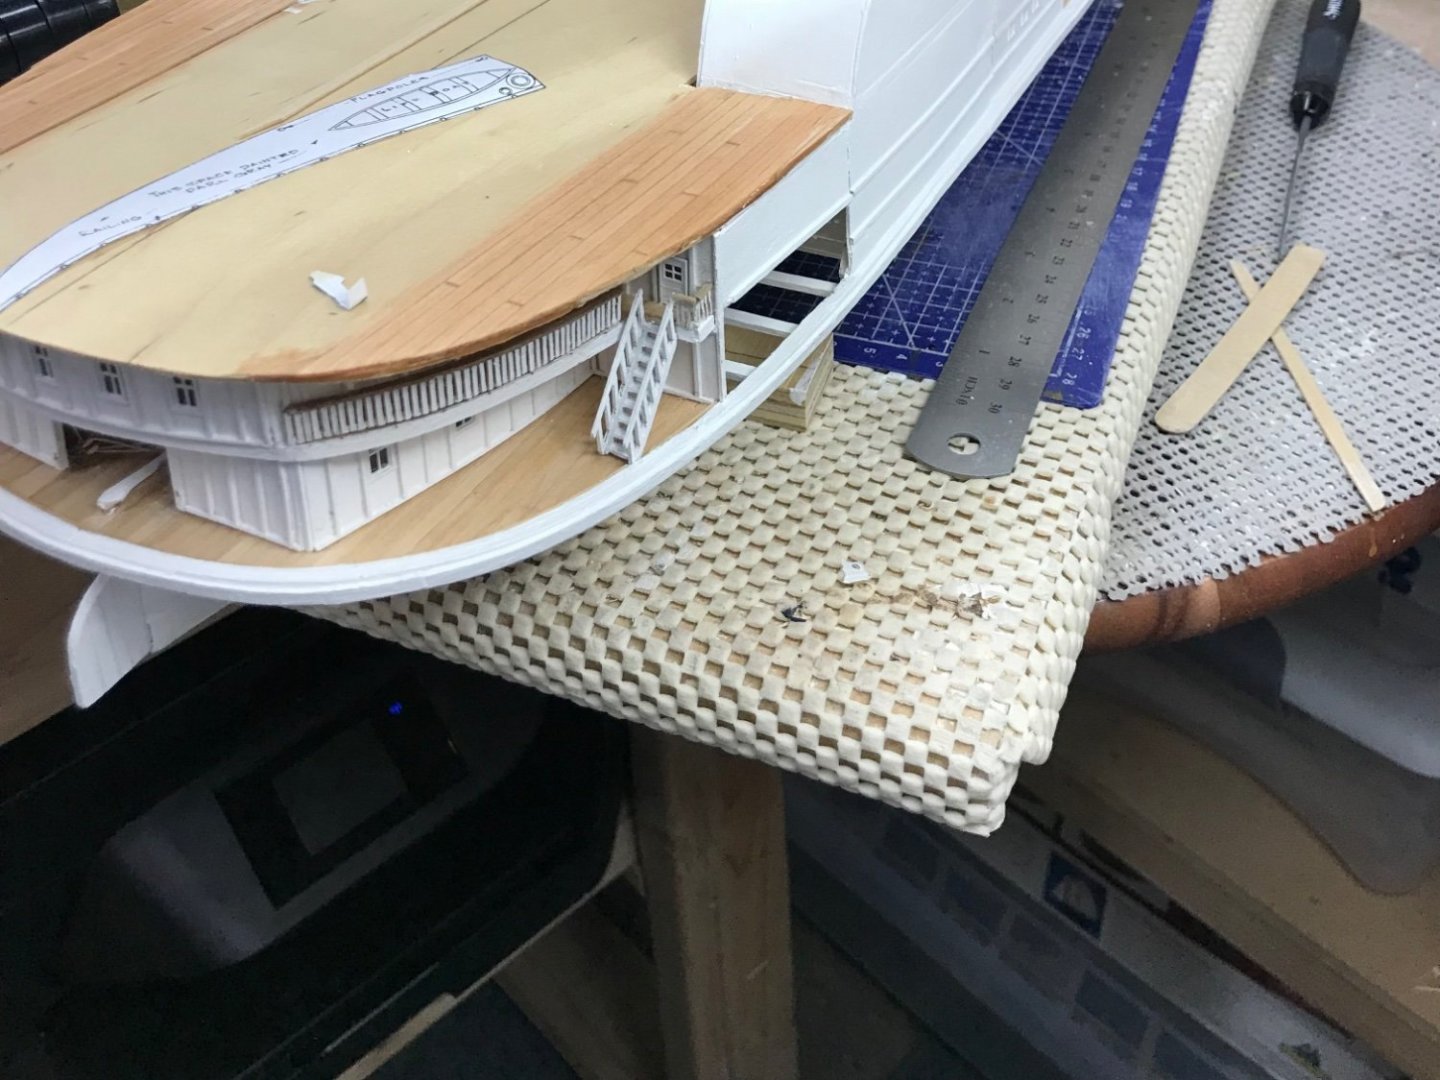
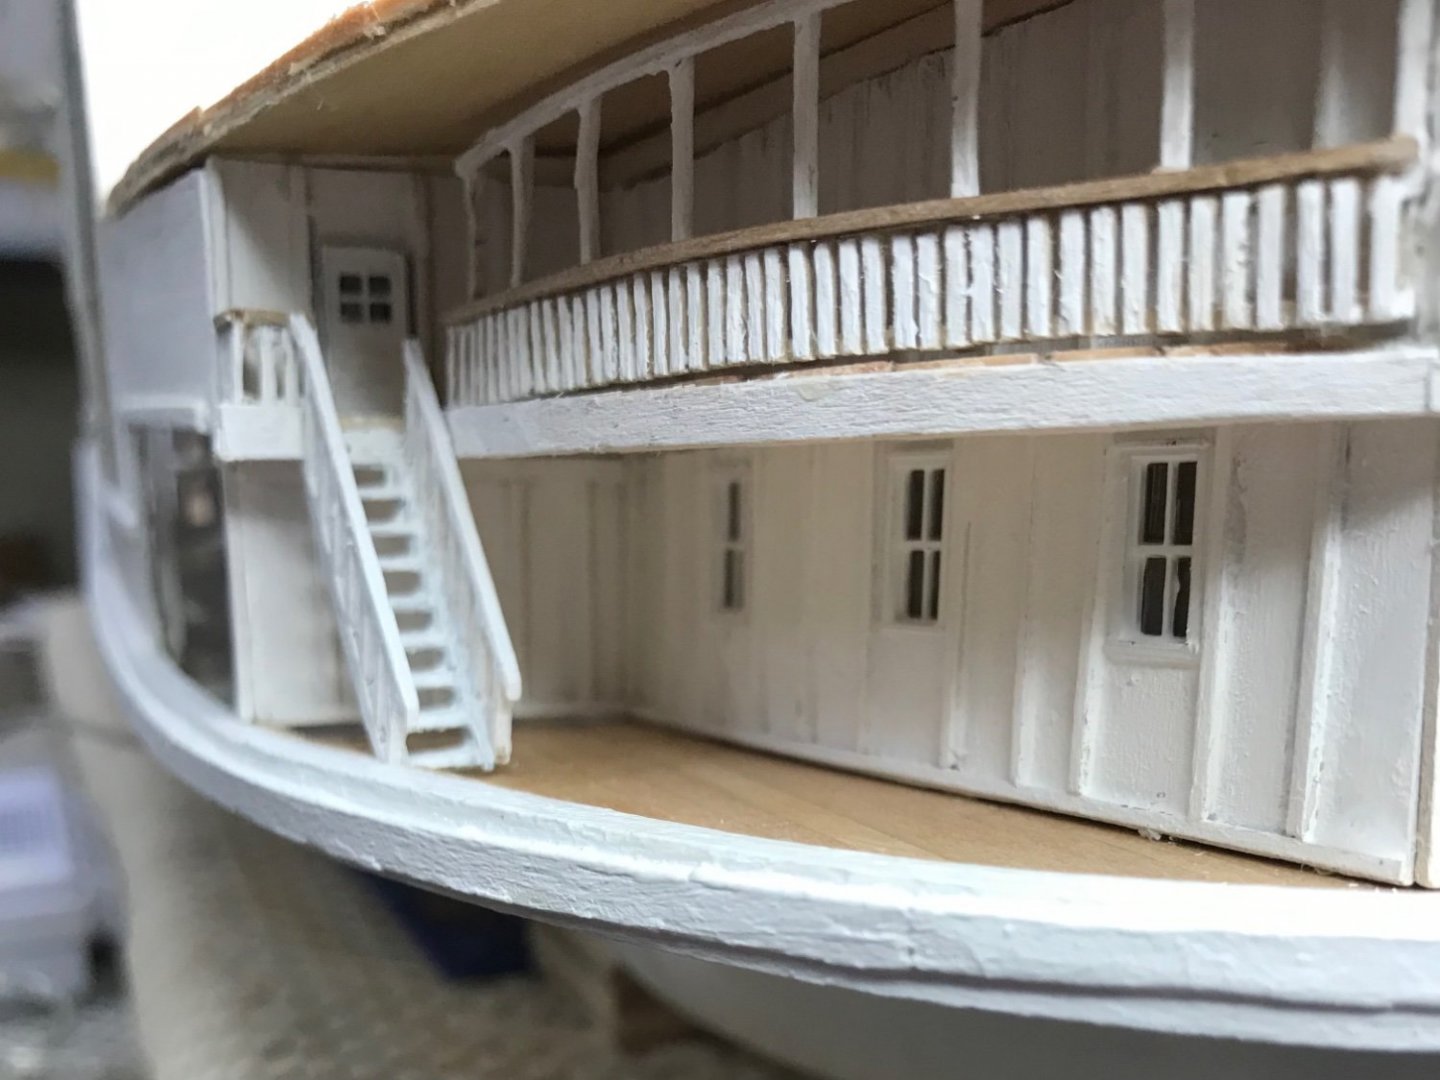
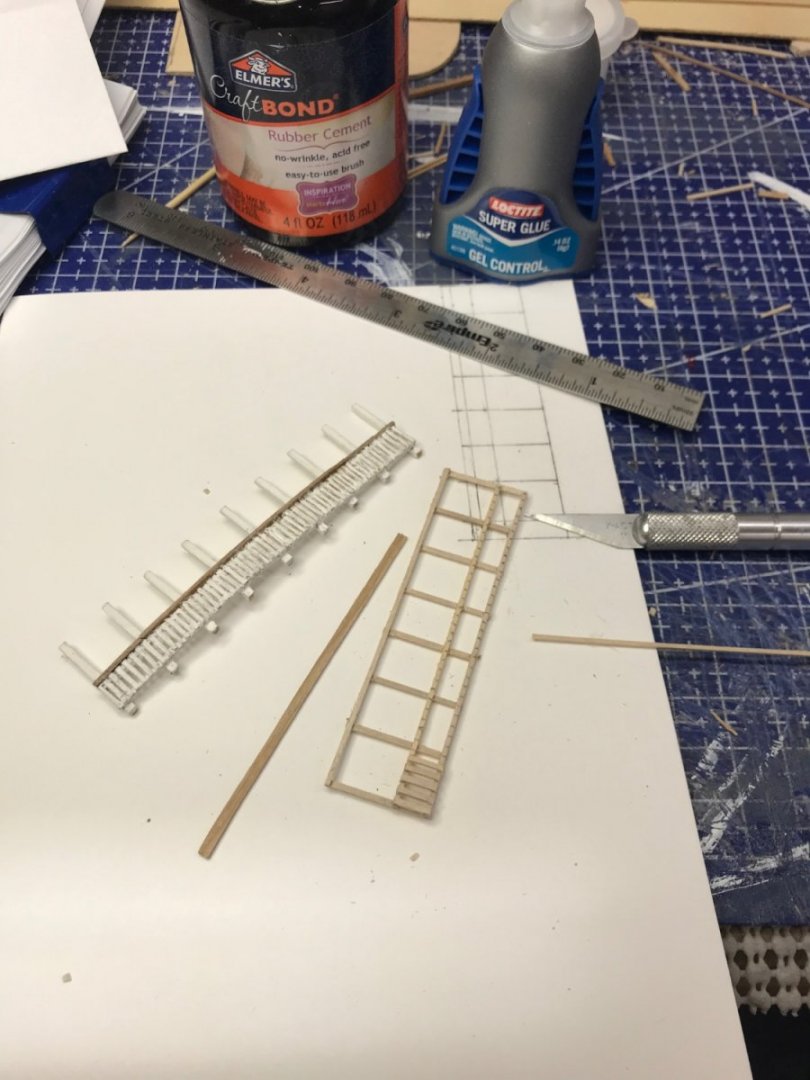
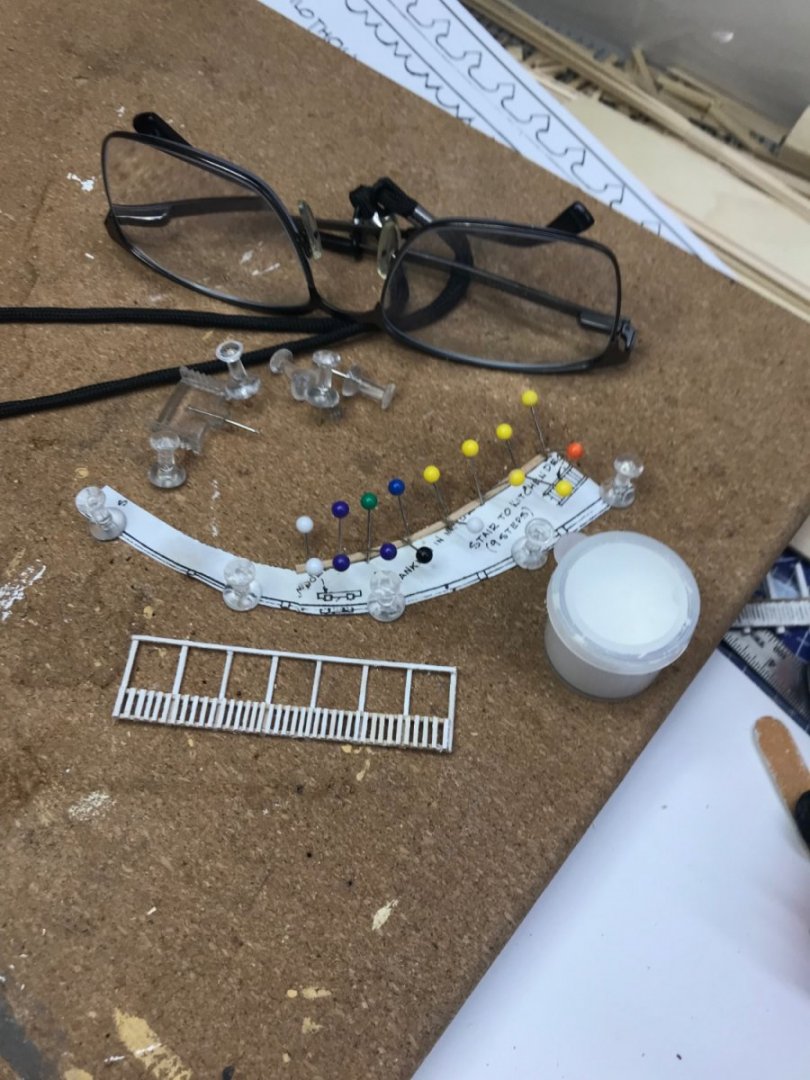
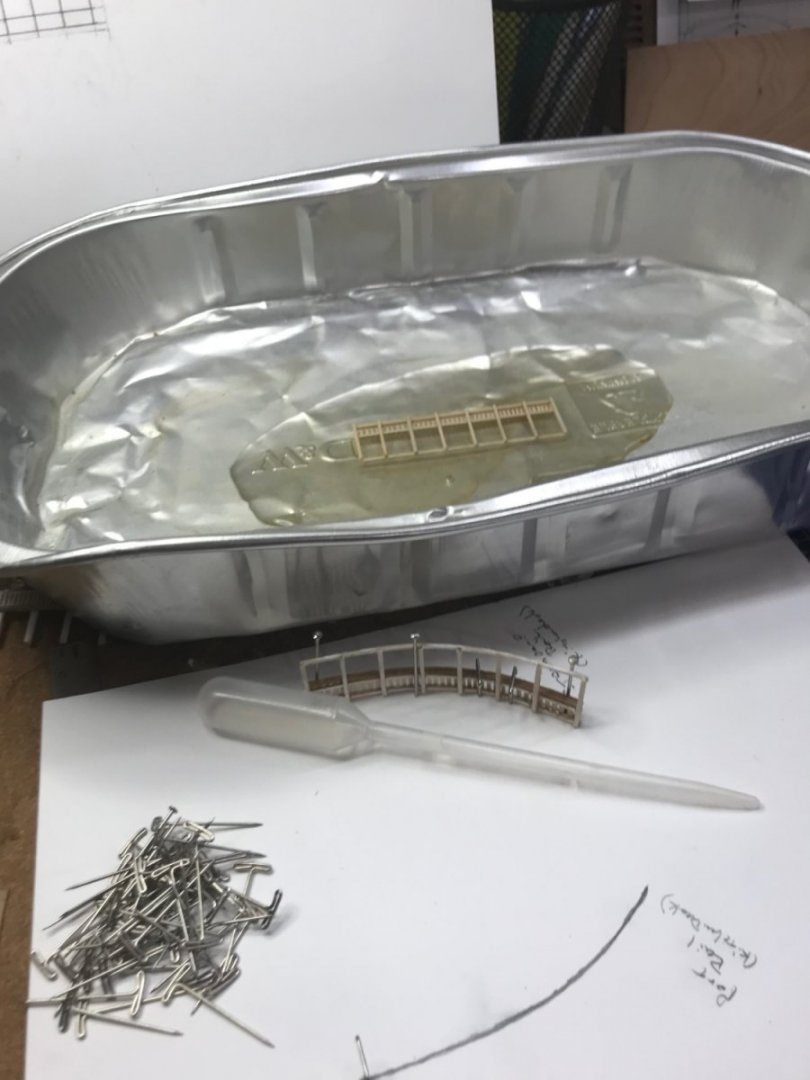
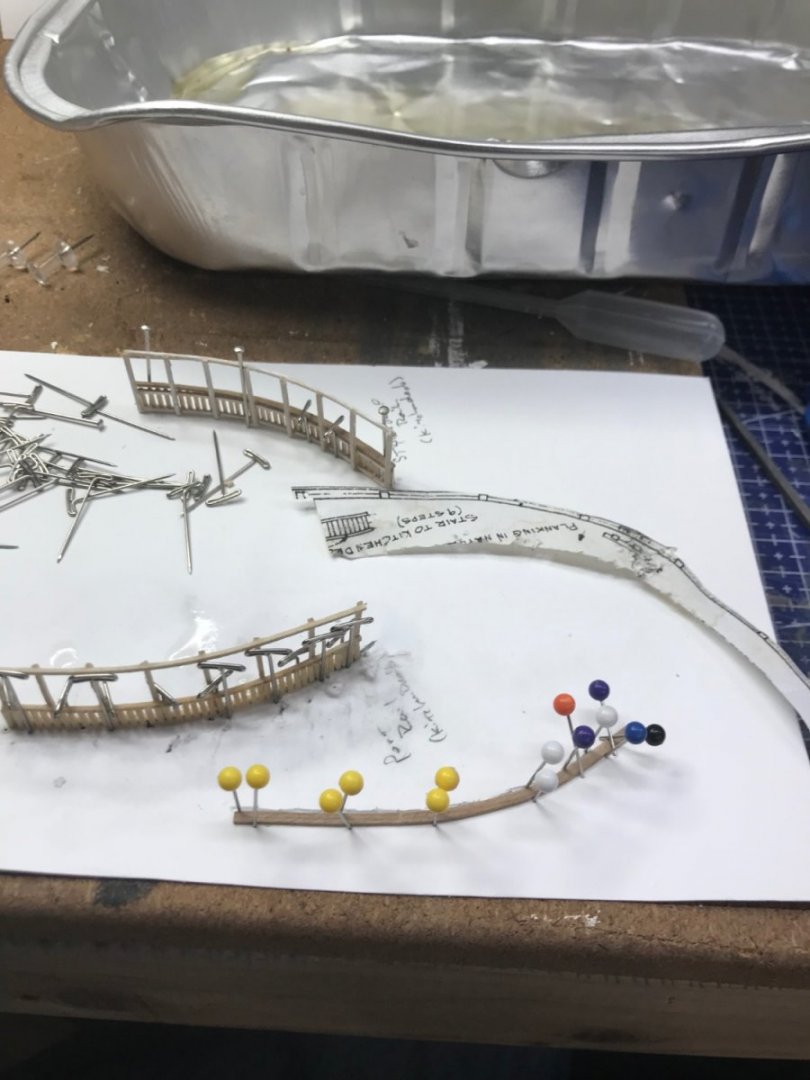
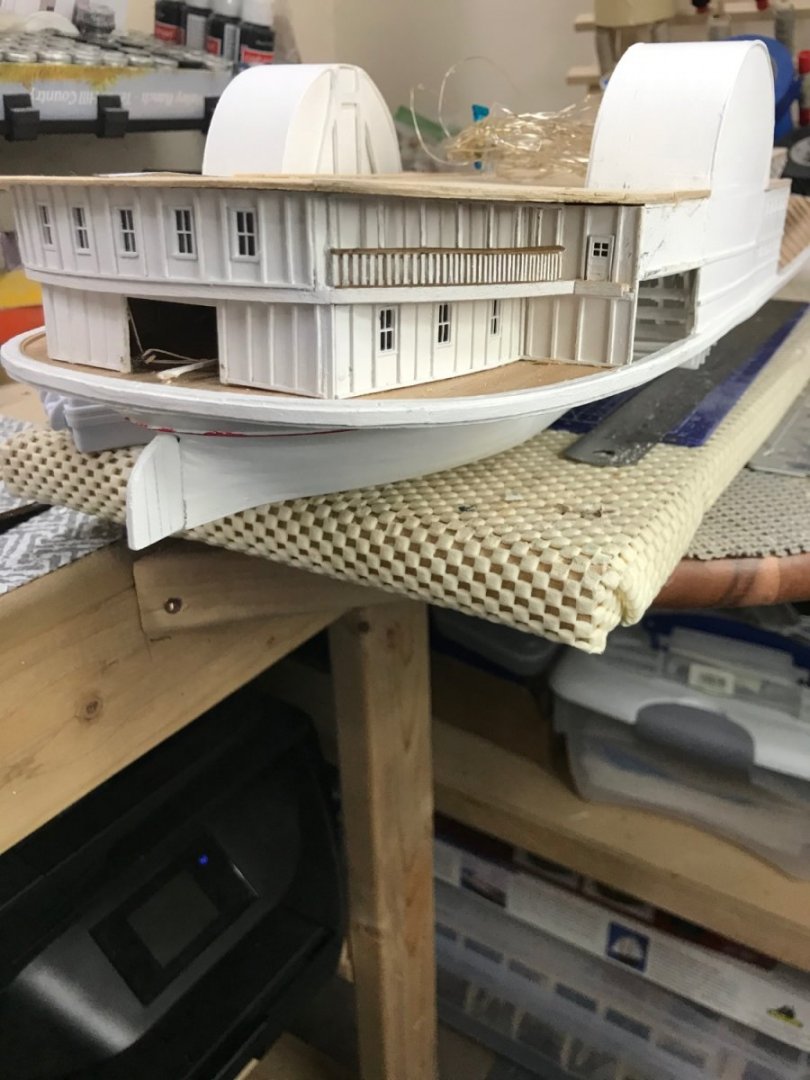
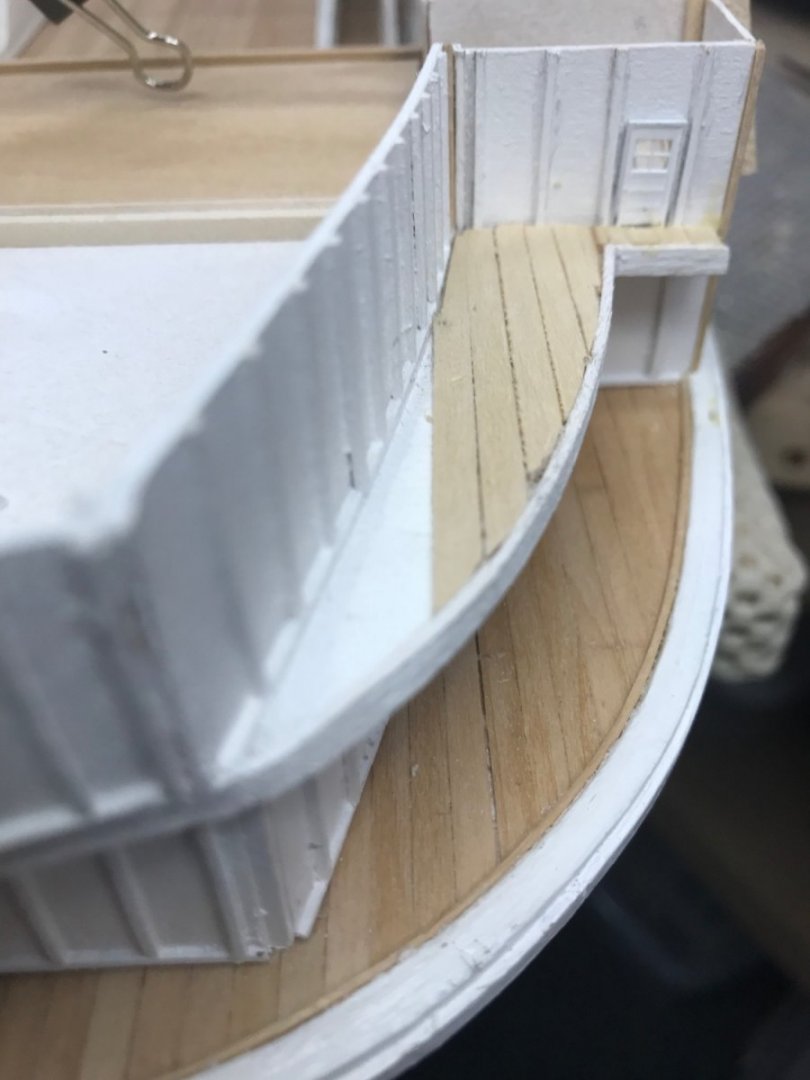
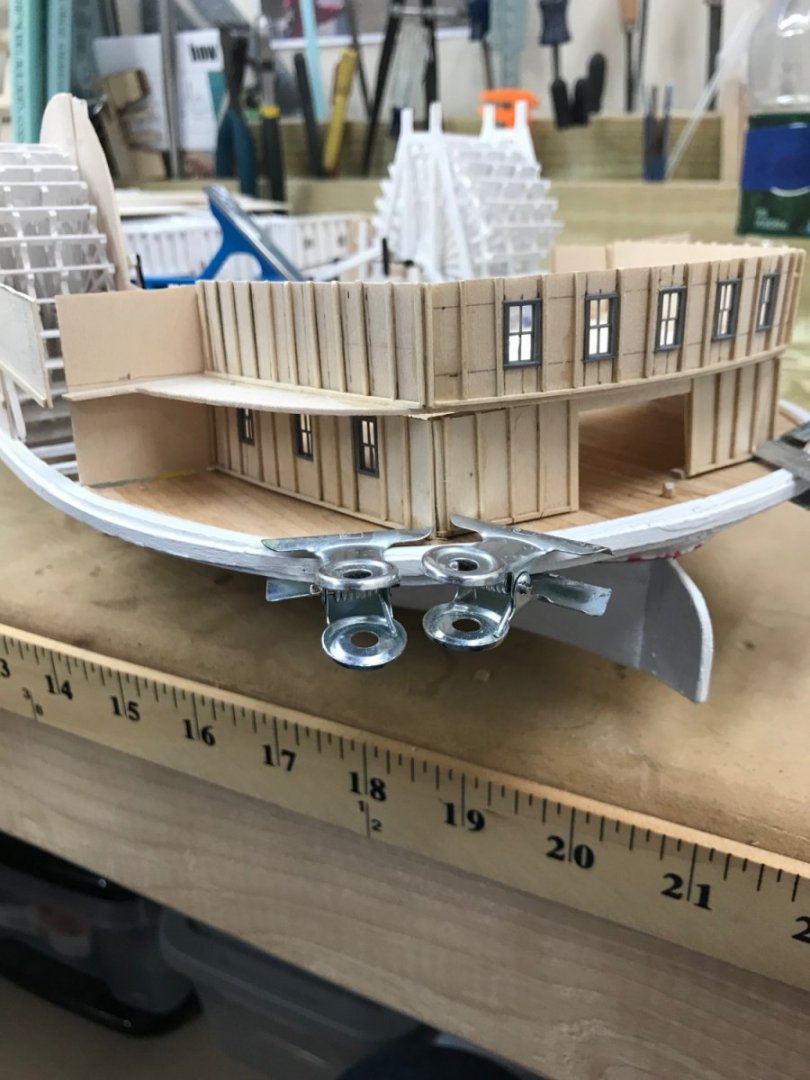
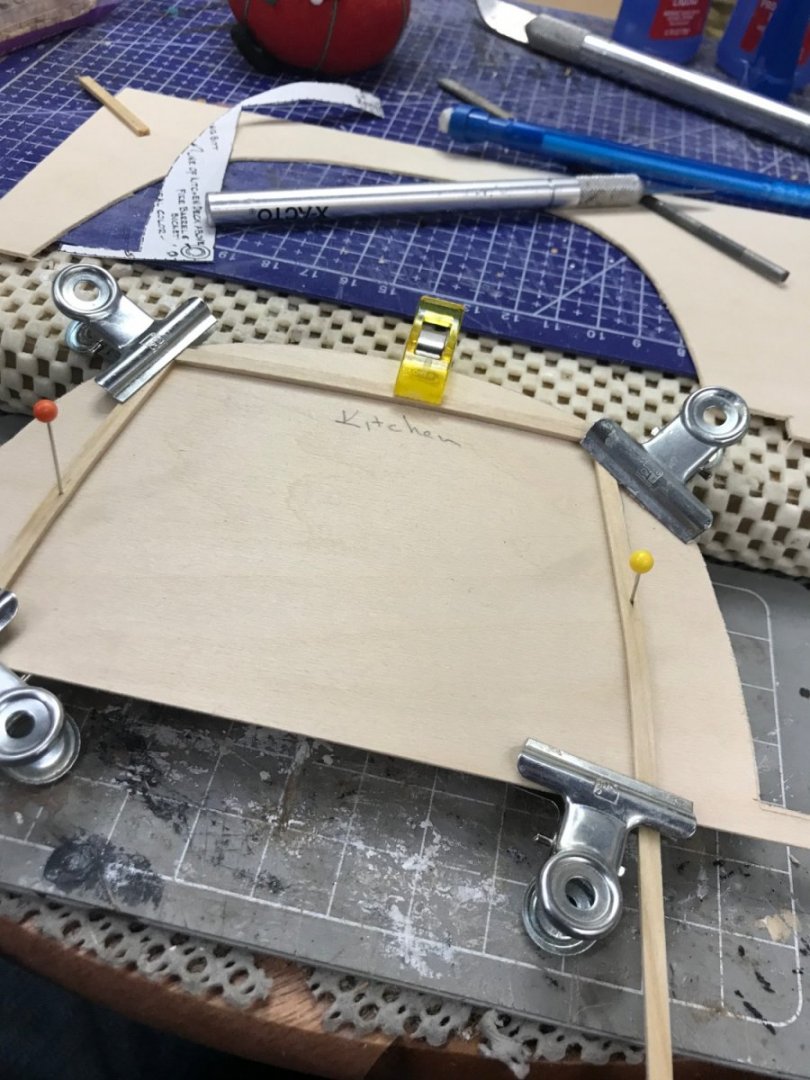
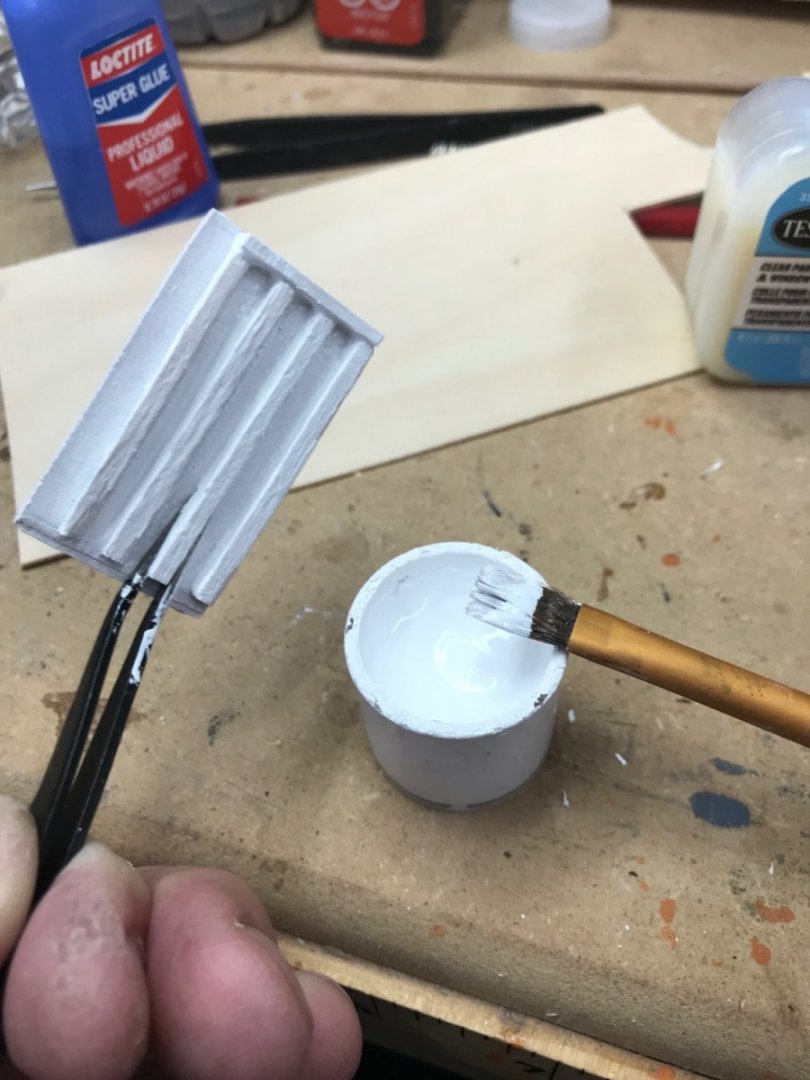
Railings 2.0… Thought I could do a better version of railing. After all, it will be a very large portion of the detail. Better spaced stanchions… Water/ammonia soak and shaping. Kitchen Deck Railing placed. Just the beginning, but a good start. Boiler Deck Planking completed. Decking ready for staining and sealing. Onwards to more walls, windows, doors and railings. 🍻


- 238 replies
-
- 6
-
-
- Robert E Lee
- steamboat
- (and 3 more)
-
Nice deck work Tom, she is going to be beautiful. Cutting stage up sounds like a good plan. Under full sail will be very grand indeed. 👍
- 200 replies
-
- 2
-

-
-
- Whaling Bark
- Charles W Morgan
- (and 1 more)
-
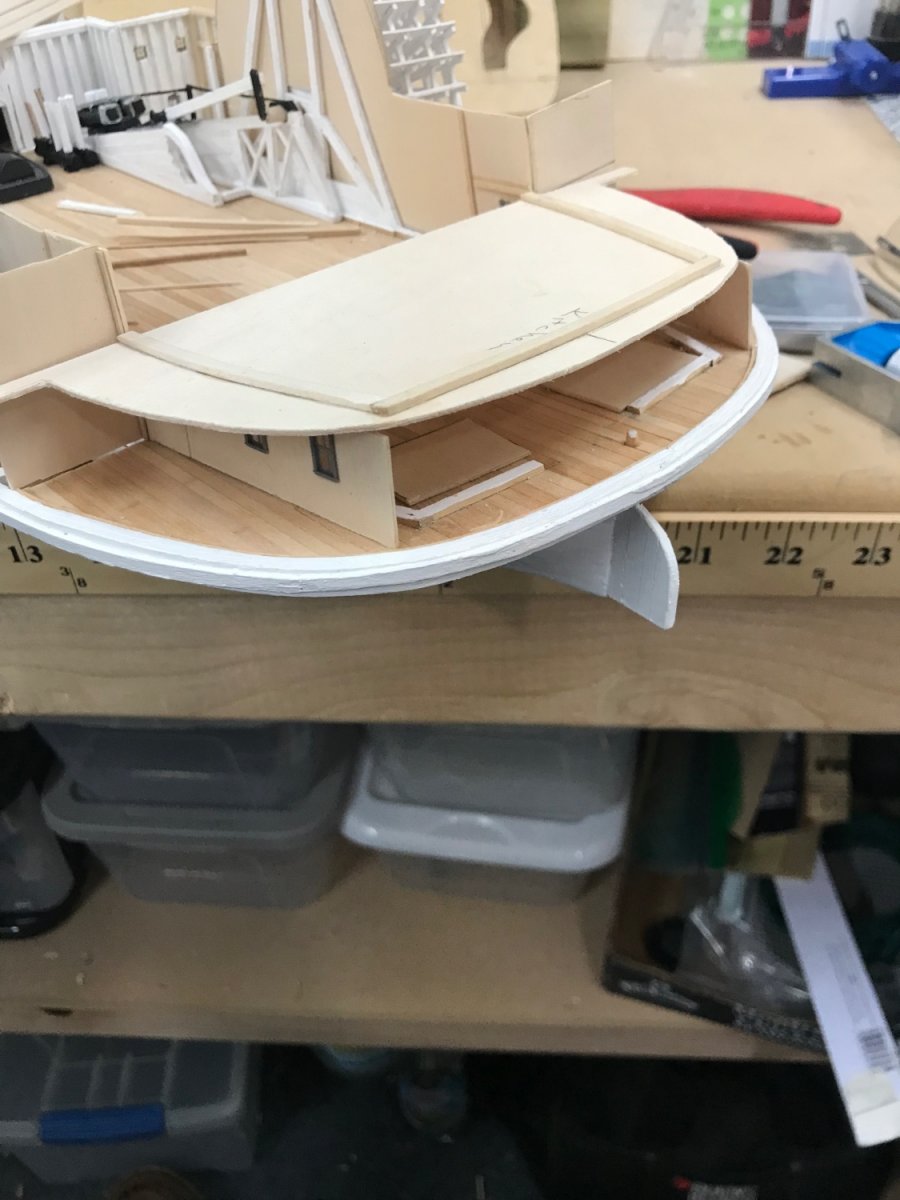
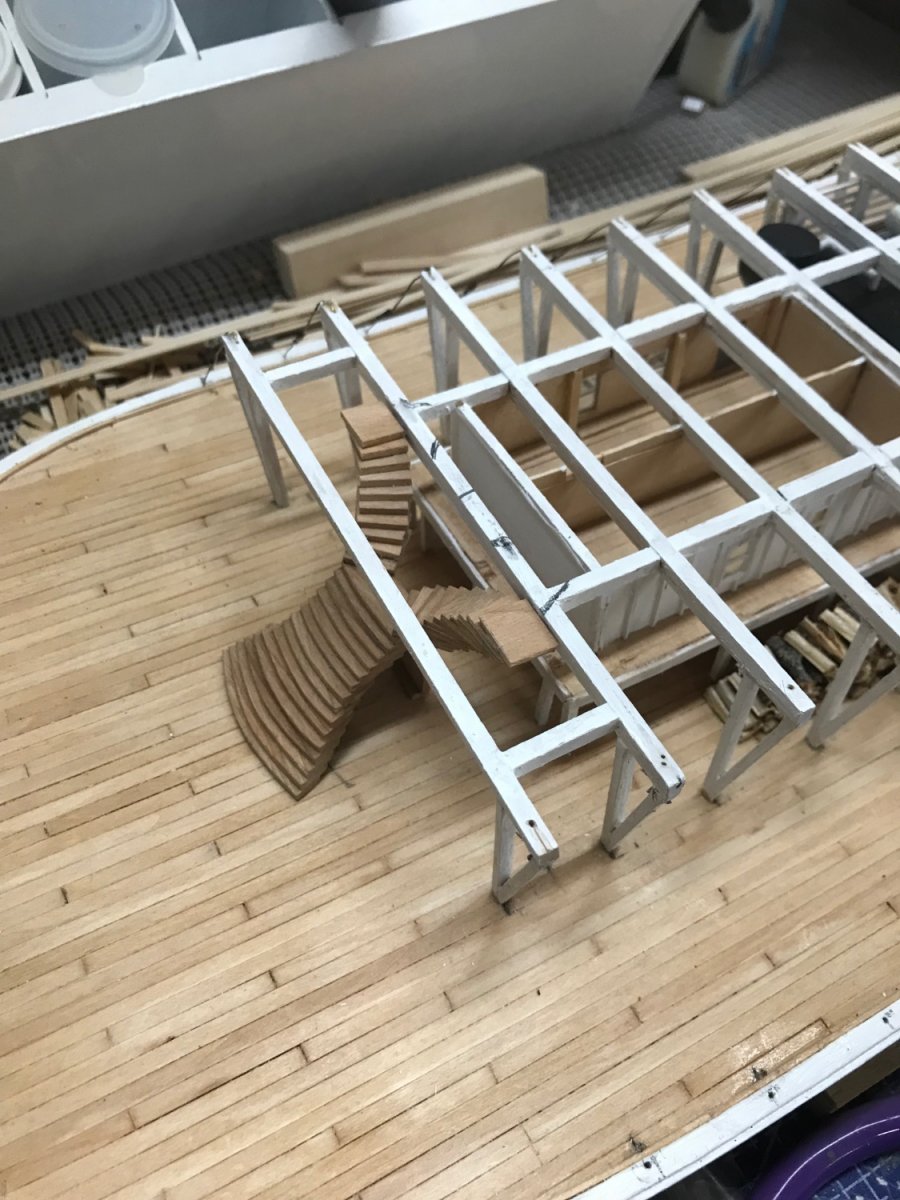
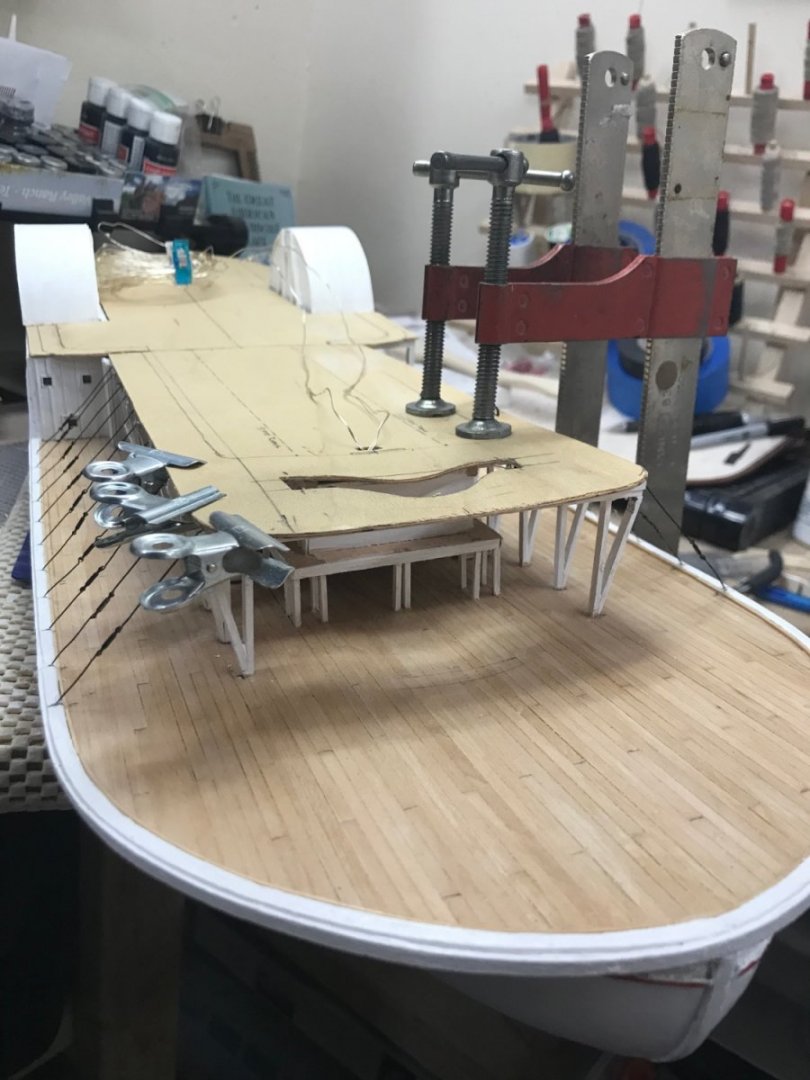
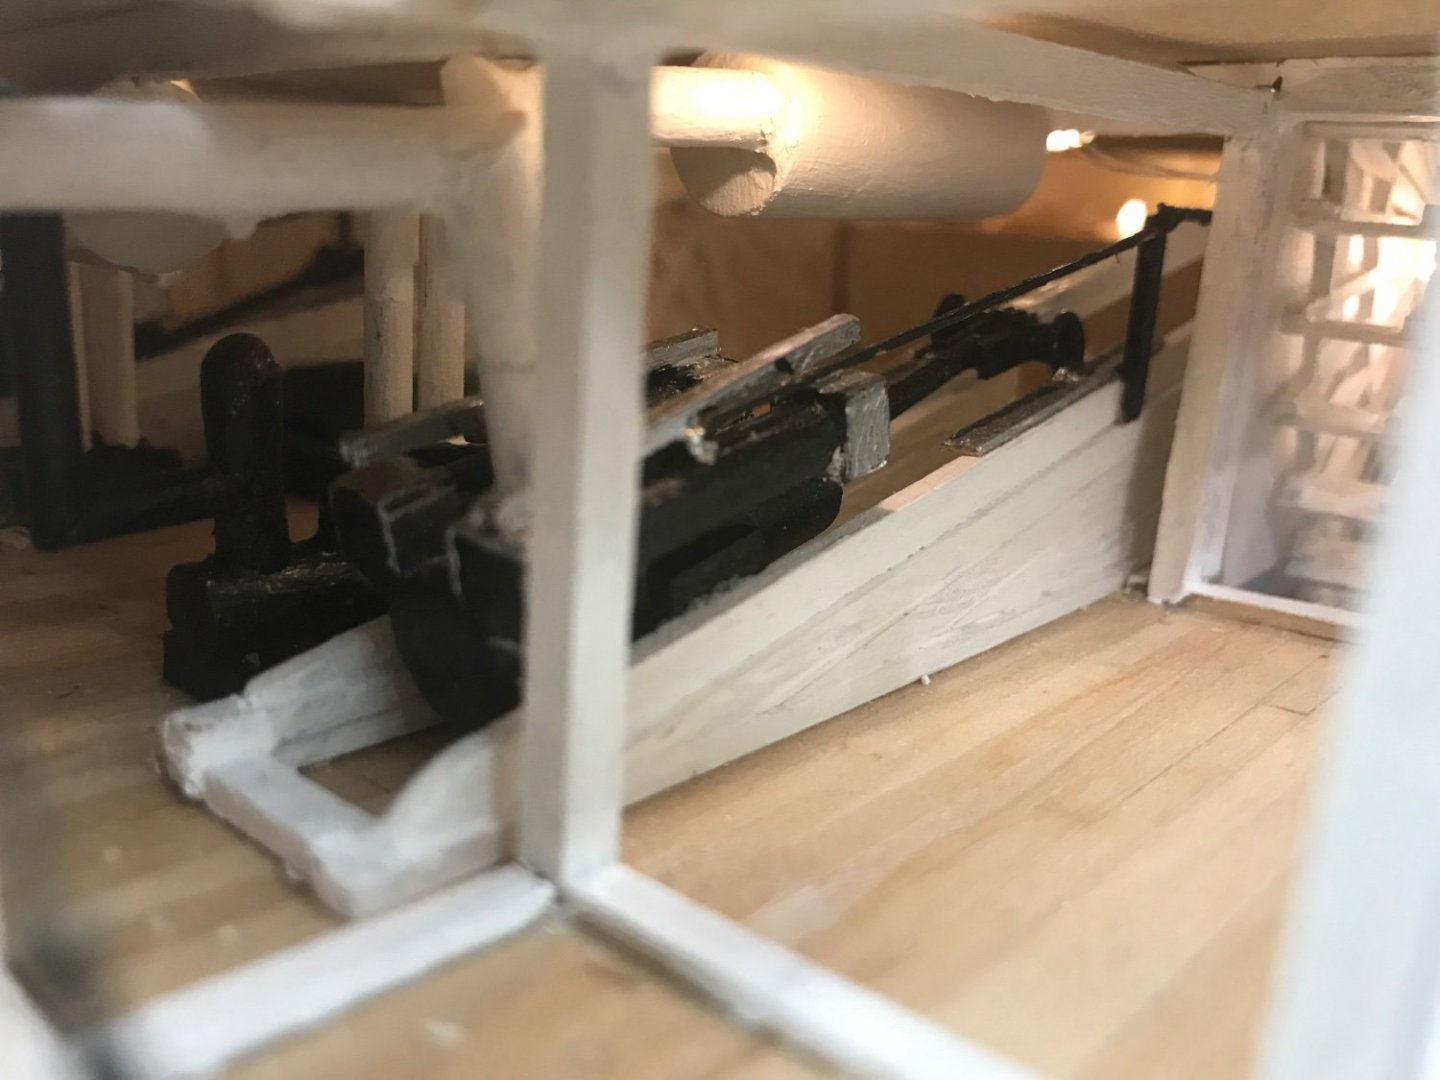
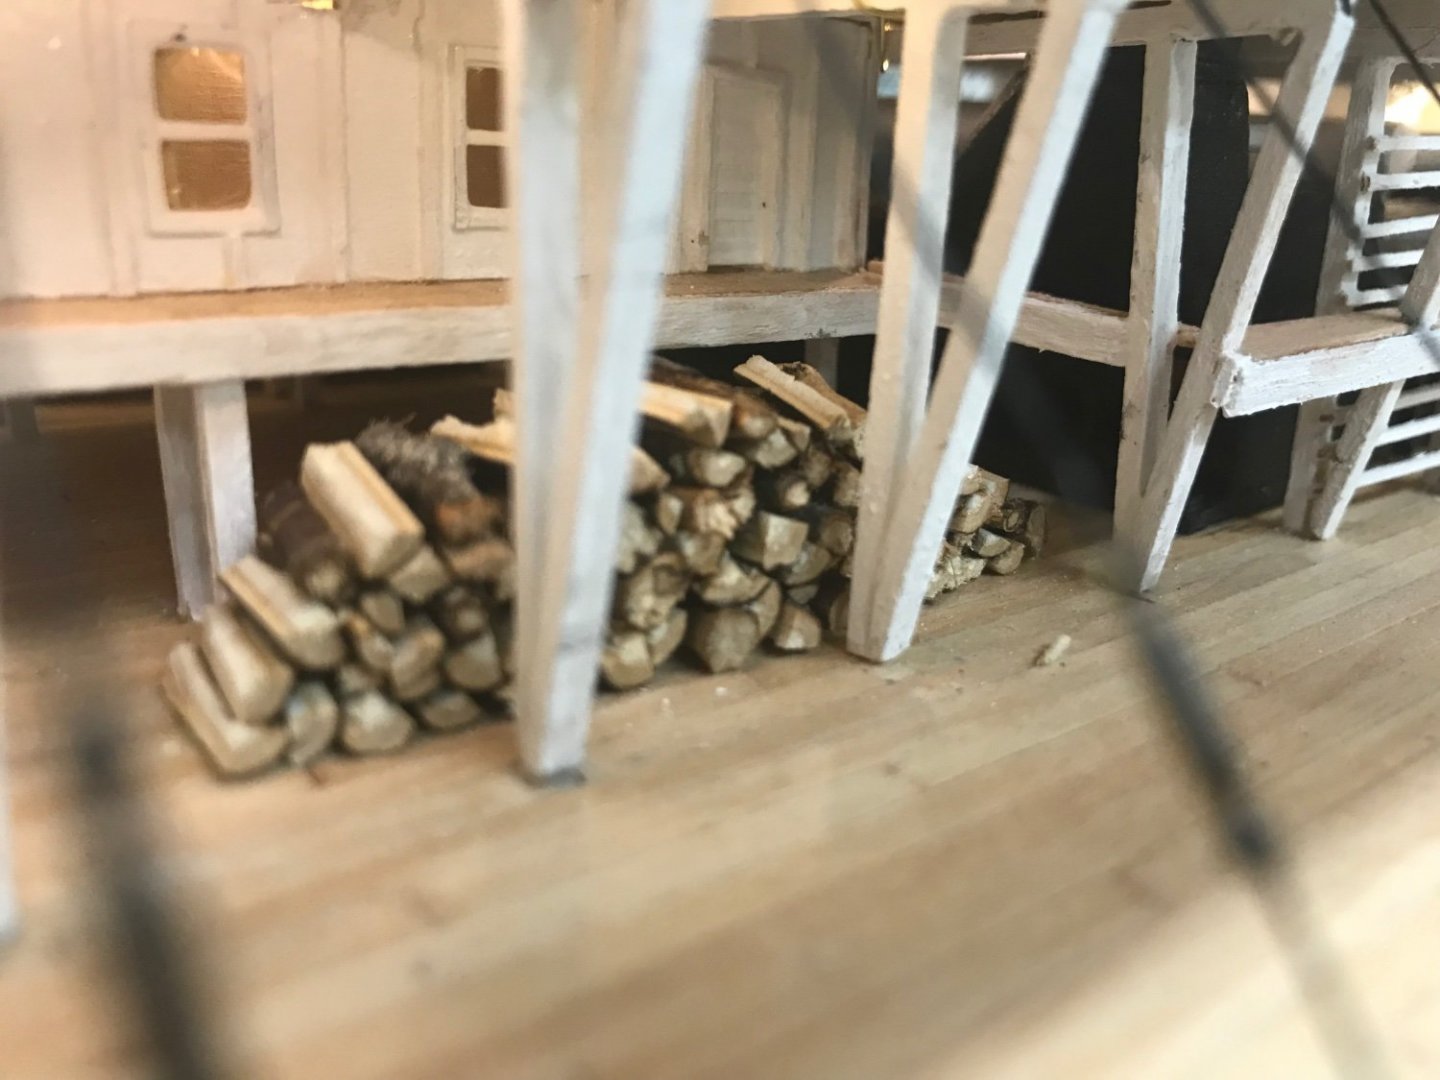
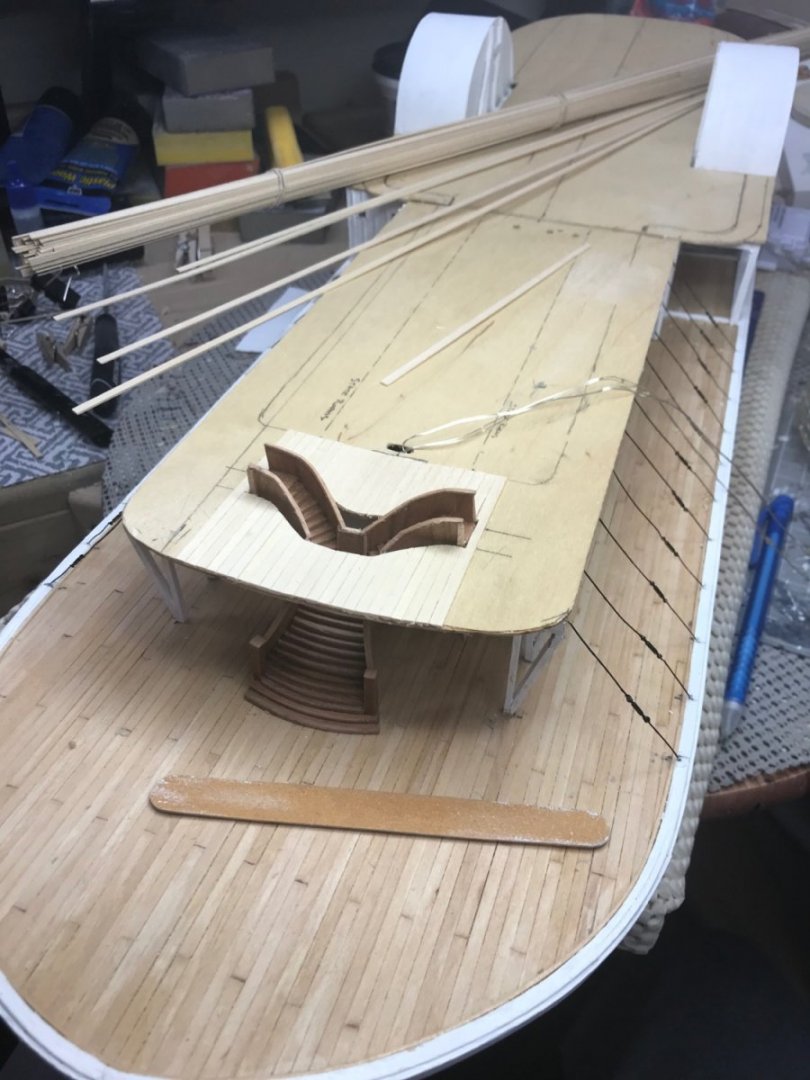
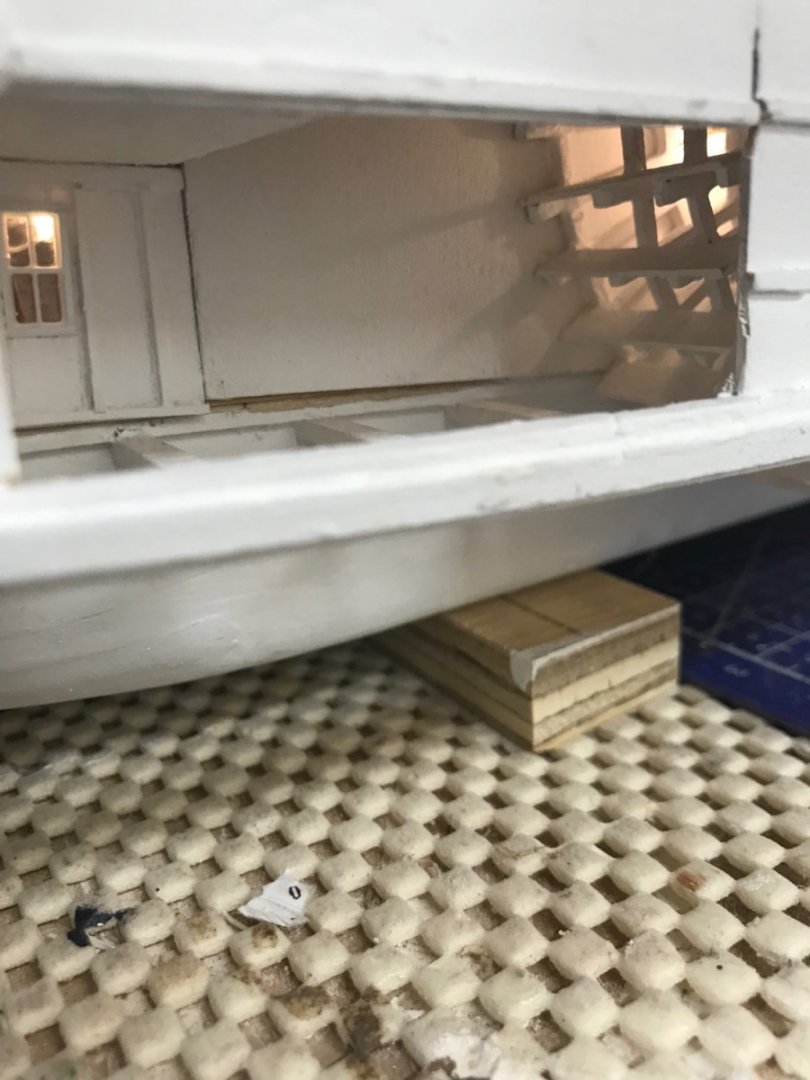
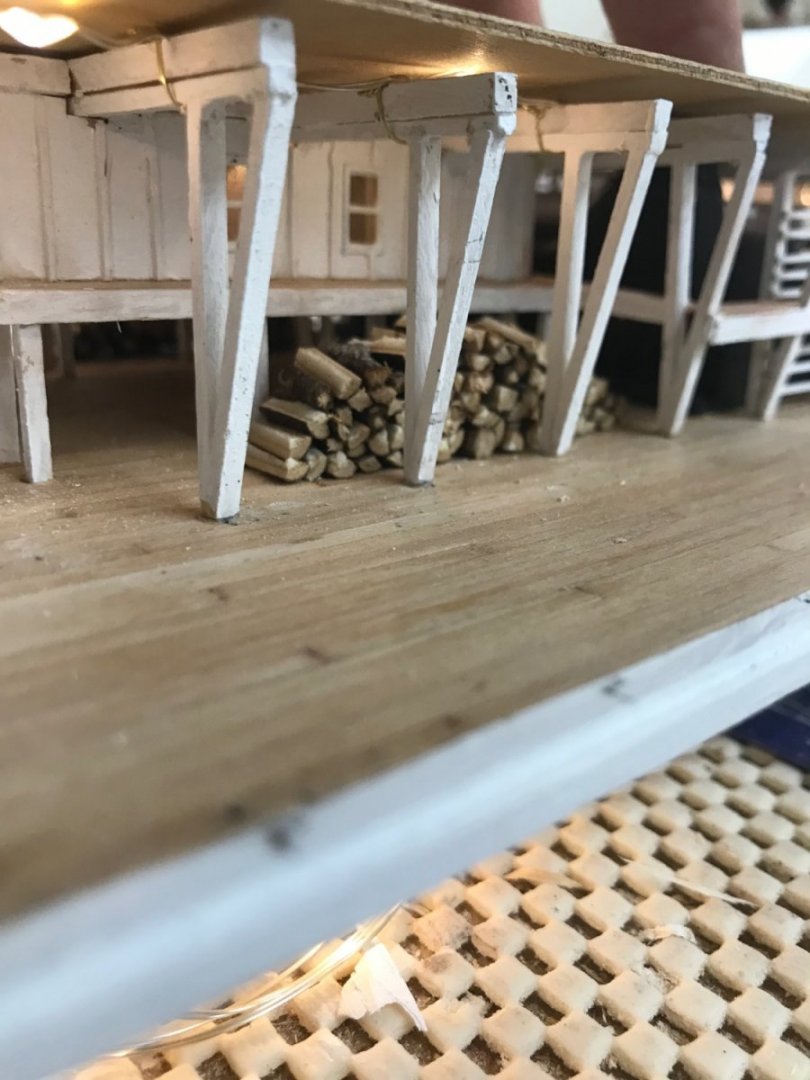
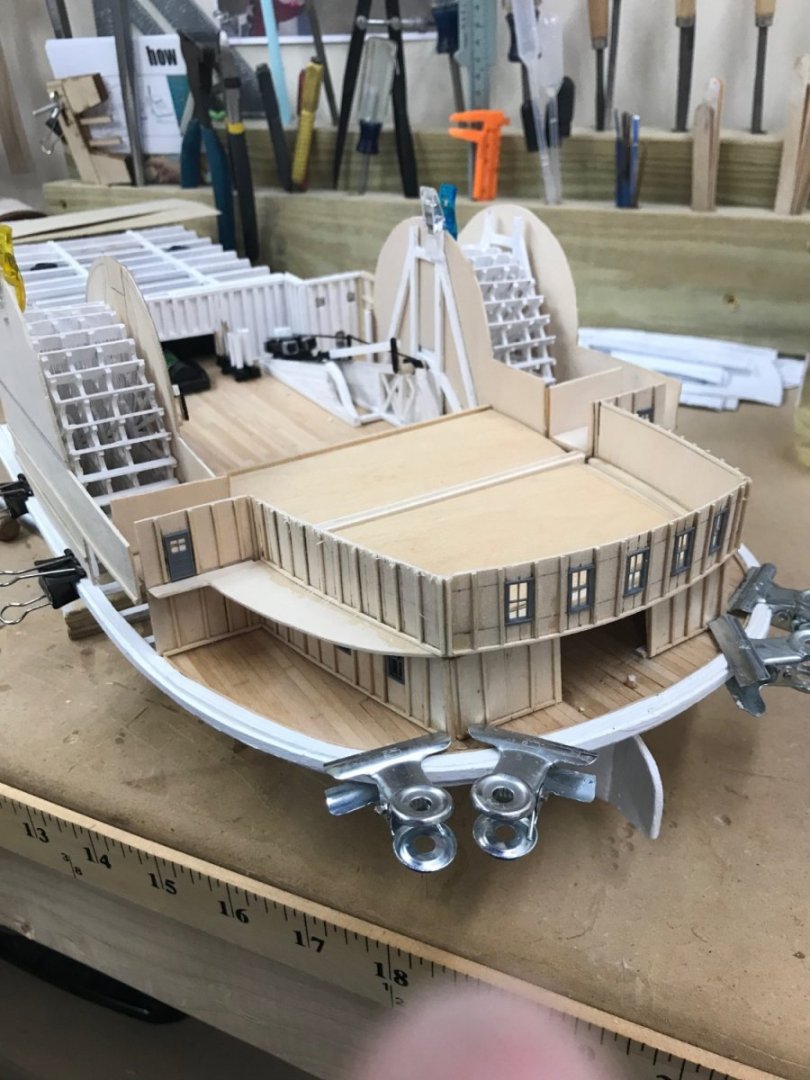
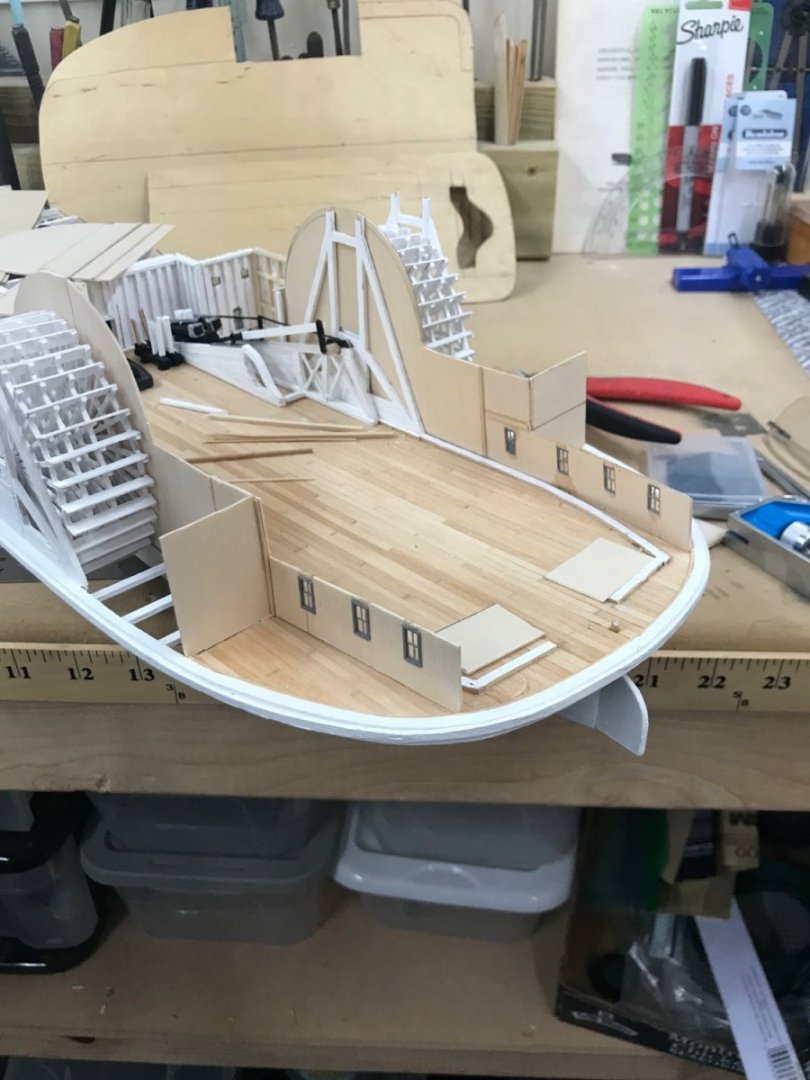
Boiler Deck… More creative clamping… Boiler Deck is now in place. Deck 2 of 4… Main Deck Lighting also in place. Here are few photos of the lighted views. Engine Room… Fore Cabin and wood pile. 😎 Grand Stairway now in place. Started planking the boiler deck. Cheers 🍻
- 238 replies
-
- 10
-
-
- Robert E Lee
- steamboat
- (and 3 more)
-
I agree, and I thought paddle wheels were tedious. 😆 Particularly given the scale, but I have the solution. Still have to figure out all the Victorian Drape. 🤨
- 238 replies
-
- 2
-
-
- Robert E Lee
- steamboat
- (and 3 more)
-
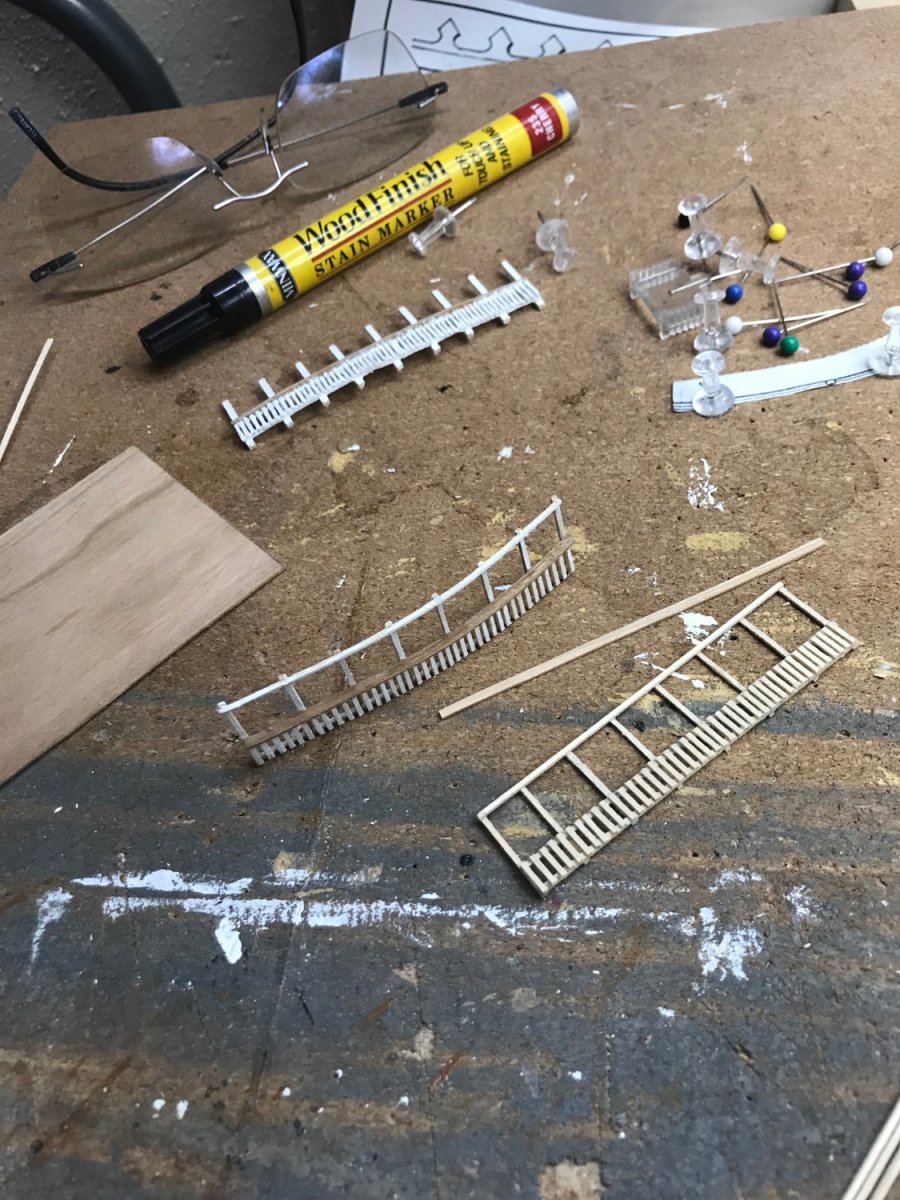
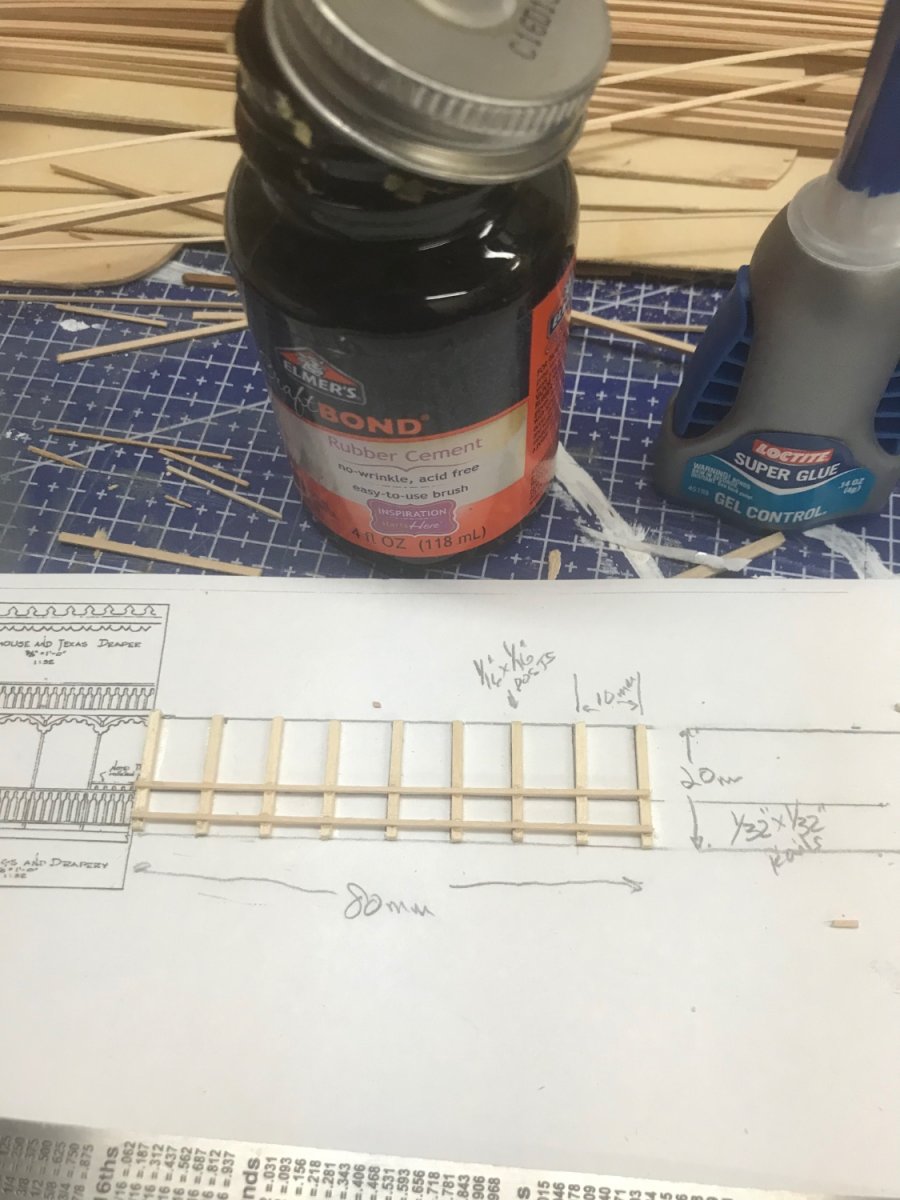
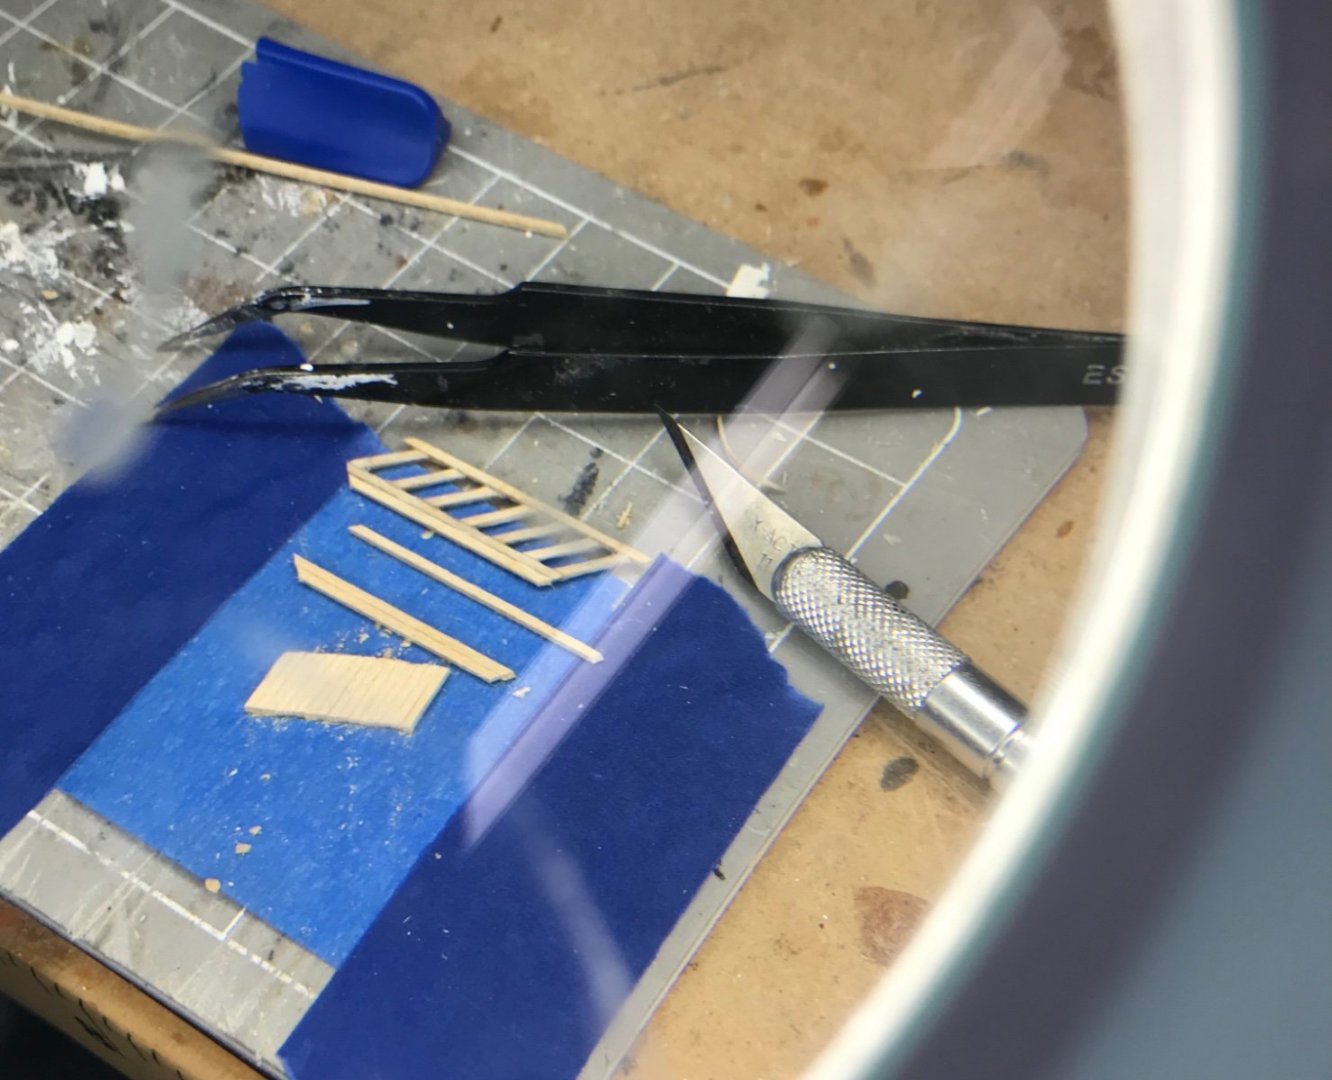
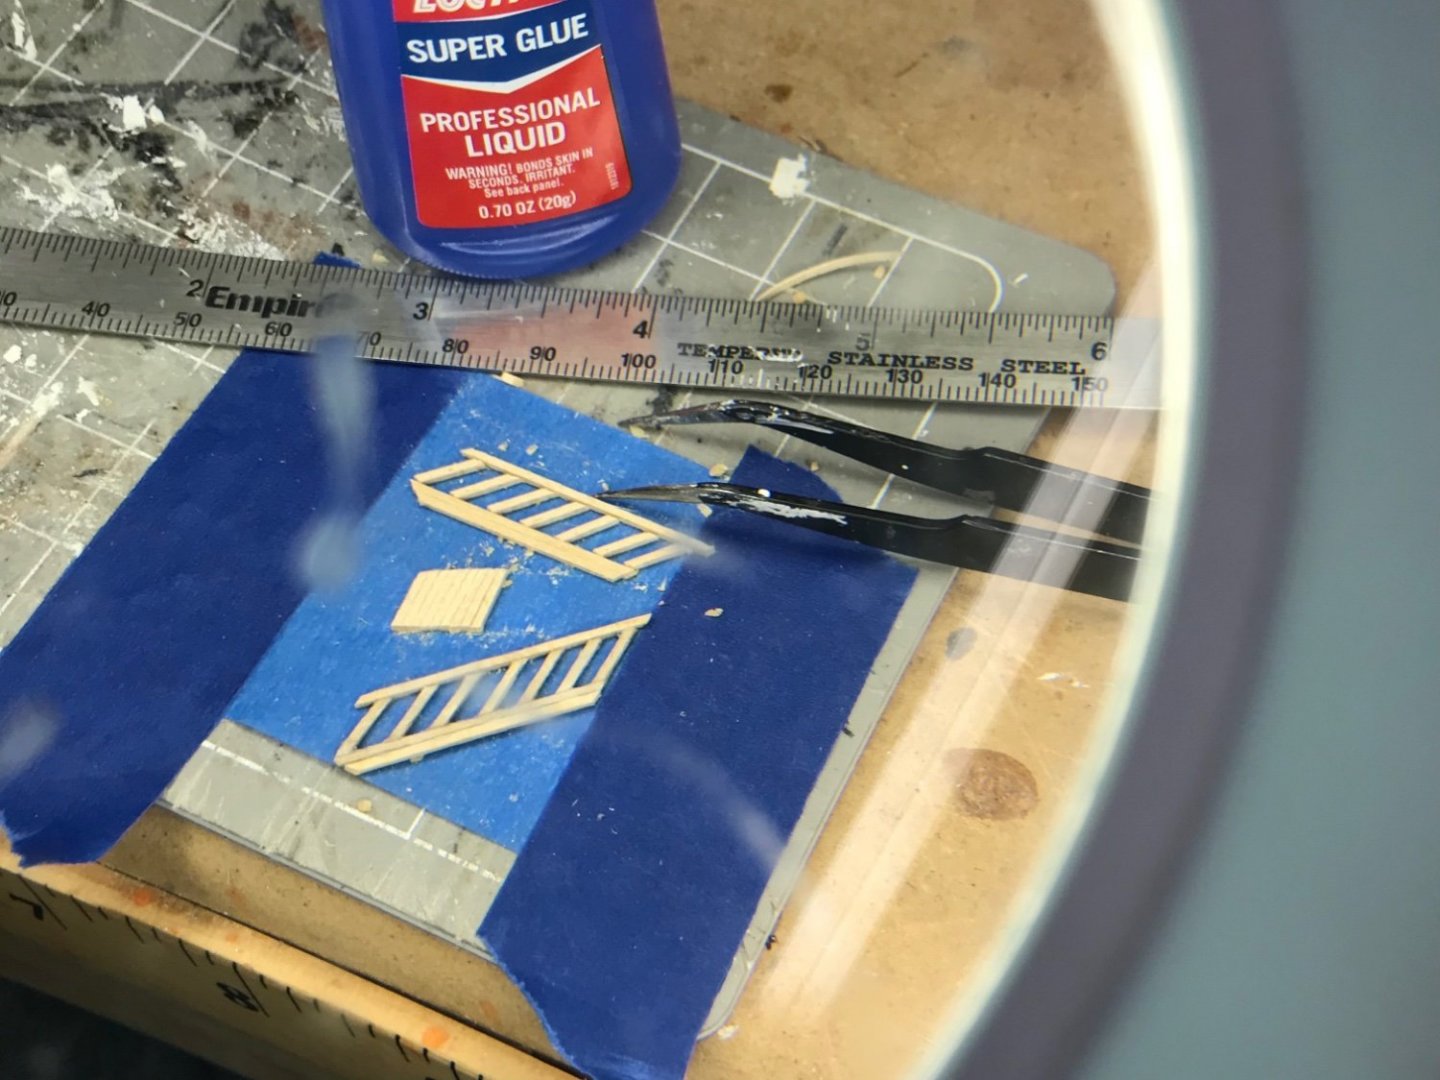
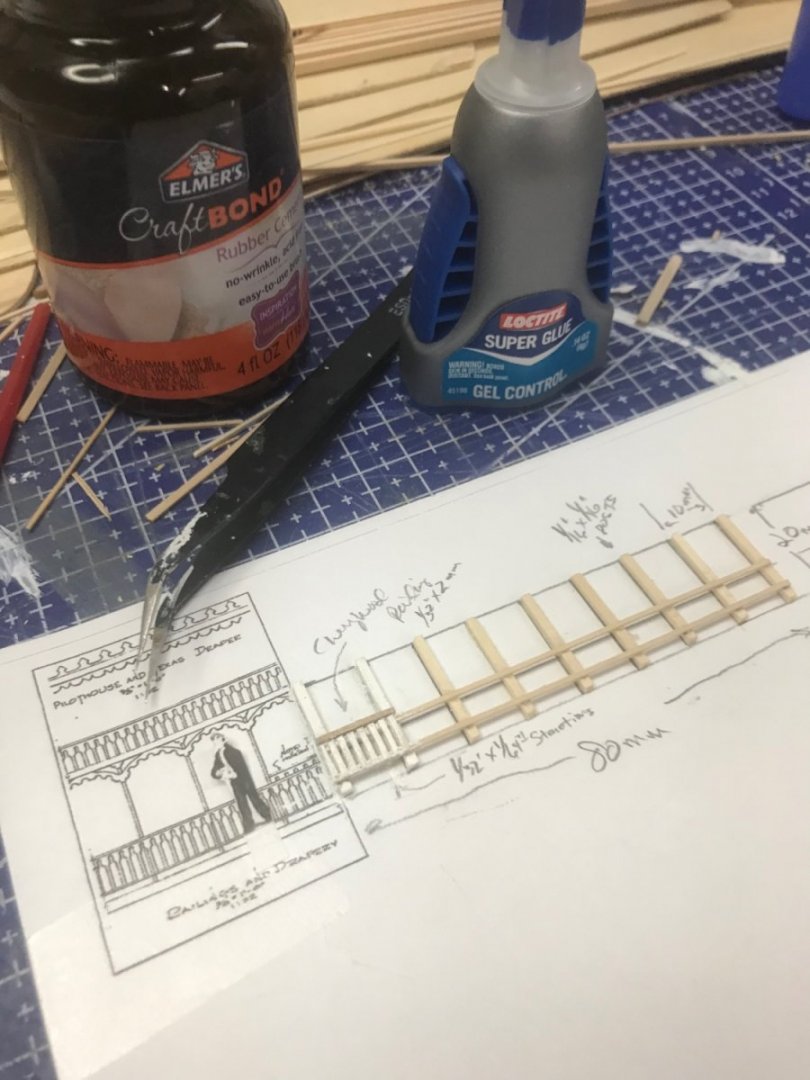
Railings, Lots of railings… I began the process of building deck railings. No wonderful etched brass fittings in this “kit”. 😆 I drew out a template on paper and used rubber cement to attach the deck posts made of 1/16 x 1/16 basswood. Then using Gel CA glue I attached 1/32 x 1/32 basswood rails across the posts. Using 1/32 x 1/64 basswood I have attached stanchions with CA glue. The top rail will be Cherry Wood cut from 1/32 Cherry wood sheet at a 2 mm width. I hope I can speed this up a bit, this first section took me a hour to assemble and paint. Very tedious to say the least, quite maddening like the paddle wheels. As you can see here, LOTS OF RAILING! Onwards… 🍻


- 238 replies
-
- 9
-
-
- Robert E Lee
- steamboat
- (and 3 more)
-
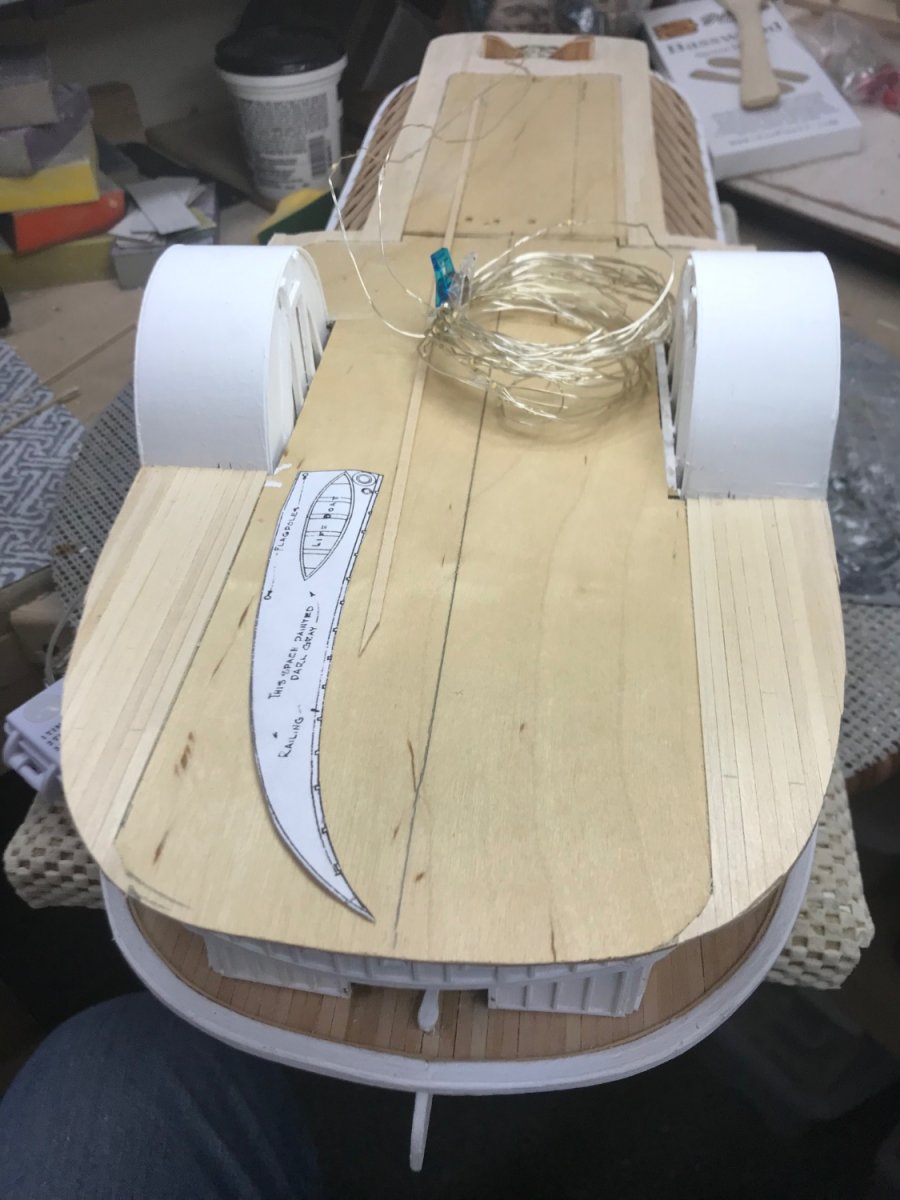
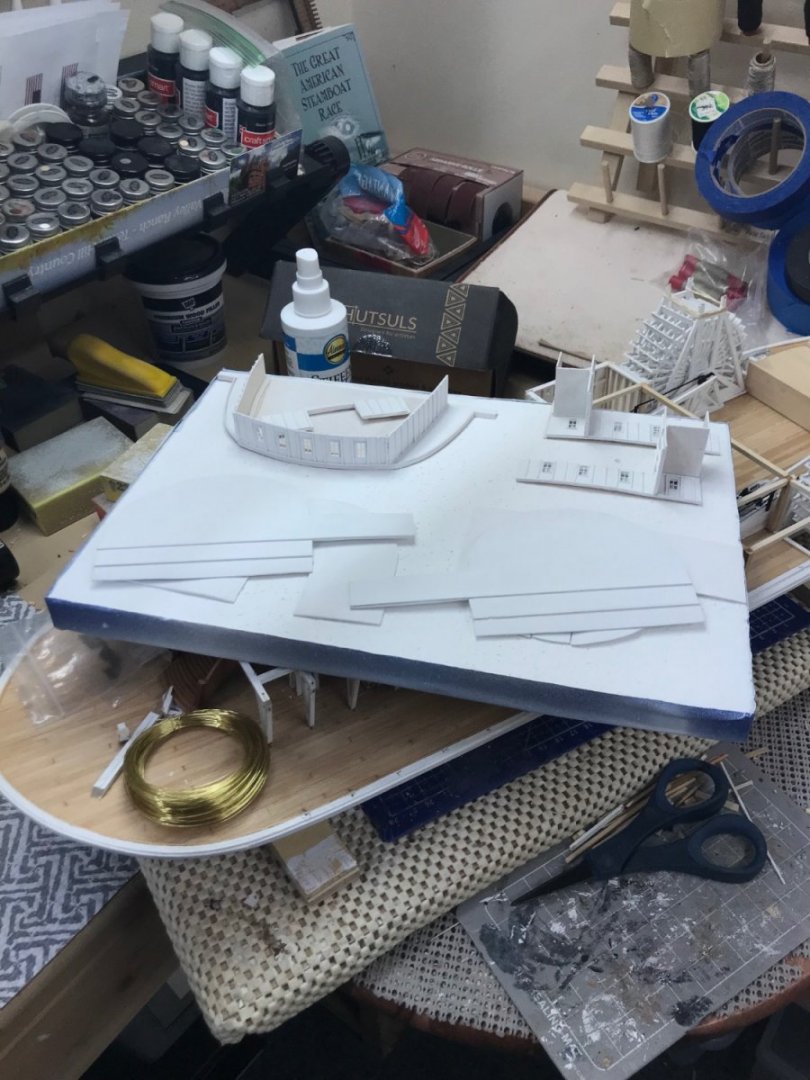
Lighting on Main Deck… Main Deck lighting has been placed and I am now ready to attached the sub decking for the Boiler Deck. Boiler Deck sub decking fitted and ready for installation. Let the fun begin… 🍻
- 238 replies
-
- 9
-
-
- Robert E Lee
- steamboat
- (and 3 more)
-
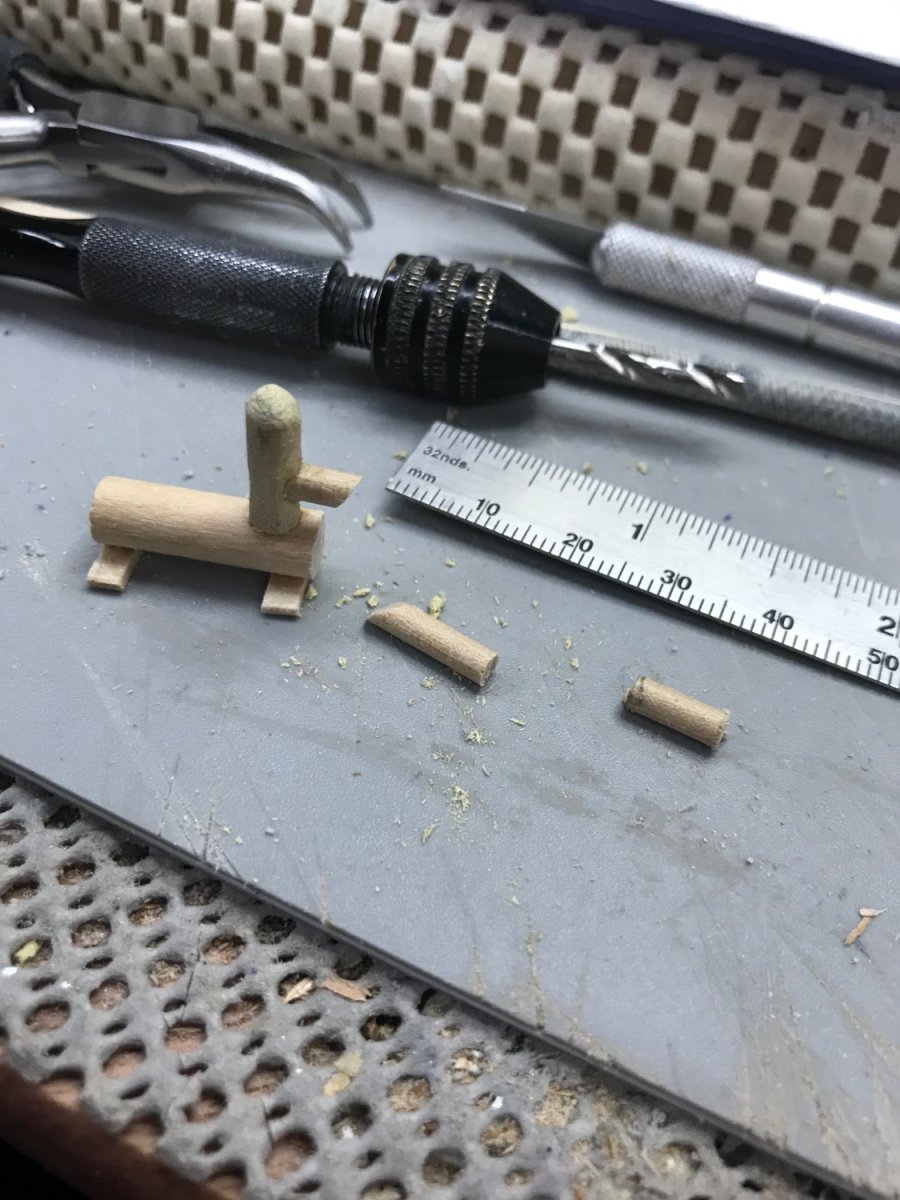
Thank you for your comments. This little guy came from my search for a crew of scale. I have decided against figures on board, but this guy won’t go away. 😆 I think I need to put a broom in his hands, so he can help clean up around here. I think the build is going well, although it can be a struggle at times. More of a scratch build than a kit, but then that’s what you get with vintage model kits. Thanks again for your encouragement. Cheers 🍻
- 238 replies
-
- 4
-
-
- Robert E Lee
- steamboat
- (and 3 more)
-
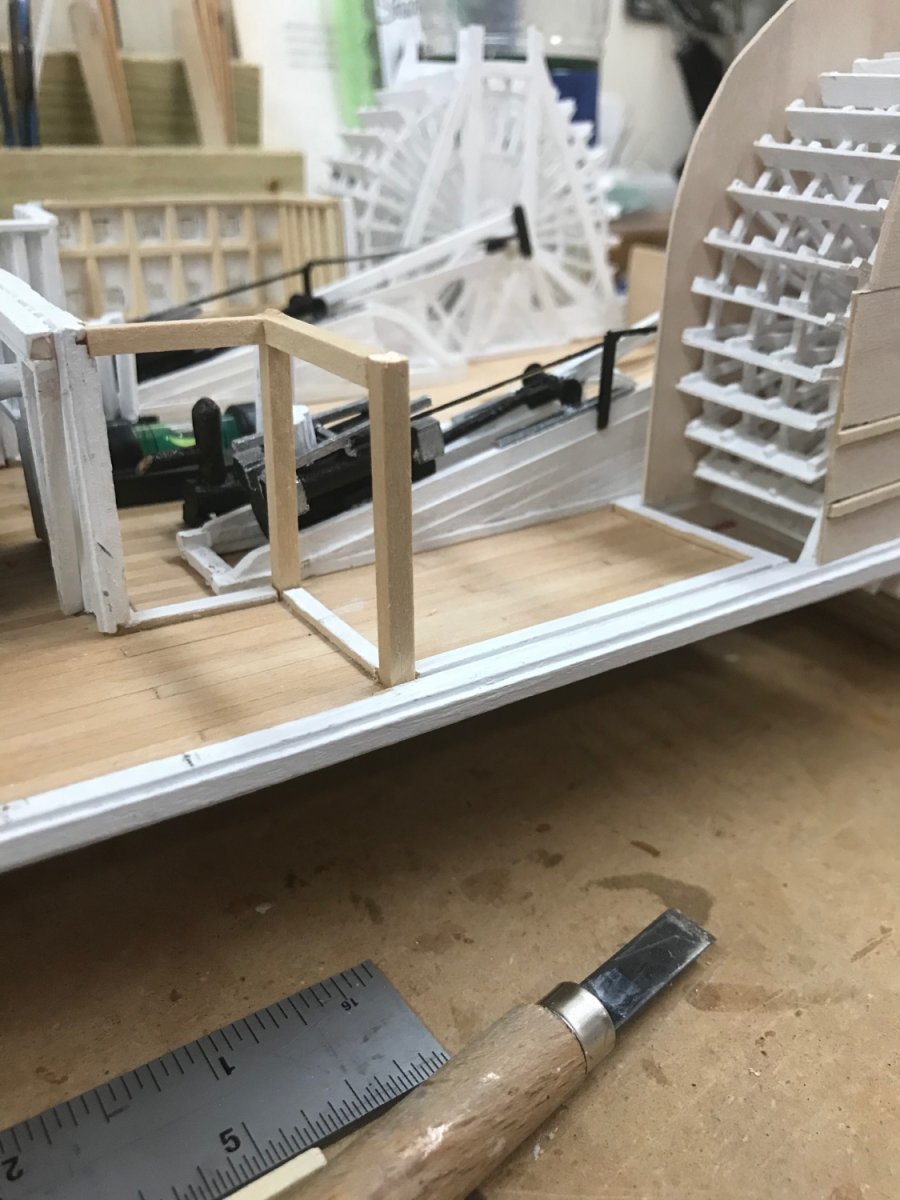
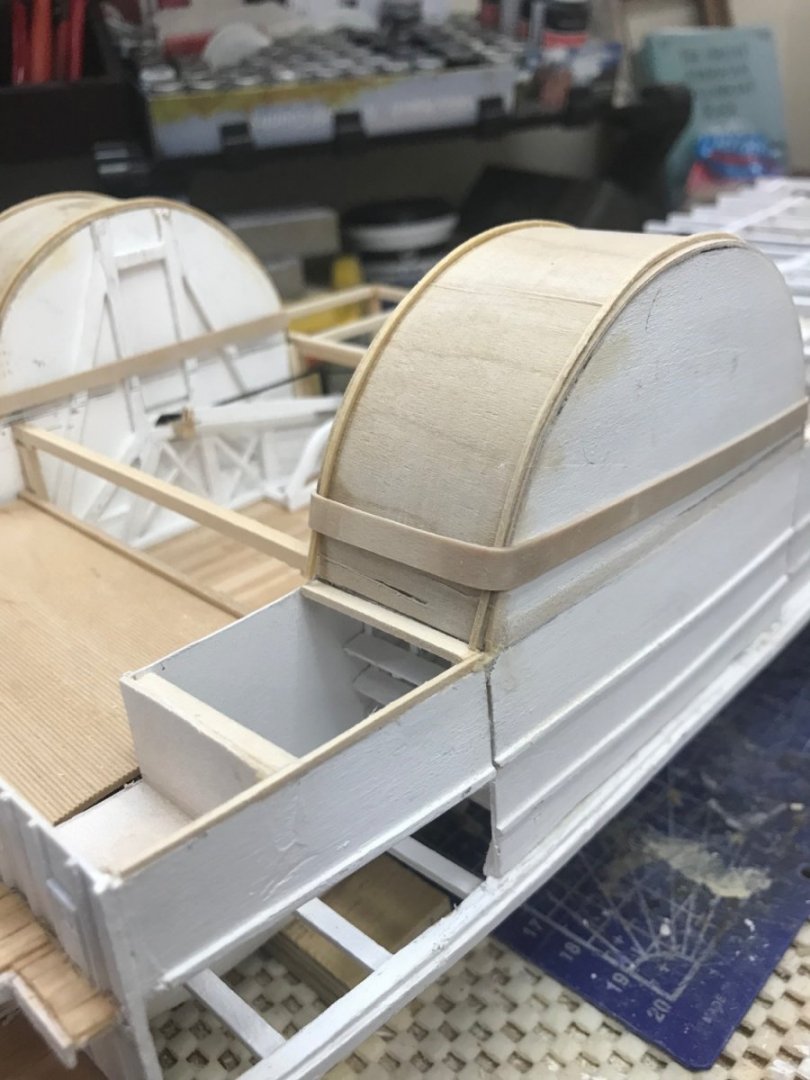
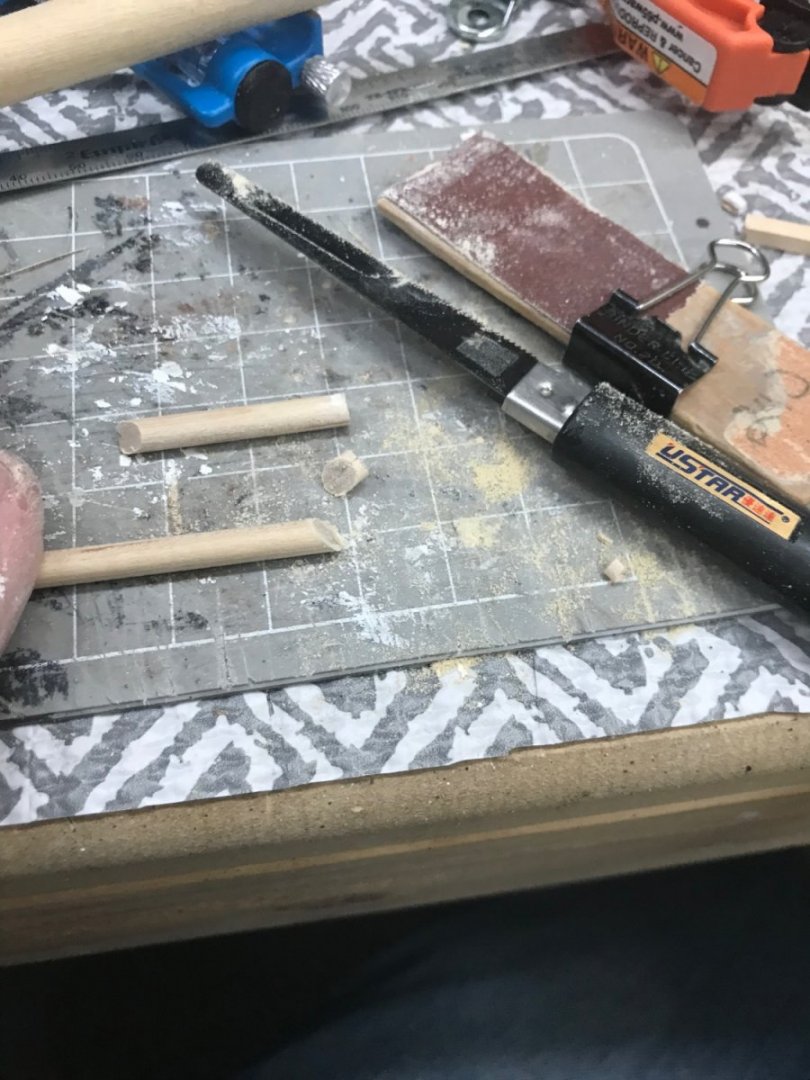
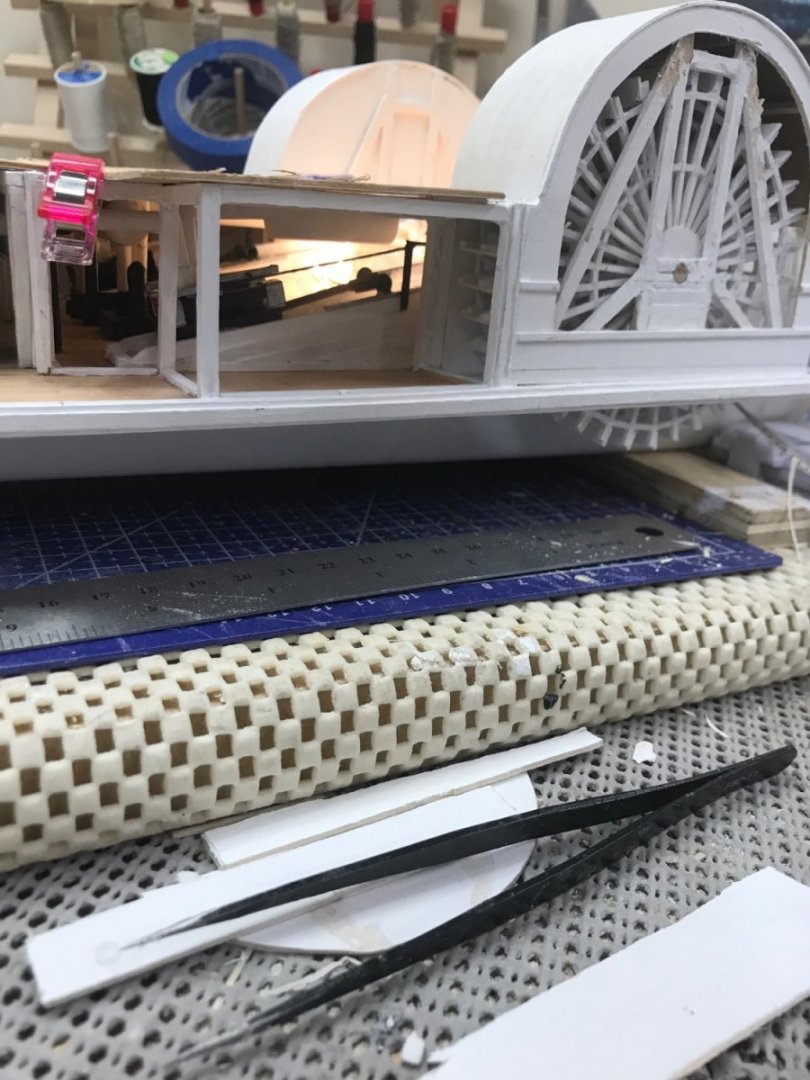
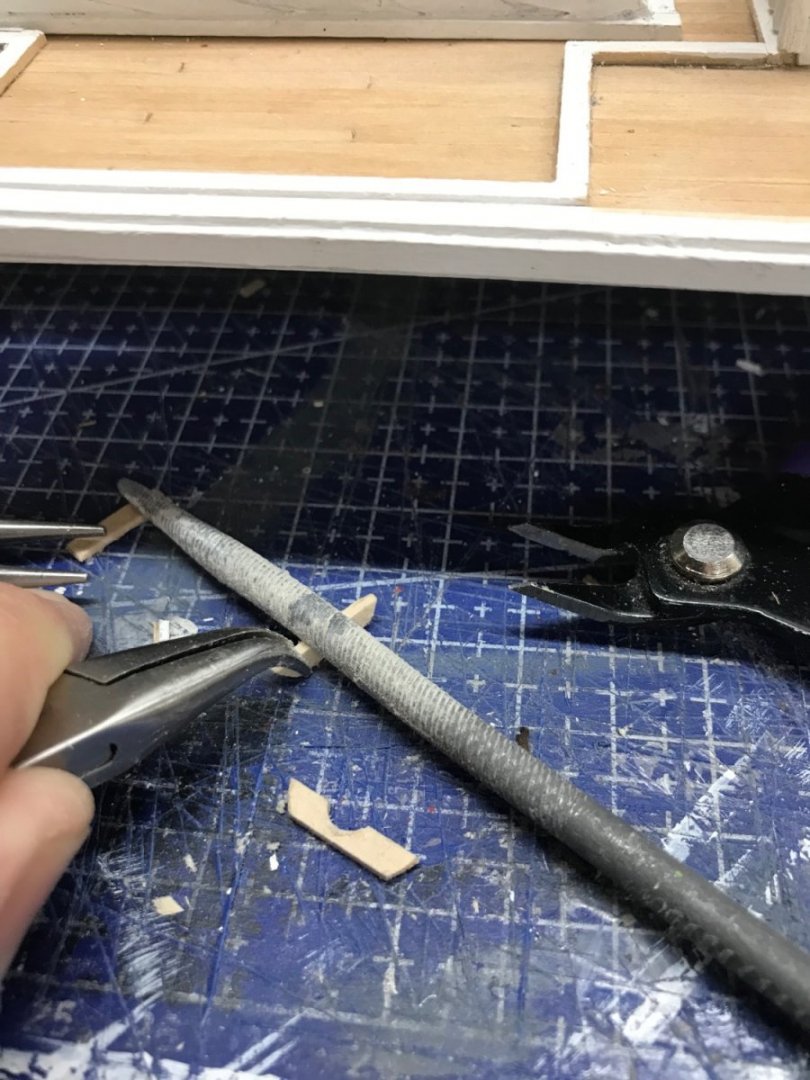
Finishing up Wheel Housings… Forming 1/32 x 1/32” basswood by soaking it in Ammonia/water and strapping it to the housings to dry. CA gluing the molding into place. Now to finish out that Engine Room. Cutting steam pipes out of dowel rods. Engine Room completed. Starting to install lighting. View into the cut away. One last look before the Boiler De k goes on. I didn’t forget the Paddle Wheel cut away. Thanks to all for your 👍 and comments, they keep me going. Cheers 🍻


- 238 replies
-
- 9
-
-
- Robert E Lee
- steamboat
- (and 3 more)
-
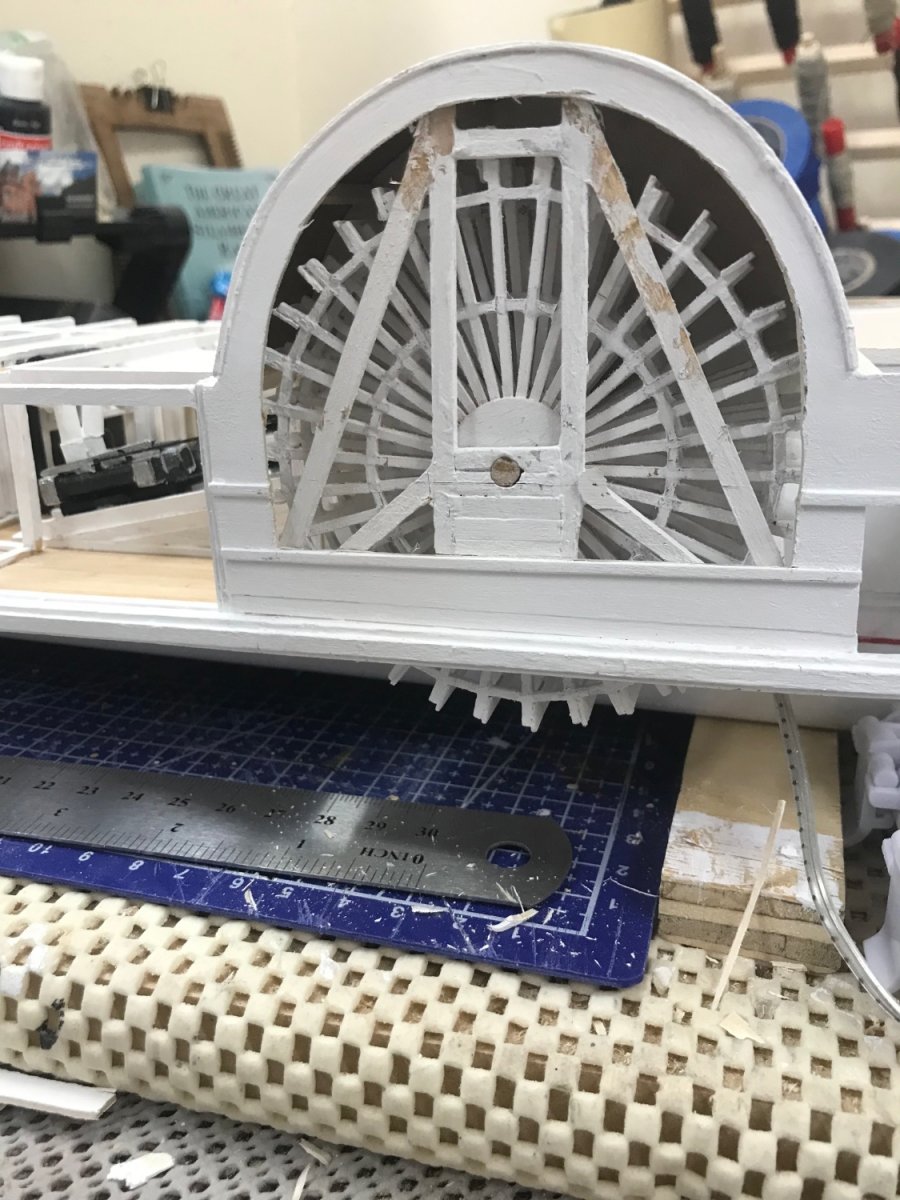
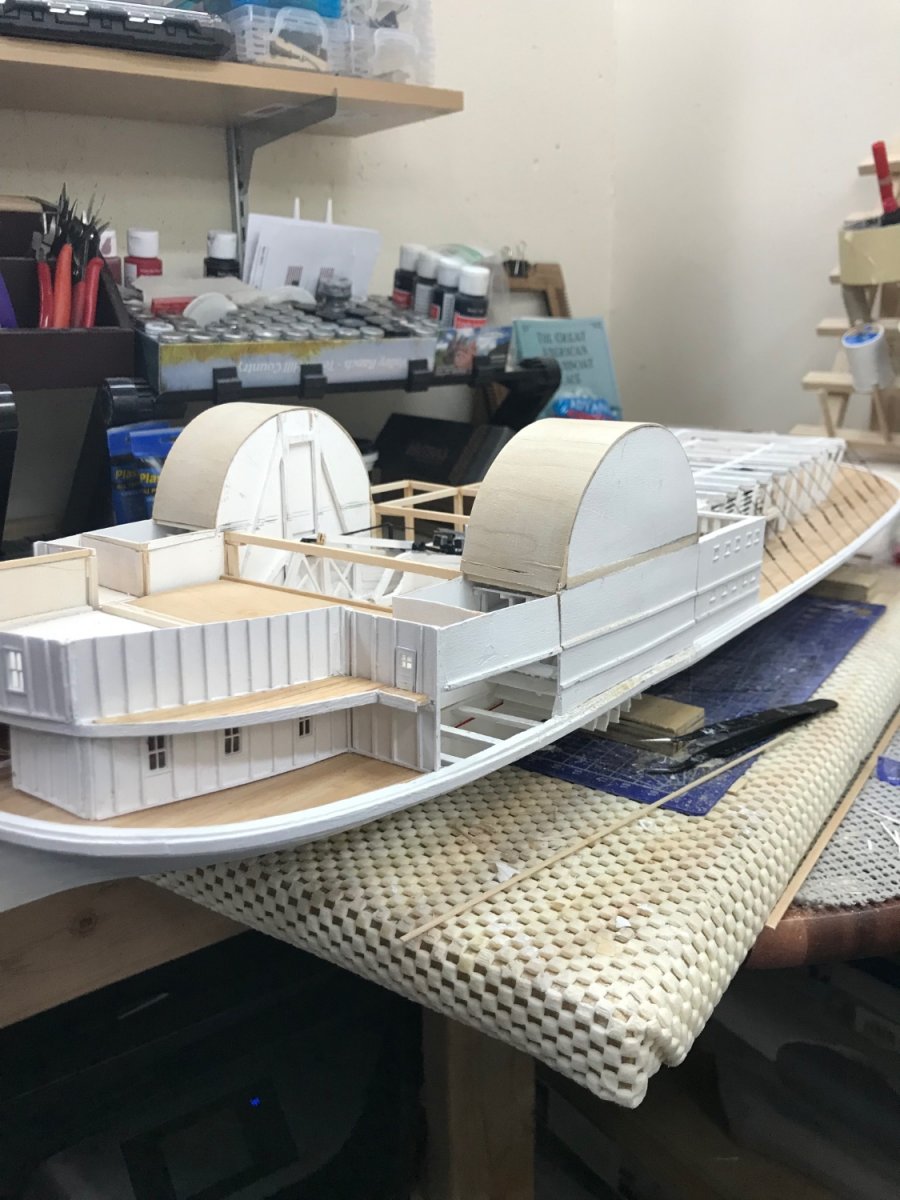
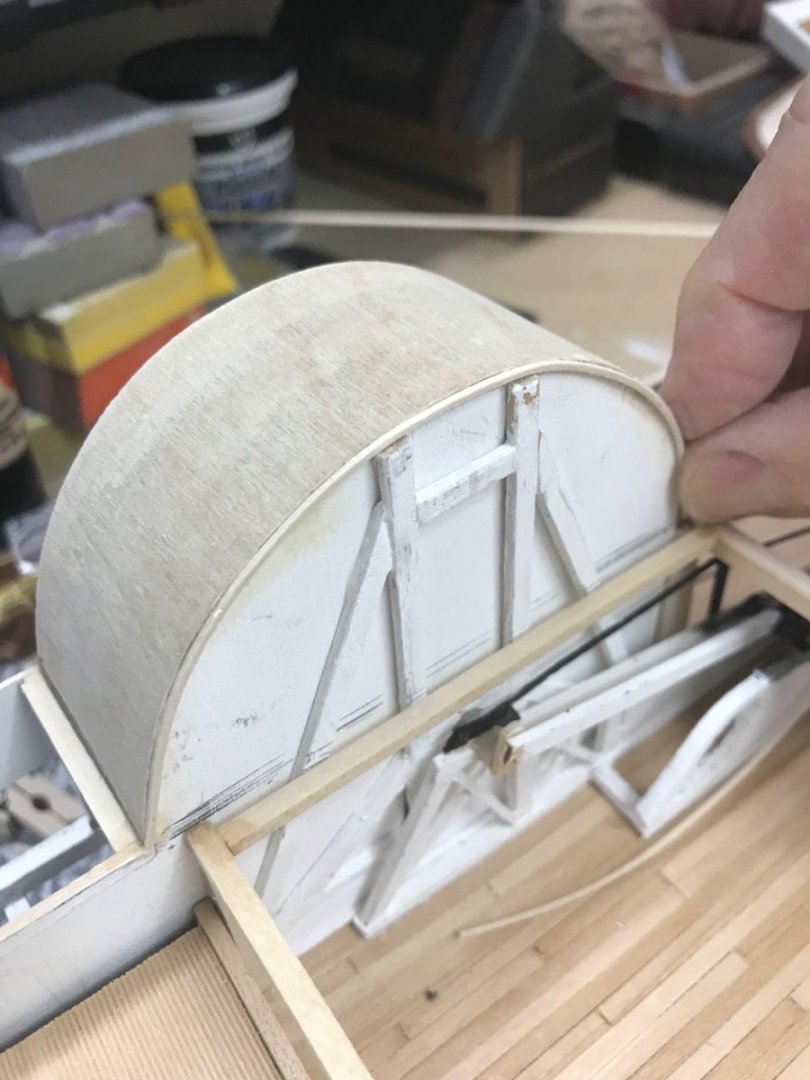
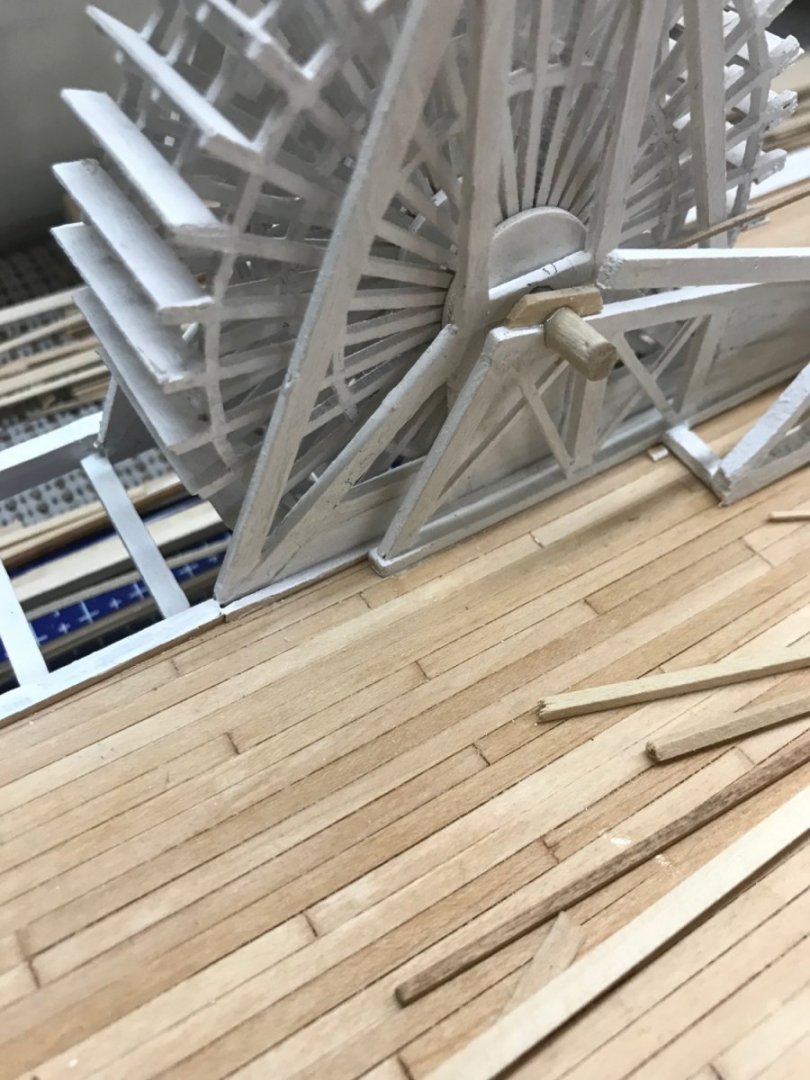
Wheel Housings… Framing up the Wheel Housing. I finally get it all straightened up and it’s time to cover it up. 🤨 That was quite the challenge! 😆 I will be doing a cutaway view of the Paddle Wheel. Can’t let that stand hidden away. 😎 Onwards… 🍻


- 238 replies
-
- 6
-
-
- Robert E Lee
- steamboat
- (and 3 more)
-
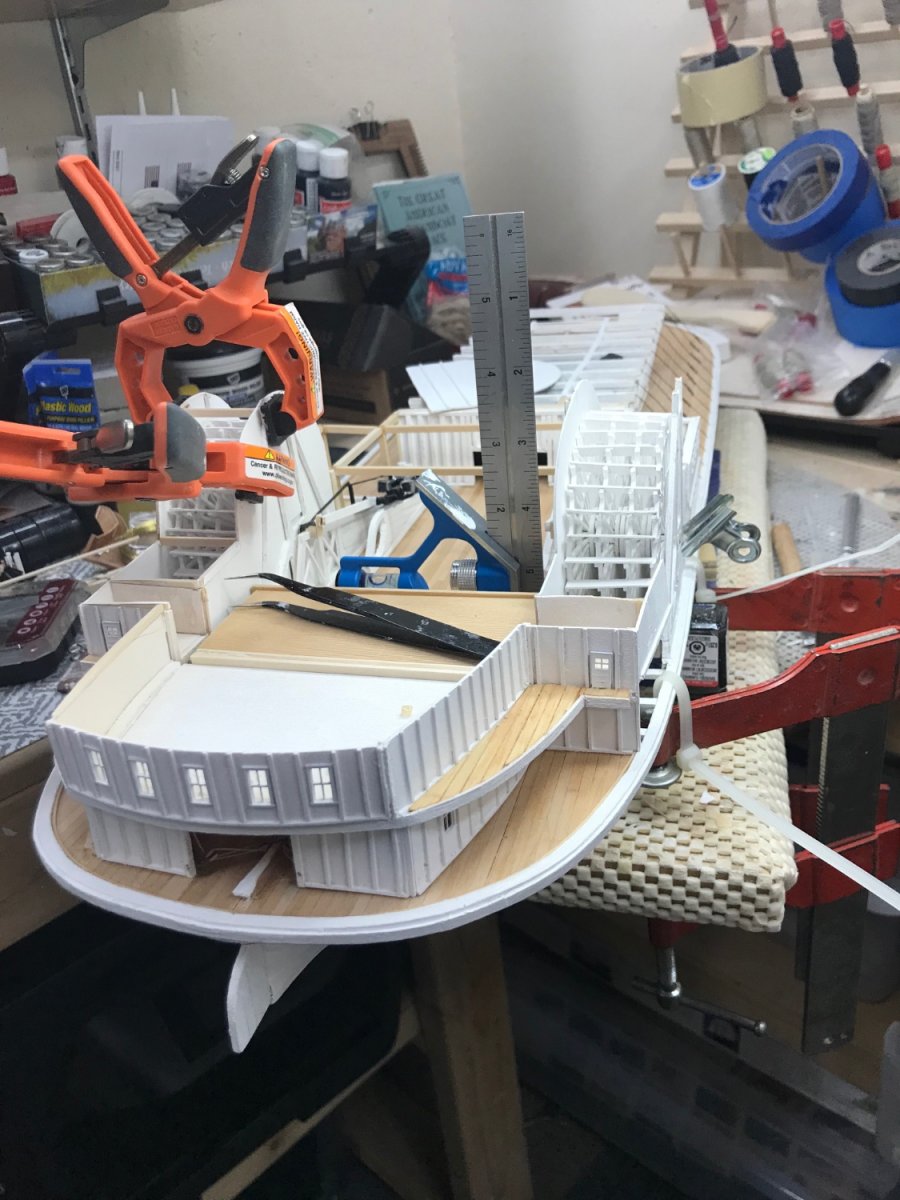
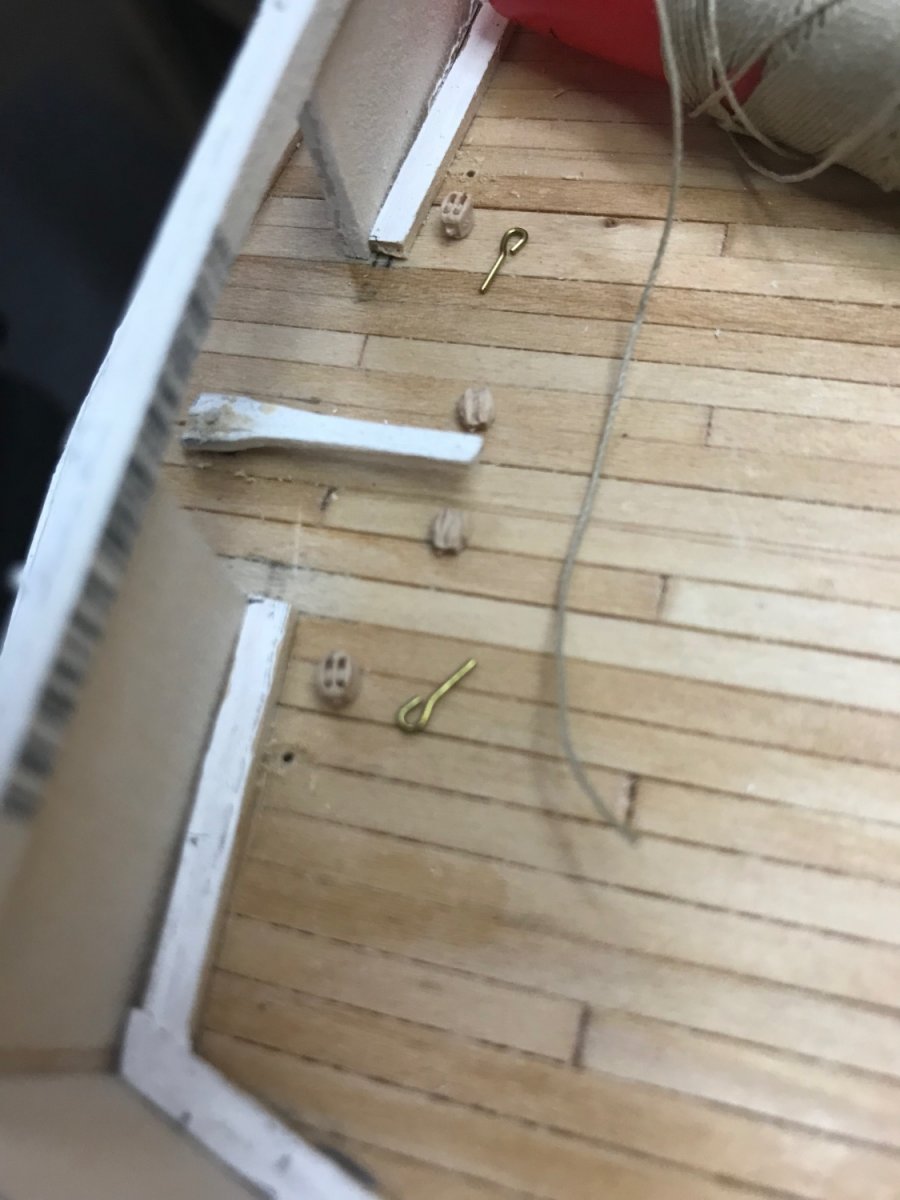
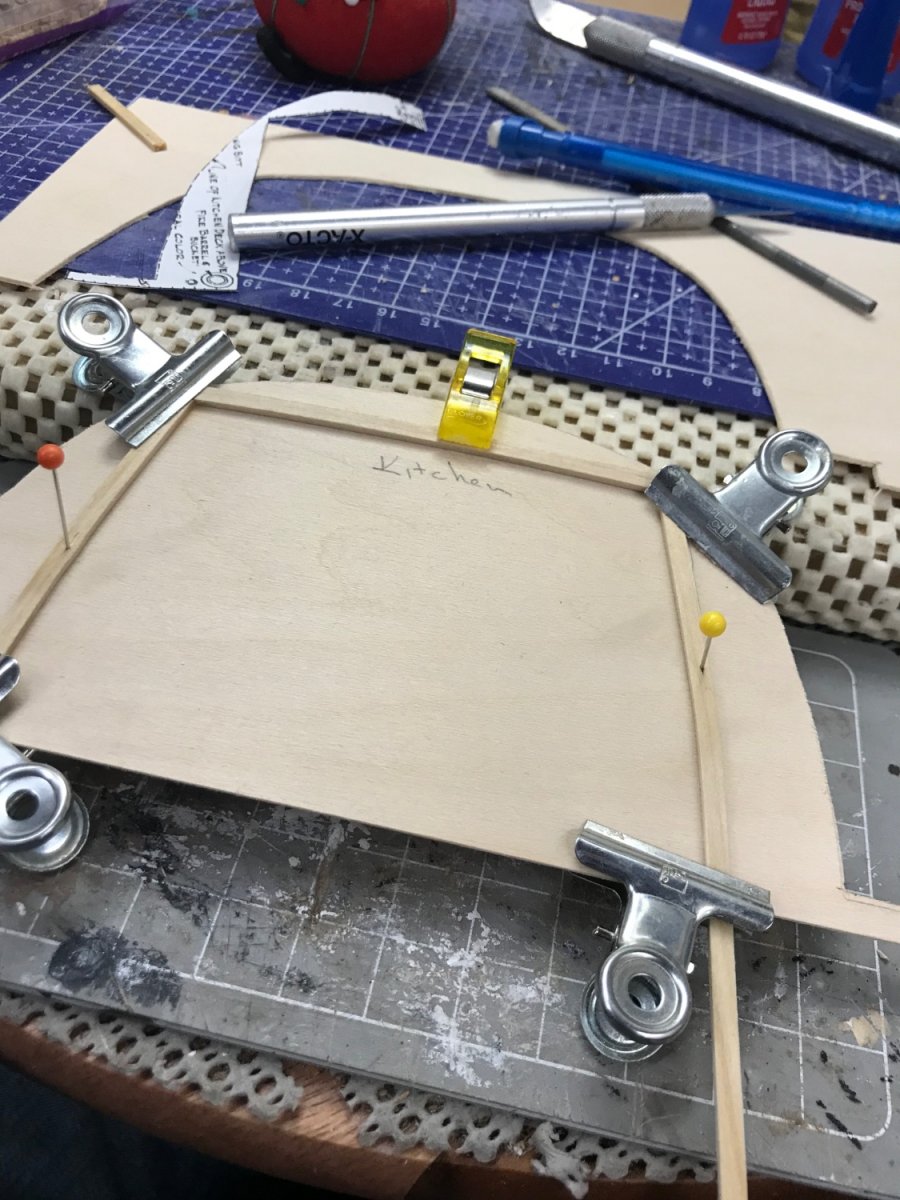
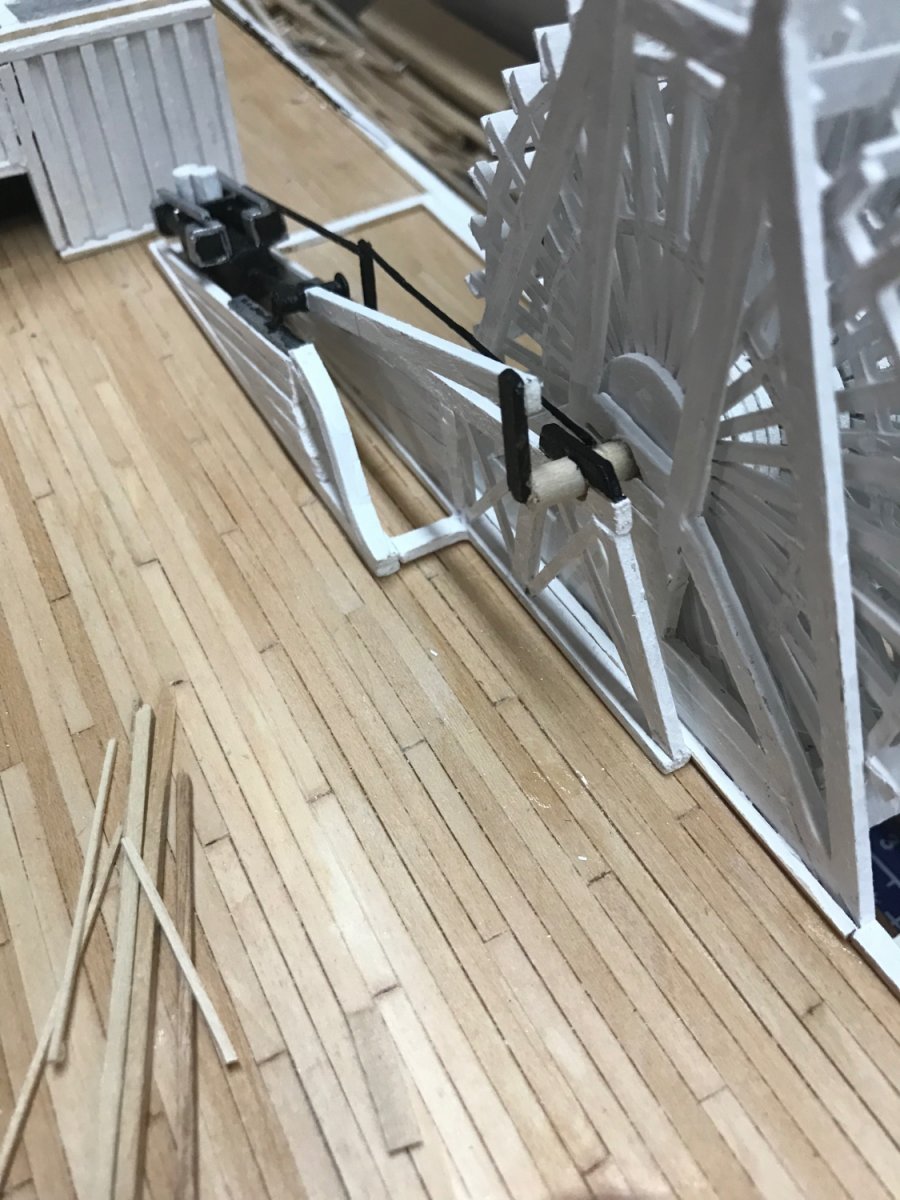
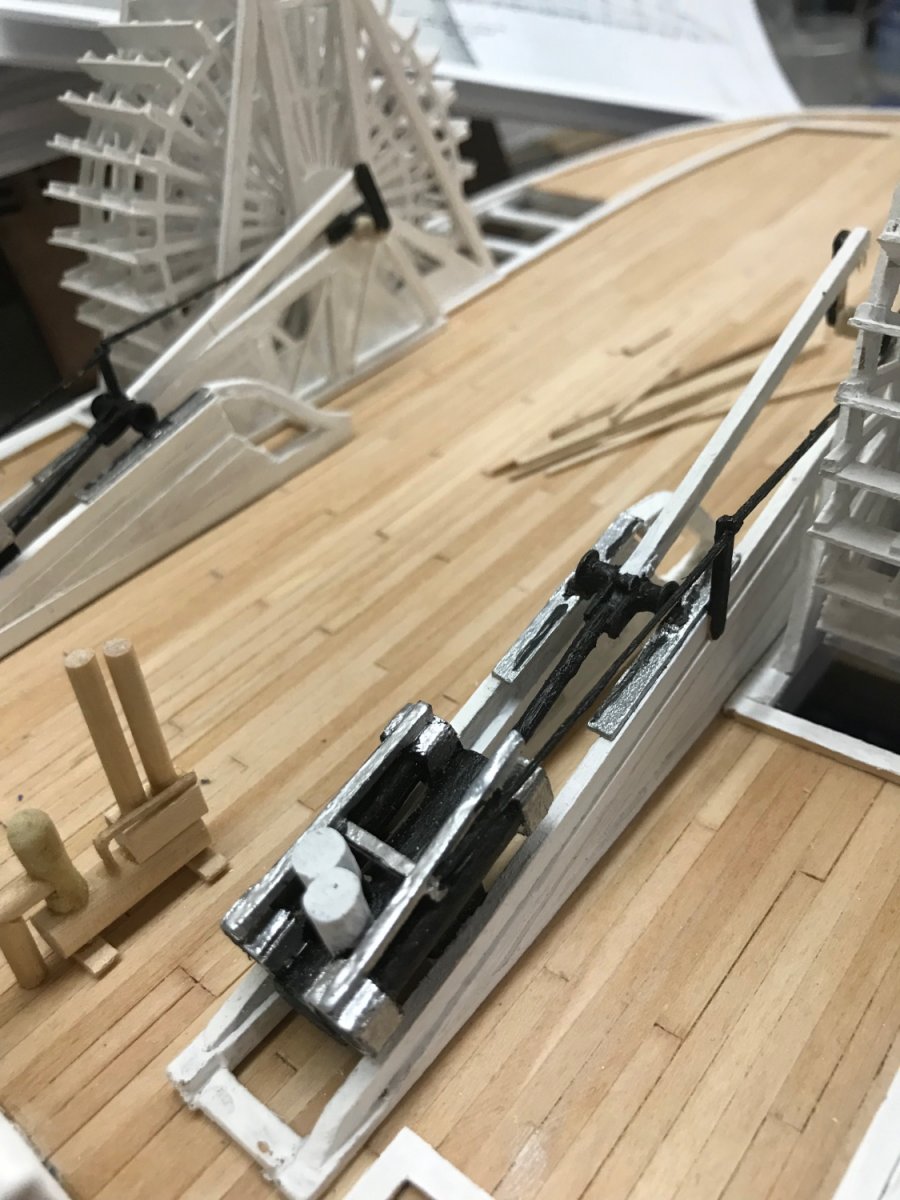
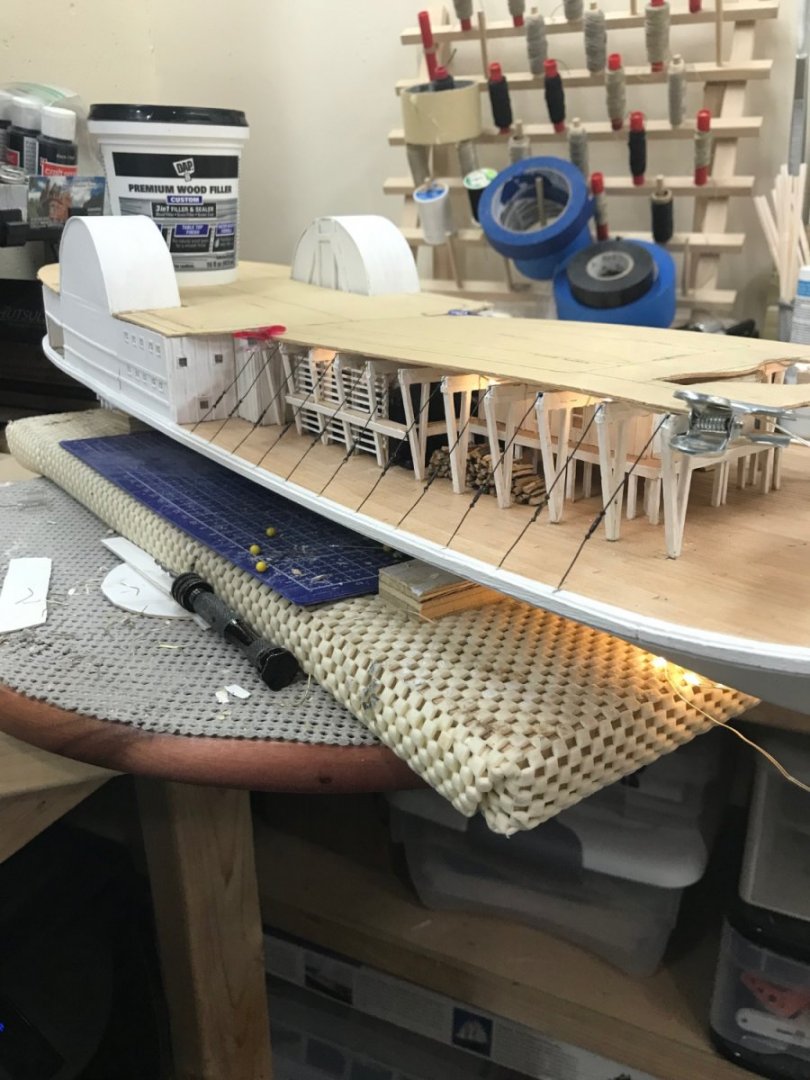
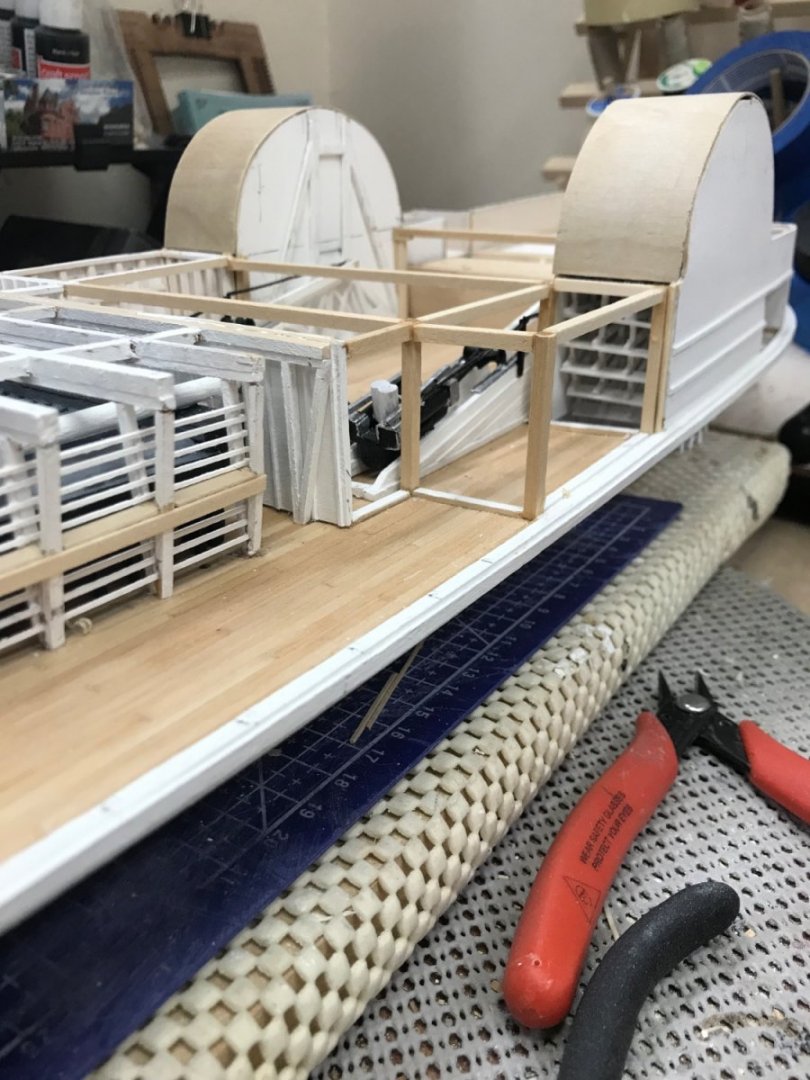
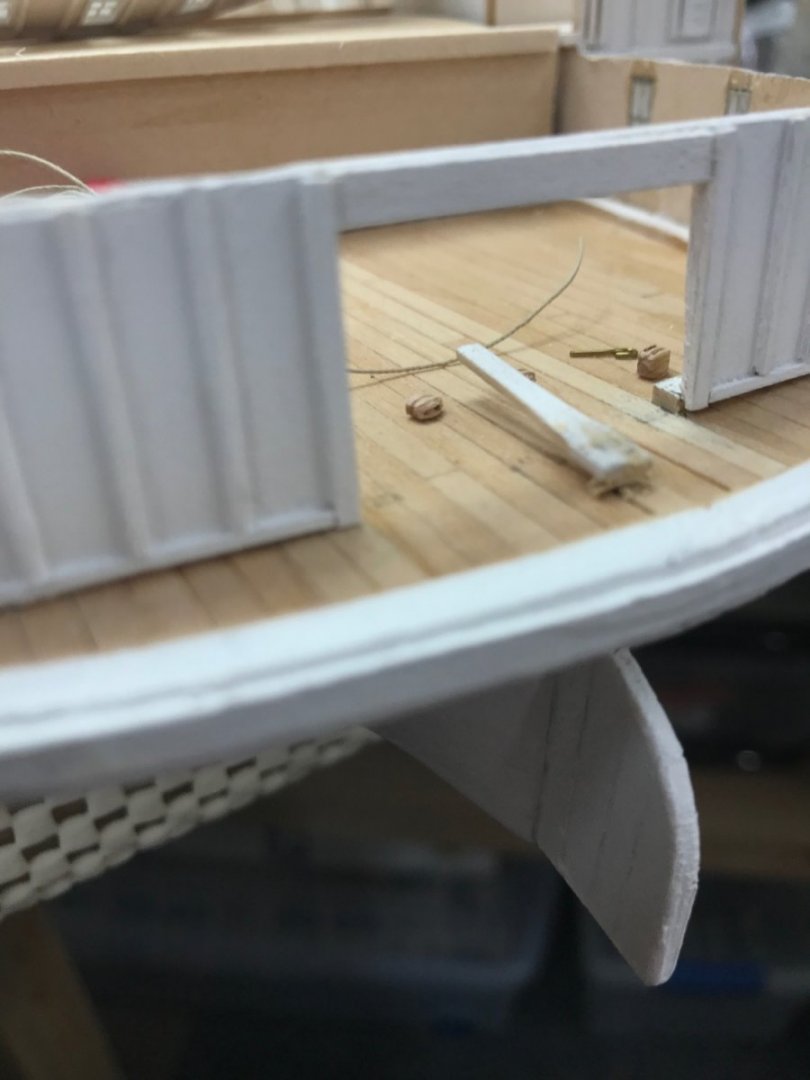
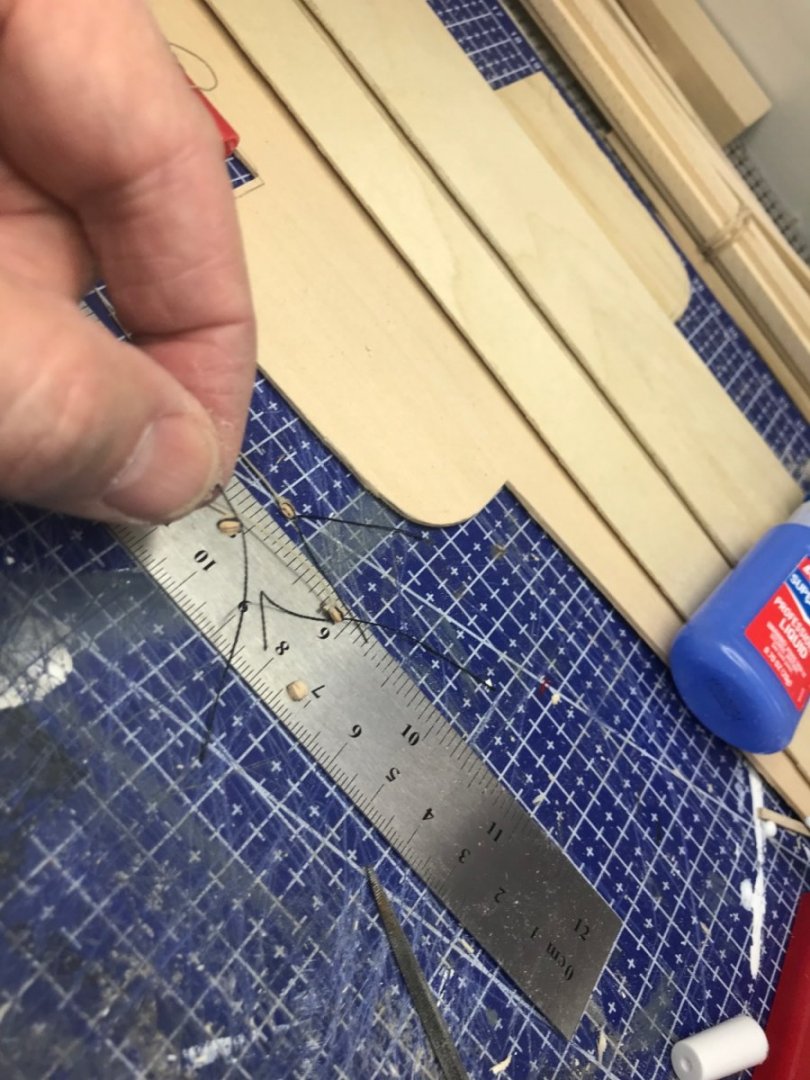
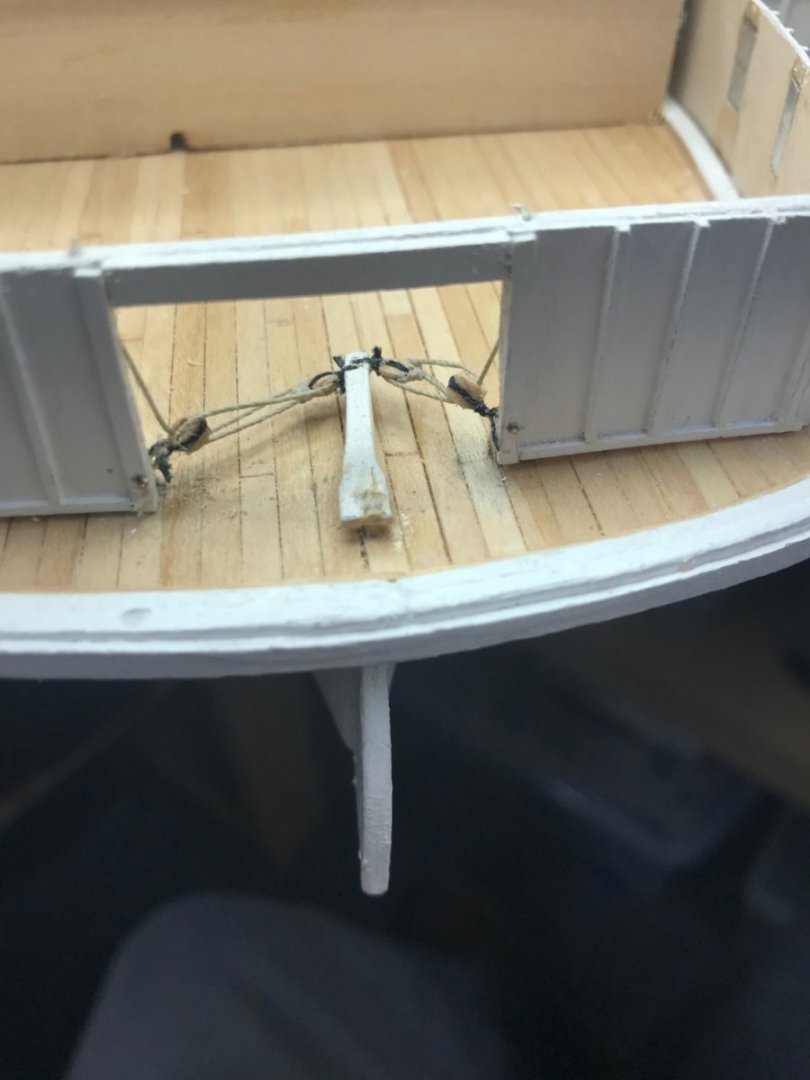
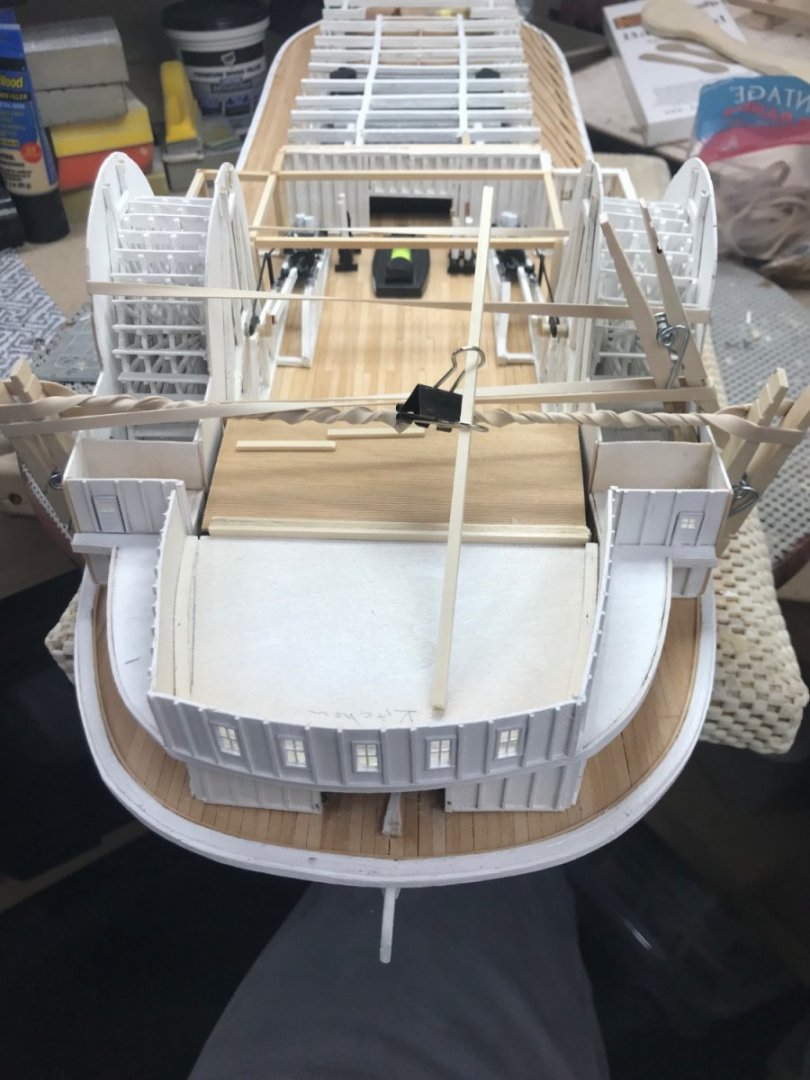
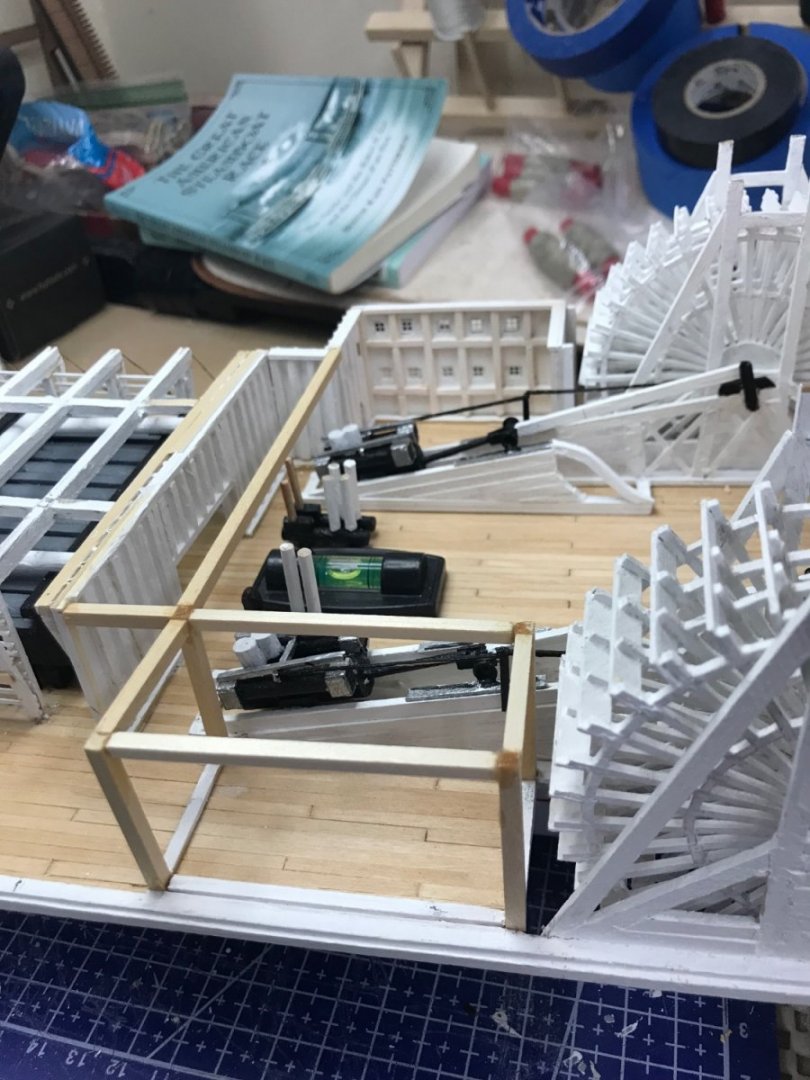
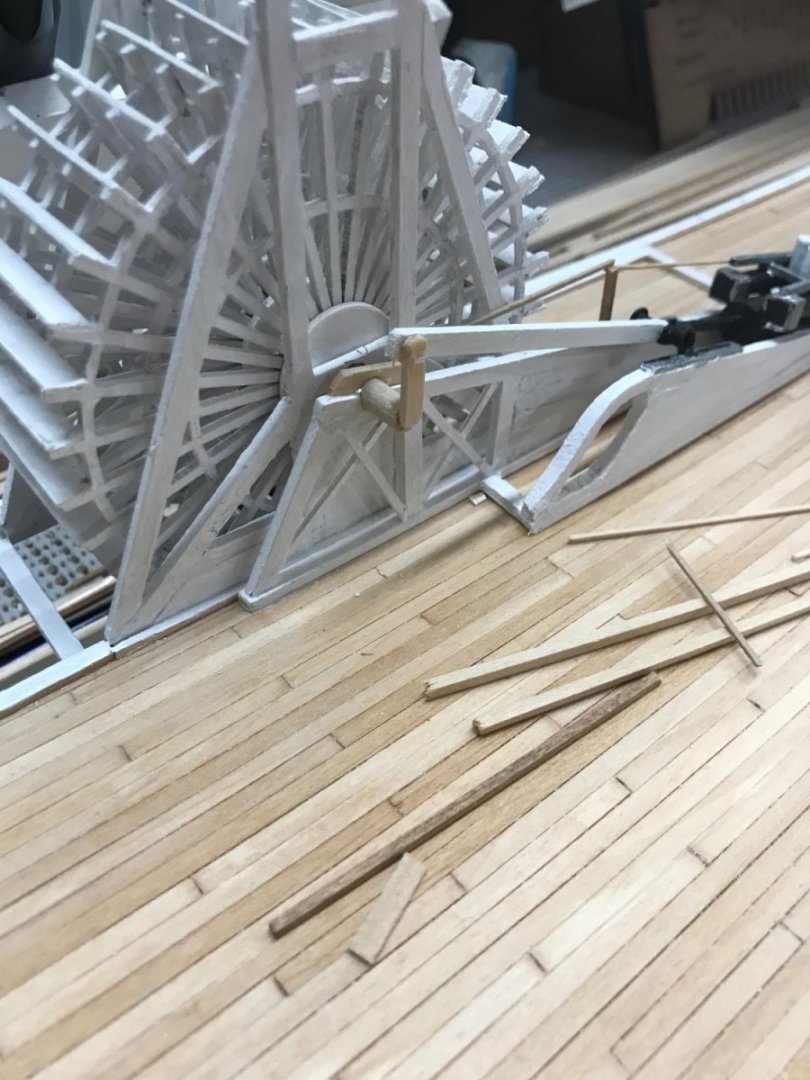
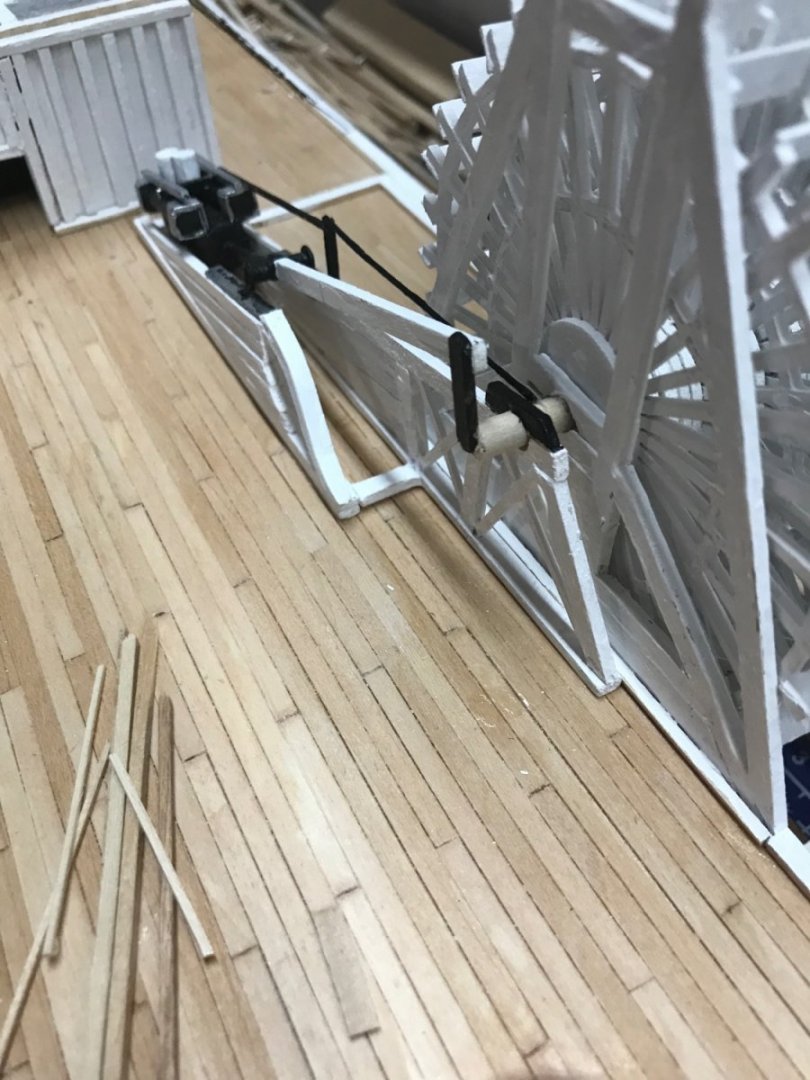
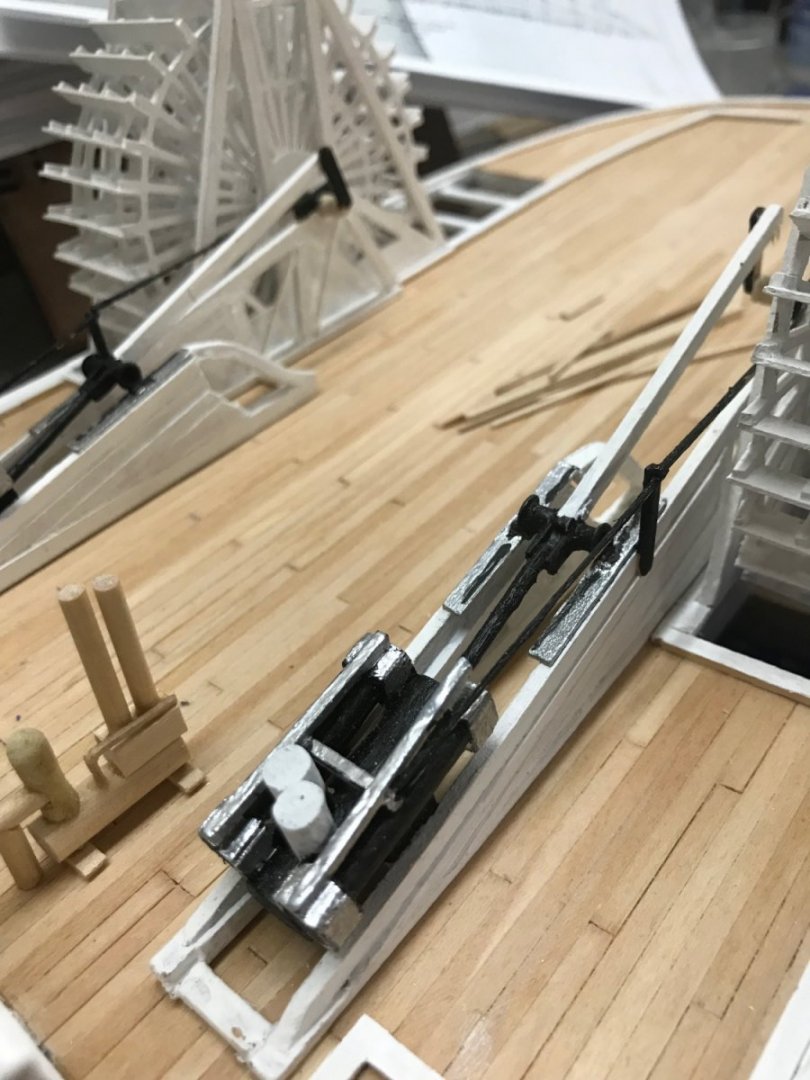
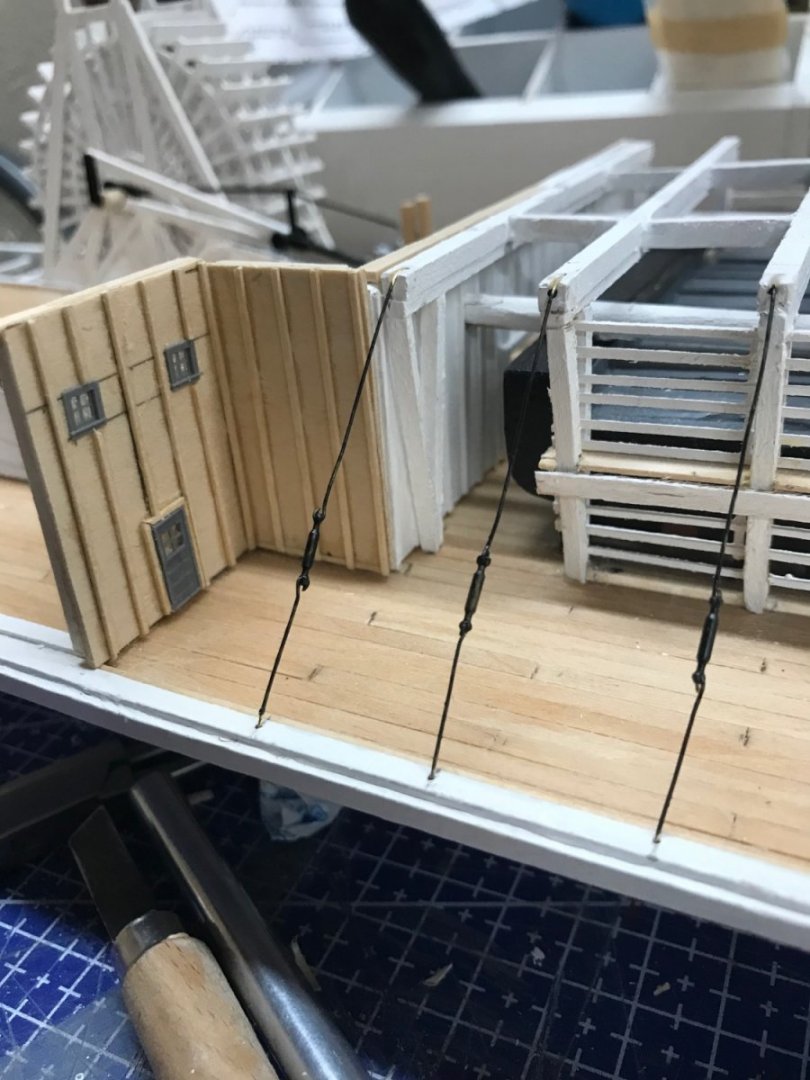
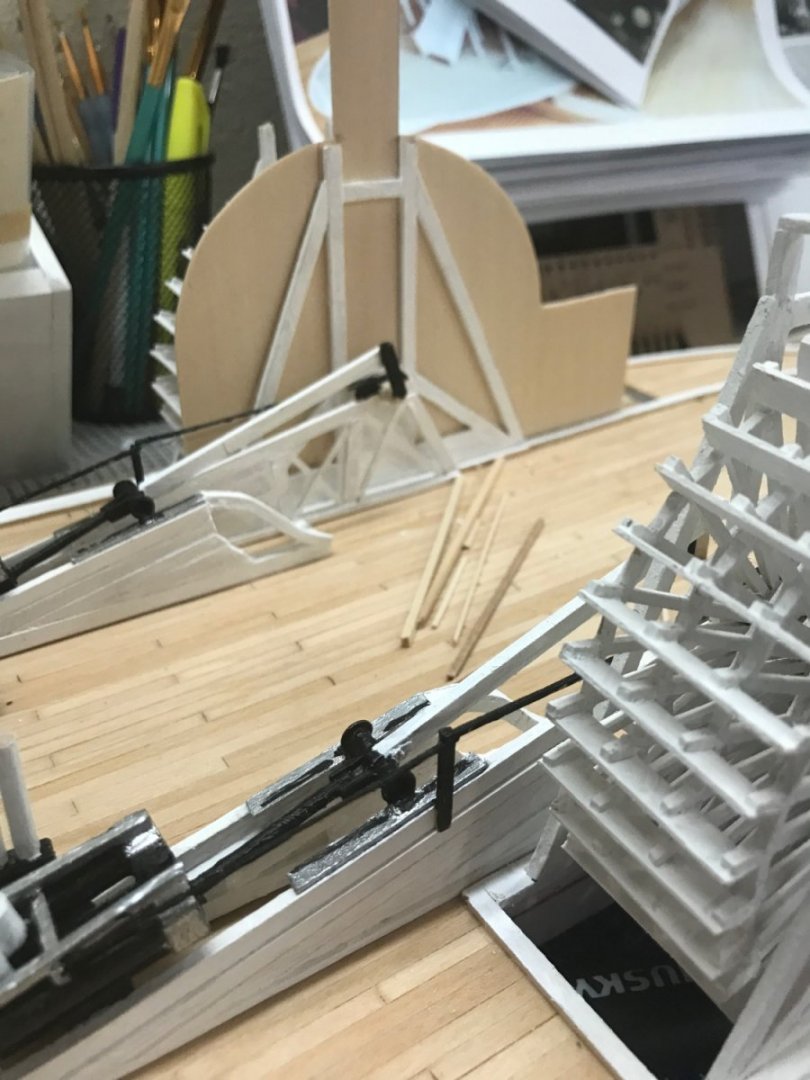
Main Deck Superstructure construction continues… Tiller rigging blocks are being installed prior to the kitchen deck placement. Stopping the blocks with black thread. Tiller rigged… Placement of wheel housings. Kitchen deck placed… Creative clamping to pull things together. 😆 Planking the kitchen deck. Note the wheel housing in the background. A bit of a lean on. 🤨 Removed the wheel housing side cover to affect repairs. Had a warped beam under the paddle wheel framing. soaked the exposed beam with ammonia and water. More creative clamping. 😬 Paddle Wheel now appears to be upright. We will let that dry overnight and see how it recovers. 🤪 More tomorrow… 🍻


- 238 replies
-
- 8
-
-
- Robert E Lee
- steamboat
- (and 3 more)
-
Actually, I feel more like a builder trying to understand the architect. Like you said, “pretending to be an architect.” 😆
- 238 replies
-
- 2
-
-
- Robert E Lee
- steamboat
- (and 3 more)
-
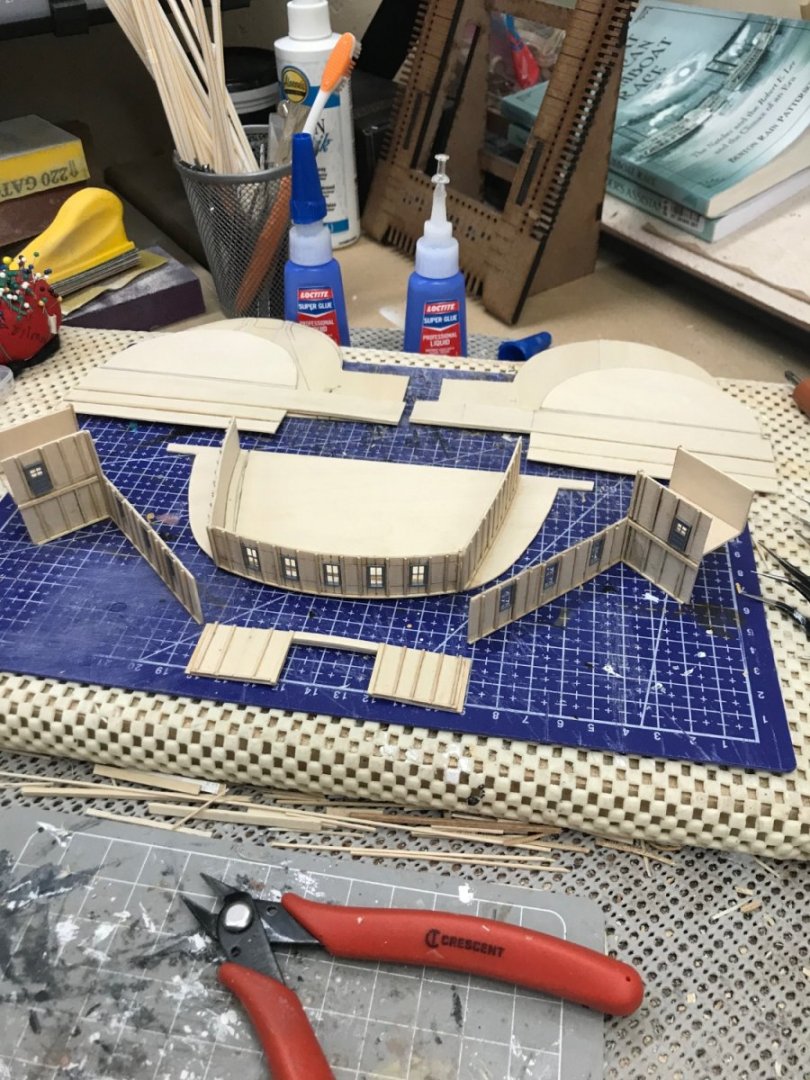
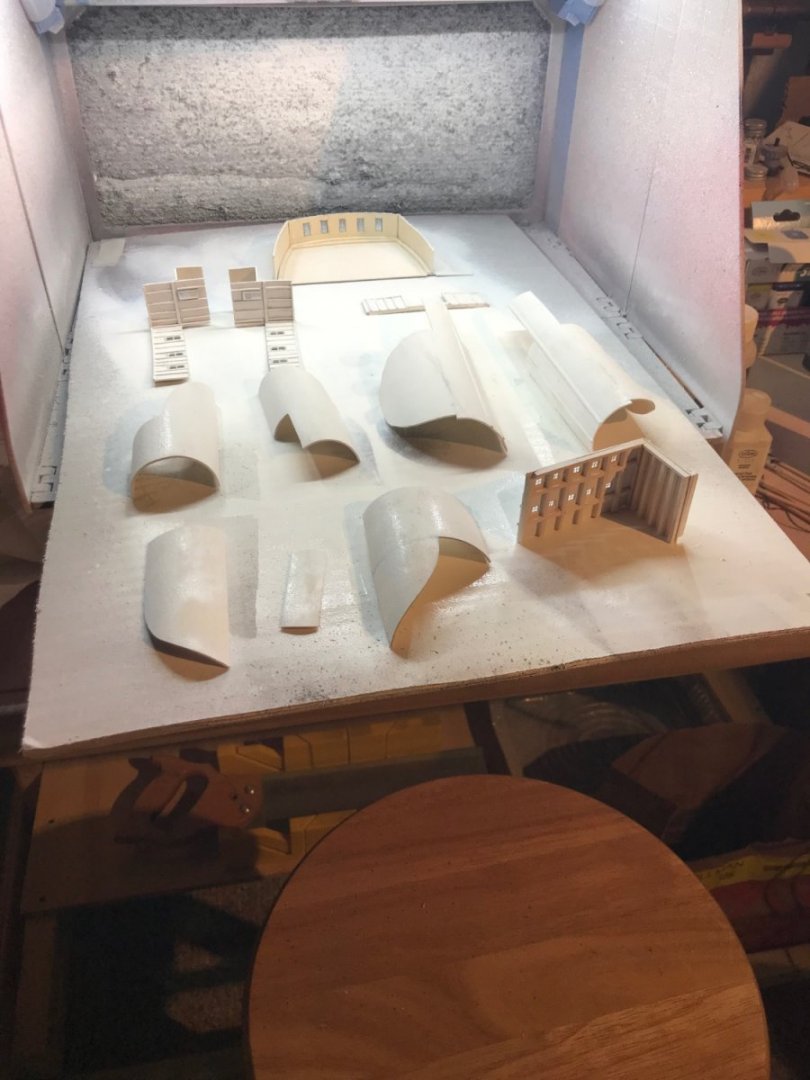
Main Deck Superstructure… Ready for the paint booth. Basswood has a tendency to curl when painted with Acrylics. Painted and ready to be reassembled. Started framing up the engine room. more later… 🍻
- 238 replies
-
- 7
-
-
- Robert E Lee
- steamboat
- (and 3 more)
-
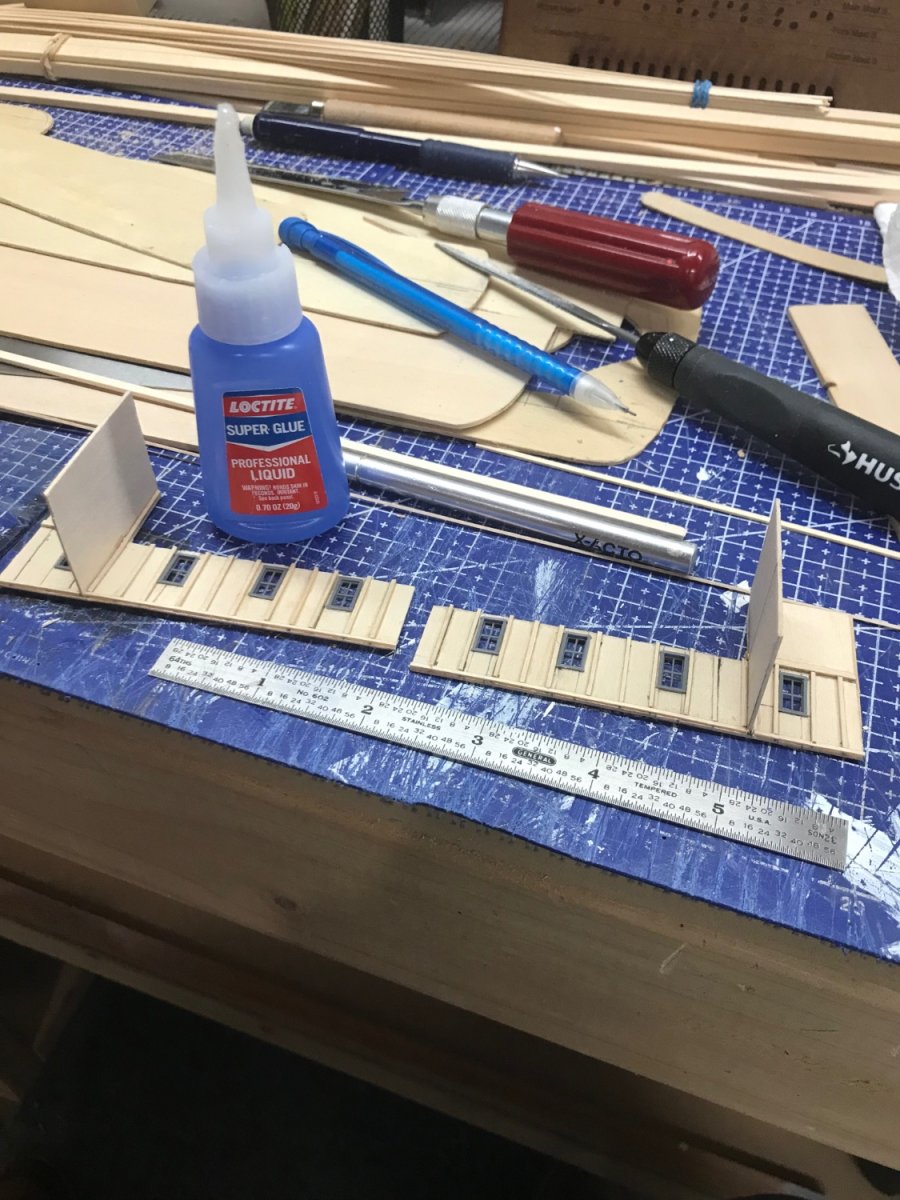
Superstructure continued… More windows and more battens… Once I have this lower structure assembled, I will be disassembling it for painting. Airbrush will give it the best look. 😎 Onwards… 🍻

- 238 replies
-
- 5
-
-
- Robert E Lee
- steamboat
- (and 3 more)
-
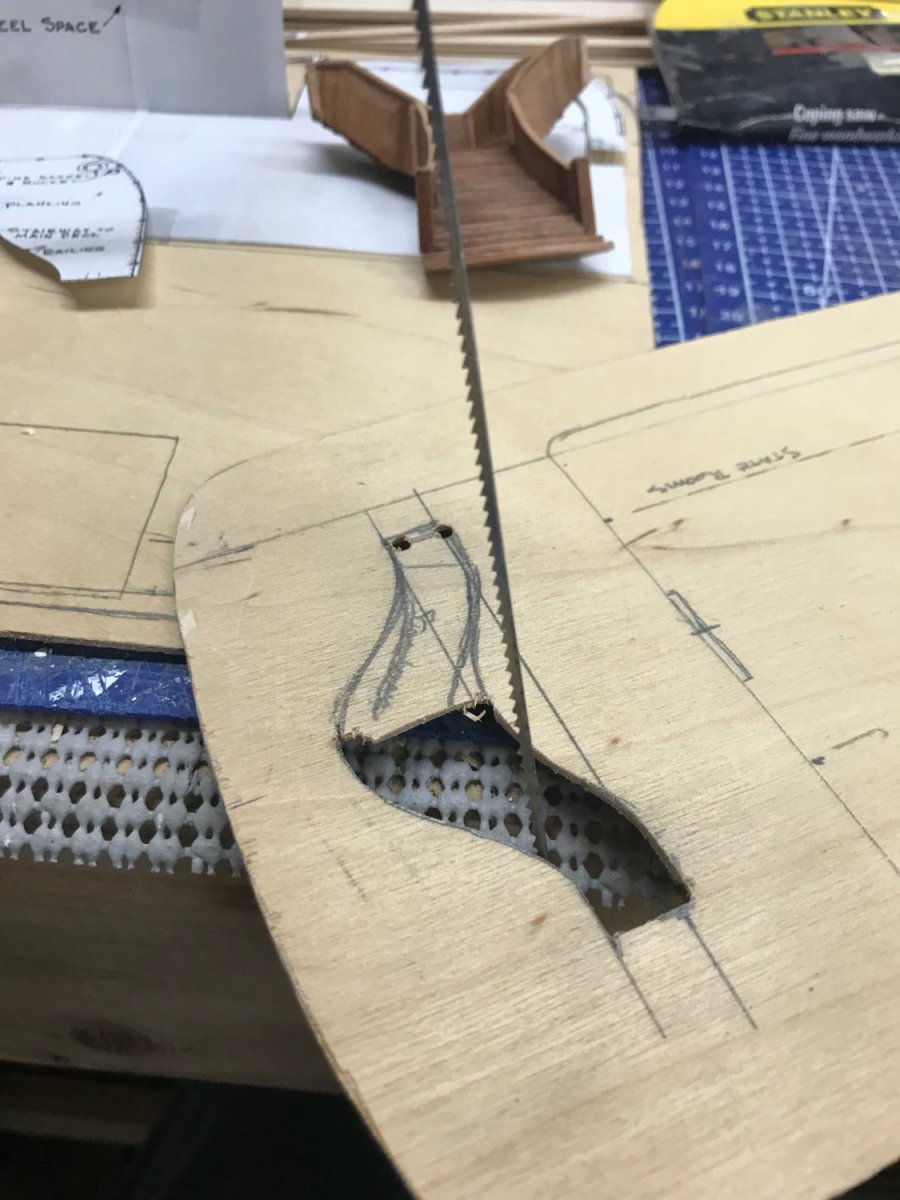
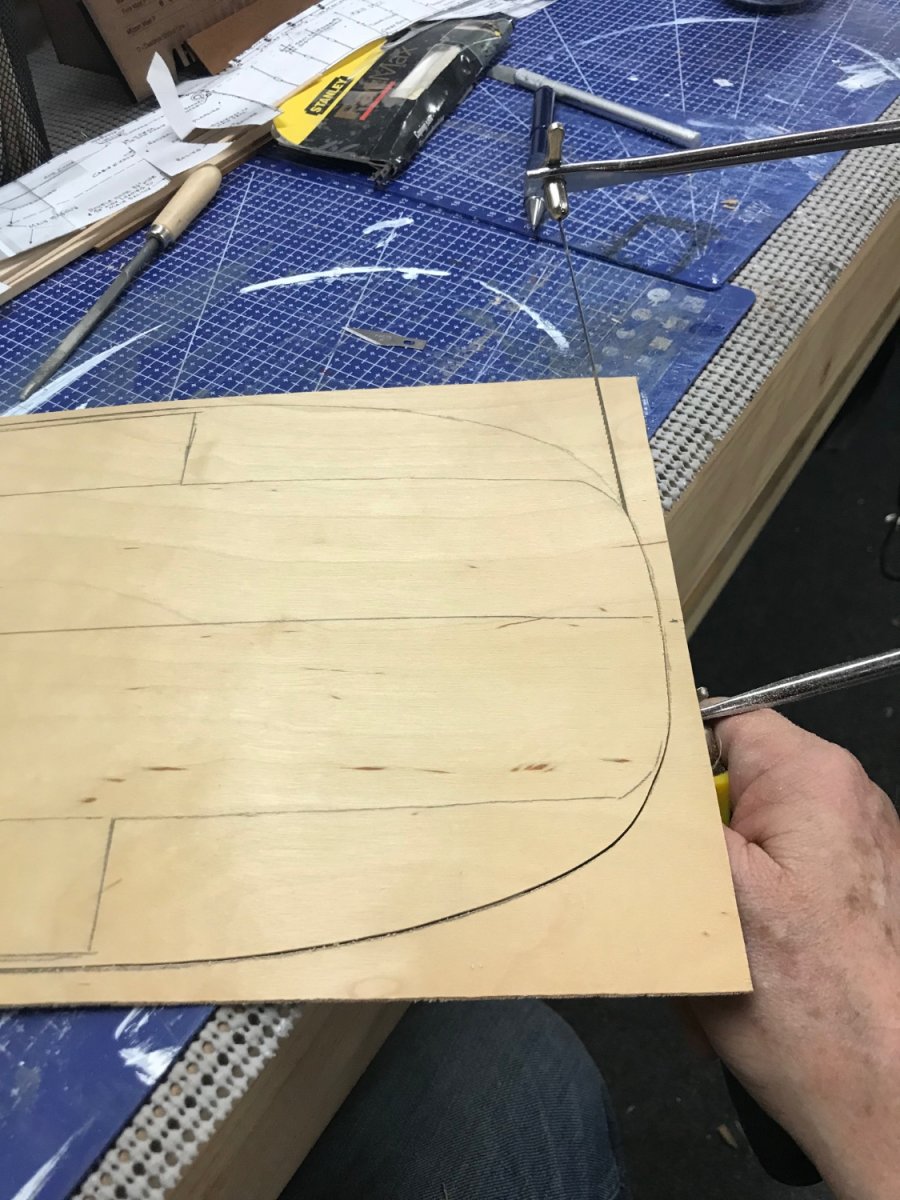
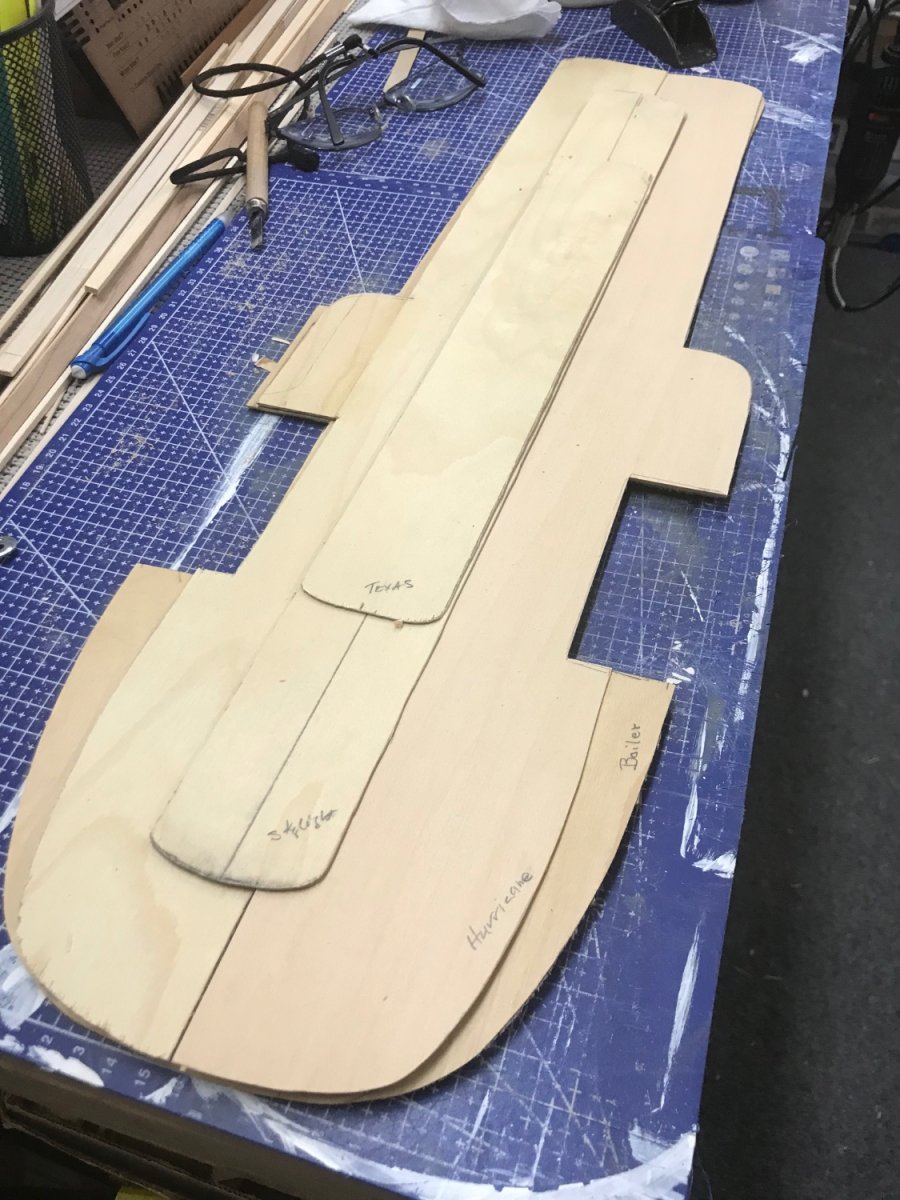
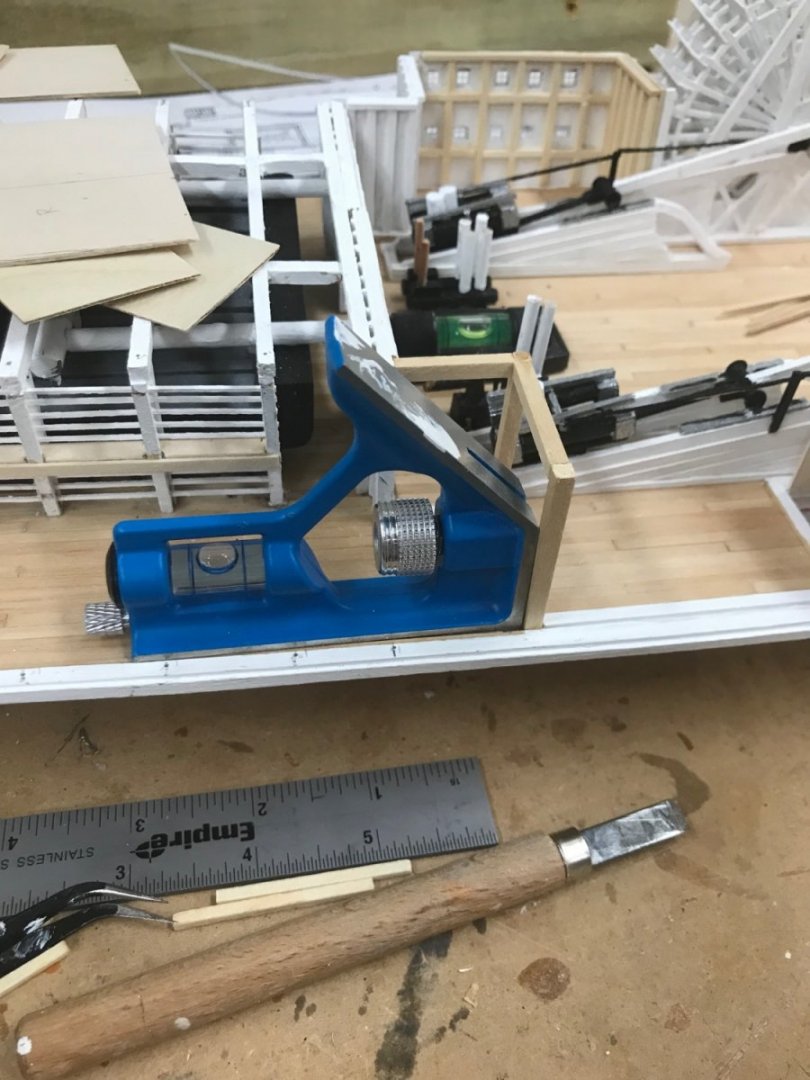
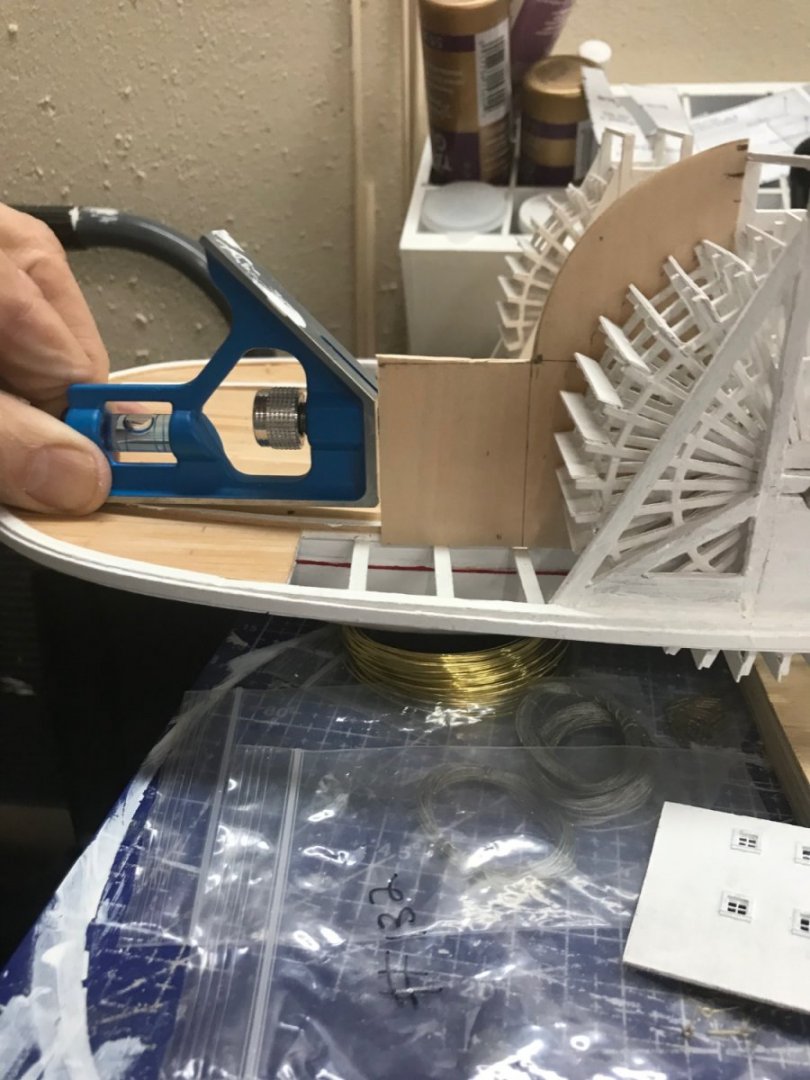
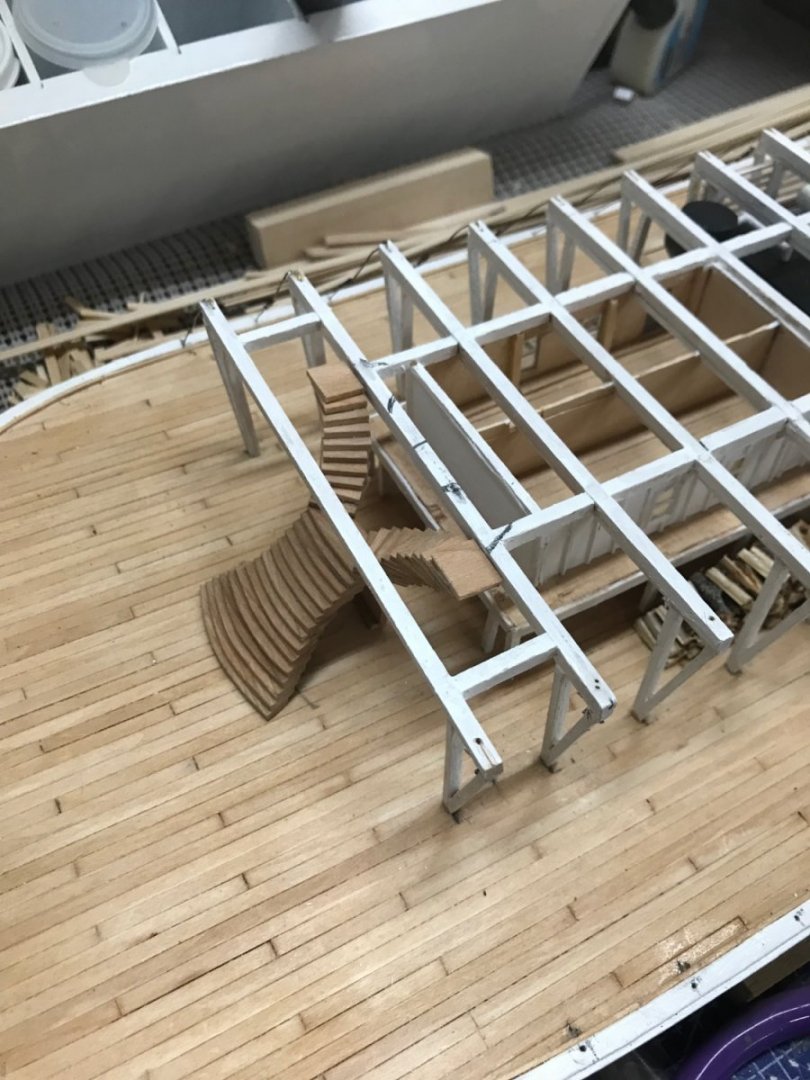
Progress on the superstructure… Cutting out Boiler deck for staircase. Boiler sub deck cut… Cutting out kitchen deck. Remaining decks cut out. Massive four story structure. It feels like I am in architecture class. 😆 Board and Batten is going to drive me batty. 😆 That and windows, four more floors to go. 🍻 Framing on the port side will be left open for the sneak peak at the engine room and paddle wheel. 😎 Bubble Bubbles it’s all got to be plumb. Looking forward to more opportunities to improve my craft. 😆 Superstructure to be continued. 🍻


- 238 replies
-
- 9
-
-
- Robert E Lee
- steamboat
- (and 3 more)
-
Yes… Lots of fun to be had for sure. A million opportunities to increase my scratch building skills. 😆 This kit essentially consists of the drawings and a giant wood package. Thanks for the comments. 👍
- 238 replies
-
- 4
-
-
- Robert E Lee
- steamboat
- (and 3 more)
-
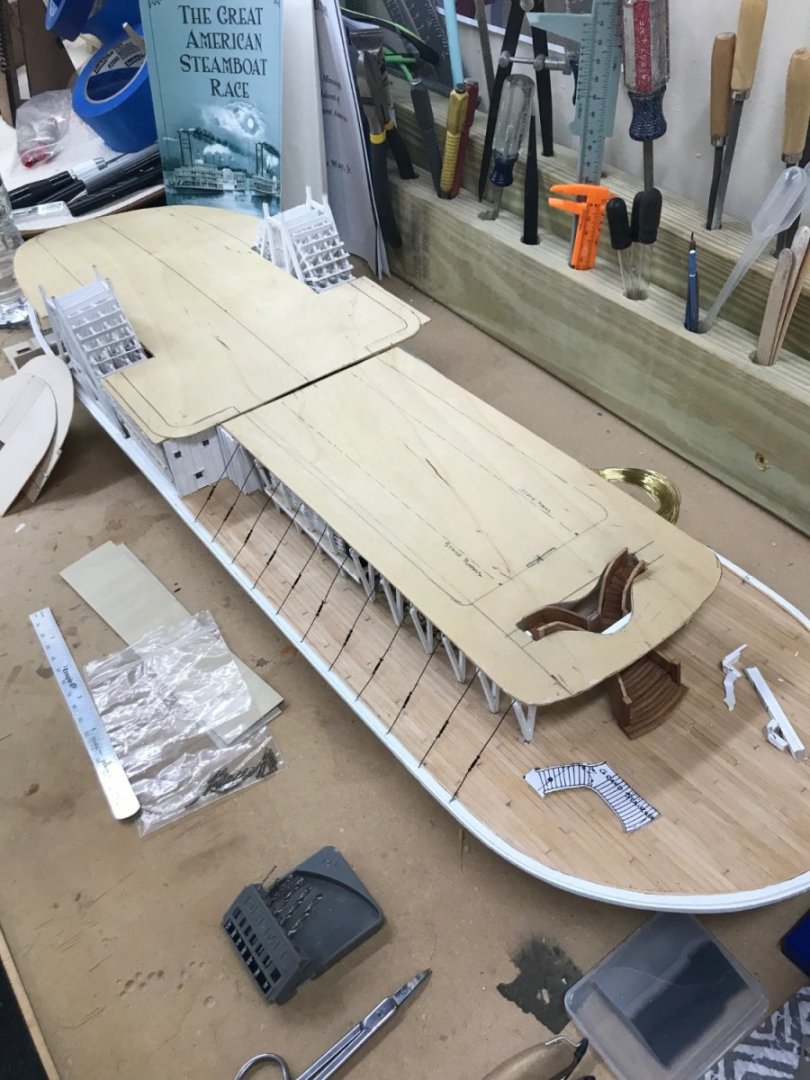
Grand Stairway continued… Preparing the staircase for railings. Used 1/32” sheet cherry wood to cut and build railings. 1/8” Mahogany posts and basswood strips as rail caps. Fine sanding prep before staining and poly. Grand Stairway in place… Cheers! 🍻

- 238 replies
-
- 10
-
-
- Robert E Lee
- steamboat
- (and 3 more)
-
Very nice planking… what is the thickness of those Maple planks, I may want to keep these in mind for my stash of projects under the bench. I have a Sergal Peregrine Galley I picked up on eBay that is missing all of its 1mm x 6mm Walnut planking. Would Maple be a better choice for the top planking over Walnut? Great job 👏
-
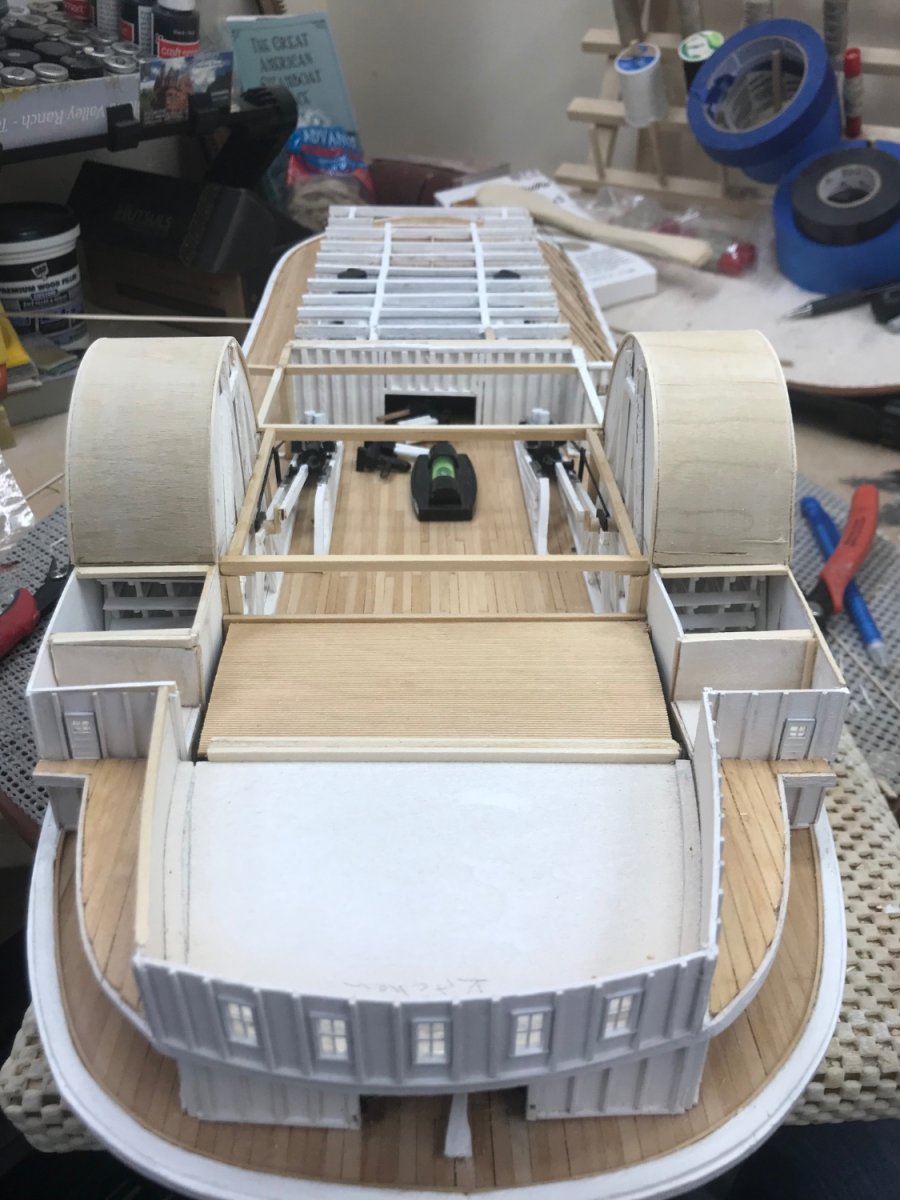
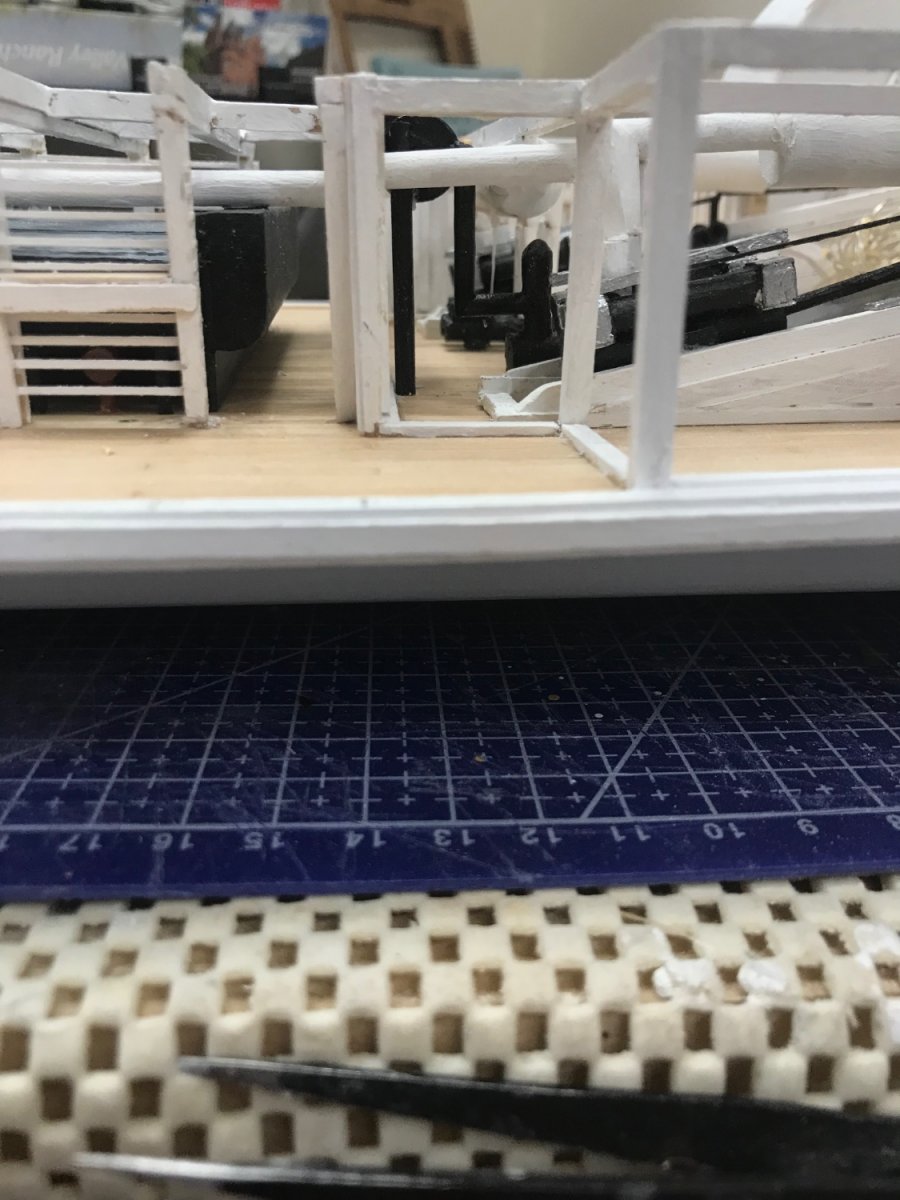
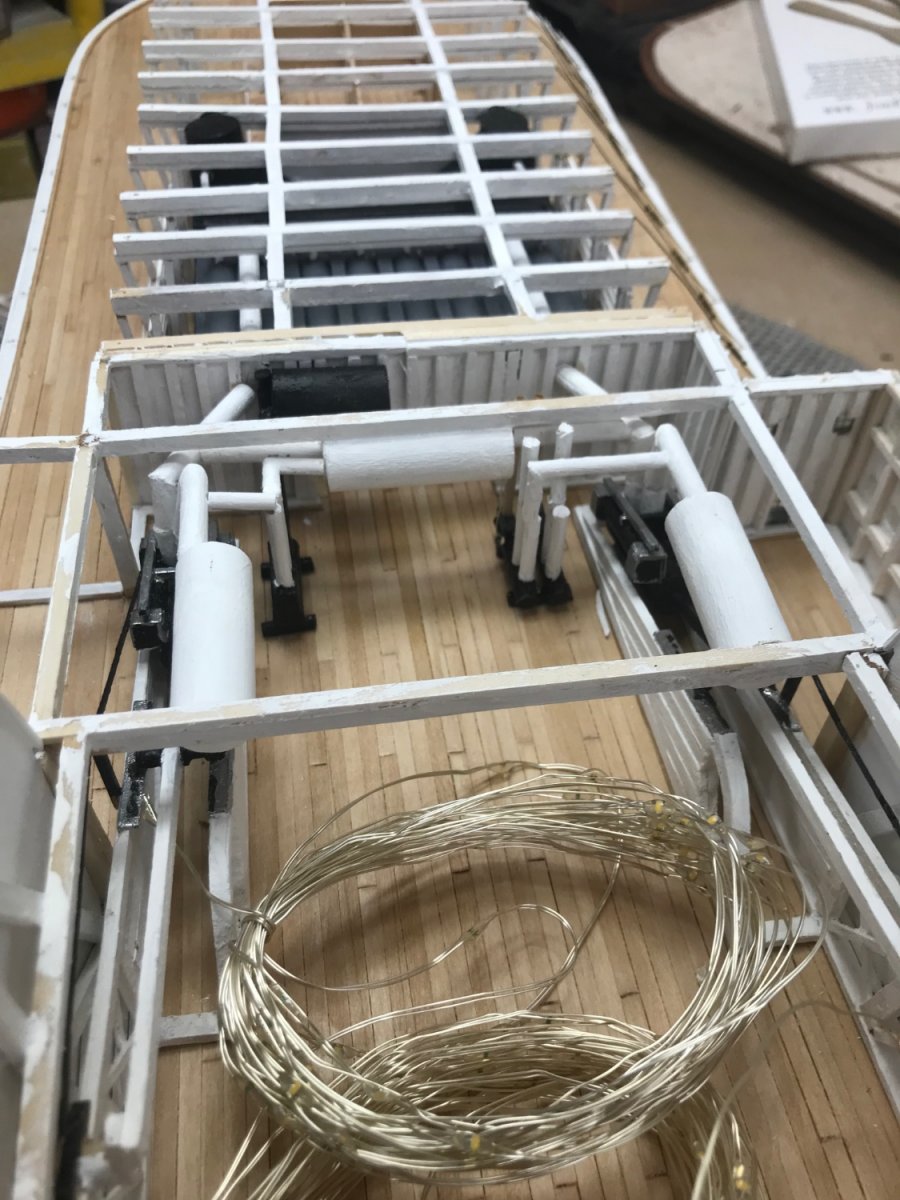
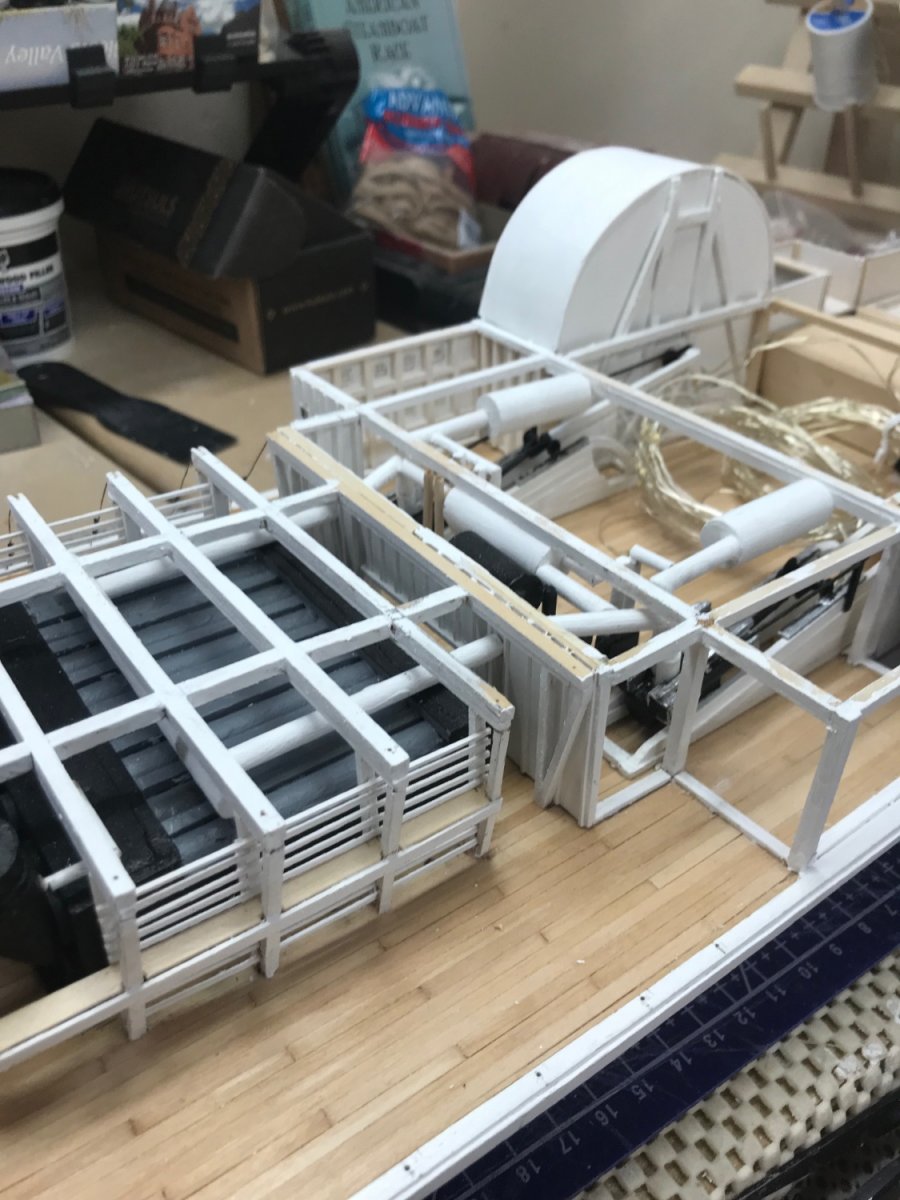
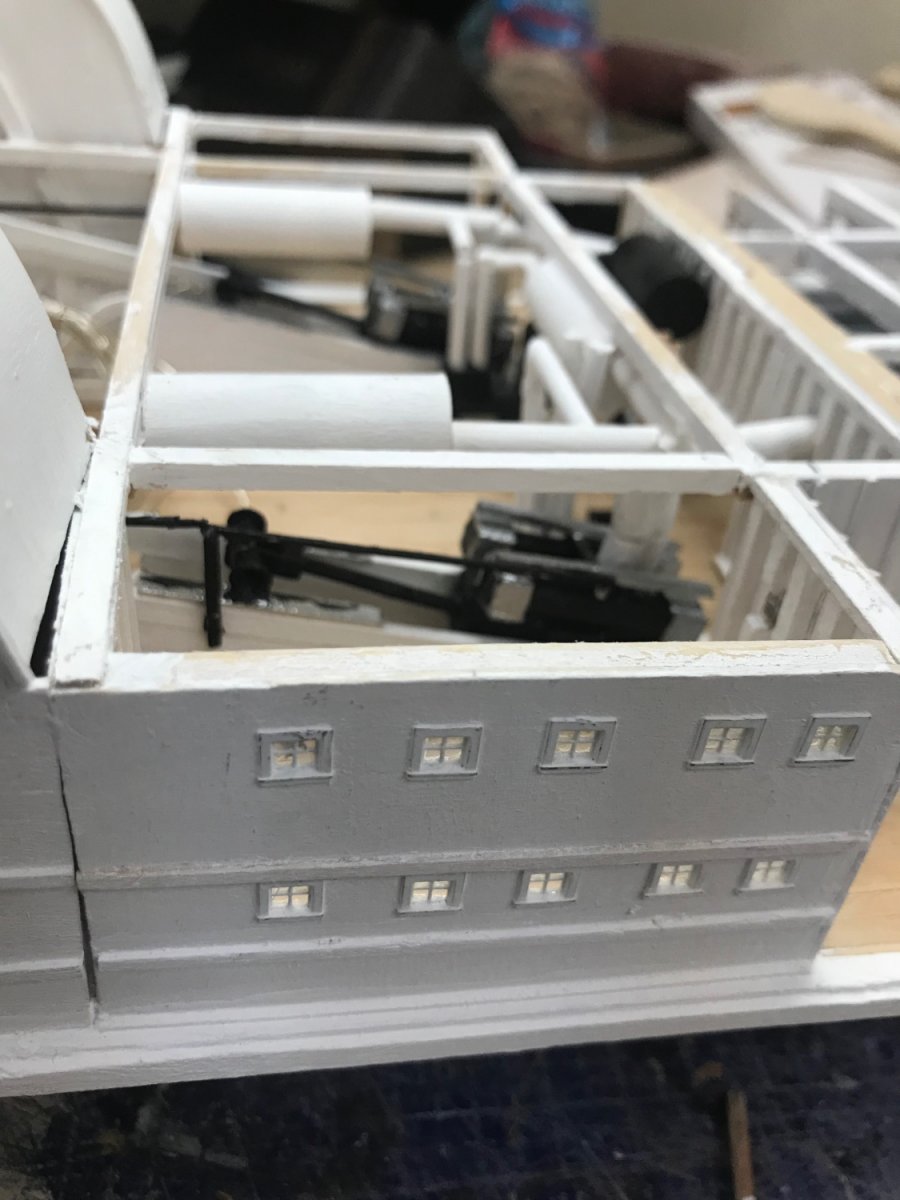
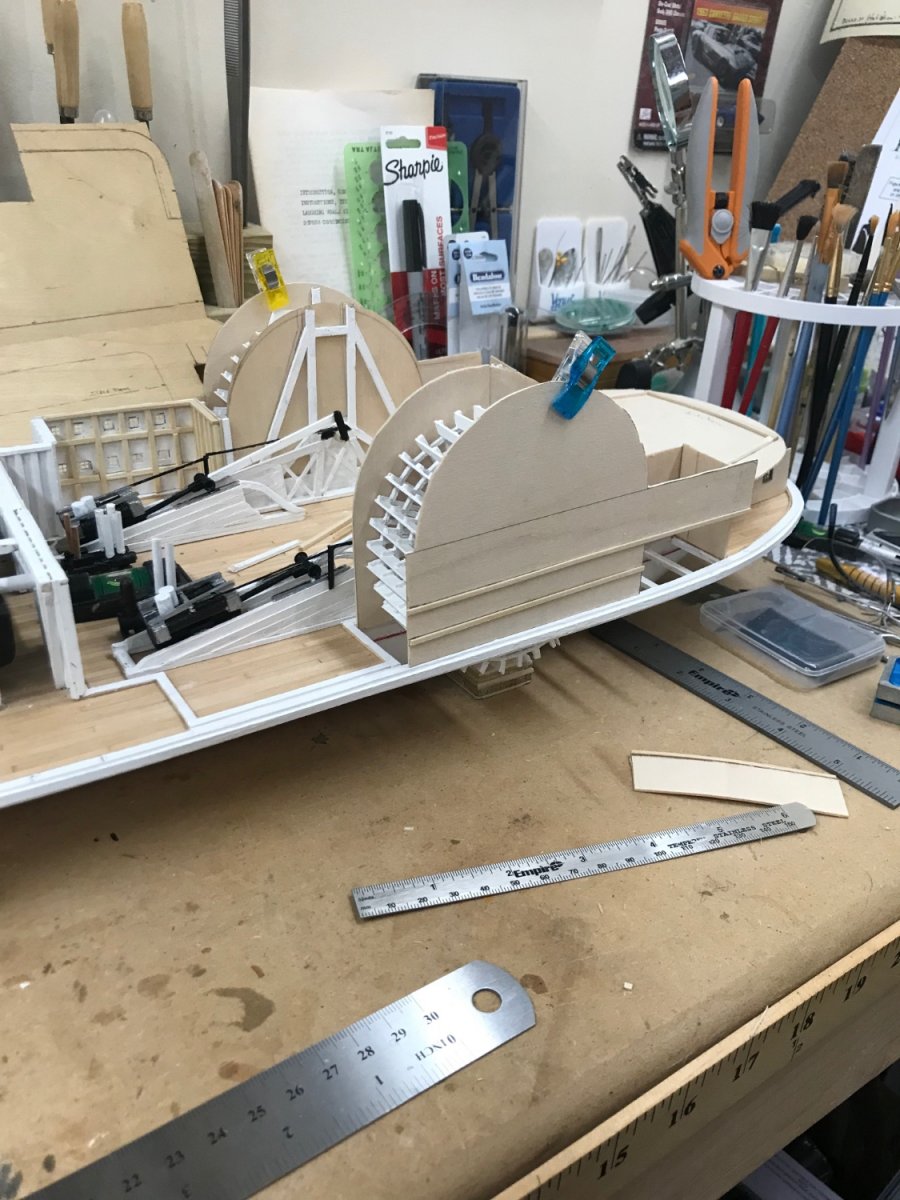
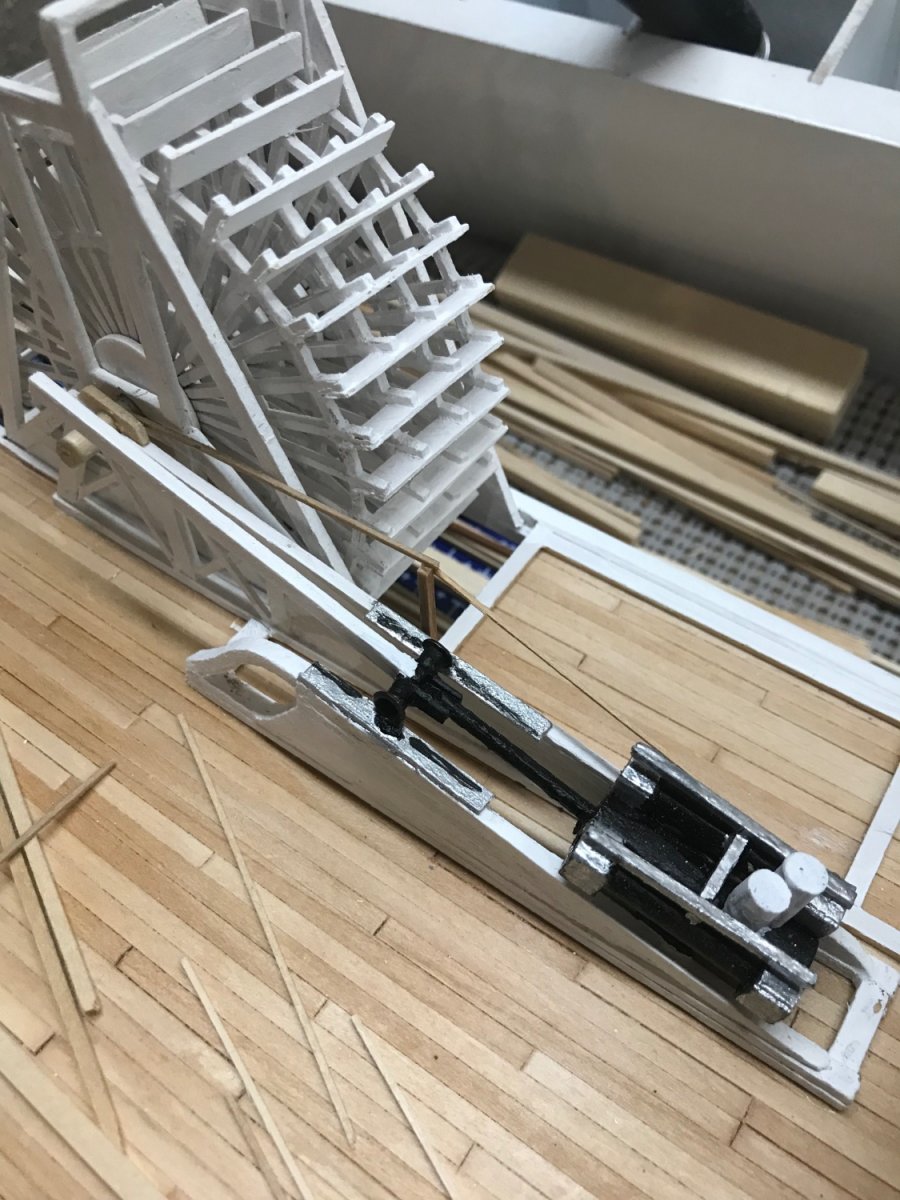
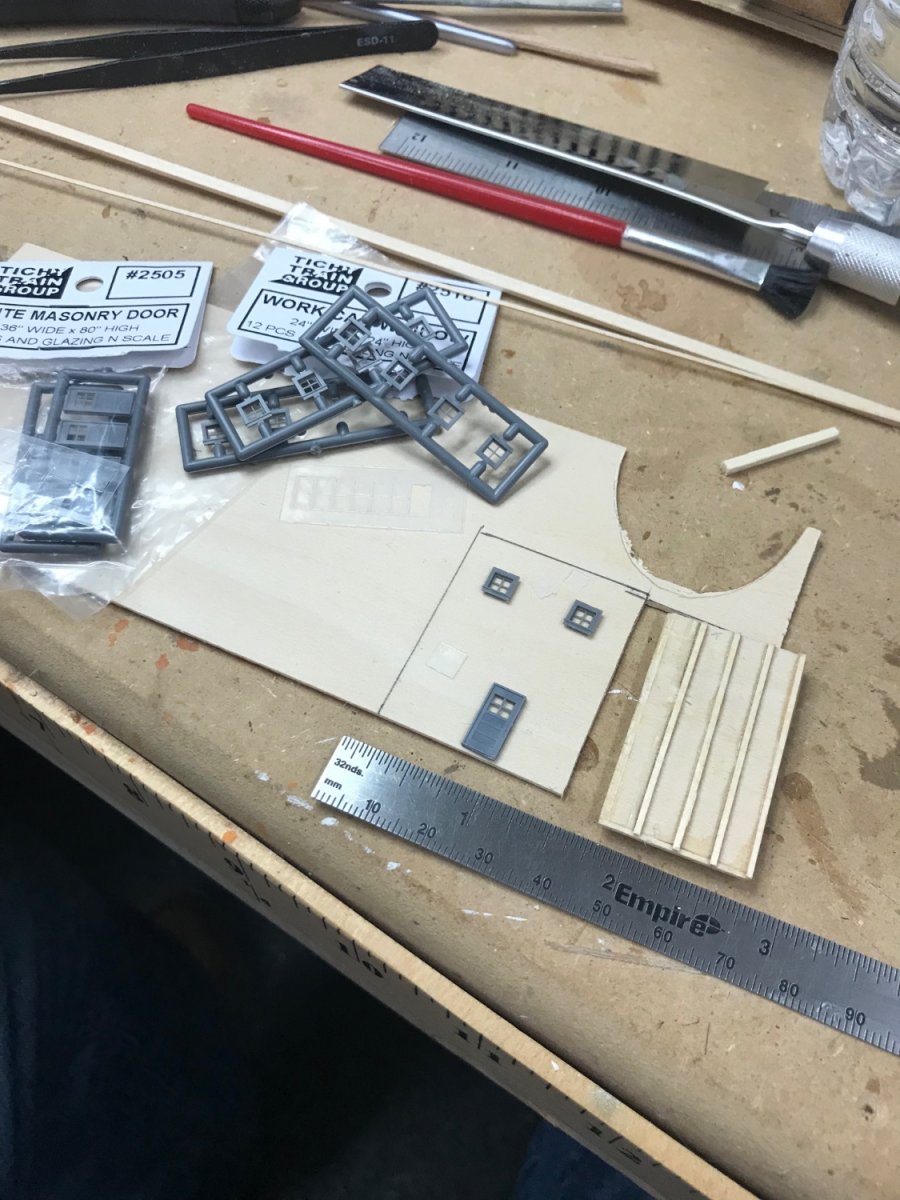
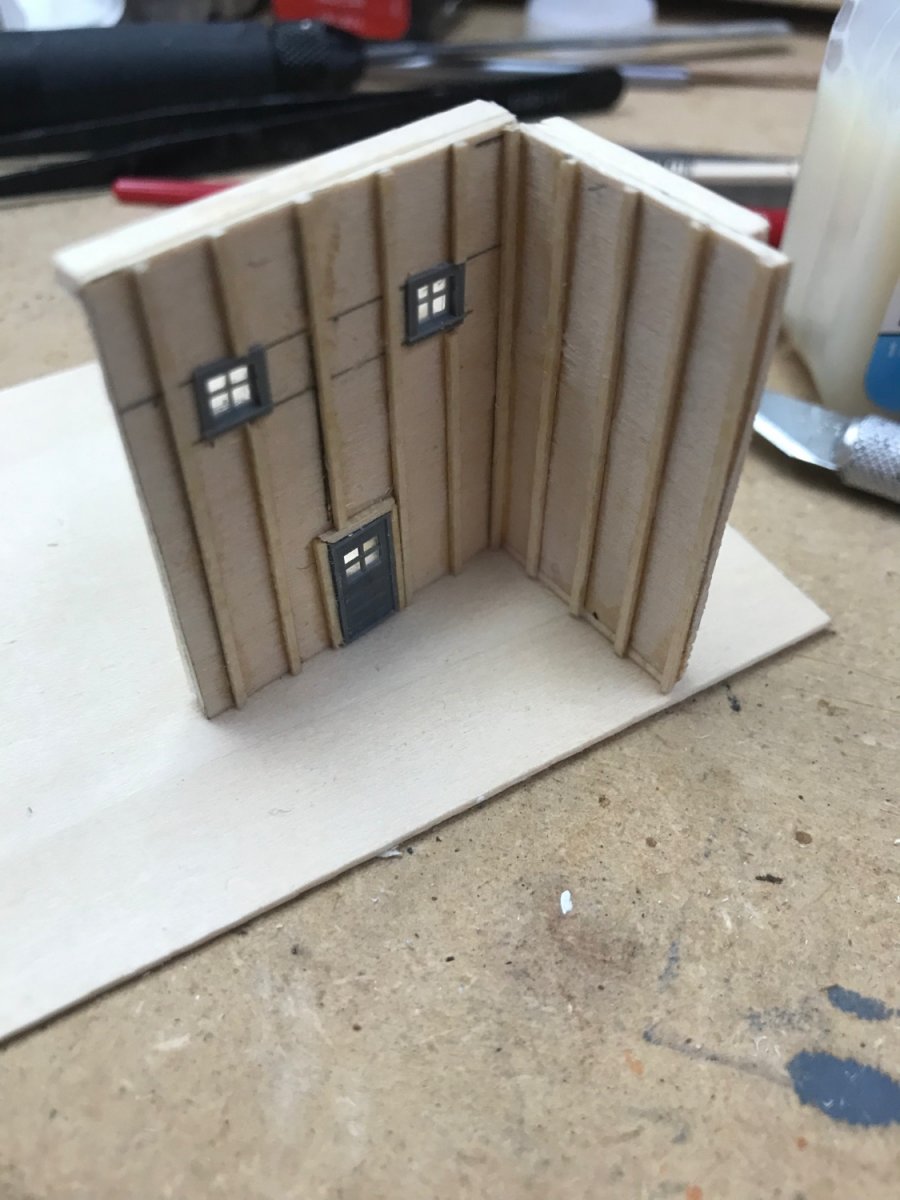
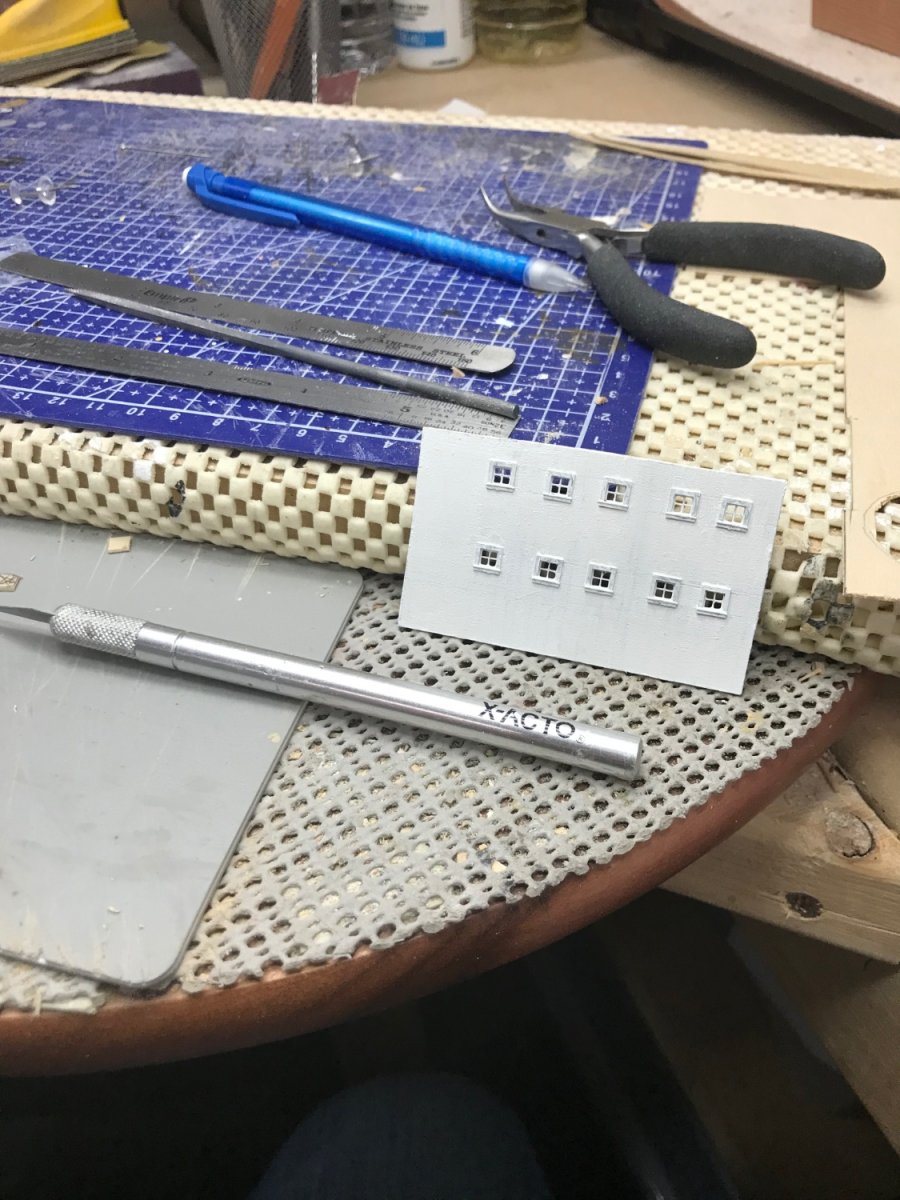
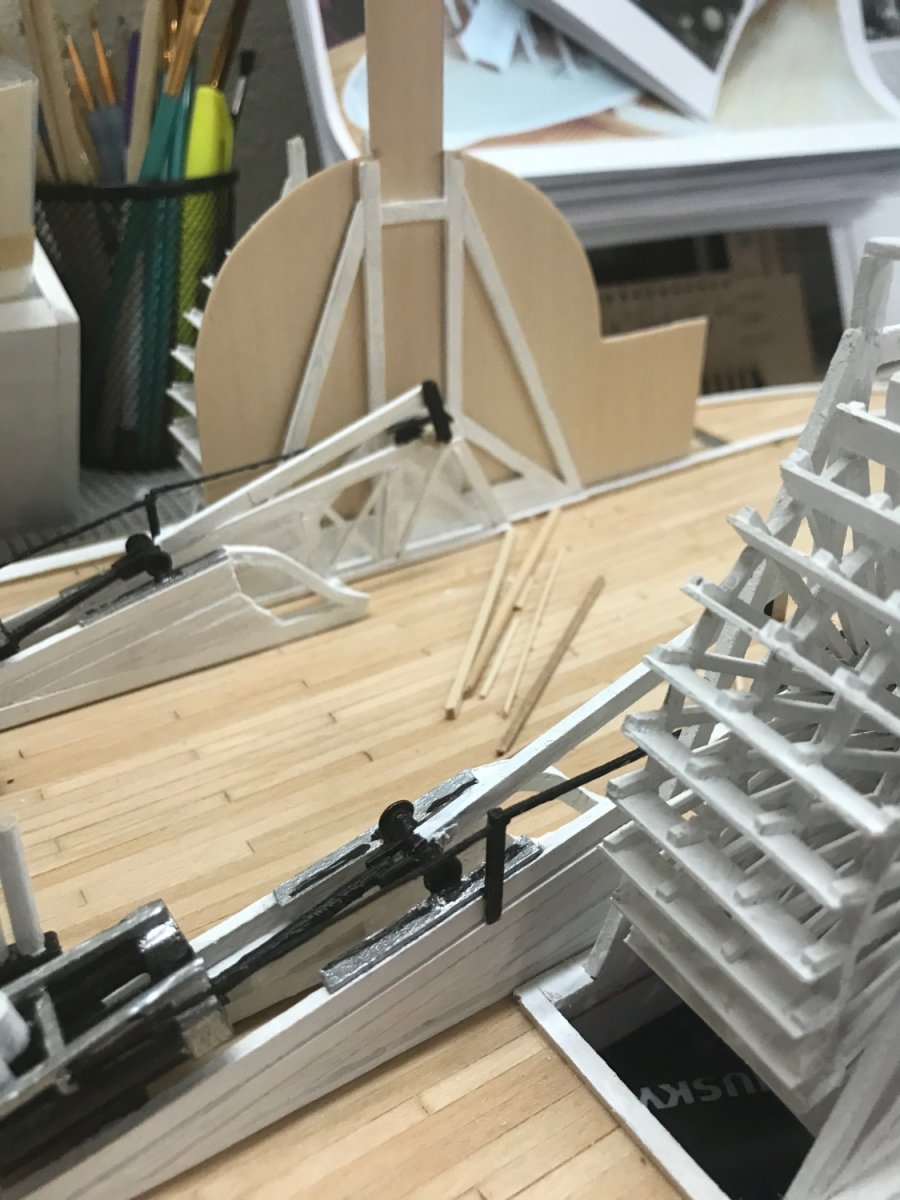
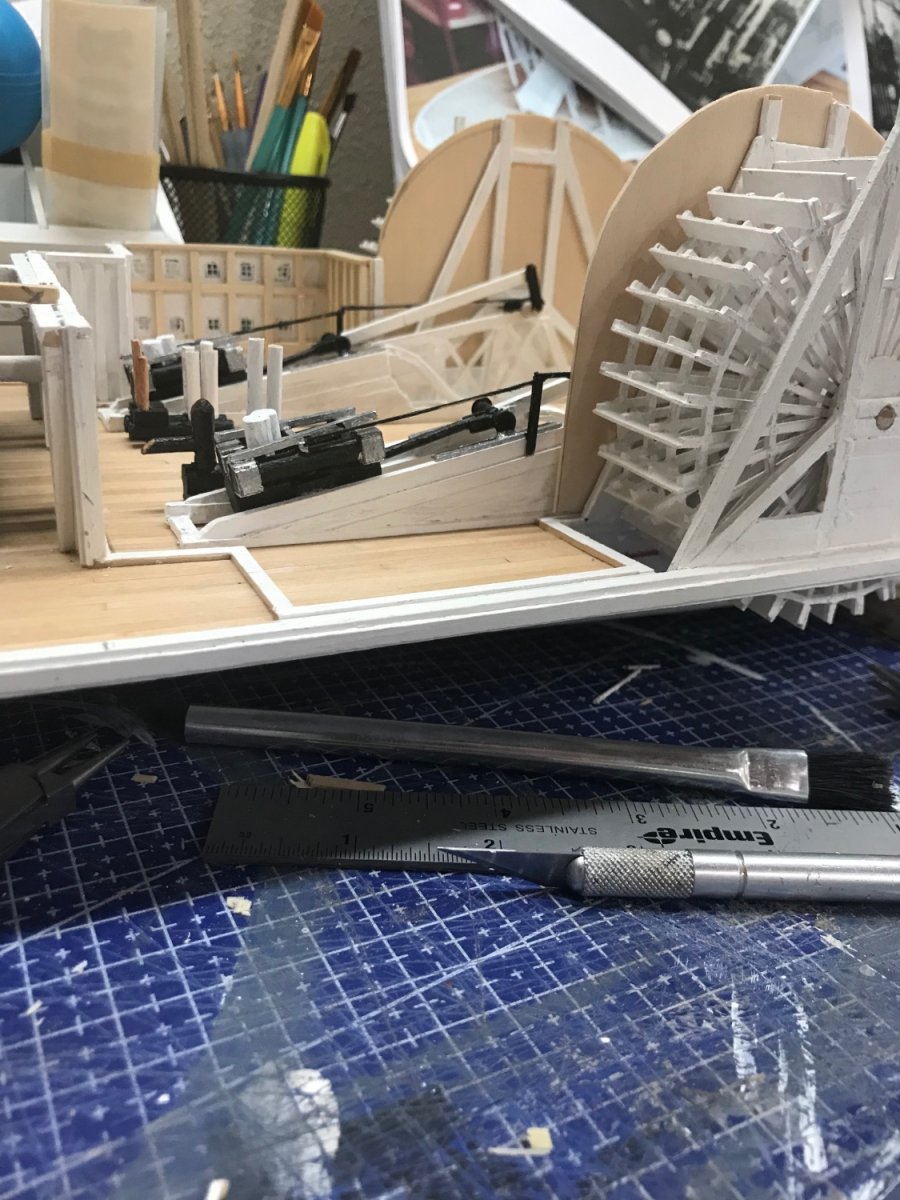
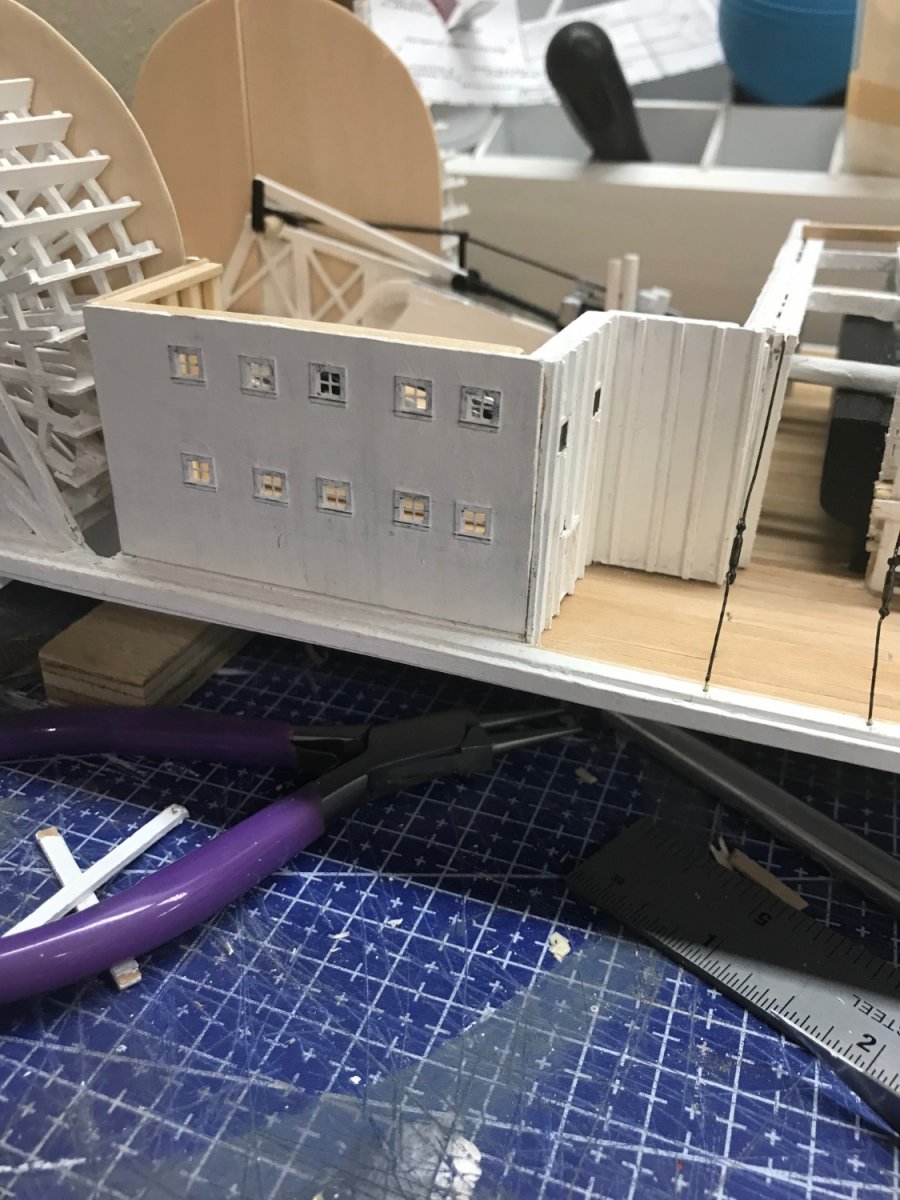
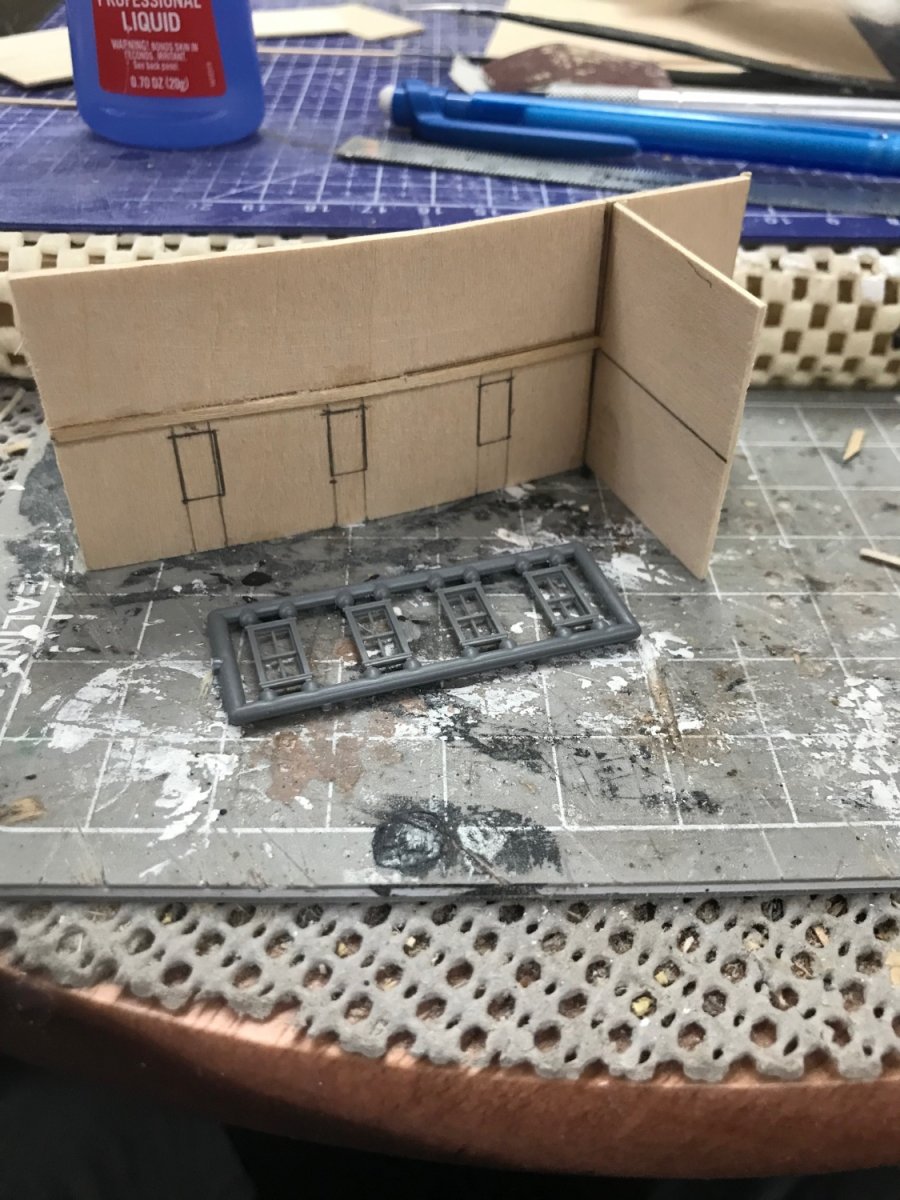
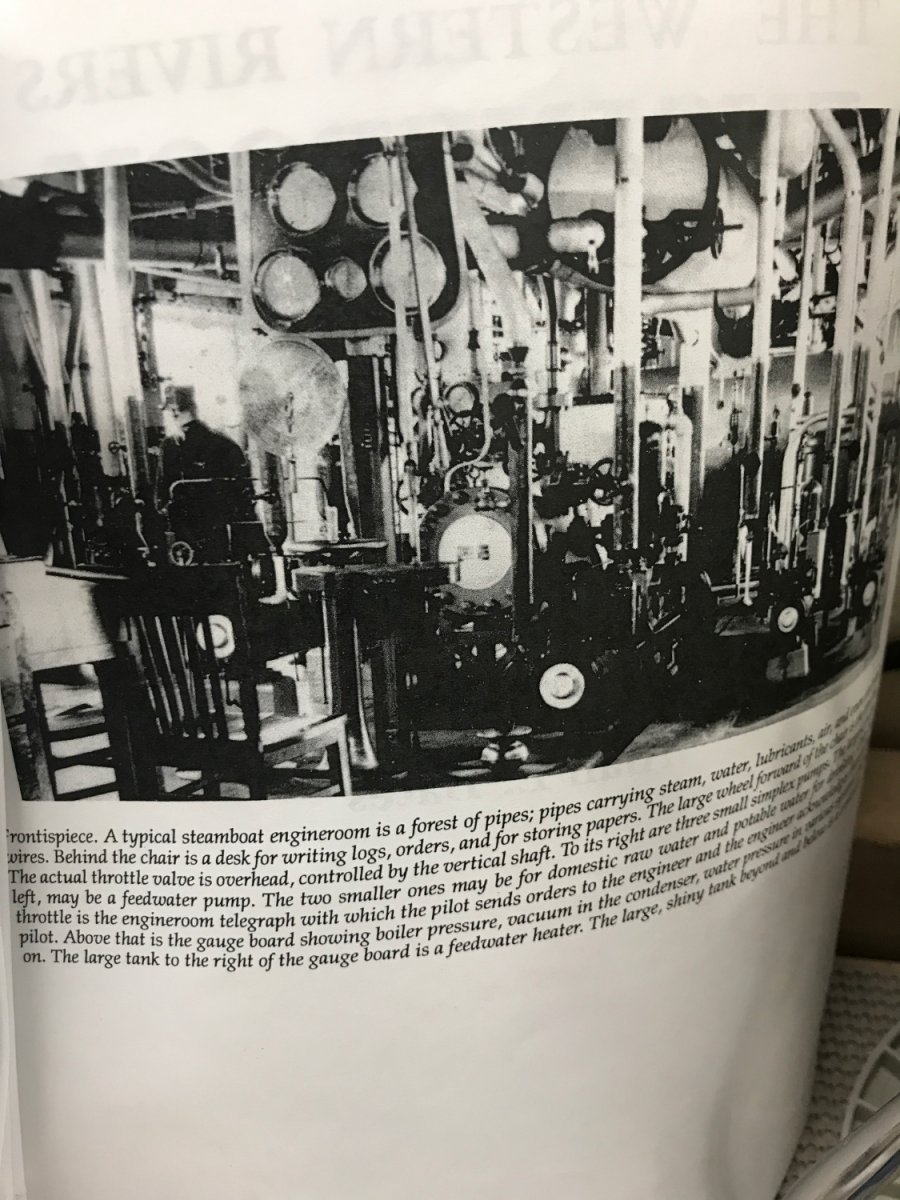
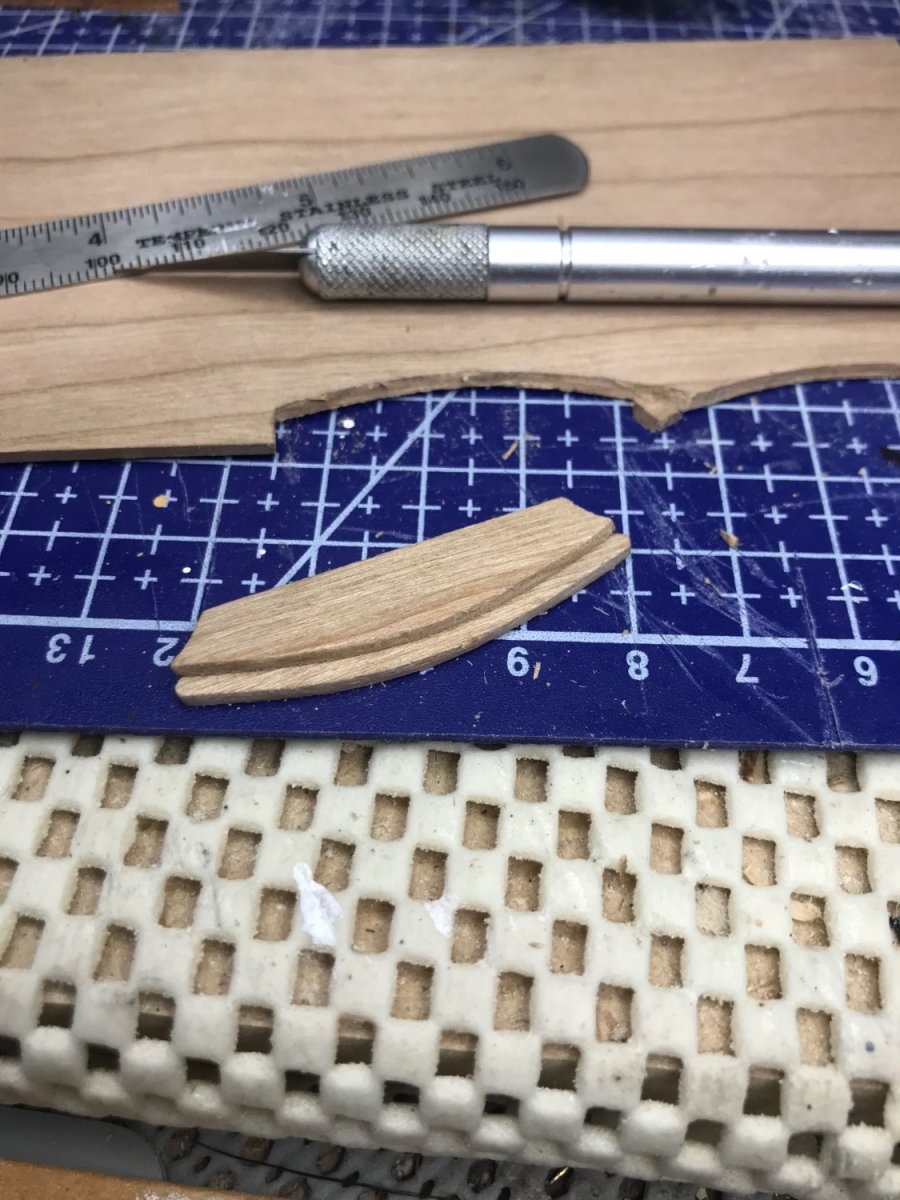
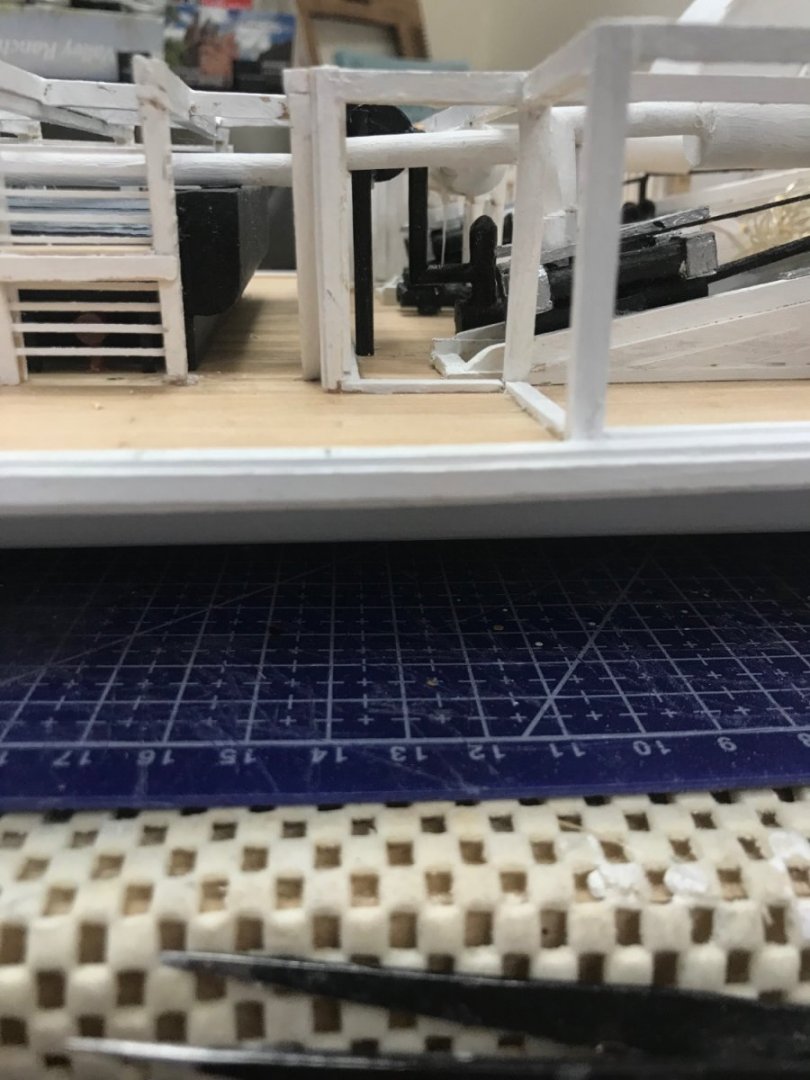
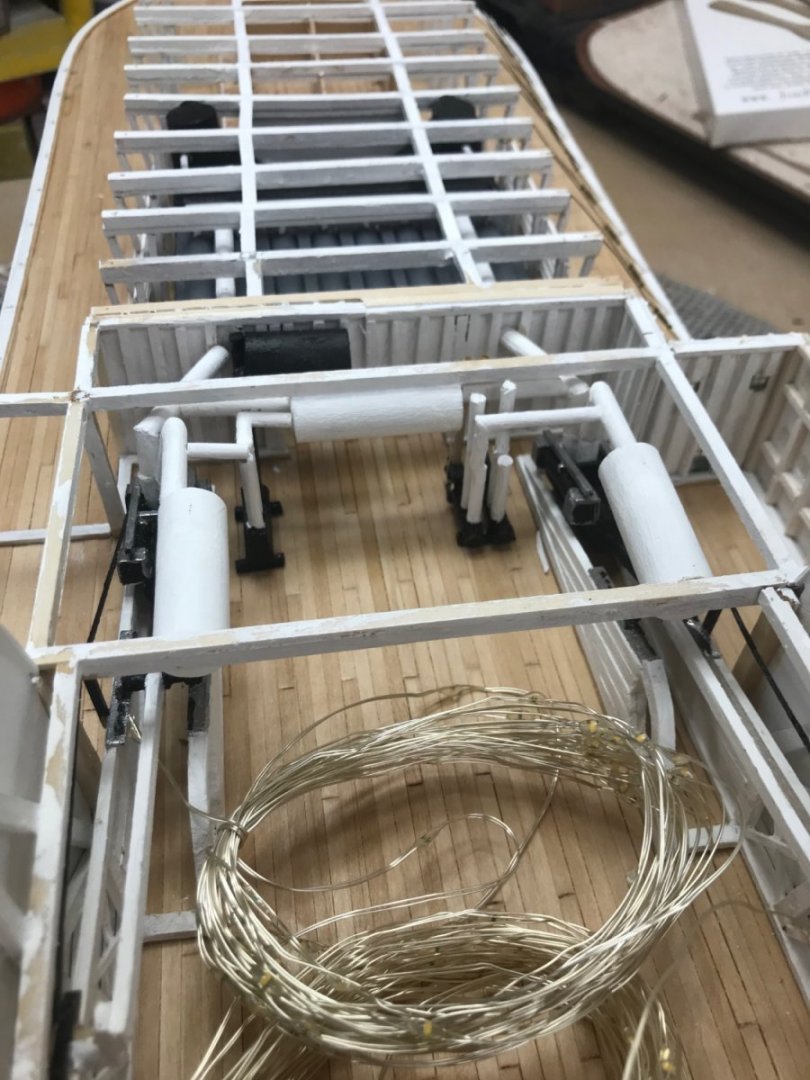
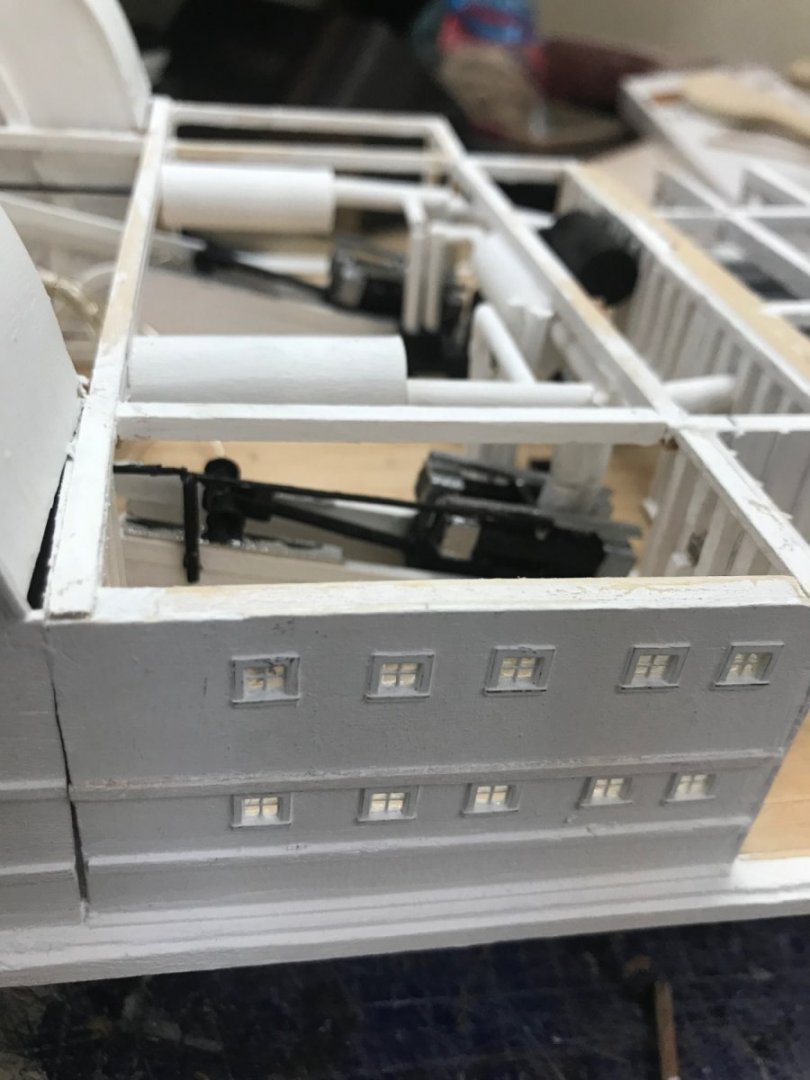
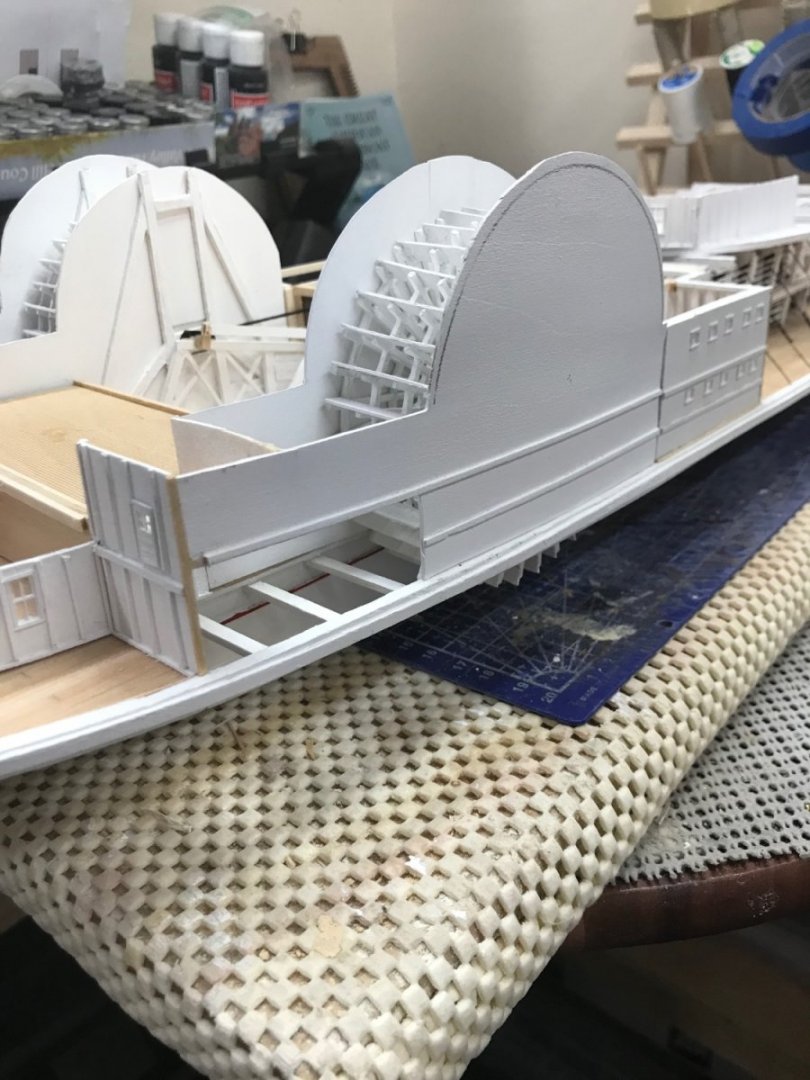
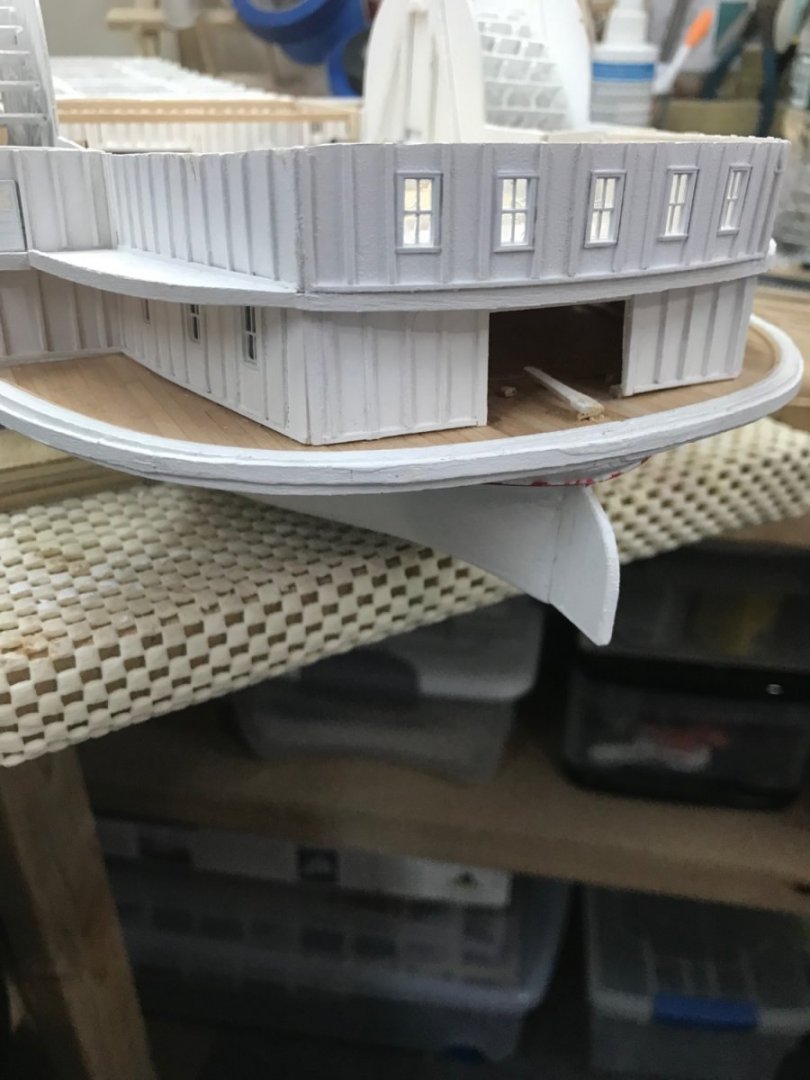
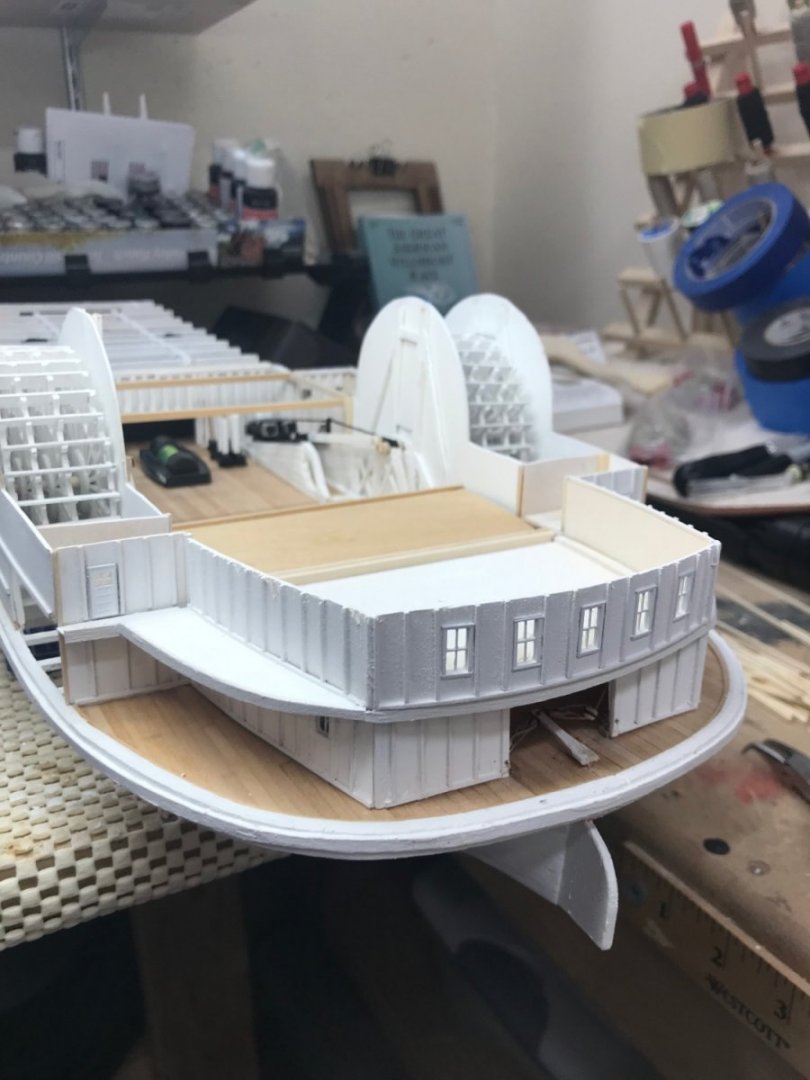
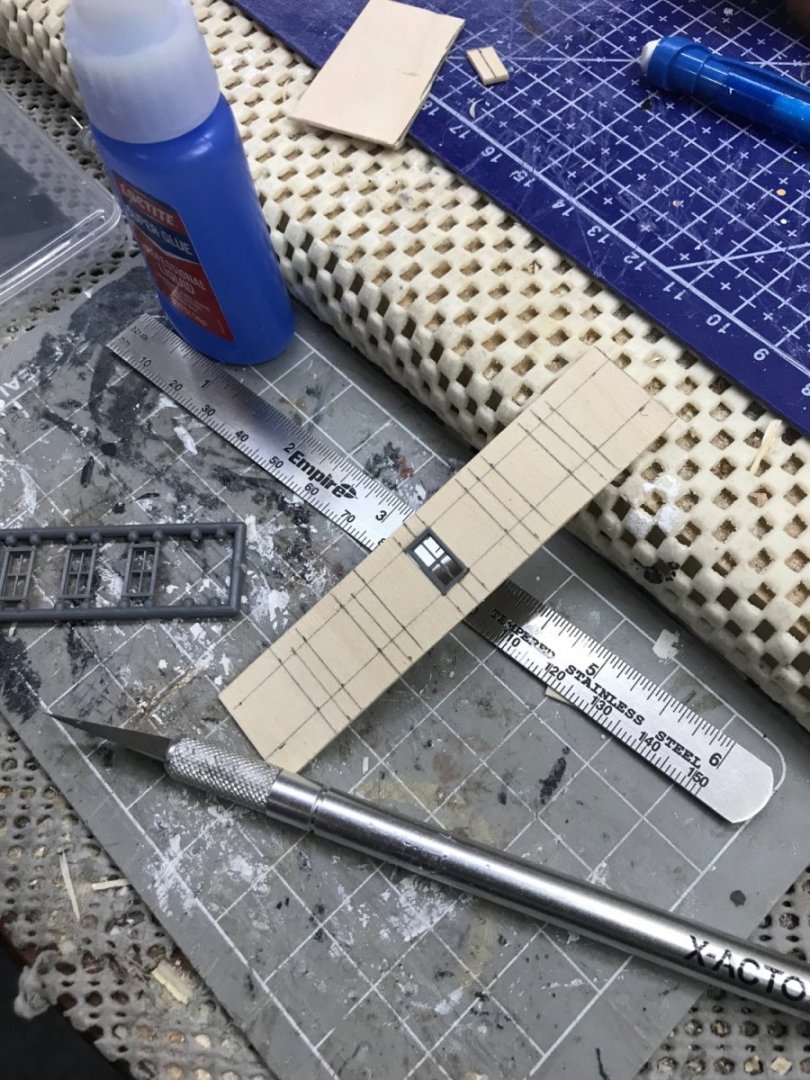
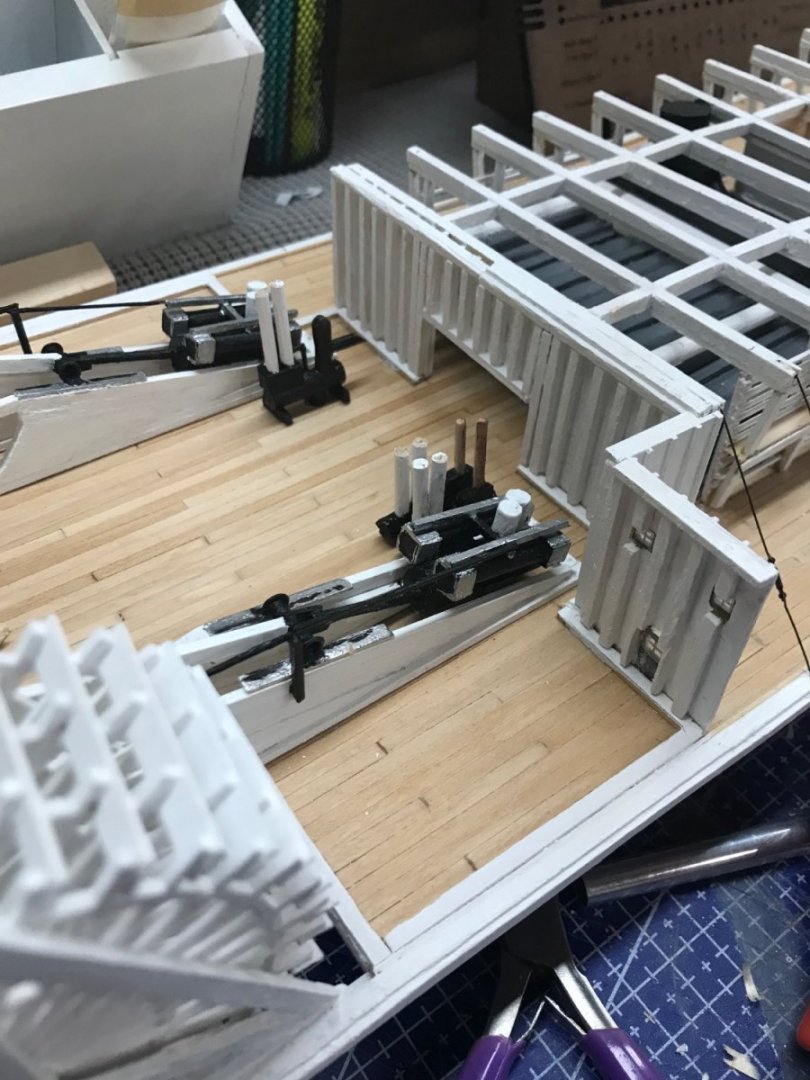
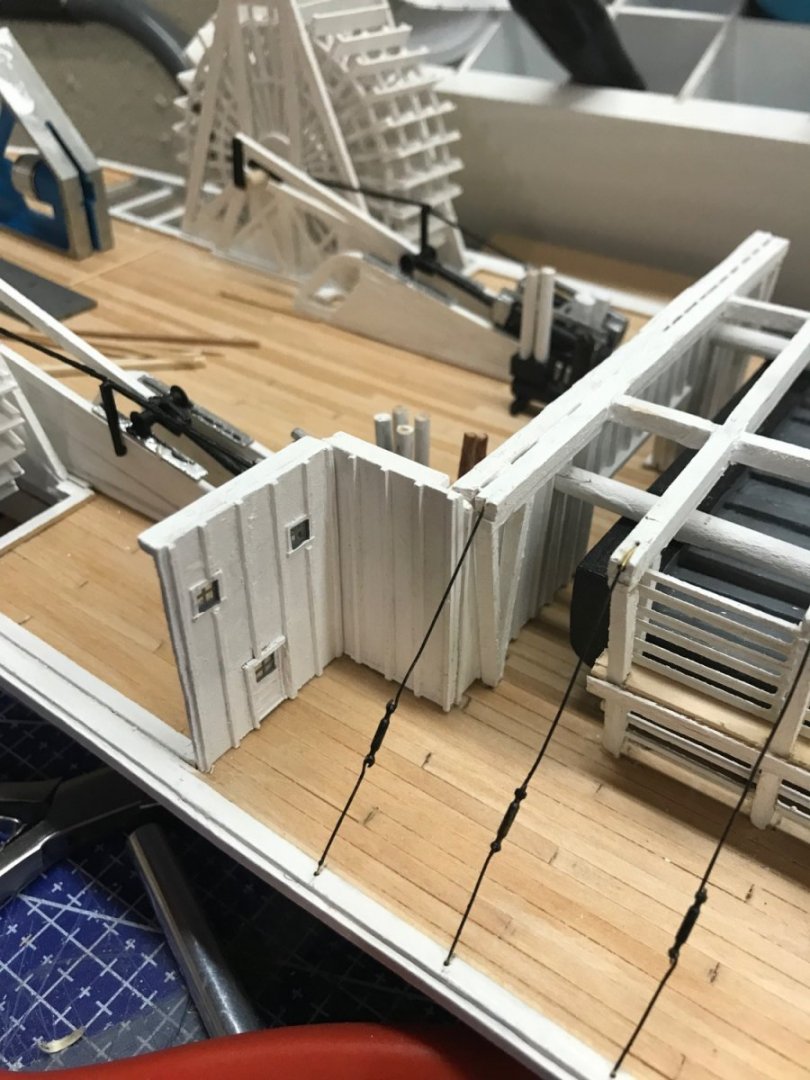
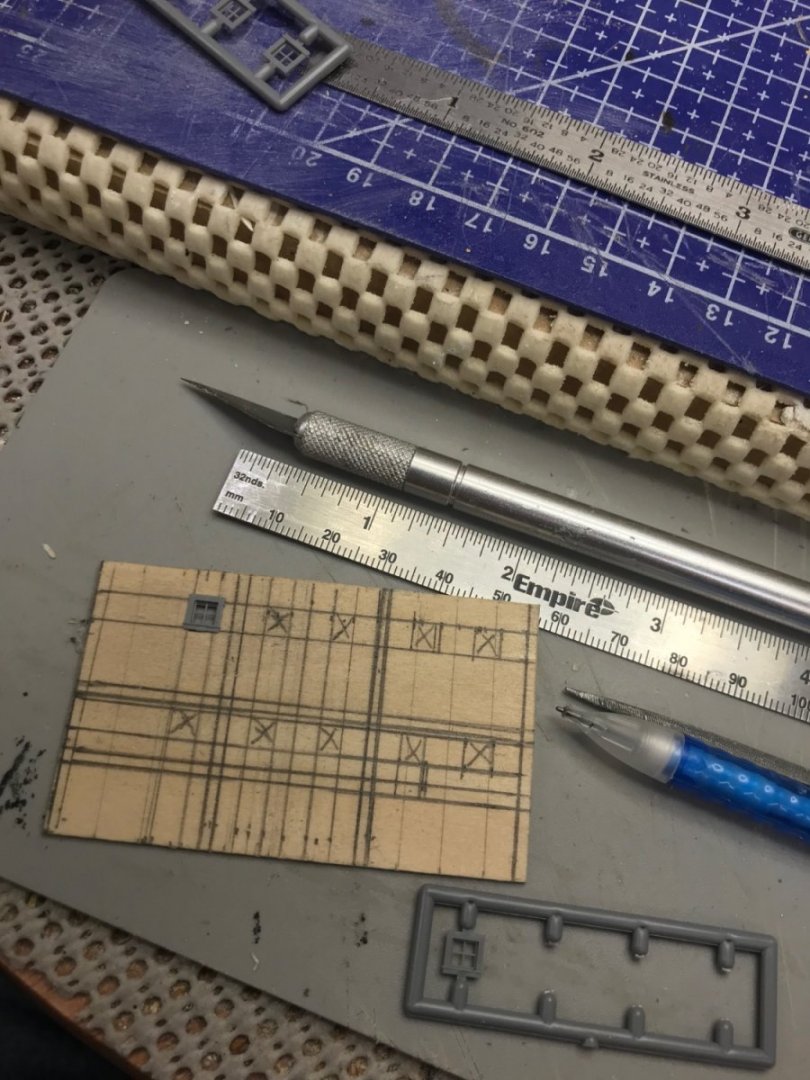
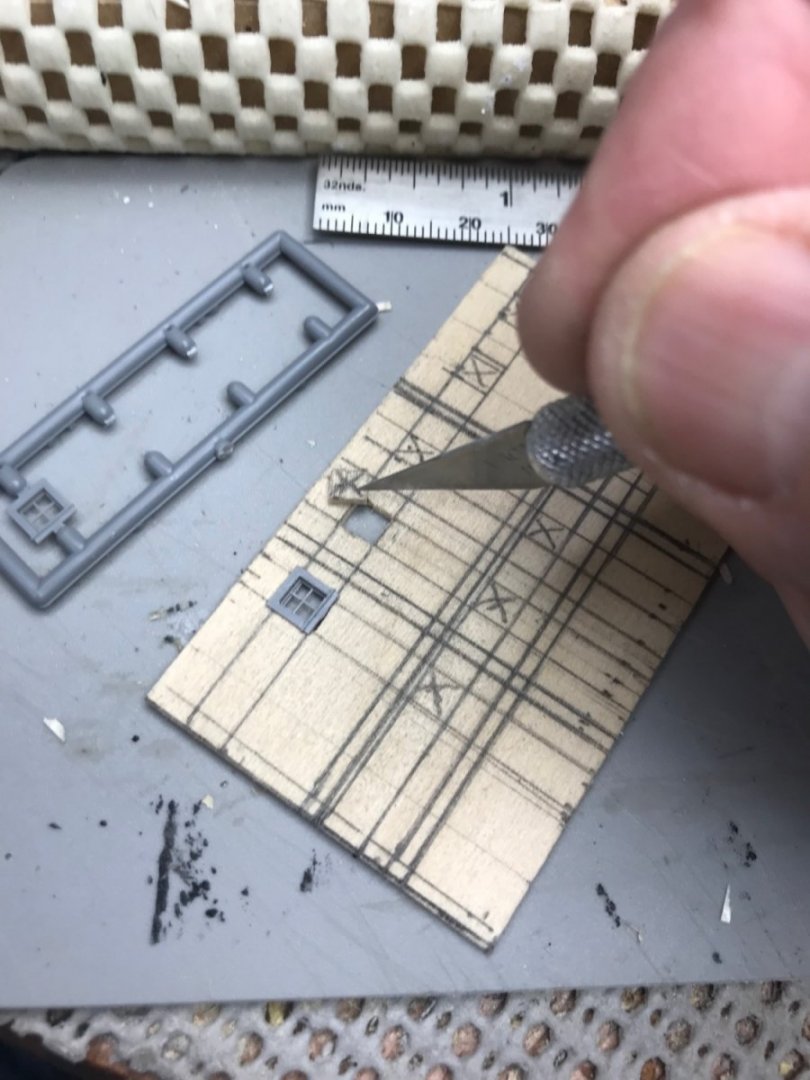
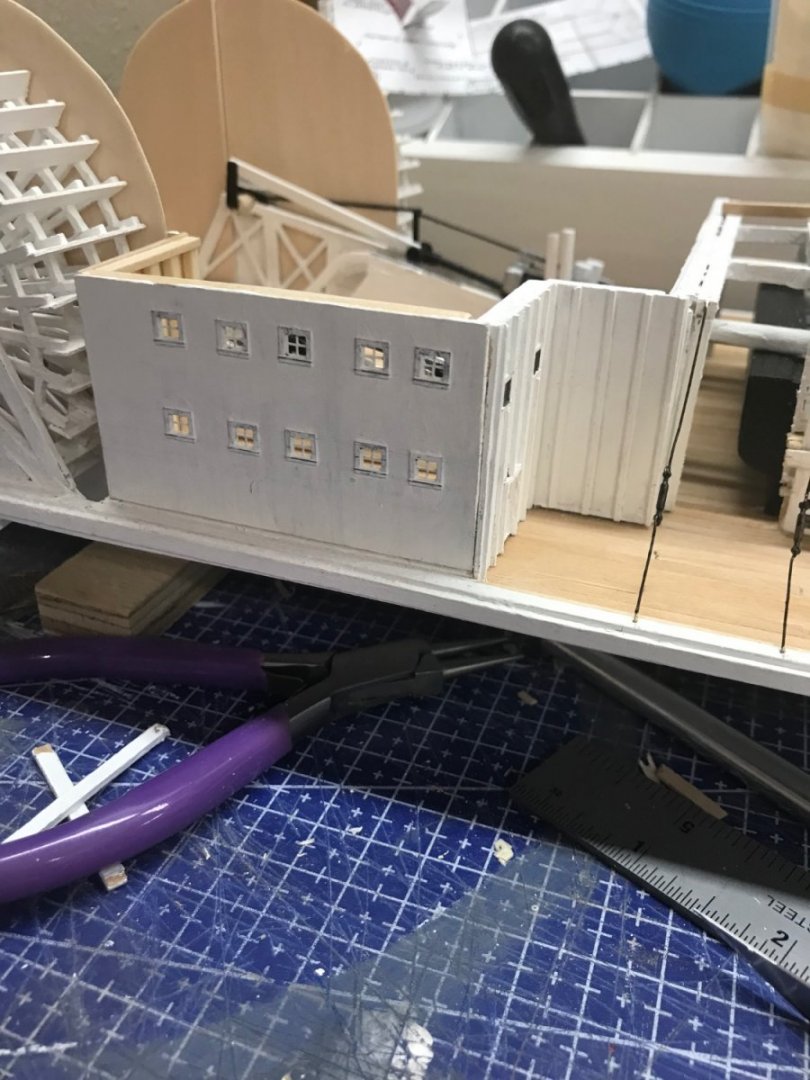
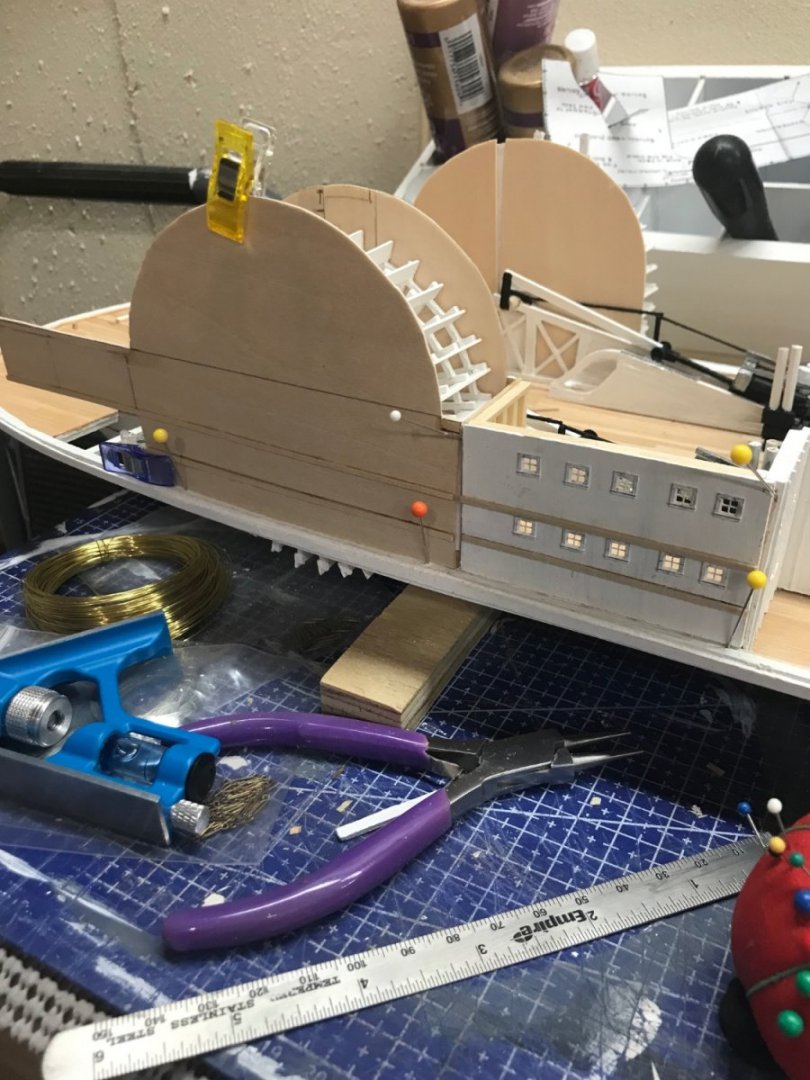
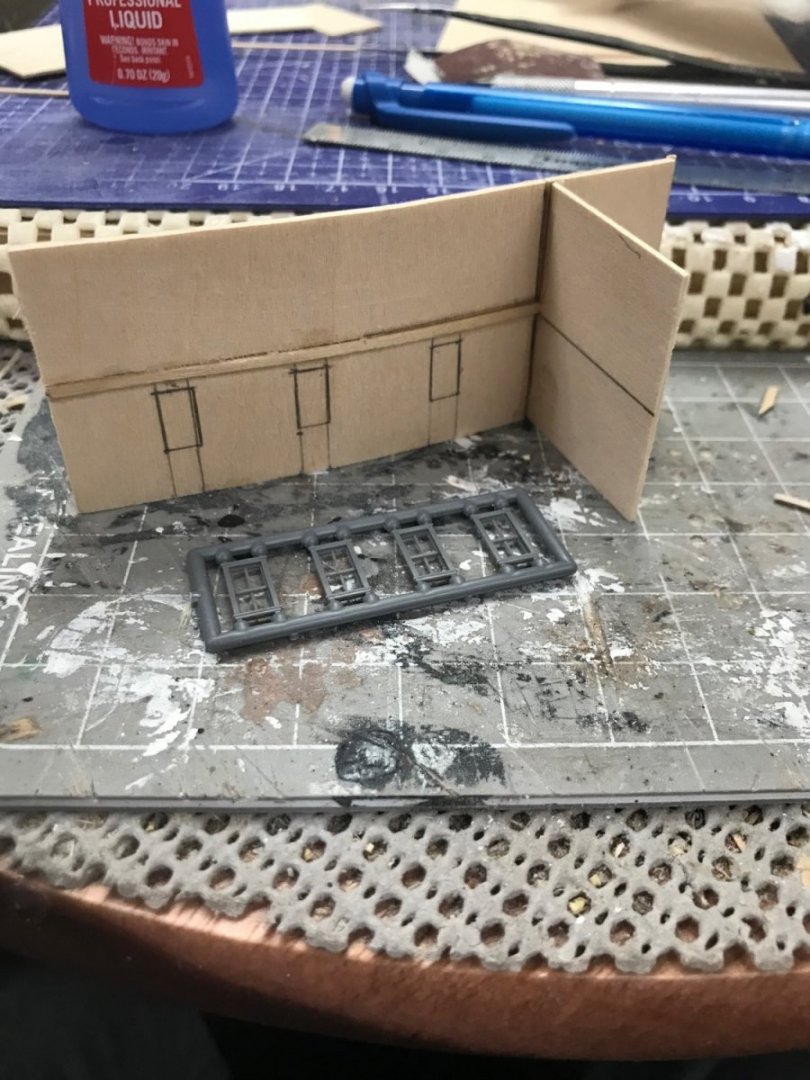
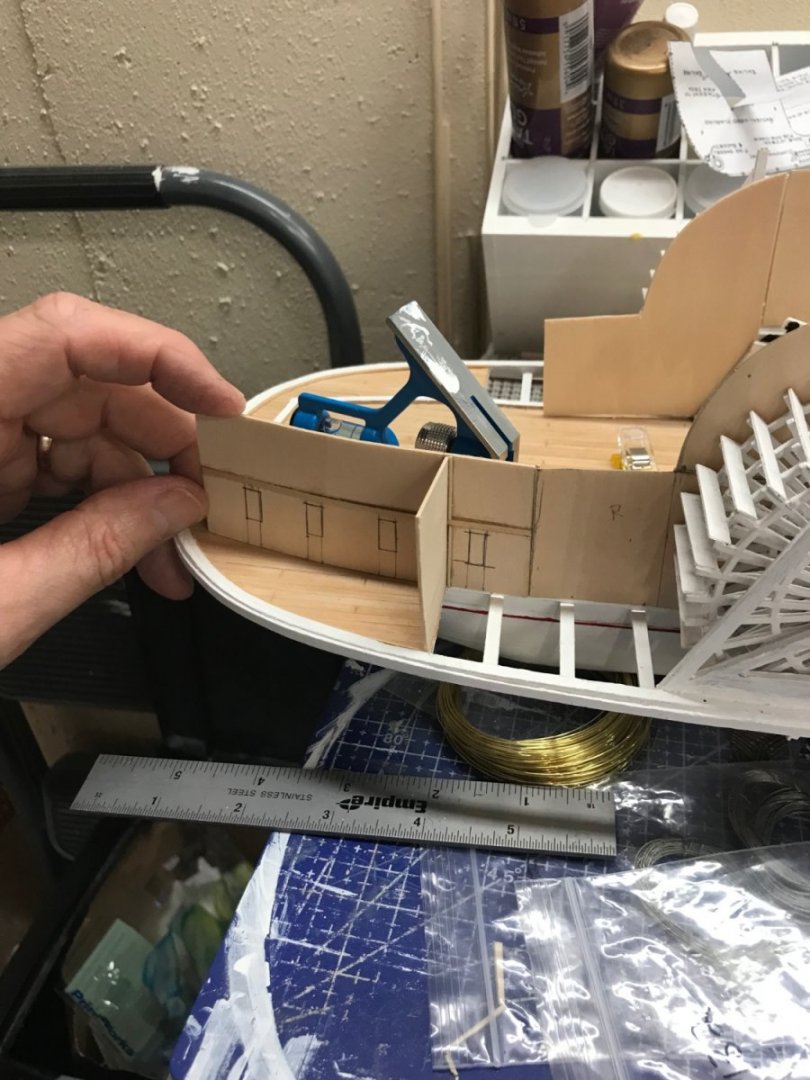
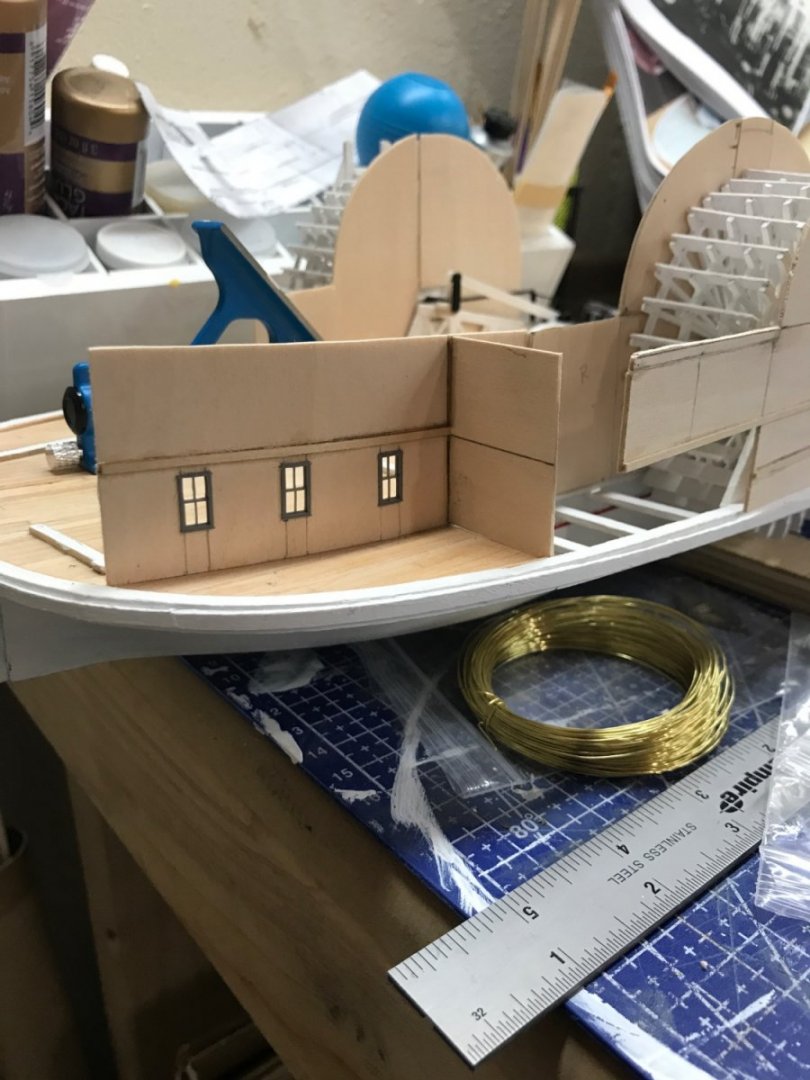
Engine Room and Superstructure… Paddel Wheel shaft journals… Paddle Wheel shaft connection completed… Boiler Feed Pump… Steam Driven pump to feed river water up into the massive boilers. N - Scale windows and doors. Board and batten siding. Superstructure walls… Because I will be viewing the engine room, I had to create the interior walls. I could not find anything regarding the interior structure, so I assumed it would be “Barn” like. Given that this is the foundation for four story hotel structure it needs to be stout. 😎 Engine Room is coming together. Note: Not going for accuracy here, very little info is available specific to Robt E Lee. I’m only trying to create the illusion when looking in under the boiler deck from the port side where I will leave the engine room wall open. The above photo taken from Alan Bates’ Engine Room Cyclopedium will be my inspiration as I attempt to add to the illusion of an Engine Room. 😎 A lot of windows to install… Engine Room wall for the starboard side. I will leave this wall open on the Port Side. On to building the Wheel Housing. Keeping everything plumb on a curved deck. 😆 This will be the view into the engine room from the port side. There will be framing only no walls. Curved walls on a curved deck… Added windows. More latter… Cheers 🍻


- 238 replies
-
- 9
-
-
- Robert E Lee
- steamboat
- (and 3 more)
-
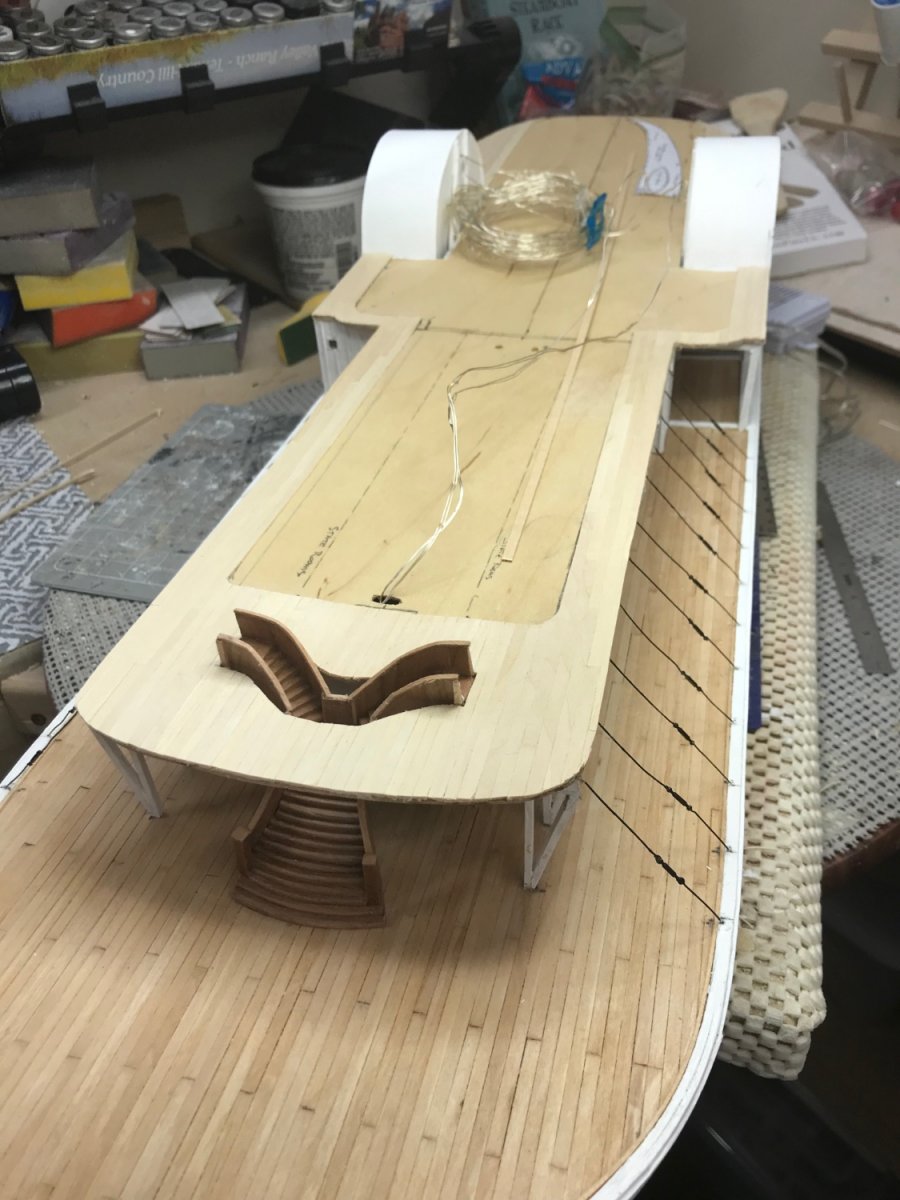
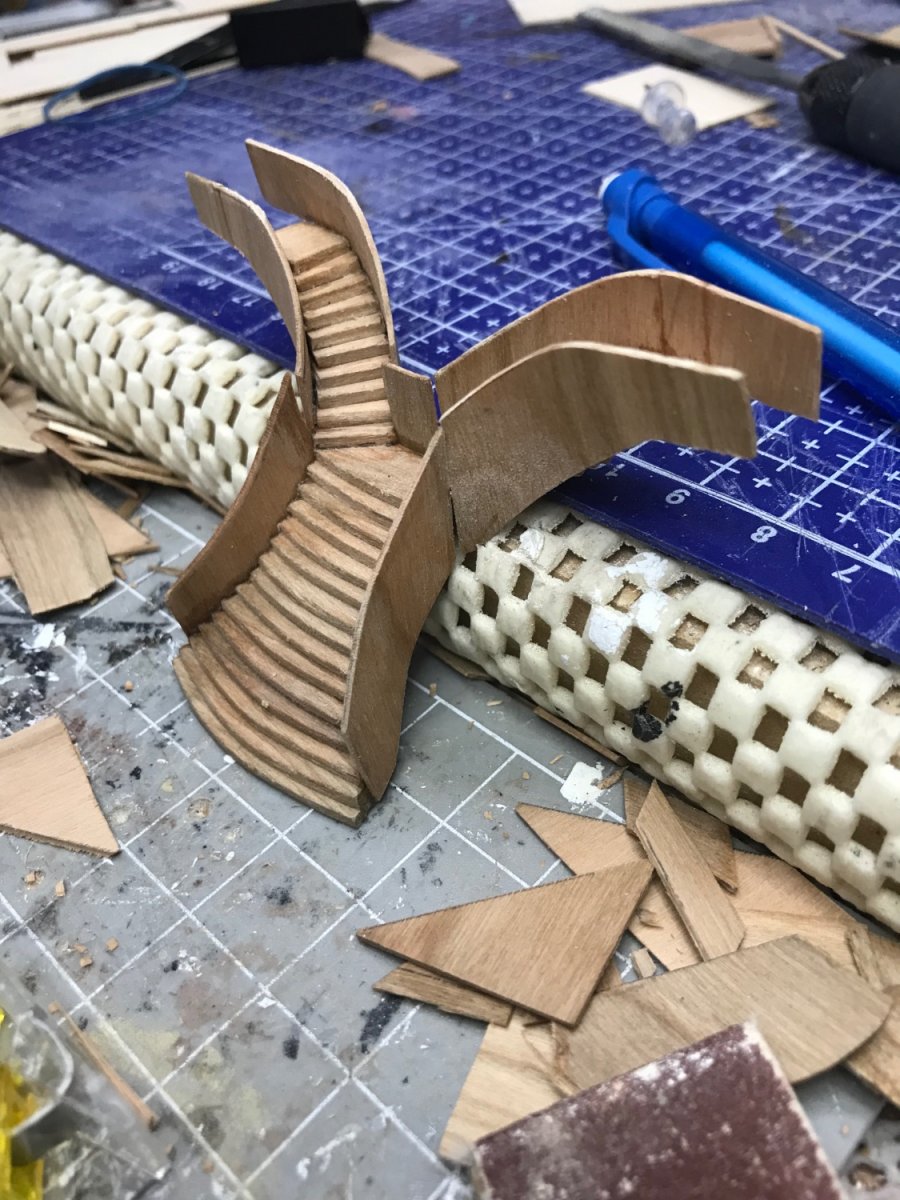
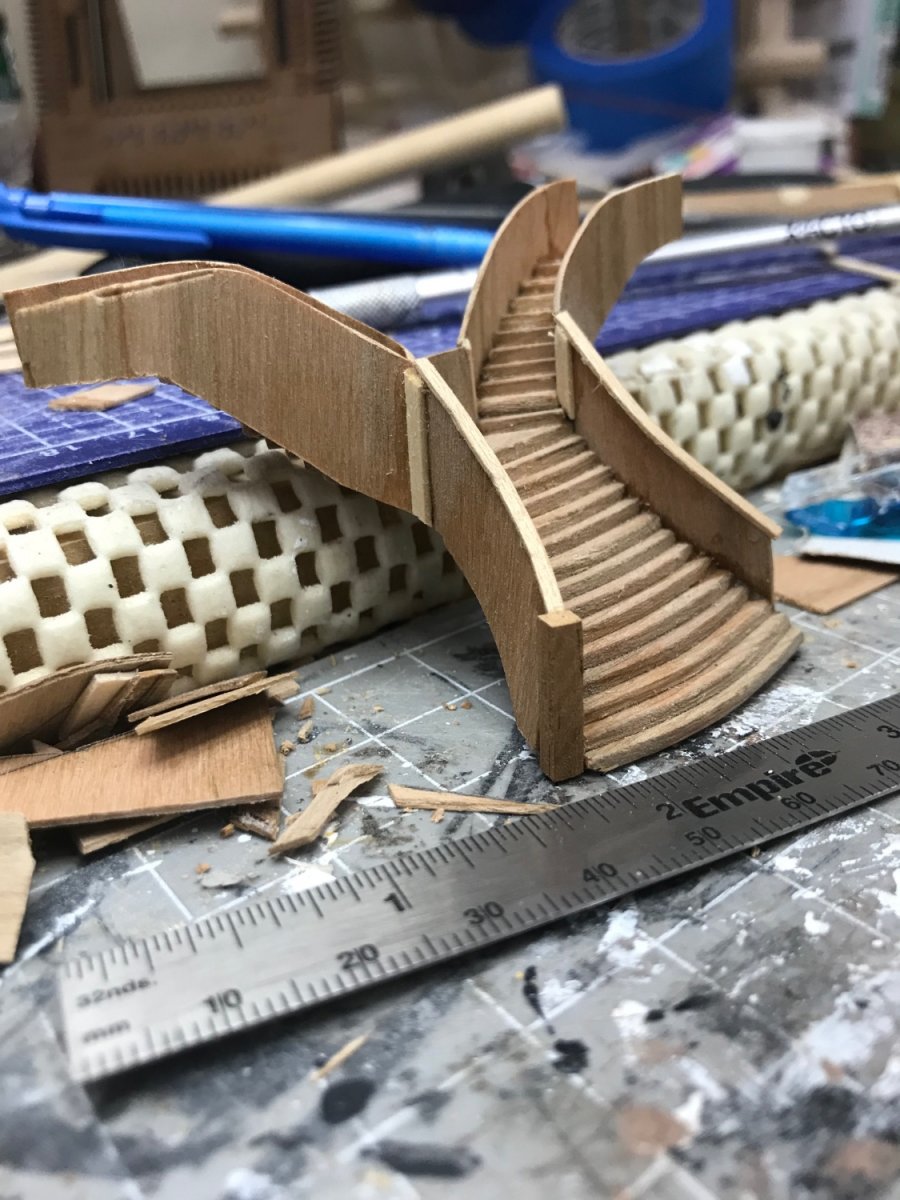
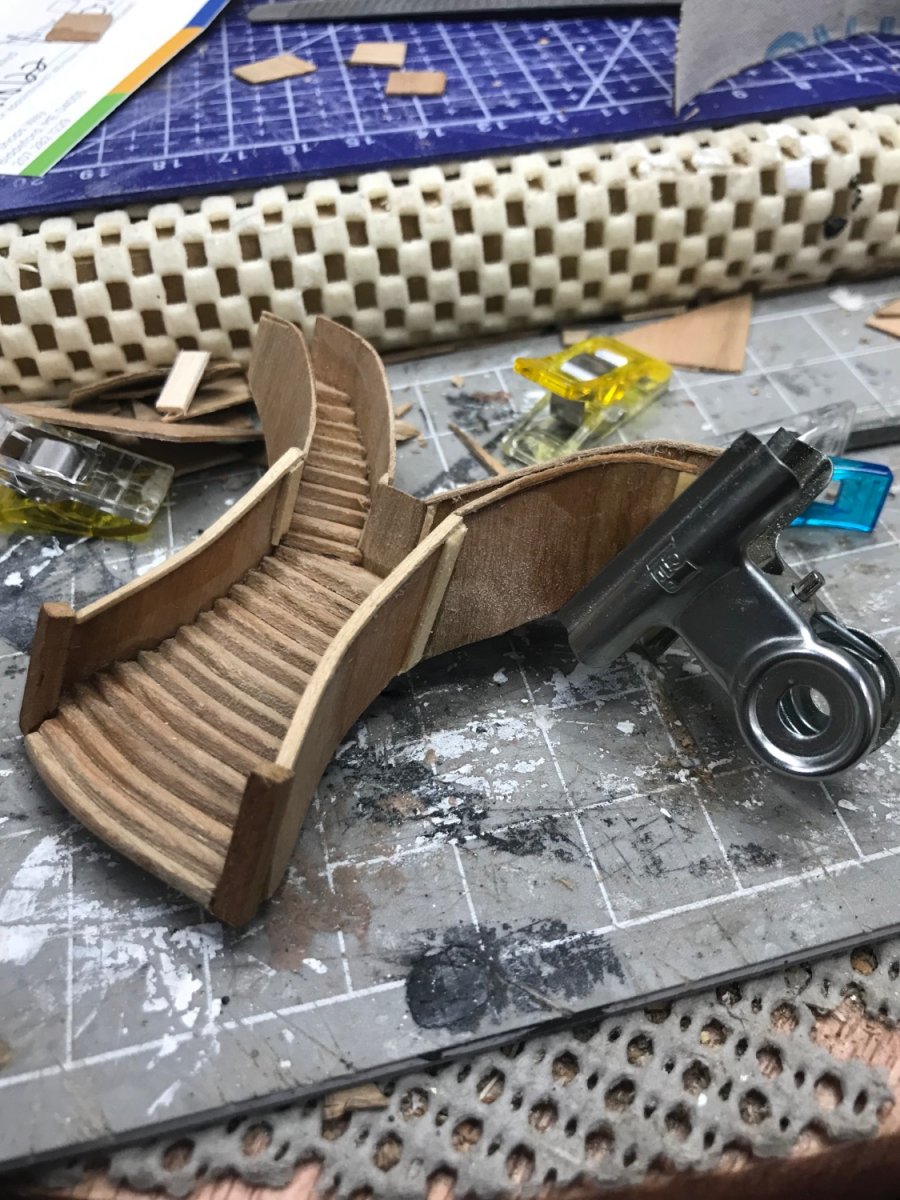
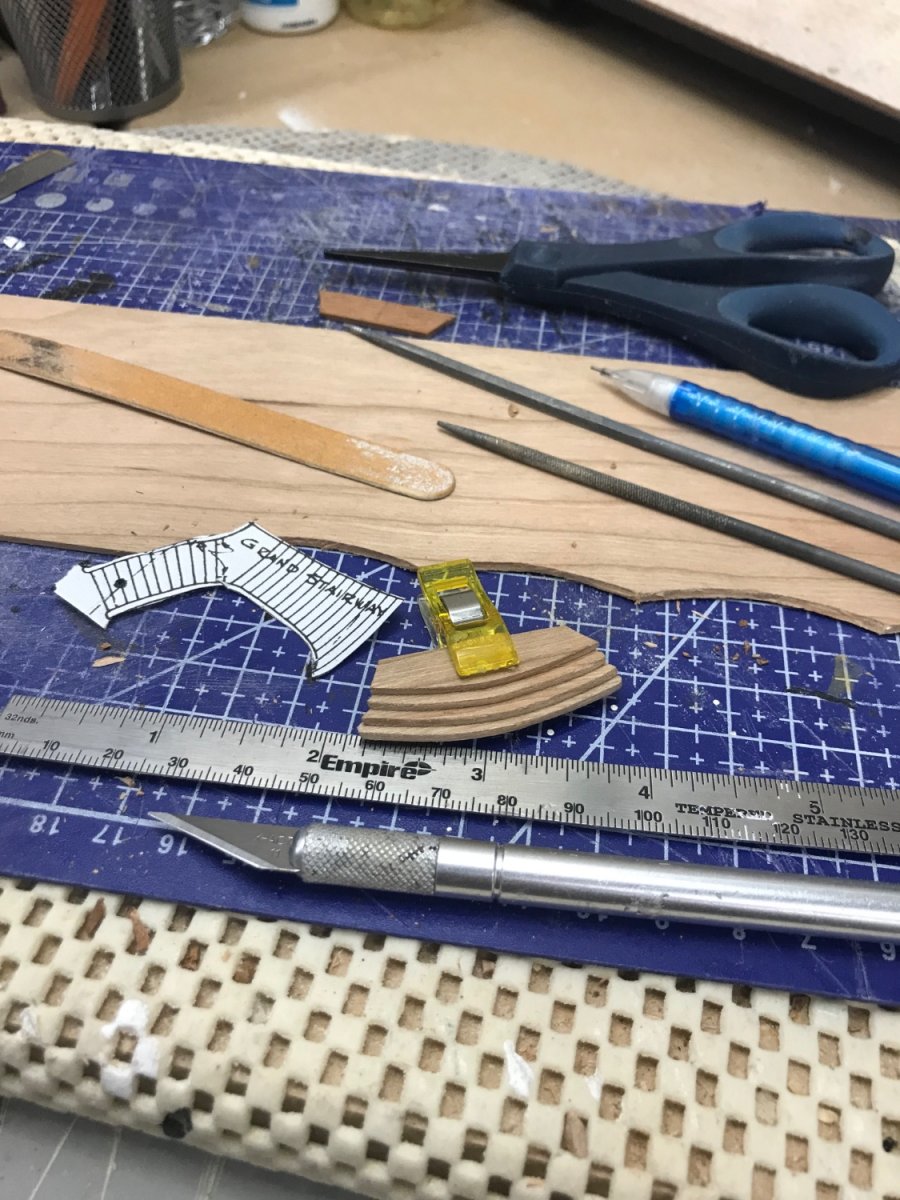
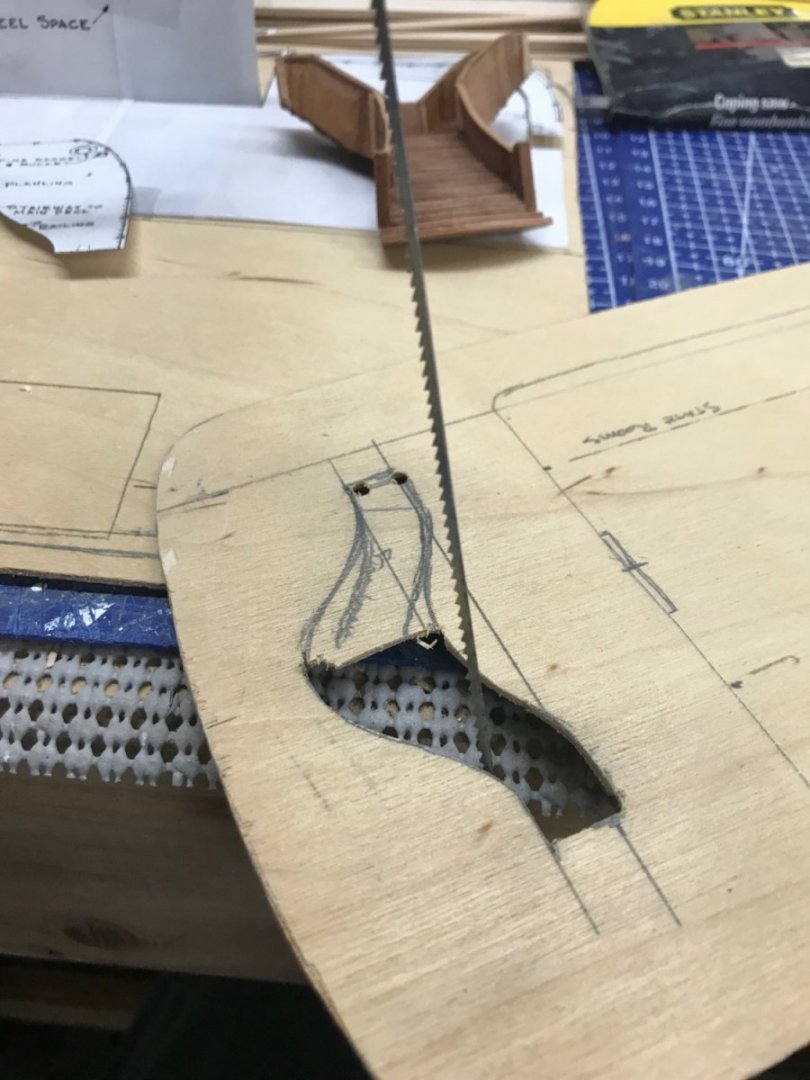
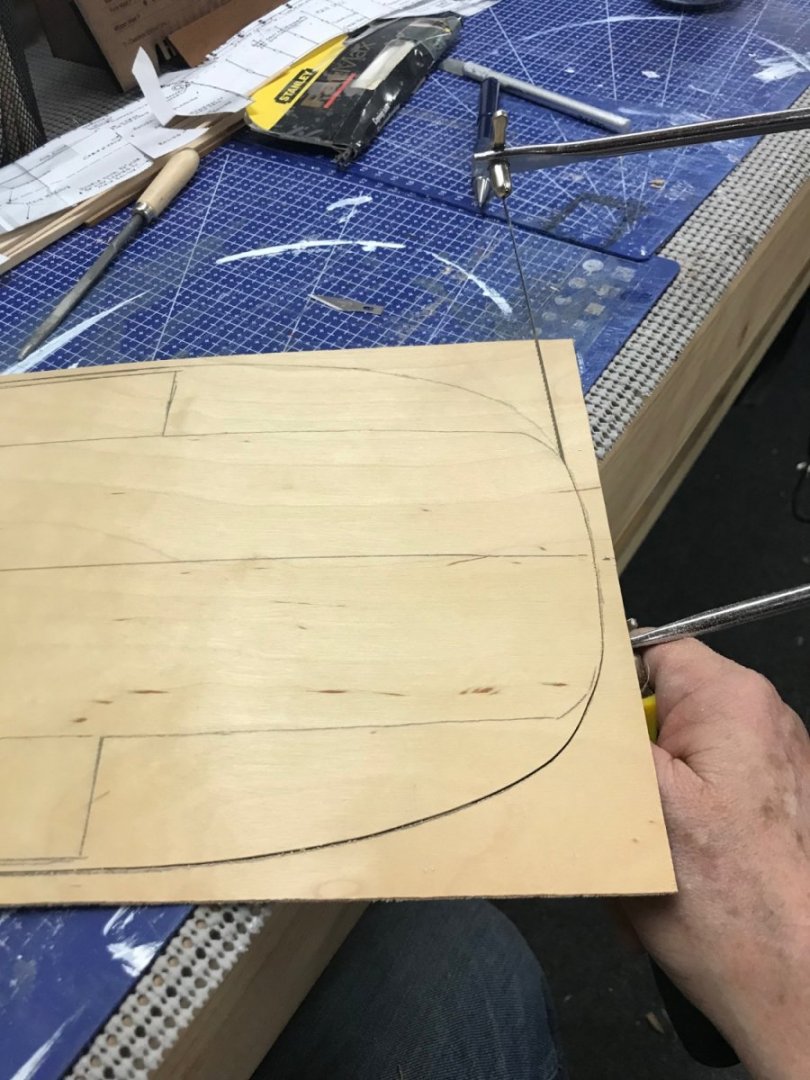
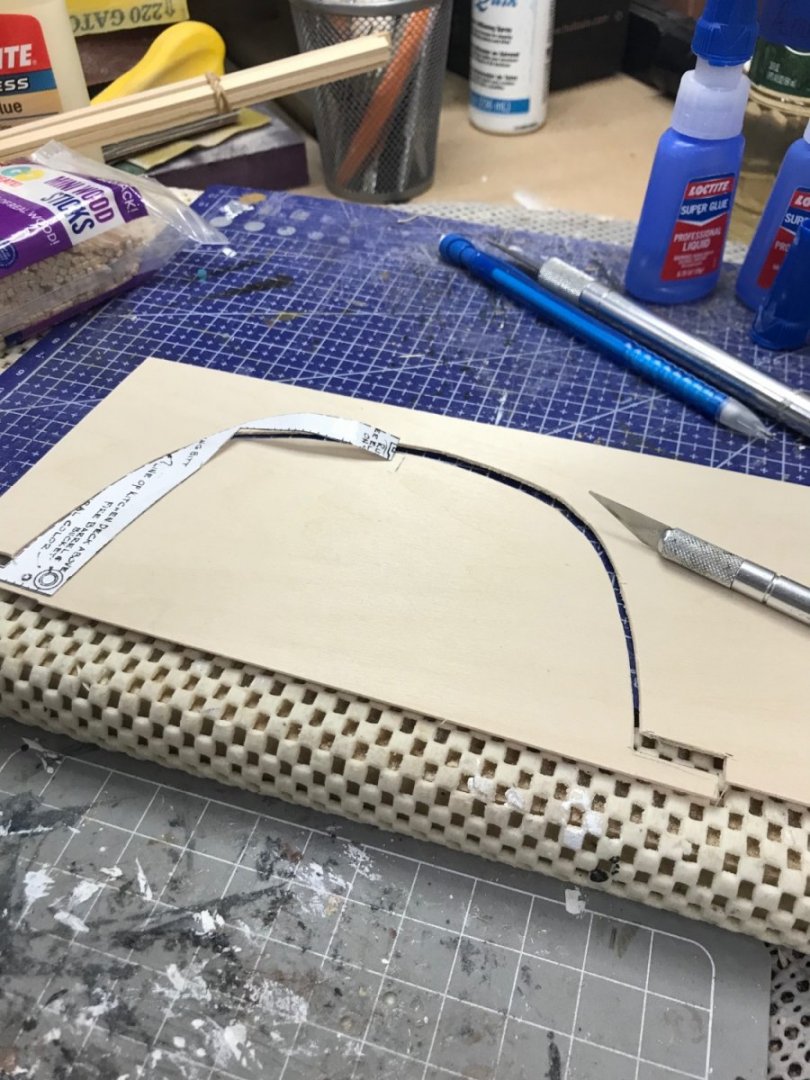
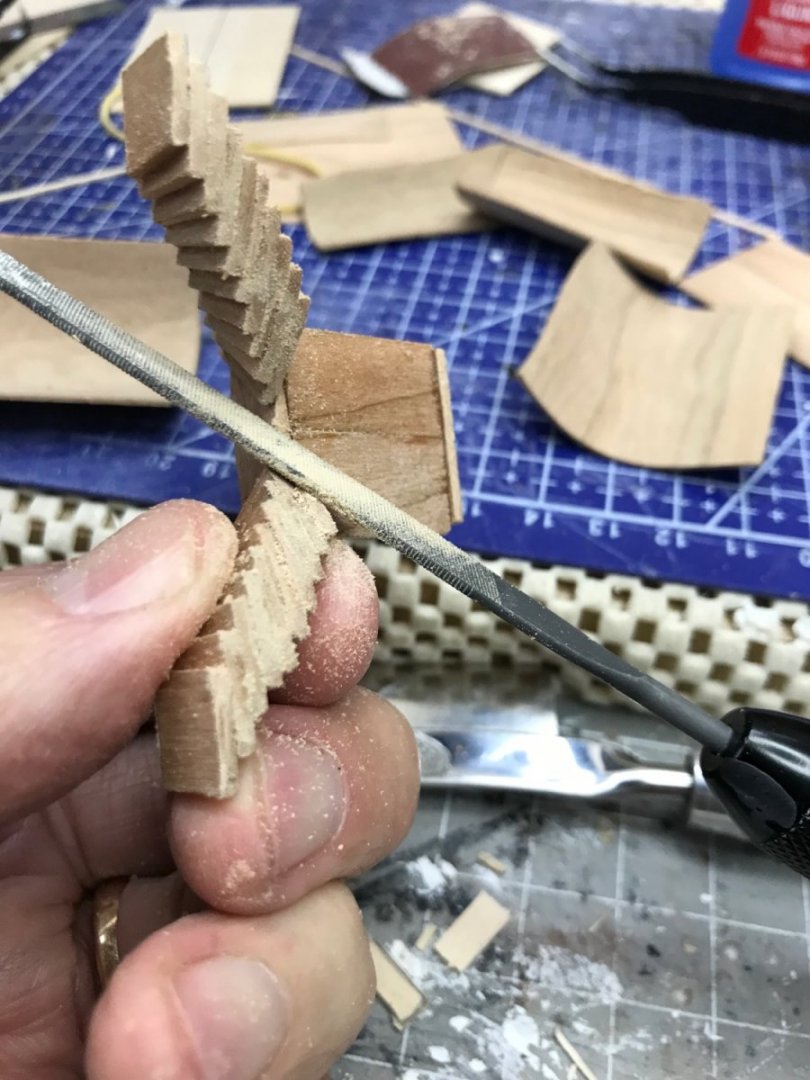
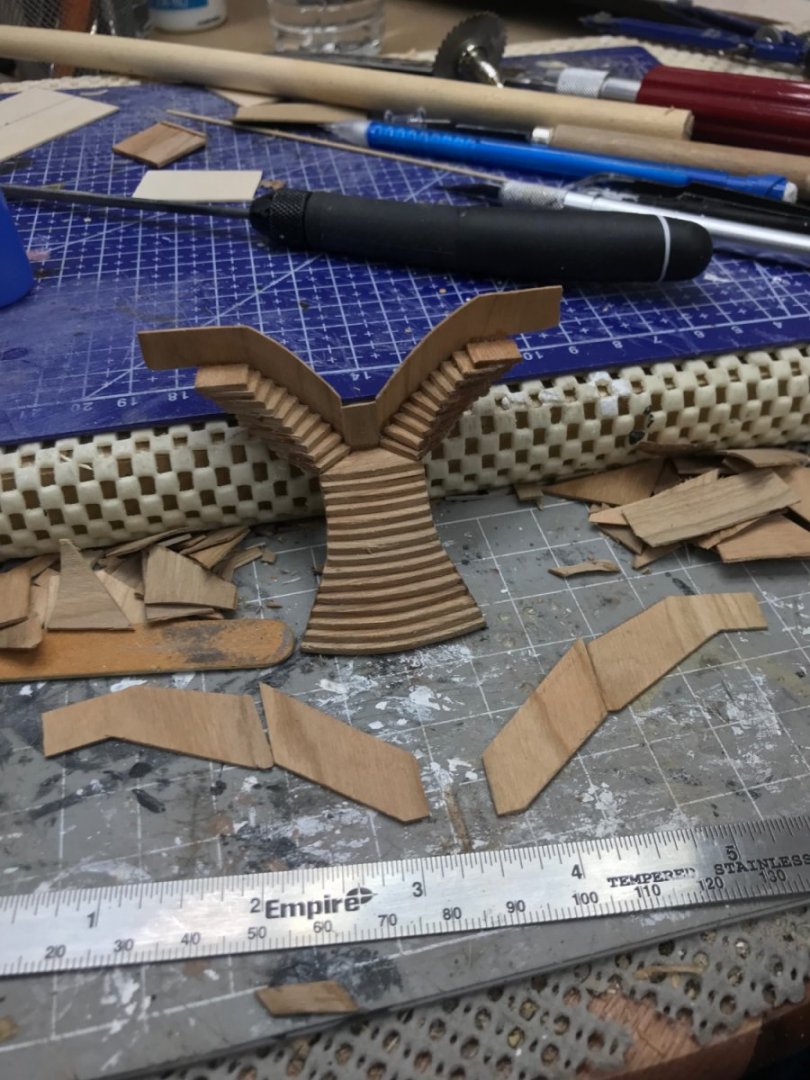
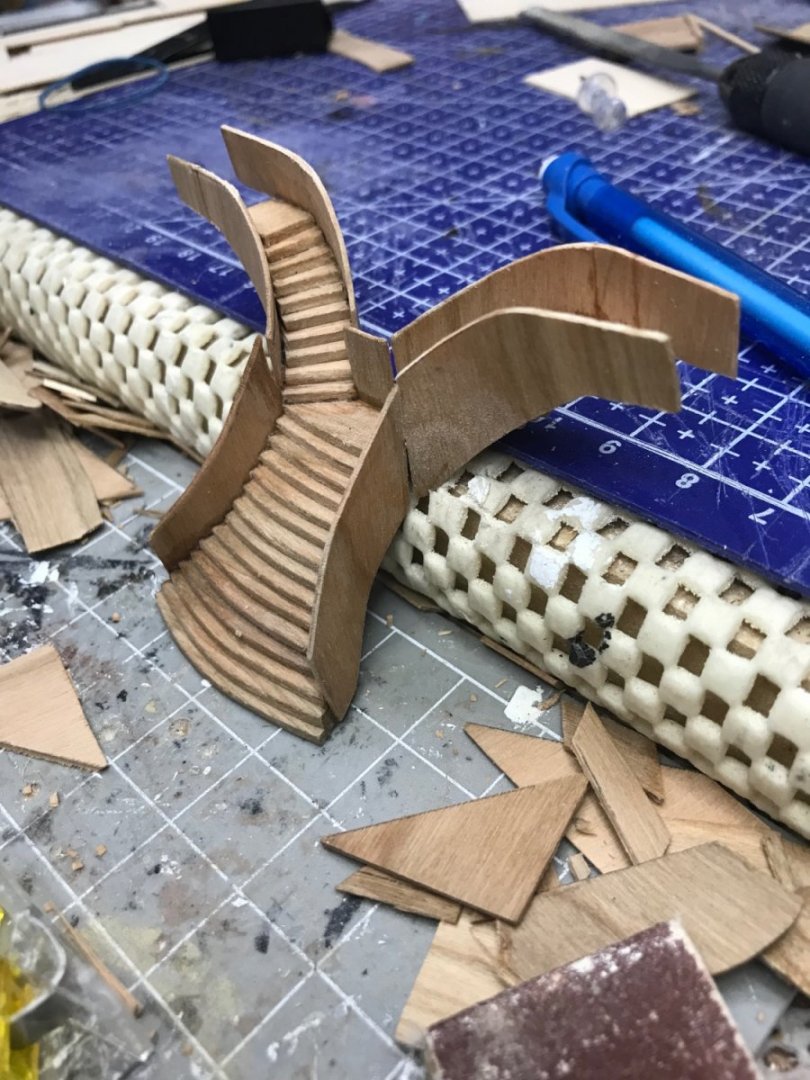
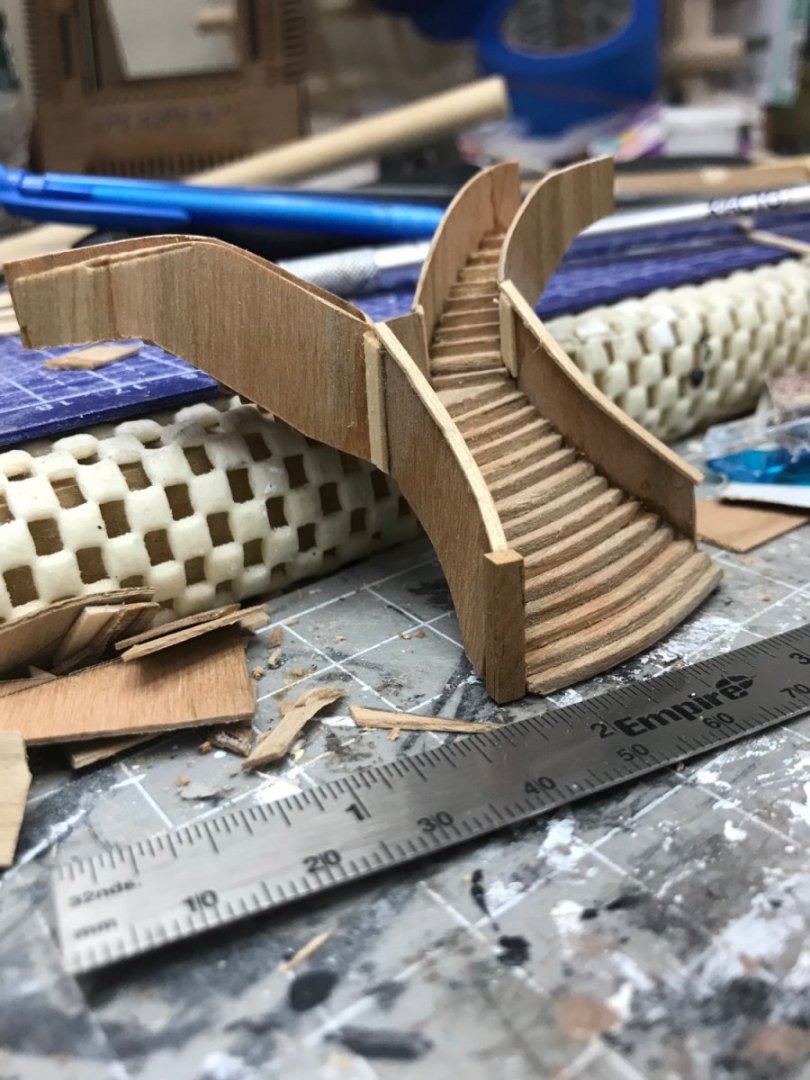
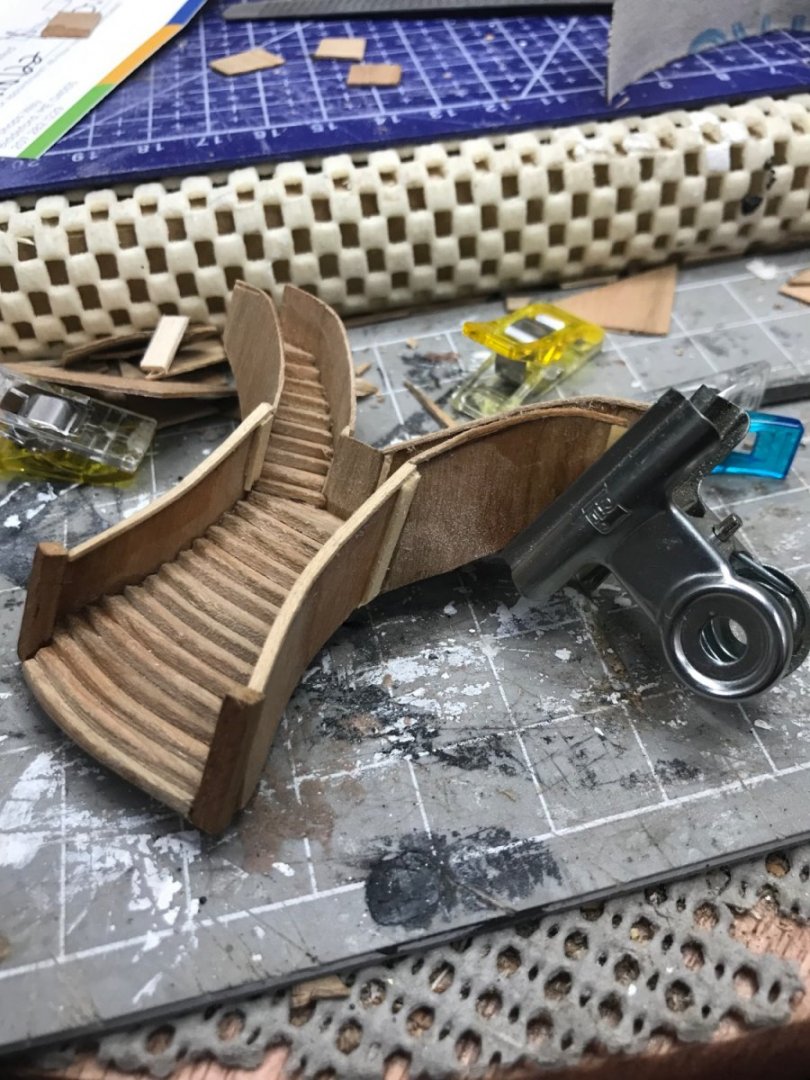
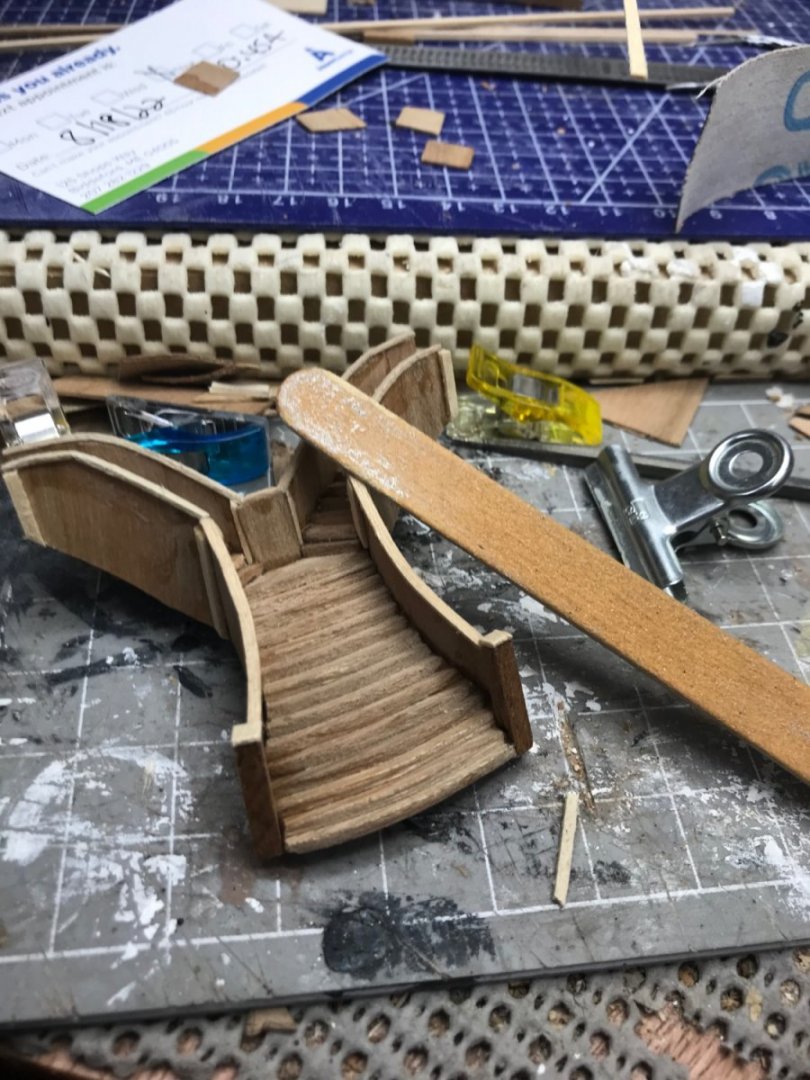
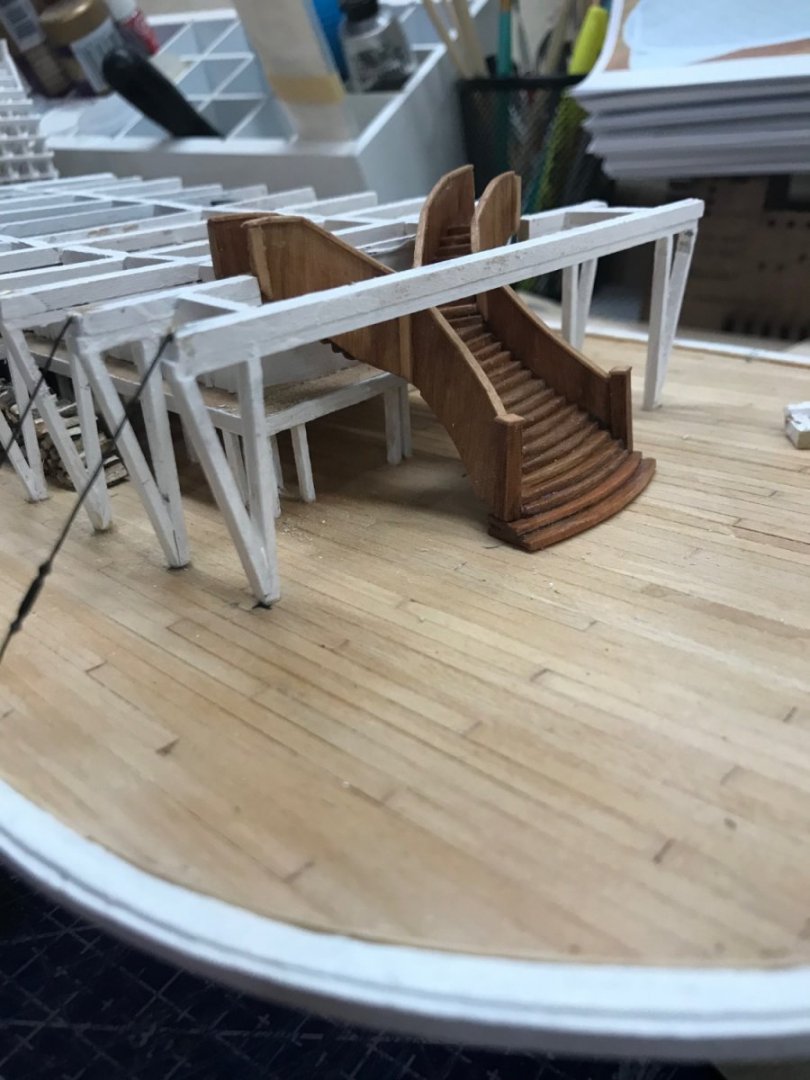
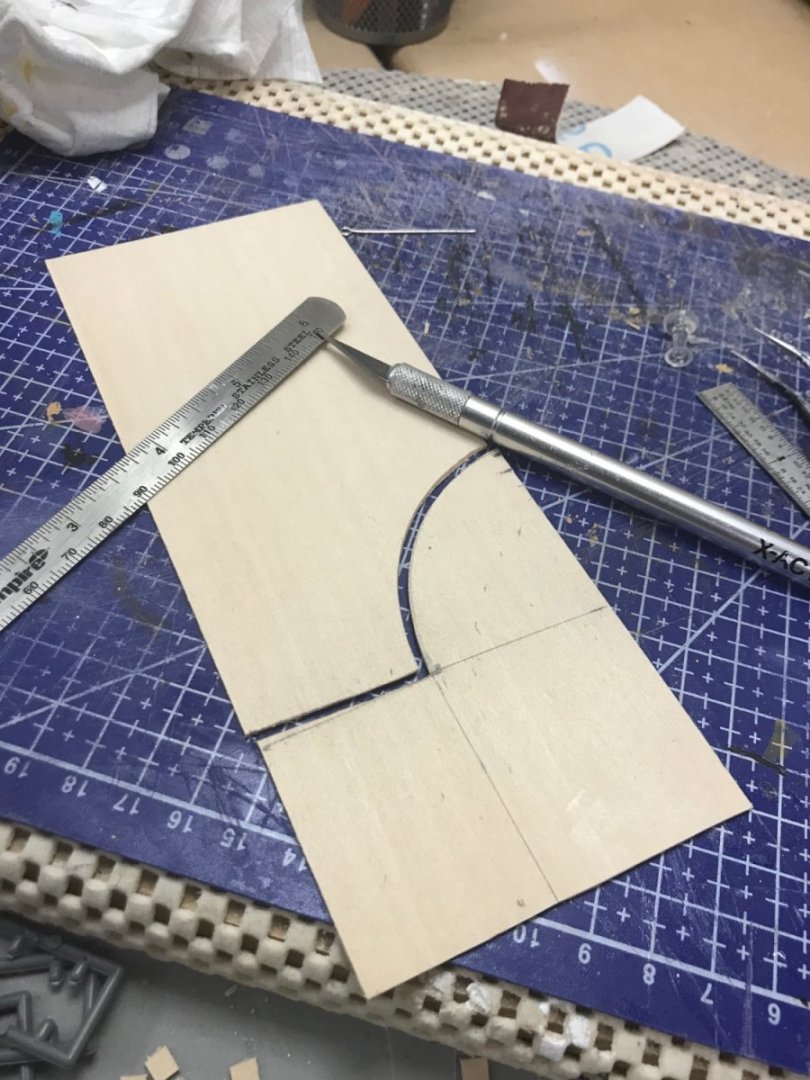
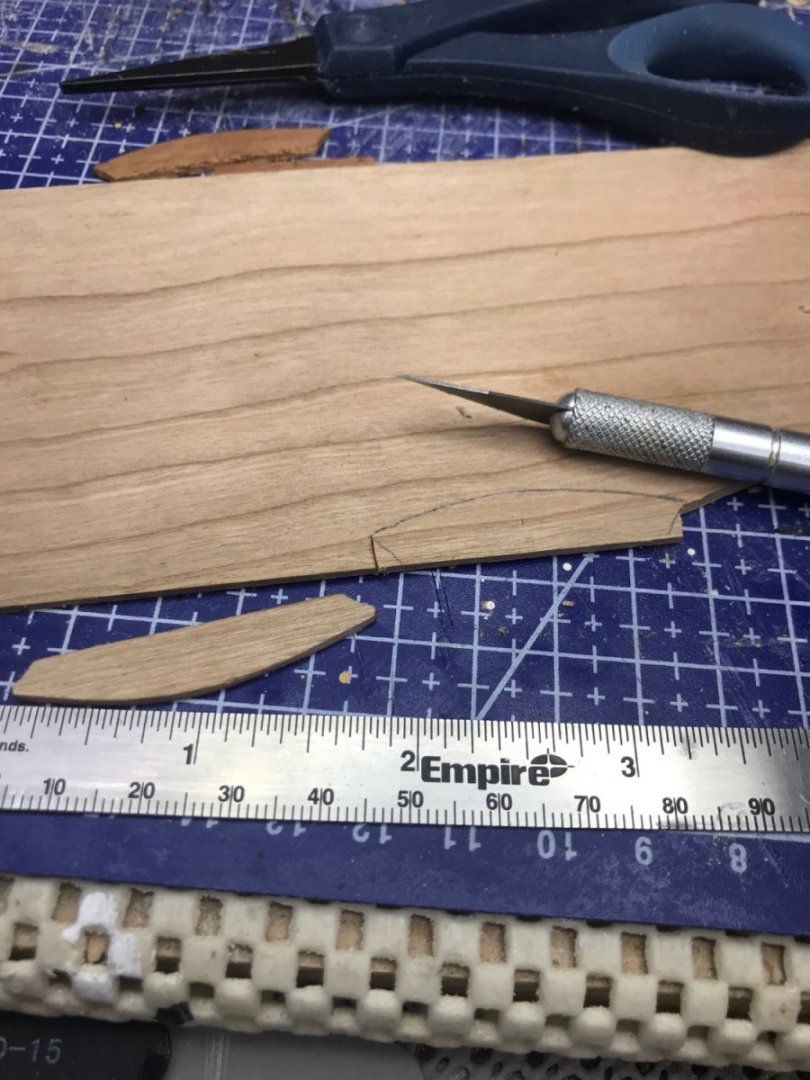
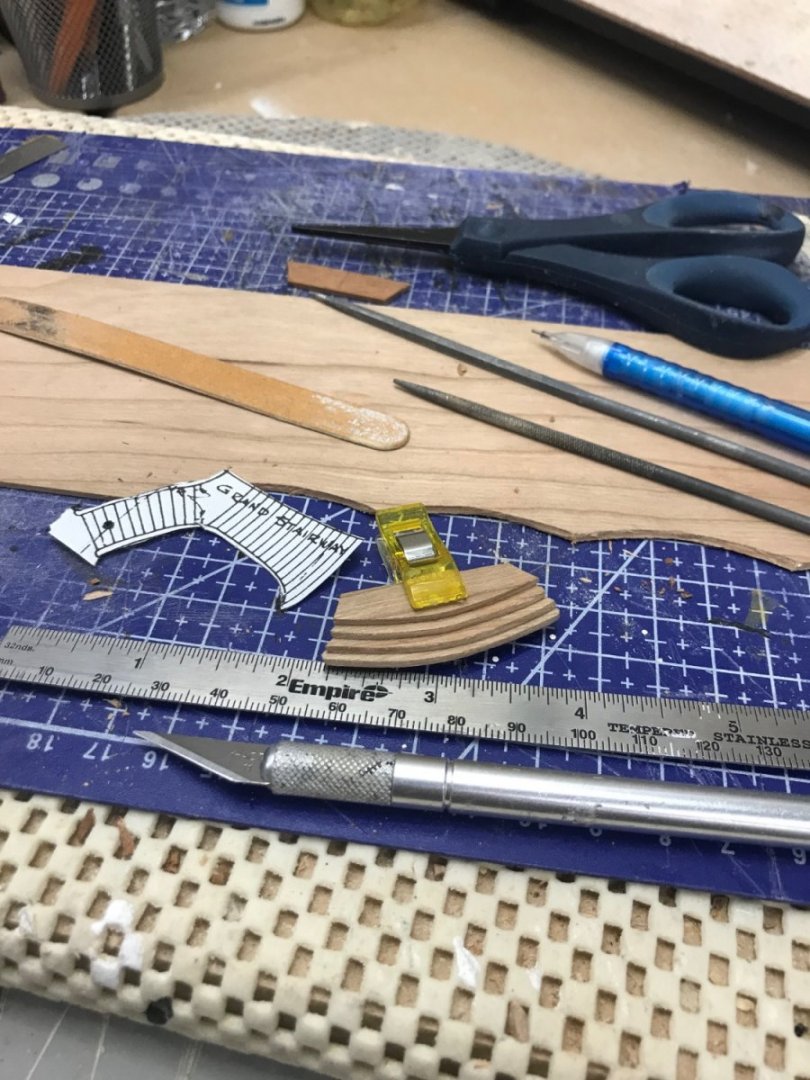
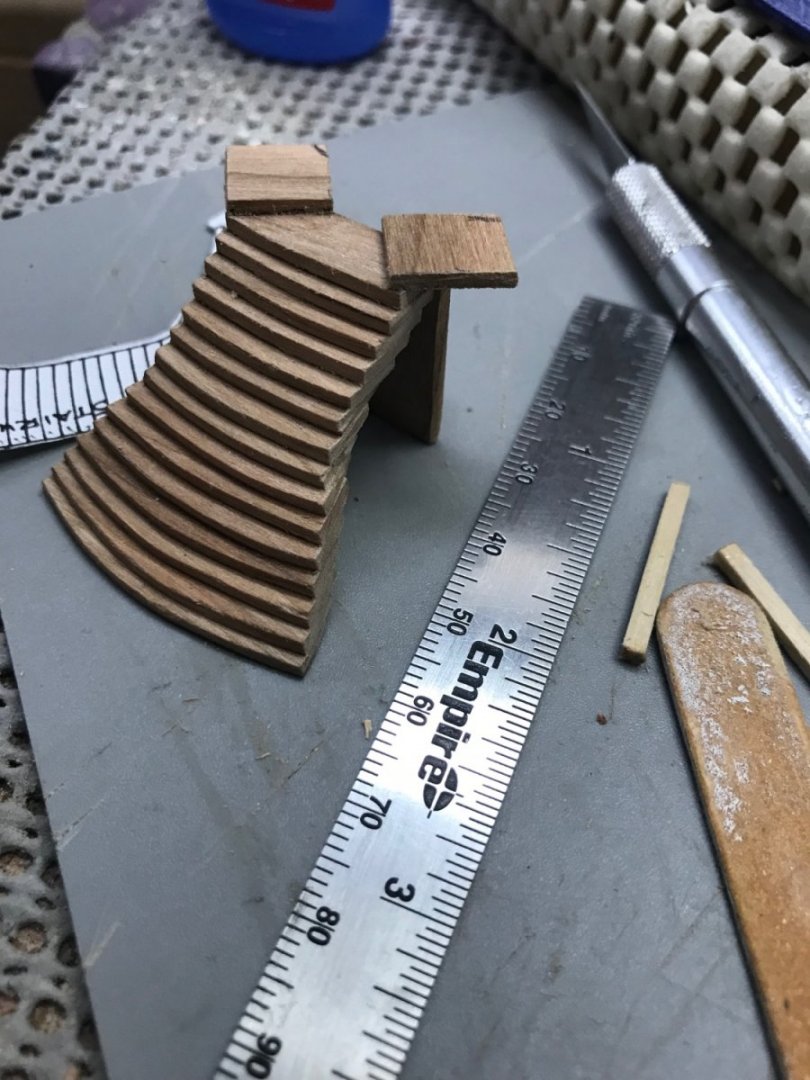
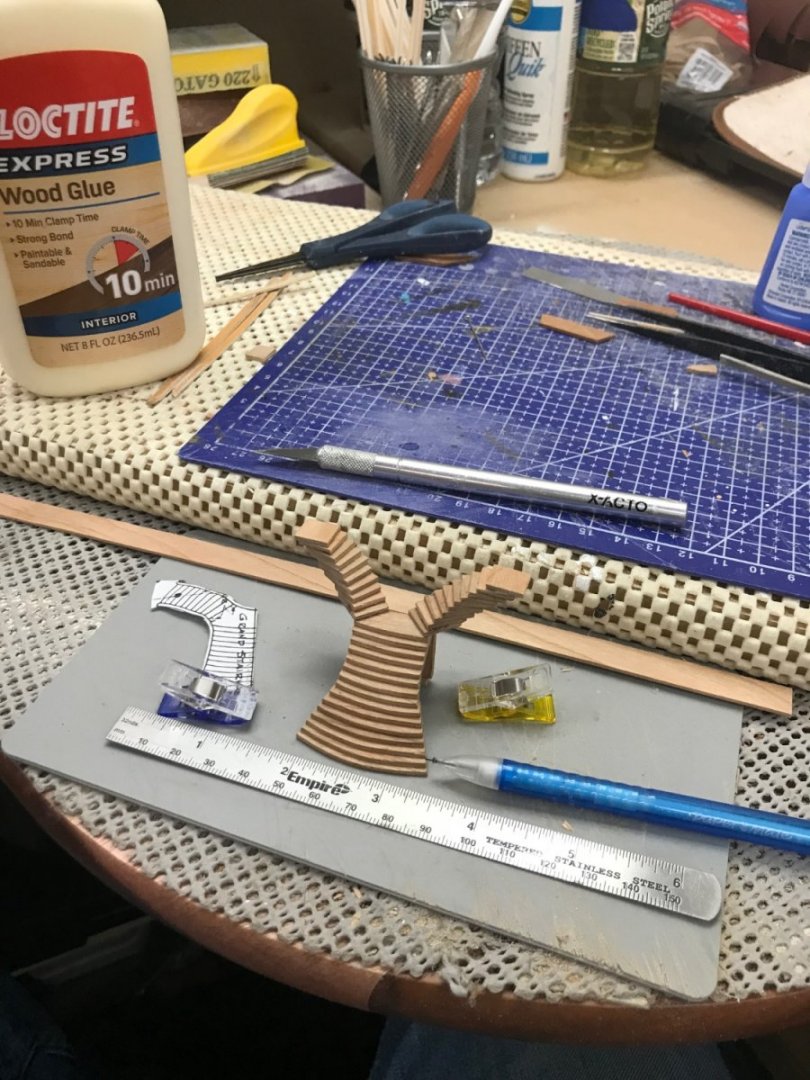
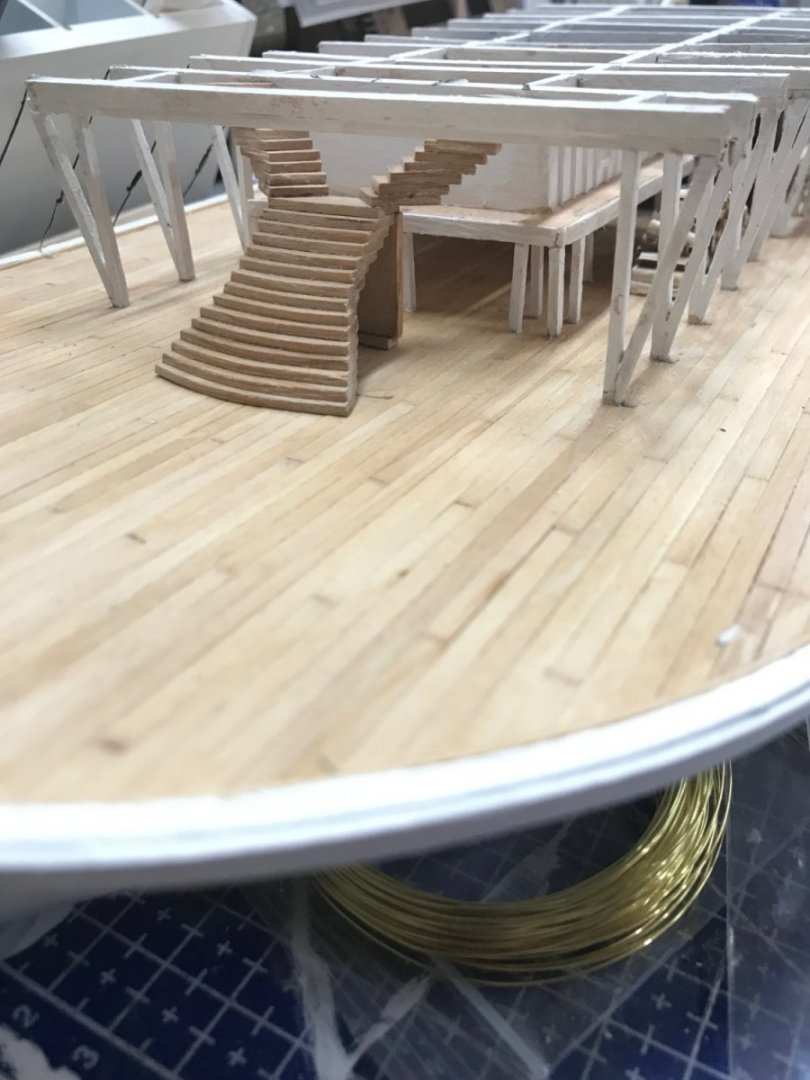
Grand Stairway… Used 1/16” Cherry to cut the staircase. Ordered some 1/32” Cherry to use for the curved railings. 😎 Cheers 🍻

- 238 replies
-
- 10
-
-
- Robert E Lee
- steamboat
- (and 3 more)
-
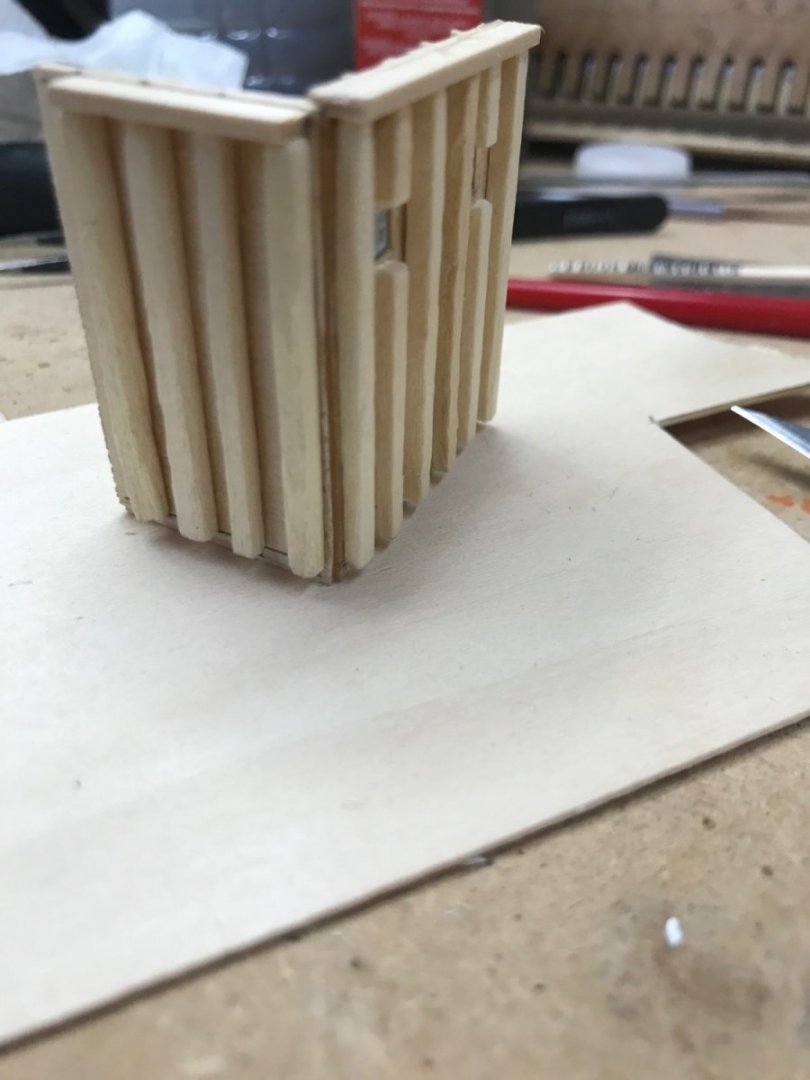
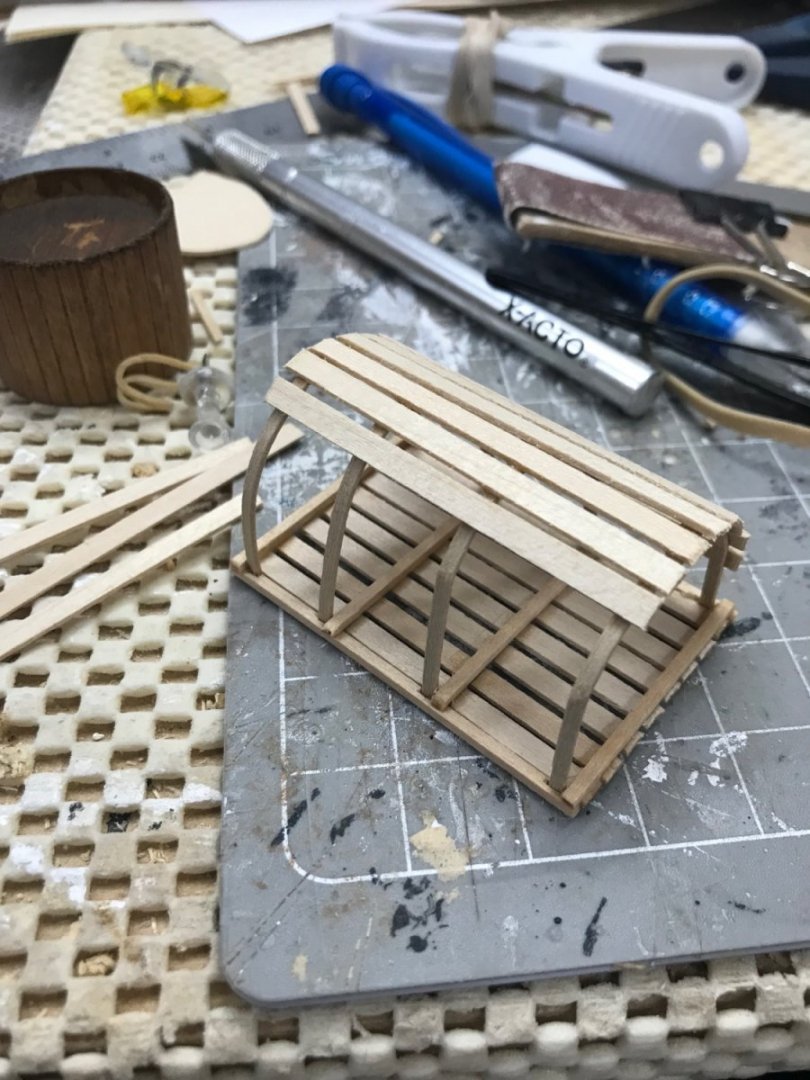
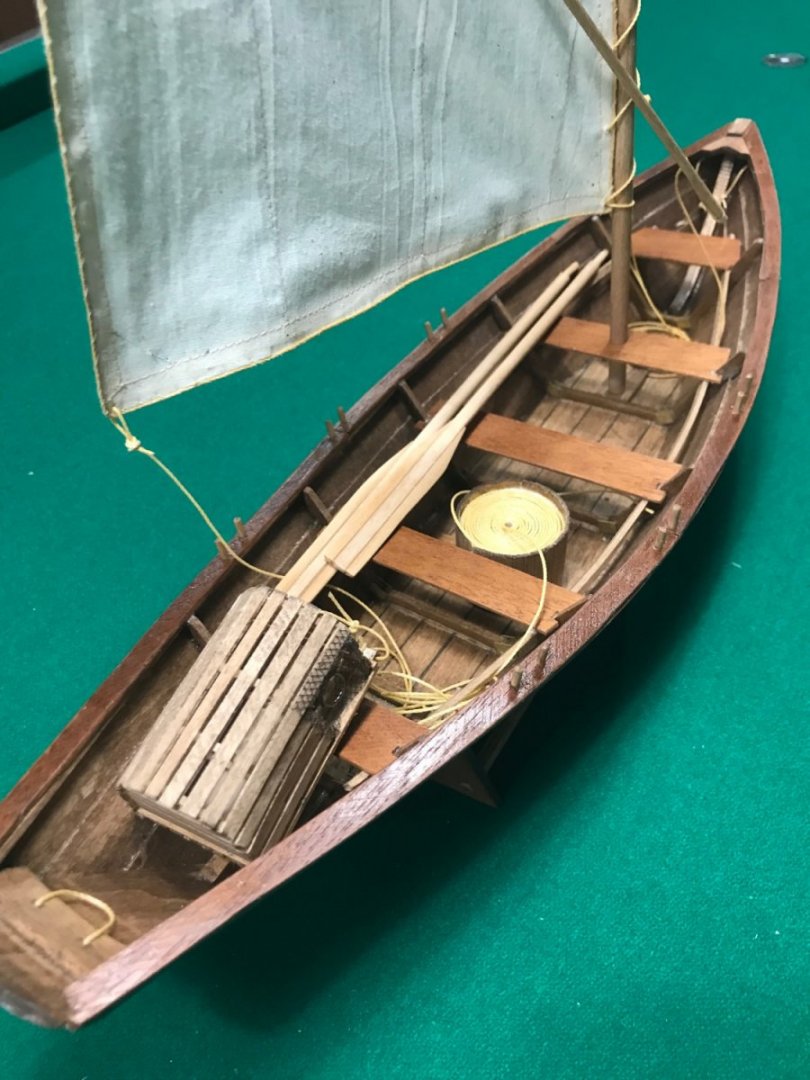
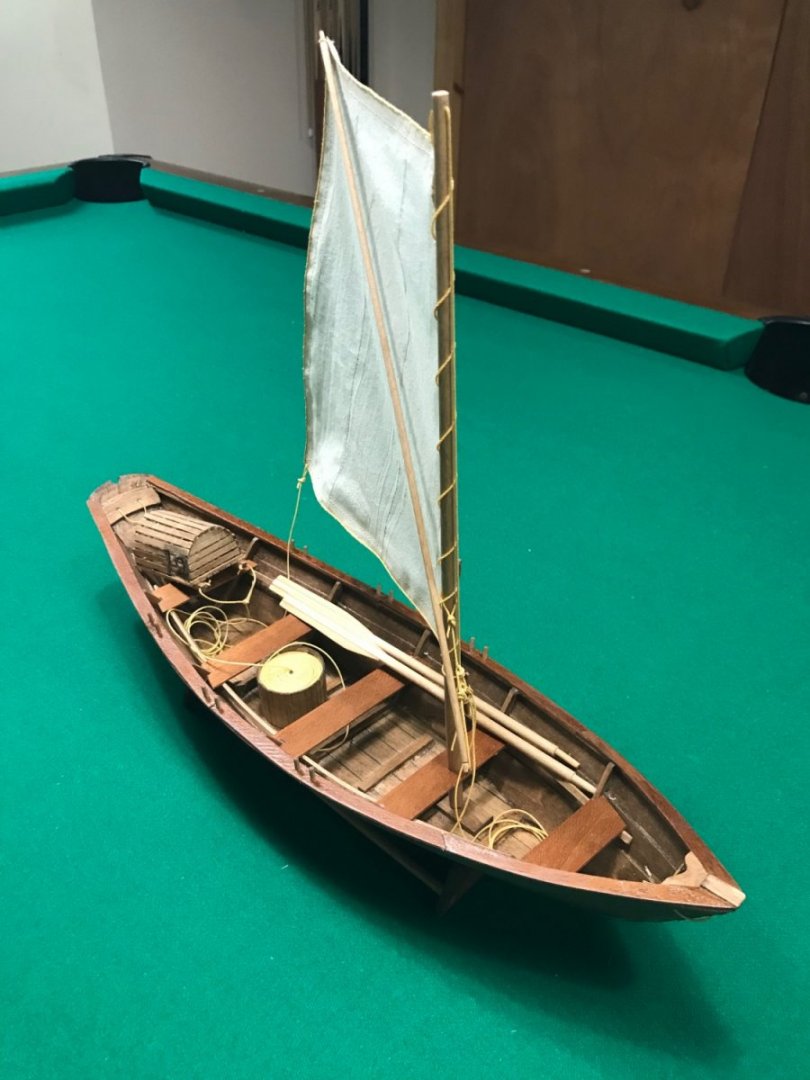
Lobster 🦞 Trap and Line Tub… Line Tub materials included in the original kit. The Lobster Trap, I am building from scratch 🦞 Now she is complete… The Dory is officially FINISHED! Back to the Robert E Lee… 😎
- 22 replies
-
- 8
-
-

-
- Laughing Whale
- Dory
- (and 1 more)