Egilman
-
Posts
4,373 -
Joined
-
Last visited
Content Type
Profiles
Forums
Gallery
Events
Everything posted by Egilman
-

F4U-1A Corsair by DocRob - FINISHED - Tamiya - 1/32
Egilman replied to DocRob's topic in Non-ship/categorised builds
Personally, it's been a while since I've seen a decent Arizona build... I have the same kit coming to stash next to my Banner AZ and everything I've collected over the years for it... Lotsa options as far as coloration for her as well given the state of paint in the US Navy circa 1940/41.... It's a stunning model when complete.... -
F4U-1A Corsair by DocRob - FINISHED - Tamiya - 1/32
Egilman replied to DocRob's topic in Non-ship/categorised builds
I understand, having suffered the same thing... I think it's perfect, no one could have done better... And your master level weathering is the icing on the cake so to speak... It is in scale and appropriate for the subject... Very well done... -
Yep Woodland Scenic.... They still have it...
-
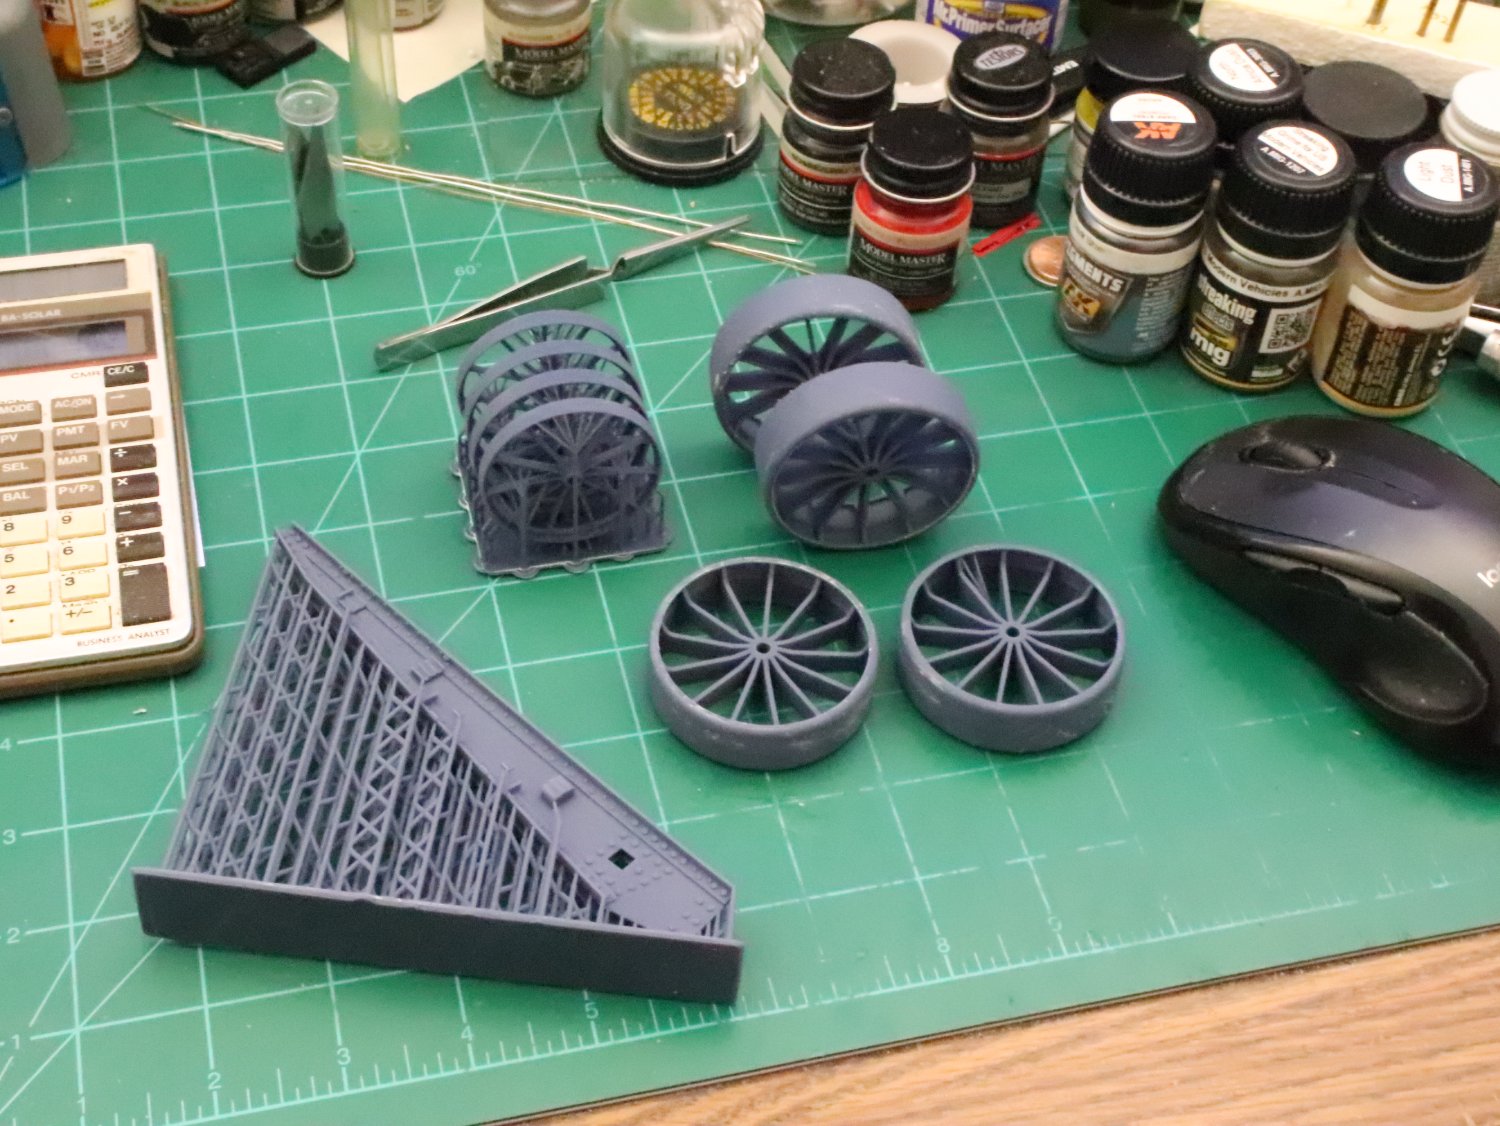
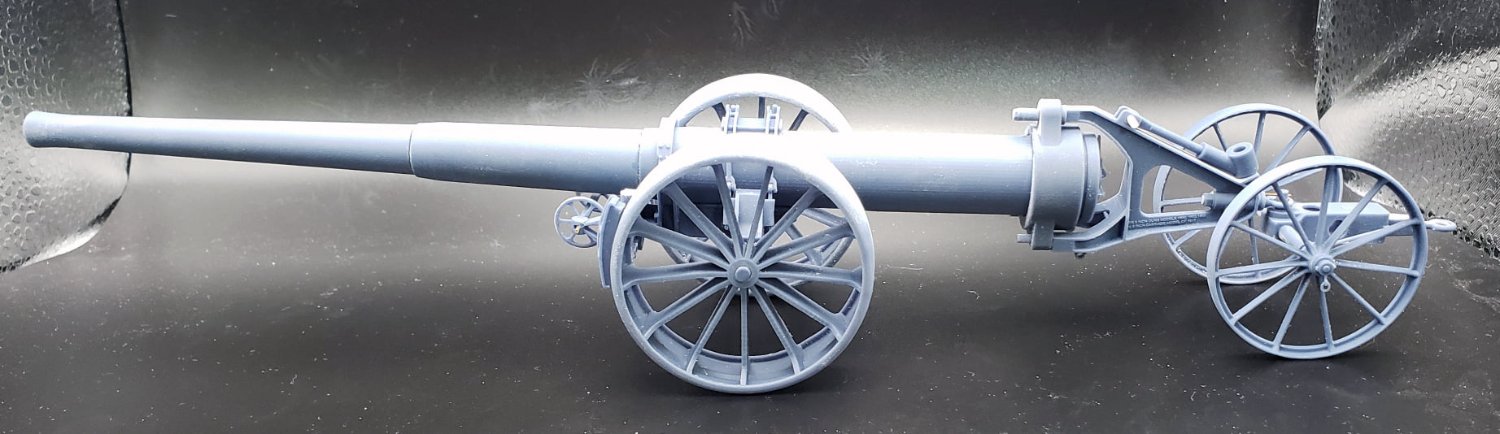
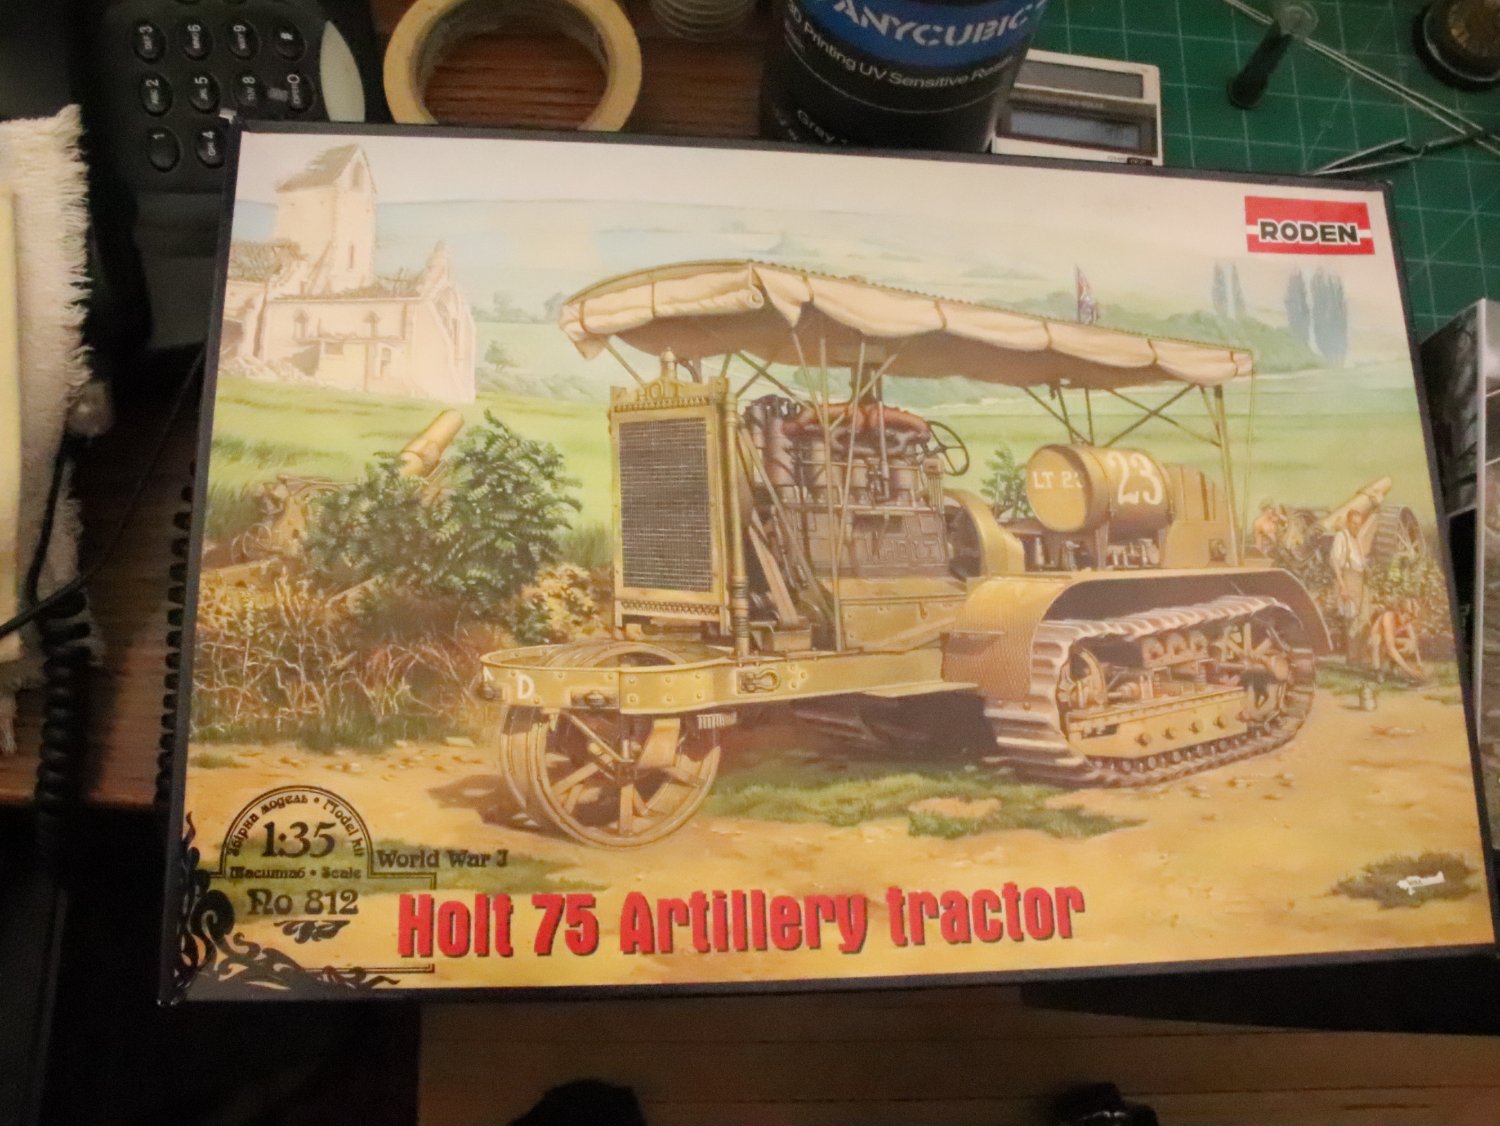
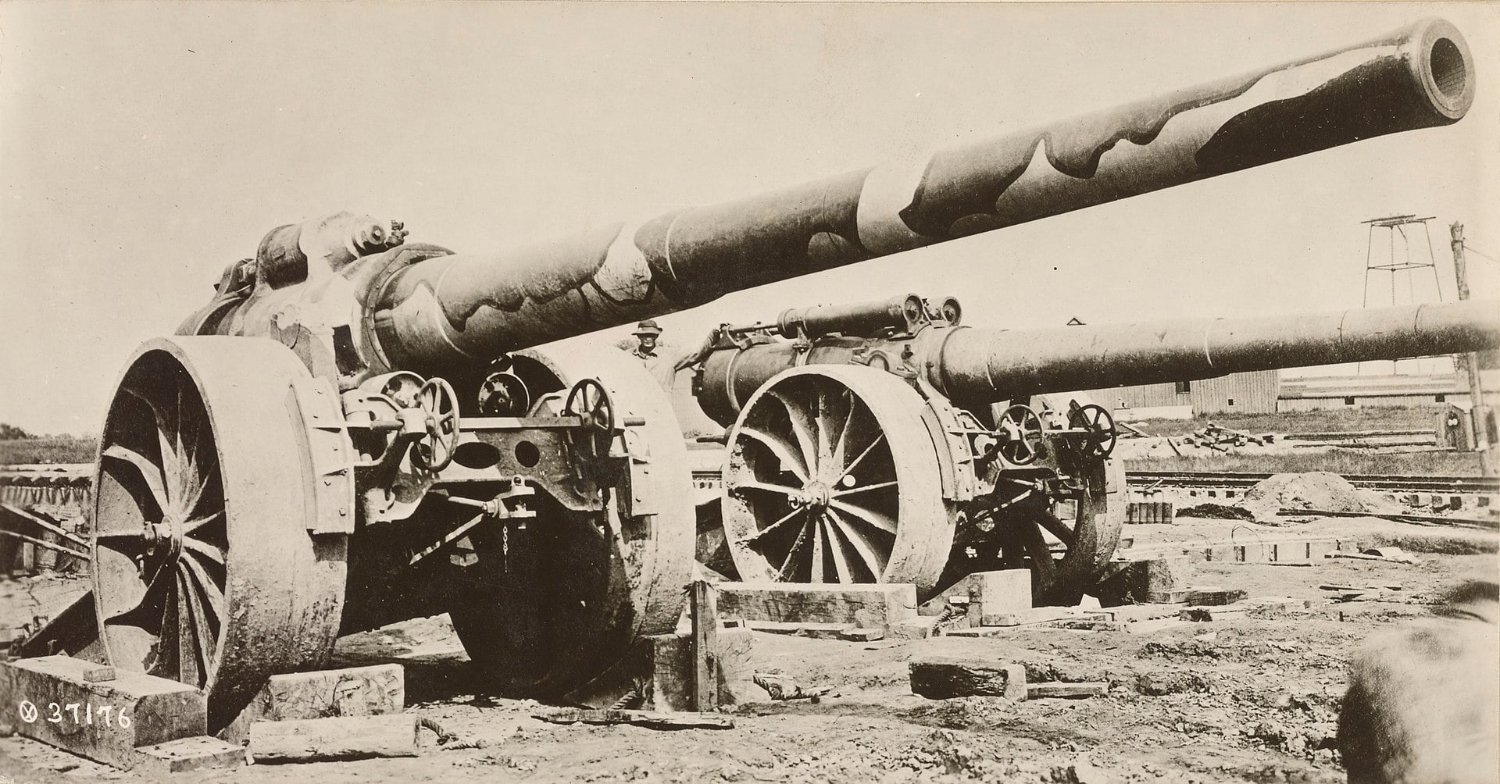
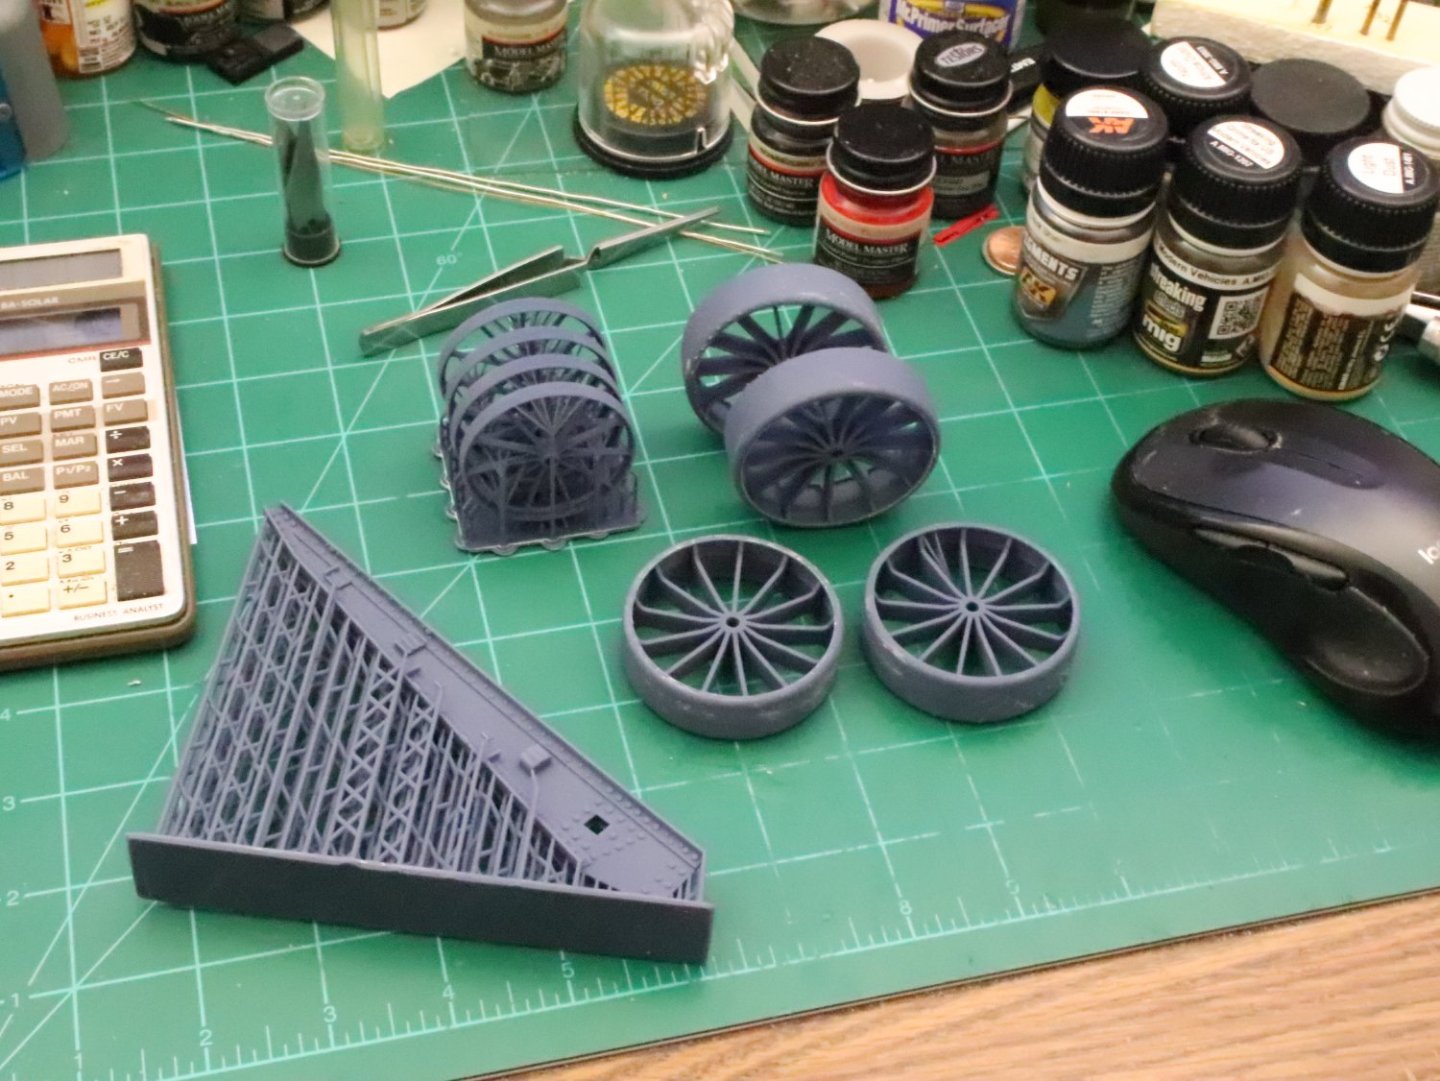
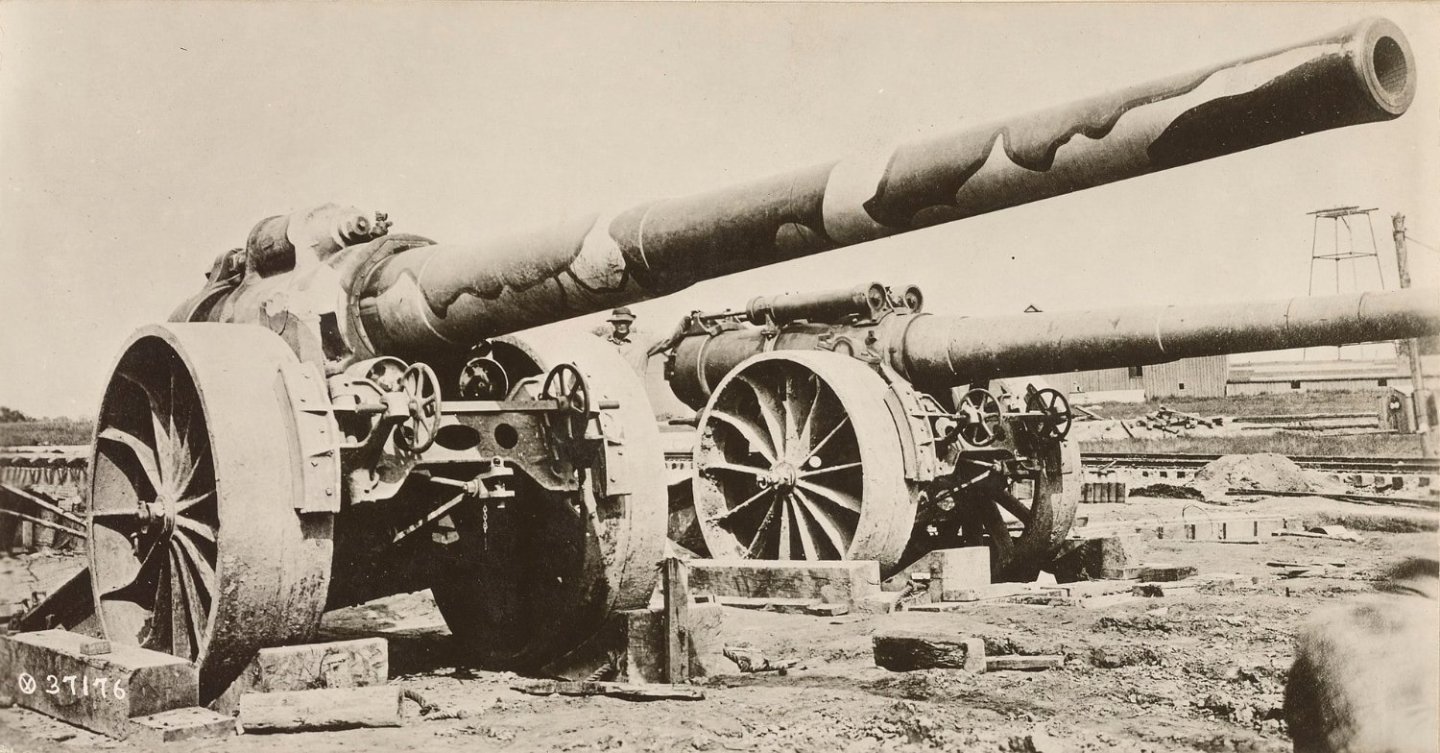
Wow we've been frequenting some of the same web spaces brother... Panzer concepts US 6" cannon... The Holt "75" Tractor and Das Werk 155mm C17S Howitzer... Been contemplating how to do that camo .... The 6" Gun was a coastal defense gun that was pulled from it's mounting and put on a "Mobile" Carriage... There were two different versions the M1917 and the M1918 as you can see in the pic, they were shipped to France but the war ended before they could be deployed... The kit depicts the M1918, I haven't looked at it close enough to see if it can depict the M1917 yet, but all the parts are there... It a fantastic piece of 3D print work... Comes with it's transport wagon and limbers as well... Great minds think alike... {chuckle}


- 171 replies
-
- 11
-

-

-
You sure it's 1/350th? I have the same kit coming out of Ukraine now for 19 days and tracking says it hasn't left there yet... but it's in 1/35th scale... Been going on a WW I binge as of late... expanding the stash... {chuckle}
-
Just a historical note Brewster Buffaloes were delivered in bare metal, they were in some cases the front line aircraft where they were stationed although they were essentially obsolete at the start of the war... all of them were painted in the field with makeshift sprayers, anything they could adapt and the usual panel masks for doing such were unavailable... Hence the "Soft/Wide Edge" look.... Probably a little too soft but close to what they really were before they were all shot down.... I agree, he's getting better and better each one he does Dan....
- 51 replies
-
- 10
-

-
-
You did great brother looks the part to me.... Sometimes dry stippling a sponge is the best way....
-
They have the primo 1/48 Fury right now, they won't even think of 1/32 until someone else like Tamiya announces one.... The Hobbycraft kit is the only game in town.... Evilbay has them at 200.00 US dollars right now (up to 280.00) and as you say they are OOP so they are going to go up in the future... A Fischer kit is in the stratosphere range right now, high end collector type stuff... (if you can find one)
-
F4U-1A Corsair by DocRob - FINISHED - Tamiya - 1/32
Egilman replied to DocRob's topic in Non-ship/categorised builds
I love that PSP base, did you create it, or was it purchased? Looks great with the plane sitting on it... -
F4U-1A Corsair by DocRob - FINISHED - Tamiya - 1/32
Egilman replied to DocRob's topic in Non-ship/categorised builds
Absolutely my friend, Microscales product only works for a few days before it attaches and becomes next to impossible to remove.... In situations where the masking has to stay on for multiple applications of spray products I found that regular old latex silicone painters clear caulk works the best.... Won't harden for months, can be spread thinly and sticks without lifting from liquids, is absolutely impenetrable to paint & thinner products but it easily pulls off when you want to remove it... The one problem is it is only available in contractor grade quantities... So using it becomes cost prohibitive given the amount we typically use on models and there is no way to seal it up to prevent drying in the container.... The application of it to canopies and any kind of glass like framework is to mask off the areas you want to paint, spread on a thin coat, then while still wet pull the masks off the frames leaving a future coated, caulked canopy with just the frames exposed to paint... I know it sounds kinda backwards, but it works... (if the model is worth the costs associated with this technique) I prefer Formula 560 for affixing canopies and windows, personal preference, (second choice would be Gator's Grip Thin Blend) and they give me the least headache when I have to remove one.... Yep that one of the bumpy trails we go down in our journey's, all I can say is keep trying and experimenting with other products till you find the combination that works for you... And once you do, never look back.... This one aside from the bleed under looks like it worked well.... It happens to everyone eventually... Nice recovery... -
F4U-1A Corsair by DocRob - FINISHED - Tamiya - 1/32
Egilman replied to DocRob's topic in Non-ship/categorised builds
Yes, Pledge doesn't fog from CA... Especially the gel CA's.... I eventually went to canopy glues for all clear styrene... Looks to me like the paint pigments were carried under the friskit masks by the thinners.... Friskit masks work well for straight up paint, or mildly thinned paint, not so well on highly thinned paint.... The fact that you could just rub it off tells the tale.... Straight paint would have attached to the styrene... I would suggest a liquid masking solution like Microscale's Micro Mask or similar when using highly thinned paints... And always dip canopies into future (pledge) before masking and painting.... I've had those heart attack moments before I learned the lesson.... (once after a 4 month build on a glass nosed B-24 and a second on a glass nosed B-25) I had to strip the canopies and do it over.... -
1936 Rolls Royce Phantom III by CDW - Revell - 1:16 scale
Egilman replied to CDW's topic in Non-ship/categorised builds
There is always Model Builder Supply... https://modelbuilderssupply.com/elbow/ Looks like they have a complete selection.... -
1936 Rolls Royce Phantom III by CDW - Revell - 1:16 scale
Egilman replied to CDW's topic in Non-ship/categorised builds
Yeah they would, you only need the od size for the tubing.. It becomes a simple plumbing problem after that and solid as well... From what I can find the exhaust was made of thinwall stainless and had simple swage connections... they drop off the front 90deg straight down till they clear the fan arc then angle at 45deg towards a central collector mounted somewhere around the front cross member then another 45deg into the collector... From there the single exhaust pipe runs to the rear.... Very difficult to find pics of the real deal though... But I believe they didn't have a dual exhaust variant for these so it makes sense... Those plastruct elbows solves this problem perfectly.... Thanks Andy for the link.... One of the things I love about this site if there is a solution someone knows and is willing to share........- 97 replies
-
- 10
-
-
F4U-1A Corsair by DocRob - FINISHED - Tamiya - 1/32
Egilman replied to DocRob's topic in Non-ship/categorised builds
It's a common mistake seen on all too many builds.... I like it too, it's very well thought out and has a scale appearance.... Well done... It's more about the look to the eye and should disappear to the camera the farther you get away from it.... Weathering is artwork and requires a feel for the effect... it's very subtle... You've got the look down, very scale, stunningly beautiful in effect... A well used operational mud bird, the way they usually looked when flying from bombed up and patched dirt strips... Definitely a "Honey I shrunk the Corsair" build... Exquisitely well done brother and thank you for explaining and showing your technique... It's a lot of work to do a used finish on a live bird... You've got it down.... A well deserved WELL DONE!!! It's a shame we can't put it in the gallery.... (although it is a ship of sorts {chuckle}) -
Look at that stressed skin detail in the last picture.... the oil canning is phantaboulous.... I'll tell ya, injection molding has come a long long way from when we started... Gorgeous airplane brother.....
-
1936 Rolls Royce Phantom III by CDW - Revell - 1:16 scale
Egilman replied to CDW's topic in Non-ship/categorised builds
Yep stainless steel exhaust system that collects forward... Weird I know, but it worked... I'm surprised they used rubber hose to replicate it, seems a bit on the shortcut side to me... Your chassis looks the part, almost solid black, semi gloss, with shiny highlights.... Sure looks the part... RR back in that day was all about understated elegance, boring but elegant, and your replicating it well.... I hope the rubber hose takes paint well, it should be a shiny part.....- 97 replies
-
- 12
-
-
-
Excellent save....
-
Hey brother, that is all to common an occurrence with some manufacturers today... That one, the fix is easy though.... Slice the cowling in half and patch in an extension out of .015 or .010 plastic... I would do it in .015 and if there is any thickness variation then leave the edge to the outside for easier sanding off... (once it is all glued together) Thank god it's on a straight section of panel...
-
F4U-1A Corsair by DocRob - FINISHED - Tamiya - 1/32
Egilman replied to DocRob's topic in Non-ship/categorised builds
Very well done, light to moderate chipping... Looks real... -
I do not know how I missed this one mike, I'm sorry.... More of your stunning PE work... I wouldn't, a 500 lb bomb wouldn't do that much seeable damage... Maybe, (probably) bulge the deck a bit, possibly split a few seams, if it was an armor piercing bomb it could easily have penetrated completely through the deck and hull to explode below the ship.. (happened to several ships at Pearl, there wouldn't be any serious stand out damage) In my opinion brother, I wouldn't enlarge it any and what you have is more than enough...
-
I haven't forgotten this one my friend, it has just been set aside while real life and other projects diverted my attention.... I will be getting back to it eventually... (yeah 2.5 years I know, that's a lot of sidetracking)
-
Beautiful job, harkens back to the day when machining was an art form itself... Today the art is being lost, everything is computer driven and is capable of some fantastic things, but still, seeing it done by hand with nothing automatic warms my heart in ways many wouldn't understand... Very well done....
-
F4U-1A Corsair by DocRob - FINISHED - Tamiya - 1/32
Egilman replied to DocRob's topic in Non-ship/categorised builds
Chuckle, I don't see the decal printers going out of business any time soon.... Not everyone has the skills to paint insignias and technical stenciling on everything.... Sometimes it is just easier to decal as opposed to painting... Few can tell the difference when done properly... -
My first three months in machine school was learning how to cut metal and read and draw blueprints, the other 21 months was learning how to make the machine do what I want it to correctly and most efficiently... You can't do that without creating jigs and fixtures.... That is the real art to successful production machining...
-
F4U-1A Corsair by DocRob - FINISHED - Tamiya - 1/32
Egilman replied to DocRob's topic in Non-ship/categorised builds
Very nice sequence, I remember creating these masks when friskit film became widely available, it's an involved process and takes a bit of patience, but when done right, beats all decals hands down... Decals can come close but paint is much more real looking.... Well done....