HOLIDAY DONATION DRIVE - SUPPORT MSW - DO YOUR PART TO KEEP THIS GREAT FORUM GOING! (Only 20 donations so far - C'mon guys!)
×


Egilman
-
Posts
4,377 -
Joined
-
Last visited
Content Type
Profiles
Forums
Gallery
Events
Everything posted by Egilman
-
 Thanks Gary, Trying not to push it too fast, letting it happen is difficult when you can begin to see it come to life... Anticipatory speed tends to retard the modeling skills... {chuckle} Thanks as well Ken, I think I've found it, trying desperately to not hurry it into a disaster... but it's looking good right now...
 -
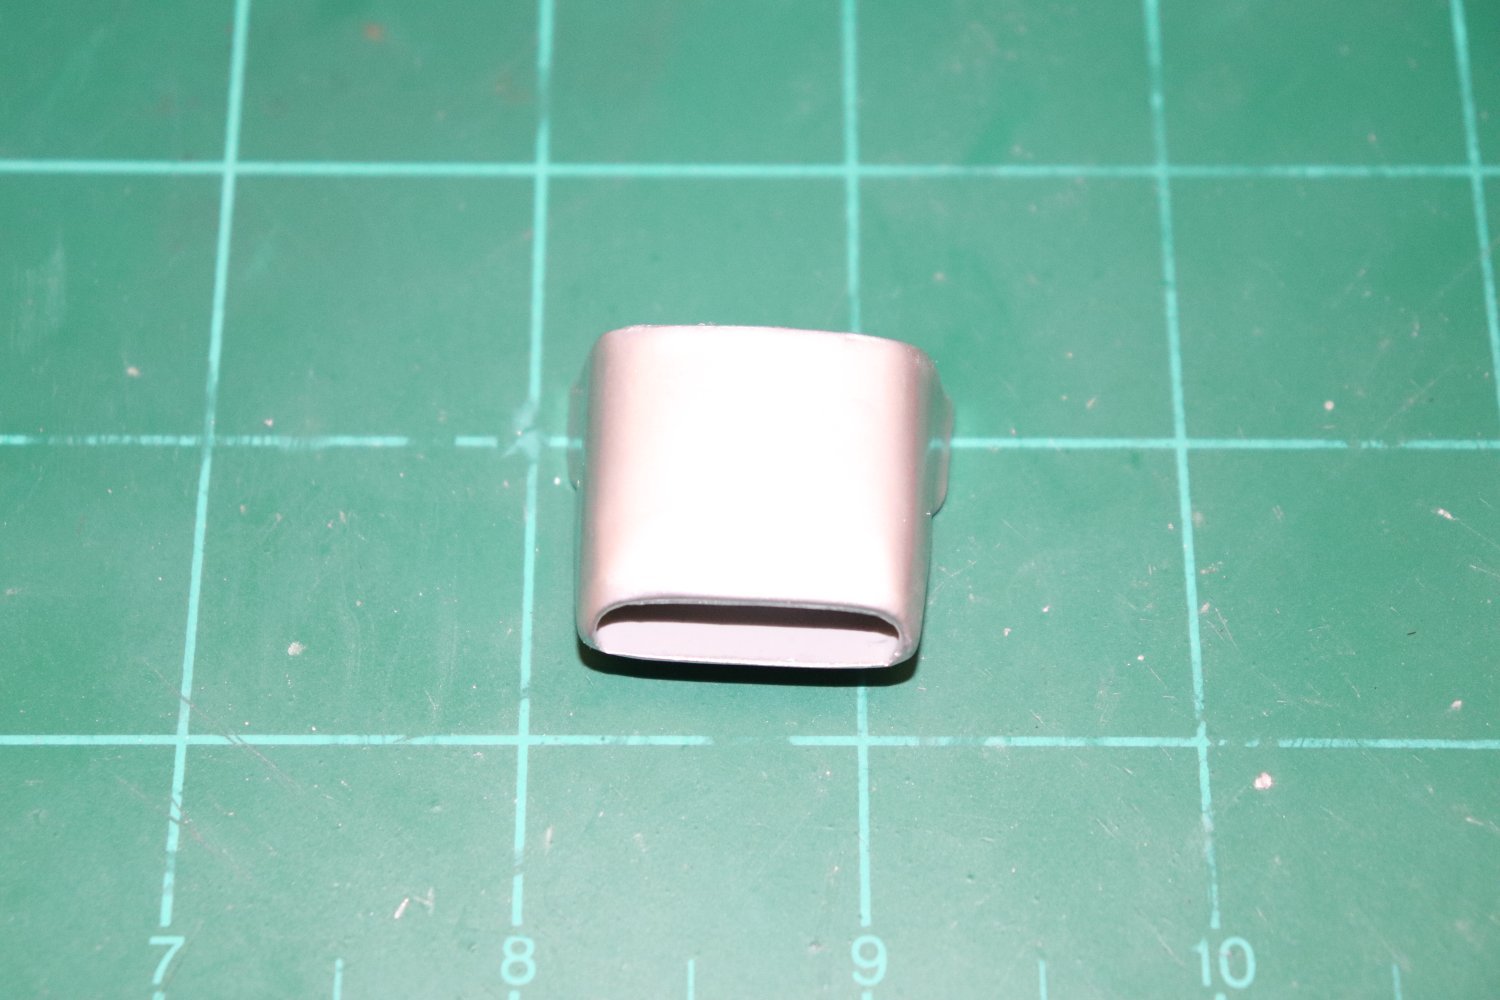
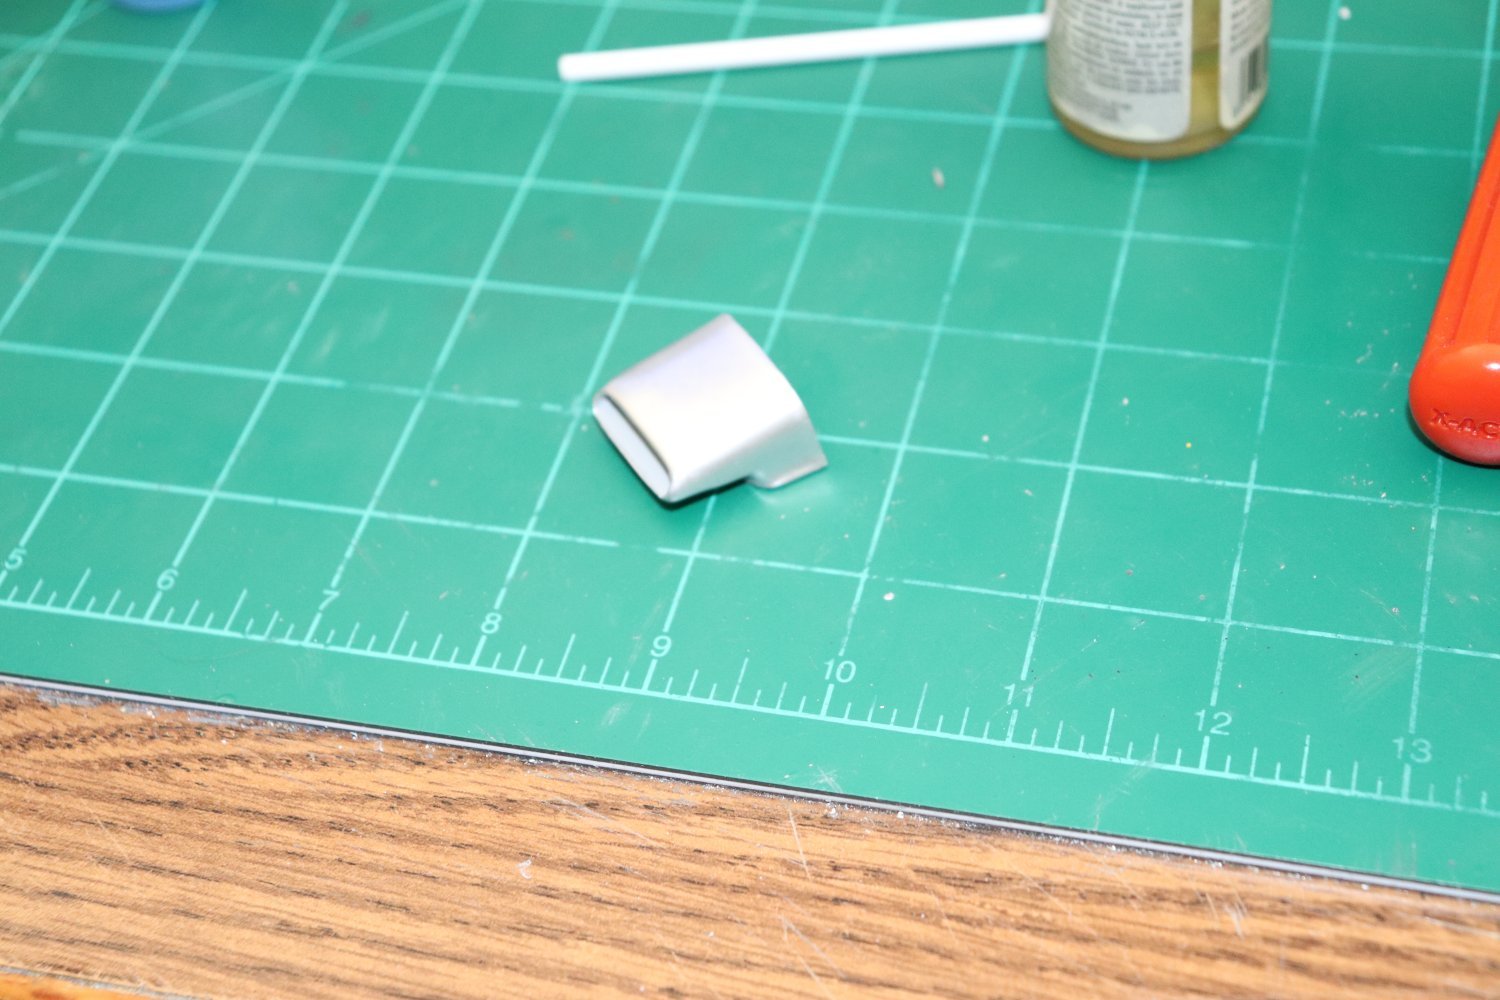
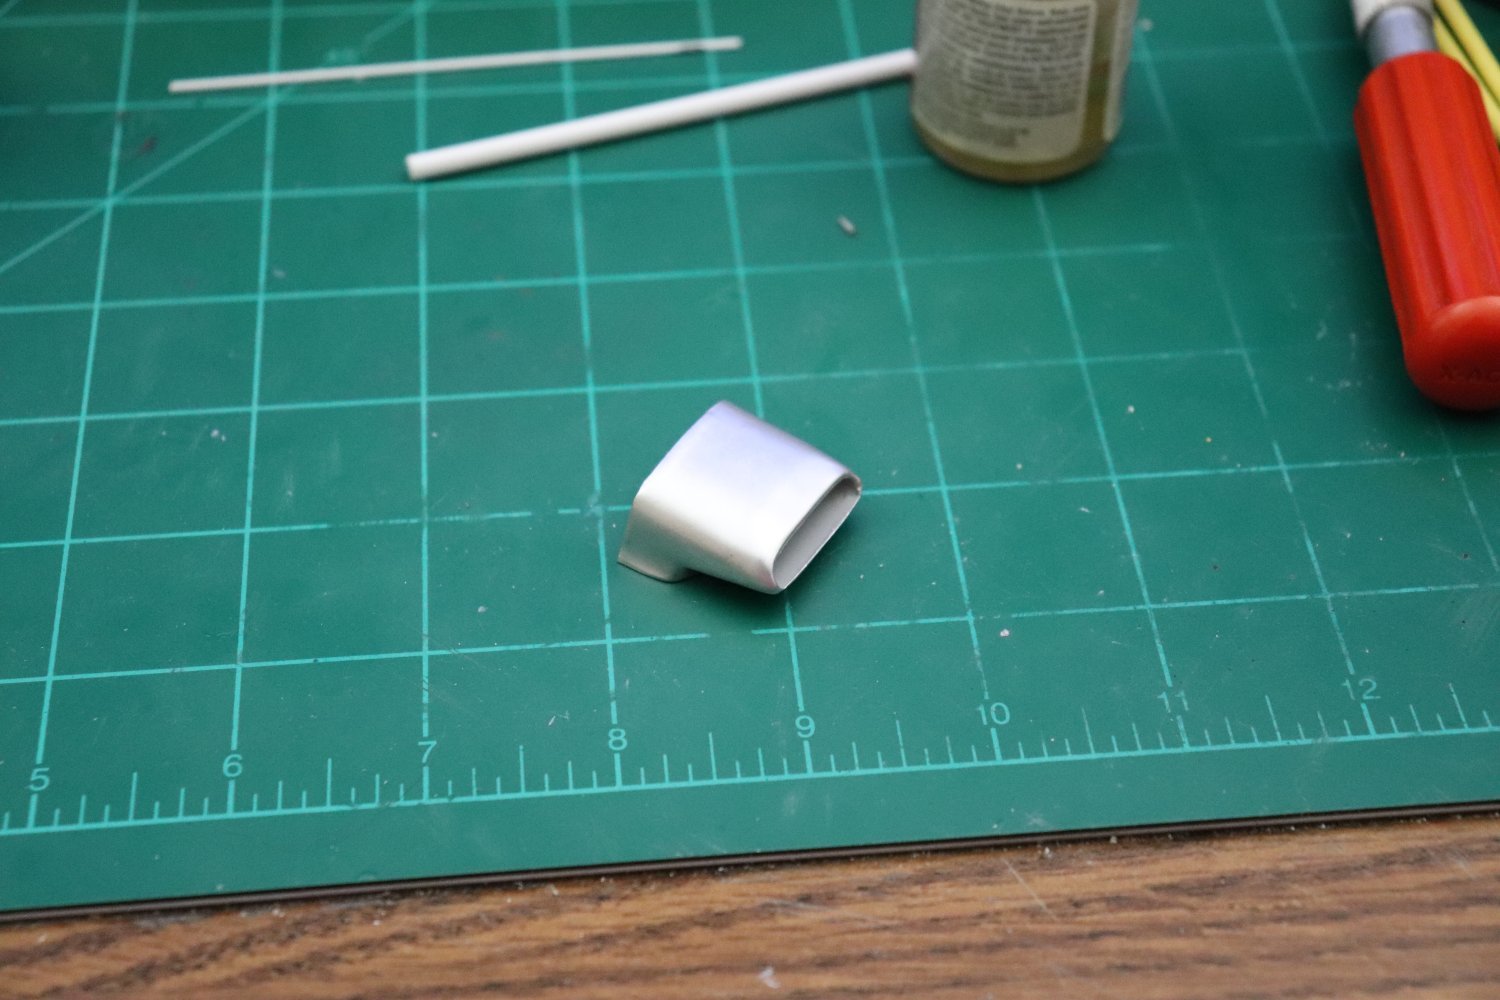
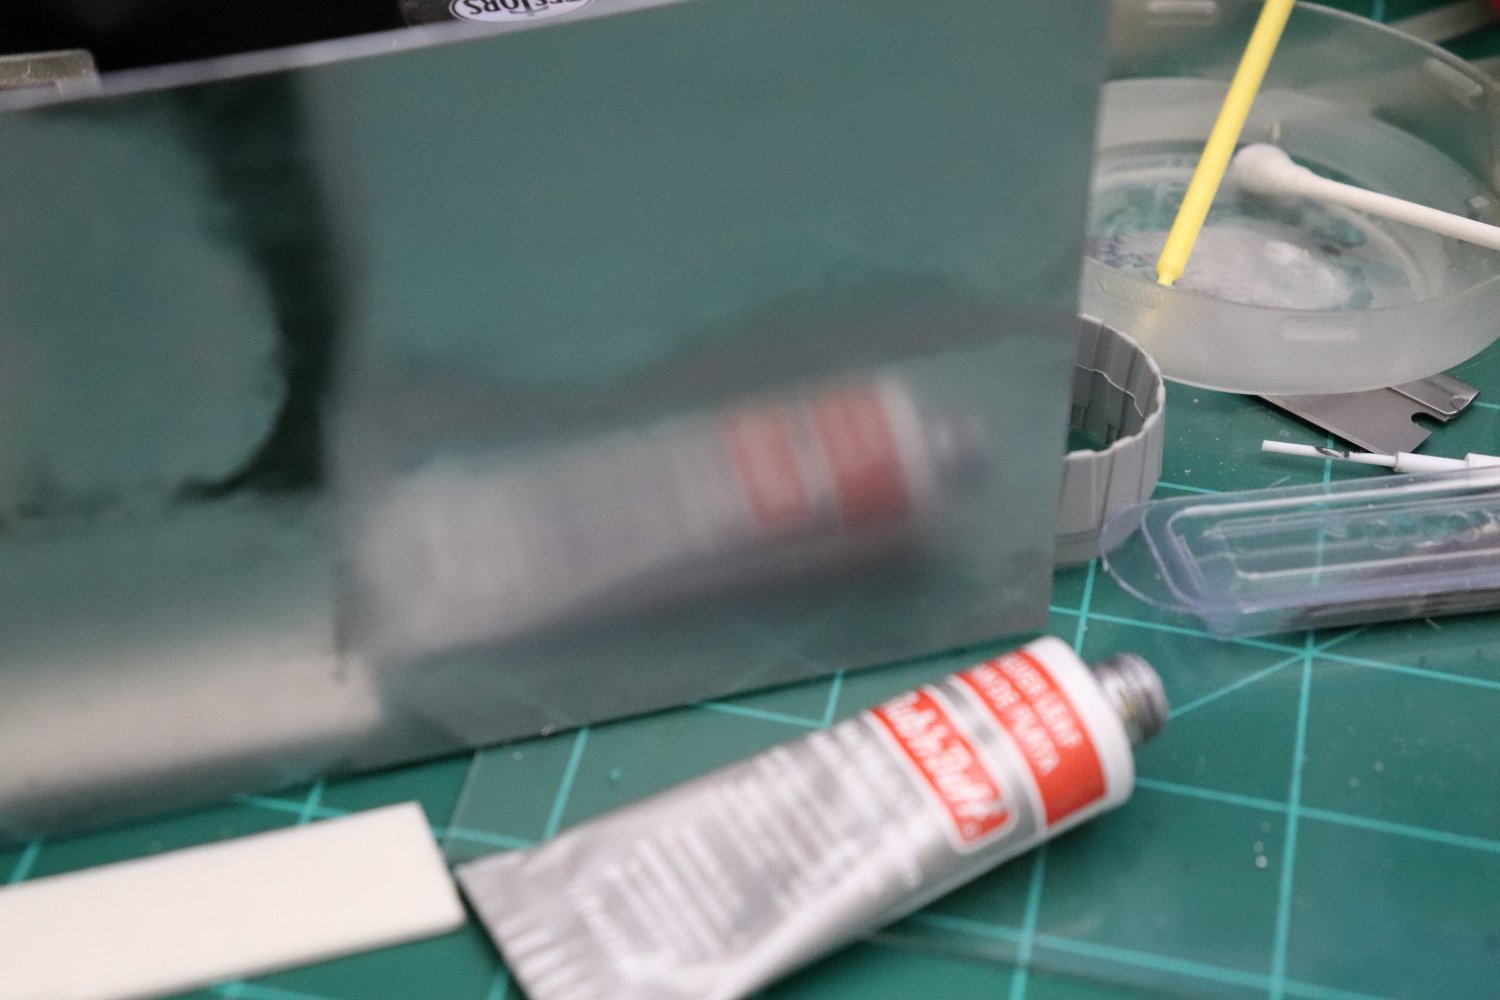
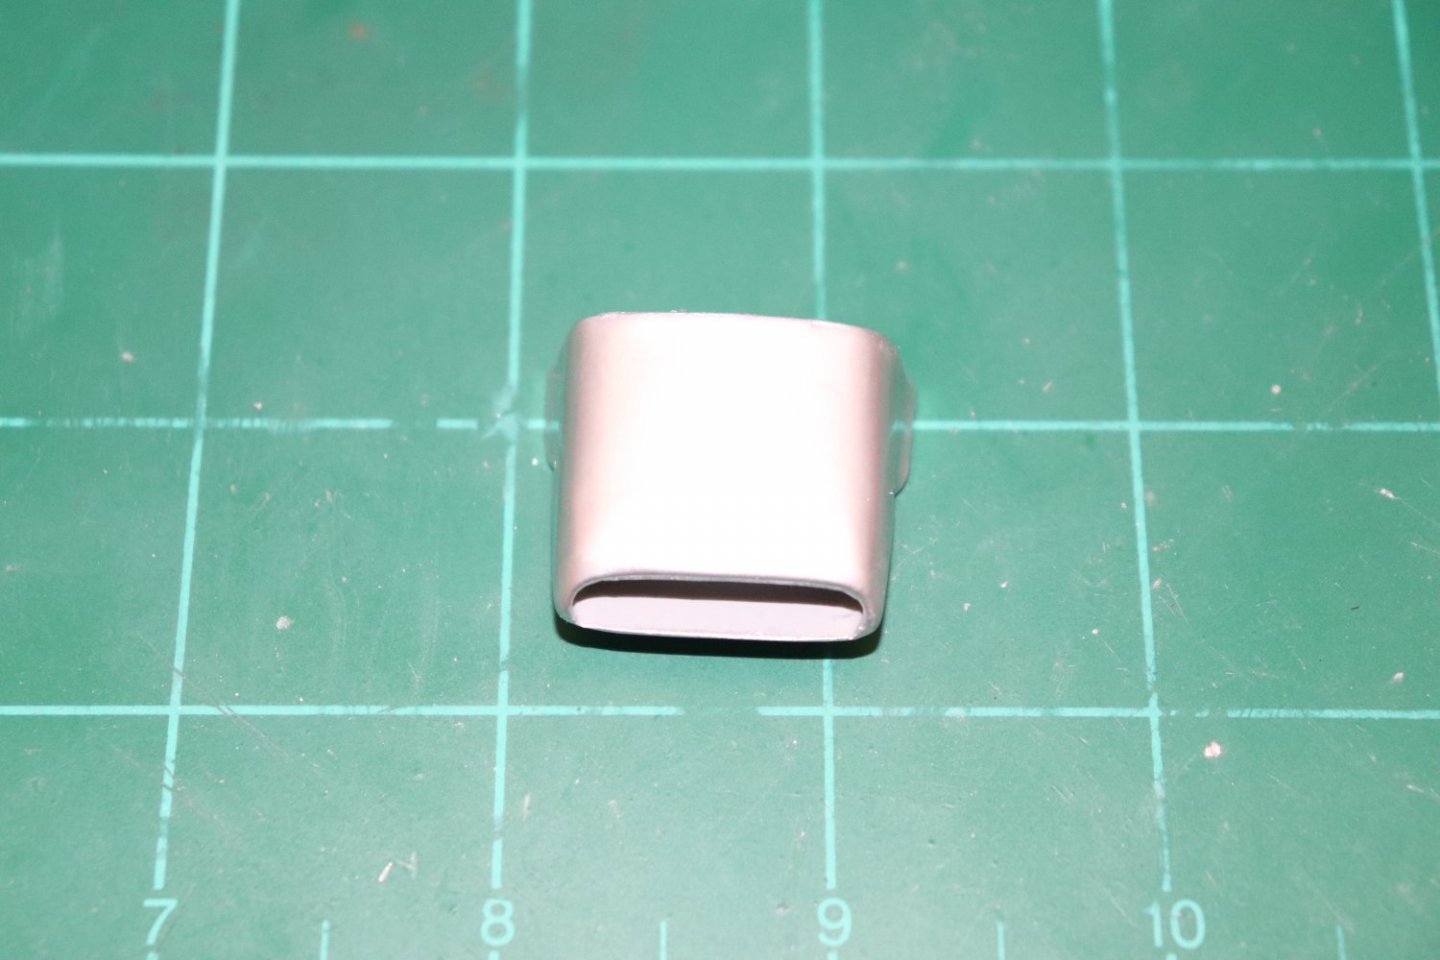
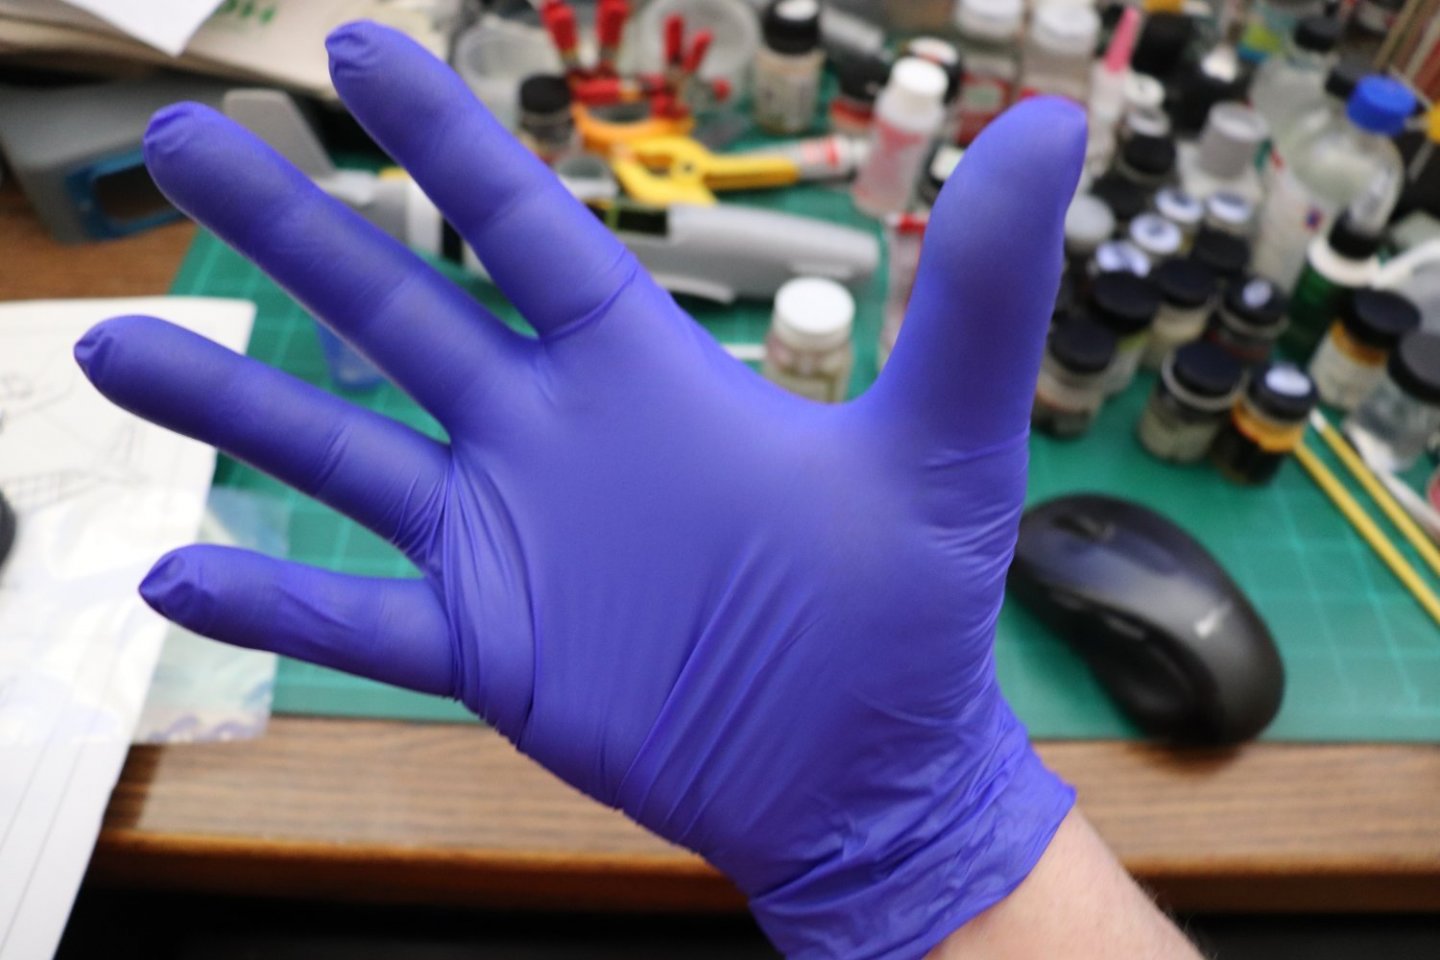
Another update my friends, (and a taste of what's coming) I've proceeded to get the rest of the construction finished... Minor things taken care of so when the finish is done it's a short assembly sequence to the finished bird... Landing gear installed, the inner doors are retracted cause that is the way they were parked... The Landing Door sequence goes like this.., #1 Inner doors open; #2 Landing Gear drops taking the outer door with it; #3 Inner Door closes... There are pics on the net of this aircraft sitting on a tarmac with the inner doors open and hanging down, but if you keep searching and find a pic of a just landed aircraft, the doors will be closed... You can also find pics of recently landed aircraft where the doors are partially open and at different angles side to side... It would take about 6 hours, but the hydraulic pressure would bleed off without the engine running and the hydraulically operated doors would sag down to the open position, the same happened with the flaps and control surfaces as well.... So what I did here was glue them closed, not so much as a recently landed aircraft, it cause the kit left no way to mount them without making a huge mess right in the middle... Also, I don't expect this model to last too long on the shelf, the landing gear is so thin that I doubt they will support the model for any real length of time without breaking.... Also the Propeller and blacked out Canopy are in process as well... But while waiting for those first stages to dry, I though I would give you all hint of what I hope is to come... The under wing radiator intake, part of the fuselage and in BMF.... Gloved finners... I use gloves for the RnB, saves the cleanup afterwards.... (and works better in my opinion than a bare finger) Rub & Buff... Well a taste, I'm pleased, very pleased.. if it comes out this well on the fuselage, I'll be a very happy camper.... Just a little more work on the Propeller and Canopy, and I feel we are going to see something good... (need to assemble and mask the canopy so the frames can be rubbed and buffed along with the fuselage) I'm hoping everything goes as planned... EG


-
I appreciate it my friend, I like to do the research as well, but sometimes I get cross tracked, thank you for the vote of confidence...
-
Hey brothers, Well the wings didn't come out too bad, but the fuselage, well, my excuse is compound curves... (I know not really an excuse) I probably should have marked the panel lines and shaved off the rivets... I know this, next P-51 I do will be a Tamiya "D" model done up as a red-tailed Tuskegee bird... Thankfully won't have any stripes and everything they forgot with this one, (drop tanks anyone) will be there... Best part? NO RAISED RIVETS!!!! and metal landing gear! (of course it will take about 4 times longer to build) I appreciate it my friends, trying to move along quickly to get to the real point... A workable BMF Finish... Thanks for the support it's appreciated..
-
Another update: All parts needing it are gloss coated... The fuselage of course was the last one done so I'll have to wait for it to fully cure before doing the RnB on it... Natural light... Bright light: So it will be the Wing assembly tonight, Fuselage RnB tomorrow night.... I know it's a longer slog thru a relatively simple build sequence and the point of doing this comes near the end, but it can't be helped if following Paul's RnB sequence... We want it shiny so it has to go over a gloss coat... Which makes it one of the last parts of the process and besides, I got a bit too close to the air intake and it developed a shallow run which will have to be polished out as well... Friday the decals should arrive so I want to be ready for them by Saturday so we will know by Saturday morning how it turned out... Onwards... I'm getting there, thanks for the patience my friends... EG
-
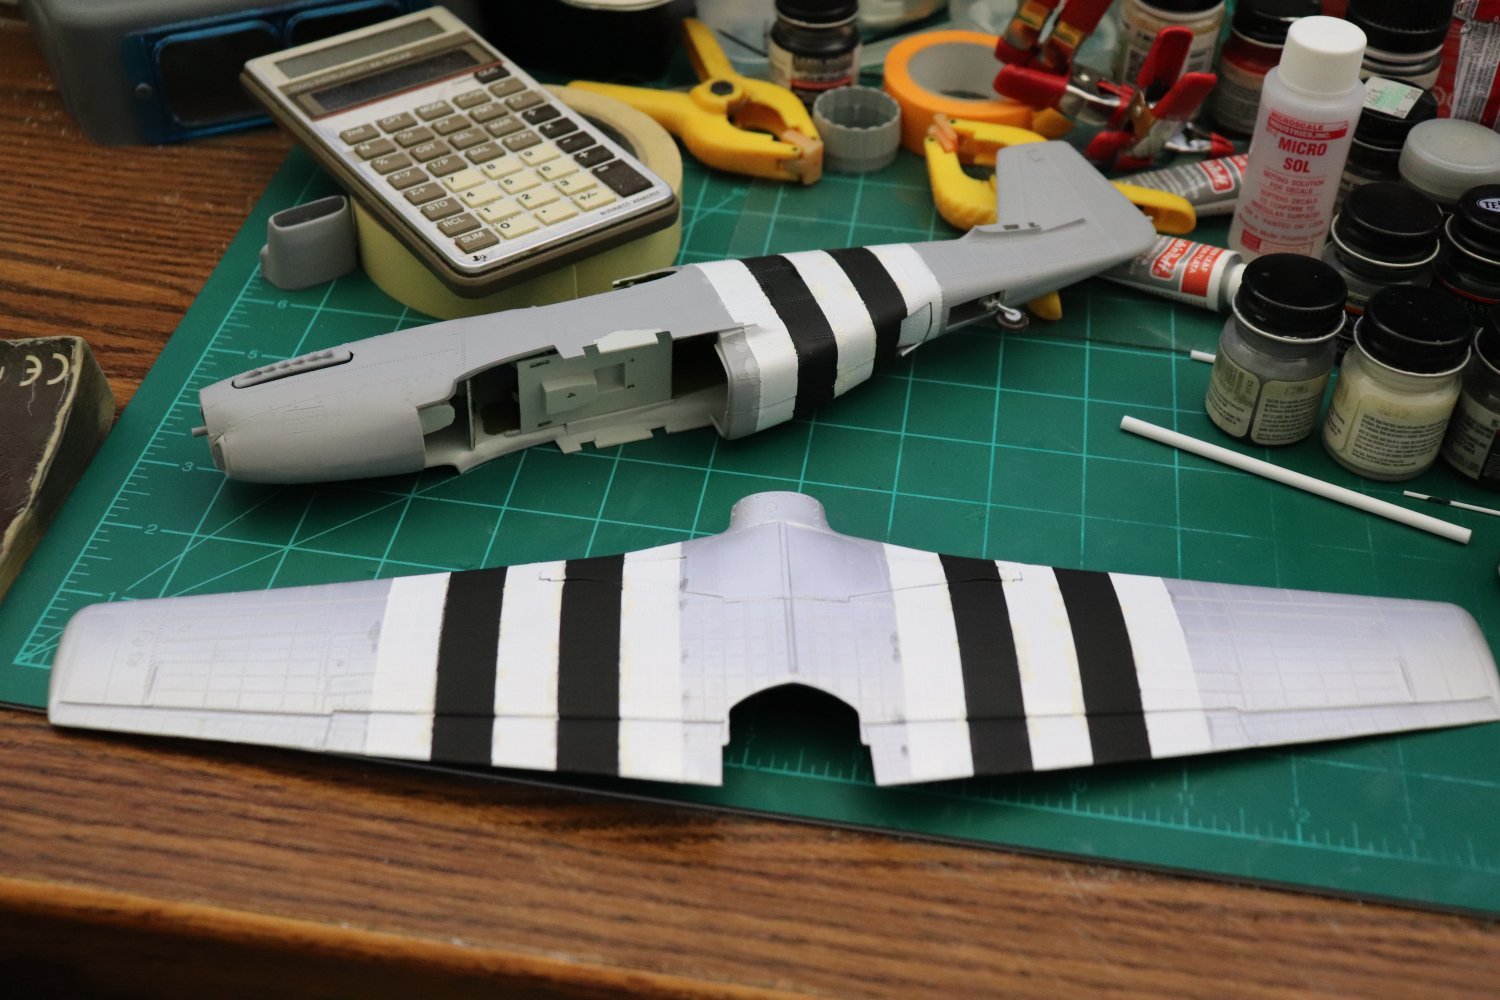
Well an update... Masking rivets... Well the invasion stripes are painted off... Not my best masking job but then it is what it is... About time for clear coating and Rub n Buffing the fuselage... That's the whole point of this quick and dirty experiment... Onwards...


- 63 replies
-
- 10
-

-
Thanks Dan, yeah it's a trip down the lane alright, I forgot how hard it is to mask when you have rivets all over the place... I think I'm gonna pick up a Hase or Dragon "D" model to do one up right for the shelf... I'm thanking god this one was relatively cheap.. {chuckle}
-
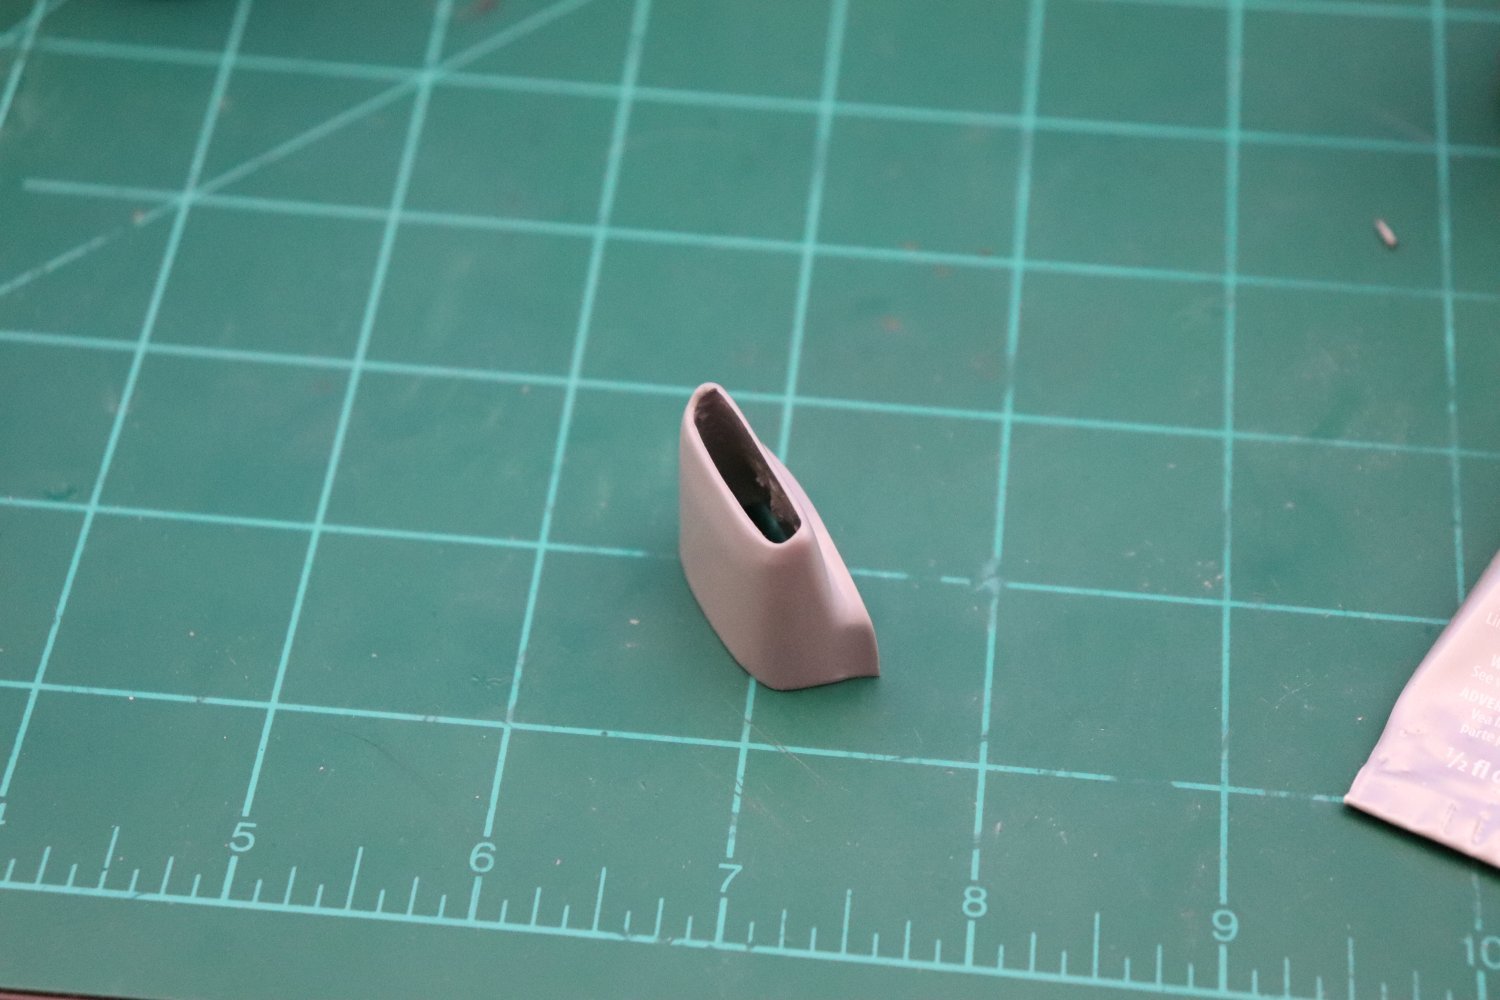
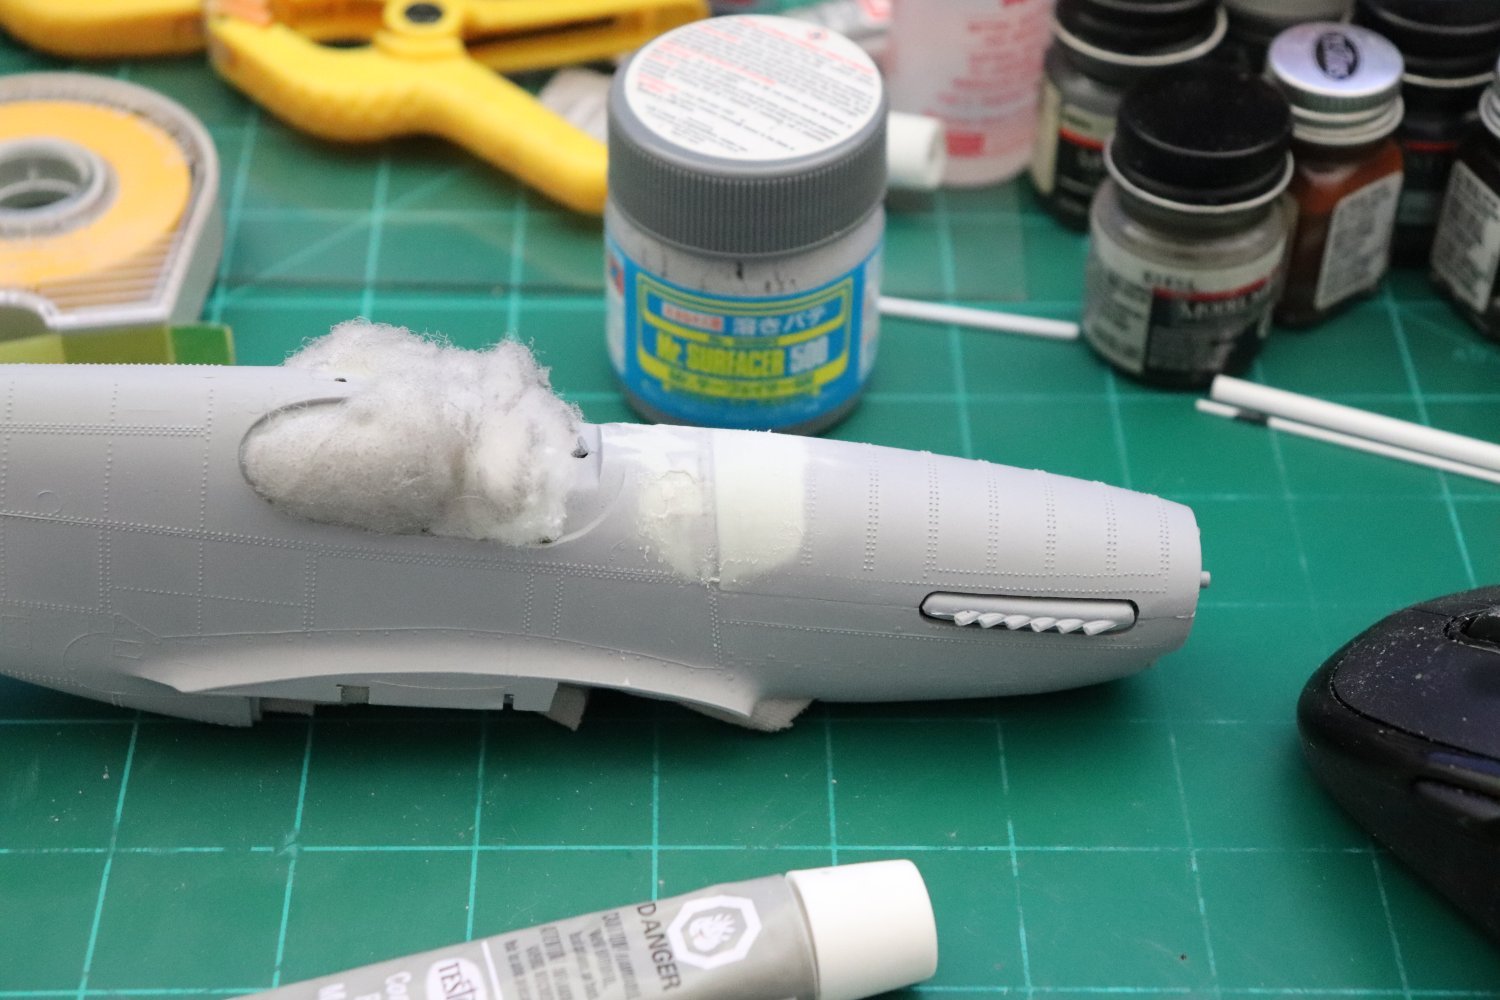
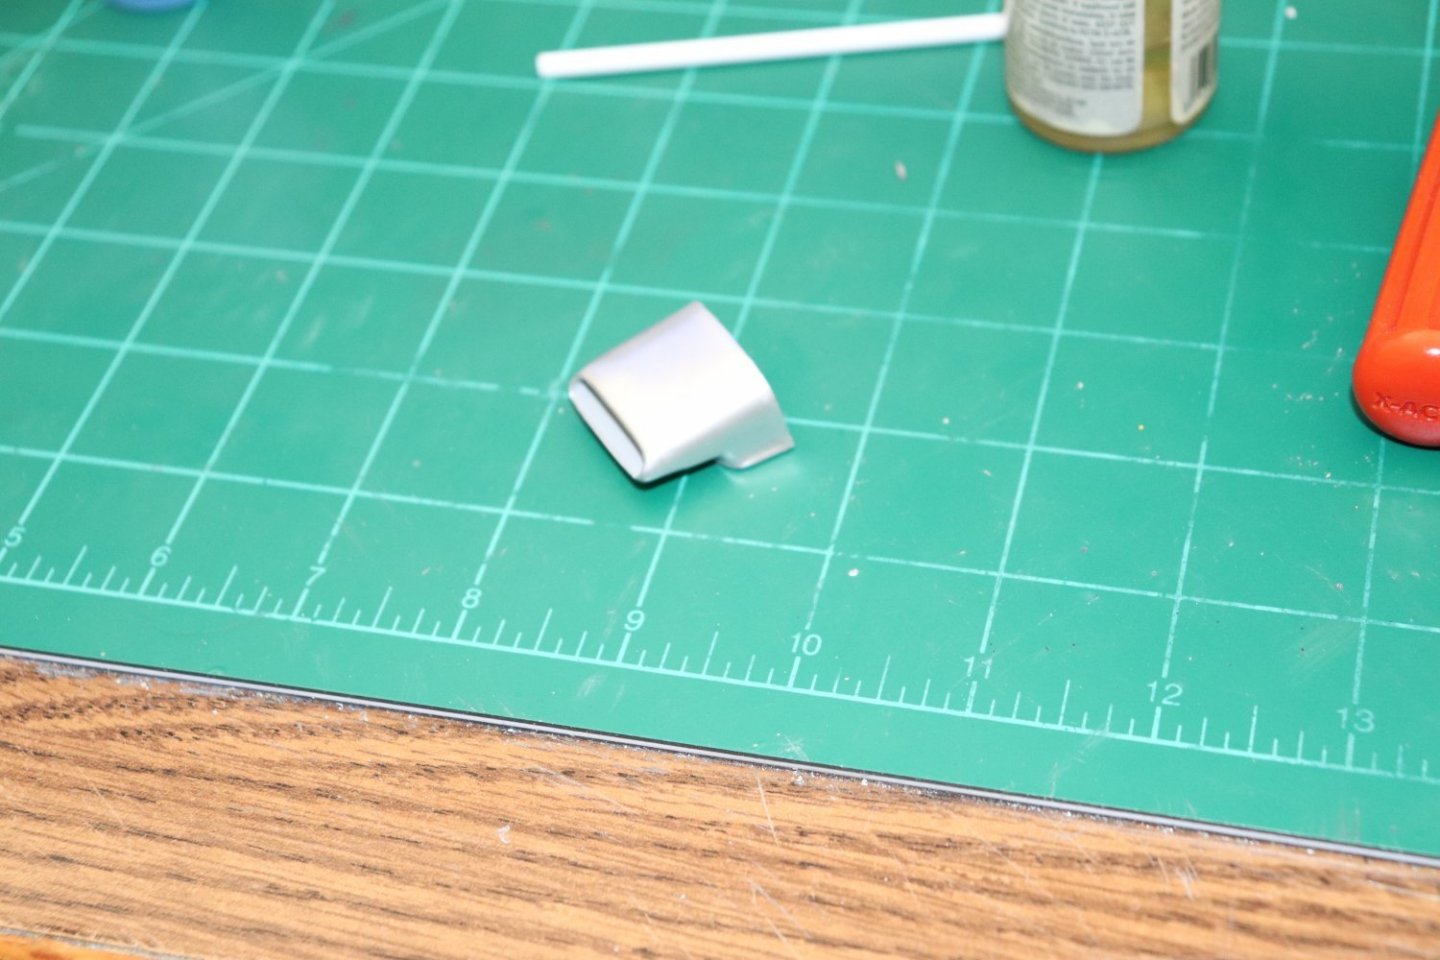
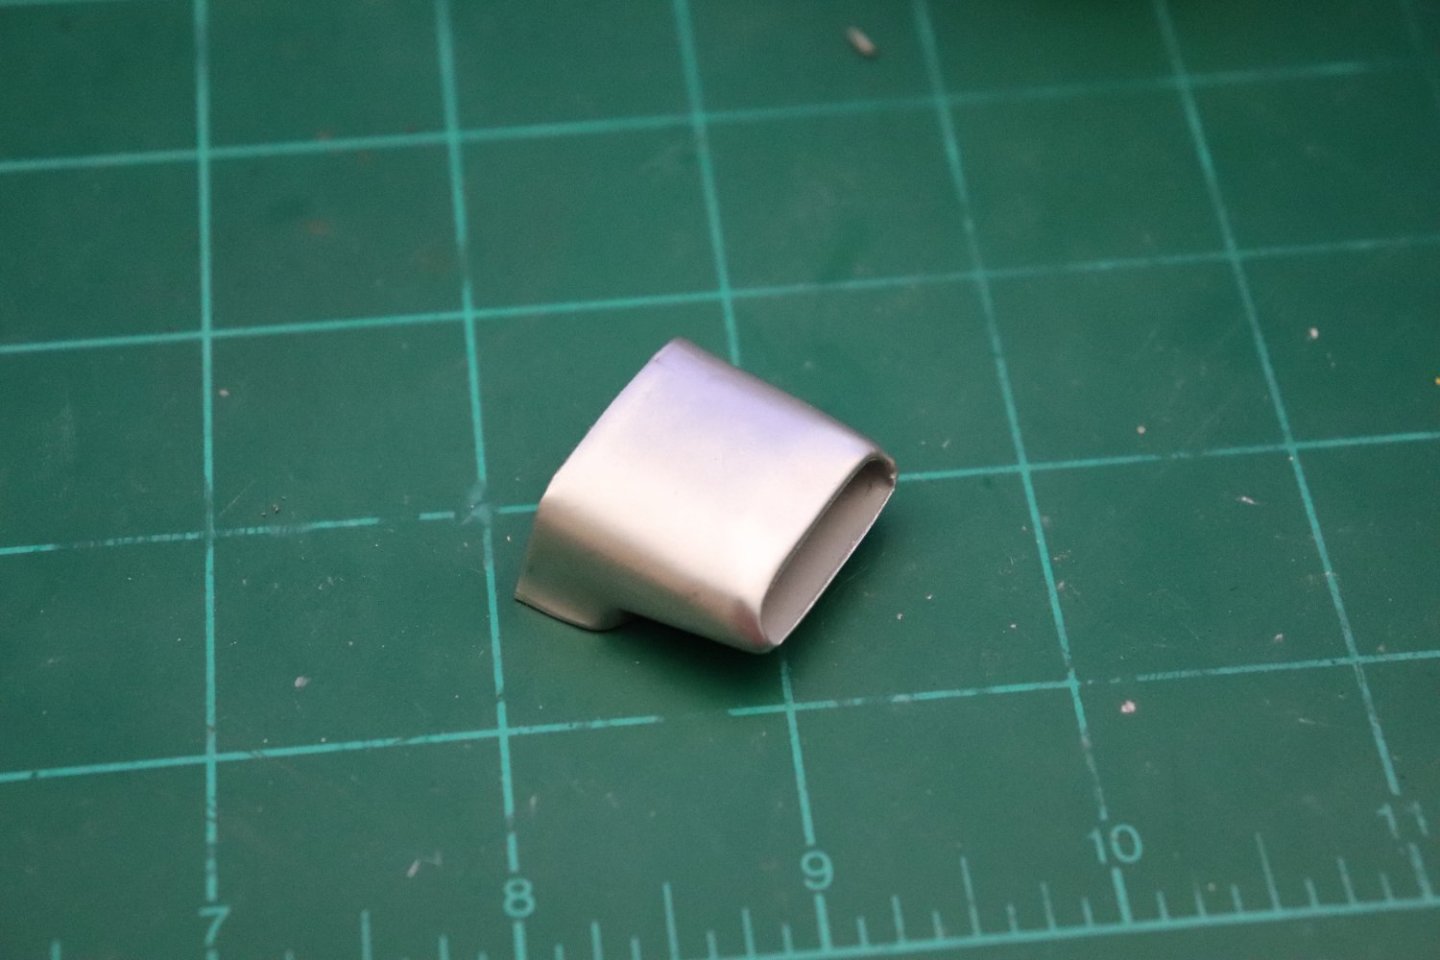
Yep it is fug UGLY for sure.. but I decided I could at least afford it a bit more rough work, so I ground some of it down... I used Mr Surfacer 500 to fill the gap and spread out a base to work on.... I then sanded the edge into a gentle curve kinda matching the cowl curve... Then spread a bit of Testors surface putty over that with a hard plastic edge... About to give it a final sanding and another shot of Tamiya fine primer... It's going to look a lot better, (smoother) but still inaccurate... Thanks brother, something about it didn't sit well.... (and I had to fix it) EG

-
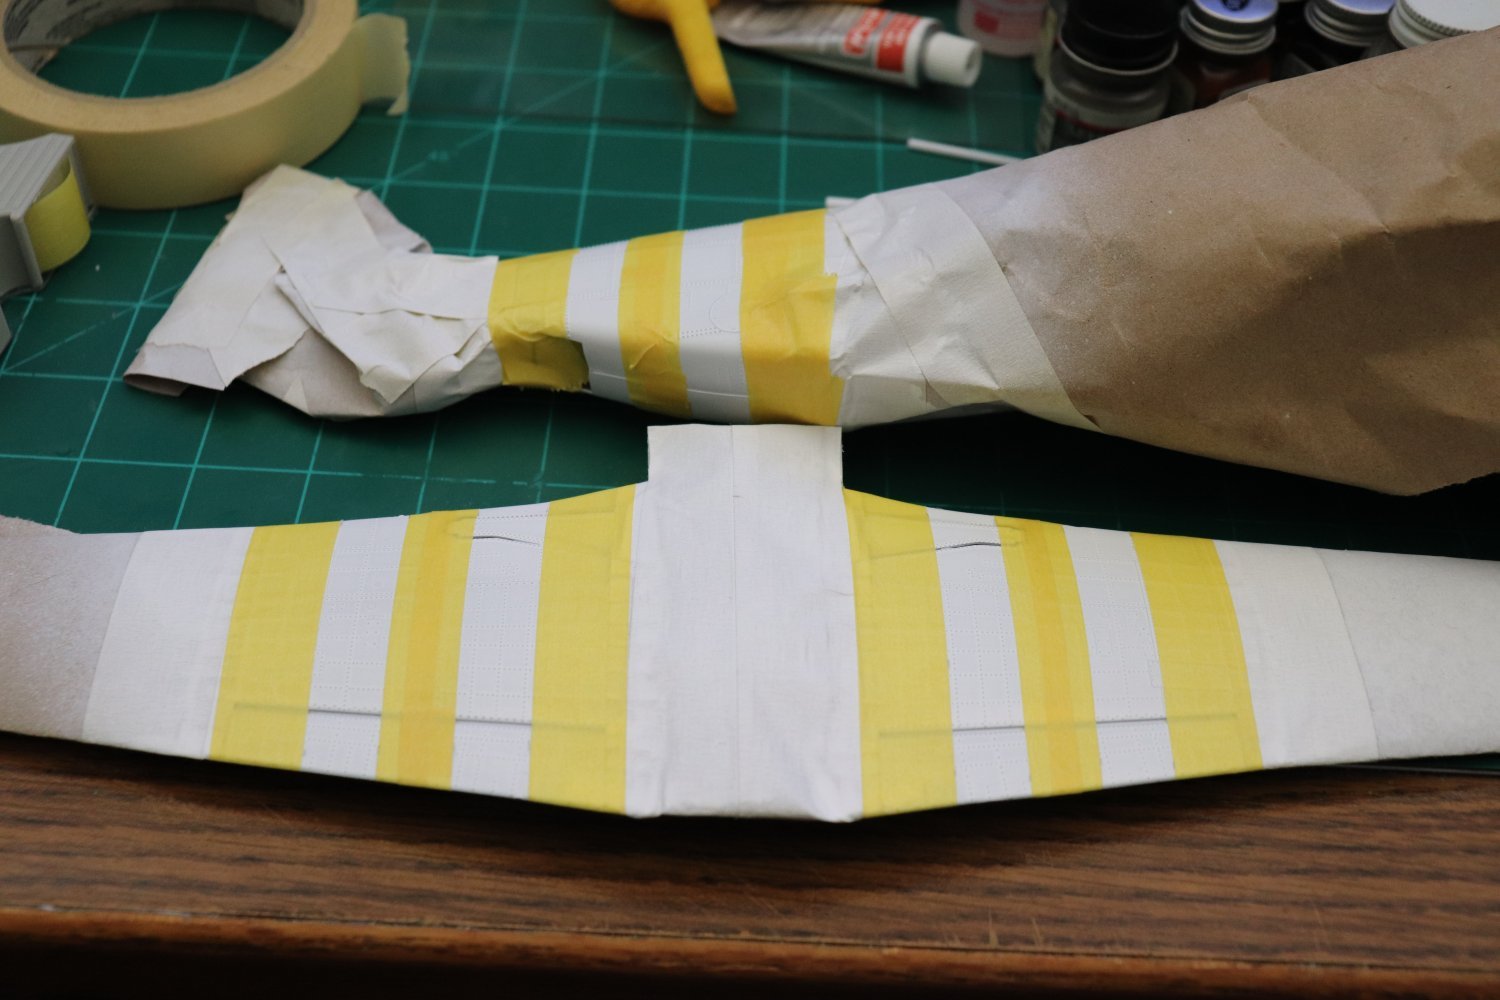
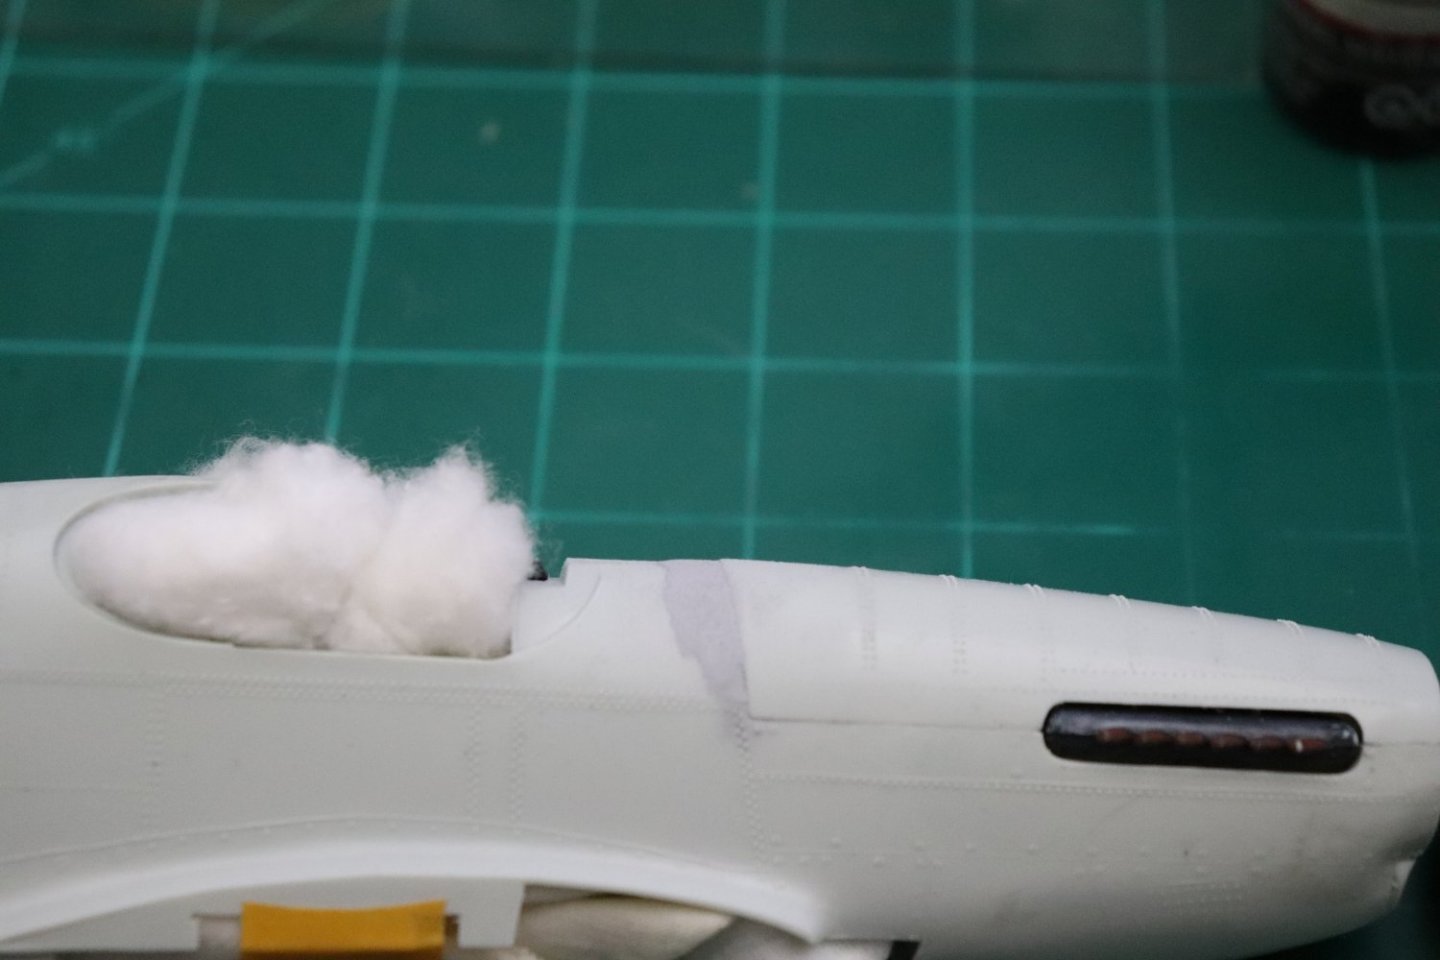
Hi Guys, I went ahead and decided to aluminum paint the wing bottom in flat aluminum plate... It's the way the original aircraft was done and allows me to mask off the invasion stripes and rattlecan them before gloss coating it... I probably should have bought a cheap F-84 to do this with as it was all aluminum but this is to see how RnB works for a realistic representation so that's the focus of this little jaunt... I won't be wasting it on something that can be done easier with a spray can... The fuselage is going to be tricky though cause of the compound curves.... In scale the stripes are 9/16ths inch wide, My debate now is do I do the full round the fuselage stripes or just the bottom of the fuselage as represented after the invasion... (after abut 3 months they started to remove the white invasion stripes as they were no longer needed, they retained the two black stripes so it was easier for the bombers to ID them in the air, the P-51, especially the B/C models resembled the Me-109 so much at a distance in profile that even veteran Luftwaffe pilots would sometimes confuse the two in the air) We are almost there... Ready to mask the stripes, first a white block to represent the white stripes and then two black stripes over that... Then gloss coat the whole thing... I think by tomorrow we will be rubbin and buffin the fuselage.... Another thing I've decided to do is black out the canopy... This a Revell kit with an operating opening canopy... Of course we all have grown beyond such toy like features today but in these older kits we have to deal with a lot of that... The canopy has huge lumps on the inside to function as the "hinges" for the opening panels, the only way to eliminate them is to grind them off and polish out the resulting damage... I'm not going to do that and so they are minimized as much as possible, the only option is to black it out... Cruisin now... these older designed models go pretty fast once you figure out the build sequence... Onwards...

-
Depends on what you want to do Dennis, if you want the high polished look then it is applied very thinly with a finger, rubbed until it shines... But yes it can be dry brushed on or thinned and sprayed as well from what I've read... Evidently the secret is to apply it very very thinly, a dab will go a long ways...
-
Yes I have tries both glued Aluminum Foil and Bare Metal Foil, There are some very pretty models having been done that way, but to me, imho, they just don't look real in a scale sense and they are very difficult to do and get them to look smooth right... it's another one of those special talents that I can't seem to master... I'm hoping this comes out more scale looking, it is certainly easier to apply than either foil or airbrush... Of course that is my humble opinion... My experiments show that Future goes over it well without major discoloration of the RnB, that is what I'm going to be doing over on the P-51 test build... Applying it, rubbing it up then sealing it... Thanks for the suggestion brother... and thanks for following... EG
-
It's definitely a blast from the past brother... Todays models seem to fall together compared to the work that goes into making one of these old designs presentable...
-
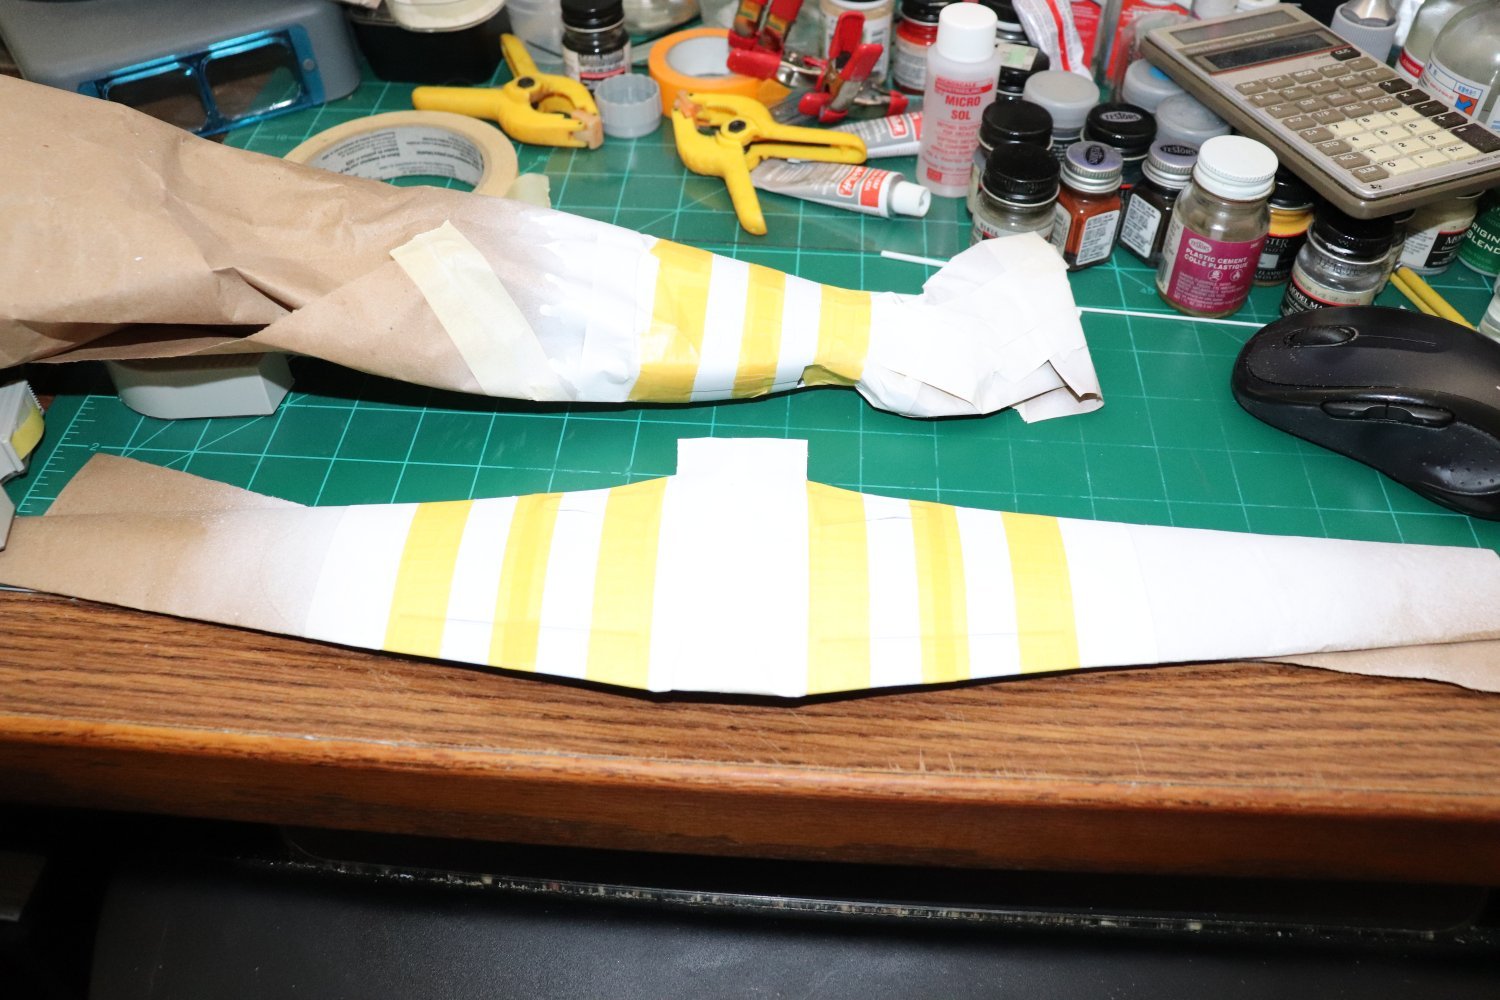
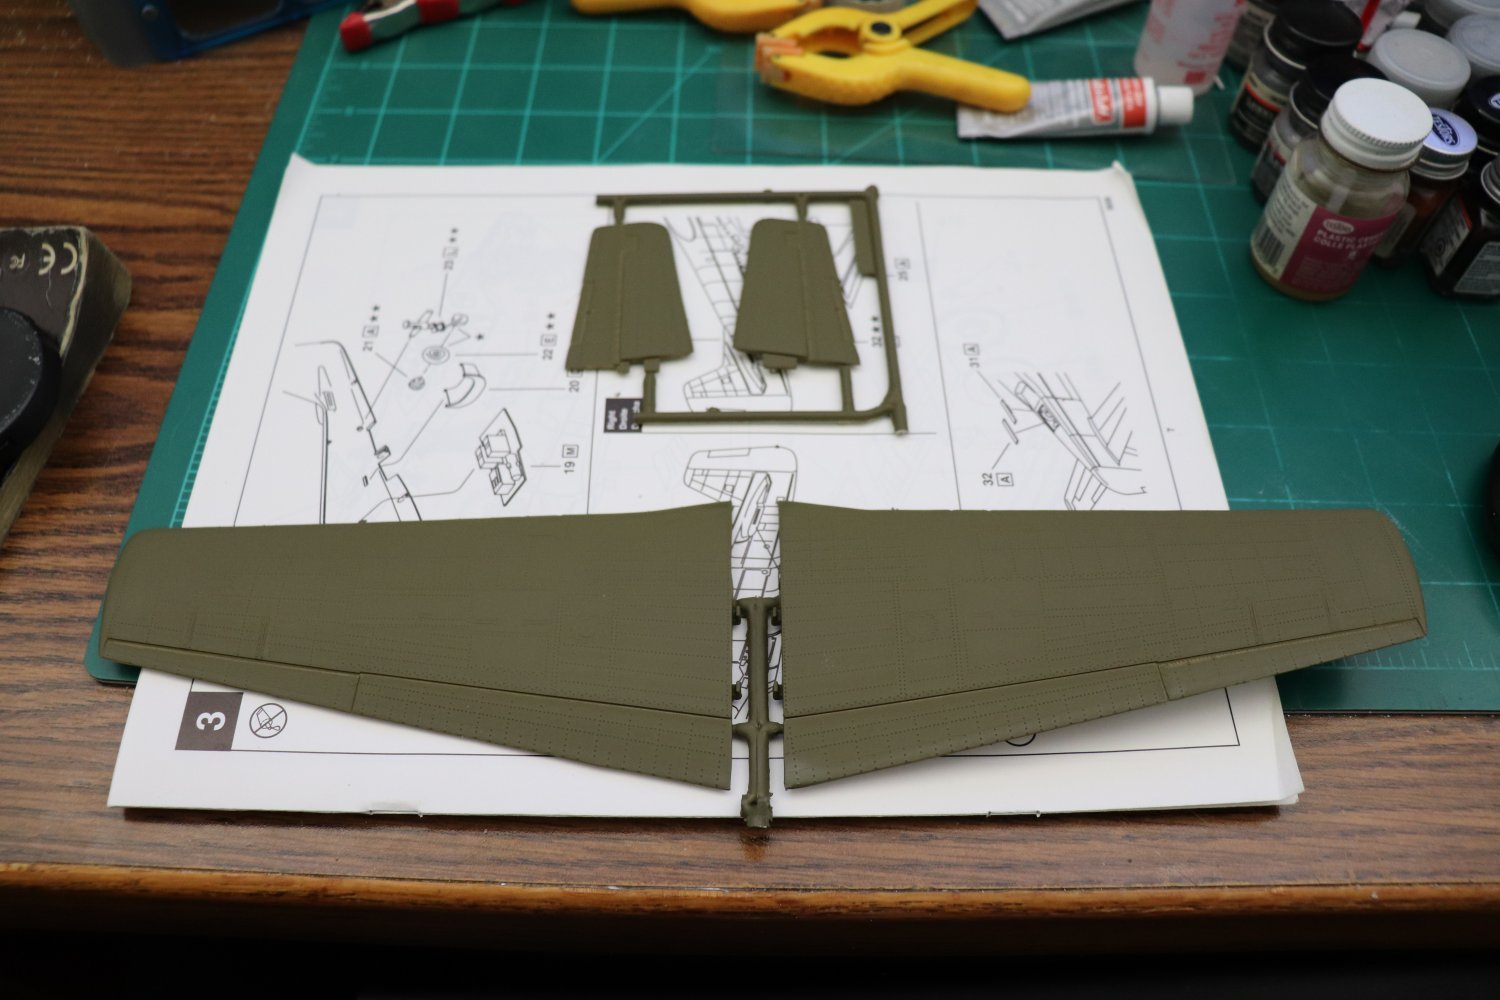
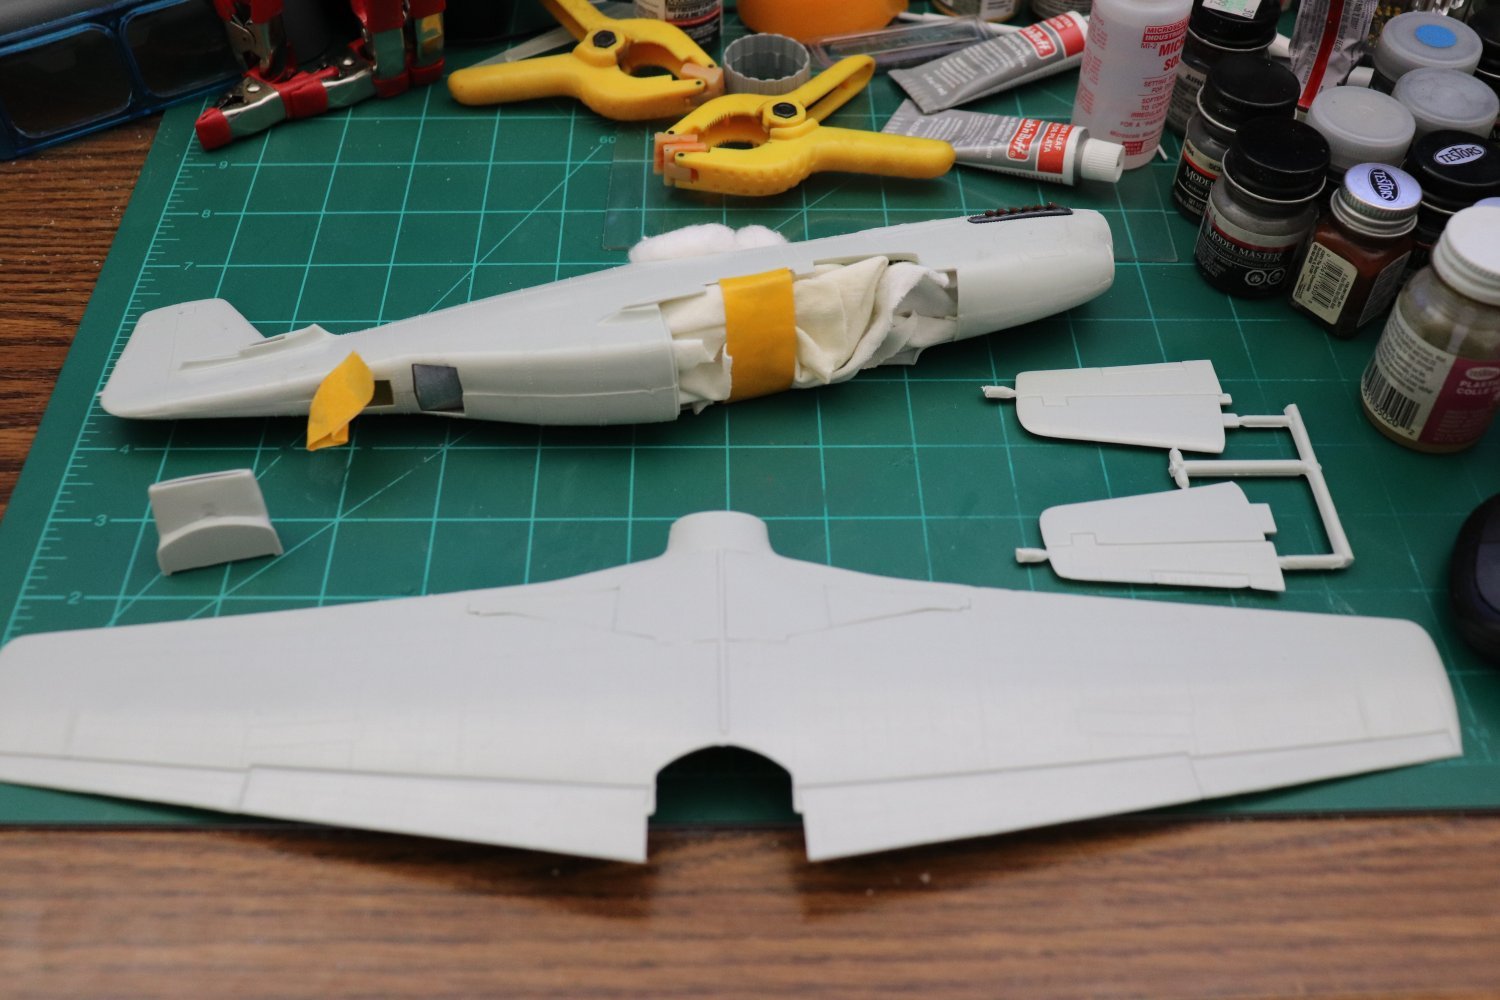
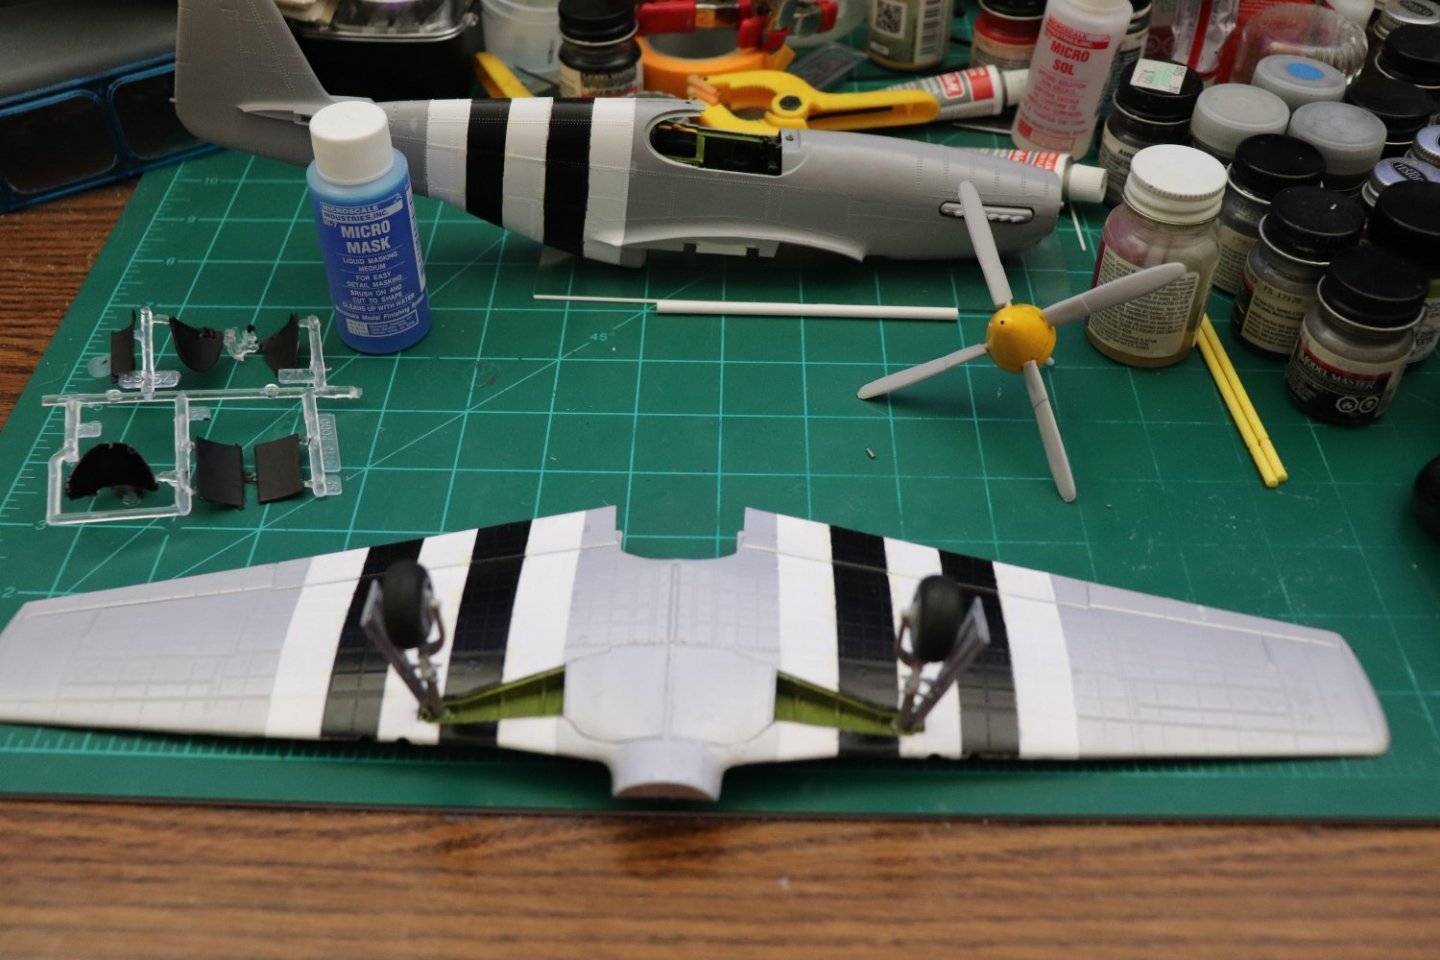
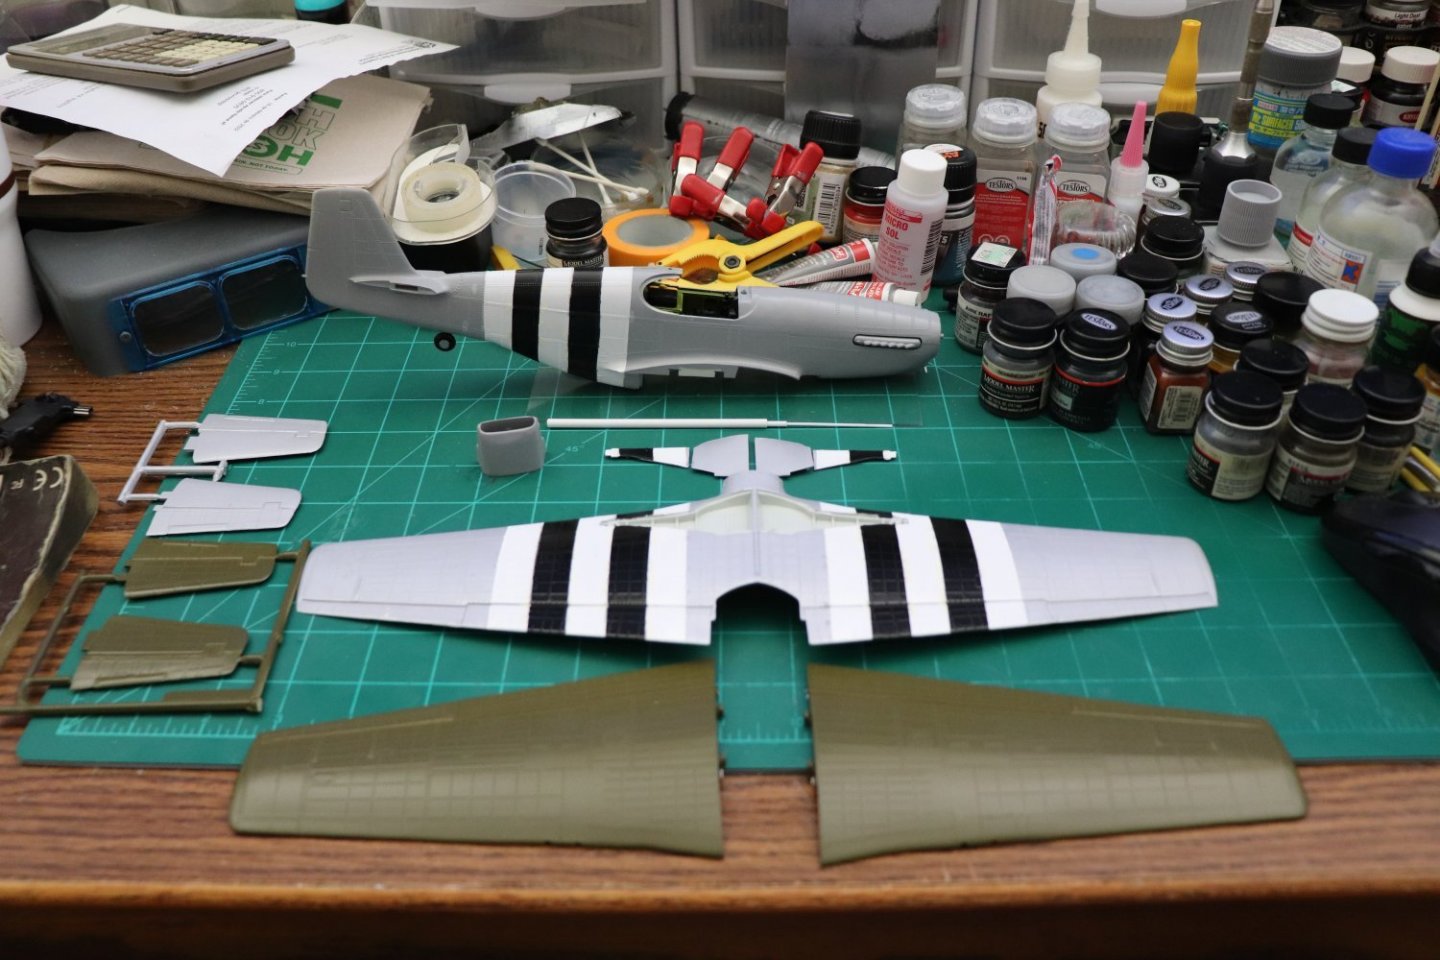
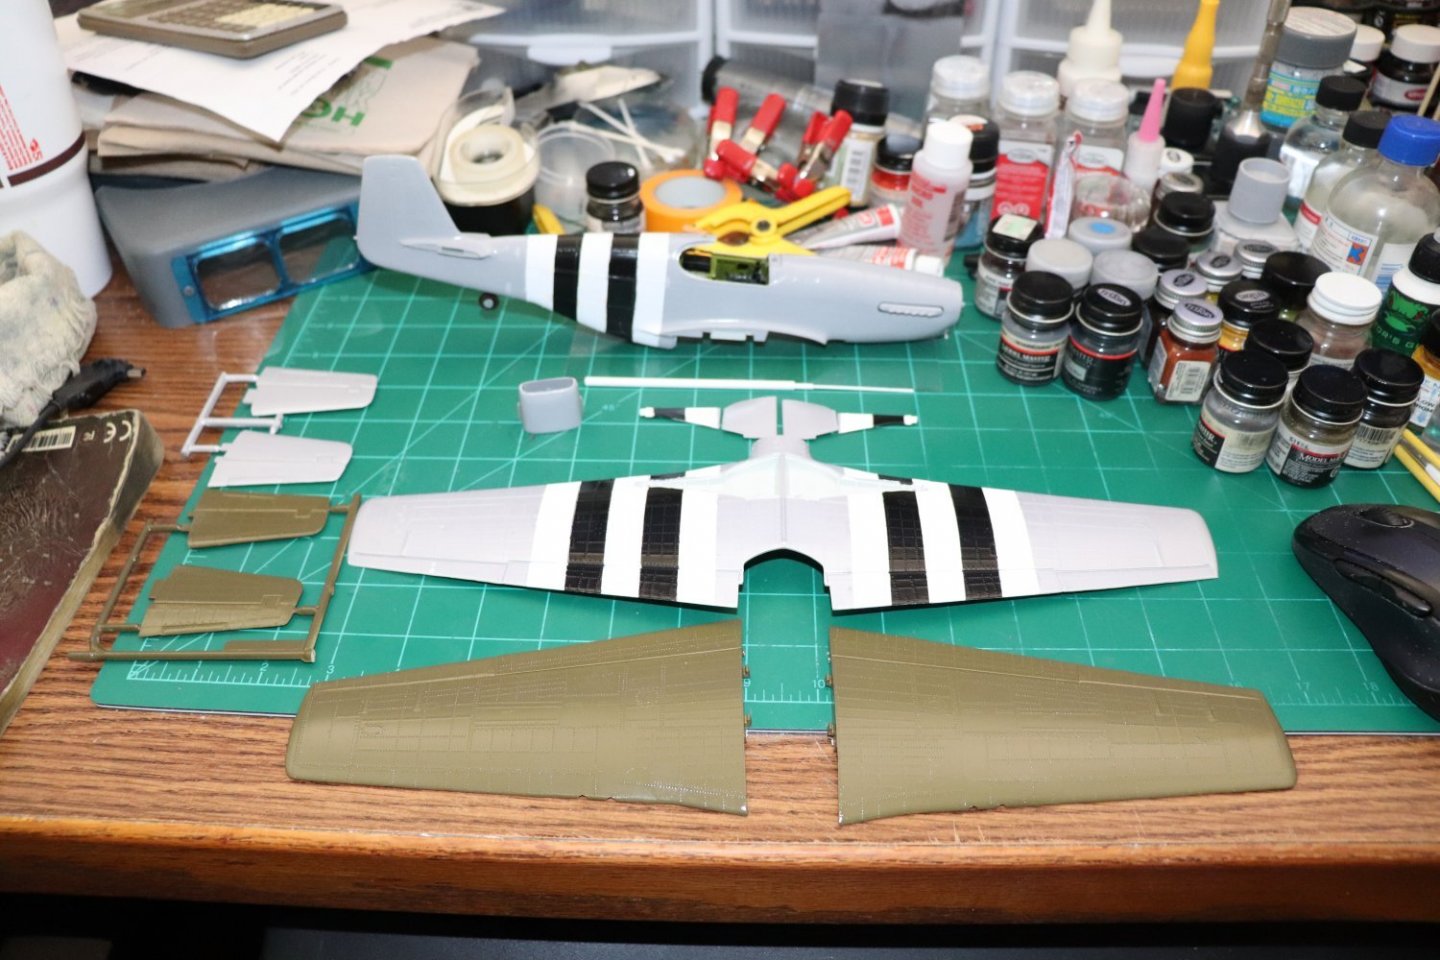
Geeze!!! WOW!!! Thanks Brothers for following and all the likes... It's GREATLY appreciated!!!! It's not too bad OC could have been a lot worse... There is one issue I'm not going to be able to fix cause of the amount of work it would take... The cowl line, it was either recut the part of try to fair it in, either way it's not going to be right... I guess that is why they recommend replacing the entire nose with a Hasegawa P-51D nose... Closeup... UGLY.. Well I guess I could sand on it for the next two days, filling and sanding, but it will never correct the obviously incorrect profile... Hopefully the OD anti glare panel will hide it some... So, I'll just take this as far as getting it up on it's wheels presentable, looking like an airplane, but, It's not my best work.... Heck it is only an experiment anyways... But, they are ready for Grey Primer... The landing gear doors are tacked in place for masking and painting the invasion stripes after priming... White block first, then two black stripes... (on each wing) Then they get gloss coated... (leaving the wing tips in flat primer) The upper wings are already painted Olive Drab awaiting the fuselage primed and painted... They will get glossed along with the rest of the parts... Ok a little knowledge will help explain what I'm going to be doing... 1st the airplane, ALL P-51's had Aluminum painted wings, NO EXCEPTIONS! They ALL did (all 15,000 of them) A P-51 with polished metal wings is not correct... (USAAC specifications for corrosion control) A lot of modelers make that simple mistake... Camouflage was usually painted in the field and at first USAAC spec was OD green over Aircraft Grey, later in the war they dropped the painting requirement when it became clear we were controlling the skies... They were shiny, hard shell painted and initially waxed but they did wear for a while and seldom were repainted... The paint job needs to be shiny bare aluminum on the fuselage painted aluminum on the underside of the wings and stabilizers and OD green on top of the Wings and stabilizers... Now Paul's process is using RnB to do both the bare metal polished aluminum and the aluminum painted surfaces... (although there are plenty of aluminum paints around today that are very very good) Here is the message Paul wrote outlining his process... That's it, after three full days searching that's all I could come up with... He did mention how he got the colored bands on his F-100 tails, he uses pastels mixed into the Rub n Buff before he applies it... He also mentioned that painted sections of the airplane like Anti Glare panels, Invasion Stripes, colored noses and tails, etc... Are painted on before the RnB is applied and masked off... So that, like my experiments before is what I'm going to be doing... Once the primer is dry, I'll be doing the pre-painting of the invasion stripes to match the airplane... Then we are going to hopefully have some fun... One thing I haven't decided is that I do have some Testors Aluminum plate in Rattle can, it's an absolutely wonderful aluminum paint goes down thin and covers well... I may do the wingtips in that rather than try to replicate aluminum paint with RnB... It's just easier that way.... Onwards my friends, getting closer.. EG


-
Thank Ken & Ed, I think it's a technique that needs to be put out there... Well I've been throwing this thing together and to be honest, I've gotten spoiled on more modern kits... This is a '69 kit, a 2019 molding.... The newness of the molding doesn't make the kit any better... {chuckle} But at the time it was the only 1/32nd scale P-51 around... Now being a '69 designed kit, I forgot about rivets, this was the age when they were finally doing away with the humongous raised panel lines and before the humongous recessed panel lines... So, what they did to delineate panels was cast lines of millions of tiny rivets... I forgot about those... So I have a choice, sand them all off, (which means I'll have to cut all the replacement panel lines) or just go ahead and proceed like they aren't there... I was reading the Squadron Signal walk around for this, and in the back in the modeling section it tells you what you have to do to build a nice and accurate P-51 B/C out of this kit... Get the Eduard cockpit set, get the old Hasegawa P-51D kit, and break out the surgery tools.... Nah, I'm not putting that much into this one, so I'll go with it like it is.... Well, looking at this pic, they really aren't all that obtrusive, but I wonder how it will effect the laying down of the RnB... I think I'm going to just go for it.... That's what this is, a test... Tomorrow I've got to go to HL and pick up a can or two of OD for the tops of the wings and horizontal stabilizers, probably another can of the super shiny testors gloss coat for the fuselage... Then at least smooth the joints, I had the dickens of a time pulling the left fuselage half back straight... It's a 1969 designed kit, did I mention that? {chuckle} Brings back memories of when I was a kid.... On the real airplane, those rivets would be sticking up a half an inch... Oh well, this is the fun of modeling... Learning new things... And it doesn't have to be super accurate, at least it will look like a P-51 B/C... EG PS: why do I call it a B/C? because there is only one difference between a B model and a C model... The "B" model was built in Inglewood CA and the "C" model was built in Dallas TX.... That's the only difference between them... Onwards...

- 63 replies
-
- 16
-
-
Hi Kevin, if you do decide to replace them, the 1946 Popular Mechanics Overland Stage model, (1/12th scale scratchbuilt) recommended using leather shoelaces, you can get them wide enough (at least you could back in '48) and one pair is more than long enough... They would have to be shaved for thickness down to the tanned side and overlapped.. the shackles would fit in their appropriate places so it would look the same and the ends in the middle where they meet put on the top side so they are hidden next to the coach body... It looks natural and real when done... (you can also bury the wire support inside them as well just in case) The leather will accept hide glue or white glue and be very secure... The coach work is brilliant the carriage work is excellent, it's going to be a real masterpiece when done...
-
Thanks Ken, I knew about the Klear/Future/Pledge debacle.. {chuckle} Thank you Alan, I've got my fingers crossed... Thanks OC, and all I can say is so am I.... Thanks Gary, I think I've got the idea of it and the point of the forum is to share... Testing and experimentation is how we learn... and documenting it here is a way to keep it from dying as a technique if I can learn how it is best done... so a small sacrifice becomes necessary.... If this works, we will be able to put a BMF on anything that will rival and possibly surpass anything an airbrush can do... That's priceless to guys that aren't airbrush skilled... Like me... {chuckle} The link for the P-51 test build is here... Just in case someone comes along late and is trying to follow.... Onwards brothers, onward EG
-
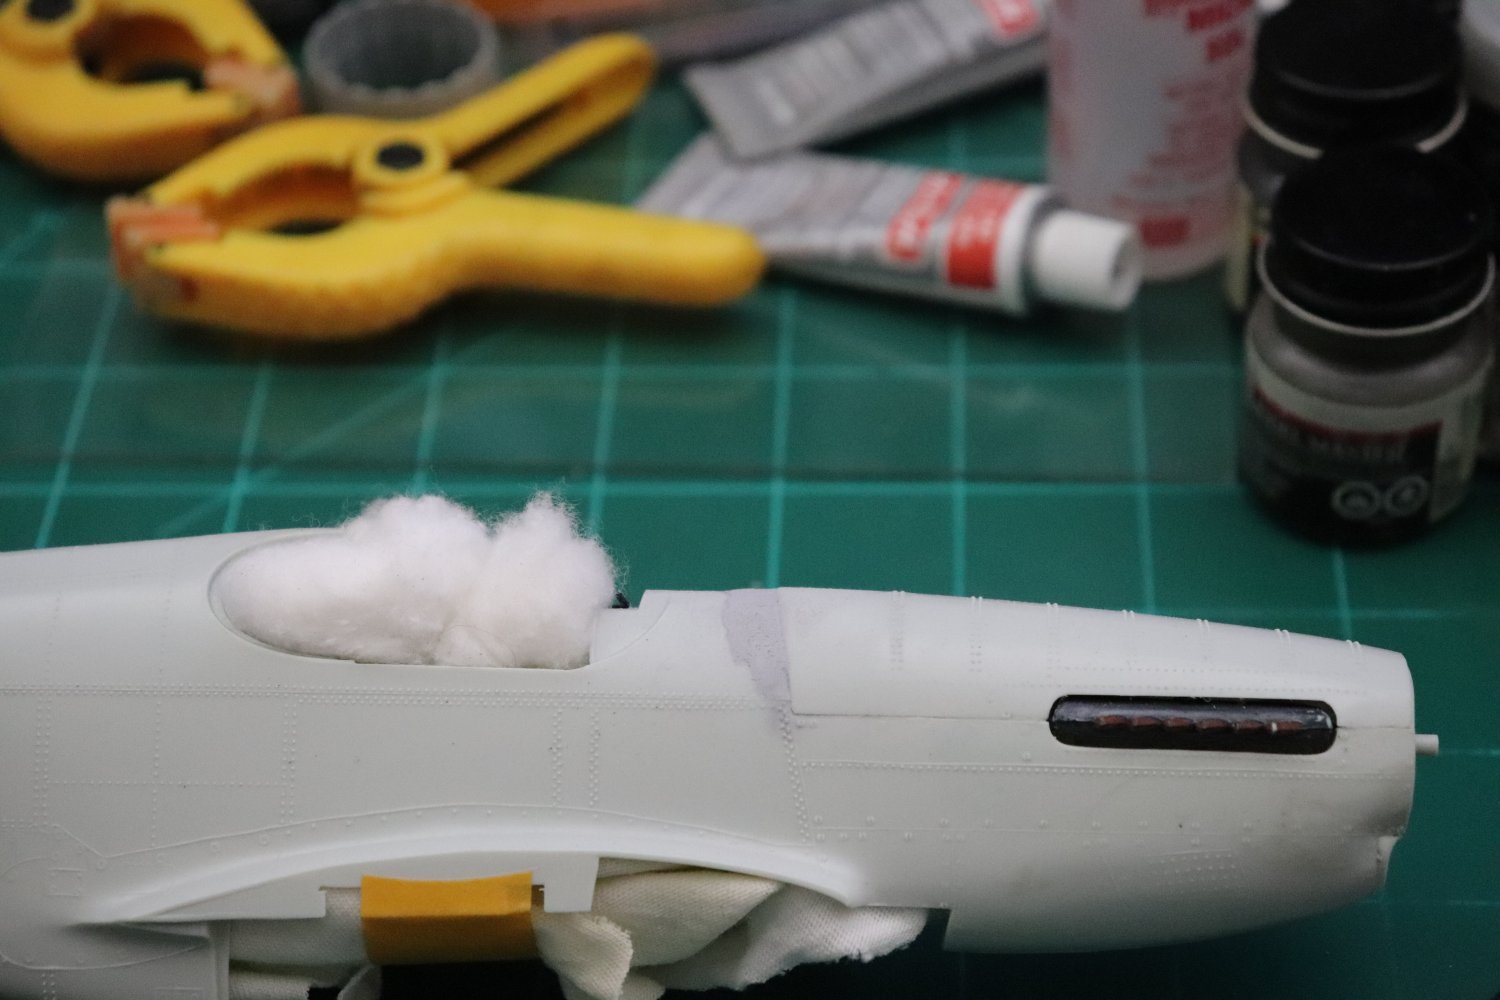
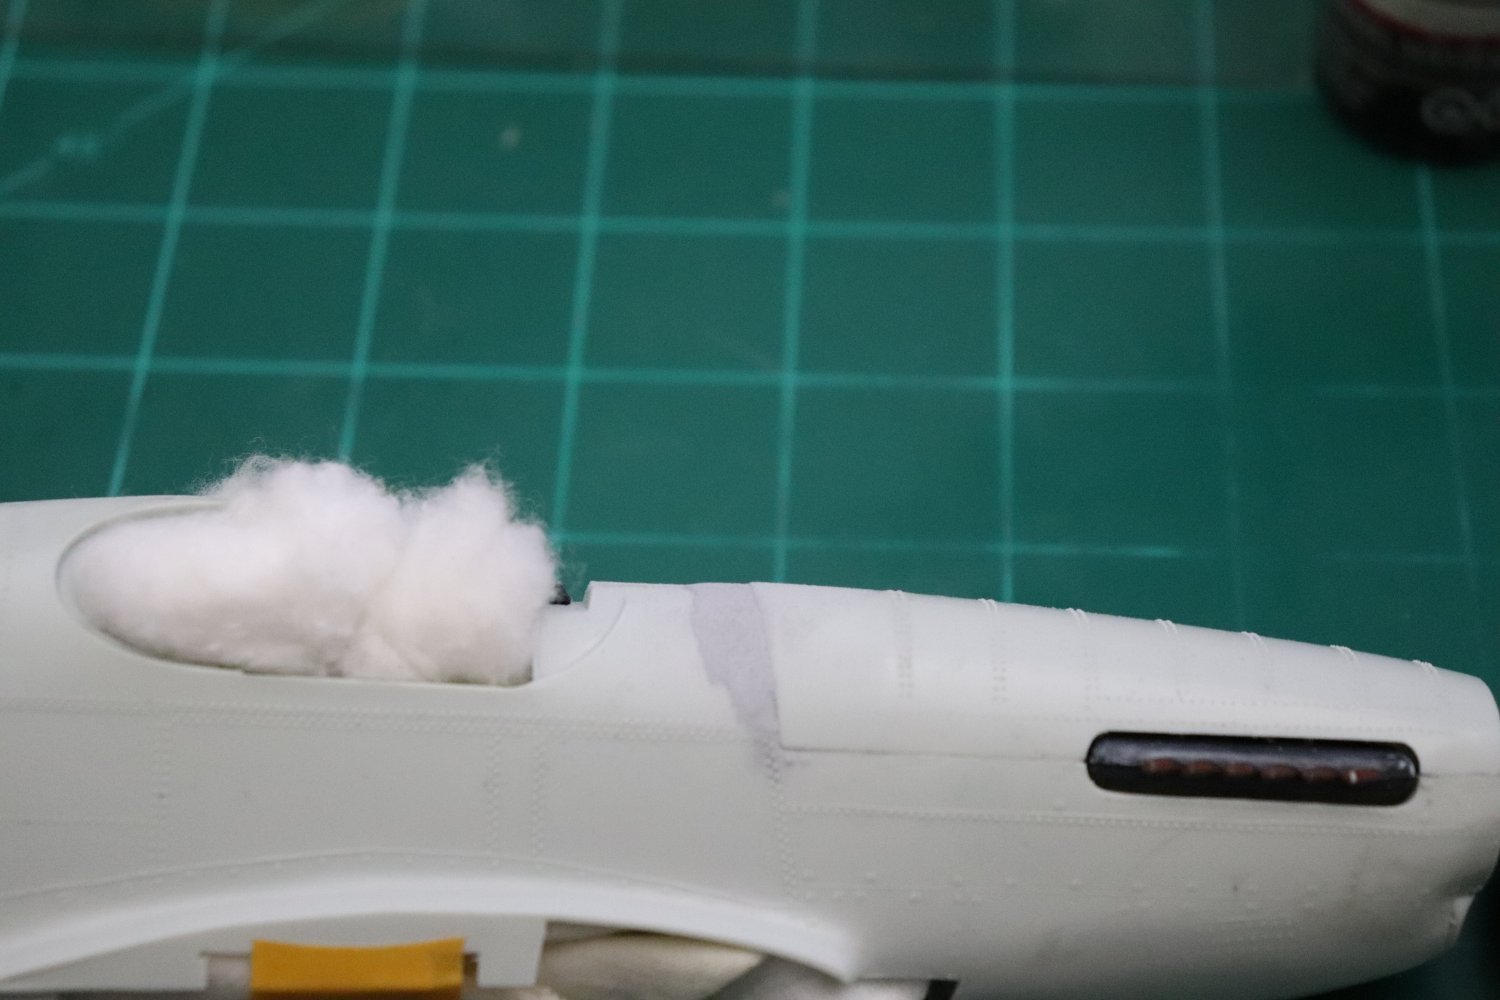
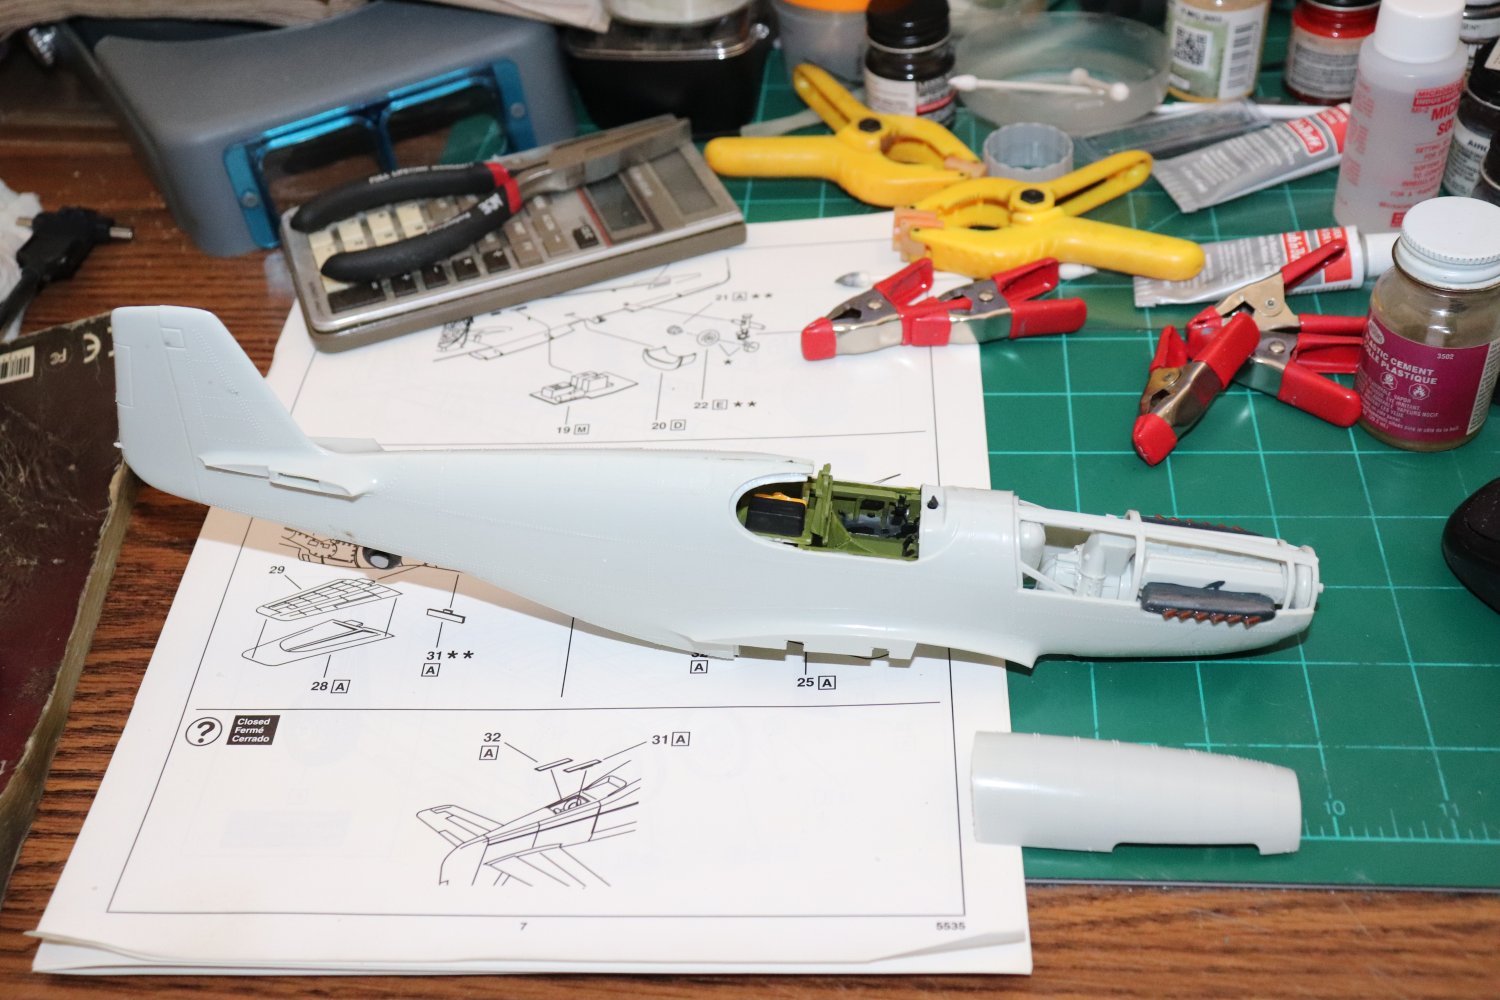
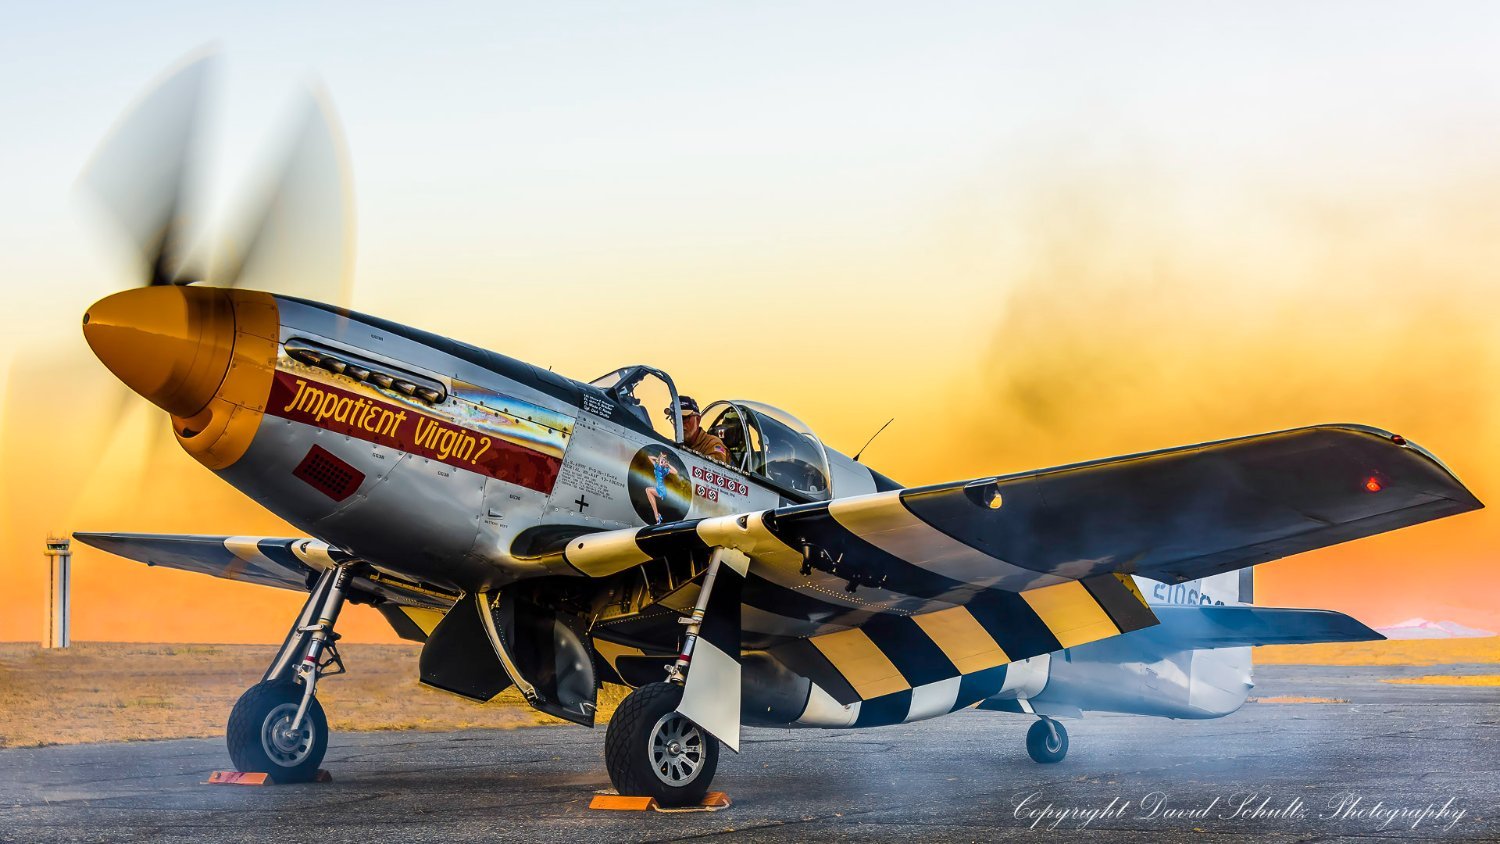
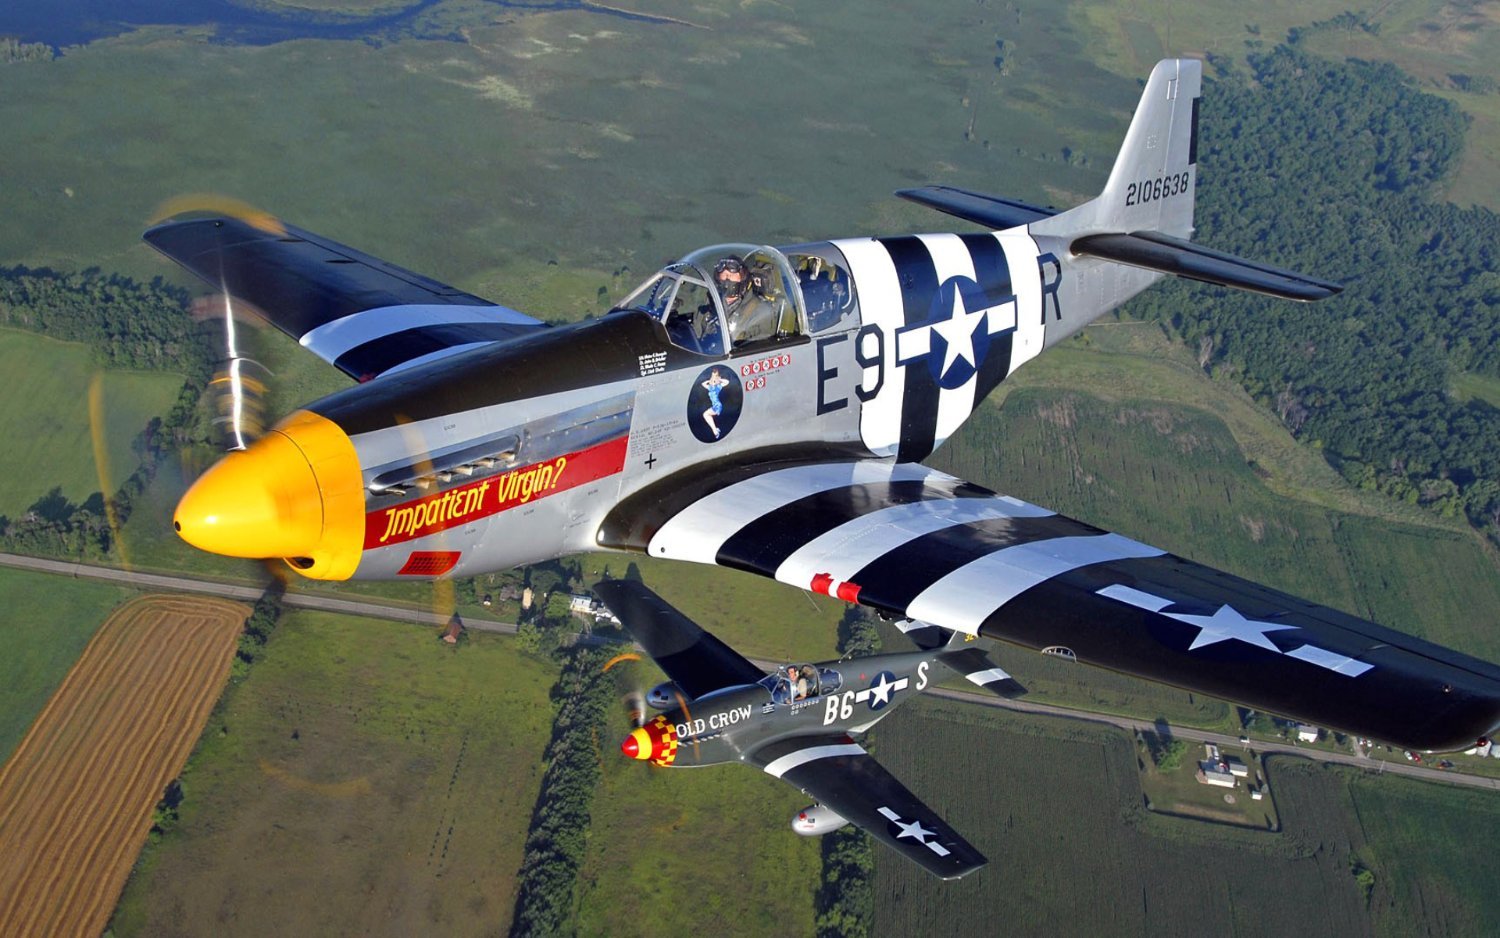
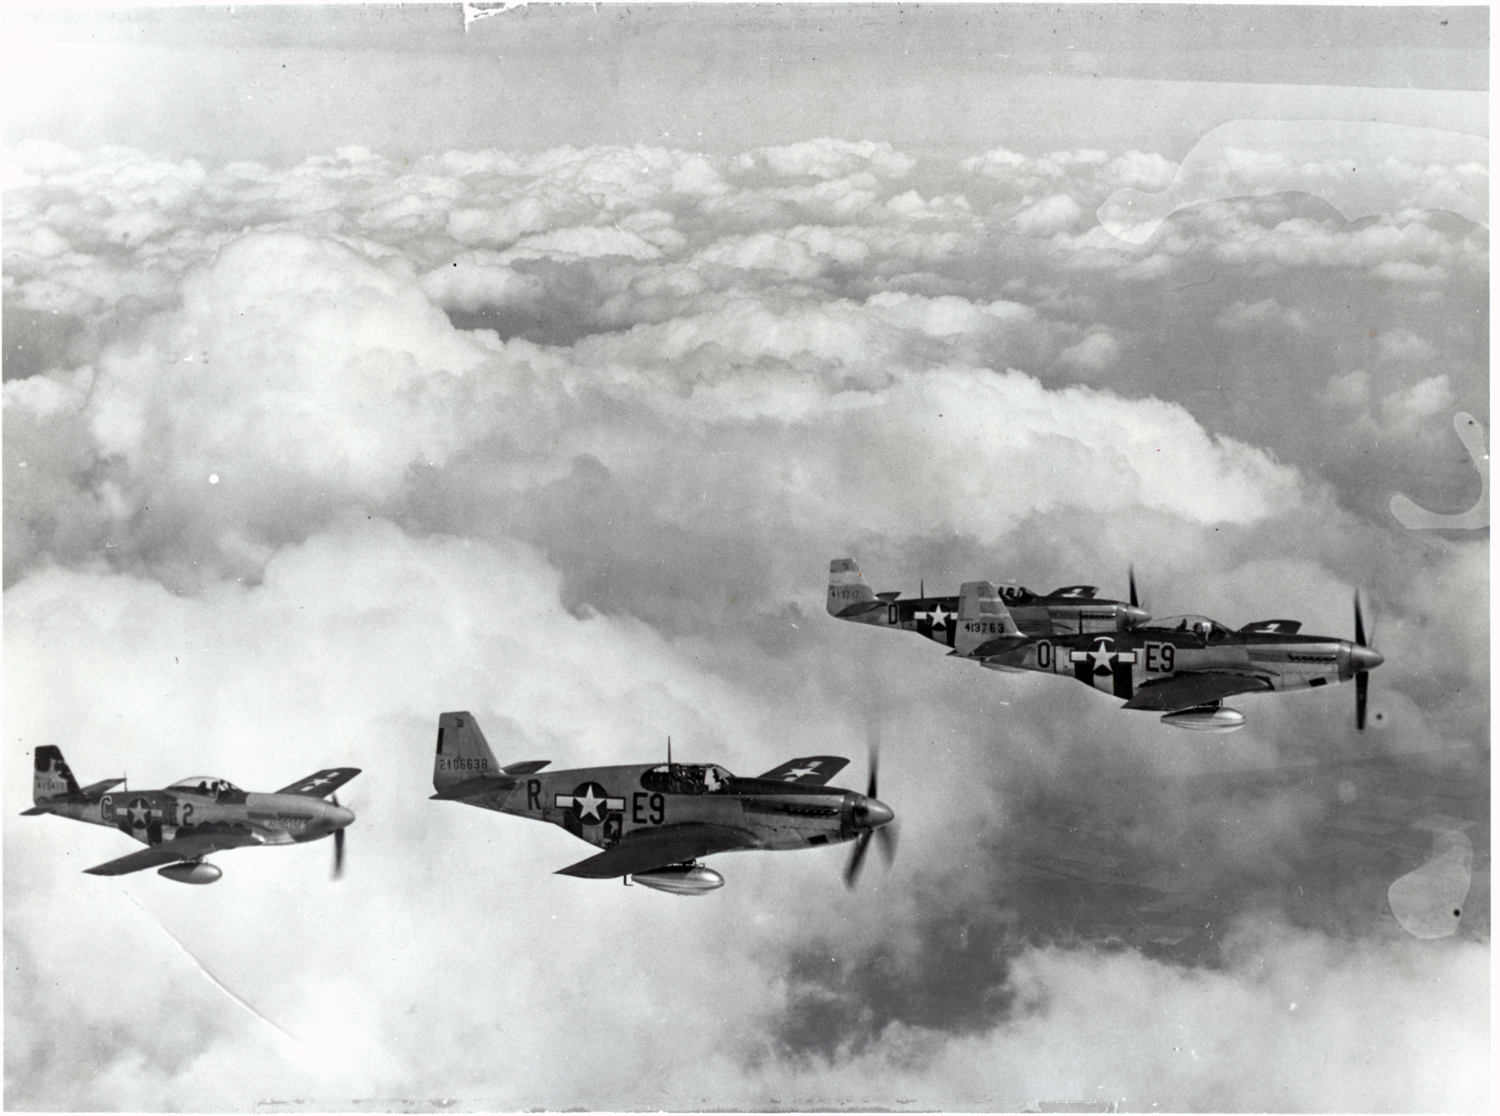
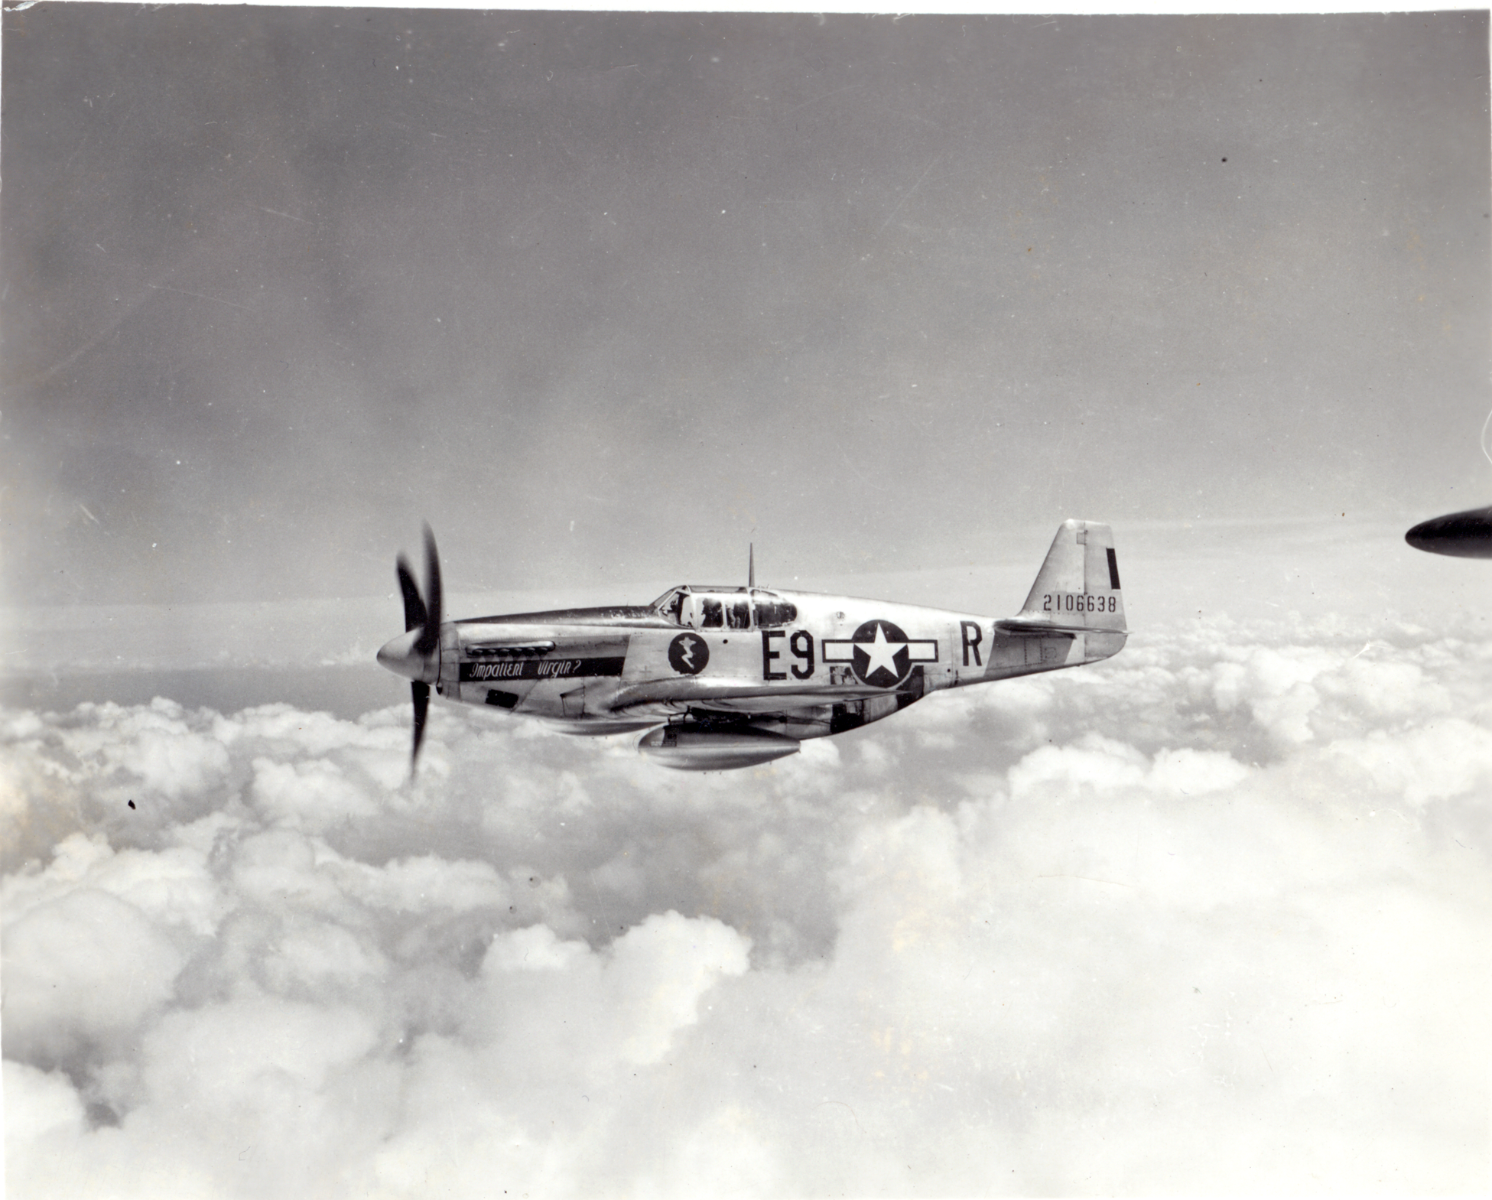
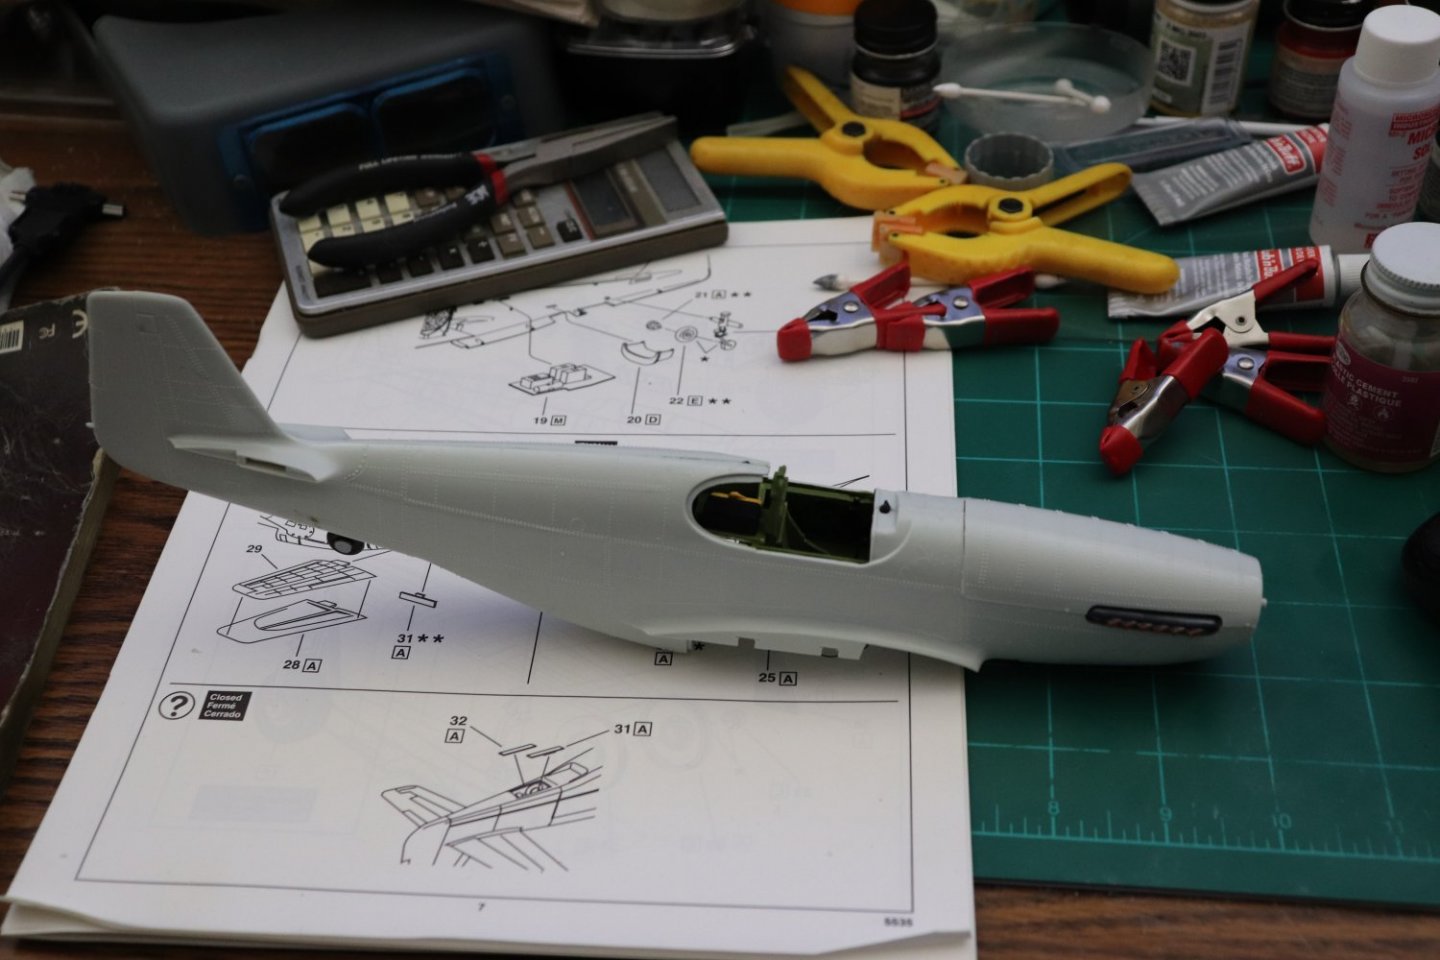
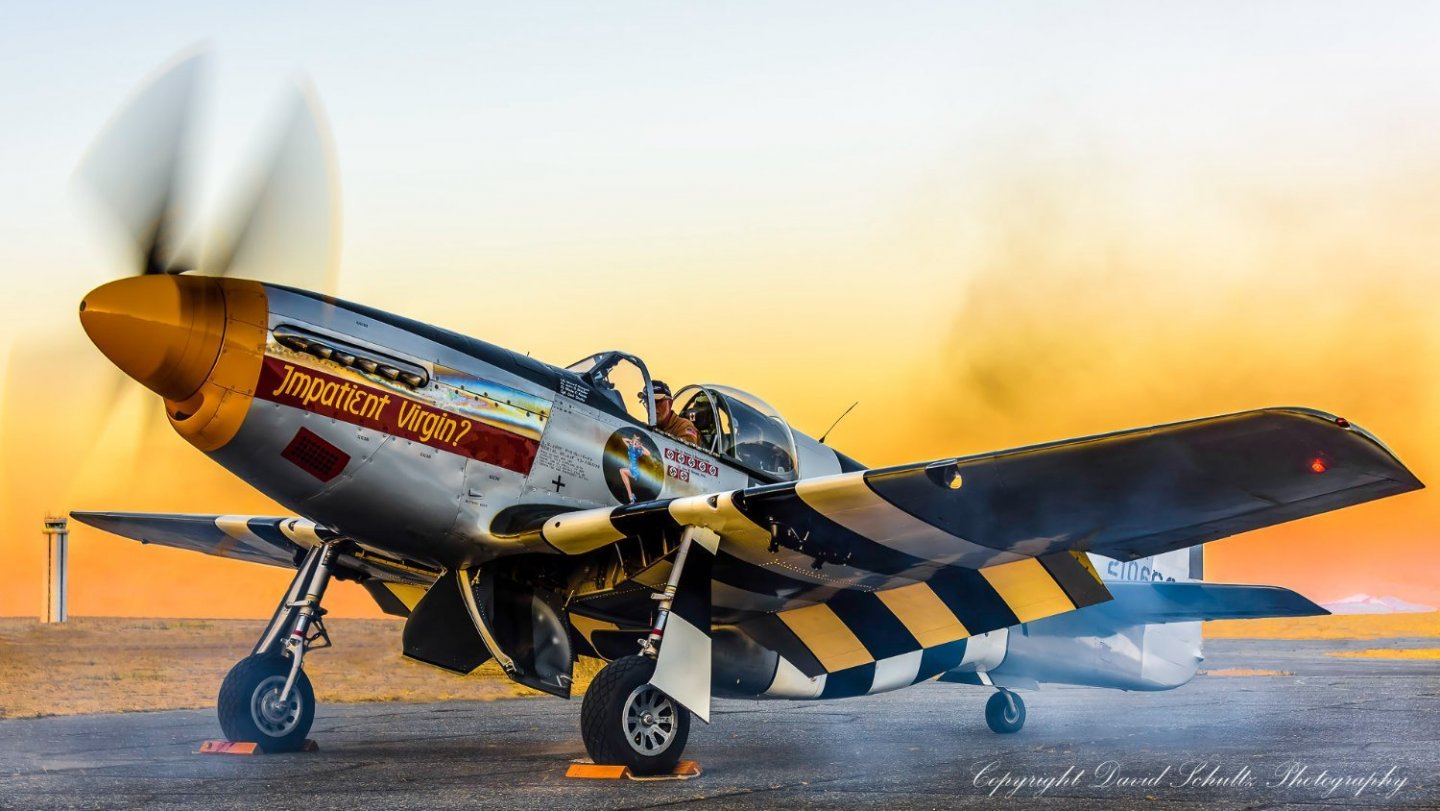
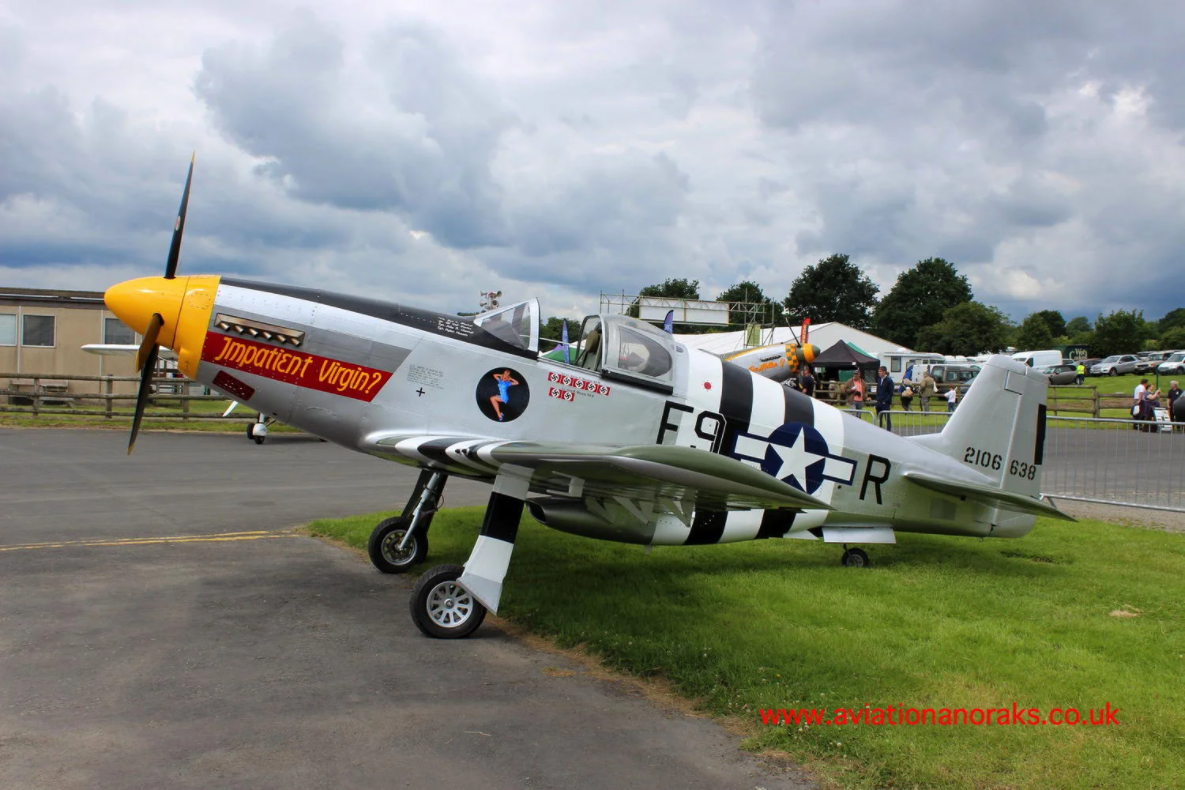
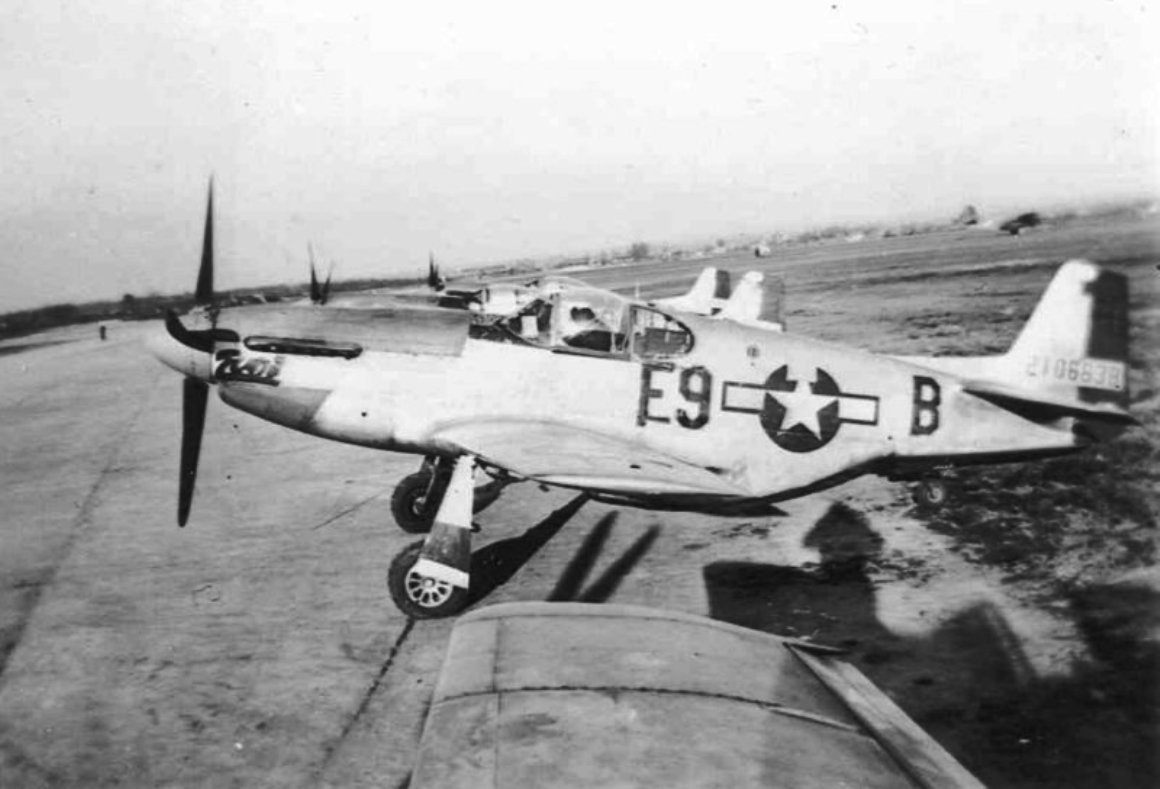
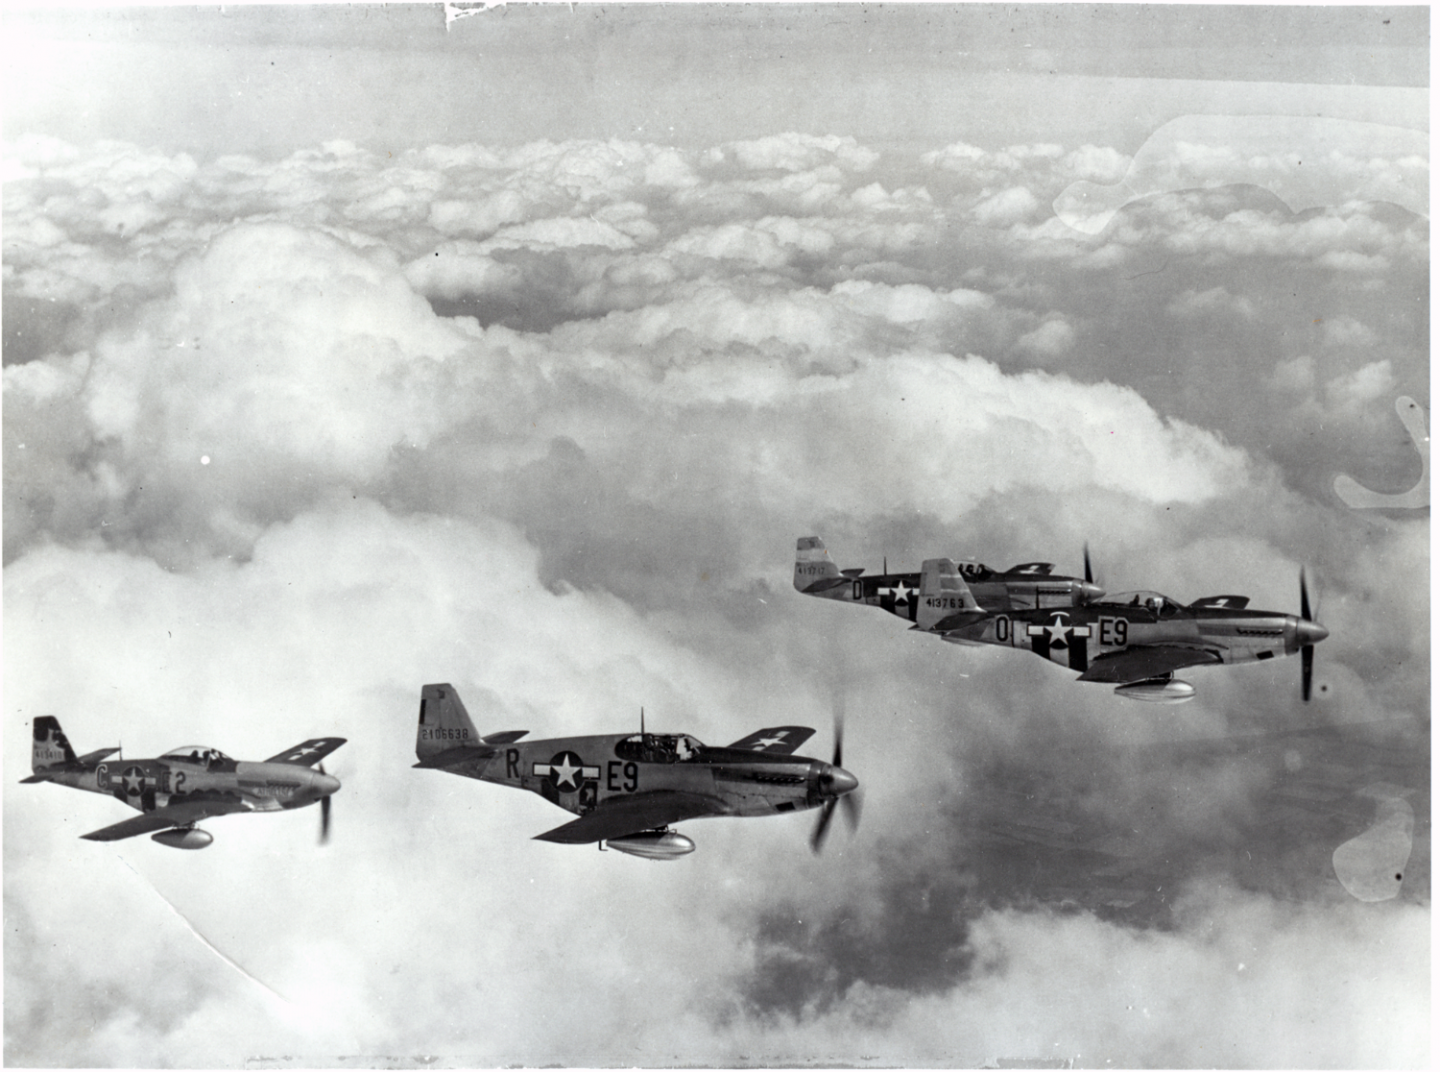
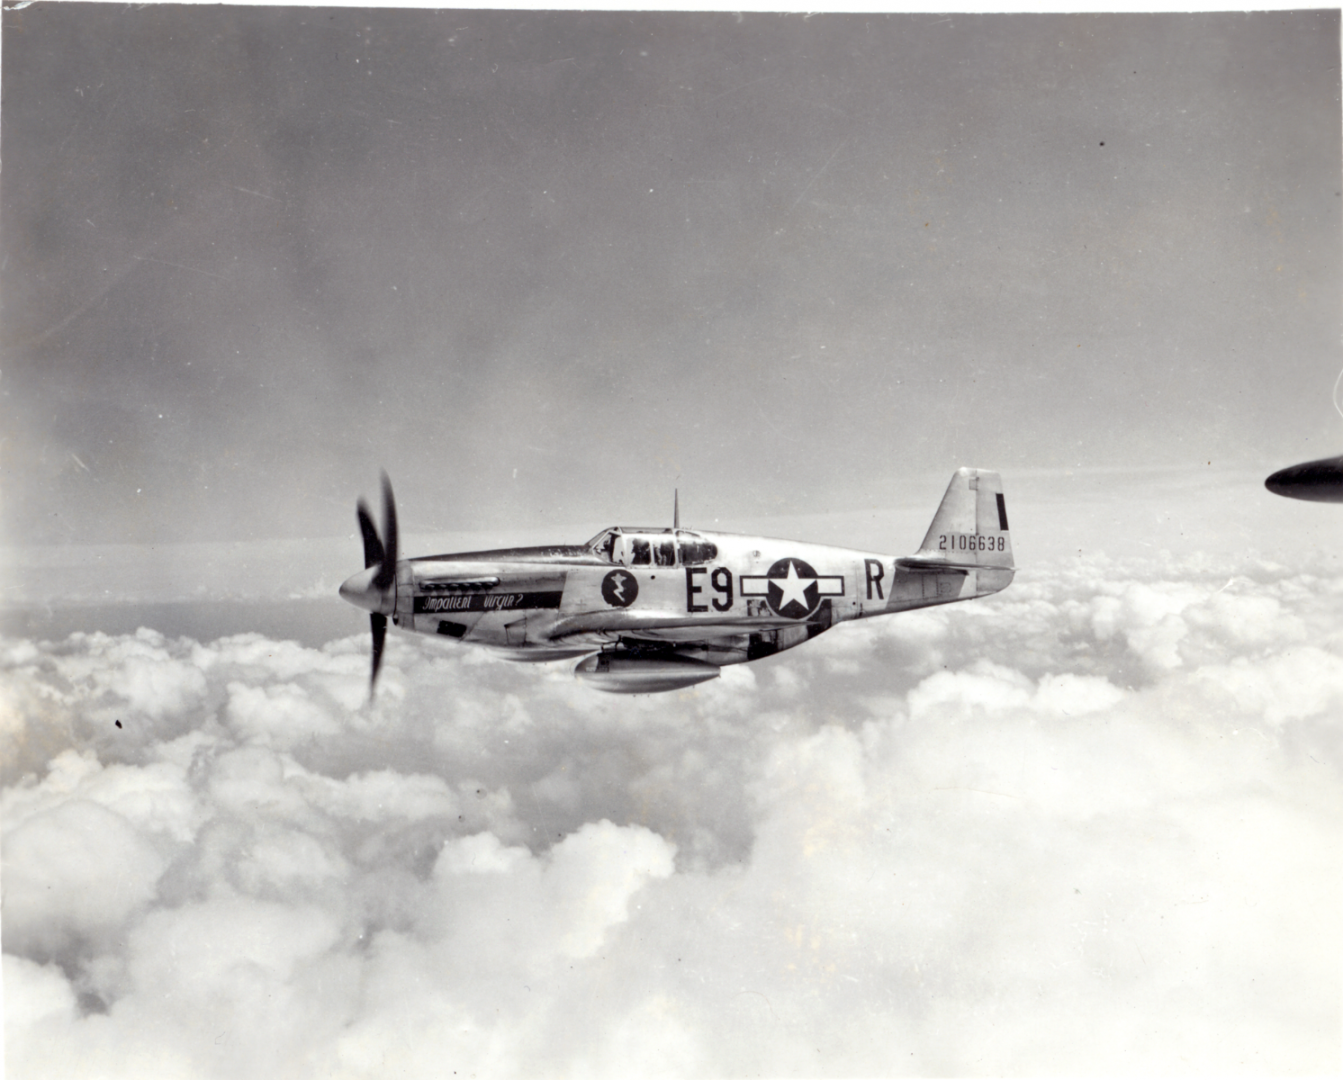
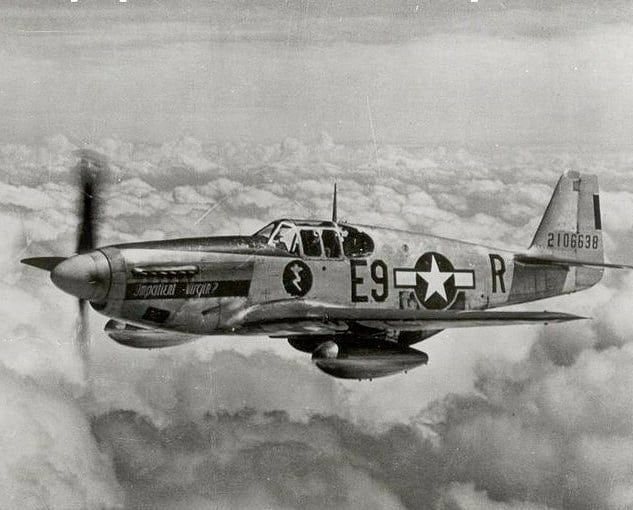
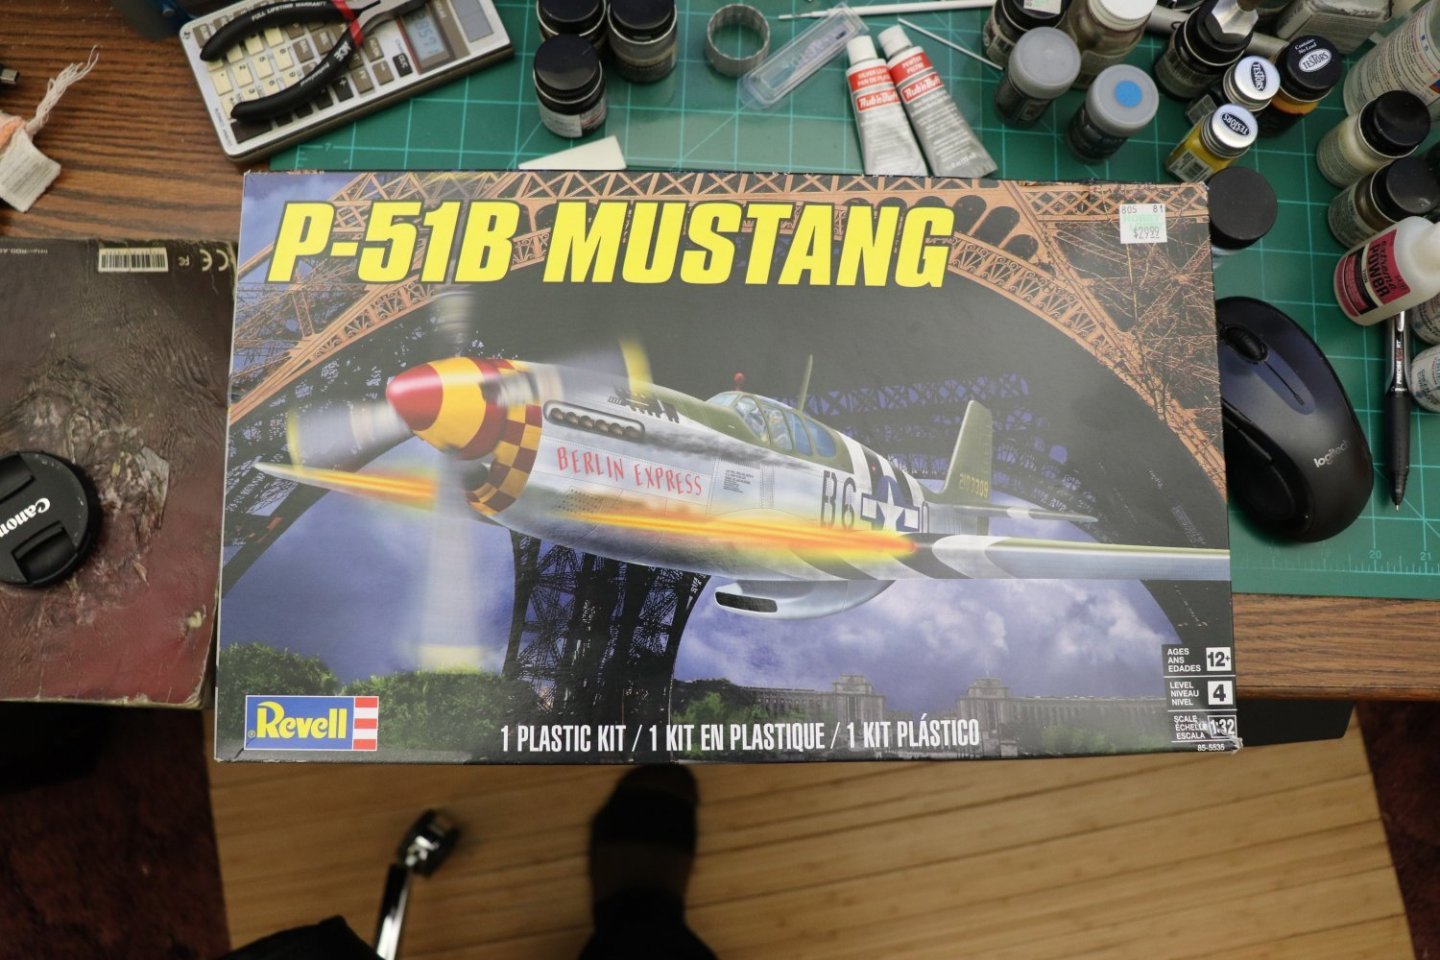
Ok my friends... Not going to go into a lot about this airplane.. It is my first attempt to build a Bare Metal Bird using the techniques needed for applying Rub n Buff... I've posted pics of what this material can do for simulated Bare Metal finishes on aircraft models here, and it looks spectacular when done... The aircraft I'm going to be modeling is P-51B-10 42-106638 - 376FS, 361FG, 8AF, it wore the unit designations codes E9-R named "Impatient Virgin" & E9-B named "EVOI" (with malcom hood conversion) I will be attempting to do her as Impatient Virgin... (I ordered the decals for it) She crashed during the war in a farmers field and was buried as unsalvageable... She was recovered sometime in 2007 and restored... This is what she looks like today... This is a fairly decent representation of her aside from her Malcom Hood conversion it looks like the same aircraft... Unfortunately this is close to what she looked like in WWII but not really... She is painted in aluminum paint.... During WWII she was a typical bare metal fuselage, Olive Drab horizontal top surfaces & anti-glare panel.... She did have invasion stripes but they did not rise above the national insignia nor cross the top of the wing... The bottom of the wing was painted aluminum.... And of course the Nose was insignia yellow... A very nice combination of colors... Here are some images of her in WWII... You can see the color changes and canopy modification with the designation change.... The kit I'm using for this is... It's a relatively simple kit only 57 parts of which is a complete Packard-Merlin which has to be installed cause it carries the propeller shaft so the prop can turn... The cockpit is fairly basic using a decal to represent the instrument panel and some side panels that are a little light on the detail, the seat is very basic... So I will be closing up the cockpit... This is basically going to be a quick build to get to the finishing aspect so I'm not going to get into anymore history on the bird...... The coloration I'm going for is Yellow Nose, Bare Aluminum Fuselage & Tail, Olive Drab on the top of the wings and horizontal stabilizer, and painted aluminum under the wings... Invasion stripes on the bottom only of the fuselage and wings as she was during the war... This will involve a number of techniques of using Rub n Buff to achieve the effects of bare aluminum and painted aluminum... I will be doing the details where they will be seen, but I will not be adding any... So here goes, will be gluing parts in a bit.... (and planning the paint sequence) EG


- 63 replies
-
- 14
-
-
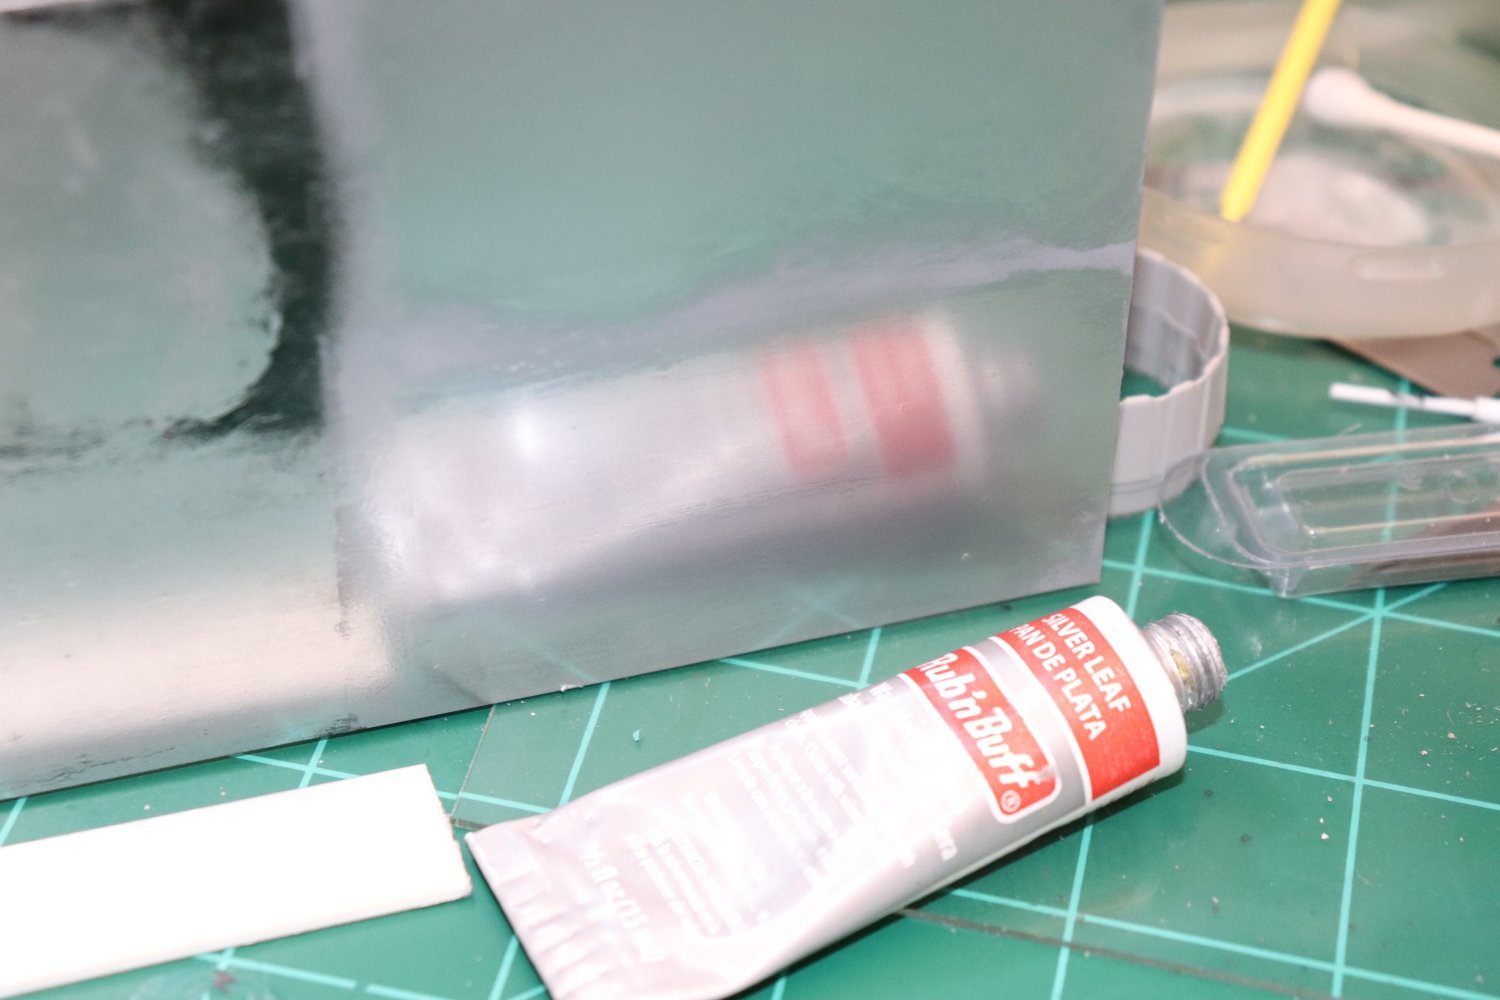
Ok I think I'm ready for my first airframe.... Natural light.... High Flash... That's over Tamiya Grey Primer... you do want a smooth finish before you apply it and you want to apply it very very thin, a little bit does the trick, AND once you have applied it and buffed it up stay off it... You do not want to add more cause it will muck it up... That's sufficient for an inservice bird that receives a modicum of maintenance every once in a while... So I'm going to give it a shot on the Revell P-51 OOB... A quick build just to validate the system I have in my mind... I'll start a new thread and handle the 51 in it's own thread and link from here to there and back when done.... (understanding the point of the 51 is to test this and not produce a finished model, although I will try to make it as good as I can) I will cover what I'm doing with the 51 in it's thread... I like it... Right now Silver Leaf Rub n Buff put down real thin with a gloved finger and rubbed in, on a glossy grey smooth surface, then lightly polished with Tee Shirt cloth then overcoated with Future... that the technique I'll be doing... See ya there... EG


- 139 replies
-
- 11
-
-
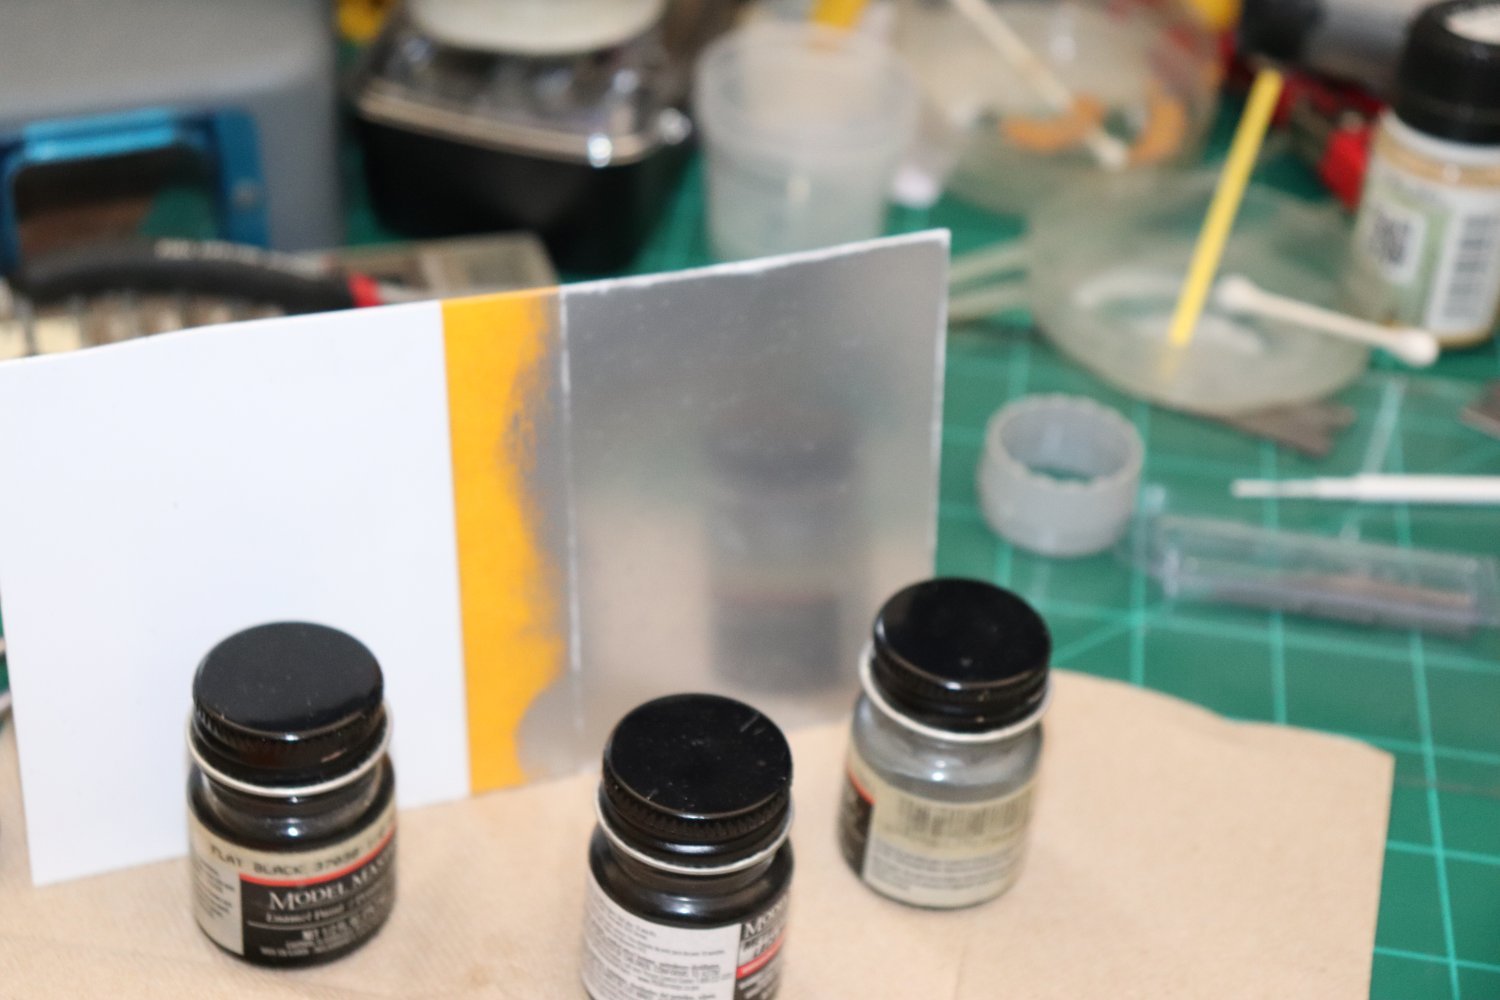
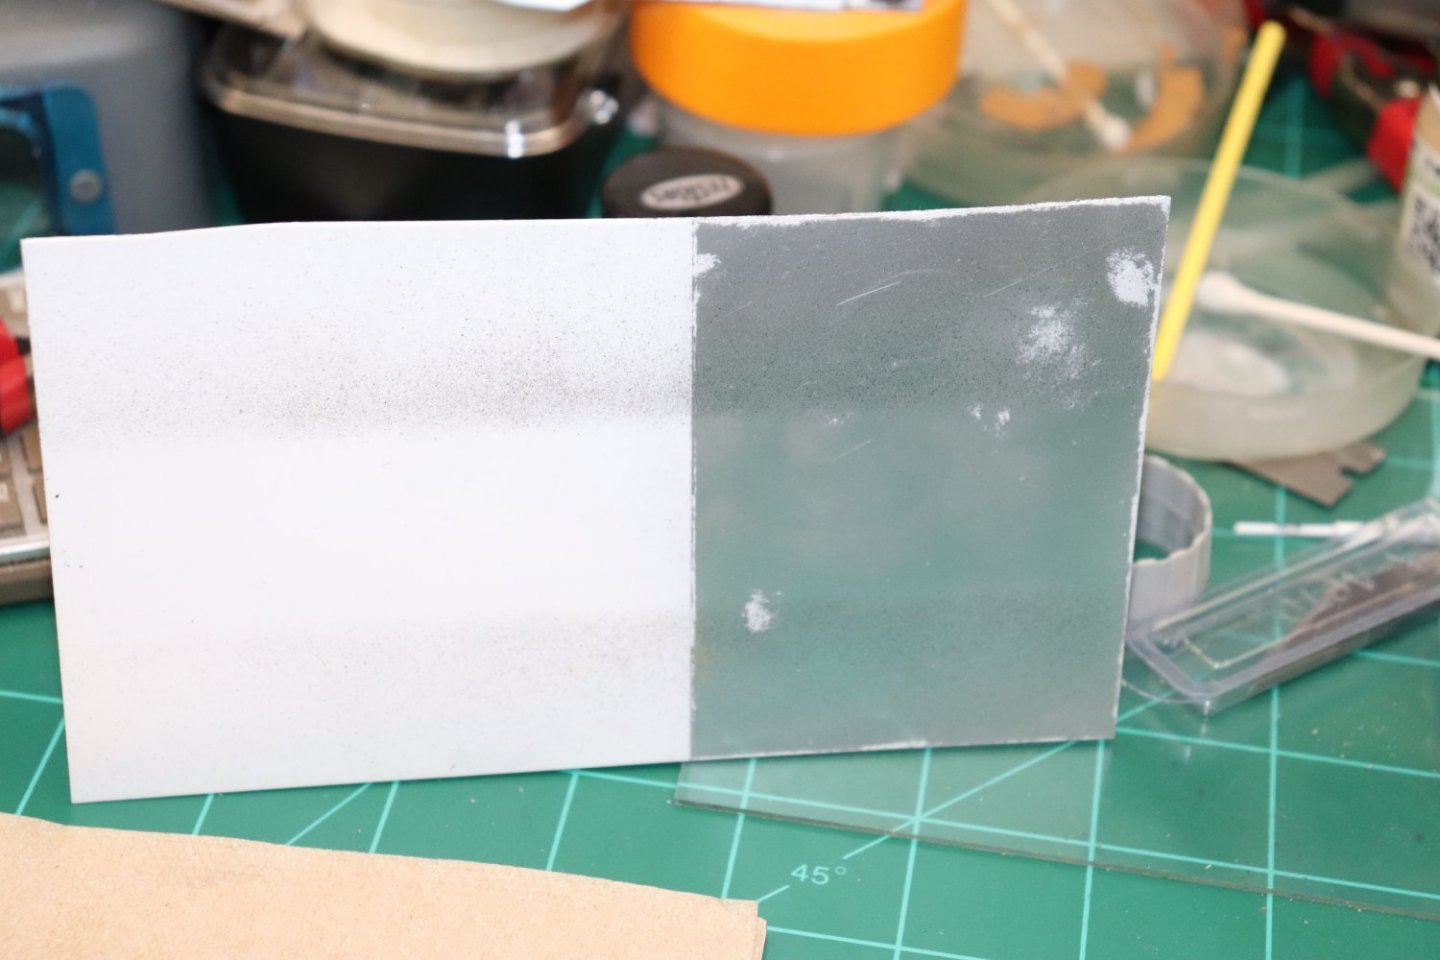
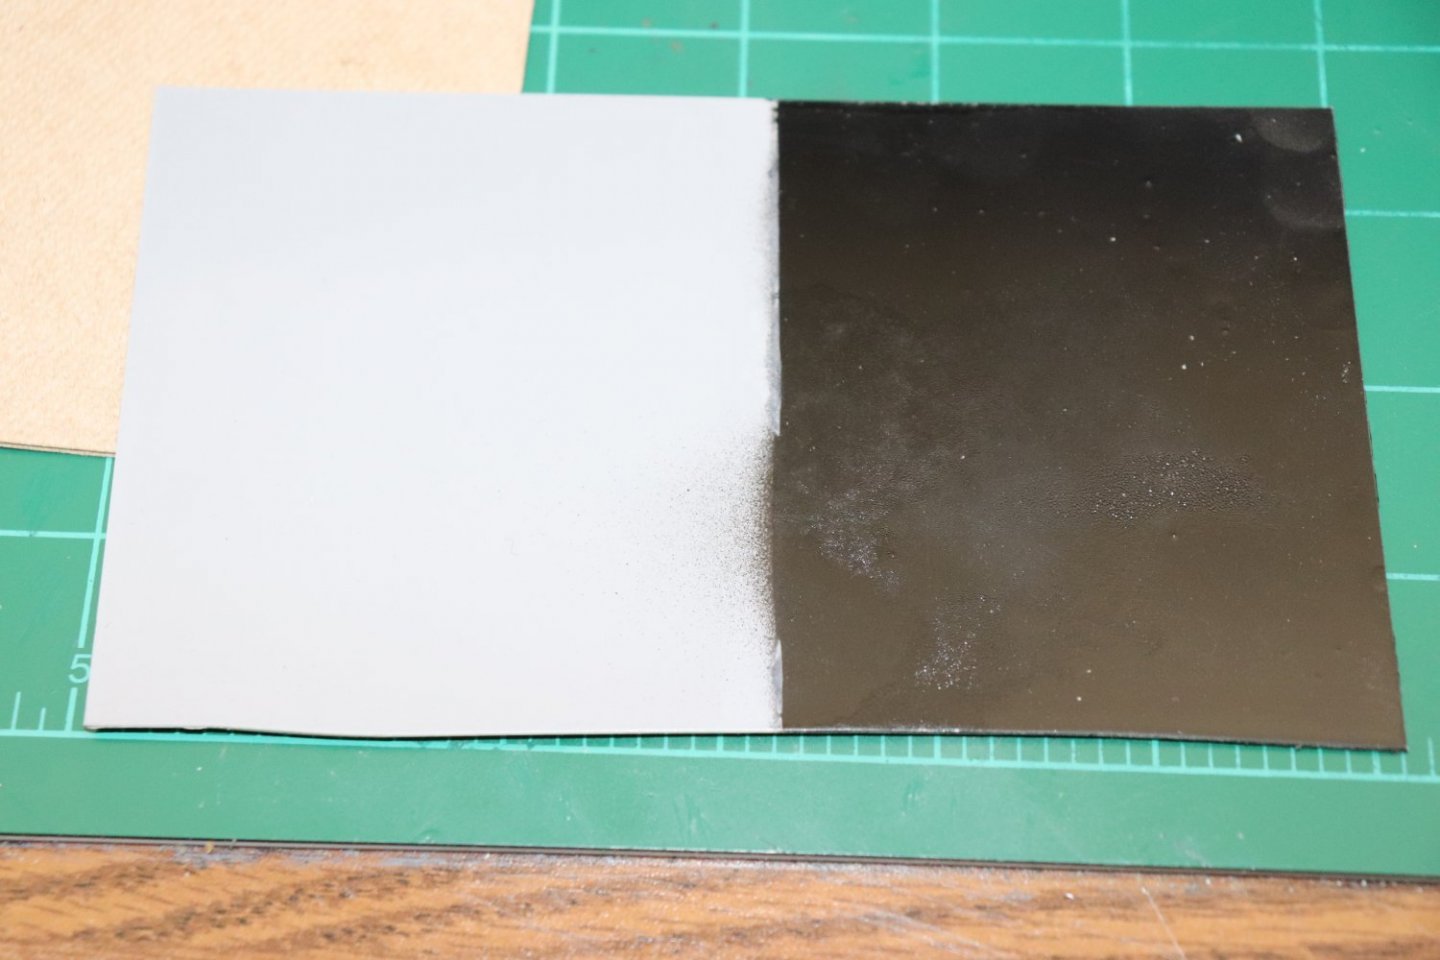
Thanks Ken, I'm still trying to follow Pete's method and learning some of what he said in his brief notes on his technique... And yes he does say black gives a greater depth of color than lighter colors for polished aluminum, Grey works for unpolished aluminum.. He also wrote that once you've put RnB down and buffed it out, if you put a dull overcoat over it it looks like raw aluminum. and if you put a gloss coat over it it looks like aluminum paint... there is a few other things like future, (he called it klear) will seal it with minimum discoloration, (good for decals and painted details) Although decals will go over RnB directly, setting solutions don't bother it... I did find out one thing... Hand and finger oils will take it off after repeated handling, and it doesn't take much handling as you can see above... So I'm looking at handling with nitrile gloves and sealing with future, once your happy with the finish, being mandatory... Here is the other side of the sheet which I've prepped with gloss black and testors ultra clear over tamiya grey primer.... This is for the second step of the initial testing which I will report here... then I will have to test this on an actual model... So I went to HL today and purchased a fairly inexpensive kit to test this on... This kit has been out a while cause I built it several decades ago... Not so expensive as it will hurt if I screw it up but presentable if it comes out right... and fits the scale of my other builds so it won't be out of place on the shelf... Once this last sheet test is done and reported I will be shifting to it as an OOB test of the method on a complete model, I do not want to screw up over 200.00 worth of F-104 cause I don't really know what I'm doing... Second test coming up... Onwards... EG
-
Nice job, I built that one when young and they were still in use... a quick little build decent detail for the period and it actually looked like the subject.... That was a plus... According to R.P. Hunnicutt, the god of US Armor historians, (Hunnicutt was one of the founders of the U.S. Army Ordnance Museum at Aberdeen Proving Ground and a frequent contributor to the Patton Museum at Fort Knox.) the Patton series of Medium and Main Battle Tanks runs from the M-46 thru the M-60, The M-60 being the last of the breed... Then the failed MTB-70 and then the M-1 Abrams.... The official names for them were; Medium Tank M-46, 90mm Gun Tank M-47, 90mm Gun Tank M-48, and 105mm Gun Tank M-60.... They were all given the unofficial nickname "Patton".... They all had their variants designated as A1, A2, A3 the same as the earlier M-4's and M-26's did... The last of the Patton series was the M-60A3... Those tracks, if left to their original connection method will fail, that's what happened to mine... I came up with the same solution after they fell off, stitching them together, unfortunately, being made of vinyl, they eventually disintegrated completely... It got relegated to the shelf of doom where it eventually was sacrificed as parts/materials to more modern builds.... Todays aftermarket will allow it to be built into a very nice representation of a late model M-48 more early vietnam era than european era... Looking good my friend...
-
Just a question Kevin, I think your idea of using elastic for the leather suspension gives a very real action to the suspension... have you figured a way to deal with the rubber in those elastics when it dries out and breaks? My suggestion, while you are at this point, is to thread a thin brass wire or two through each elastic, so when the rubber dries out and breaks, the nylon covering and wire will hold them together and the dead rubber will serve as a filler to let them keep their shape? I would hate to see all that beautiful work fail in a few years...
- 150 replies
-
- 10
-
-
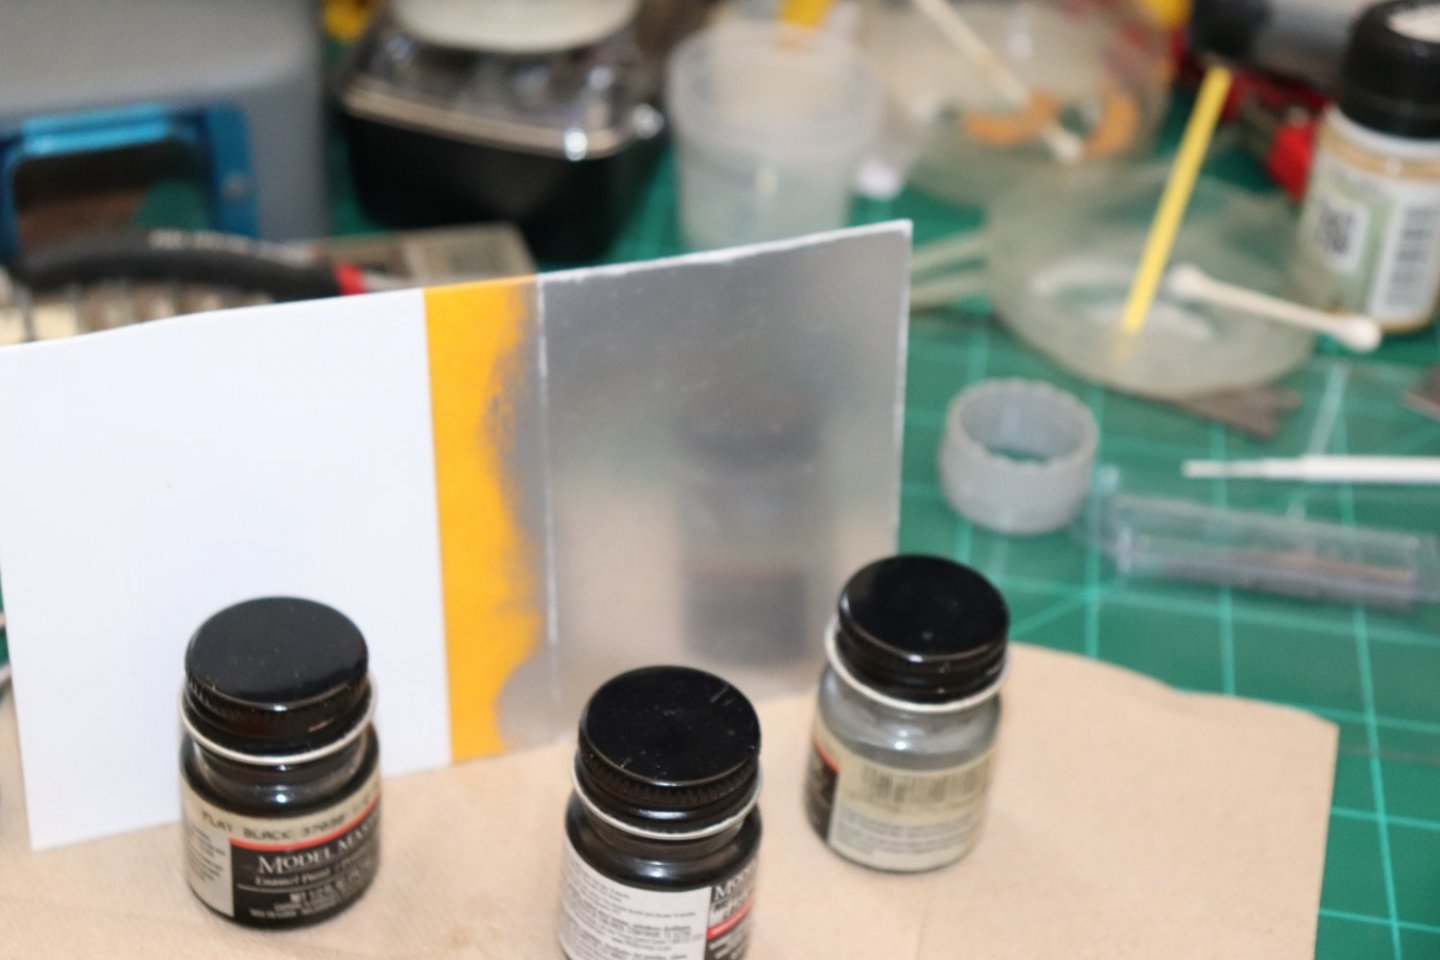
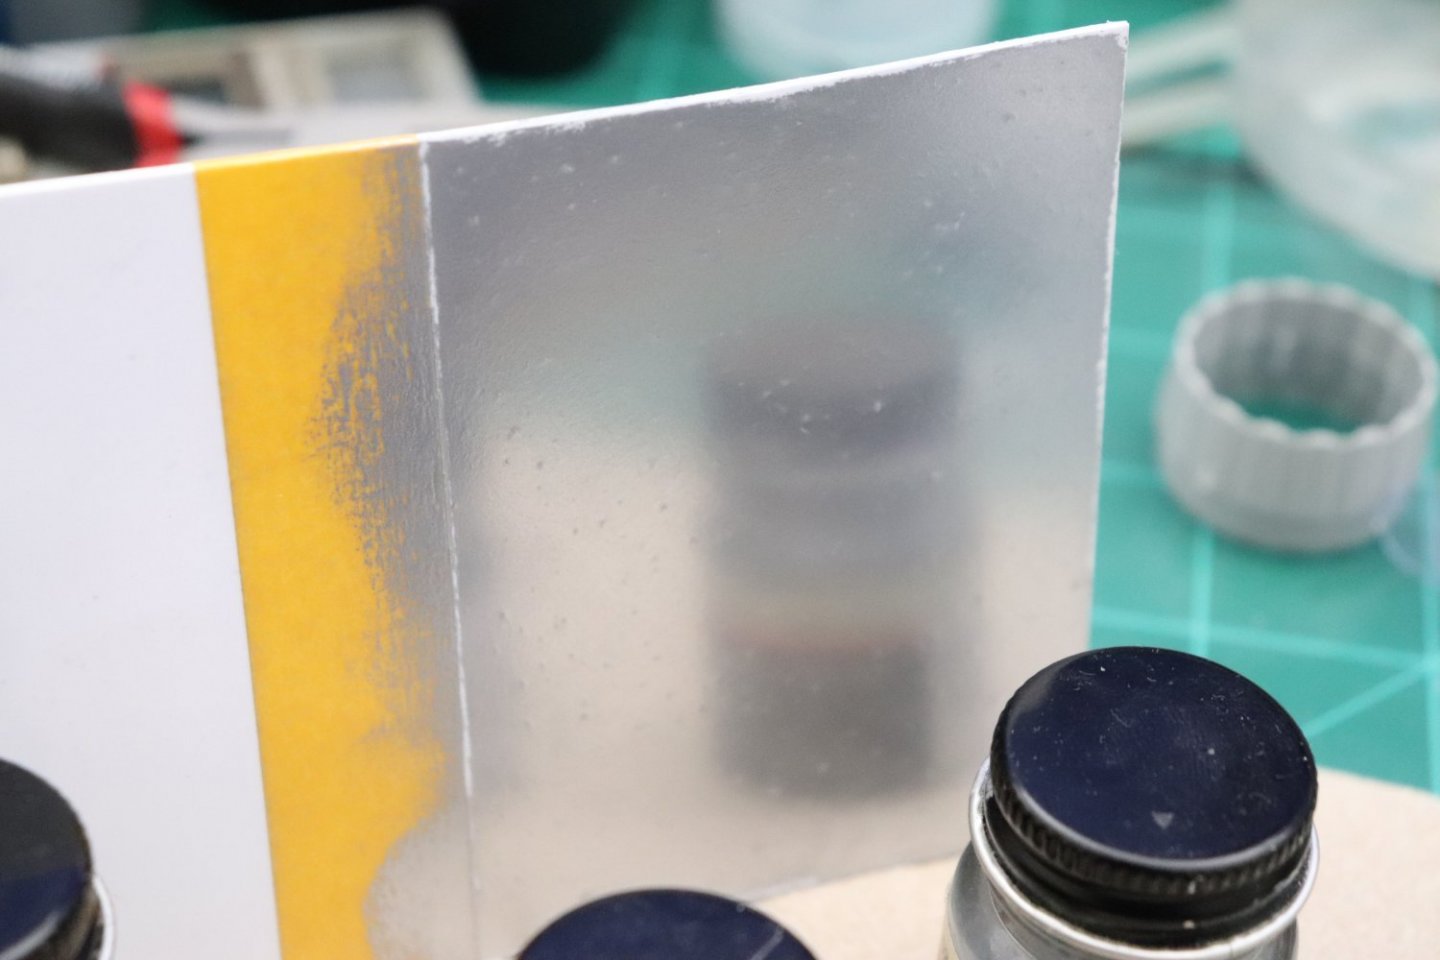
Another small update... Testing continues... Two things I learned, you get a nice soft reflection off flat paint, you get a shinier reflection off a shiny coating... That is .020 styrene sheet with a brush on coat of future allowed to dry completely... This is close to the finish on a standard issue bare metal bird... and what it tells me is shinier finishes work better for shiny metal, flat finishes work better for unpolished metal.... Now future is not a super shiny smooth finish, it is a smooth semi gloss finish... So what I'm going to do tomorrow is split the other side of this sheet and paint half of it with high gloss black over Tamiya grey primer from rattle cans and on the other end rattle can a diamond finish after smoothing the surface down to as smooth as possible... Glass like I hope... The smoother the surface the shinier the RnB buffs up is what I think happens....... The reflection above, I can see myself in it from about two feet away, just a blur mind you but you do know it is you when you move around... You can tell and arm is an arm a hand is a hand, but you cannot pick out details... From about a foot away, I can see my face, blurry, but you can see it... Better the second time around I think... Now I'm beginning to wish I didn't prime the plane parts flat black... cause I might have to change them to gloss... Till tomorrow brothers...
- 139 replies
-
- 11
-
-
Mine too, we had the 318th FIS out here when they transitioned from F-106's to F-15's... They are something to behold.....
-
I'm here Dan, Several decades ago I did the 1/48th Monogram "A" model of this aircraft... Yep it's a large one alright... Will be taking the center soft chair, back won't handle climbing up to the rafters... (now where's that popcorn)
-
Excellent! It's probably time I learned to paint figures.... and I can't go wrong with your advice...