Bill97
-
Posts
2,716 -
Joined
-
Last visited
Content Type
Profiles
Forums
Gallery
Events
Everything posted by Bill97
-
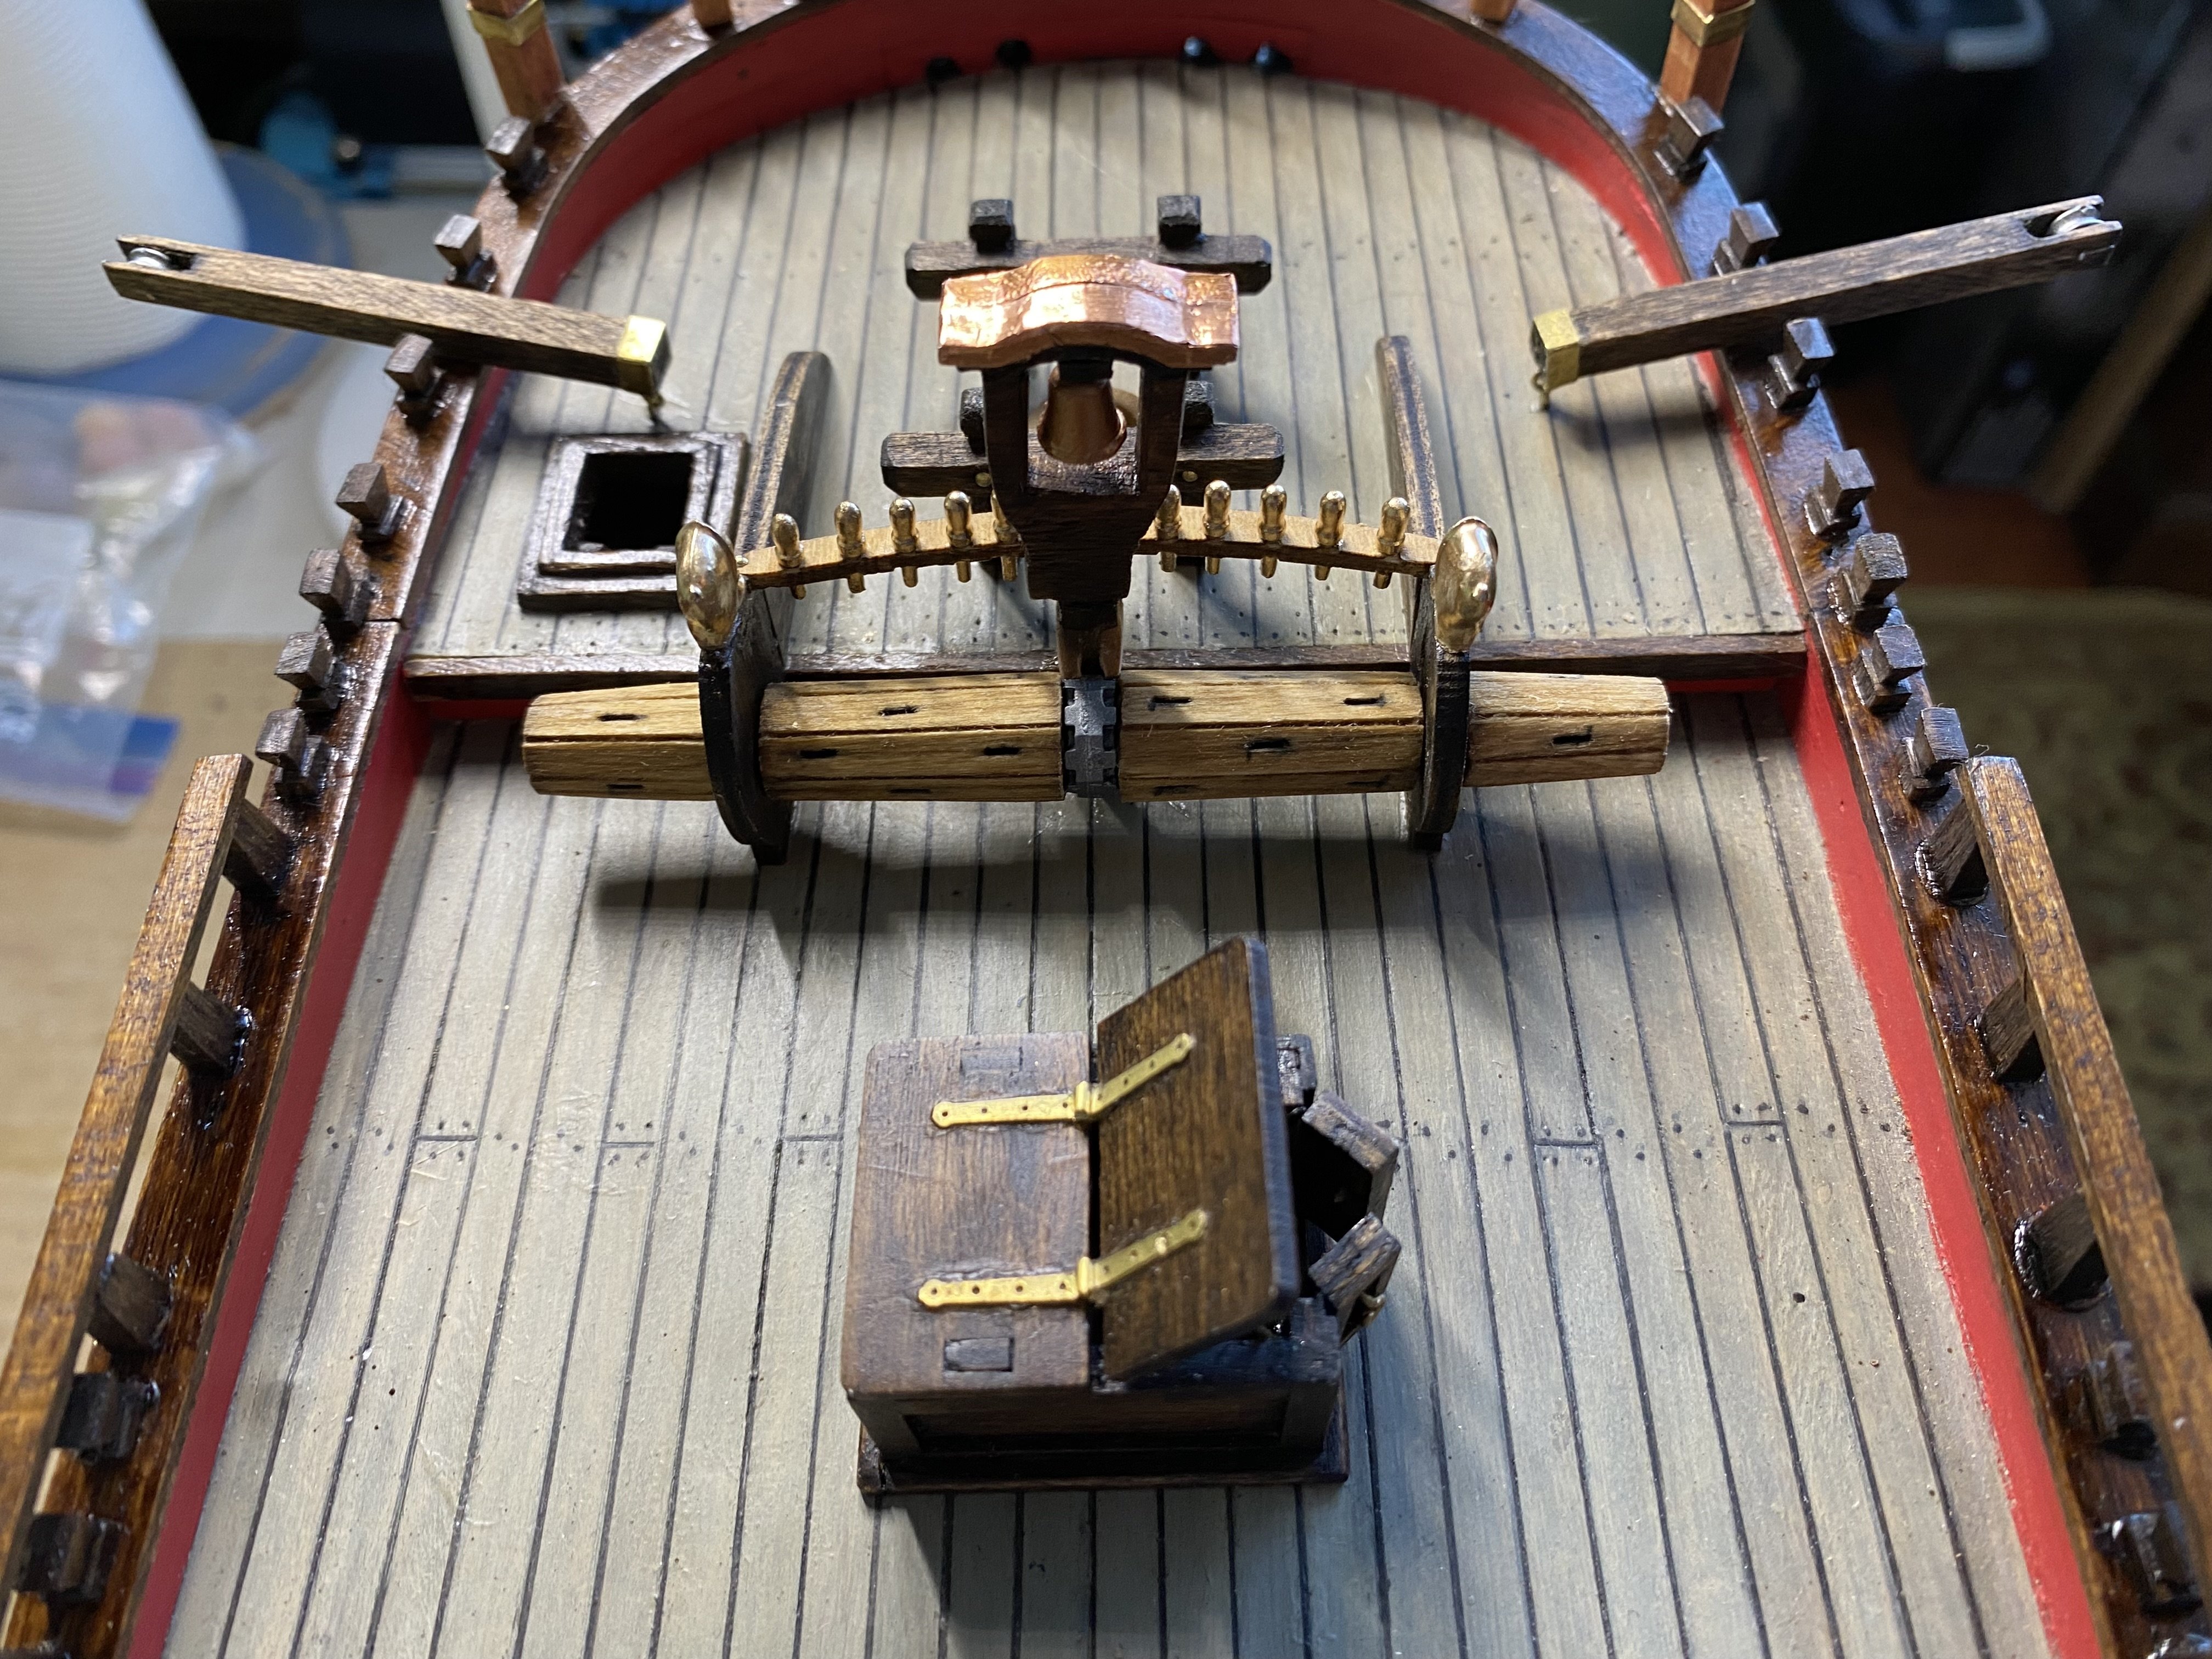
It is a pretty busy quarter deck Ian. I check the different references from time to time and it was all there from what I can determine. I will have to check out the Great Eastern and then watch for it.
-
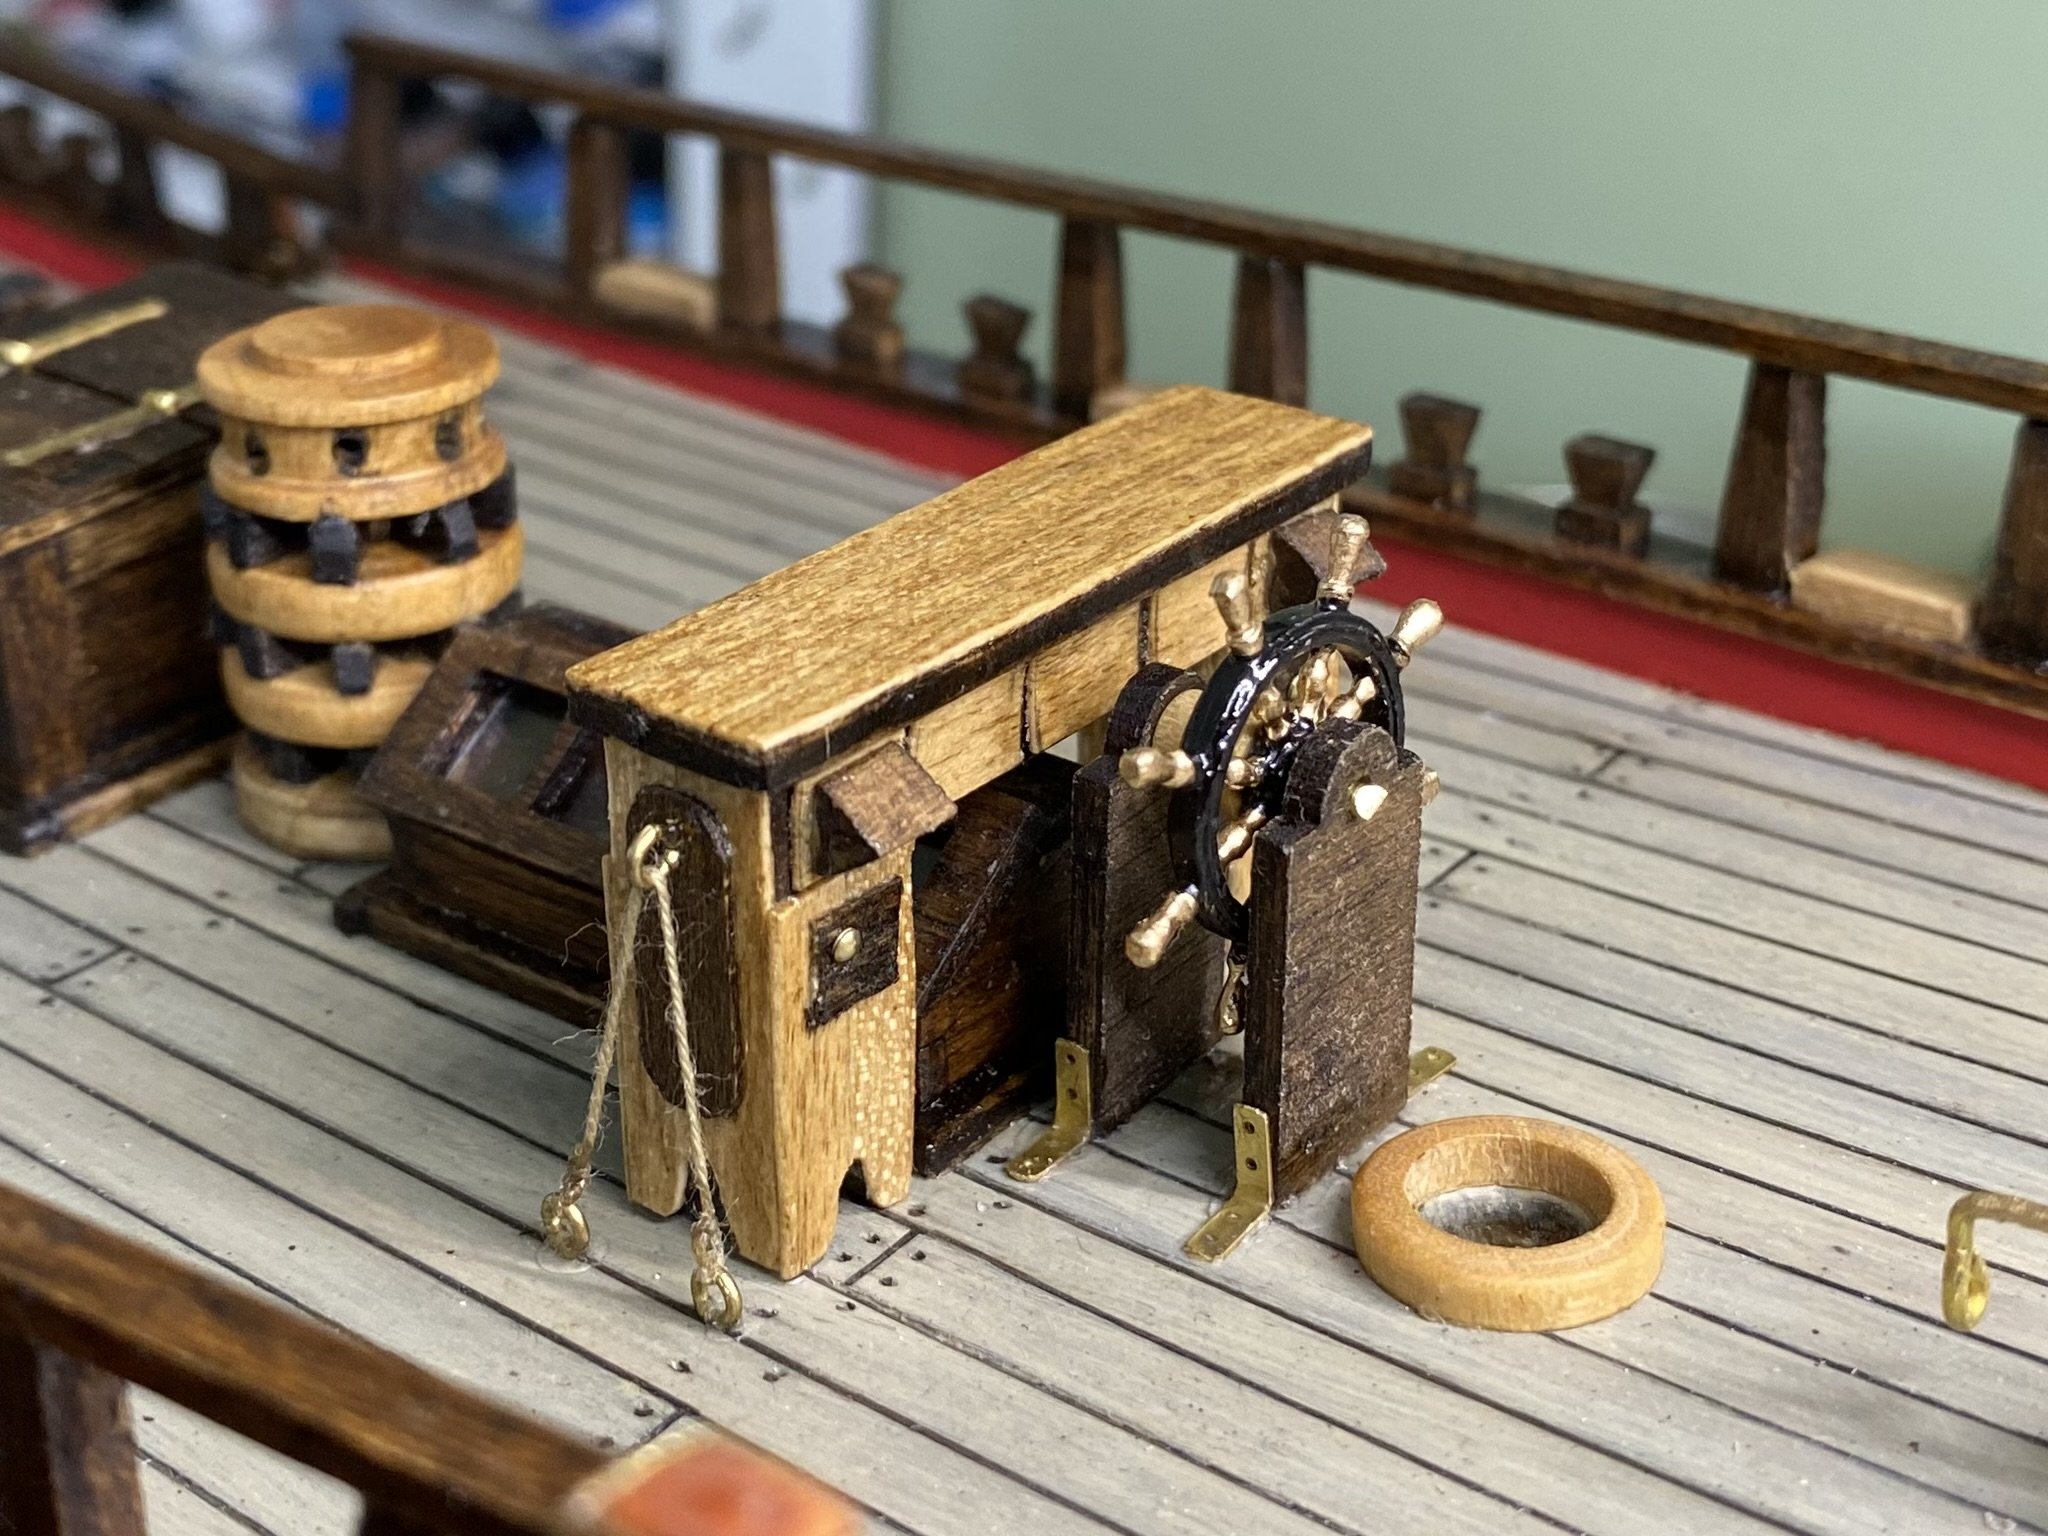
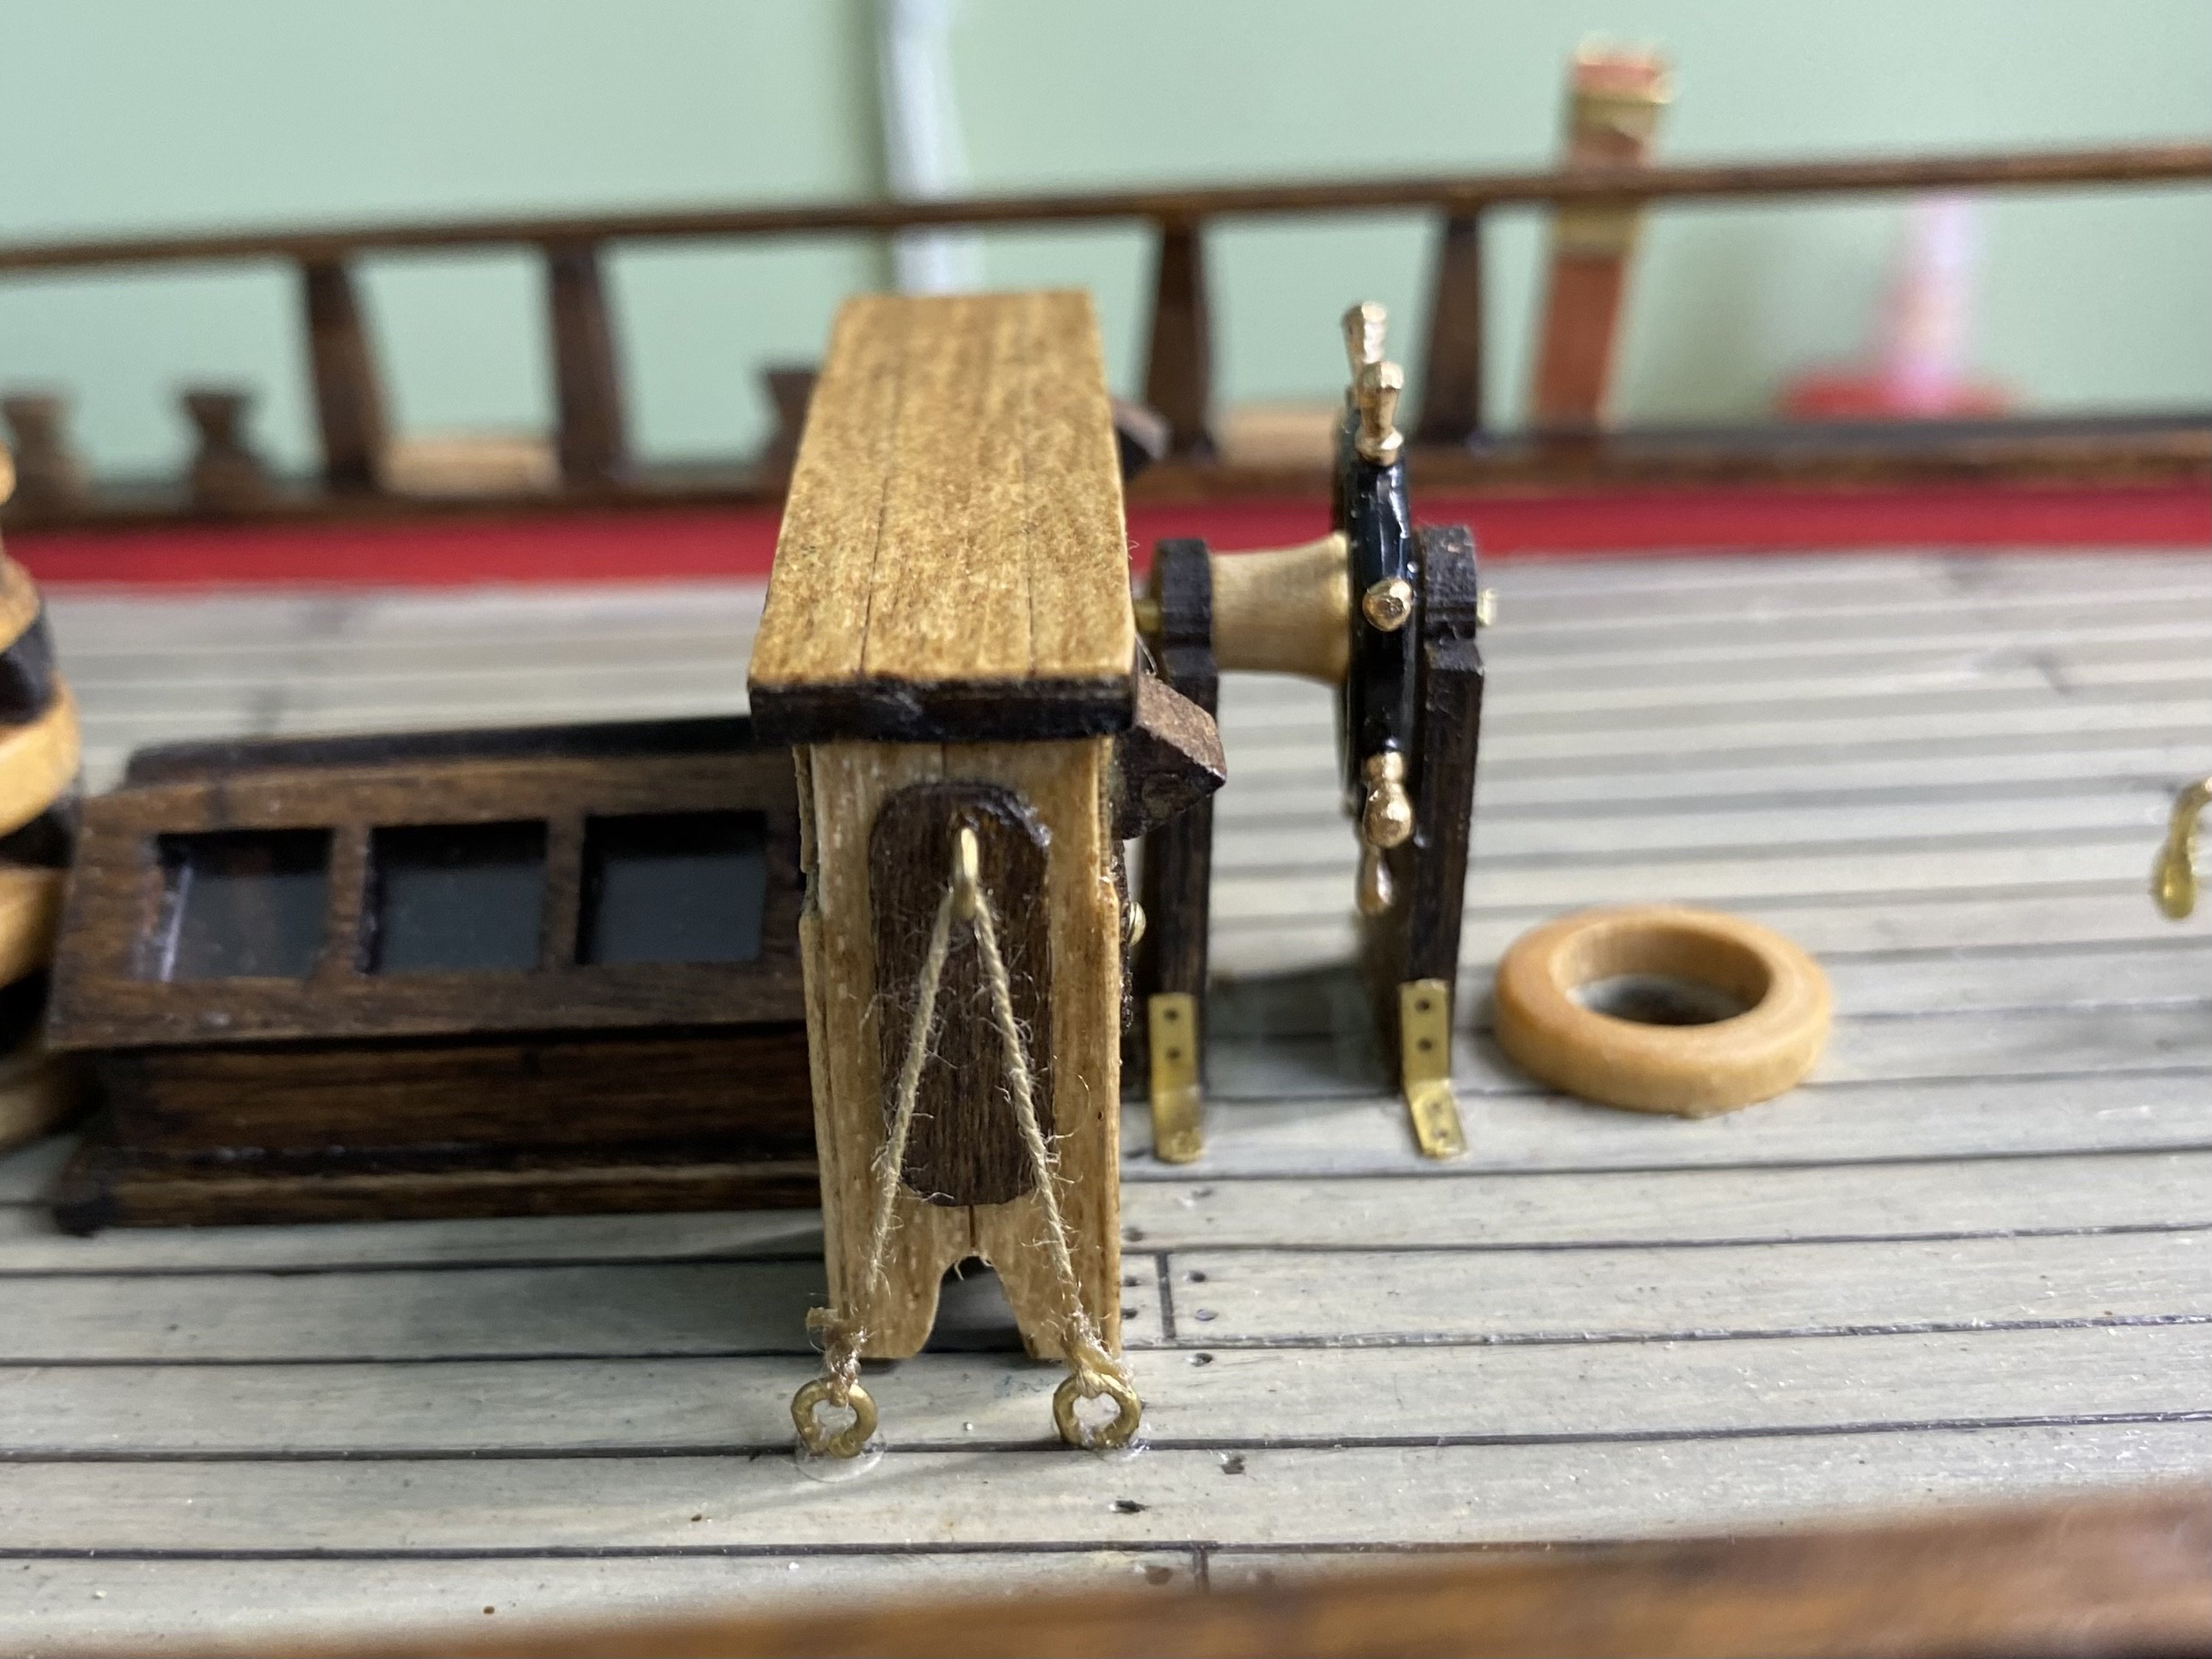
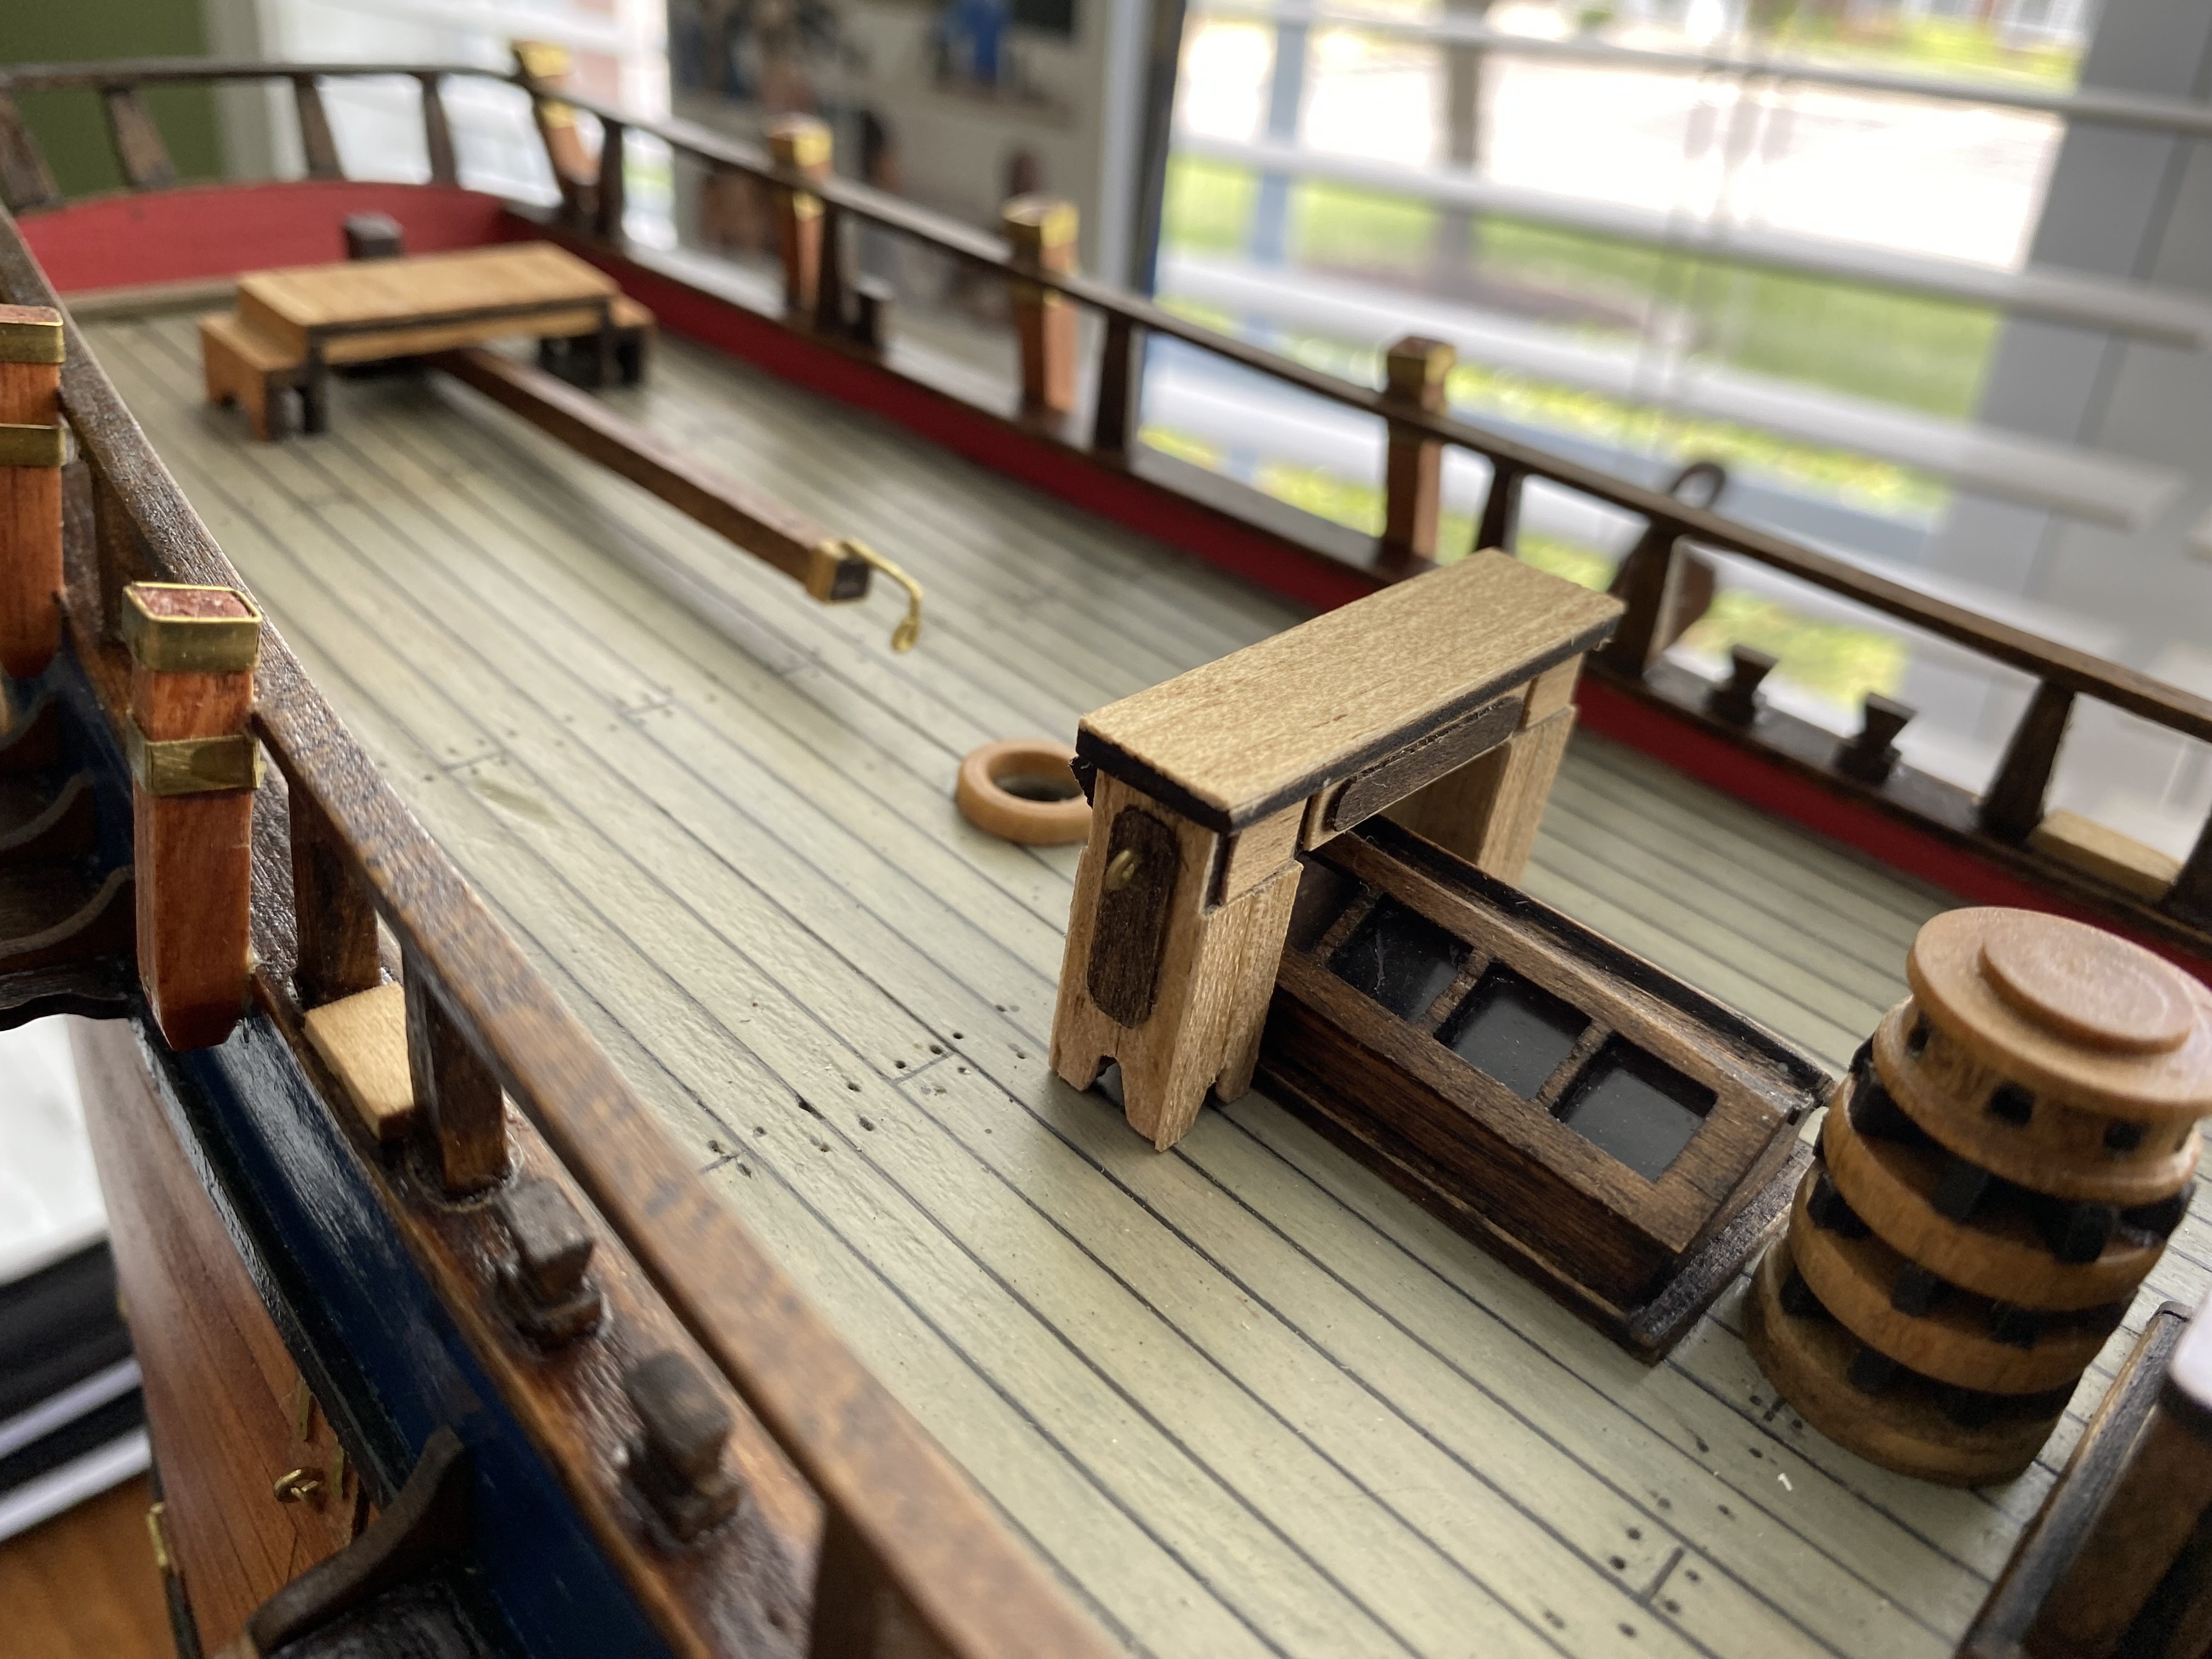
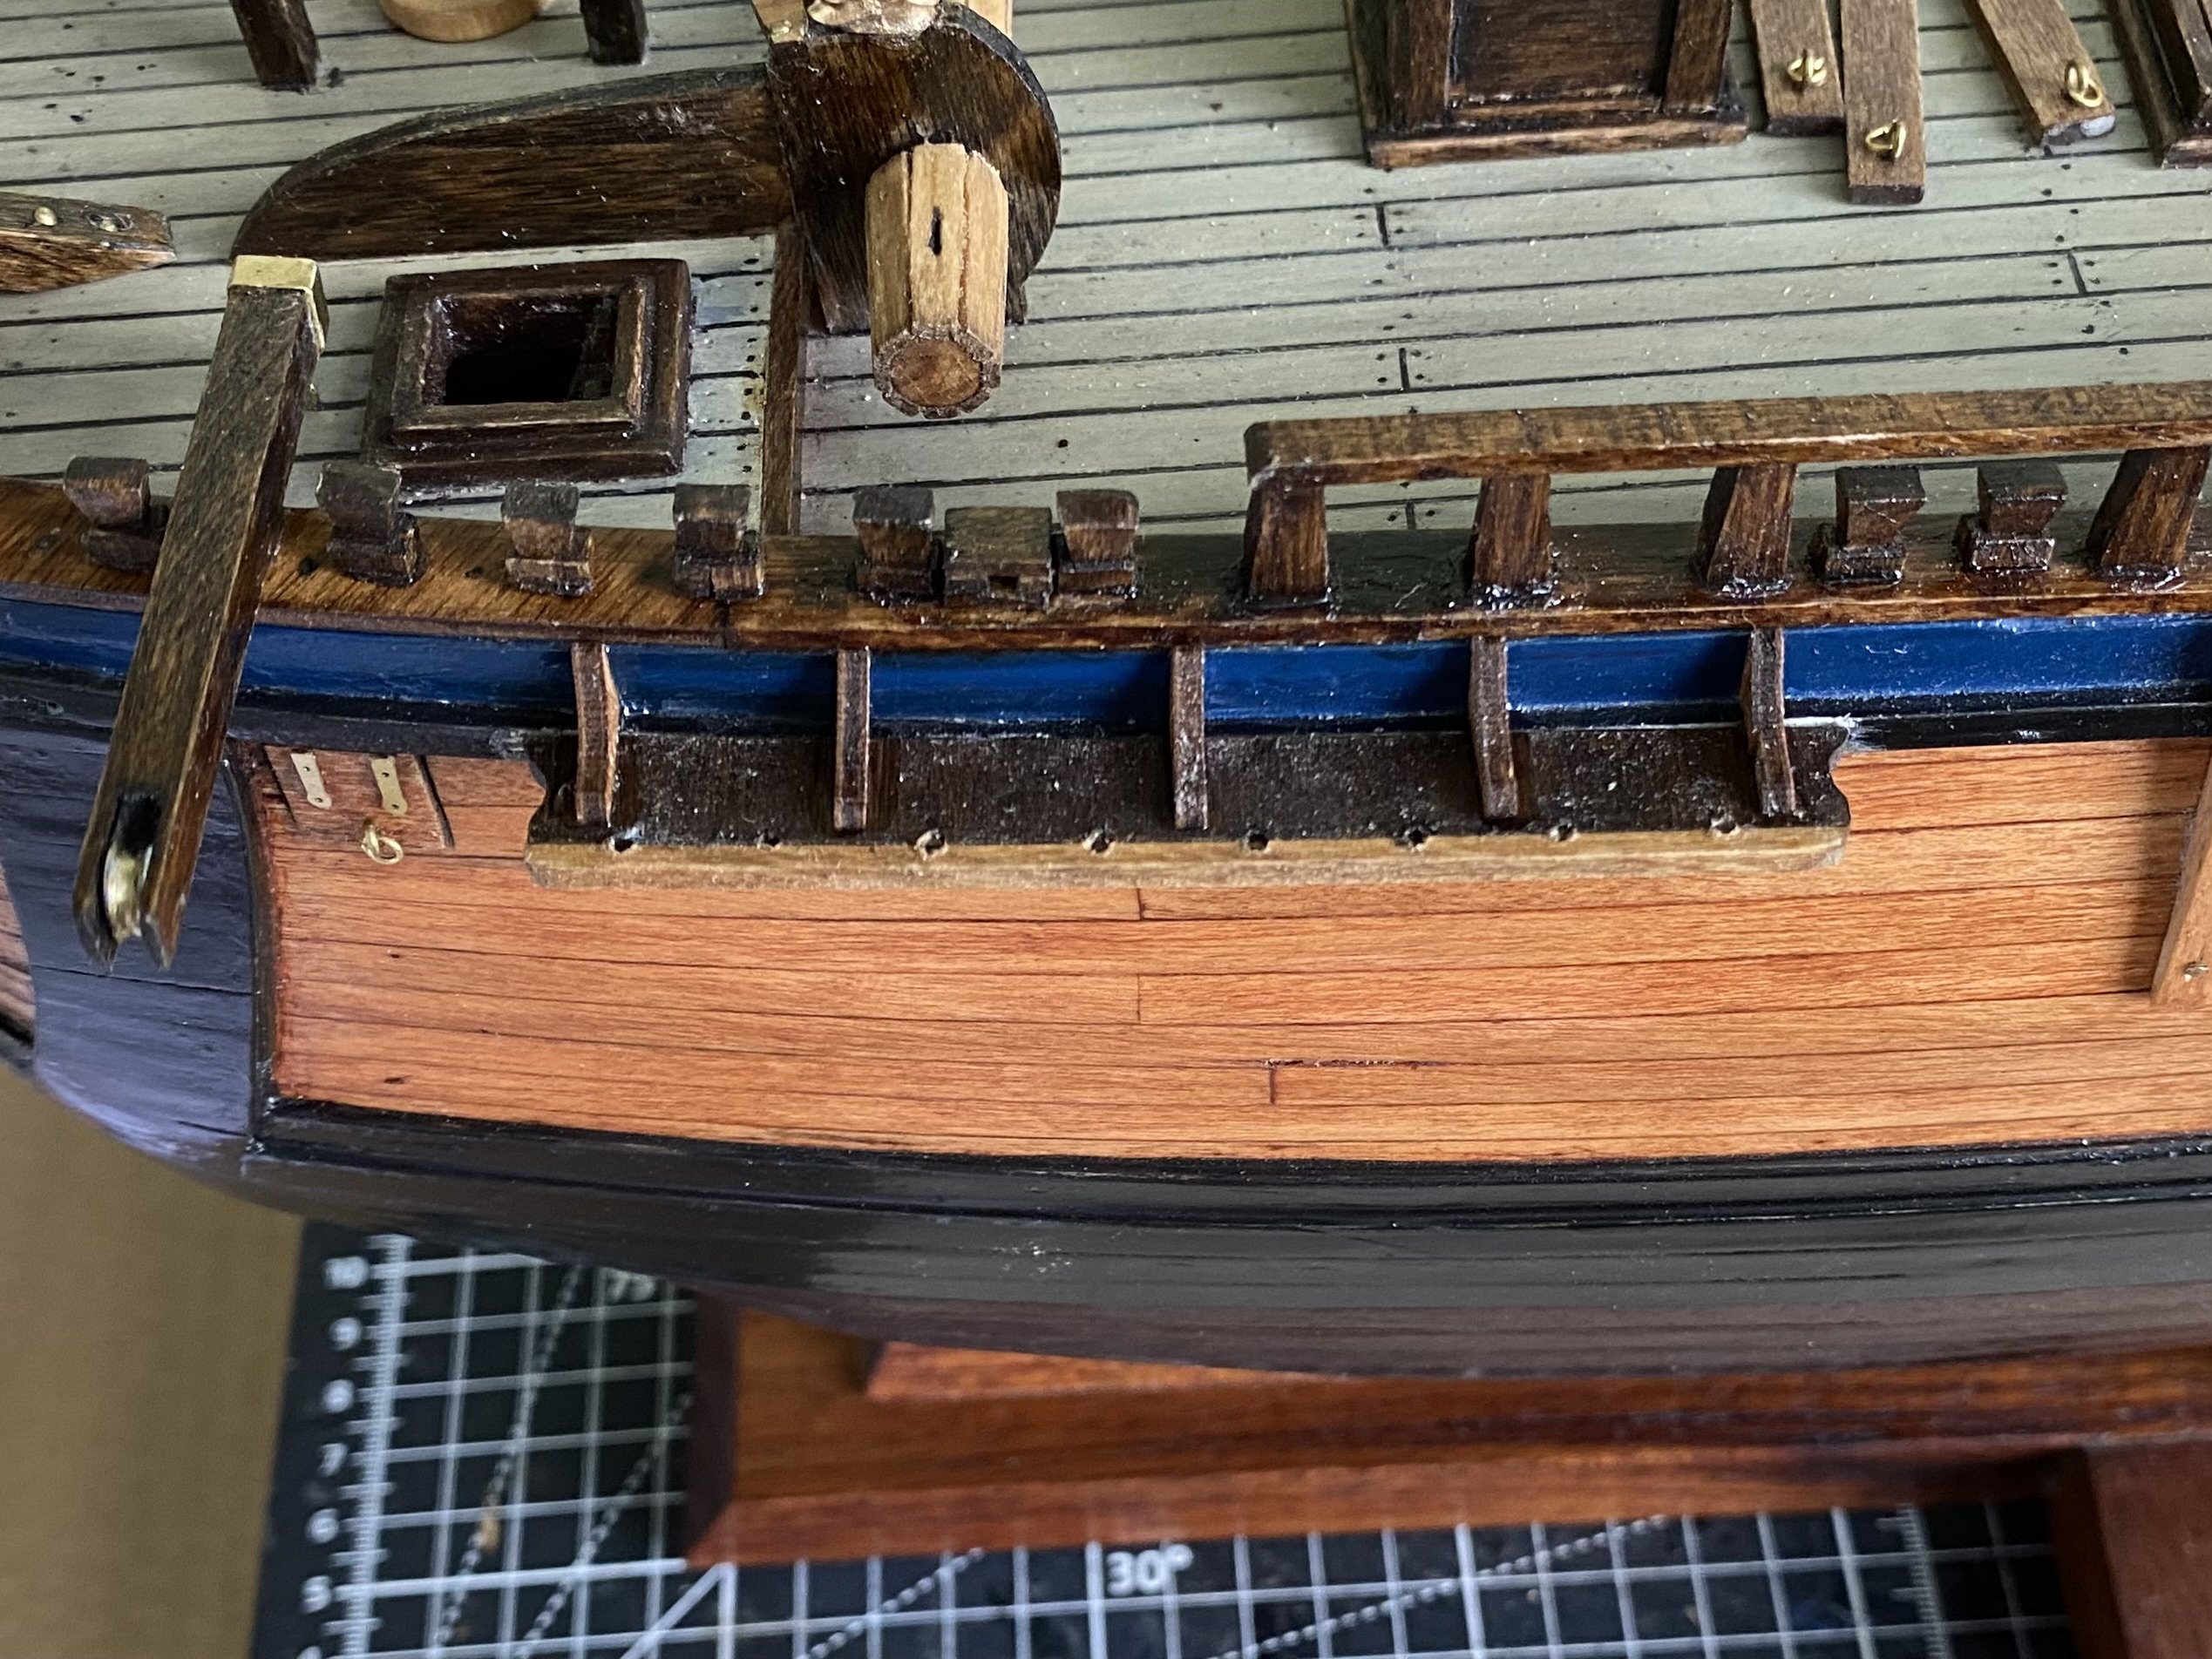
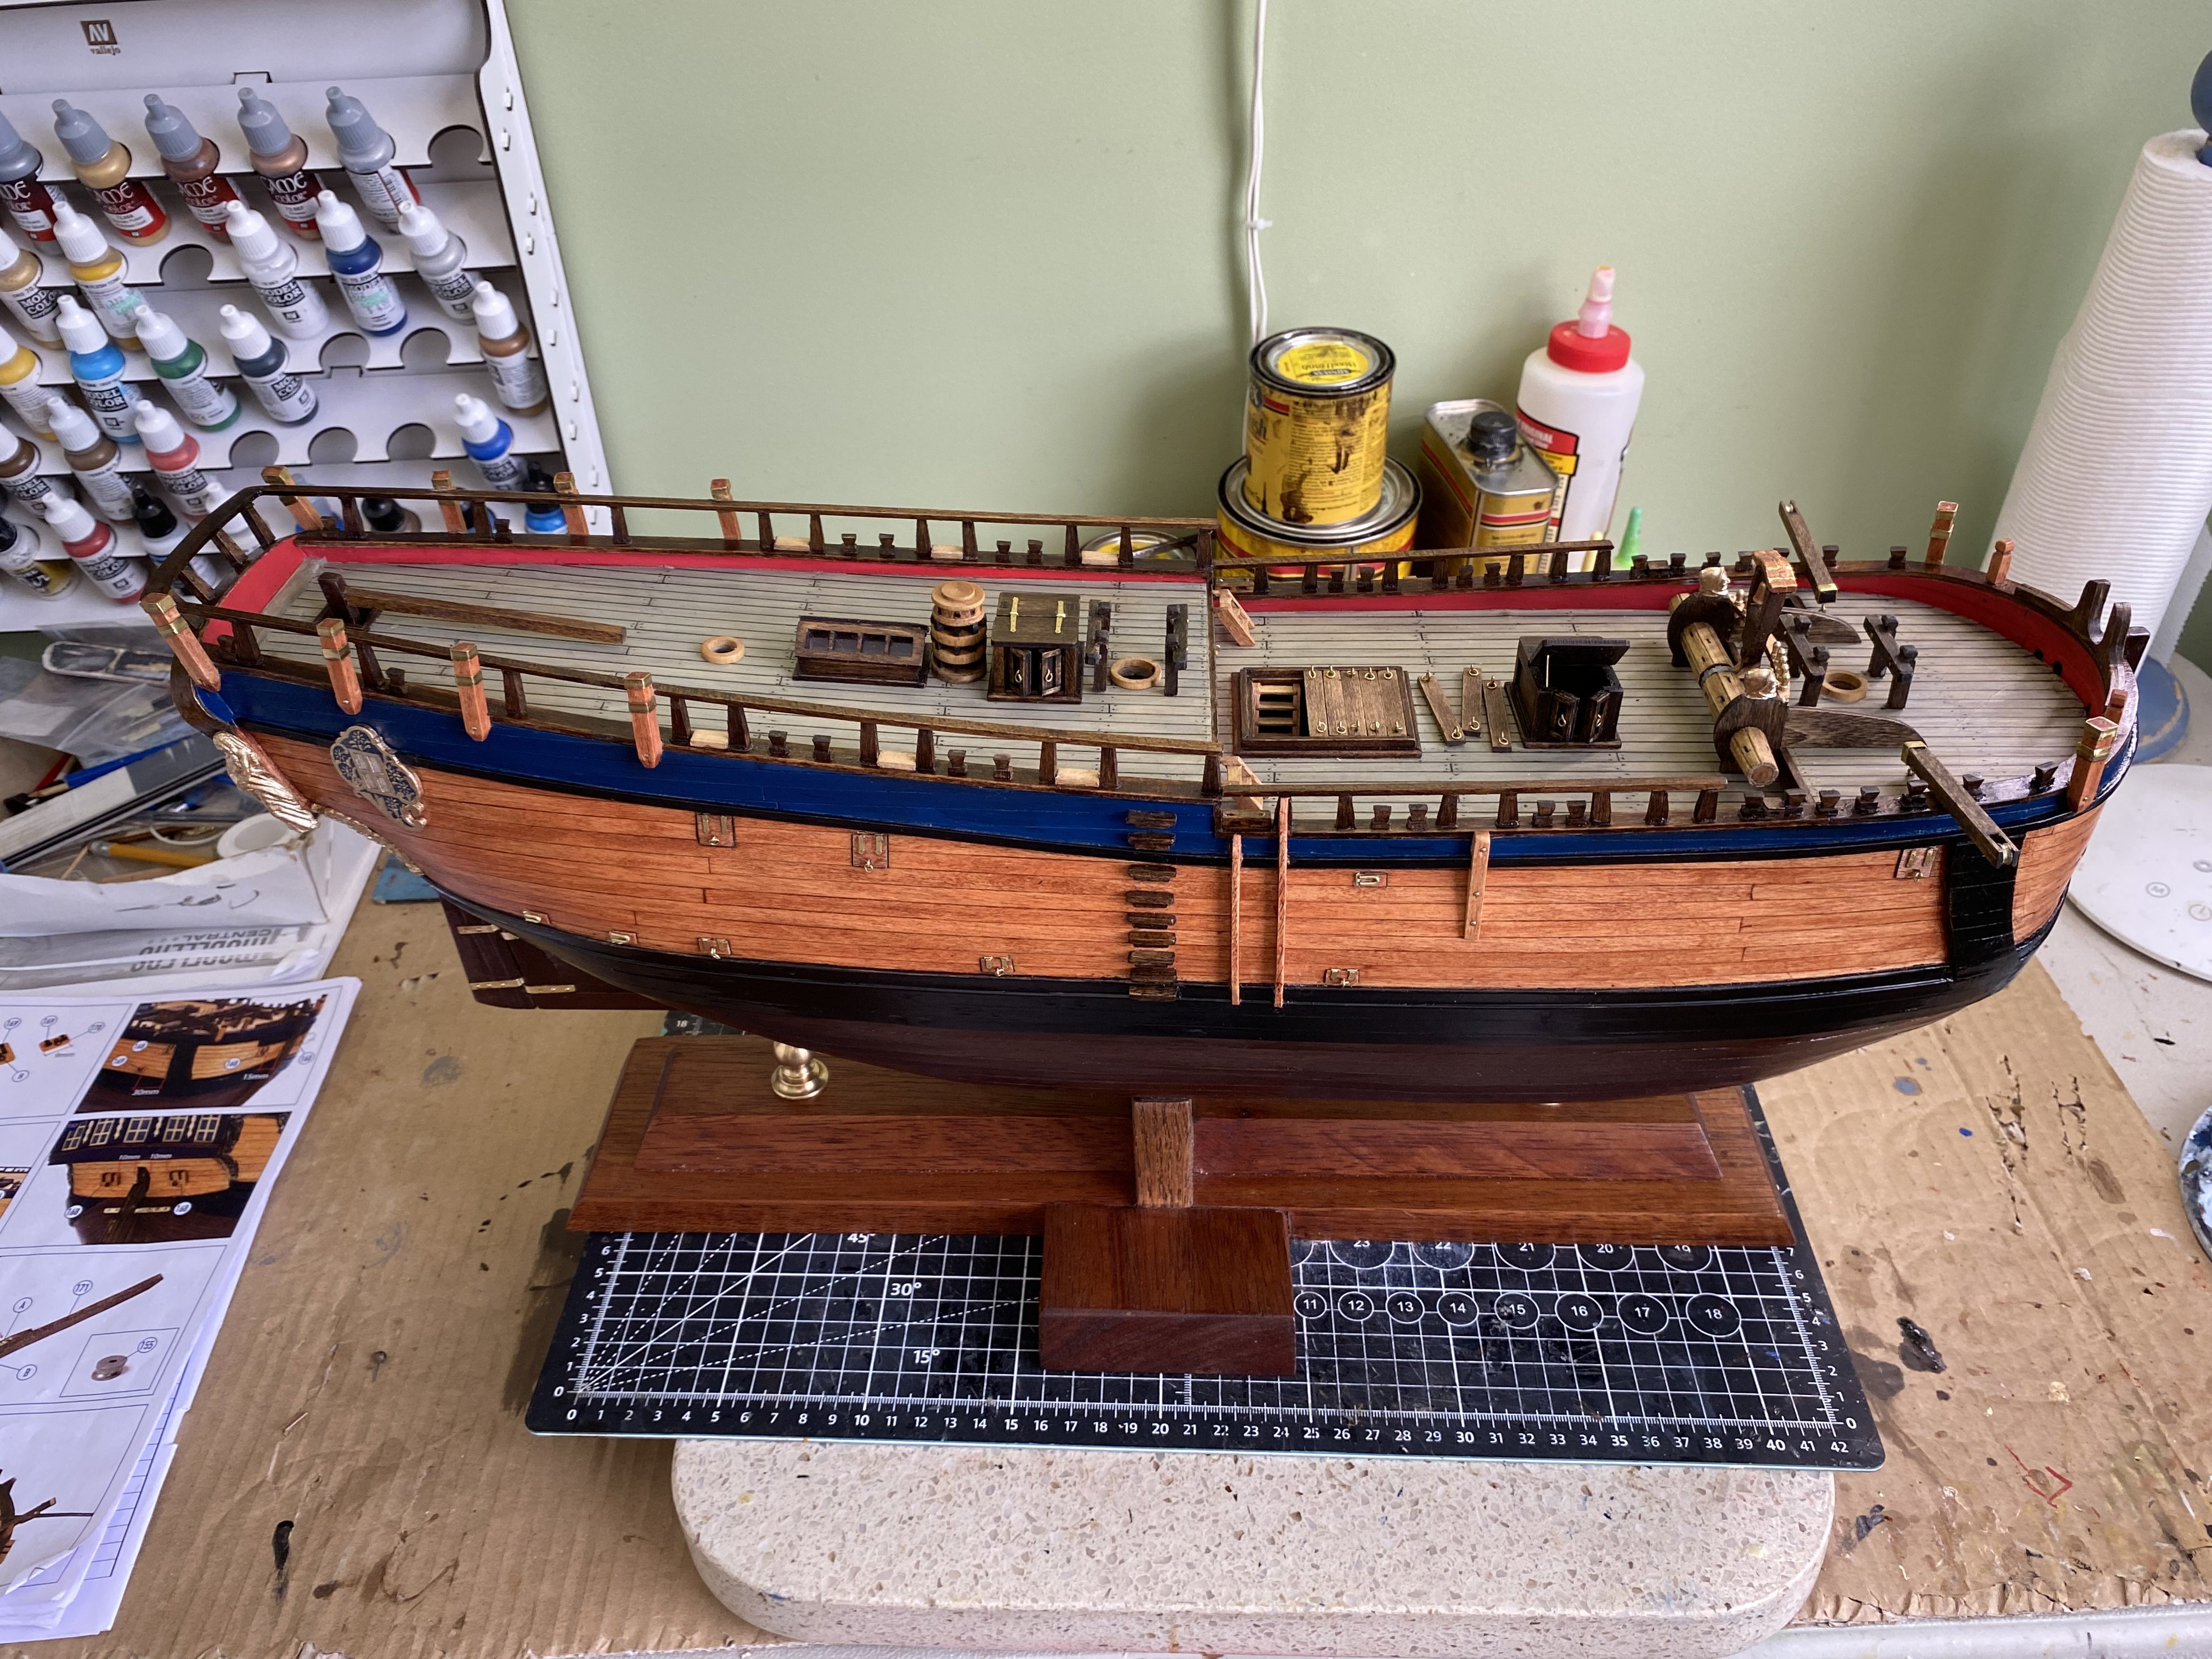
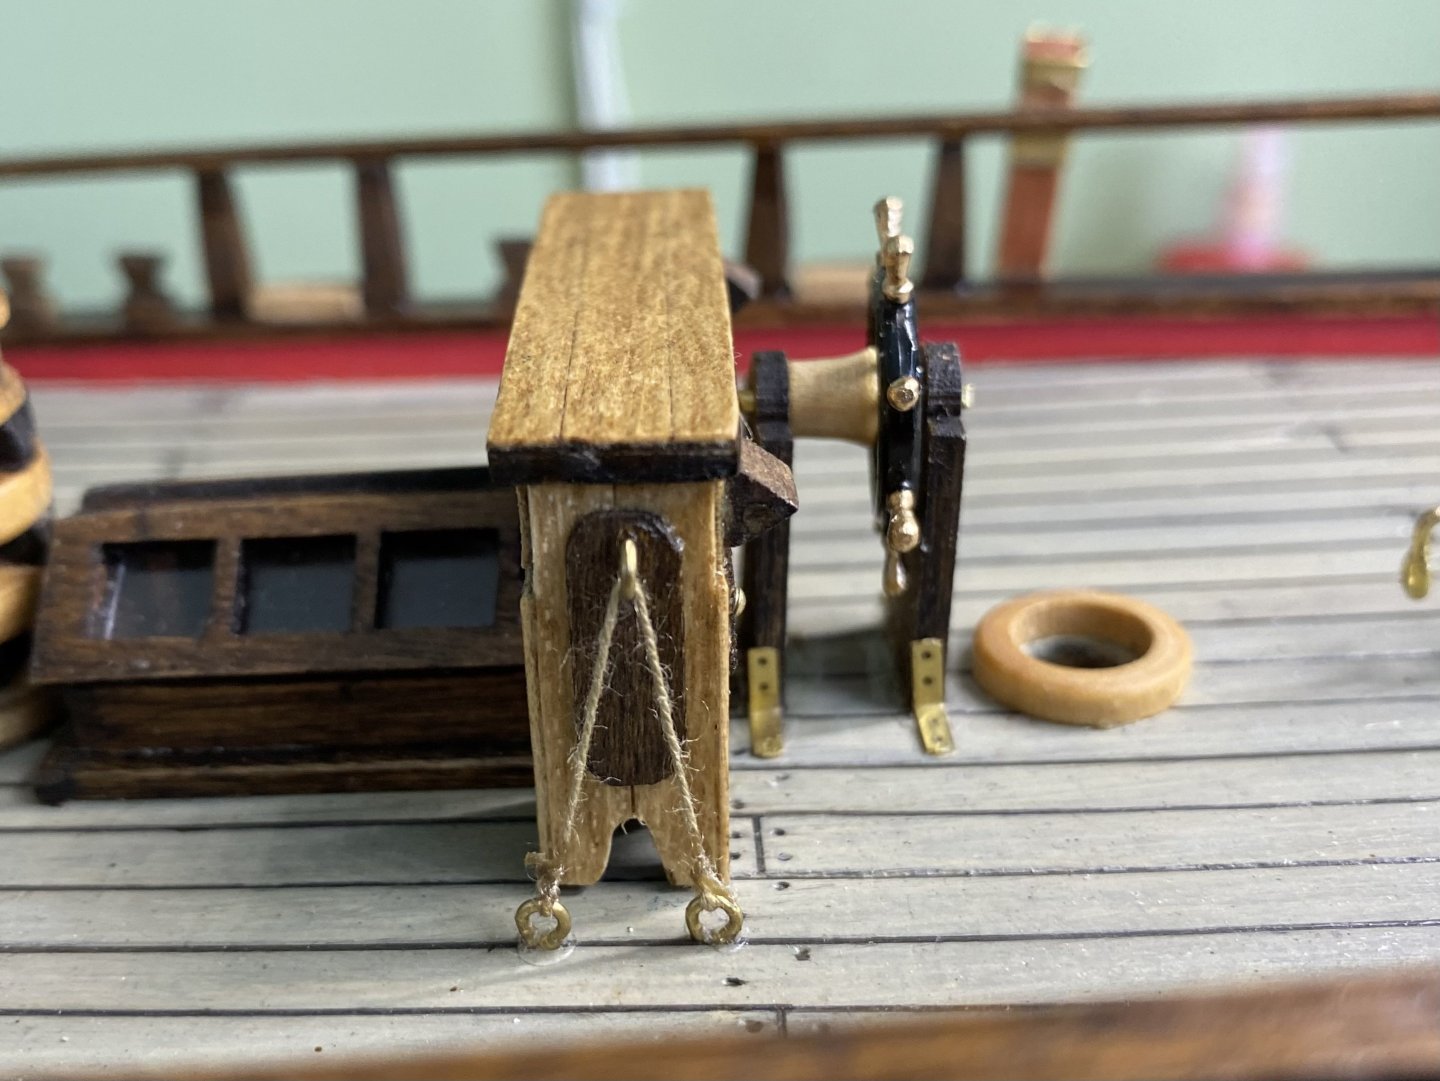
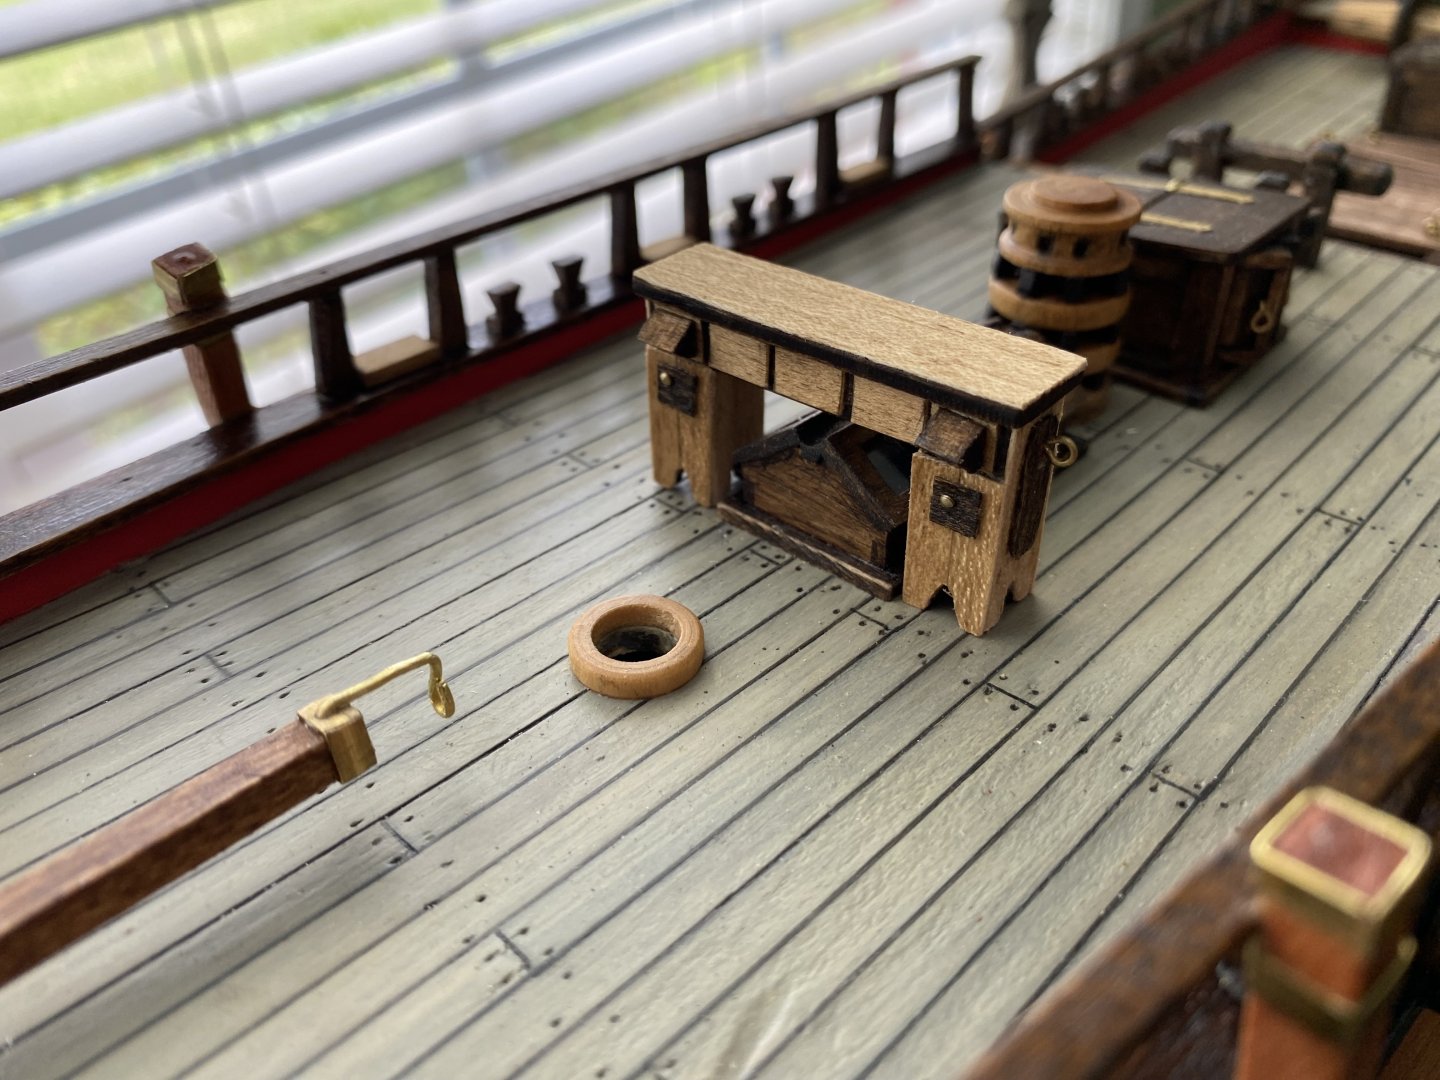
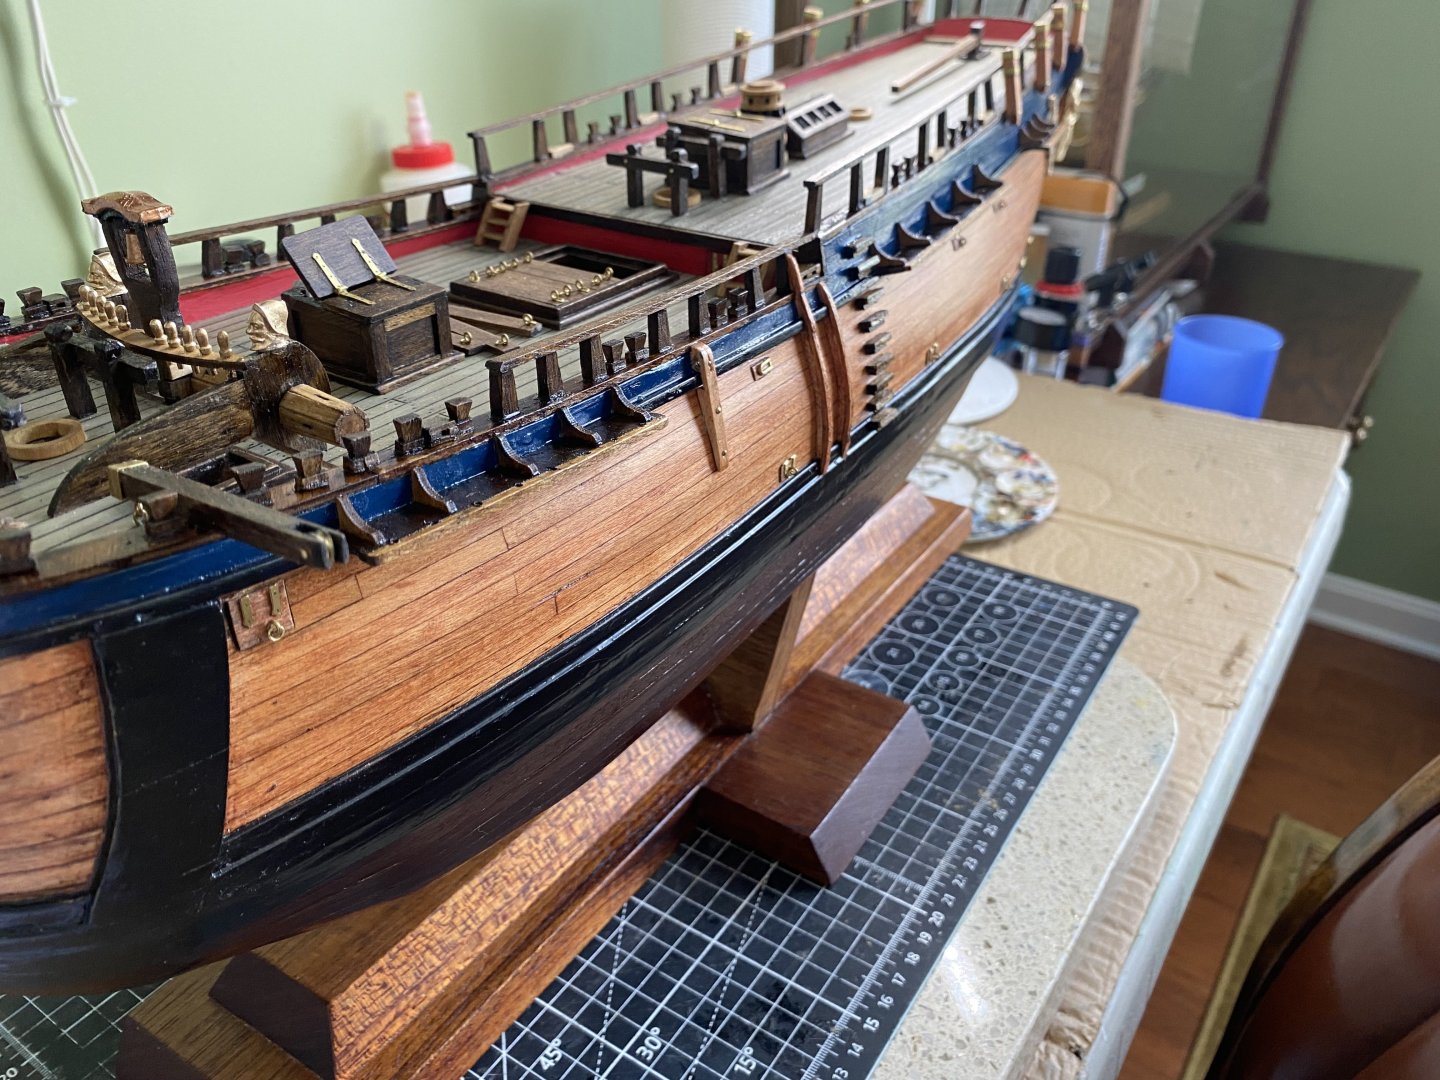
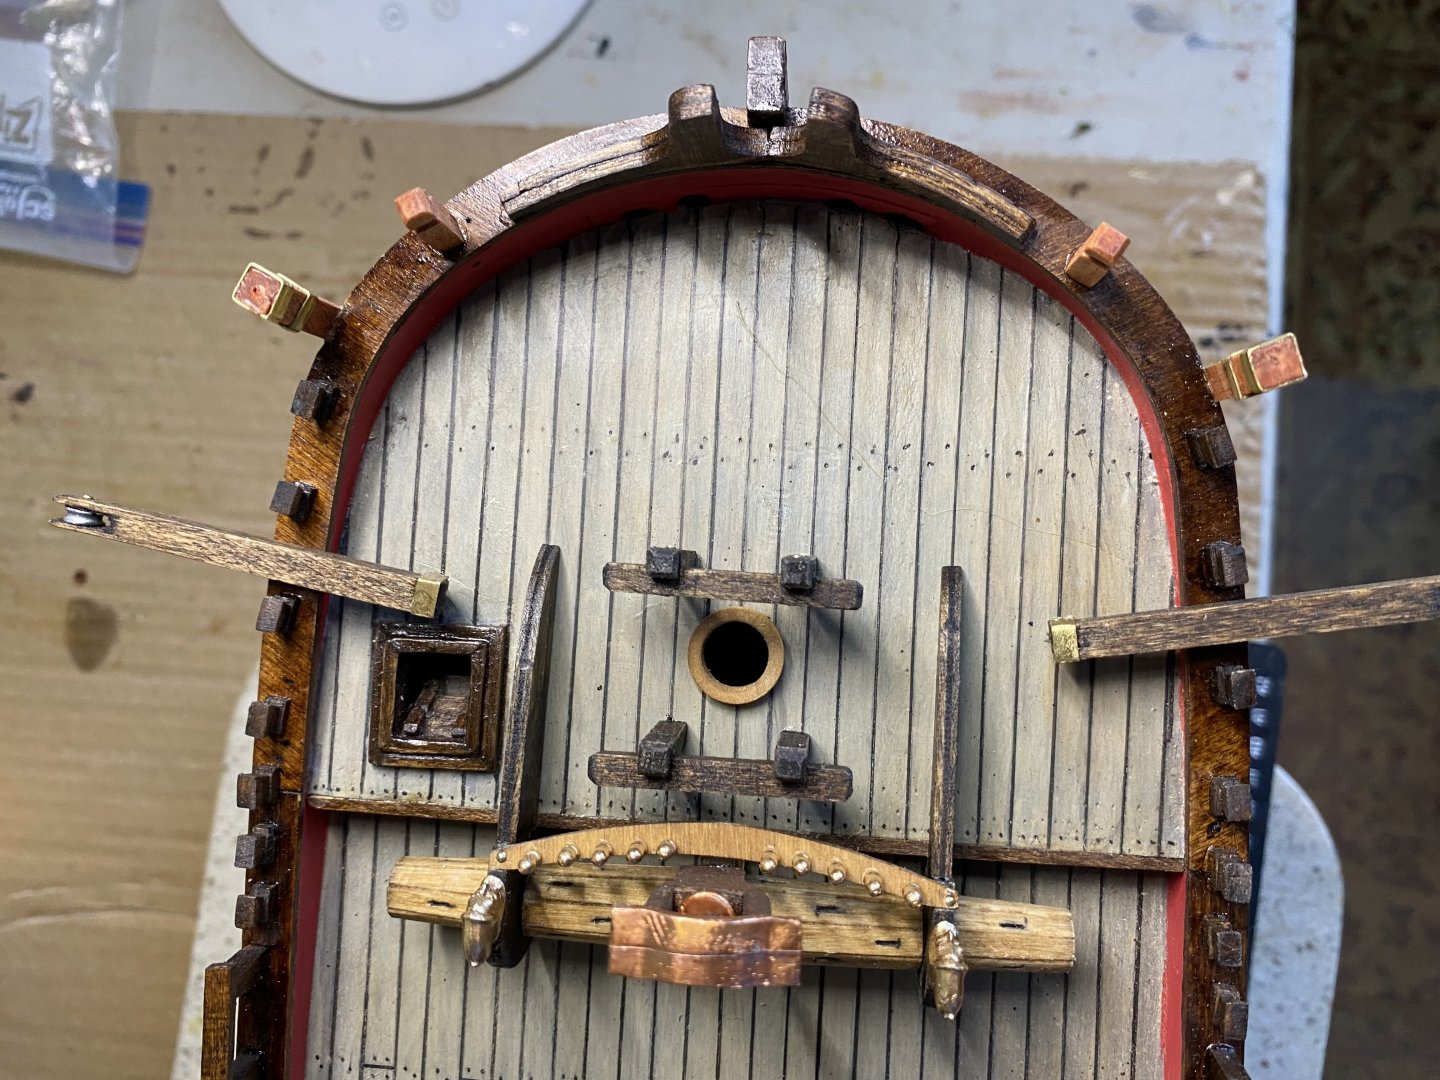
Recent additions are the binnacle cupboard, the helm, the chimney, and front hatch cover. I opted to add a little gold to the wheel of the helm.


-
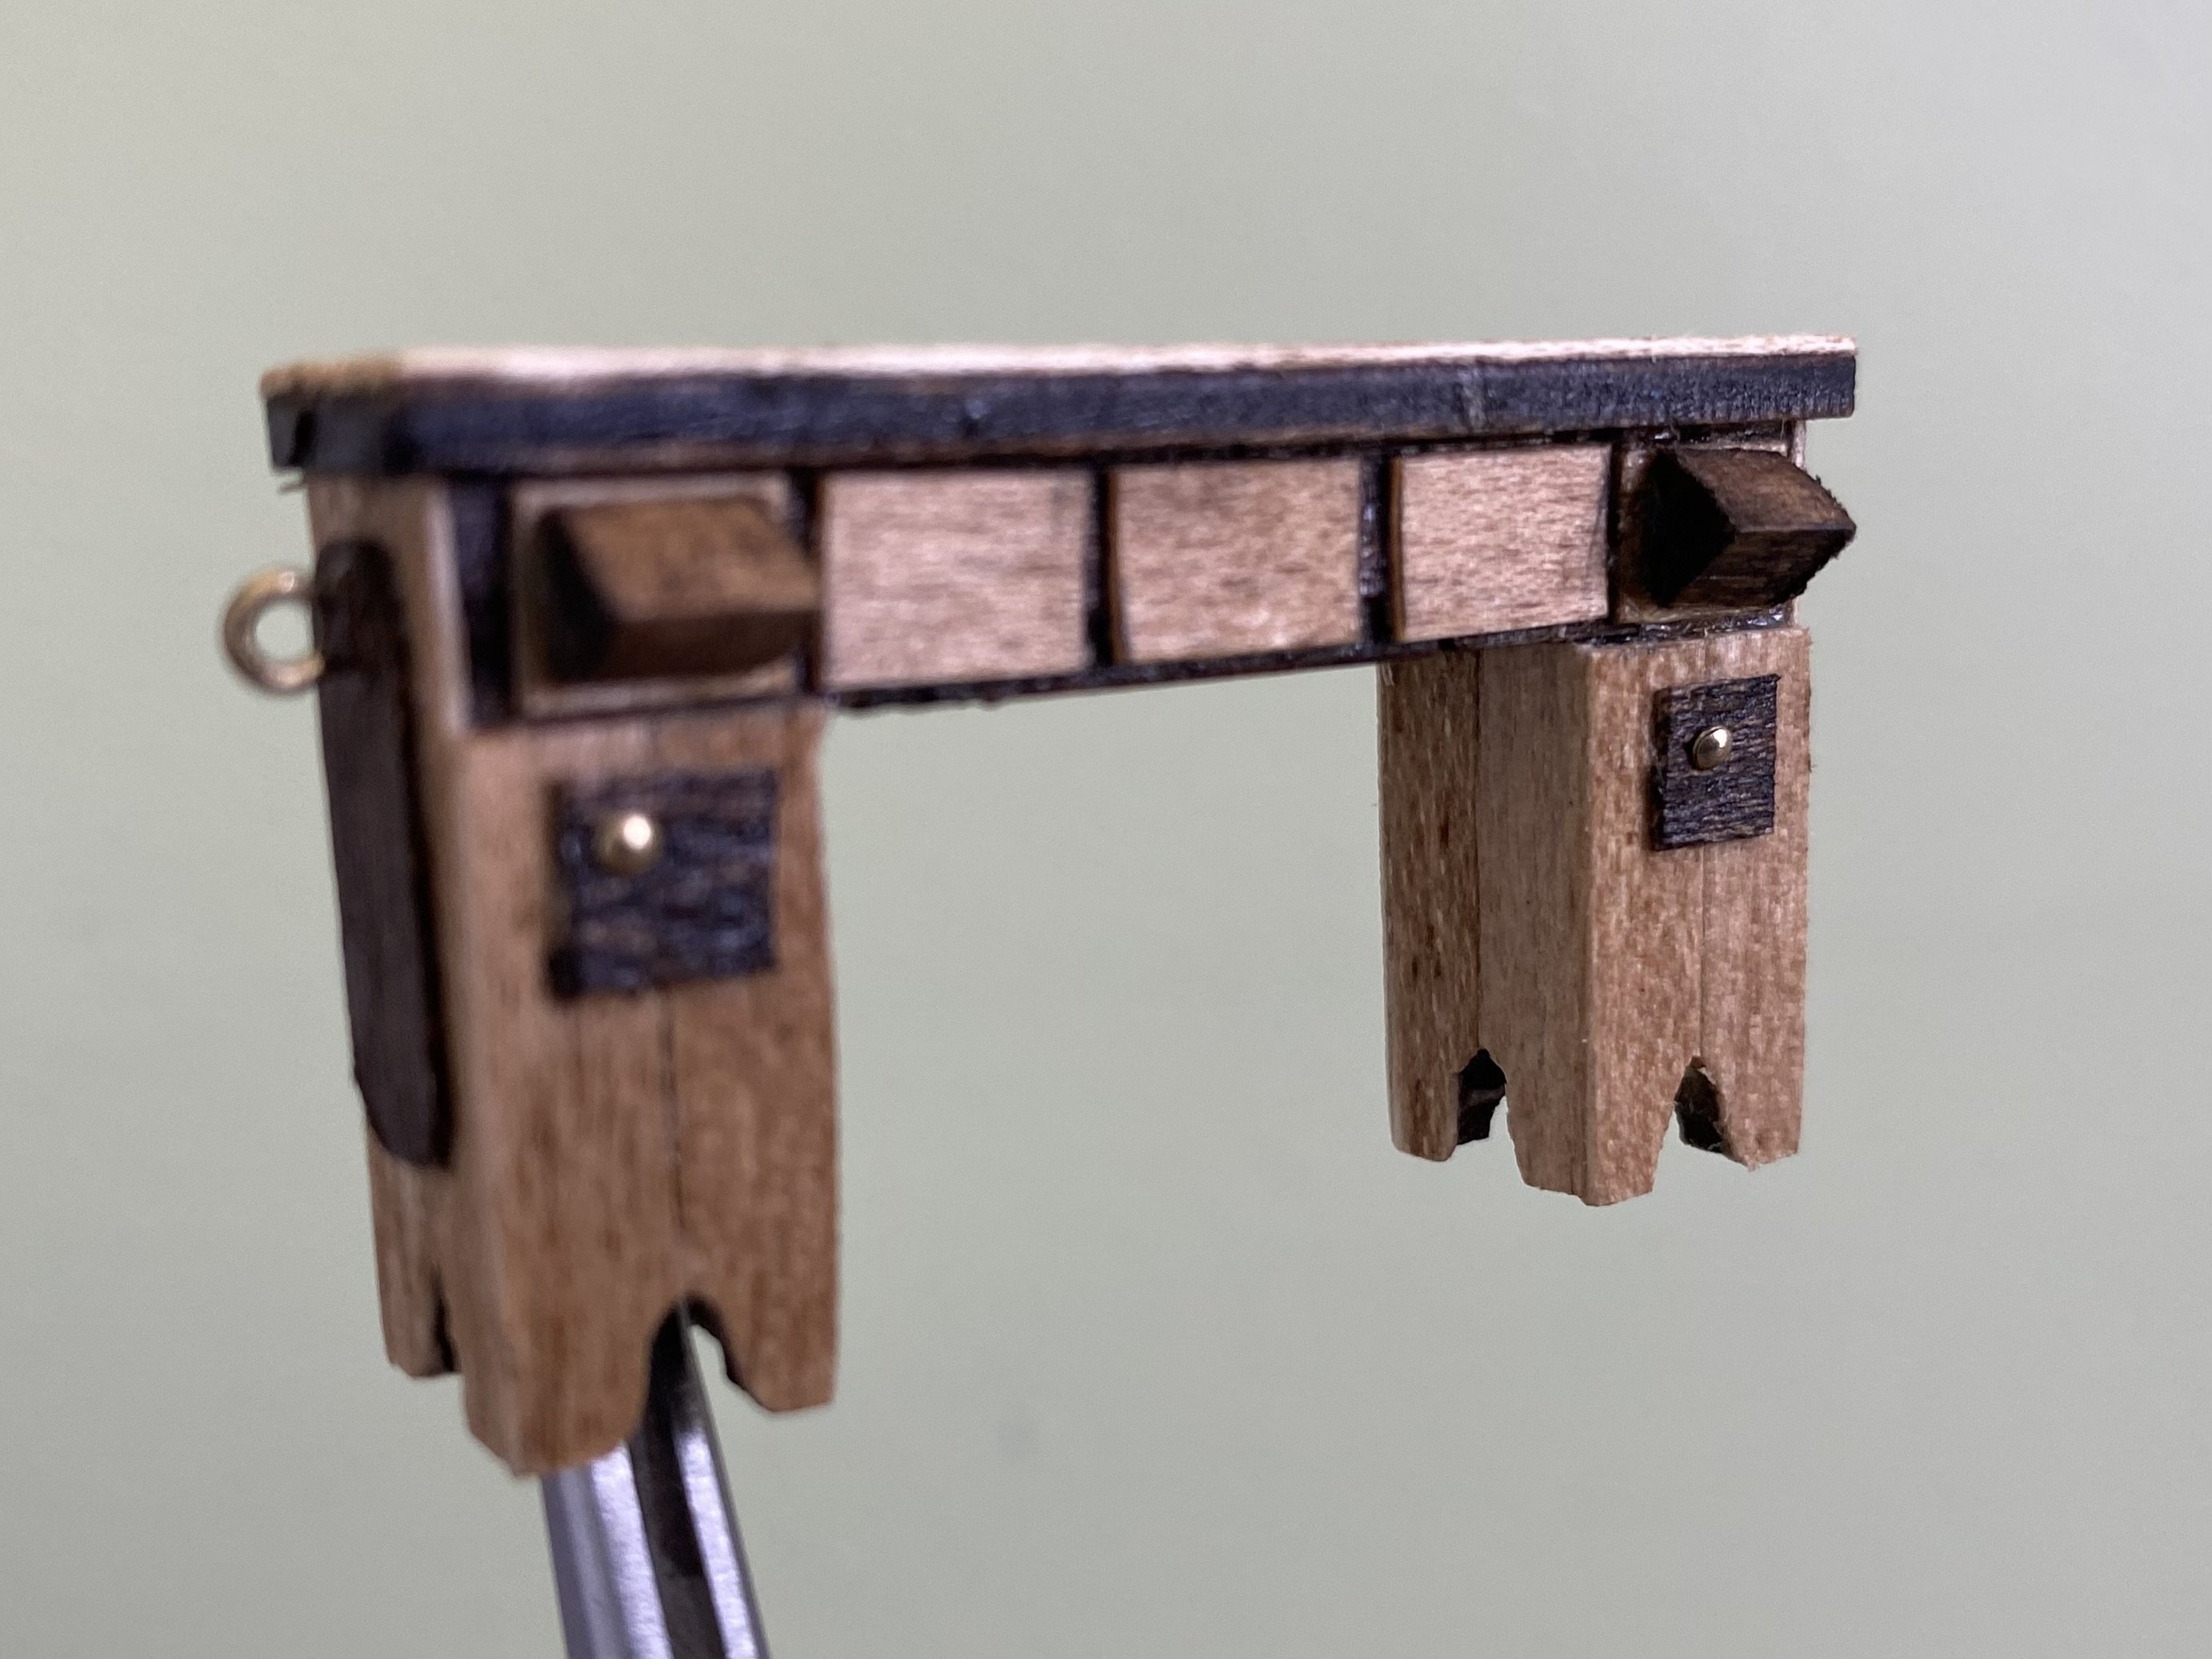
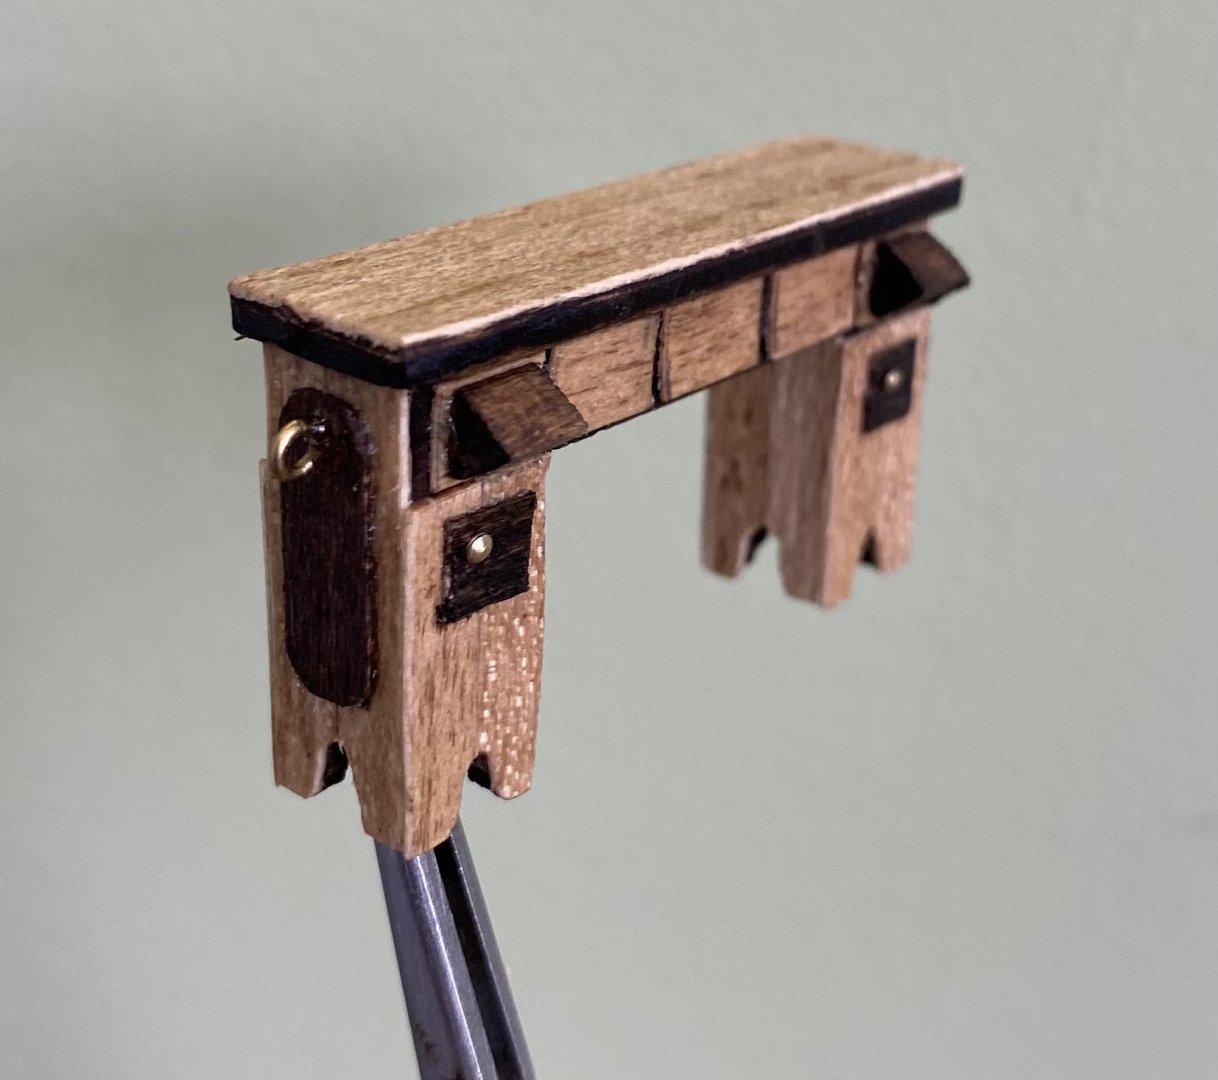
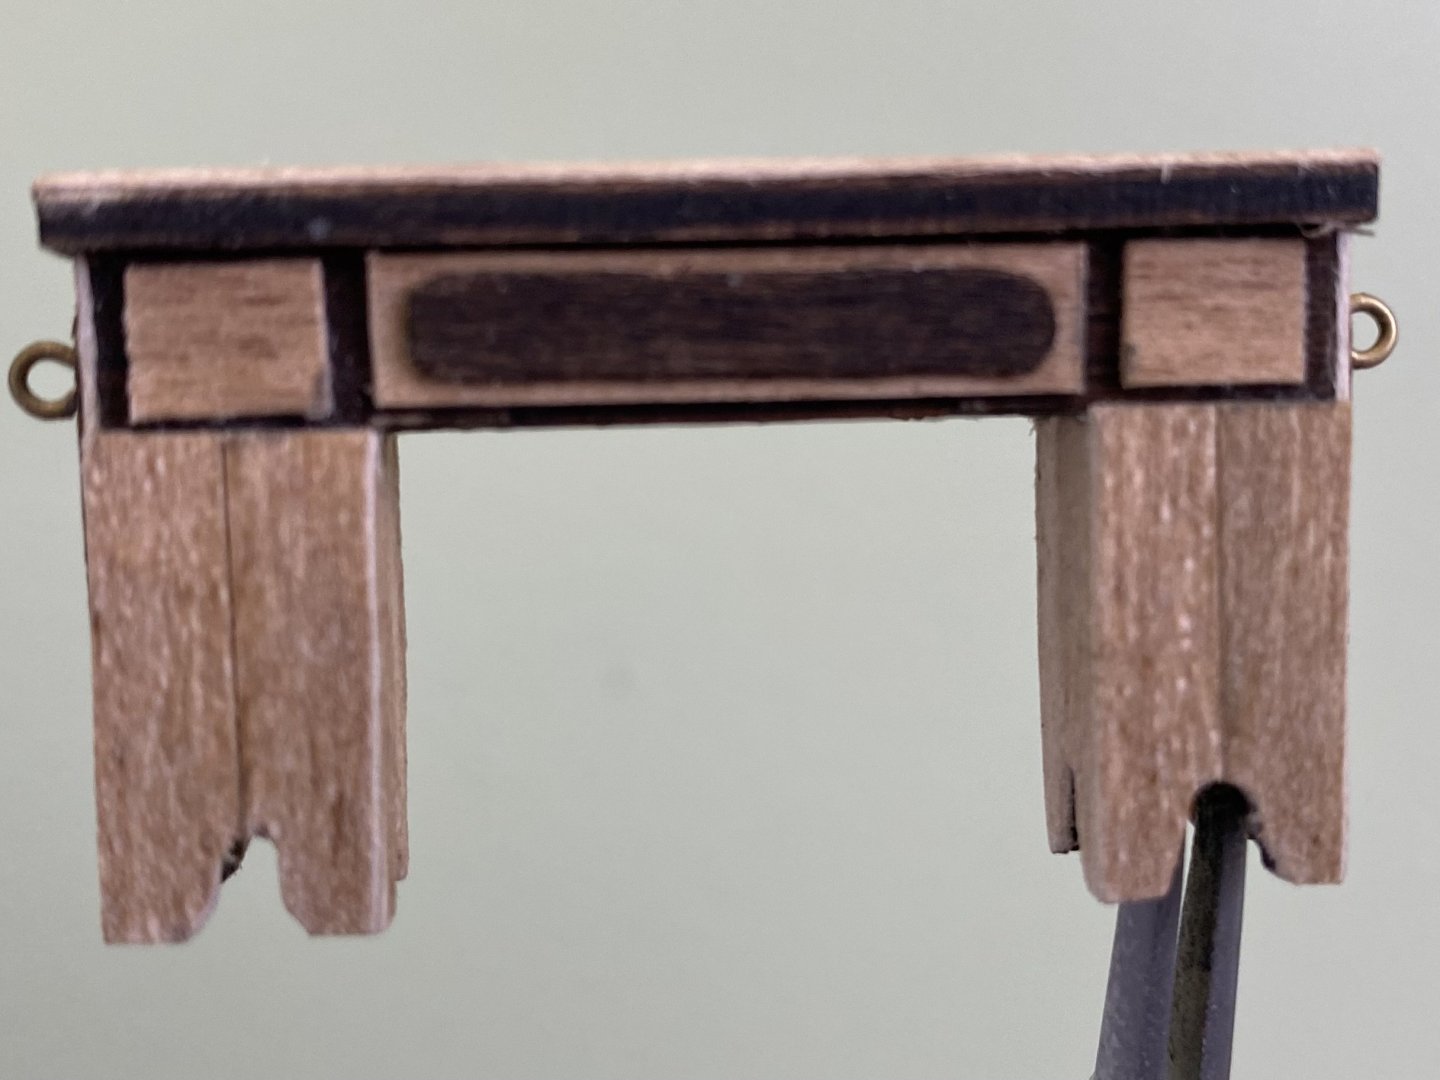
Spent a couple days building the little binnacle cupboard. A lot of measure twice cut once when shaping all the pieces. I think it came out alright. Mounted in front of where the helm will ultimately be.


-
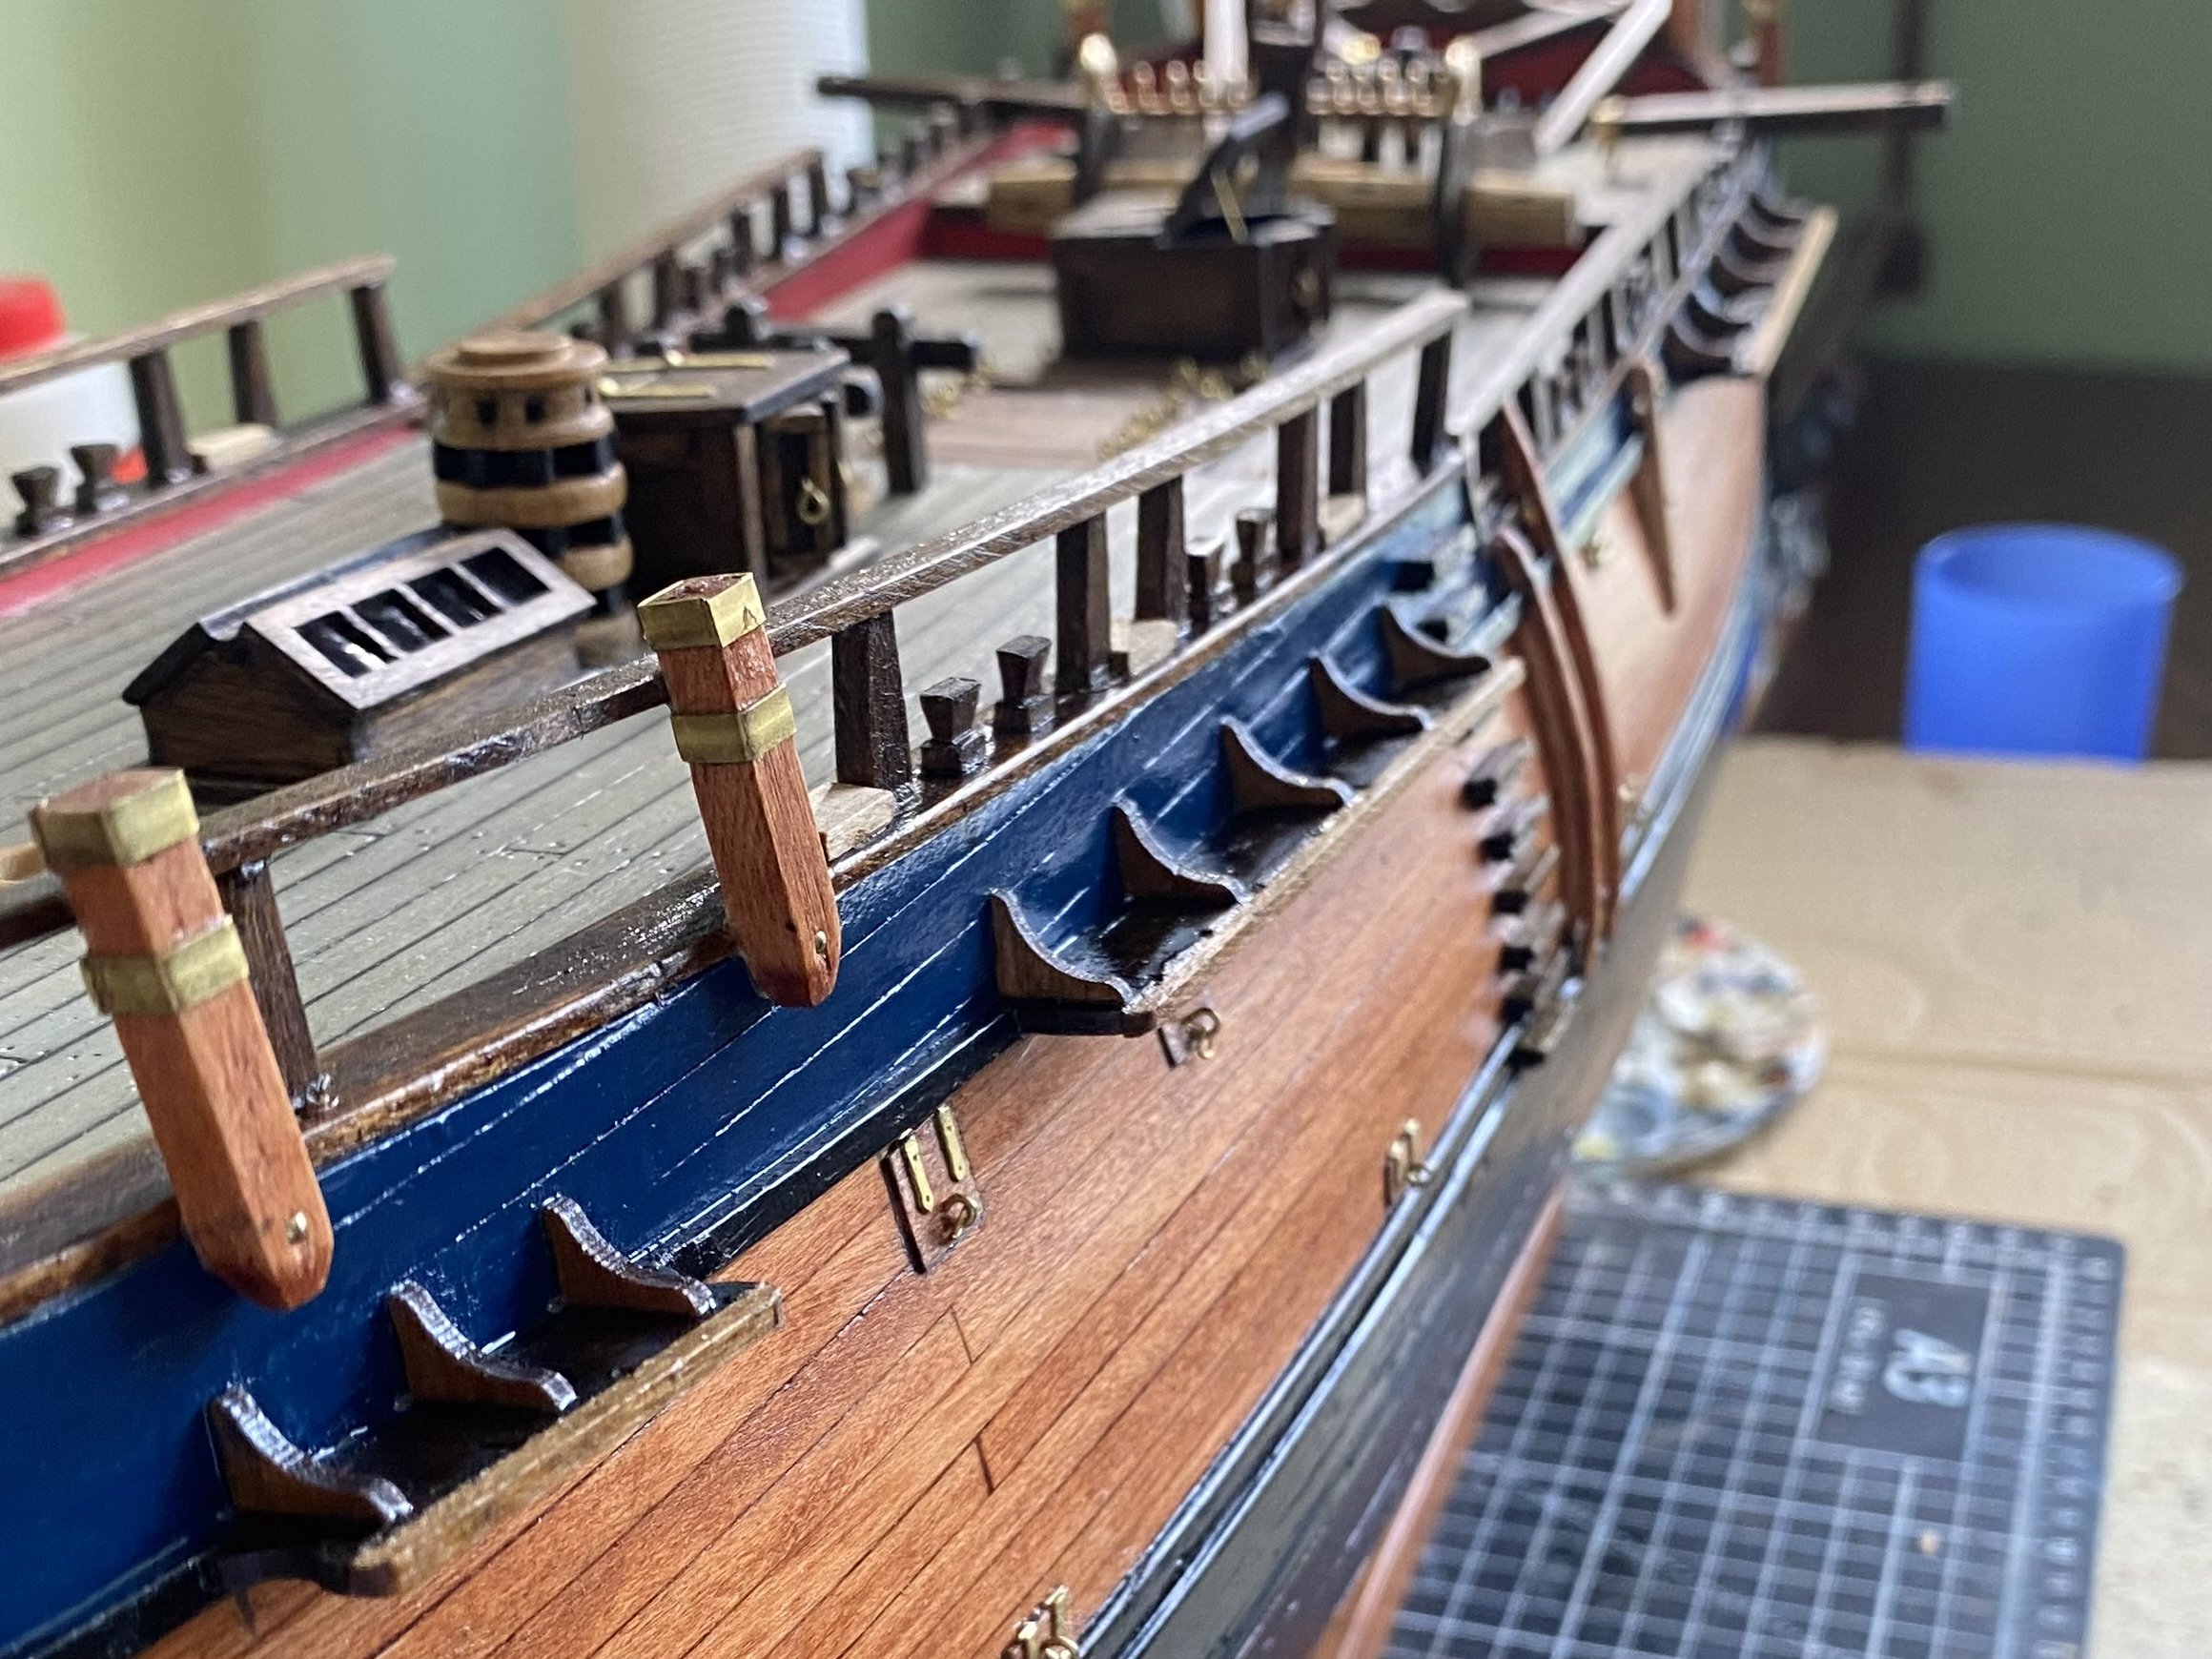
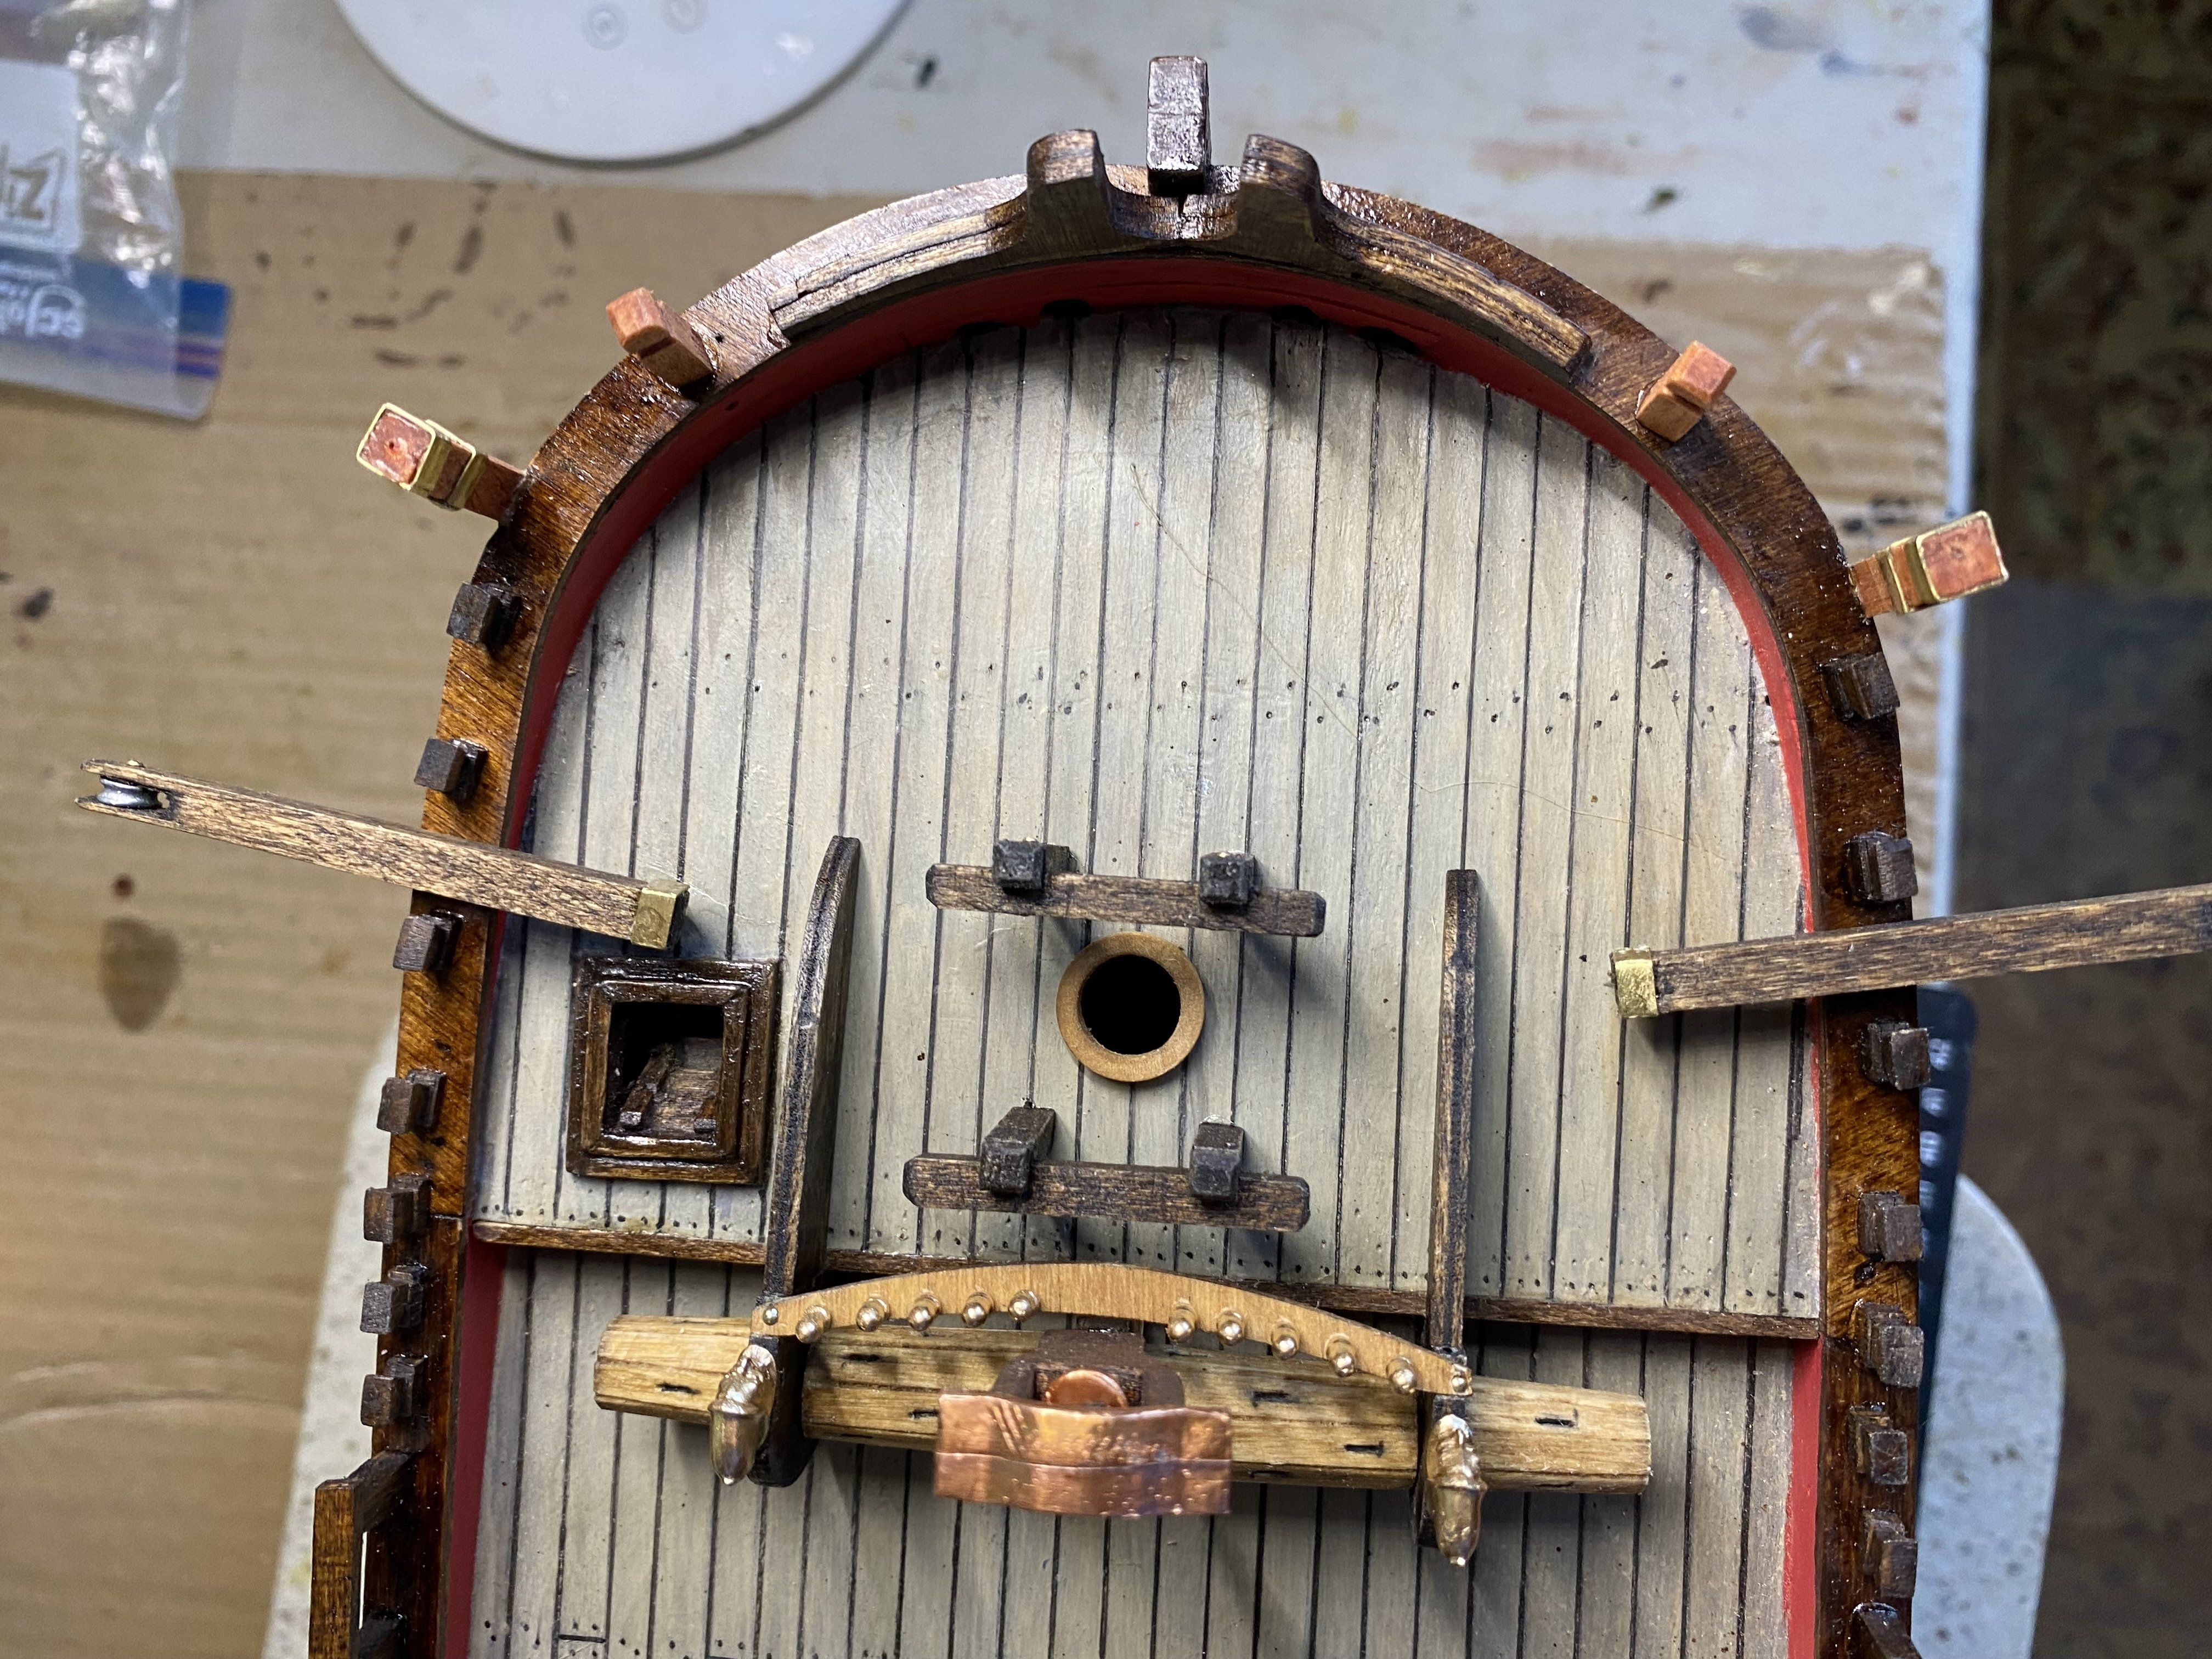
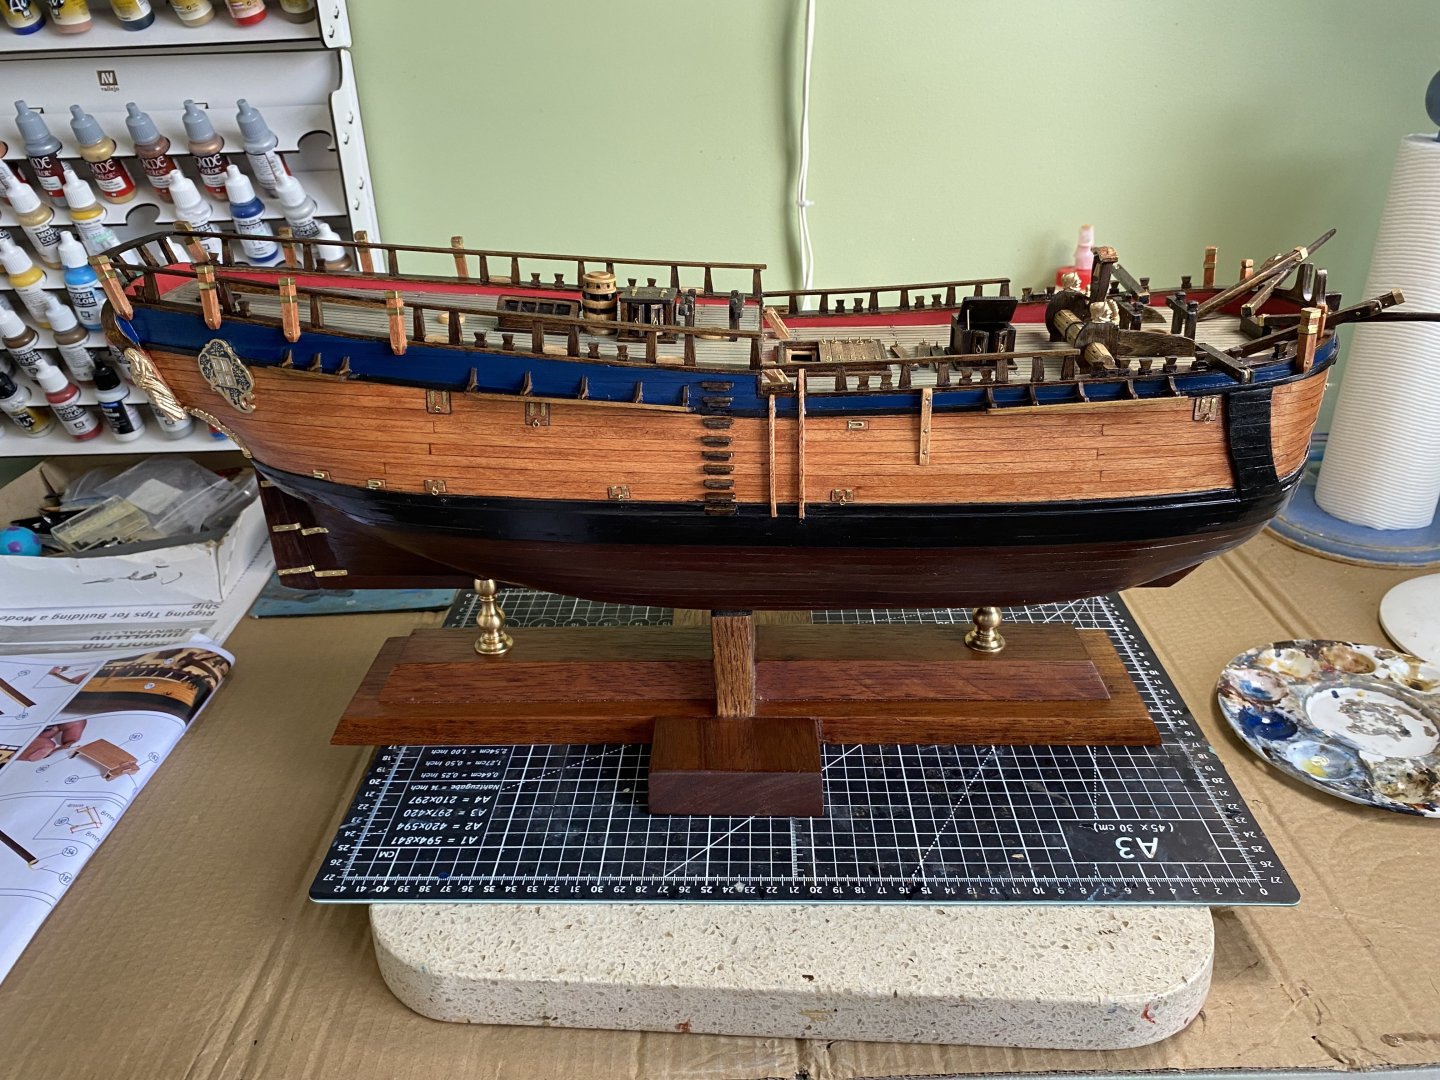
Channels made and installed all around. My Endeavour is coming along nicely. I know it is not nautically accurate but it’s have decided to go with a satin finish on the hull exterior.


-
No Ian. I am adding insulation to CPT Cooks cabin. He had no idea what temperatures he might run into 😀 Yes I guess I did get auto-corrected. Aggravating when that happens.
-
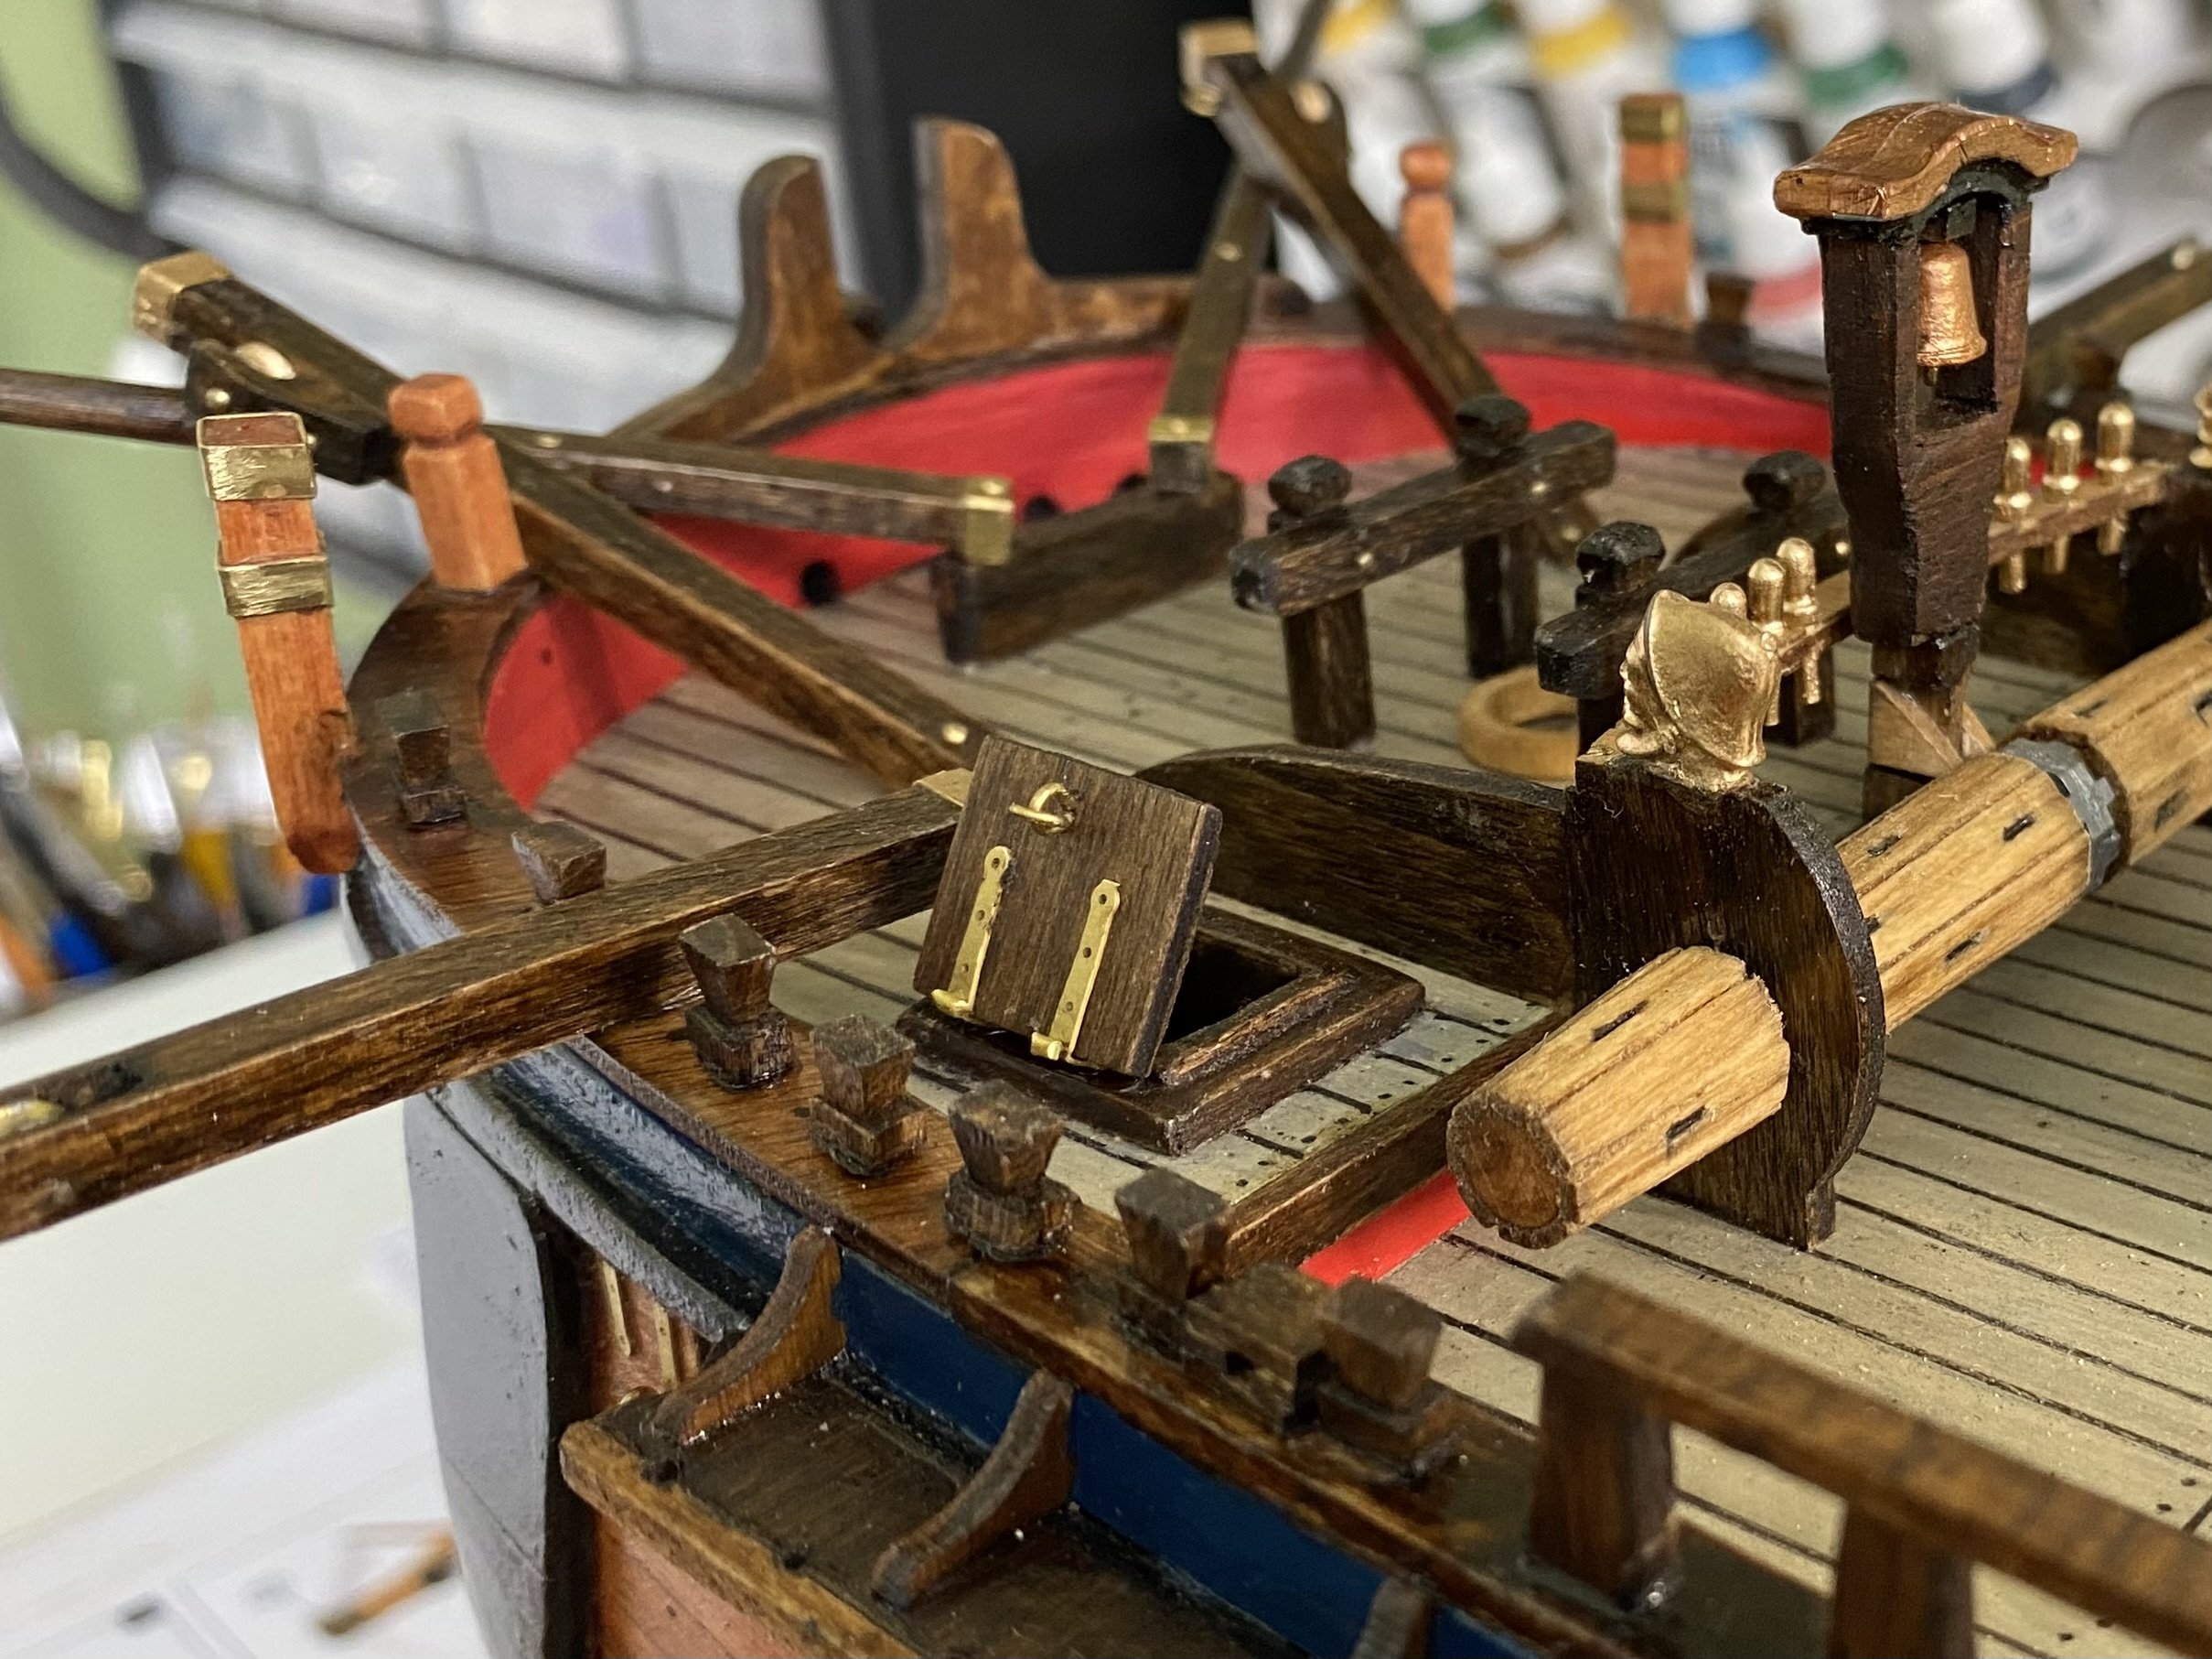
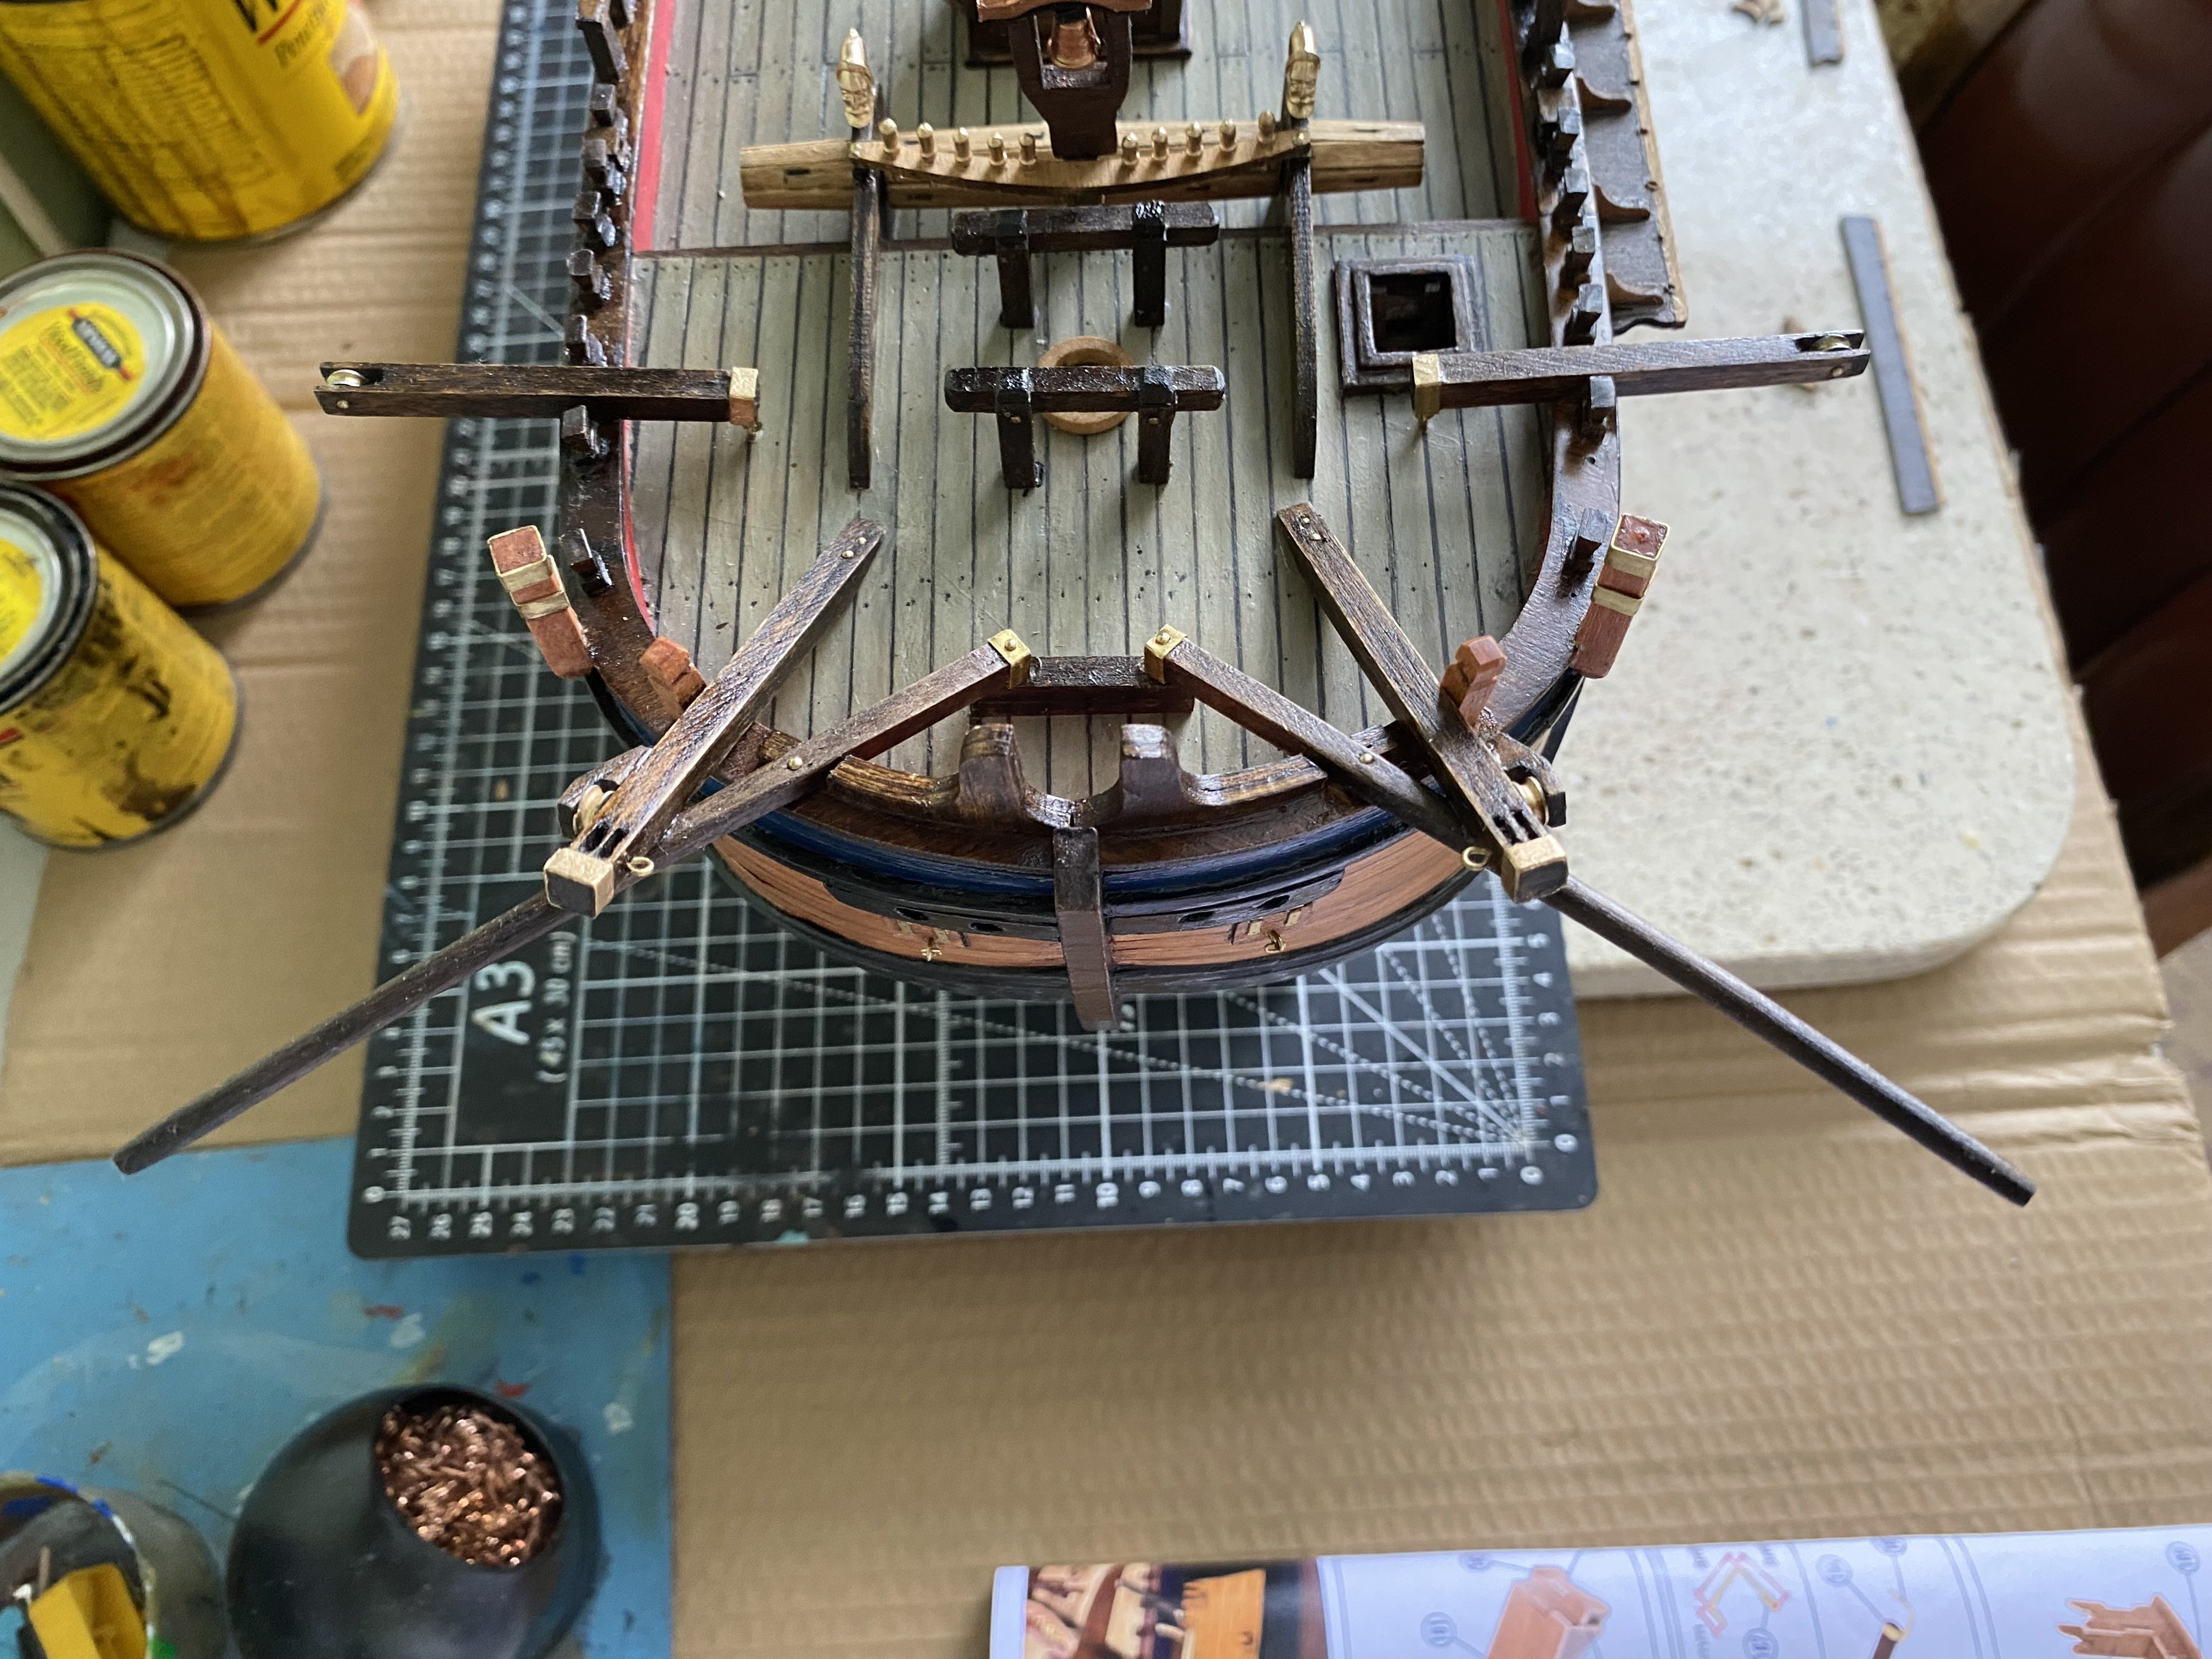
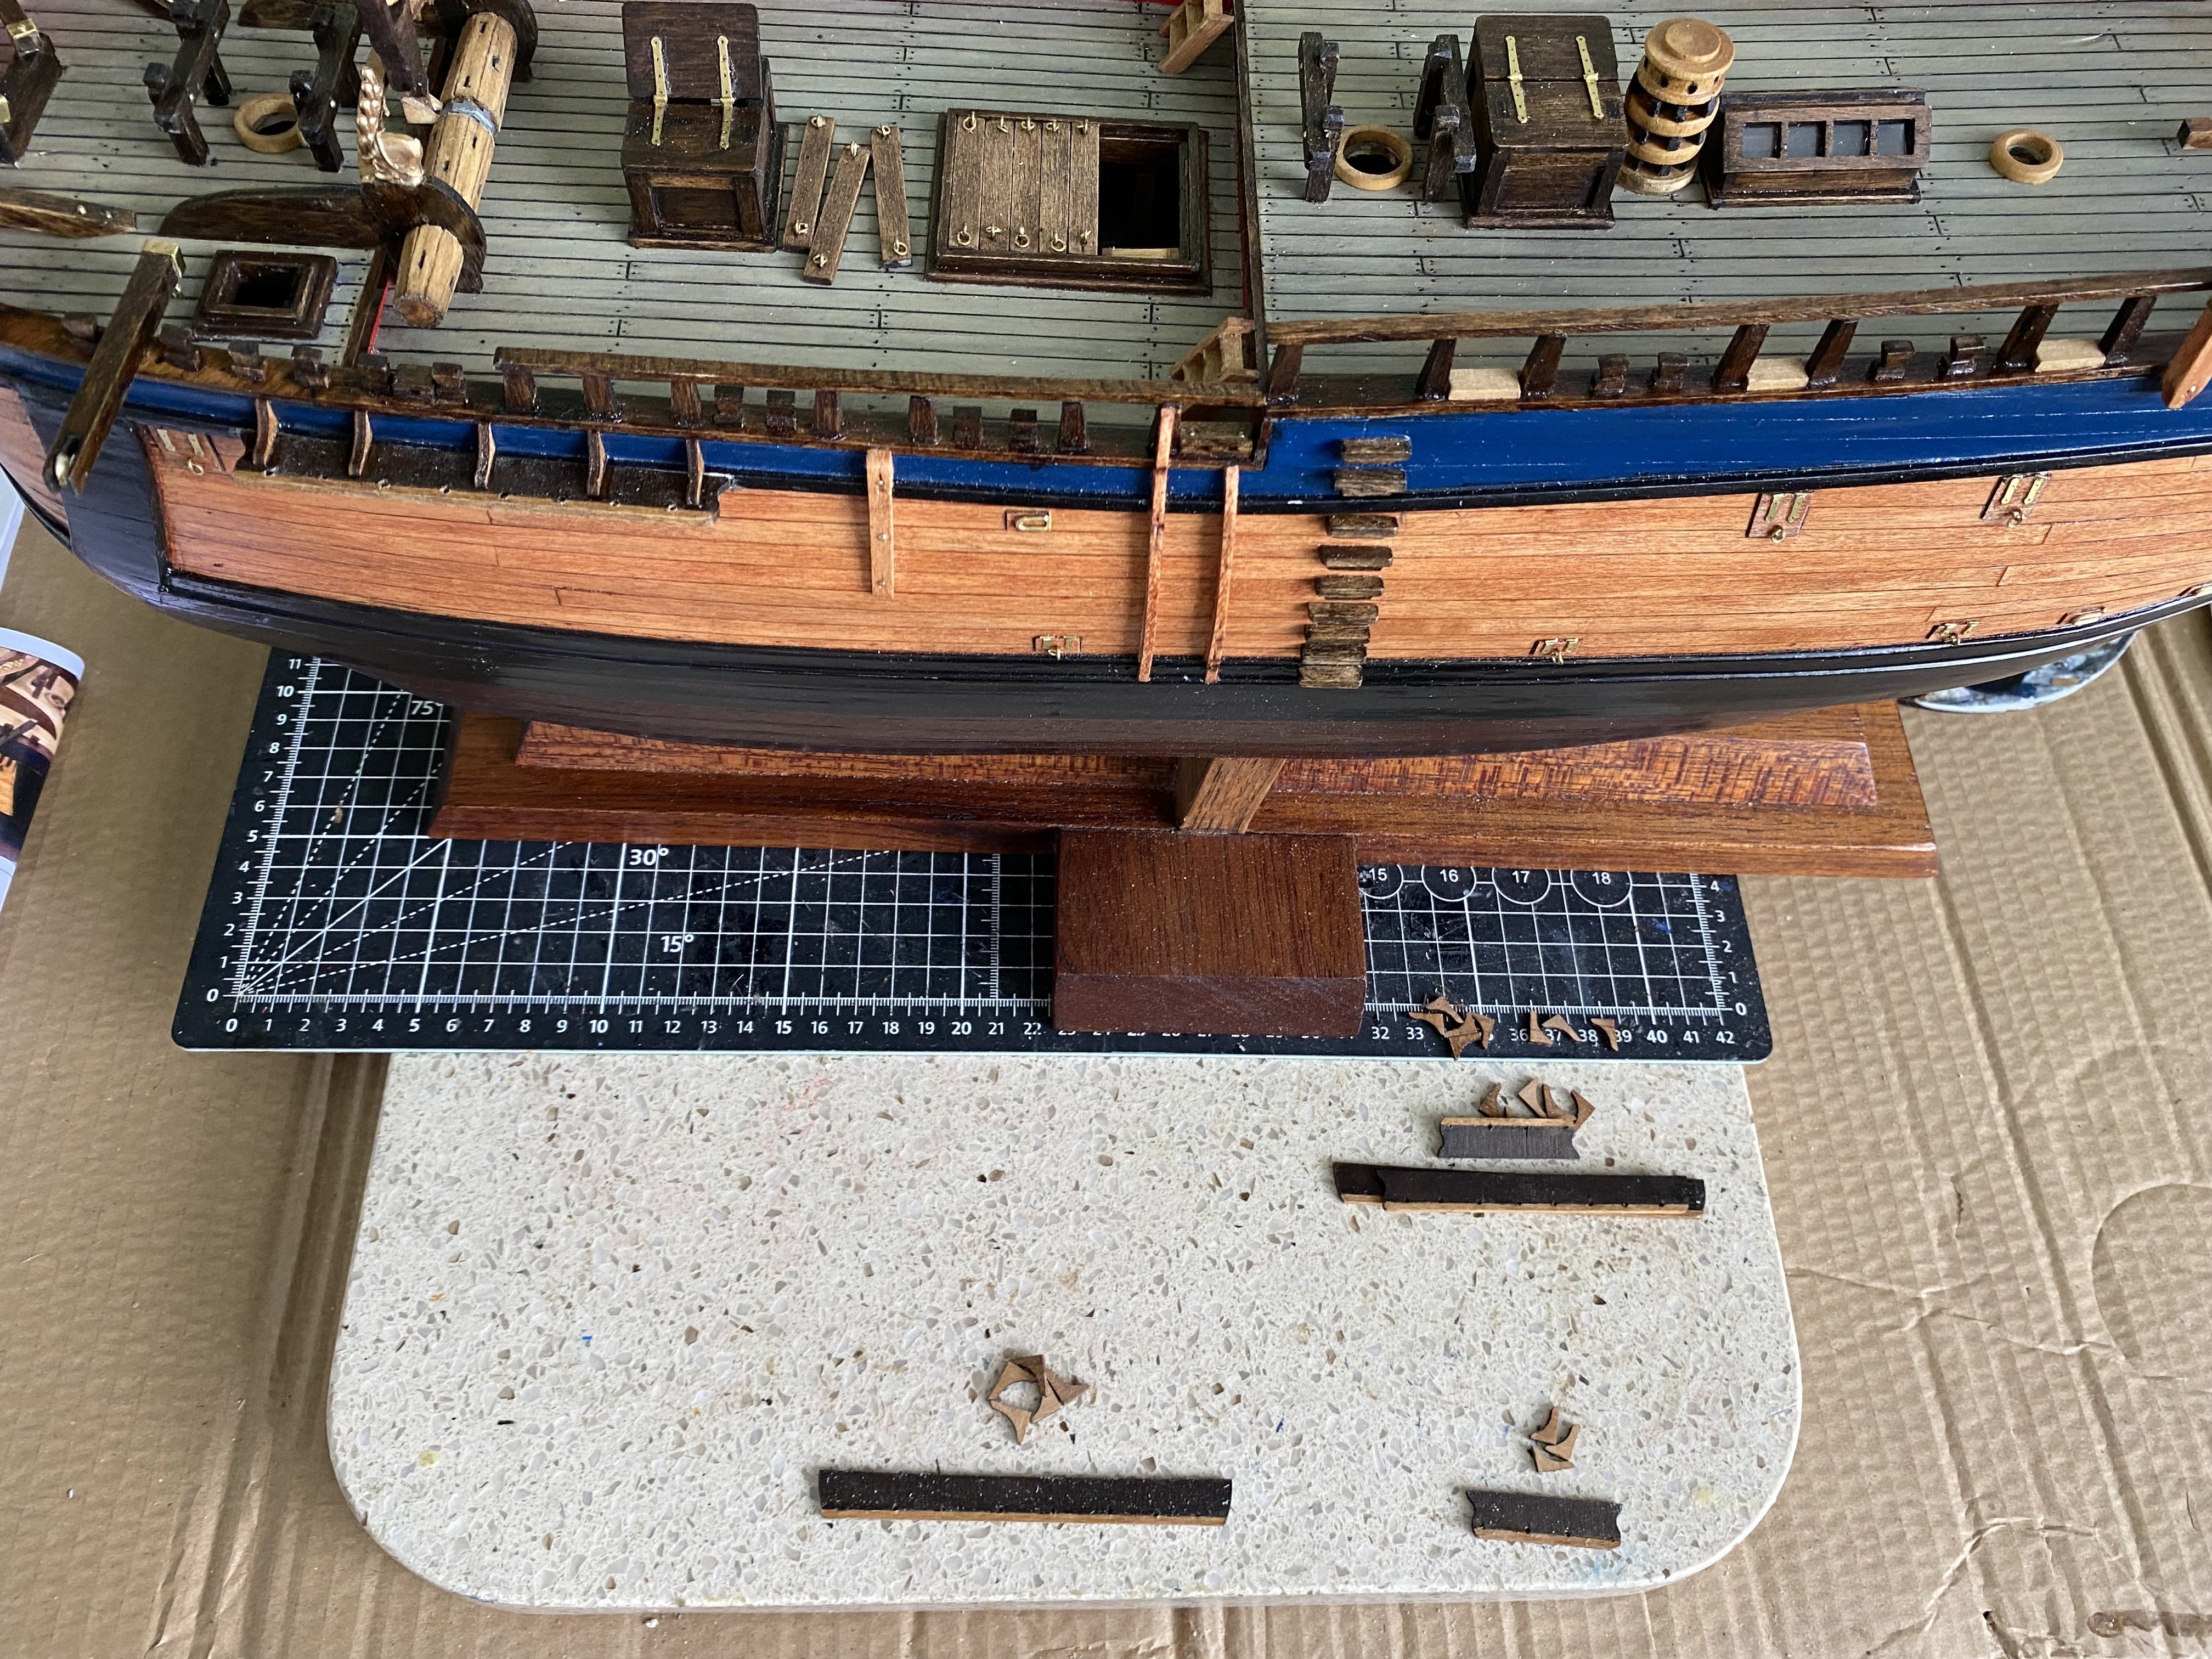
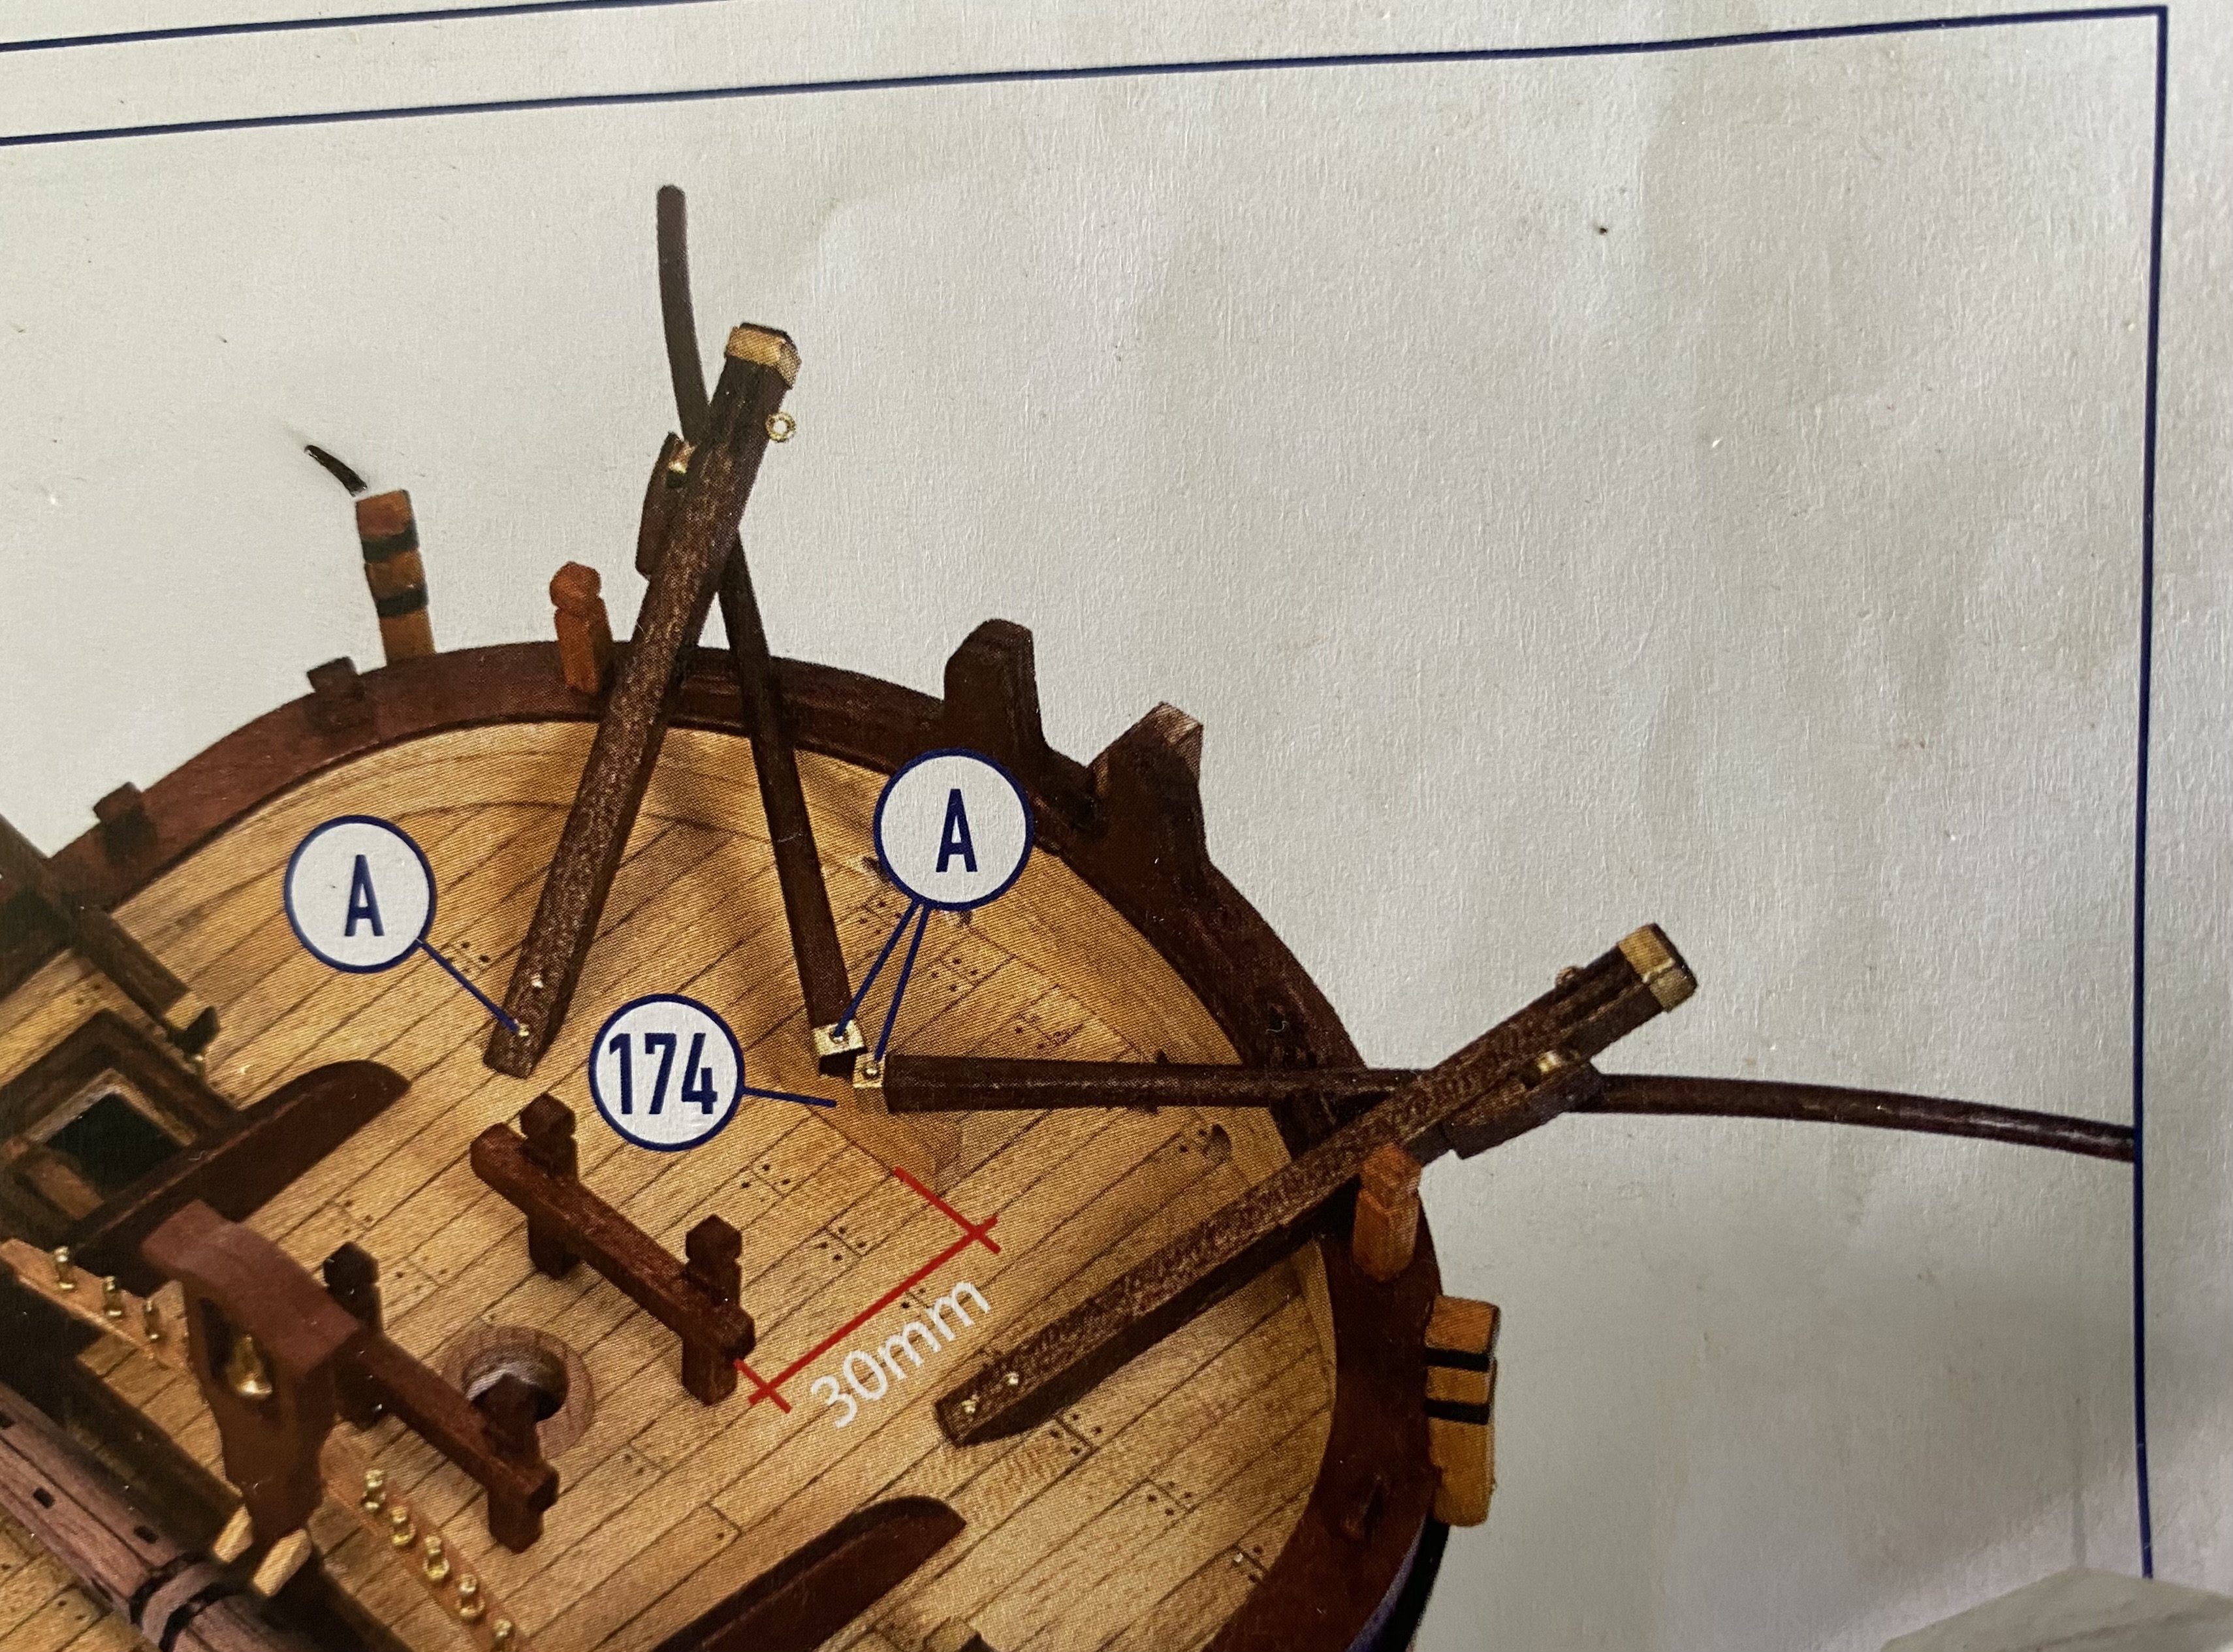
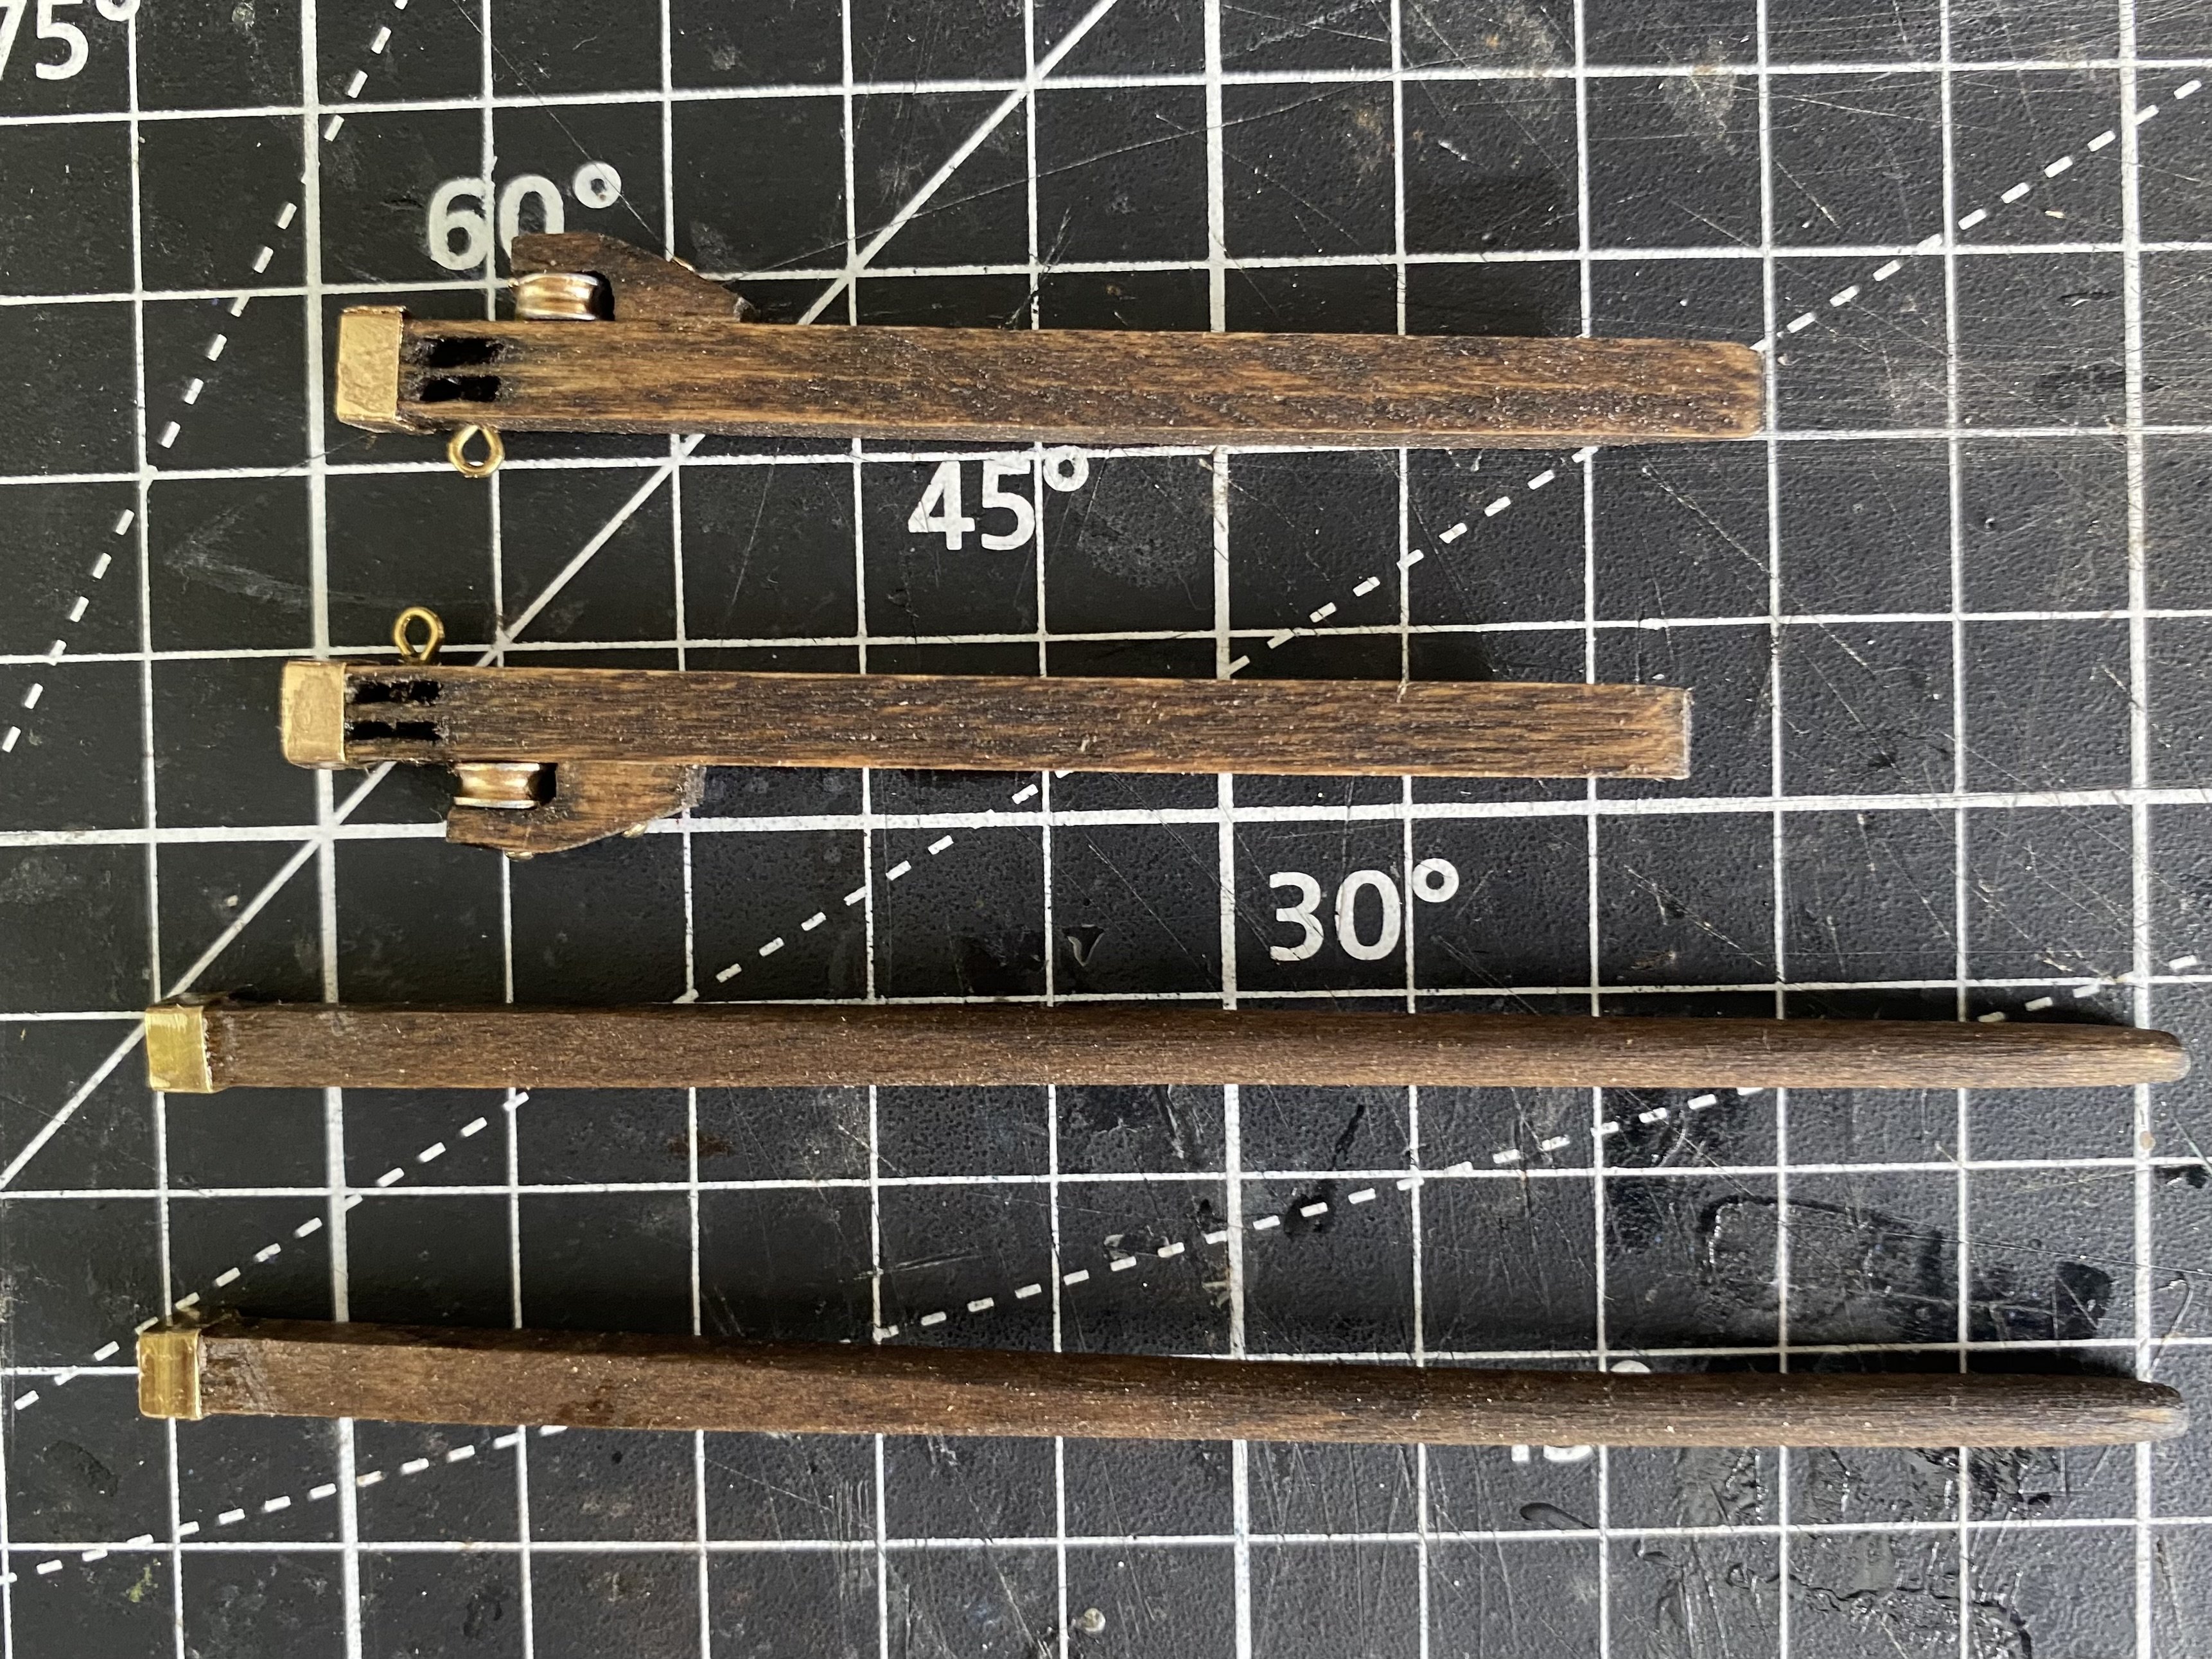
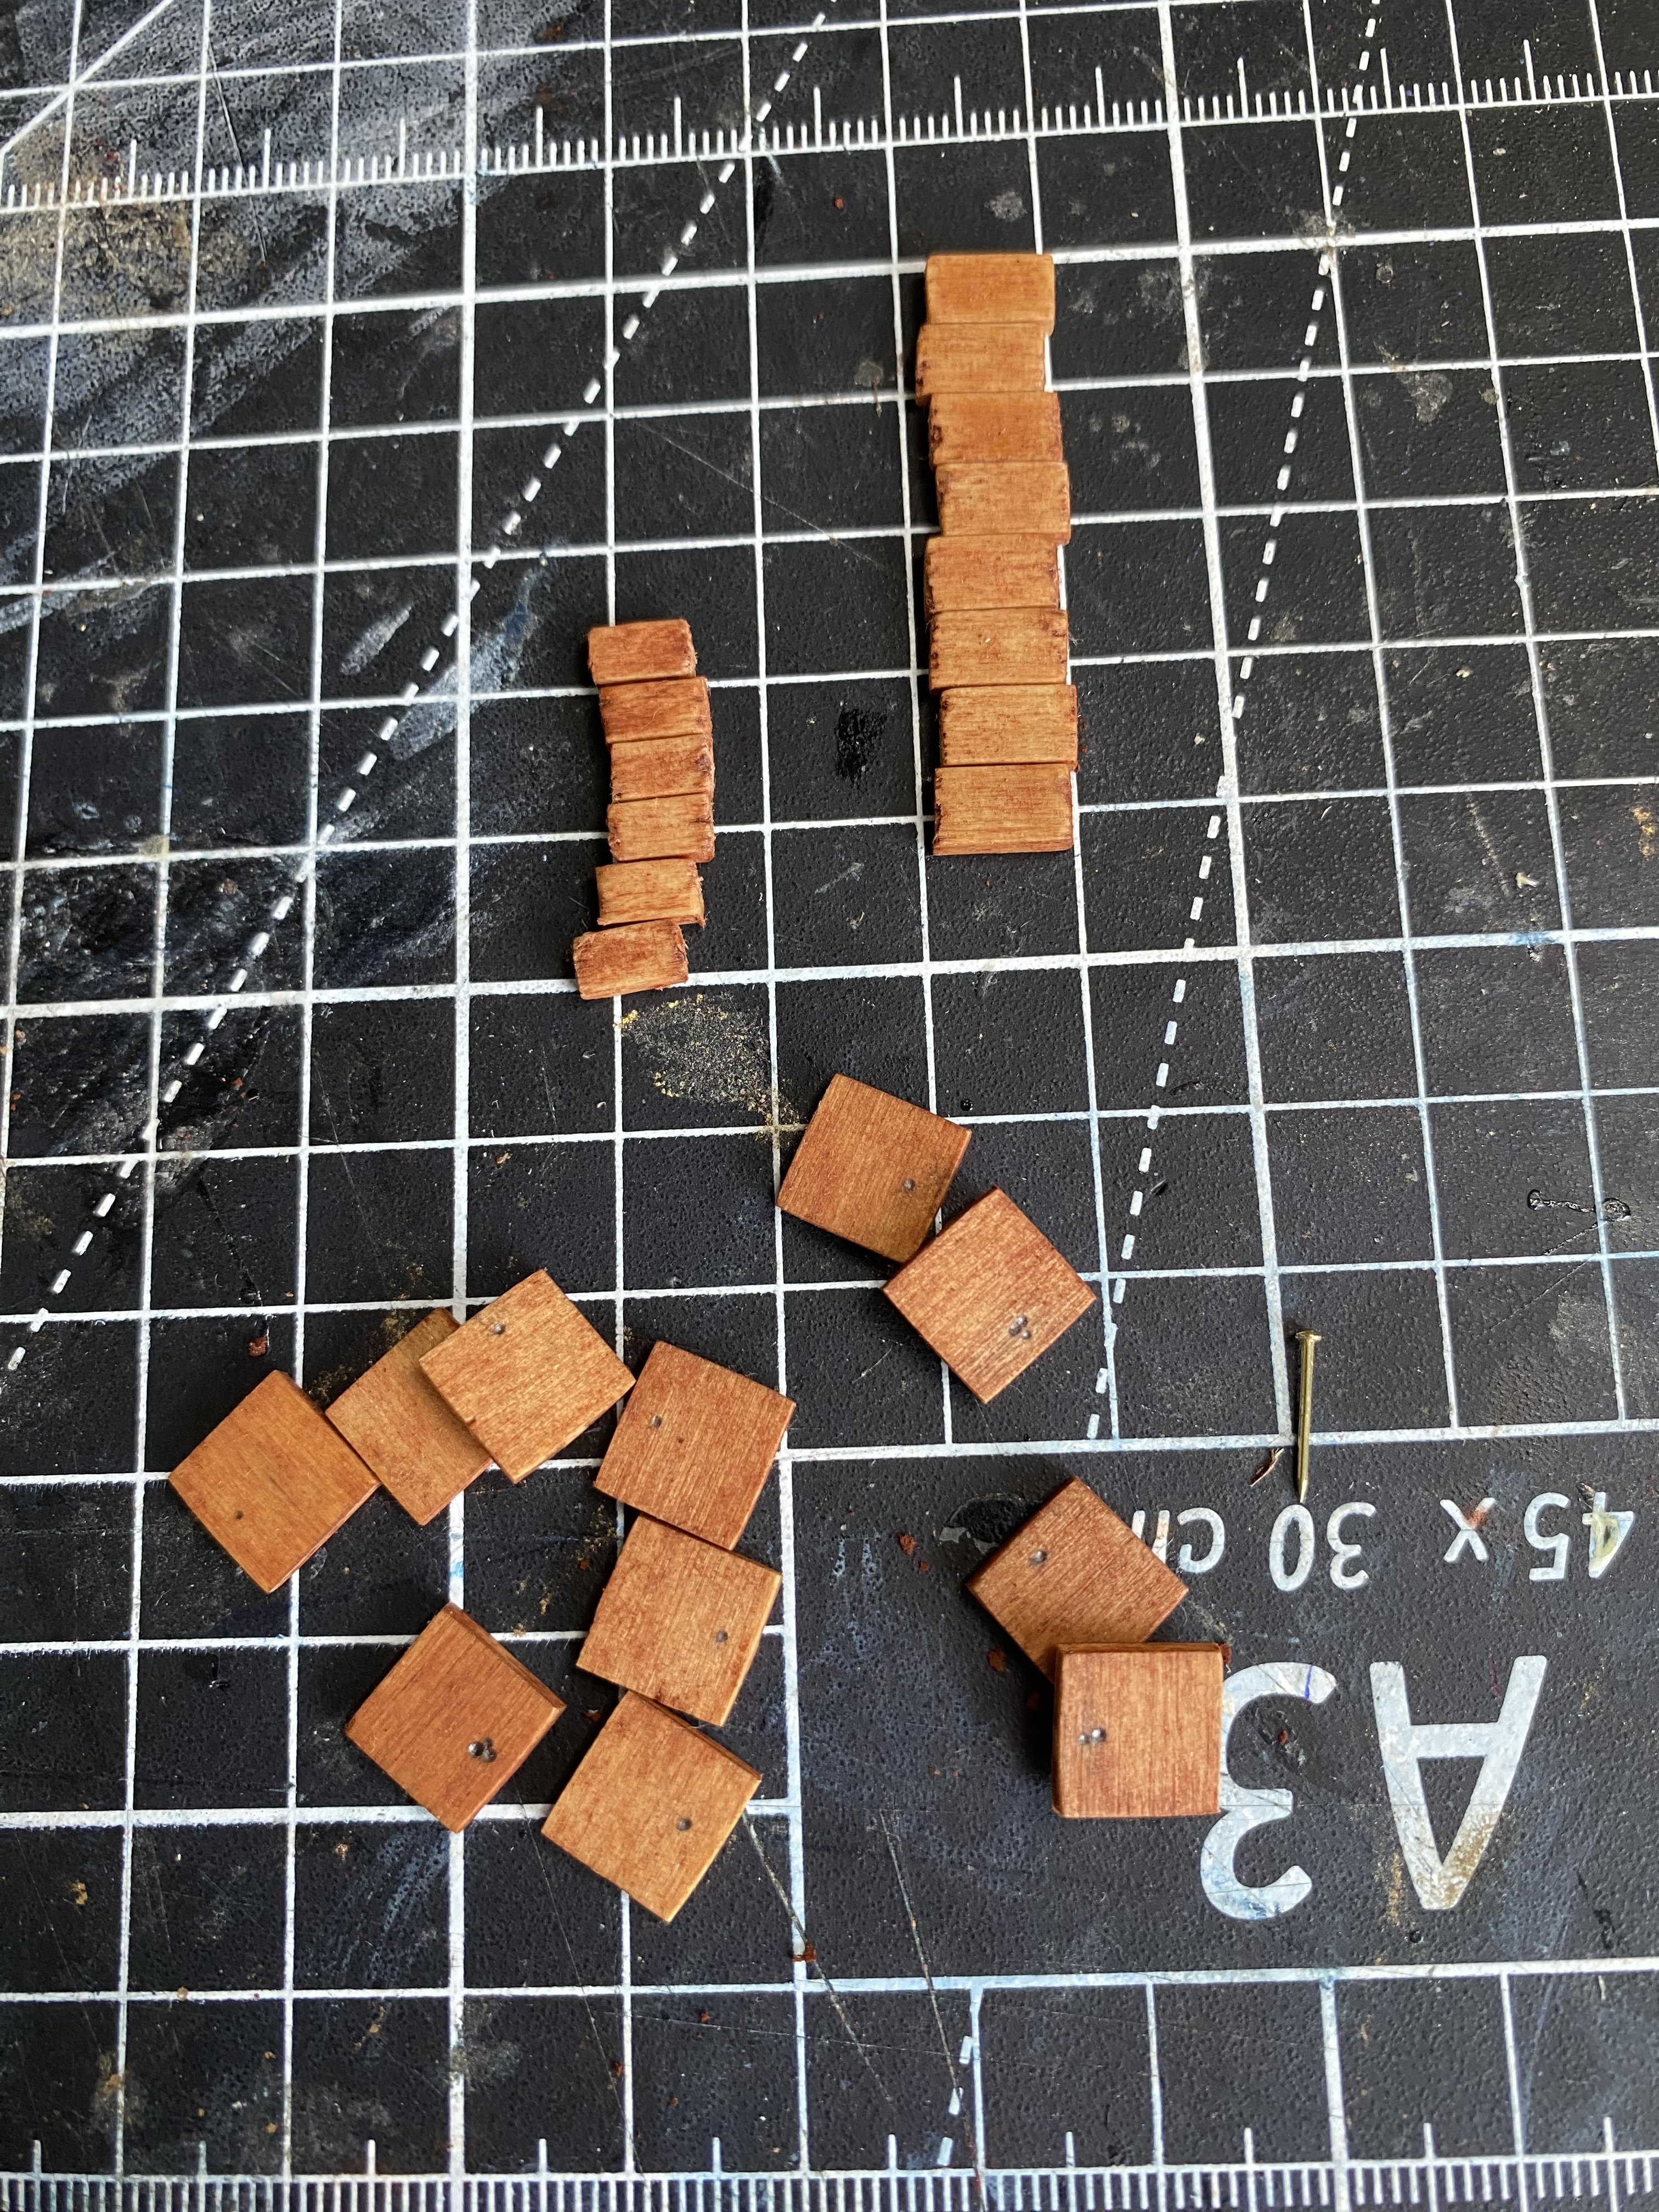
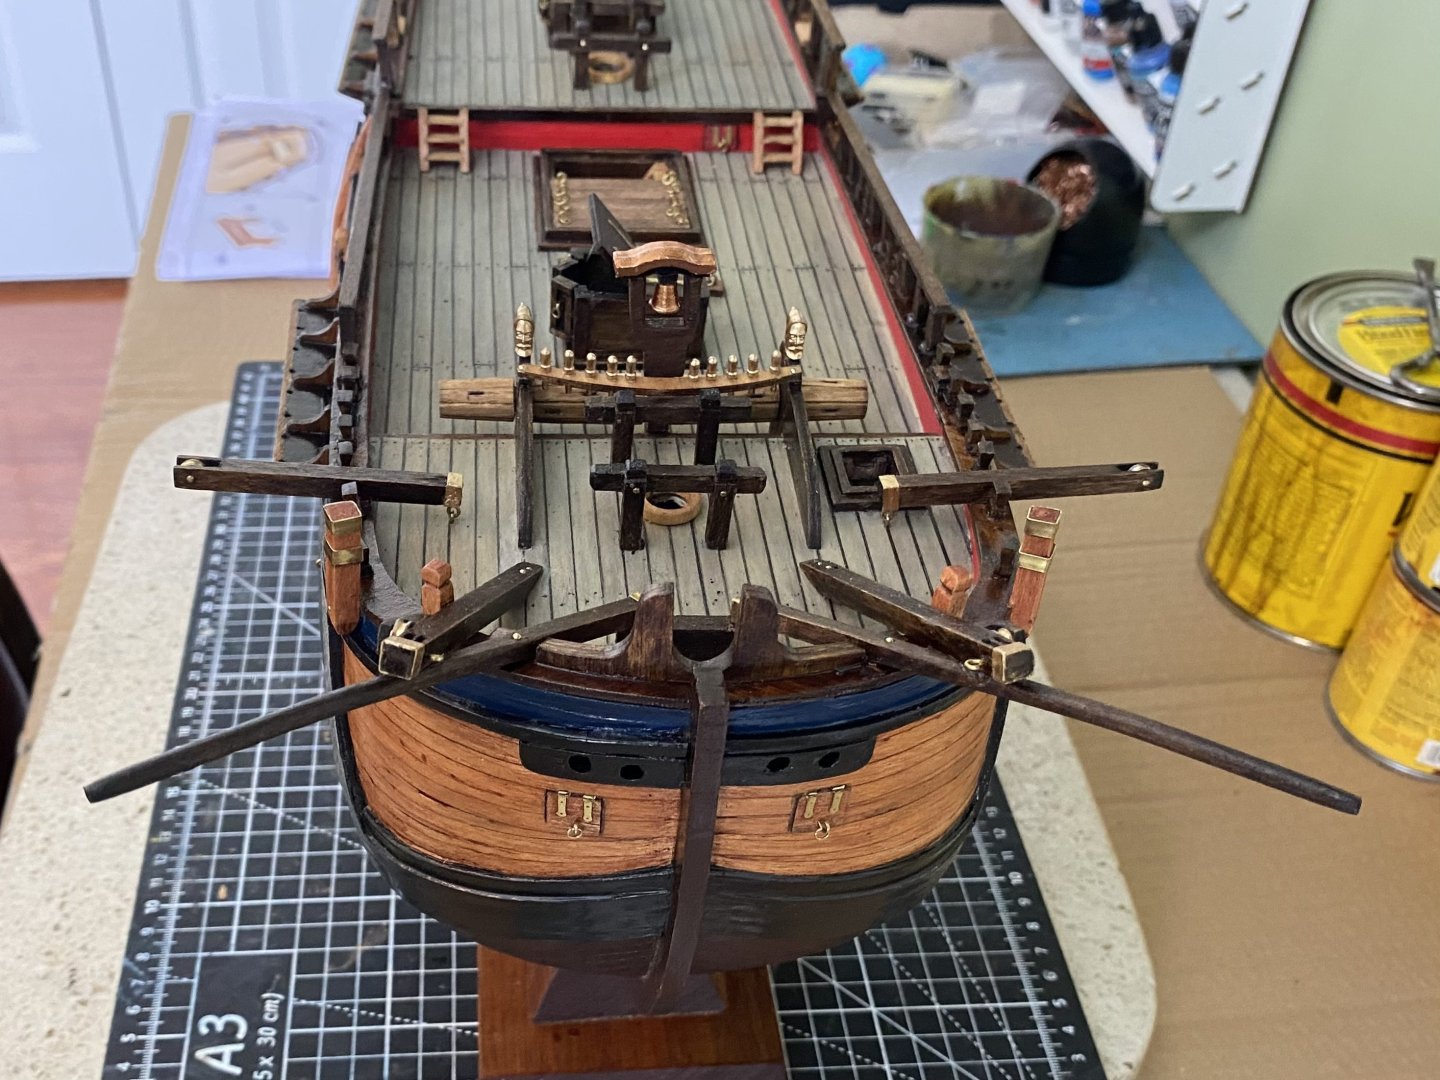
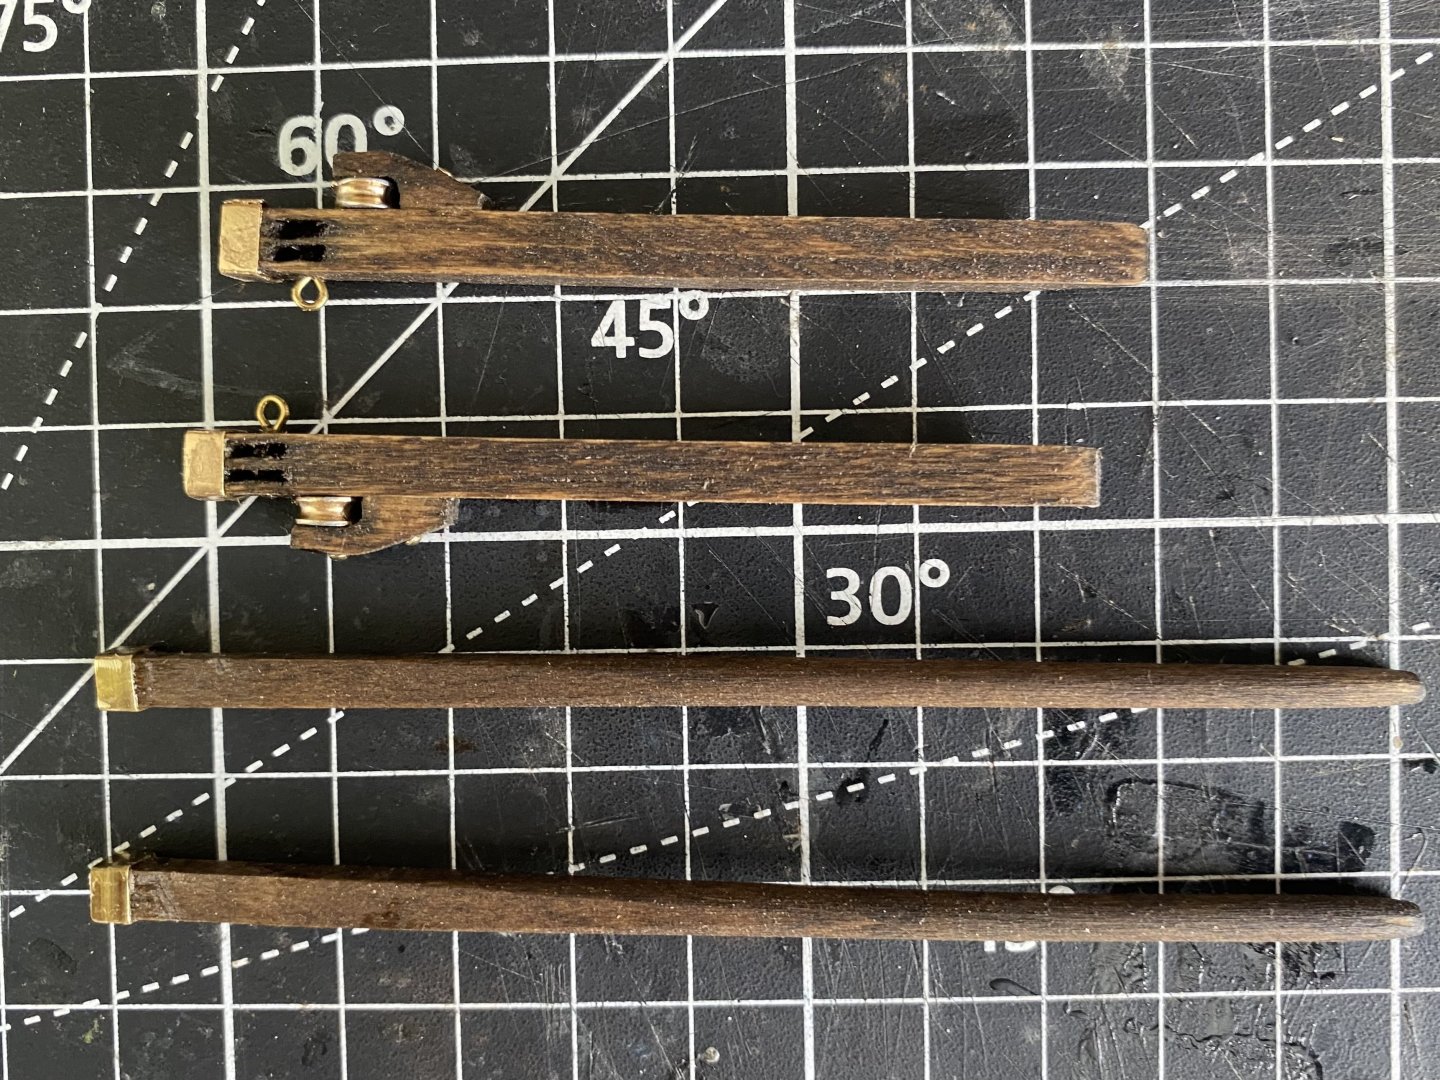
Davits made for the bow of the ship. Really enjoying hand making all the little wooden pieces that go into this build. Kevin for guys like you that 3D print a lot of your pieces, I am understanding the joy that comes with it b

-
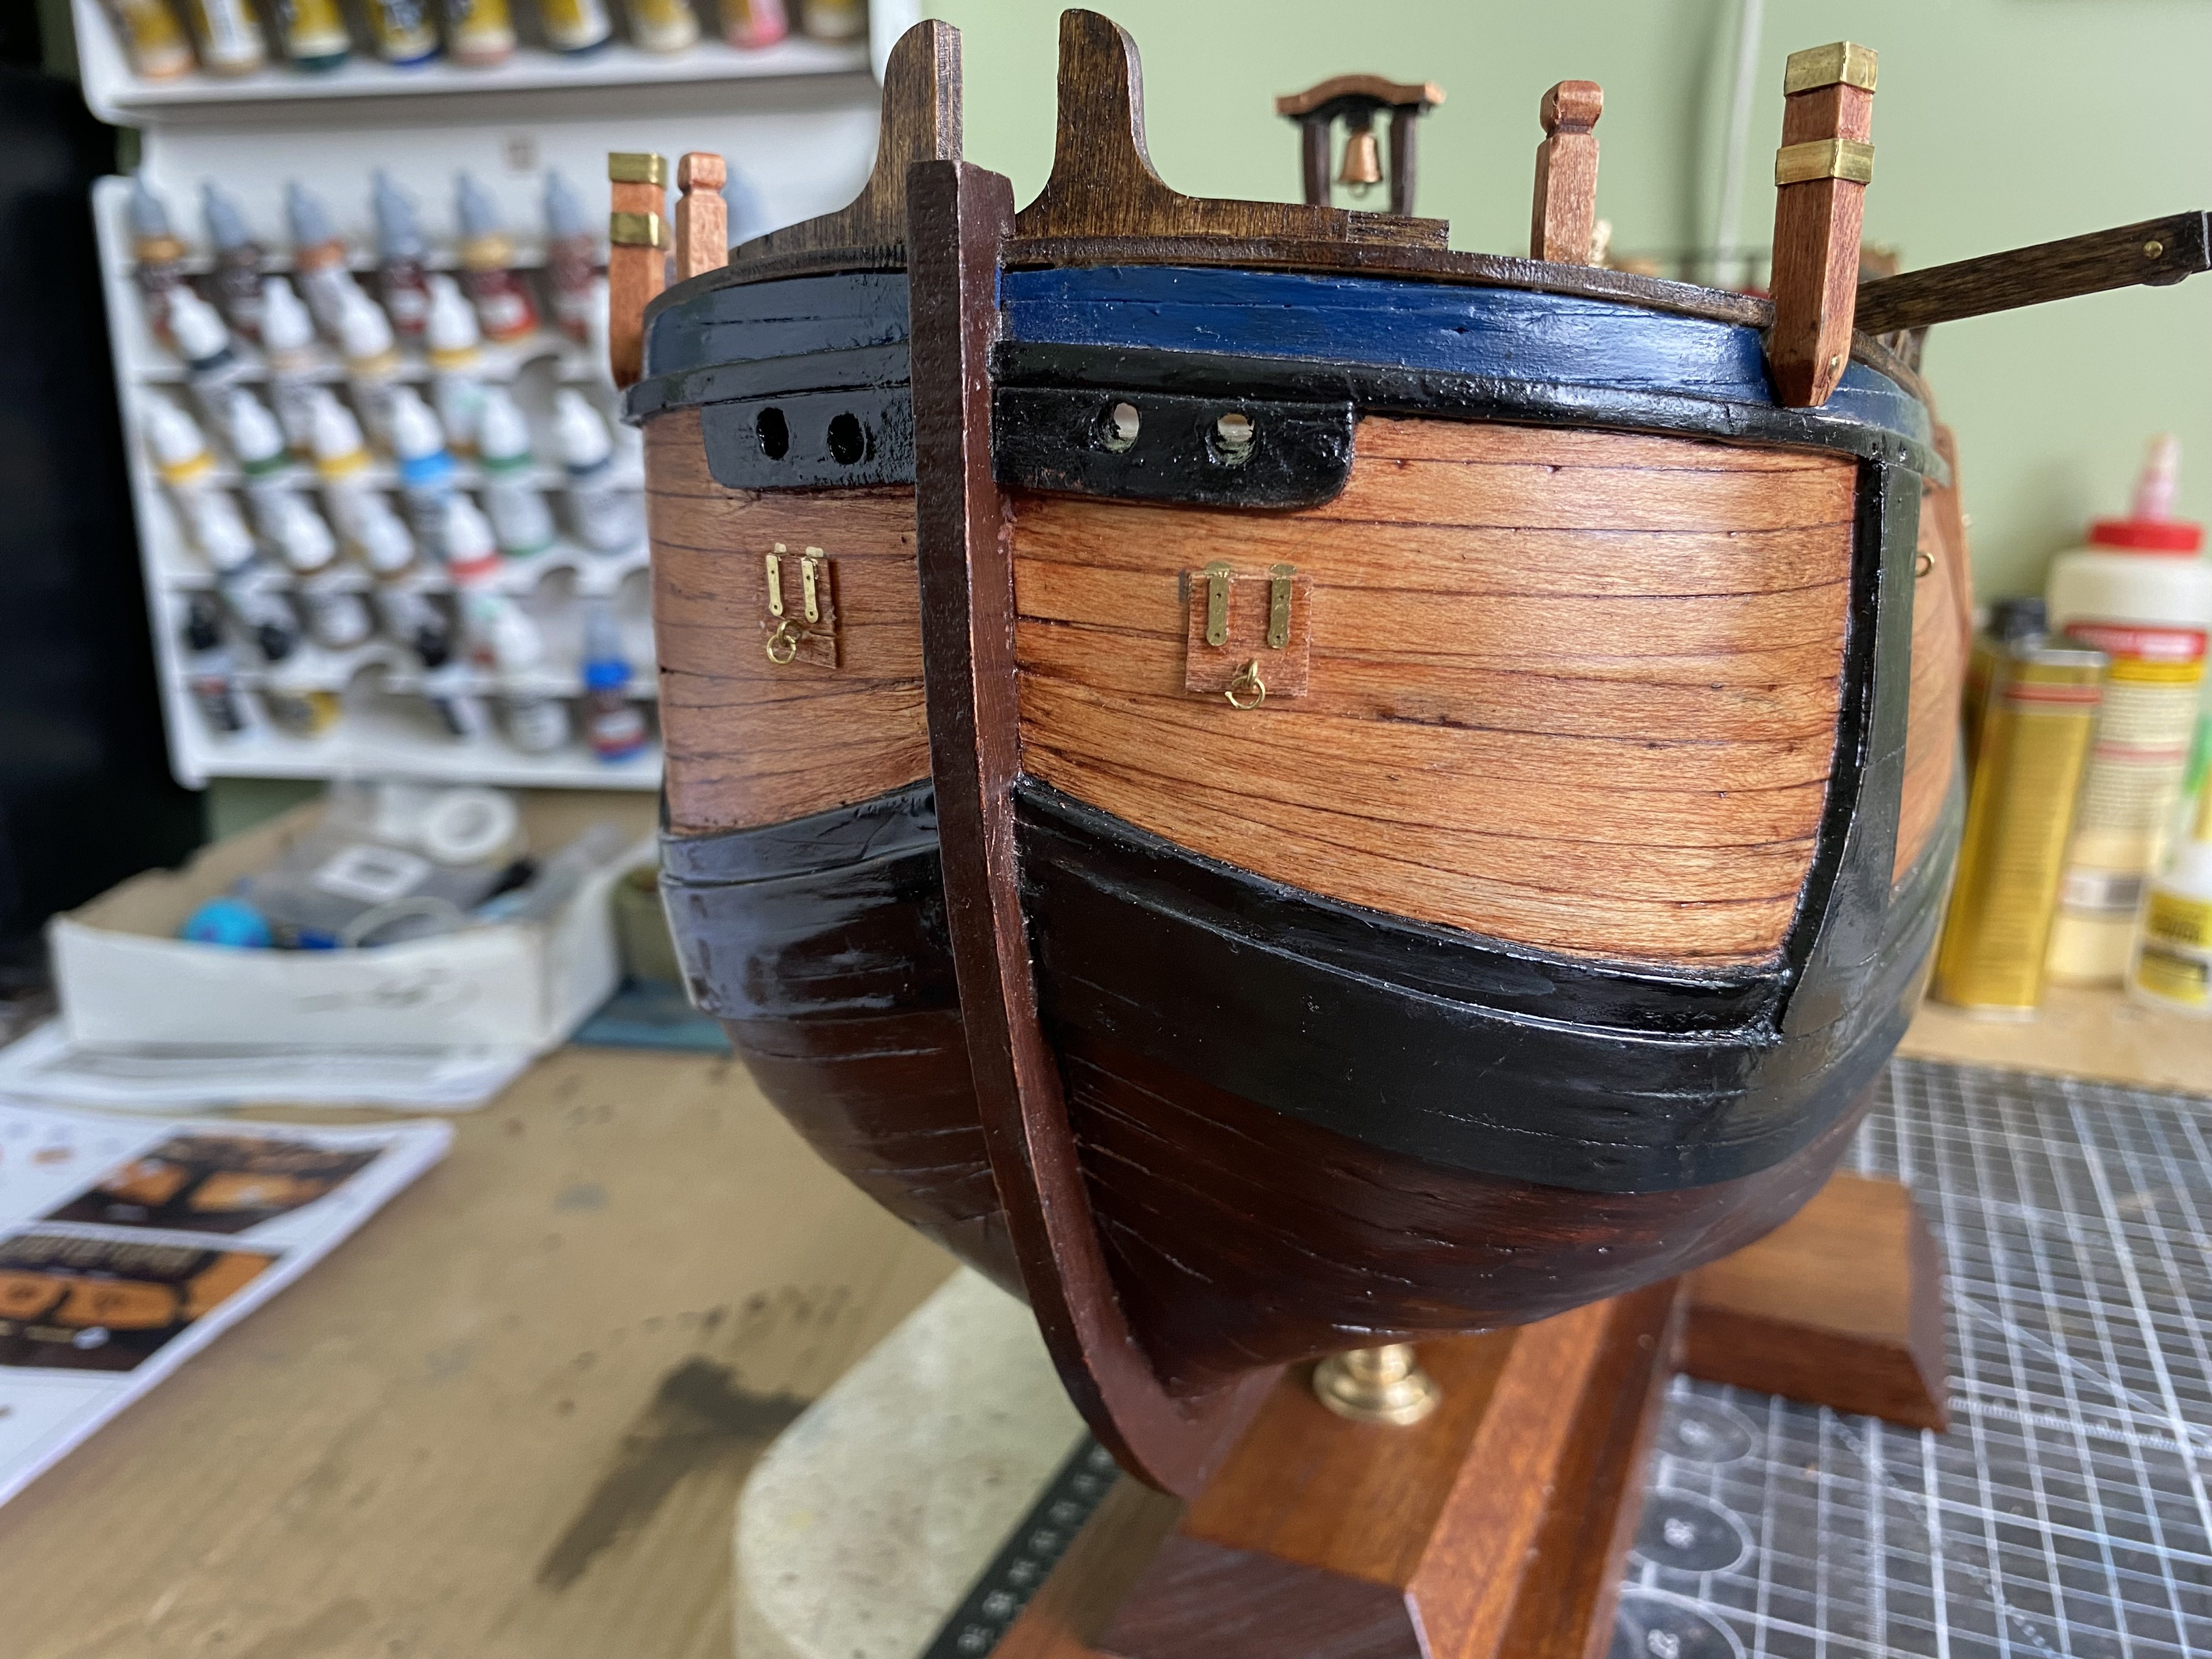
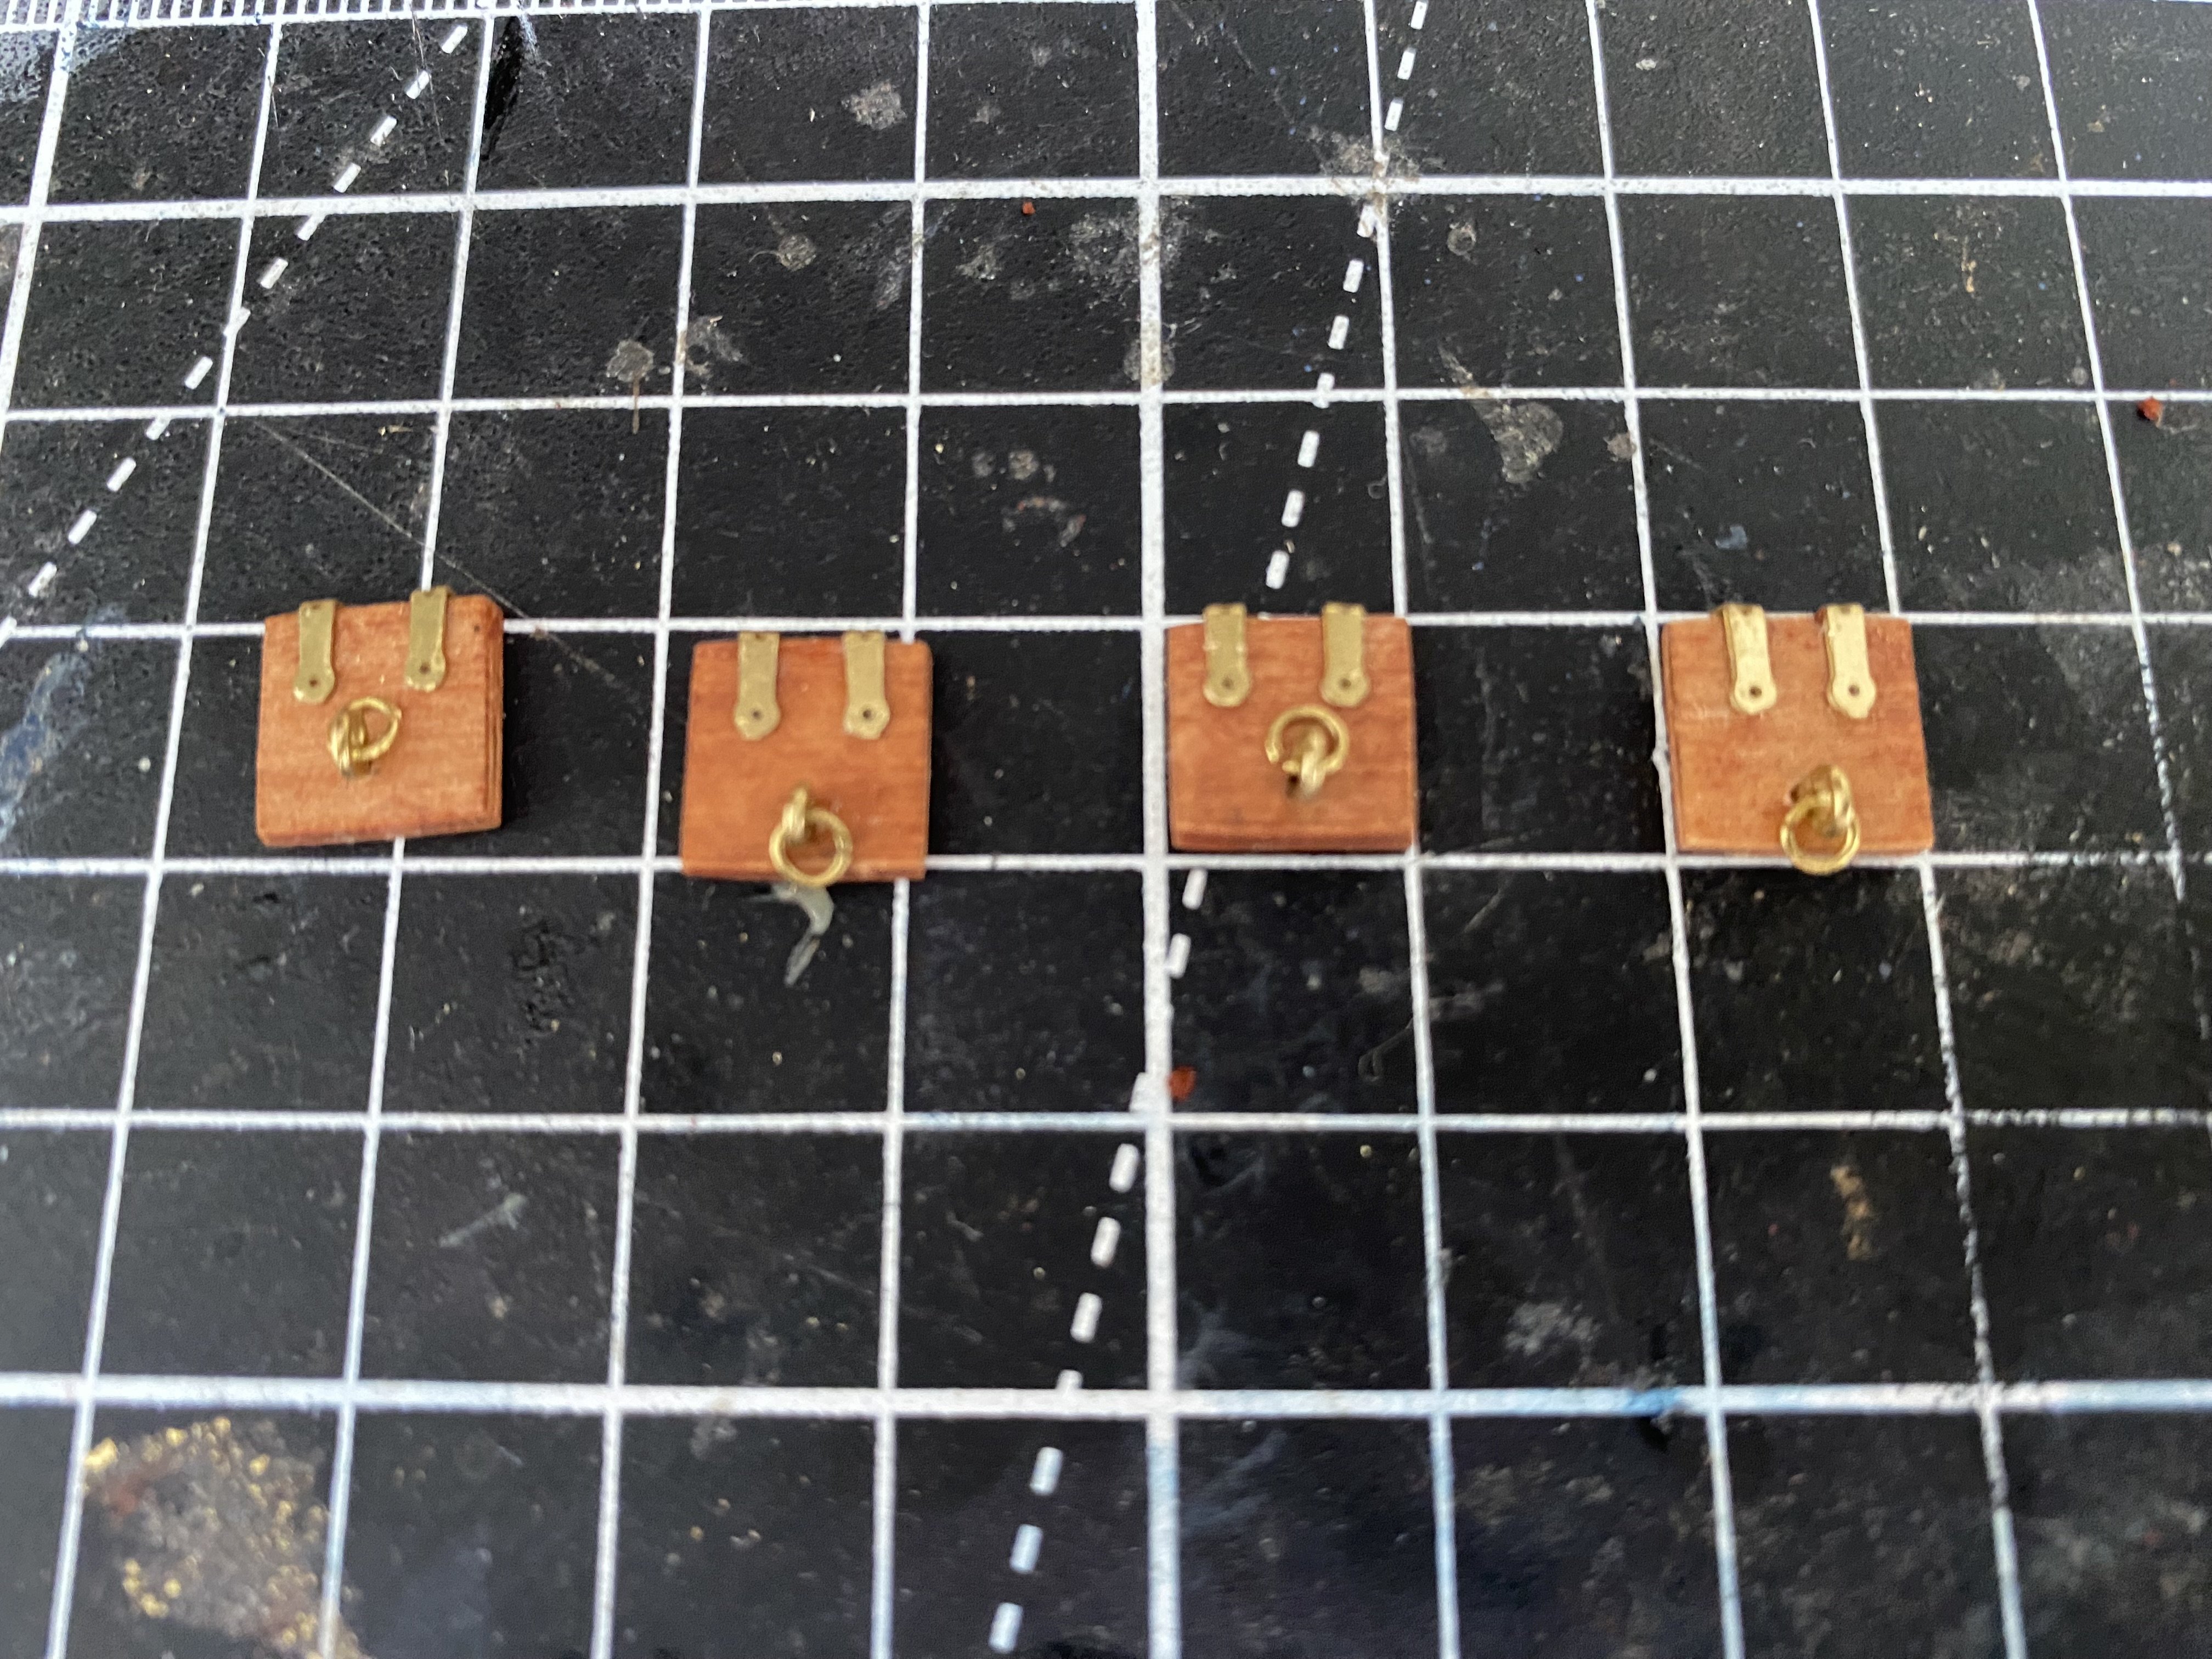
Went back and completed all the hatch covers by combining Kevin’s idea of cutting an edge into the veneer with a sharp blade all the way around the veneer covers that Veszett suggested. I then used black panel line accent color to highlight the scored lines.

-
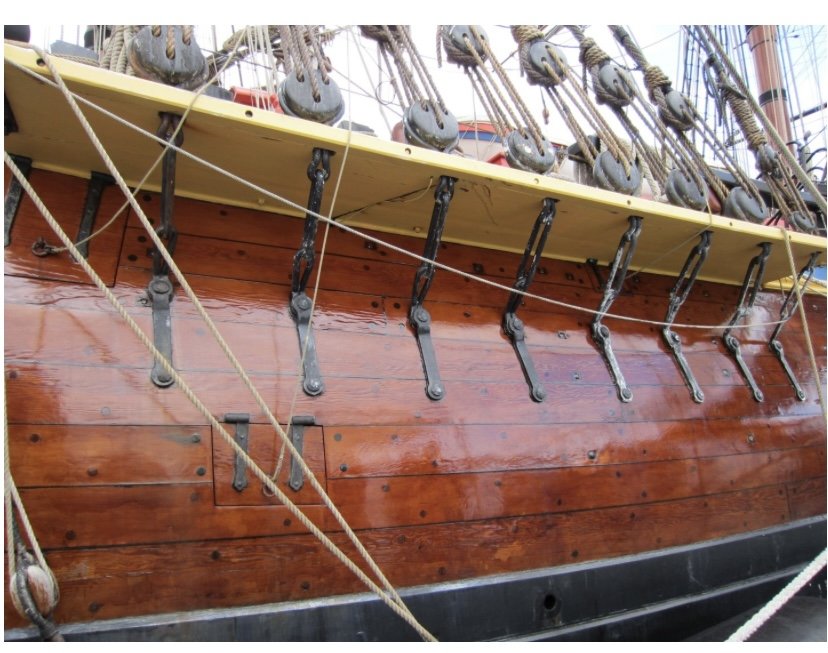
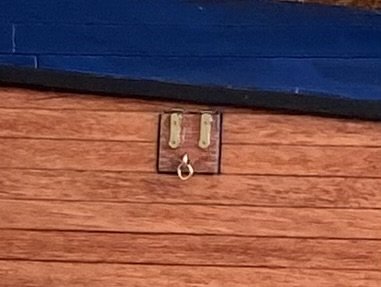
So next curiosity is to add lanyards to the hatch cover rings or not? In your photo shipaholic it appears lanyards are present and go up over the bulwark instead of into a hole above the cover.
-
Thanks shipaholic. Looking at the photo it appears I may have been better served had I tried Kevin’s suggestion: Is there any scope for an (e), similar to (d)? Simulate the hatches by directly cutting fine outlines and planking into the hull with a modelling knife? See Kevin what I mean about me making my decision to quickly 🥲? Not sure I could have cut convincing lines and puttied in the current veneer, so probably best I did a middle ground.
-
Thanks Kevin. 😀There are times I move too quickly on my decisions and after I wish I had done something different.
-
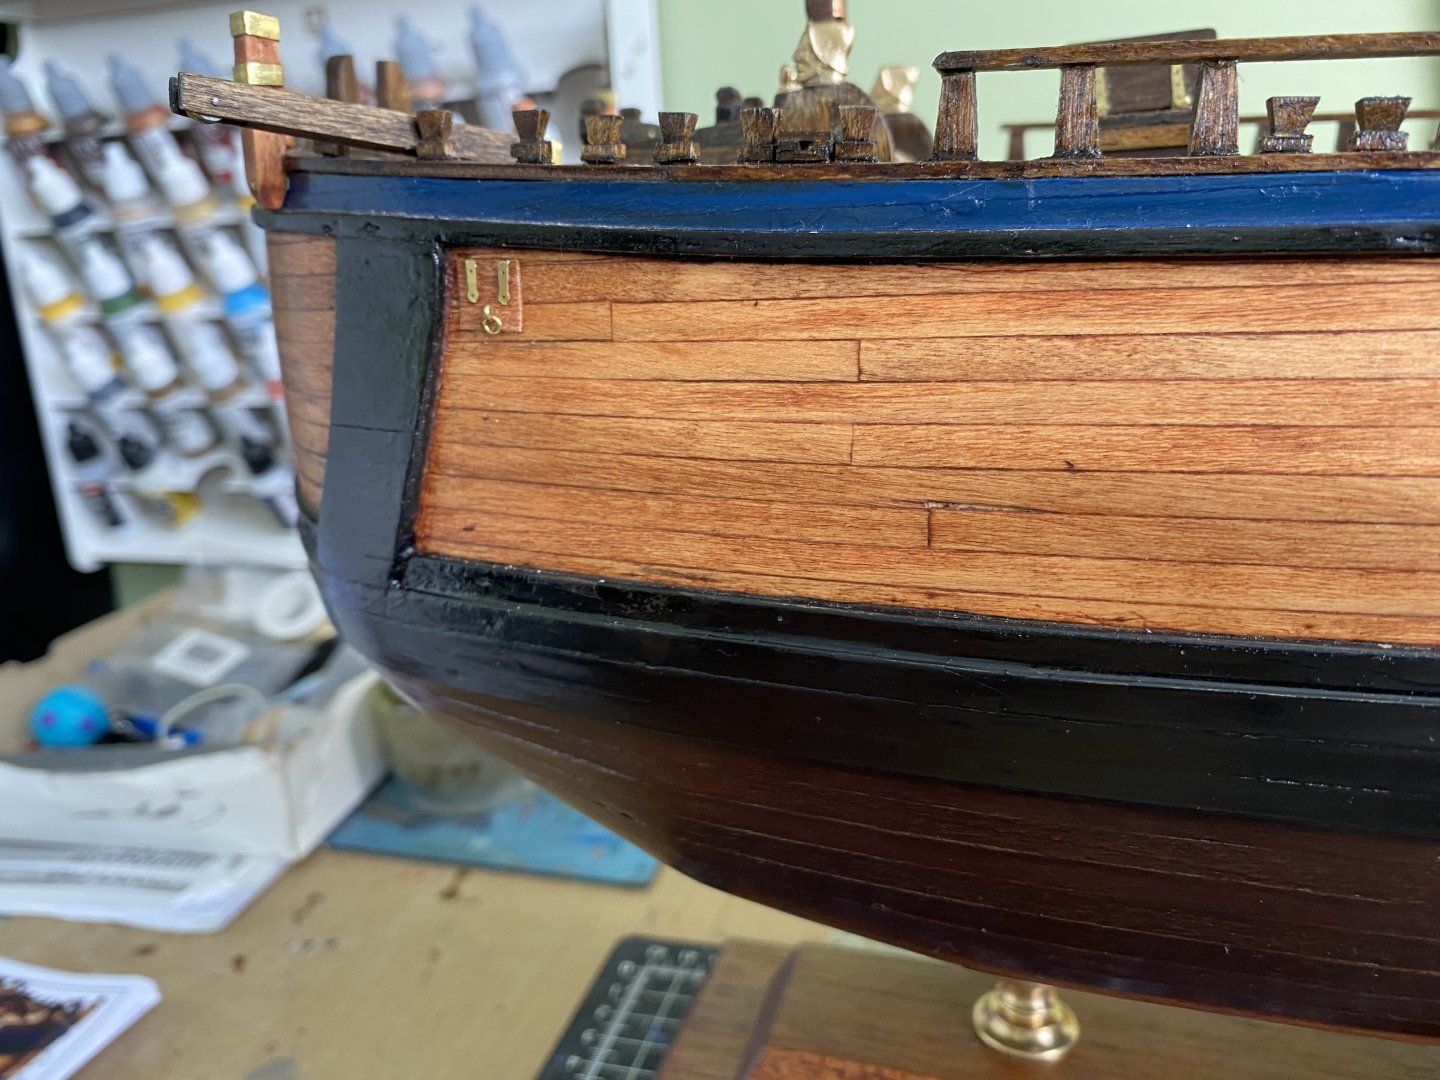
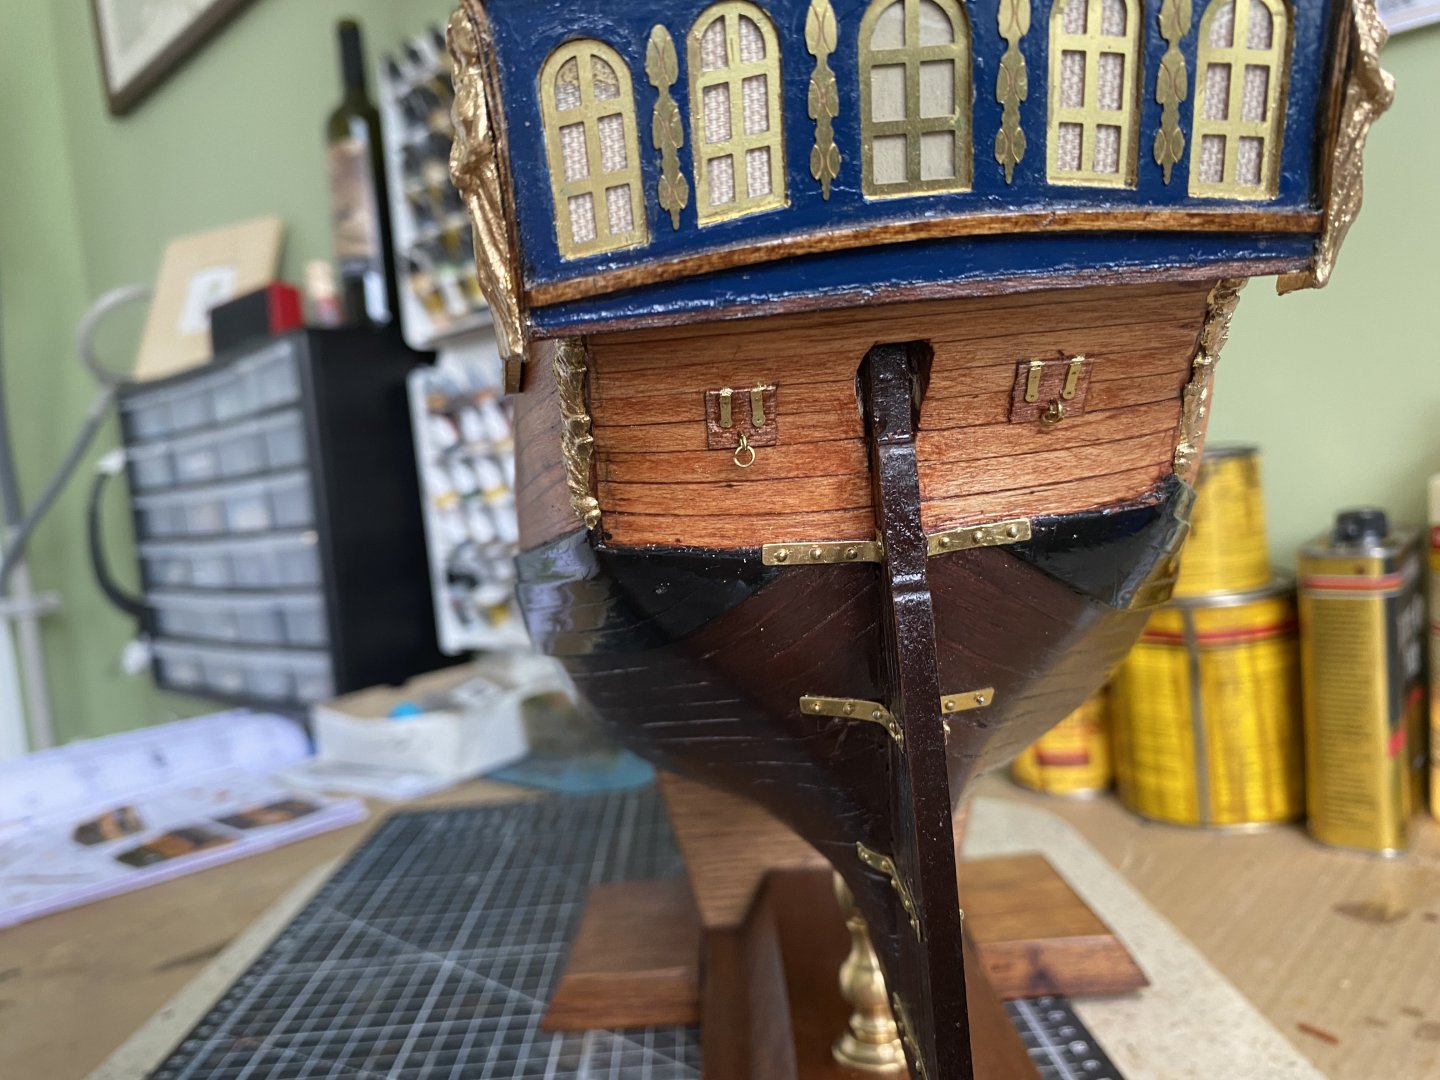
So I ultimately went with Veszett’s recommendation of just replacing the hatch covers with pieces of veneer the same length and width. Stained and glued them in place and then glued on the hardware.


-
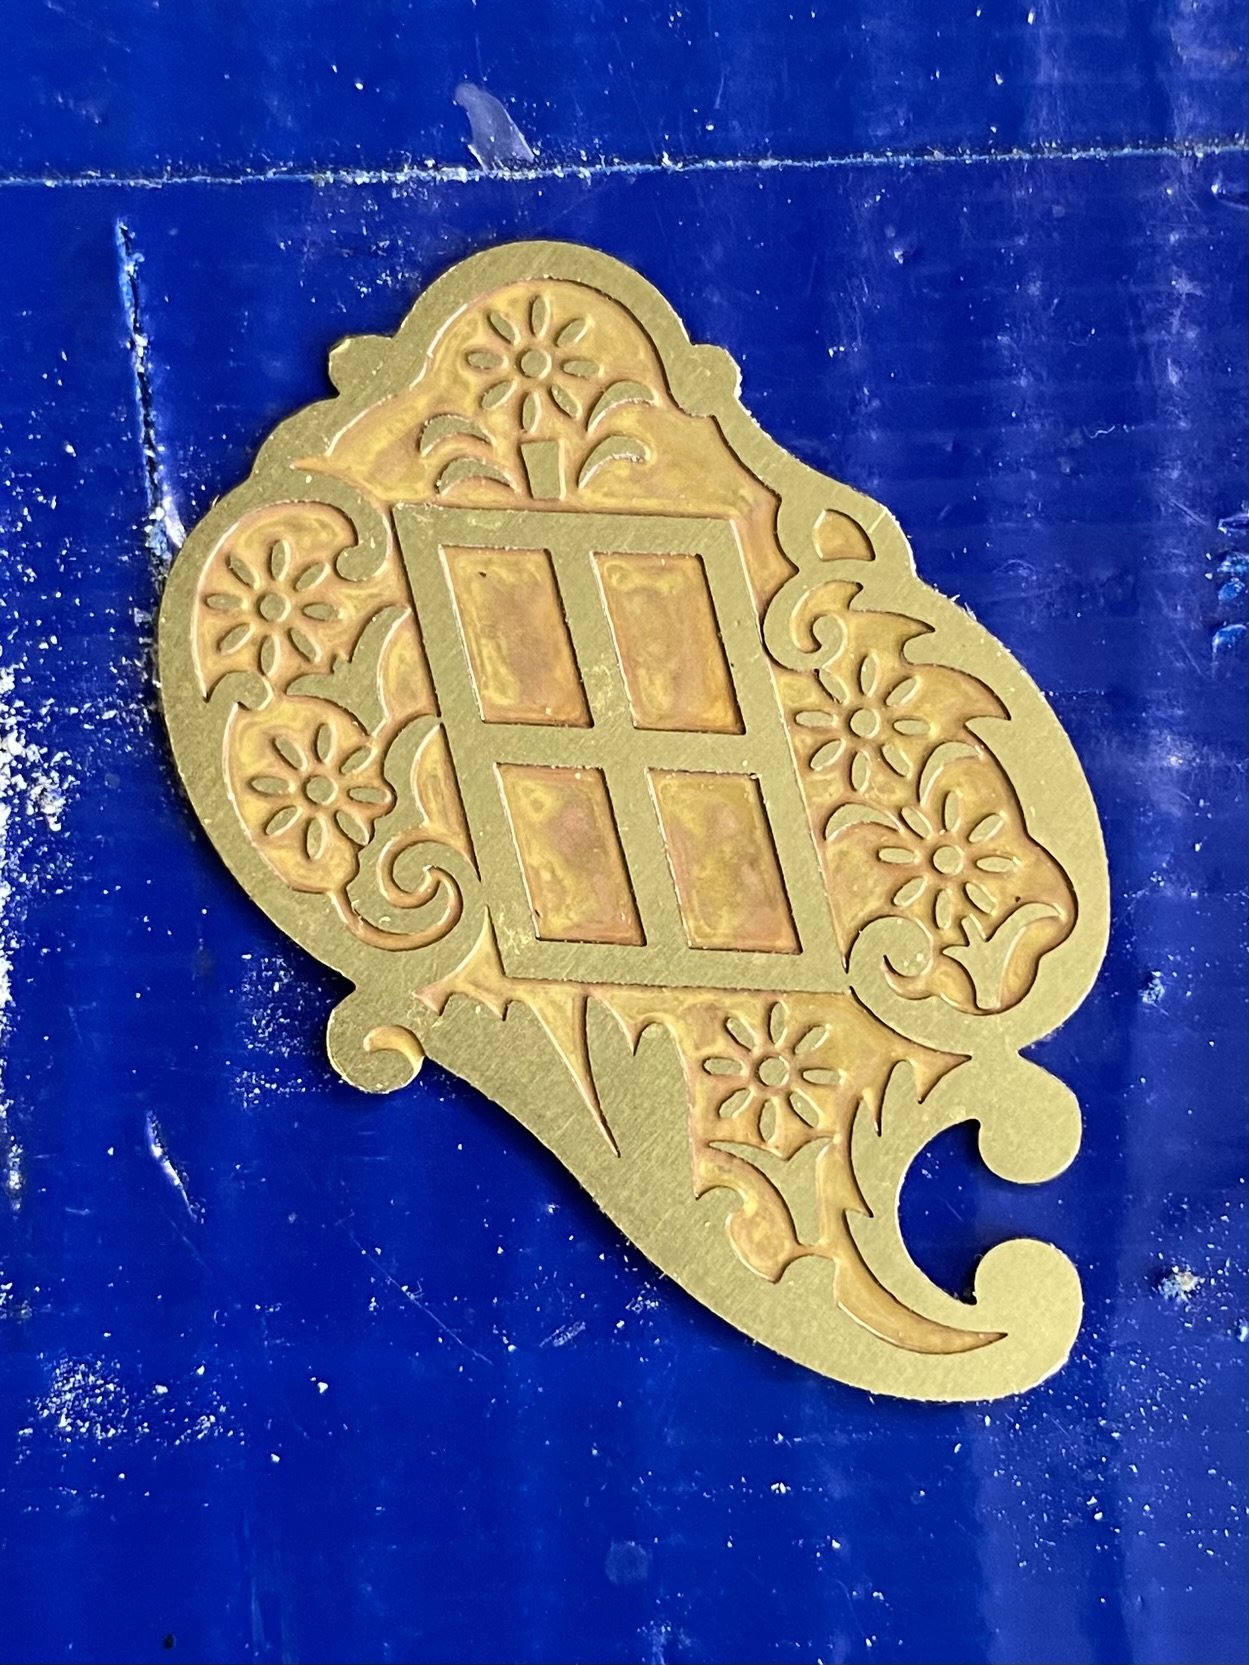
So a thorough search of AOTS did not address the hatch covers. It does title the openings as Airing Ports and Light Ports. The drawings in AOTS show the covers being somewhat flush with the hull, as does the photo of the replica in Sydney. I think I am going to go with Veszett idea. Unfortunately I have made 4 so I will need to see if I can remove the hardware.


-
Wow guys I like your help on this! I think I am going to look at doing it Veszett’s suggestion. Kevin your suggestion is a great option as well. I will of course review what AOTS says as yo mentioned Ian. As I initially mentioned I was working around the idea of having a few partially open to give some realism but I think that could result in more problems then it is worth. I have found it very interesting that there is very little conversation on my build from other wooden model ship builders. You guys continue to follow along with me, and I you. But really no opinions, advice, or recommendations from builders of this wooden ship or others. I simply could not have made it through my Victory or Soleil Royal without you guys. Thanks again. Oh, and Kevin, I really am having fun with this model. I love woodworking and this enables me to employ some of the skills I have learned over the years. Will definitely be a well thought out decision where I go next, plastic or wood? Still many great plastic models out there and I have learned a lot about building them. Many great wooden as well. Just what medium do I want to work in. Wooden models certainly strain the budget. OcCre recently came out with their wooden HMS Victory. There are numbered kits. You guys should check it out on their web site. It is beautiful! Will set you back a bit of your budget!!!! Wow!
-
Thanks Ian. I realized after I sent my question that option (c) would not work on the bow. I have about 3” of solid wood there forming the distinctive bow shape. Will see what ATOS has to say. The photos of the replica appear to show the covers flush. But I am not sure. May just stick with the way OcCre tells me to do it.
-
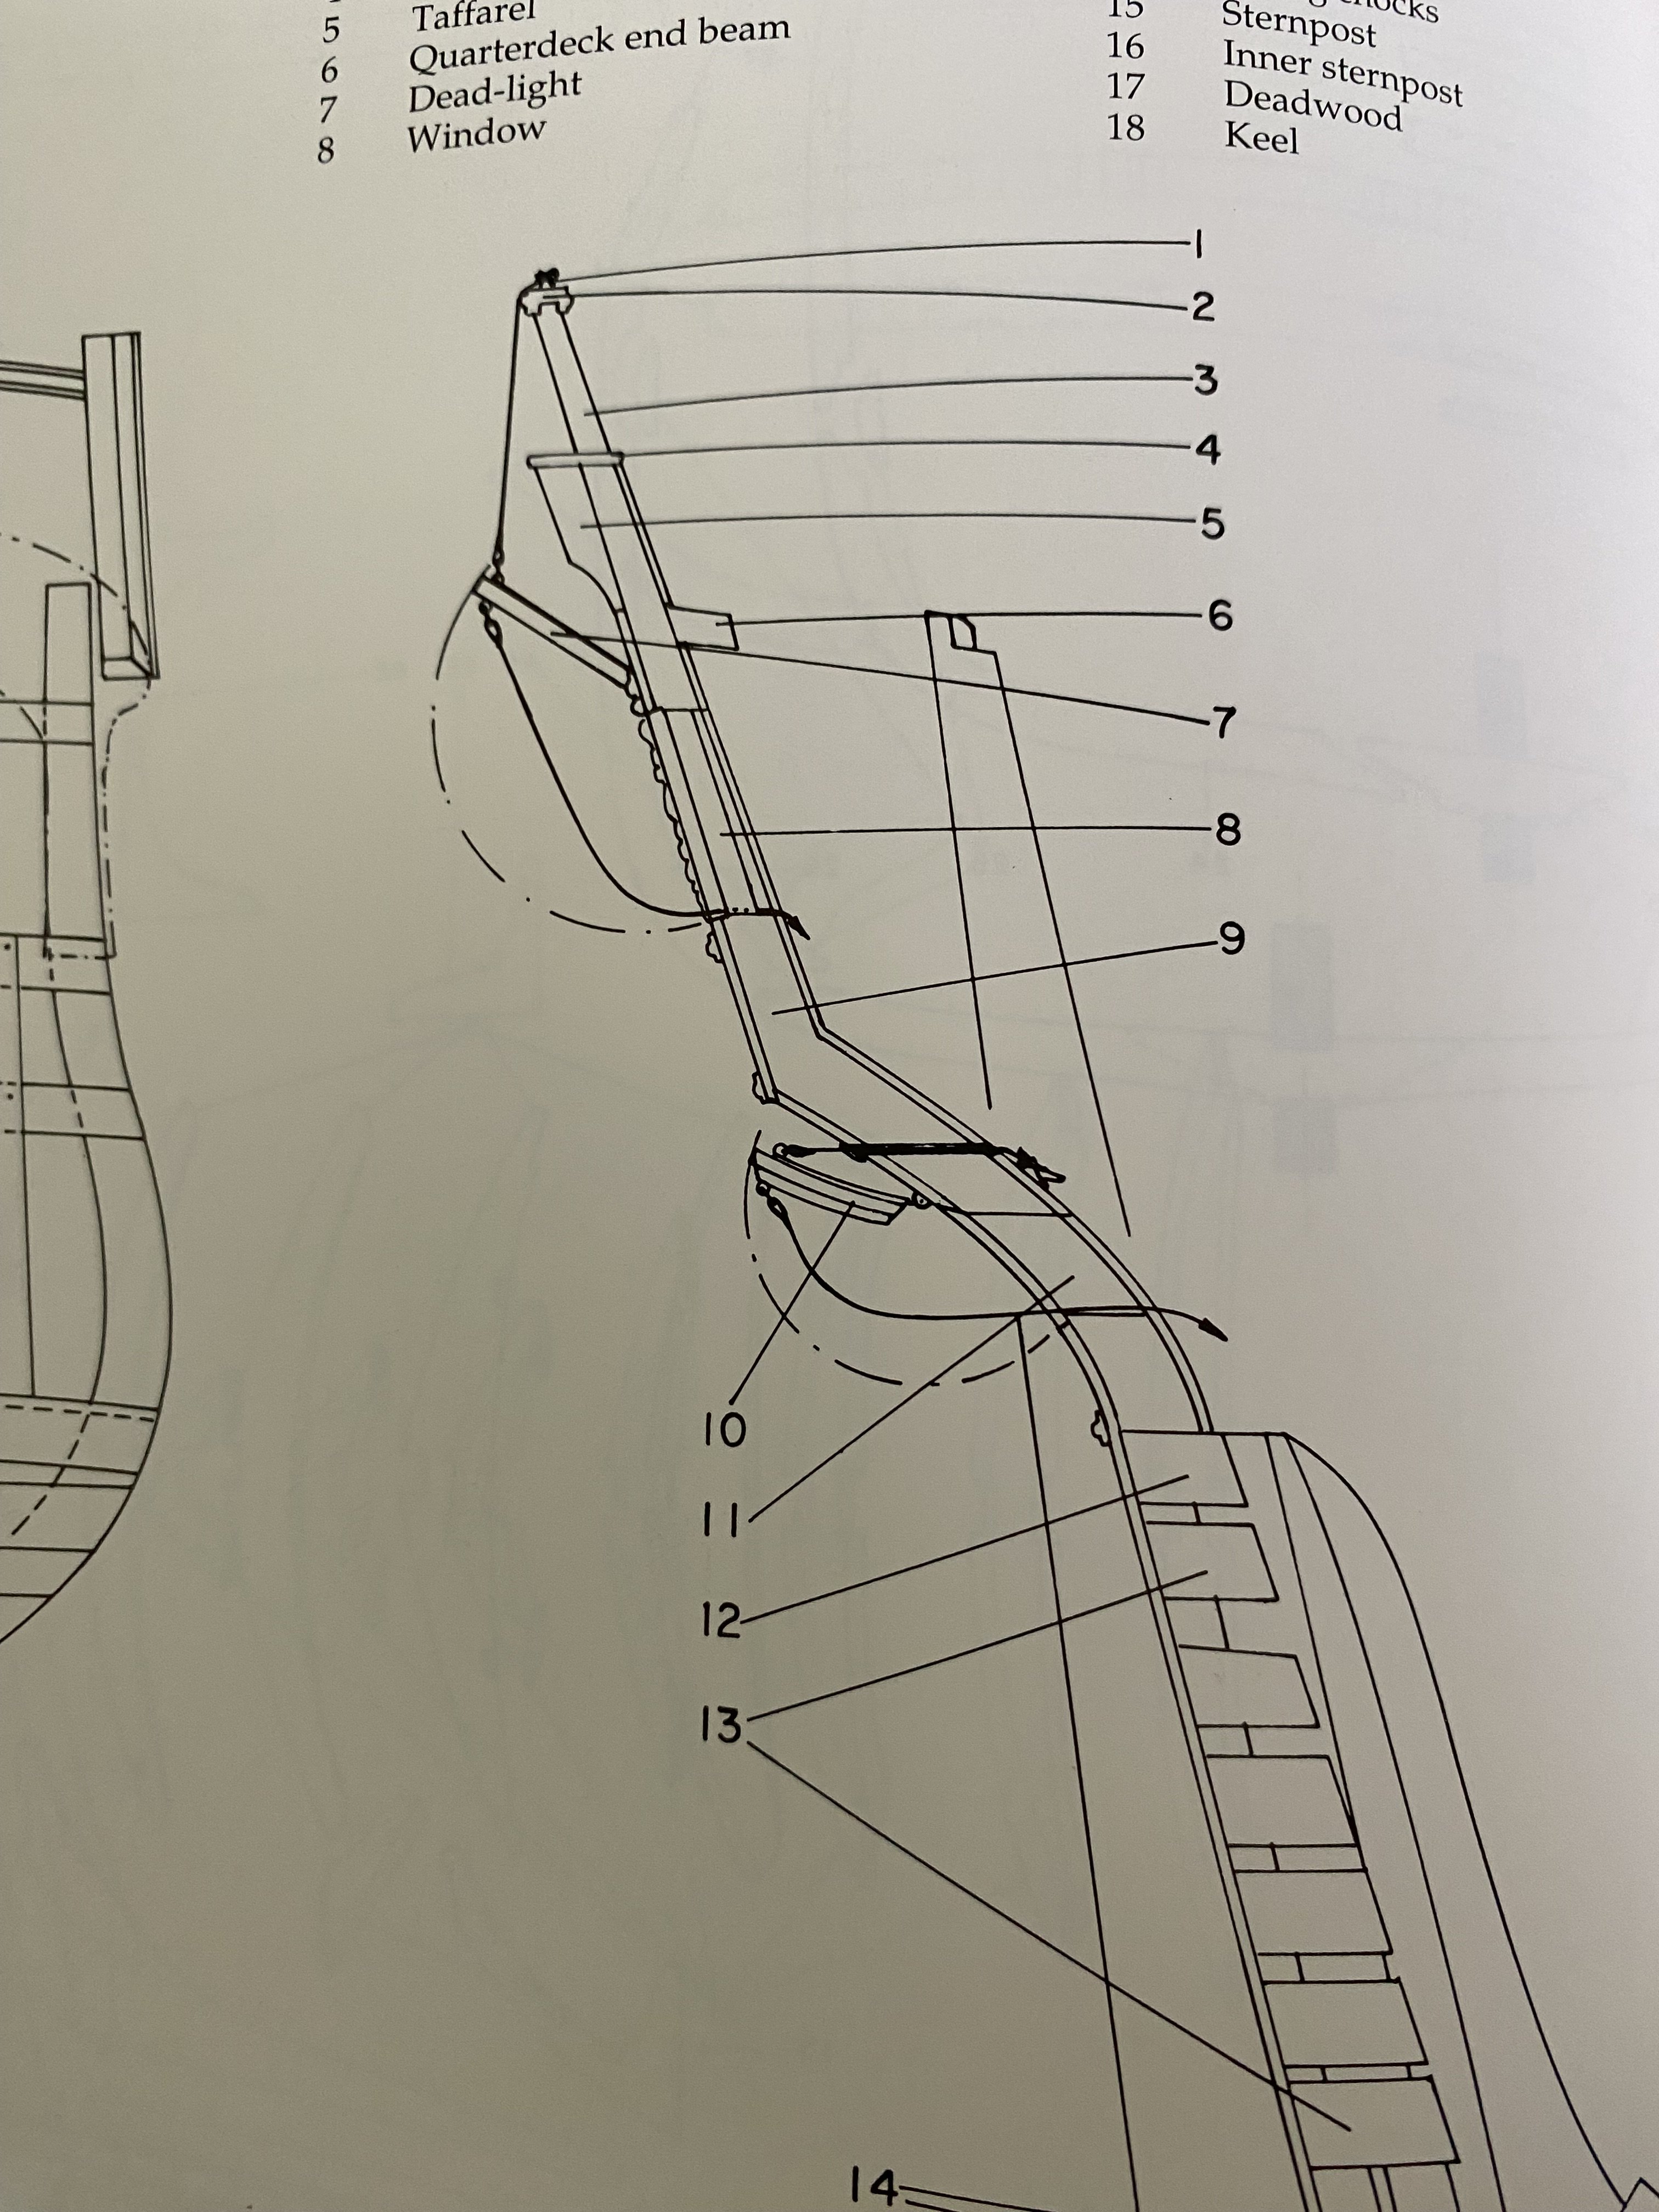
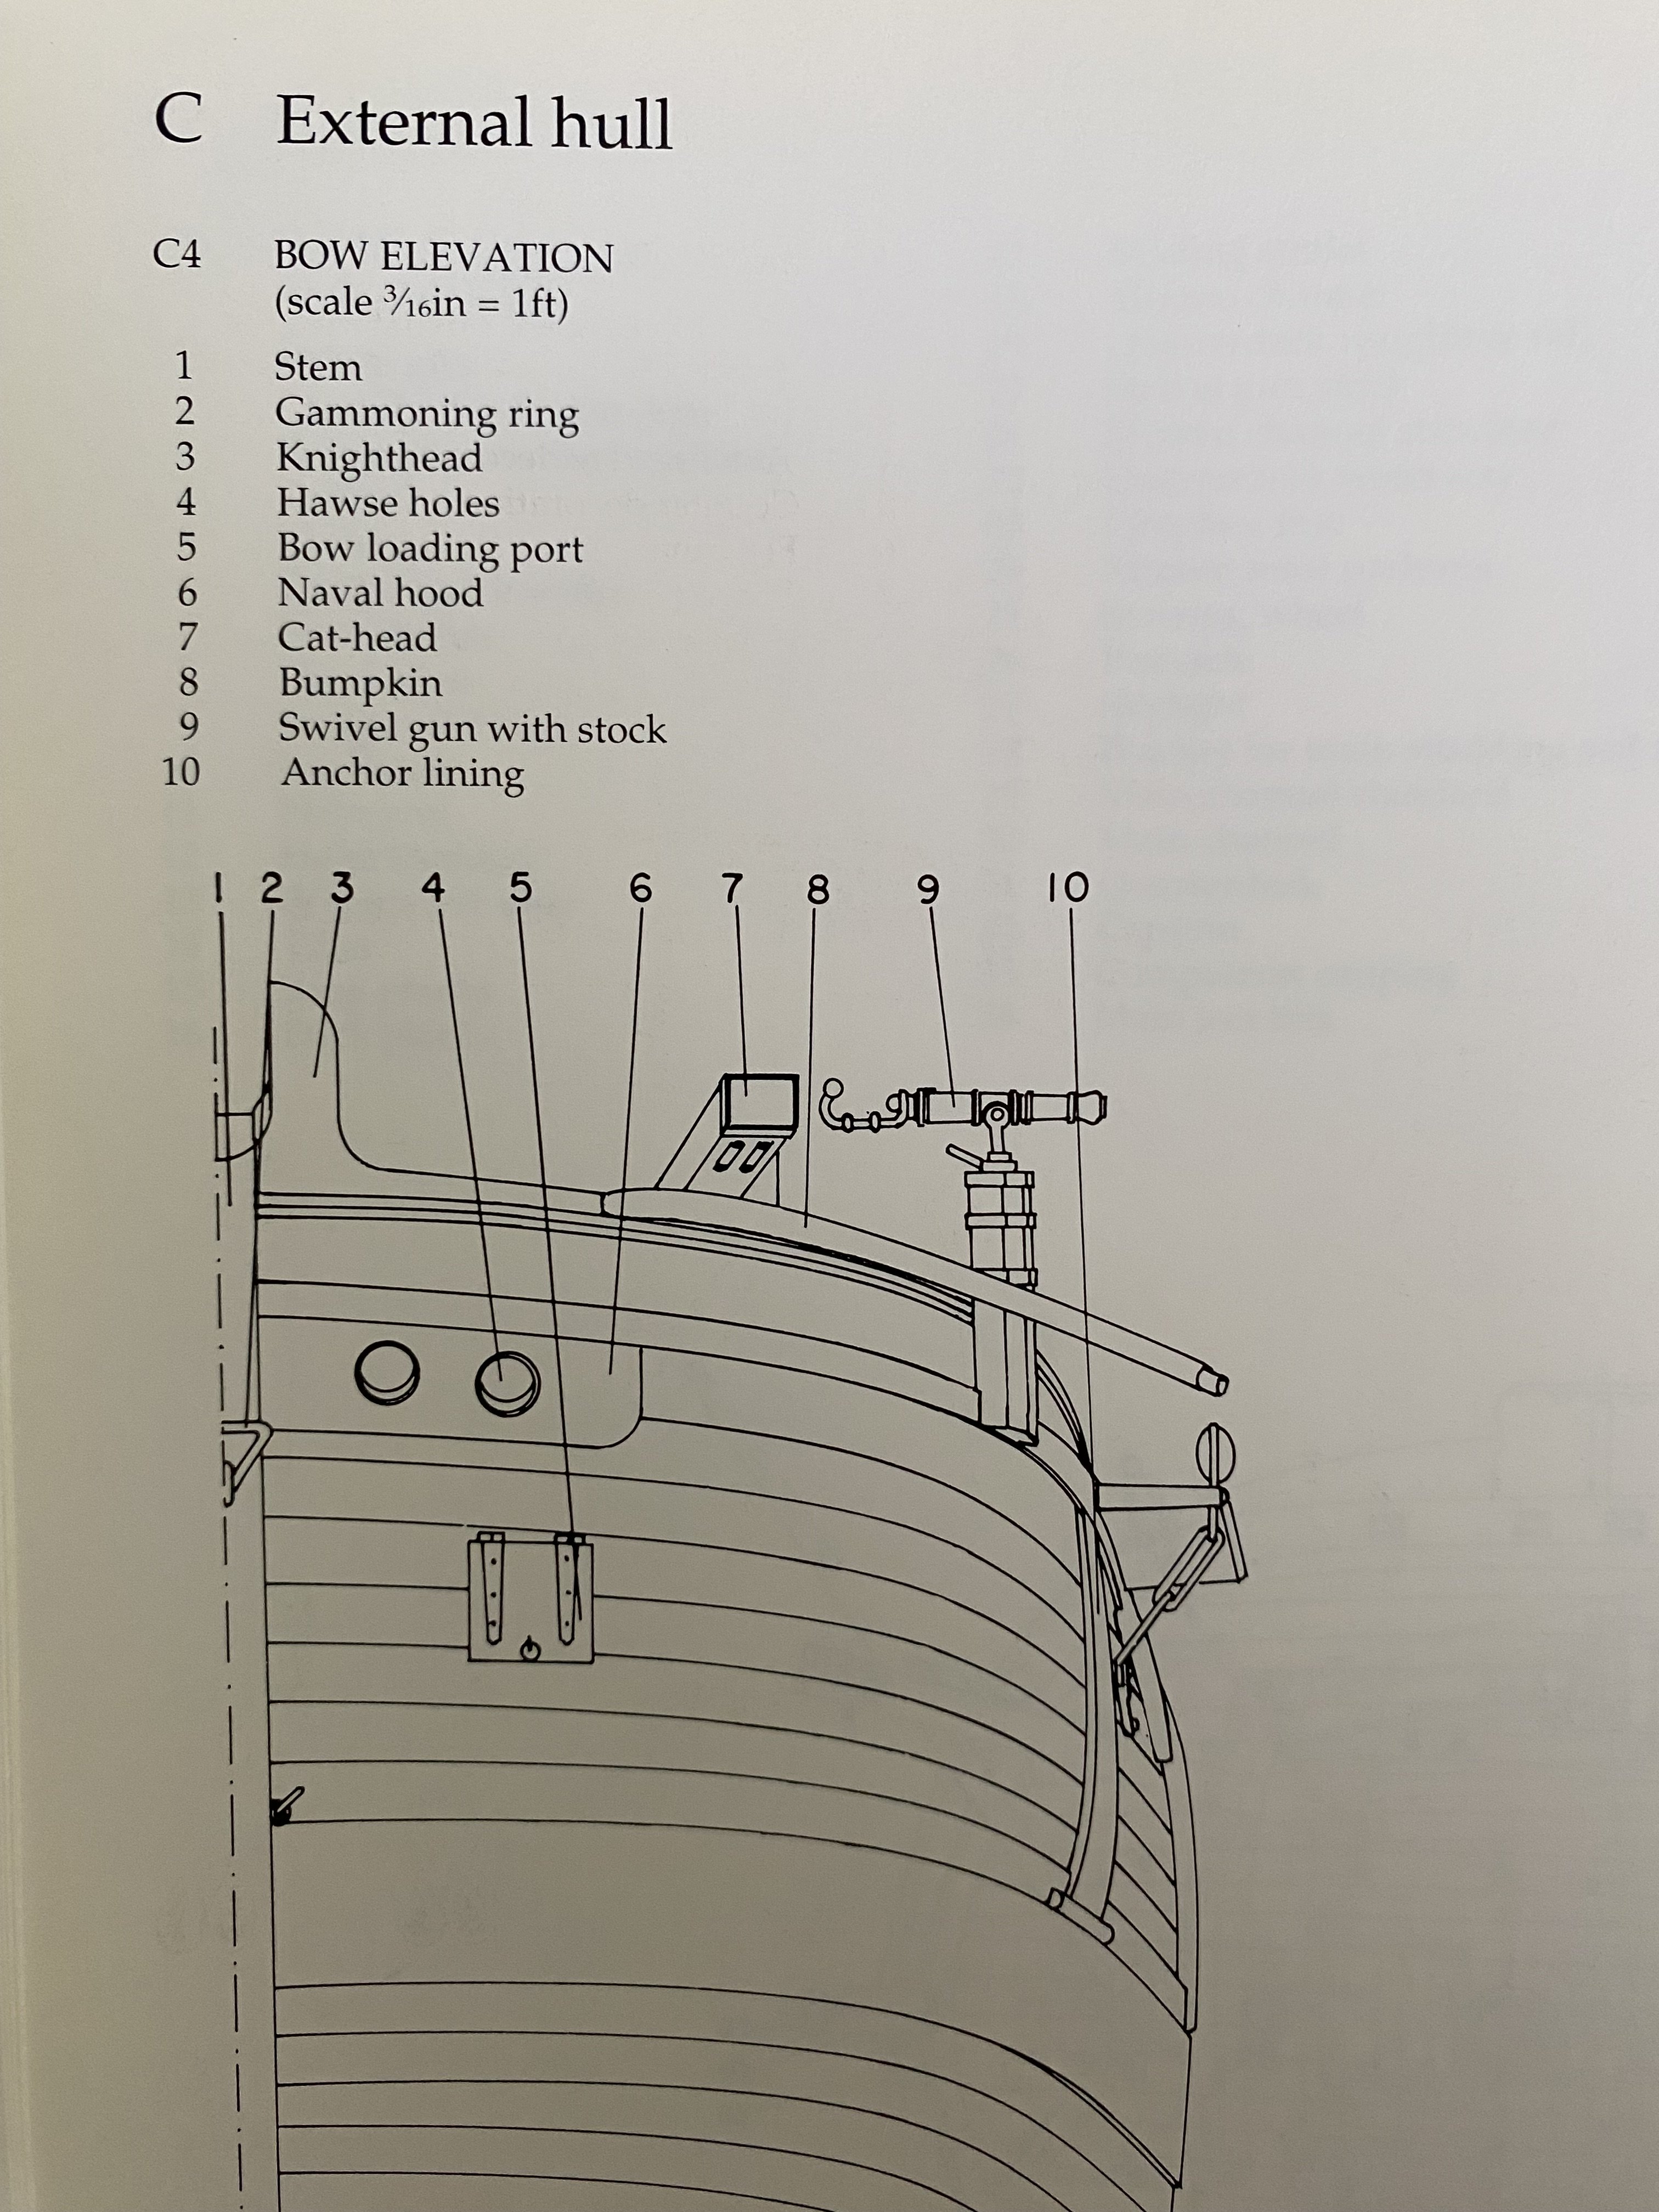
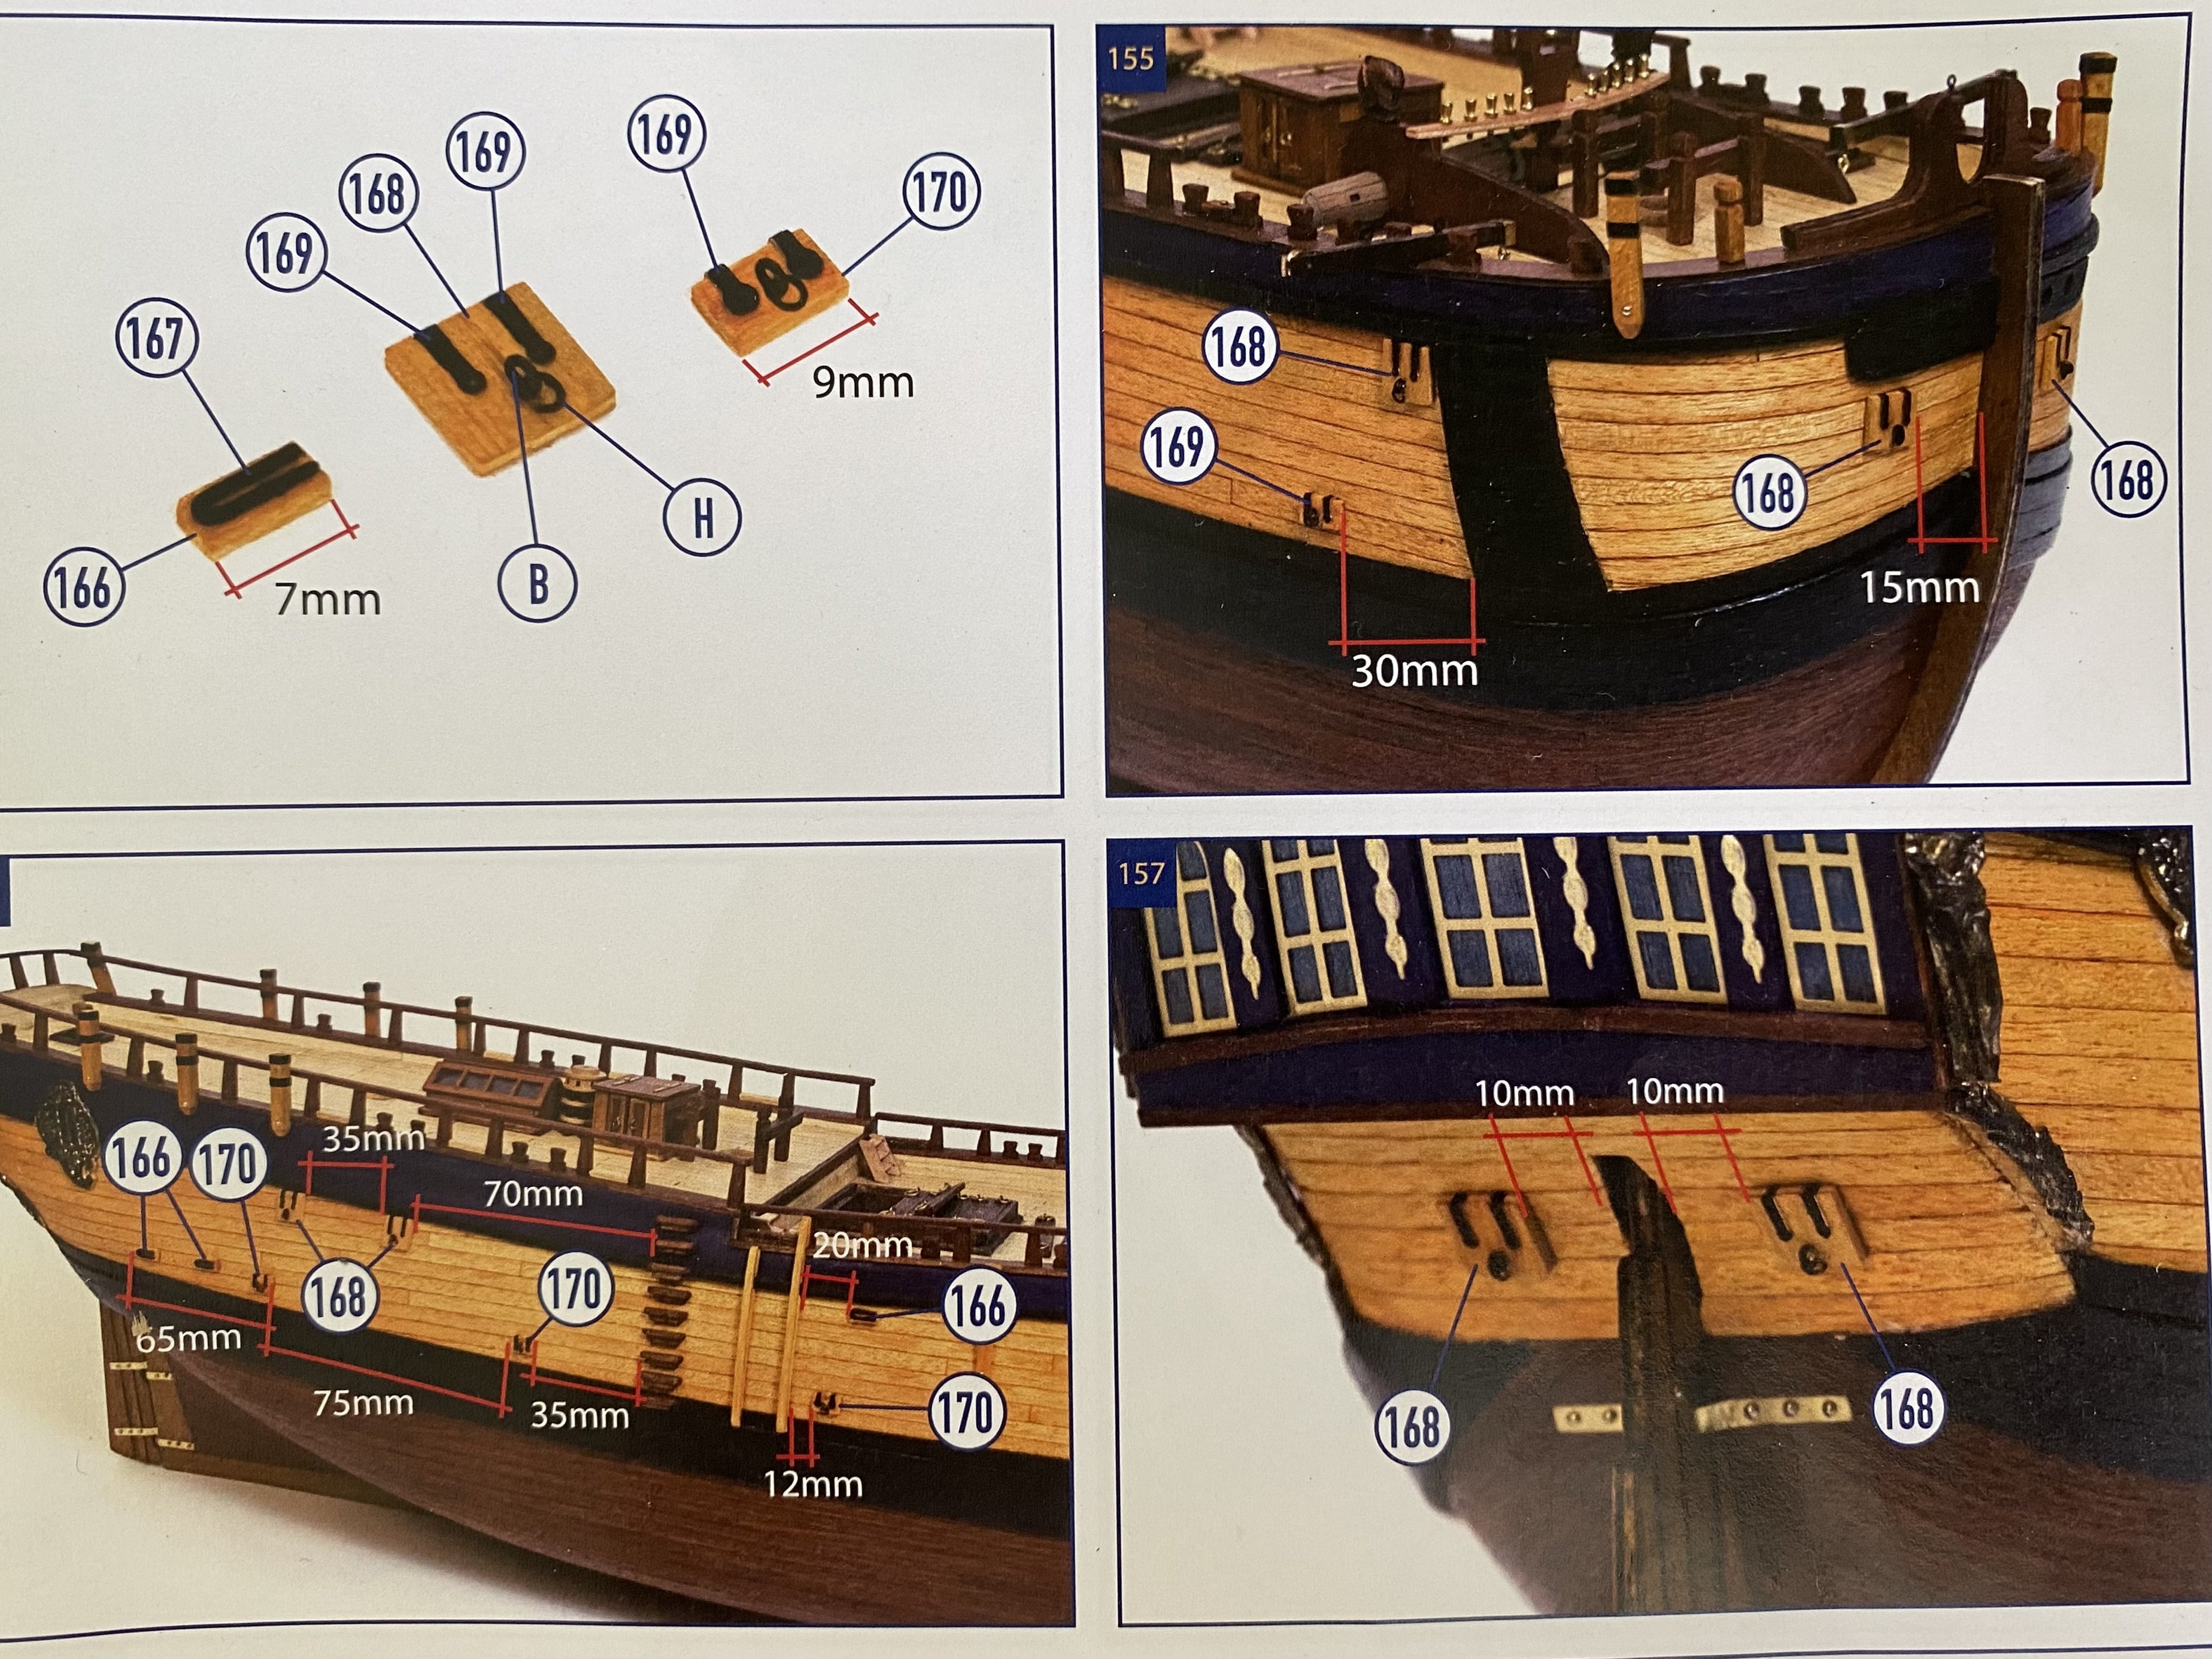
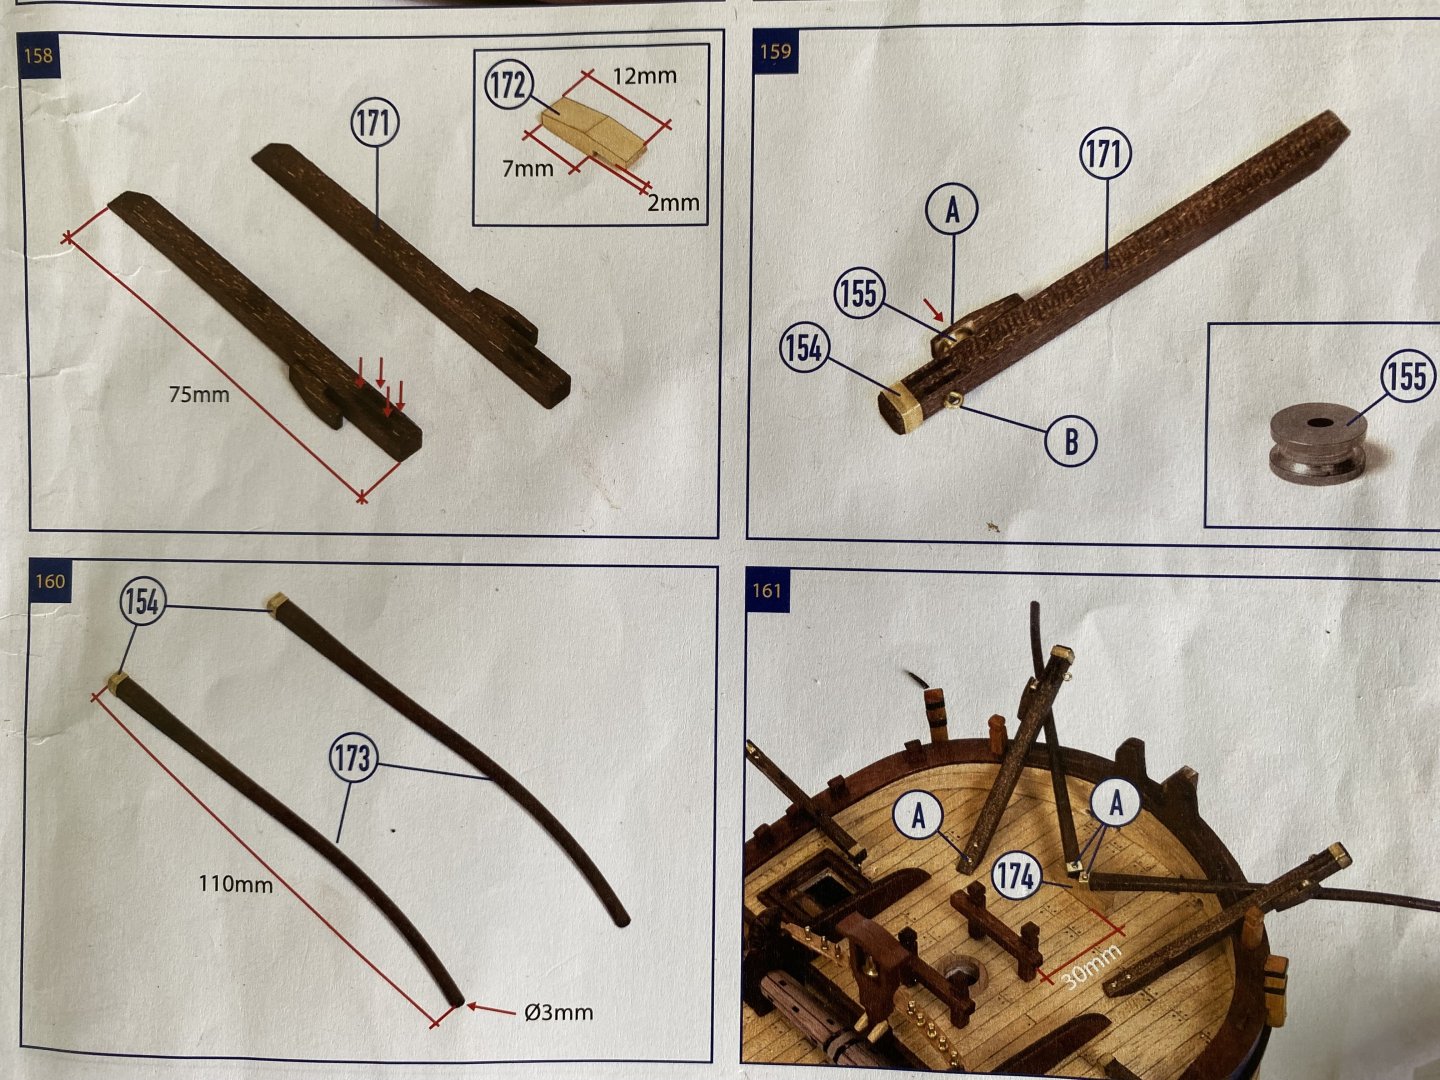
Time for opinion question. For the various hatch covers around the hull OcCre instructions have me cut various sizes of wood for the hatch covers (picture 154 top left). Then attach the needed hardware. Pictures 155-157 show simply gluing the covers to the hull at the designated locations. Covers are not set in and flush with the side of the hull. This of course is different from any of the plastic models I have built where the hatch opening is molded into the stock hull halves. My options seem to be: A: Do as the instructions say and don’t ask any more questions about it. B: Attach covers slightly open about 30 degrees and paint a flat black square behind the cover to give the appearance of being open to inside of hull. C. Try to cut a square hole the size of the hatch cover in the hull at the various spots and actually inset the cover into the hull. Opened or closed. This would entail attempting to cut cleanly through two layers of planking. My beautiful planking! 😫 Your thoughts?


-
When I considered trying to duplicate Marc’s painting skills to mine I realized it was very much similar to that of Leonardo Da Vinci and his not so famous brother Larry Da Vinci 😉
- 1,508 replies
-
- 1
-

-
- Le Soleil Royal
- Heller
- (and 1 more)
-
Congratulations Kevin on your SR. I did like the new color instructions that came with my kit. I have not seen the older version to compare. Those are some great questions I will have to give some thought to. My top tip Kevin probably would be to decide right off your color scheme. As you know you can find many builds on MSW. Scroll through the index carefully. There are a few different title groups. Some spell it La and some Le. Others title groups are just Soleil Royal. But anyway back to color scheme. You will see variations. Of course the spectacular colorful route Marc is taking! I think his is the build you can lose your mind if you try to duplicate what he has, and is, doing 😀! Others, like mine, are less colorful and the statuary is all gold. Mine is gold leaf. Also decide a white or wood color hull. Other tip would be to carefully review Marc’s build and pick out some things he has done you might want to attempt to employ in your build. With your 3D printing skills you should be able to print a number of his embellishment. I attempted most of mine, which were not many, as molds and resin casts. Of course replace the plastic masts and yard sections with wood dials where you can. Use your printed blocks instead of those included with the kit. Kevin I will keep thinking about this and add more thoughts as I remember them. Especially things I wish I had done or regret doing.
-
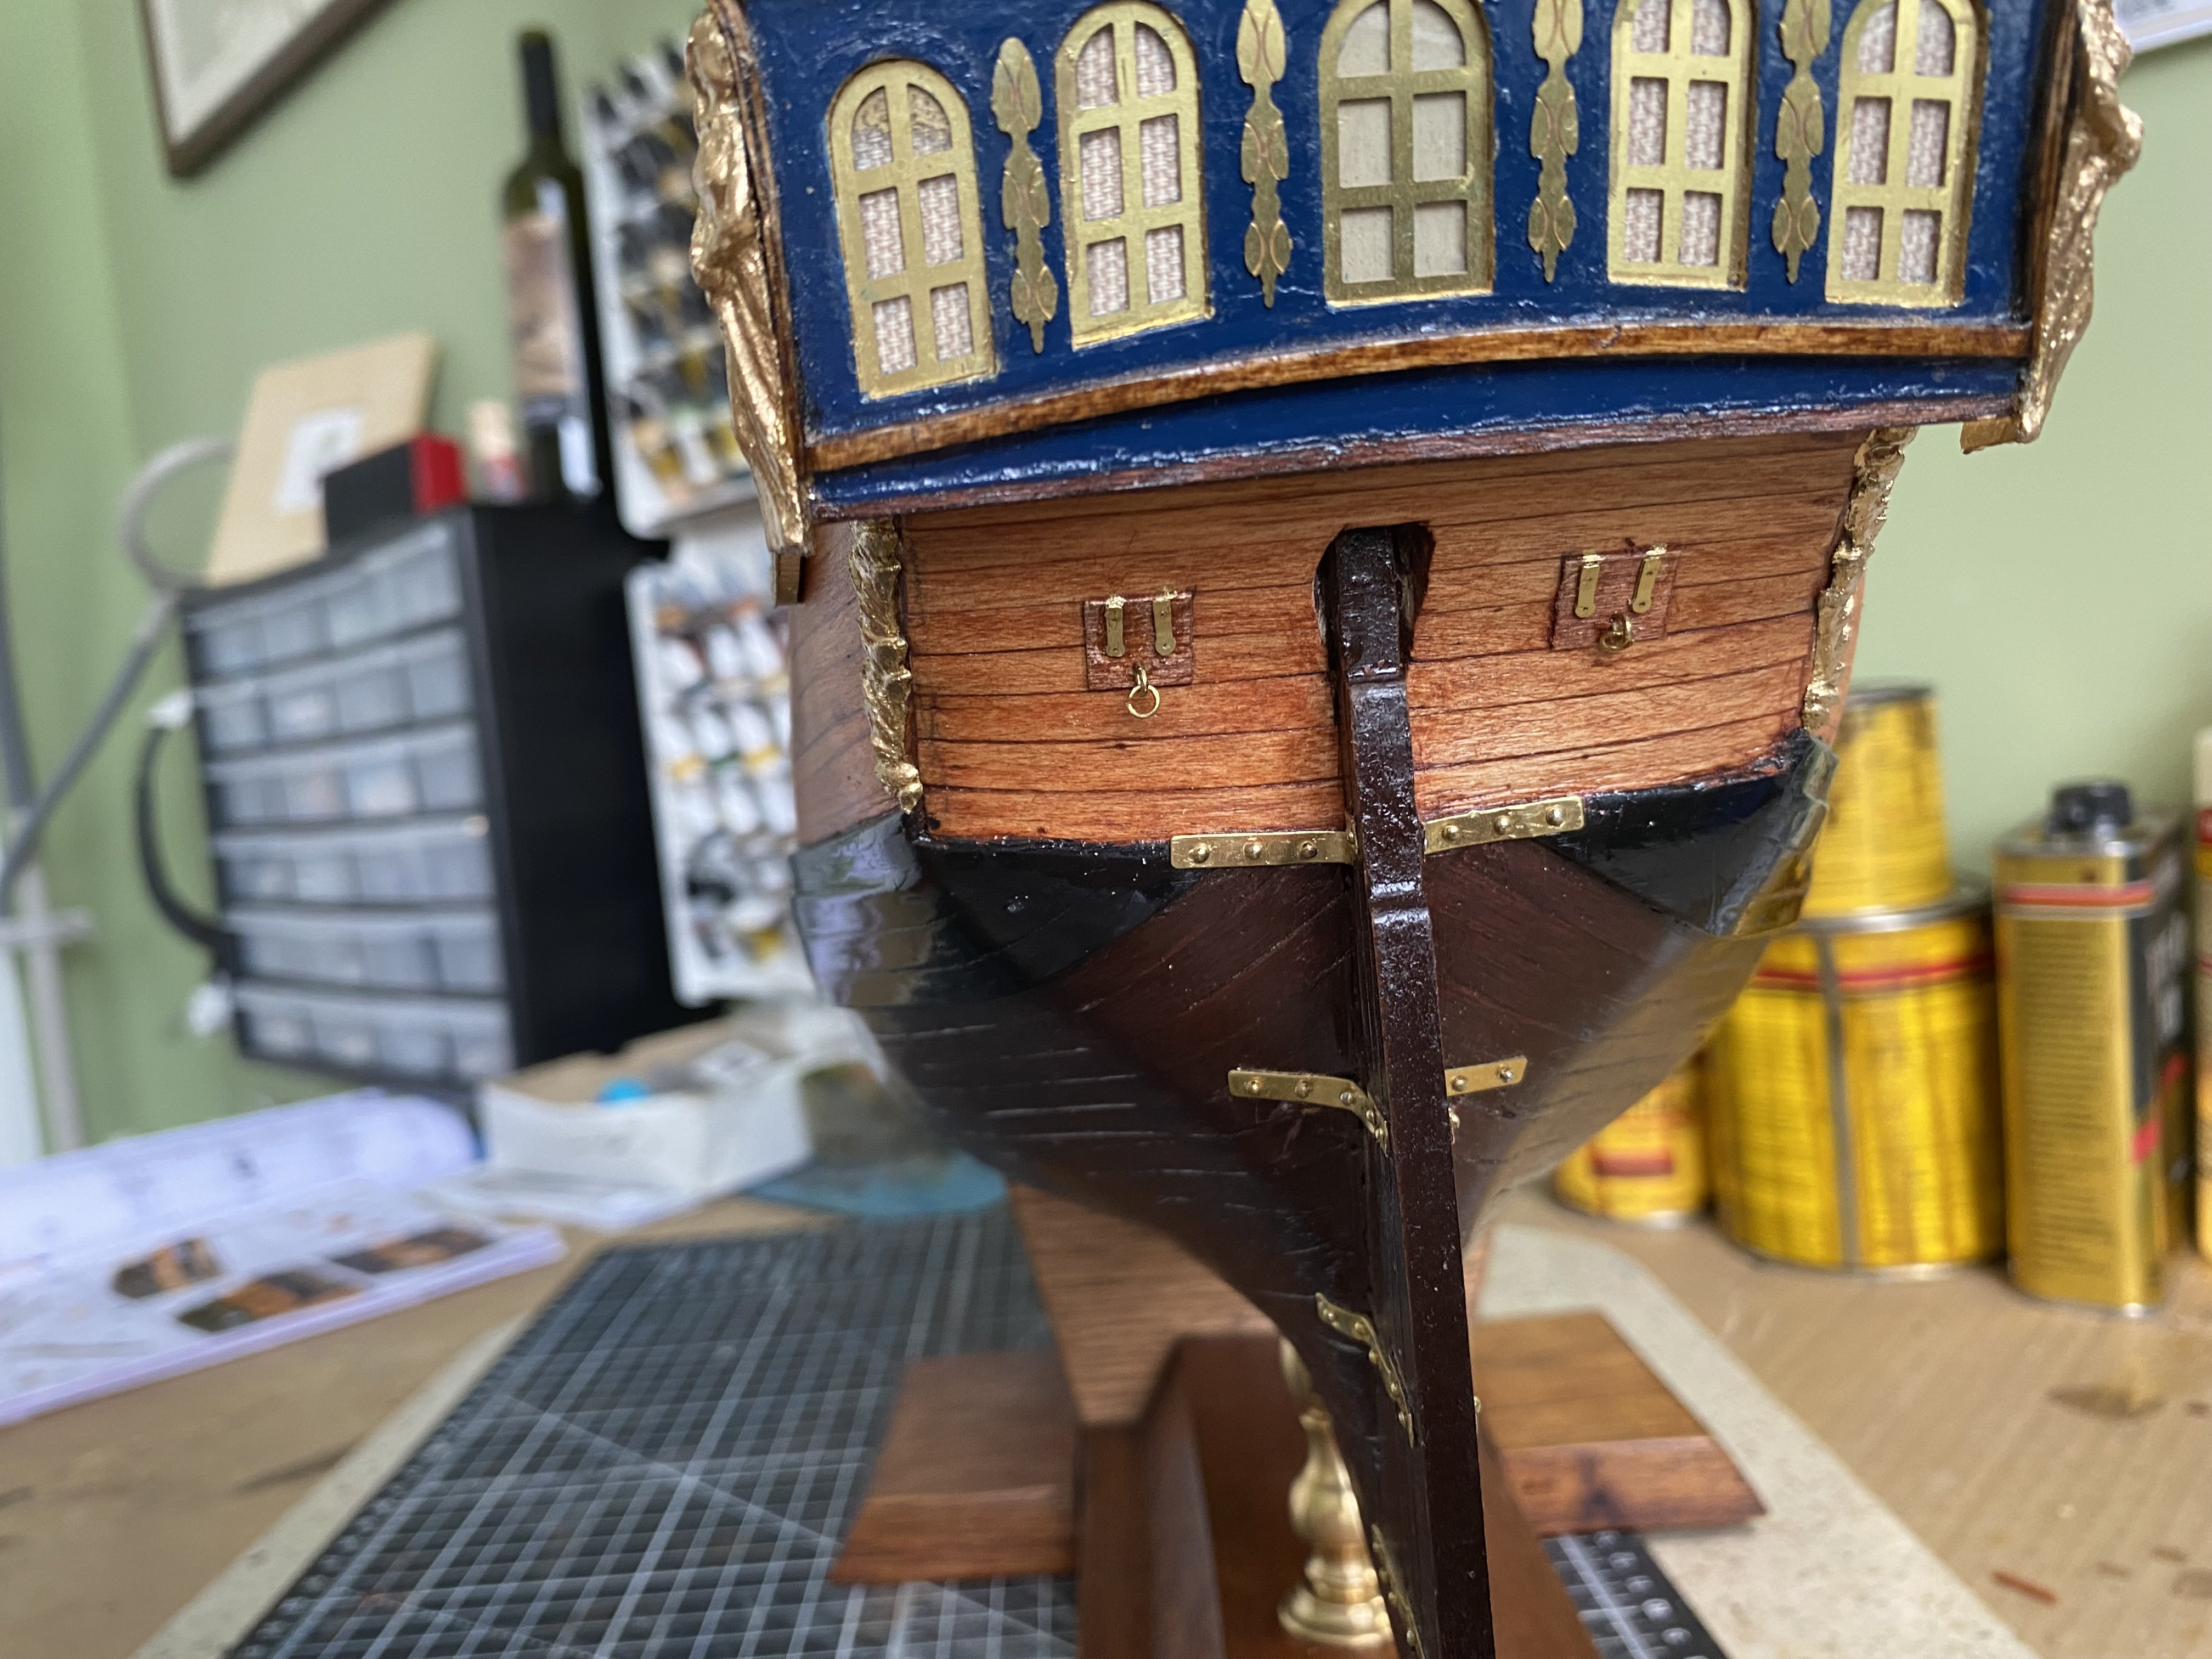
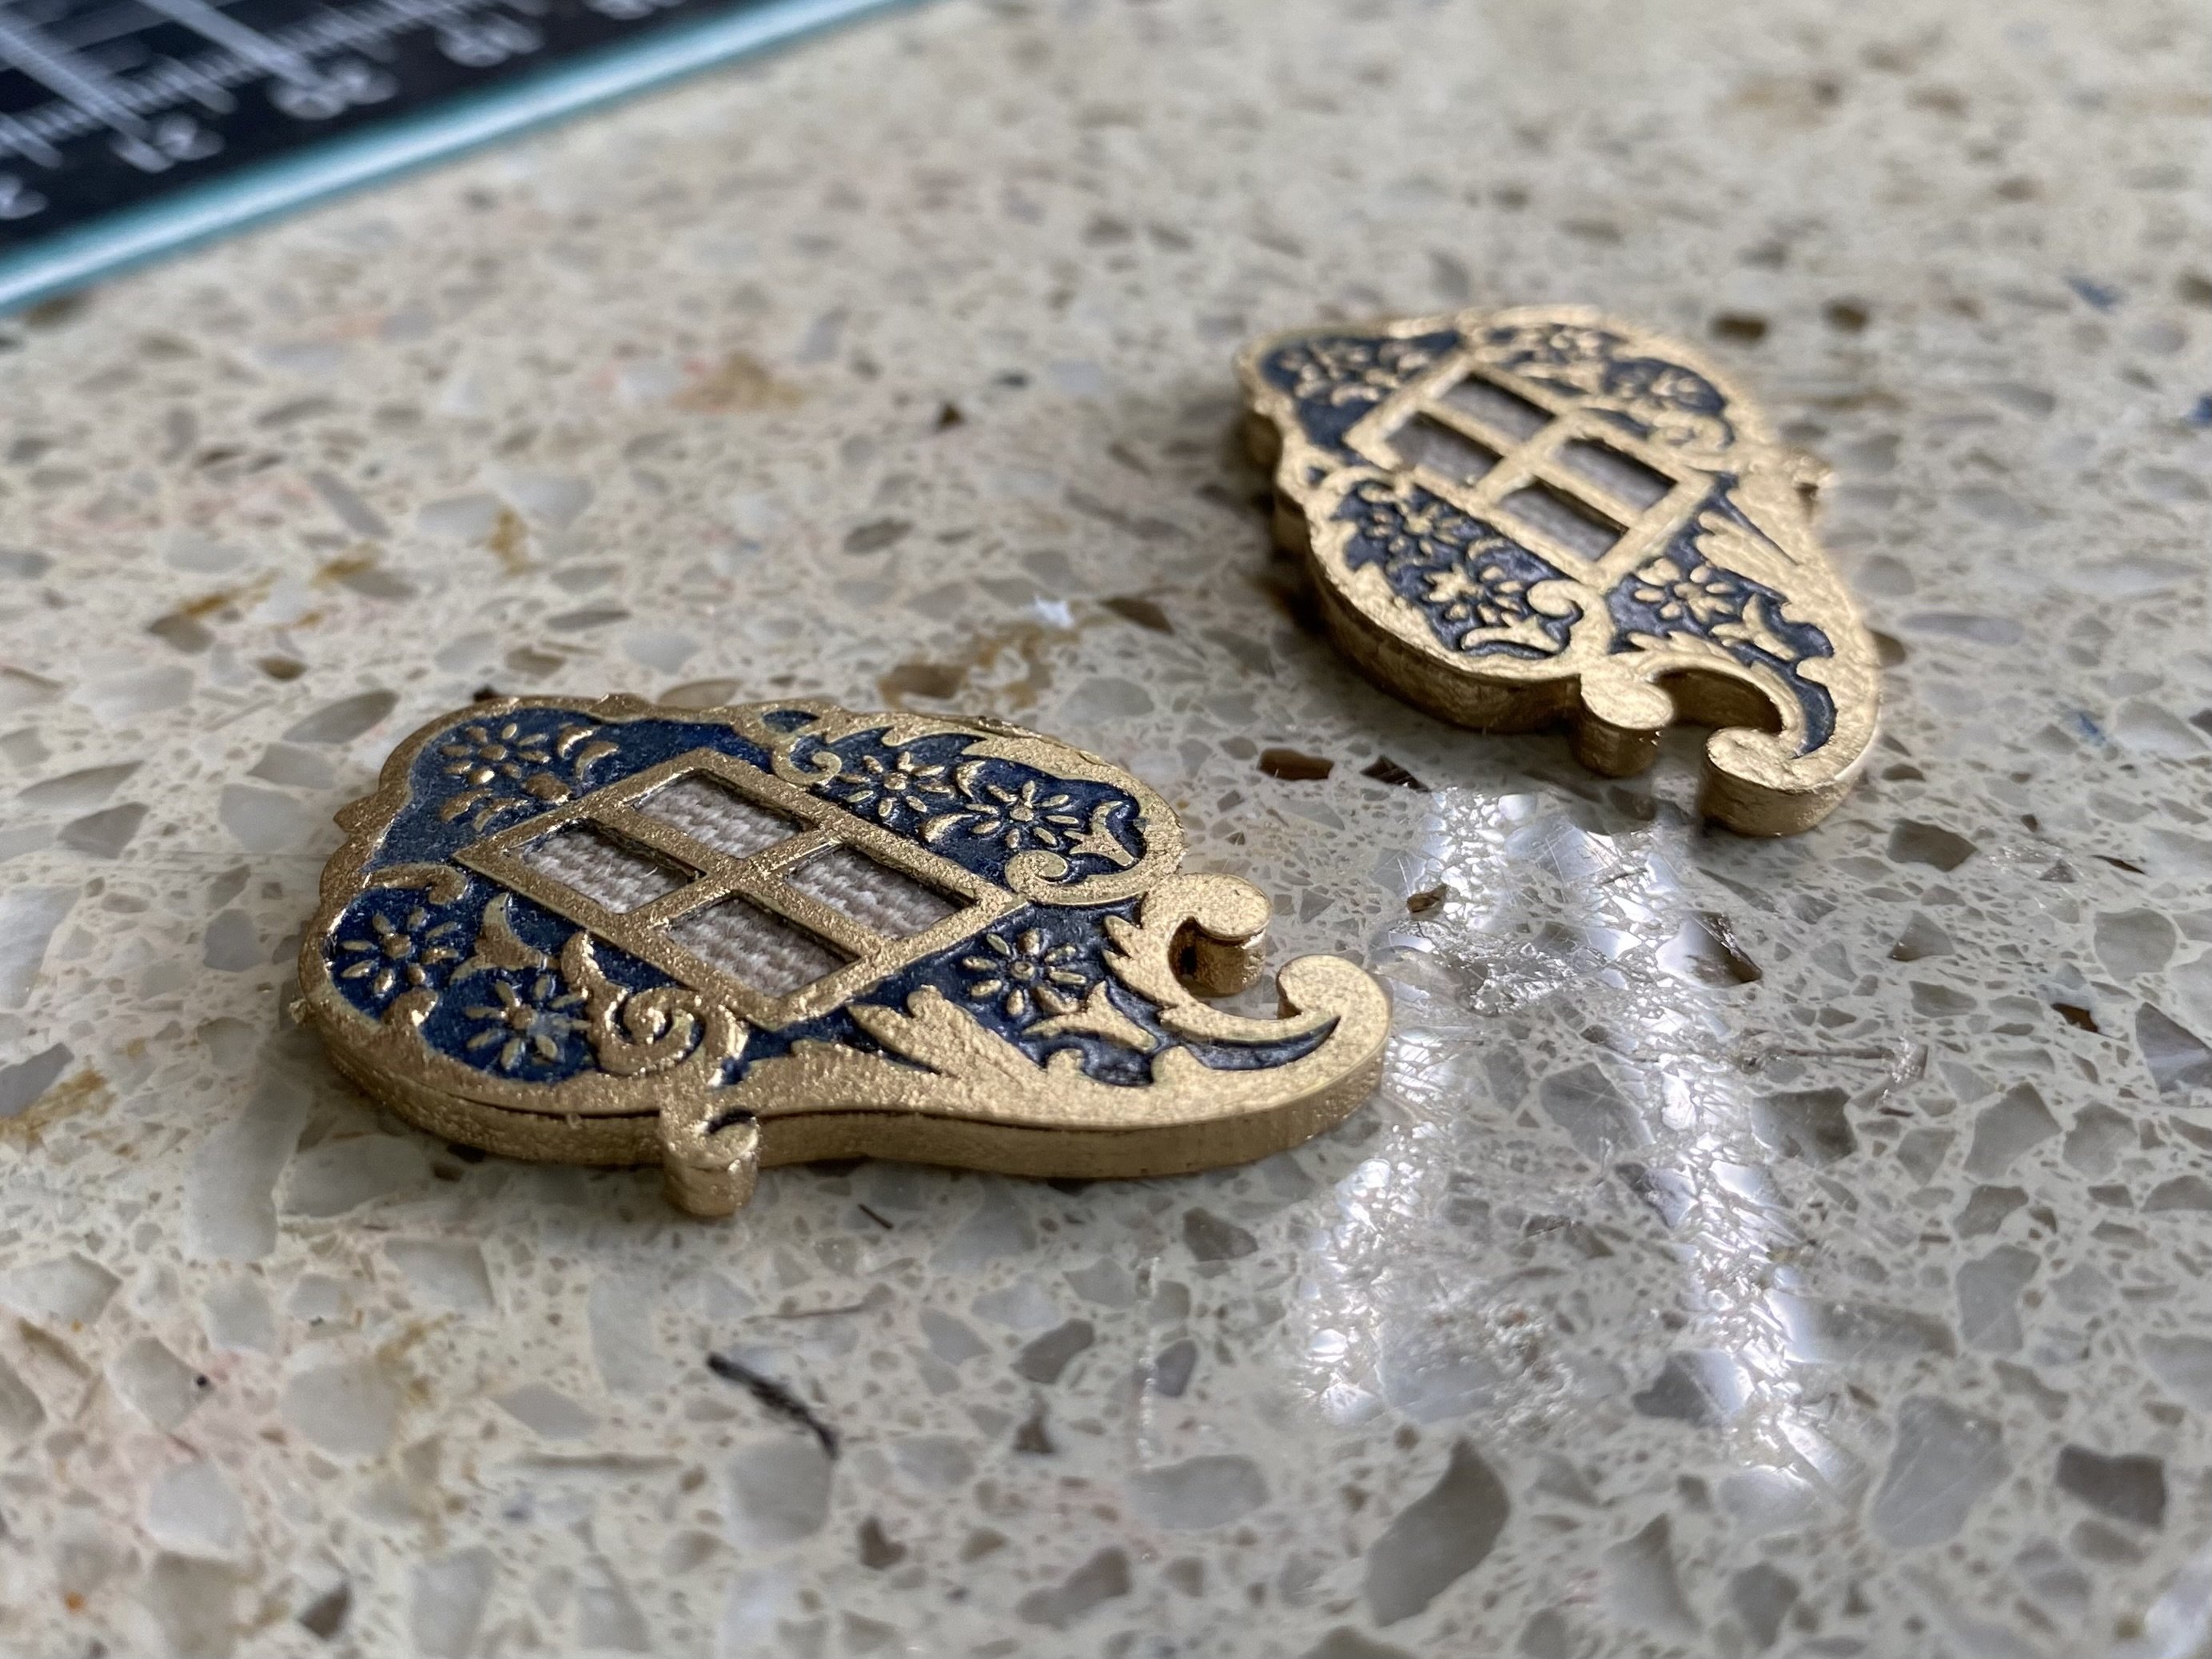
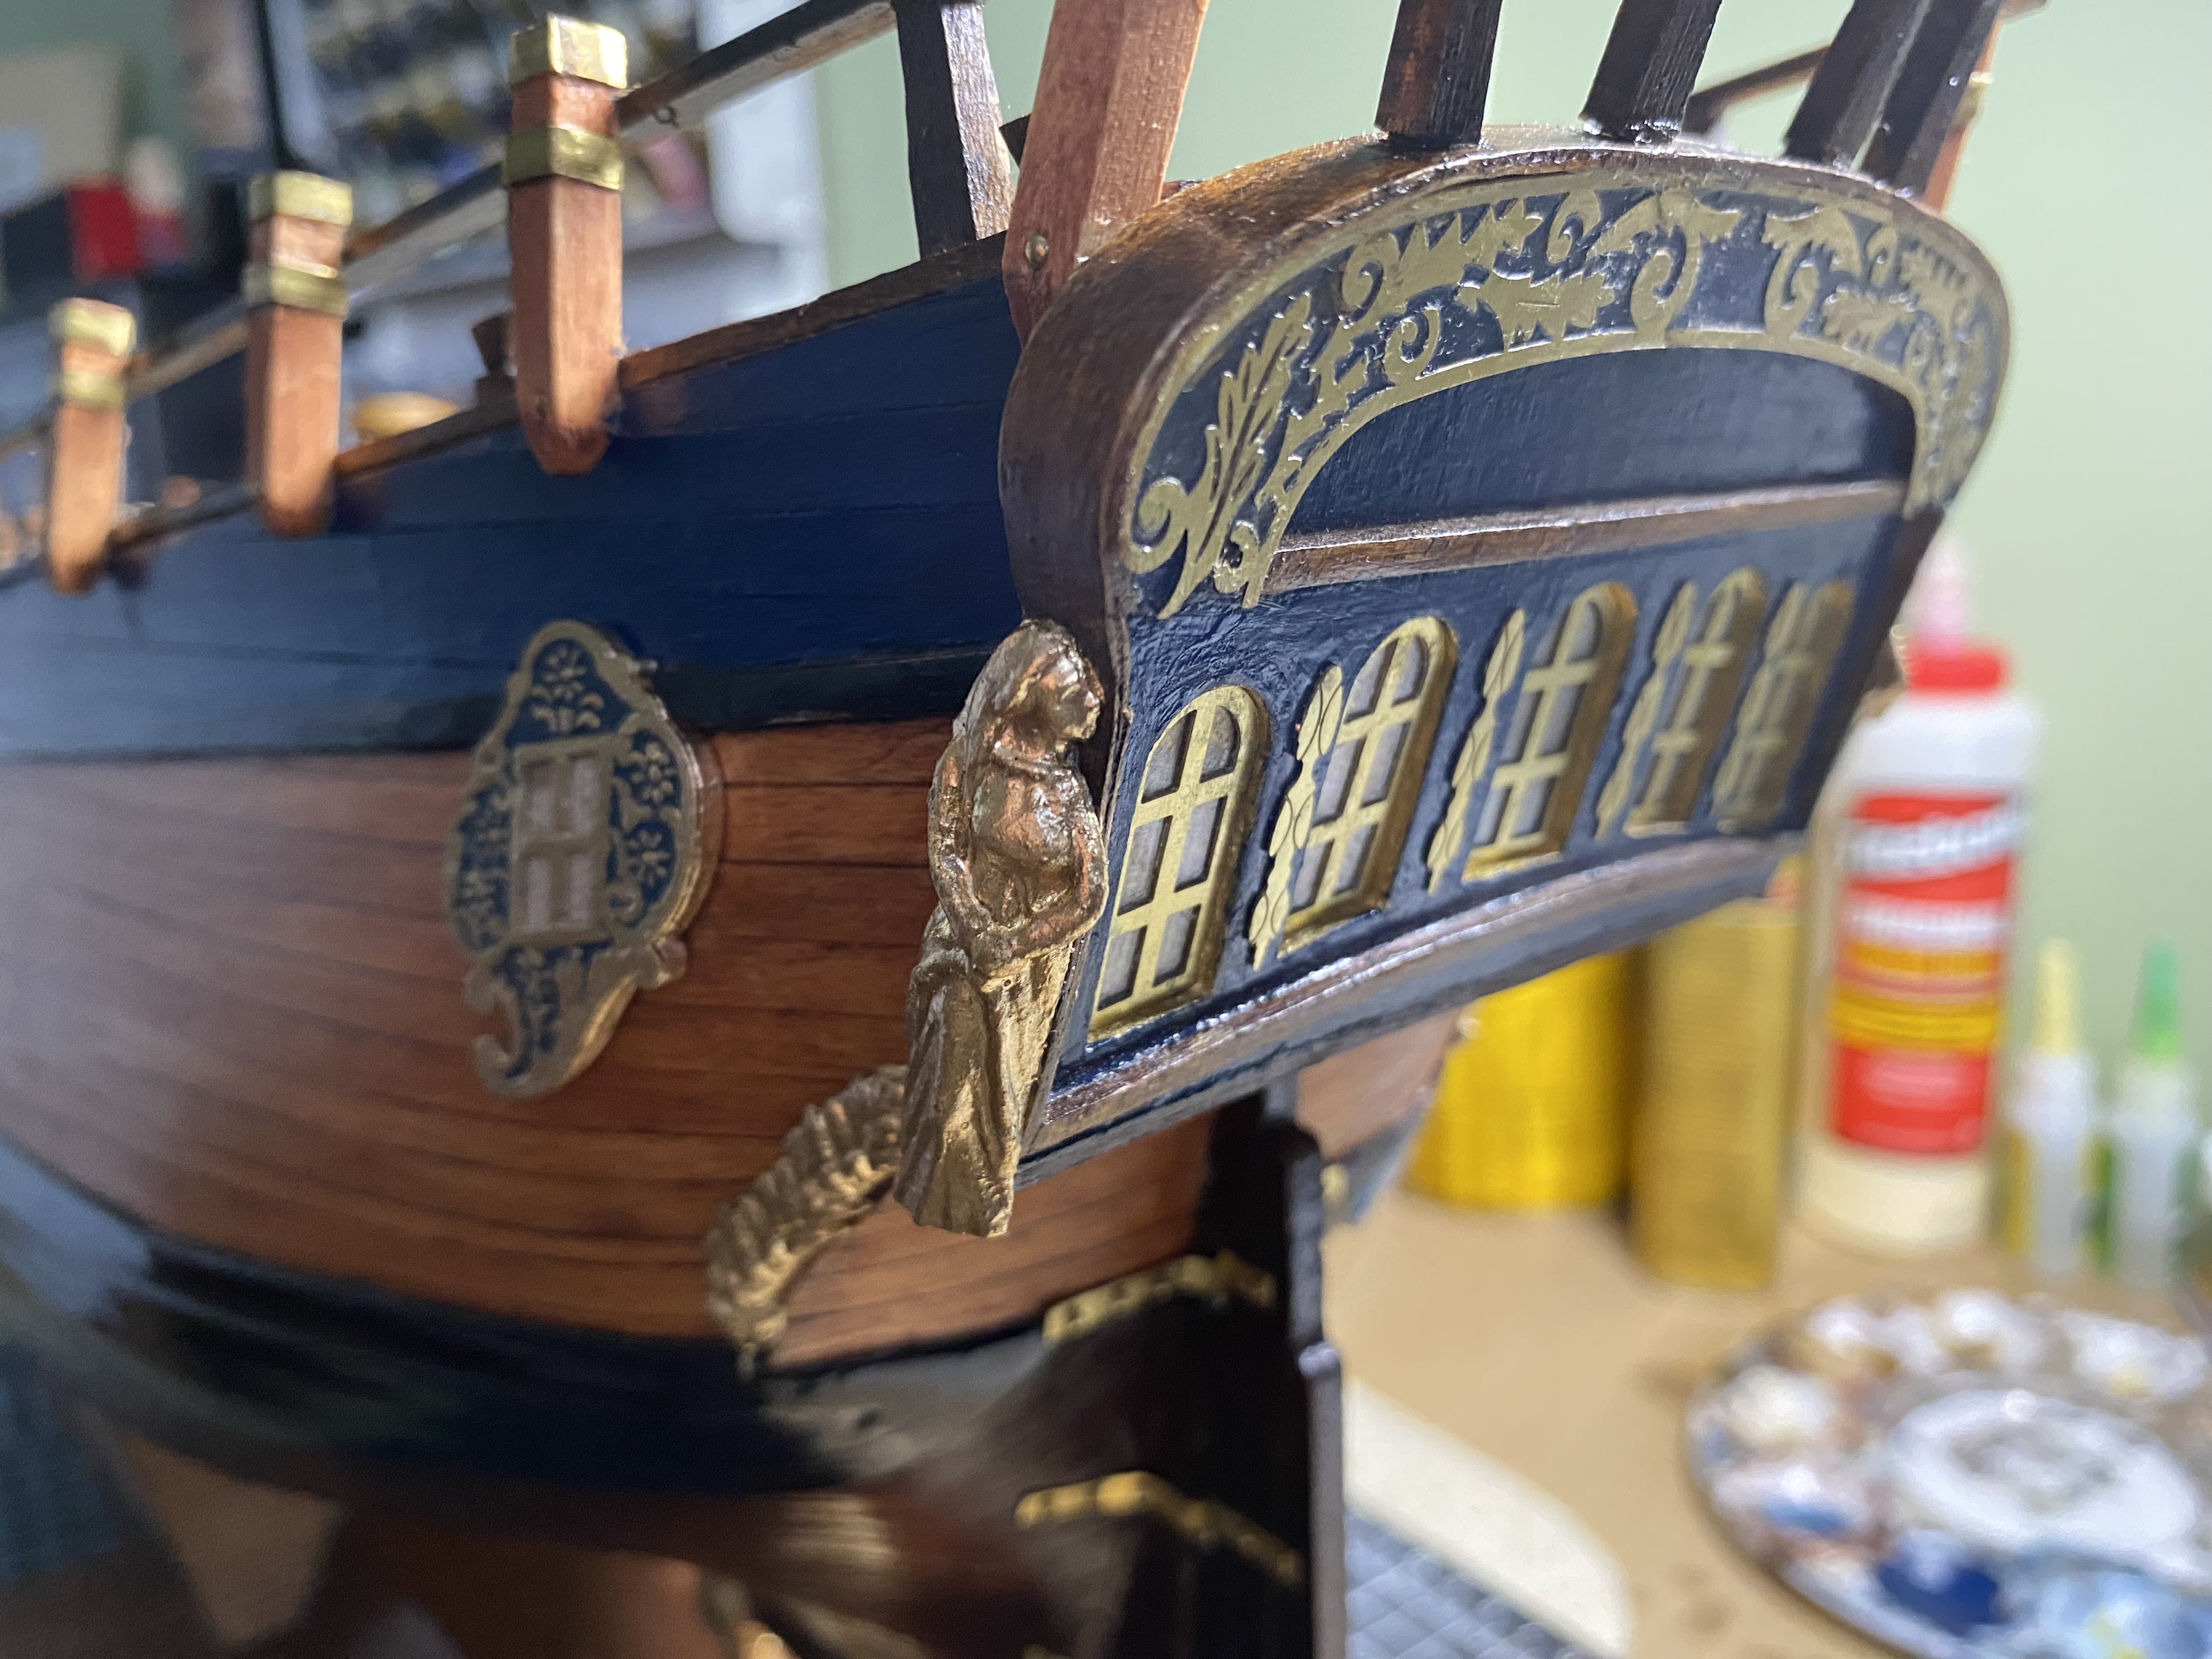
Added the side stern windows. The kit came with metal windows with the pane part filled in with metal. I wanted to duplicate the way I did the stern plate windows with a plastic clear window pane backed up by the appearance of a window curtain. So I drilled and cut out the metal window pane. Then I painted the inside portion the same blue as the area of the bulwark. I then added clear plastic for the pane and a small piece of the same fabric as the stern windows. I then attached it to the matching wooden piece in the kit and then to the hull. Finally I fine tuned the black rubbing strake to match the edge of the window.


-
Beautiful job as always Marc! I will add this tutorial to my list. You and Daniel do a lot of the experimentation hat the rest of us can just wait to replicate. BTW. Excellent cuticles 😀! My nails and cuticles look like I have been working in a coal mine and the wife is quick to remind me when attention is warranted 😊.
- 2,699 replies
-
- 2
-

-

-
- heller
- soleil royal
- (and 9 more)
-
Kevin congratulates on your pending retirement. That’s great news. After my retirement (2010. Can’t believe it has been 14 years) is when I had the free time to get back into modeling. I admit I probably spend too much in my ship yard now. Have to force myself to get other things done first each day. Will be excited to see someday what you guys do with wood or mixed media.
- 2,699 replies
-
- 2
-
-
- heller
- soleil royal
- (and 9 more)
-
Marc I built the Airfix Wasa (find it here on MSW). I decided after that I wanted to work at the larger scale. My eyes and fingers just can’t work as well at that small scale. I have the Airfix Golden Hinde in my stash but may help a grandson build that. When the day comes that you transition to wood I think you will really enjoy it. I know I have building my OcCre Endeavour. For now let us all enjoy watching you build this beauty at your fingertips.
- 2,699 replies
-
- 3
-
-
-
- heller
- soleil royal
- (and 9 more)
-
Marc some day in the future when you have completed this beautiful hull of the ship and are ready to move up to the masts, yards, etc, do you think you may have a bitter sweet sadness that this part is finished? As I mentioned before this build has been a big part of your life. Or, are you looking forward to that part of the build just as much? I have no doubt you already have tons of research material that will make that part of the ship just as breathtaking.
- 2,699 replies
-
- 3
-
-
- heller
- soleil royal
- (and 9 more)
-
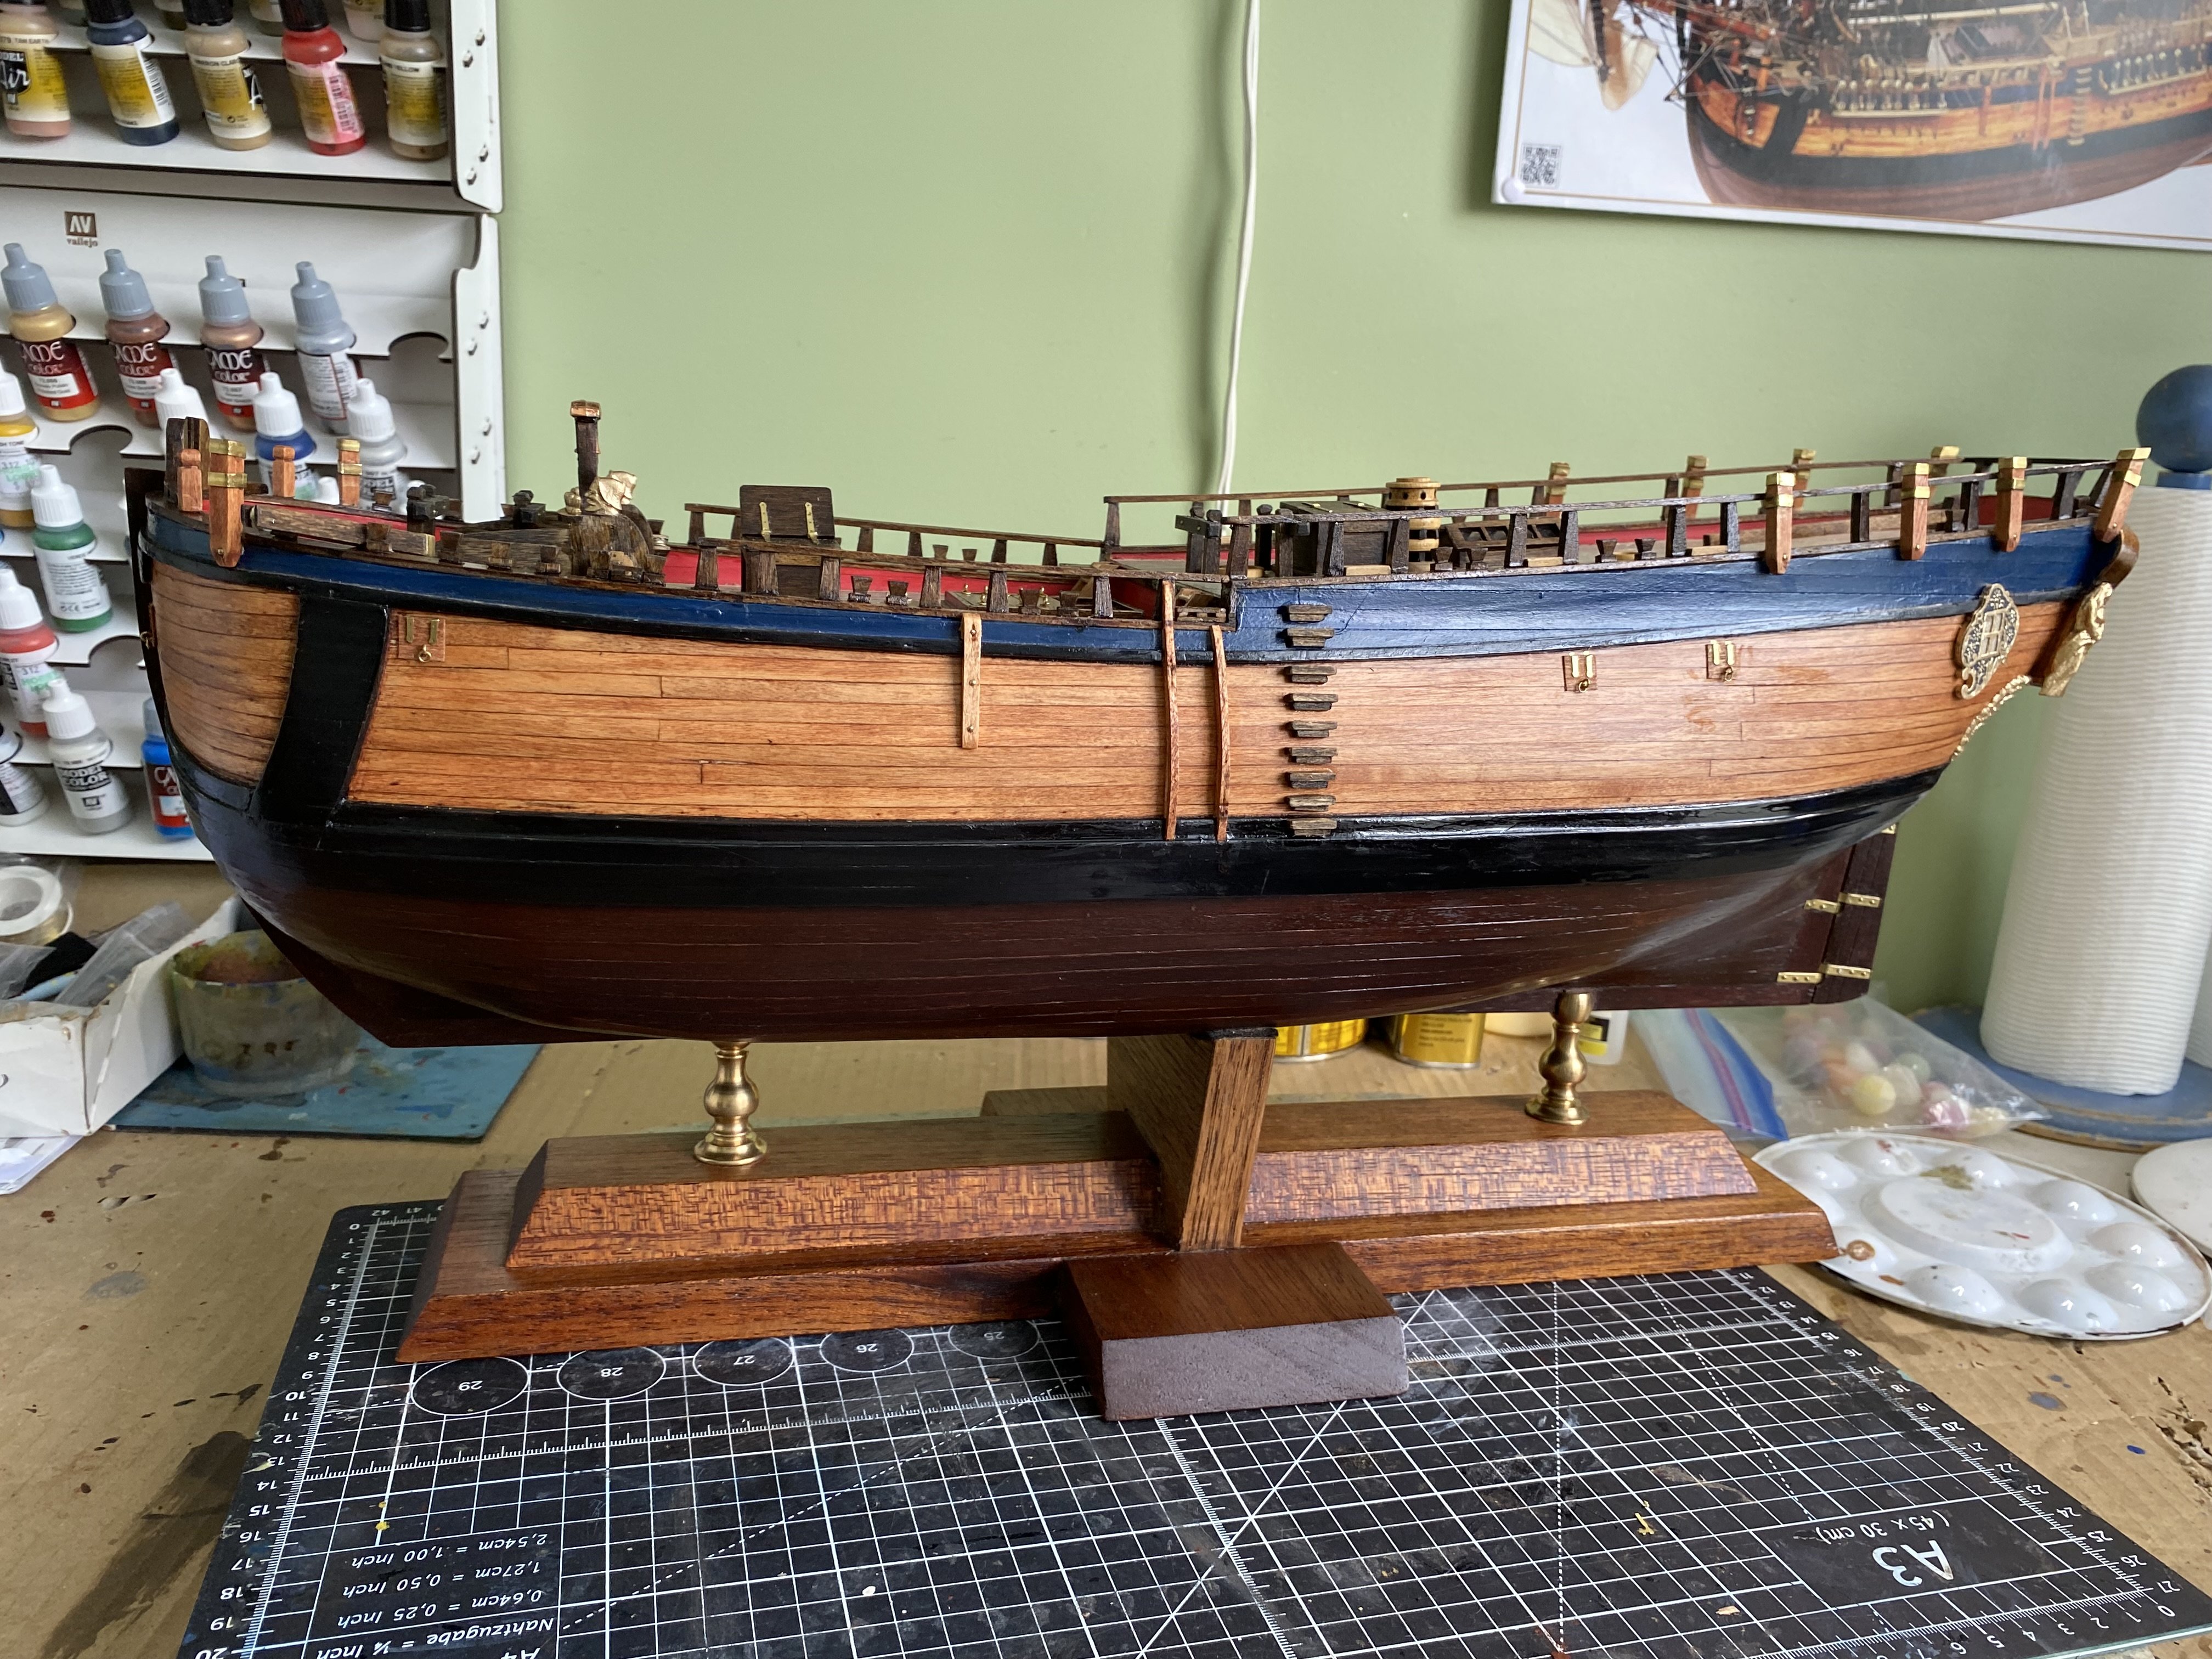
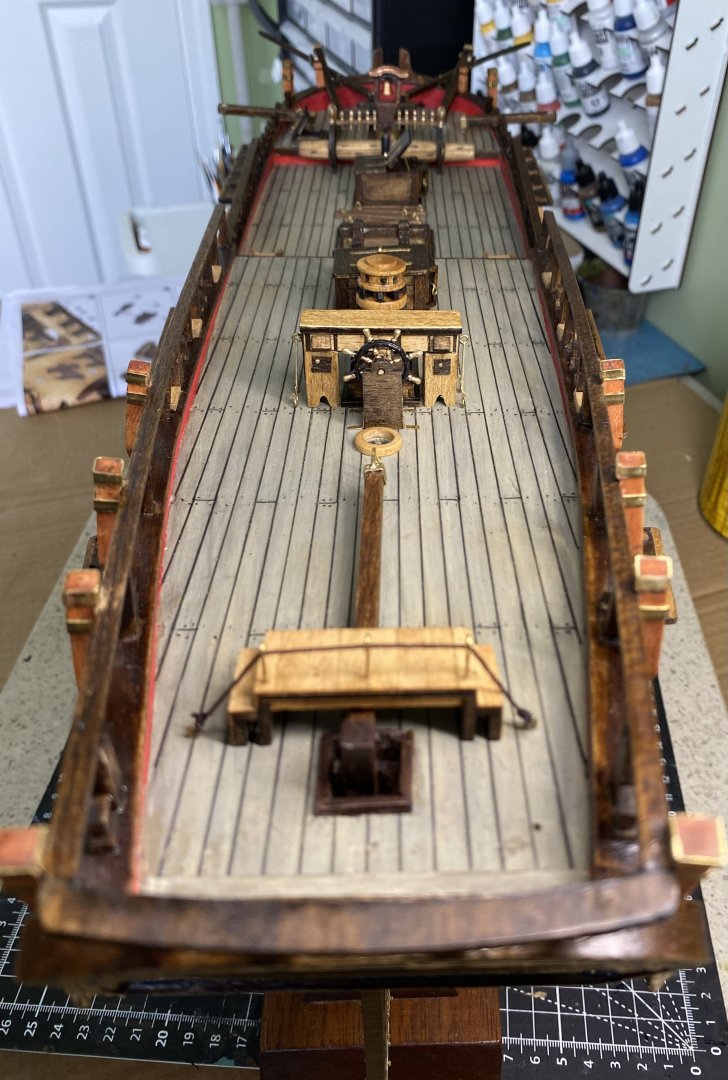
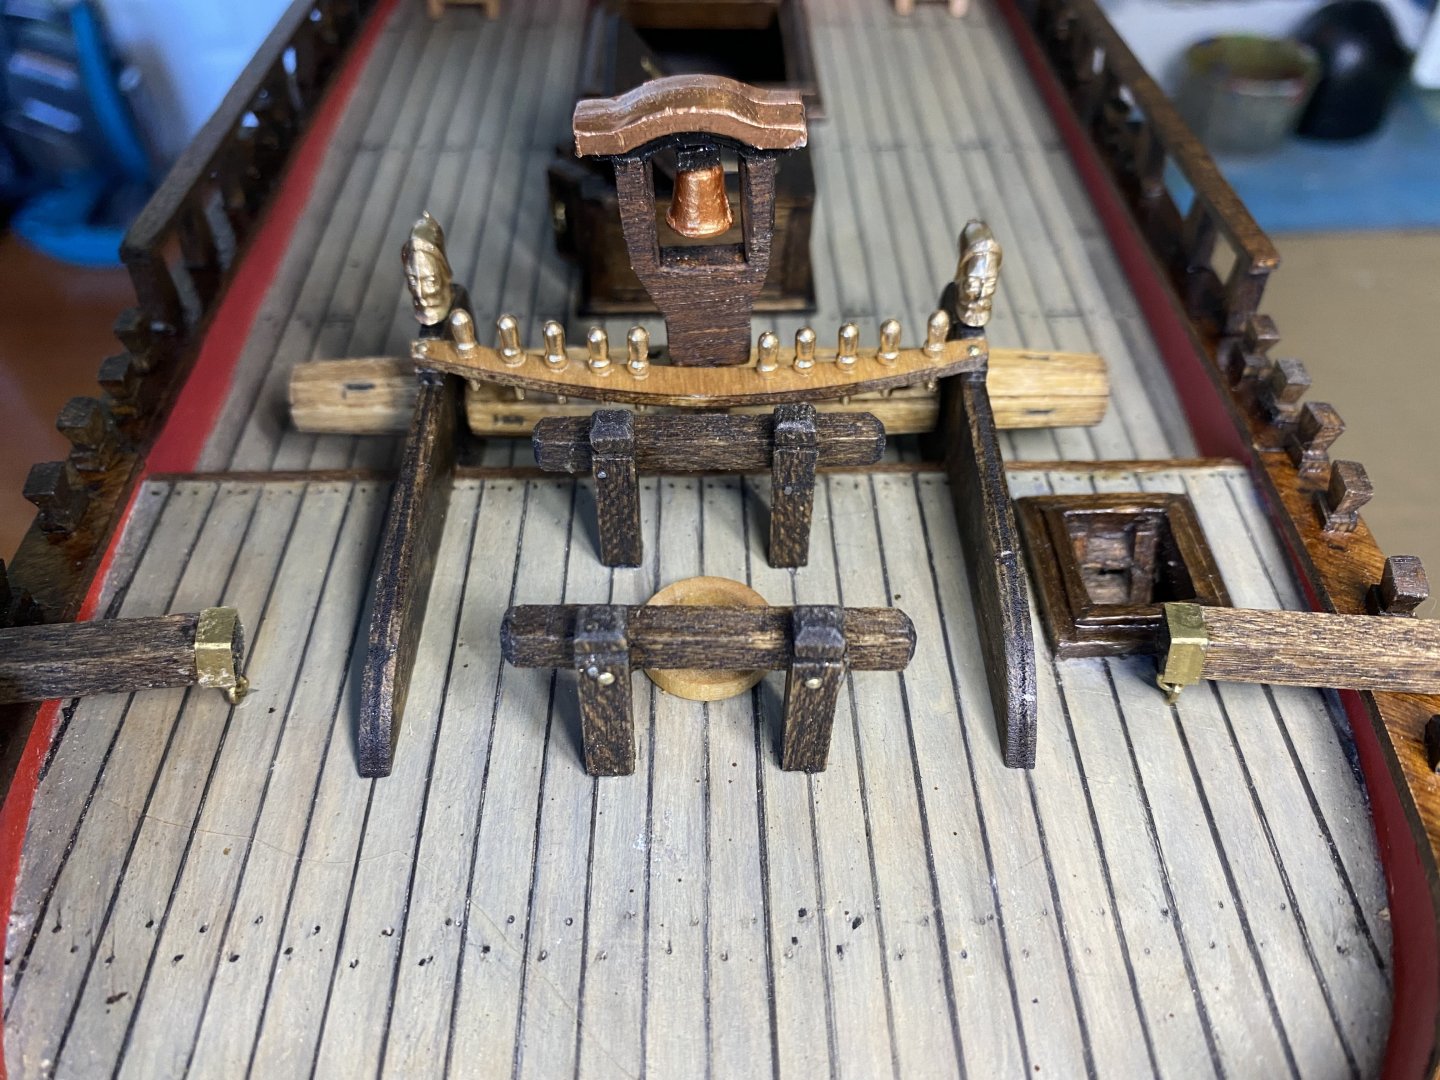
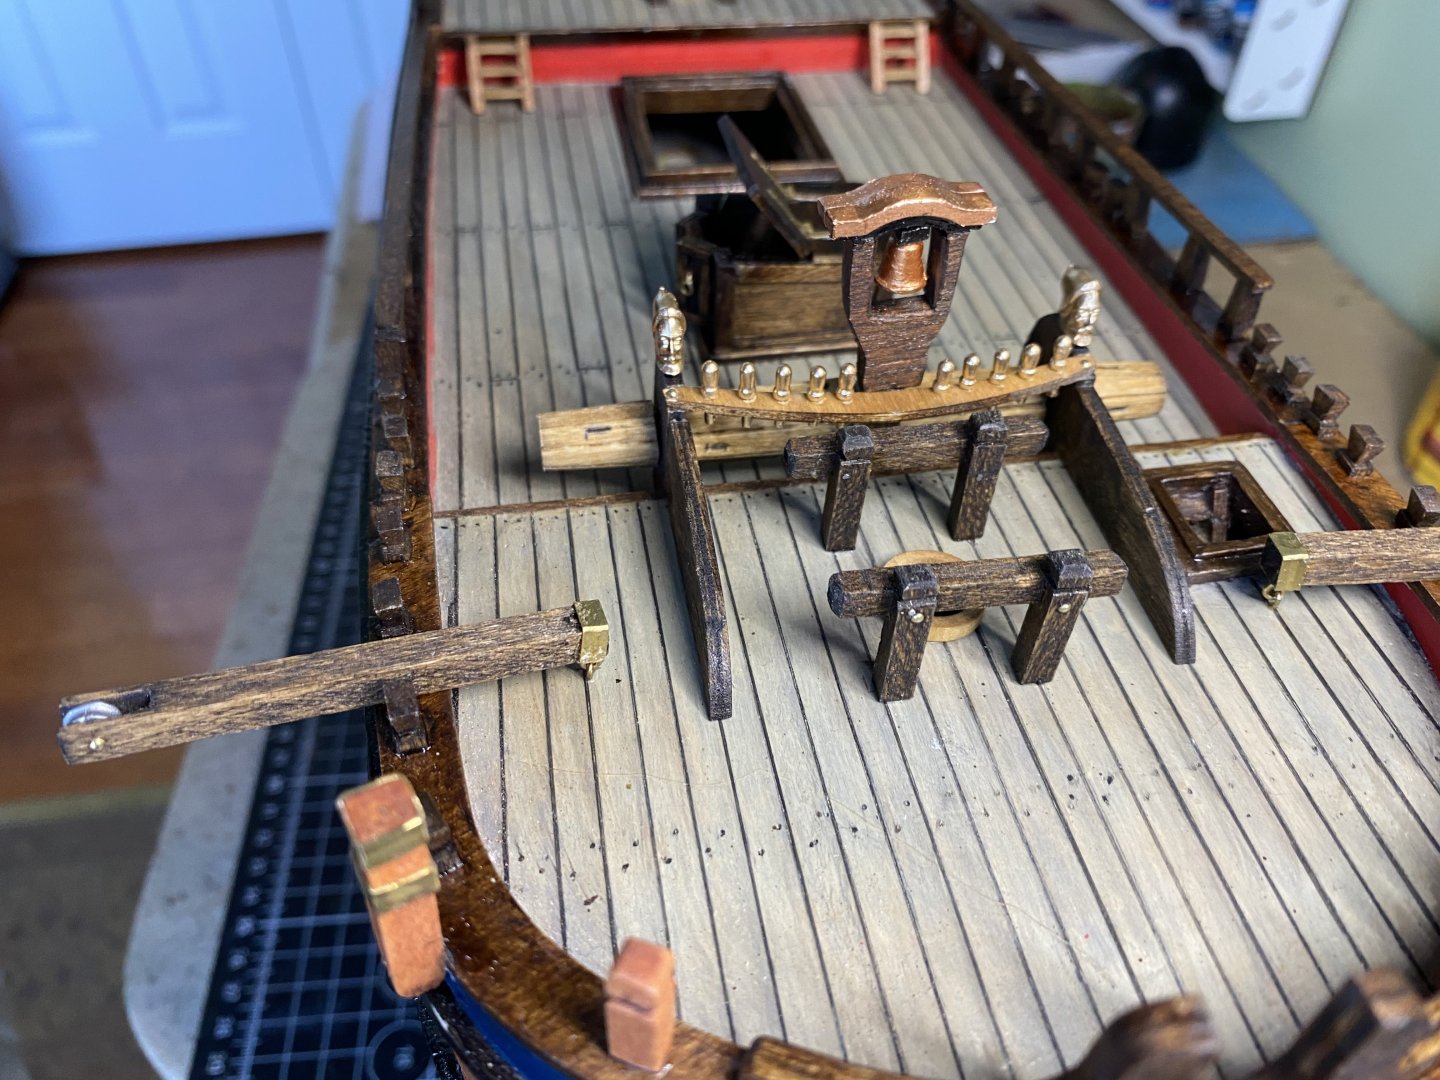
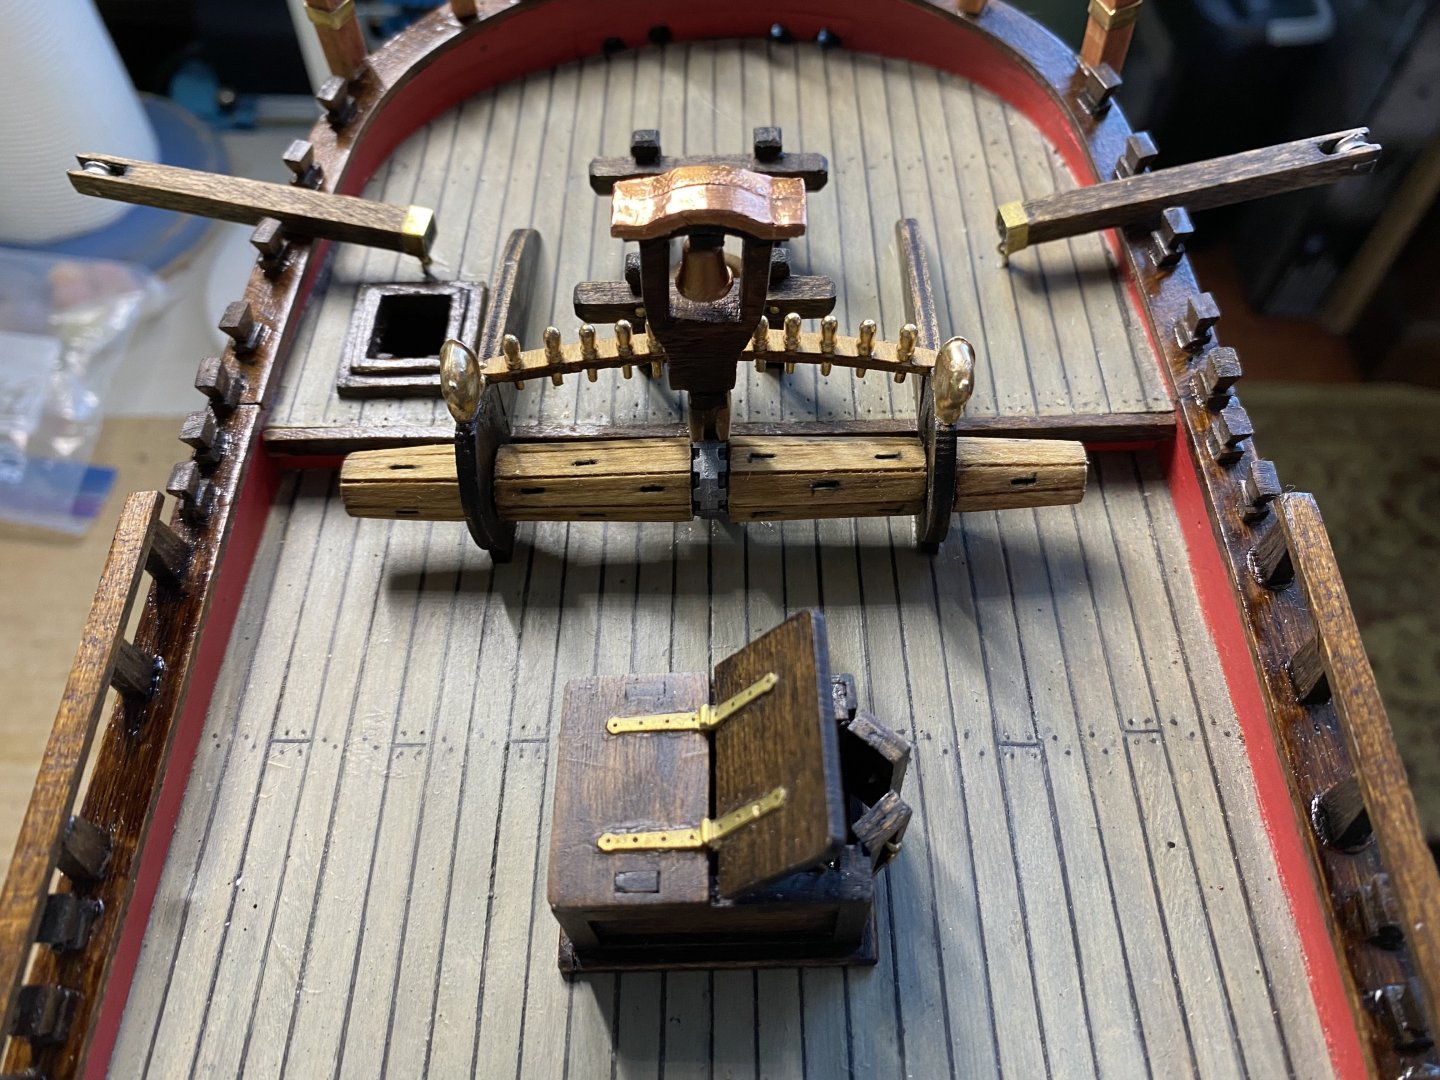
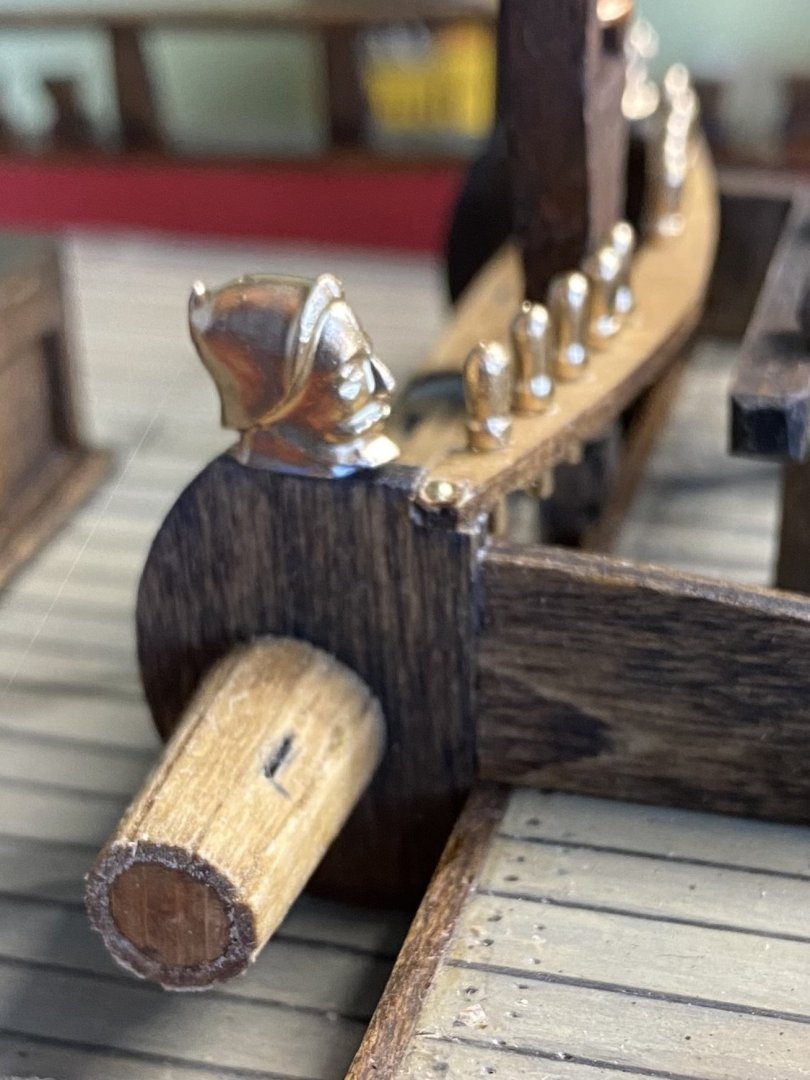
Davits, windless, and belaying pin rail added. Also a couple figure heads on top of windless. Coming along beautifully I think.
-
Some may think me crazy but rigging is probably my favorite part of building these ships. Initially, years ago, I was more interested in building the actual ship and found the rigging tedious. While building the HMS Victory I received so much guidance and help from all you guys reference the rigging, plus read numerous recommended books on the subject. I began to understand the fascinating engineering that went into each rigging line. Prior to that I just put the different threads where the instructions directed. Looking back at some of my older models I see numerous rigging mistakes. Although sometimes very tedious, like tying ratlines, I really enjoy how rigging the model brings it to life. ,
- 2,699 replies
-
- 6
-
-
- heller
- soleil royal
- (and 9 more)