Bill97
-
Posts
2,729 -
Joined
-
Last visited
Content Type
Profiles
Forums
Gallery
Events
Everything posted by Bill97
-
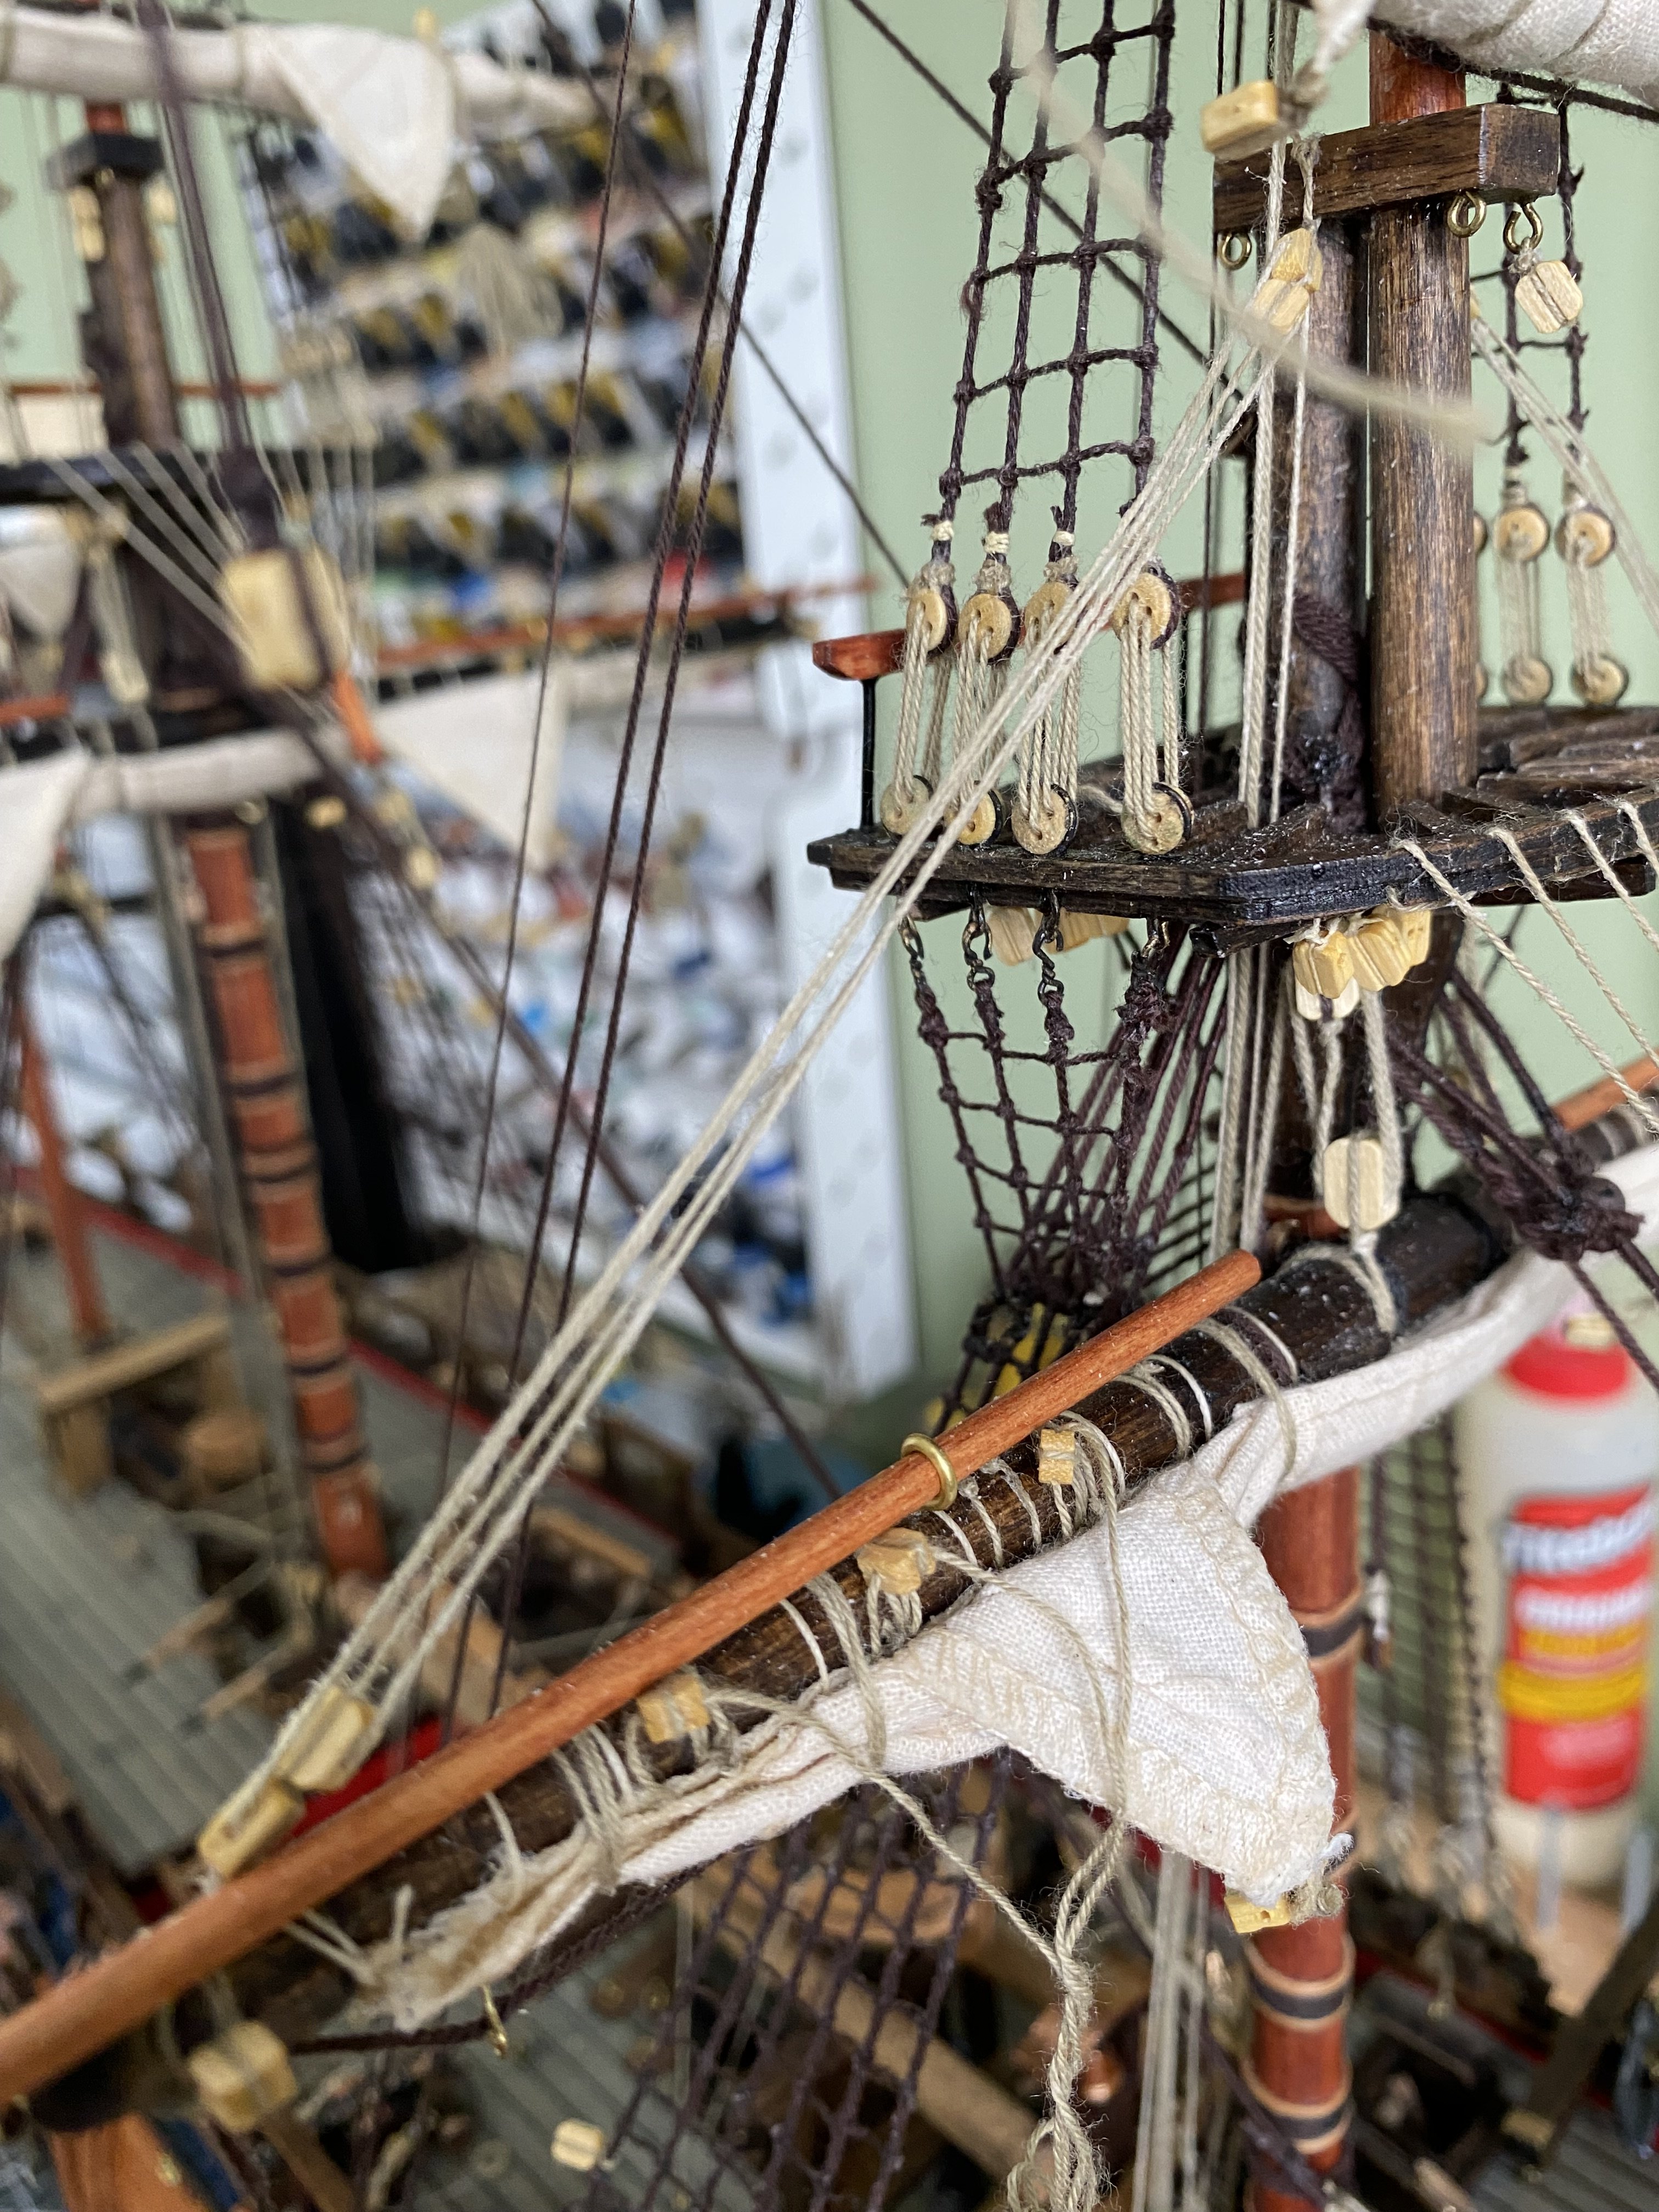
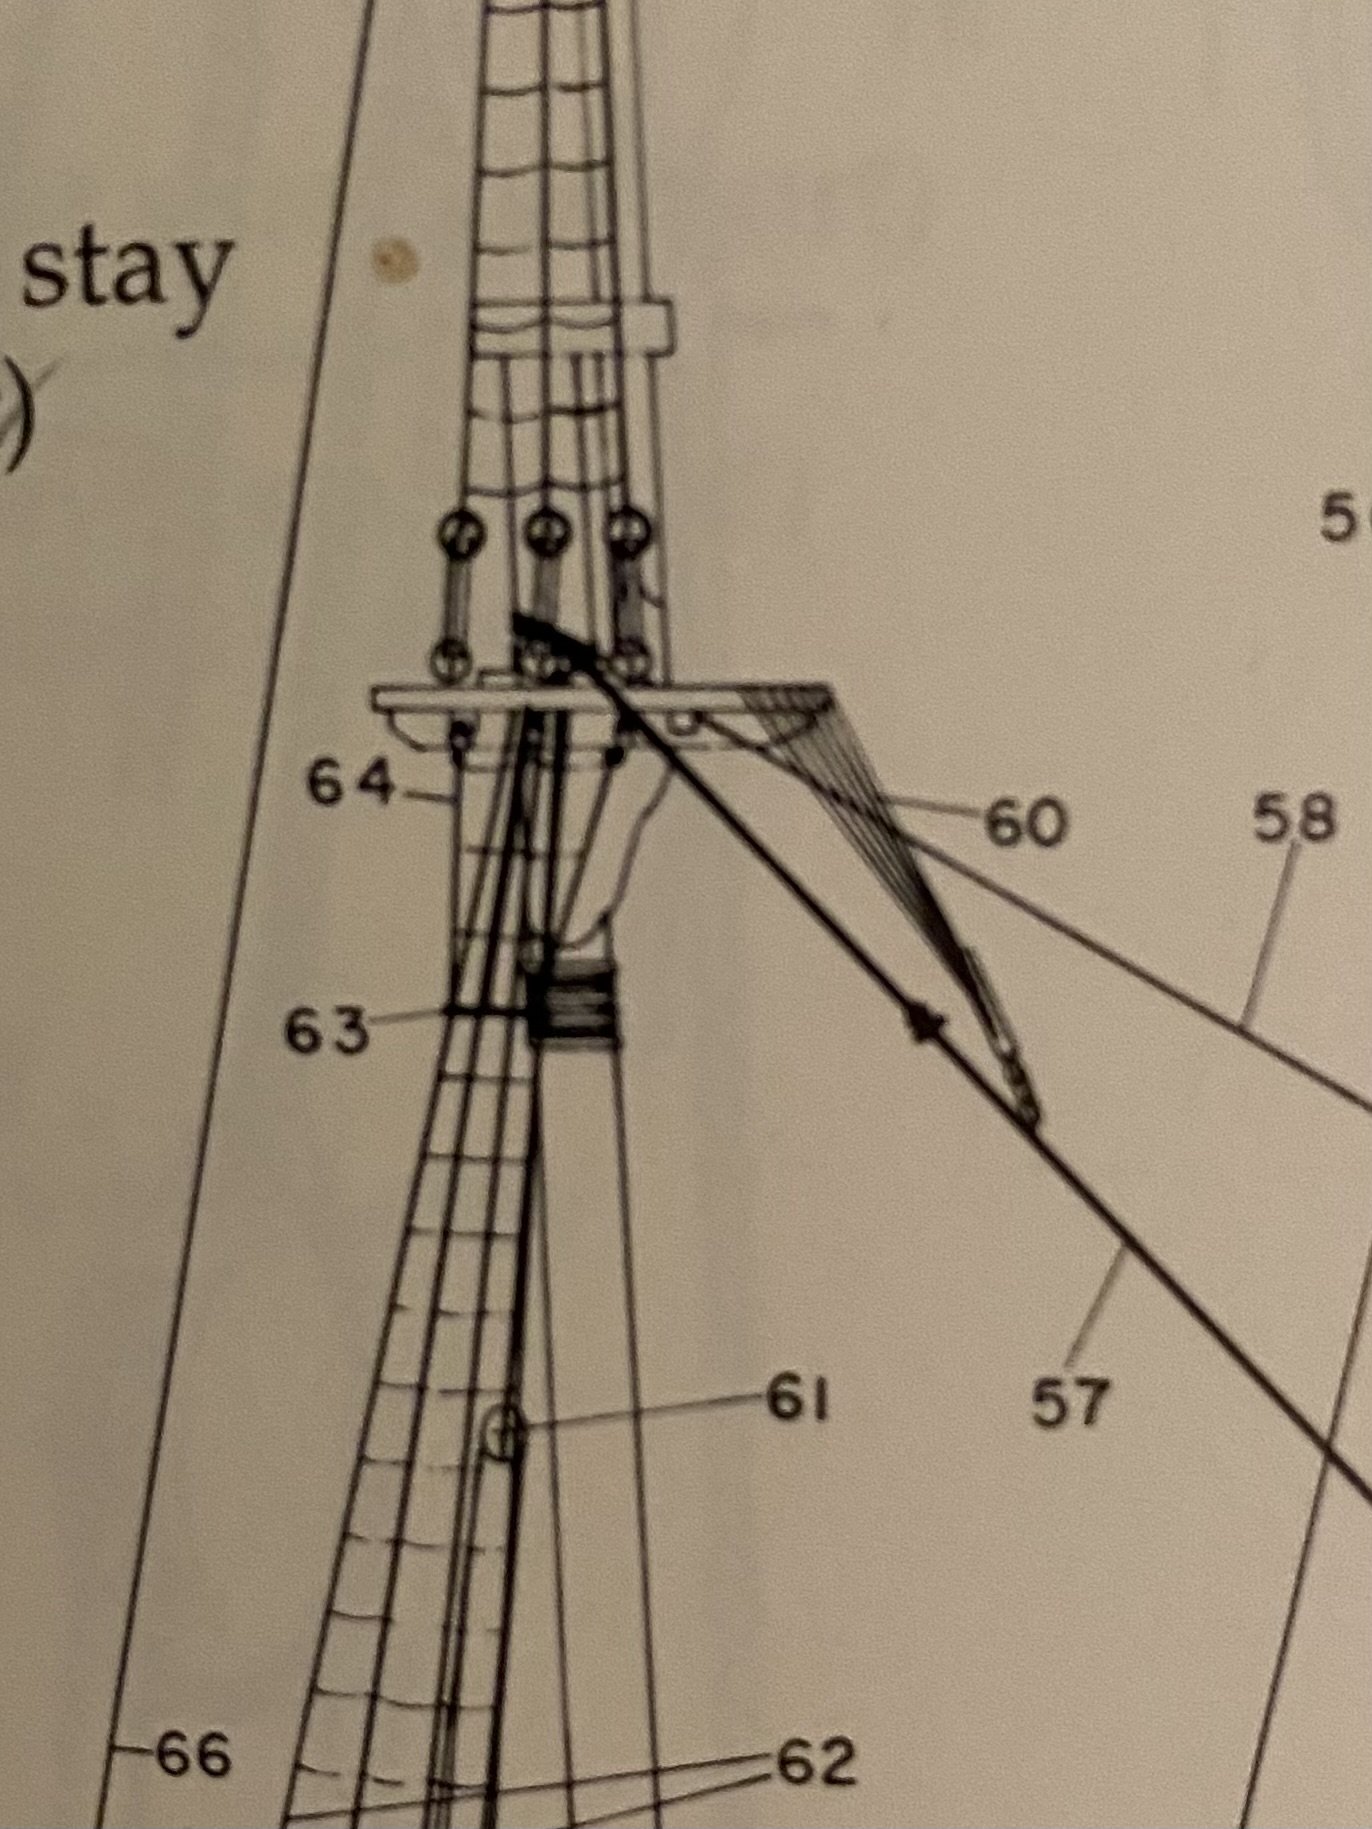
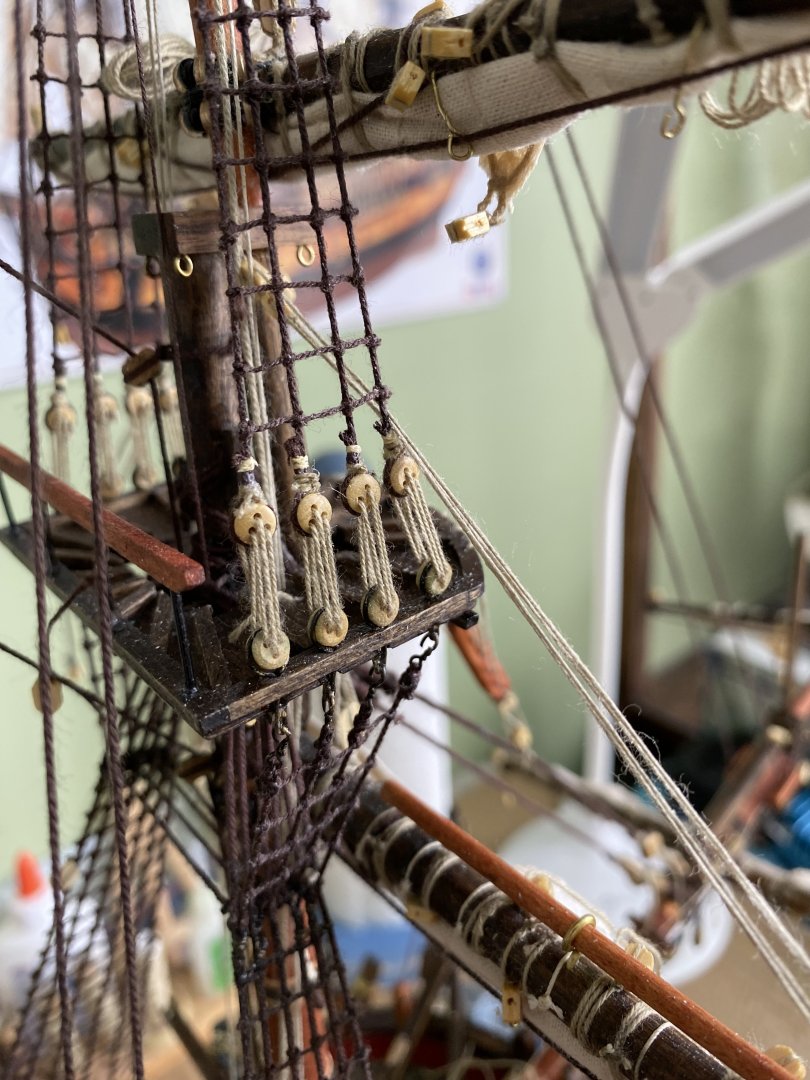
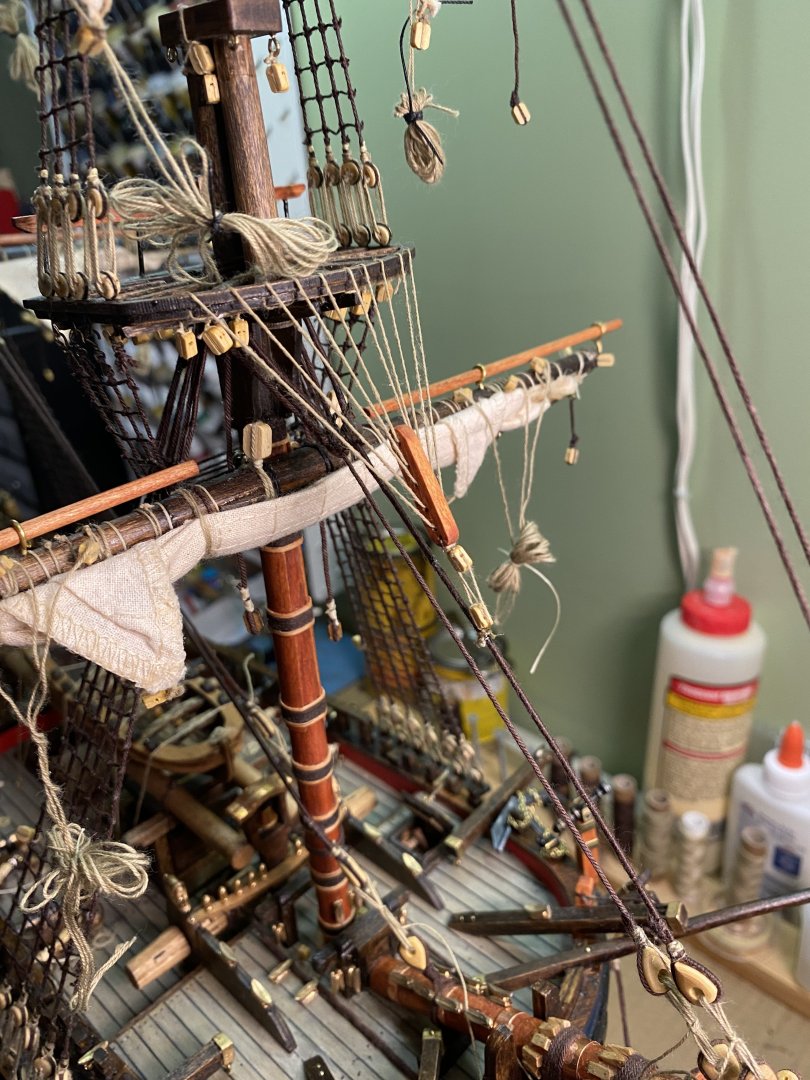
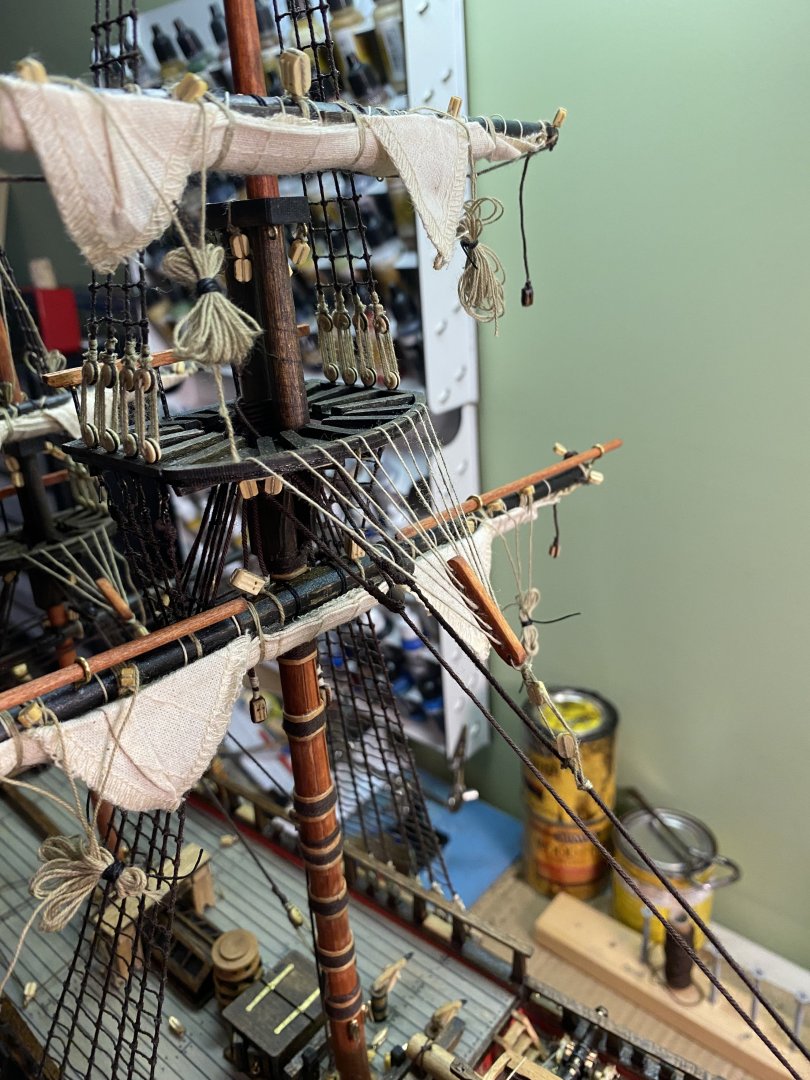
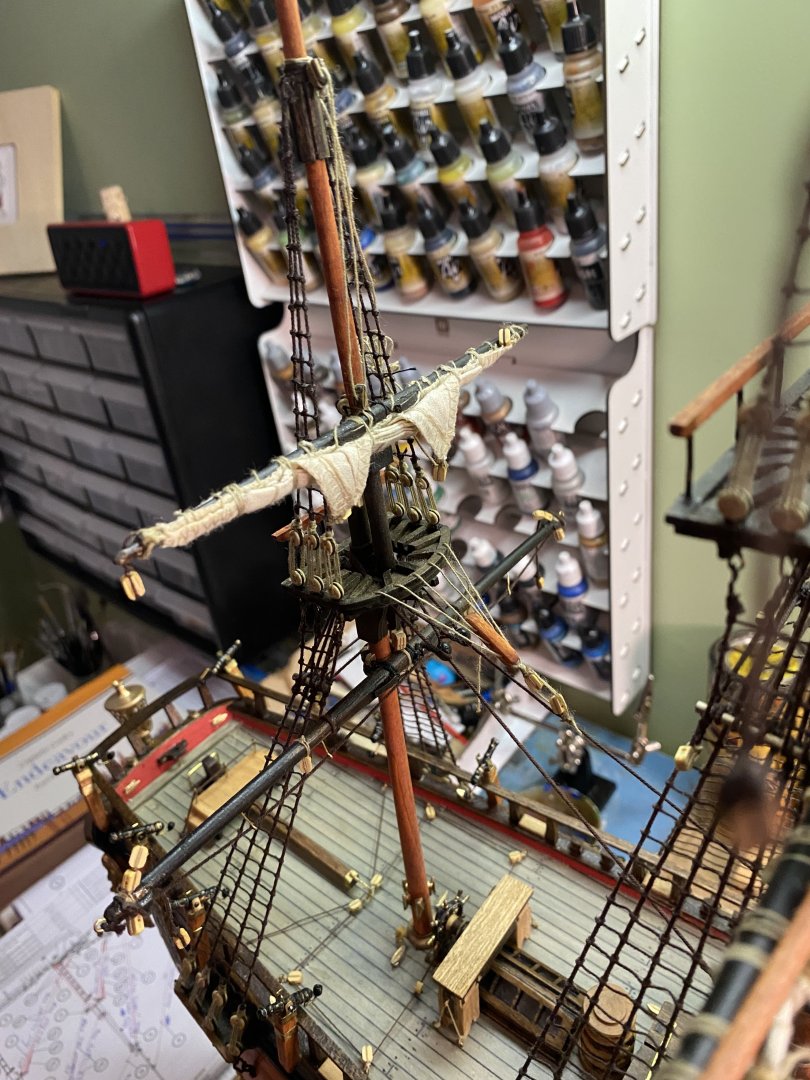
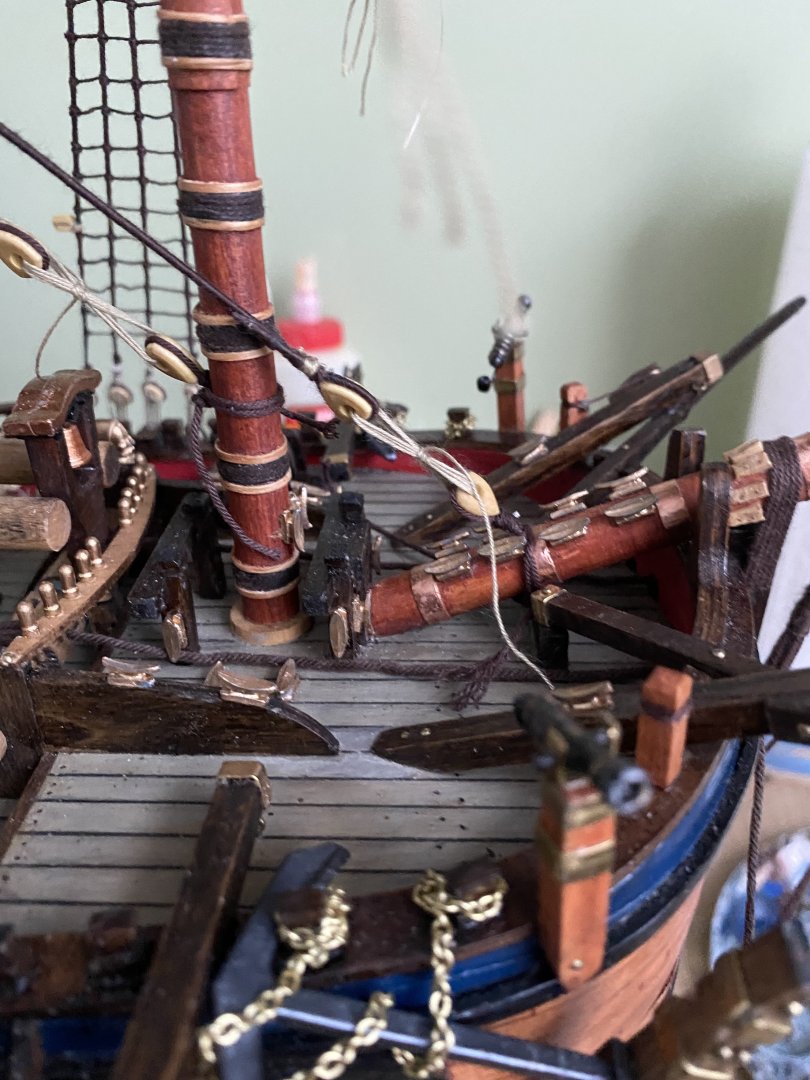
Yes Ian that is from the Endeavour AOTS. In this method would the cross jack yard not be raised or lowered by a line through a block and down to the deck? A second new question for you Ian. I have added the lifts to the fore yard. A block arrangement is at each end of the yard and a matching pair tied to the cap. When I run the lift it brushes against the first upper shroud. Expect that should not happen. A similar situation happens at the topsail yard but here I could run the lift through the cross tree. Lines are not permanently tied yet so corrections are certainly possible. Your thoughts? I could maybe move the block arrangement tied to the mast top forward but that would require using an eyebolt. Eyeballing the mainmast and can tell I will have the same issue.

-
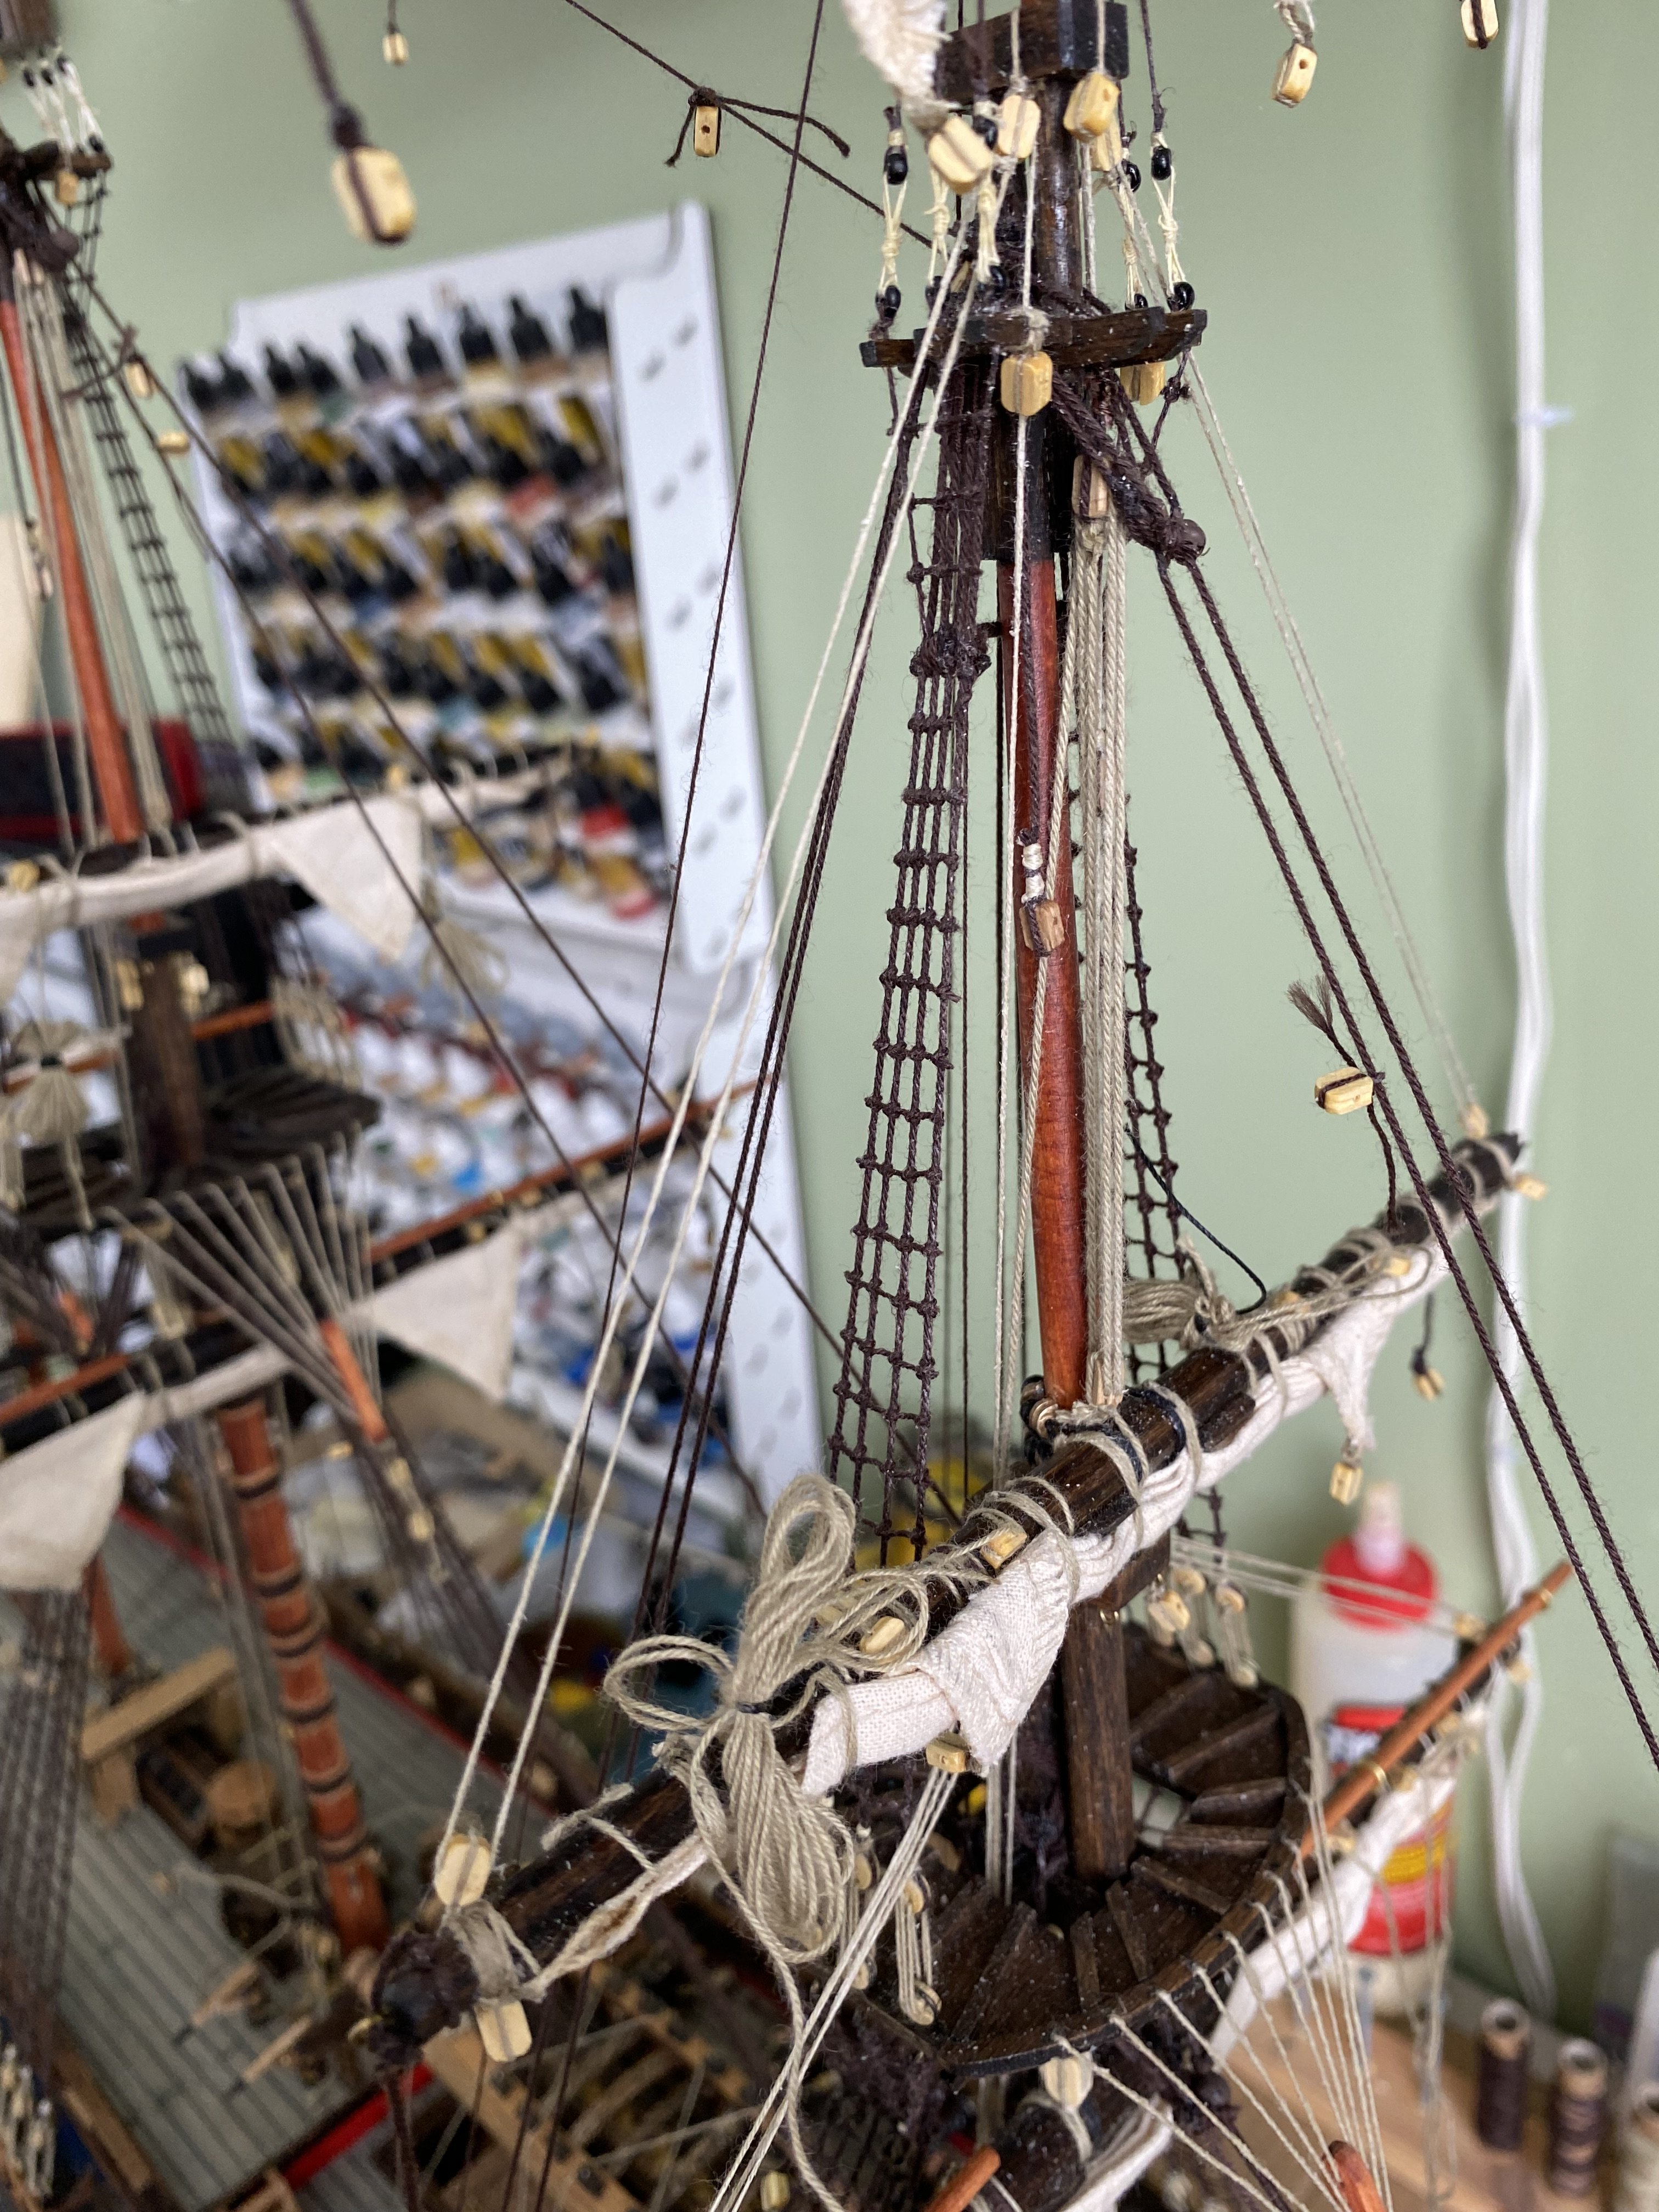
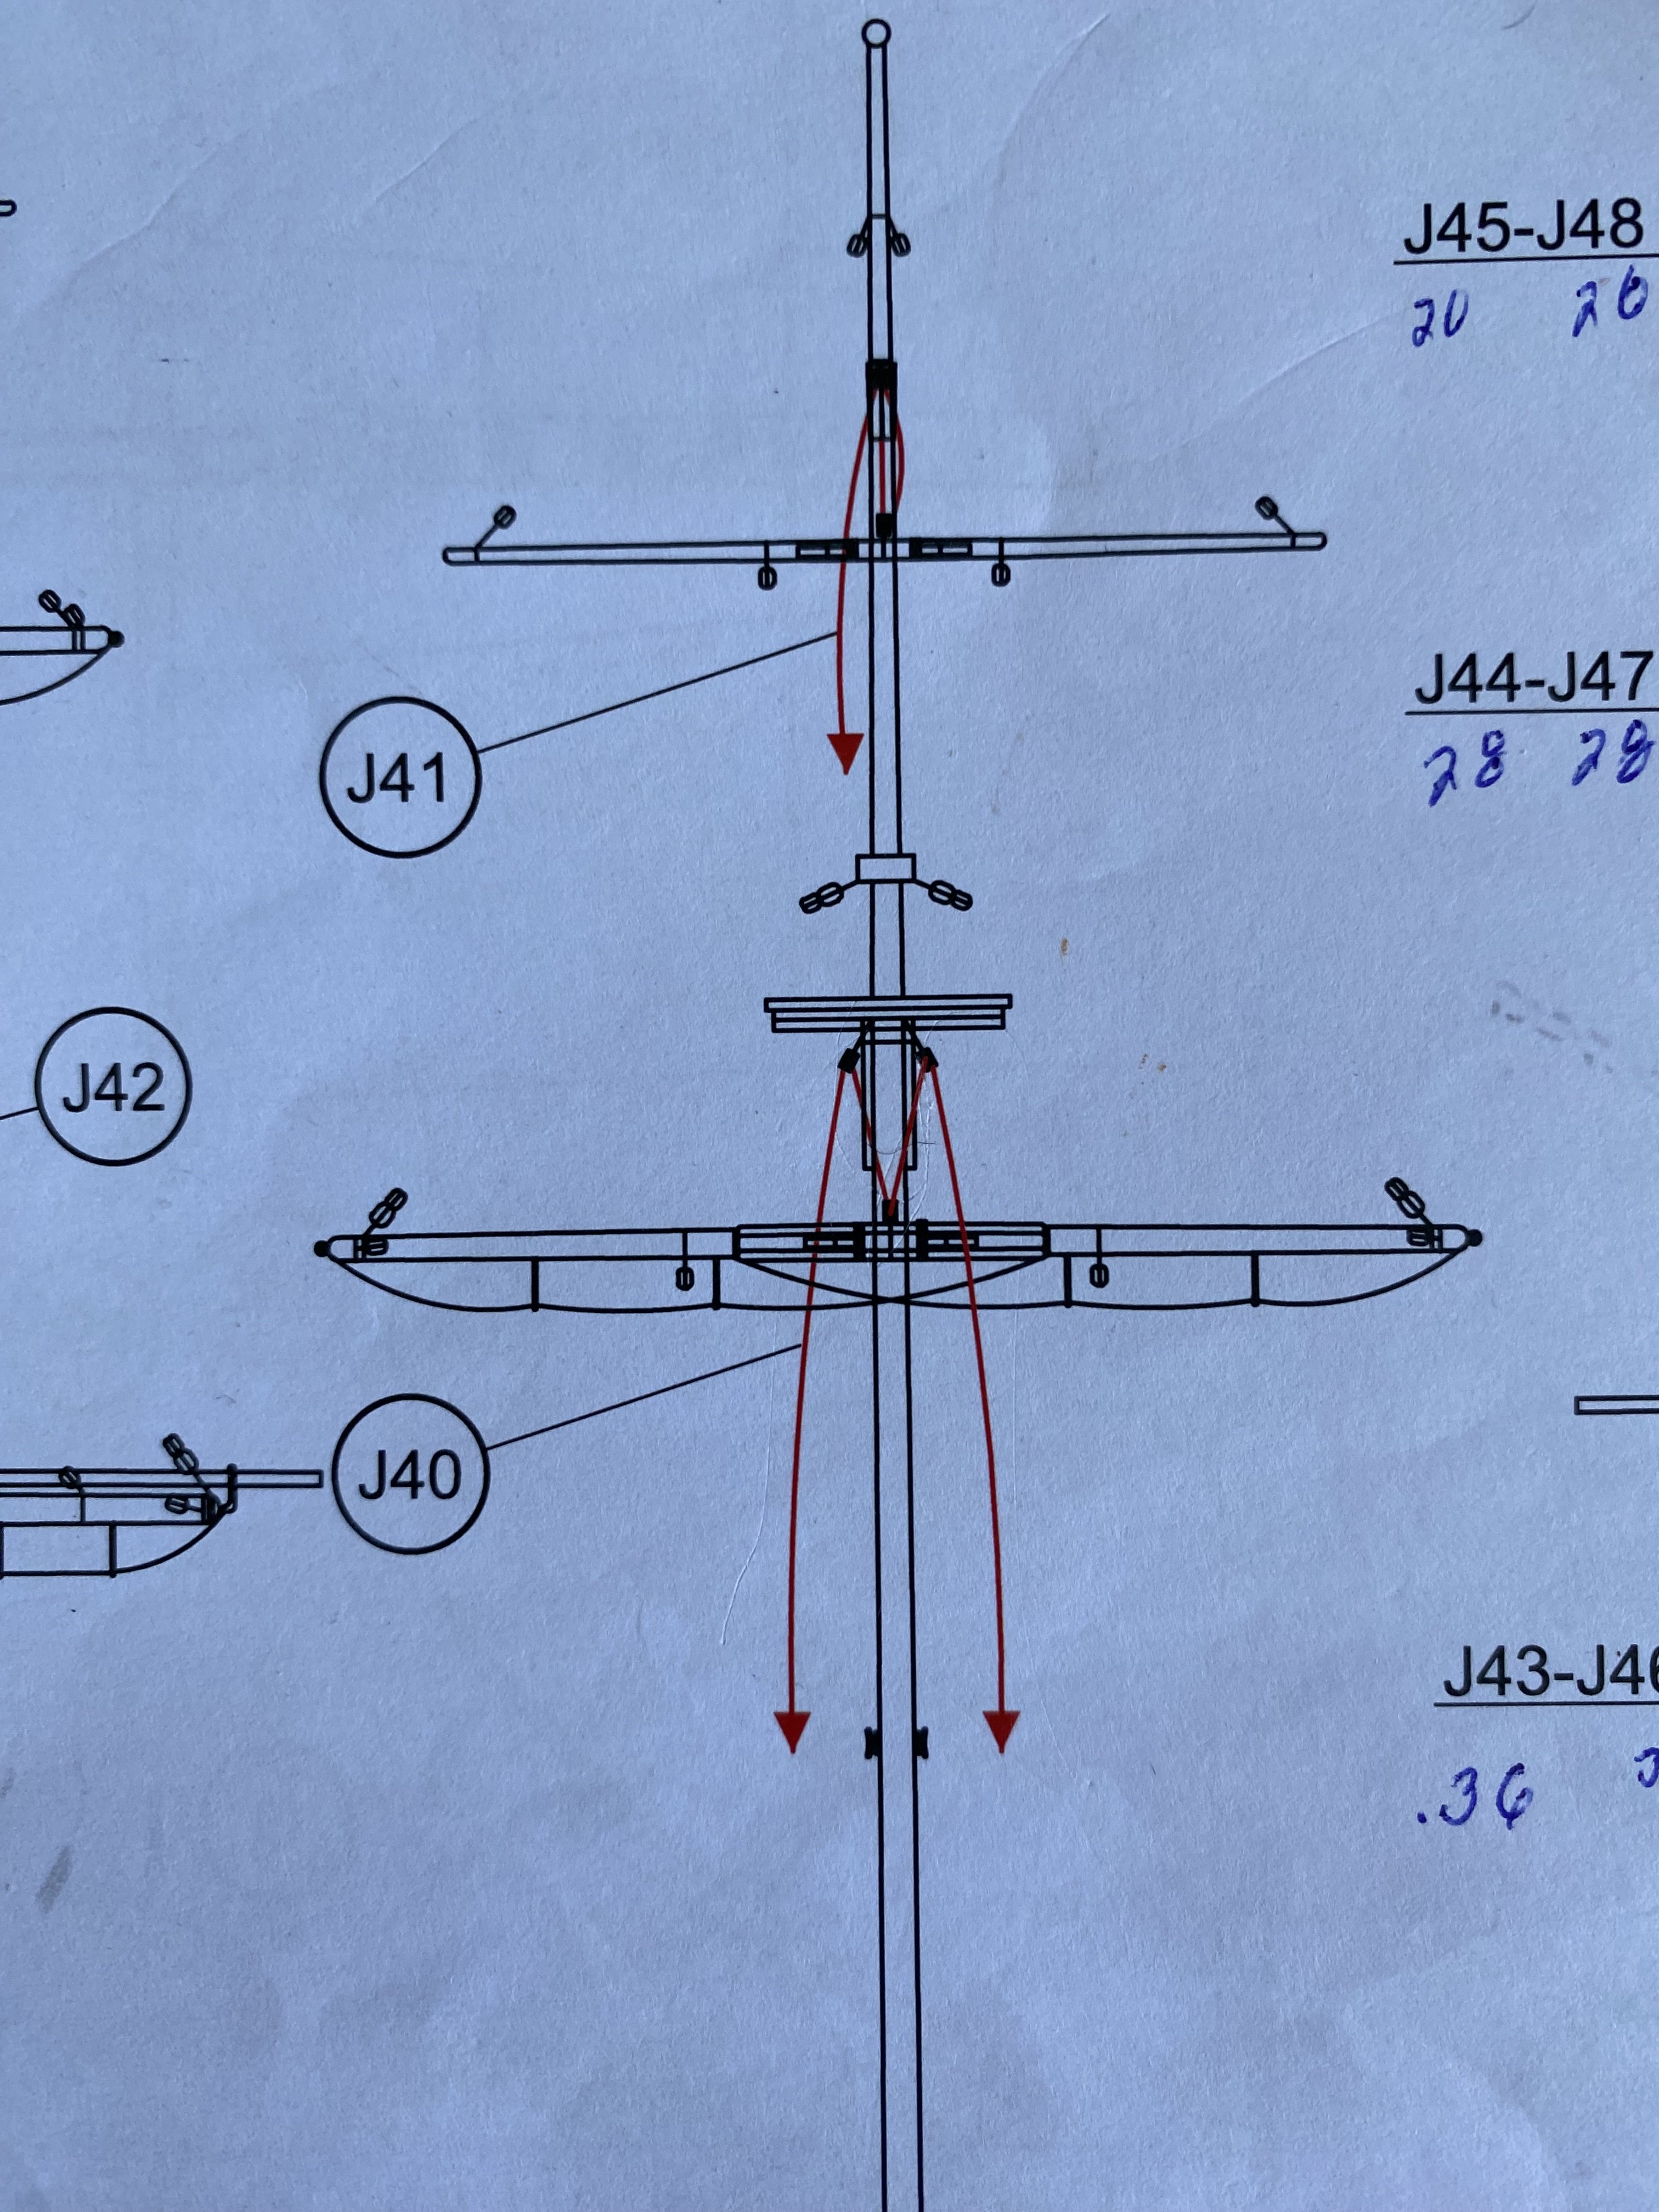
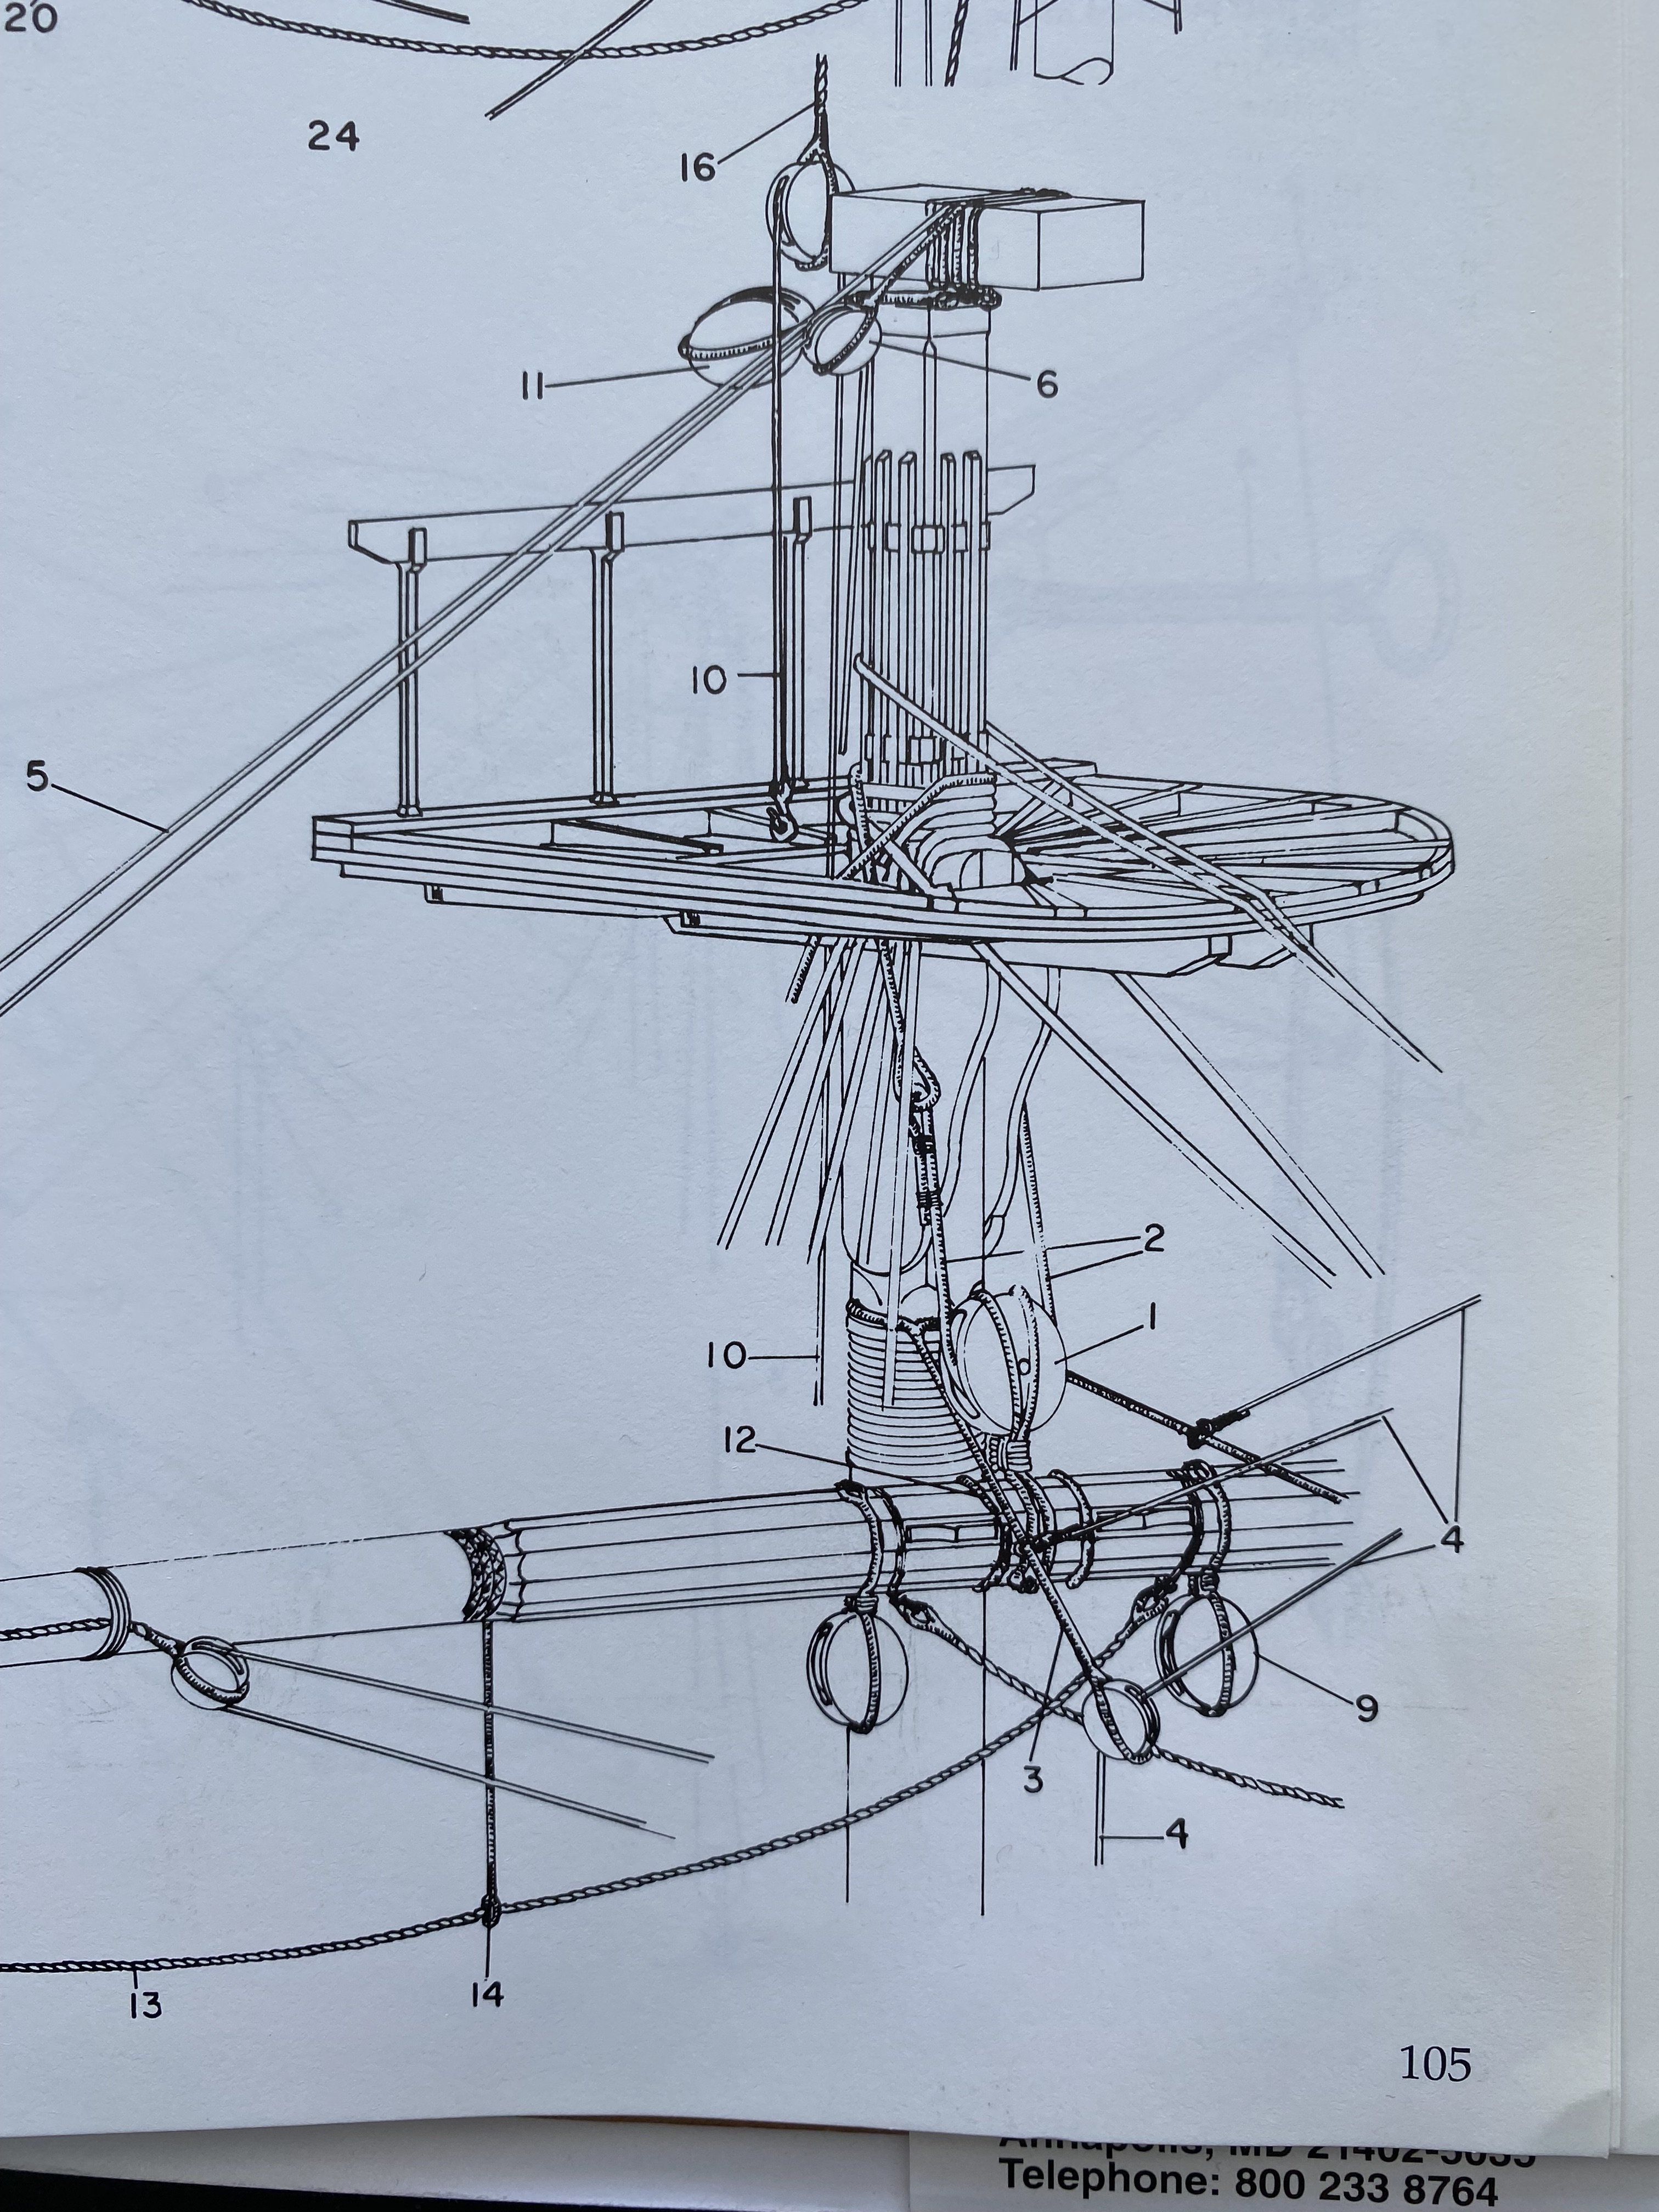
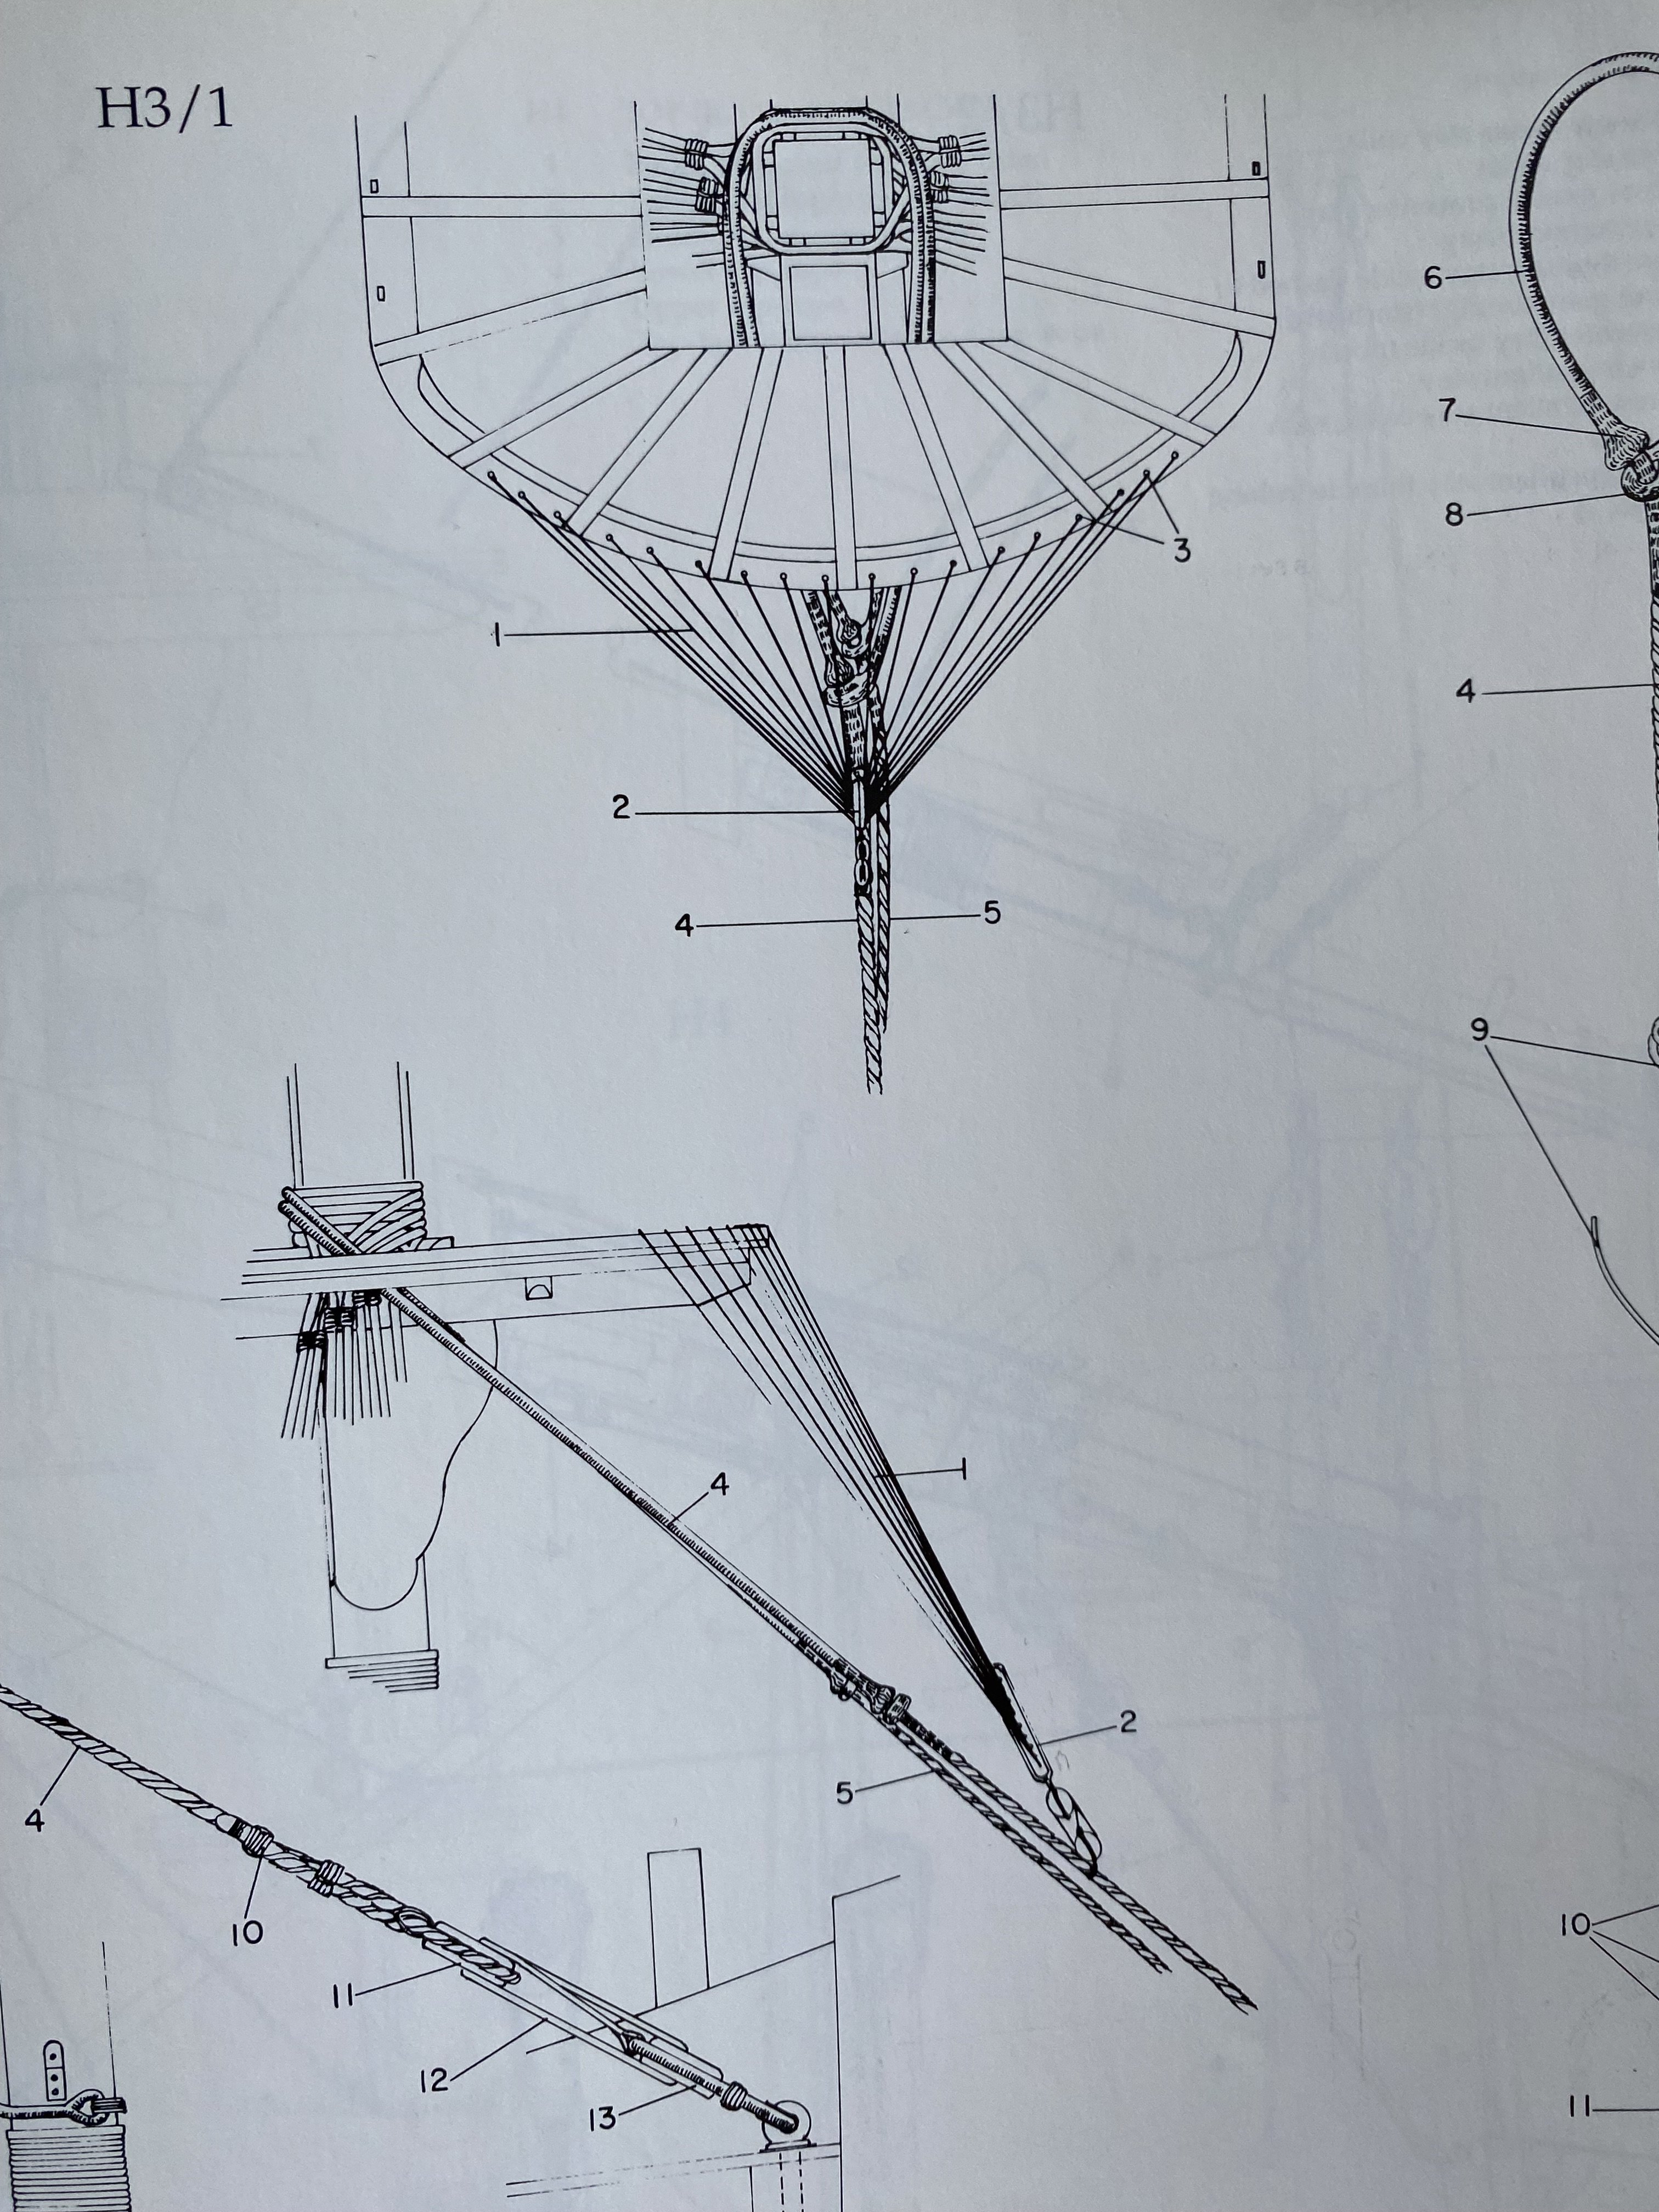
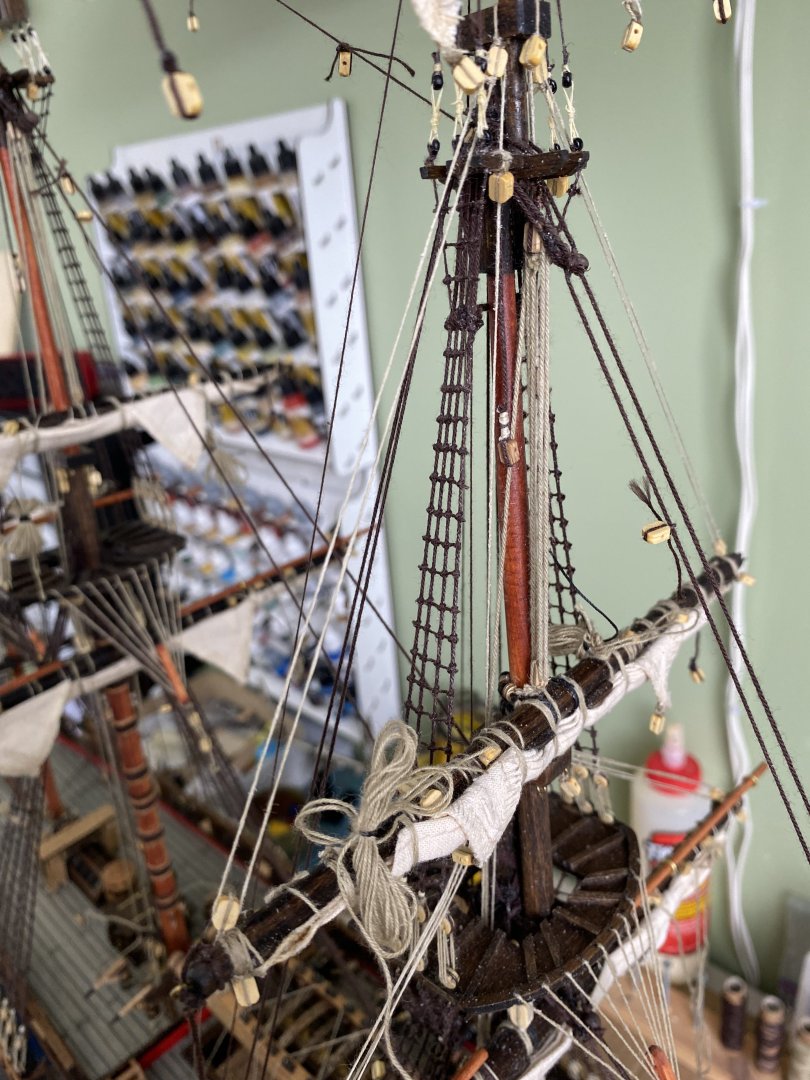
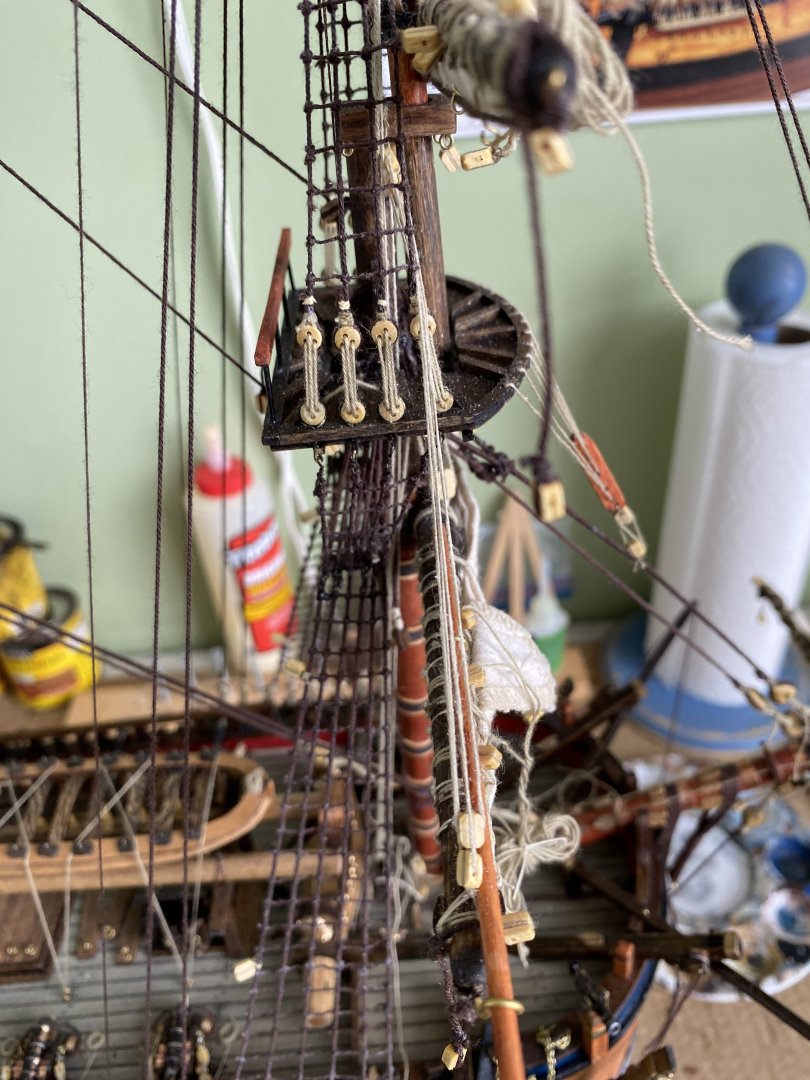
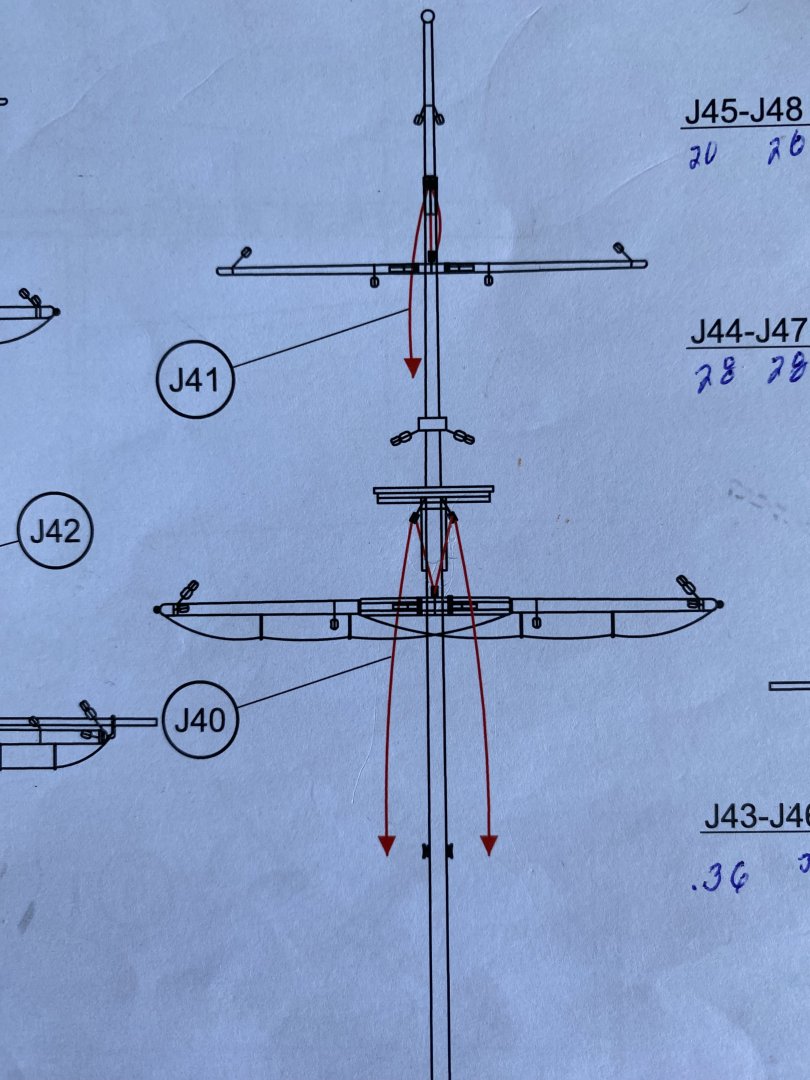
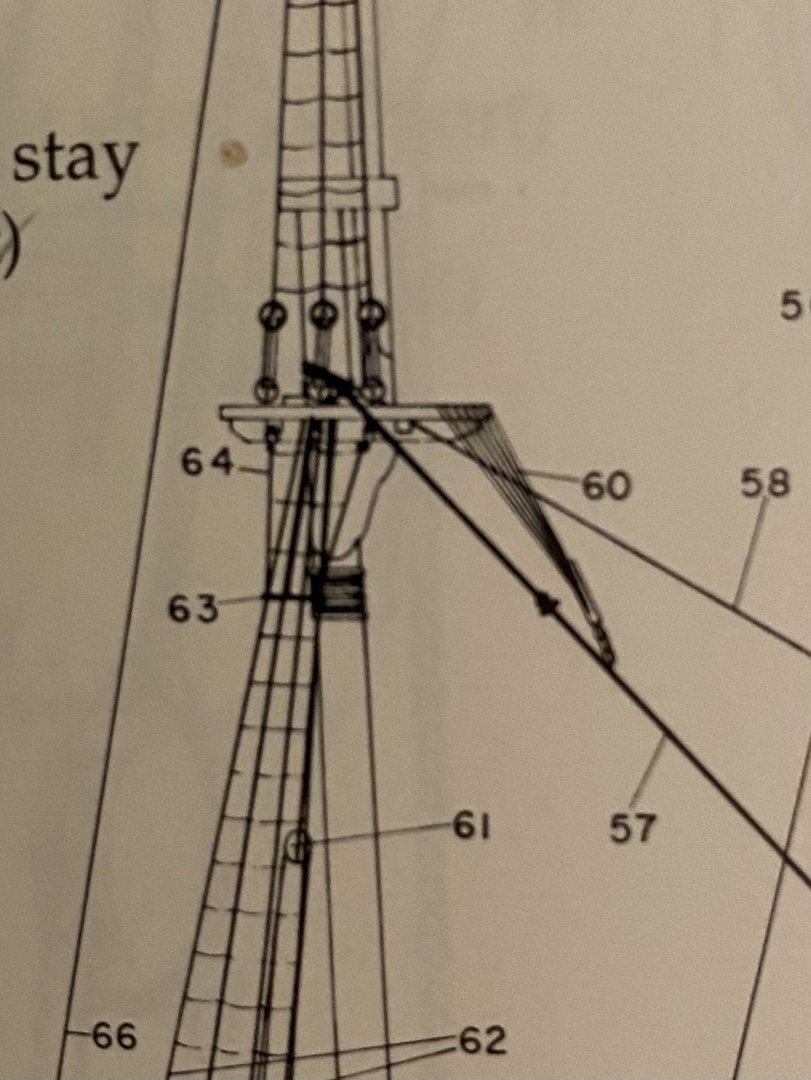
Alright my friends I am stumped. I can not figure out the correct rigging of the sling for the crossjack yard. The first picture is the drawing from the OcCre instructions. The second photo is from the AOTS book. Which I am not completely sure what is going on there either. I understand the sling. But does any part of the rigging of the sling go down to a point on the deck! The OcCre instructions show a red line going from a double block on the yard up through single blocks on the top and then down to the deck. Not sure exactly what is going on there with a double block on the yard. The AOTS shows a double block also but does not show if the rigging line goes down to a he deck. The instructions have a parrel on the he yard so I assume it can be raised and lowered like the fore and main yards. I am stumped. Your help, as always, would be appreciated. Bill

-
So Marc you would just leave it alone? I know with other things the more you mess with it the worse it is going to get.
-
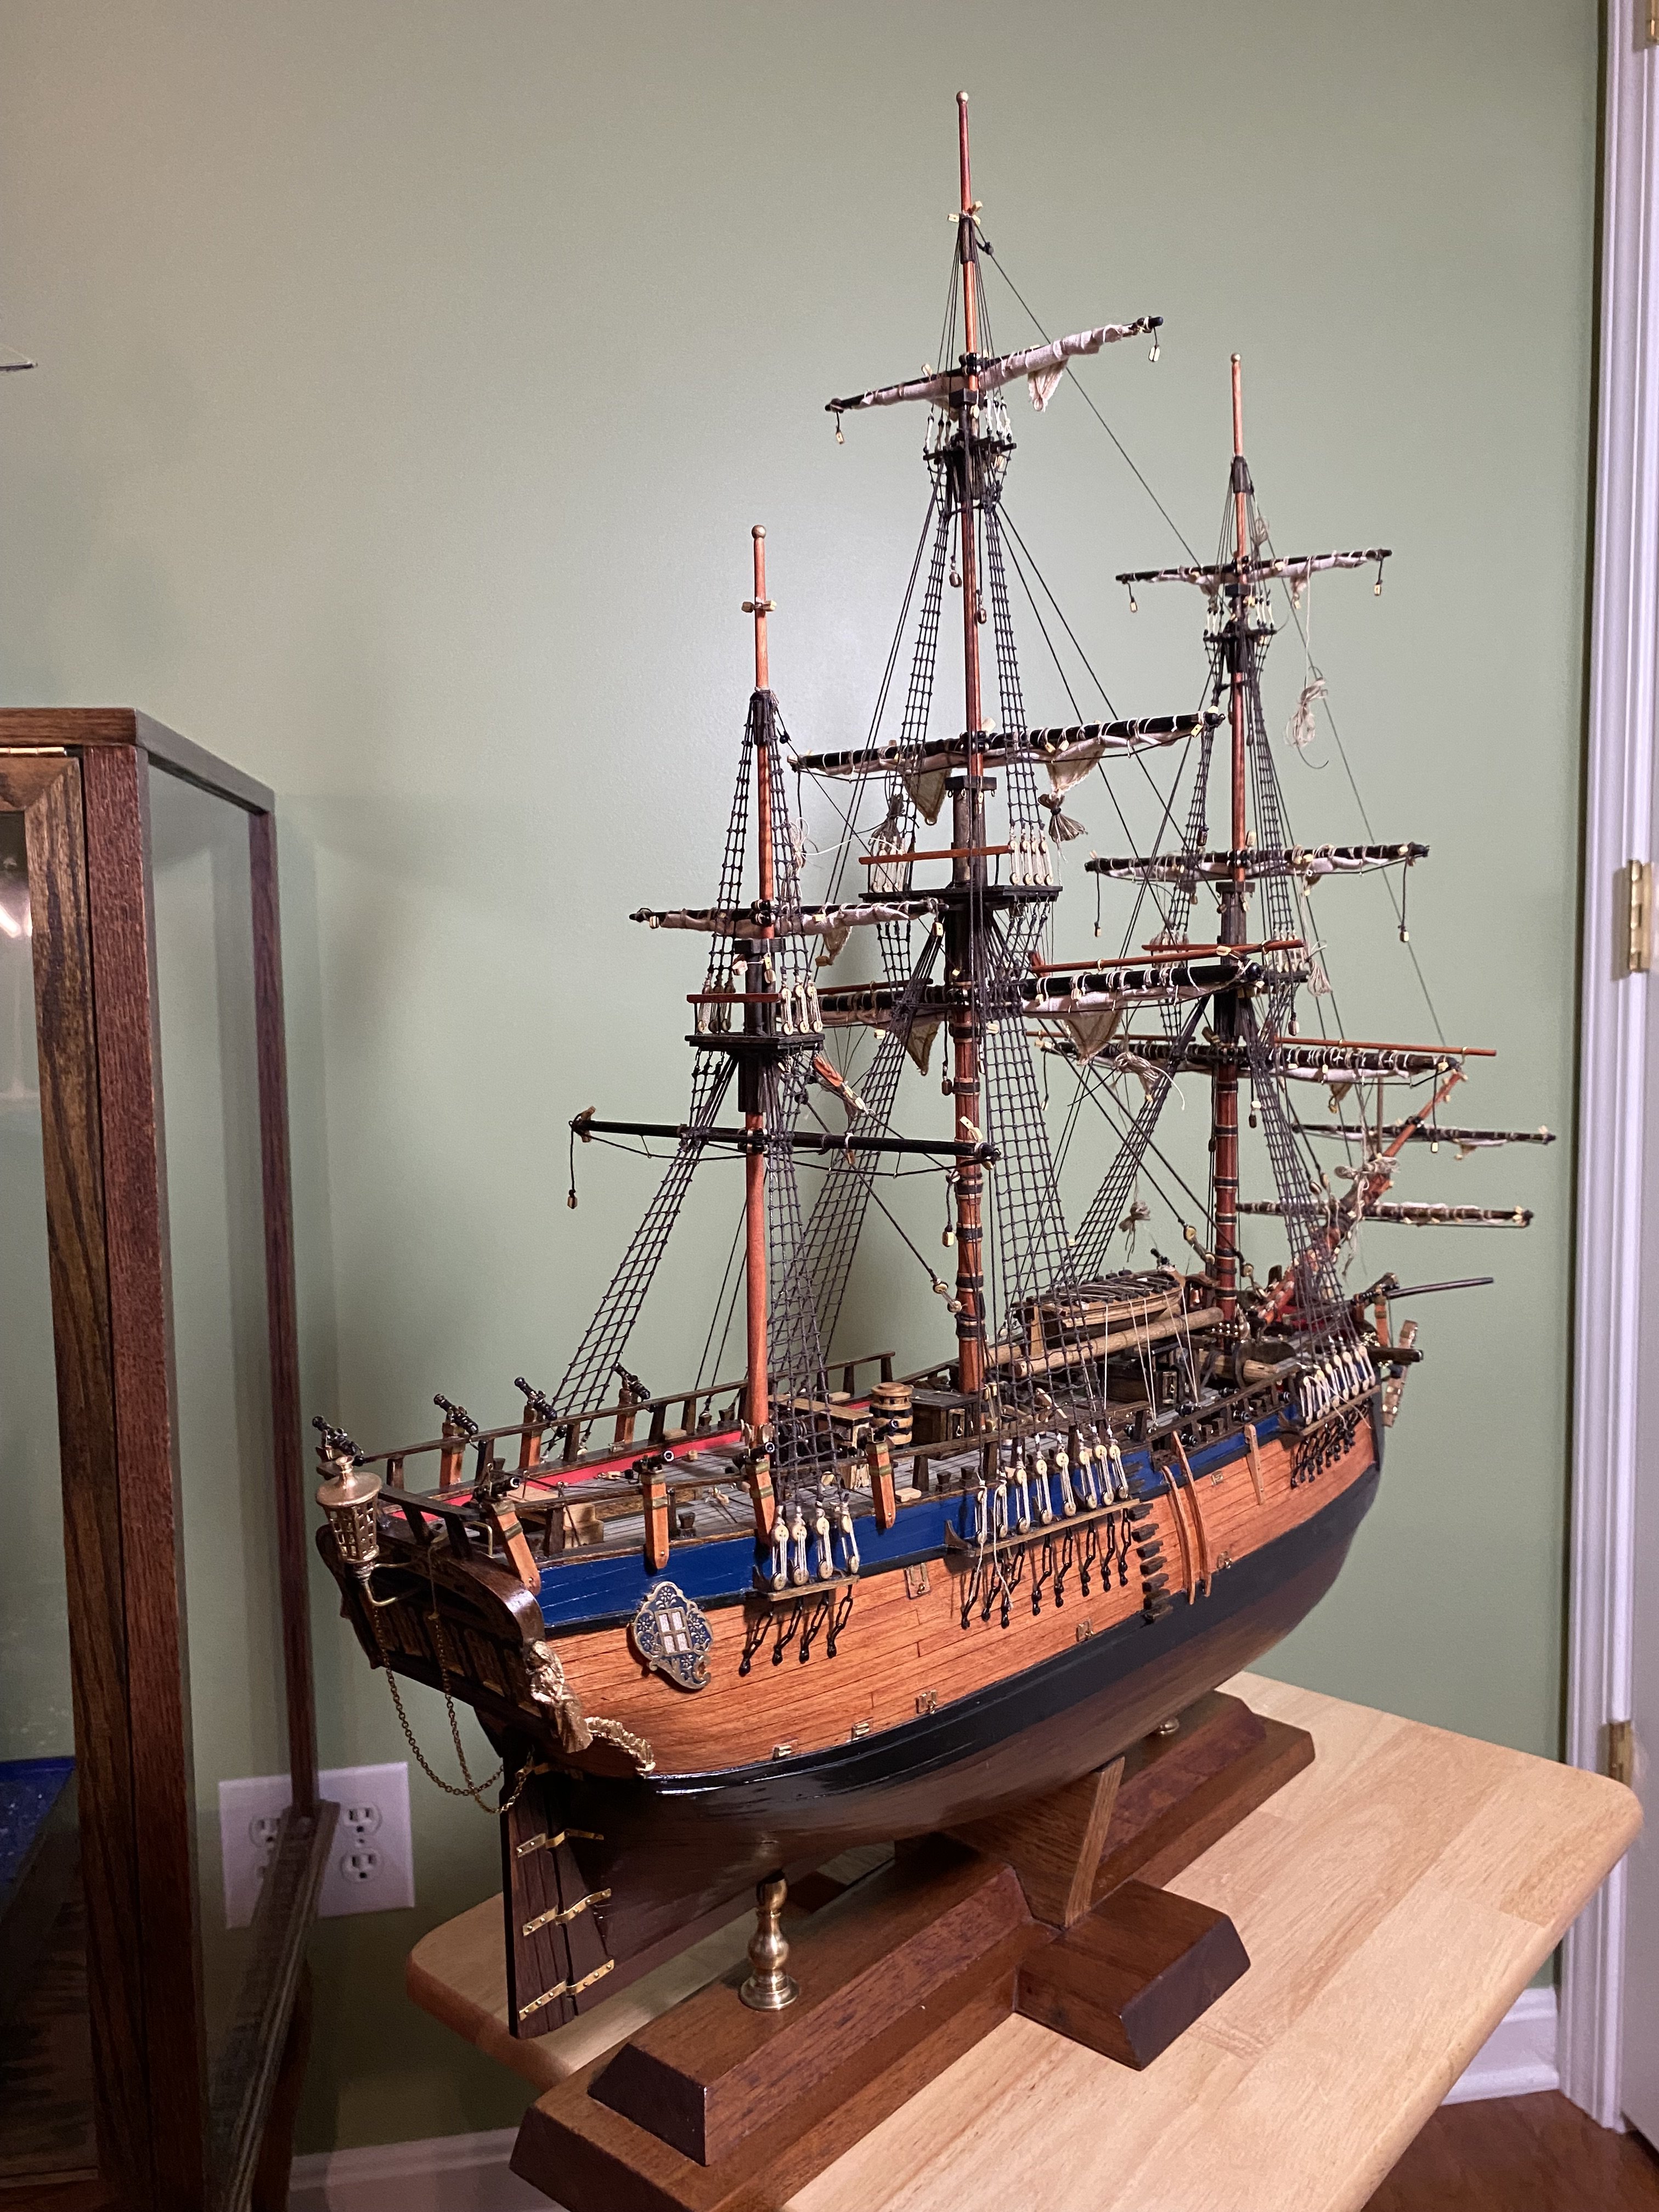
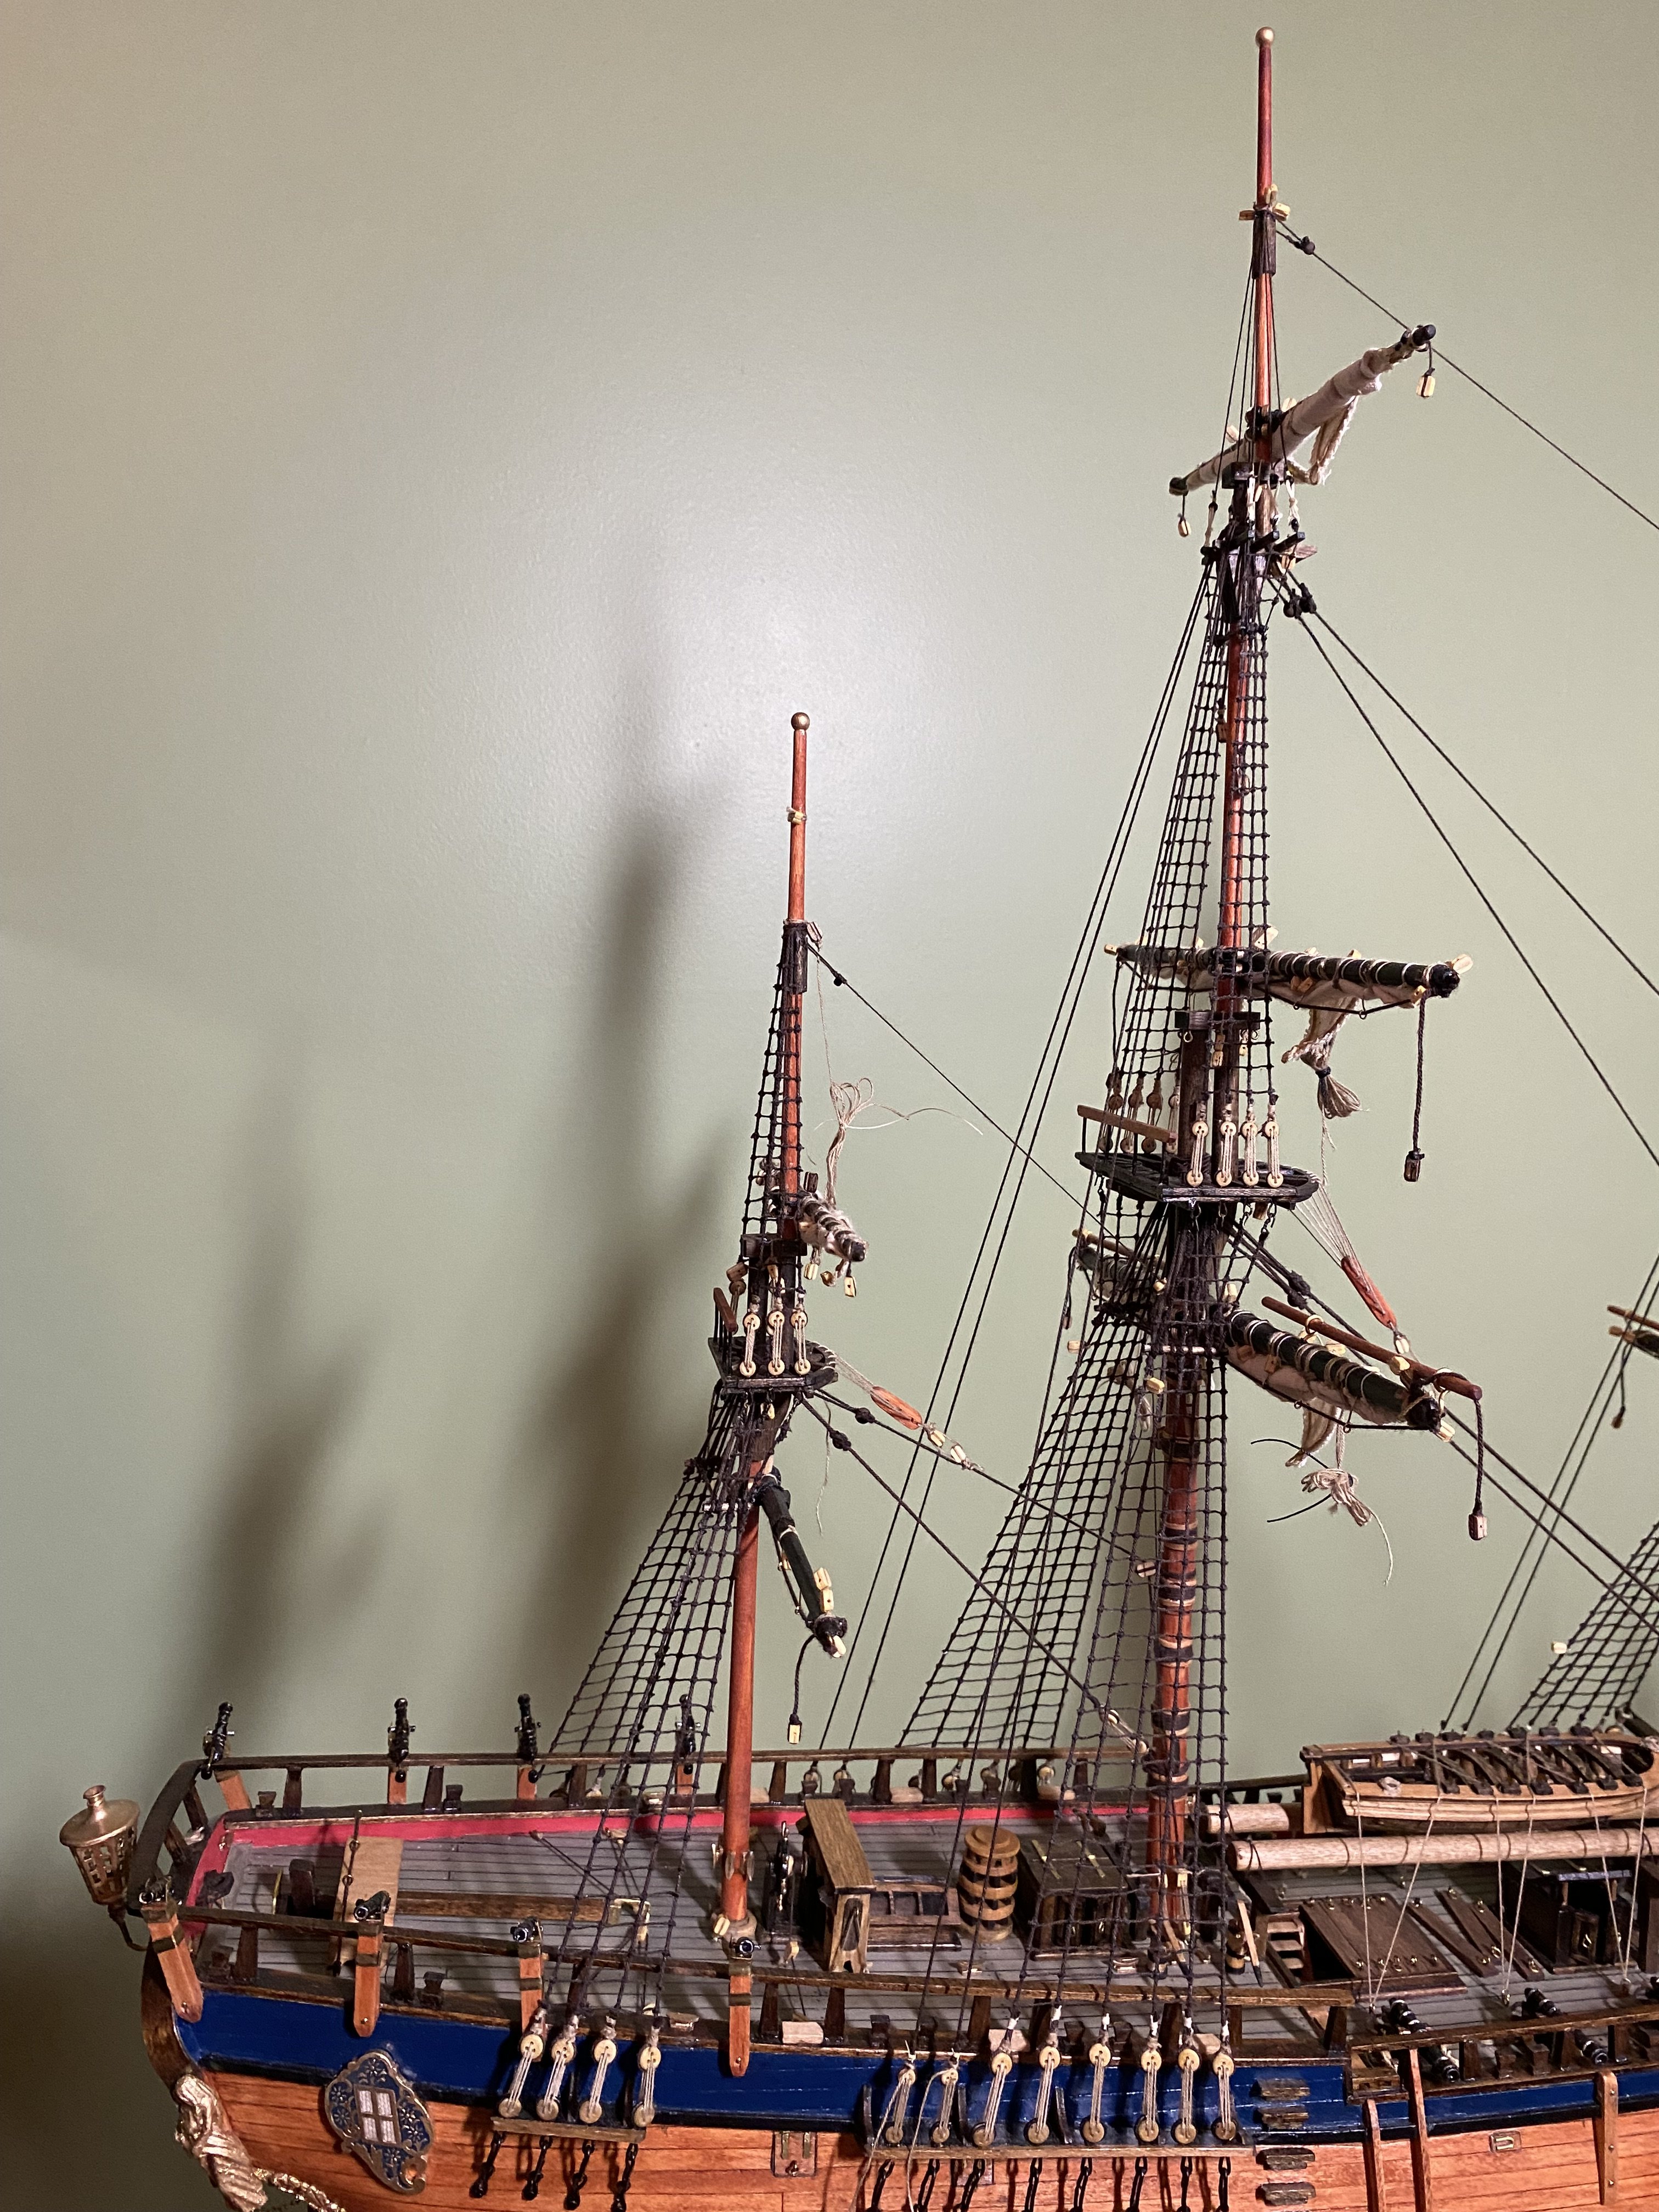
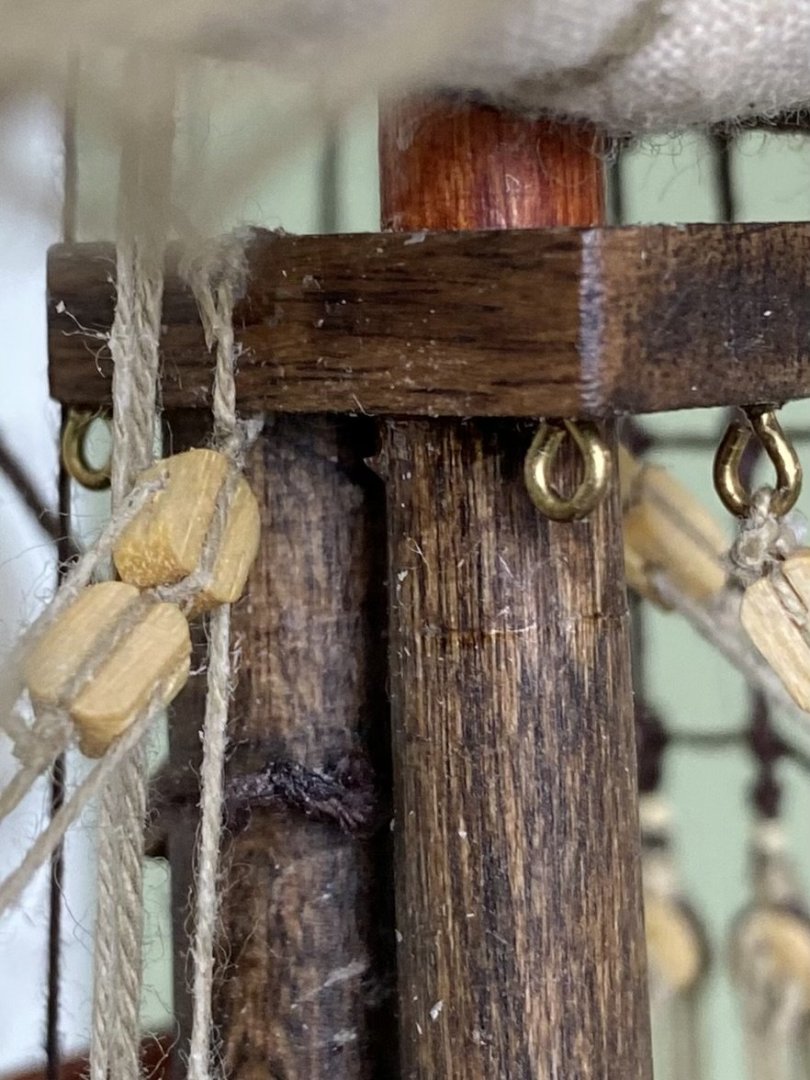
Thanks Ian. I appreciate your comments. I do have one little area of disappointment I can’t get right. My wife tells me is my OCD. If you look at one of the photos that shows a side profile, maybe the next to last photo. Zoom in on the foremast shroud chains. You will notice two dark spots between the 6th and 7th preventer plate. I had to move the 6th chain and plate slightly forward to maintain the straight line of the shroud from the mast top down through the channel to the top of the plate. Before I did that the visual line of the chain and plate hooked a bit toward the stern of the ship. After I pulled the nails to move the plate I had two nail holes I had to fill. A short piece of tooth pick glued in worked perfectly. Unfortunately no matter what I do I can not get the tiny plug to stain the same as the planking. I know from years of woodworking that end grain of a piece of wood stained darker than side grain. I guess that is the issue here.
-
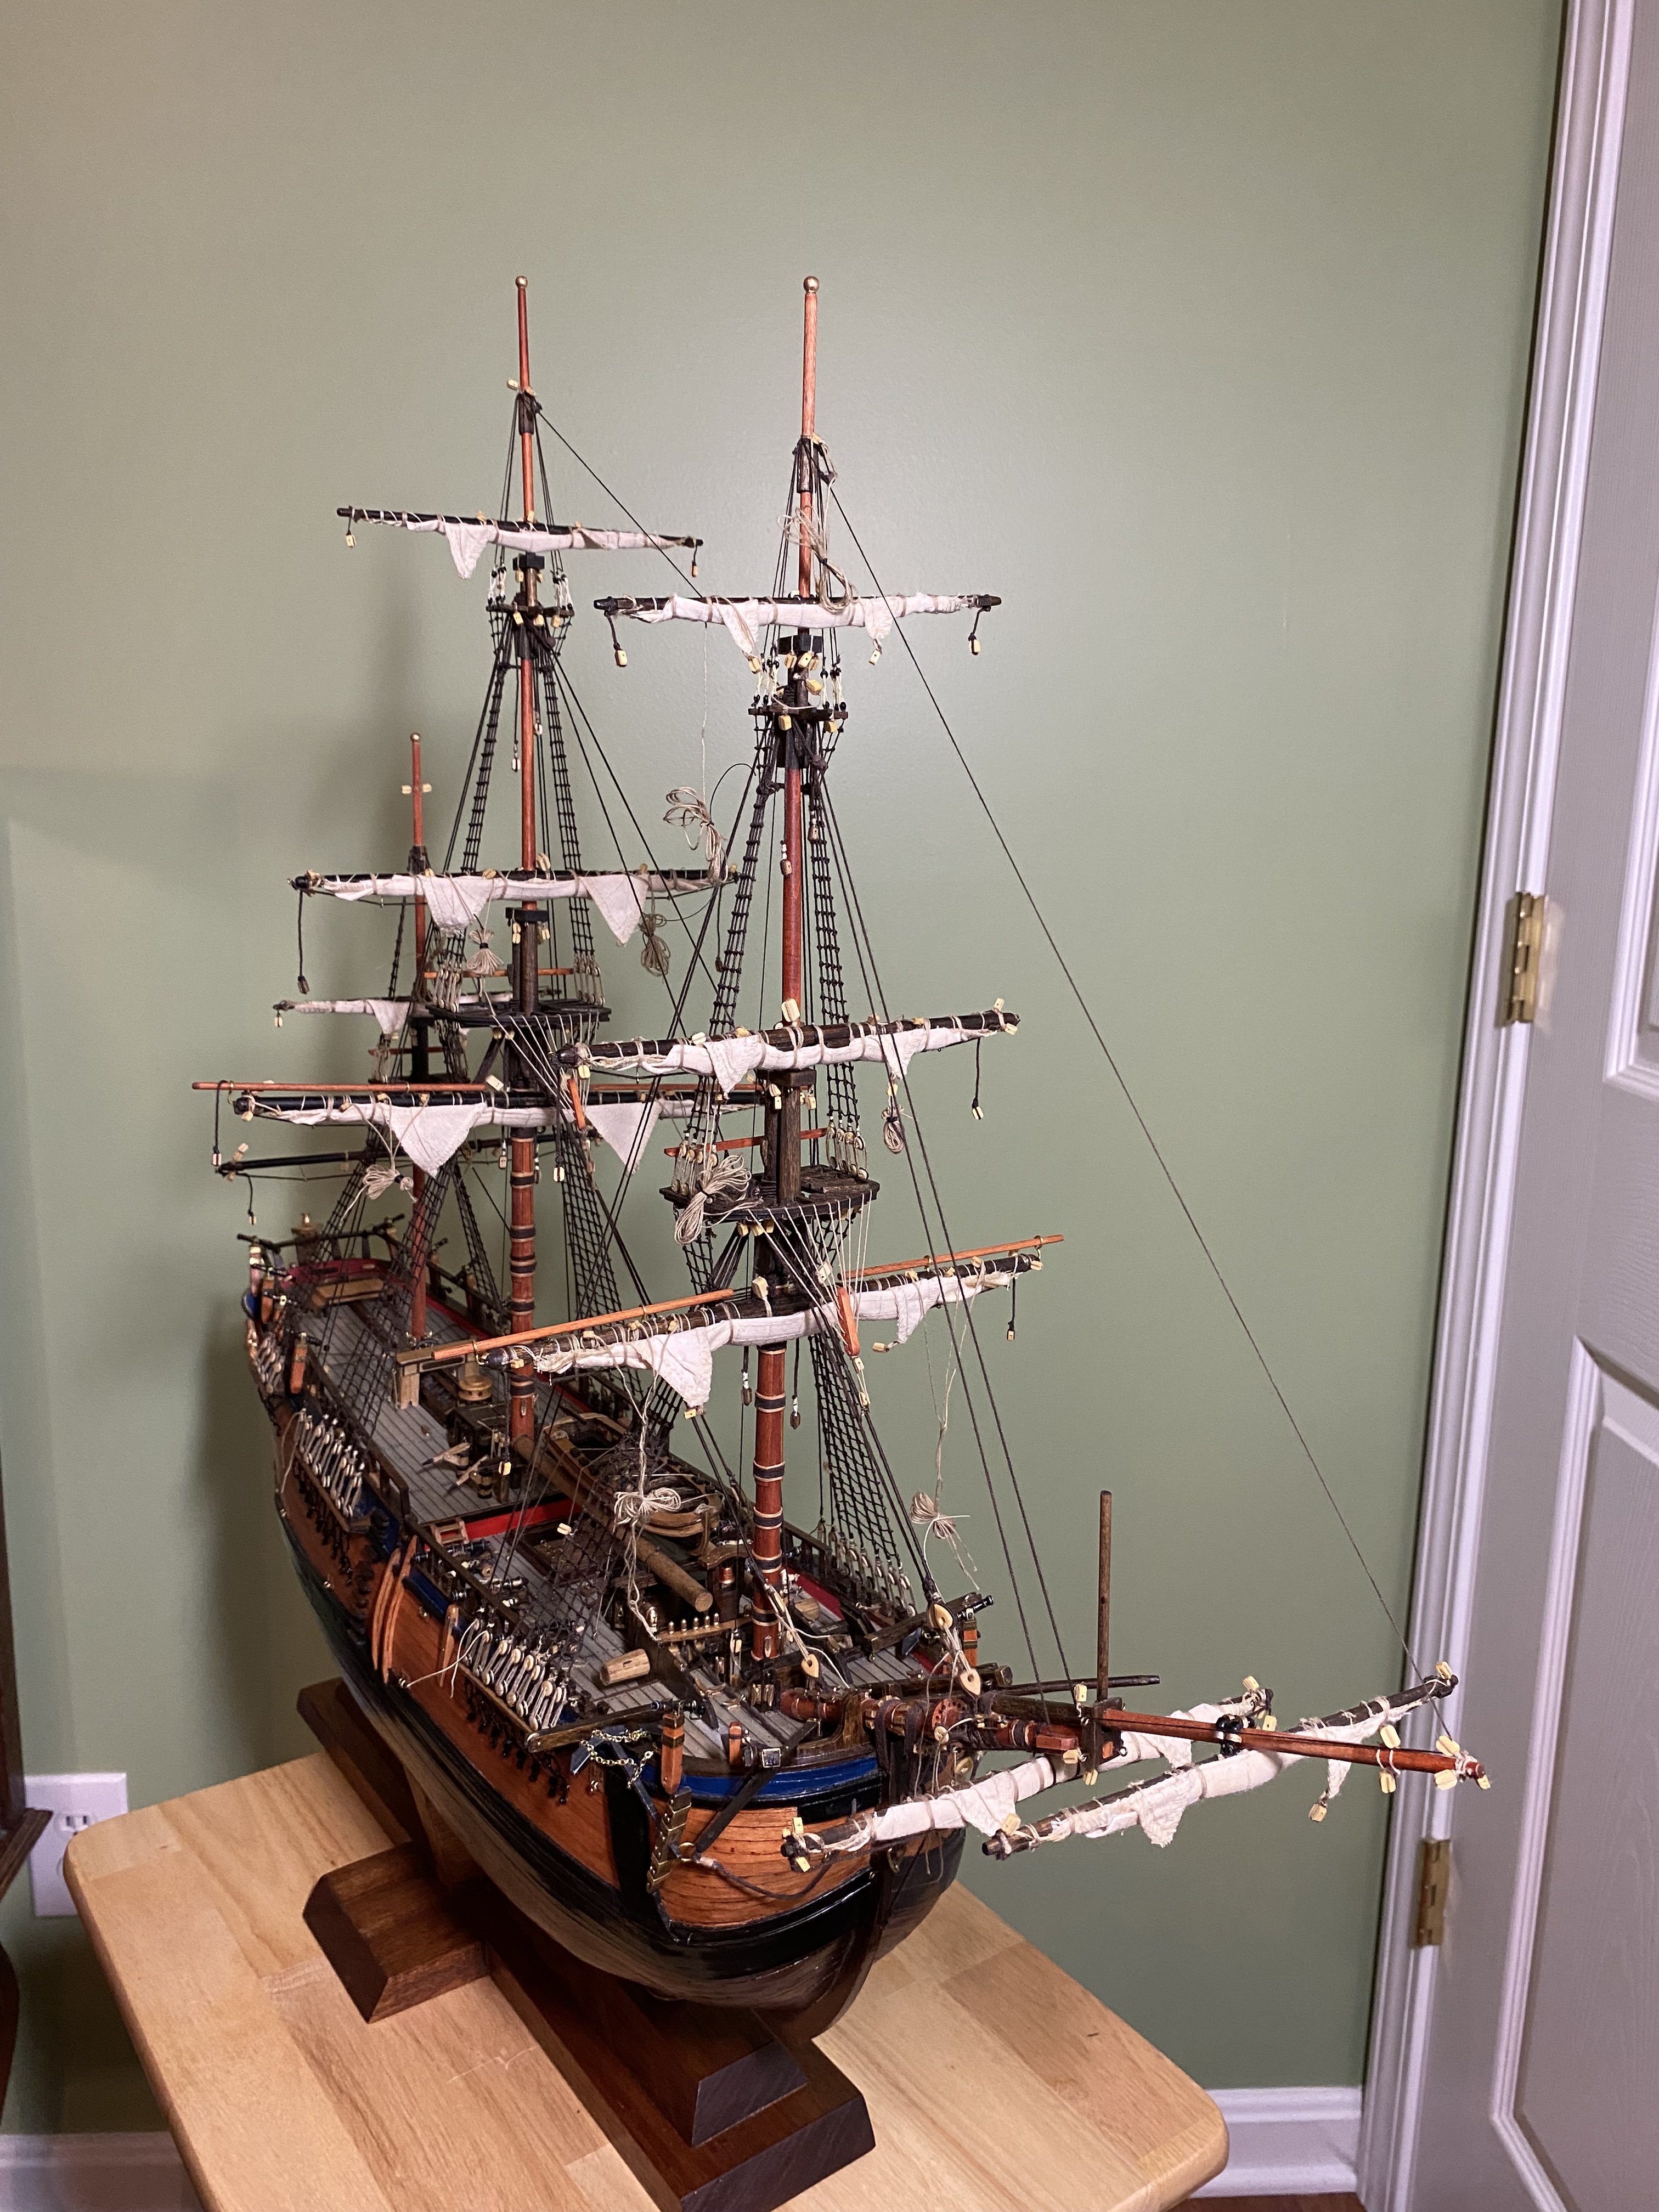
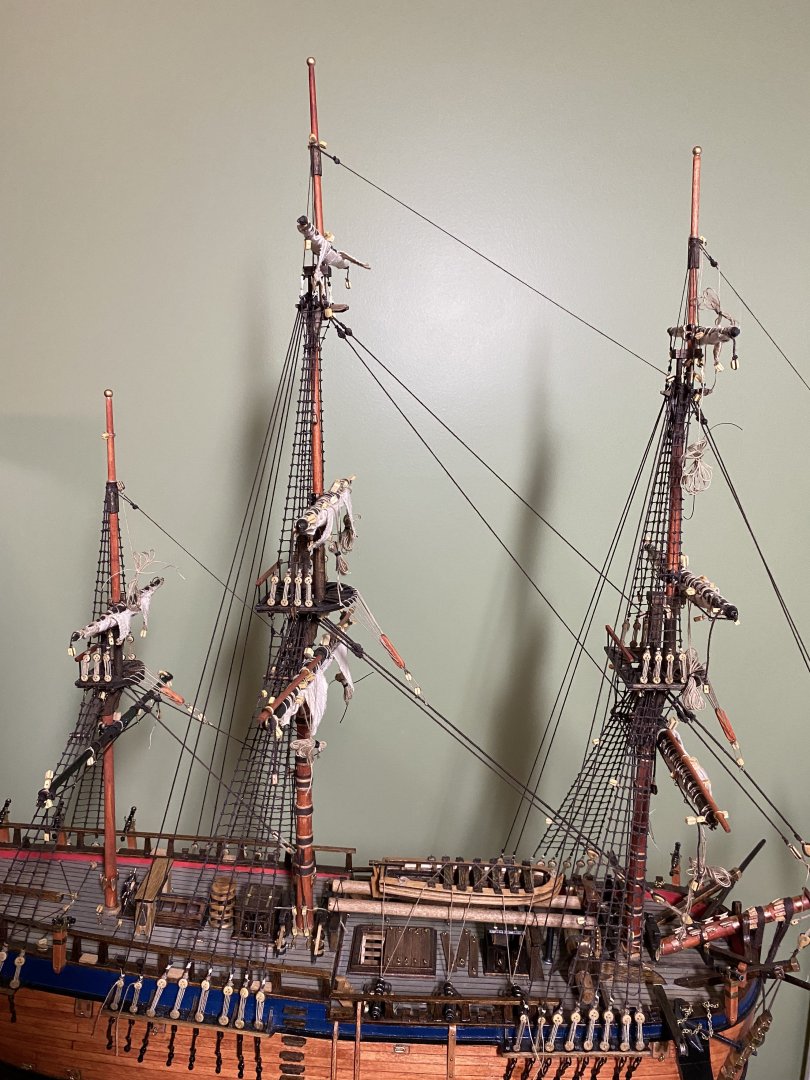
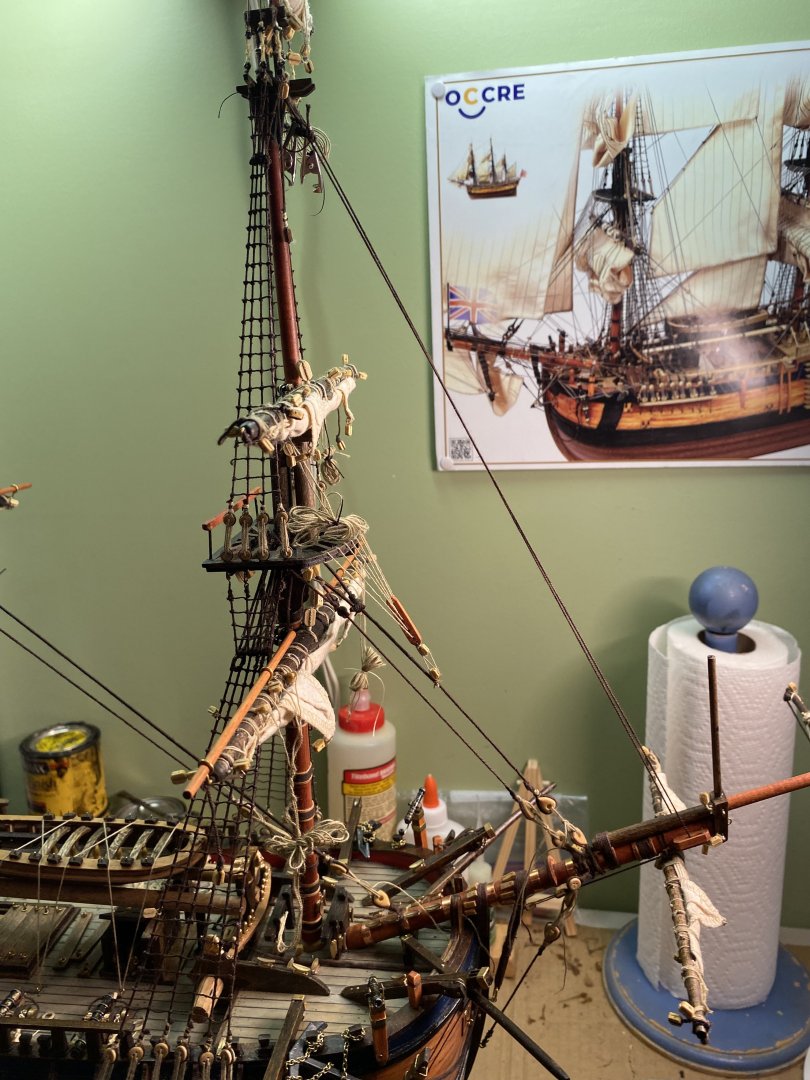
Most of the various backstays now in place. Still need to add the mizzen backstay and the topgallant backstay for the fire and main mast. For whatever reason OcCre does not address the top gallant backstays. They are shown in the AOTS so I will fashion and add them as well


-
Robert I am again reading through your build for tips as I am now finishing the standing rigging. I am also adding the additional backstay OcCre does not. I really like the additions to the deck features you did and may try to duplicate some of them. I am really curious where you came by the two coins you show displayed with your model.
-
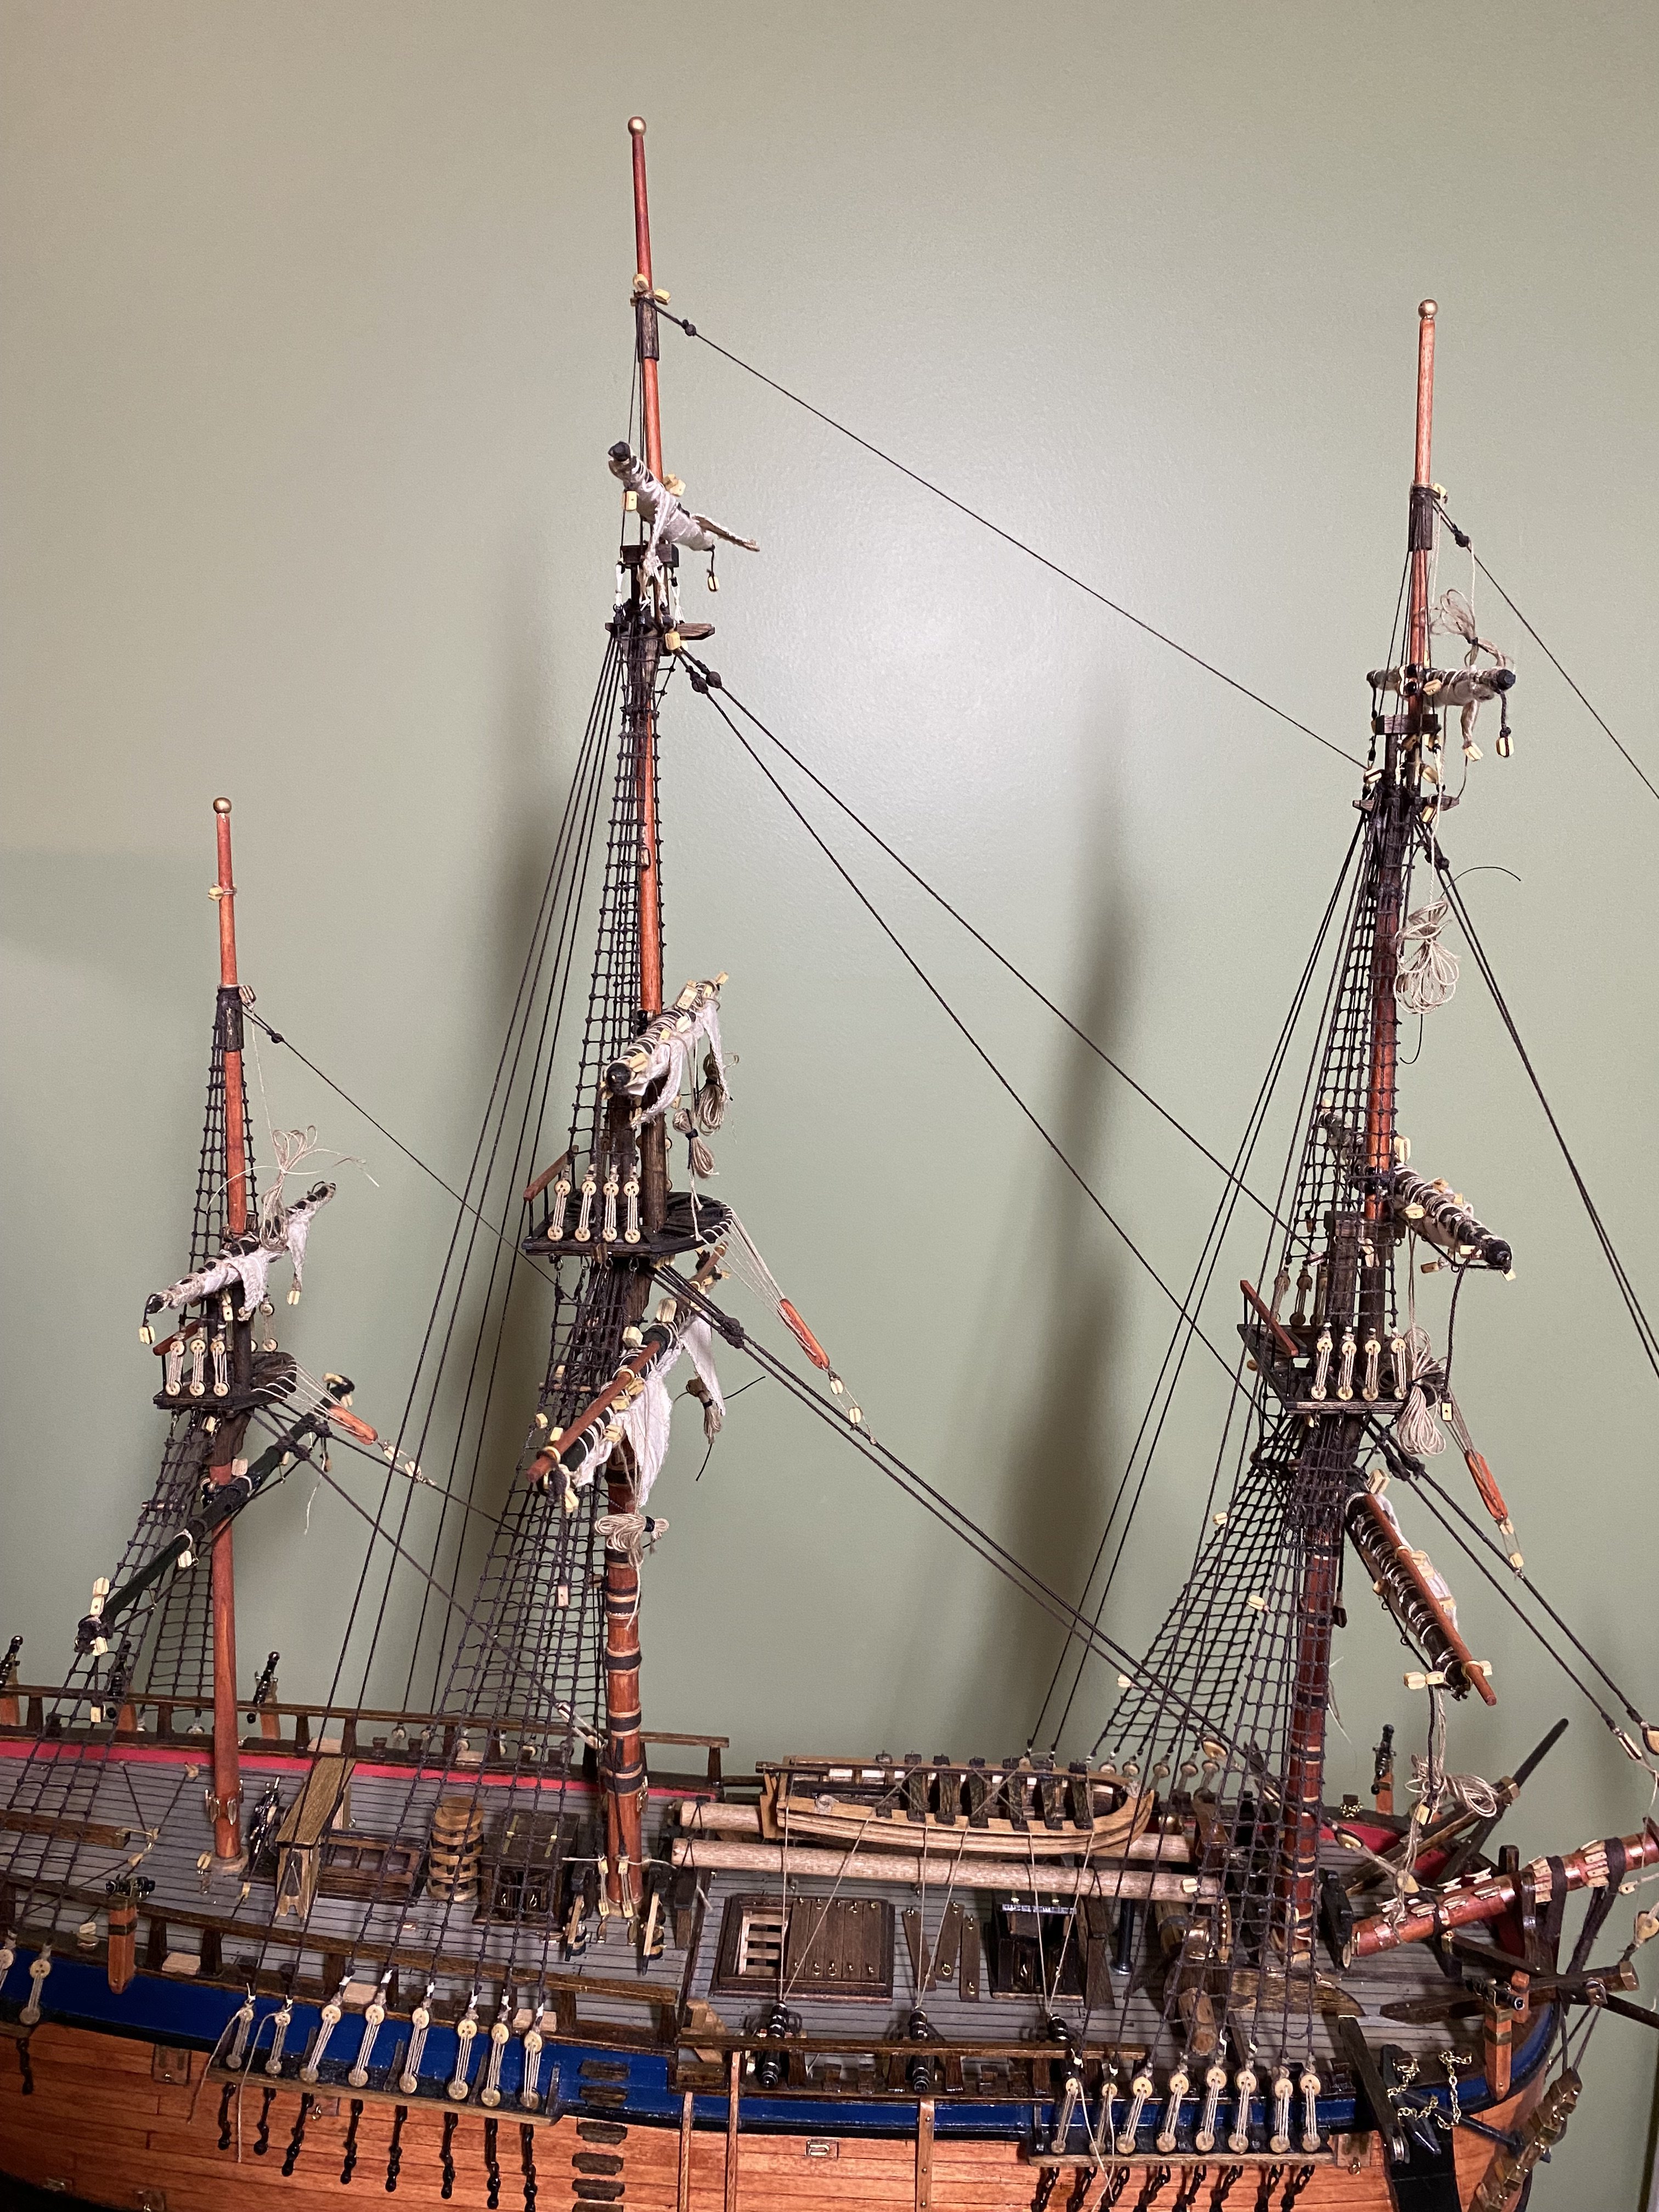
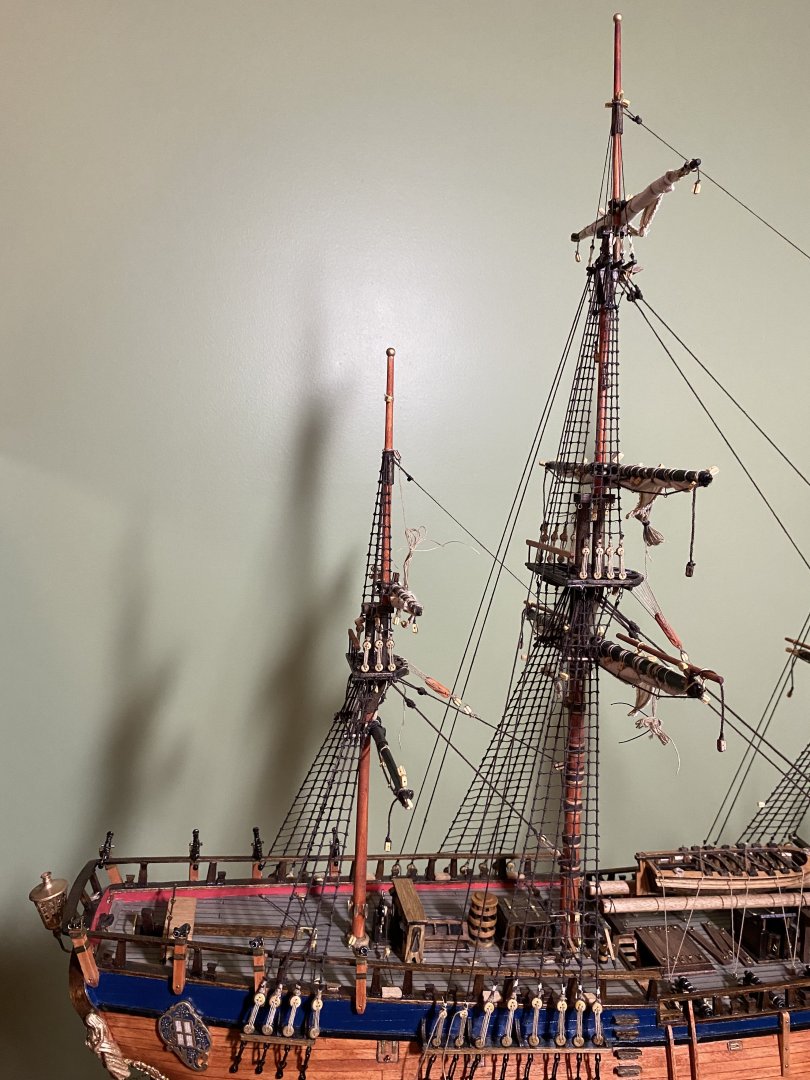
Crowsfeet finished on all three masts. For the mizzen I went with attaching it to the the staysail stay. Started the topmast stays and top gallant stays. Working my way up the foremast.
-
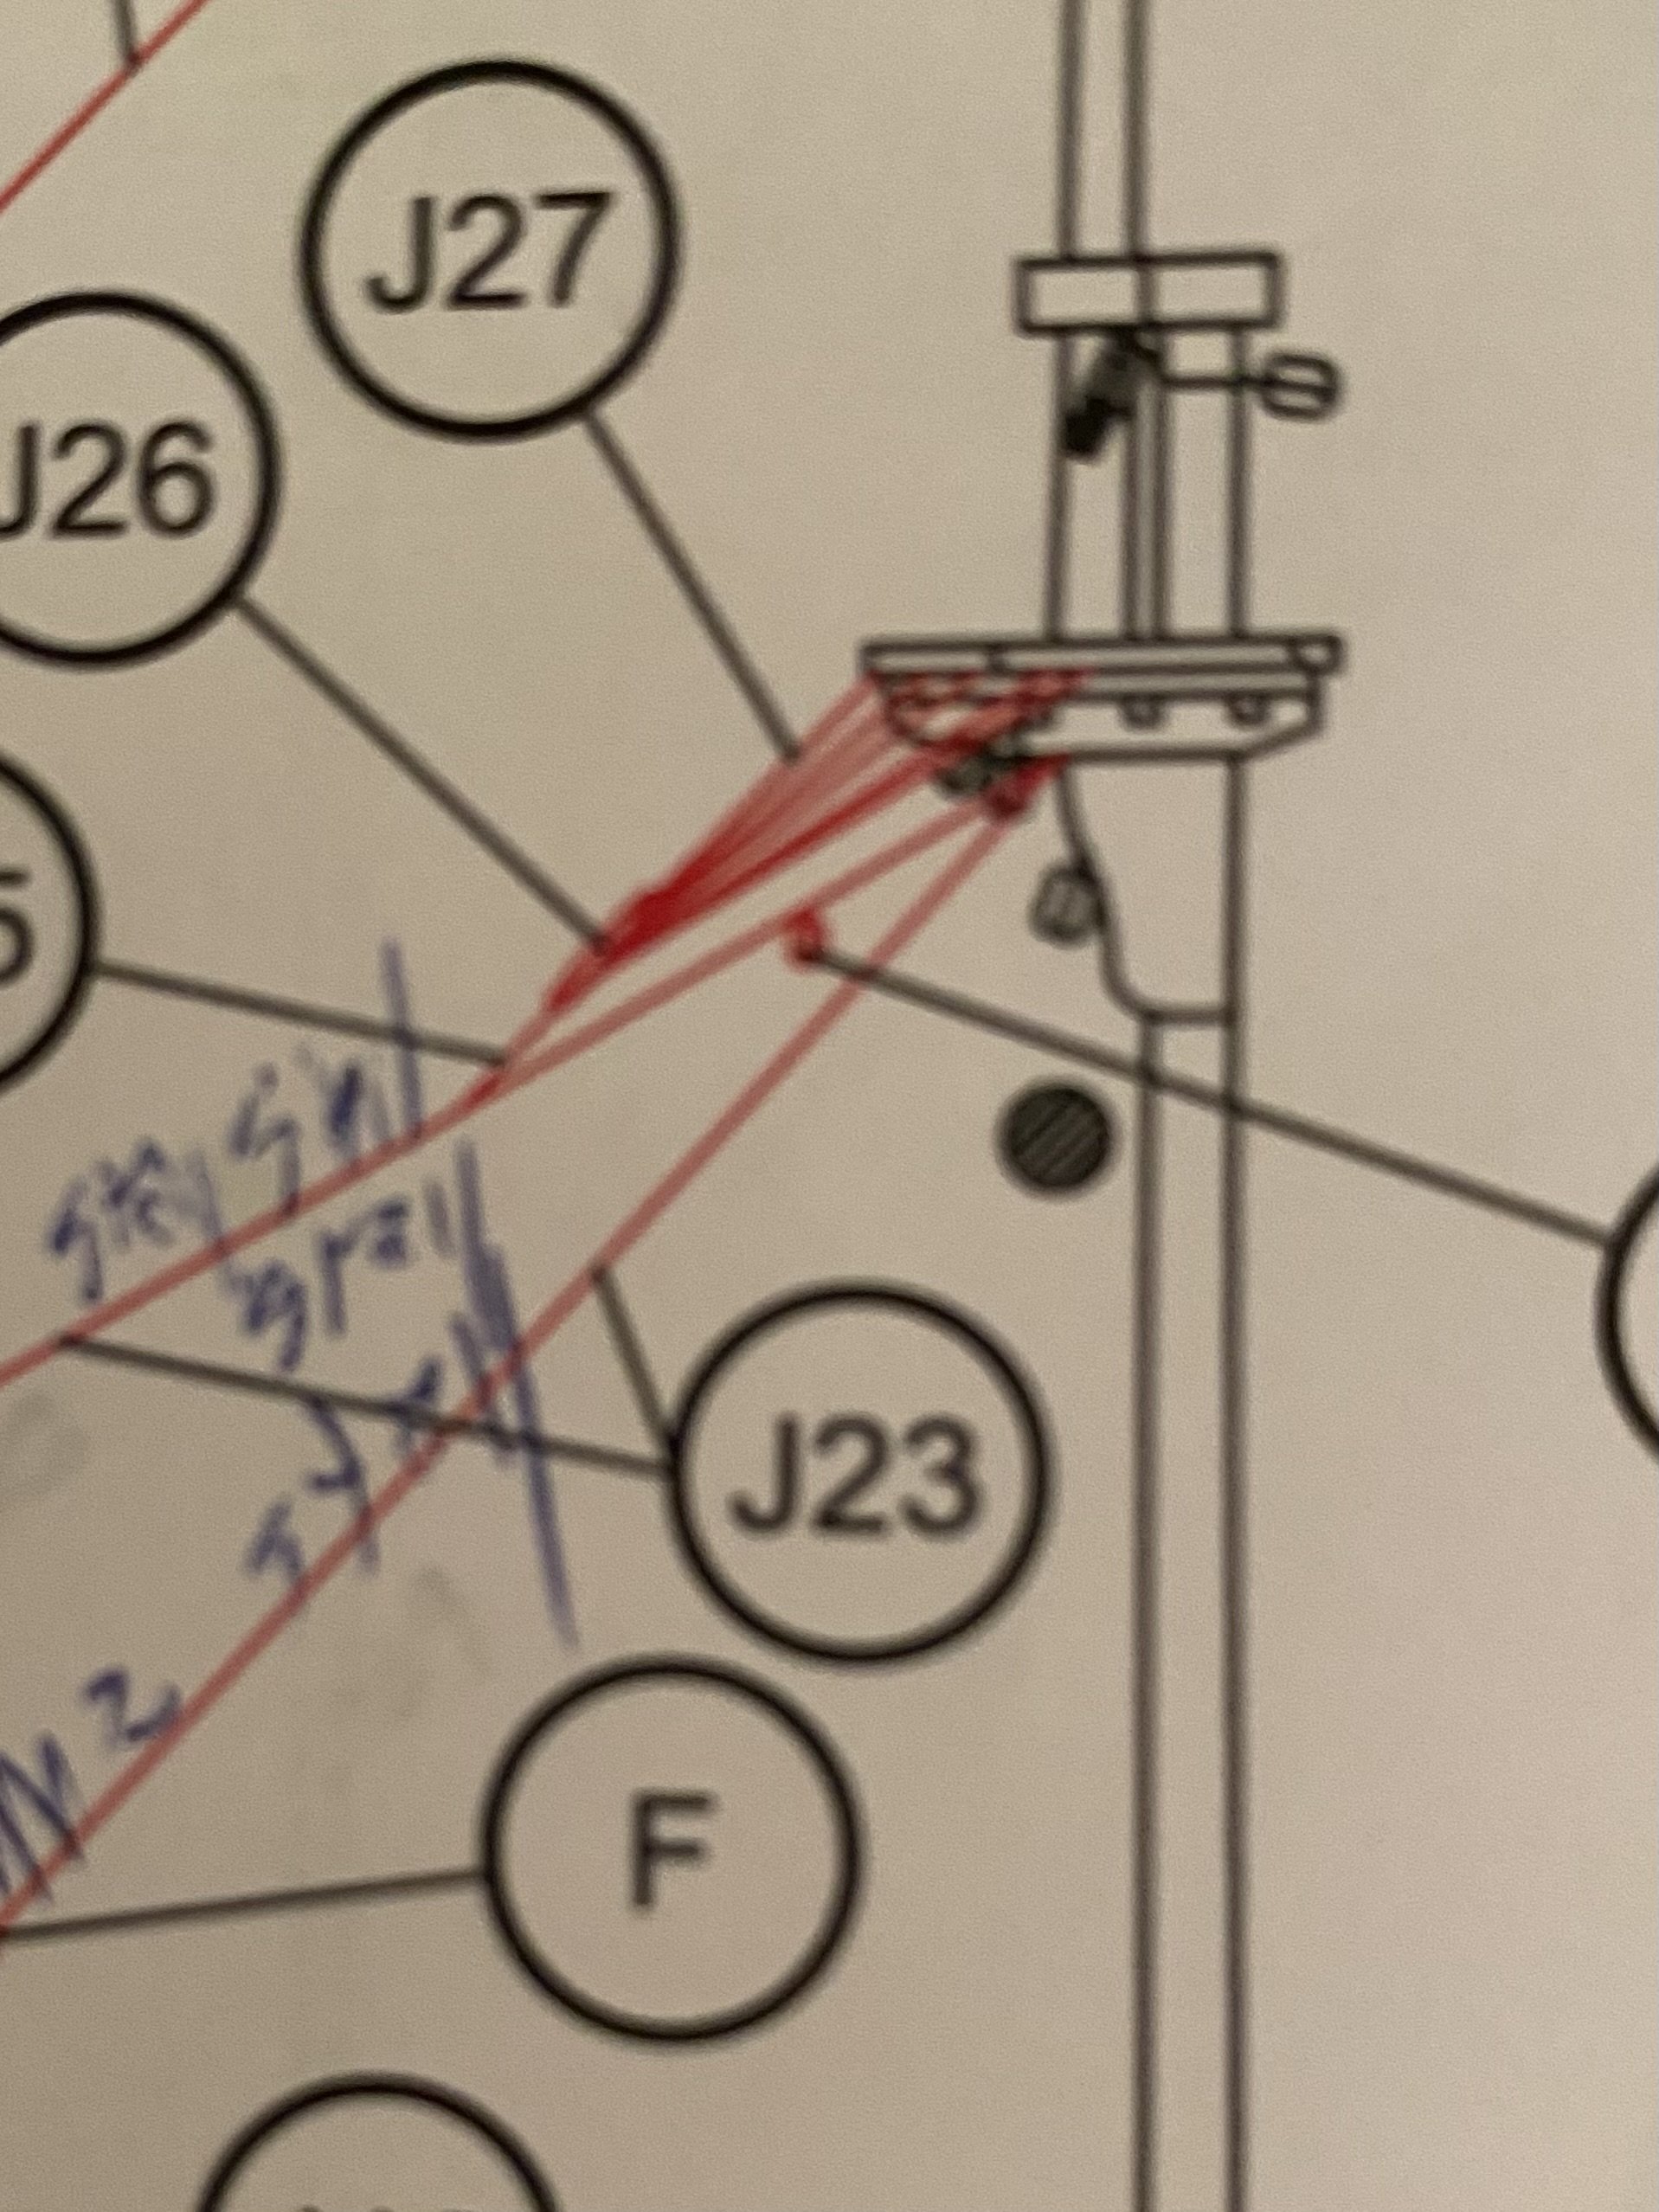
Have another question for you guys reference the crowsfeet. I have completed the foremast crowsfeet and plan to work on the mainmast crowsfeet next. Following that I will do the mizzenmast crowsfeet. Therein is my question. The OcCre rigging instructions (pic 2) show it being attached to the mizzen staysail stay. The AOTS book (pic 3) shows it attached to the mizzenstay. The mizzen stay is the heavier stay of the two and the one rigged the same as the fore and main stay. However the mizzen staysail it is rigged below the staysail stay. This would require running the staysail stay through the crowsfeet which does not seem practical. Rigging the crowsfeet to the mizzen staysail stay avoids that issue but rigs it to the weaker of the stays. Which do you think is correct?


-
Well that is what I have. With both hearts of the tackle forward of the foremast. I had to move the heart tied on the bowsprit out further than the instructions showed so the two stays did not come together. You can see in my photo the heart for the preventer stay.
-
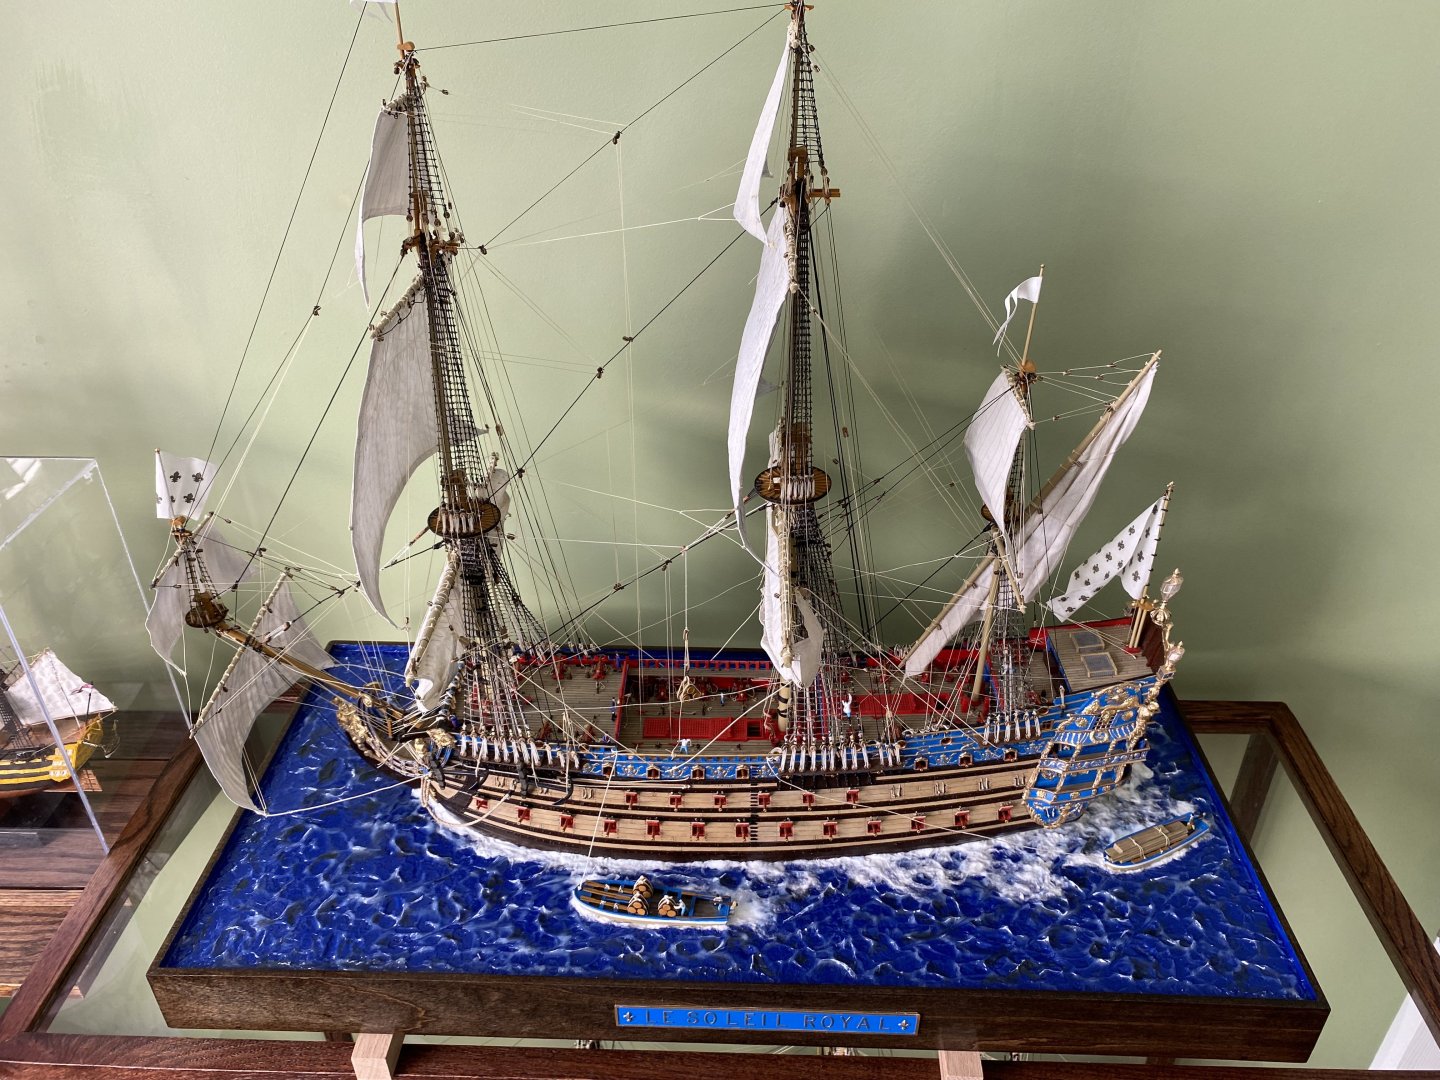
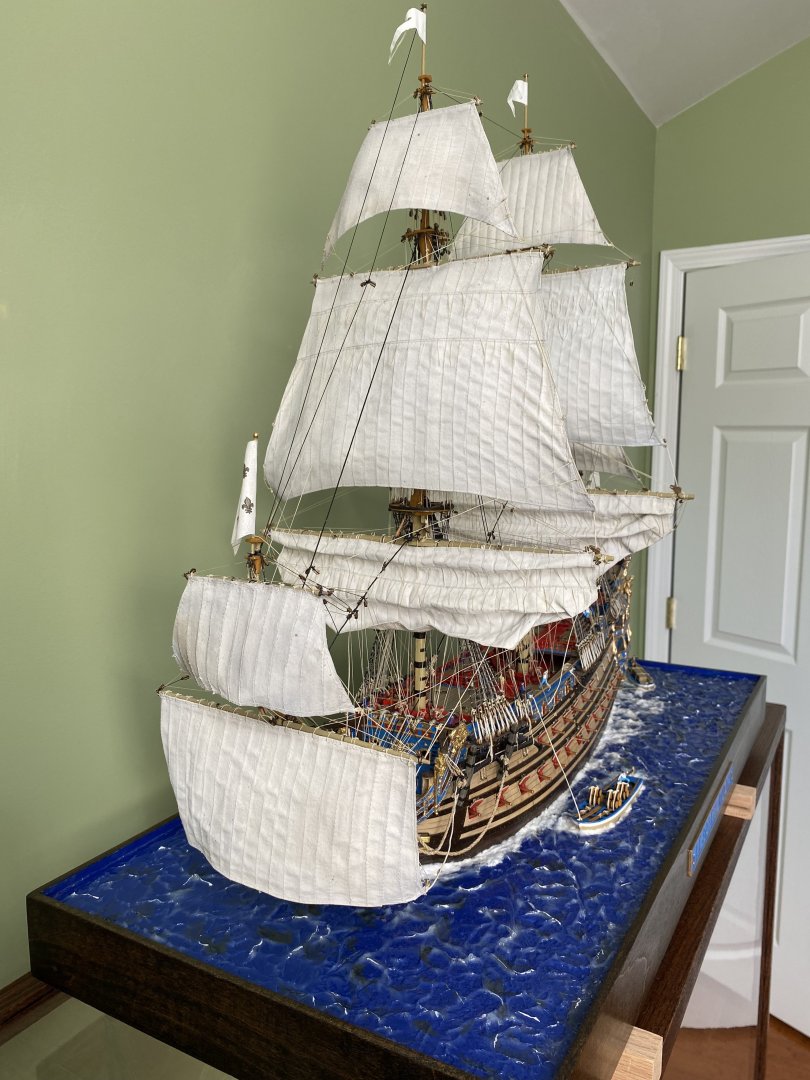
I am working on the mainstay. The instructions have it lead to a heart tackle on a collar near the base of the bowsprit. This results in the stay rubbing against the foremast. I checked my Victory and Soleli Royal and see the mainstay touches the foremast on both those ships. Is that just the way it is?
-
Yes it has been that my friend. My wife and I both battled pneumonia earlier this month. Here in KY doctors are saying we are having a quaddemic with flu, RSV, Covid, and norivirus. Top that with many days of below freezing temperatures and deep snow. Isn’t it great! 😒
- 2,699 replies
-
- 2
-

-
- heller
- soleil royal
- (and 9 more)
-
Marc I am setting here on a quiet Sunday morning by the fireplace with my coffee and my iPad. I decided to take a peek at your build to see what’s new. Reading again through the last few posts. I am again moved by the words from HAIIAPHNK, yancovitch, shipmodel. So much truth in what they said!
- 2,699 replies
-
- 4
-

-
-
- heller
- soleil royal
- (and 9 more)
-
Jake I stopped by for a peek into your Mayflower progress. She looks fantastic! Beautiful job. Love the Hawaiian shirt as well.
-
Yes it is Marc. I think it is a beautiful ship. Being that it is still sailing today there are countless photos available to help with the build. It has a steel hull and the OcCre instructions have them being builder apply a coat of wood putty to the hull after the 2nd planking and then sand it to a smooth finish before adding the paint colors. I am already thinking about being a rebel and throwing authenticity out the window. As a lifelong woodworker I love the look of wood joinery and wood grain. I am thinking of giving the model a wood hull like my Endeavour instead of covering all that beautiful planking with wood putty. I know that will be completely wrong and I will probably be put on MSW probation 😊. But I am excited to see how it might look.
-
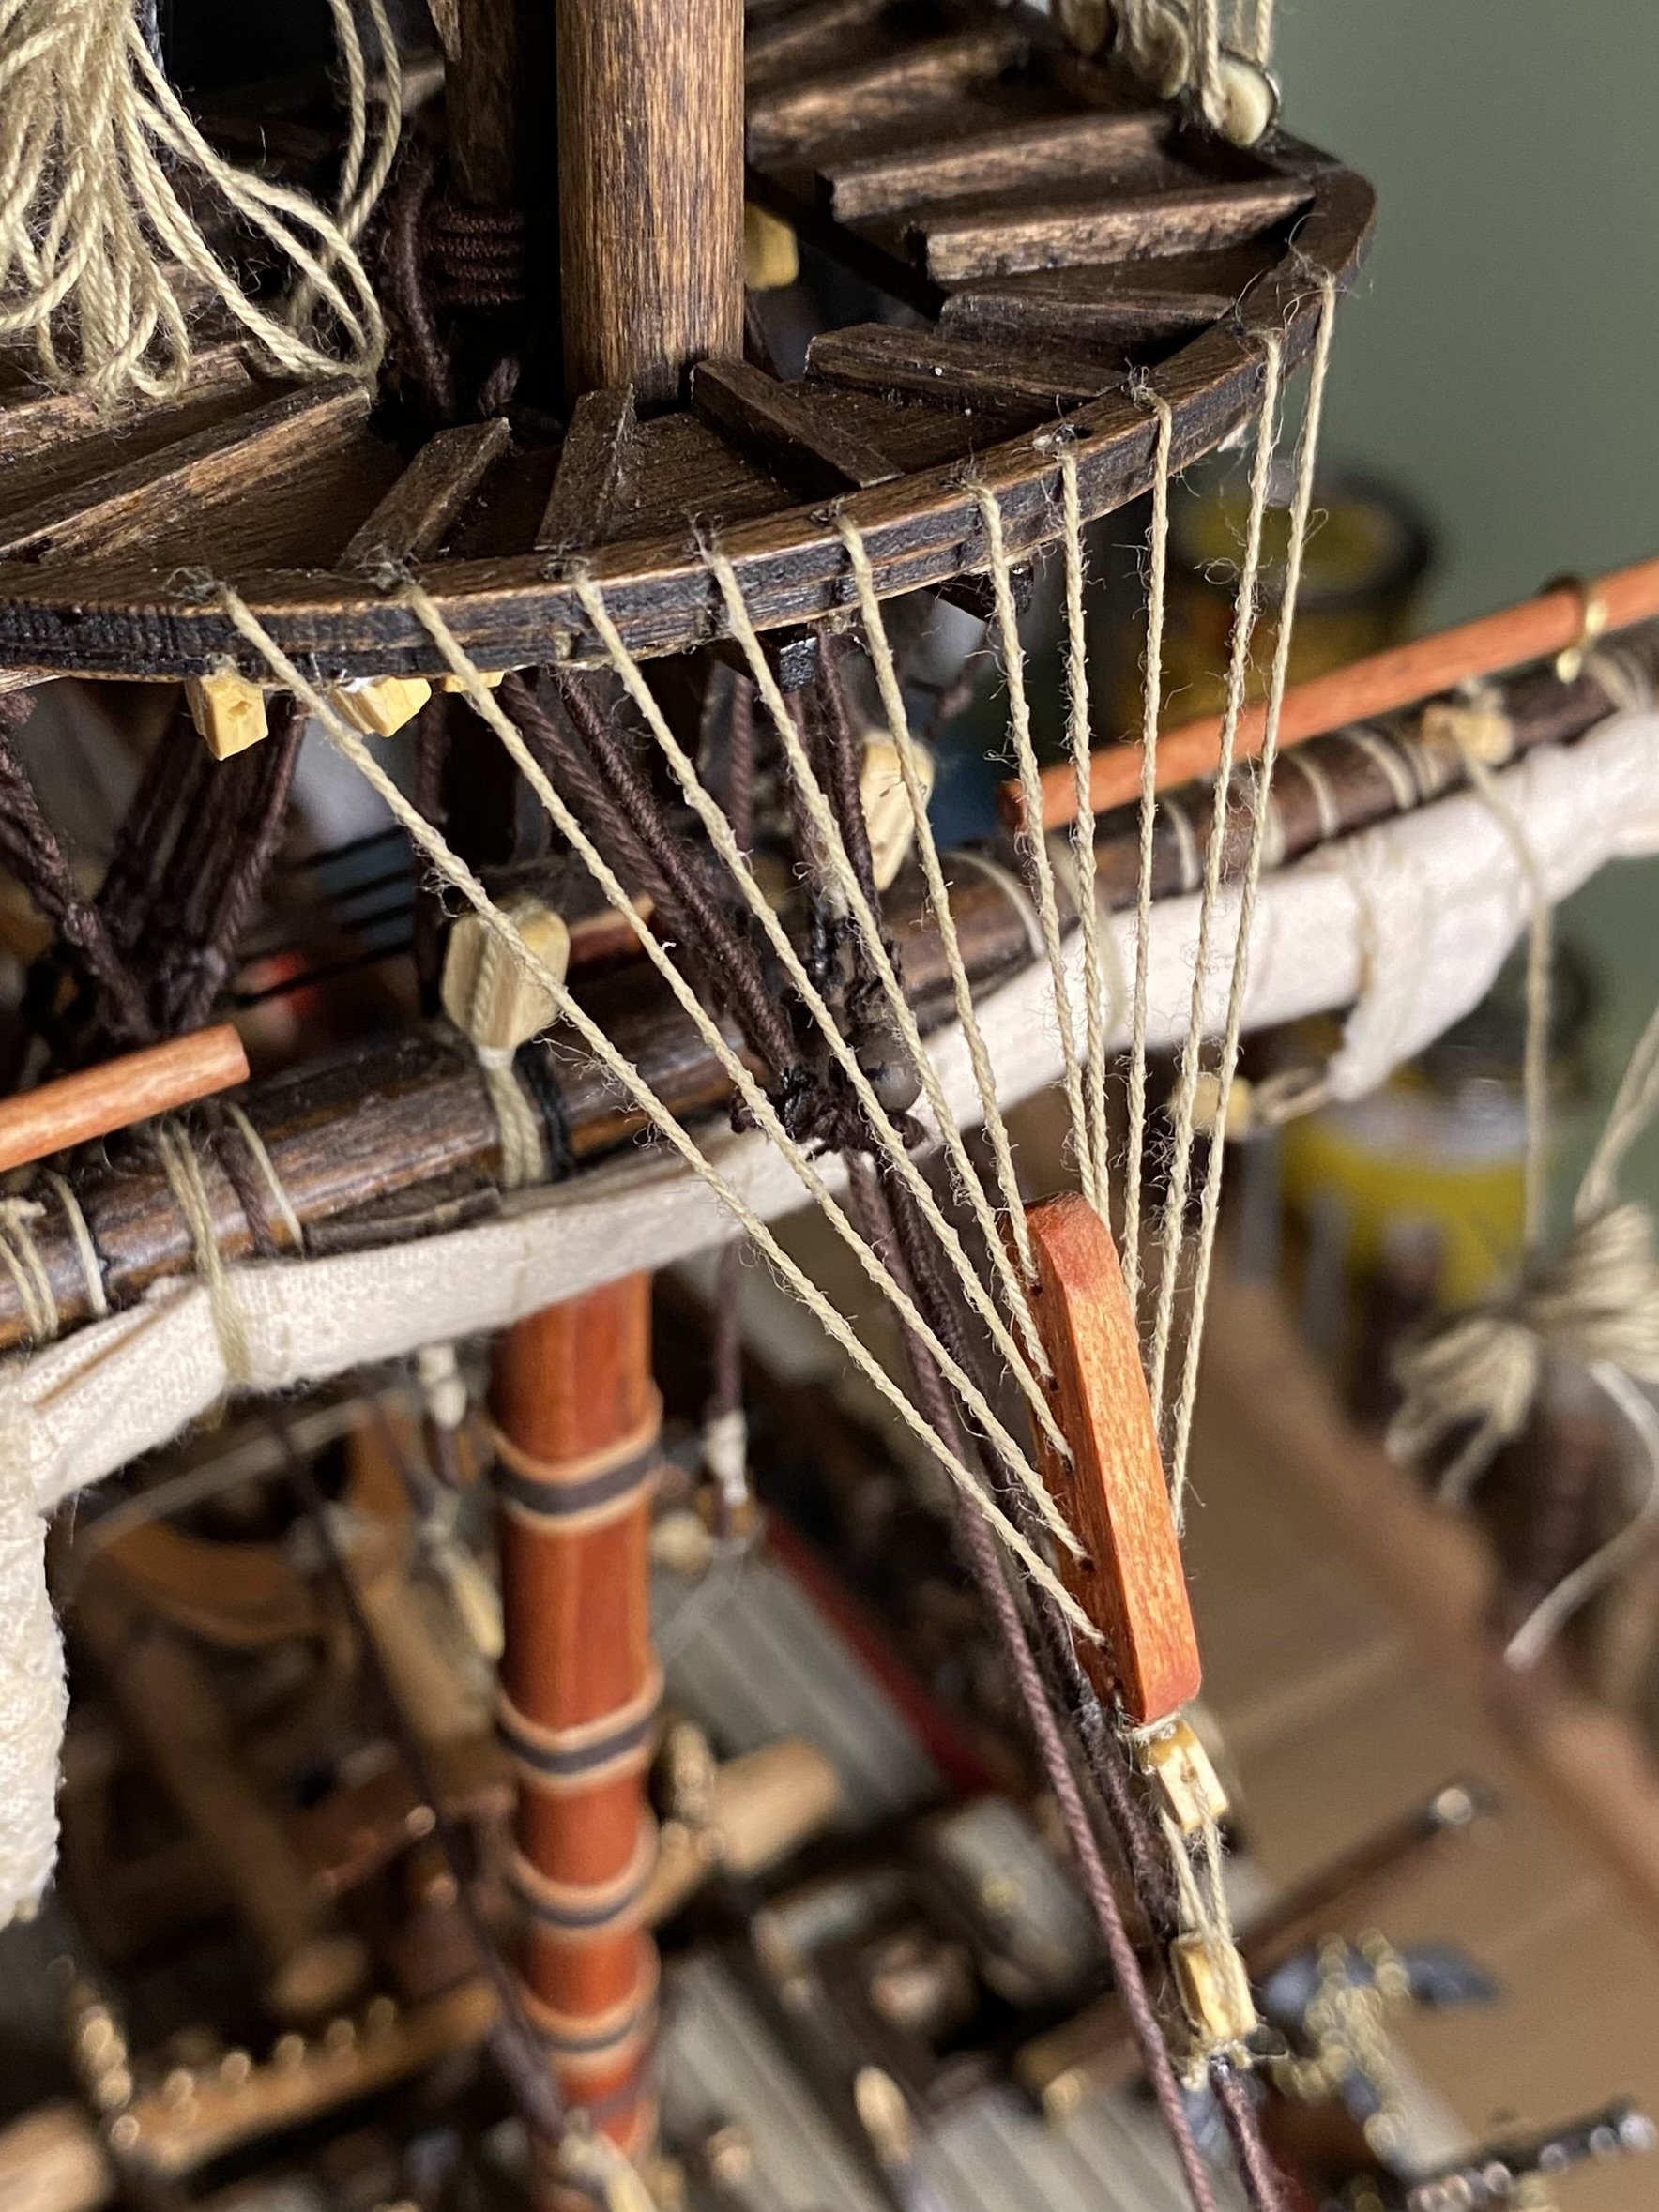
Thanks guys. That makes perfect since. I am going to be honest here and show my ignorance. I was actually wondering what the crowsfeet purpose was. Now that I know it makes since to use the lighter thread. Ian my next wood model which I found under the Christmas tree but have refused to even open yet is the OcCre Amerigo Vespucci. I don’t want to be distracted from giving all my modeling attention to my Endeavour. I have also purchased an entire electric system to light it similar to the way Daniel (here on MSW) has done his. https://modelshipworld.com/topic/33873-amerigo-vespucci-by-danield-occre-1100/page/11/
-
Ian it has been a while since I asked you a question about rigging. I have one now. The Endeavour had a rigging function called the crowsfeet at the front of each of the three mast tops. They were rigged to the appropriate stay. In the AOTS book they are shown in the Standing Rigging section. OcCre instructions have them being made with the raw or tan thread that is used for running rigging instead of the dark brown thread that the standing rigging is made with. I am thinking they should be made with the standing rigging color. Your thoughts?
-
Thanks Ian.
-
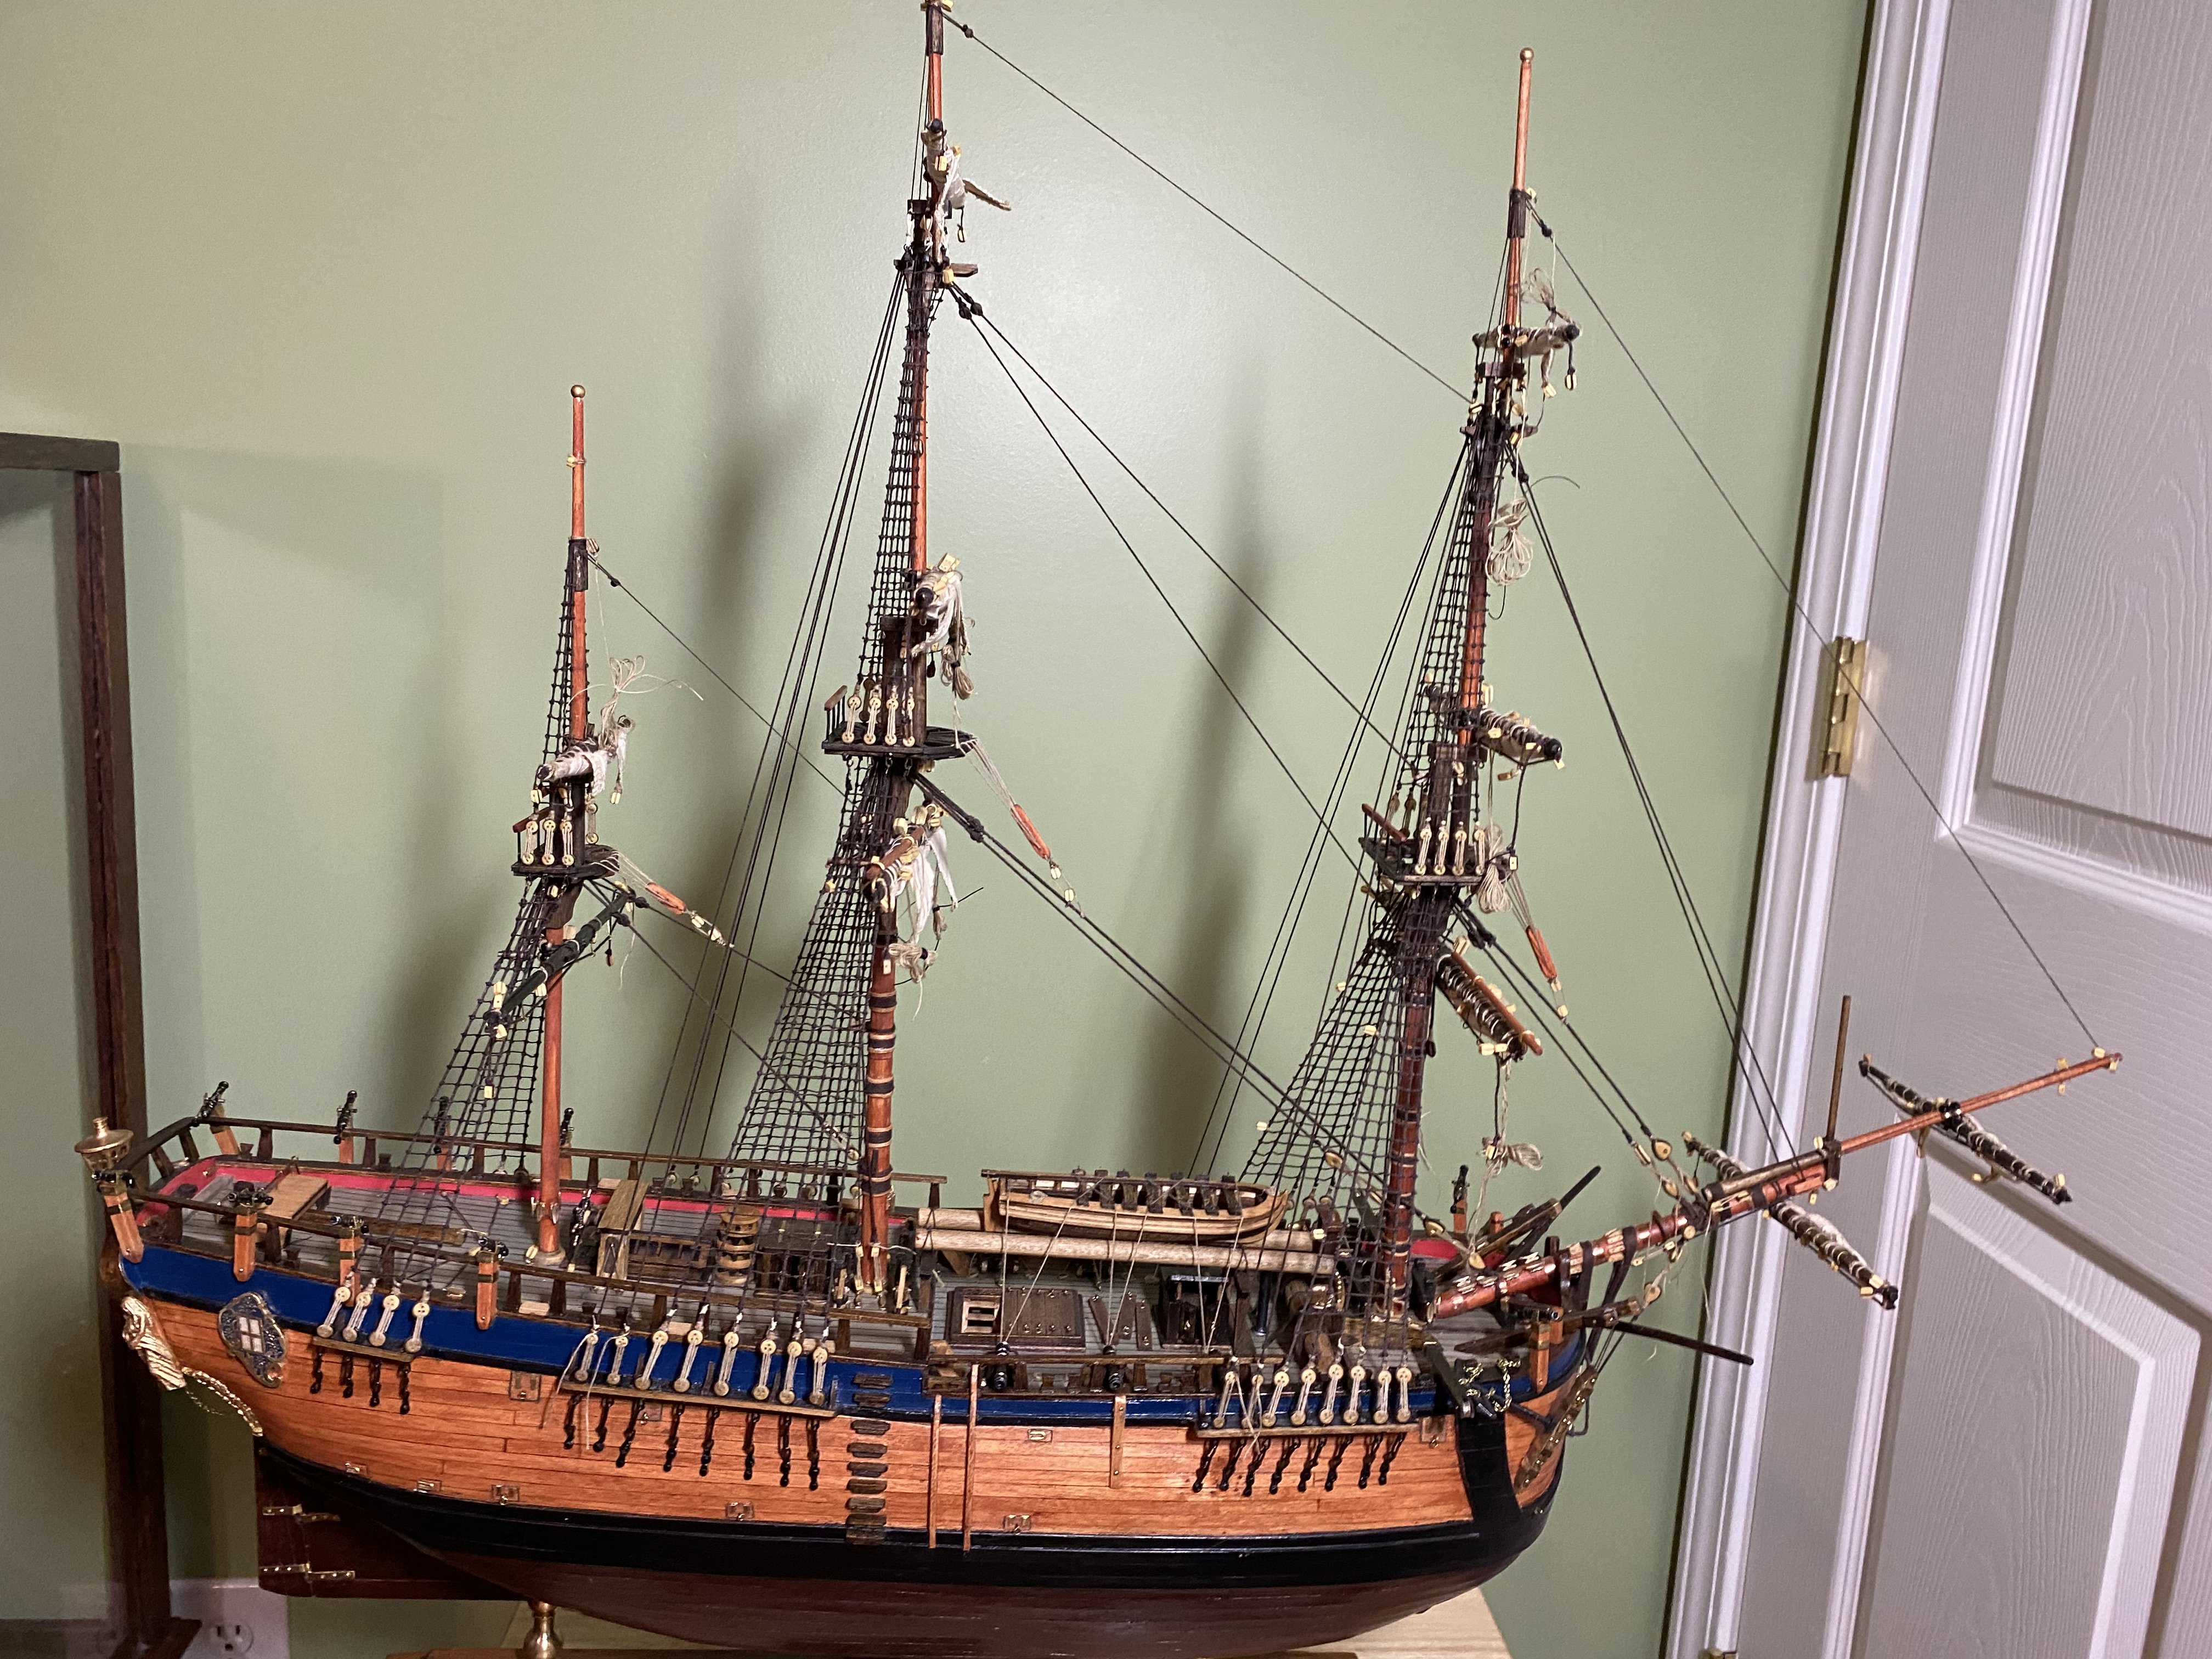
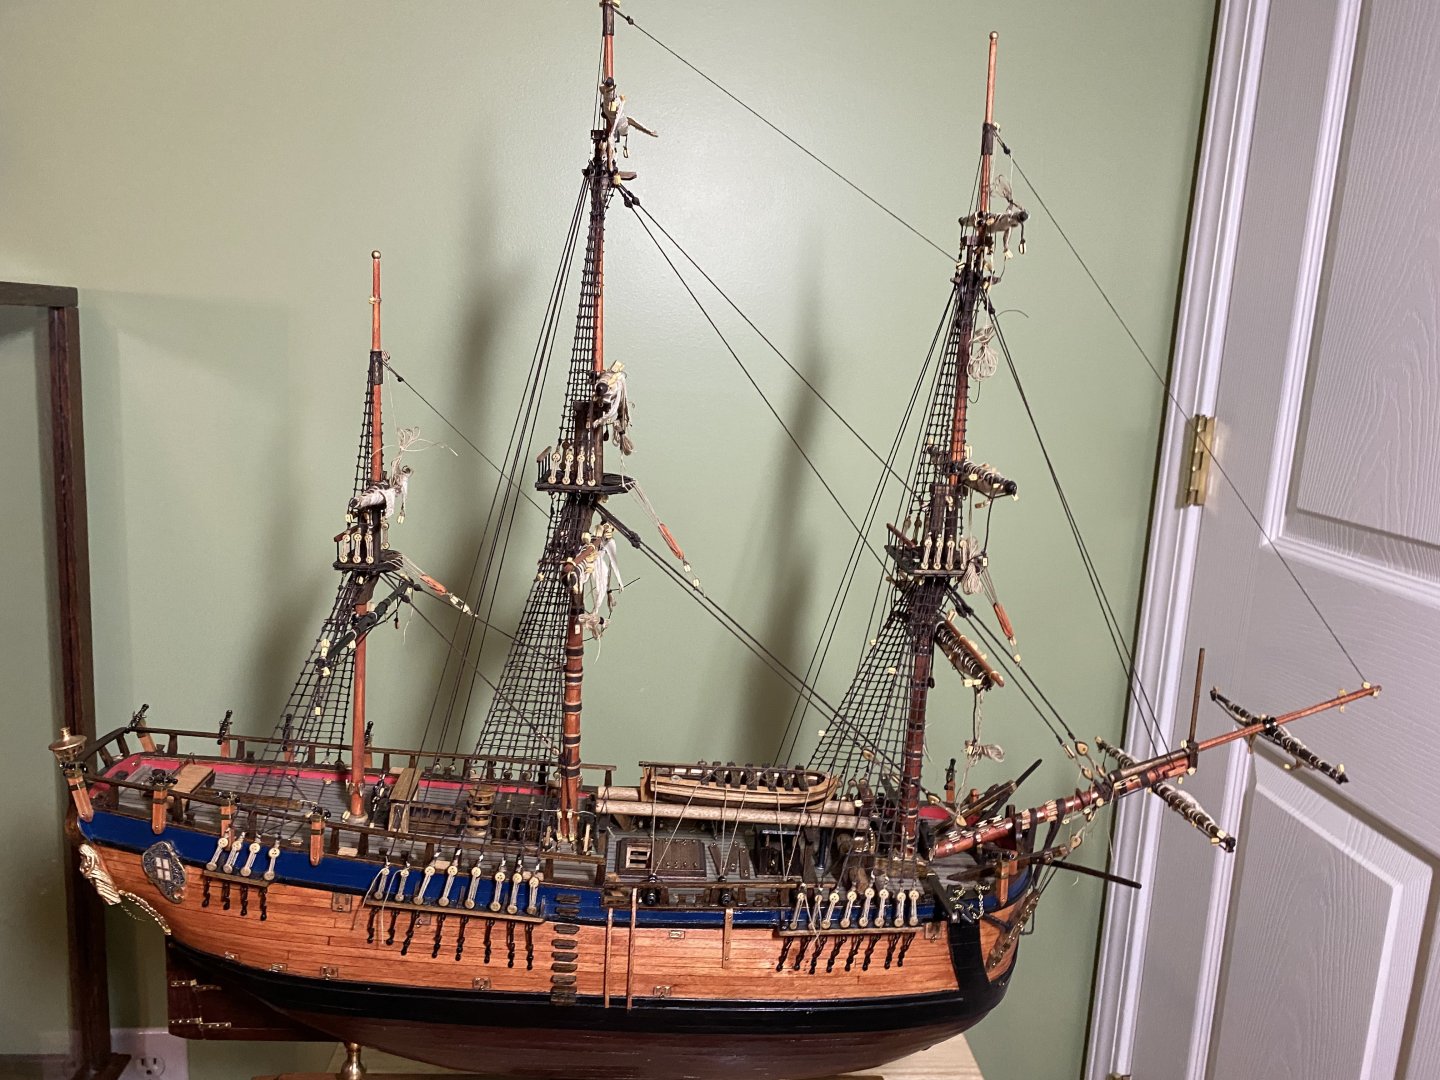
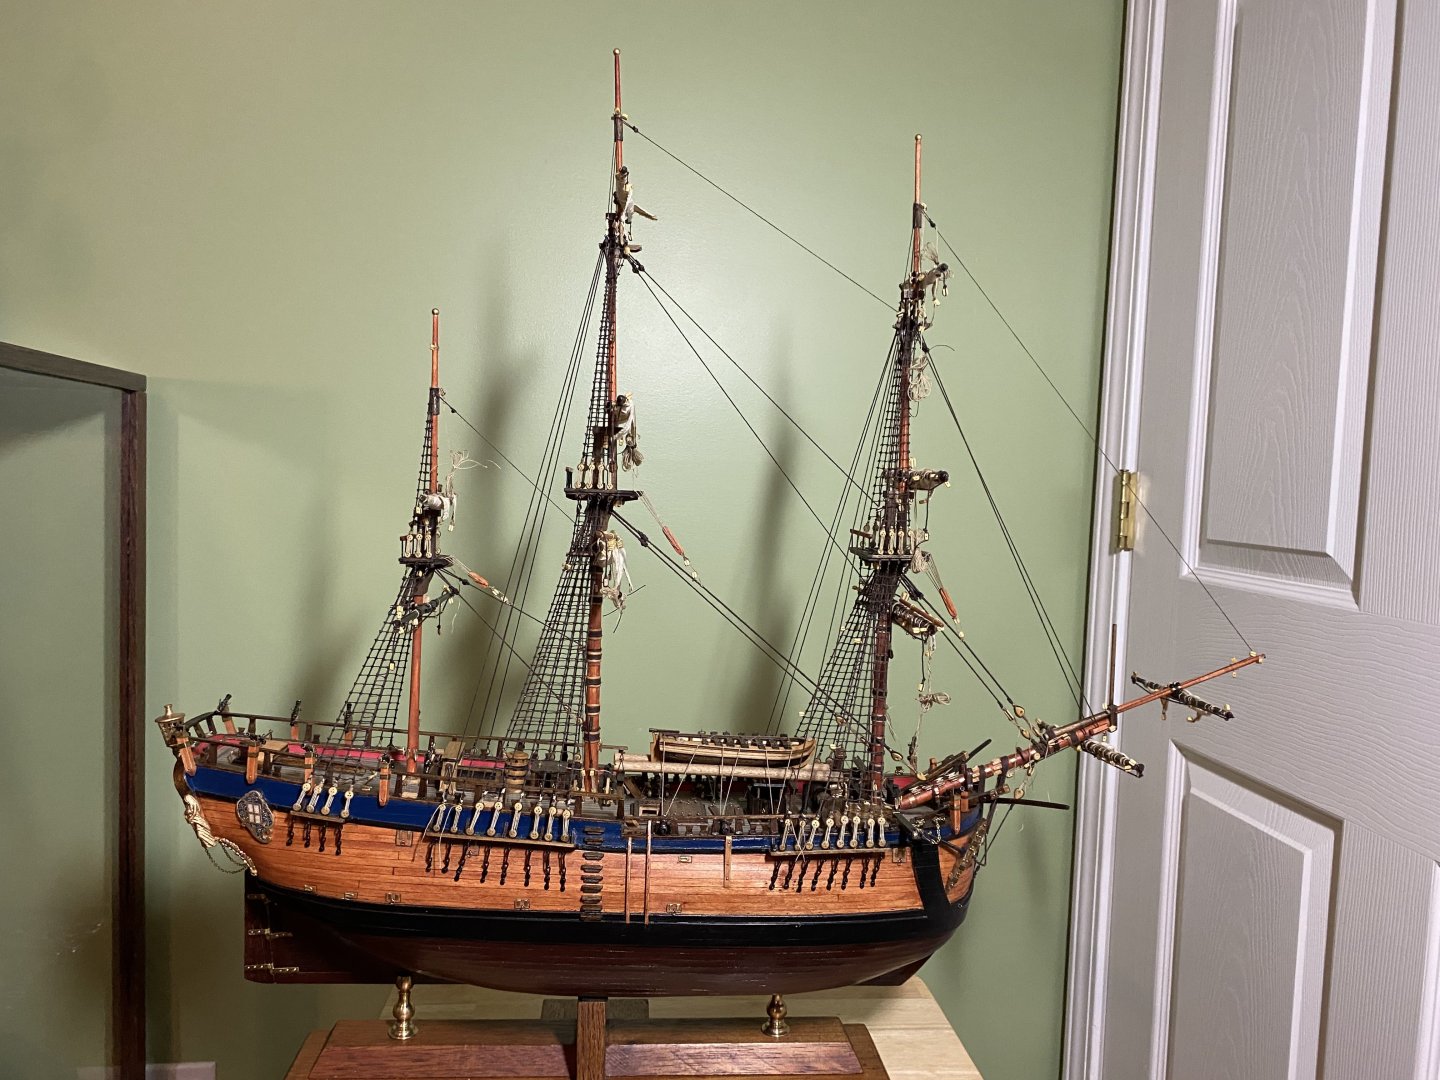
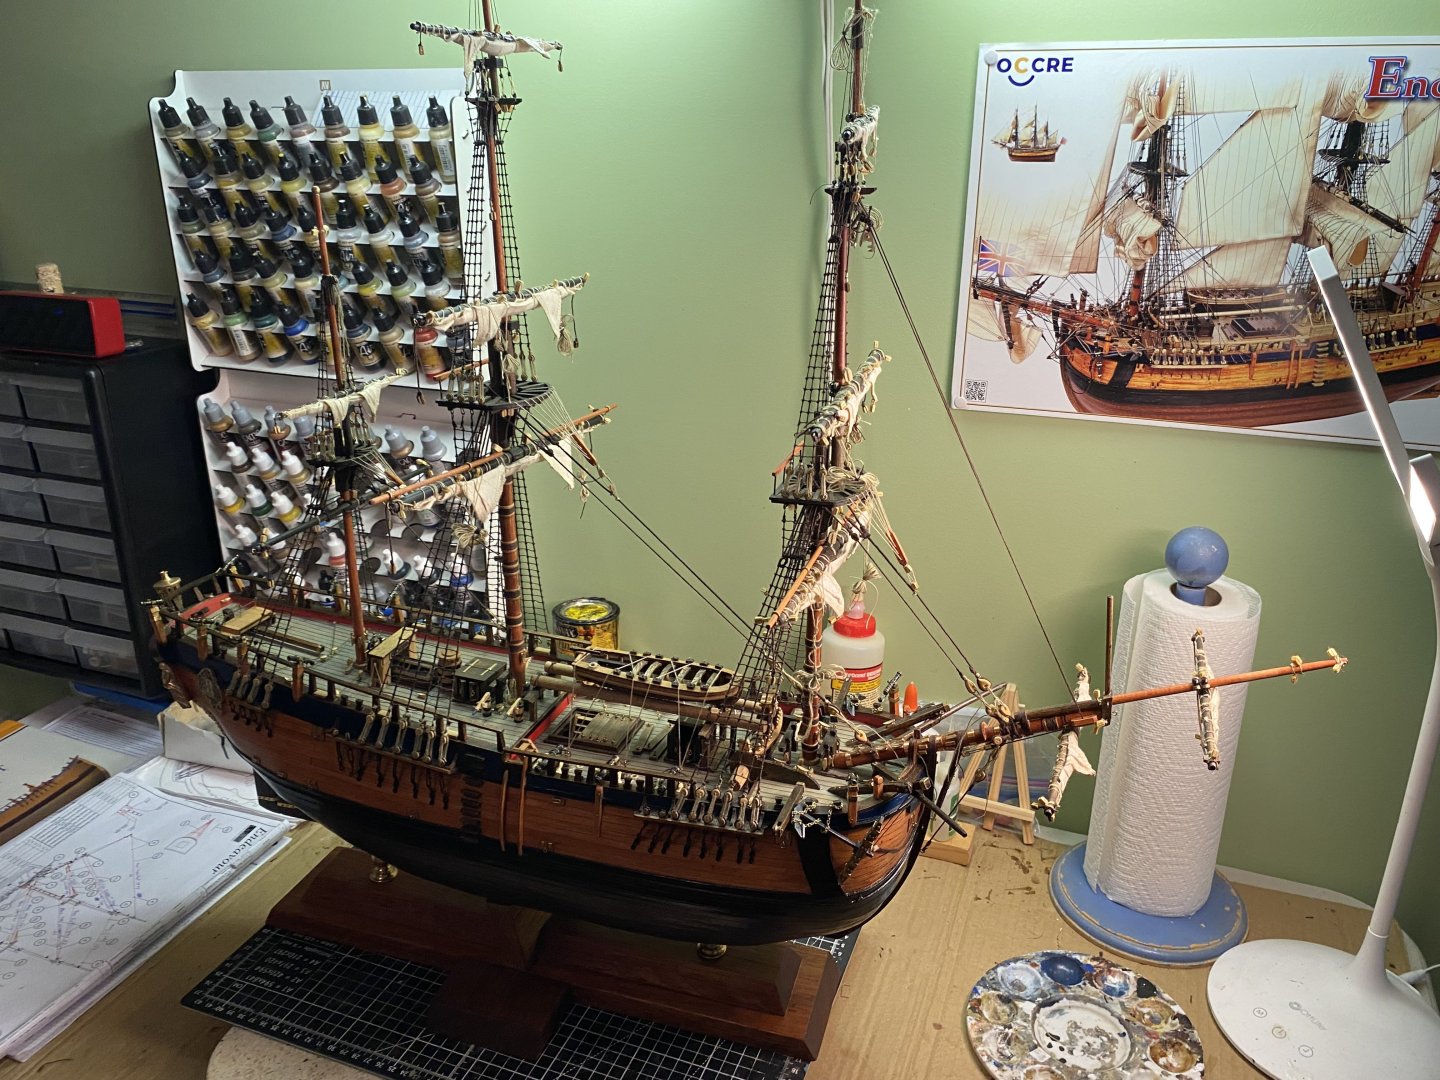
Well gentlemen after thoroughly going over all the standing rigging I have completed so far I believe I am ready to move on to all the stays and the remaining standing rigging. IMG_6419.mov
-
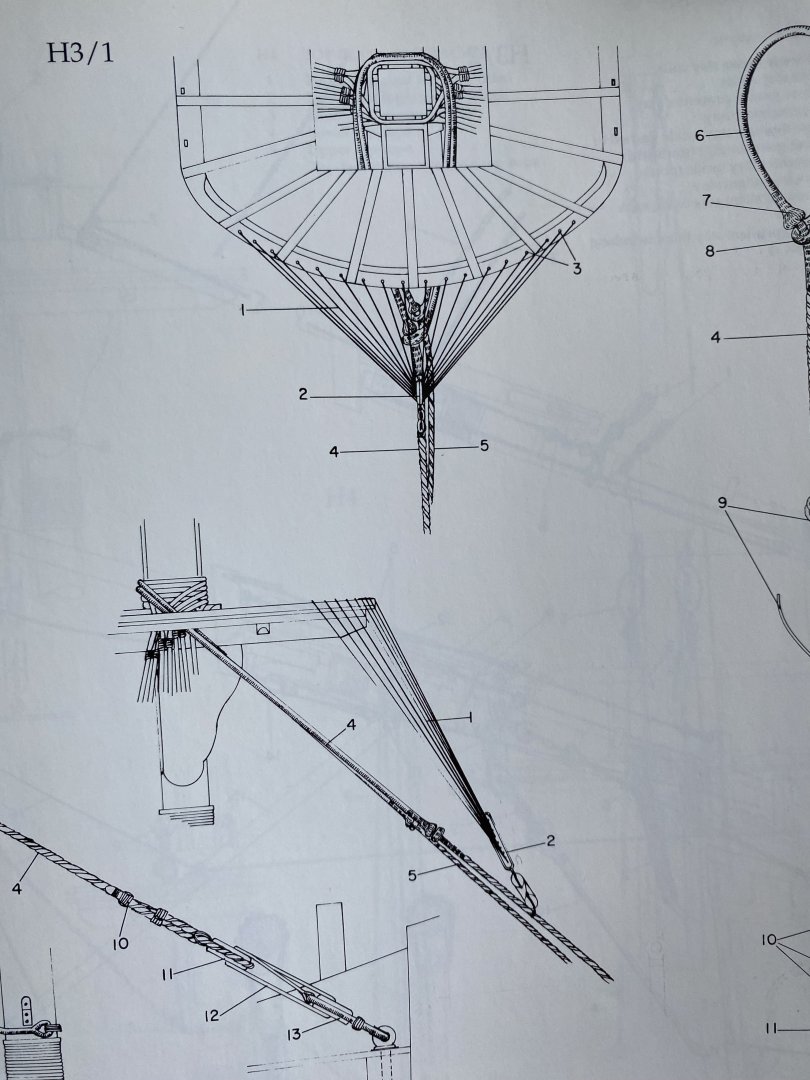
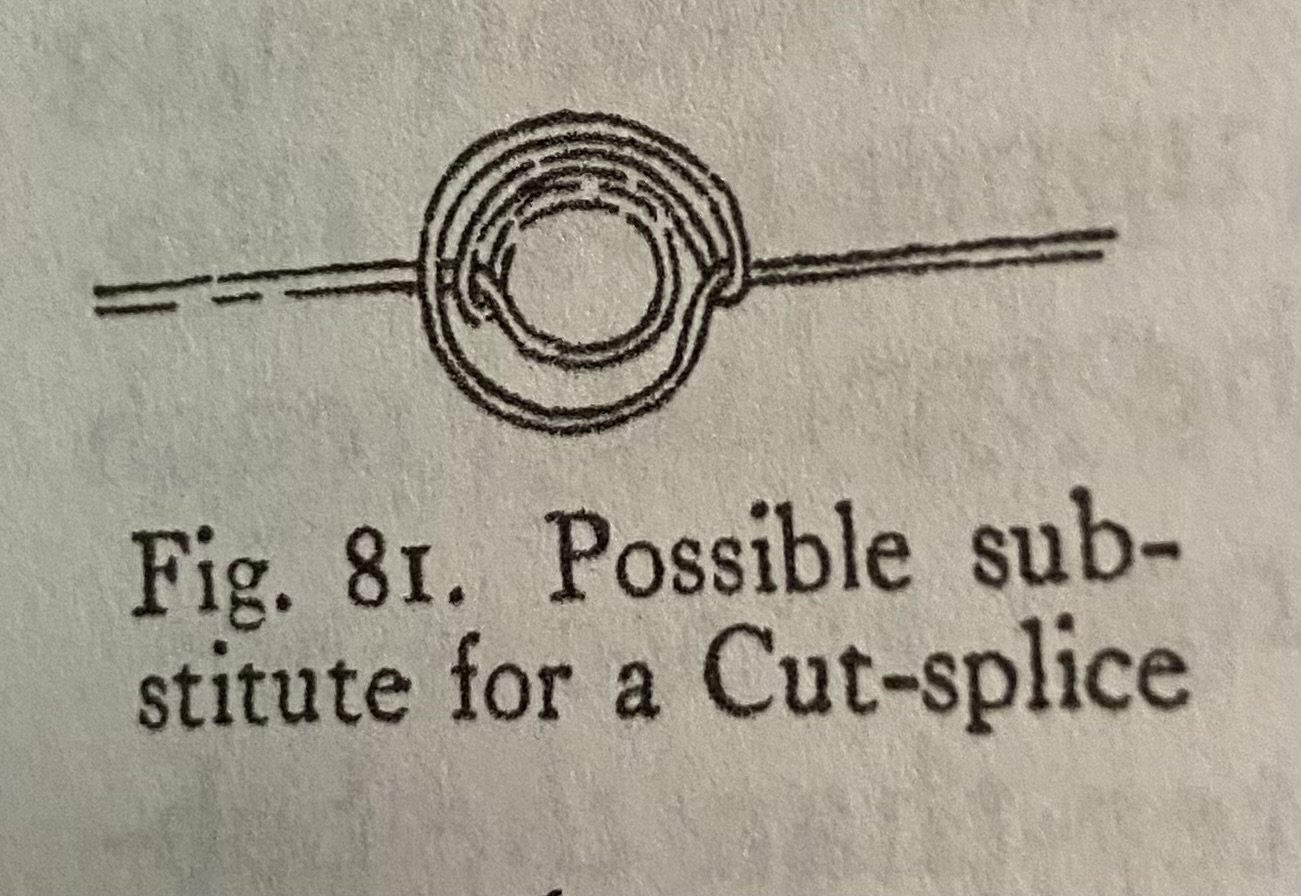
Starting the process of rigging the main topmast shrouds and then the last set of shrouds on the ship the main topgallant shrouds. This will be followed by the last bunch of ratlines. I am seeing half hitch knots in my sleep. Have been curious how to tie an odd number shroud or single tackle pendants. I know there should not be knots tied at the mast, so I often wonder best way to solve this dilemma. Well I found my answer in Anderson’s book. This “knot” solves the issue. Took some practice but eventually I got it several places on my model.
-
Thanks again Daniel, as always. I feel a bit guilty taking advantage of all the research you have done! Zooming in on your second picture in comment #387 above I can very clearly see the light boxes you have used. I will have to research a small LED spot that comes in different colors with a voltage that can be run on the same circuit.
-
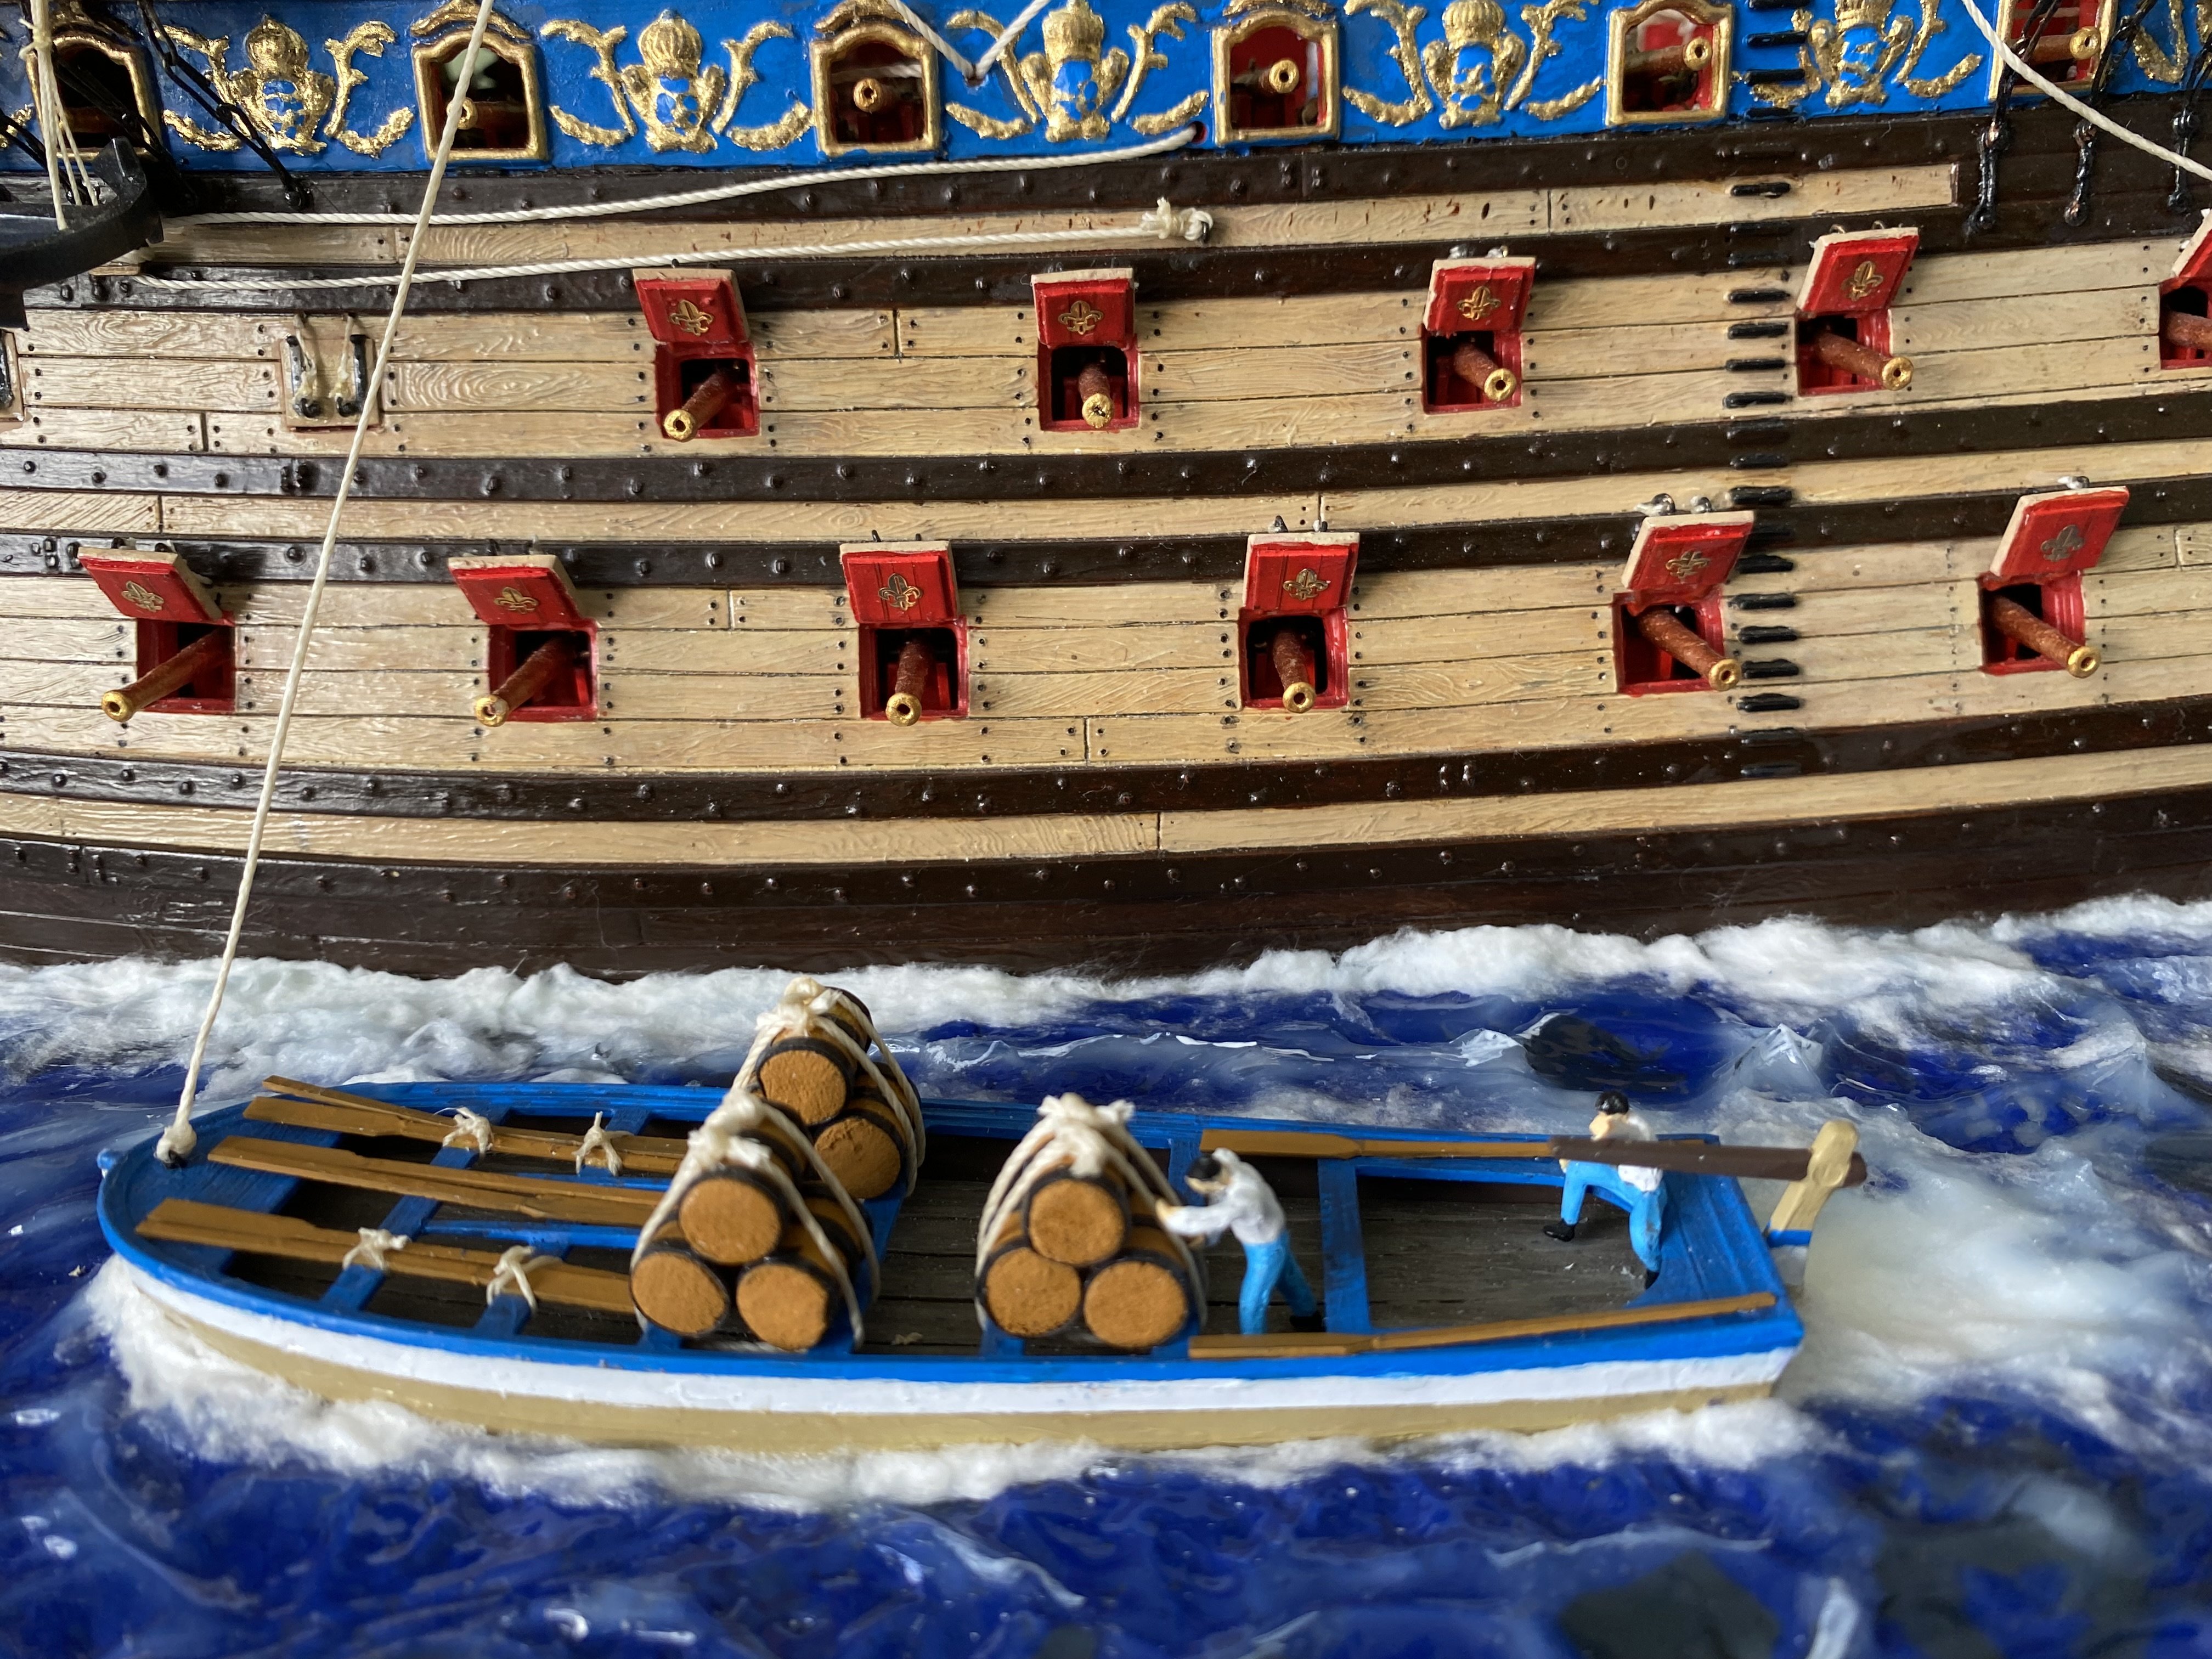
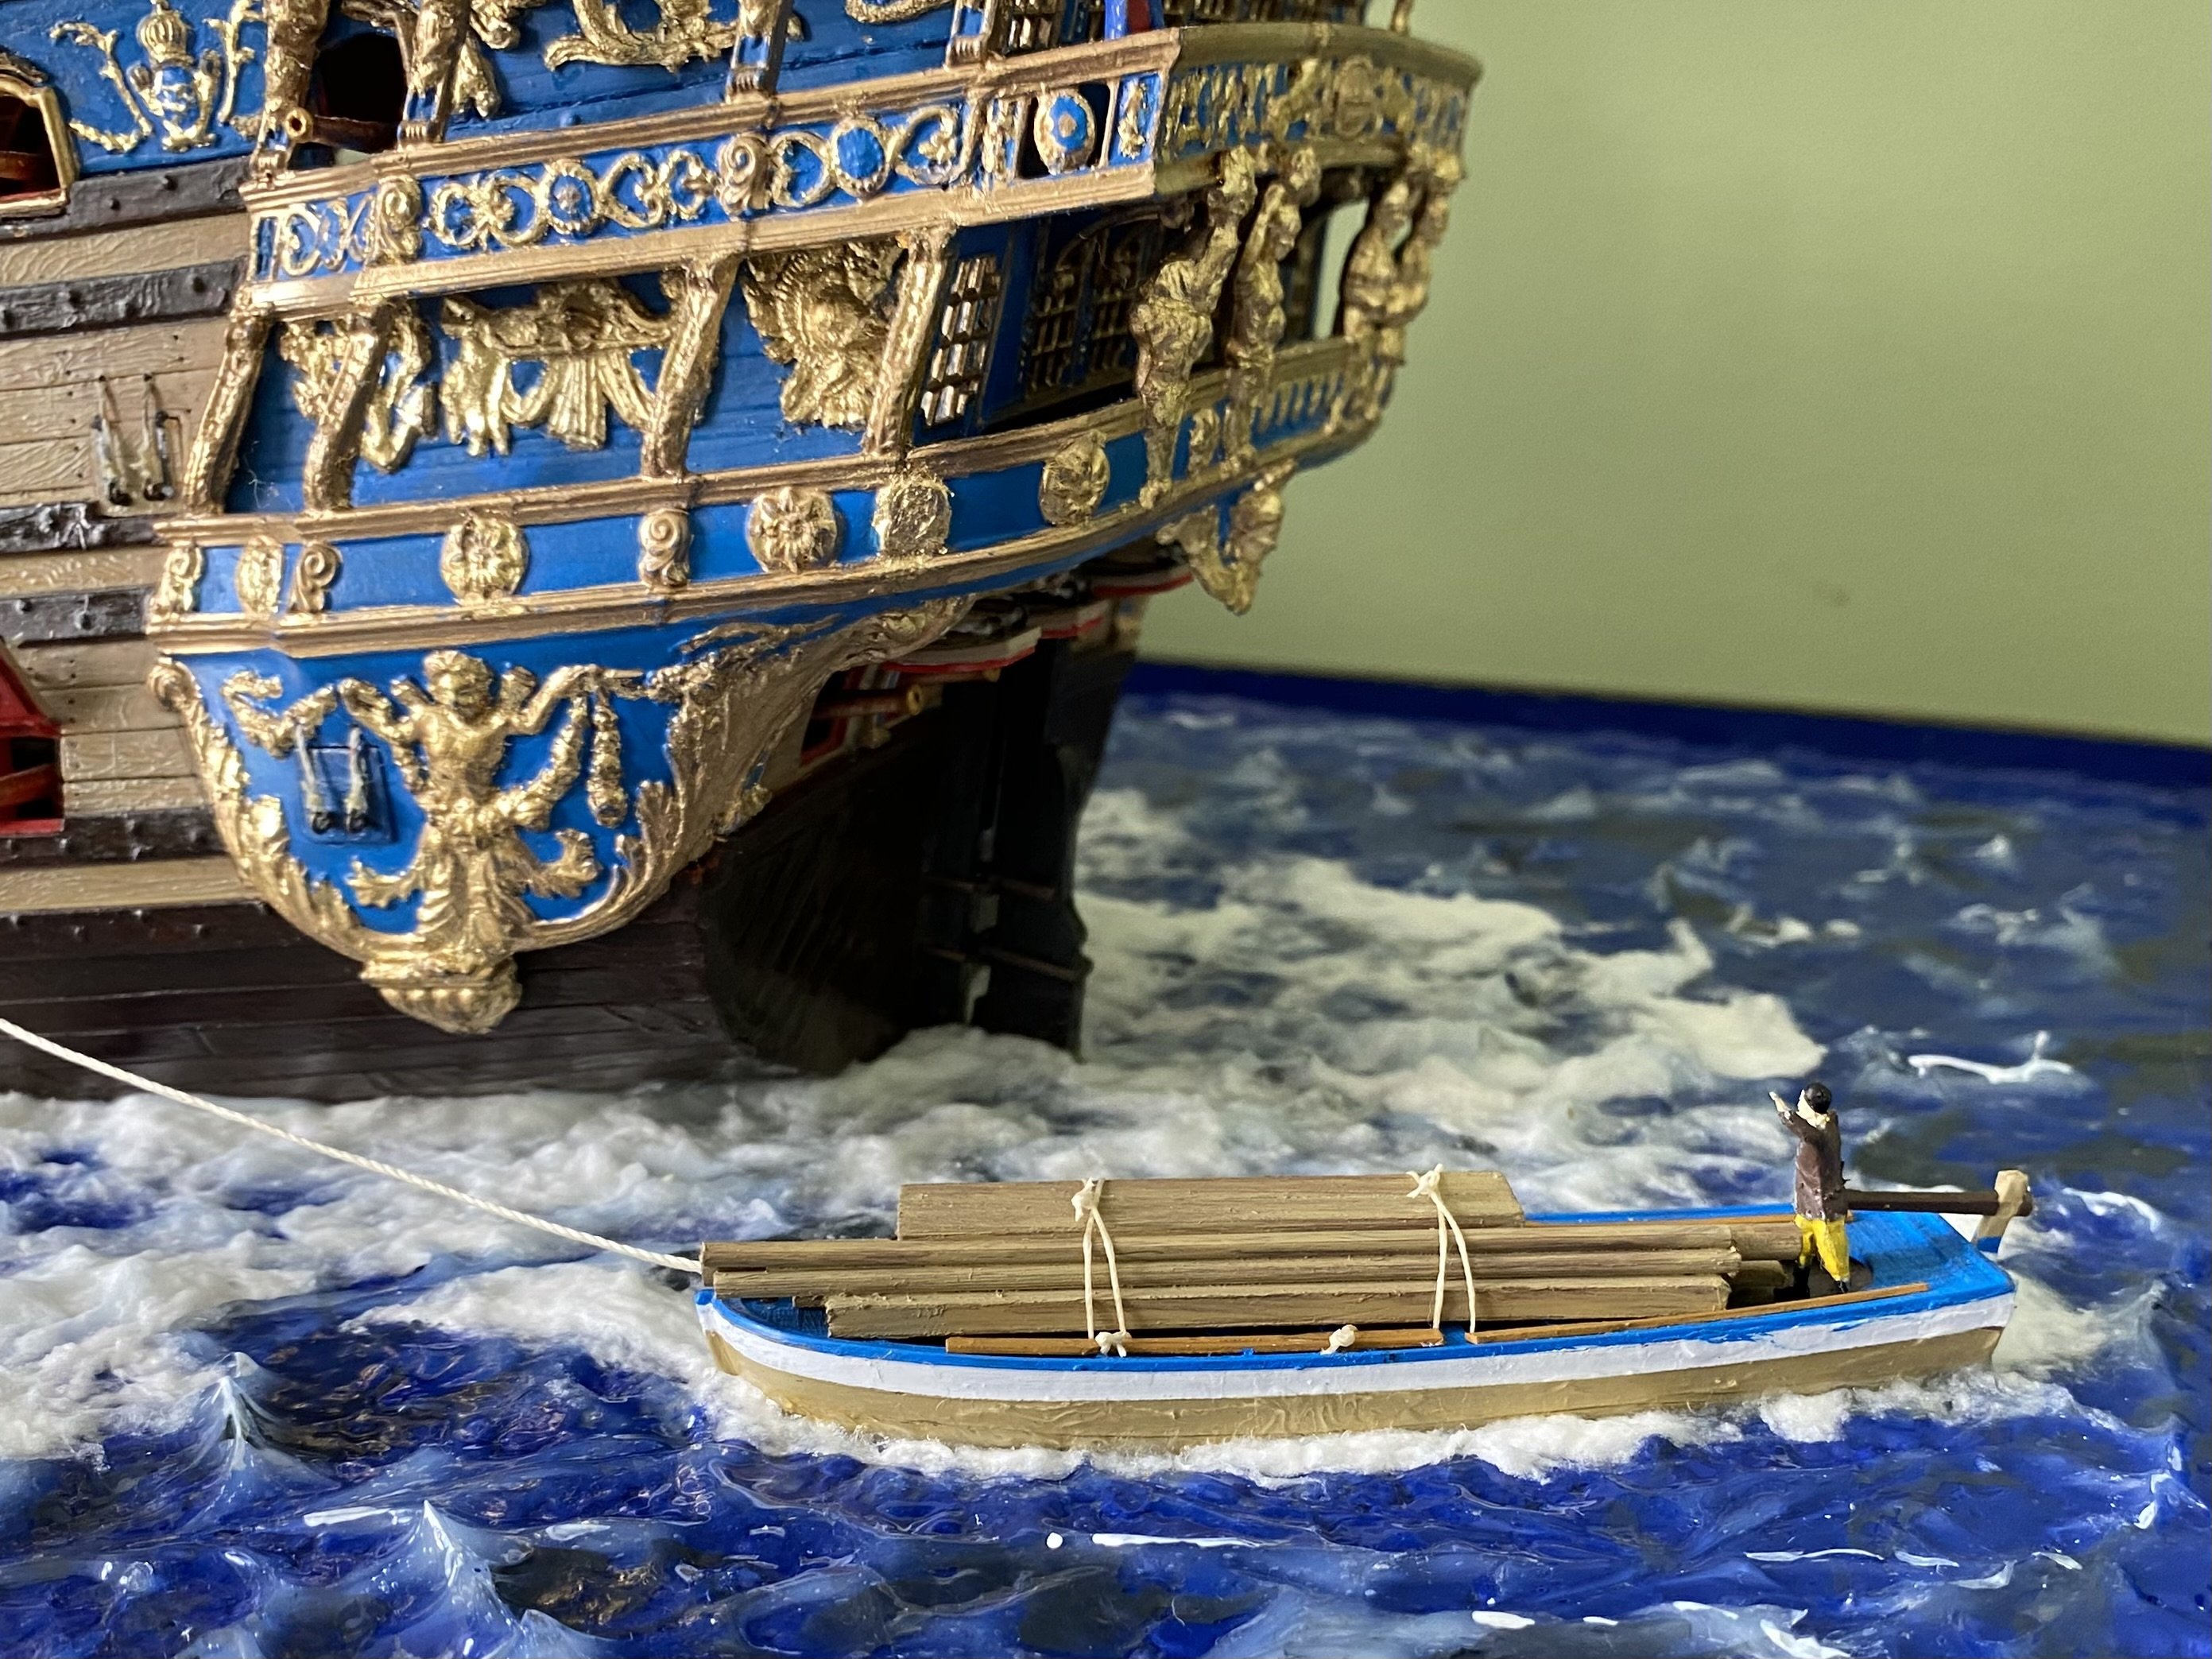
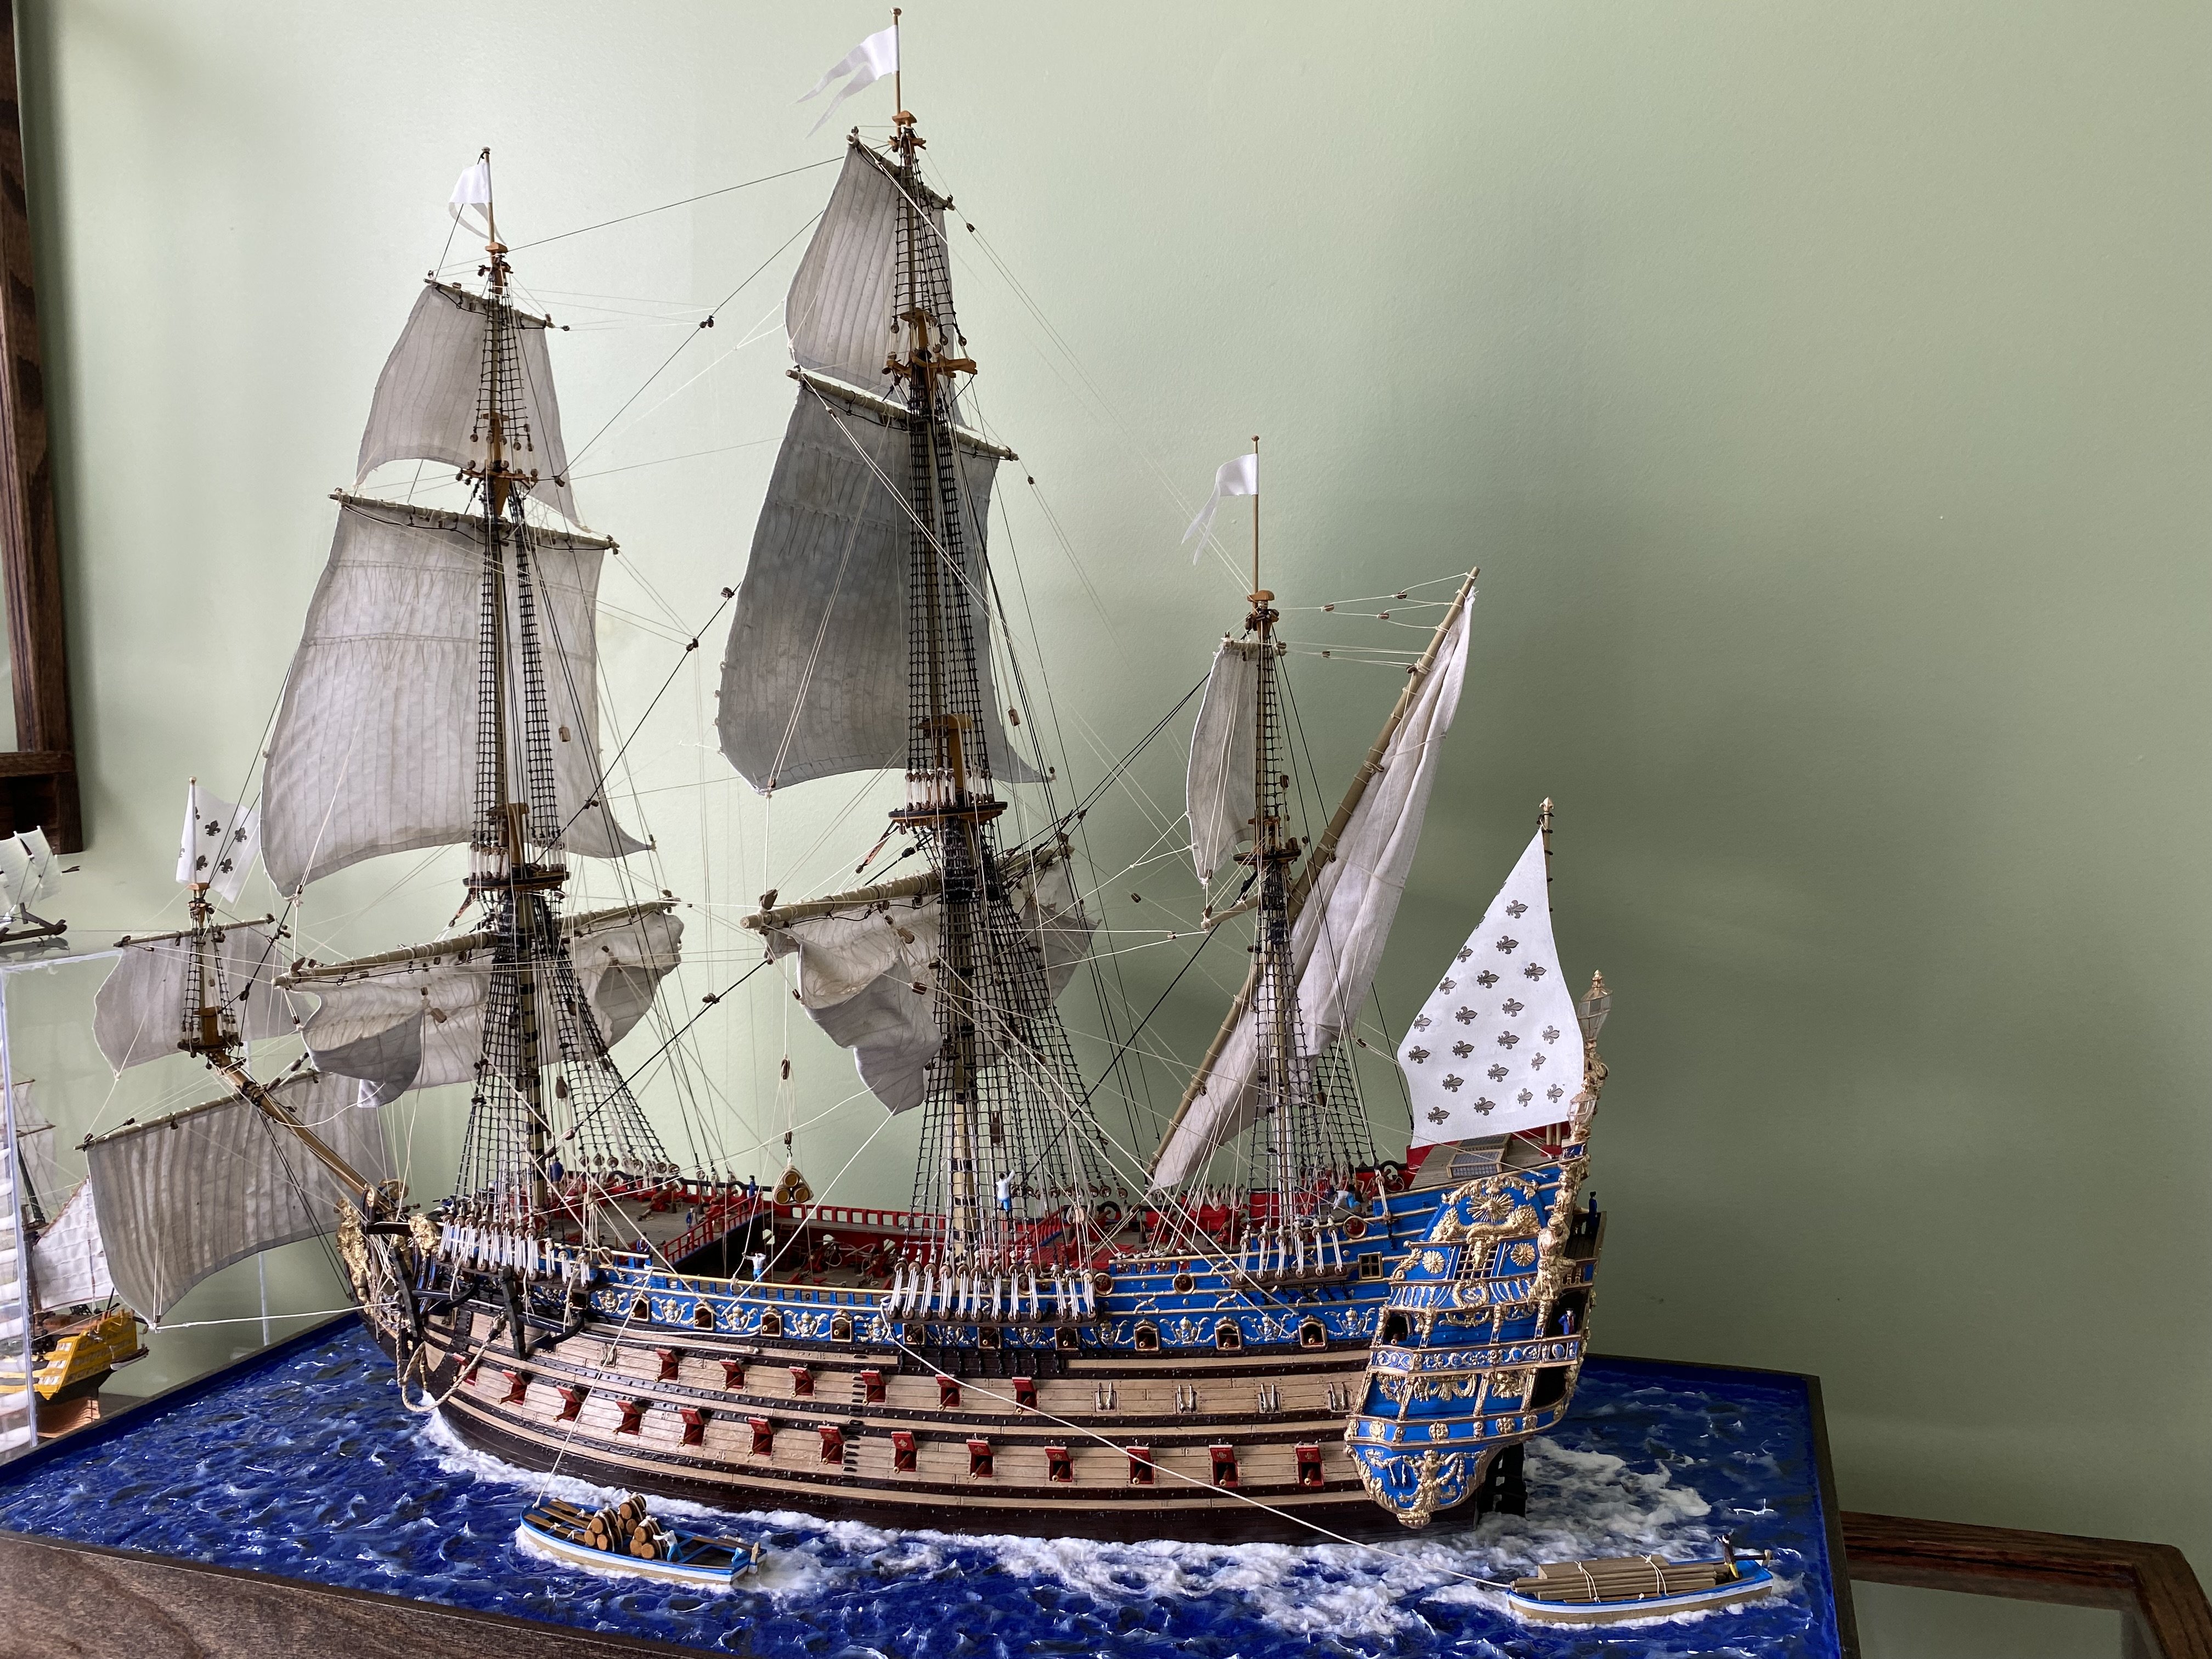
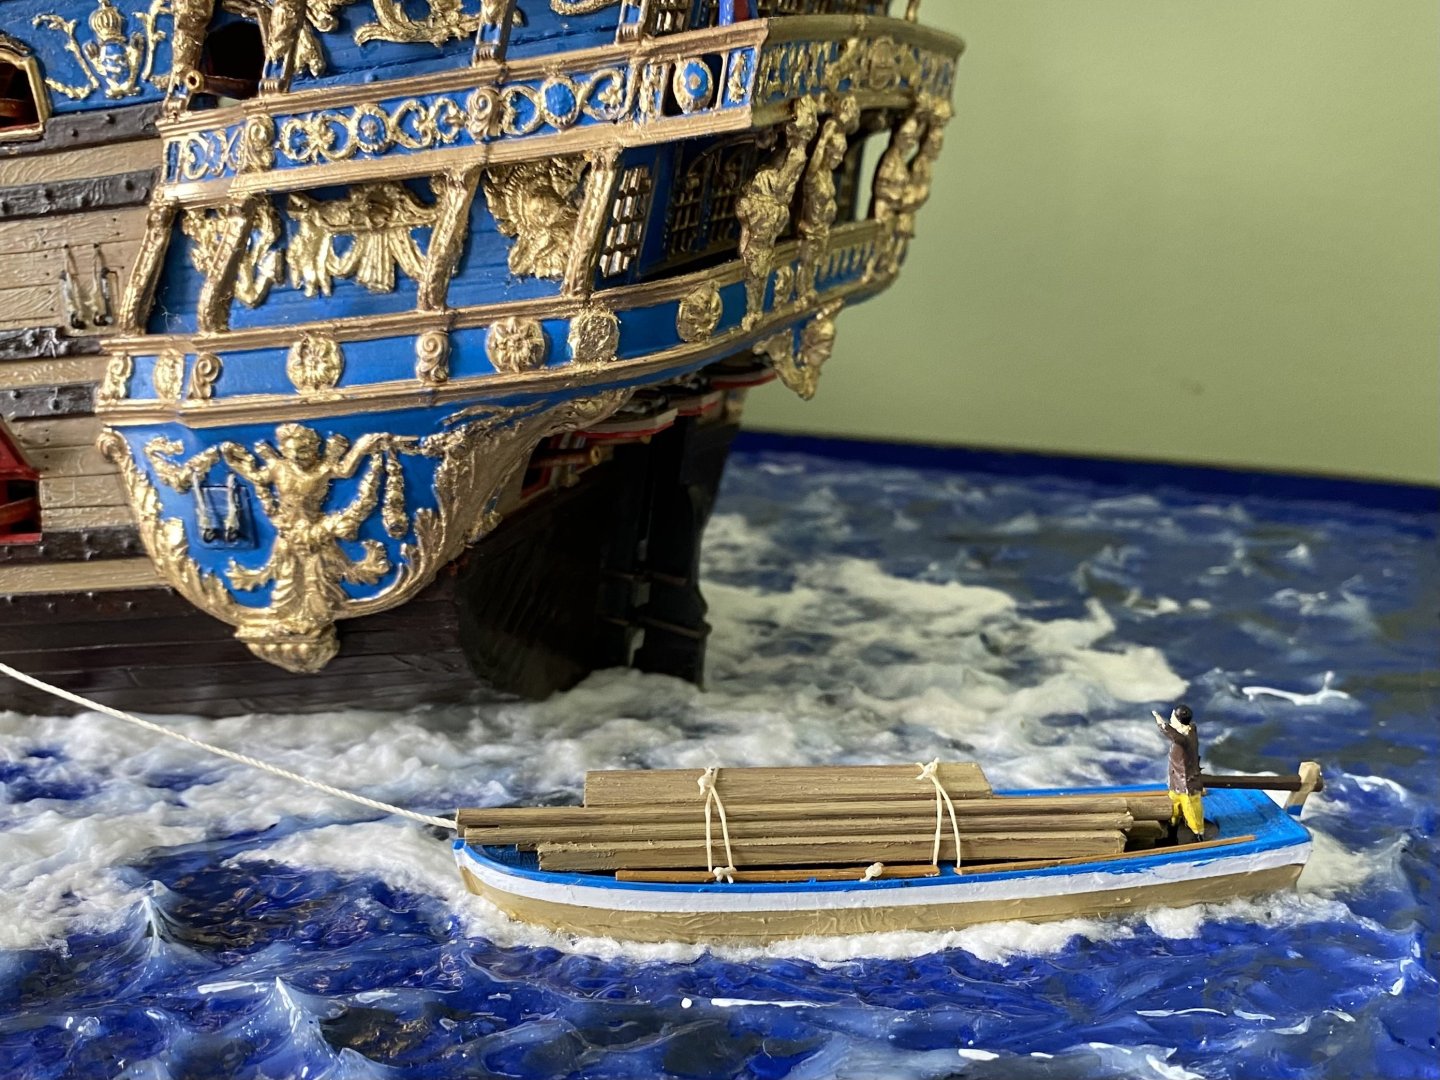
John after a string recommendation from a Marc I had to come over and take a look. Had not visited before. As many have commented your work is superb and very impressive. Marc helped me throughout my Heller Soleil Royal build. What a beautiful ship she is. I placed mine in a diorama.


- 106 replies
-
- 12
-
-

-
- Soleil Royal
- Ship-of-the-line
- (and 2 more)
-
Thanks Marc! Really appreciate your compliment. Since we met digitally years ago I have worked diligently using advice from you, Ian, and others to learn and hone the craft. I know I still have miles to go to reach your skill level, if that is even possible. Happy New Year to you and your family as well.