HOLIDAY DONATION DRIVE - SUPPORT MSW - DO YOUR PART TO KEEP THIS GREAT FORUM GOING! (Only 64 donations so far out of 49,000 members - C'mon guys!)
×


Bill97
-
Posts
2,707 -
Joined
-
Last visited
Content Type
Profiles
Forums
Gallery
Events
Everything posted by Bill97
-
Thanks Popeye. The second part of your reply is my exact question. I will suspend the block up close to the yard as in the diagram I attached with the red lines.
-
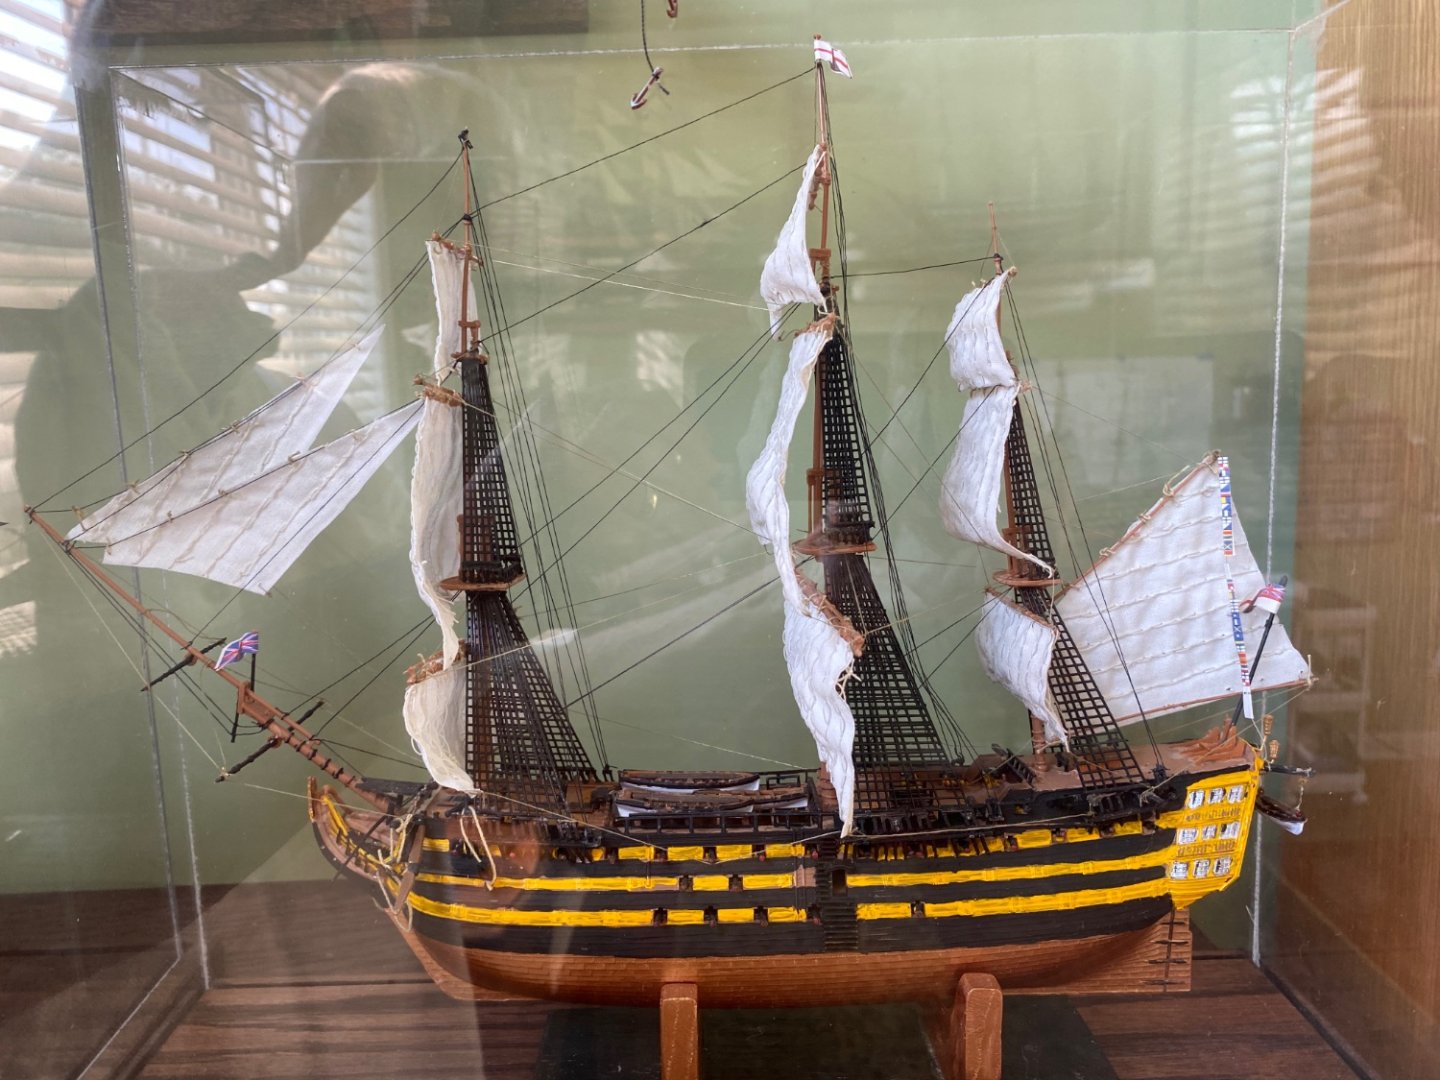
This is his smaller Victory. His grandmother hand stitched his sail for him. Pretty good I think for a 6-7 year old 😠
-
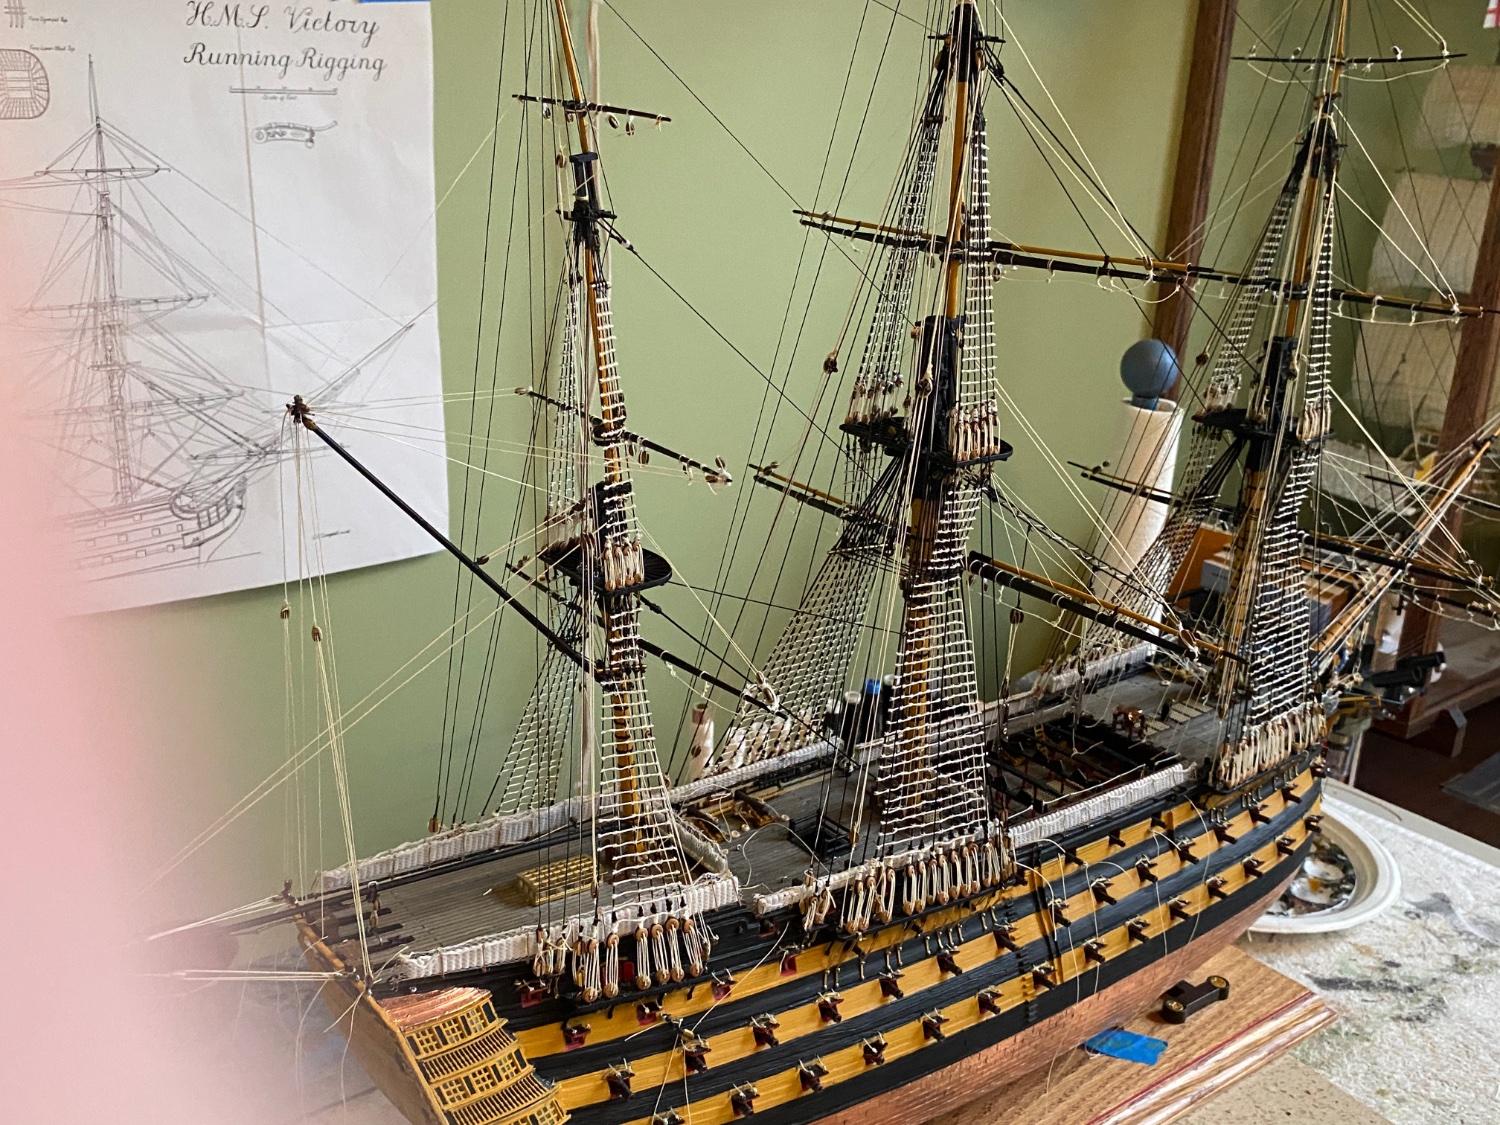
Yes Dave there is a lock! My youngest grandchild, the one who’s 8th birthday we are celebrating tonight is actually my ship building buddy. Together we built a much smaller scale HMS Victory, I think it is 1/250 from Revell. He really enjoyed building it on Papaw Day (as he calls it). I made a small display case for it in my ship room. He likes to compare his to mine under construction, and points out the many similarities. 😊
-
Marc I don’t know if this is good news or bad news, but based on your involvement it does not get less busy as a grandparent. 😊 We have 3 kids and 7 grandkids. Different sets of grandkids are here 3 days each week. Most are involved in sports so there are games to go to on week nights and weekends. Speaking of birthday parties, we are celebrating One of the grandkid’s birthday tonight. Got to love it.
-
Love the Victory pun Marc 😀. You are right about the sails. Would be difficult. How is the move going?
-
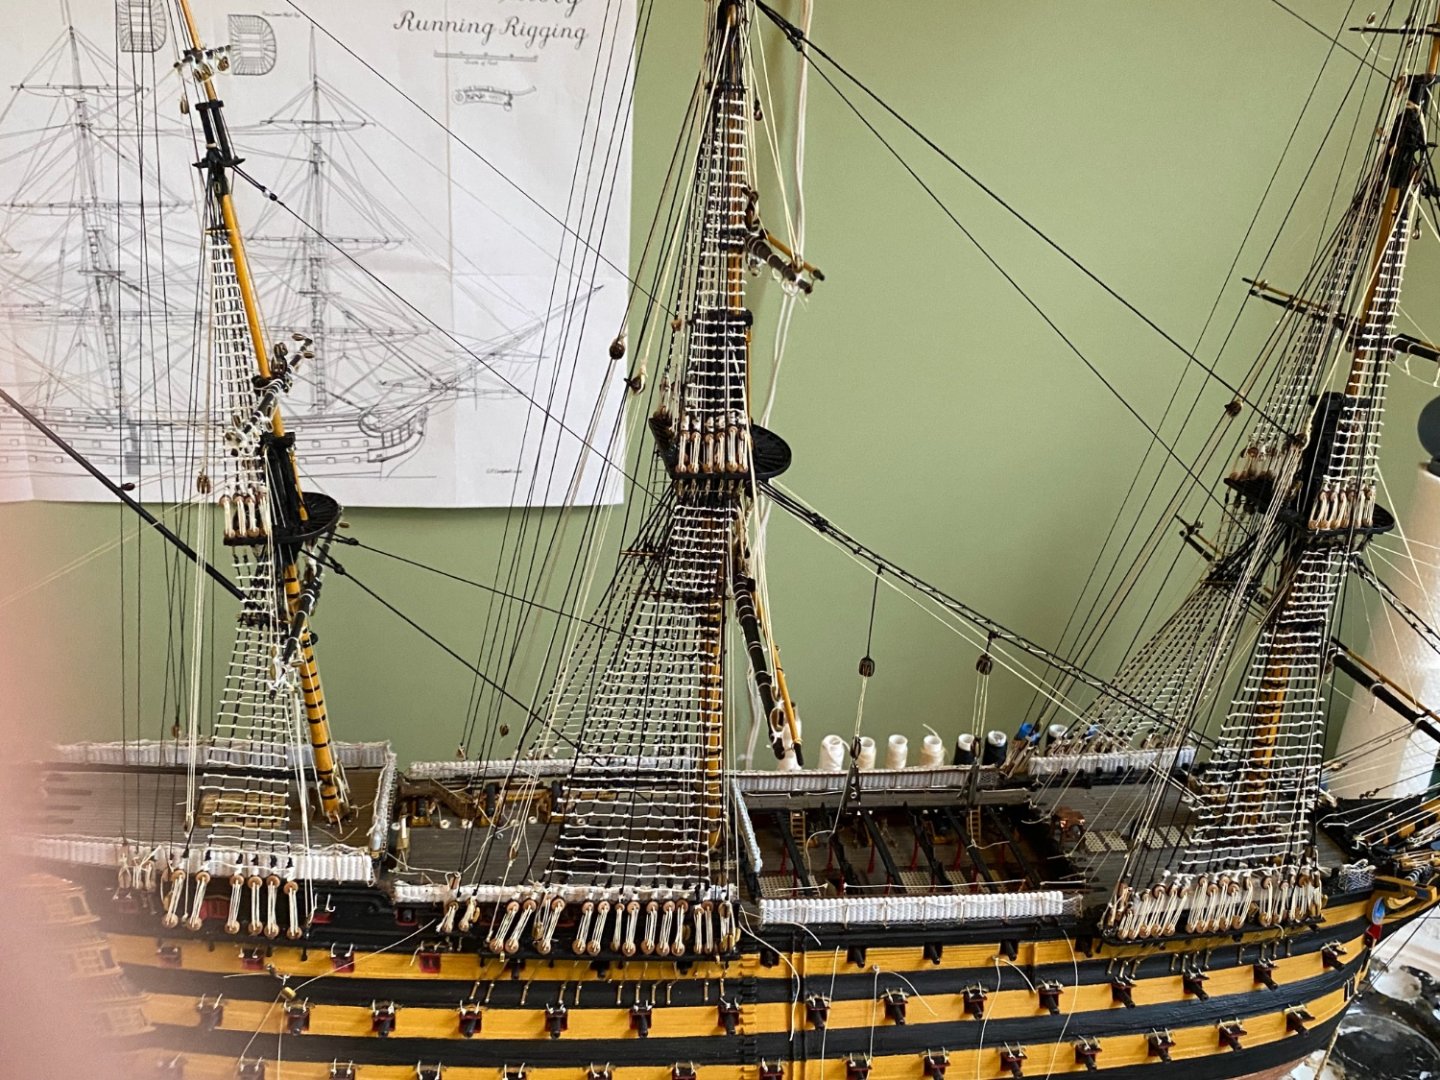
Dave you talking about the ratlines? If so, no I am leaving light colored thread. I have seen a number of builders use a tan thread for the ratlines and black for the shrouds. I really like the visual interest that brings.
-
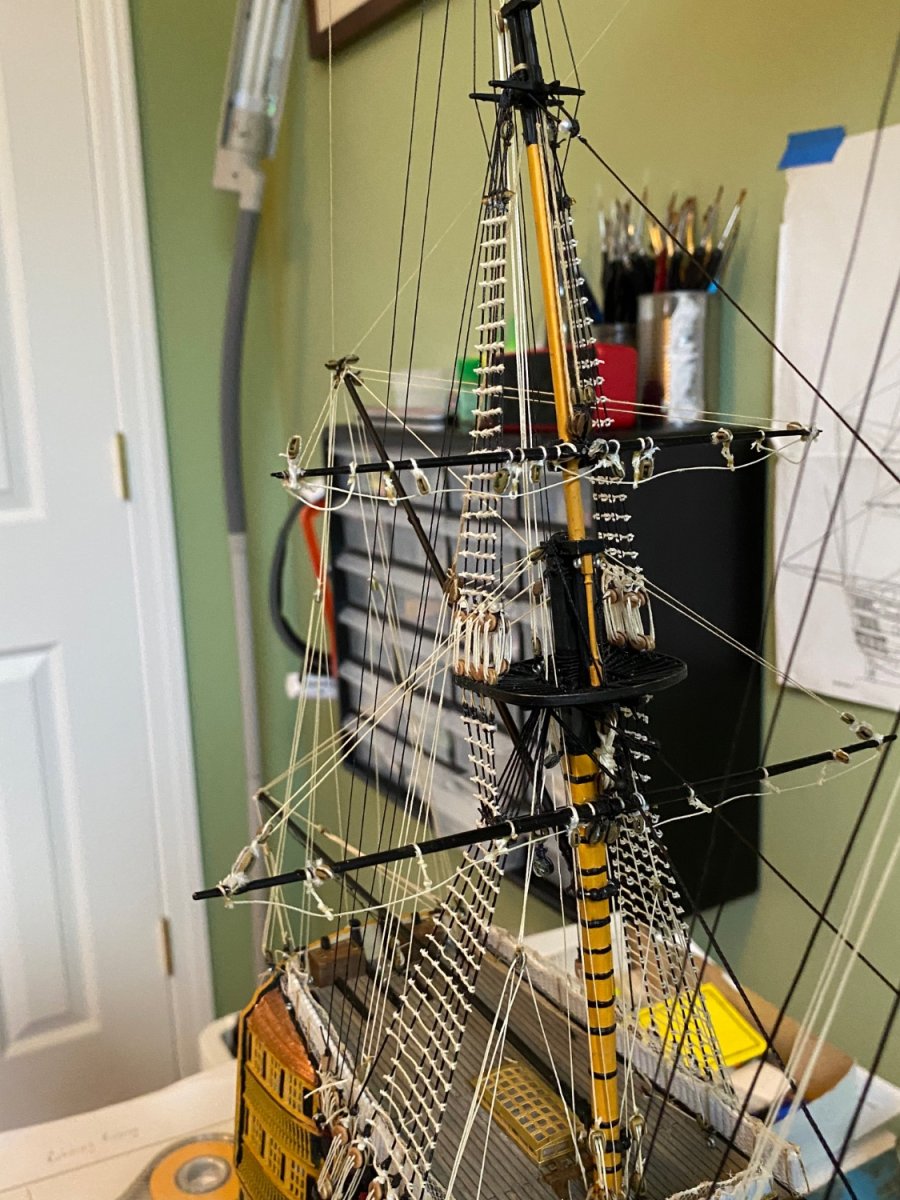
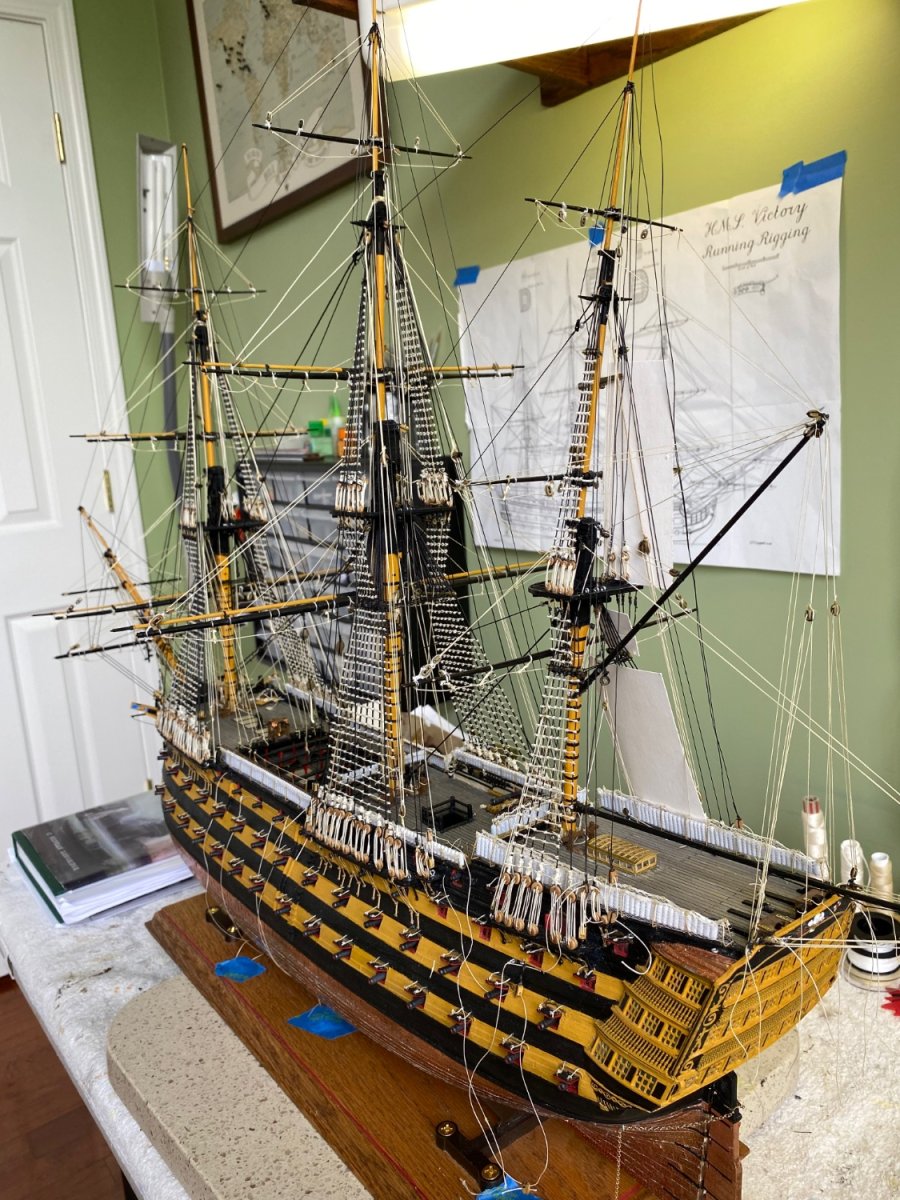
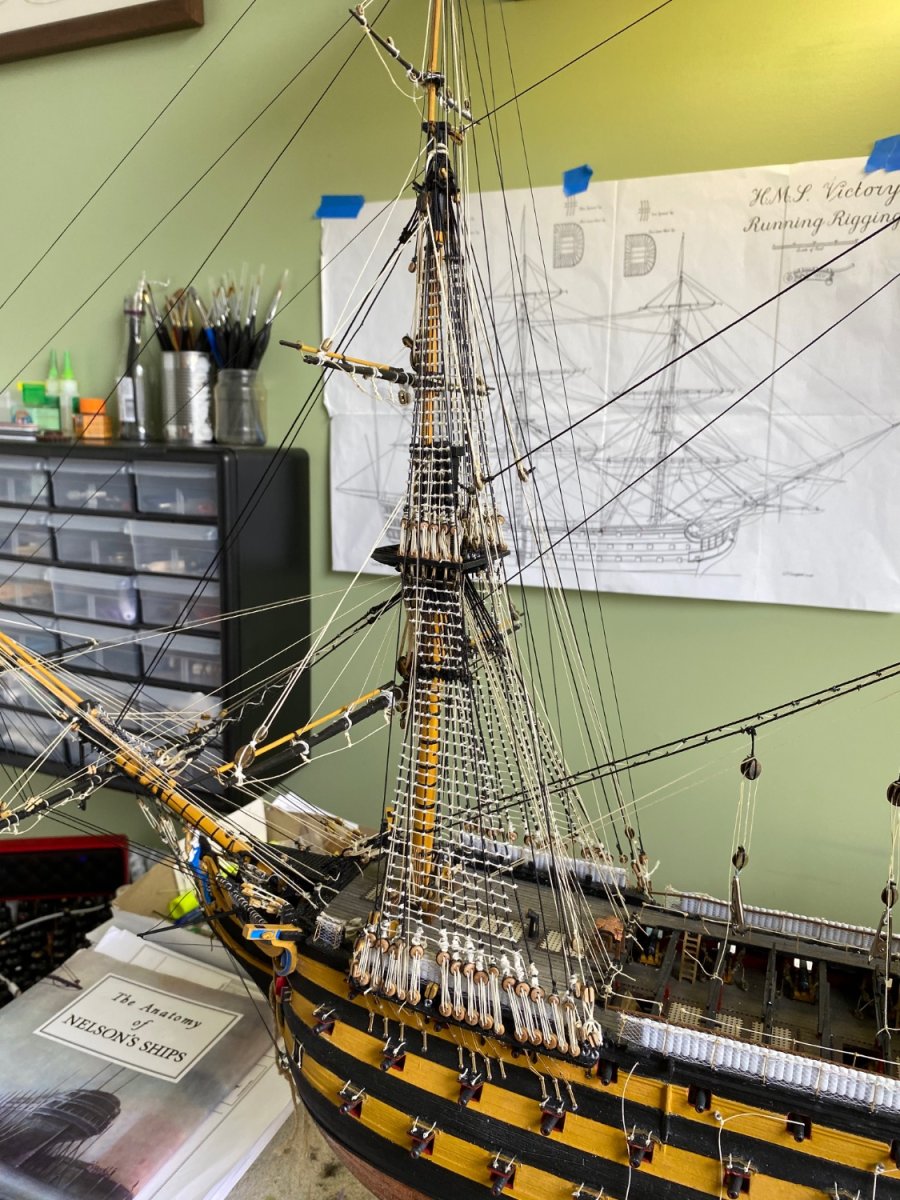
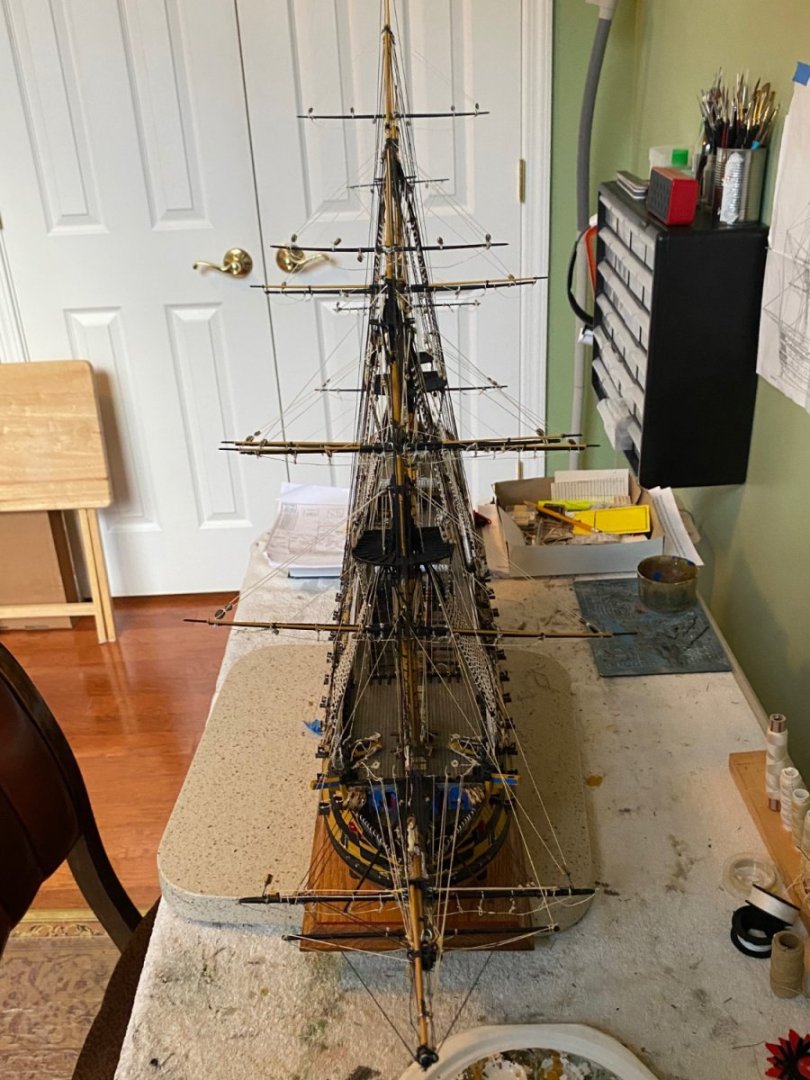
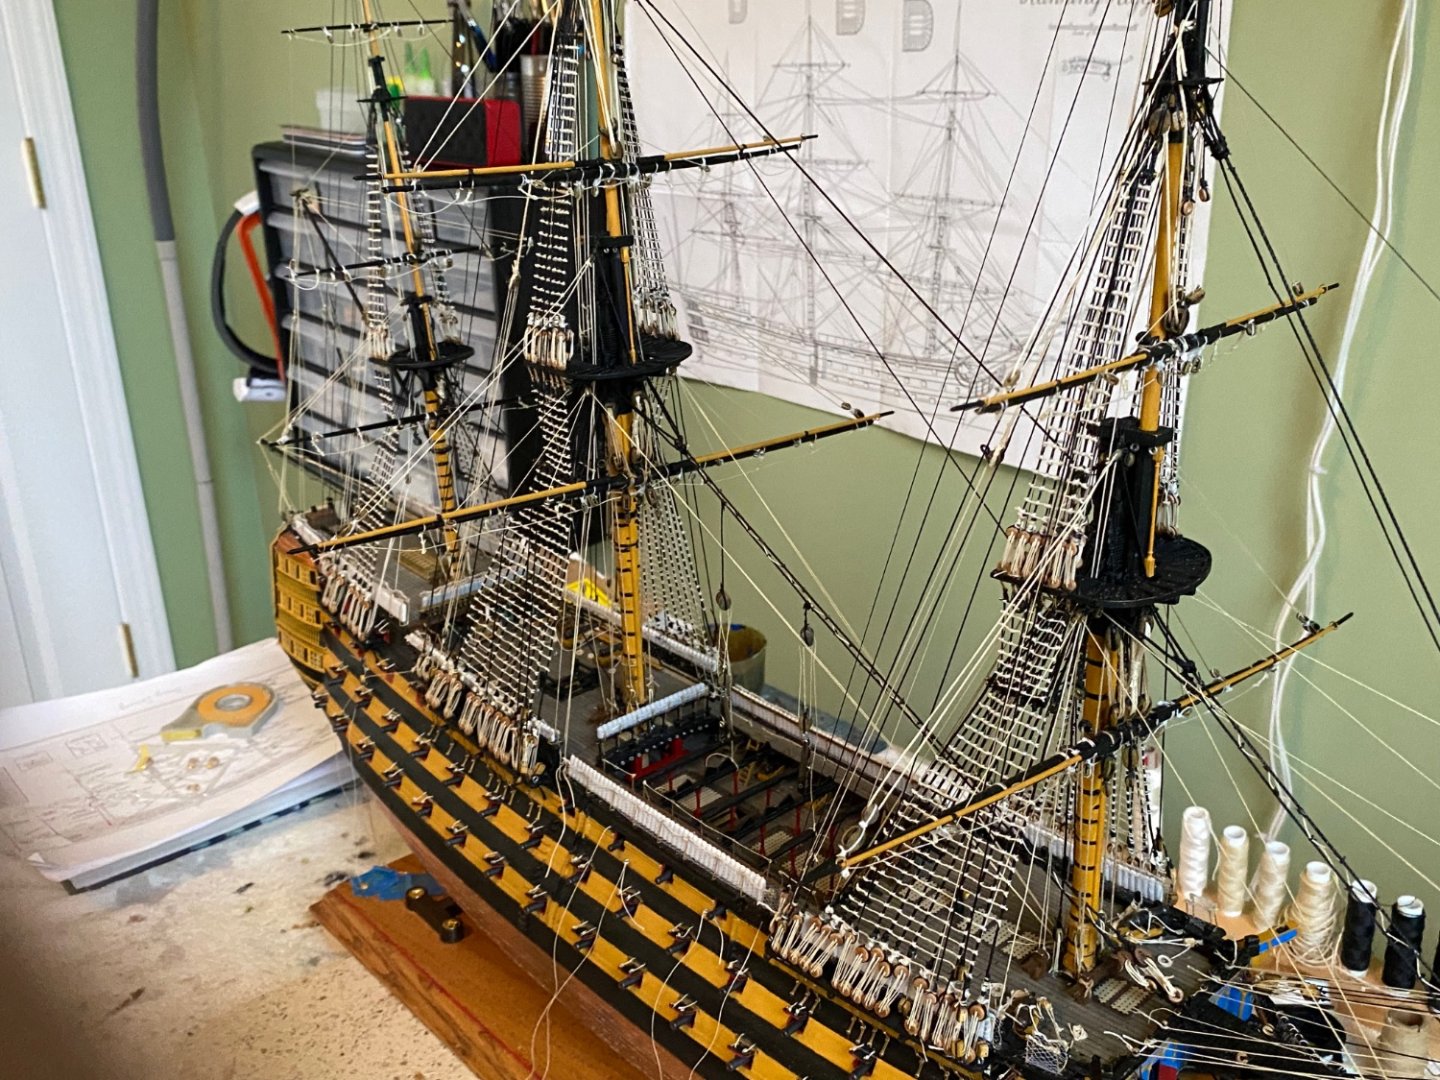
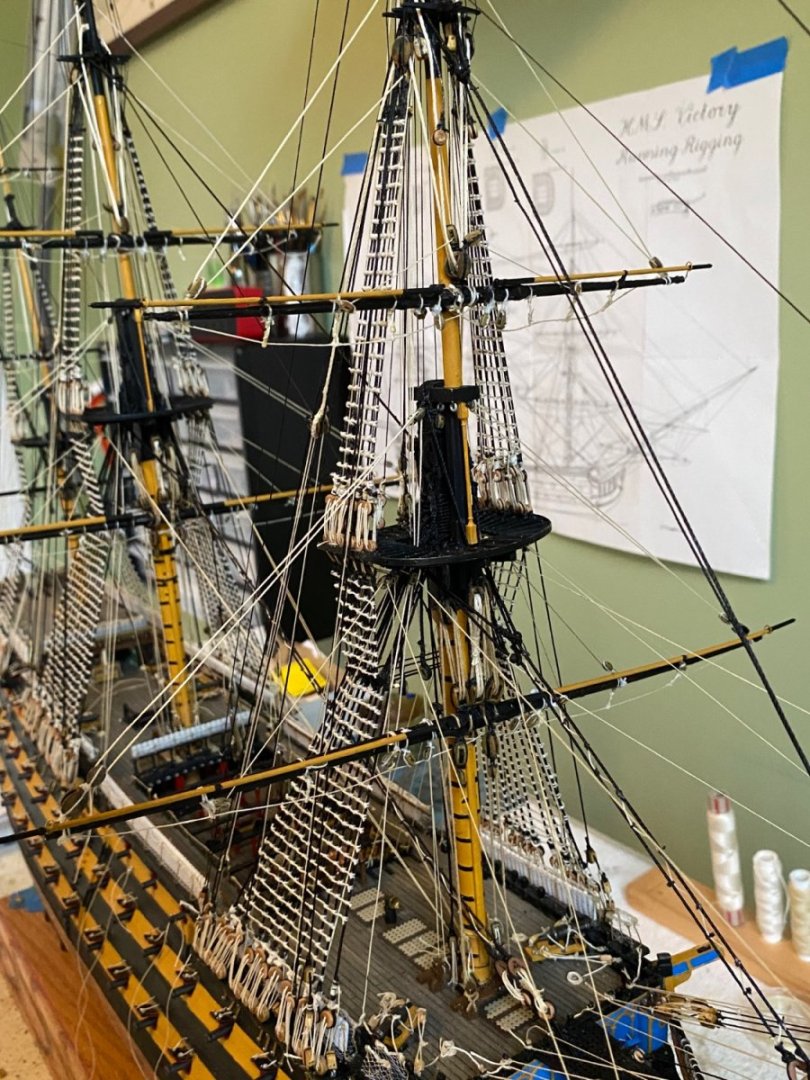
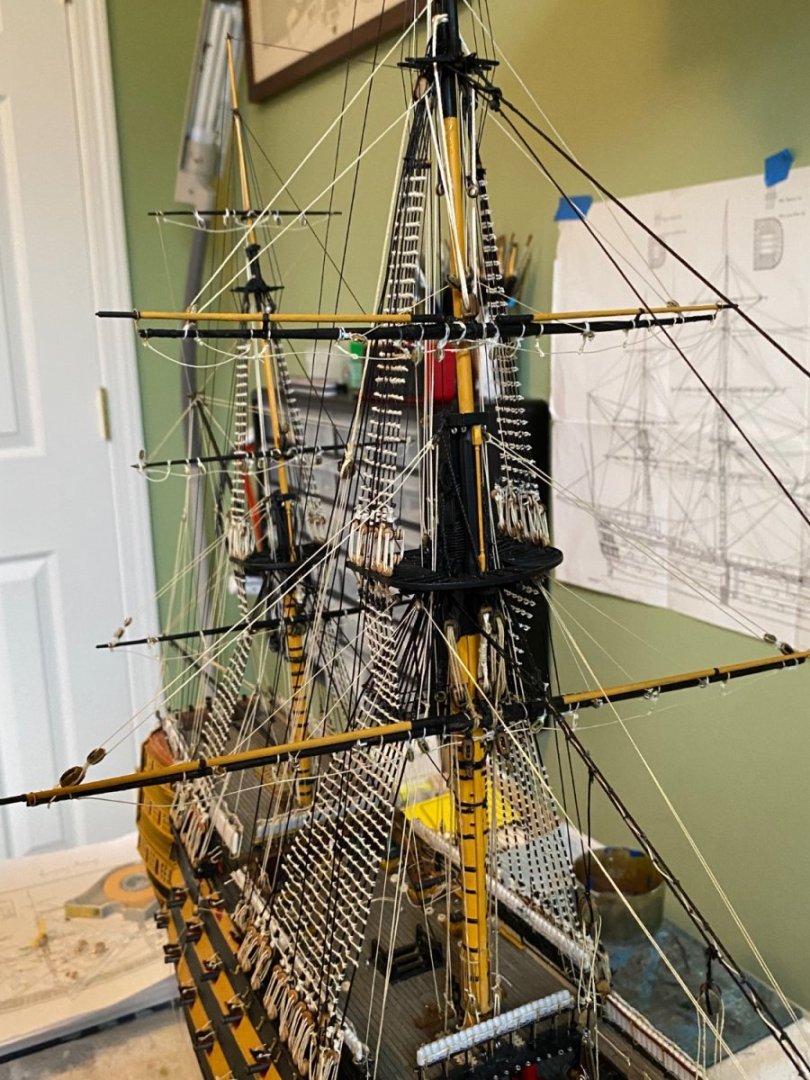
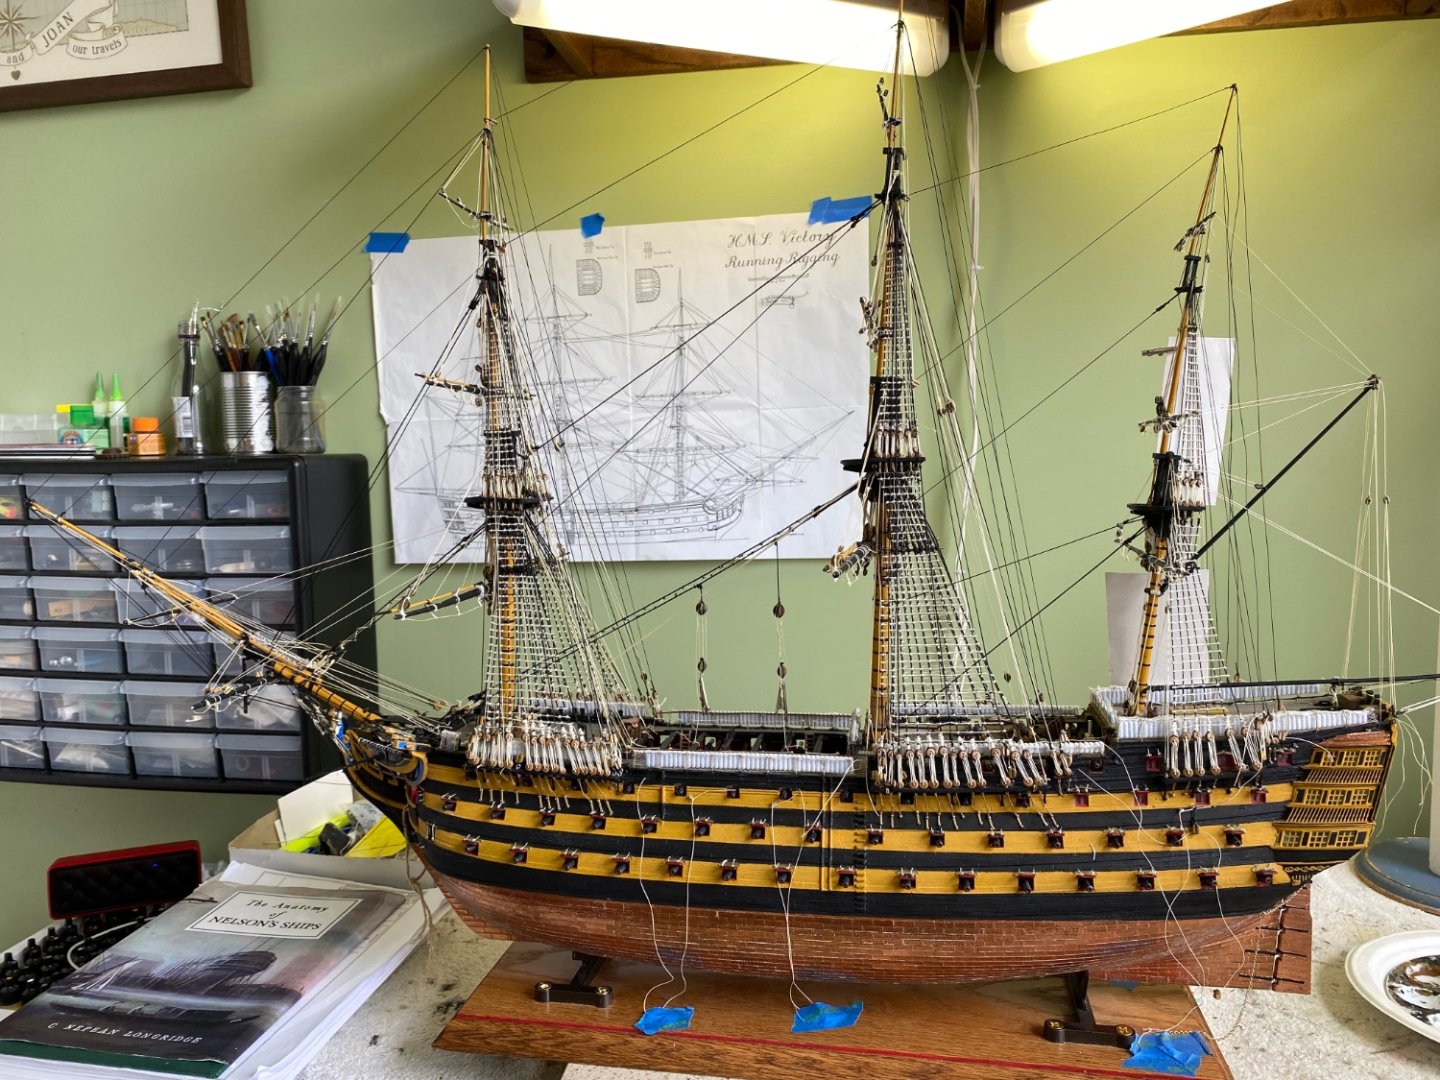
ALL THE RATLINES ARE FINISHED!!! Wow! That is all I can say. Would be curious of the total knots, but not going to waste time doing the math. 😊 Now on to sheets, clews, tacks, and braces (+ a few other threads here and there) to finish the rigging! Subject to change if I decide to add furled sails, which I must decide soon. For ship parts I still have the anchors, lanterns, davits and boats, and stanchions and rails for the mast tops


-
Thanks Marc. That lifts my spirits a bit about the pricey model I have yet to get into. I am surprised you commented here. I hoped you would but expected you were up to your elbows in paint and had no time for MSW! 😊
-
Well John and Marc (Marc if you venture over here to John’s blog). I have begun reading SR build blogs and researching other references on line about the Soleli Royal at times when I am not working on my Victory. I have to admit I had not researched the model much at all prior to purchasing it. I was fully expecting it to be of the same quality as the Victory. I had read the Heller 1/100 Victory and Soleli Royal were the flagship models produced by Heller. I also understood the building instructions supplied by Heller for both were not very good, especially the rigging instructions. I purchased the Longridge book for the Victory and with the help of a few fine people here on MSW I have been able to build a model I am proud of. I have not opened my SR kit yet but I can only assume Heller produced it from the same molds as their previous editions you guys are building. From all the reading and research I have done, including both your build blogs here, it seems the model has some short comings to say the least. After my experience with the Victory I fully intend to purchase replacement deadeyes, blocks, and other rigging parts. I am curious if the deficiencies you have experienced are related more toward ill fitting pieces and actual construction problems or more toward inaccurate authenticity, or both? I am much more interested in building a beautiful model ship but not necessarily an authentic replica. No one I know that will ever see it will inspect it to point out period inaccuracies! Based on your experience building it, does the out of box kit present the opportunity to build and complete the model, or are there numerous instances where pieces just don’t fit together or work the way Heller explains? I am thinking I am glad I am building and learning from the Victory before starting the Soleli Royal instead of the other way around.
-
My last move to mine and my wife’s current home was in 2005 after all three kids got married and moved on. Repainted the whole interior last year and hope that is the last time I have to do it. This 70 year old man has no business on a ladder painting high vaulted walls and ceilings. Will have to pay a professional next time, or threaten the kids and grandkids to do it for me. Yes good enuff is good enuff.
- 2,696 replies
-
- 6
-

-
- heller
- soleil royal
- (and 9 more)
-
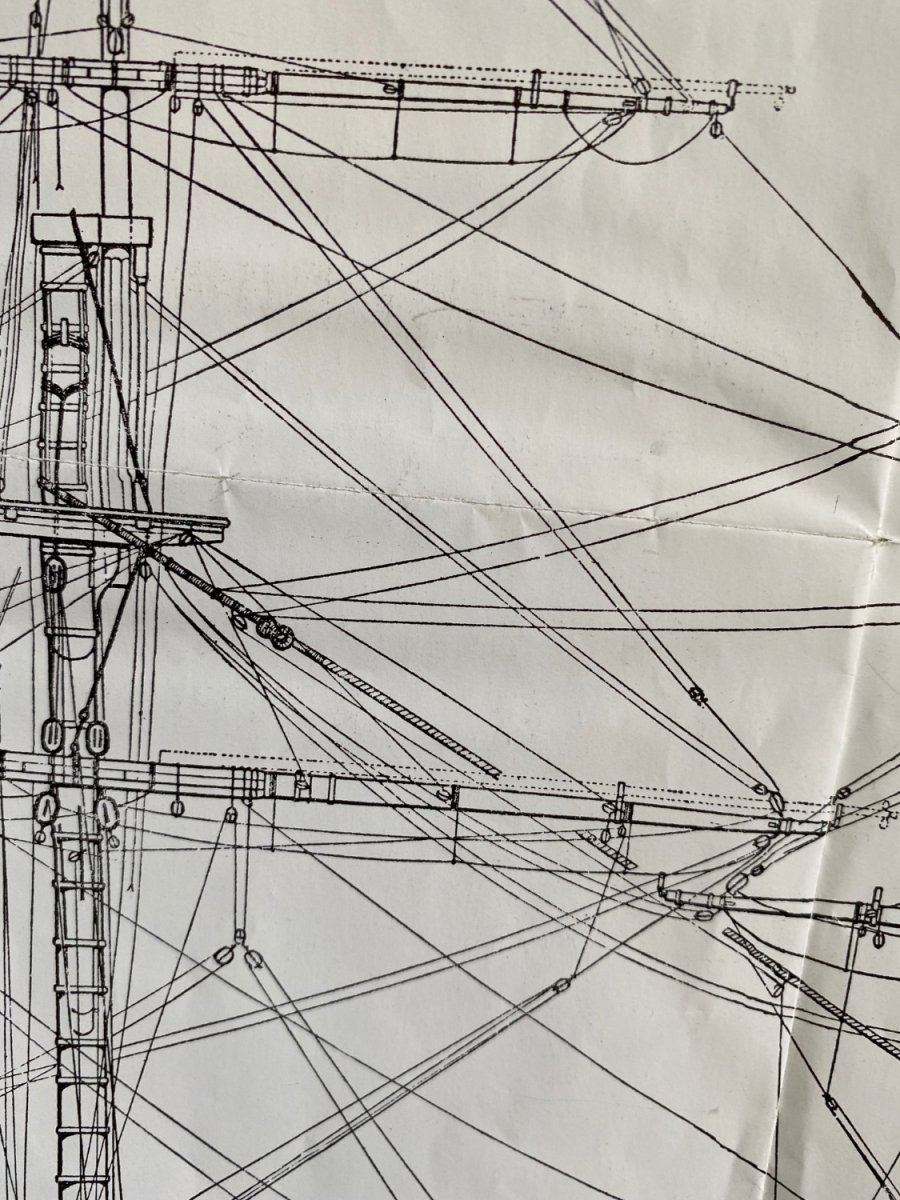
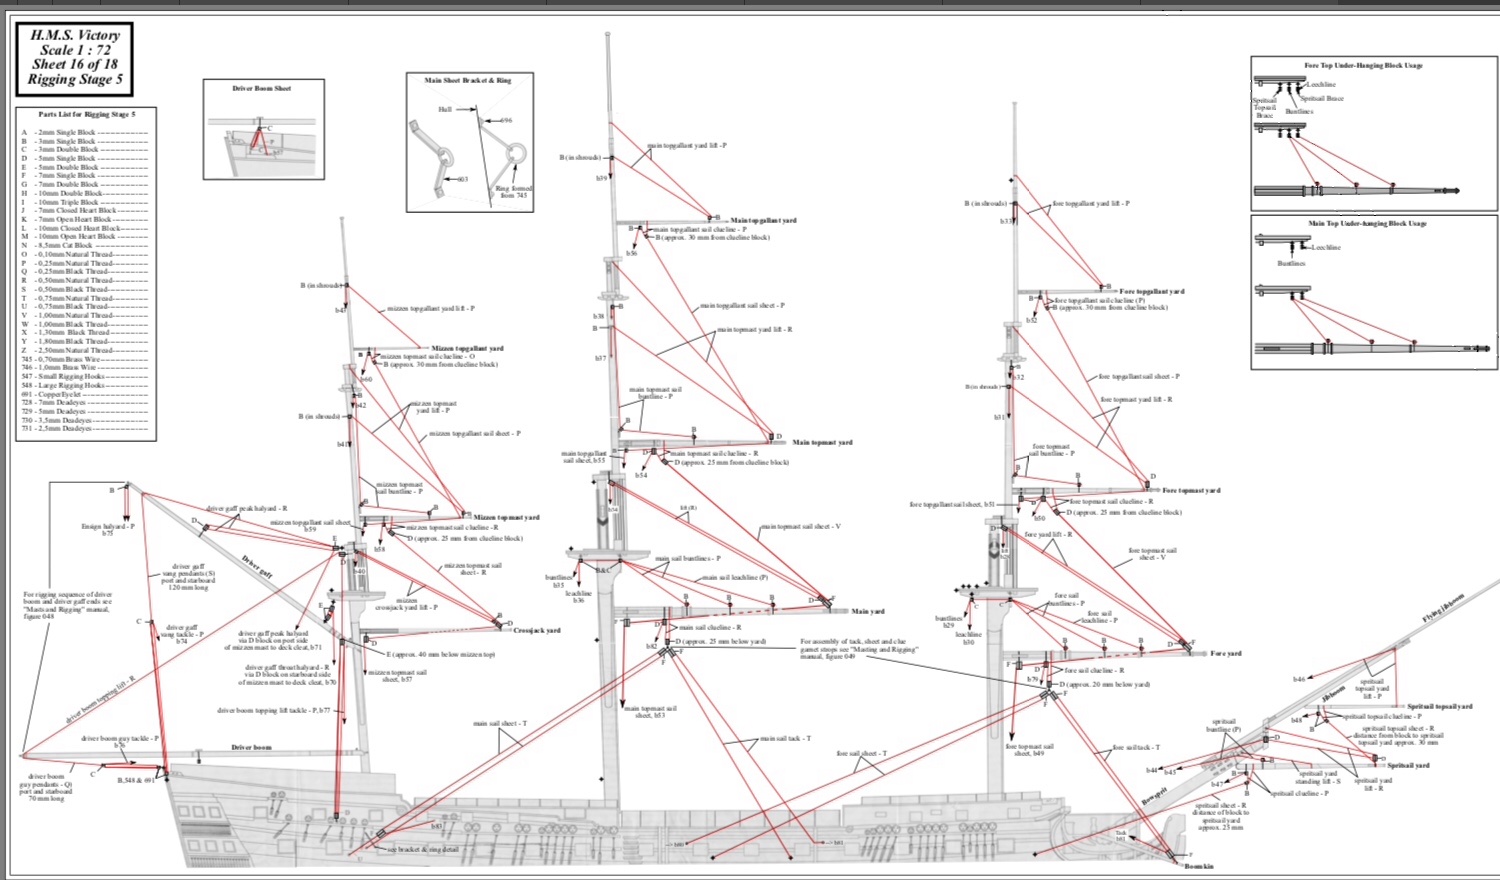
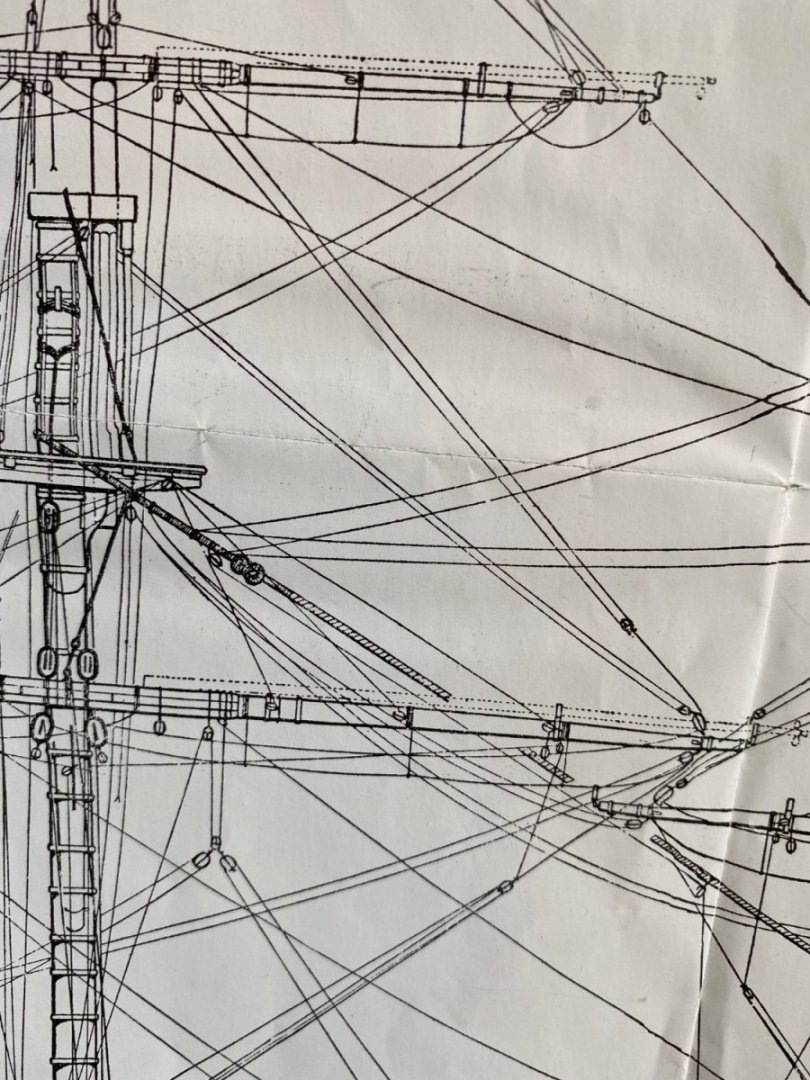
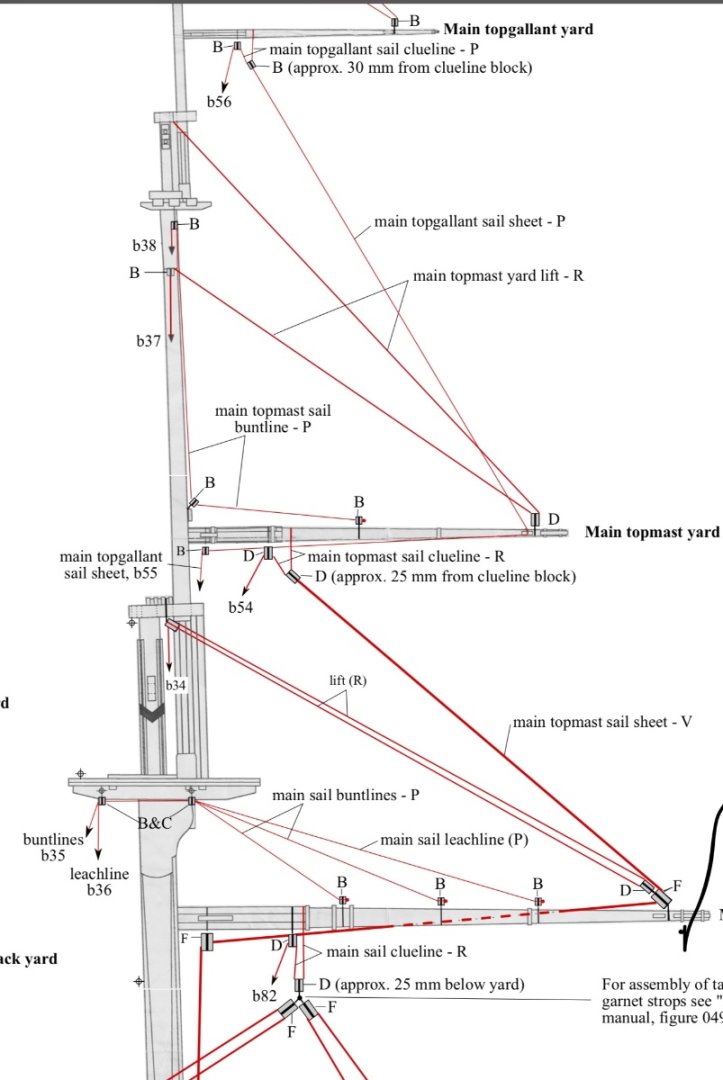
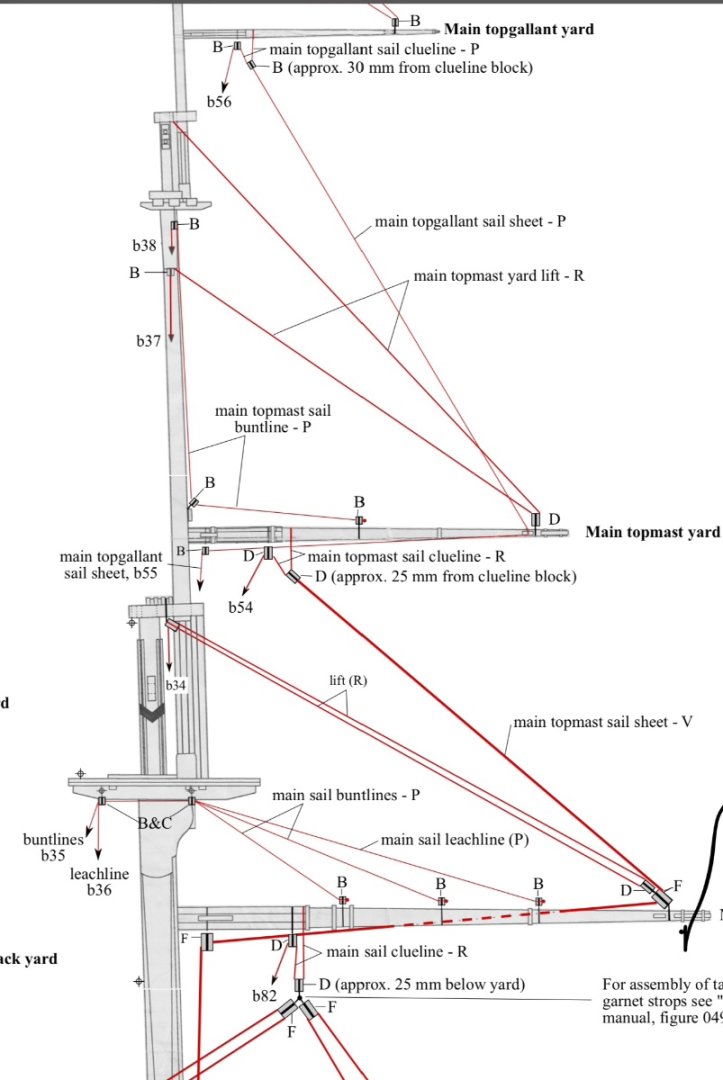
Thanks again Popeye. That might be an idea to tinker around with as an idea. One last question Popeye and then I will stop picking your brain. A little ways back you said “One method of rigging these three lines on a model when there is no sail bent is to put the strops of the blocks through each other and then hoist them up part way to the yard with the clew.” In the diagram I attached for this conversation it shows this arrangement hoisted up close to the yard and actually gives a measurement of 25mm or 30mm. In the plan I have from my reference book on the Victory written by Longridge it shows this arrangement drawn almost all the way out to the block on the yard (see attached diagram from Longridge). Was there a standard for where this arrangement would have been positioned when sails were not present, or is it just a matter of visual preference?
-
Yes Popeye that is correct. Pretty much your first sentence in Paragraph 2 of your comment above. Could you explain what is mean by harbor furl? You used the term above. Have not heard that term before.
-
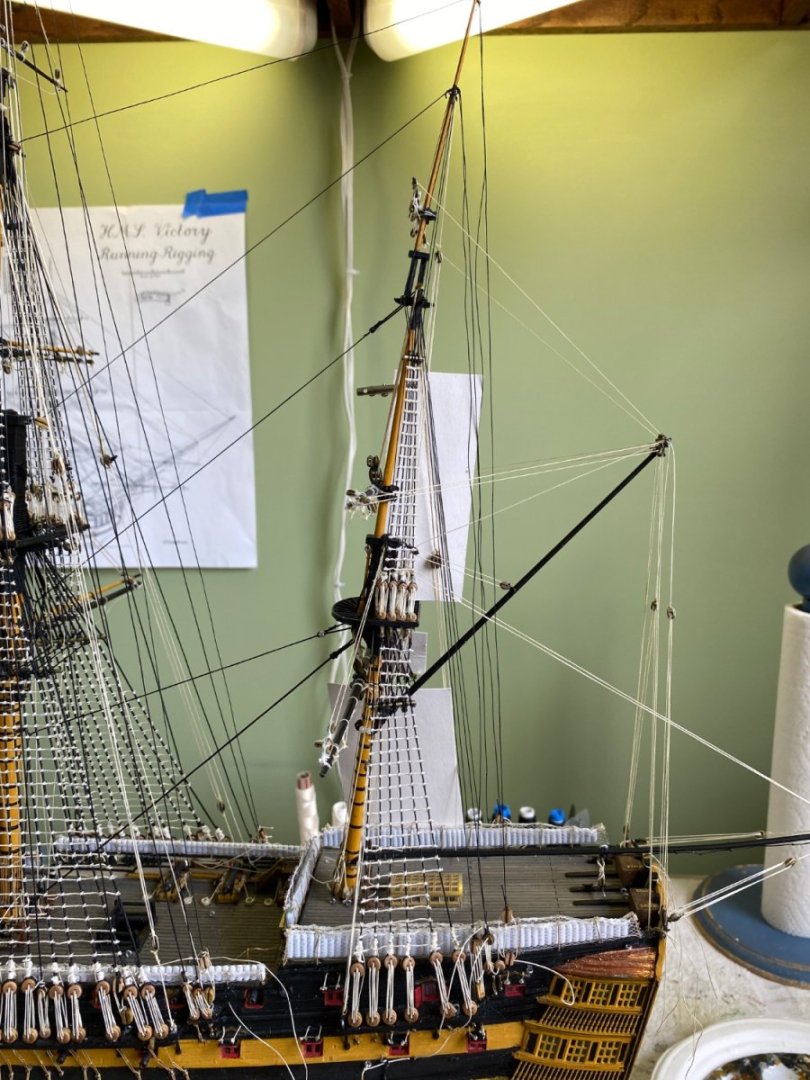
All the ratlines on the port side complete! Wow that was a bunch of knots! Ratlines for the shroud sets on the starboard side of the mizzenmast still to go. Then on to braces, sheets, clews, tacks , etc. Anything but ratlines! 😊


-
Always a pleasure Marc! Hope your move goes well. Since you are going into Manhattan will you be downsizing, or did you find a new place big enough for all your modeling goodies?
- 2,696 replies
-
- 4
-
-
- heller
- soleil royal
- (and 9 more)
-
Thanks again Popeye. I have learned a lot, I think, in just this short conversation. Hopefully the follow up questions I asked show I now have working understanding of this part of the rigging, and that you are a good instructor! 😊 From your analysis of and comments about the diagram I attached I am lead to believe if I follow it to a tee I will be good and fairly accurate. As I mentioned I am having this running debate with myself as to adding furled sails or no sails at all. Some builders here on MSW have strong feelings about this subject as to what makes the best display of the ship. My USS Constitution model is without sails. I have a couple ships displayed with full hand made sails, and a couple with a combination of furled and unfurled sails. My HMS Victory is going to be either no sails or all furled. I was trying to determine how to convert the rigging diagram I attached to rigging with furled sails. Your paragraph 2 above leaves me to believe either option would not require much change. If I do add furled sails I just need to decide to either detach the clews from the sail or leave them hanging out of the sail bundle. You make a very good point about a ship in harbor for a long period would un-bend the sails or harbor furl. That is the display feel I am planning for so maybe I should just go with no sails since I don’t know what harbor furl is anyway. Popeye where do you stand on sails for model ships? I definitely don’t use the plastic molded forms that come with the kit. Any time I add sails I sew them myself.
-
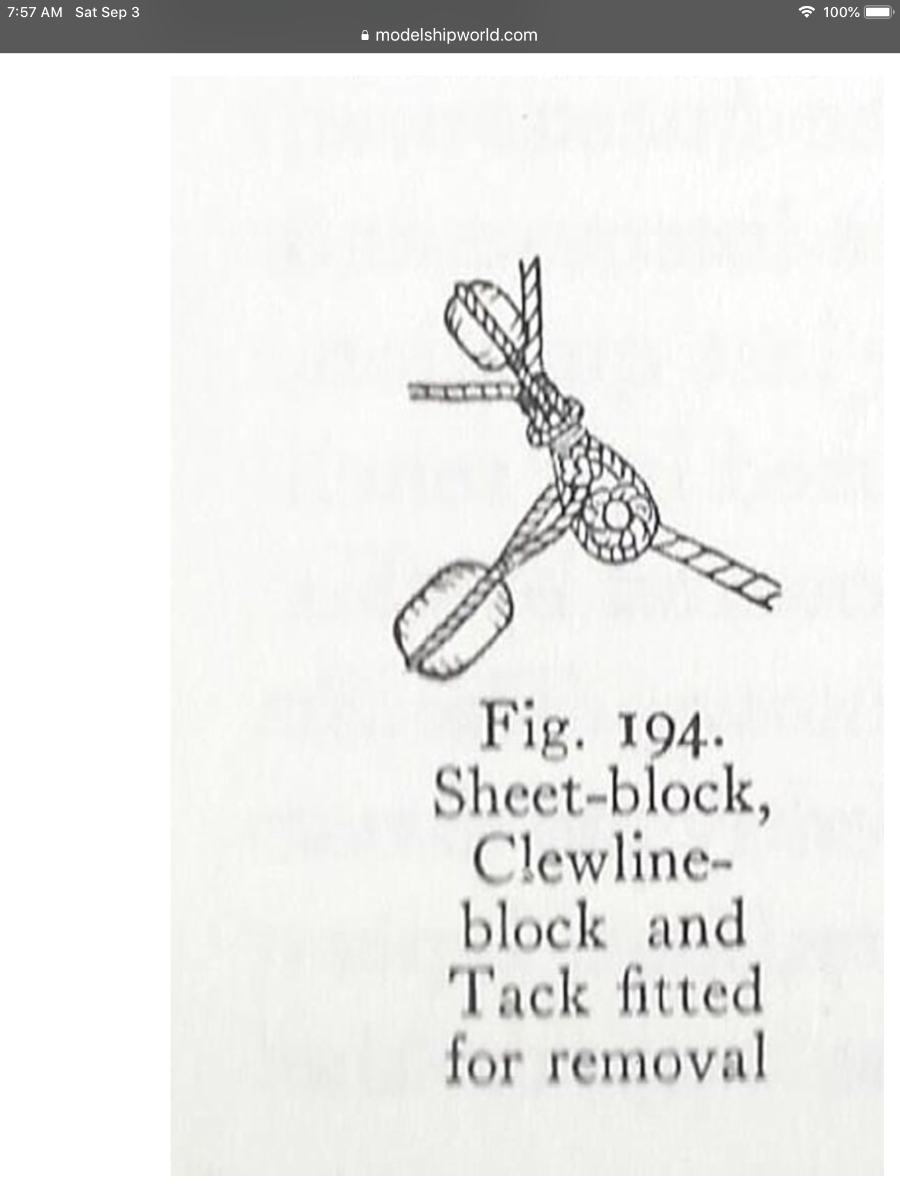
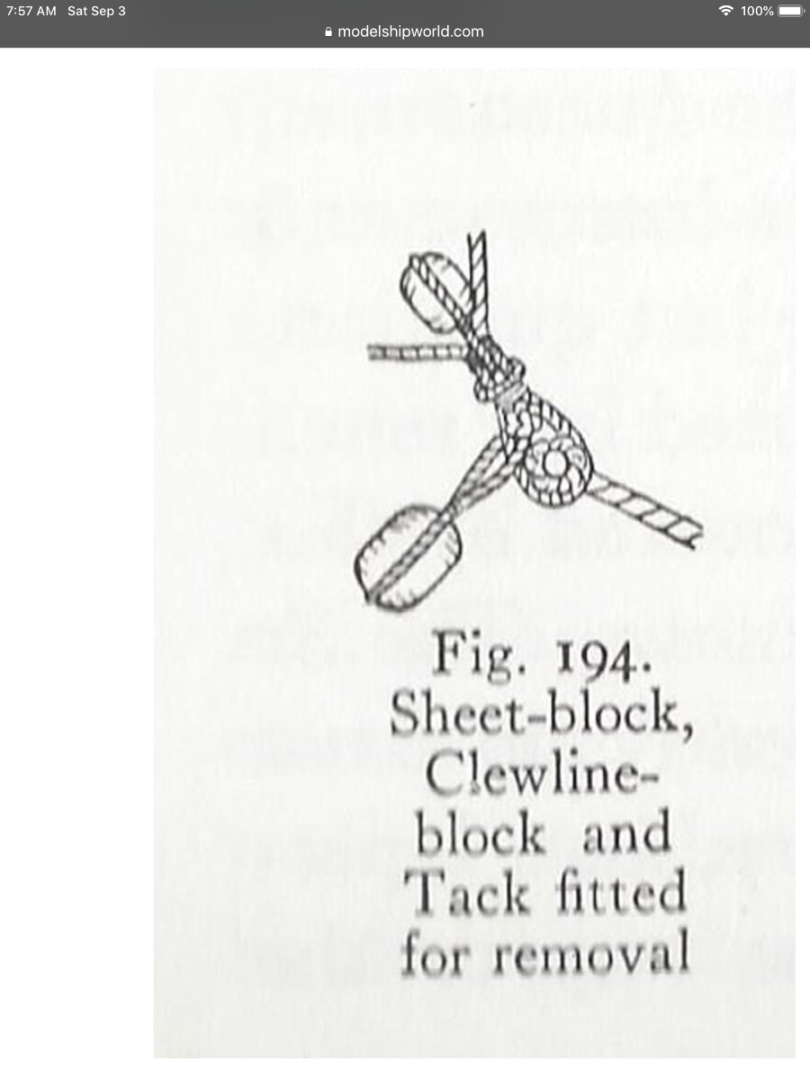
Ok Popeye I have read through your tutorial and have a couple questions for my clarification, if you don’t mind. 1. In my diagram the tack for the lower sail (one of the F’s) is a block with the tack reeving through it with the ends of the tack going off to two belay points. In your Fig 194 the tack is a single line with the knot. I assume in the arrangement the single line passes through a block somewhere below before attaching to a belay point? Both methods are acceptable with there just being a difference in how the strop of the tack block would fastened? 2. To correct a major misunderstanding I had that I now realize from your explanation is that the clew of the sail is removed from this configuration when the sail is furled? Is that correct? I was thinking the rigging configuration was maintained to the corner of the sail regardless if furled or unfurled? Removing it seems inconvenient at best, if I understand correctly. When the crew was ordered to unfurl the sails did they then need to attach all the sail corners (clews) to the sheet and or sheet/tack rigging? 3. Also for clarification only. In the diagram I included the topmast sail sheet and the topgallant sail sheet end at a clew block (D and B). In this arrangement there is not a sheet block similar to the rigging at the mainsail? The sheet is just attached around the clew block rather than reeving through its own block which would be attached by rigging to the clew block? Do I have that right? Thanks again Popeye. Hope you don’t mind my asking for a bit of clarification. I think what I am gathering here is if I just follow the diagram I attached and leave furled sails off I should be good to go! 😊 Bill
-
No Kevin I have not seen those and will need to check them out. I started a topic the other day titled: Proper Rigging of Sheets. Popeye is trying to help me understand how the combination of the sheet, tack, clewline and clew on the sail all come together if I plan to add sails either furled or unfurled. Have to admit I don’t quite have my head around it yet and am wondering if I do want accuracy if I should just leave the sails off.
-
Thanks Popeye. I will read through your excellent tutorial several times to make sure I got it. As you said learning the proper names helps a lot.
-
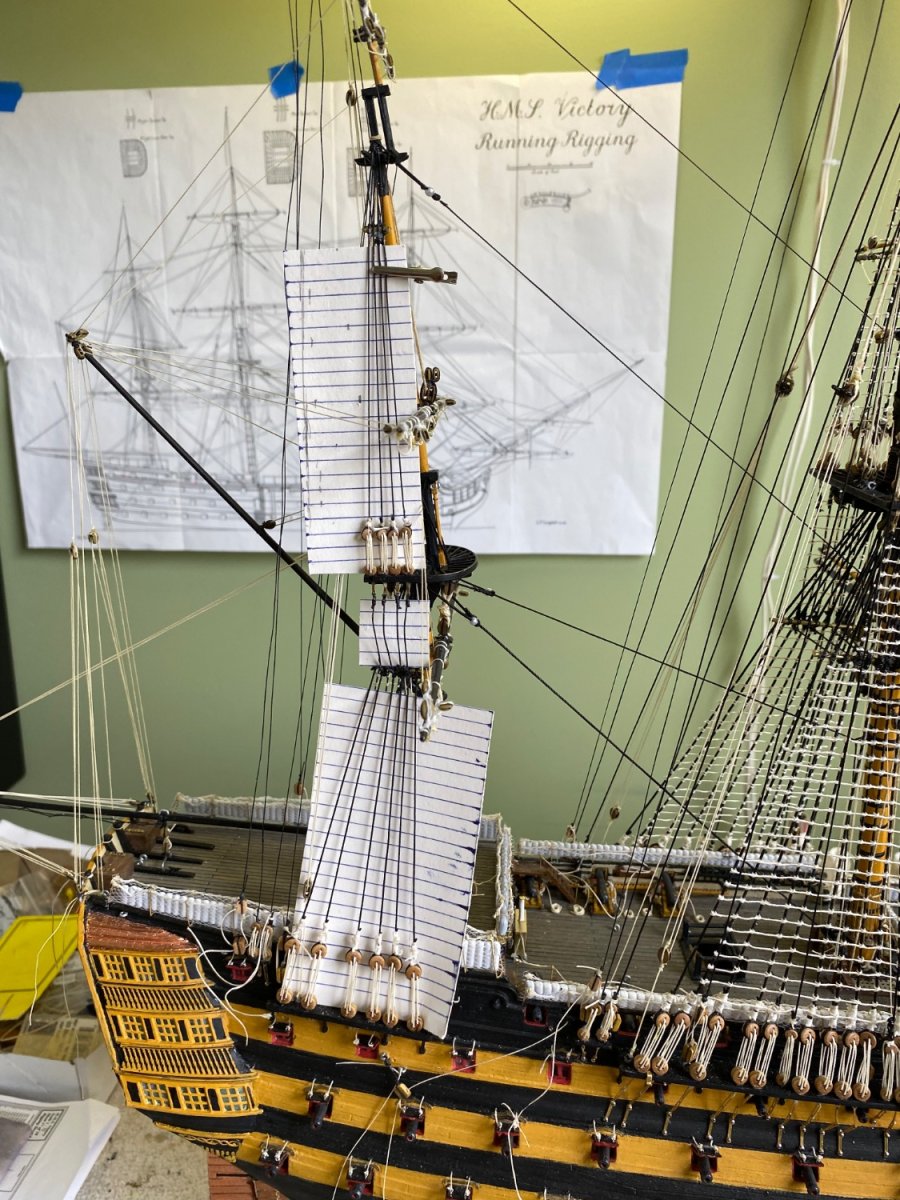
Kevin I ran across what I think is a pretty good method to make a furled sail that I am going to practice a bit. If I can get something I like I may use it on my Victory. If not I will just go without sails. With that in mind I am going to leave the sheet, clewline, and tack belay points loose so I can maneuver that rigging intersection to wherever the tip of the sail ends up being. I know I should decide before I move forward but I am just so unsure what I want to do. I am definitely not going full unfurled sail. I can’t figure out how to copy and paste a link but here is the title of the post if you want to search for it. Landlubber Mike's technique for furled sails
-
Kevin I took some time today to get get caught up on your Cutty Sark build. I am amazed at your skill and ability to print the pieces and modify their size from the OOTB pieces to make them more visually appealing. Your painting is fantastic as well. I am following your inner debate about furled sails. I am having the same inner debate for my Victory. Can not decide.
-
Popeye mentally I have stepped away from my Victory reference this question. Not actually asking this question as it might pertain to my build, but just for my nautical knowledge. I have always been fascinated by the engineering people use to make things work. To that point the rigging of these tall ships amazes me how each and every line serves a well thought out unique purpose. This sheet, clewline, tack engineering is fascinating me and I wonder if you could answer a question for me. Again this is not necessarily for my build, just my knowledge. I am trying to figure out what the crew would do when they wanted to add a sail or remove a sail. Above you said the blocks for the sheet, tack, and clew would be attached to the corner of the sail. I am guessing in the photo below you sent me the loop that is wrapped around the clew block is attached to the sail? It is hen just pulled along to wherever this block arrangement is pulled by the lines. In the other photo from Caldercraft at the top of the 3 different sheets it shows either a large block (D) or a smaller one for the topgallant sail. It further shows the clew line reeving through these blocks and then on to its appropriate belay point. In actually practice for accuracy that should be a 2 block arrangement for the upper sails, with the clew reeving through the top one, the sheet reeving through the bottom one? Was there away the crew were able to attach or remove the loop at the corner of the sail to this 2 or 3 block arrangement without having to take down the rigging? In the picture you sent, if the loop going around the clew block is in fact the corner of the sail I can’t see how the crew could get it in that position without removing the clewline that reeves through the clew block. In the photo from Caldercraft it shows the standing end of the clew tied off at the yard. When adding or removing a sail did the crew untie that standing end take it through the clew block and then tie it back to the yard?
-
Thanks Popeye. This will help a lot. I am still debating with myself if to do furled sails or no sails. Probably leaning more toward no sails. Which ever way I go I now understand how to rig the sheets and clew. Obviously best to decide prior to rigging but if I rig the sheet and clews drawn up to the yard now as if for no sails and would then later decide to add furled sails I would just rig the the clew at the corner of the furled sail to the block at the end of the sheet. I guess that is how it was actually done on the ship? By the way I very much remember blog input from you on one of my previous builds a couple years ago (great MSW name you use. Unforgettable). Can’t remember which one now. Hope you are doing well. Was up your way in Boston a while back and of course had to visit the USS Constitution!
-
Thanks Allan. Unless someone advises me otherwise I am going to follow the instructions on the Caldercraft plan for the sheets, tacks, and clewlines. So if I understand correctly, just for my knowledge, if a sail was hung on the yard the bottom corner would be attached in a rig grouping at the point where the sheet meets up at the clew. Then when the sheet is pulled out to the end of the yard the clew line would follow with the corner of the sail attached. In this design the clew and sheet work opposite each other to haul the sail in or out. In the above diagram the corner of the sail would be attached right there at the block on the sheet? Is this correct?
-
Caldercraft
-
Thanks Jose. I attached a page from a different manufacturer of the model ship’s instructions. It makes it clear, I think, how to do the sheets. Does it appear fairly accurate? If so, I can do this. In actual use would the block shown at the end of the sheets near the yard be attached to the corner of the sail and be hauled up by the corresponding clewline?