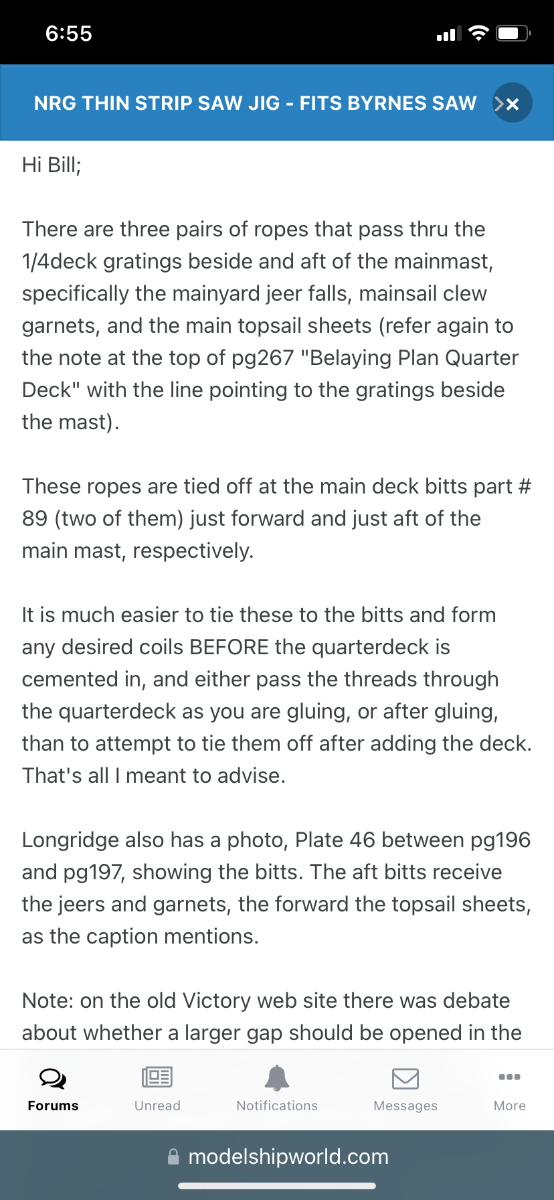
Bill97
-
Posts
2,730 -
Joined
-
Last visited
Content Type
Profiles
Forums
Gallery
Events
Everything posted by Bill97
-
About 2 hours to the beach. Wife driving a little and my thoughts drifted off to the Victory again and my wrong thread size. When I get back to the ship yard I am going to correct the fore and main mast topsail yard tye and halliard. I am going to leave the .75mm tye on both since that involved a lot of rigging and blocks. I know it is about .20 mm to big but I can live with that. I am going to replace the 4 halliards with a .25mm thread. Should be able to salvage the 4 long lengths of .75 thread for a future use. Should not be a difficult repair then on to mizzenmast.
-
I am in route Ian. Wife taking a driving shift. So my two ropes should be .5mm and .25mm?
-
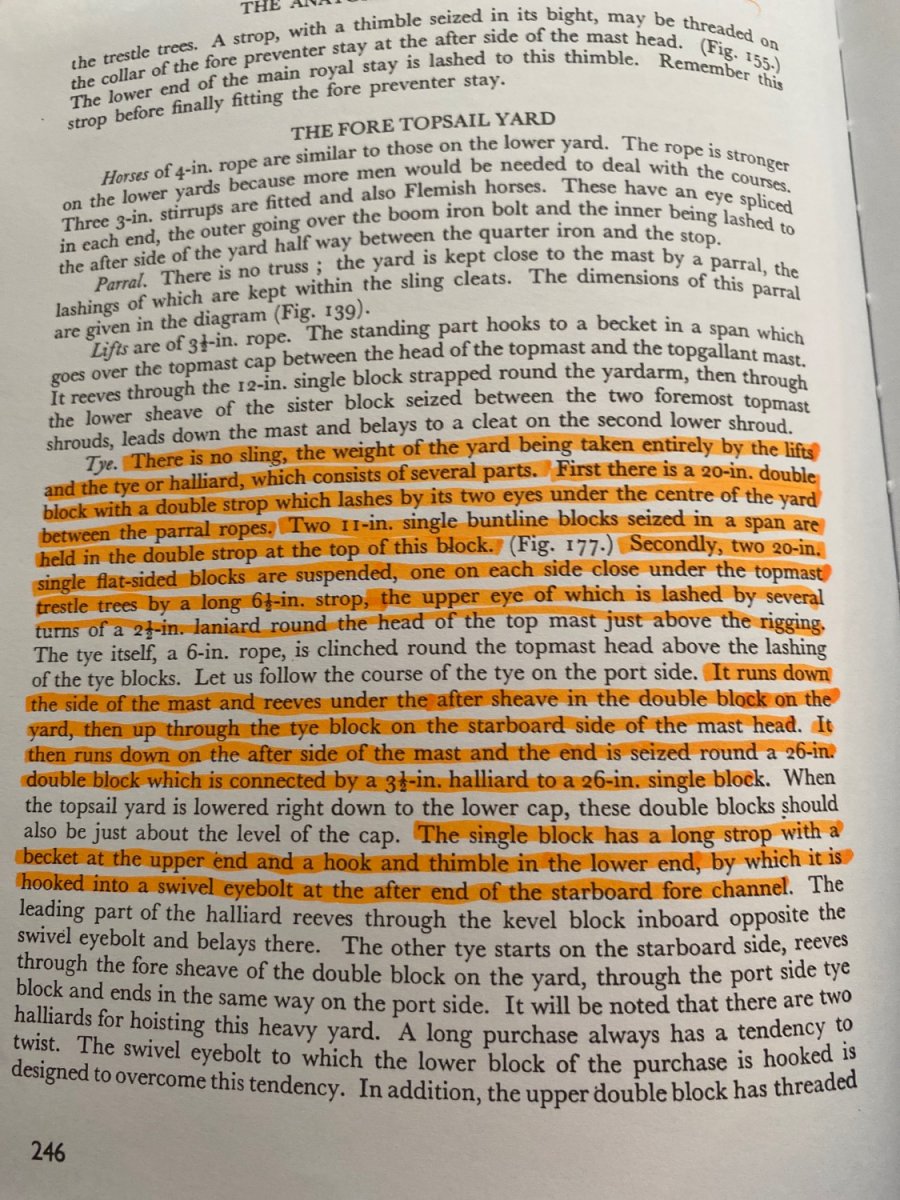
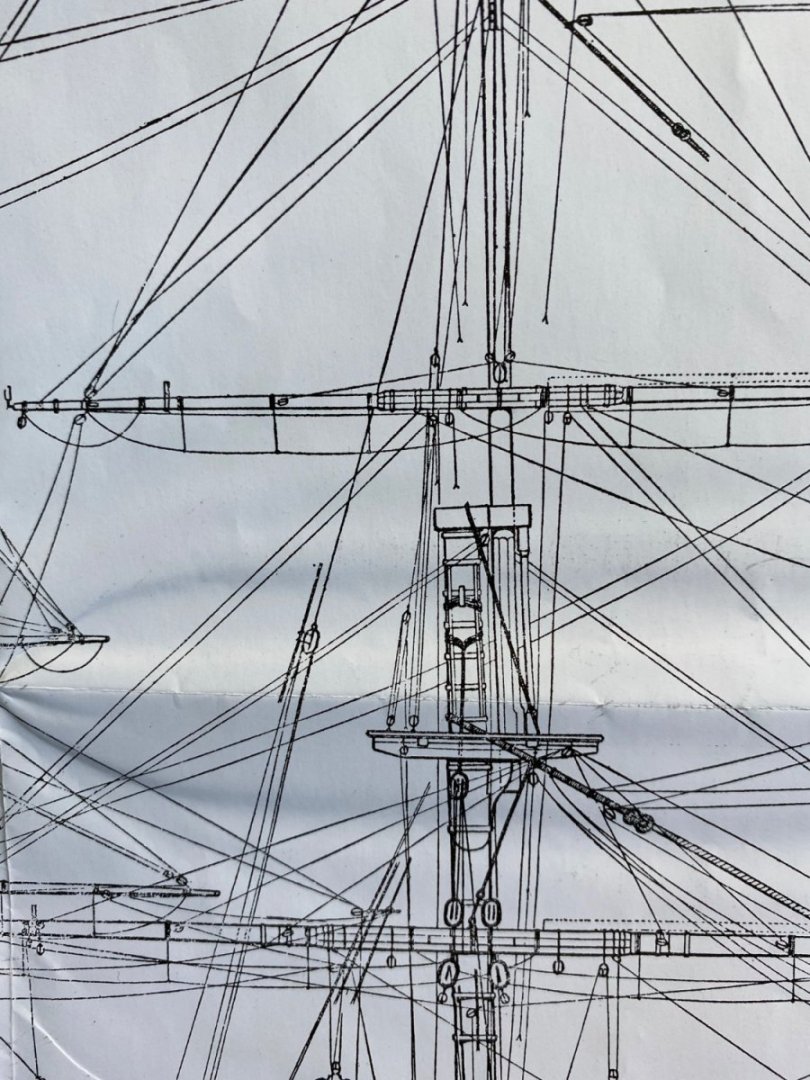
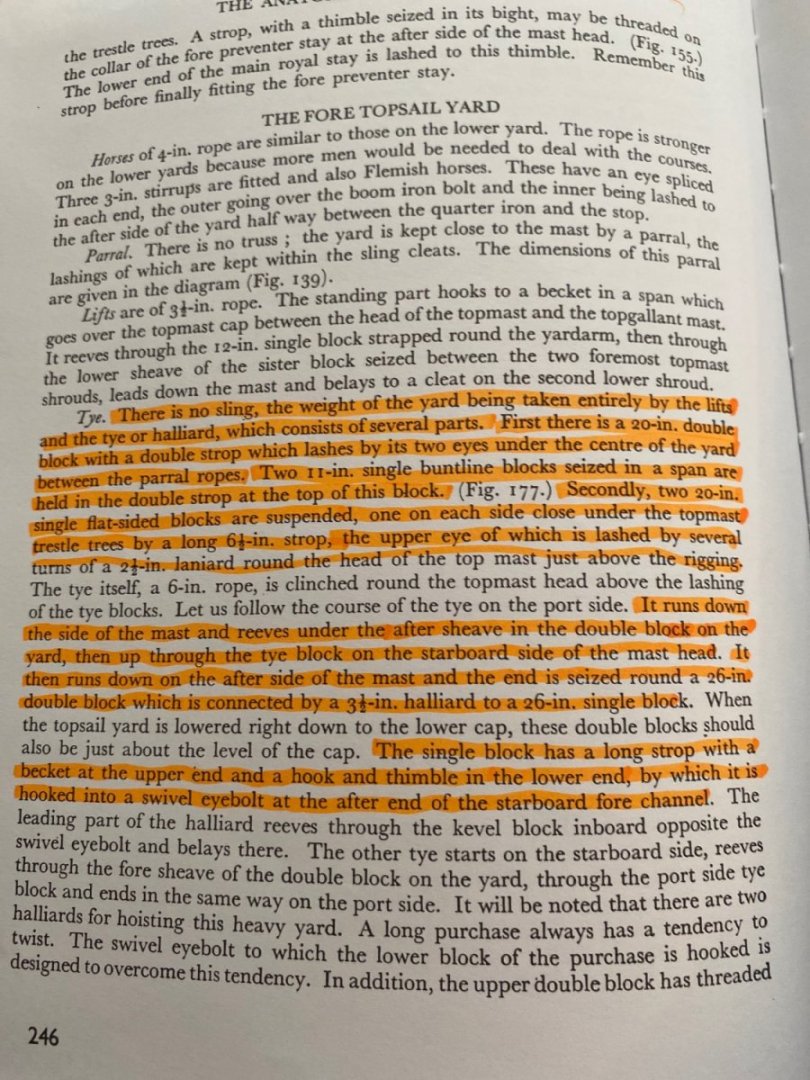
Longridge says the tye was a 6” rope and the halliard was a 3 1/2 rope, about half the size. My trusty 1/100 converter shows a 6” rope would be 1.5mm and a 3 1/2” rope about .75mm. Does that sound right? A 1.5mm rope (thread) for the tye seems big. I used a .75mm for the halliard. Is that correct? I used a .75mm for both the tye and the halliard. Or am I completely wrong on both? 😀
-
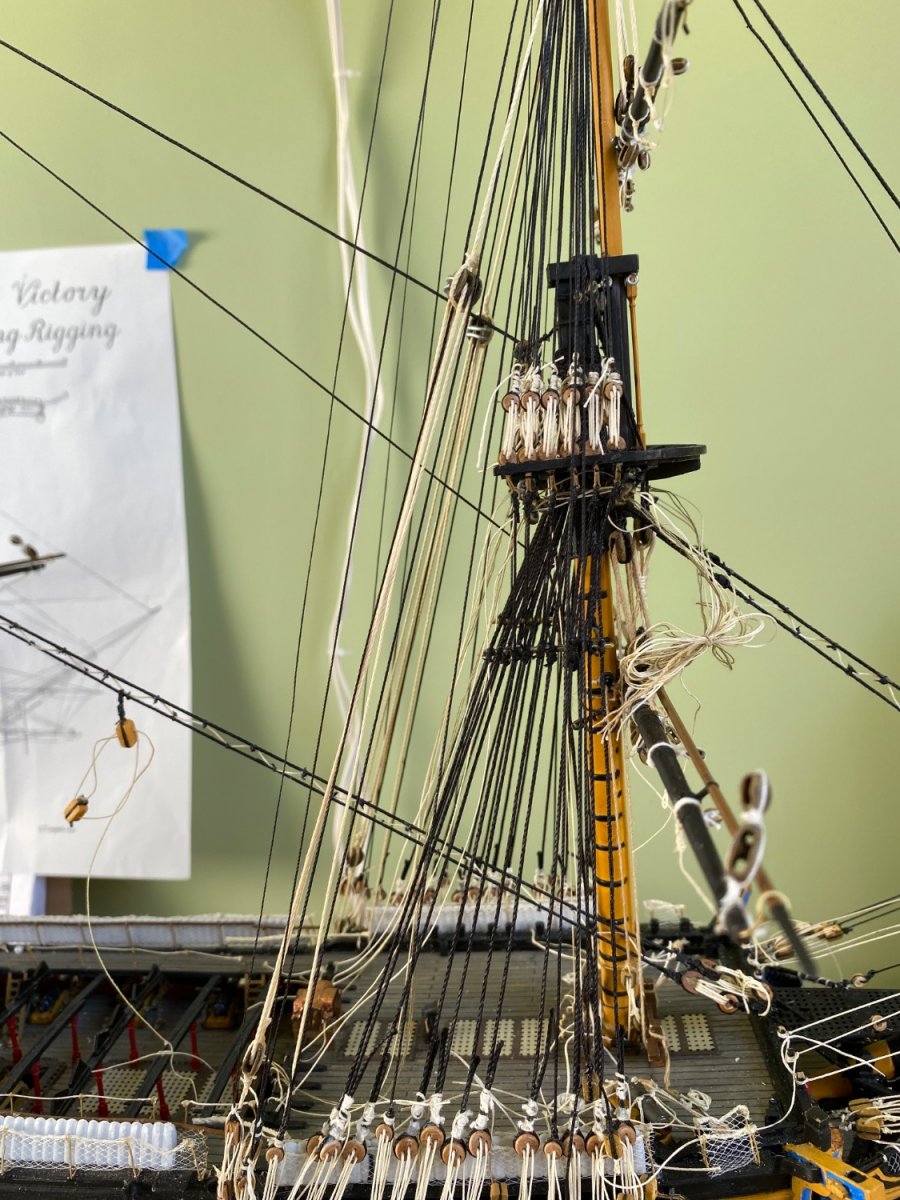
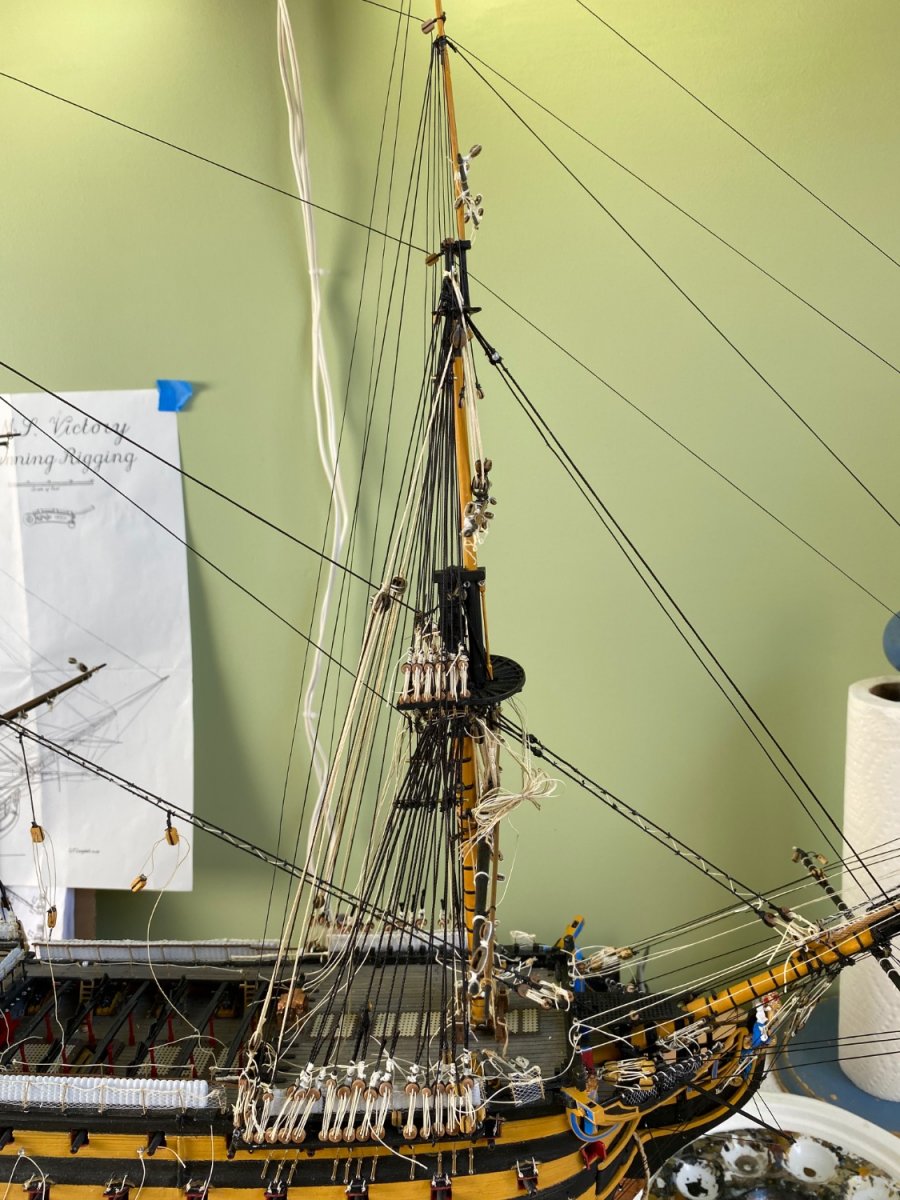
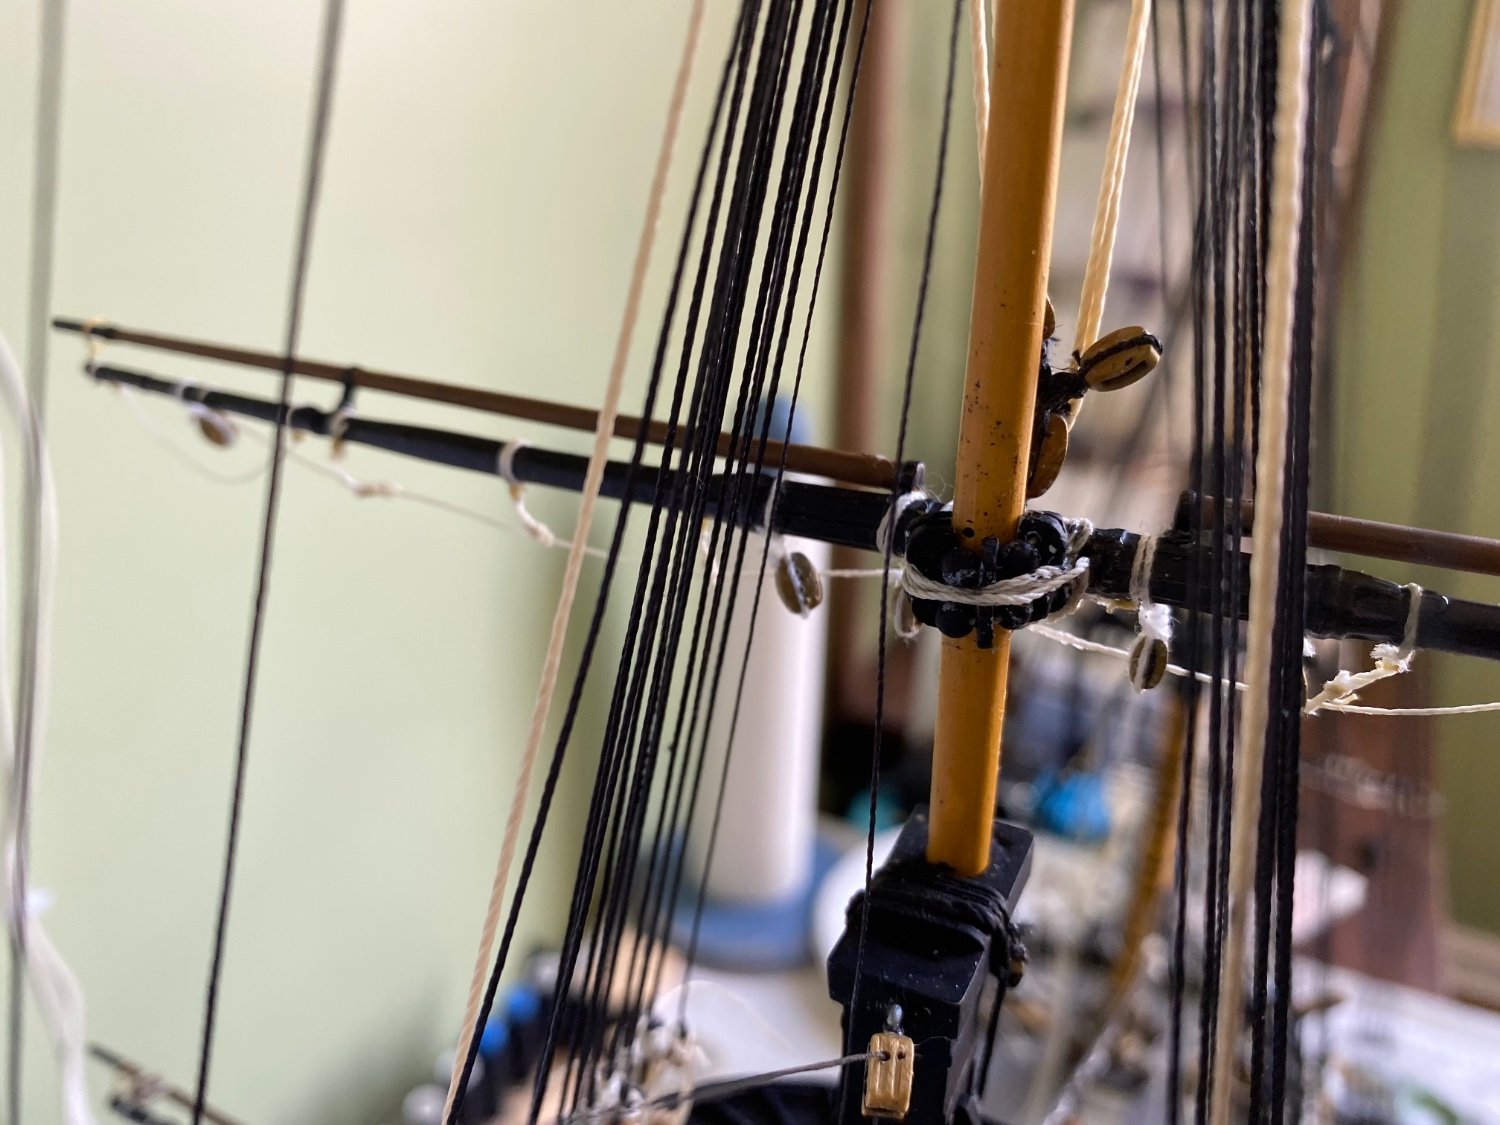
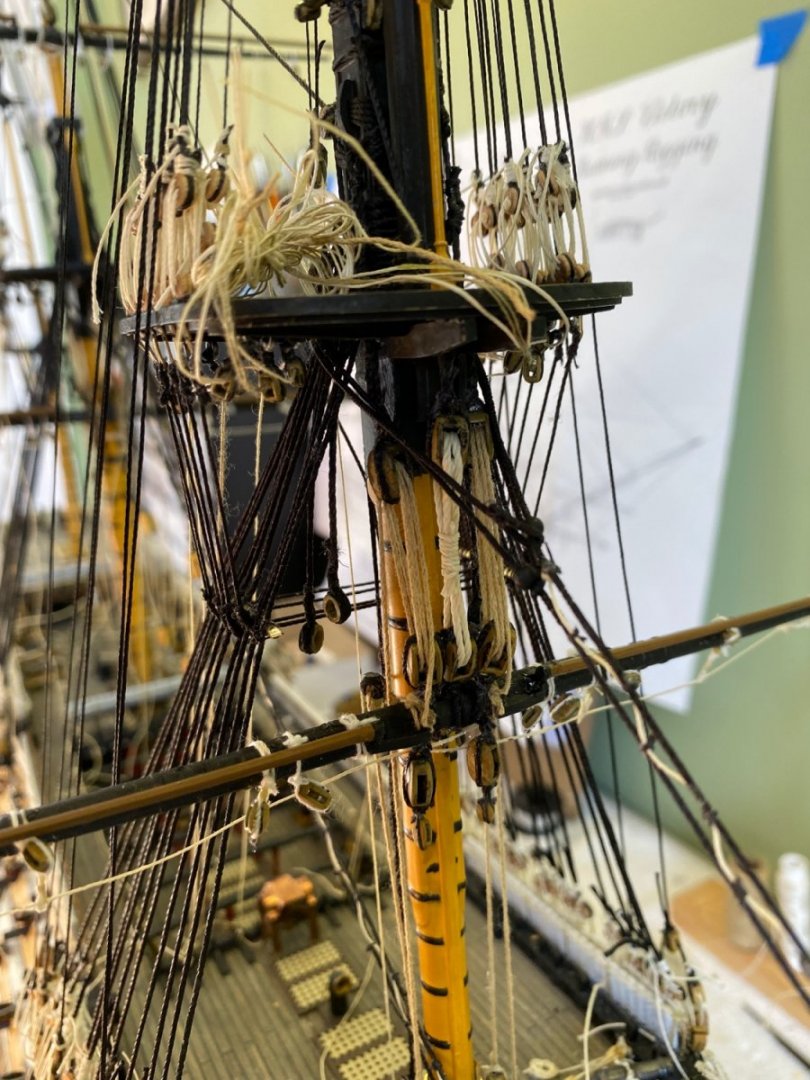
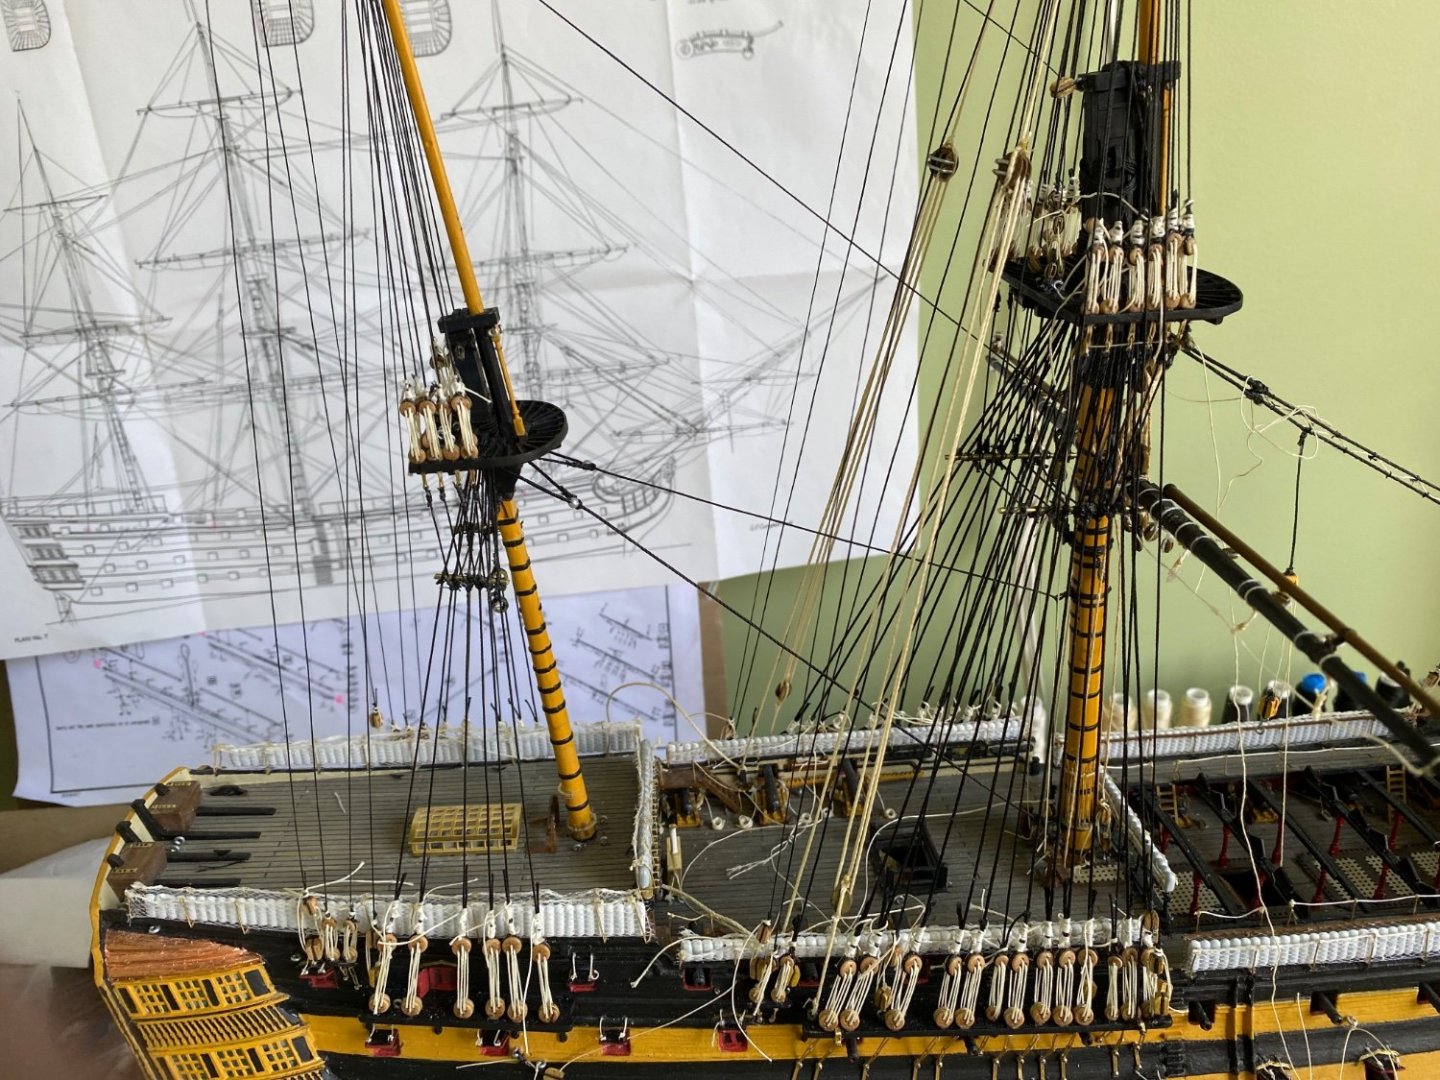
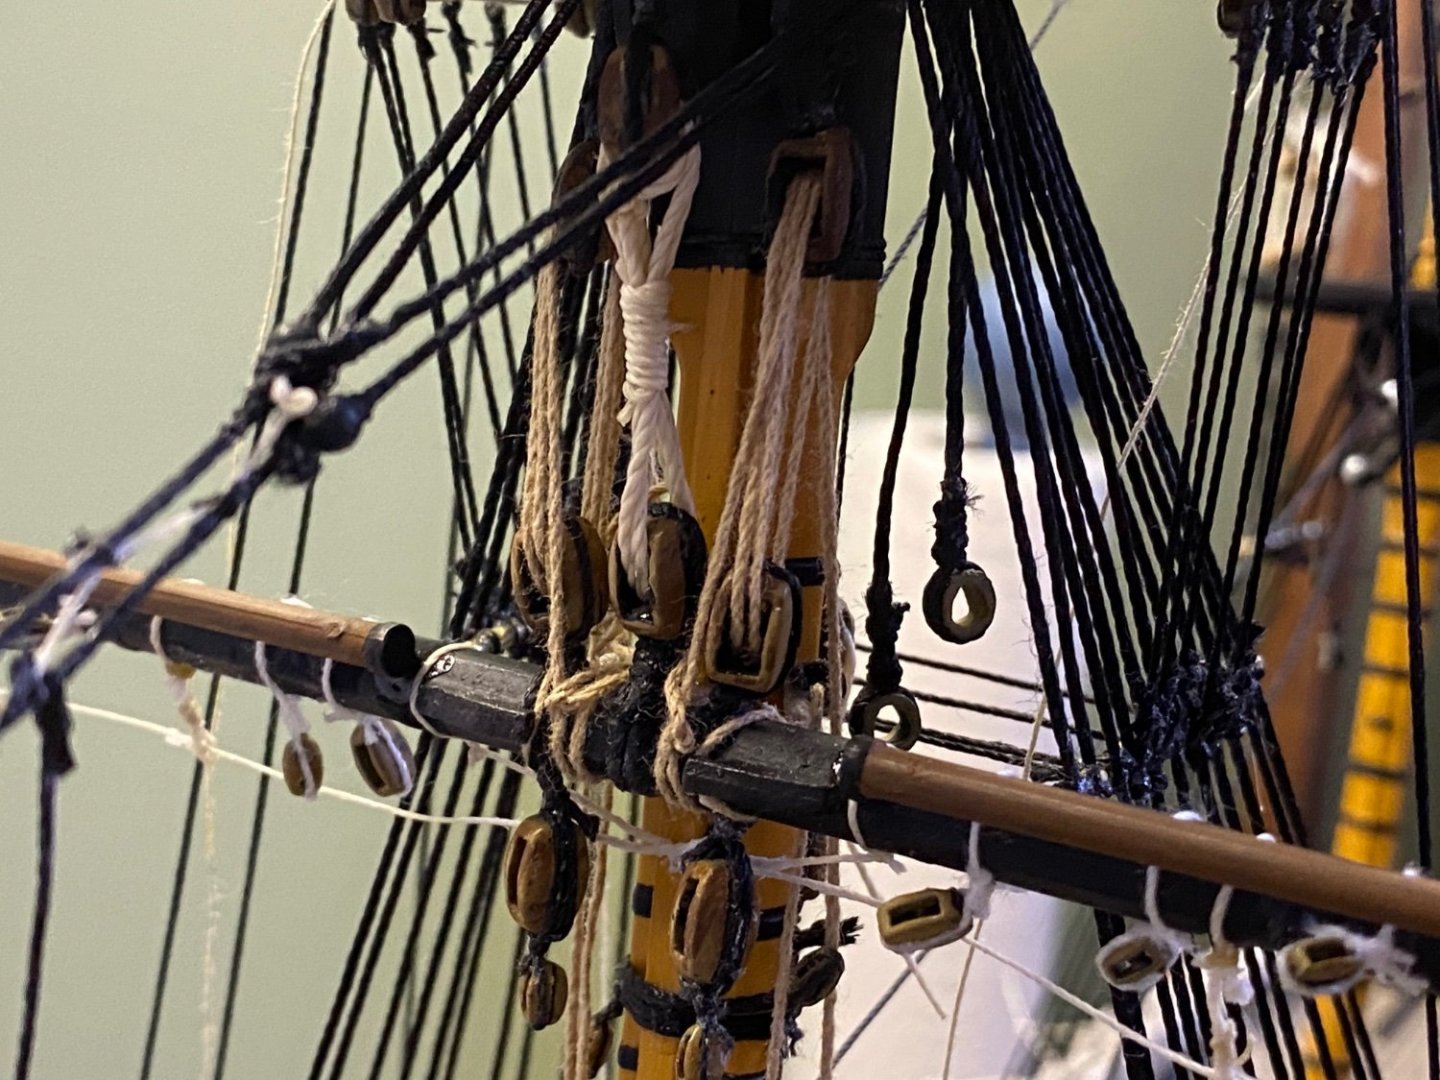
Shutting down the ship yard and sending on the workers on vacation for another week! Off to the sea shore and beach again with the other side of the family 🌊🏊♂️🏖. Had a goal of completing the initial installation of the yards on the foremast before shutting down but came up a little short. As shown above I have the foreyard done. Today I got the necessary blocks installed and tyes for the topmast yard. Did not get the topgallant yard tye installed or the parral for the topmast yard or topgallant yard. I am thinking I may have used the wrong diameter thread for my tye system on both the foremast and mainmast? I think it is to big at 7.5mm. When I get back I may have to redo both. I used the same size thread for both the tye and the halliard. Will have to check Longridge again. Haste may very well have made waste of my heavier thread.


-
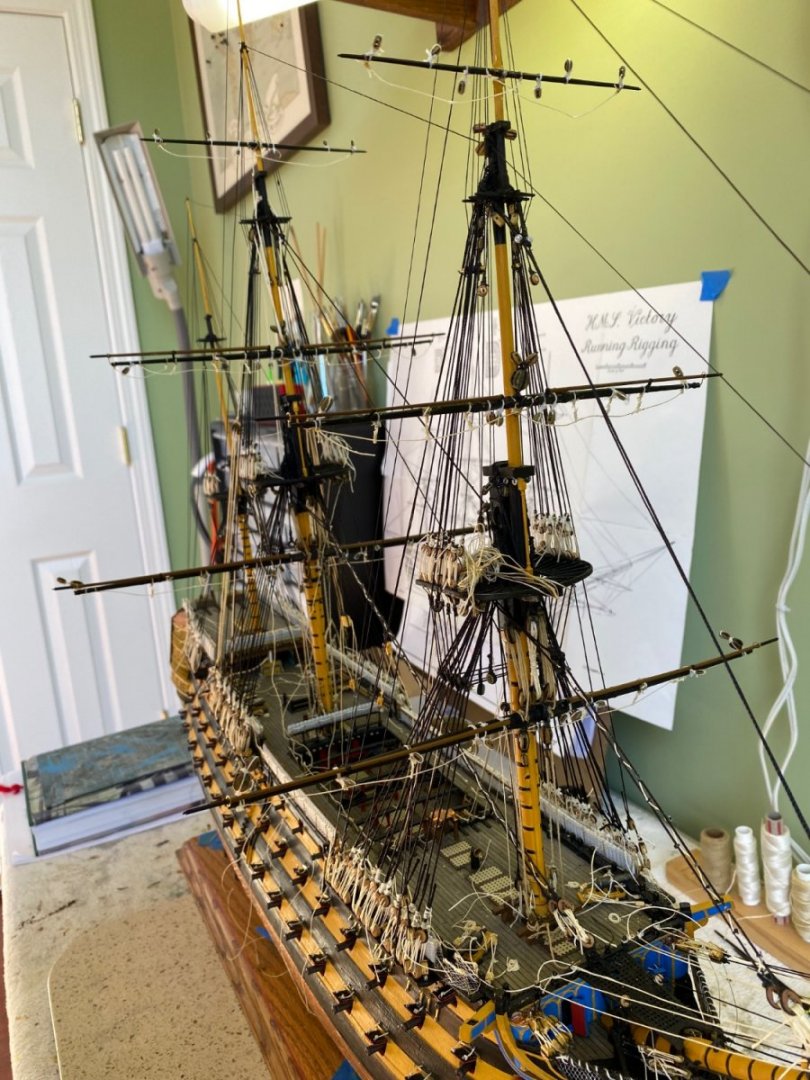
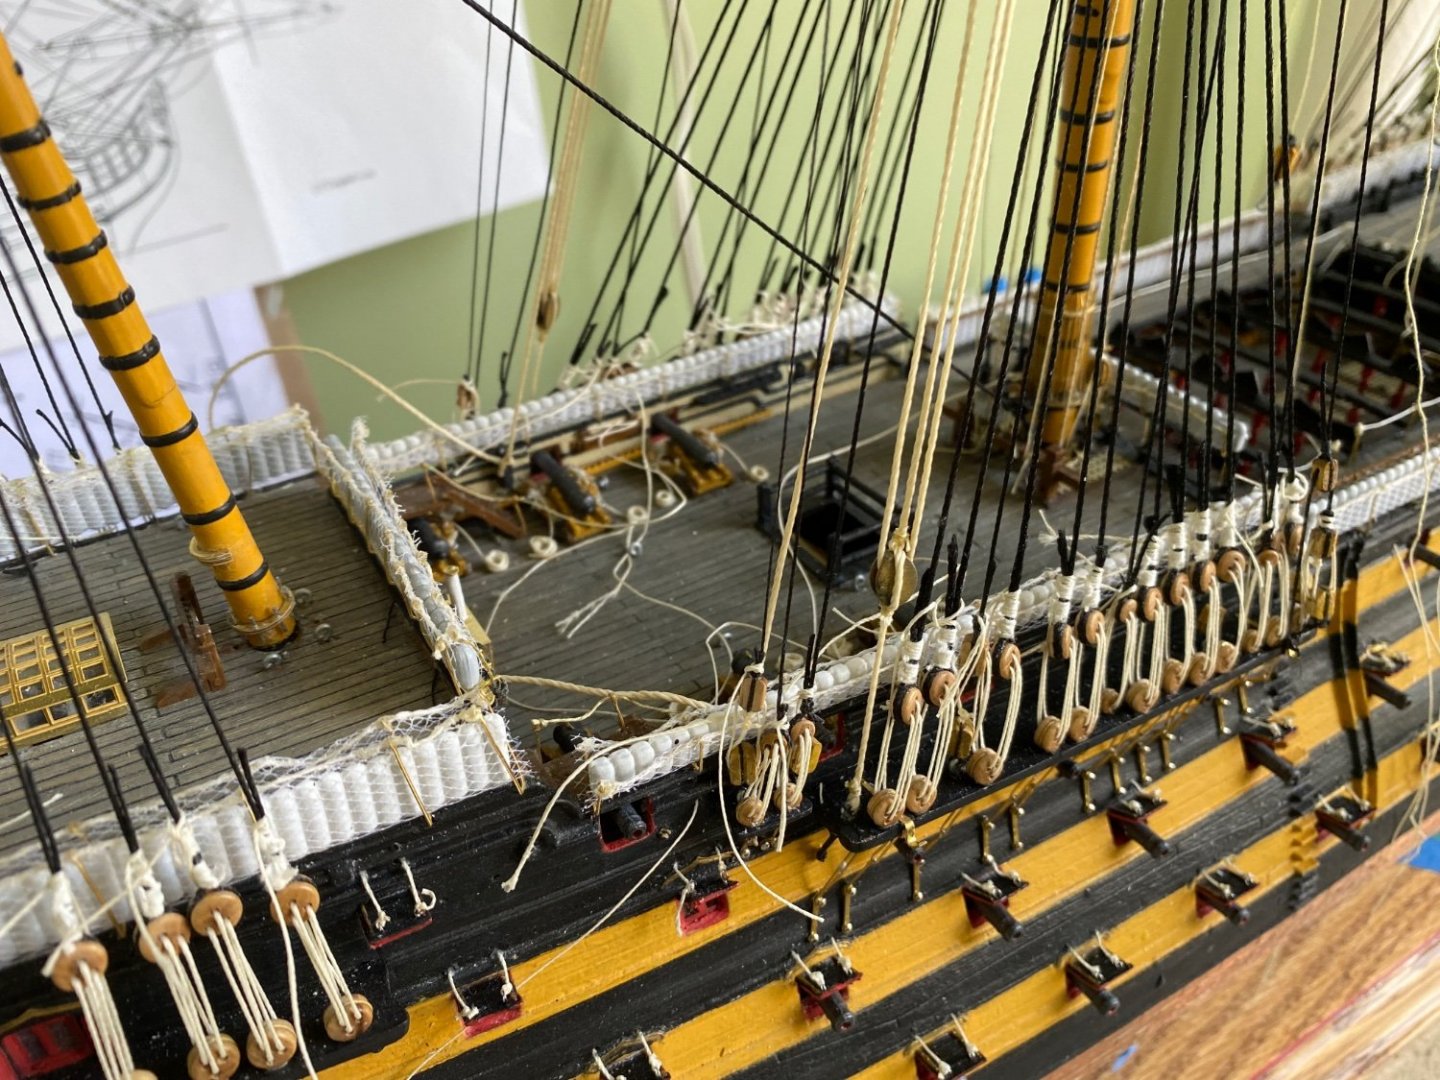
Got the three yards mounted on the foremast. Completed the sling, truss pendants, and jeers on the fore yard. After I took the blog pictures and finished working for the day, I looked back at my photos. I noticed I tied the jeers to the yard outside the jeer blocks instead of between the jeer block and sling. Will need to correct that.


-
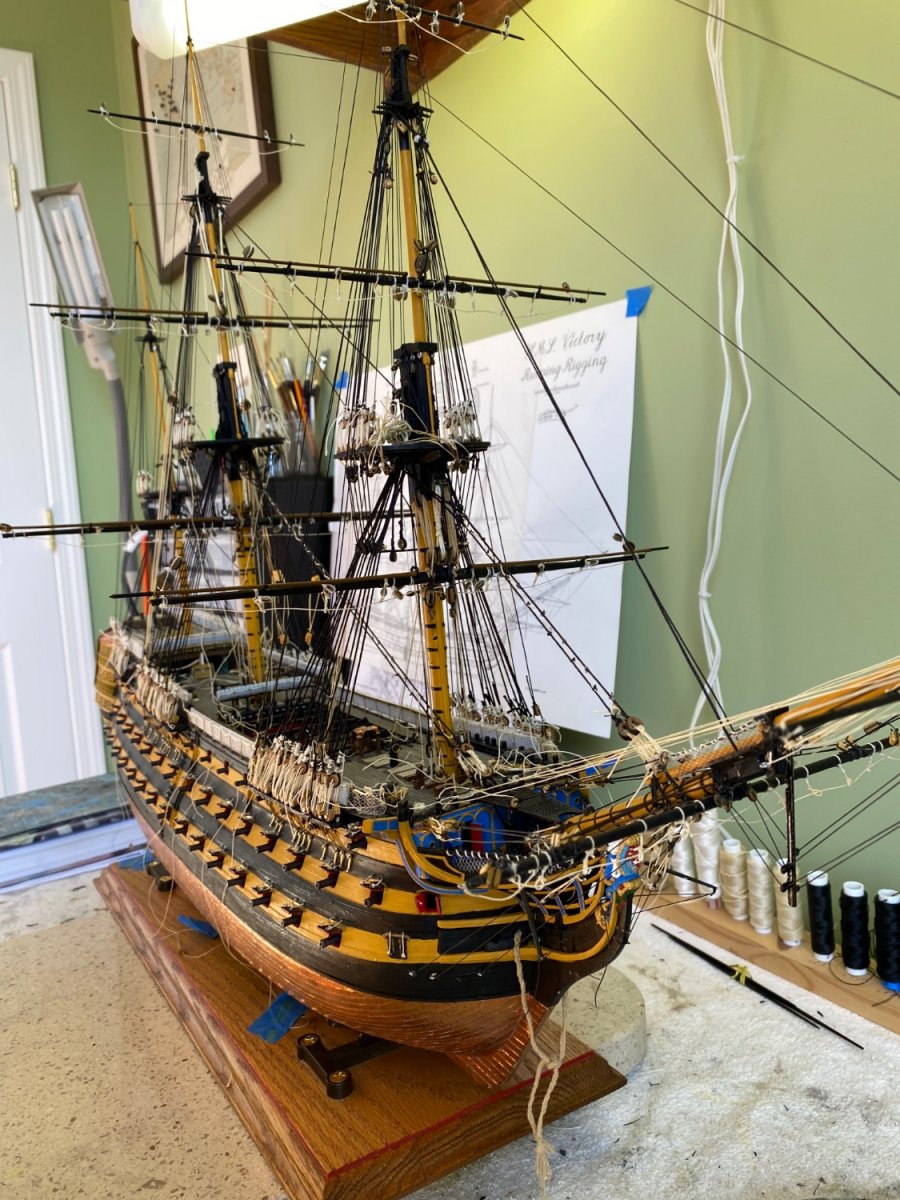
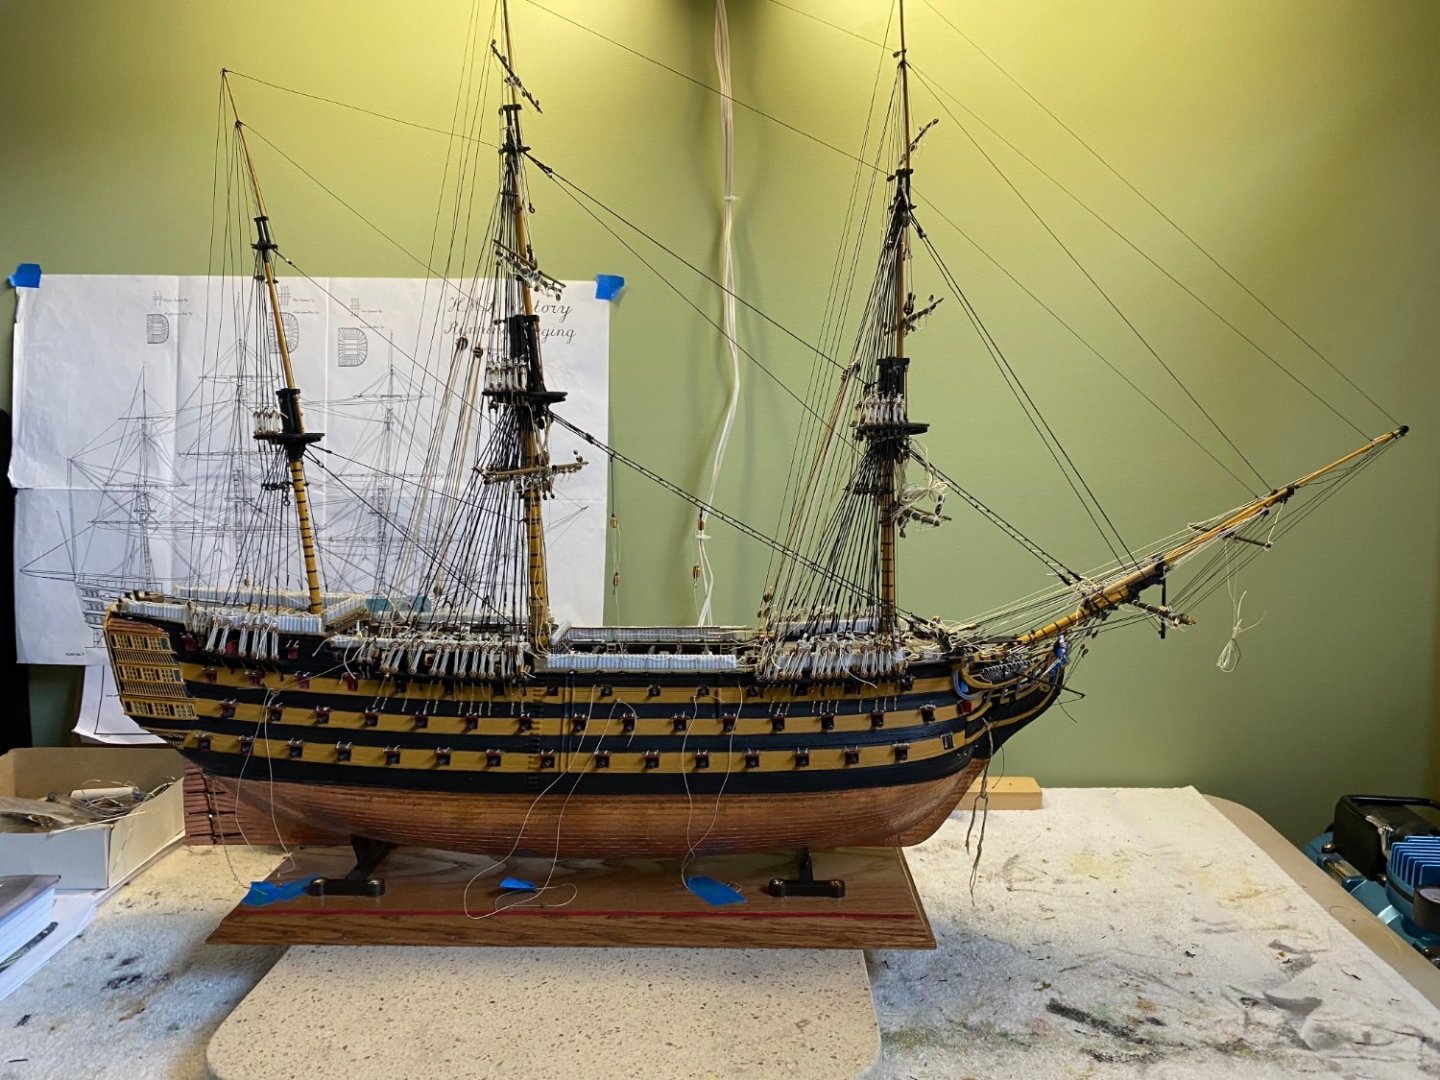
Primary yard installation of yards on main mast completed (slings, truss pendants, jeers, tyes, parrells, etc). Moving on to foremast then mizzenmast. Once completed I will return to do the lifts, buntlines, leachlines, cluelines, etc).
-
Ian I had my fingers crossed that I would get a 👍on my tyes! Woo! That is a relief! 😀
-
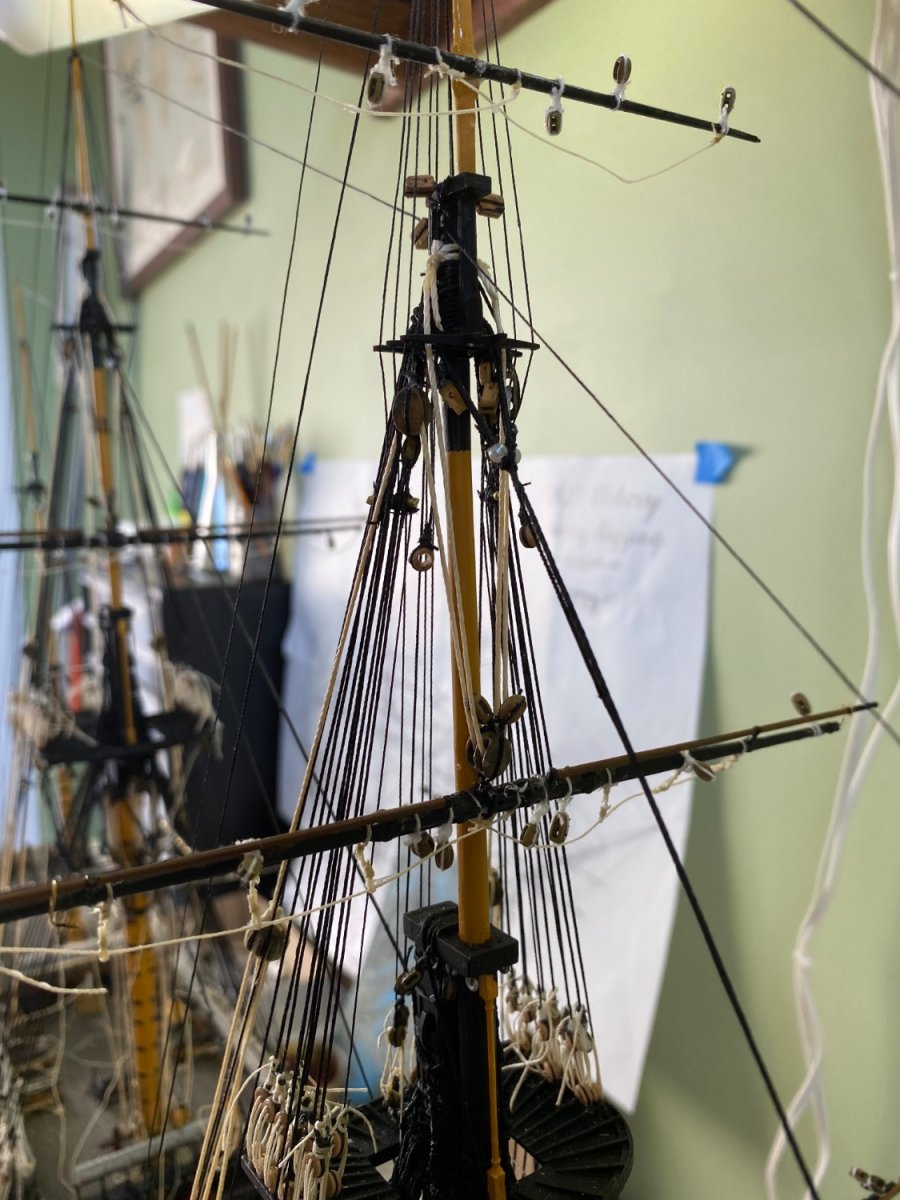
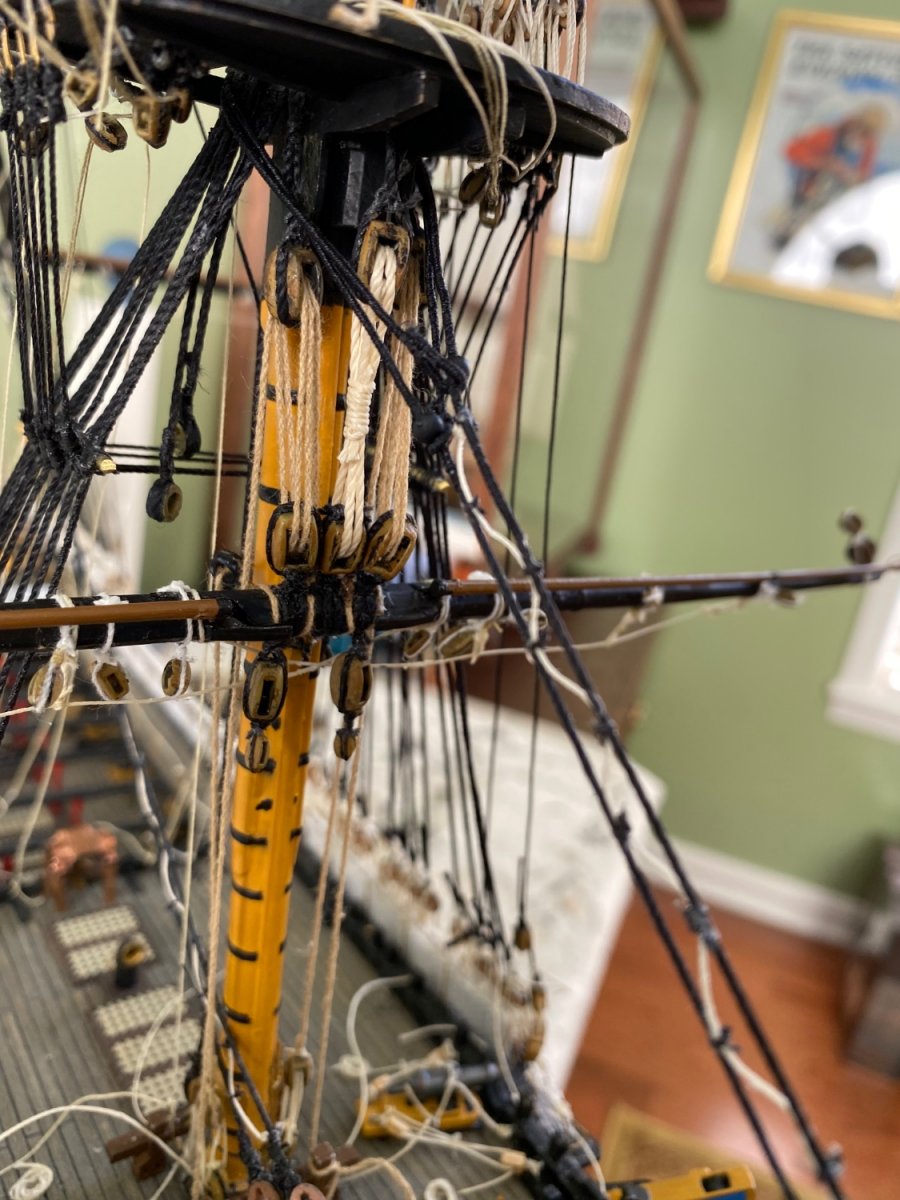
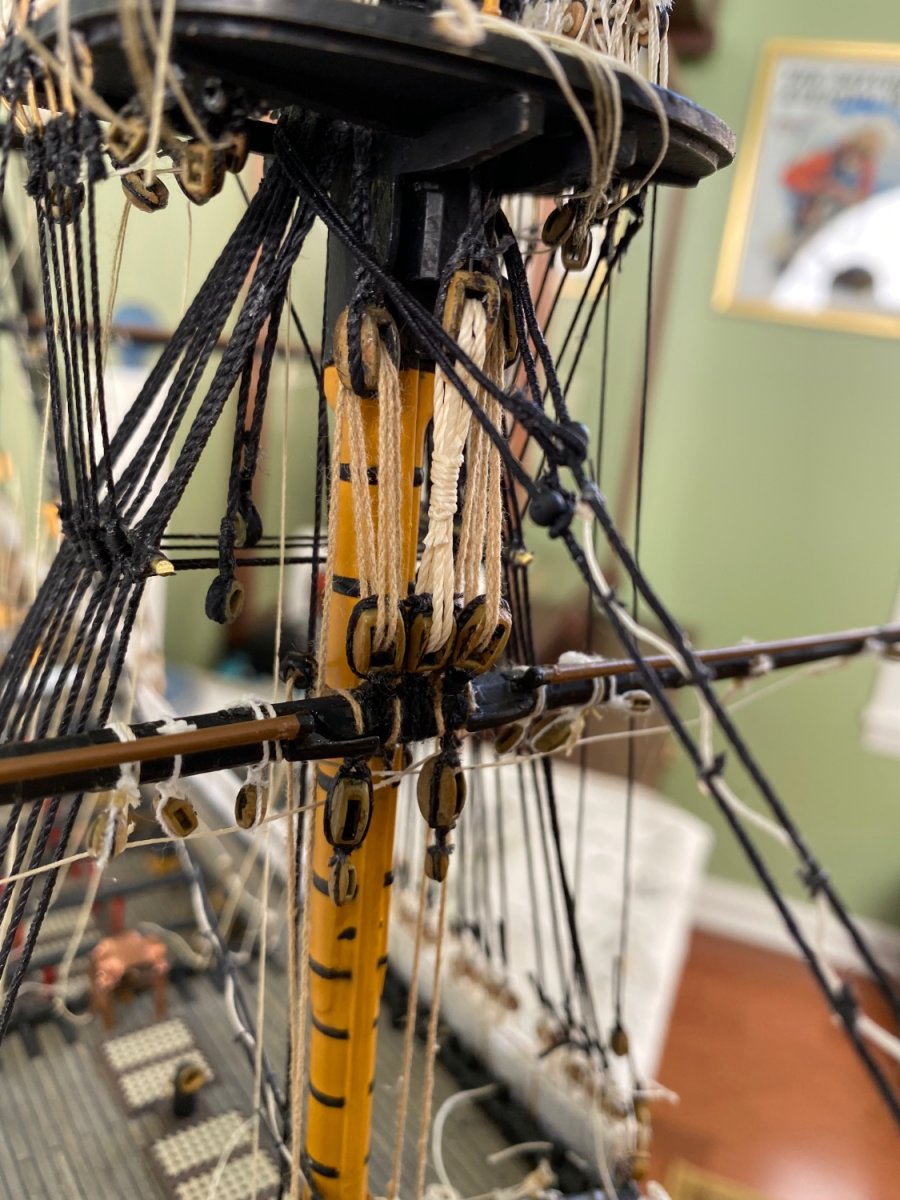
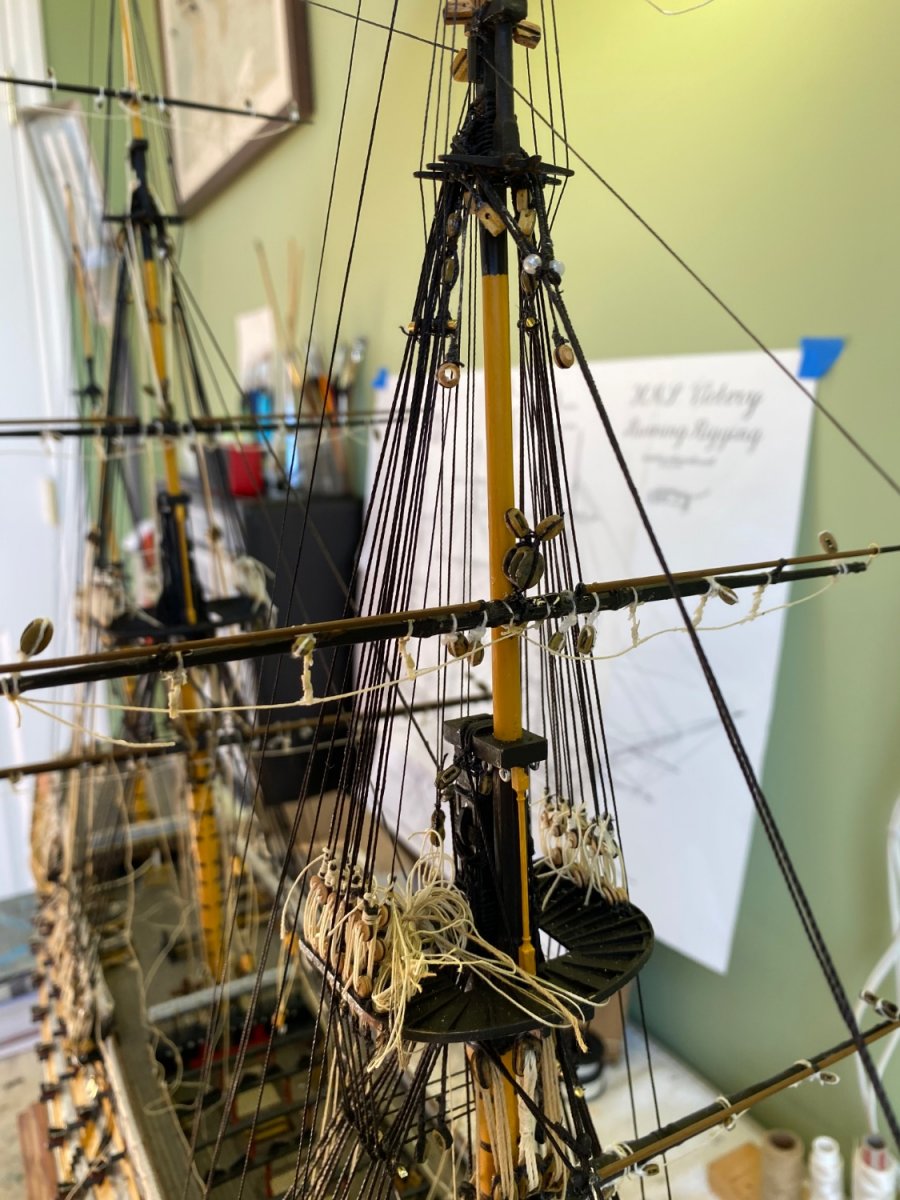
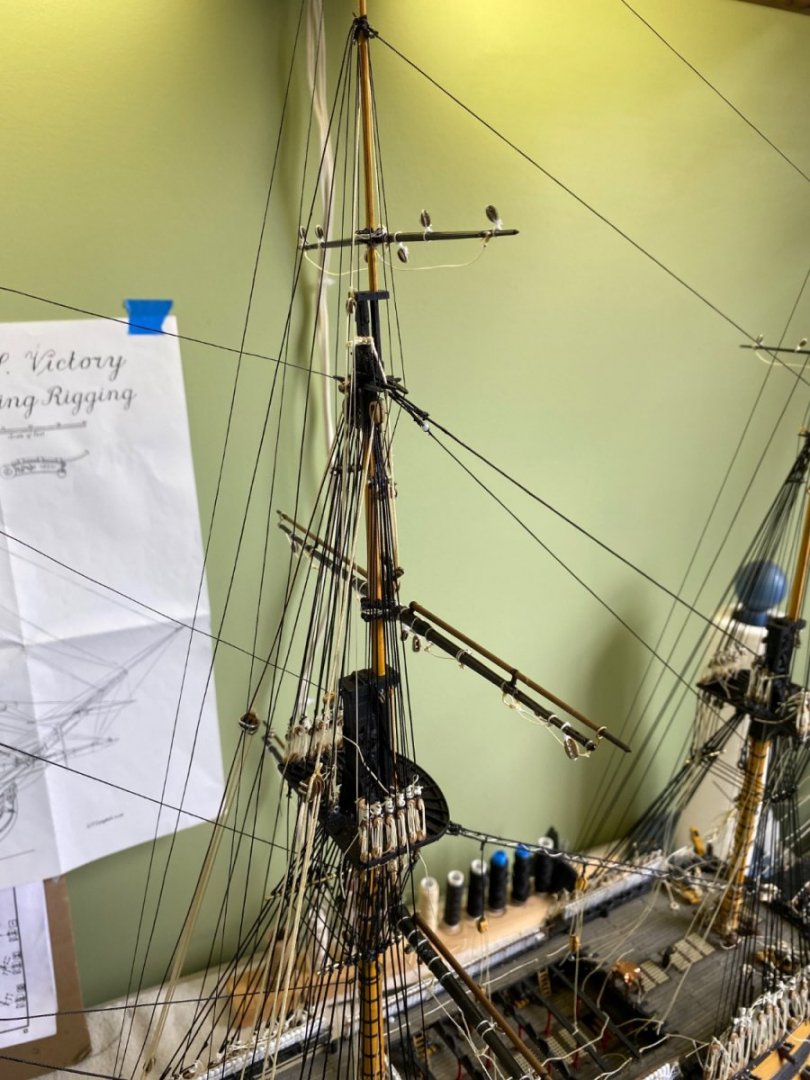
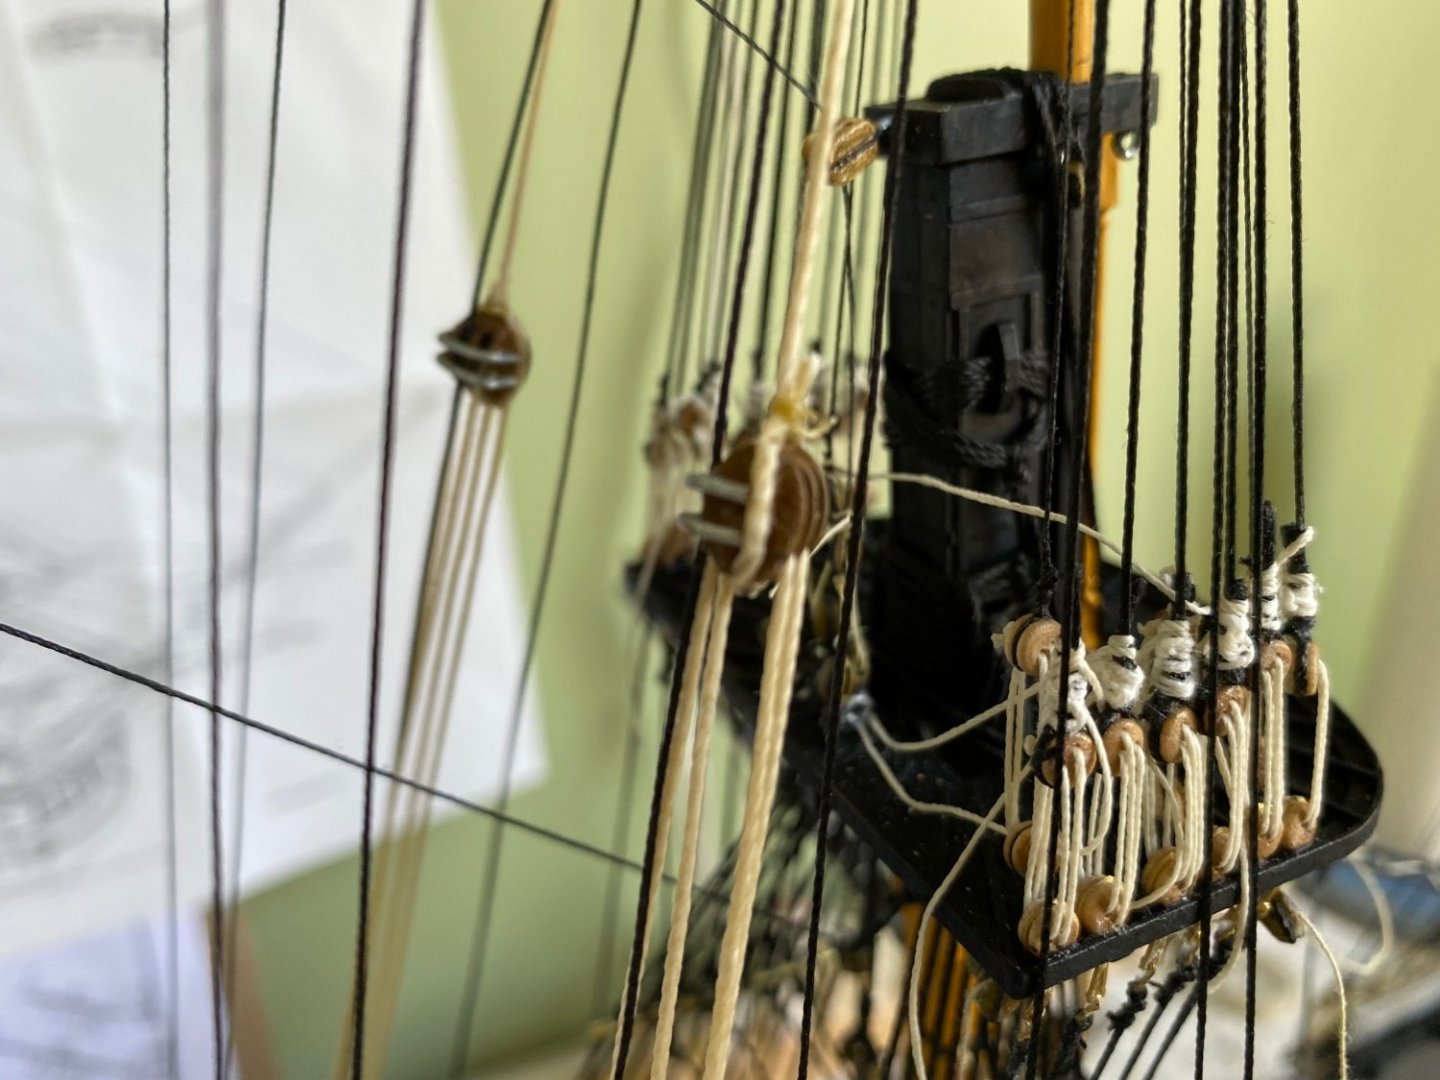
My very first perrel in place on the main top mast and the topmast tyes with the double blocks altered to connect to the backstay.

-
This is my first try at an idea. Added some additional horizontal groves on the double block from the center to the one edge. Then I took some heavier gauge wire and made some basic staple shapes the exact width of the block. I added a bit of CA to one side and slid the wire shape into the groves. The opposite side I will wait to add the CA until after I put it around the backstay. That is if I am able to gently pry the “staple” open enough to slip the backstay in without the dried CA on the other side breaking loose. Then it will simply be a matter of connecting the tye to it. Once I attach the tye to the block the rope will butt right up against the ends of the “staples” to give a more finish d look. I may paint the staples black, not sure. This idea seems close to the way the double block attachment to the backstay is shown by Longridge in Plan 7. Stay tuned to see if it works. If not I will try plan B.

-
Ian checked the rigging looking at your reply. It makes perfect since. Now looking at my double blocks to determine the best way to attach a couple fabricated fittings so I can attach it to the backstay. 🤔
-
See Ian you make it make since! I was not thinking about this logically. A dua moment. Of course with the block system at the top, as the yard lowered the double block would be pulled up, not lowered along with the yard. Of course. Thanks for the digital tap to the back of my head!
-
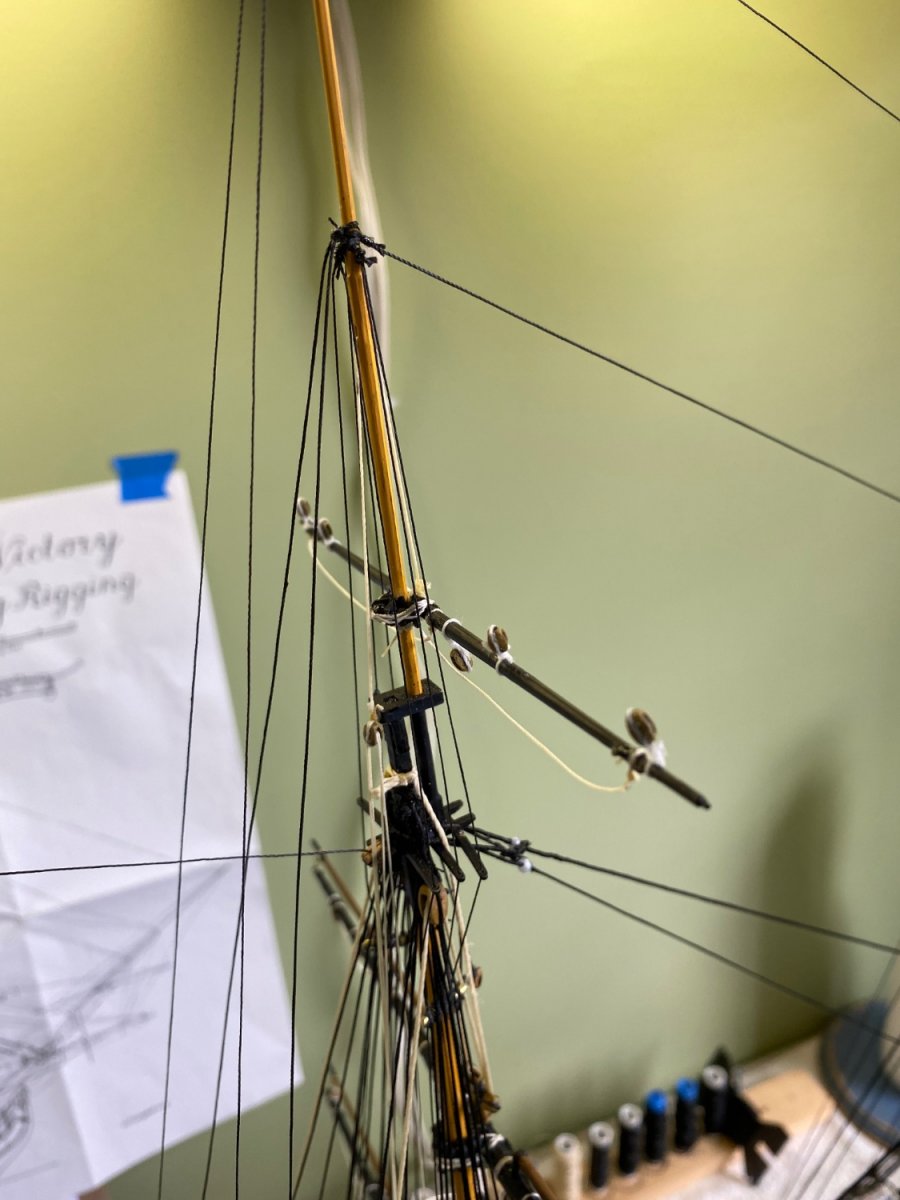
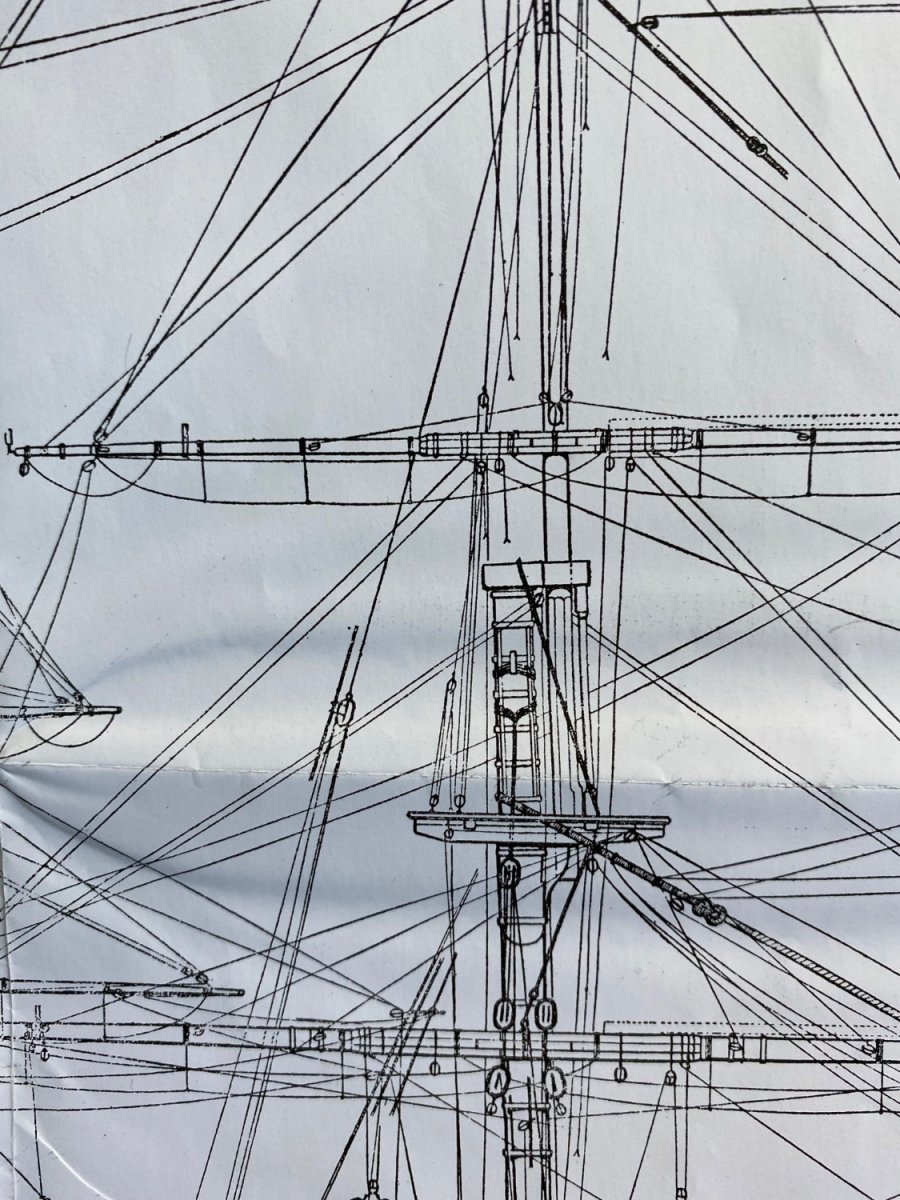
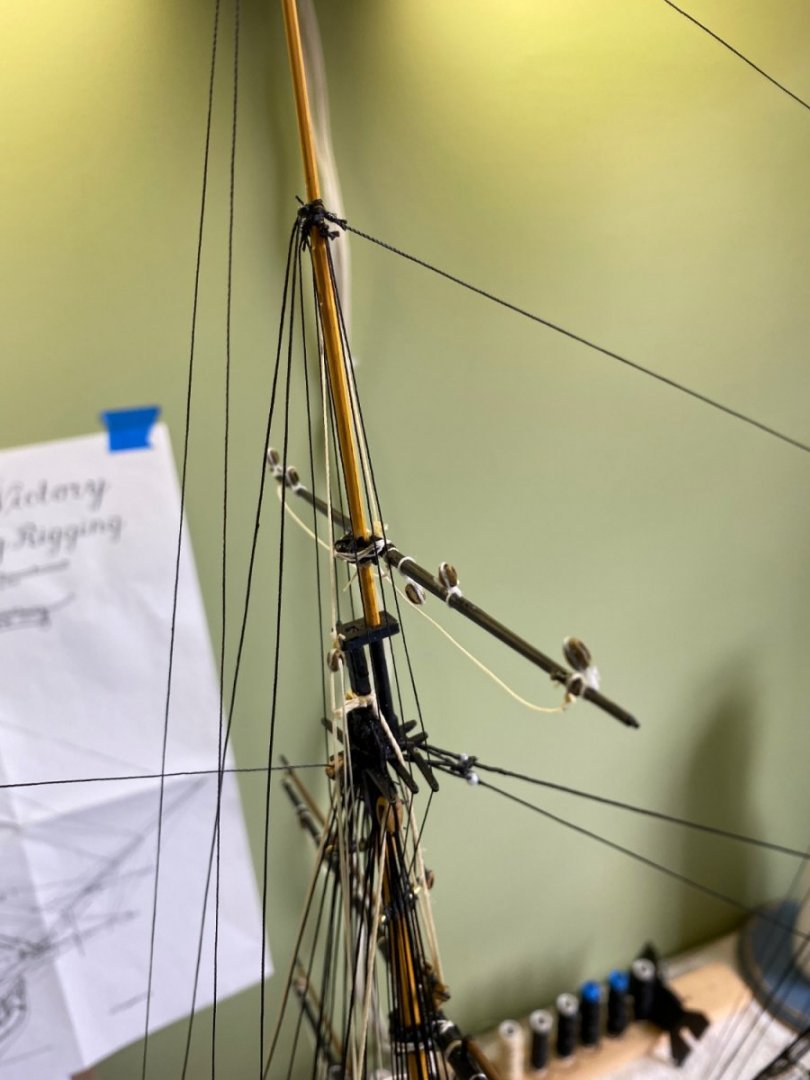
Ok Ian needs some help with your’s and Longridge‘a direction. This may be a case of me not understanding what is being explained. In both of the directions (your’s and Longridge), “when the topsail yard is lowered down to the lower cap , these double blocks should be level with the cap.” Are you talking about the same cap? The lower cap is the only cap below the topsail yard? In Plan #7 the double blocks are already below the cap with the yard in the raised position. I can’t understand how if I lower the topsail yard the double blocks would move up? It would make since if the instructions said the double blocks would be level with the mast top if the yard was lowered, not the mast cap.
-
Ian I think Longridge references them at the top of page 242. Yard Tackle Pendants. Is that what you are talking about? They would have a similar purpose as the pendants hanging from the main mast stay over the boats and the other ones attached at the different levels of the mast?
-
Thanks again so very much Ian my friend. You so easily turn Greek into English 😊 Now if you have nothing more exciting to do with your time, which I am sure you do since hockey is going strong right now, you could go ahead and start your much more clear explanation of rigging the top gallant yard! Might as well get a head start. If you know me, you know I am most likely going to be asking you a question 😁 Thanks again my friend, you are pulling me through this maze one step at a time. So very much appreciated. I have no doubt any current or future builders of the Victory who read through my blog will also find your guidance extremely helpful. Bill
-
Ian I just grabbed up my plans you referenced and reviewed them as I read through your text. Excellent job of explaining the rigging. You should actually teach a virtual course for modelers building the Victory. And now I am going to admit something I never noticed before. Don’t tell anyone but until now I never noticed that there is a Plan 9. As I read through the book I just flipped past it thinking it was just a small version of Plan 8. I am going to have to come up with an idea of how to get the thimbles attached to the upper double block around the backstay. There is already a deadeye attached to the end at the channel.
-
Thanks Ian for confirming what I thought I understood. I also still drawing a blank on the Lifts. The paragraph right above the area I have highlighted.
-
Ian help my eyes are crossing 🤪. I am studying the main topsail yard. Understand it follows the same process as the fore topsail yard. Page 246 of Longridge explains the lifts and the the for the fore topsail yard. After highlighting certain areas and rereading I think I understand how to do the tye. Only question I think I have there is getting the tye to the kevel. It looks as if the tye reeves through the block attached to the end of the channel then back up to the double block right below the truck and then directly to the kevel? My main question is the paragraph about Lifts right above Tye on that page. Not getting that at all. Did you do the topsail yard lifts.
-
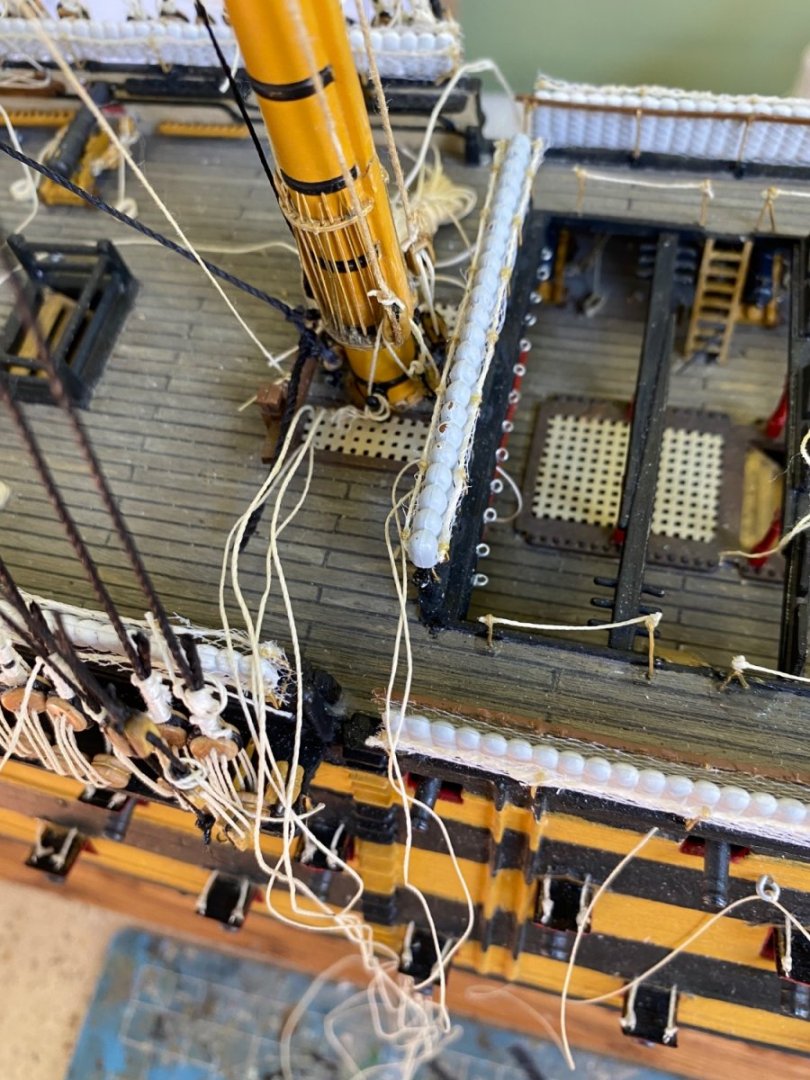
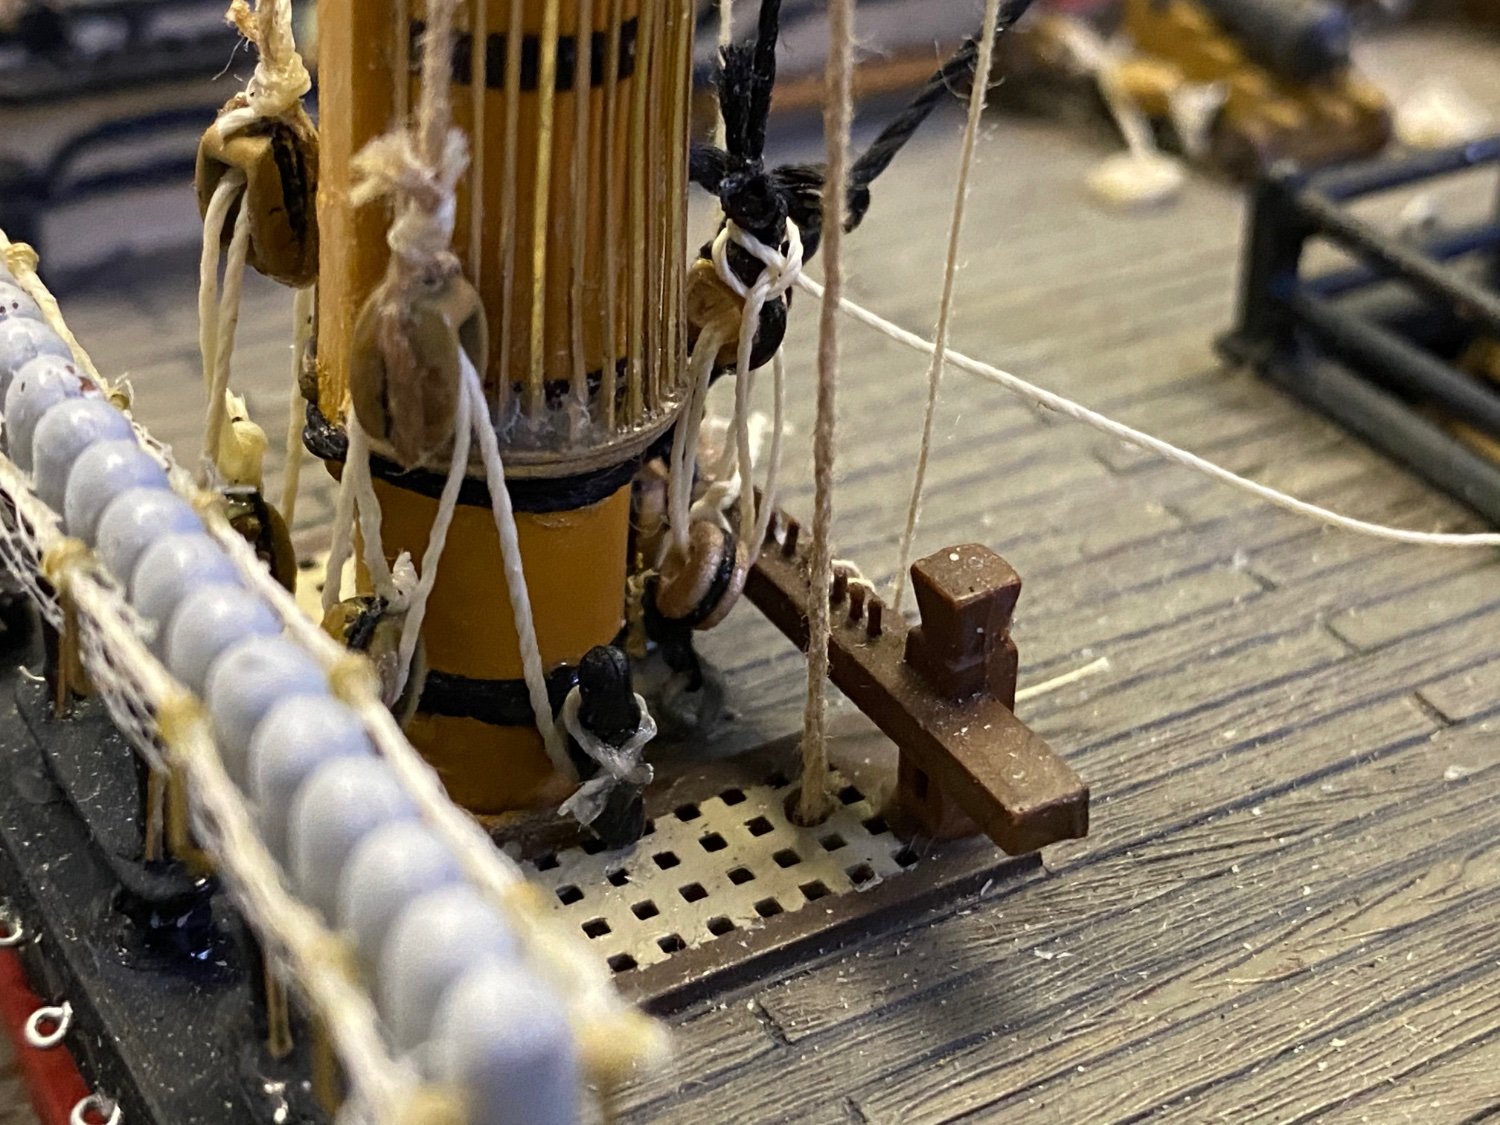
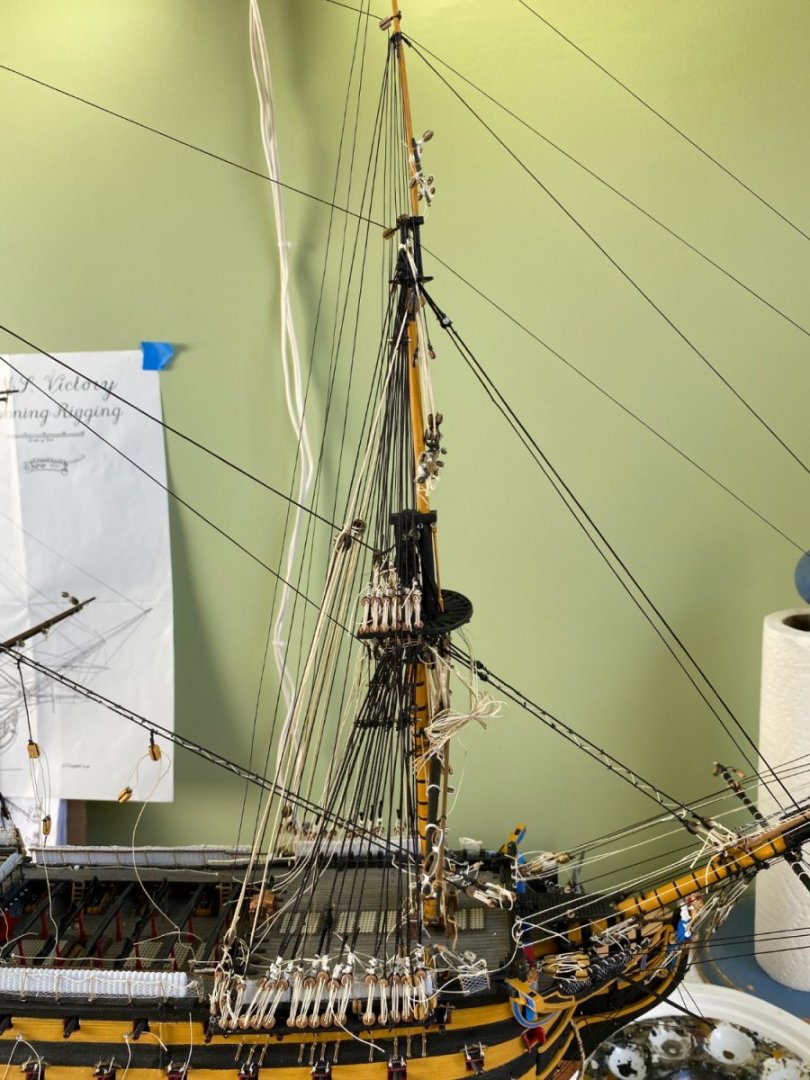
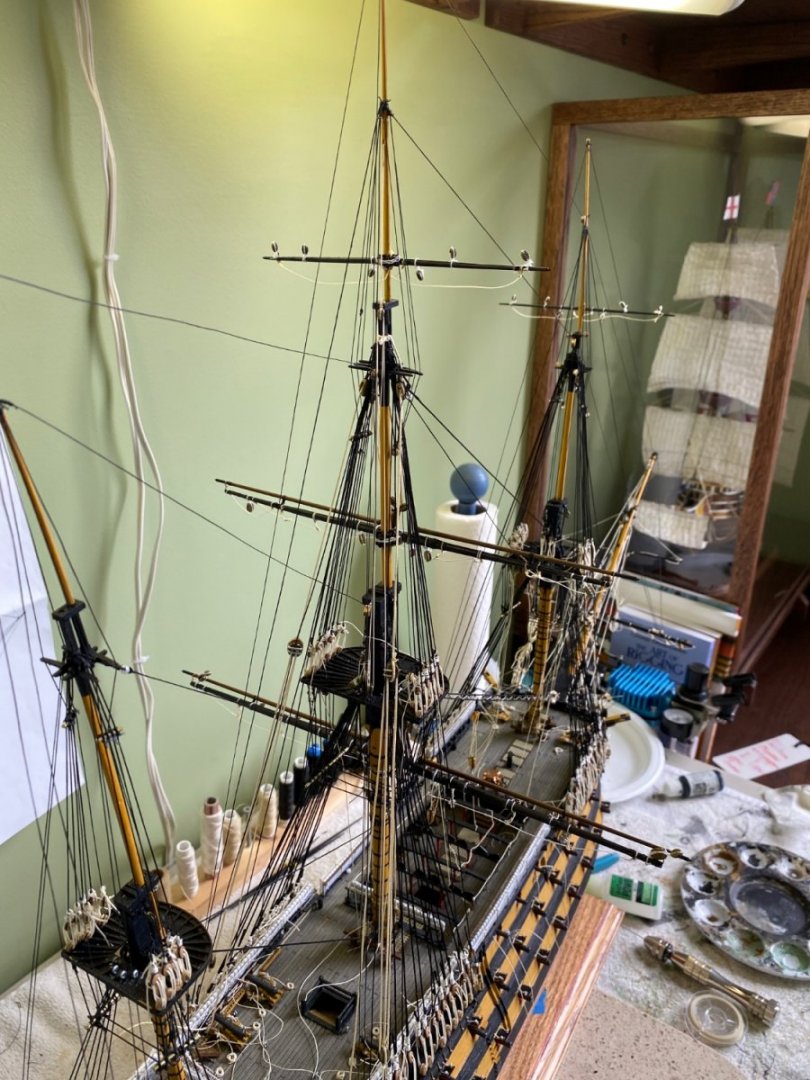
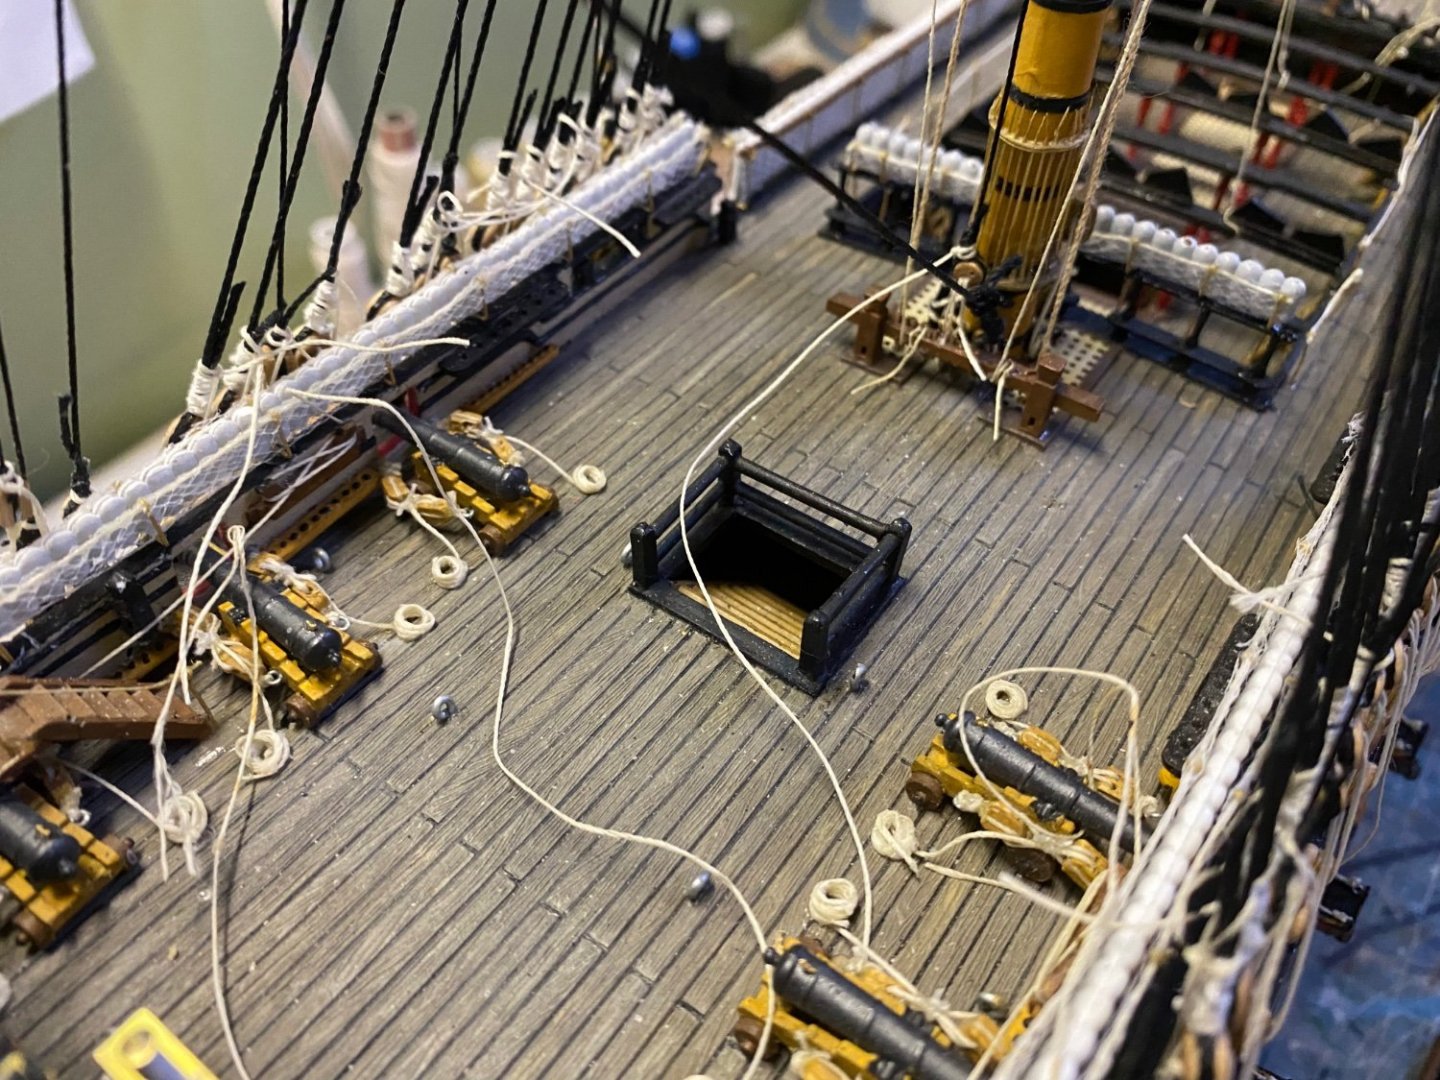
Gentlemen the main yard jeers, sling, and tackle pendants complete! I was able to rerig the jeers to the bit on the upper deck by running two new correct diameter threads down through the grate (had to drill the hole for each slightly bigger). Then I discovered with a bright headlamp and extra long special tweezers I was able to do it from the stair going down aft of the main mast. Wow! What a tedious job that was. Wish I had a couple little tiny sailors to do that for me. The rope colors for the sling and jeers is a bit different. Unfortunately those are the tan shades of my two required threads. I expect on the actual Victory there was a variation in the natural ropes with time, weather, and wear.


-
Ok. Looking at Ian’s old comment and Longridge’s Plate 46 I think I have this all wrong, or wrong below deck anyway. Back long ago when I as was still a pup learning what to do I did not follow the instructions correctly. I clearly see now I should just have 3 lines coming up from the upper deck on each side of the main mast (jeer, topsail sheet and clue garnet. Each was to belay to the cross piece at the bitts after reeving through the sheave. I did not do it that way. As you notice on my picture above I reeved each of the lines through the bitt and then back up through the grate instead of belaying to the cross piece. So I have 6 lines on each side instead of 3. 😠 I can fix the forward topsail sheet but will have to give real thought to how to fix the jeer and clue garnet.
-
Ok I scrolled through and finally found it. Comment #461 from Ian. Looks like the jeers go through the grate aft of the mast. I can fix this. Tune in. 😊

-
Ok, a little problem. I looked back through my build for the discussion about this but can’t find it. I have a number of lines coming up through the grate in the Quarter deck that I tied off to the bitts on the upper deck. I know two of those are the main yard jeers to be rigged in reverse. The problem I have is when I did it I did not use appropriate diameter thread. All of the threads are to small in diameter. I need to try to replace them but I can’t figure out which ones would be the jeers. On the Upper deck as you know there are two sets of bittts. One forward of the mast and one aft. I can get to the one forward but not the one aft.