Bill97
-
Posts
2,716 -
Joined
-
Last visited
Content Type
Profiles
Forums
Gallery
Events
Everything posted by Bill97
-
This is just a curiosity and maybe more a question for the moderators. Do you guys ever get multiple pings of the same notification? I will sometimes open this site and have a high number of notifications. When I click on notifications there will be numerous replications of the same notification. The attached photos are screenshots of a couple examples.


-
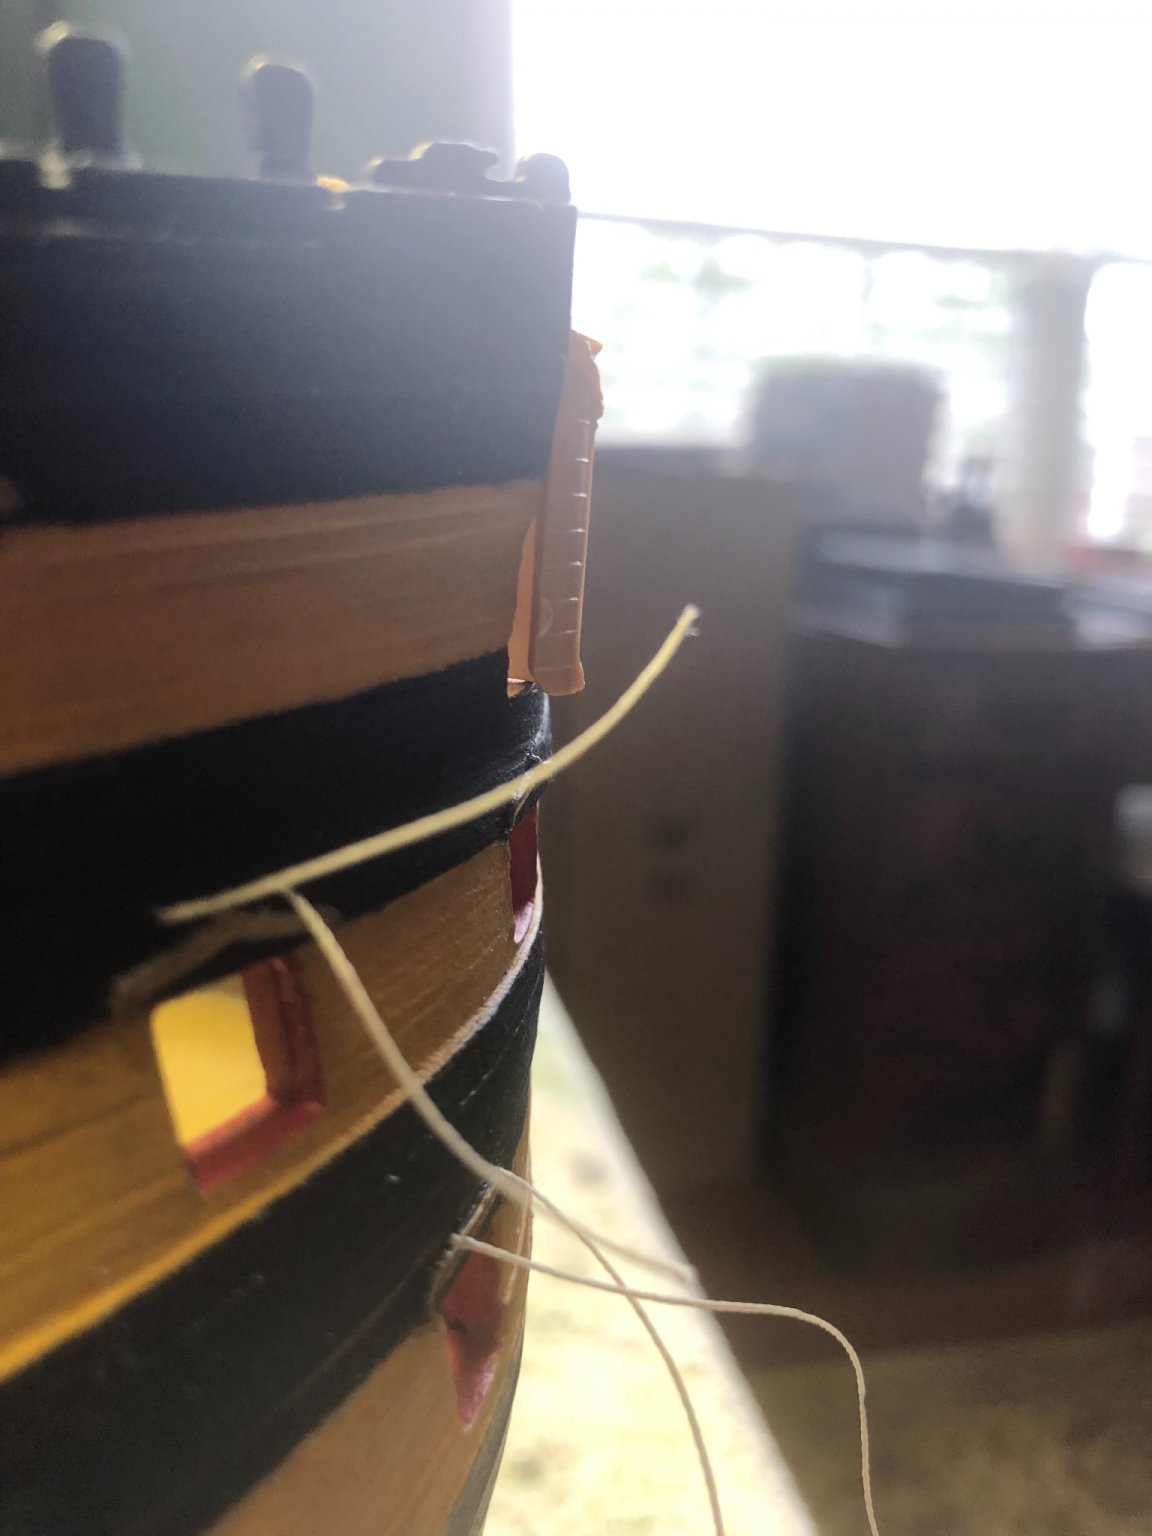
Thank you Kevin. Hopefully it will be as helpful to others as all of the help others have been to me as I have gone through. Something I think I just noticed, and I may be wrong. I picked out the next handful of pieces from the kit to begin painting. When I examined them for any needed cleanup I noticed there are no connection type additions. You know like little pins on the bottom of a piece that is to be inserted into a predrilled hole on the ship with glue for a solid joint. These look like they will just be a smooth but joint. Not seen that before on other models.
-
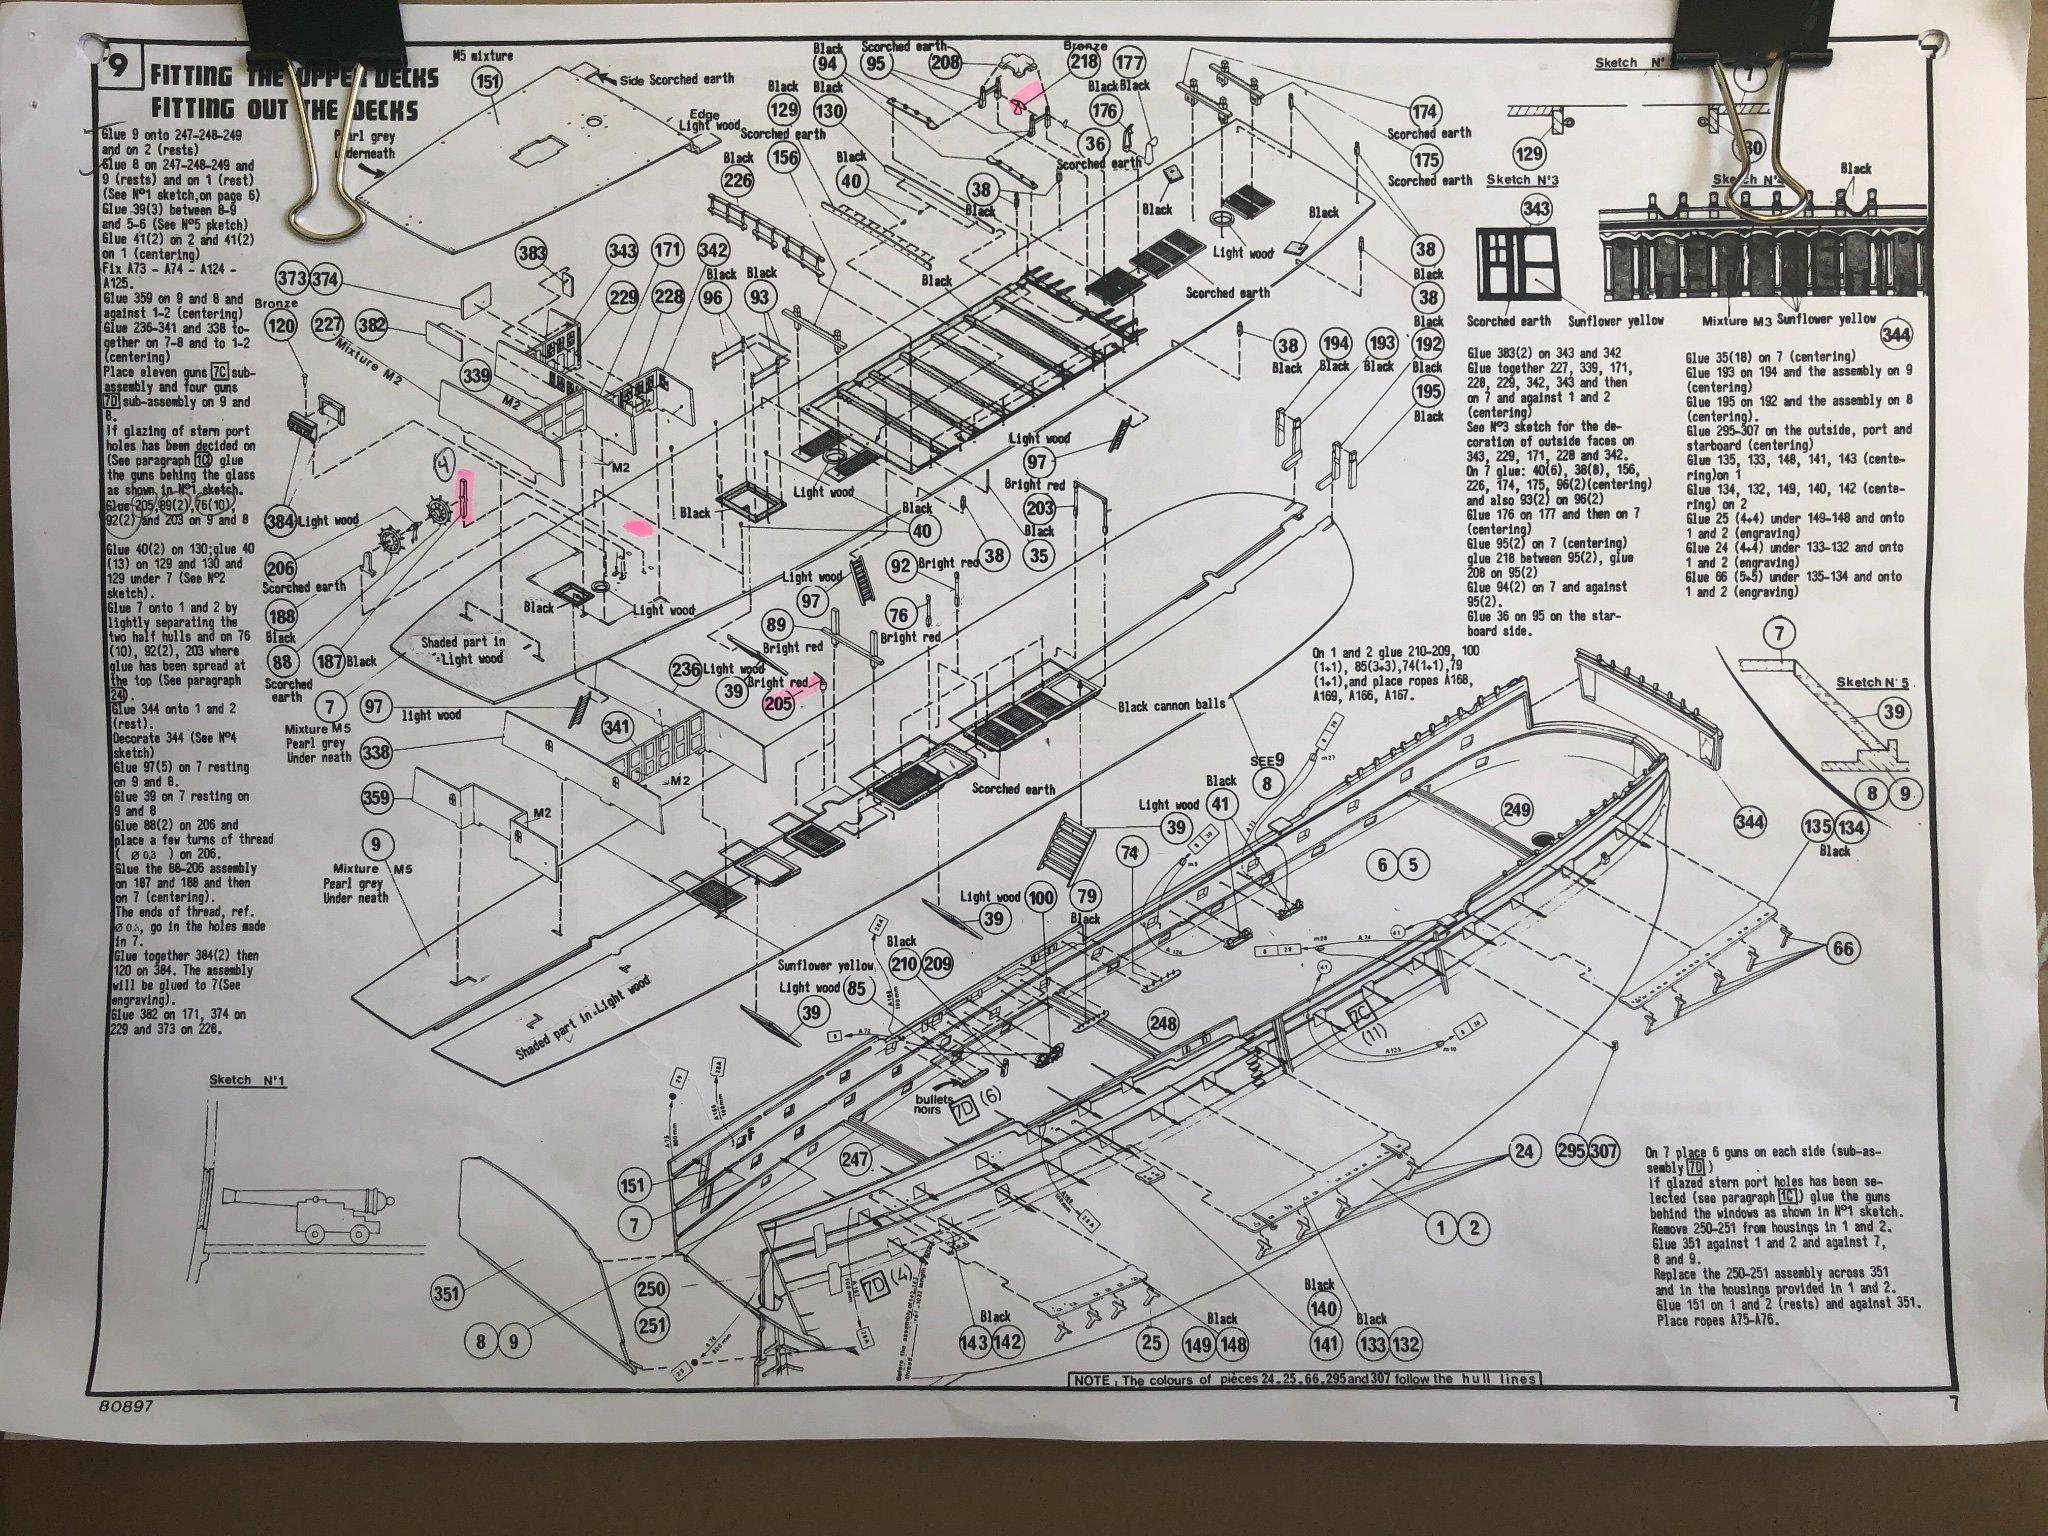
Thanks Ian. My plan so far is to follow step 9 sequence just as written, I hope. For sure going to get those lines in before the quarter deck. I have read ahead the first section of Step 9, located the designated pieces for painting, including 41 and 100, and plan to tinker with that for a few days. Definitely a lot to do in Step 9. Will be referring to Longridge’s book as well as you guys builds. I am finding I have to keep referring to my etched parts from Daniel to make sure I don’t skip a part I got from him. I did a cross reference of my etched parts with the kit instructions and highlighted the part in the instructions that needs to be replaced by a etched part (notice the pink highlighter on the page 9 photo above). Thanks as well Old Collingwood. That explains the overhang. Bill
-
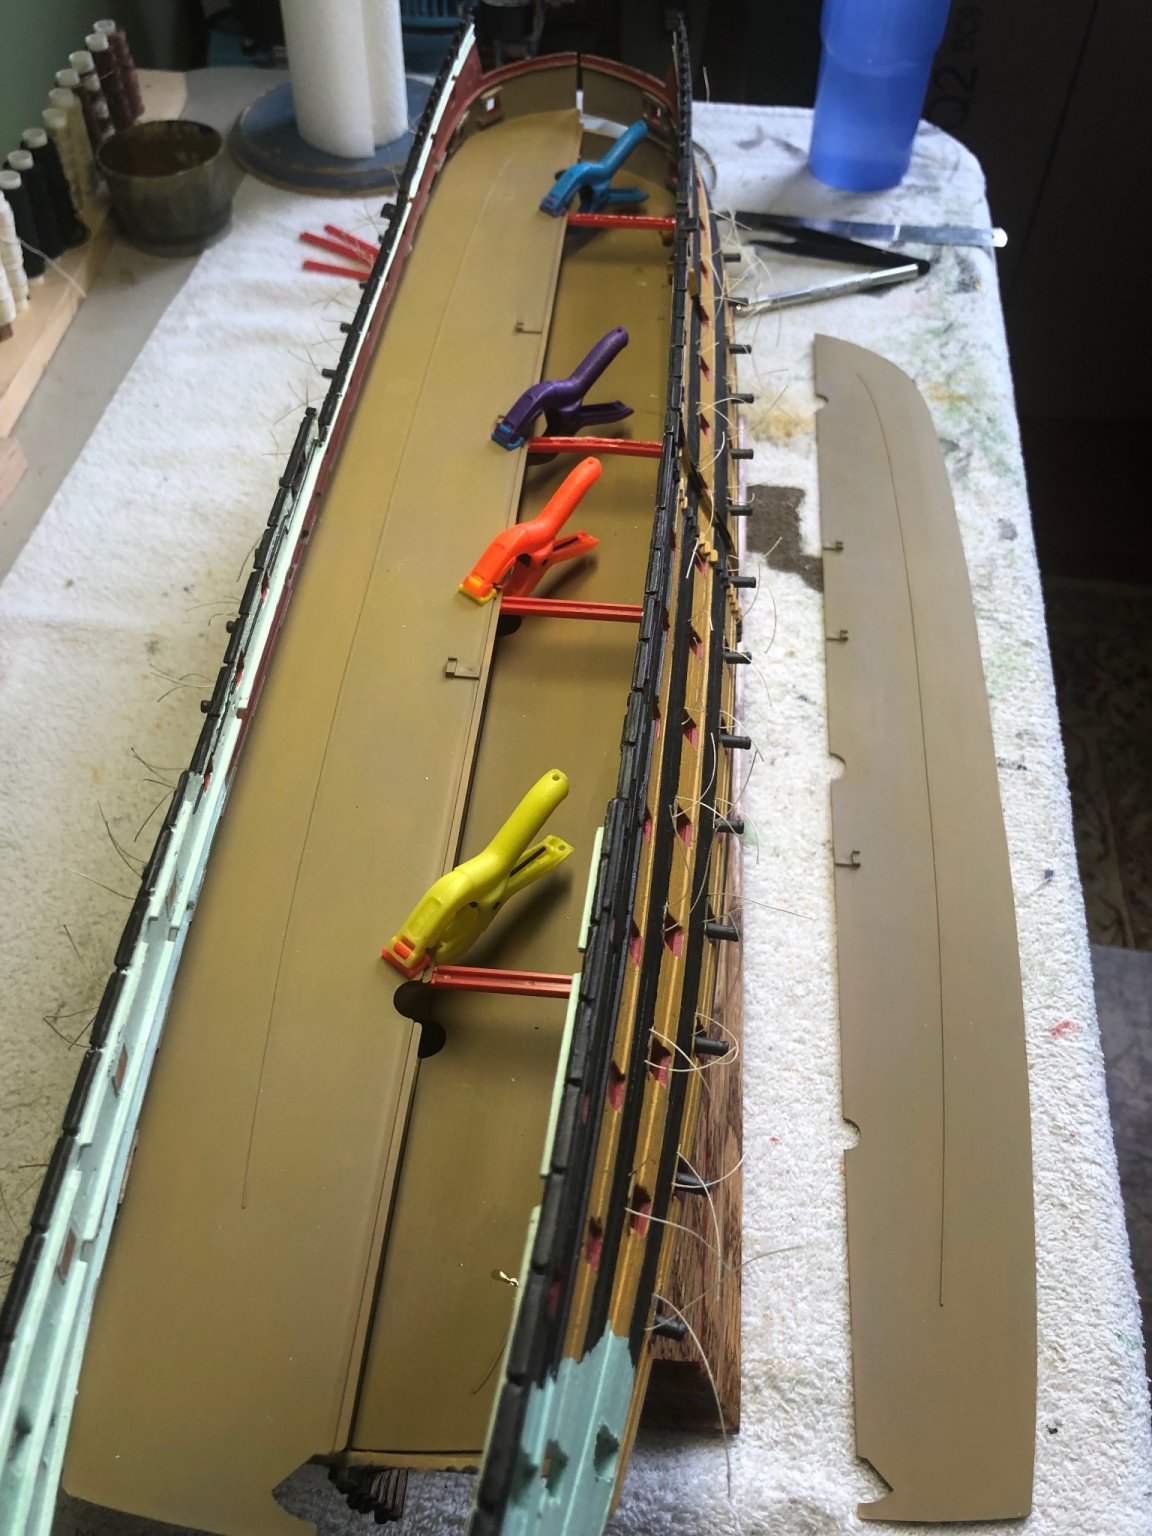
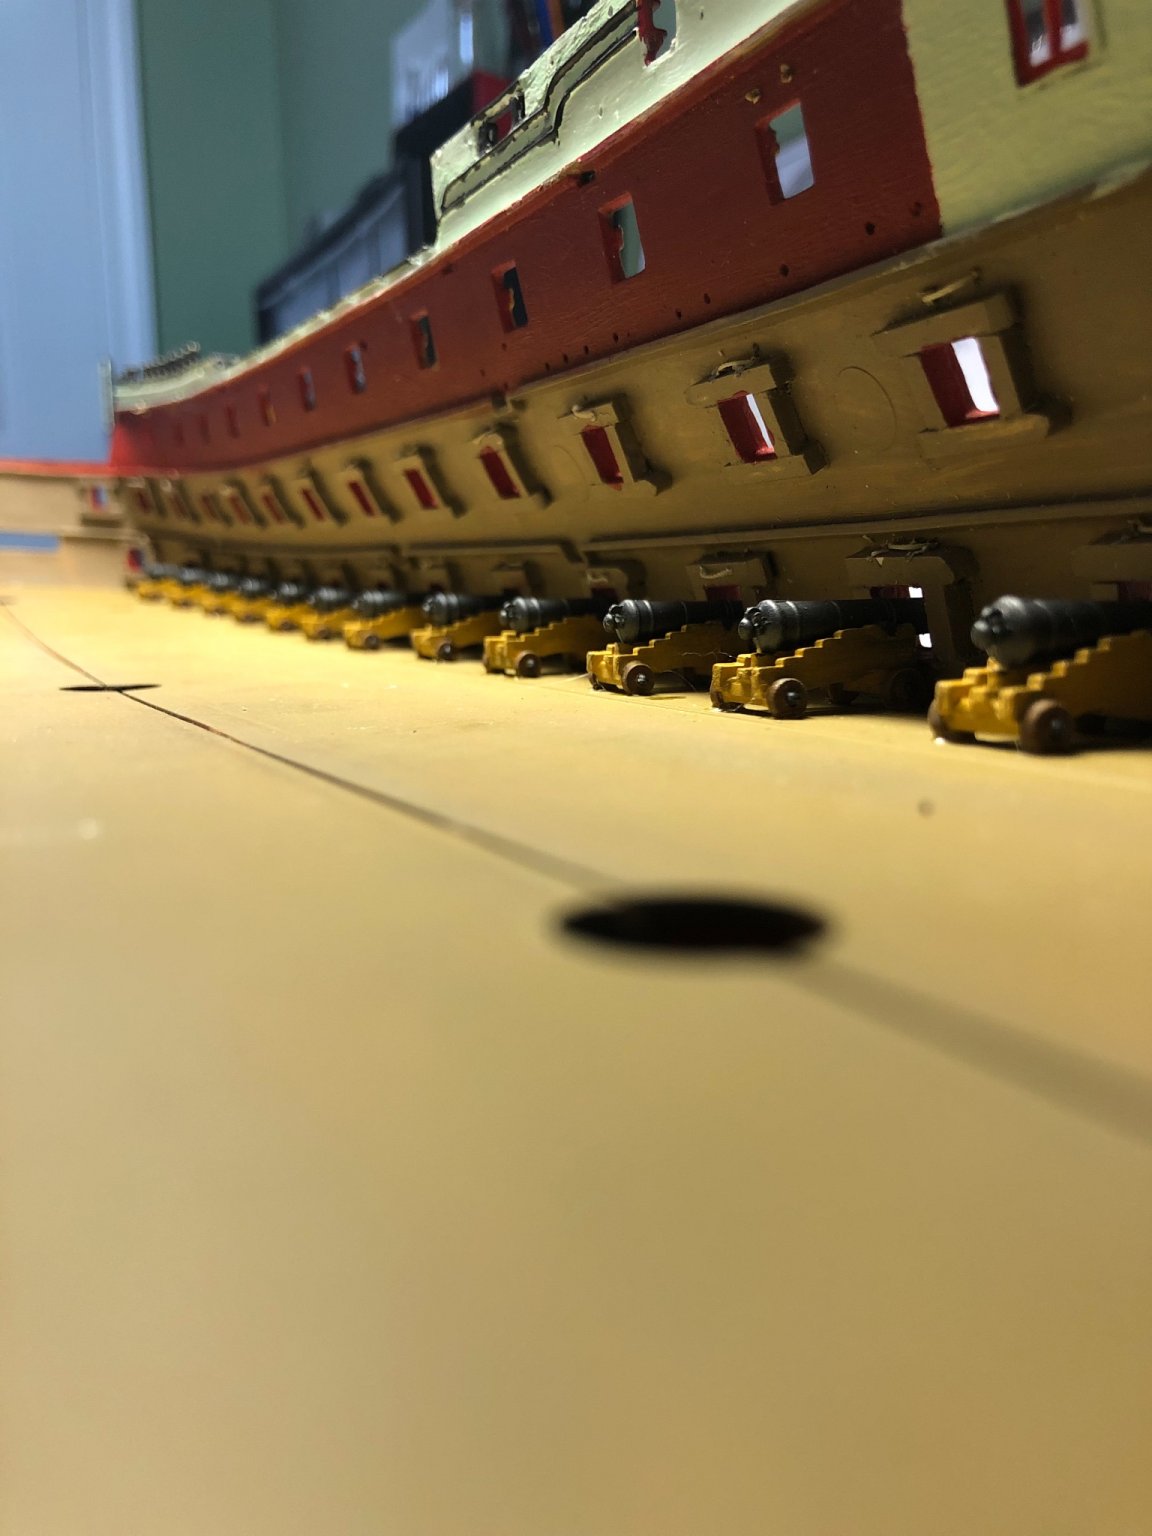
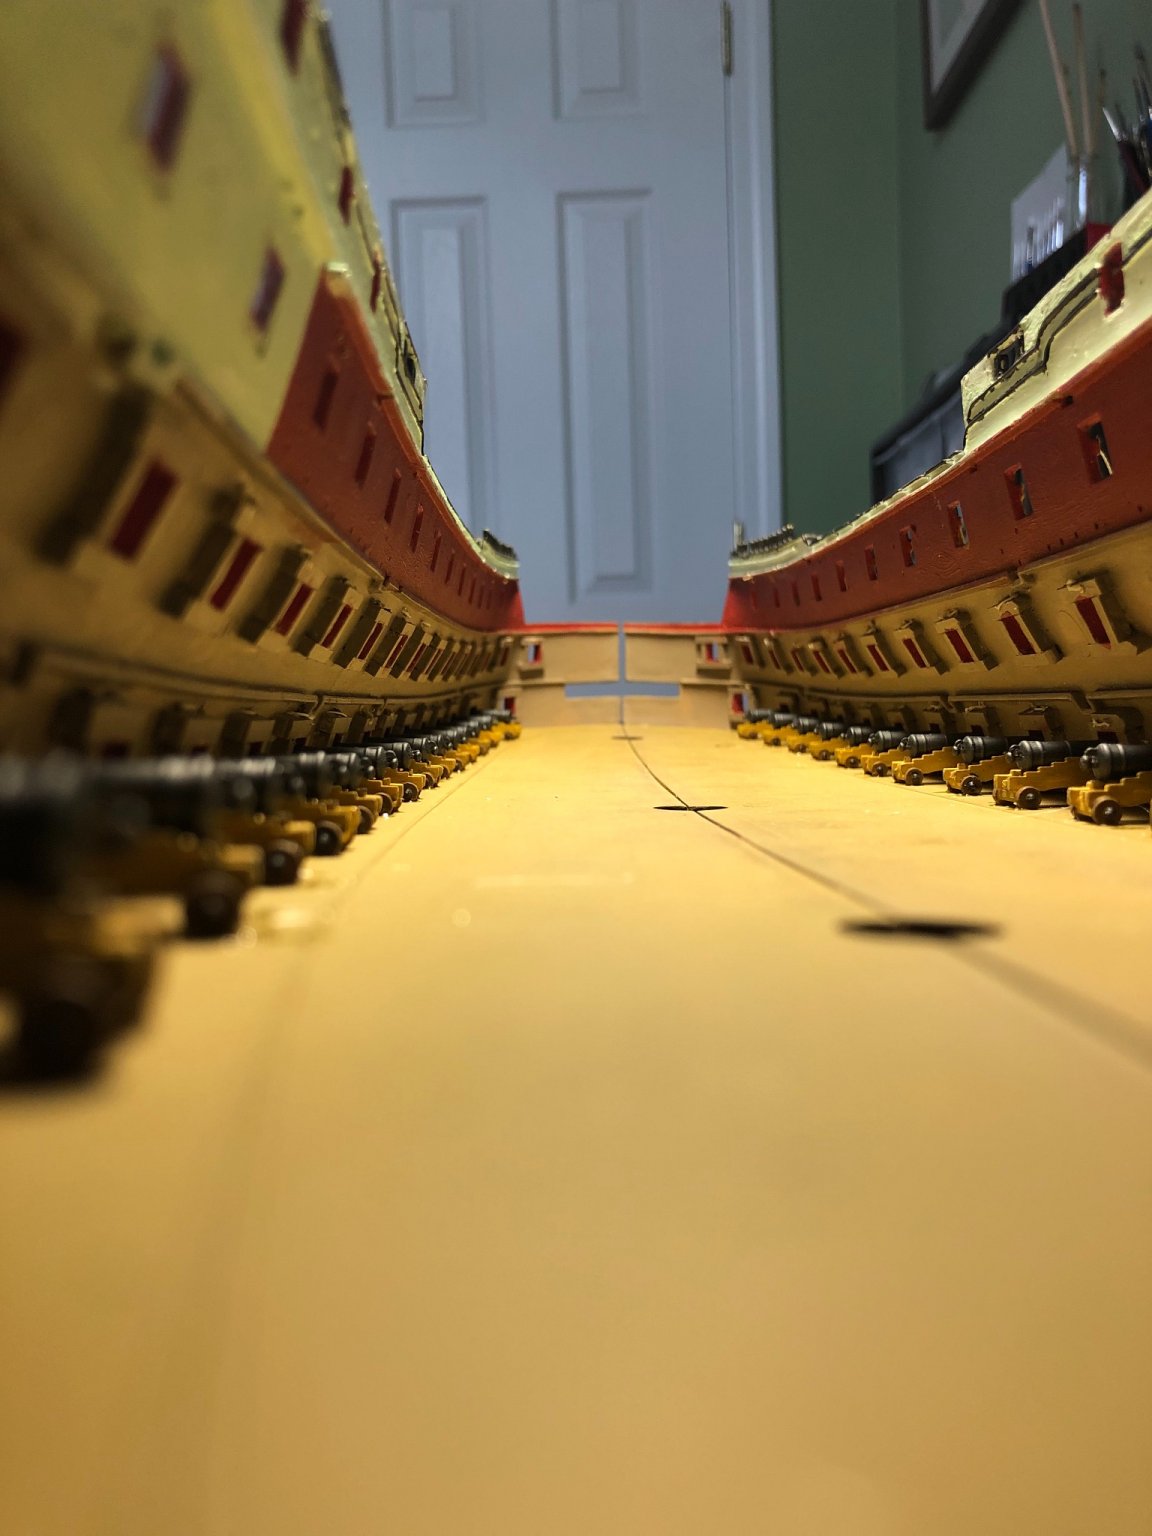
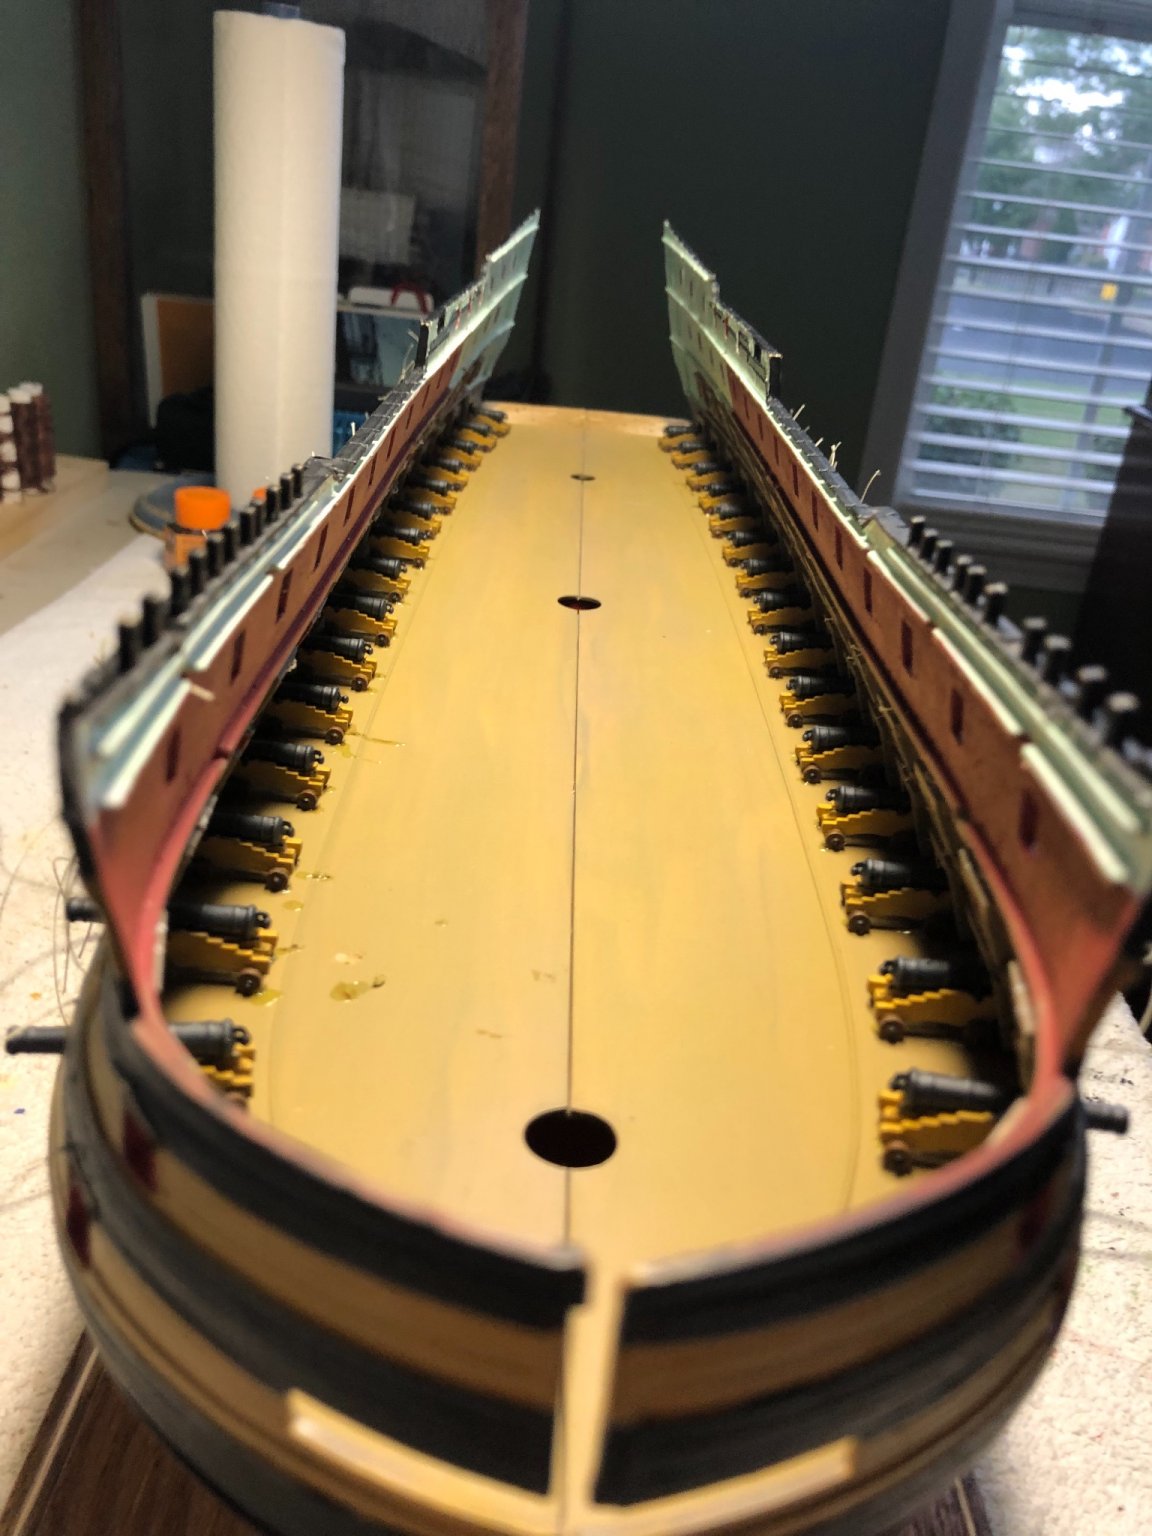
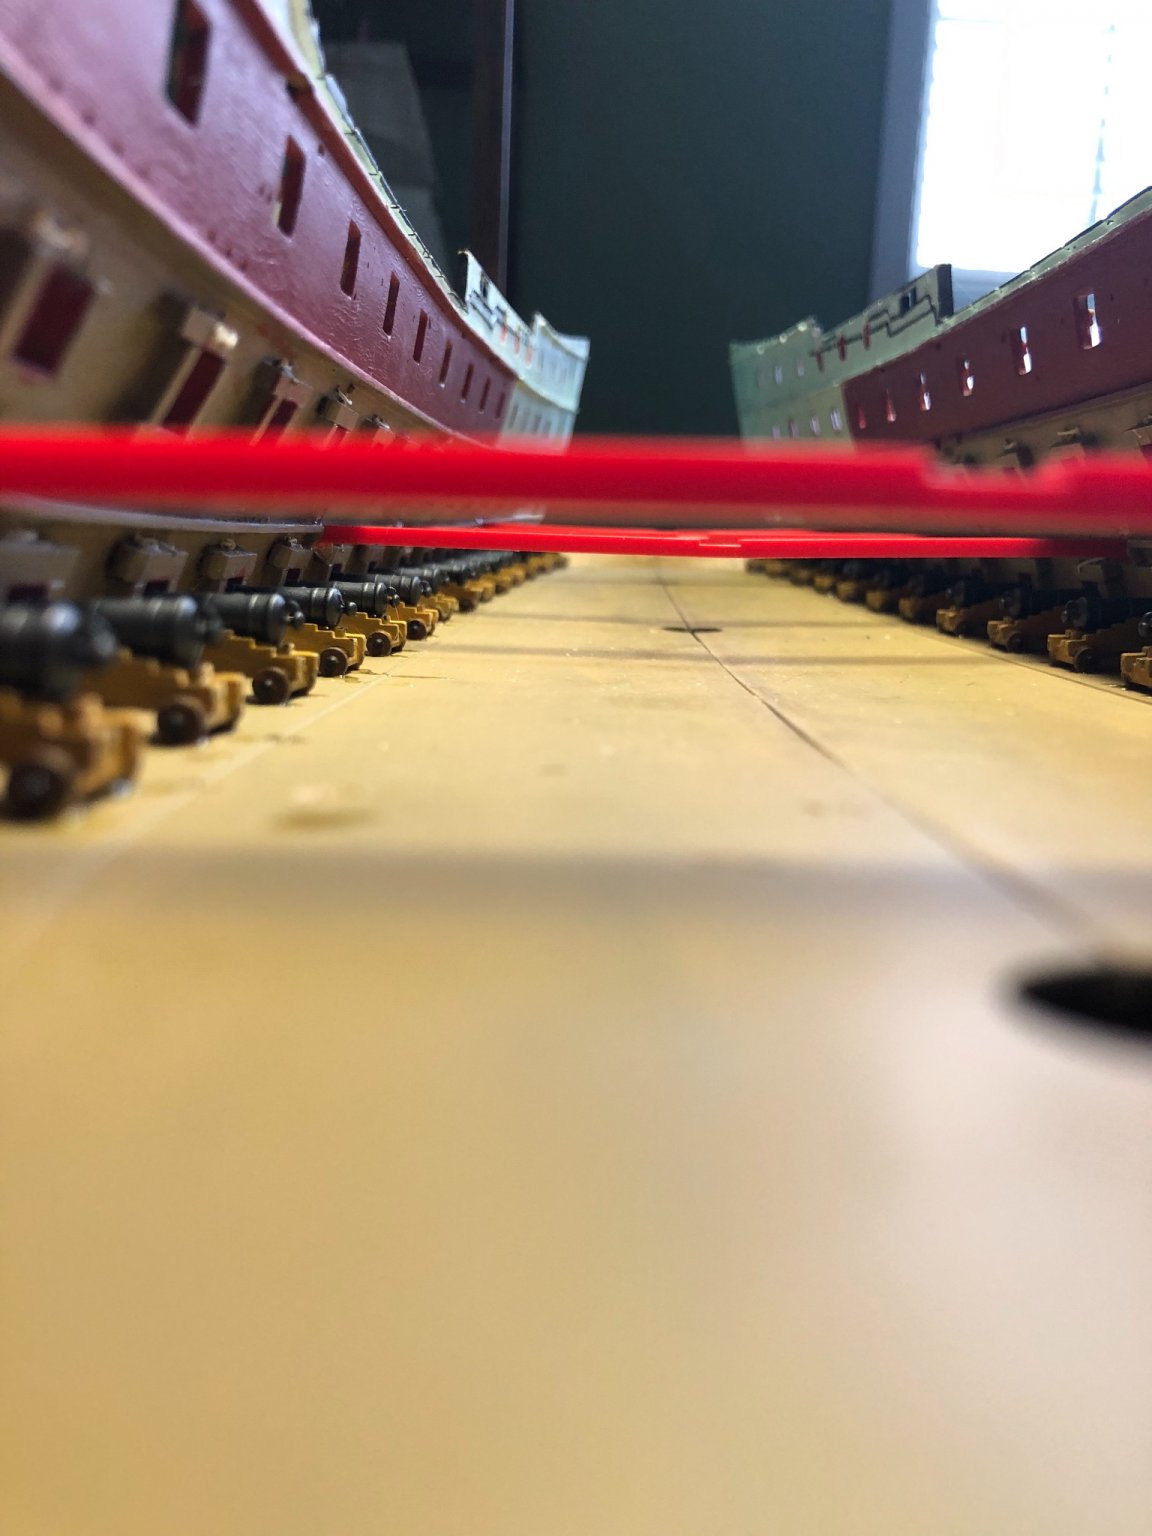
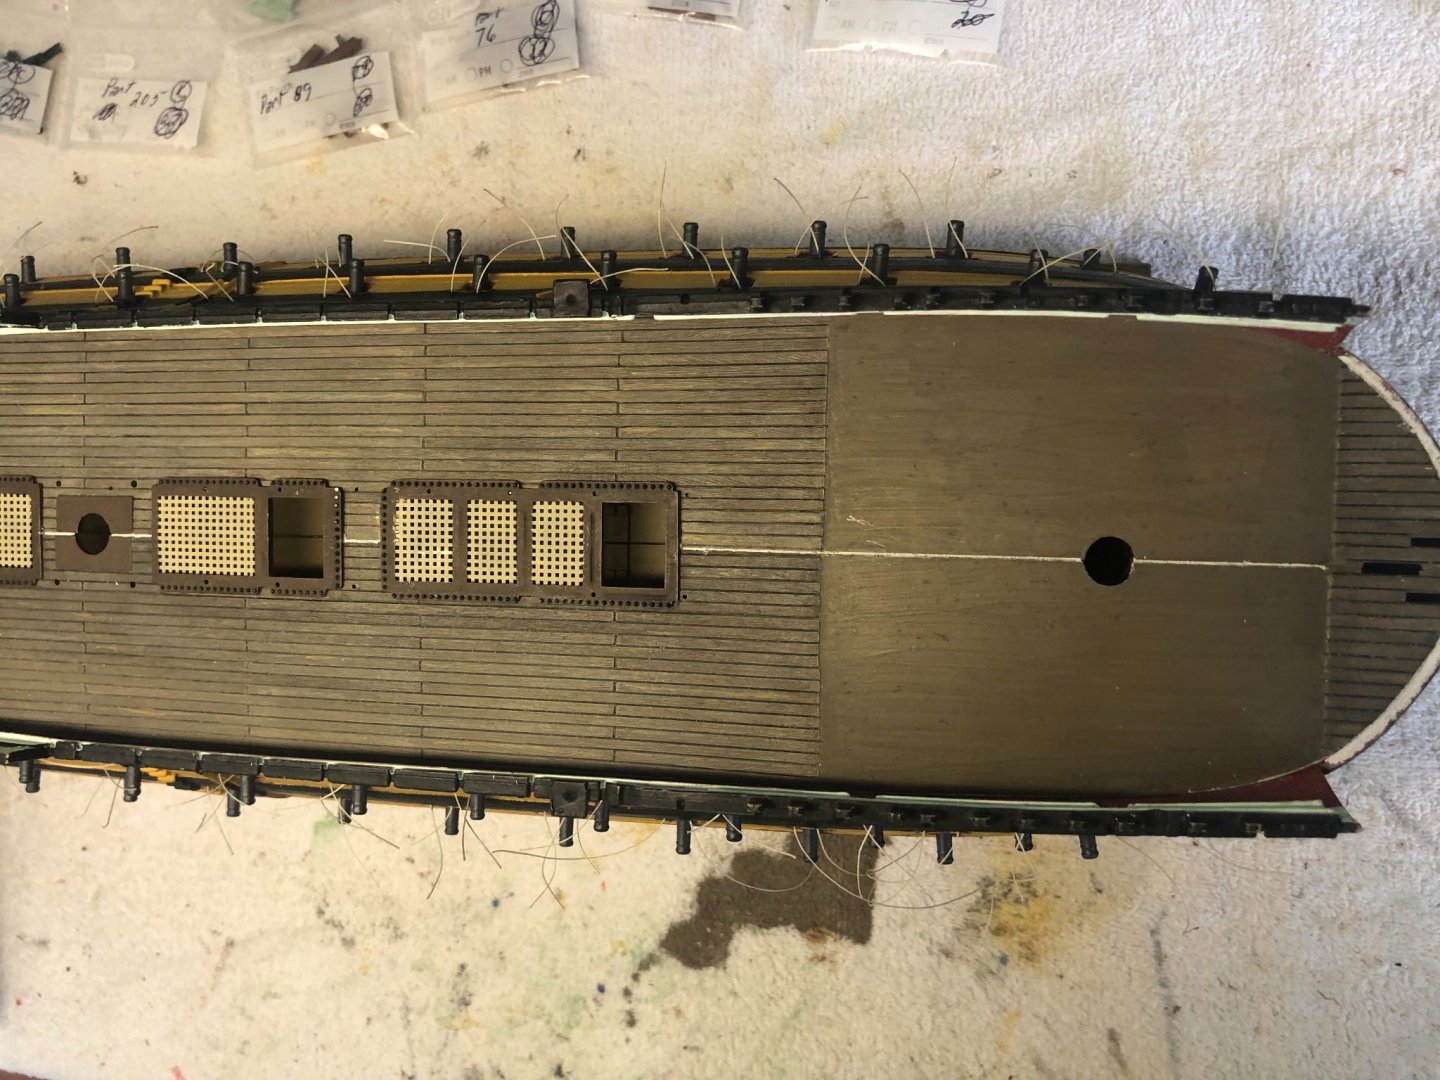
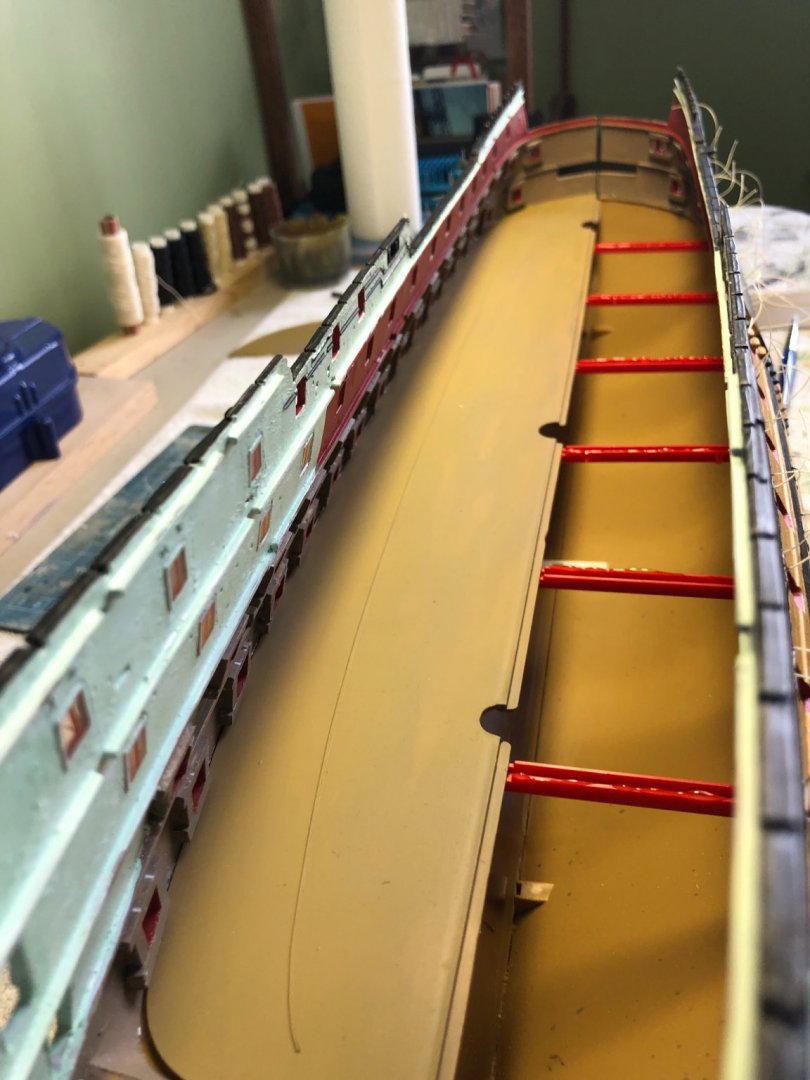
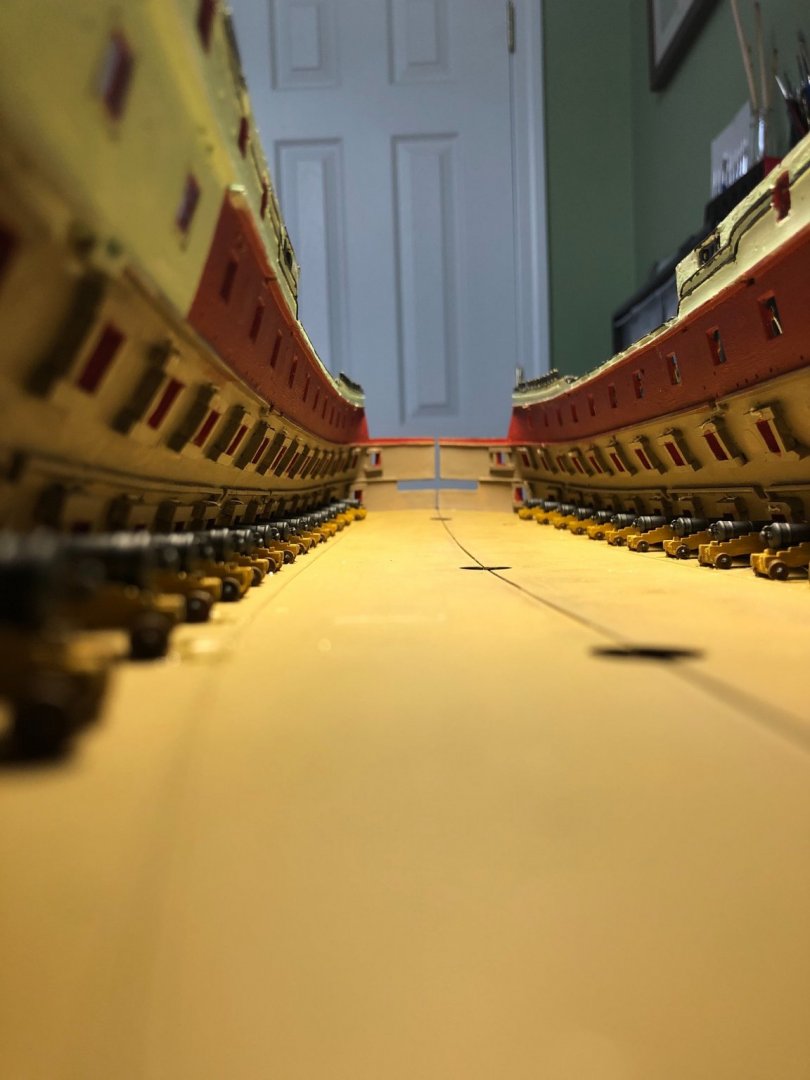
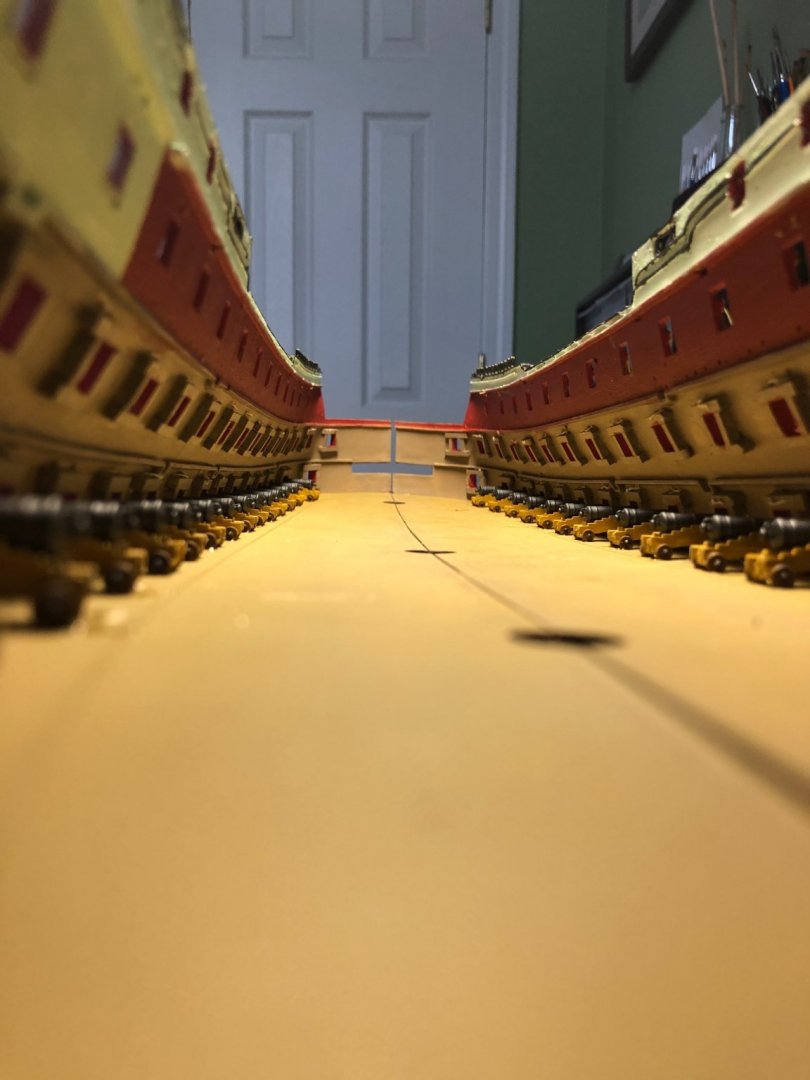
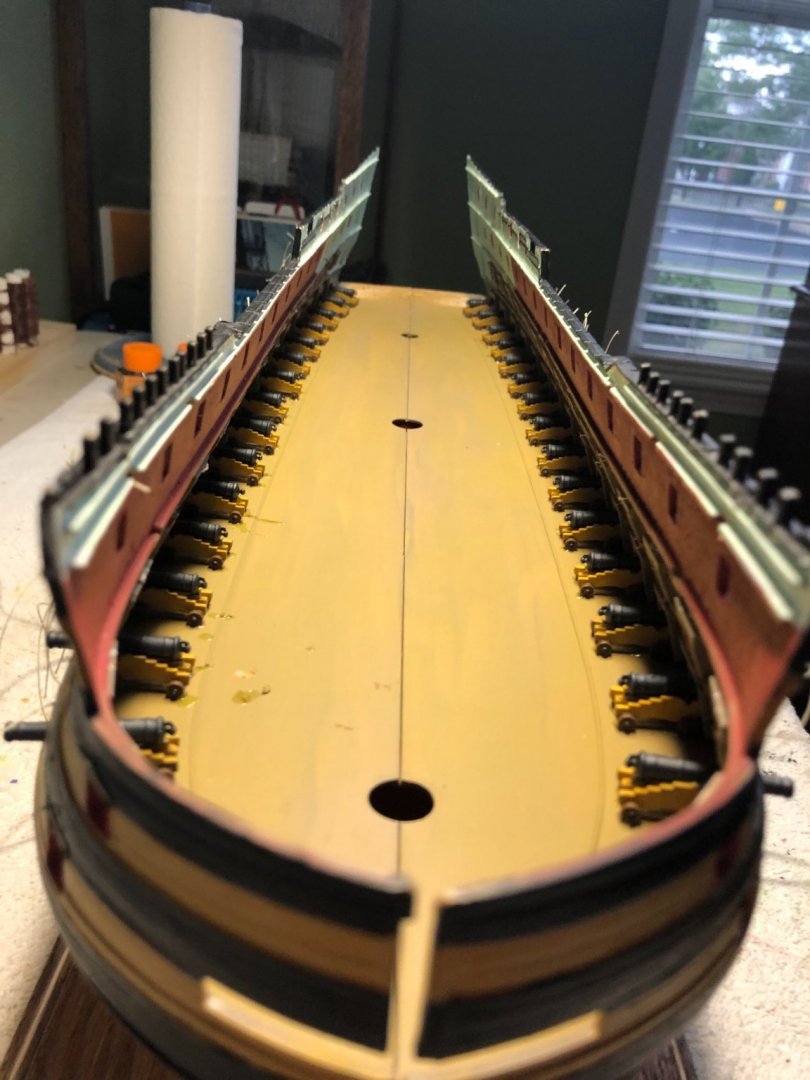
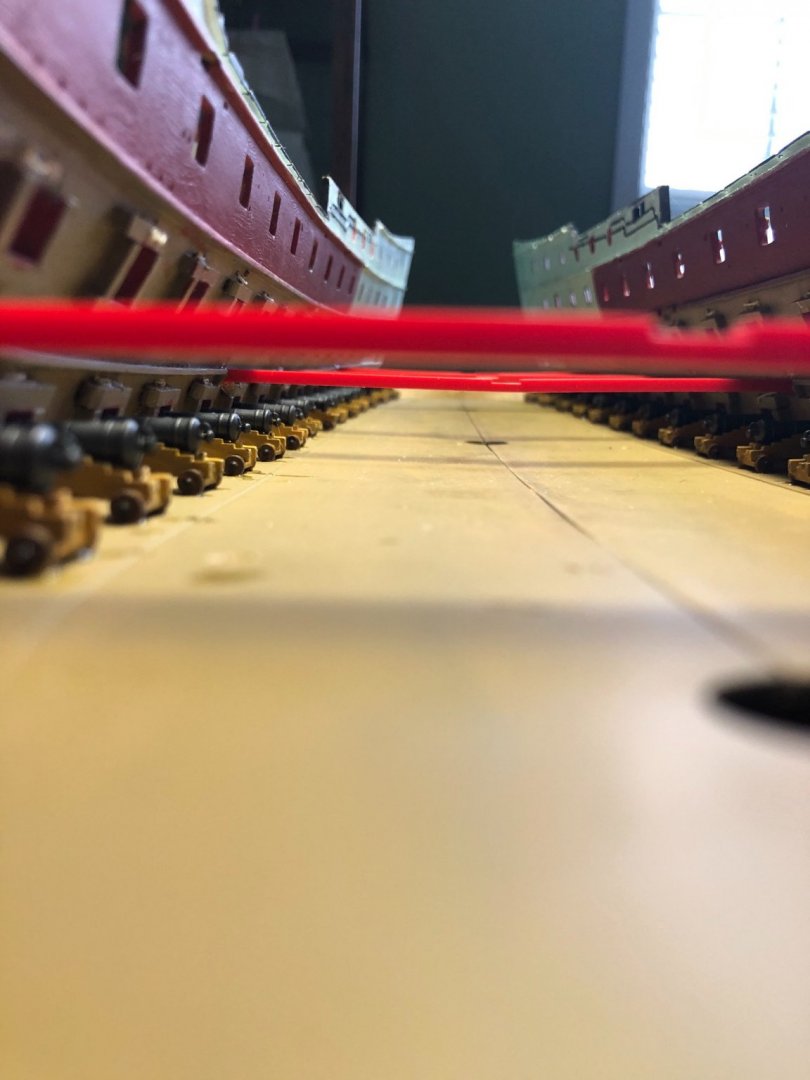
Working my way up! Lower and Middle decks in. Sixty cannons mounted in out position. Upper deck put in and putty applied to seam down the center. Once it drys I will gently sand and touch up deck paint. Now on to a whole lot of painting of parts that will go on these decks and the next one up.


-
Thanks Ian.
-
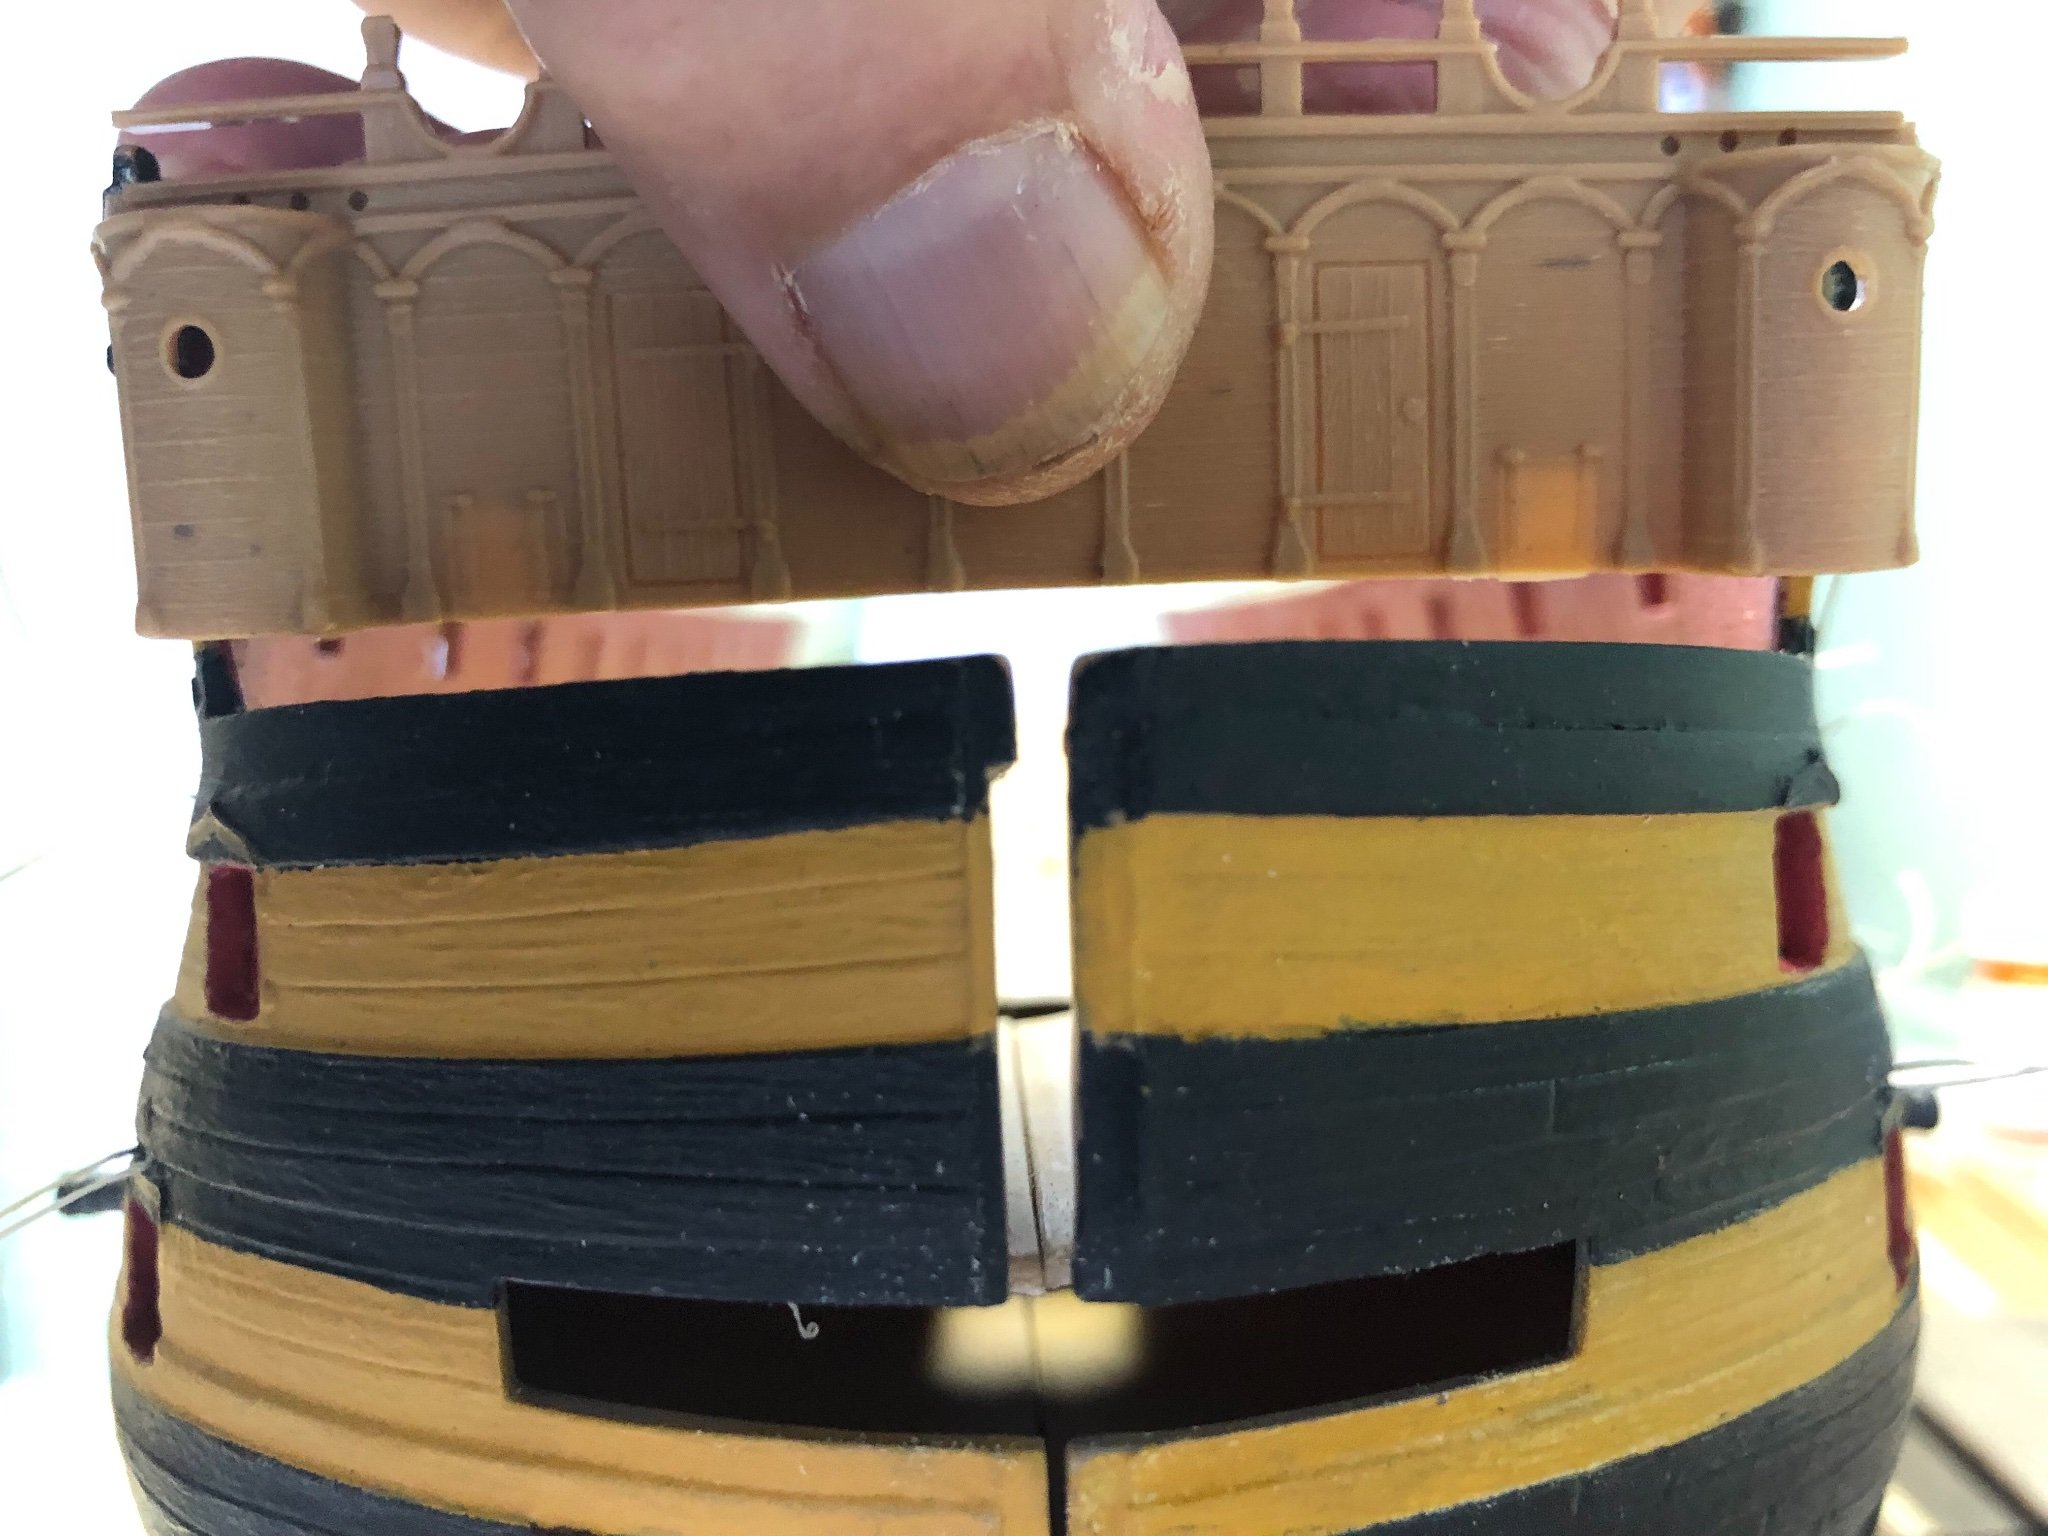
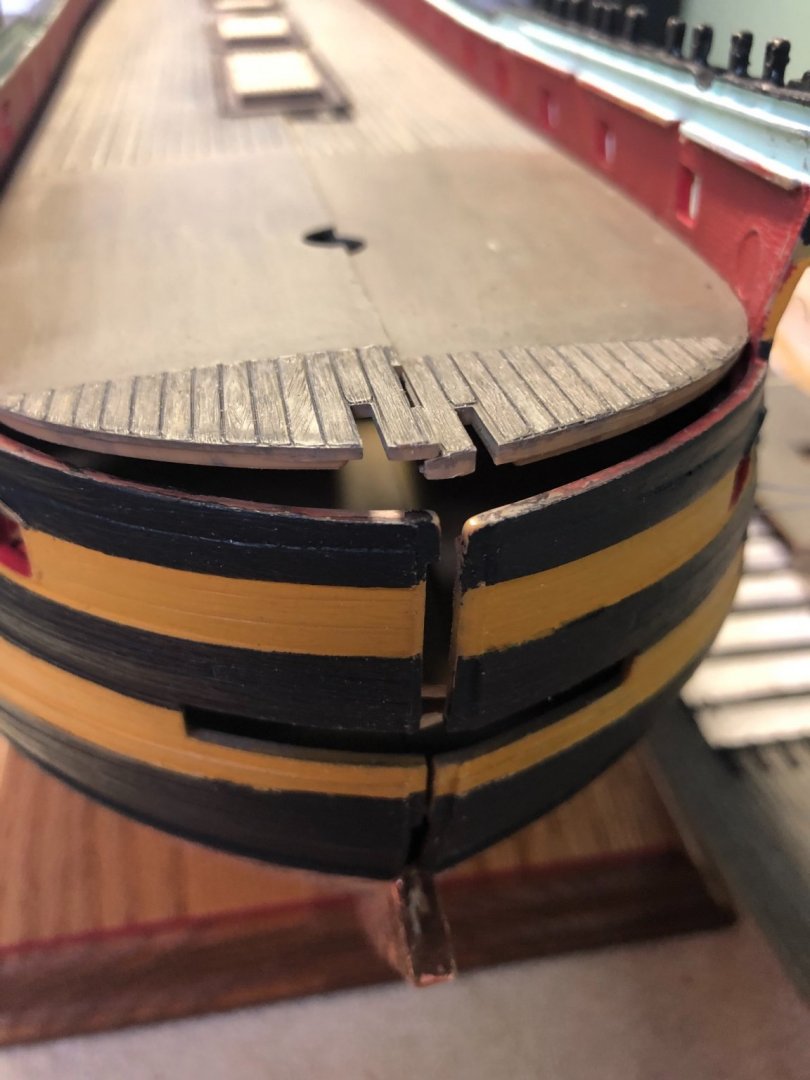
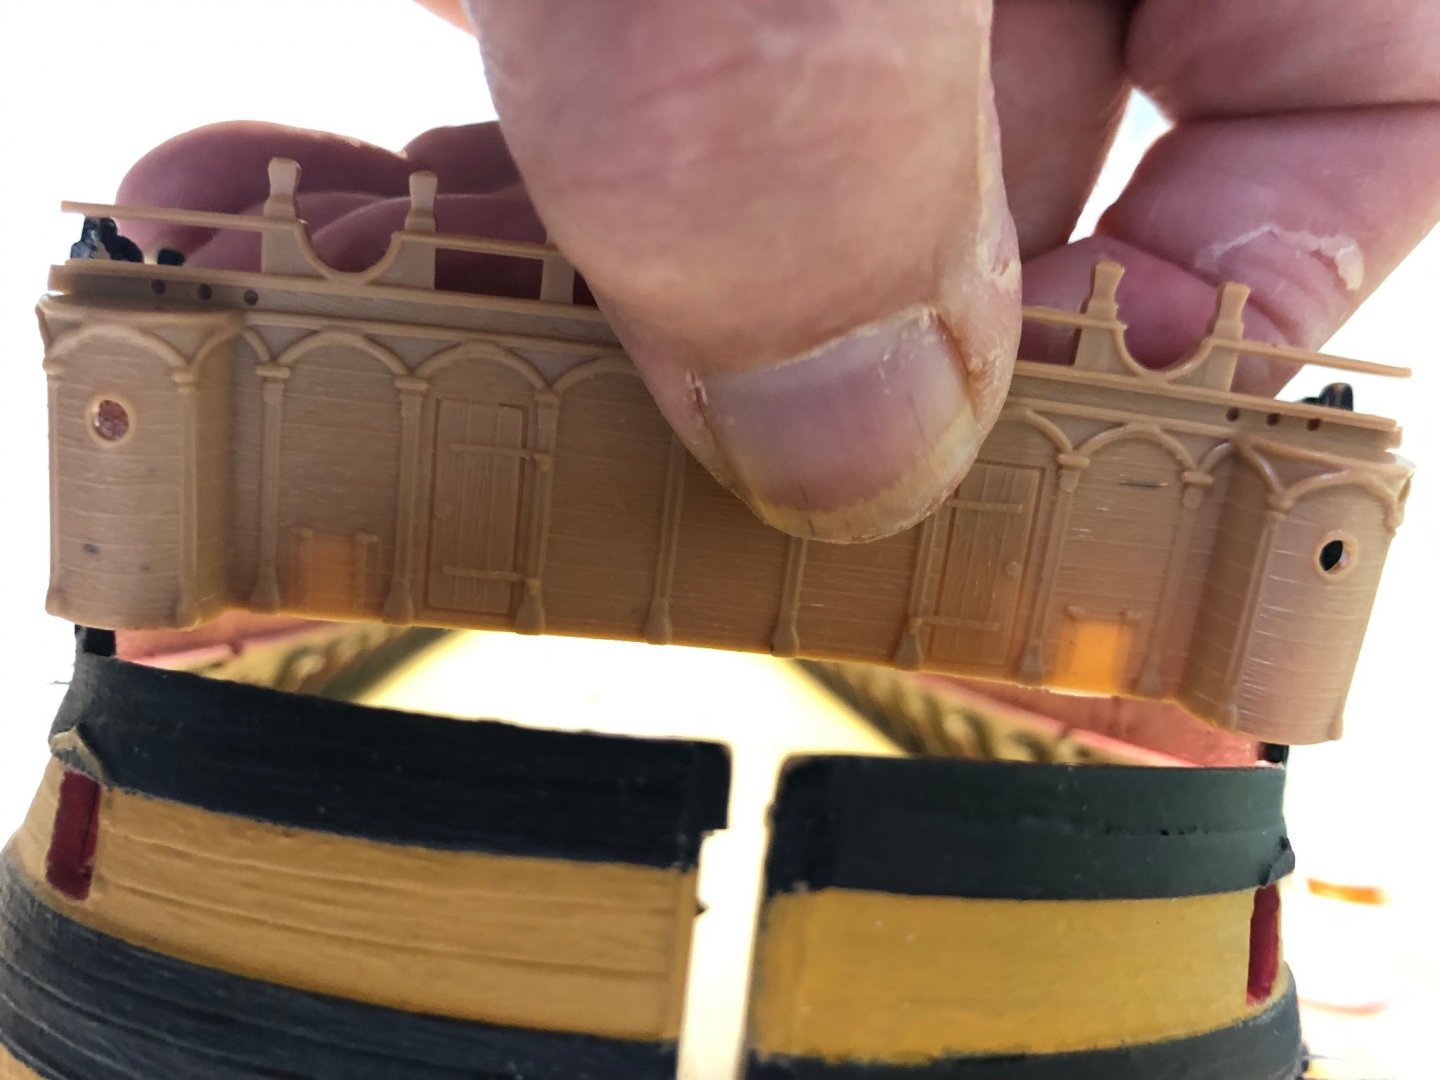
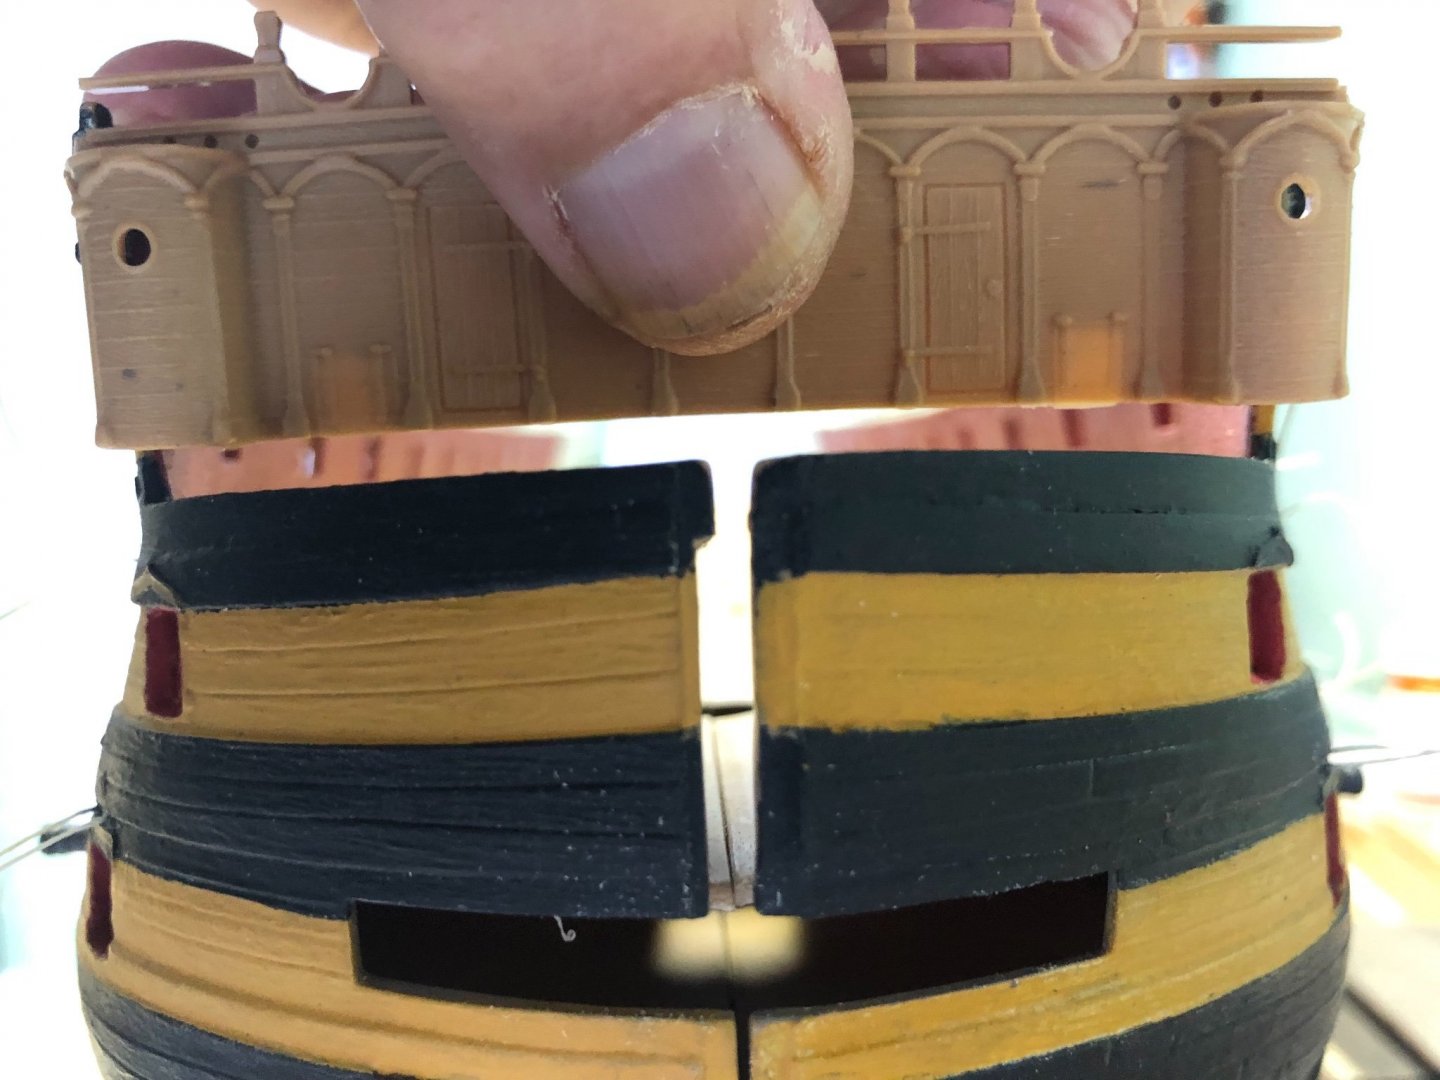
Thanks Marc. The more I tinker with it the more I think you are correct. Everything seems to fit perfectly except for the bottoms of the round houses. The flooring section matches up to it. And if the hull was wider at that point the deck would would not reach the sides. Guess I will just proceed and see what happens. Need to look ahead and see if something covers the open part of the roundhouse on each side.


-
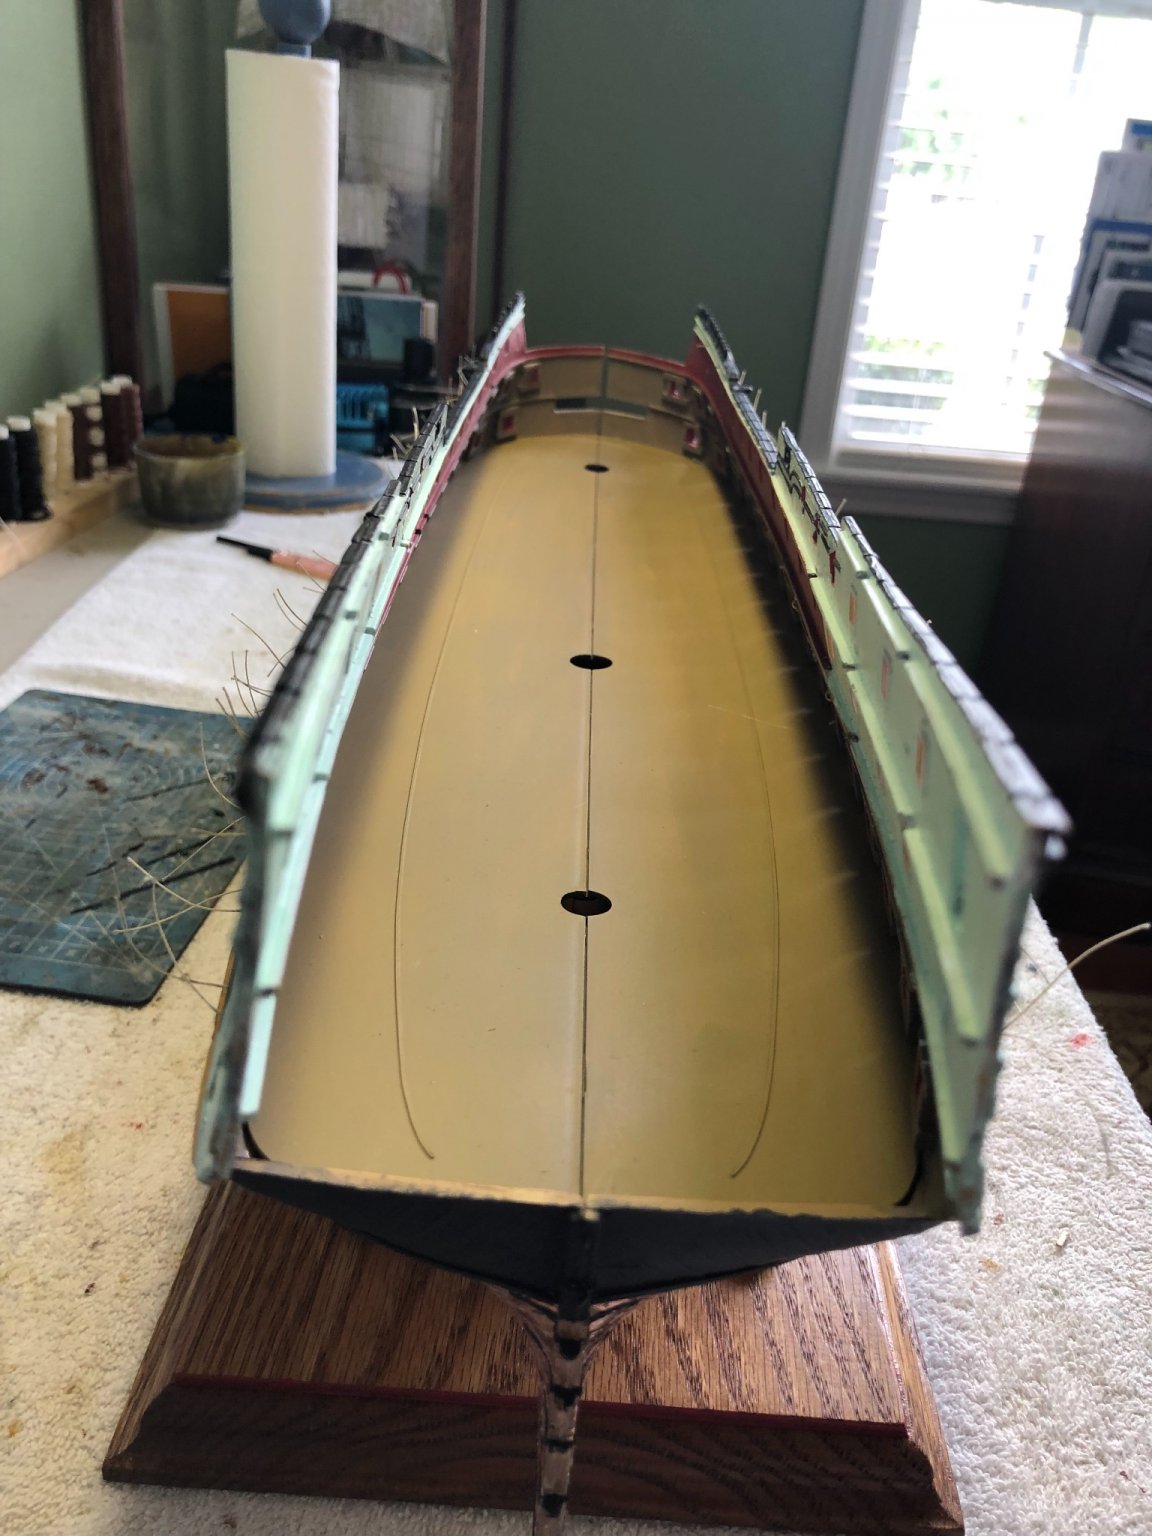
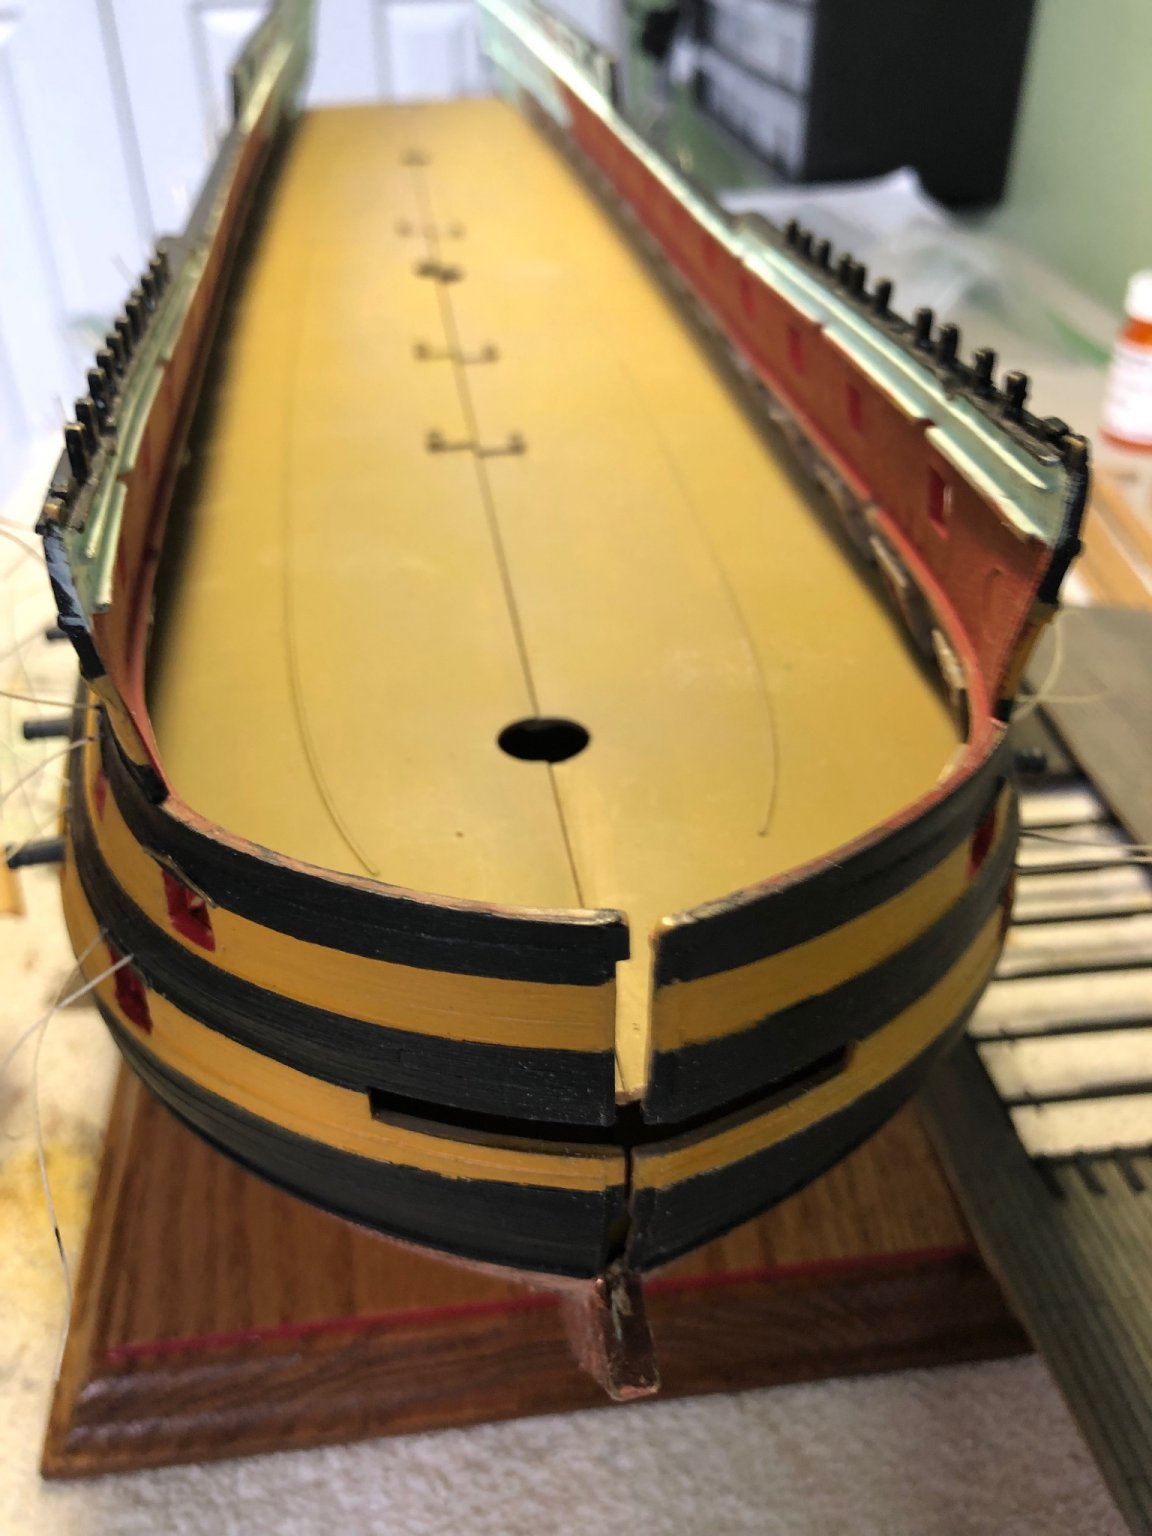
HELP!! Ok my friends I need you to tell me if I have done something wrong before I go any further. Yesterday I put in the Lower deck and the 30 guns. Today I am dry fitting the Middle deck which was snug and needed to be sanded a bit. I also skipped the Upper deck and dry fitted the Quarter deck just to check the width of the space. The Quarter deck was really snug but fit perfectly once I got it in. All good so far until I was curious about the obvious slant of the opening at the top of the bow where the bulkhead goes. It is wider at the top than the bottom. I held the piece up to the opening (as you can see in photos) and discovered it is to wide at the bottom? All the deck pieces are really tight. Did I do something wrong when I put in the Lower deck? Only thing I have glued in so far


-
Thanks Marc for the YouTube link. Really enjoyed watching that. Kevin I have actually not read either of those series. Will have to make a library trip. Thanks
-
As I mentioned, I watched it before and enjoyed it. But this time after working with the Victory model, and others, I found myself attracted to the rigging and the physical features of the ship more than the plot! 😀
-
Have any of you guys watched the movie Master and Commander with Russell Crowe? I watched it again this evening. First time watching it since I started the Victory. If you have not seen it you need to. Admiral Nelson is discussed at length by the crew of the ship in the movie. I don’t know where this movie was filmed or how, but the realism of the ship was incredible to include the rigging. Look for it if you have not seen it.
-
Thanks Daniel. Appreciate the compliment. Keep the temptations coming. Some I will except and try. Others I may determine are above my skill level.
-
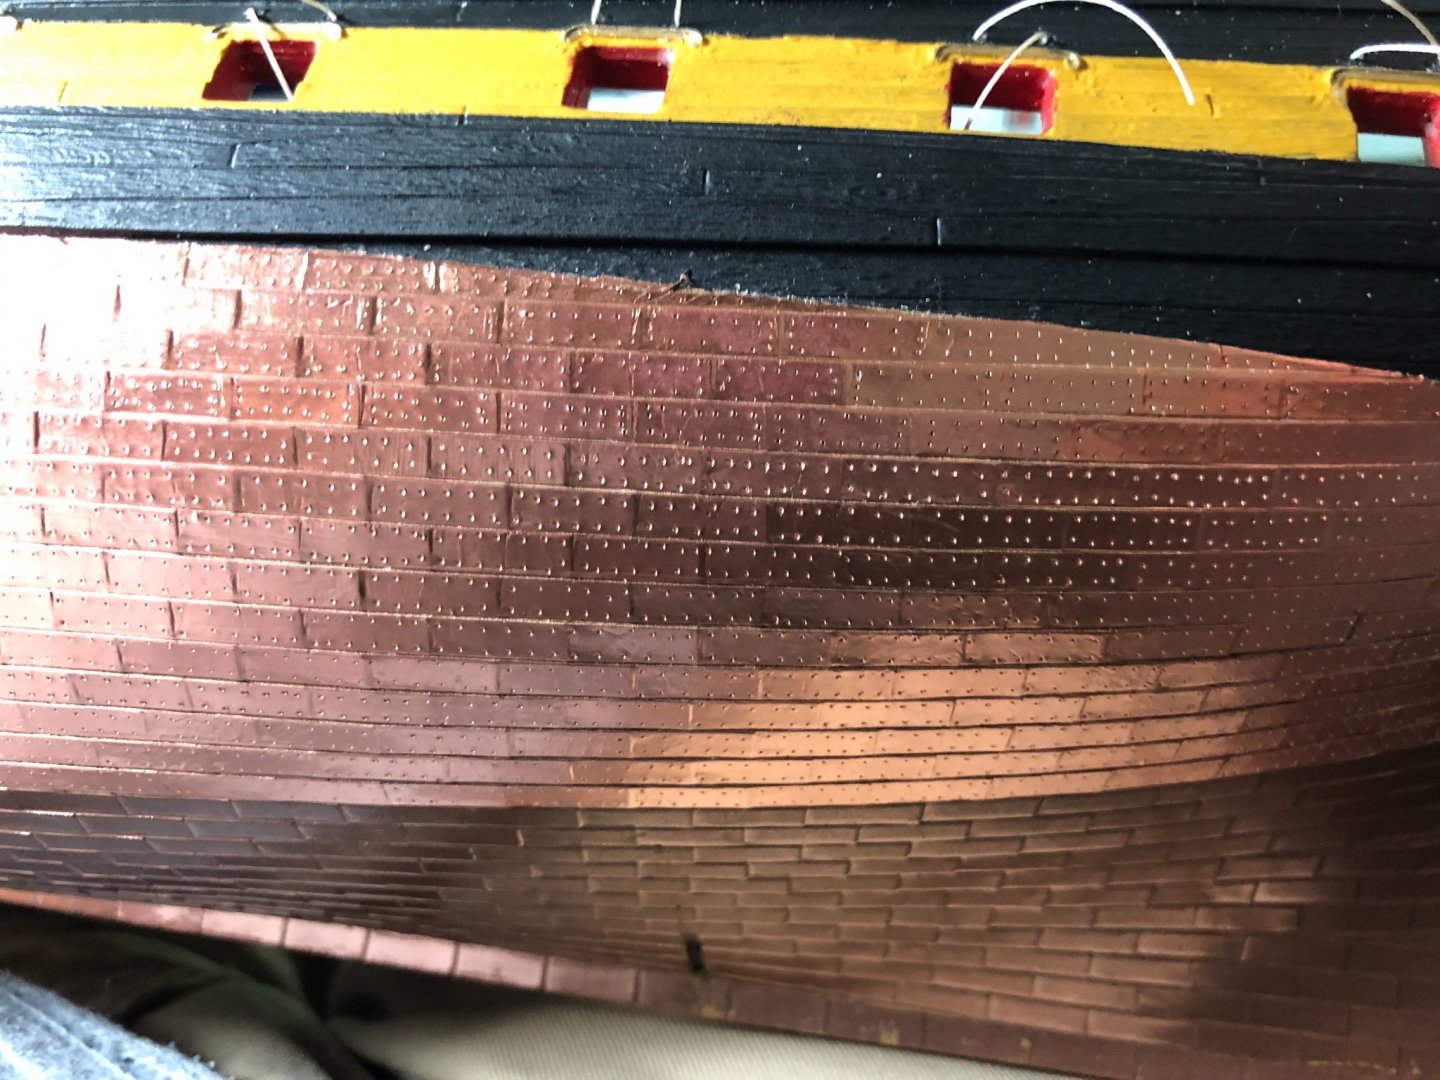
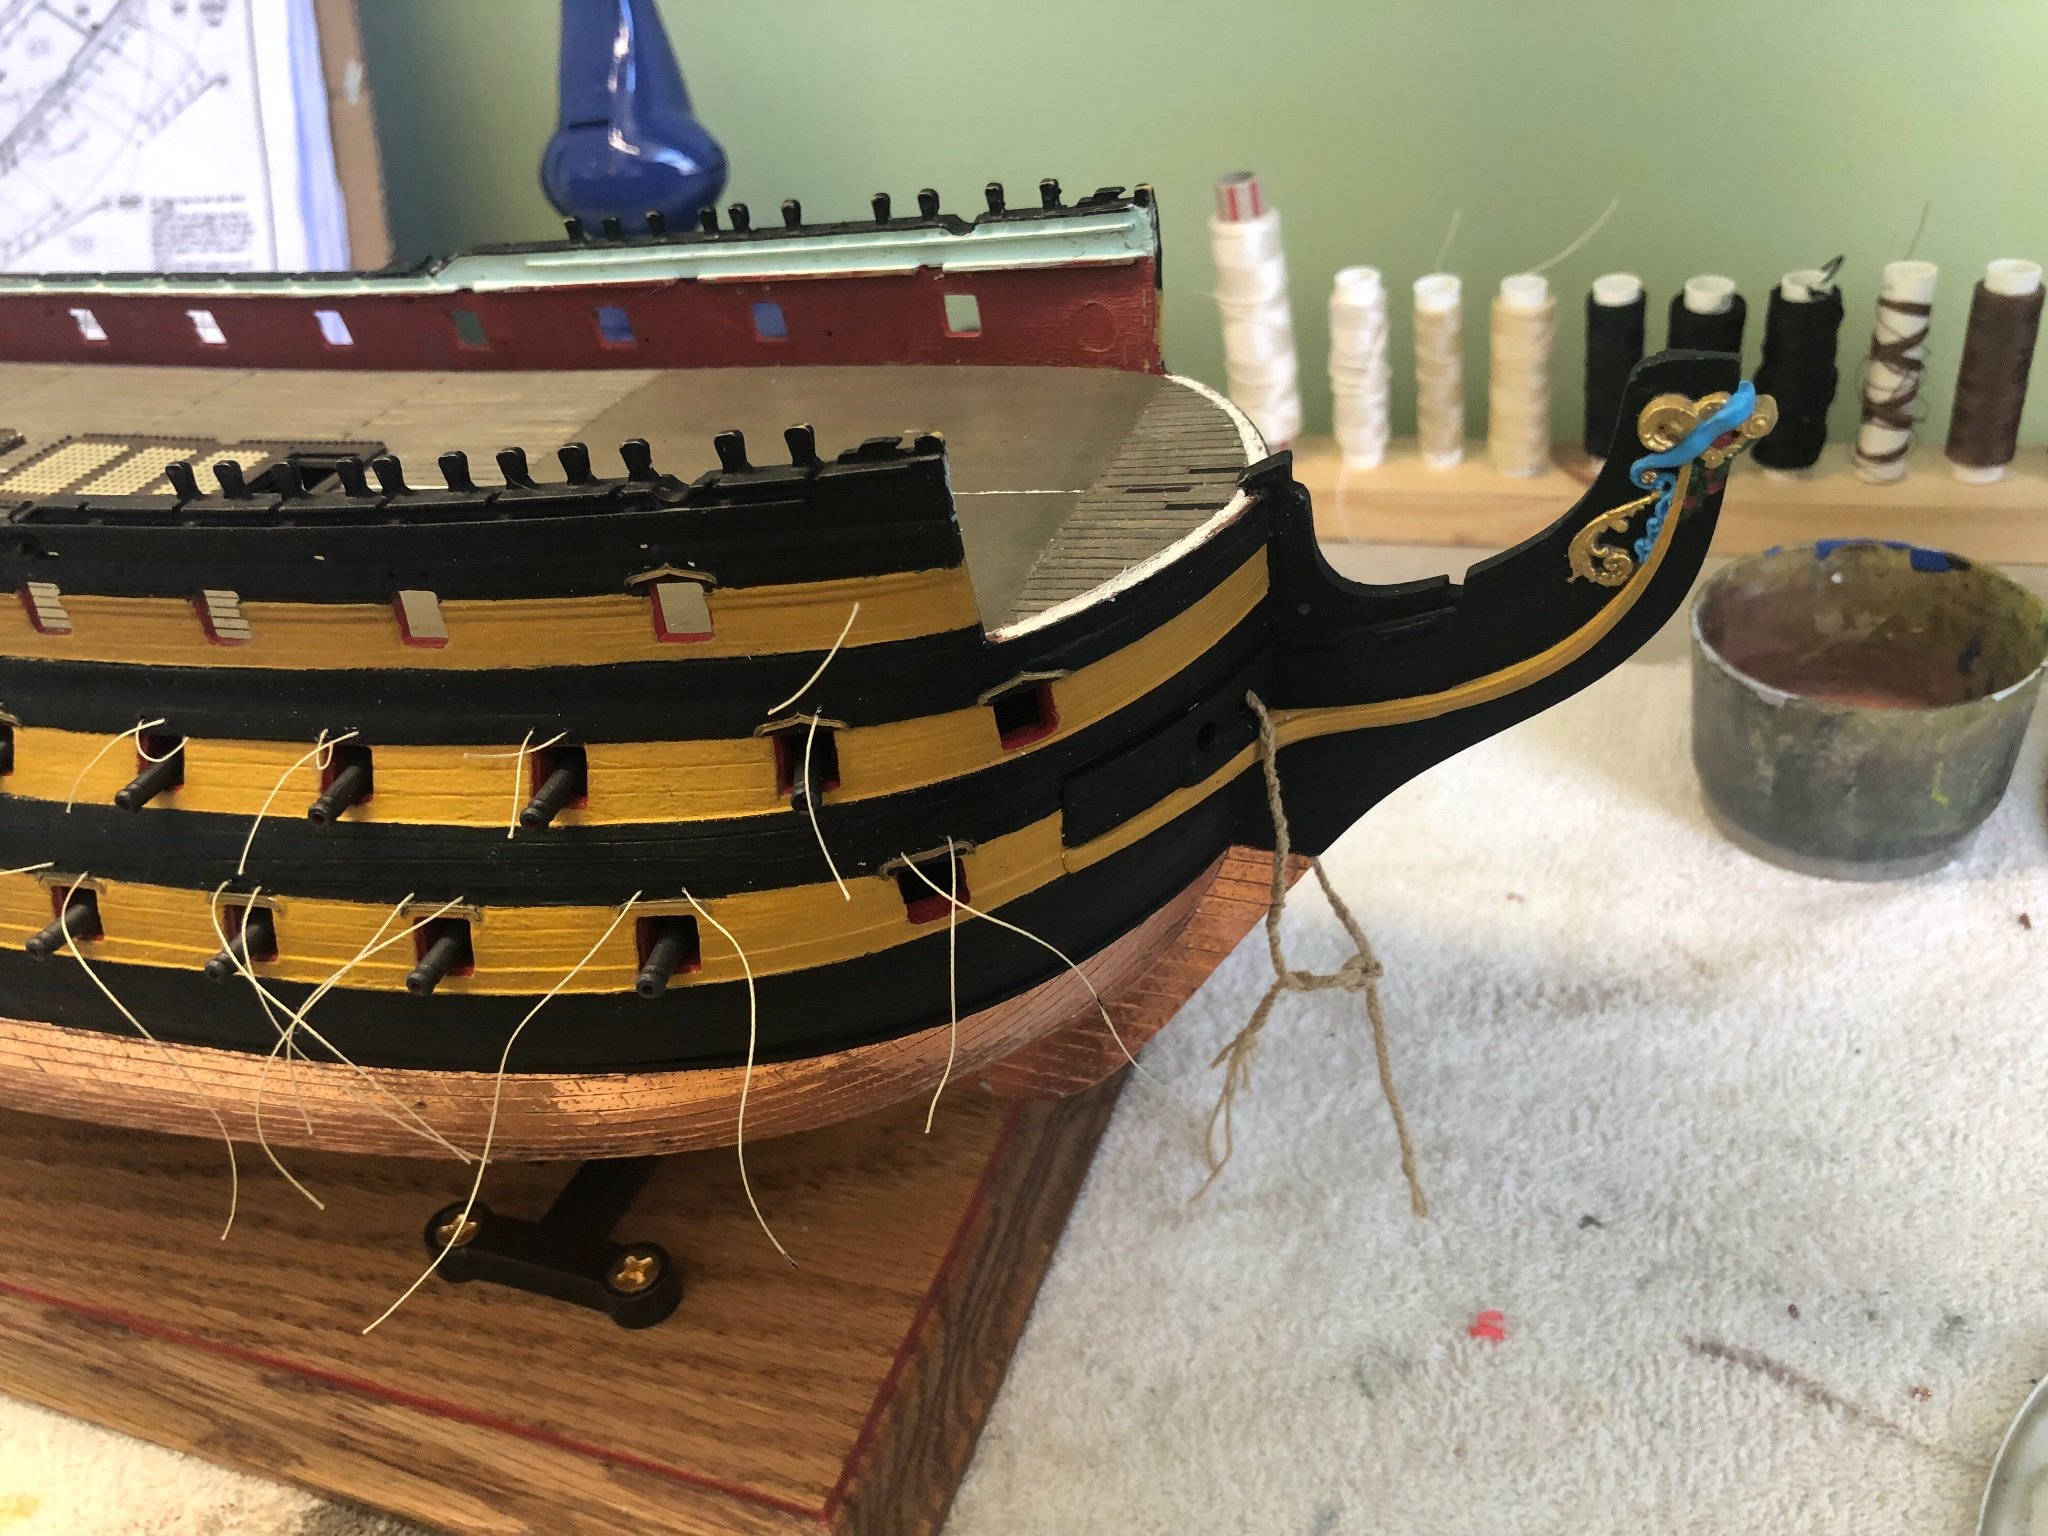
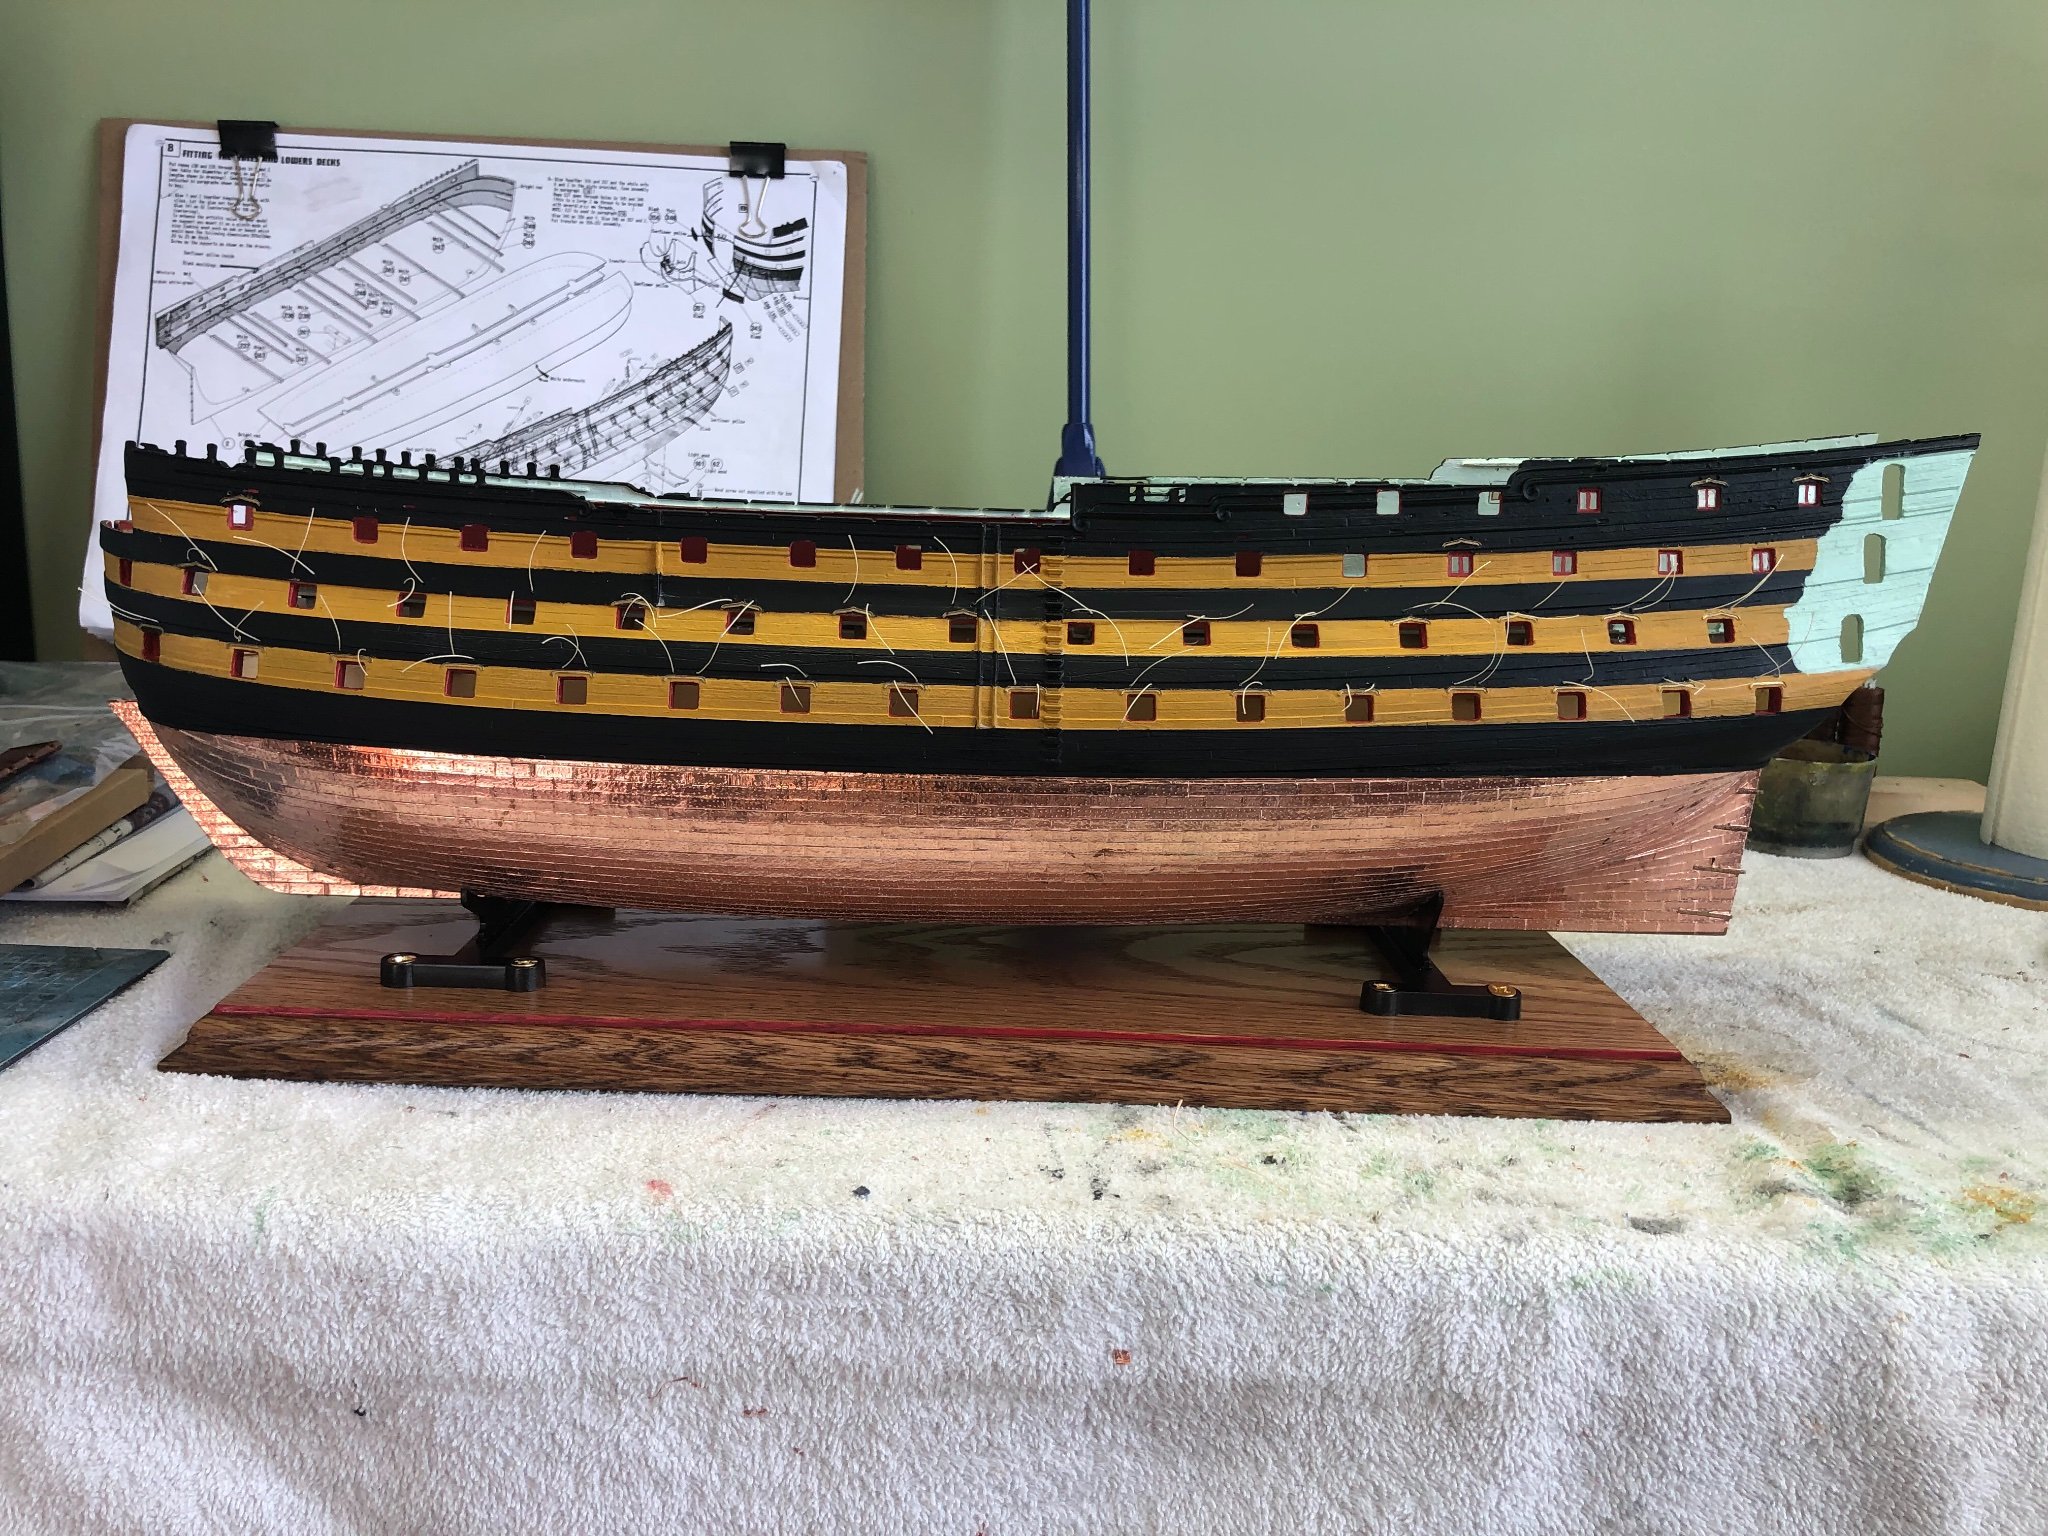
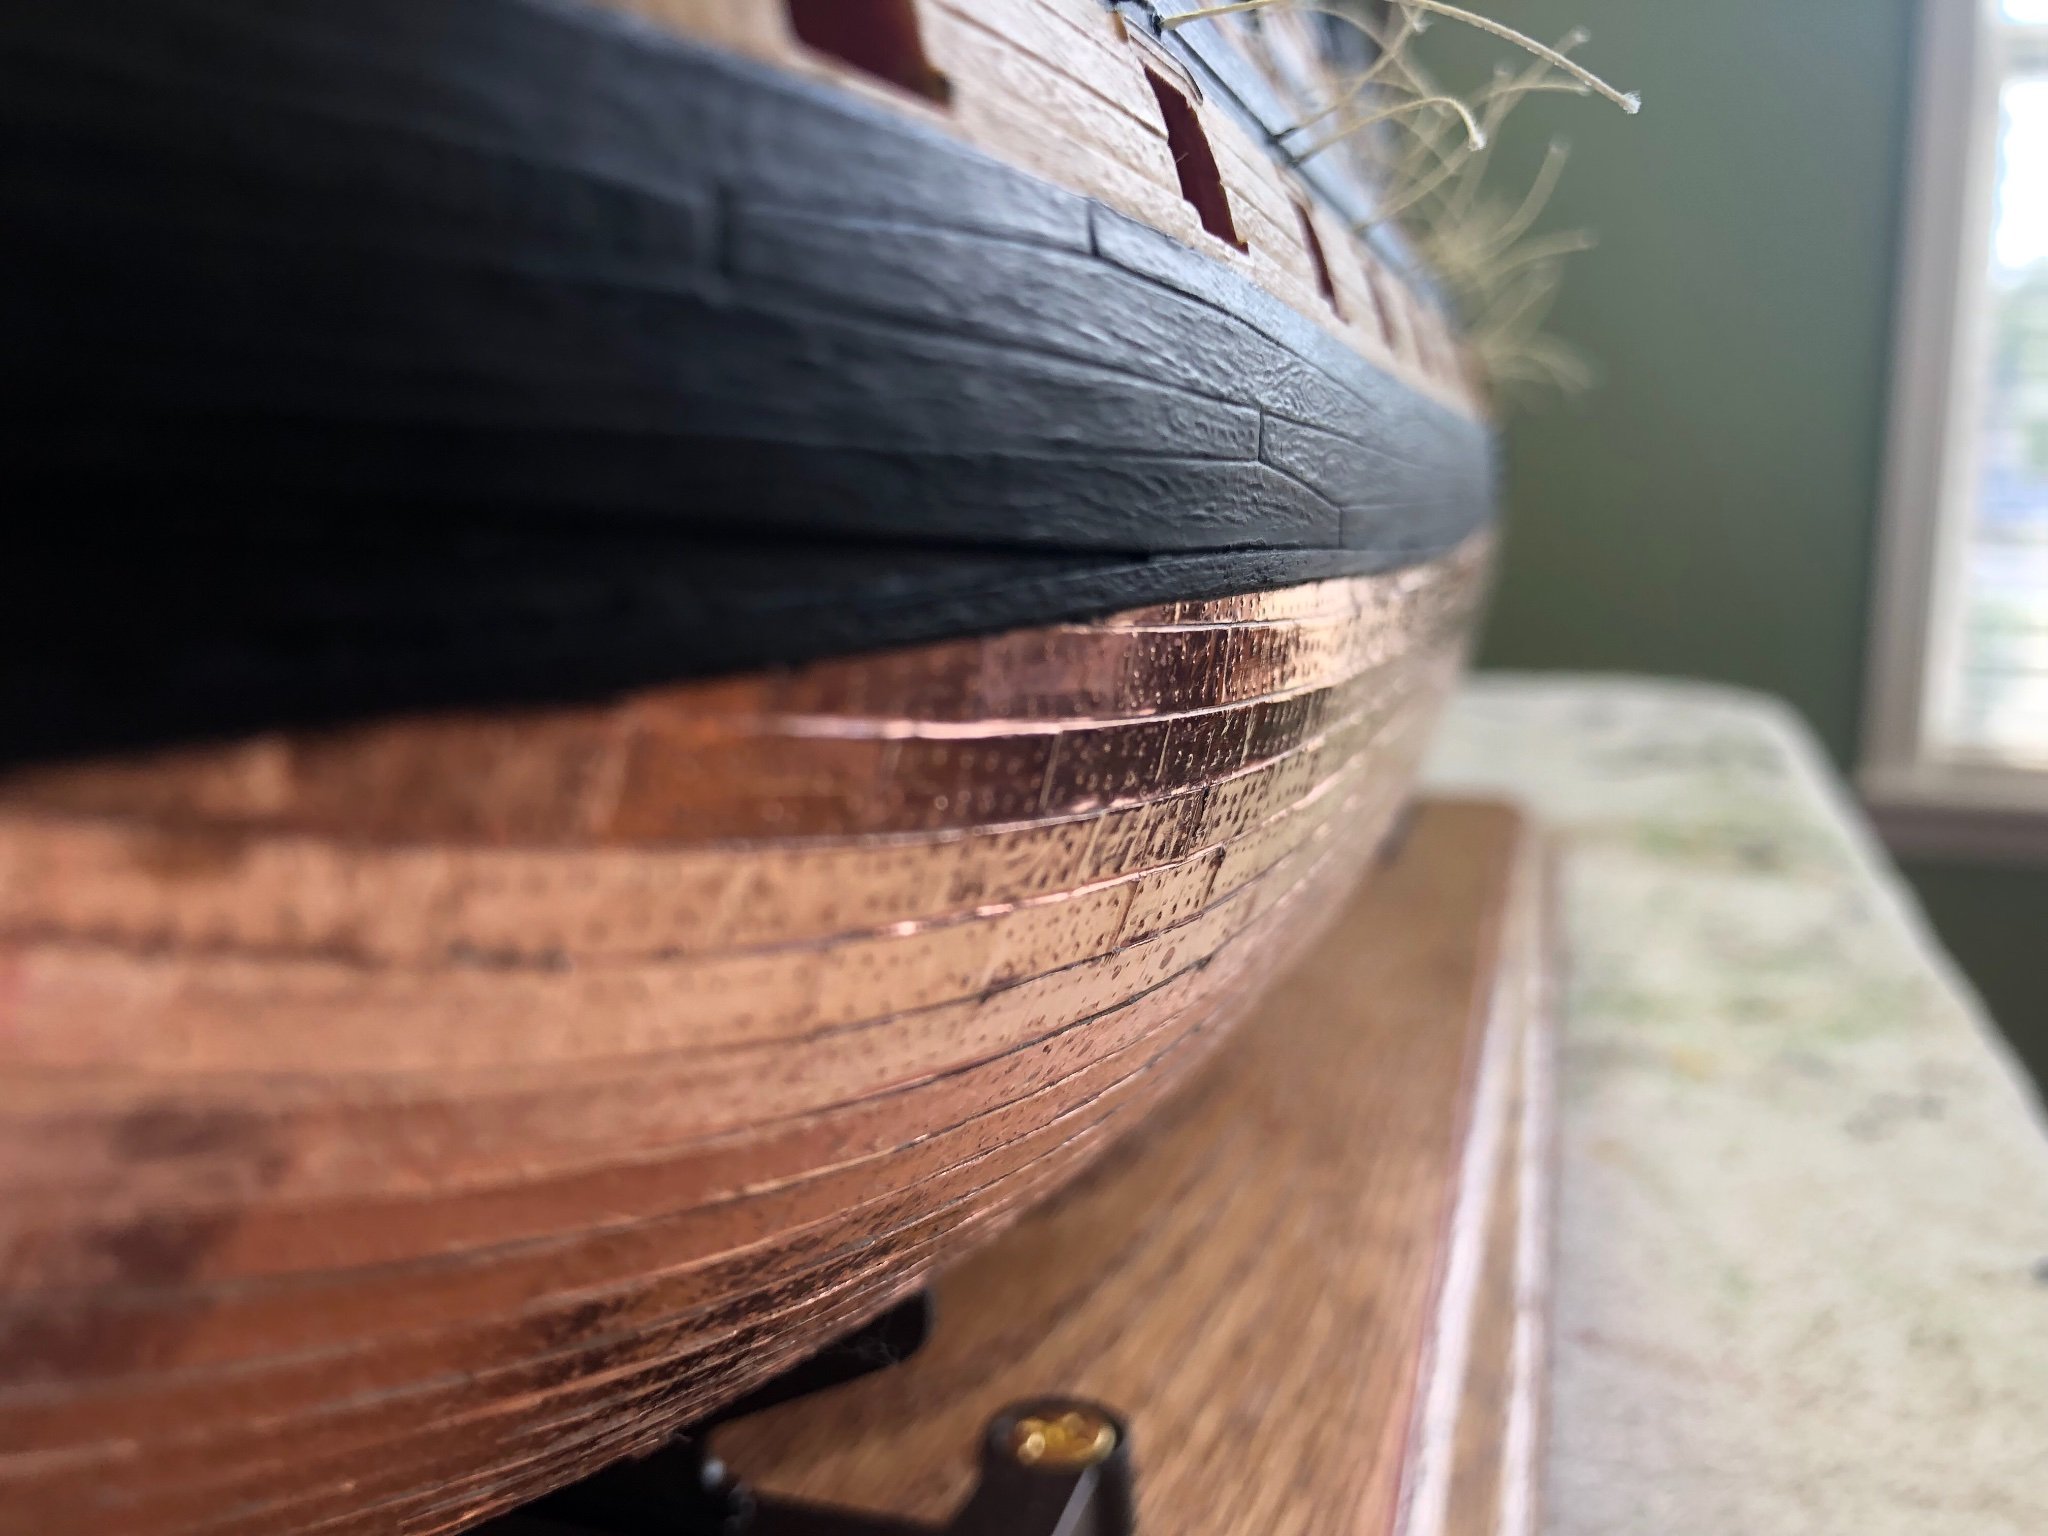
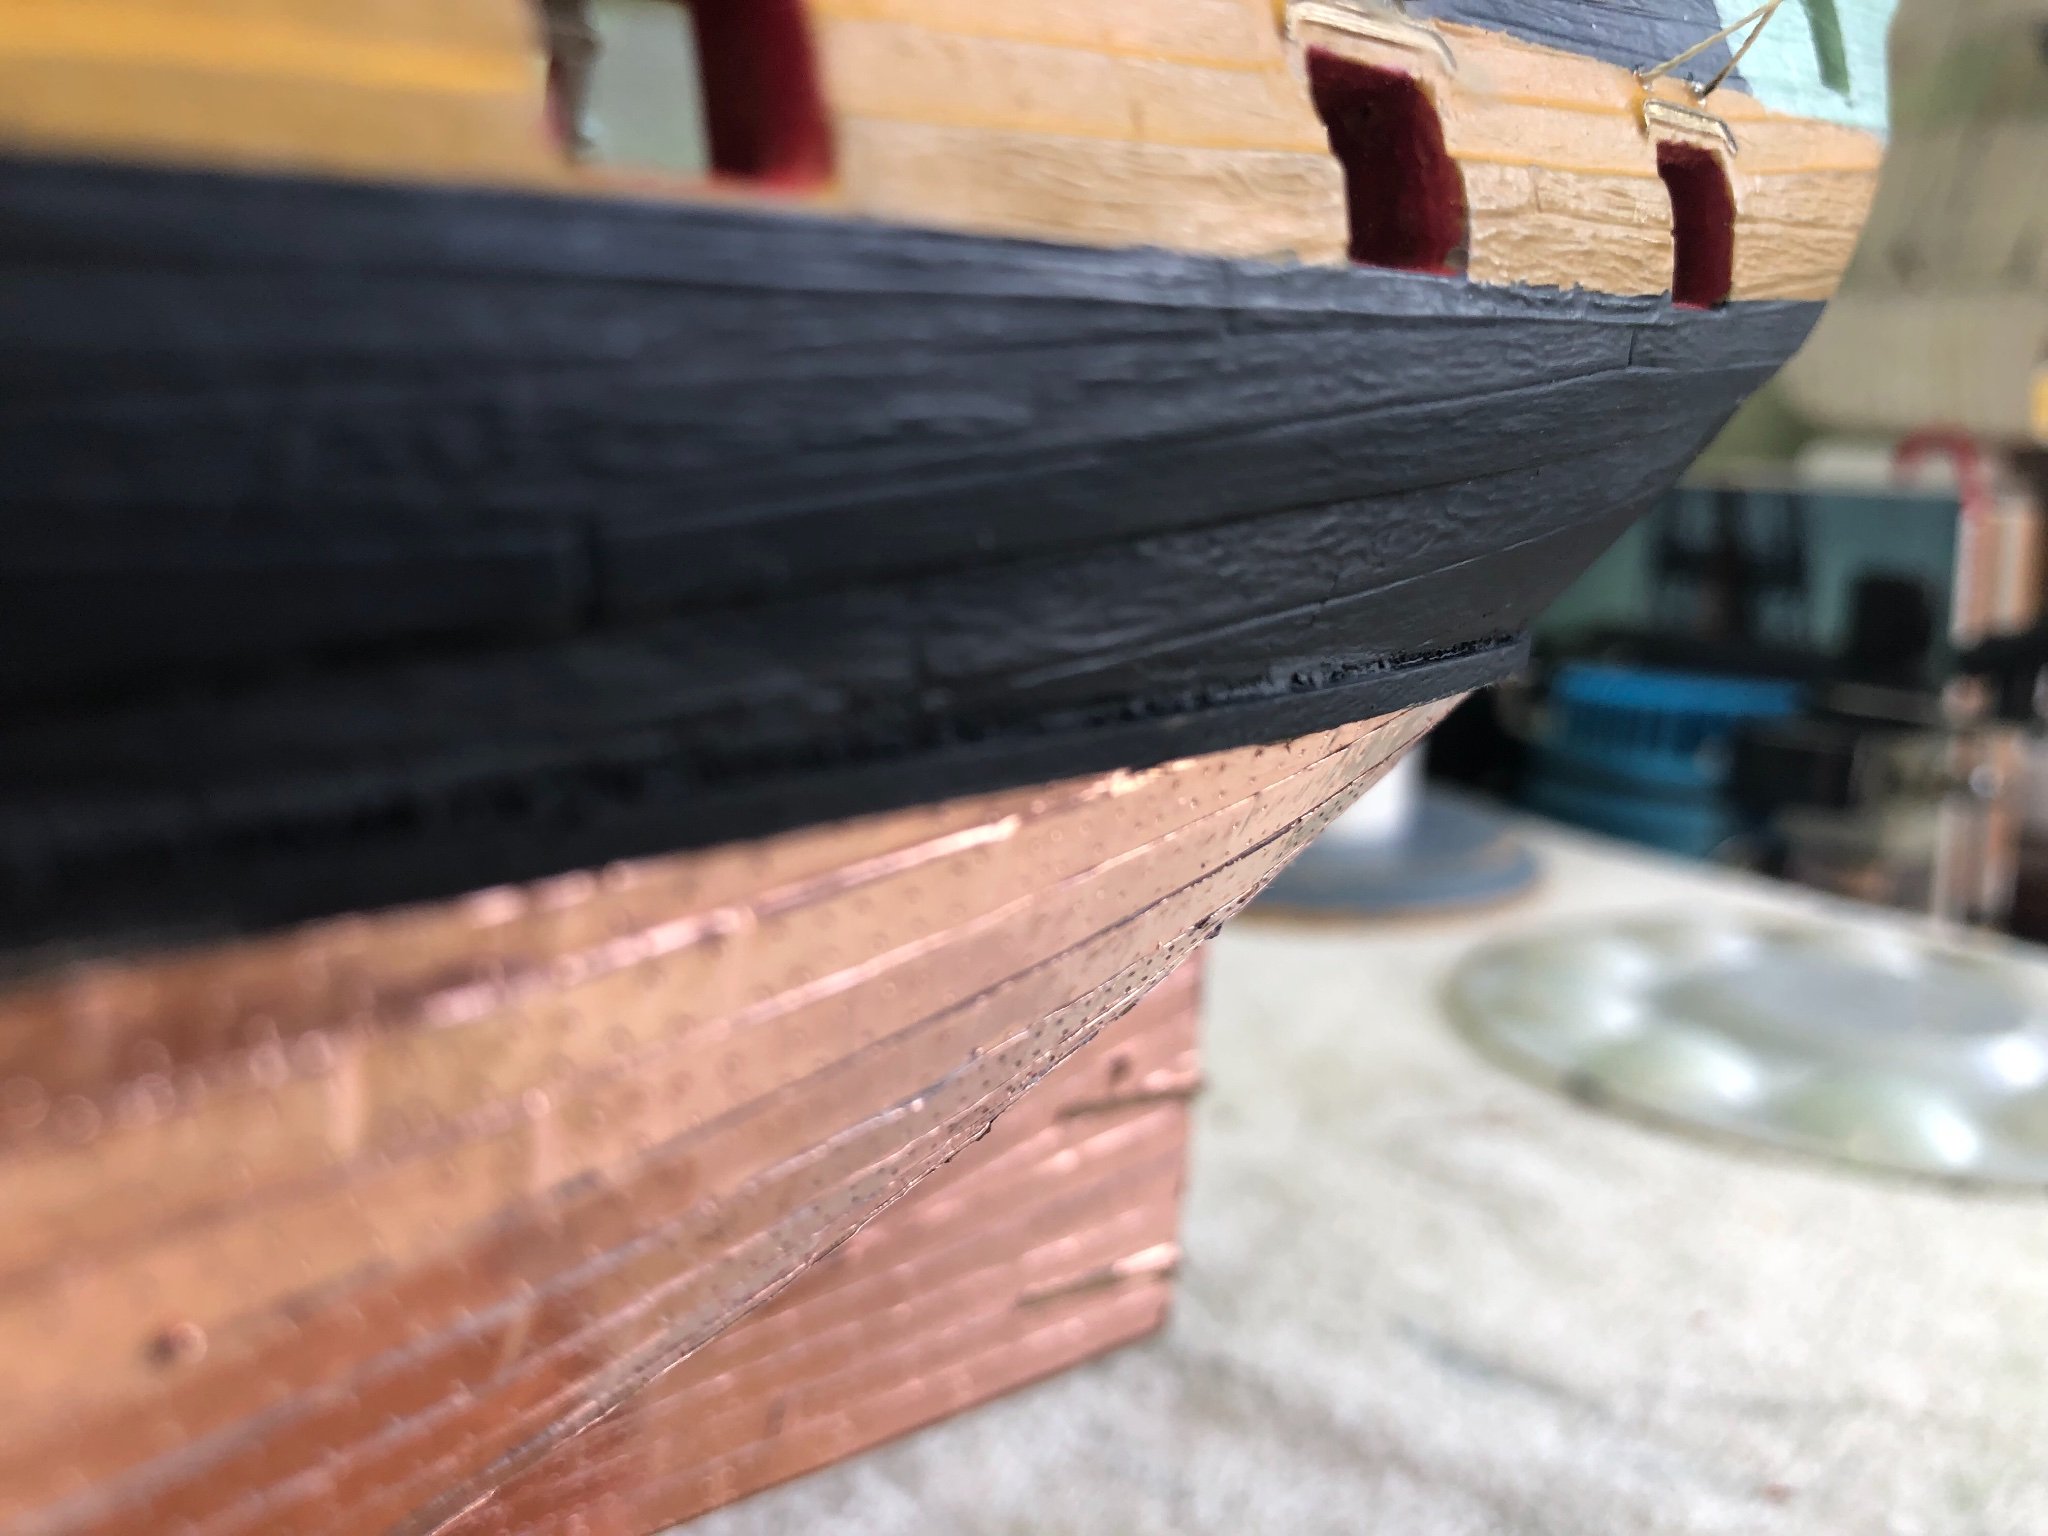
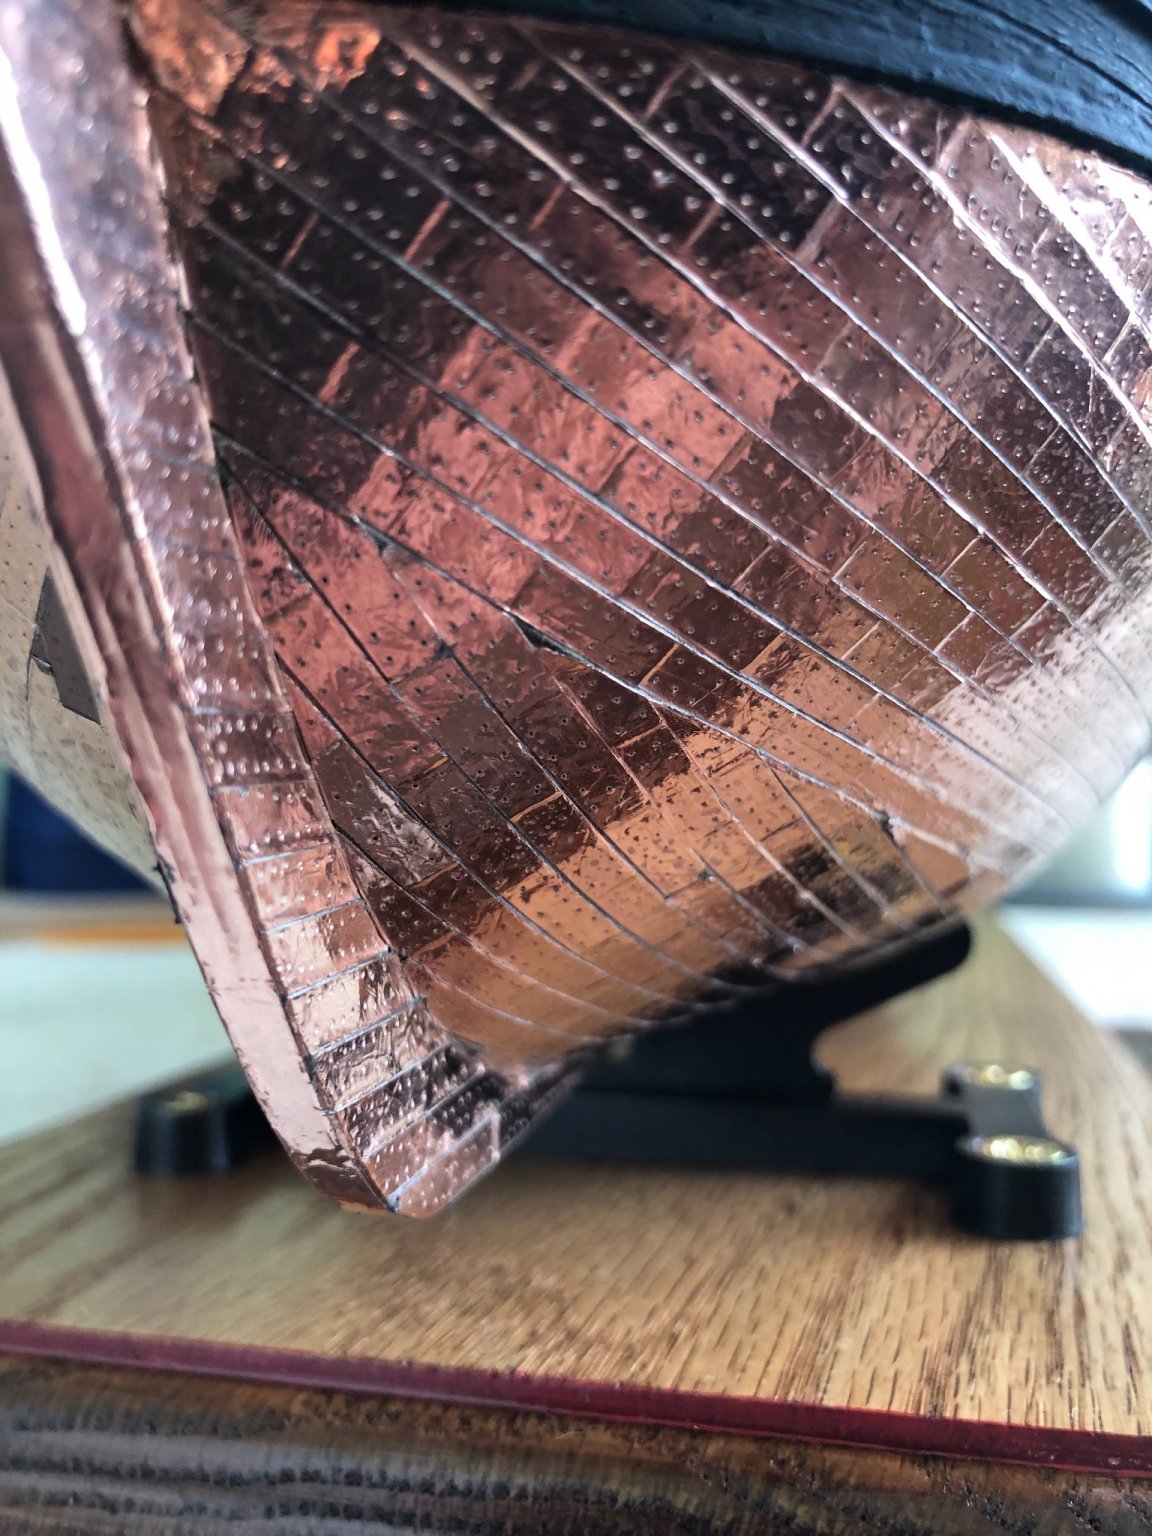
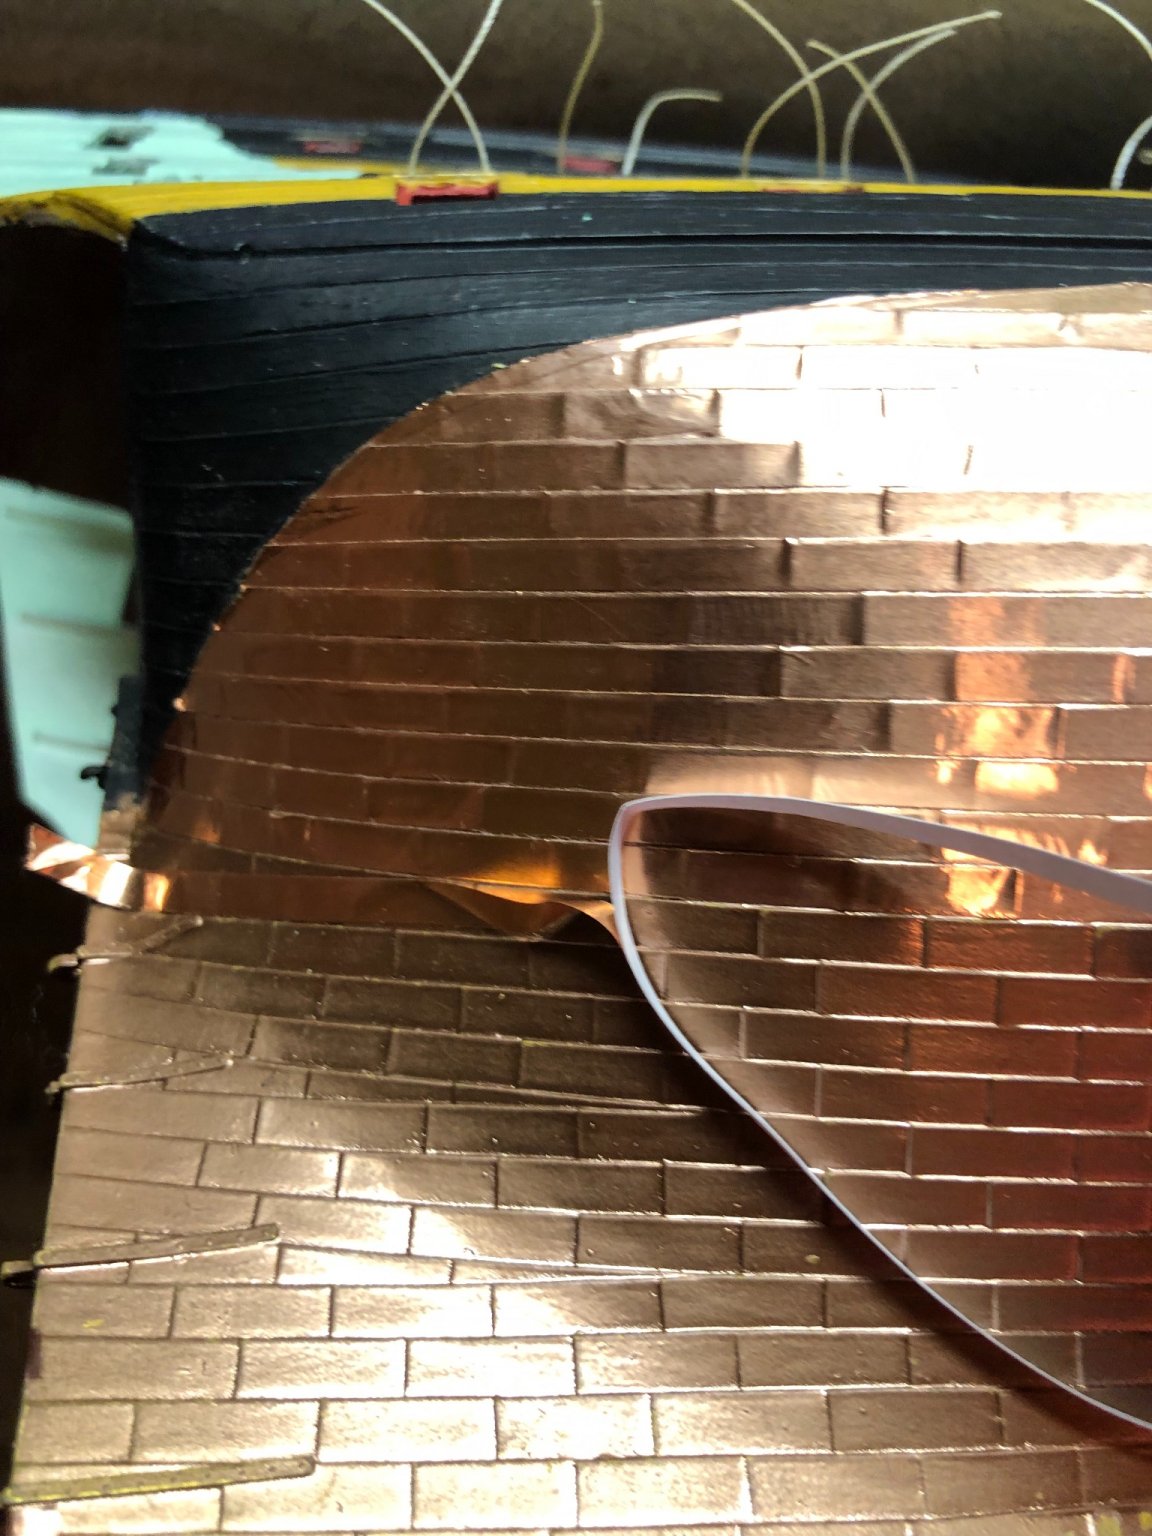
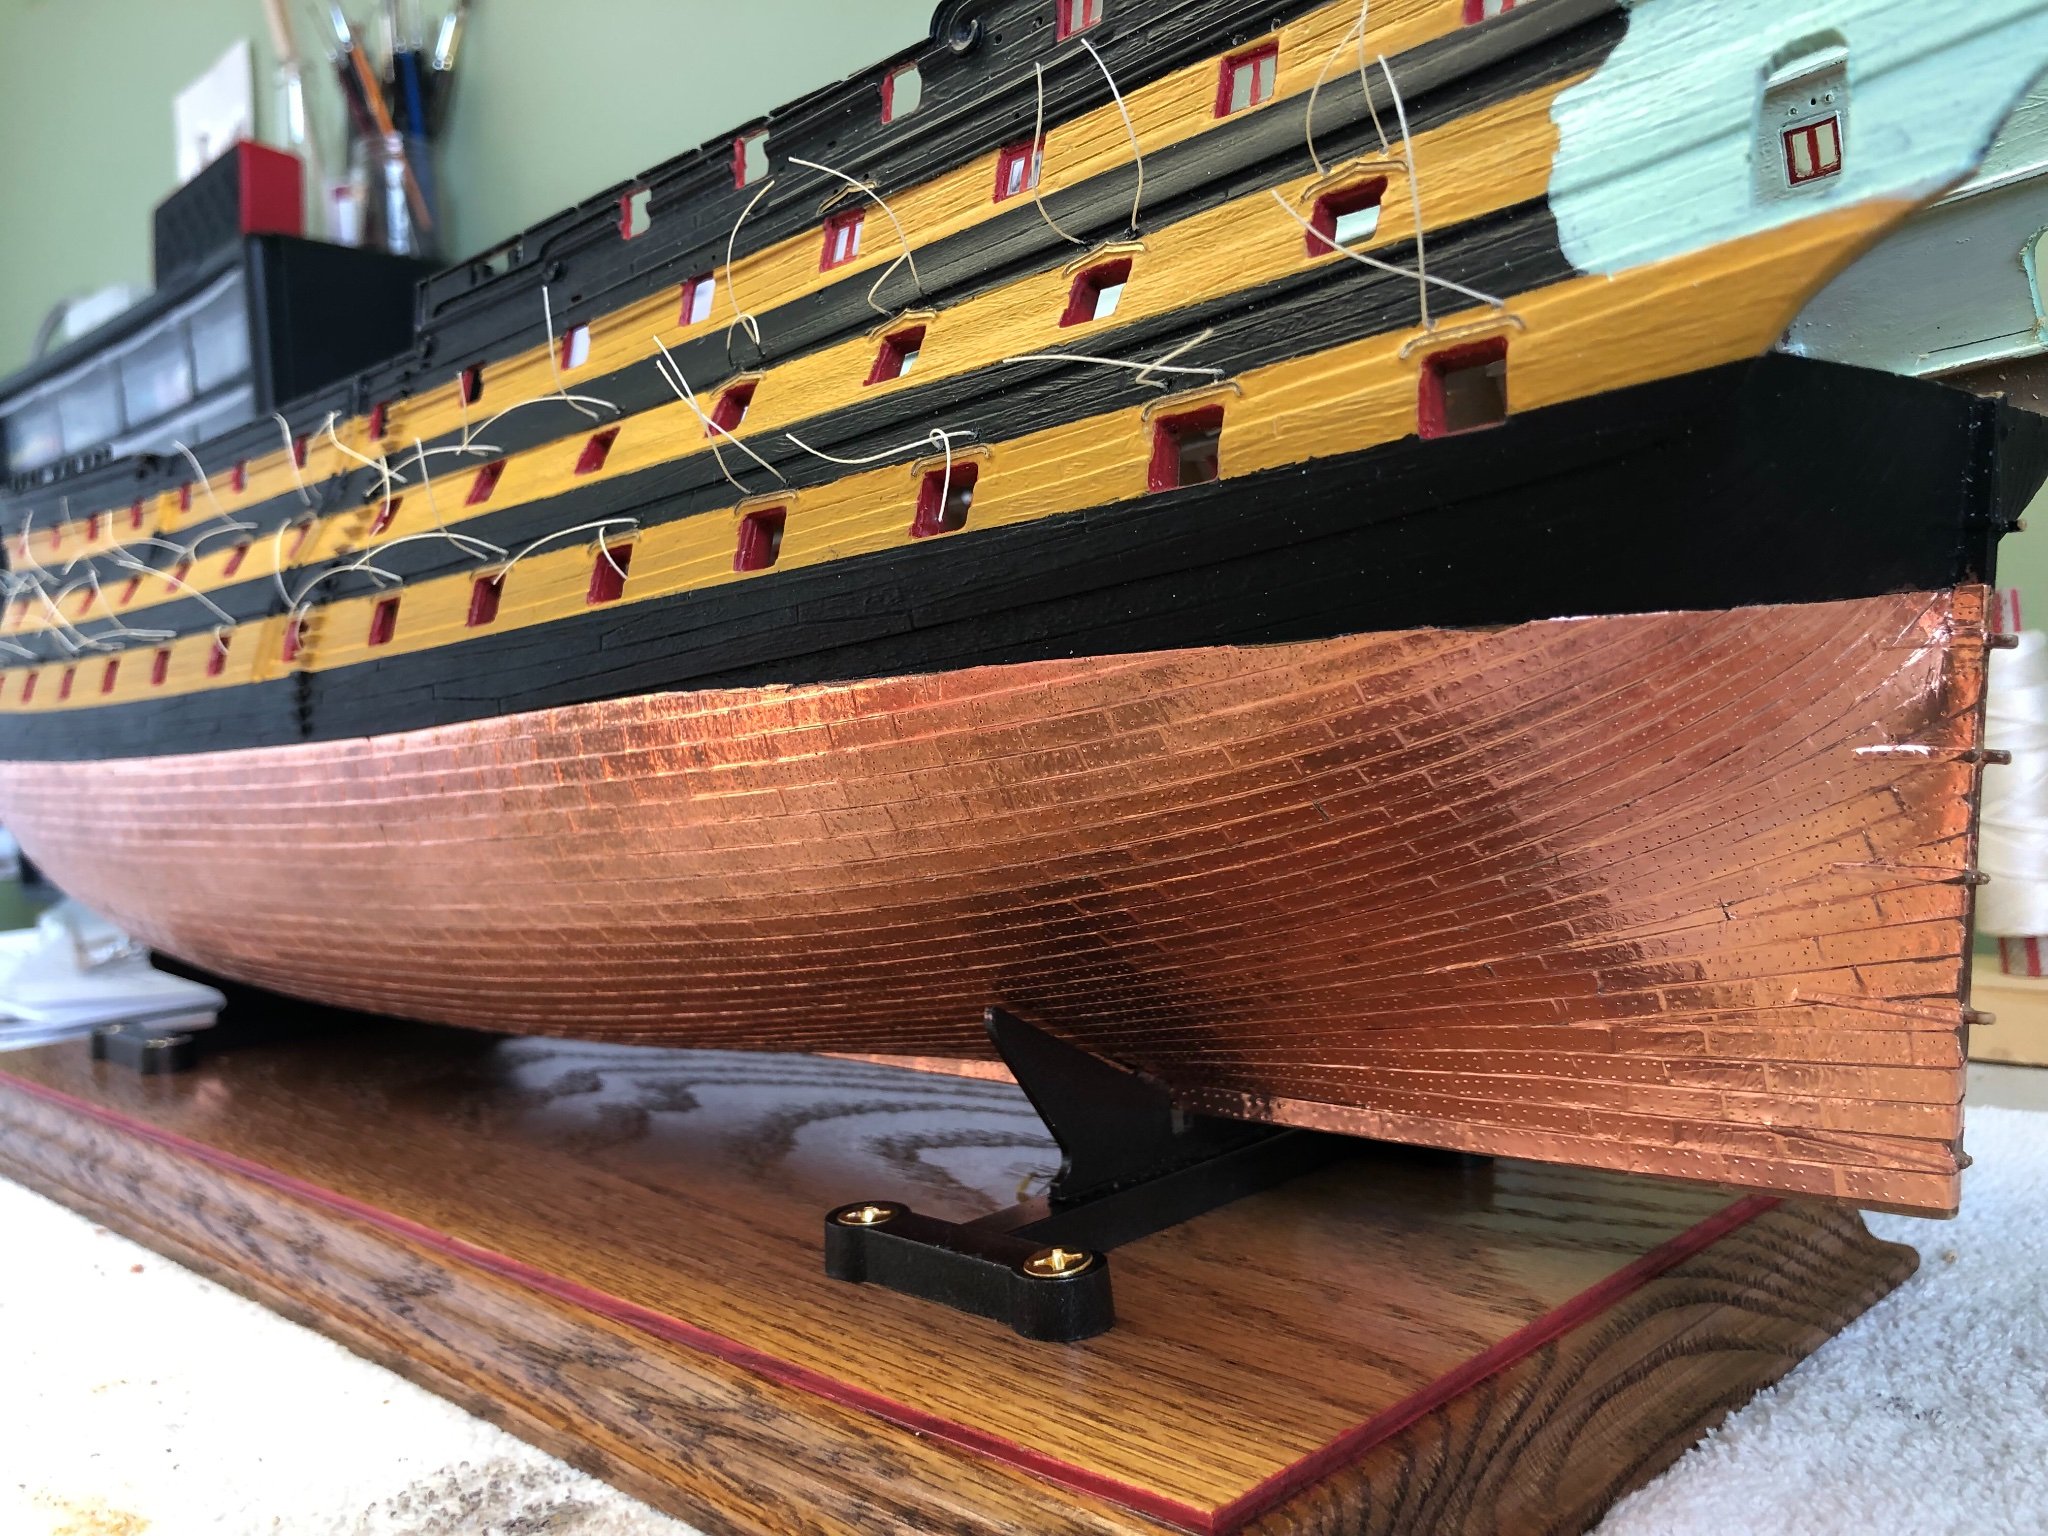
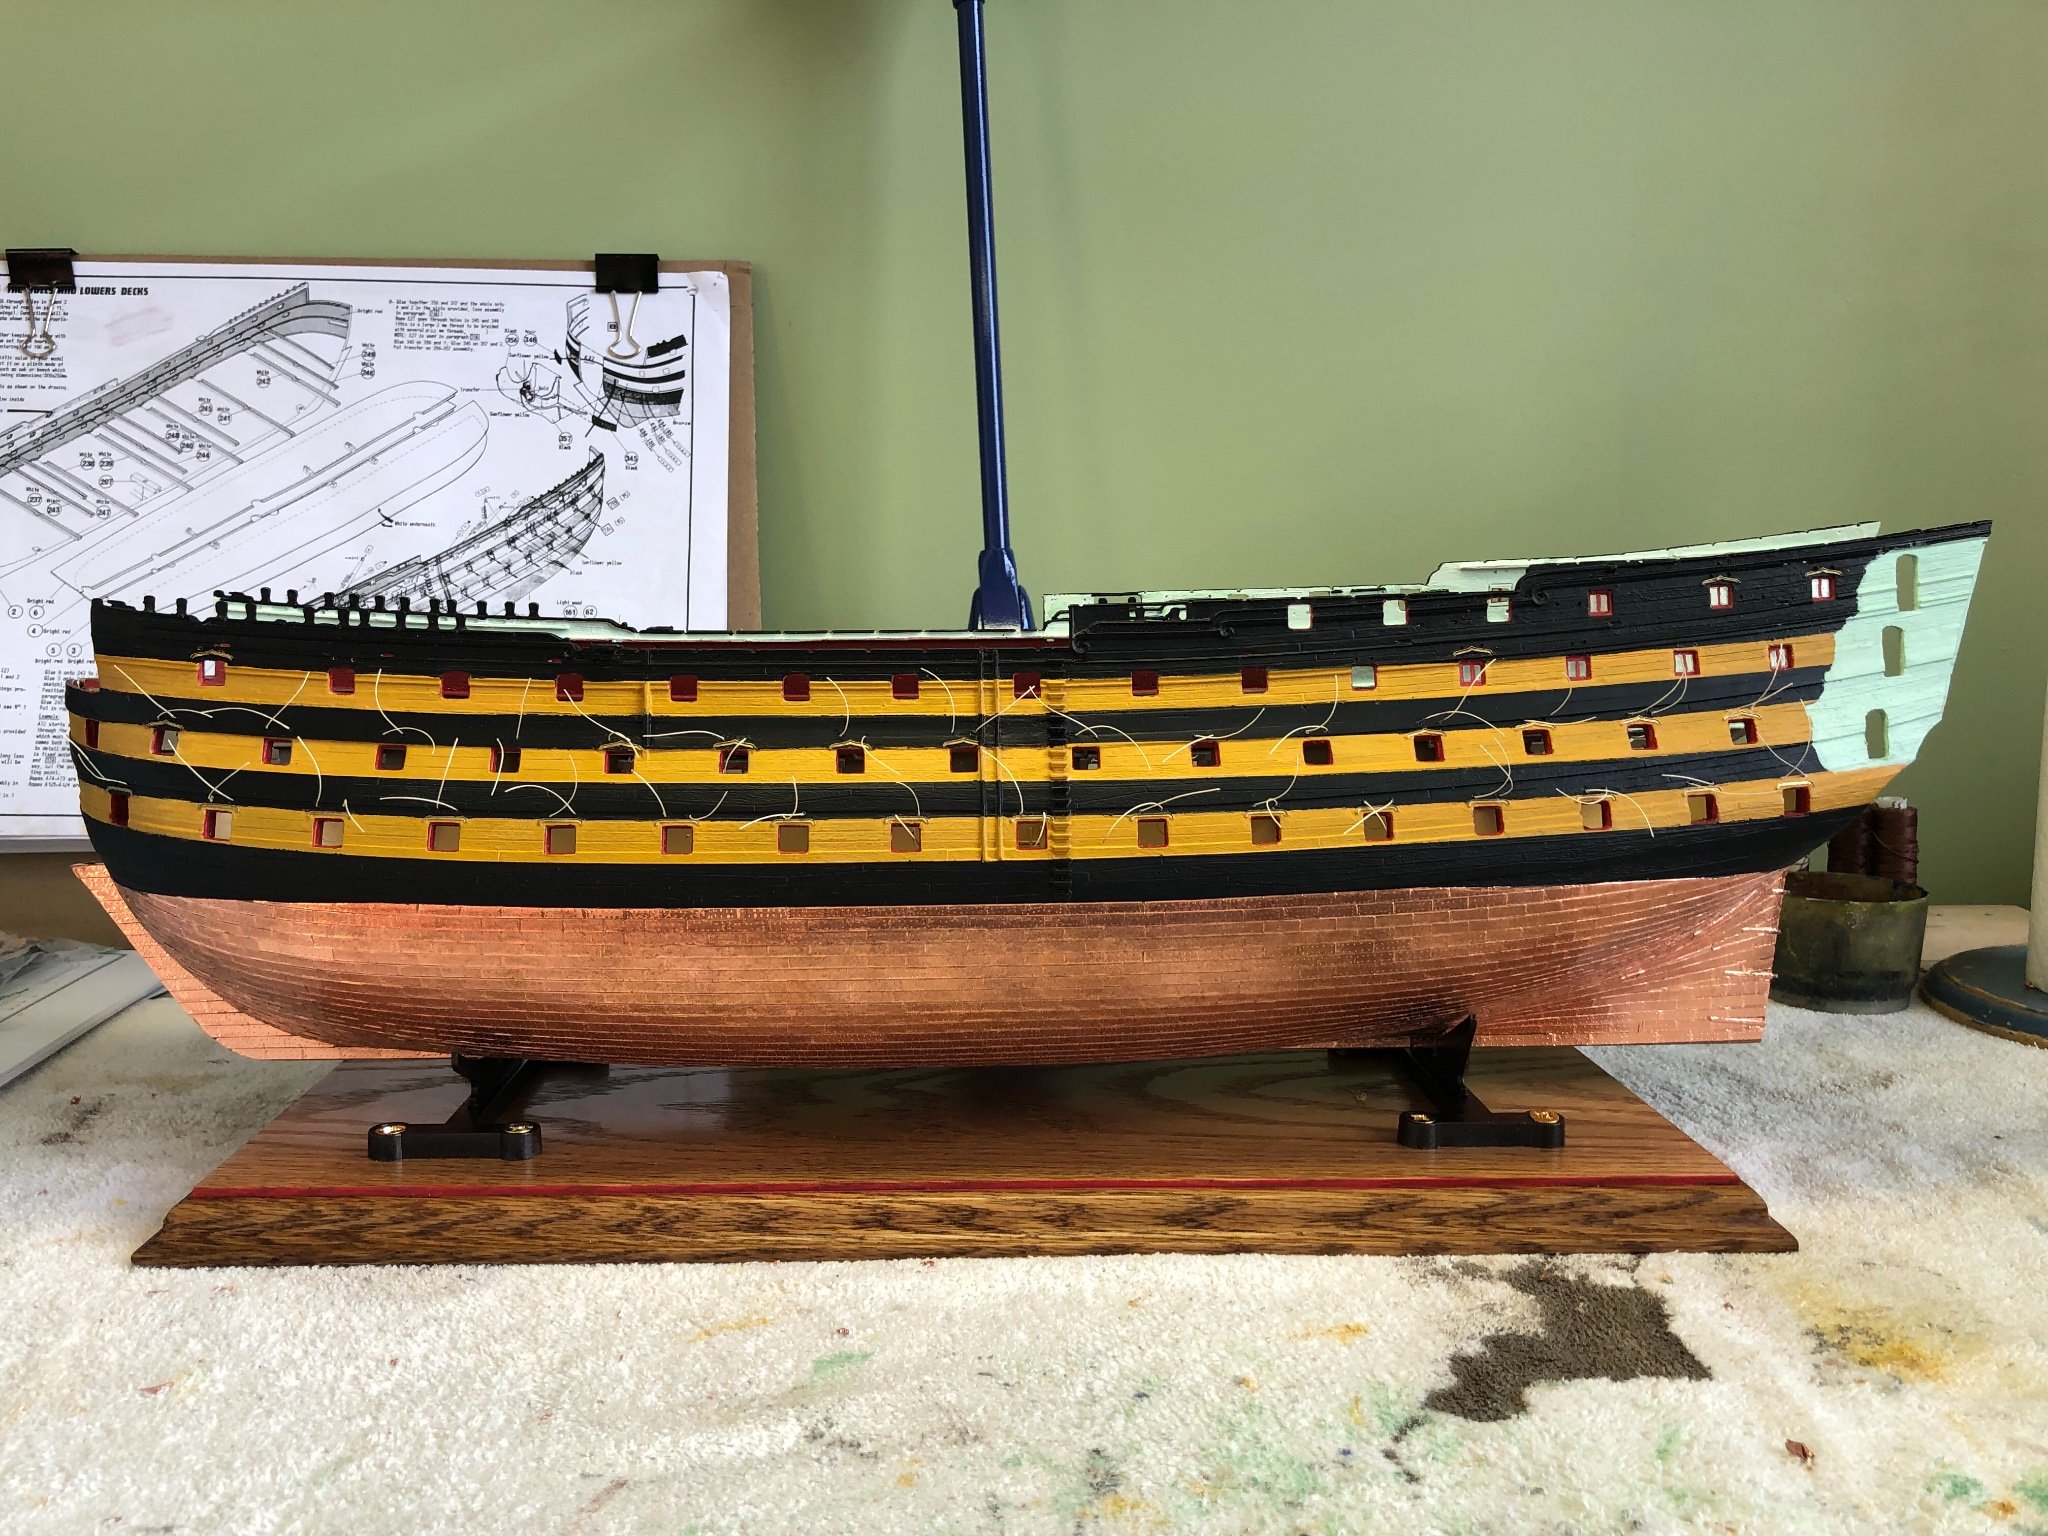
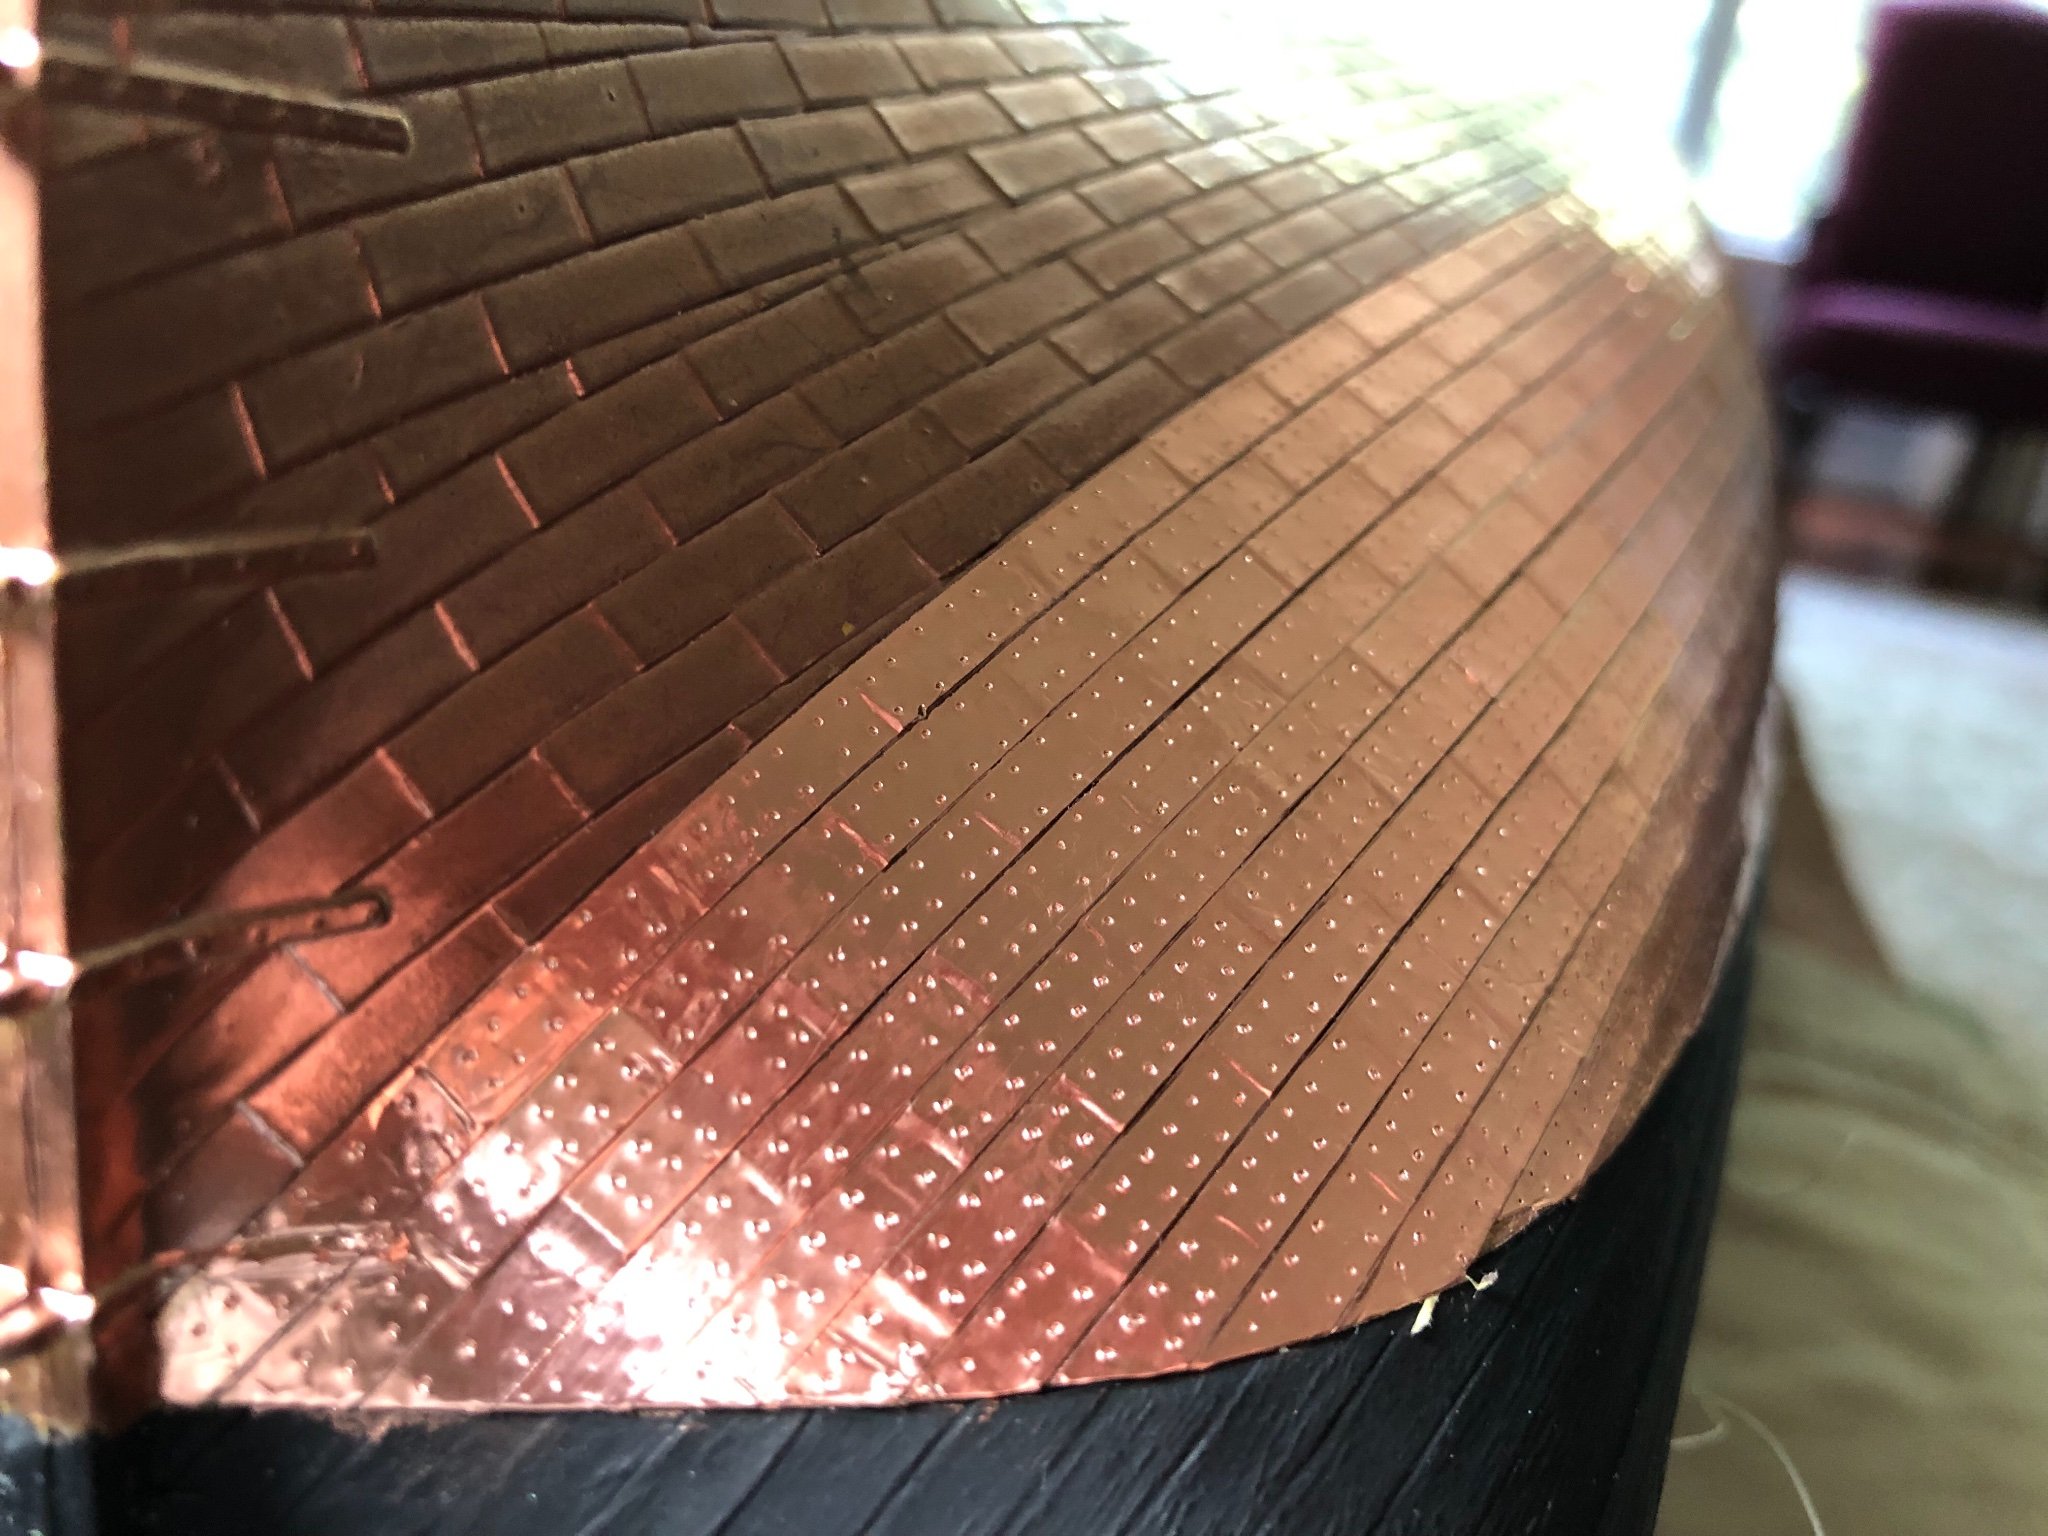
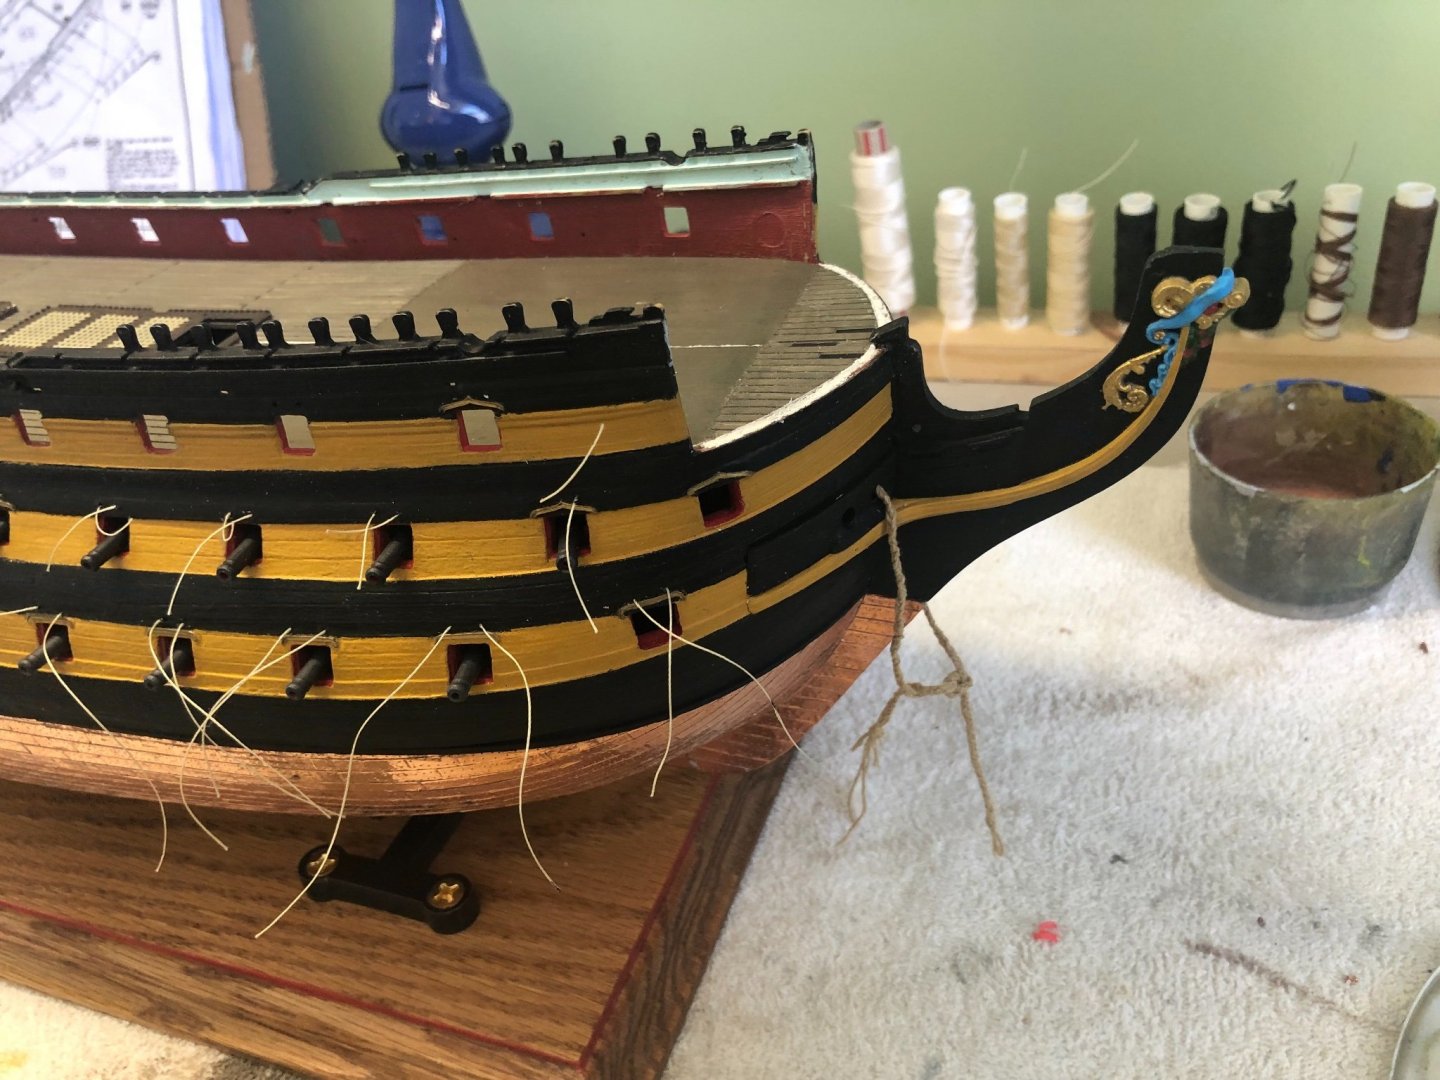
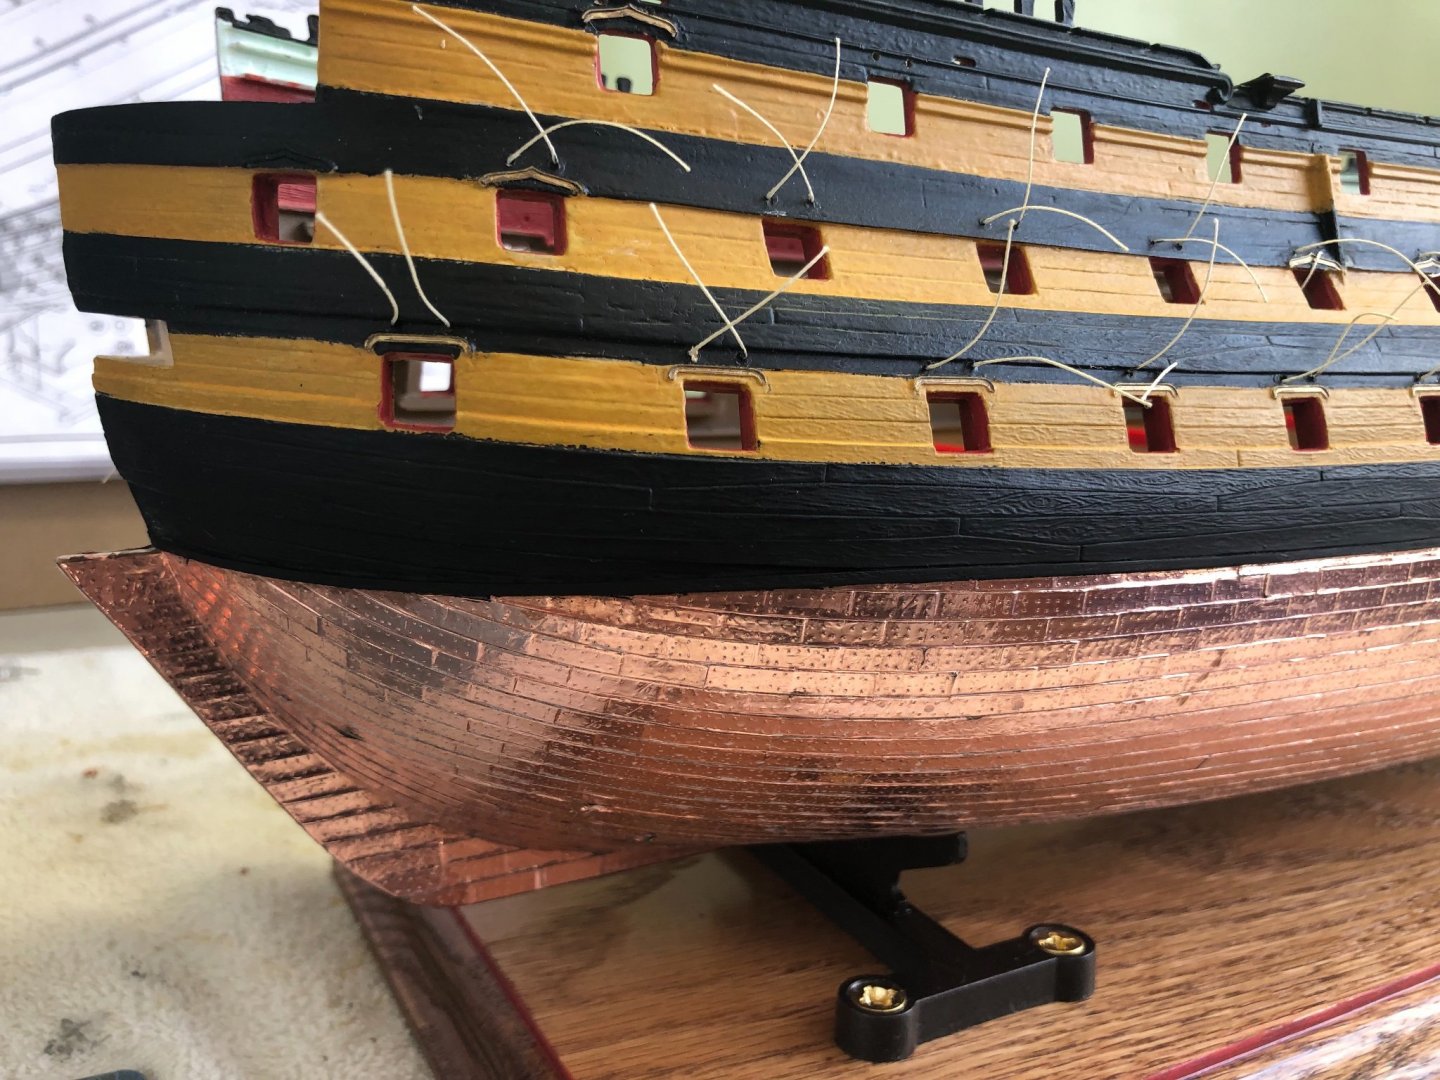
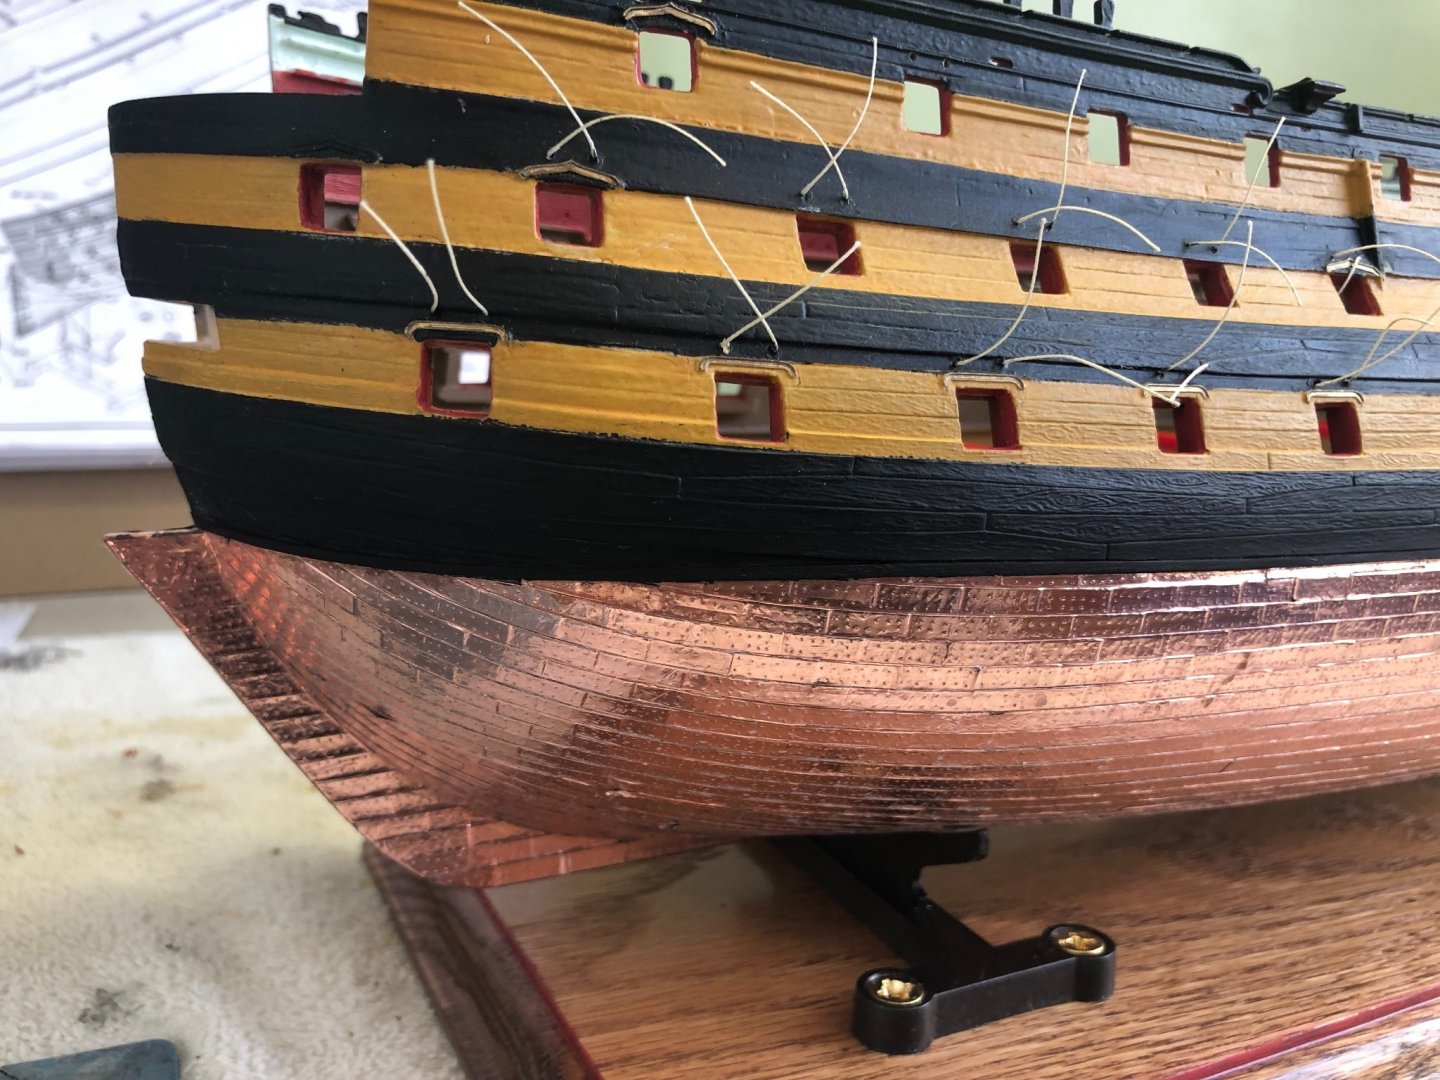
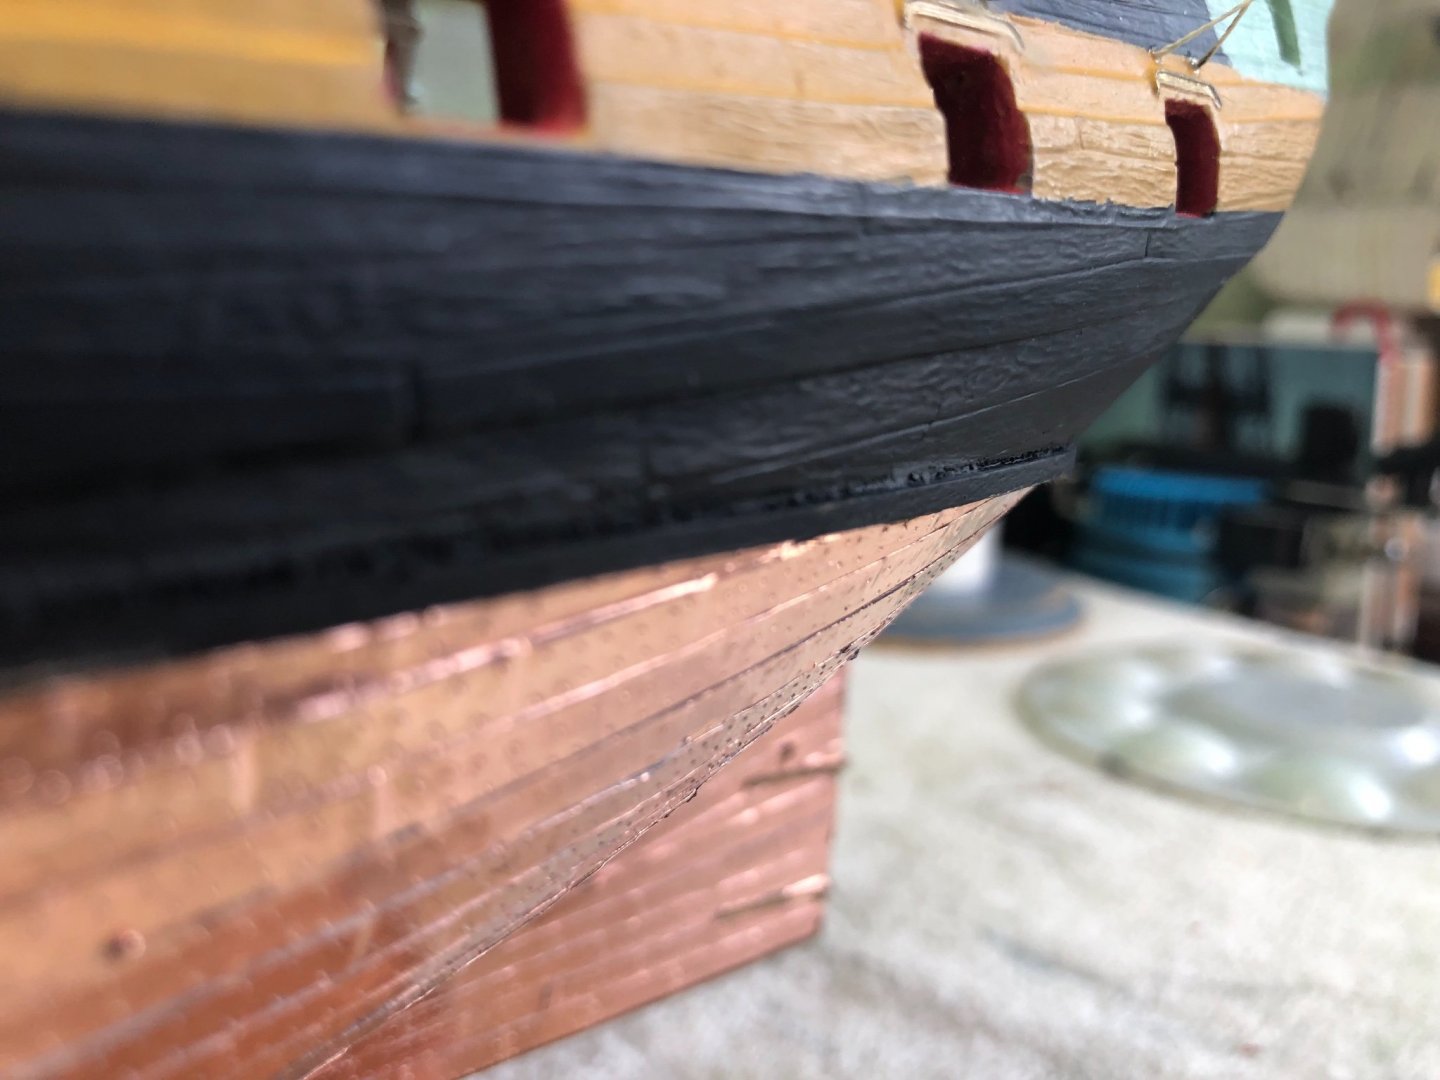
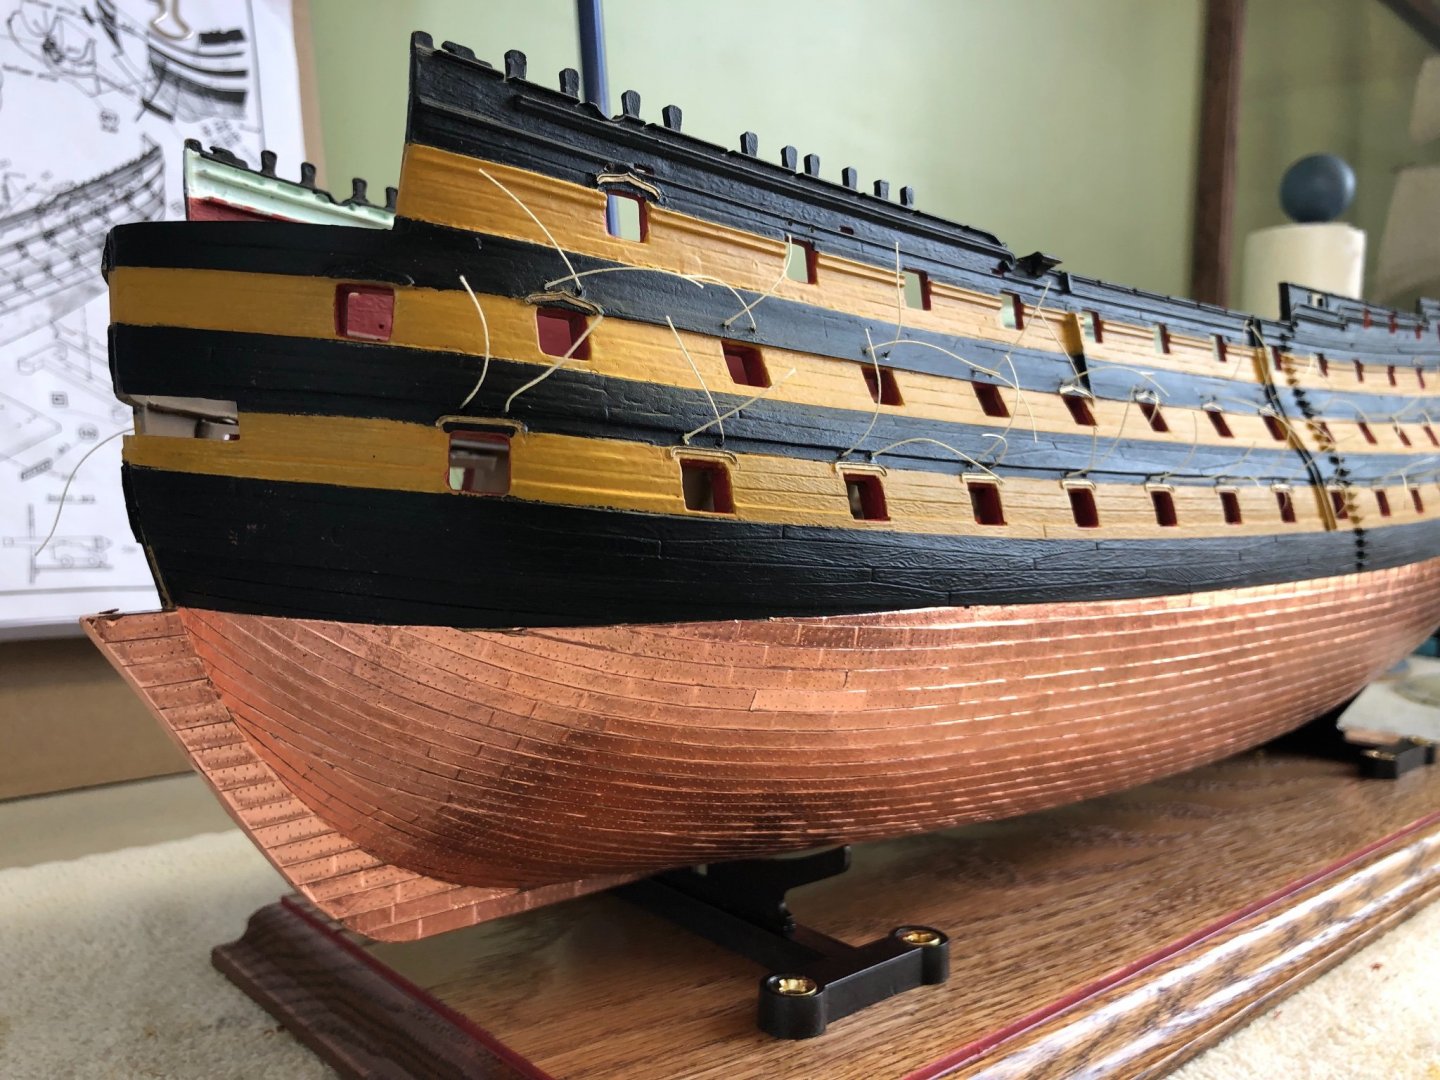
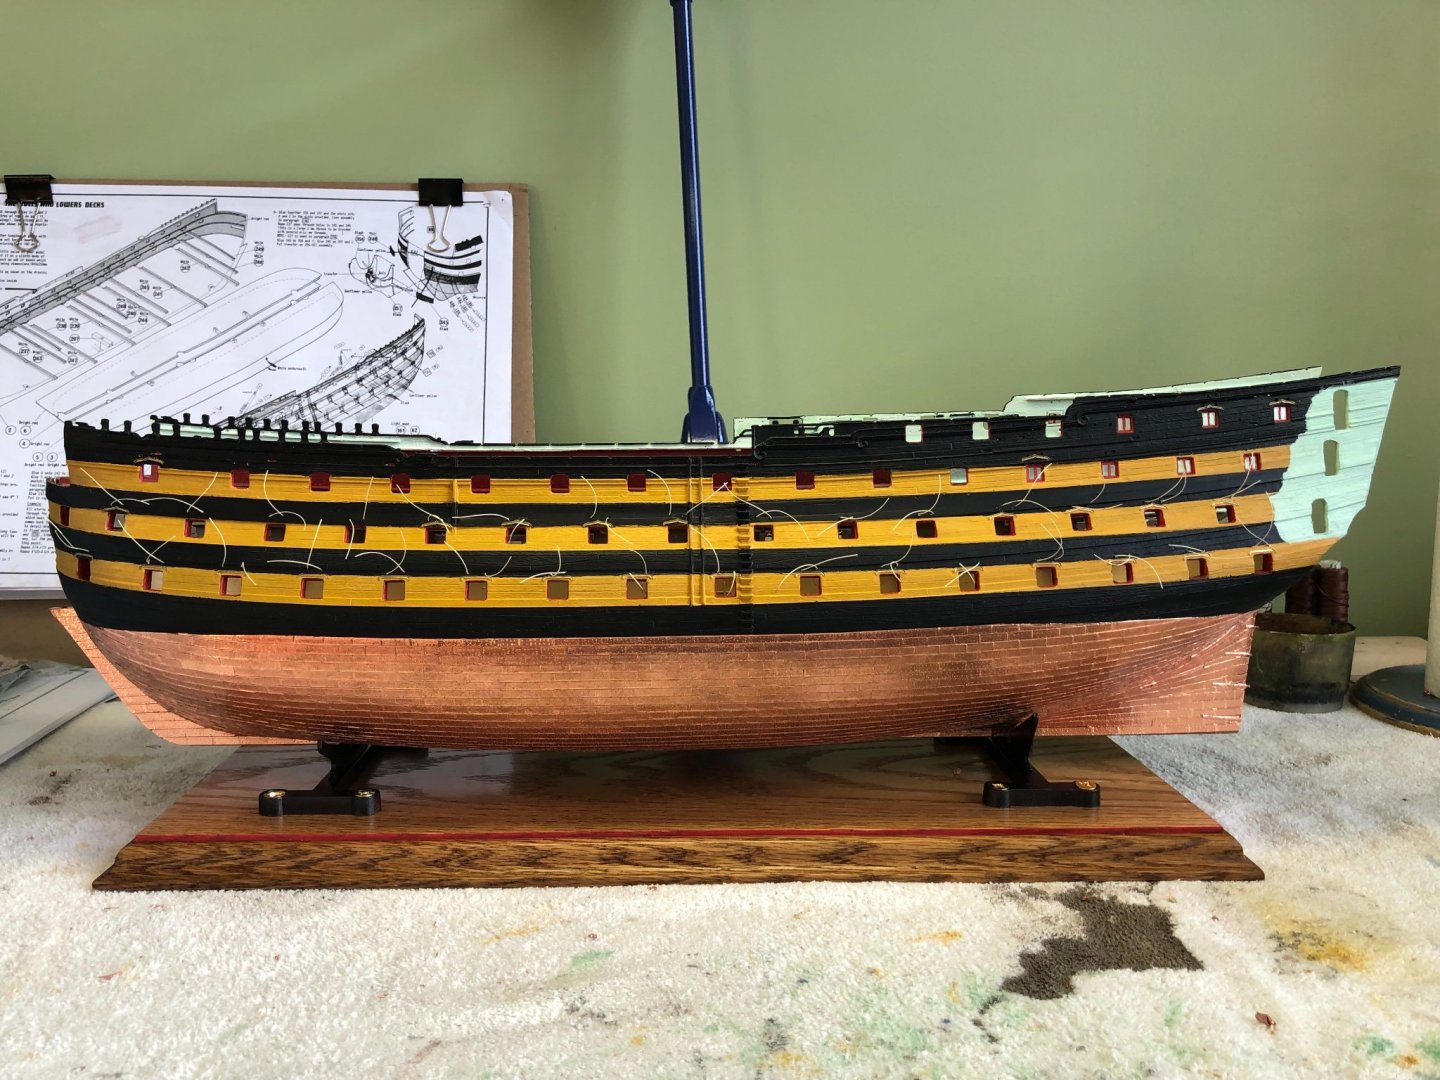
OK gang I have decided to go full bling bling on my Victory. Probably a new take on this beauty. Please don’t vote me off the web site! 😀 Since I decided to leave Daniel’s rigols and all his other etched pieces shiny brass I decided to polish the copper bottom! Also using Daniel’s process I added a small wooden batten at the top of the copper to make a clean line between it and the black. You can barely see it in the photos. After using the polish on the copper tape I noticed I had accidentally pulled up a tape corner here and there. Went ahead and mounted the hull to the base so I don’t need to handle the copper any more to tarnish it. Will gently repair the few lose corners tomorrow wearing jewelers gloves. What is really neat about using this tape is doing a repair now or later simply requires using my exacto knife, cutting the tape at left and right edge of the “plate” and removing the damaged piece of tape. Then cutting a new piece to replace the piece removed. Add a series of nail holes and the repair is invisible.


-
So you will just toss the stern plate and quarter galleries that came with the kit and use your replacements? I have no idea how it works but I find 3D design and printing fascinating. Obviously from what you said above you have to be prepared for some costly experiments that may not go just right?
-
Kevin this is fascinating watching you work this out with the 3D printer. Anxious to see the finished piece attached to the hull. I really like the decorative pieces for the stern plate. That will give you very clear sharp lines. I have no experience with 3D printers. Enjoy watching your progress.
-
Kevin if you refer back to Daniel’s build post #53 in Feb 2013 you can see how he added the batten trim and solved the Heller Hump!
-
Kevin I also found these instructions on line. For a blue patina, mix one part Miracle-Gro with three parts water for a solution that you can spray or wipe onto the copper. For a green patina, mix one part Miracle-Gro with three parts red wine vinegar. A patina will form within 30 minutes and become permanent within 24 hours.
-
Kevin I suppose you could do both. I have wondered about doing just that. I am sure I would need to do a test on several strips stuck on a piece of Evergreen or something to see if the aging solution effected the adhesive. Would not want to ruin the wool already done.
-
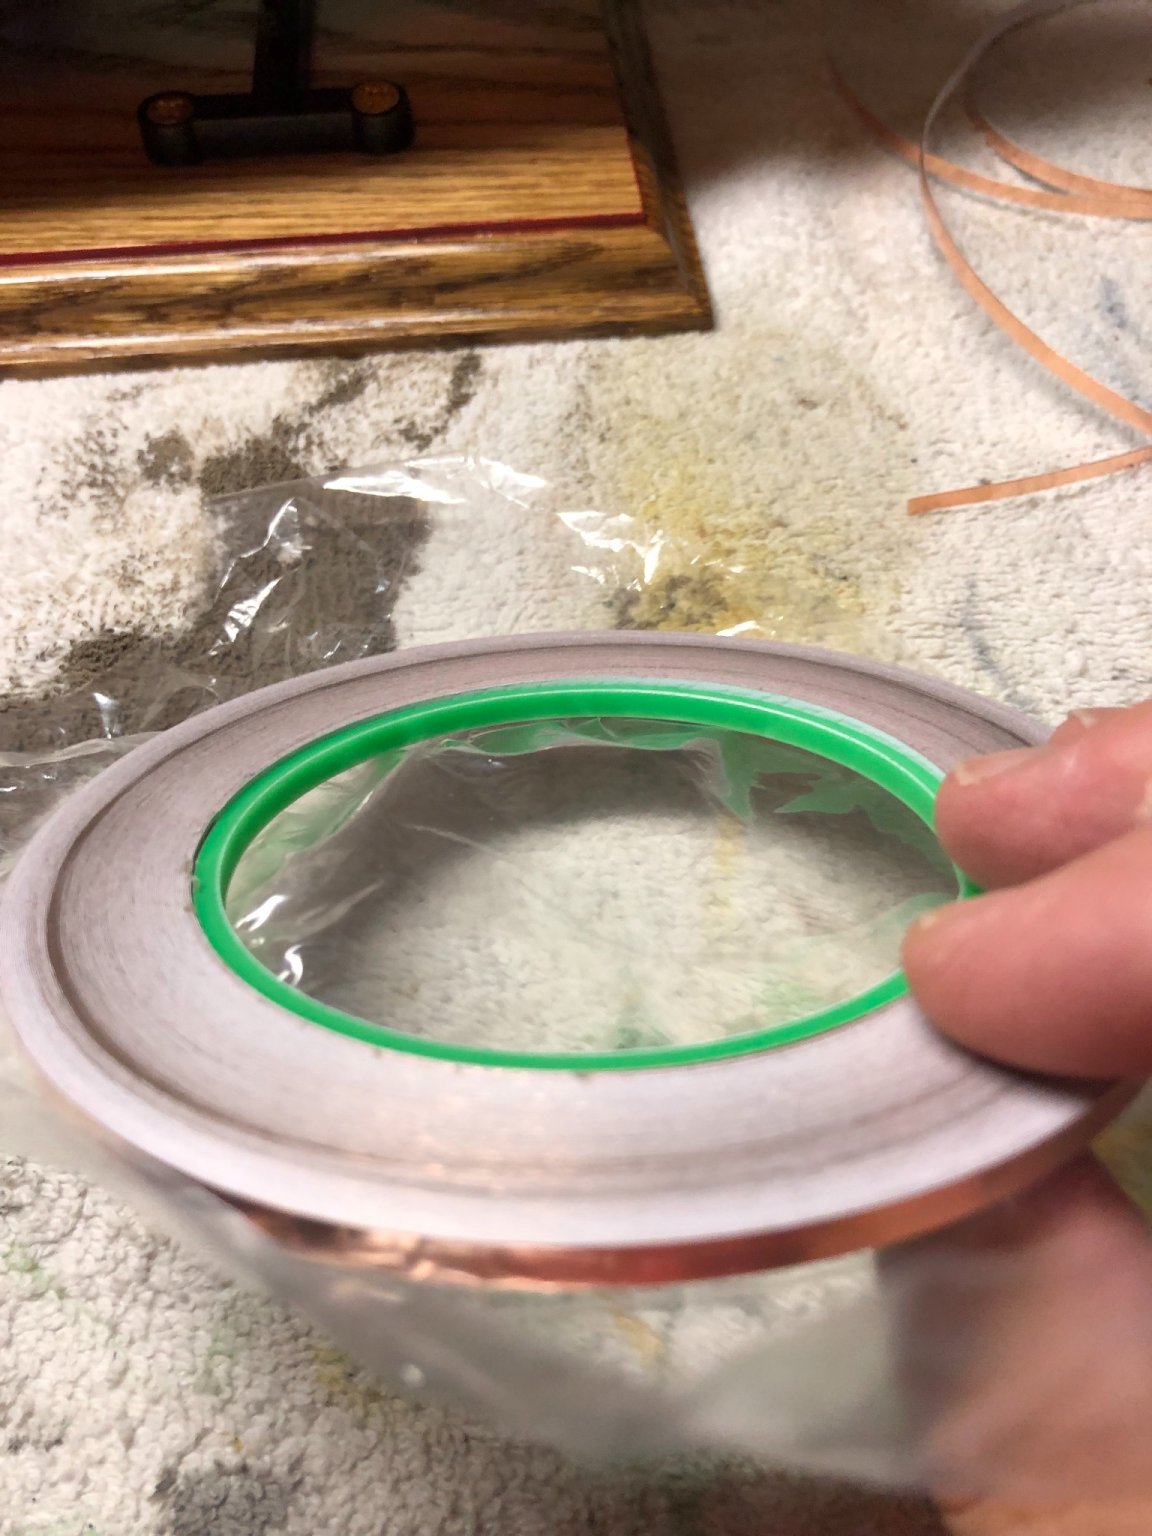
Oh Kevin I apologize I forgot to thank you for the pictures. They should help me a lot. Search this on Amazon. This is what I used. Could not figure out how to copy the link. Takes 2 rolls. uxcell Single-Sided Conductive Tape Copper Foil Tape 4mm x 30m/98.4ft for Guitar,EMI Shielding Crafts, Electrical Repairs https://www.amazon.com/dp/B094HCYNBR/ref=cm_sw_r_cp_api_glt_fabc_VSAQGDX18Y6953QXP139?psc=1
-
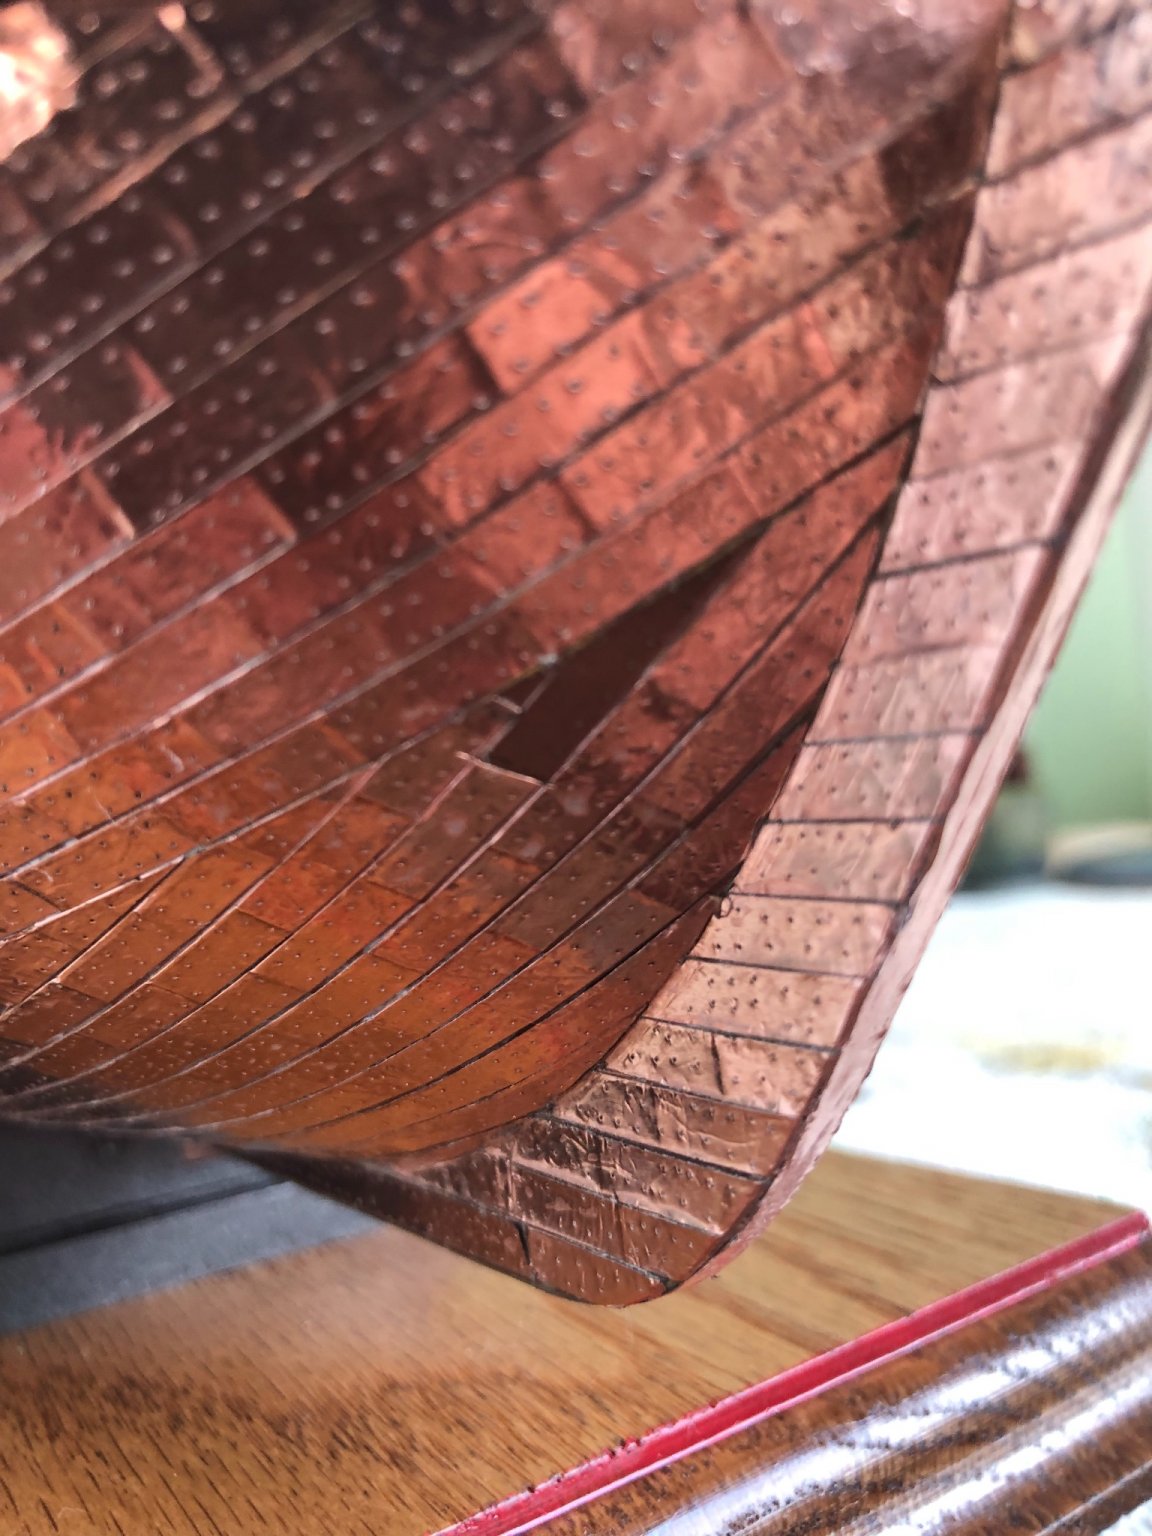
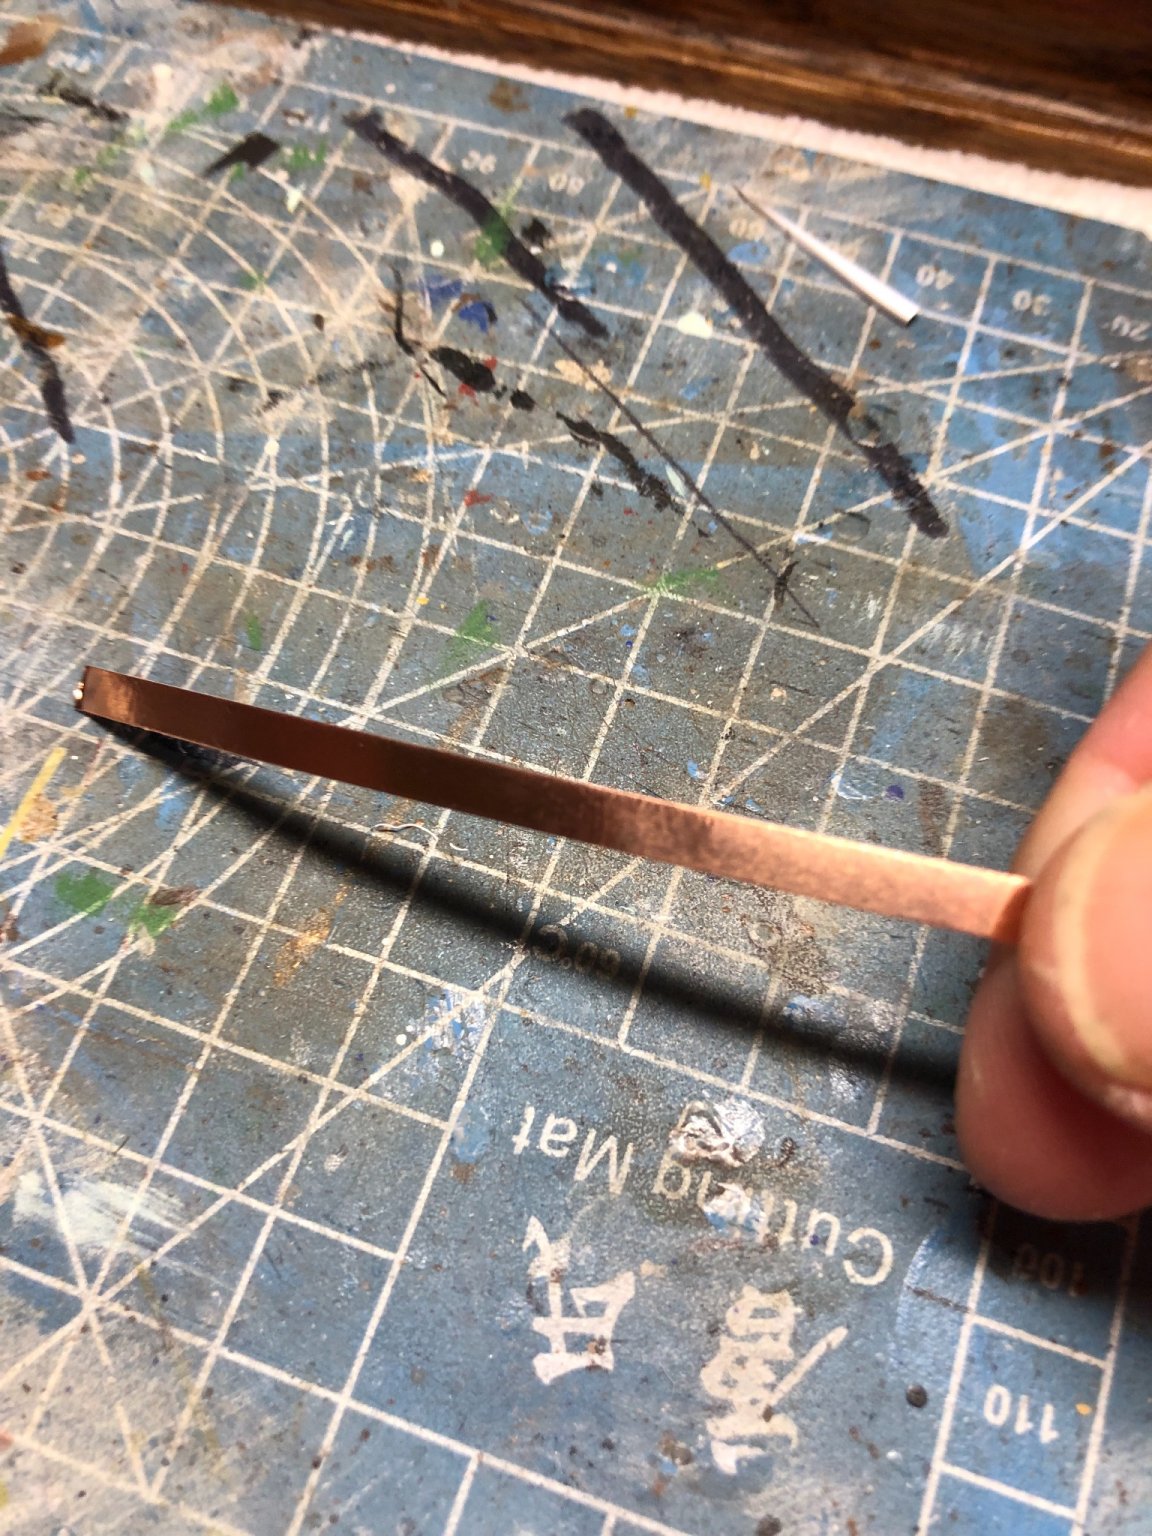
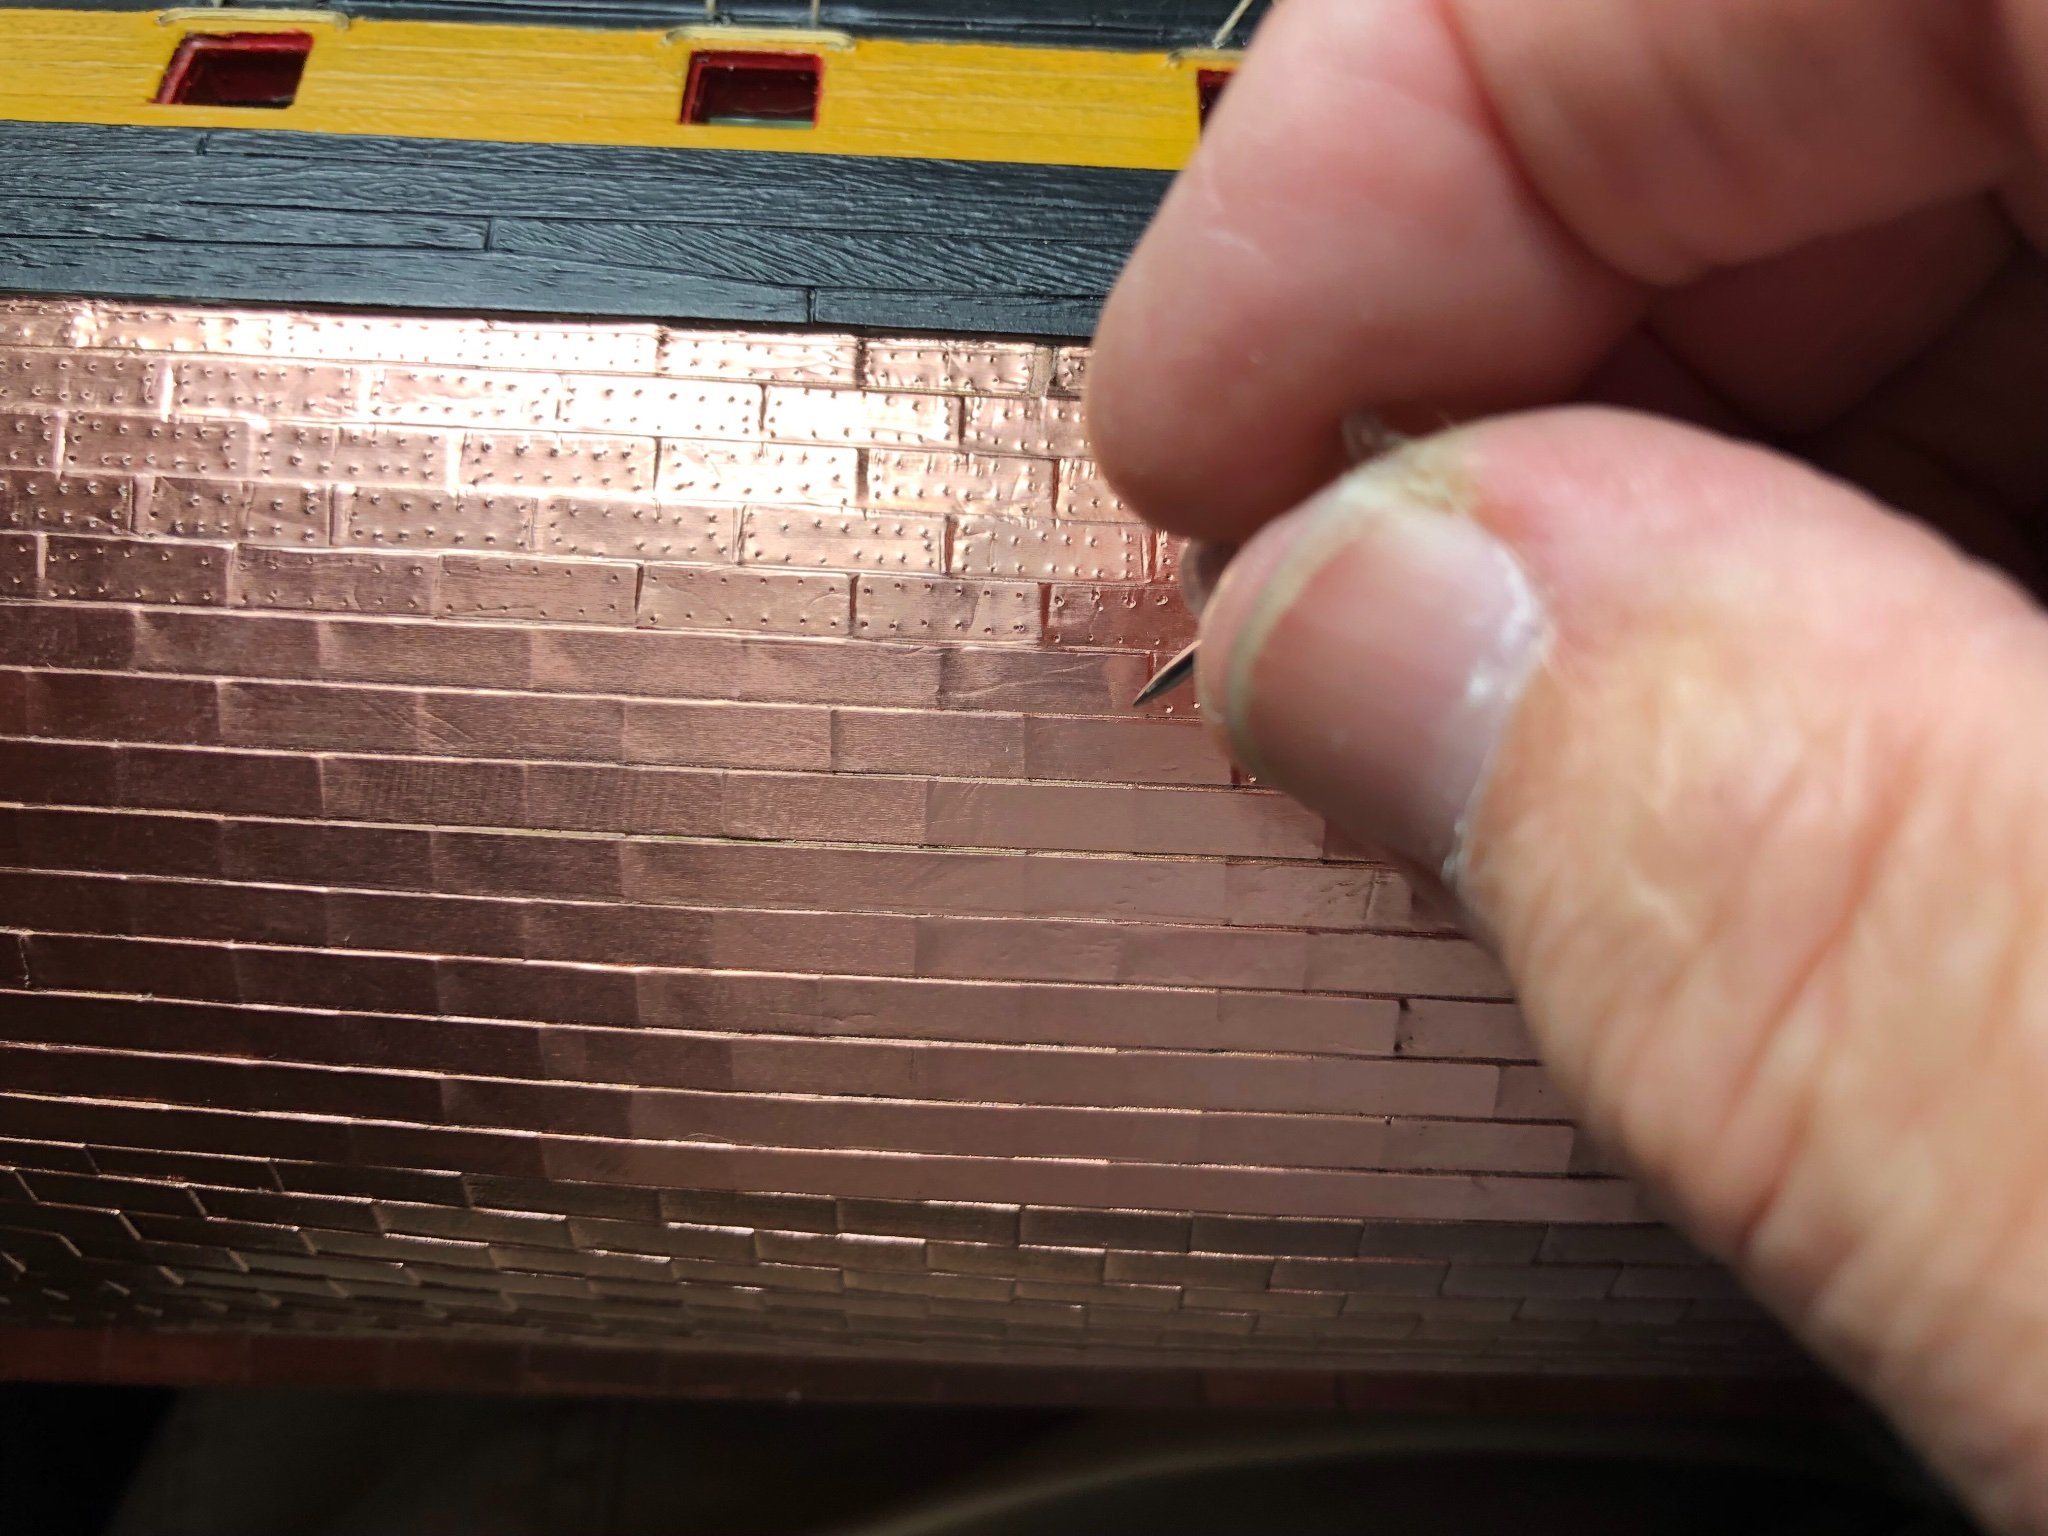
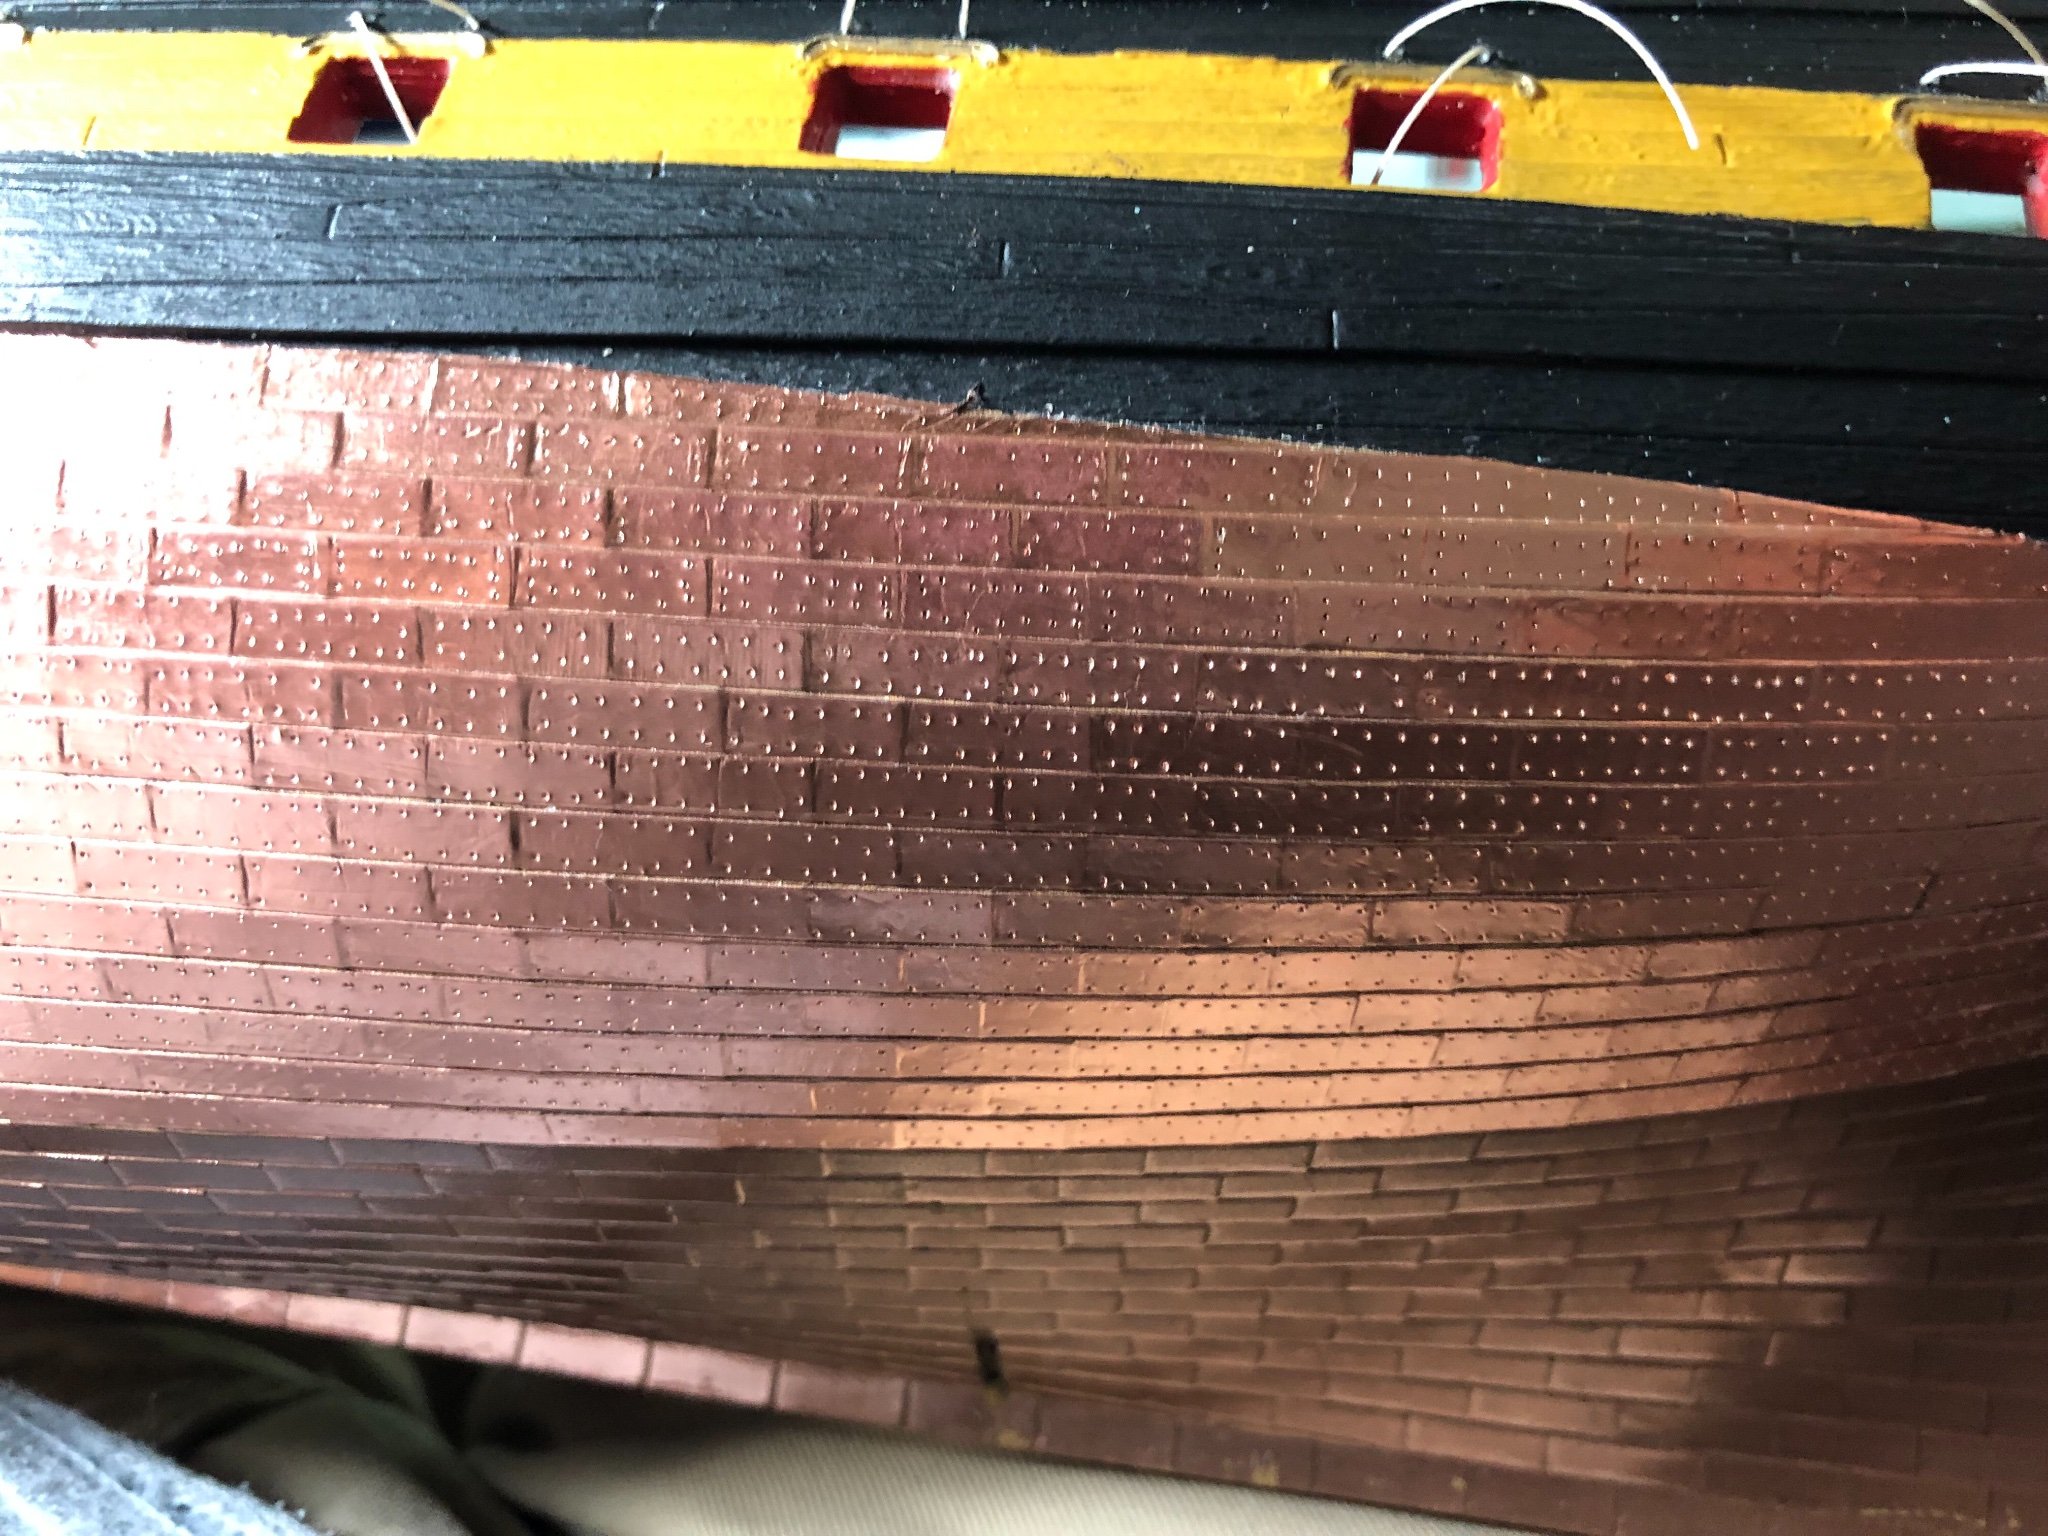
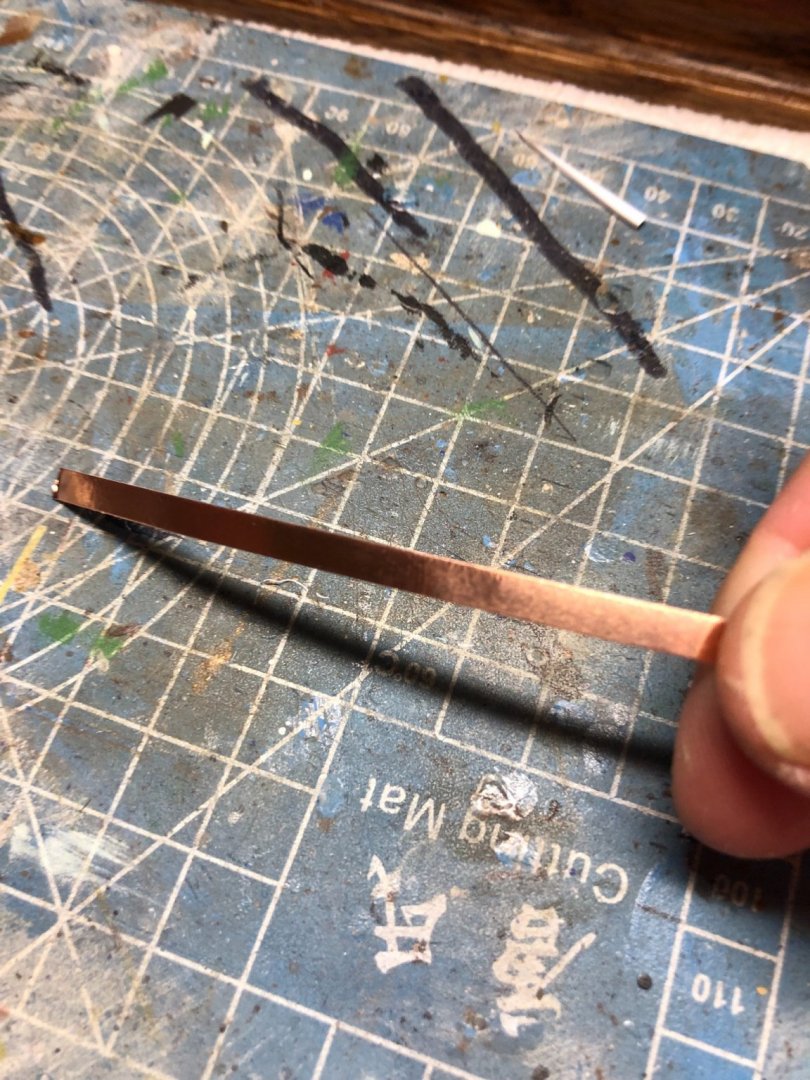
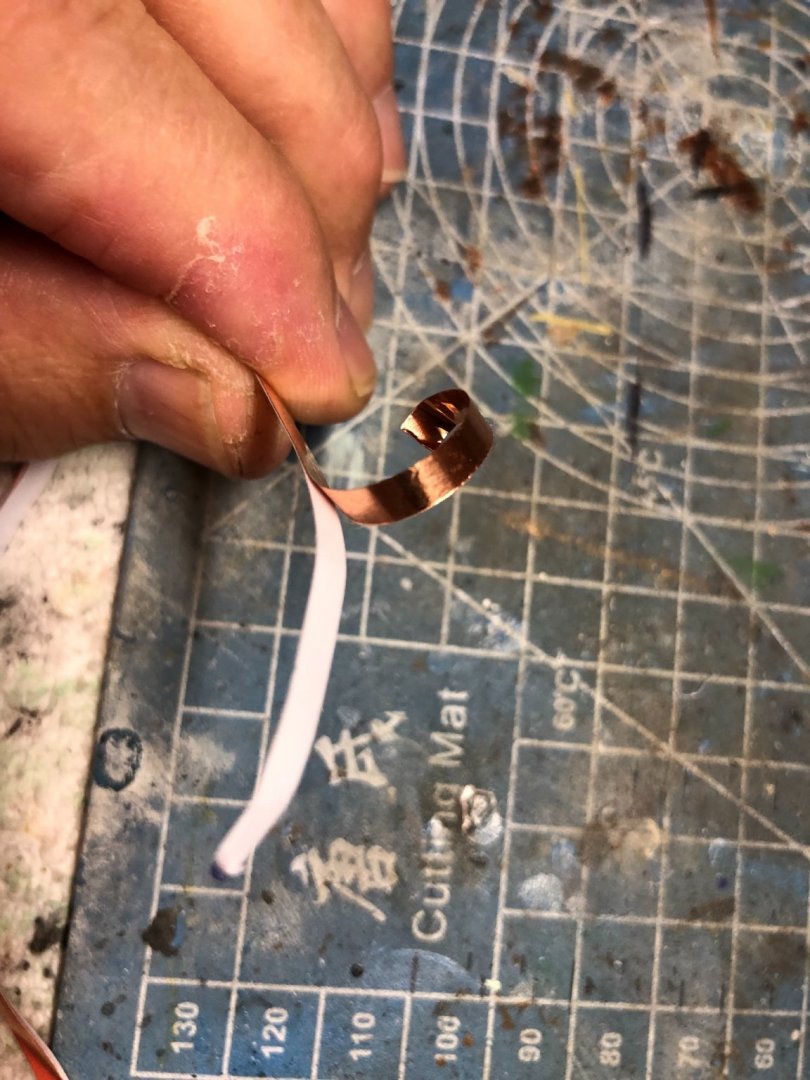
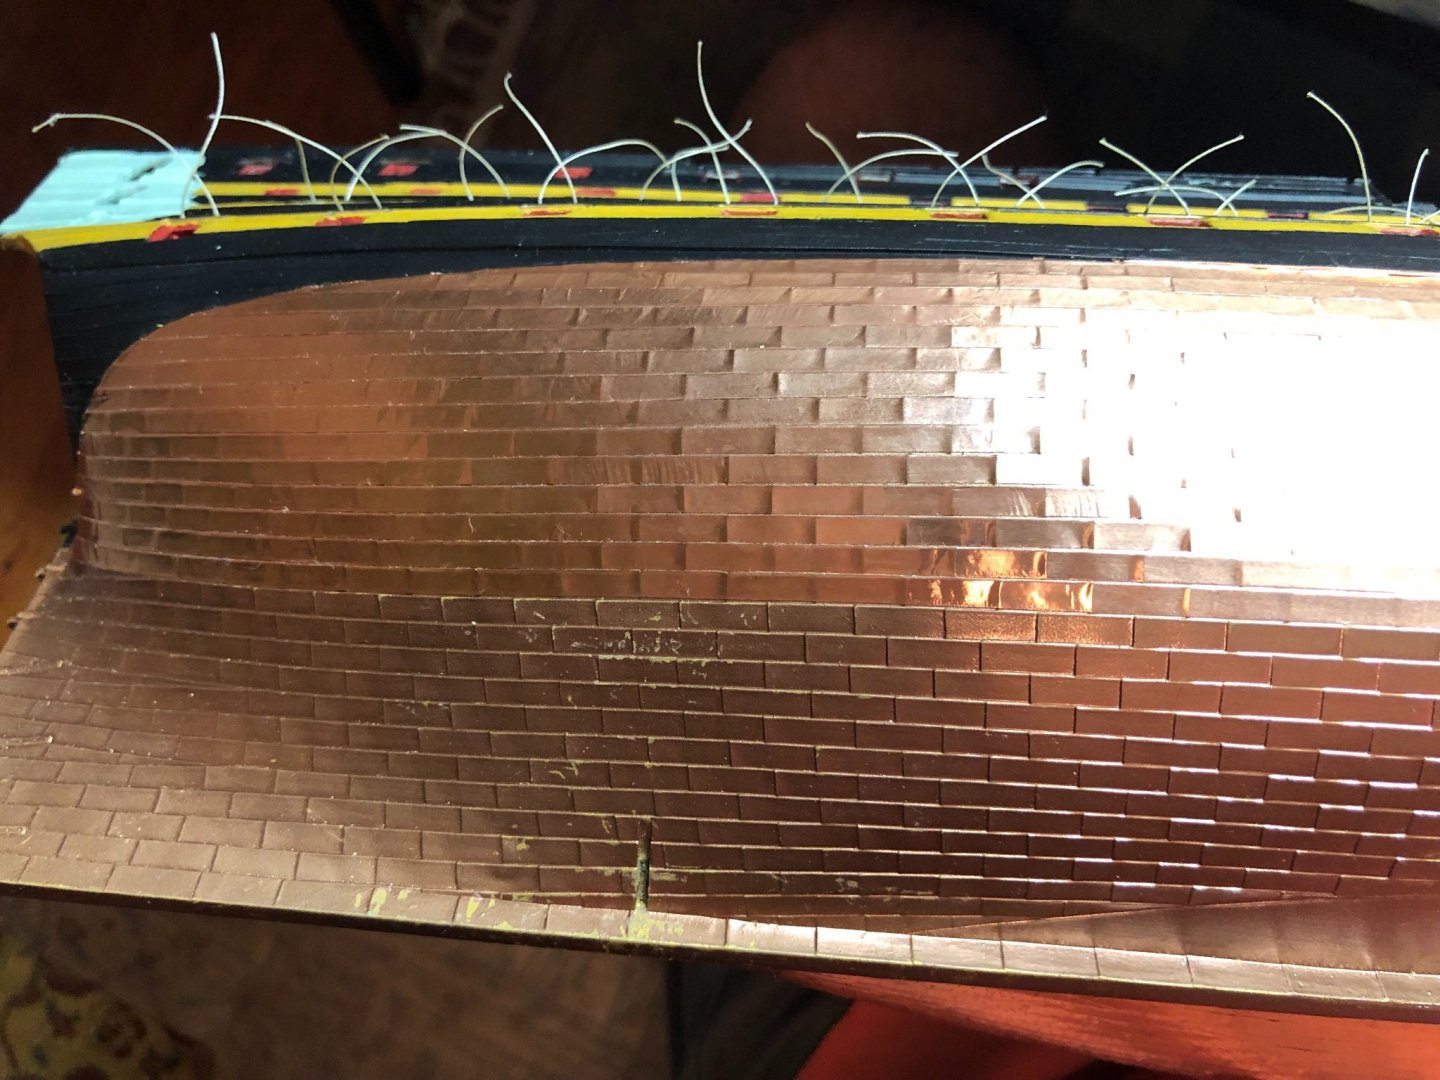
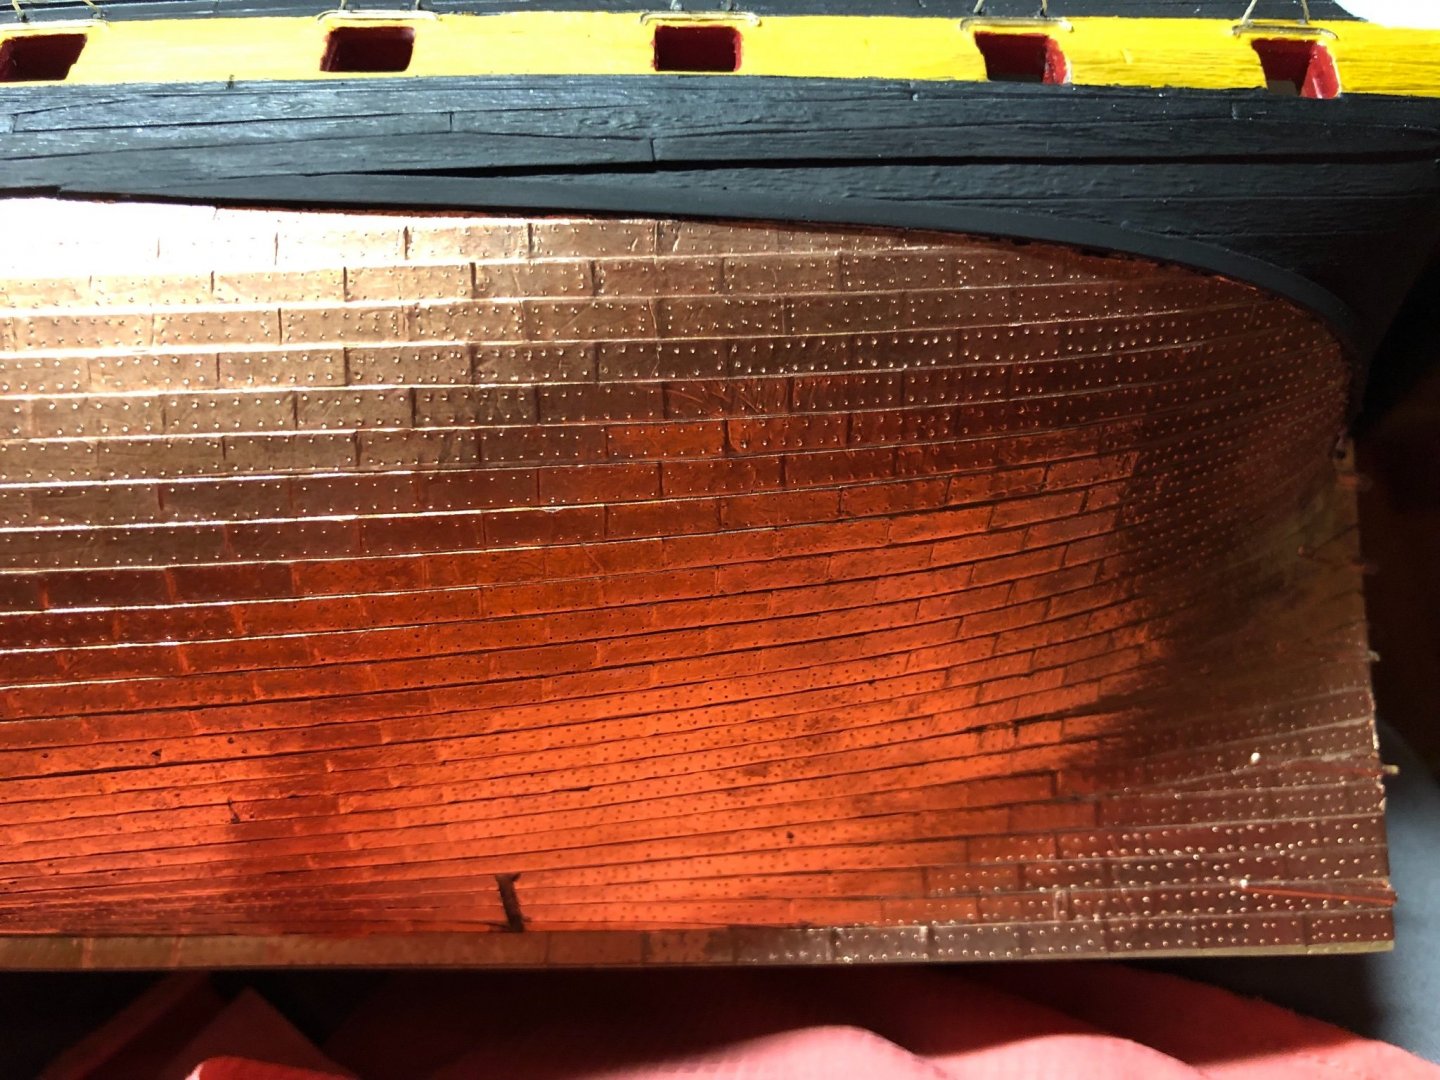
Sorry Kevin. Did not see this until now. Somehow I got signed out of the site. It is not difficult at all to do the copper. Maybe a 2 or 3. I read in Daniel’s post that you need 4mm copper tape. The plates on the Heller 1/100 are exactly 4mm wide, or tall I guess. I found it on Amazon. I put a copper spray paint on first so any tiny missed spaces would not be obvious. You then start at the top row of plates. Unroll a length of the copper tape, start at one end and slowly pull the backing off the copper as you press it to the row. It is kind of fragile so you have to be careful. If it breaks, which I have had happen a number of times, I use my exacto knife to cut a straight edge at the last plate and then simply start there again. I also my exacto knife to cut sharp edges at beginning and end. I wanted to give the impression of nail holes. I simply use a push pin and poke a series of holes in each plate trying to keep them somewhat uniform. Today I added a small strip of Evergreen as a border between the black and copper and painted it black thinking it gave a more finished look.


-
Thanks Kevin. That would be very helpful. If you don’t mind maybe just send me a couple pictures of either side. Front, middle, back I guess. That way it will be big enough to zoom in. Holes and other features should be the same on both sides. BTW Kevin I am venturing over to your side of the Atlantic next month (if Covid situation does not cause us to cancel). Going to be in Scotland for about a week. Will go through Heathrow to connect to Edinburgh. Finished the copper on the port side including “nail holes”. Trying to decide if I want to polish it to get the hand oils and smudges or just leave it. I know the Victory copper is not bright and shiny. I am going to put a small border strip of evergreen to separate the black and copper to give a more defined edge.

-
Examining the upper sides of my hull looking for the intentions where possible holes should be or where they were before I covered with Evergreen, I am discovering I will have to drill holes for these lines we are discussing. I guess I will refer to the different pictures in reference material for appropriate locations.
-
Dogged determination or needing to be on medication! 😀 By the way where did you go camping 12 hours from Ottawa? Sure it was beautiful.
-
Spending a lovely Sunday relaxing and applying copper tape to my hull. I wanted to add the appearance of nails to the copper but I do not have one of those handy dandy roller tools Daniel had when he did it so I am doing it the old fashioned way. Push pin one poke at a time (12 pokes per plate)! 🤪