HOLIDAY DONATION DRIVE - SUPPORT MSW - DO YOUR PART TO KEEP THIS GREAT FORUM GOING!
×


Bill97
-
Posts
2,704 -
Joined
-
Last visited
Content Type
Profiles
Forums
Gallery
Events
Everything posted by Bill97
-
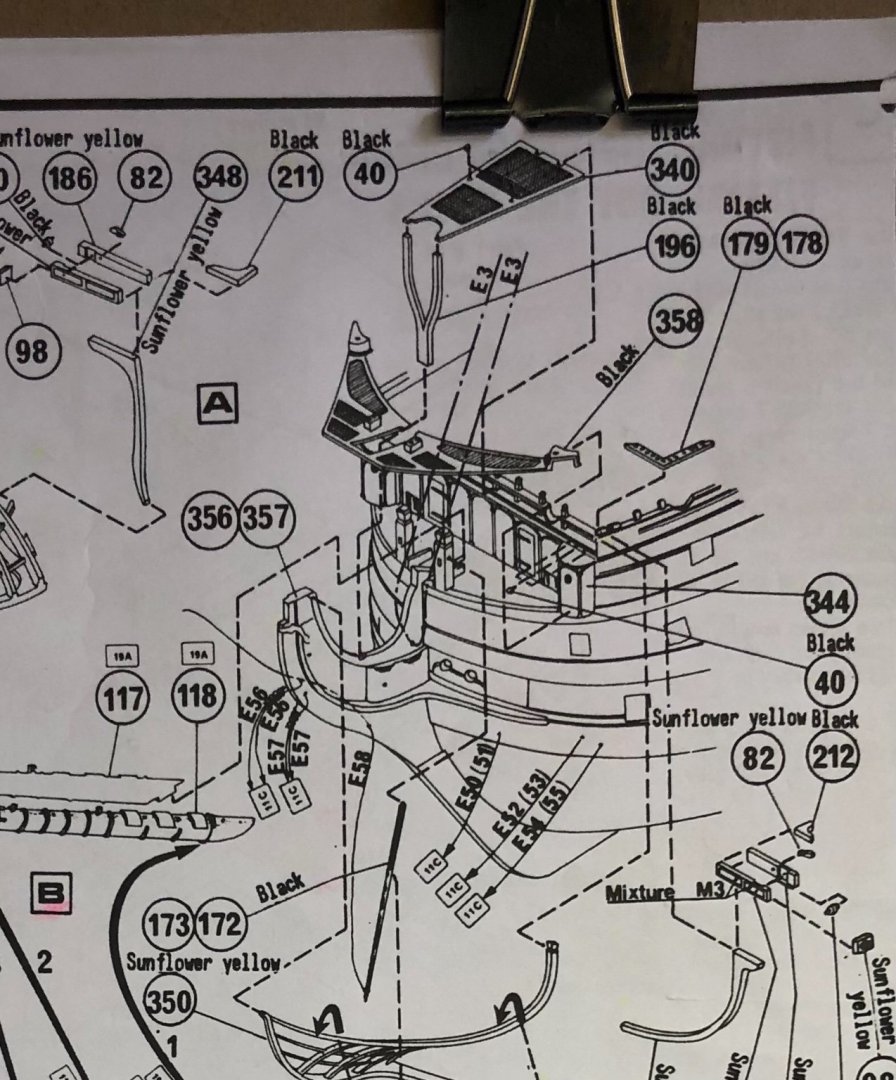
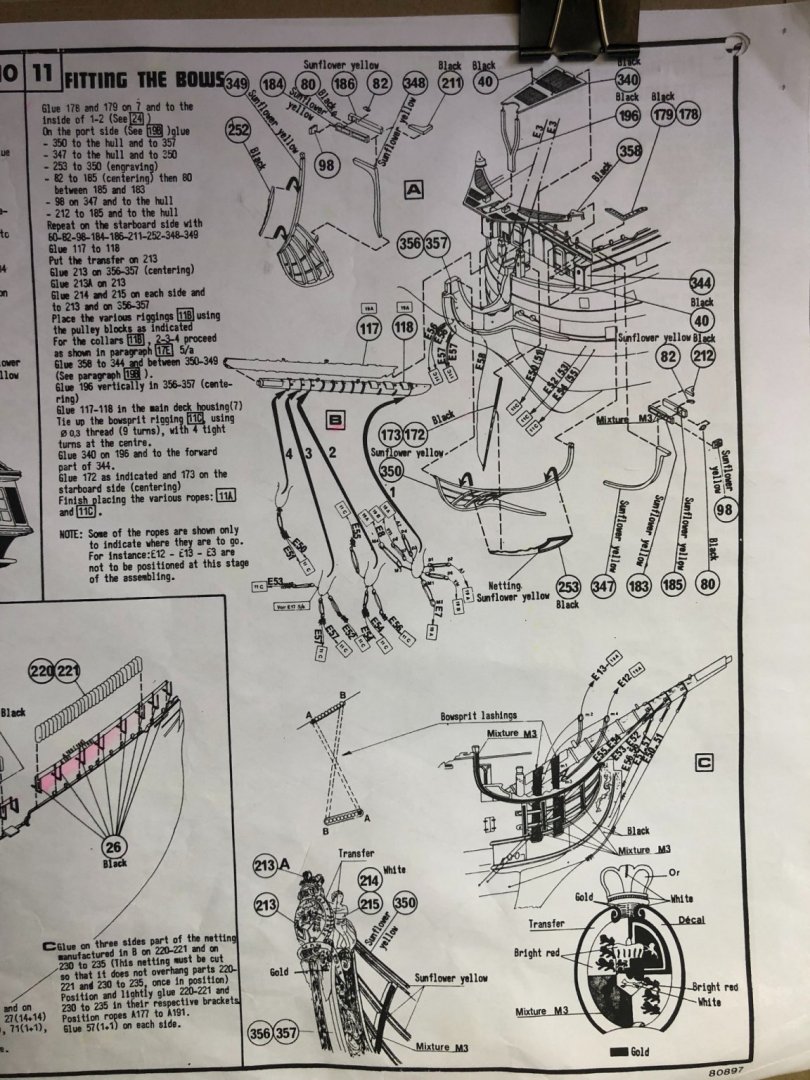
Ian in your previous comment you speak of the slots in the marine's walk. I am not familiar with the term. Are you referring to part #340 in the picture of the instructions? Heller calls it the bowsprit grating. Want to make sure I am following your advice.
-
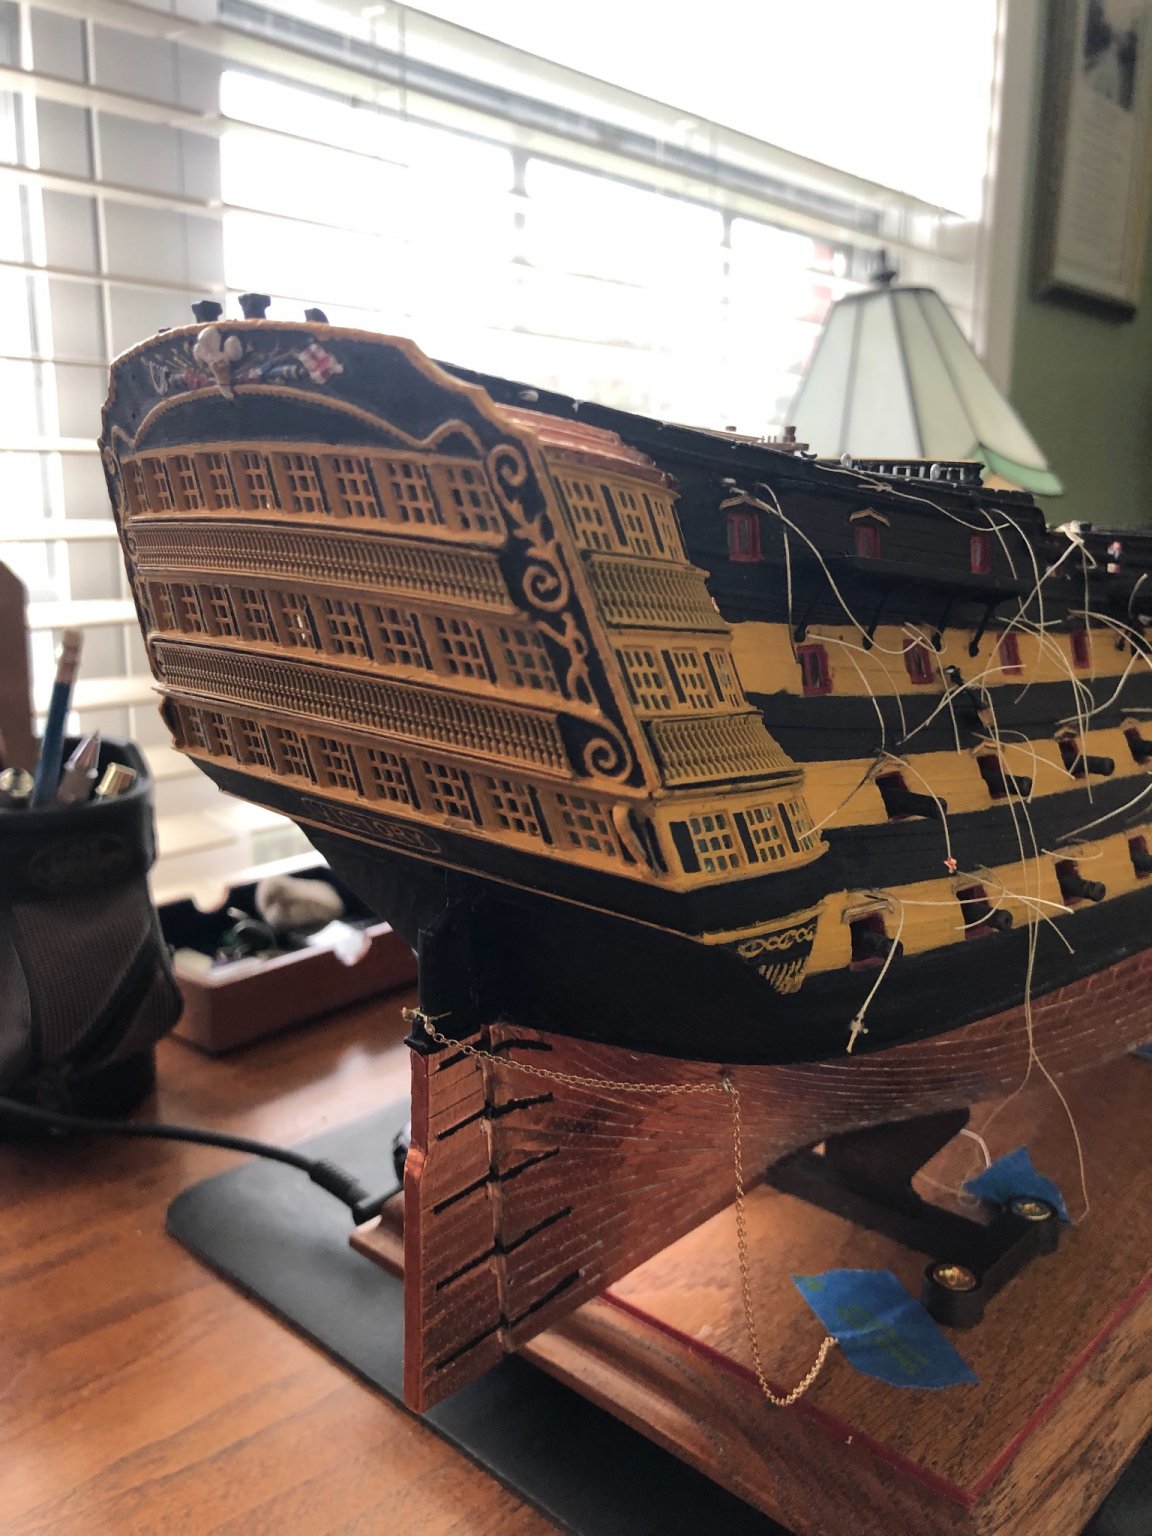
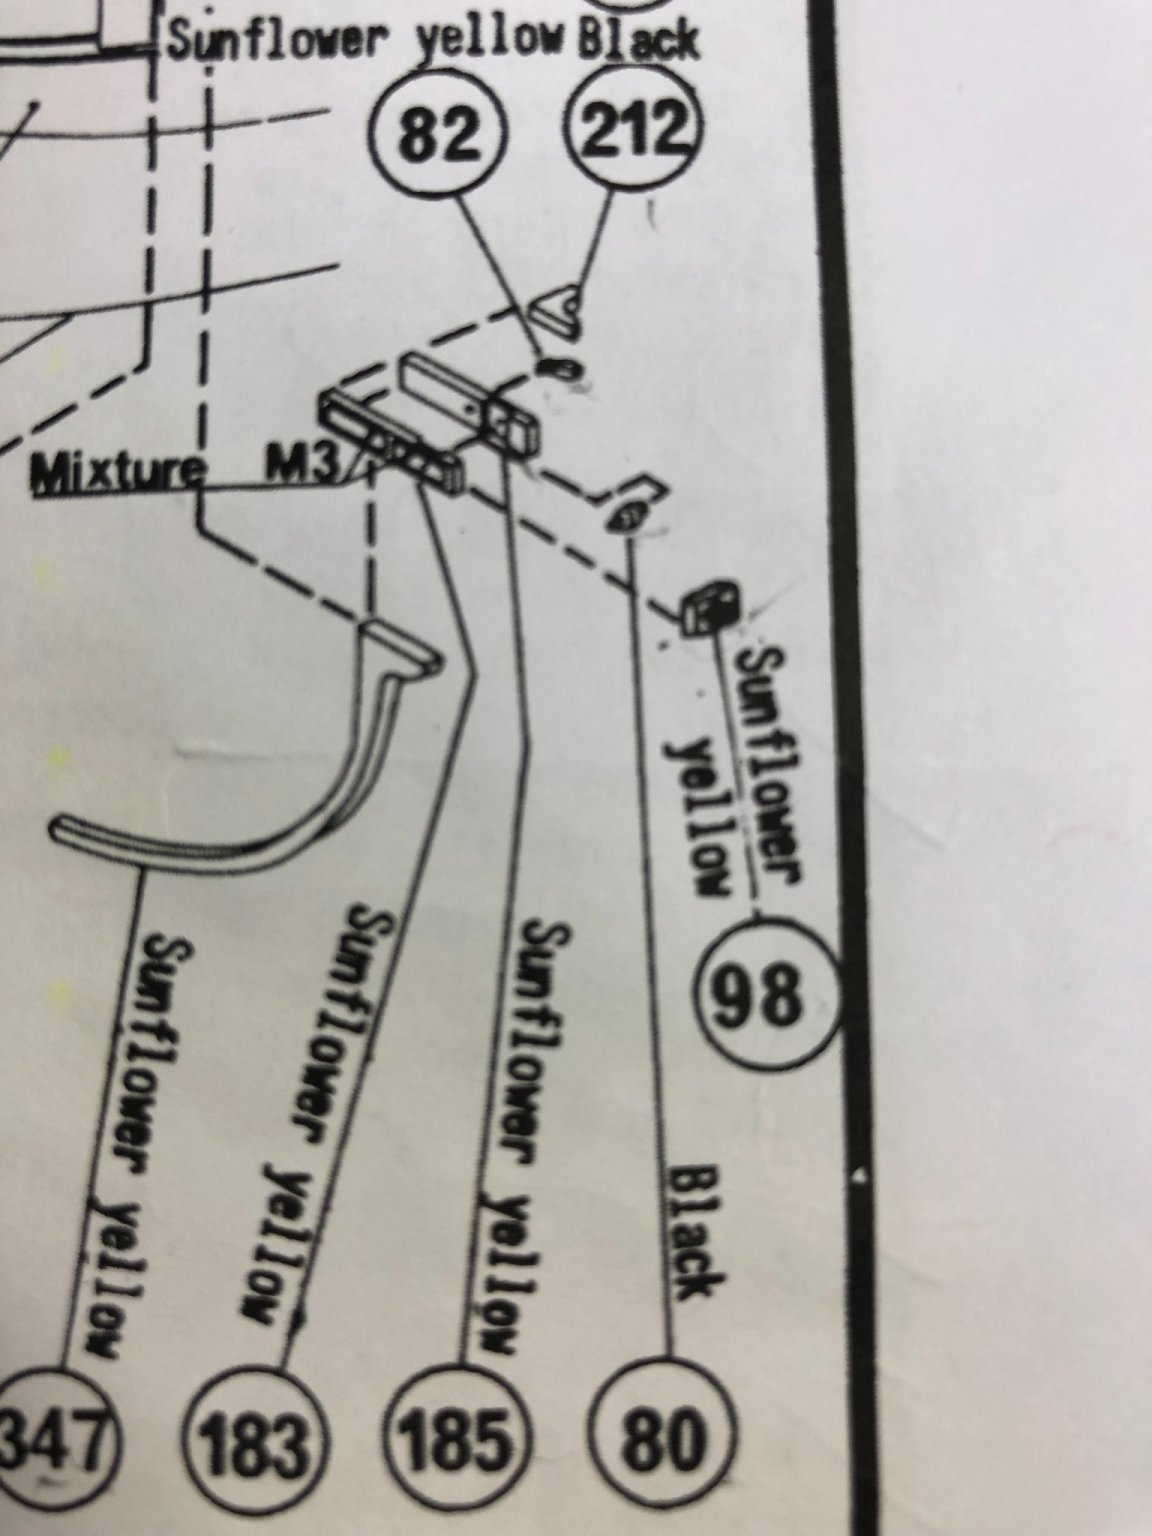
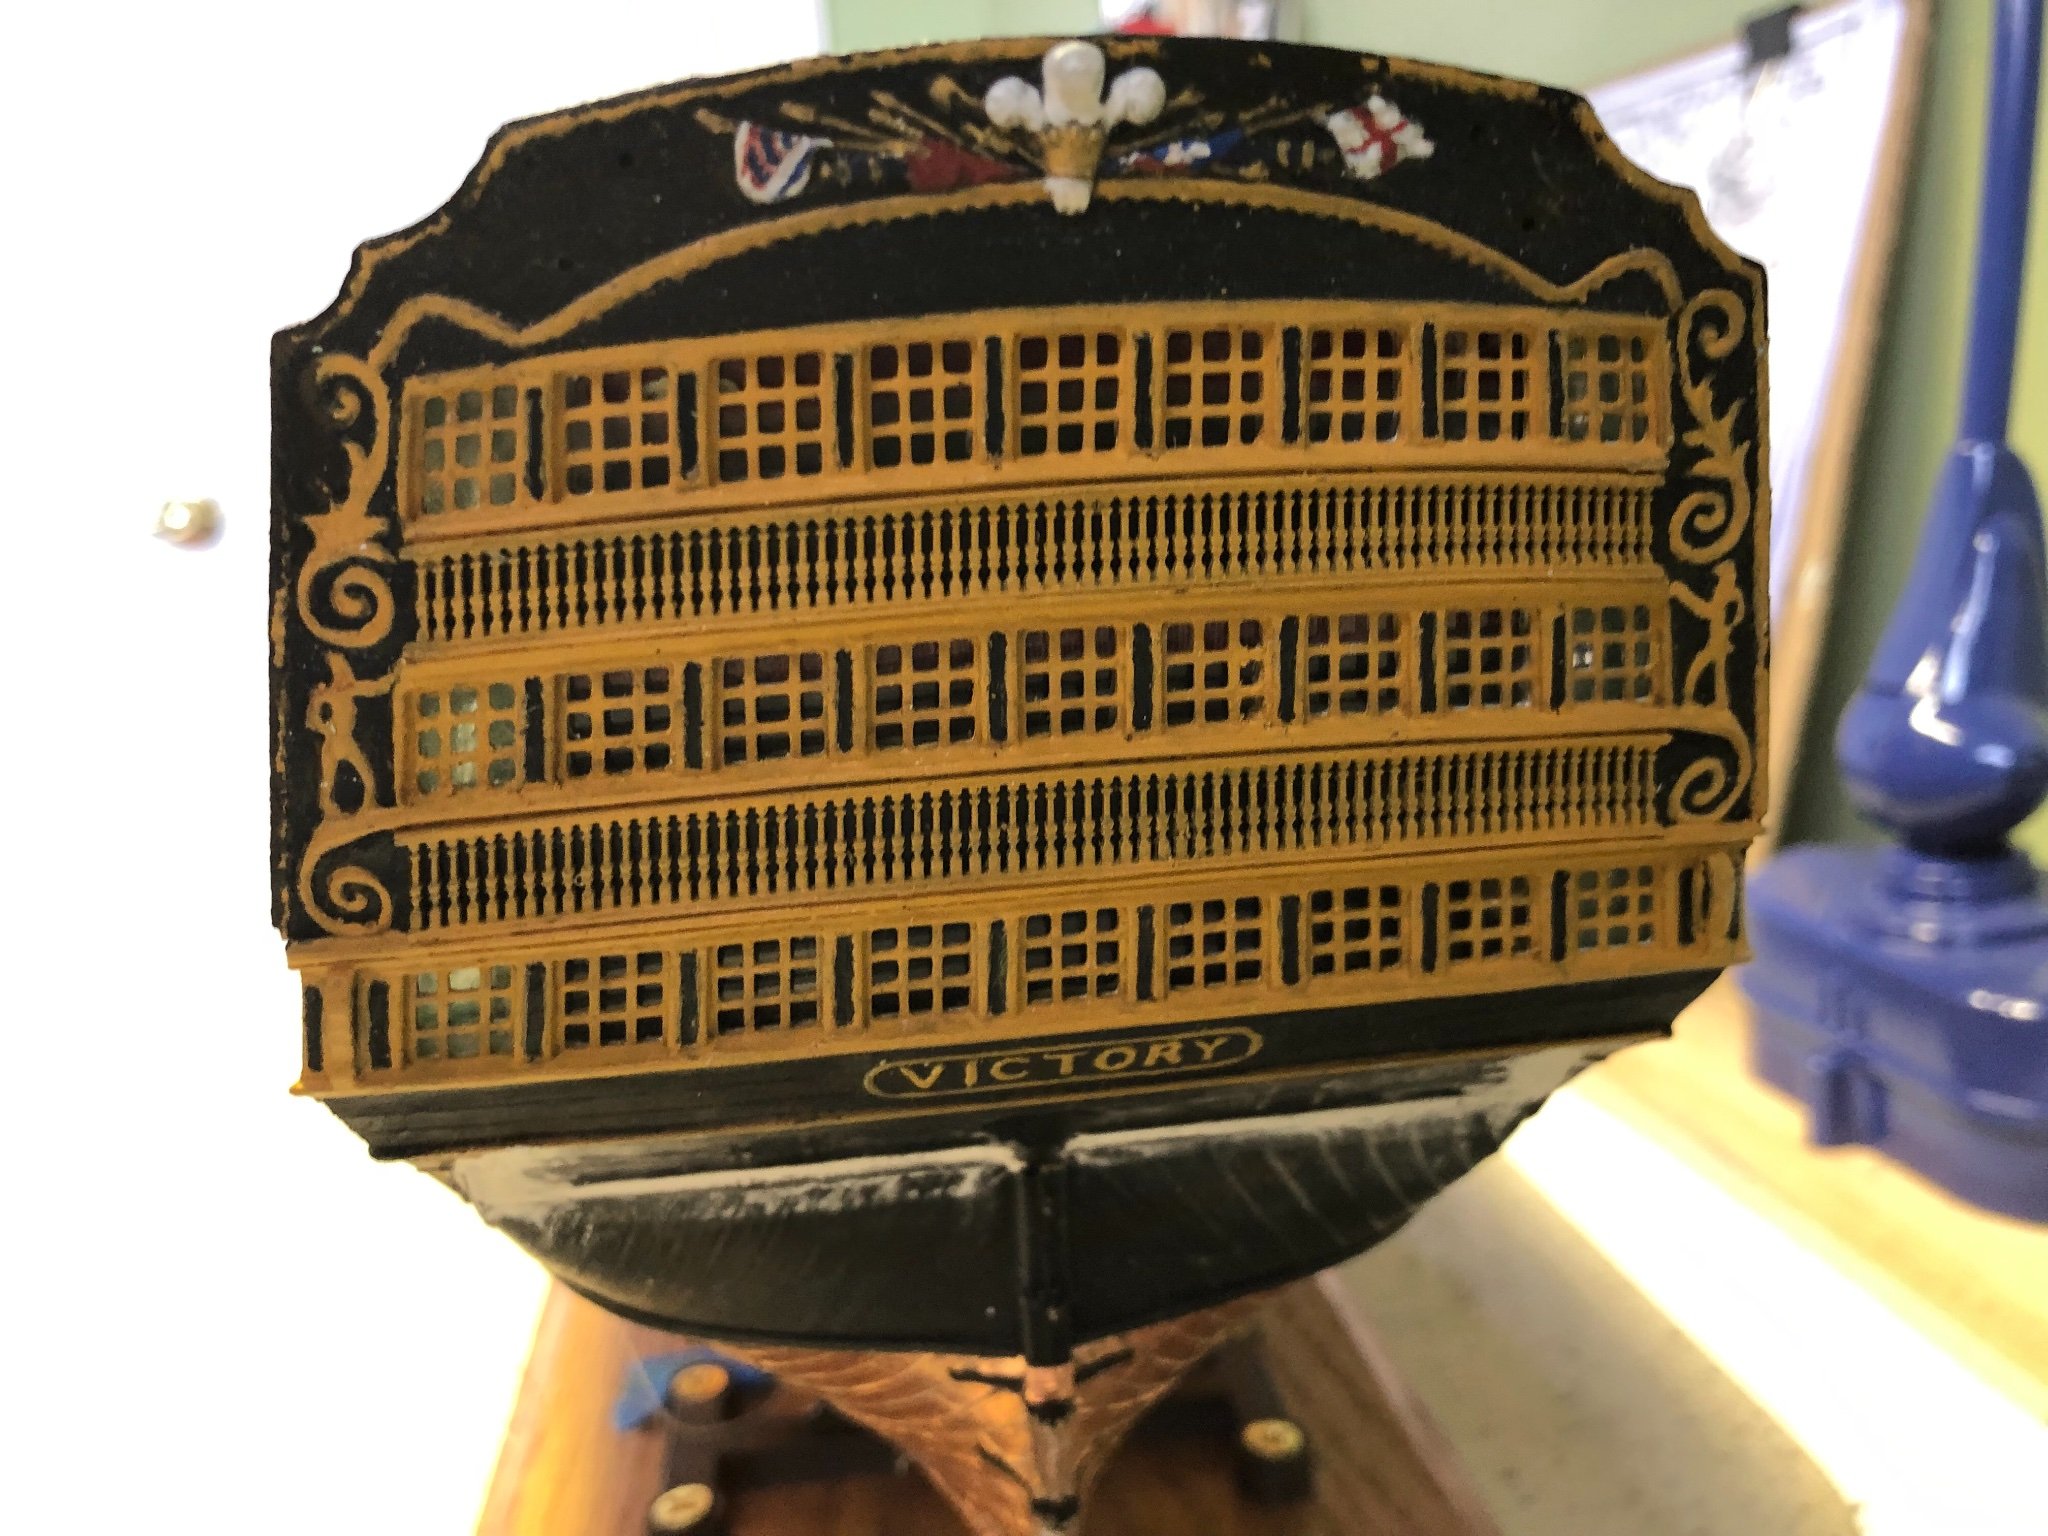
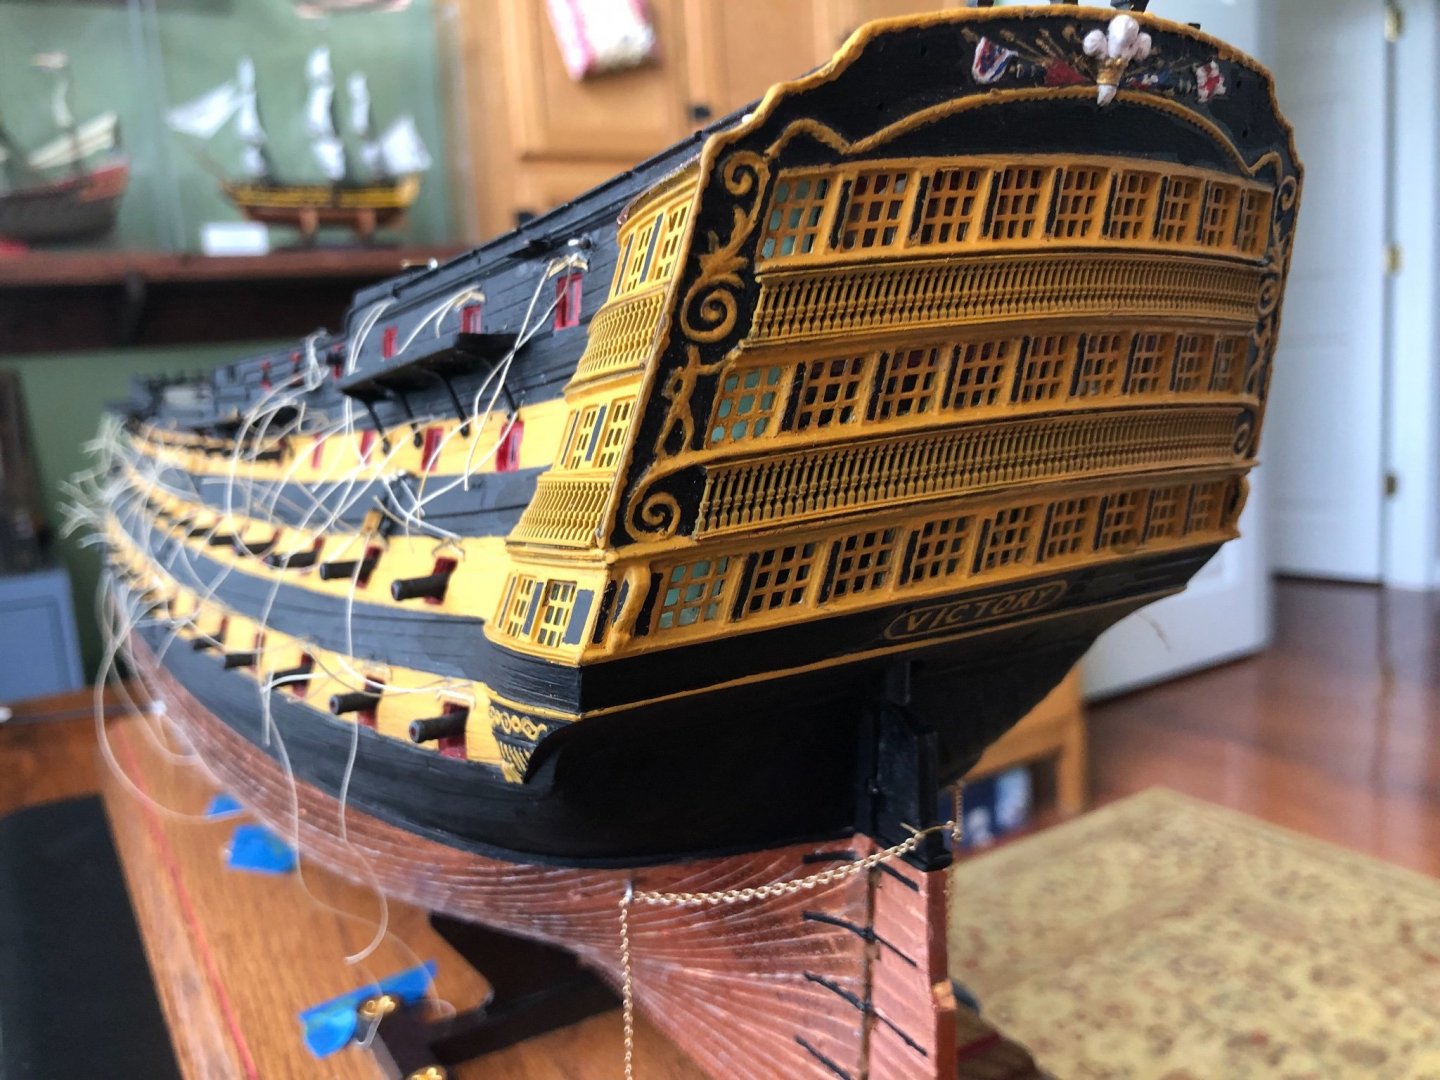
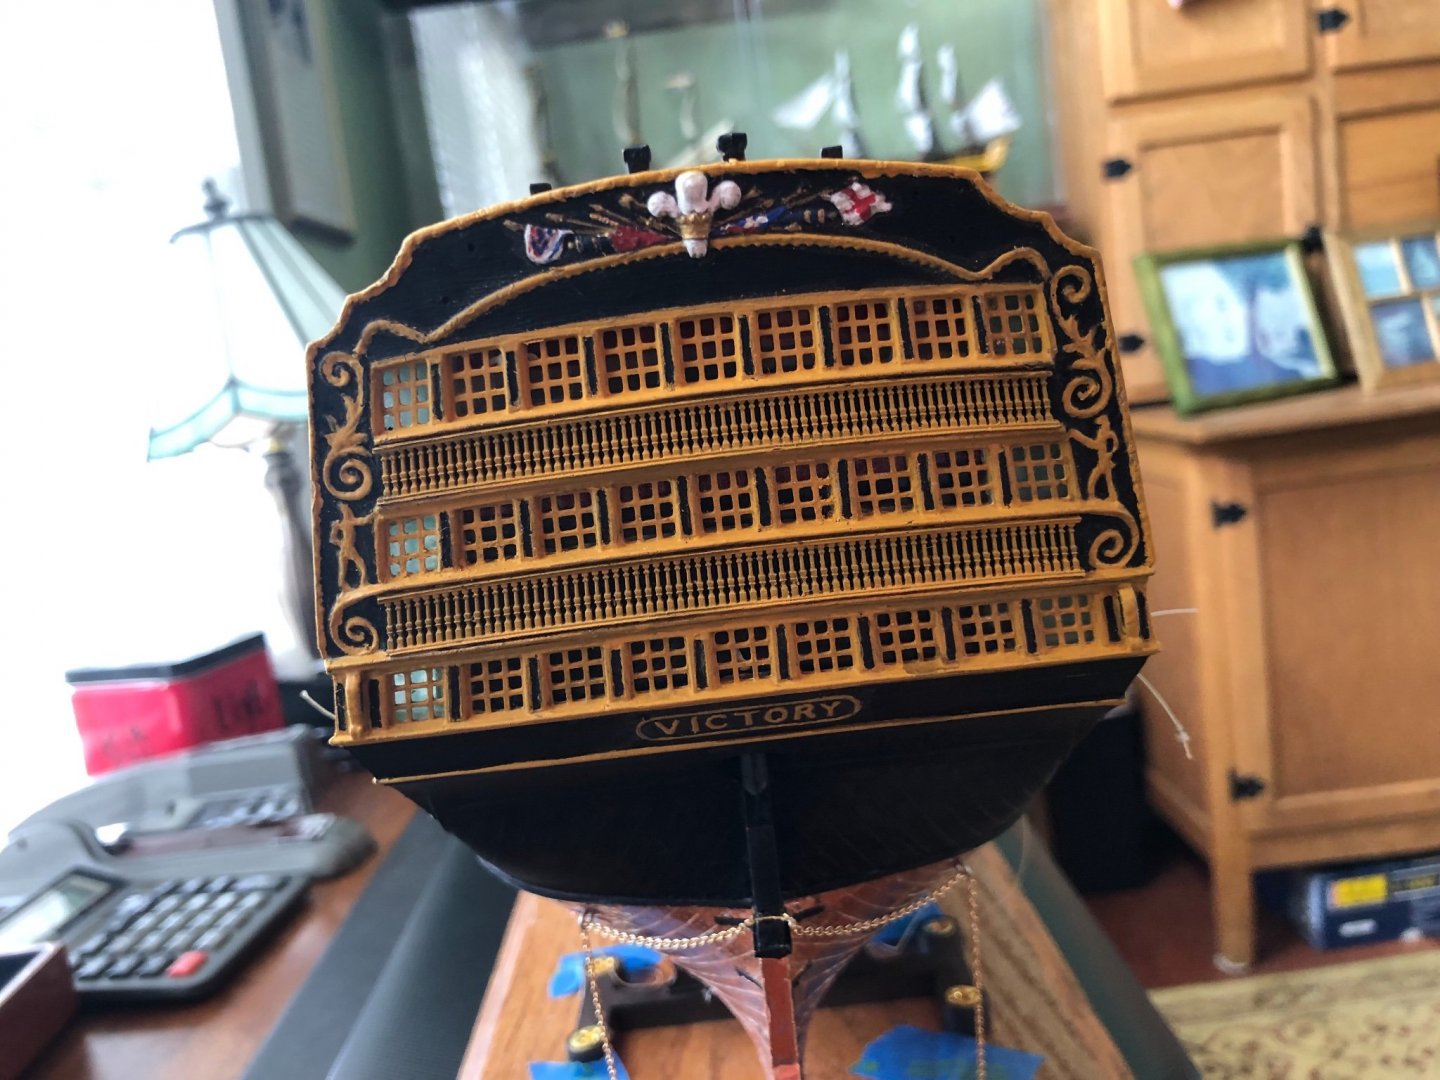
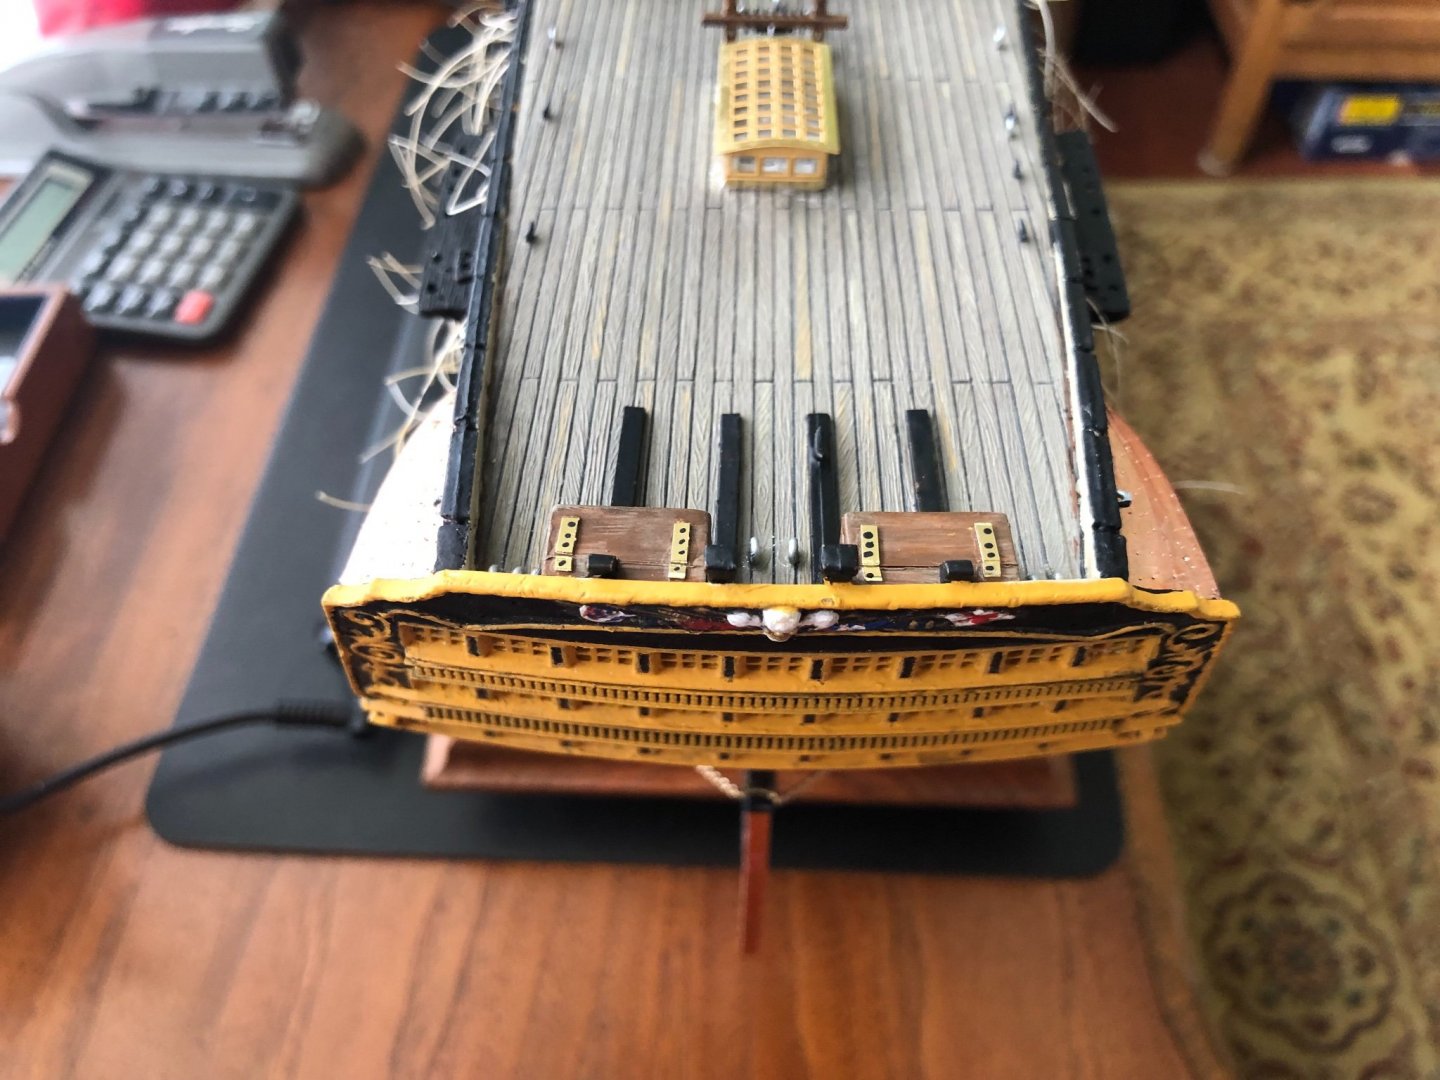
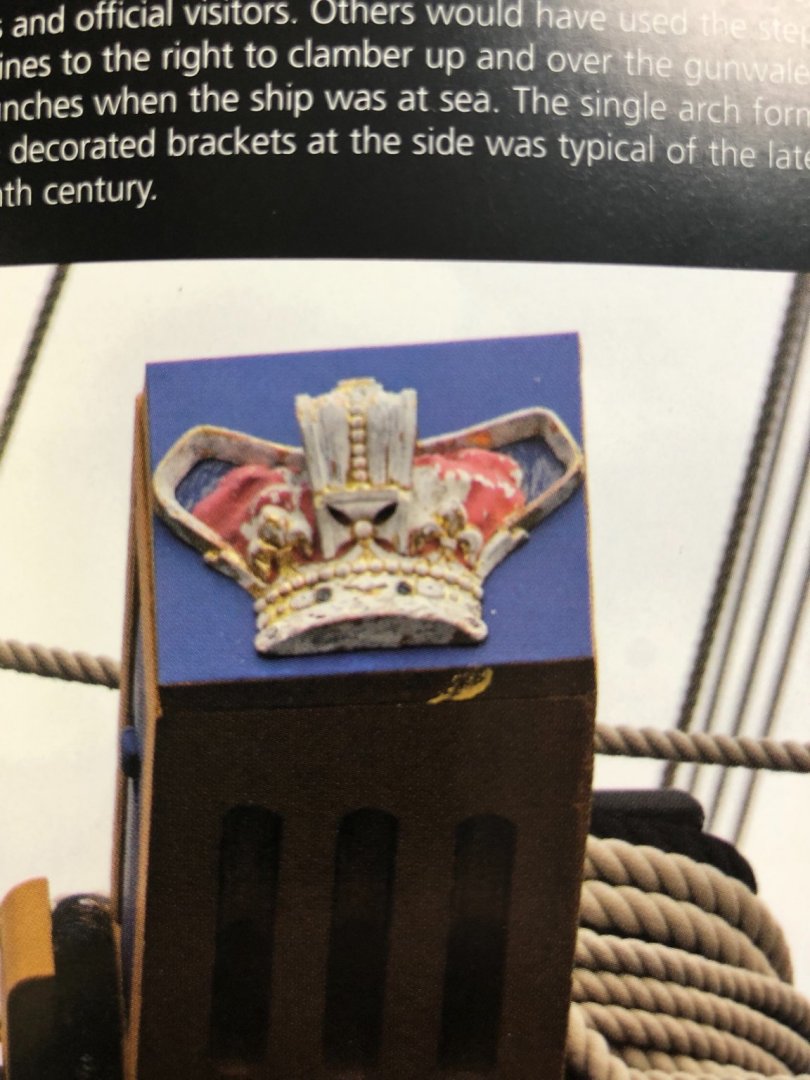
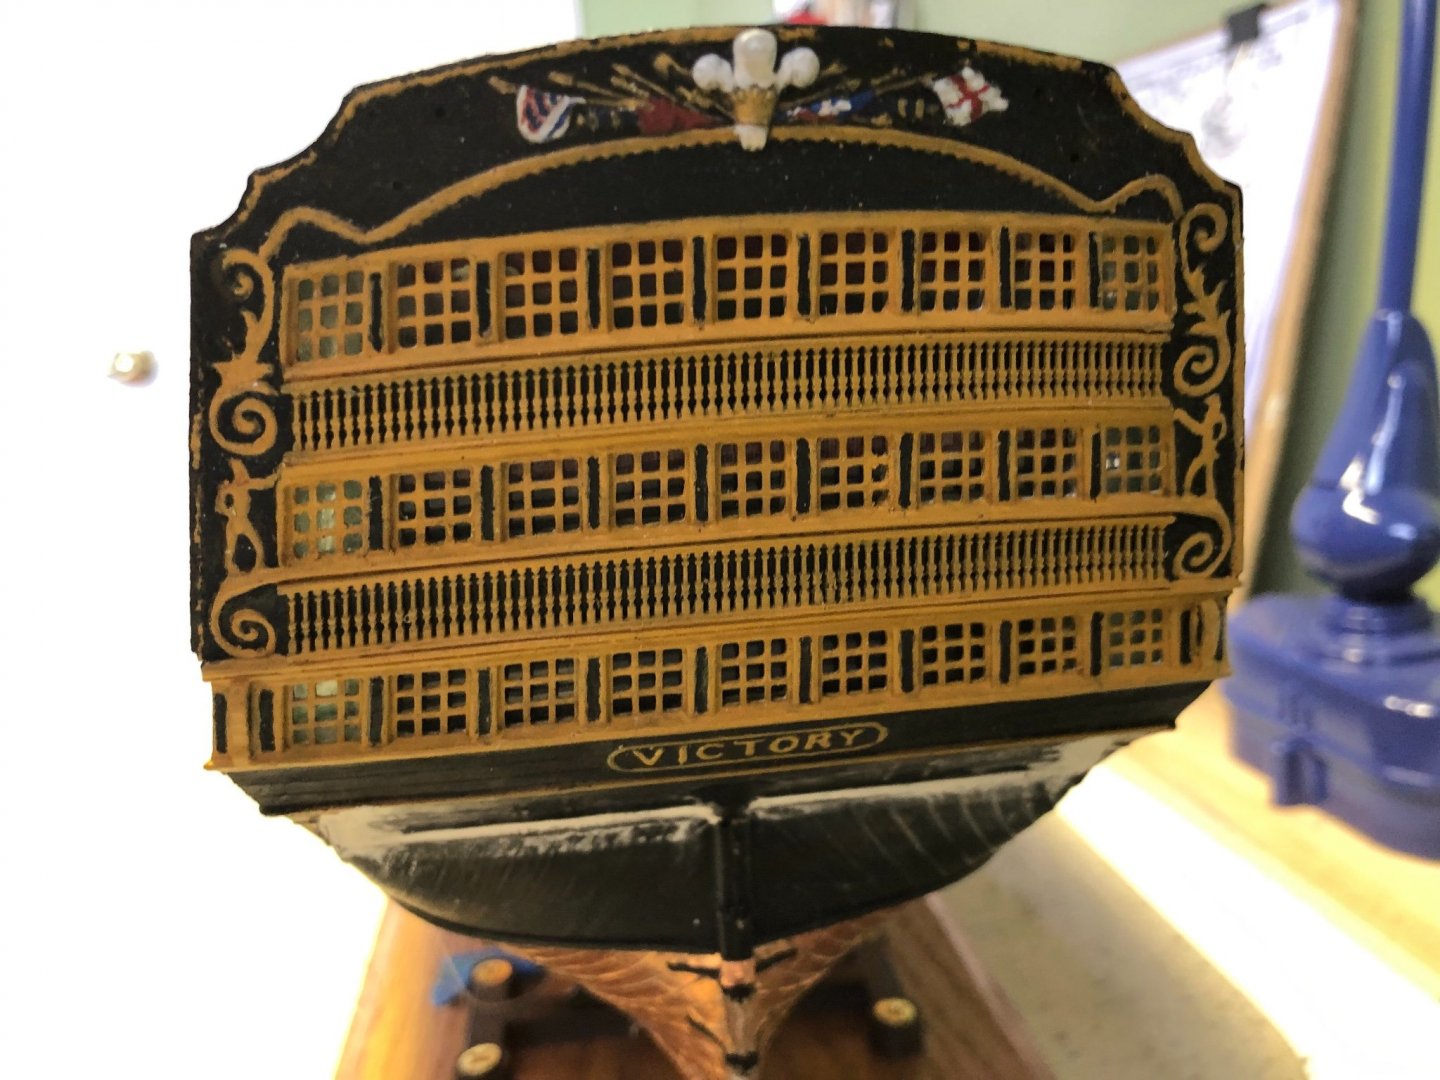
Well this is a disappointing and unfortunate first for me. Apparently I must have discarded the piece of sprue 8 (both) that had this part😟. Never done that before. I always make it a habit to examine each piece of scrap sprue prior to discarding it. Kevin in your photo it appears part 98 is in the general area of the ladders. I have passed that area and installed all the ladders so I can only conclude it went with the scrap pieces of sprue. Lessons learned! Keep all scrap pieces of sprue until model is completely finished. Fortunately it is not a critical piece, more decorative. I will just attempt to hand paint the crown on the end. On a happy note, I have completed the stern and quarter galleries except for the lanterns which I plan to hold off on until closer to finish.

-
Thanks Kevin. I will look again. If it is on yours it has to have been on mine. Hope I have not accidentally discarded it when I cut off other pieces.
-
Thanks Ian. All the help is certainly appreciated. Yes I did get Daniel’s knight head. Will study all your suggestions.
-
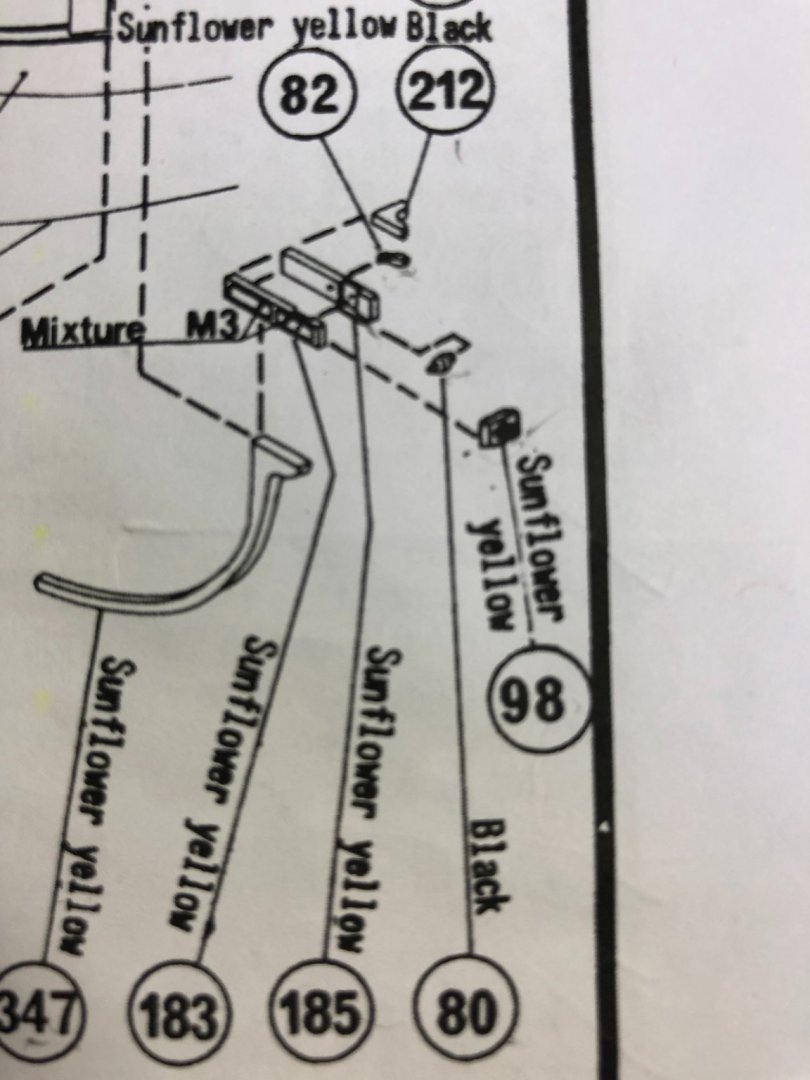
Kevin when you get a chance could you check your kit to see if it has a part? I am searching for part #98 (see photo). It is called the Half Crown and is supposed to be on pack #8. I have scanned it and all the other packs and don’t find it. Curious if I am just not seeing it, I lost it somehow, or Heller no longer uses it. I am assuming this is what it is. Thanks
-
Kevin when you get a chance could you check your kit to see if it has a part? I am searching for part #98 (see photo). It is called the Half Crown and is supposed to be on pack #8. I have scanned it and all the other packs and don’t find it. Curious if I am just not seeing it, I lost it somehow, or Heller no longer uses it. Thanks
-
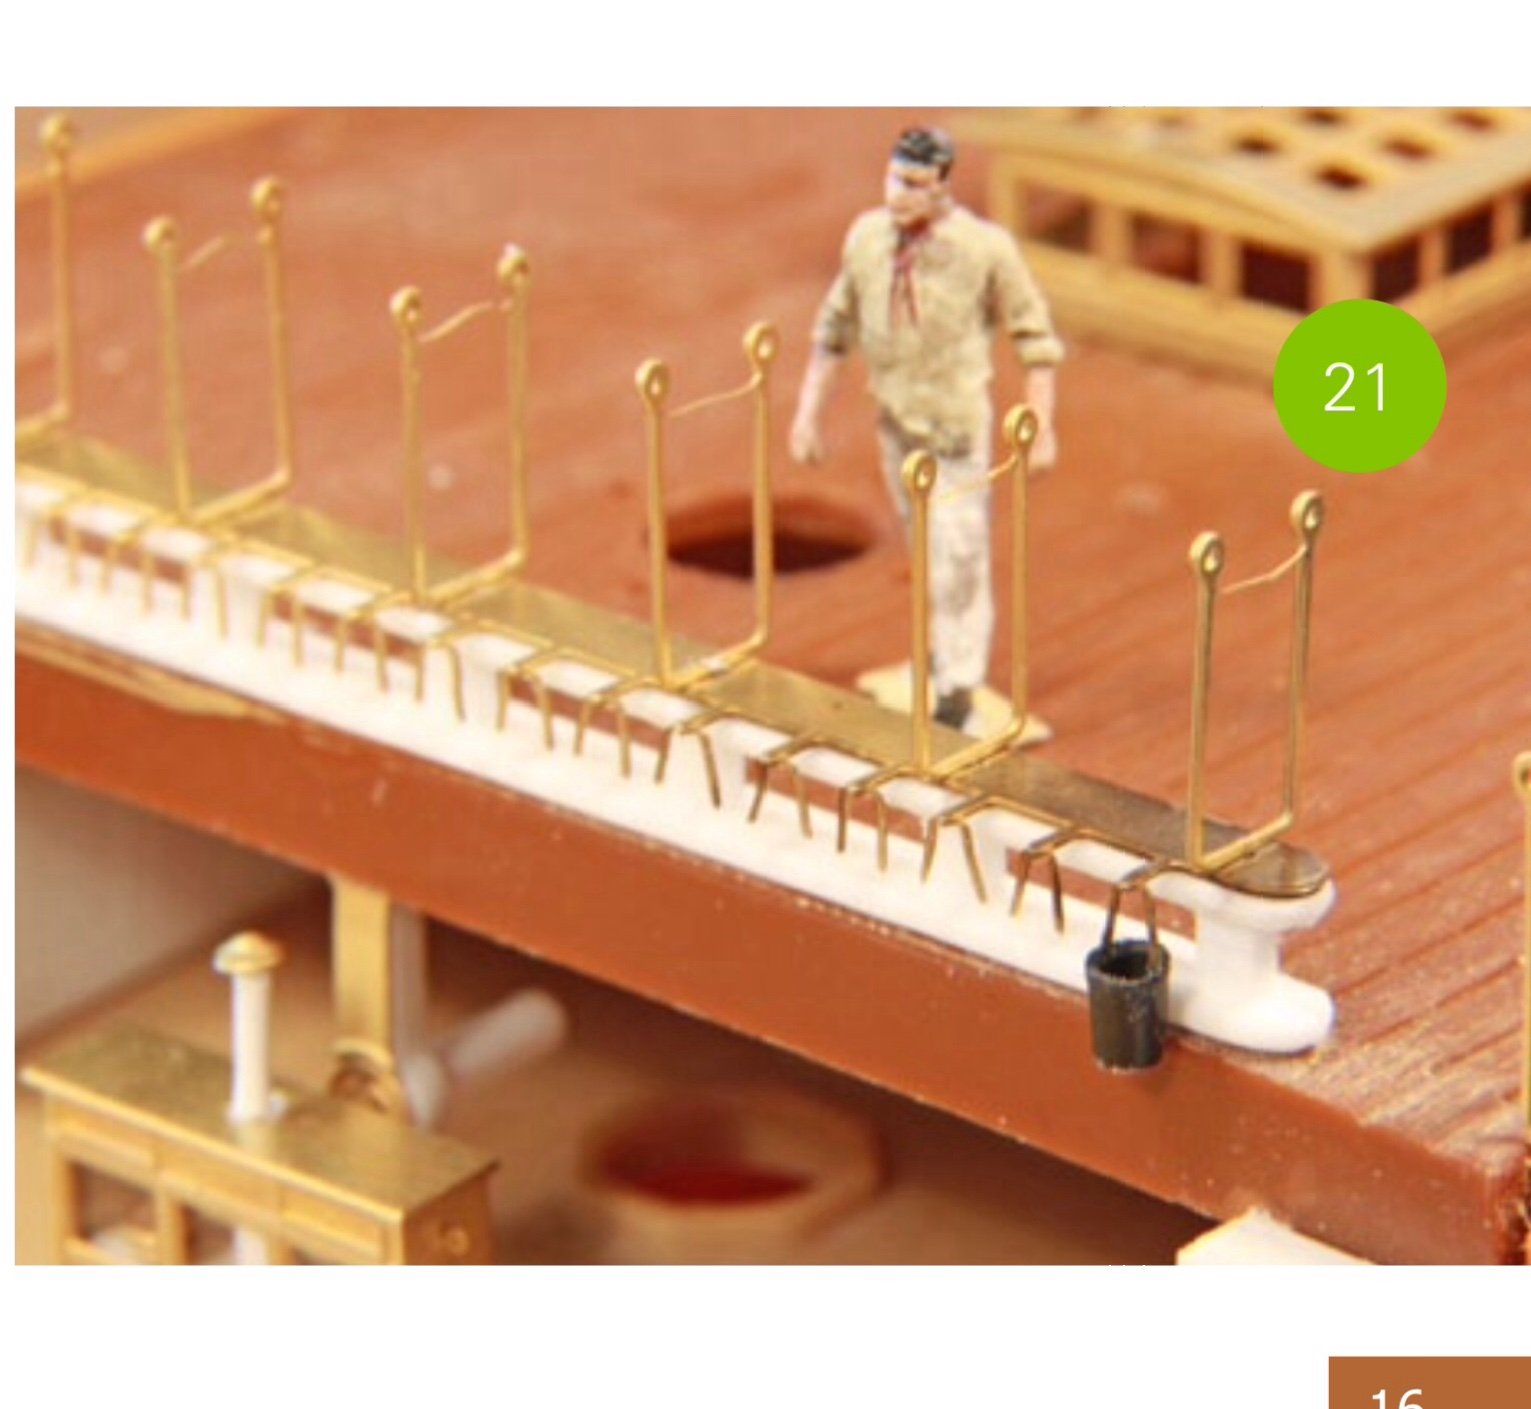
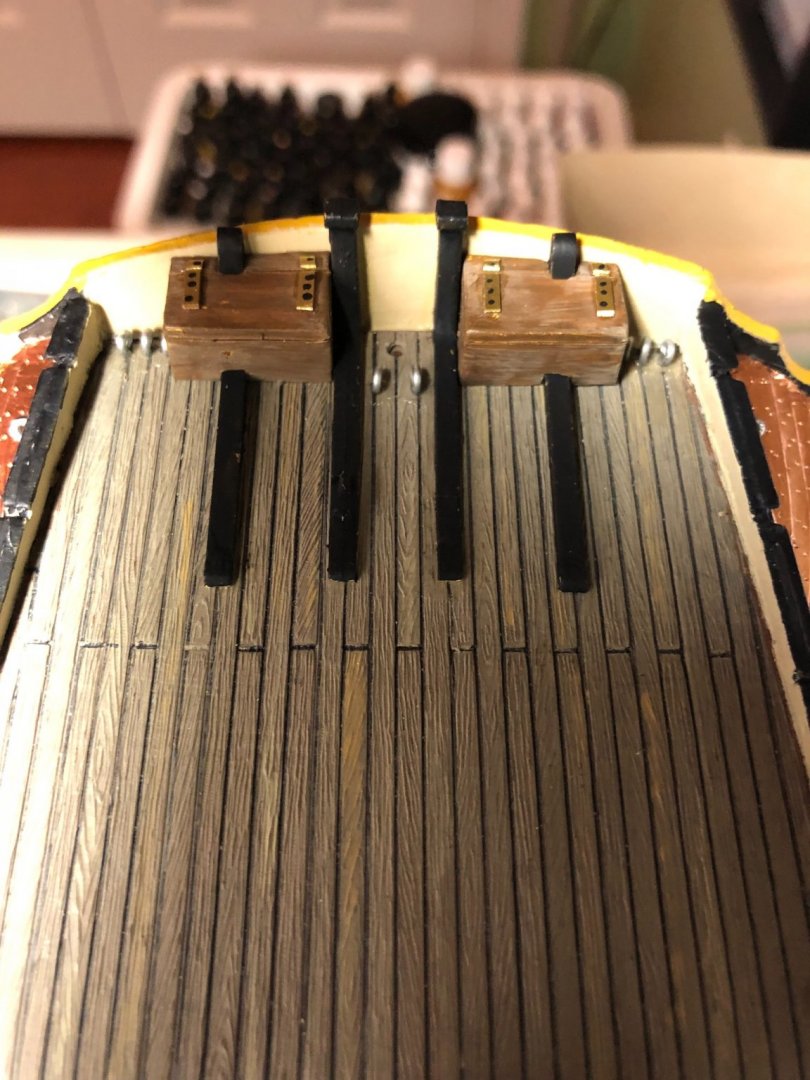
Well heck Ian. Now you tell me.😀 Well they are in and done now. Still look better than the plastic cubes supplied with the kit. I think I read somewhere that Admiral Nelson tried the idea of hinged wooden chests to protect the flags from weather before switching to the cubby hole idea. 😉 I think my ship is the version during that week are two he used the chests. 😀 Think that sounded convincing? Now on to this mess!
-
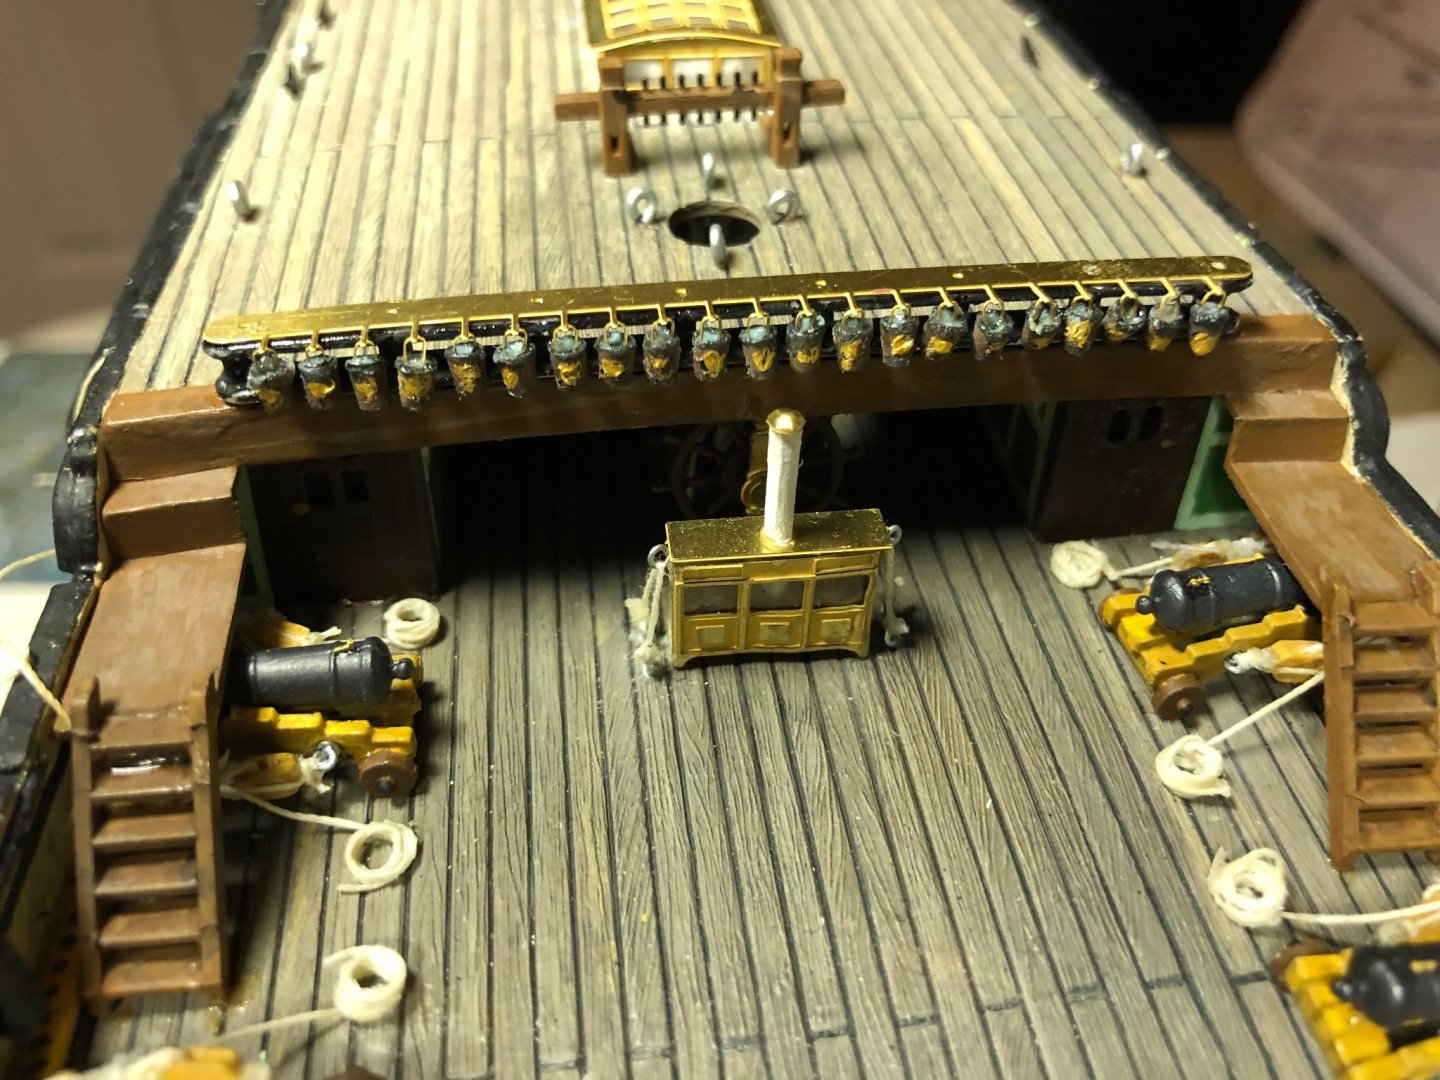
Ok I was hollering before I was really hurt! 😊 once I looked closely at Daniel’s picture I saw he put the little brass wires inside the buckets. I was trying to attach the little wires to the outside of the buckets. That just was not working. Once I saw Daniel put them on the inside of the bucket wall I simply put a touch of CA in the bucket and fed to the two little wires in and used my tweezers to press them apart inside. That worked great. Got that done now and Daniel’s skylight. Also dressed up the storage boxes at the back with some brass hinges.


-
OK guys I am pulling my hair out today. I did all the steps in Daniel’s instructions for Plate 4 and painted all my little water buckets. I began the process of attaching the buckets to the tiny brass wires that make the bucket handles. Began might not be the appropriate term here! I am sure I am to do this using CA glue but I can not establish an effective way to do it. For any of you who have used Daniel’s Plate 4, how did you attach the little tiny water buckets.

-
Woo Hoo! Some secret family member has already checked Heller Soleli Royal off my Christmas wish list. That means the kit will be under my tree Christmas morning! Of course it will go in my stash until I finish my HMS Victory someday. Hope you guys are still around for advice.
- 2,696 replies
-
- 6
-

-
- heller
- soleil royal
- (and 9 more)
-
Yes Marc, I have definitely booked your build blog for future reference per chance anyone in the family picks up on my Christmas gift hints
- 2,696 replies
-
- 4
-
-
- heller
- soleil royal
- (and 9 more)
-
Marc I know I still have quite a ways to go on my Heller HMS Victory. And by the way thanks always for your helpful comments on my build blog. But I need your opinion about this model you are building. Would recommend or discourage me from putting the Heller 1:100 Soleli Royal on my Christmas wish list? Now that I have gotten so engrossed in building a model the size and detail of the Heller Victory I don’t think I want to go back to smaller, less detail models. I think the work you have done on your build is incredible. I have read a number of times that the Victory and Soleli Royal models are in a class by themselves. Your thoughts? Or would you recommend something else? Maybe something you saw at the show?
- 2,696 replies
-
- 4
-
-
- heller
- soleil royal
- (and 9 more)
-
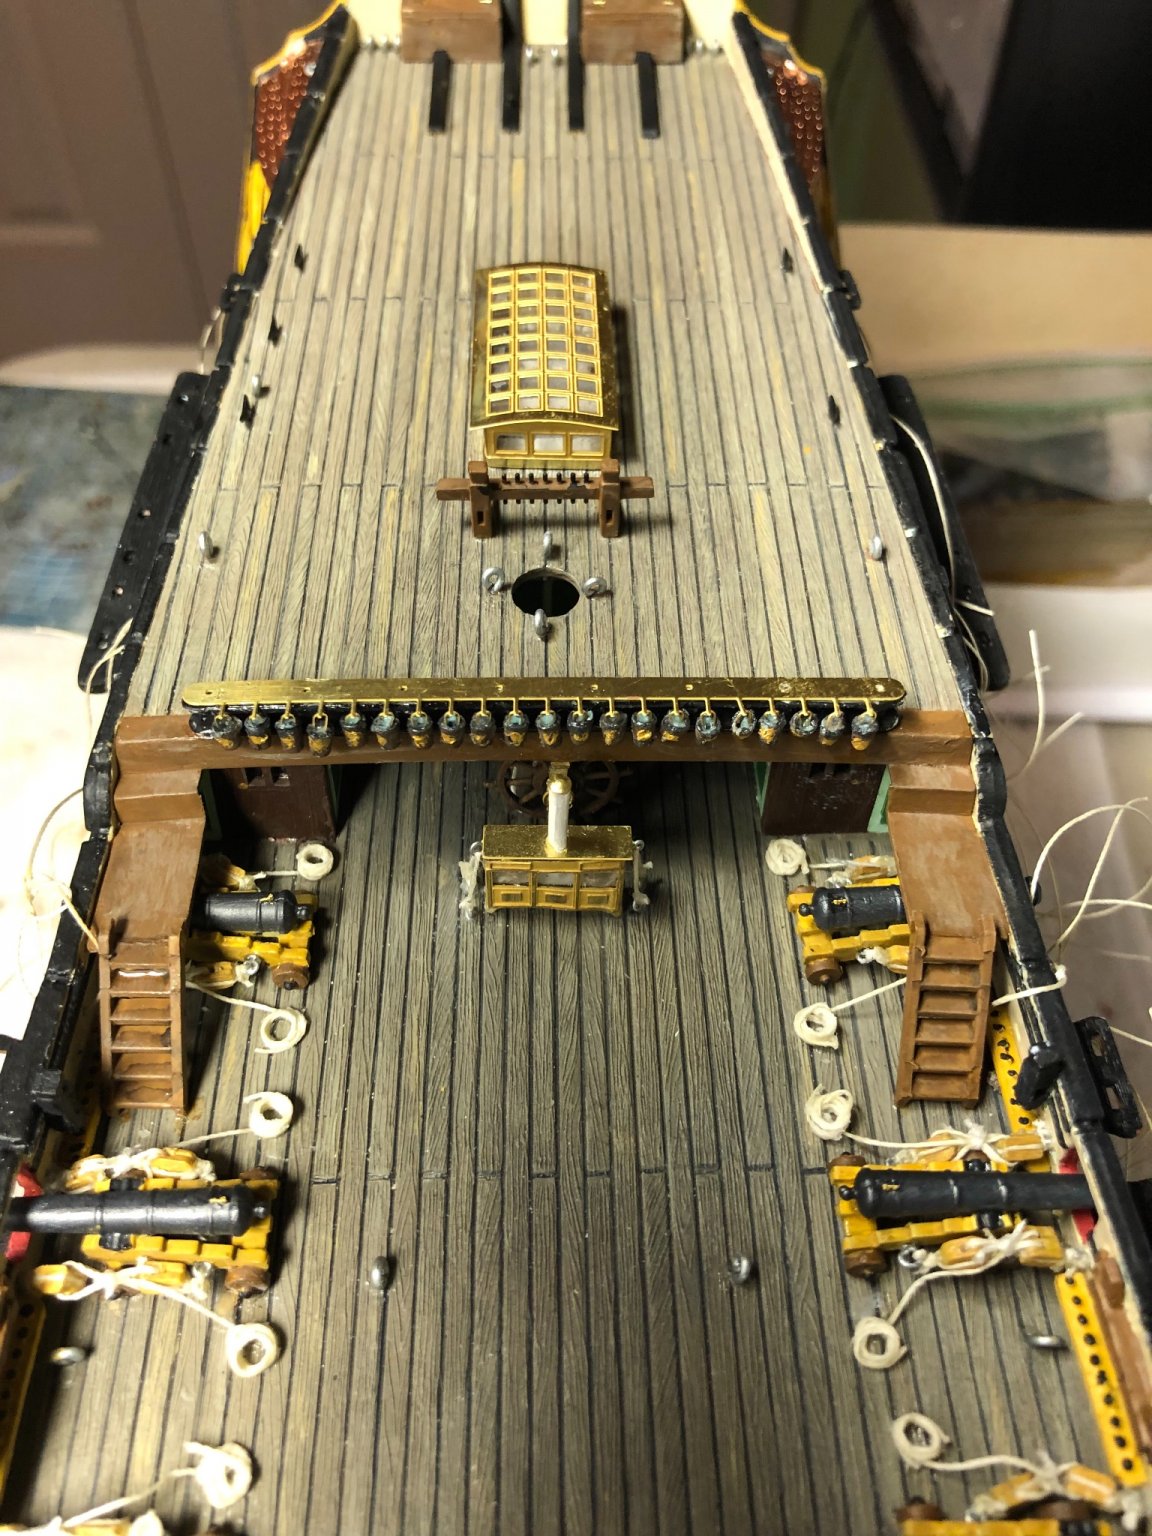
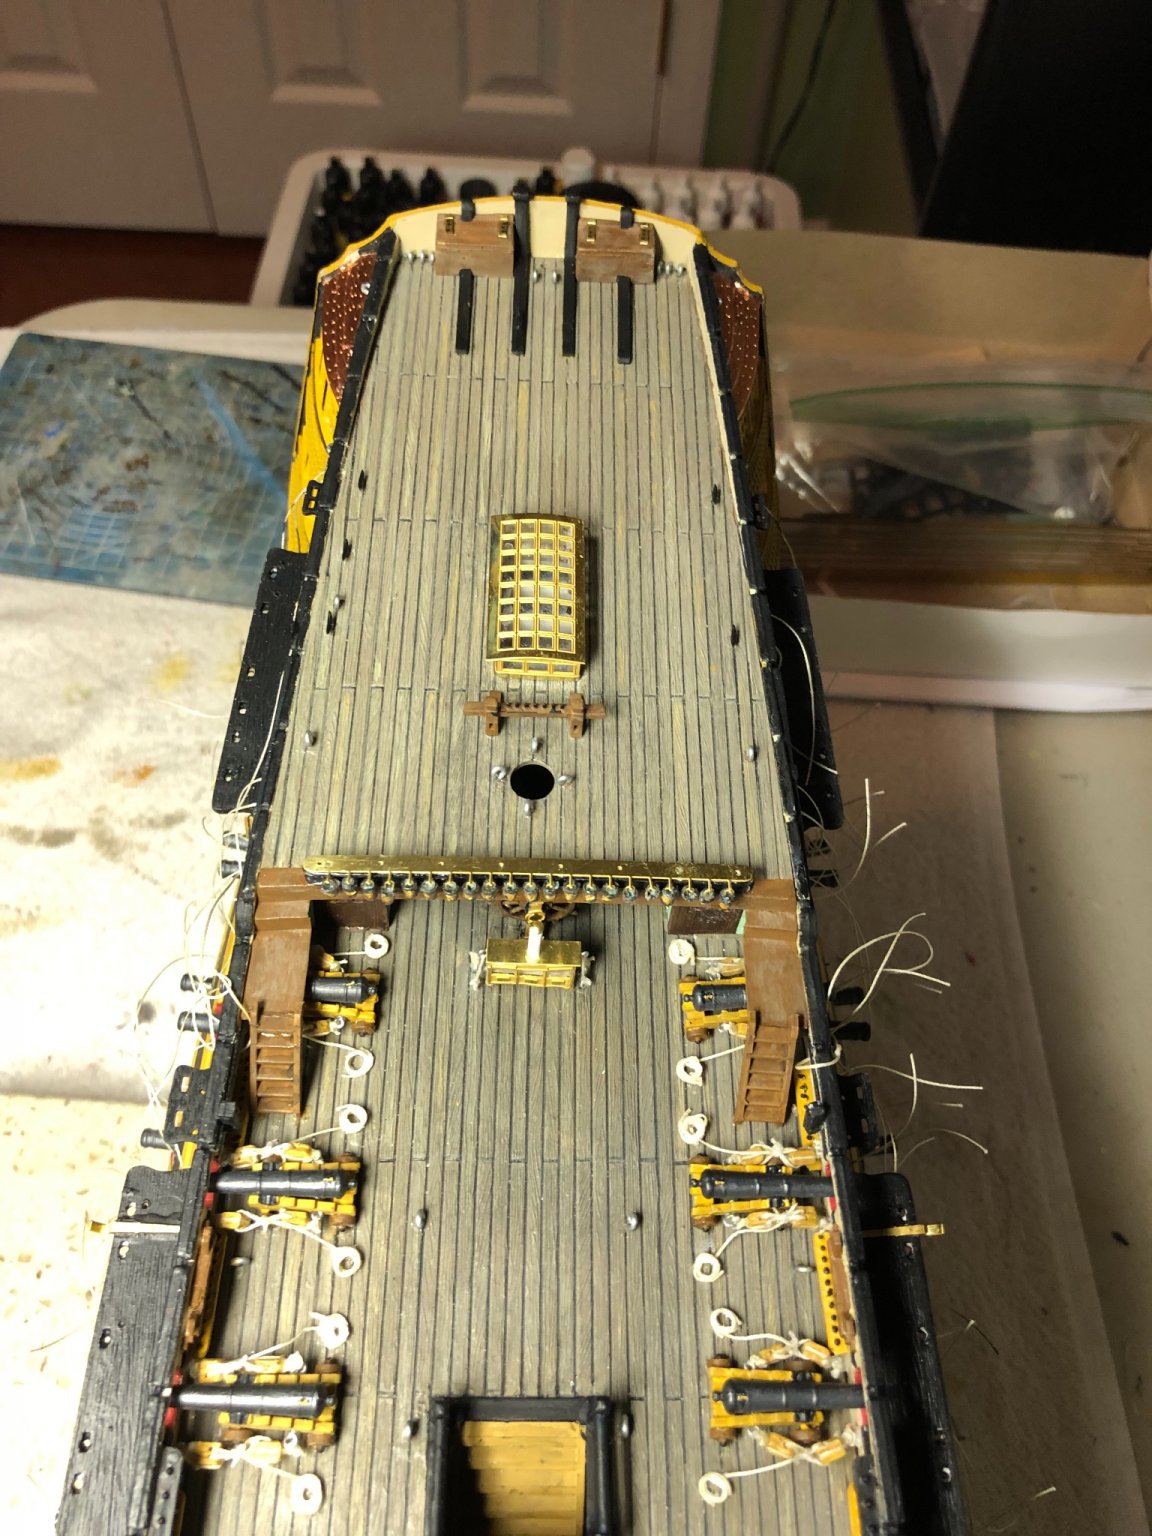
Fantastic job Kevin. You are truly becoming a master of the 3D printer. Very impressive!
-
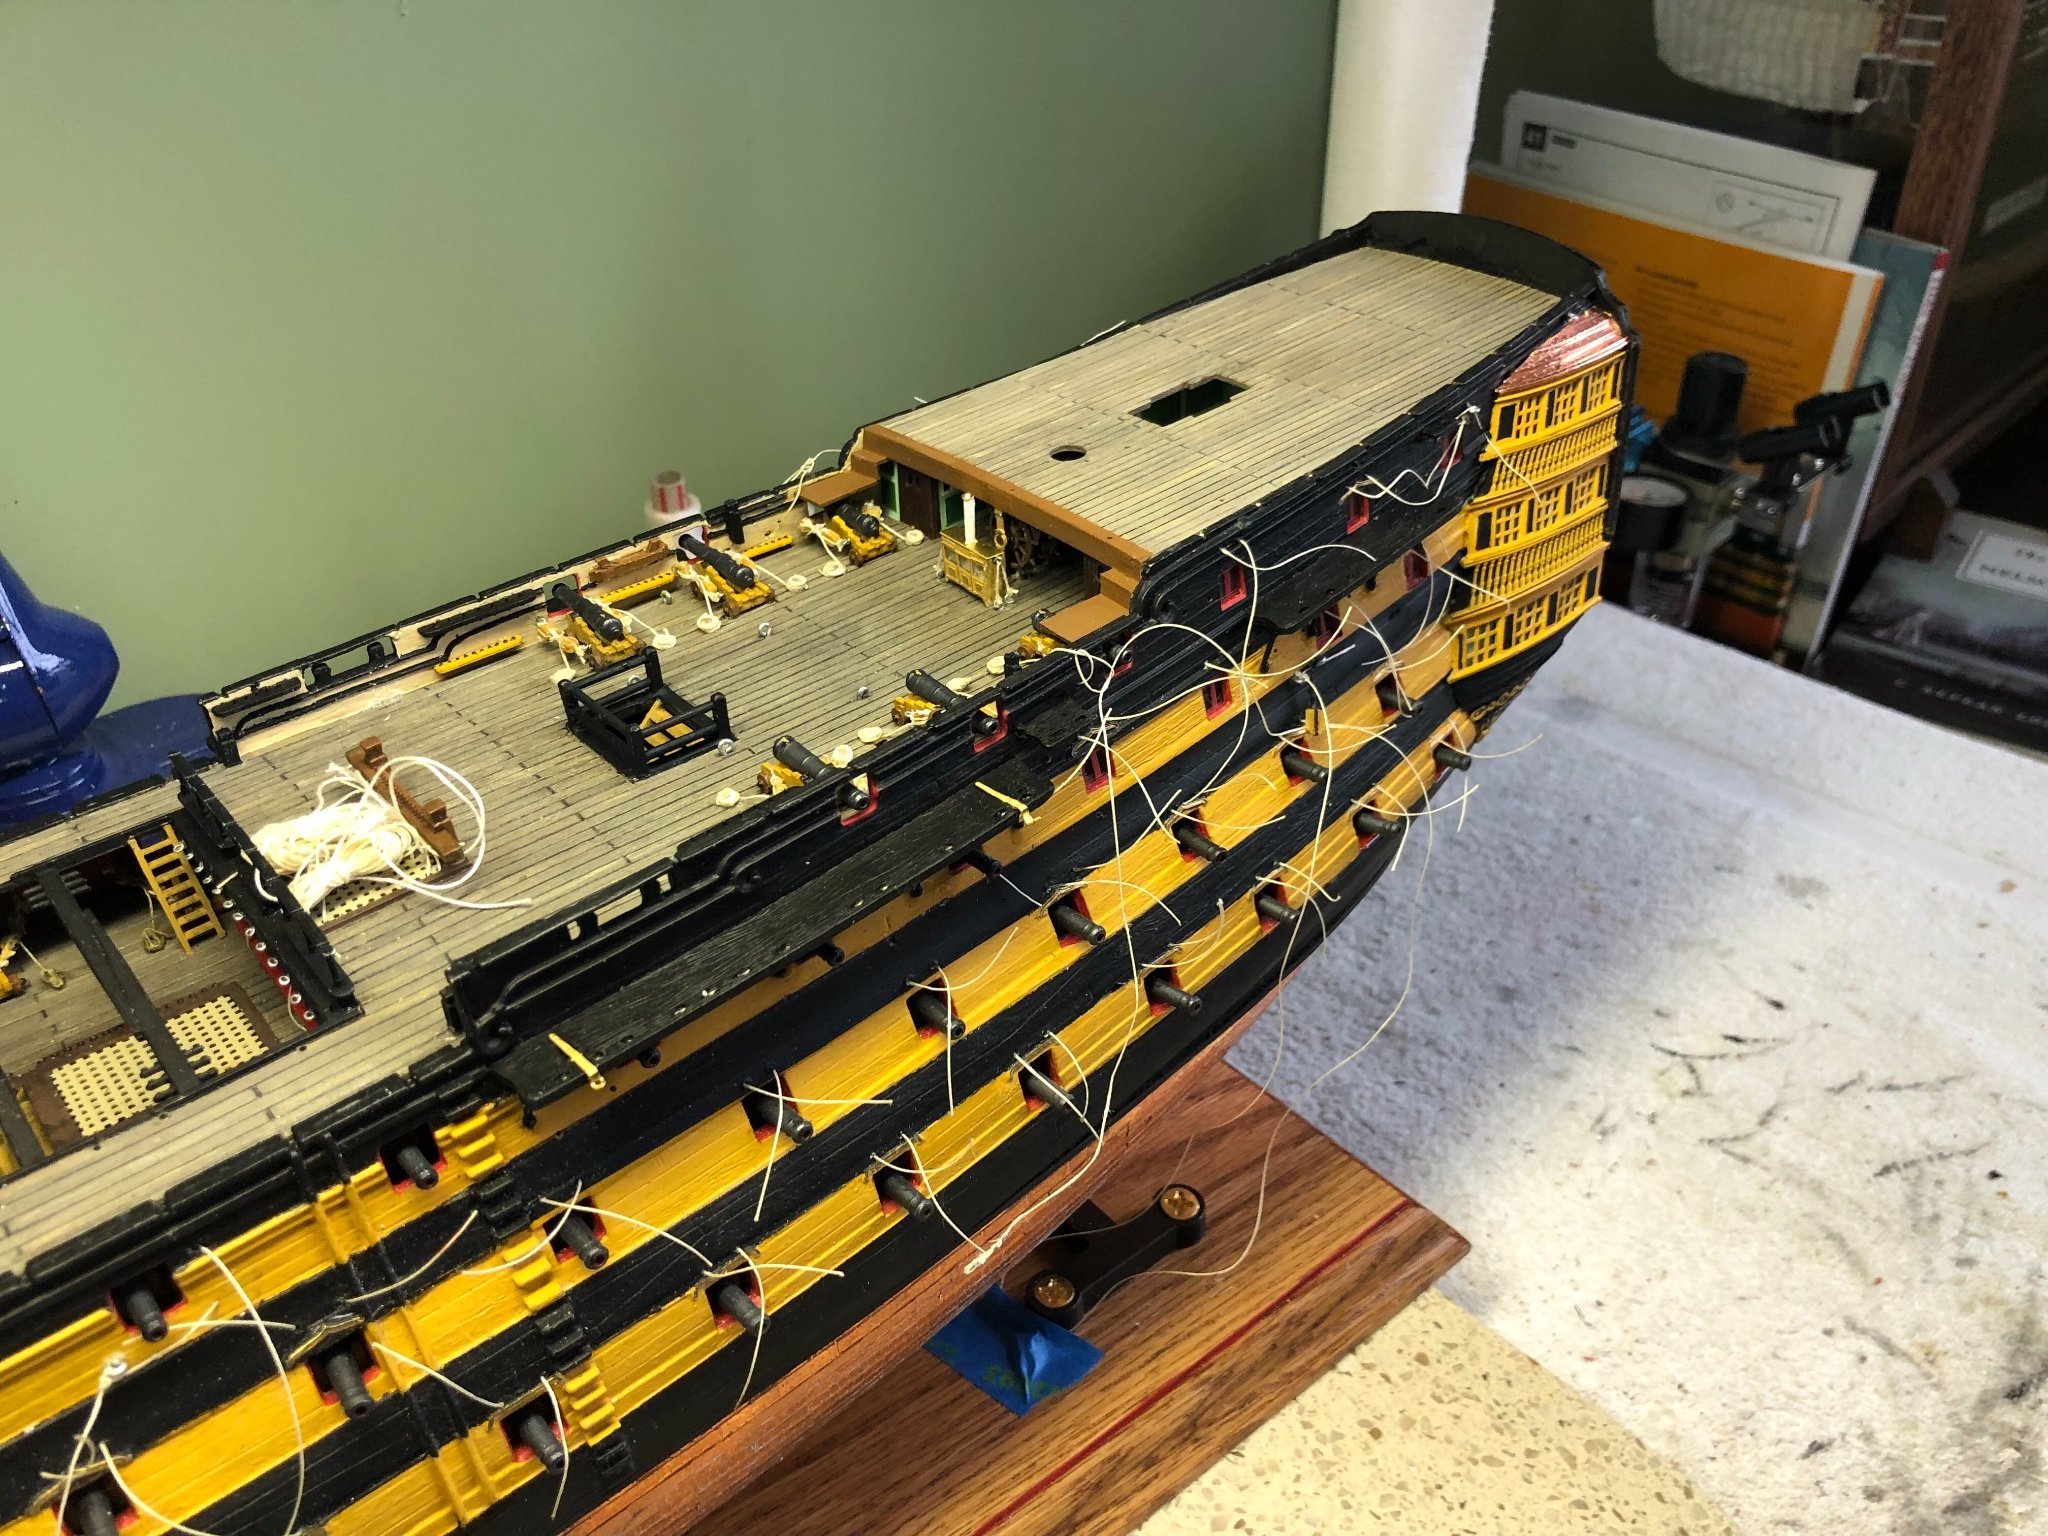
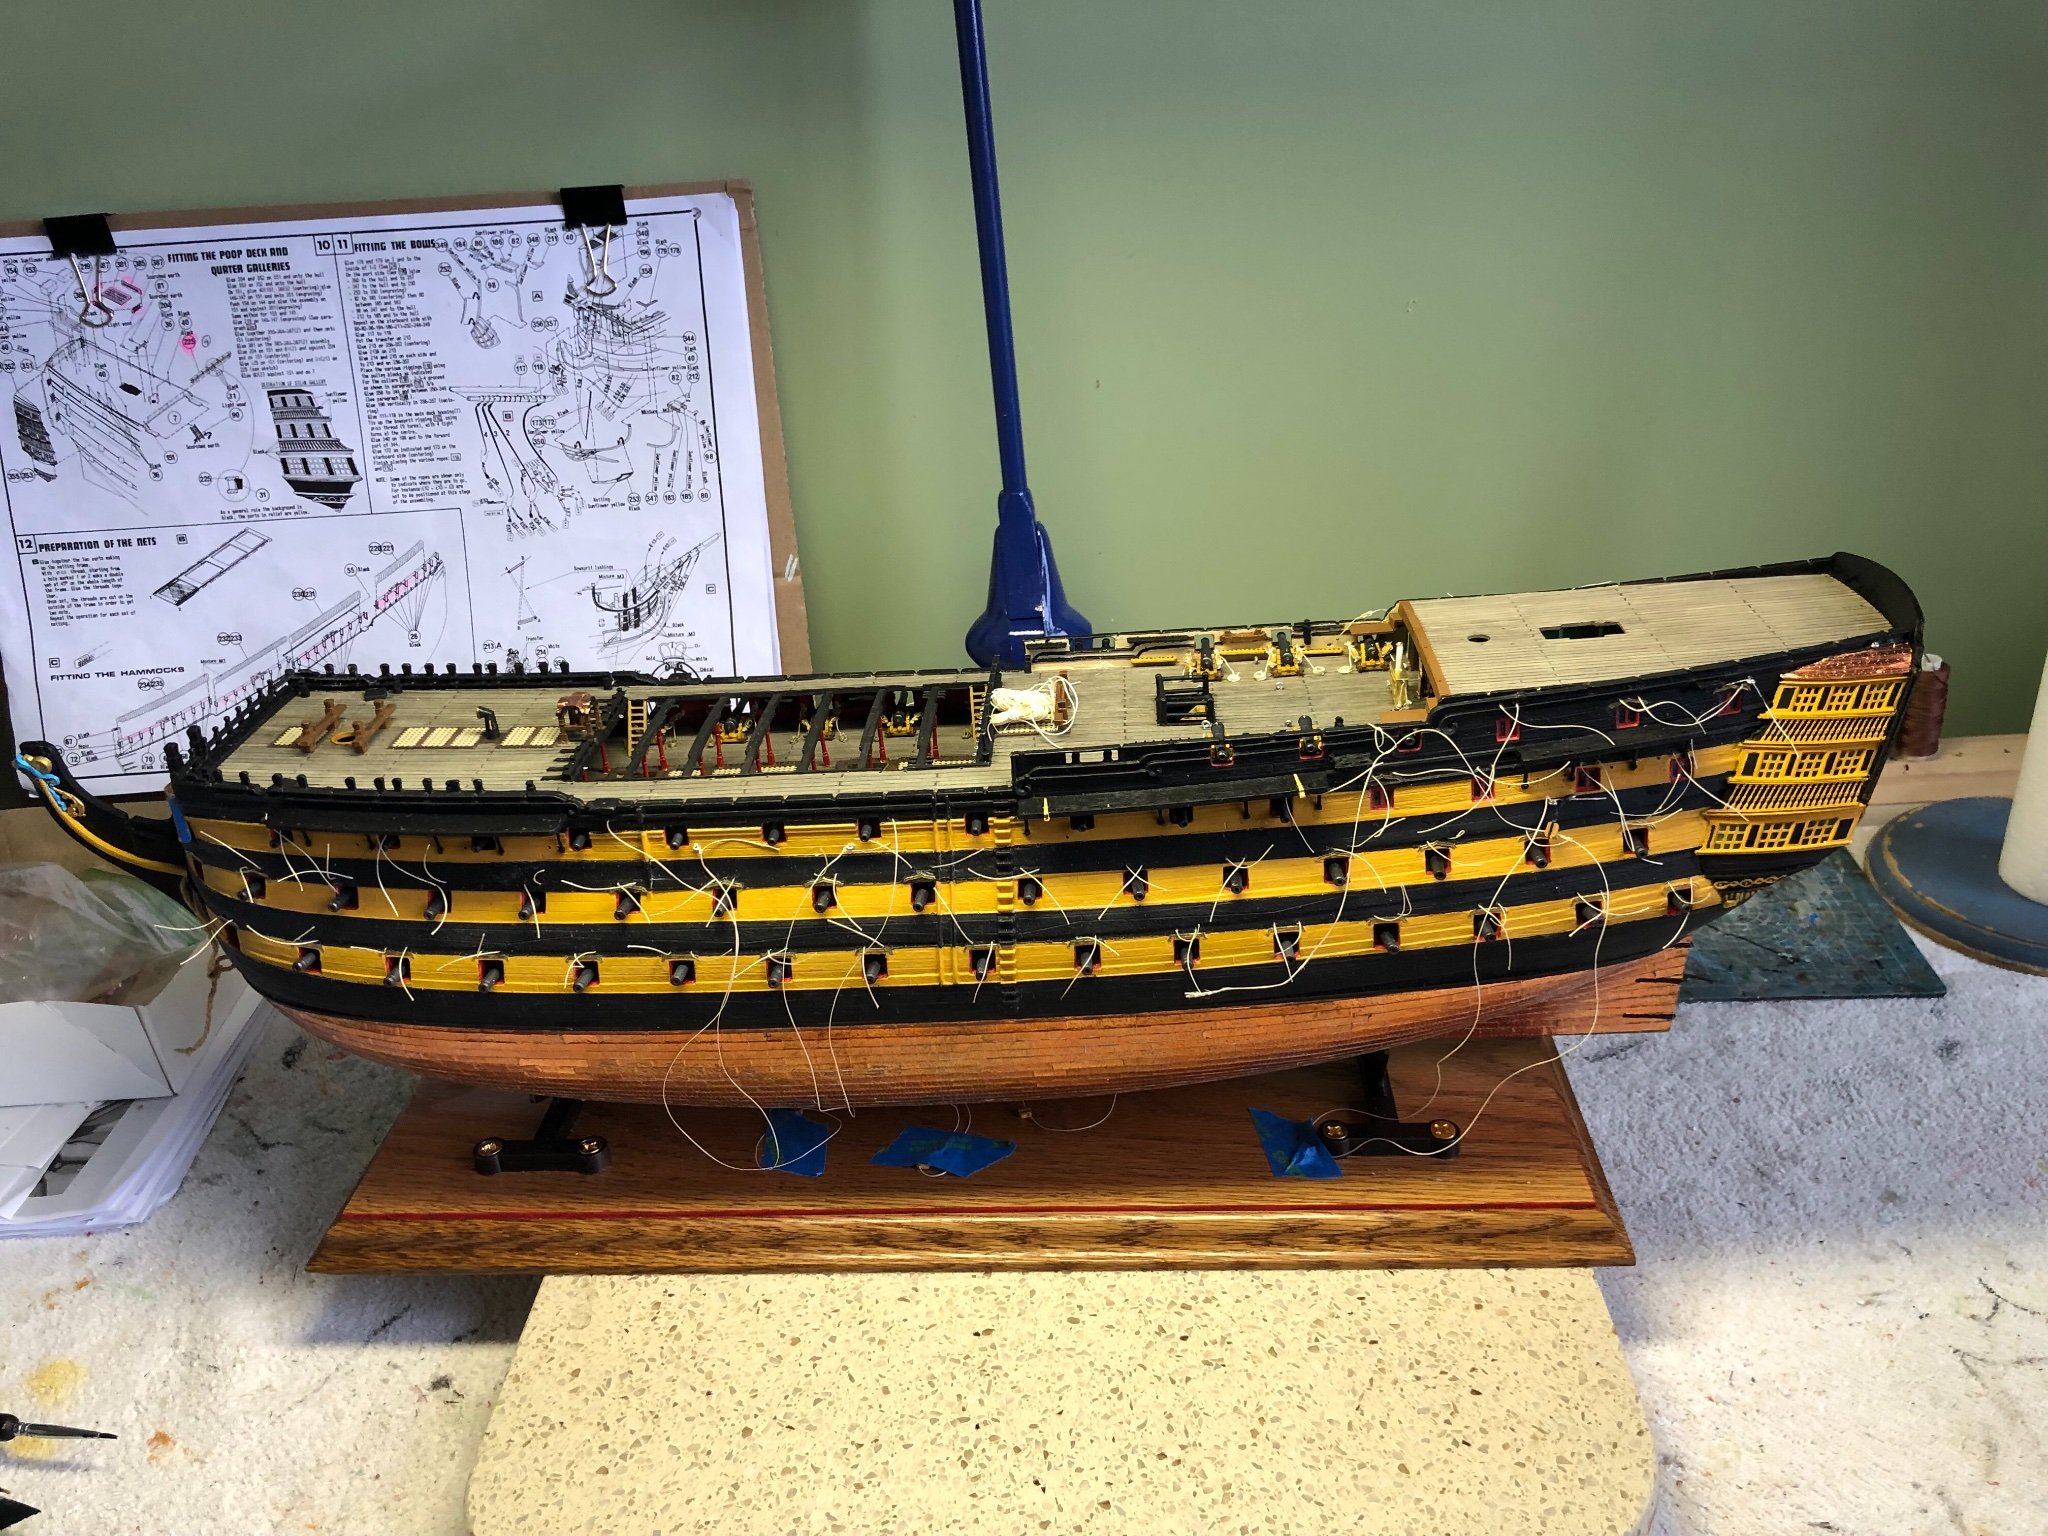
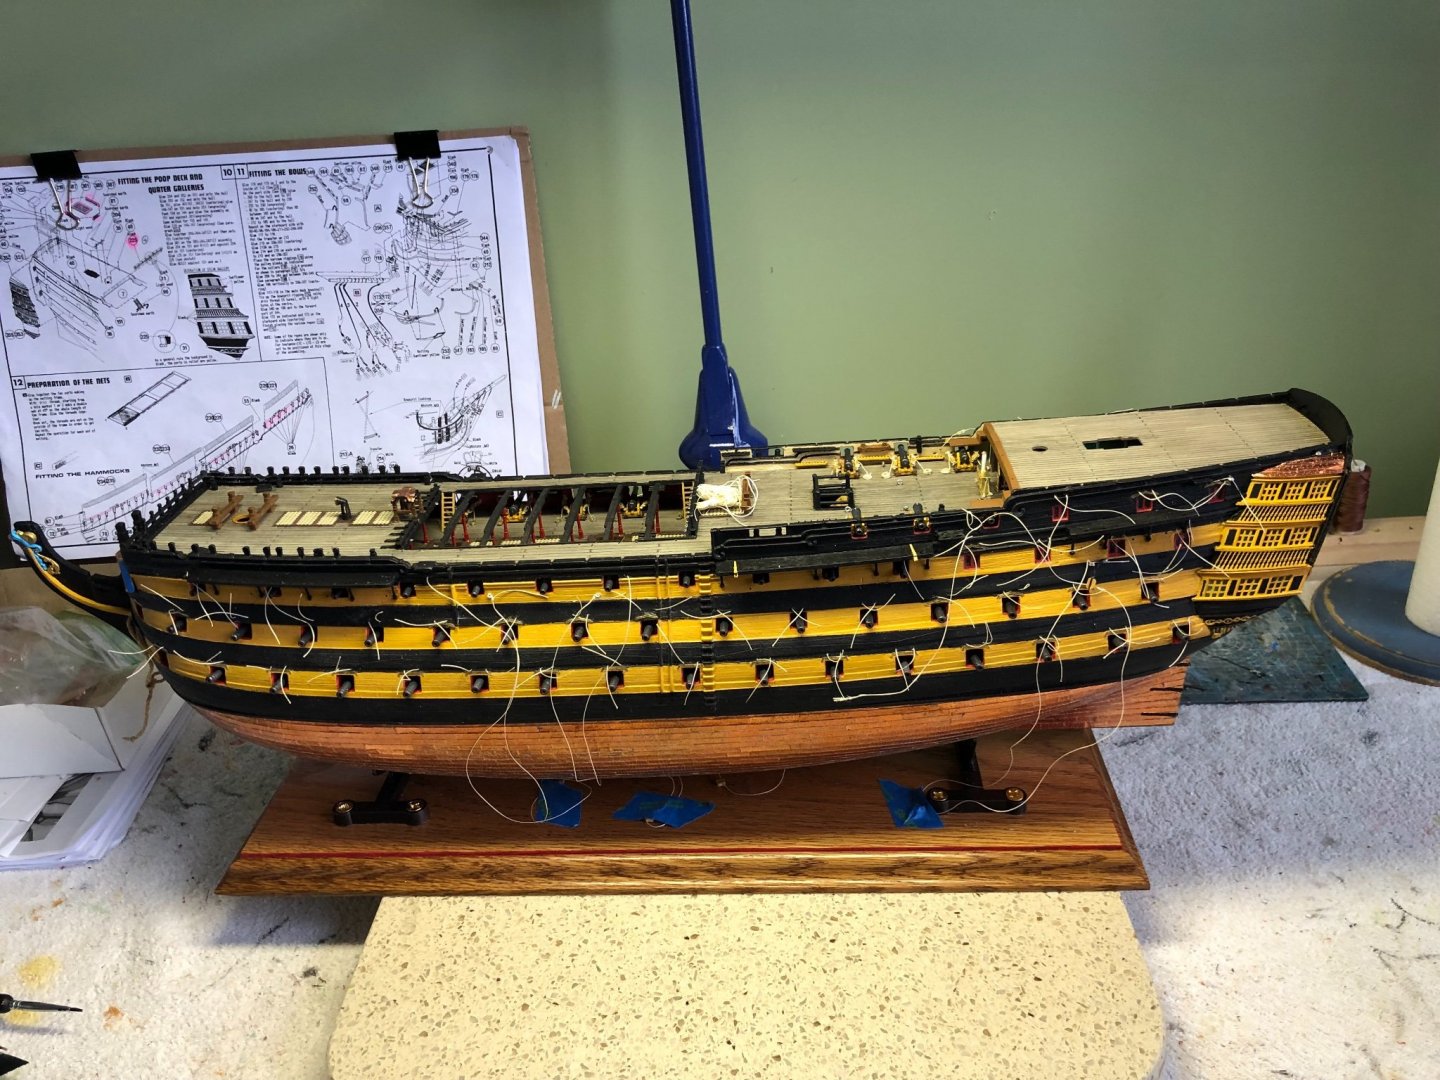
Thanks Ian. I have been anxious to get those parts installed. Had to remove the stern piece and redo it. After it set last night and the glue tried I noticed this morning that it was just slightly off center making the quarter galleries fit differently. I was able to carefully remove it and reattach it with no visible damage. Fine tune it over the next few build periods and move to the bow end. Again thanks for your help throughout this build along with Kevin and Daniel.
-
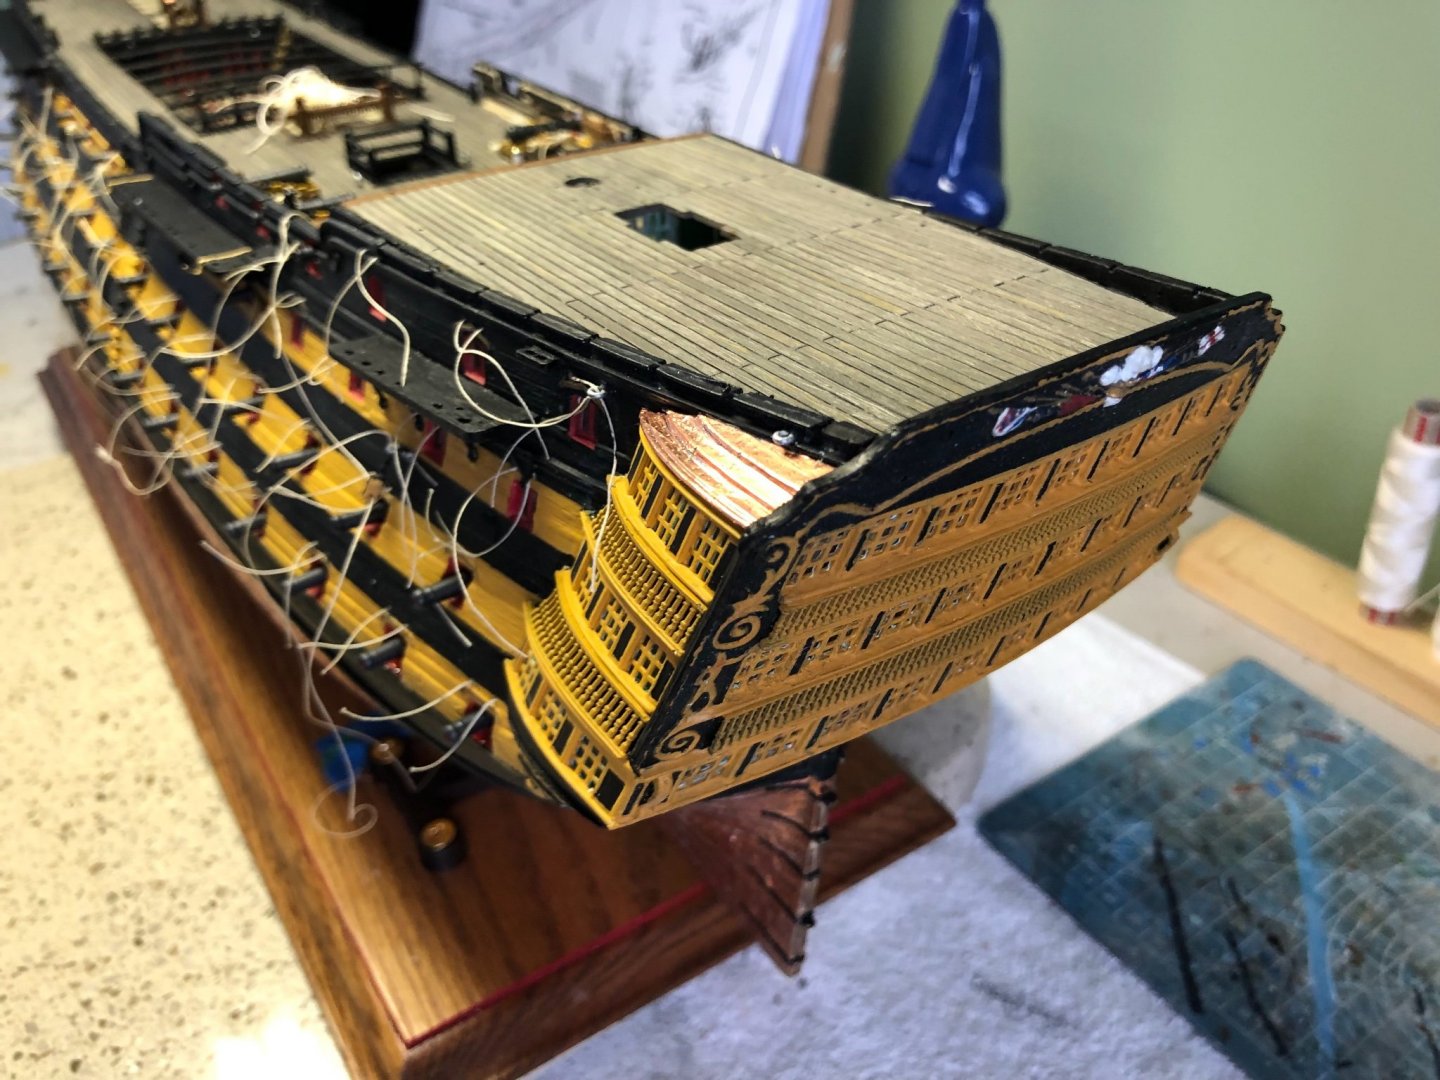
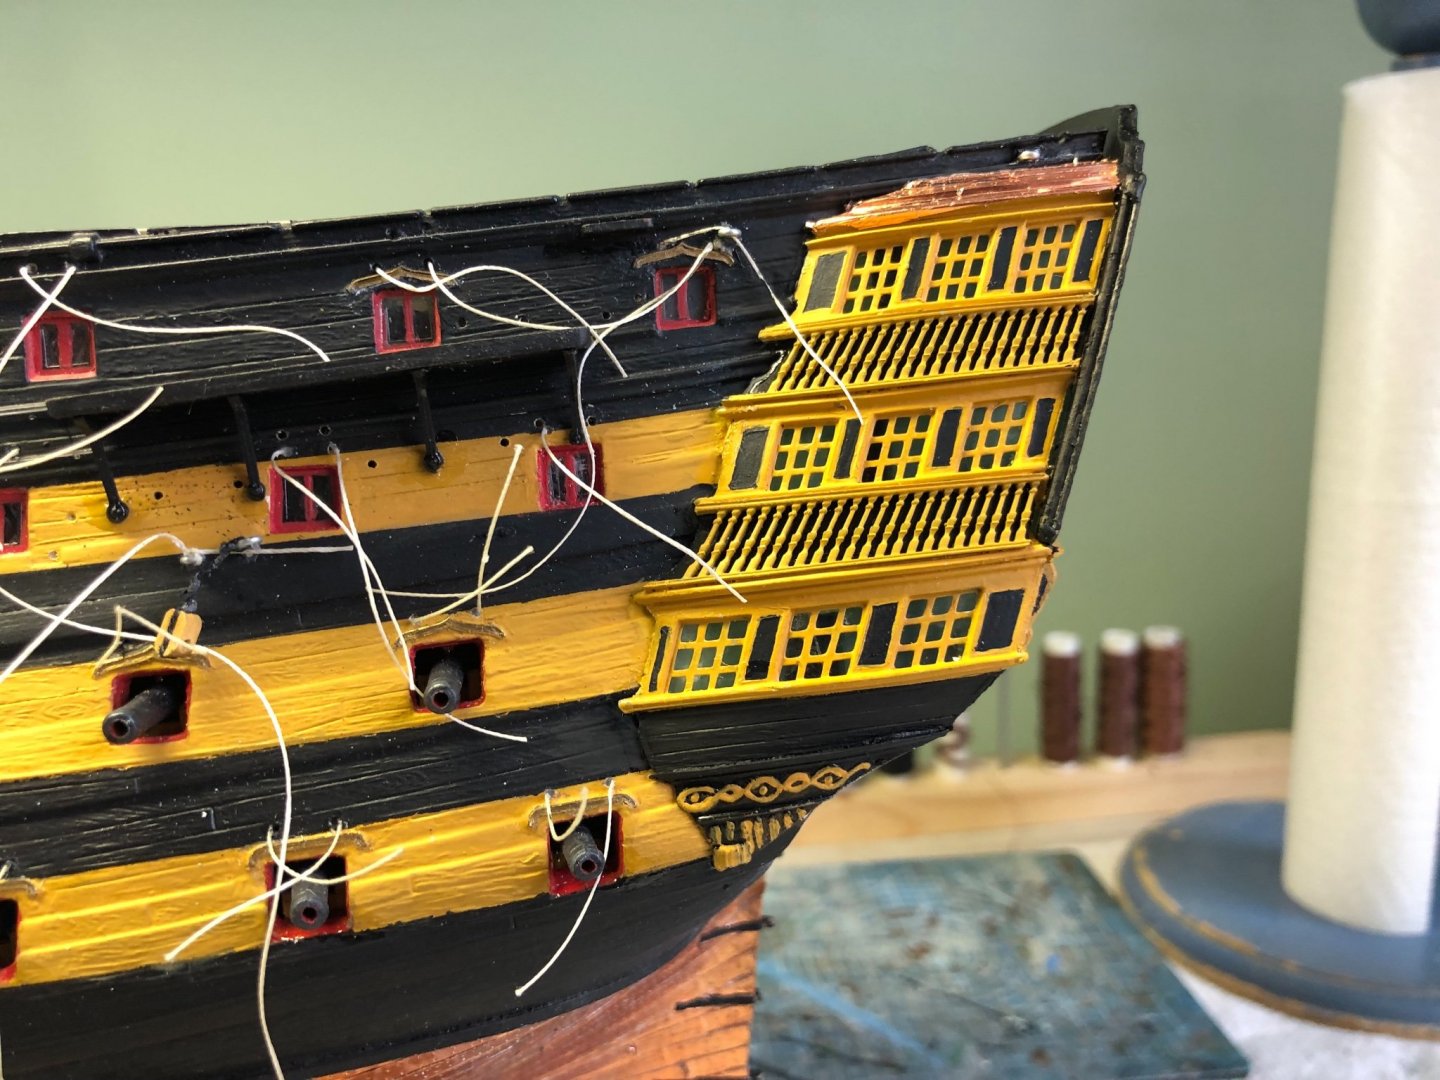
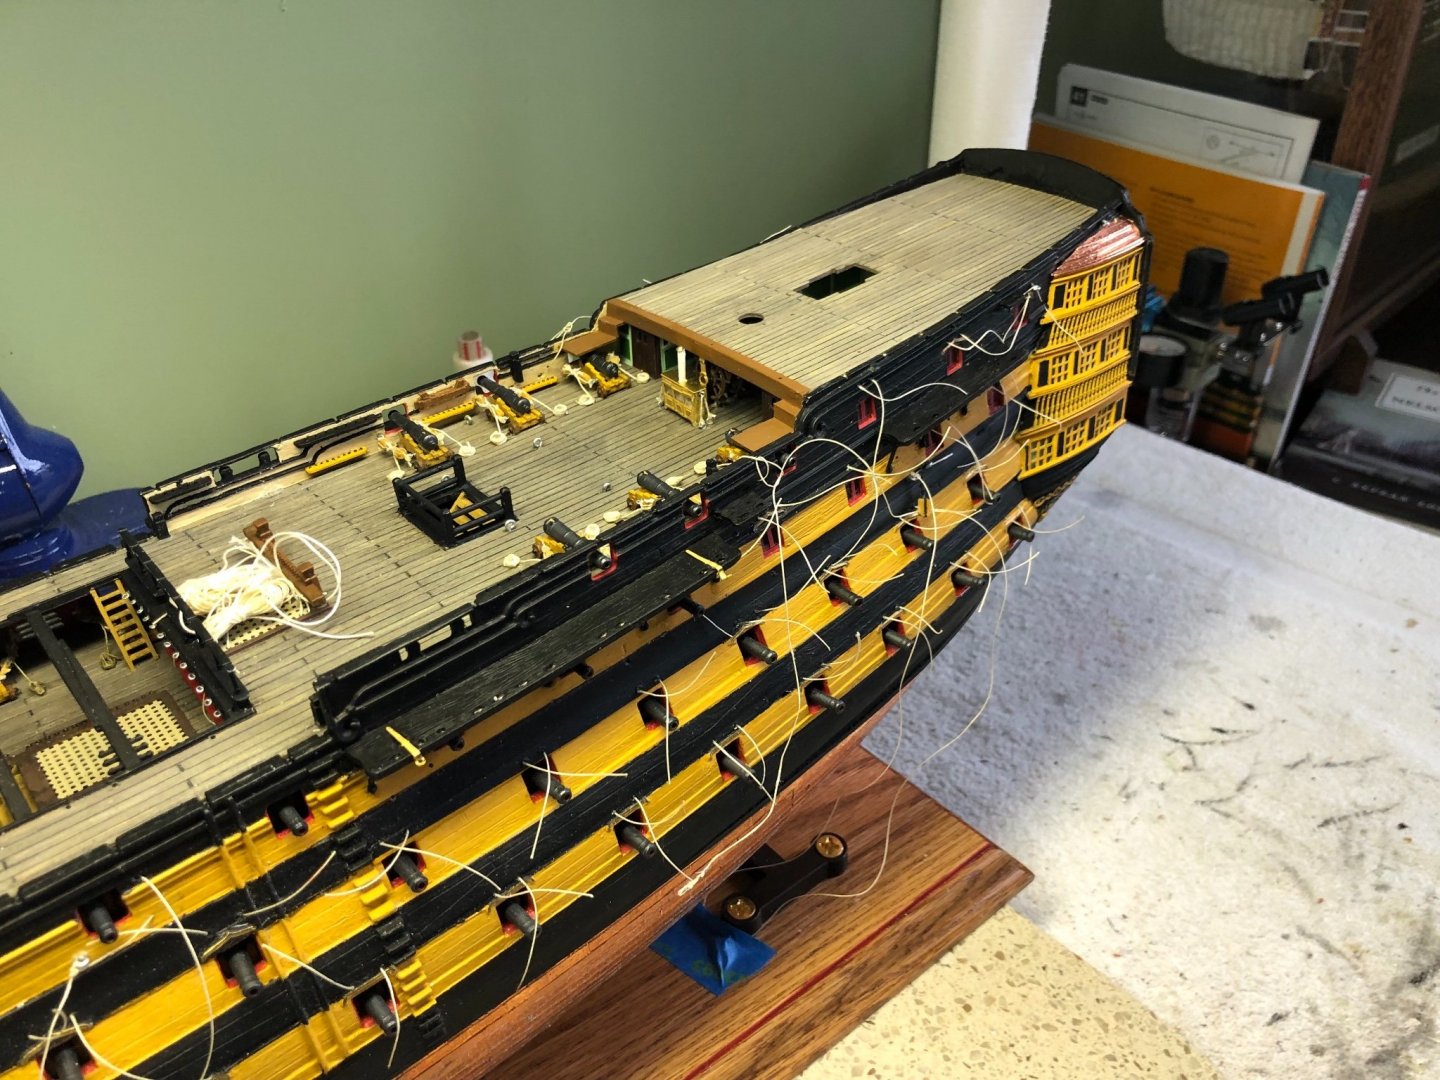
Stern and quarter galleries installed over last couple days. Have to admit that was a bit of a challenge. Put copper on the roofs of the quarter galleries. A little putty here and there to fine tune a couple seams and then a little sanding followed by some paint touch up and I believe she is going to look pretty good!


-
Kevin that is the best idea I have heard yet! 😀😀😀
-
That sounds like a great plan Ian. I still have the Constitution rigging instructions booklet which I will use for sequence of lines then refer to Longridge’s book to see how he advises rigging that similar line. 👍
-
Ian let me ask you and anyone else that cares to respond to this question. How do/did you use Longridge’s book as a reference guide? I still have not got a good grip on that. Hence my previous question. Do you simply start at the chapter that begins the rigging process and follow sequentially through the book adding the designated lines as you go or do you follow the Heller instructions (which we all admit is tough) and look to Longridge’s book for guidance on that particular rope (thread) even if it means jumping all around in his book? I am very much a sequential builder. Do this line, then this line, and so on. I know I do the standing rigging before the running rigging. In my previous builds, especially the Revell USS Constitution, the instructions gave the sequence of every single line including the pin it tied too. I must admit I really liked that.
-
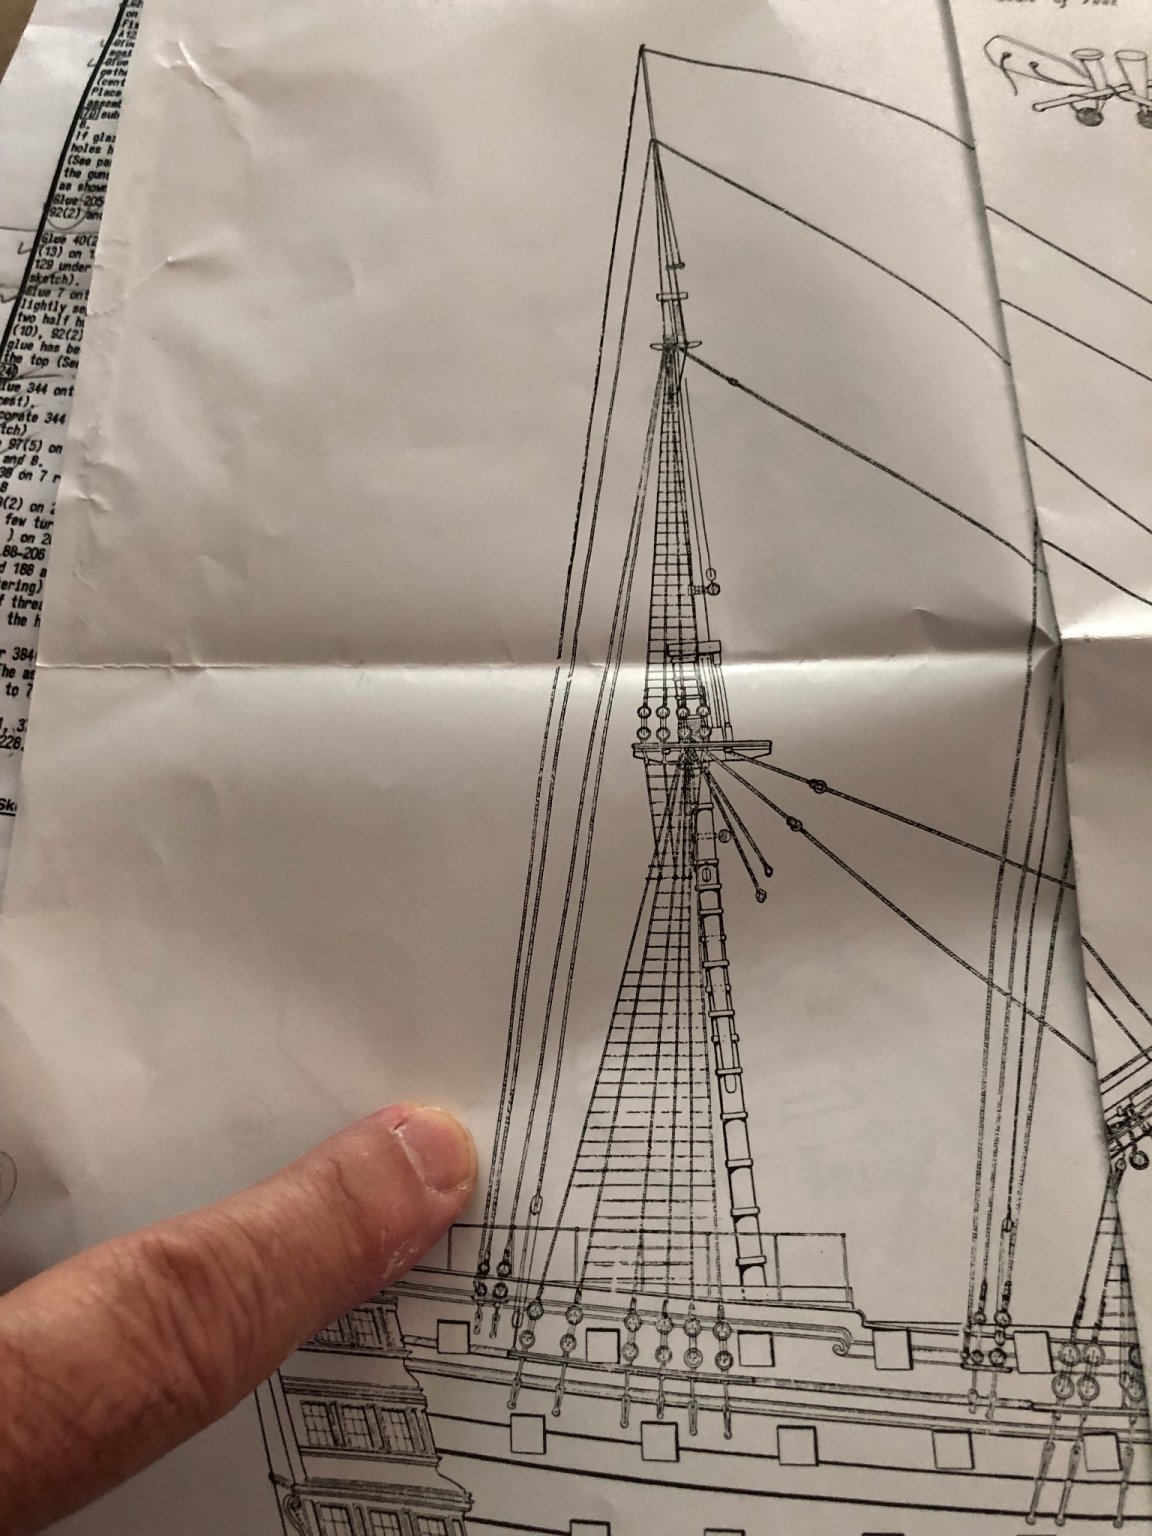
Thanks one more time Ian. After reading your reply I realized I had a “da” moment! That photo is obviously not of the bottom deadeyes. Just this one photo you attached of your Victory shows some incredible rigging! Beauty that I can only hope to get close to. I have an idea. How bout I bring my ship and meet you somewhere in between like Detroit and have you rig mine for me 😁.
-
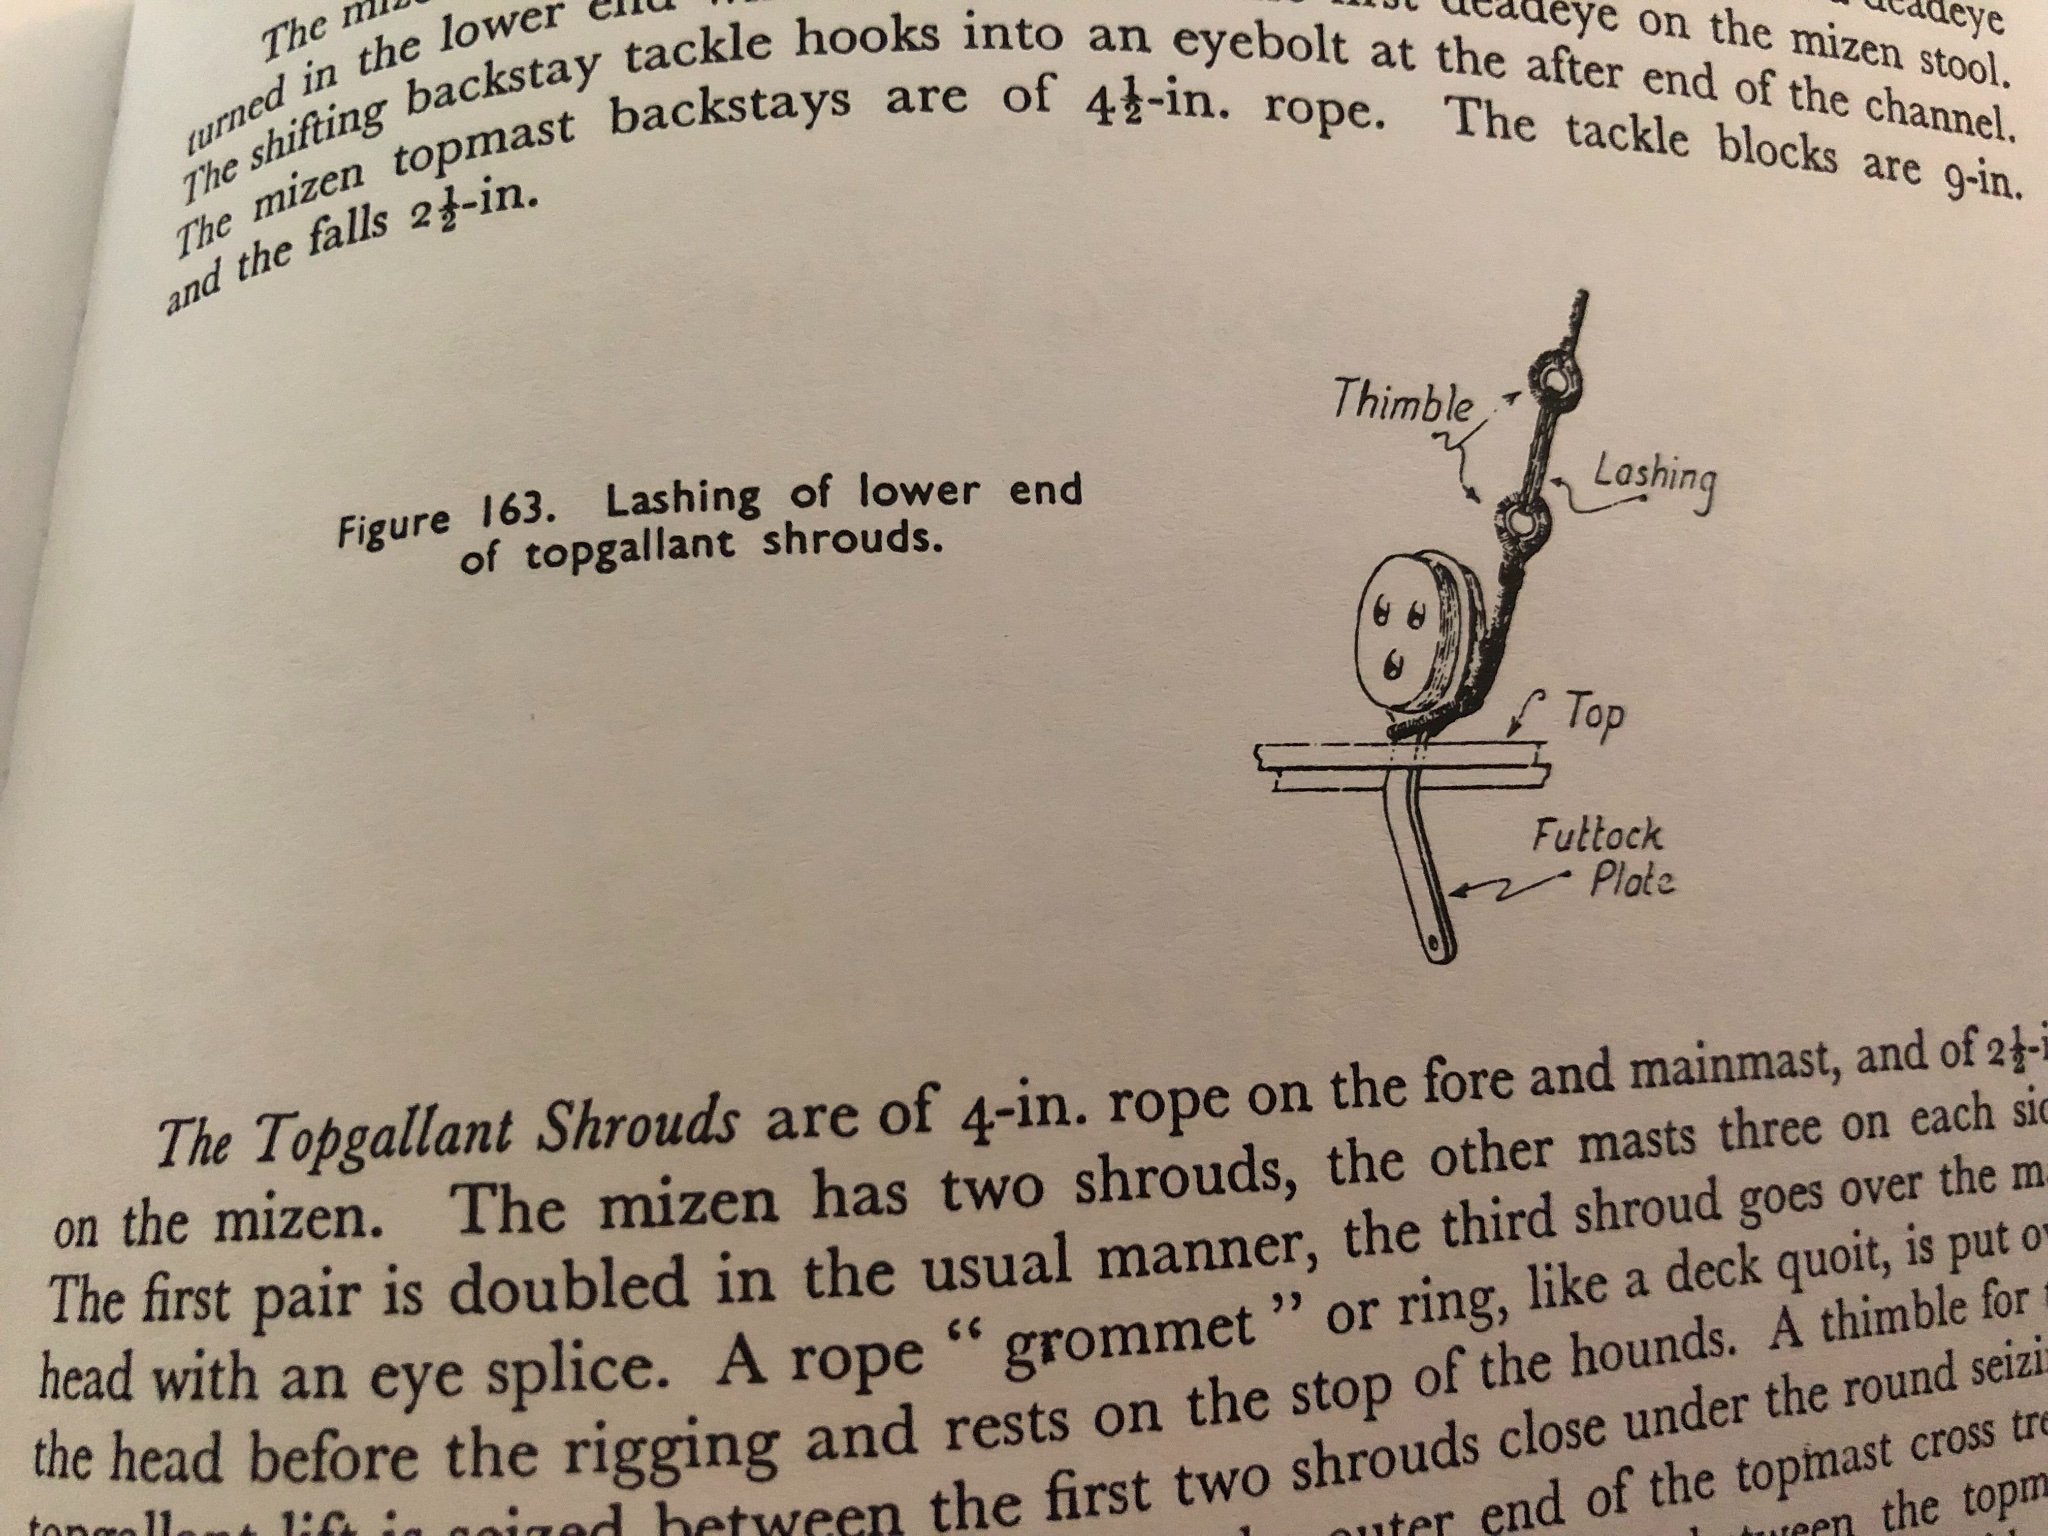
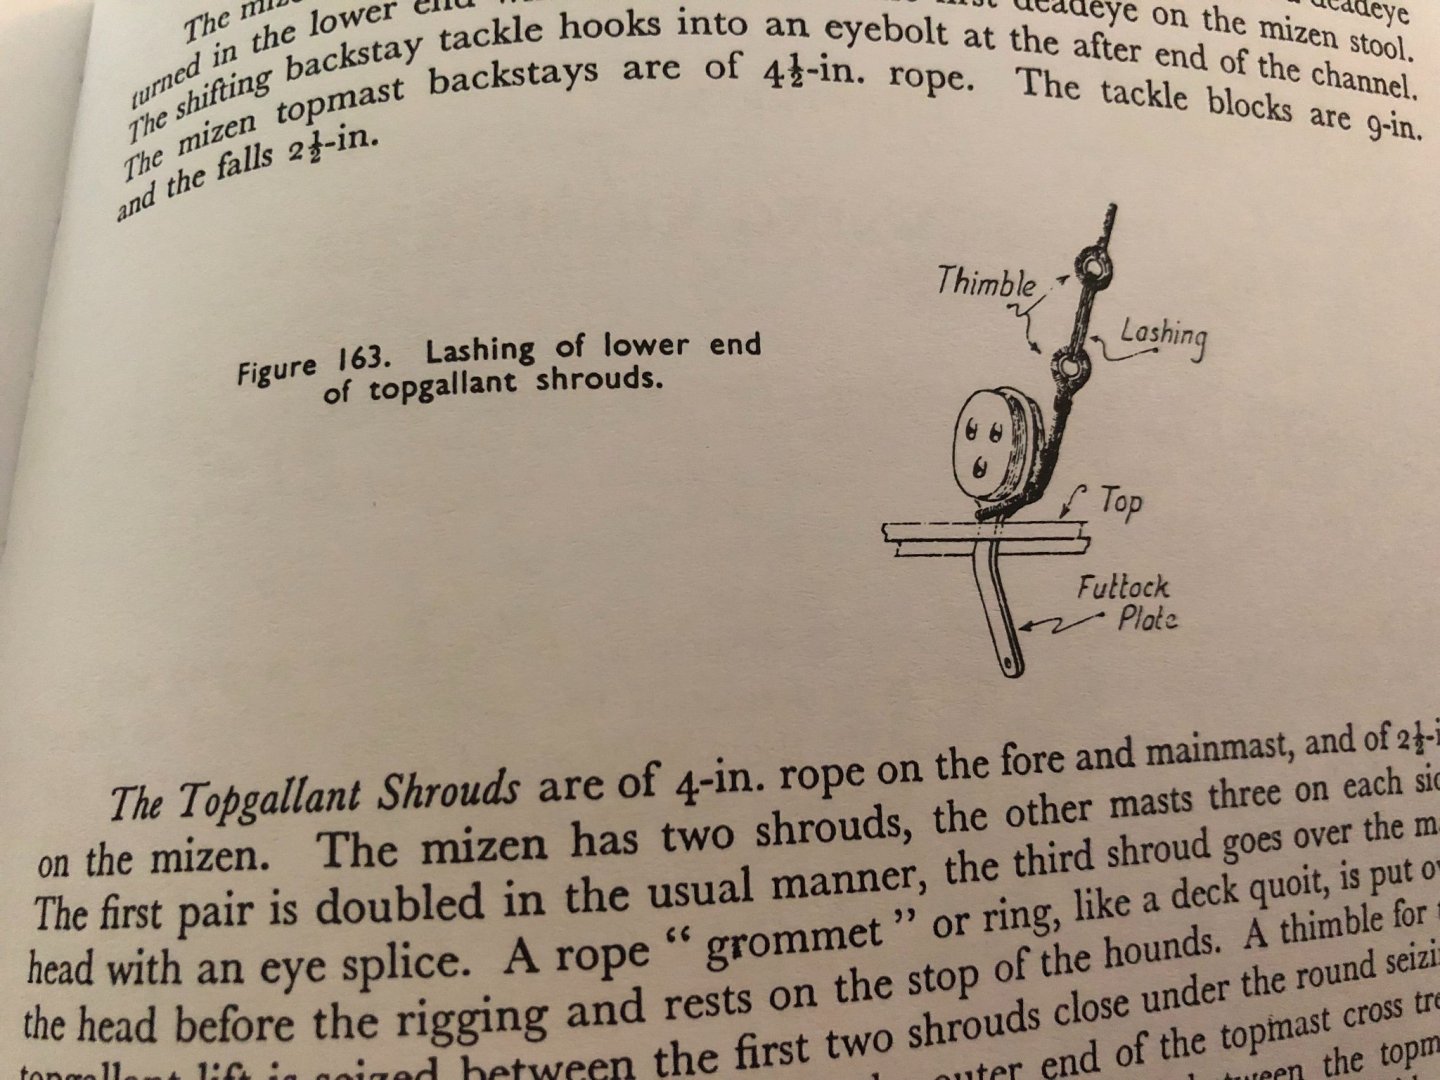
Ian in the photo on page 233 it shows the line (topgallant shroud) to be attached to the deadeye rather than an eyebolt. Is either method acceptable or am I misreading.
-
Thanks Ian. Your help is always so appreciated! I am guessing like the other advance rigging steps I just attach an appropriate length of thread and coil it up for now?
-
The Heller standing rigging diagram shows a 3rd line running to the top of the mizzenmast even though there is only 2 deadeyes on the chain plate. I wonder if the line I questioned in the previous post is this line and if so, what is it attached to at the bottom?

-
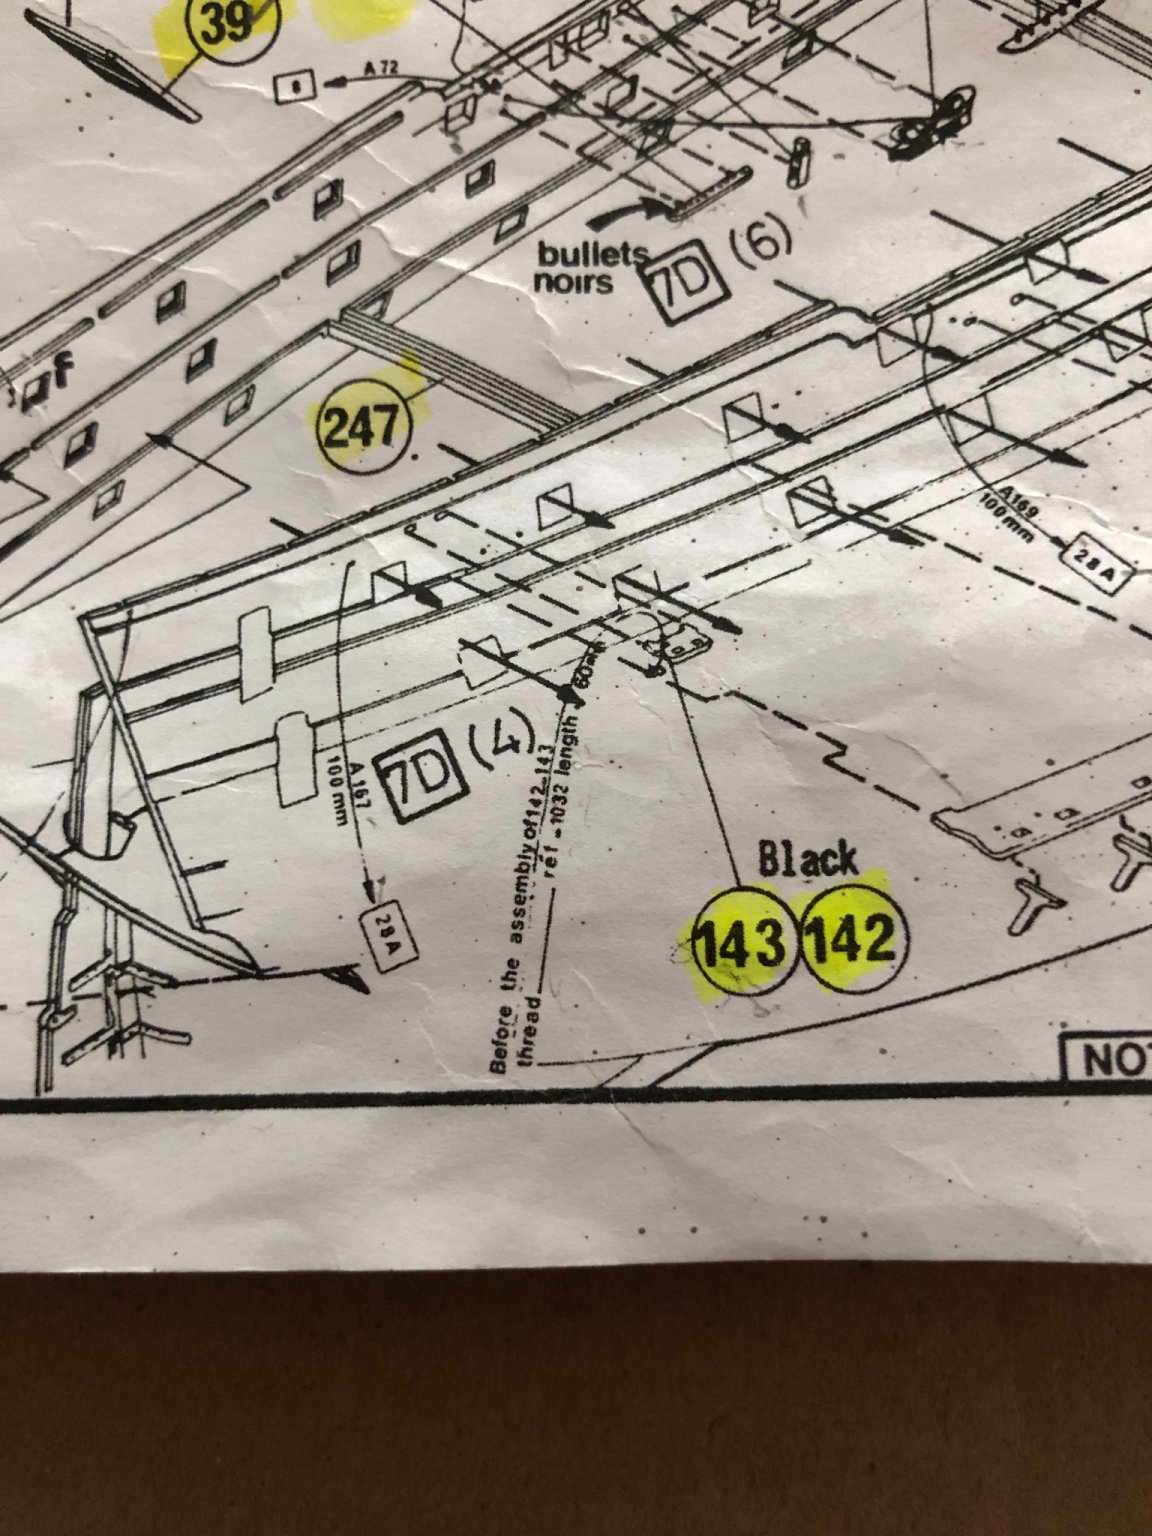
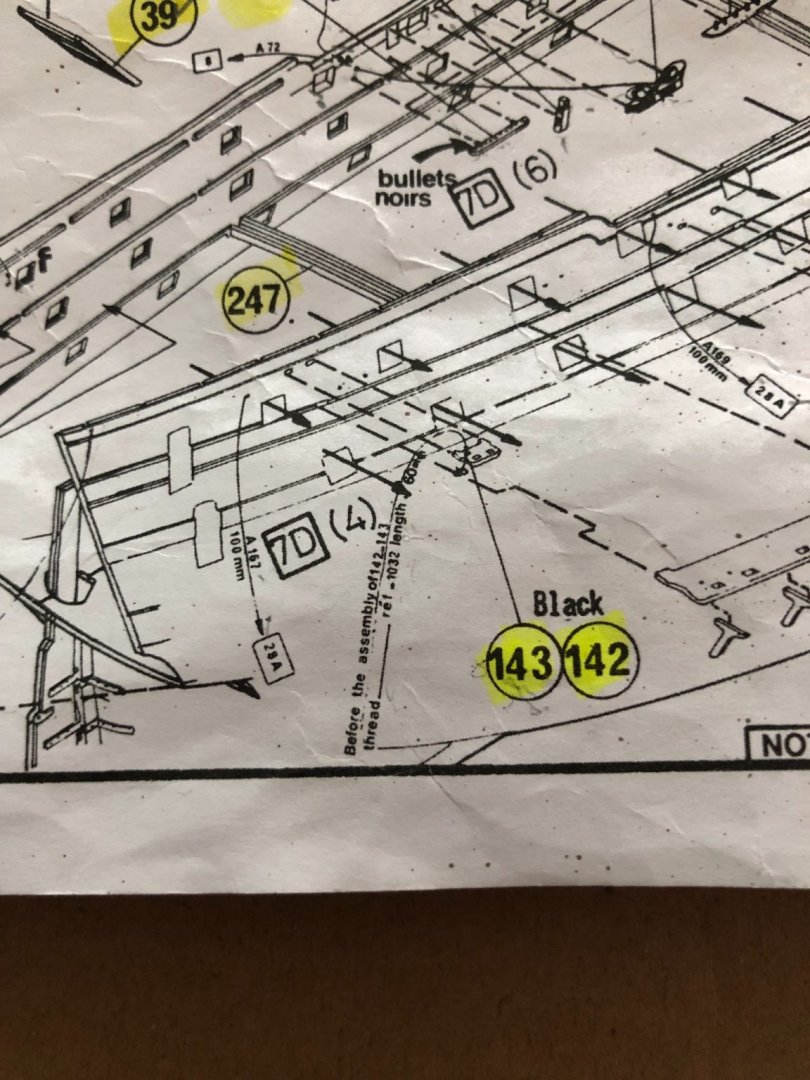
OK gentlemen here is your next quiz. I have looked through Longridge’s book and searched through the Heller instructions but can’t put my finger on this early rigging step. In the picture I am instructed to do something with a line near the mizzenmast backstay chain plate. I know I will eventually run standing rigging up to the mizzenmast and attach to deadeyes on this chain plate but I am not confident what this line is that I am instructed to thread before assembling parts 142 and 143. No idea what is meant by (ref - 1032 length 60mm). Can’t make out if this line is also attached to the chain plate.
-
Oh OK Ian. I looked back. I remember now. Thanks for the reminder. I still don’t remember all the terms and names of parts and have to scroll back or ask questions. 😊
-
Ok Ian I am still learning nautical terms. Your last comment “feed that main tack through the chess tree” might have went over my head! 😊