ScottRC
-
Posts
559 -
Joined
-
Last visited
Content Type
Profiles
Forums
Gallery
Events
Everything posted by ScottRC
-
 My references vary. In addtion to the Squadron and Detail in Scale publications, I have a photo set from NAVSOURCE of the ships commissioning in 56 along with a number of photos my father took.
 -
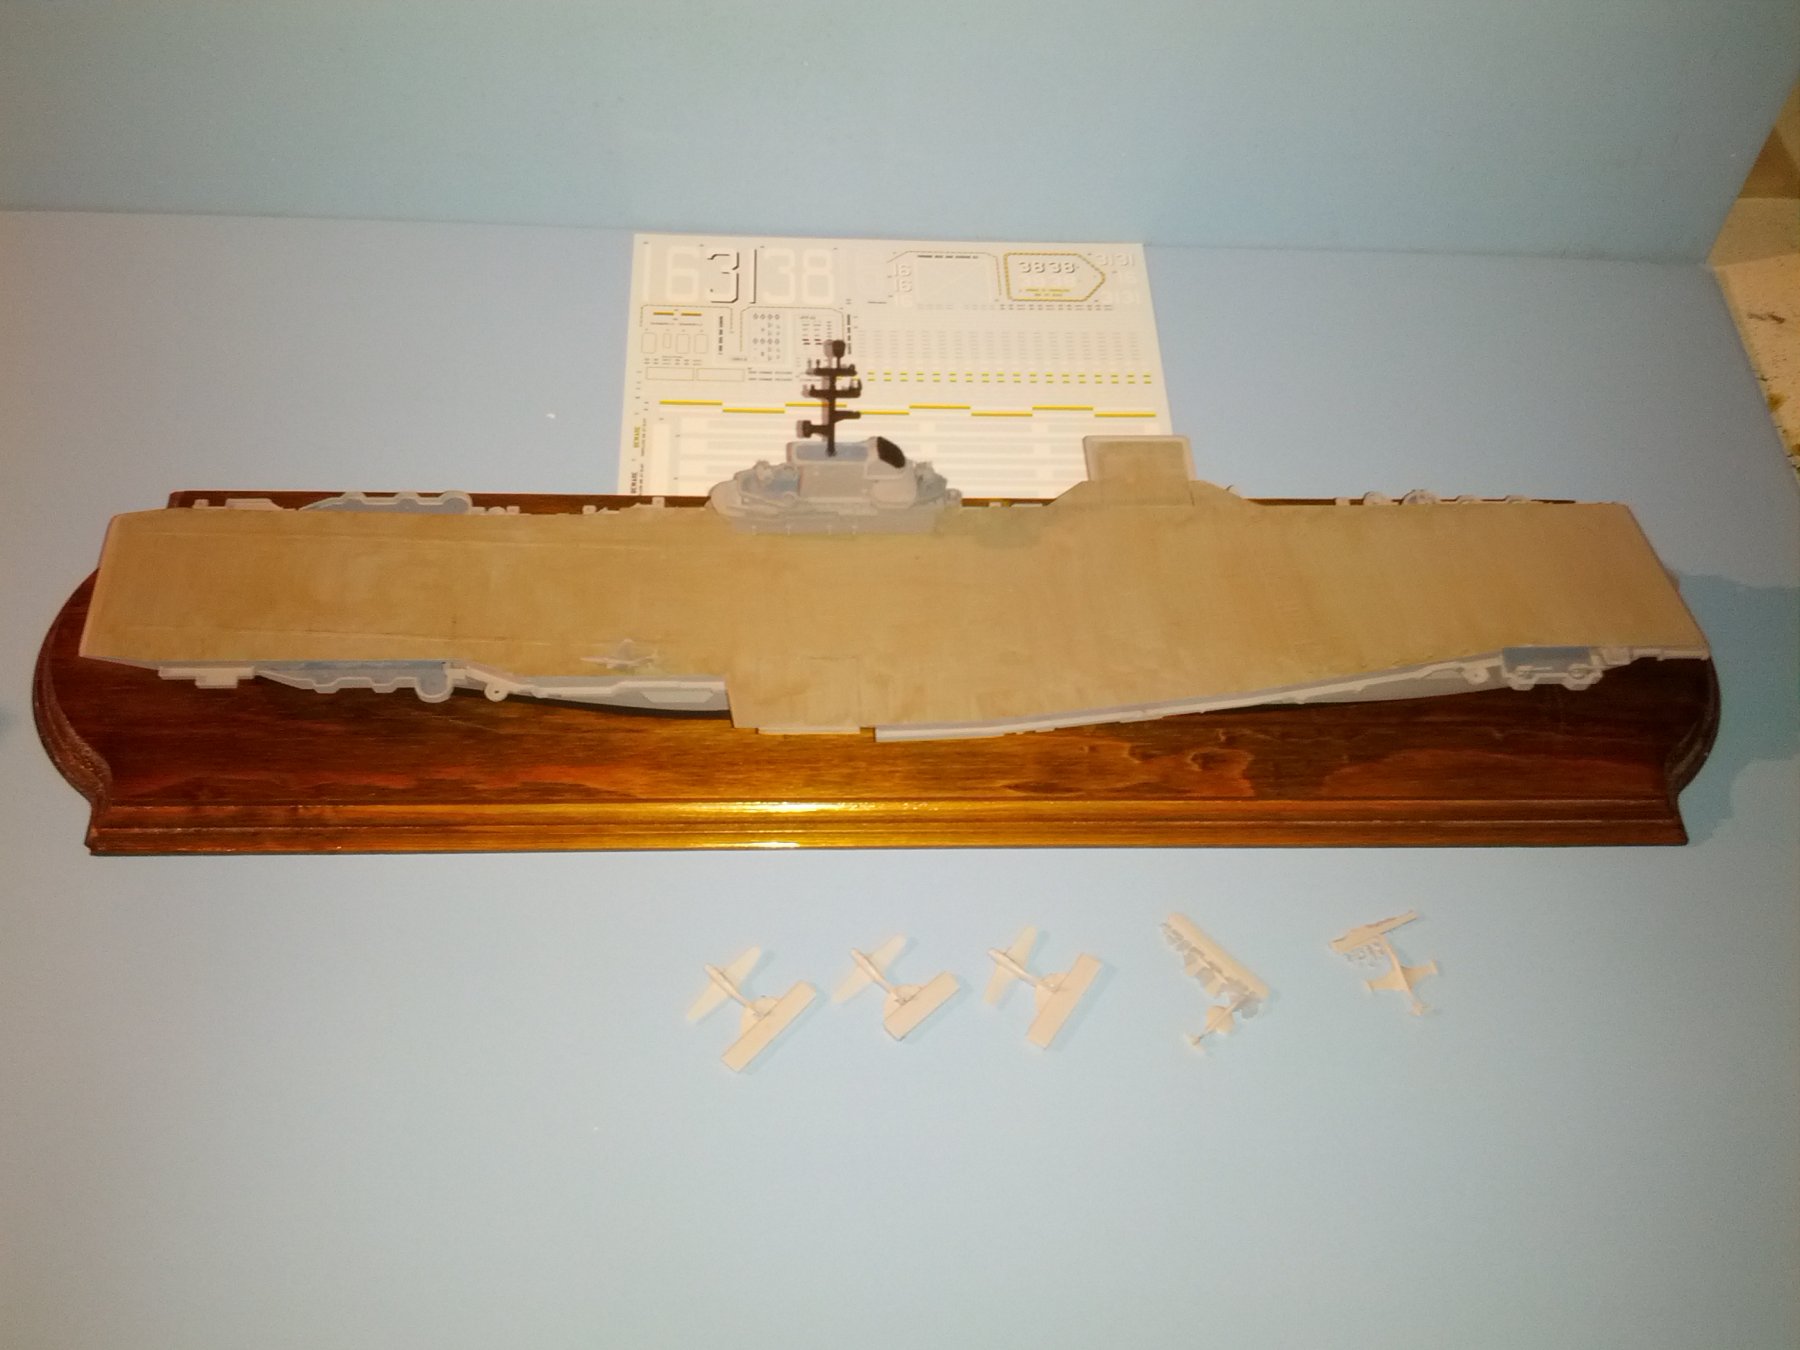
While waiting for the PE to arrive, I plan to start masking out the flightdeck for all the details that need to be painted. I also have all the planes to start painting and building. So a lot to keep me busy.
-
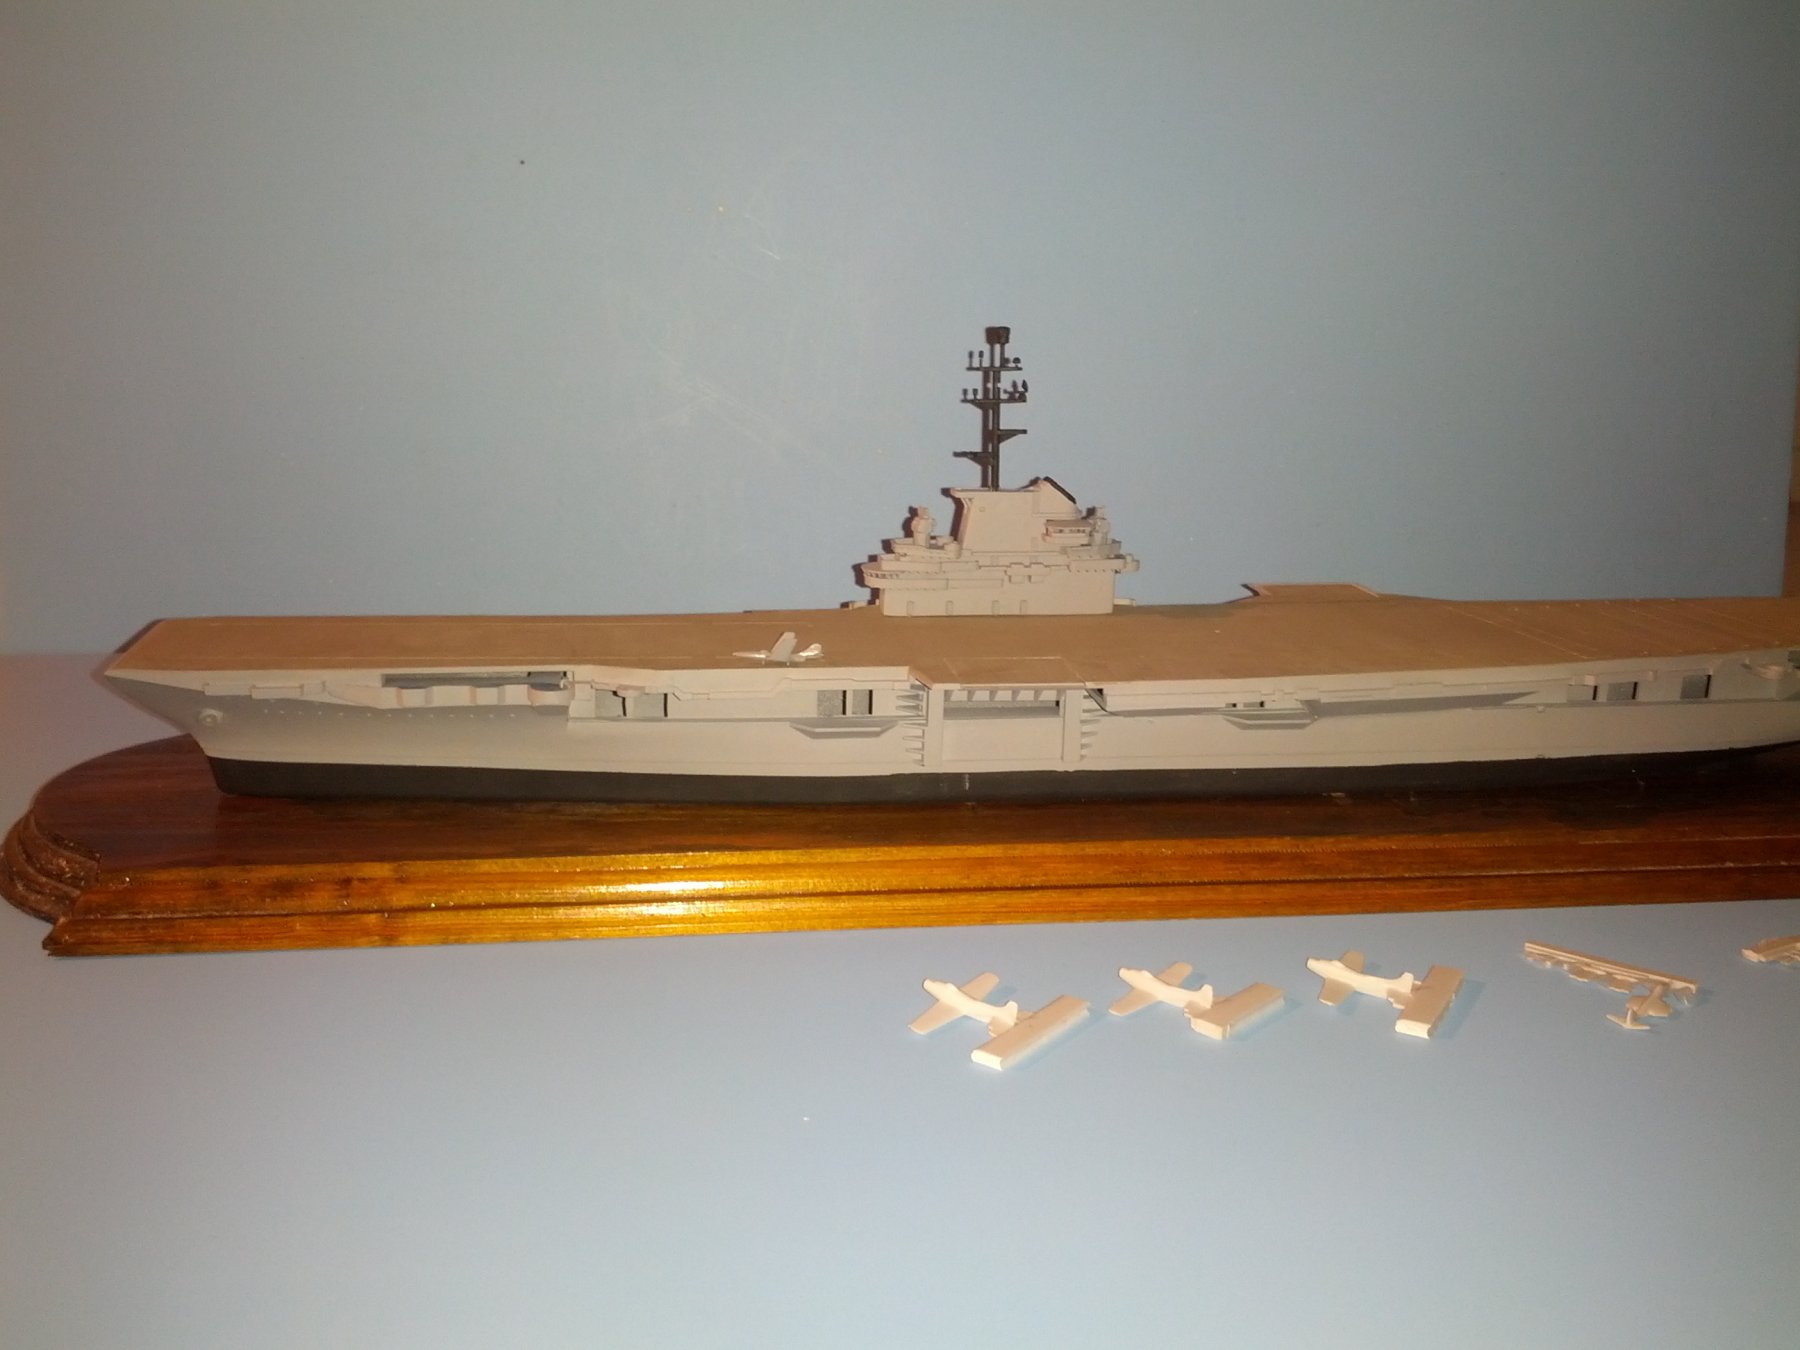
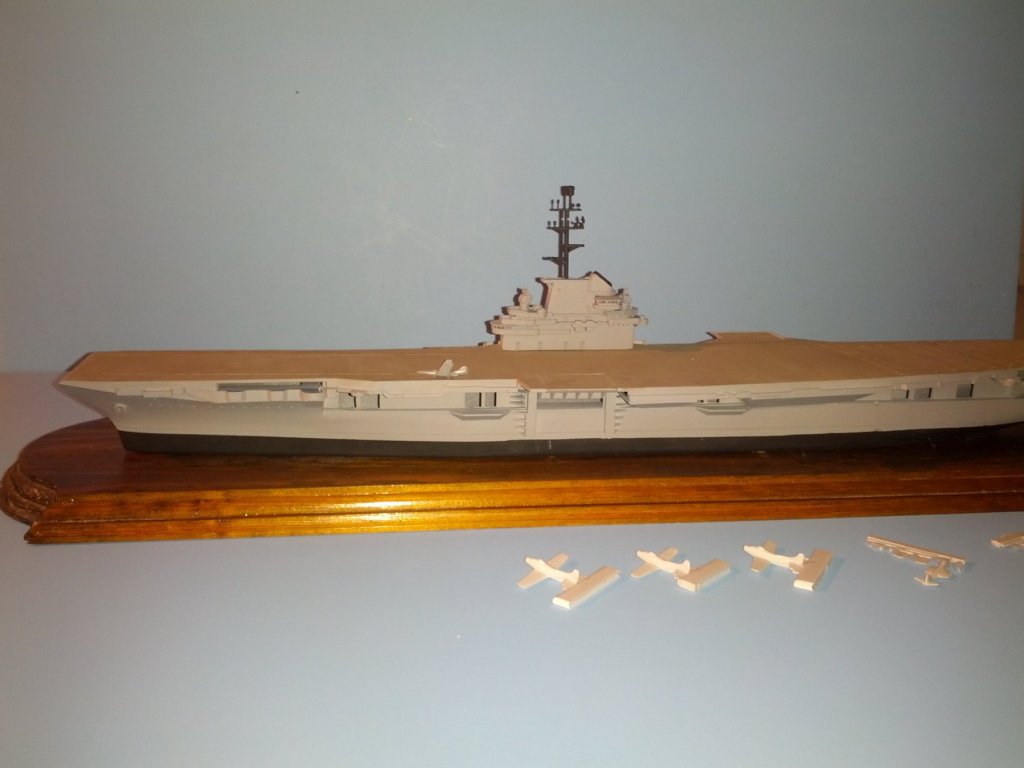
A final coat on the flight deck and now ready to start detailing.


-
Great to hear from you Vintage Modeler. The Starfighter Decals will work for 59 onwards. I have the same set, but in 56 there was a large 16 on the stern and a smaller one on the bow, both were yellow, so like the Oriskany, I will be making my own decals, or stenciles and paint the numbers on, I haven't decided yet. Gold Medal Models makes a PE set for the Revell kits that will also work on this kit. I broke down and ordered one last night becasue I couldn't stand not having accurate radar and also wanted to spuce up the elevators. Once you start using PE on one model, it is hard to not use it again. I got my PE set through VCS Hobbies part # gmm540-6/18515 PE Set 1/500 Revell Essex Class and Forrestal Class Carrier. Scott
-
Ditto....worth the investment.
-
Use both airbrush and brush. I airbrush the yellow first, mask it, then airbrush the copper, mask, then airbrush the black. For airbrushing, I use Model Master, Tamiya, Humbrol, and White Ensign brands both acrylics and enamels. To give the model tone and body so it doesn't look like airbrushed plastic, I will do washes of thinned oils and acrylics. With brush painting, make sure you are using a good quality brush and only load the brush up 1/2 way and do light strokes. My favorite paints are DecoArt artist acrylics. Hobby Lobby, Ben Franklin, and Michaels have them. They make a Yellow Ocher and Lamp Oil Black along with a huge selection of whites and yellows to help tone the colors down. I think of a model ship like a three dimensional painting.
-
Jay, Thanks for the tutorials. I started making coils last night instead of what I should be working on, and that is to work up the nerve to rig the jeers and stays on my Connie.
-
Hi Jerry, Thanks for posting, I have followed your builds both here and I think on RCU and have been inspired to someday try an RC square rigger. Scott
-
Good kit to start out on. I notice you are using Tamiya paints, which are very good. Do you have their "Mr. Surfacer" primer? I would suggest washing all the parts in a warm water with a mild detergent, then once dry, giving everything a light coat of primer and you will find your model will be much easier to paint.
-
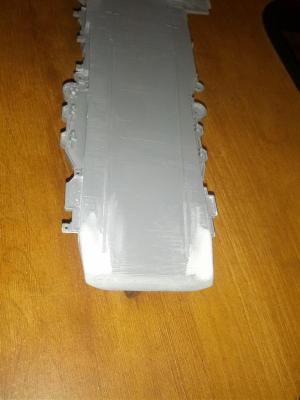
Had some time this morning while waiting for someone to get ready for school, so I put on the first wash of dove gray. Went on pretty light and I also noticed my camera flash setting was not correct. A few more coats and then some weathering. I also added the bridle catchers to the bow. Unlike the Revel kit, the Renwal kit didn't have them molded in.

-
This is the goal. Front page from the Cruise Book.

-
And now its time to dry for awhile. There is still some blending to do then round three will be adding the gray wash to lighten things up. Then the fun begins in adding the details.

-
Then wipe with a lint free cloth, keeping with the grain of the wood. Just like staining eh? Well, same principle, except we just make a plasitc base simulate wood and now we are doing the staining and weathering process.

-
I would first spread the mixture with the grain across the flight deck with a very soft, thik brush. Covering the entire flight deck.


-
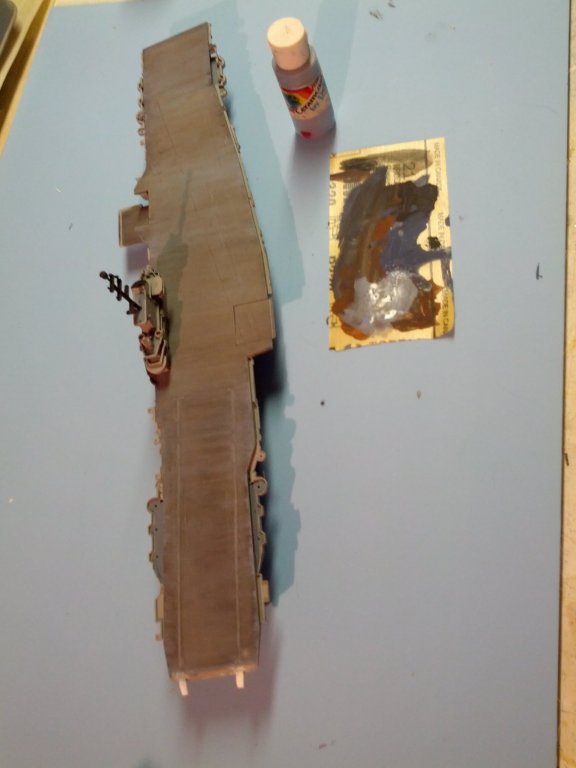
started round two of color washes on the flight deck. The goal is to get a look of gray stained weathered pine soaked with salt, oil, and aviation fuel. Round one was light washes of light uniform blue, burnt sienna, and lamp black mixed.
-
Nice build. I have the Scientific Sea Witch that I want to start someday. I am to understand you stained the lower hull? I am interested in doing this instead of painting or using copper. BTW, keep adding detail until you feel you cannot add anymore. That is the key to enjoying this hobby. Scott
-
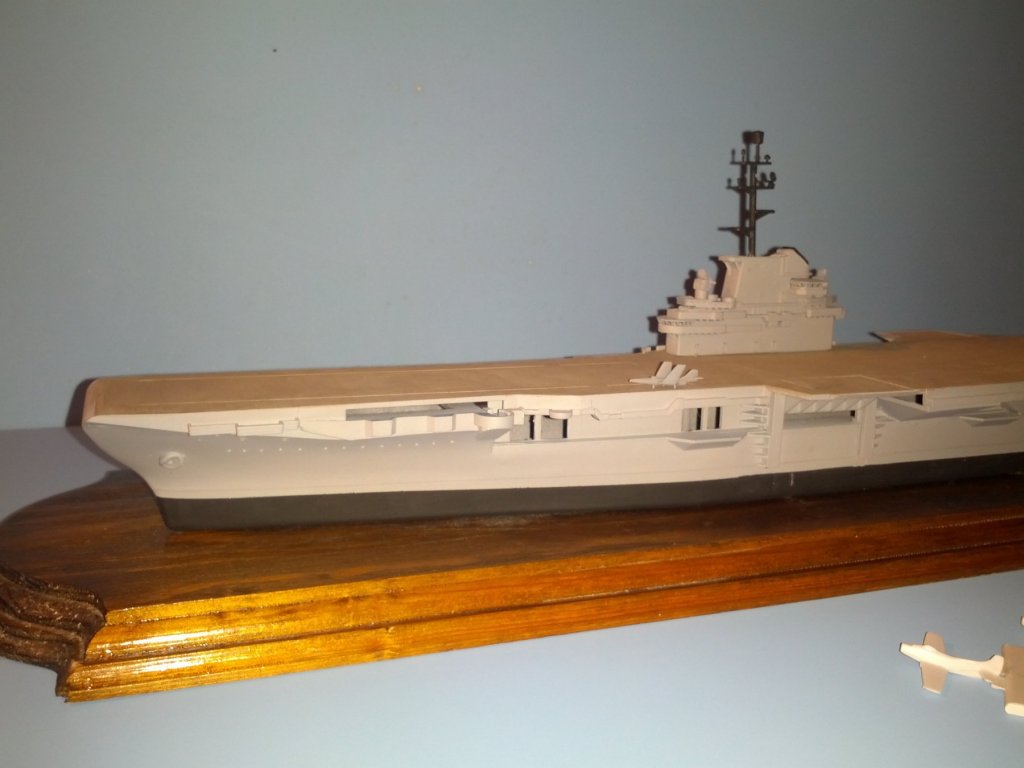
And at present I have added the base coat to the flight deck. The flight deck color for this period is unique in that the ship left the yard with the flight deck only stained. It was later painted with a non-skid dark gray. So, like the Oriskany, I will be doing the painting starting with a base coat followed with washes of blue, gray, and black.


-
Picture of the side of the hull
-
I have now started the painting process. First was the overall gray with the black boot stripe. when this kit was released, it was common to have them with flat bottoms. The explanation was that it was part due to Defense Department censoring and part for the ease for children to sail across the living room floor. I plan to build up the base and put the hull in a sea of Gesso, like my Oriskany.
-
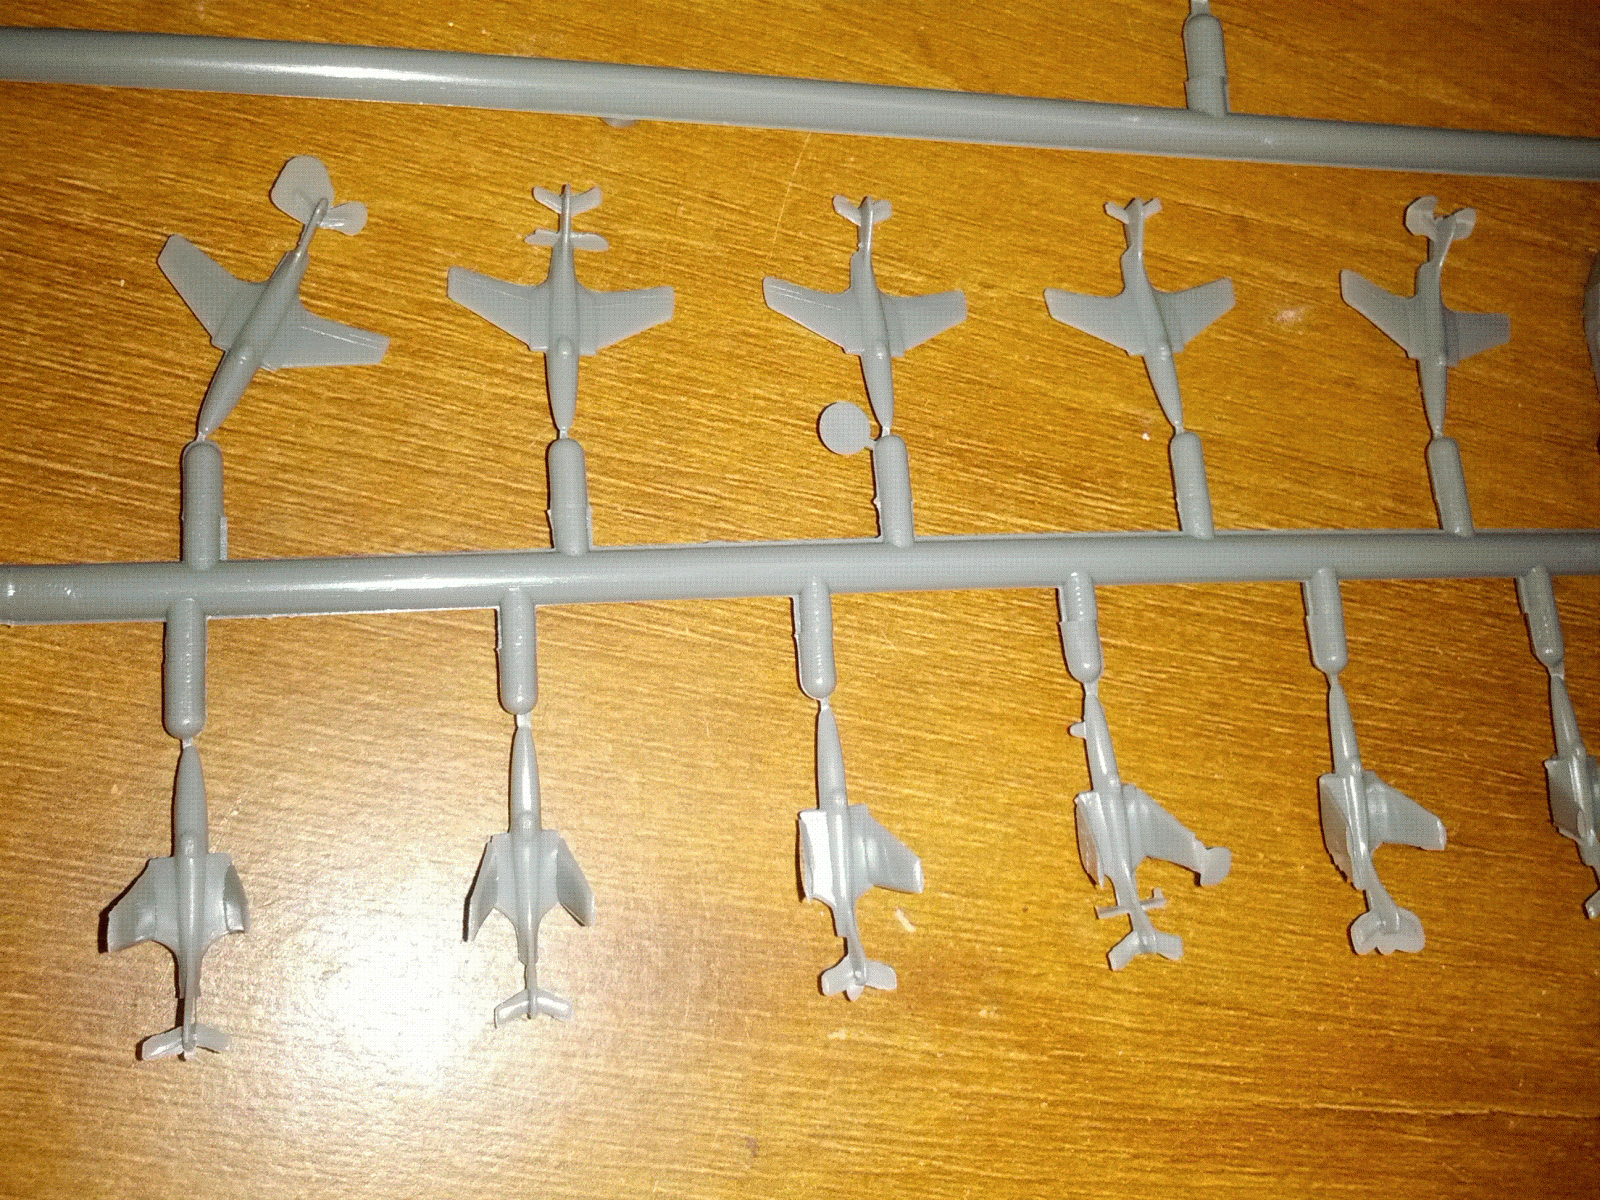
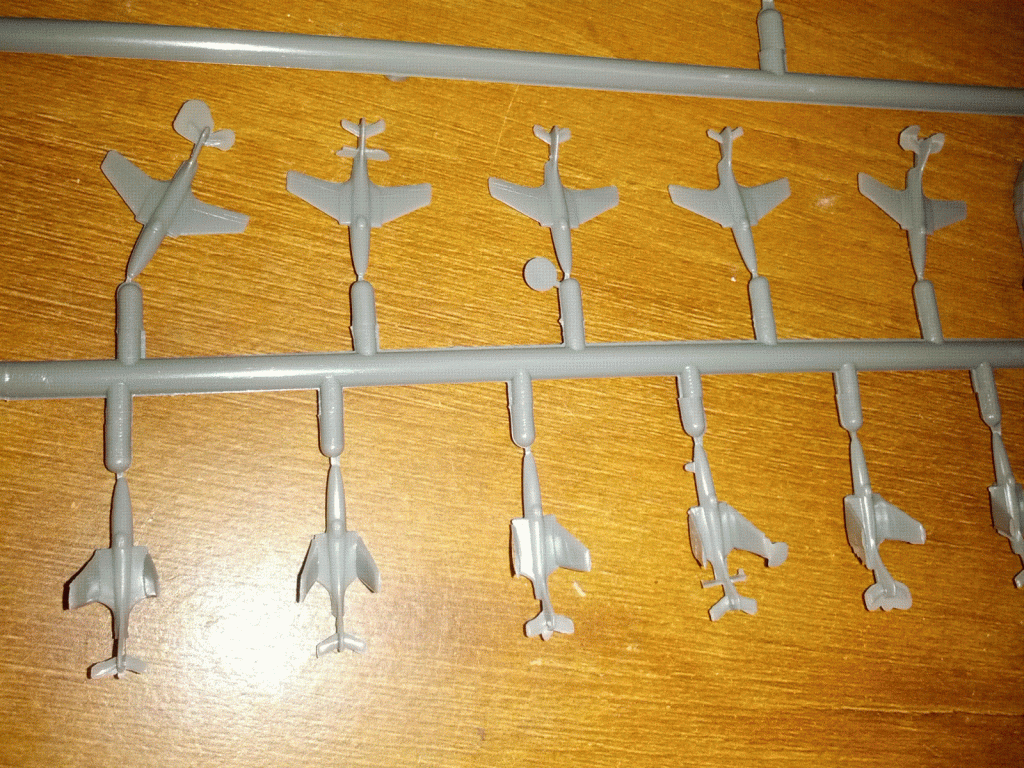
The planes that came with the kit are all Cougars, which were perfect except the canopies will need a little work. I also got Banshees and AD's from Starfighter along with the correct squadron markings. The only planes I will be lacking will be the Cutlass.

-
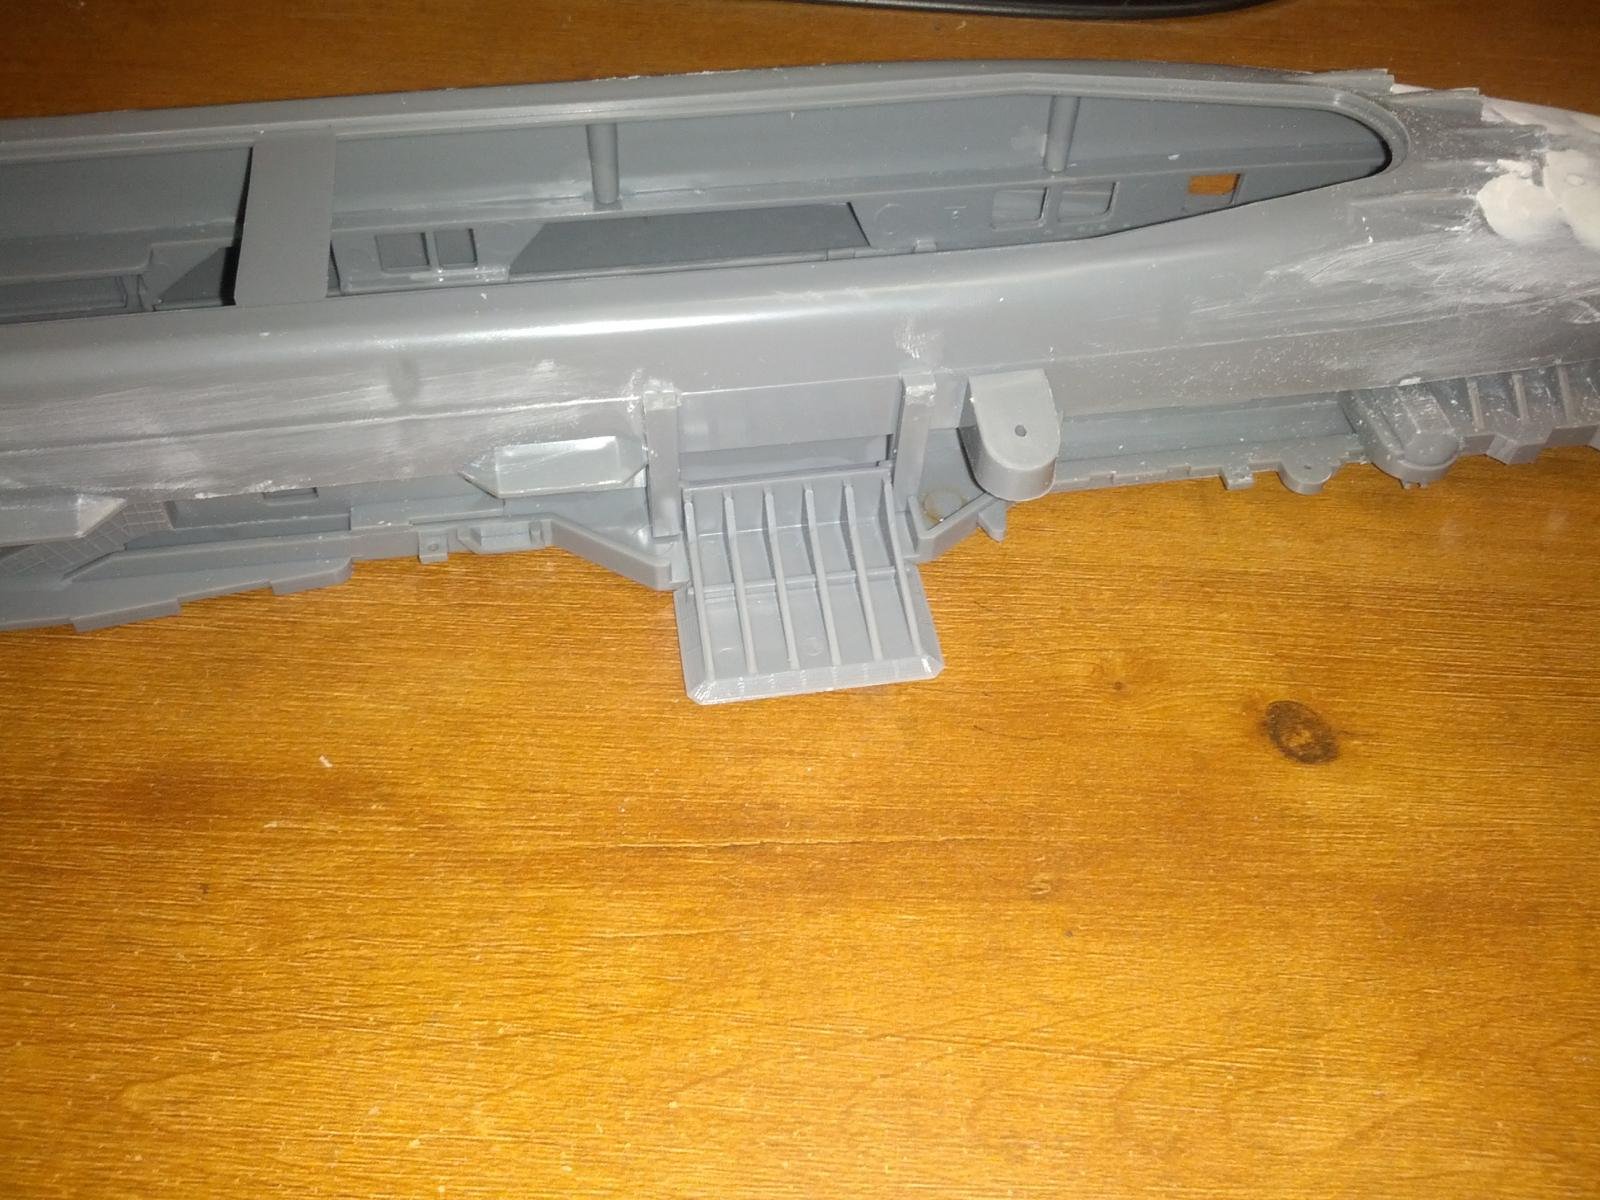
The one area that is lacking scale detail is the elevator. I scratch built these before and I'd rather tie ratlines all day then build another one. There is PE for these, but its out of my price range, so I may just leave it up and out of site and pray my OCD doesn't force me to make it right.

-
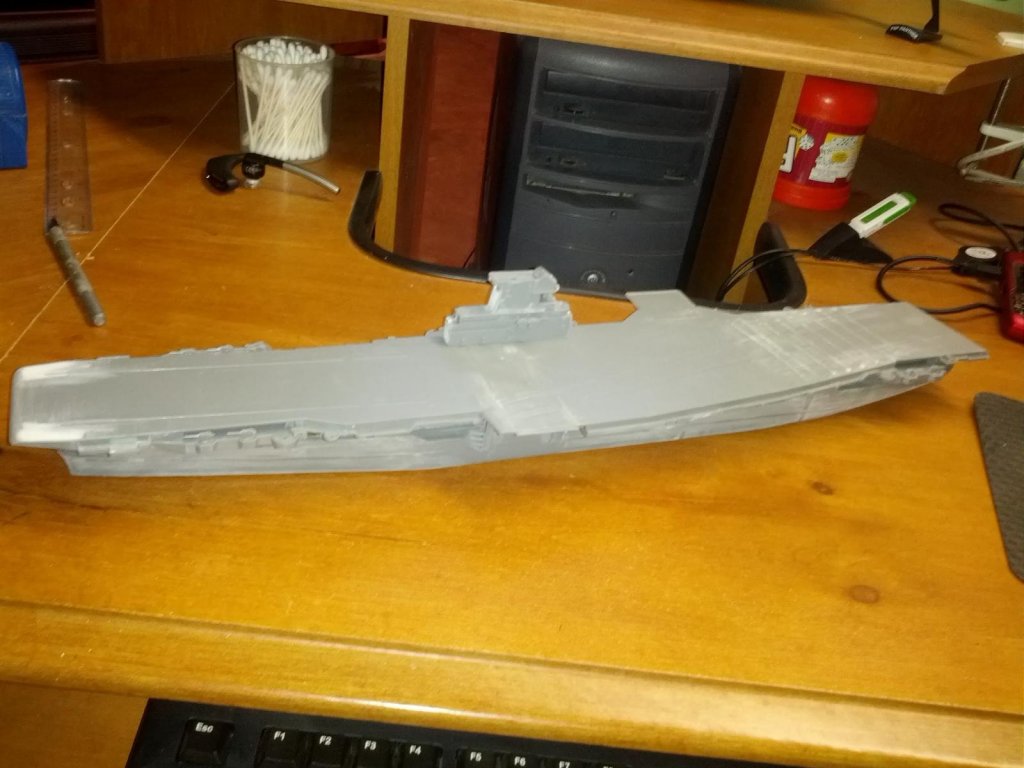
Here was the progress up to last week. The kit was typical "toy scale" and had gaps that needed filling. It also lack detail and I am still contemplating how much Photo Etch and other details to add. I built the Oriskany a few years ago and I went overboard with the detailing to the extent it was no longer enjoyable to build. So this build I am just relaxing and having fun and will only go as far a I feel with the details.

-
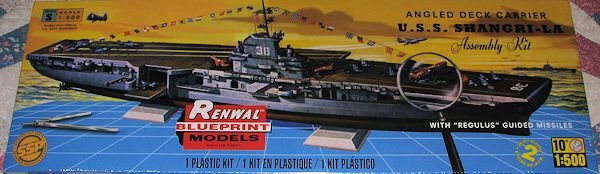
Back in November I posted in the Plastic Kits section about the re-release of the Renwal USS Shangi La and the Revell USS Hornet. These kits, other then a couple of resin short run releases, are the only representation of the Essex Class carrier in its modernized configuration. Both my brother and I built these as kids, but for the past twenty years these kits had been out of production. My father was on the Lexington for her first cruise after she was modernized, and in 1990 I kit bashed for him a model of the Lex in 1/700. The Renwal kit was a big surprise, because it matched the Lex to a Tee as she looked when she left the yard for shakedown in 1956, so I had to purchase it and try to make a larger model of the Lex for my father. Unfortunately, he passed away over Christmas and would never be able to see it. I decided to continue the build because my brother is building a shadow box to display his service medals, certificates, and burial flag and he wanted to put the ship in the shadow box. So, bear with me, I already started and do not have a lot of pictures as of yet, but will try to post as I go. Here is the kit
-
Thanks, I will start a log, hopefully I can keep it up, I tend to forget to take pictures as I build.