starlight
Members-
Posts
146 -
Joined
-
Last visited
Recent Profile Visitors
-
 Steve Anderson reacted to a post in a topic:
HMS Victory c.1765-1791 by Steve Anderson - FINISHED - 1:64 scale
-
 Moonbug reacted to a post in a topic:
HMS Pegasus 1776 by Moonbug - Amati Models - 1:64
-
 billocrates reacted to a post in a topic:
HMS Victory c.1765-1791 by Steve Anderson - FINISHED - 1:64 scale
-
 Saburo reacted to a post in a topic:
HMS Winchelsea 1764 by glbarlow - FINISHED - 1:48
-
 AJohnson reacted to a post in a topic:
HMS Pegasus 1776 by Moonbug - Amati Models - 1:64
-
 Knocklouder reacted to a post in a topic:
HMS Pegasus 1776 by Moonbug - Amati Models - 1:64
-
 mtaylor reacted to a post in a topic:
Checkered cabin flooring
-
 starlight reacted to a post in a topic:
HMS Sphinx 1775 by Blue Ensign - FINISHED - Vanguard Models - 1:64 scale
-
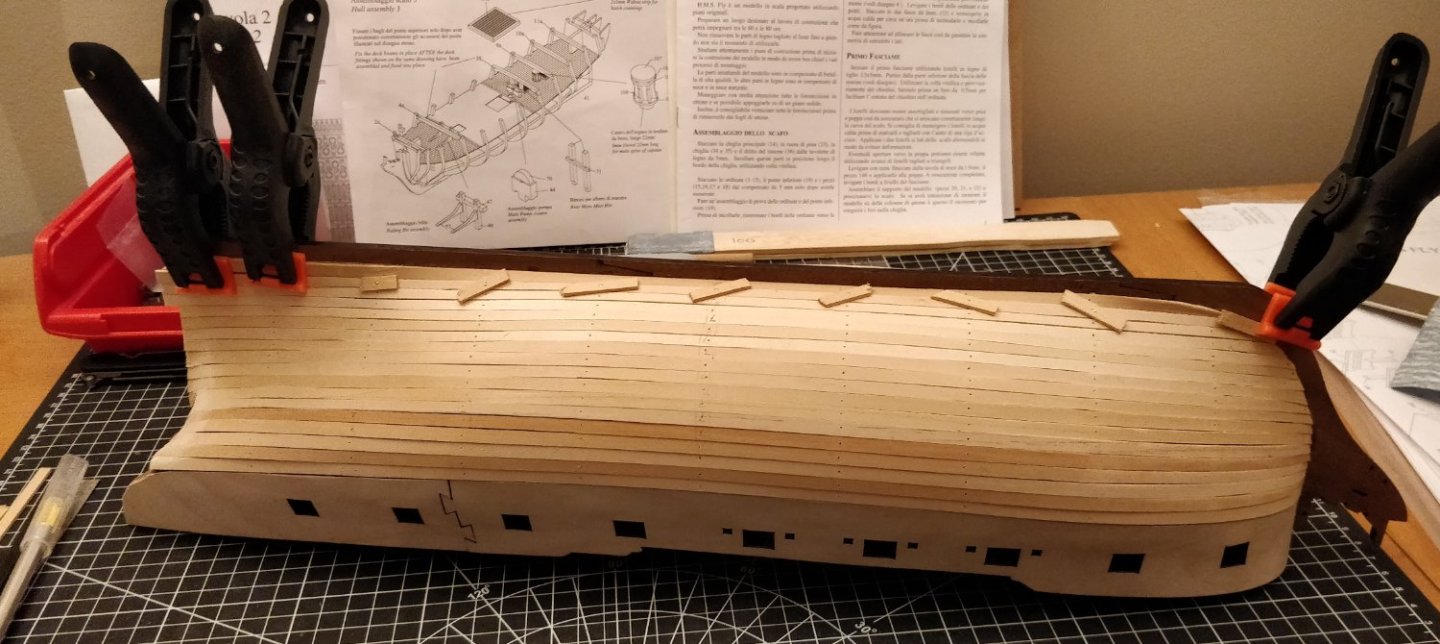
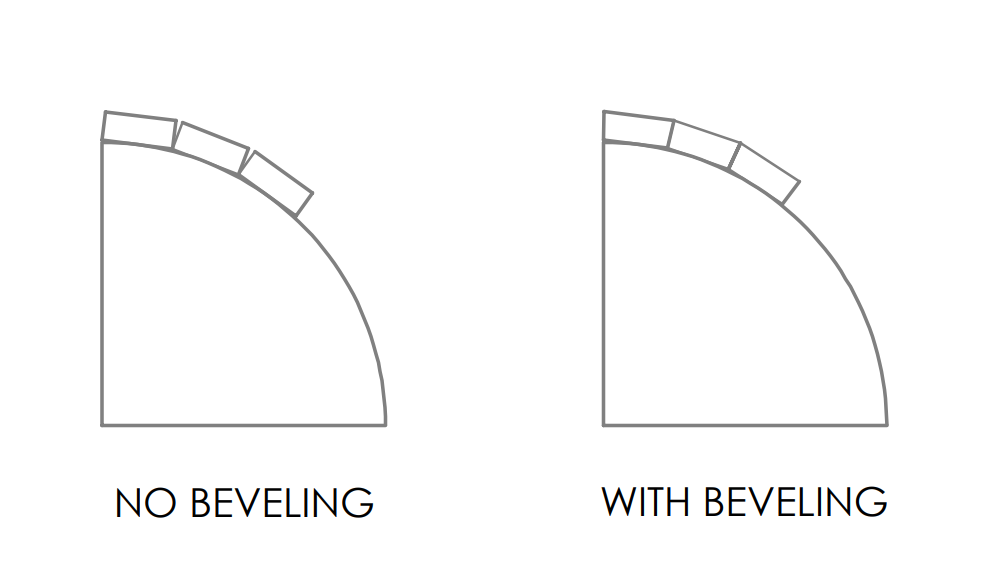
Hello @MangoFox, It seems like you've got a good grasp on what needs to be done. It's always difficult to explain hull planking without actually being there in person. At least for me there was only so much I could do by reading this forum, I had to learn by experience in the end. I don't think anybody ever gets the planking on their first build perfect. Here are some tips I might offer: The LN kit should come with brass pins for the first planking, no? For the severe curvature at the bow and stern these might help to hold the plank up tight against the bulkhead. Just make sure you pin them through some sacrificial material or you'll never be able to remove them (see pic below). For the second planking you can use CA glue here and there for the same purpose. Are you beveling the edges of the planks? This should be done especially in areas of tighter curvature to reduce gaps (see pic below). You will also get a small difference if you measure up your tick strips against the inner or outer surface, if that makes sense. If your planks are edge bent and twisted properly you should be able to avoid the clinker effect. But do treat the 1st planking as a learning experience as you can afford to make mistakes here. Hope that helps, starlight
-
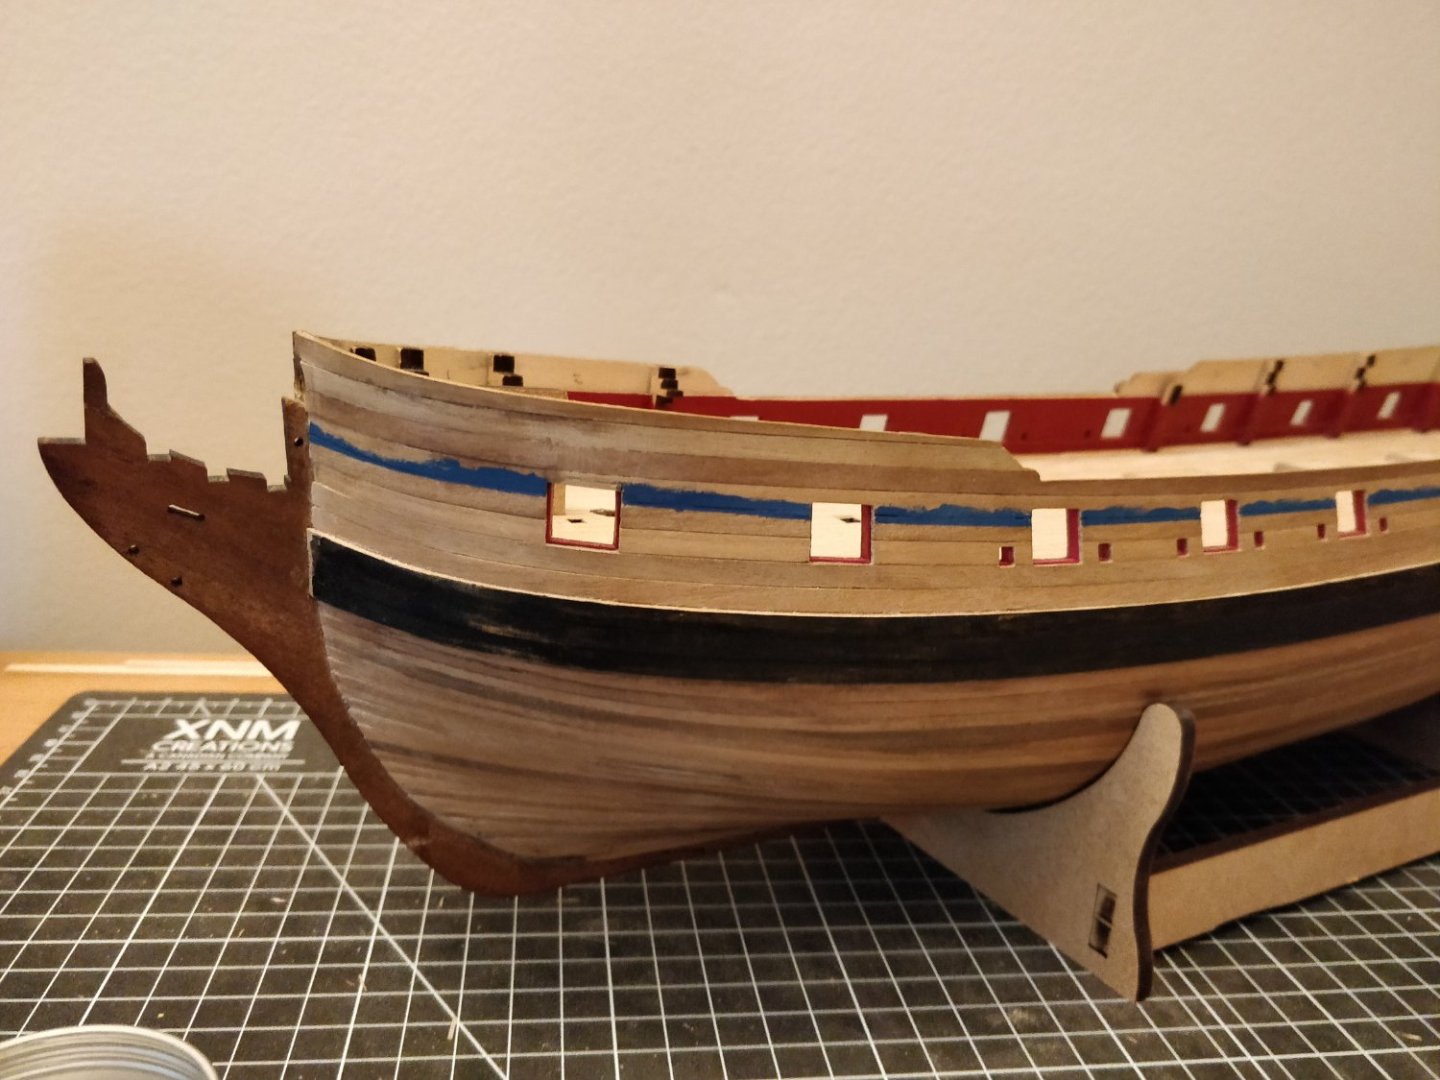
Thank you Blue Ensign, I went ahead and lowered the bridle ports by about 2 mm. The run of the waist rail looks better to my eye now, but time will tell if this causes other problems. I did not end up reducing the width of the ports because I didn't think I could achieve a satisfactory result after laying new hull planking. (lower edge of blue paint represents top edge of waist rail)
- 82 replies
-
- Fly
- Victory Models
-
(and 2 more)
Tagged with:
-
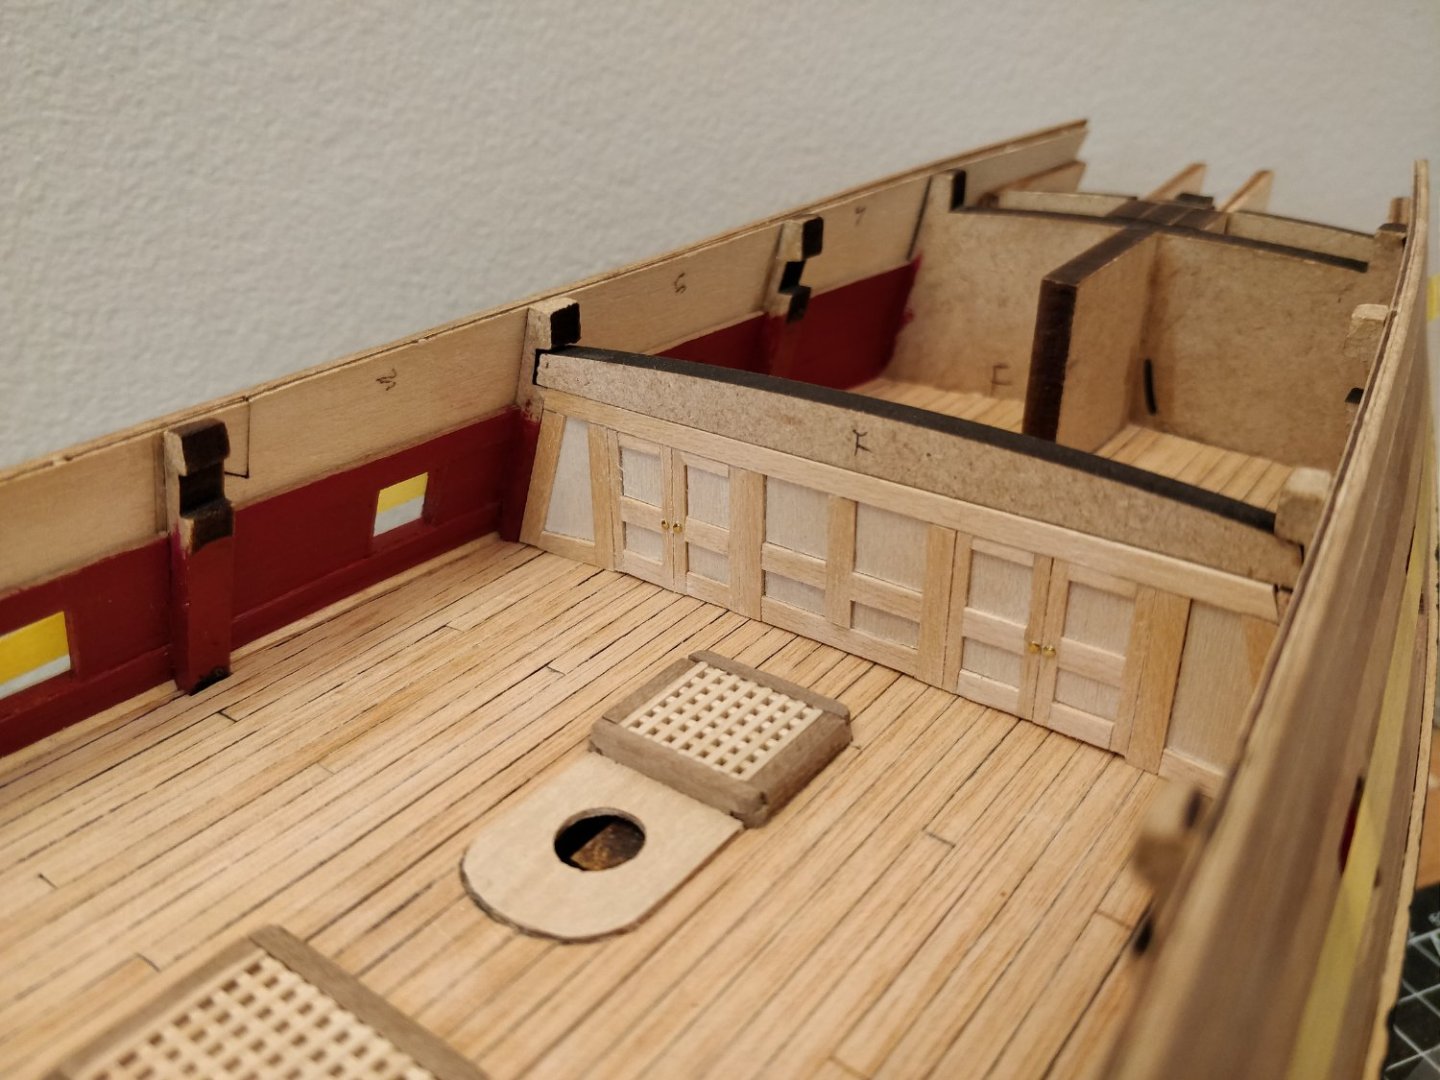
Thanks Chris, unfortunately this is the way the kit has been designed. Based on the other gratings I have made so far, it is hard to see through them so the beam would probably go unnoticed. I may just stick with leaving the bulkhead partition panel in this location since it will also be barely visible.
- 82 replies
-
- Fly
- Victory Models
-
(and 2 more)
Tagged with:
-
 starlight reacted to a post in a topic:
Monitor and Merrimack by robert952 - FINISHED - Metal Earth - 1:370 and 1:393
-
 starlight reacted to a post in a topic:
HMS Winchelsea 1764 by Jeff 1/48
-
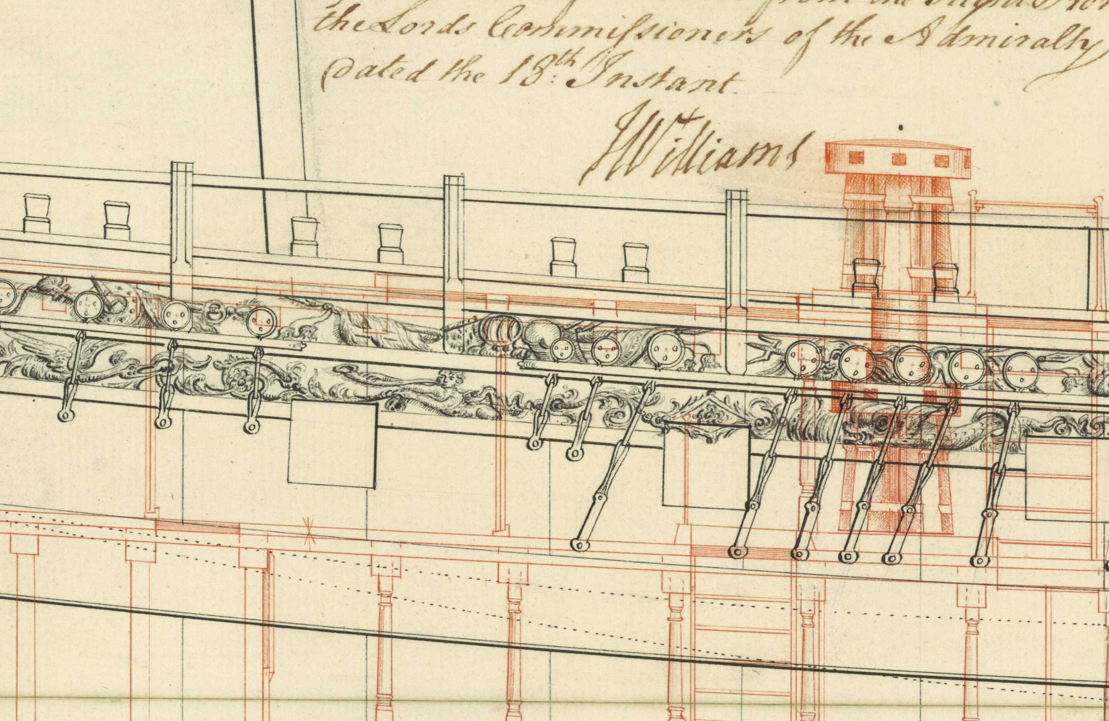
Hi Chris, I completely forgot to reply to your comment. Currently the kit bulkhead beam (and by extension my partition panel) lies under the quarterdeck grating. Is this the proper location? Measuring from the RMG plans for Fly suggests that the bulkhead panel should actually be moved a bit further aft: -starlight
- 82 replies
-
- Fly
- Victory Models
-
(and 2 more)
Tagged with:
-
Glad to see you started a build log! I'm sure others will jump in with detailed advice to any specific questions you have, so I'll just offer some general advice, from one newbie to another. Make sure you read the tutorials on hull planking. You can find them in the Articles Database (in the top bar), under the heading "Framing and Planking". Check out as many other build logs as you can for the kit you're building: https://modelshipworld.com/tags/Endurance/ This is the best way to inform yourself in advance to any quirks and issues you might encounter, especially if you're going to be doing any kit-bashing. I myself have bookmarked around 15 different logs for the ship I'm building and have found them immensely useful. Plan as many steps ahead as you can (by looking at other people's logs), but try not to overthink things to the point where it no longer becomes enjoyable. The goal after all is to have fun. Best of luck with your build. -starlight
-
 starlight reacted to a post in a topic:
Endurance by Galliumsphinx - OcCre - 1:70 - first build
-
 starlight reacted to a post in a topic:
New member and modeller
-
 starlight reacted to a post in a topic:
New member and modeller
-
 starlight reacted to a post in a topic:
New member and modeller
-
 starlight reacted to a post in a topic:
New member and modeller
-
Welcome, Zac. I too am from Canada and am in my 20's. There aren't very many young'uns like us here on MSW. As everyone else has said, do start a build log. I am also working on my first ever model, and have found it both practical and sentimental to have photos and details of my build process. Besides that, there are so many knowledgeable members here who have answered my questions throughout the years. I'd be glad to have a chance to pay it forward. Cheers, starlight
-
Thank you @markjay and @JerryTodd for bringing this information to my attention. I had no idea these floorcloths were so common, even nowadays. mtaylor, I found this stock photo of the cabin on Victory: https://www.alamy.com/stock-photo-the-captains-day-cabin-onboard-the-hms-victory-nelsons-flagship-in-25705347.html It surprises me how crisp and bright the pattern is, almost like tile! Much appreciated for pointing me in the right direction. -starlight
-
Hi Steven, The last part of your post set off an alarm bell in my head. I am also a first time model builder. I would simply ask you one question: are you prepared to take on a truly monumental project, one that may take you several years? Forgive me if I sound like I am disrespecting your skills or motivation. It is just that when I was getting into this hobby, I too was enamoured with the idea of building a ship of the line, and quickly realized from browsing the many amazing builds here that I was way in over my head. I decided to cut my teeth on a simple sloop of war first, and it has already taken me over 2 years (and I still have not completed the hull). I'm sure others will be quick to chime in, but to start, if you have not already seen it I would recommend this excellent thread by @ccoyle: Whatever you decide, I wish you luck. -starlight
-
Hello all, I am seeking some information regarding the checkered flooring on the stern cabin for English warships of the late 18th century. I understand that it was made from painted canvas and simply laid down over the deck planking, but I have a hard time conceptualizing what this would look like in reality. Are there any photographs of modern reconstructions? Any resources would be most welcome. Thanks in advance, starlight
-
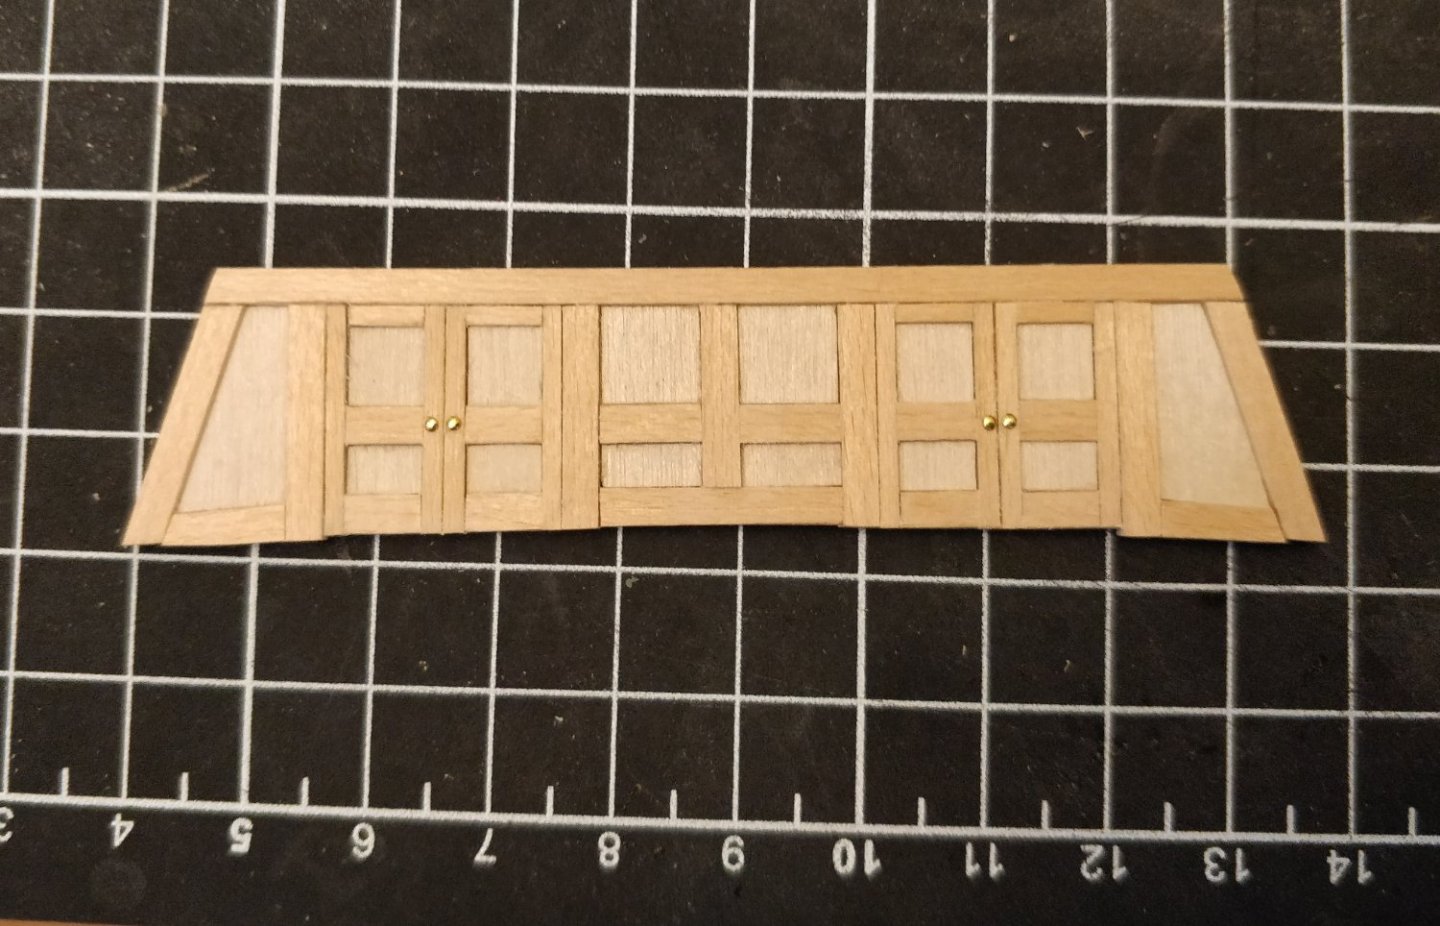
Just another small update for today. As a way of procrastinating on the more important parts of the build, I decided to (once again) copy the great Blue Ensign and Dan Vadas and make a cabin bulkhead: The frame is made from leftover lime wood strip from the 1st planking, the panels are 1 mm plywood, and the doorknobs are the heads of the brass pins that came with the kit. Still need to add the cants that mount the bulkhead to the deck. I'm afraid it doesn't hold a candle to the builds I based it off of, but I think it's the best I can do with hand tools. Not sure yet if I will do the other bulkheads. I would still like to open up the stern cabin, just doing some more research first. -starlight
- 82 replies
-
- Fly
- Victory Models
-
(and 2 more)
Tagged with:
-
Hello Steve, You have an exquisitely beautiful model, one that is in fact older than I am. I can only hope to someday have the level of patience and passion to take on such a monumental project as this. Nowadays we are very fortunate to have access to things like hobby-grade CNC machining, computer aided design, and 3D printing. It's interesting to think about how the art of modelmaking has changed since the early 90s! Regards, starlight
-
Planking Help Needed
starlight replied to JDillon's topic in Building, Framing, Planking and plating a ships hull and deck
Oops, how embarrassing! Fixed.
About us
Modelshipworld - Advancing Ship Modeling through Research
SSL Secured
Your security is important for us so this Website is SSL-Secured
NRG Mailing Address
Nautical Research Guild
237 South Lincoln Street
Westmont IL, 60559-1917
Model Ship World ® and the MSW logo are Registered Trademarks, and belong to the Nautical Research Guild (United States Patent and Trademark Office: No. 6,929,264 & No. 6,929,274, registered Dec. 20, 2022)
Helpful Links
About the NRG
If you enjoy building ship models that are historically accurate as well as beautiful, then The Nautical Research Guild (NRG) is just right for you.
The Guild is a non-profit educational organization whose mission is to “Advance Ship Modeling Through Research”. We provide support to our members in their efforts to raise the quality of their model ships.
The Nautical Research Guild has published our world-renowned quarterly magazine, The Nautical Research Journal, since 1955. The pages of the Journal are full of articles by accomplished ship modelers who show you how they create those exquisite details on their models, and by maritime historians who show you the correct details to build. The Journal is available in both print and digital editions. Go to the NRG web site (www.thenrg.org) to download a complimentary digital copy of the Journal. The NRG also publishes plan sets, books and compilations of back issues of the Journal and the former Ships in Scale and Model Ship Builder magazines.


