HOLIDAY DONATION DRIVE - SUPPORT MSW - DO YOUR PART TO KEEP THIS GREAT FORUM GOING! (Only 13 donations so far - C'mon guys!)
×


starlight
-
Posts
146 -
Joined
-
Last visited
Content Type
Profiles
Forums
Gallery
Events
Everything posted by starlight
-
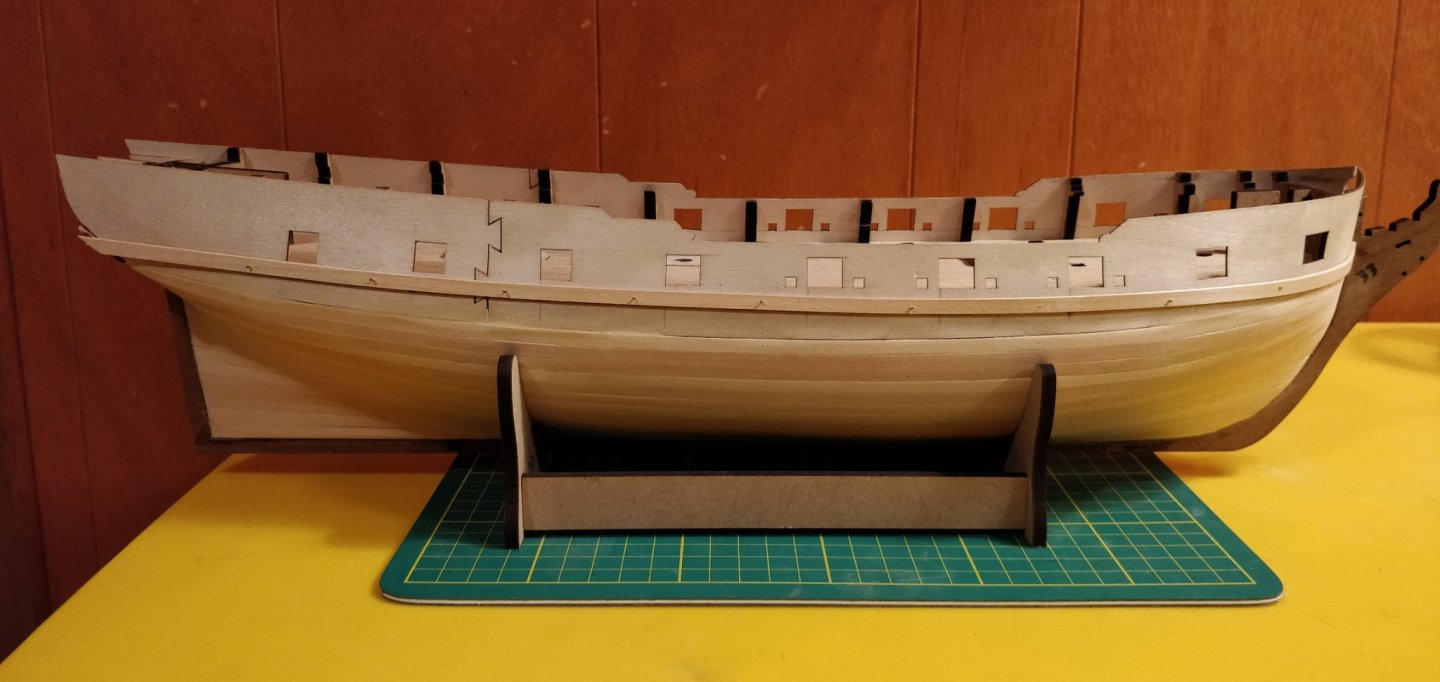
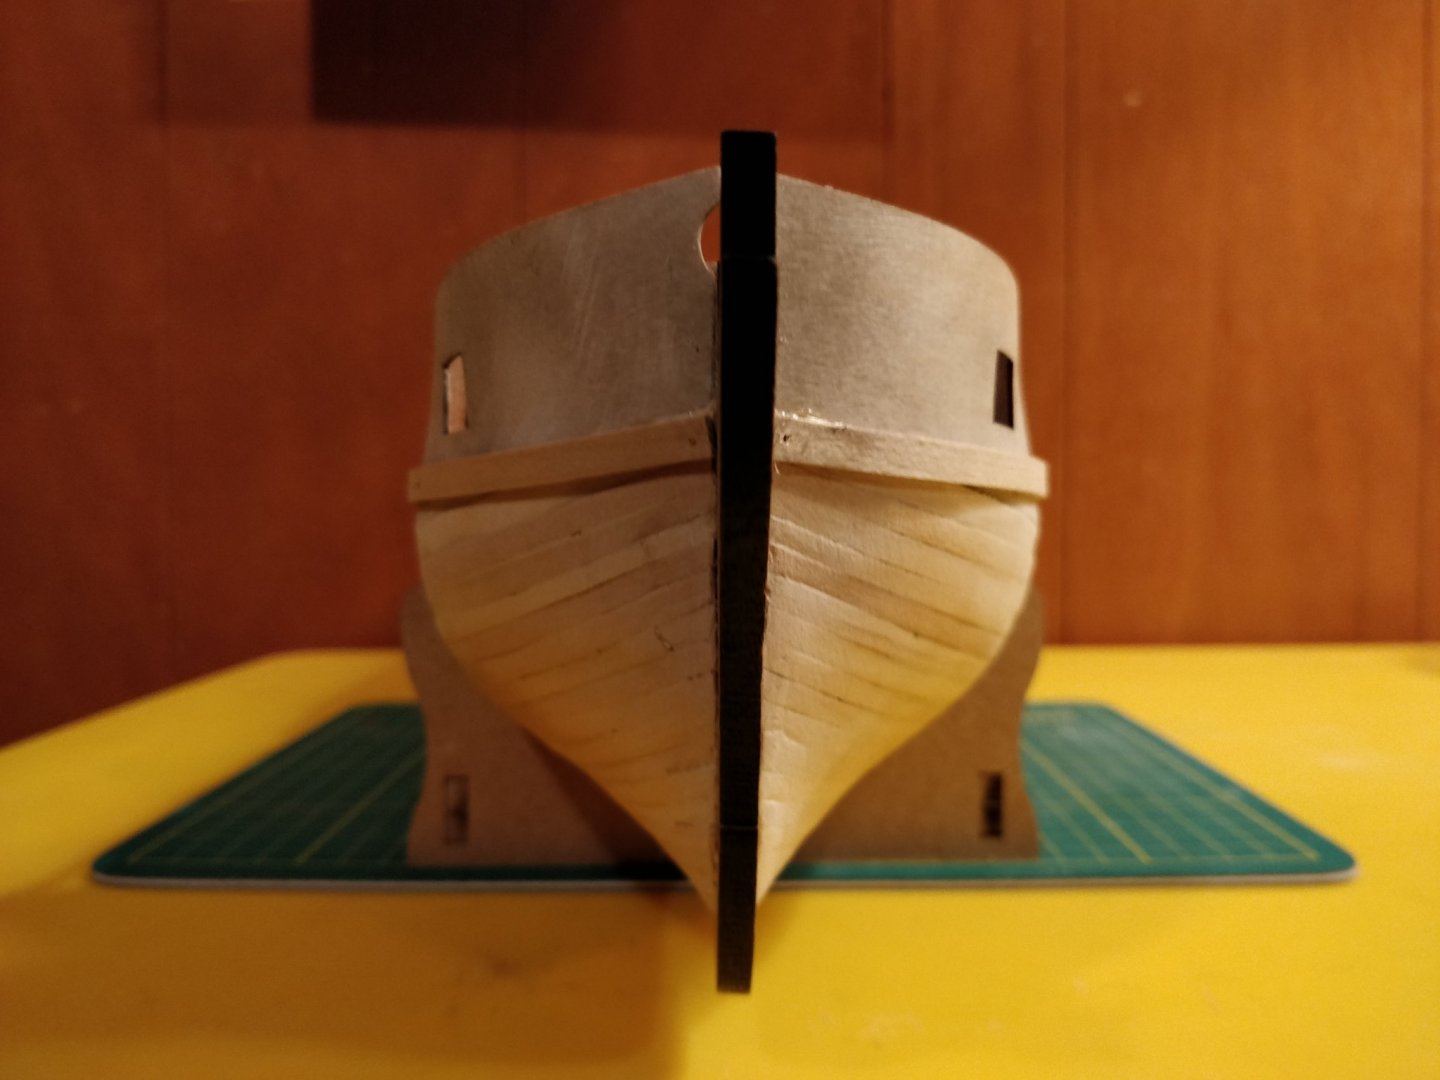
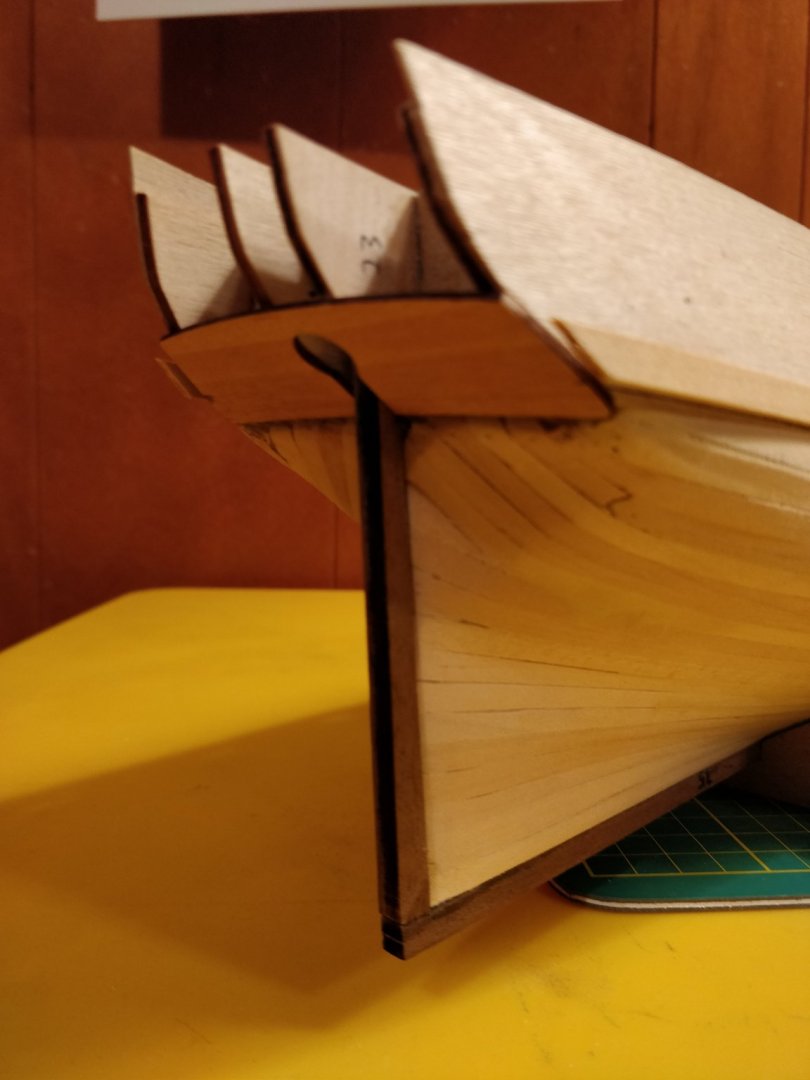
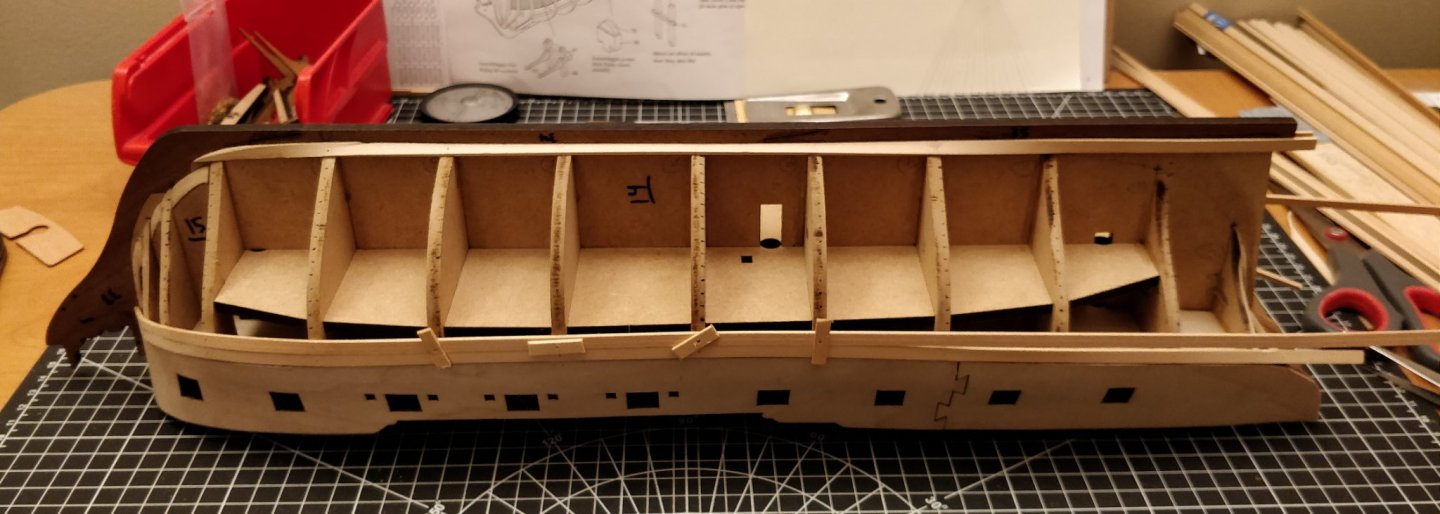
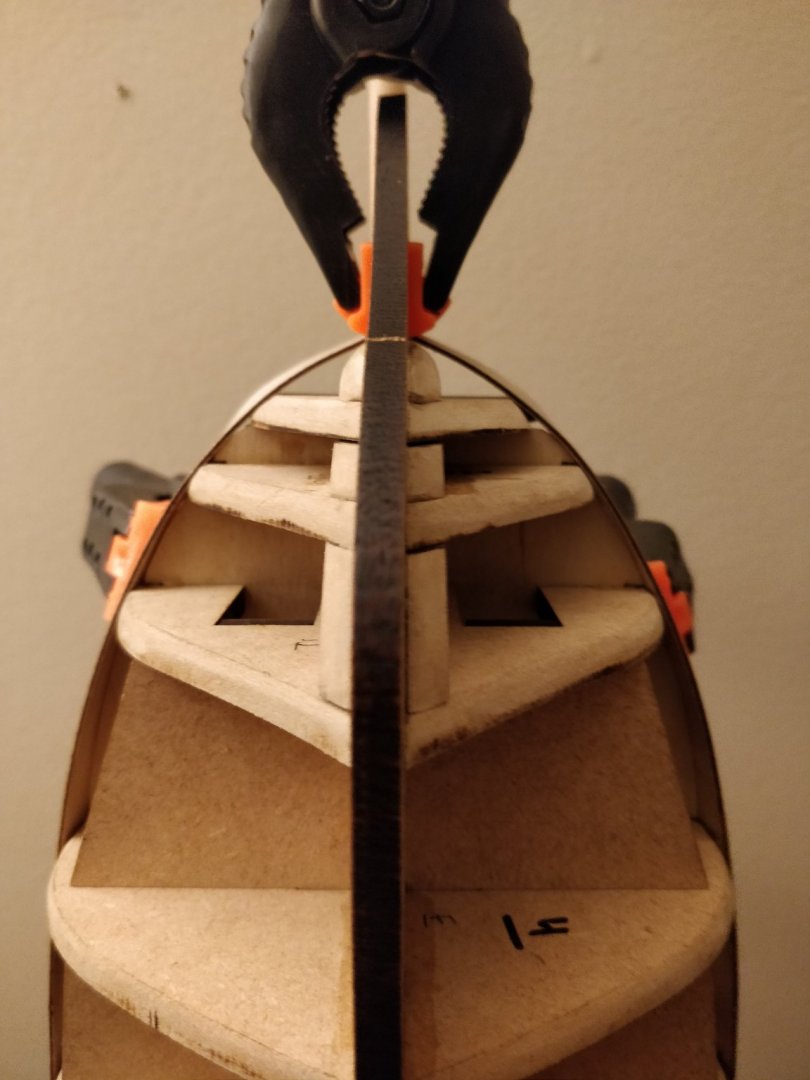
Thanks to everyone who has been following along so far. I am with family for the holidays so please excuse the change in background. I finally finished sanding the 1st planking to a state that I am reasonably happy with: I have been slowly working up the courage to start the 2nd planking. In preparation for this, I glued on the rudder post and stern counter: Then I tried my best to lay out the main wale using the kit-suggested method of measuring down from the gunports, followed by pinning a temporary strip along the profile. The bottom edge of the strip represents the top edge of the main wale. I would certainly appreciate any comments on the placement of this feature. Thanks again to all and happy holidays. -starlight

- 82 replies
-
- 6
-

-
- Fly
- Victory Models
- (and 2 more)
-
Looks amazing, Tim! I'm still dragging my feet on the task of sanding my first planking... hopefully I can take a page from your book with how decisively you did the second planking. -starlight
-
Hi Richard, looks great! Forgive my ignorance, but what is the purpose of the sweep ports? I see that many modelers add extras to the gunport strips. -starlight
-
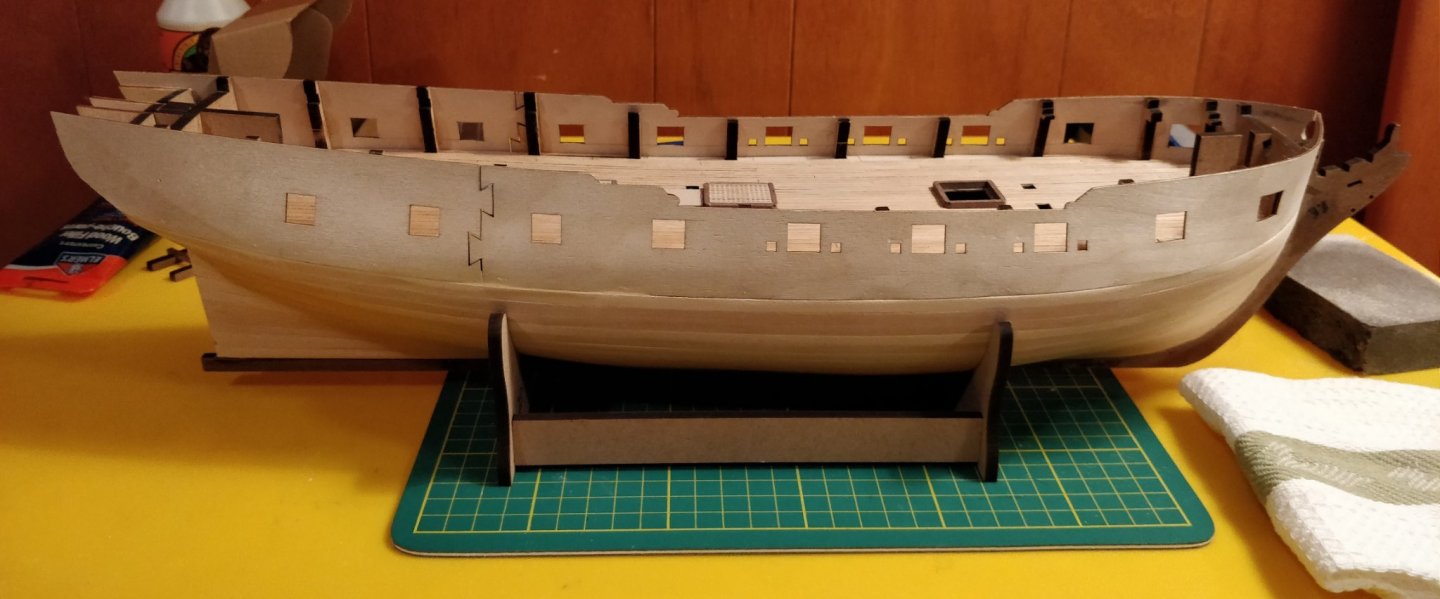
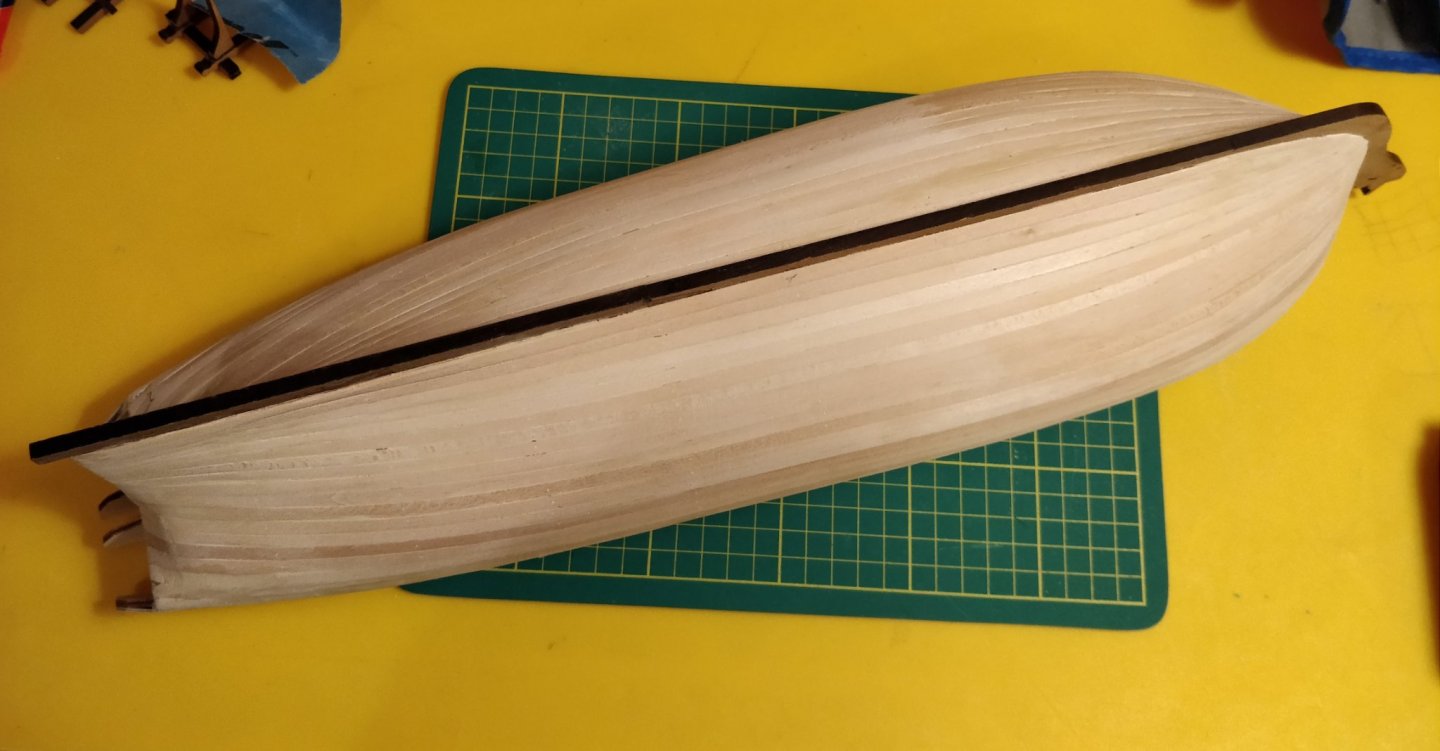
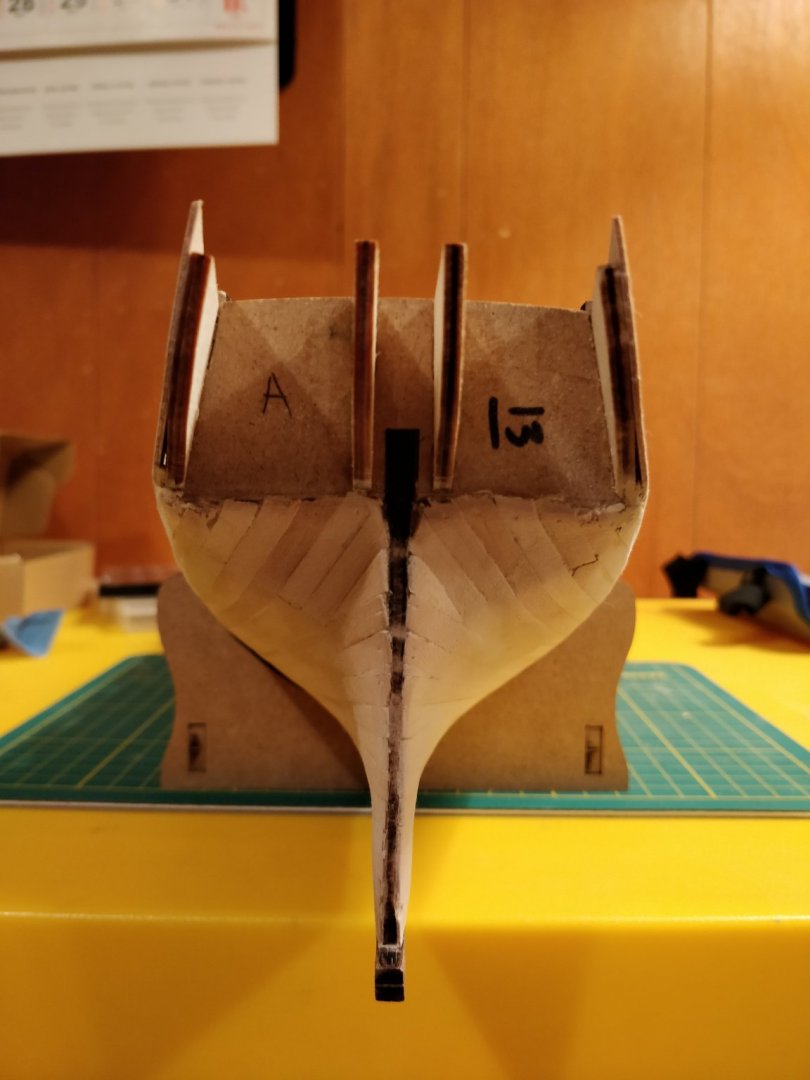
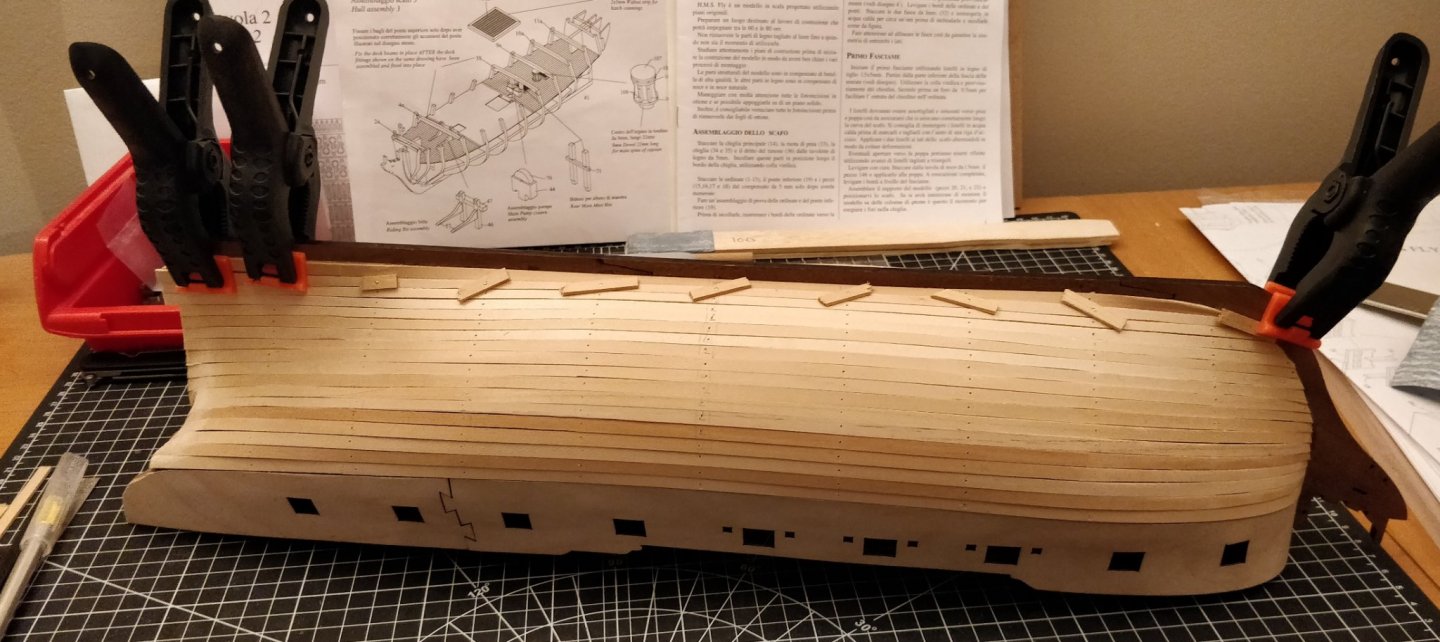
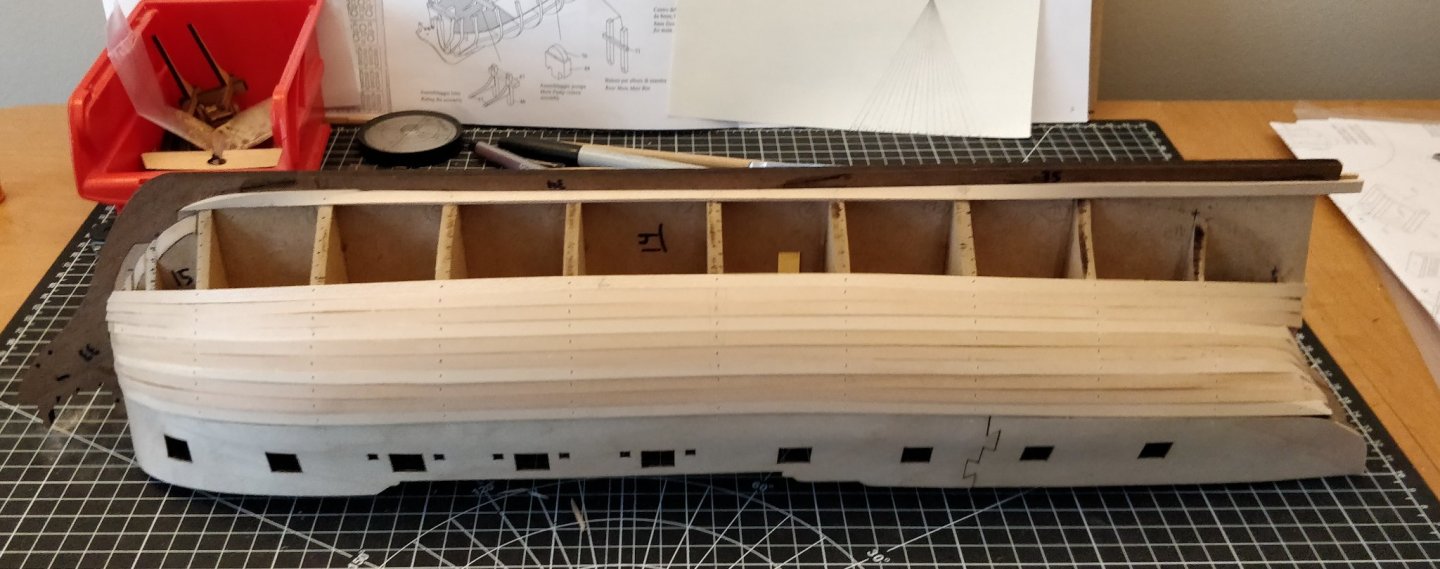
Hi all, Finally finished the 1st planking. It's certainly not a work of art but it still turned out better than I had hoped. Some notes: Unfortunately I did not fair BH 12 enough and I ended up with a kink at the stern curve I only used water to form the strakes (no steam, iron, etc.) No CA glue, just PVA and temporary pins 3 small stealers per side used at the stern, none at the bow, no drop planks Pictures below. Will spend some time sanding and filling before moving on.
- 82 replies
-
- 2
-
-
- Fly
- Victory Models
- (and 2 more)
-
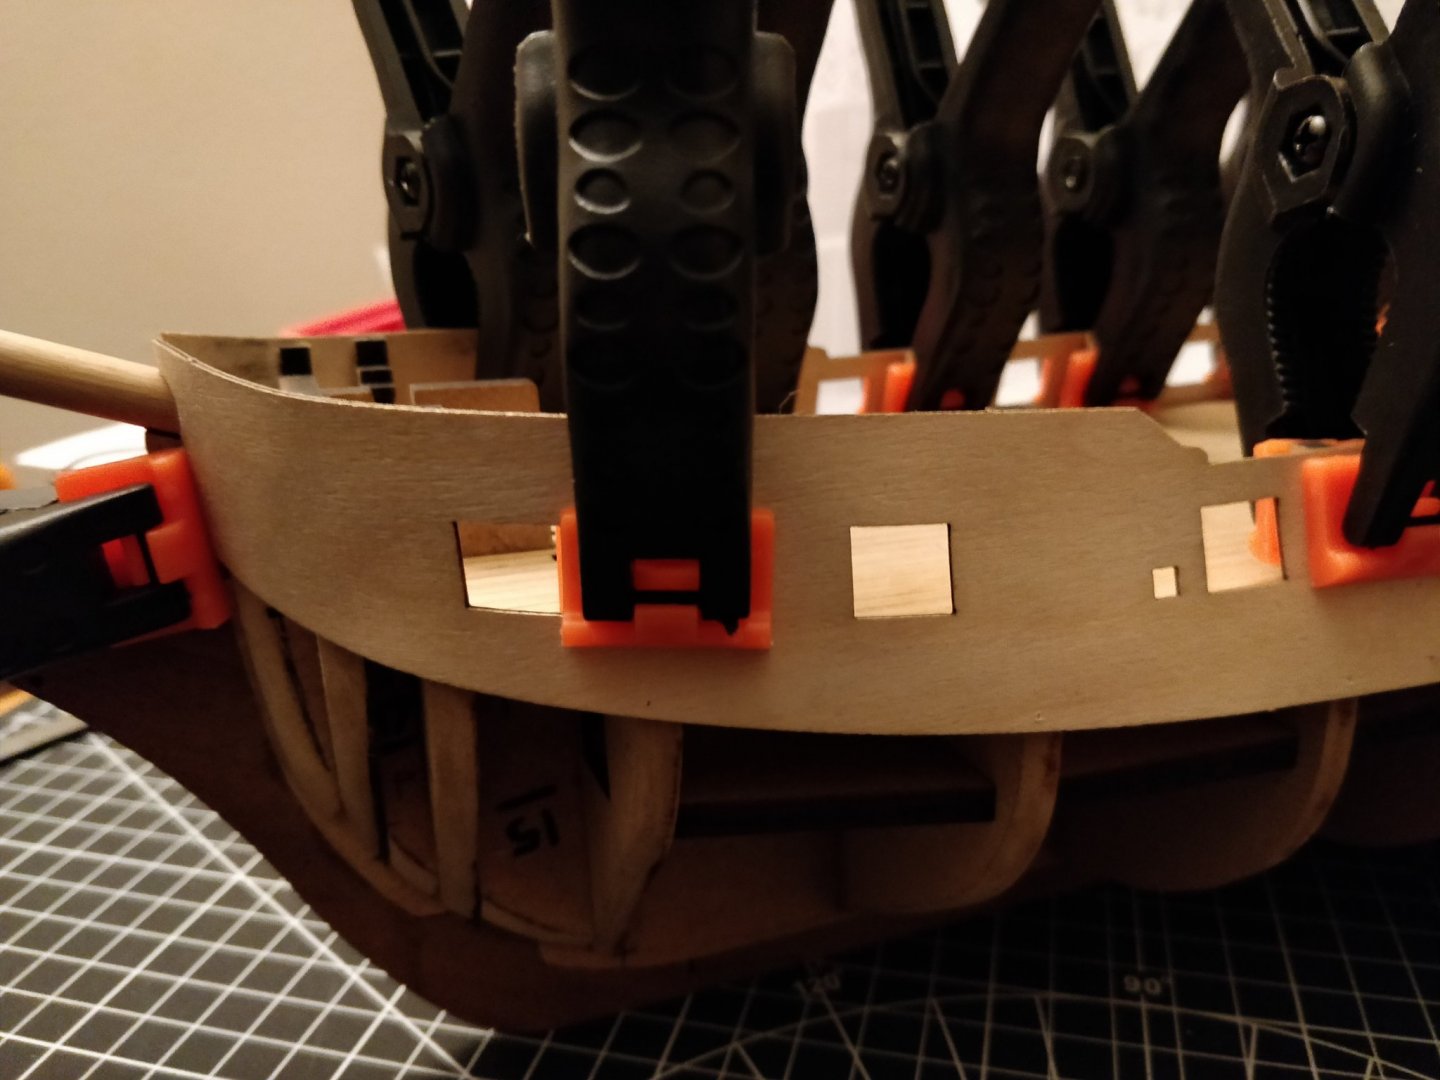
Thanks to everyone who commented. @Tim, Richard: I appreciate the reminder to cut the outside of the 3 waist bulkheads before gluing. I'll have to buy a flush-cutting saw when it comes time to remove them... @mugje, I followed your suggestion and it worked quite well. There is some curvature at the bow that I found difficult to clamp, but I'm happy with how things turned out overall. @SpyGlass: Thanks once again for your expert advice. I think I managed to move them forward about half a mm, but then I started to feel that further fiddling was only making it look worse. I dry fitted the upper decks and the start of the quarter deck is roughly in the middle of the "step" in the gunport strips (at BH 8), which is I think how it should be? After gluing I had some slight waviness along the bottom of the strips. It's hard to see at a glance and difficult to fix, so I'll probably have to leave it as is. As well, the upper part of the strips are slightly separated from the waist bulkheads, since there was no glue to hold them in place. For the most part, I'm happy with how they turned out though. Anyways, here are some pictures. Am hoping to start the hull planking next week. -starlight

- 82 replies
-
- 2
-
-
- Fly
- Victory Models
- (and 2 more)
-
Looks great, Tim!
-
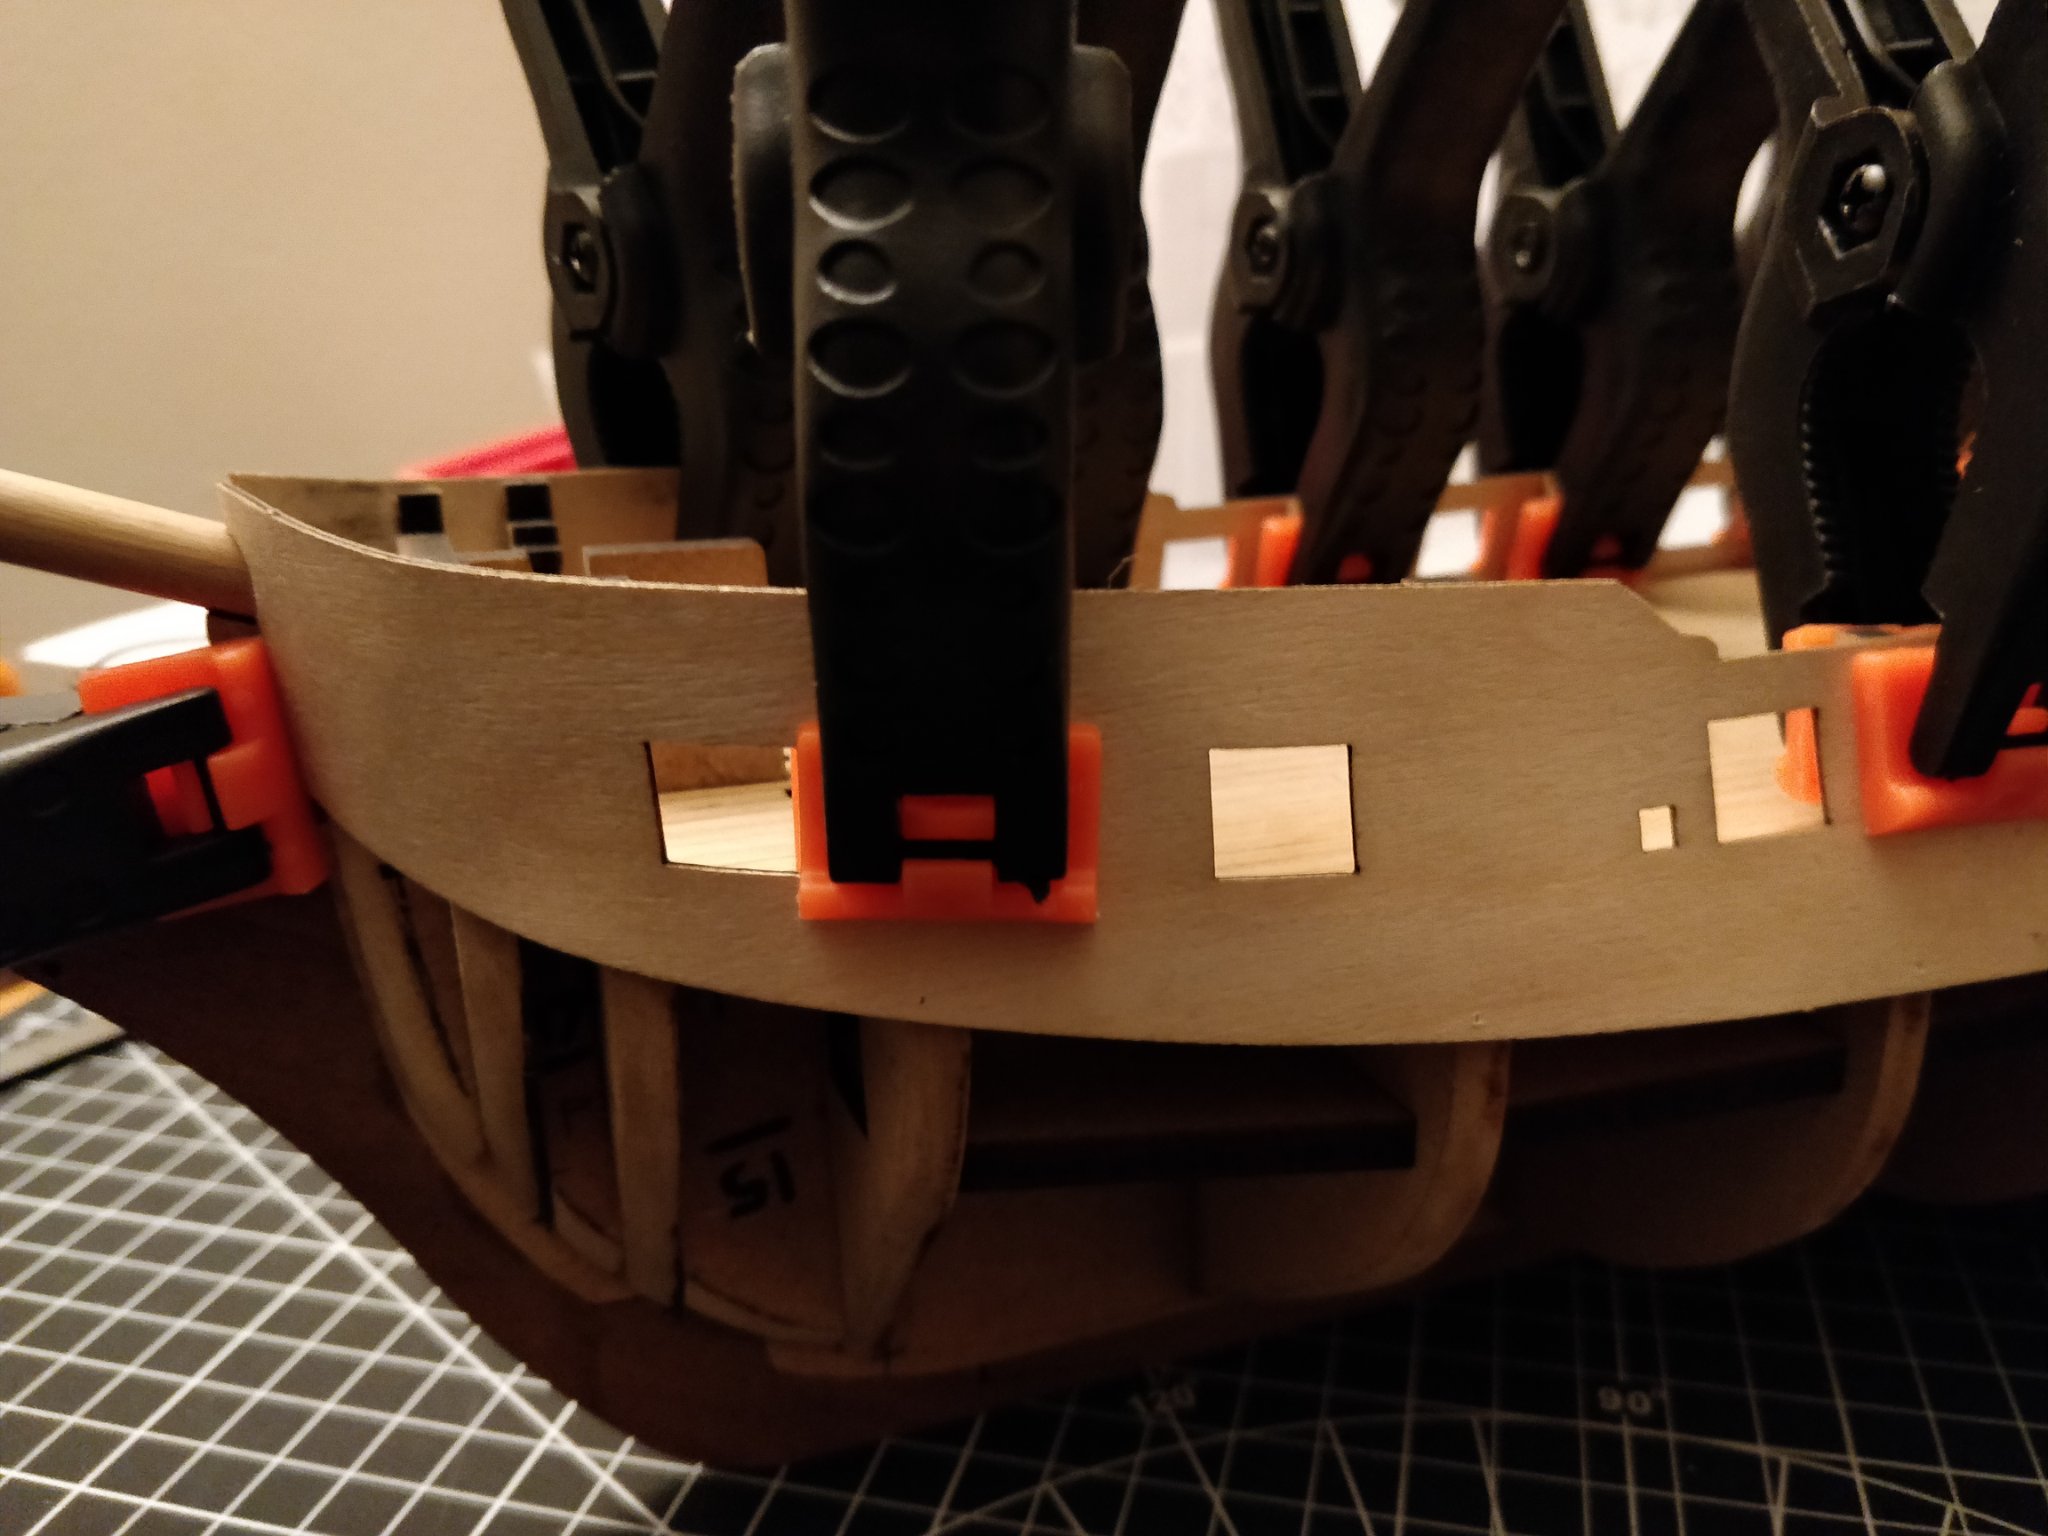
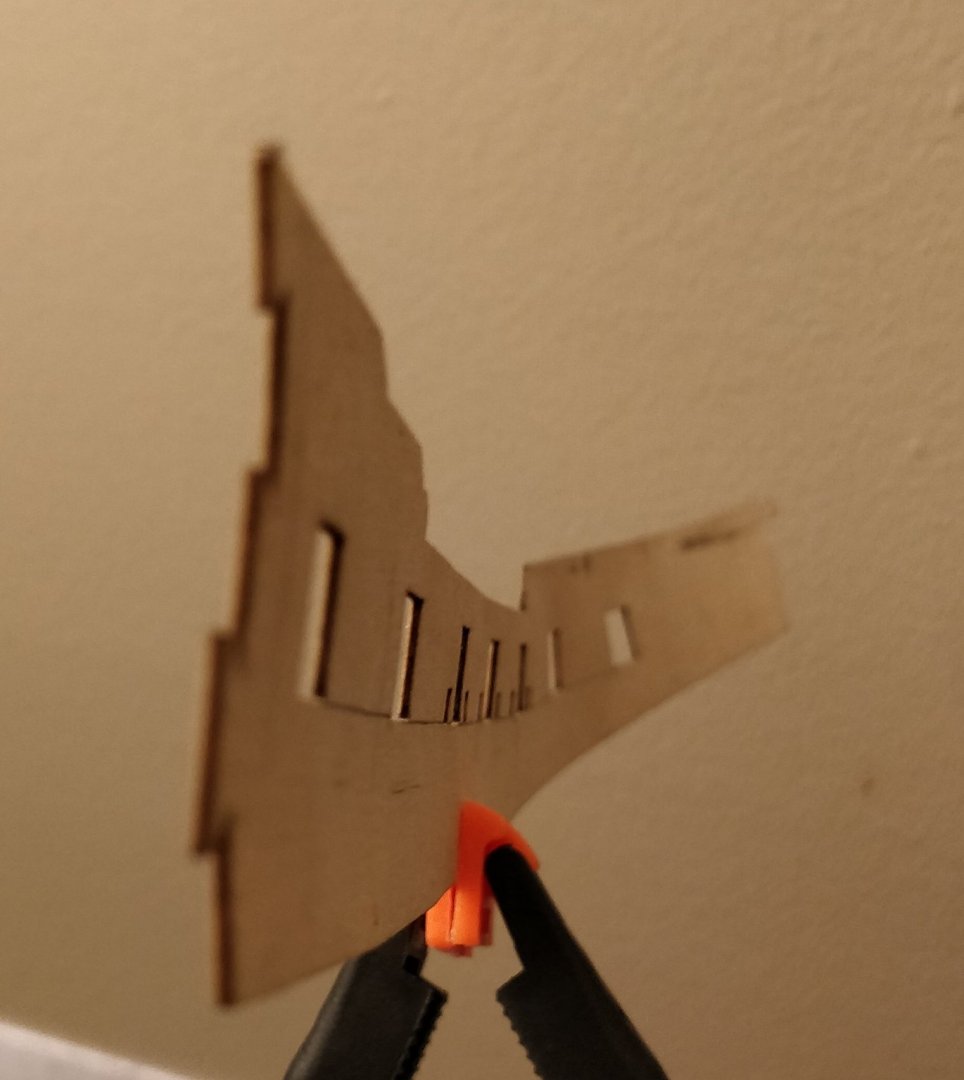
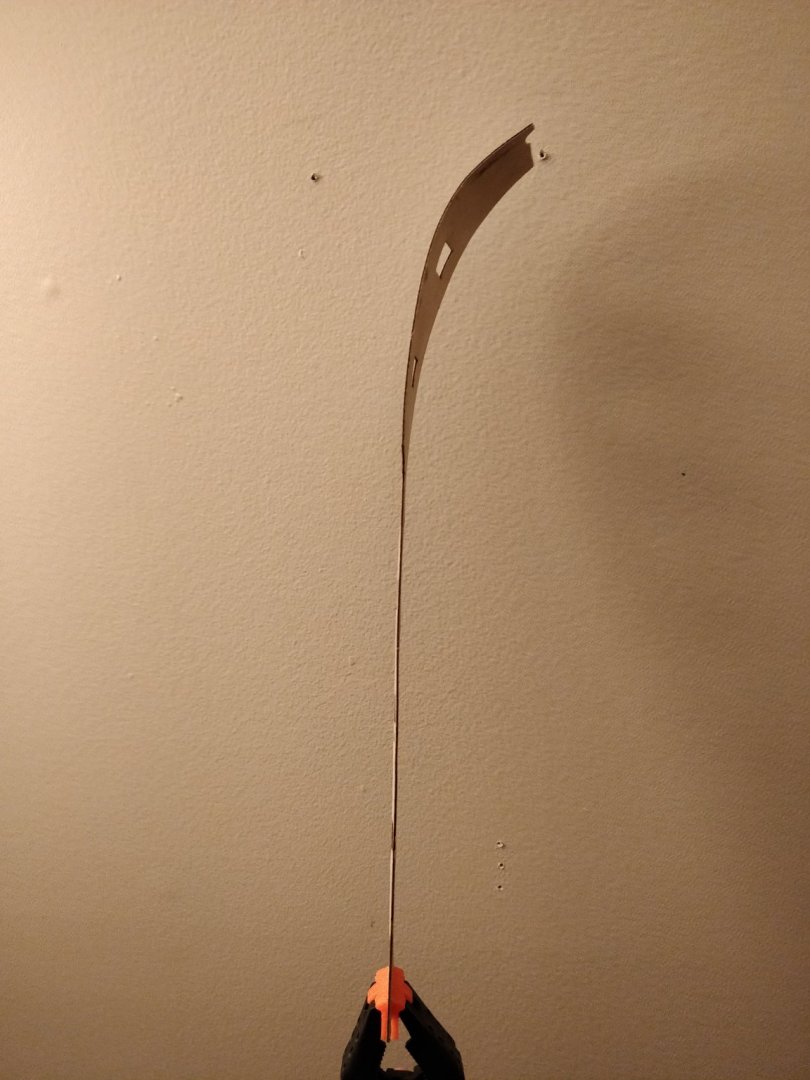
Thanks Richard and Tim for your kind words. I made some progress on the gunport strips, with three rounds of soaking and shaping. Am hoping to get some feedback before I glue them on. I ended up trimming around 3mm off of the front ends. Here's what I have so far:


- 82 replies
-
- 4
-
-
- Fly
- Victory Models
- (and 2 more)
-
Fast progress, Tim! I look forward to using your build log as another excellent reference when I get to the hull planking myself. For us first time builders, I think the goal should be to learn as much as possible while still producing an acceptable-looking result. With that in mind, the first planking is a perfect opportunity to make mistakes and learn from them. Just some food for thought. -starlight
-
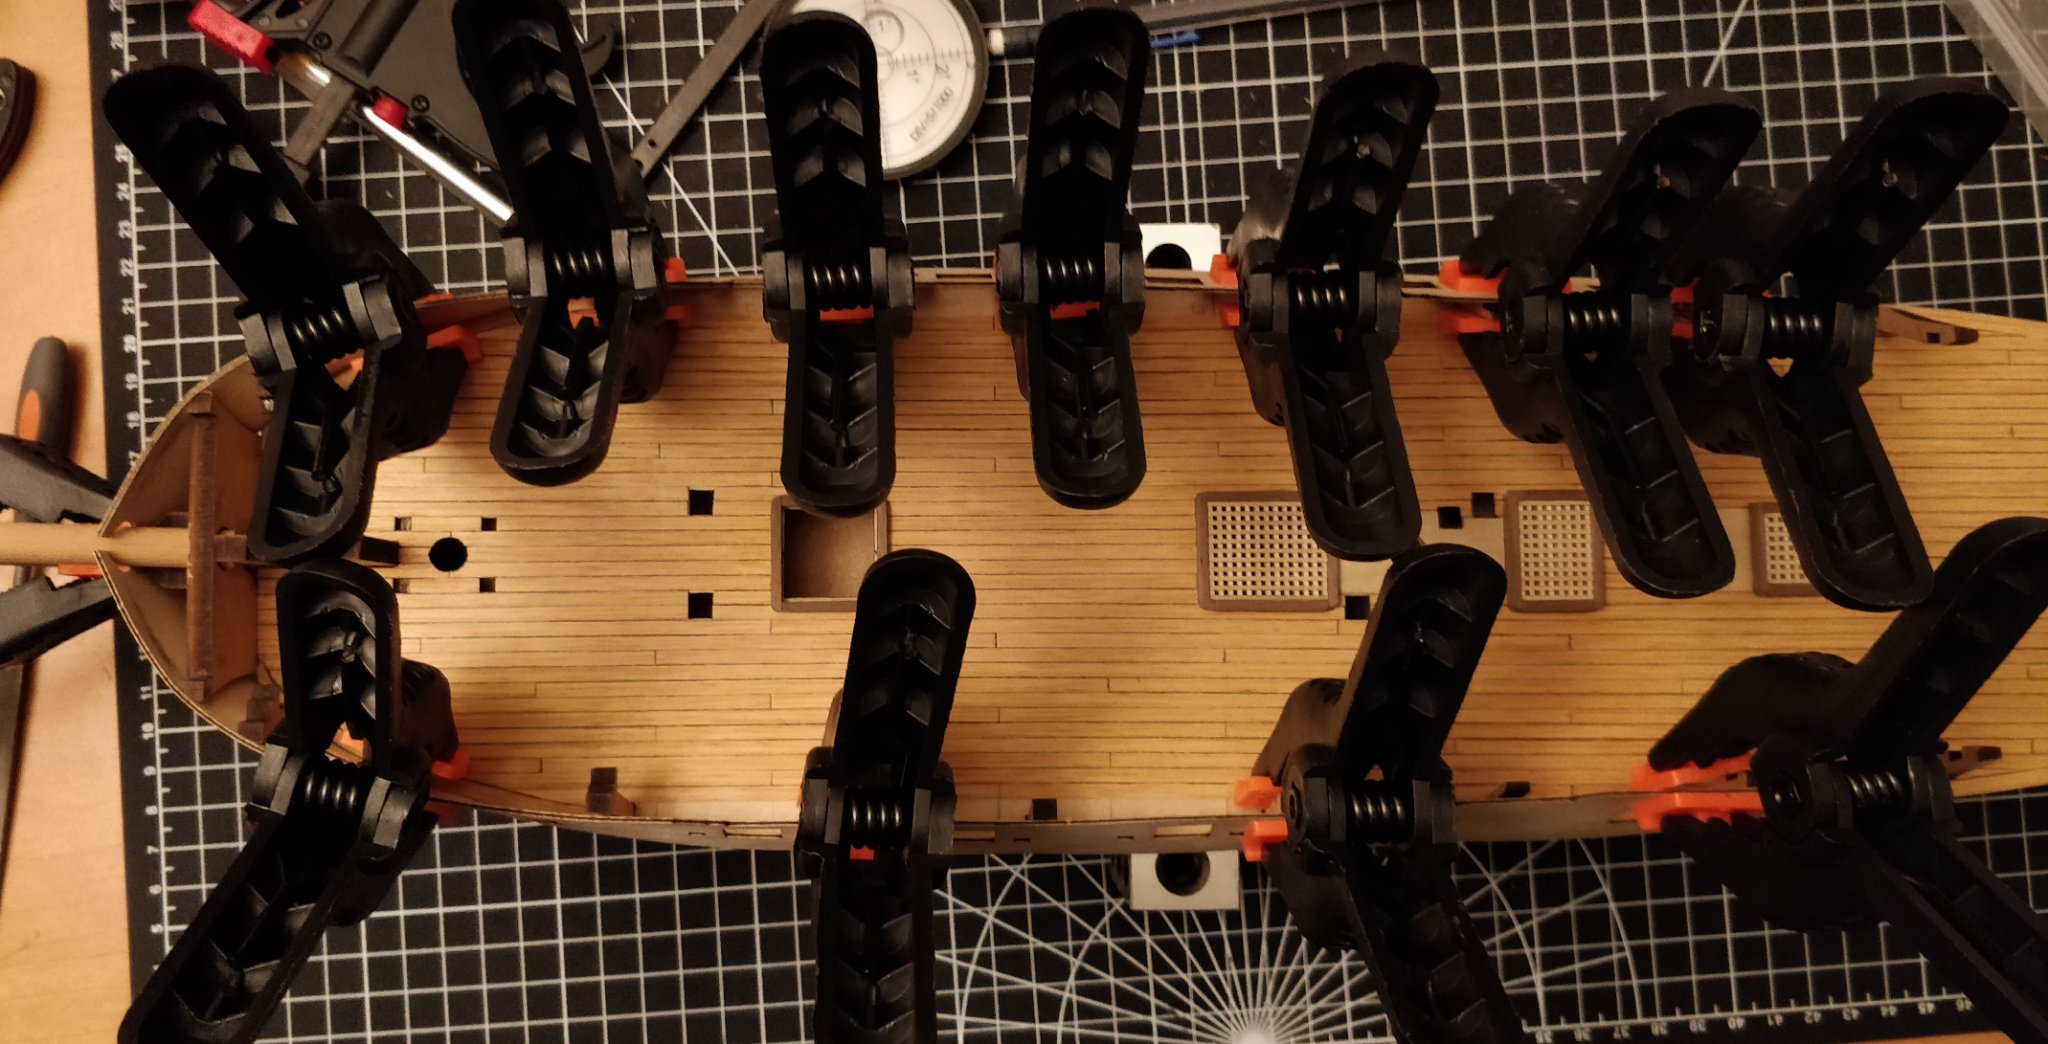
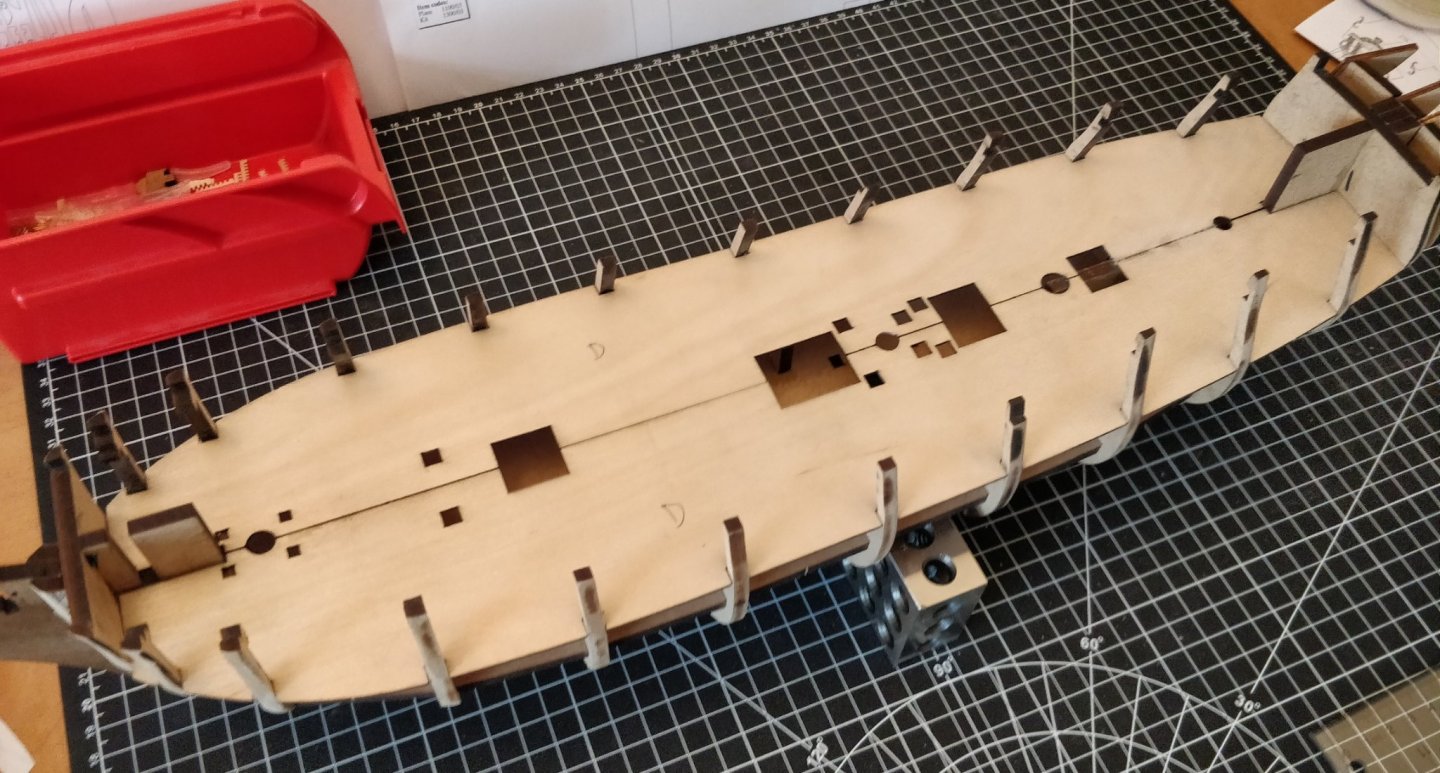
At this stage I am more or less done with the planking of the gun deck, for now. Some self-reflection: I ended up using a 4-butt shift pattern (as opposed to a 3-butt shift), especially because I was using the 3mm width Tanganyika from the kit, rather than wider planks as most others use. The 4-butt shift agrees better with narrower planks in my opinion. Special thanks to Richard44 for giving me excellent advice on the margin planking. Since I only had the 3mm strips to work with and I wanted to make curved margin planks of at least that width, I simply glued two planks side-by-side without marking any caulking. I then cut this 6mm plank to the correct profile using a paper template. The seam is not too visible and for low curvatures the grain of the wood is mostly aligned. In any case, I think this method is vastly easier than the suggestion in the kit instructions, which say to soak the planks, make cutouts along the inner radius, and then bend them. An issue I experienced using marker for the caulking: when marking the butt joints, the ink has a tendency to bleed into the planks because of the orientation of the wood grain (the ends promote much more capillary action than the sides). The trick, I found, is to make a single, quick, confident pass of the marker. Comments and advice are more than welcome. I hope to start the gunport strips this weekend. -starlight
- 82 replies
-
- 4
-
-
- Fly
- Victory Models
- (and 2 more)
-
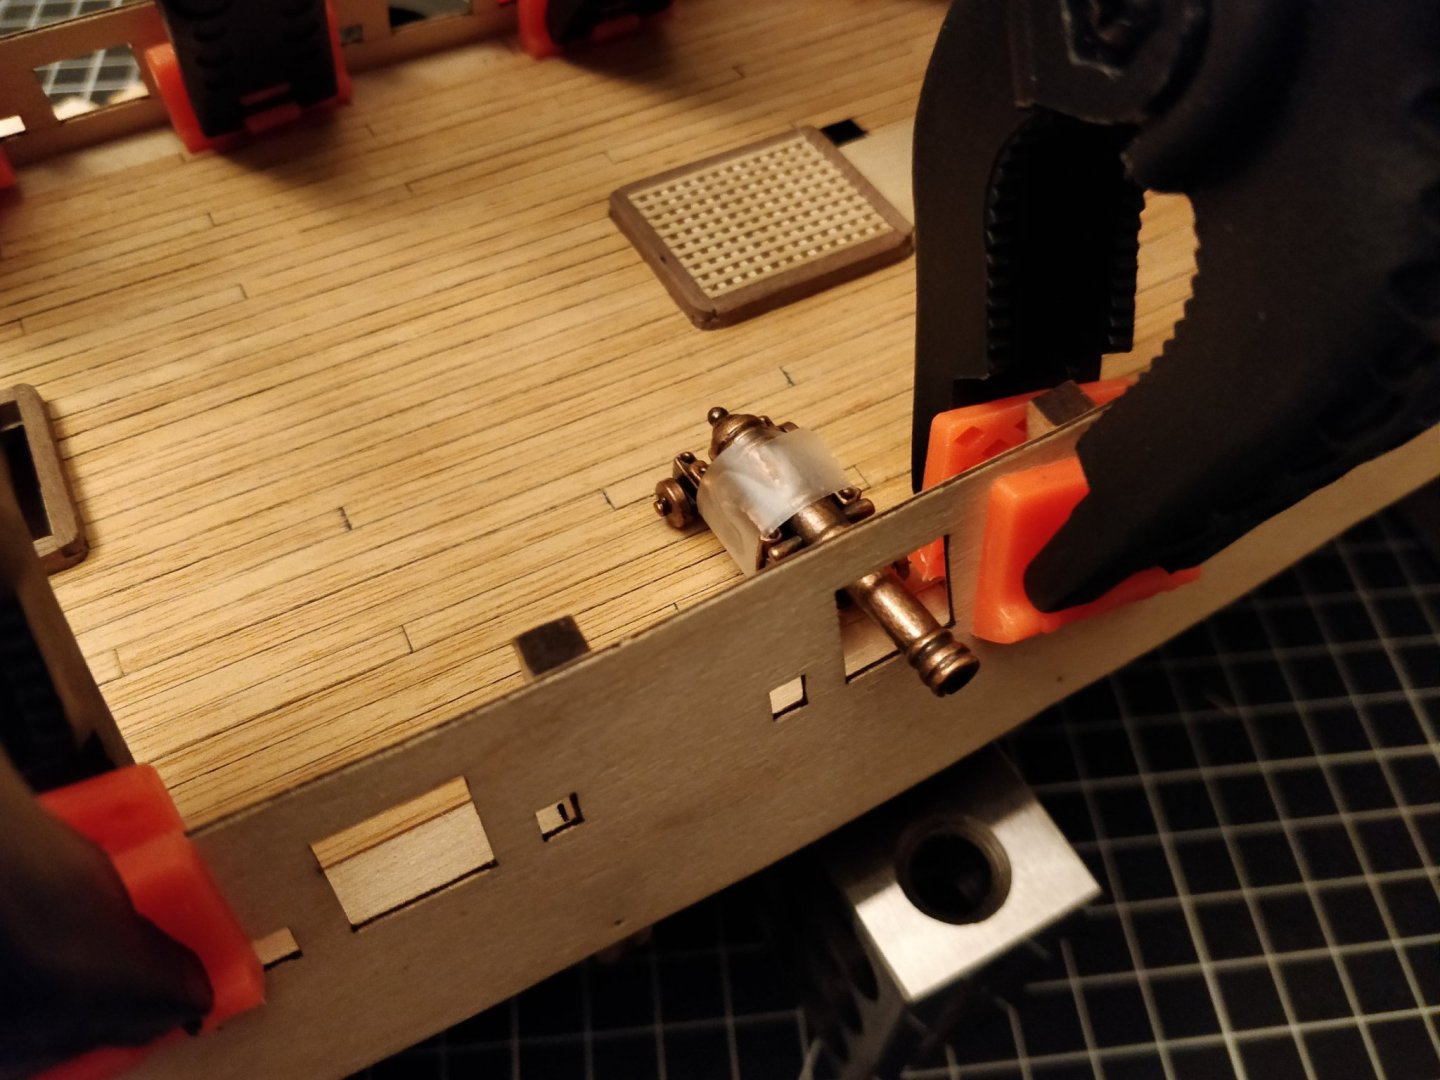
SpyGlass, Thanks for your kind words. Perhaps in future builds I will allow myself to cut corners, but as this is my first build, I am using the "out of sight" details as an opportunity to practice and make mistakes. Certainly I am now more confident about planking the upper decks. Regarding the capstan, there is indeed interference with the upper deck beam. It seems this has been noted on other build logs as well, especially if a dowel is added to join the upper and lower capstans. I will also have to file away some material on that deck beam. -starlight
-
Hi Richard, Your hull planking is looking quite methodical and well done. If you don't mind me asking: for the deck planking, are your margin planks cut from a flat sheet of wood, esp. at the bow? I would like to add a margin plank to my build but I only have the kit-supplied Tanganyika strips to work with. The instructions suggest making cutouts along the inner radius and bending the strips, which I already know will be a nightmare to do. Thanks, starlight
-
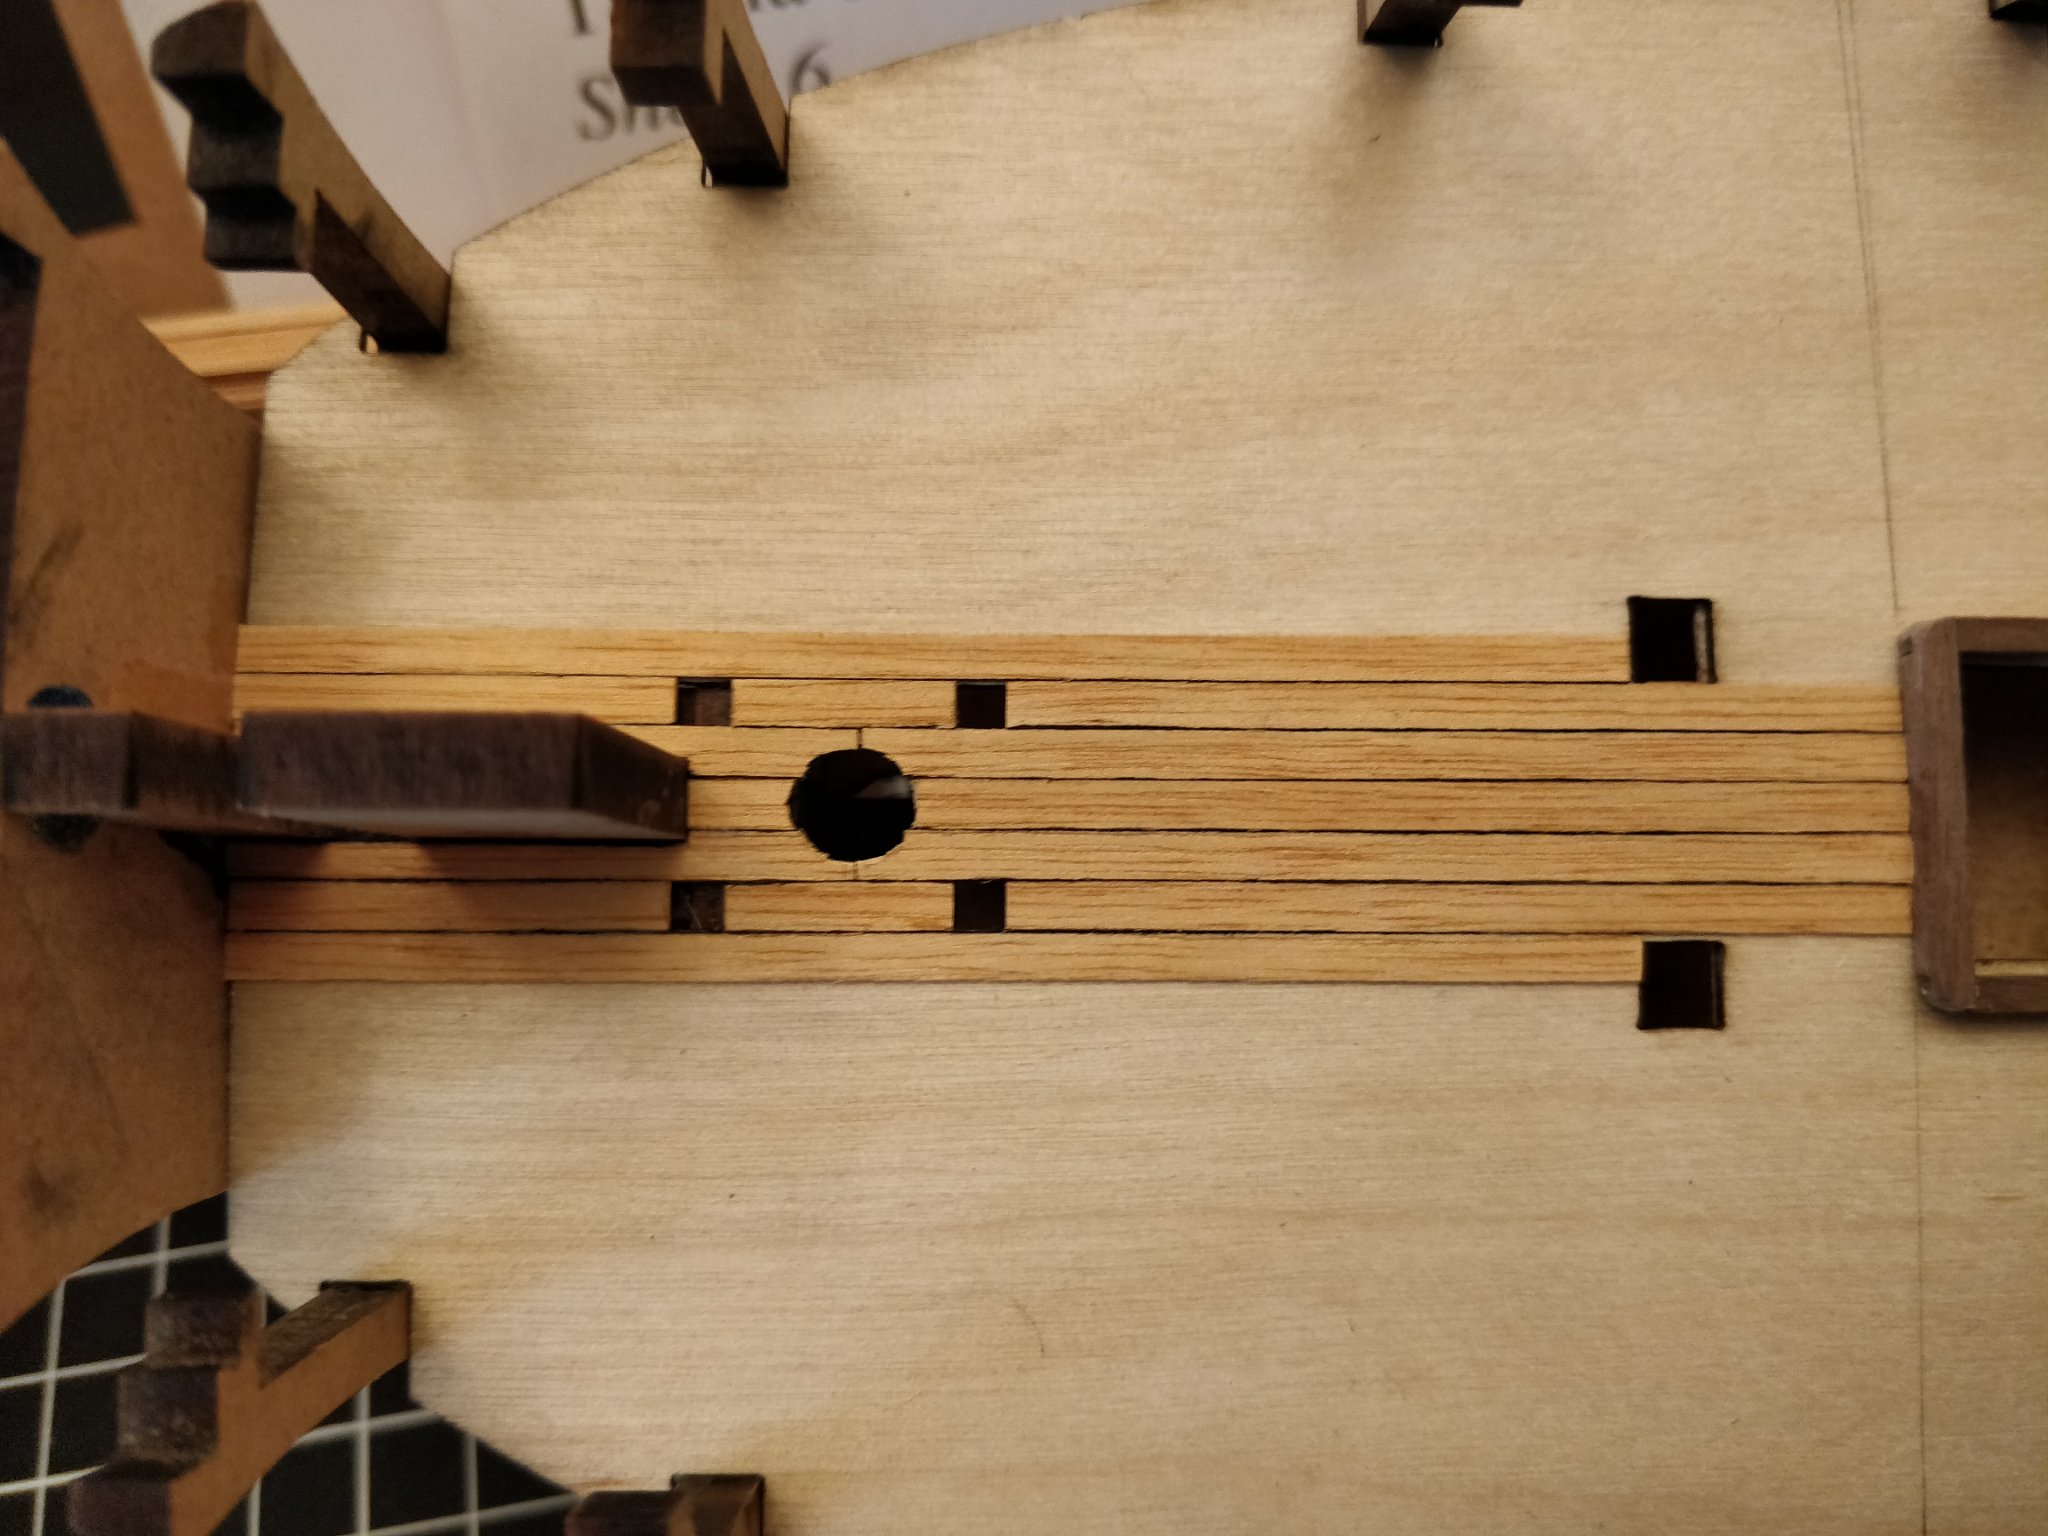
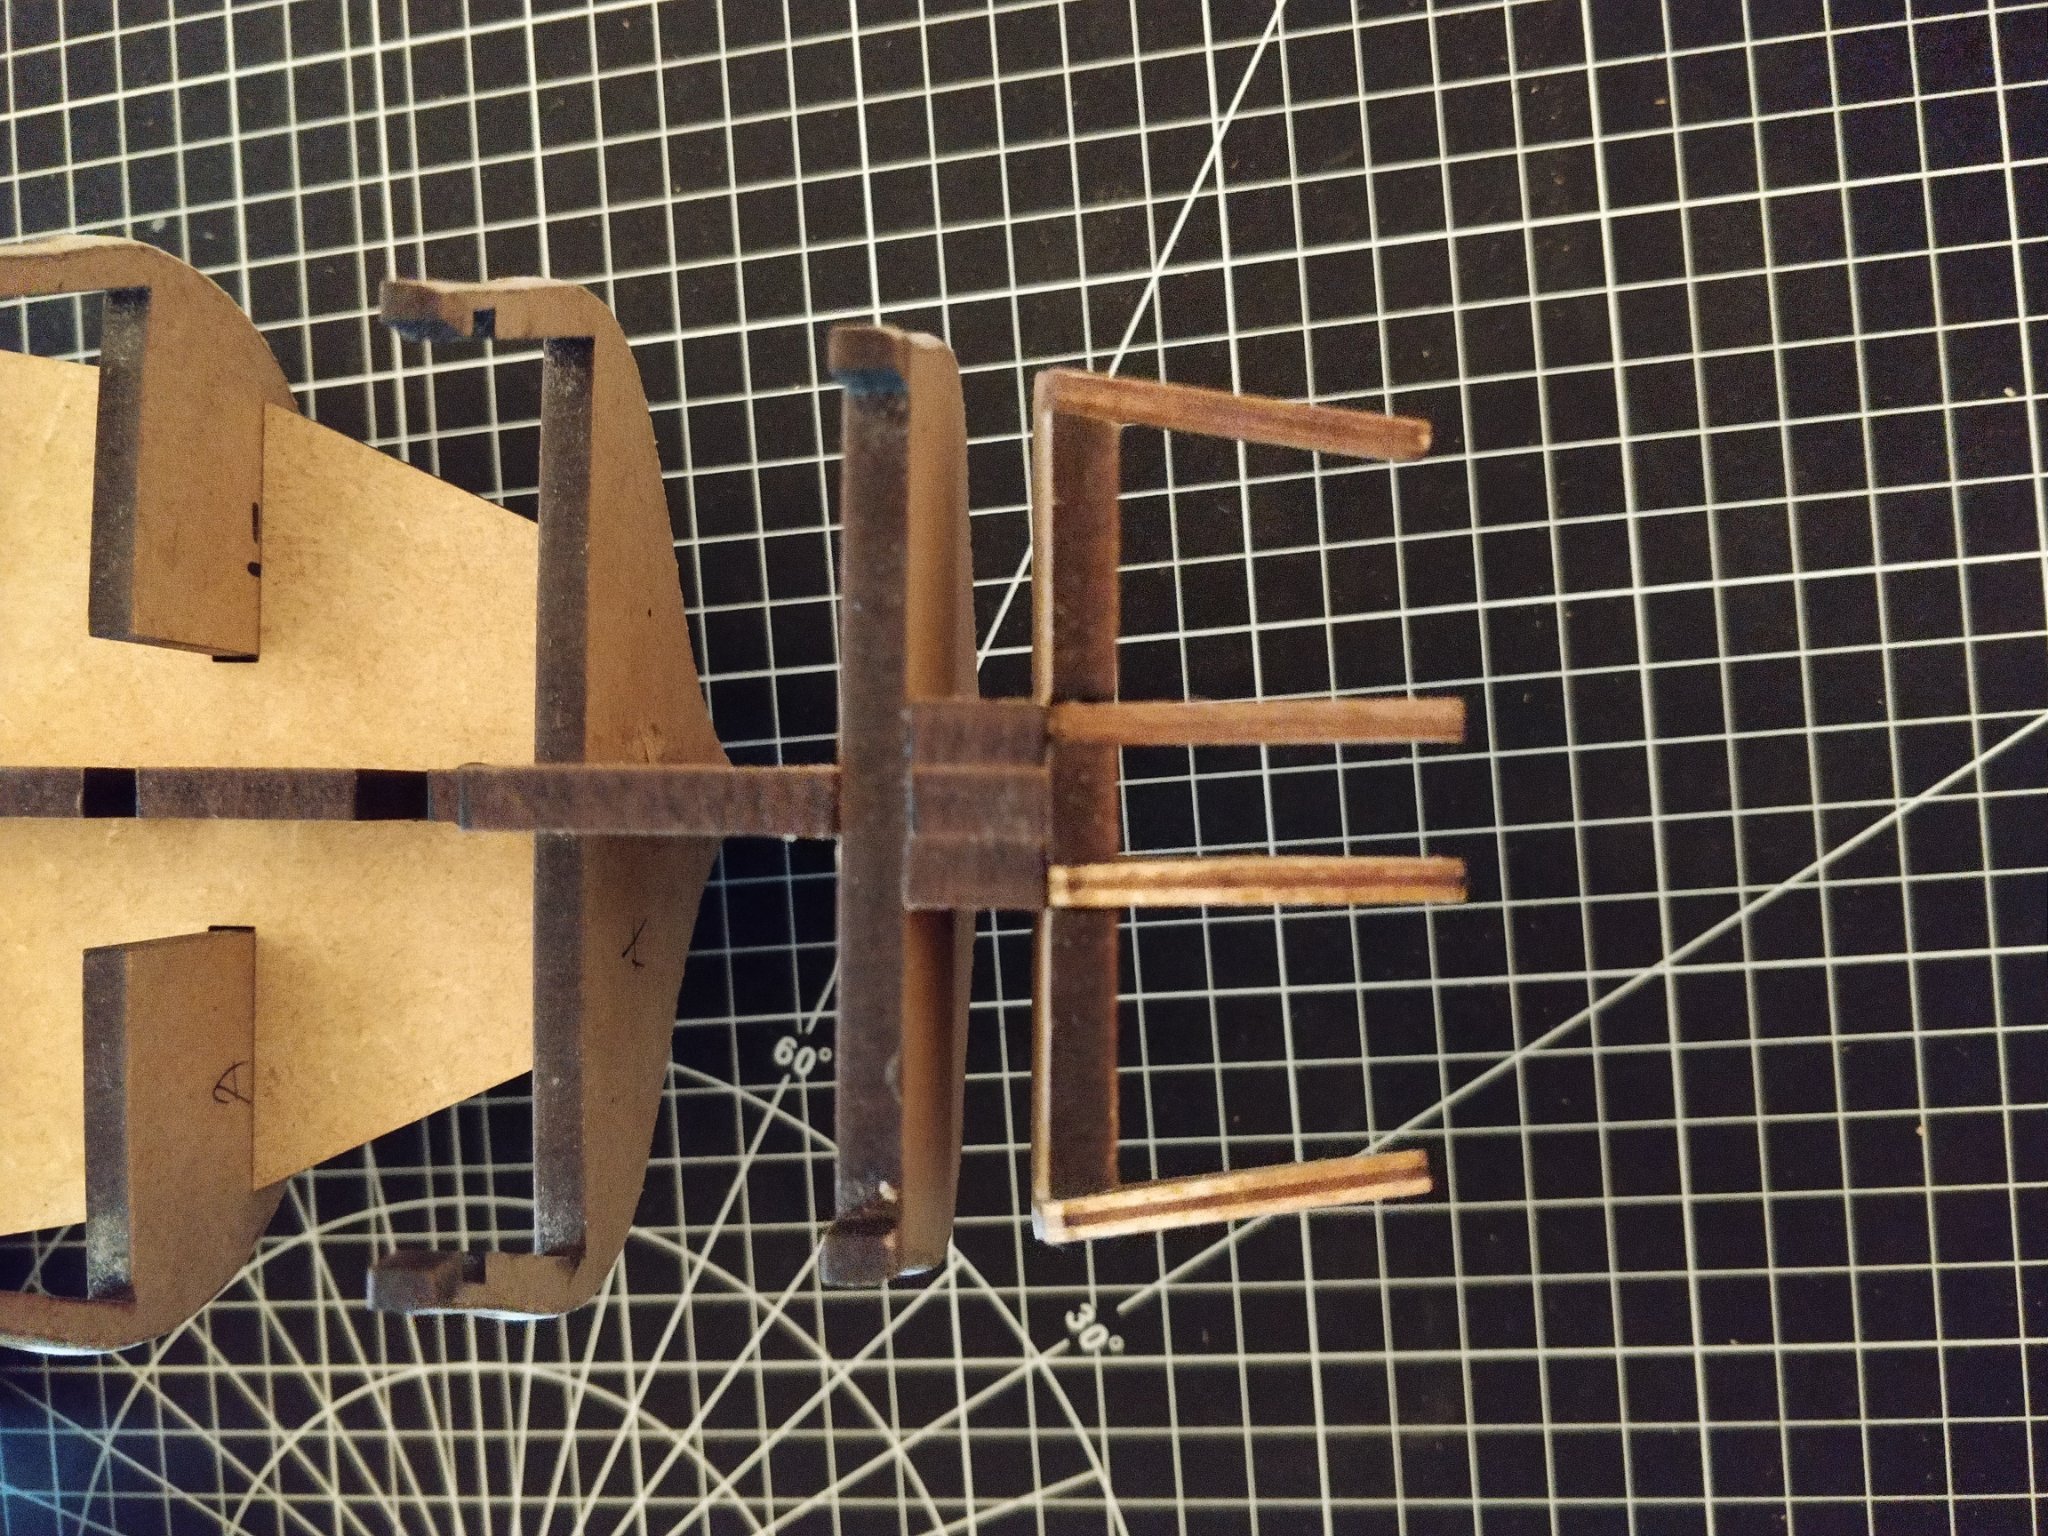
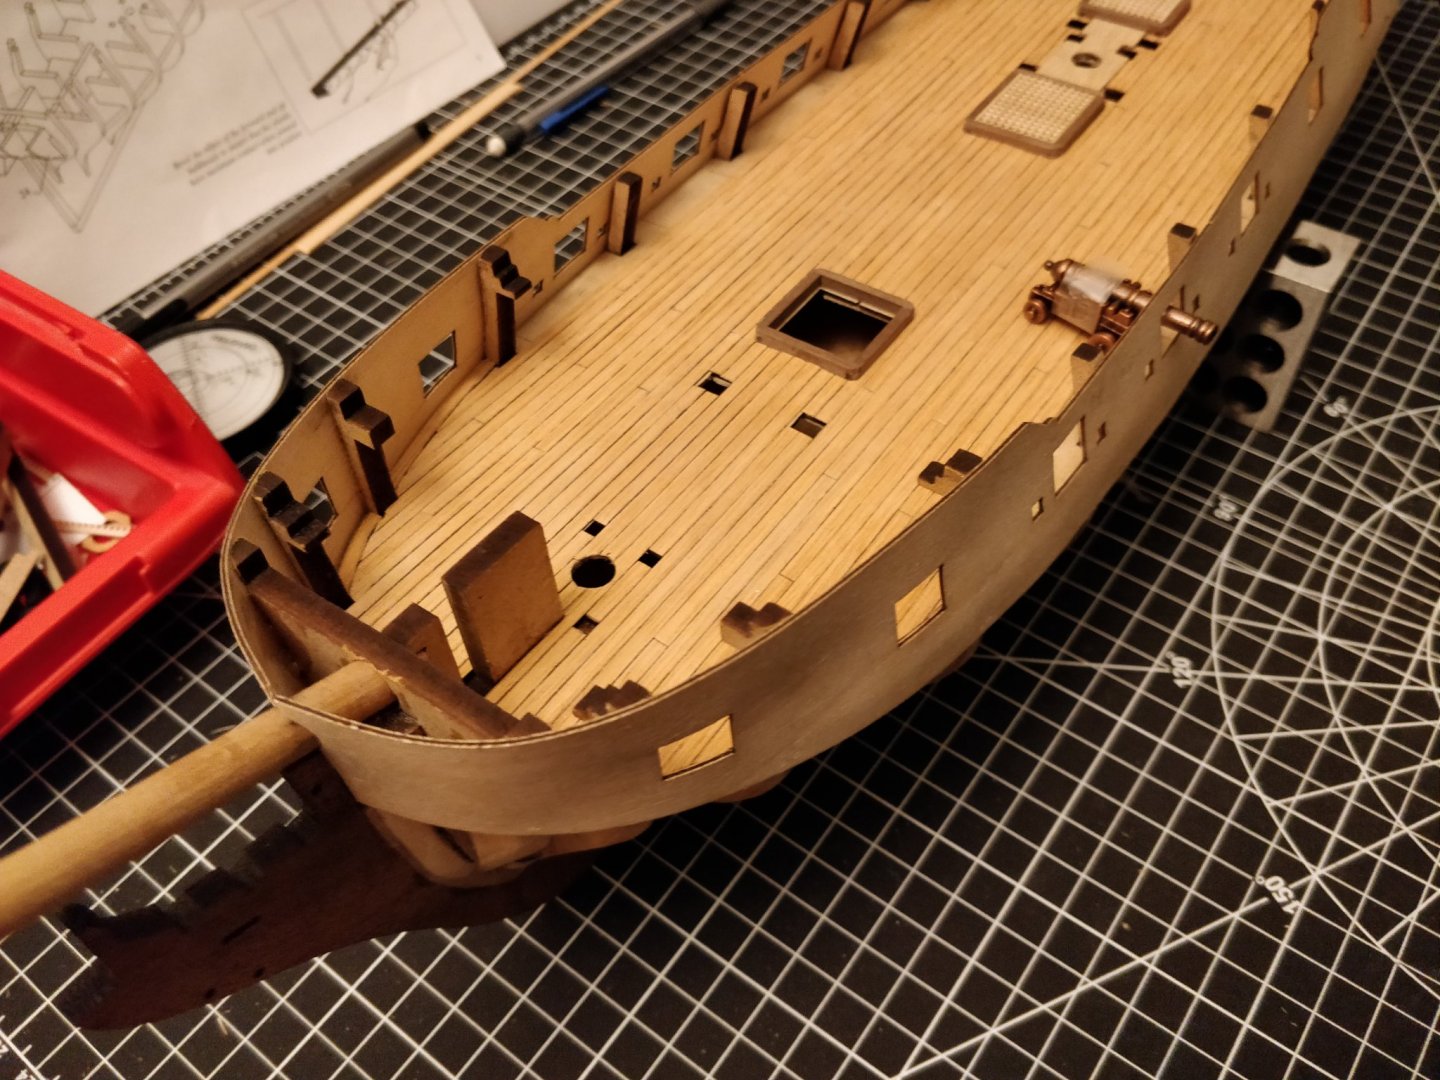
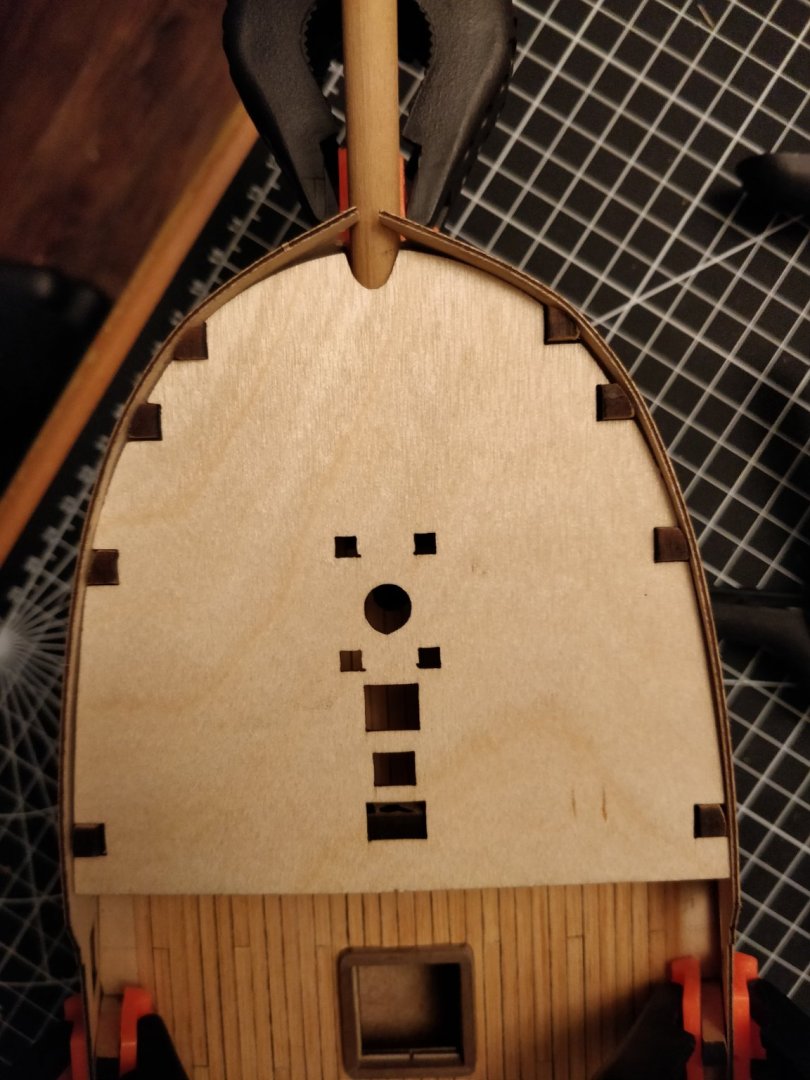
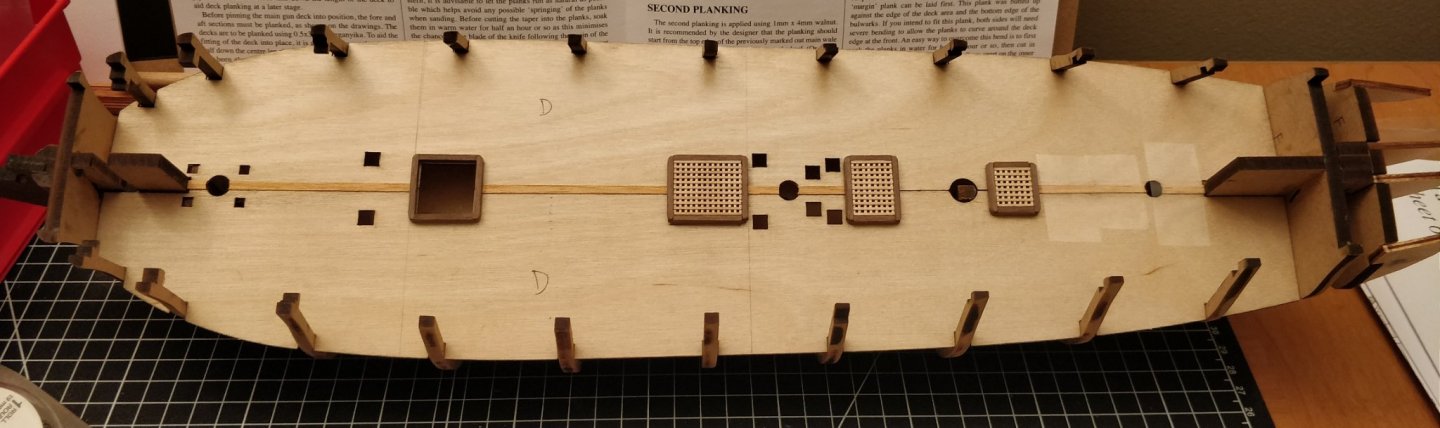
Some more deck planking progress. I added a capstan step and a main mast partner.

-
Hi Tim, Your build is looking quite good! Seems like you've been making fast progress. I also started the Amati Fly kit a few months ago as my first ever model and have been slowly muddling through it. I'll be sure to keep an eye on your build log. Feel free to reach out - maybe we can help each other through this kit. -starlight
- 164 replies
-
- 1
-
-
- fly
- Victory Models
- (and 4 more)
-
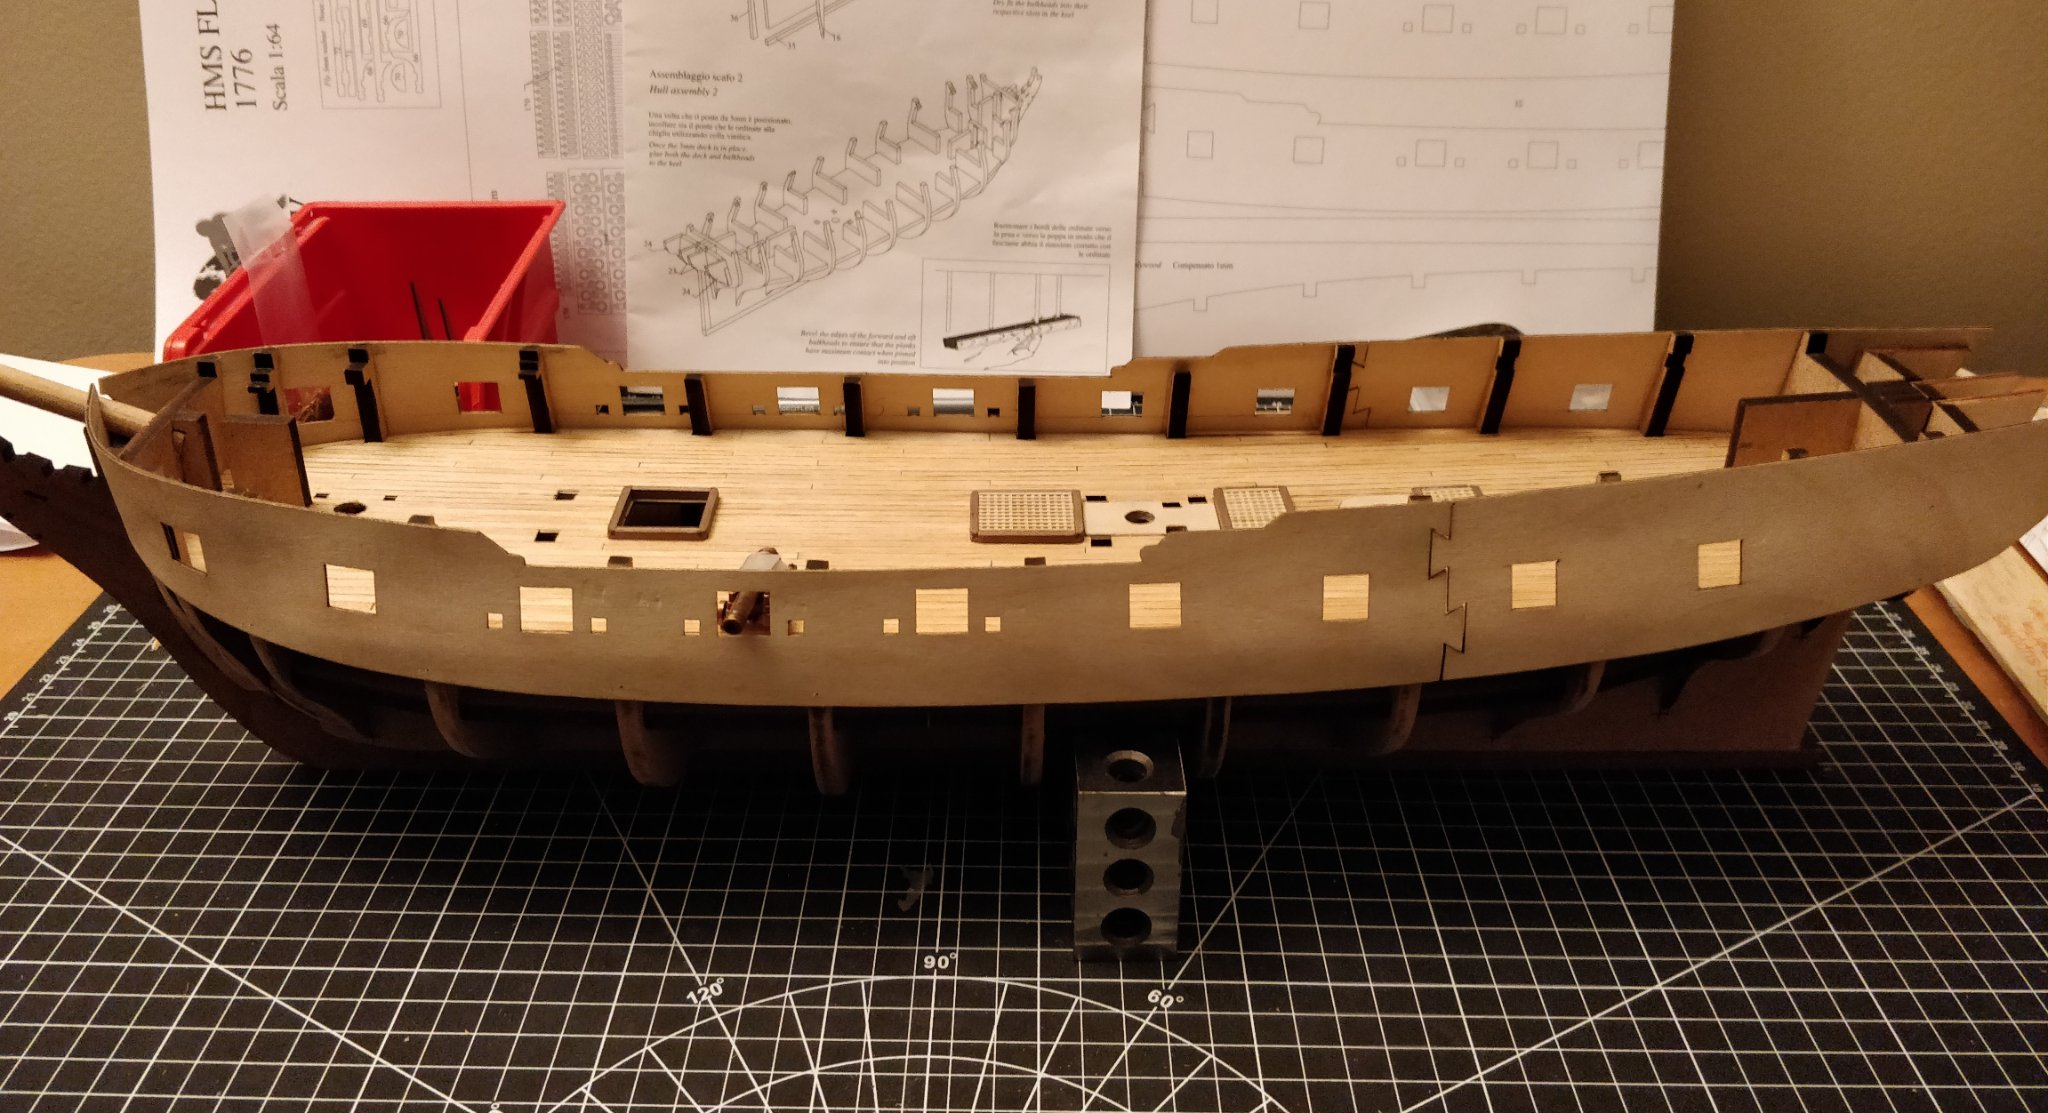
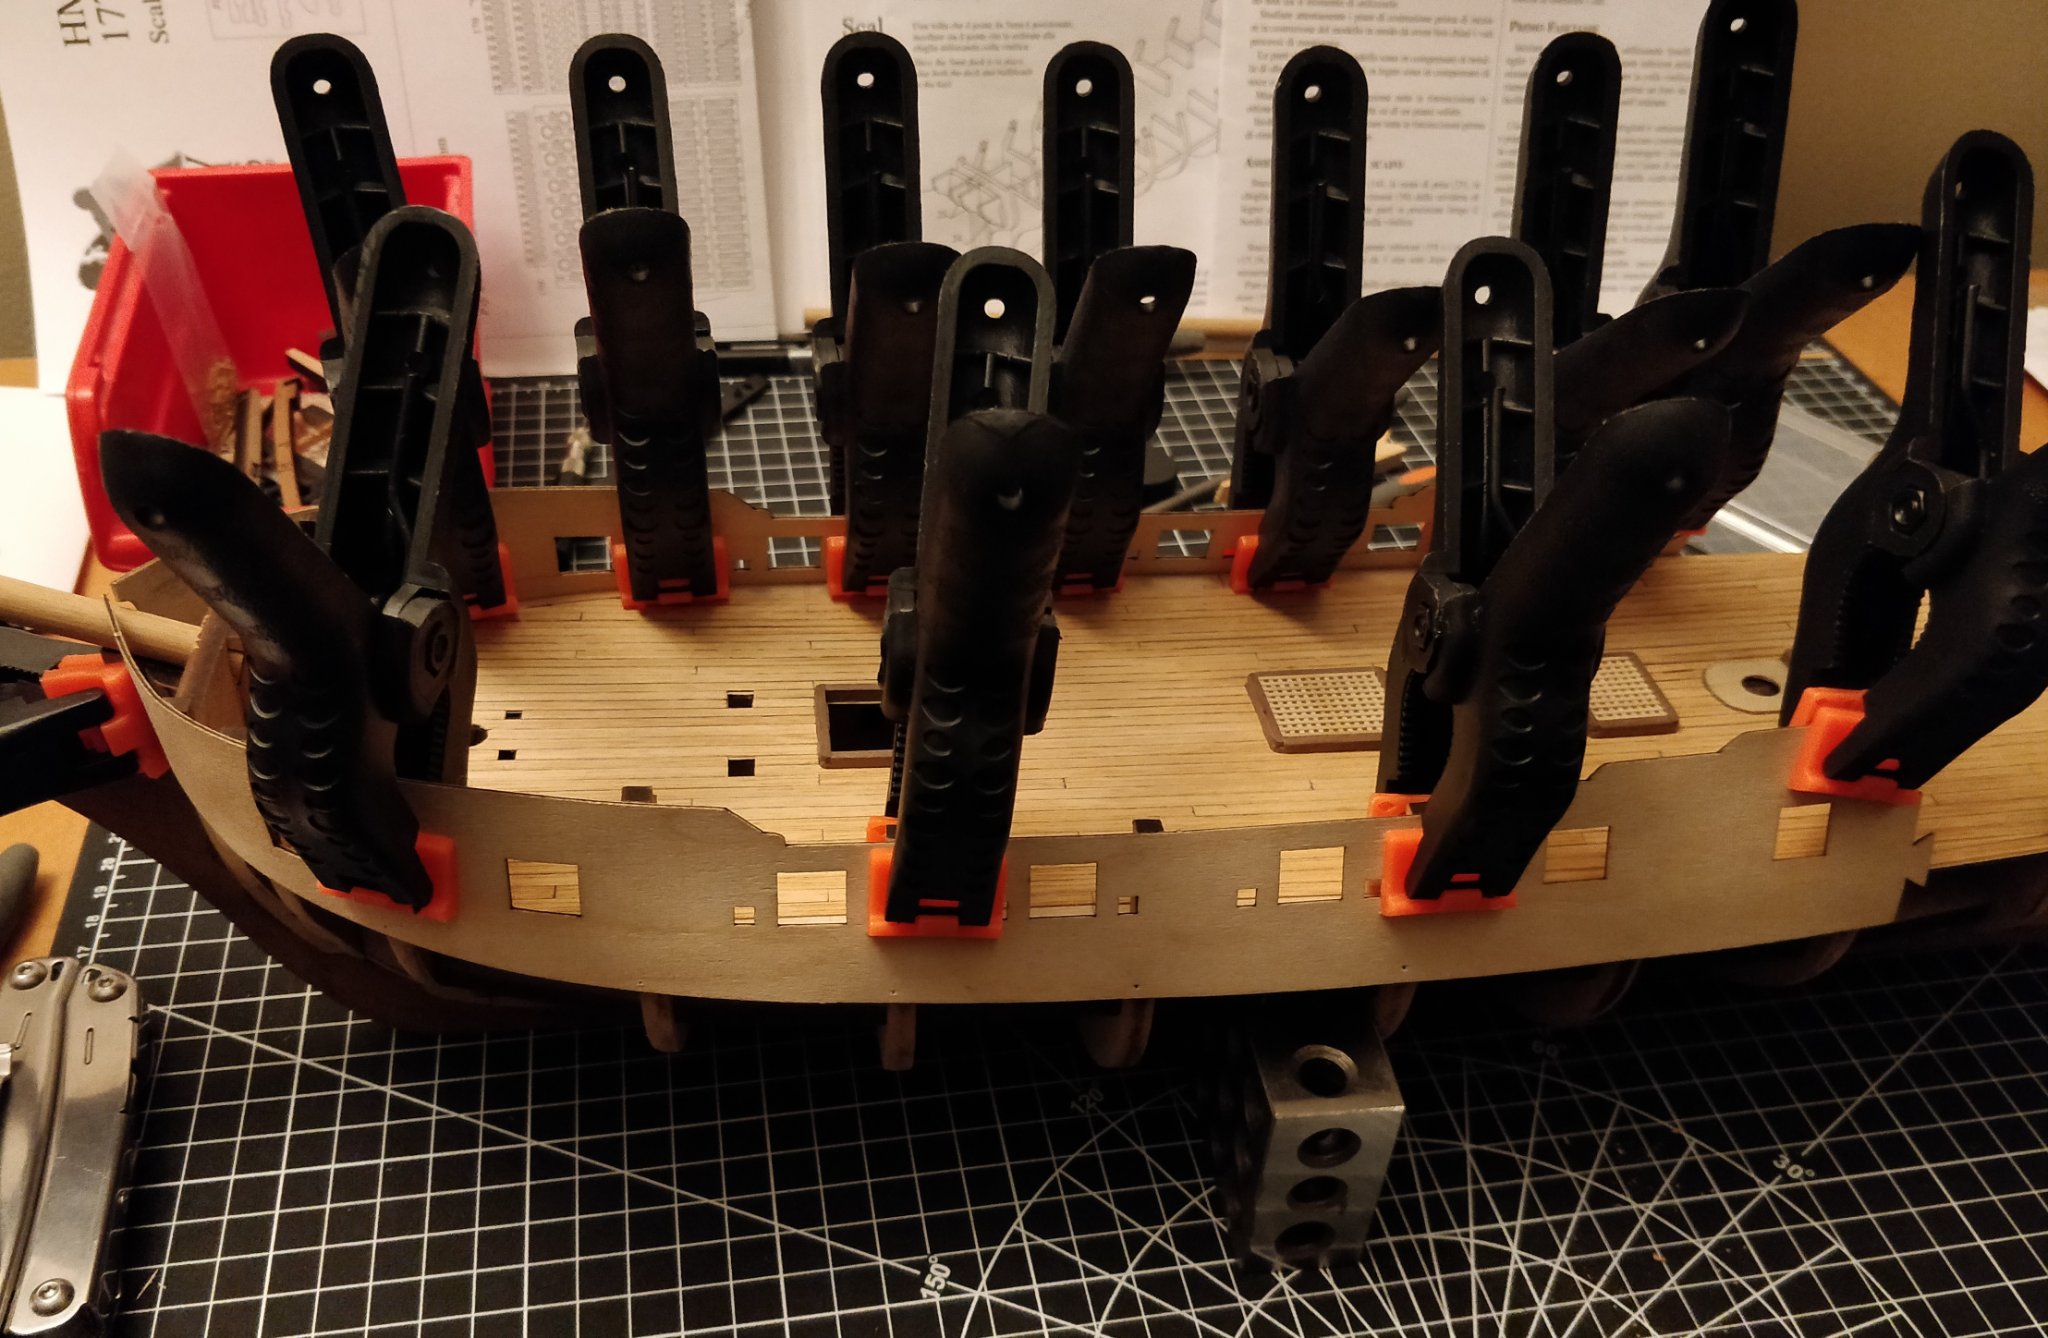
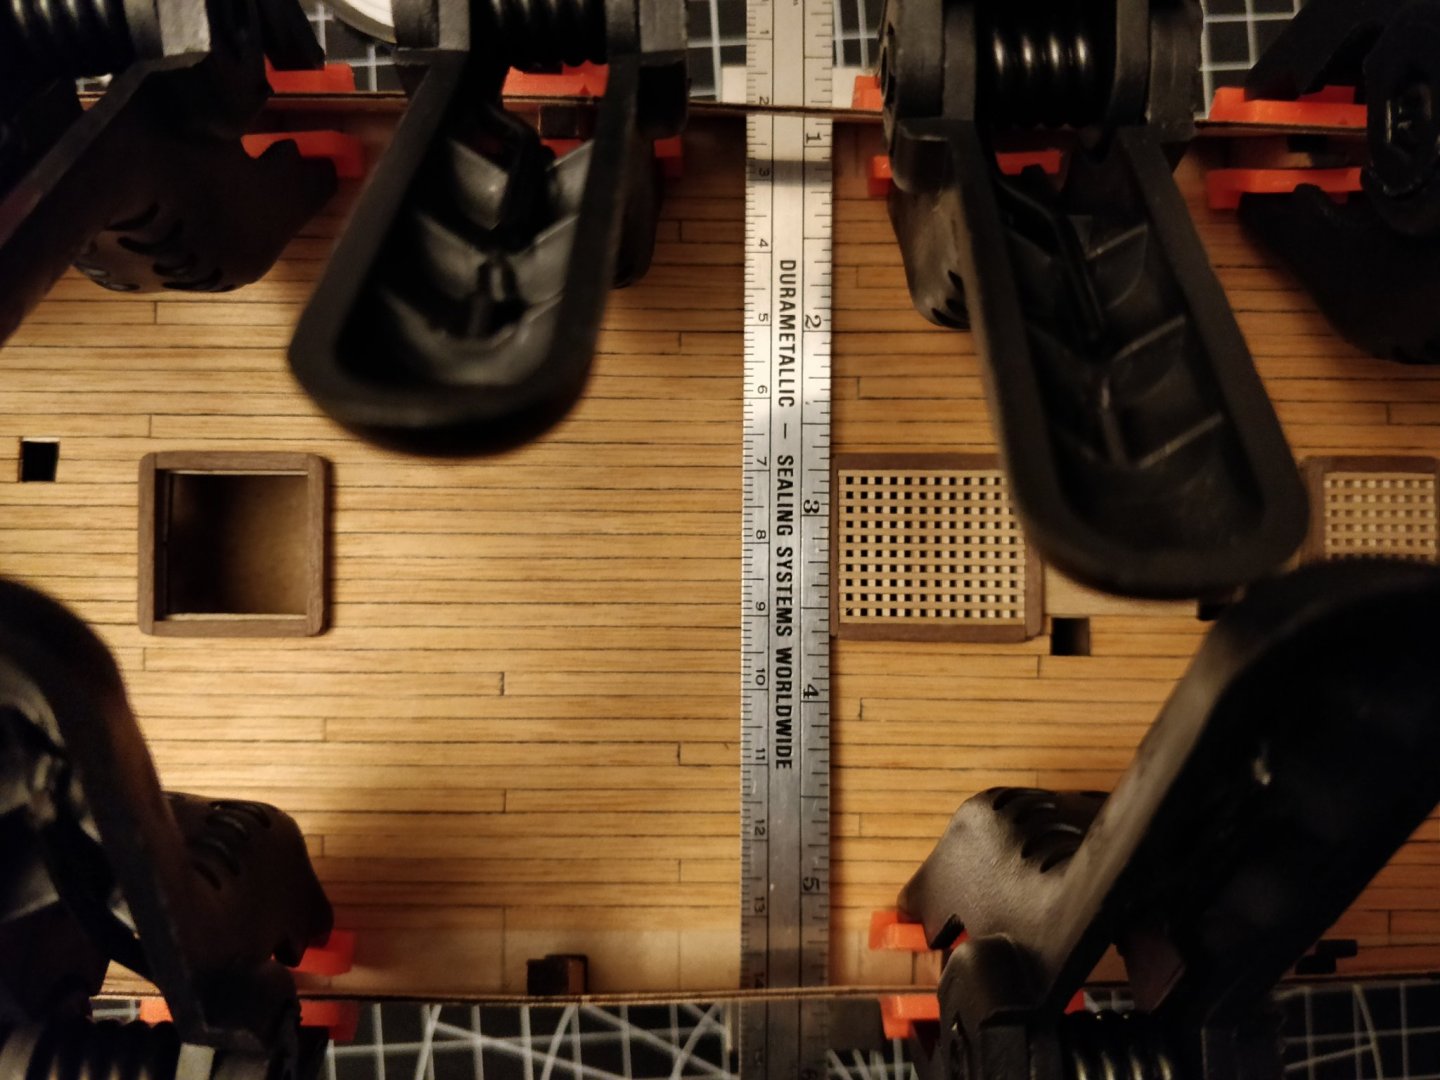
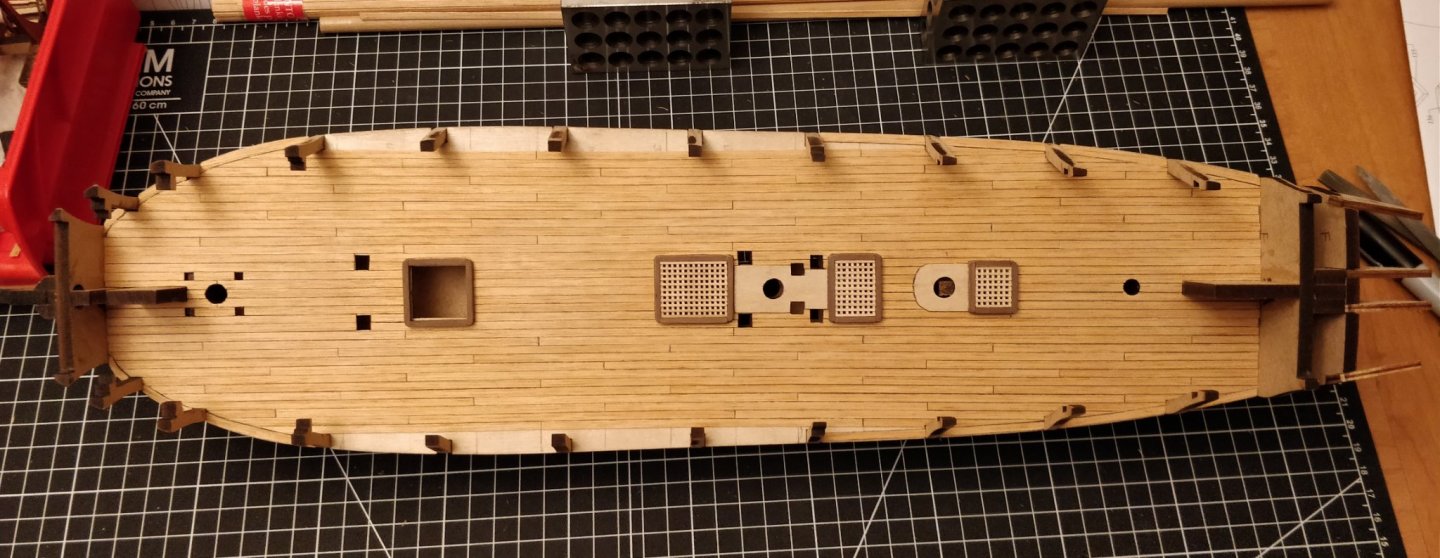
Hello everyone, I have been getting to grips with the deck planking over the last few days. Most of my decisions were based on builds from Blue Ensign, aliluke, Richard44, Dfell, mugje, and probably some others whom I have neglected to mention. I'm hoping to get some feedback before proceeding further. Some key points: The first thing I did was reinforce the deck ply along the centerline by gluing some strips of 1mm scrap plywood underneath. Previously the two halves of the deck tended to spring up and down and rub against each other. Now the deck feels quite solid. The majority of other modelers do not use the kit-supplied Tanganyika, and probably for good reason. The loose grain makes it very difficult to work with and it frays easily. Using a different material is not an option for me however, so I will try to do the best I can with it. I decided to use a king plank (not sure if it can be called by that name as it is the exact same as all the other planks). I think it at least helps to add rigidity to the centerline seam. I will use straight planks without butt joints along the centerline based on Blue Ensign's method. Outside of this area I would like to try either a 3-butt or a 4-butt shift but I am a bit out of my depth on how to plan the deck for it. I simulate the caulking with a black marker applied to one edge of each plank. The lines are not very clean, partly due to my own lack of skill and also the low quality of the Tanganyika. I will not be doing top and butt planking. I would also like to add a capstan step and mast partners (at least for the mainmast). I haven't figured out the profiles and dimensions for these yet. Anyhow, here are some images of what I have so far. I'd appreciate any advice. Thanks. -starlight

- 82 replies
-
- 2
-
-
- Fly
- Victory Models
- (and 2 more)
-
Thanks again for the advice on the pedestals. If I'm not mistaken, I have until just before starting the hull planking to choose a mounting method, so I will most likely procrastinate on that decision for a while yet. I will however keep what you both have said in mind.
-
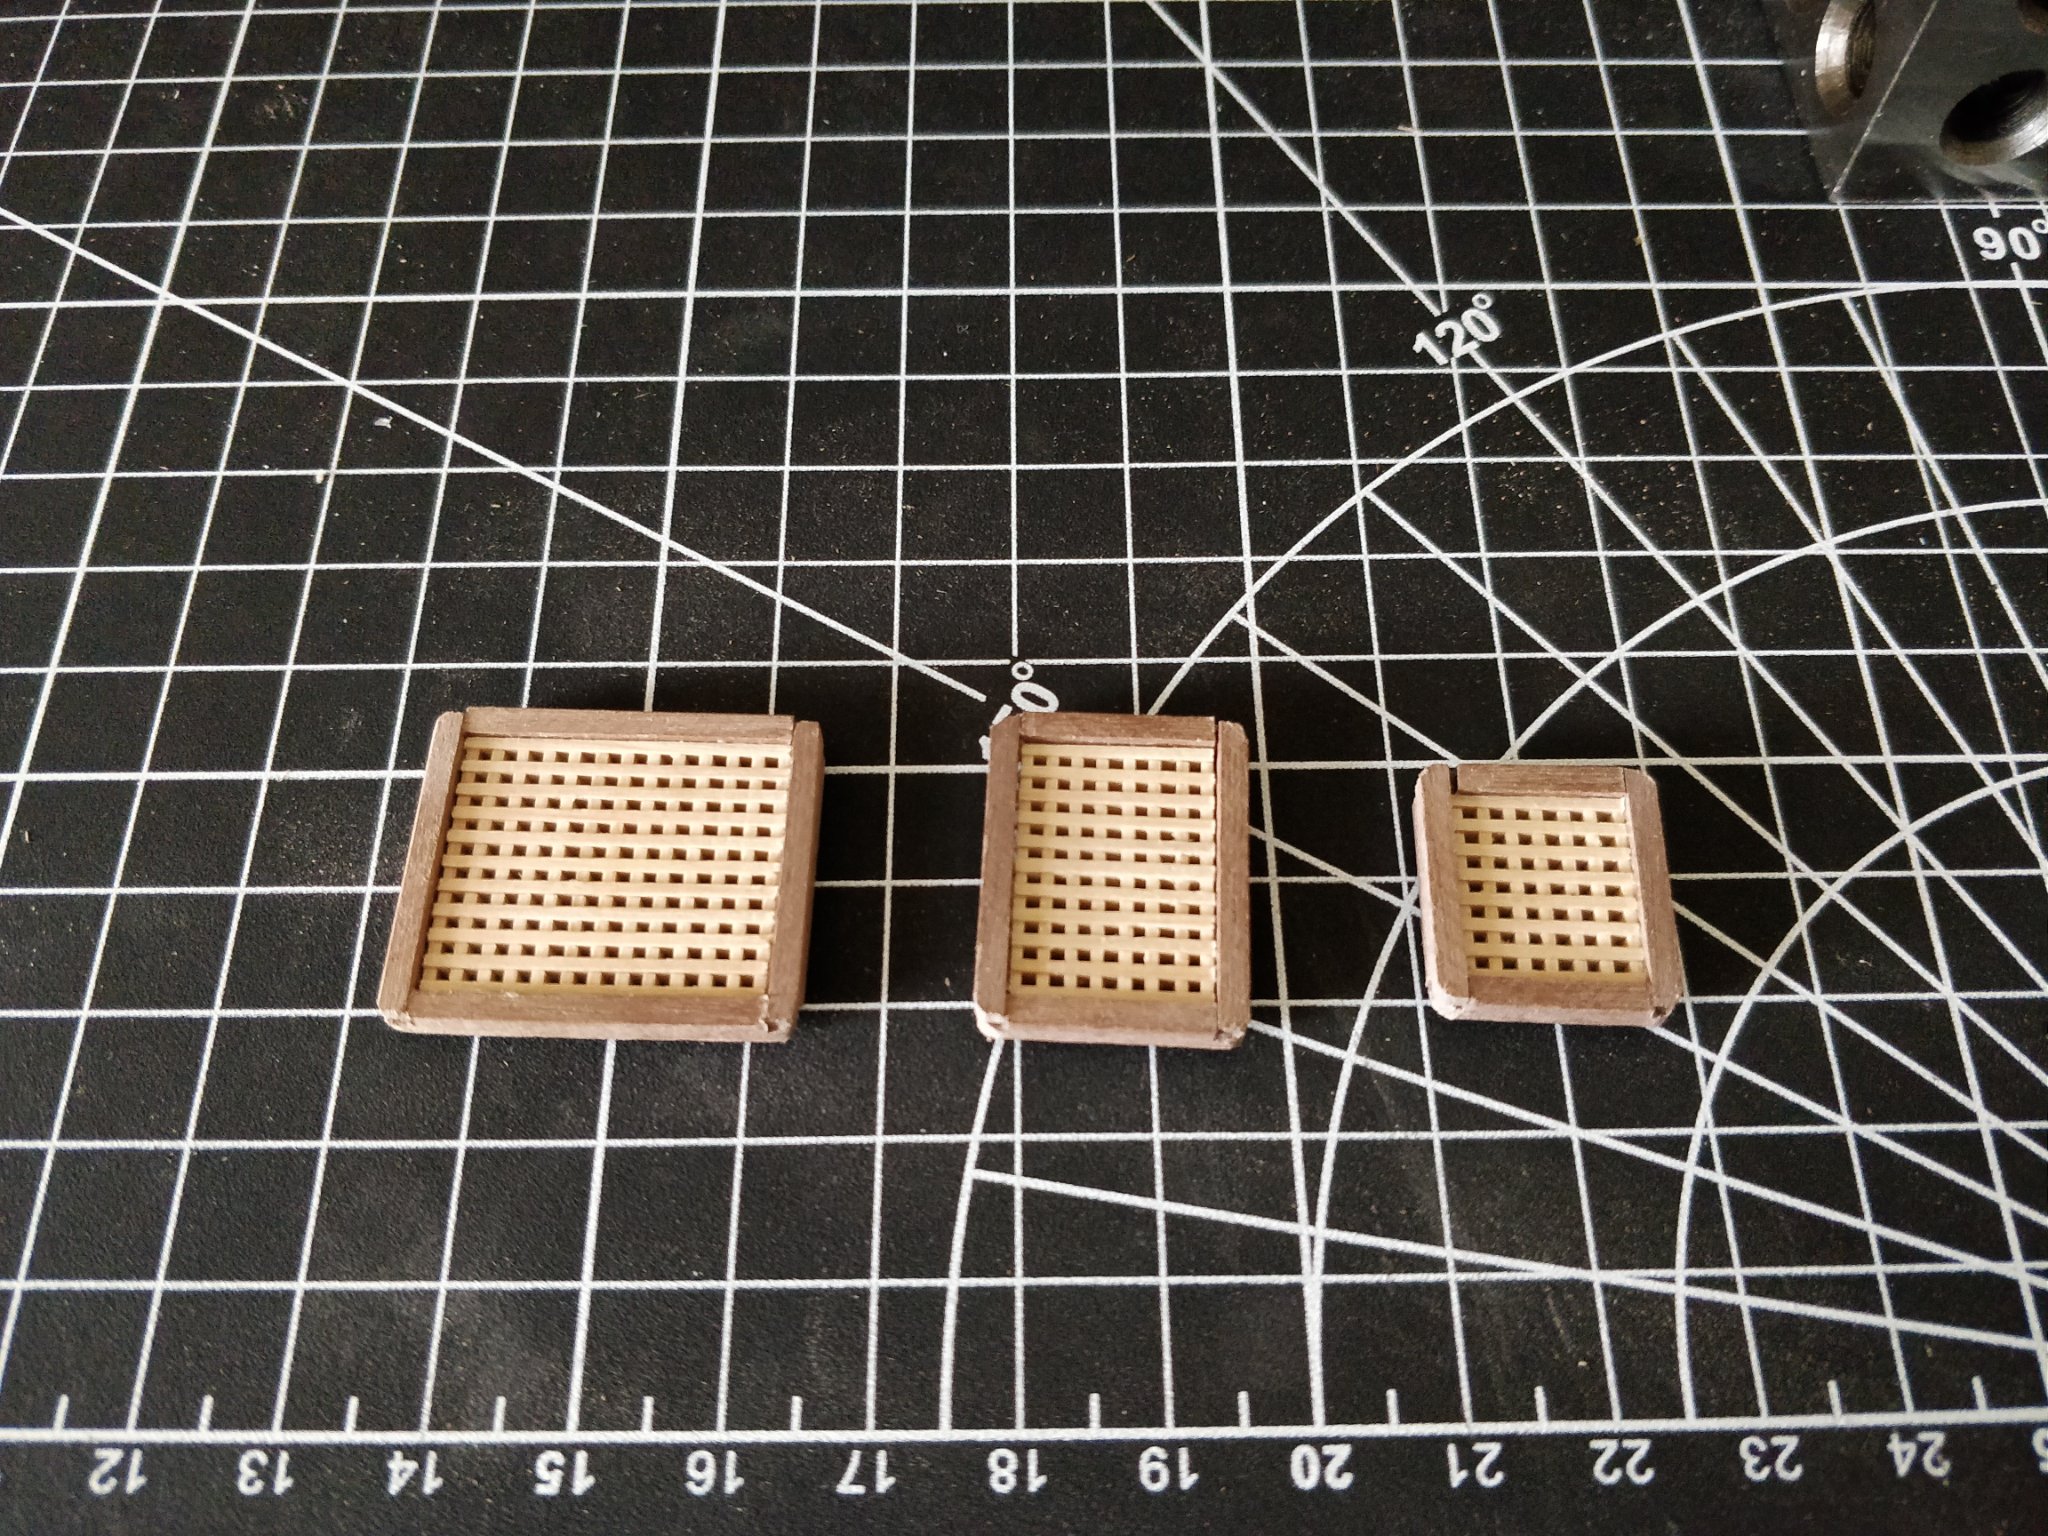
Hm, thank you for the information, Gregory. I did not know that sailors walked across the gratings. It seems like it would be uncomfortable, especially in bare feet. I have reworked the hatches so that the gratings are now flush with the coamings.
- 82 replies
-
- 1
-
-
- Fly
- Victory Models
- (and 2 more)
-
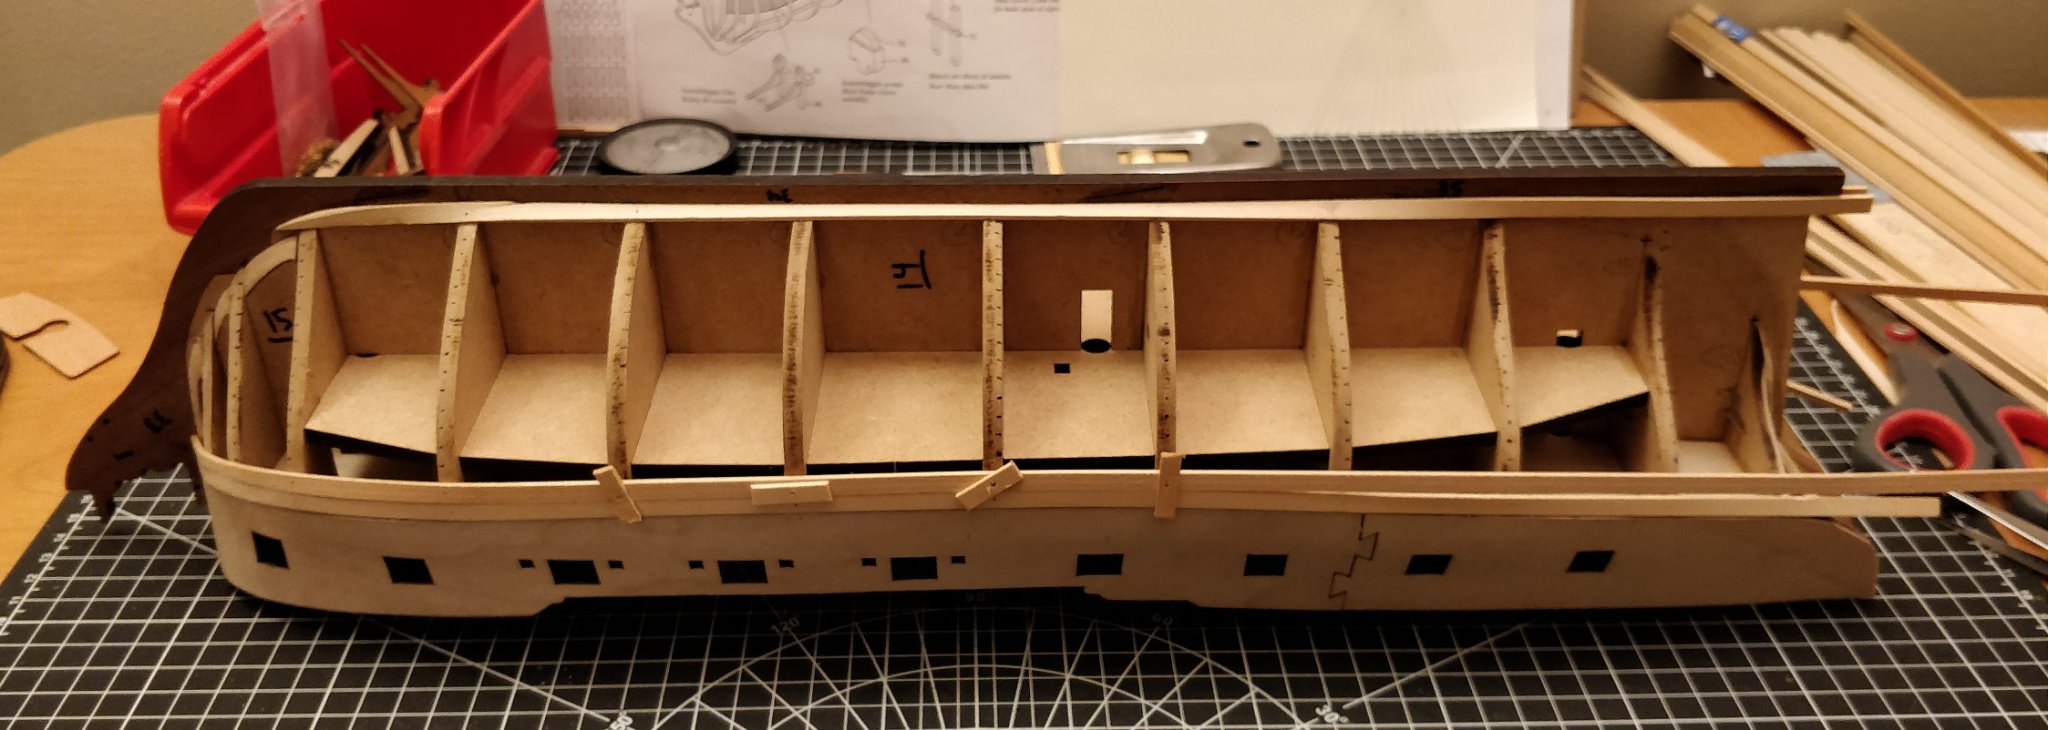
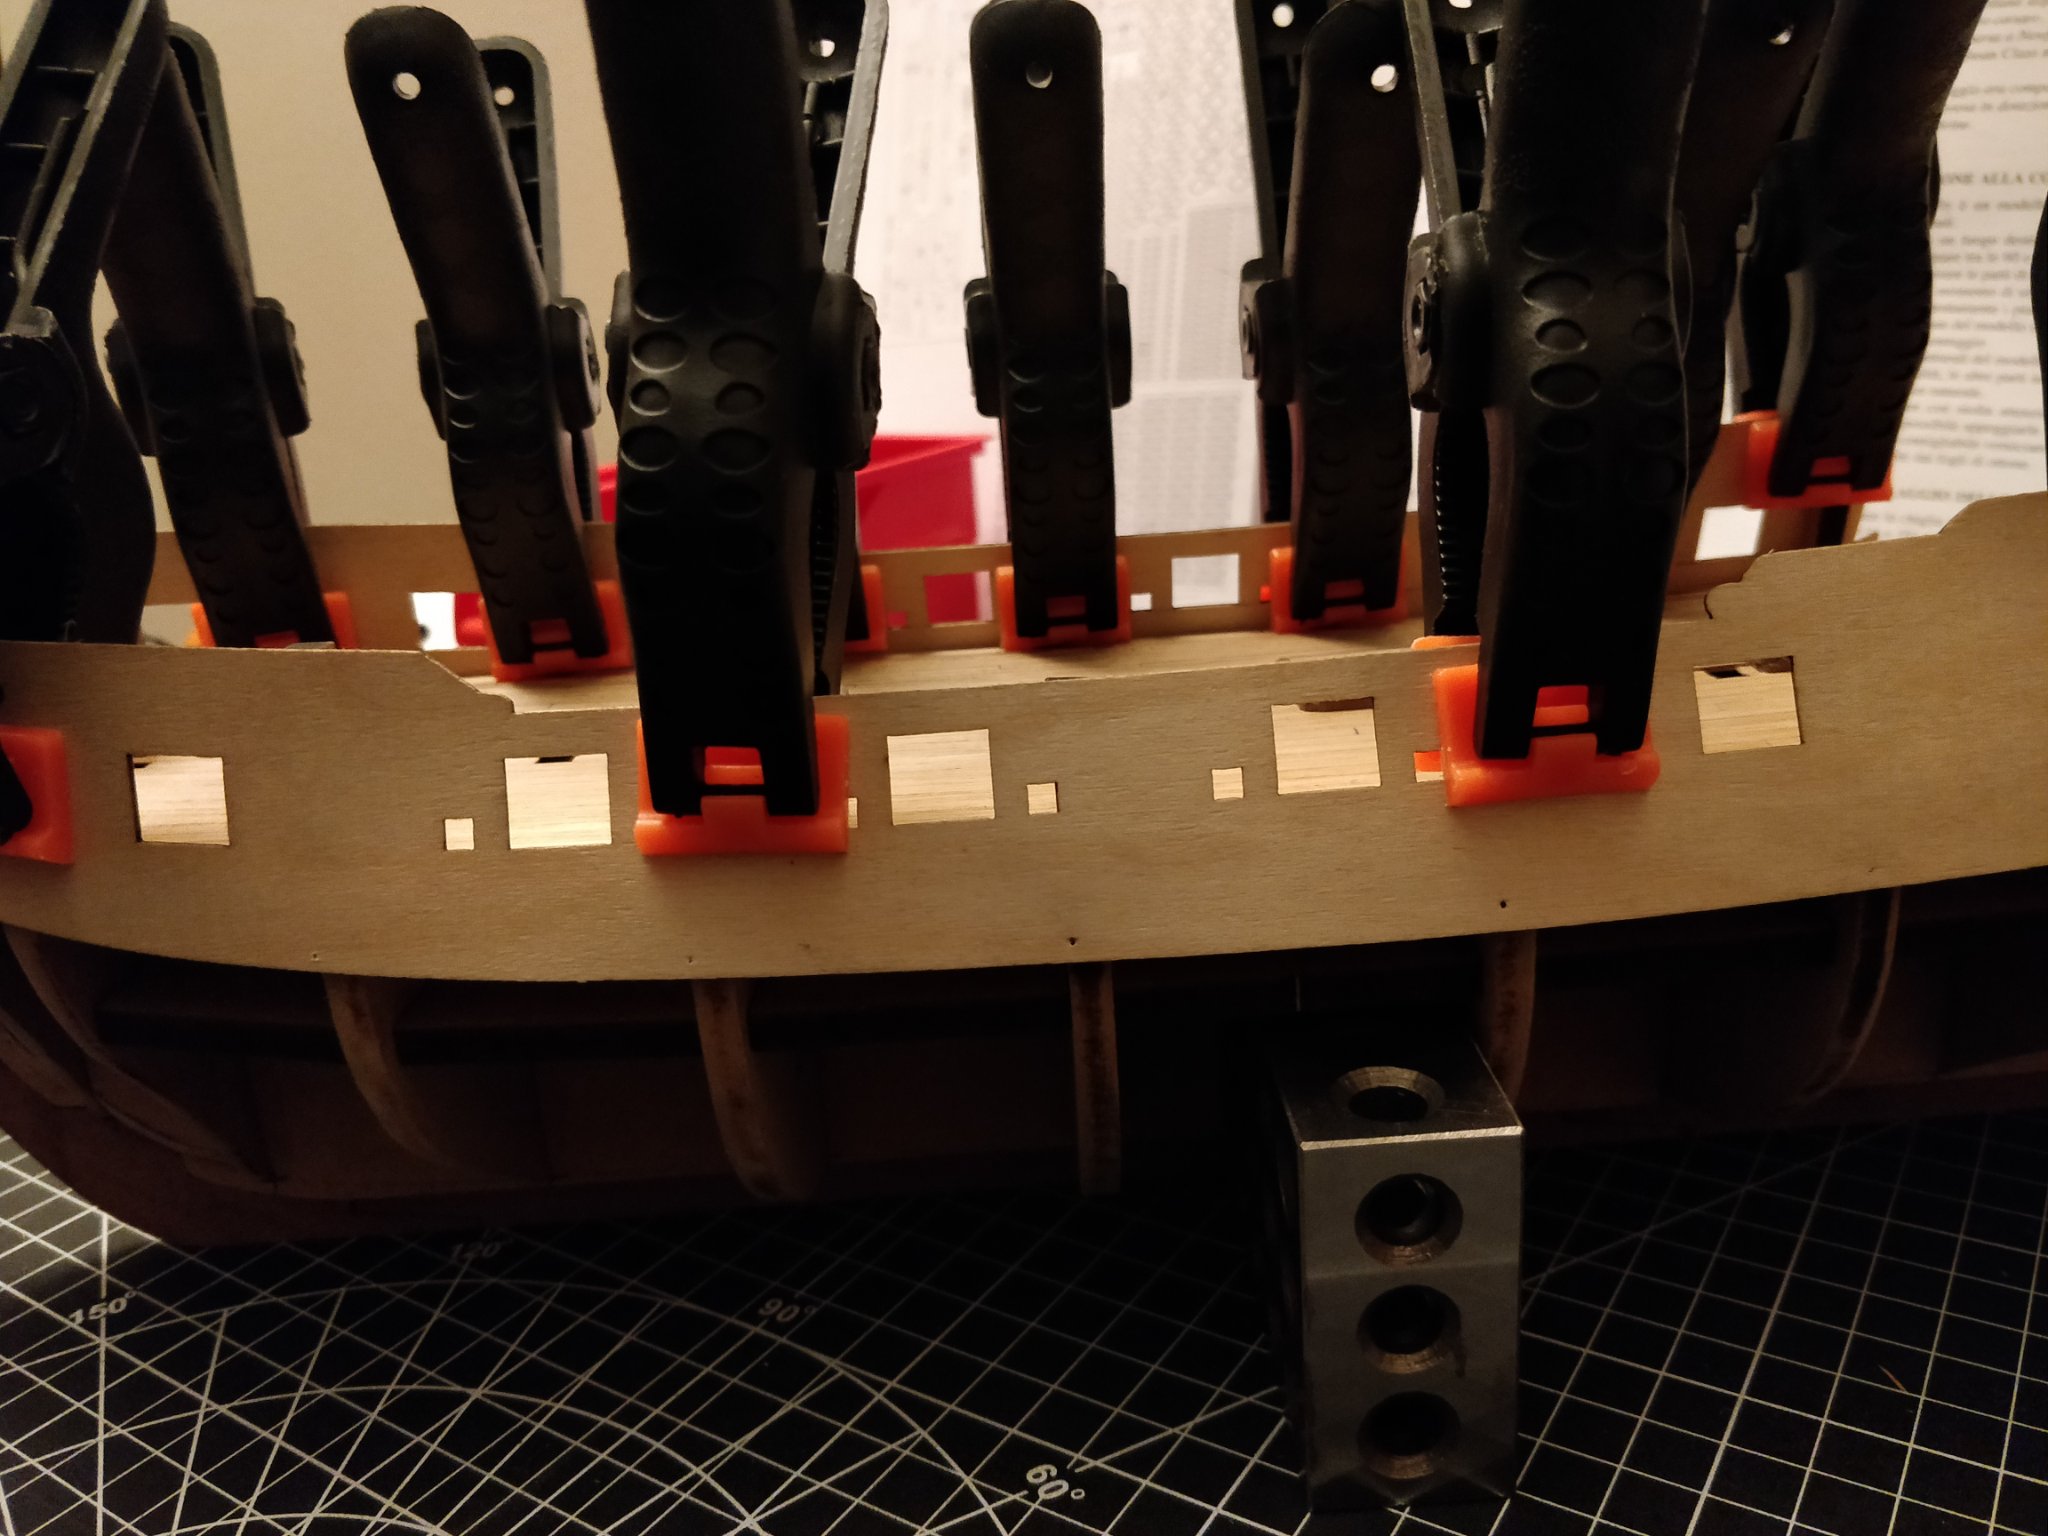
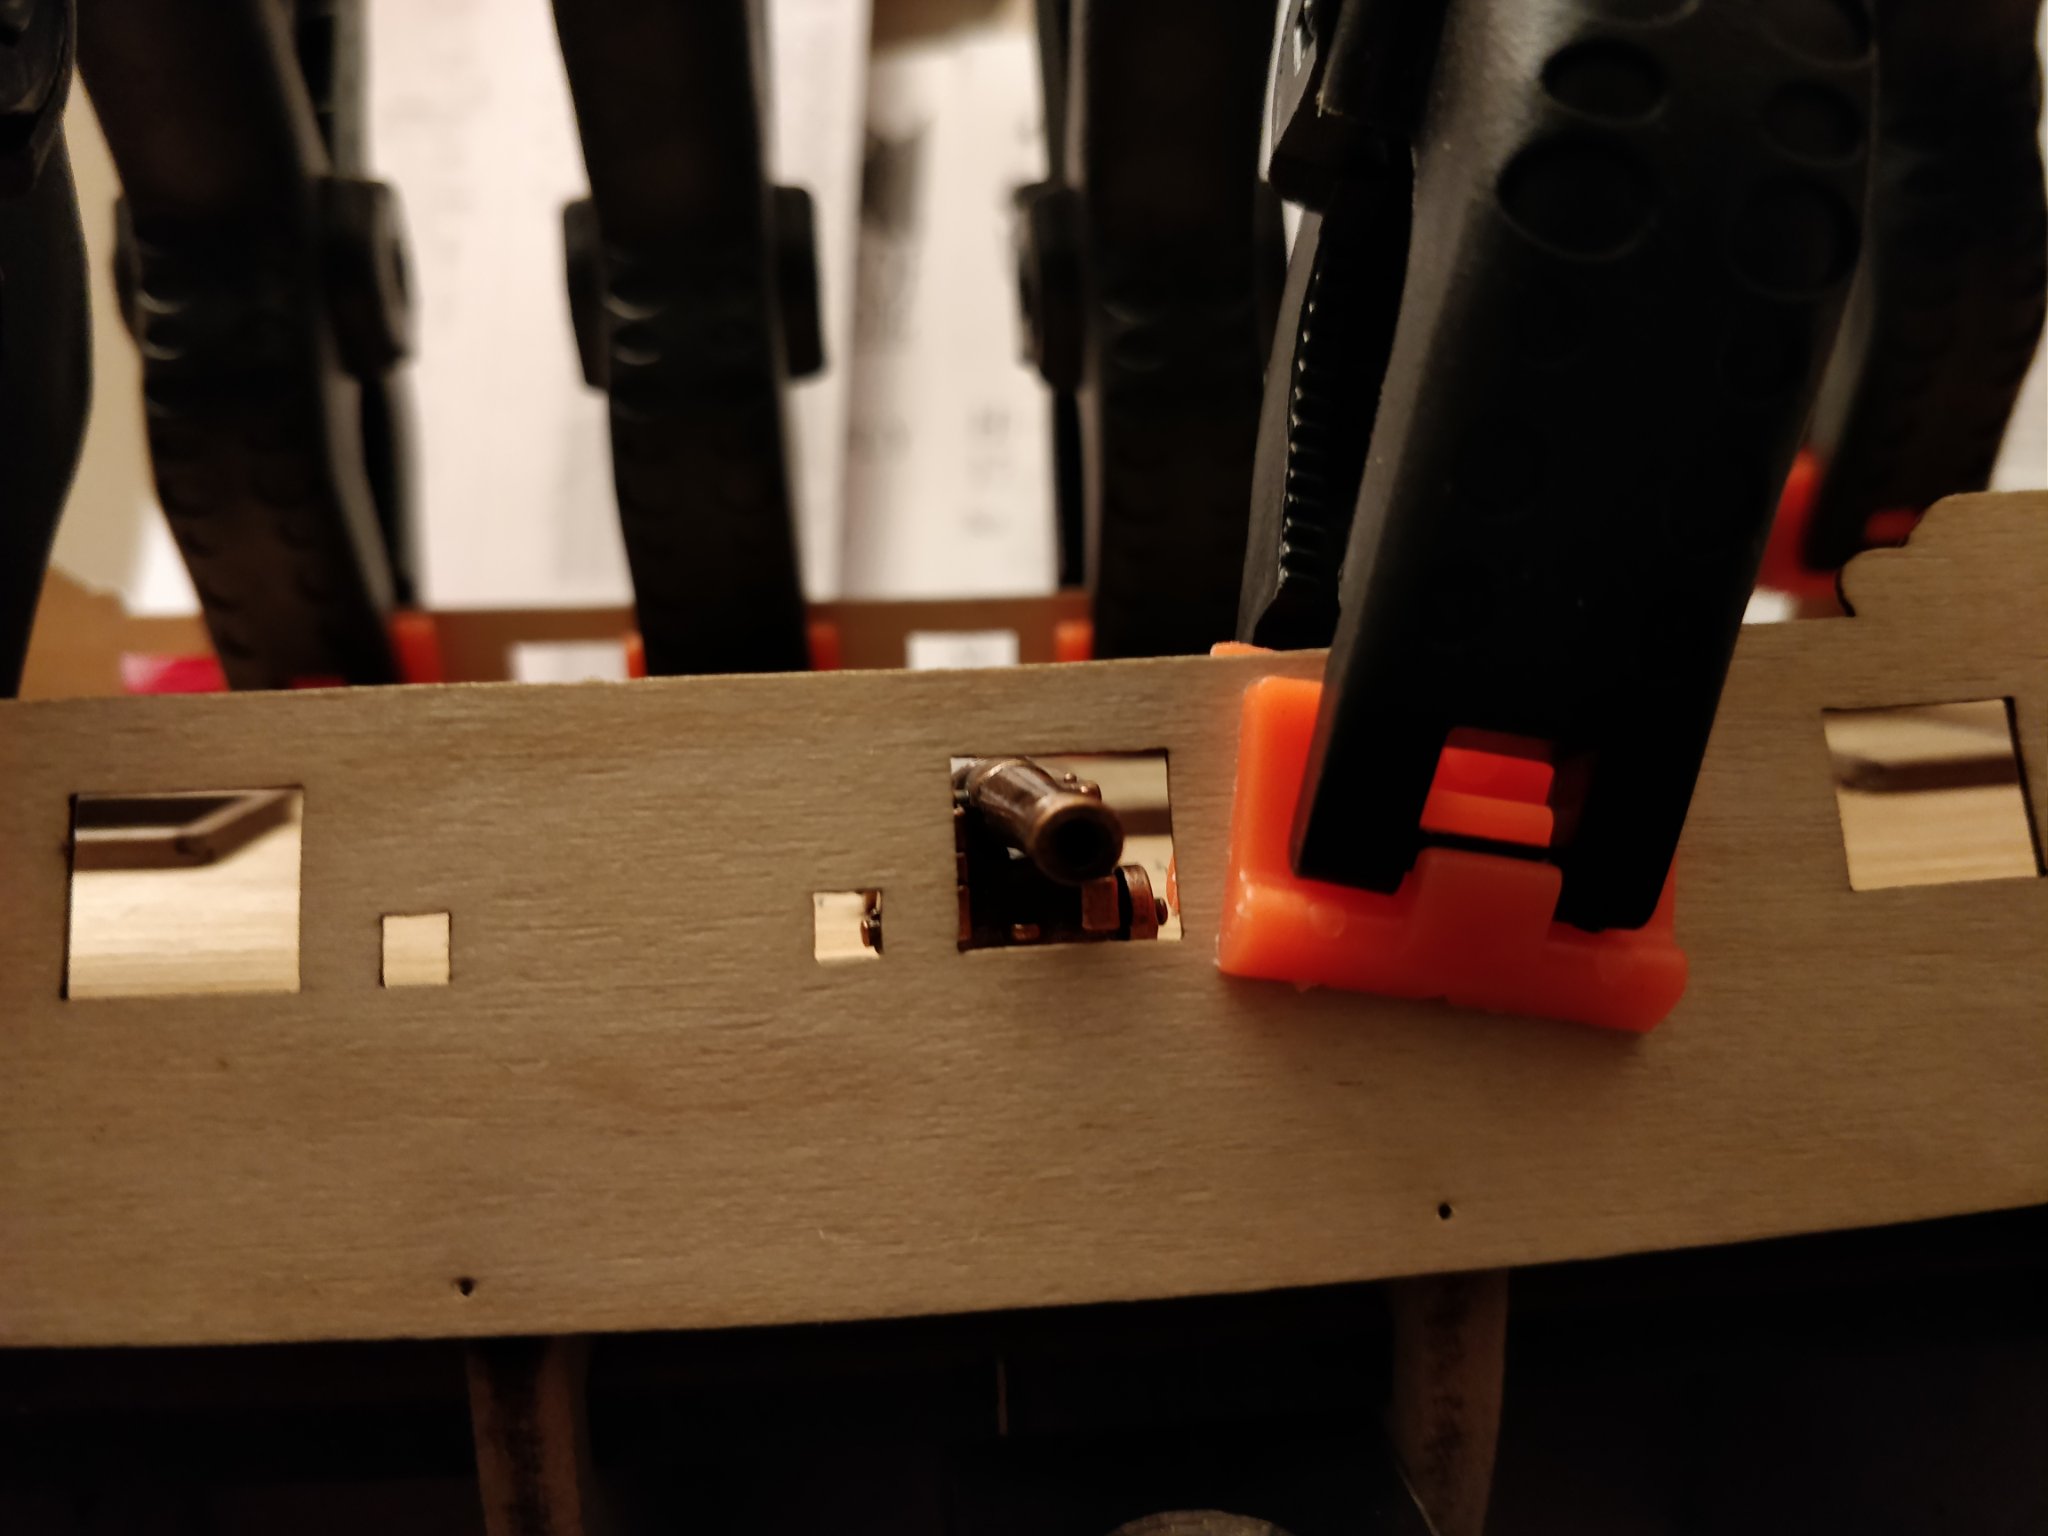
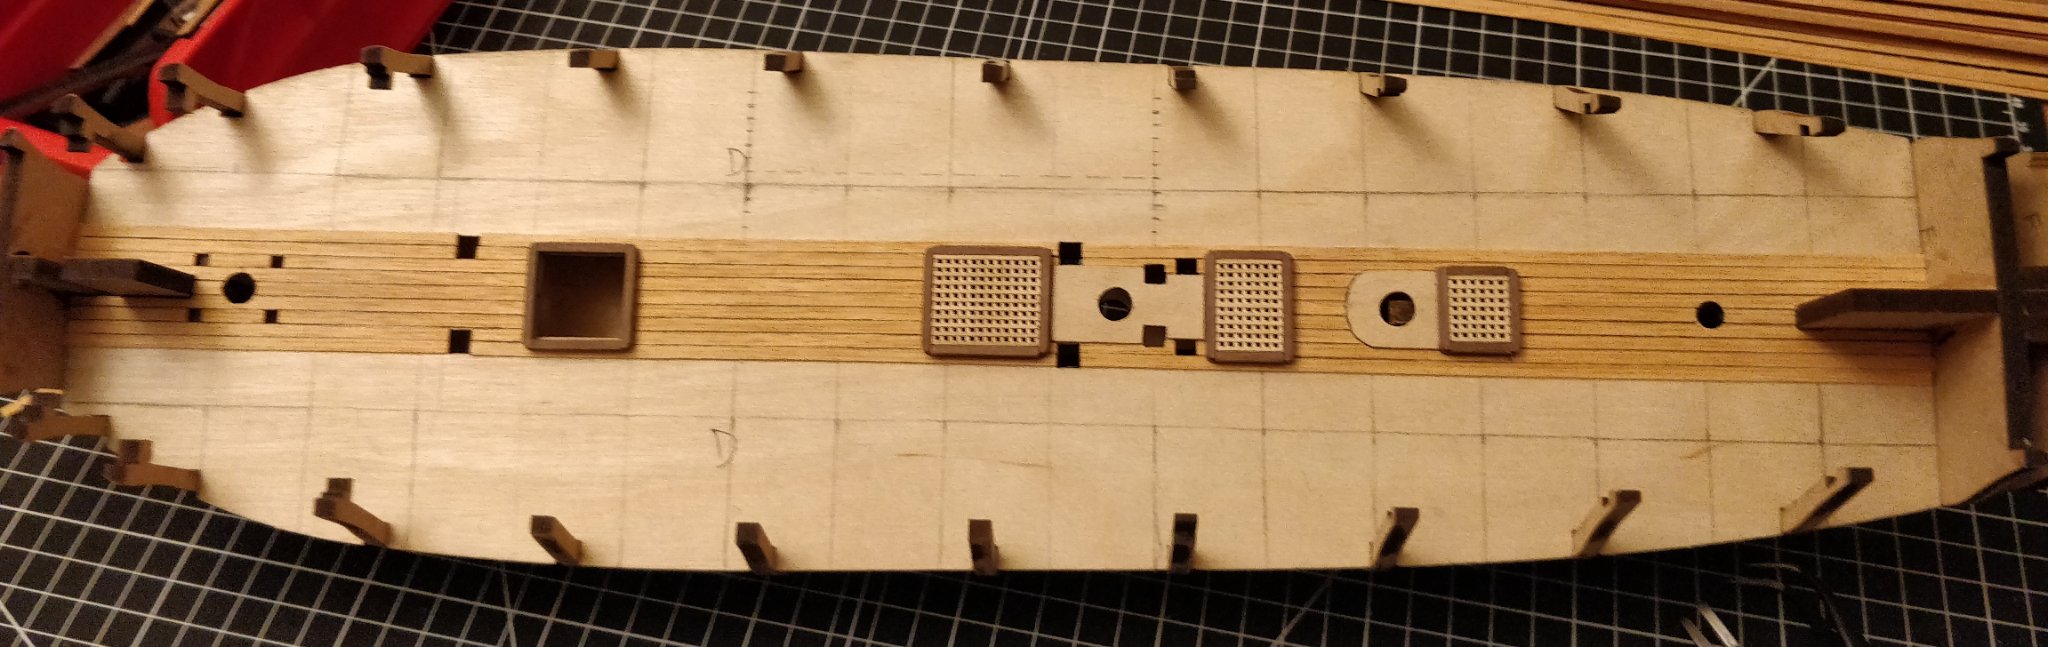
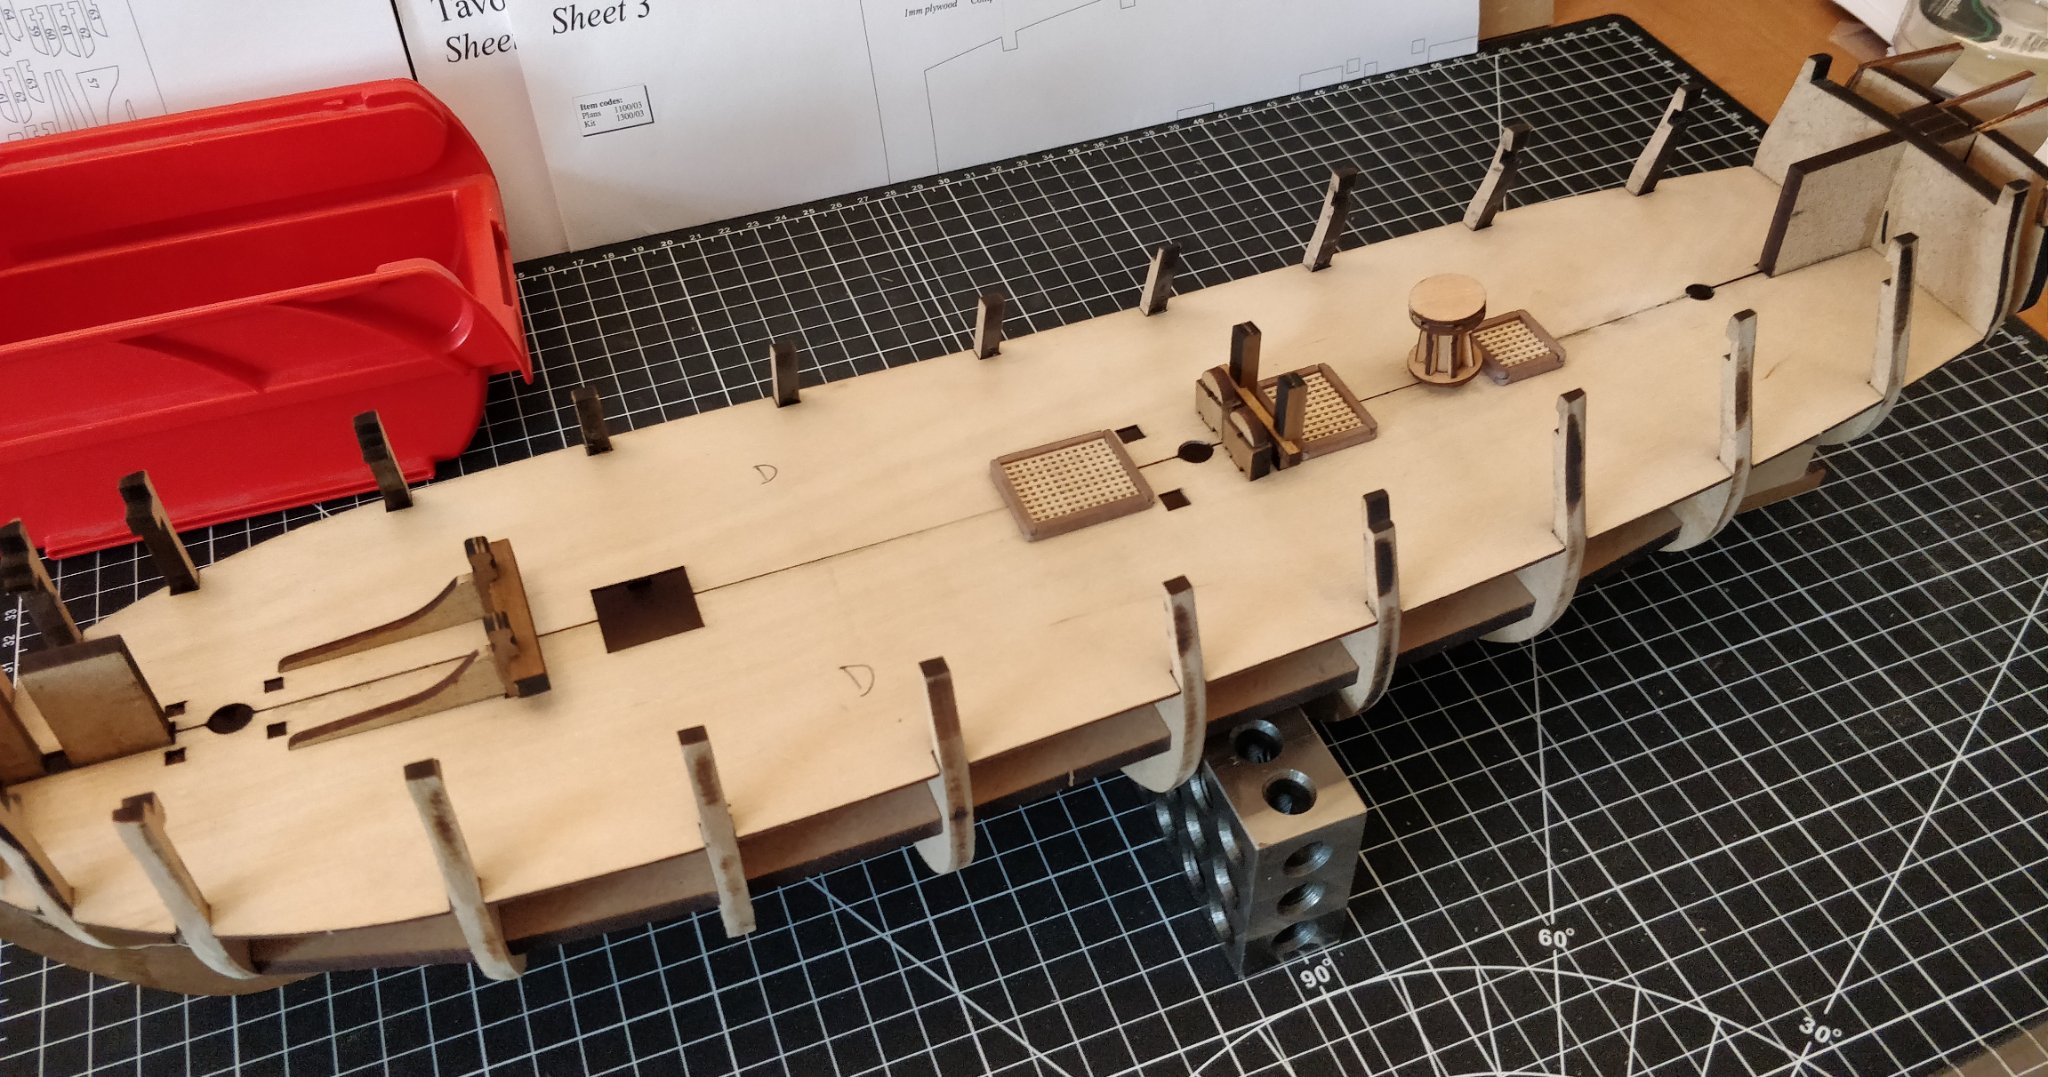
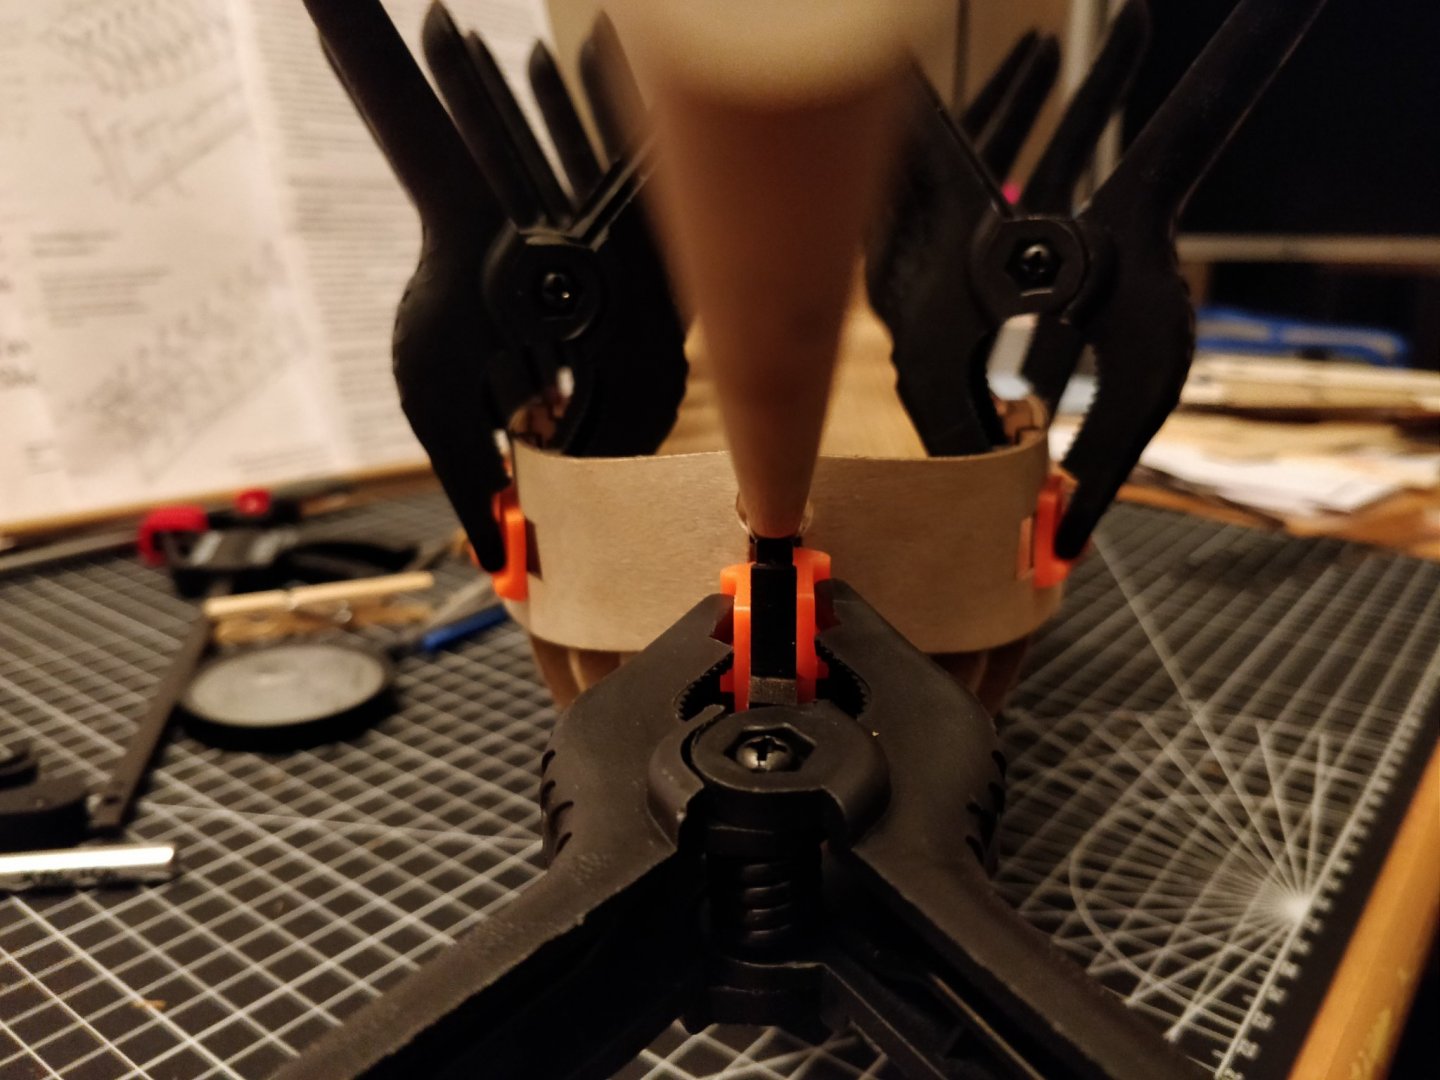
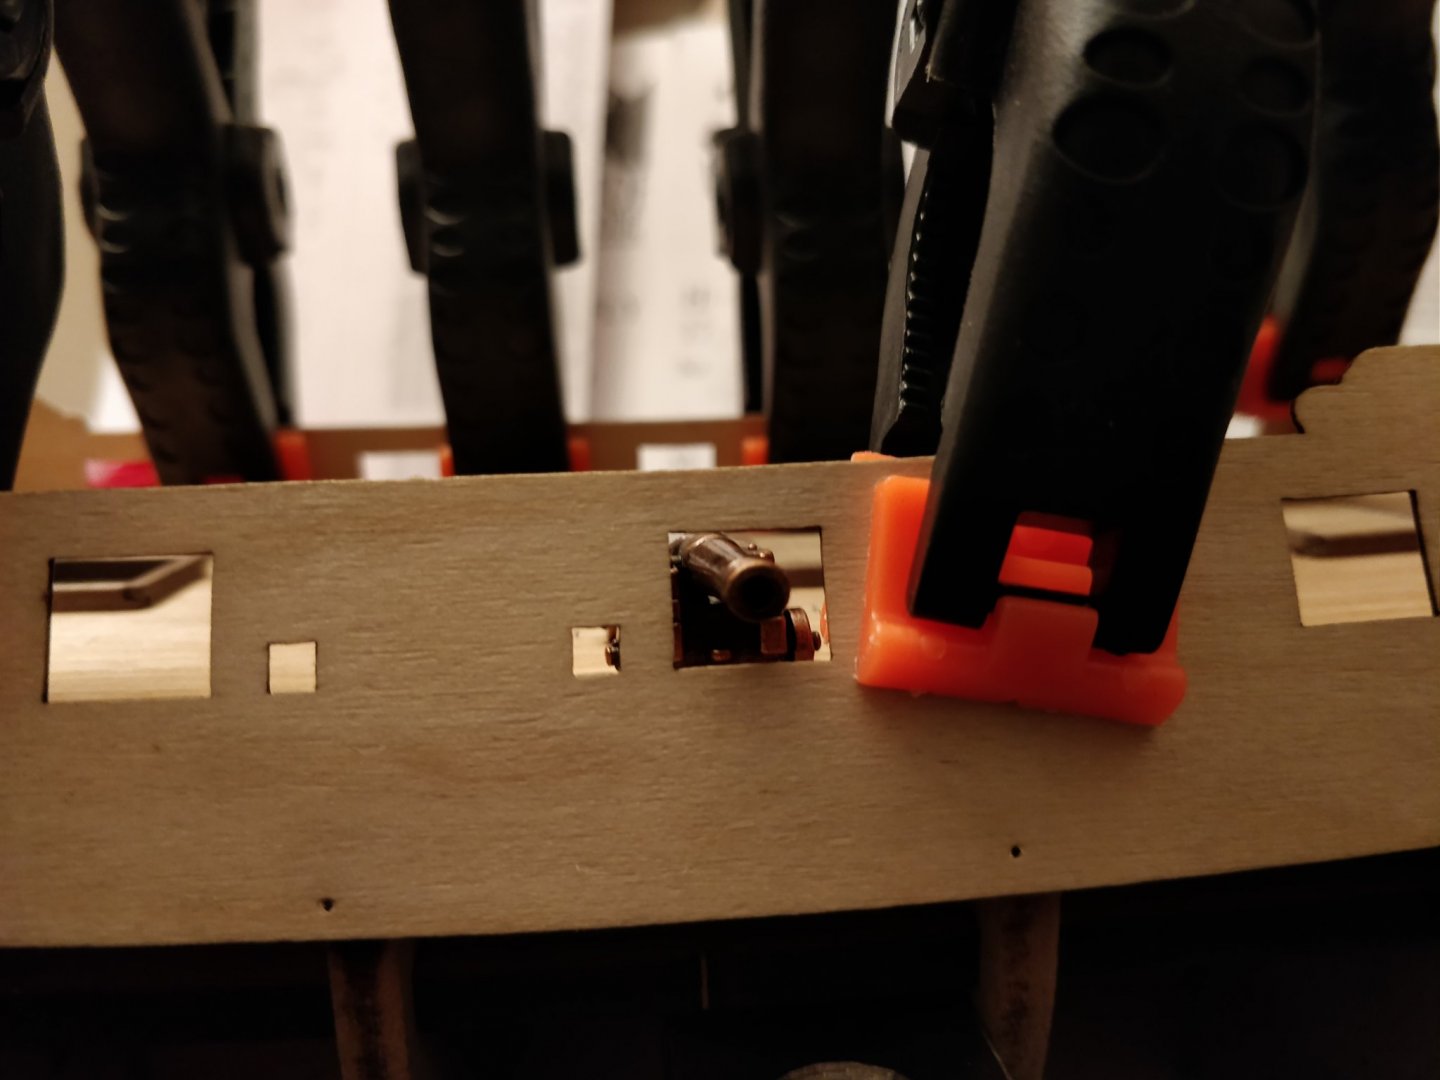
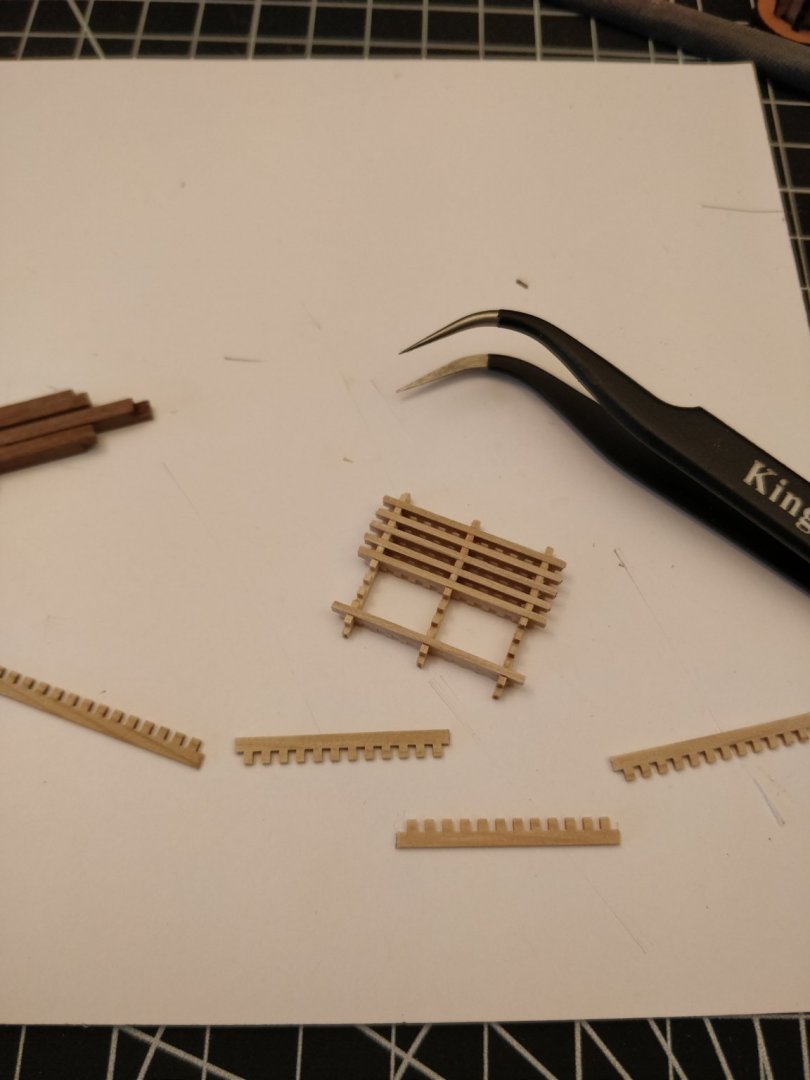
Small progress update: Glued the gun-deck to the bulkhead/keel assembly. Assembled the hatch coamings/gratings based somewhat on Blue Ensign's method for their build of HMS Pegasus. Specifically: I copied the orientation of the gratings with the longitudinal timbers running unbroken and slightly proud of the lateral ones. I attempted to imitate the half-tenon joints Blue Ensign used instead of the miter joints in the instructions. Emphasis on "attempted", as my fit-up is much poorer in comparison. Some key differences: My hatches are flat instead of cambered. I installed my gratings slightly recessed into the coamings (as opposed to flush or proud). I don't have any historical reason for this... I just thought they looked better that way. Here is the deck with the various fittings test-fitted into place: Hoping to get started with deck planking in the next week or so. -starlight


- 82 replies
-
- 2
-
-
- Fly
- Victory Models
- (and 2 more)
-
Thank you both for the advice. The kit instructions mention drilling mounting holes for pedestals after the hull planking is completed. Based on other build logs this seems much too late, especially if using a captive nut inside the false keel. I was considering just using two small cradle blocks, either CNC milled brass or, failing that, 3D printed plastic. On that note, I have used some wood-PLA filament which sands and stains quite well. Using a cradle in lieu of pedestals would allow me to more easily remove the ship from the display case if necessary. Let me know what your thoughts are. Thanks.
-
Hi Richard, Thanks for your words of encouragement. I just looked up Blue Ensign's log and I regret not having discovered it sooner! It is very detailed and will be of great help to me. I wish you the best of luck with your own hull planking. Please document it well for my benefit. "I glued the false deck in place then planked it - it seems the logical thing to do." - do you mean the gun deck? This was my concern since the instructions say to plank it before installing. If I do that, I'm sure planking will be easier but I imagine the deck will be stiffer and harder to install, and vice versa if I plank in situ. As you say, I am endeavouring to be as cautious as possible with my build. My biggest fear is realizing that I've made an error after several steps of gluing/painting. I am trying to read all of the relevant build logs and ask a myriad of questions. Ultimately, I have to recognize that I am not in a position to make many of the modifications/improvements that others have done, and that "perfect is the enemy of good", especially for a first model. In any case, I'm sure I'll be happy enough to have a completed ship when all is said and done. -starlight
-
Hi Richard, Just wanted to say that I recently came across your build log and am very impressed! I myself am building HMS Fly (my very first model) and have found a wealth of useful information in your posts. I'll definitely be keeping an eager interest in your progress. -Starlight
-
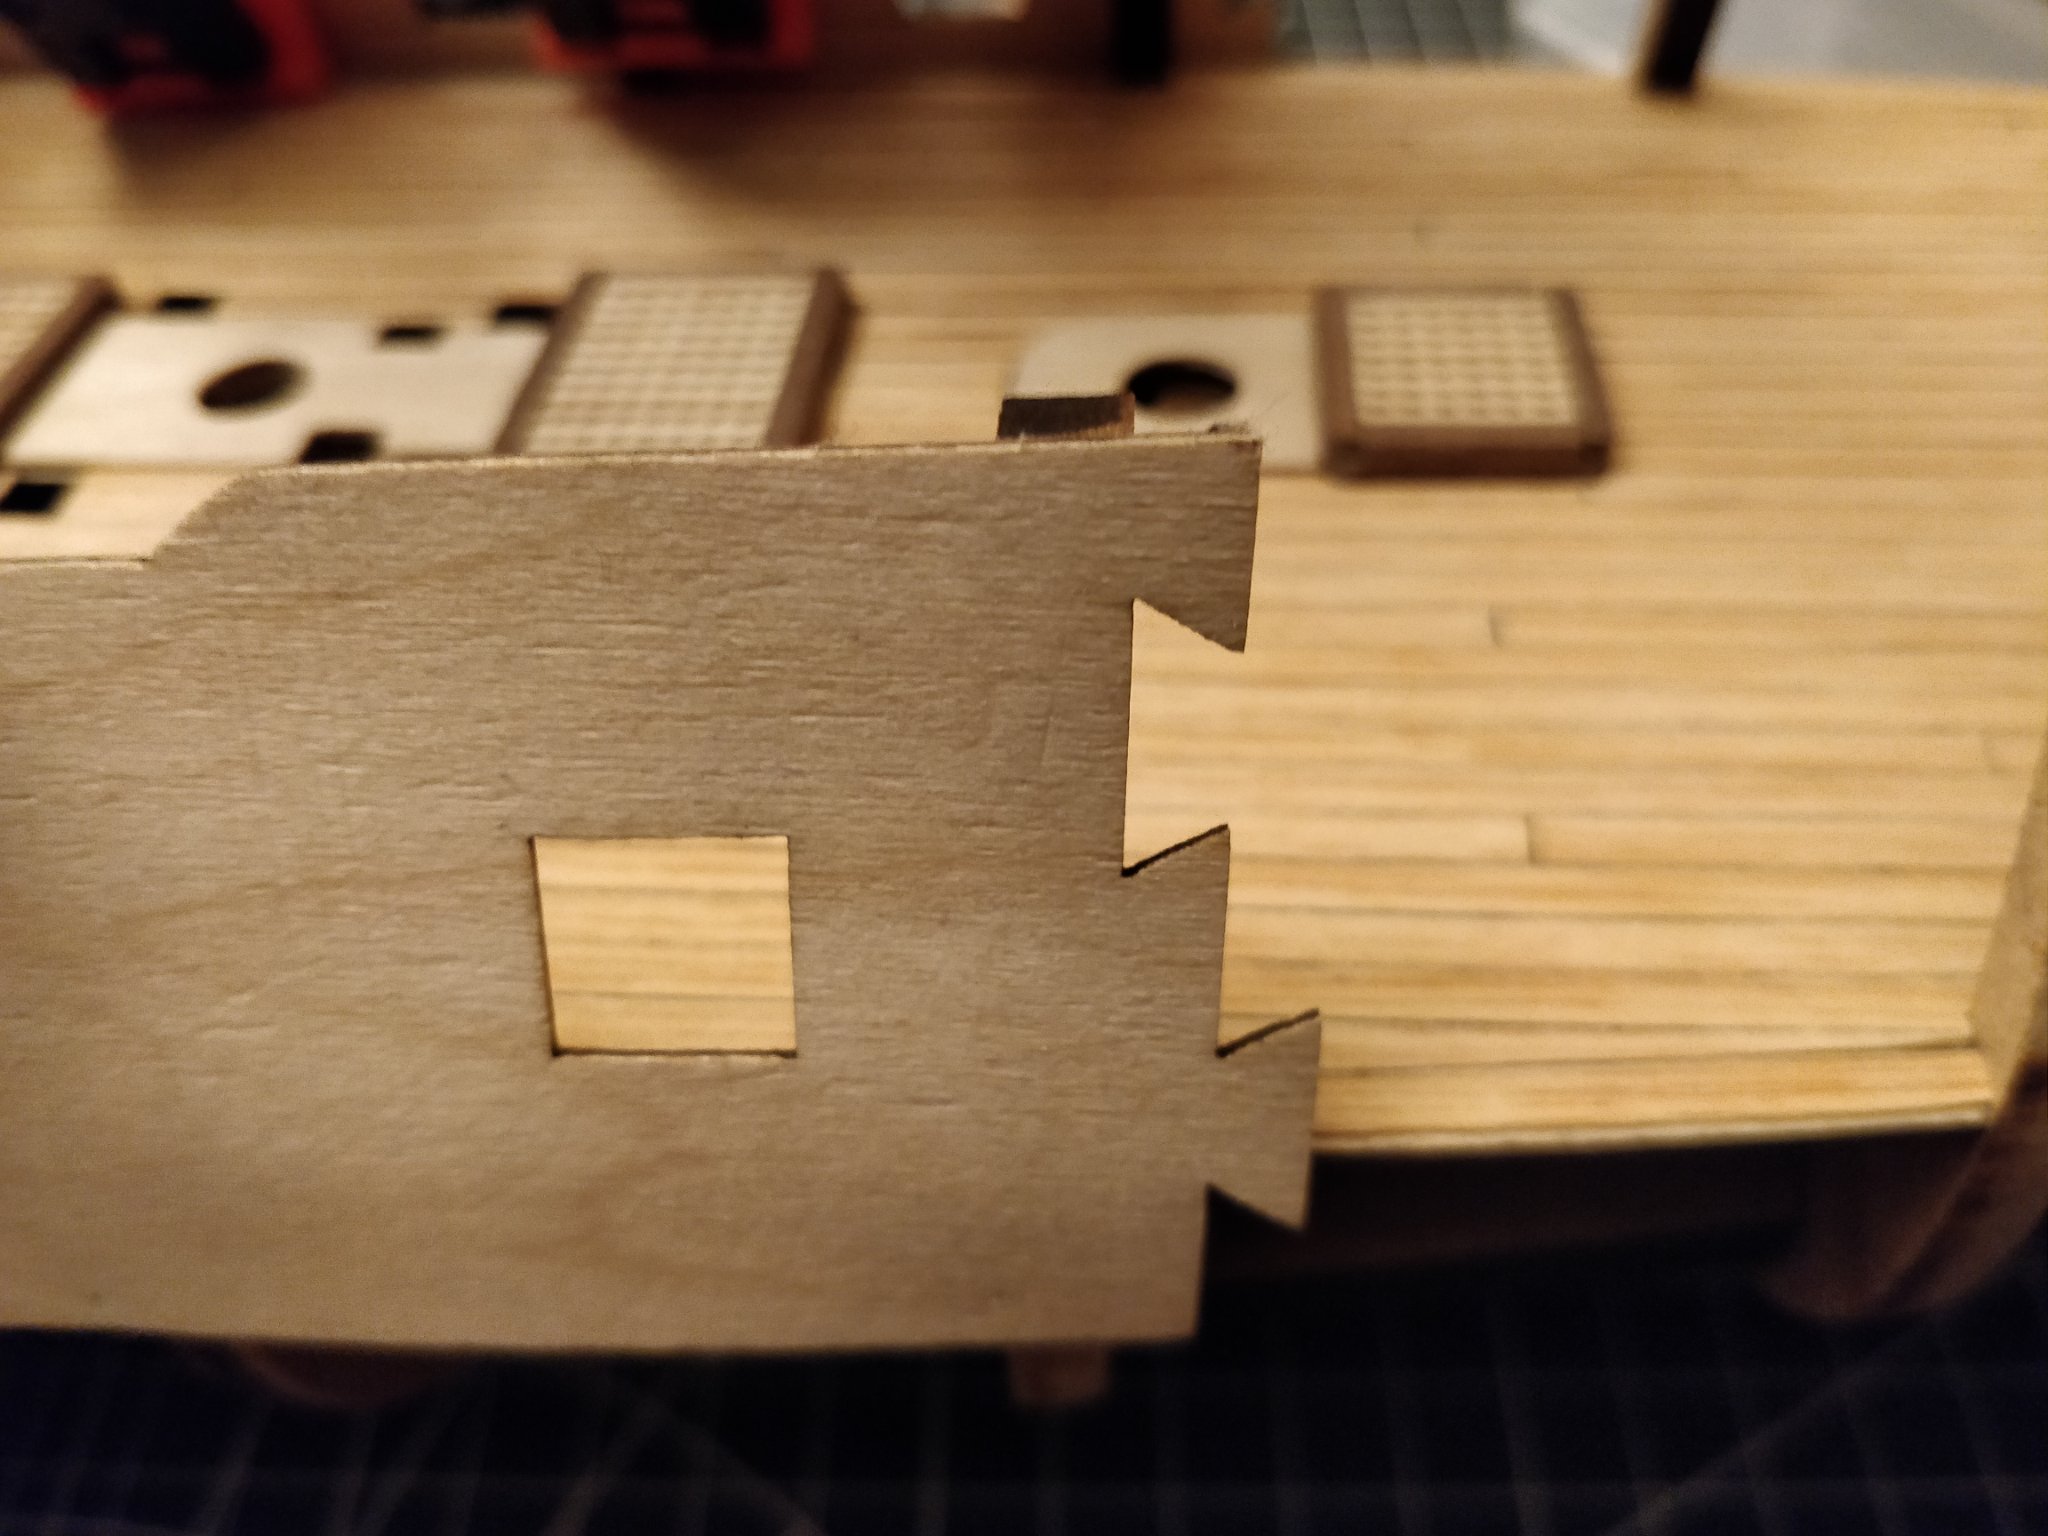
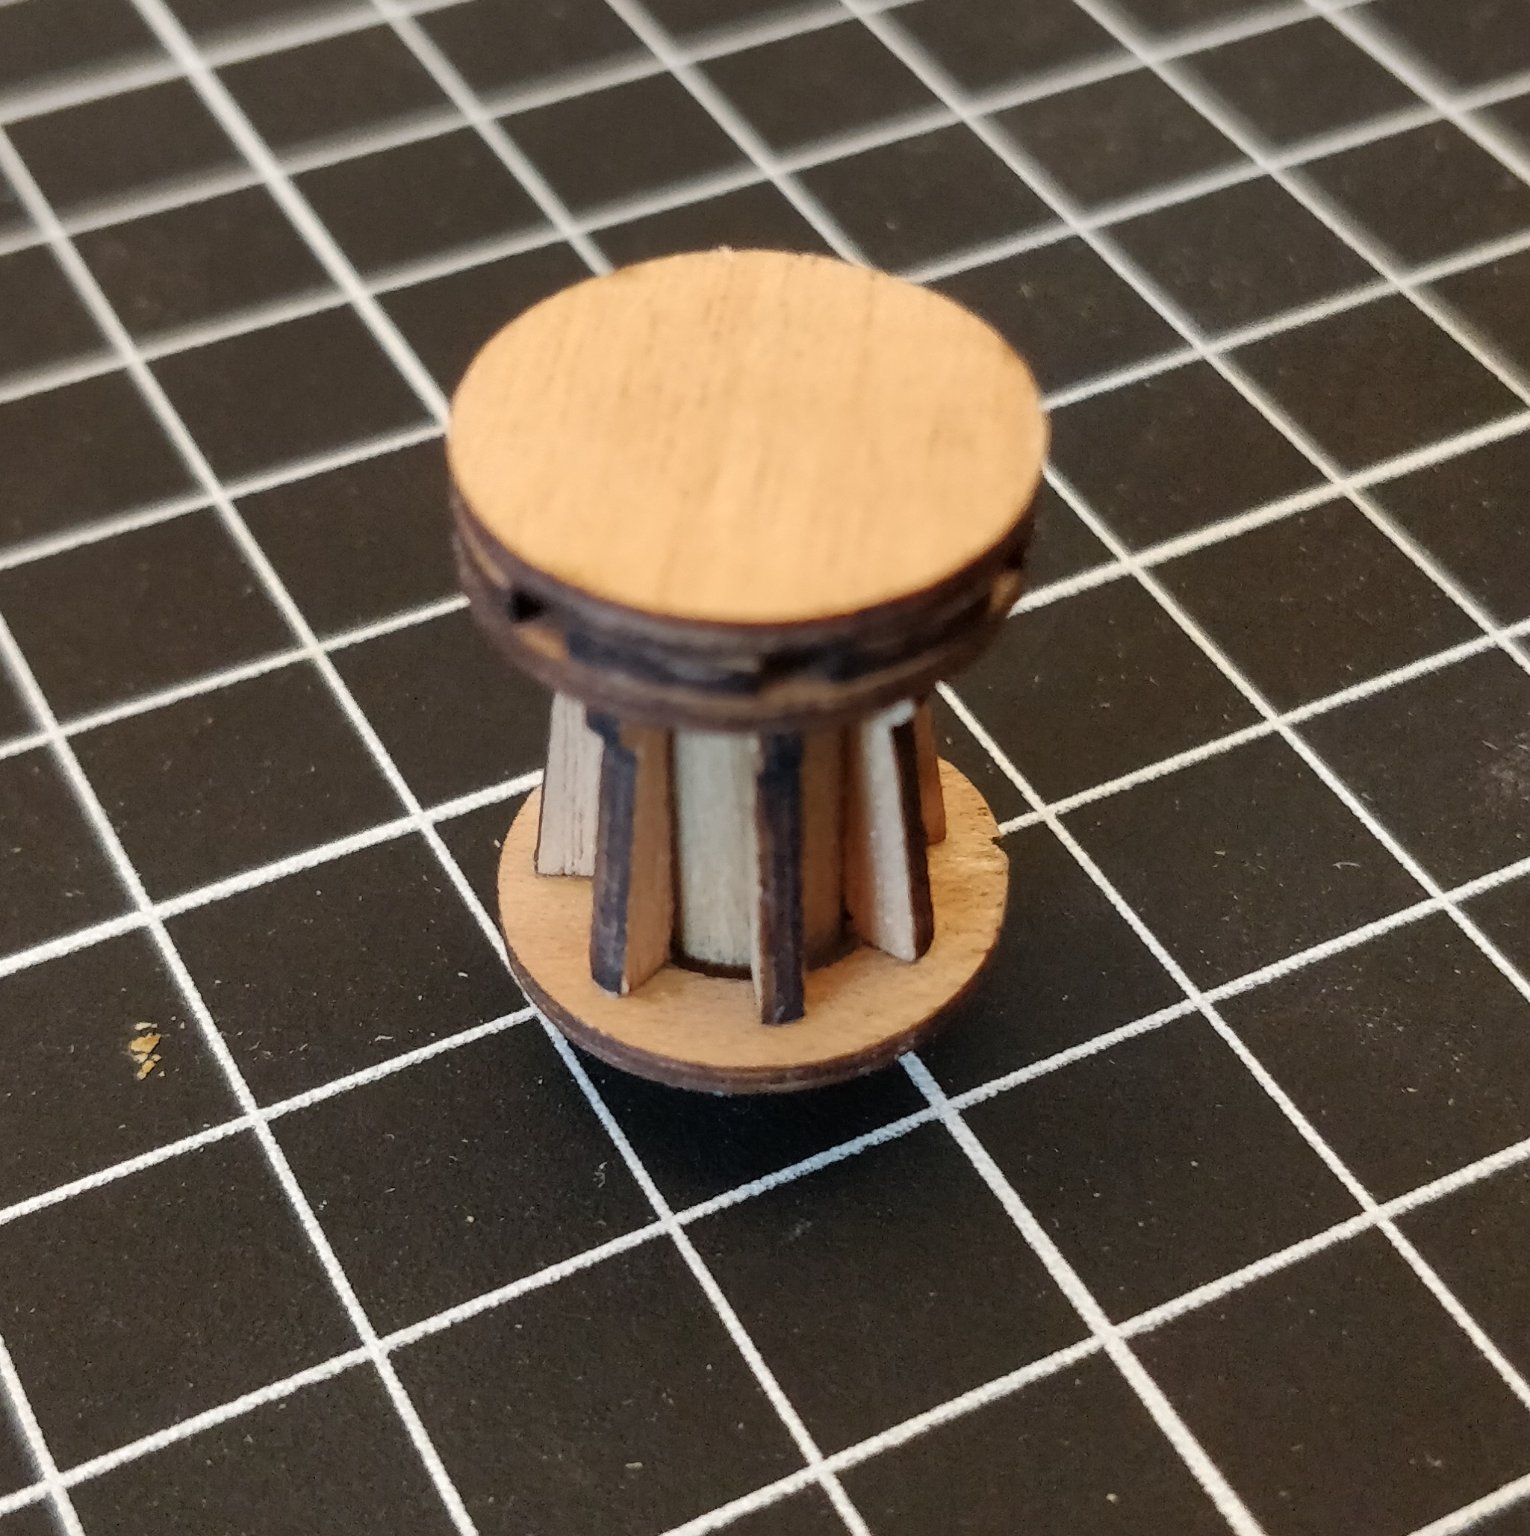
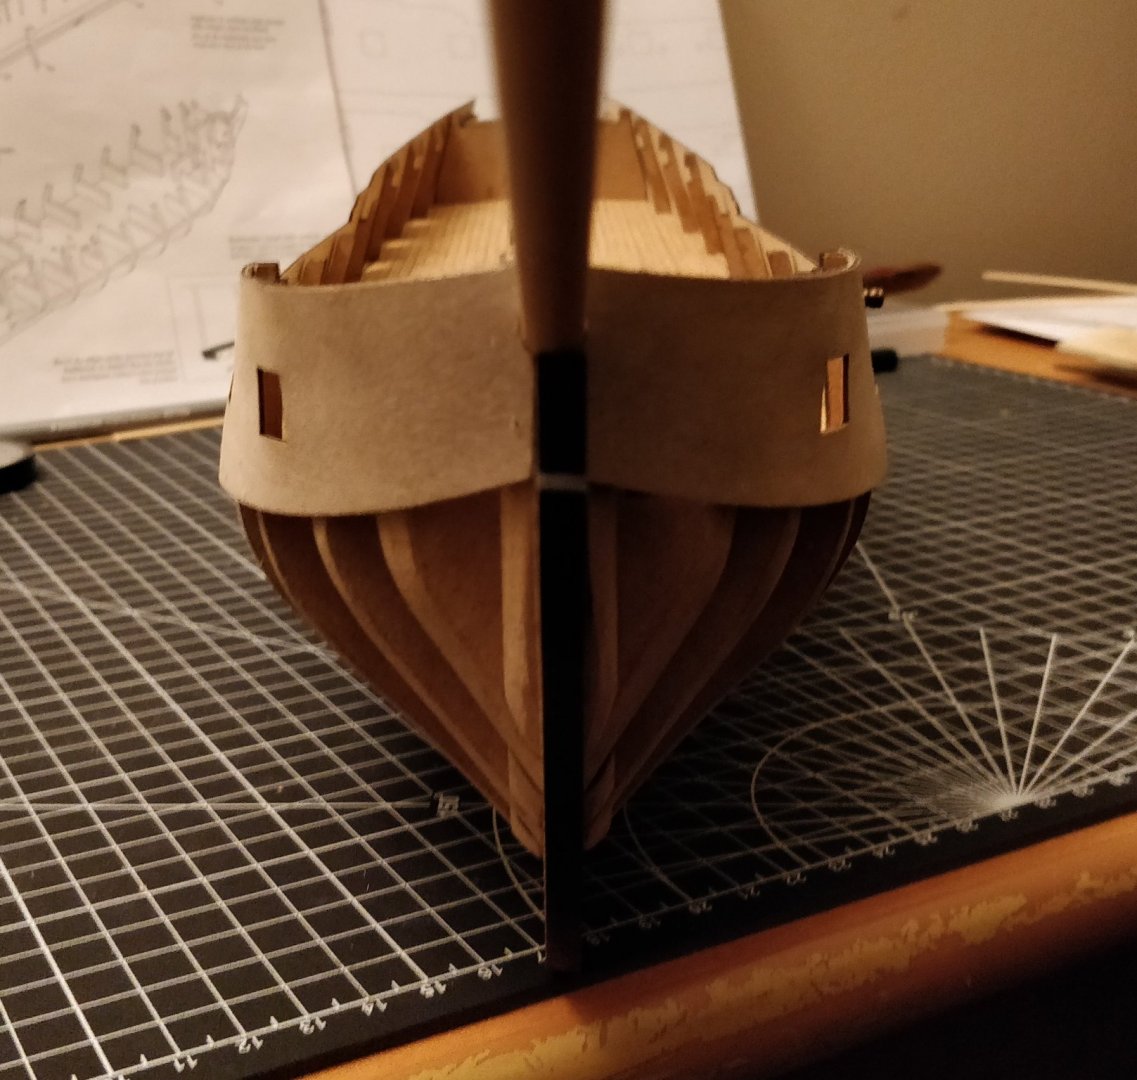
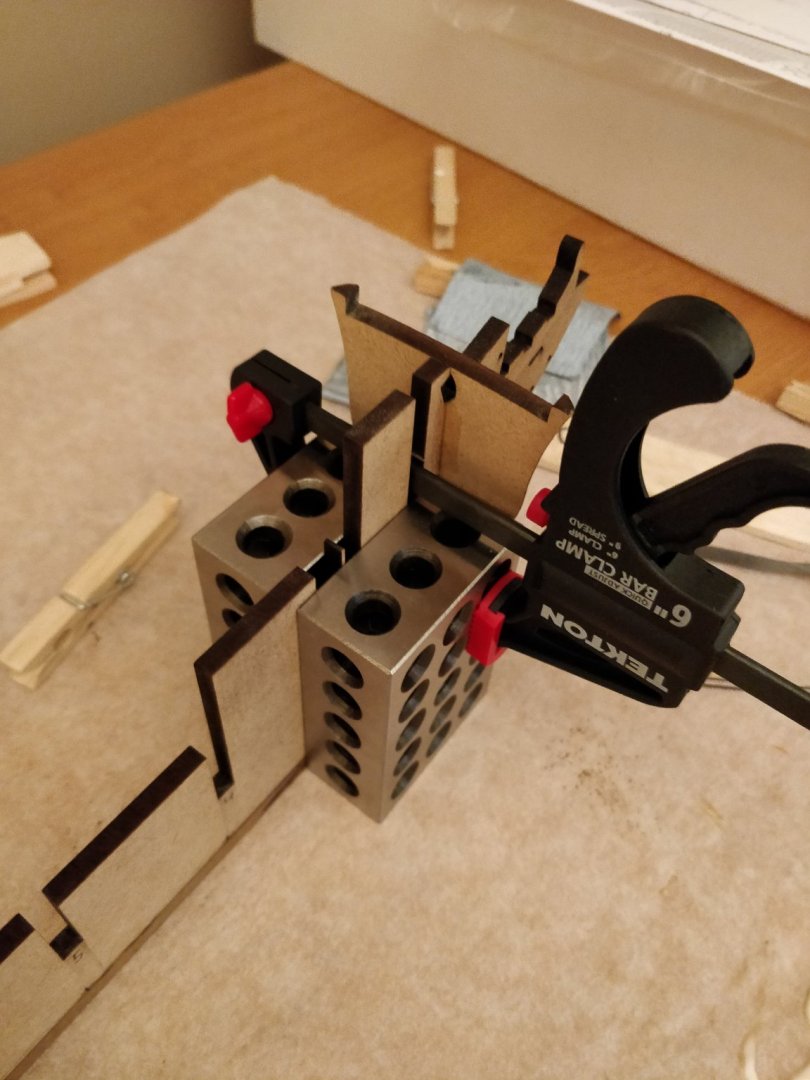
The aforementioned capstan assembly. Upon reading other build logs of Fly/Pegasus I realized that I had severely under-faired the stern extensions. I decided to redo them, and I think they look more reasonable now. After doing some research on the deck planking and fittings, there are some salient points on which I would appreciate any comments/advice: I see that many other modelers add planking to the false MDF deck below the hatches on the gun deck. I certainly appreciate the visual improvement this makes, but I highly doubt that the kit comes with enough extra planking for me to do this. Are there any other options to give this effect? I am preparing to do the hatch coamings but I confess I have no idea how to join all the little bits together and the instructions are a bit sparse on dimensions. Can anyone point me toward some primer material on the subject? In all the other build logs I have seen, the (very proficient and experienced) modeler simply breezes past them. Should I be planking the deck in situ as everyone else seems to be doing? Thanks everyone.


- 82 replies
-
- 2
-
-
- Fly
- Victory Models
- (and 2 more)
-
Hi Chris, it's an honour to see you on my build log. The kit is very well designed and I hope I can do it justice. I suspected that the 8th part was a matter of spares, just wanted to make sure. -Starlight
-
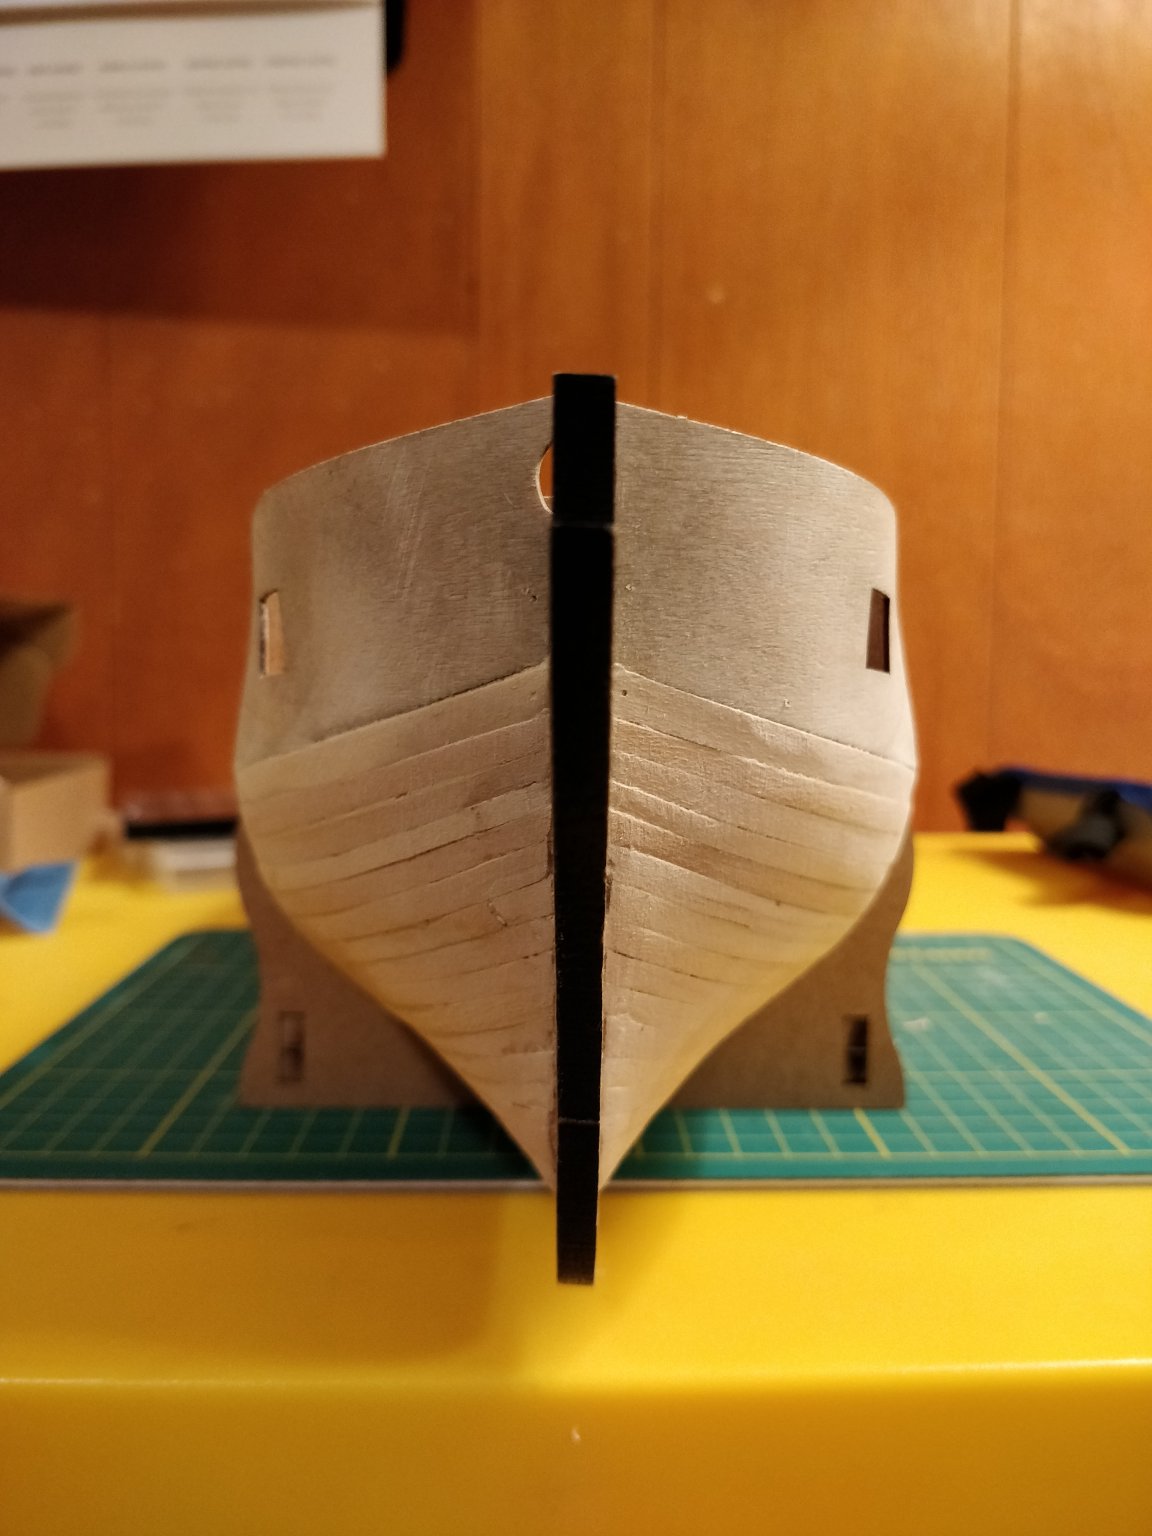
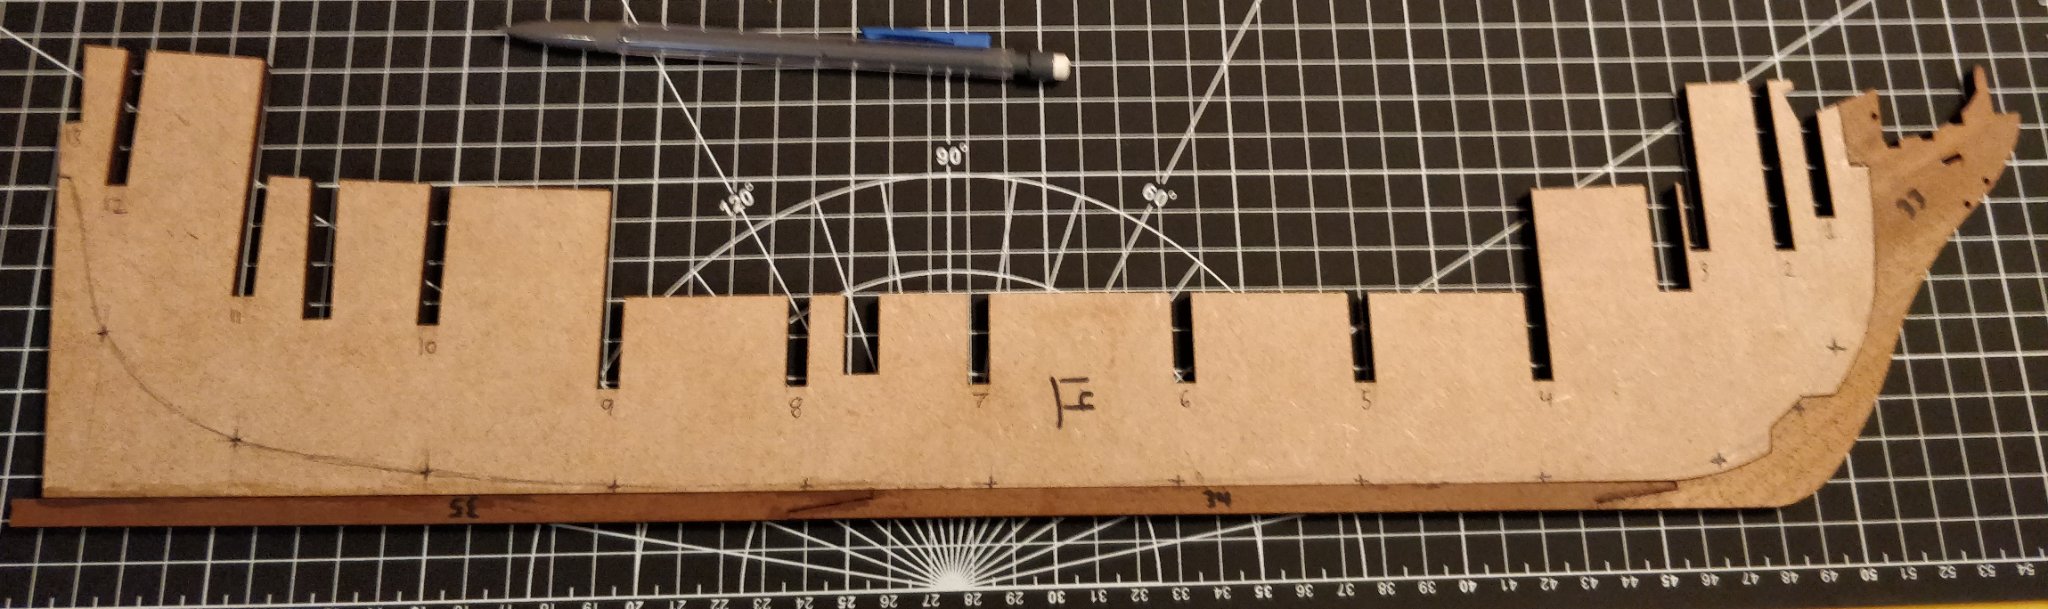
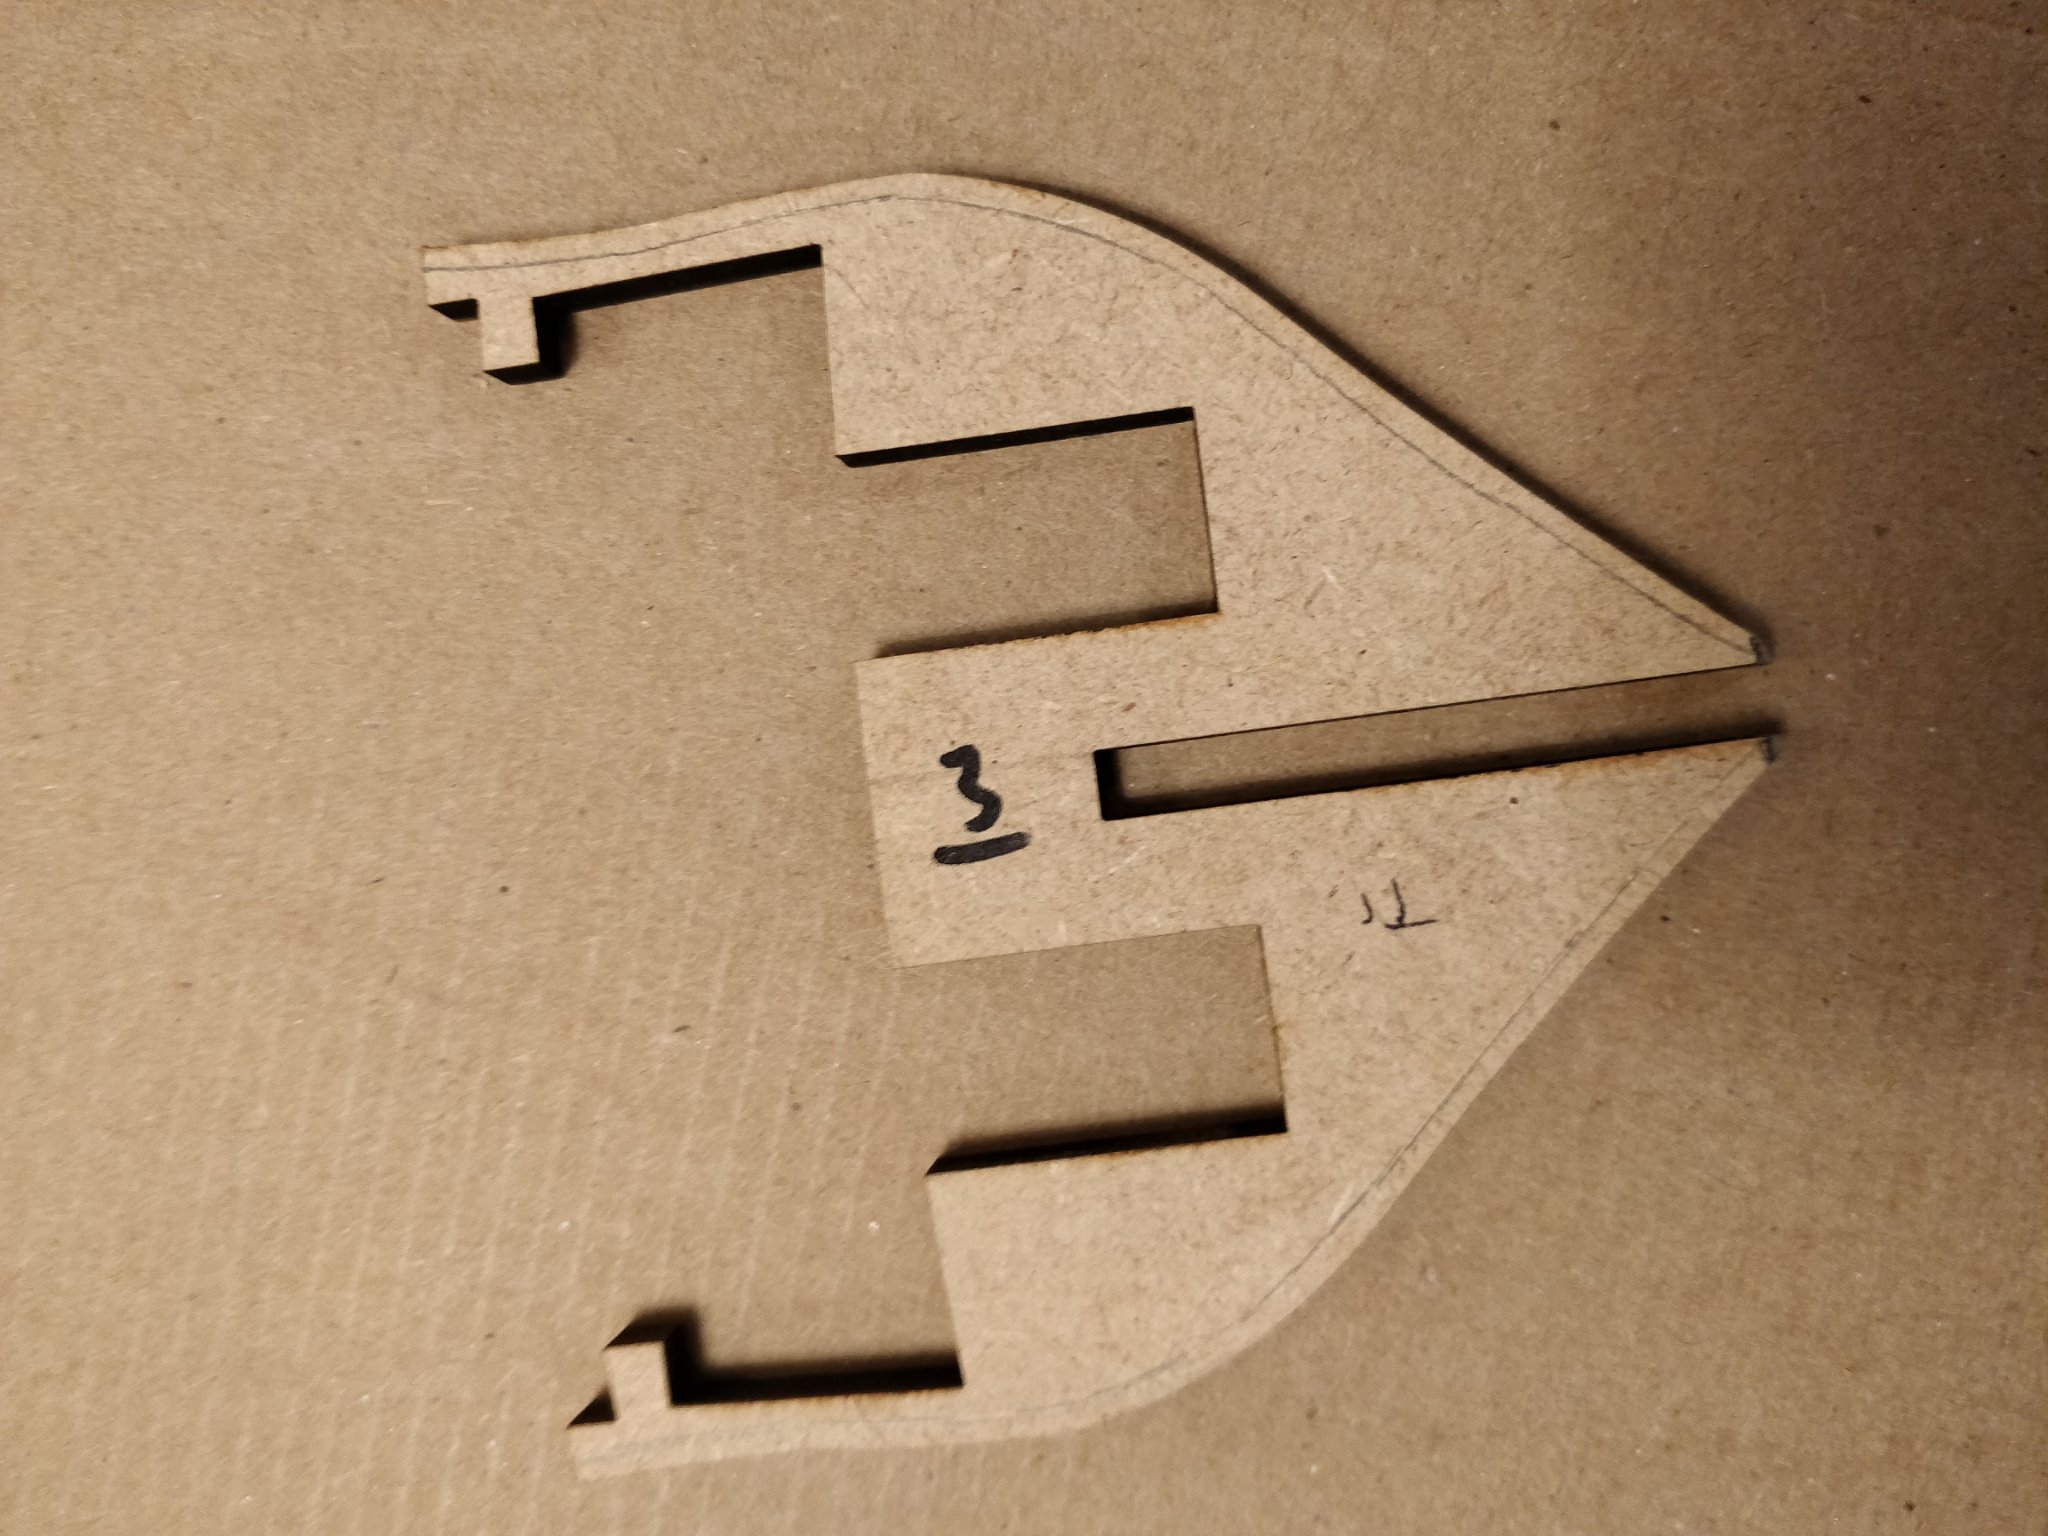
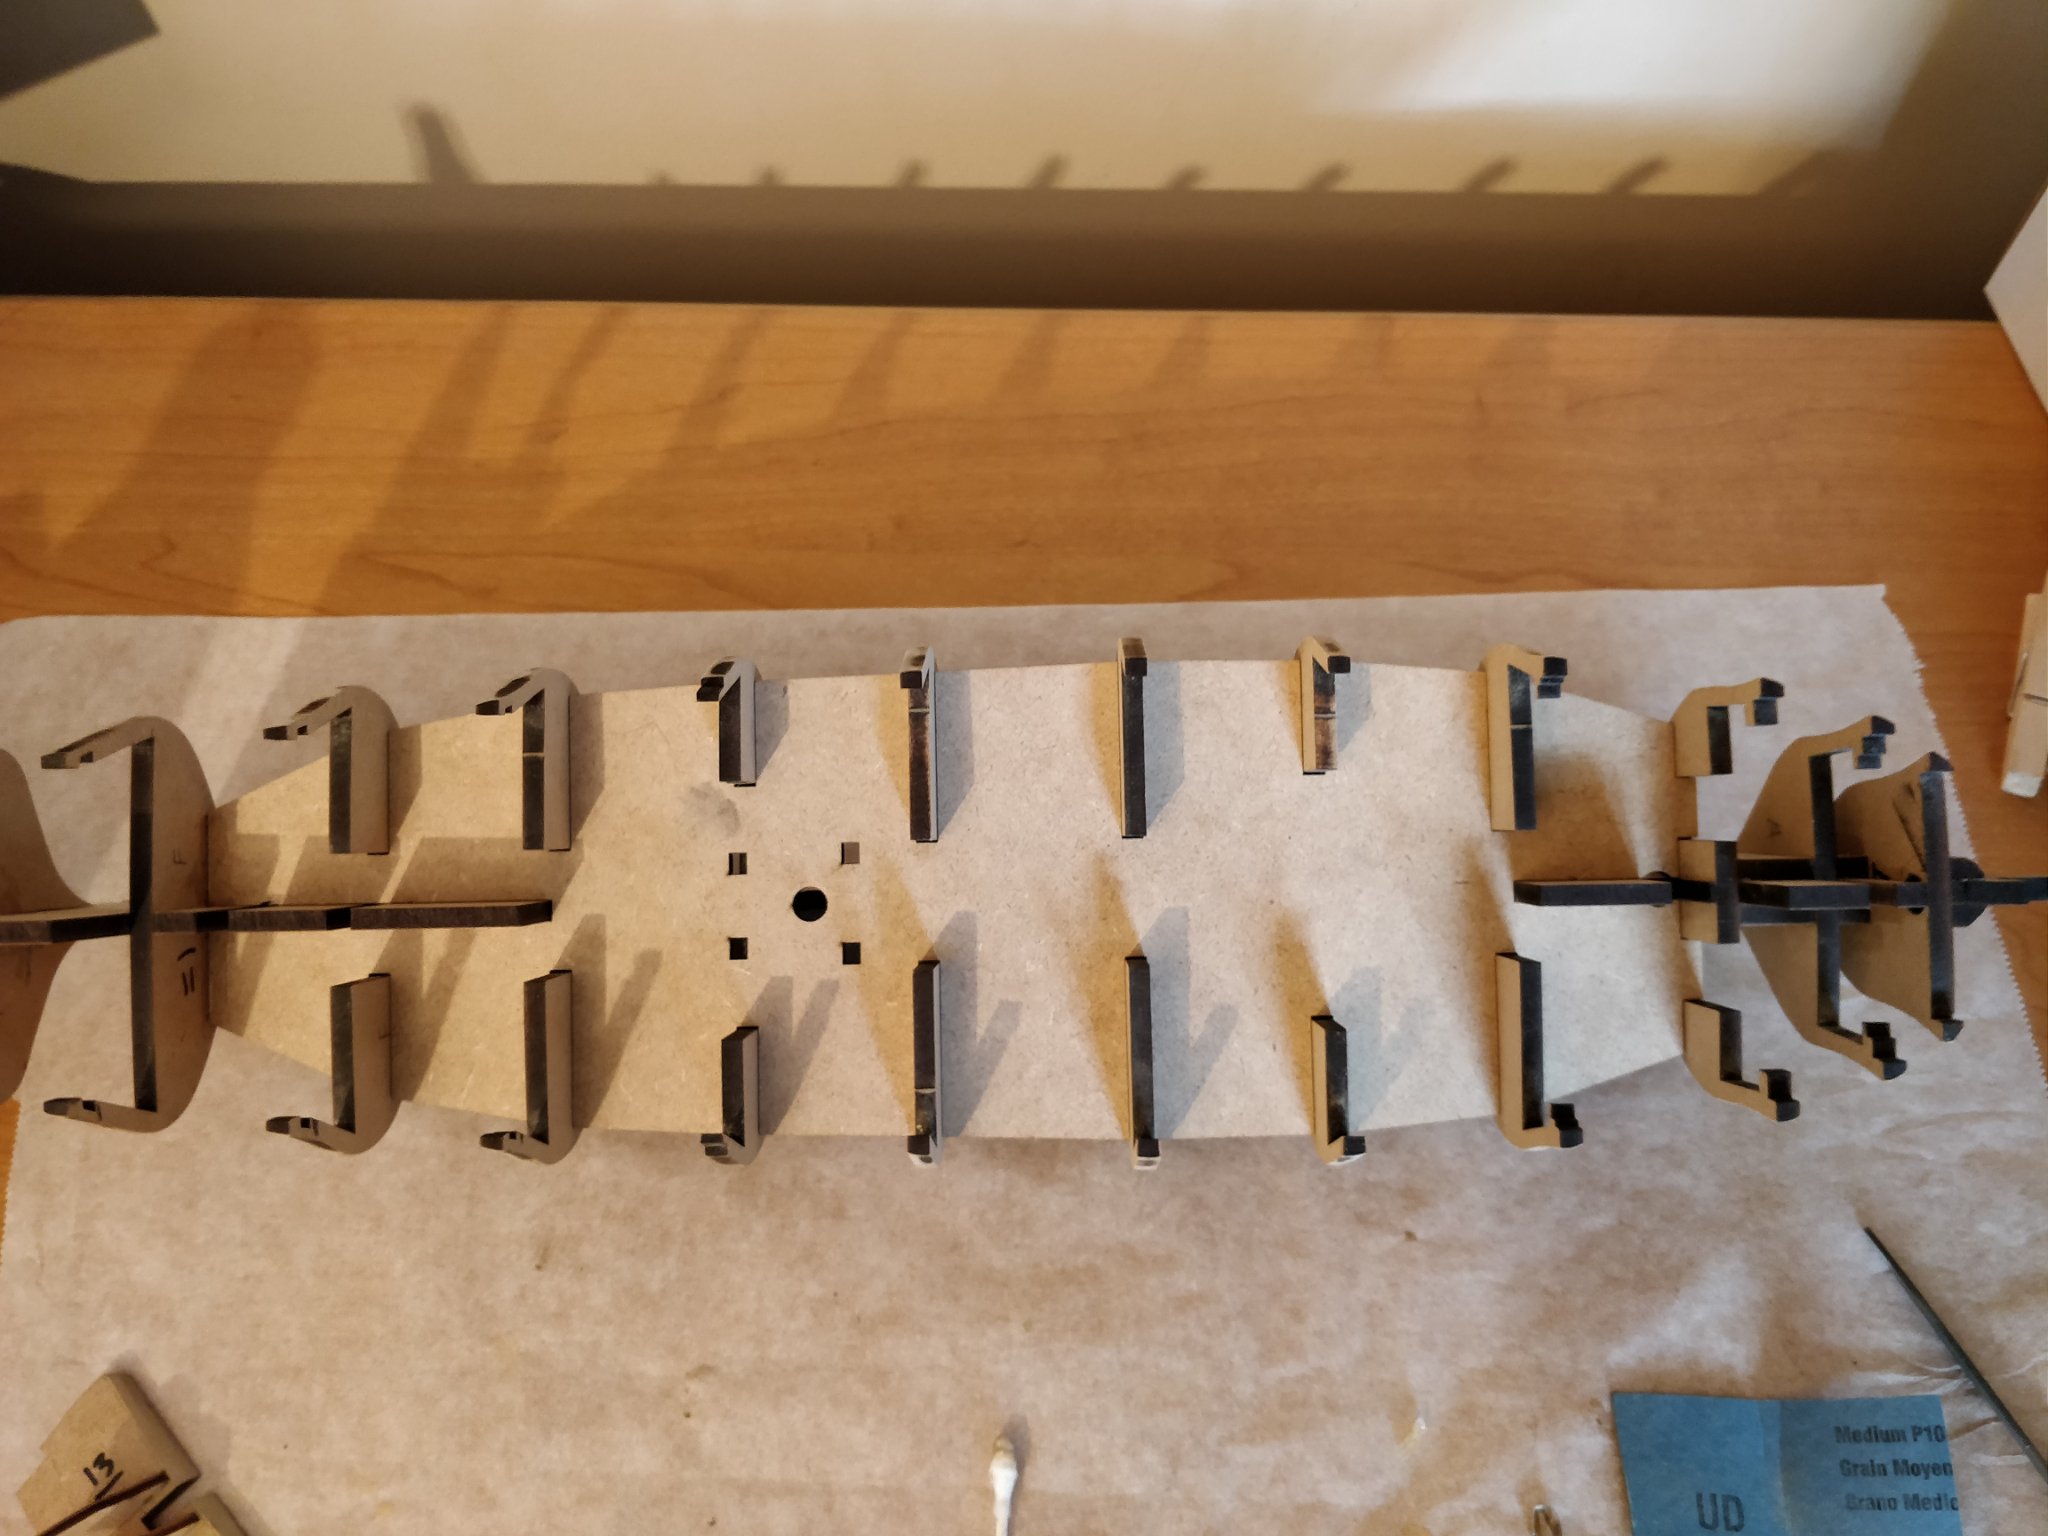
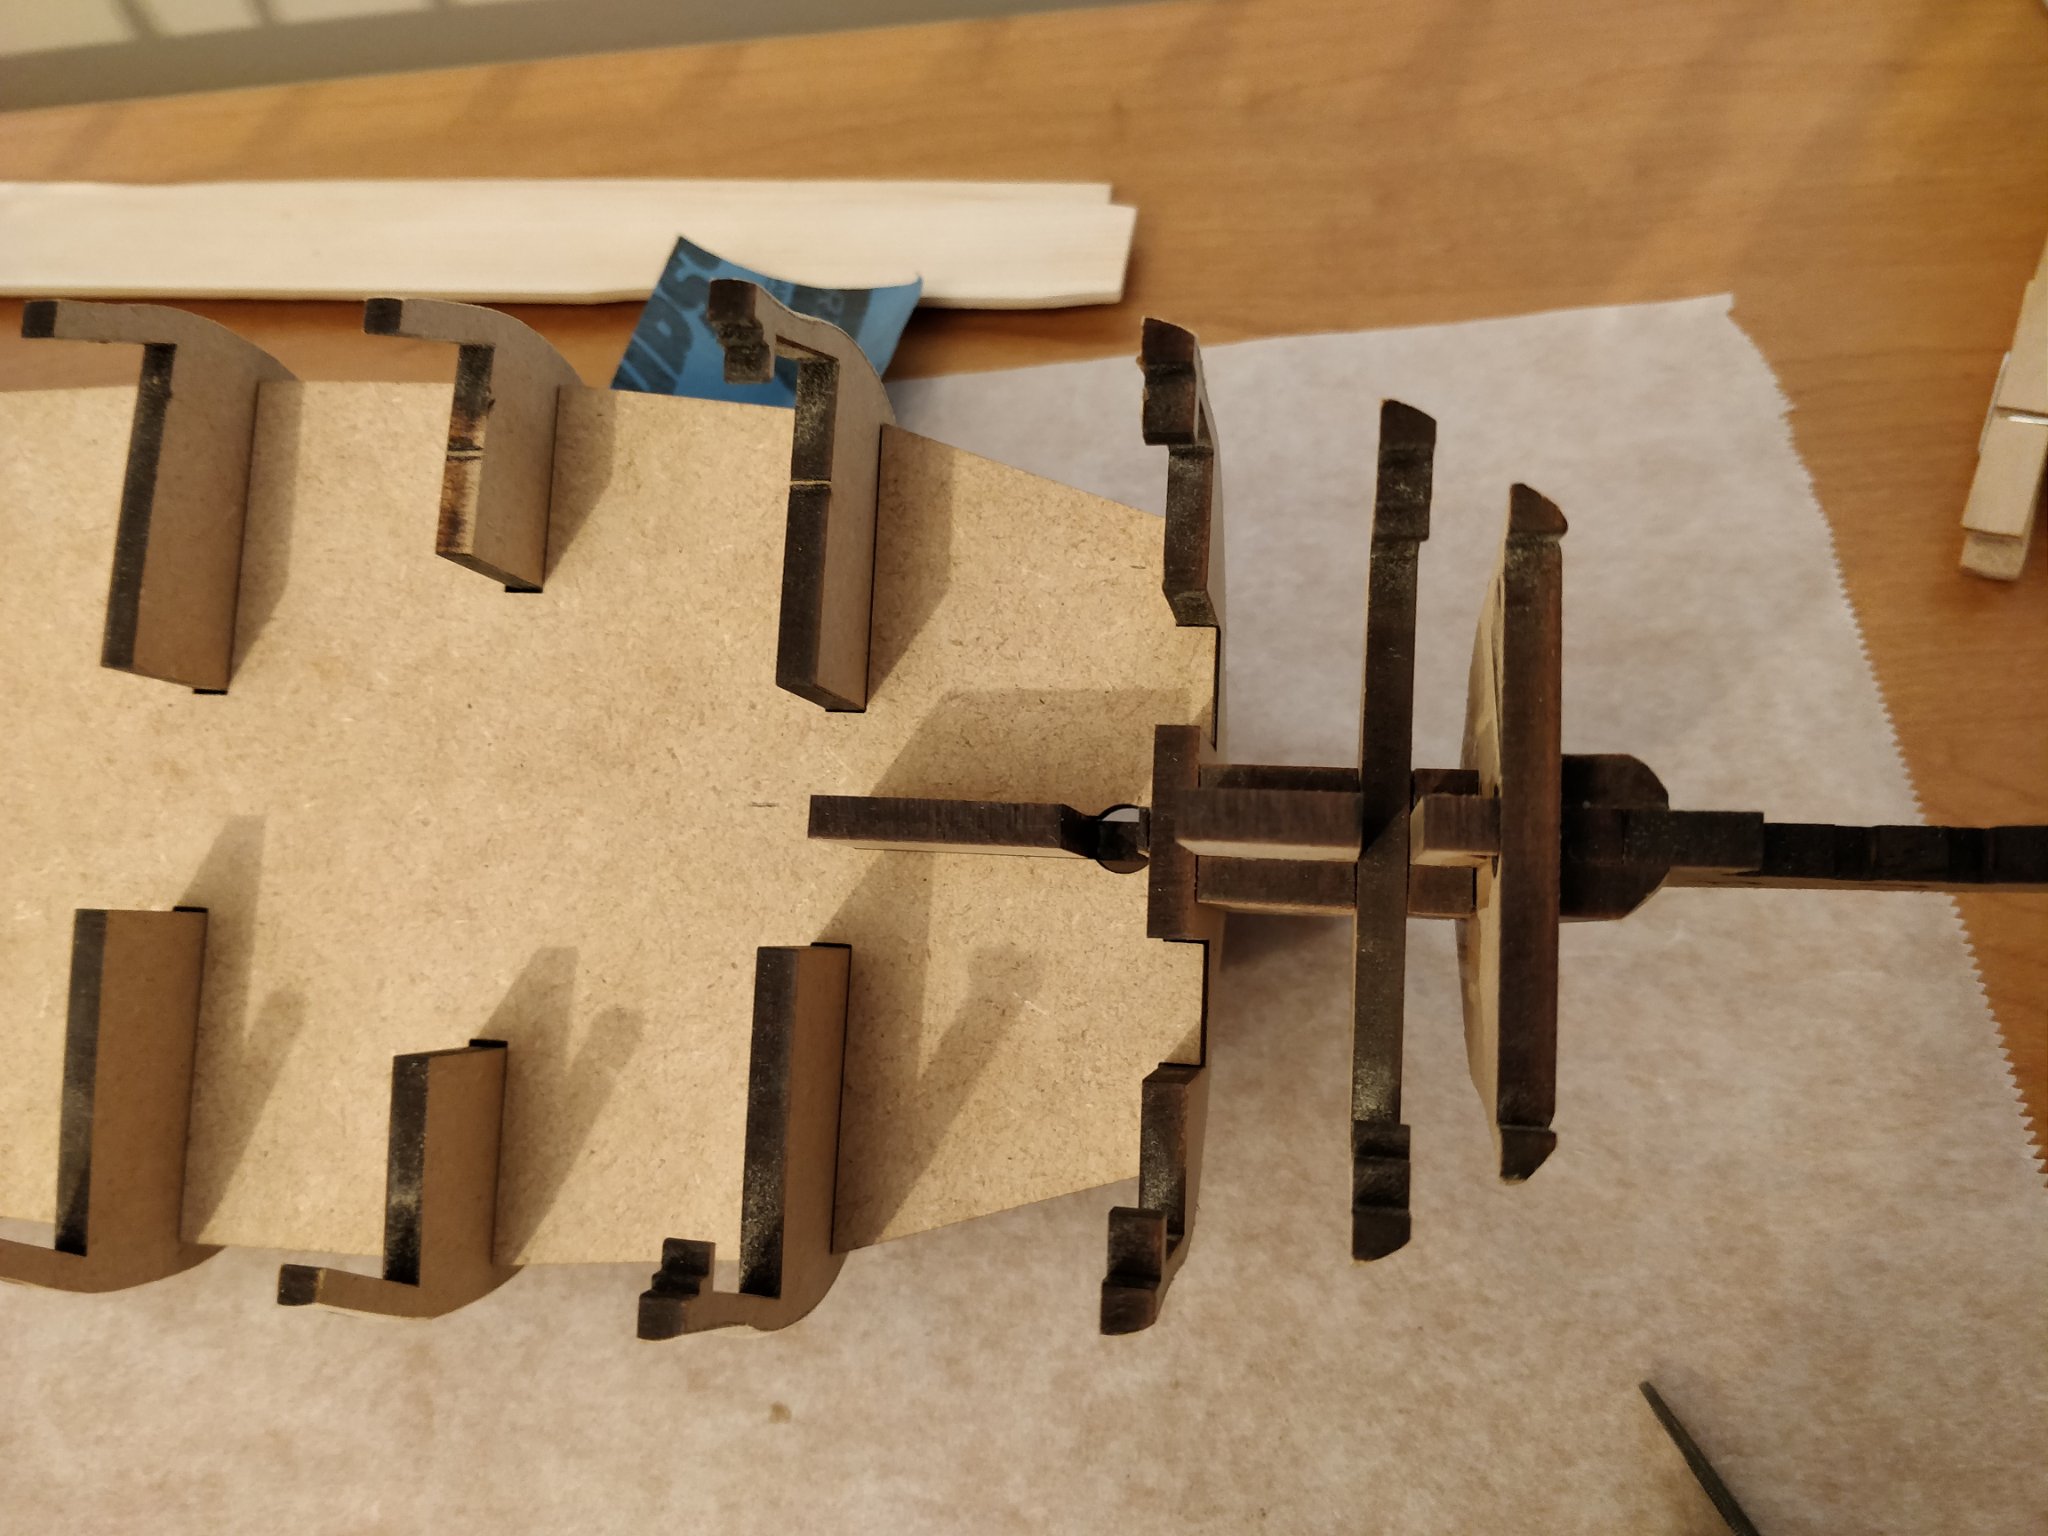
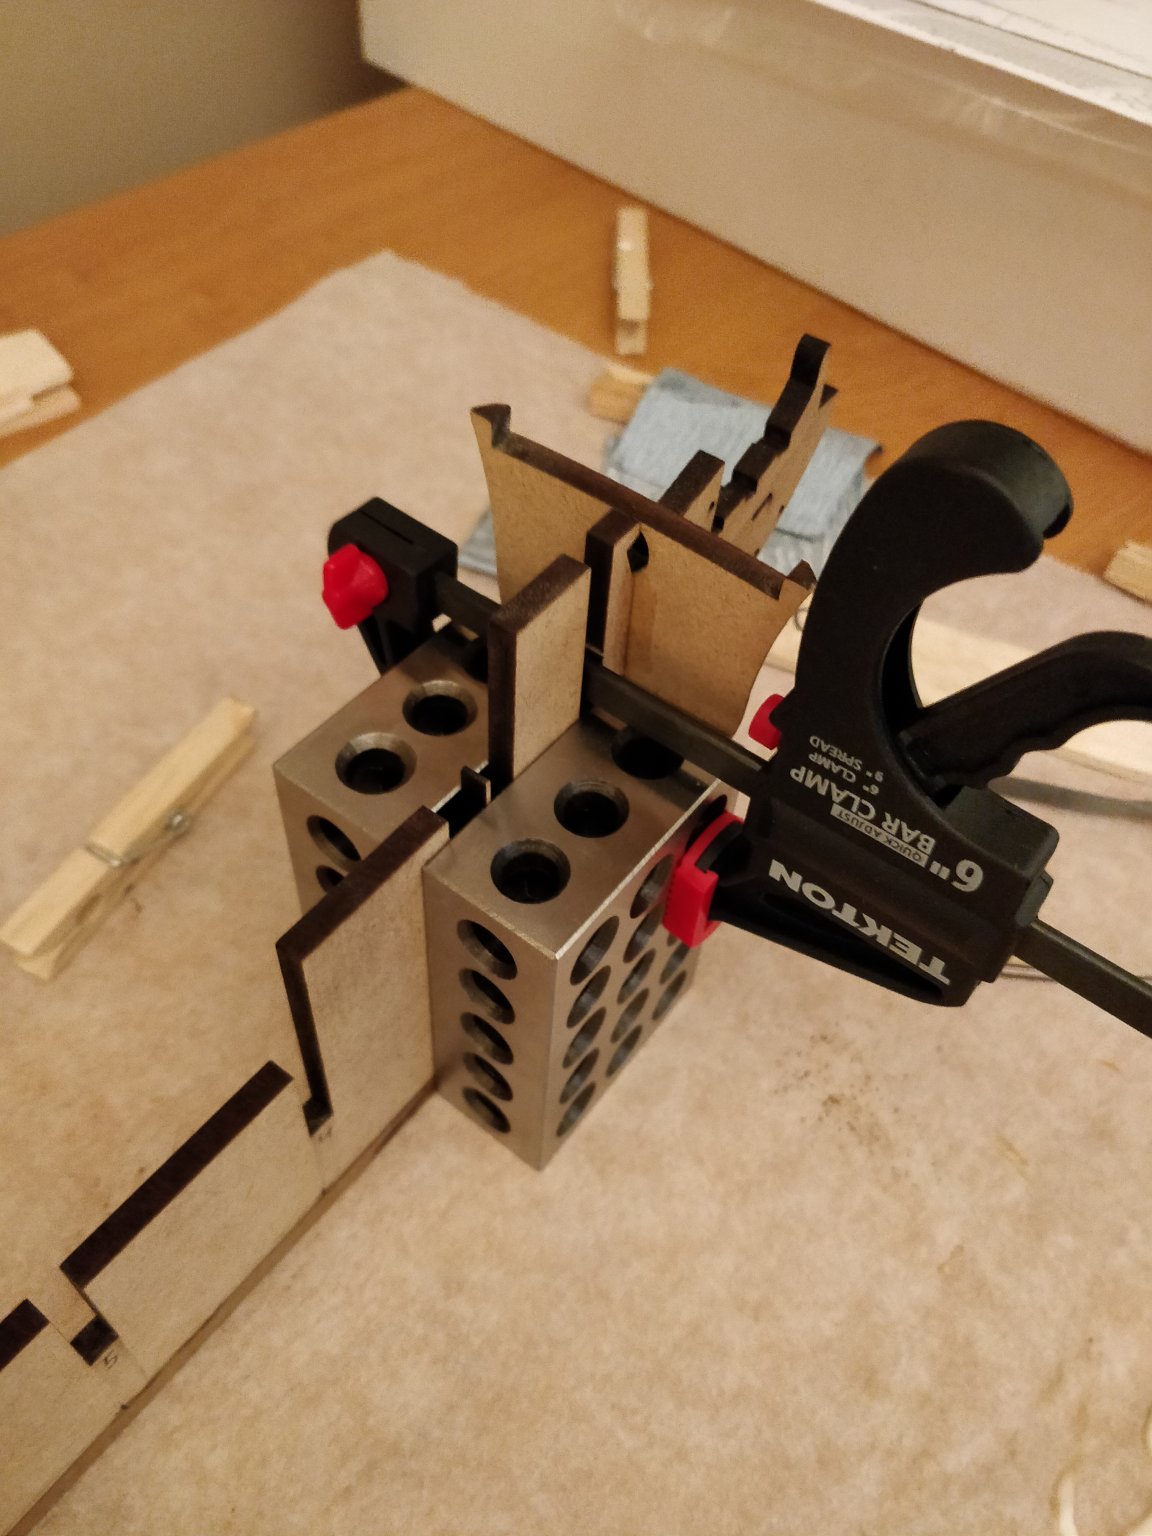
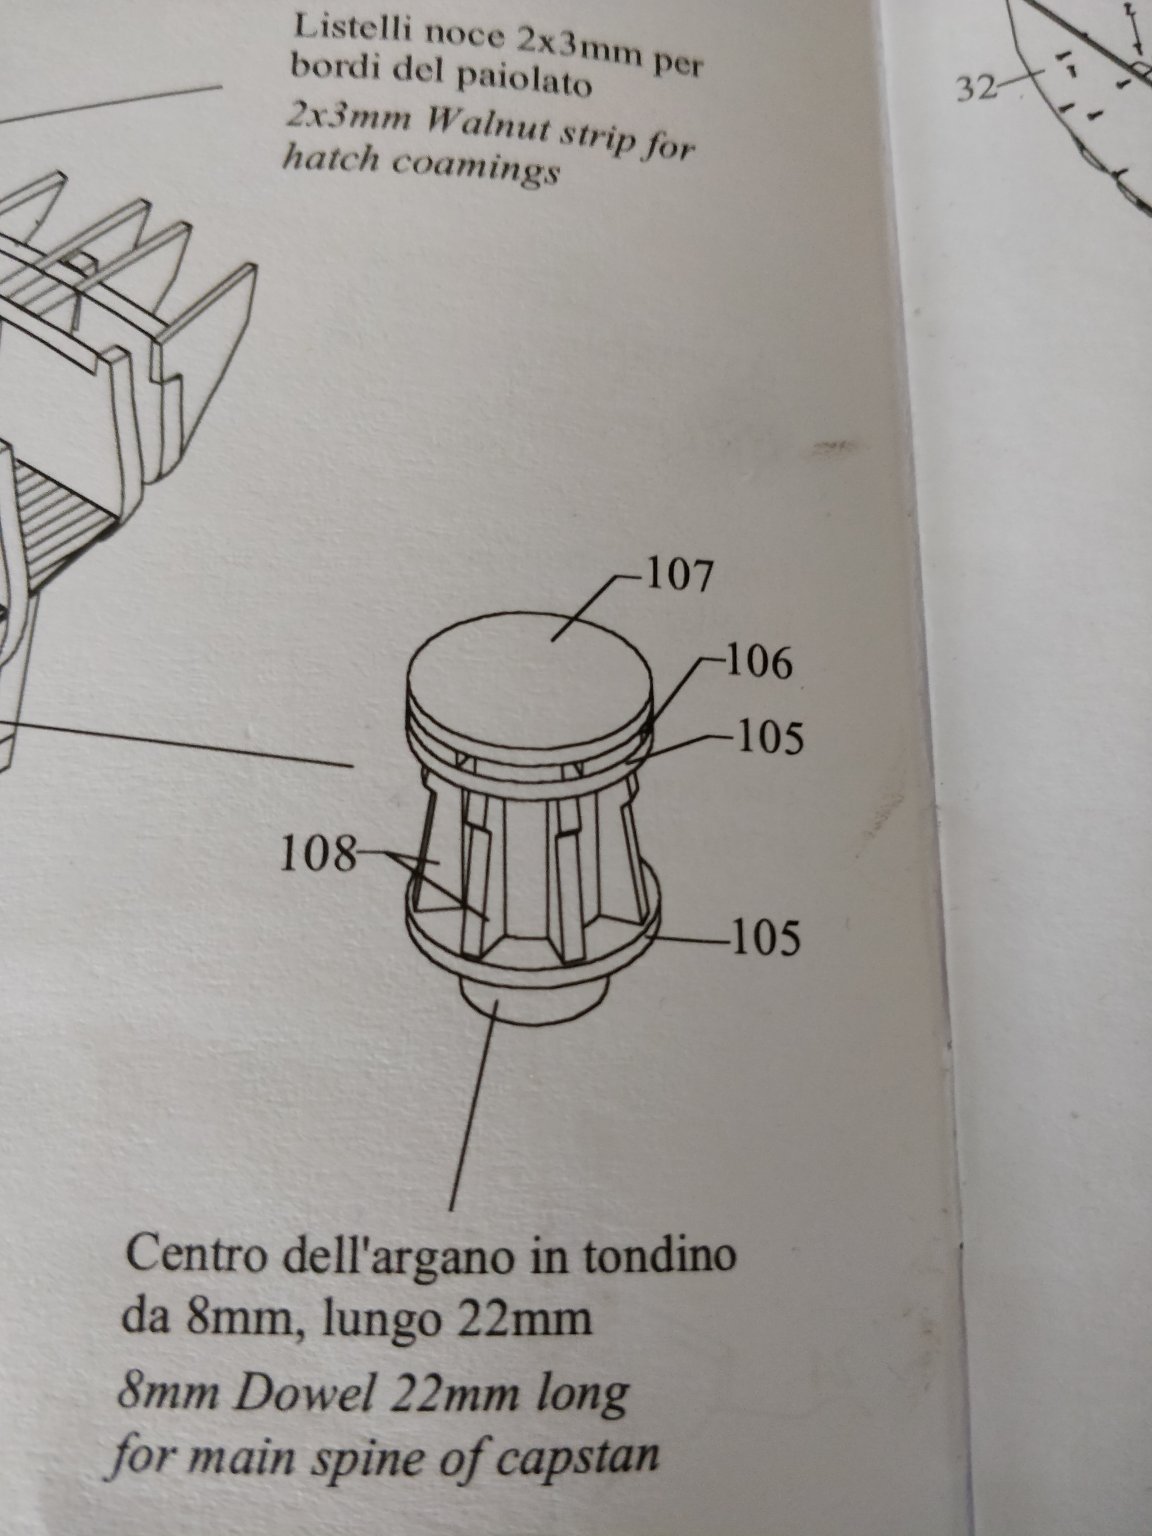
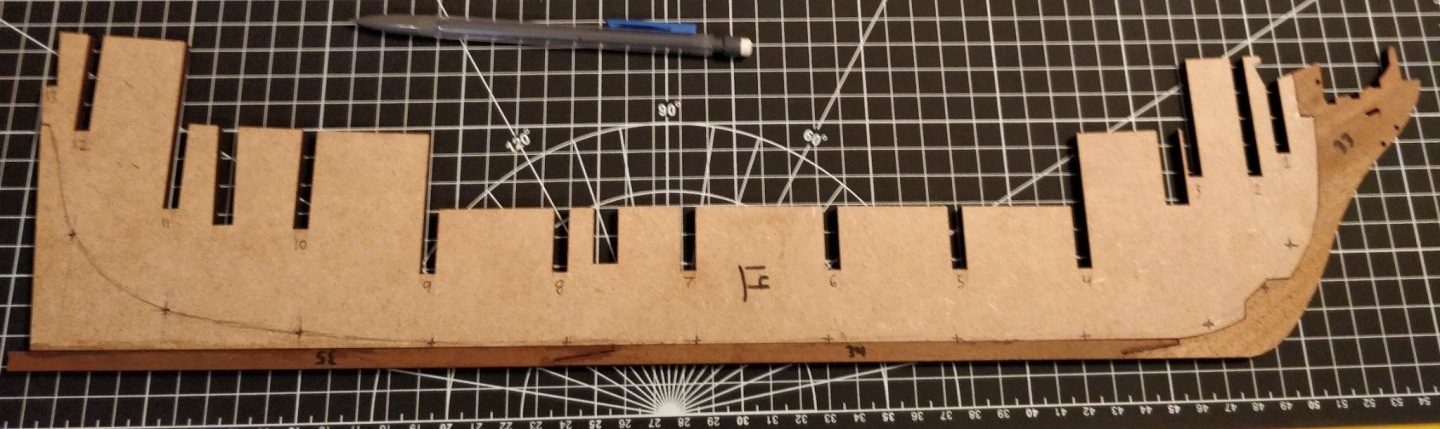
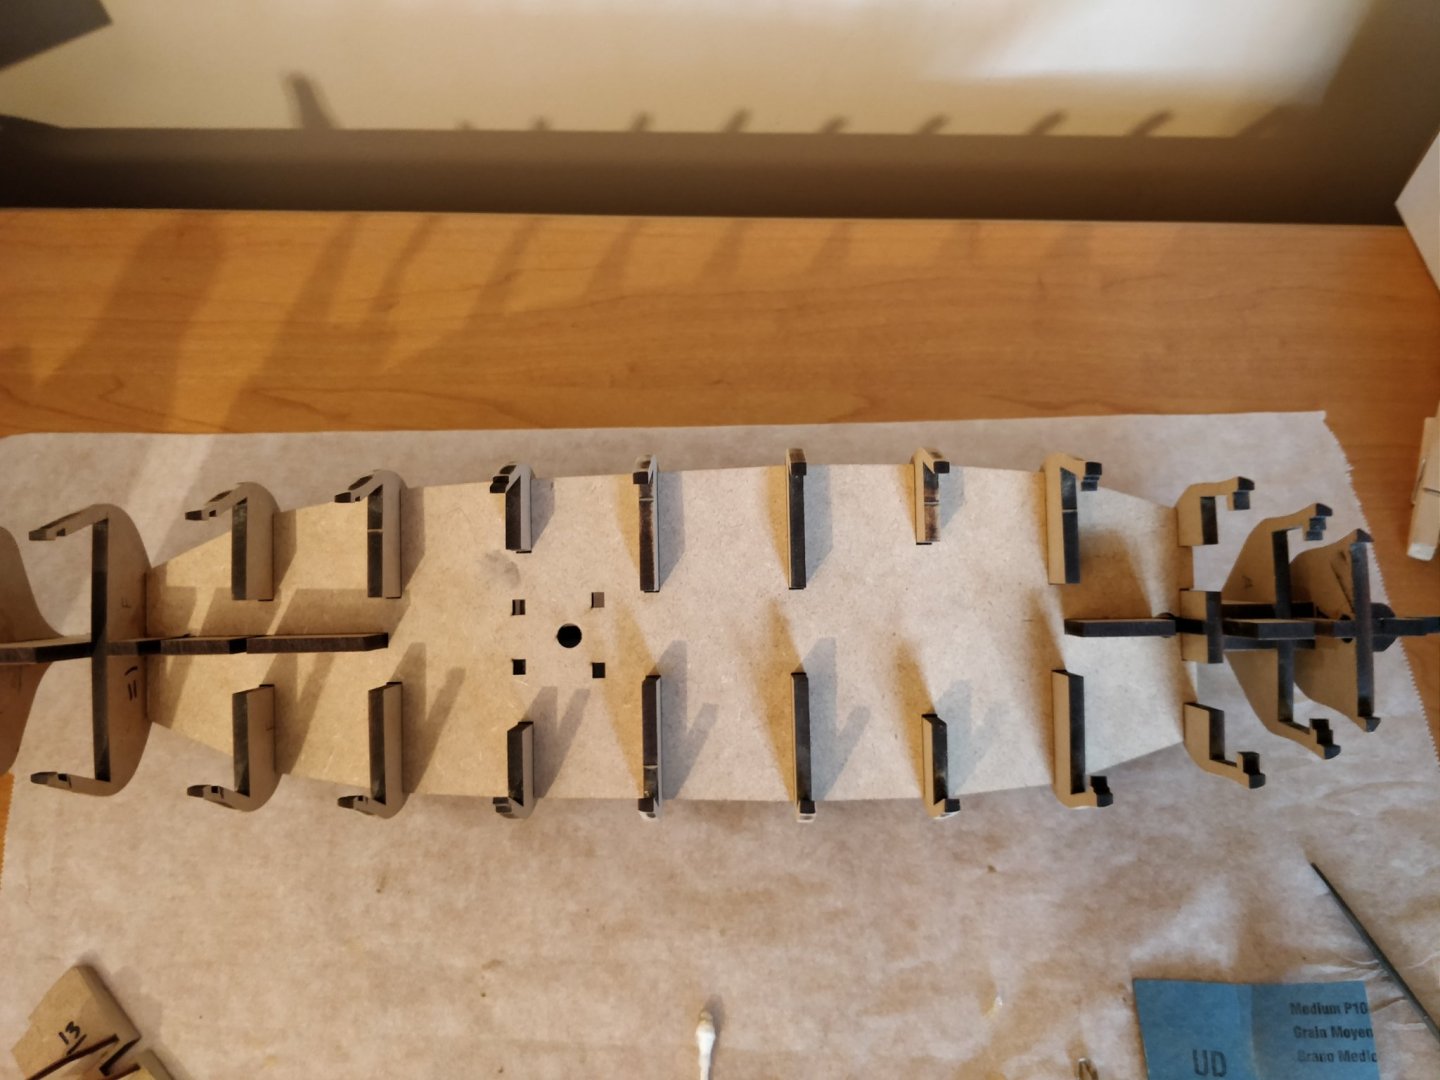
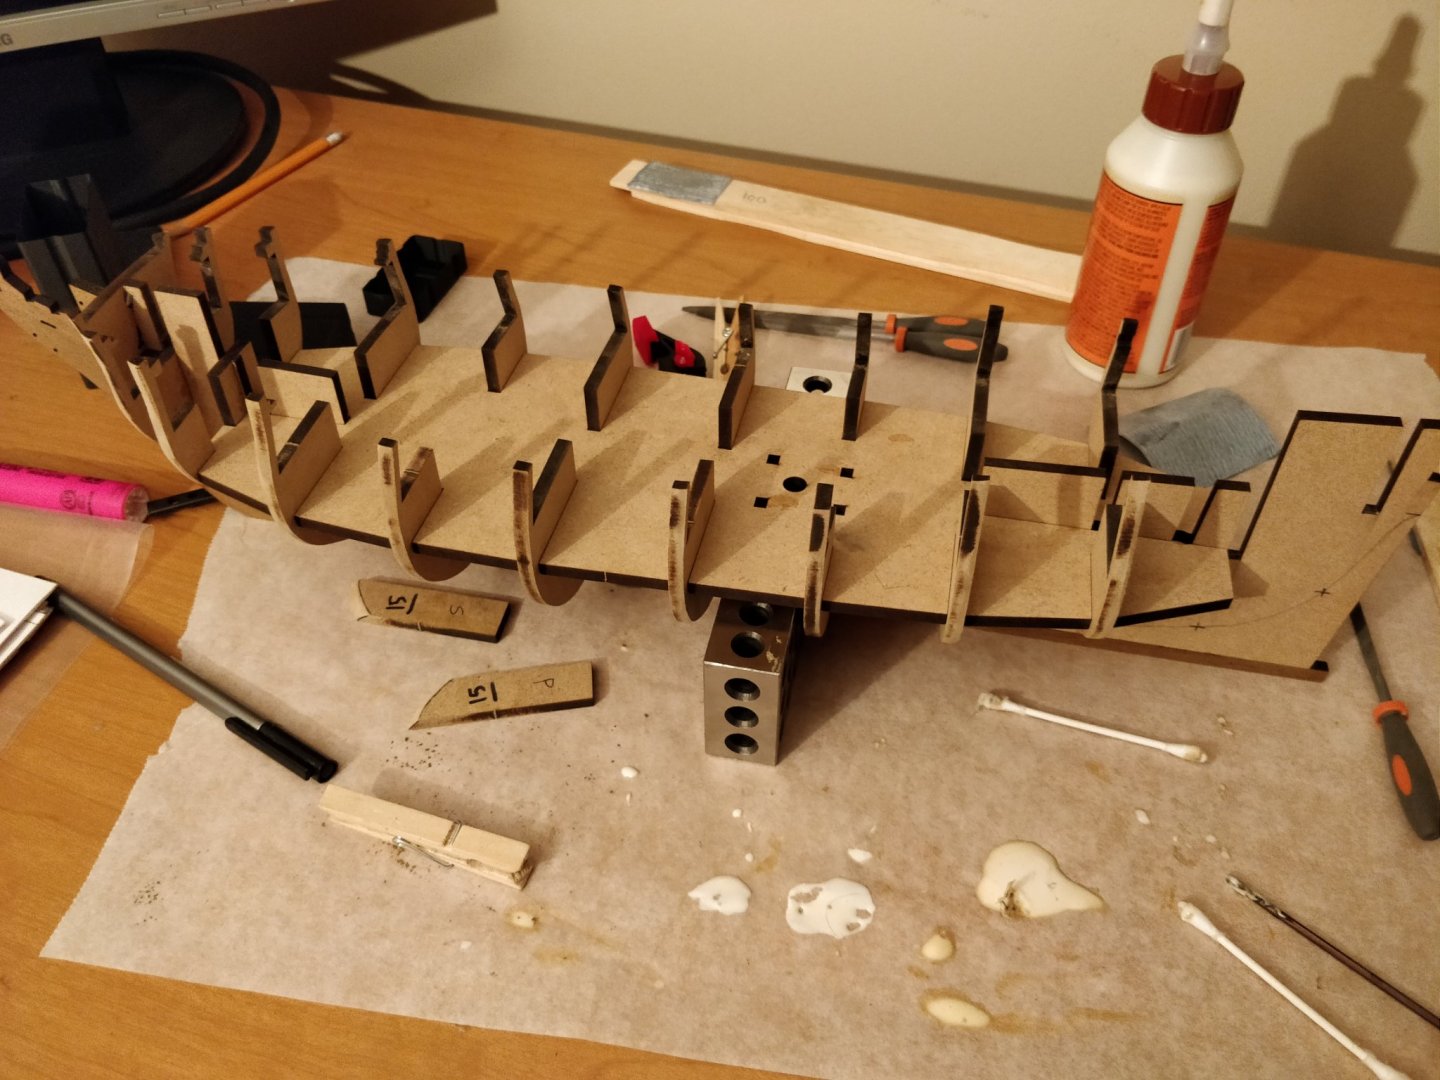
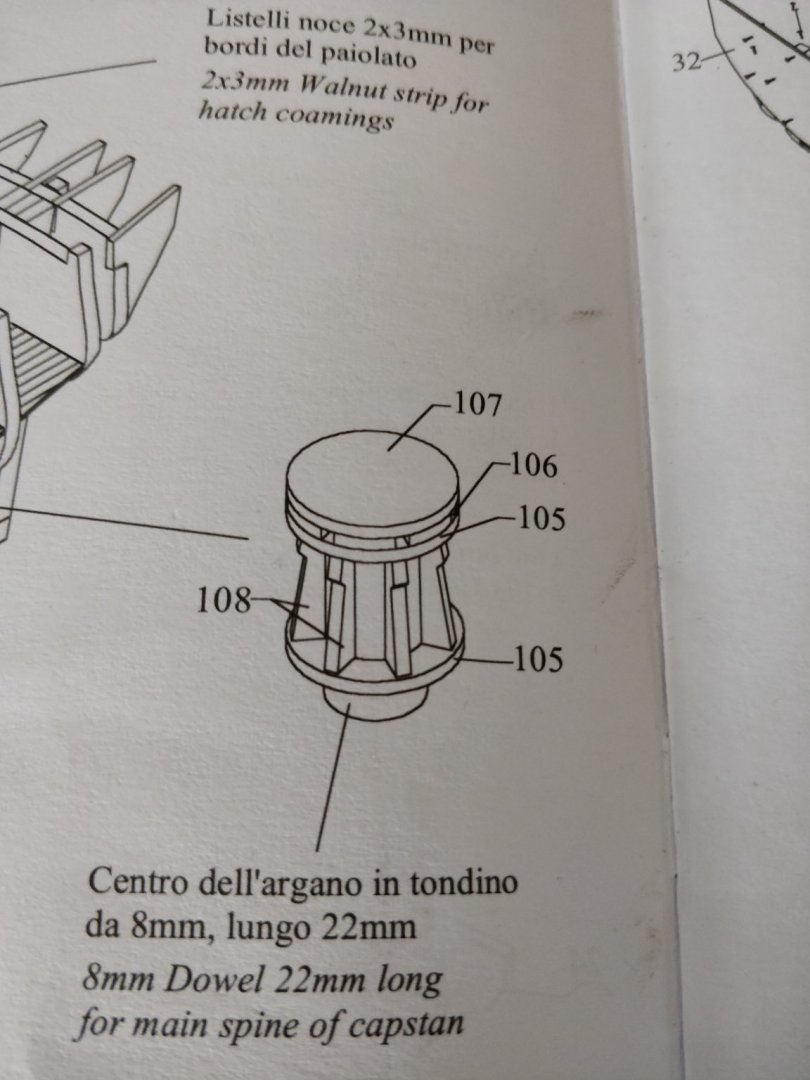
Progress update from the last few weeks. Drew the bearding line. I traced a paper cutout to make sure it was the same on both sides. Roughly bevelled the bulkheads. I did this by scribing an offset onto the bulkhead using some cheap calipers and some basic trigonometry. This gave me a visual target to sand down to. Bulkheads after bevelling: Glued the bulkhead assembly together. Will be moving on to the deck planking and assemblies next. A quick question regarding the capstan: how many ribs (P/N 108) are present in this assembly? The drawing seems to show 7, but 8 are provided. Thanks in advance.


- 82 replies
-
- 3
-
-
- Fly
- Victory Models
- (and 2 more)
-
Hi CTDavies, Your model looks quite nice. I will be sure to check out your build log. -Starlight