HOLIDAY DONATION DRIVE - SUPPORT MSW - DO YOUR PART TO KEEP THIS GREAT FORUM GOING! (Only 13 donations so far - C'mon guys!)
×


starlight
-
Posts
146 -
Joined
-
Last visited
Content Type
Profiles
Forums
Gallery
Events
Everything posted by starlight
-
Gun Port Yellow?
starlight replied to Dave_E's topic in Painting, finishing and weathering products and techniques
Dave, Lots of good advice here for you in this thread. Admiralty paints are well liked by many, so it's a shame that they're not working for you. Keep in mind that "ochre" denotes an iron oxide earth pigment, so all ochre paints are supposed to look darker. There are lots of bright yellow pigments for you to choose from if that's what you prefer. I would just add in two things: You may have heard of the "scale color effect" (here is a good explanation of it: http://www.009.cd2.com/members/how_to/colour.htm). Colors that are too intense can give your model a toy-like appearance. Be wary of comparing colors on your monitor, since they will almost never reflect what the paint looks like in reality. Your best bet is to buy a small bottle and test. Fortunately, paints are fairly inexpensive, even for my meagre student budget. wefalck, I see your posts all throughout this site and I always seem to learn something new from them. Am much indebted to you for your wealth of knowledge. -starlight -
Hi Dave, Might be worth checking out some of the other Lady Nelson logs to see how others tackle this problem. I suspect it will depend on if you want the model to be detachable from the mounts. Some modelers permanently fasten them. You could try padding the inside of the jaws with some felt or something to take up the gap. -starlight
- 362 replies
-
- 2
-

-
- Amati
- Lady Nelson
- (and 2 more)
-
That is some of the cleanest planking I have seen on this site. Very impressive. -starlight
- 840 replies
-
- 5
-
-
- winchelsea
- Syren Ship Model Company
- (and 1 more)
-
Looks really good! Thanks for the pointer to Greg Herbert's brass blackening tutorial. I will be shamelessly borrowing this technique along with your use of microscope slide covers for window glazing. -starlight
- 419 replies
-
- 3
-
-
- Victory Models
- Pegasus
- (and 2 more)
-
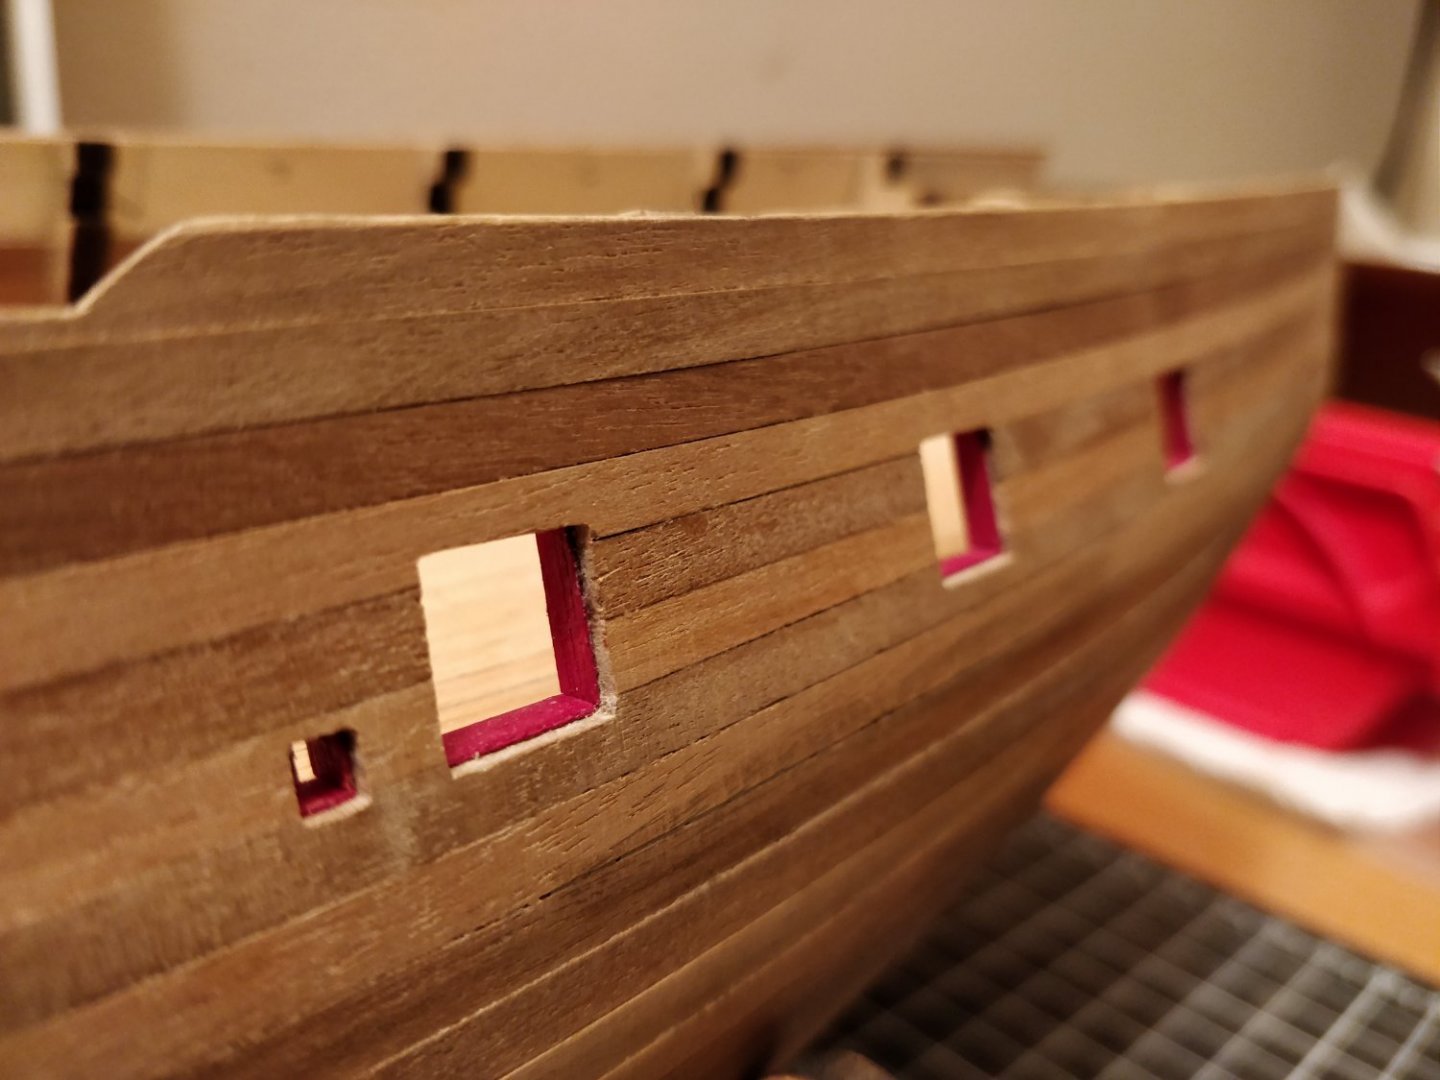
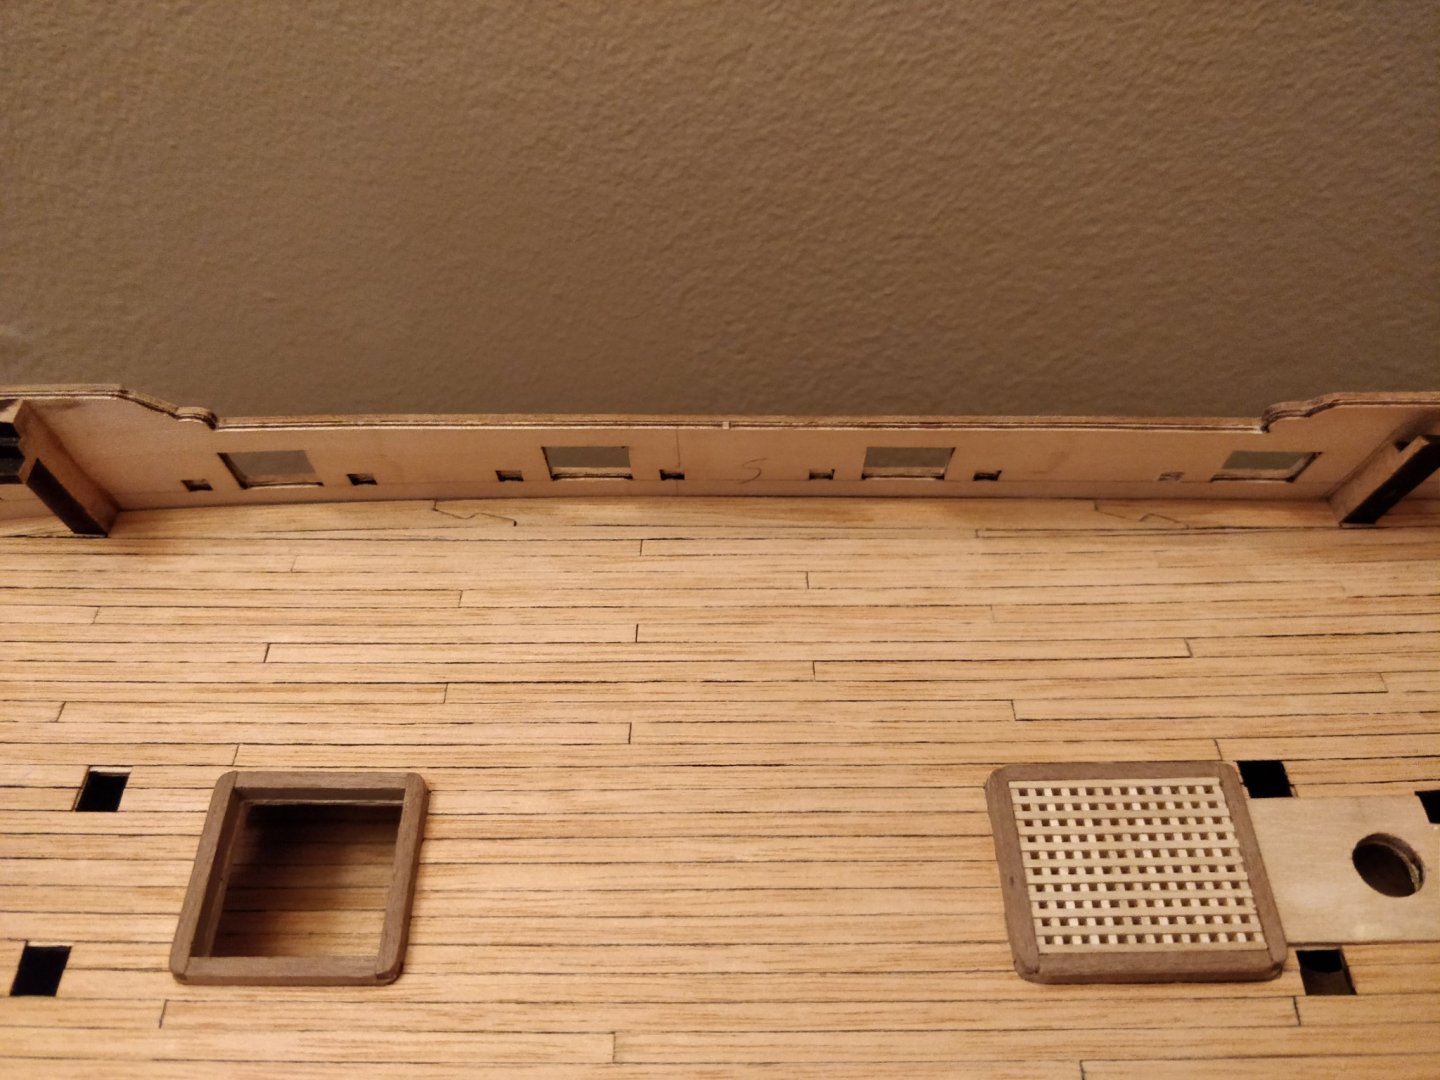
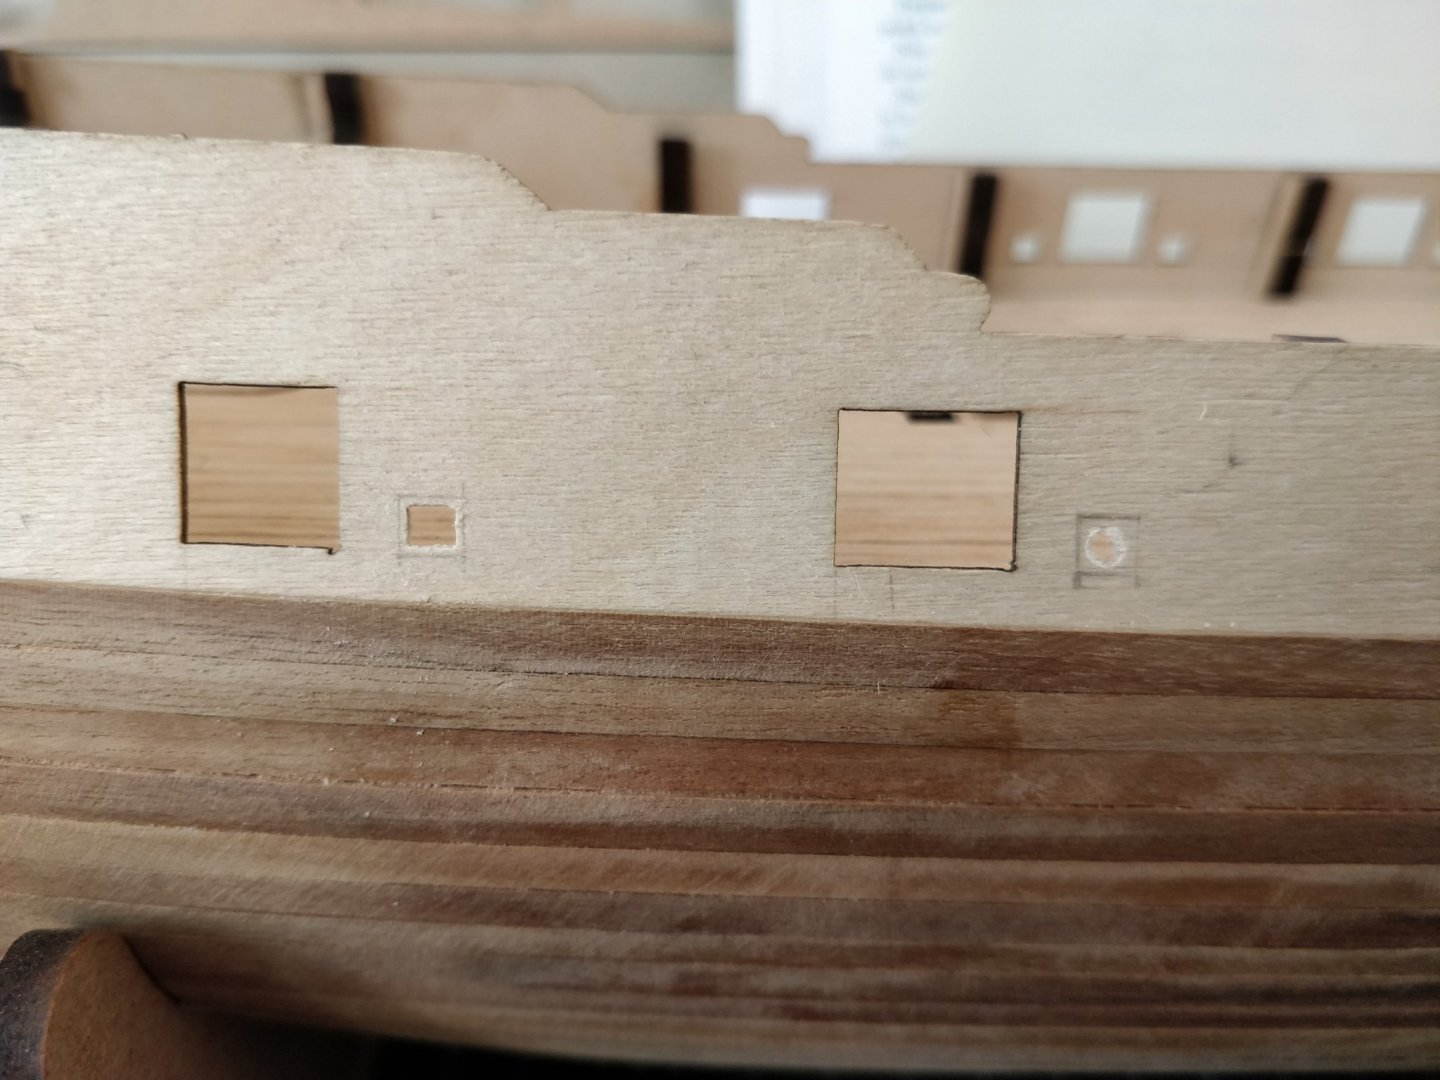
After a lengthy process I have finally finished cutting out and squaring up the gunports and sweeps. I learned halfway through that the upper/lower faces of the ports are supposed to be perpendicular to the center plane, instead of angled perpendicular to the hull surface... (see the late Dan Vadas' Vulture build for clarification). I am now proceeding with lining the ports with stops (another excursion from the kit instructions). I am using the kit-supplied Tanganyika here. It's very difficult to work with but is the only material I have of suitable thickness. I chose to leave the external planking unpainted (something I took from aliluke's build) to provide some highlighting contrast for this detail. Contrary to most other builders, I find the sweeps easier to do than the gun ports... Thanks to all who continue to follow my slow progress. -starlight

- 82 replies
-
- 4
-
-
- Fly
- Victory Models
- (and 2 more)
-
Wow! That gun tub looks clean and crisp. Very interesting subject and what seems like a good quality kit to match. -starlight
-
Hello Ken, I believe many of the experienced modelers here recommend the smaller boats from Model Shipways and Vanguard Models. I don't have any personal experience with these kits but they are consistently praised for their material quality and clarity of instructions. Edit: I neglected to mention the kits from Syren, which are also highly regarded here on MSW. Cheers, starlight
-
Hello Blue Ensign, Kindly allow me to take up some space on your log here to say that this is some really impressive work. Your Pegasus log continues to be one of my primary references for my Fly build and I am really grateful that you document everything so thoroughly here on MSW. Could I ask how you obtained/made that marine from a few posts ago? (Or the one for Pegasus you alluded to) -starlight
- 857 replies
-
- 2
-
-
- Sphinx
- Vanguard Models
- (and 1 more)
-
Hello Kirby, I recently came across the pirate ship bed you built for your son and it was stunningly well done. I have no doubt you'll do a great job on this model too. I wish I had put a waterway and spirketting on my Fly... maybe it's not too late... Cheers, starlight
- 139 replies
-
- 1
-
-
- Lady Nelson
- Amati
- (and 2 more)
-
Hi Tim, Looks like you've built a beautiful model, and at record pace! I only hope that mine looks half as good as yours. -starlight
- 164 replies
-
- 2
-
-

-
- fly
- Victory Models
- (and 4 more)
-
Absolutely beautiful. May I ask how you make these hinges? -starlight
-
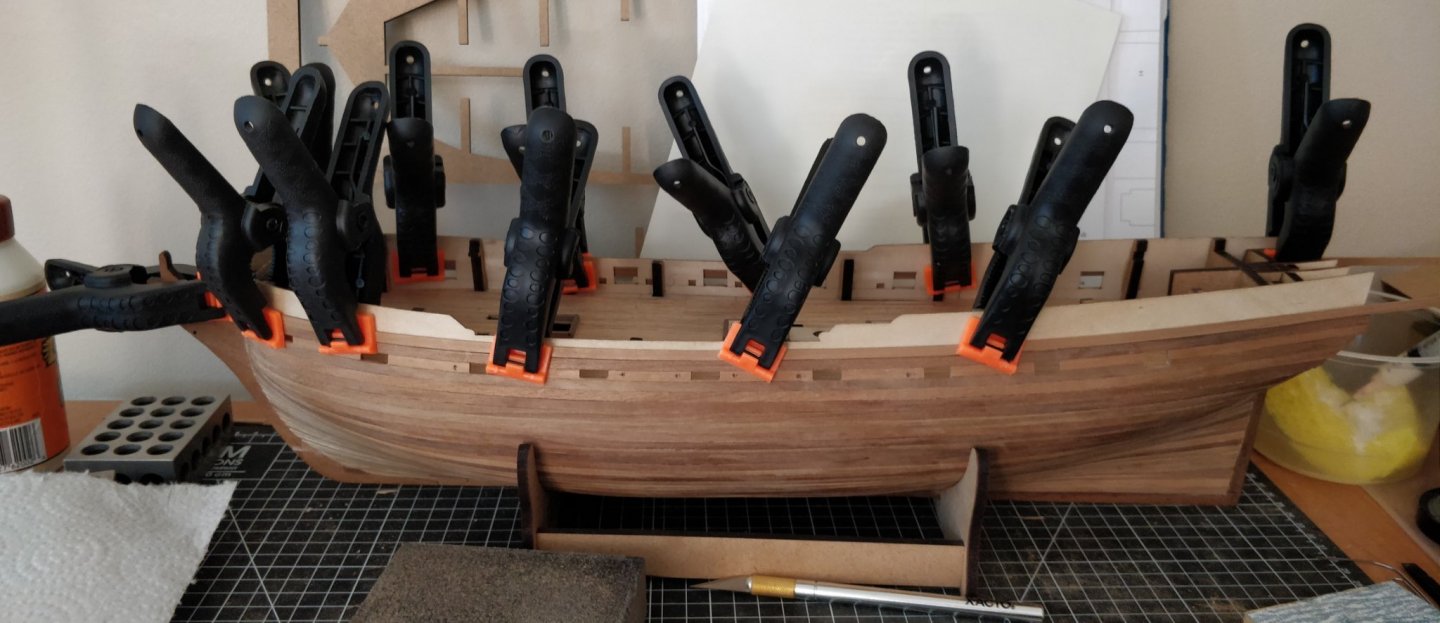
Hi Dave, Looks good so far. I'm also a novice at this but I think either choice is fine based on my own experience. Make sure to remember your paint ratio in case you need to do other fittings/touch ups later on in the build. What I did on my Fly build was to plank the deck first, then paint the lowest bulwark plank before gluing: This way you get a good fit-up and a clean painted edge. Also, for the second planking, give some thought as to how you want to finish the hull. If you're painting the area below the waterline white, you can afford to be more messy with that section . If you want to use stain/tung oil/etc. you need to be sure not to have excess glue which will block the pores of the wood. Cheers, starlight

- 362 replies
-
- 4
-
-
- Amati
- Lady Nelson
- (and 2 more)
-
Hello Lars, Nice to see another "young'un" on MSW. I'm in grad school for engineering, so not much older than you, and decided to build the Amati HMS Fly kit as my first ever model (plastic or wood). My advice to you is: certainly don't bite off more than you can chew, but also pick a subject that genuinely captures your interest. Wooden ships take a long time to build, so it's important to stay passionate about what you're making. I also think the ideal difficulty for a kit is something just a little above your skill level, otherwise you won't learn anything! -starlight
-
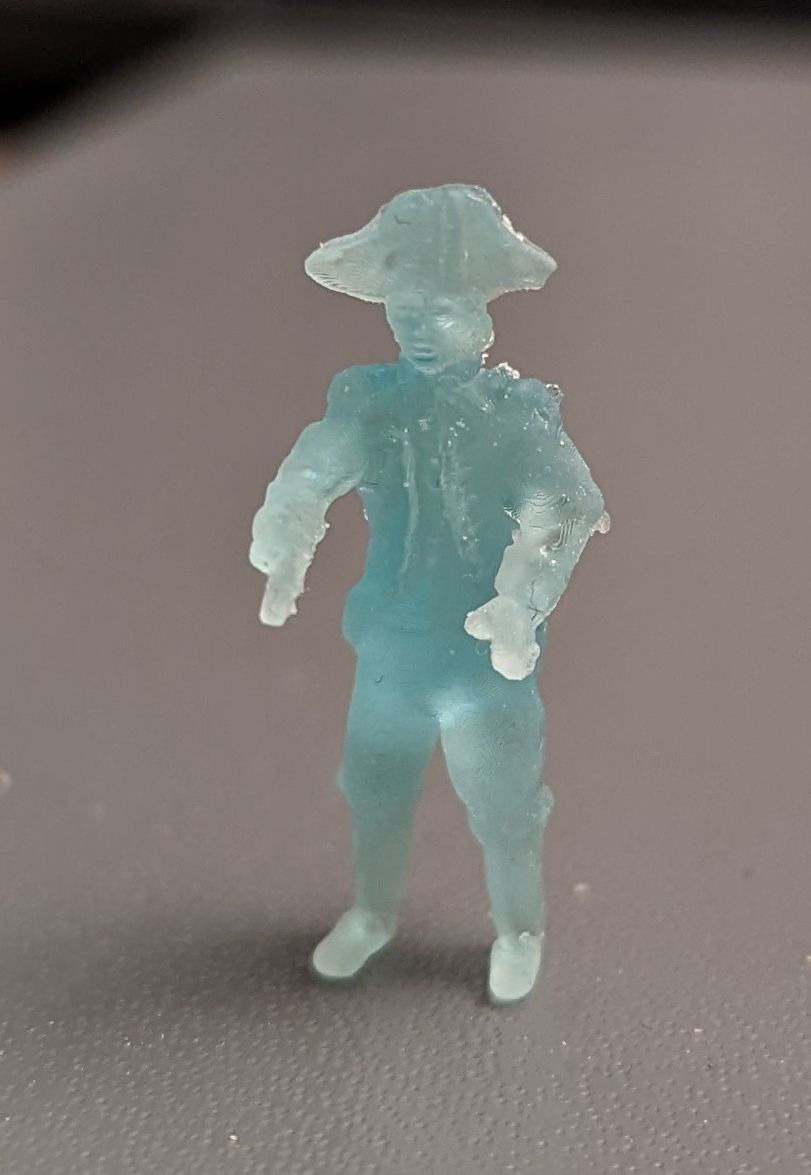
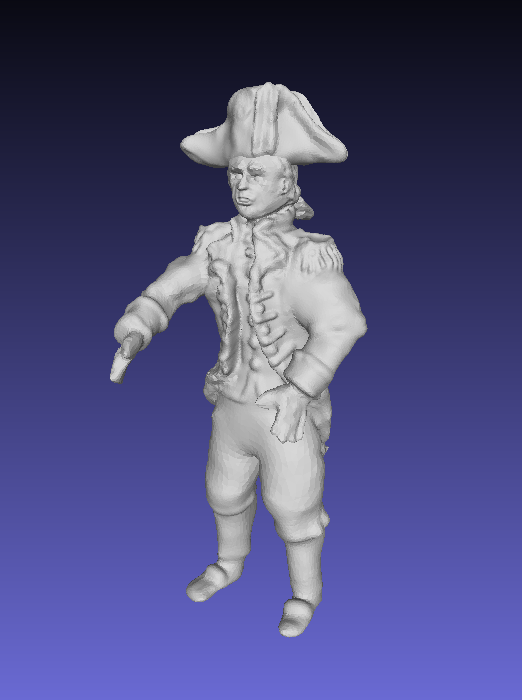
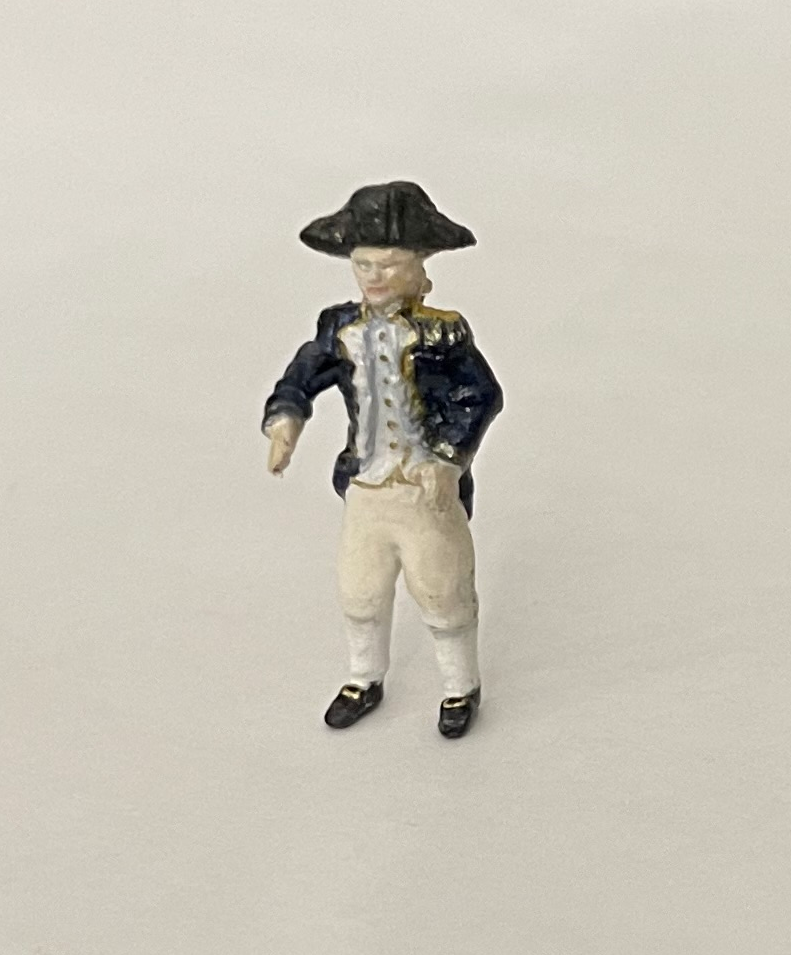
Hello all, I have been steadily working away at filing out the ports. As a diversion, I decided to make a little captain to help visualize the scale of the project. I found some excellent paid and free 3D models from Alf Scherer here: https://www.myminifactory.com/object/3d-print-sailors-and-officers-to-crew-model-ships-1750-1820-130700 I chose one of the English officer designs to print. It was originally modelled for 1:72 scale so I simply scaled it up for 1:64. Here is what the STL looks like: Below is the printed figure before painting. It stands at around 27 mm tall. Here is my attempt at brush-painting with Tamiya acrylics. I tried to depict him as a commander (as would befit a small sloop-of-war) circa 1800. Unfortunately the details look a bit muddled in the photo, so I will try to obtain a macro lens or something. Any comments are appreciated. -starlight

- 82 replies
-
- 4
-
-
- Fly
- Victory Models
- (and 2 more)
-
Cutting out gunports
starlight replied to Etcher's topic in Building, Framing, Planking and plating a ships hull and deck
I'd also like to know how experienced modelers do this... As for myself I use a keyhole saw with a very fine TPI to do the vertical cuts (which have the greatest tendency to splinter because of the wood grain). I've also tried using a scroll saw blade held between two clamps (like a wire saw). For the horizontal cuts I just use a craft knife. I usually do a roughing pass with saw/craft knife, leaving about 1 mm, and finish with files and sanding sticks. -
Hello all, Life has gotten in the way these past few months but I am finally able to work on the Fly once again. After some discussion in another thread I settled on Vallejo Red (70.926) for painting of the inner bulwarks. Some progress pictures below of lining the inner bulwarks. I followed the kit instructions of painting the lowest walnut strip before installing. I won't bother to plank the small gap between the first two bulkheads. Next I will spend some time opening up the gun/sweep ports again. -starlight
- 82 replies
-
- 3
-
-
- Fly
- Victory Models
- (and 2 more)
-
Red Ochre Paint
starlight replied to starlight's topic in Painting, finishing and weathering products and techniques
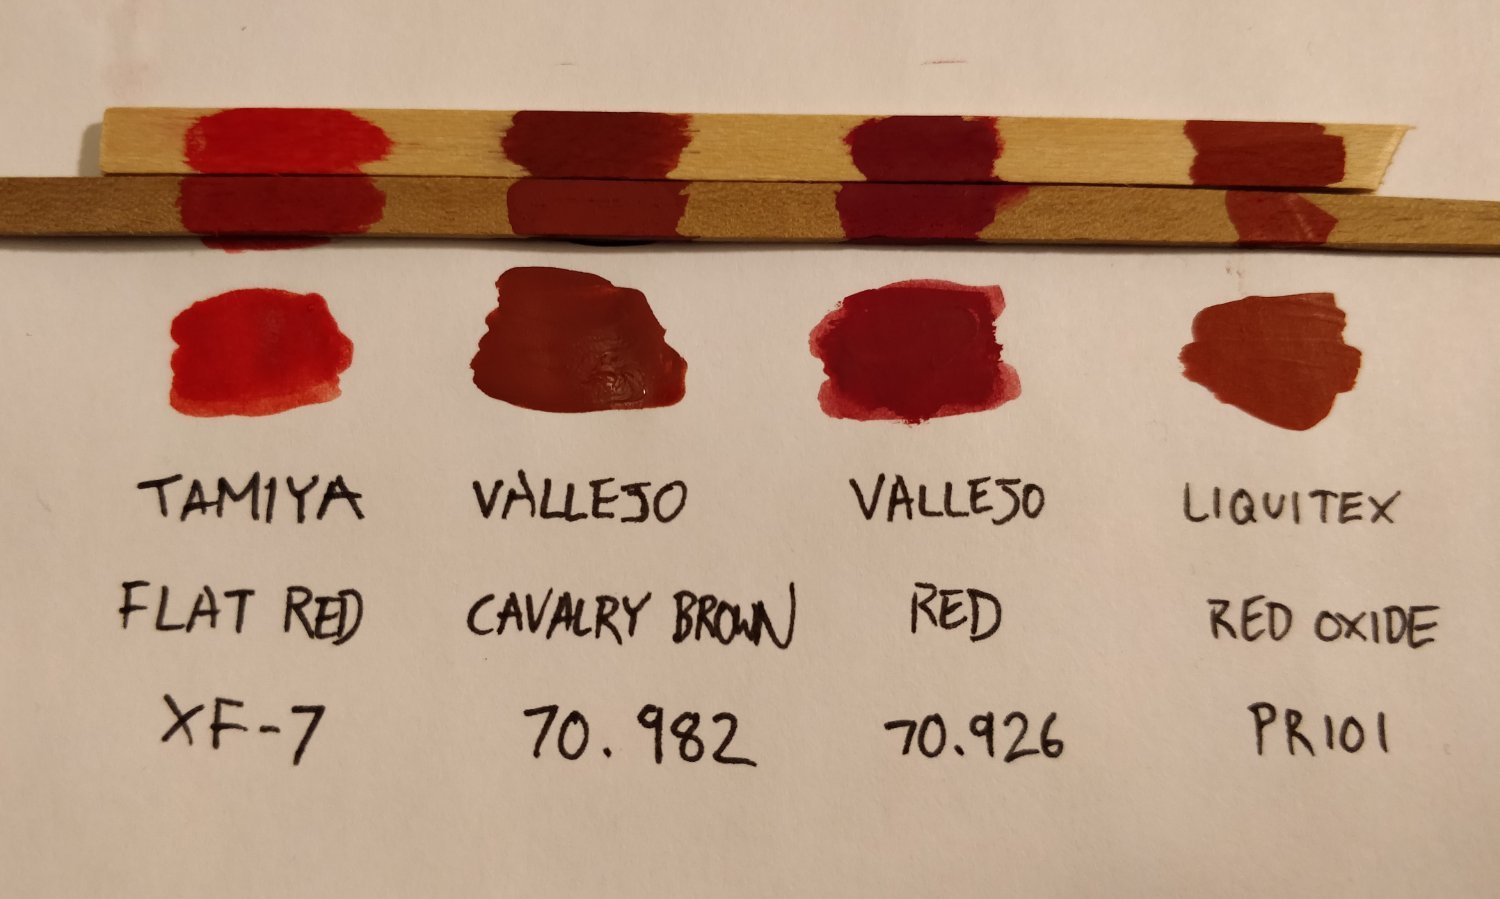
Thanks everyone for your recommendations and advice, I'd like to stick with acrylic paints for reasons of safety and simplicity. I purchased some today and tested them on various substrates. Some comments below in case another novice like myself ever reads this: Tamiya - Flat Red (XF-7) Too bright of a red in my opinion. Quite thin and required multiple coats. Even so, there is colour variation depending on the material being painted. Vallejo - Cavalry Brown (70.982) I found it to be much more brown than it looks in the photo (and on colour swatches online), at least on my monitor. Vallejo - Red (70.926) Probably the closest to what I was looking for. Thank you, @mtaylor! Might be a little bit too intense in colour, but it dried a lot darker than I was expecting and was consistent across different woods. Liquitex - Red Oxide (PR101) A soft body artists' acrylic that I thought might work. However, it also came out much more brown than expected. In the end I think I will go with the Vallejo Red.
-
Hello, I am looking for recommendations for a single product (i.e. no mixing) red ochre paint suitable for wood bulwarks and deck fittings. I understand that there isn't one "true" historical colour, so I am just interested in something shelf-stable that can be brush painted. I wasn't able to find anything suitable from Tamiya or Vallejo, and my local hobby stores don't carry much else. Would artists acrylic paints work? Thanks in advance, -starlight
-
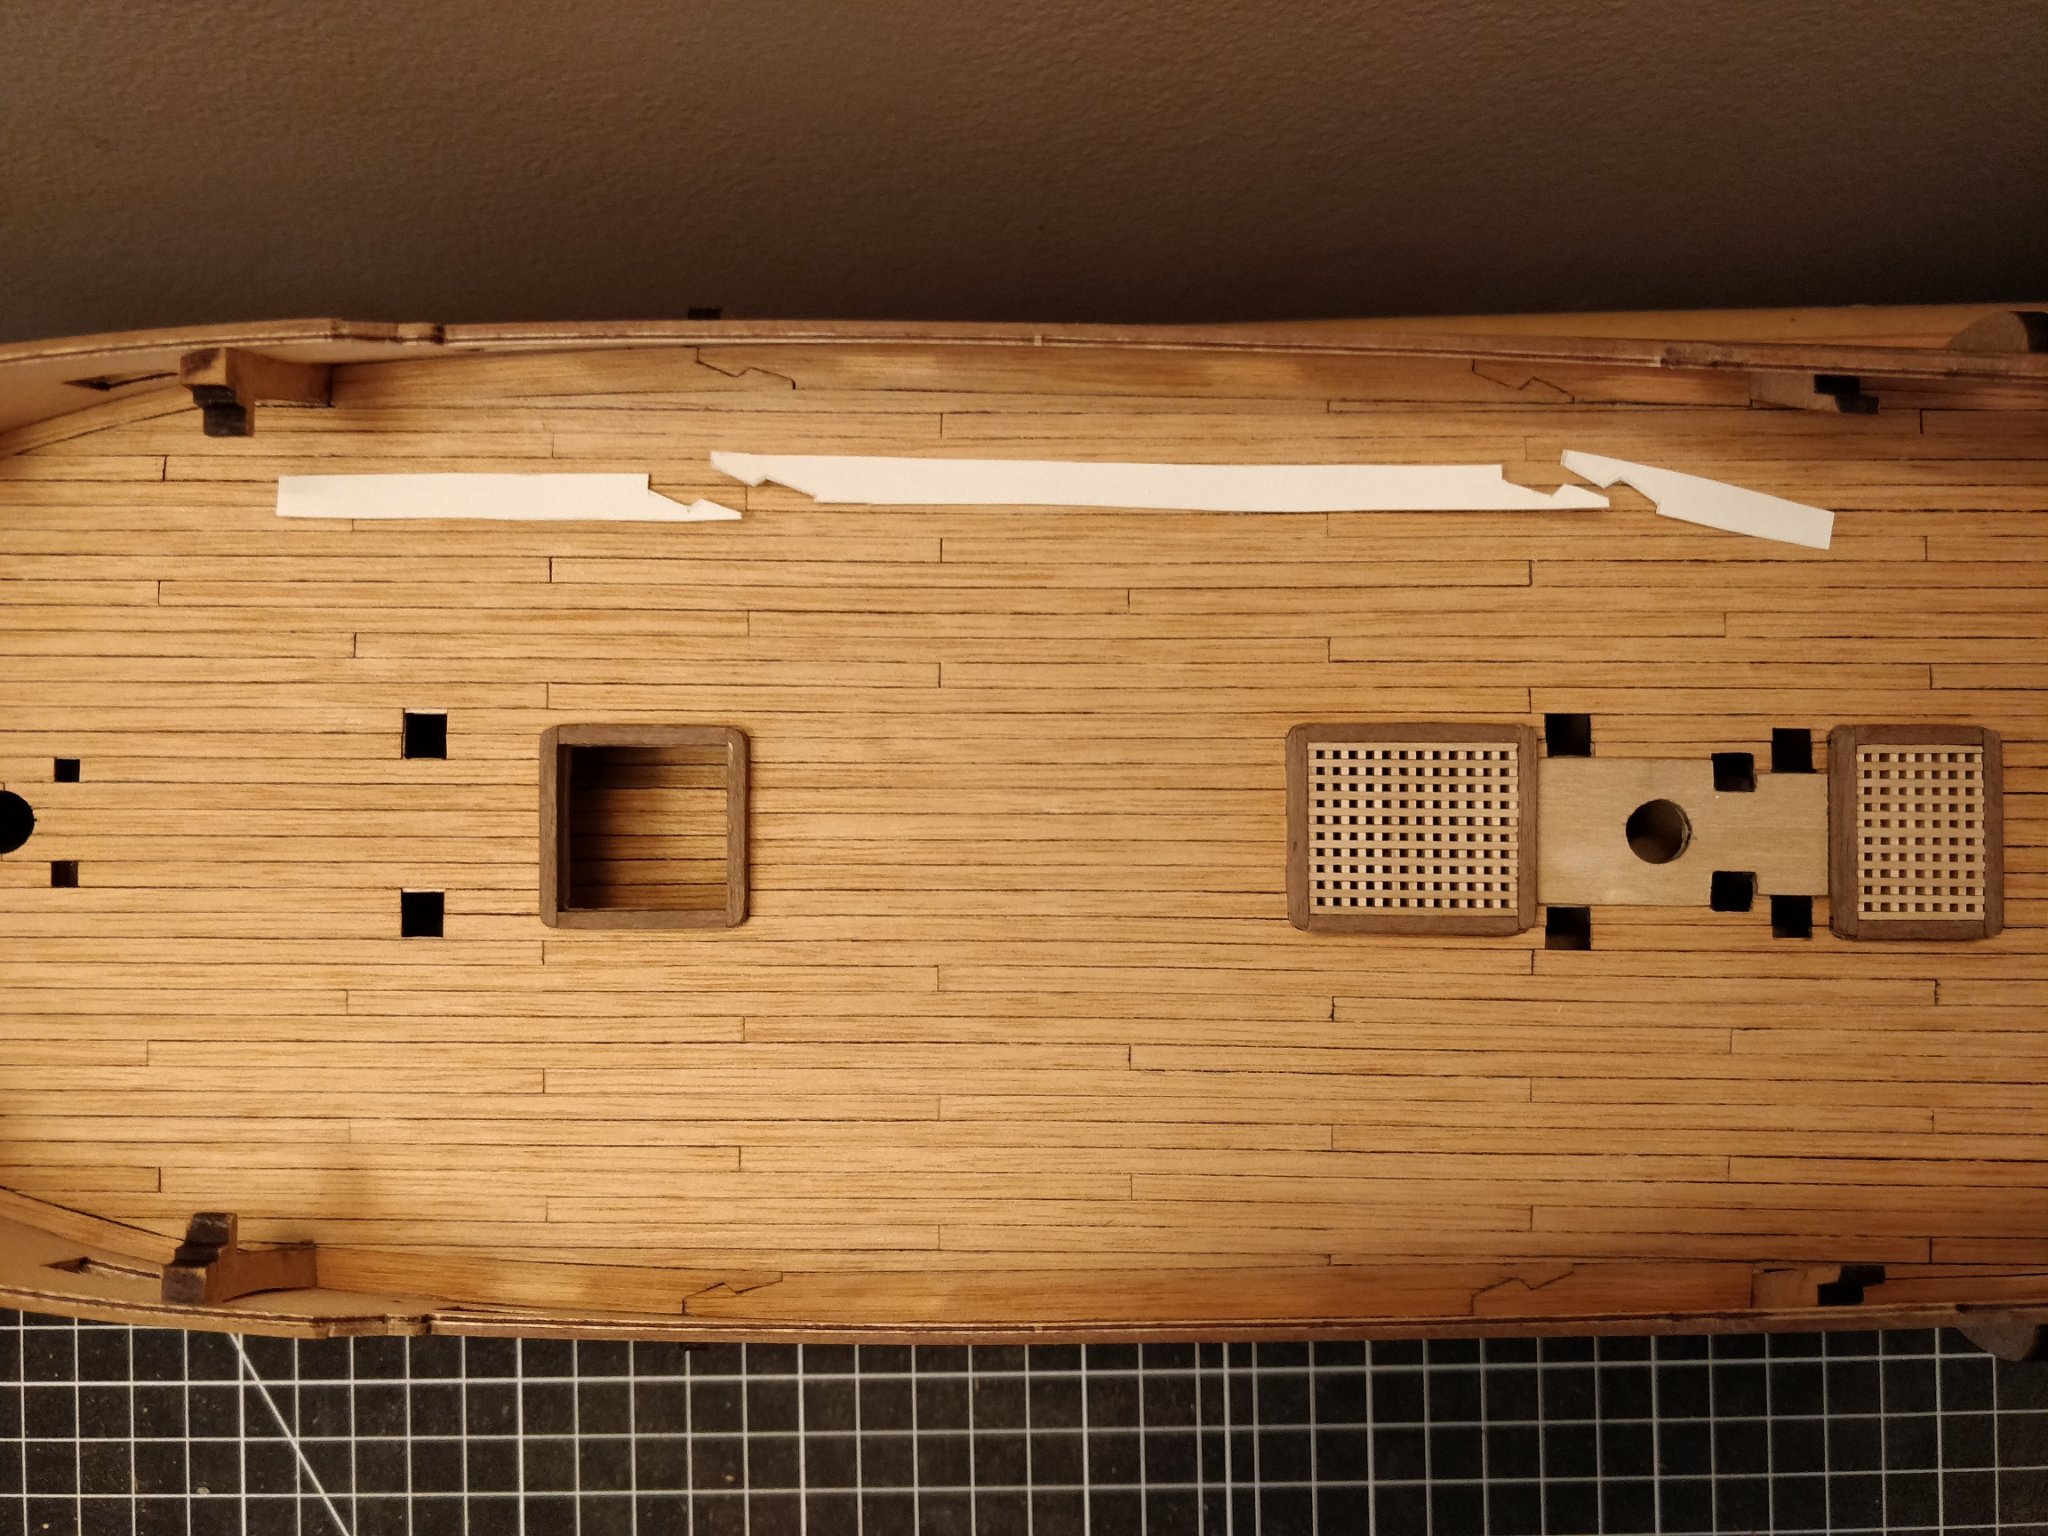
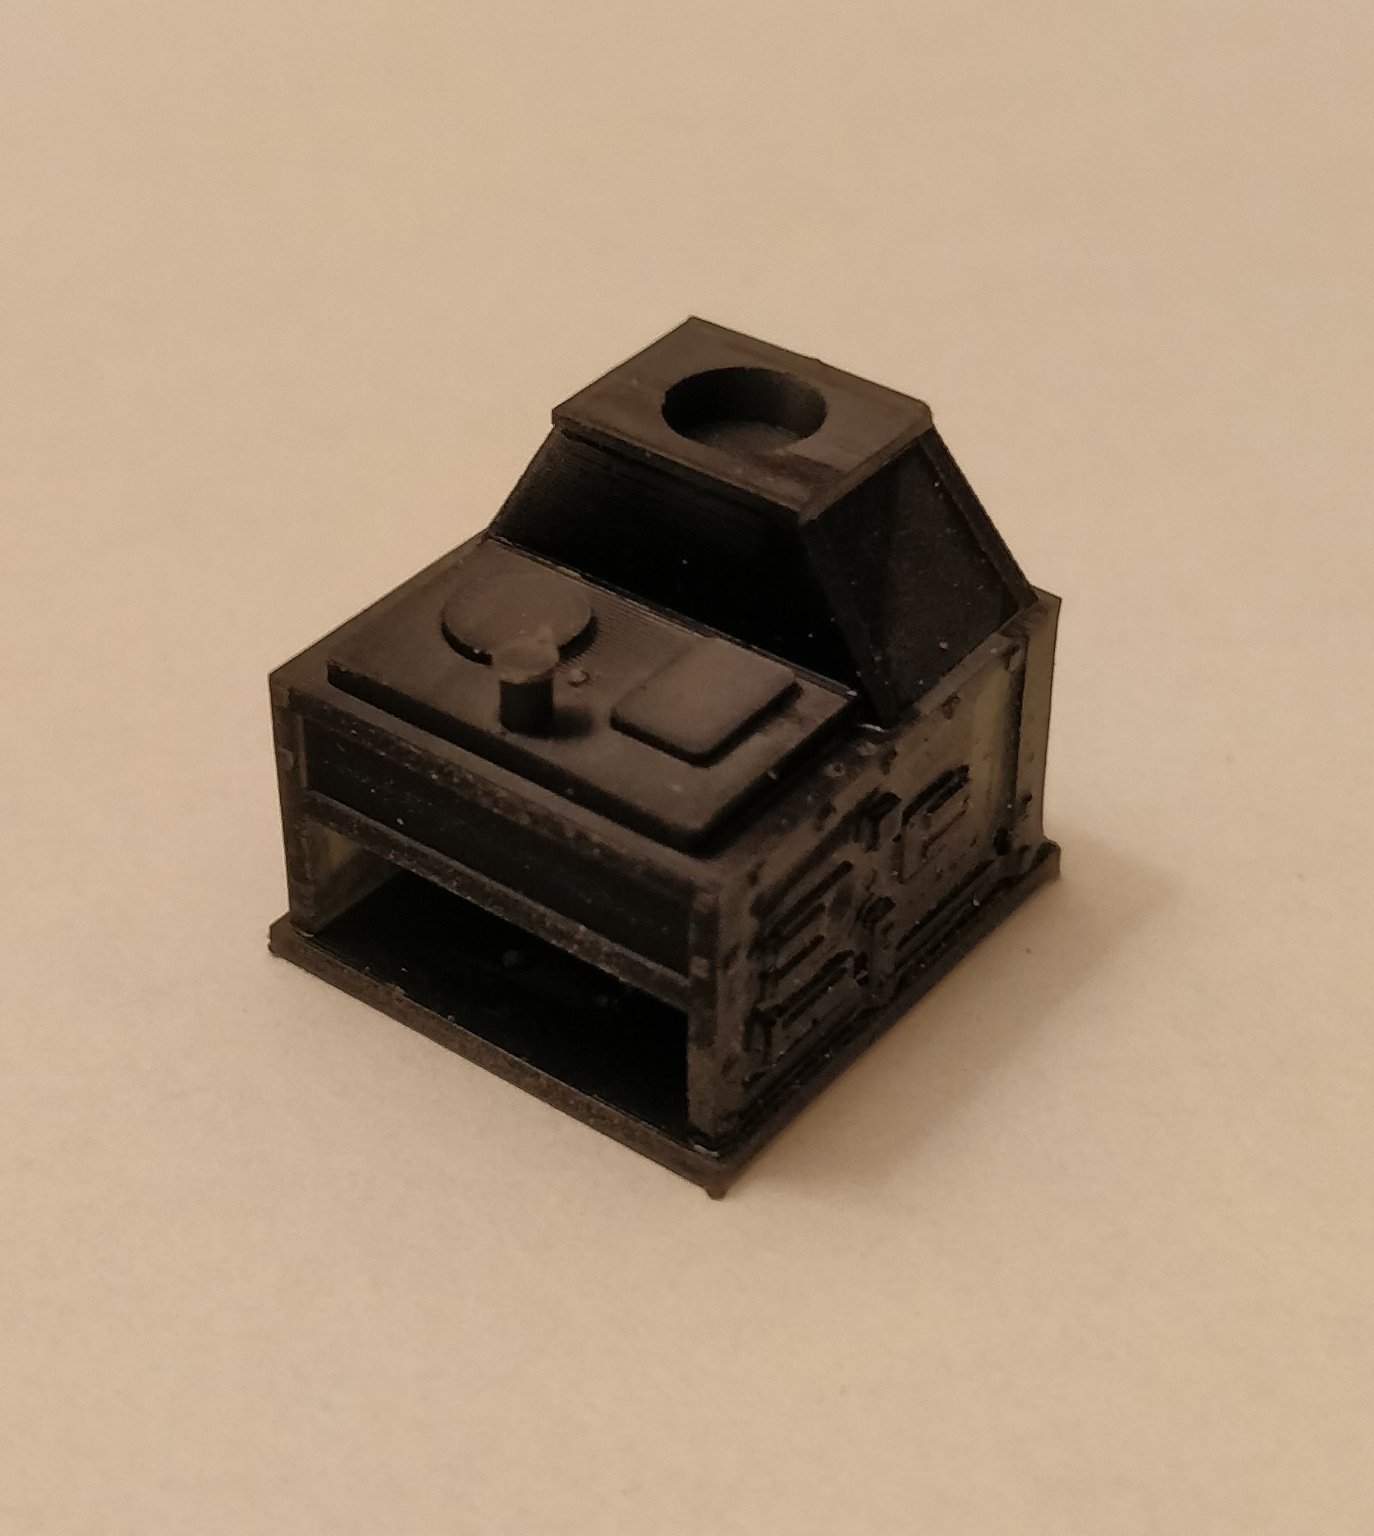
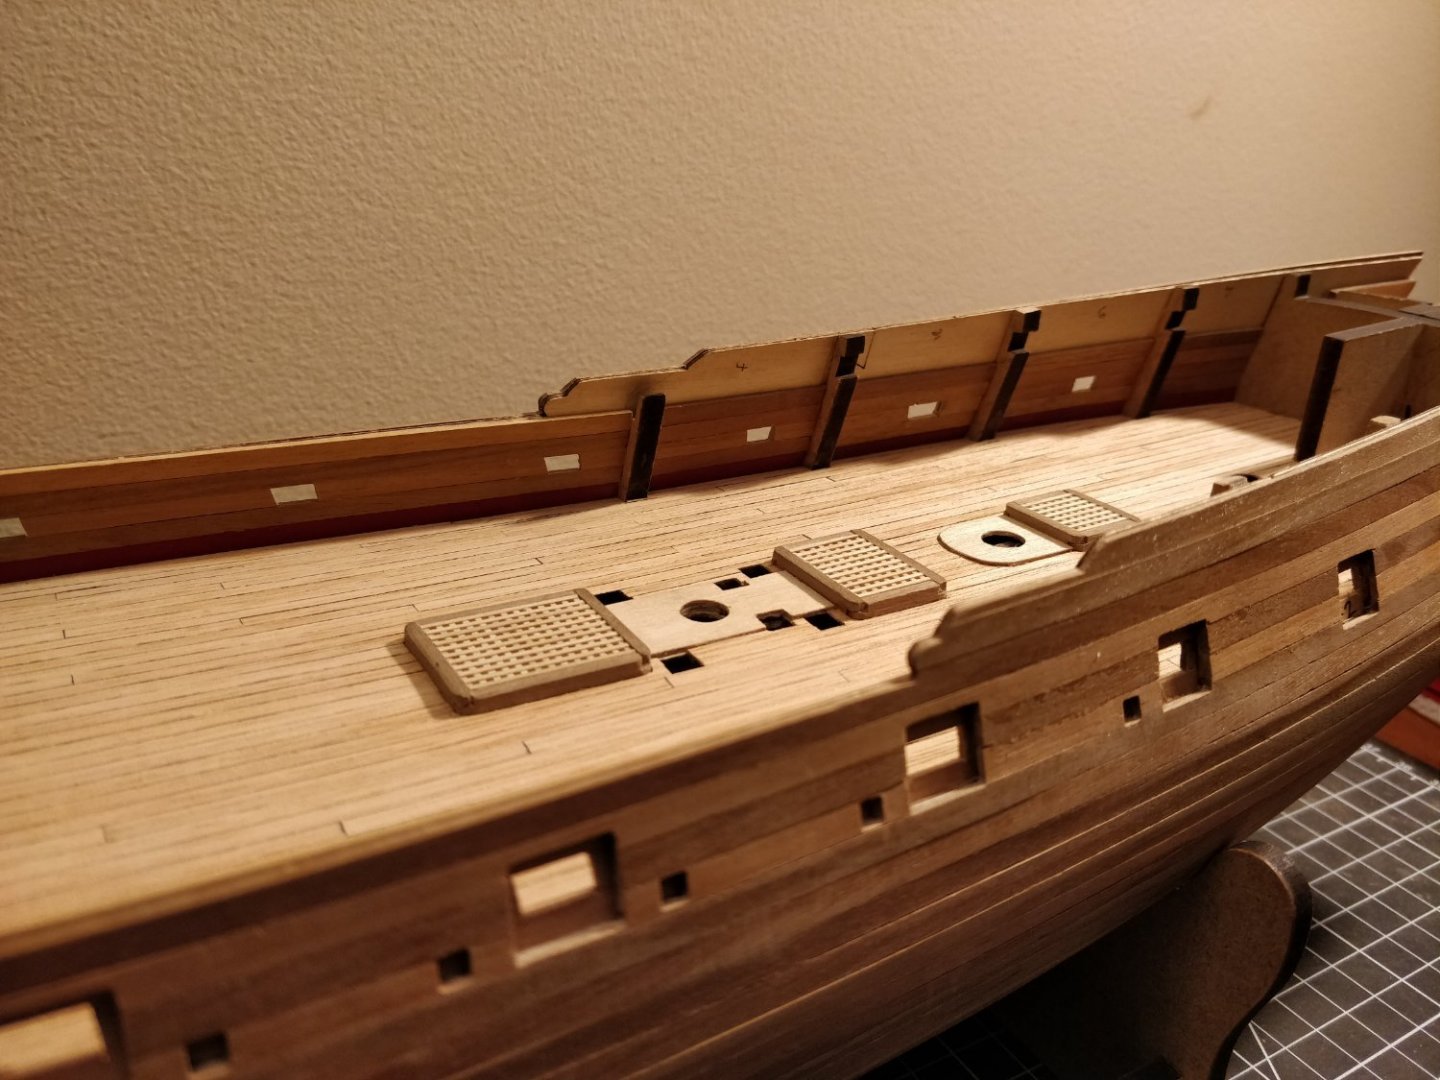
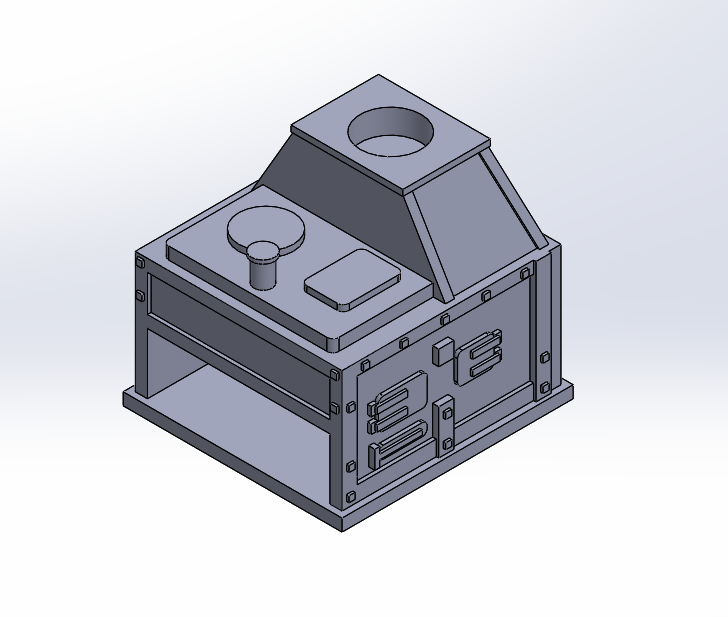
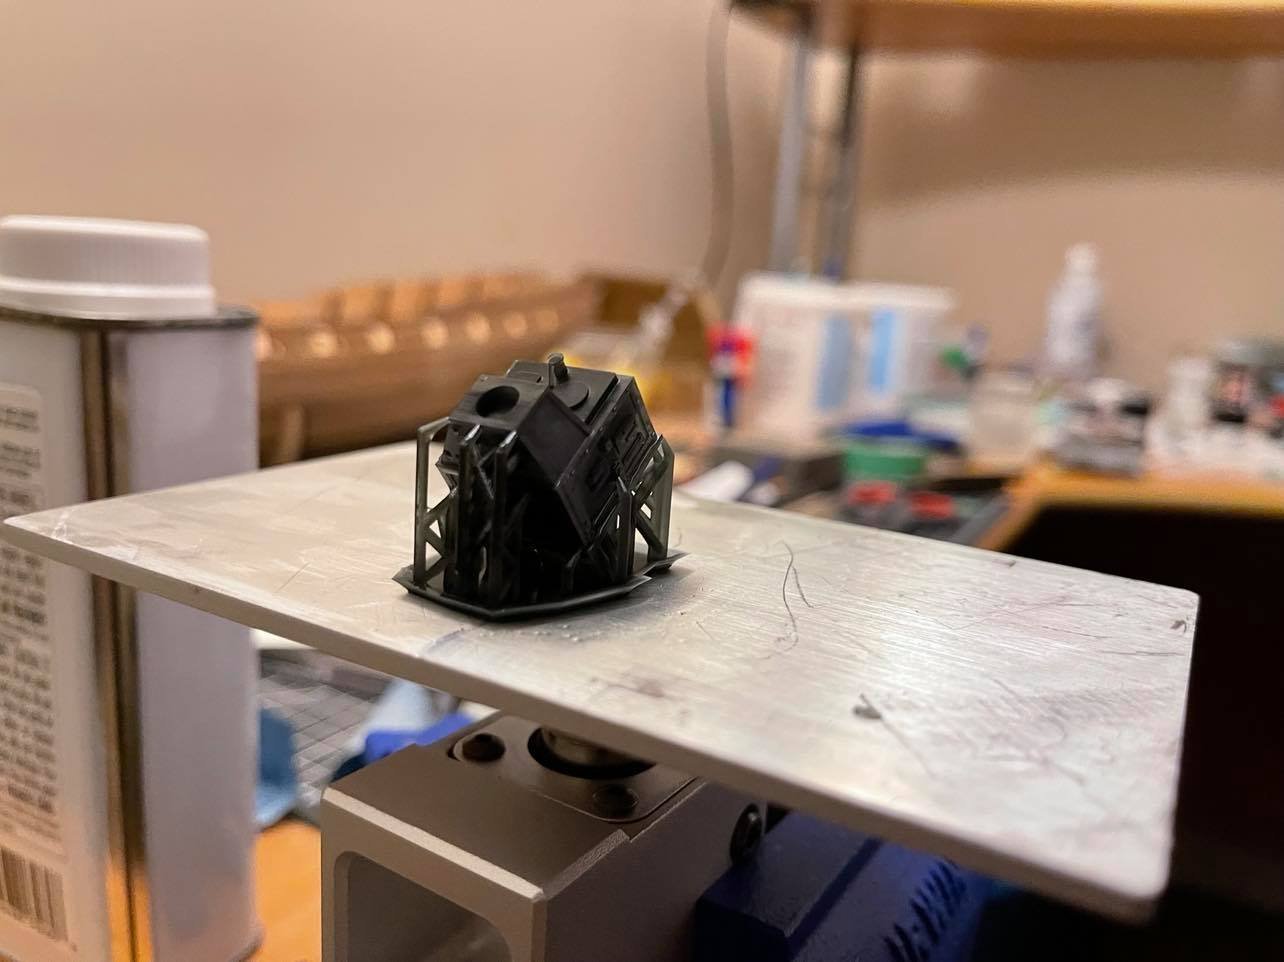
Hello all, I completed the planking of the main deck. I decided to add a margin plank with the scarph joints as others have done. Made numerous mistakes creating them and they're still not perfect, but probably as good as I can get with hand tools. During the process I realized that I had forgotten to account for the thickness of the inner bulwark planking on the previously-completed margin planks, but fortunately those are hidden under the upper decks. The new scarph joints are offset inward slightly to account for the bulwark planking. Next, I decided to follow many other modelers again and create a stove. Special thanks to @Blue Ensign for allowing me to copy his Pegasus stove based on his build log photos. I decided to 3D print most of the stove. CAD model that I made: Print sitting on the build plate with supports still attached: Stove with supports removed: I will now work on adding handles, the firebox grill, the exhaust pipe, etc., and then painting the stove. -starlight


- 82 replies
-
- 6
-
-
- Fly
- Victory Models
- (and 2 more)
-
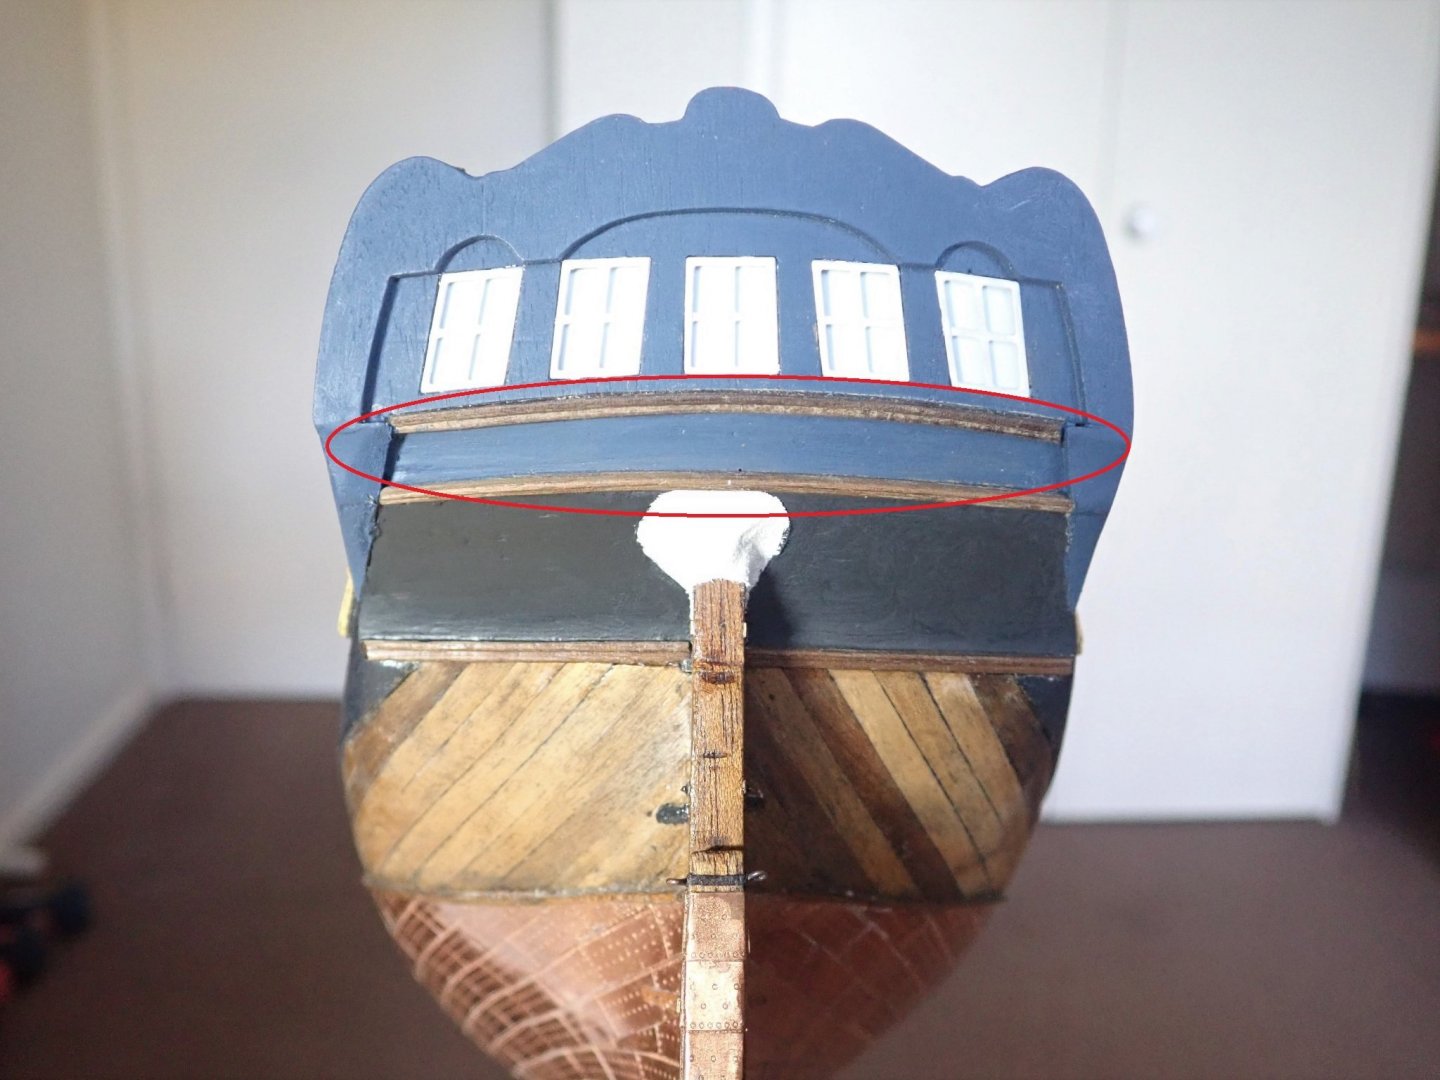
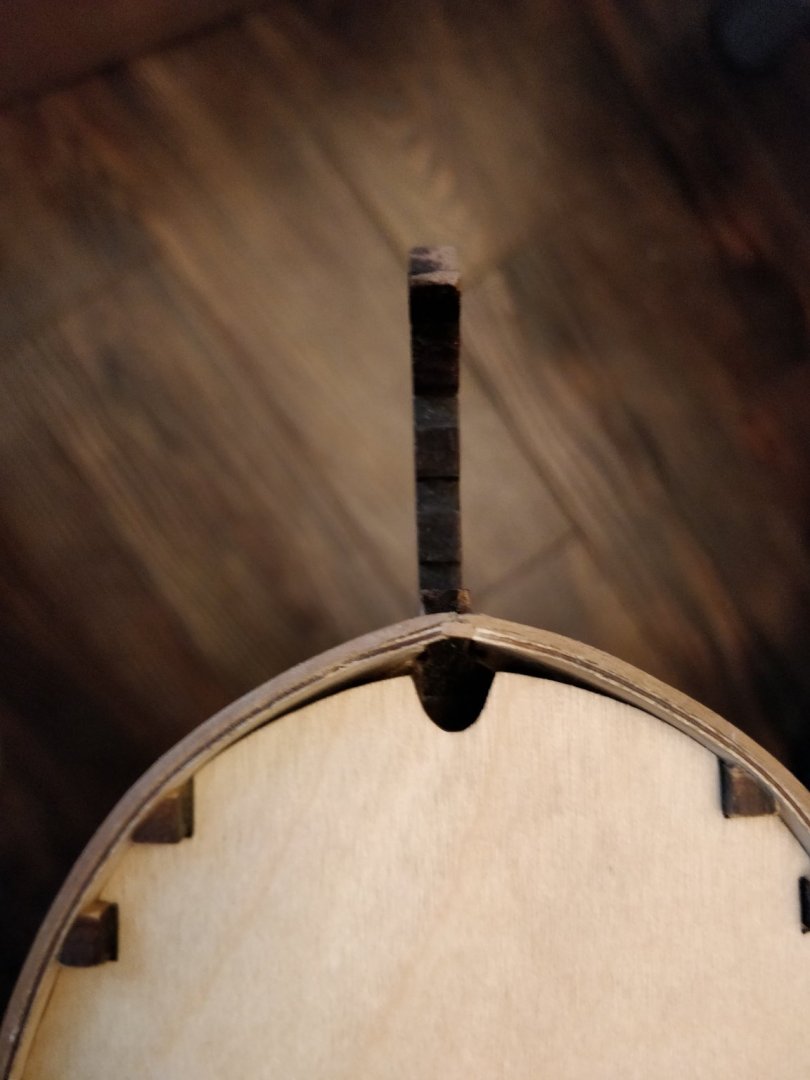
Richard, thank you for the kind words and for continuing to help a novice such as myself. If I could ask a few questions about your reply: Do forgive my ignorance of the correct terminology. For some reason I thought that the piece with the windows was called a gallery... If I may show this picture from your build log: I believe the circled feature is the upper counter(?), which sits between the two kit-supplied pieces for the lower counter and the stern fascia. If I understand correctly, this piece must be made to size out of the walnut strip. Therefore my question is, how high is the fascia supposed to sit? The kit instructions are rather light on detail regarding this aspect. Also, is there any info on these moulding strips that separate each section? If I plank the quarterdeck (and foredeck?), will I be able to remove them afterwards to complete the fittings underneath? I will have to go through your build log again to see how you've done it. I am very much trying to think several steps ahead as you say, although this usually results in a paralysis of action: in which I am too afraid to start a new task for fear of overlooking something crucial. Thanks again, starlight
- 82 replies
-
- 1
-
-
- Fly
- Victory Models
- (and 2 more)
-
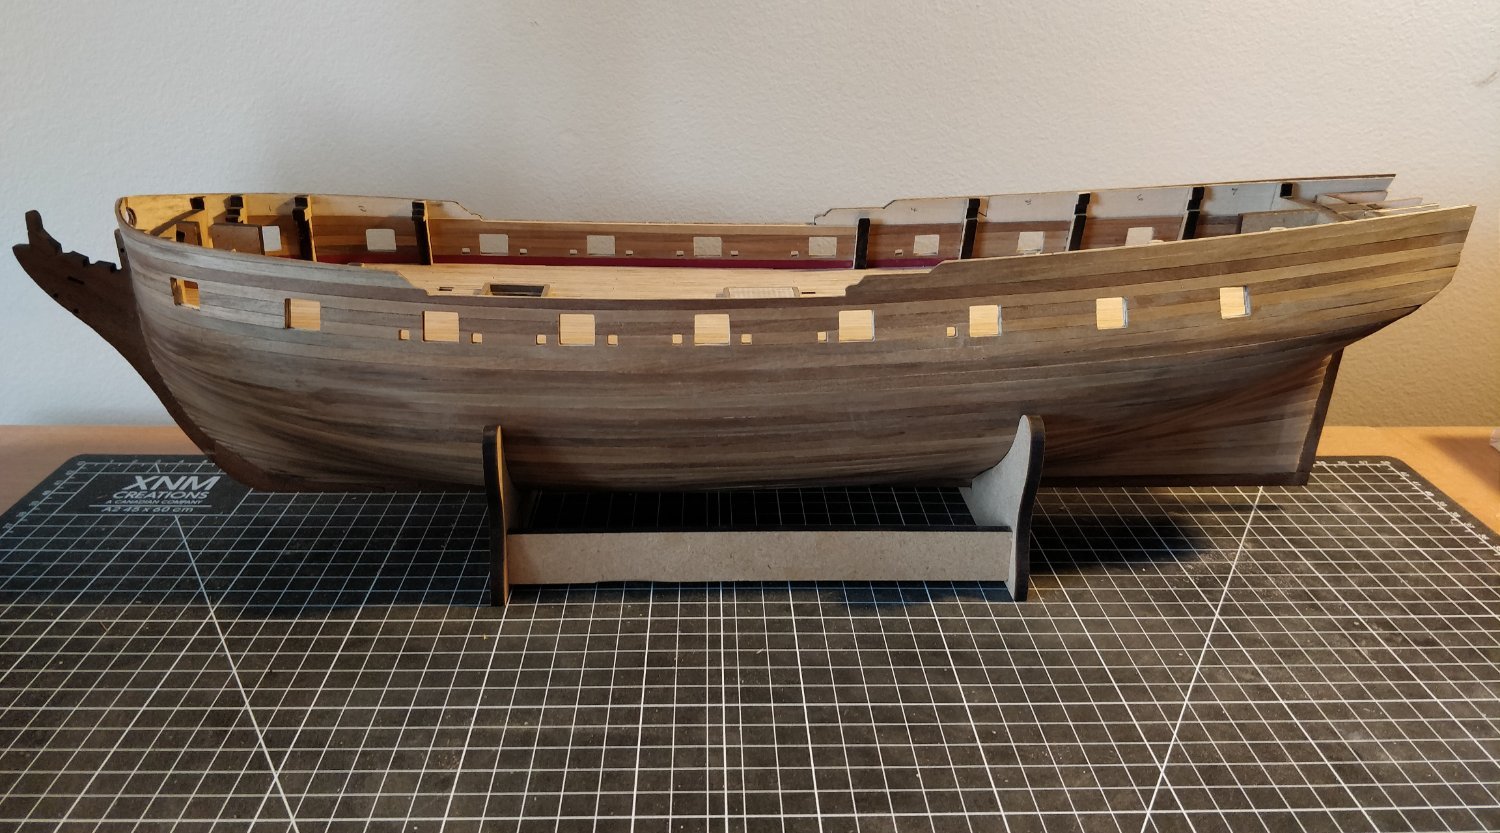
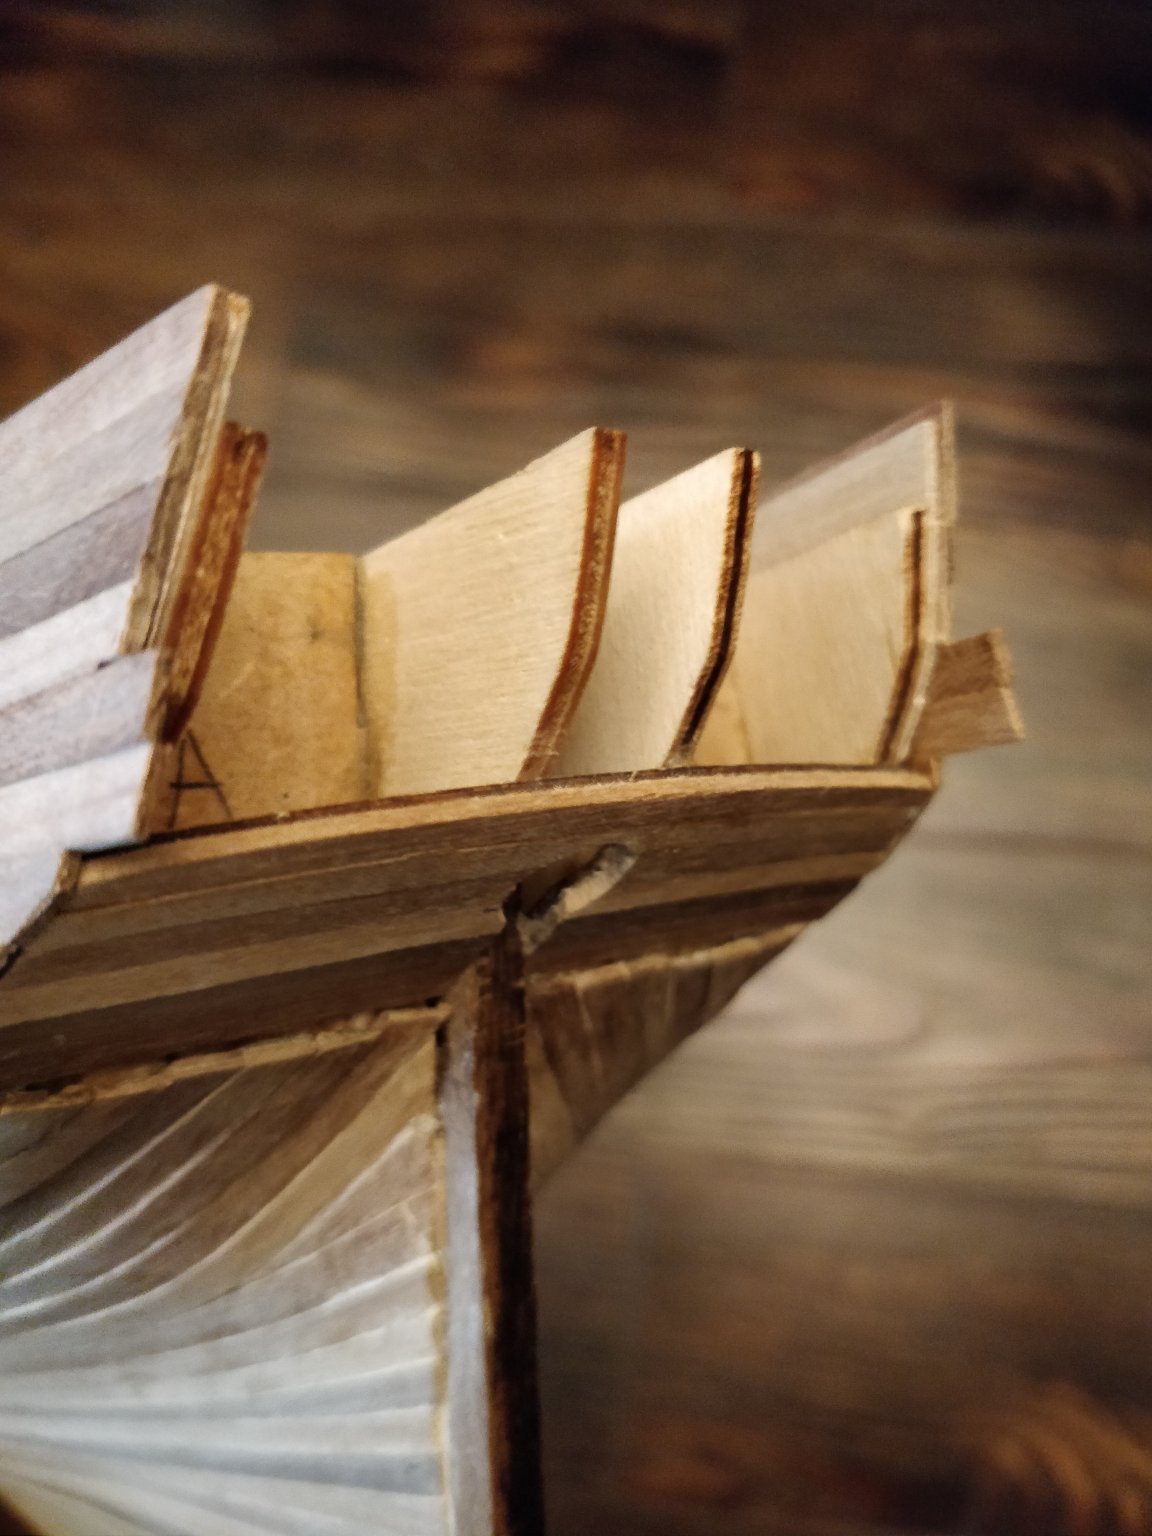
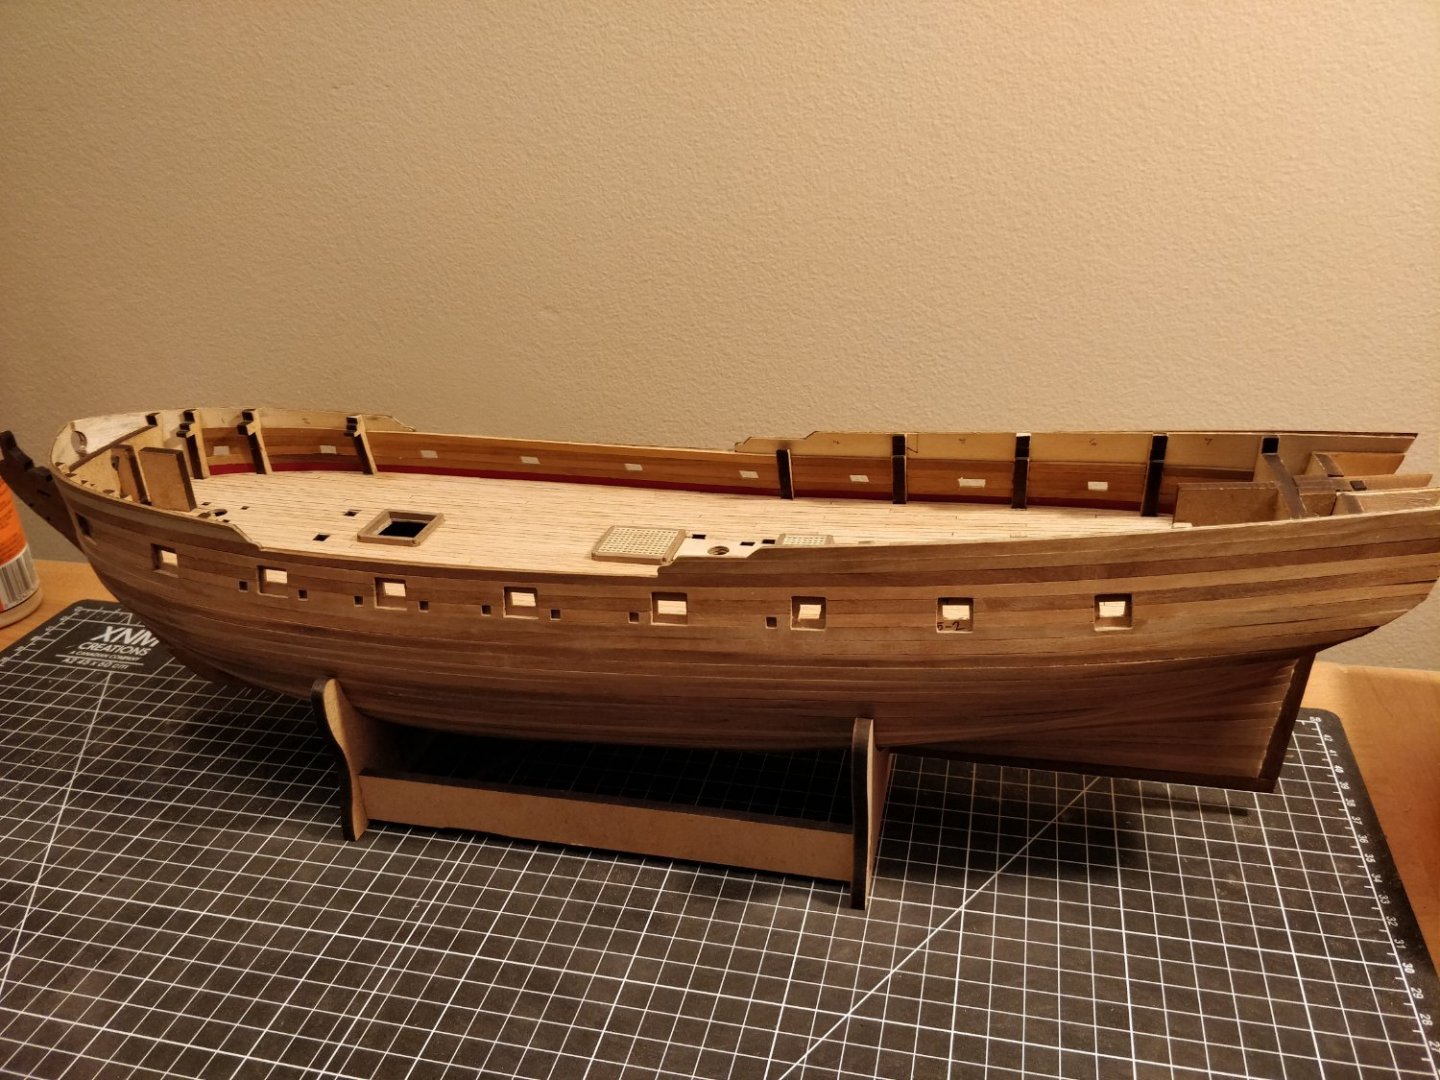
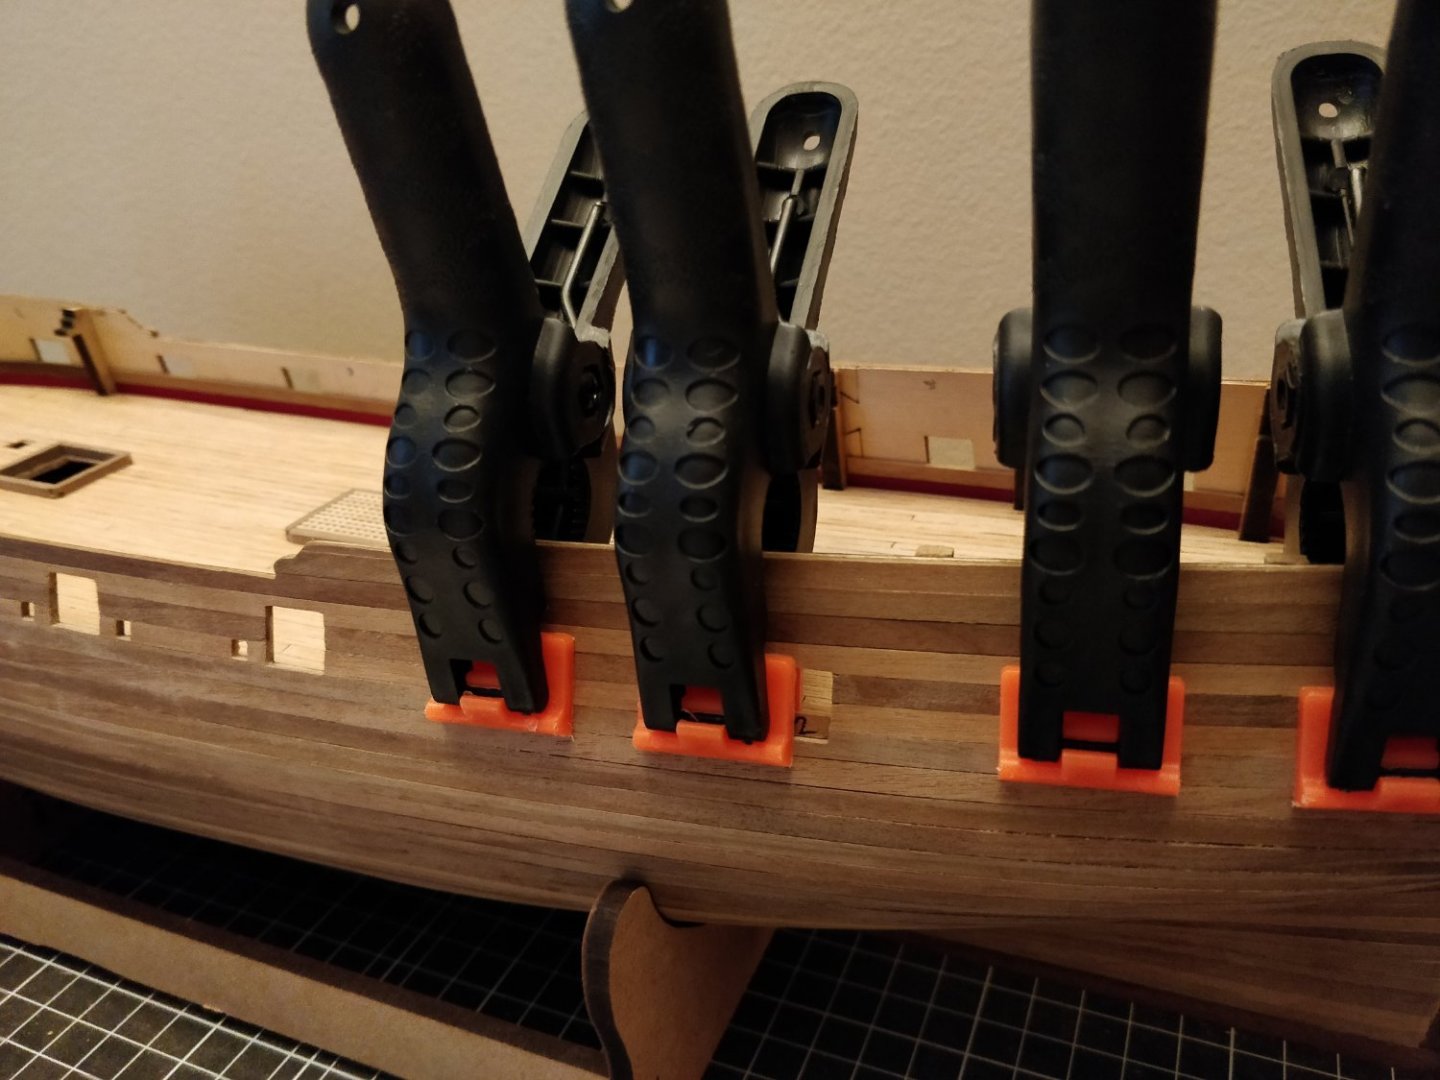
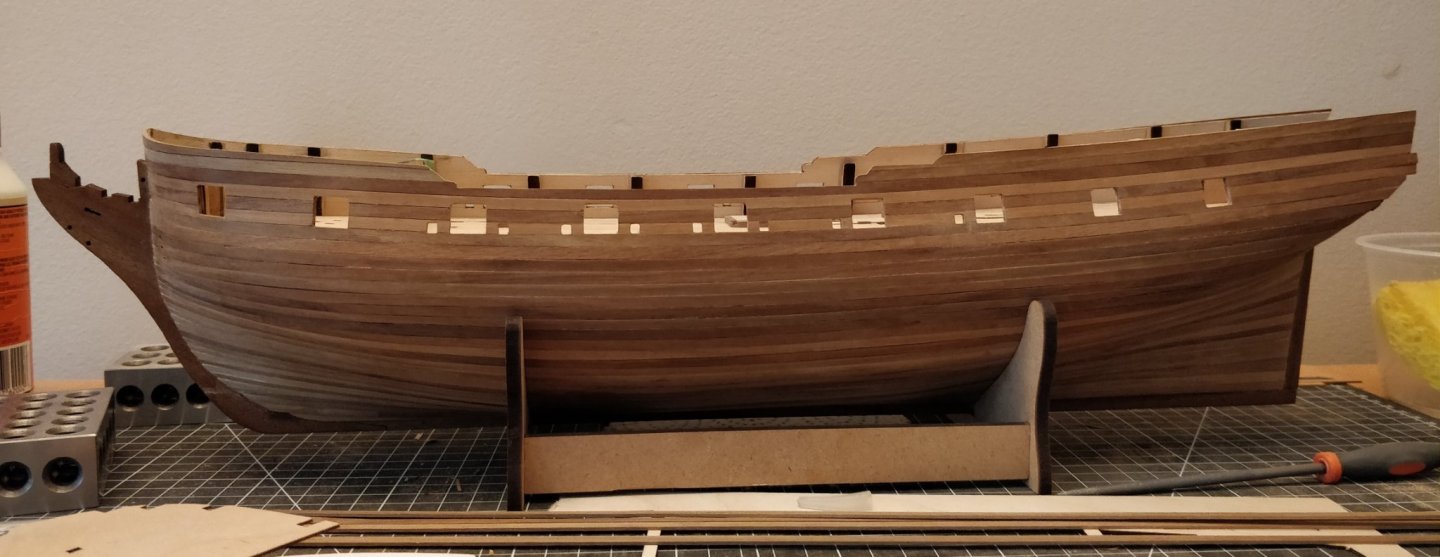
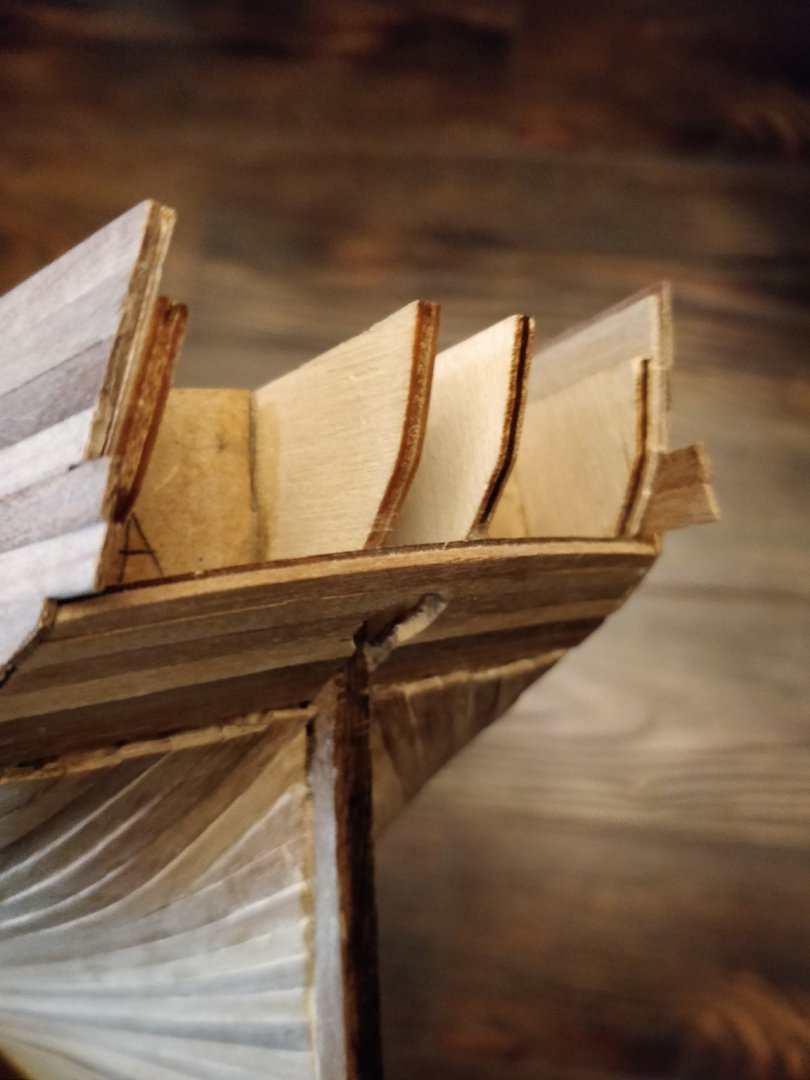
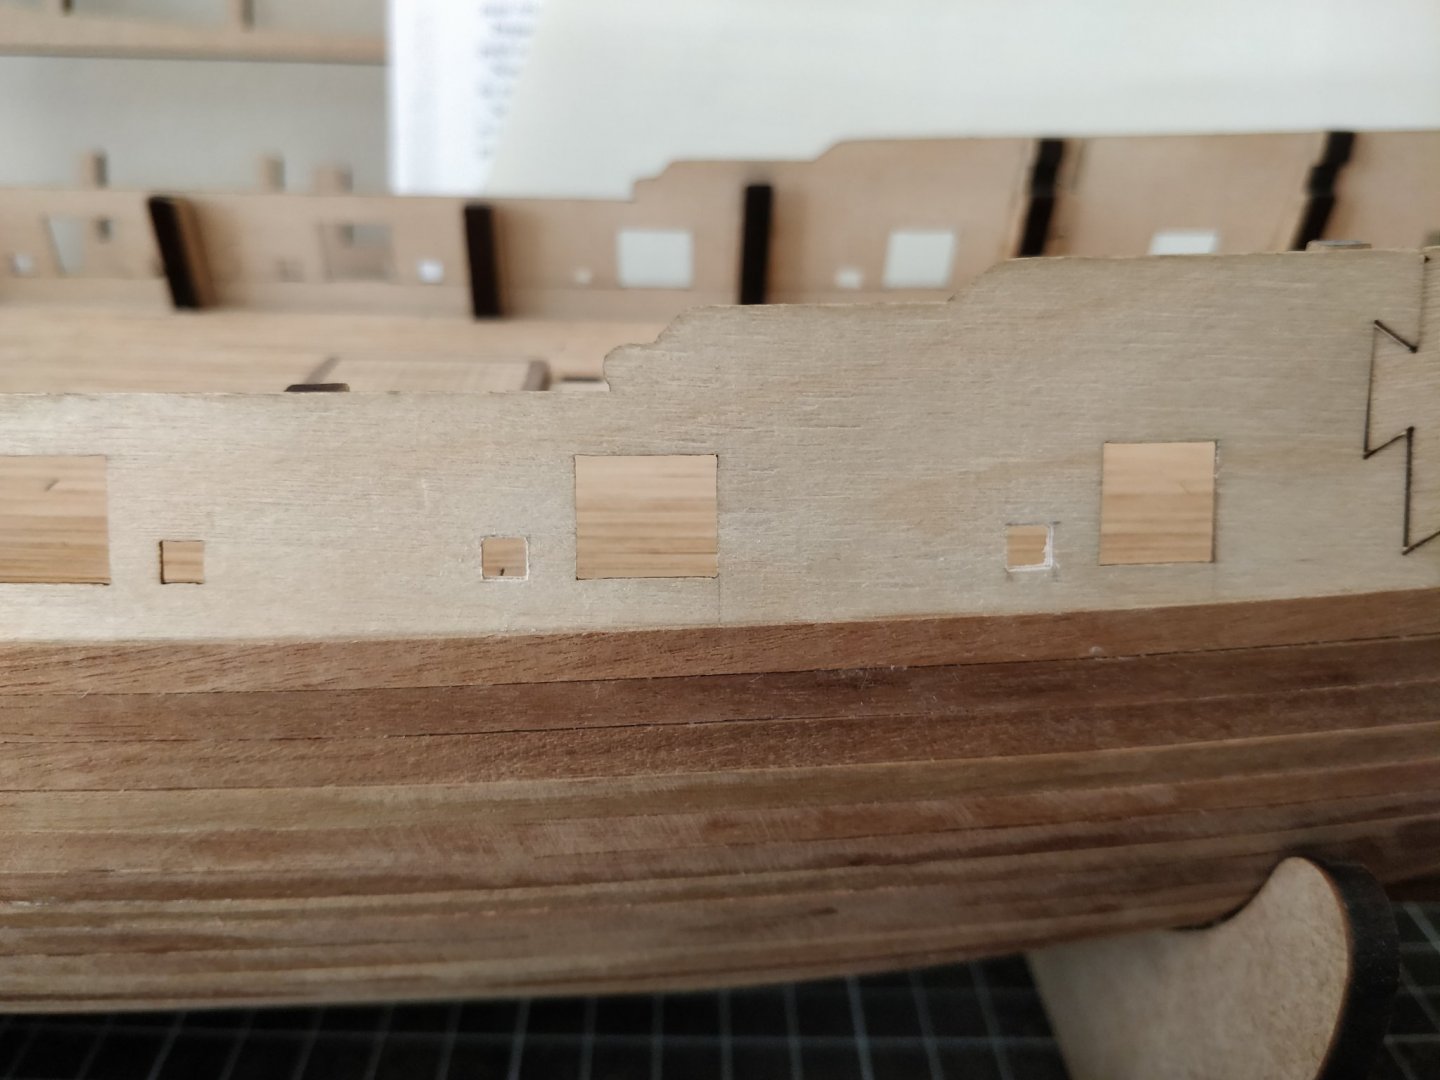
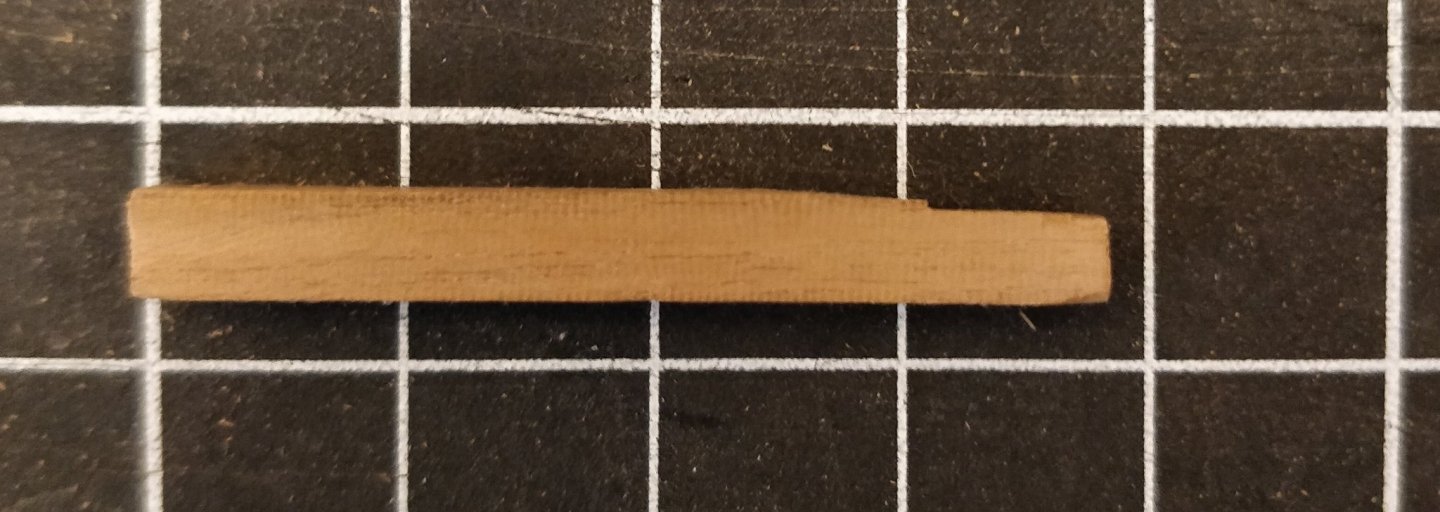
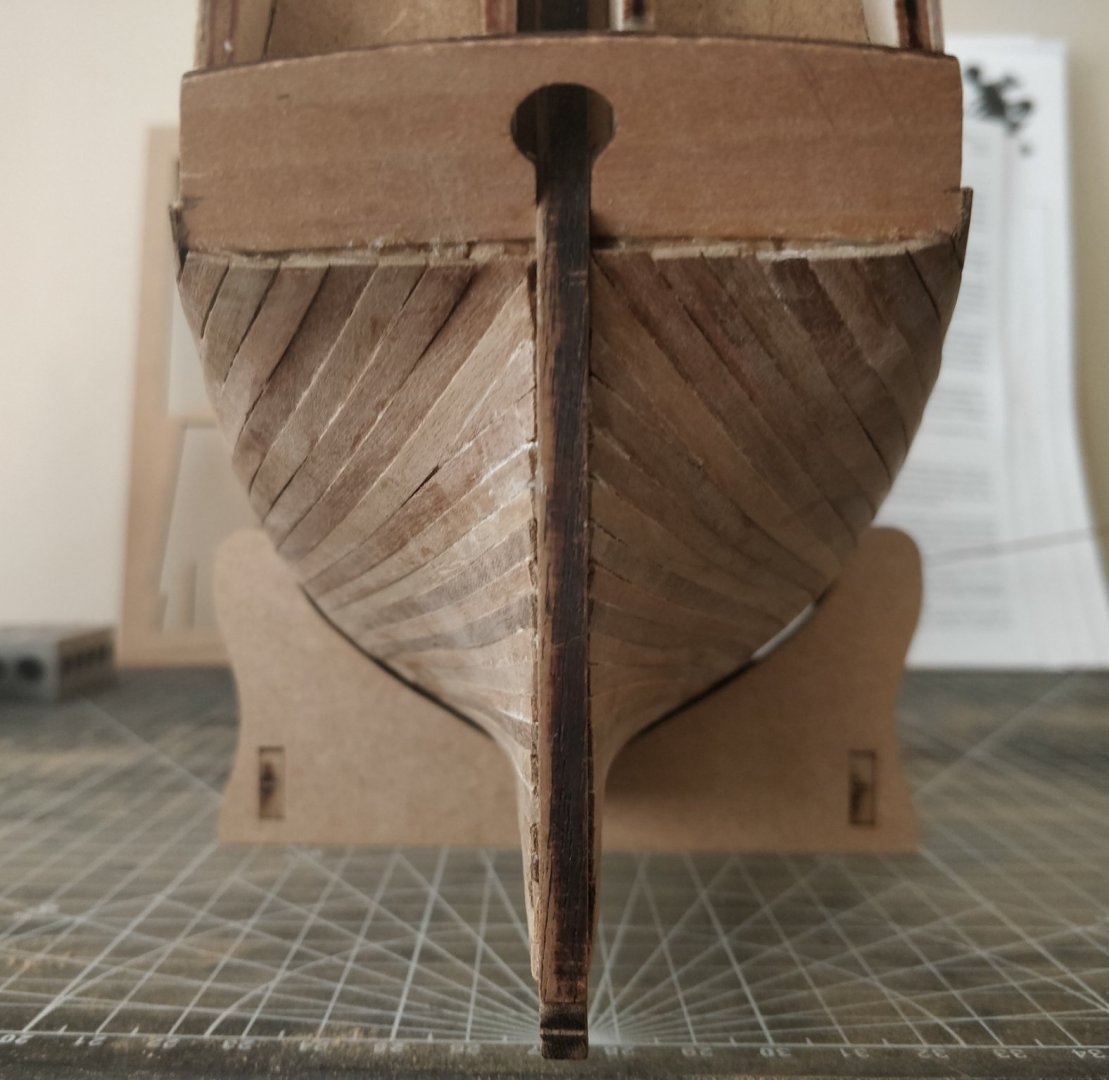
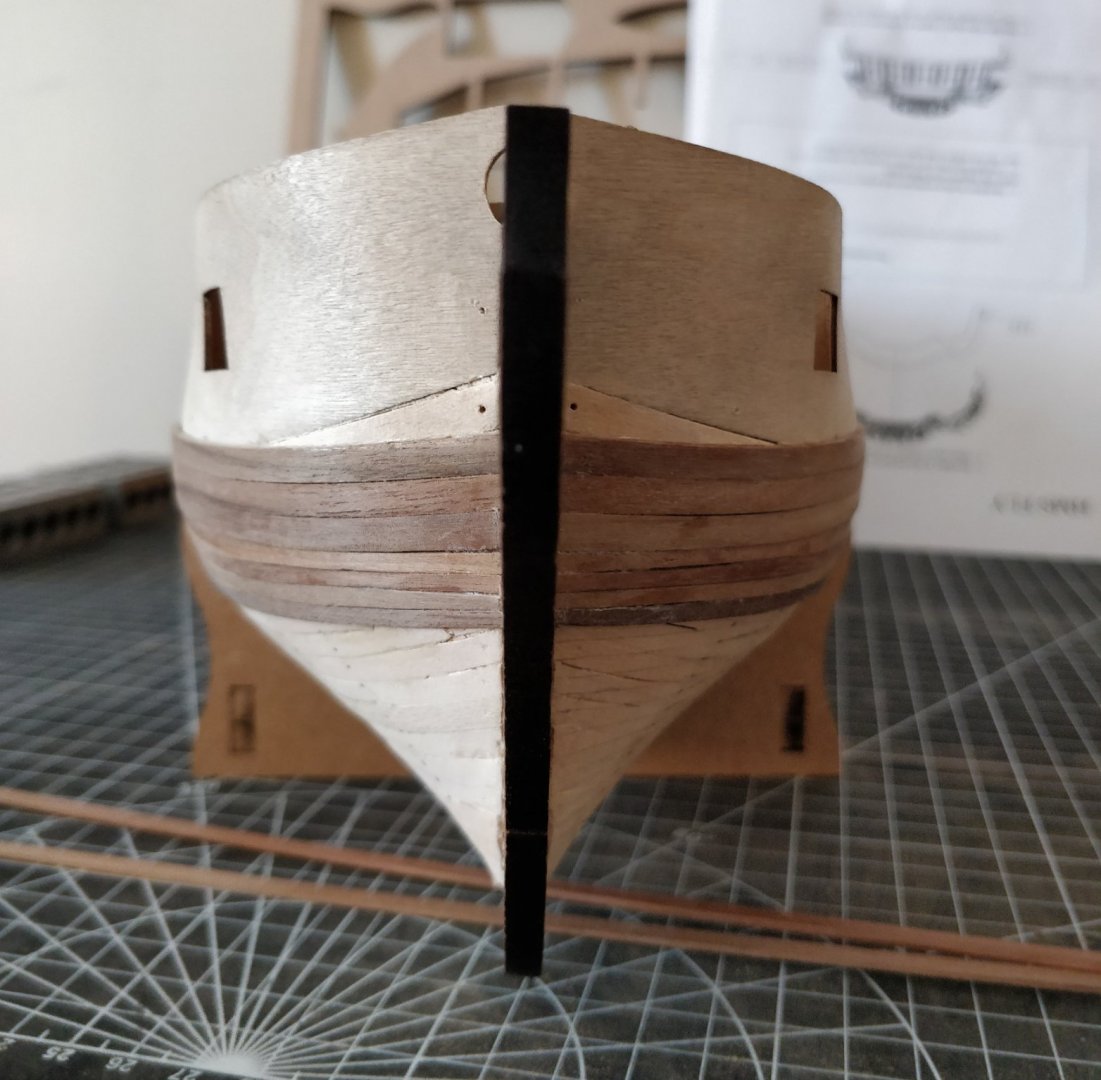
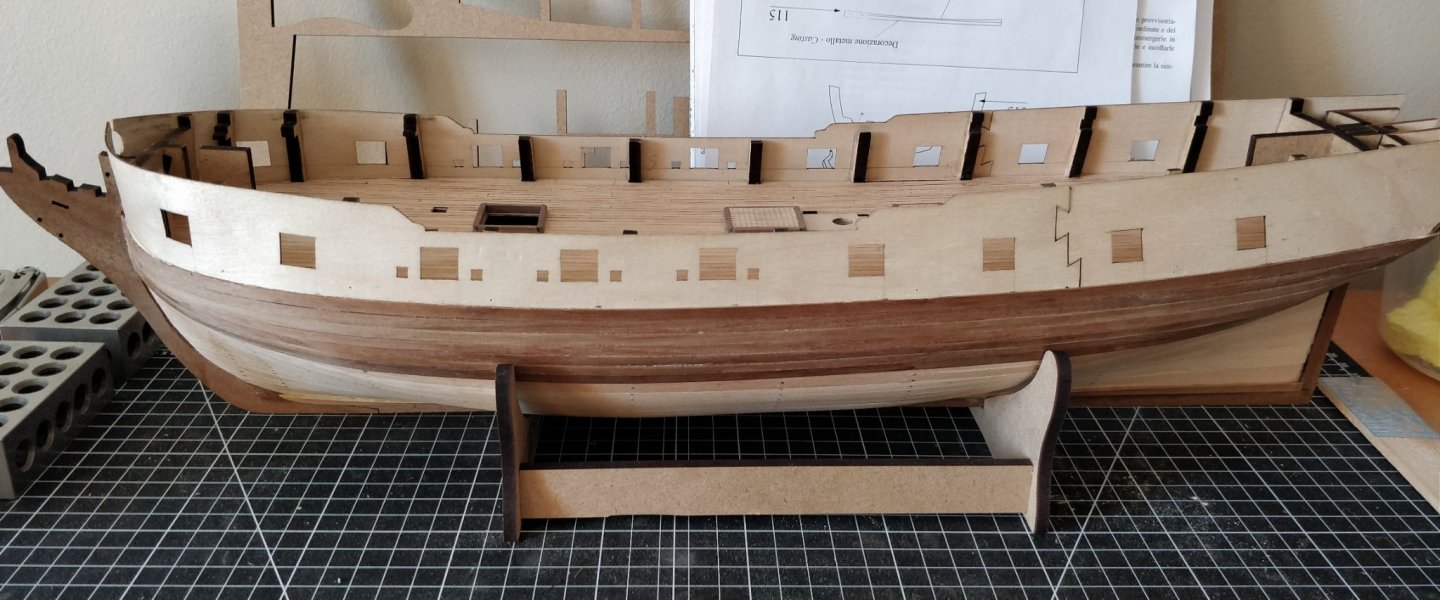
Hello all, I've made some more slow progress these past few months. I decided to add the two additional sweep ports on each side: I then completed the outside second planking above the main wale. I decided (against the wise advice of Richard44) to do the outside planking first before the inner bulwarks. My justification was that I could keep using the bulkhead tabs for more stable clamping. I'll have to live with this decision when it comes time to drill holes on the inside. I made a little key from some of the walnut strip to verify the size of the sweep ports: I have two major concerns about the work I've done so far. Firstly, I was not able to get the proper curvature at the bow. Is it worth trying to force the plywood and walnut into position? Secondly, I'm not sure how to terminate the walnut planking at the stern. In particular, how does the intermediate section between the stern counter and gallery look? Any resources would be appreciated. After these two issues are addressed I'm still a bit unsure on the best way to proceed: Do I stain/seal the hull? Do I break off the bulkhead tabs and complete the deck planking? Do I fit the stern gallery? Regardless, I will probably spend some time filling and sanding before moving on. Thanks to all for looking in, and I would appreciate any and all advice. -starlight
- 82 replies
-
- 3
-
-
- Fly
- Victory Models
- (and 2 more)
-
Hi Richard, that looks really good. I finally managed to finish my second planking below the main wale and am looking at your build log among others to see how best to proceed. Do you recommend planking the inner bulwarks before doing the outer planking above the main wale? I didn't really understand your explanation regarding the cannon eyebolts. Thanks, starlight
-
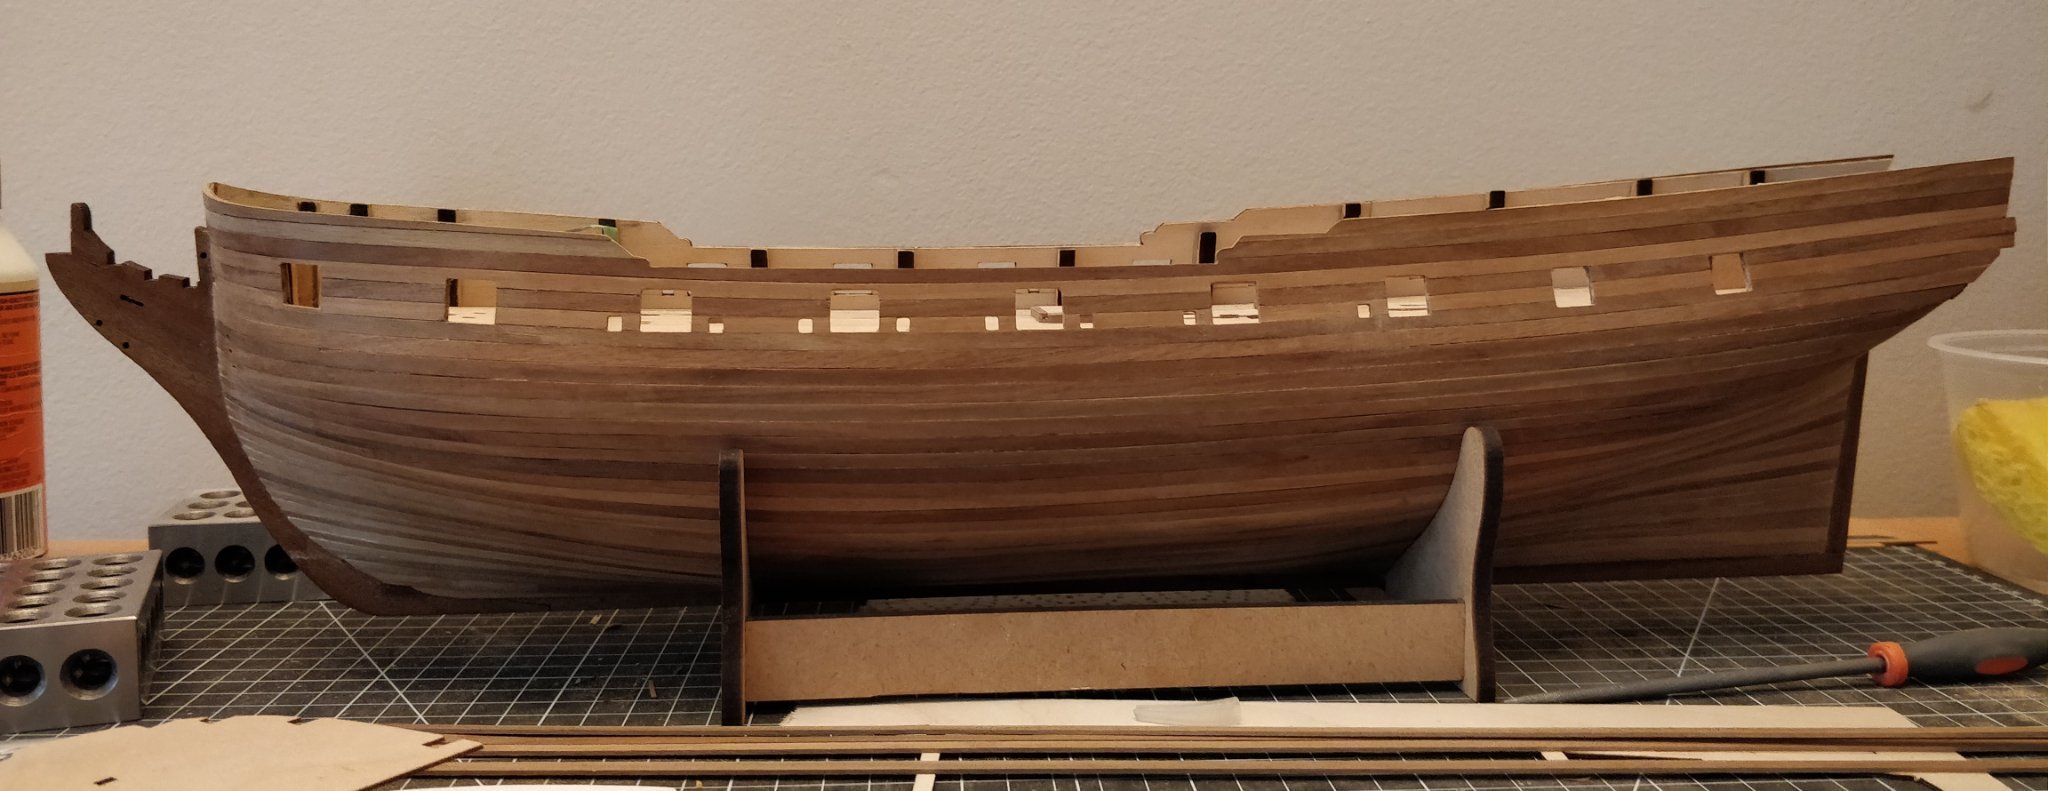
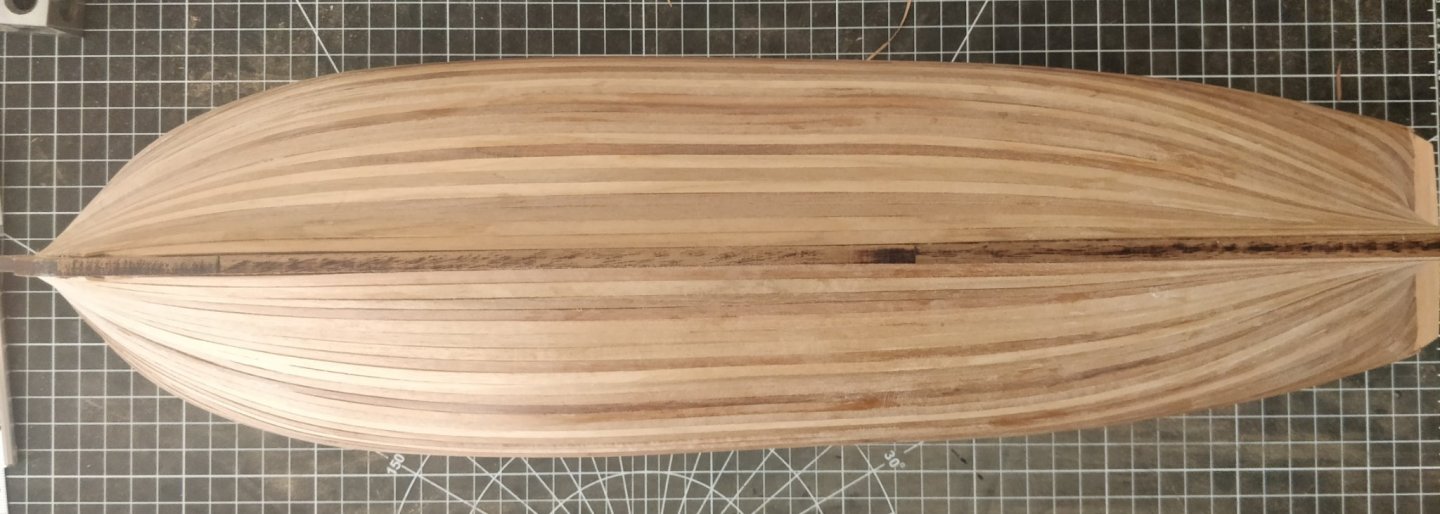
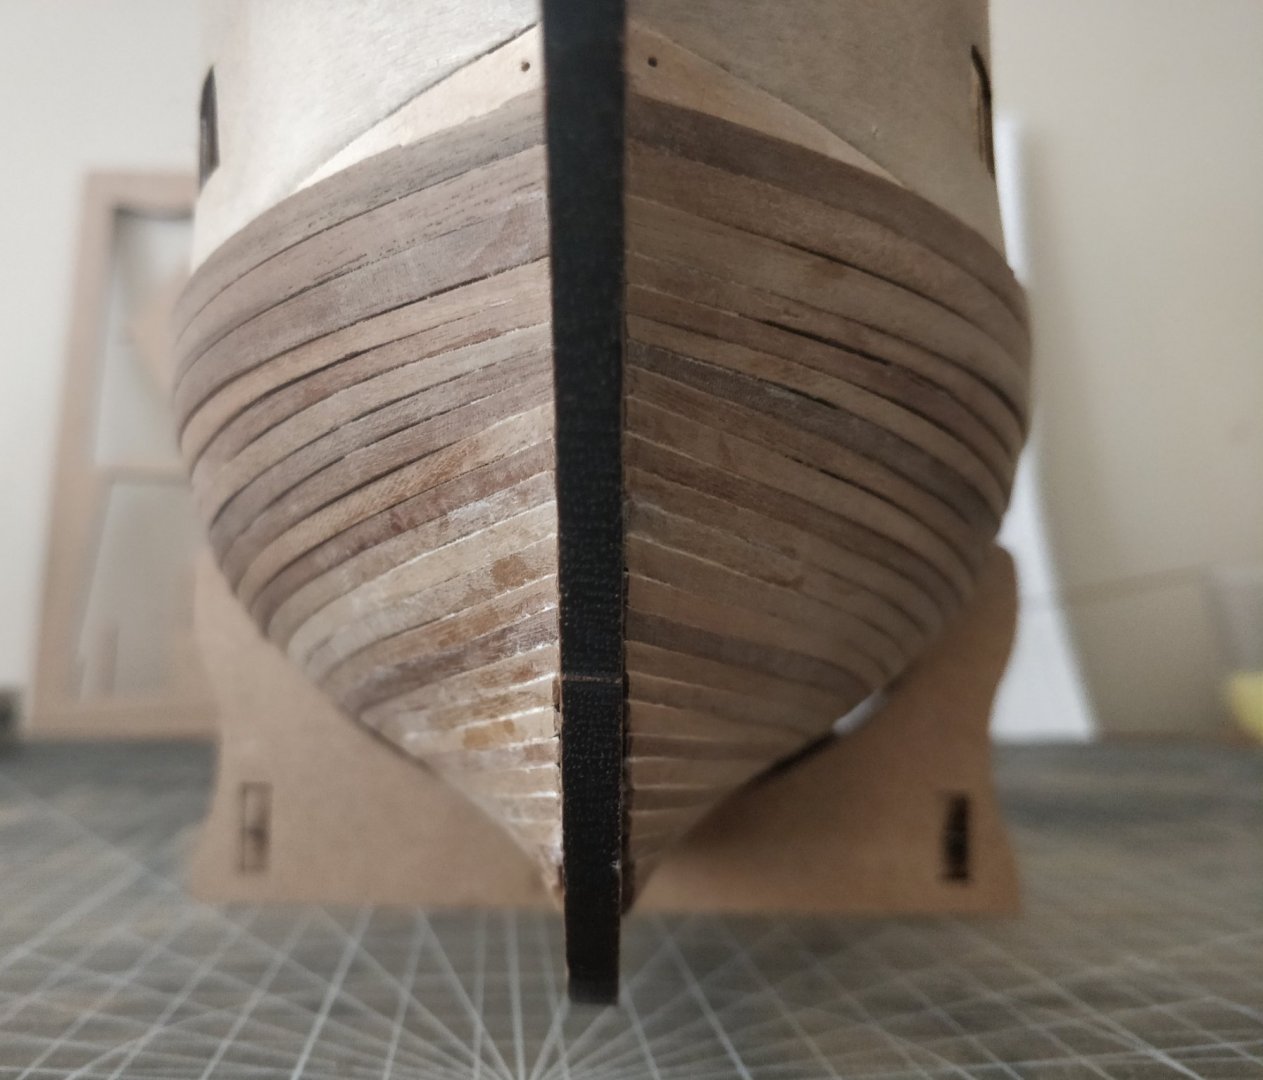
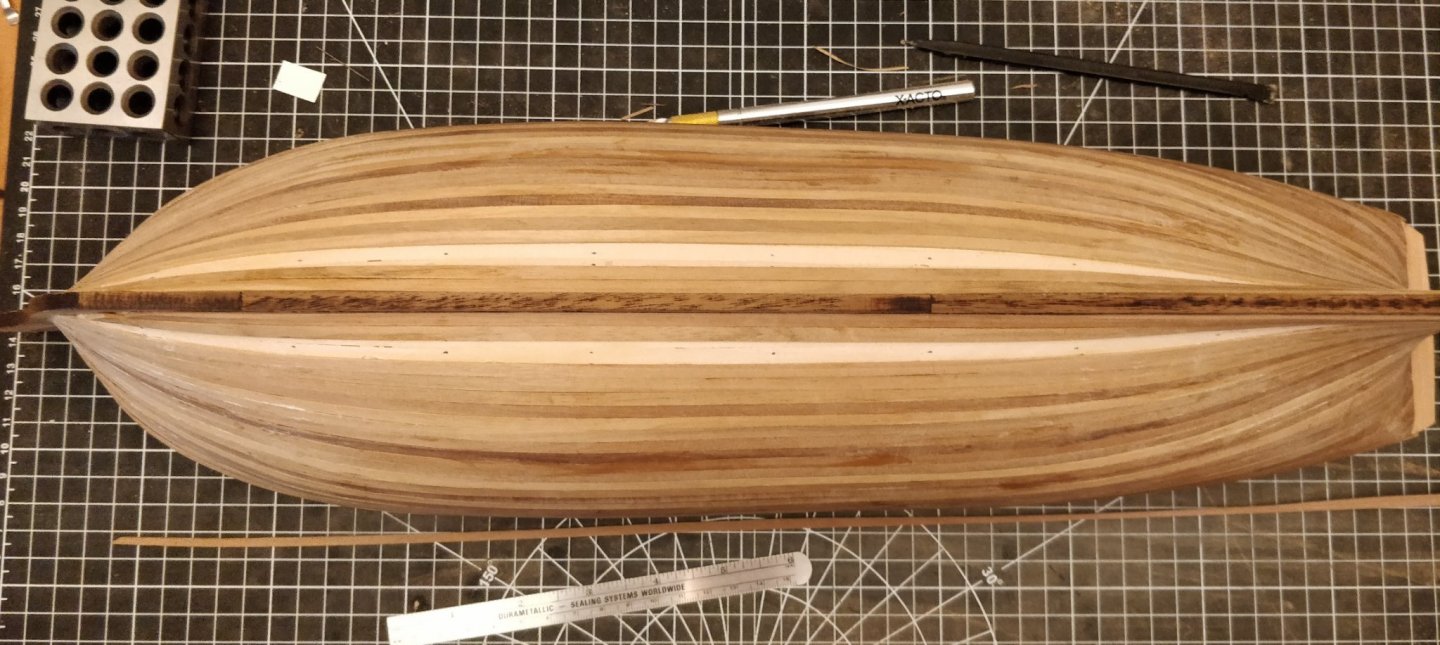
Hello all, I have made very slow progress these past few months but I am finally finished the second planking below the main wale. Pictures below. -starlight

- 82 replies
-
- 4
-
-
- Fly
- Victory Models
- (and 2 more)
-
Looks great, Richard. I wish I had done scale length planks for the 2nd planking as you did... they look quite nice. -starlight
-
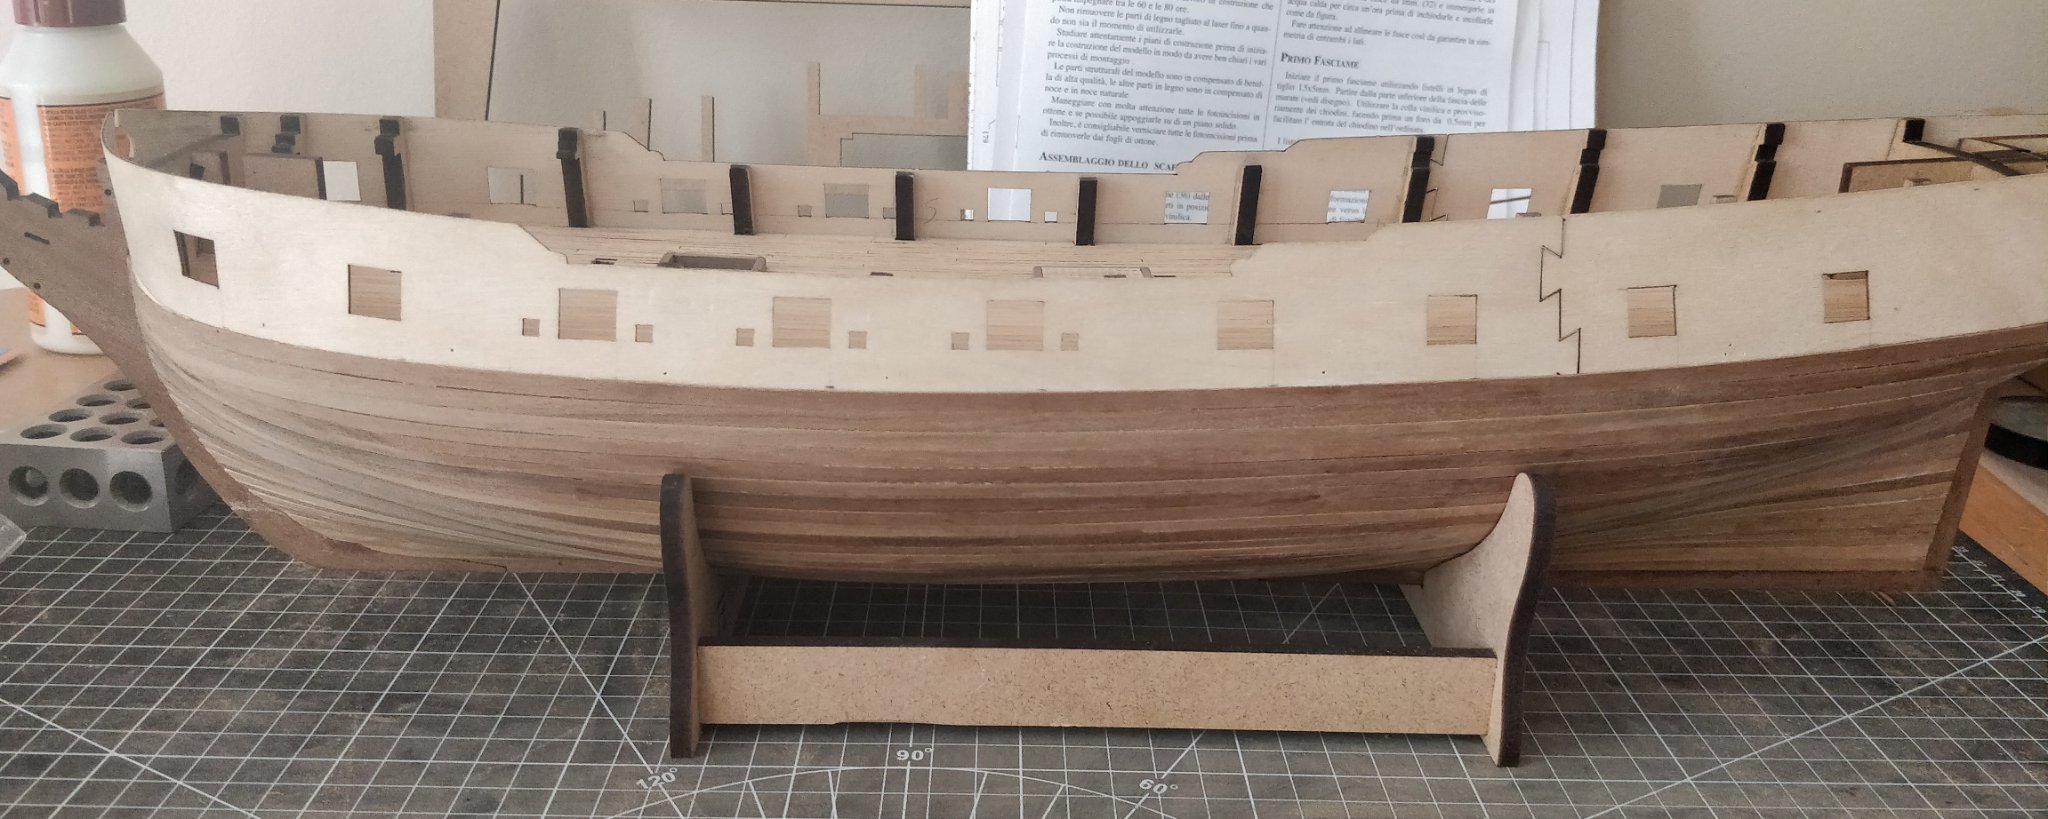
Hello to all, I have not been able to dedicate much time to my ship since my last update, and I can see that I have fallen behind significantly compared to the other Fly/Pegasus modelmakers. I am slowly progressing on the second planking, although by my reckoning I am only averaging one strake per side per week. I fear I will be stuck on this stage of the build for quite some time. Pictures below. -starlight
- 82 replies
-
- 4
-
-
- Fly
- Victory Models
- (and 2 more)