starlight
-
Posts
146 -
Joined
-
Last visited
Content Type
Profiles
Forums
Gallery
Events
Everything posted by starlight
-
Hi Dave, take a look through this thread: https://modelshipworld.com/topic/21776-carriage-gun-rigging/ I have found it to be an invaluable resource, since I am rather ignorant on the intricacies of gun rigging. Regarding the breeching line: "[it] was roughly 1/3 the diameter of the shot, and was long enough (3 times the length of the cannon bore) to allow the cannon to move about a foot or two inboard of the bulwark to give the gun crew room to swab and load the cannon." What caliber are the guns for LN? I would guess they are supposed to be 4 pounders but I also suspect Amati has supplied the massively oversized pieces that I had on Fly. Historical accuracy aside, your choice of rope size may also be dictated by the ring/eye bolts and blocks that you use. These will have to match or they will look awkward. Not sure about LN but for the Fly kit I don't think Amati actually made provision for rigging the guns... thus I doubt they would have supplied any line for it. I would advise you to purchase from Syren or Ropes of Scale or look into making your own. I'm interested to see what advice you get from more experienced users since I will be doing gun rigging soon as well. -starlight
- 362 replies
-
- 3
-

-
- Amati
- Lady Nelson
- (and 2 more)
-
Dave, do you clear-coat your parts after they are blackened? From what I understand, the selenium produced by the blackening process does not actually bond to the brass and therefore is susceptible to flaking/chipping. You may have already seen this thread:
- 362 replies
-
- 2
-

-
-
- Amati
- Lady Nelson
- (and 2 more)
-
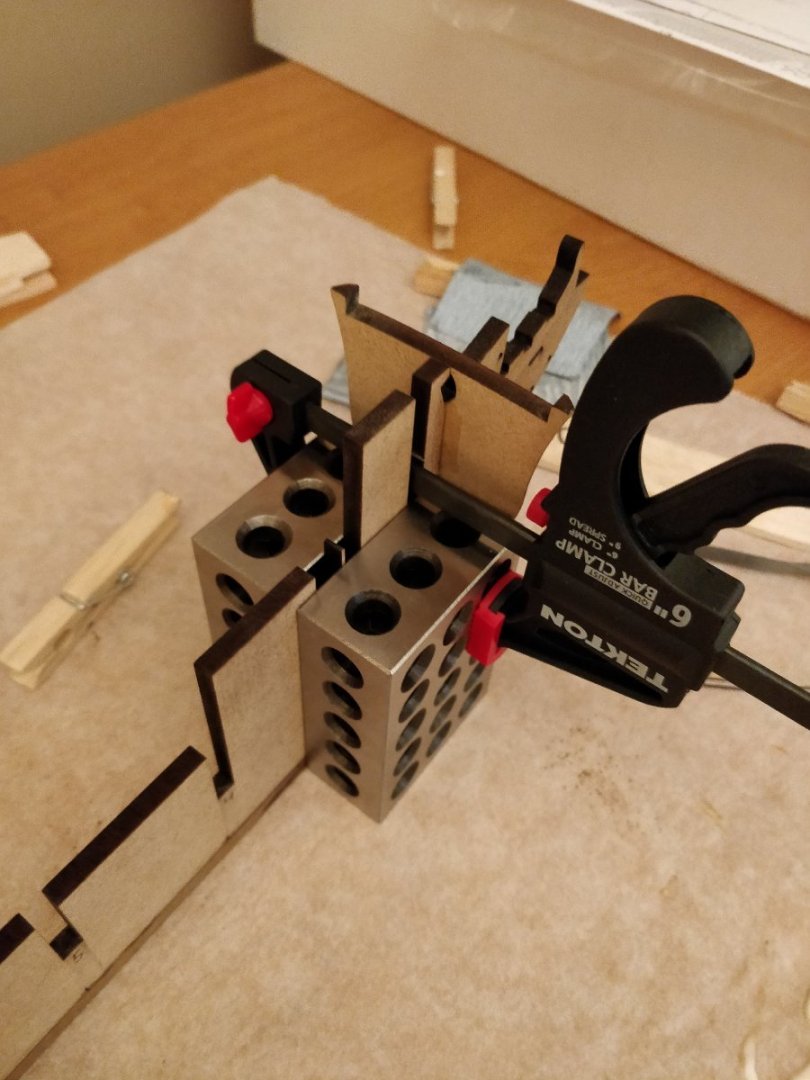
Hi JGoff, I also used 1-2-3 blocks to hold the bulkheads square on my build and they worked fairly well. Probably not enough clamps on the below image but you get the idea. One thing to be aware of: if you have excess glue coming out of the joint, it will get onto the blocks and will require a good cleaning to true the surfaces up again (ask me how I know). -starlight
- 83 replies
-
- 2
-
-
- Lady Nelson
- Amati
- (and 2 more)
-
Hm... that is troubling. My Amati kit probably has these same parts. I will give one a try today and let you know. -starlight
- 362 replies
-
- 2
-
-
-
- Amati
- Lady Nelson
- (and 2 more)
-
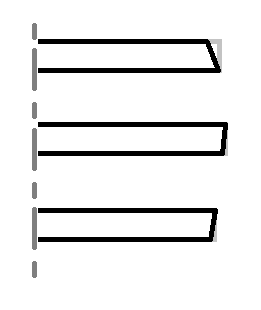
Hi Rudy, in general you should leave one edge as-is and chamfer the other edge. If the bulkheads are laser cut you can use the laser char as a visual guide, i.e. leave just a tiny sliver of char. I made a quick drawing which I hope will help. In grey is the bulkhead before fairing, in black is after. Cheers, starlight
-
@allanyed, thank you for looking in on my build. I definitely agree that 3D printing cannon barrels is the way to go from a cost and simplicity standpoint, and I am glad that so many experienced modelers are embracing the technology. As for myself, having used 3D printing so much for school, I wanted an opportunity to learn some new techniques such as blackening brass. In any event, the Amati kit guns are unacceptable to me and are probably the worst part of the kit I have encountered thus far. Based on my experience there should not be any problems with the breech ring. This guide for SLA printing recommends a minimum hole diameter of 0.5 mm, but you can probably go smaller for shorter holes. The worst case scenario is that the hole closes off, and you just have to drill it out again. Feel free to PM me if you need help generating an STL file. Cheers, starlight
- 82 replies
-
- 1
-
-
- Fly
- Victory Models
- (and 2 more)
-
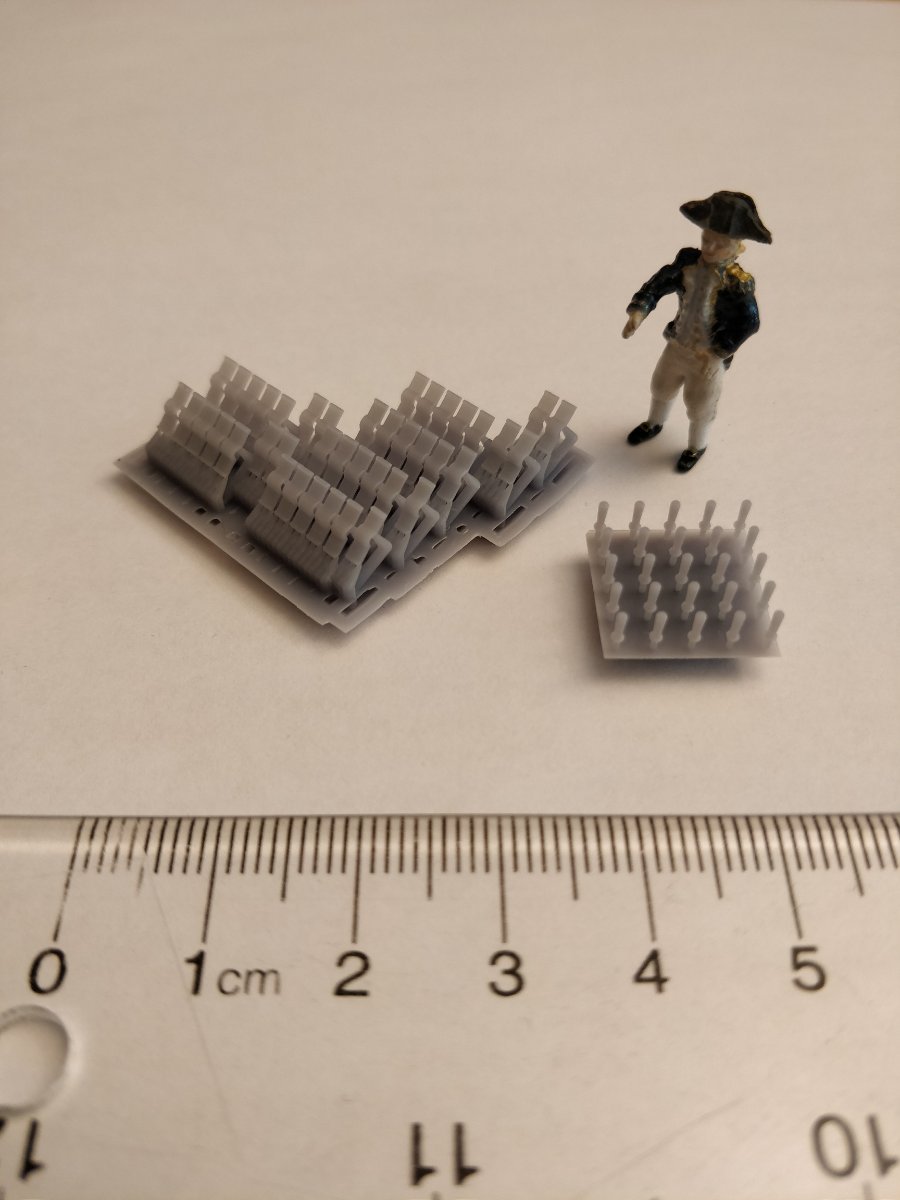
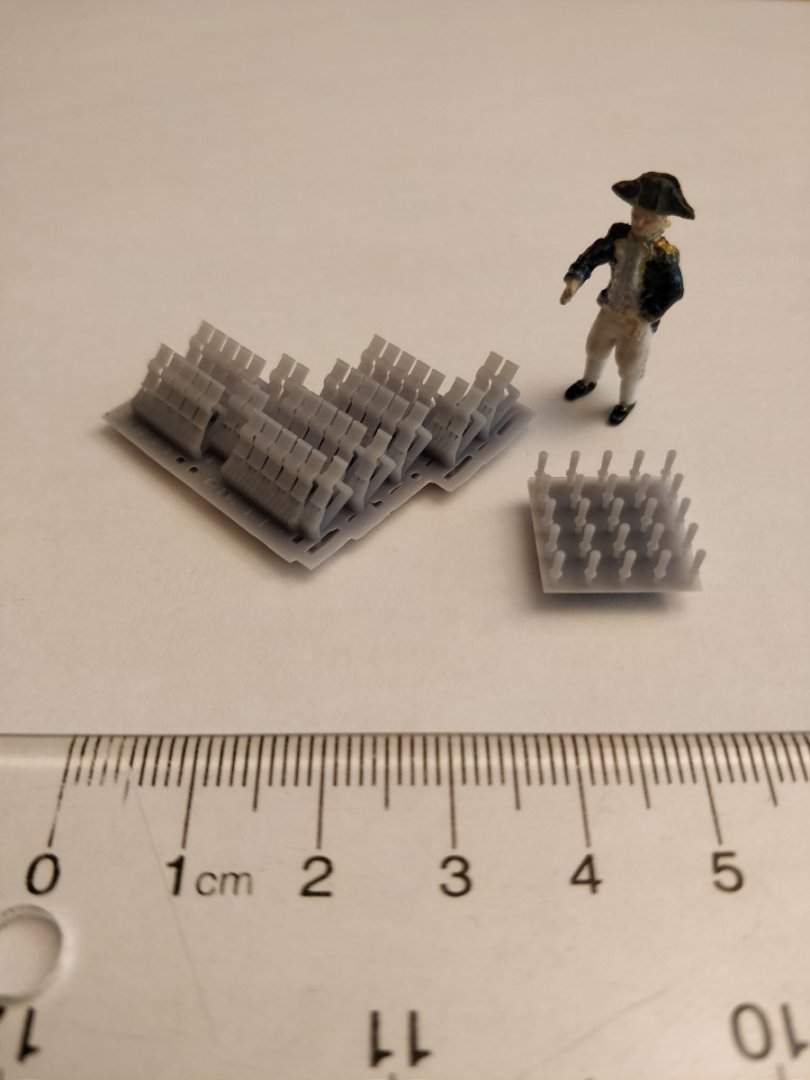
Just a small update for today. I was not confident in my ability to shape 16 identical quoin handles out of wood, so I once again resorted to 3D printing. The same goes for the cap squares. Given that I am almost certain to lose a few of them, I made spares. Here is the captain admiring the products of a technology from 200 years in the future. -starlight
- 82 replies
-
- 3
-
-
- Fly
- Victory Models
- (and 2 more)
-
Masa, you might not be an expert builder yet, but you produce some of the most detailed and instructive diagrams I've seen on MSW. Keep up the good work! -starlight
- 77 replies
-
- 4
-
-
- Santa Maria
- Artesania Latina
- (and 1 more)
-
Great work, Tim! It's been a pleasure to have followed your log since the beginning. -starlight
- 164 replies
-
- 2
-
-
- fly
- Victory Models
- (and 4 more)
-
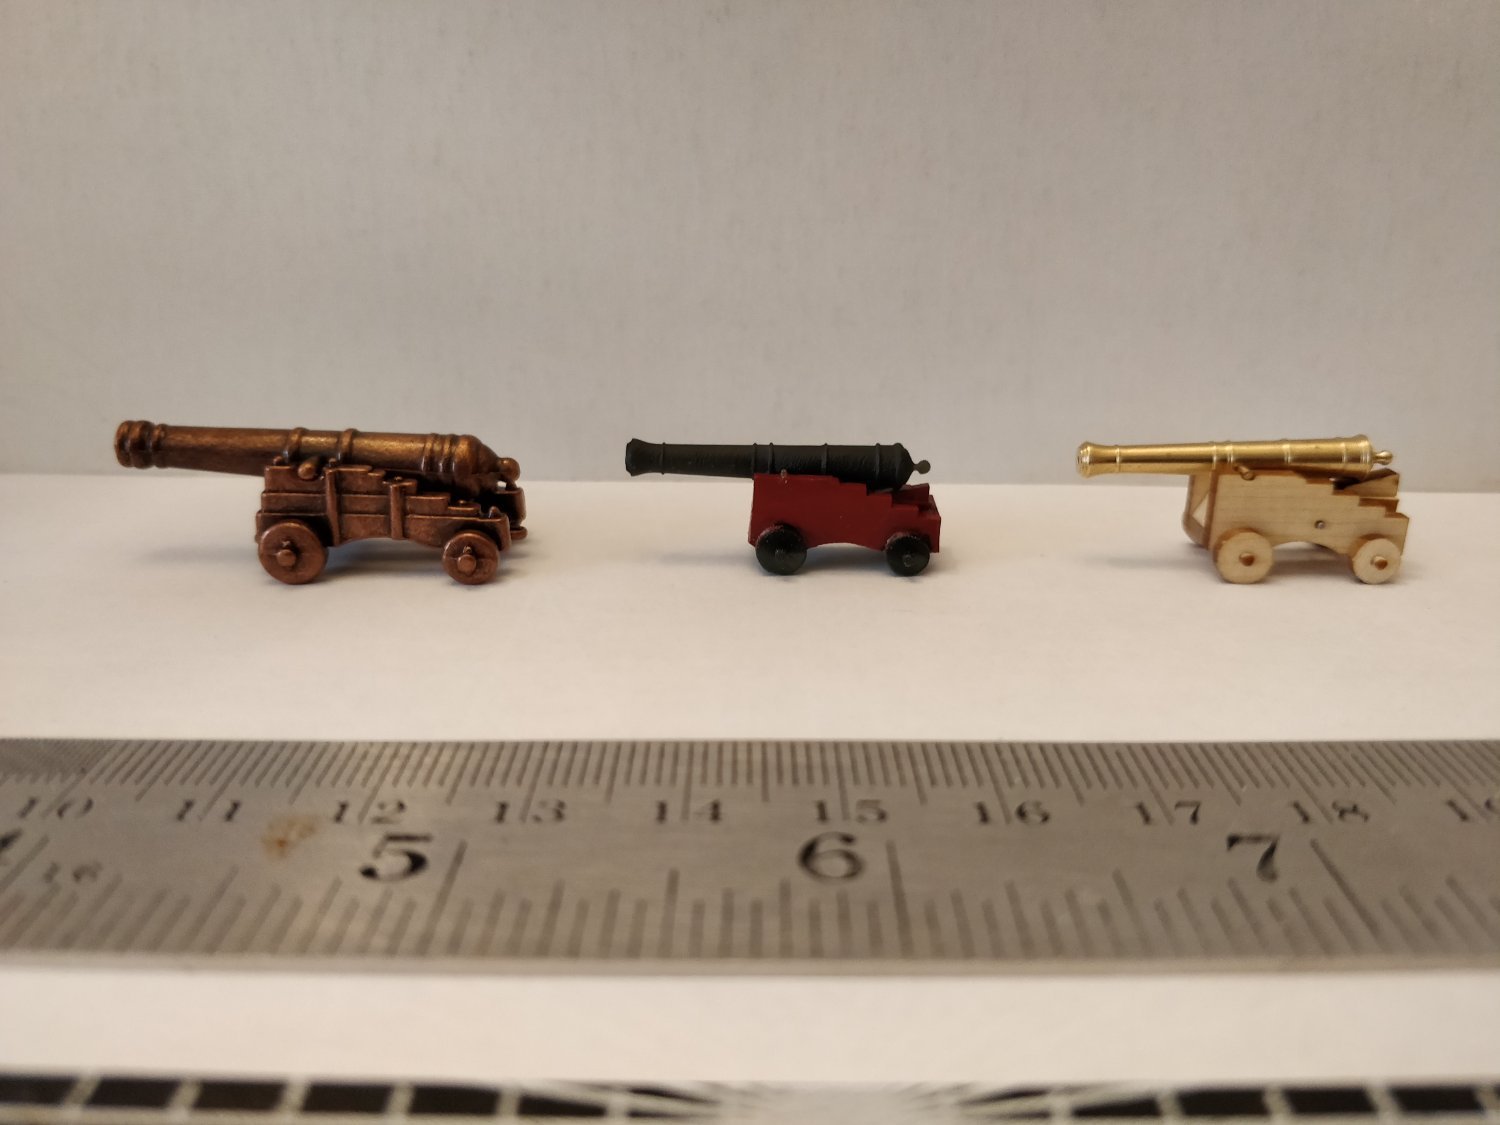
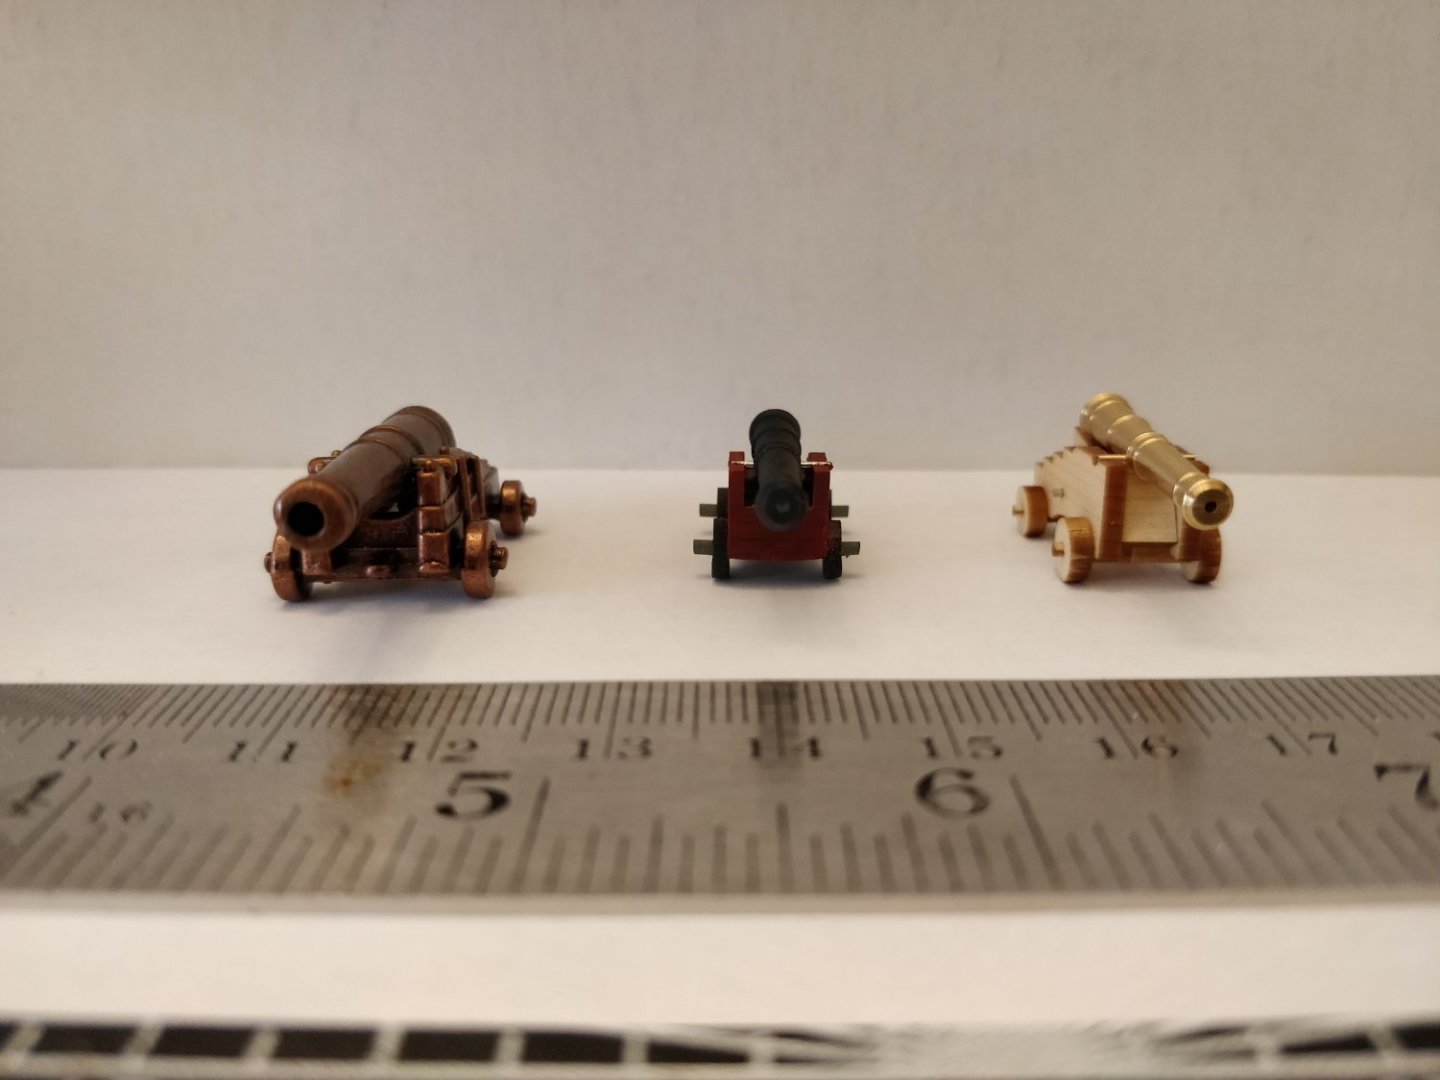
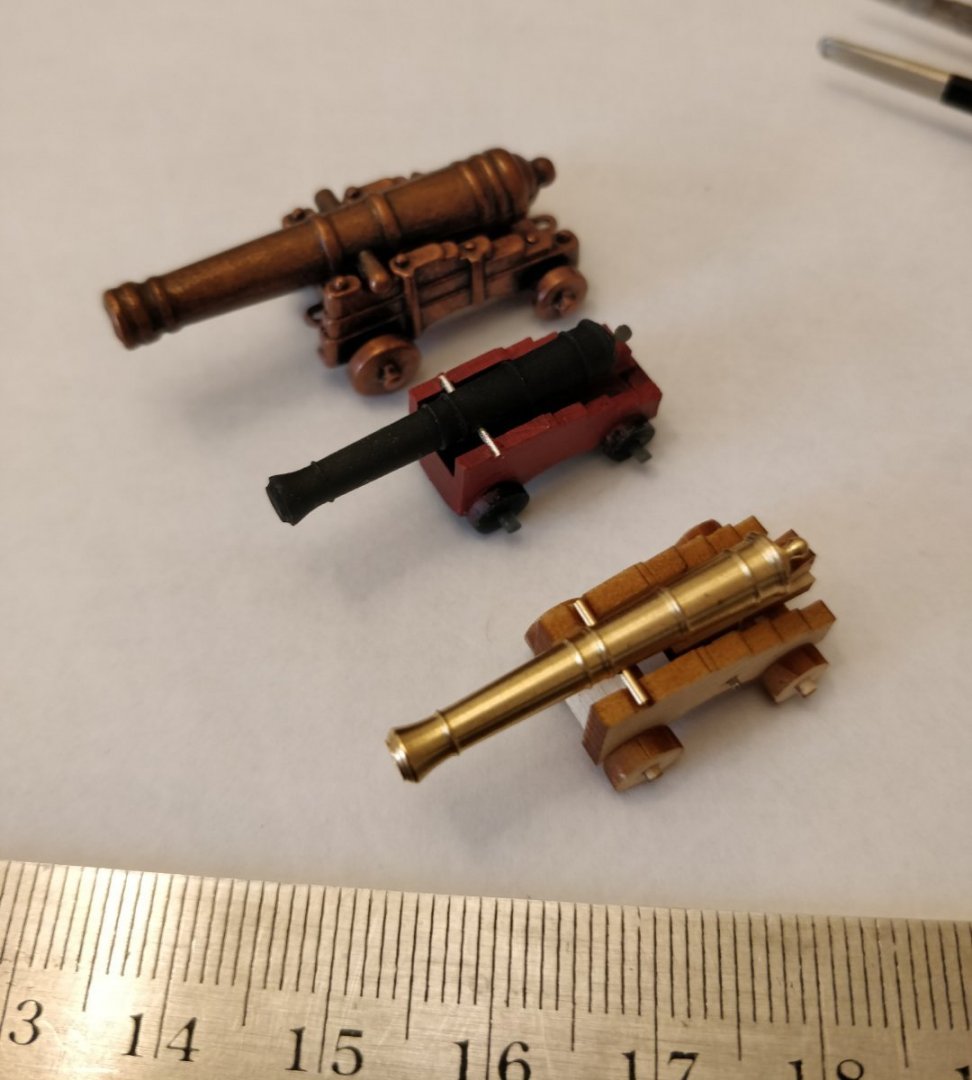
The port stops have been repainted and I am comfortable setting aside that part of the build for now. As with most Swan-class kit builders, I was not satisfied with the Amati guns that came in the kit and looked to replace them. I vacillated for many weeks on different options: brass guns and wood carriages from Syren resin guns from various sources printing my own guns and scratch building the carriages In the end I decided to buy the parts from Syren. As part of my decision-making process, I did print a rough mockup to see how they would look. Below are some images of a kit gun, my prototype, and a Syren gun (from left to right). I will now proceed with assembling the carriages and blackening the guns. -starlight

- 82 replies
-
- 5
-
-
- Fly
- Victory Models
- (and 2 more)
-
Dave, Have you looked at the ones from Syren? https://syrenshipmodelcompany.com/turned-brass-cannon.php#!/Turned-Brass-Swivel-Guns-13-16-long-20-75-mm-1-4-scale-4-per-pack/p/50194771/category=5764759 Another option would be to 3D print them if you have access to an SLA printer. There are plenty of design files floating around. -starlight
-
Rudder painted white?
starlight replied to Dave_E's topic in Painting, finishing and weathering products and techniques
Hi Dave, Perhaps an expert can chime in here, but my thoughts are: The white "paint" was not just for show in real life, it was an anti-fouling coating to inhibit the growth of barnacles and other marine life which would increase the hydrodynamic drag on the hull, slowing the ship down. Therefore it would make sense to paint everything below the waterline, including the pintles and gudgeons (the two parts of the rudder hinges). Whether or not you choose to as an aesthetic matter is a different story entirely. -starlight -
The sheer strake
starlight replied to rudybob's topic in Building, Framing, Planking and plating a ships hull and deck
Hello rudybob, (Disclaimer: I have not built this model before) I don't see why the sheer strake would not follow the bulkheads. That is after all what they are there for. A quick search for "English Pinnace" on MSW turned up a number of useful build logs showing how this plank should lie: https://modelshipworld.com/topic/22234-18th-century-pinnace-by-delf-finished-model-shipways-124-scale-small/?do=findComment&comment=678179 https://modelshipworld.com/topic/27044-english-pinnace-by-ericwilliammarshall-finished-model-shipways-scale-124/?do=findComment&comment=783869 In any case, if you can't get it perfect I wouldn't stress about it since it will be covered up by the decoration as @Jaager mentioned. Lastly, it would really help if you mention what model you are building when posting questions like these. Cheers, starlight -
Judging from how the unstained areas are mostly located at the plank seams, it is likely that the culprit is excess glue, which has has sealed the wood, preventing the stain from penetrating. As Roger above me has said, this glue will need to be removed. It may also be possible to use a solvent to dissolve the glue, but I would test off-model first to make sure there are no unwanted effects. -starlight
-
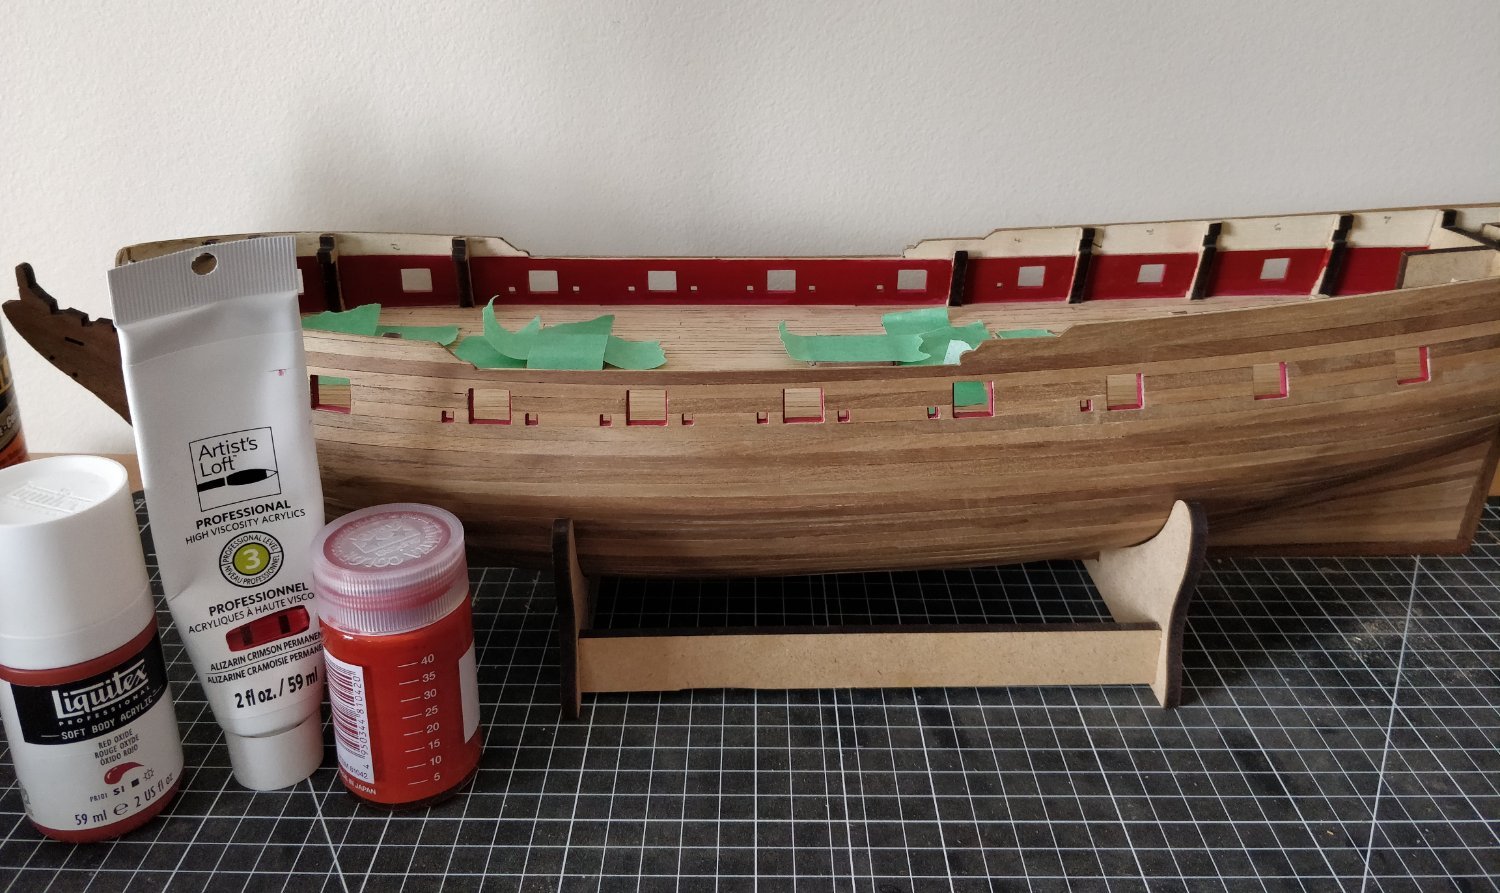
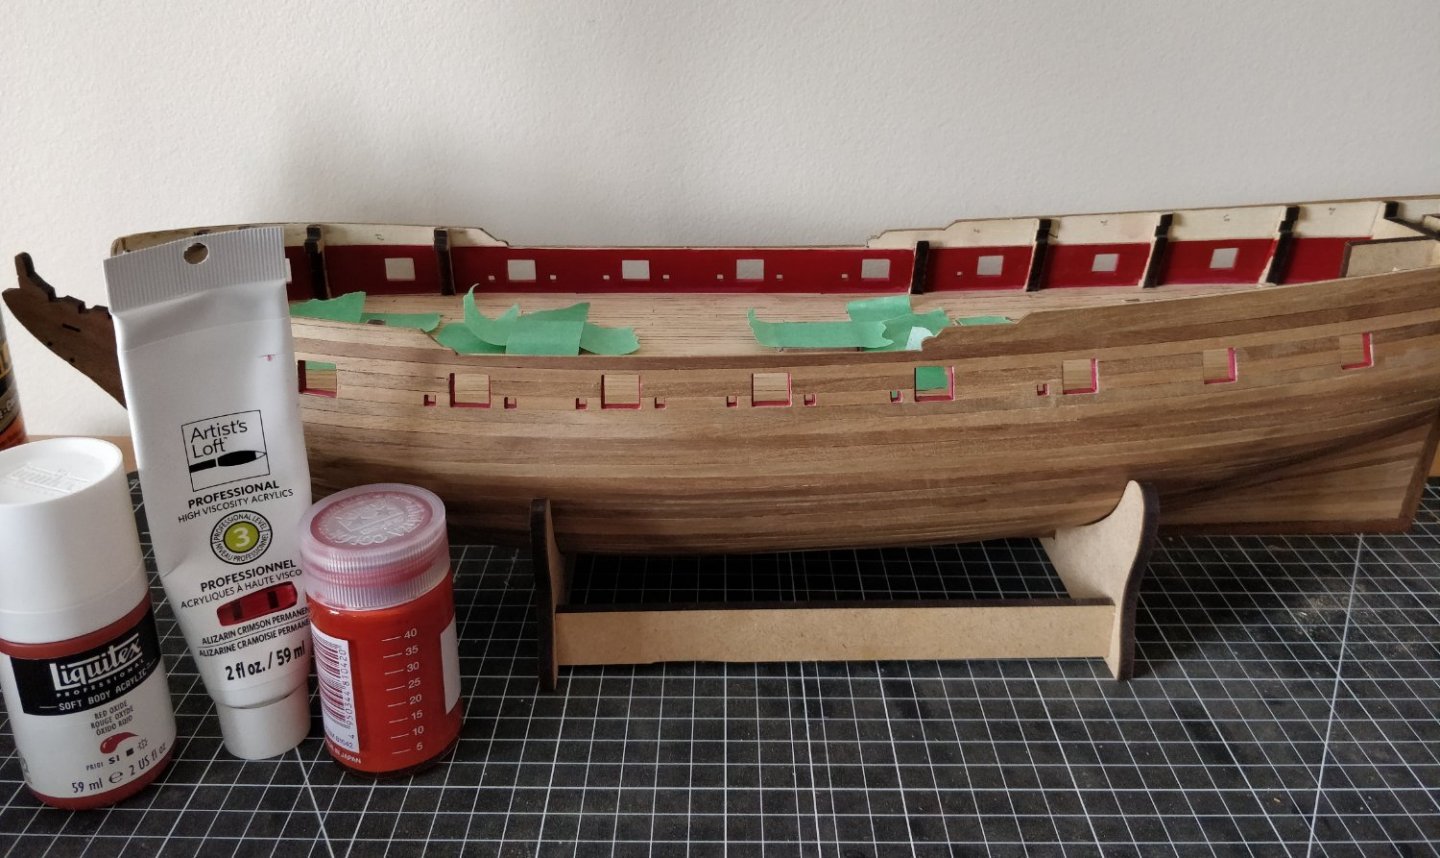
Well, I did mix some paint, and I am much more satisfied with the colour now. I gave the inner bulwarks a few coats to see what it looked like (as much as I could without masking the deck). I used about a 4:1 ratio of Artist's Loft Alizarin Crimson Permanent to Liquitex Soft Body Red Oxide. There is a brown shade to it, but it doesn't come across on my monitor. Ultimately the colour is still probably closer to "red" than to "ochre" but I prefer it that way. Here's a close-up showing the difference. The old paint is visible on the port stops and near the edge of the deck. Since I usually work on this model during the evenings, I never really had a chance to view the paint in bright daylight. A word of caution to other newbie modellers. Now for the monumental task of repainting the port stops (including the outward facing edges...) -starlight

- 82 replies
-
- 6
-
-
- Fly
- Victory Models
- (and 2 more)
-
My metal ruler was wrong.
starlight replied to modeller_masa's topic in Modeling tools and Workshop Equipment
Having heard this specific admonition as well, I decided to finally look it up. It turns out that "ruler" as a measuring instrument is well attested to in the historical record. For example this line from the Wycliffe Bible (circa late 14th century): "He graueth diligently..bi þe kunnyng of his craft..licne it to an ymage of man, or to sum of beestis; it he comparisowne þurȝdrawinge with a rewler, & make þe colour of it with red & broun." And in Early Modern English, from mathematician Robert Recorde's The pathway to knowledg, containing the first principles of geometrie (1551): "More easyly..may you fynde and make any suche line with a true ruler, layinge the edge of the ruler to the edge of the circle." As I understand it, both "rule" and "ruler" trace their origin to the Proto-Indo-European "hreg", and then to the Latin "rego", and so forth. All this is my overly pedantic way of suggesting that grumpy shop teachers were simply annoyed that "kids these days" didn't use the same words as they did. -starlight -
My metal ruler was wrong.
starlight replied to modeller_masa's topic in Modeling tools and Workshop Equipment
It could be the case that the "zero" has worn down over time on one of the rulers. If you own calipers I would probably just check the ruler against that, since it will typically be made to higher accuracy than the ruler. You can also buy gauge blocks for a reasonable price. A pair of 1-2-3 blocks is cheap and I've found them to be very useful while modelmaking. -starlight -
Thanks Moonbug, I had really hoped to make it work with a single pigment, but everything I've tried has either been too red or too brown. I know a lot of people recommend the Admiralty line of paints, but I'm not sure if I can get them cheaply. Perhaps I will just bite the bullet and mix some paint. -starlight
- 82 replies
-
- 2
-
-
- Fly
- Victory Models
- (and 2 more)
-
Hi Moonbug, Could you elaborate on this? I think the bridle ports and the aftmost 3 gunports are supposed to be about 1.5 mm narrower than the other ports, but are there any other differences? I am also confused about the shape of the port doors (lids?). The kit-provided ones are completely square, but the ports themselves are not since the two horizontal sides follow the sheer(?) of the deck... so which one is wrong? Thanks! -starlight
- 419 replies
-
- 3
-
-
- Victory Models
- Pegasus
- (and 2 more)
-
Hello wefalck, this is some really impressive work and of a subject from what I feel is an unjustly forgotten period of history. I had a few questions about your recent posts if you will indulge me: Please forgive my lubberly ignorance, but are the forecastle deck and the quarterdeck the same thing on SMS Wespe? I only ask because you previously called it the forecastle. Do you have any more information on the theory behind the radial planking pattern? I've not seen this design on later warships, so perhaps the benefit did not outweigh the cost? Also, you mentioned that you remade the deck because you wanted it to look more like teak. Does this mean that this deck and the one in the barbette would be planked from different wood species (in reality)? Thanks! -starlight
-
Ah, very creative Moonbug. I dare say these wings look much better than those of the kit figurehead. -starlight
- 419 replies
-
- 4
-
-
- Victory Models
- Pegasus
- (and 2 more)
-
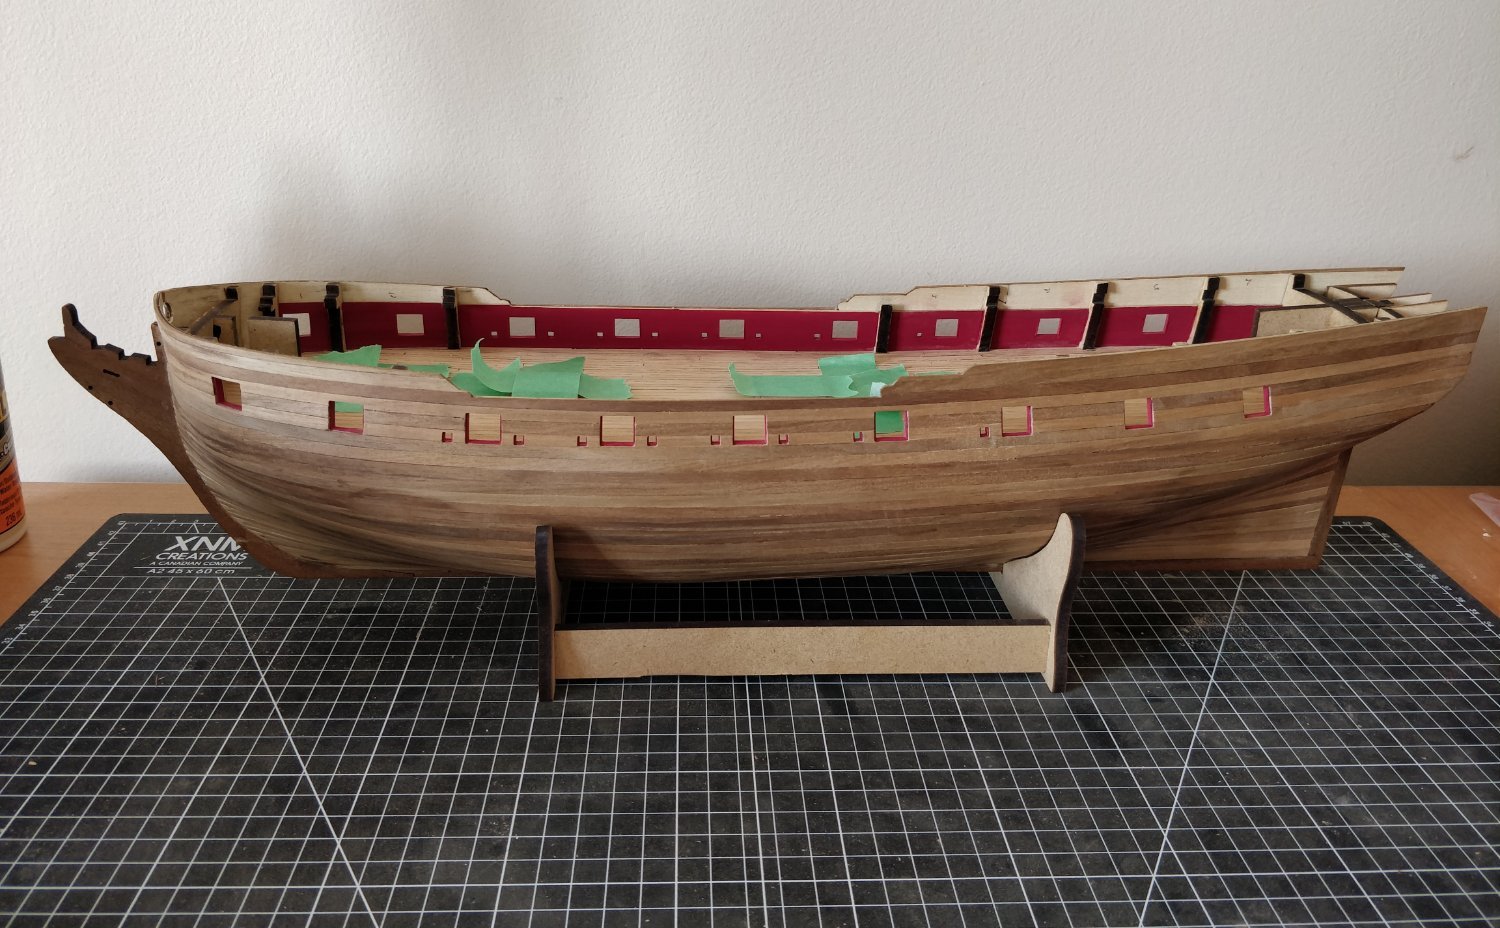
I finished lining all the gun and sweep ports, and gave the inner bulwarks a coat of paint. With this larger surface now painted I am not satisfied with the colour... it looks overly cherry-red in the daylight. I will probably spend some more time looking for a replacement. -starlight

- 82 replies
-
- 7
-
-
- Fly
- Victory Models
- (and 2 more)
-
copyright
starlight replied to michael mott's topic in Using the MSW forum - **NO MODELING CONTENT IN THIS SUB-FORUM**
I believe the question is: instead of directly posting a copyrighted image (say of HMS Victory), could one instead link to the Google search page containing that image, eg: https://www.google.com/search?tbm=isch&q=hms+victory You could then play around with the URL parameters so that the Google search returns a specific set of images. Although, why not just link to the externally hosted image itself, which also does not infringe on copyright? -starlight -
Wow, that assembly came together really quickly and looks great. Thanks for taking all these close-up pictures. -starlight
- 419 replies
-
- 2
-
-
- Victory Models
- Pegasus
- (and 2 more)
-
I had this problem on my HMS Fly build. After filling and sanding the first layer of planking, I think some of the filler broke off on the interior and started rattling. It bothered me to no end, so I shook the model strategically to determine between which bulkheads the debris was located in, and cut out a small piece of the planking to remove it. It was only the first planking layer, so not a big deal. -starlight