HOLIDAY DONATION DRIVE - SUPPORT MSW - DO YOUR PART TO KEEP THIS GREAT FORUM GOING! (83 donations so far out of 49,000 members - C'mon guys!)
×


DaveBaxt
-
Posts
1,324 -
Joined
-
Last visited
Content Type
Profiles
Forums
Gallery
Events
Everything posted by DaveBaxt
-
I can see from other builds that cutting a rabbet is well worth it and also see that removing a section of the plywood stem and stern and replacing this with a more suitable material such as boxwood is prefereable and as I have some of this in stock will probably give this a go too. Deciding where the best place to remove plywood stem is yet to be decided. As regards the rabbet and how this is best achieved and wondering if it acheivable using a milling machine but think this would be difficult using such a machine. Can the use of a Dremel router attachment and Dremel achieve better results or is the use of a plain old wood chisel be just as effective. Just a few things going on in my mind before I start again.
-
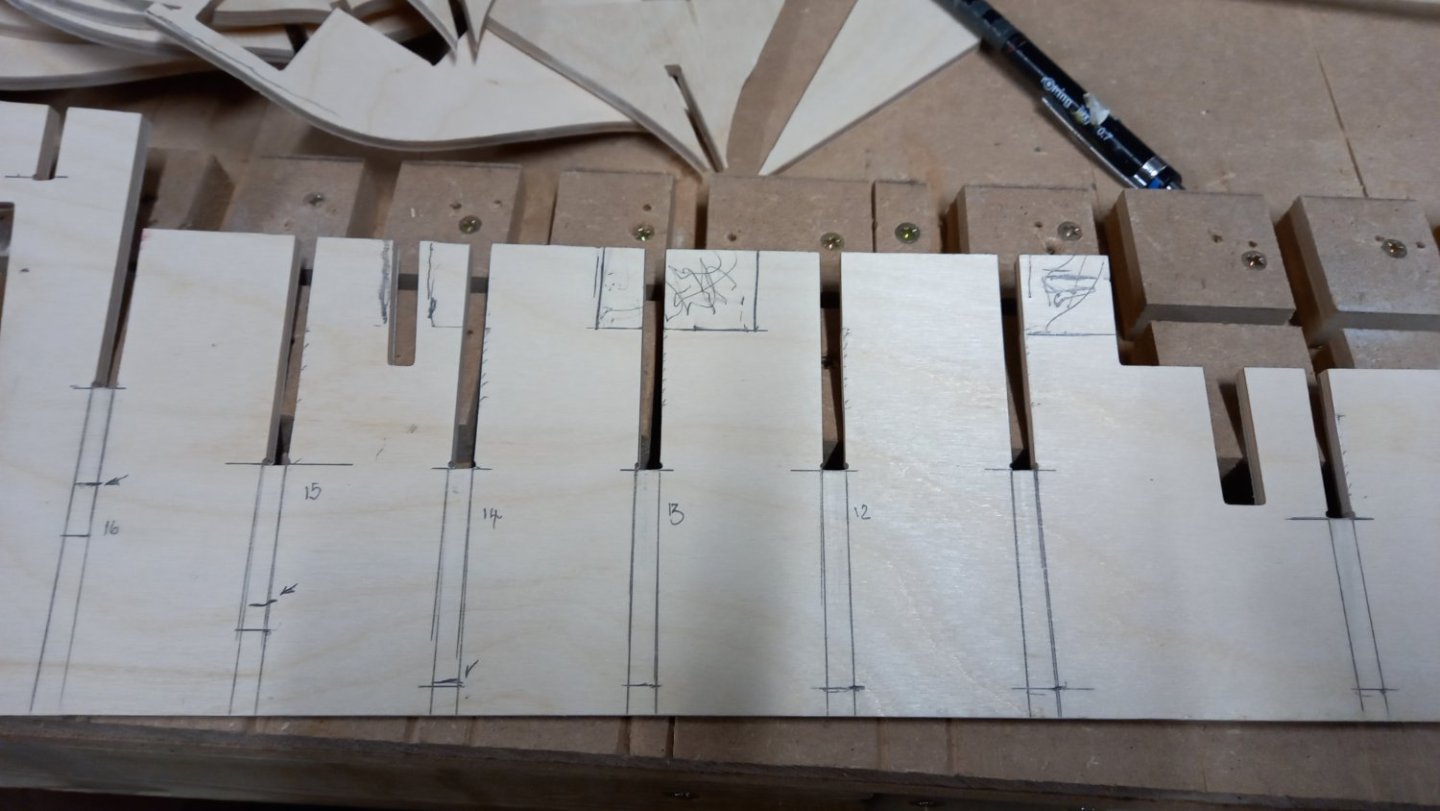
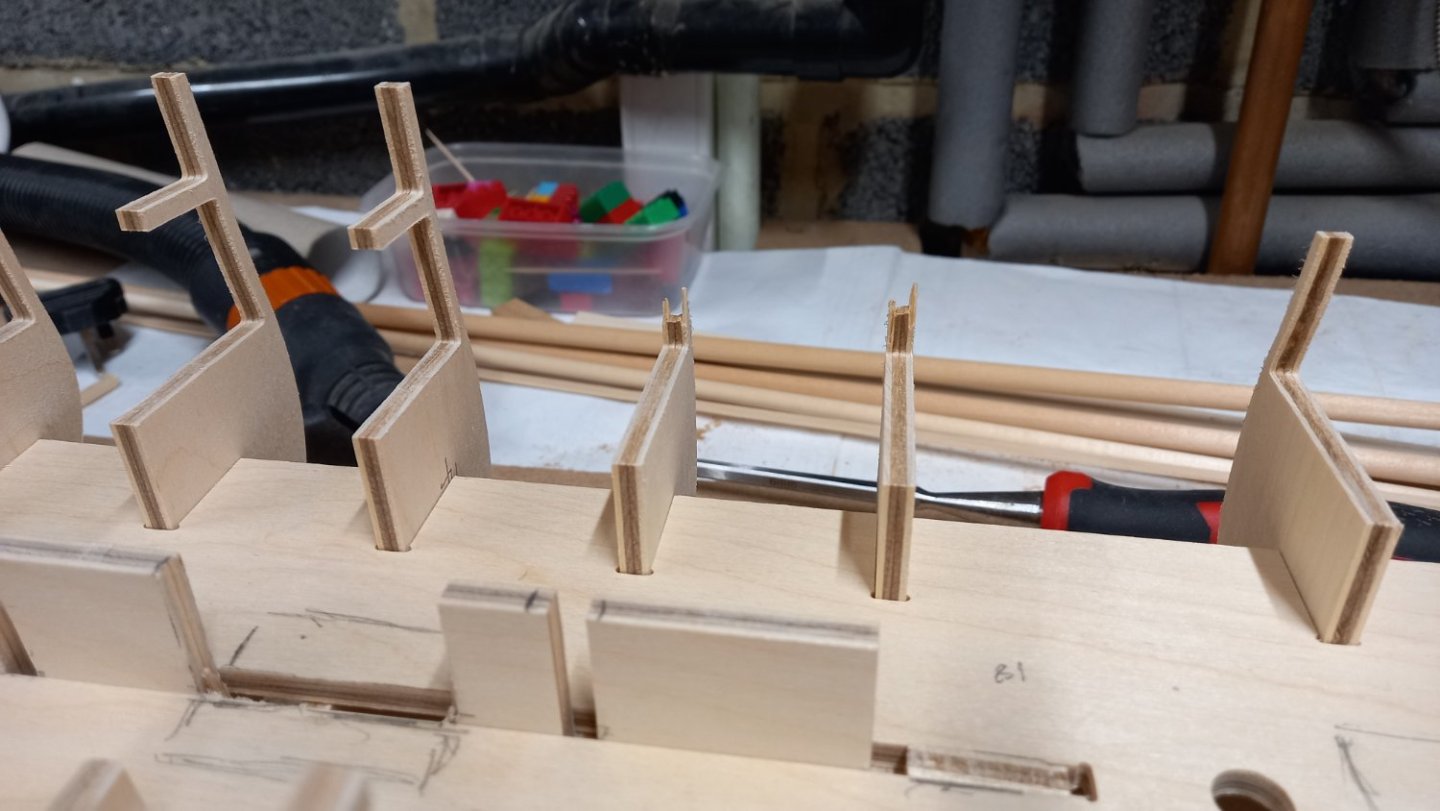
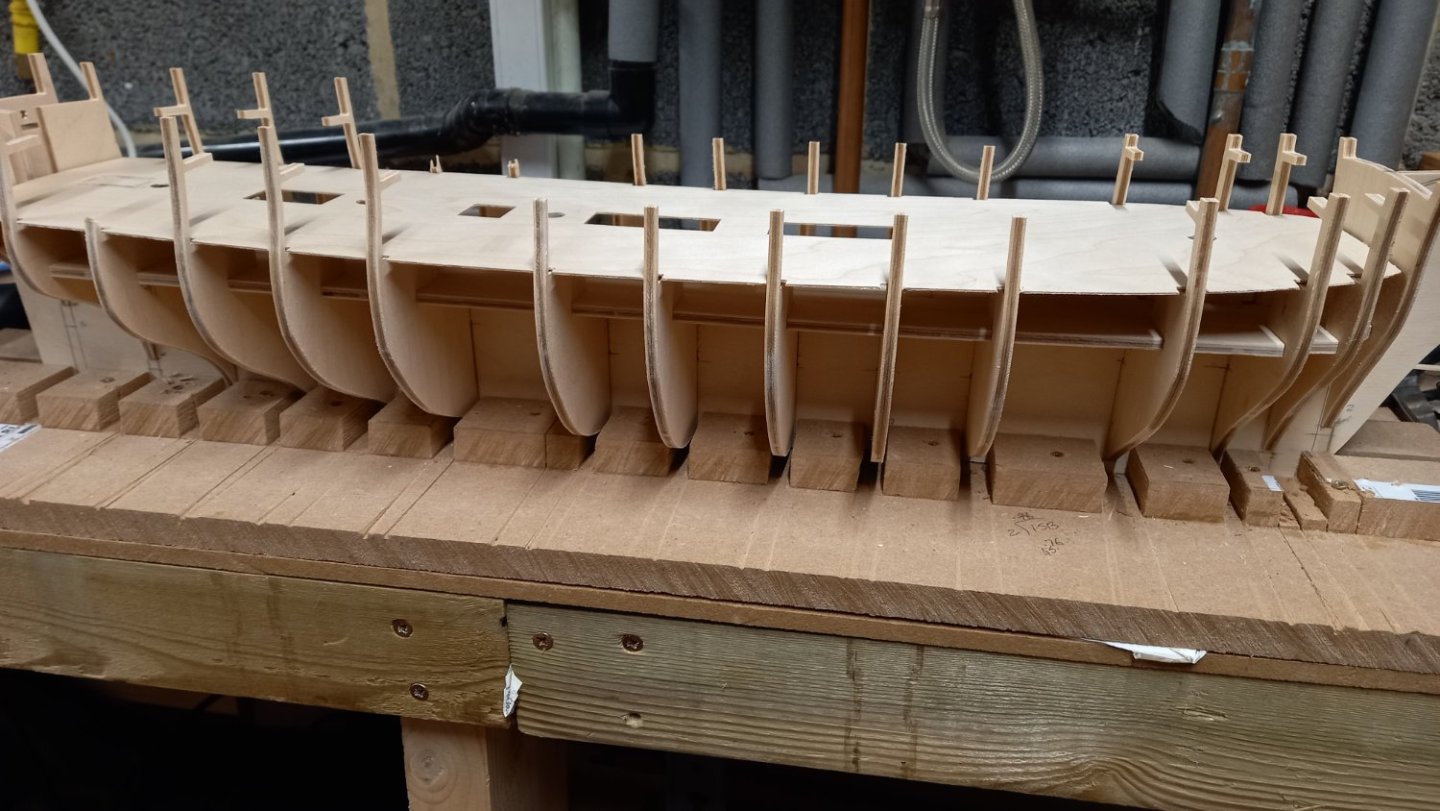
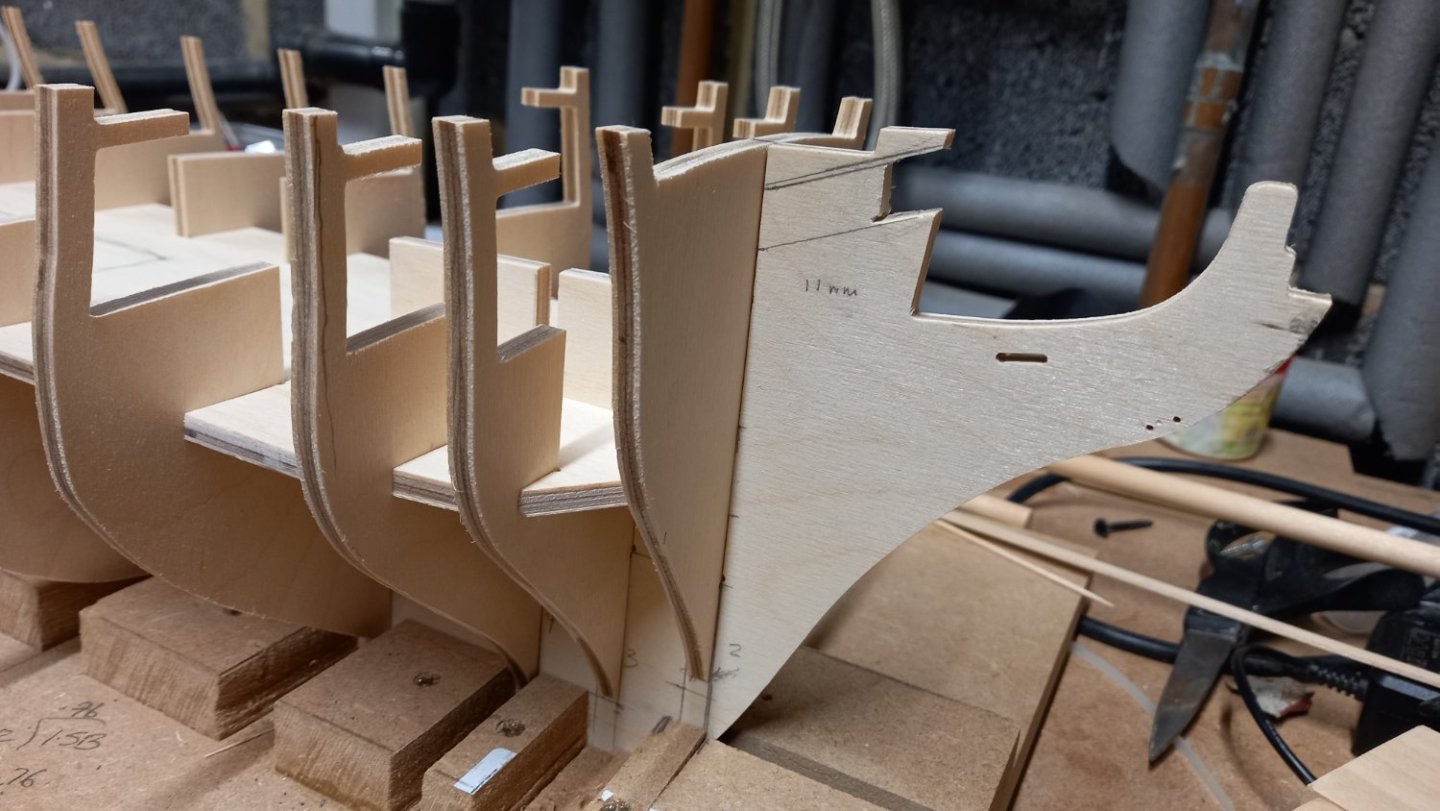
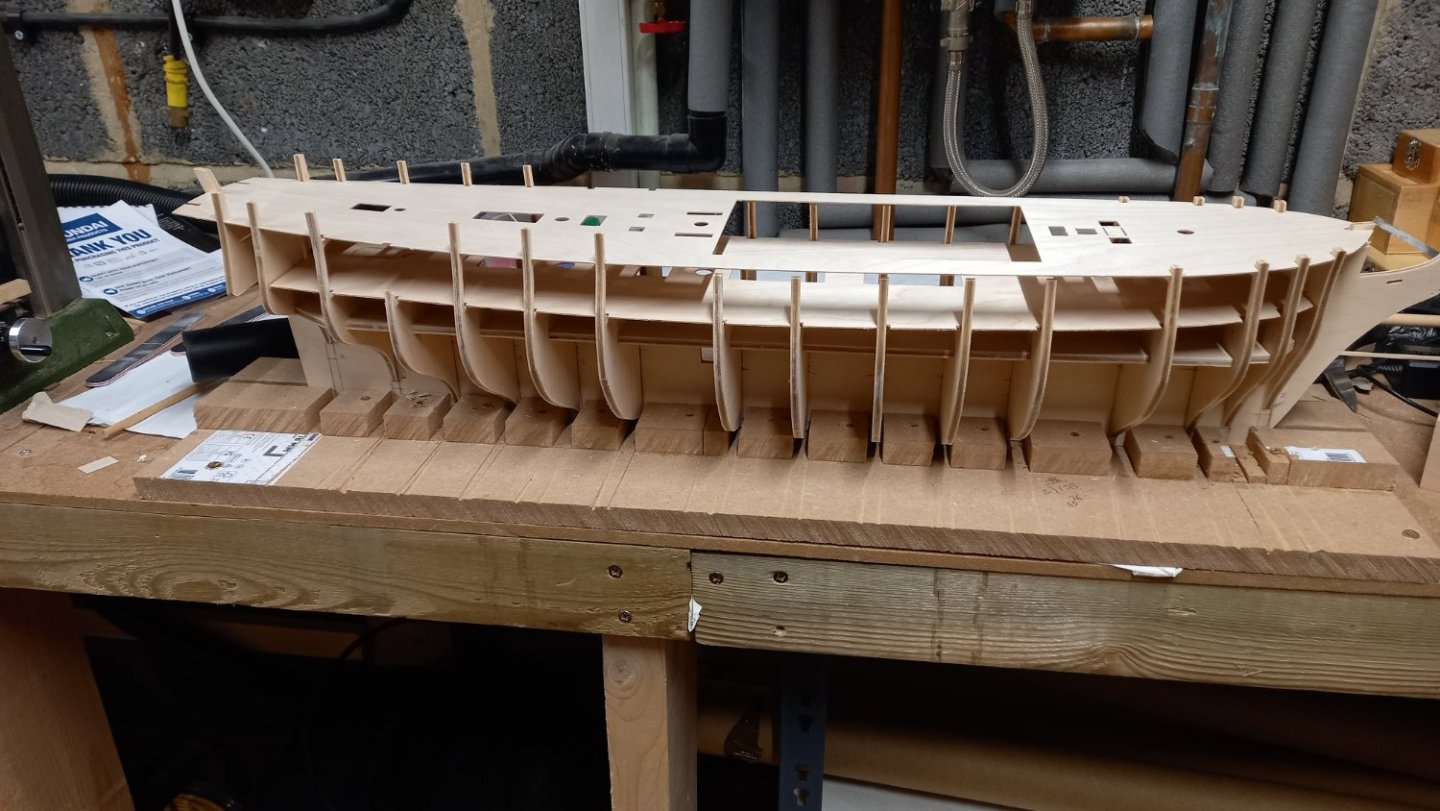
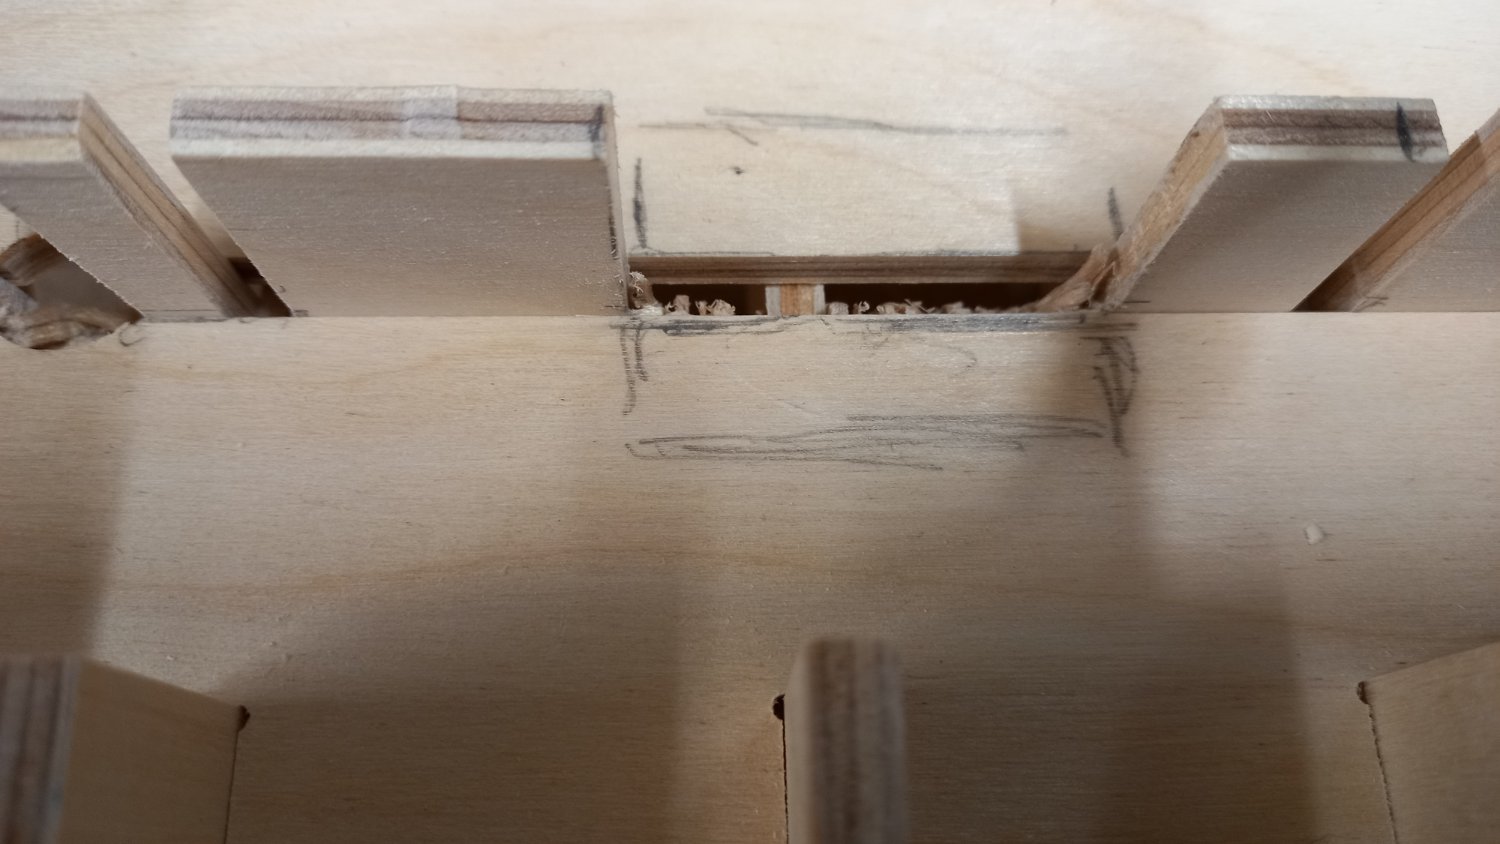
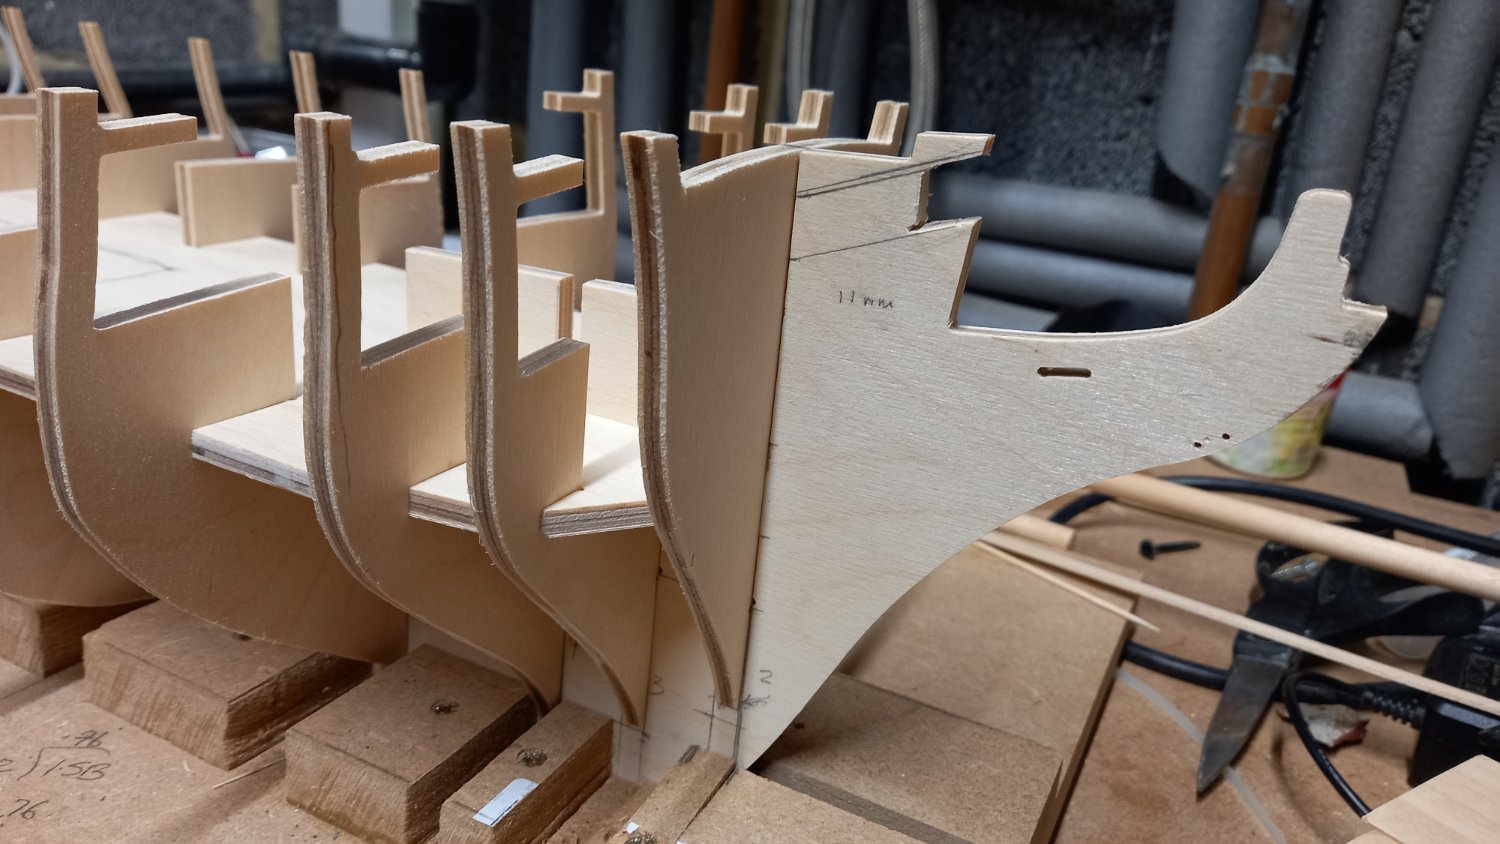
After reading several blogs on this beautiful ship I couldn't resist removing her from the box and taking a look at whats on offer. After the issues I had building the Endeavour ( I am still working on the rigging) the first thing I looked at was the plywood keel and to my pleasant surprise there was only a slight twist at the bow. Instead of using the brackets supplied by the kit for making the initial building board (these were not completely square) I built myself one out of MDF. Once the keel was placed into this and dry fitted the decks everything looks to have squared up nicely including the bow section. I would already like to thank a number of members including Dunock,DavidEN and BeefWellington for there considerable help in pointing out a number of issues with the initial build including the cutwater, the angle of the bowsprit, removal of the section of the false keel to allow some of the lower deck to be planked. The position of the mizzen mast and again it was necessary to remove another section of the keel. It was also mentioned that the first gun port from aft will fall foul of number 3 bulkhead These are all issues I will need to address before gluing takes place but intend to hold fire whilst rigging the Endeavour and given time hopefully will be able to figure out the best coarse of action moving. Here is some photos of major patys dry fitted. Notice already I have broken off a number of the upper deck supports. Not a great start. Another reason I chose to build this model is due to being the proud owner of The AOTS series and therefore will adhere to this as close as possible and perhaps consult bothe James lees and Lavery for anything which needs further clarity.One thing which I have notice with the this Caldercraft kit is the sizes of the masts, which are the same as the Endeavor. Although it is once again my intention of building the masts from sqaure boxwood stock, I notice that the according to AOTSD the main,fore, mizzen and bowsprit should be 11.1mm,9.7mm,7.3mm and 11.1mm consecutively . So I currently only have boxwood up 10mm thick. So I will need to order some 12mm thick for this job. I am still not sure whether or not I need to make a rabbet or not and to also replace the stem with boxwood. At present I am unsure of the drawing if I need to add a walnut keel and stern post too, or I actually need to cut into No 3 bulkehead to allow the line up of No 1 gunport or can I just move the gunport at a later date. Any advice in this area would be appreciated.

-
Using a serving Machine. ( Syren Serv o matic)
DaveBaxt replied to DaveBaxt's topic in Masting, rigging and sails
Thanks Chuck. I have a feeling it might be something to do with that. I will try again without too much pressure and see if this helps. If not perhaps I could try a different type of serving thread and see if this helps. Best regards Dave -
There are a number of Sphinx build logs but I have been looking forward to you starting this one Derek and I look forward to watching your progress. It already looks like you are off to a great start.
-
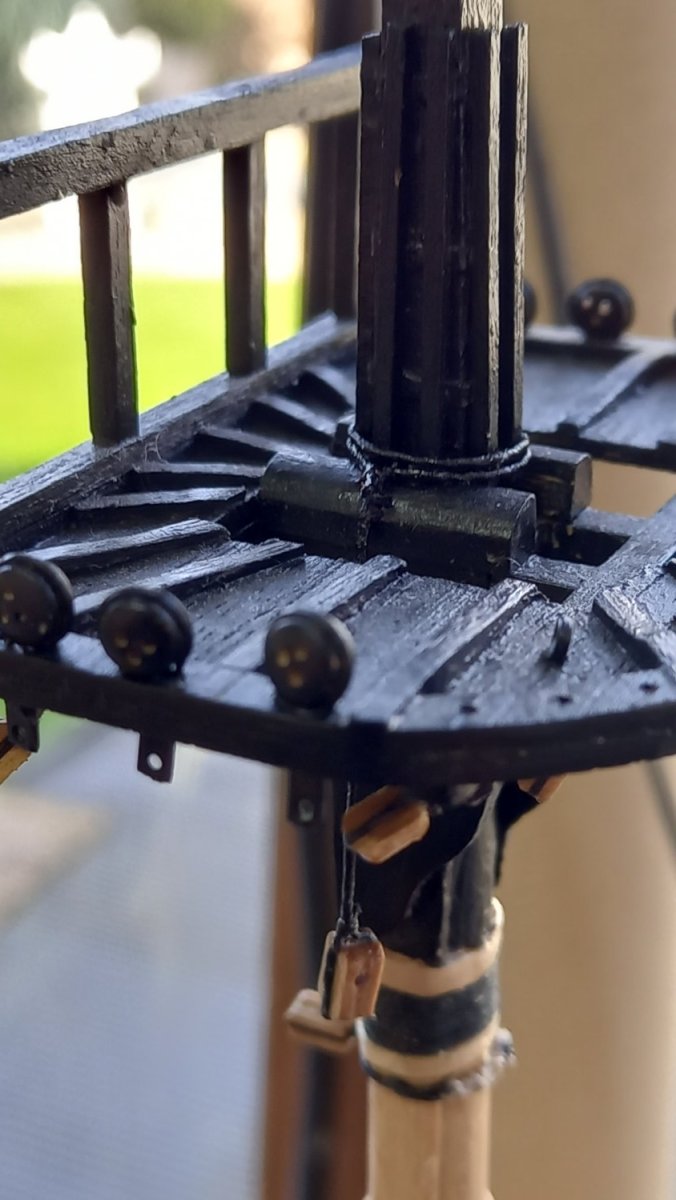
Really nice work on those tops and such an upgrade on the tops supplied by Caldercraft.
-
Using a serving Machine. ( Syren Serv o matic)
DaveBaxt posted a topic in Masting, rigging and sails
When serving shrouds, especially the forward one where it is quite long I am finding eventually the length of serving between the bobin and my left hand ( guiding hand) the thread becomes tangled due to twisting . I have tried the bobbin in both positions ( where the thread comes off the top and off bottom) I am also feeding the siezing onto the top of the shroud so I can see what is happening. I have tried removing the bobbin of thread and turning it clockwise and anticlockwise but I am unsure if I am unwinding the thread in the correct direction. Hope this makes sense -
I have been thinking of doing the Sphinx for awhile now. The amount of Vanguard boats and Cannon I will be using on my HMS Diana I may aswell save me some money and go for a Vanguard in the first place. The quality of some of the pieces is far superior with Vanguard. So I will be staying tuned for your Sphinx build with interest. .Best regards Dave
- 345 replies
-
- 1
-

-
- Duchess Of Kingston
- Vanguard Models
- (and 1 more)
-
Amazing workmanship Derek and something we can all look up to and for me hopefully one day can ever reach such high levels. I look forward to seeing your next project. Best regards Dave
- 345 replies
-
- 1
-

-
- Duchess Of Kingston
- Vanguard Models
- (and 1 more)
-
Prior to the fitting of the mast shrouds and after consulting Lees book 'The Masting and Rigging of ships of war 1625 to1860' on smaller ships there is only one pair of Pendant tackle per lower mast and one per of Burton pendants for the mizzen were fitted. The Pendant tackle having a single block on each end and an eye spliced at the top . According to lees the pendant tackle for the Endeavour period is fitted similar to Swifter and has single rope spliced at the top end and one for each side. Hope this makes sense. Both Burton pendant and pendant tackle are fully served . The runners for the tackle are not normally fitted on model, however there will be main stay tackle to fit at a later day for hoisting boats etc.


-
Sounds like something we could use instead of super glue or 2 part epoxy resin but then again perhaps it does not have the strength of epoxy. Good to know all the same. Thanks again for your input. Best regards dave
-
Thanks guys for the information and what has confirmed that I already thought that there are better products out there than pva glue. I am currently using a product called Bulls eye Seal coat which I am informed is Shelac,at least that is what it says on the Tin. Interestingtly enough it does not go off or at least it hasn,t yet ,when I left the top off a small bottle overnight. I like the sound of Bobs idea of dipping small parts into it then easily wiping off any excess. I have some ethenol and methelated spirits without the purple stuff so I can thin it down so will quickly run out of areas,if that makes sense. Anyway I have also used this diluted on rigging knots and lines and I believe it to be a stronger hold. Thanks again guys for help and patience . You will make a modeller of me yet. At least I hope you will. best regards Dave
-
I recently joined a local modelling club where the people are all into plastic modelling of all different types. I am currently putting together the 18lb Cannon carriages for my next build . Although I am intending to use diluted shelac or similar to seal the pear wood prior to painting. I thought about airbrushing the medium for sealing if possible. Of coarse the guys at the club were very helpful and they all agreed that diluted PVA glue would be the answer.. Although this initially sounds like a good enough idea, ie. Cheap and readily available, I then wondered to myself . Why is pva not extensively used by the people on this forum for the above purpose and wondered if it is due to raising the grain or something else which I am unaware of. I just thought this would be a good subject to discuss as I believe that the there are a lot of knowledgable people on this forum especially on the subject of all things wood and how to seal it . Especially using an airbrush and, is this is even possible. As there is some very intricate detail on the parts of the carriage that I intend to paint, I do not want to lose them by filling up the indentations with sealant. Best regards Dave
-
Cheers guys I will take your advice.
-
I have just been looking over my Caldercraft Diana 1 :64 kit and think the carriages for both the 18lb and 9lb cannon are not great and I am thinking of replacing them with Vanguard carrages but there is quite a bit of difference in the sizes. The lengths of Vanguard cannon are similar to the sizes of the Brass cannon supplied by Caldercraft and happy with them. here are the caldercraft sizes for 18lb Carrage 28mm and cannon 42.5mm, 9lb Carriage 25mm and cannon 40mm. Vanguard carriages are 25.25mm and 20.2 mm respectively. I have been thinking about going with the next size up ie 24 lb and 12lb carriages which are 29.6mm and 24mm or 27 mm depending upon it is a long cannon or not. So these sizes are pretty close, but would they work? Best regards Dave
-
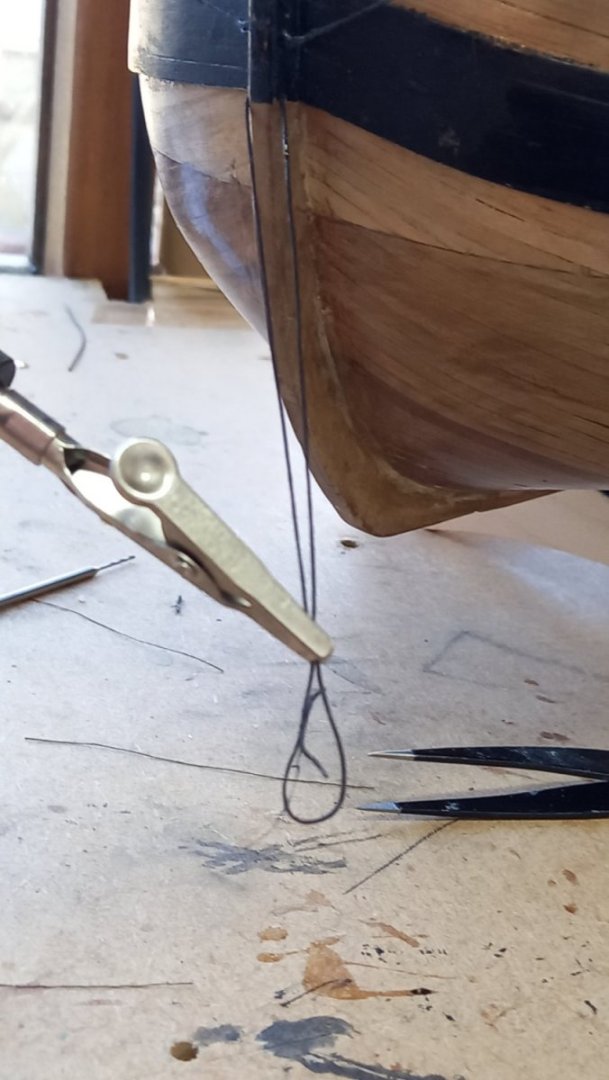
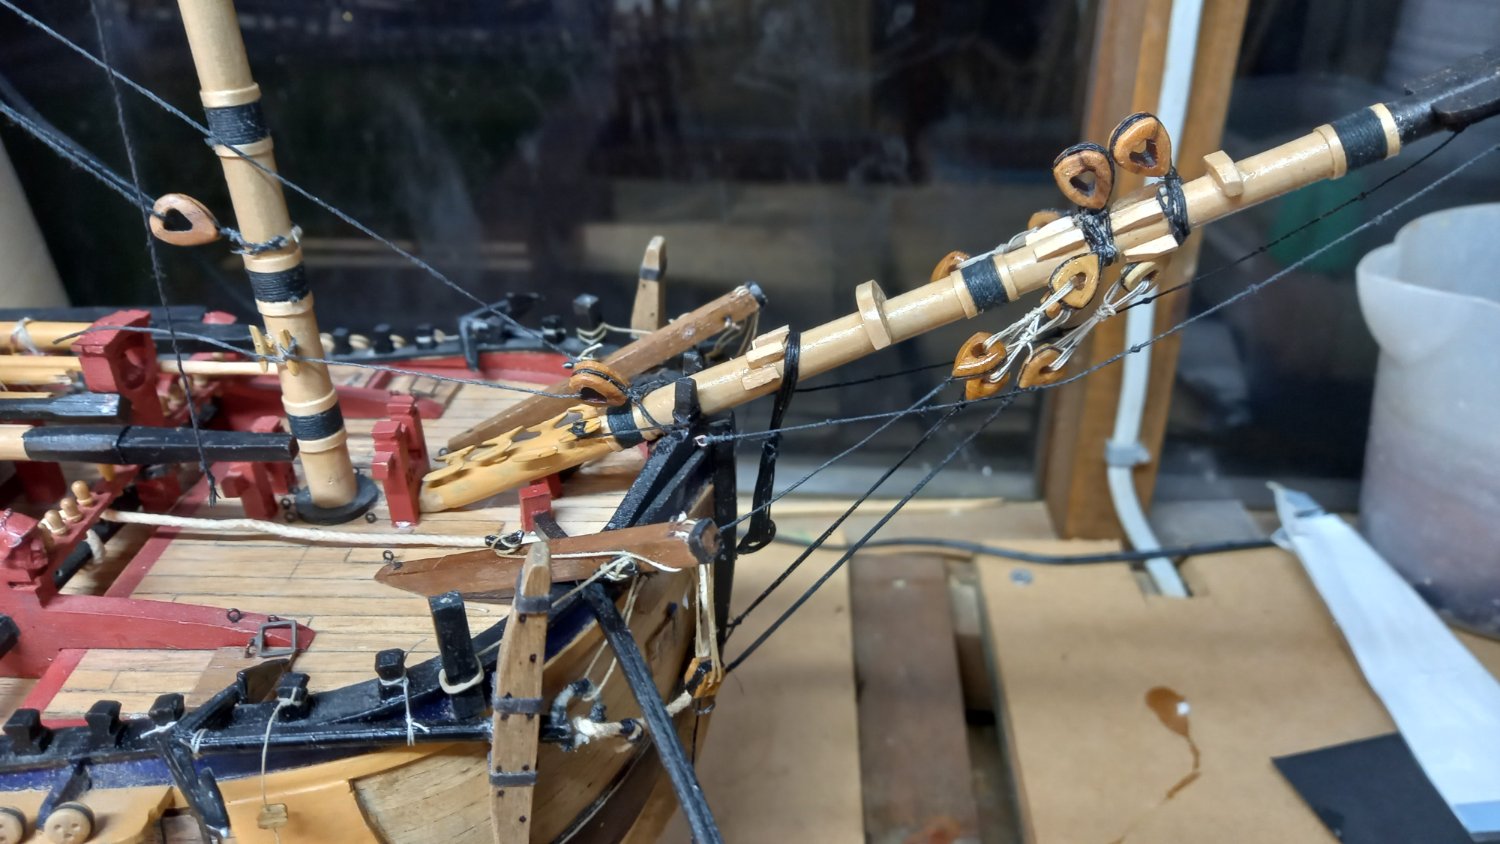
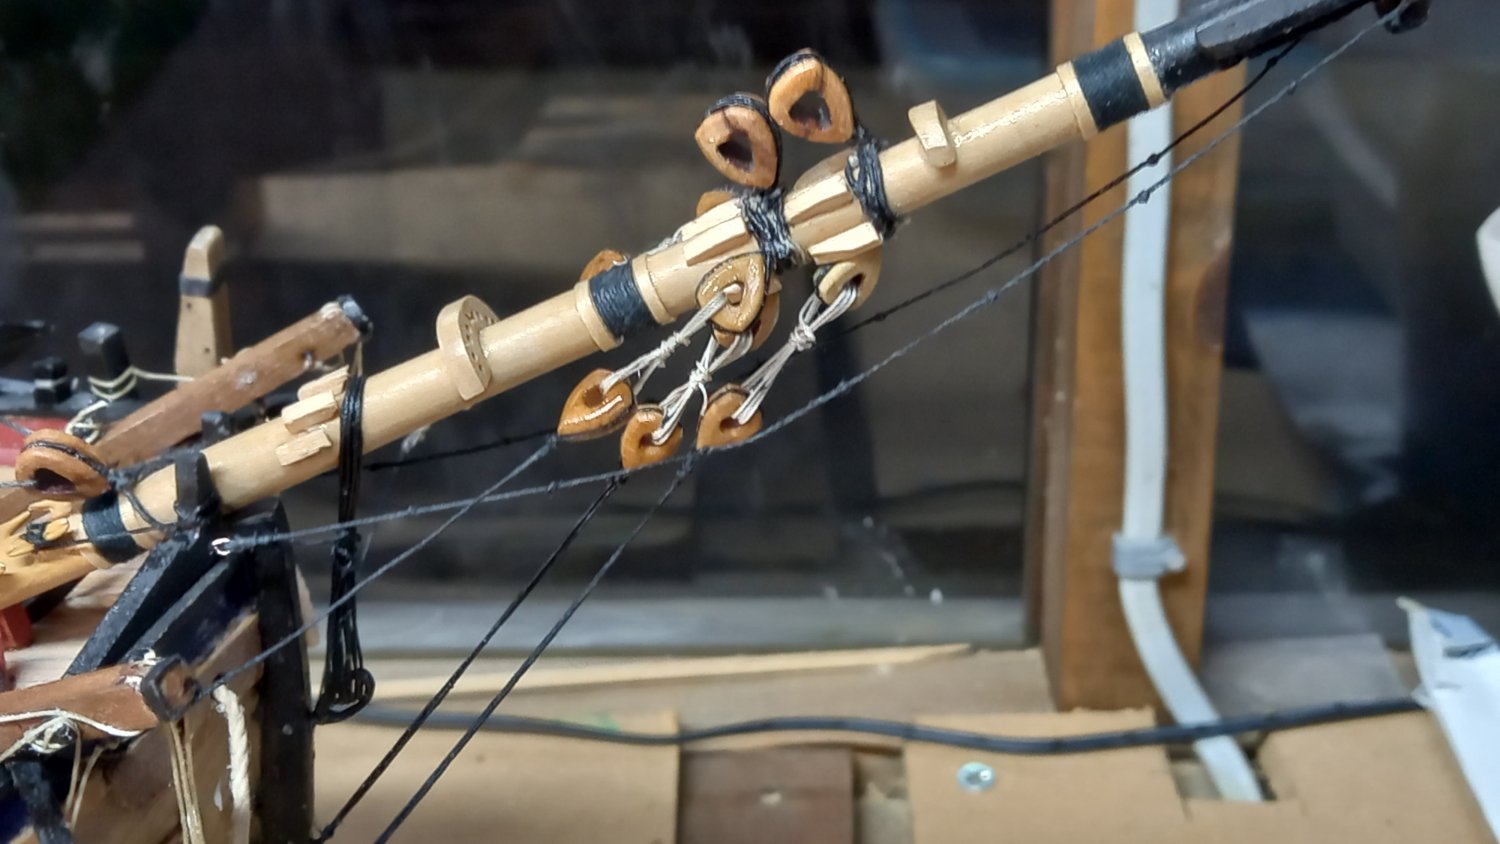
Completed Bobstays and horses .Hopefully better photos this time as I have managed to figure out my camera/phone. Also I have added in the collar with closed heart for main preventer stay attached to lower fore mast also fully served as fore preventer stay collar. Next up moving onto the Mizzen stay collar which is atthached to the main lower mast and according to lees measurements about 28mm up from the deck and is a dead eye until a later date and will go with this. Also there is no preventer stay on the mizzen mast until a later date so will be going with that too I also need to find out which blocks /hearts are attached to the lower mast for the top mast stays before starting on the shrouds and whilst I have sufficient room a big mistake I made whilst building the Bounty. No doubt I will forget something.

.thumb.jpg.95f1722a8e6cff2156518612eb2d6777.jpg)
-
Cheers Gary. I am really glad you mentioned this book and recommend it as I have also managed to find a cheap copy of exactly this book and in excelent condition.I have also managed to obtain 'Thhe young sea officers sheet anchor' by Darcy Lever which I believe also comes highly recomended and it has clarified a few things with good drawing which were not in Lees book. Thank you for your input and please recomend or perhaps not anything which you come across as I am hoping to gradually build a good reference library . Best regards Dave.
-
Completed the Spritsail Gammoning, shrouds and one of the horses not so easy getting them exactly the same lengths and knots in the same place. Next up will be the fore and after Bobstays which are fully served. There are a number of different views on how these are put together but believe David Row has the correct one which agrees with James Lees book. Here is a coule of photos of my progress together with Dave Rows Bobstays. I would like to thank David for using his photo as I believe this is the correct way for the Bobstays on the Endeavour
-
Yes Ron I think I read that somewhere too but they also needed to put something around the bolts too. According to Wikipedia they ended up makeing the bolts out of zinc znd copper allow to what was a great expense. Eventually they did away with copper and instead used Muntz metal 60/40% copper/zinc which I think they mean the plates and not the bolts but could be wrong. I still think there would be issues with the zinc but anyway this was superceded byt anti fouling paint of some discription.
-
Thank you once again for clearing the means of applying the viewing distance and for explaining how the copper plates are fastened to the hull and it is in fact the vessels iron bolts acting as the anode in electrolysis and this now makes perfect sense to me as Modern day steel vessels have a similar problem and use zinc bars attached to the hull to act as sacrificial anodes to protect the hull. shafts etc. from electrolysis
-
Thanks Bob for your kind remarks. I have been trying to consider viewing distance and these photos are probably taken closer than the viewing distance and without any magnification. So I think further away you see less detail so still unsure whether correct or not. I have yet to try another tecknique building up layers using washes, only and I think its called glazing. I think perhaps you can add the glaze to the acrylic paint but could be wrong. An idea which was suggested to me by a modeller who is into war gaming etc. I also thought about just using airbrush teckniques for this alone and see what happens. Once again I have a question if I may.I have been considerin the aplication of dirty downs moss and rust products as I been sent some by the mistake from the retailer. I appreciate that copper was applied to the ships bottoms to protect the wood from worms and wondered how effective it was as an anti fouling and whether or not this was actually effective once the patina effect had taken hold. I also remember reading somewhere that this patina effect was only there whilst the vessel was out of the water and was generally removed by erosion.when moving along in the salt water. Less effective in rivers with fresh water perhaps? I also understand that after fitting the copper plates that the iron nails in salt water caused serious problems with electrolosis and caused the nails to almost disapear, a kind of sacrificial anodes if my chemistry is correct. Such is why today they use sacrificial anodes to protect the steel hulls. Therefore my question is would it be prudent to show some signs of rust and moss among the verdigris or again wonder if this would be too much detail. So I still have some way to go with experimenting but I am enjoying the journey and thanks once again for your help and patience. Best regards Dave
-
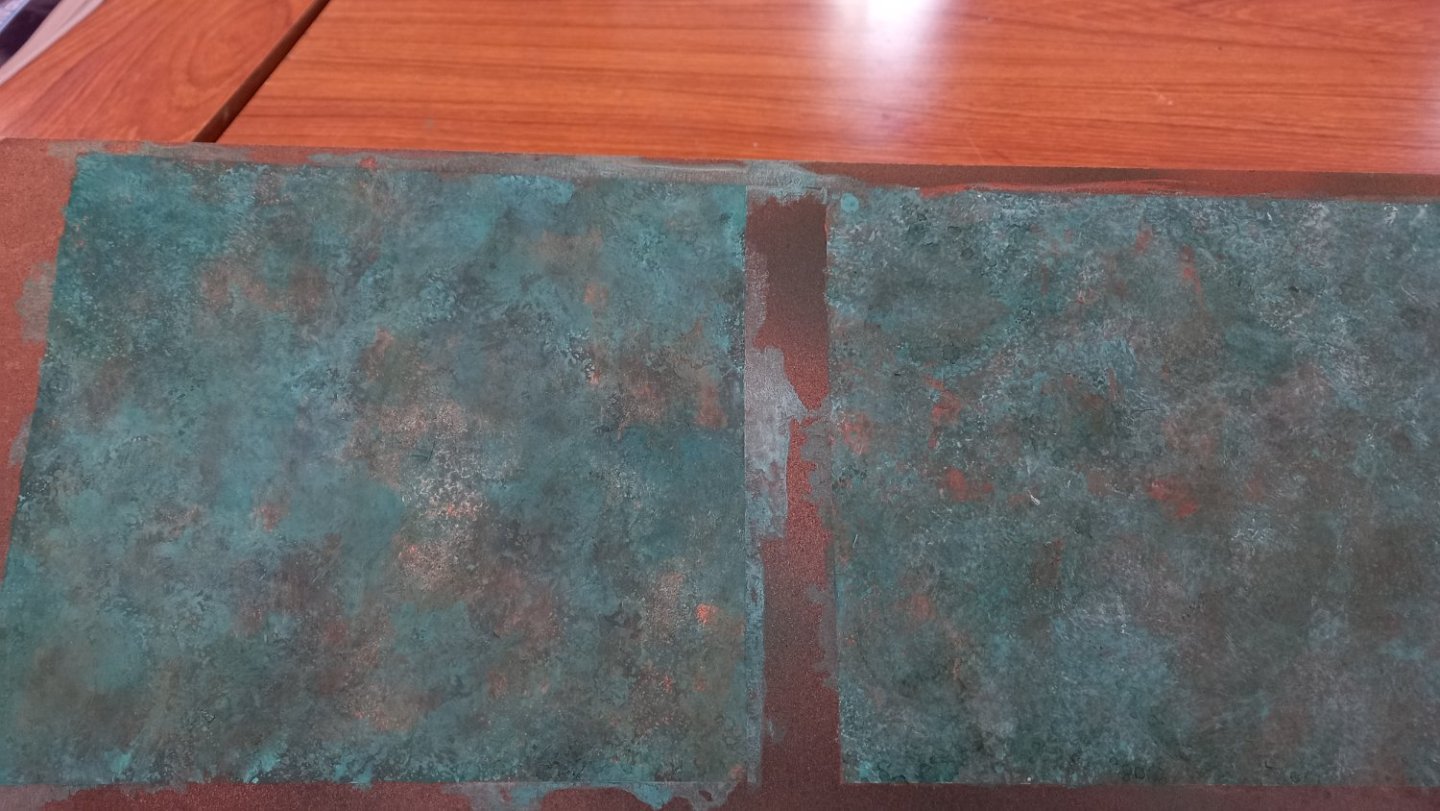
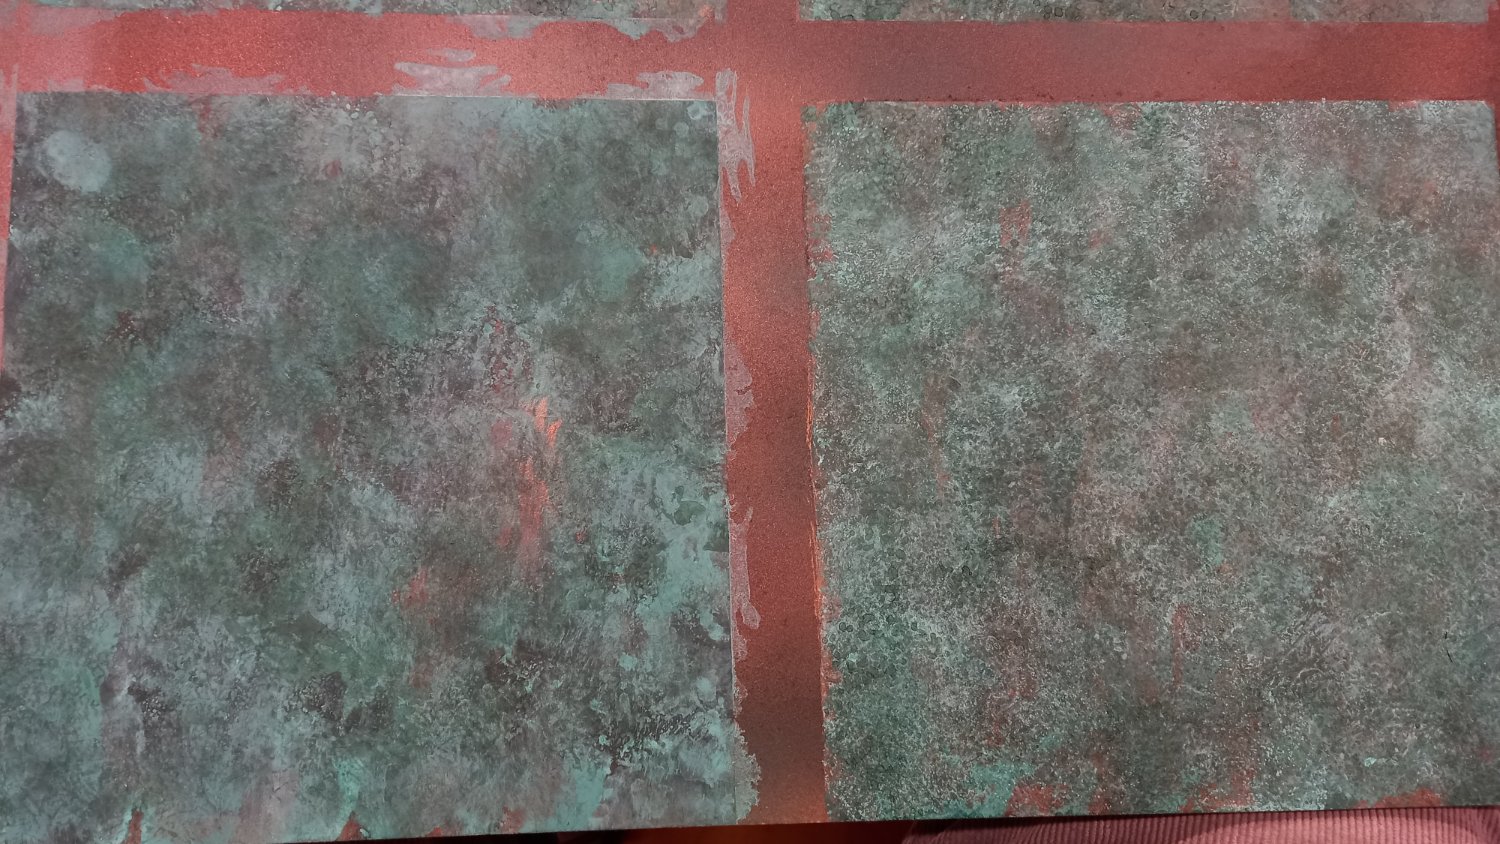
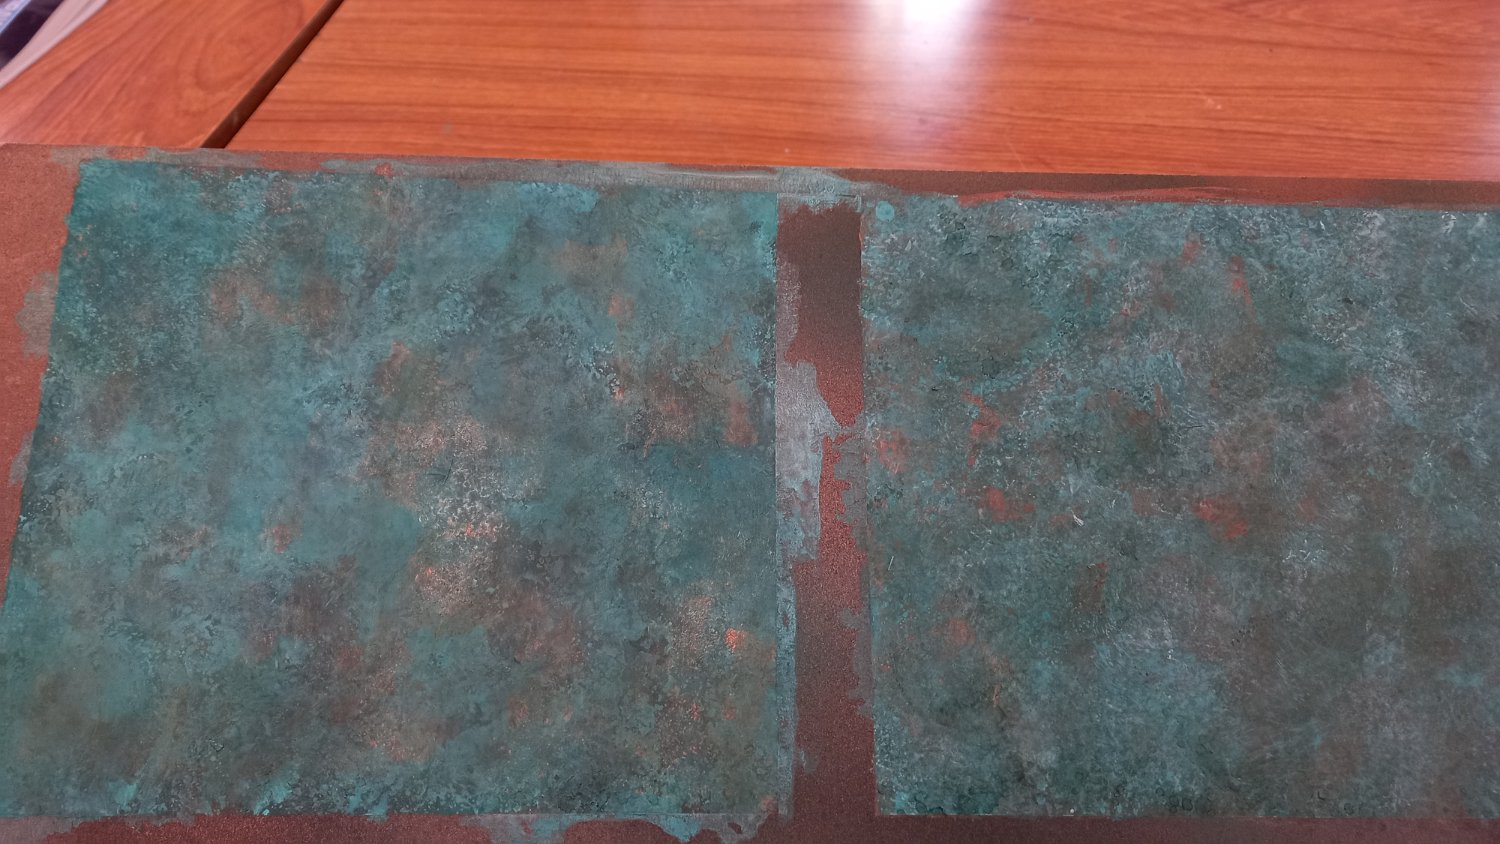
Ok After getting the hang of airbrushing or at least mixing with thinners ( at least for the acrylics I used )I eventually thought I would try and mix a few colours and come up up with something that might look like a ships bottom with copper tiles whilst the ship was out of thr water. Here are four square tiles all with various base layers. One or two with a black and another with aged copper and copper.both paints by Dark Star. The MDF was also primed with a shellac based product. The black base coat was also coverd with various copper and applied by airbrush. I then went onto applying several coats of vedigris made by Dirty downs and Vallejo . The Dirty Down Verdigris was applied neat without watering down and the vallejo vedigris was mixed with both black and white acrylic to achieve different shades of vedigris and watererd down quite a bit. this was applied using a sponge and I also in some areas wiped off quite a bit using paper towels. I also applied white paint on its own and again wiped off using paper towels. After watching several videos I got the idea from this video and quite liked the look of the result. Although my first results are not as good as the video I am quiter pleased at my first attempt and hopefully I can improve as time goes by. I am unsure how realistic this looks or how much copper you would actually see but your thoughts would be much appreciated. Best regards Dave

-
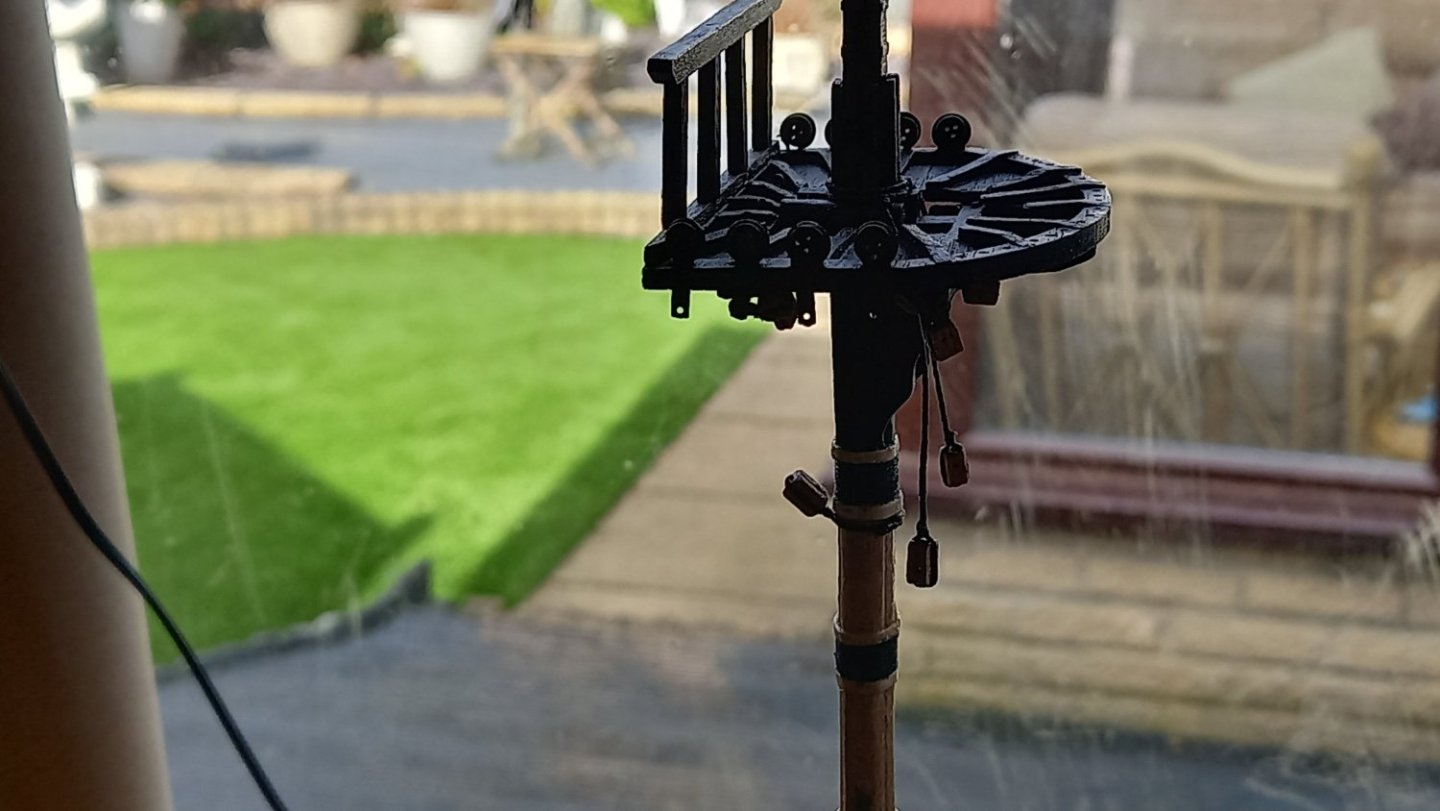
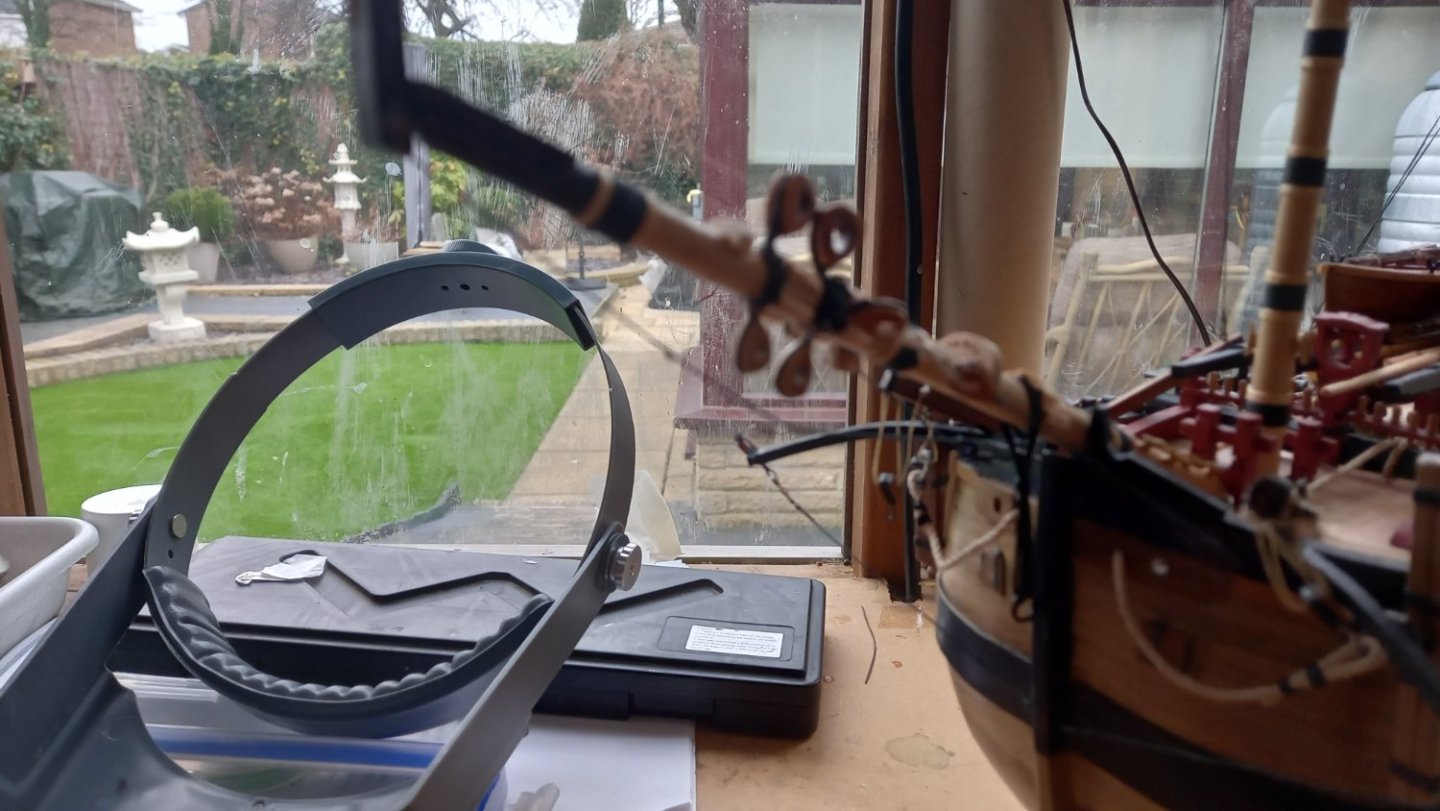
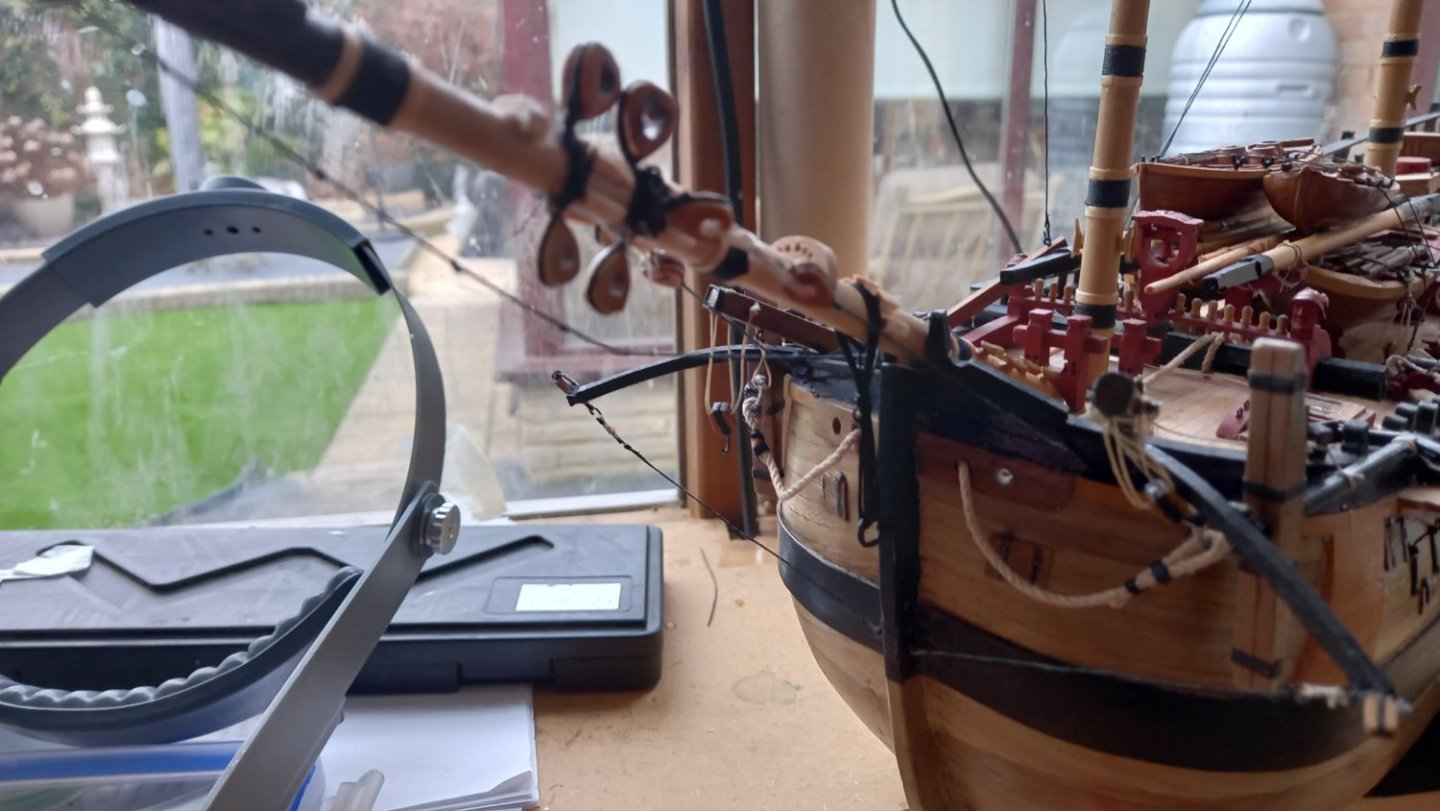
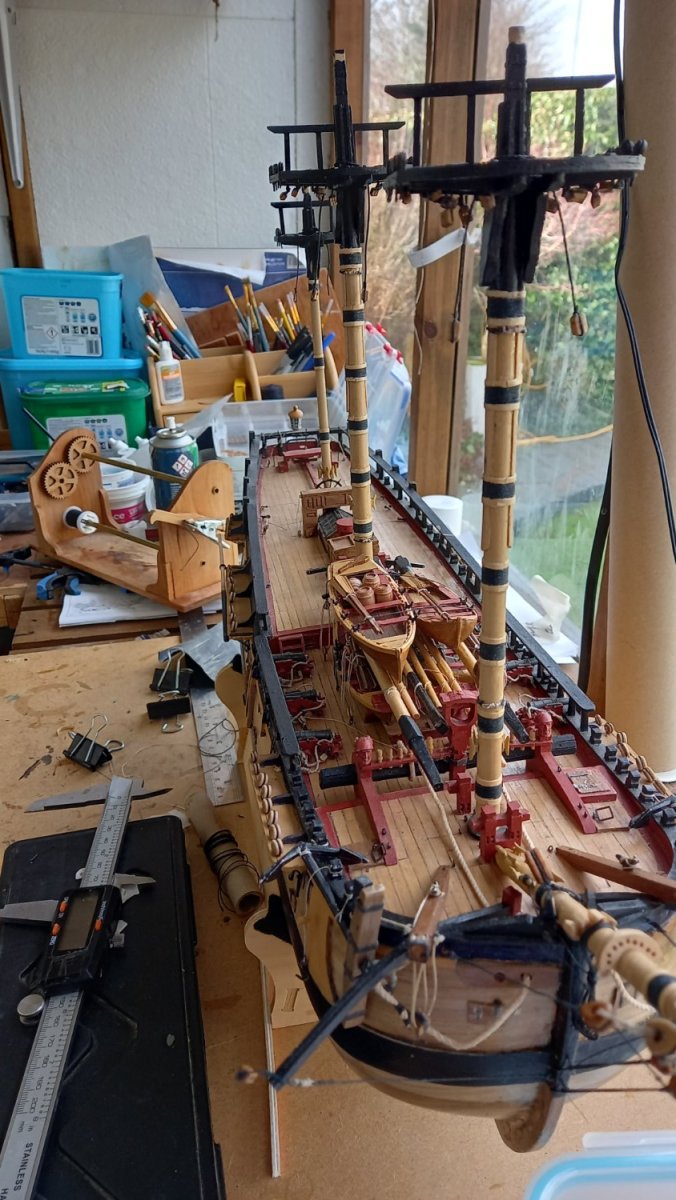
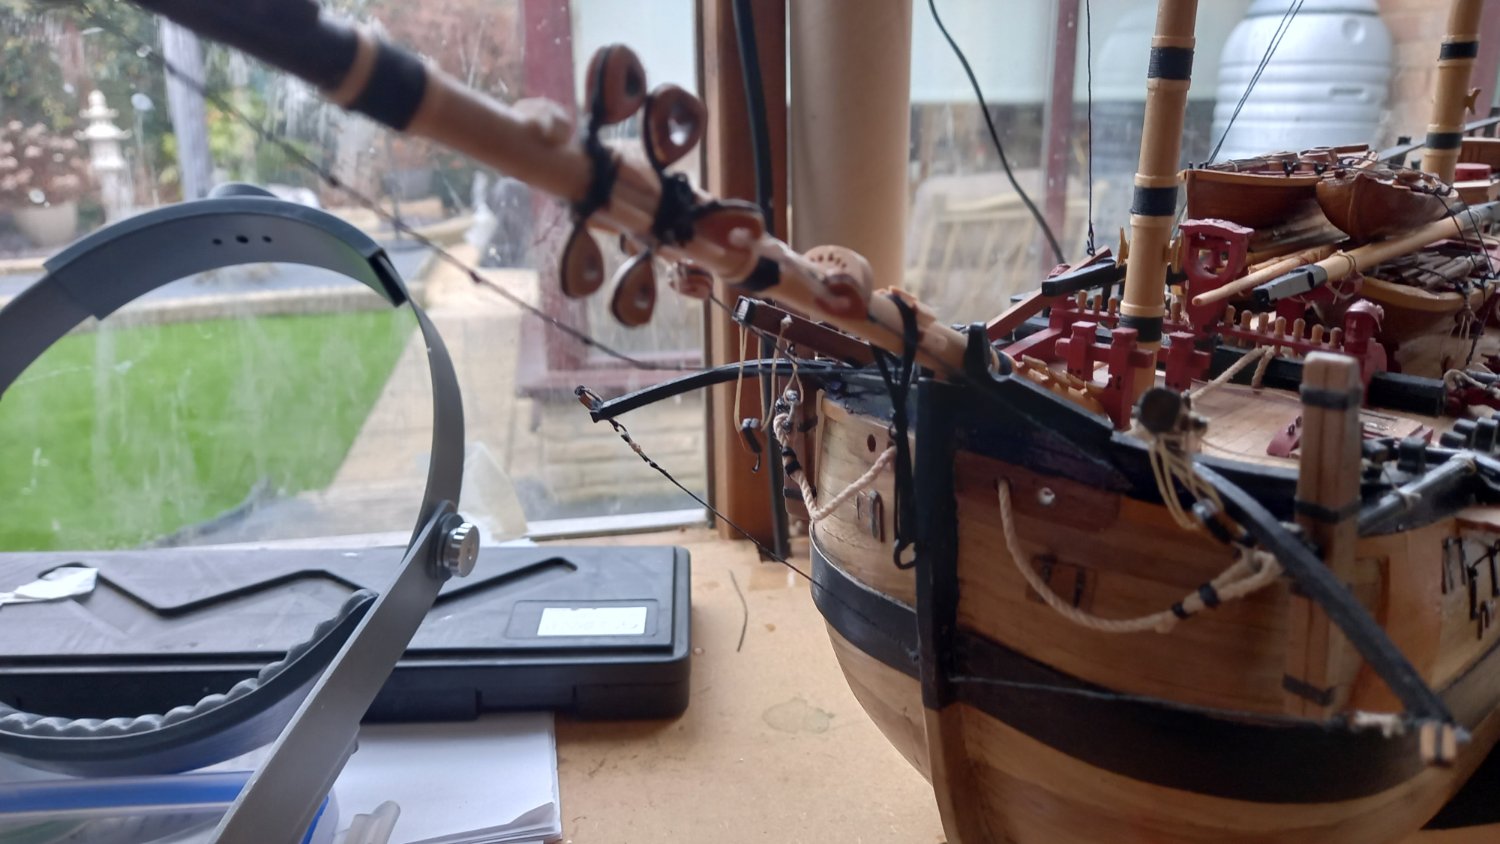
I have just fitted the main mast stay to the bowsprit and made temporary stays to see what sort of room I have between the boats and the stays. I have now decided after finding in Lees book a photograph a close up of the main top clearly showing that the preventer is below the stay and there is good clearance between the preventer stay and the boats. I can now mark on the foremast the position of the lower main stay collar .I am therefore assuming that the Lower fore preventer stay is also on the bottom on this particular ship.

.thumb.jpg.4200ce10c97093eb7b0515b4dbee9442.jpg)
-
Stays & Preventer stays top or bottom 1761
DaveBaxt replied to DaveBaxt's topic in Masting, rigging and sails
Too True Allan but sometimes it can be a bit frustrating especially after asking someone like your good self only to find something later under my nose. Once again I thank you for your time and patience. Best regards Dave -
Stays & Preventer stays top or bottom 1761
DaveBaxt replied to DaveBaxt's topic in Masting, rigging and sails
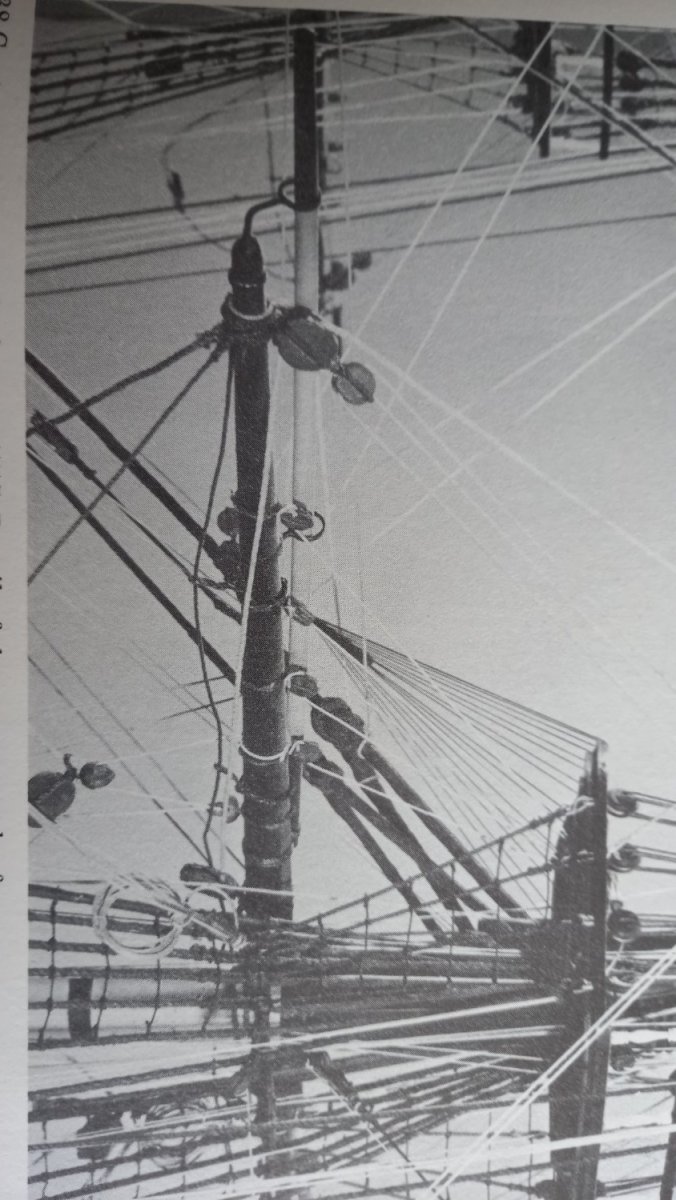
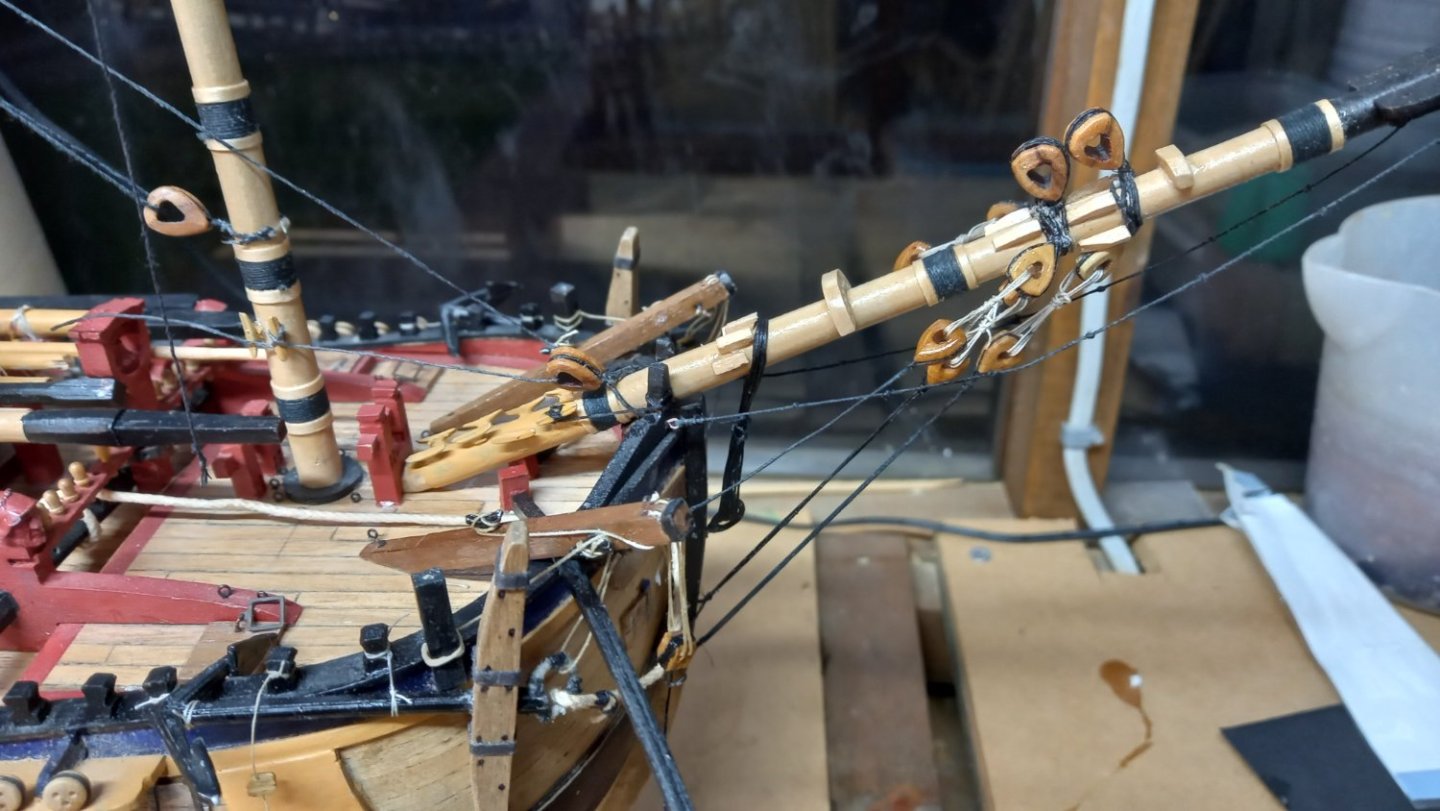
Thank you Allan and you photographs confirm what I already thought but still unsure as to which way they are fitted on the Endeavour and wonder where quite a few modellers are getting their ideas from and placing the preventer stay below the stay, especially the fore mast. I have check to see if this is possible on the main mast and that the Preventer stay clears the boats which it does and can be seen from my next photo. This rigging is only temporary, just to show the position on where to fit the collar on the foremast. I also notice that the Endeavour replica has the preventer lower on both main and fore masts so still unsure so in this case will probably go for this. I have just found the above photograph of another model of the Endeavour found in Lees book (Sorry about the quality) This clearly shows the preventer stay below the stay on the main mast and that the crows feet do indeed connect to the main stay. So from this photo can I safely say that the fore mast has the same arrangment, after all it just another model. But how much proof do I need. Haha..thumb.jpg.19629c760b4bb880412b3f7b43fe9d3c.jpg)

-
I have seen a number of very good models ( Better than mine anyway) of the HMS Bark Endeavour 1761 with the for preventer stay on the bottom . If this is the case can you confirm that the crows feet will then be on the for stay and not the preventer stay? According to Lees book 'The masting and rigging of English ships of war' This can be the case on smaller ships but does not mention this can be the case for the stays on the main mast therefore can I assume that the main preventer stay is on the top and connnects to the crows feet? Also most of the collars attached to the bowsprit have thumb cleats to stop the collars from sliding down the Bowsprit, except the main stay which I cannot find these on any drawings/references I have. I understand that in some cases the main stay is not secured at the bowsprit but at the cutter or on the deck but fairly sure in this case it is secured to the bowsprit between the bulwark and the deck. Although I am trying to follow Lees book whenever I can, sometimes it can be a little vague . I also do not own the AOTS Endeavour which might shine some light on this subject. Any replies would be a appreciated. Best regards Dave


.jpg.c88ddaae6019353b6861fb370065081c.jpg)


.jpg.d8f3aa9b5e7ac295ea39aadca226e60f.jpg)
.jpg.2d1e54898dccda92bb17a4e6b23c93f7.jpg)