HOLIDAY DONATION DRIVE - SUPPORT MSW - DO YOUR PART TO KEEP THIS GREAT FORUM GOING! (Only 13 donations so far - C'mon guys!)
×


DaveBaxt
-
Posts
1,324 -
Joined
-
Last visited
Content Type
Profiles
Forums
Gallery
Events
Everything posted by DaveBaxt
-
Thank you Allan for adding to what is fascinating subject on its own. Perhaps they weren't on the models at all as these weren't part of the ship as such and not part of the ship building process or were they?
-
Gun Ports Before I go any further I have been giving these some thought and to what is the best approach. I am in two minds to cut the gun ports to the inner hull wall using a template which would help to follow the deck line. I came across this thread as to the shape of the gunports and found it very helpful especially for the two forward gun ports at the curvature of the hull and the rise of the deck I think as this is an 18th century English ship the C is probably the correct shape where the top and bottom follow the deck and the sides are 90 deg to the waterline I can see from a good few questions on this forum there are many different methods of cutting the gun ports and as yet I have not decided on my approach . Cutting the gun ports after the outer hull wall has be laid, seems to be the most common. However there is also the option of cutting the inner hull wall first then fitting the gun port frame before laying the outer hull ( first planking) next. I am unsure which is the best approach. I do however like the idea of using a template but this could be incorrect too.? Any advice is always welcome. best regards dave
-
Thank you Richard for adding those drawings of the Victory and it has definately throws a new light on the subject and is interesting in the least.Are those drawings supplied by Caldercraft or there from another source? I have a copy of the AOTS Diana and this is what I am currently building. This also depicts the guns in a similar position to your drawings. I think this is why I asked the original question. I too am no expert but perhaps it depends upon the size of the vessel and their associated guns. For what it is worth your model looks fantastic and the presentation does not look out of place. Because of the slope and curve of the hull height wise , what do the Victory guns look like head on, does it change the perspective at all? Just a thought. Best regards Dave
-
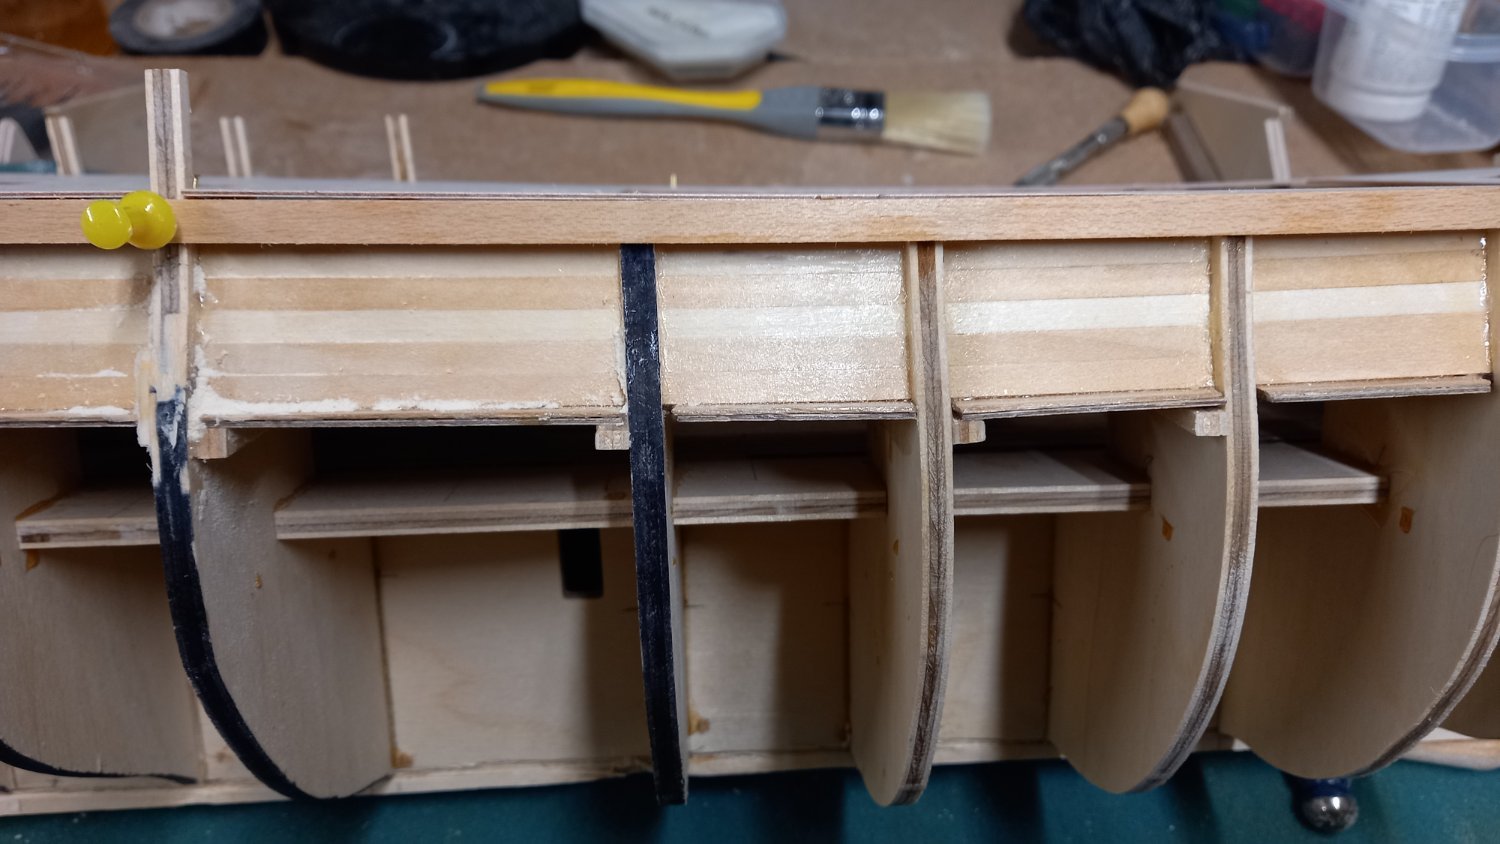
Thanks David for your kind words and I would not have managed it so far without the help of others who have gone before me as your good self, so appreciate your input a lot. I can see why you have left a bigger gap between gunports 7 & 8 as I have thought about the space required for the ladders and fenders but I hopefully should be OK with 38mm as is the drawing any further and then i think there are issues down the line with forward gunports or chain plates. You have just reminded me as regards the quarterdeck chainplates and shrouds but I am certain I have alreasdy done this but will double check anyway. Haha. Preperation for first layer of planking. I temporarily pinned the upper false beck to the upper bulhead supports and to my surprise there was a 3 to 5 mm gap between the top of the inner hull planking and the false deck. III I then checked the hieght of the false deck against the Caldercraft drawing and it is correct. I can,t understand why there is gap as I brought the inner hull planking up to the top of the bulkhead uprights and then I realized this is only level with the bottom of the upper false deck supports doh!. After realizing this I decided to raise the inner hull wall to reach the upper surface of the brackets, It was necessary to fit seperate pieces between the bulkhead uprights so now the inner hull planking reaches 5mm higher at the mid section where the upper deck is open. I will need to think of some way of supporting the mid section of the upper false deck. I see by the drawing that there is supposed to be 5 x 5mm plywood athwartship beams which I am not sure whether using plywood in this area is a good idea as they will be seen. These are not attached to the bulkhead uprights so might have to sort something out to support the deck in this area. I will need to give this some more thought. I also need to fit some supports to the quarter area as at the moment when I come to start the 1st layer of hull planking the planks will be just hanging in the air in this area. It was also necessary to trim the outer edge of the false deck flush with the bulkheads and some more final fairing of the bulkheads will be required before starting the first layer of planking.


-
Thank you every one for coming to my aid in what are some really great answers. Special thanks to Gary for spending time in his answer and to Vane as well for what is specific to the Diana. construction. As you say with the drawing being two dimensional, then perhaps the gunports might just miss the bulkheads which would make sense. Alan Thank you for the link which I will take another look and hopefully will shine a bit of light on the situation.. Mark I think this will probably end up the easiest solution in the end to hopefully ensure that the gunports are not moved . Again thank you to all for their time and patience. Best regards Dave.
-
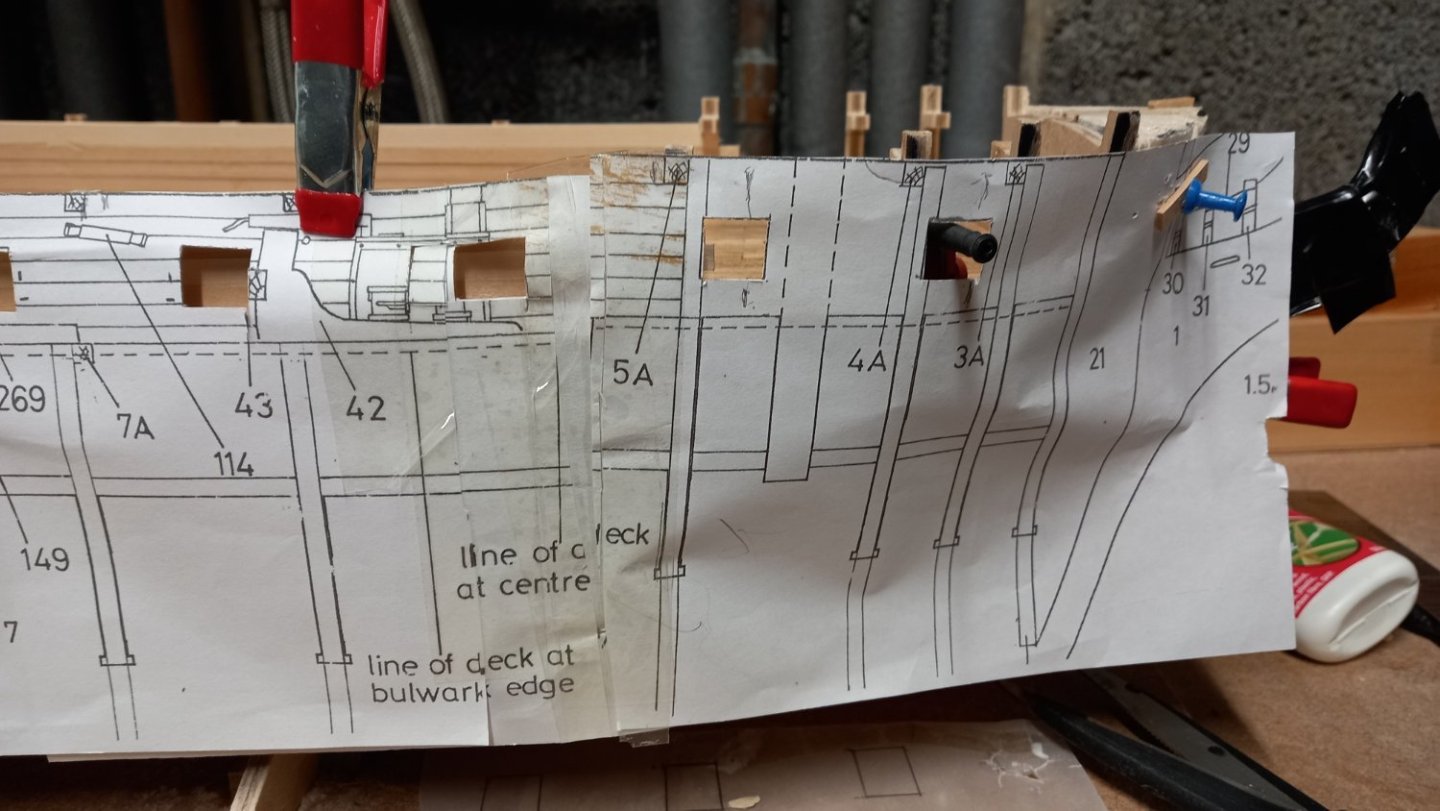
Sorry to keep returning to the position of the gun ports. After using the drawing as a template and cutting out the gun ports from the drawing. I found that apart from the forward 2 ports 1 & 2 the rest pretty much fits without altering the length of the upper bulwark/template and should be able to fit the ladders without having to cut the length of the upper bulwark. As regards the forward two bulkheads , If I move these a few mm forward I should be able to miss these but will be unable to fit ant gun tackle to these cannon. As these will be under the deck I am not sure this is necessary however I have glued extra pieceds of timber to the bulkhead upright supports so can cut these away at a later stage, so a bit of belt and braces approach. I have now received the Bloomfield Cannon barrels from Vandguard ship models and can see fom the position of the cannon on the deck I think i will need to raise the gunports slightly than on the drawing to ensure they are lieing centrally in the gun ports. As far as I can see the position of the gun ports on the model can not be the same as the drawing on the AOTS Diana as this model is POB and not frame built. as is the AOTS Diana. I asked this question on this forum about chainplates lining up with gunports and I recieved a number of varied solutions. I also think the instructions is what confused me as both gunports being 30 mm Caldercraft instructions or 31.5 mm AOTS dimentions, both do not work out. However the Caldercraft above drawing which I pinned to the model does line up and the bulkheads miss all of the gunports except no 4 & 5 bulkheads and gunports 1 & 2. Thank you to Vane for pointing out that as this is a 3d ship and the drawing is 2 dimentional then infact these gun ports would miss the .bulheads 4 & 5. I therefore think that as the chainplates appear to miss the gunports as well as the bulkheads I think following the Caldercraft drawing is the only satisfactorily solution I can come up with. Hope this makes sense.

-
Thank you Mark for your input which always appreciated. I would normally agree as regards the design of the model should take care of the chainplates blocking the ports but unfortunately with the Caldercraft Diana this is not that straight forward as some tweaking with the channels is required to ensure that this does not happen and is a bit tight . I am also concerned with the corner of one of the gun port doors hitting the chainplate if closed, so may need some tweeking in this area too. Unfortunately I had to change the position of the gunports ever so slightly so that they miss the bulkheads. Another oversight by CC but I might have to either cut out the section of bulkhead instead of moving the gunports and make new channels, which I might do anyway. I still have not decided one way or the other yet! Best regards Dave
-
Are the Gun barrels to sit centrally within the gun ports when models are presented or is there any leeway. I am thinking that it is necessary for deadeye chainplates have to miss the gun ports wherever possible but if not should still be well clear of gun barrels. Discuss.
-
I have started watching these and slowly working through them. Enjoyable so far watching SS Great Britain and Endeavour. Whilst enjoyable especially SS Great Britain(watched just prior to visiting Bristol although ended up not going aboard her) I thought HMS Bark Endeavour lacked detail about the vessel but more about James Cook and his voyages but this was indeed interesting as well. I am now looking forward to watching the rest of the series. Thank you for the prompt . Best regards Dave
-
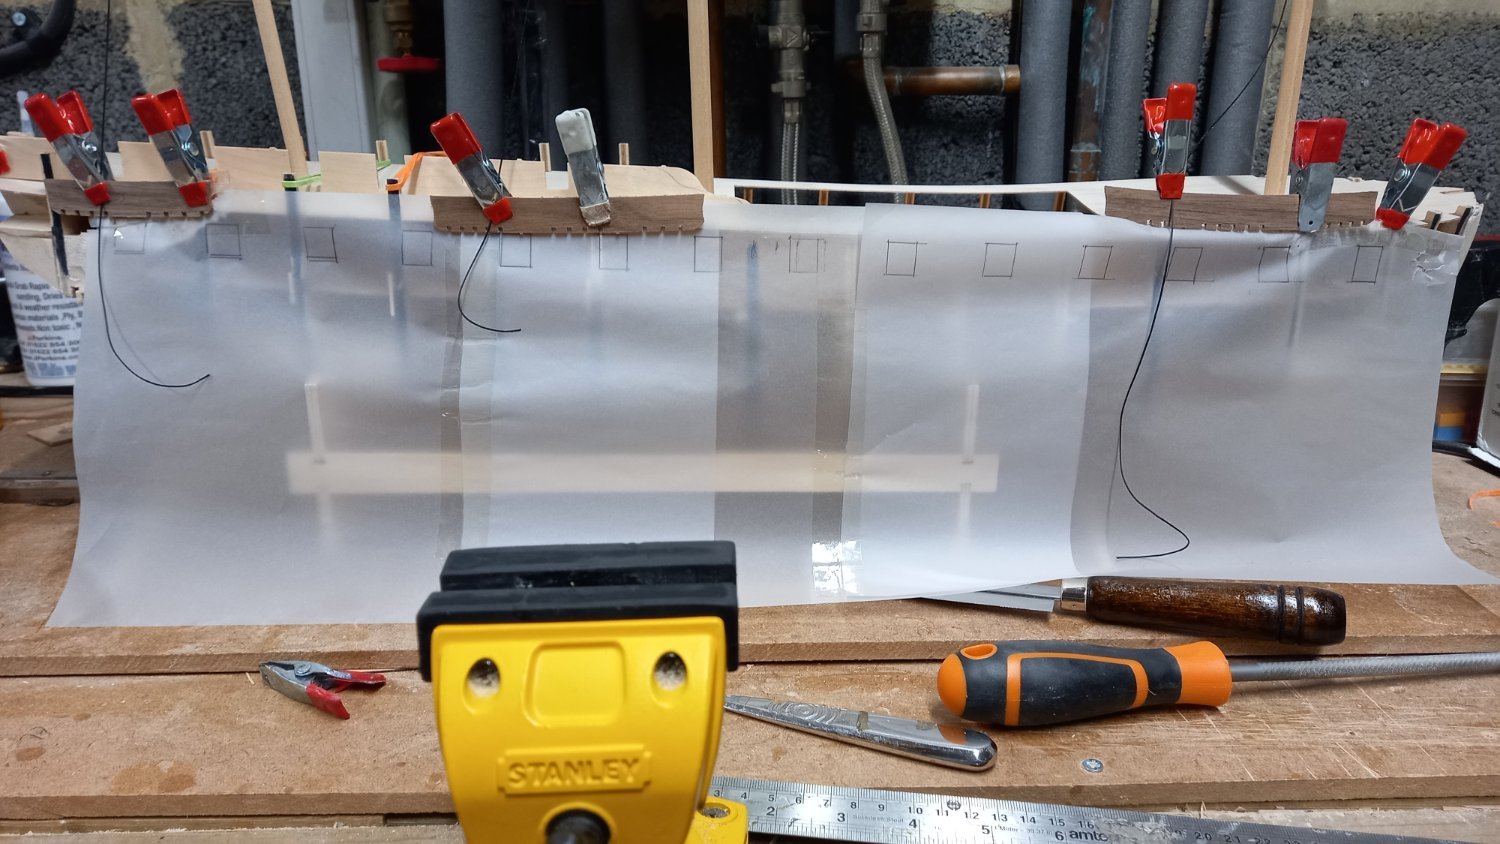
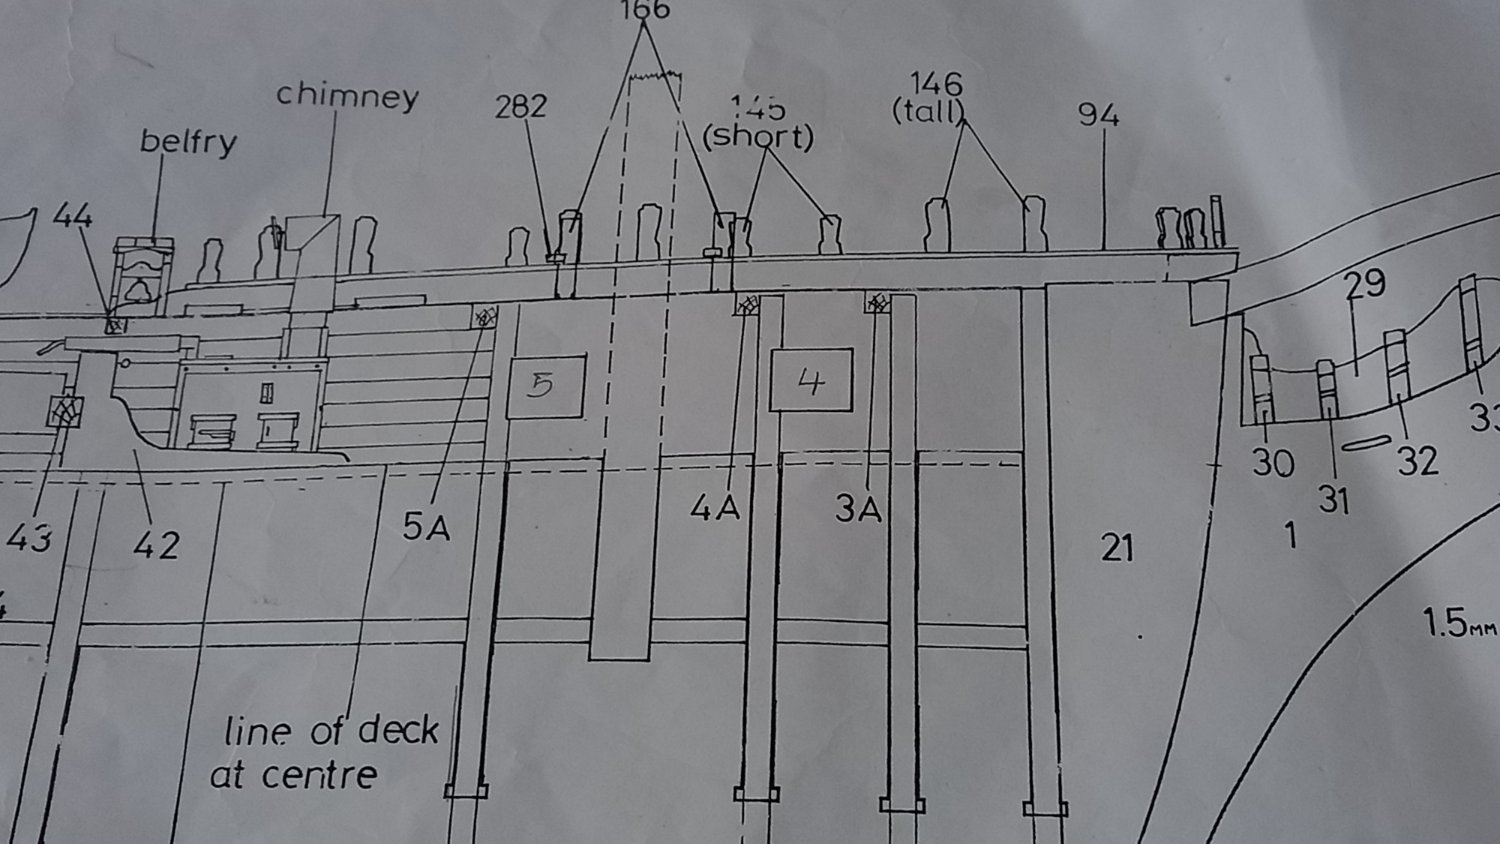
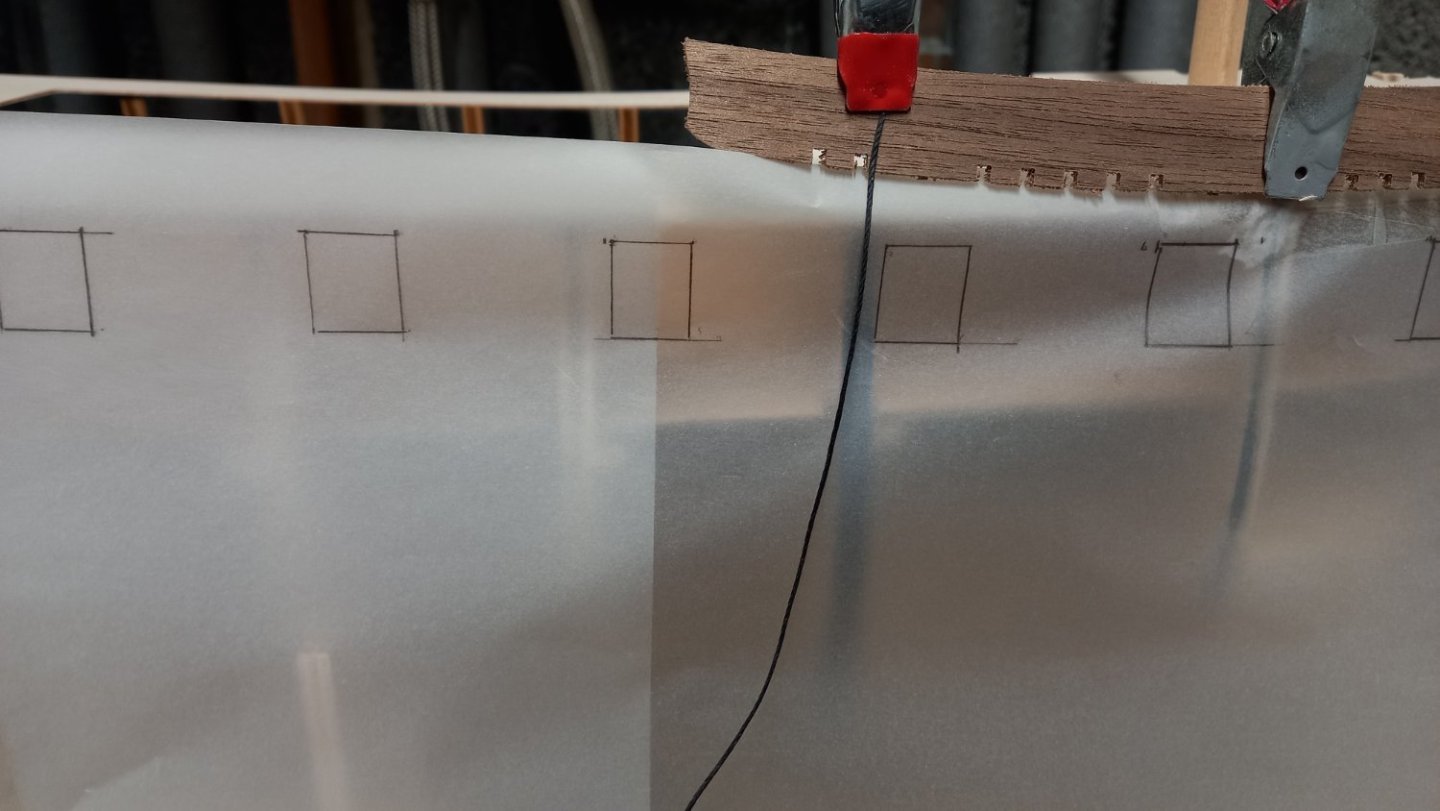
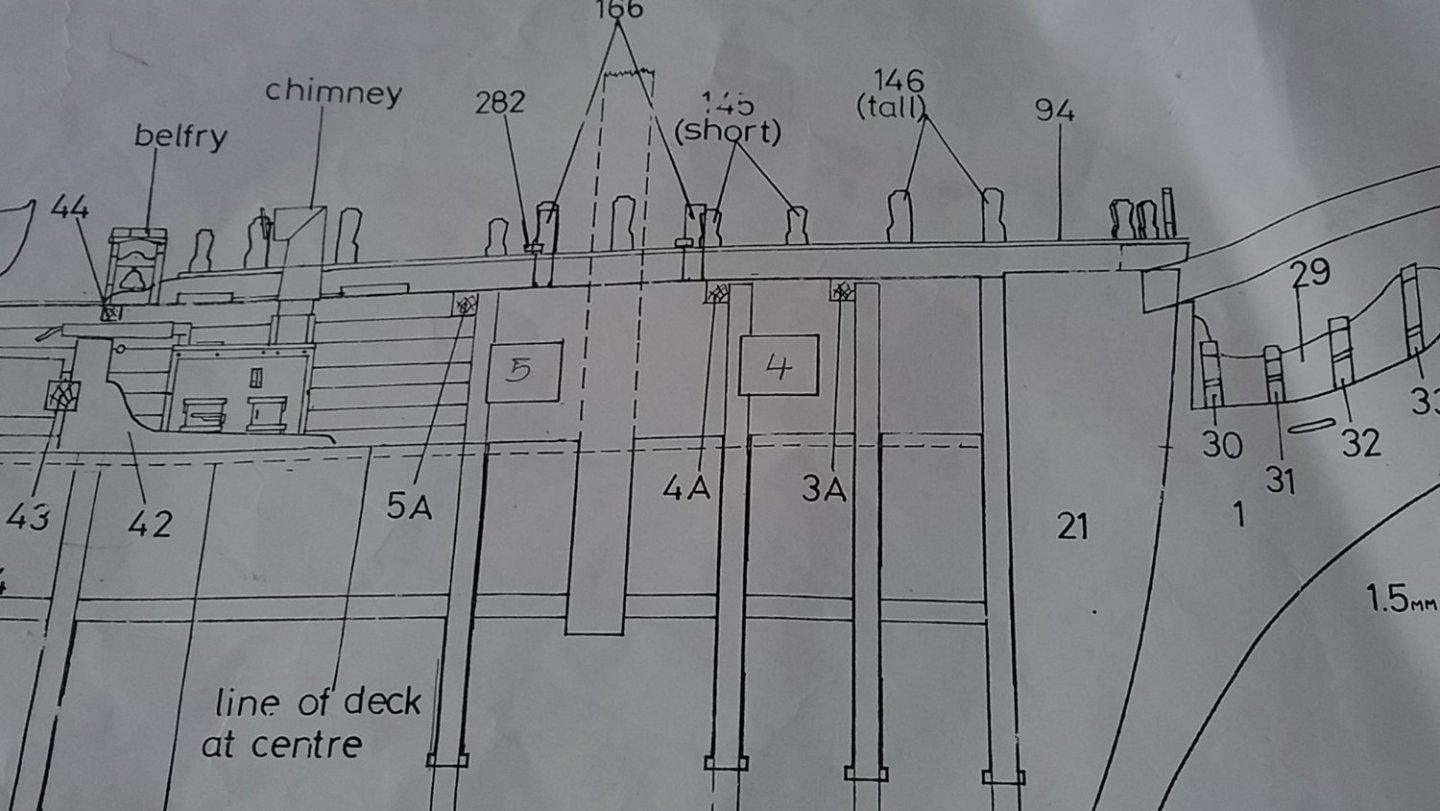
Gun port positions Any one who has previously built the Diana can testify this may cause a few issues down the line. The instructions states that the gunports should be 30mm apart but the drawing suggests they are anywhere between 28 and 38 mm and if starting from bulkhead No 16 and carrying on with an equal distance of 30mm then you end up with the gunports lining up with bulkheads 4 and 5. I have made a template and traced the gunports at 31.5mm apart and if I start just 3mm forward of bulkhead No.16 then this ensures the gun ports are clear of the bulkheads (just) and I also temporarily fitted the masts & channels and found that there will hopefully be no issues with the deadeye chain plates crossing the gunports and should be clear of the gun barrels. There is however the position of the ladders and the vertical protectors of some concern. These will have to be moved so as to still be between gunport 7 and 8 as per drawing however it will be necessary to alter the upper gun port template ( bulwark)by reducing the forward edge so is not in line with the ladders at the deck. Hope this makes sense I believe this is a small price to pay rather than start moving different gun ports and not cutting out sections of bulkheads 4 & 5b but still maintaining the equal distance required . Update on Bloomfield Cannon Barrels. As I previously decided to change the 18Lb cannon carrages, I have also now decide to use the Bloomfield pattern for the Barrels. Thanks to Allan for his timely intervention. Chris from Vanguard models has kindly supplied me with the 9ft (long) Bloomfield barrels ( 3d Printer which I have heard have excellent detail) together with the brass fittings only, without the carrages for a very reasonable price. Once I have these and assemble one I will also be able to work out the correct height of the gunports so hopefully the gun barrels will end up centrally in the gunport. Lots to think about but no doubt I will het a few snags.


-
Thank you again Jason for your reply which will hopefully go someway in helping me make the correct decision moving forward. Best regards Dave
-
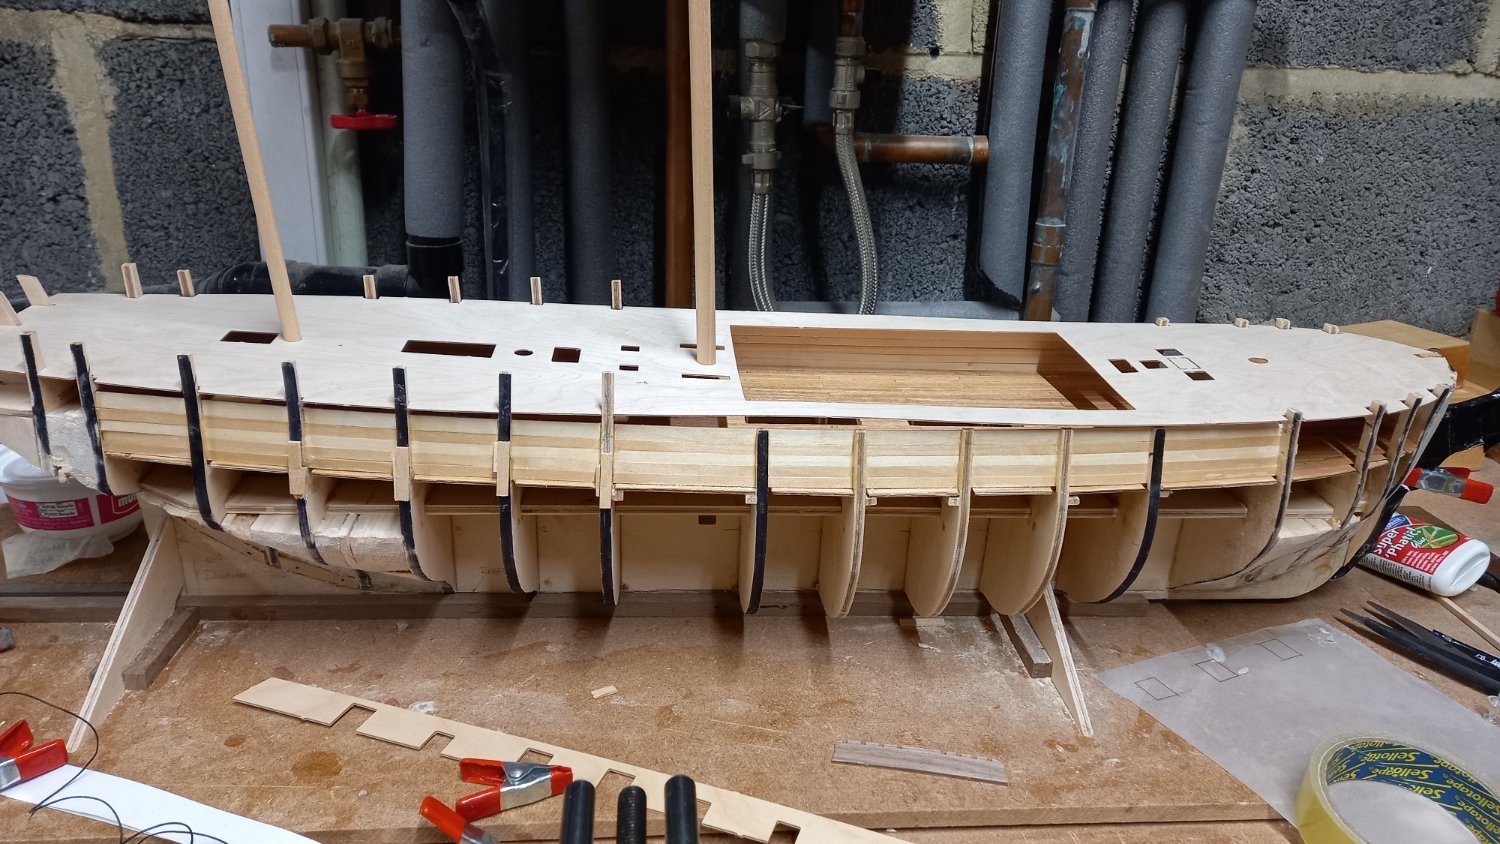
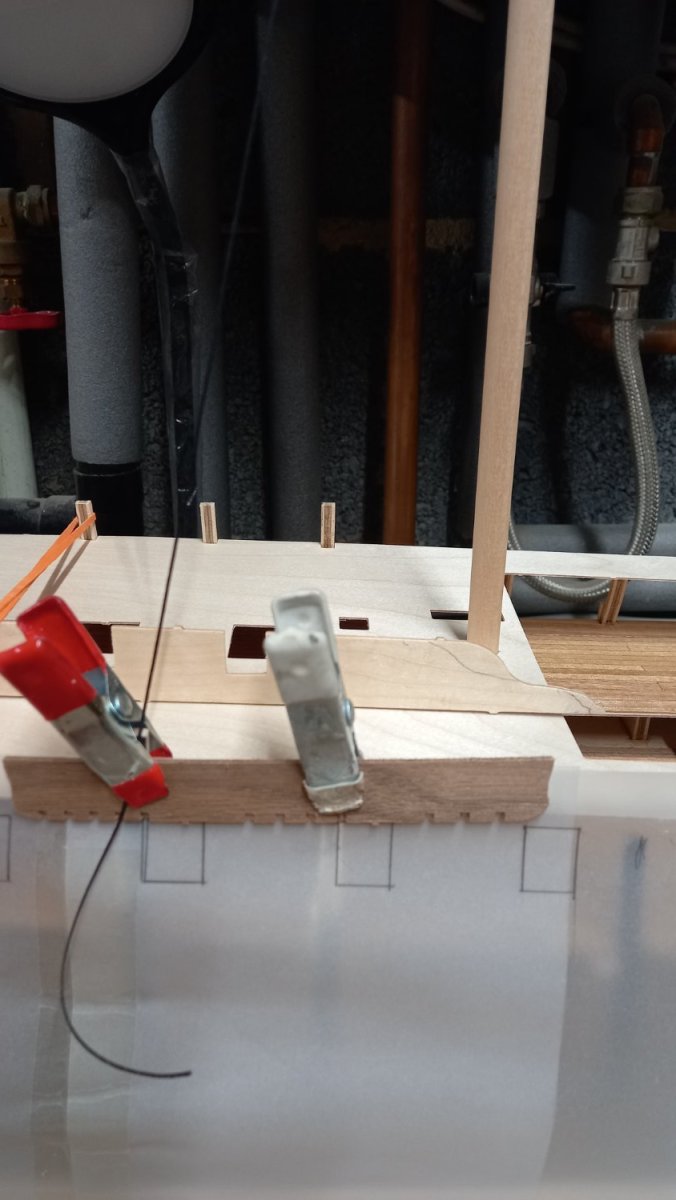
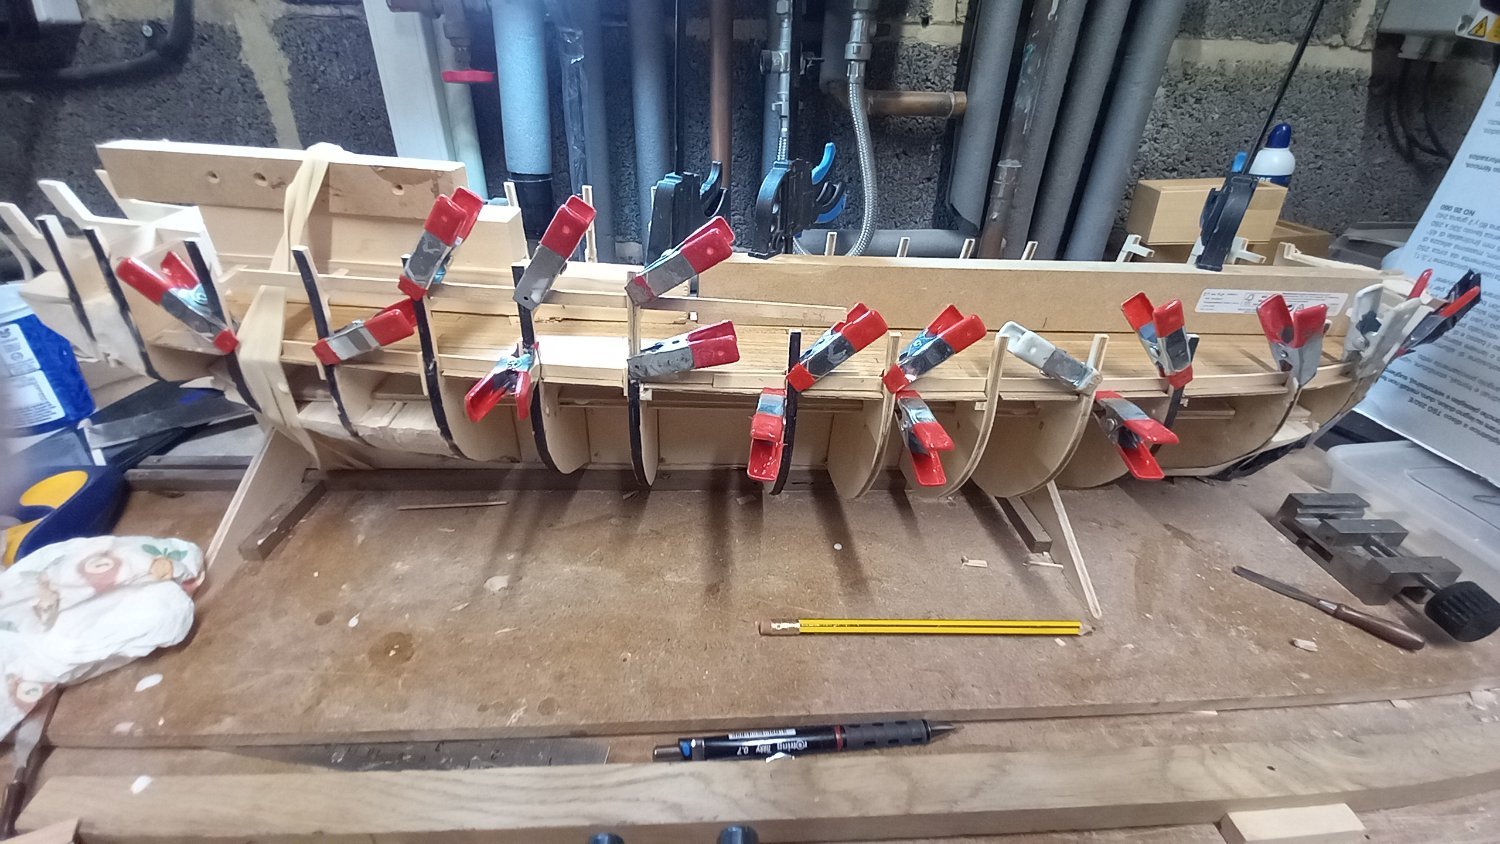
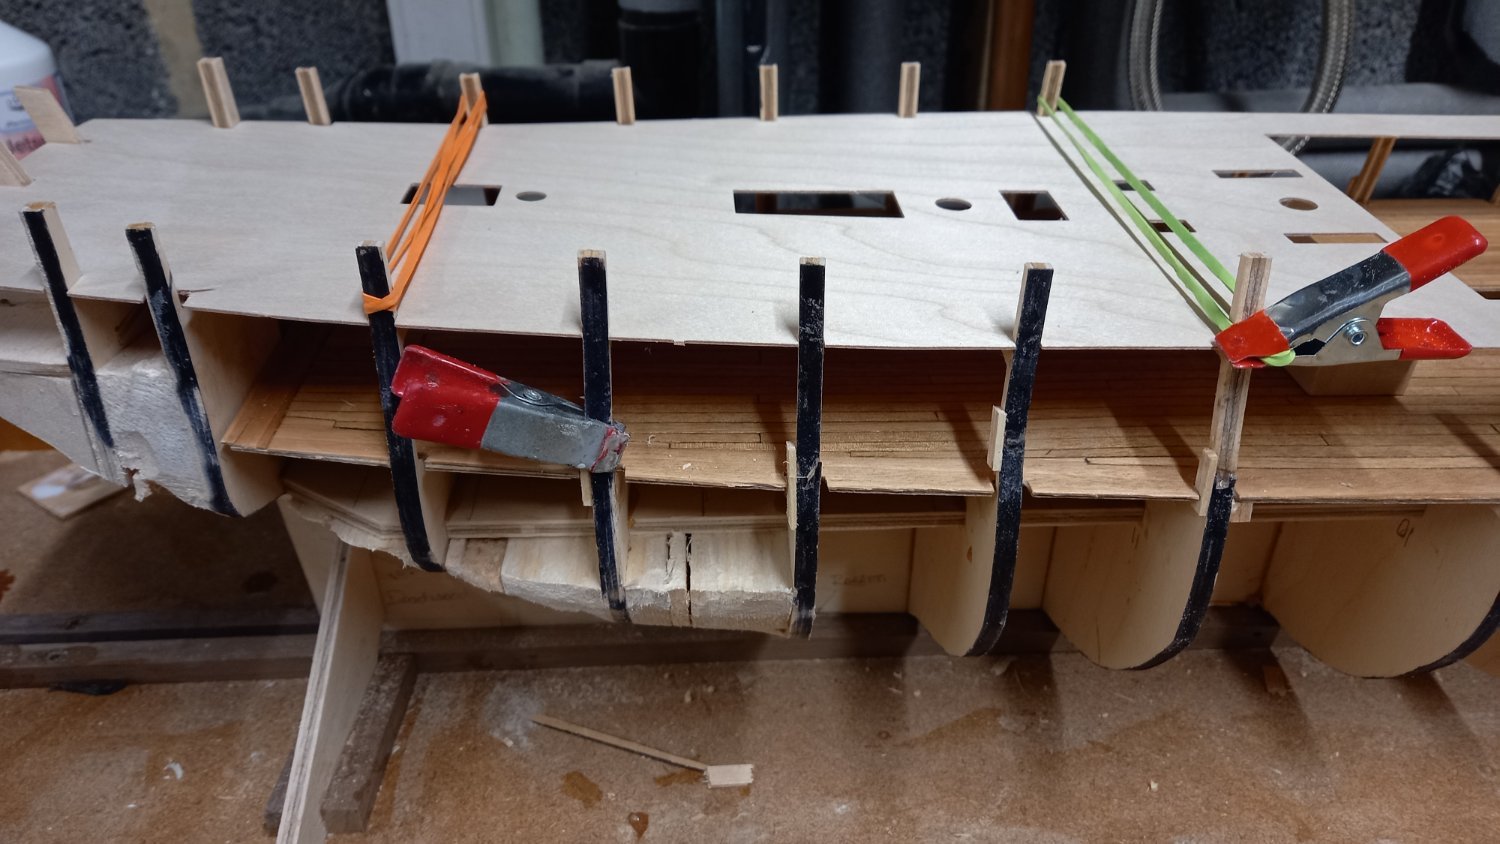
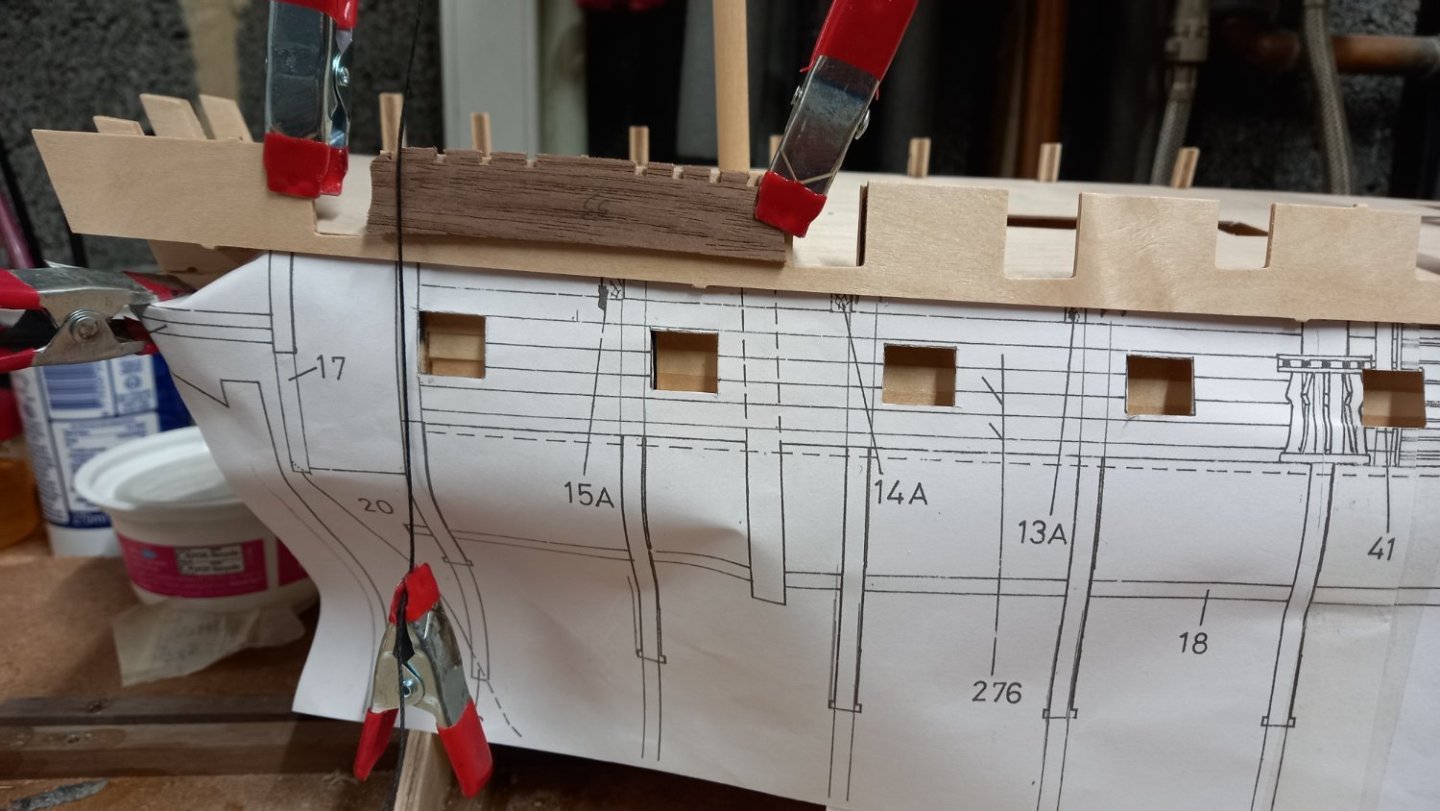
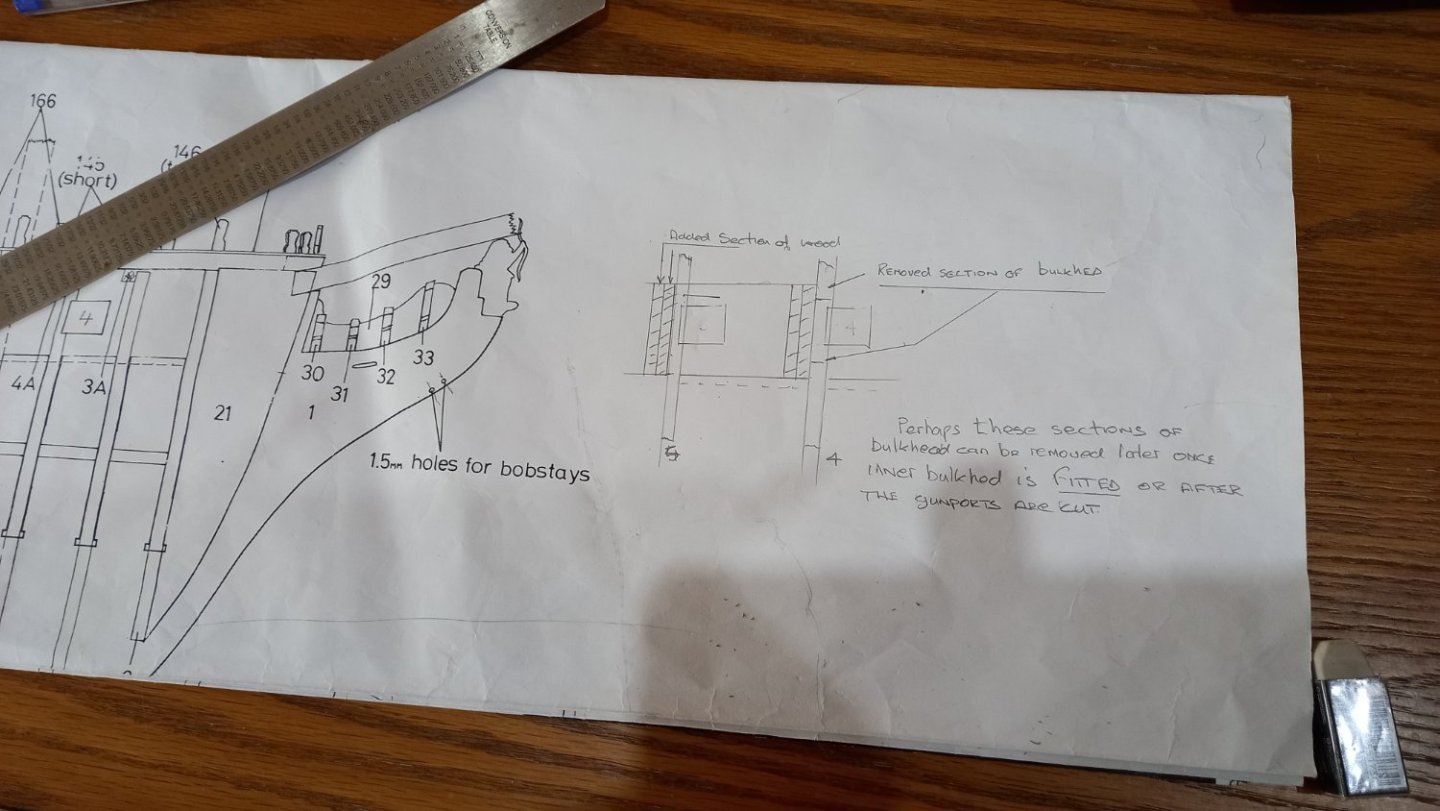
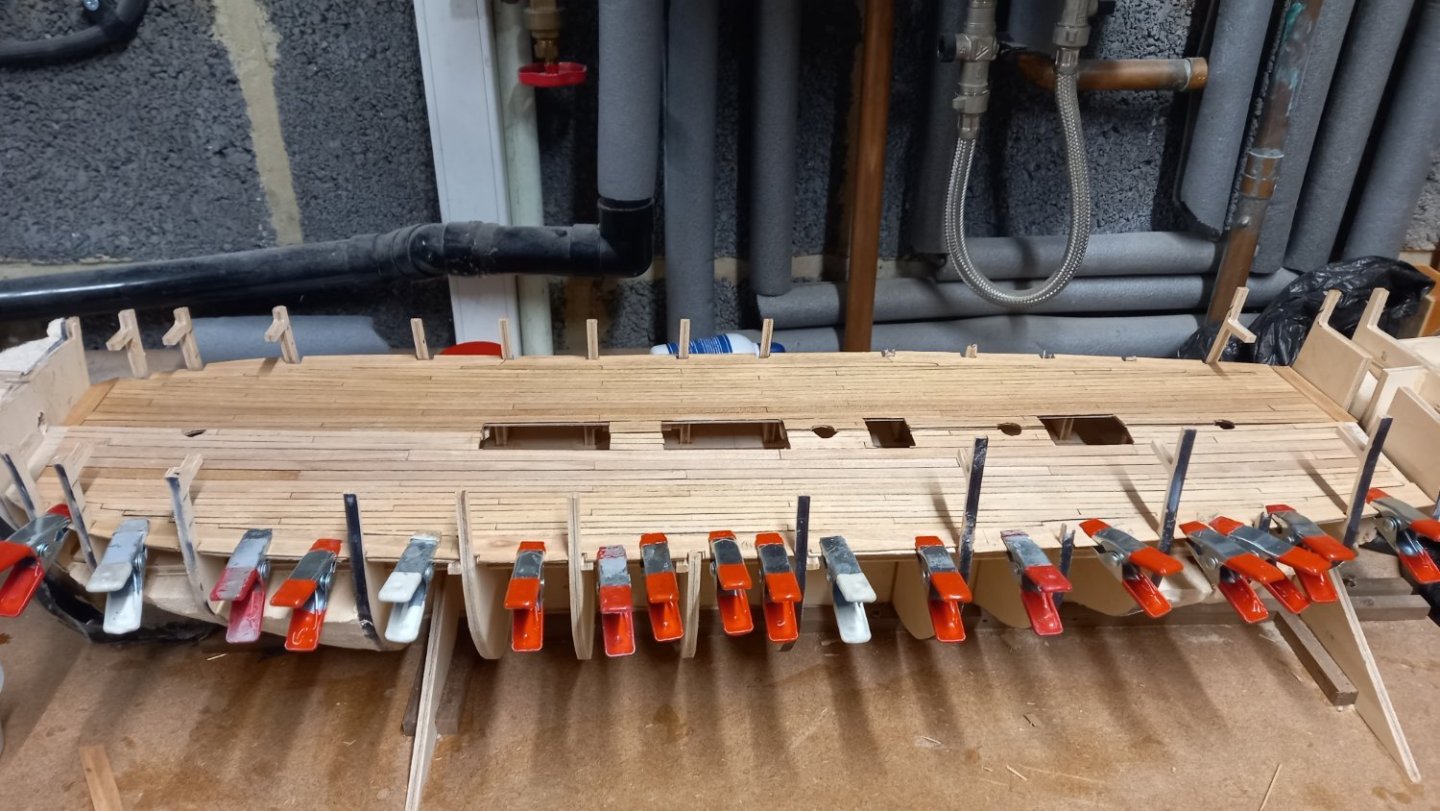
Ok lots of clamps to make sure that the deck halves were secured flat onto the supports( athwartship beams). Unfortunately I missed an area around the main mast were I forgot to fit some extra supports athwartships underneath, so ended up gluing a piece underneath which looks to have worked ok. I also fitted the upper gun deck as a template to ensure that the bulkhead uprights were in the correct positions whilst gluing them back into place. Before I build up of the inner walls where the gunports are located I need to exdend bulkeads 4 and 5 towards aft where it looks like on the drawing that the gun ports will hit No's 4 & 5 bulkheads. This has been mentioned in many previous Diana logs but as yet I am unsure as to how to proceed with this. I am toying with reinforcing the bukheads and then possibly cutting away the initial bulkead section between the two decks, but unsure at what stage to do this. Perhaps after the innerwalls are constructed or leave until after the gun ports have been cut. Any help with this would be greatly appreciated. . TThere is still another issues as to whether or not to extend the inner walls beyond bulkhead `5 . I think if I do I would need to chamfer away the inner corners of the bulkhead uprights or the distance between the inner and outer hulls will increase and then perhaps the guns would not stick out of the gun ports as far on the curved section than at the midship section of the ship. After Allans timely intervention, ti would appear that the CC supplied guns do not comply with Bloomfields pattern and are too short anyway. There has been a few Diana builders who have continued with the inner walls beyond bulkthead 5 but the thinning of the bulkheads further in this area might weaken the bulkhead uprights too much. Any help on this too, would be very much appreciated. I am currently thinking of returning to the rigging of my Endeavour, whilst I think about these issues a bit more.


-
Thank you Allan for what is always your appreciated input. Yes please do as it is always worth checking these things. For the record the brass cannon supplied by CC look really good and I have both oportunities of either blackening them or airbrushing them ( now I have the necessary equipment)However as yet I havn't checked the accuracy of these against AOTS Diana and nor got around to what other modellers have decided to do in the past. I also have a few decent books on the subject so I have plenty of research to be get on with. Any advice or pointing me in the right direction is always welcome so keep it coming Best regards Dave.
-
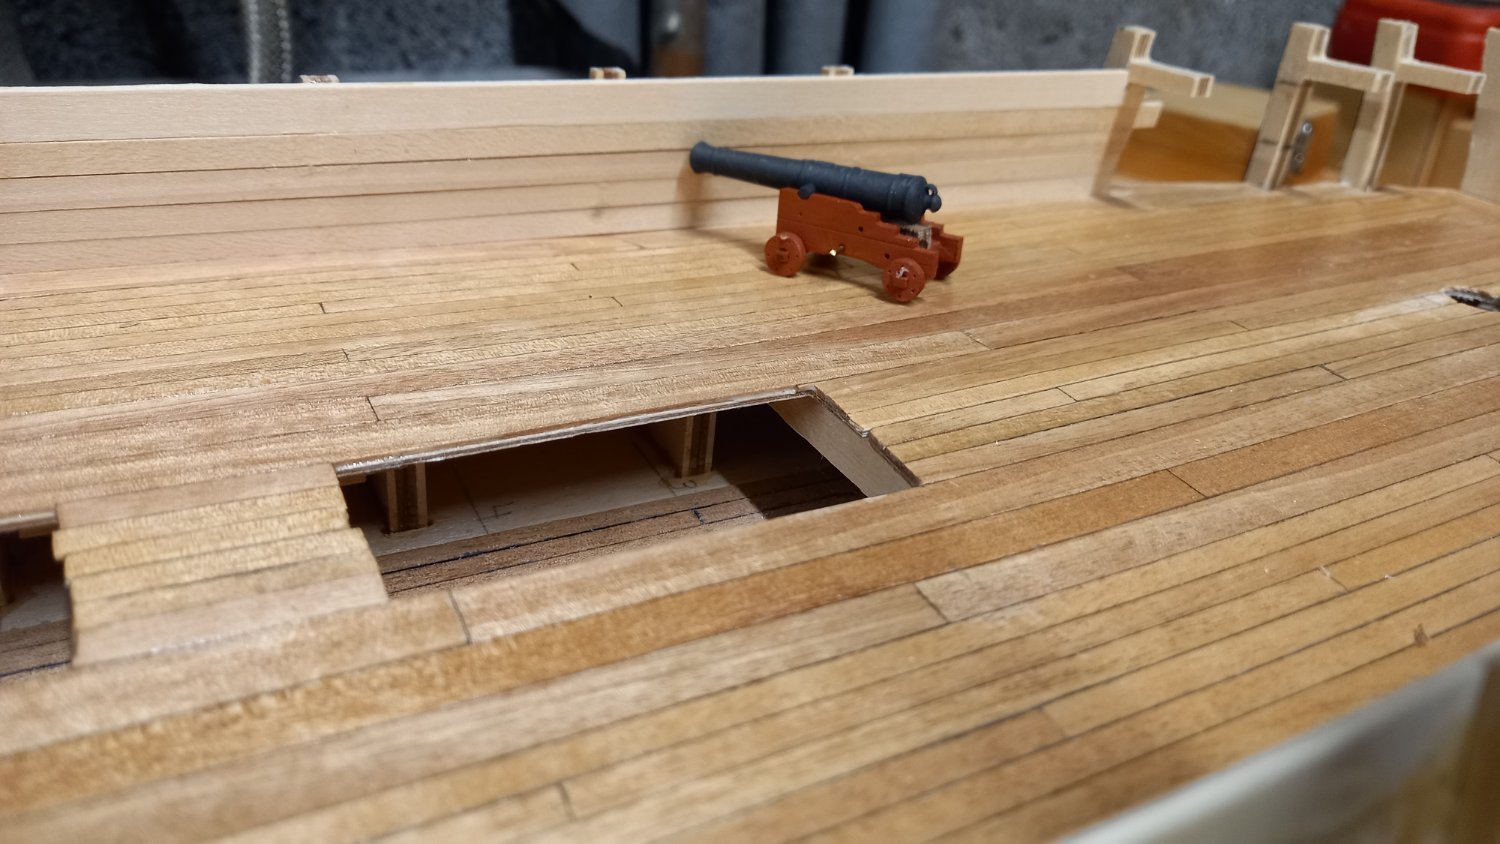
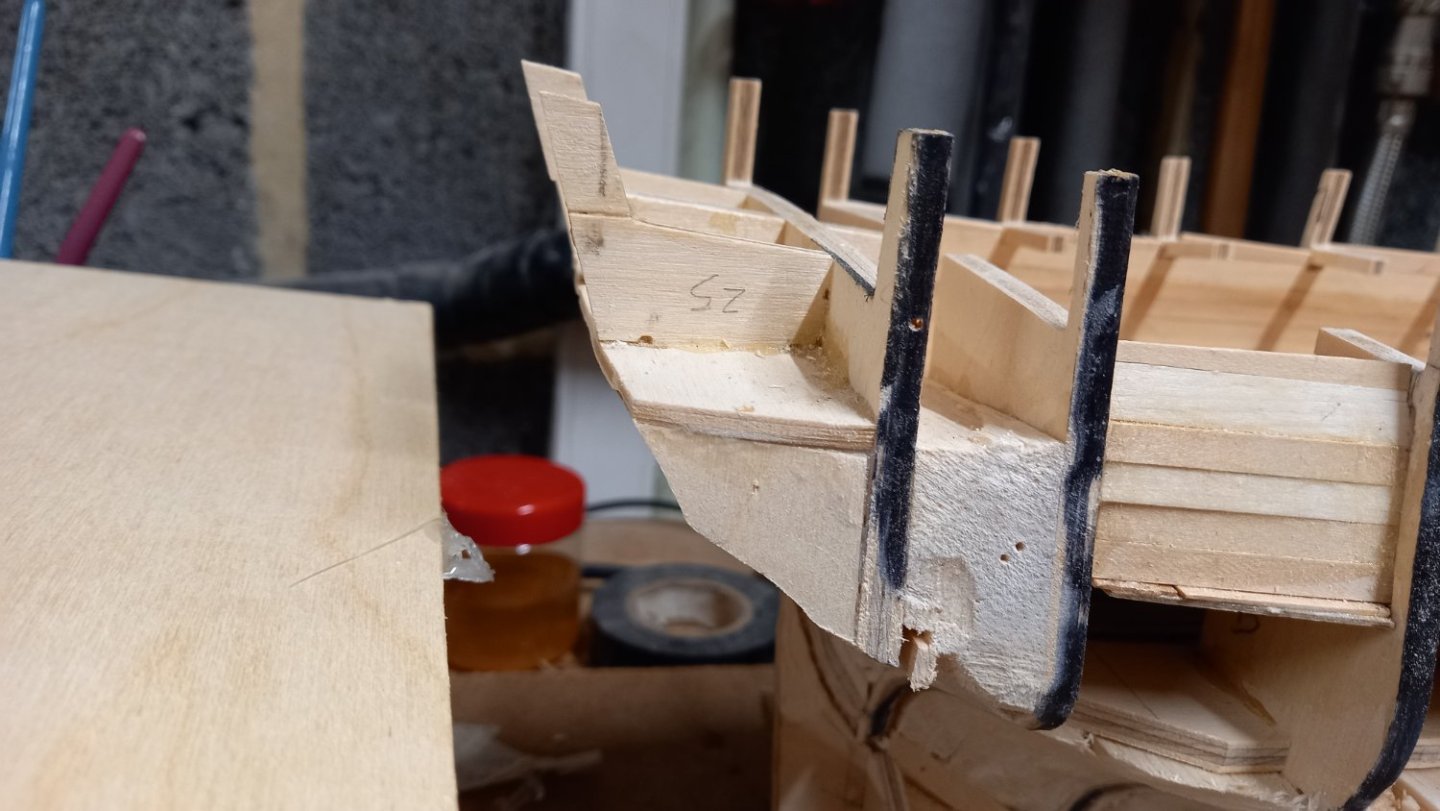
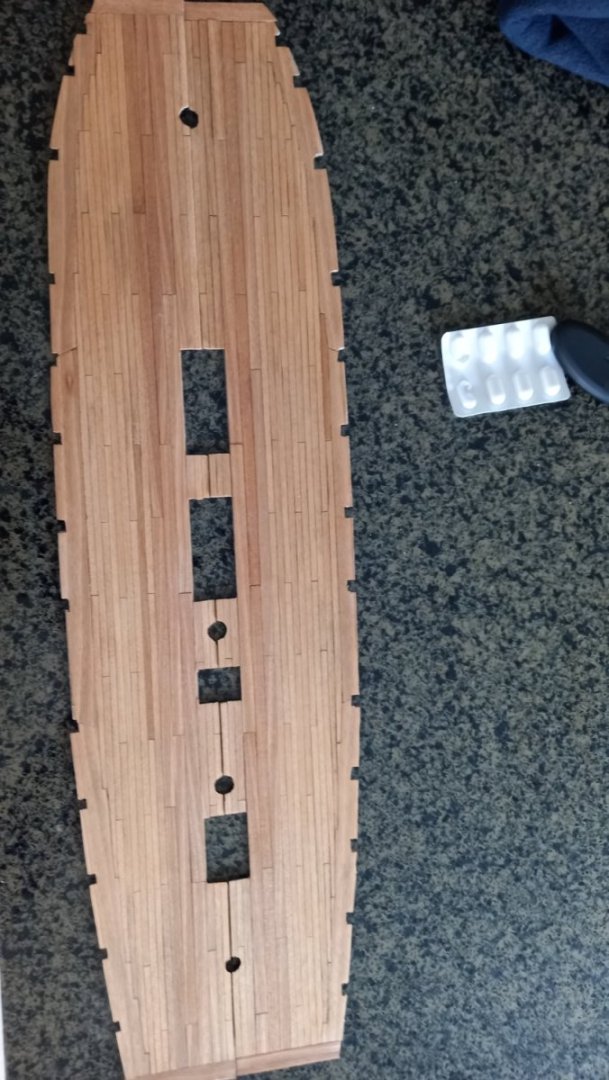
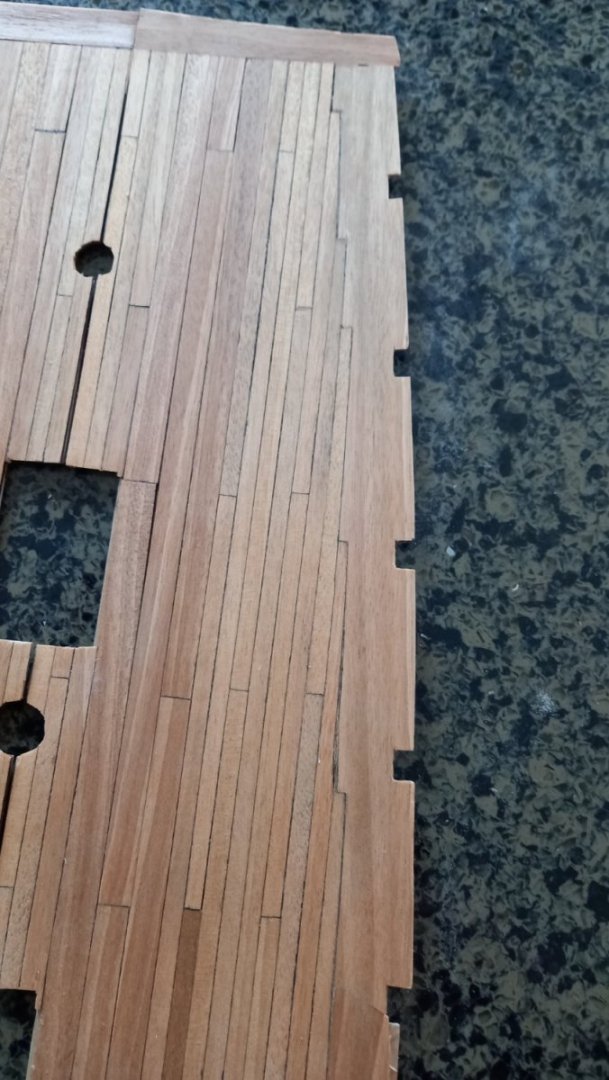
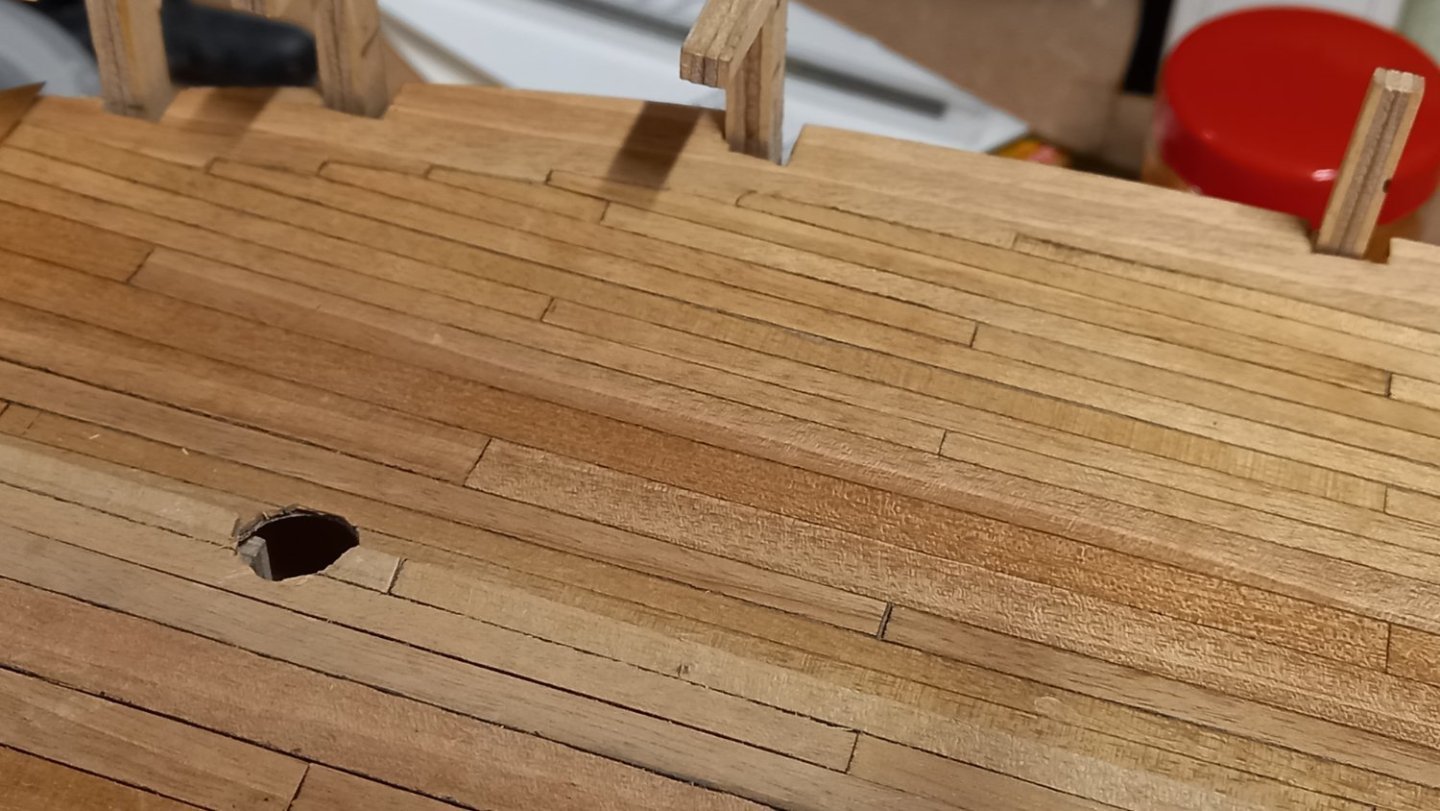
Finished off fitting the planks to the lower gun deck and joggled 4mm planks to square off the ends of the planks. Not perfect but as this deck will not be seen except through the gun ports and as this my first attempt, it was good practice joggling the planks into the margin plank. I am not sure if cutting the false deck into two seperate pieces was the best way forward, as I have found that gluing the planks onto the thin plywood without pinning the false deck onto the bulheads, has allowed the deck to curve/warp the wrong way ( oppisite to the natural curve of the deck) I am sure I will be able to get this right by adding more curved supports under the deck and bending the finished deck into position. I will however need to do this before planking the hull which was not my original intention, but will now be as per the instructions. If I were to do this again, I would have not have bothered with fitting margin plank and fitted the false deck whole first and then glued the planks into position. One other problem I had was when cutting the Tanganyka wood it had a tendancy of following the grain and is very soft. I ended up being very wasteful with the tanganyka strips. Sorry if this sounds like I am making excuses and I could have soaked the strips of tanganyka in water first but I also worried about shrinkage as I have not used this wood before. For what it is worth I would definitely use Maple instead if I could source it other than CC. I now have the task of repairing the upper section of the bulkheads which many have broken off. I may have to strengthen these somehow and ensure they are back in their original position. I have thought about fitting them with brass pins but unsure if this will work. I definitely need to be more careful the next time i do this. This construction of the Diana has so far been way more dificult then my previous two builds, but determined to carry on.
-
I know where you are coming from but I am sure youwillbe fine but good luck anyway.
-
Great looking Gun tackle David and should put you in good stead for when you move on to the main rigging. Have you decided on sails or no sails and if that is a yes will they be furled or not? I am really looking forward to watching your approach to the rigging and no doubt will be up tp your usual high standard like the rest of your Diana's build.
-
Once again a big thank you Jason. Best regards Dave
-
Thank you for explaining that to me as it was most helpfull. Also the link to your work which looks amazing .Hopefully I can imulate something half as good.Thank you. Best regards dave.
-
Sorry for more questions but what are all those single edge razor blades made from and how do you cut the shapes out of the blades.Thank you for your helpand patience Dave
-
I take my hat off to you Sir. Amazing workmanship.This is something I would like to try on my Diana but fear I might end up using the brass profiles from CSM but will definately give the wood a try but notsure it is within my skill level. What wood are you using Jason and sorry if you have already mentioned this somewhere as my memory fails me. I look forward to watching your progress.Best regards Dave
-
There are some fantastic work on those wood profiles.Jason and just wondering if you made those yourself and if so what did you make them from? I have noticed that Cornwall ship models sell brass profiles under Caldercraft fittings and quite reasonable for 1mtr lengths and wonder if I could use them. However i am unsure if these are the correct sizes. https://www.cornwallmodelboats.co.uk/acatalog/caldercraft_83302.html#SID=507 Great looking Ship and some very fine detail. Look forward to your progress. Thank you Best regards Dave
-
Thank you and that is probably what I will end up doing. Thank you for your quick response.Best regards dave
-
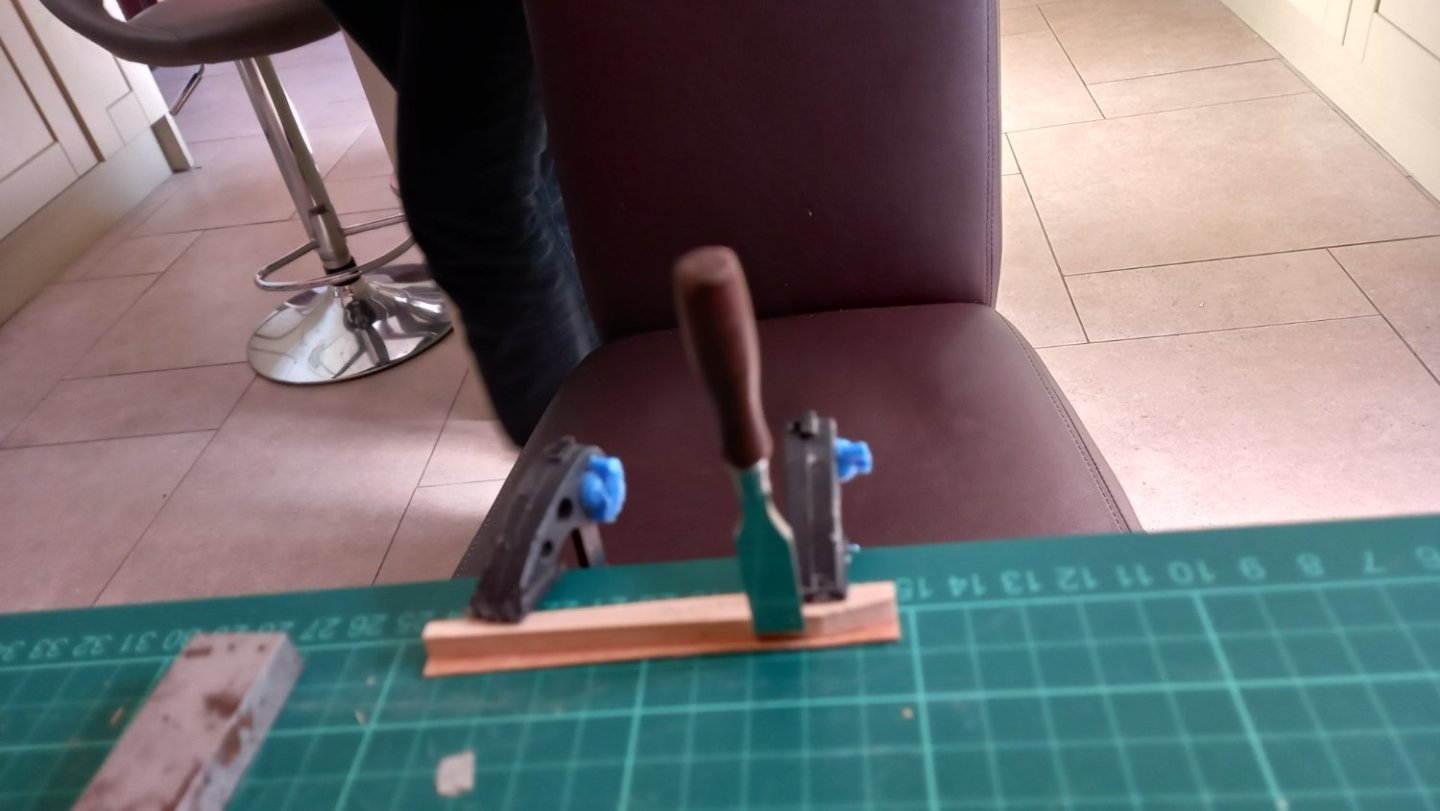
Thinking of cutting a template out of metal and sanding several sticks at once using a disc sander. Hopefully I can meke the template as accurate as possible, although I think the wood one was fairly accurate. Just another thought and might work. I could easly make this out of brass or copper sheet but hopefully not too soft.
-
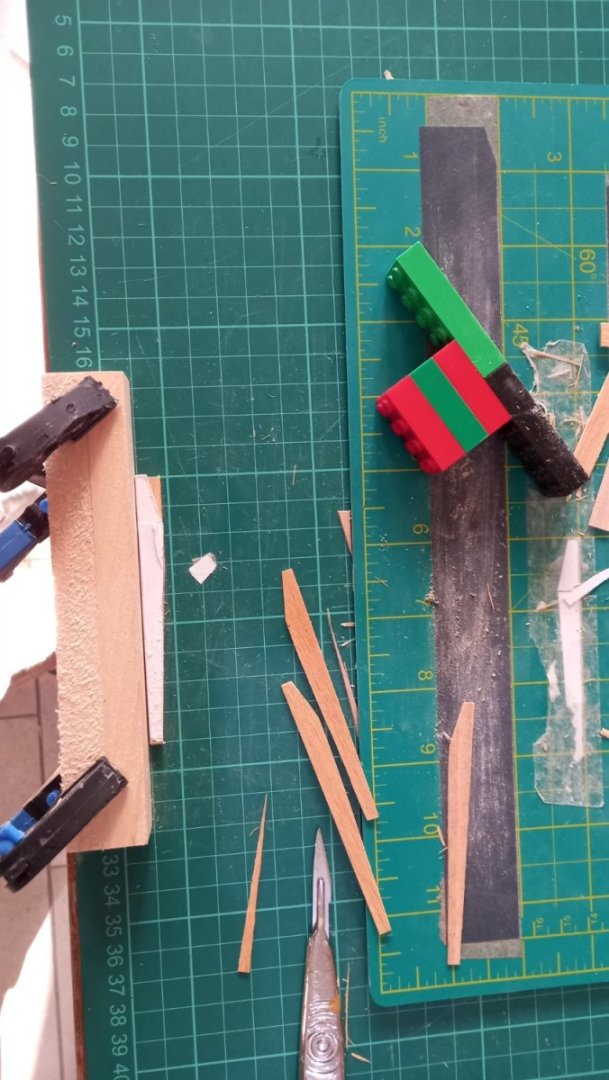
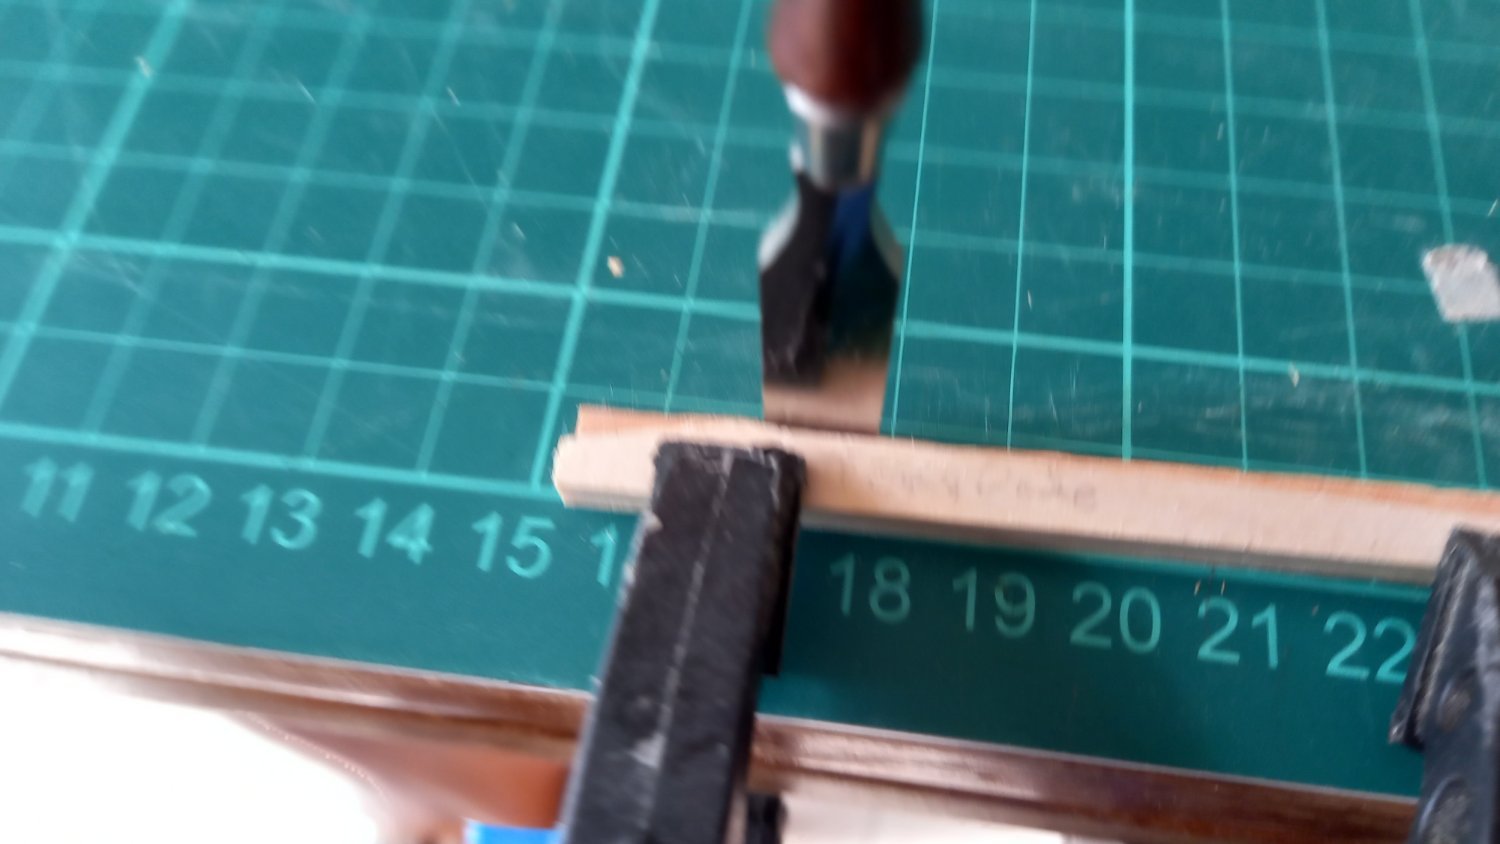
I have attempted to make goggle sticks in a sort of mass produced way, Ie cut a good number to length- no problem. make a template as accurate as possible from thicker plywood and then clamp each strip to the template and cut off a number of google sticks and give a light sanding. I have tried cutting them with a scalple knife and with very sharp chisel . The material is 1mm tanganyka which is very soft and both the knife and chisel cut the wood fairly easy. I am still having problems with leaving small gaps and wonder how I can possibly get them to fit better before cutting into the margin plank. Surely I don,t need to make each one like I have made the template or make each one to fit in situe if that makes sense? When I have made a batch, most of them do not fit exactly and I need to swap them about like a jigsaw puzzle. Joggling is definately an apt word for them. Any ideas would be very much appreciated before I bury myself in joggling sticks