DaveBaxt
-
Posts
1,324 -
Joined
-
Last visited
Content Type
Profiles
Forums
Gallery
Events
Everything posted by DaveBaxt
-
Some terrific chisel work on those beams and the overall workmanship is excellent. I hope you get more time to work on her and look forward to your progress. Good luck Dave.
-
The usual excellent workmanship producing a first class display.
-
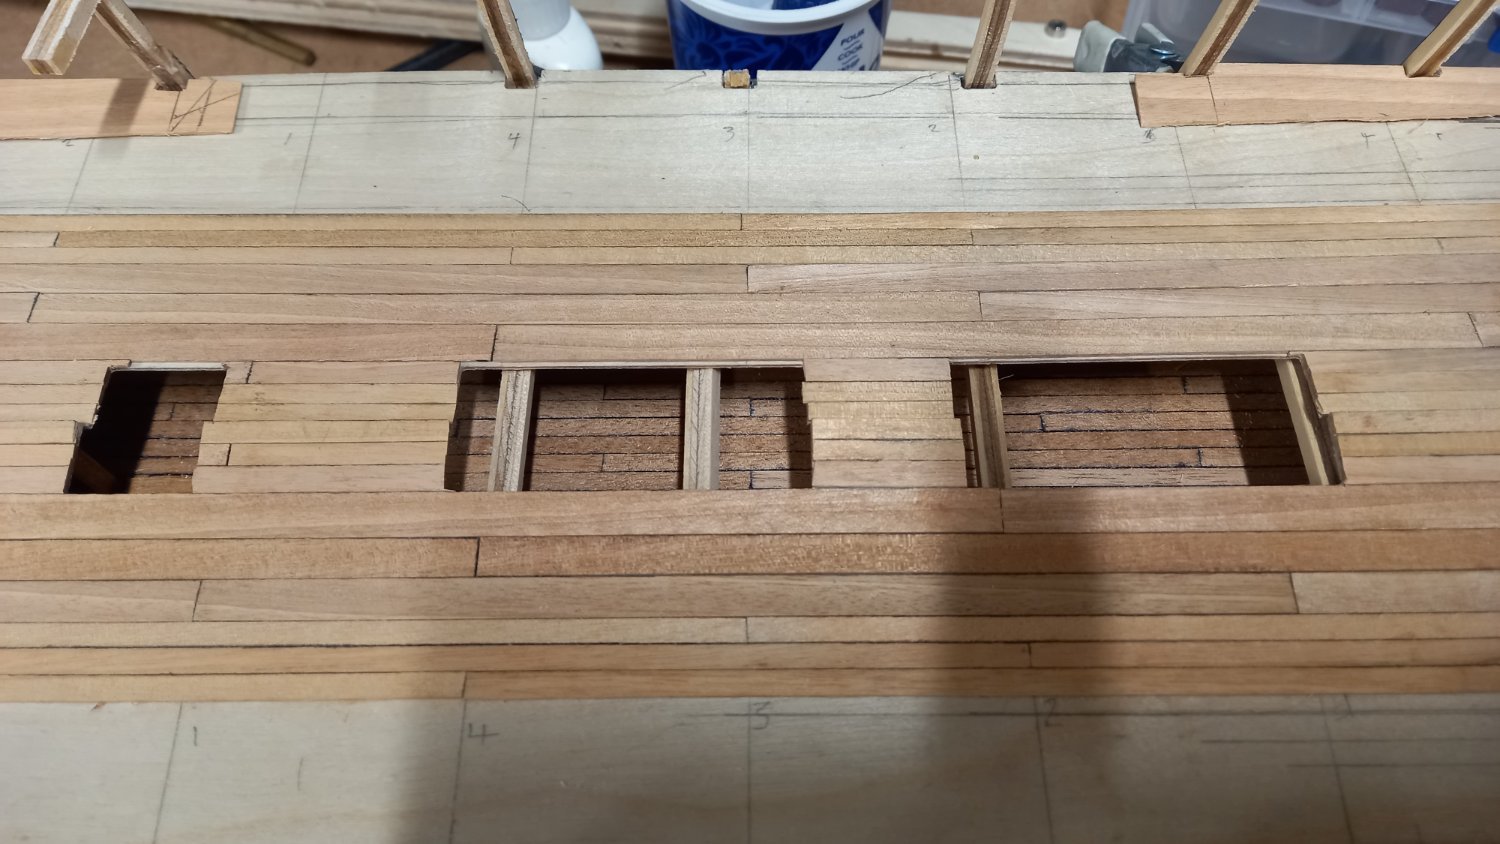
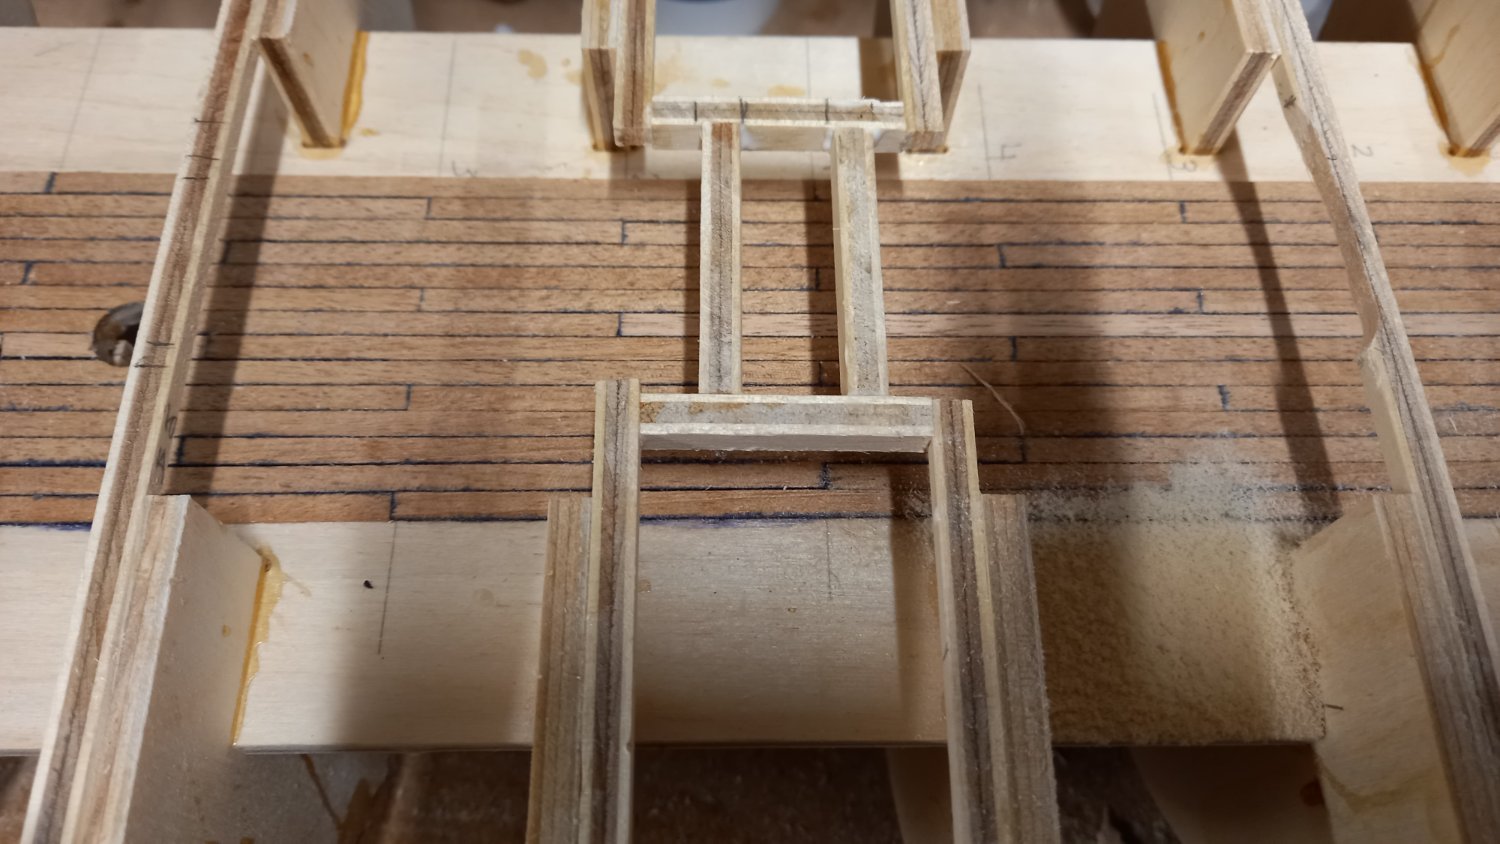
A big thank you to DaveEN for a great solution to hiding the Beams across the loower gun deck hatch opening.Although probably not obvious under the hatch covers but thought I would go down this route also. Might even stain these a bit to darken them. I also had to shift No 10 A beam to the other side of the bulhead so again not to go directly across the hatch opening. I thought I would do these now in case I forget them, as these beams are not mentioned in the instruction.


-
I have really enjoyed your log so far and has been a great help with the gun ports and what to expect when I eventually get around to that part. I started building the Dianna a couple of months ago and currently working on the the lower gun deck so probably a good while before I get to the current stage you are at. Good to hear your health has rerturned and arer back to working on your models. Your Diana is coming aolng niicely and I look forward to your progress. best regards Dave
-
Thank you Derek for your kind words. I am definately find the rigging more challenging on the Endeavour than the Bounty now that I am trying to do it as correct to the best of my knowledge and skill wise. I am also working on the Diana whenever I have had too much of the rigging but that also has quite a few challenges too. I sometimes wish I had gone down trying a Vangard model as the Diana by Caldercraft has a number of design issues. As you are already aware, there are also a number of issues regarding the rigging lines supplied by a lot of kits and after seeing your own rope and a good few others who make there own I am definately thinking of getting the Syren ropewalk and making my own for the Diana. I have used rope for my Endeavour stays made by 'Ropes of Scale' which is far superior to what has been supplied in the Caldercraft. However buying all the rope from Ropes of scale would be quite expensive .although the prices are very reasonable I am quite wasteful . Best regards Dave
-
Thank you Jason for being able to recall this in detail. I am assuming you mean by build up that area of the gun ports as both ways will need a square box fitted inside between the internal and external hull ( sorry not sure what this is called) I think I would like to extend the internal hull planking further as it finishes the job off nicely I think. However I did find Rays log and after checking the drawing, through everything into doubt. I am wondering if I could add some material at the bulkhead uprights rather than shape them to increase the gluing surface area for internal planking. Hope this makes sense and I appreciate your patiience.
-
Thank you Sam. Its very frustrating getting set poor quality wood or even the wrong wood if that is possible. I might end up keeping the best of the strips or the same colour for the top deck. Sorting the correct widths and colour is very time consuming but I suppose that is what the hobby is all about. However this is the least of my problems to what might be down the road with gun ports inline with Bulkheads etc. This is definately my biggest challenge yet!
-
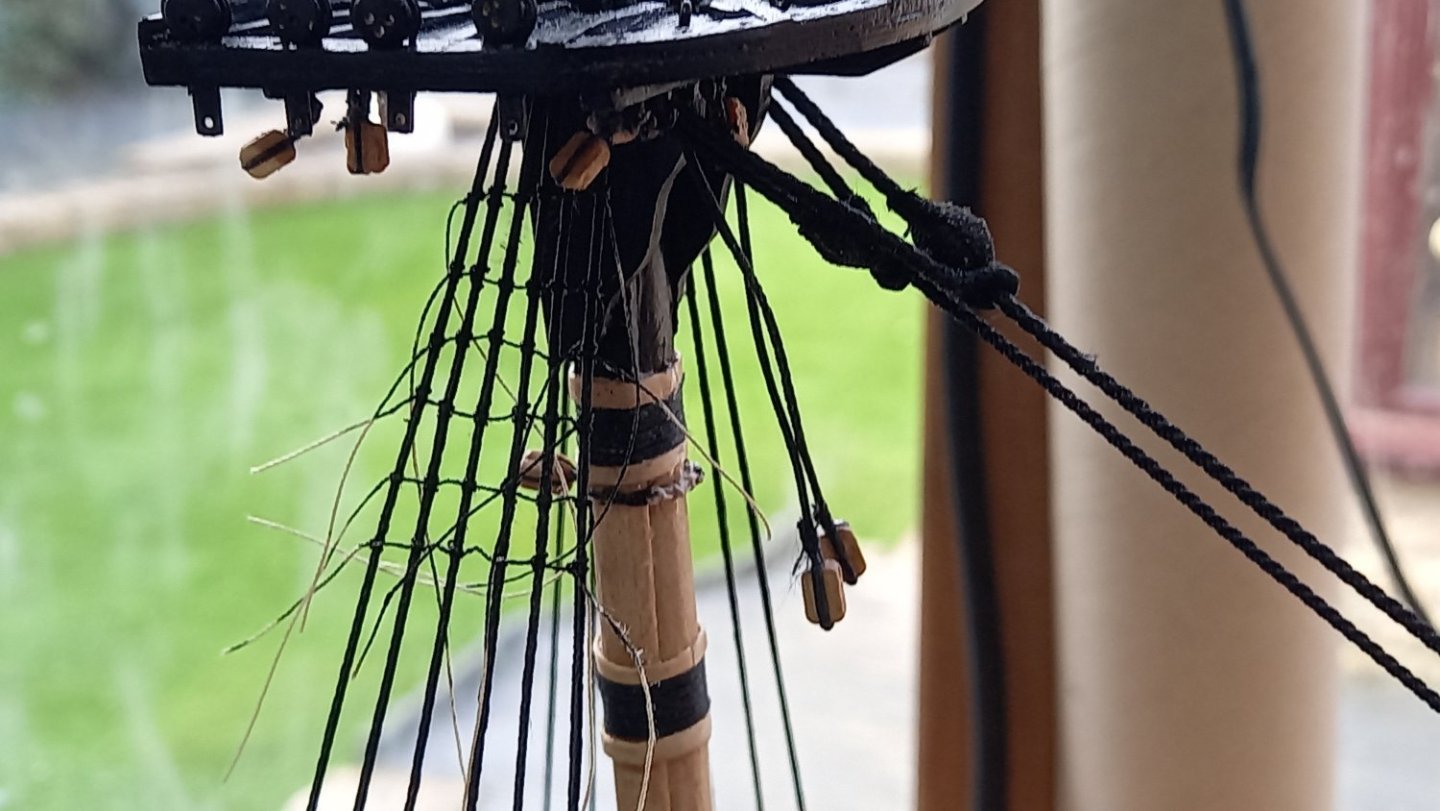
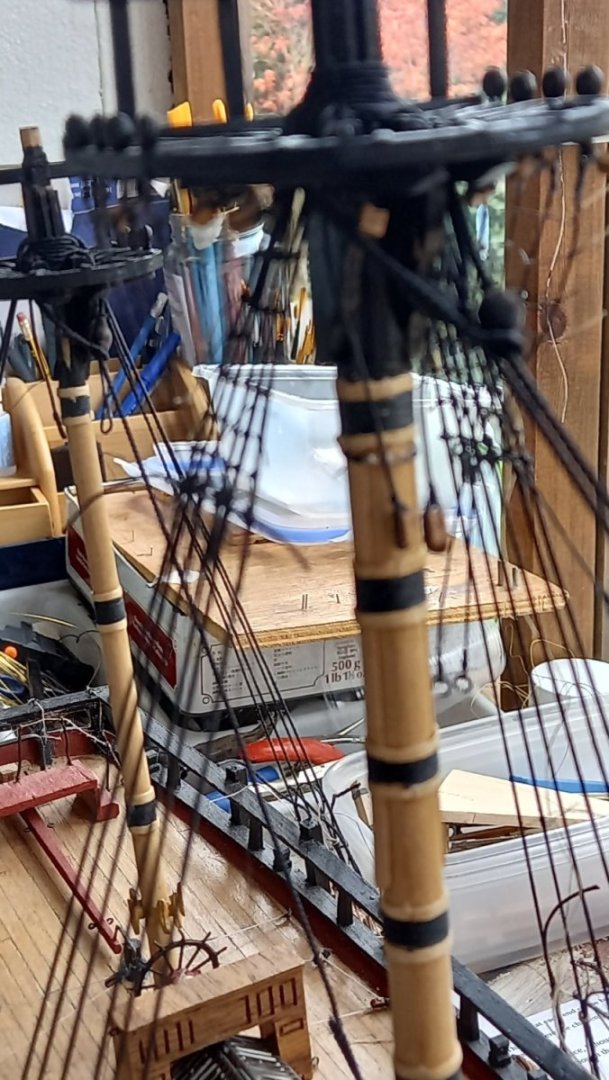
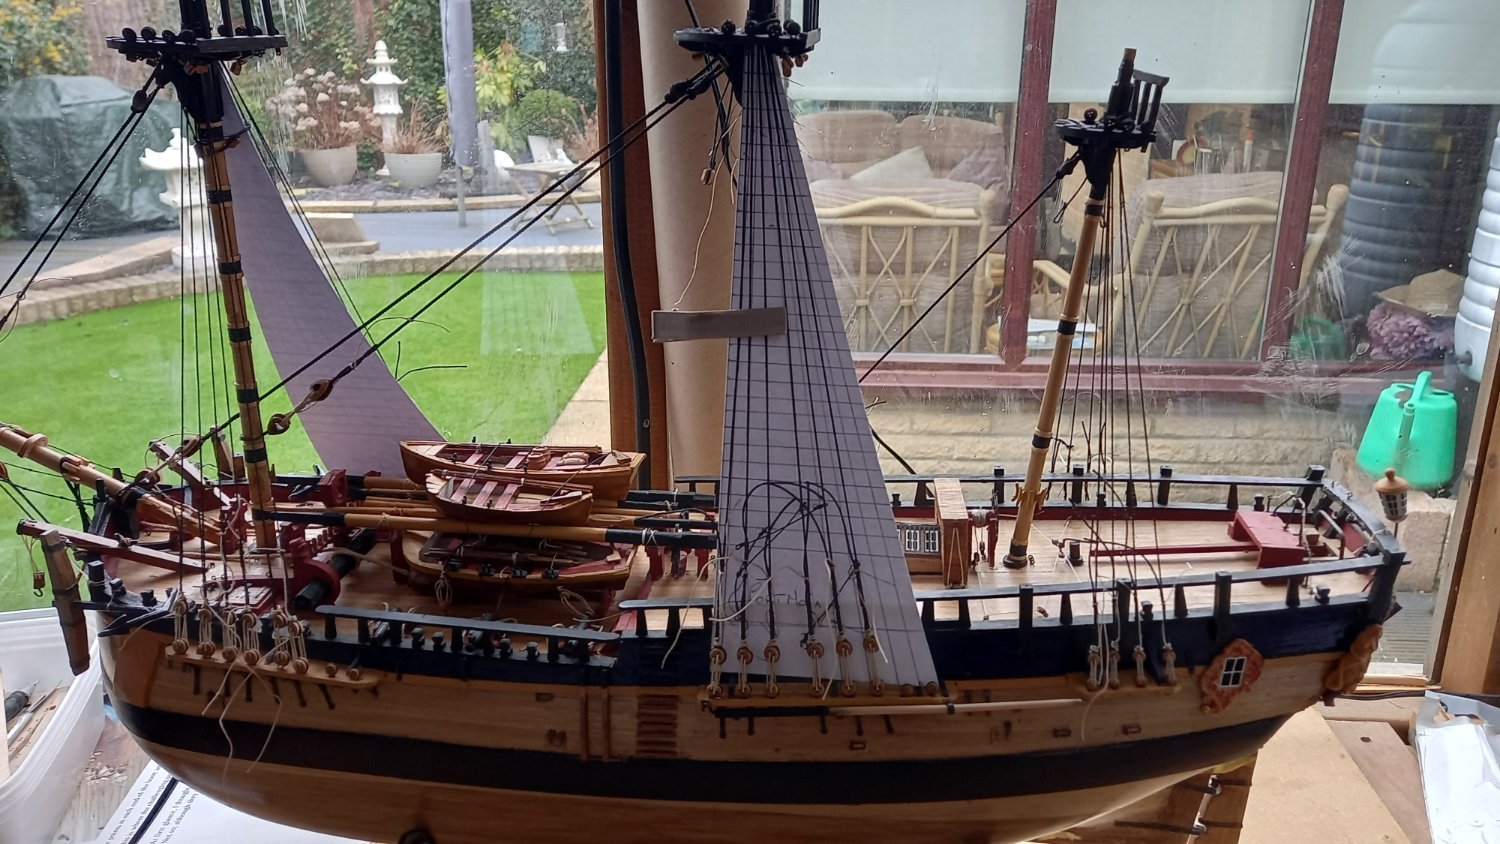
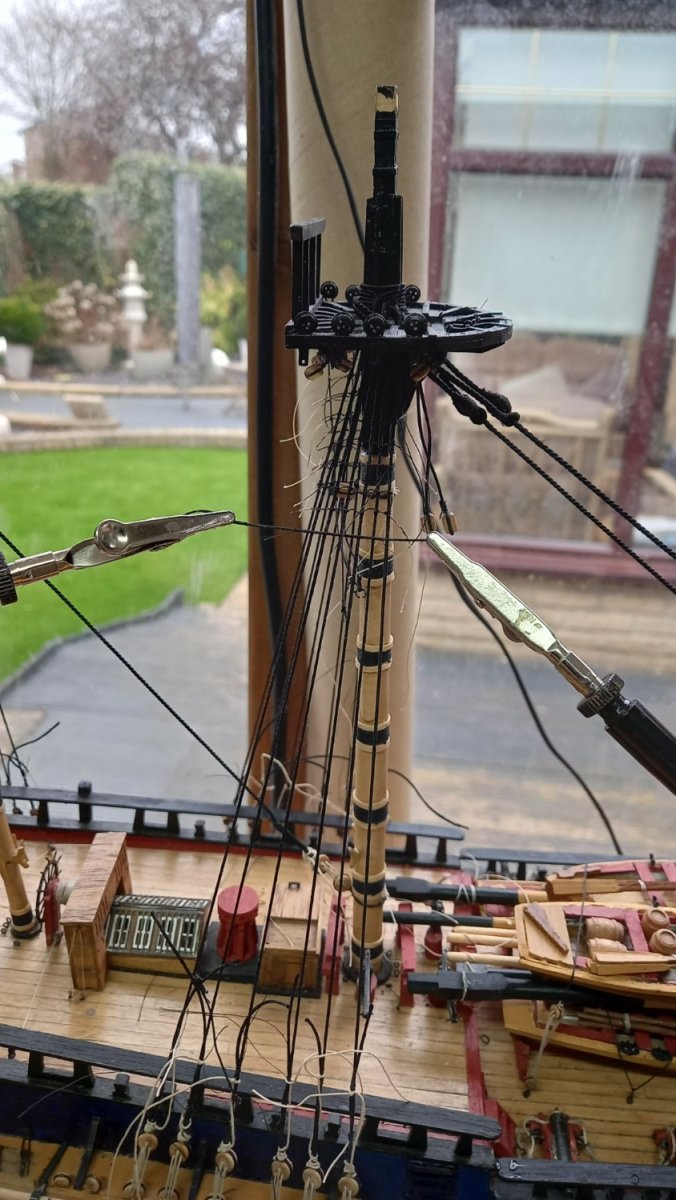
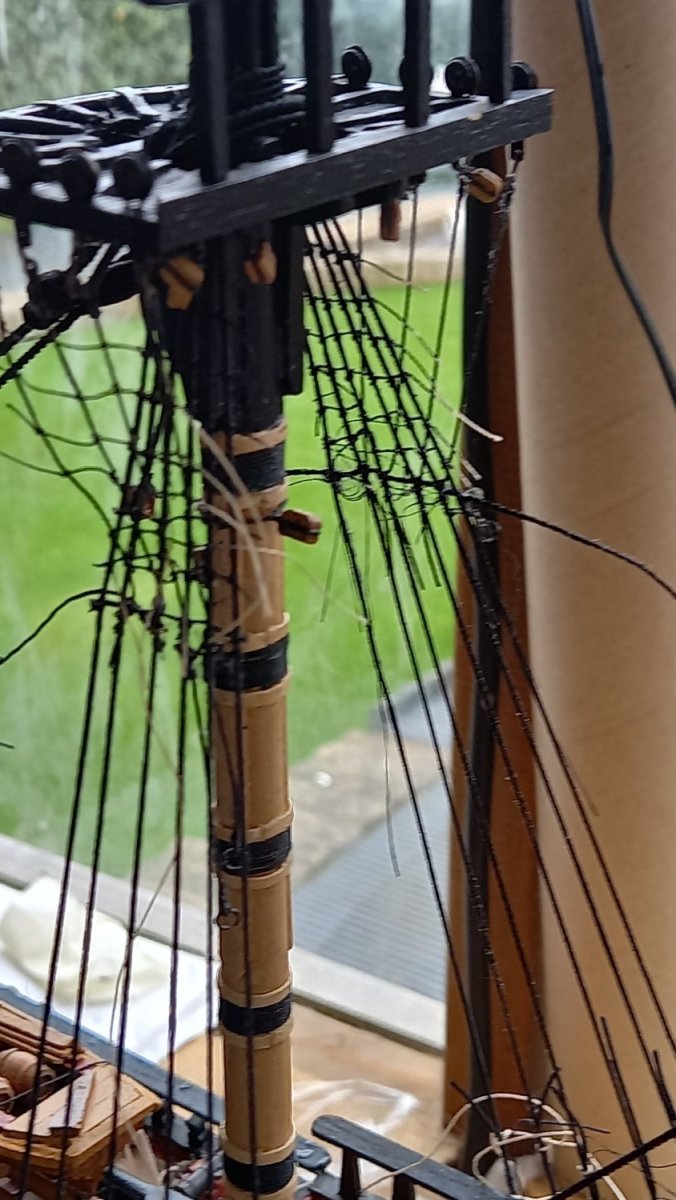
I have made a start on the futtock shrouds and the Catherpins. I also added ratlines using 0.1 mm natural rope and the dyed this using black indian ink. 0.1 mm is a bit on the small side as according to lees should be slightly larger but I think using the 0.25mm black thread, I think makes the knots look too large. I have also fitted the ratlines on the shrouds at the very top ( behind the futtock shrouds) I have no evidence either way that this is correct as some modellers leave these off. I therefore fitted the ratlines to shrouds prior to fitting the futtock shrouds as I thought it would be easier to do this that way. I am fairly sure this has to be up there with the most frustrating bit of rigging the futtock shrouds( I know there are a few) but It has given me a squnt a number of times. Taking a break for a few days and heading off down to Bristol and Bath for a few days away from modelling but couldn,t resist a visit to the SS Great Britain. So I will be keeping an eye open to see how they did things in the 19th century


-
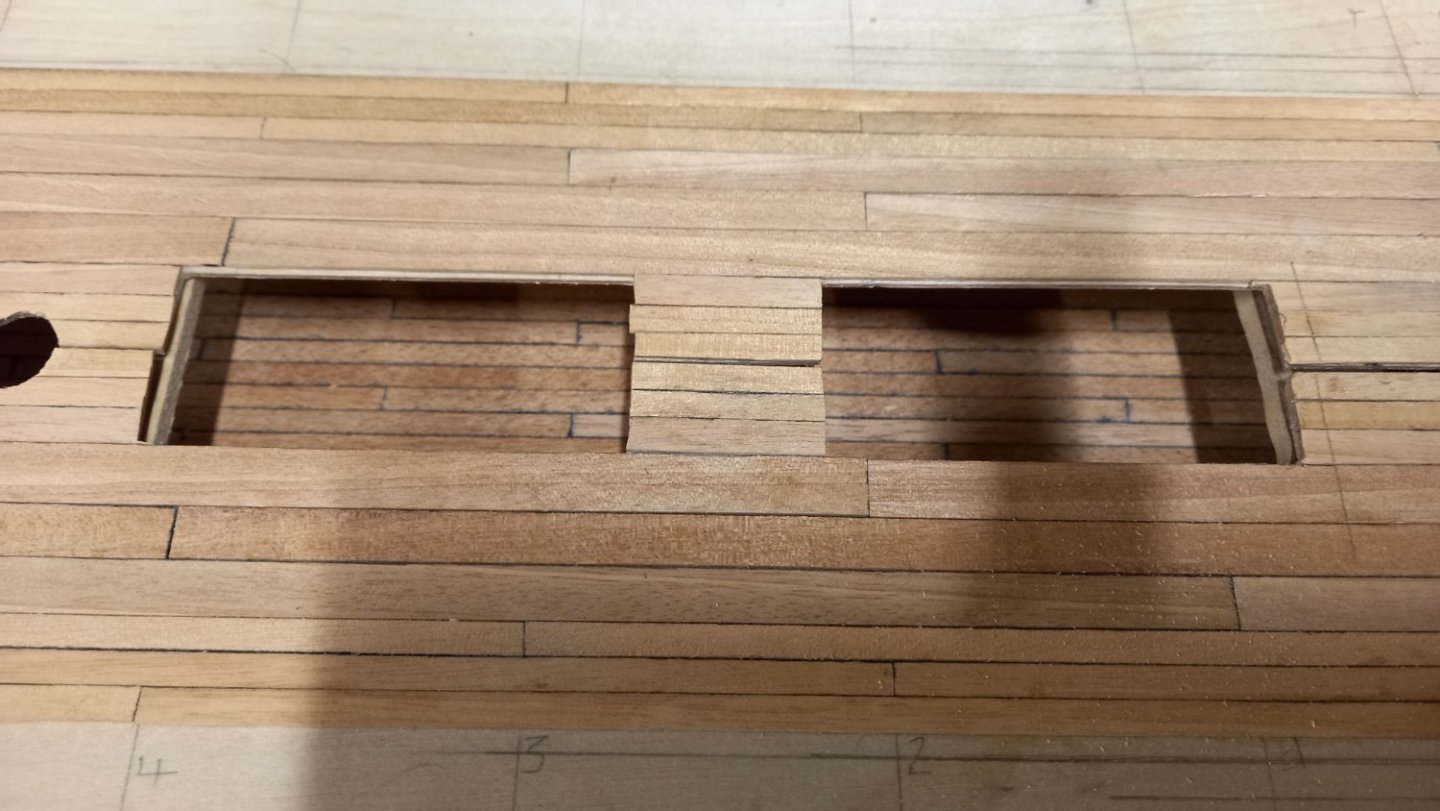
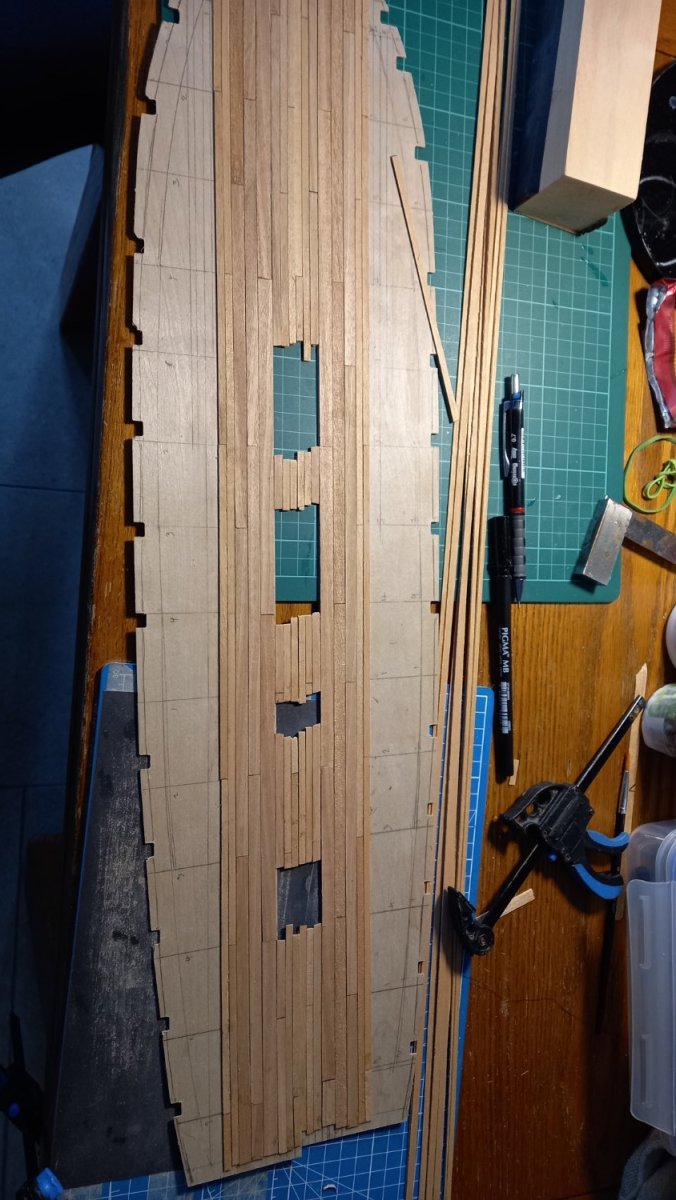
After not being too pleased with the maple stock received from Caldercraft, I ended up returning to using the Tanganyka which came with the kit. I have since ordered some Tanganyka 1mm x 100m sheet from CSM as I have decided to try fitting a margin strake using this Tanganyka , unfortunately this also has a very large grain running through it but as this is the lower gun deck and will be hardly be seen I thought it would be ok to proceed. After the help from a few modellers on this forum I have now got some really good marker pens and after sanding the edges of each piece of planking individually I have no more bleeding. I have attempted to copy the decking strips of the drawing in AOTS Diana using different strip widths and as most of the strips were all slightly different in width I made sure each 1 mtr plank was laid the full length of the ship and therefore could not mass produce the strips so they would not get mixed up. So far i have made templates for the margin planks and cut them from the Tanganyka sheet using very sharp veritas chisels and then sanding. Hopefully the difference between port & stbd is rectified due to making templates as the position of the bulkhead uprights are slightly different. Since cutting the false deck into two it has been much easier to work with and I am no longer breaking these uprights off when attempting to fit and remove the deck whole. Here is the work so far. will be start of the spring gardening season and not forgetting working on the rigging of the Endeavour.I am leaving the work on the Diana for a while as I am off on holiday for a few days and visiting the SS Great Britain down in Bristol. Once I return it.


-
I like the look of that Proxxon sander Derek. The fitting on the end must be a game changer. I have the other larger one which works off the mains. It is great for doing hull planking and masts etc but for that pesky little fiddly job its not much use. Darn it Derek it looks like I need to get another tool . Only joking and thanks for the update on your newest project which is coming along nicely. Best regards Dave
-
Your interest is always welcome Thank you
-
Yeah Sam I am finding it slow progress and difficult to figure out with what to do first. I started with the lower shrouds before the stays but I am sure we will all get there in the end. I tend to work on the the Endeavour through the week and the Diana at the weekend. It gives me a headache working on the rigging all the time so need a break .Ha ha. Good luck with the rigging and you are doing a cracking job so far and your workmanship is far superior to mine.
-
Nice work on those yards Sam
-
Thank you Gregory .Yes I am sourcing strips and Veneer and something I might look into. I am beginning to think you might be correct regards it being beech as it cerainly doesn,t look like your mapleveneer or any other maple planking jobs I have seen on this forum. I am beginning to wish I had used walnut as its readily available and I haven,t had any issues with walnut in the past.
-
Thank you maRk for your welcome input. The pen you suggest has already been suggested on here and seems to be much better than when first used a different make on the Tanganyka. However the chisel end of the marker looks interesting and definately might be worth a try. Thanks again for taking an interest in my log. Best regards Dave
-
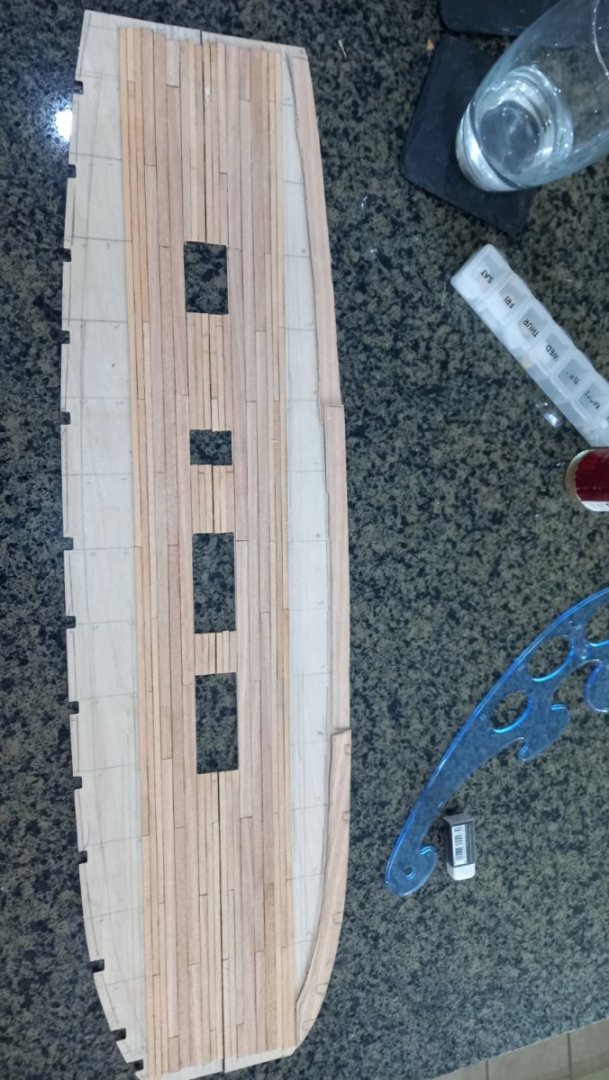
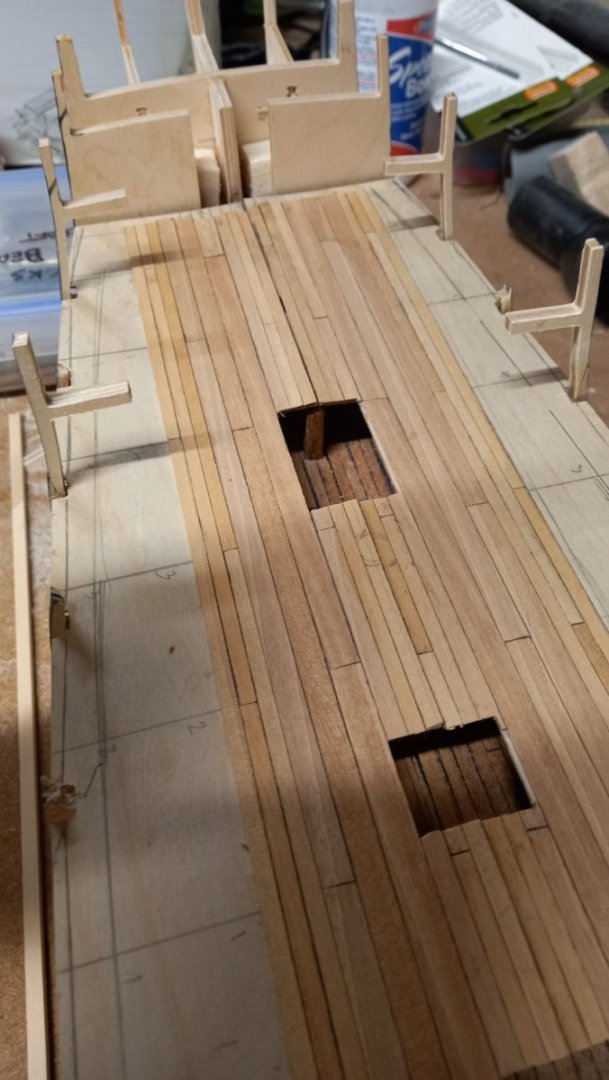
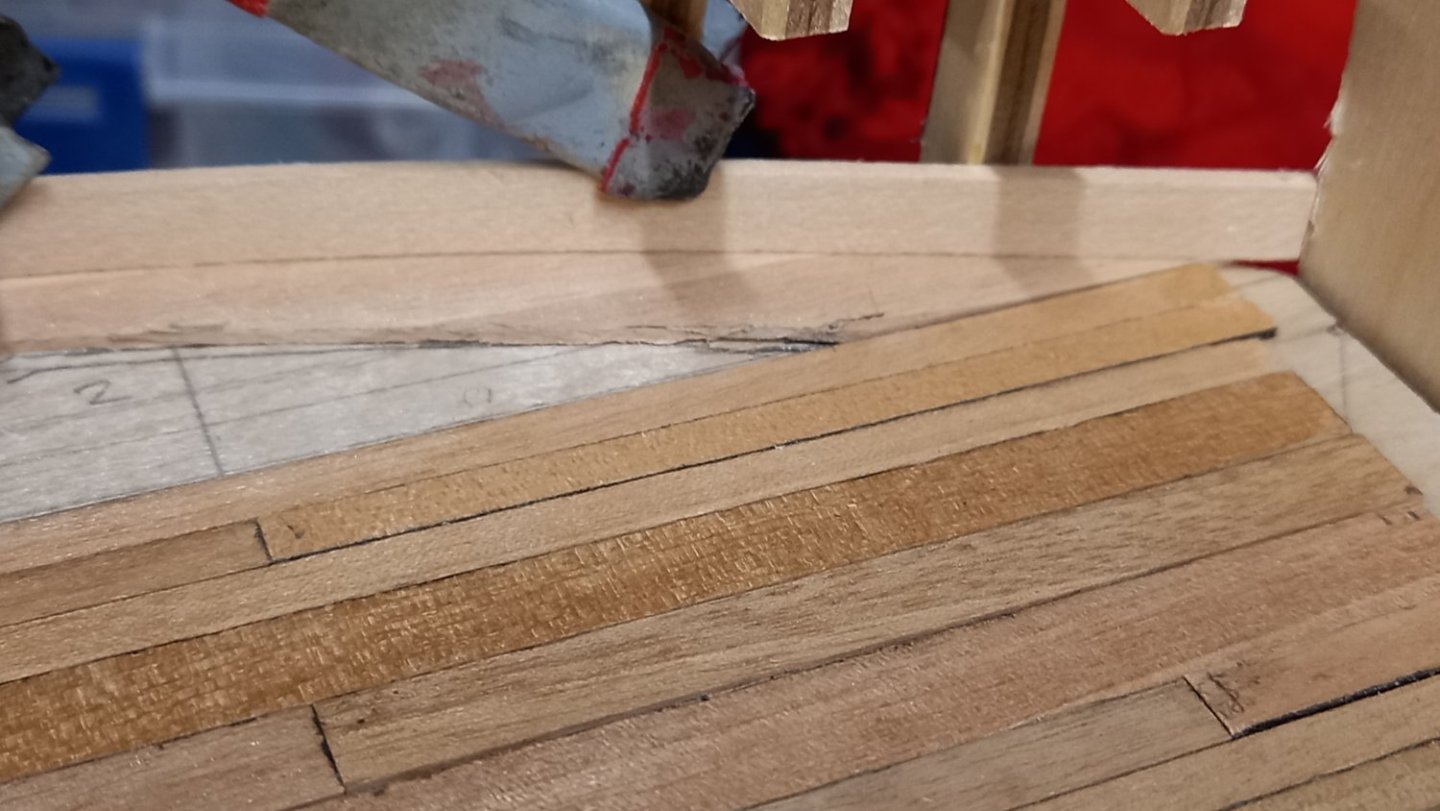
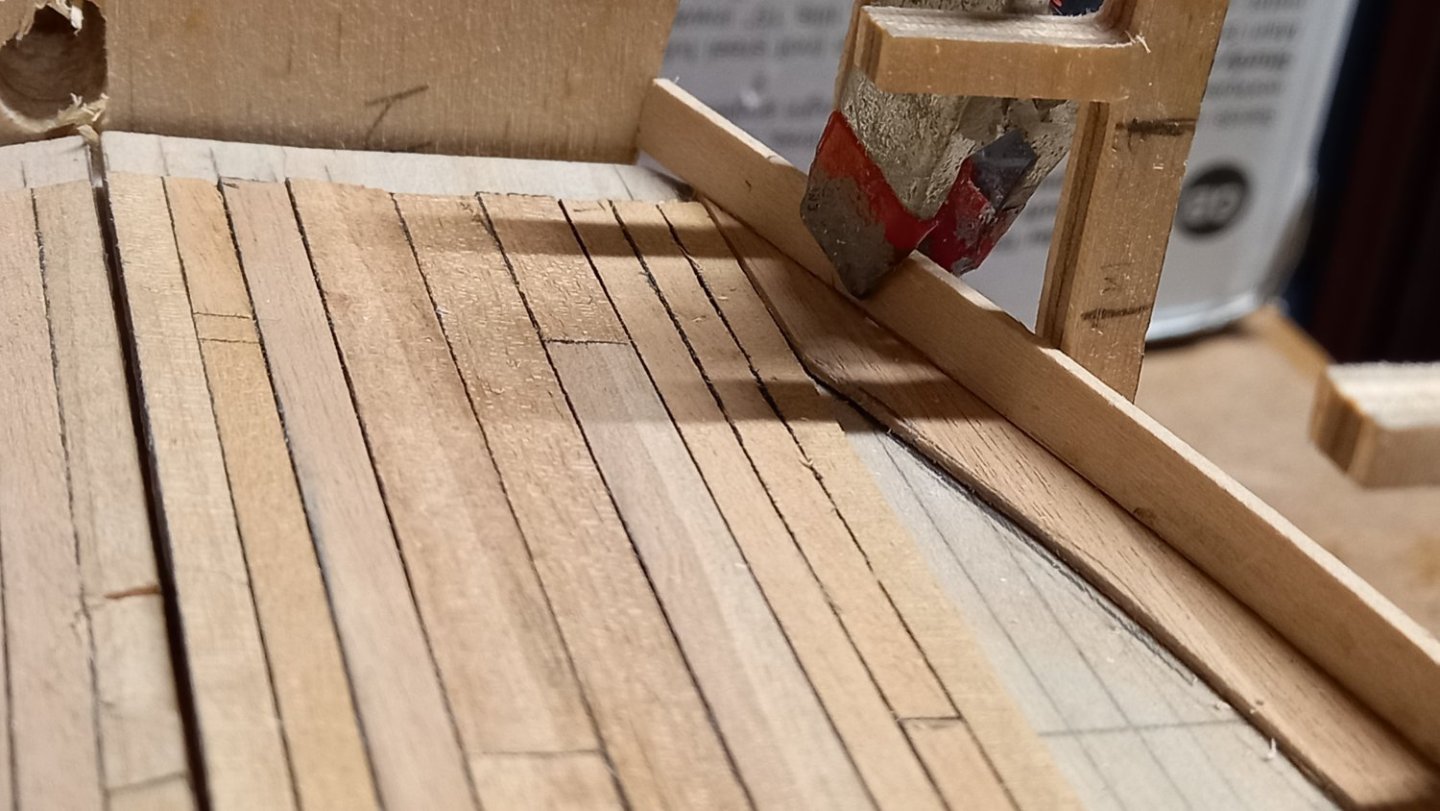
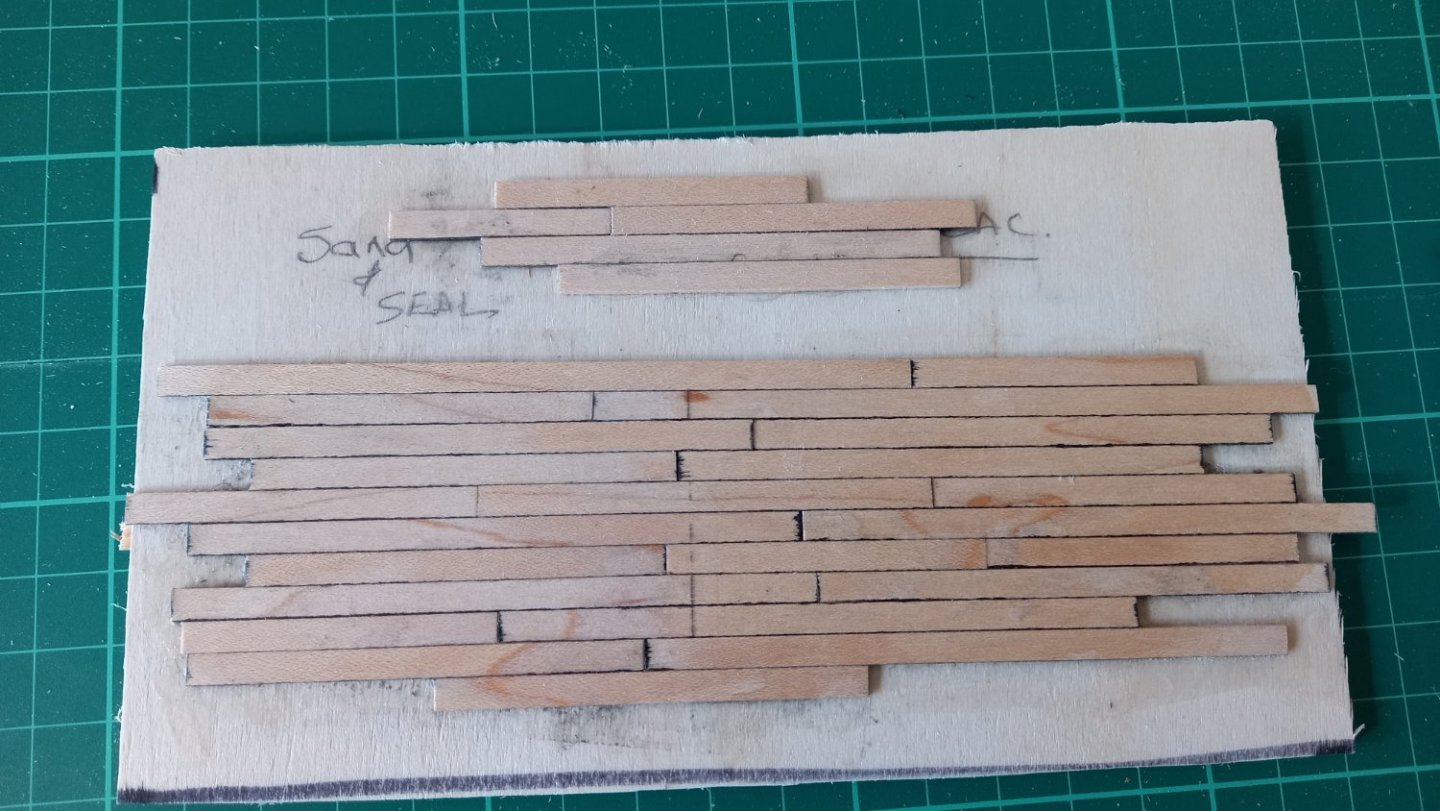
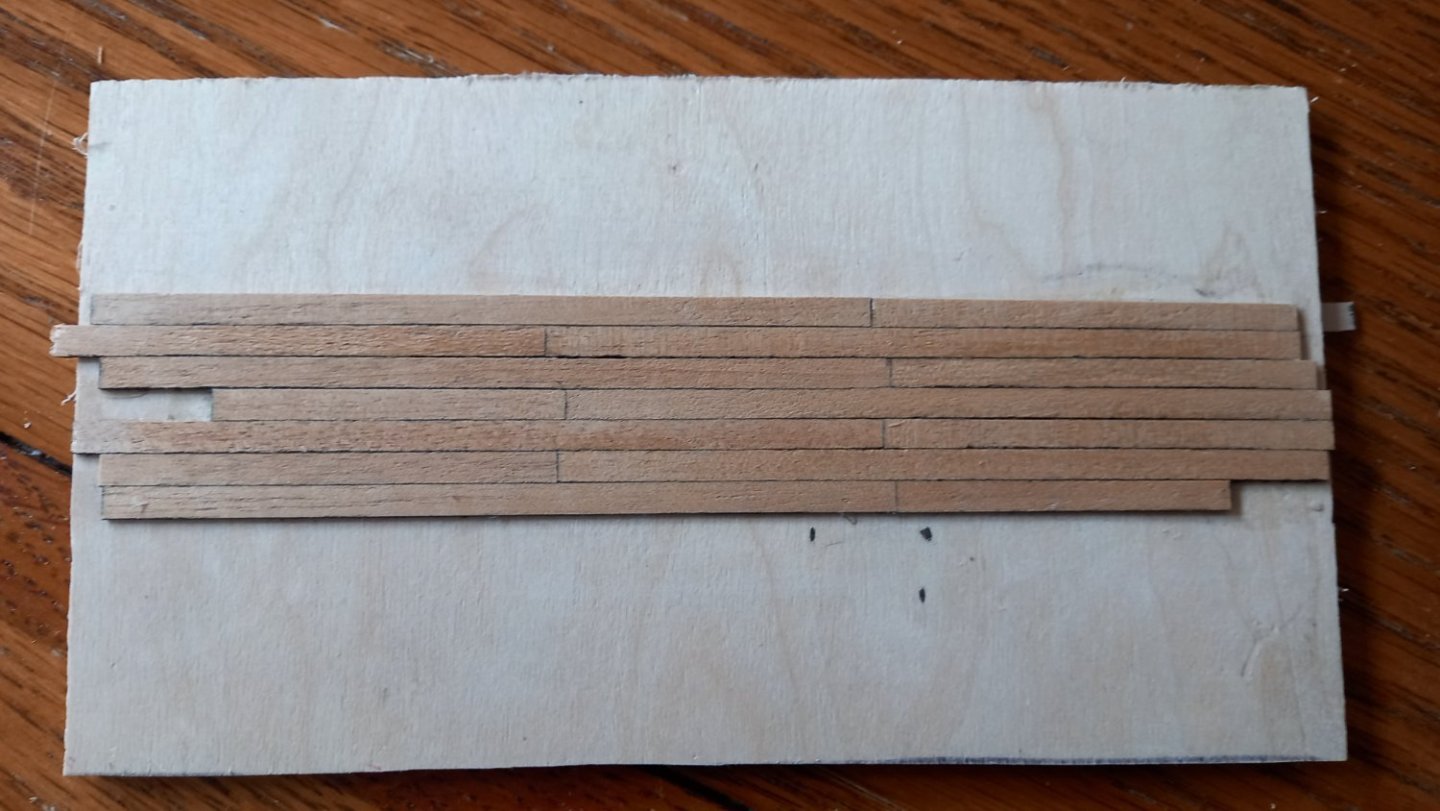
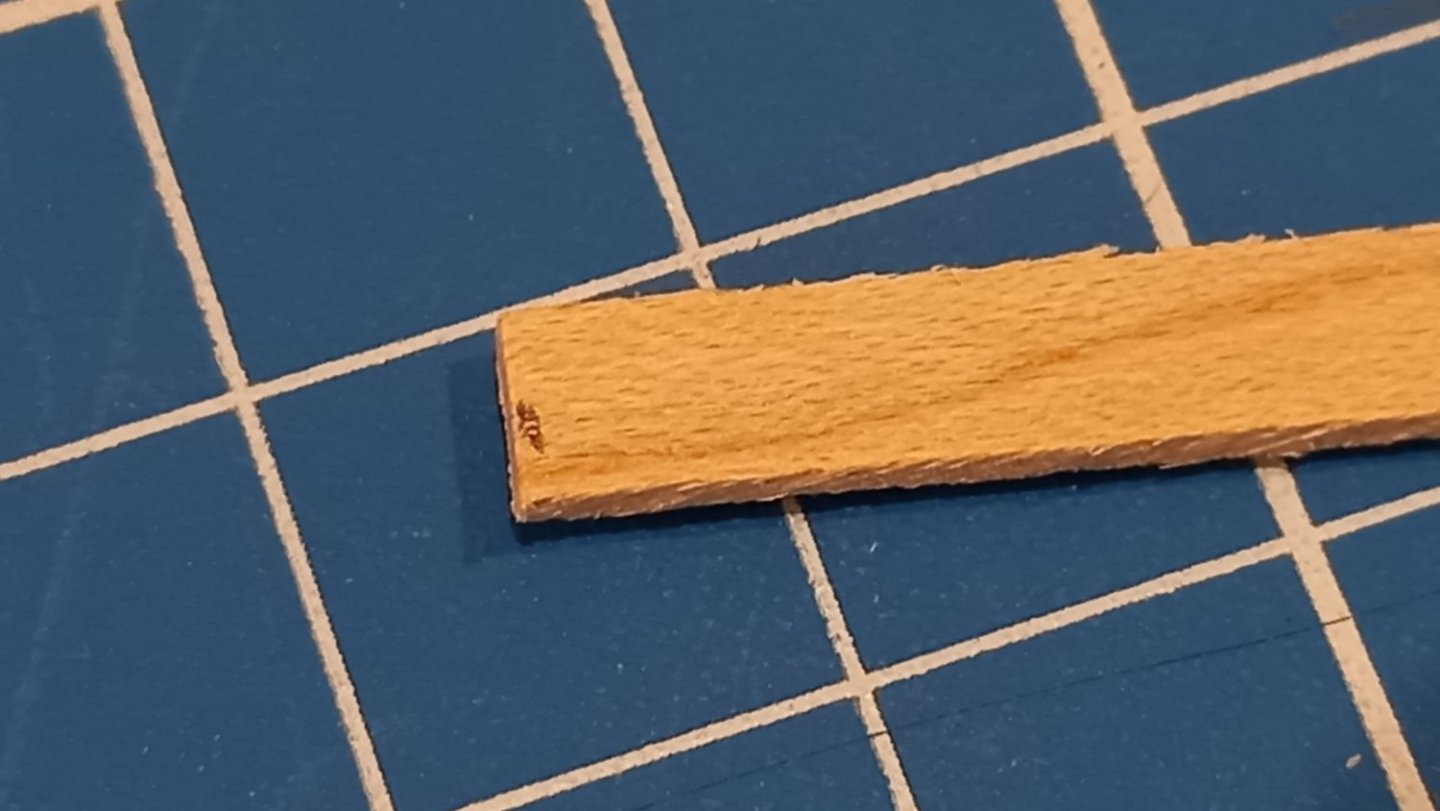
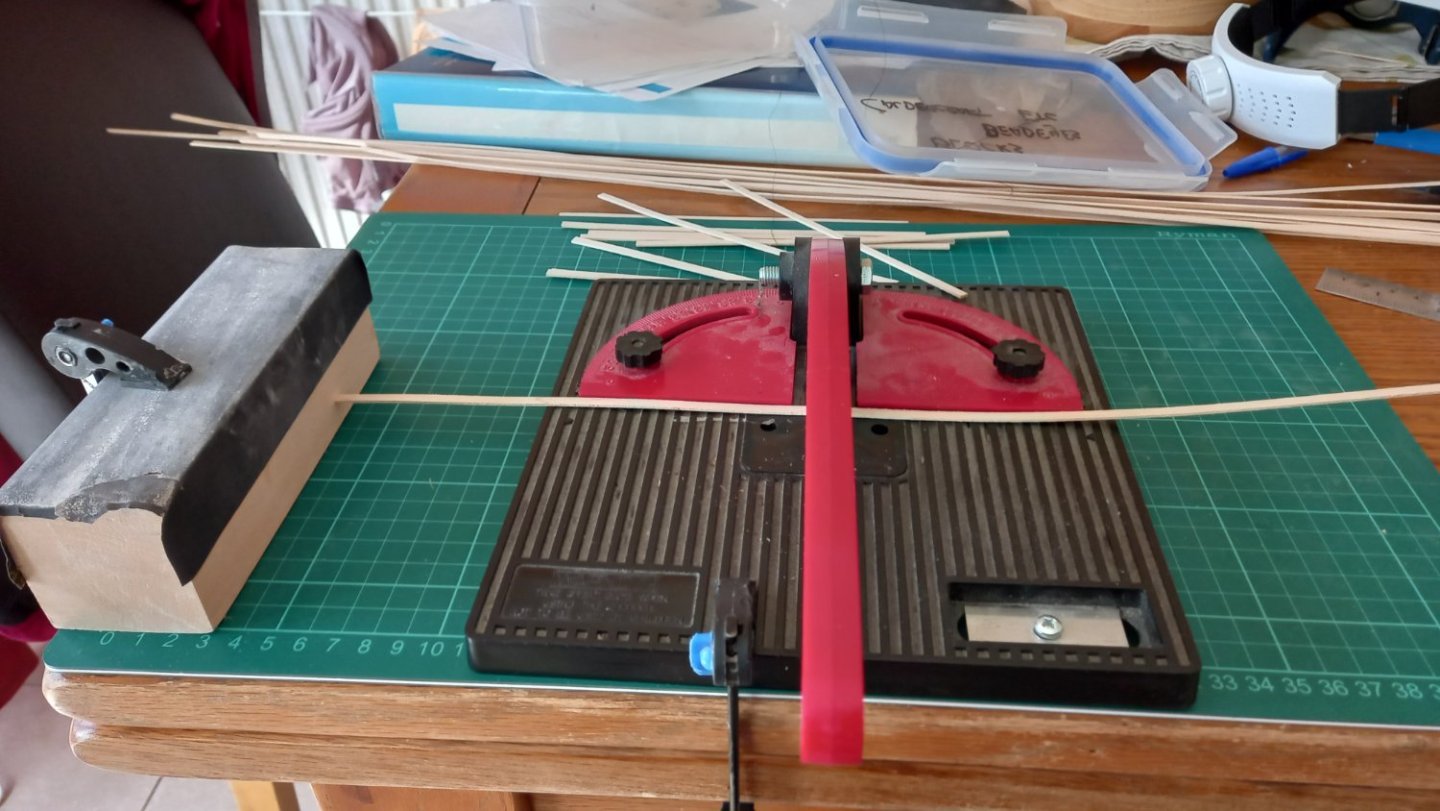
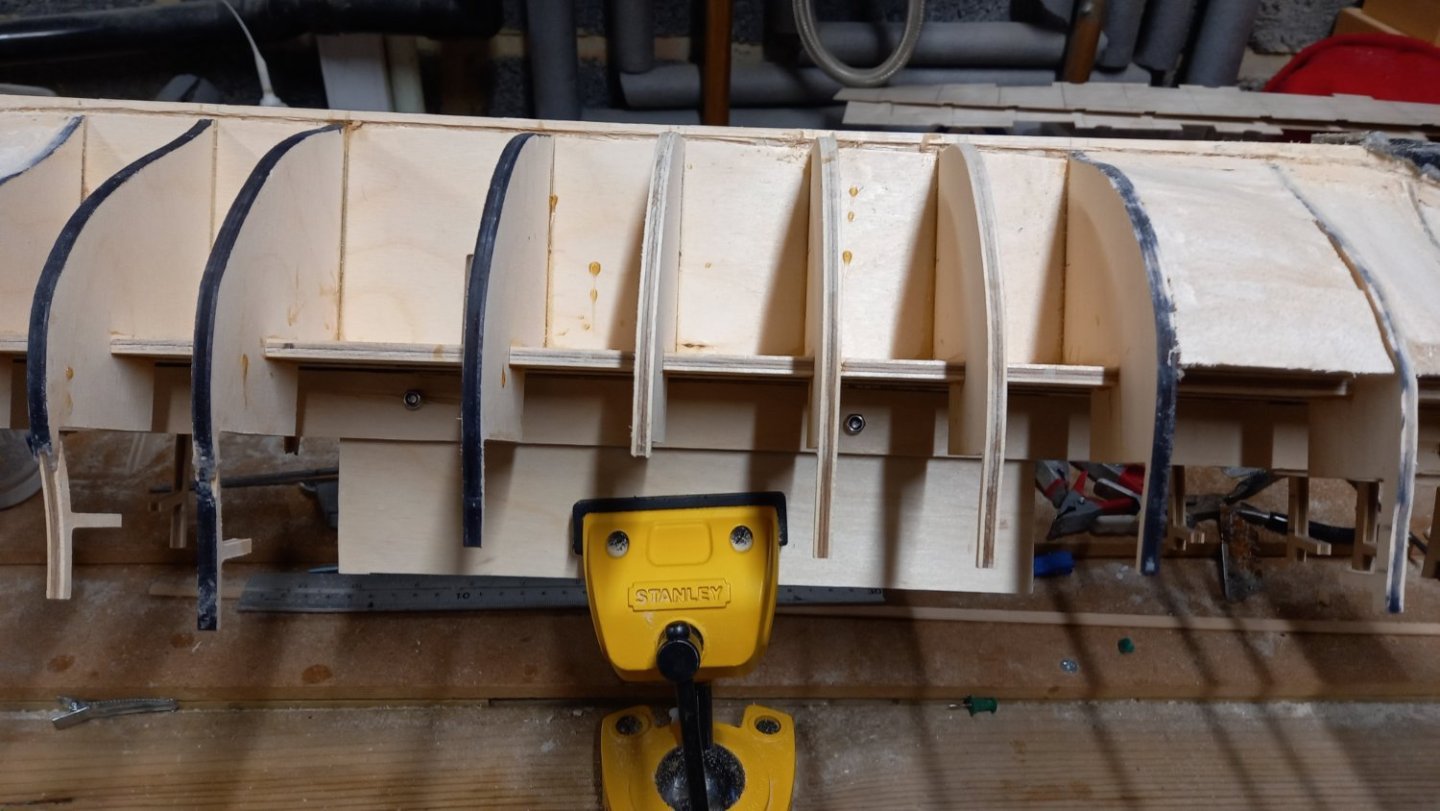
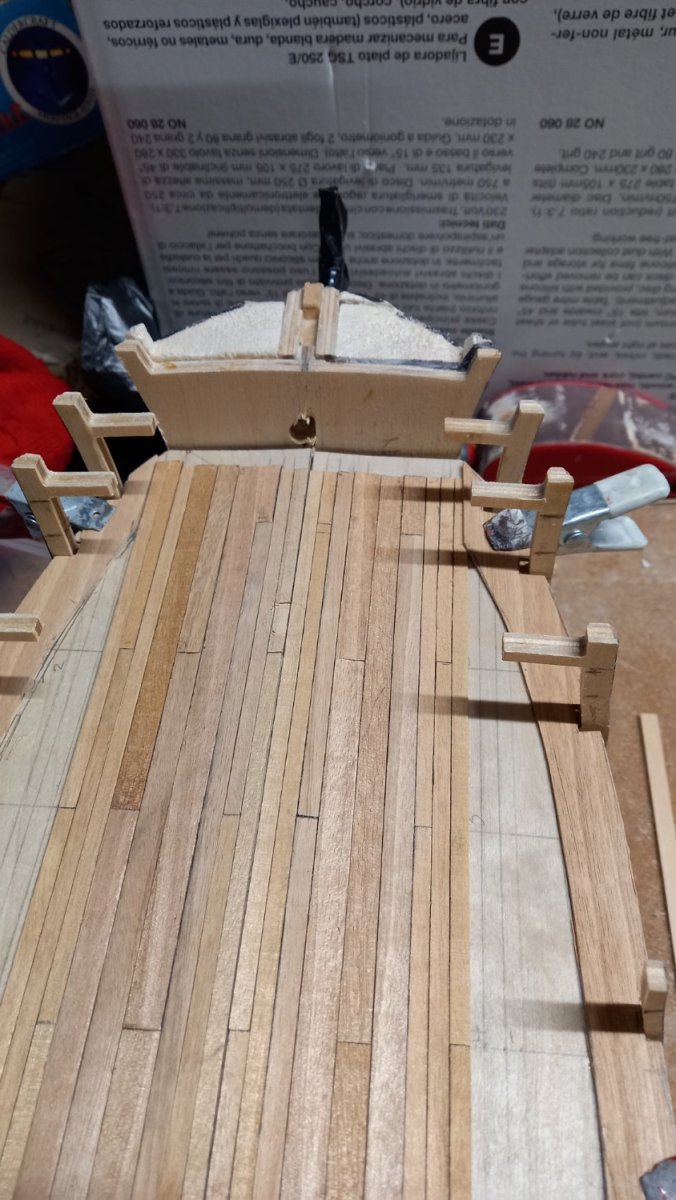
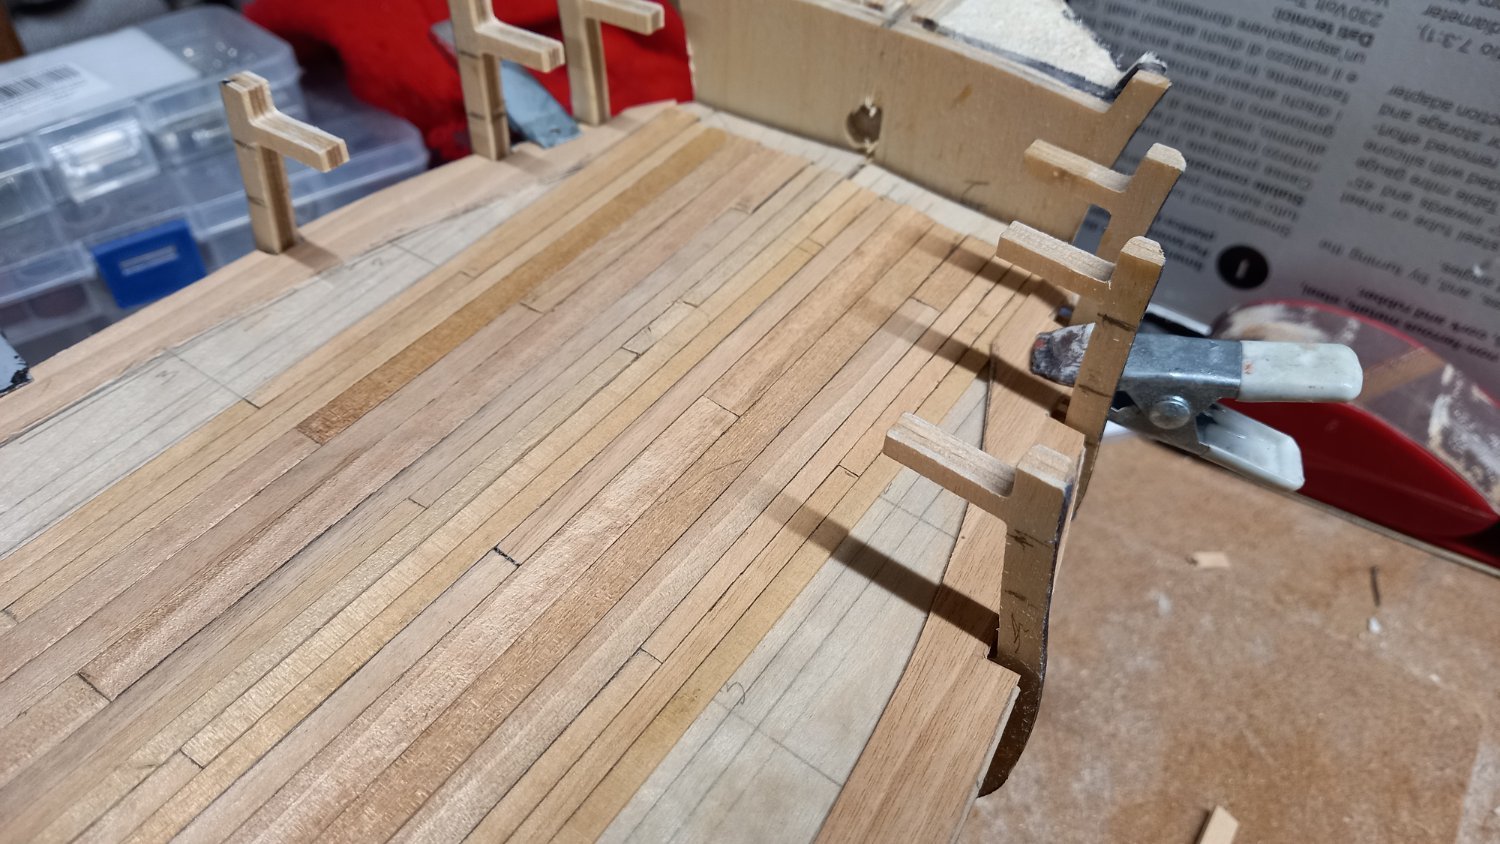
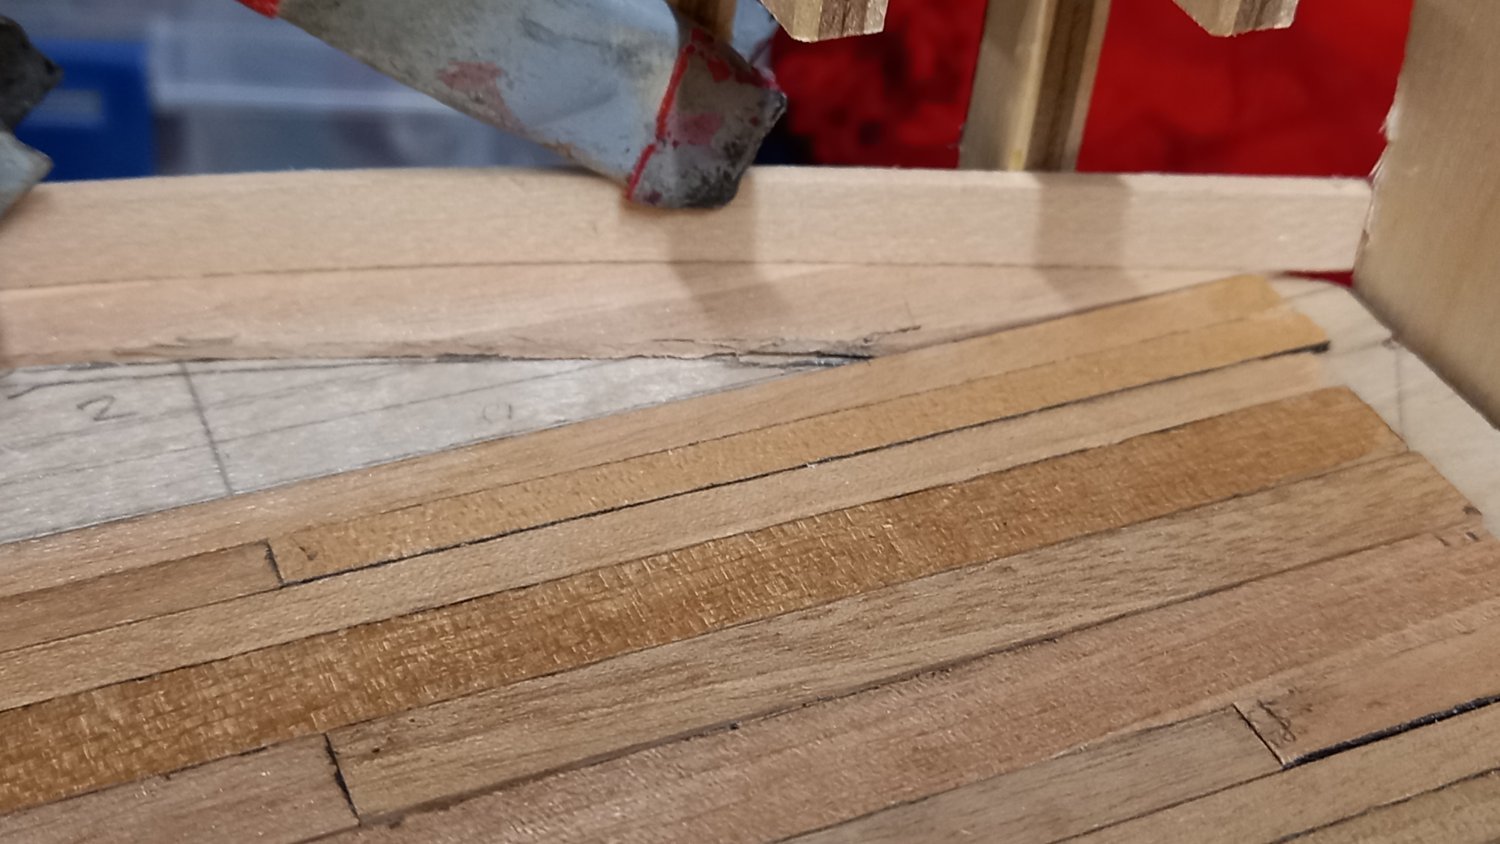
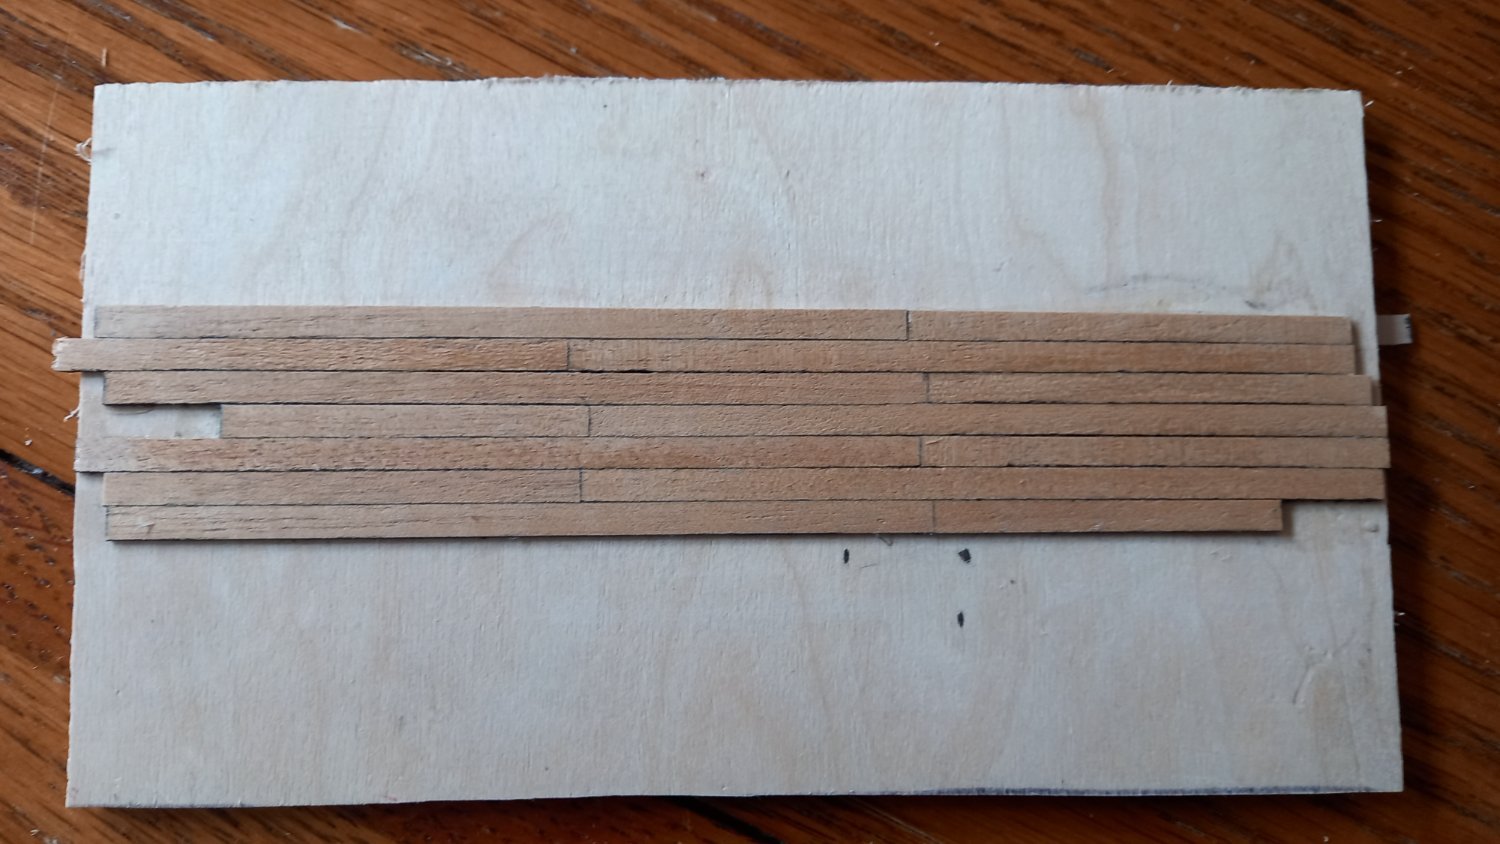
A bit of progress regards marking out planking on lower deck planking but I am still scratching my head regards which to use. I tested a few maple planks with new marker pens and although this worked quite well the maple required all edges to be sanded before looking reasonable. However there is a large light brown grain running through the maple which is way out of scale. I have therefore think I will end up using the tanganyka as I tested this with the new marker pens and after sanding the edges the bleeding is much reduced here is a comparison. I have been considering fitting a margin plank, however I have ordered some maple 1 mm sheet to make these with that and as yet I am unable to source any tanganyka 1mm sheet and only comes in 10mm wide strips max so I might have to use two planks side by side or see what it looks like with perhaps maple margin planks.I think using planks side by side might make this more complicated but might give this a go. The last photo is of a maple plank before sanding and you can clearly see the large grain running through it. I do wonder if this is normal for maple ? Here is a photograph of my deck plank cutting station I made up.Which will hopefully save me a lot of time which can be better used sading each piece of planking idividually. I decided to cut the lower gun deck in two as I thought it would be easier access for doing the deck planking. Also I might leave off the gun deck until after the external planking is complete so that I can fit a jig to hold the ship upside down in a vice whilst carrying out both first and second planking. Not sure if this is feasable. It will be necessary to fit the planking to the inside of the bulwarks to give some strength in this area. before fitting the gun deck. Hope this makes sense. Here is a couple of photos of the jig I will be using for external planking and how it will sit in my angle adjusting vice . Not I have used bolts so they can easily be removed instead of screws. Hope this makes the planking job easier.
.thumb.jpg.d8e2a6558a18e9070f5ac4780724ad0e.jpg)
.thumb.jpg.a837eac7c524cc6d9c06e9a56a706599.jpg)
.thumb.jpg.8fcabb848185a433d47f7da96497775c.jpg)

-
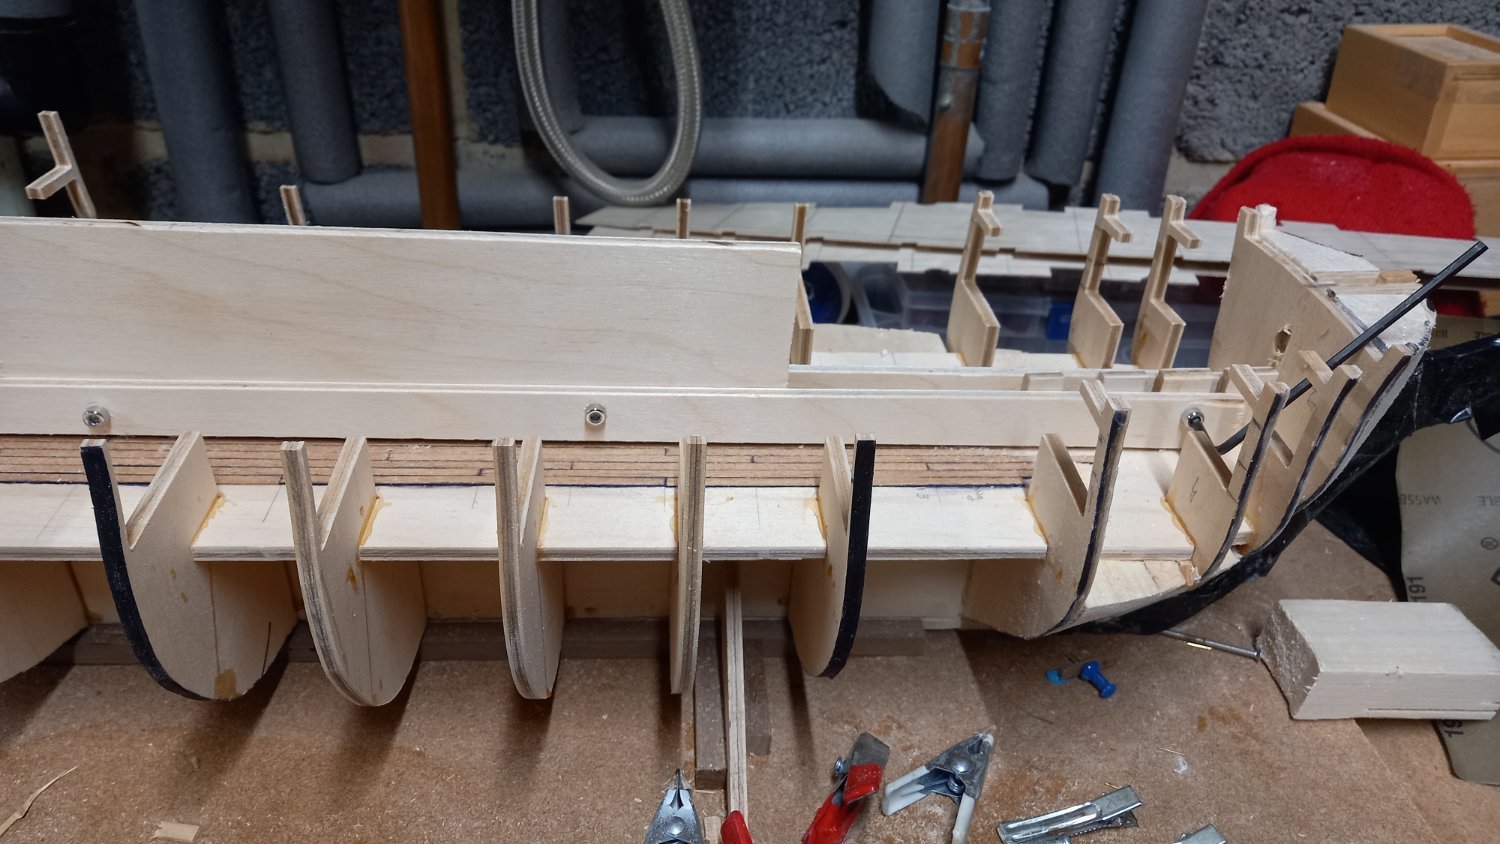
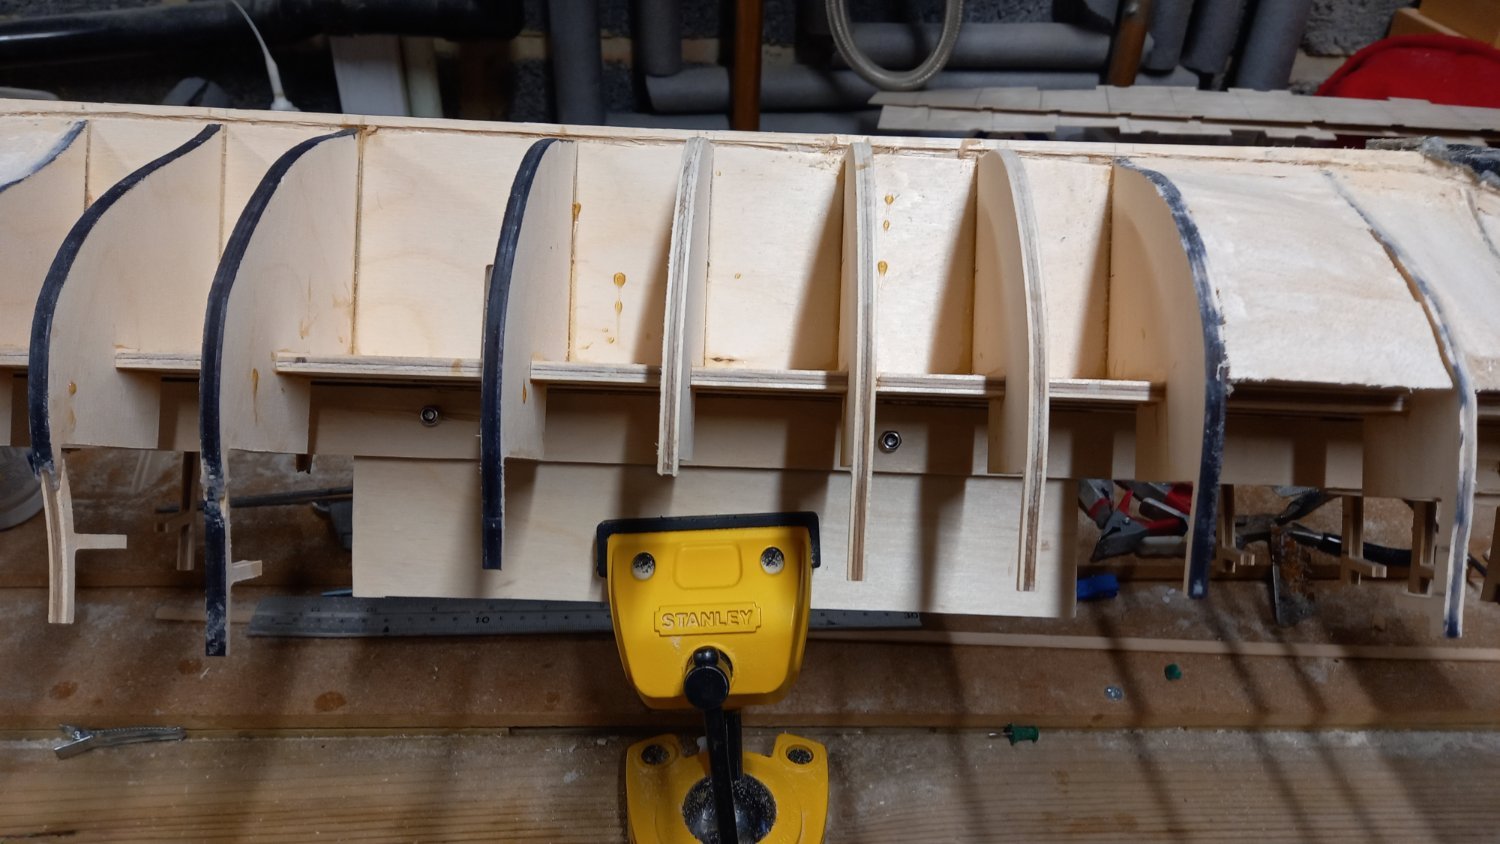
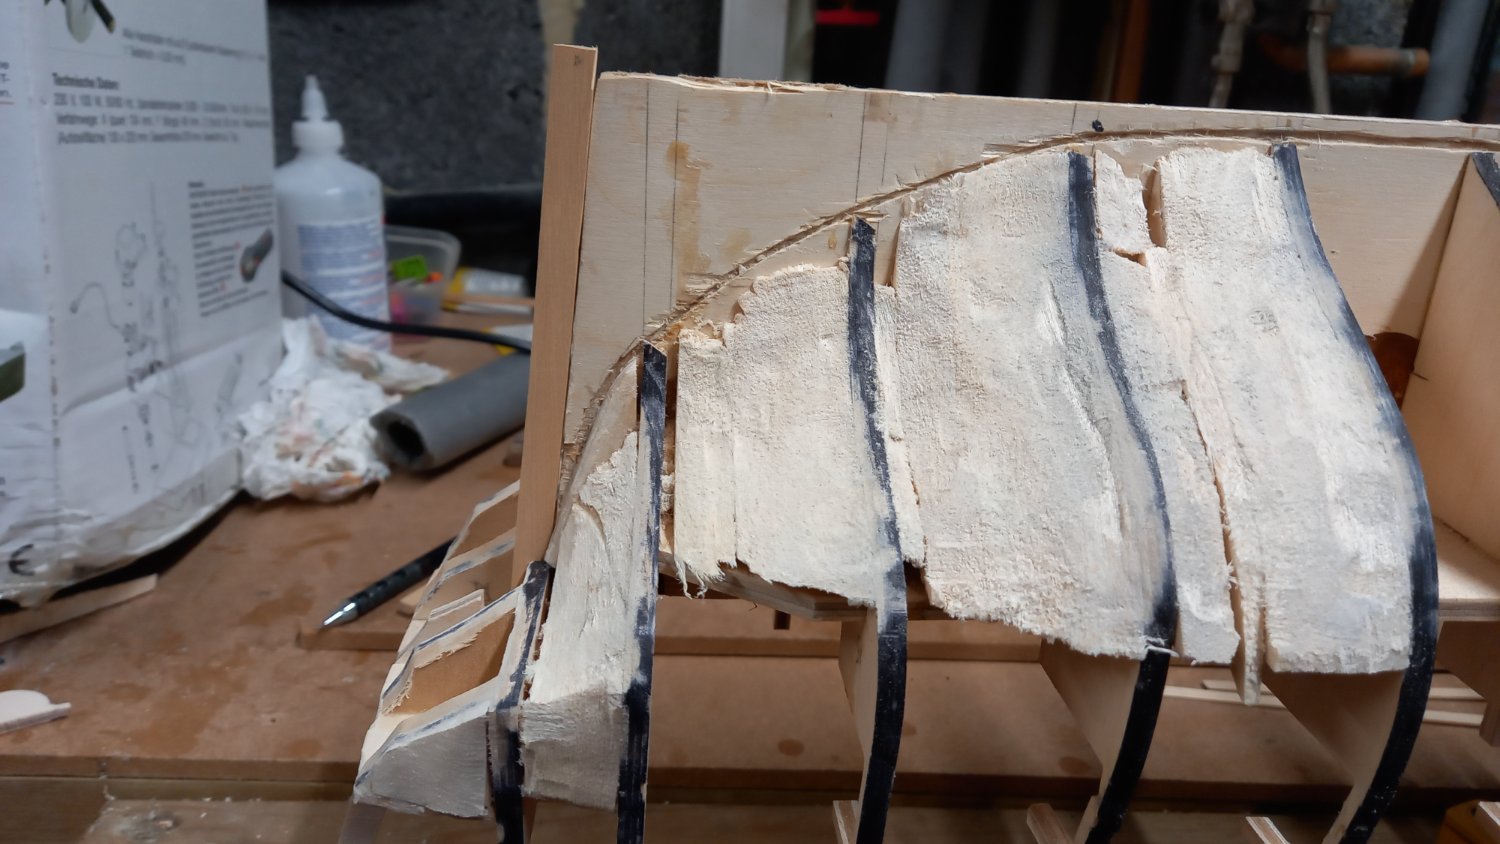
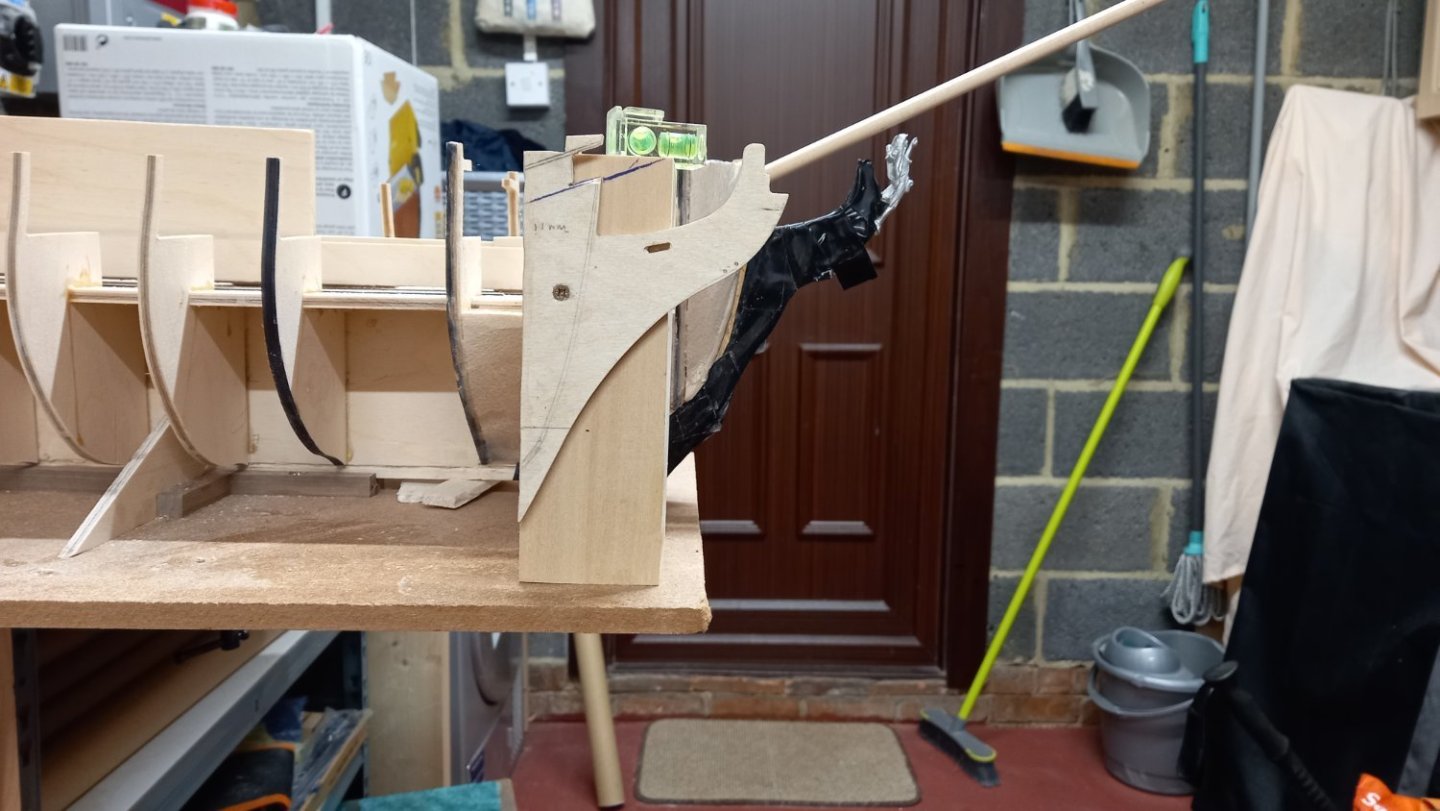
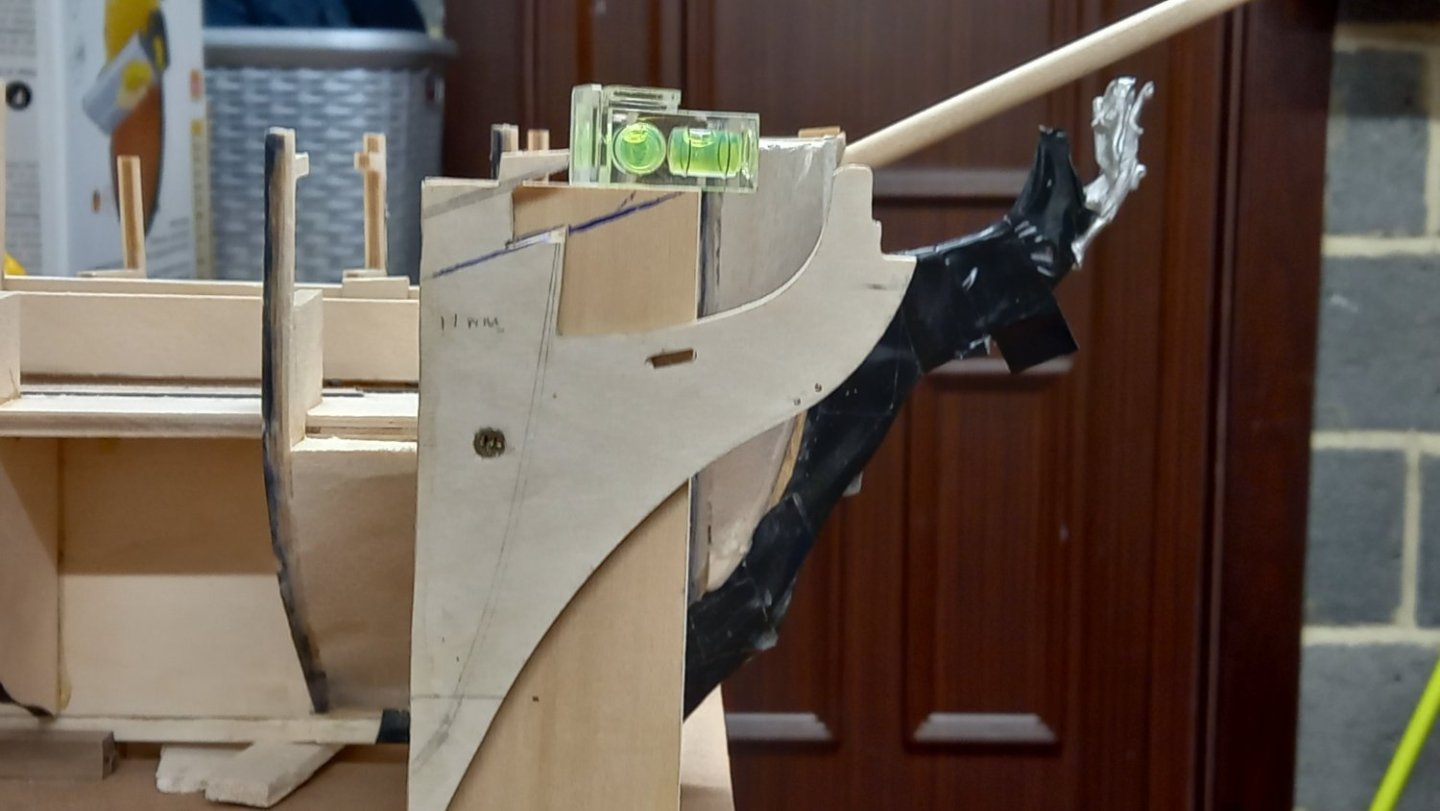
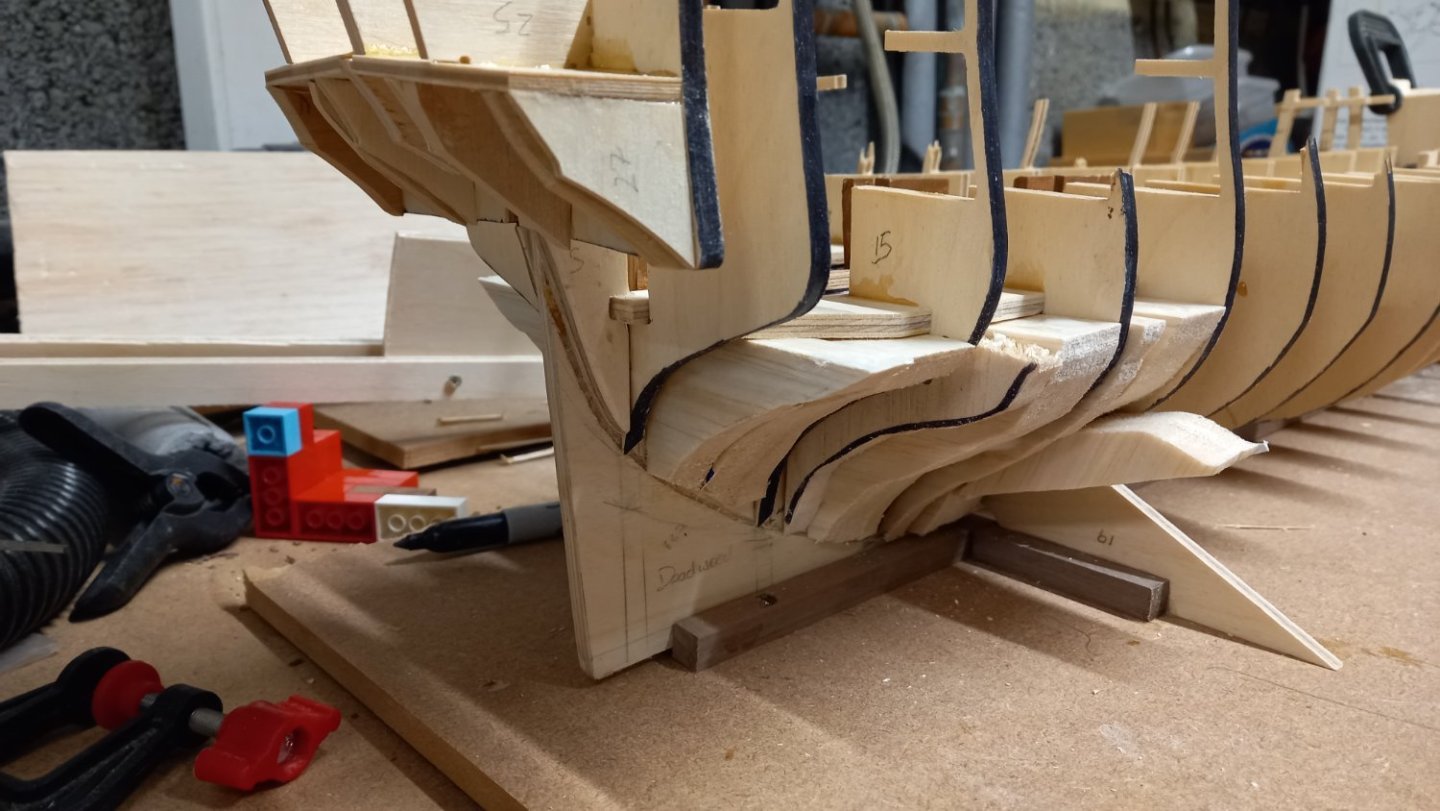
Continued with shaping balsa wood blocks and amazed at how much material I had to remove using a dremel. I could make an awful lot of filler out of the that lot haha. An attempt at drilling out a hole for the spritsail mast and tried to make a template using the old plywood stem. I made this as close to the angle copied from AOTS drawing and checked I cleared the figure head. I still need to file the hole bigger to take the 11.5 mm mast ( according to james Lees book ) ) could only drill up to 8mm diameter before running into problems with the drill catching the top of the cutwater/ stem. I have also made up the stern post out of boxwood but not glued this into position, until perhaps the planking is complete. I have also fashiond a method of holding the workpiece upside down for ease of planking in an adjustble vice so that the ship can be moved at any angle required. I am not sure if this would work though. It would require leaving the decks off until the hull planking is complete and I am unsure if the decks are better being in place for strength reasons prior to planking the hull. If planking the inboard ( top of the bulkheads,inboard) gives enough strength then perhaps I could get away with this but at the moment I am unsure and will need to give this some more thought.

-
David I think Vanguard sell longer wood oars . They are longer than the supplied brass ones and better in my view.Good luck.
- 310 replies
-
- 2
-

-
- Diana
- Caldercraft
- (and 1 more)
-
margin plank/waterway
DaveBaxt replied to DaveBaxt's topic in Building, Framing, Planking and plating a ships hull and deck
Thank you Allan and as always your input is always a help. Some nice drawings which shows clearly what is going on in that area. Since posting this thread I have since been studying Peter Goodwins book which has some very good pictures of how the waterway is fitted in relation to the margin plank and scupper. I think this has been mentioned perviously by Ed so I thank him kindly. It is interesting what goodwin says about scupper and that are not normally shown on contemporary models due lack of documentation of sizes etc. Goodwin produces a very interesting read regarding that some scuppers were made of lead with a leather flap on the outside to prevent the access of water. Also that waterways were also fitted to help to protect the joints in that area from the ingress of water as well as used to carry water away. Perhaps now I will be able to make a better dicision as regards how to produce something which will resemble that of the the Dianas period. Again I would like to thank everyone who has taken their time to post and for their patience.Best bregards Dave -
margin plank/waterway
DaveBaxt replied to DaveBaxt's topic in Building, Framing, Planking and plating a ships hull and deck
Thanks guys for some great replies which I seemed to have acknowledged . For the record this is not formy Endeavour which is almost complete but for my next adventure the HMS Diana which was launched 1794 so would have both waterway and joggling of planks at that period according to AOTS Diana.Special thanks to Blue Ensign for keeping the explanation simple so I coud understand and this is probably the way I will progress. However until now I was not aware that the waterway and margin plank are a different piece of wood so thank you for that. As my Diana is plank on bulkhead and after reading ``sections on Peter Goodwins book it only confused me and I found it difficult to interpret for POB and having a false deck. I am assuming that the water would run off the deck into the waterway so would need to be lower than the deck planks, or is it the oppisite and stops sea water going the other way? Thank you once again for your help and patience . I cetrainly need to go over Peter Goodwins explanation again and hopefully the penny drops. -
After reading several threads on the above subject, I am still unsure how to proceed. Some modellers are gluing the waterway into position and then joggling the deck planks to fit and using a sharp knife to shape the waterway to suit the planks. Others are not gluing the waterway into position so unsure what would work best. My question is this, can you still start laying planks from the centre of the deck and work outwards or will this cause issues with the thickness of the planks being different thicknesses or will you have the smae problems starting at the waterway and working inwards. Another question I have is regarding the margin plank/waterway itself and is it easier to shape this from several pieces scarfed together rather than trying to bend a plank edgeways. I appreciate there are different scarfing joints for this purpose but if there is a less complicated joint than the hook method or is this applicable to 18th centuary. I have thought about doing this for a while now, but each time I get closer to starting out the the deck planking , I end up just doing the deck planks without an edging plank/waterway.
-
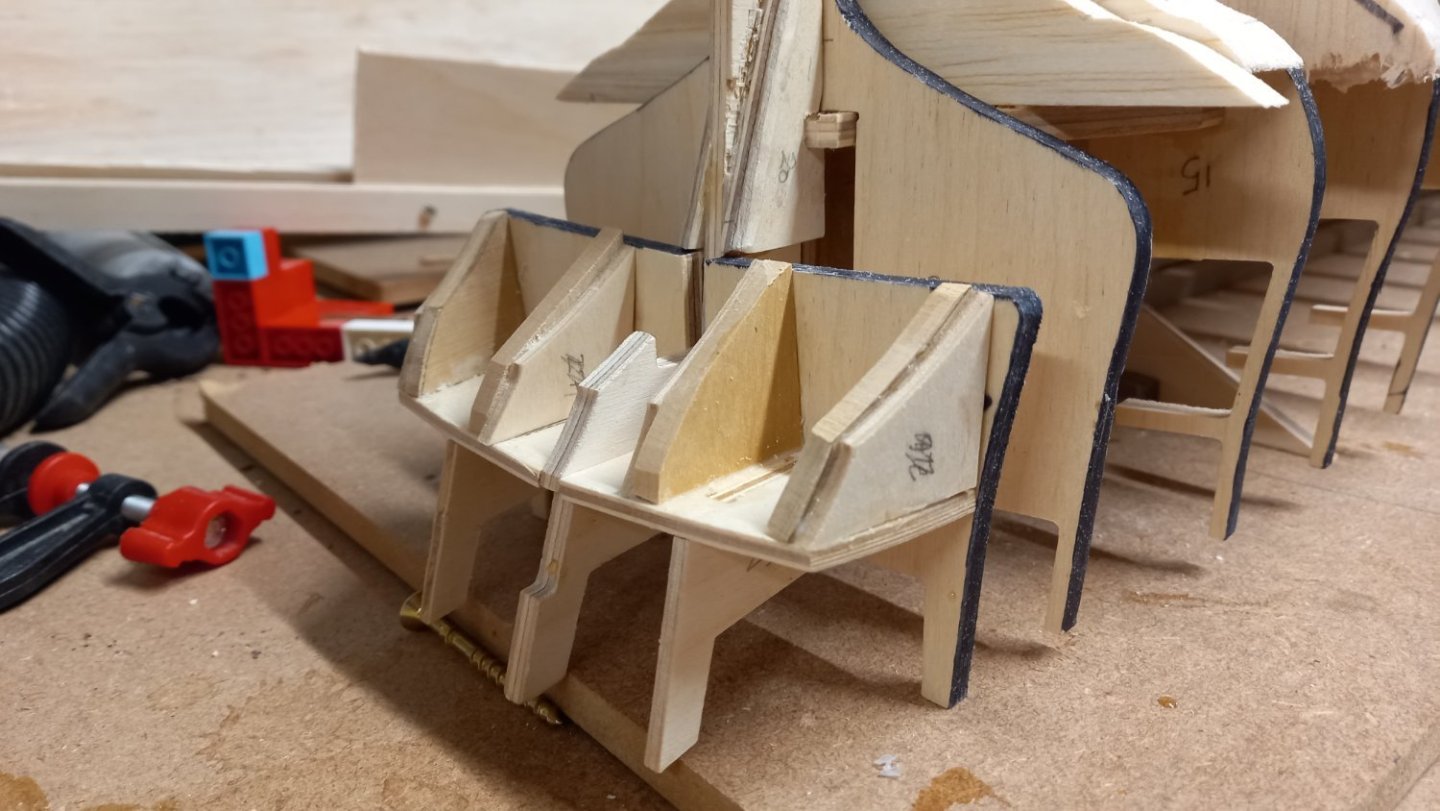
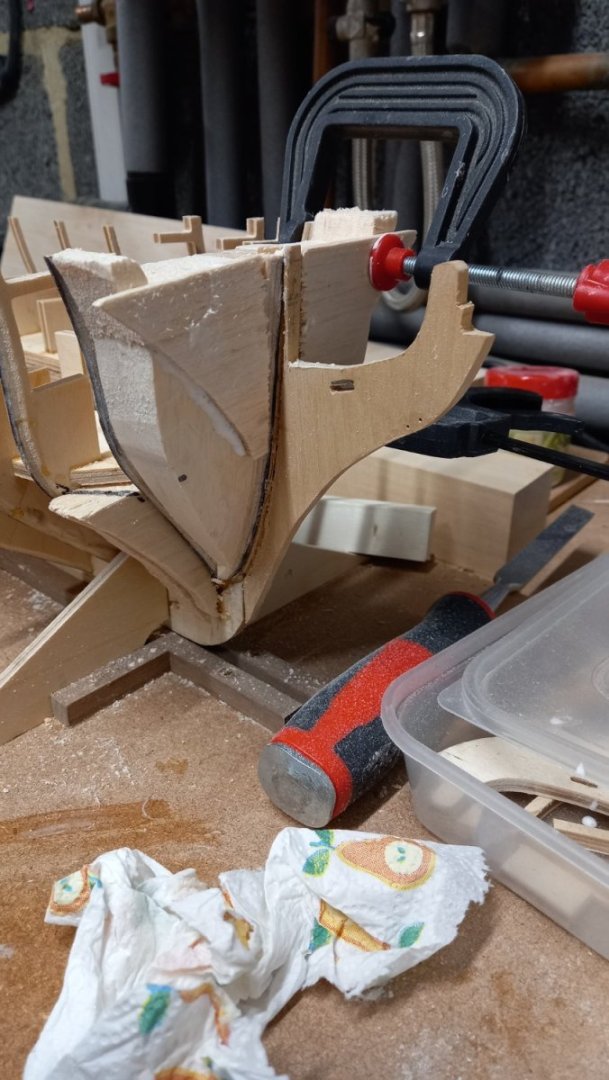
Good news today. After deciding that I would use maple strips for the decking. I eventually sourced some from no other than Caldercraft and received it this morning. I would like to try and fit a water way and try and scarf the peices together and also fit them by joggling or jiggling what ever it is called. I see from Jason and Davids log they have made a fantastic job and would be pleased if I could do a job as half as good as theirs. For the record this will be my first attempt at this so will need lots of help here guys. Any links to information /step by step would be even better or tips you may have would be fantastic. I have completed gluing some of the parts at the stern counter which wasn,t to clear on the first drawing or drawing number 2 either so thanks to Jason who was kind enough to post a few photos on his log of the stern area emabled me to figure it out. As these sections were only 3mm wide I strengthened them using some small pieces of 5mm box wood I had left over after cutting out the stem. I think Jason mentions this too. I still need to cut out the stern post from boxwood too. I have started filling in the lower sections for and aft with plywood to help with getting nice curves. here are some photos of the work so far. Alot of work to do here and expect a lot of dust here with the balsa wood but hopefully it will be worthwhile. I
-
Great allround workmanship and fantastic looking shrouds and ratlines. You are almost there.Always nice to see another HMS Bounty. Take a bow!
-
It was not my idea but another modeller on this forum but happy to pass it along.
-
Nice work with the card to give the klinger effect and something I might try . Great idea David
- 310 replies
-
- 1
-
-
- Diana
- Caldercraft
- (and 1 more)


.jpg.45b0c9a085f10b9a2c73e4bf0a86f65b.jpg)

.jpg.0e1825ed5231fc5a690d57b1d7d77856.jpg)

.jpg.932fe7b866575164c2419b61078f0aa3.jpg)