HOLIDAY DONATION DRIVE - SUPPORT MSW - DO YOUR PART TO KEEP THIS GREAT FORUM GOING! (Only 13 donations so far - C'mon guys!)
×


DaveBaxt
-
Posts
1,324 -
Joined
-
Last visited
Content Type
Profiles
Forums
Gallery
Events
Everything posted by DaveBaxt
-
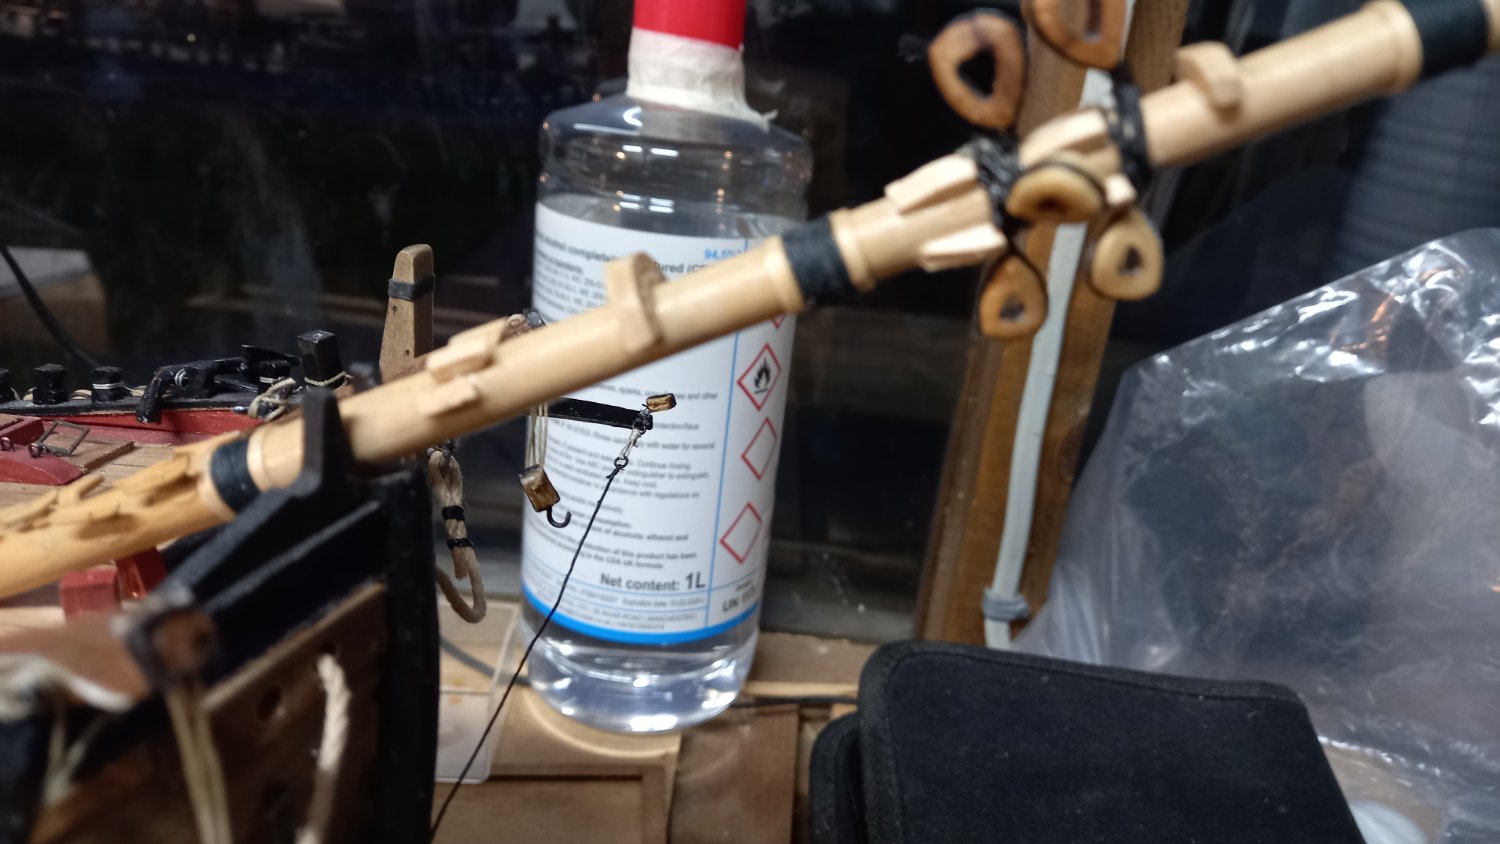
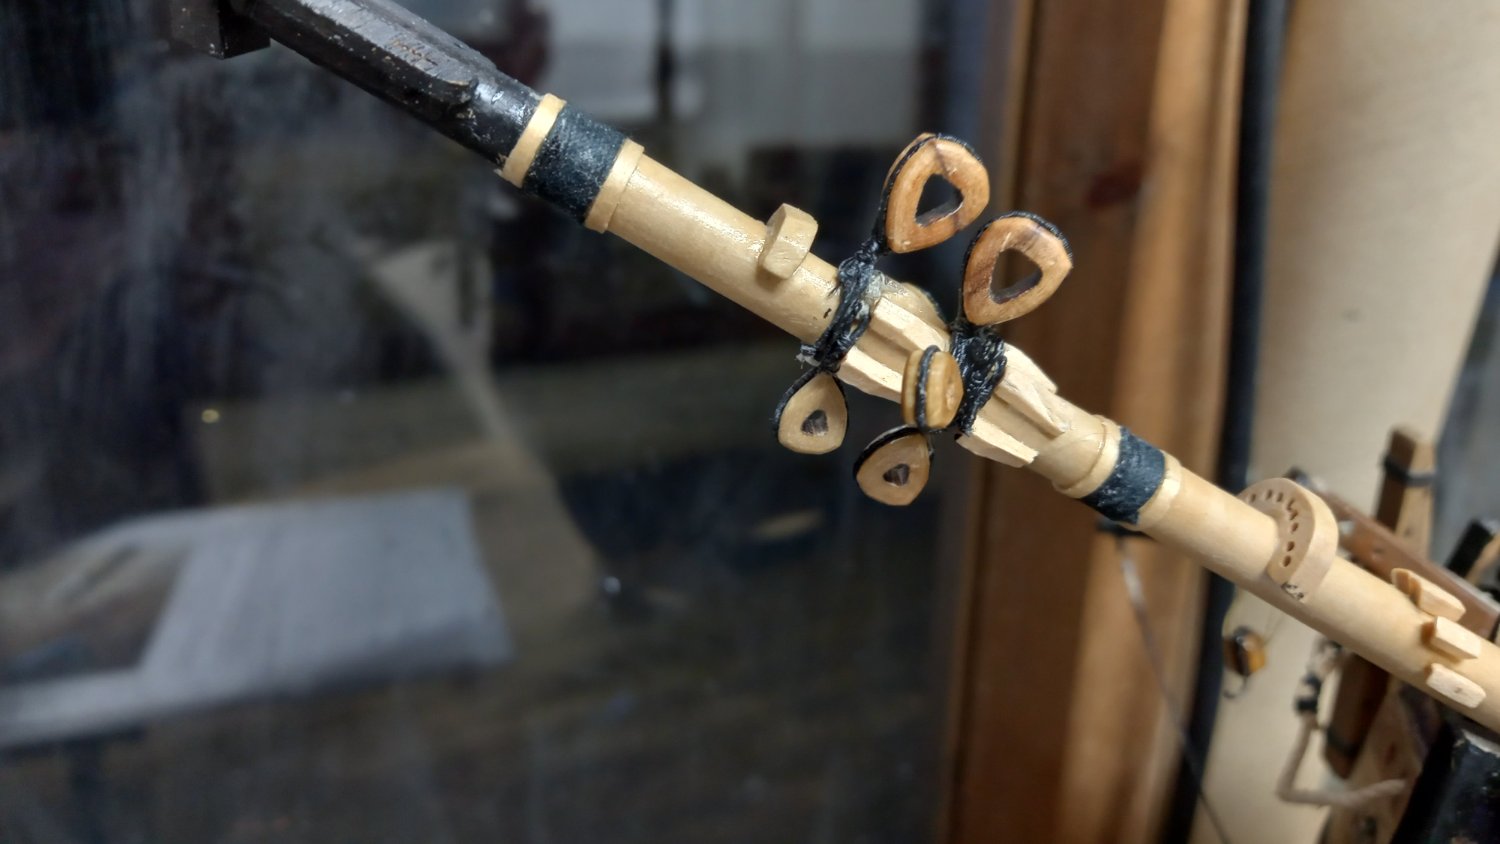
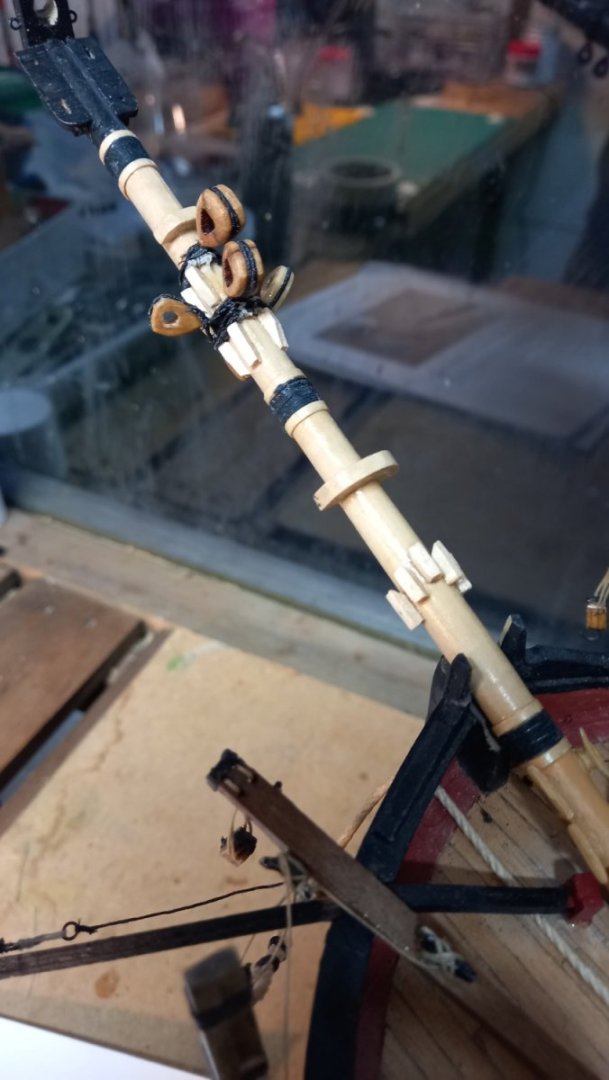
Here is my several attempts at one of the anchor buoys which didn't turn out too well. Moving onto the lower collars etc starting with the fore stay and fore preventer stay on th eth bowsprit together with the bobstays and bowsprit shrouds. A bit tricky and wish I had positioned the sets of thumb cleats further away from each other as it was a bit of a tight fit with bobstay,shroud and main collars between them. The fore stay collars also are doubled for this period. Collars are also served. I could have also made the thread a shade smaller than 0.75mm would have help too. Next up Next up will be the lower collars for the main stay and main preventer stay but at the moment I am unsure which exactly is the position for them. Which one is on the top. I have seen a few builds where the fore preventer stay is on the bottom but the lower main preventer stay is on the top. Does this mean that the crows feet will on the fore stay rather than the usual fore preventer stay. I have not yet thought that the fore preventer stay could be on the bottom as it is on the Endeavour replica.


-
I have only just contacted these guys to find out if they are ok for airbrushing and the answer was yes. Just add water for thinning as they are quite thick. As yet I have not tried these out with a airbrush but intend to do so in the near future. They have a good range of colours which I have been informed are replicated for a ships particular period but being a beginner I unable to confirm this. Anyone else who has used this paint for airbrushing I would be very interested to find out. Great thread by the way.
-
IThank you for your input but I am now a little confused as I was under the impression that acrylics do require alcohol to be thinned as well as distilled water as explained to me in this thread thread However I do appreciate that it is probably better to use the same make thinners as their paint. I have also come across a few videos on how to make your own thinners with the afore mentioned ingredients such as flow improver and retarder. All of which is used in home made Acrylic thinners. Please correct me if you think I am wrong as this is beginning to get more and more confusing. I have been informed that Vallejo primer does not require any thinners at all and can be used straight from the bottle and yet some say thin with water. I apologize if it apears I am contradicting you in anyway. Please forgive me as I am only just starting out in this part of the hobby. Hopefully it will become obvious to me in time and thank you for your input. Best regards Dave
-
Sounds like a decent approach. Thank you
-
Sorry if this is the incorrect place to add these questions but I am interrested to know what peoples thoughts are on the following. Ok I have now had a go with my new Harder and Steenbeck airbrush with 0.2 nozzle and air pressure at 20 psi using Tamiya acryic paint and seemed to go ok with only one minor issue. thats for another time. At some stage I would like to try airbrushing brass and other metals using vallejo primers.So next up I thought I would try and see how I got on and after giving the bottle a thoroughly good shakes I then mixed the primer with thinners at the ratio of 2 to 1( same as with the Tamiya acrylic paint). I also added a drop of flow improver and a drop of retarder and then give it a go. Lets say this is not the best diciscion I have ever made. The tip/nozzle immediately blocked without any primer coming out at all. I was unable to clear the tip using an airbrush cleaner/thinners so ended up stripping the airbrush down completely to clean it. Eventually i got back to where I started. Once again I tried the airbrush using the Tamiya acrylic and once again it worked perfectly. My lessons learnt when using an airbrush. Don,t make any assumptions when using a new product for the first time, especially when using a different medium and do as much Research as possible before trying. I have since learned that when using Vvallejo primers they are not supposed to be mixed with anything and should be sprayed neat. However I did find the primer quite viscous and have also leaned it can be mixed with water.and nothing else. I have also learned that I could use a larger nozzle than 0.2( I have the facility to use a larger size nozzle on my airbrushso not a problem if needed)Another solution has also been recomended and that is to crank up the pressure to 25 to 30 psi. Also I would like to know what preperation ship modellers are using to brass or other metals prior to priming the surface before using an acrylic based paint.I always find that the paint is easily scraped off afterwards? Once again I would like to thank you for your help and patience.Best regards Dave
-
New Hyundai HY7524 compressor not working
DaveBaxt replied to DaveBaxt's topic in Modeling tools and Workshop Equipment
Thank you for your kind advice annd it is appreciated. Please forgive me if I am wrong but I was under the impression that there is already a water trap under the bottom of the regulator valve which you can see in the photo but is this not the same thingas a seperator.This compressor is also diaphram and is also oiless. Any further advise is appreciated. Best regards Dave -
New Hyundai HY7524 compressor not working
DaveBaxt replied to DaveBaxt's topic in Modeling tools and Workshop Equipment
I finally ended up recieving a new pressure gauge and replaced the old one with the new one and hey presto all up and running. I met up with a few friends at my local modelling club and I have arranged for my first lesson/introduction on airbrushing next week so hopefully I will now be up and running. I also have all the other stuff at hand, such as Thinners ( making my own) retarder and various acrylics. I have been told that various vheap products can be used for cleaning the air brush , but will give the thinners a go first. Looking forward to my first attempt at Airbrushing . Best regards Dave -
According to Brian Laverys book.'The Arming and Fitting of English ships of war ' The Boats were covered in Rosin until 1771 and the covered with white lead. That does not mean that some copper was used on ships from other countries or perhaps later than 1800 when Learys book does not cover a later period. perhaps someone more knowlegable (Which there are many) might add something here. Hope this is of any help.
-
I read something similar too but I think it applied to the first parts that were coppered on ships. I will try and did it out but pretty sure it was in Brian Levery's book 'The arming and Fitting of English ships of war1600 to 1815. I will check out if there is anything about coppering small boats. Definately an interesting idea though.
-
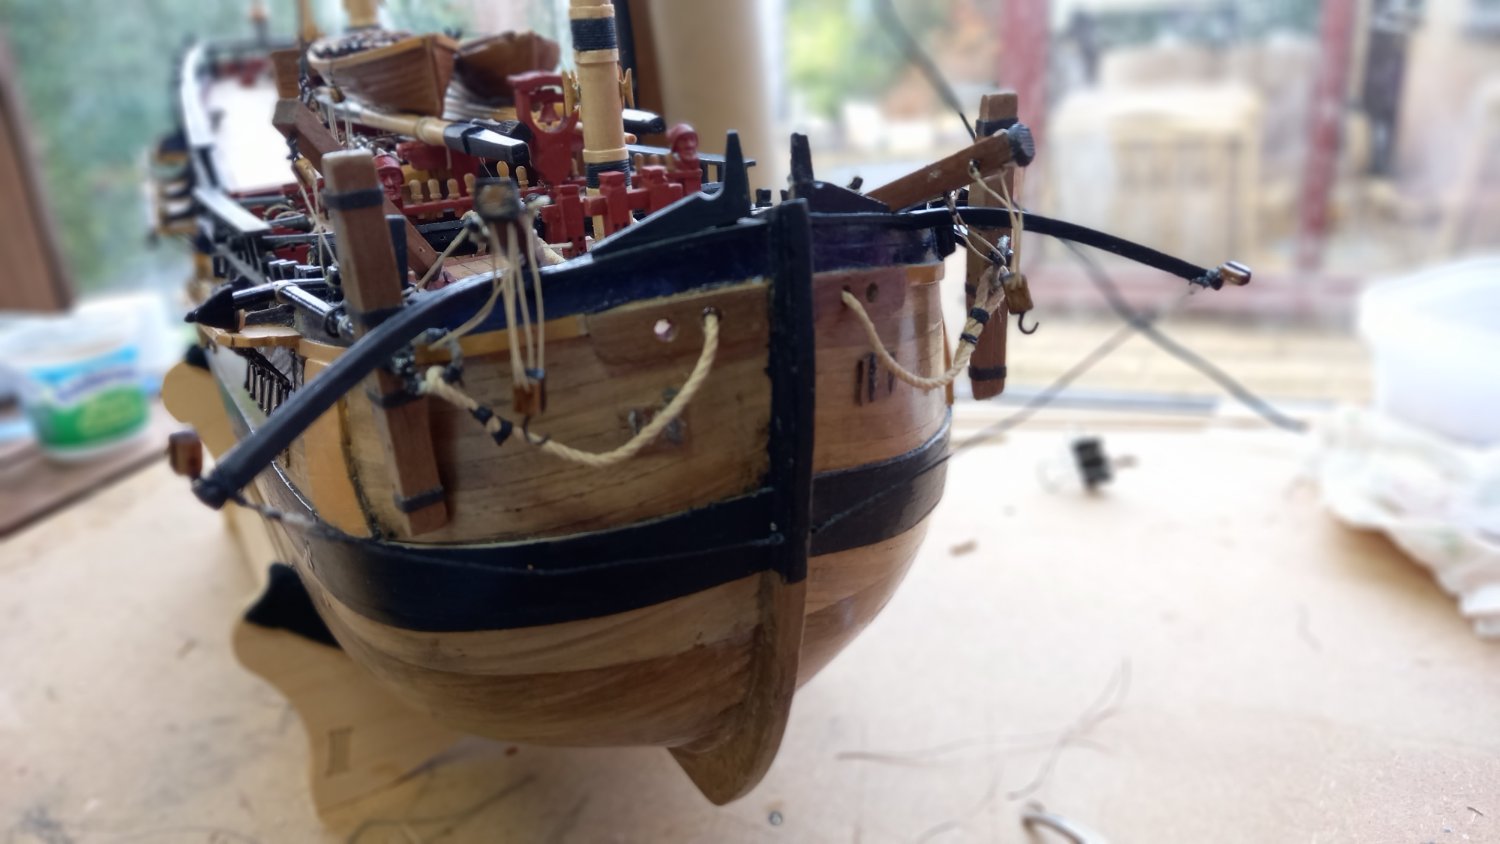
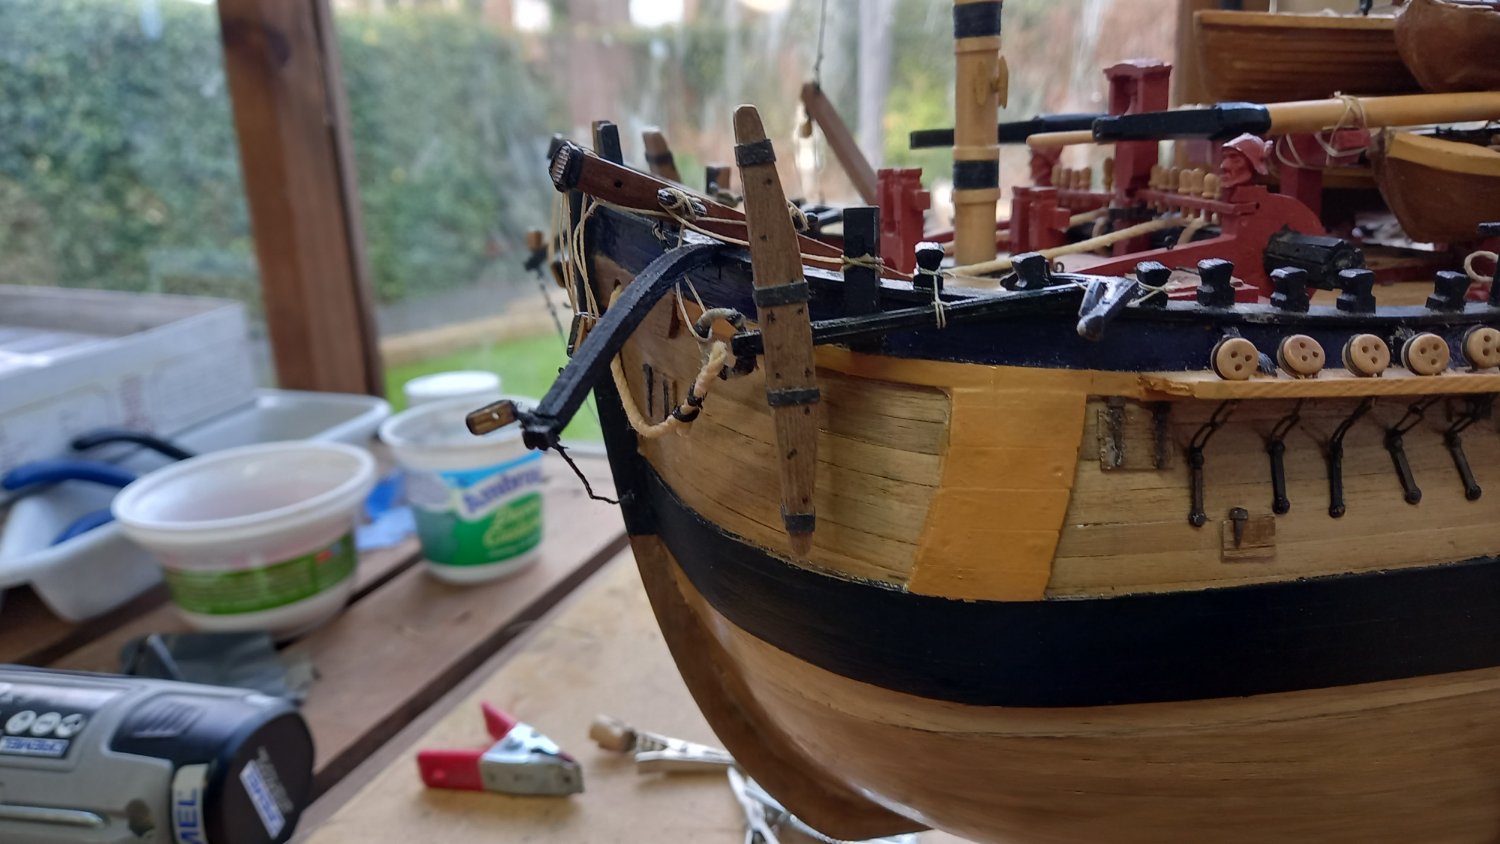
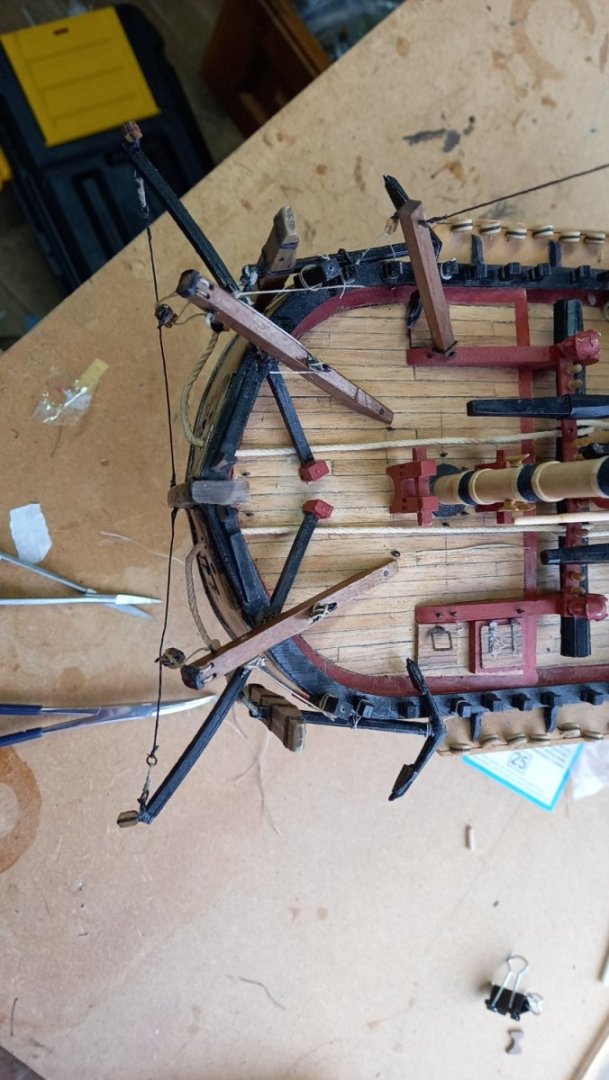
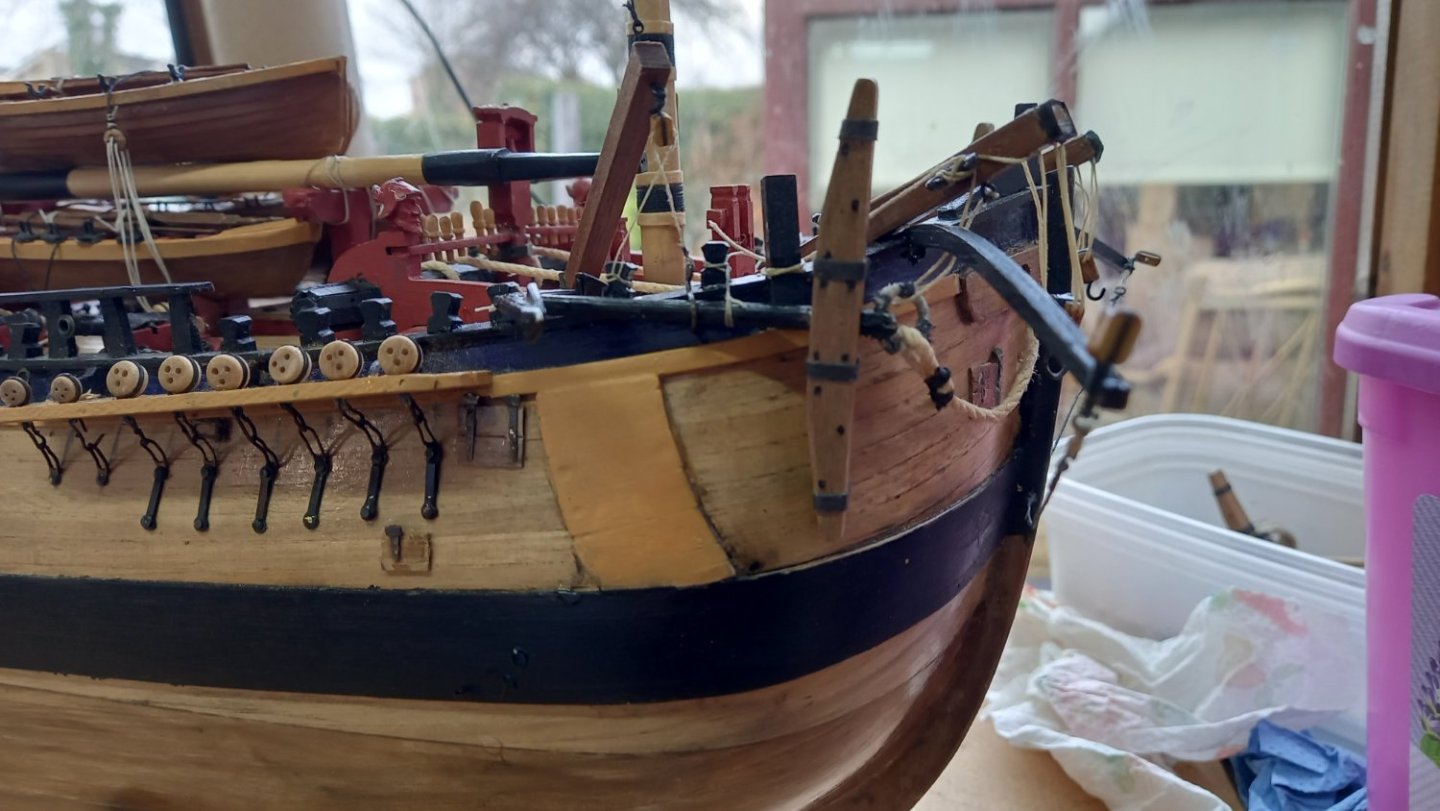
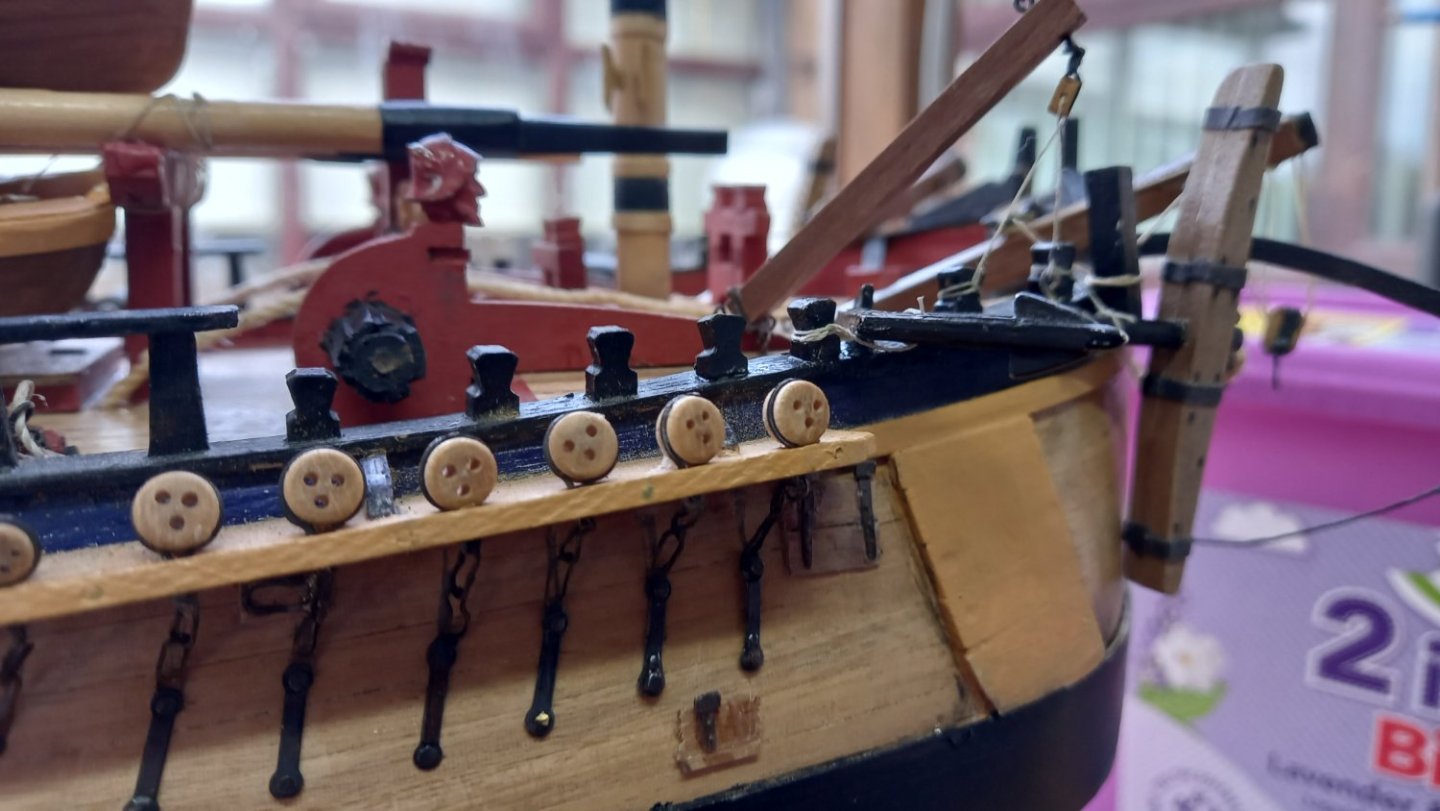
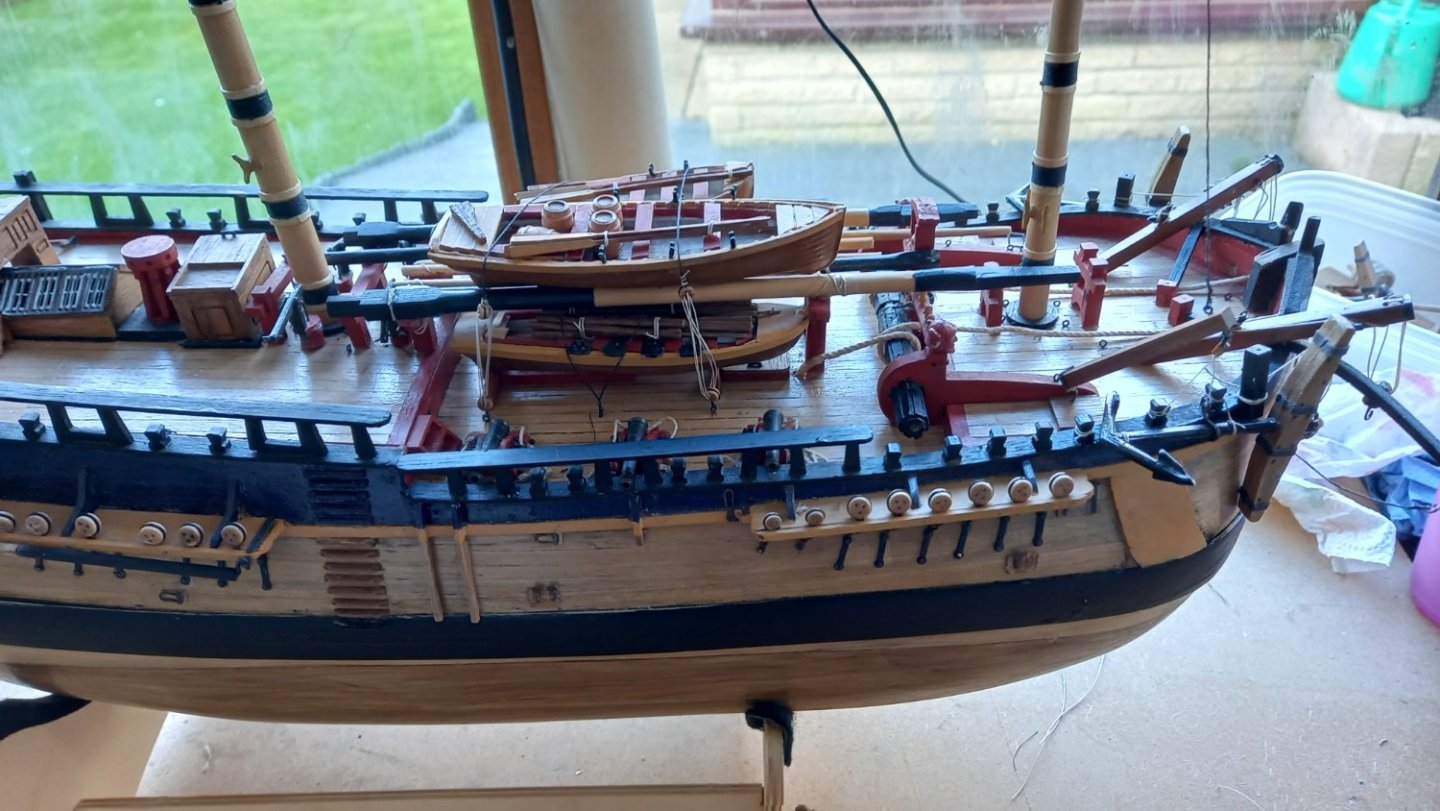
Moving onto securing the boomkin guys/stays and according to Lees for this period only one stay is fitted with a single block on the end for the single tack rope. Then onto securing the forward anchors with the cat head tackle and fish tackle. This is accurate as I think possible and copied from 'Arming andFitting of English ships of war' by Brian levery and includes the stopper on the anchor ring in place for letting the anchor go. For the record I used black card from the kit for around the ends of the cat heads. Next I will attempt to make the anchor buoys and hopefully Next iam making an attempt at making the buoys for the anchors and I hope they turn out ok.Then finally onto the standing rigging.


-
Nice cannons and their tackle, I also like the serving machine doubling up to make nice work on them small blocks.
-
I take my hat off to you Sir and once again I would like to thank you for your time and patience for walking me through the field of airbrushing and something I can add to my list of posts. I have learned so much about different mediums to use over the past month or so and not forgetting the importance of keeping to scale.
-
Sorry Bob for more questions. There always seems to be more of them. What sort of alcohol can be used for thinning Acrylic. There are a number of modellers who use Admiralty acrylic ( made by Caldercraft) including myself and have quite a few different colours. They also sell packages of these paints for there particular ships. There has been one or two people have mixed these 50/50 with water to use with a airbrush and I wonder what your thoughts are on this mixing acrylic with water? It is also taking about one hour to dry between coats and requires up to 20 coats. This does appear to be a bit excessive. When using alcohol or brand name thinners is there a general recommendation on mixing % or do we use the milk like consistancy as a general rule. Perhaps for a beginner one should use the paints own thinning medium and perhaps they would offer the correct % for their own paints/primers or varnishes. Your help and guidence on this subject is forever appreciated.Best regards Dave
-
Thank you Spyglass. These are exactly what I want, although possibly a different time period, I now have a better idea of what I am looking for. Thanks too for the photos . Best regards Dave
-
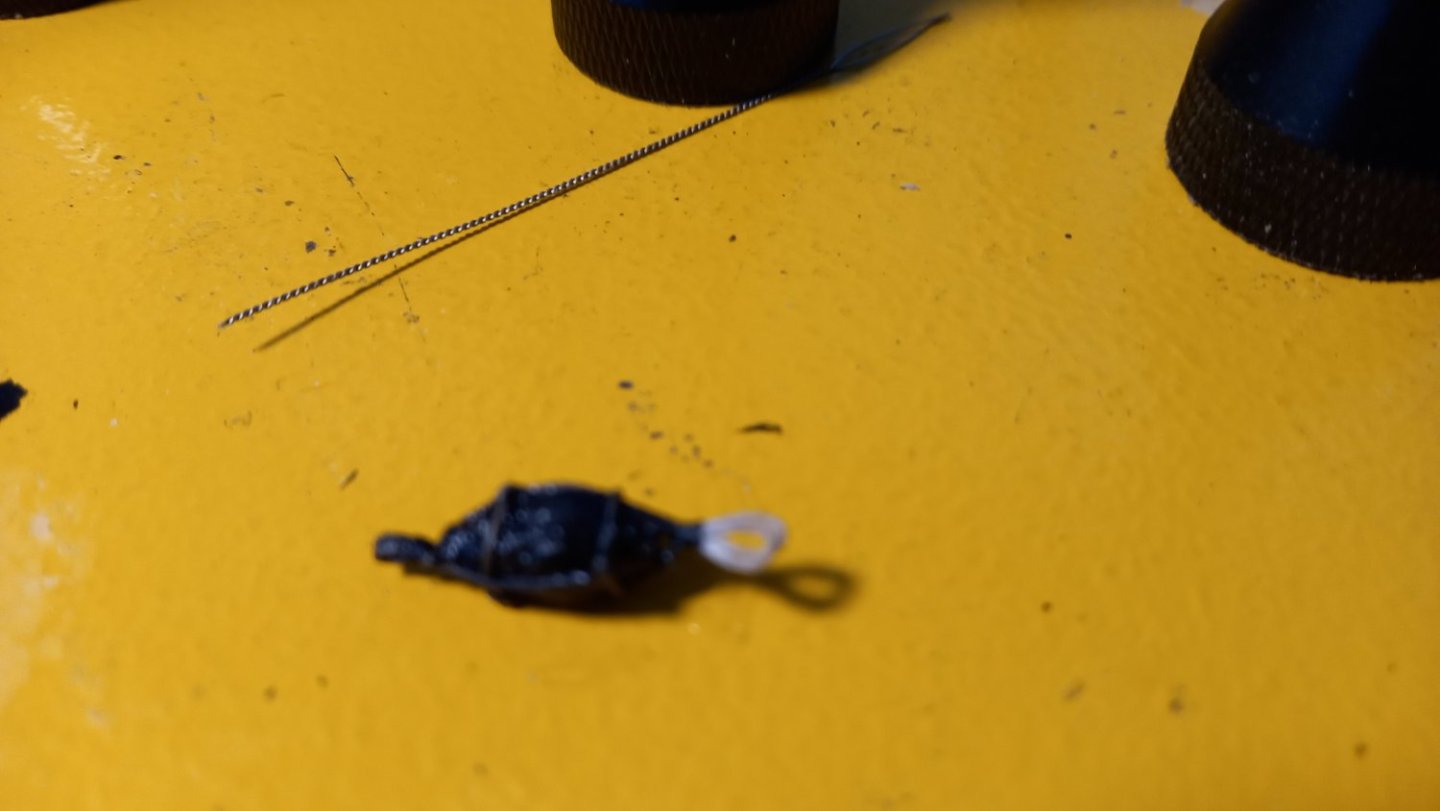
According to Brian Laverys book 'The arming and fitting of English ships of war' The cat block would be difficult to remove whilst holding the weight of the anchor, so a stopper is also fitted to the anchor ring. This will take the weight of the anchor whilst the hook can be lowered and then removed. This stopper is basically a loop to a cleat on the side of the cat head which threads through the anchor ring and when one end is released the anchor would safely fall away or hang on the anchor main rope. I am unable to find much in the way of a drawing so I wonder what this would look like. Brian lavery also states that this has a stopper knot on one end but I am unable to imagine what this would look like and how this is attached to the cleat. I am also wonder if this would be shown on a model whilst the anchor is stowed/secured to the timber heads or would the stopper be stowed away until such time as the anchors would be needed. Hope this makes sense. Dave
-
Thank you Bob for this indepth reply and which clears up pretty much every question I had going around in my head. I apologize for not replying to your reply earlier as I have only just seen this. Also thanks for the links too. I will no doubt end up using a number of different products and spend a lot of time practicing. I have recently joined a local modelling club which the guys mainly do plastic models but there airbrushing skills are truelly amazing . The chance to obtain some instruction, has been offered to me so I am looking forward to taking up the offer. Fortunately I haven,t even started on the ship with a copper bottom, so I have a lot of time to learn and pracice the different techniques to produce something reasonable to the eye. Once again Bob I appreciate your help and patience for now and in the past. Best regards Dave
-
Thanks for adding to this thread Paul. I have recently joined a local modelling club who are mainly into plastic modelling of every kind and they are truely experts in the arts of airbrushing. I hope I can pick up some of their tips .You mentioned the company Dirty downs which has also been recommended to me, so look forward to trying this out and have ordered some of this in together with another company called Dark Star for the copper brown. Perhaps another approach would be the use of weathering products but although I have been interested in working with these products as yet I have not tried them. However when looking at models with these techneques they are truely amazing. One for the future I hope.
-
Not sure if this should be added to the other thread currently running. When using an airbrush can we apply shellac to seal the wood prior to using Acrylics or do I need a prime and I am assuming shellac can be thinned with methalated spirits or ethenol?I am assuming then ordinary surface primers such as made by Tamiya or Vallejo can be airbrushed prior to using Acrylics on metal? I then come on to using varnishes and can these be applied over the paint( to protect it) by airbrush too and if so what are these thinned with. I apologize as these are a number of questions which has been playing on my mind.
-
Thank you Ron and Kurt for another excellent tip. Also Wefalk regarding the Vellajo air paints .After searching through a few videos regarding these acrylics one or two people have been have issues regarding spray patterns and clogging oog the nozzles etc and how to prevent this happening. One person reckons it is to do with shaking the bottle in the correct manner and the other is to do with the correct mixture of improver/thinner/paint and air pressure. I thought at the time that this defeats the object of Vallego Air. He also suggests its to do with the type of bottlleI am not suggesting there is anything wrong with the paint but perhaps there are other issues a foot here At the end of the day I suppose I will have to try these paints for myself as I am sure your recomendation is a sound one. Thank you again for your input and I look forward to your thoughts on this if any. Another question if I may regarding the the airbrush holders with the pots, I am assuming these are also used for cleaning and wondering if thinners were inside the pot would prevent the paint from drying at the tip whilst storage between coats. I am just thinking when airbrushing a large area such as a hull, then something like this would be needed, especially when using acryiics.
-
New Hyundai HY7524 compressor not working
DaveBaxt replied to DaveBaxt's topic in Modeling tools and Workshop Equipment
Sorry to hear you had so many problems with your compressor Alex. However they do seem to get decent reviews on Youtube and other places but mainly by people who have just got them. So time will tell. I think the saying is generally true. good not cheap.cheap not good. I think its the price which is attractive .It will be interesting to see what the after sales is like if any. Anyway thanks for your input its appreciated -
New Hyundai HY7524 compressor not working
DaveBaxt replied to DaveBaxt's topic in Modeling tools and Workshop Equipment
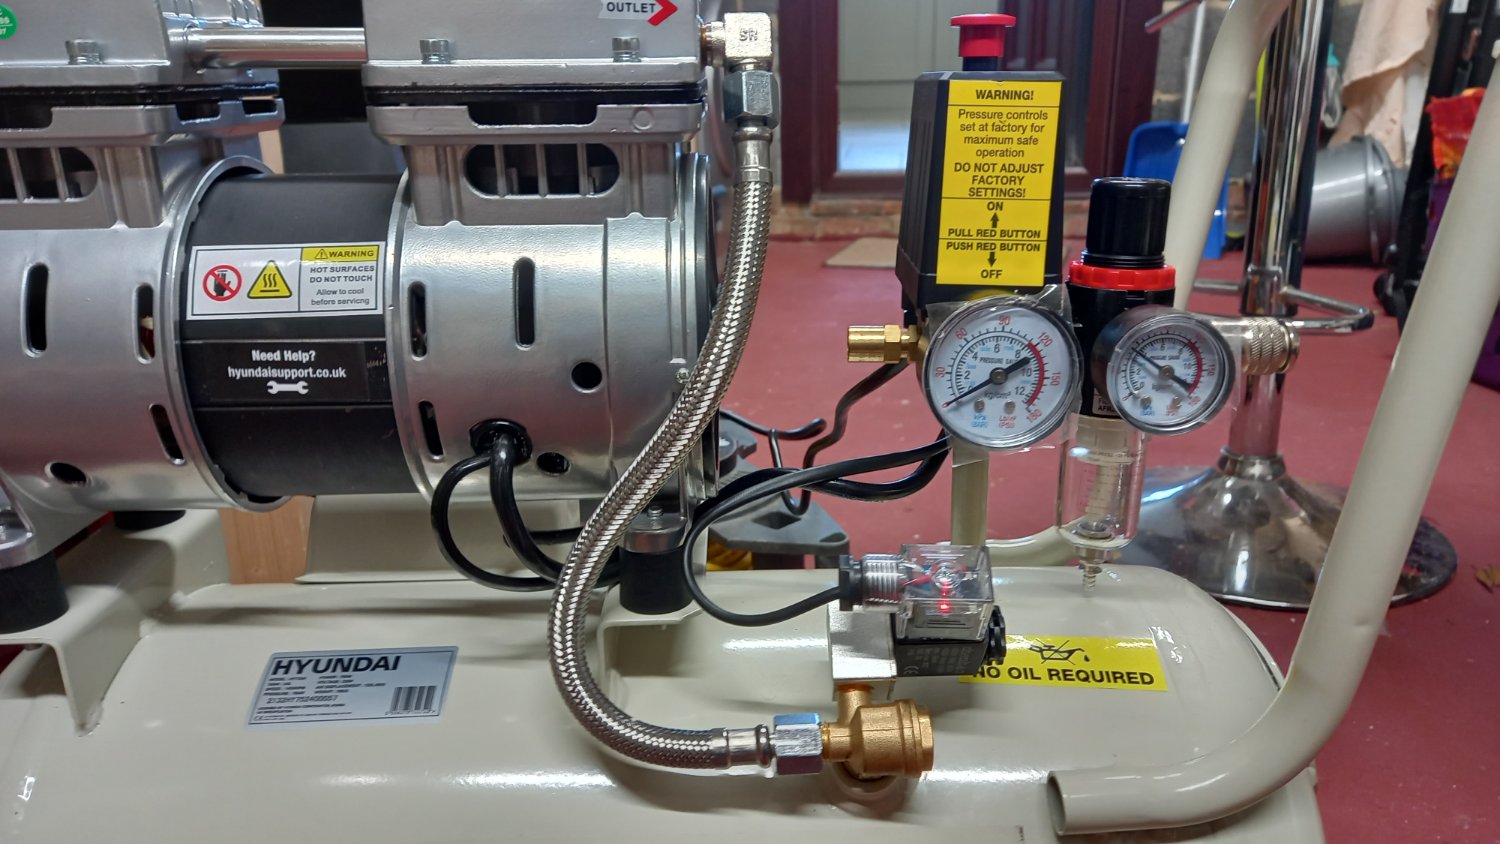
Thank you Roger. I have done a test run by adjusting the outlet pressure to aproximatley 7b when the compressor cut out. So the on /off pressure switch is set at 7 bar (factory set). As I haven,t got an airbrush yet (In the post)so I reduced the pressure by opening the drain cock on the bottom of the tank until the compressor re started again which was around 5 bar. So all would appear to be operating as per normal. I think you are correct in thinking the gauge is either faulty or there is a blockage to it. As the tank pressure gauge looks to be on the same outlet pipe/manifold as the outlet gauge (fitted after the pressure regulating valve) which is working fine, I think it is now fairly certain to be one or the other faults you mentioned and probably a faulty gauge. I have thought about swapping over the two gauges to prove this one way or the other but if I damage anything I will lose the warranty so think I will leave it for now . It now looks like I will have to contact Hyundai on Monday and see what they have to say. Hopefully they will give me a new one but that is a fair bit of hassle.perhaps they could send me a new gauge to change but I doubt that and just in case the fault is something different. Thank you again Roger for your help and patience,best regards Dave -
New Hyundai HY7524 compressor not working
DaveBaxt replied to DaveBaxt's topic in Modeling tools and Workshop Equipment
Thank you Jim that was already in the start up instructions Now that I figured out what the pressure switch does I let the compressor run up to the tank pressure ot 7 bar by adjusting the outlet pressure and winding in the pressure regulator and worked out that at least I know that the cutting in and out between 5 and 7 bar is working so all good apart from the large tank pressure gauge. However I am a little worried that the tank relief valve is on the same manifold as the gauge so it would really be nice to get th gauge working. I will have to get in touch with hyundai and get this sorted befor I properly use it. -
I have just removed this from the box and read the instructions which are very poor( no drawing showing the different parts apart from the wheels on the bottom and the air intake filter)I fitted the air intake filter and closed the drain valve. I am still waiting for the airbrush and hoses to arrive but thought I would give it a run anyway. So switched on as per instructions. All would apear to be working ok with the small gauge gradually rising as expected. However the large gauge which I think is for the tank does not apear to be working . I also adjusted the outlet pressure to what the gauge is showing. The compressor I think unloads but does not cut out but instructions say that it should cut out?. There does not apear to be any change in noise level at this point. What am I doing wrong?

-
All great news and saved me a few quid. I also see Vallejo do a bottle of improver and assume this to increase the length of time the paint stays wet but not sure how this works and wether or not this can be achieved with thinners or not. I am now assuming that you don,t need a cleaning kit as well or is that wishfull thinking? Thank you again for your help.