DaveBaxt
-
Posts
1,324 -
Joined
-
Last visited
Content Type
Profiles
Forums
Gallery
Events
Everything posted by DaveBaxt
-
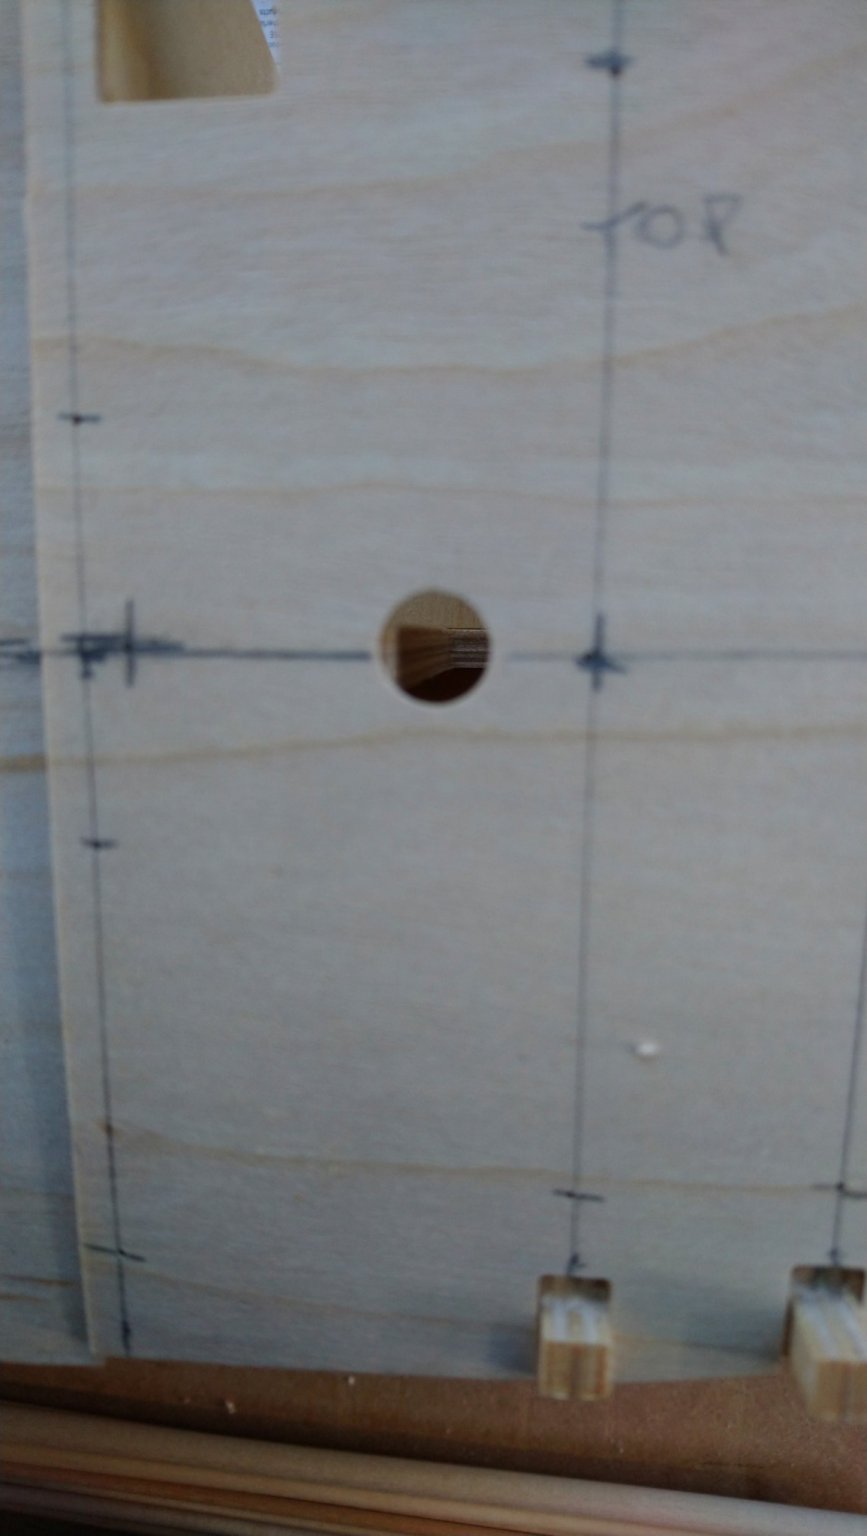
Looks Like I need to get in touch with Calder craft. After looking closer at the 1.5 mm Walnut sheet I first noticed that the stern facia has four windows missing. At first I just thought that they had just dropped out and were waste. However on closer inspection I believe these are recessed rather than holes, like the one in the middle. Also the edges are rough as if they have been broken off and cannot understand why. Also if these had just dropped off ,surely they would be in the box somewhere. If there are any Caldercraft Endeavor builders out there can you please confirm that the windows should be in place. Thank you.

-
I would just like to thank everyone who has taken their time to add to this thread and what seems to be a very popular subject. As I am only a beginner and as yet not at the stage where accuracy of scale is so important but still I have taken the time to ensure that rigging and other such specifics are accurate to scale so why not the grain of the wood! However using Tung oil or similar is something I would like to try. I appreciate that once used then anything added later such as glue or paint may cause issue. In the past I have rightly or wrongly used sand and sealer which again brings out the grain and leaves a sheen. This was always easy to remove by sanding in areas which were then needed gluing or painting, not sure if this would be the case for any oil which would soak into the wood. I am happy with the replies I have received and will give it further thought in what direction to take and whether or not to use anything at all. For the record I do like the look of those Vanguard models. Best regards Dave
-
Thank you for confirming what I already suspected after reading a fair bit on this forum. Nice to hear it from your good self and thank you for what seems an alternative view. Best regards Dave
-
Regarding the tung oil . Are you guys using it on just about everything that or just the deck and hull and how are you applying it? Best regards Dave
-
I agree about the Walnut. Lovely looking wood but I must admit painting covered a few mistakes in the past. Hopefully I will make a better job on my next ship and now thinking I might give the tung oil a go. Thanks once again for your input. Bast regards Dave
-
Yes it does look rather nice. Great planking too!
-
I have see model builders using weathering products to make the ships look more authentic rather than when the ship was newly built. My last and only two ships the bottoms were painted and my next one the Endeavour is also to be painted brown as per instructions . I have now come across the use of Tung oil to enhance the grain of the finished wood and I would imagine this would give the wood a sheen too. If I made a good job of the second planking .Is it a shame to cover it up with paint but rather enhance the lovely walnut wood? However is this taking away the reality of the model and making it look rather like a piece of furniture? Your thoughts on this would be appreciated. Best regards Dave
-
Bow & Stern blocks
DaveBaxt replied to DaveBaxt's topic in Building, Framing, Planking and plating a ships hull and deck
Thank you mark for all your input and for helping me with what is the bestway forward and in some way undestanding why and how is the best mateials to use. I think understanding which is the best woods to use in a subject in its own right and needs careful study. I am still learnig stuff about this hobby on a daily basis . Best regards Dave -
Bow & Stern blocks
DaveBaxt replied to DaveBaxt's topic in Building, Framing, Planking and plating a ships hull and deck
Thank you mark for explaining the shrinkage of wood and fascinated at how it does this. As for plywood I have just spent a lot of time straightening out a plywood keel on my HM Bark Endeavour but eventually I got there with building a jig and fitting extra support pieces see my blog if you have I am therefore a bit reluctant to use ply for this purpose and could it cause problems later down the line or is it ok as it would not be allowed to move if used for blocks.Best regards Dave -
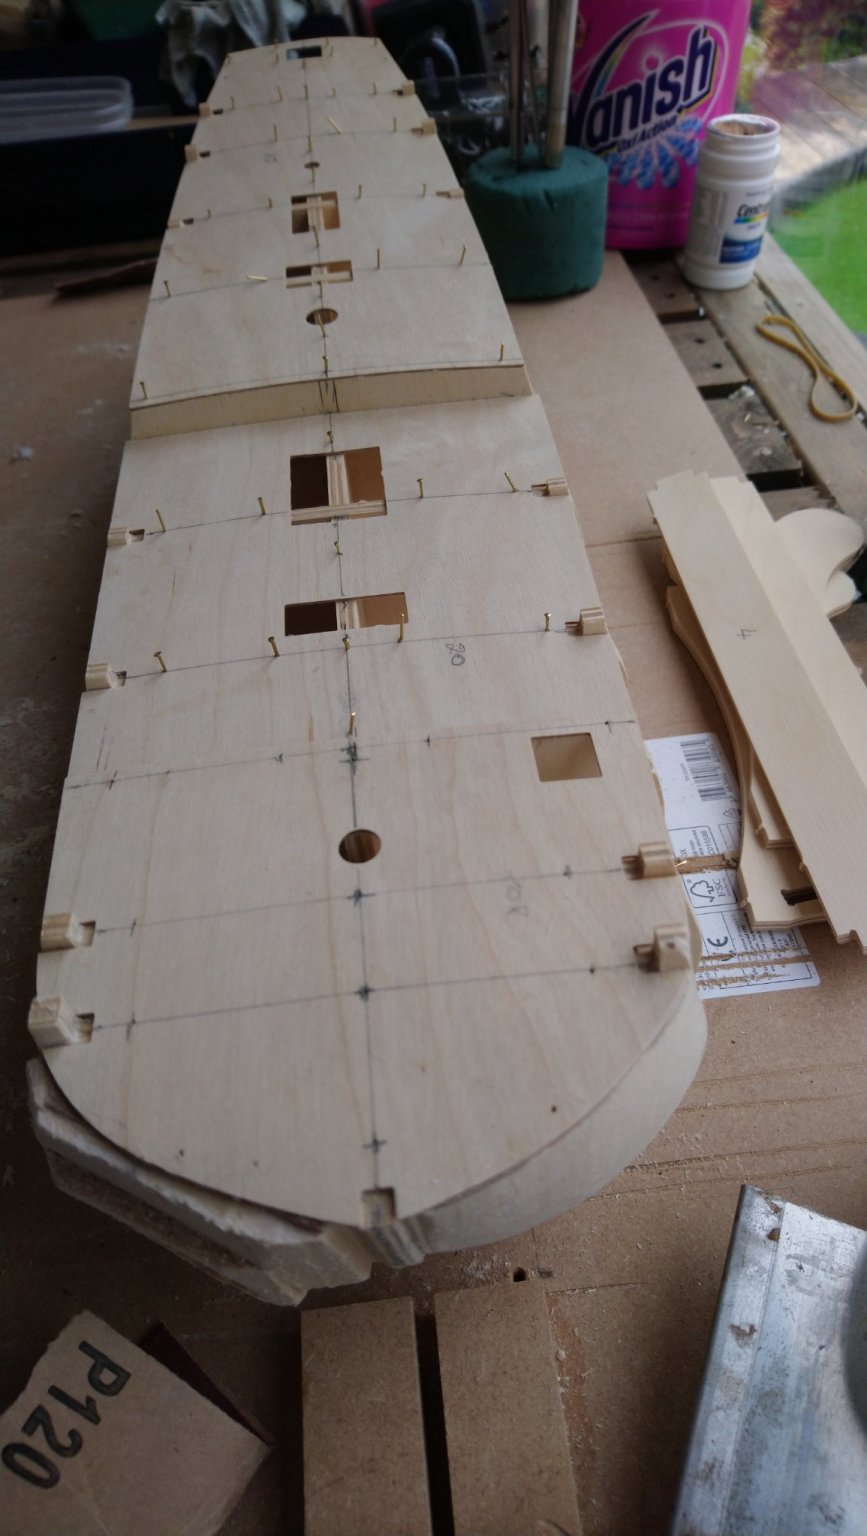
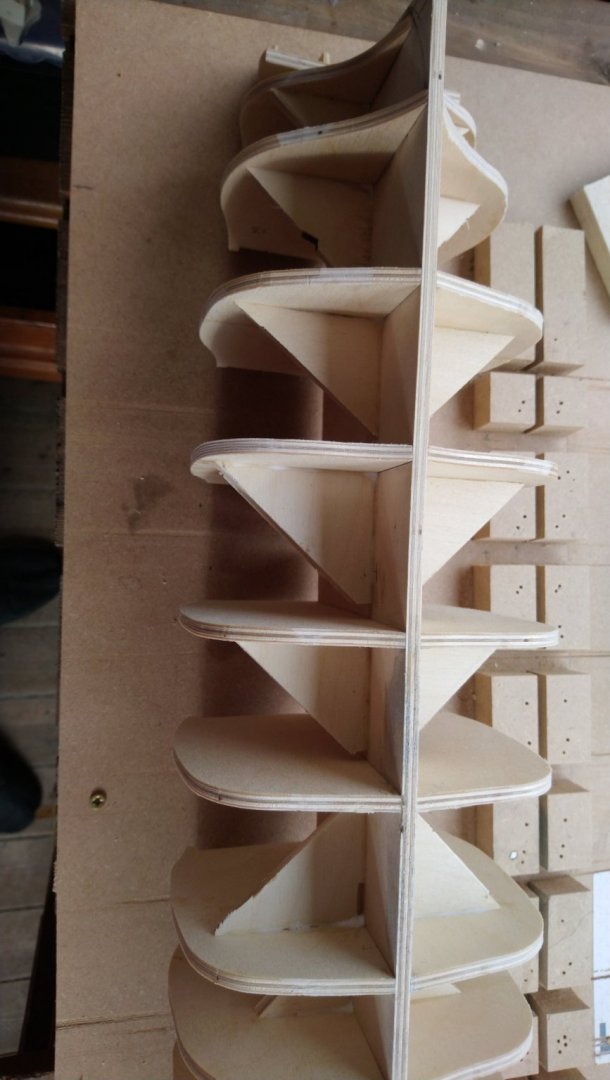
Finishhed glueing and pining the deck to the bulkeads and keel whilst everything in line whilst in the jig and hey presto a straight keel. I am over the moon and should hopefully remain so whilst laying planks alternatively port and stbd


-
Bow & Stern blocks
DaveBaxt replied to DaveBaxt's topic in Building, Framing, Planking and plating a ships hull and deck
Thank you Gregory and I see what you mean and that would work. Best regards Dave -
Bow & Stern blocks
DaveBaxt replied to DaveBaxt's topic in Building, Framing, Planking and plating a ships hull and deck
Thanks Mark I hadn,t thought of that but good idea. I have done a quick search and found lots of outlets that sell blocks of basswood for carving etc and thought these would be ideal however I wonder does it make any difference which way the blocks are fitted ie does it matter if the end of the blocks are what will be the surface to glue the planks onto? One well known model shop here in uk sells different thickness basswood ply would and think this wood work well too. Perhaps if purchased from model shop the plywood would be ok to use straight away. Whats your thoughts on this Mark? -
Bow & Stern blocks
DaveBaxt replied to DaveBaxt's topic in Building, Framing, Planking and plating a ships hull and deck
Thanks guys for your input, so it looks like bass wood is the way to go however this SPF sounds interesting too so may search about here in the uk. Best regards Dave -
Bow & Stern blocks
DaveBaxt replied to DaveBaxt's topic in Building, Framing, Planking and plating a ships hull and deck
That sounds like a good way to do this but could be a little tricky as I have already fitted sections for strengthening but definately worth considering for my next build. I could also consider building a model with frames. Thanks once again for your help . Dave -
After looking at several different build logs I have come to the conclusion that a few people including my self, have experienced problems keeping a nice curve with the first layer of planks, not at the bow where you would normally fit blocks, but just aft of the bow and between two bulk heads and under the water line. This seems to me to be between two bulkheads with the greatest change in shape ans usually before the second layer of planks is fitted this flat area is then built up with filler to get the correct shape. My question is ,does anyone use shaped blocks in this area the same as in the bow and stern to help maintain this nice curve? Also I have been using balsa wood for the blocks but find pins do not hold too well and wonder if there is a better wood which can be used, perhaps mdf can be used for this? Hope I am making sense and people understand where I mean on the hull. Best regards Dave
-
I know I am some way from the masts but all the dowels are white wood and just wondering what sort of wood it is and wonder why not Walnut ? It will therefore be necessary to stain or paint some of the masts and yards . I have some walnut dowel in my stock so will probably change the masts which are not painted for walnut . Is there any other reason for not doing this other than the extra costs. I have tried staining lime before using a walnut wood dye and didn,t like the finished look although I am not sure if the supplied dowel is lime. Any ideas? Also found most of the smaller dowels 6mm and under are also warped. Not too impressed with the kit wood so far. I wonder if it would be better to order directly from Caldercraft as I we don,t know how old the kit has been stored at the retailers.
-
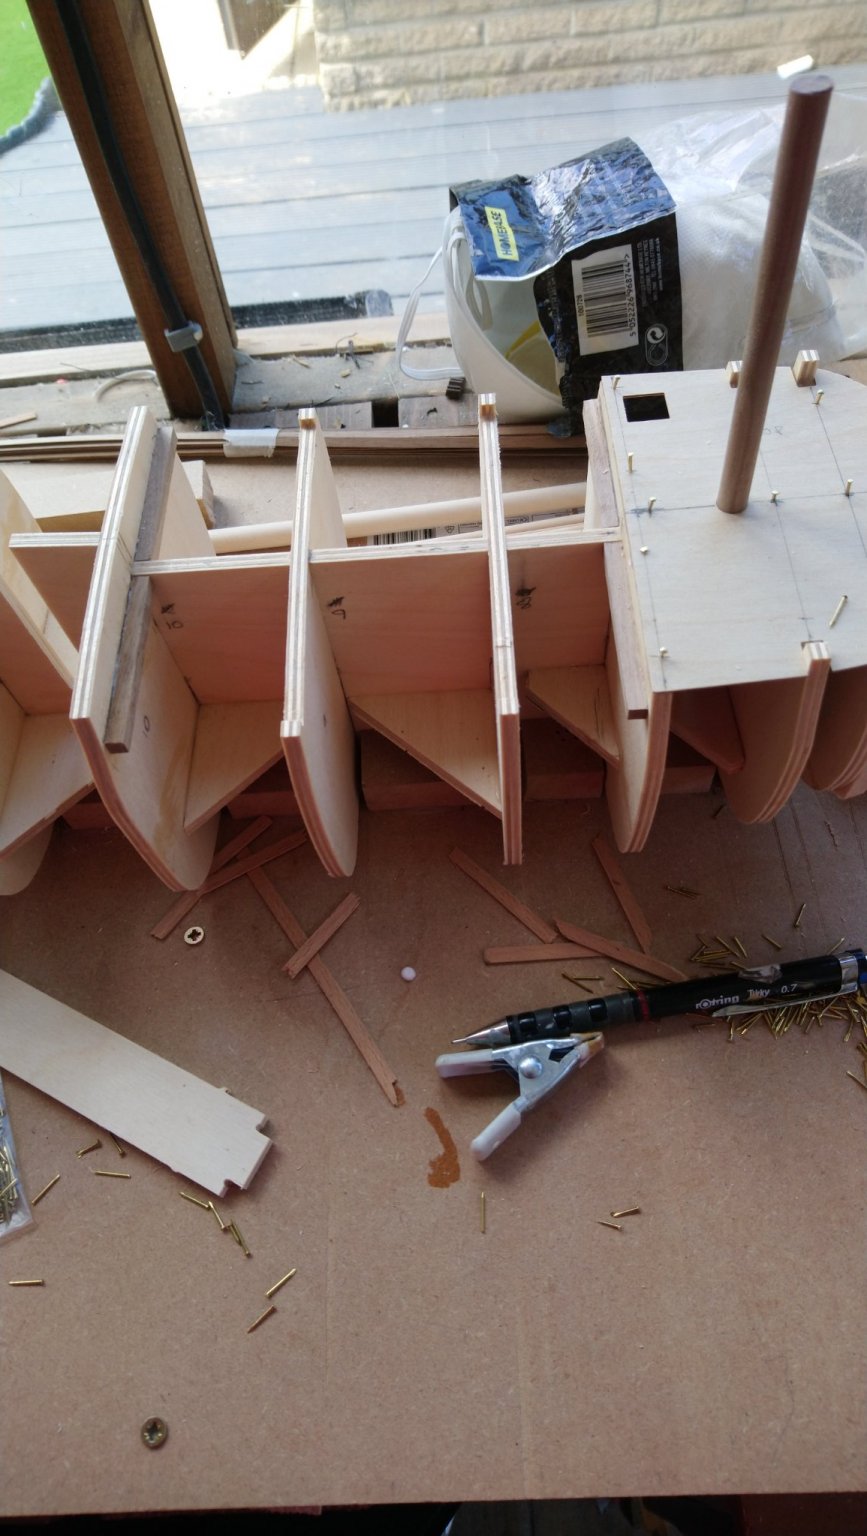
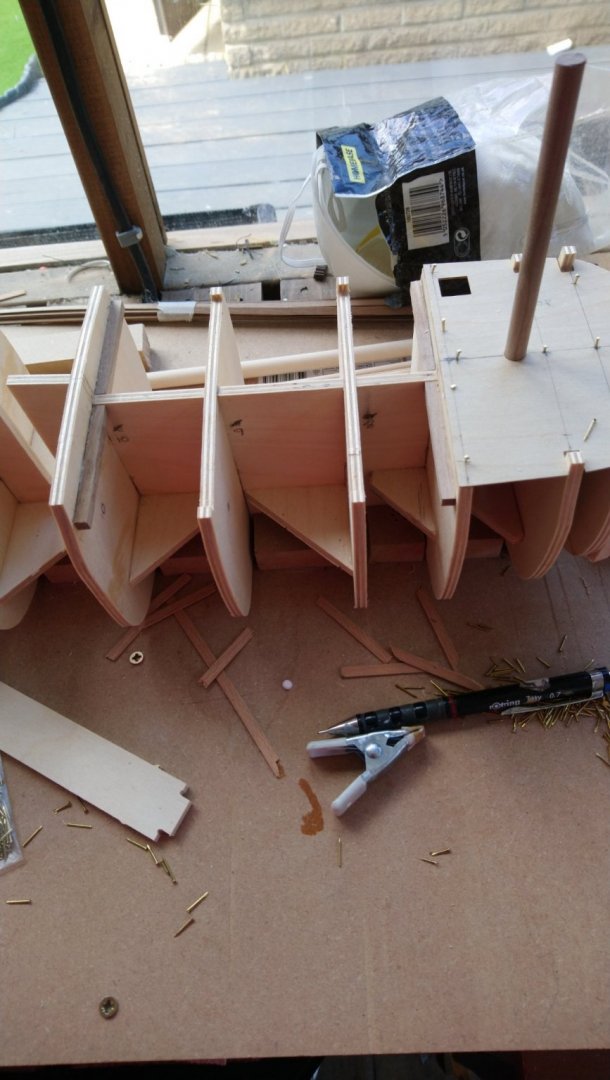
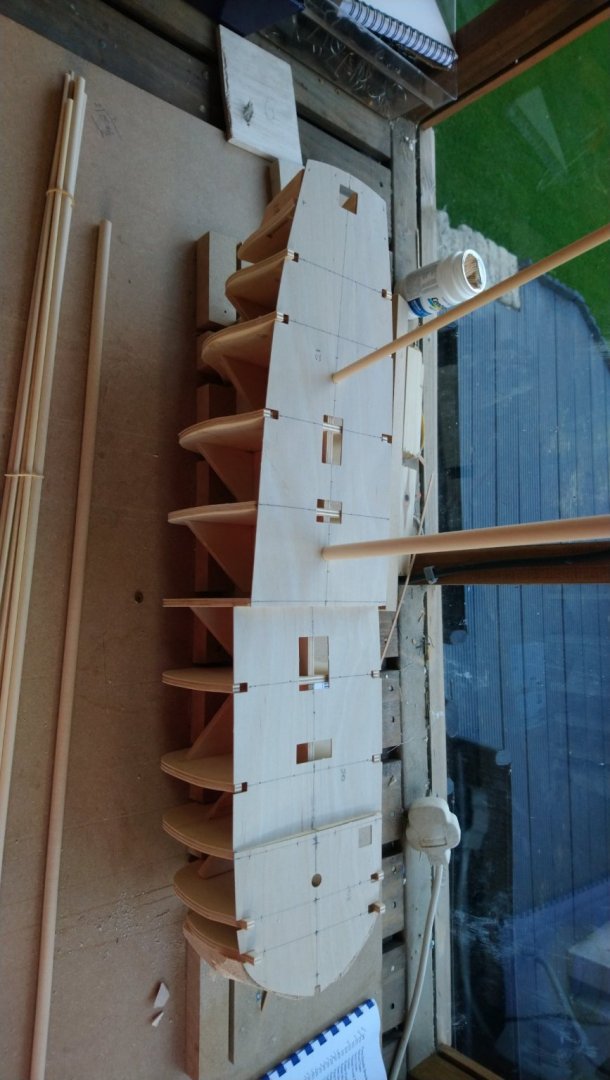
Started gluing and pining the decks after removing some material at the aft end of the slot in the bulkhead to allow the mast to now fit. I tried to take measurements from one of the plans of the deck layout but I don't think they are to scale. I also fitted 4 strips of 5x5 mm walnut to support the lower deck in the mid ship area. This was not in the instruction but just thought the deck needed this. Once the glue dries I intend to remove the pins
-
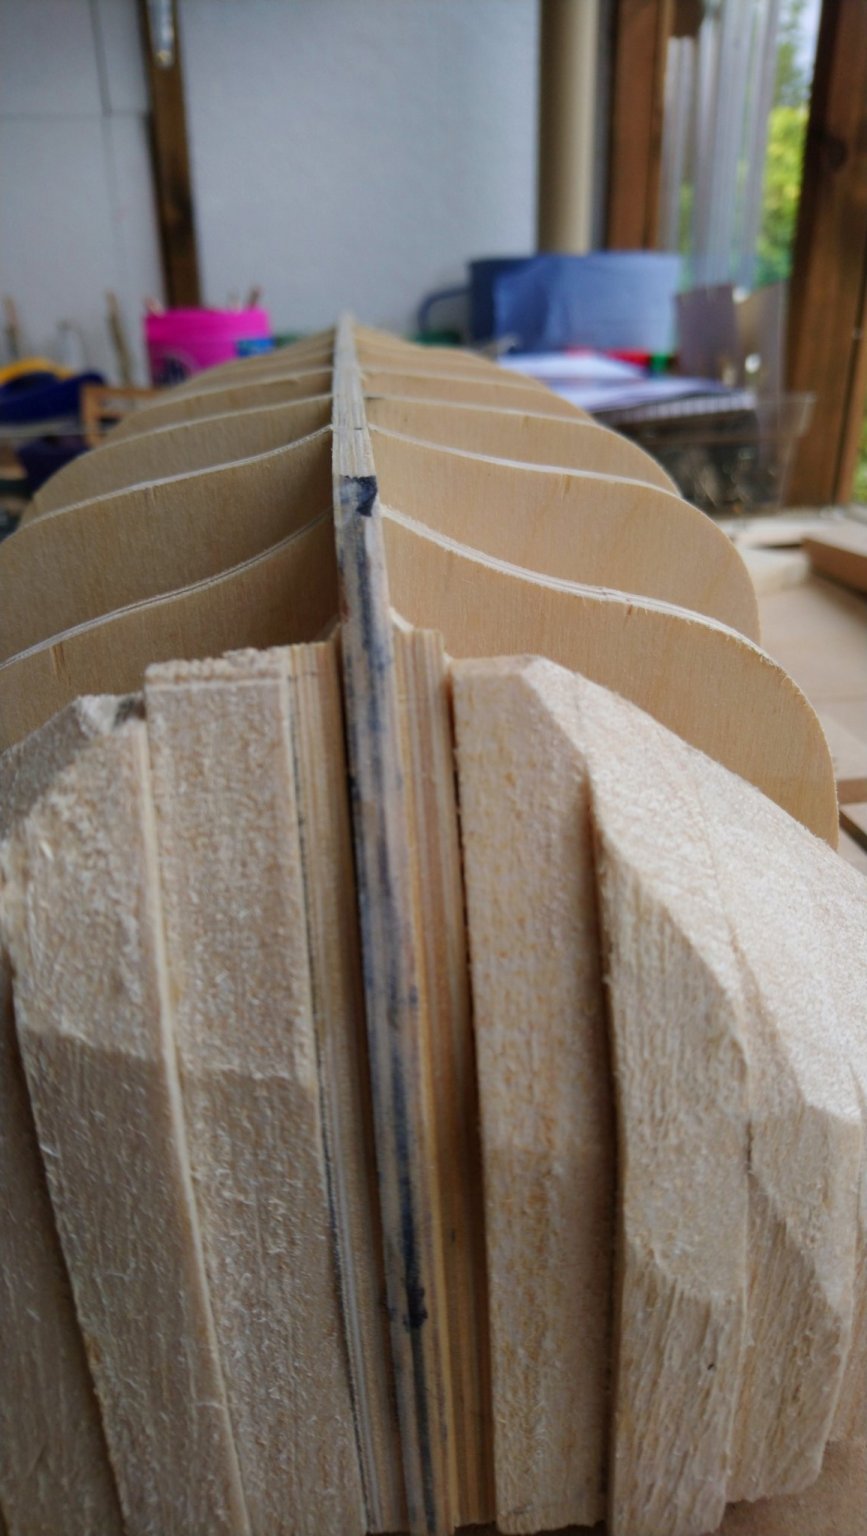
I am beginning to think that its almost impossible to get the plywood keel flat again without some form of support and once that support is remove will always deflect a smaller amount back to its warped condition. Just hoping I have done enough to not cause any issues later on down the line.
-
Just did a dry fit of the deck pieces and noticed that the fwd mast hole does not line up with the alocated slot. I will need to check the drawings to see what is the correct position. I think I will be easier to move the slot in the false keel than move the hole as it is only about 1 mm but we shall see.

-
I agree and think it is all part of the hobby. My last build the Bounty was not without issues as well . The main one being the holes in the deck did not line up with the mast and hit a bulkhead and that was rather interesting sorting that one out .I am beginning to wonder if there is always one or two problems with all kits or is it just me. Rather than be put of I am hoping to build more ships from Caldercraft .So if I have any further issues regards a warped keel I now have the evidence to prove the extent I have gone to, in order to straighten the keel. I see you you have come up with another way of straightening a keel with the two glass plates and sound interesting. How long was the keel in the plastic bag for? If your not in any hurry to start might be the way forward . In the end how successful was this?
-
After having another look at it I don,t think it is too far away and to be fair to Caldercraft I haven,t as yet glued the deck on yet as this is what he instructed me to do. So will carry on the way I am going and see how it goes. Your advice may well be the wise thing to do but having got this far it will be interesting to see how it turns out. I may however regret my decision only time will tell. I will attach the decks and think a bit more. Thank you once again for all your help it is much appreciated. Best regards Dave
-
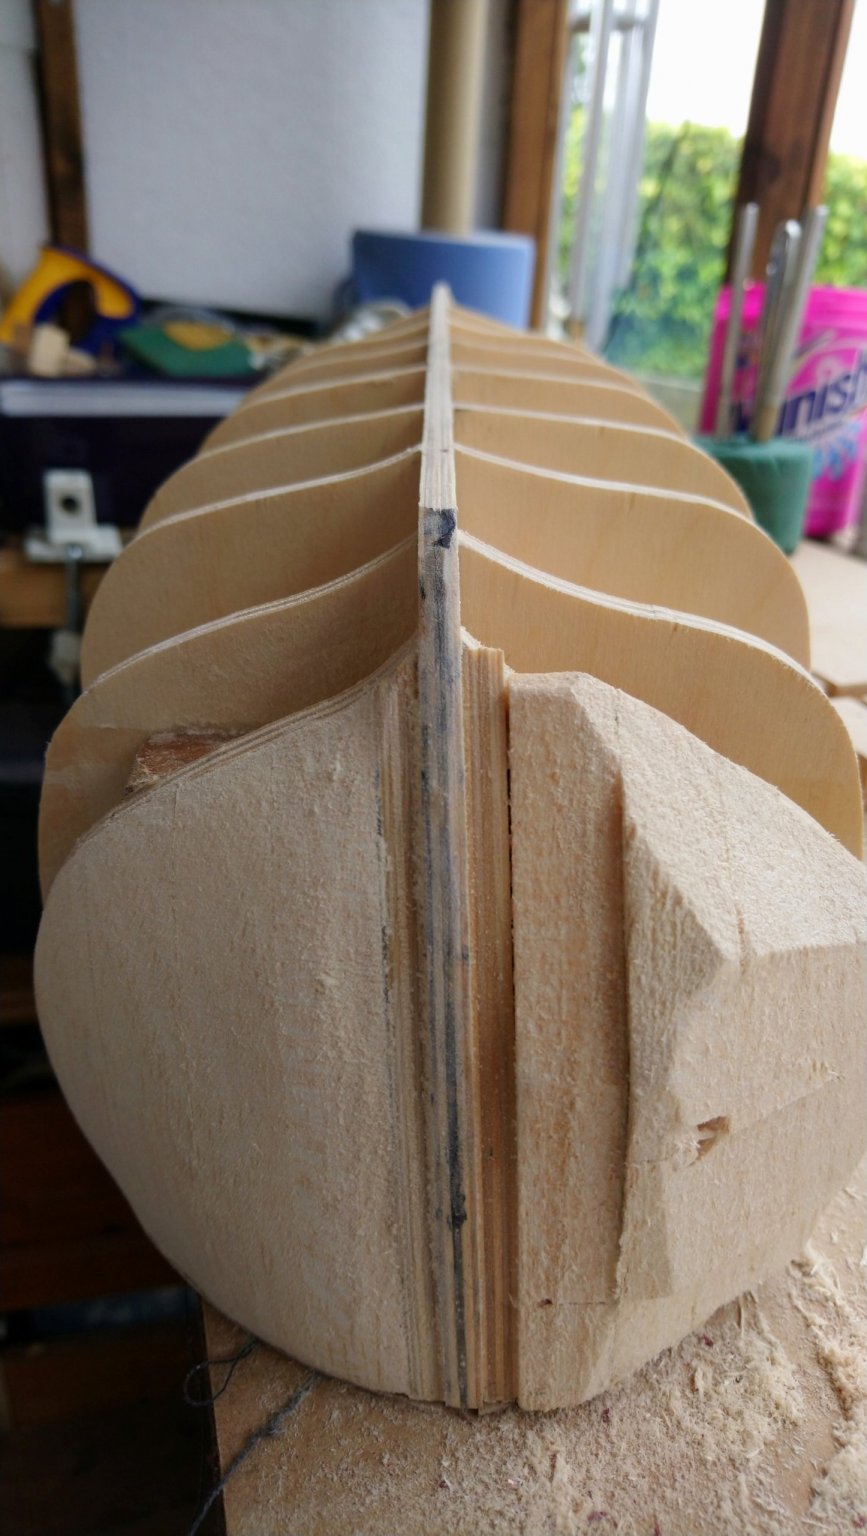
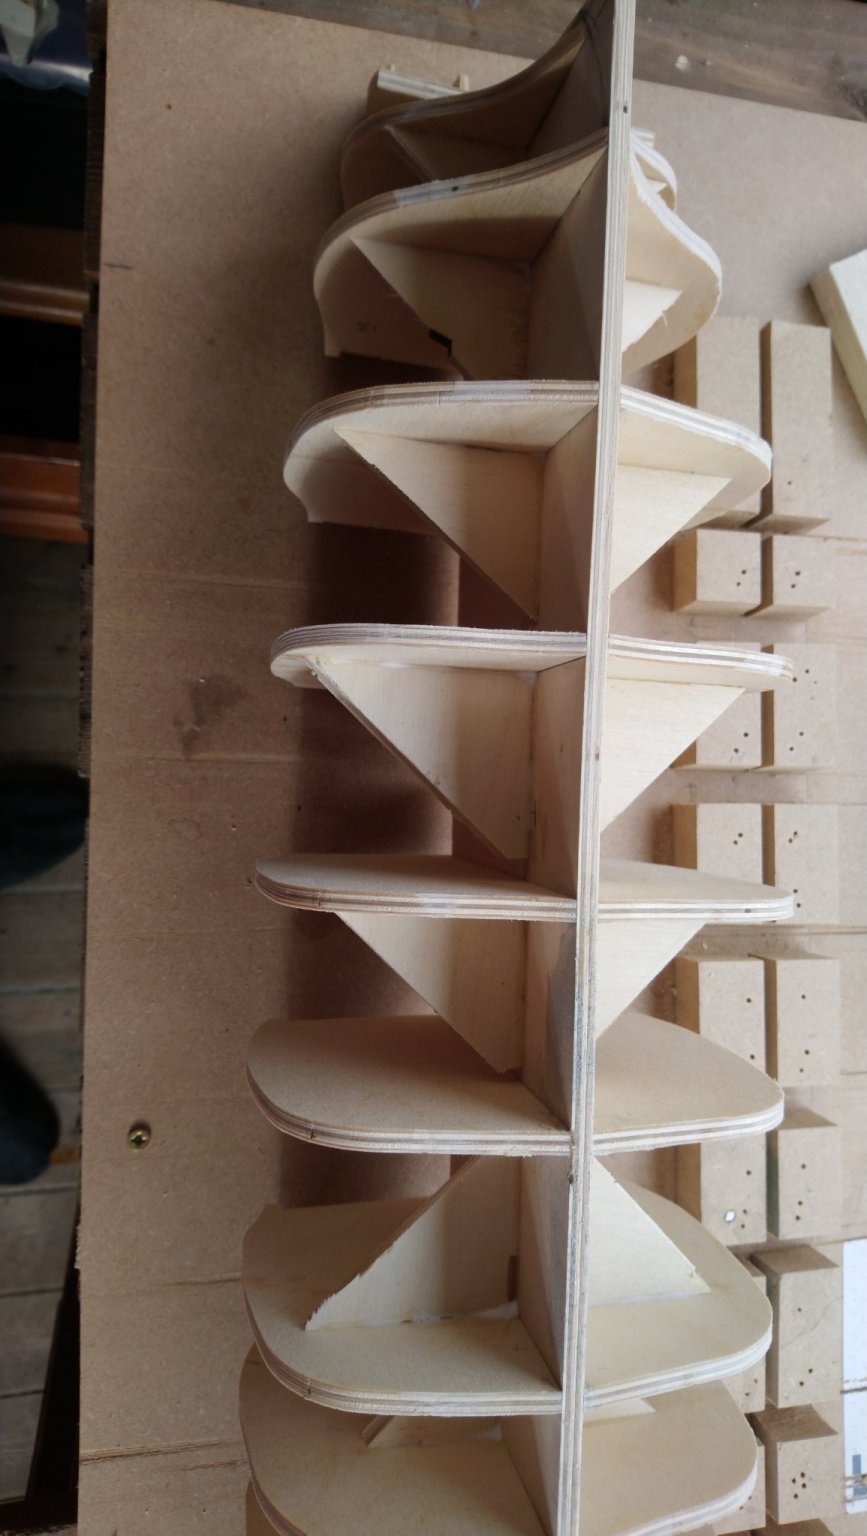
All bulkheads set up square using clamps and lego bricks. Glued into position and allowed to dry over night. Keel looked straight as a die but then removed from the jig you could still see a lttle bit of a curve at each end of the keel. So have decided to glue in some 90 deg pieces in between the bulkheads whilst in the jig and glue in the forward blocks to aid bending the blocks around the buff bow in the hope this will aid the straightening of the keel. I allowed the glue to dry overnight and once again when removed from the jig , although improved it is still not 100 % . I think the next stage will be to glue and pin the deck into position and see where we are then. I I am not sure if there is much more that I can do. I am thinking of fitting some blocks aft which may help I could also fit some 12mm x 12 mm walnut strips at the bottom, on each side of the keel and in between the bulheads but unsure if this would make much difference. When looking at the keel from the top it looks straight to me so once I pin the deck perhaps this should be good enough.

-
HMS Diana by ECK - Caldercraft - 1:64
DaveBaxt replied to ECK's topic in - Kit build logs for subjects built from 1751 - 1800
The Amati Victory sounds interesting. I am far from an expert on anything to do with Amati but generally speaking I think the wood in general is high quality than the Caldercraft stuff. However I did have an issue with the clips for the lower dead eyes were pretty useless and wish I had changed them for the Caldercraft, however someone with your experience might not have the same issue. I think the instruction for amati were ok but the drawings for the rigging were way off for the period of ship (Bounty) After lots of head scratching and loads of stuff I had to do again I finally got there . I might one day go back and build another Bounty but there is so many yo choose from . Thanks for taking the time to do a great blog for us to follow. Best regards Dave and keep up the excellent work. -
HMS Diana by ECK - Caldercraft - 1:64
DaveBaxt replied to ECK's topic in - Kit build logs for subjects built from 1751 - 1800
You have a fantastic collection of models and definately something to aspire to. The Diana is definately one of the models I would like to build in the future but as I am just a beginner fI elt I should like to build something smaller first. I have just completed the Bounty by Amati but have now just started on the Endeavour and just moved onto Caldercraft. I would like to tag along if I may as I think I could learn a lot form your construction techniques? I also see you have also built the Agermemnon which is another one I would be interested in building once I have honed my skills somewhat. However as I haven,t yet built a war ship as such I thought I would probably be better off going for the snake first. What are your thoughts of the Caldercraft range as I see you have tried a few different manufacturers? I hope you don,t mind me adding these questions to your blog and perhaps I should have sent you a message instead. Sorry! if that is the case Best regards Dave