DaveBaxt
-
Posts
1,324 -
Joined
-
Last visited
Content Type
Profiles
Forums
Gallery
Events
Everything posted by DaveBaxt
-
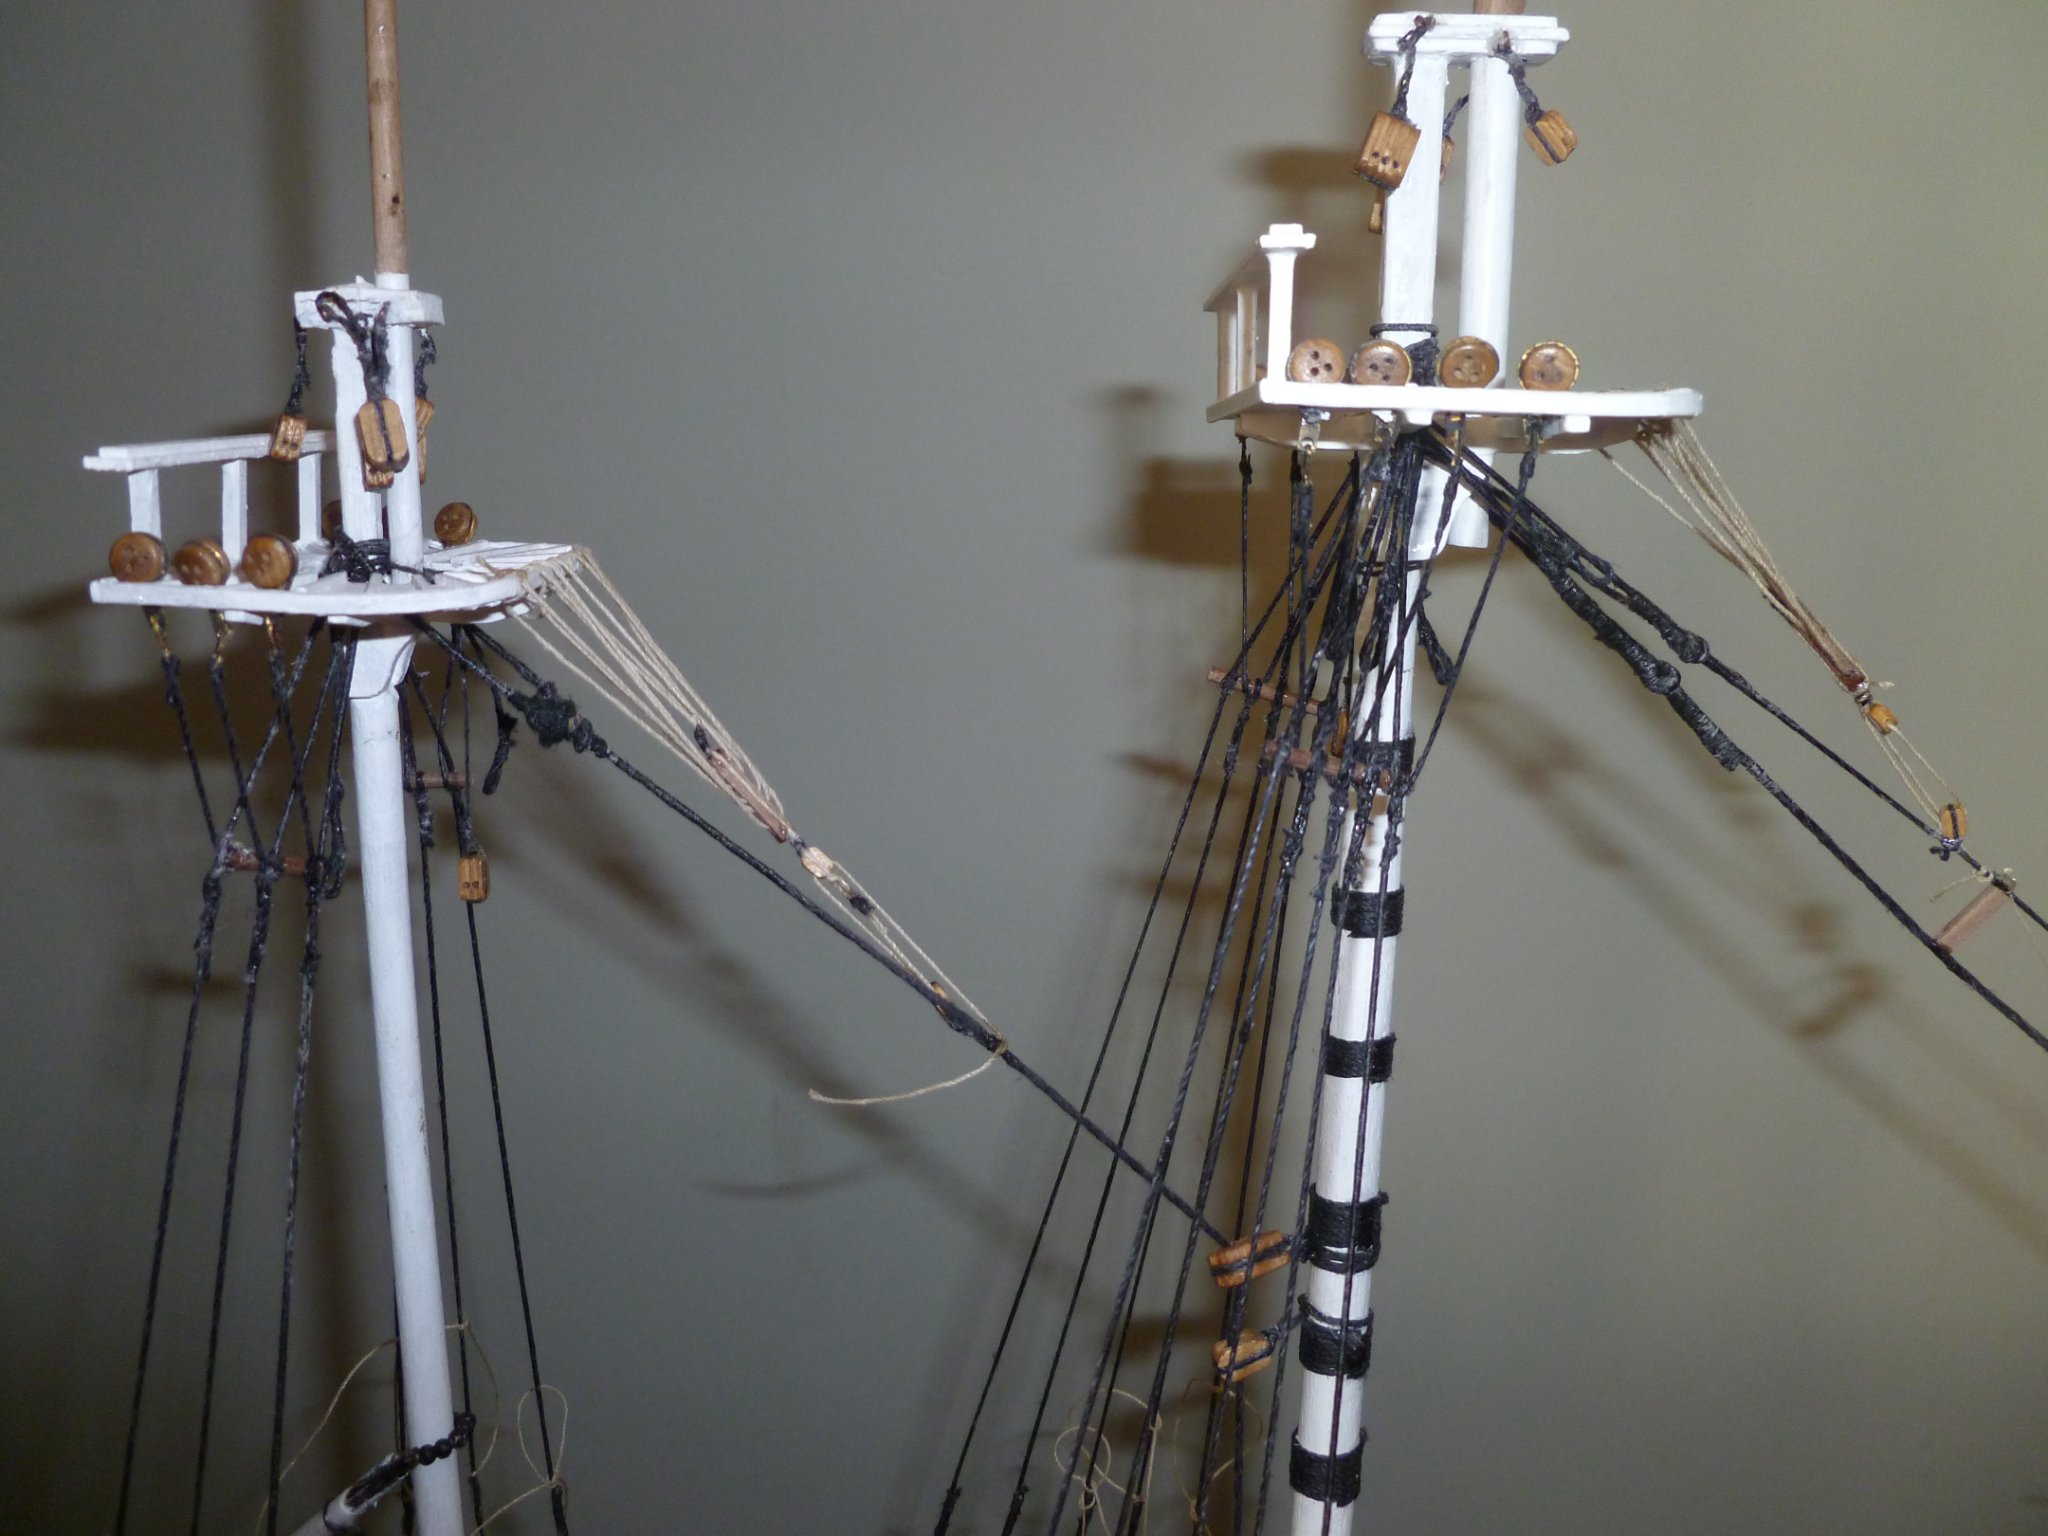
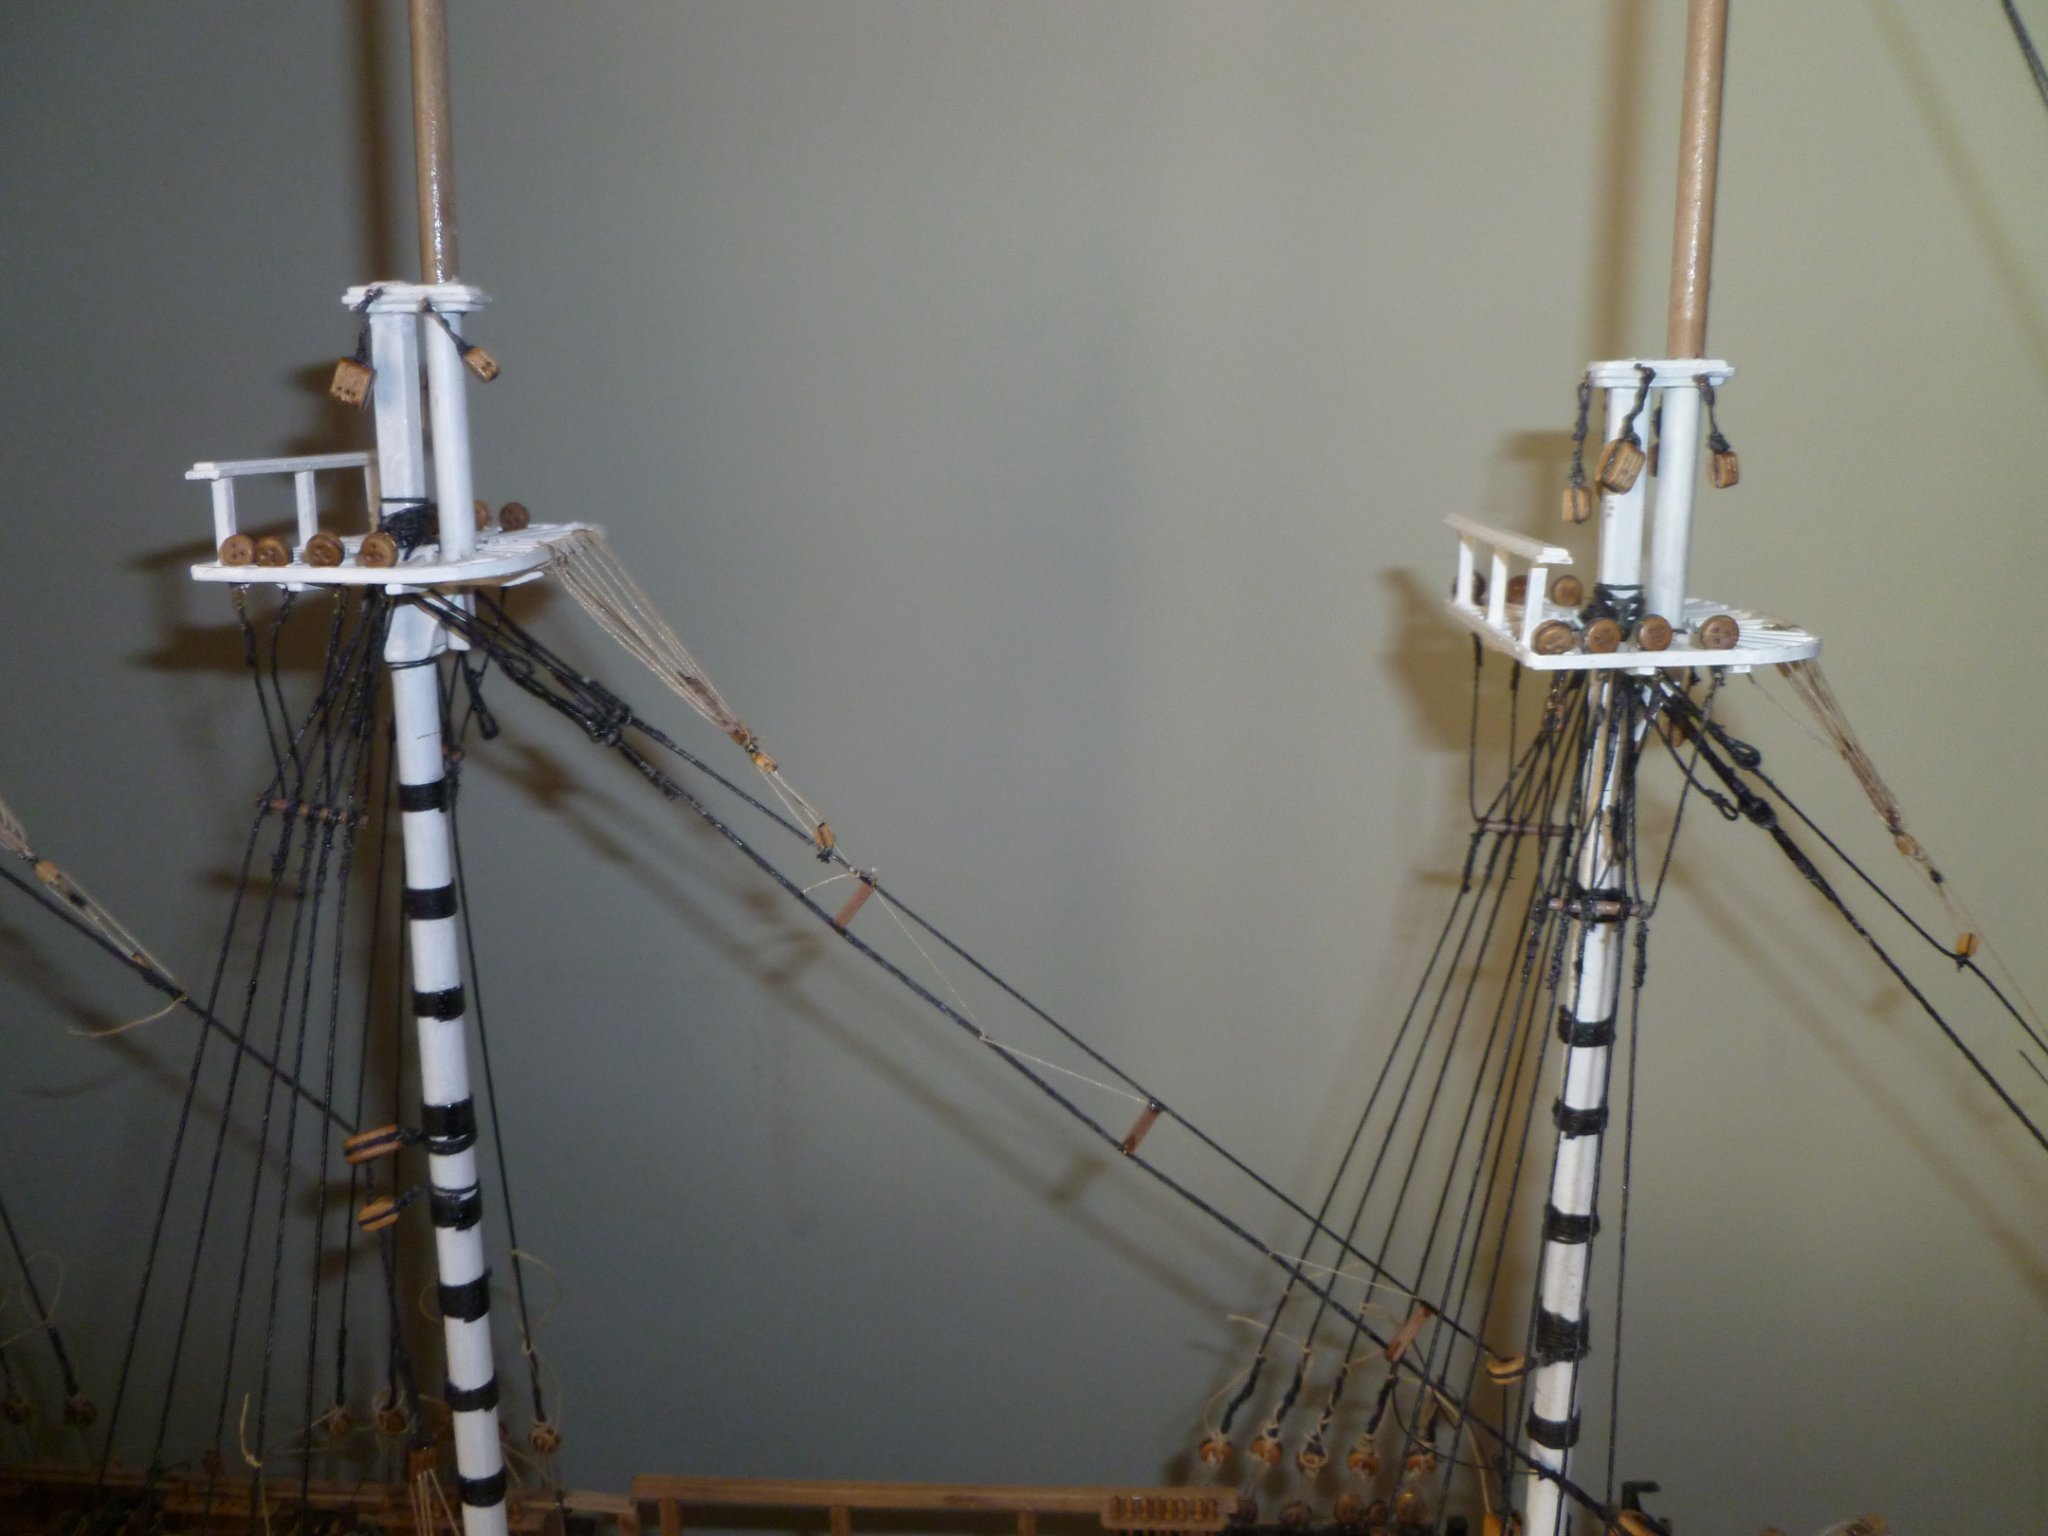
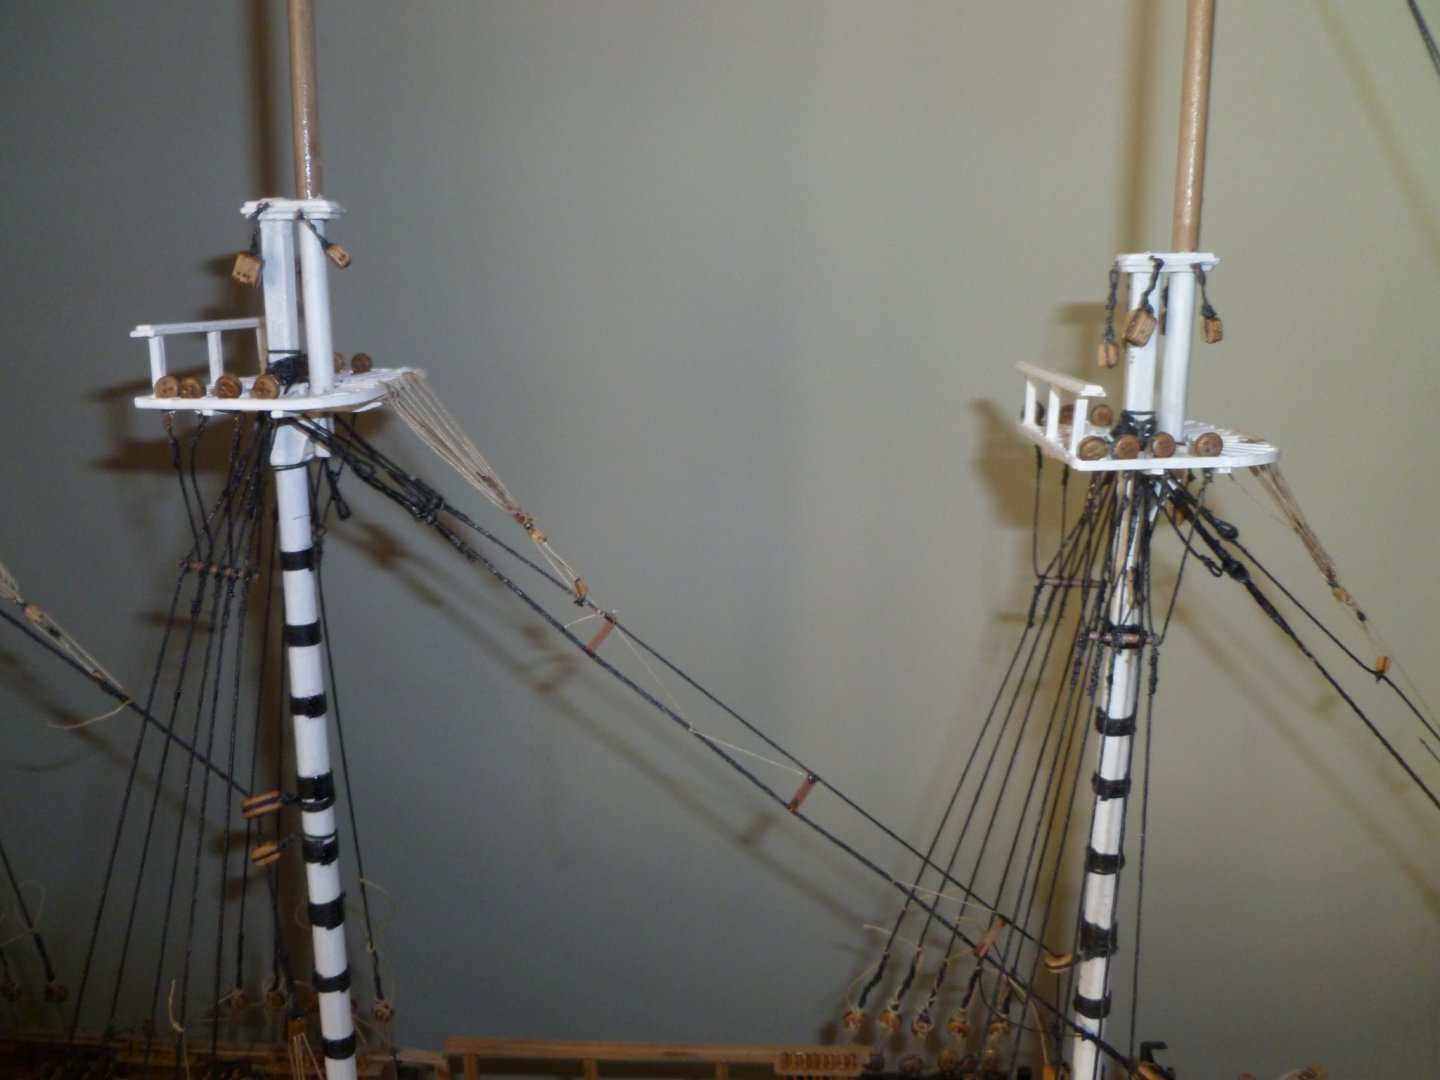
Thank you for getting to the bottom of this for me Allen. Fortunately I have served the fore most shrouds and where the other shrouds are wrapped around the masts. Although the back stays are not fully served , am I correct in saying they are served where they are wrapped around the mast head and also fitted with a mouse except for the top gallant back stays. Basically anywhere there might be some rubbing taking place . Best regards Dave
-
Confusing to say the least. It does suggest that this is not absolute. So can I assume that most people would not carry this out? Thanks once again for your quick response. Best regards Dave
-
According to Mondfield's 'Historic Ship Models' I understand that the backstays were served their full length from the first half of the 18th century and this would include the HMS Bounty 1787. Can anyone confirm that this would be all of the back stays? Best regards Dave
-
Looking great!
-
I know how you feel I have spent a lot of time on my hands and knees looking for pins, cannon bals and 2 mm blocks as well as many other items. I agree with Keith regarding tweezers and only use them for the brass rings and the rigging.Nice work on those windows by the way. Best regards Dave
-
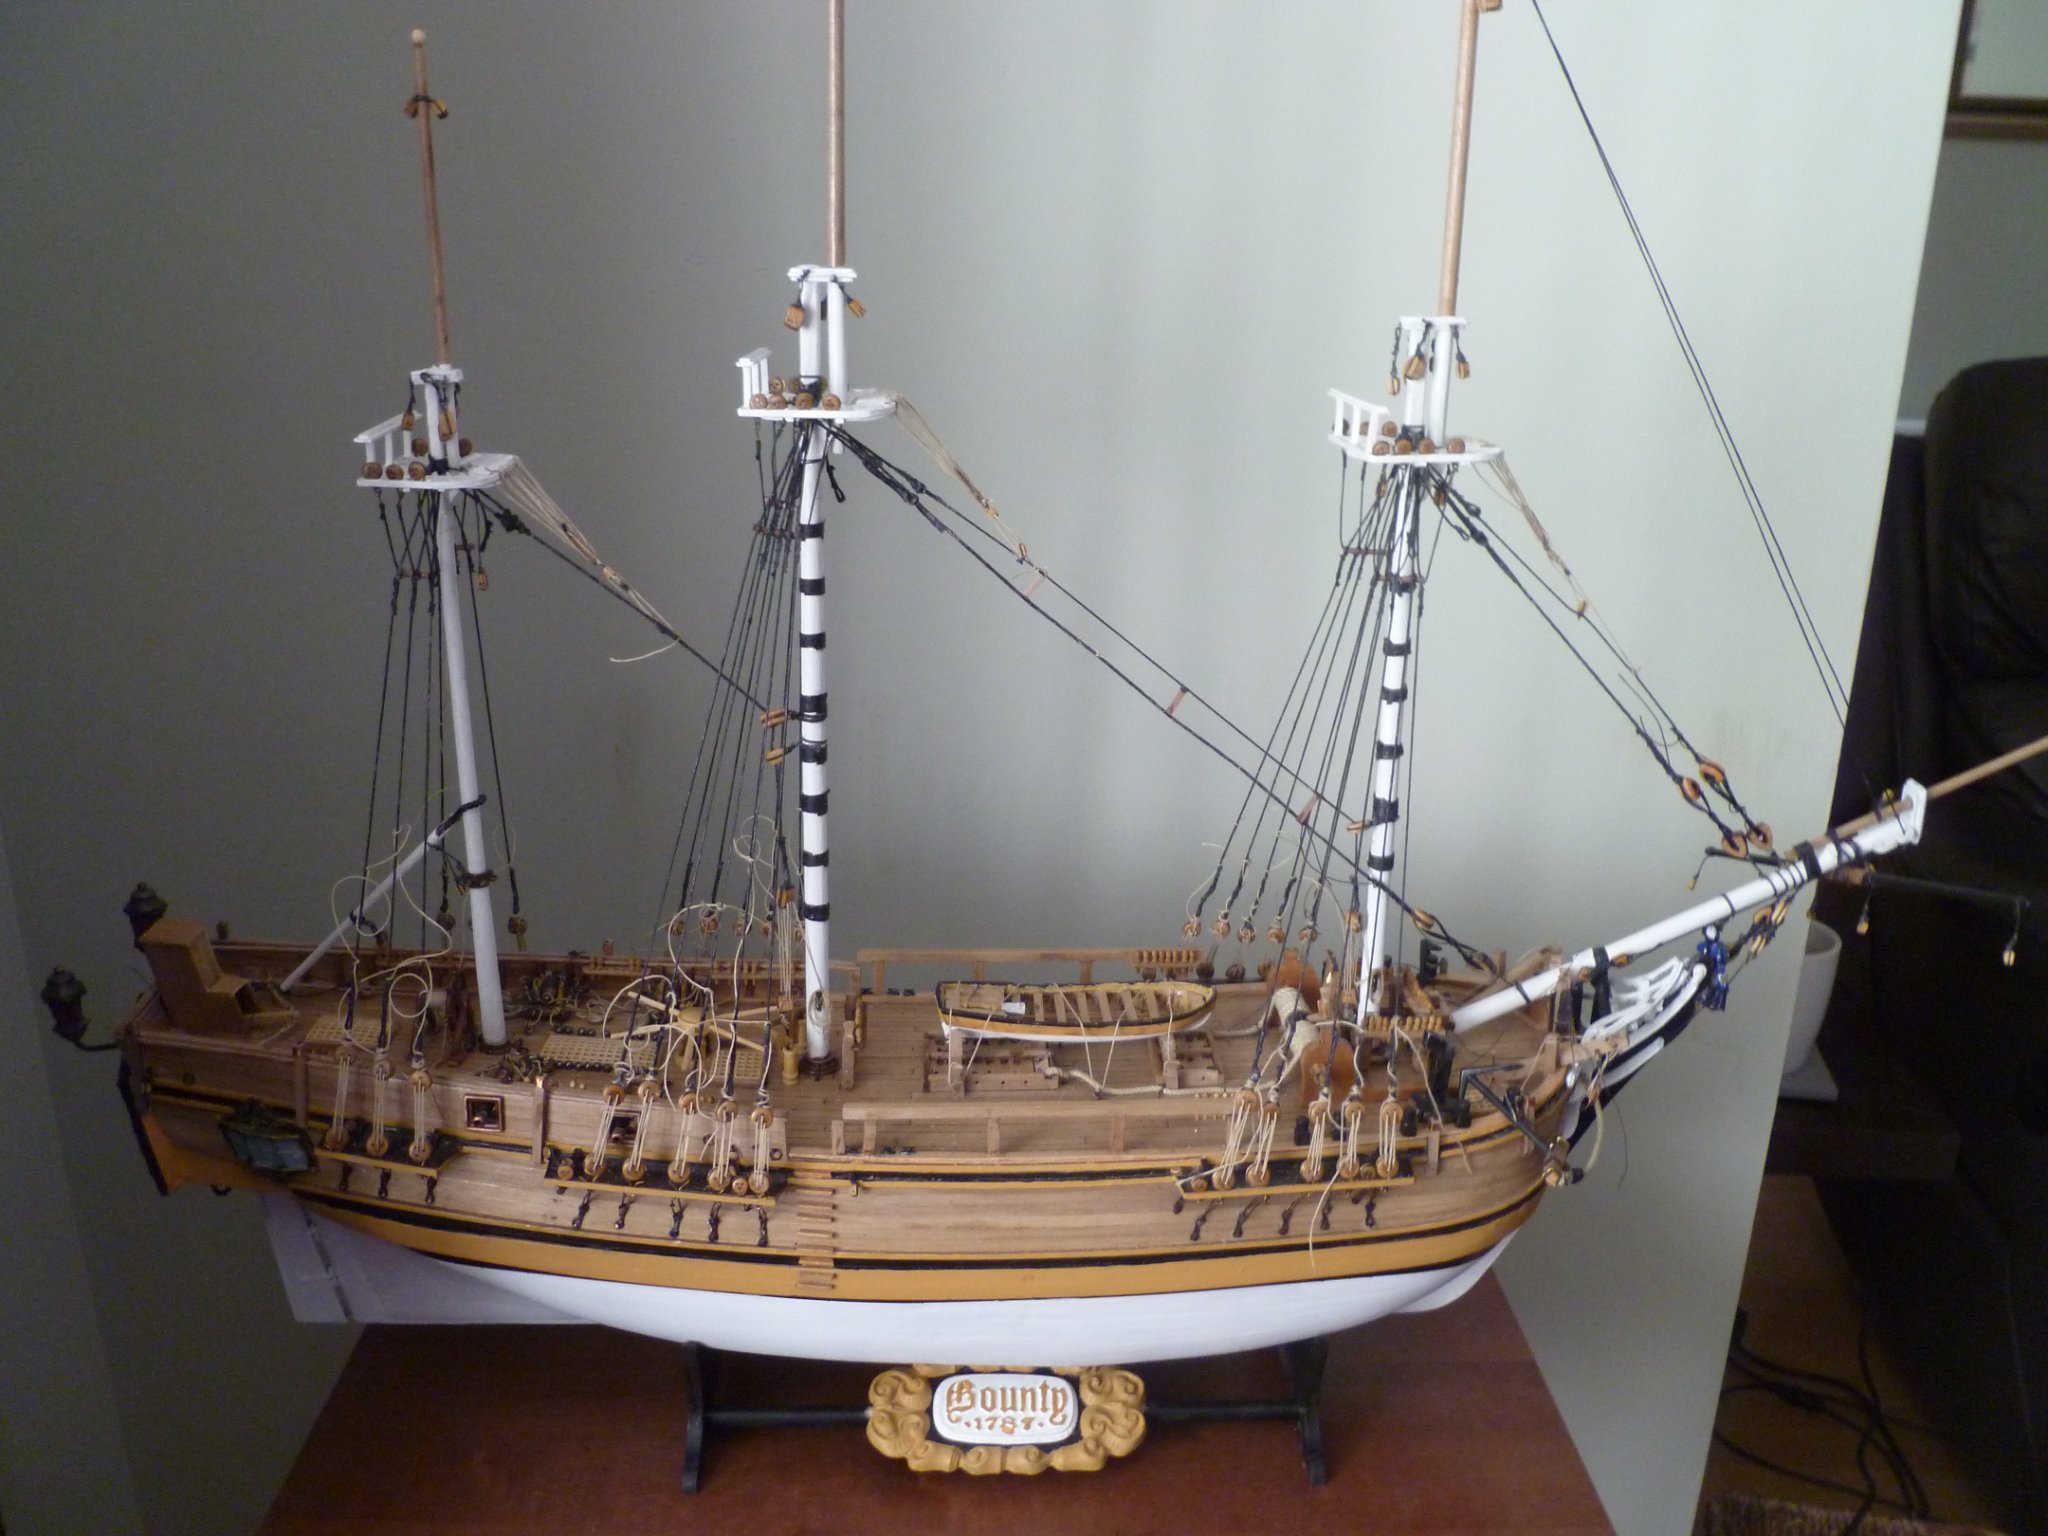
Welcome aboard and thank you for your kind words. Yes I thought the box art made a statement too , however I am not sure how accurate the colours are . Which manufacturers are you building there seems to be several different ones and quite a few blogs on the Bounty going. That is one of the reasons why I chose the Bounty for my first period ship. There is also a number of videos of the Amati Bounty which I found very helpful at the beginning but have gone more with the advice of the guys on this forum as ths was more accurate. Best regards Dave
-
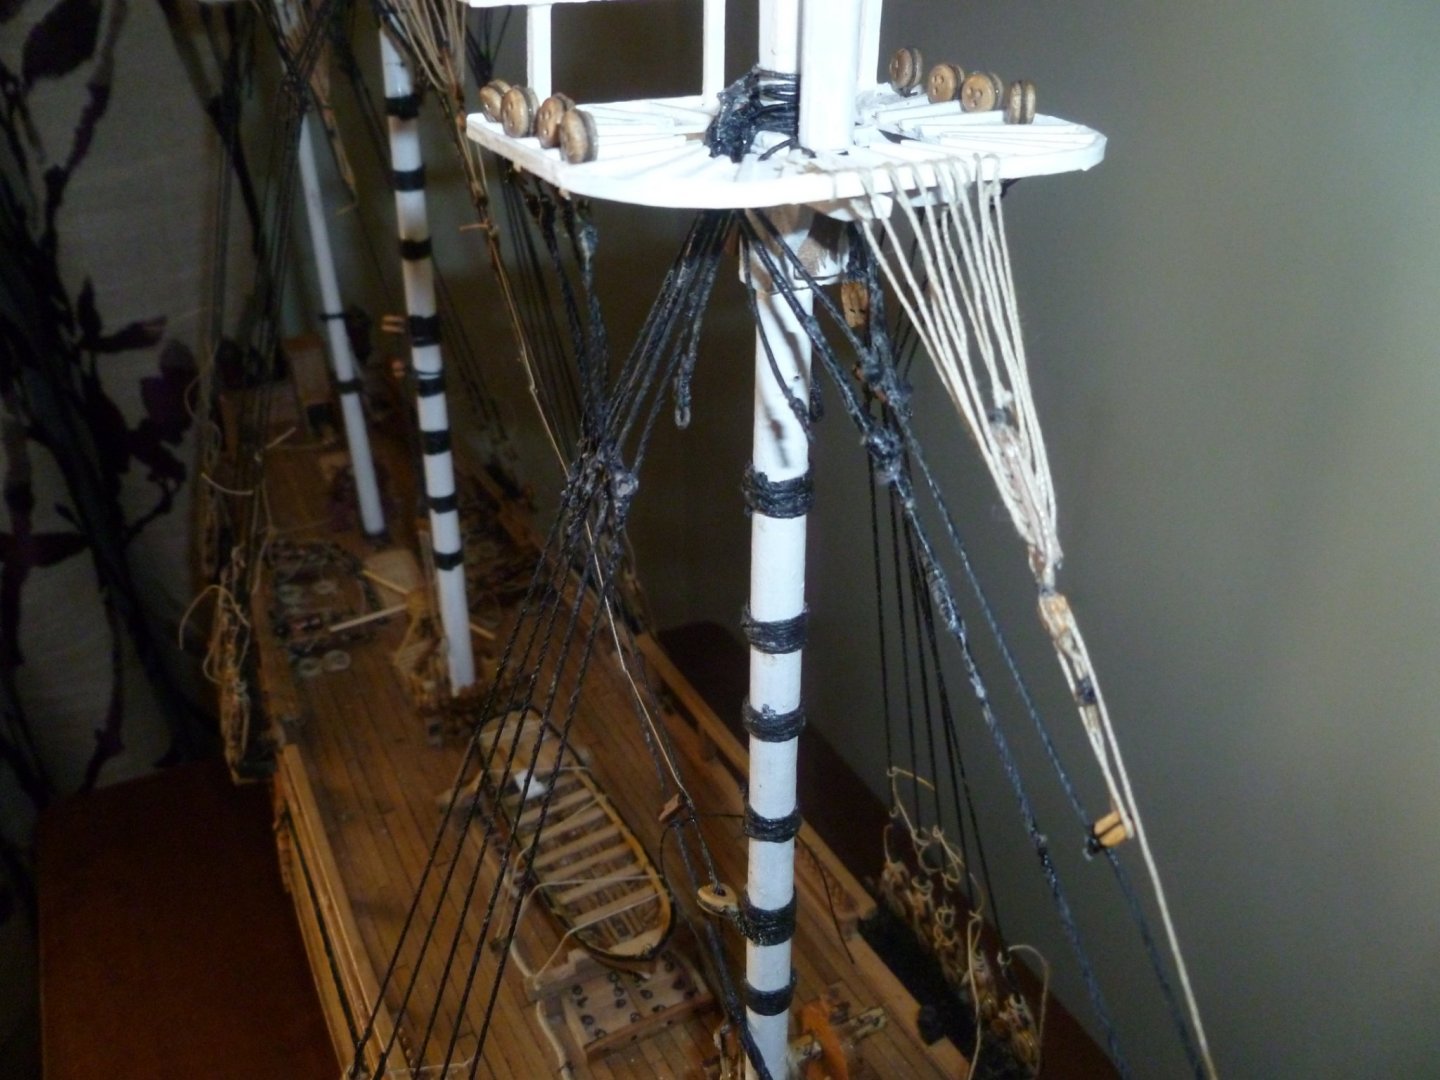
Just completed the futtock shrouds. According to instructions there were no links around the dead eyes but directly onto the futtock shrouds. According to the 'Historic ship models' by Monfield this is incorrect for this period, so purchased some Amati futtock shroud lnks and used these together with hooks. Both were blackened as per all previous brass fittings. You can also see some of the crows feet which I did. Unfortunately I did not use wax on these as I used light rope rather than black. Not sure if this is correct .However I think I will wax for the rest of the running rigging as it prevents furring on the ropes. I am also not sure if this is the correct way forward for the running rigging. It has been a slow process with the standing rigging so far. I am not working on the model as much as I like due to other commitments. Next in line are the top shrouds and then finally the back stays. Hopefully I will have an easier time of the top shrouds as the links I used for the pad eyes were very similar to the ones made by Caldercraft and have the little tab on the tail of the link. Hope this makes sense.


-
Proud owner of a Dremmel drill stand
DaveBaxt replied to DaveBaxt's topic in Modeling tools and Workshop Equipment
Thank you everyone for all your help in attempting to try and pick the correct drill press and vice. I hope I am now in some way able to make a better choice in what to look out for. Best regards Dave -
I thought I would just call in and see how you are getting along. I really like the look of those cannon and the the rest of the deck fittings. best of luck with the rest of the model. Best regards Dave
-
Just thought I would call in and see how you are getting along. You are doing absolutely great with the Billing version of the Bounty .I really like the look of the planking of the hull and especially the stern section. I only wish I had purchaced that book of the Bounty for my build. How much information does it give on rigging? I have another book which might be of interest to you .'Historic Ship Models, by Monfield . Which gives the different changes in construction for different times and different countries. It iwill be really great for different ship buids. Anyway keep us all posted and keep up the good work. Best regards Dave
-
Proud owner of a Dremmel drill stand
DaveBaxt replied to DaveBaxt's topic in Modeling tools and Workshop Equipment
I do like the look of those and look to be very well made . I inagine the holes are for a means of clmping it to the base of the drill stand? Also I had a look on the link you gave me but could not see these or any other insert vices. Thank you for your help.Best regards Dave Baxter -
Proud owner of a Dremmel drill stand
DaveBaxt replied to DaveBaxt's topic in Modeling tools and Workshop Equipment
I would like to thank everyone for thre input, which has given me lots of different options to think about and I will do a bit more research before making a final dicision. Best regards Dave -
Proud owner of a Dremmel drill stand
DaveBaxt replied to DaveBaxt's topic in Modeling tools and Workshop Equipment
This is very good to hear and I am heading down this route. I have also had great feed back on Proxxon tools in general from facebook . What did you think of the vice that Proxxon are selling as an optional extra. I have heard that this could be a problem. Thanks for your input.Best regards Dave -
Proud owner of a Dremmel drill stand
DaveBaxt replied to DaveBaxt's topic in Modeling tools and Workshop Equipment
Interestingly enough the Proxxon 220 gets a mention in the power tools section https://thenrg.org/articles/power-tools but does not give any information about this dtill stand. However it does mention that the Dremel drill stand might not be accurate. enough.. I have done a search on line for any reviews on the Proxxon 220 and the only down side I can find with this machine is the Proxxon vice not being stable enough . Fortunately the vice comes seperate so I can always purchase a more robust vice. Your input and help is appreciated . Best regards Dave -
Thank you Mark for your help and pateince .I have tried what you have suggested. Here's hoping. Best regards Dave
-
Proud owner of a Dremmel drill stand
DaveBaxt replied to DaveBaxt's topic in Modeling tools and Workshop Equipment
Roger thank you for your input and I agree that anything involving the marine industry is usually over priced and probablly the same with tools bought for the modelling industy will be the same. However I am hoping that if I buy it from a model shop hopefully it would be what I need but could be wrong. I am hoping that perhaps someone on this forum is using the same make and model and let me know if it is suitable.I can then shop around and see id I can get it cheaper or at least one that is similar.Best regards Dave -
Ok This is where I am at the moment. I had another go at running the Excel programme ( once I got online with my Microsoft account) However I am still unable to open any exsisting excel files which I have downloaded.For some reason when I press file and open it only lists any new excel files but does not give me the option of searching my folders for anything I have down loaded. Once again I would like to thank everyone for all their help. However I am spending more time trying to work this out than working on my model. So I have just about given up with this and I am sorry I didn't manage to get this sorted. I will just have to do it the hard way. Although my build might not be totally accurate it will do for me for now,having just started the hobby and building my first period model ship.Perhaps one day I will come back to this, if I ever build a ship from scratch and need to make my own mast and spars or make my own rope. In the mean time I will just try and use rope which is near enoughand is readily available to buy . I will try and use brown rope for my next build which I should be able to buy on line in lots of different sizes, if not perhaps I will consider making my own.Best regards Dave
-
Proud owner of a Dremmel drill stand
DaveBaxt replied to DaveBaxt's topic in Modeling tools and Workshop Equipment
I have now had my Dremmel drill stand for some time now and have to agree with most that the stand is pretty useless of trying to drill anything accurate and even worse when trying to drill metal . Unfortunately I was unable to get my money back so I might try and sell it on ebay. I have now recovered from the expence of buy something usless and have been looking at bench drill. The one which is readily available form a local ship model shop is this one:- https://www.hobbies.co.uk/proxxon-tbm-220-bench-drill-702060-28128 The vice is not included so altogether is around £200 mark. I would really like some input and whether I can get more for my money. I don,t want to make the same mistake as I did with the Dremmel. I am really surprised at Dremmel as the cordless Dremmel is an excellent product and I have used it many times. Thanks again .Best regards Dave -
Allan for some reason all of the square buttons are all missing as is a few other things. I will try and see if I can open another spreadsheet from somewhere and use that instead of the current one. Unfortunately I no longer use windows( too much hassle with running older programmes when a new version of windows s released) so went with a chrome book which is android like a phone.. I have just found out that I can download Excel onto my Chrome book . However I am now have problems logging into my Microsoft account having not used it for a few years. It has froze me out, so unable to try again until tomorrow.Thanks once again for taking the time to take a photo and post it and trying to help me out. Best regards Dave
-
Alan I can,t find that either. all I can find is the caution this will erase all your data, which I have clicked and then entered the scale of the ship and then clicked on yes for metric. I am beginning to think I am an idiot. It does work on metric as why would you get the choice?
-
That sounds like it is going to make life easier.It kind of makes sense now that you have explained it.Thanks once again for your input .It is very much appreciated. Best regards dave
-
No worries Allan, I am hopeful I will eventually get there, providing it can be run on different spreadsheet other than windows excel.
-
I am not using windows but it should work anyway. I have downloaded it and opened it up with a different program . I cannot see the button to enable editing . Does this button have a name, perhaps it has a grid reference or what ever they are called. Thank you for your reply it is much appreciated. Best regards Dave
-
I am just about ready to attach the Futtock shrouds to the main shrouds and got to thinking about the ratlines . It was my intention to leave the ratlines until the last thing on the standing rigging ie 'ratting down' I am now wondering that once I connect up the futtock shrouds to the futtock stave and lower shrouds ,how difficult would it be to get to the ratlines at the top of the shrouds,behind the futtock shrouds and wondering if it would be easier to do the main lower shrouds first, or at least do ratlines down to the futtock stave. Hope this makes sense. Sorry if this has been asked many times before. Best regards Dave