DaveBaxt
-
Posts
1,324 -
Joined
-
Last visited
Content Type
Profiles
Forums
Gallery
Events
Everything posted by DaveBaxt
-
Thank you for the link john. I think that was the first thread which got me onto this Pickling before blackening idea. Best regards Dave
-
Well done Allan you have rescued me once again . Thank you for taking your time to do a search for me. Argos of all places, who would have thought haha. Just a thought but would these pots from argos not be too big for my needs?
-
After due consideration of finding a safe/cheaper alternative here in the uk I think acetone will be the way to go. Sounds like vinegar might help do the trick so will give this a try too. Once again I thank you for your input. Best regards Dave
-
Hello and thanks for your reply . It was your earlier post which gave me the Idea of using Sparex .Unfortunately I am unable to source this in the UK and ca only get it from the US which is about 4 x cost for postage. I also noticed that a small pickleing pot is also quite expensive here in the uk so I am looking for an alternative. I would just like to thank every one for helping out on this . Best regards Dave
-
This sound like some serious stuff and I am not sure I want to go to such lengths to ensure that I have sufficient blackening on my brass parts. Perhaps after due consideration I will see how I get on with acertone and possibly some wire wool. I am very grateful for your reply which may have saved me from serious injury. I wonder what warning is given on the packaging and which way round to add what to what. Best regards Dave
-
What are the guys using for cleaning brass before using Brass black . I read on hear that some people are using Sparex in the US but unable to source this in the UK. Any alternative out there in the UK. I am also confused as to why some people are using sodium bicarb to neutralize the Pickling agent and then Acertone afterwards. The last bit is what confuses me , Why would you then use the acertone after the sodium bicarbonate ? Best regards Dave
-
Keep up the good work and I will be interested to see how you achieve the weathering effects.
-
Incorporation of fishes
DaveBaxt replied to DaveBaxt's topic in Building, Framing, Planking and plating a ships hull and deck
I would just like to add another thank you to all who have contributed to this thread as it has become another very interesting subject . Like everything in the wonderful hobby not everything is as it first seems and always needs to be investigated. Hopefully my skills are at a level where I can put my new found knowledge into practice. Best regards Dave -
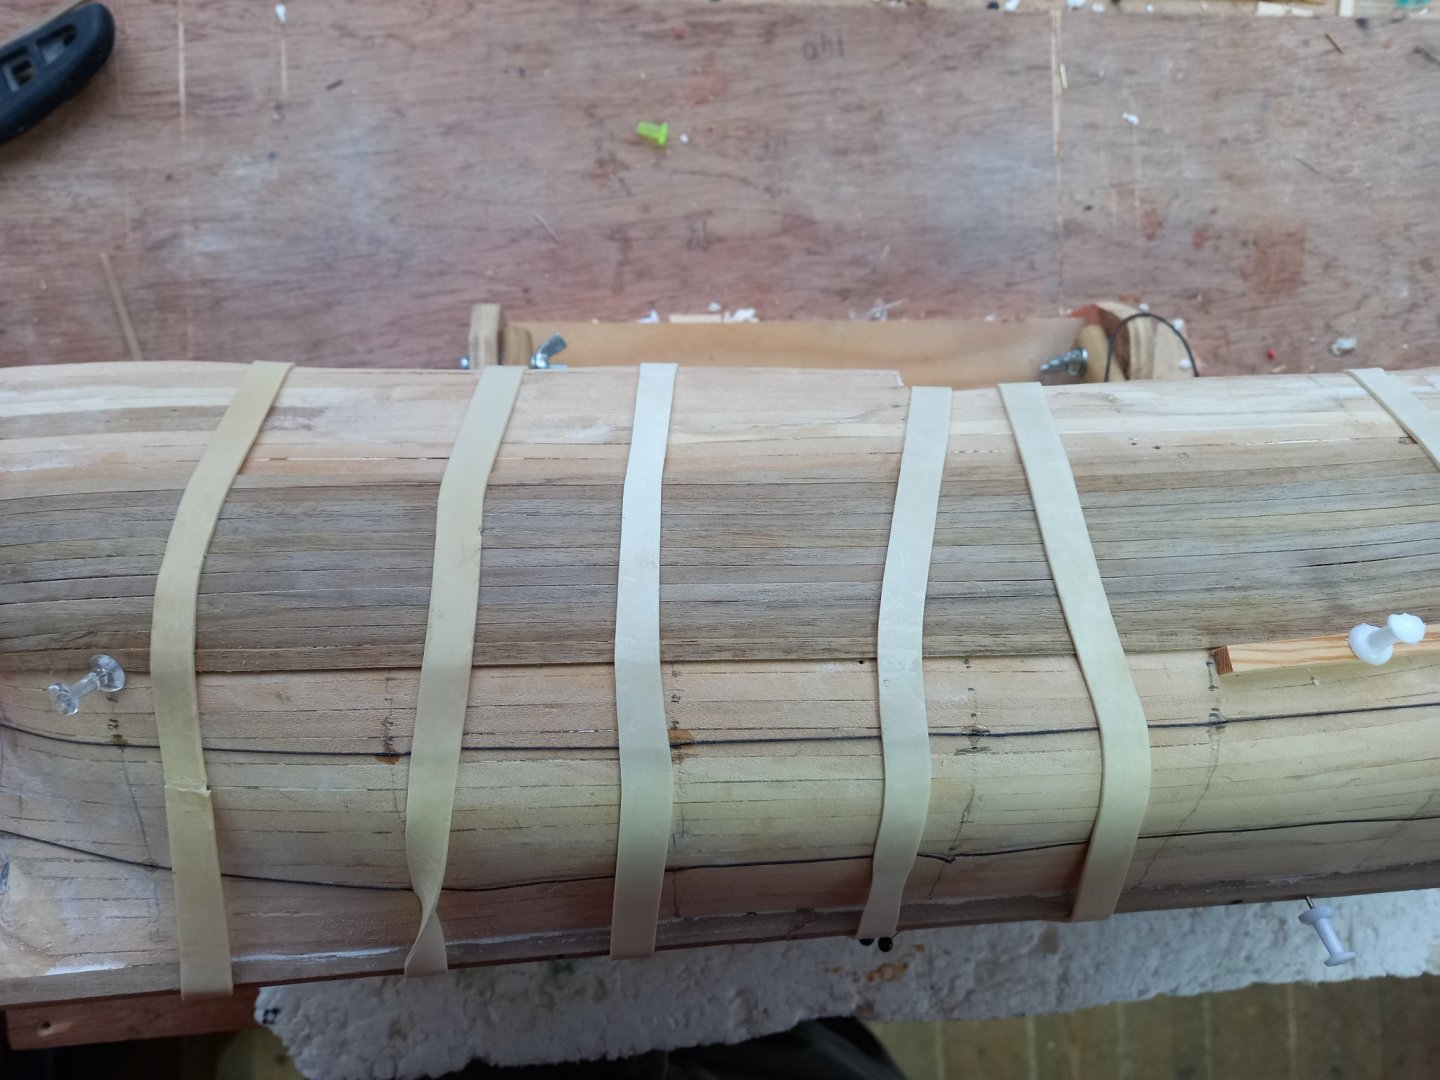
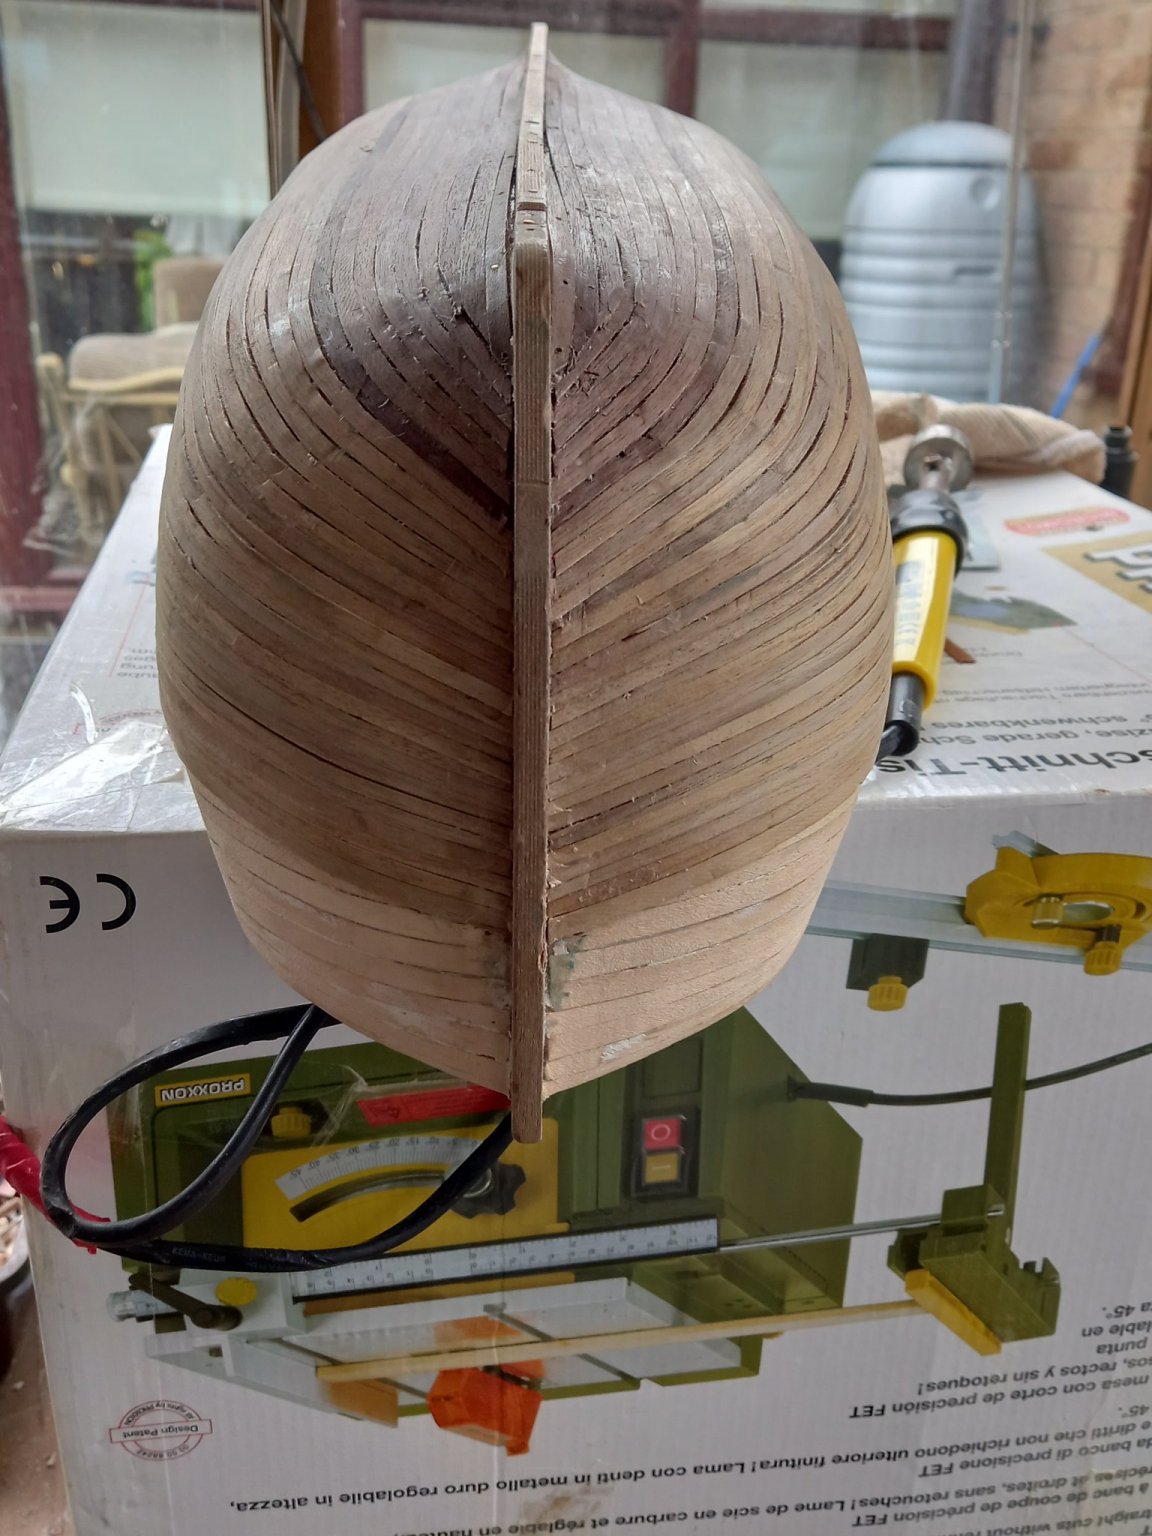
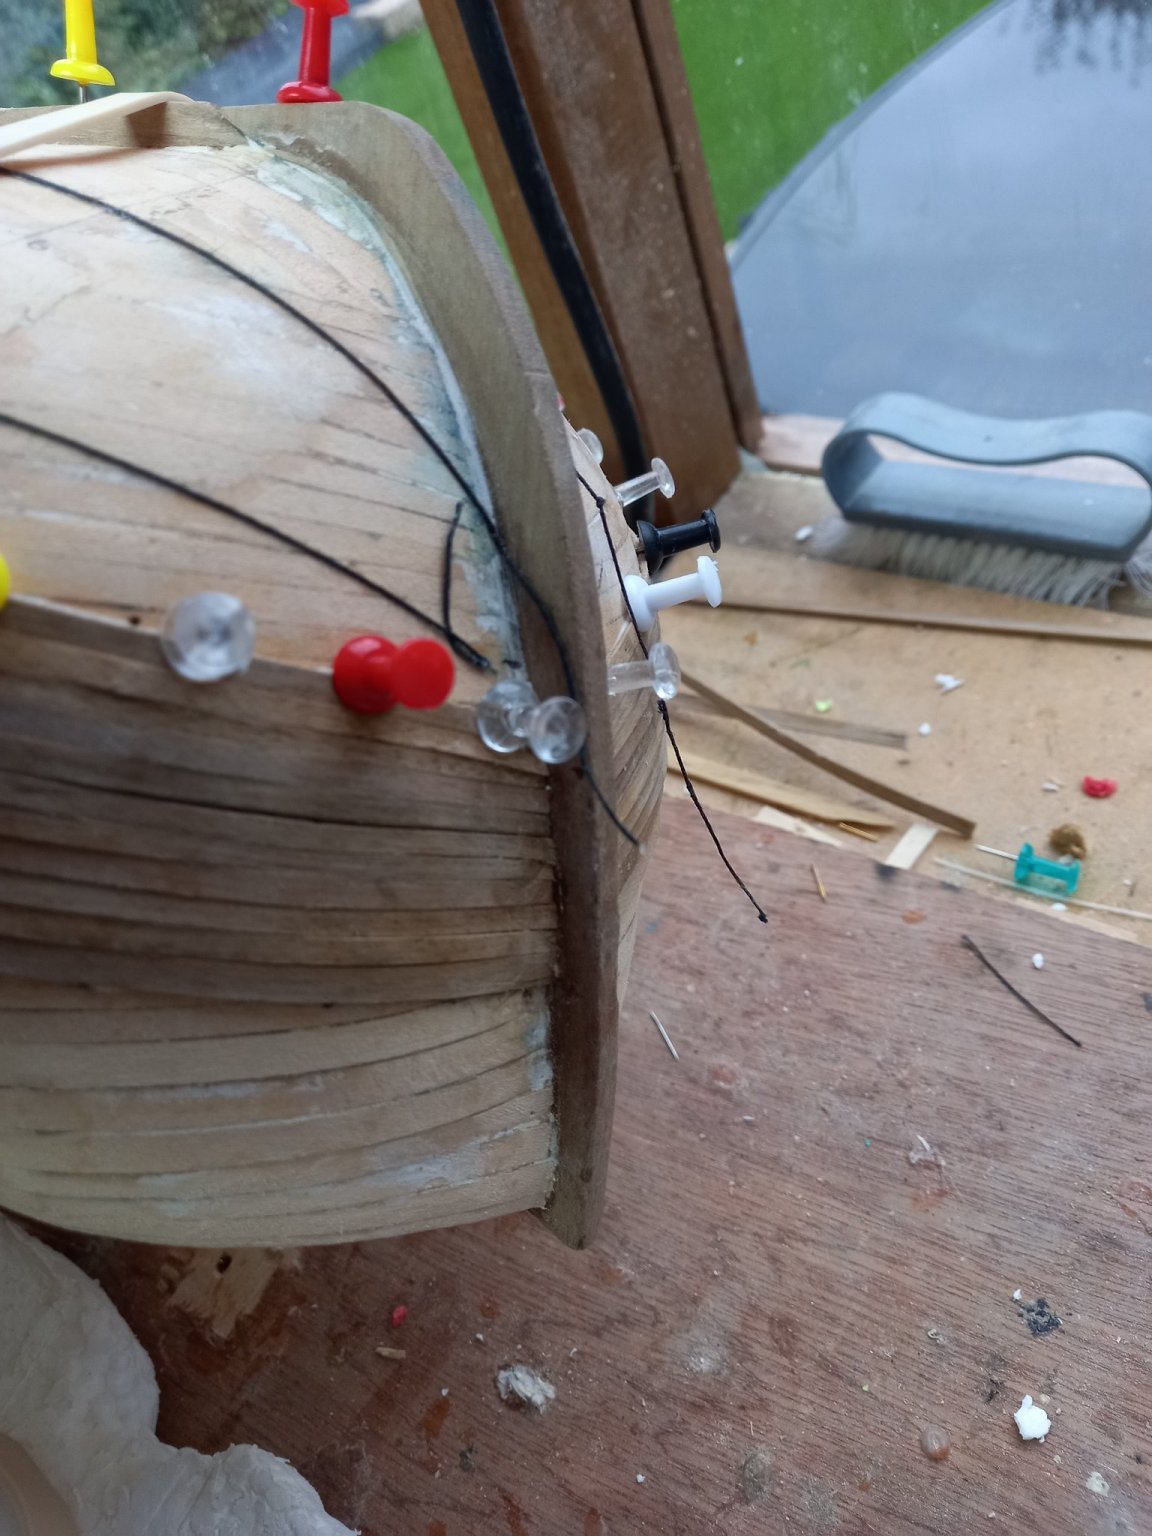
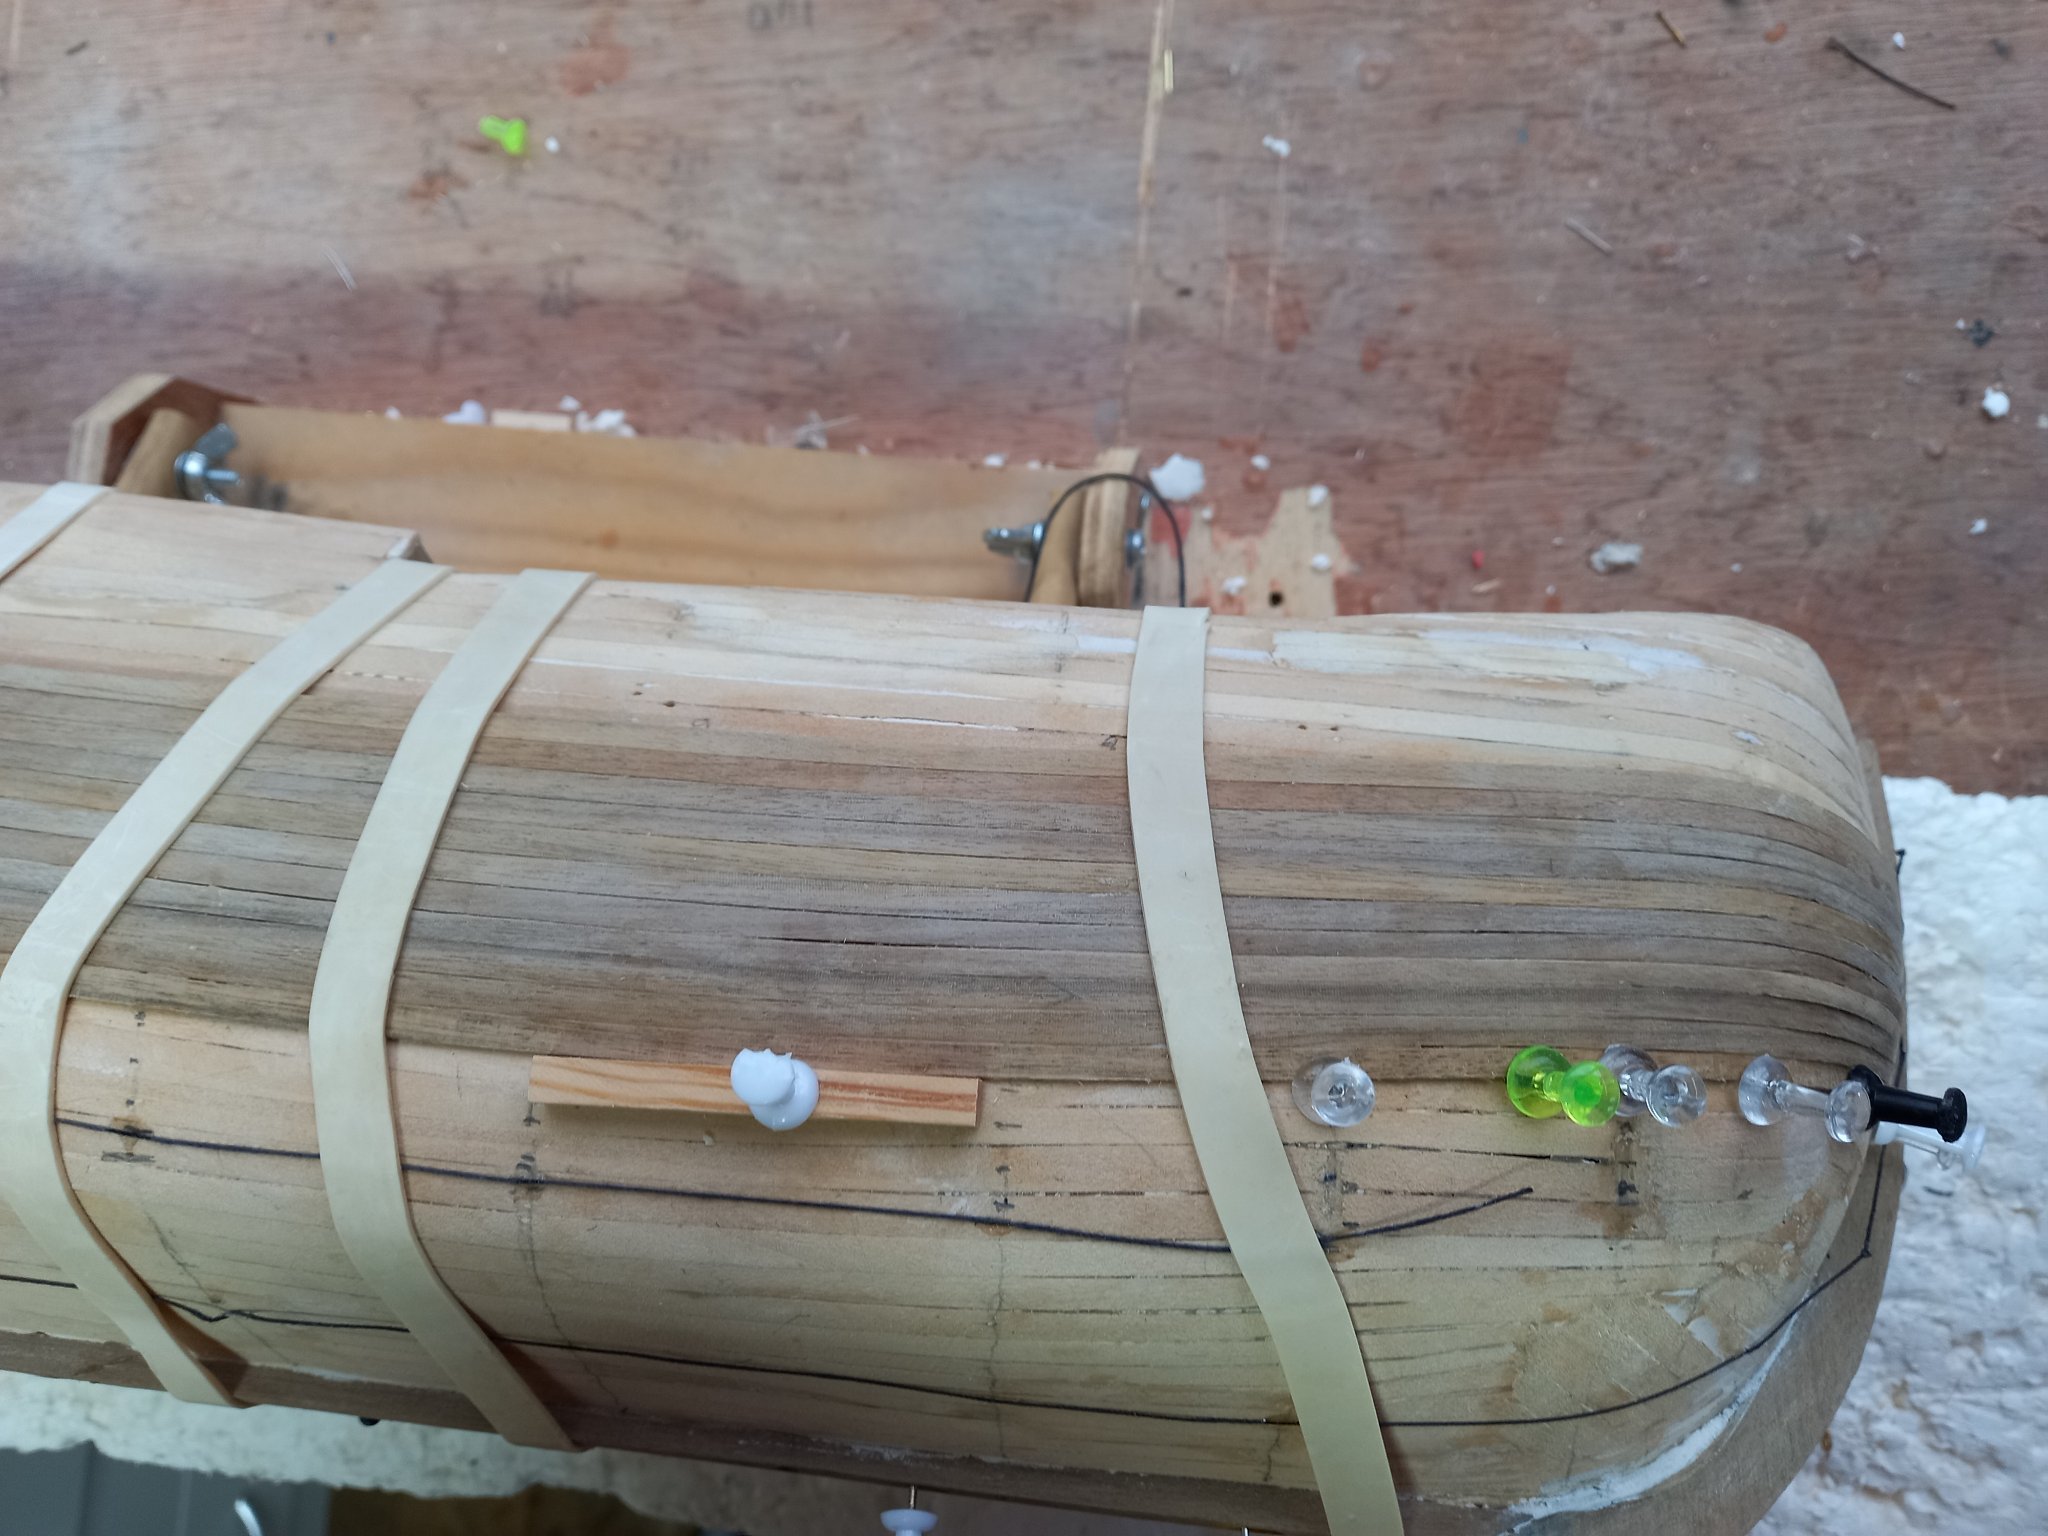
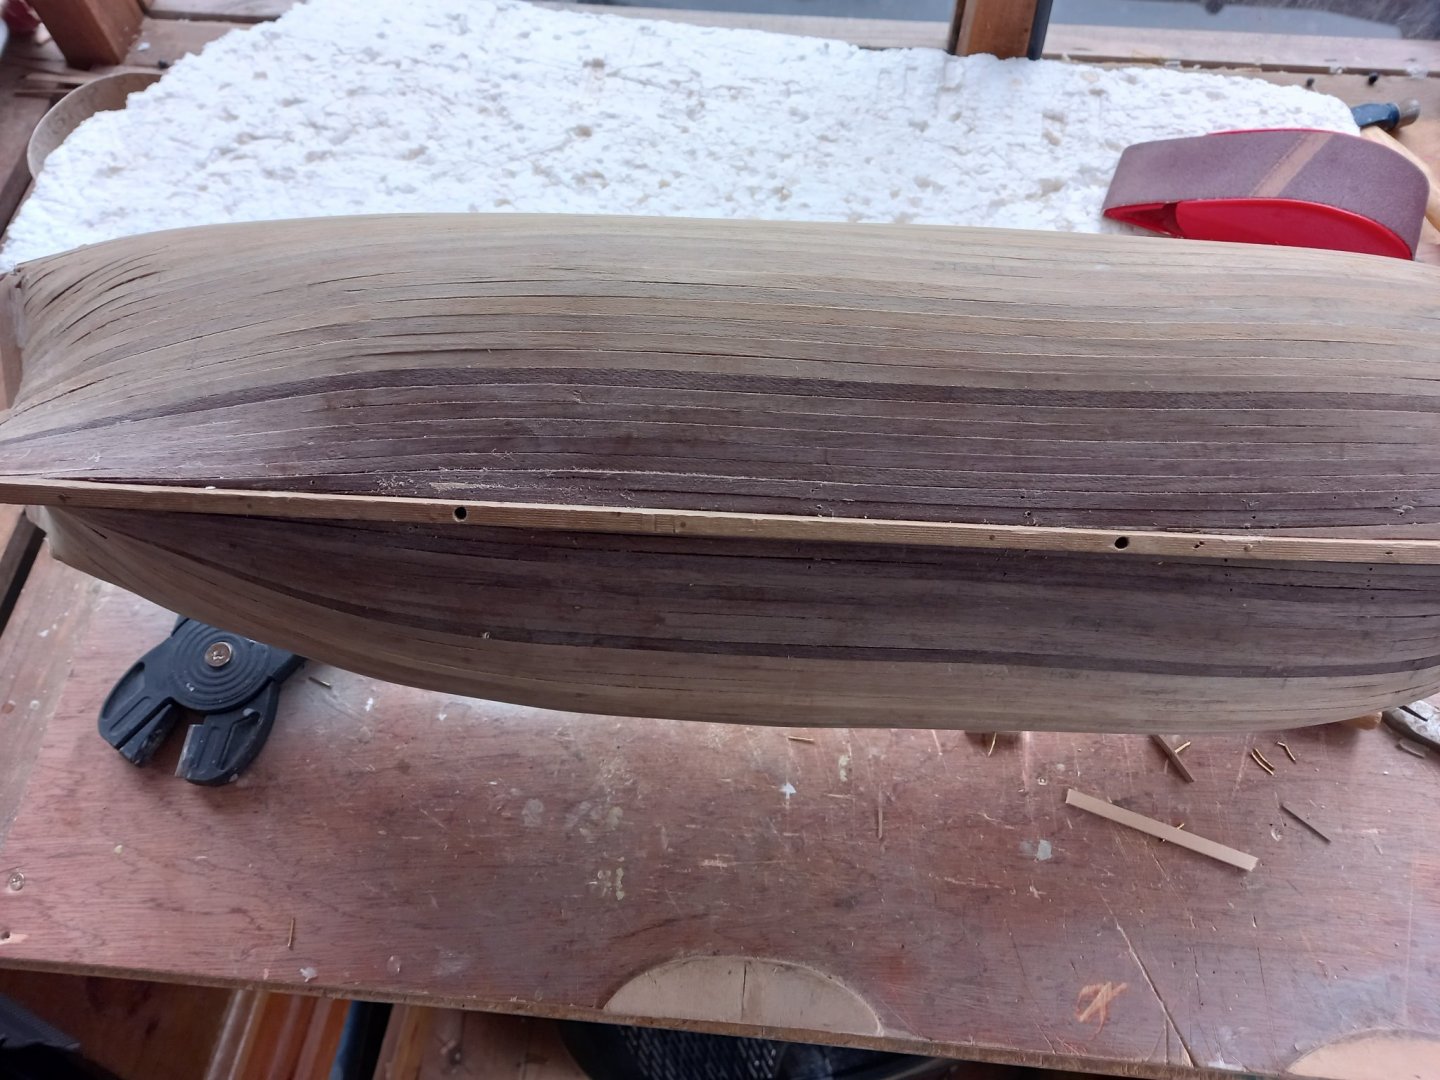
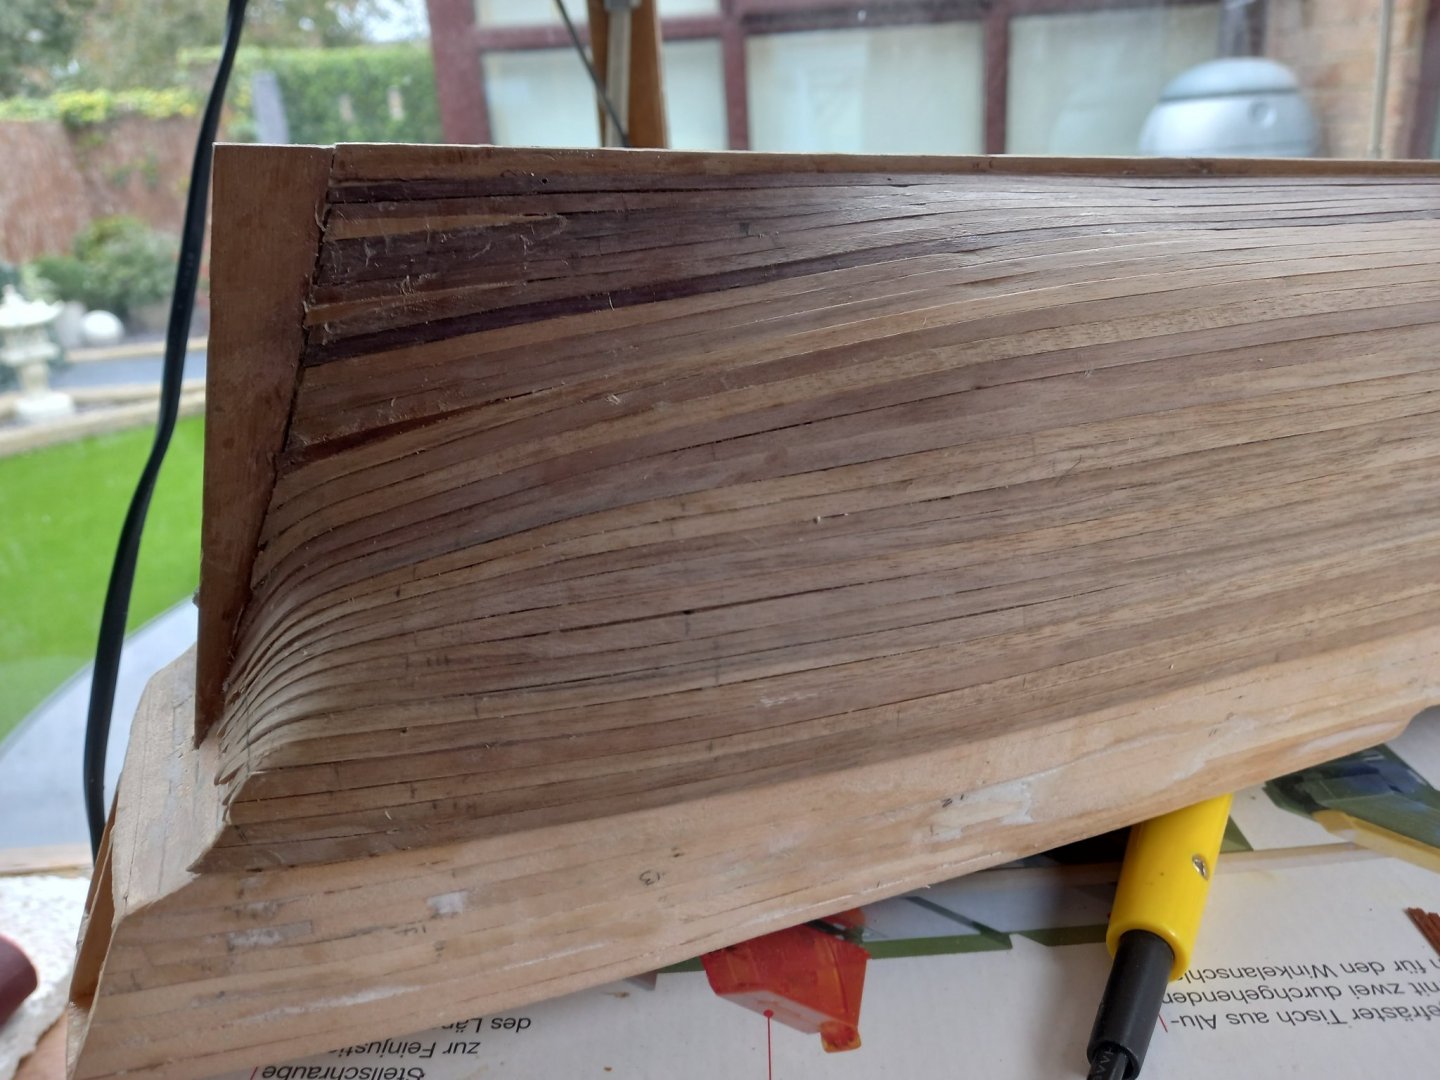
Completed the second planking from the wales to the keel ,working with 1mm x 4mm Walnut. It didn,t work out as well as my last ship the Bounty which was also in Walnut but only 0.5 mm thick and easier to work with I think. I had to use a few steelers to fill in the gaps at the deadwood area .A lot of work still to do to with sanding and filler to get it presentable . Fortunately this area is painted. Hopefully I make a better job of the rest of the planking up to the Bulwarks.


-
Incorporation of fishes
DaveBaxt replied to DaveBaxt's topic in Building, Framing, Planking and plating a ships hull and deck
Thank you for the above Everyone. I have only recently been to see the Trincomlee but unfortunately I did not notice the waterways as I was too busy looking at the rigging and other things. I definately need to take a trip to Whitby at some stage as I haven't been there for years and should be a bit less busy now the holidays are over. I can now see the scarf joints in the cap rail after take another look at the photo and if the water way is similar I will be happy with trying this out. Just for one more question if I may if the waterway is thicker could you not just use 0.5 thick wood and lay it on top of the planks? Although inaccurate will probably look the ok. Best regards Dave -
Incorporation of fishes
DaveBaxt replied to DaveBaxt's topic in Building, Framing, Planking and plating a ships hull and deck
Spy glass Thank you once again for your help. But now I am confused as in your photo is what I thought was the Joggling and does not show the scarfing joints where th pieces of the waterway join together. Also I think what the seaman is standing on would be the waterway Please correct me if I have this wrong in anyway . Great photo by the way. Best regards Dave -
Incorporation of fishes
DaveBaxt replied to DaveBaxt's topic in Building, Framing, Planking and plating a ships hull and deck
Thanks guys for you responses and just as I thought I had the hang of this I have done some research on scarfed joints and all I could find is this previous post of which is a bit complicated for my taste. However I would imagine I could use a scarf joint without the hook bit which I have seen but can,t remember where. Also in the previous post there is a few options as to which and I personally think the top one in A looks the best on a curved bulwark but not sure if this is acceptable. Any help with this would be appreciated. Best regards Dave -
Incorporation of fishes
DaveBaxt replied to DaveBaxt's topic in Building, Framing, Planking and plating a ships hull and deck
Once again thank you Gary As I have already got some planks twice as wide as the deck planks I would like to use them for the waterway. Ufortunately they are the same thickness but as the scale 1:64 , as you say should be able to get away with this. I have already made a template of the deck so have an idea of the shape of the outside edge of the waterway but it would be even better if I had some idea which is the best way to lay the wider planks(waterway) in relation with the bulwarks or where to start Hope this makes sense. Best regards Dave -
Incorporation of fishes
DaveBaxt replied to DaveBaxt's topic in Building, Framing, Planking and plating a ships hull and deck
Thanks for correcting me in what these deck planks are called Joggling and now appreciate that it would be incorrect in doing this to the HMS Bark Endeavour and so will not carry this out. However Morgan you do however mention that the planks do run out and butts up against a waterway and not just up to the bulwarks. So is this waterway a wider plank to incorperate the shape of the bulwark or is this also something which was not used until the 19th century and should not be considered for the Bark Endeavour Again I would like to thank every one for your replies. Best regards Dave -
I am currently getting closer to doing my deck planking and I am thinking of incorporating the above. I have a German link which although explains the process ,for me it is a bit vague and I am hoping some one has a more detailed approach. https://www.modellskipper.de/Tipps/Tipps_zu_Decks_und_Beplankung/Einarbeiten_von_Fischungen I am also wondering how accurate this fishing is in terms of , is it commonly used on vessels such as the HMS bark Endeavour 1758 or whould it be used for a different period of ship or is it purely for ornamental value. Best regards Dave
-
I am currently building my 3 rd model and only my second period ship. My first ship was also a Billings model but found the Instructions and drawings very sparse. I managed to finish the HMS Bounty by Amati and like you did a blog . I got lots of help and incouragement of the members on here and would not of finished her otherwise. I also asked numerous questions and have redone parts more than I would care to admit. But eventually I got there.I look forward to your progress which I am sure will be a help to us all. It is always interesting to see what the differences are between the kits for the same ship.Best regards Dave
-
Got you and thanks for the explanation.. Not seen them over here but will take a closer look for them.
-
What are these about I can see the different shapes but wonder if they are rigid or flexable . Do you attach the sand paper to them or are they already abrasive? Why do they call them soft sanders? Sorry for the dumb questions. Best regards Dave
-
Looking good so far and some great photos of your build and would like to follow your progress if I may. Keep up the good work and good luck with the build. Best regards Dave
-
Looking good so far and as I am also building the Endeavour but made by Caldercraft I would therefore like to follow your progress if I may. I am also doing a blog do feel free to take a look. I am just about completed the second planking so not too far ahead of you. I look forward to see your future progress. Good luck and keep up the good work. Best regards Dave
-
Thank you Mark it is much appreciated. As I understand it you have mainly built you previous models 'scratch build' so with that in mind do you expect to use any large power tools for this build such as Miller,lathe and that sort of thing. I appreciate that this model has been designed so that everything fits together perfect and therefore should be no need but if you have the equiplment ?.......
- 505 replies
-
- 4
-

-
- vanguard models
- Sphinx
- (and 1 more)
-
I am no expert but tried using PVA glue for wales and Channels on my last buid but found it quite difficult as it took too long to dry. I then tried CA glue and held the pieces in place and then used an accellerate. This worked quite well but not too sure how strong this is. I have since received some Rocket Super phatic glue (the stuff Delf is talking about) and was thinking of giving this ago as I understand a little goes a long way, dries quicker than PVA and it penetrates the wood so hopefully stronger than CA. If this goes as well as I hope perhaps I will use it extensively on my next build which will be one of the kits from Vanguard.
-
I would really like to follow this blog if I may and not add anything to spoil the flow with basic questions ( Just a beginner) So if I need to ask you anything Mark perhaps I could send you a message instead? Once you got started, you work so fast and I only wish I could work to such a high standard of workmanship. Look forward to seeing your progress and thank you for all your previous help. Best regards Dave
- 505 replies
-
- 5
-
-
- vanguard models
- Sphinx
- (and 1 more)
-
Thought I would post an update. before heading off to Cornwall for a week break.( I wonder if there are any good model shops or Museums I could go and see whilst I am down that way) Any way I have made a start on the second planking. As it happens I don,t think I have done as good a job as I did on my Bounty when using 0.5 x 4 mm Walnut. This is 1 mm thick and I found it more difficult to work with. I ended up soaking for several hours and then allowing to dry overnight. Sometimes I used a heating iron to quicken the process before glue into place. There will be quite a lot of sanding to do ( perhaps that is why they use 1 mm thick Walnut) and will need to use some filler in one or two places but hopefully it should look ok when the planking is finished. I will try the Walnut dust and PVA mix as a filler , but wonder if you can buy Walnut filler already mixed..