DaveBaxt
-
Posts
1,324 -
Joined
-
Last visited
Content Type
Profiles
Forums
Gallery
Events
Everything posted by DaveBaxt
-
Here is a link to a blog whom built his own carrages and hooks. I don,t know if his idea is something you could use. Hope it is of help Take a look further down where he makes his own hooks. I am sure you have already thought of this but here it is anyway.
-
Some terrific work on the Cannons. Iam just about to start the Cannons on my Caldercraft Endeavour which is also 1 : 64 and have got some great tips from you in this regard. I too am not impressed with the carrages and I am toying of making my own. If they don,t turn out too well I can always purchase some from Chuck. Fortunately I have only got six to make. Haha
- 310 replies
-
- 1
-

-
- Diana
- Caldercraft
- (and 1 more)
-
Hooks sound like a good idea and something I could and probably will try this. I don,t think I have come across any eye splices yet but will take a nother look and see what I can find. But if I used these then again it would be easier if it was connect to the eyelet away from model. Once again thank you for your input as it is always appreciated. Best regards Dave
-
Thank you for your prompt reply which is much appreciated and which is something I need to try. I am assuming that it is just a normal wipping and then once done it would then just slide down the rigging line and then pulled tight. All excess lines could the be cut. I can appreciate that your idea look sand sounds simple and will give it a try,but I am still wondering if it would be easier to do this away from the model and securing the eyelet in its position after the rope is completed.Best regards Dave
-
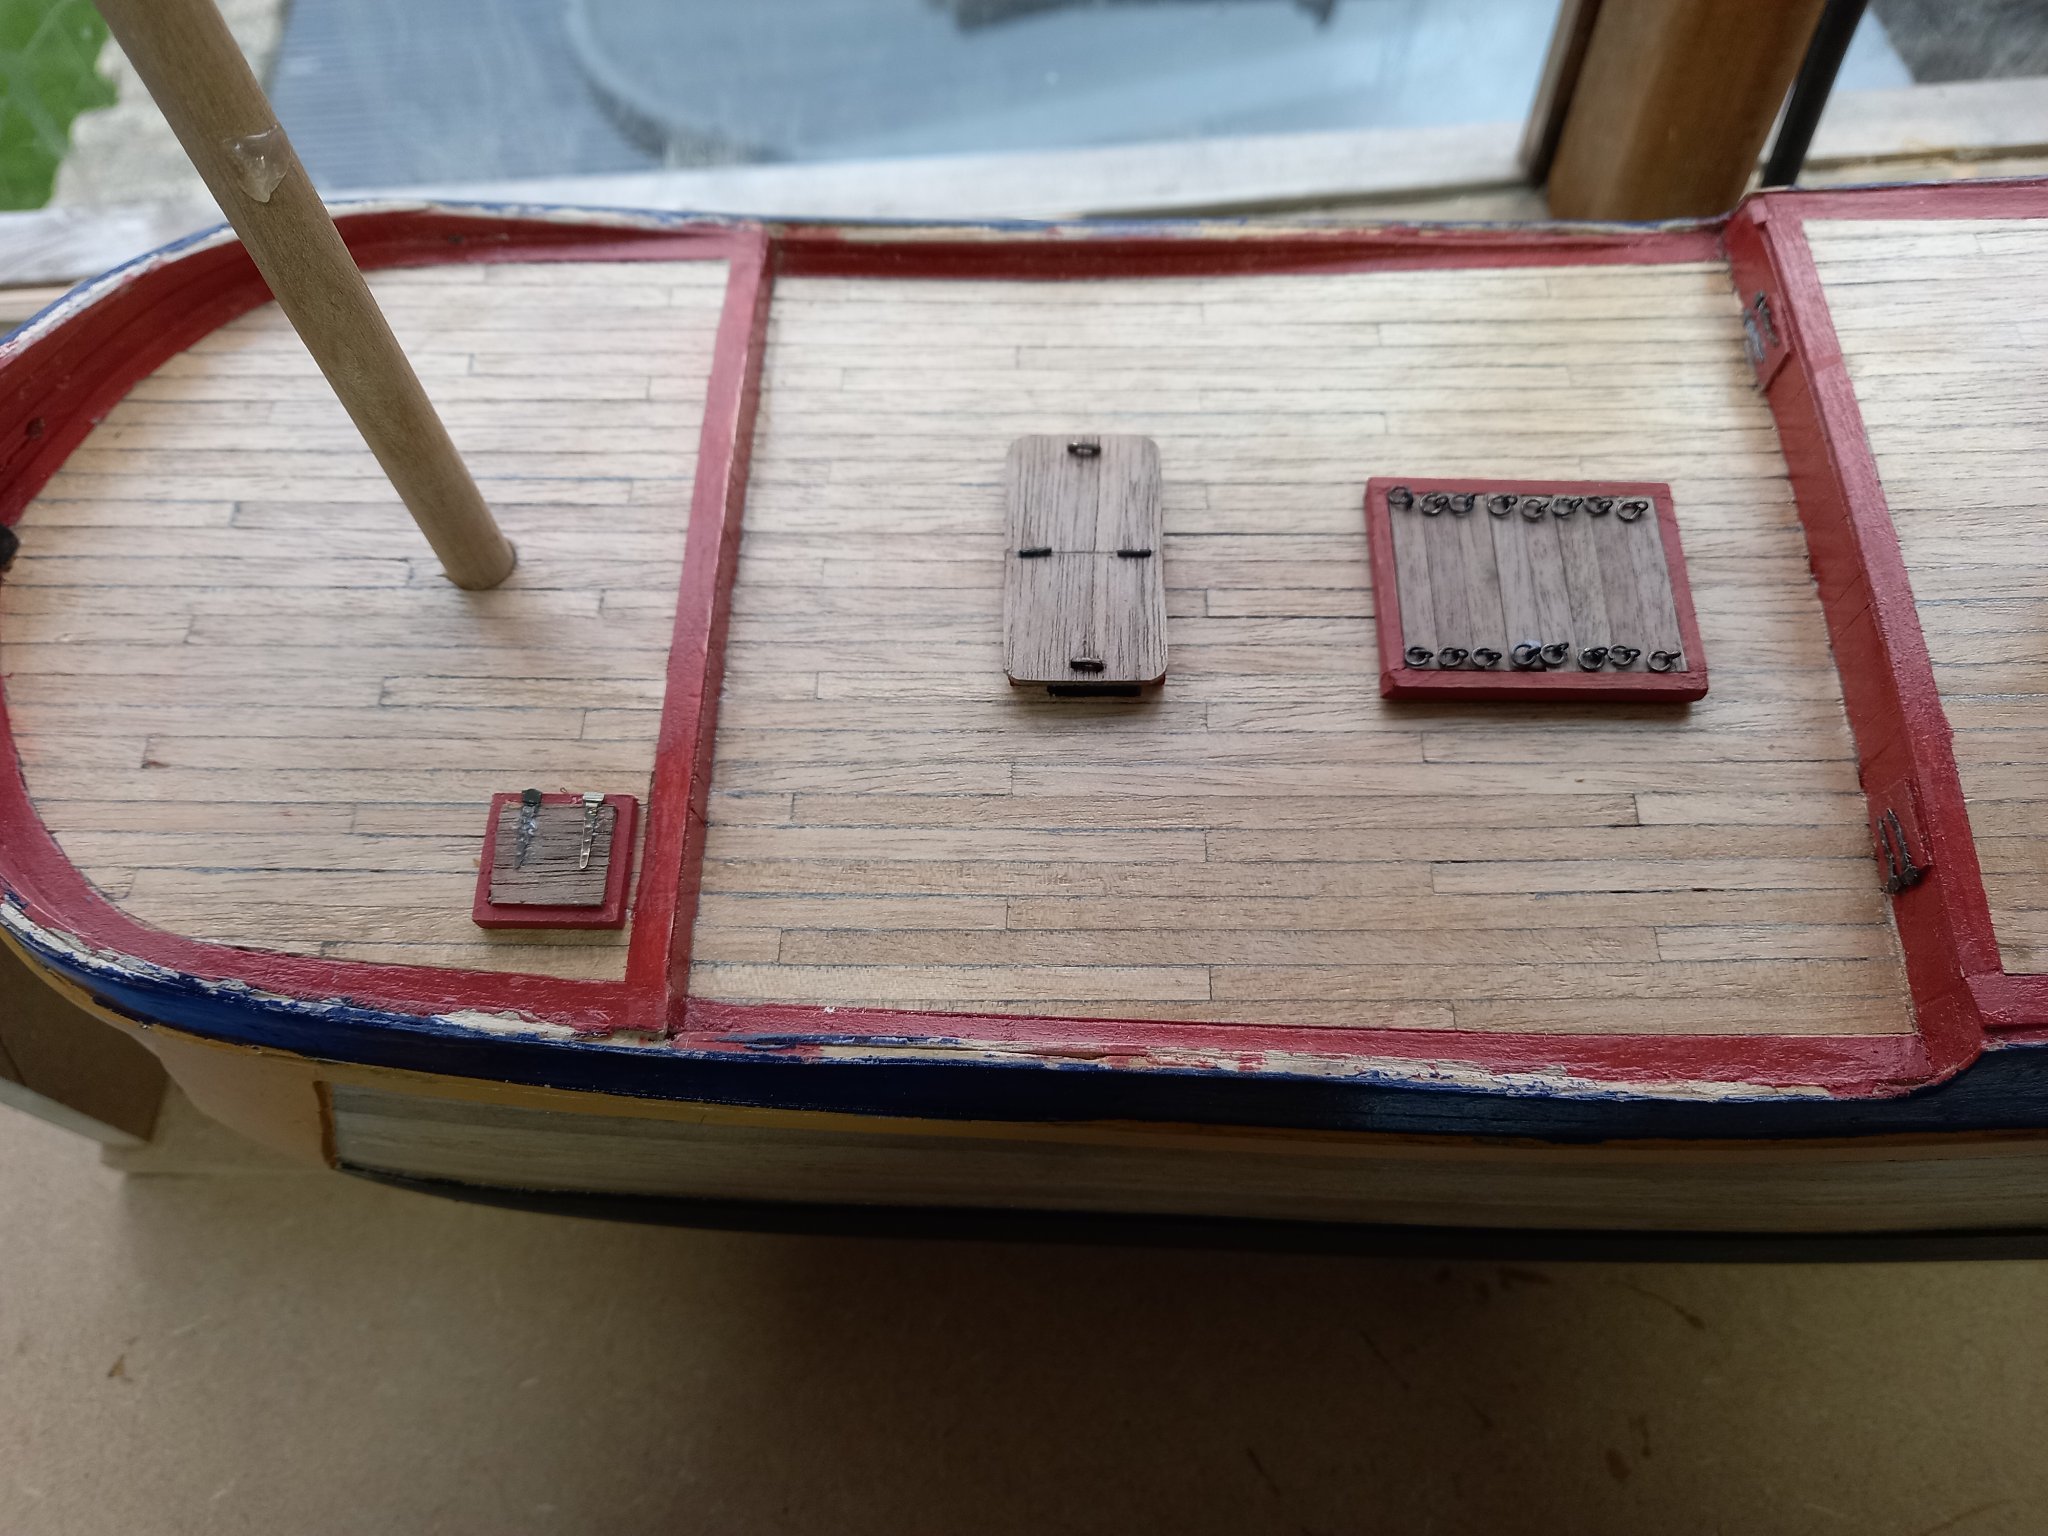
I am just about ready to attach everything to the deck ( furhiture and fittings etc)including the copper eyelets to the deck. However the last time I did this I then had great difficulty attaching the rigging lines to these eyelets and only managed to do a reef knot at best due to all the other deck furniture getting in my way.. This time I am thinking of drilling the holes in the appropriate places but leaving the eyelets out until after the rigging has been attached to them. Doing it this way will make it easier to carry out a proper seizing on the end before gluing the eyelet to the deck if this is indeed what is required I am just wondering if anyone else is doing this or if not, what reasons are there for not doing it this way and are there any other better ways for proceeding with this? Best regards Dave
-
I think the grain looks really good and seems to have a more weathered look and more realistic view in my humble opinion.
-
Excelent and thank you for the quick response. The Binnical is similar to the Caldercraft one so I will attempt to use it. The Fwd Bitts are interesting and will continue the way I am going but looks like there is only one pulley on each side of the Forward Bitts. I can now move forward knowing I have improved the accuracy of how the Endeavour was built. Good luck with your current build and I look forward to your progress.
-
Thank you Schubbe for joining this blog and for your kind words. The picture you have sent me has helped me a lot and can see from it, what looks like a canvas cover of somewhat . From a translation to English ( this didn,t work out too well) I think it confirmed this. It would appear that a few previous builders have just decided to leave this off so you can see the mechanism at the top. Unfortunately this mechanism differs from the Caldercraft version so will just have to live with that. I have also changed the design of the Bitts which gives them a more realistic look rather than just square at the ends I have shaped them and drilled holes at the bottom to simulate pullys,where I believe the rigging goes through before it is secured round the top of the bitts At a risk of using up your valuble time I would appreciate any photos of the Bitts in the AOTS book,especially the forward ones. As yet I have only shaped the tops on these and not drilled the holes in them. I too notice there are a number of suttle differences between the AOTS book and the Caldercraft kit which I am not to concerned about but another major one I think is maybe the Binnacle and I am still not sure which way to go. AS nothing is yet glued down I have still got time to decide. Your offer of helping with any photos of these items would much appreciated.
.thumb.jpg.036f1f6411ba6ae8dbe5b2218de01746.jpg)
-
Any thoughts on super phatic on rigging knots. I have used Ca CA in the past but appreciate this is not ideal and would rather use PVA but again waiting time for setting is problematic.
-
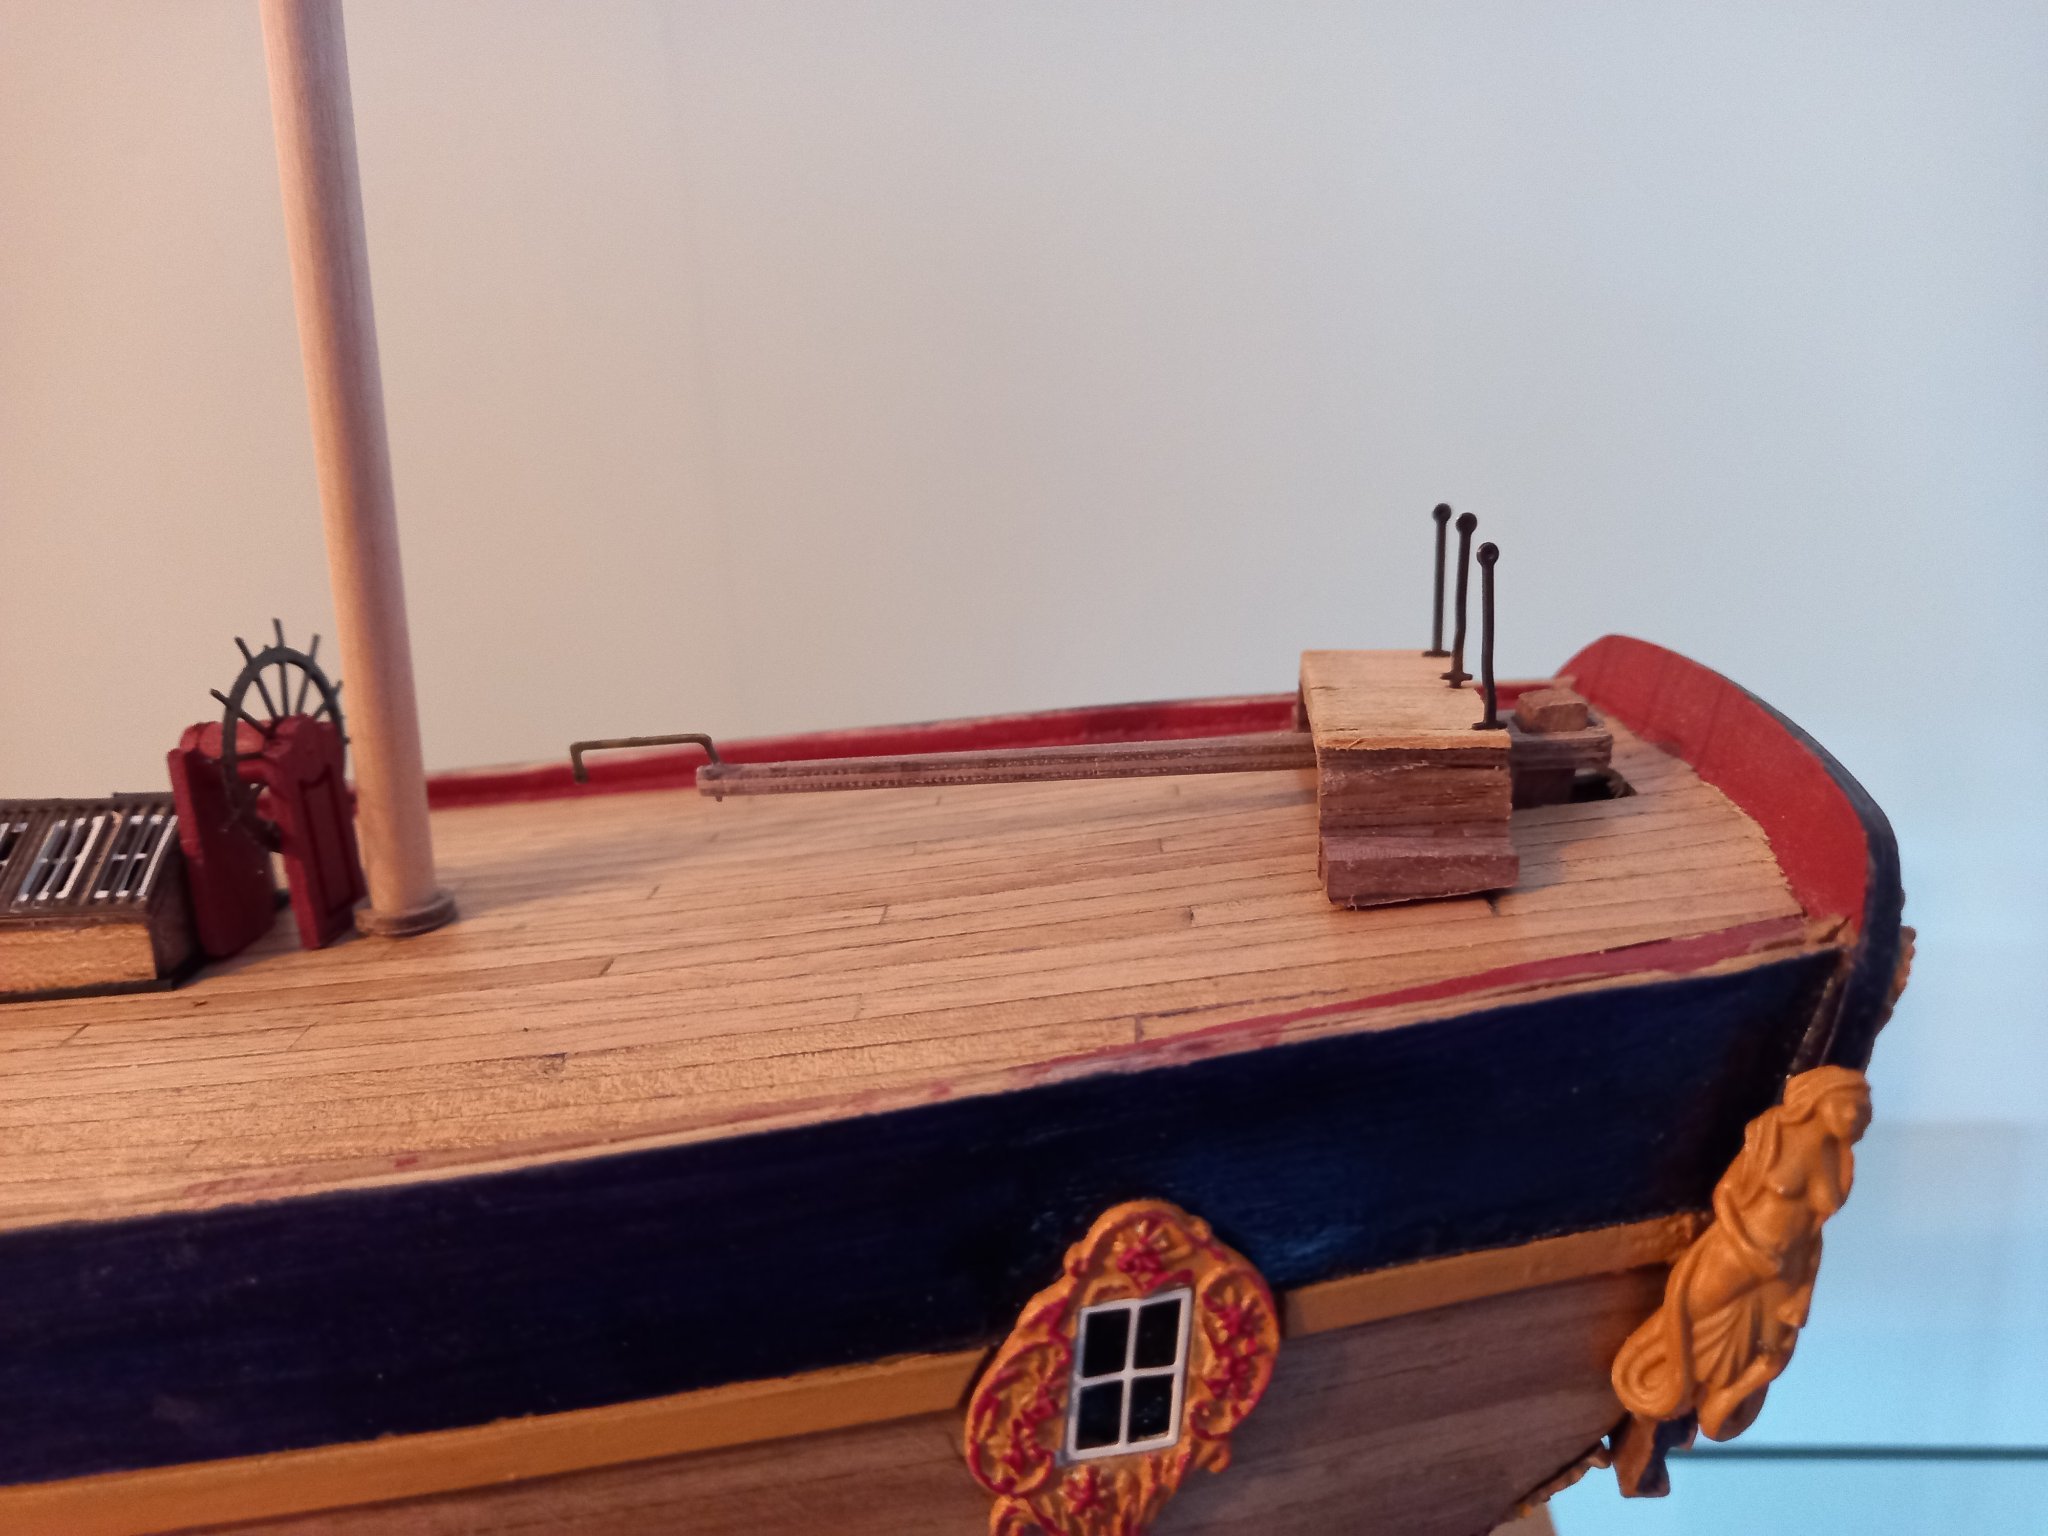
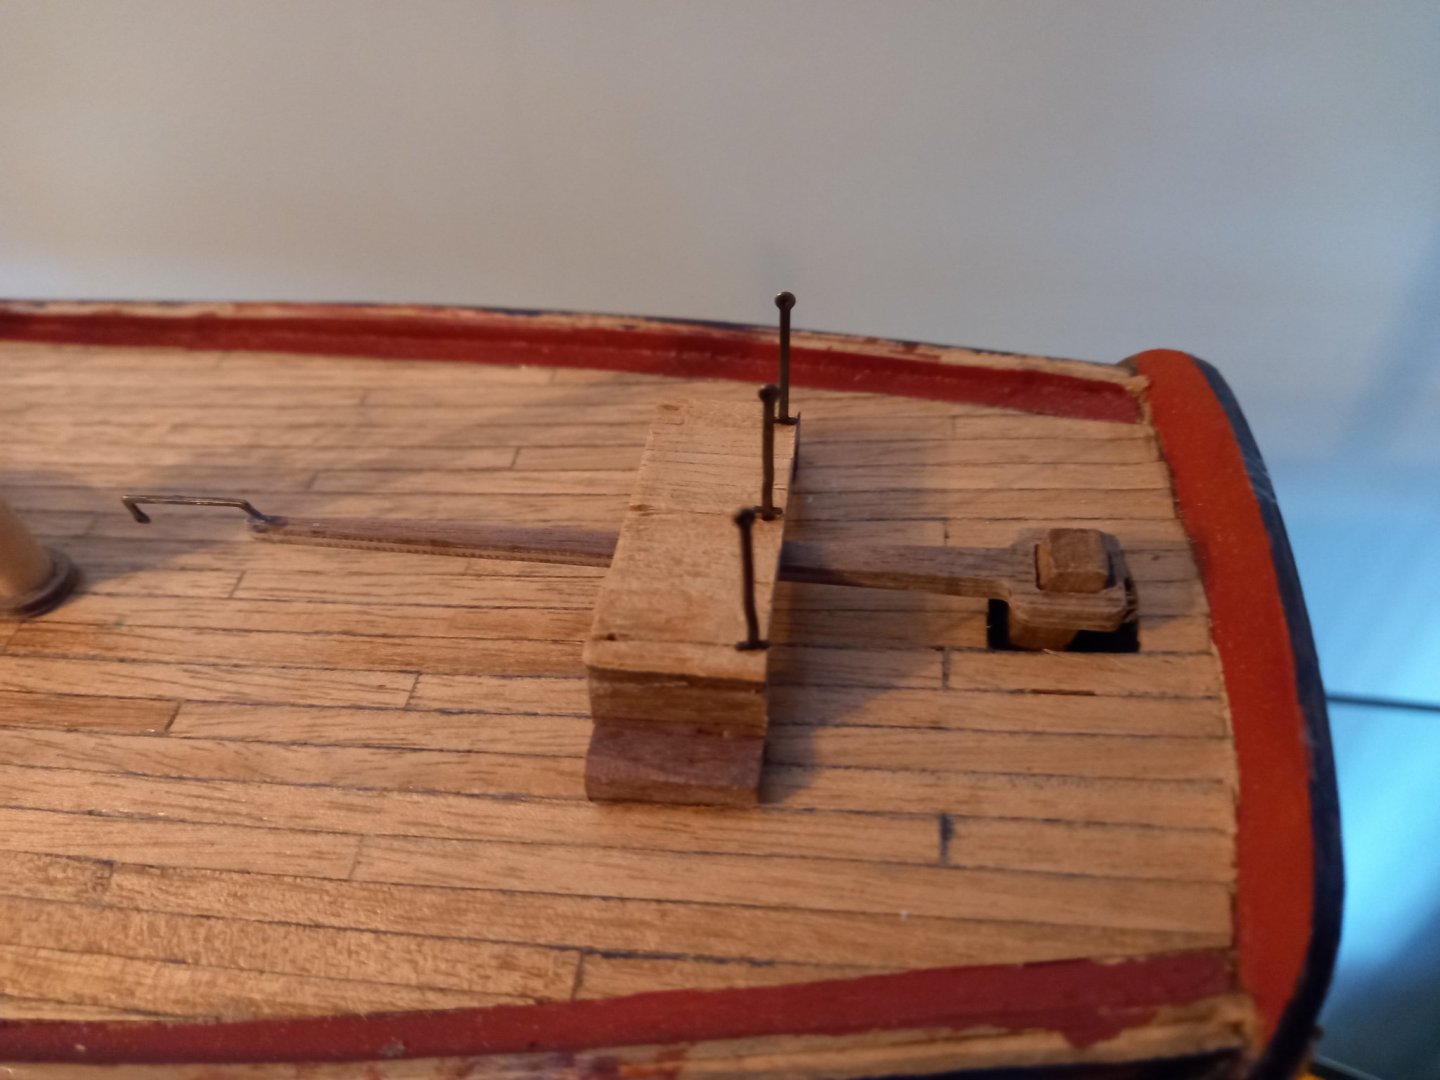
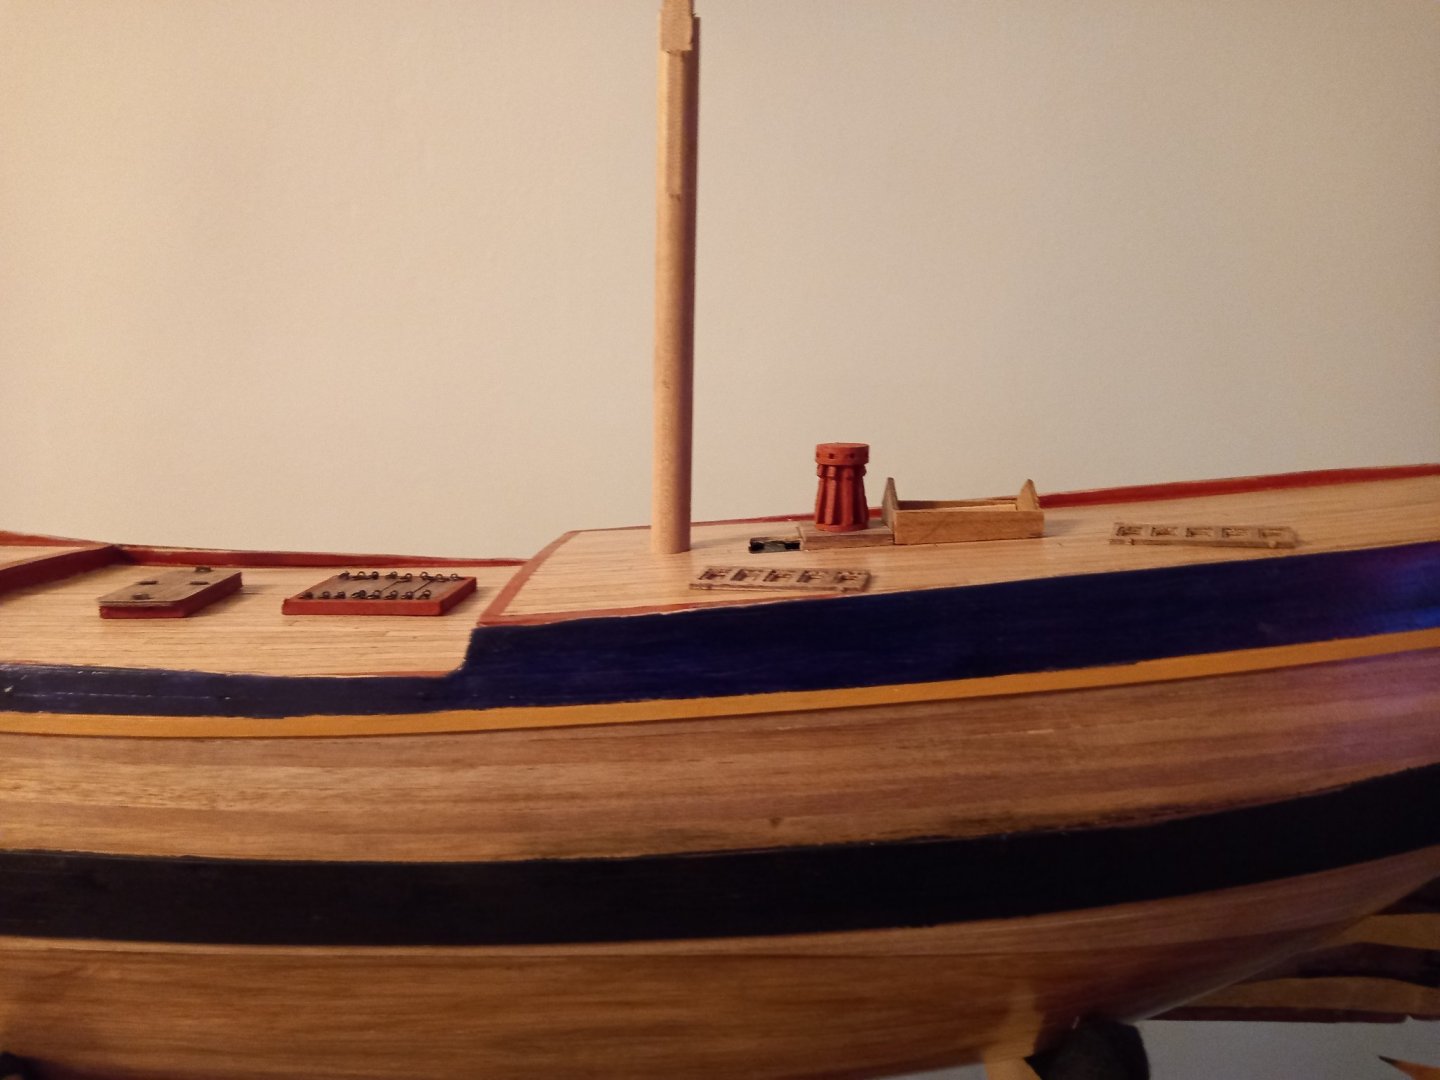
Before I continue with the steering I would just like to mention that although there is nothing on the plans and as far as I can see on other blogs there is no cover over the hole in the deck where the rudder post comes out. I can see from a photo of the Endeavour replica that a small cover is fitted and on my last build the Bounty a small hut was placed over this opening which would prevent the ingress of water. So I would like to replicate this and see if this works Above is a photo of a small platform which fits over the tiller arm alsready fitted with hand rail stantions made out of brass and blackened. The end of the tiller is fitted with another brass piece which I believe is so that the tiller arm does not come into contact with what I think might be a chimney. This is also not in the drawings but have seen this added to other builds of this model. Fortunately I have needed to use a few of other modellers ideas as I do not own a AOTS book of this ship.

-
Cheers Allan thanks for sending me that link and looking at the photos it would appear that the ends are shaped and I am now thinking of making my own as the ones supplied by the kit are a shade too short as well. Best regards Dave
-
The above is in Regards to the HMB Endeavour and although I am a long way from the rigging, I have just put together the Bits and almost ready to attache them to the deck. I have noticed that the Bits at the base of the masts are not shaped at the top as they are on the cap rails and I wonder why this is the case. Is it necessary to have these shaped in order to secure the running rigging which is what I assume these are for? On my last and only build ,The Bounty all my running rigging that ended at the fife rails around the masts were terminated at belaying pins , However I did tie a few off around the bit ends which were all shaped. Also this running rigging passed through pullys or blocks at the base of the bits before going to the belaying pins. None of these pullys are fitted to the bitts of the Endeavour. I am assuming that the above is due to changes in design of rigging but do wonder if the design of the bits on the Endeavour would actually work or would these simple bits be of benefit if the rigging were secured with a half hitch or something similar and although secure, could be released quickly if needed? Hope this all makes sense Best regards Dave
-
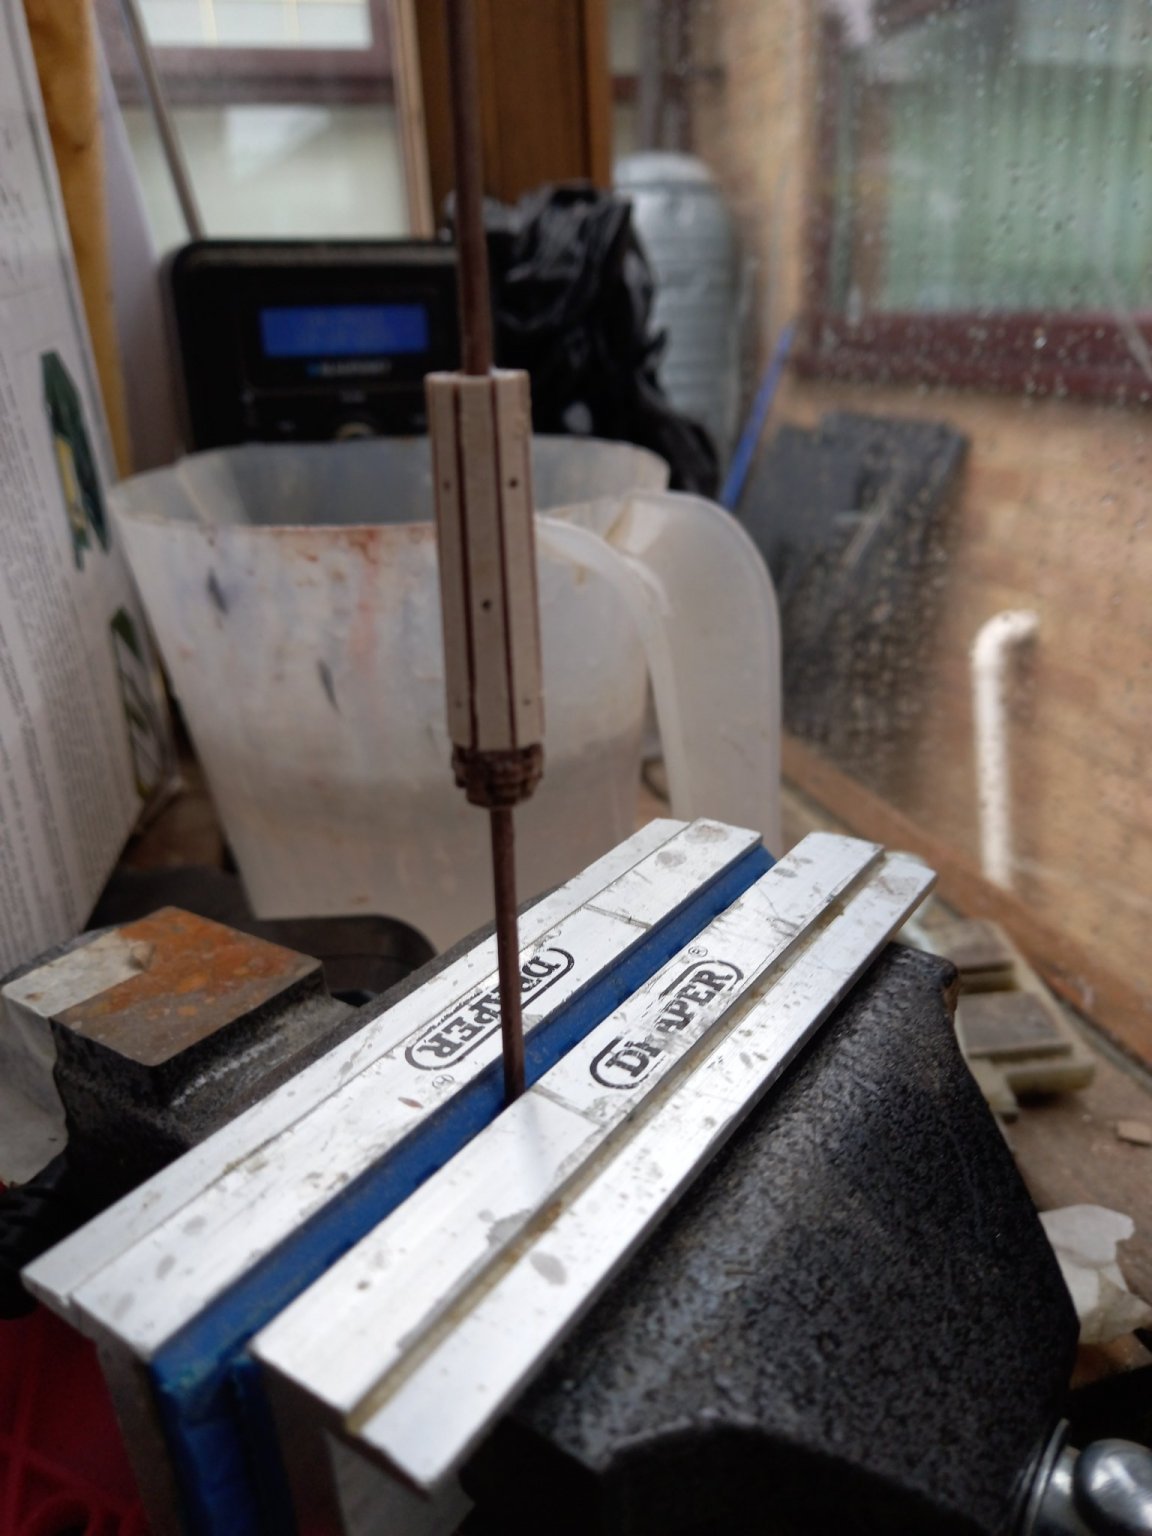
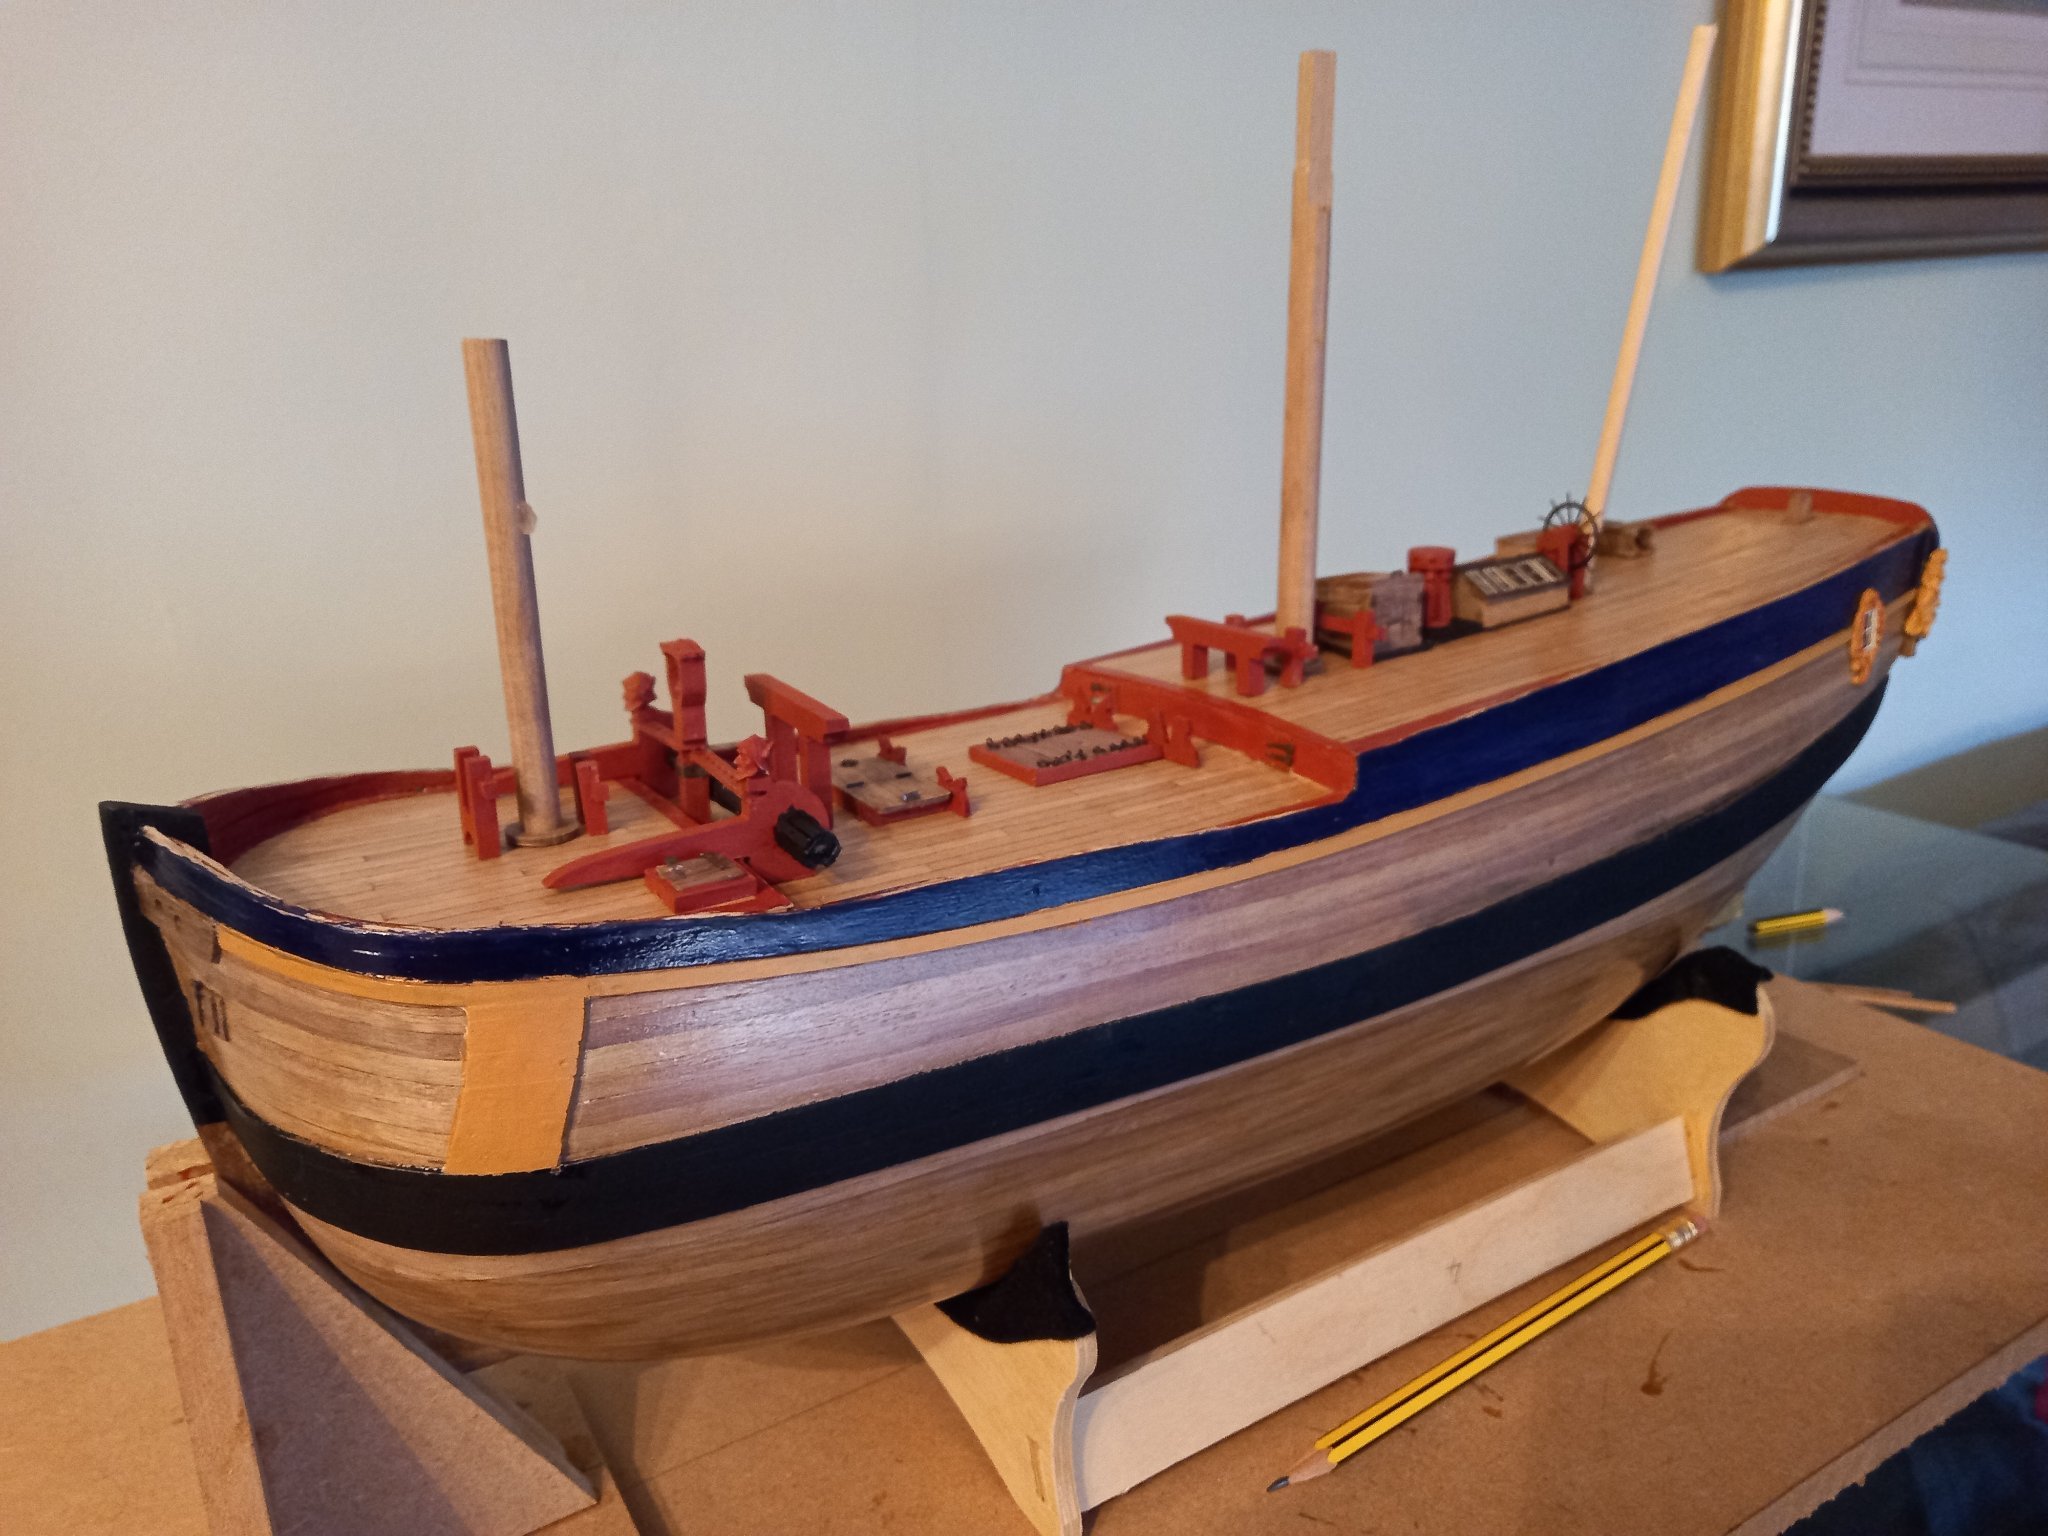
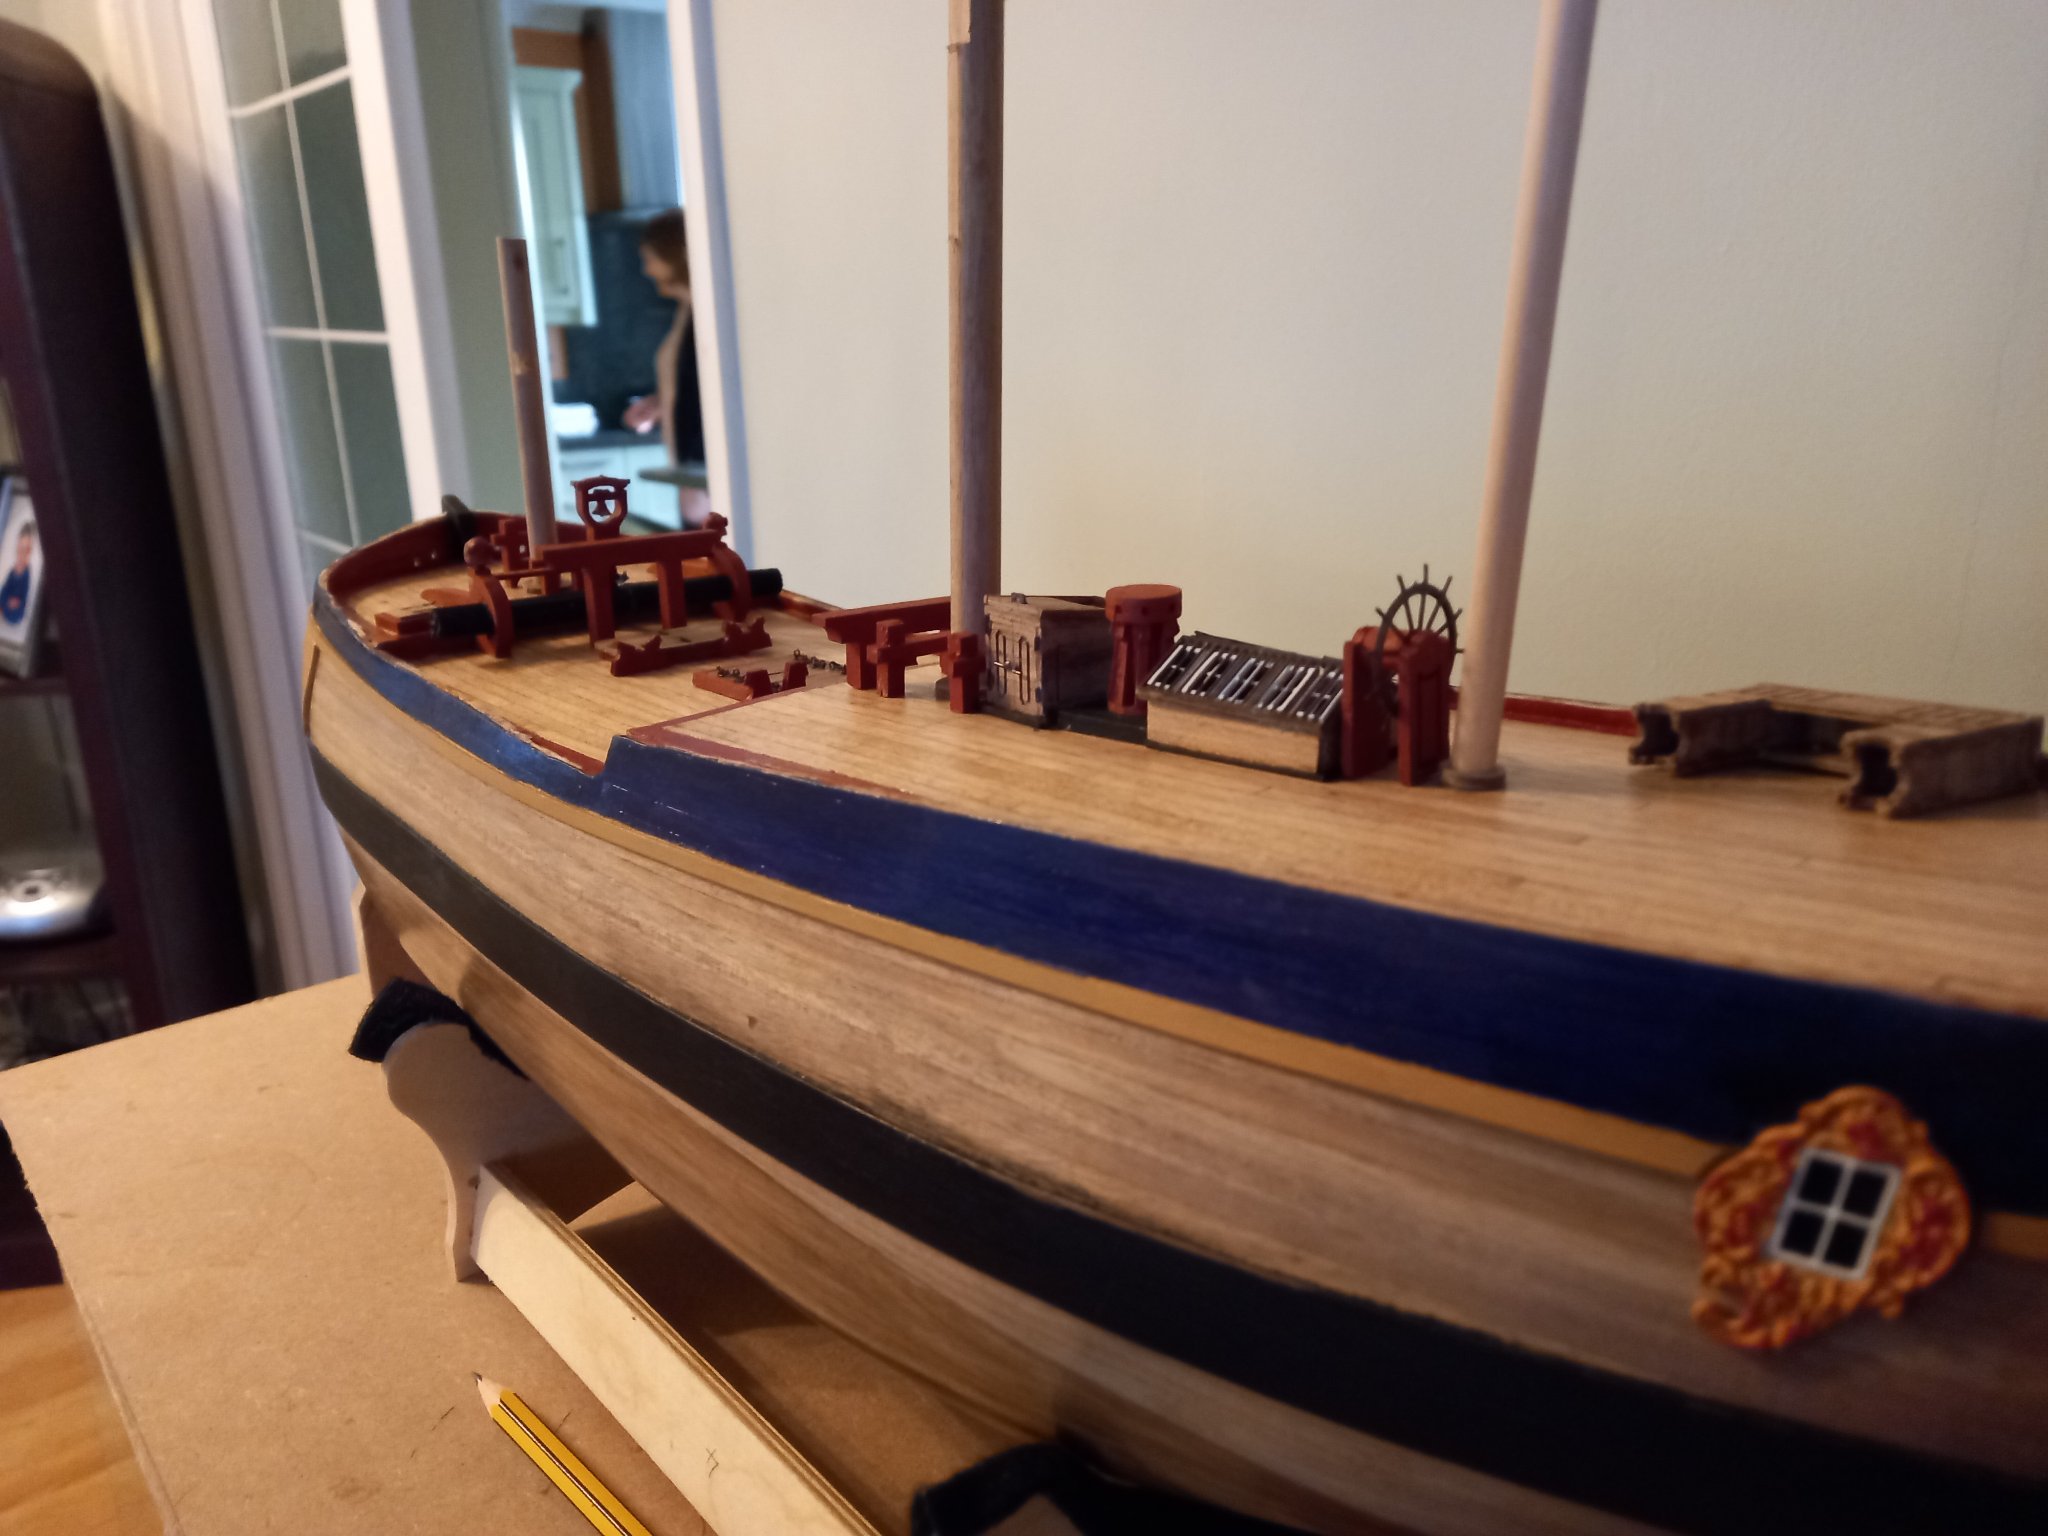
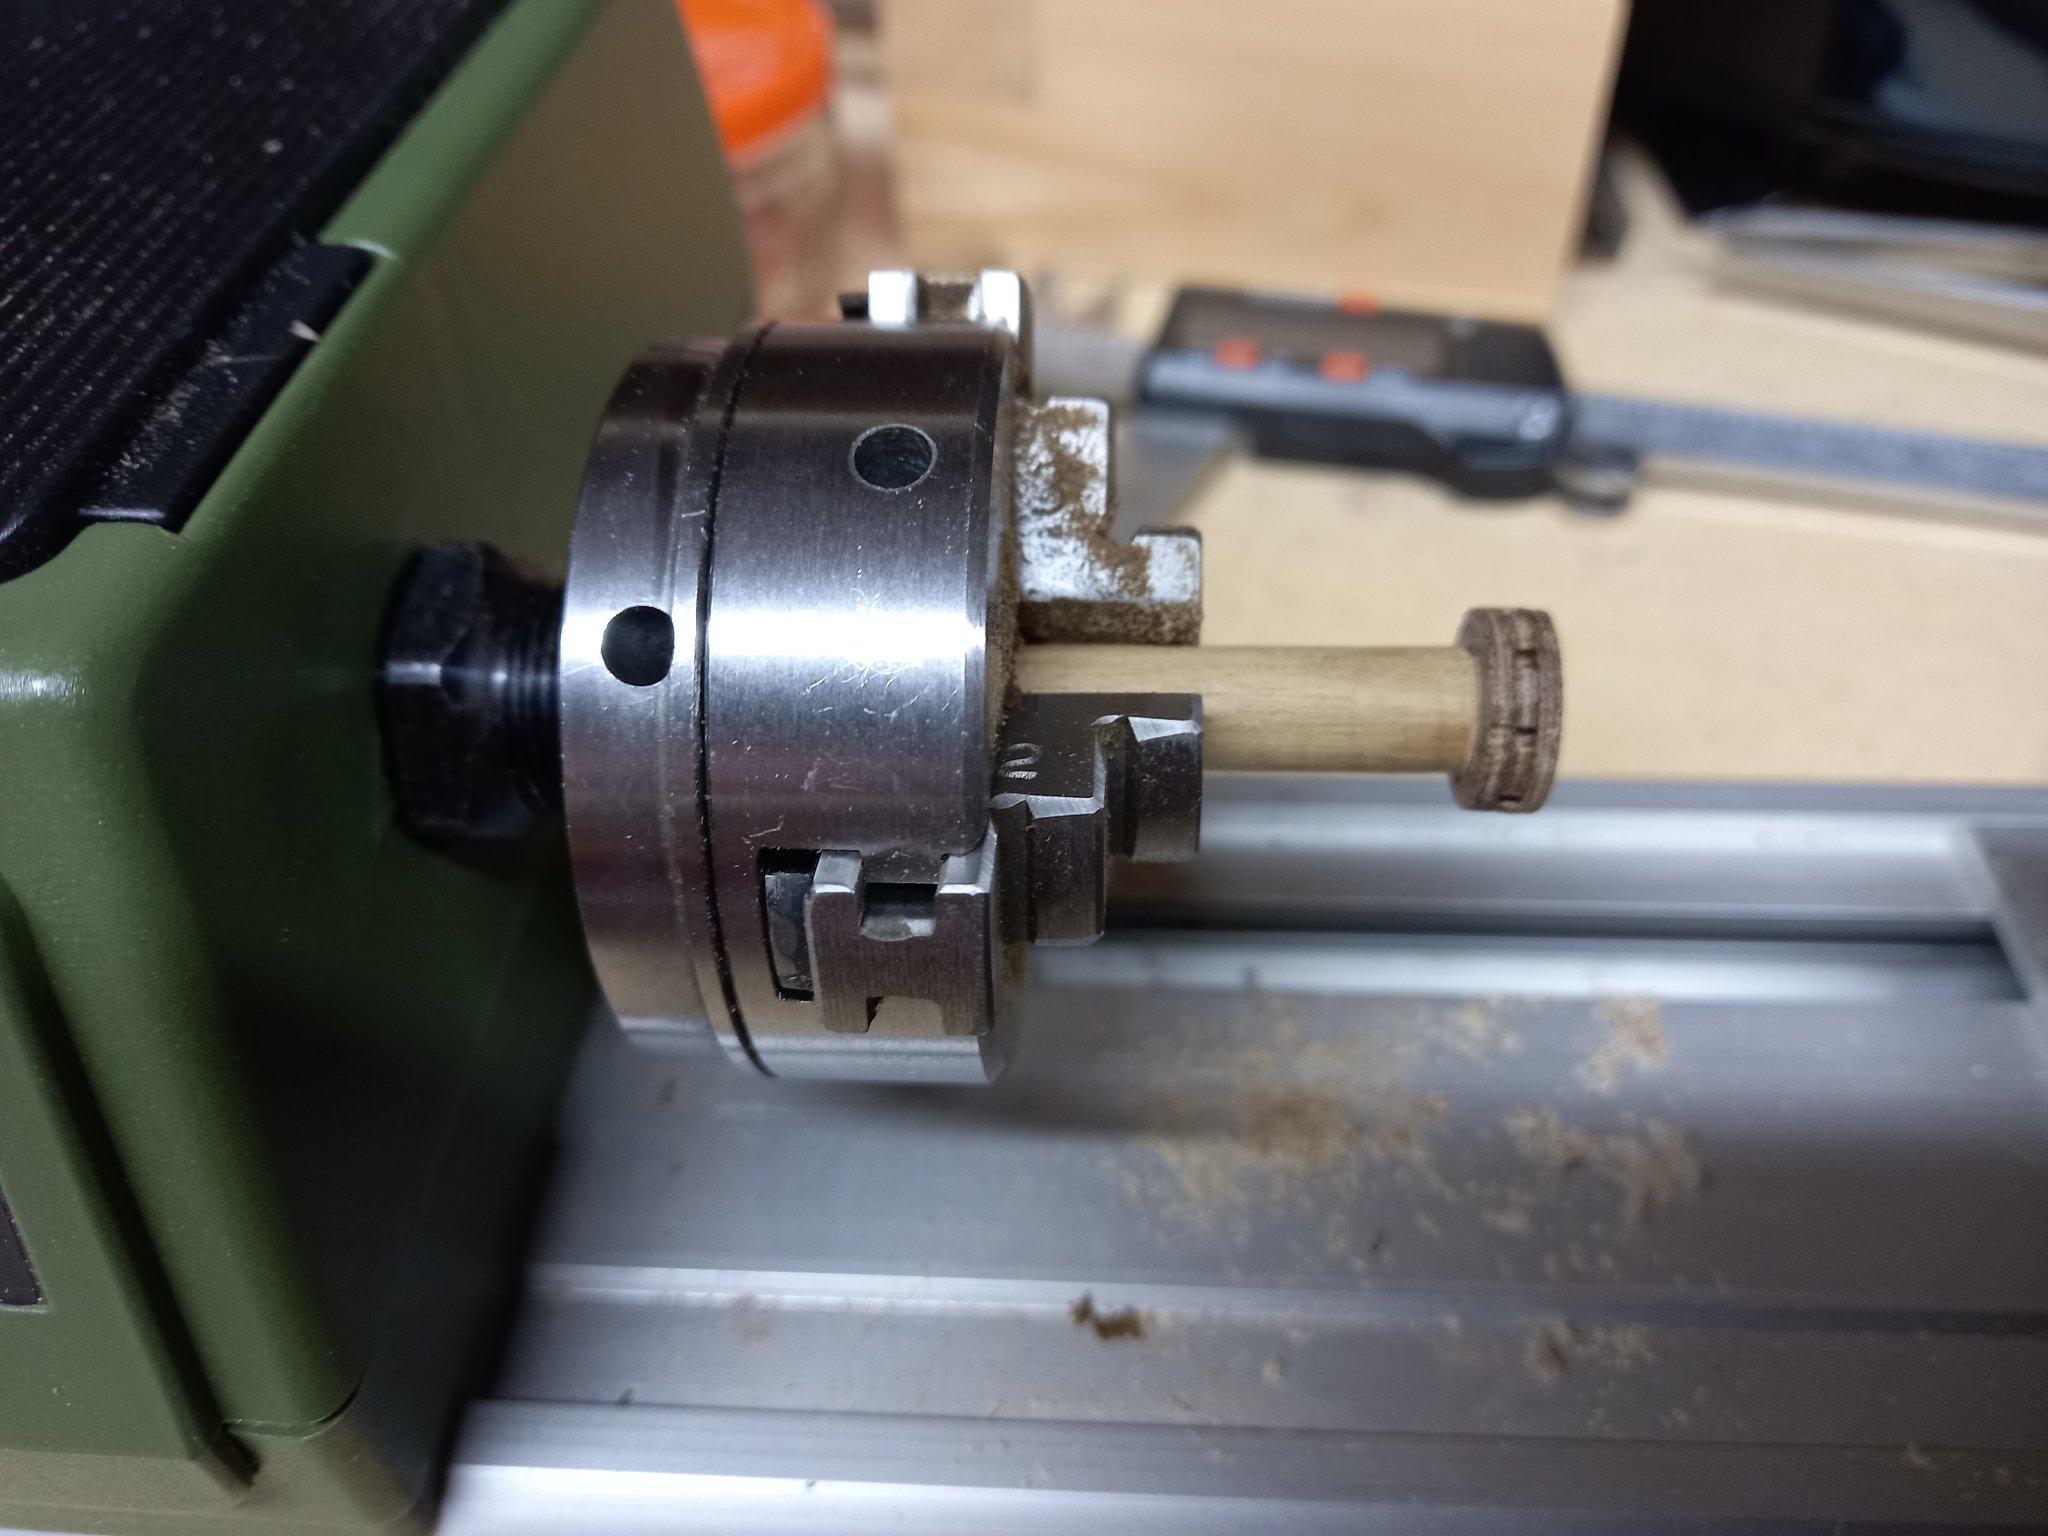
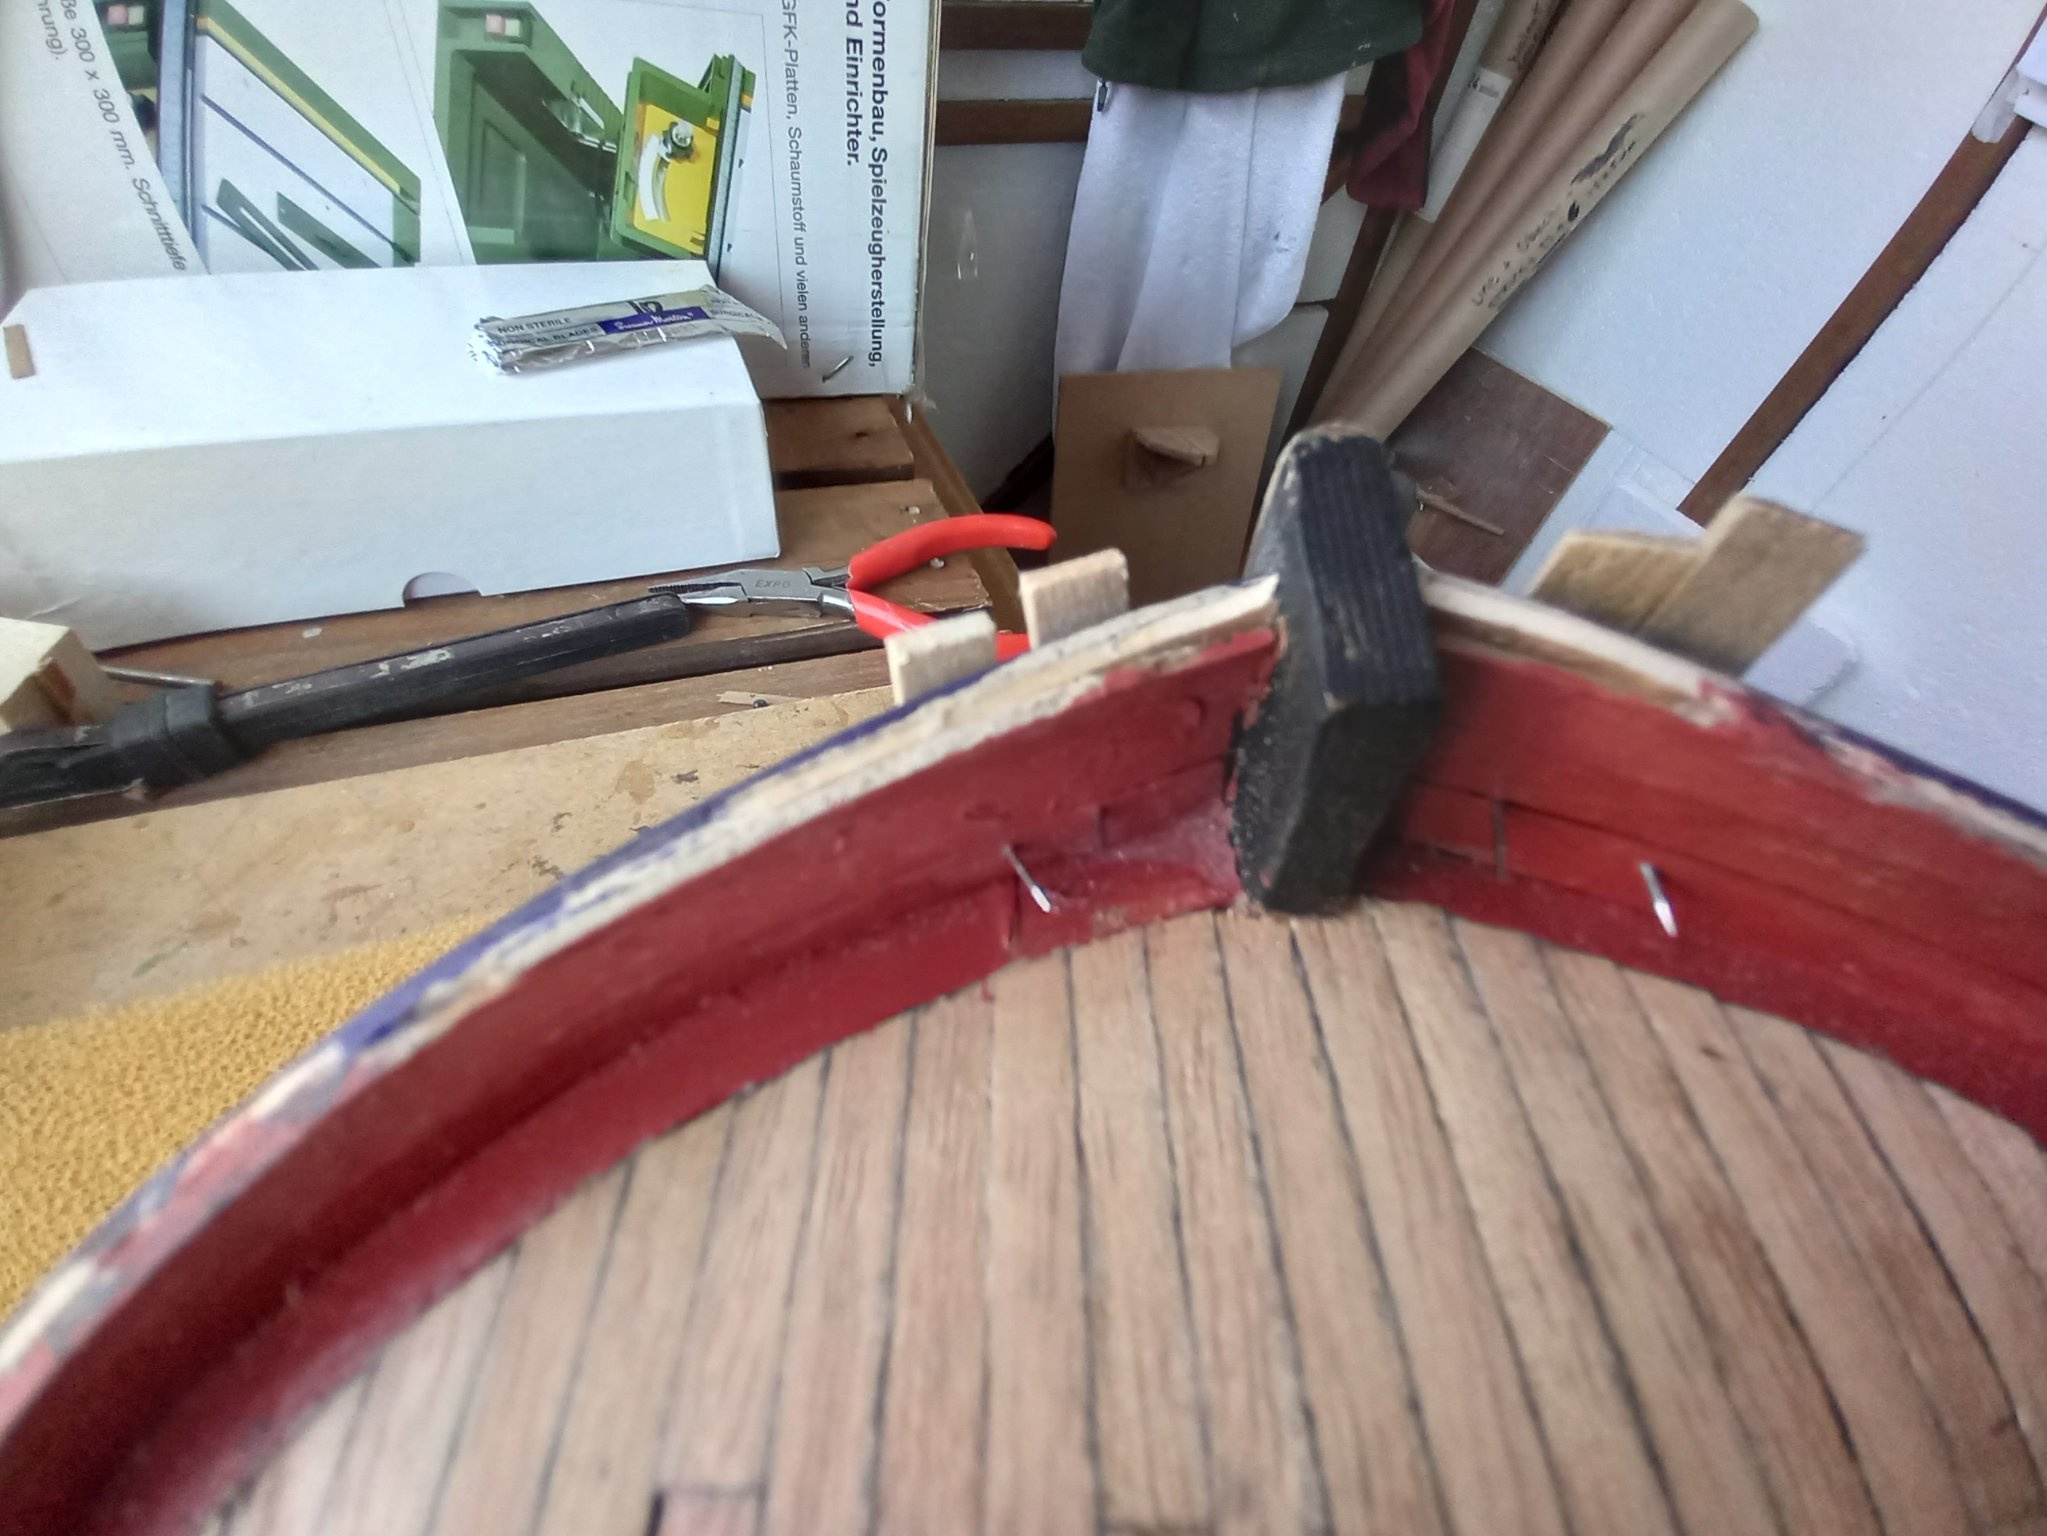
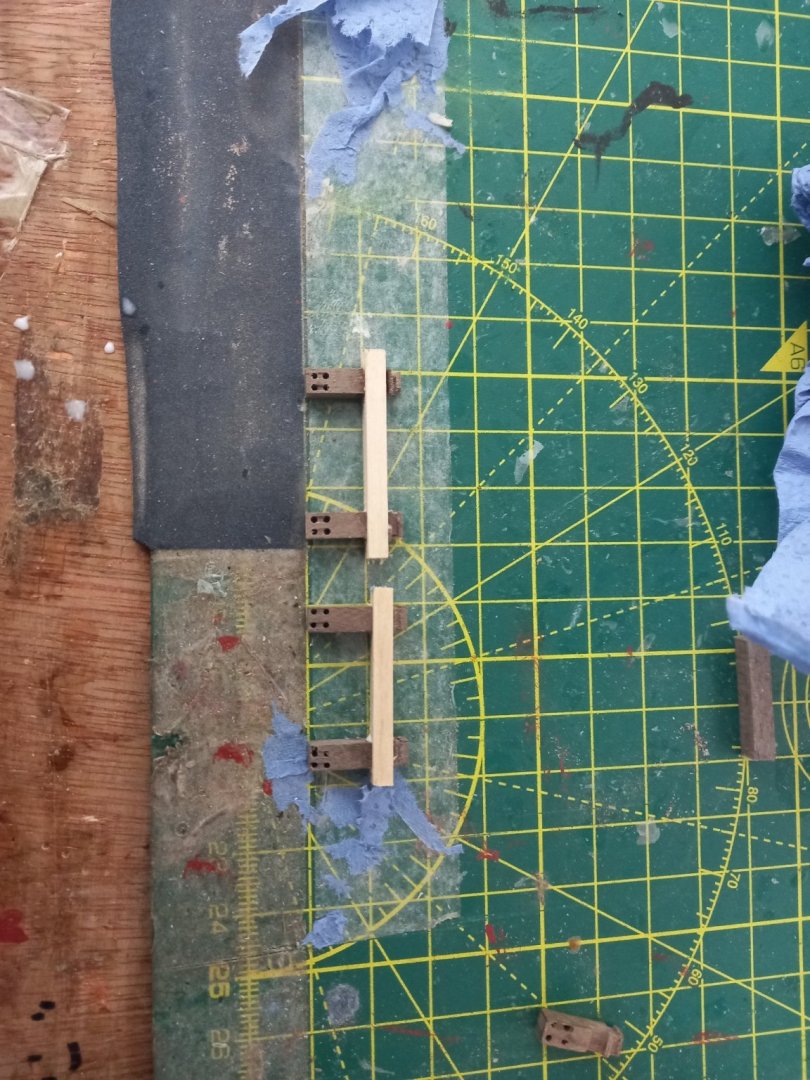
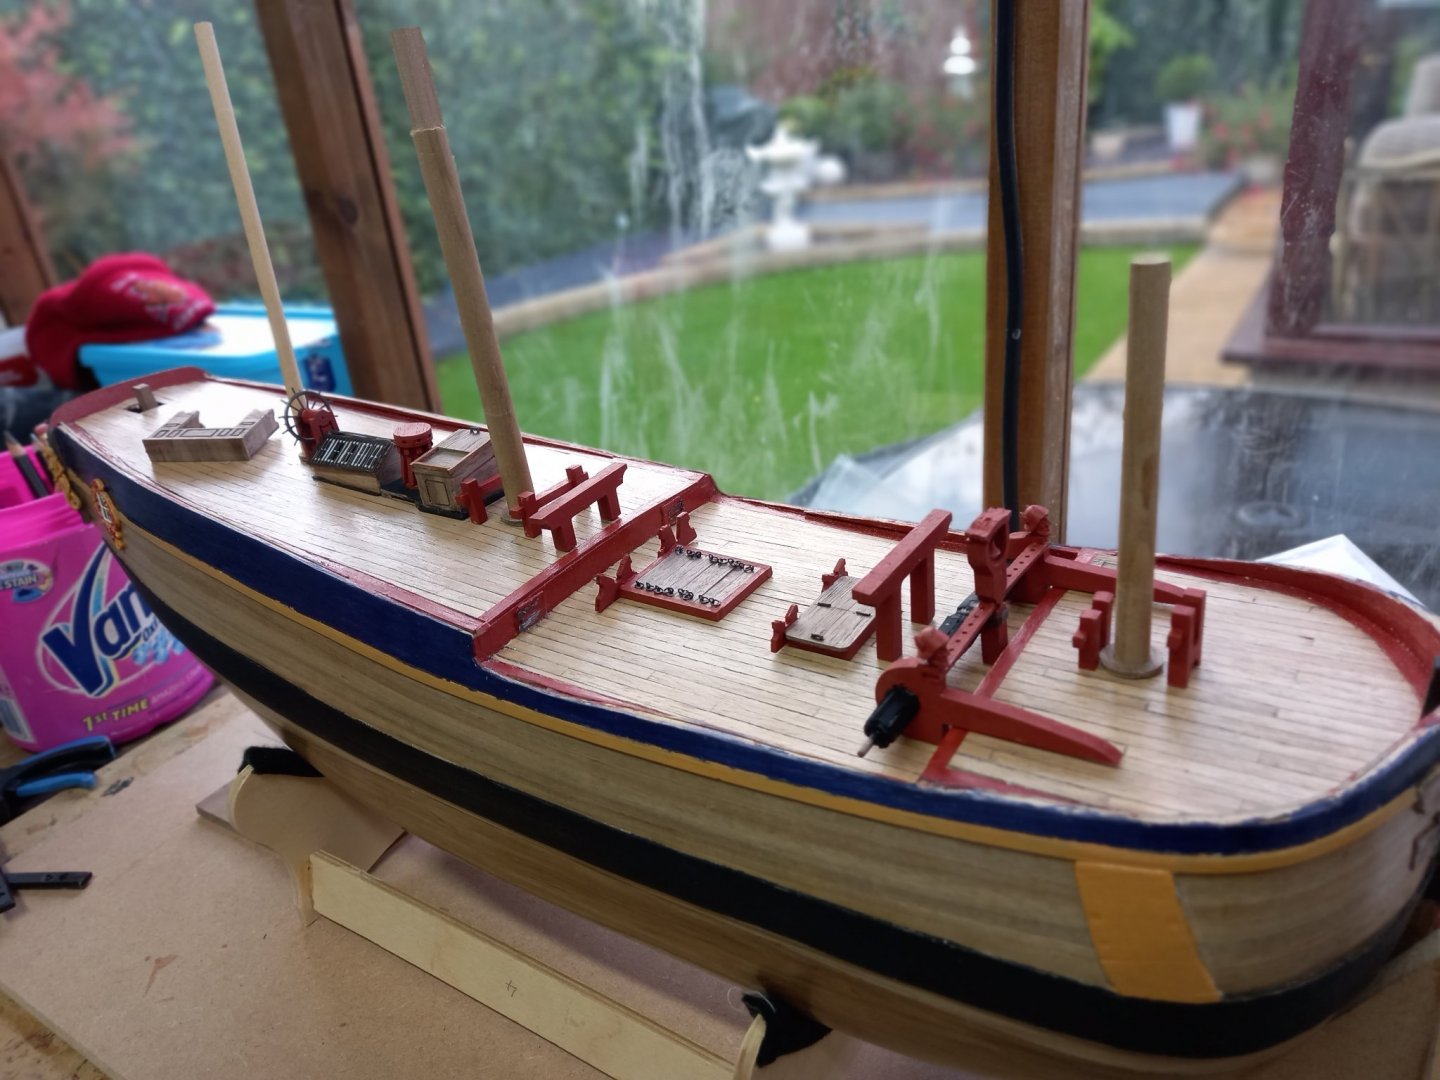
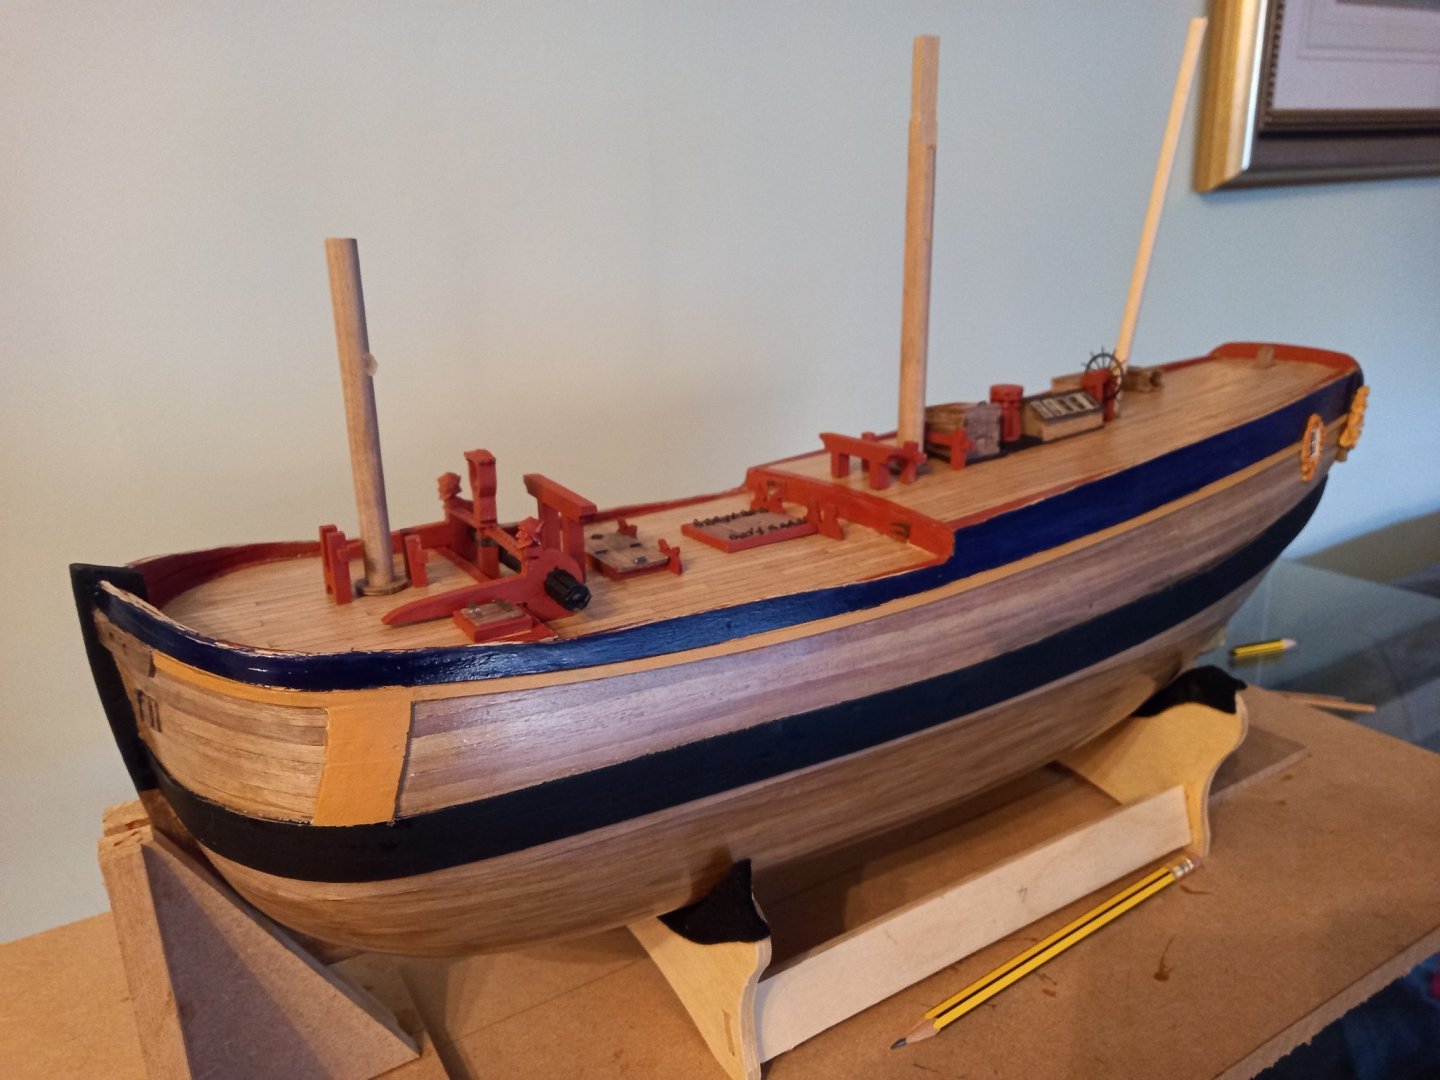
I have made some progress with regards to the deck furniture/fittings . I did find assembling the windlass rather tricky compaired to the Bounty as I wasn't too happy with the barrels. Each flat of the octagon required assembly using 0.7 mm plywood strips as can be seen in the vice. This part on the Bounty was a cast piece and was much easier to assemble. however I got there in the end. I I have now only got the bilge pumps to assemble and perhaps tweek the angles of the bottom of the bitts and then I am almost ready to start attaching the fittings and furniture to the deck. However I need to fit pins to the bottom of the bits and the supports for the ship boats. I am still not sure of the Binnacle as I cannot see were this will fit. It is my intention to make something similar to the Endeavour replica as can be seen here Anyway here is a couple of photos of my progress so far


-
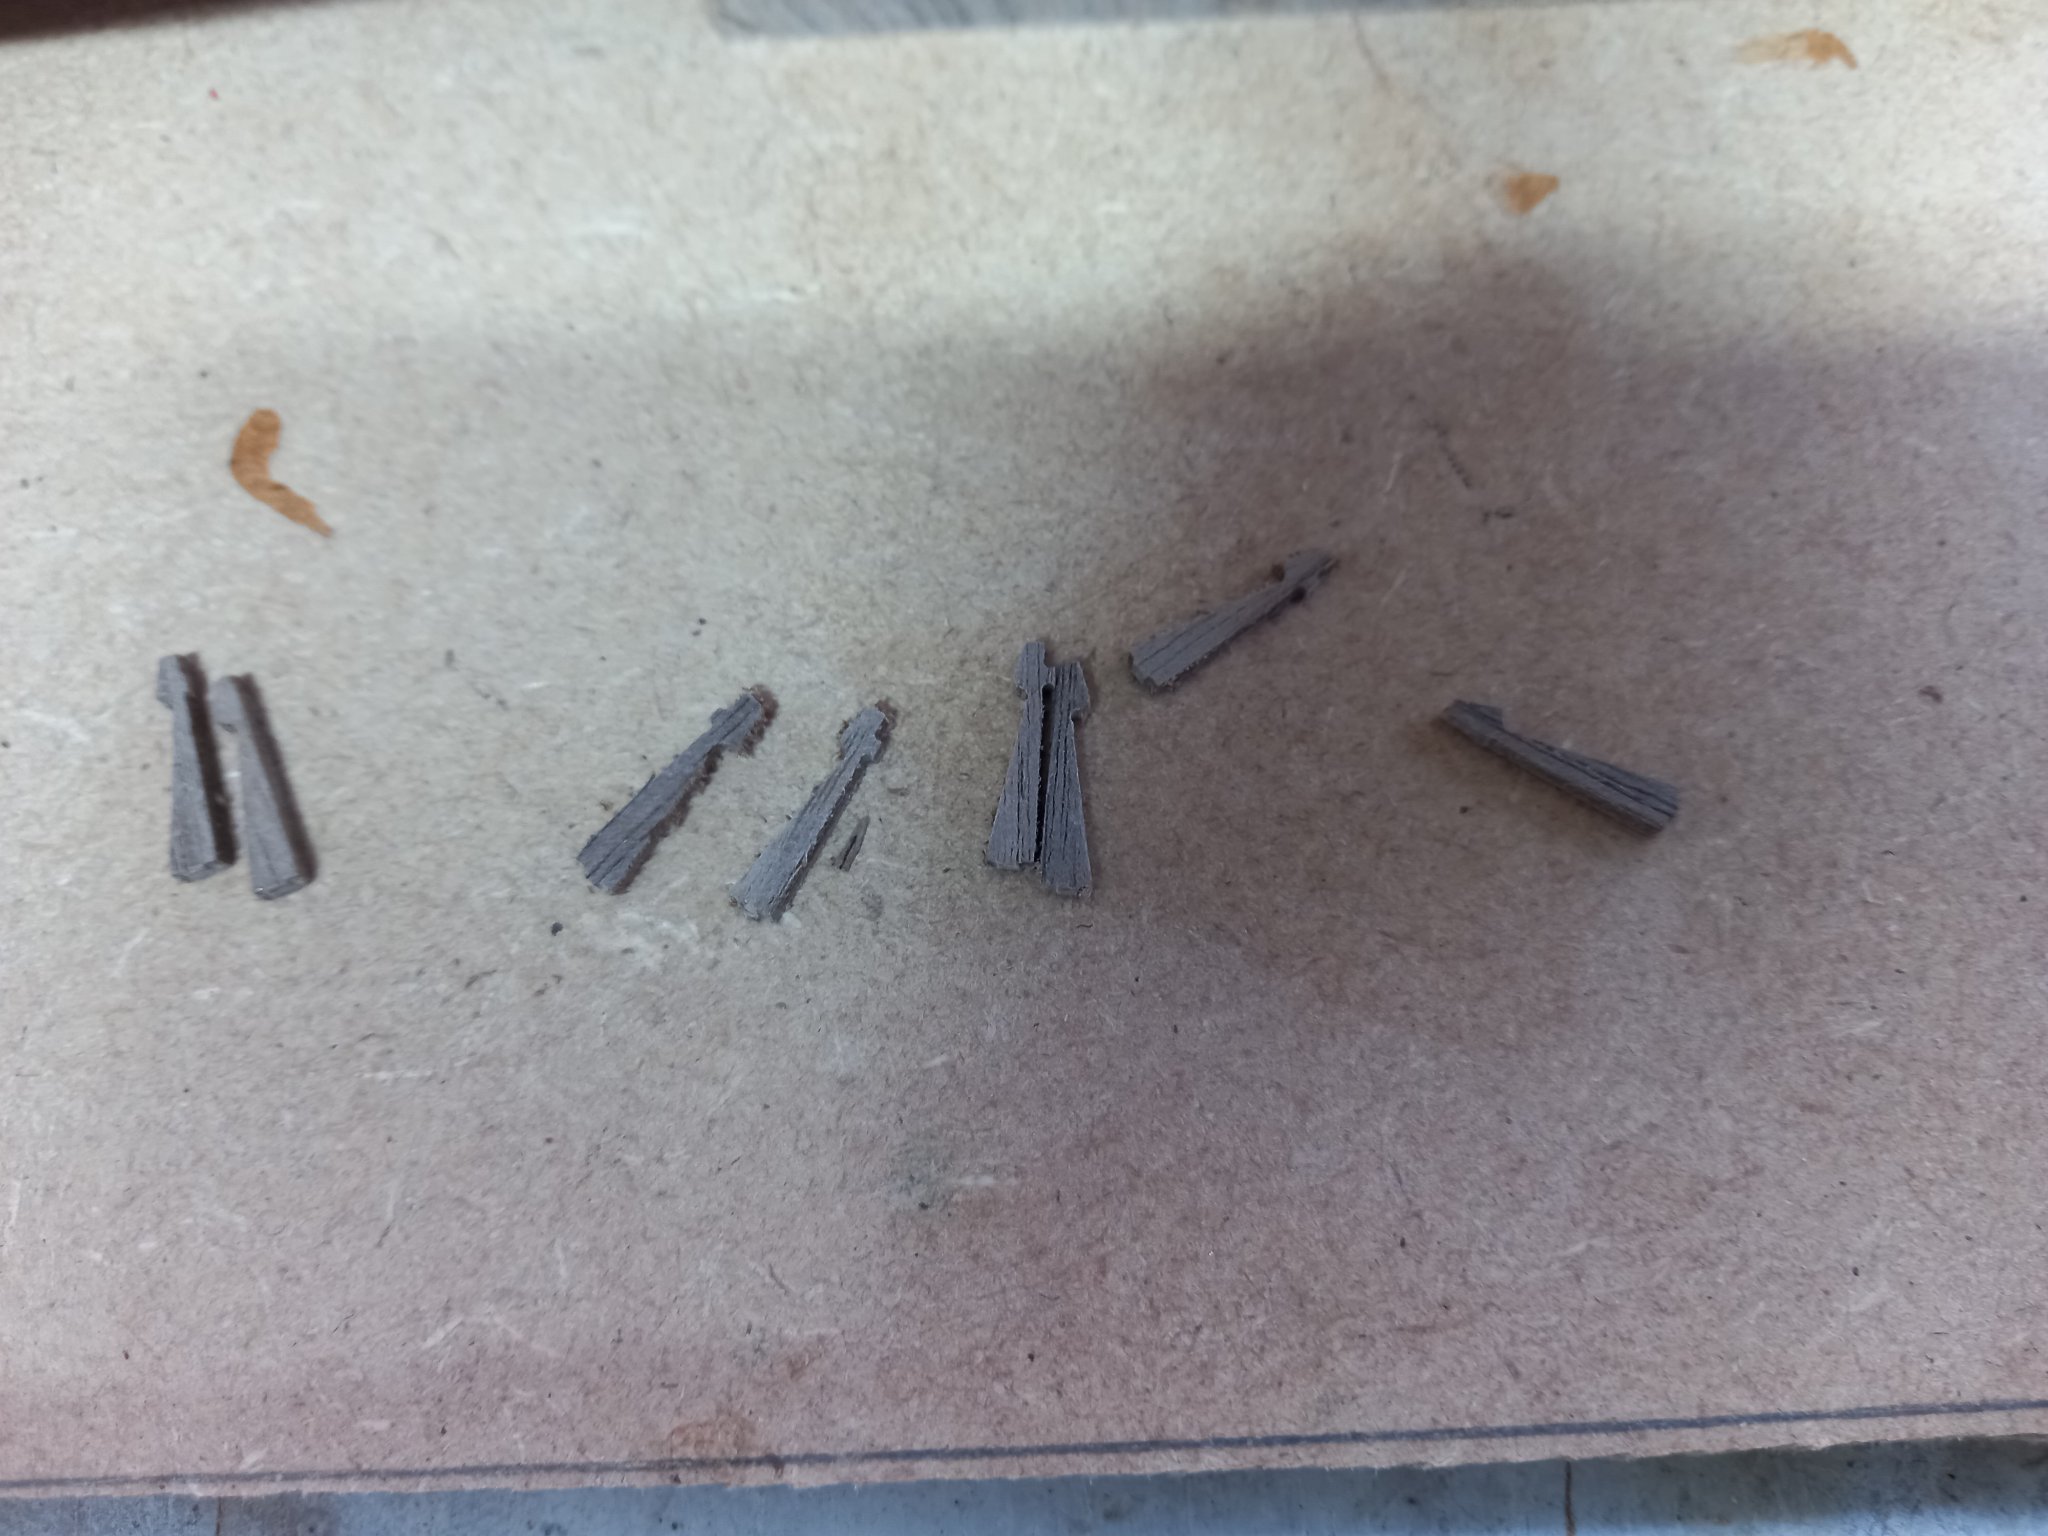
Making progress with compensating for the slope of the aft deck. I made two wedges for under the Capstan base on my Proxxon Milling machine and cut a wedge out of the sides of the skylight

-
Thank you for that and nice to get some input. There is a good bit of work more than the Amati Bounty but up to now it has been fairly similar but think the extra gear on the deck compared to the Amati Bounty is quite a lot and should keep me busy for sometime. I am currently pondering over whether or not to go with keeping everything on the deck vertical or perpendicularto the deck. I think most of the previous blogs have gone with vertical which is different then the drawings so will need to either fit wedges or cut out material to make a slope. Just trying to figure out the best angle. I will probably go with as near to when she is on the stand. If that makes sense. Hope you get your other work done soon. So you can get back to your Bounty.
-
That is a 'Blast from the past' I didn't know they still made wooden pegs. I thought every thing was made in plastic these days.Second planking is looking great! Dis you lay the first one at the top and work your way down or by the position of the pegs it looks to be the other way round?
- 505 replies
-
- 3
-
-
- vanguard models
- Sphinx
- (and 1 more)
-
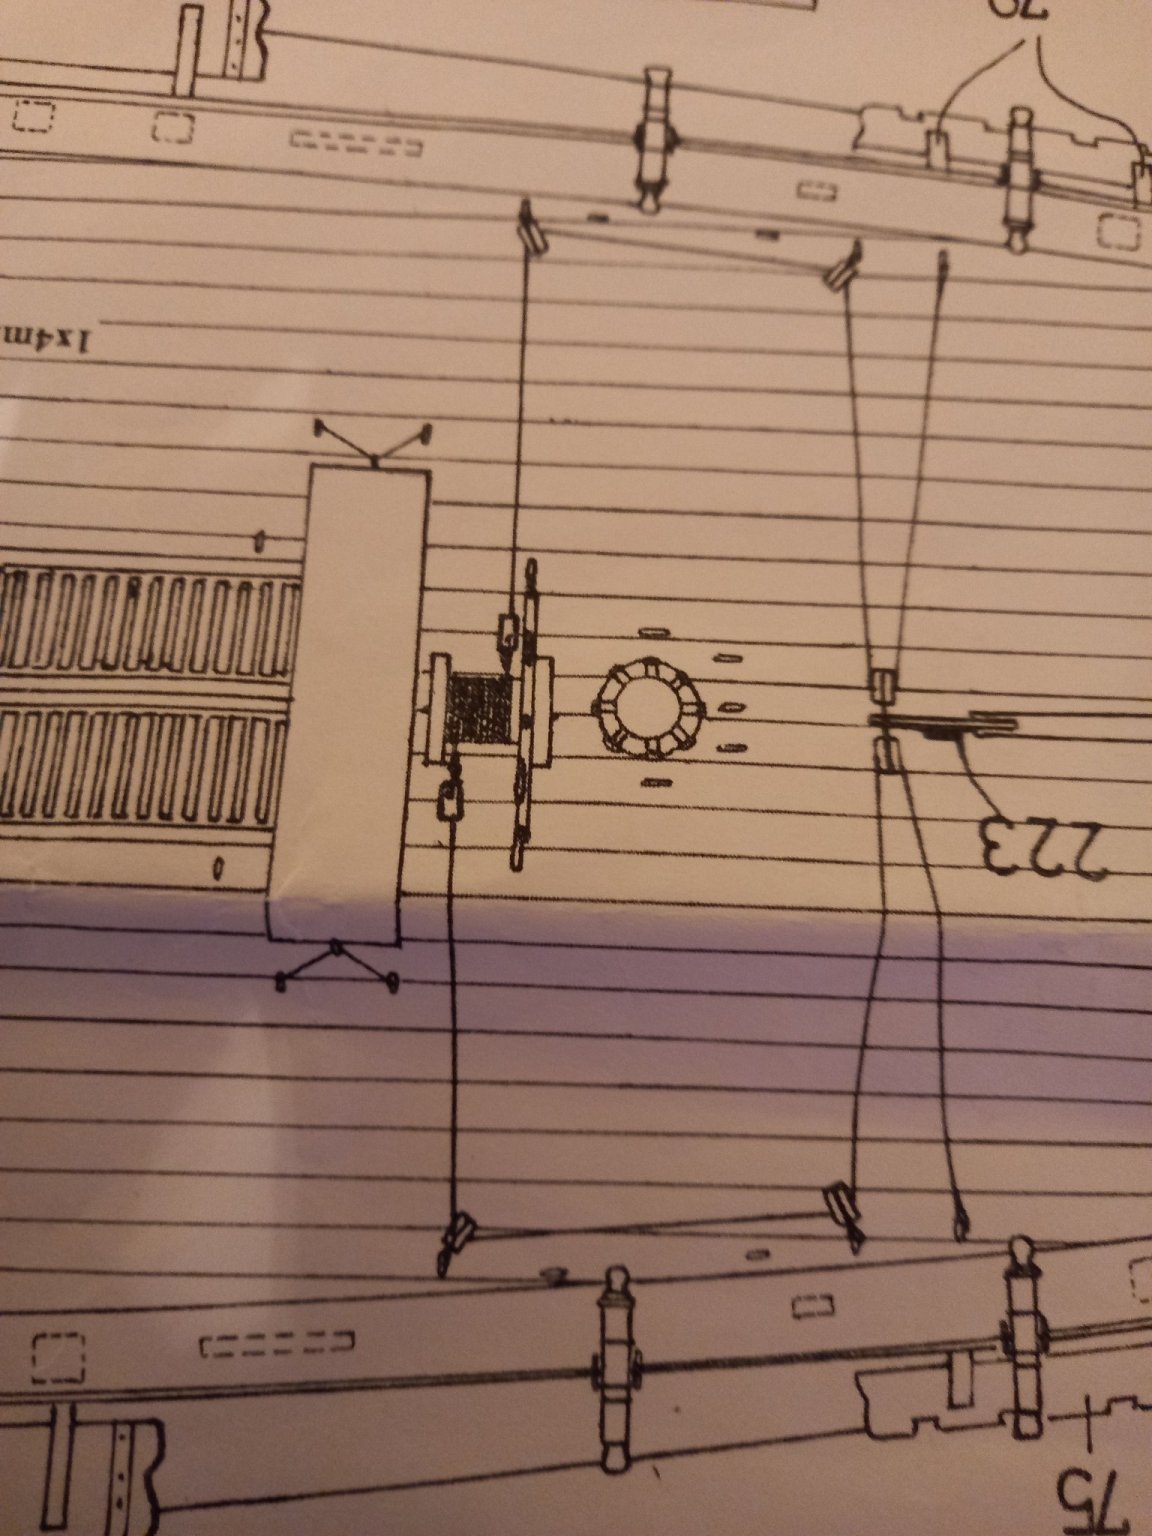
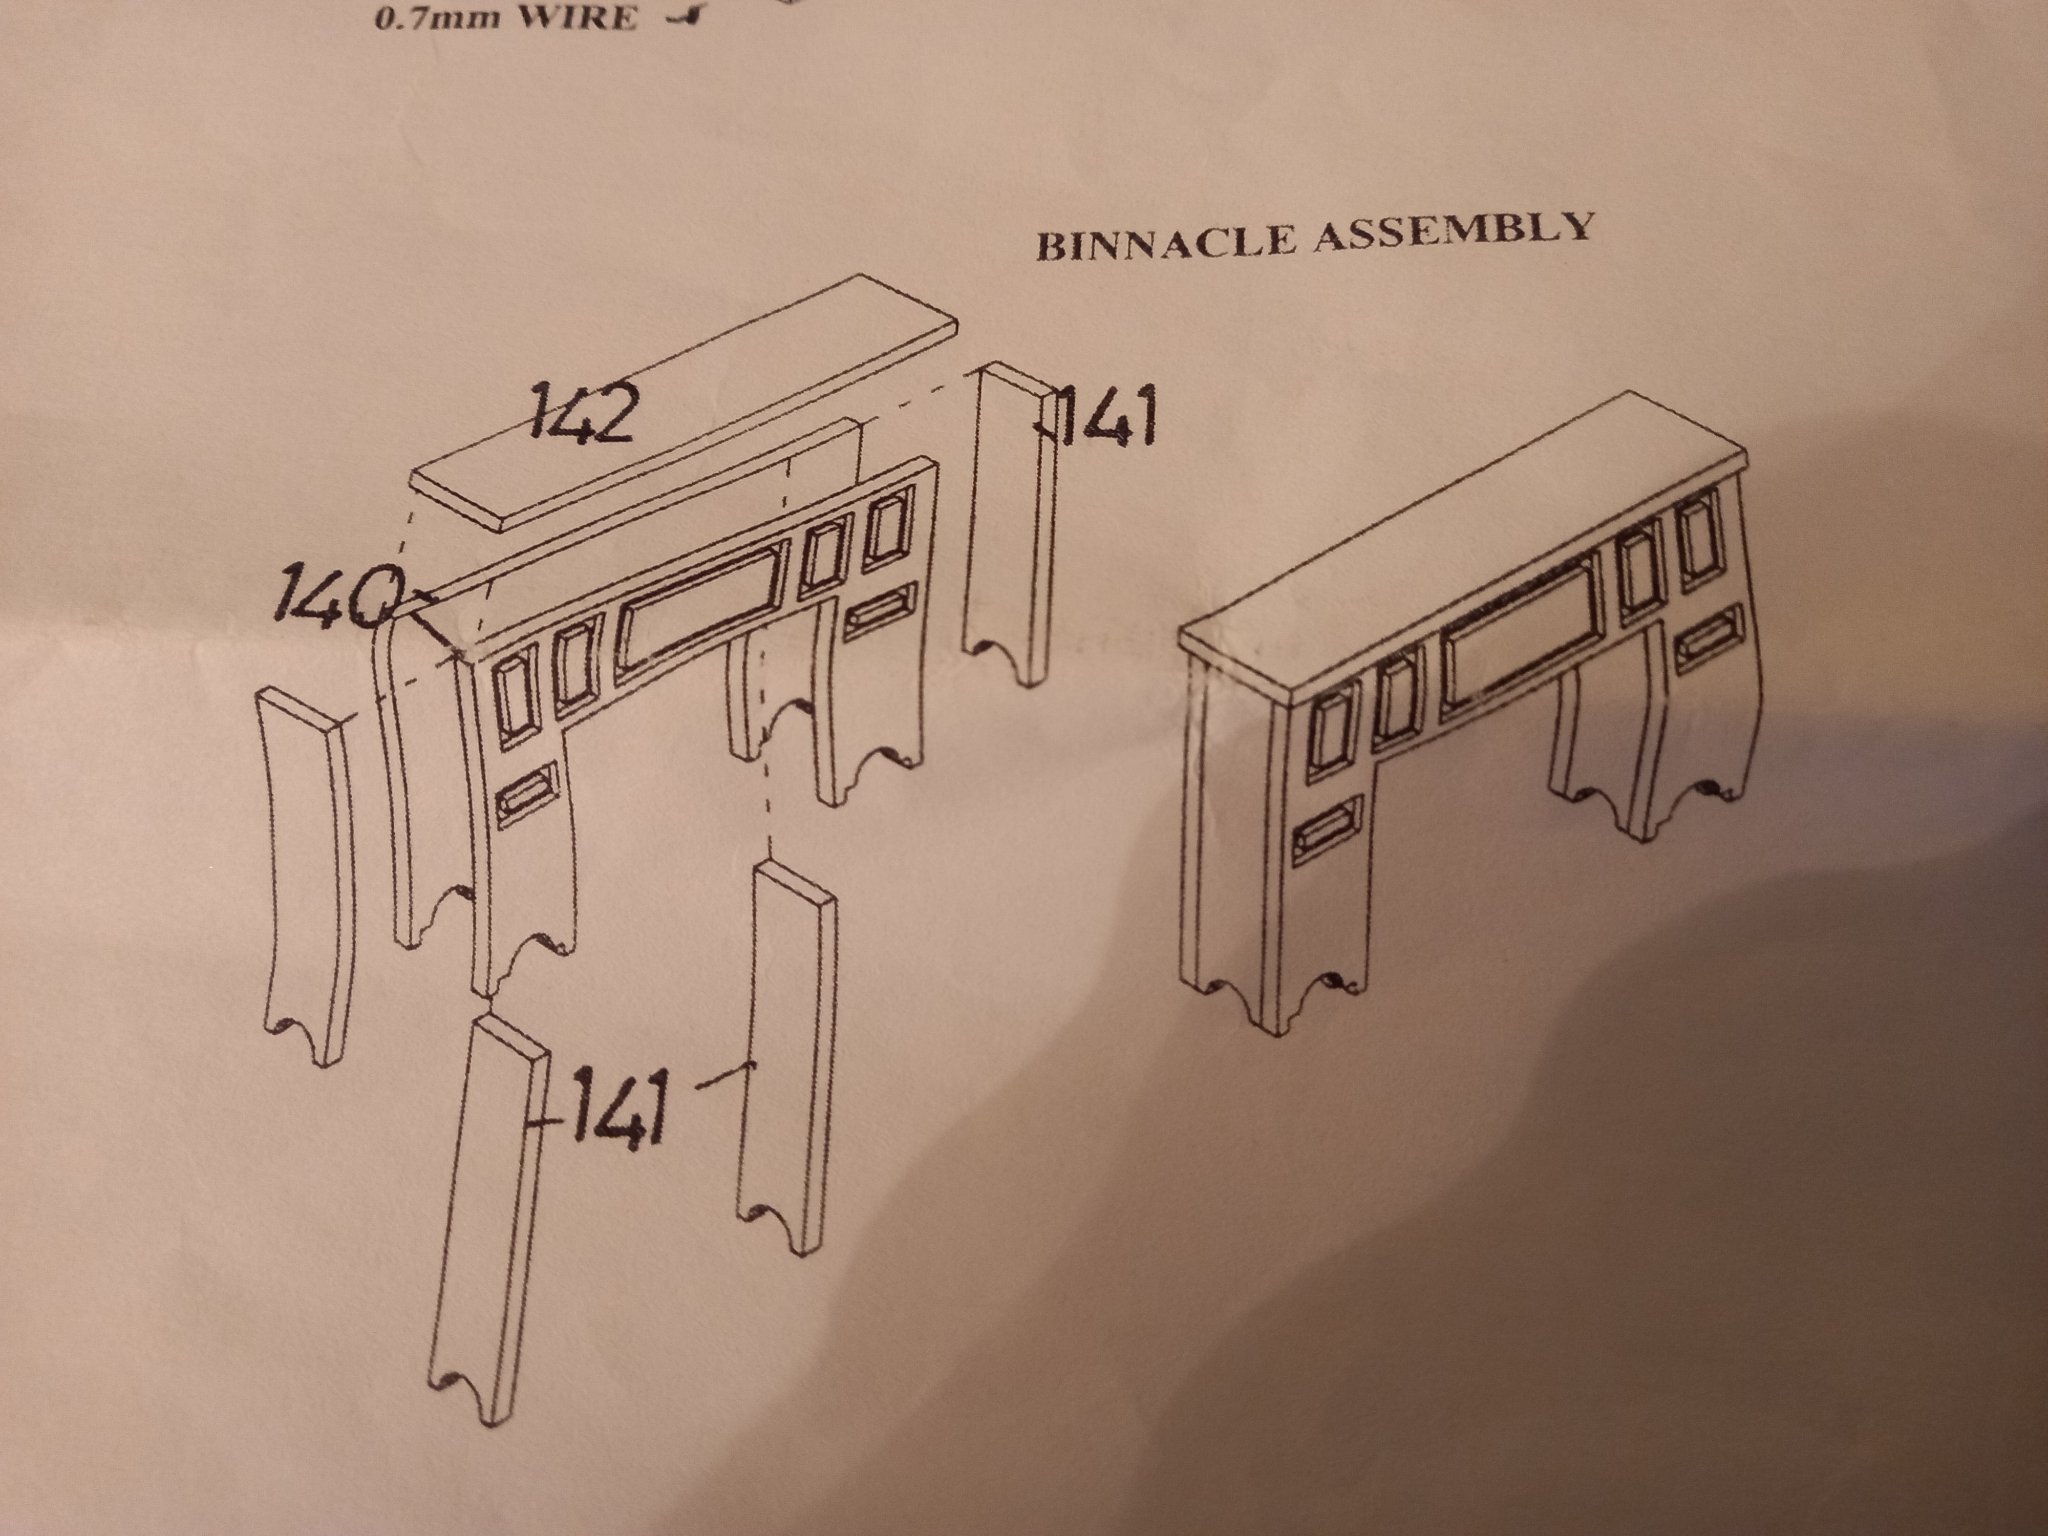
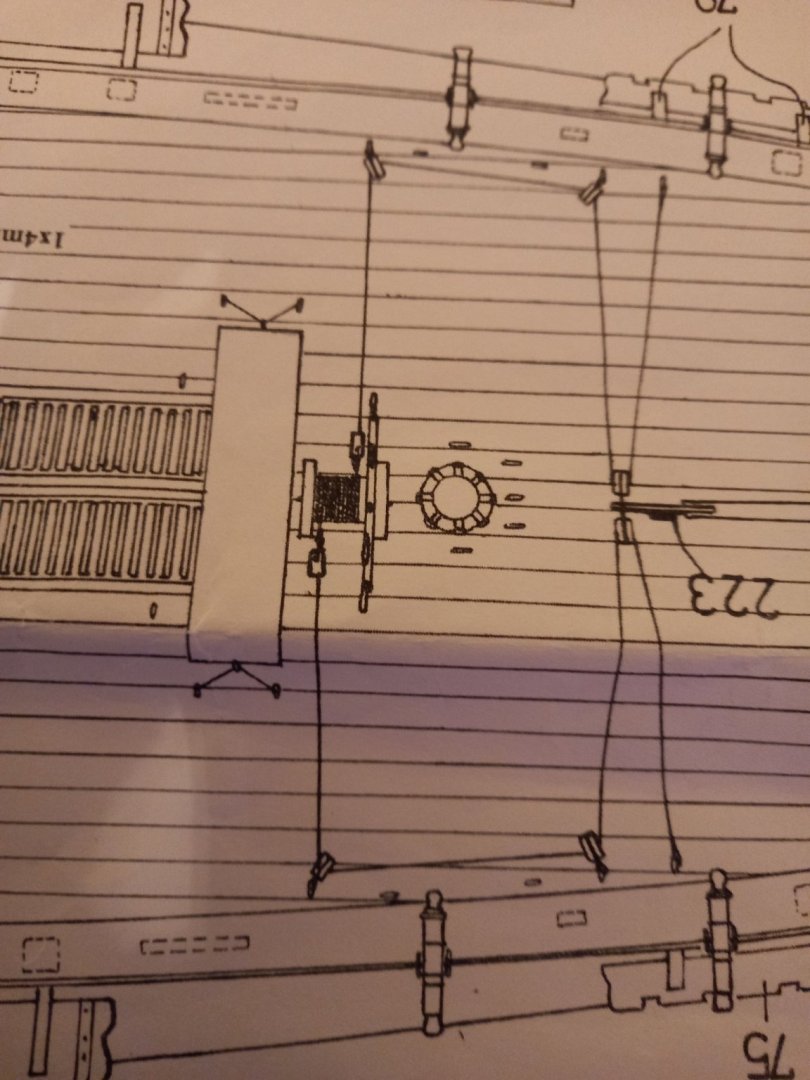
Change of tack here. Instead of following the instructions to continue with the hull fittings I have followed the blog by Dashi and started on the deck fittings. First few fittings went rather well Moving onto the Capstan and although the fittings weren't the best I decided to turn down the ends of the 8 mm Dowel and then cut slots to take the vertical Whelps. This has worked reasonably well Next up is the Binnacle assembly and I can't see any other place other than above the area between the ships wheel and the skylight assembly. I have looked at a few blogs and cannot see such a thing as this and see from some photographs that the compass his housed in a small cuboard and wonder if I should try to make something similar. Here is the drawings of what is supplied be the kit. If there are any Endeavour builders out there some help here would be of value. Thanks


-
Beautiful looking stern. May I ask did the name come with the kit or did you have to make the letters yourself ?
- 310 replies
-
- 1
-
-
- Diana
- Caldercraft
- (and 1 more)
-
Brilliant Allan you amaze me we how quickly you research stuff. I always seem to take a wrong turn somewhere and end up off track . Even on here I never seem to get what I need when doing searches but thankfully there is always help from someone such as your good self. So thank you once more. Best regards Dave.
-
Thank you for searching that out for me Allan. As they say here in the uk . There are many ways to skin a cat. No idea where that saying came from and not very suitable these days . I am truely amazed at how many different ways the period ships are put together. I just wish I were 50 years younger when I started this hobby, so as to give me enough time to learn it all. Best regards Dave
-
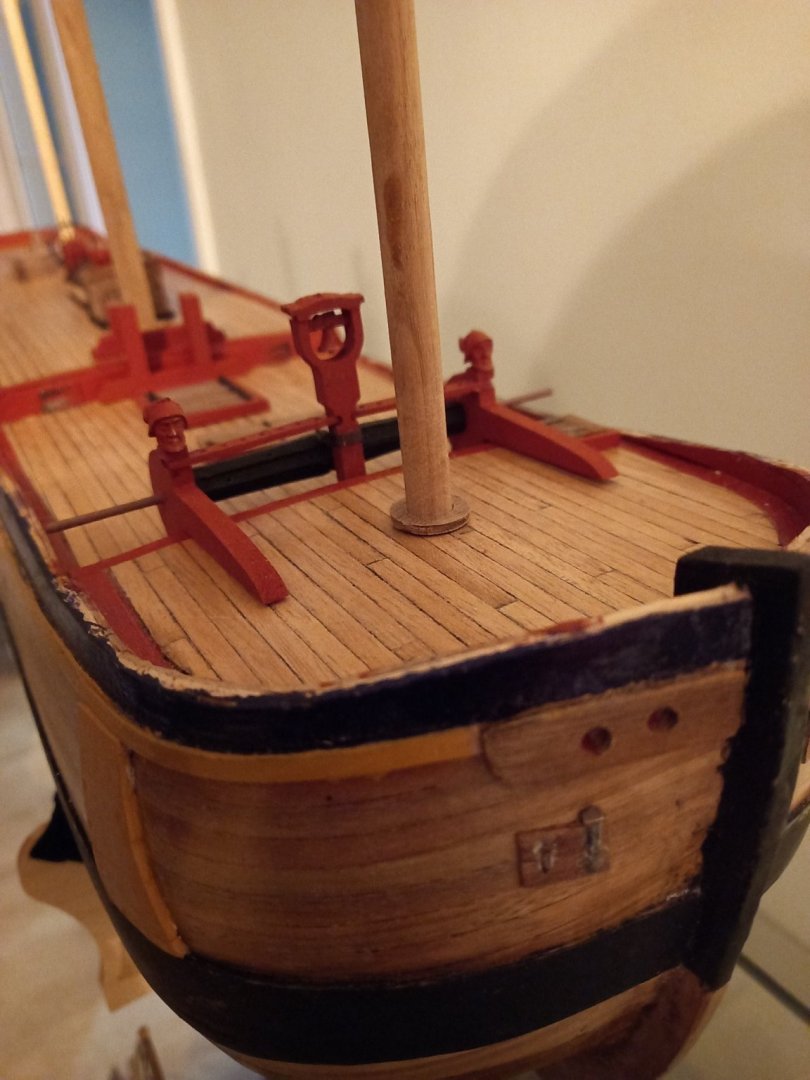
After fitting the new position of the Naval hoods and the holes drilled through there is now sufficient room for the anchor ropes. Anchor lines also fitted and painted.

-
Sorry I did not catch this earlier as it did not flag up for some reason. Thank you again for searching this out for me. Am I correct in thinking this would be a plank on frame model and this wale would be fitted before the planking was fitted? Great close up diagrams are always the best! I think.Best regards Dave
-
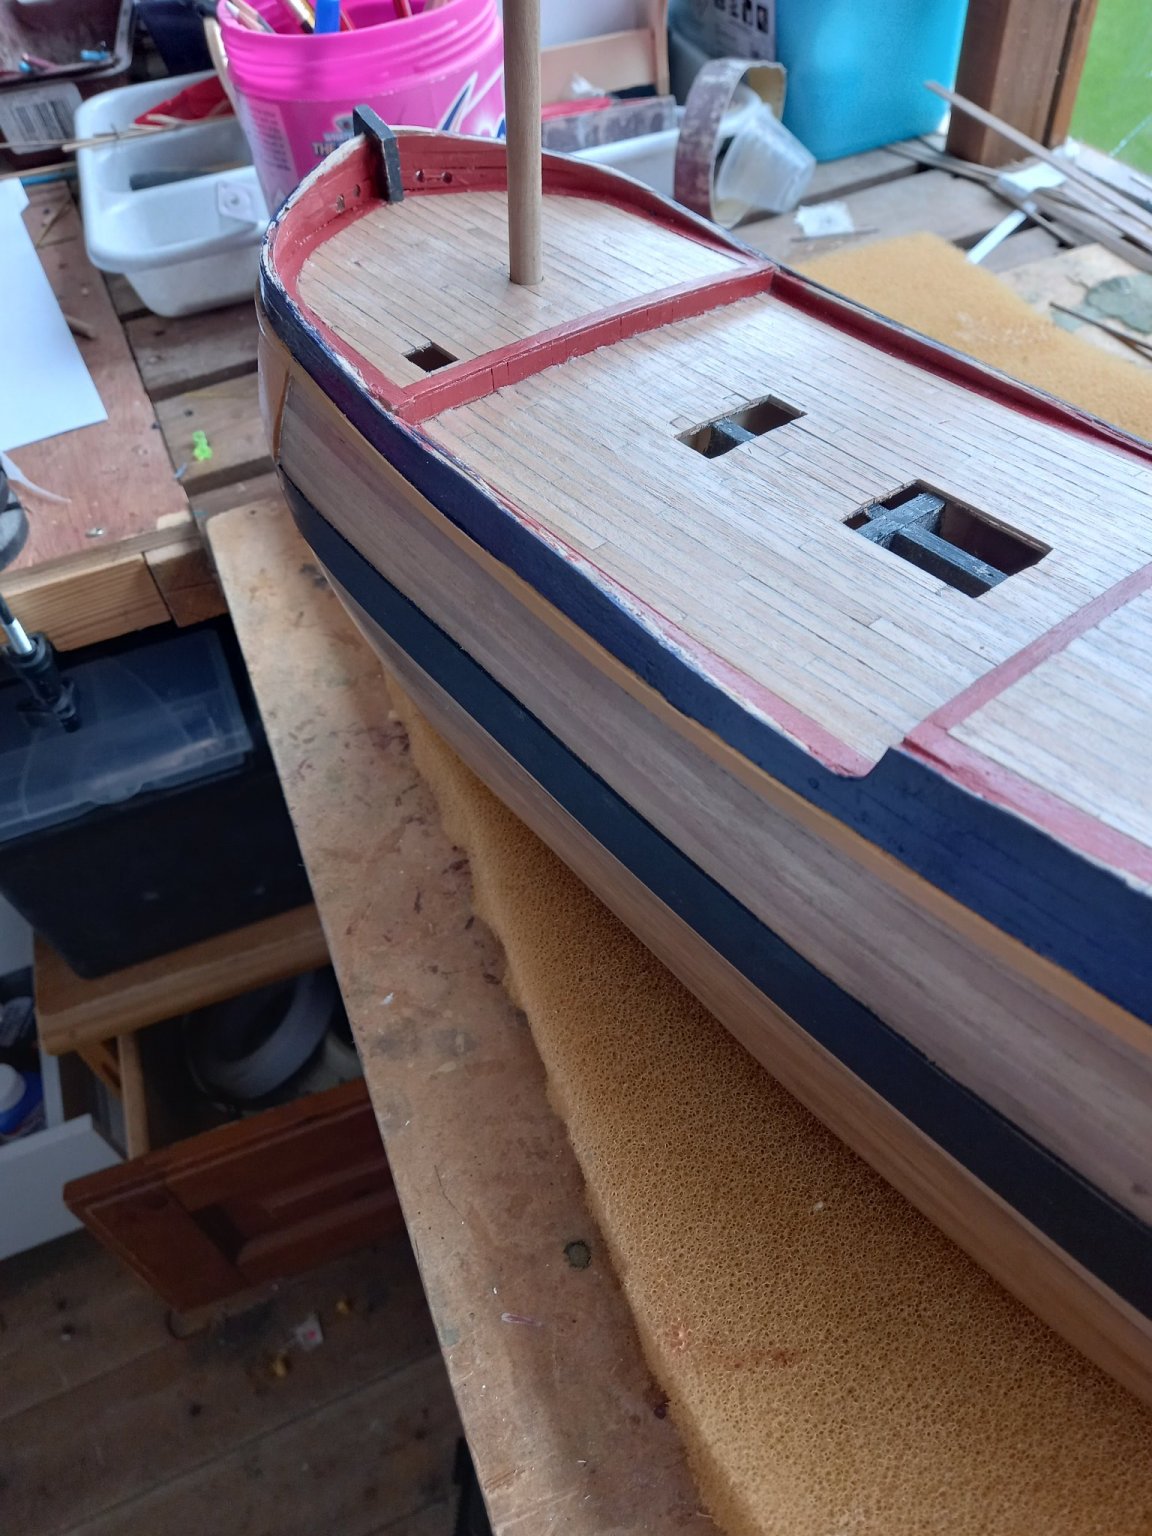
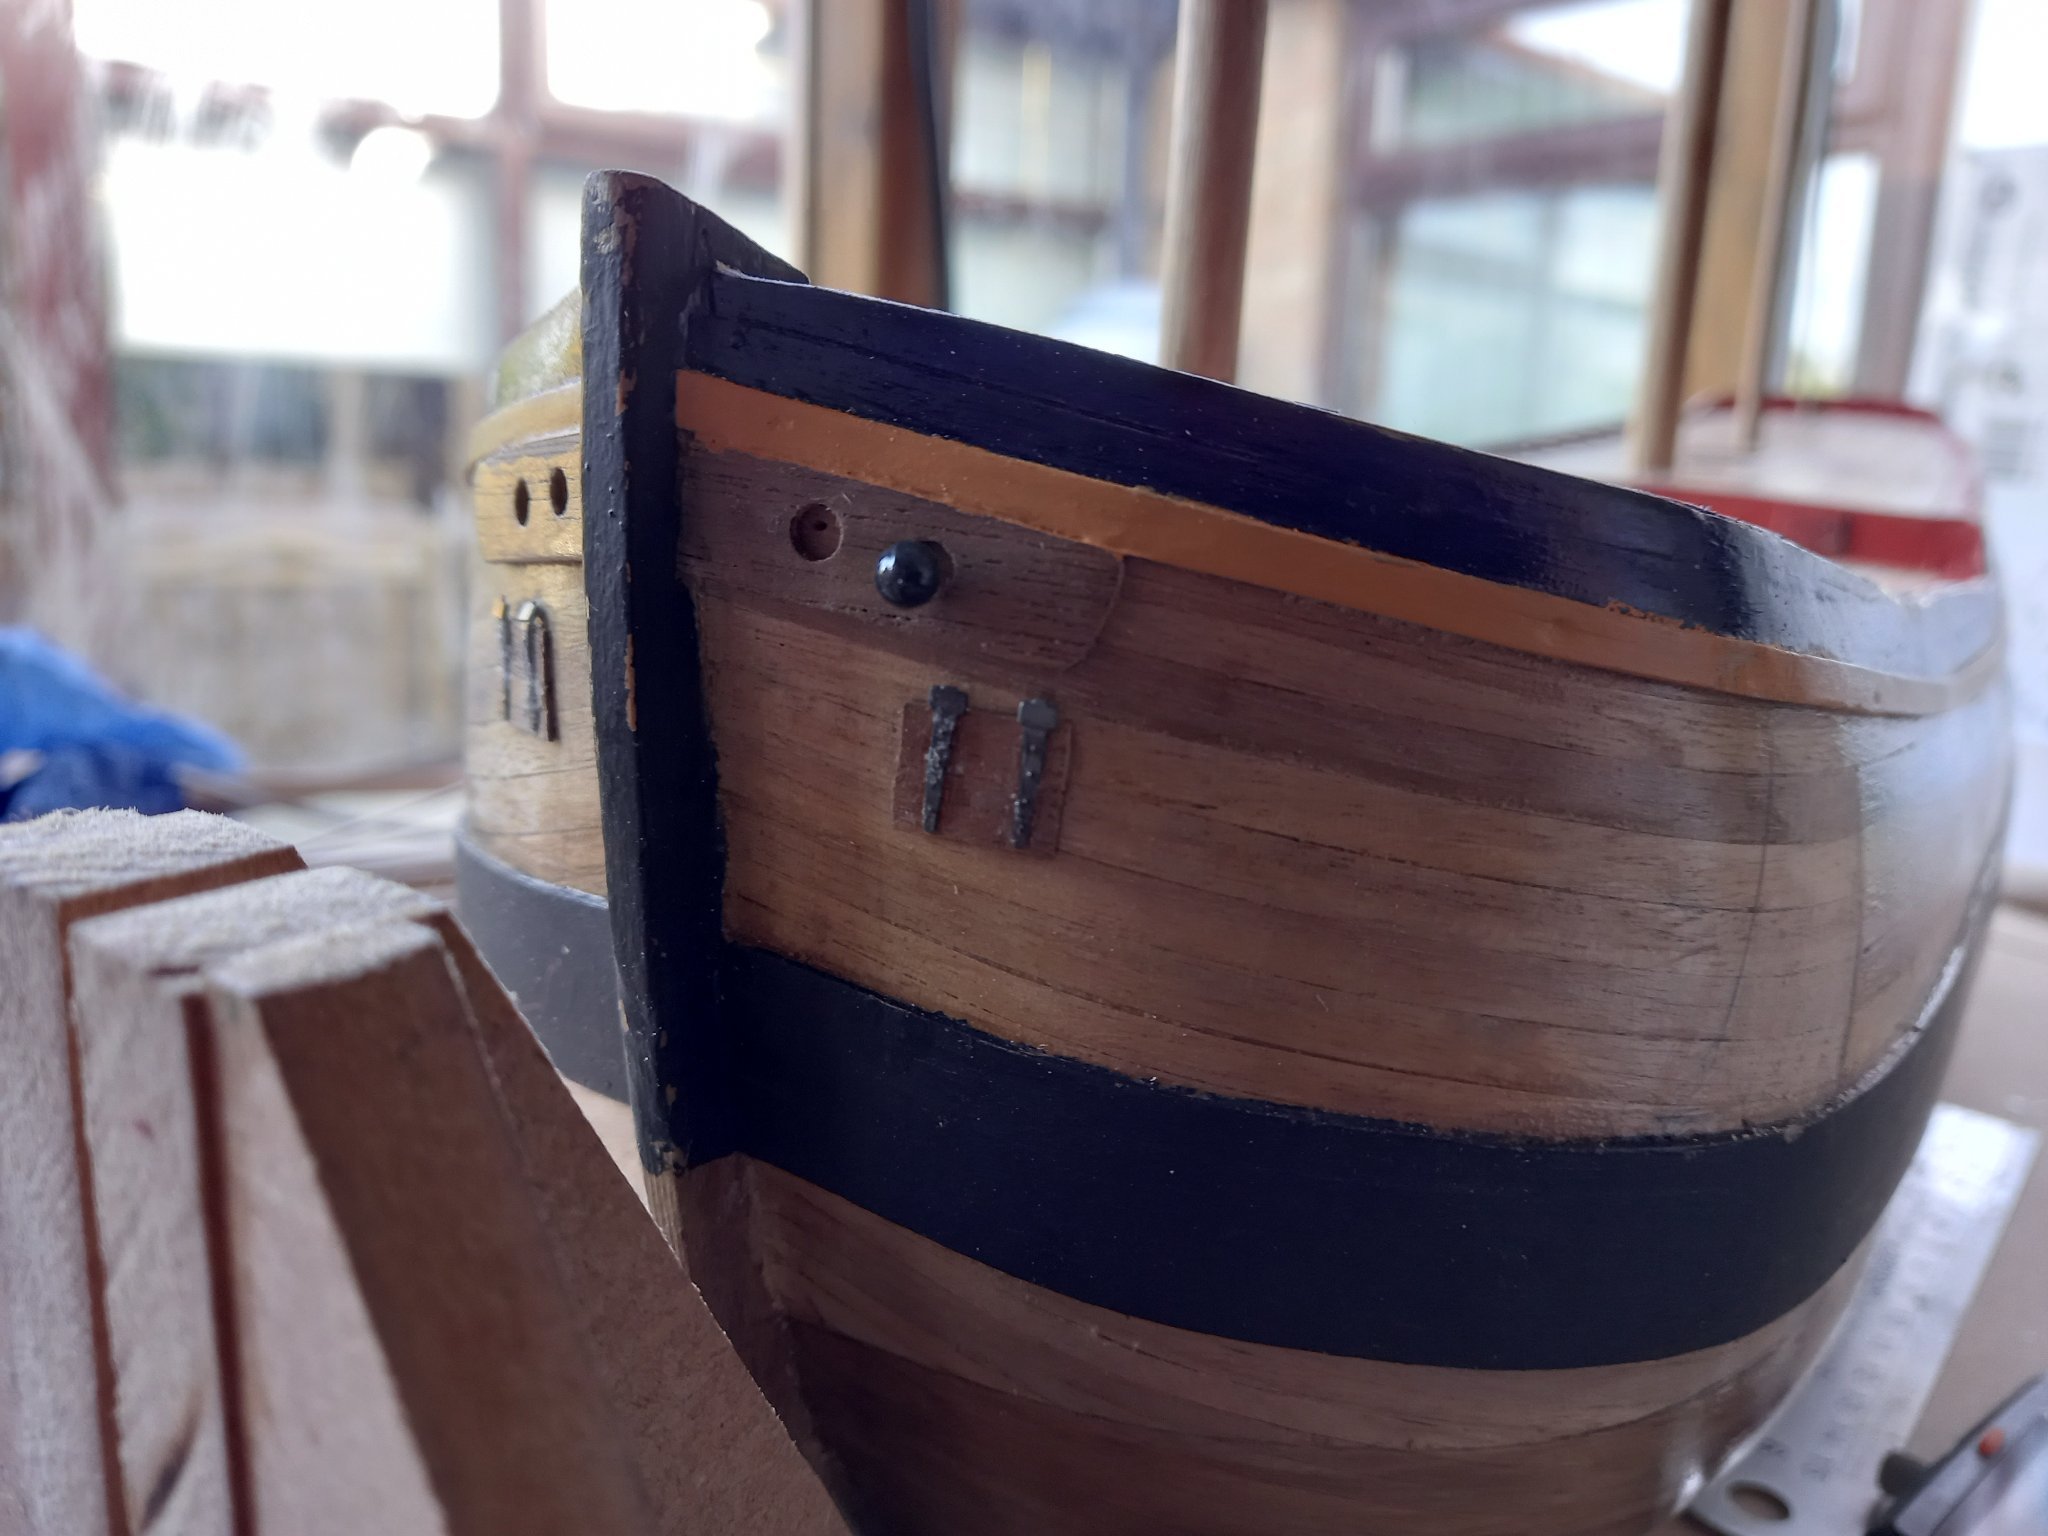
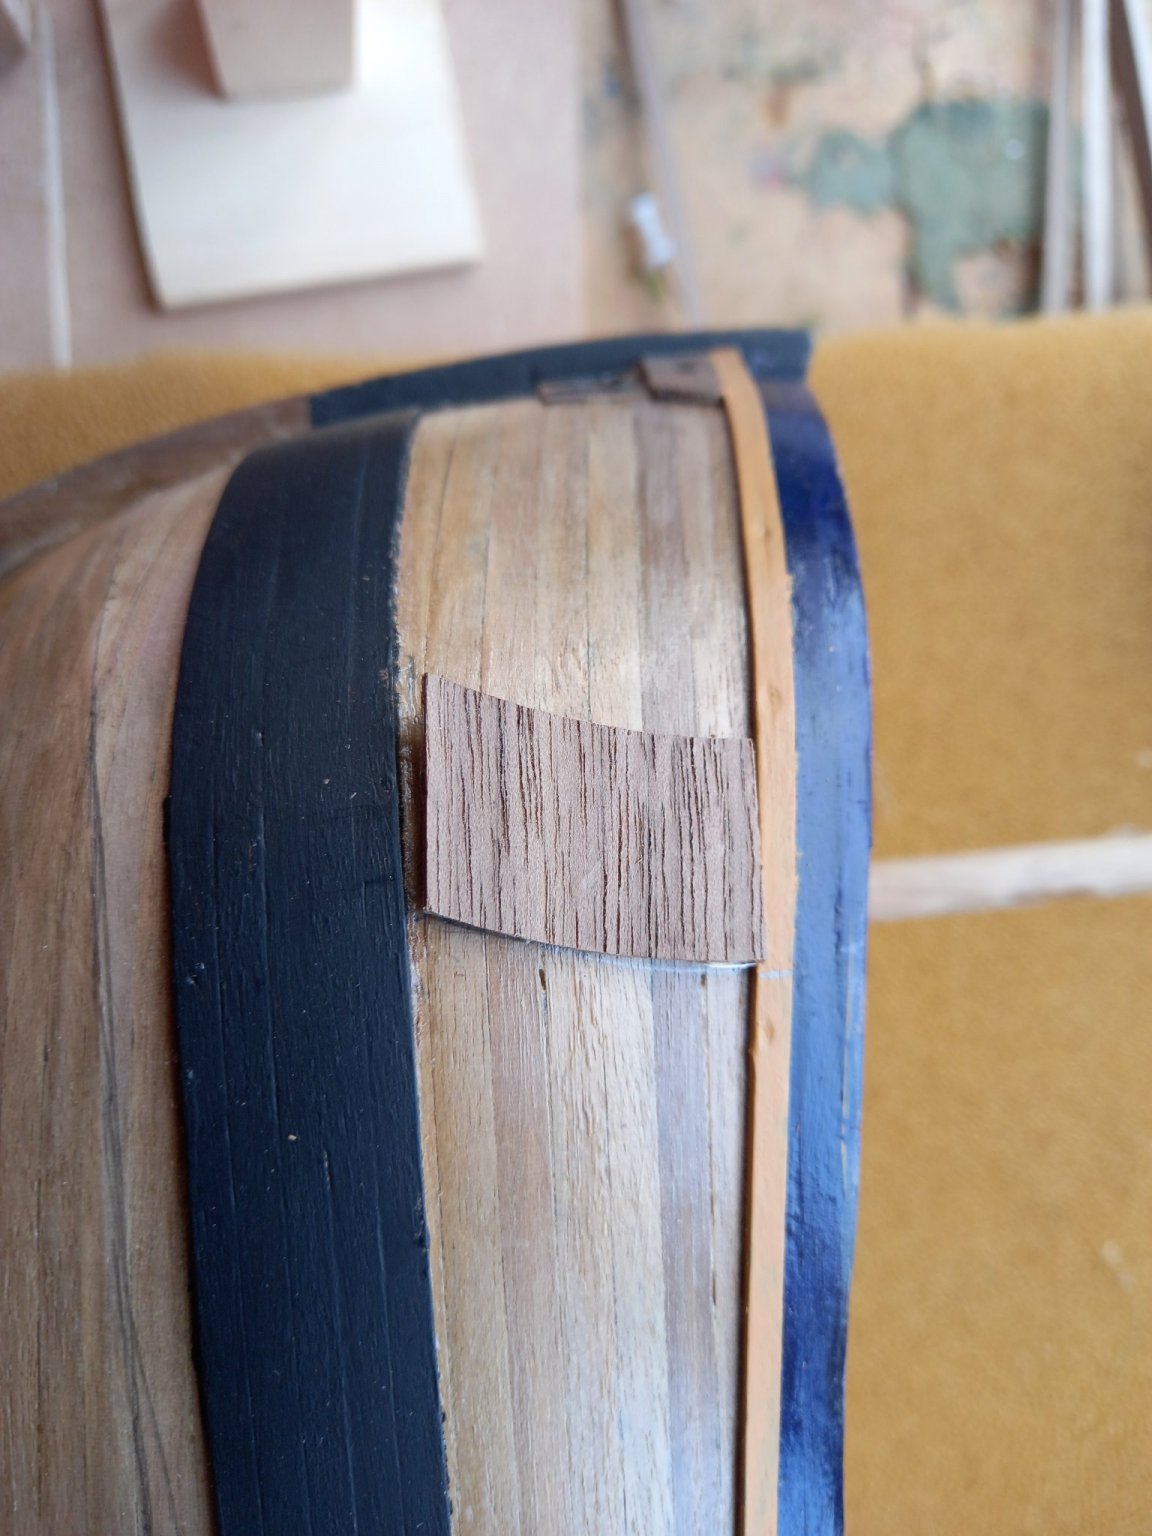
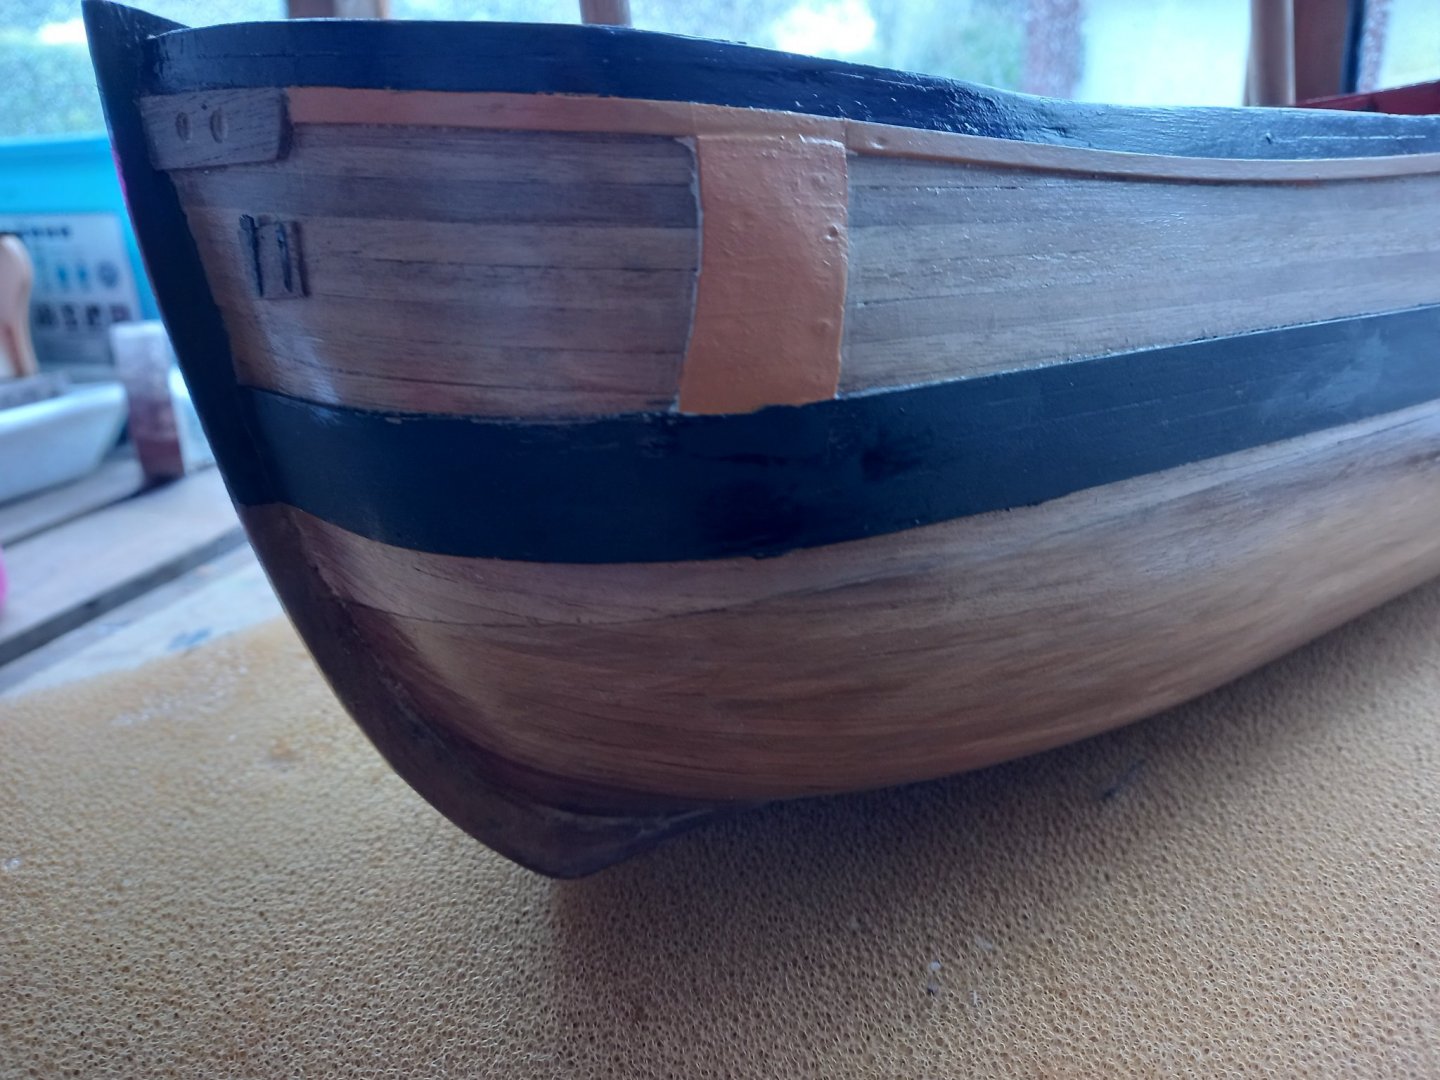
Just realized I think O have made my first major mistake or perhaps not myself. Looking at the two hawse plates just which I have lined up just under the upper wale. Fortunately as yet I have not drilled the holes out yet. I have checked other blogs and they too have had the same problem and have fiited the naval hoods higher up than what is on the drawing.so I will need to do the same and cut away the upper wale. I am kicking my self for not noticing this earlier as a few people have documented the problem with this build. Hopefully I can sort this without any damage to the hull when removing naval. hoods. After removing the naval hoods and a section of wale you can see from the new position of the pins through the hawse holes that there should be enough clearance for the anchor rope to clear the deck.

-
Great look there Lyle and and interesting formula. Keep up the excelent work and I look forward to your progress. Well done! perhaps one day I will try a bit more of a weathered look. I definately like yours.
-
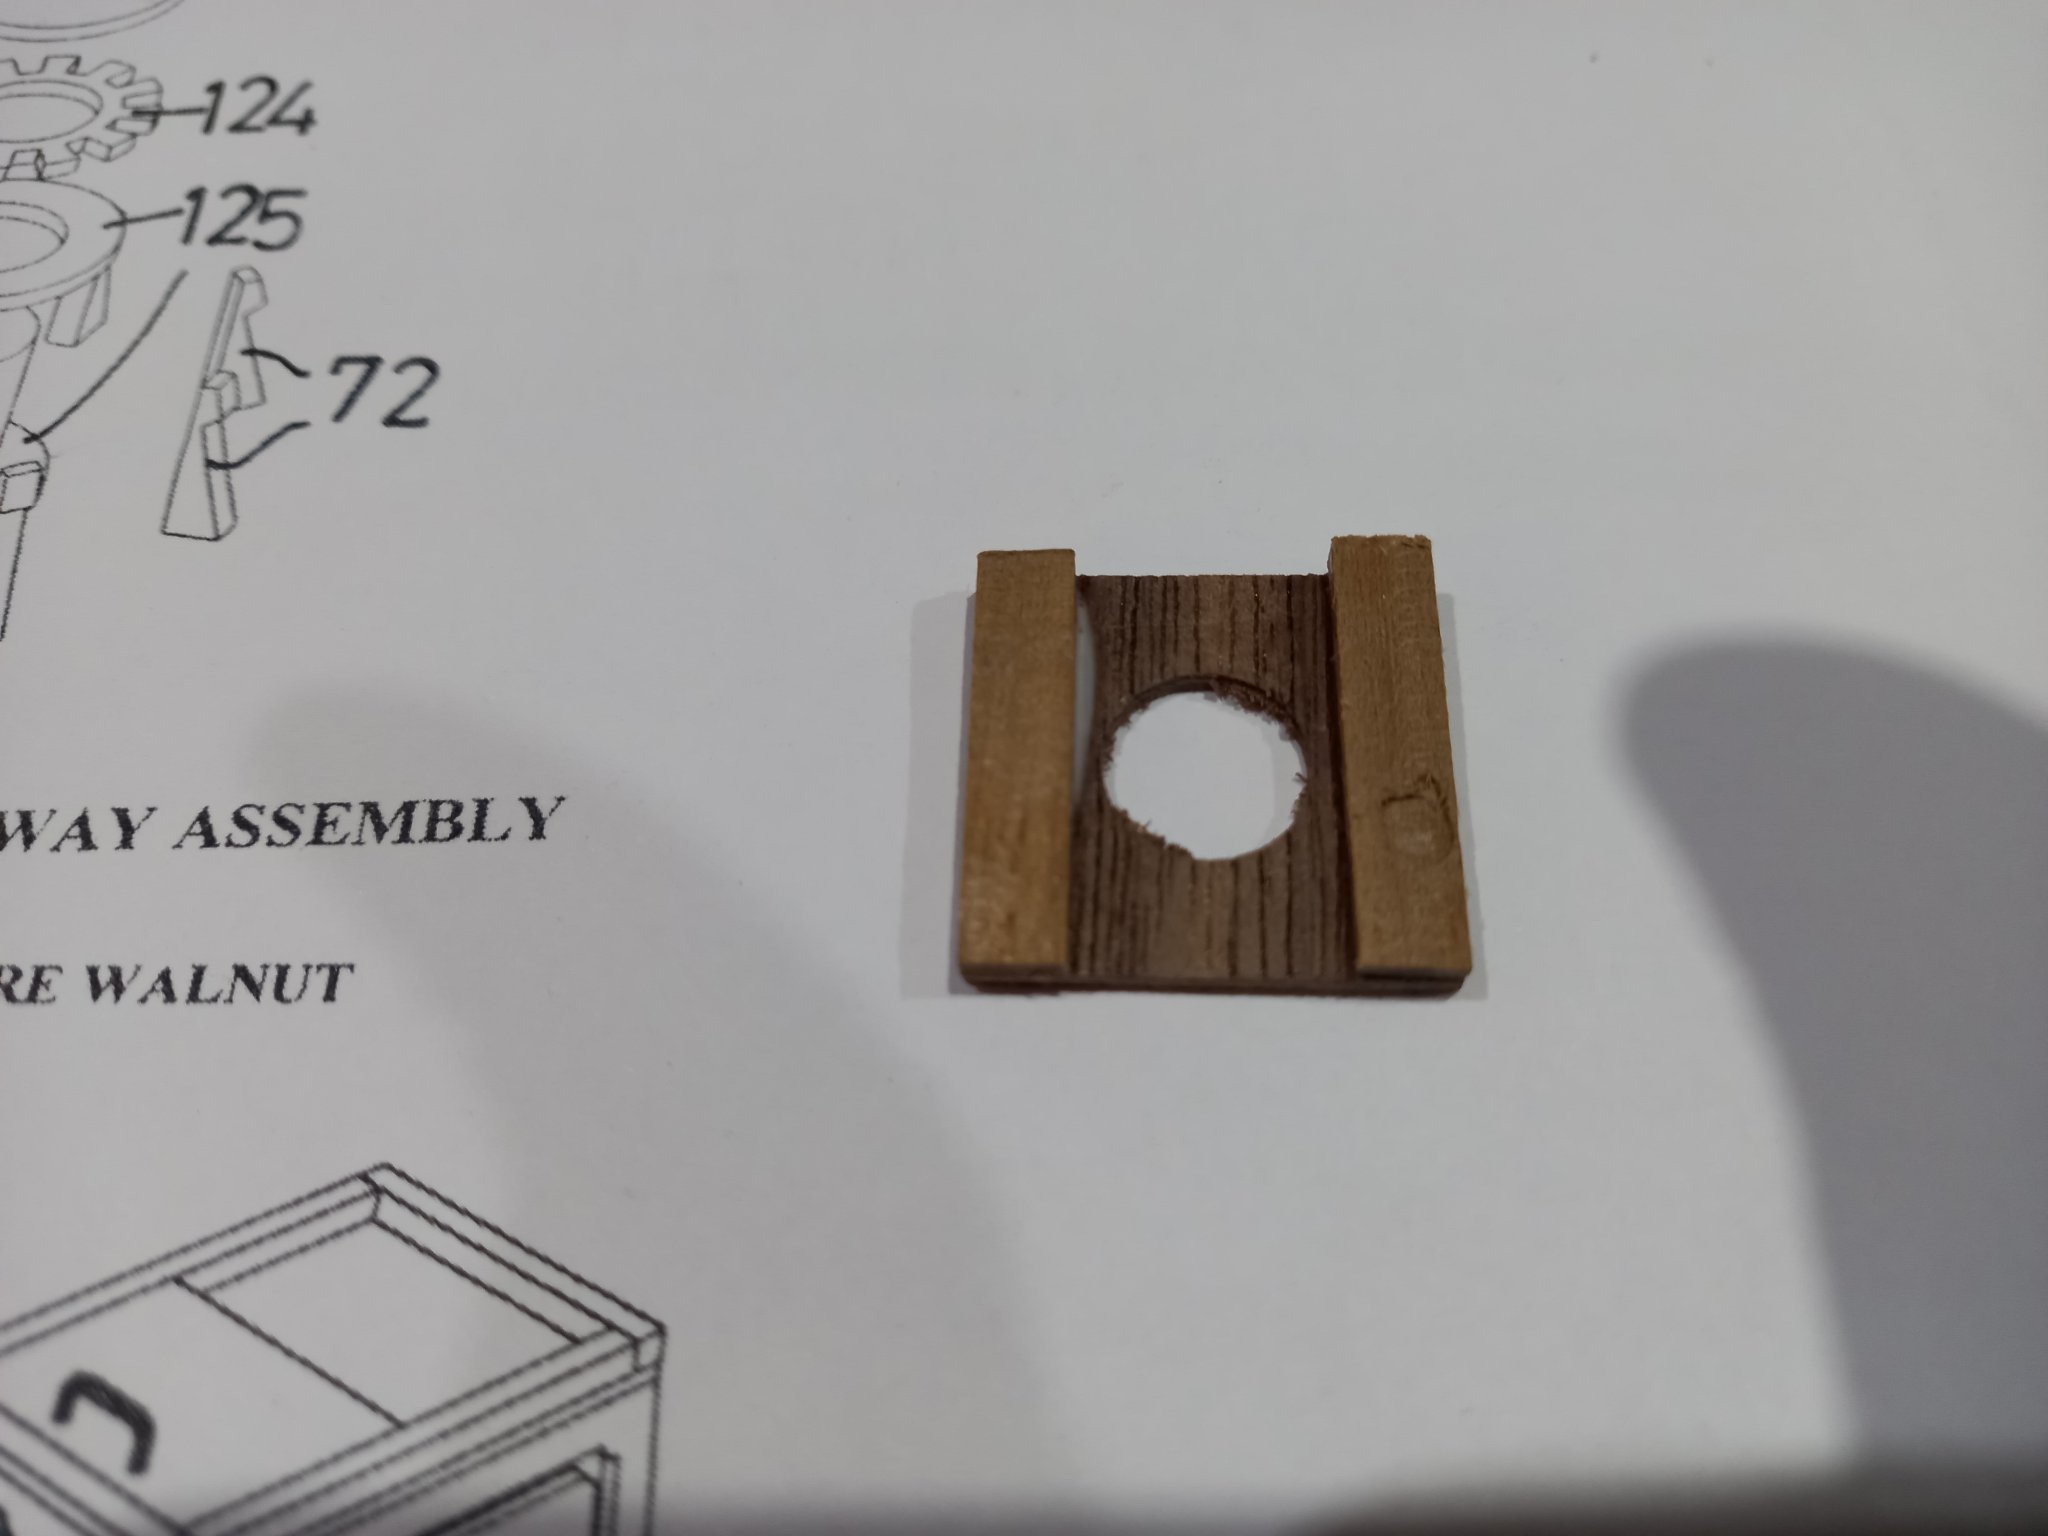
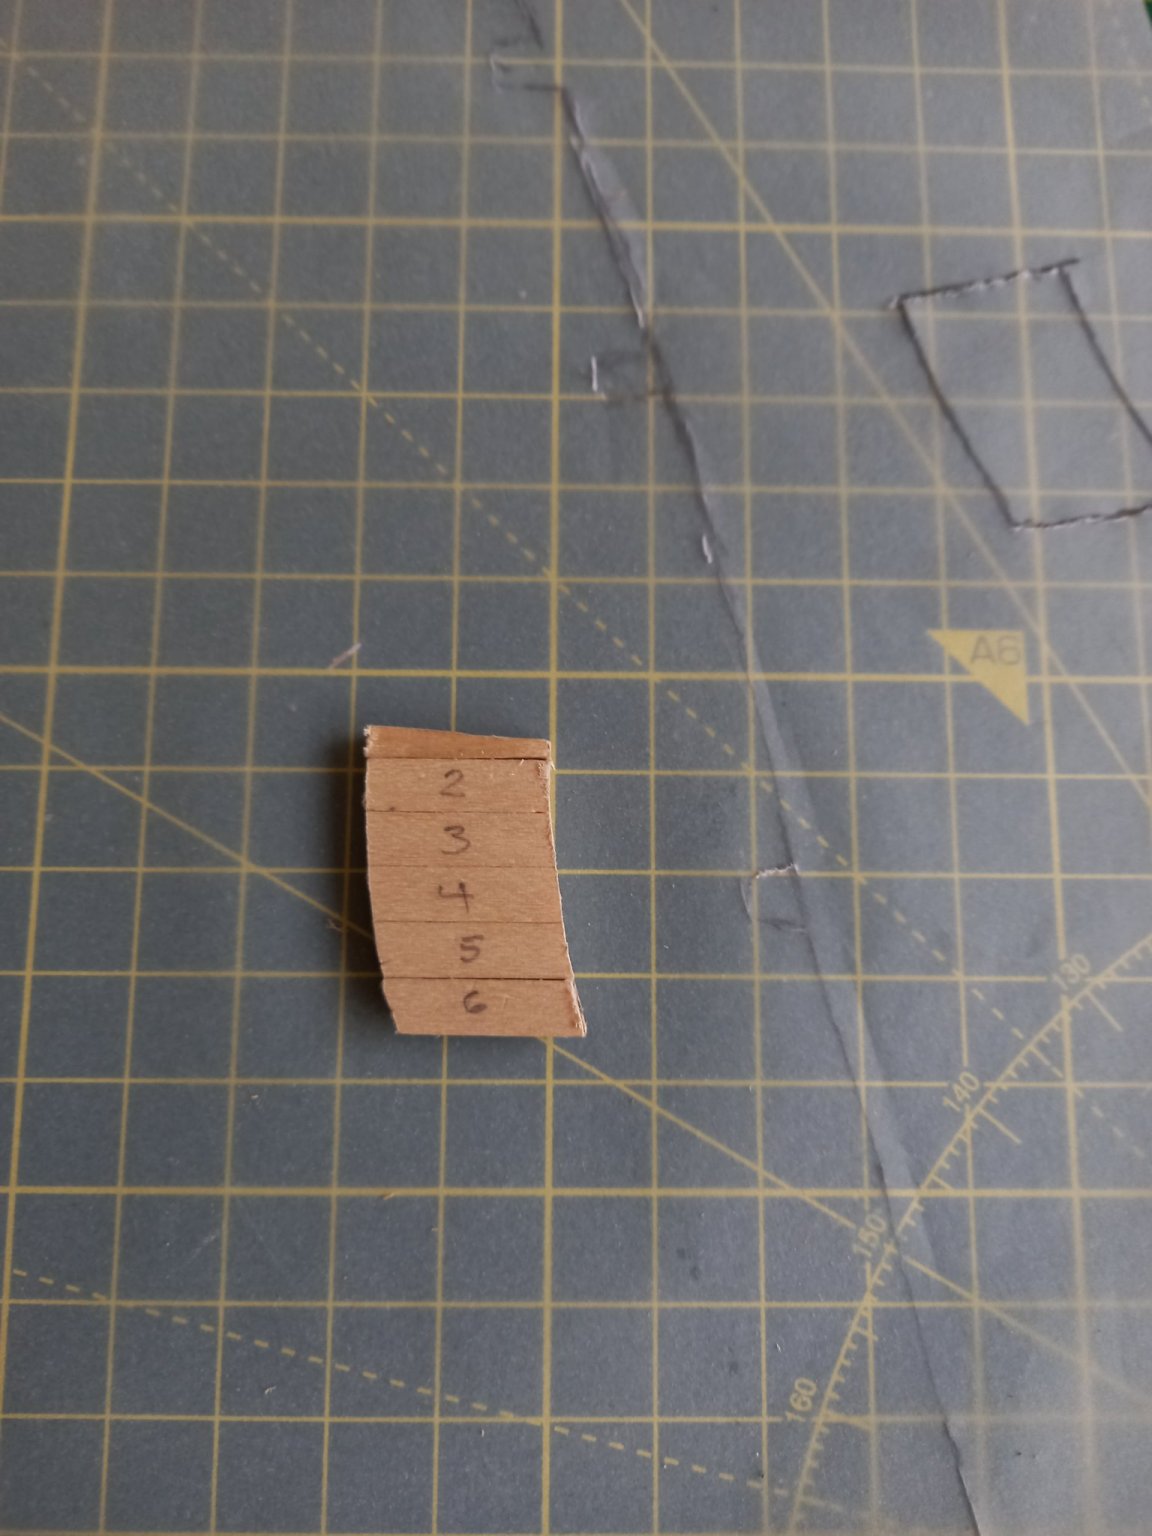
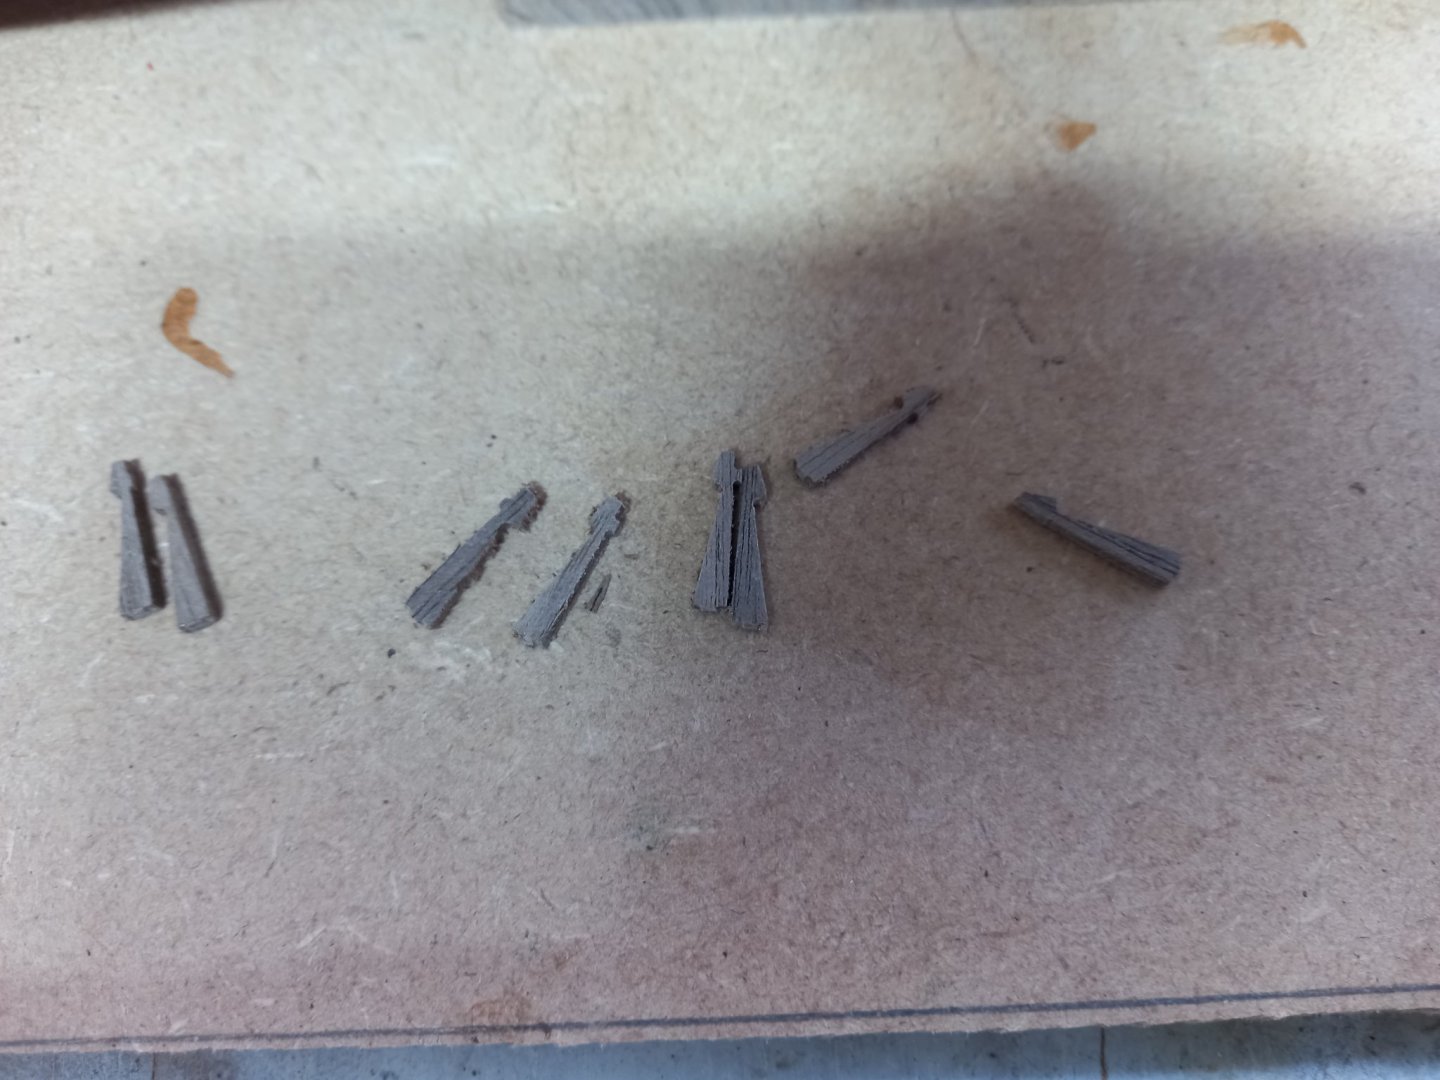
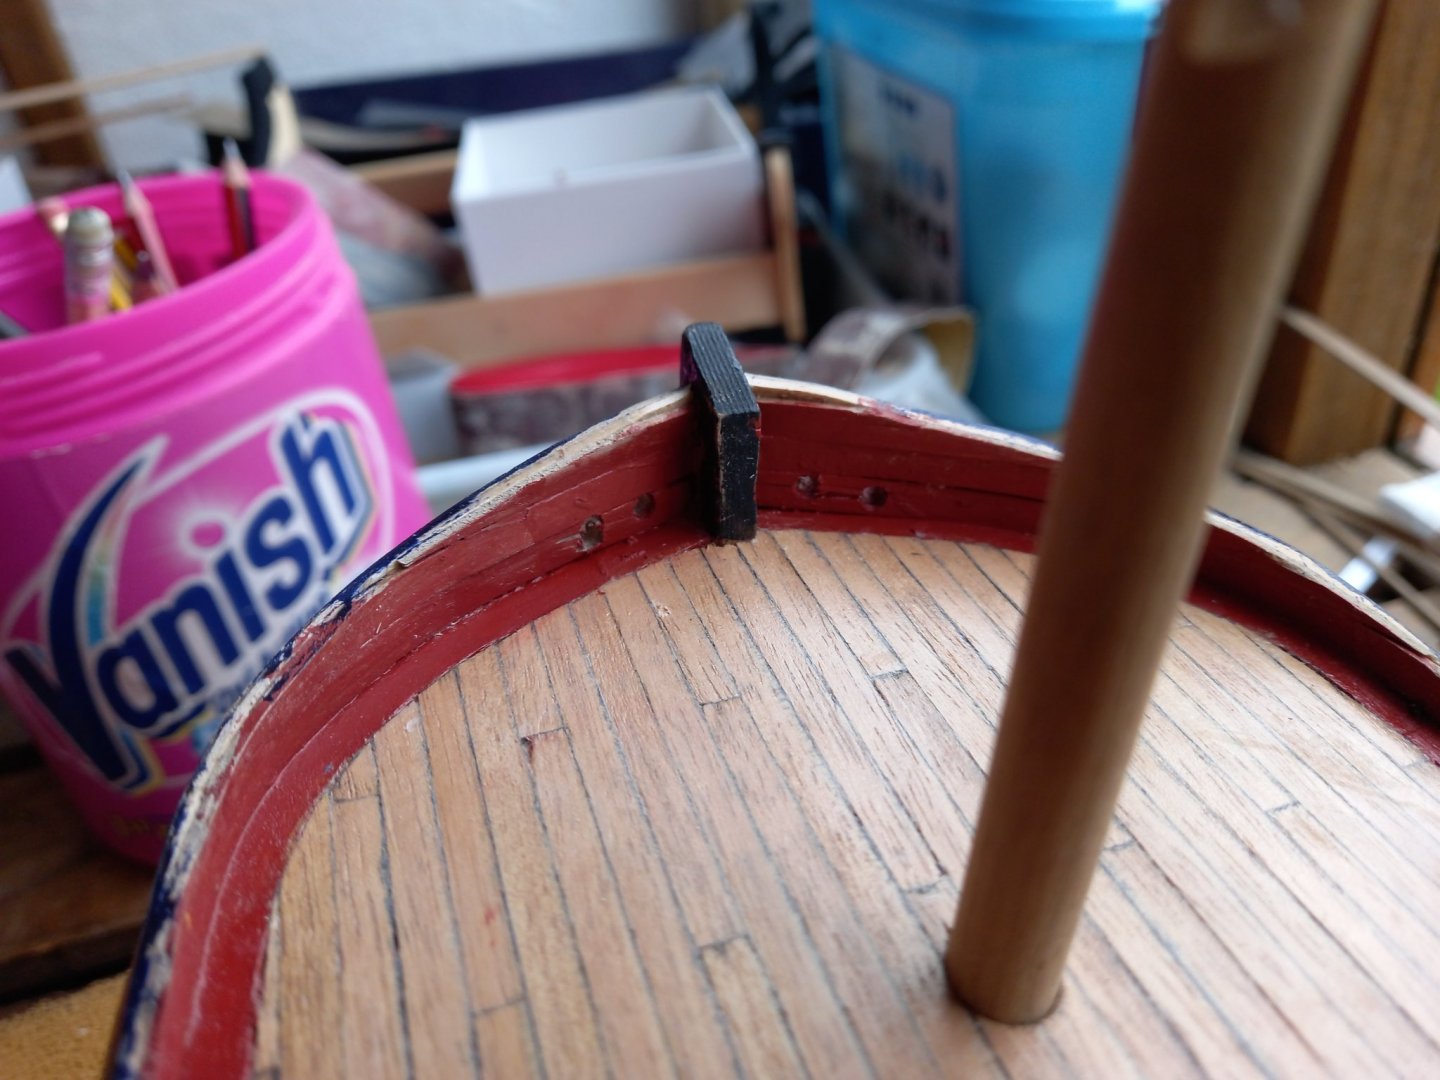
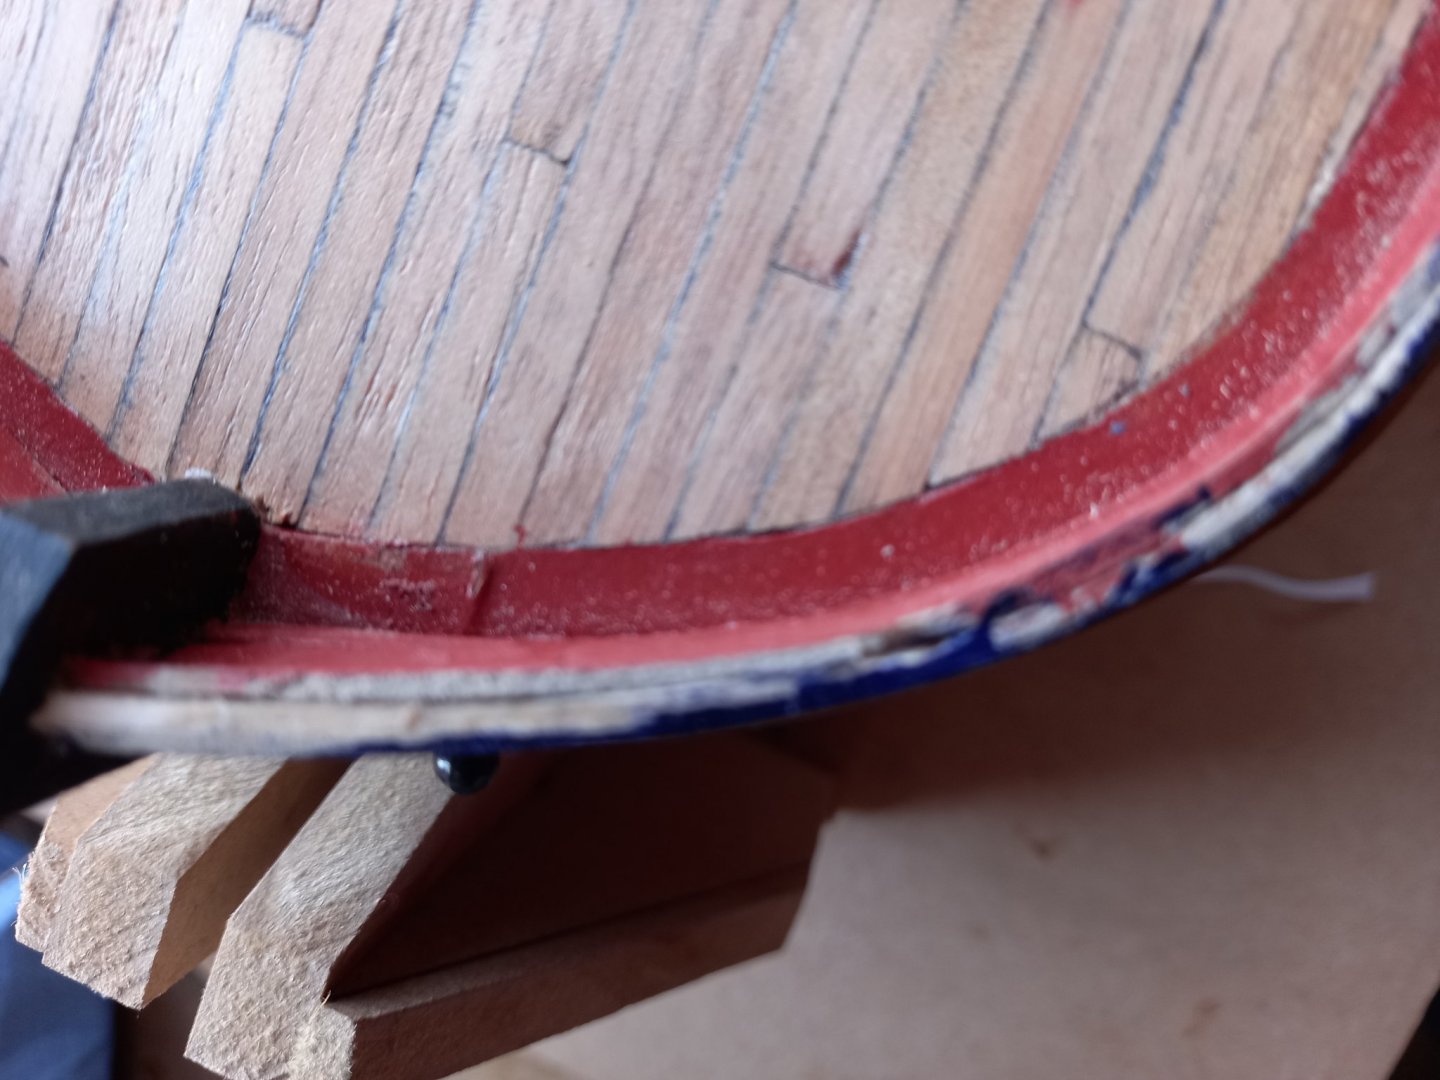
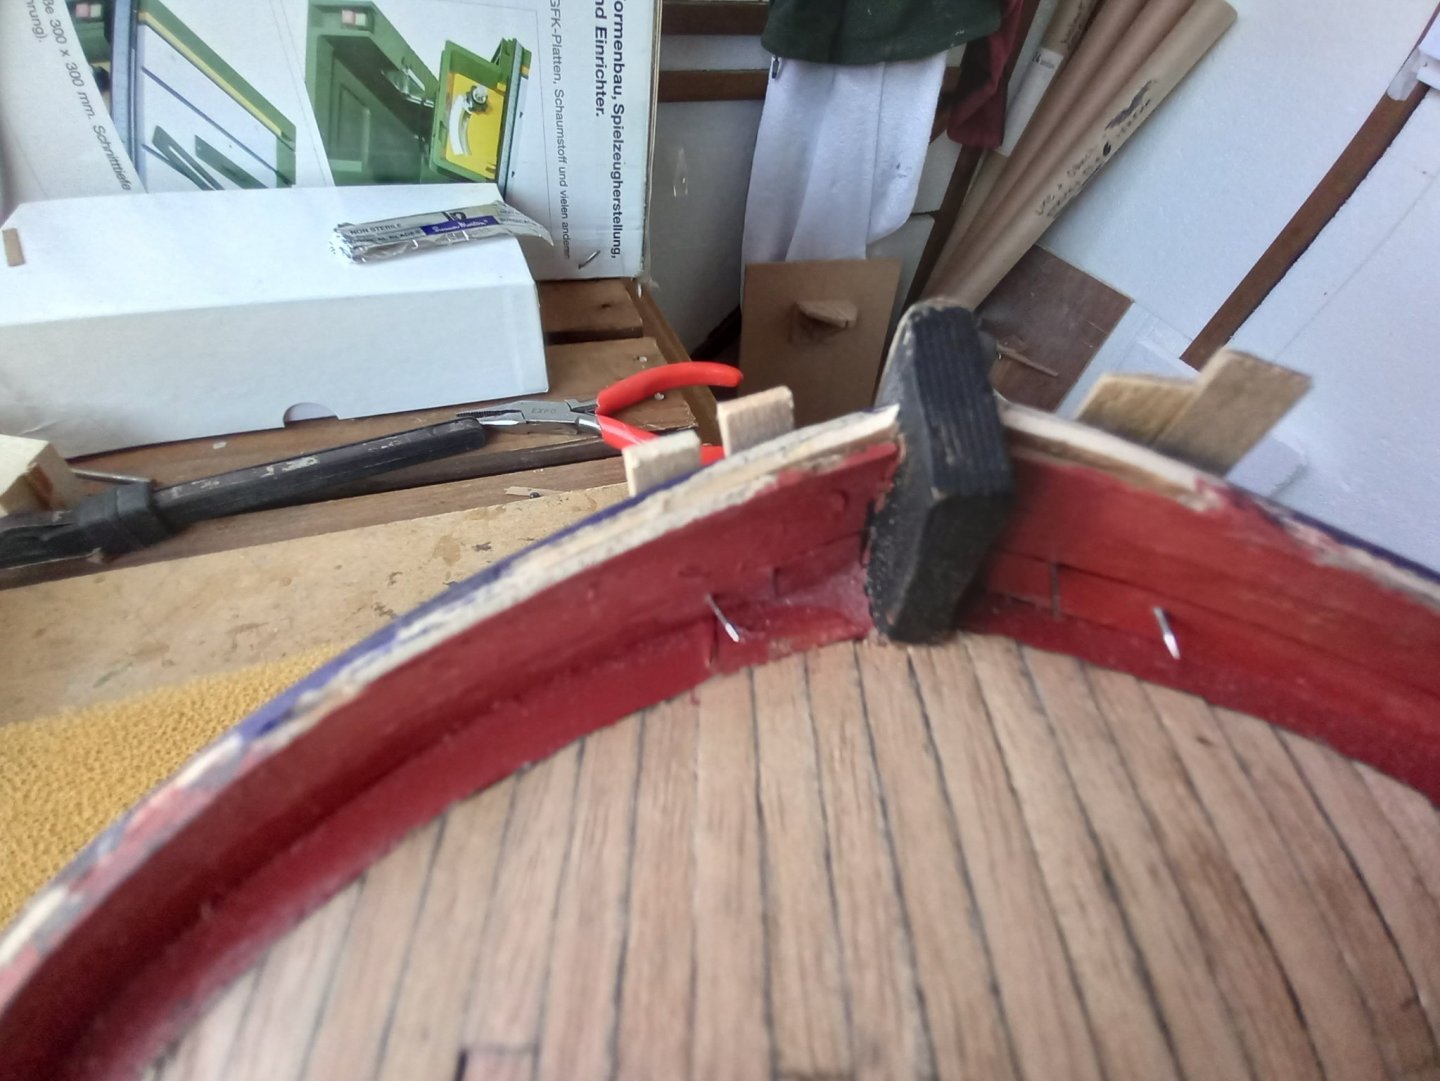
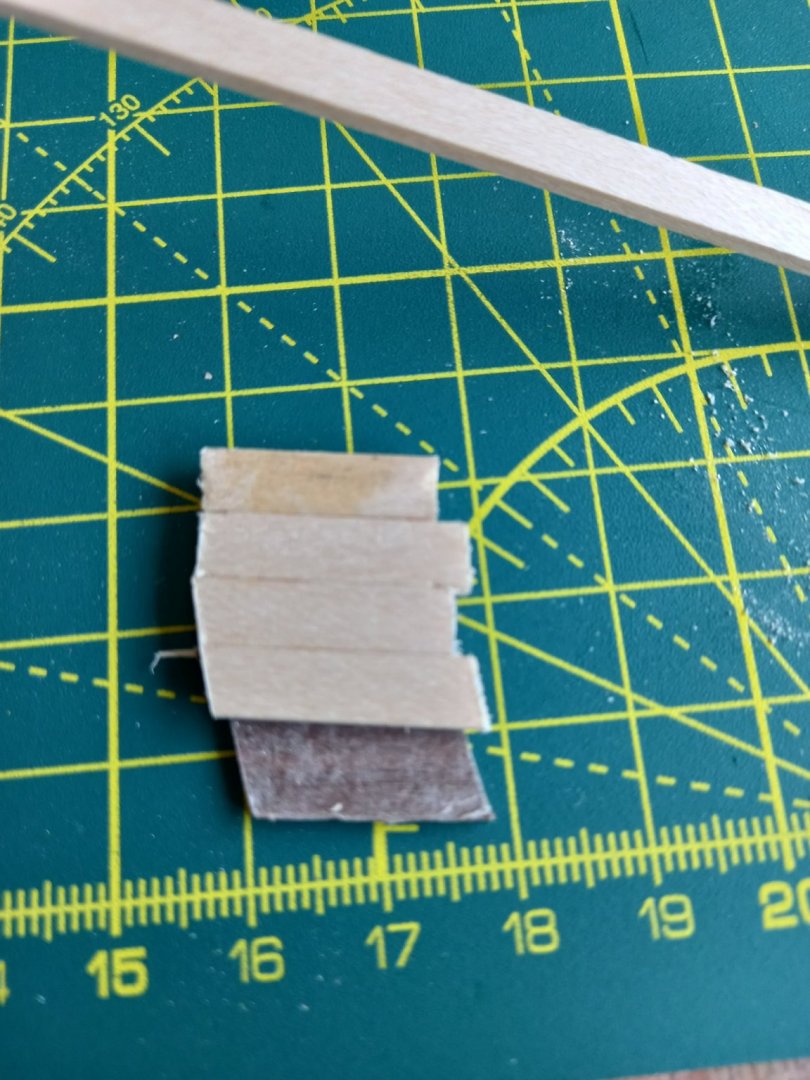
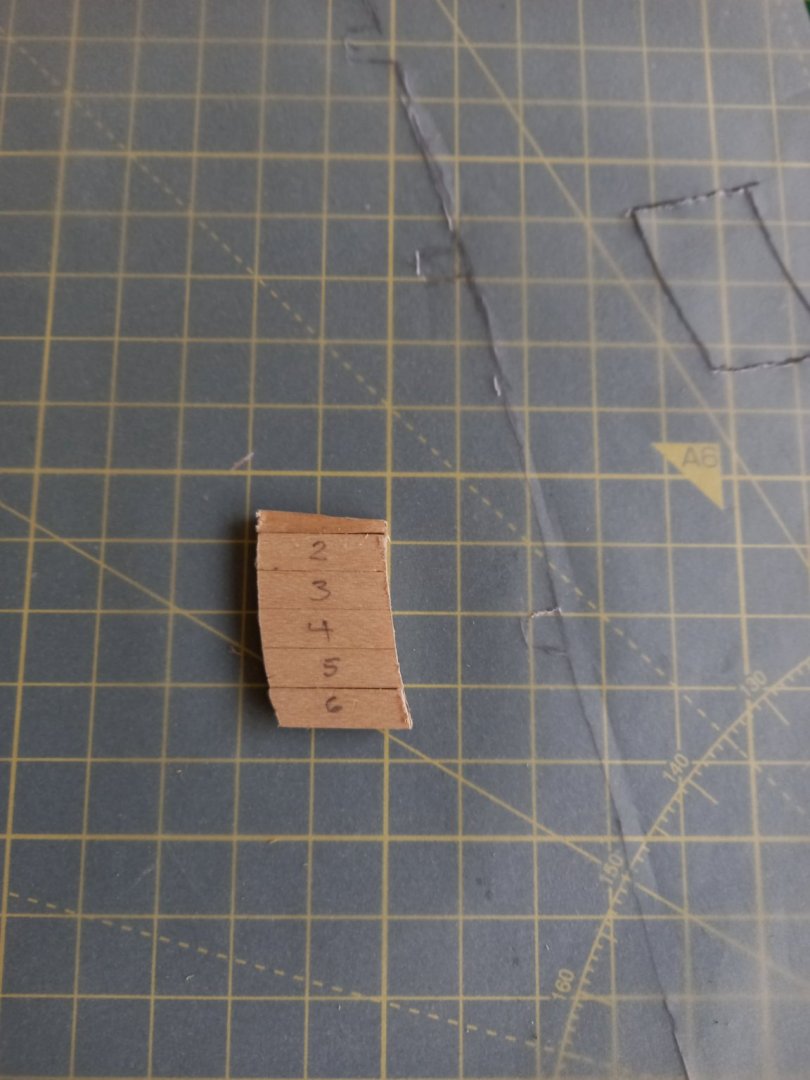
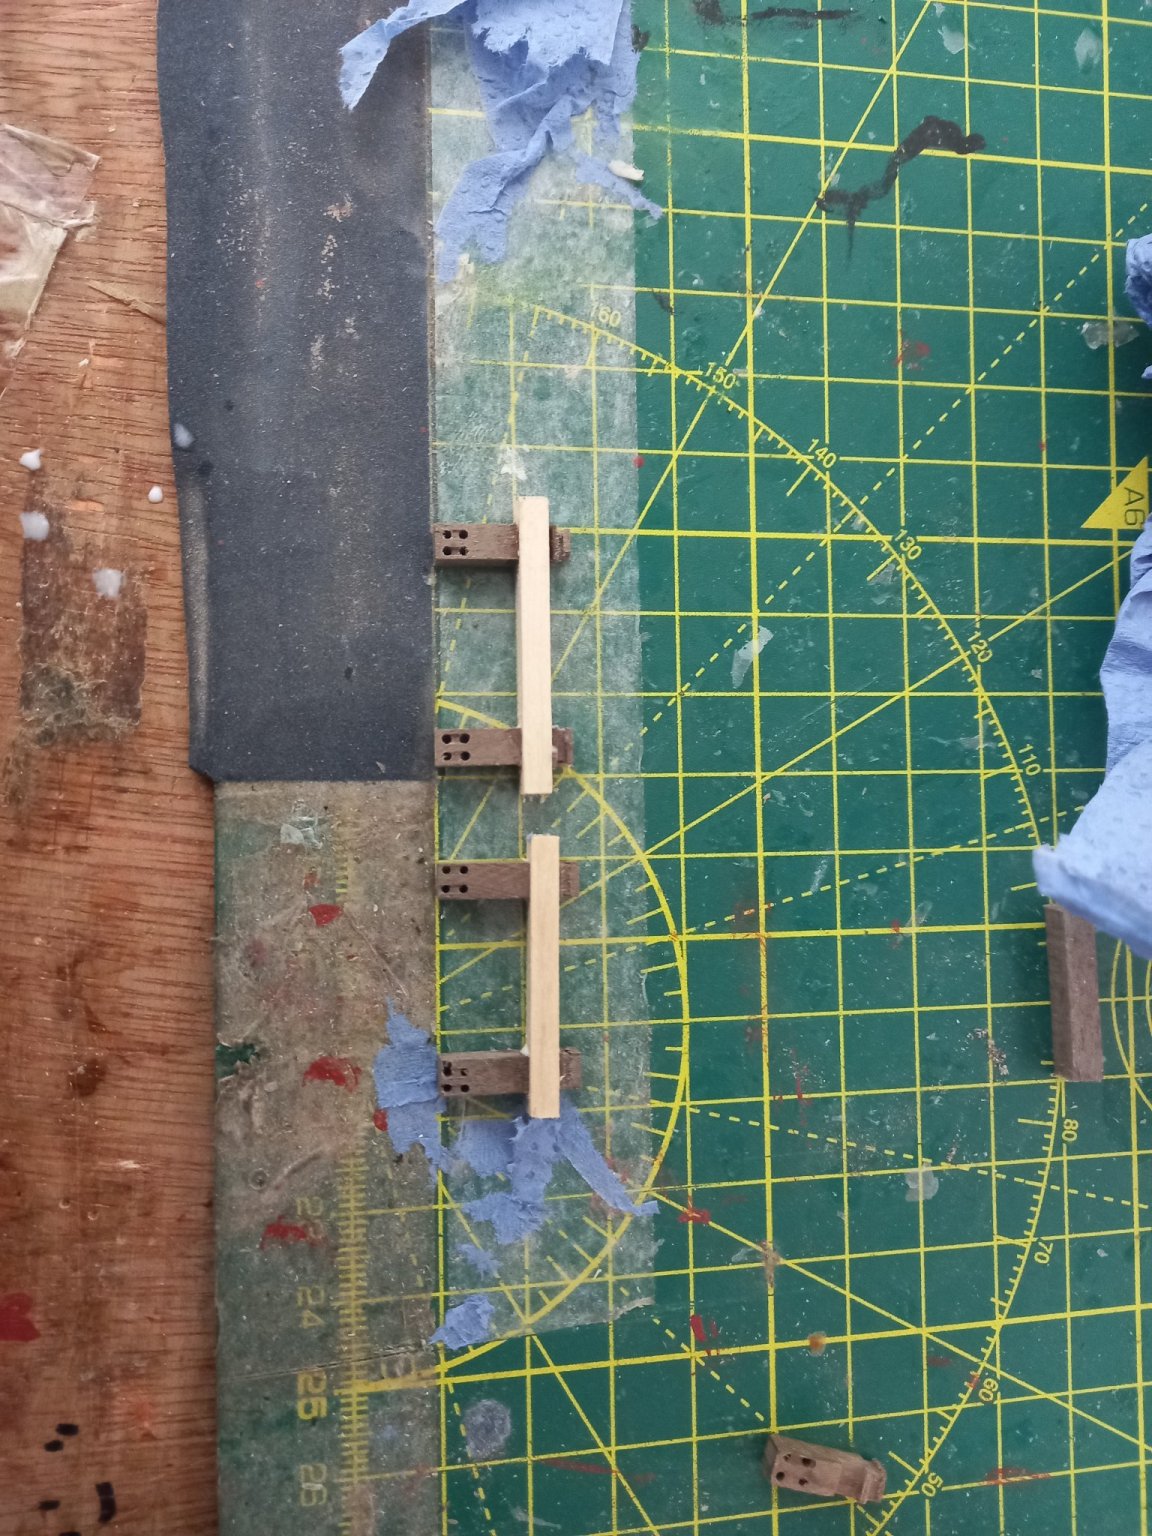
Fitted Rudder pintles and bushes which I found very fiddly.Then I fitted the rudder straps first then temporarily secured the rudder with tape whilst gluing and pinning the longer rudder staps to the hull. Glued Quarter badges using CA glue after paining behind the windows mat black .Started focusing on the anchor linings part no 122 which did not fit. I therefore decided to make new ones with 5mm x 1.5mm Lime strips as can be seen below using double sided tape and extending the strips to enlarge the anchor linings and then shaping them. It will also be necessary to bend the 1.5 mm strips to suit the shape of the hull. Hope this works out ok.


.jpg.b5c279a162f7e20eead59ed93ae90c2a.jpg)