DaveBaxt
-
Posts
1,324 -
Joined
-
Last visited
Content Type
Profiles
Forums
Gallery
Events
Everything posted by DaveBaxt
-
Fantastic build and a credit to the hobby. I am thinking of building the Endeavor by Caldercraft and think your blog would be a great help. Best regards Dave Baxter.
-
Thanks once again for your Input and no doubt you are right . I will have to check my next model more carefully . This being my first period ship I just assumed everything would be made to the correct scale. How wrong could I be.After modifying my tool I thought I had removed all of the burs but alas unfortunately not as I accidently cut one of the lines as I was taking the line underneath the pin rail and I had to do it all again Gggrrrr! The joys of modelling I suppose.The screw driver sound like a very good idea. Best regards Dave
-
Thanks for that and I think a Dremmel will definately be on my shopping list for my next model. Hopefully my next model will be from Caldercraft and with a bit of luck will be smaller of the correct scale. Thanks once again for visiting my blog it is much appreciated. Best regards Dave
-
securing ropes at the belay pin at the base of the mast.
DaveBaxt replied to DaveBaxt's topic in Masting, rigging and sails
I can now see what you mean and it makes sense when you think about it. Thanks again for clearing that up for me. Best regards Dave -
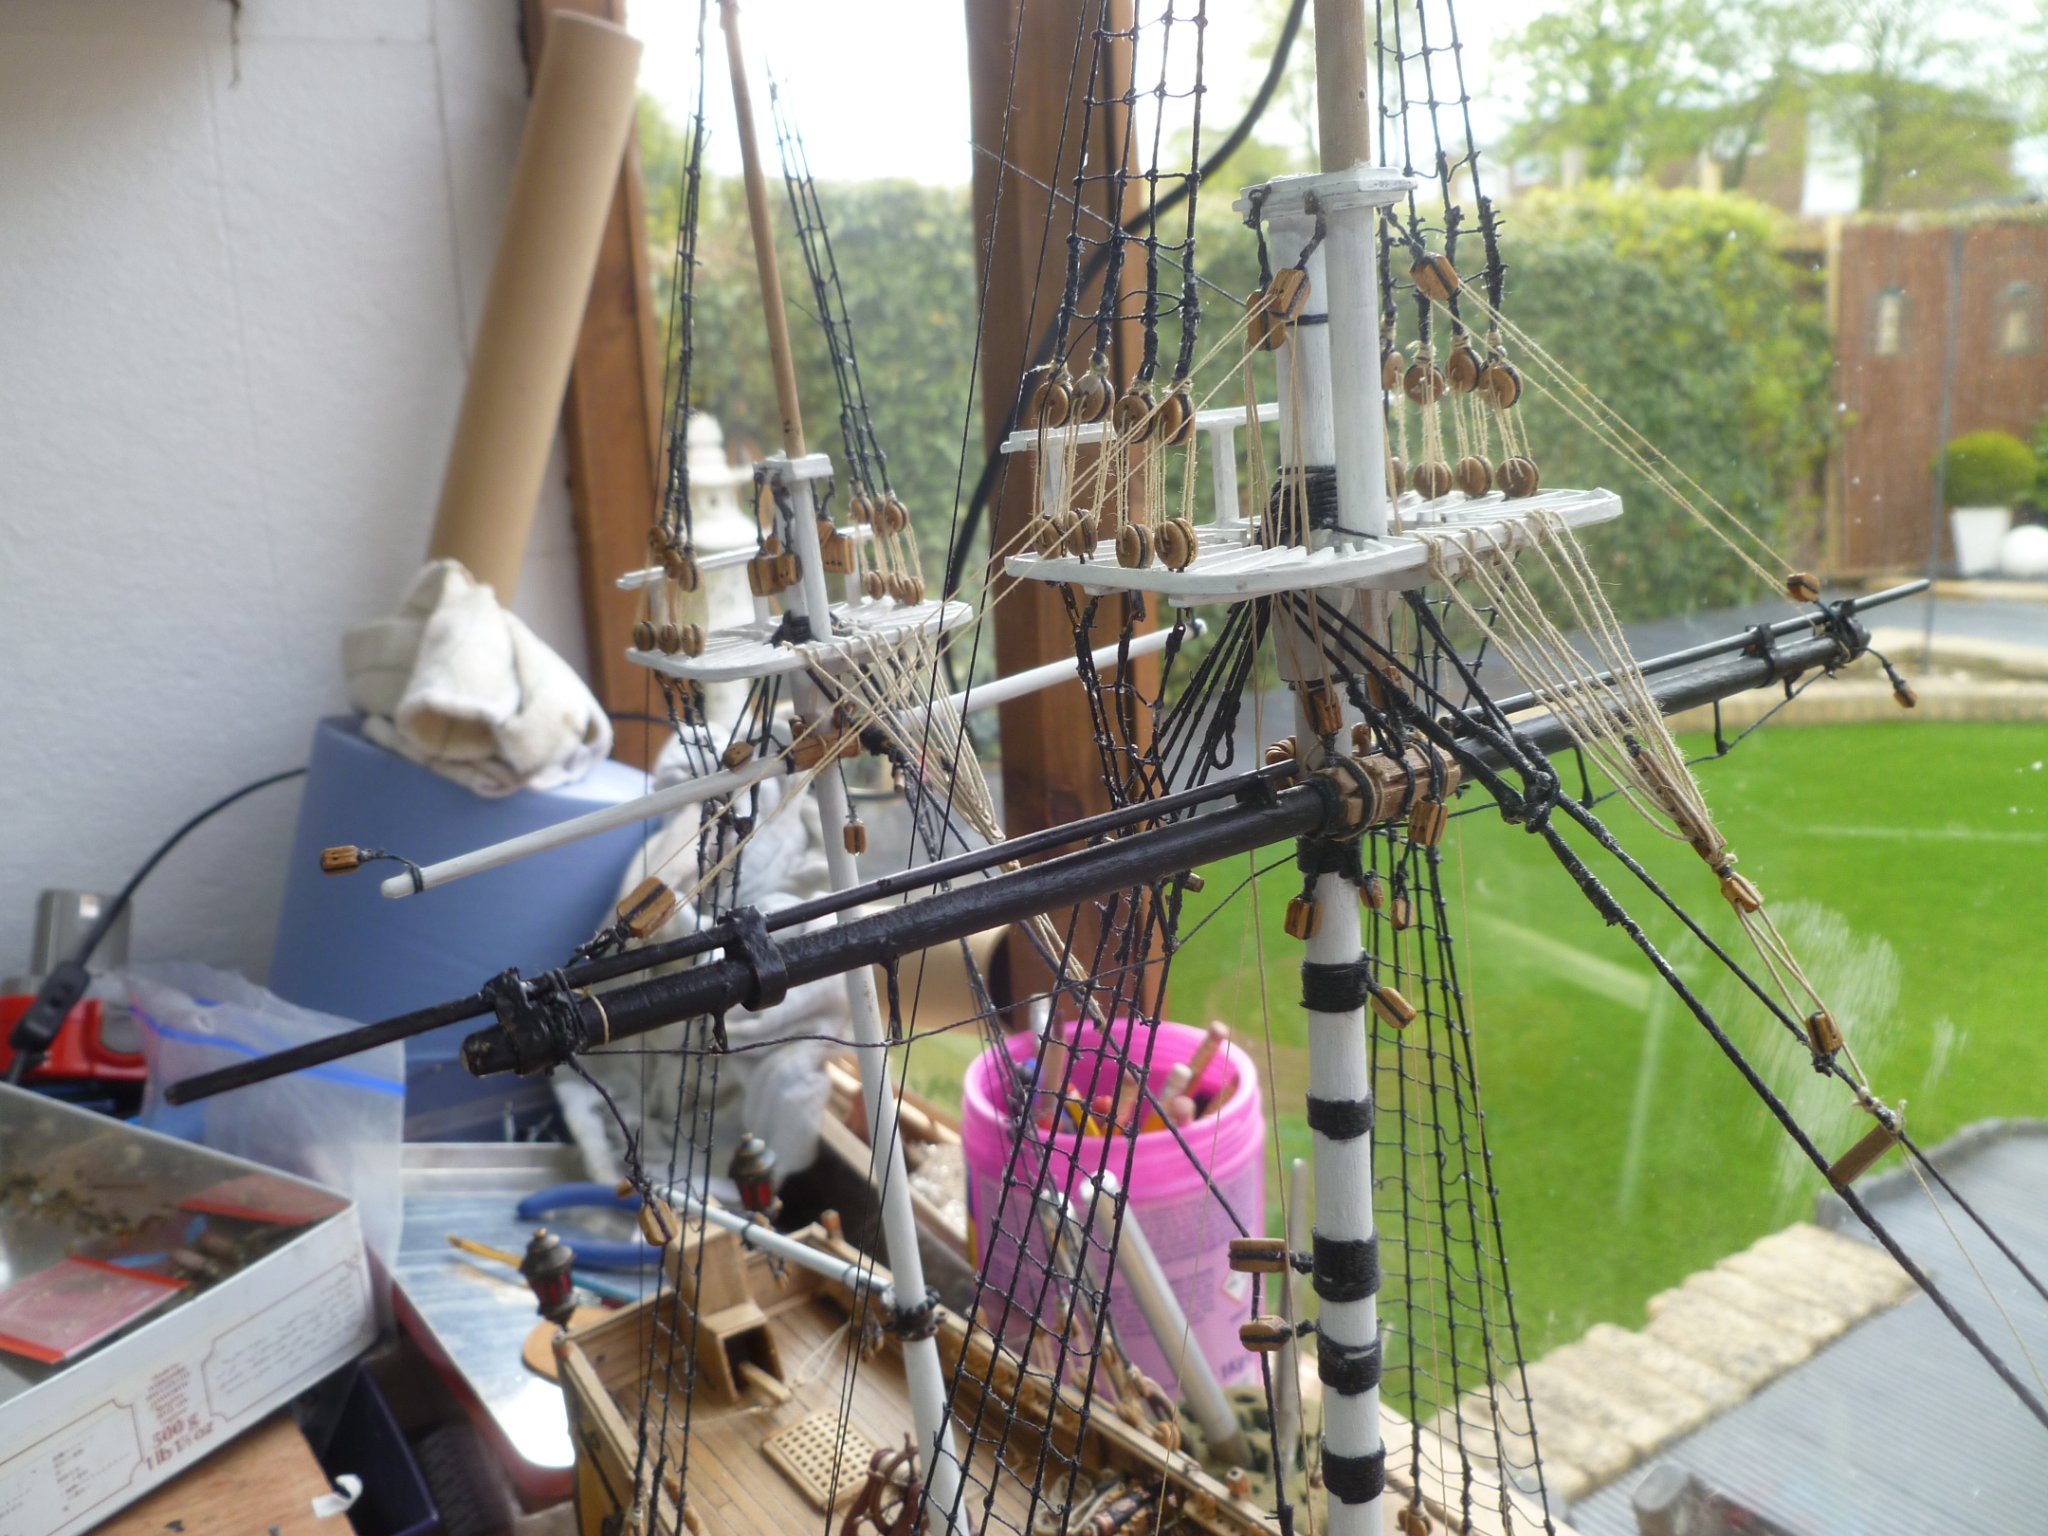
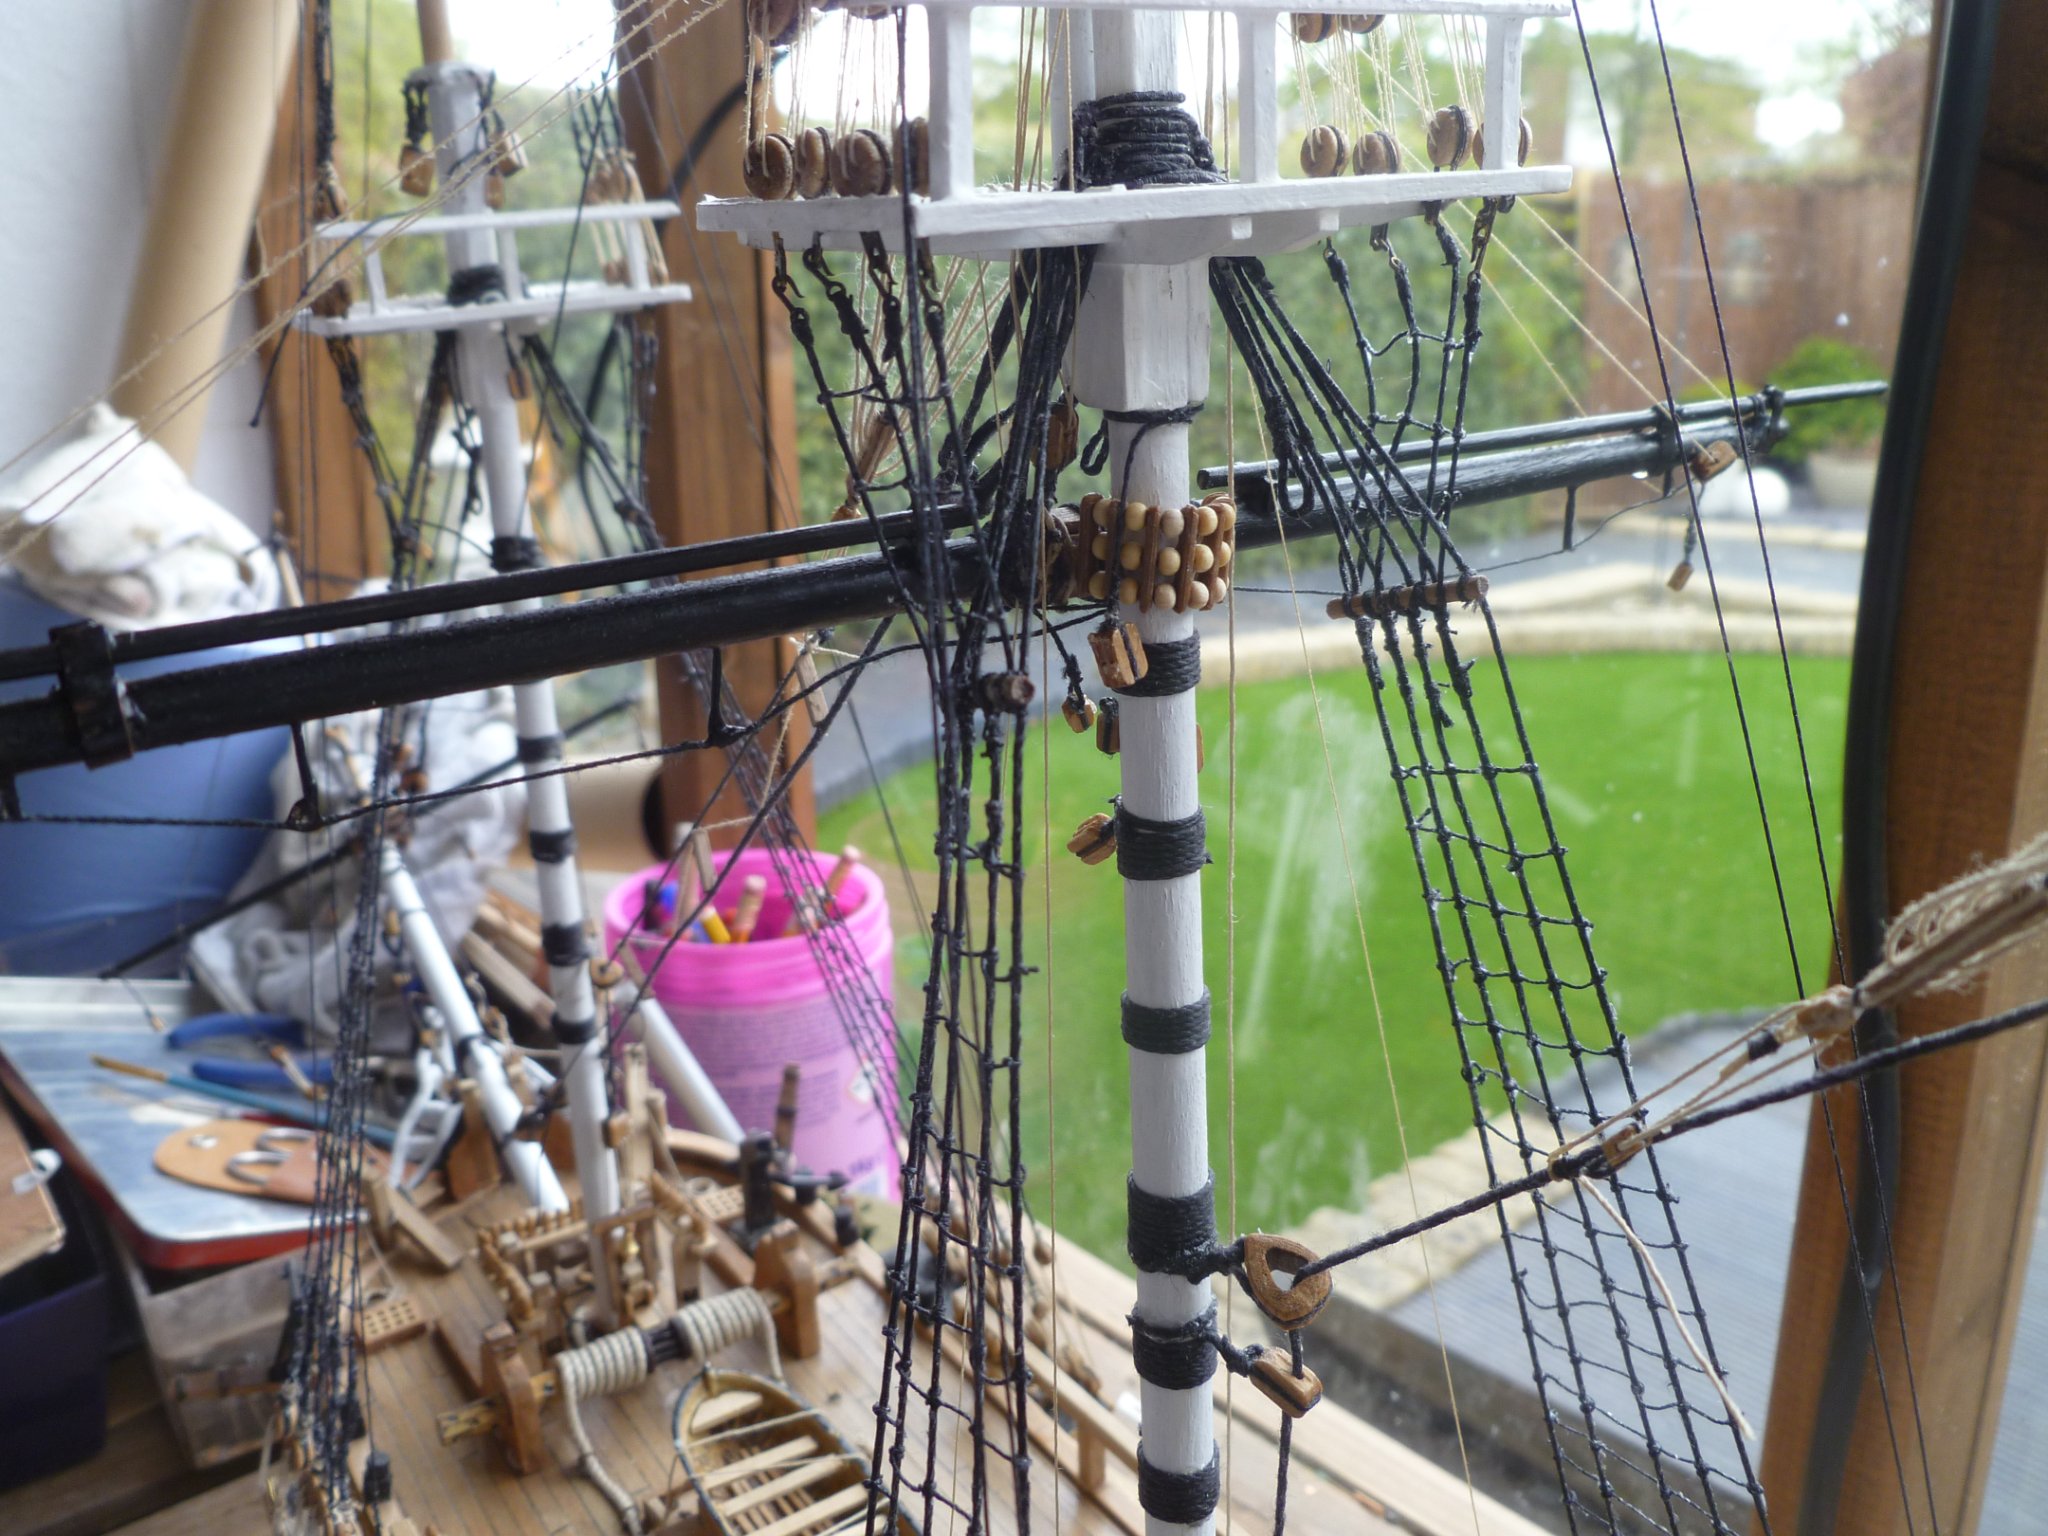
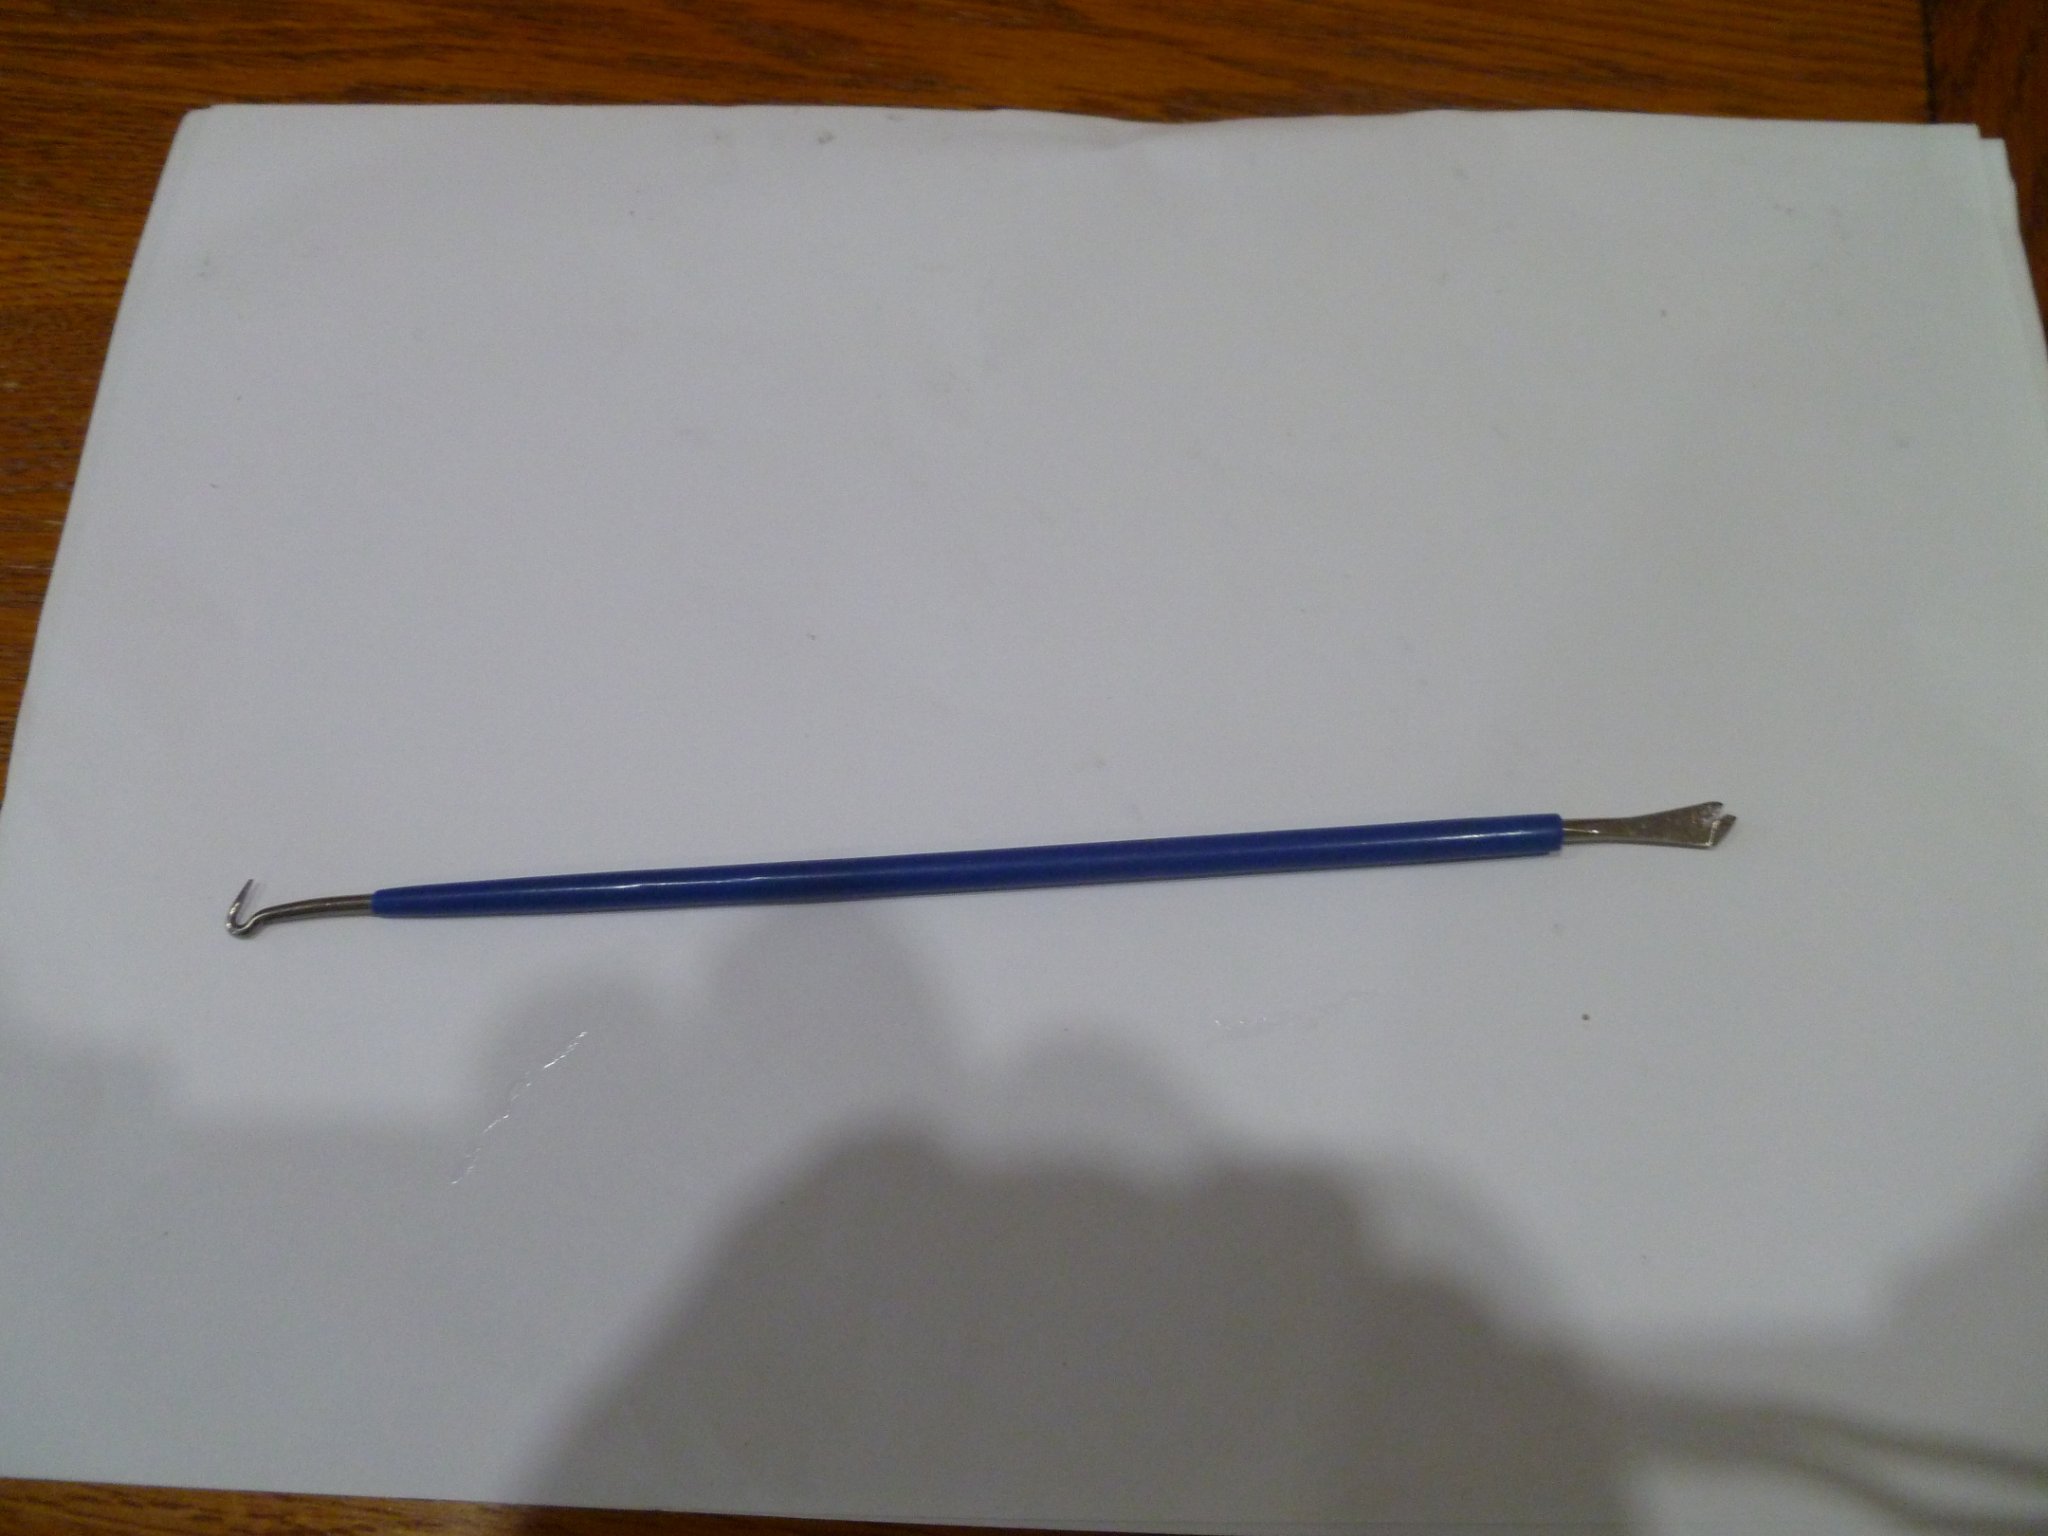
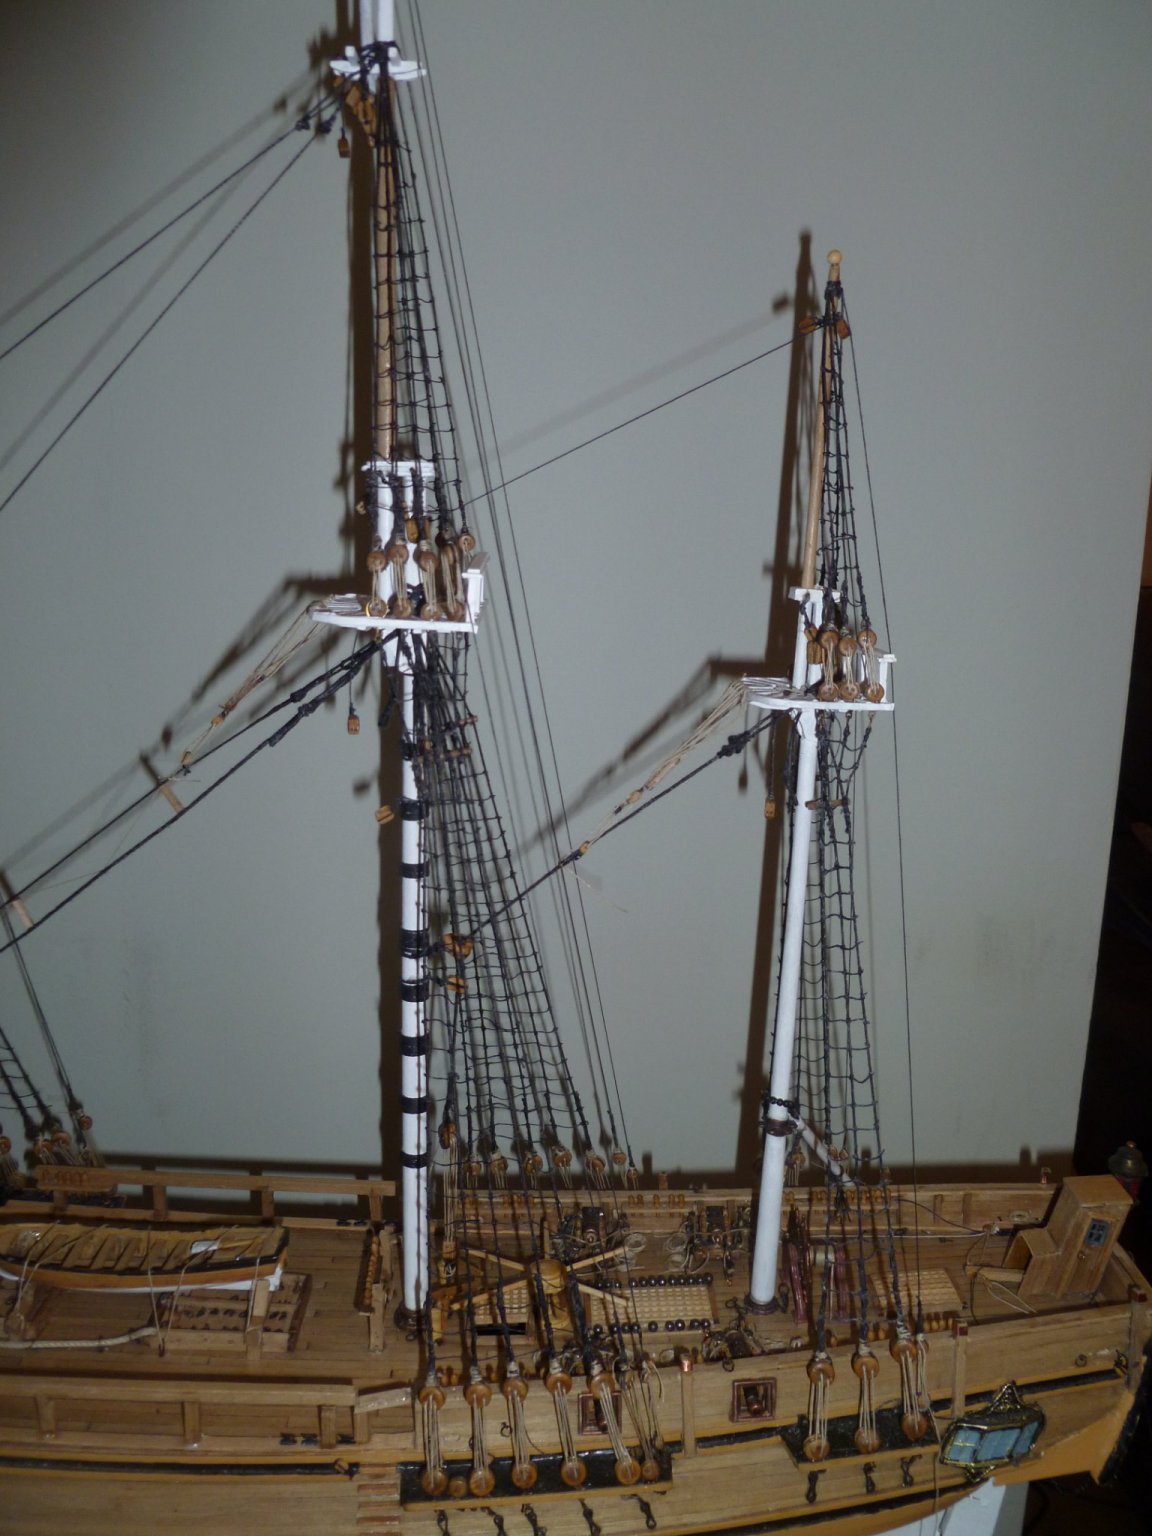
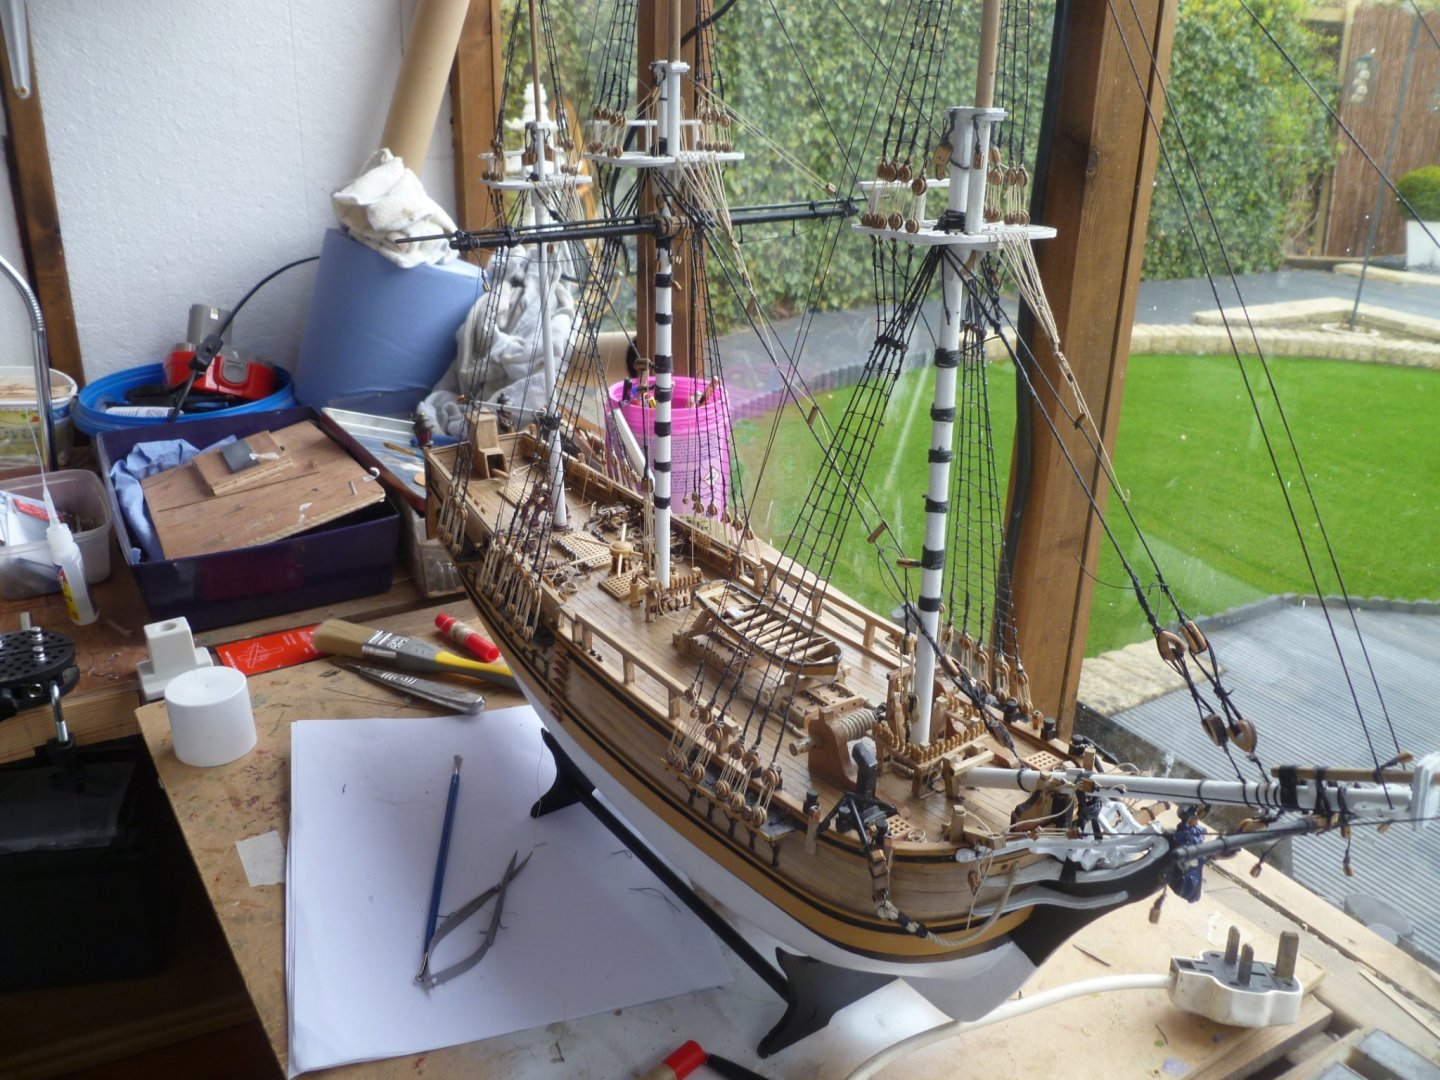
I have started raising the lower coarse yards to the masts and fitting the Parrels with 3 rows to the main and fore masts. I also decided to fit the lifts working from the main lower and outwards and upwards, thinking it would be easier giving me more room before raising the top and top gallant yards. It was very tight in this area,especially just under the lower cross trees . I have temporarily fitted the lines at the belaying pins until I sort out the best way to belay the lines . It appears to me that the belaying pins are far too big (to large a head on them ). and wonder if thinner ones would be better I definately need to modify the tool I have, as I am finding it almost impossible to belay the lines properly using this tool. Here is a photo of the belaying pins with the large heads. Perhaps in hindsight I could have drilled the holes slightly further apart but this would enlarge the size of the pin racks. Another solution would be to source some thinner belaying pins. I have also included a photo of the tool I purchased for belaying the ropes. Unfortunately the slot is too deep and is hitting the back of the bulwark before securing the line underneath. I will therefore need to modify it to suit. Perhaps I should have saved myself some money and made one from the start.


-
securing ropes at the belay pin at the base of the mast.
DaveBaxt replied to DaveBaxt's topic in Masting, rigging and sails
I am more than grateful for your reply but unfortunatley some of it I do not understand what you are trying to tell me. Please forgive me for my ignorance and I am happy to do do some research and see if I can sort this out. There is clearly more to this than meets the eye and there seems to be a lot of bad practices out there. Once again I thank you for giving me the help with my model and hopefully one day will appreciate the finer and accurate methods of building a model ship. Best regards Dave -
securing ropes at the belay pin at the base of the mast.
DaveBaxt replied to DaveBaxt's topic in Masting, rigging and sails
Thank you popeye for your reply which I think I follow ok but not sure about the clove hitch around the top of the timber head . There are two sheaves at the bottom so does that mean that both ropes have a half hitch at the timber head ,one on top of the other . I am assuming that the timberhead is the bit that is carved at the top of the post. I am not sure why they would do this and would be gratefull if you could explain this to me. Thank you and Best regards Dave -
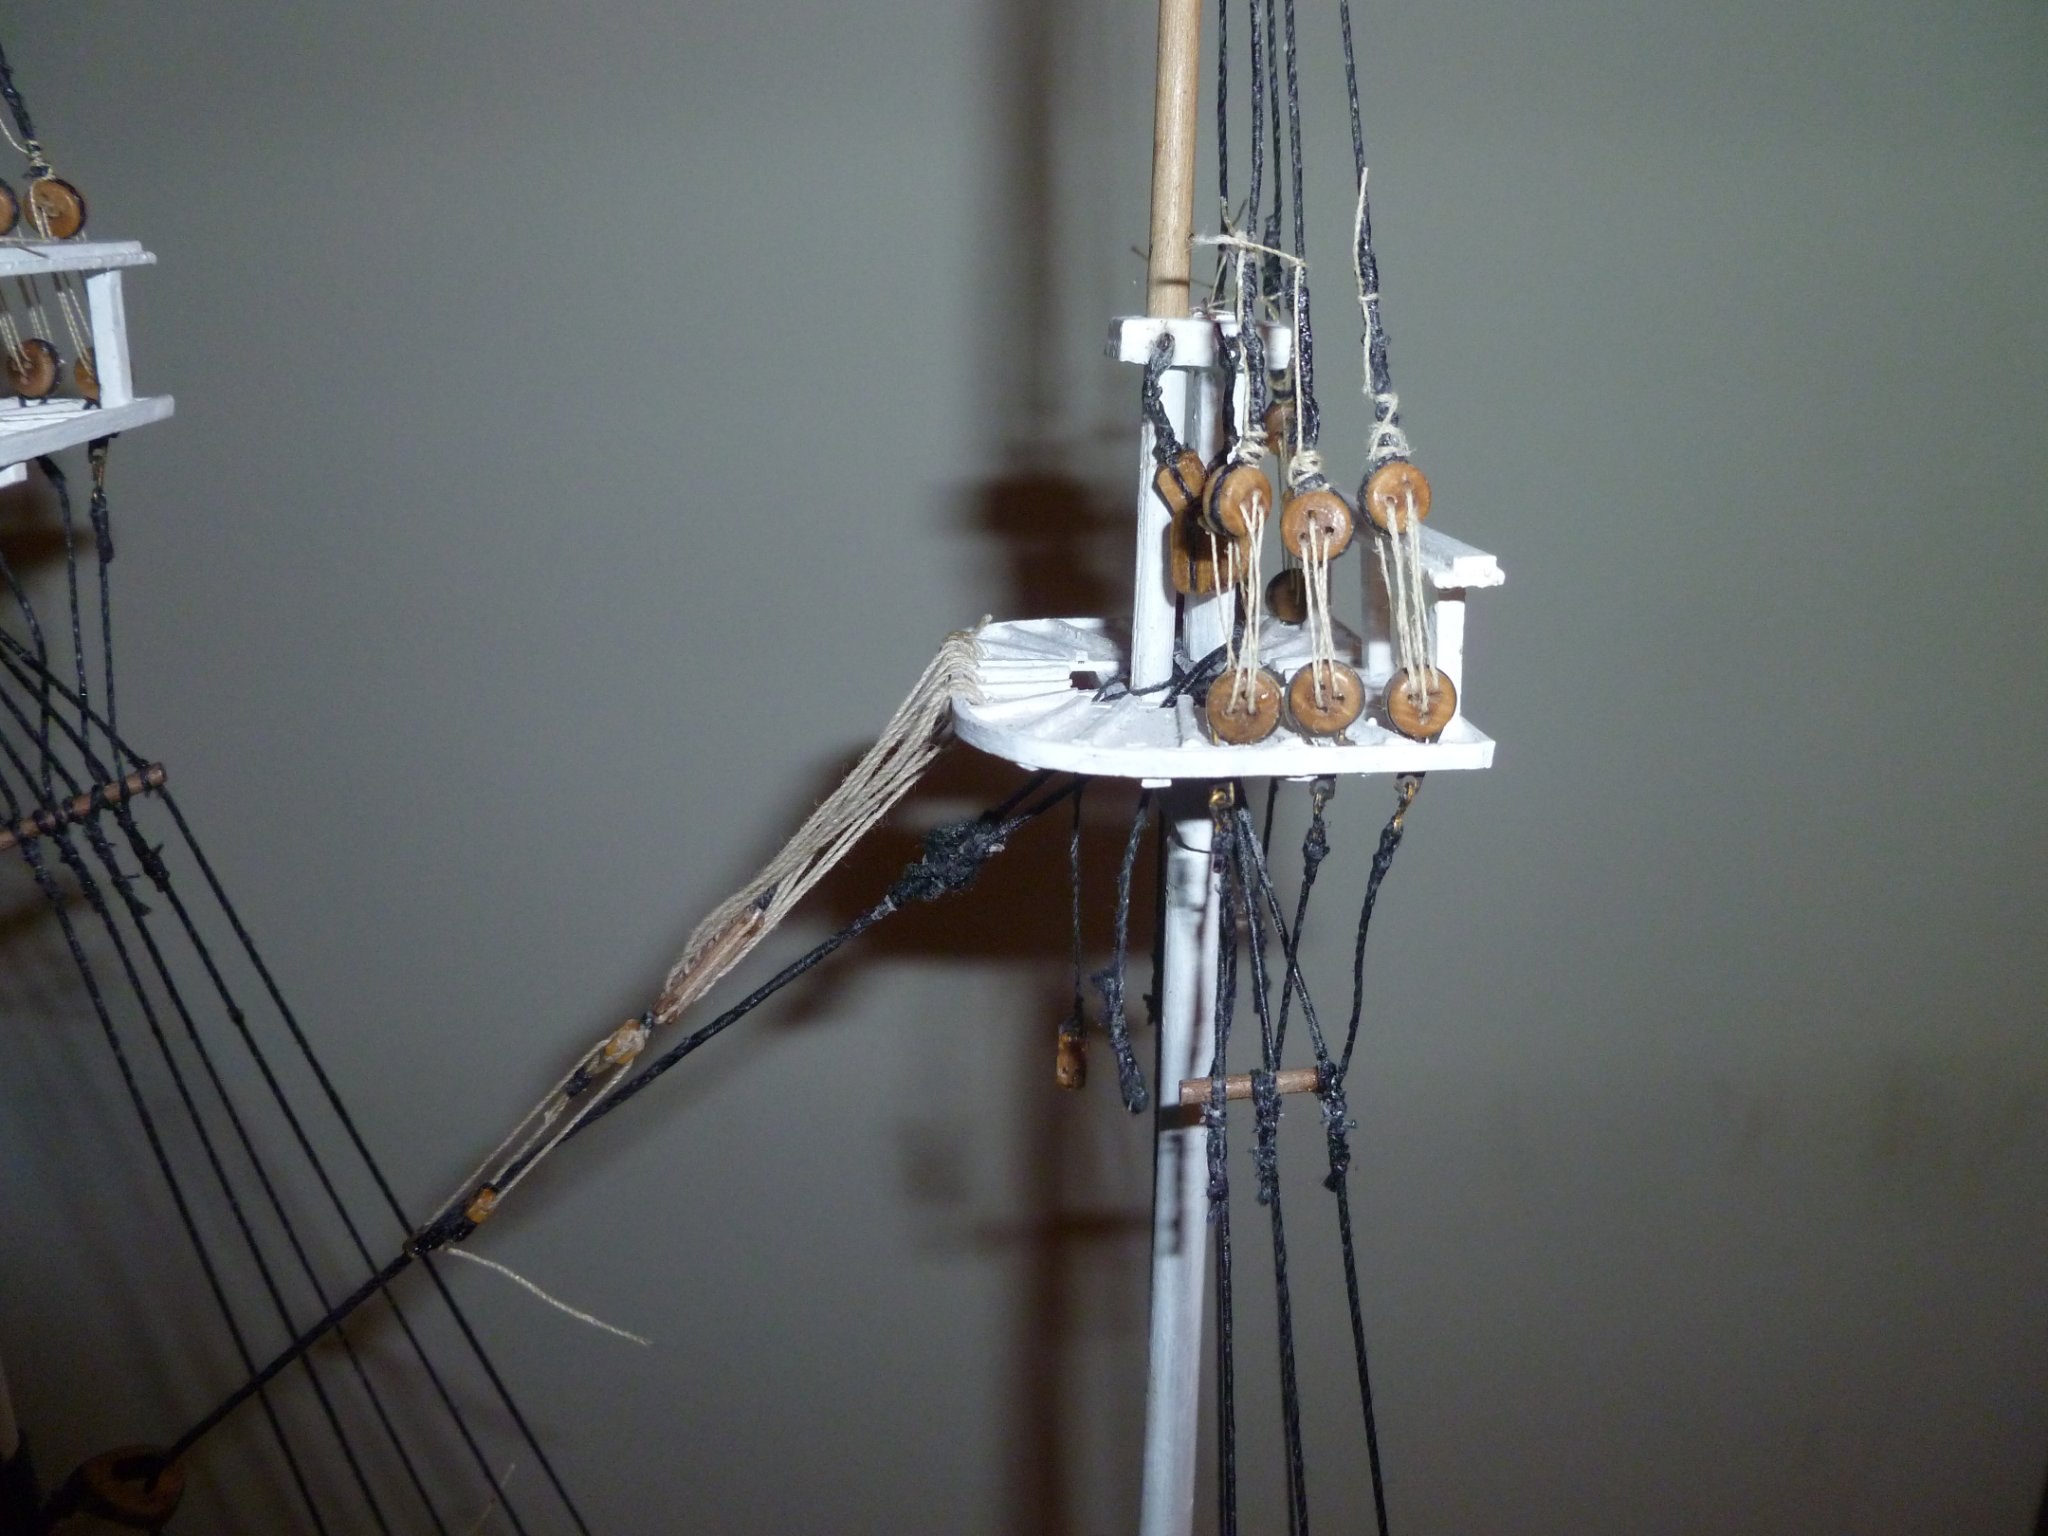
I am currently fitting the yards to the mast and fitting the tyes/jeers for raising the lower yards. From the 3 hole blocks on the caps,the rope goes down to the fife rail at the foot of the mast. However before it is secured to the pin rail it is reaved through a pully underneath and then comes up to the belaying pin from underneath. Is the rope then wrapped around the pin in the usual figure eight or does the rope come up through the hole rather than down through the hole when coming form an above direction? The other question is, are people securing the ropes with the figure eight over the belaying pins or is it better to just take it through the hole and then push the pin in and then make a seperate rope loop and then fit this directly over the pin or do we have to do the figure eight first. Hope this makes sense Dave
-
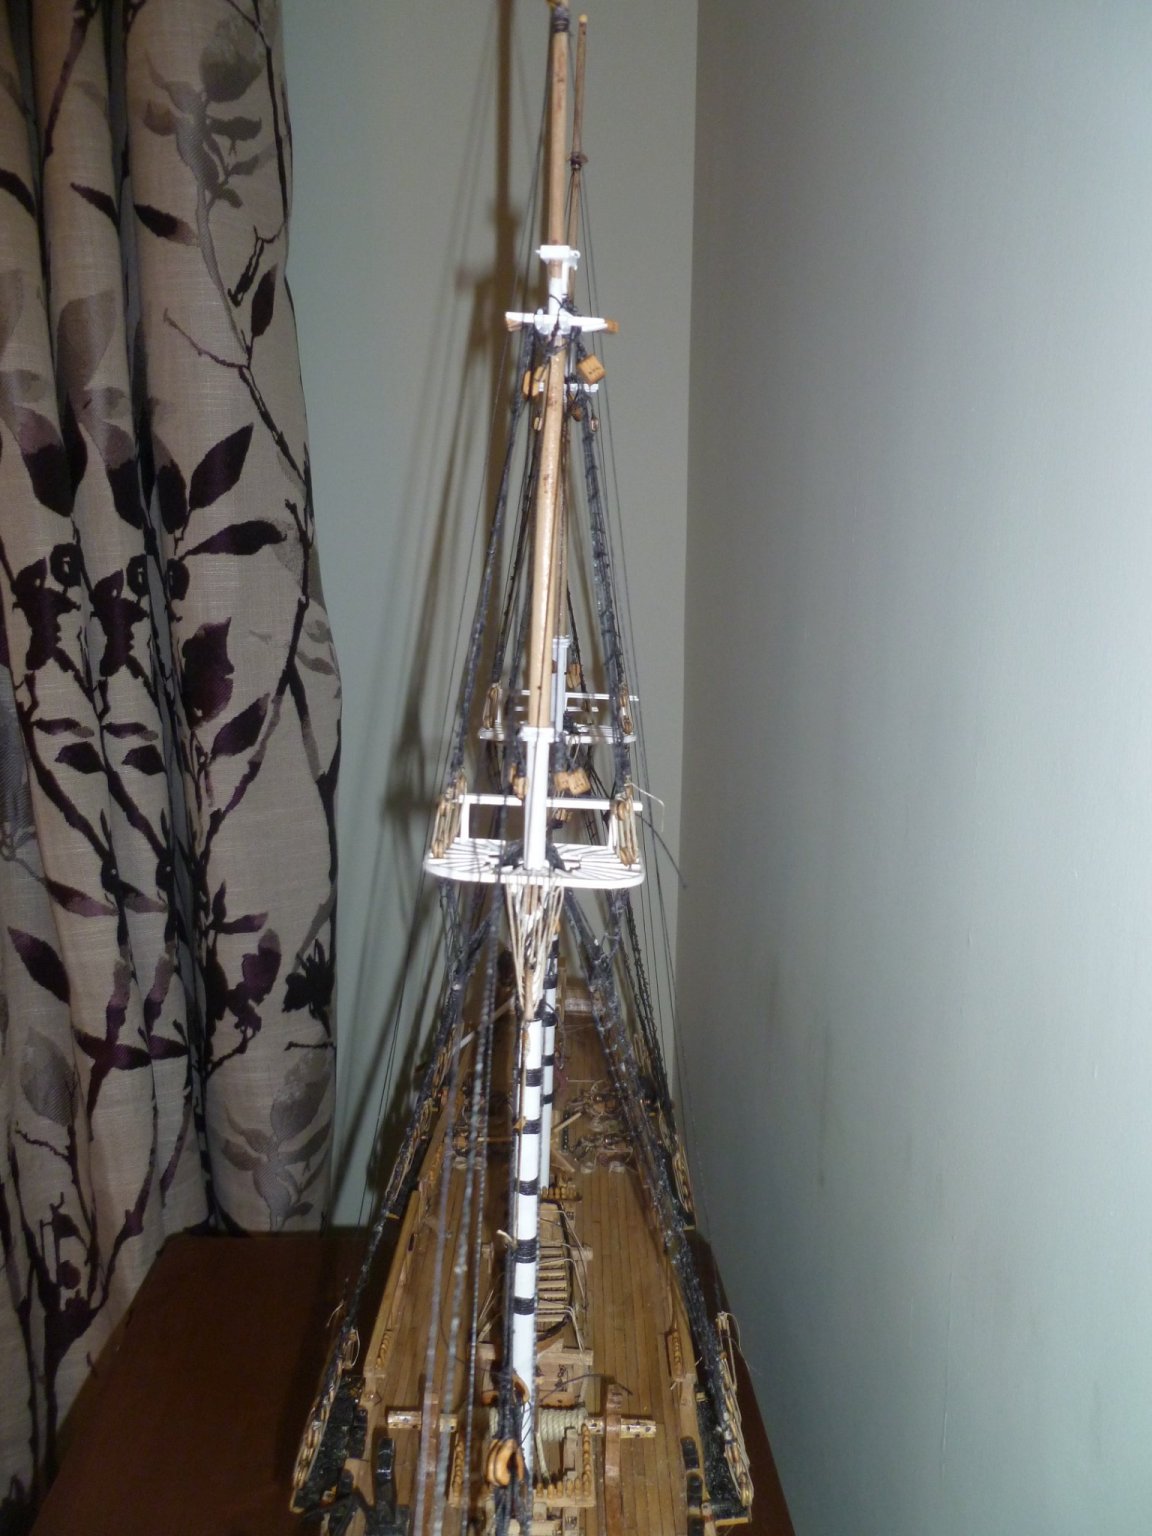
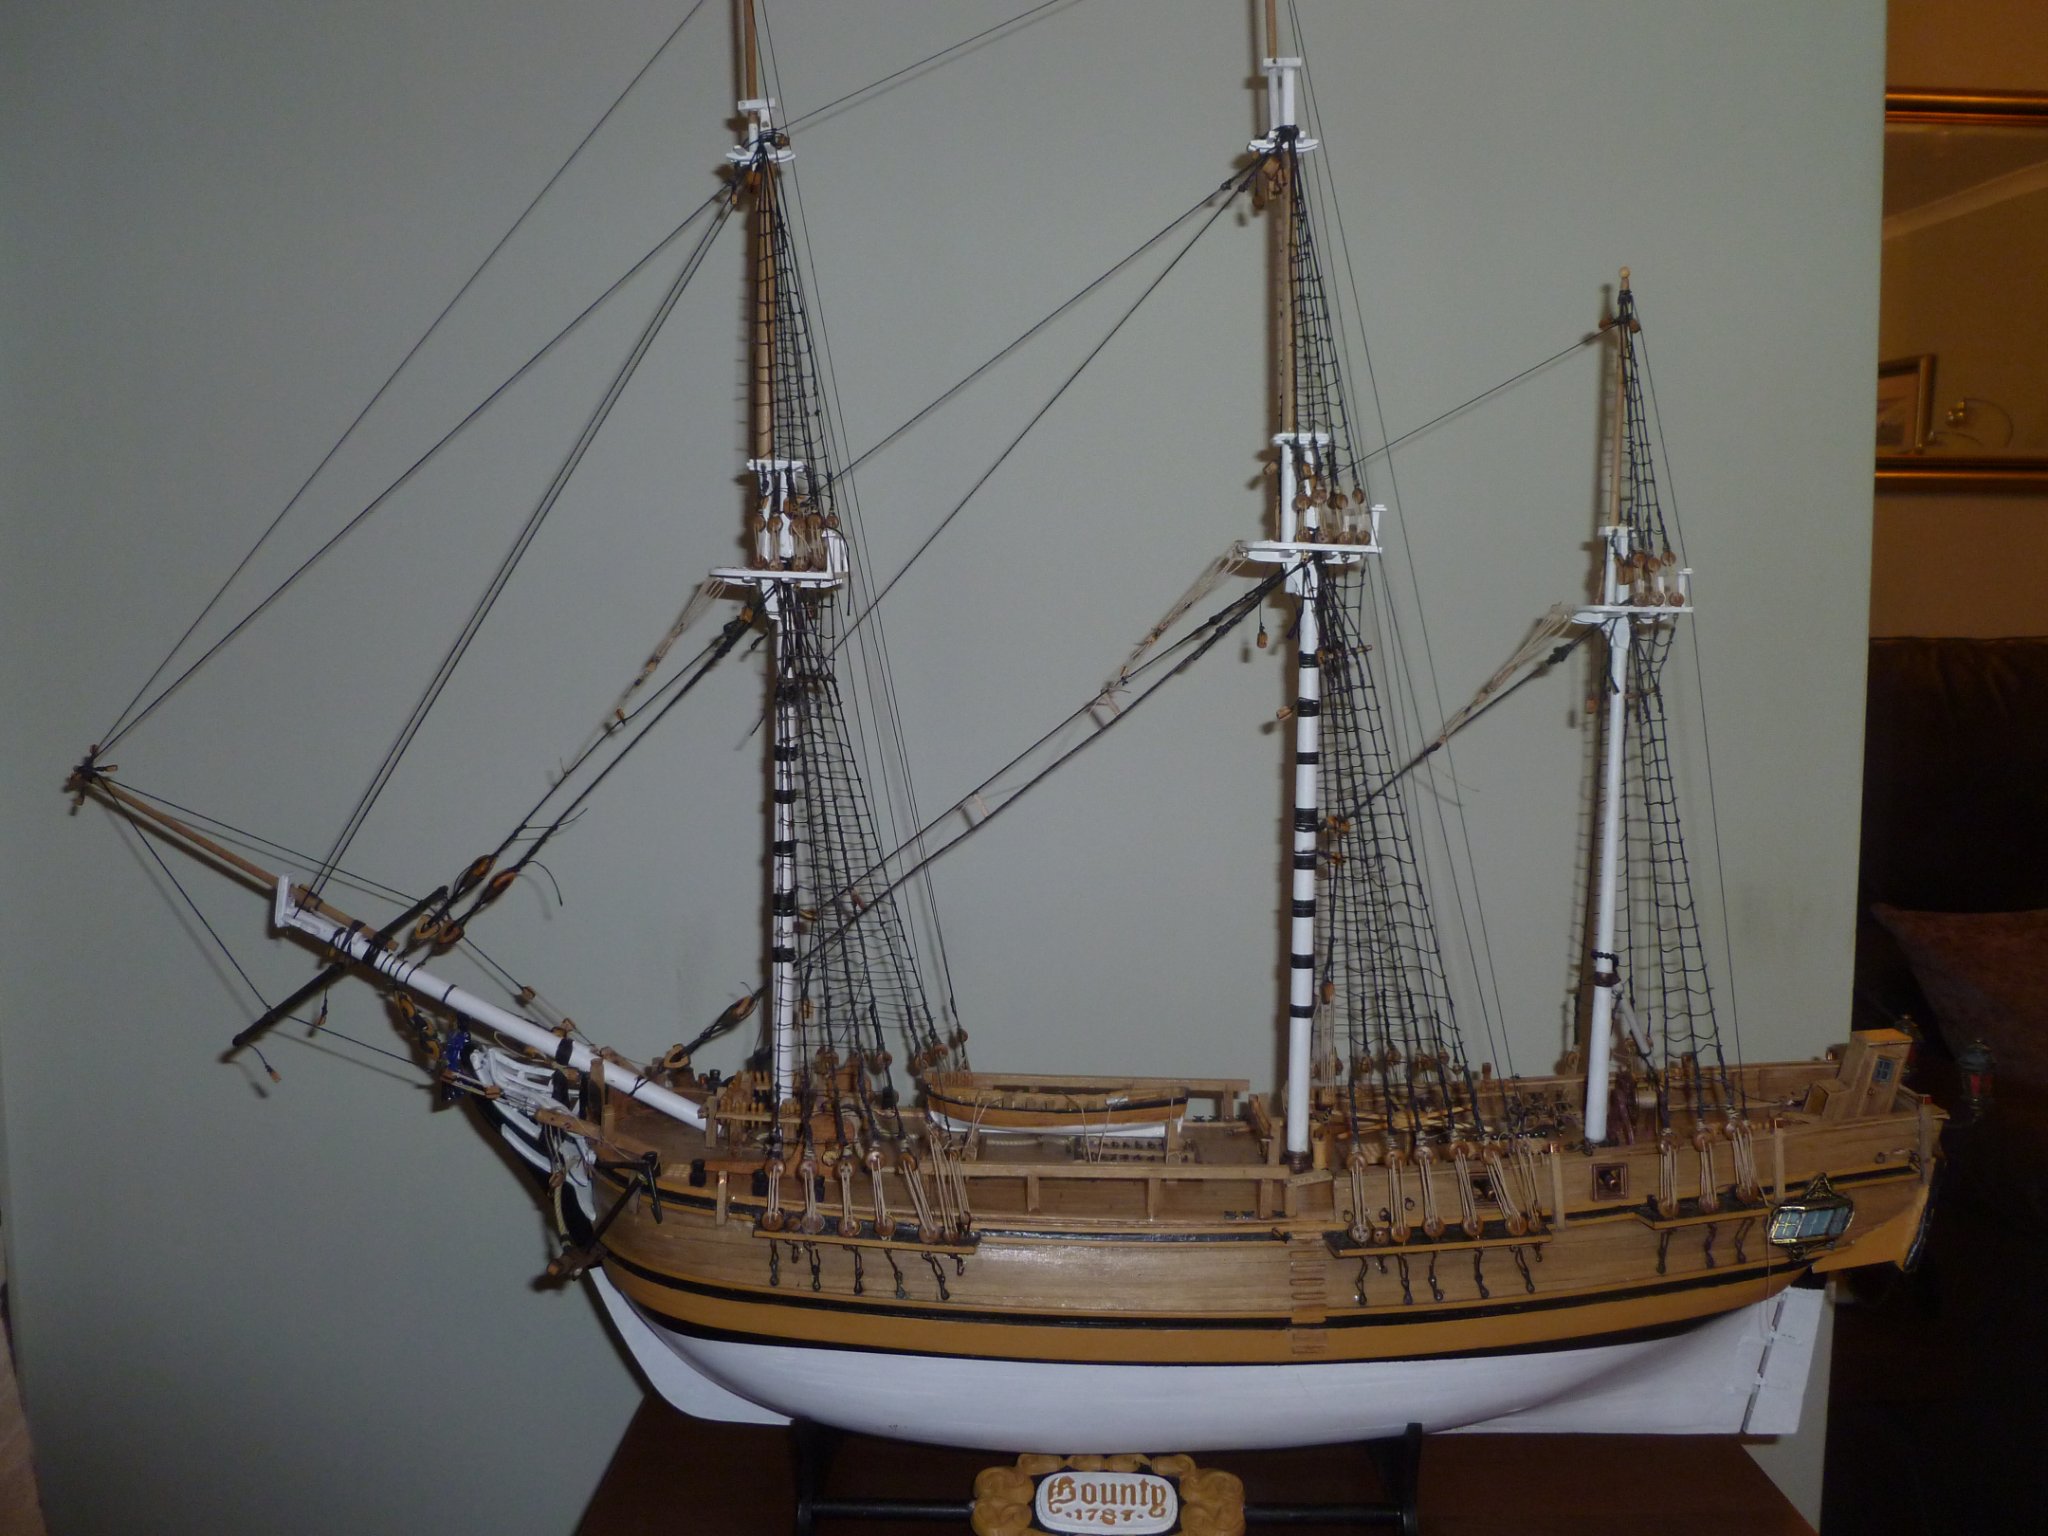
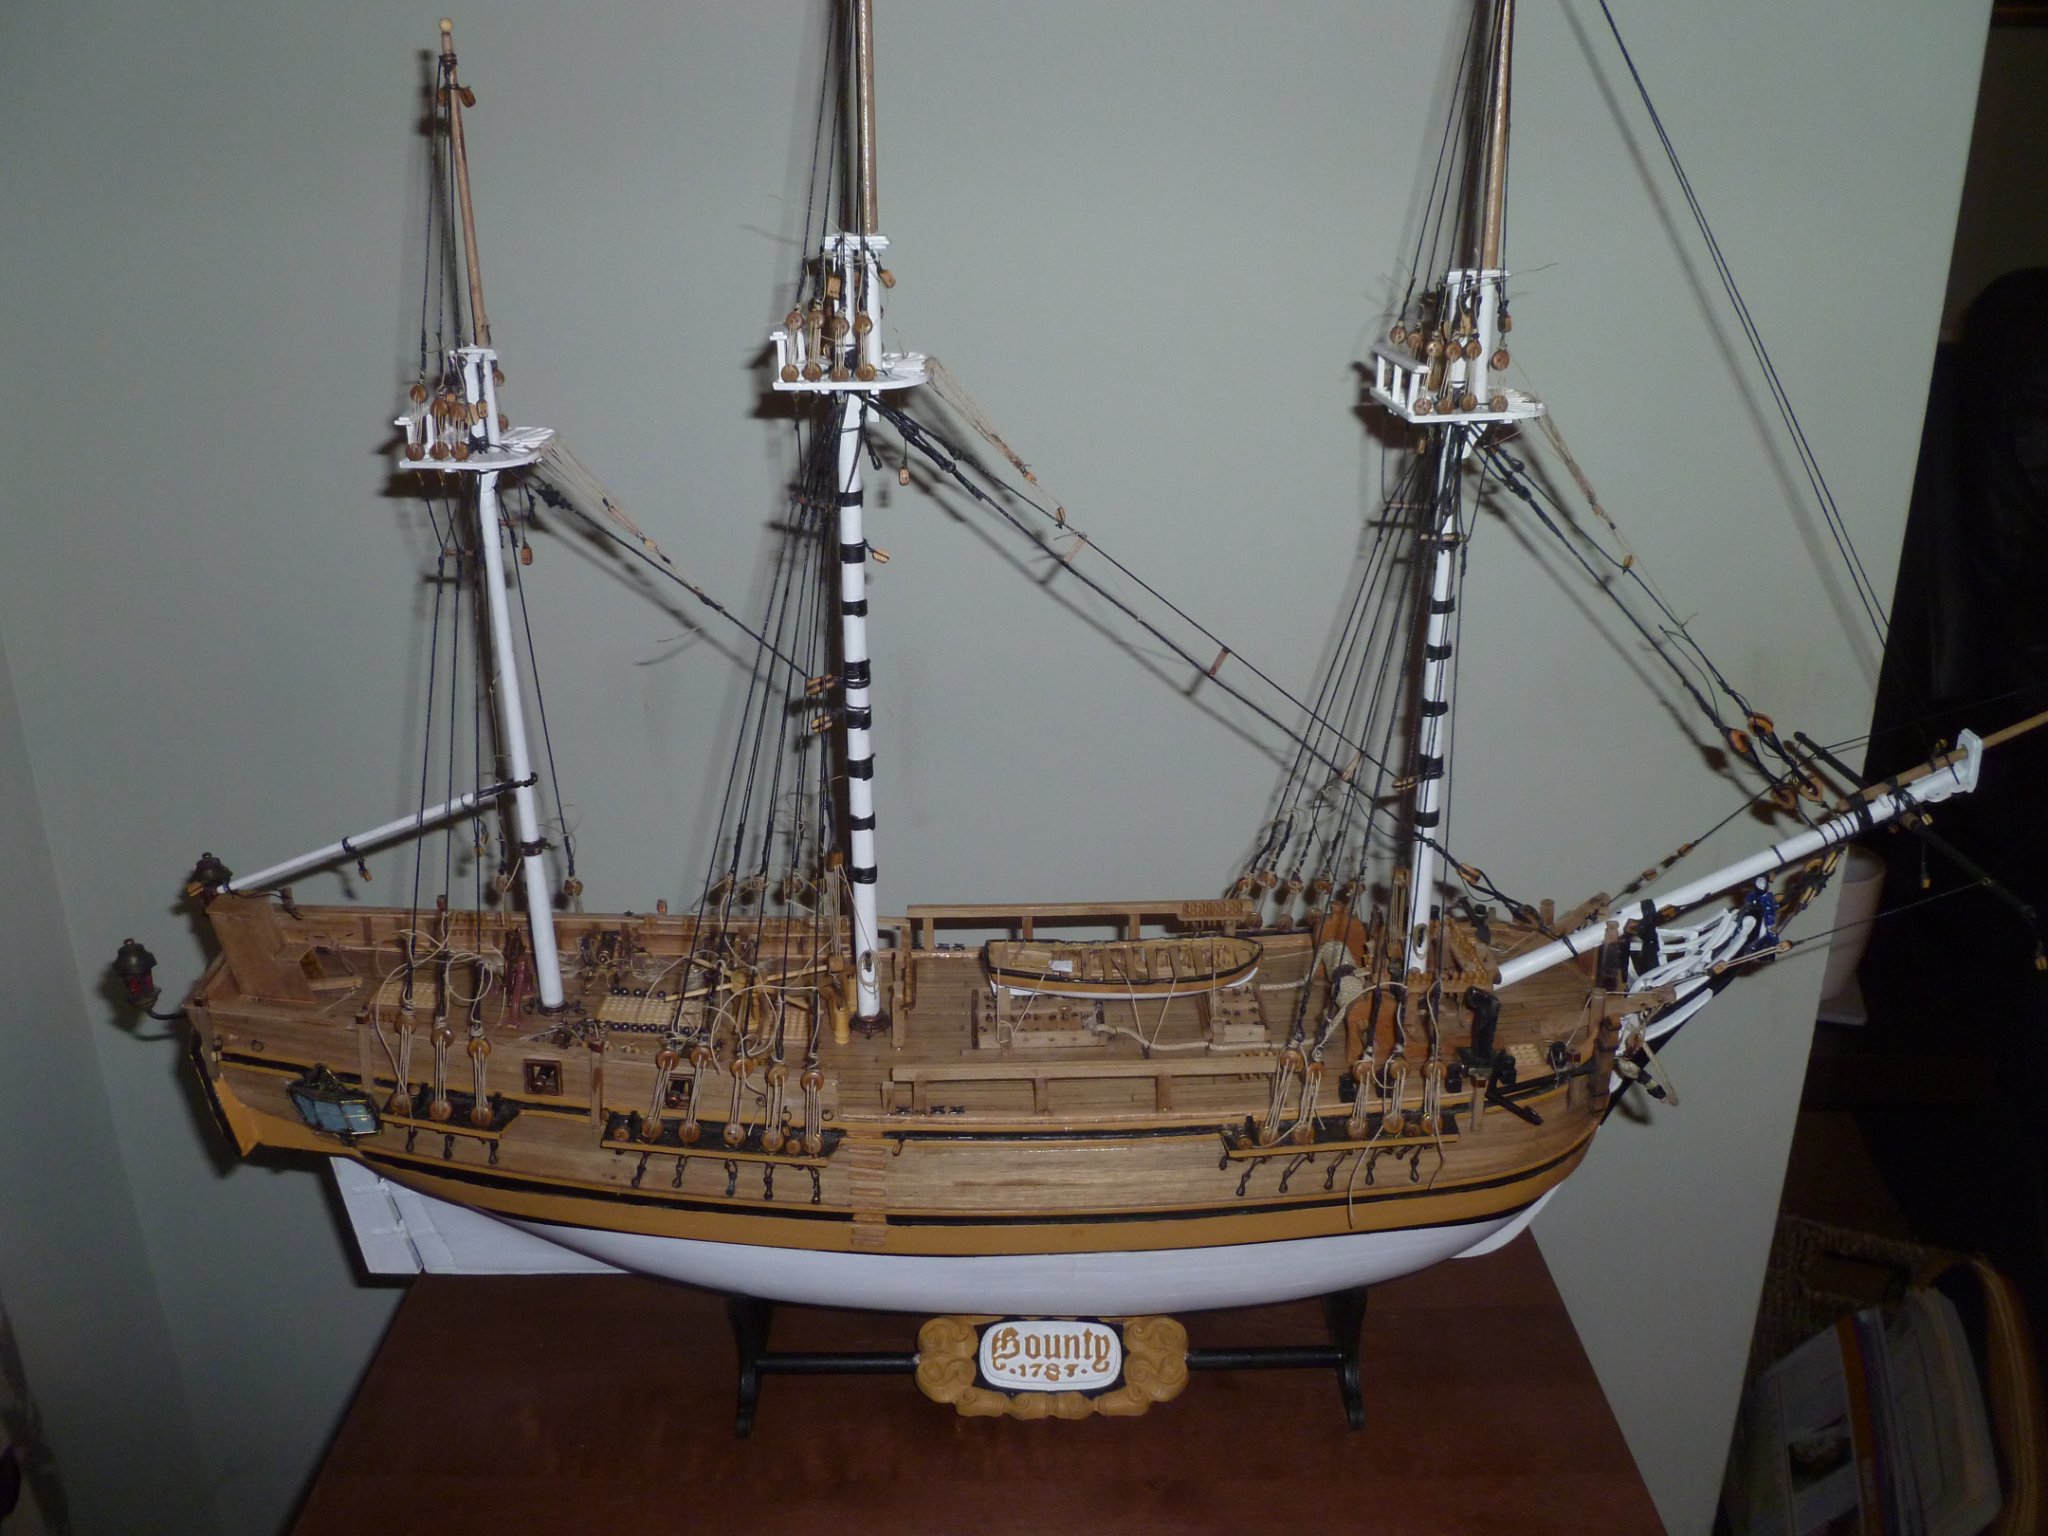
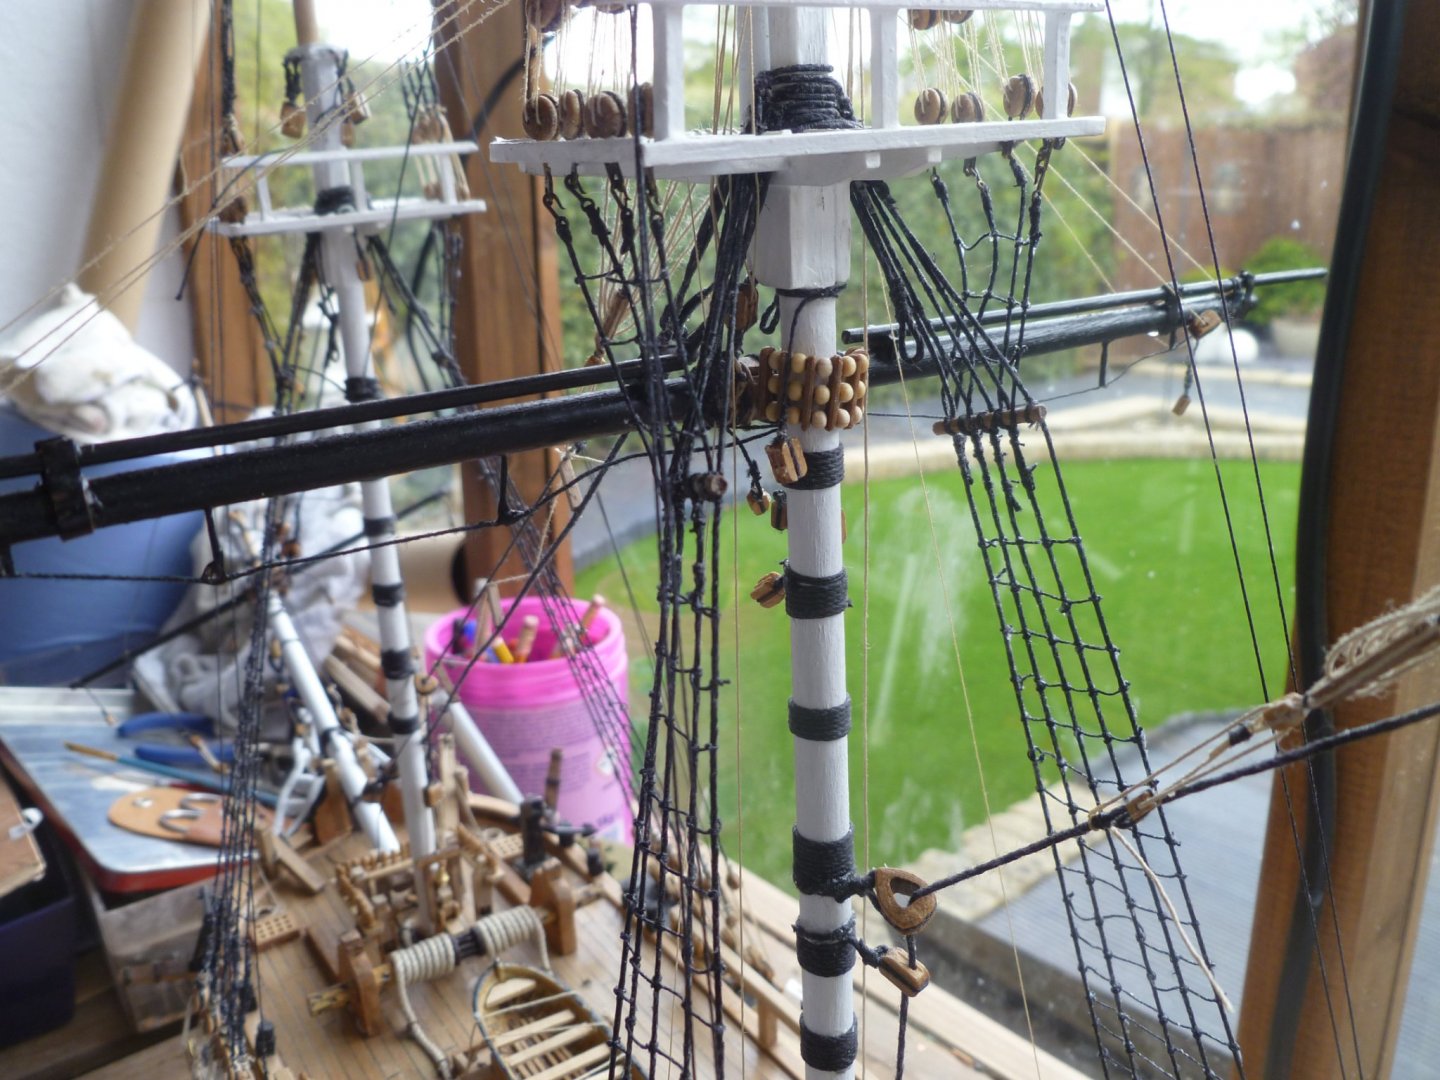
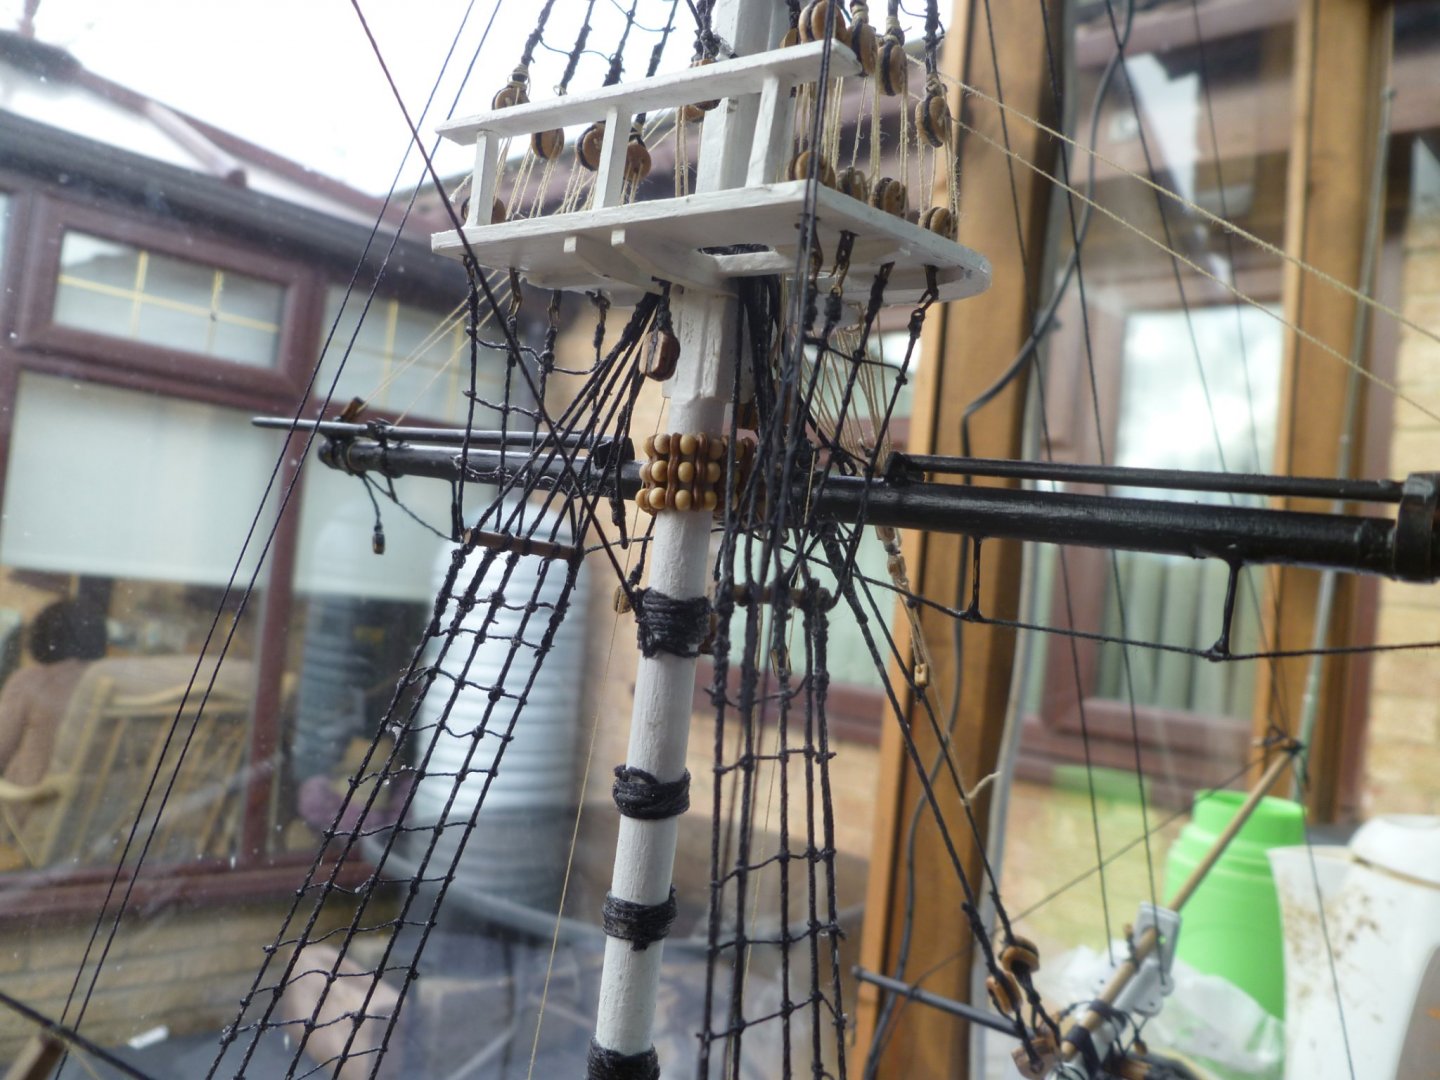
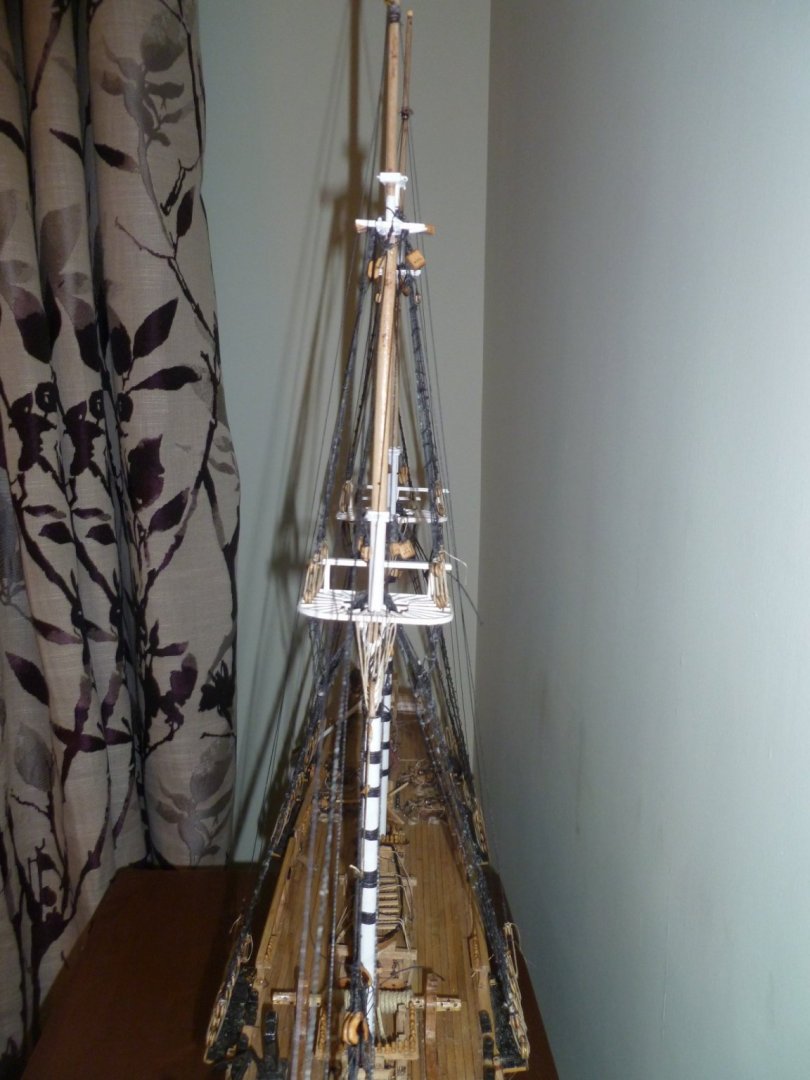
Update. Ratlines completed. I decided to use half the size which was stated in the Amati instruuctions which said .5mm. I went with 0.25mm black thread instead as I thought this looked better with having white masts and also I believe it to be standing rigging and therefore tarred.The size of 0.25mm is much closer to the size as suggested in 'History of ship models by monfield' Here are a couple of photos of the completed standing rigging. Just a bit more tension on the backstays and I might change one or two of the back stay lanyards as these have got a bit hairy for some reason( I wonder if it has anything to do with the smallest of the deadeyes). My ratlines definately improved as I went along and by the time I got about half way through I was much better at it.

-
It might be worth doing a test piece and try what ever you are using afterwards ie varnish ,sand & sealer. I don,t expect to be a problem but you never know. I found one edge was just about right, but made sure it was a evenly covered . Here is a link to all you need to know https://www.modelerscentral.com/blog/how-to-do-deck-planking-on-wooden-model-ships/ For the record I cut the strips to size first rather than as in the photos. There is also a deck planner link somewhere out there which I thought explains it all nicely.Good luck
-
Regards the lines on the deck planks. I got the idea of a Bounty builder off this forum. He actually did one plank at a time but I managed to do 3 or 4 clamped together with the edges showing together. Running the side of the permanent marker along the edge. I did a test to make sure it doesn't run into any varnish or sand and sealer. It takes a bit to get the hang but it's much easier than caulking and quite a good effect. Just do one edge and one end only. Hope this helps. Best regards Dave. Keep up the good work.
-
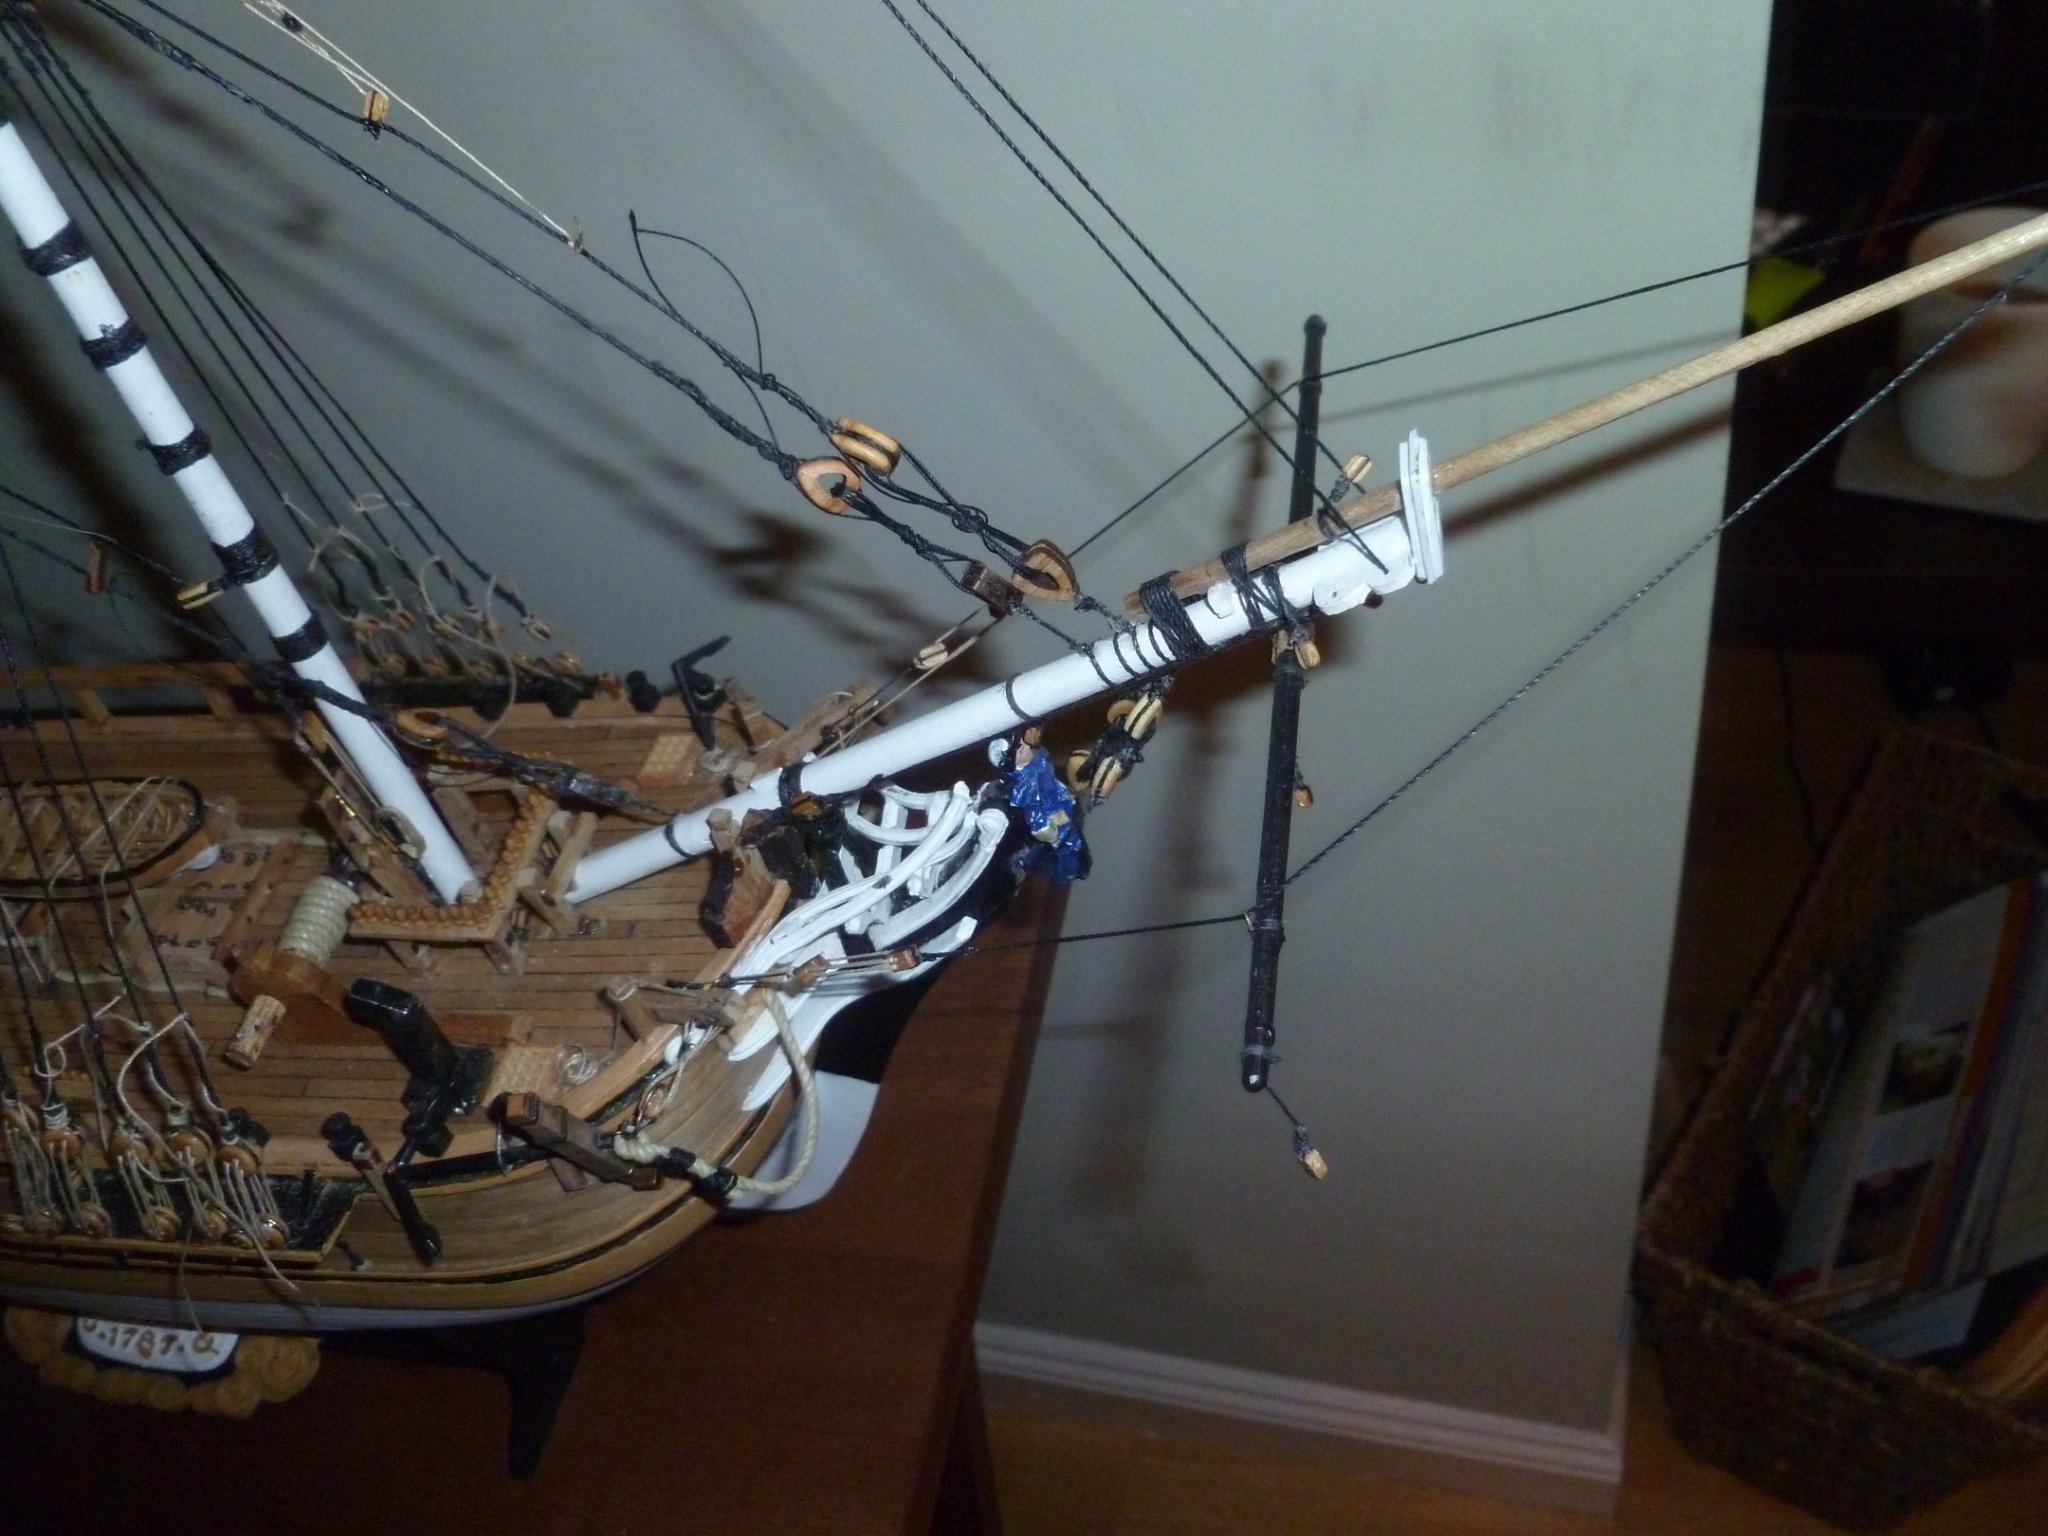
There does seem to be an awful lot of carving and pieces to shape on the Billings version of the Bounty. Great if you like a challenge and I suppose in the end this is what we are all after. On the Amati version of the Bounty ,most of these pieces you are making are of a metal alloy or probably aluminium as they are very light,easy to cut and bend so very easy to work with. Unfortunately the pieces aft did not fit on my Bounty and I therefore made them out of wood myself, the same as you. However the pieces at the forward end leading up to the cut water and the figure head were quite easy to work with and bend into the required shape. I am just wondering if these pieces can be purchaced from Amati or can you use some square section of aluminium which might make life easier for you. Forget what I have said if you are happy with your progress and the way you are and by the way you look to be doing excellent and a much better job than myself. I hope this helps and keep up the good work .Best regards Dave
-
Thanks for sharing that with me Bob. Unfortunately I think a lot of what I have picked up might be old methods and now not necessarily be the best way forward. I have now gained a number of books most of which have helped me with the basics but not necessarily accurate and although possibly get you by but better procedures, tools and information are now available. Unfortunately it is not always easy when so many procedures are done in different ways. Although it is sometimes frustrating I nearly always check on this forum what peoples thought on the subject are. Home this makes sense. Best regards Dave
-
Thank you Bob. It is obvious to me that you are very knowledgble in model ship building and I bow to your prior experience and forgive me if I have frustrated you in any way. It is interesting to know that there are so many different views in this hobby and not always helped by so many different media to choose from and not all being correct. I would also like to thank you for what seems to me like sound advice regarding testing different things away from the model before trying it on the actual model itself. As regards pre soaking of ratlines before fitting them to the model, which has not been backed up by any other person and is strongly ill advised by a number of people I will therefore send this idea to the bin rather than attempt any experiments or otherwise. It is also interesting to here what you and others are saying regards Bees wax. Something which I have been using from the beginning. I do find it makes the thread easier to work with but did not find it was of any use with reducing the fuzz, when threading eyes and blocks etc ,especially when using the lighter thread, which being a lot worse than the black thread. I am assuming the lighter thread is hemp and the black thread being synthetic but I could be wrong. I would like to thank you again Bob for yours and anyone elses patience in tying to help me with this hobby and look forward to any future help I may need. I believe if it was not for the help of people like your good self and others on this wonderful forum ,I would not have got this far with my first build of a period model. Best regards Dave Ps Perhaps I should win an award for the most help received in building a model ship
-
-
Thank you for your replyies and this is obviously something I need to think of carefully before going ahead, AS this will be the first time I will be doing ratlines perhaps I need to try doing them without pva on them and see how I get on, once I have mastered the technique, perhaps then I can consider attempting trying pre soaking a few pieces and see if there is any difference. Best regards Dave
-
I am no expert and only a beginner and wonder if the procedure I have mentioned would prevent the mess as you suggested when using PVA. Just a thought. I have also been informed ( from an old book) that once the rigging is completed it is then varnished. Is this still carried out today. Thanks for your input and for another way forward. Just wondering if you use shellac on any other rigging other than the rat lines.
-
I have read somewhere but can't remember the source ( I have read that much of late) that pre-soaking the ratlines in diluted PVA glue and allowed to dry makes the ratlines look better. However prior to fitting them they must be wetted again to make them soft again. Just wondering ifthere is any advantage in doing this or is just waxing the rat lines sufficient? How many of you modelers pre soaking your rat lines or do you think it is worth a try? Best regards Dave
-
Great idea for the rope coils and they love amazing. Mine were a complete mess and I think I used too much rope. I really could do with doing them again and use those counters. I had the same problem with the blocks on the cannons but eventually got away with using 2 mm .However i must of used twice as many extra ones . I was really glad when I finished the Cannons and moved onto something else. You are doing great and look forward to your progress.Best of luck Dave
-
Thanks for your kind words. The colour is more of a personal choice and I got the idea from the front of the box. When I ordered the ship I was also given the opportunity to purchase the paints which included these colours. Perhaps the colours are not to everyones taste but although might not be authentic I do rather like it. Just for the record I have ordered a display case for her which will take a month before it arrives so hopefully I'll be finished by then
-
Thanks for you kind words. The lines are not very tight but need a liitle bit of tension once I have completed the stays and back stays. I Don, t think they need to be so tight but just enough so they look taught but I could be wrong. Perhaps someone more knowledgeable can step in and answer that one
-
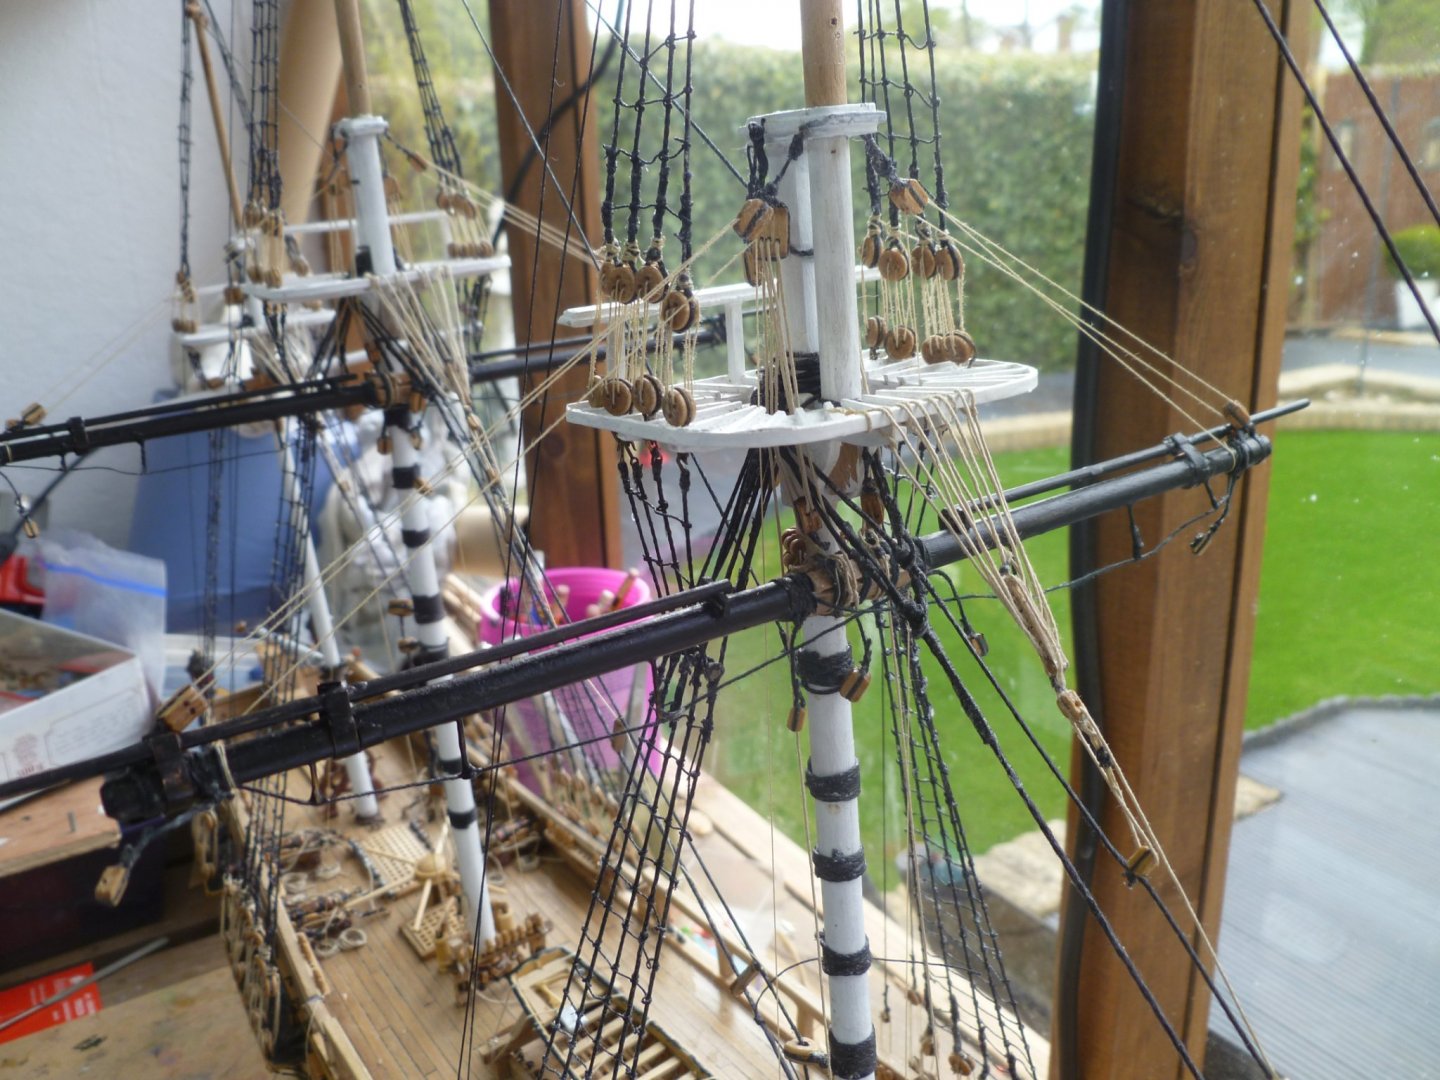
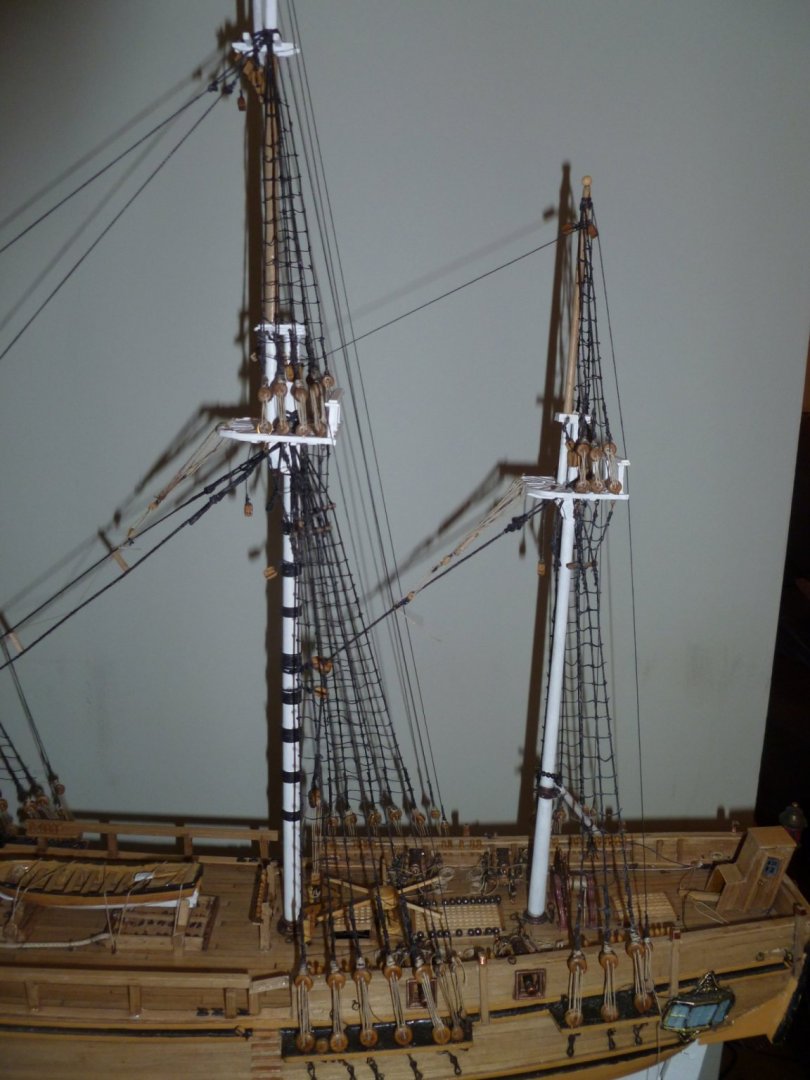
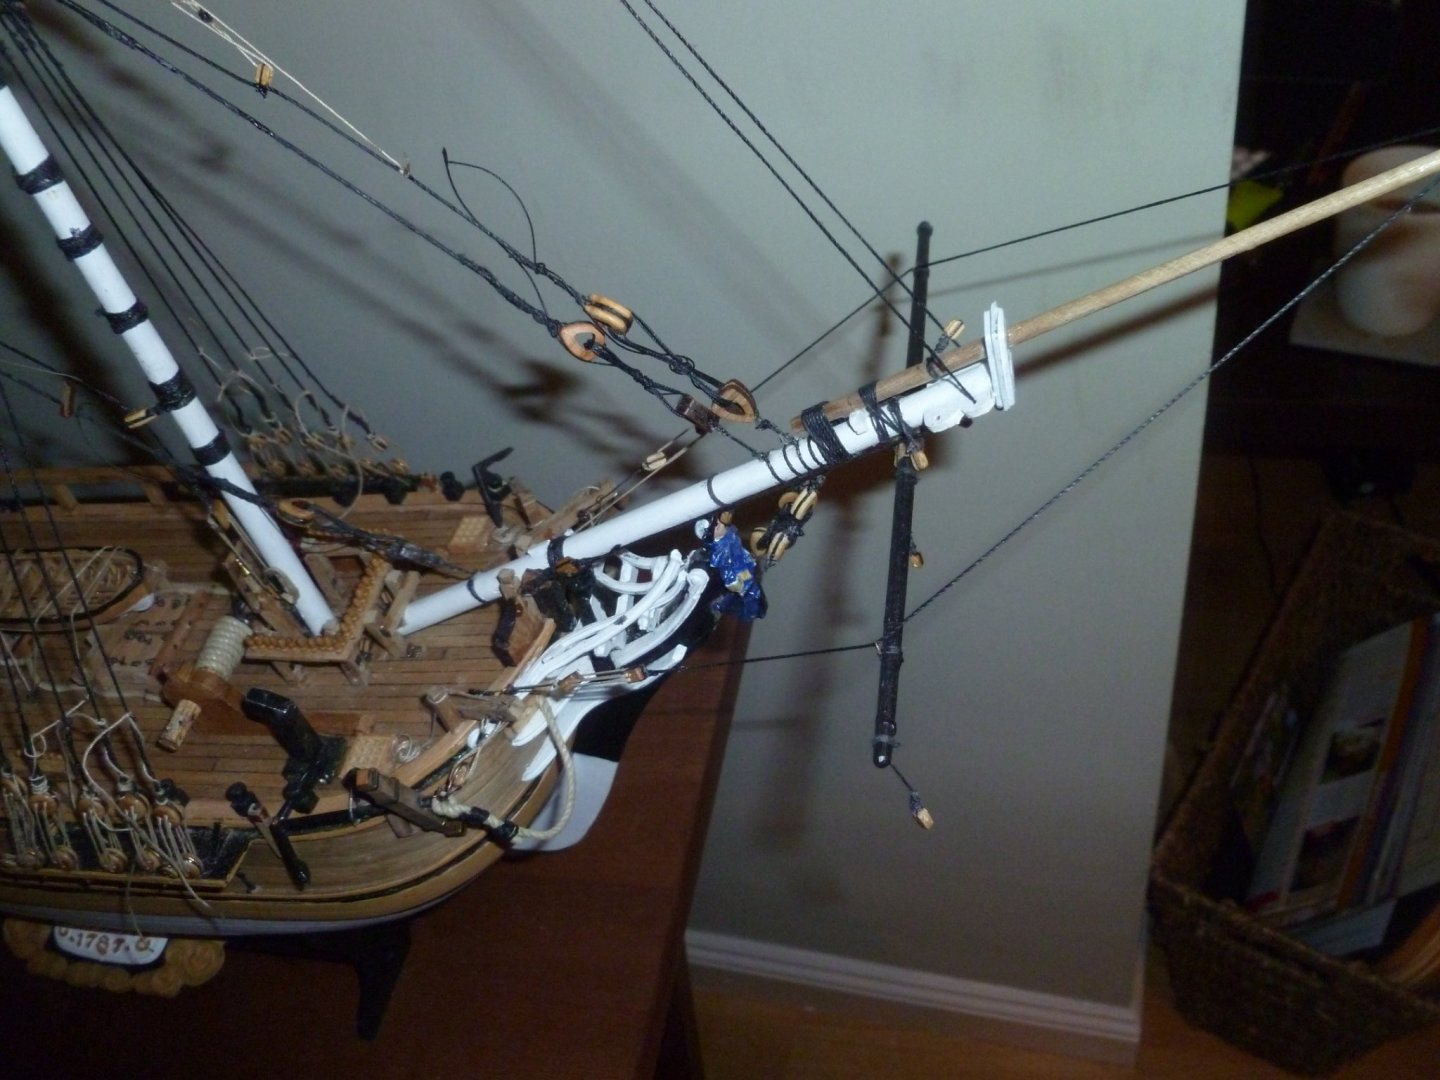
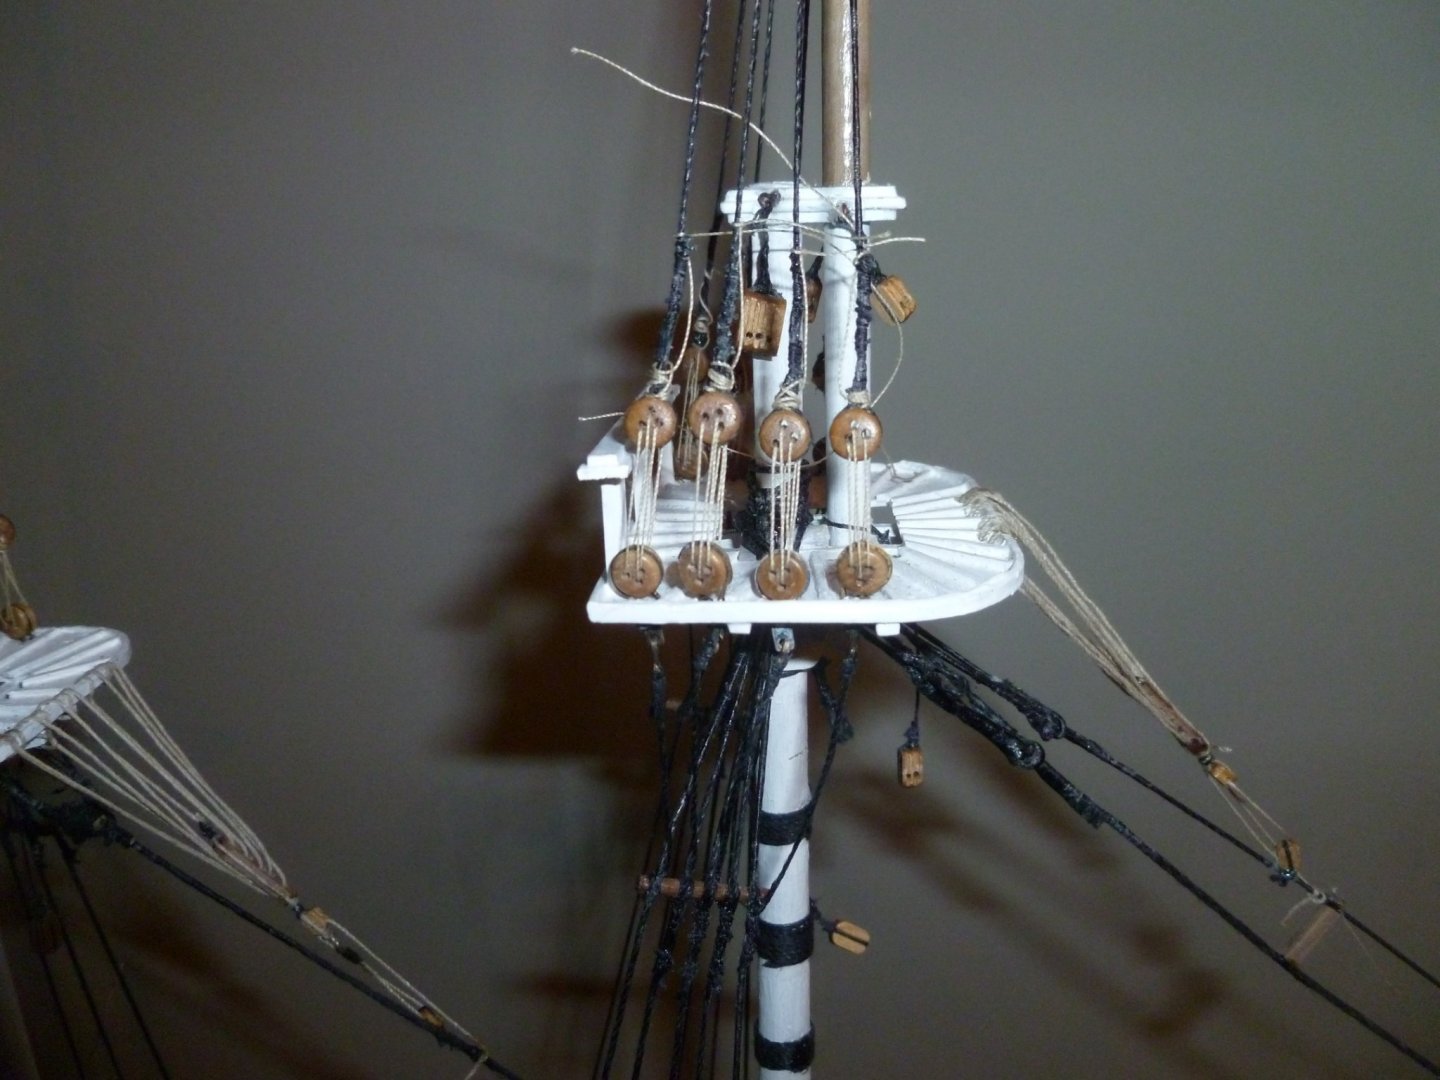
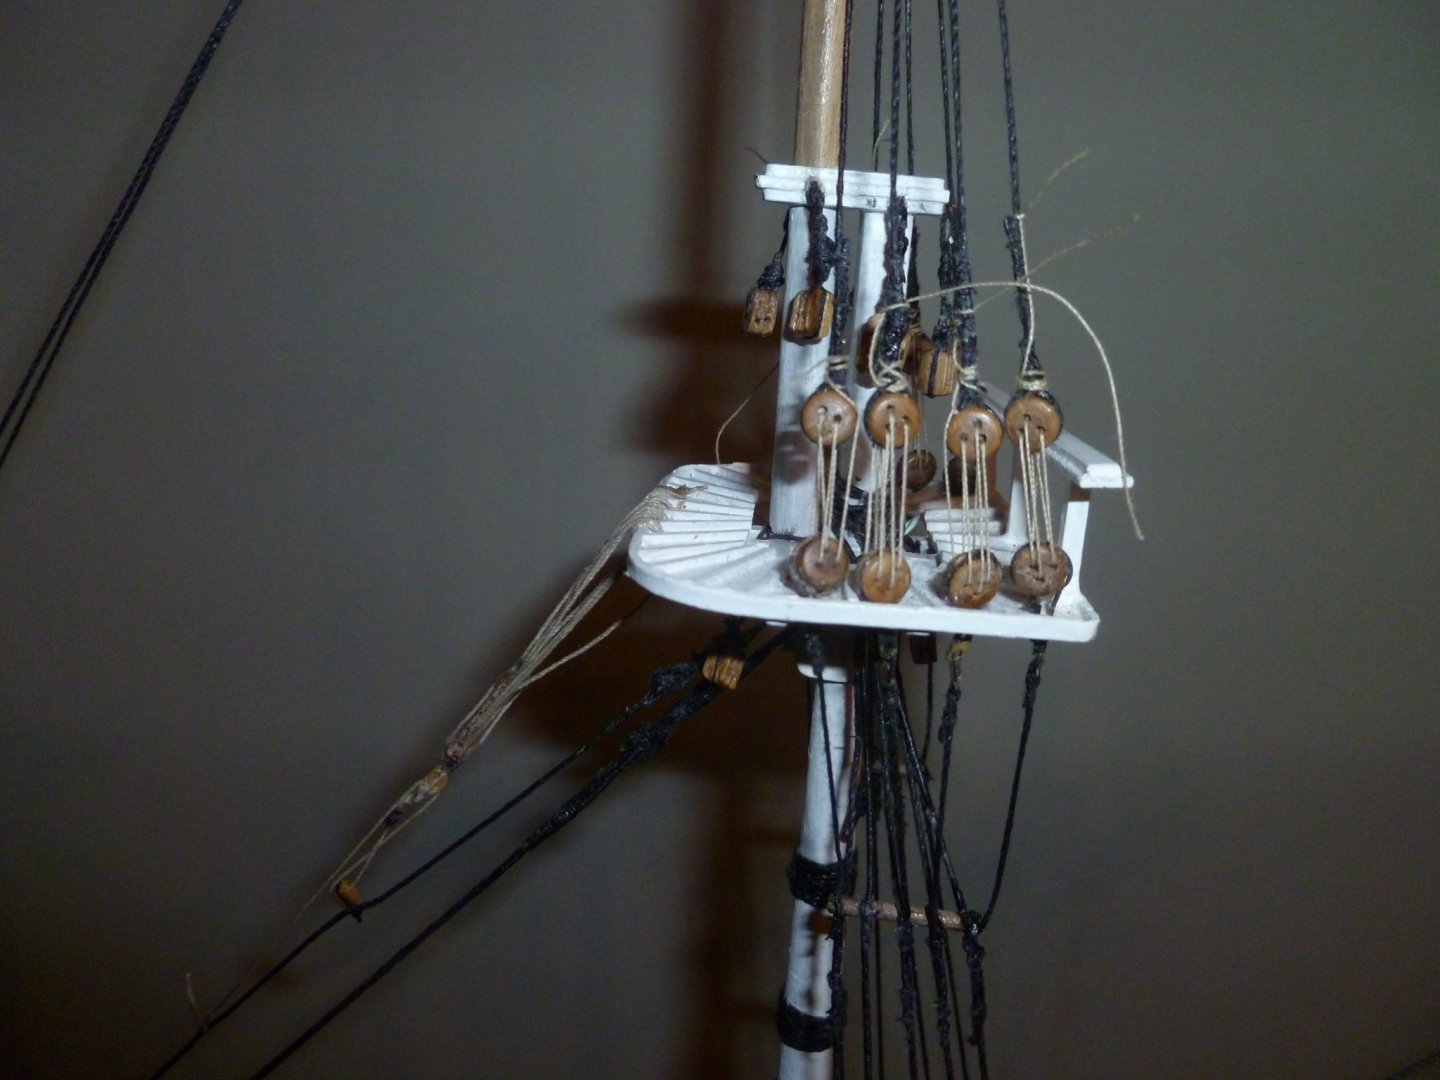
Top shrouds complete and moving onto the top fore stays and jib boom guys. For the record according to the instructions, most of the top and topgallant stays are wrapped around the tops without a mouse and directly attached to the mast in front. According to my source Historic Ship Models by Mondfield these should all have a leading block and lead to the deck via block and tackle. Unfortunately there is no connection on the deck level and I do not have the room. Therefore I will take some advice which I have been given and this time go with the instructions. Unfortunately I wont have any adjustment on the stays once they are set in place.Here is a few photos of my progress so far.


-
Sorry I missed this but I agree with every thing you say. I found the Bounty very tough for a first time build of a period ship and only my second build ever. I like the look of the vessel in the back ground. What ship is she. I look forward to any input you would care to make, having built 5 period ships, you are an expert in my eyes. Best regards Dave
-
Wow! there is a lot of work gone into compiling that list and did not imagine what I was getting into. Best regards Dave
-
Thank you every one for trying to help me with what seems to be a very complex subject, Even some of the experts who have produced books on rigging seem to have a difference of opinion. I suppose it is understandable having been so long ago and once explained to me that the guys who write these books, only have the same information as i or anyone has. Allan I have a number of books which I have purchased since starting this wonderful hobby less than a year ago but still want to gain as much knowledge as possible I will see if I can get lees book on Masting and rigging. for hopefully a more balanced view. To make sure I am looking at the right book is it 'Masting and rigging for English ships of war 1625 to 1860 ?