TimC
-
Posts
109 -
Joined
-
Last visited
Content Type
Profiles
Forums
Gallery
Events
Everything posted by TimC
-
Just a thought I had after applying the stain. Once the poly is applied you do feel the need to sand a little on your models to get a good bite from the glue? I figure wood glue may need a little roughness to adhere to, but CA should theoretically bond to anything not actively oily, yes? best tim
-
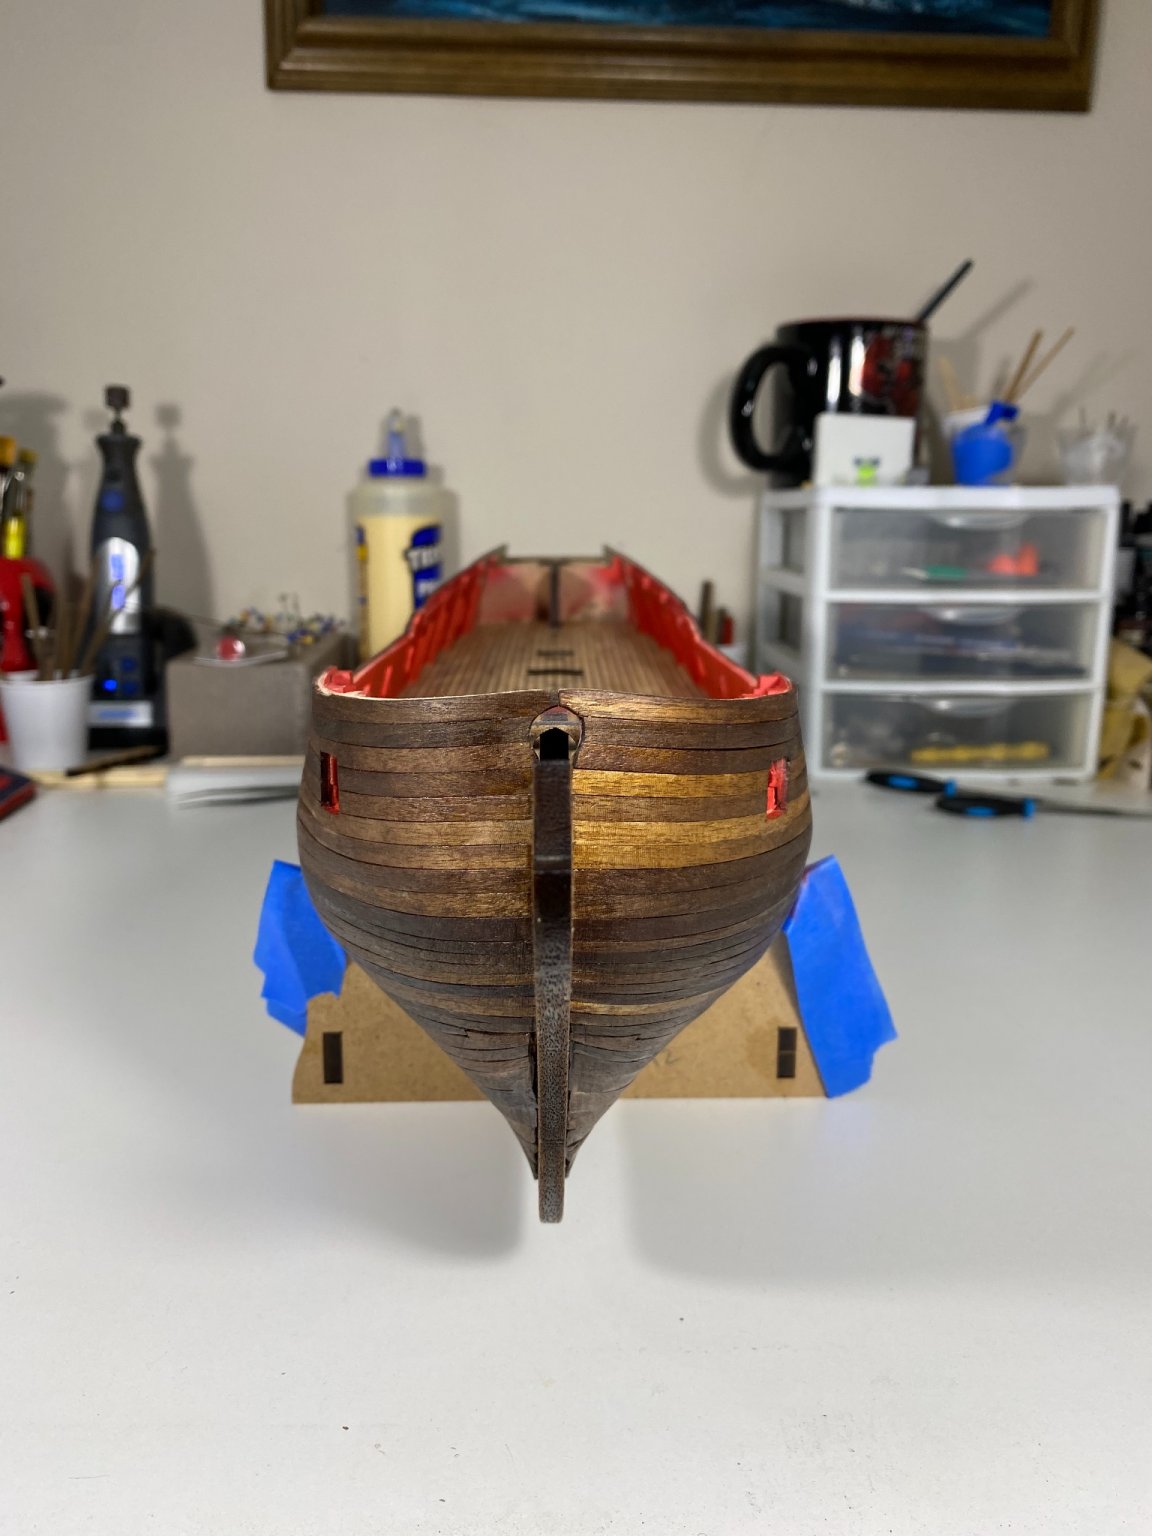
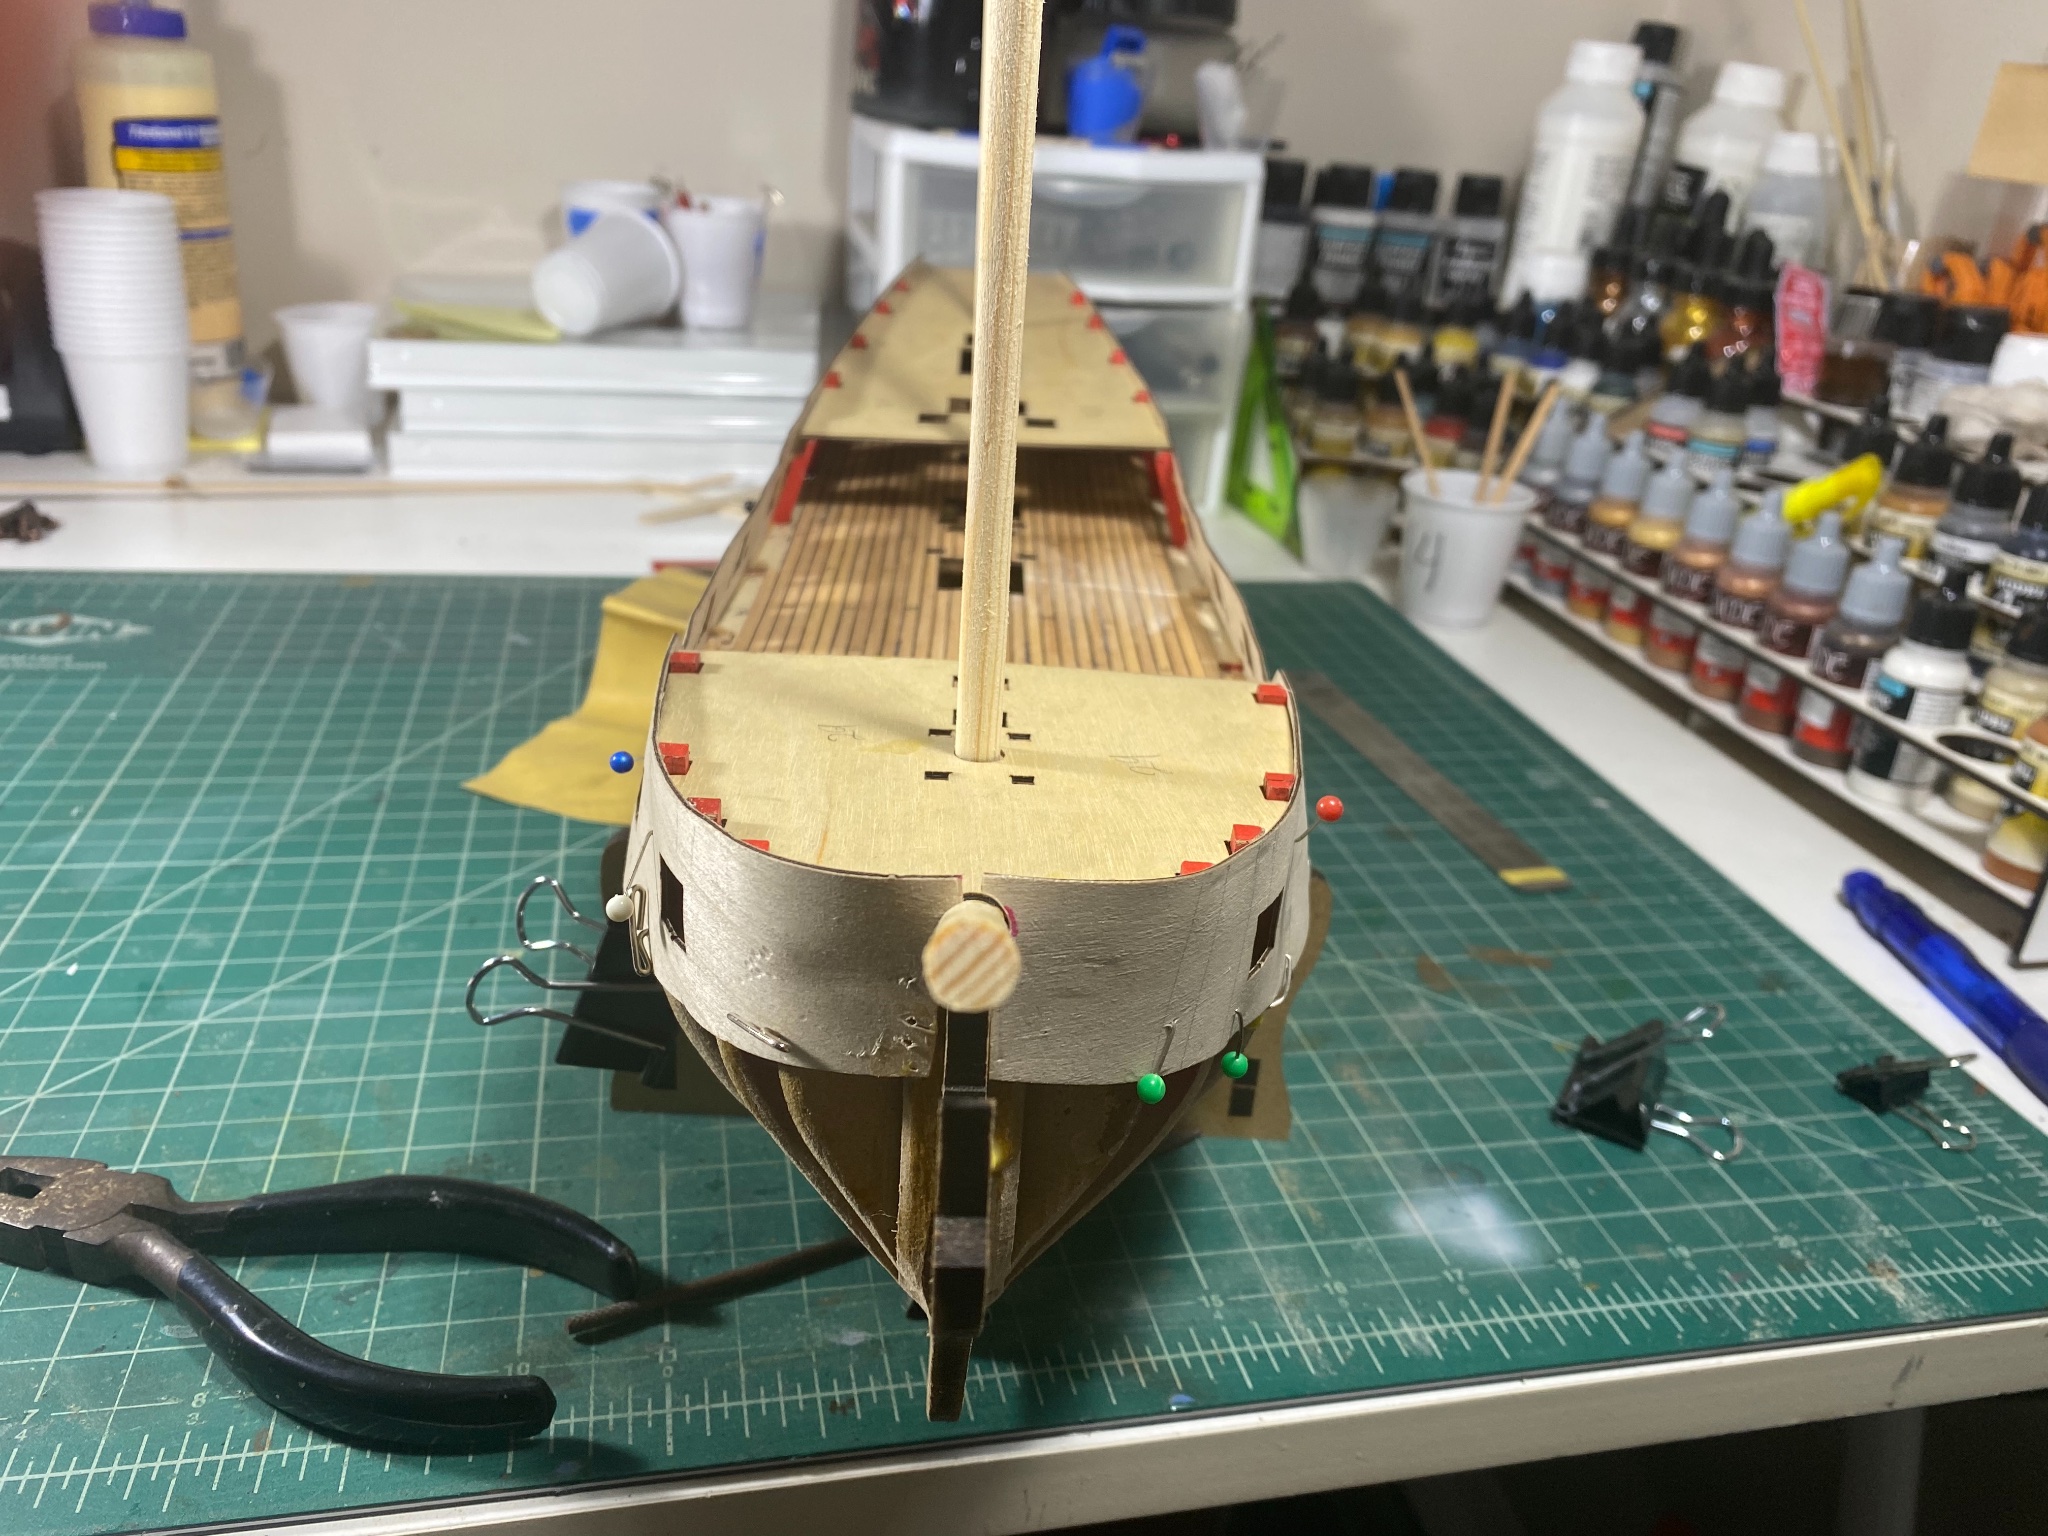
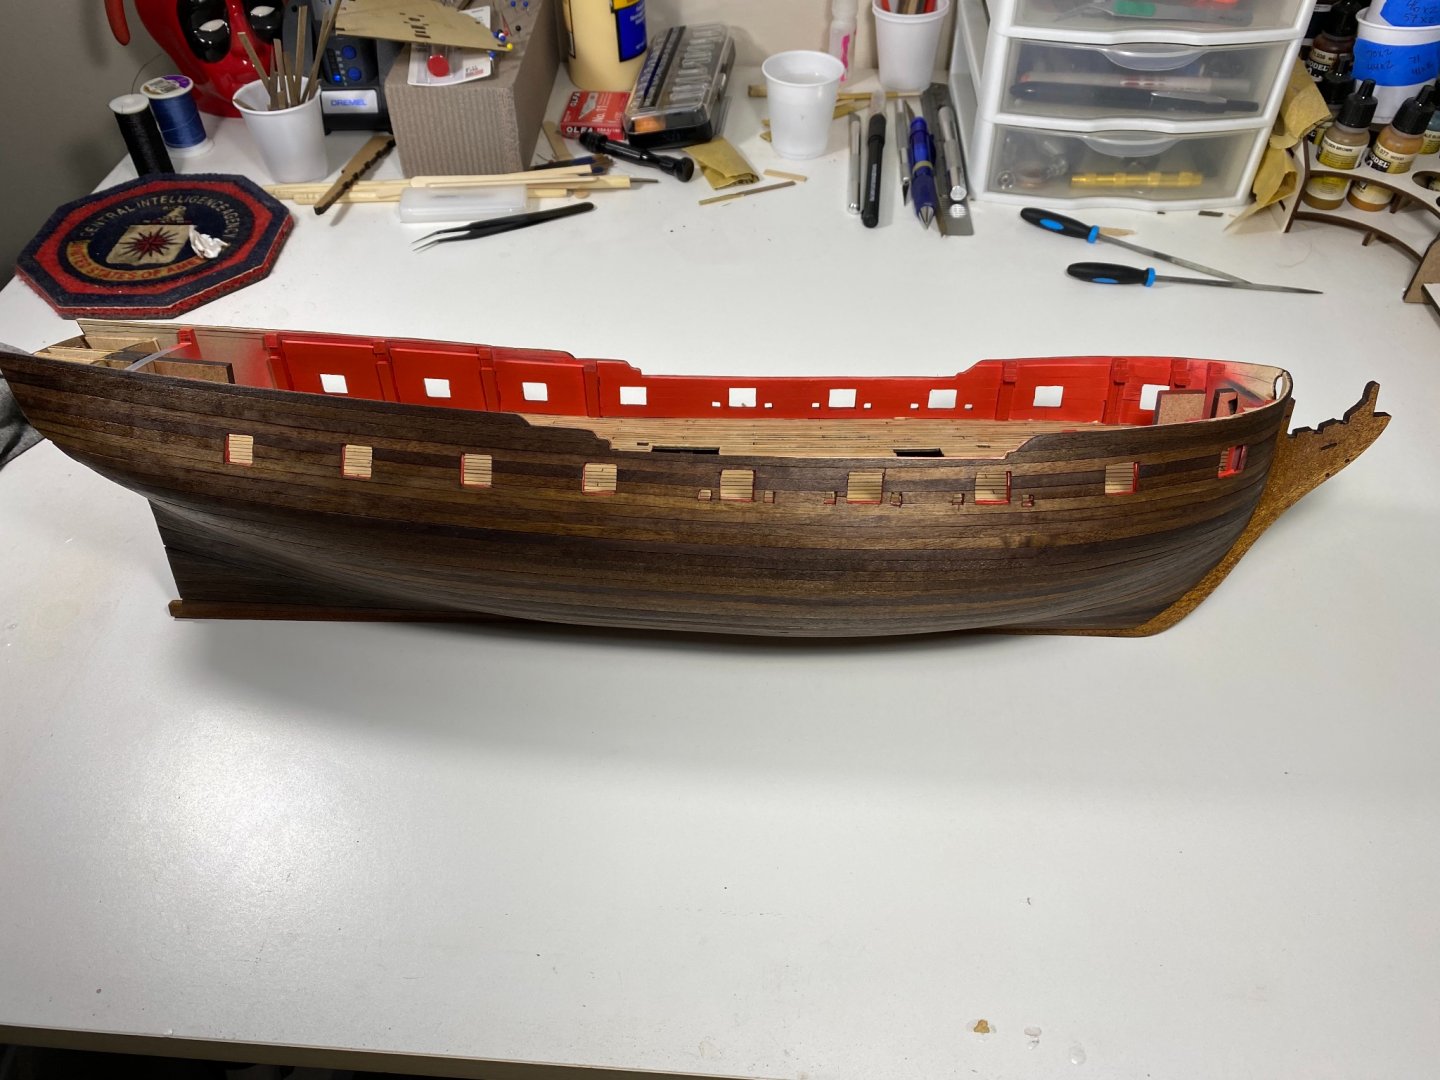
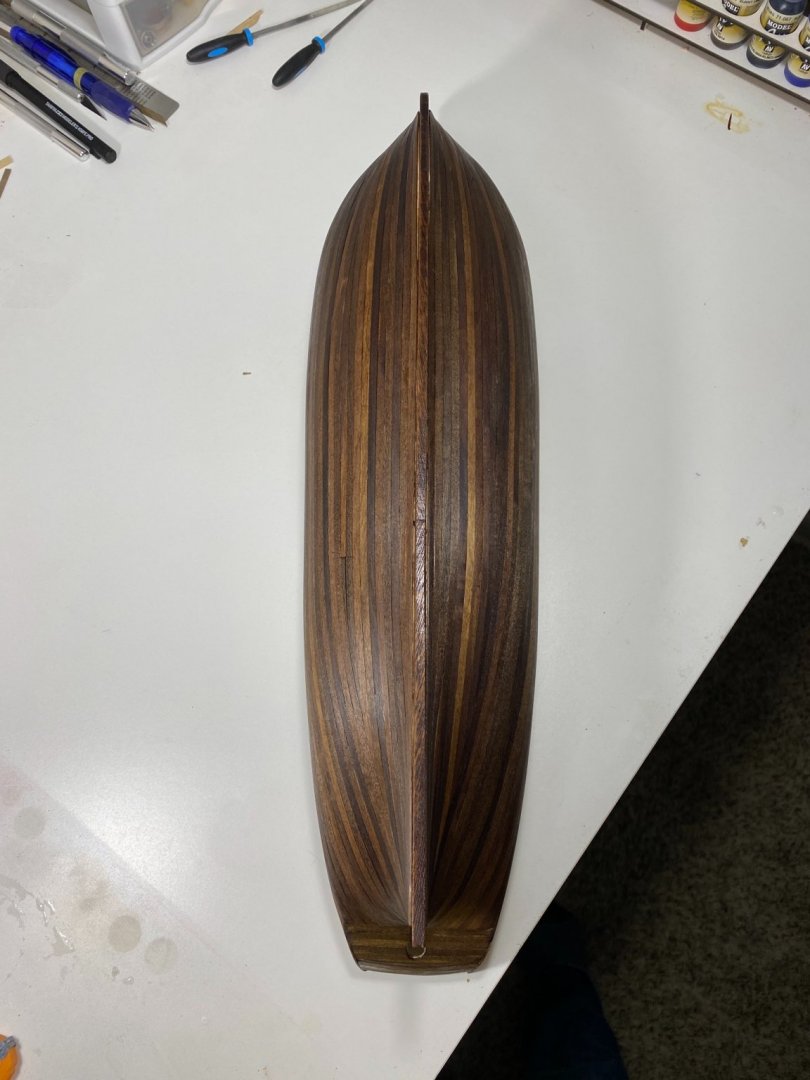
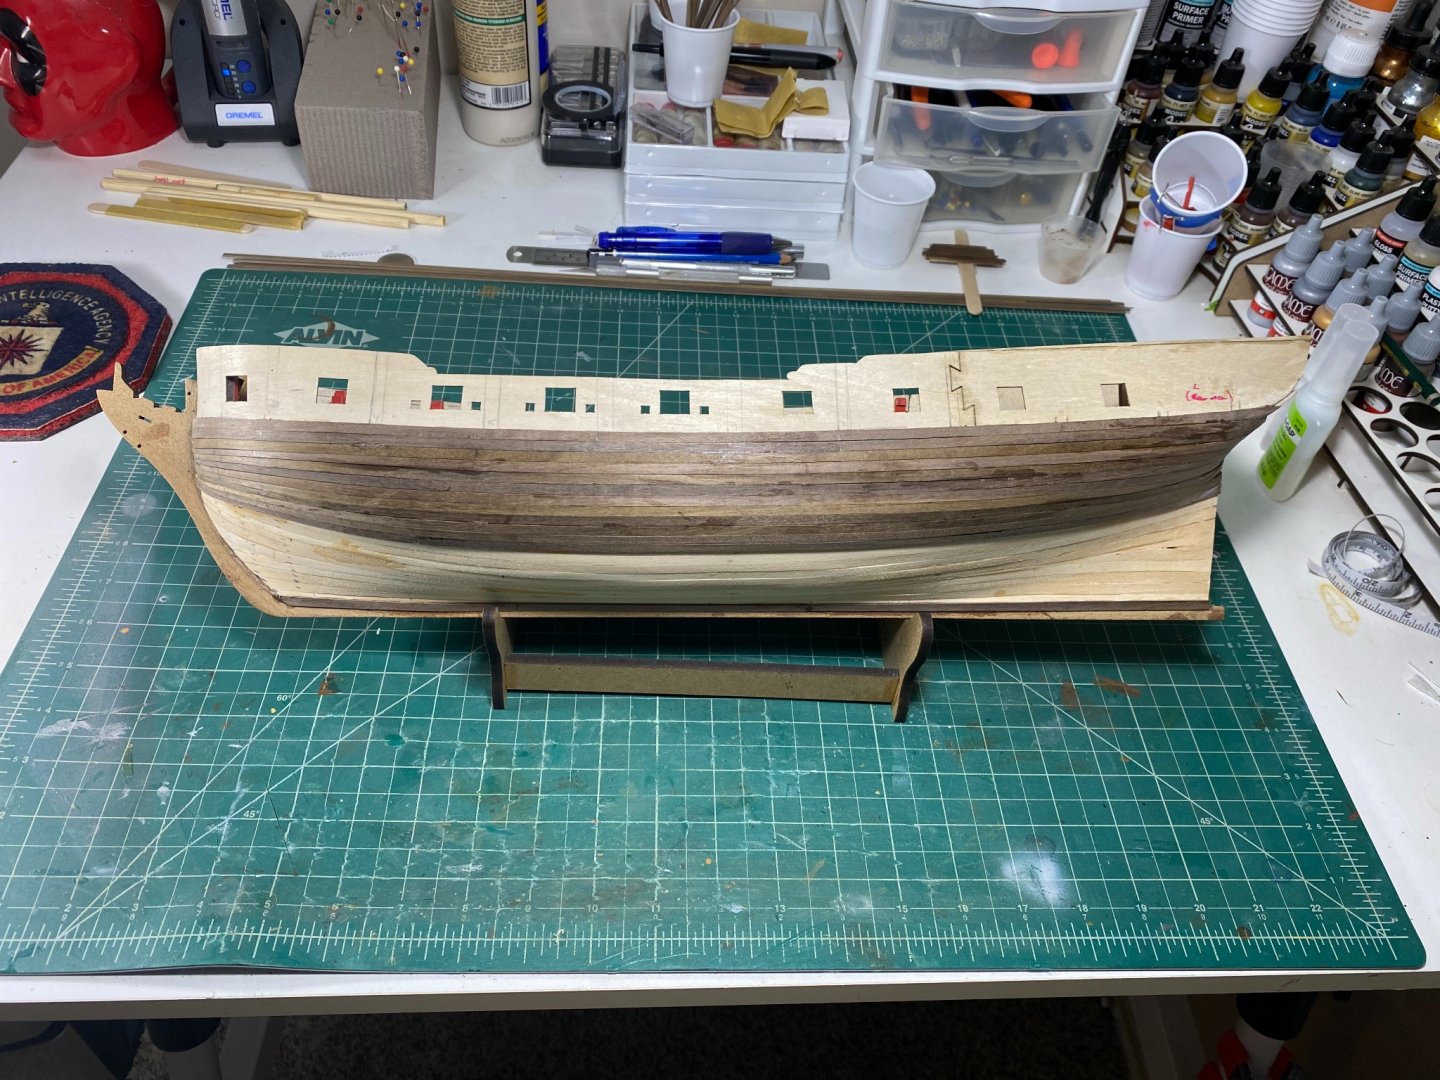
So I have made a bit of progress since last time. I got the bulwarks completed, finished the outer hull, and got some stain down. i finished the bulwarks with left over lime wood since I felt like it fit better and had a nicer color to apply red over without it coming out too darkened by the walnut. I’m going to put another strip at the bottom but I’m not sure if I want to go red or have a slightly different shade to add some mild depth. After fiddling with some scrap pieces, I decided to put a layer of Puritan Pine stain over the walnut as I feel that the pine sank into the creases of the walnut and highlighted them while also bringing out the natural colors of the surface. I did a single wipe on layer so far that I plan to finish with poly satin once it cures. Not sure if I’ll add a second layer of pine before that, since right now I love the look.

- 164 replies
-
- 2
-

-
- fly
- Victory Models
- (and 4 more)
-
Can’t thank you enough for the advice. I have about 4 planks left on the upper gun ports then going to sand everything down to even things out and remove any visible CA. Then onto the clear coat hopefully. Very excited to get into more of this ship.
-
I really appreciate all the feedback! I picked up a tin of miniwax satin clear for about 13$. Once i get the upper portion of the gunport strips planked up, ill throw some scrap pieces together and start experimenting
-
Thank you for the likes and suggestions! glbarlow, I’m from Delaware. Is there a specific brand you like to work with? I’ve seen a lot of people using Ronseal but it looks like that’s hard to find here in the US. I feel like I see a lot of miniwax poly and varathane polys at my local Home Depot though thank you for the input. I’d love to get to seal but I may have to try mini wax or varathane
-
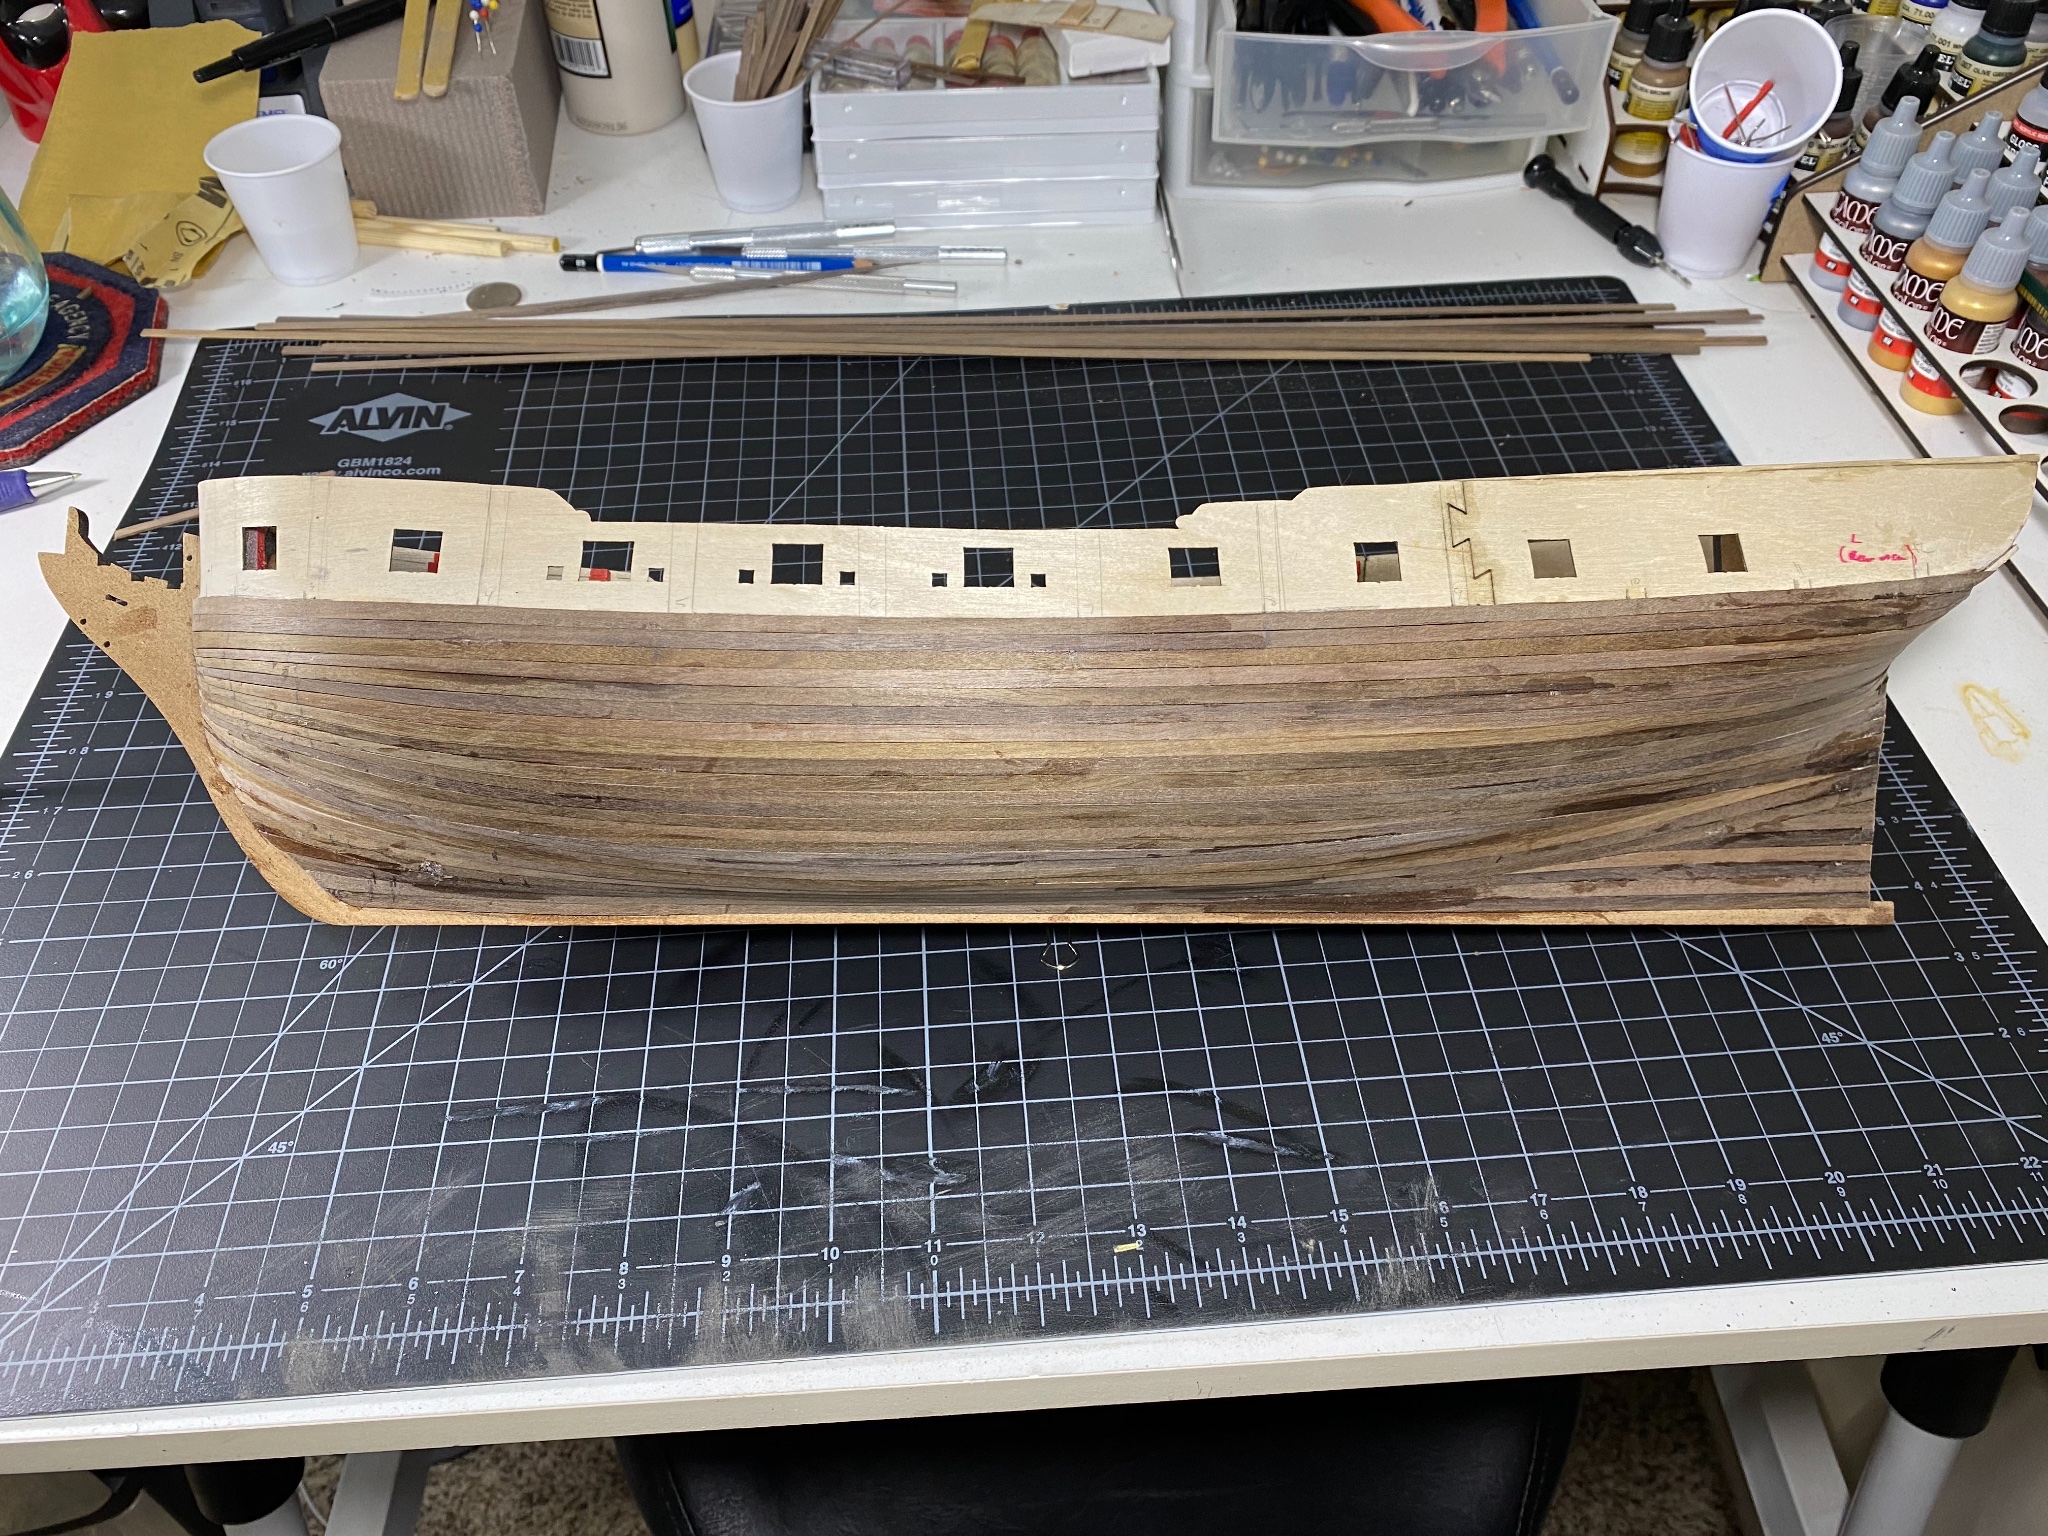
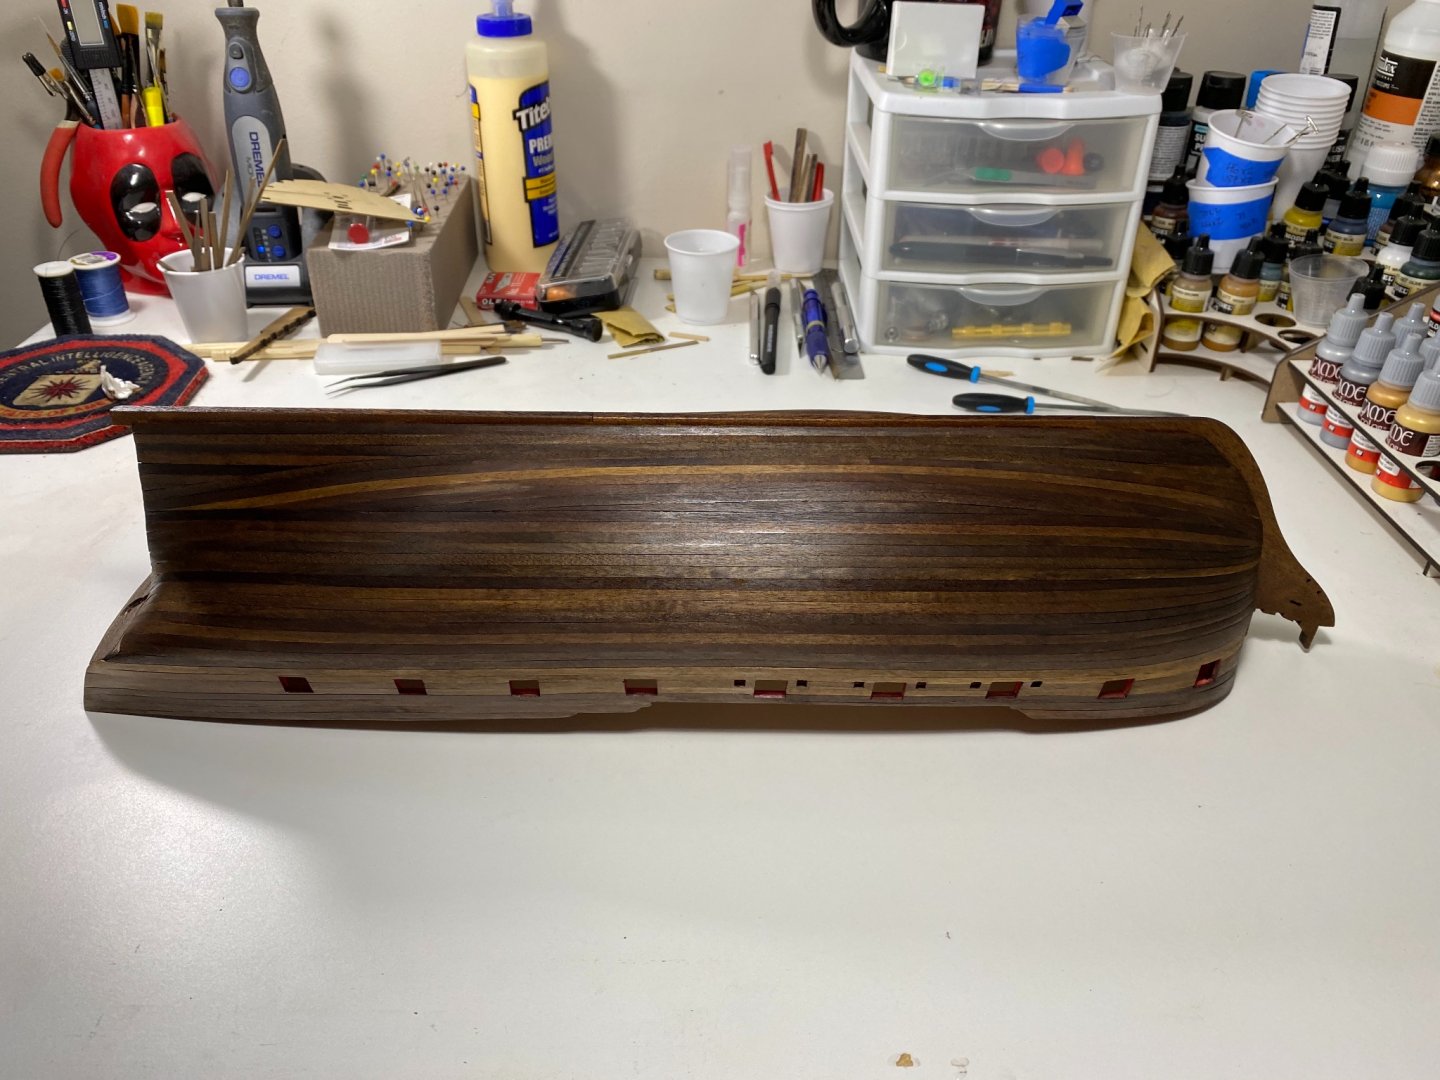
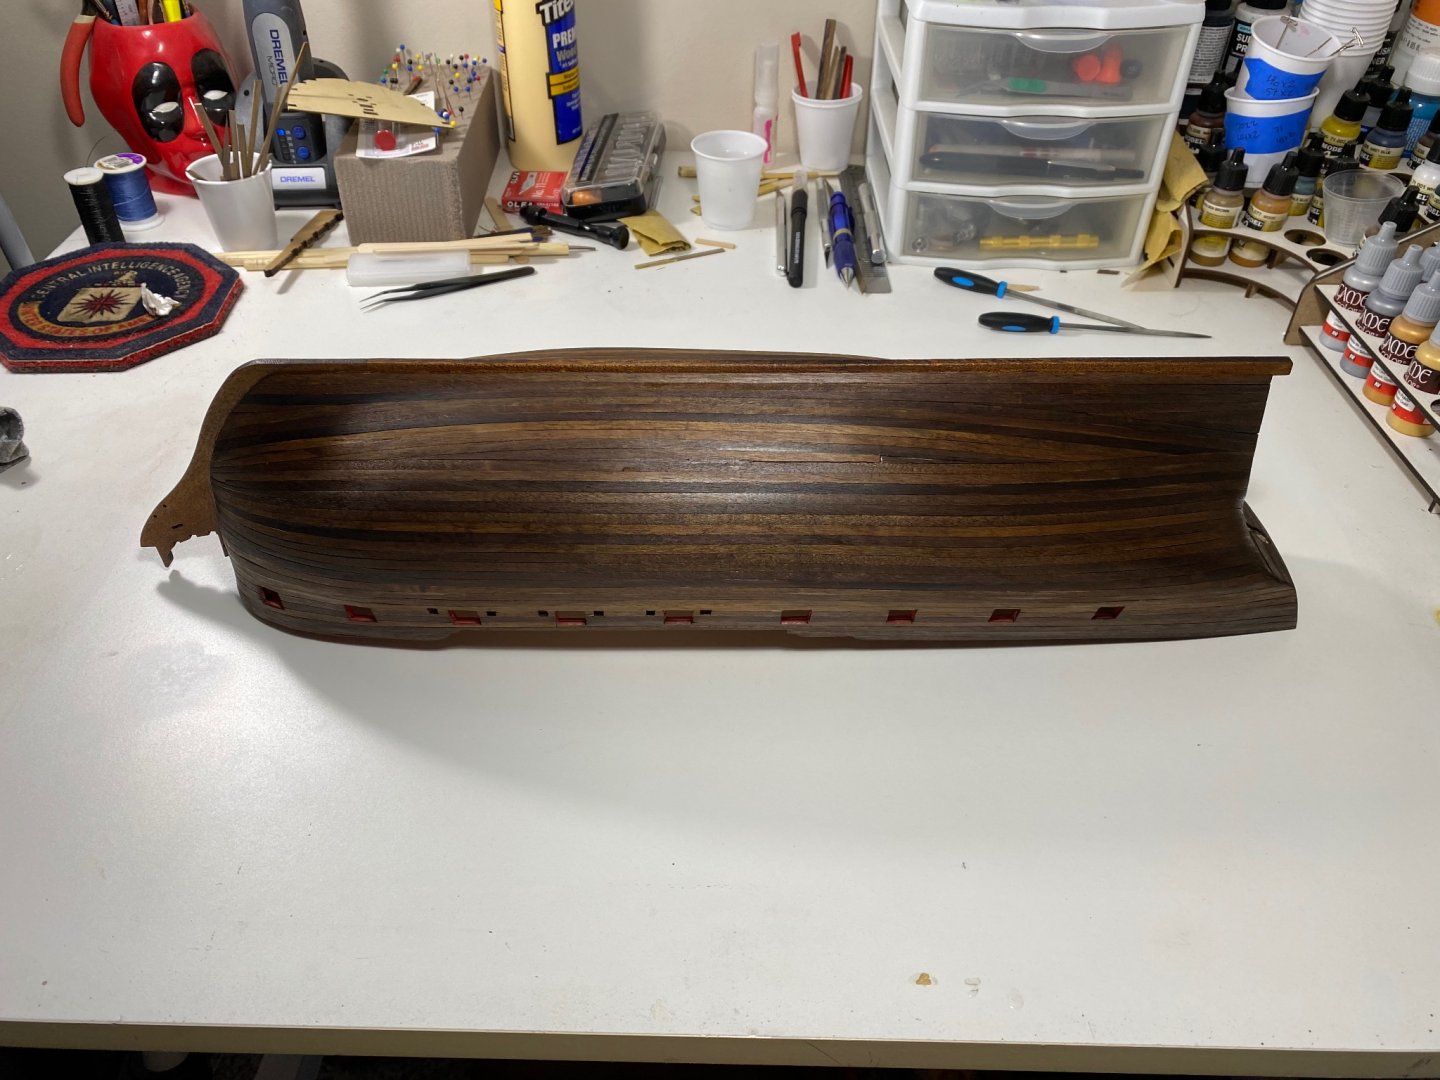
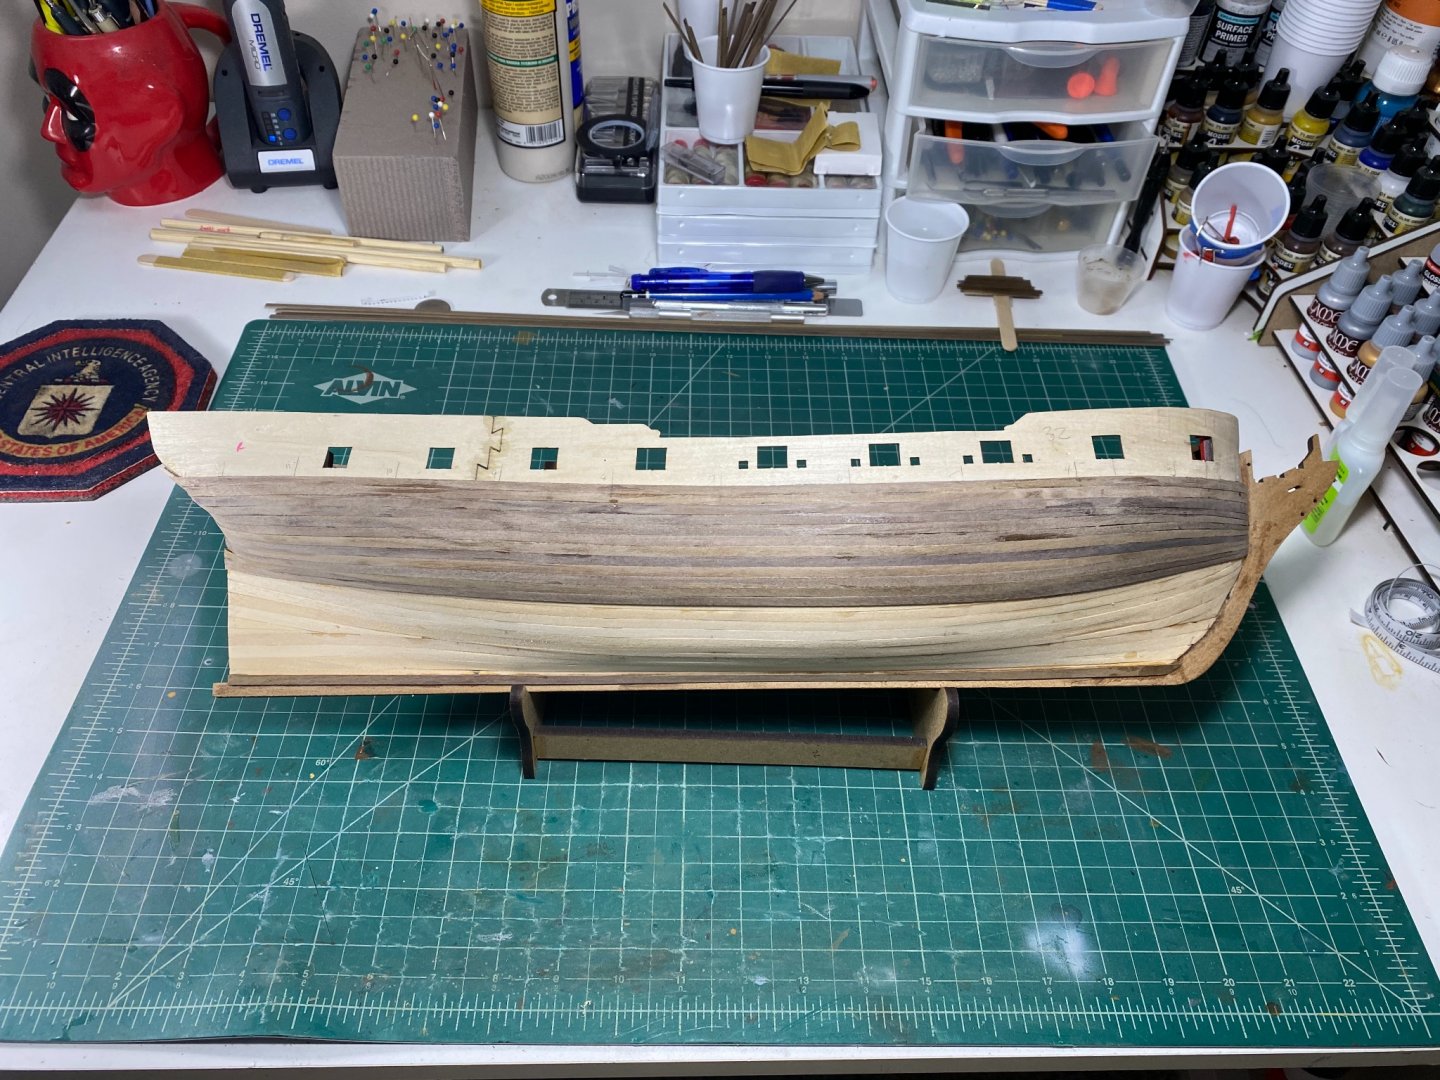
Bottom portion of the walnut planking completed last night. Very surprised this went as well as it did for my first attempt. I’m very happy with at least some symmetry! a question that I have now is that I really want to bring the wood to life, but don’t want to impact my ability to glue the other structures that are needed to the hull. I am also not completely sure at this point if I want to paint the bottom or go natural (leaning toward unpainted since my planking came out decent). is there a way to accomplish a natural finish using tung oil, stain, varnish, etc that will leave me open to choices later? Is one better than the other? I should note that I would prefer to only compliment the woods natural tones if I stay natural, I don’t want to overdo any stain or vanish any and all advice would be very helpful. I’ve used stain before but never tung oil so I’d be an amateur there. Have a great day, thanks for looking !

- 164 replies
-
- 2
-
-
- fly
- Victory Models
- (and 4 more)
-
Thanks! Im hopeful to be moving further this weekend. I took a look at yours and it is coming along nicely as well the tip on the decorations is great! I will definitely reference that lime plank for spacing
-
It’s definitely a process and it’s a mess 99% of the time. I just clean it up here and there to keep my girlfriend from using one of the very sharp scalpels against me
-
I believe you’re right that I may end up being a little wide in the end. This is my own fault for not shaving enough off before the initial planking. I was able to shave off a good amount after the first planking so I’m hoping that a light sanding after the 2nd planking will either make it flush or “close enough”. I’m already in making notes for my next build in areas to improve upon. I definitely understand the process a lot better now so I’ll be able to plan everything out more accurately
- 164 replies
-
- 1
-
-
- fly
- Victory Models
- (and 4 more)
-
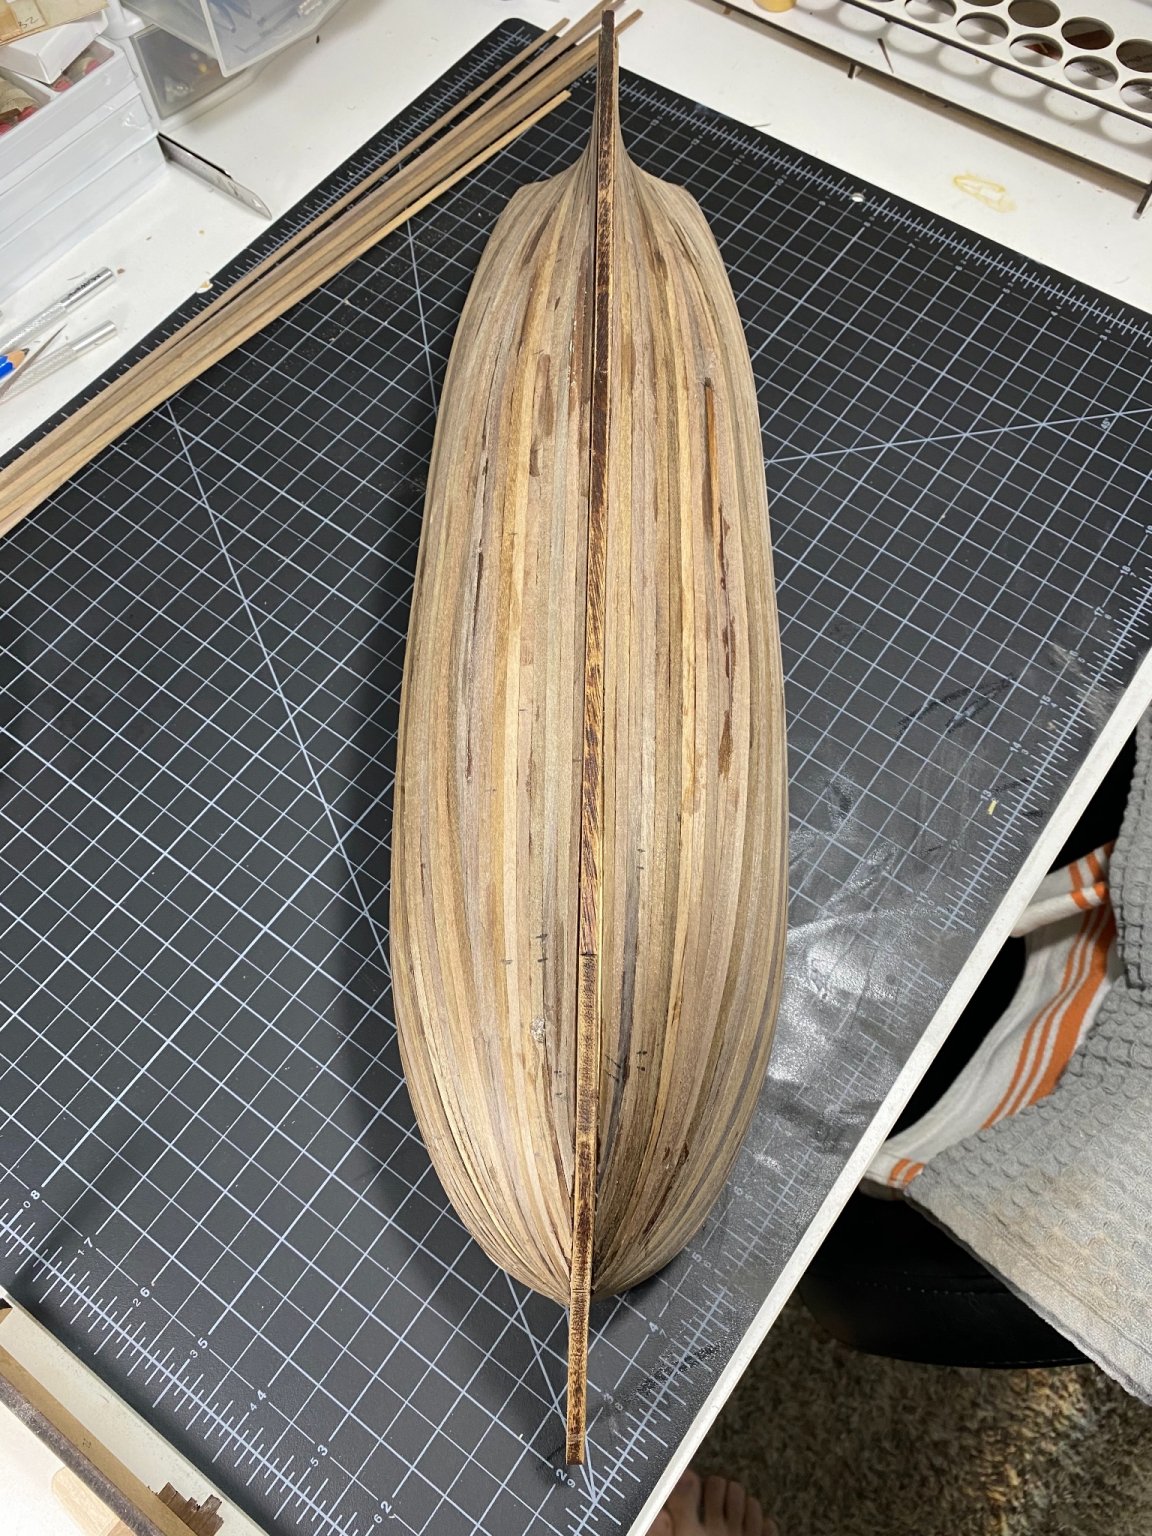
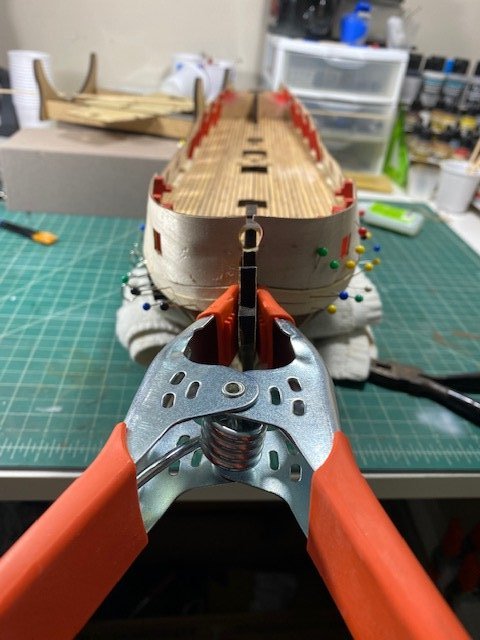
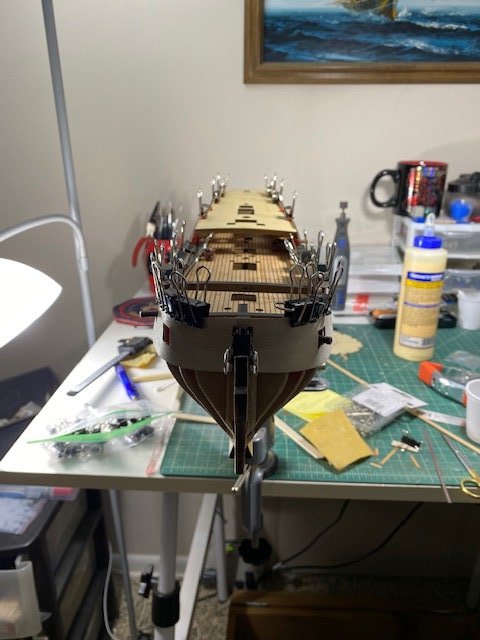
Had the day off, so I got a good bit done over the weekend and today. Second planking is definitely easier with the entire surface underneath being solid and smooth. happy Monday!


- 164 replies
-
- 4
-
-
- fly
- Victory Models
- (and 4 more)
-
Richard this is looking wonderful!!!
-
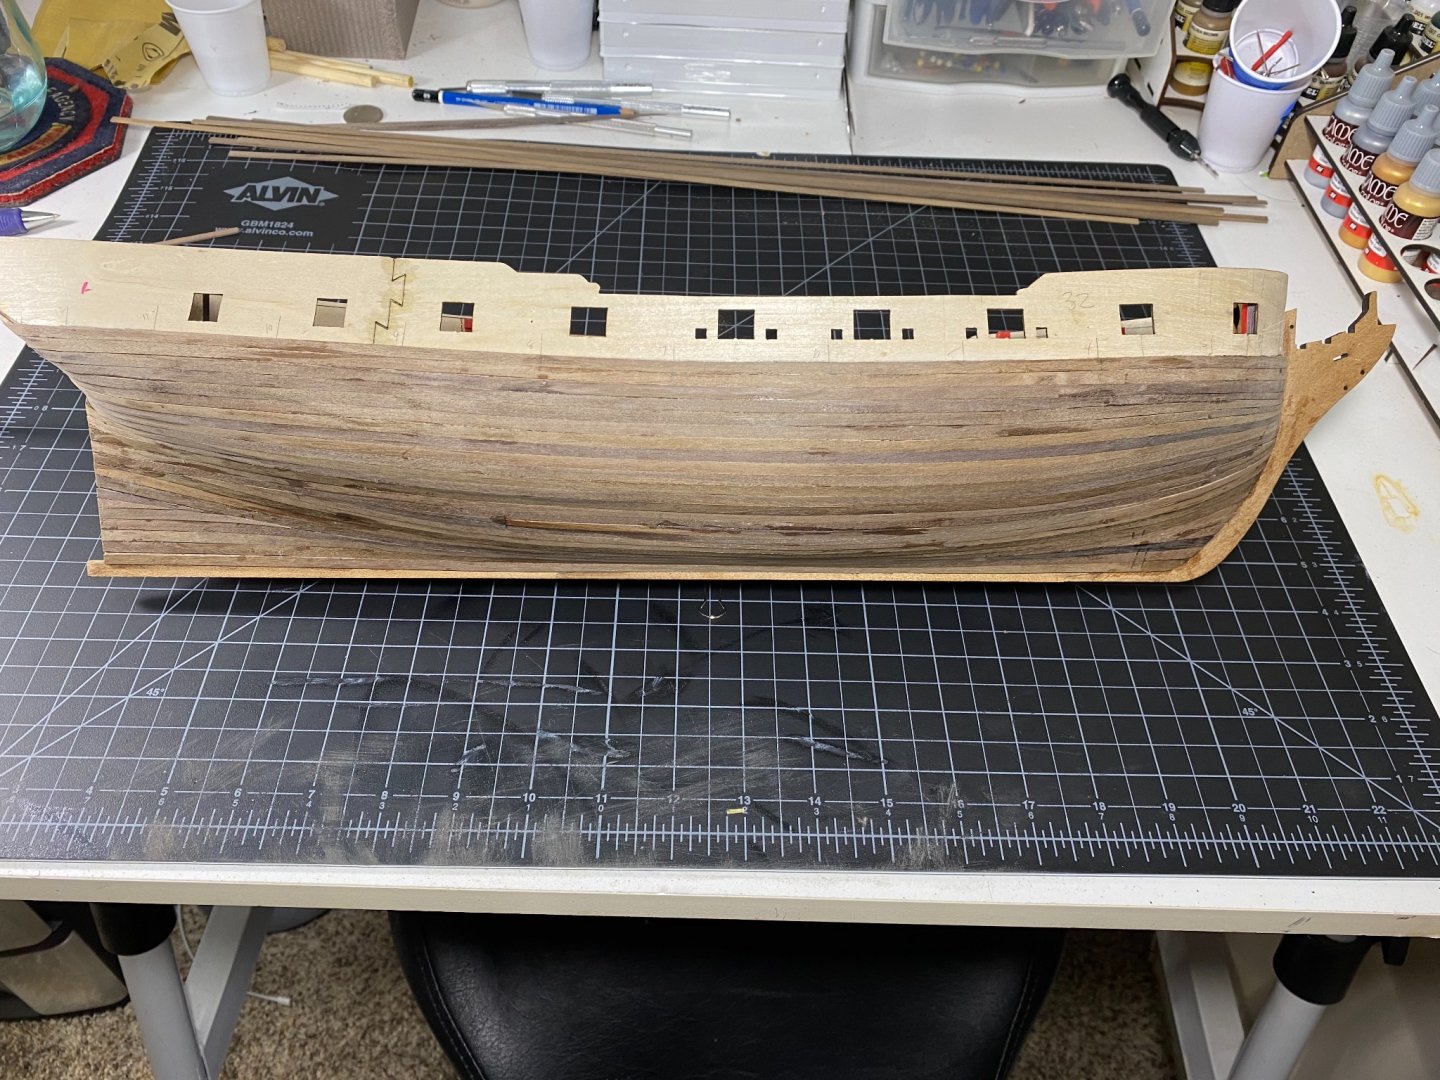
Looks great! Everything appears lined up nicely including your cannon compared to the strips. And don’t worry about the wave at the bottom. Mine had the same thing but with the thickness of the first planking layer you’ll be able to sand it down flush extremely easily. Keep Up the great work !!
-
Thanks for the primer tip. That will definitely save a little time! You were right before as well. Getting the hang of it only took a few planks, then I was able to relax and enjoy the sawdust
- 164 replies
-
- 1
-
-
- fly
- Victory Models
- (and 4 more)
-
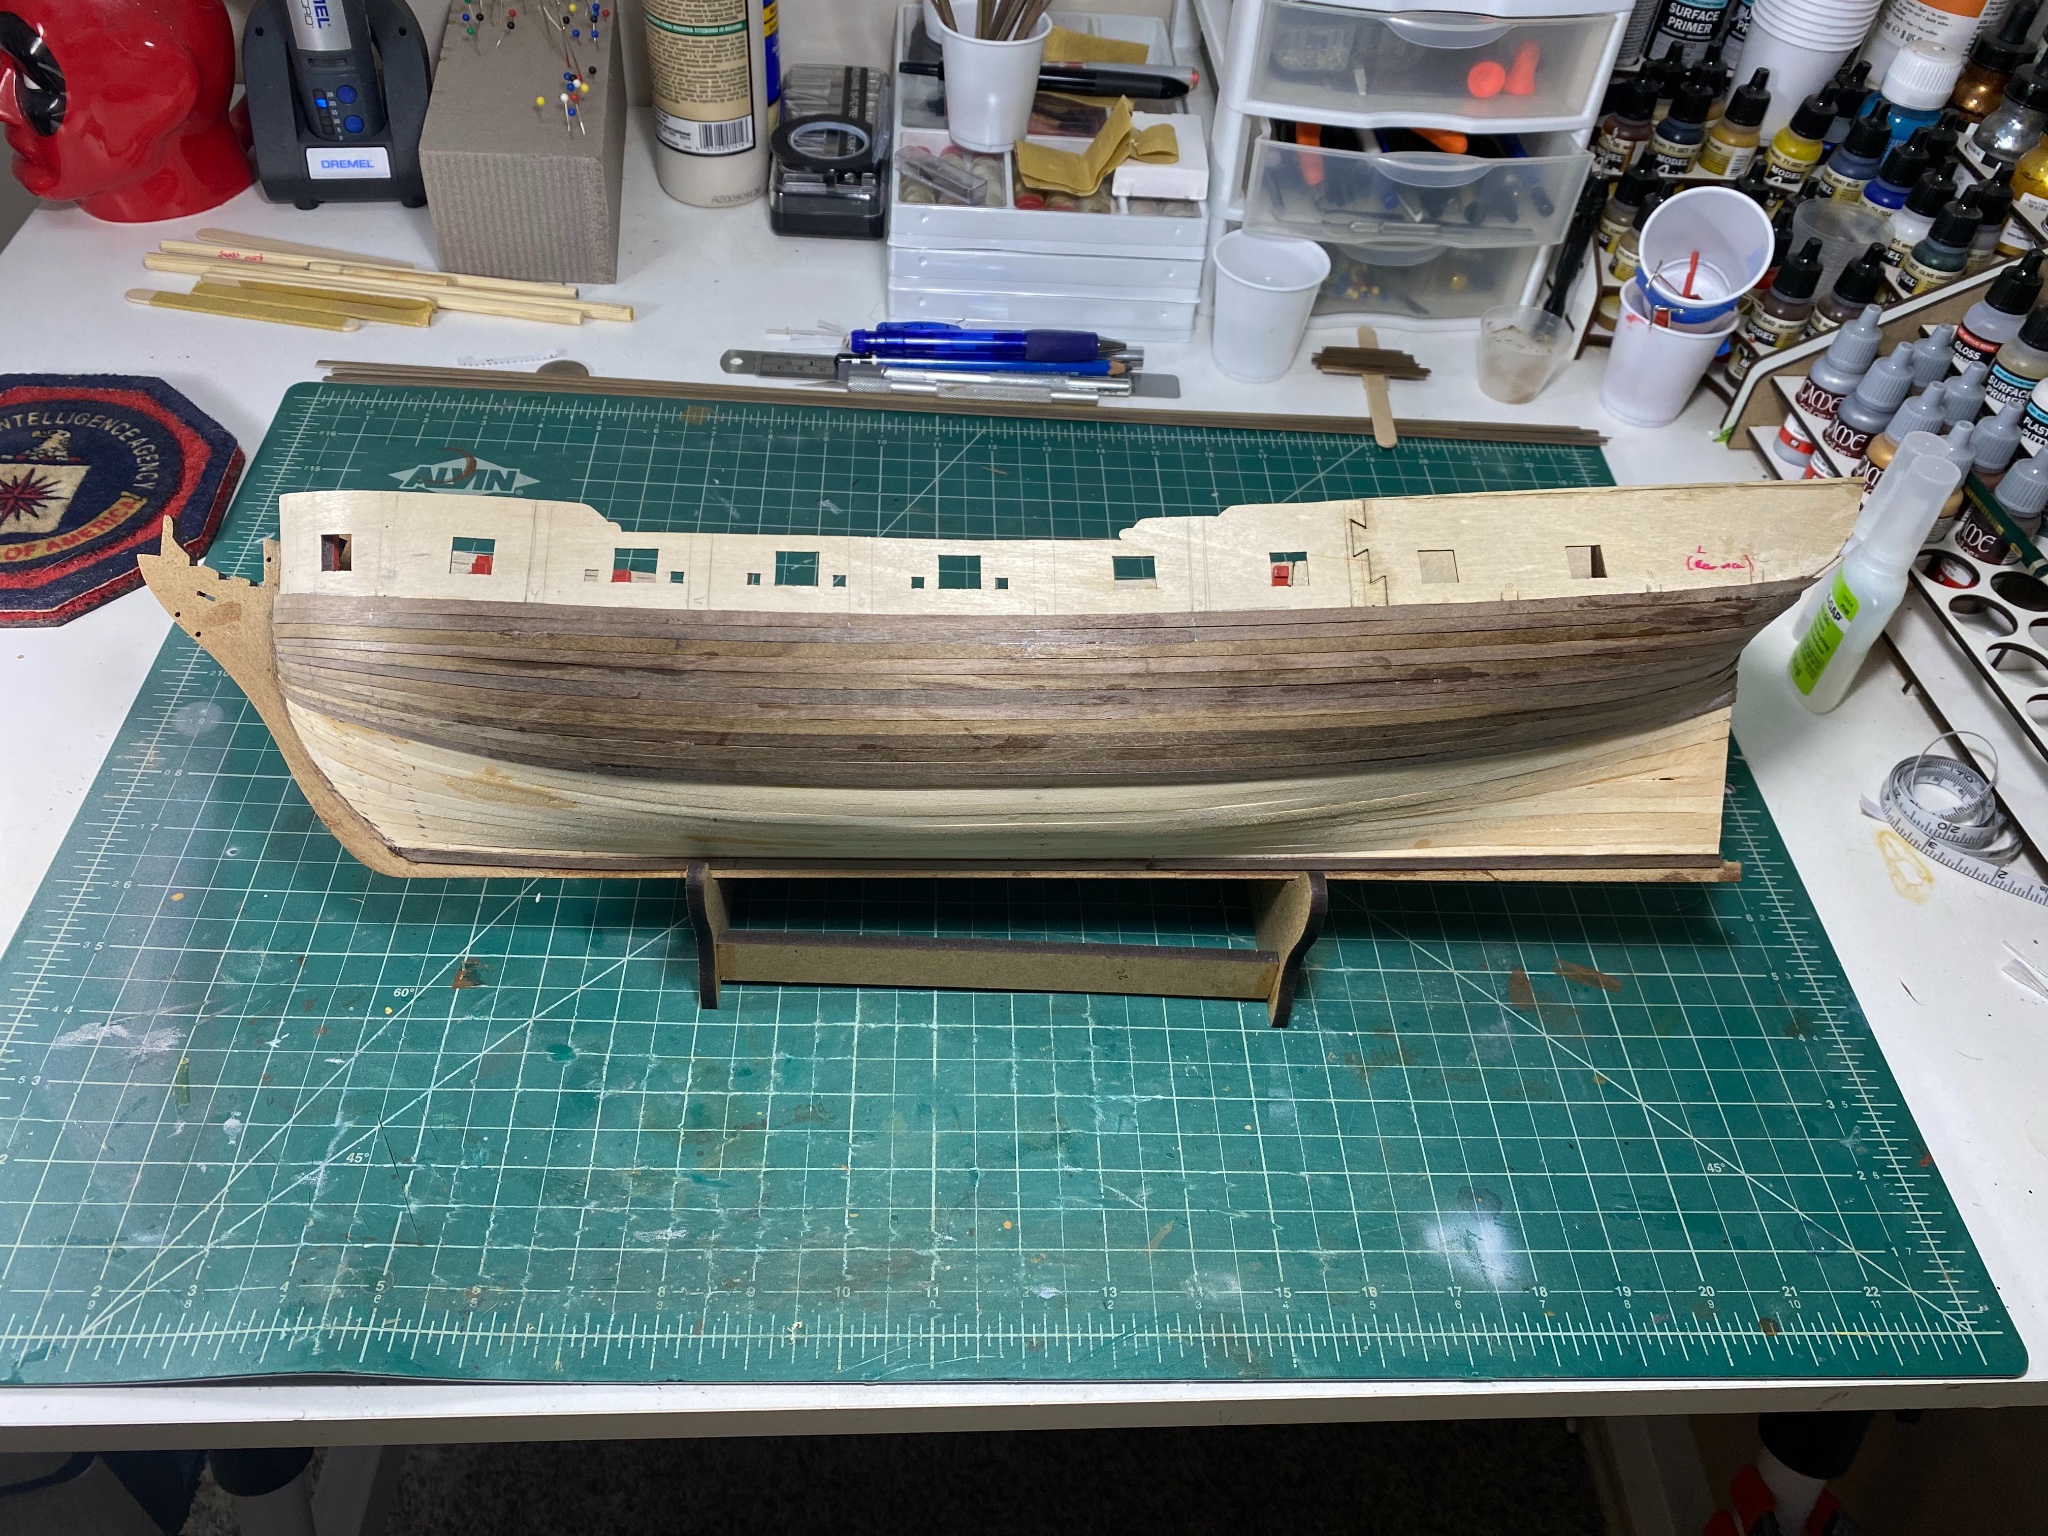
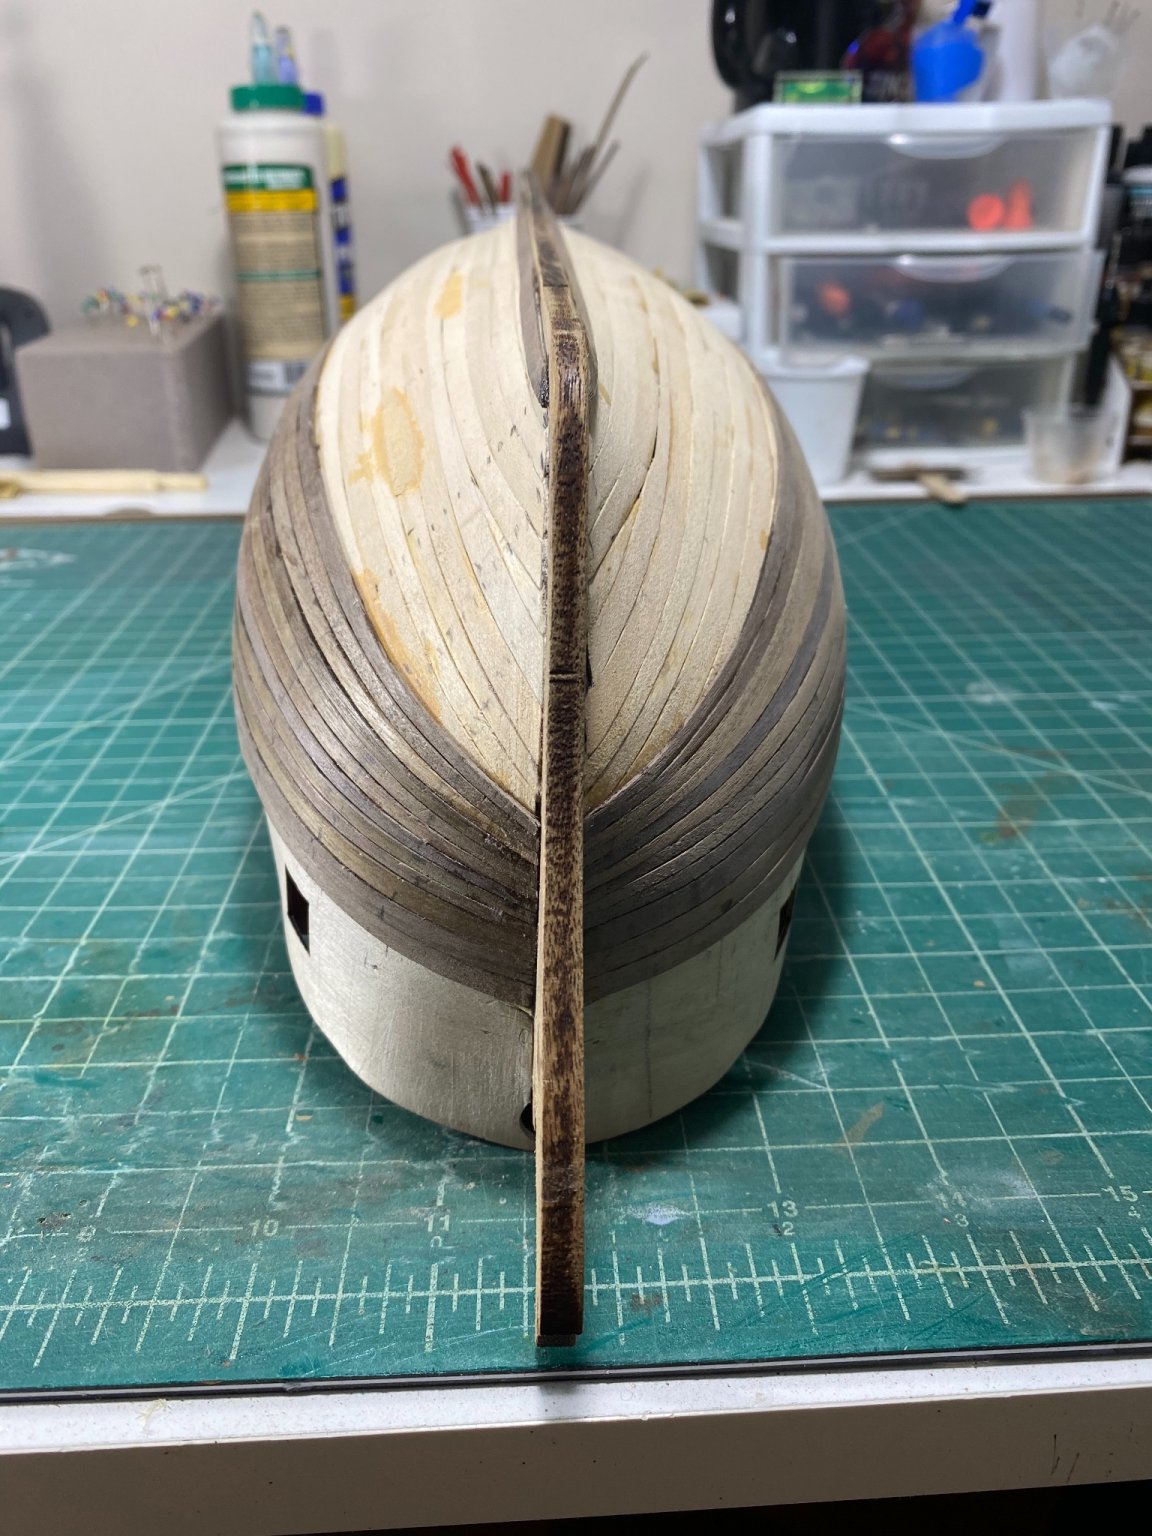
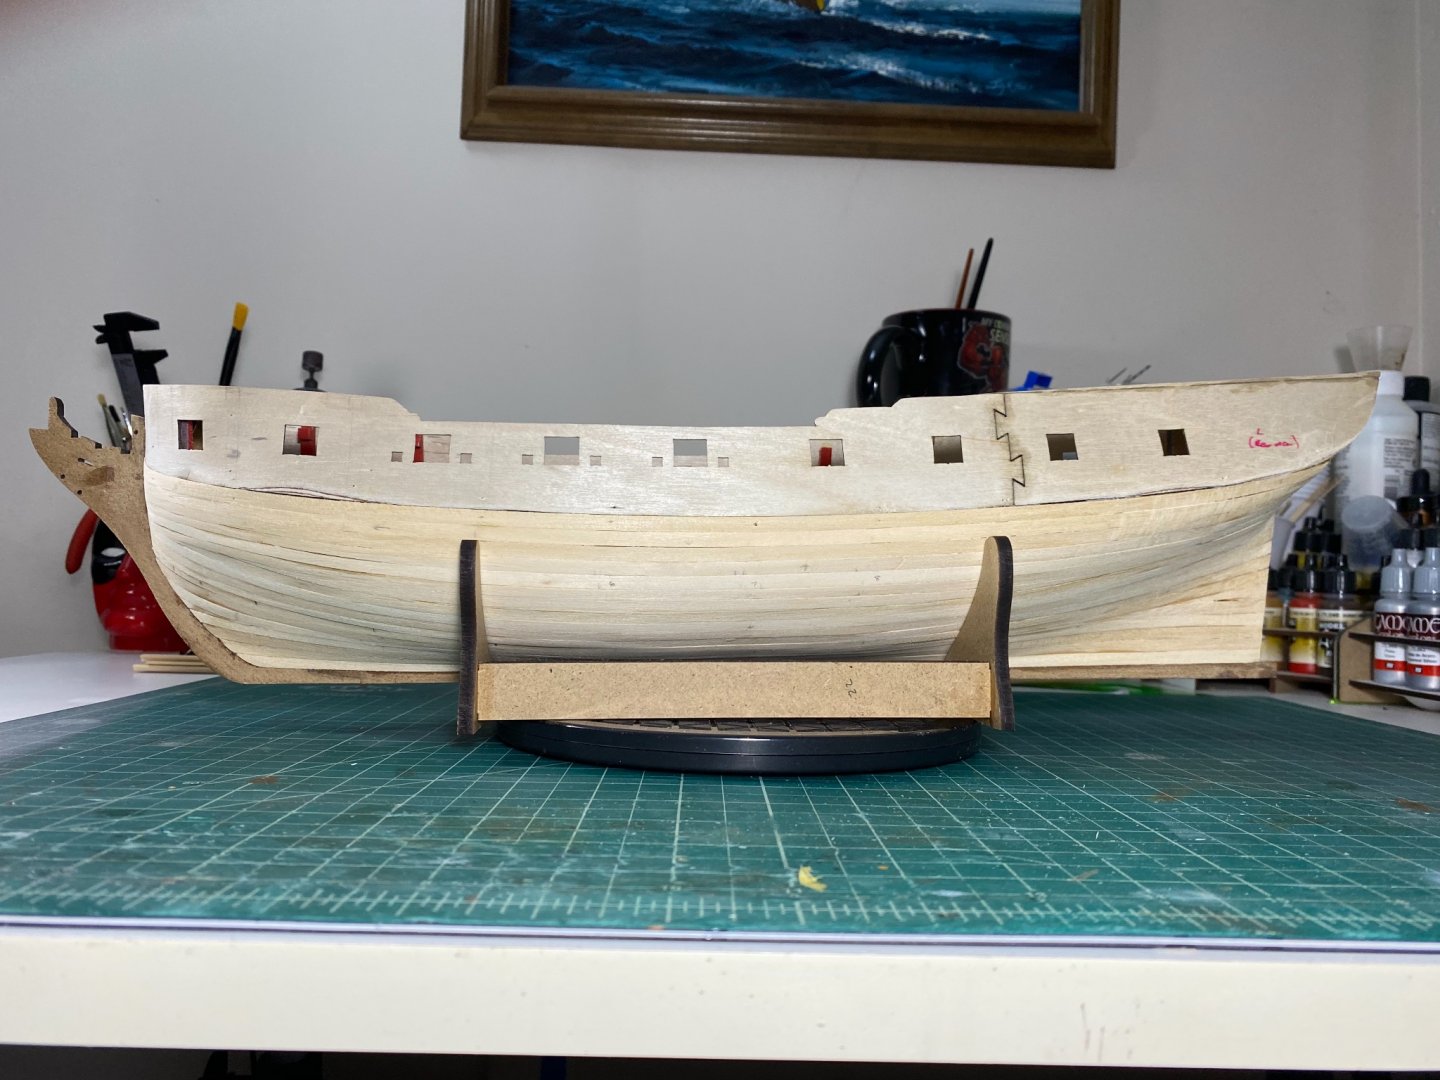
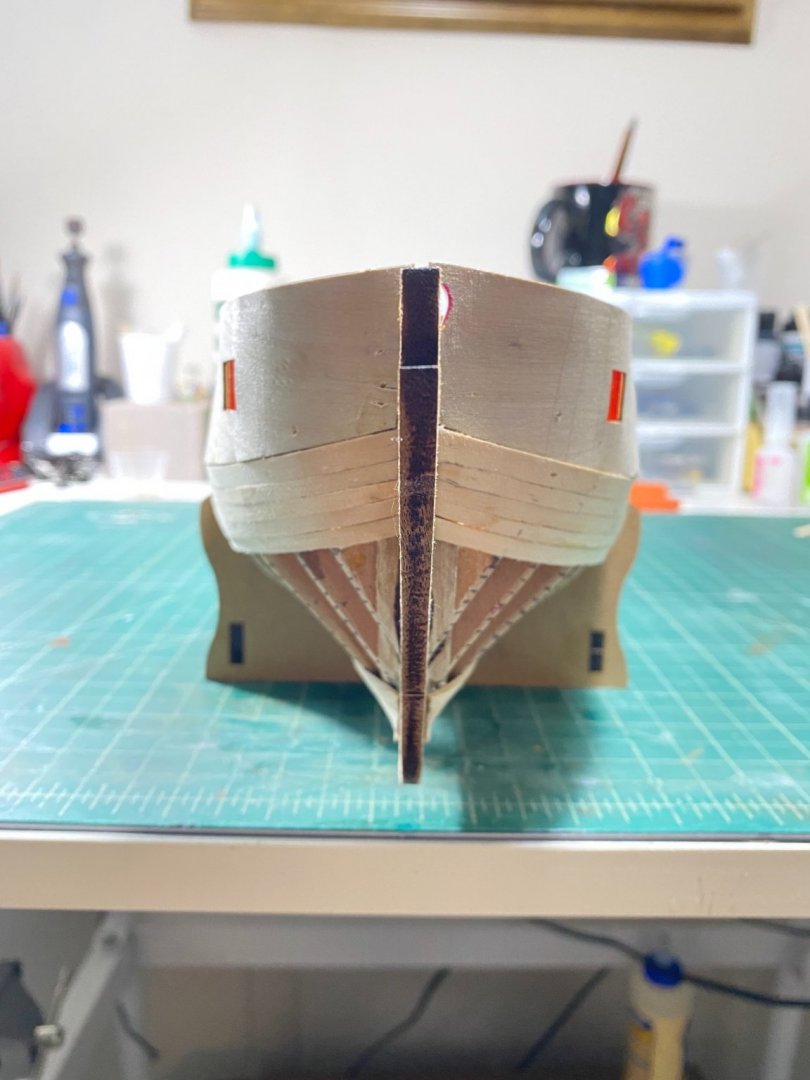
Hi all I just finished up the first layer of planking 😊! It is far from perfect but I’m actually pretty happy with how it came out. I feel like it has decent symmetry between sides and I’m definitely more confident to go into the final layer of planking. there are some minor gaps that I plan to hit with wood filler. I still need to obsess over it a few times to make sure I have sanded enough away to allow for the second layer at the bow and stern. Then I’ll likely do a thin primer of grey which I believe a lot of people mention on here to see imperfections?? If this isn’t wise please let me know. thank you to all who have helped this far. I truely appreciate it and would not have made it this far without all of you. The willingness to help in this community is incredible Tim

- 164 replies
-
- 3
-
-
- fly
- Victory Models
- (and 4 more)
-
You’re probably where I got the idea from! I’m doing it and I’m sitting there like where the hell did I get this idea from? Fantastic advice. Made it much easier I suspect
-
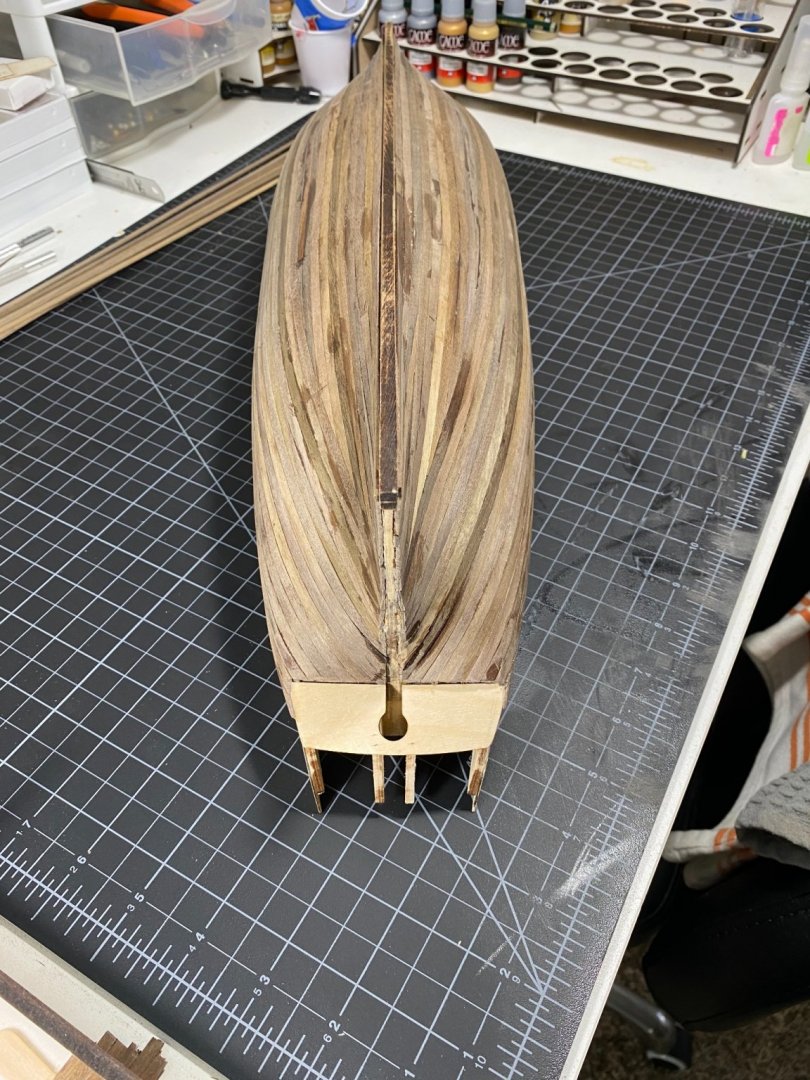
Made a bit of progress the last few days!! @Chucks videos were exactly what I needed to see. Somehow it made a lot click for me and I dove right in. It’s not perfect and I definitely have a few lumps and bumps to fill and sand but it’s better than I expected for a first go thank you all for the help thus far tim

- 164 replies
-
- 4
-
-
- fly
- Victory Models
- (and 4 more)
-
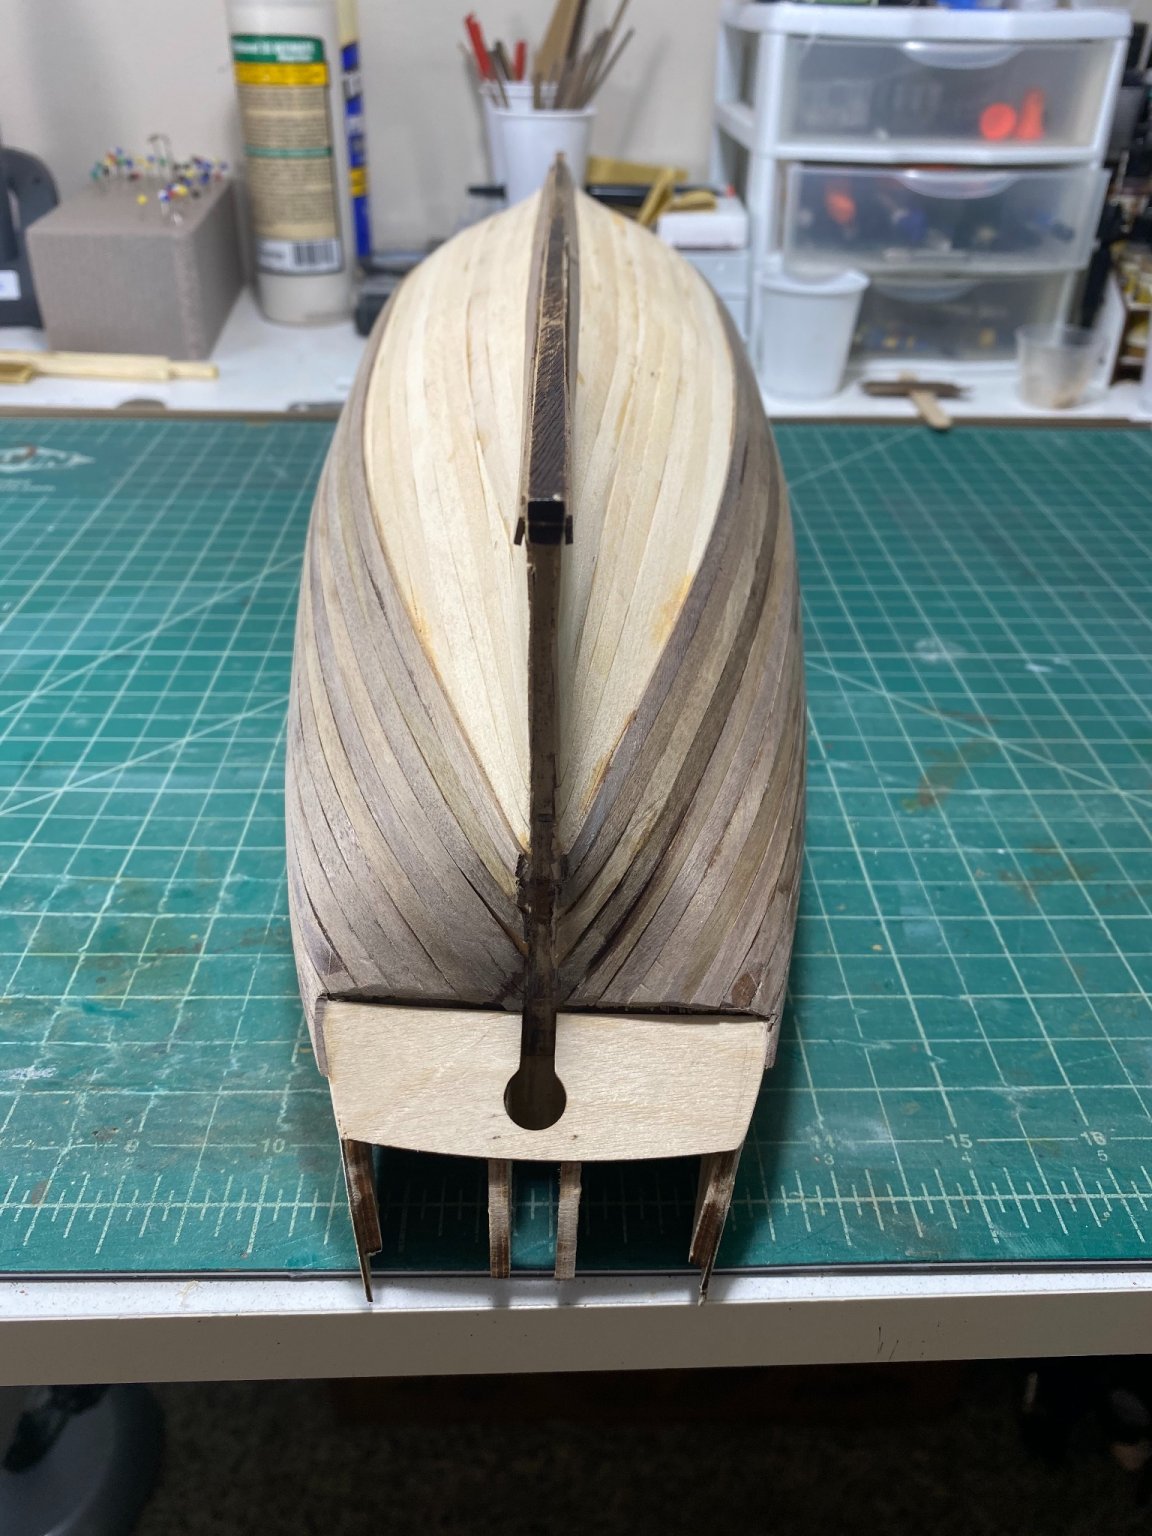
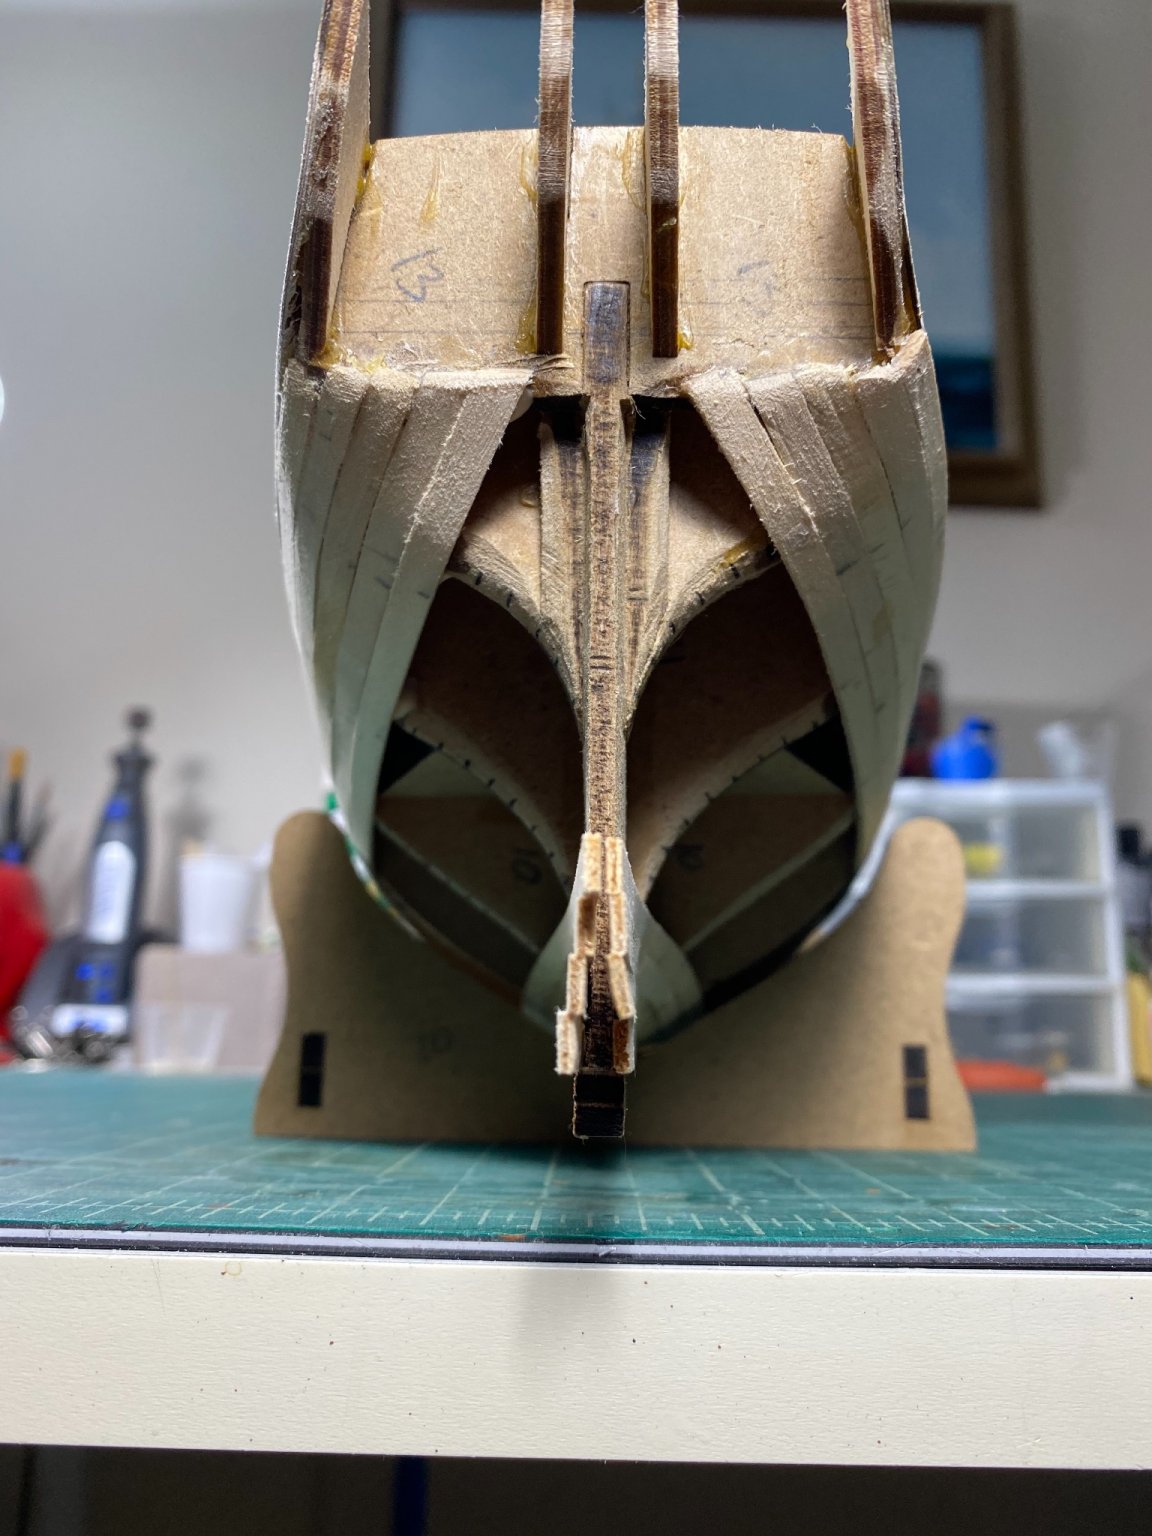
Looking good! I had to trim a bit off of the front as well then reshape the sprite hole. I ended up pre gluing the jig saw before putting it in place the final time. No idea if that was smart or not but it’s on there. Before final gluing I ended up half cutting the bulkhead posts that are removed later on. I felt like cutting after everything was on there would have been difficult to do cleanly anyway it looks great to my eye!
-
Awesome planking! Looks great, very clean and crisp
-
All, I cannot thank you enough for all of the encouragement and advice!! I will definitely be looking at Chucks videos, since it seems that there is a lot of praise there...plus a quick glance looks like his method of teaching fits my style of learning I think you hit the nail on the head with this glbarlow...i have been getting lost in so many logs that I was giving myself anxiety trying to put it all into one streamlined approach. Hopefully ill be able to start lining the ship tonight or tomorrow and have something decent to show soon For now, back to work for me Best, Tim
-
Thank you for the advise Spyglass! I think that i am over-thinking and worrying a bit too much on this instead of just feeling it out and trusting the process. Have a great day!
-
ok so I have started the portion of this that has me the most nervous..planking. I have read a lot of information on here and watched a lot of videos, but I feel as if i only loosely understand it. I am not a math inclined person, which makes me more anxious....i am a muscle, joint, and ligaments guy in my real life. Anyway, i have dry-fit the first 2 planks under the gunport strips without needing any taper since they lay smoothly without needing to force anything unnatural. I would assume the tapering begins where i would need to unnaturally force or bend the planks to fit in an area. THe ones i have fit look symmetrical to my eye and seem to lay nicely, so im not sure if I should have tapered them at all just because the numbers say to? Ill use BH 6 as my reference here: I took measurements of the length under the gunport strips to the upper edge of the keel prior to my dry fit and noted roughly 93mm. With the kit supplied 5mm plank that equals roughly 18.6 planks. Now, to get the planks at the other BHs, I would take this # of planks and use the distances of the other BH measures to determine those plank widths at each section. For instance, if my BH 1 measures 56mm, that would be 56/18.6= 3.01 width to fit 18.6 planks, yes? Now, since i laid the first 2 planks without taper, should I redo the measures starting under those planks? or should i have tapered the top edges of those planks originally? Best, Tim


- 164 replies
-
- 2
-
-
- fly
- Victory Models
- (and 4 more)
-
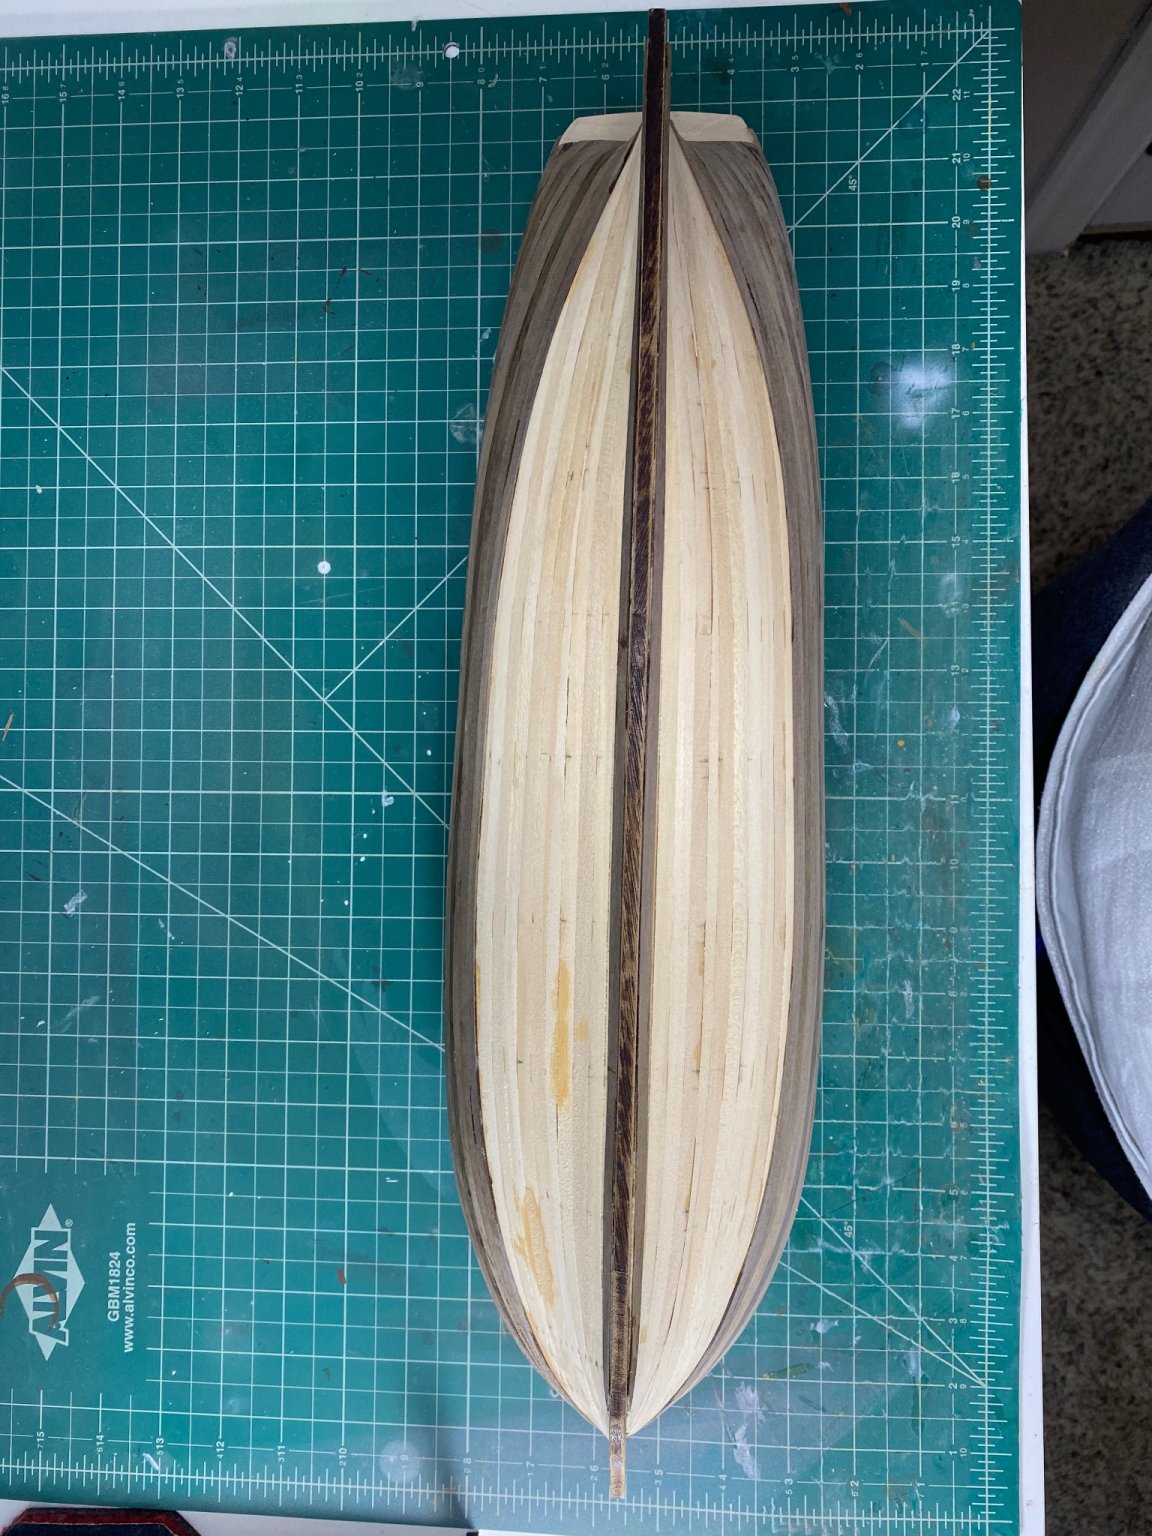
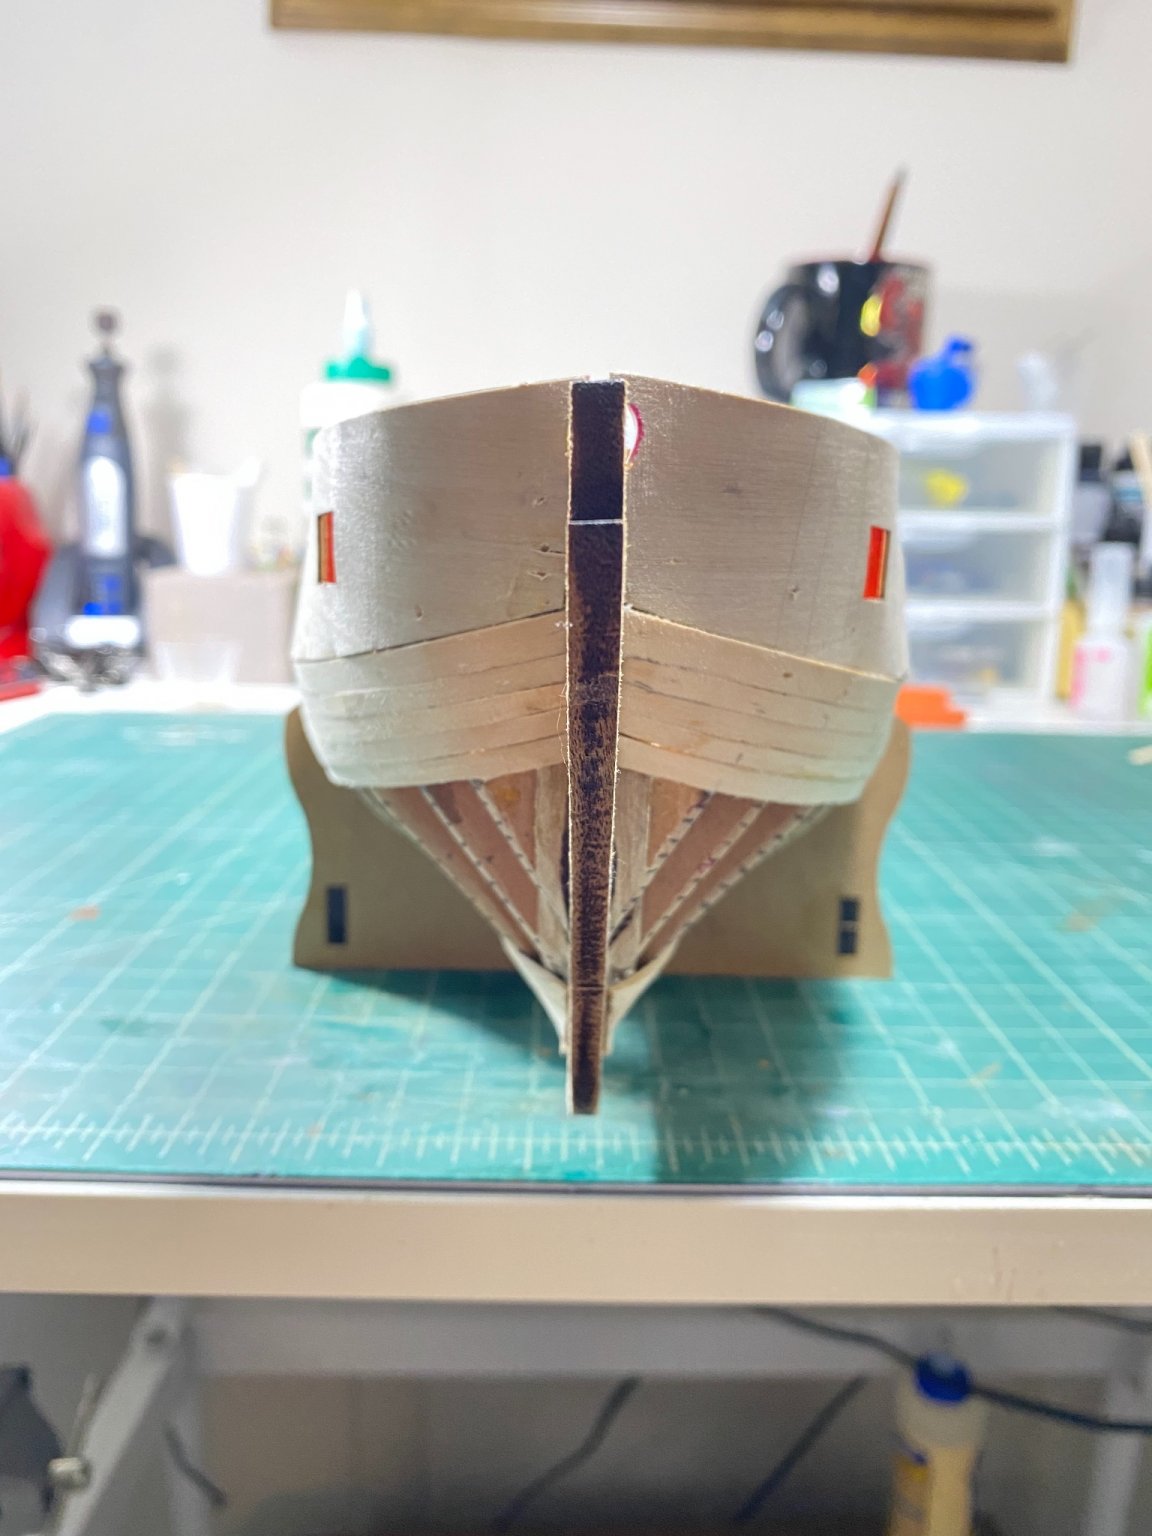
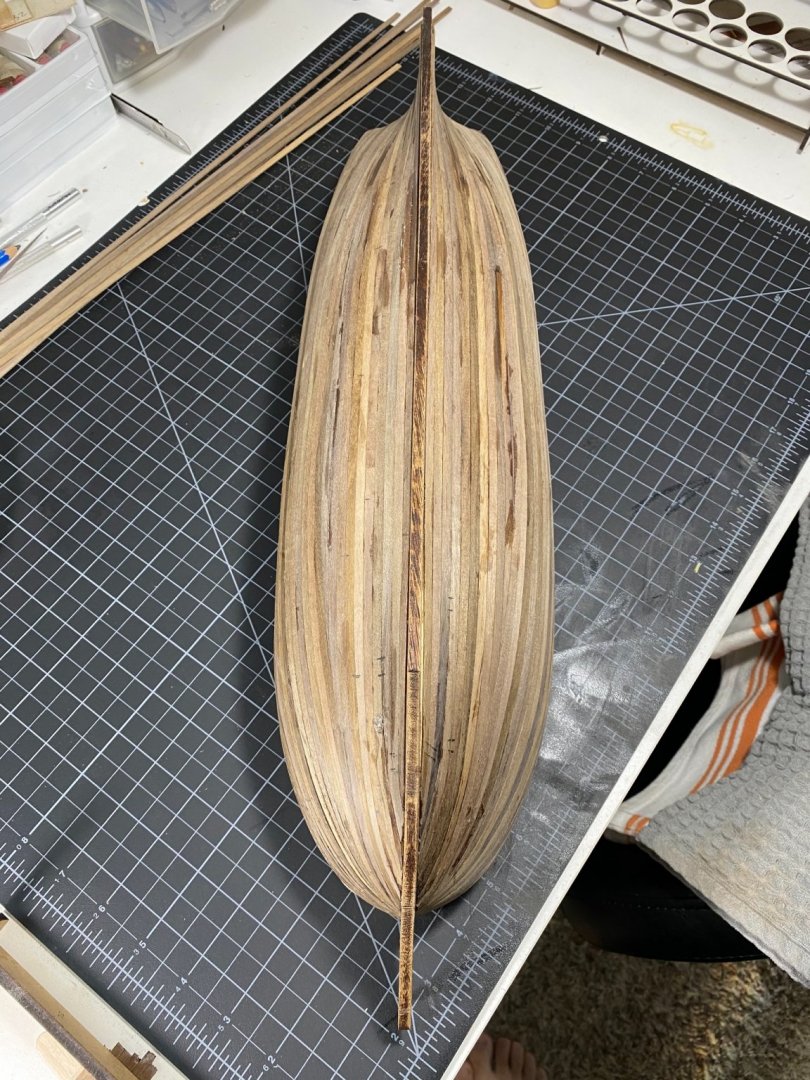
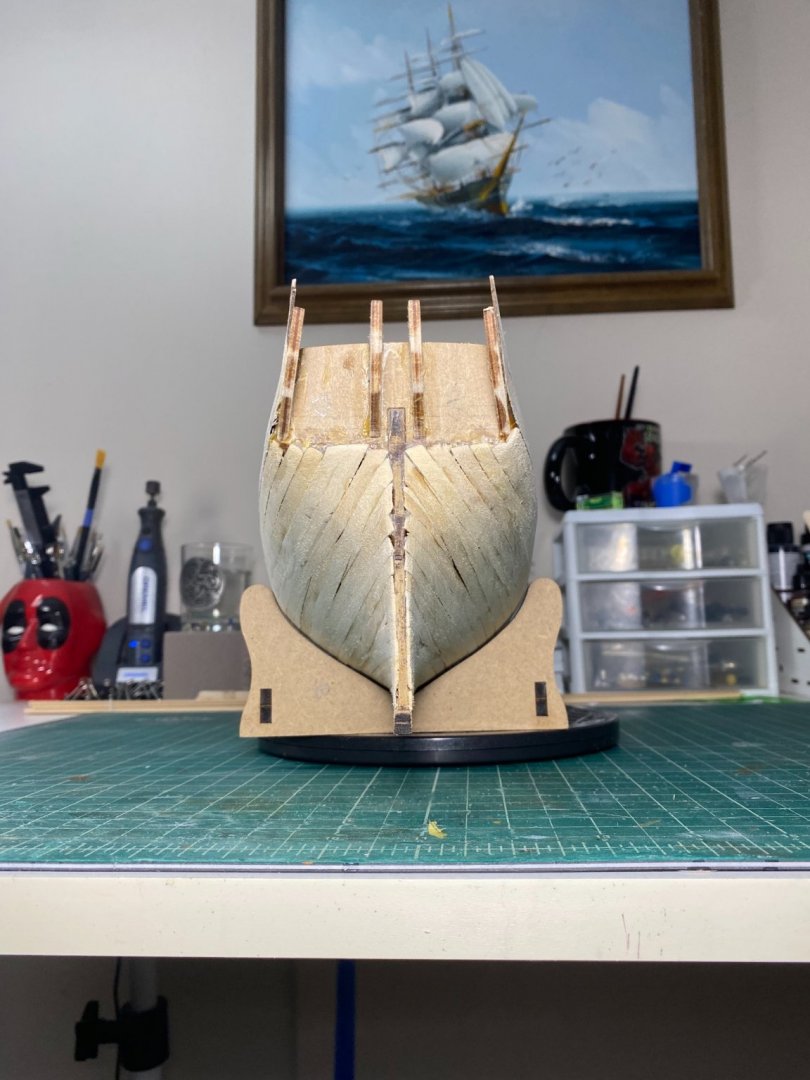
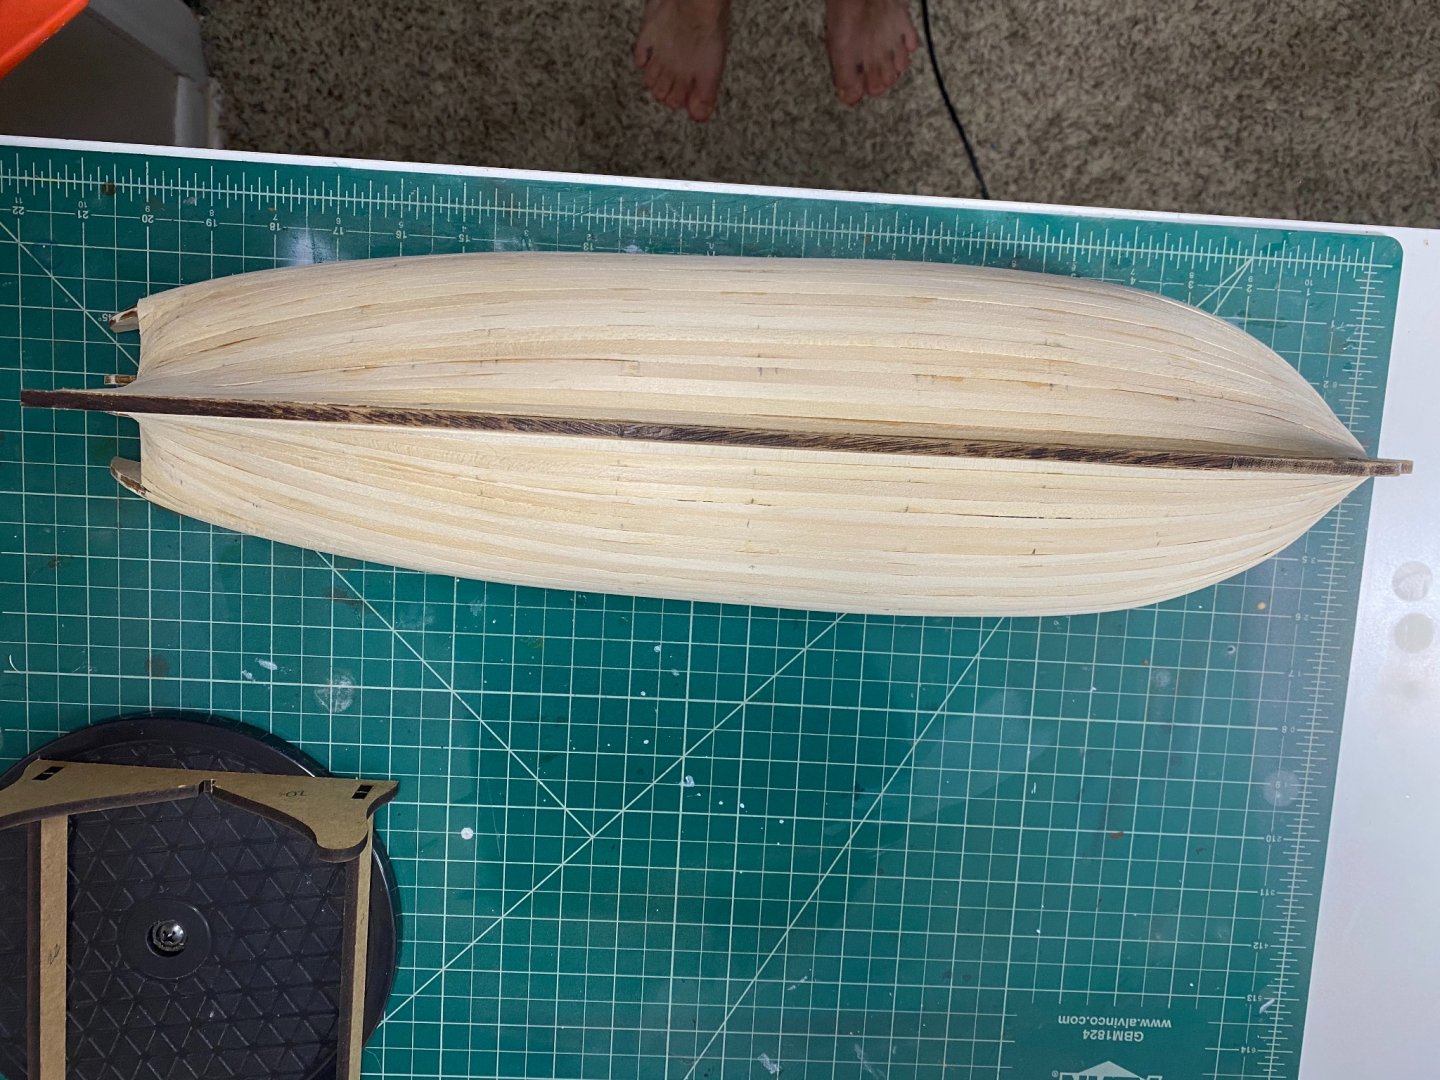
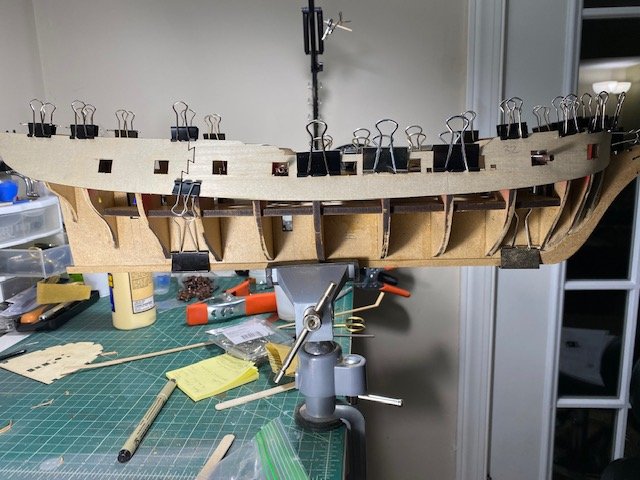
She ain’t perfect but I think she’ll float! on to planning out the planking so far I’m pretty happy with it, hasn’t been the easiest, but I’m definitely learning the process. It’s super satisfying to see the progress :)

- 164 replies
-
- 5
-
-
- fly
- Victory Models
- (and 4 more)
-
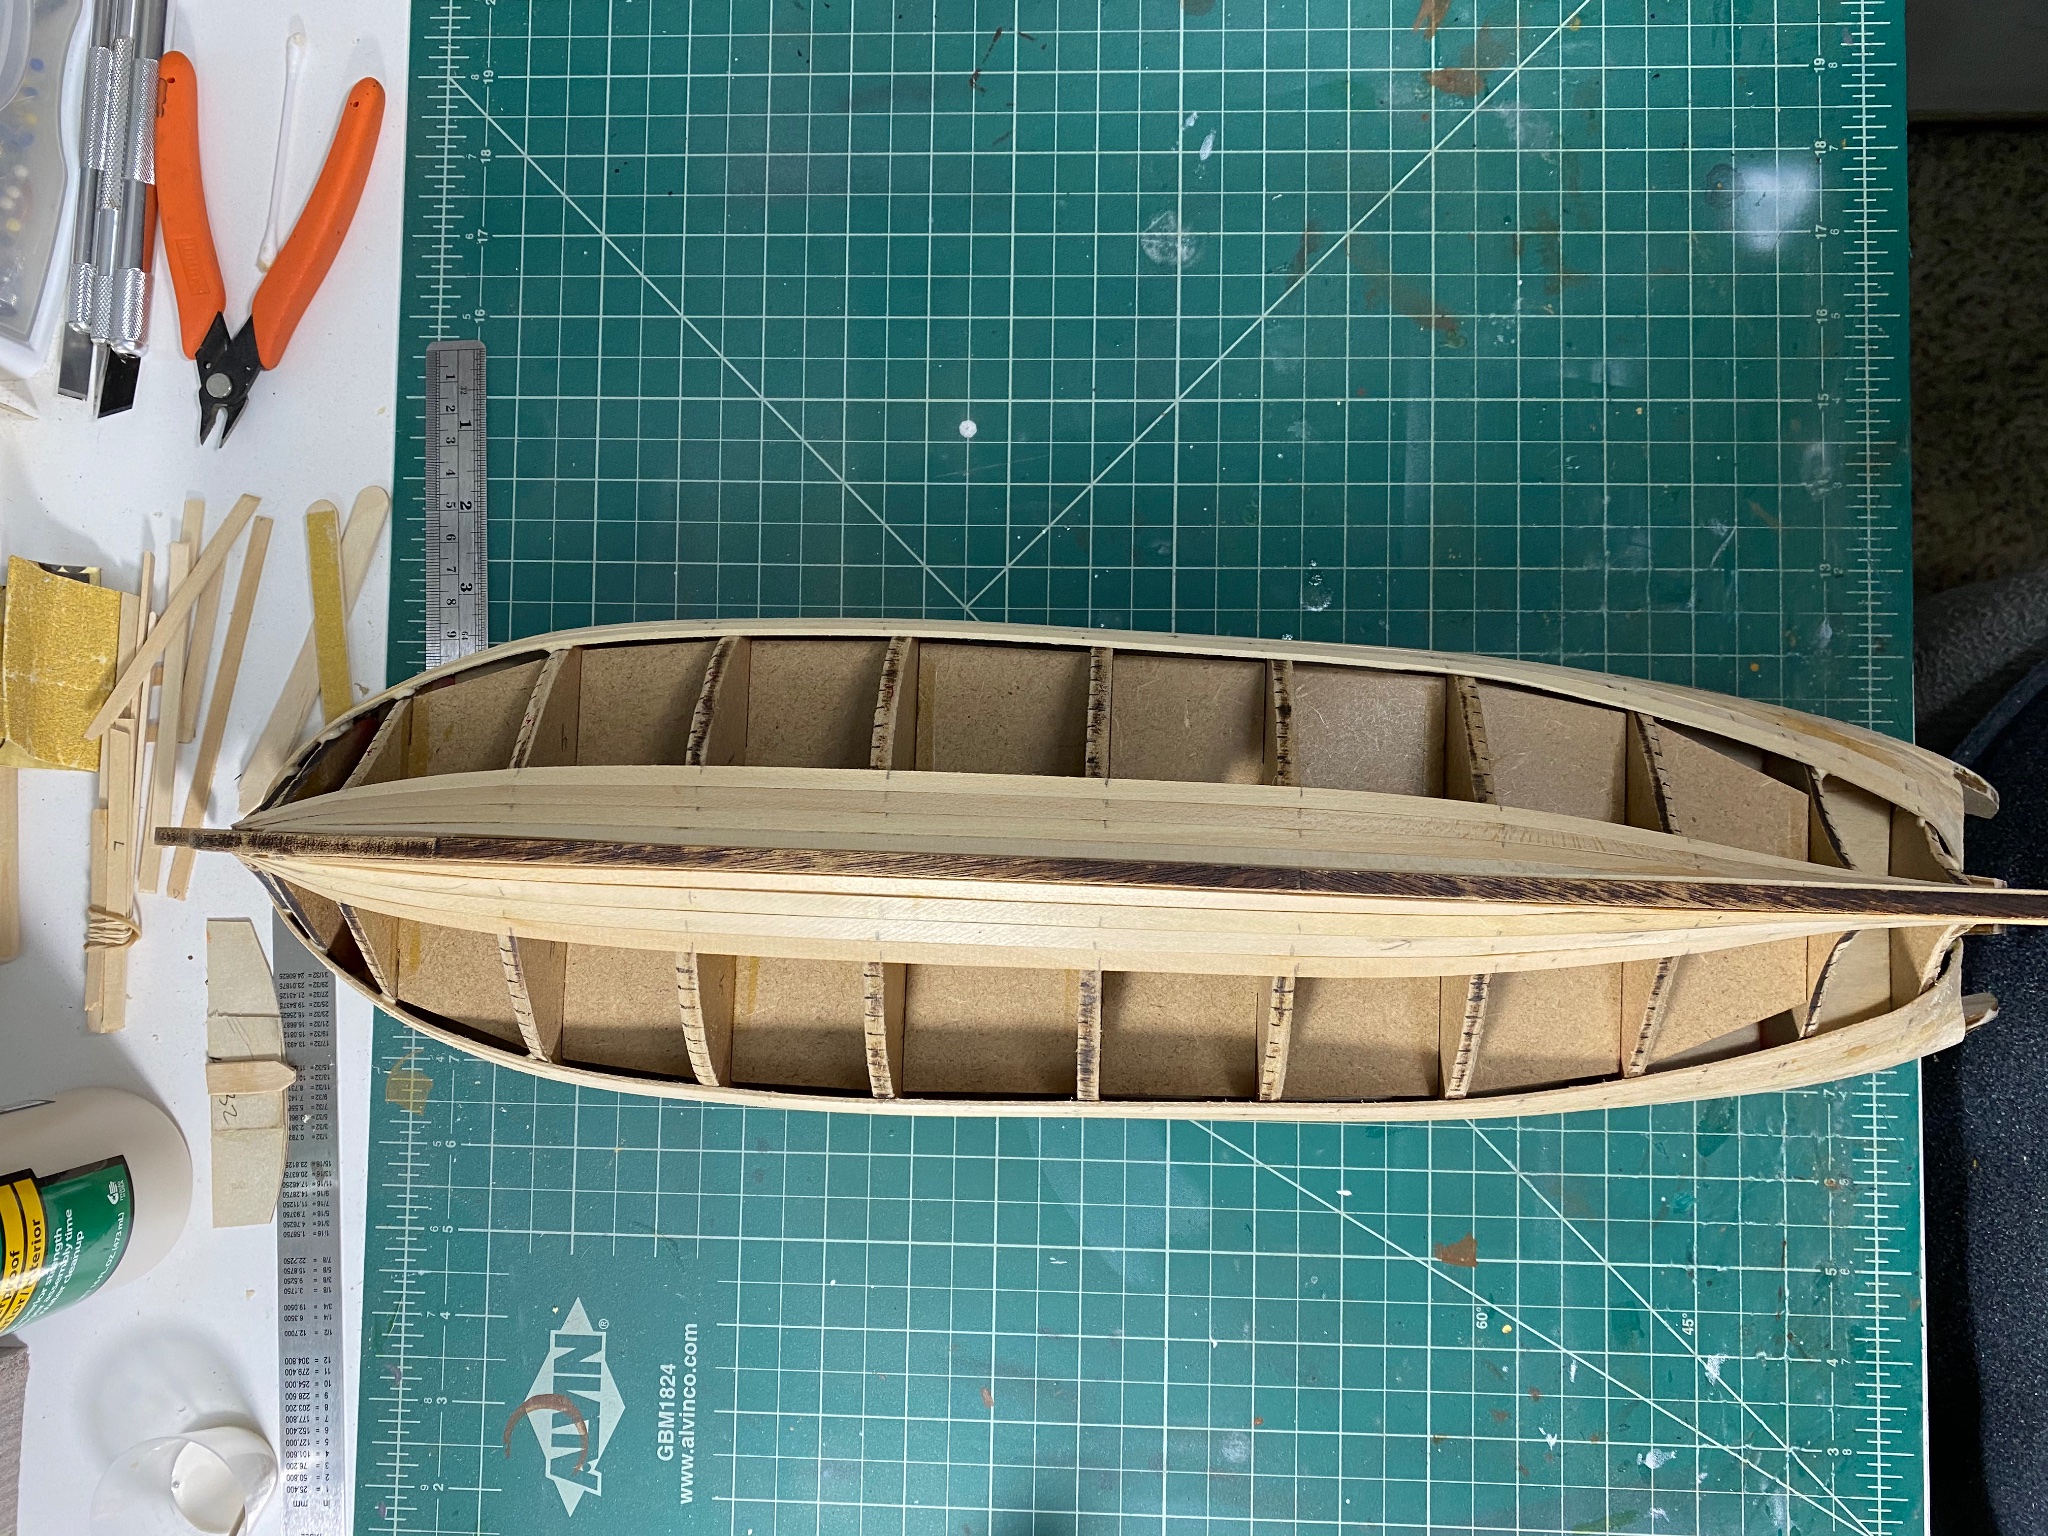
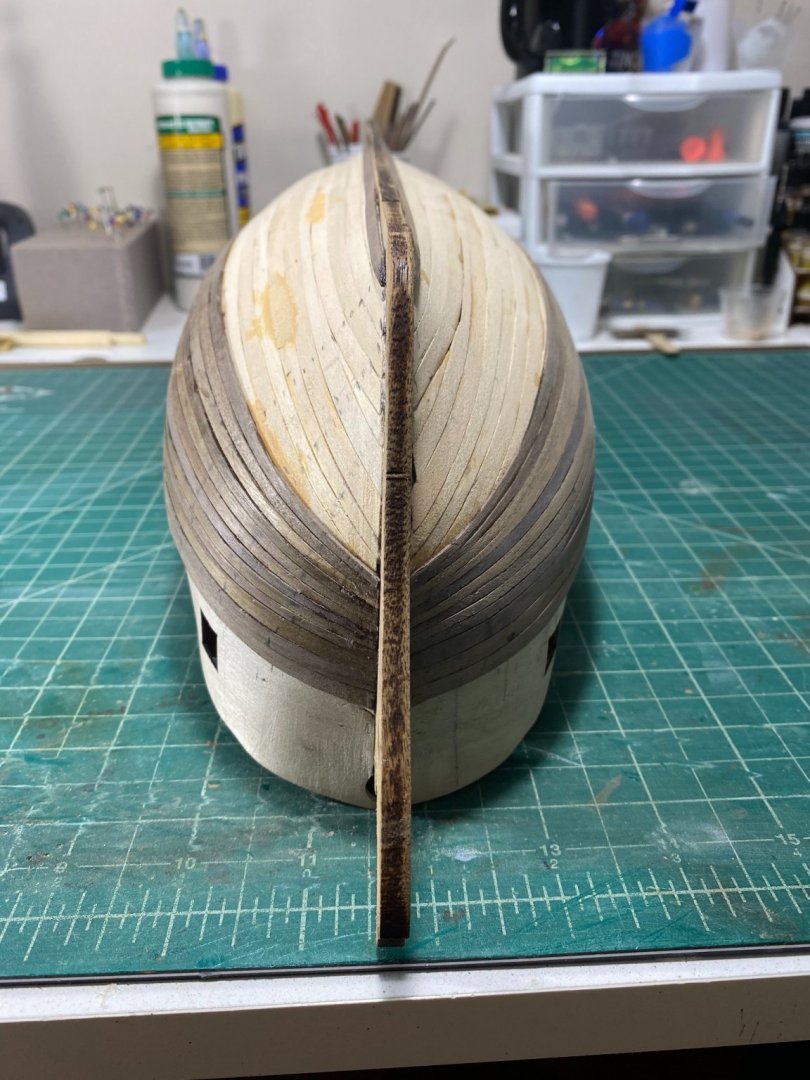
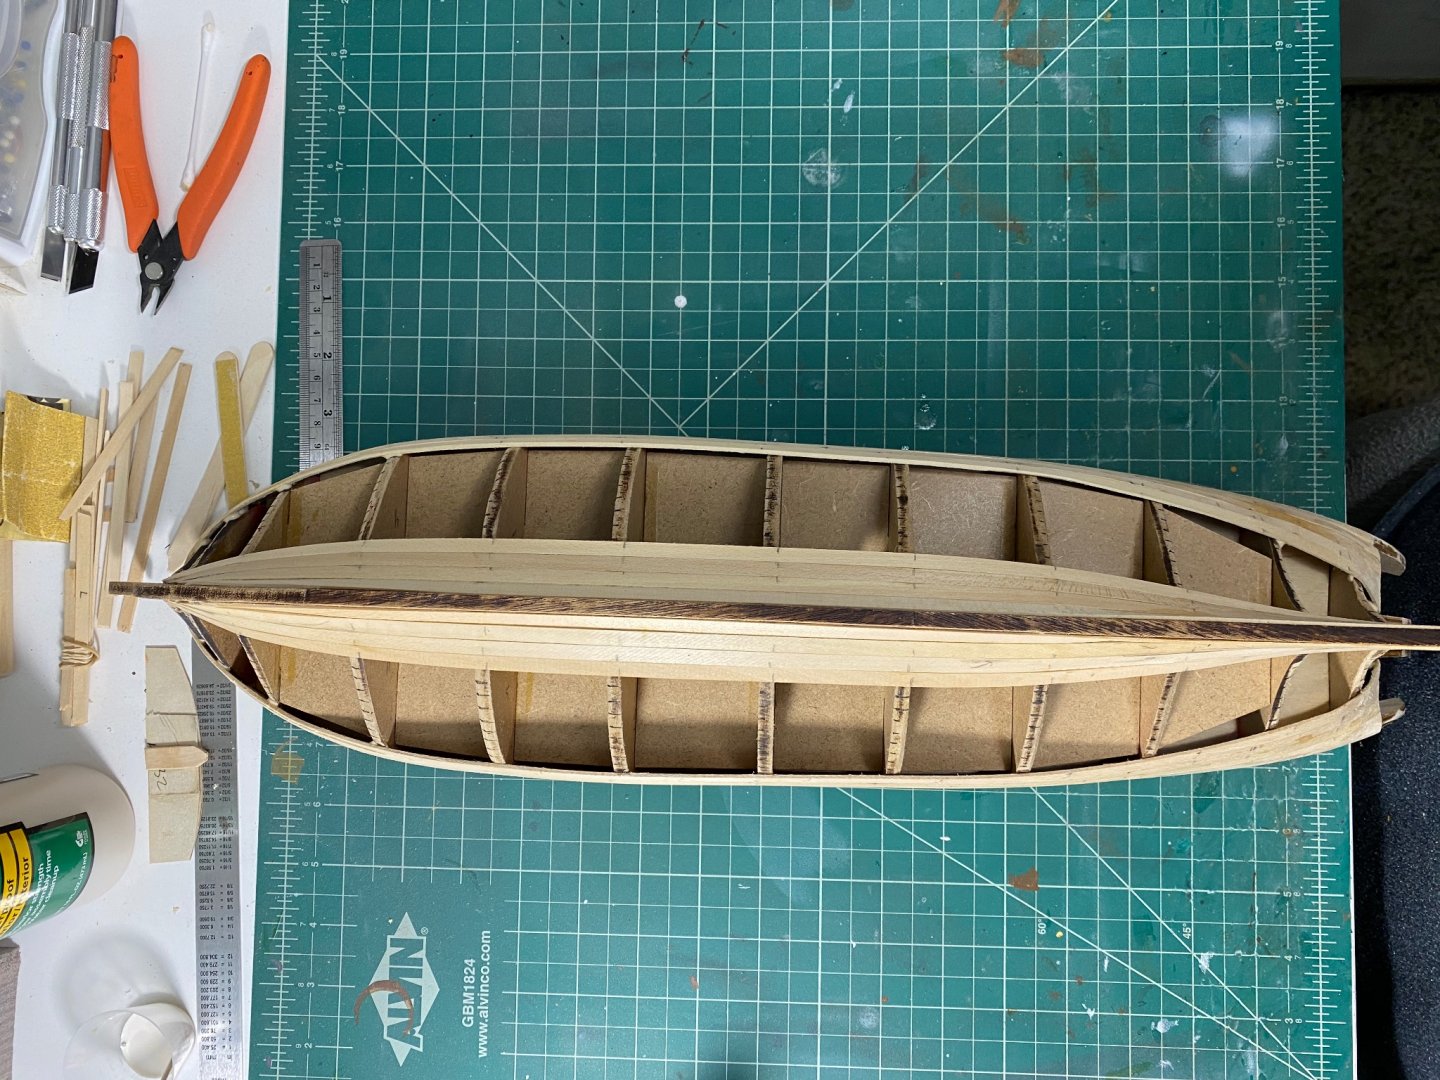
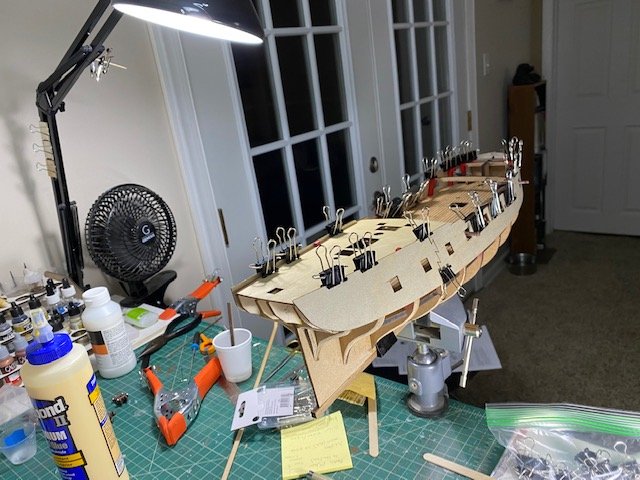
Thanks for the encouragement spyglass I appreciate it A better fitting showed that my jigsaw is sitting just to the rear of BH 9 and it terminates in a good spot on the stern to my eyeballing it hoping my 3rd soak and set holds tonight and I can play around with gluing it tomorrow afternoon once I’m done seeing patients. For now off to bed tim
-
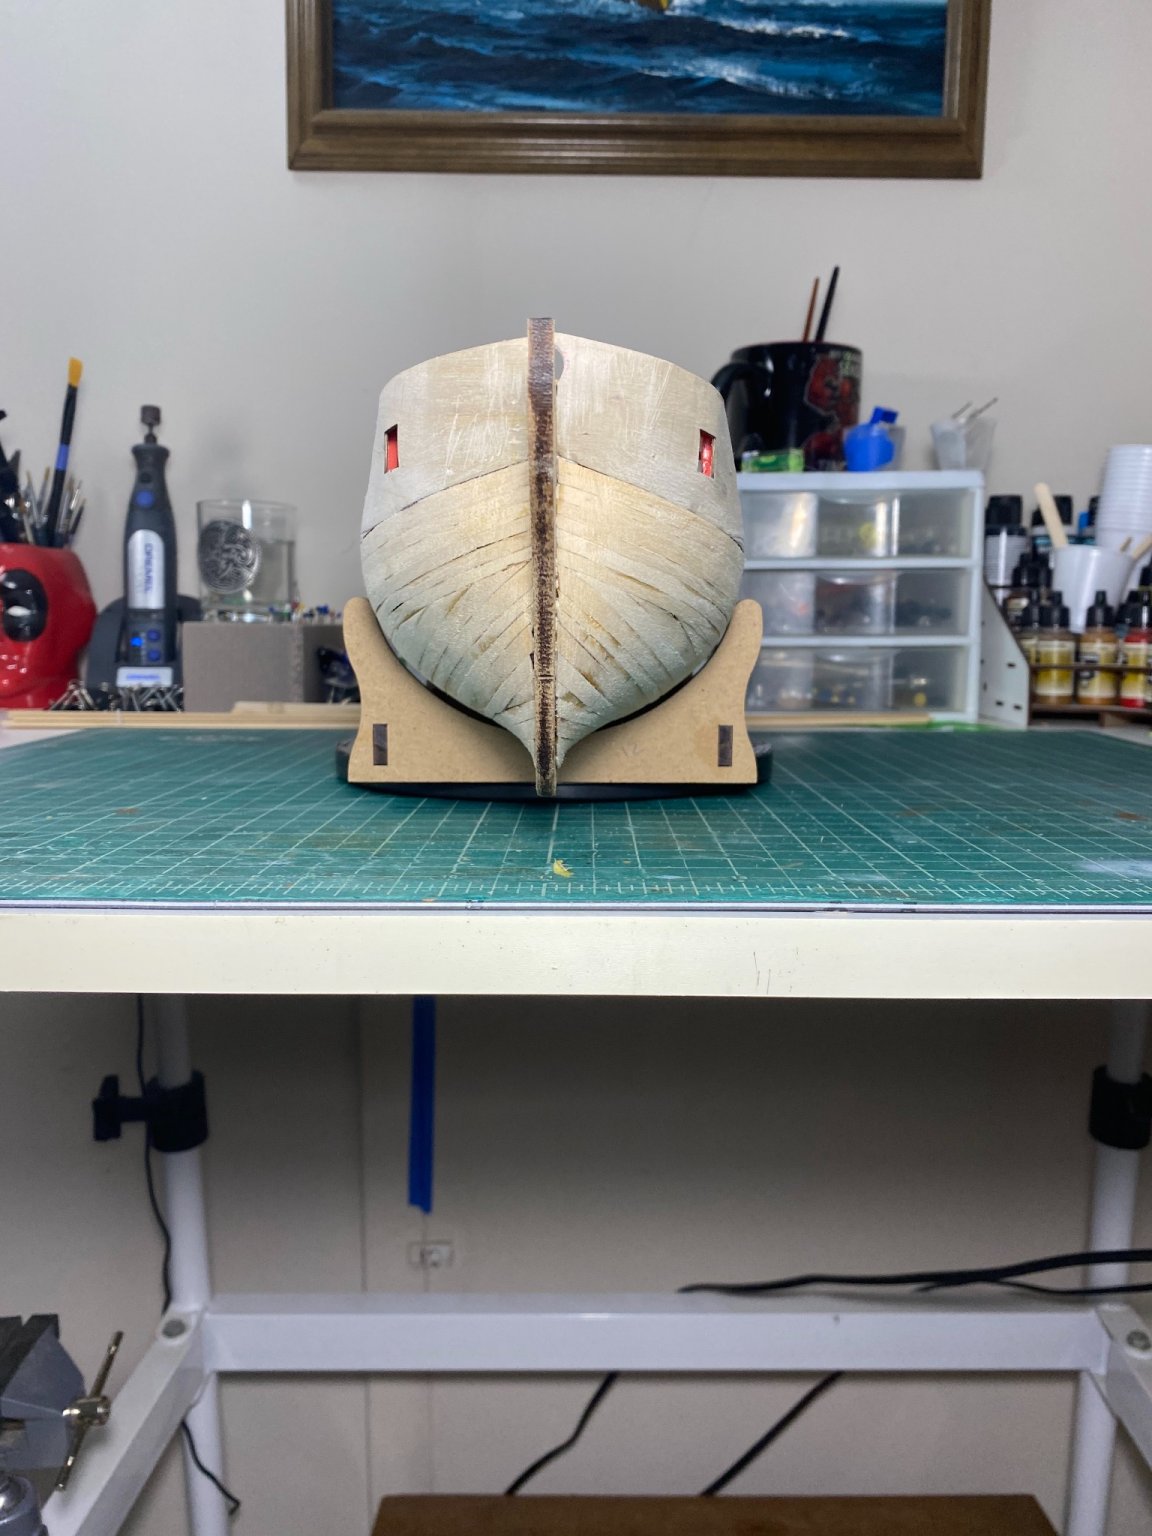
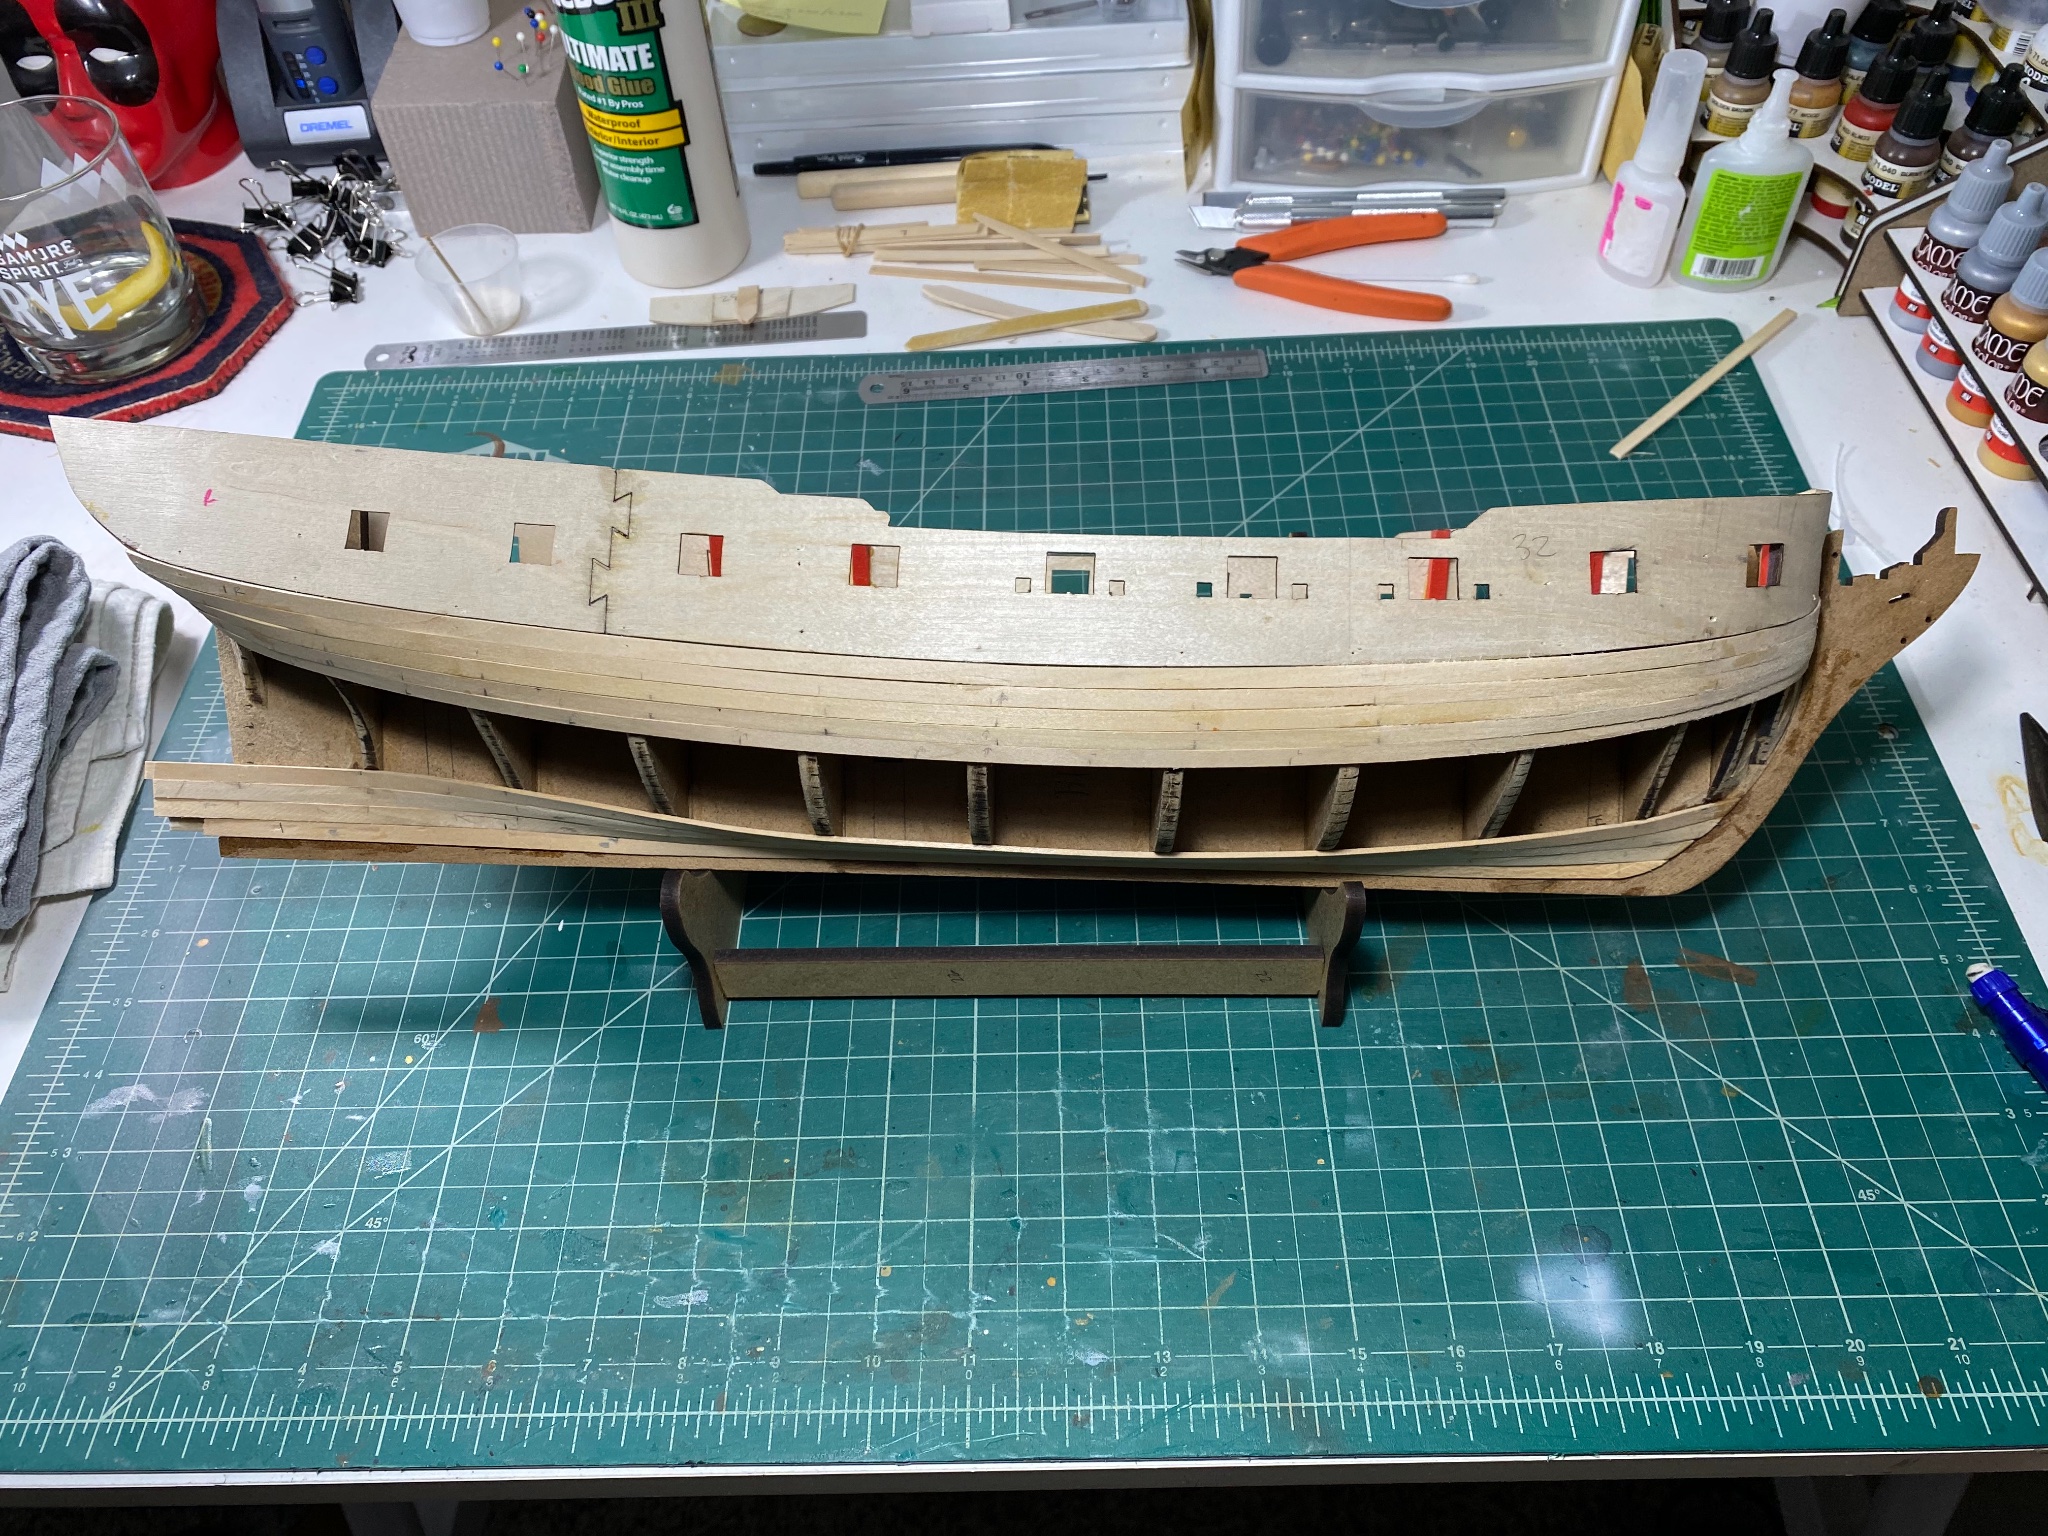
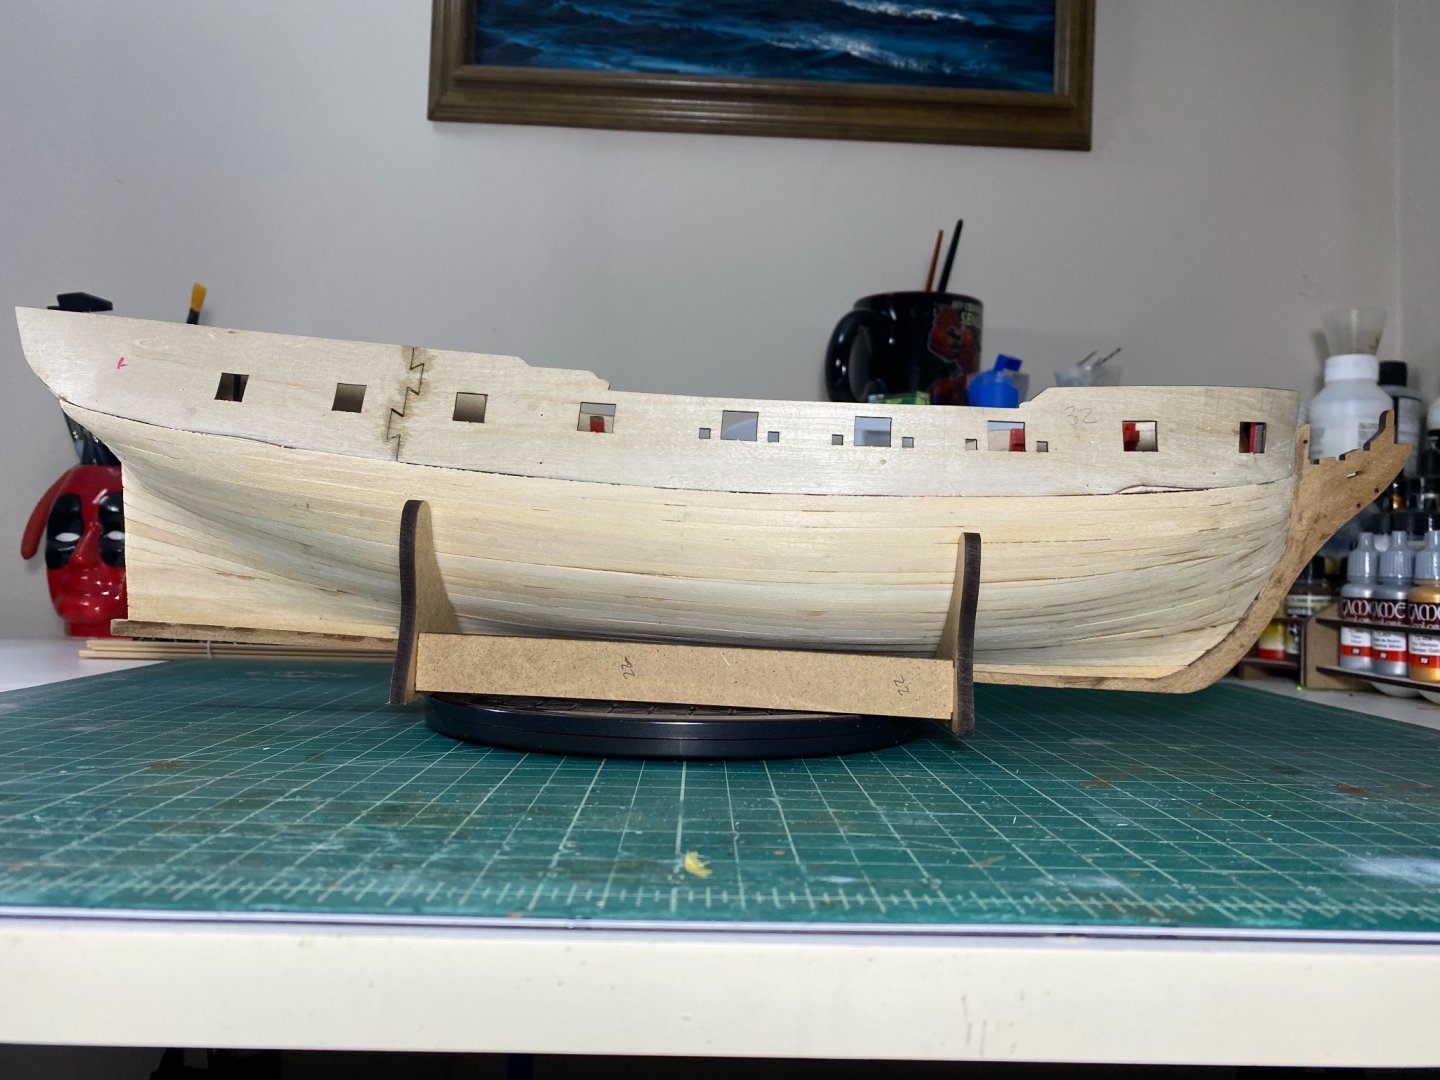
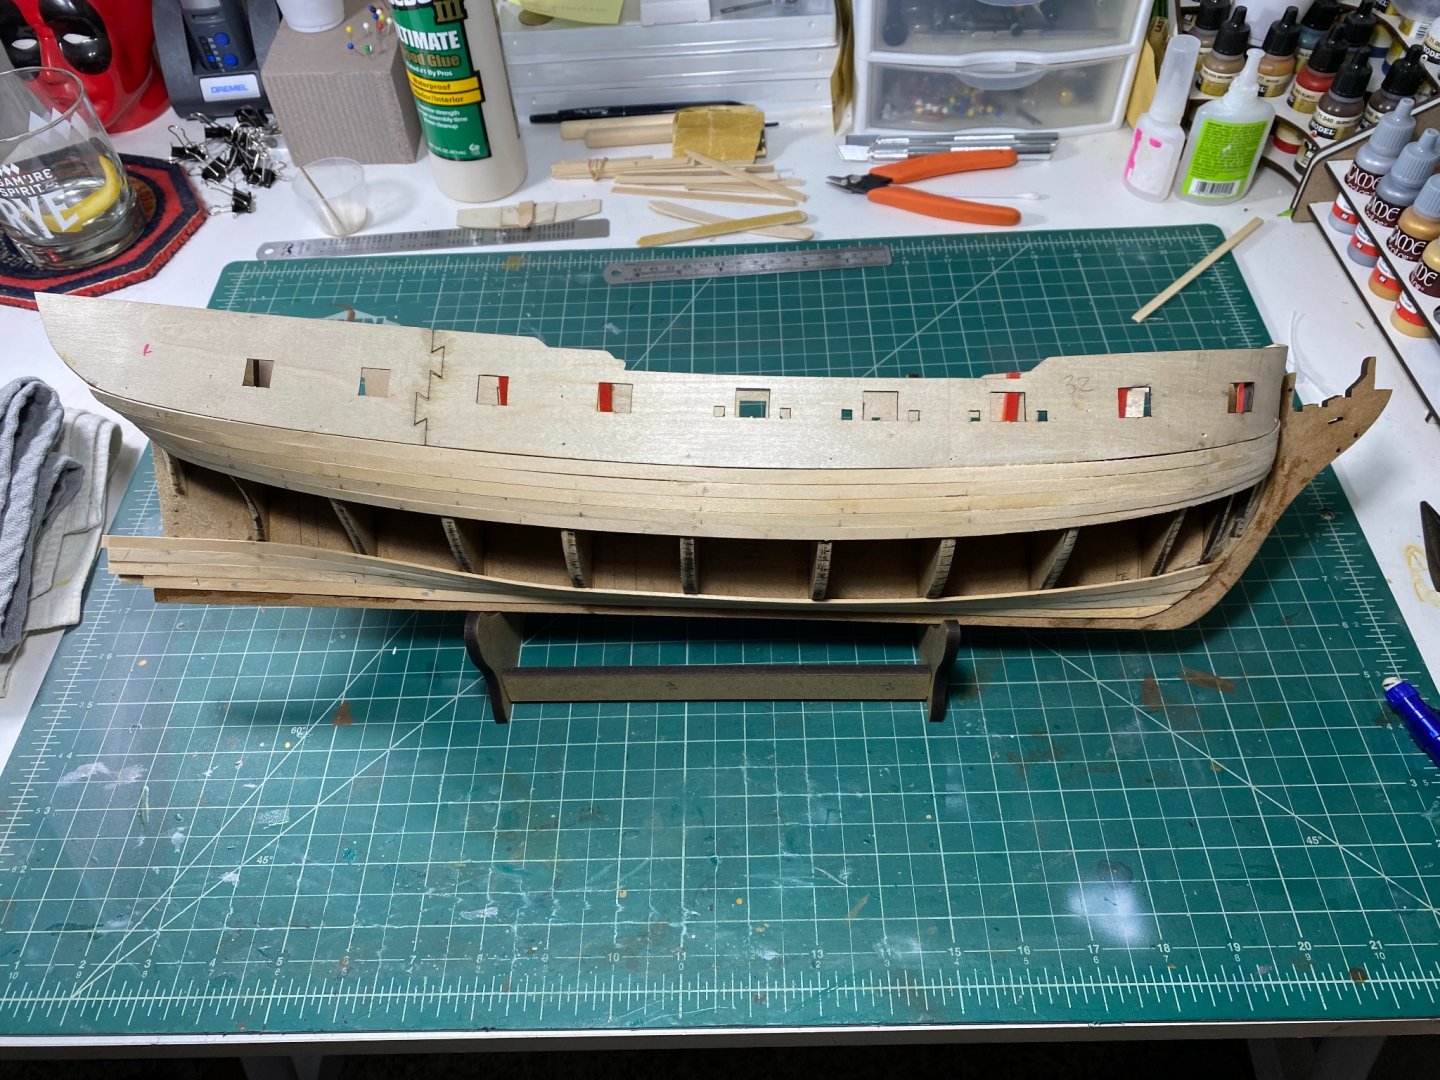
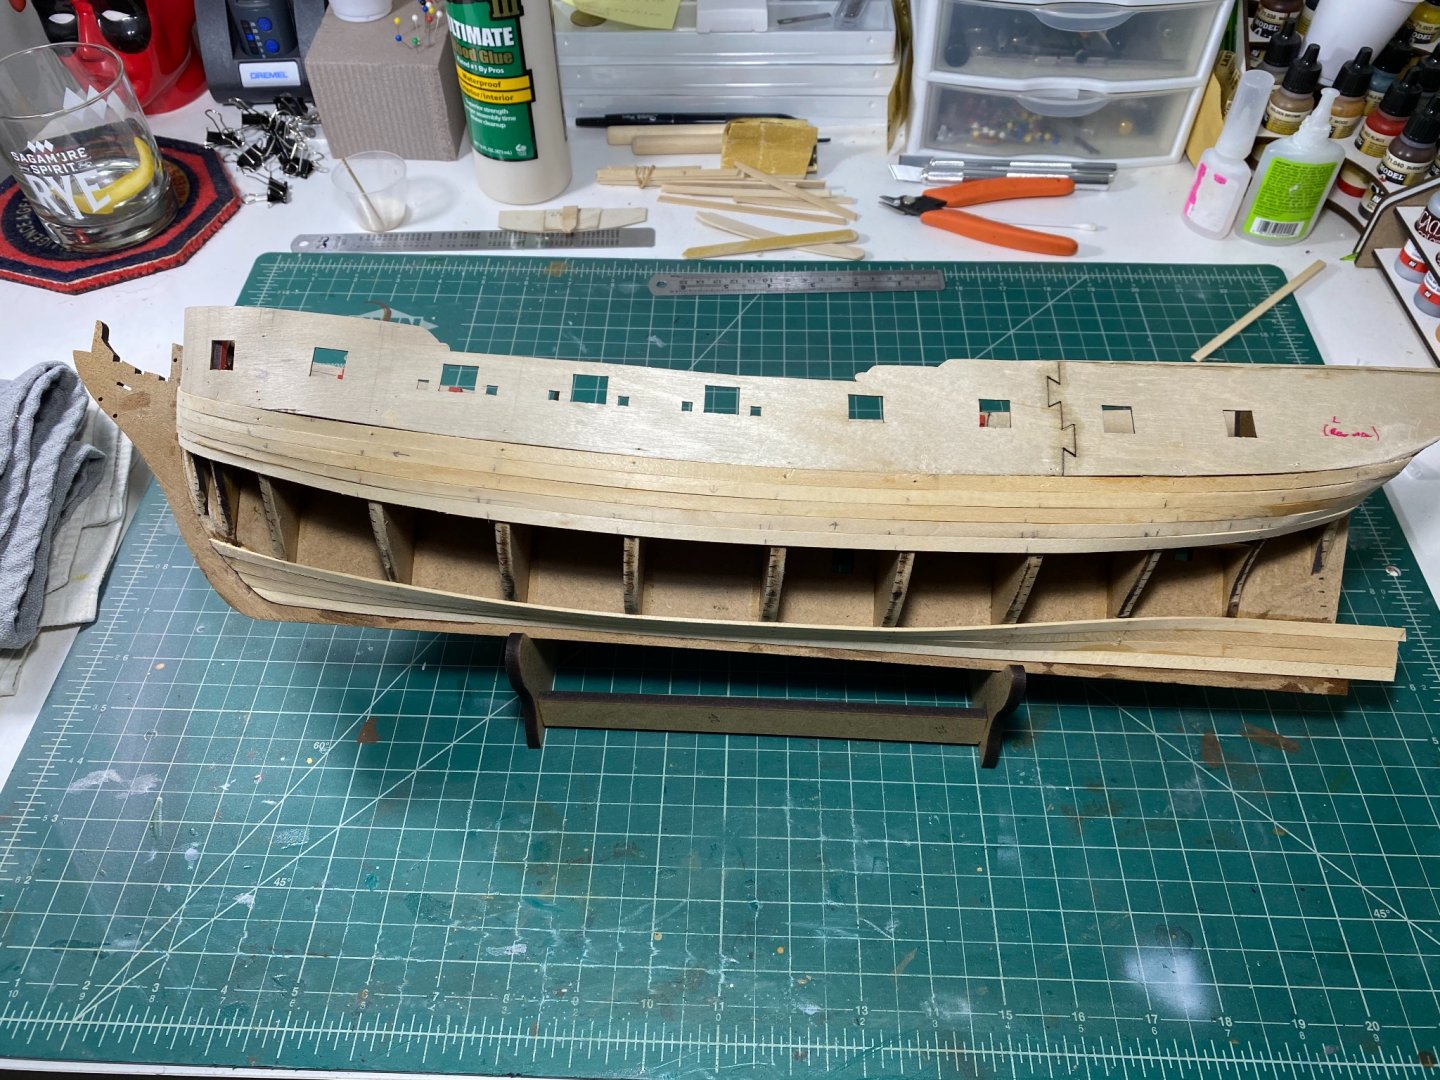
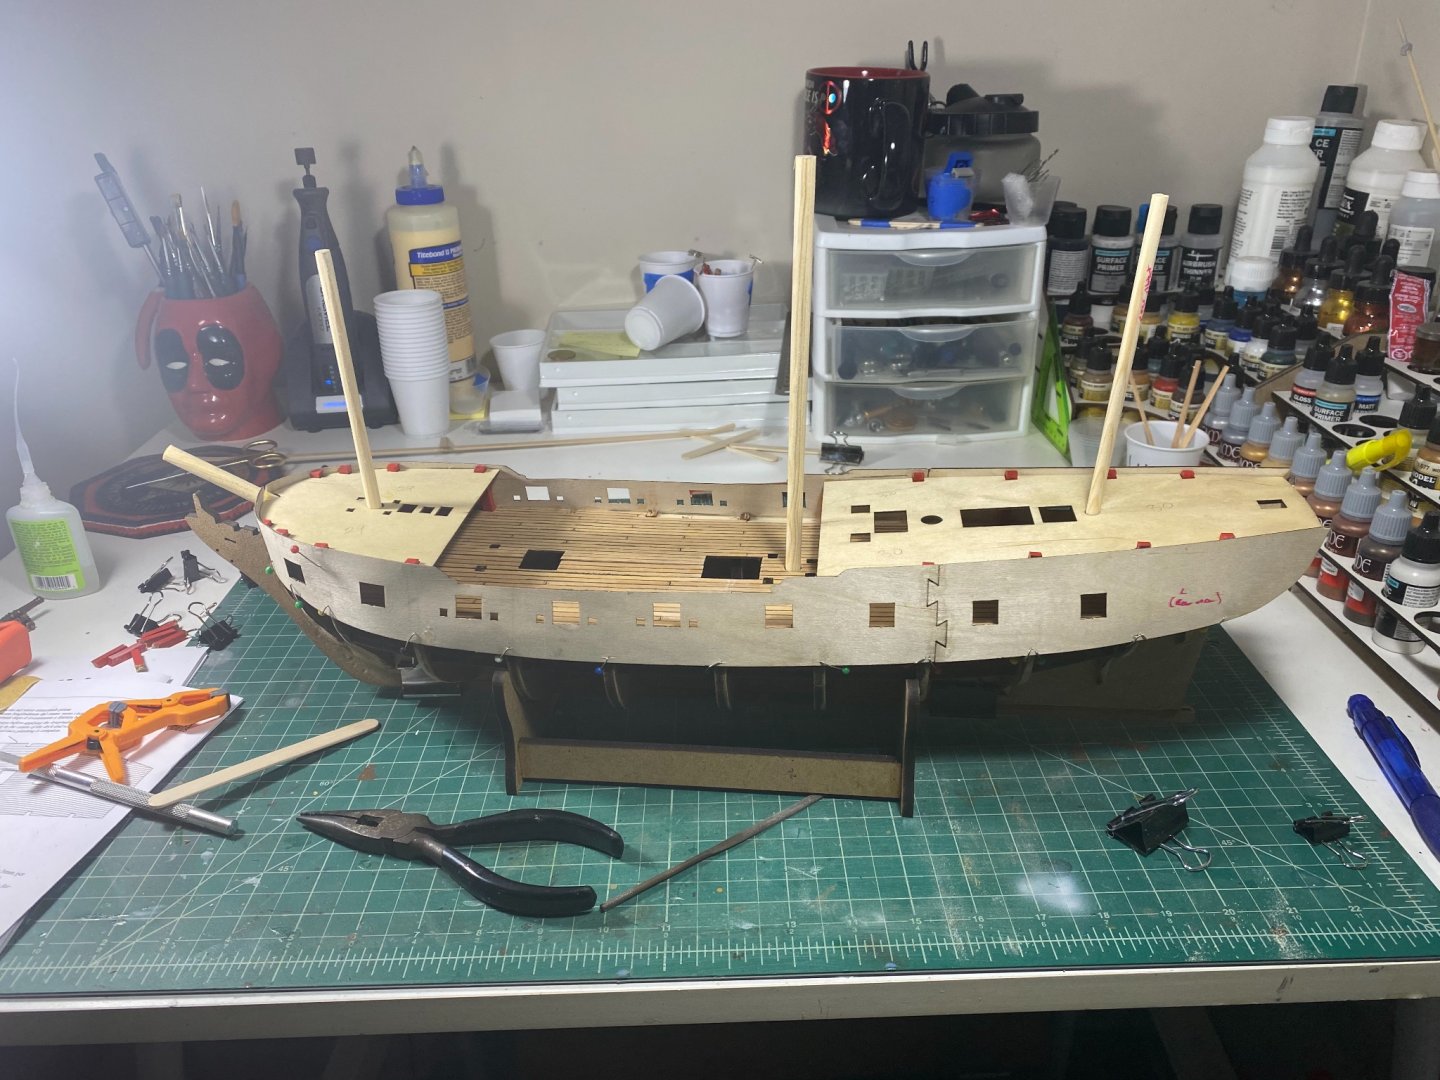
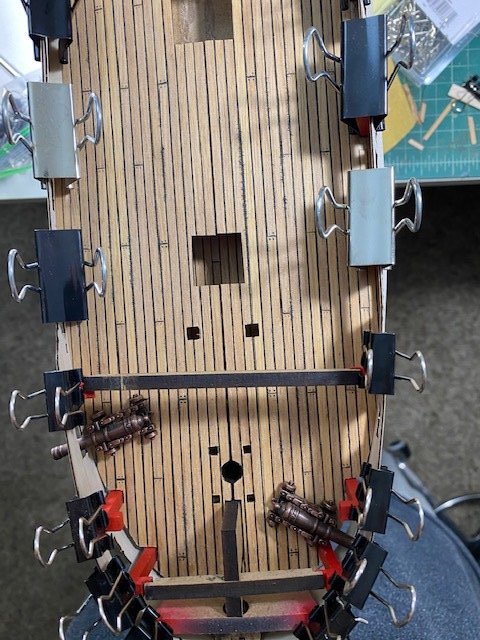
Hi all, I did a first try on the gunport strips. Any issues that you can see that I should correct? My measurements show that I'm level across and equidistant between BHs and the gunports. I had to remove a bit from the front end of the strips to allow the jigsaw to sit around BH 9...this allowed the rear portion to sit fllush with the end of the rear upper deck, but now I will have to reshape the hole for the bowsprite. I also used some of the kit cannons to judge gunport positions relative to the deck and they seem good to my naked eye. I think I will buy the upgrade set though for the better cannons. I feel pretty decent about it for a first shot, but i will likely re-soak and shape a few times to make sure I get the subtleties of the BH curves before I finalize anything. Please feel free to leave any constructive criticism for me to improve upon! Thanks for looking in Tim

- 164 replies
-
- 2
-
-
- fly
- Victory Models
- (and 4 more)
-
Damn that looks very good. I’m hopeful I can come close to that on this