HOLIDAY DONATION DRIVE - SUPPORT MSW - DO YOUR PART TO KEEP THIS GREAT FORUM GOING! (Only 13 donations so far - C'mon guys!)
×


TimC
-
Posts
109 -
Joined
-
Last visited
Content Type
Profiles
Forums
Gallery
Events
Everything posted by TimC
-
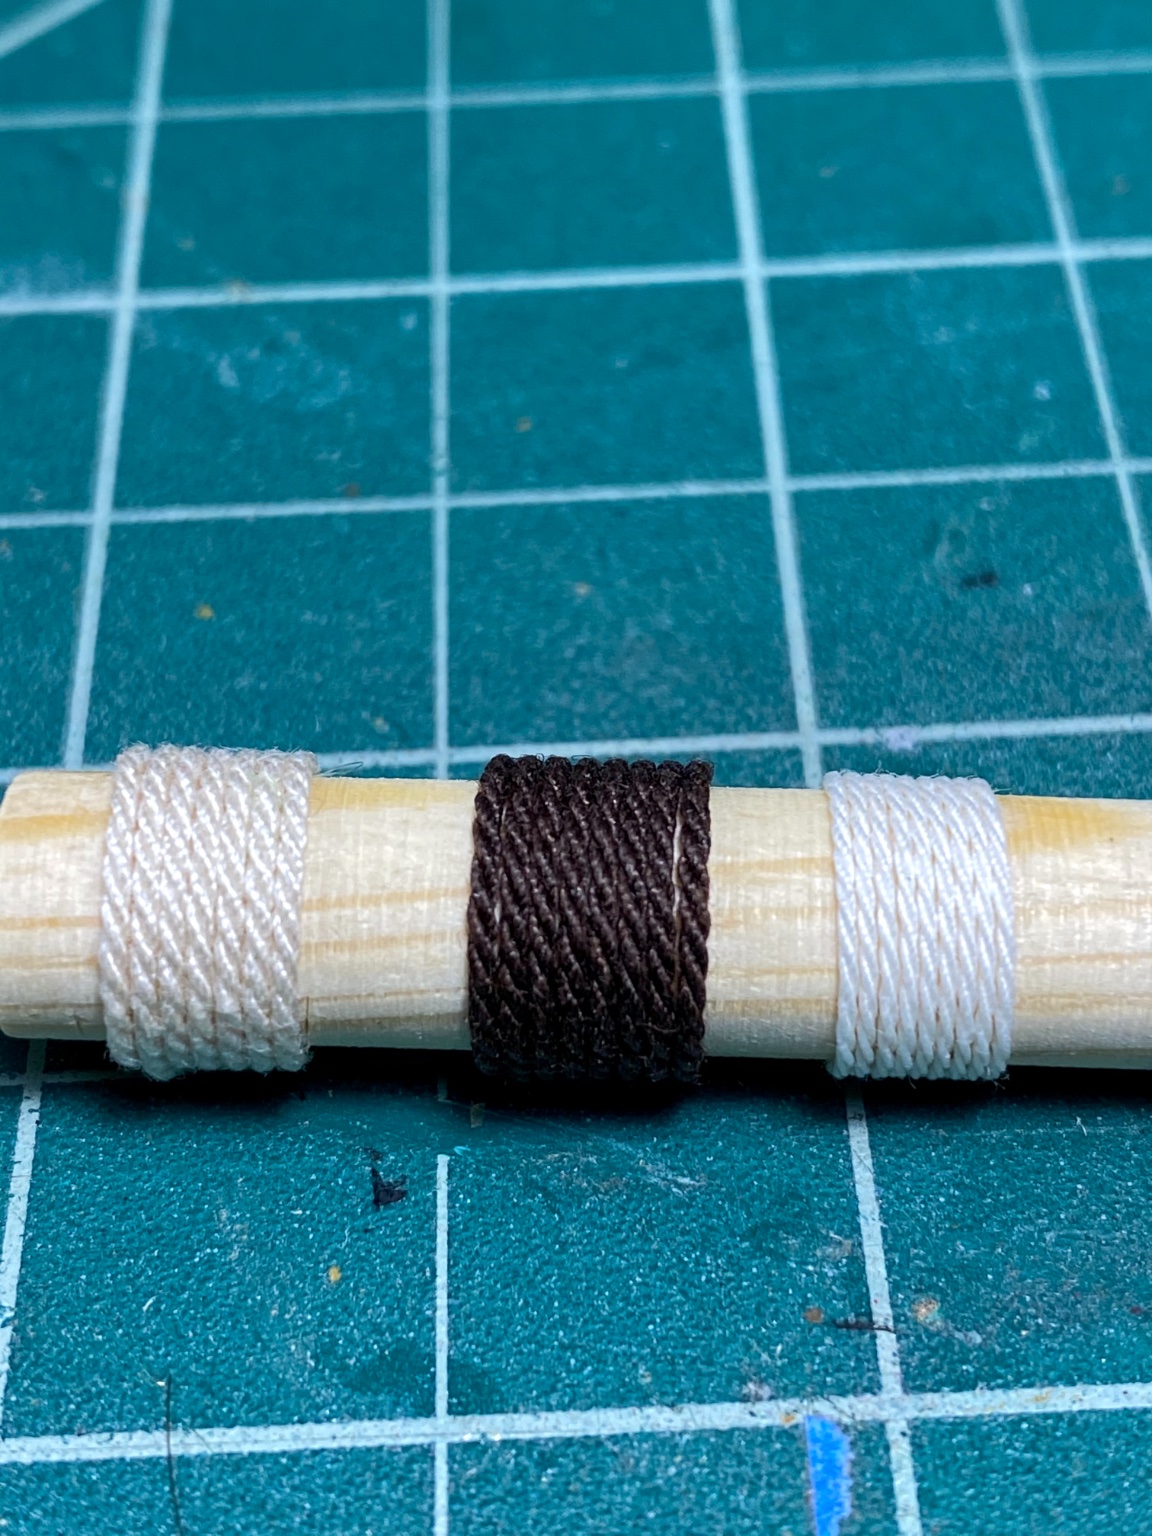
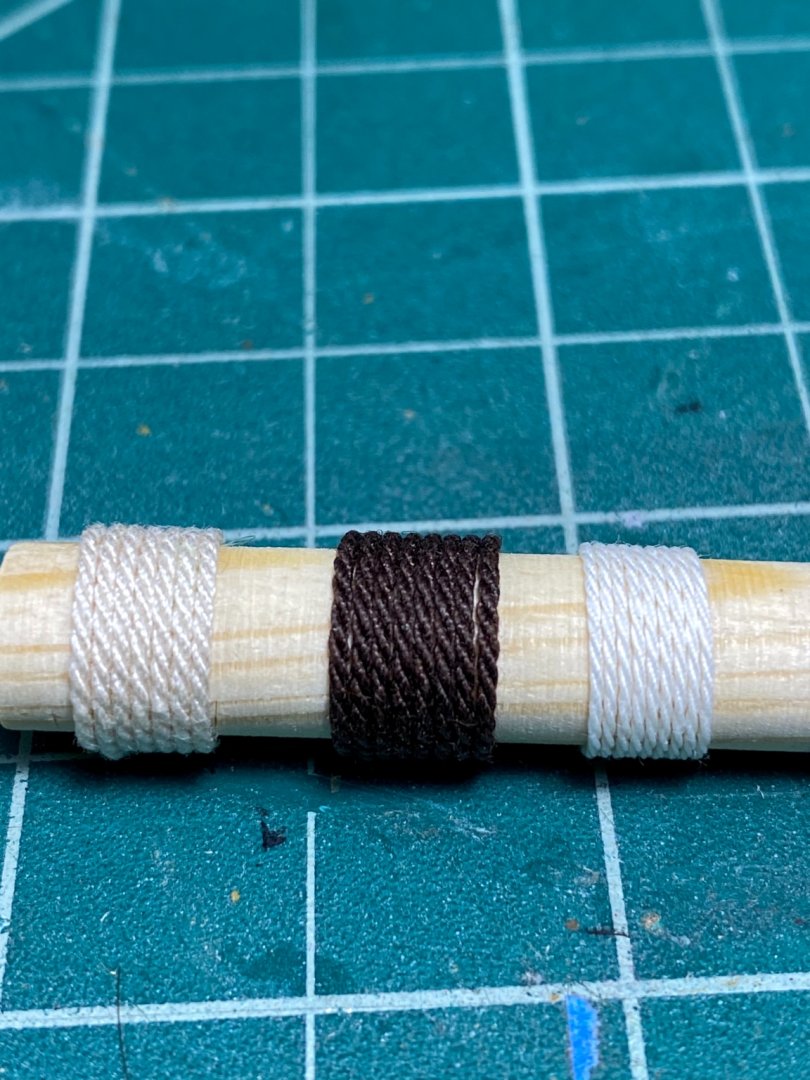
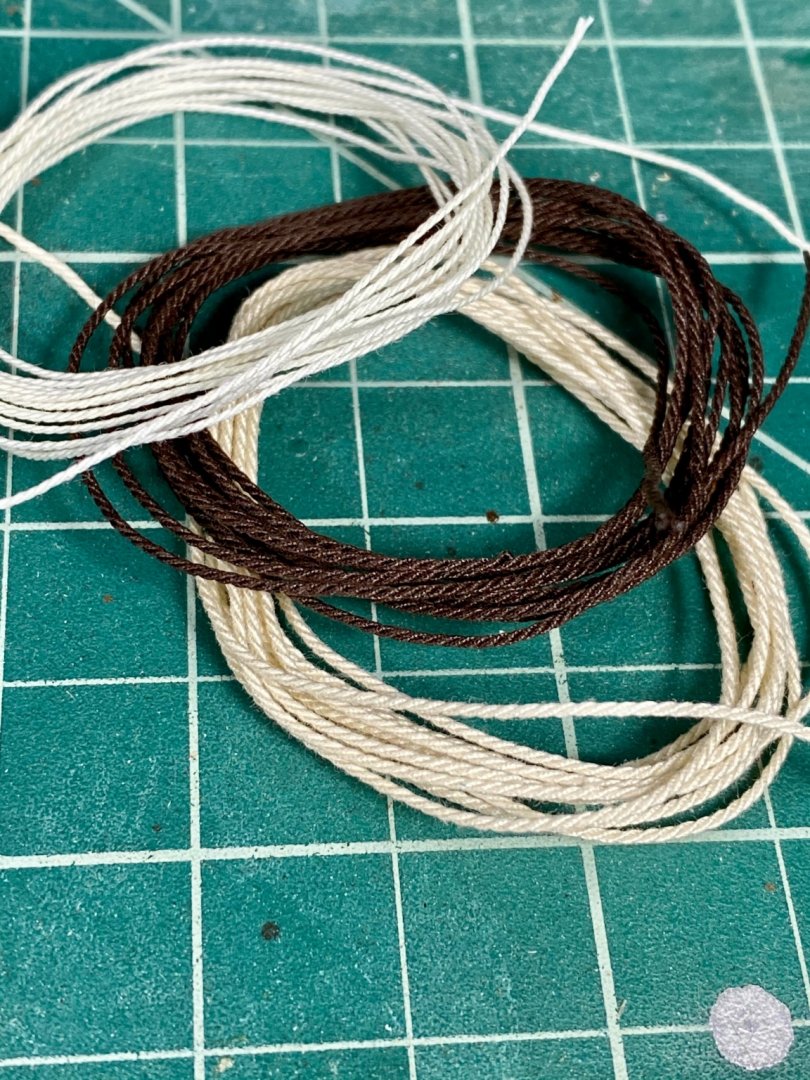
First go at marking some rope with Syrens Rope Rocket. I was expecting to have absolutely terrible results my first few. Luckily I was not so disappointed. This tool is an absolute gem to work with. my try’s are not anywhere near perfect but I’m extremely satisfied with my first try’s. 1st rope was brown, 2nd was white, 3rd was tan @Chuck, your tools are invaluable and expertly crafted. Tim
- 164 replies
-
- 4
-

-
- fly
- Victory Models
- (and 4 more)
-
Hey Alan! Great to see you on here. Thank you for taking a look and your compliments I am going to put the handles on there. I just haven’t gotten around to it...got sidetracked with the bowsprite, but they’re still dry fitted so I’ll be adding them in soon are you planning to put a log of your Kearsarge on here?? Tim
-
That looks very nice, Richard
-
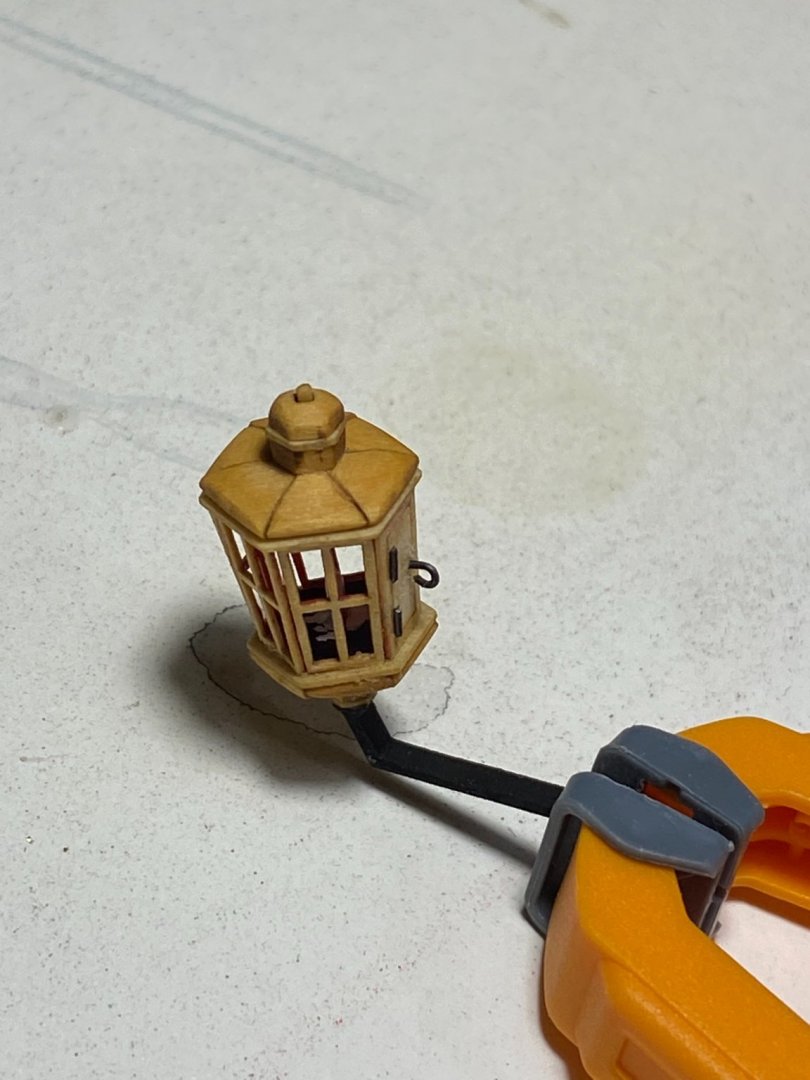
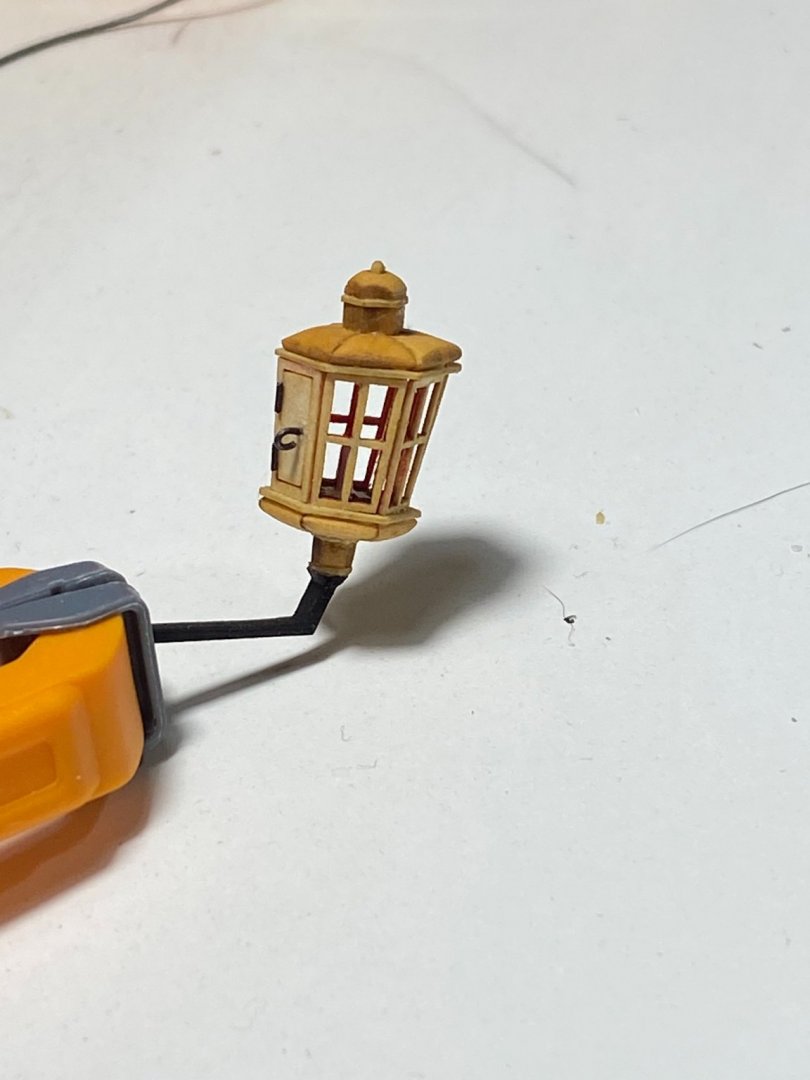
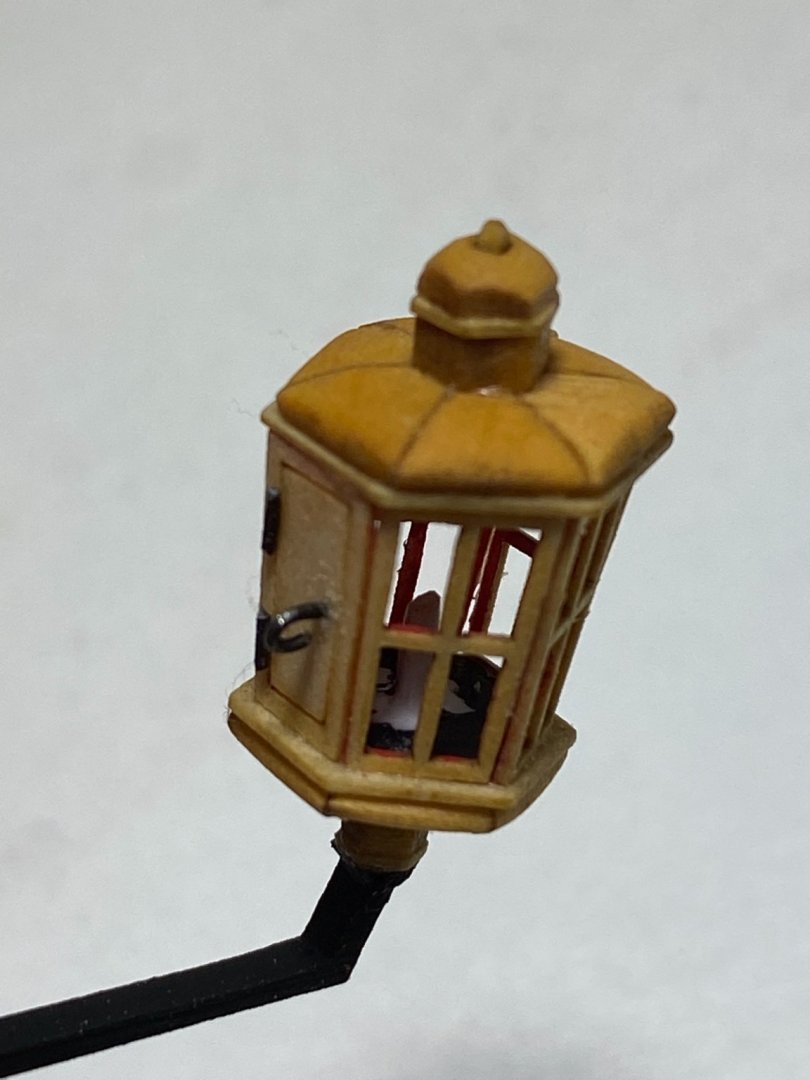
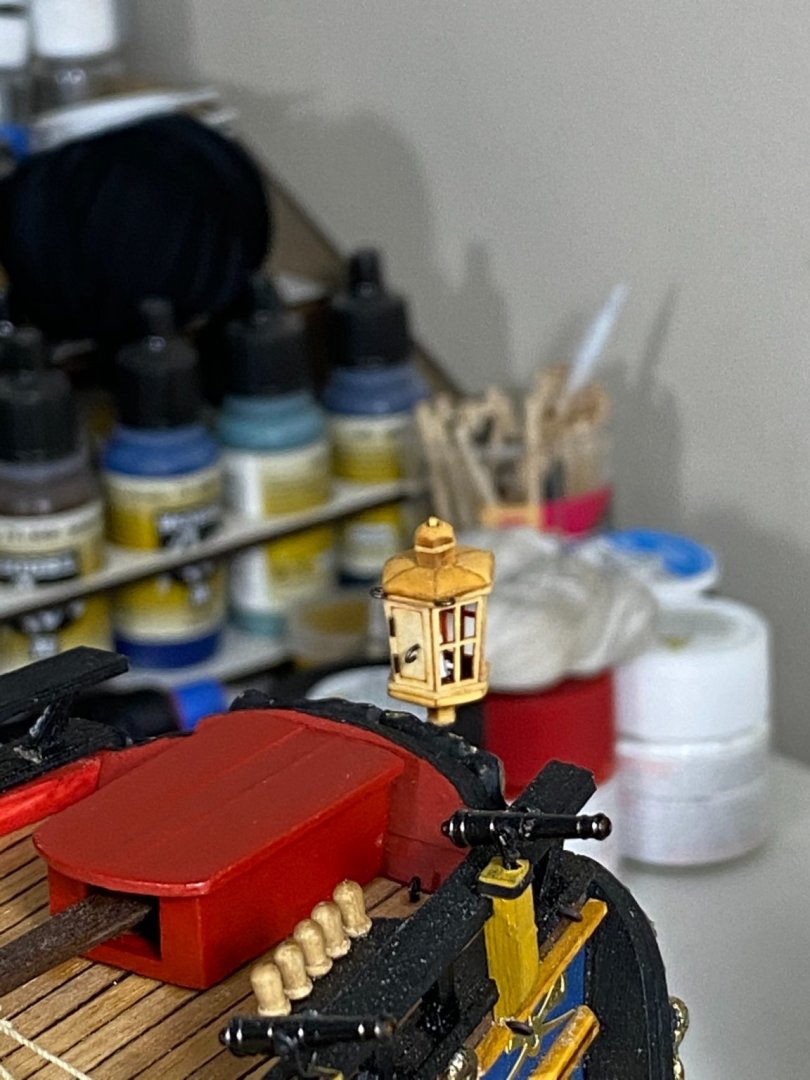
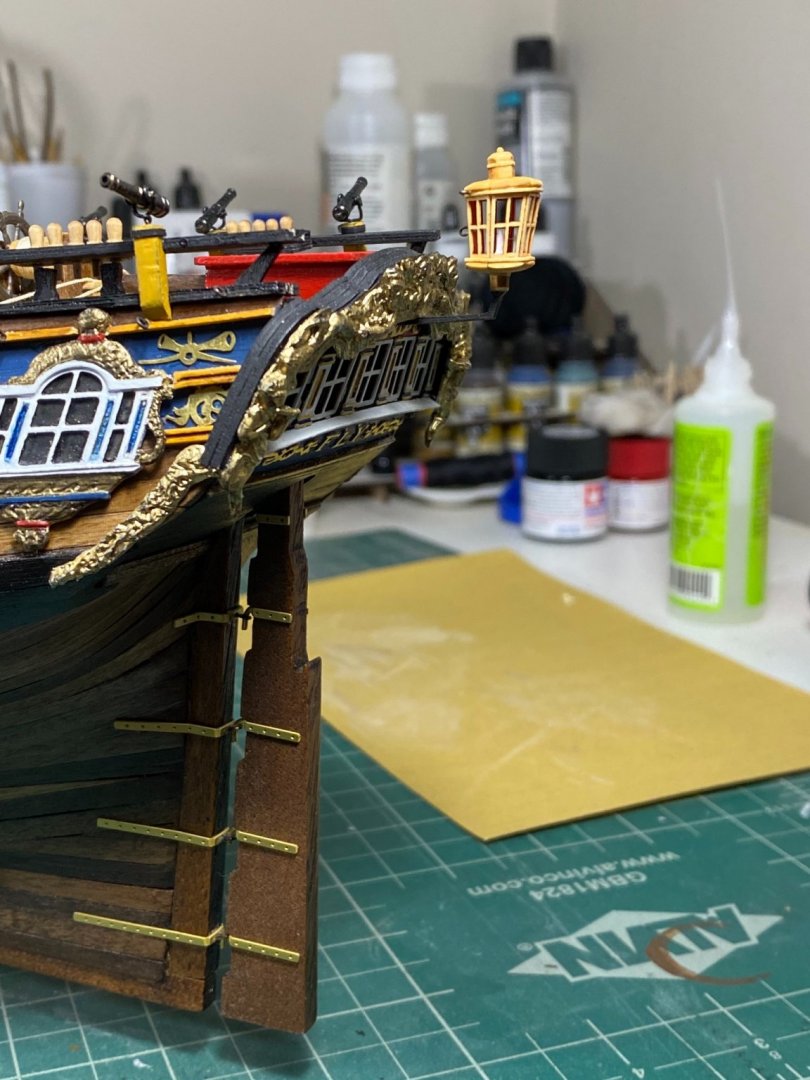
Thank you to those that liked my last post Minor work done this weekend. I had purchased a lantern kit from Chuck at Syren a while back and was finally at a point where I could put this together. I have to say the mini kit was a pleasure to build...extremely well crafted. I chose to leave the acetate out as I liked the look without it. tonight I got it mounted on the stern and I am very happy with the look Next I will be moving onto the masts and attempt to use my new lathe properly. If there is any advice on lathe work, I am open to any and all comments have a great night Tim
- 164 replies
-
- 10
-
-
- fly
- Victory Models
- (and 4 more)
-
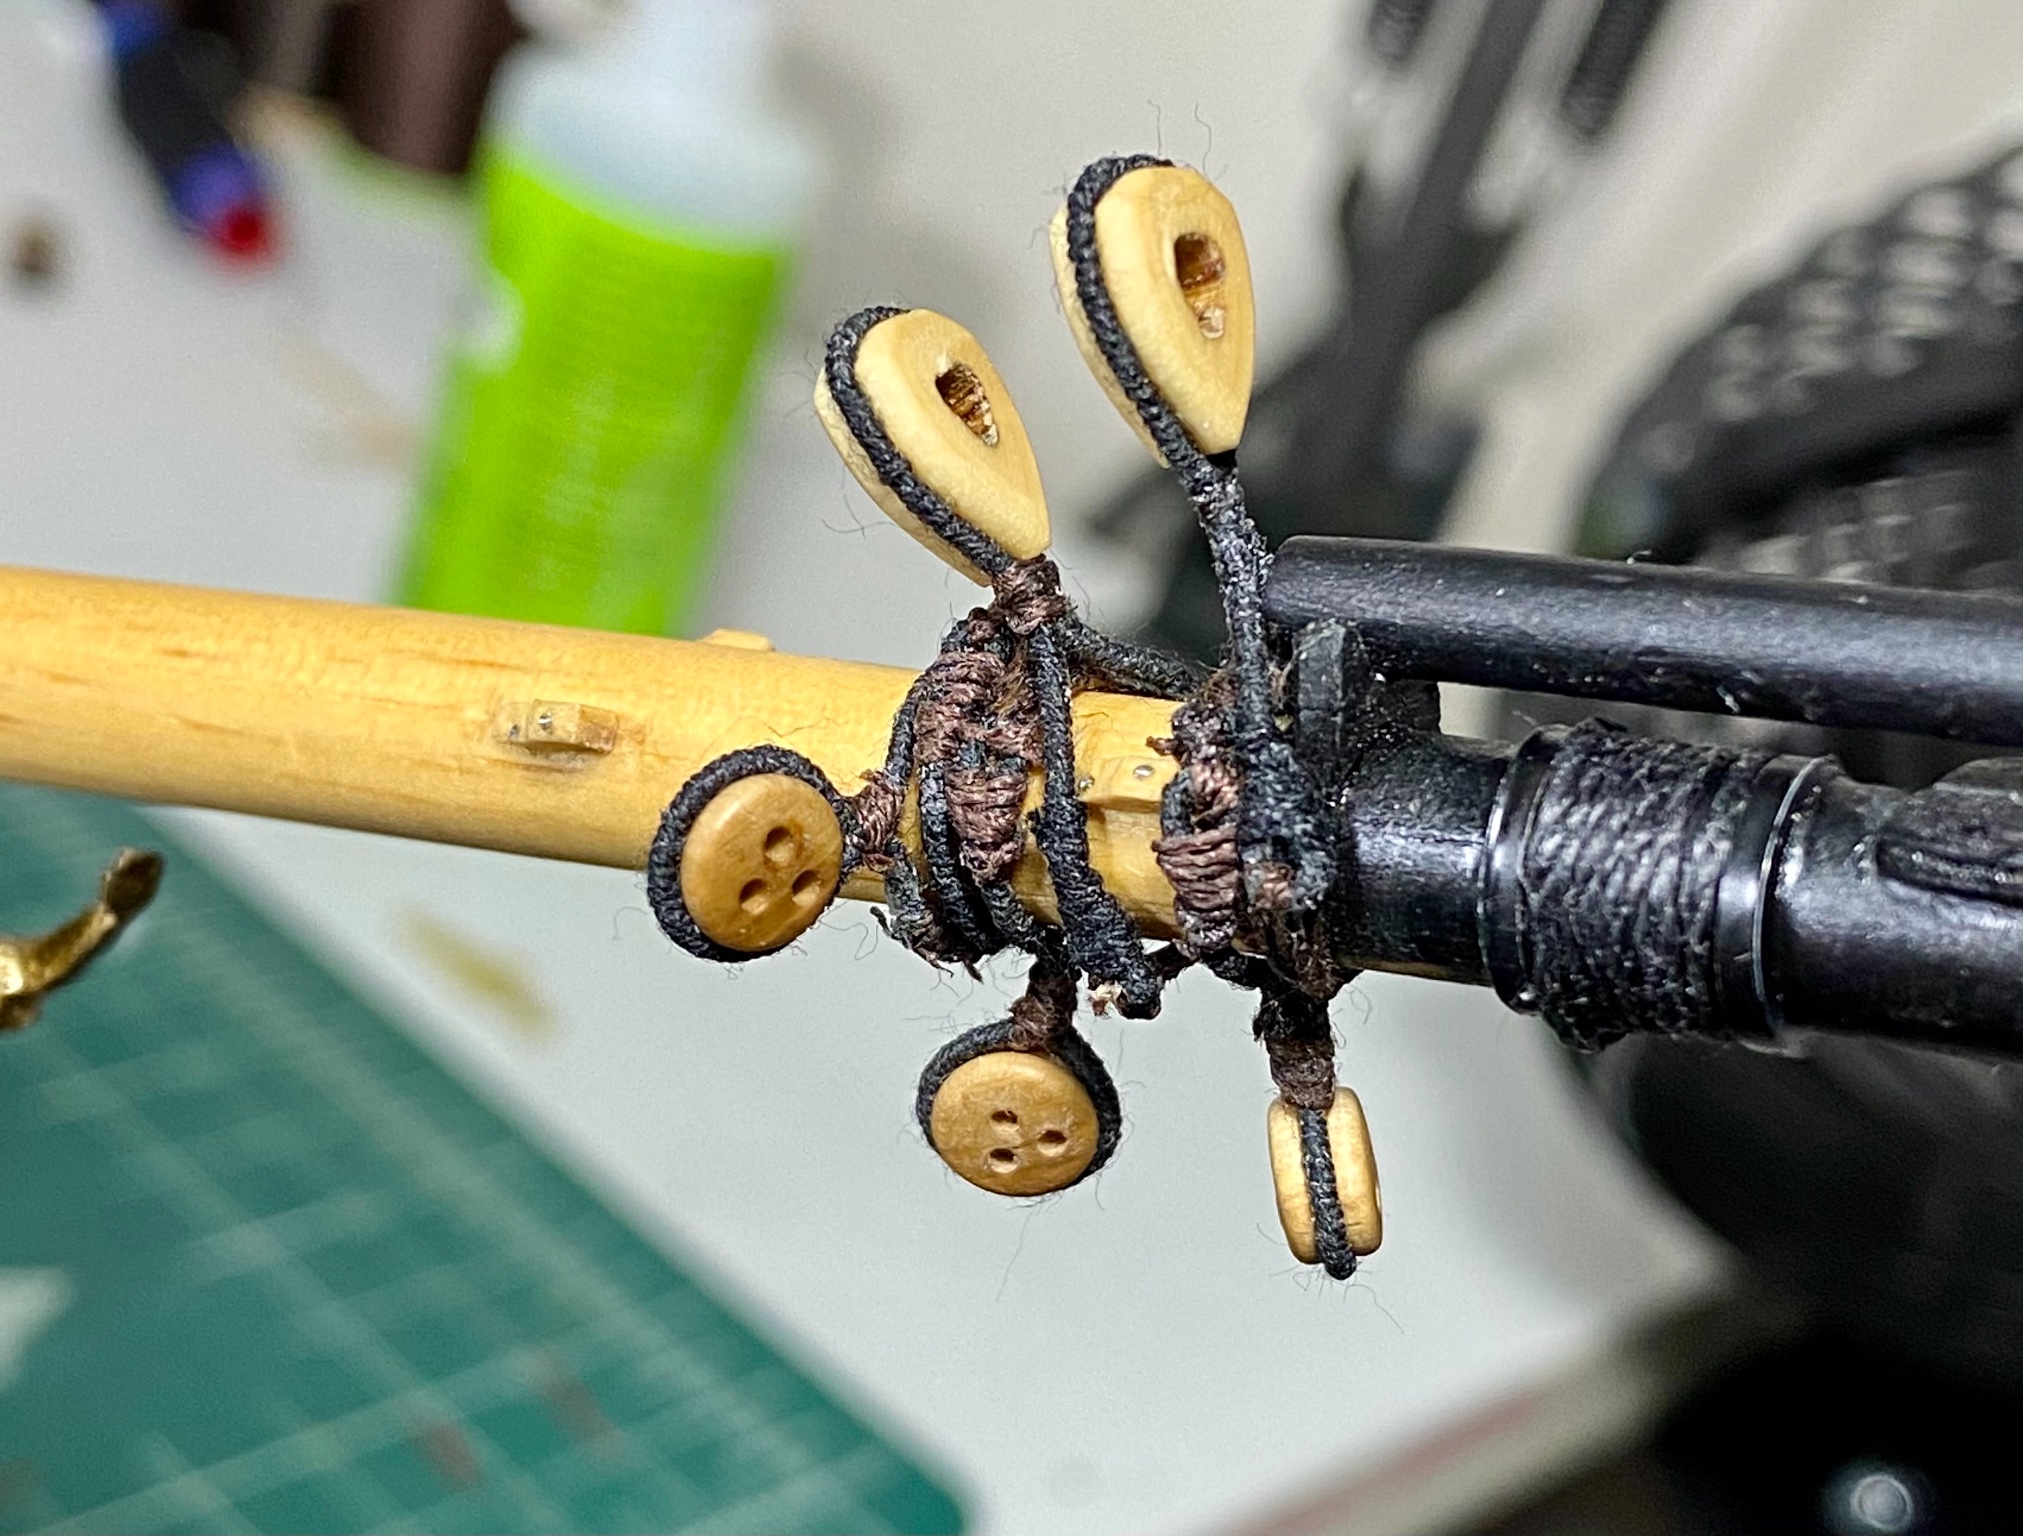
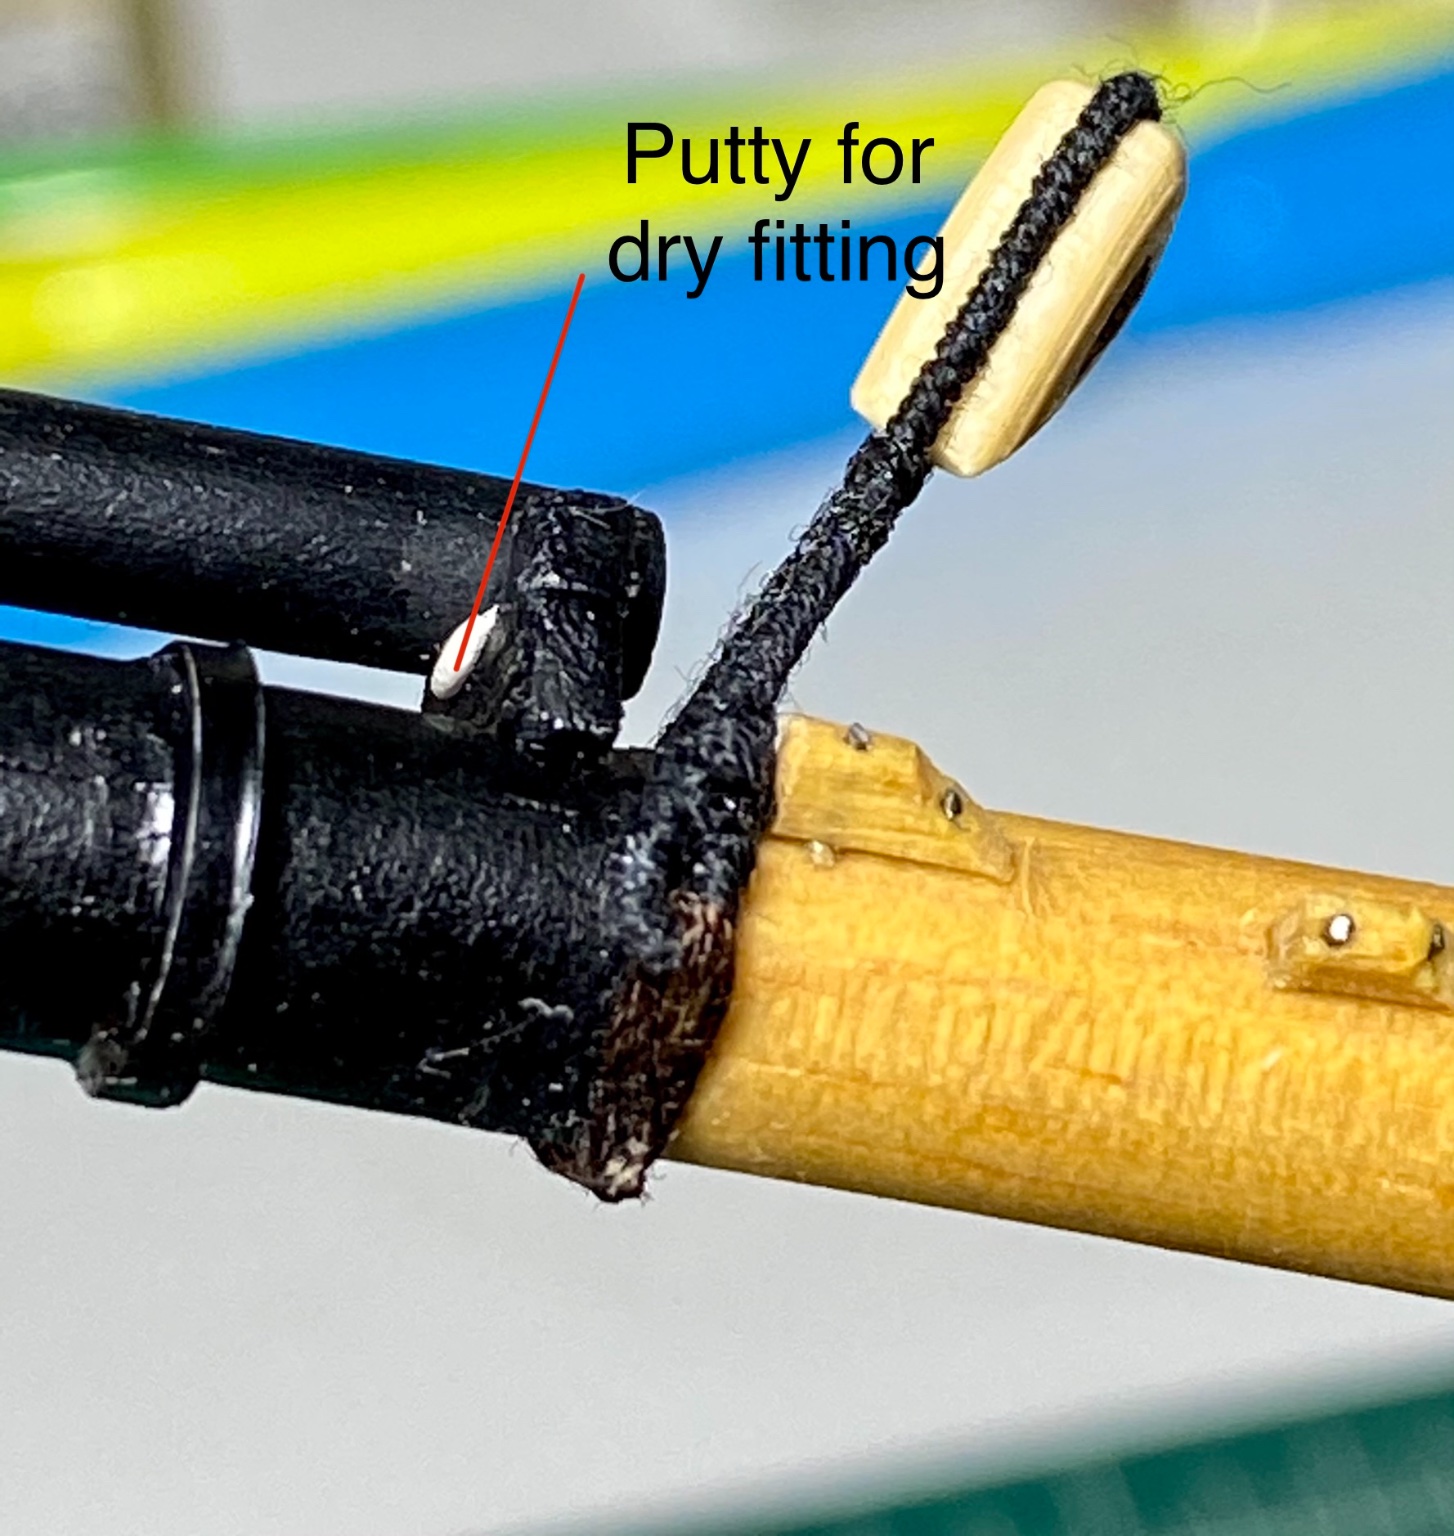
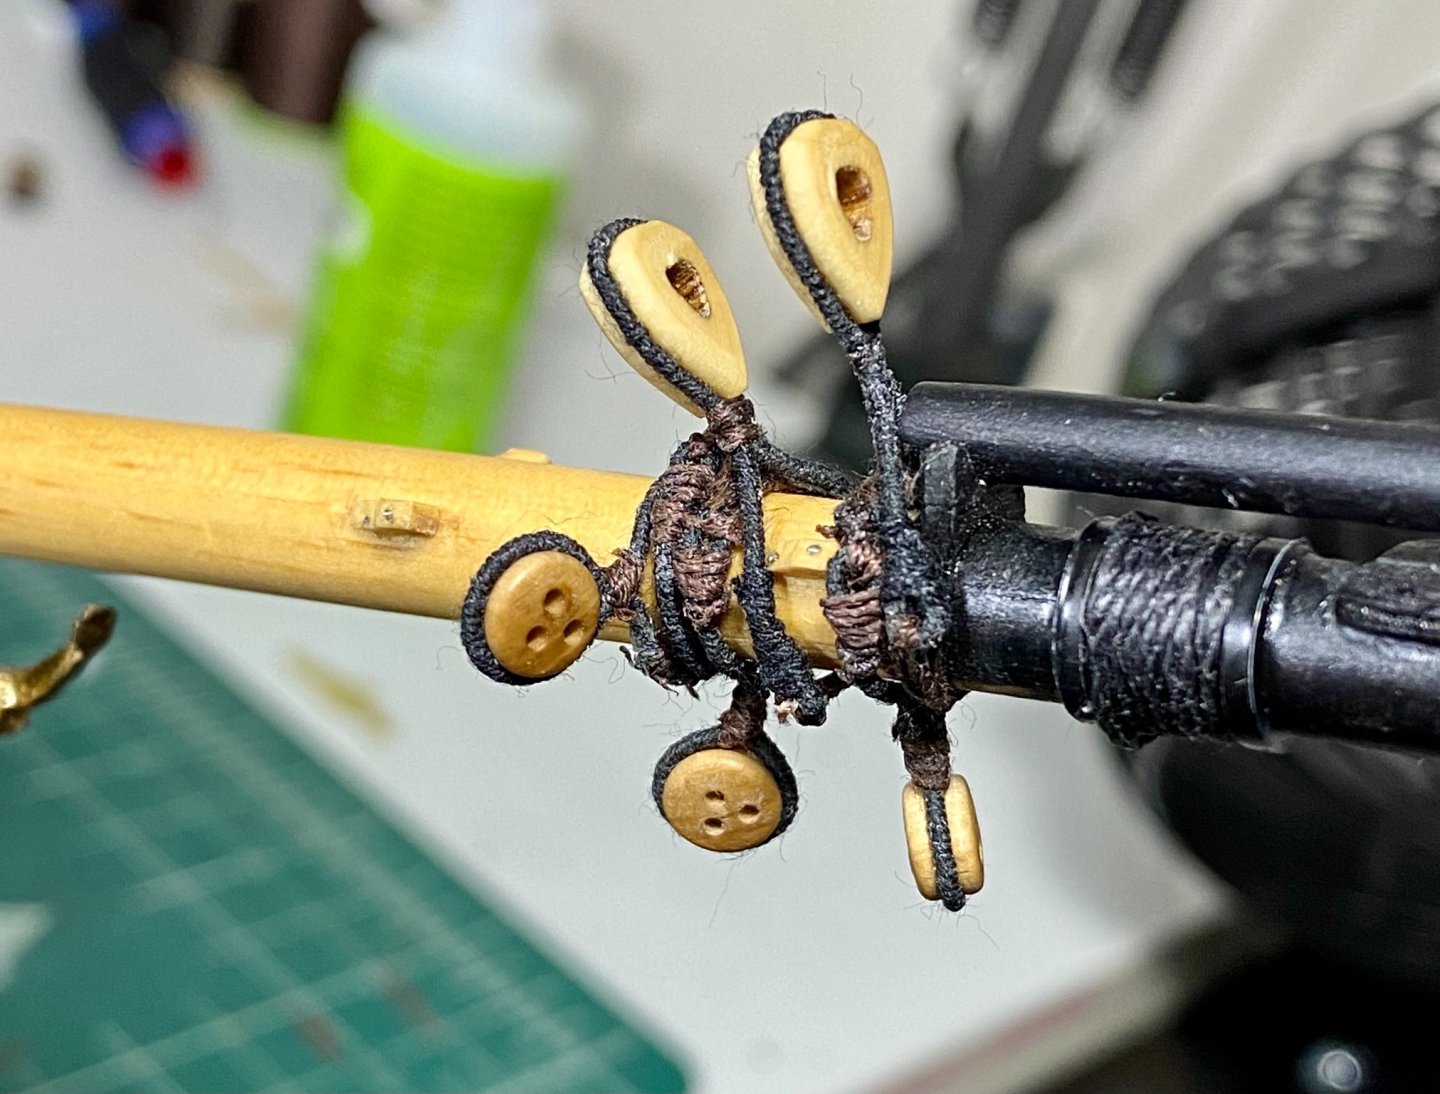
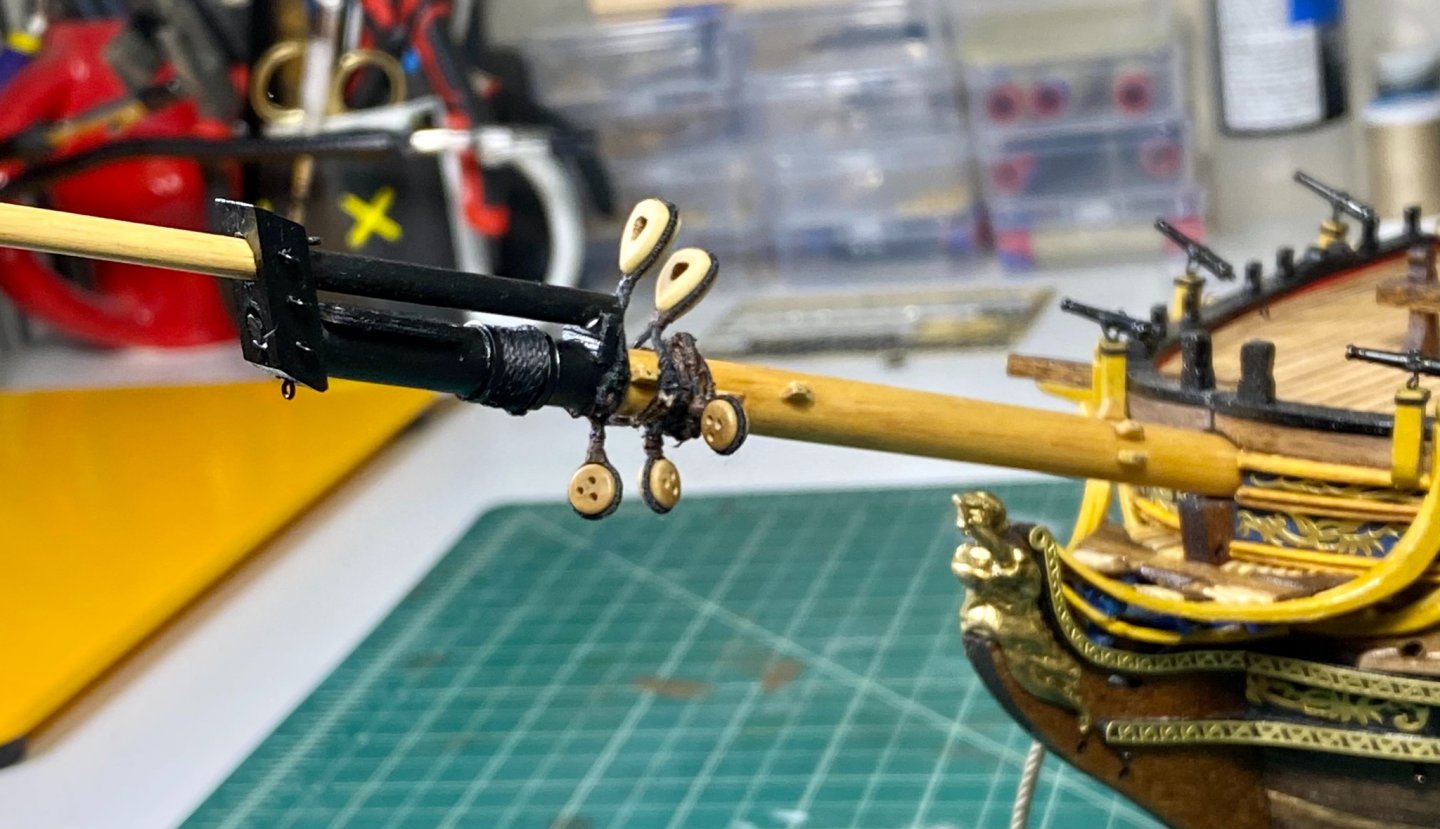
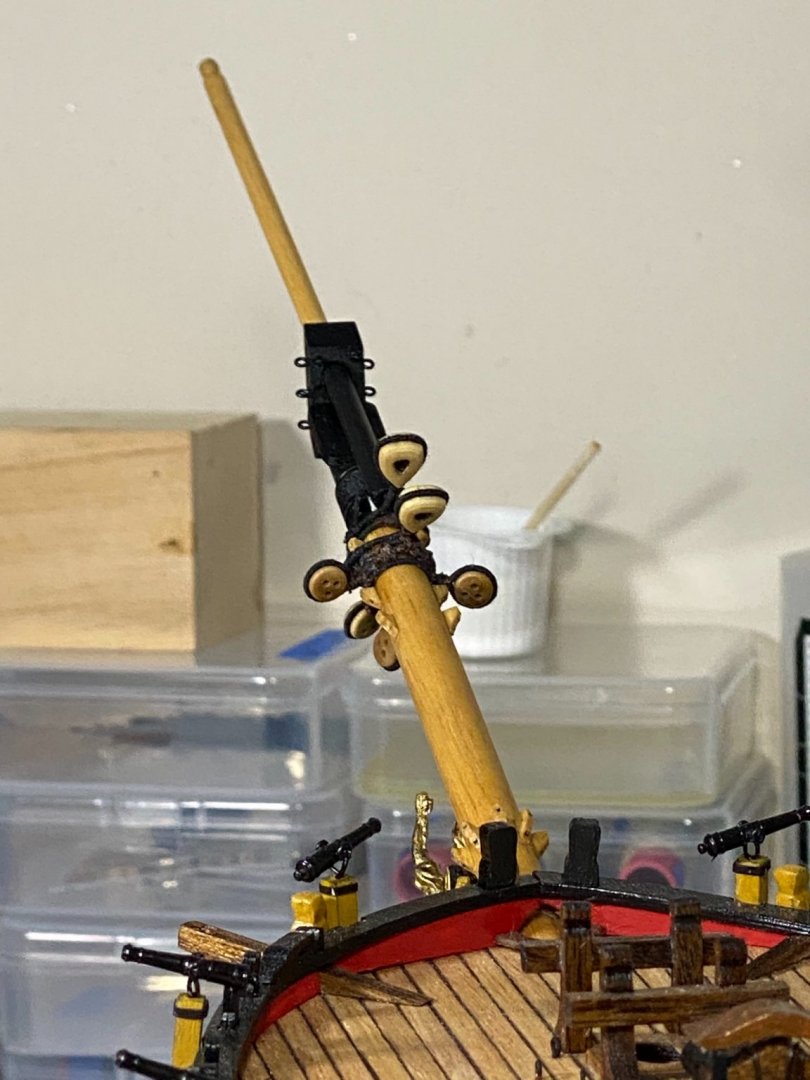
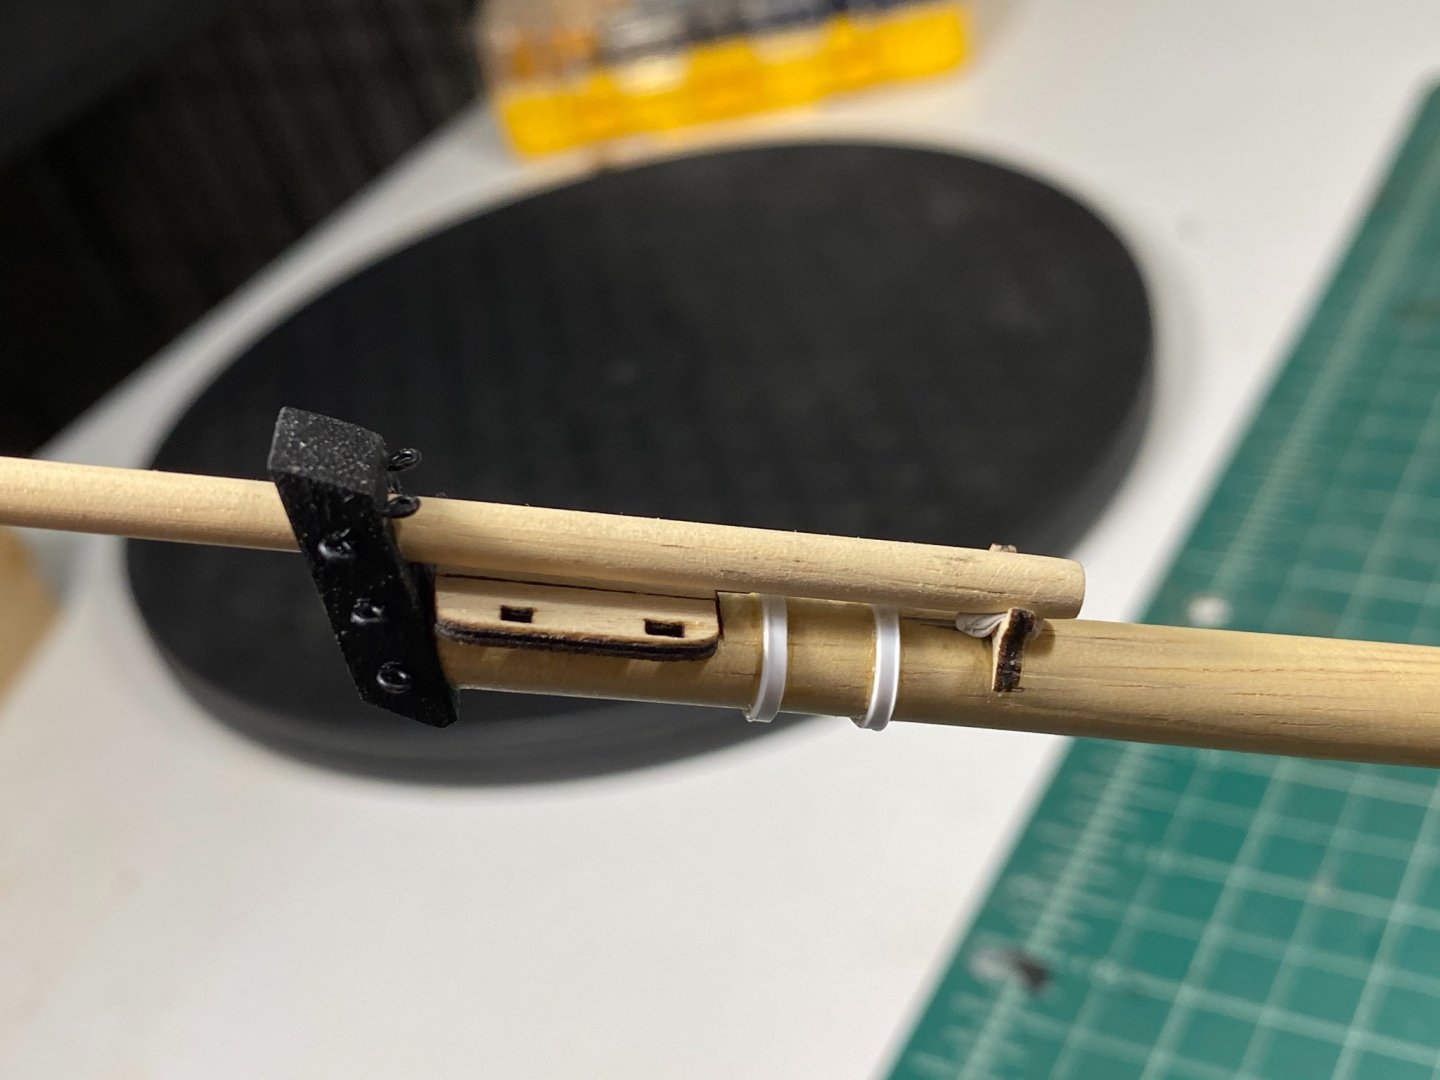
Hi all Got to work on adding some of the blocks to the bowsprite this weekend. These are taking more time than I would have guessed, but I am playing with serving lines (courtesy of Chucks Serv-o-Matic— such beautiful tool) and creating eye splices that I finish with frapping(?). I think that’s the right term.... love the look, but it’s an adventure getting there sometimes. I’m sure I’ll figure out tricks as I go on. everything is dry fit right now with the jib boom held on by a small dab of putty. I think the cleats for the gammoning may be my favorite feature so far on the bowsprite. I got them evenly spaced and they have a nice little profile. I have test fitted the gammoning but will leave it off for now until I place the parts for good. I was fortunate to purchase a Proxxon lathe recently so I’ll be playing with that for the rest of the masts and yards. Should make things easier but I’m sure there’s a learning curve there too Cheers Tim

- 164 replies
-
- 5
-
-
- fly
- Victory Models
- (and 4 more)
-
Makes perfect sense. One thing I know is that I’ll be in line once this ship is on the market. Excellent work so far
-
thanks for the information guys! I measured against BEs numbers and I ended up pretty close within about 0.3 mm (ish) at each section so I will probably leave it as is. I have been following the plans much more than the written instructions for the most part. I’m very much more visual in how I process things so it’s good to know the plans are more important in some regards. luckily I have a quad hands from my dealings in plastic ships so that will be handy again. thanks again Tim
-
Do you think there would be any market for letting the builder select which pre cut sheets they’d like, but include the plans with dimensions for the smaller pieces? That way they can scratch the parts they want and it may ease some of the production time/cost for you in some regards. Not sure of the logistics this may require, or if it’s feasible, but it was a thought that crossed my mind can’t wait to see the final product on this one Tim
-
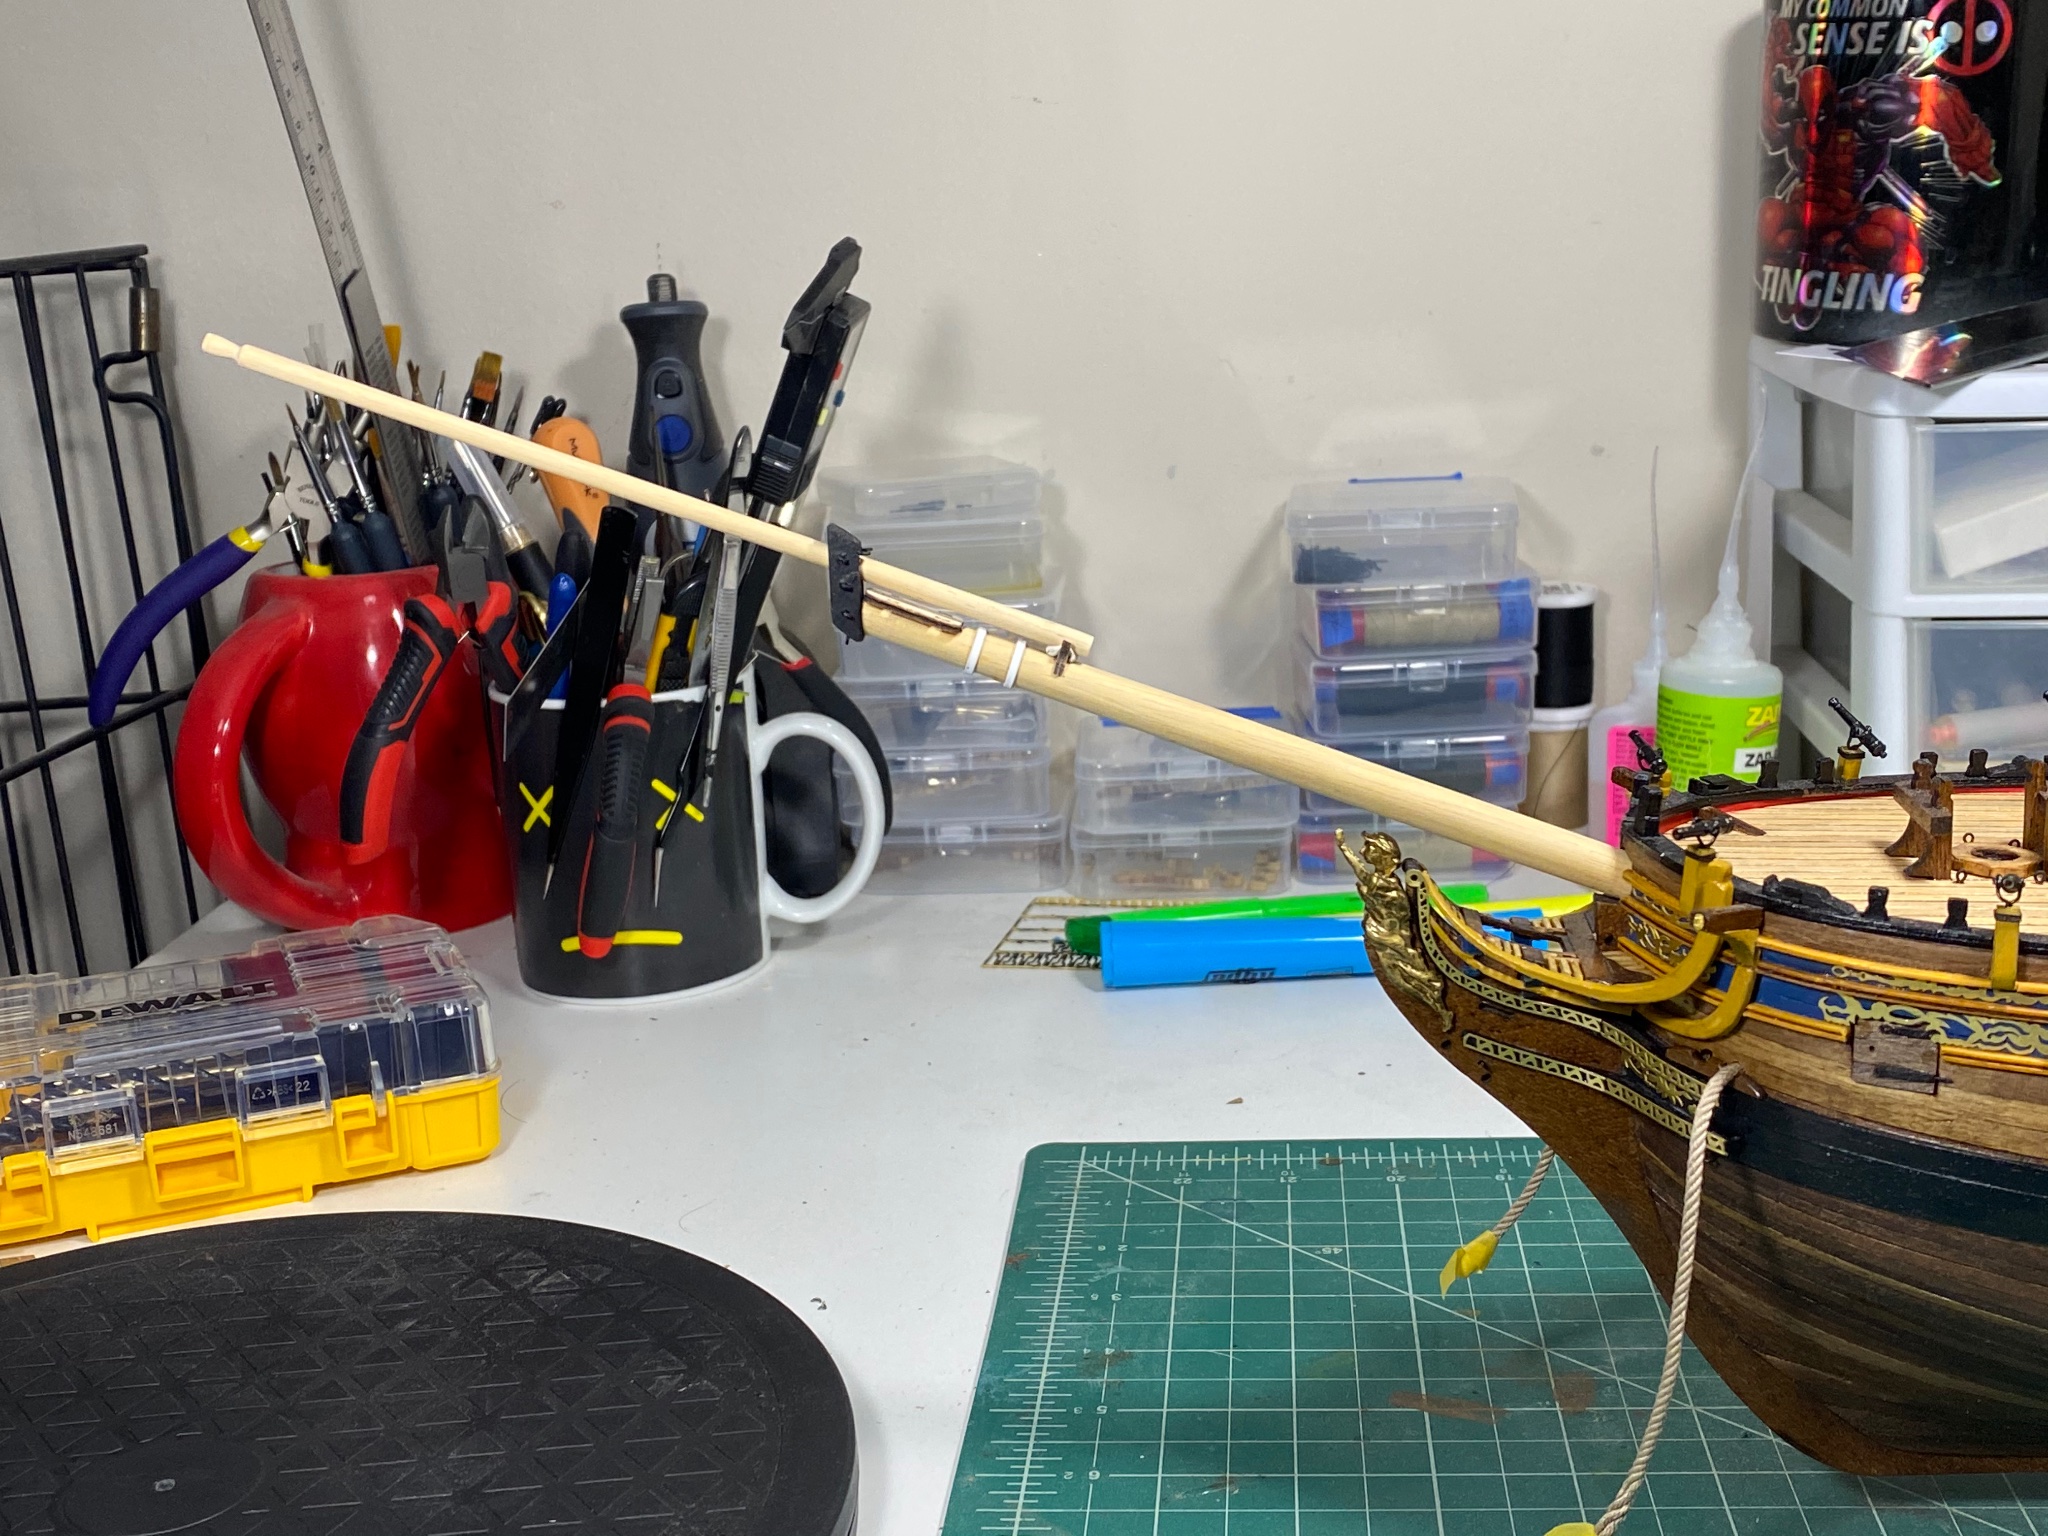
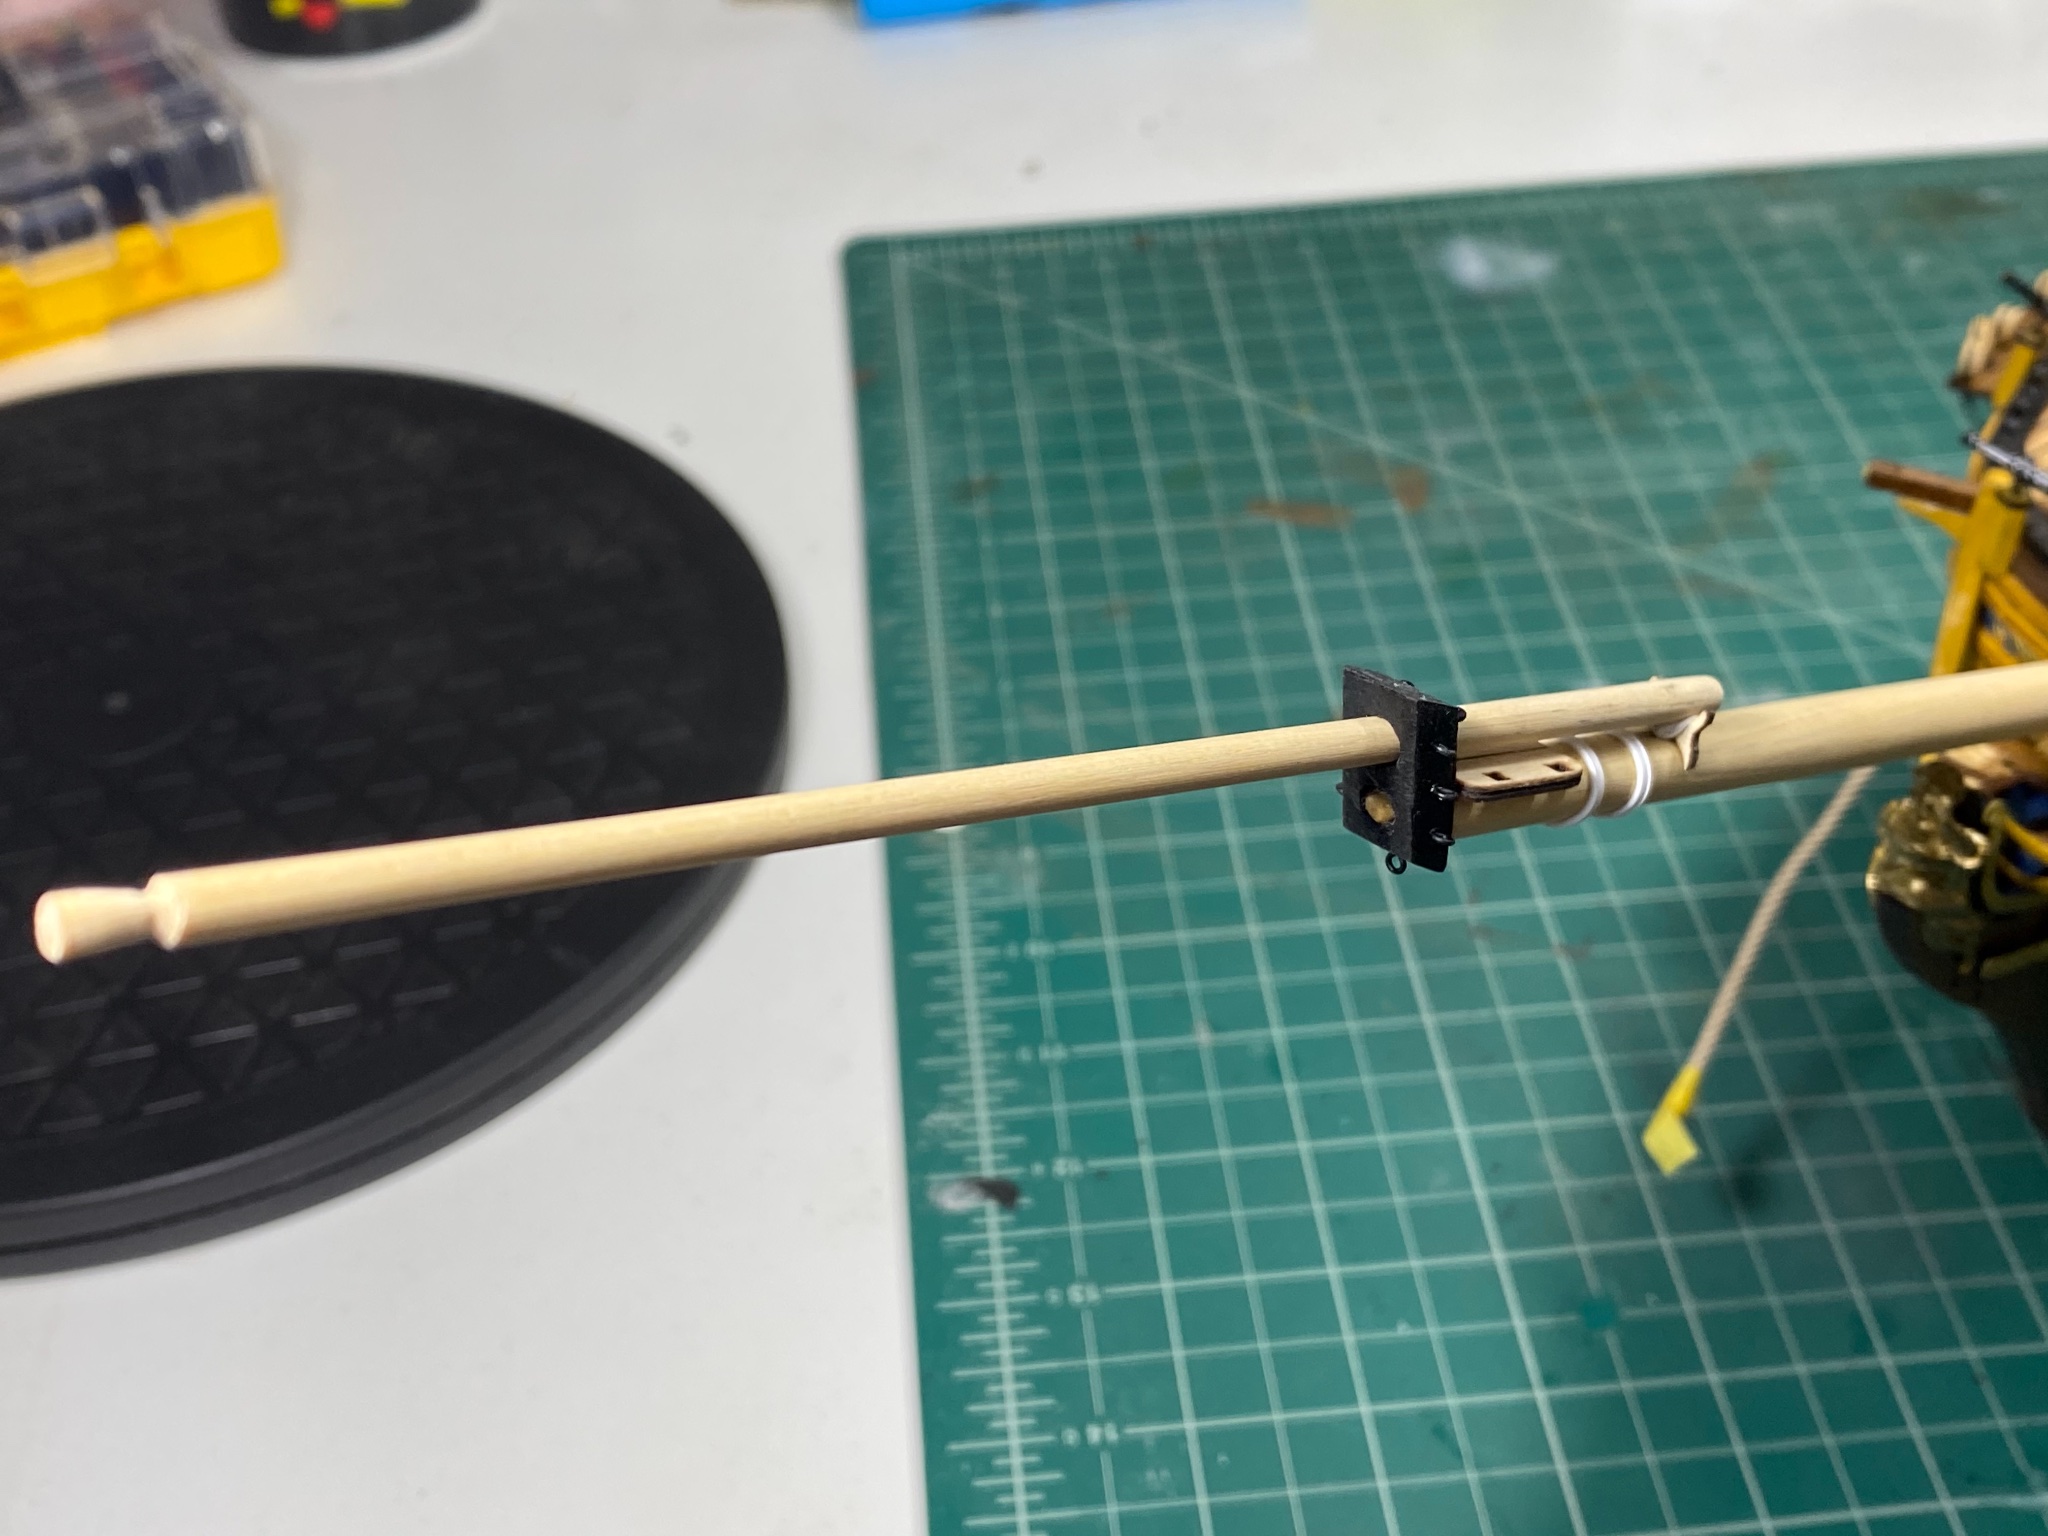
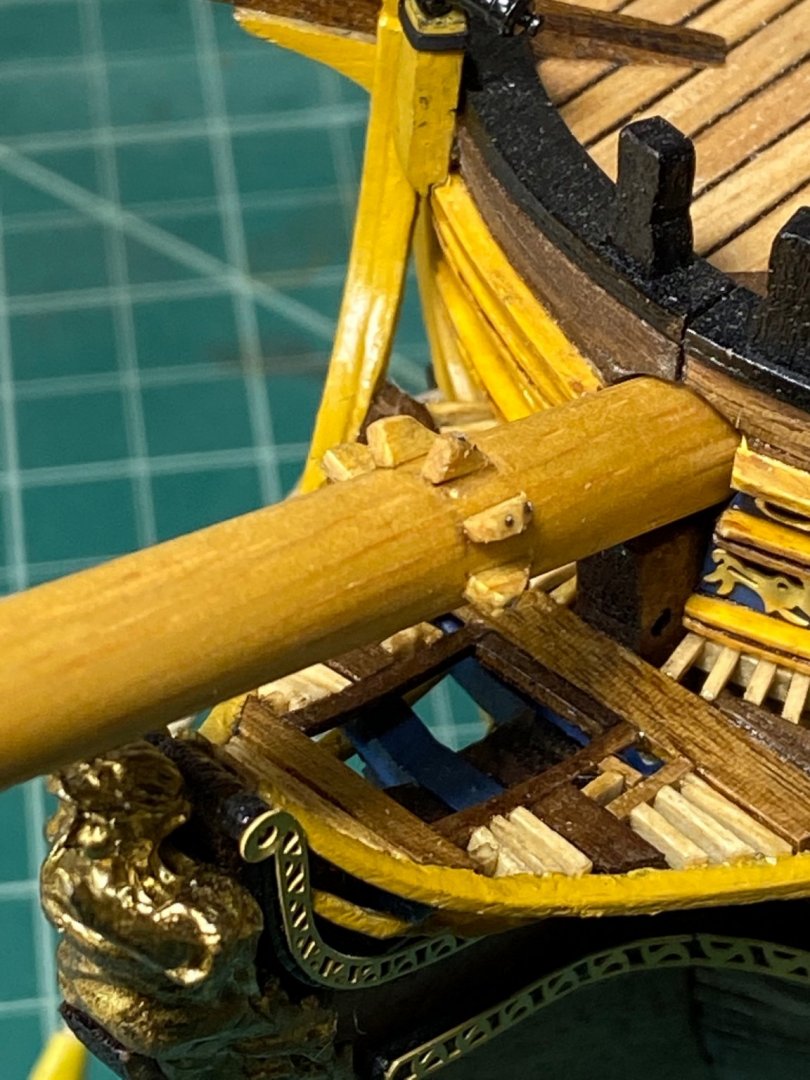
Ended up just going for it and assuming I understood everything correctly. Everything is mostly dry fitted at this point, but I had to redo the cap as most have done. I couldn’t see any way to get the angles right or otherwise. i decided to use Ramin dowel since I can use light staining as needed. The walnut in my kit seemed like it would have been too dark to my eye given the rest of the ship. I rigged a lathe by using a standard power drill and my feet/toes to operate the trigger, leaving my hands free to sand and hold the dowel steady. Glad no body was around to watch that show 😂😂 here is my attempt at the bowsprite. Almost all of it can be adjusted so please let me know if something appears off. Tim


- 164 replies
-
- 4
-
-
- fly
- Victory Models
- (and 4 more)
-
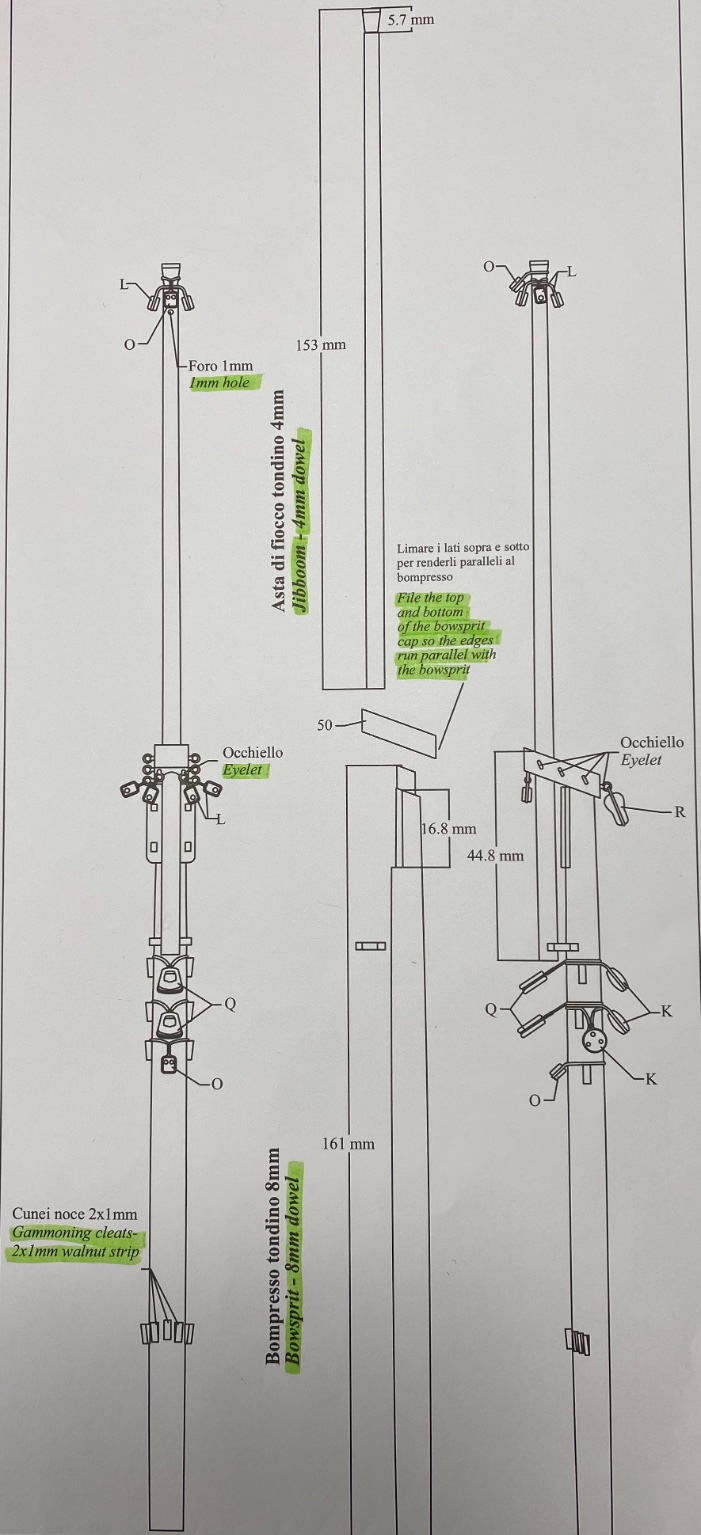
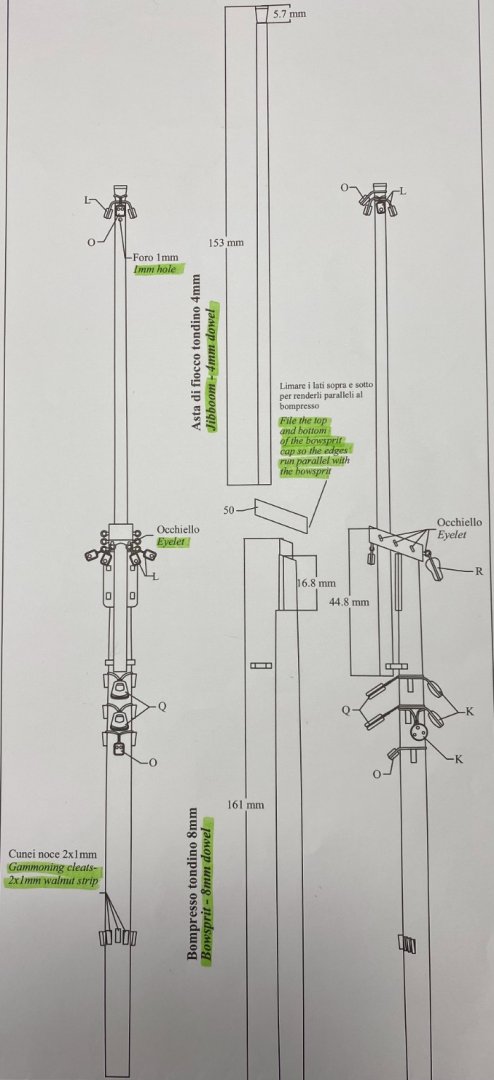
This may be a bit of a dumb question but I figured I’ll ask. On the plans, does the length of the dowels include the depth that goes into the ship? For instance on the bowsprite plans does the 161mm include the portion that goes into the bowsprite hole until the point that it is fully in place? also, the plans do not seem to indicate a taper to the bowsprite, but it seems that there is a slight taper. Is there a portion of the instructions where this is listed and I am not seeing it or should I just measure directly from the plans on this one? thanks! Tim
- 164 replies
-
- 1
-
-
- fly
- Victory Models
- (and 4 more)
-
This entire build is inspiring. I’ll certainly be referencing your serving and rope work for my build. It will be my first time doing this type of detailed rope work as well. I can only hope to have results like yours Tim
- 950 replies
-
- 1
-
-
- syren
- model shipways
- (and 1 more)
-
Thank you BE and dunnock for the comments as well as Richard for the like Tim
-
Incredibly clean work. Very well done 👍🏻
-
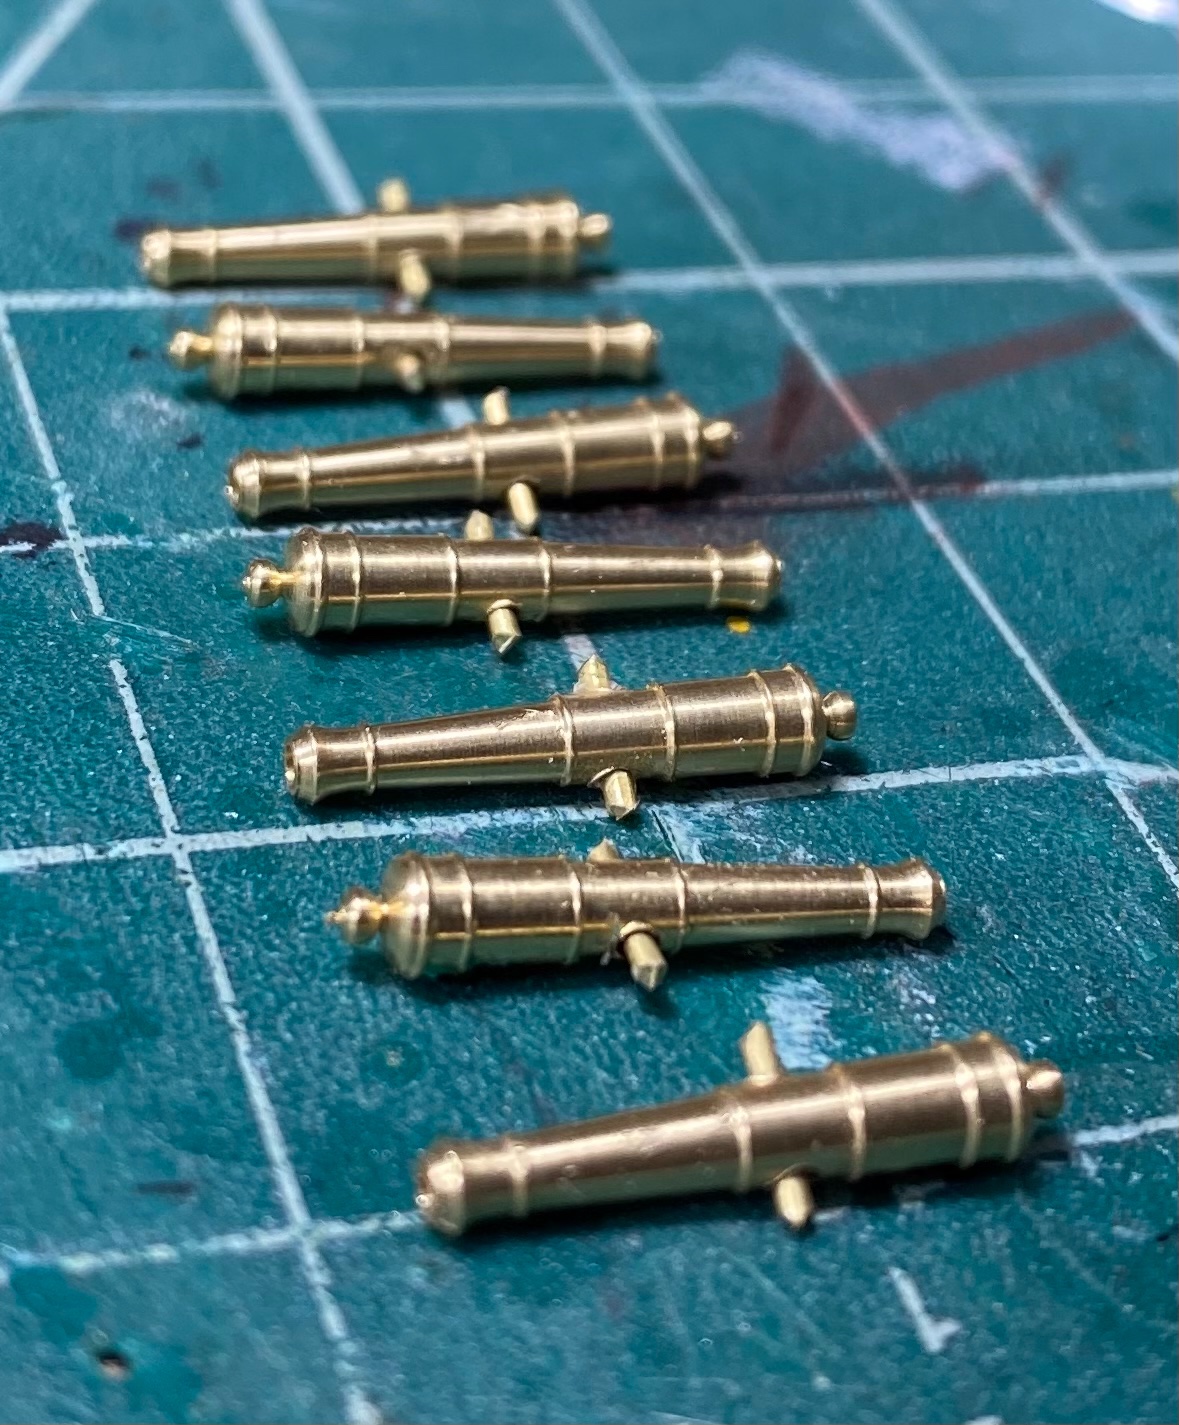
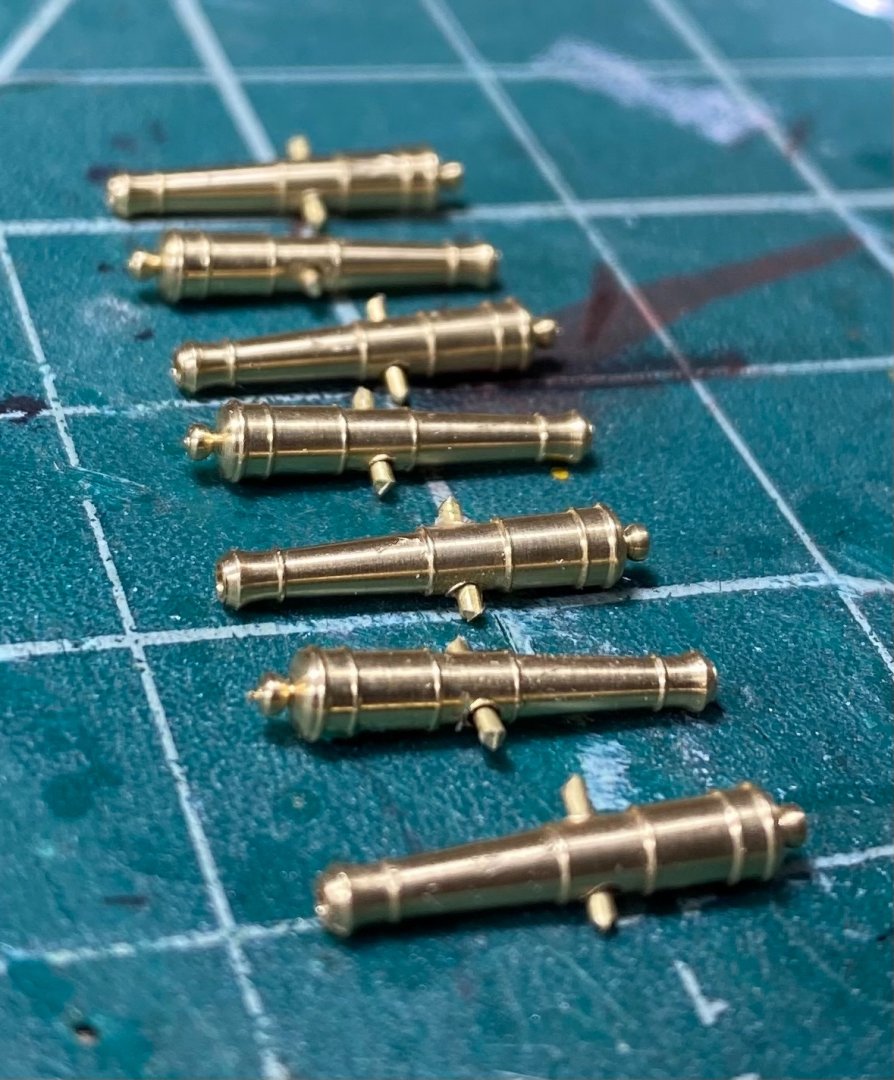
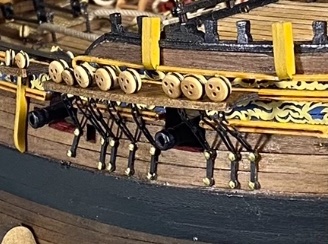
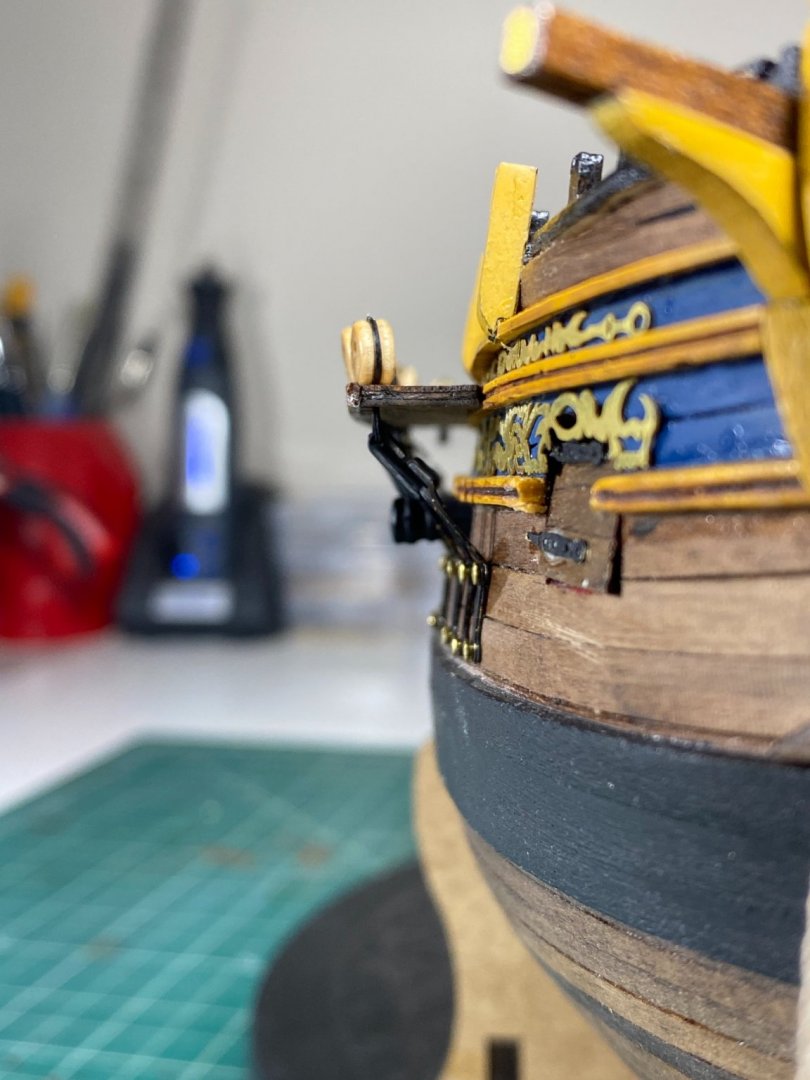
Hi all Minor update tonight. I was able to complete the starboard side chain plates and orient them to the projected path of the shroud lines. This was much more cumbersome than I initially expected but I’m happy with the result I’m hopeful that now that I have some experience placing them, the port side will not be as fiddly. I also received my replacement 15mm swivel guns from RB Models. I was impressed that they only cost 11$ US including shipping all the way from Poland. They are extremely well done in my opinion I had to drill through the center to insert a 0.7mm wire on which to attach the yokes(?). The yokes I decided to make from 24 gauge dark annealed wire that I formed into the appropriate shape and twisted the bottoms together to form a pin to insert to the post. They are not perfect, but they fit nicely and I feel they look good to the eye. for now they are dry fitted, but I will paint them black once completely assembled. That’s it for now. Onto the port side ! have a great night —Tim


- 164 replies
-
- 8
-
-

-
- fly
- Victory Models
- (and 4 more)
-
Thank you all for the likes and comments. I appreciate the encouragement and extremely kind words more than you know. Tim
-
Looks very even and uniform to my eye Richard. I especially like how nicely the rivets/indentations came out. Did you do this with a jig or were the plates pre done that way? keep up the great work! Tim
-
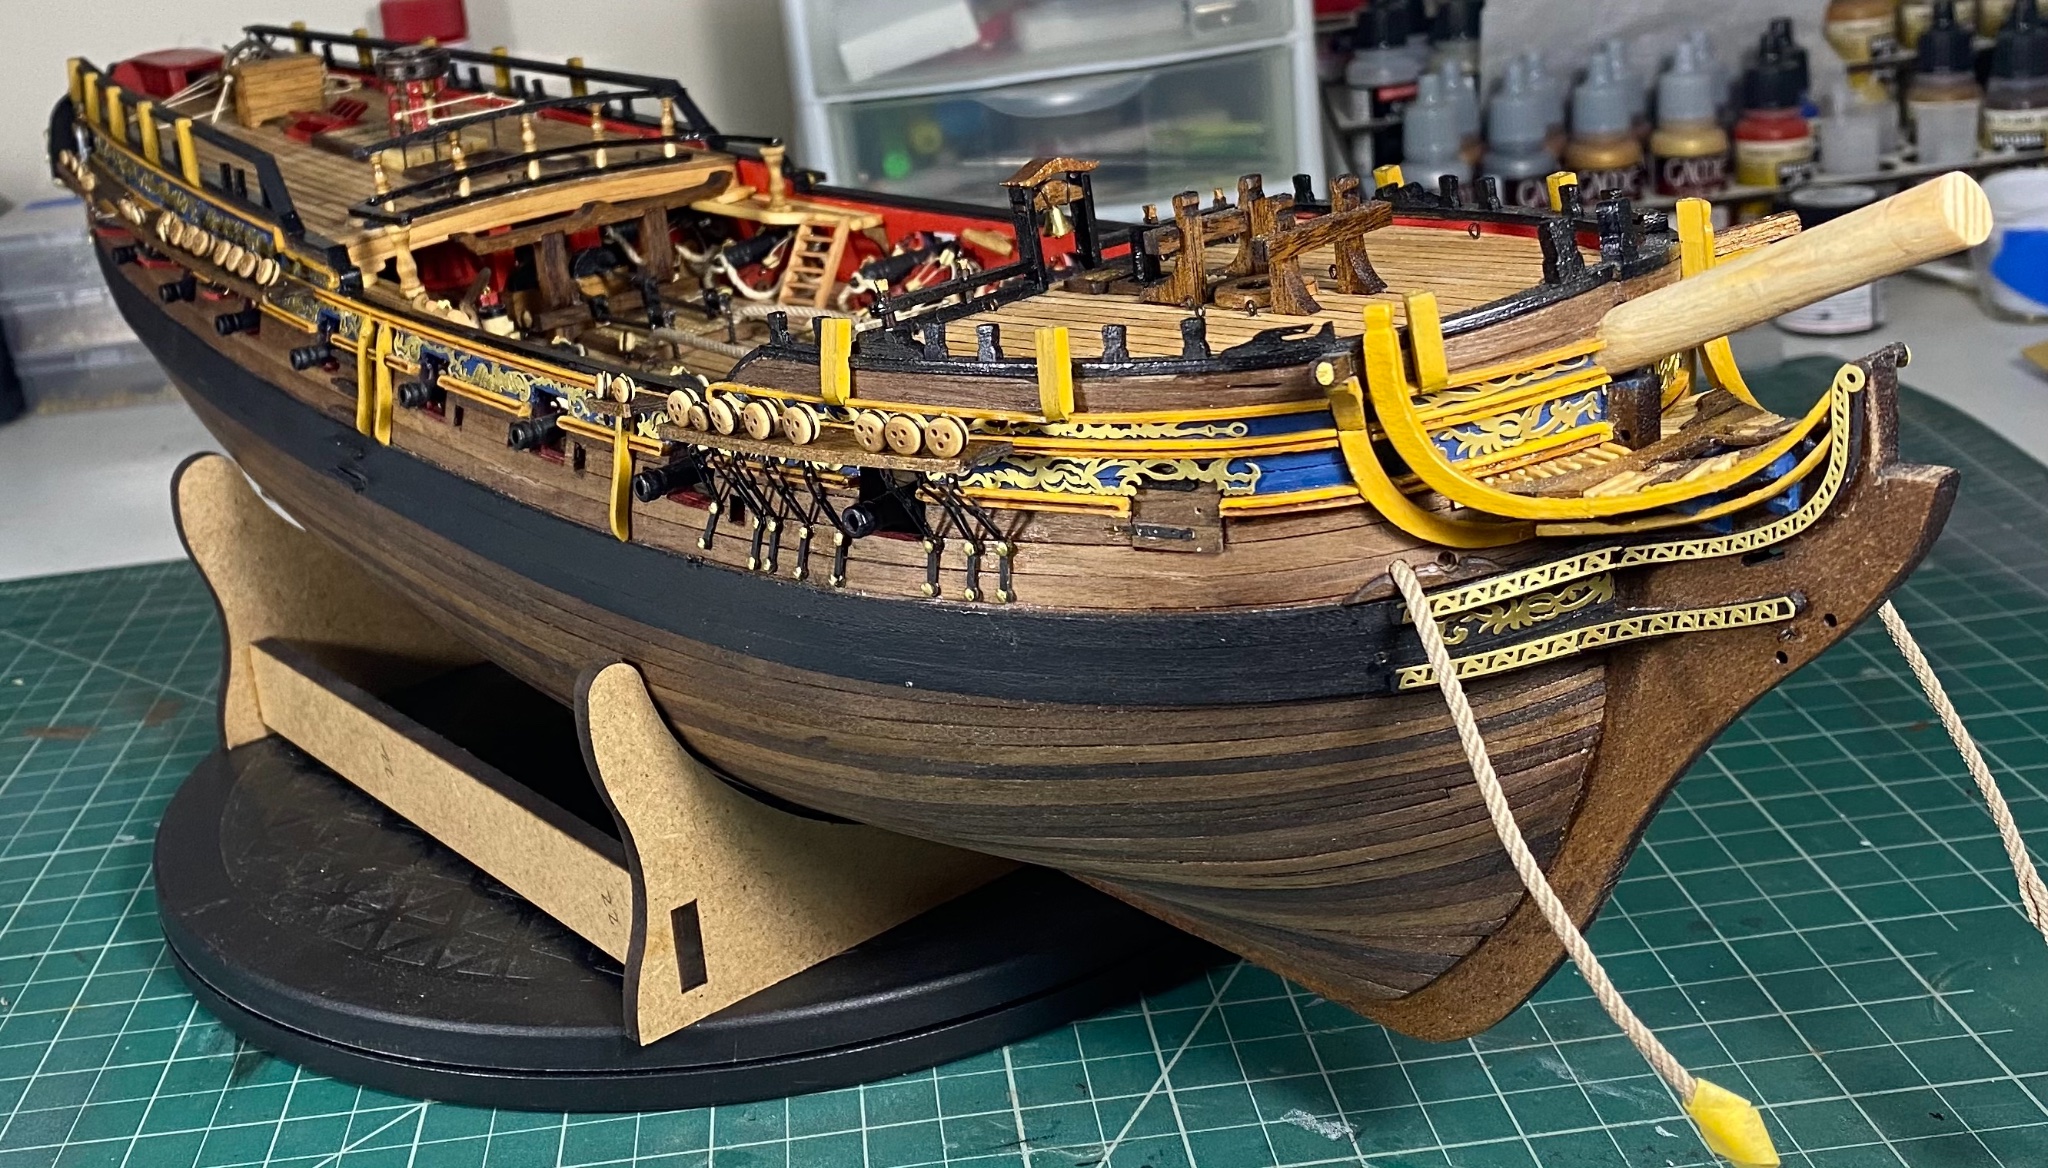
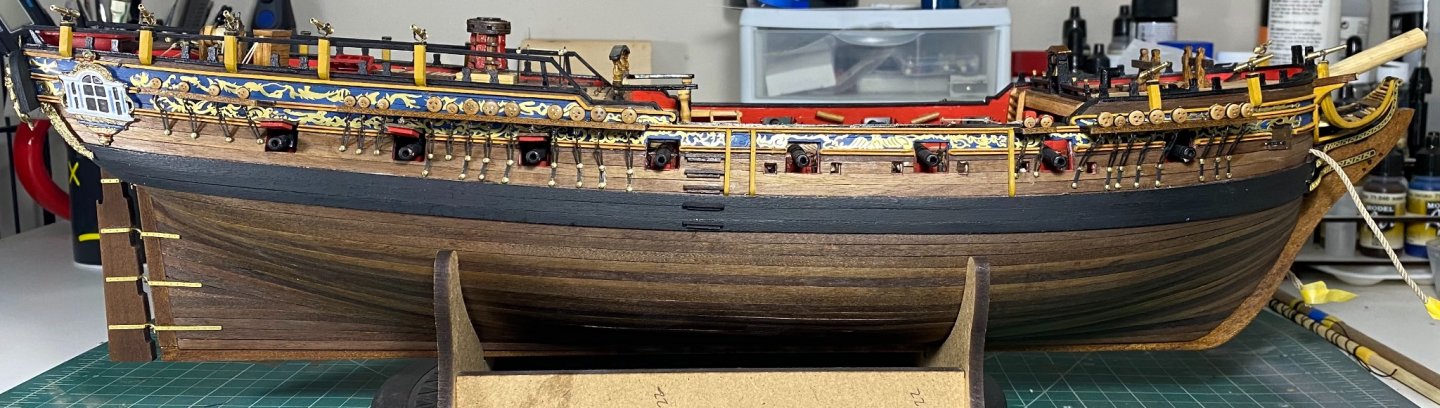
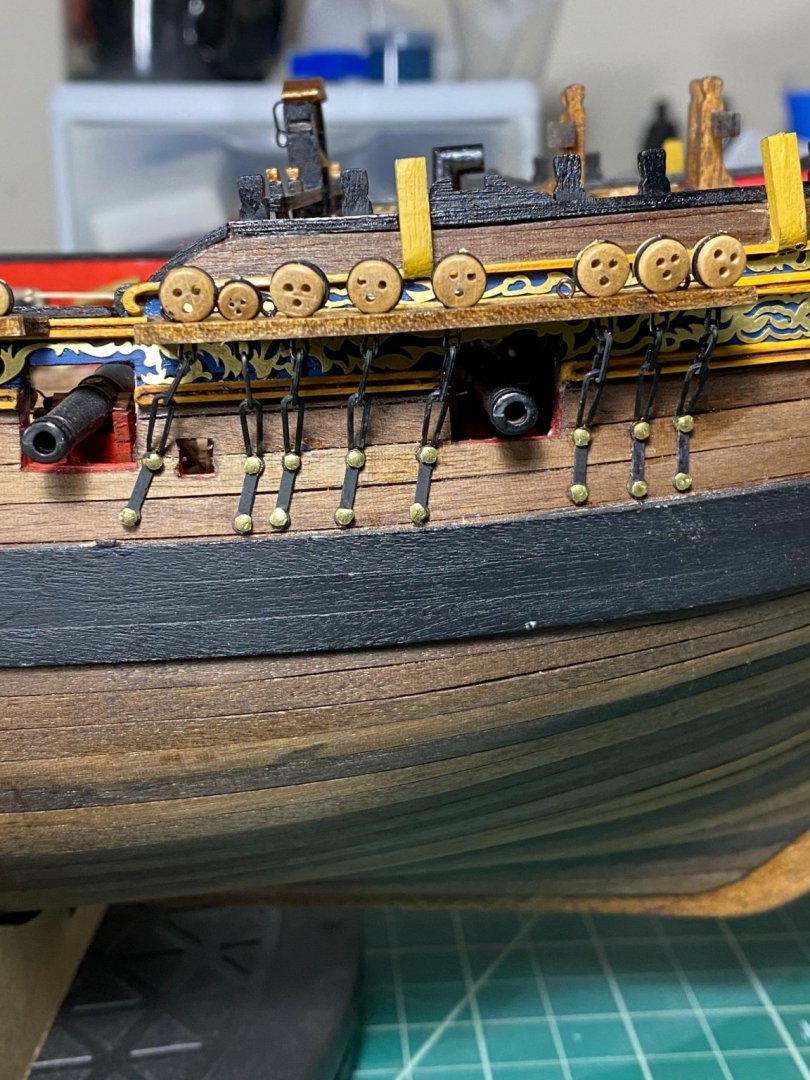
Started to work on the channels and the bits beneath the channels. These are proving to be a challenge to get initial attachment to the hull. Currently I’m using a spare piece of dowel, measured to show where the shroud line would attach, with a piece of string to get the closest angle for the pieces to attach in line with tension. I think I have the angle mostly right (or as close as I will be able to at this point. I may improve or figure it out as I move back and then do the other side). This side profile shows the angles in getting now as well as an idea of how everything is laying. Please feel free to offer any and all advice on making this process more efficient or better. These took me about 2 hours to get all the pieces cut, measured, blackened, glued and pinned. have a great night all! Tim

- 164 replies
-
- 5
-
-
- fly
- Victory Models
- (and 4 more)
-
Thanks Dunnock for taking a look! I appreciate it I was able to get my posts attached without too much trouble thankfully. I’m still waiting on the guns to arrive but I have plenty to keep me occupied Tim
-
Was wondering where you’ve been! Best of luck with the move Tim
- 59 replies
-
- 1
-
-
- Fly
- Victory Models
- (and 1 more)
-
After seeing the result you have achieved so far, this ship will definitely be on my build list for the future. Exceptional work Tim
- 127 replies
-
- 1
-
-
- confederacy
- model shipways
- (and 1 more)
-
What you’ve done so far is looking great! Don’t worry about speed , just enjoy when you have time! Tim
- 82 replies
-
- 1
-
-
- Fly
- Victory Models
- (and 2 more)
-
Looking very clean! did the swivel guns come with the kit or were these purchased separately? Tim
- 124 replies
-
- 1
-
-
- panart
- royal caroline
- (and 1 more)
-
Thank you all for the likes and suggestions! I was able to find these and order a full compliment of them. Oddly enough the international shipping was only 4$ extra so that’s a win! I’ll probably use your mounting methods as I like the effect you achieved. Did you have enough spare PE hooks or did you end up buying more? I may end up leaving a few off as you and @glbarlow suggested. If I do leave some out is there a place they are typically stored on the deck or are they stowed away?? Id love to have them visible if possible even if not mounted. Thank you Richard! I looked at the syren ones but they didn’t seem to have small enough ones on his schematic. They may be there but with his store down at the moment given the frenzy this week, I couldn’t look any further. I’m looking forward to seeing the coppering of your hull! thanks all Tim
- 164 replies
-
- 1
-
-
- fly
- Victory Models
- (and 4 more)
-
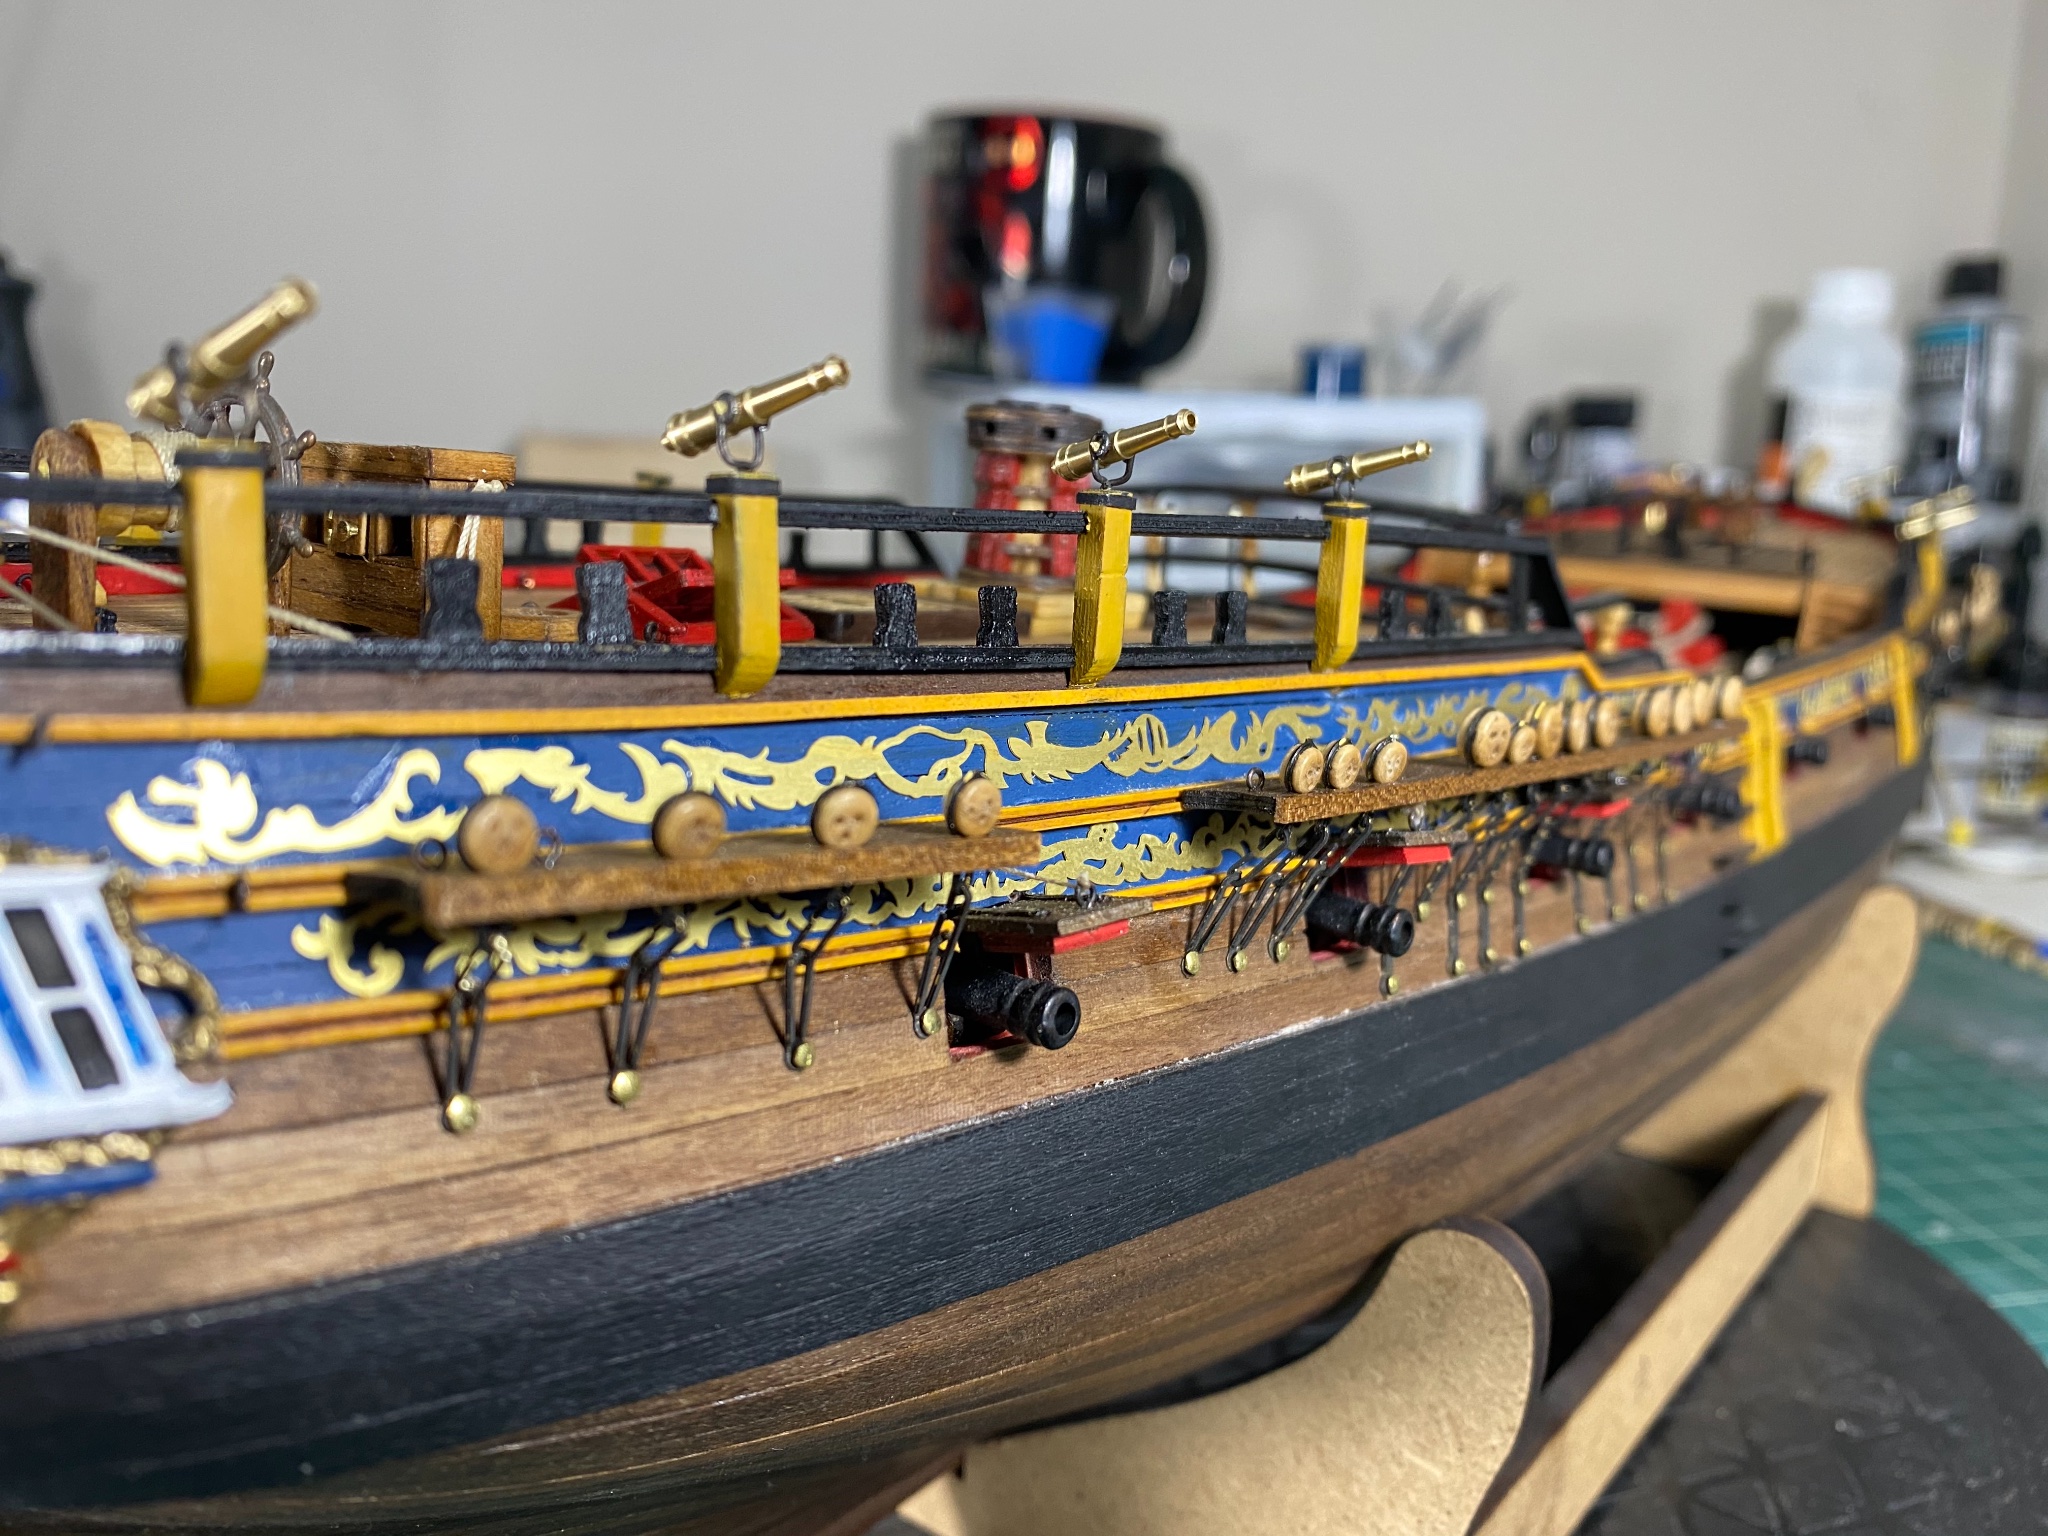
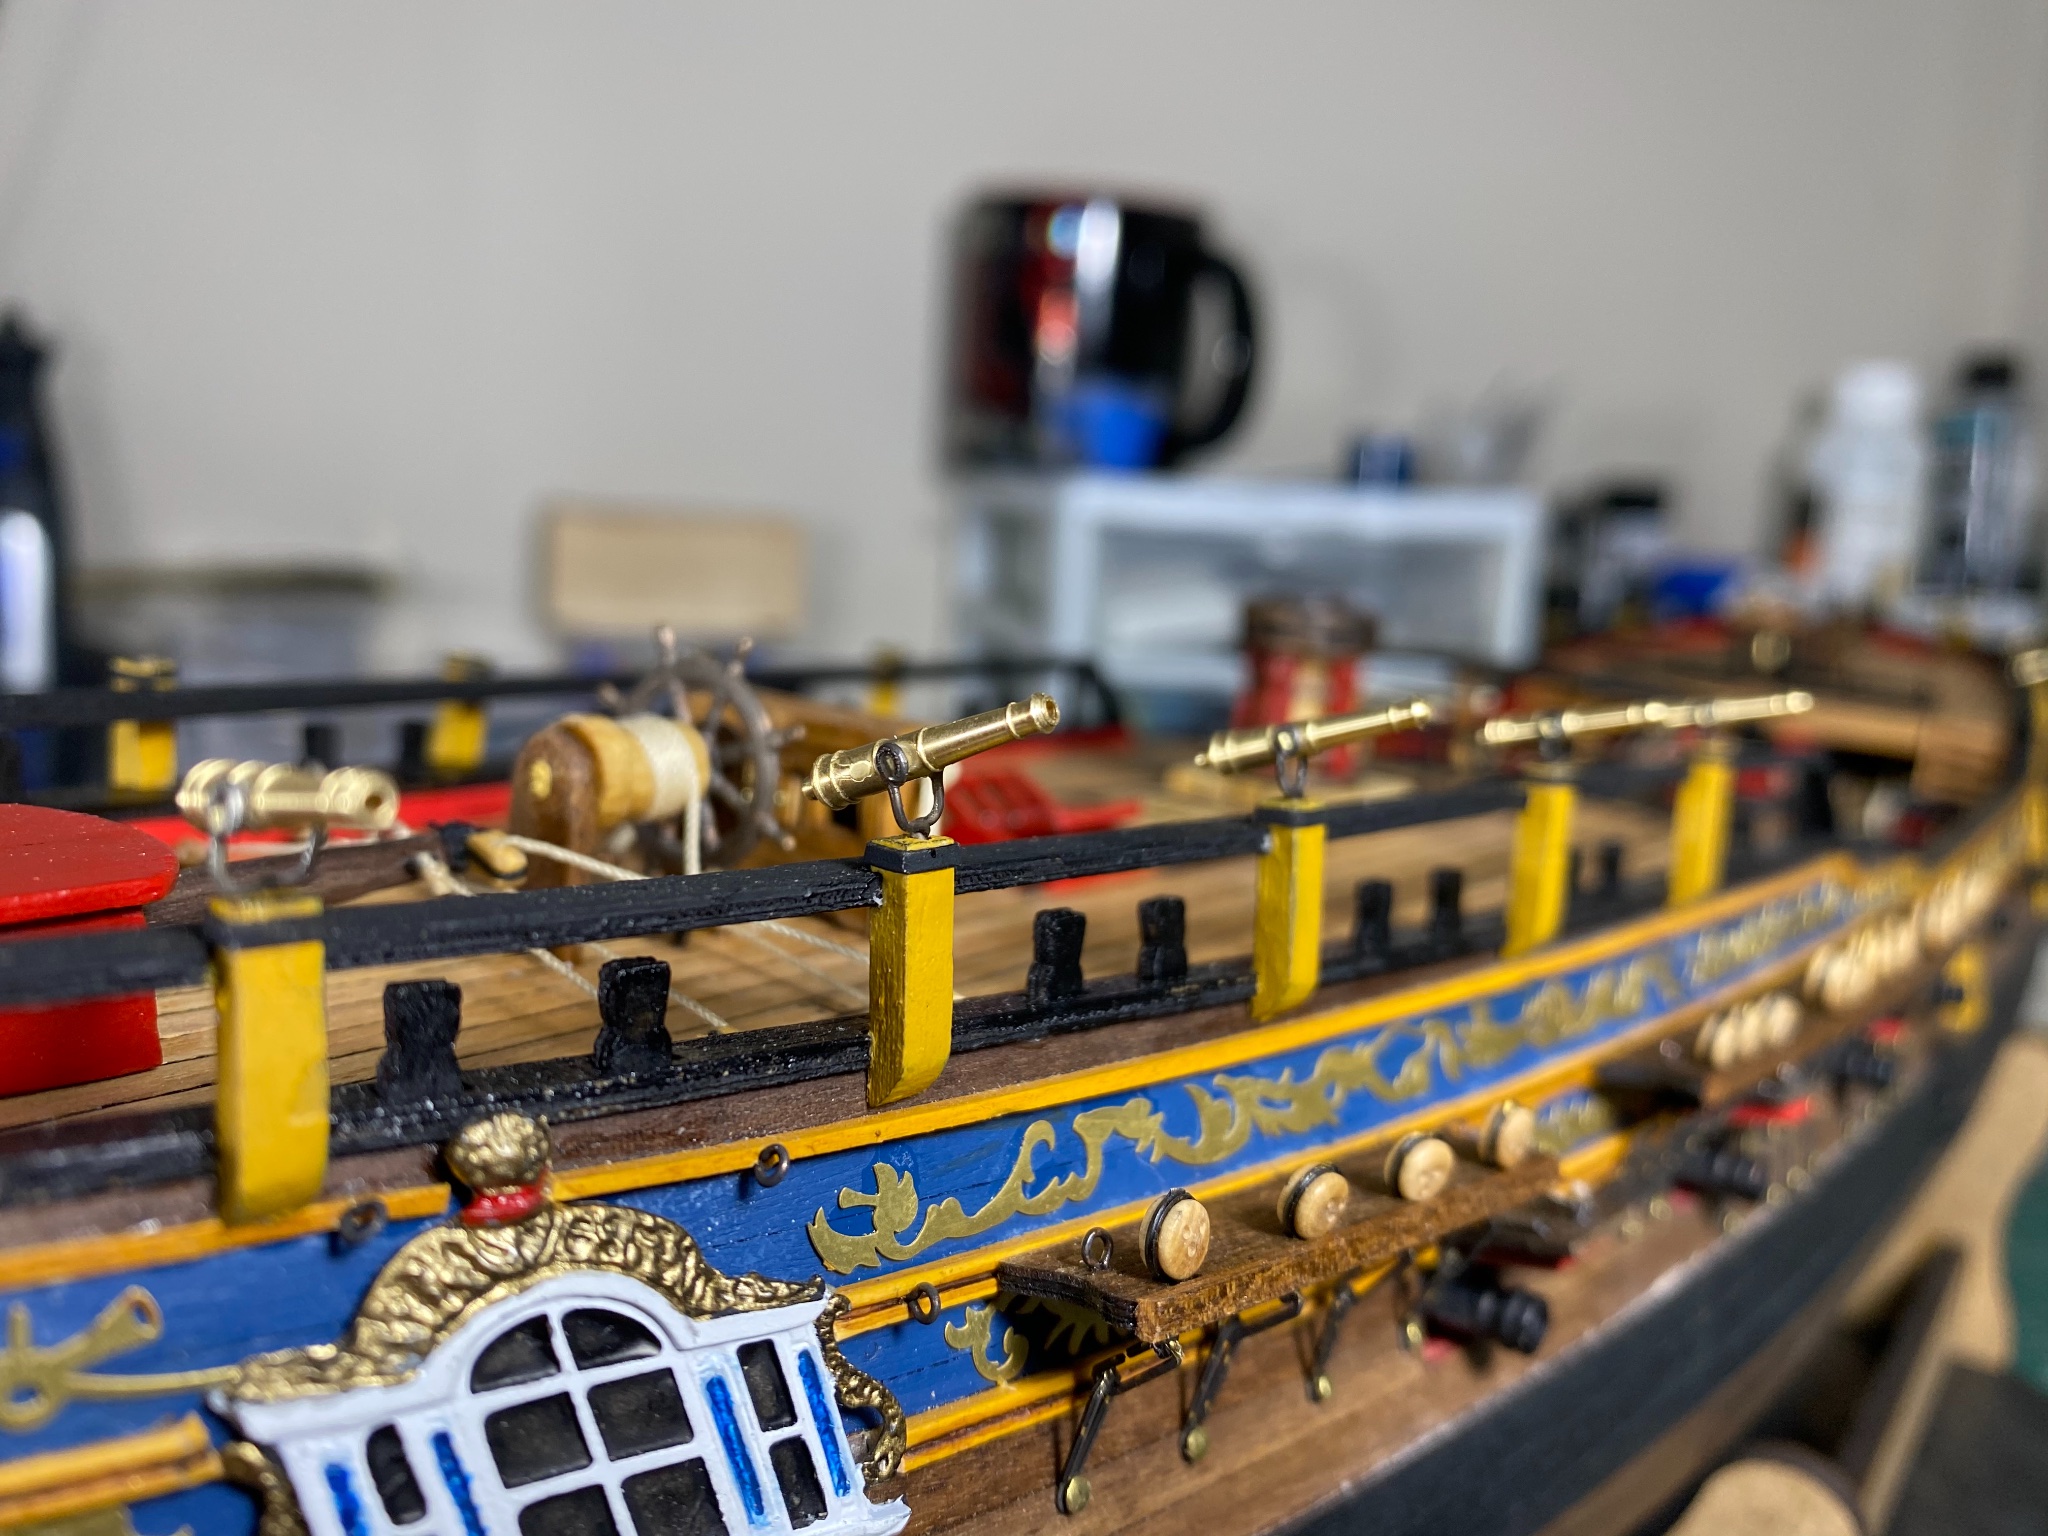
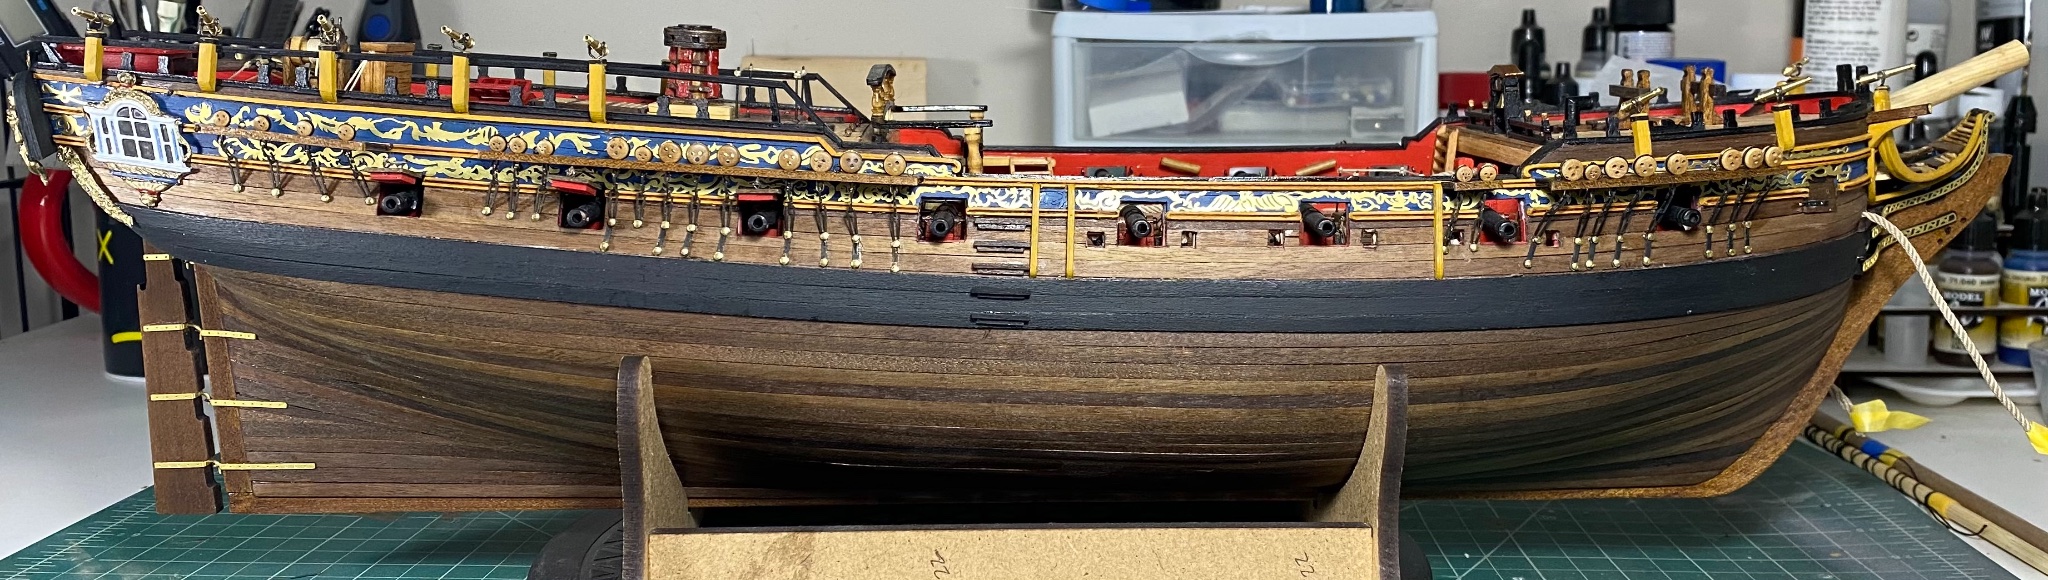
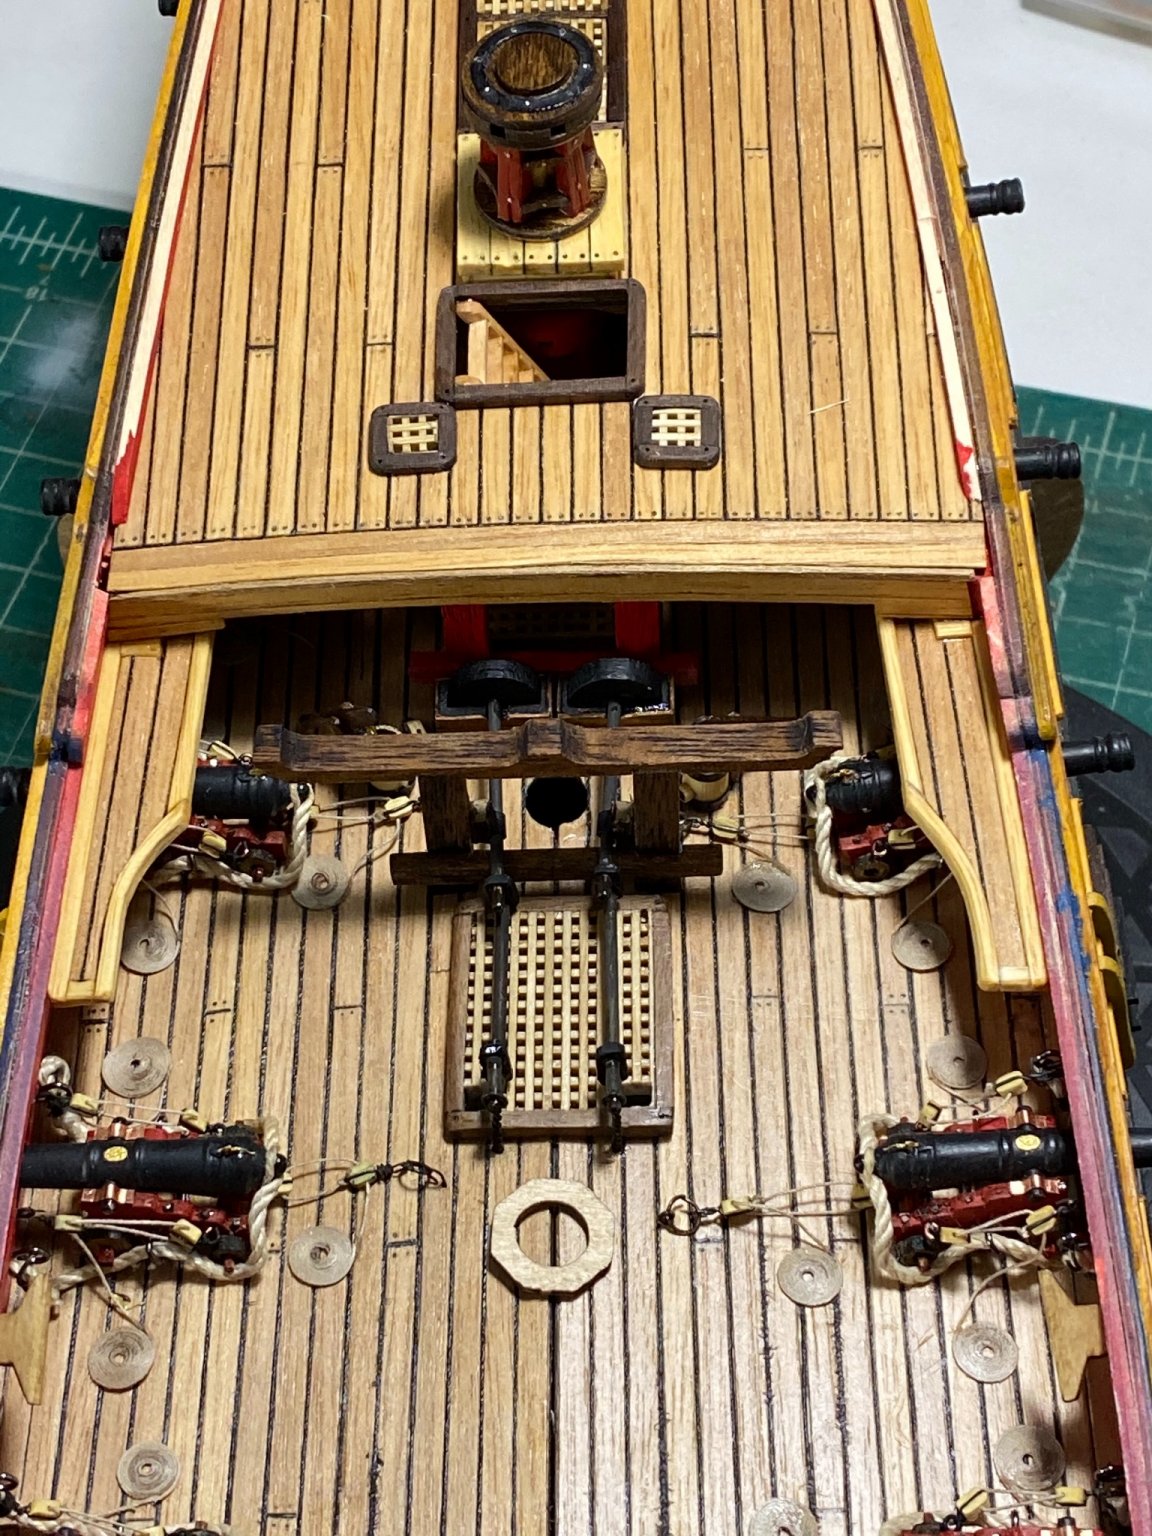
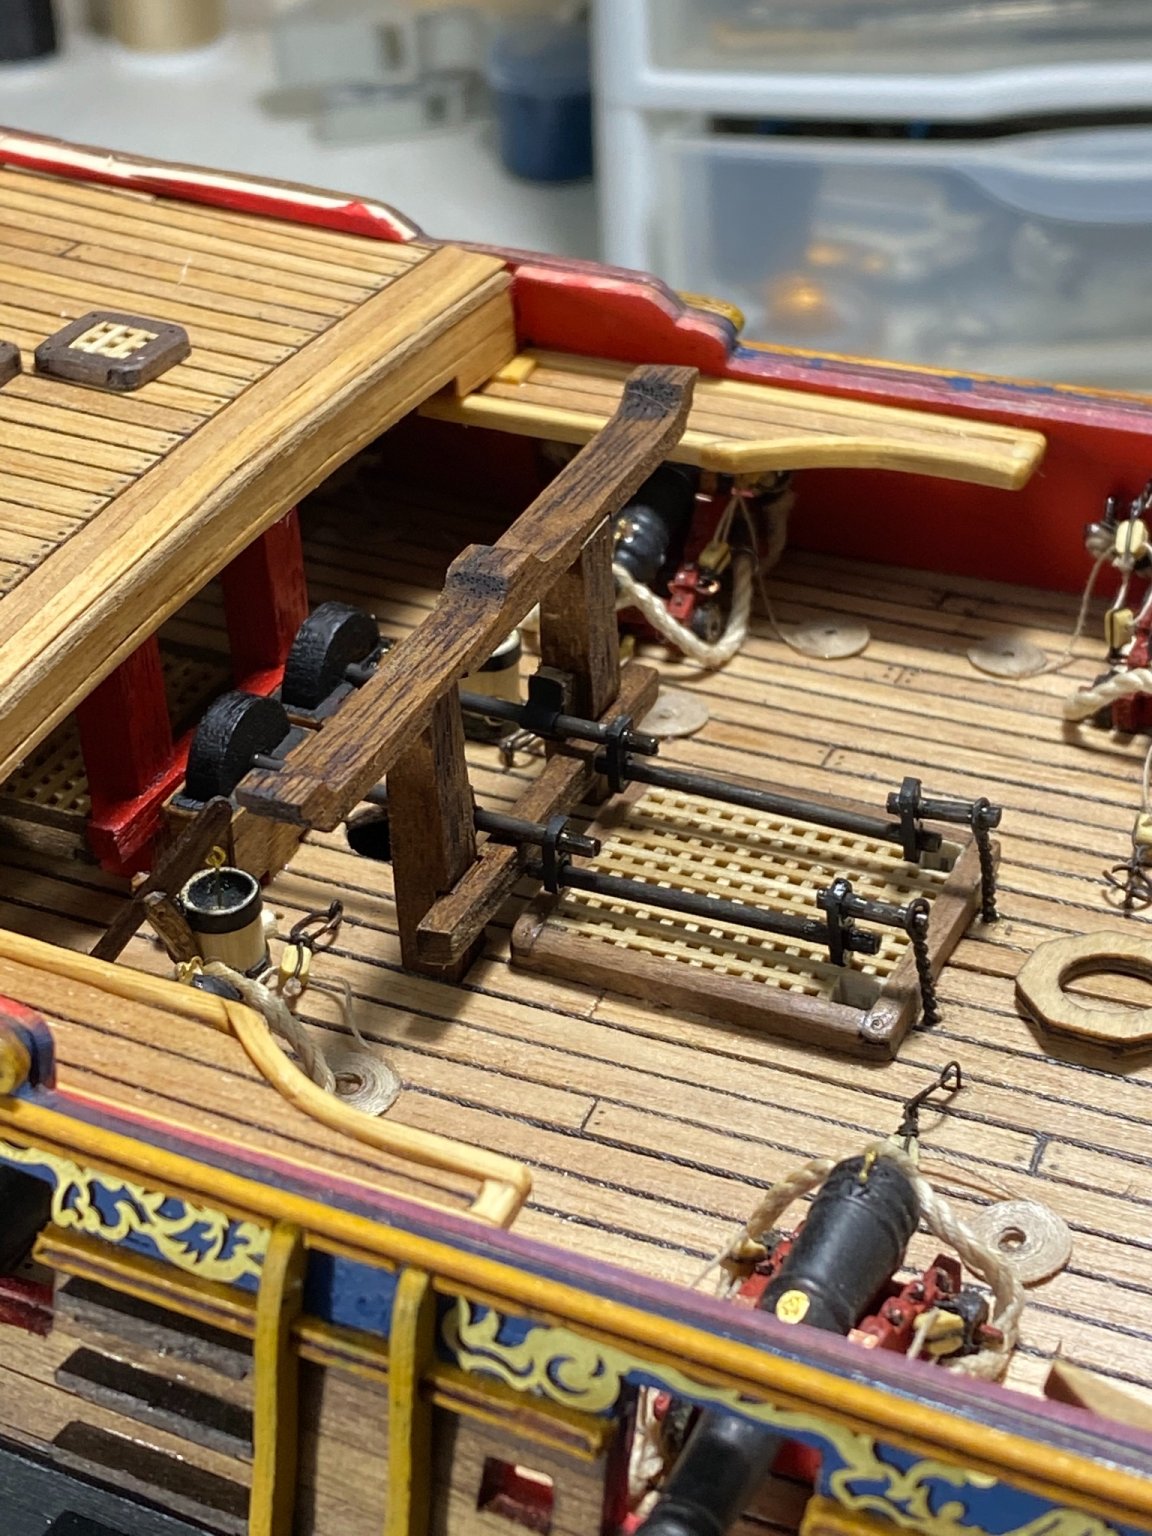
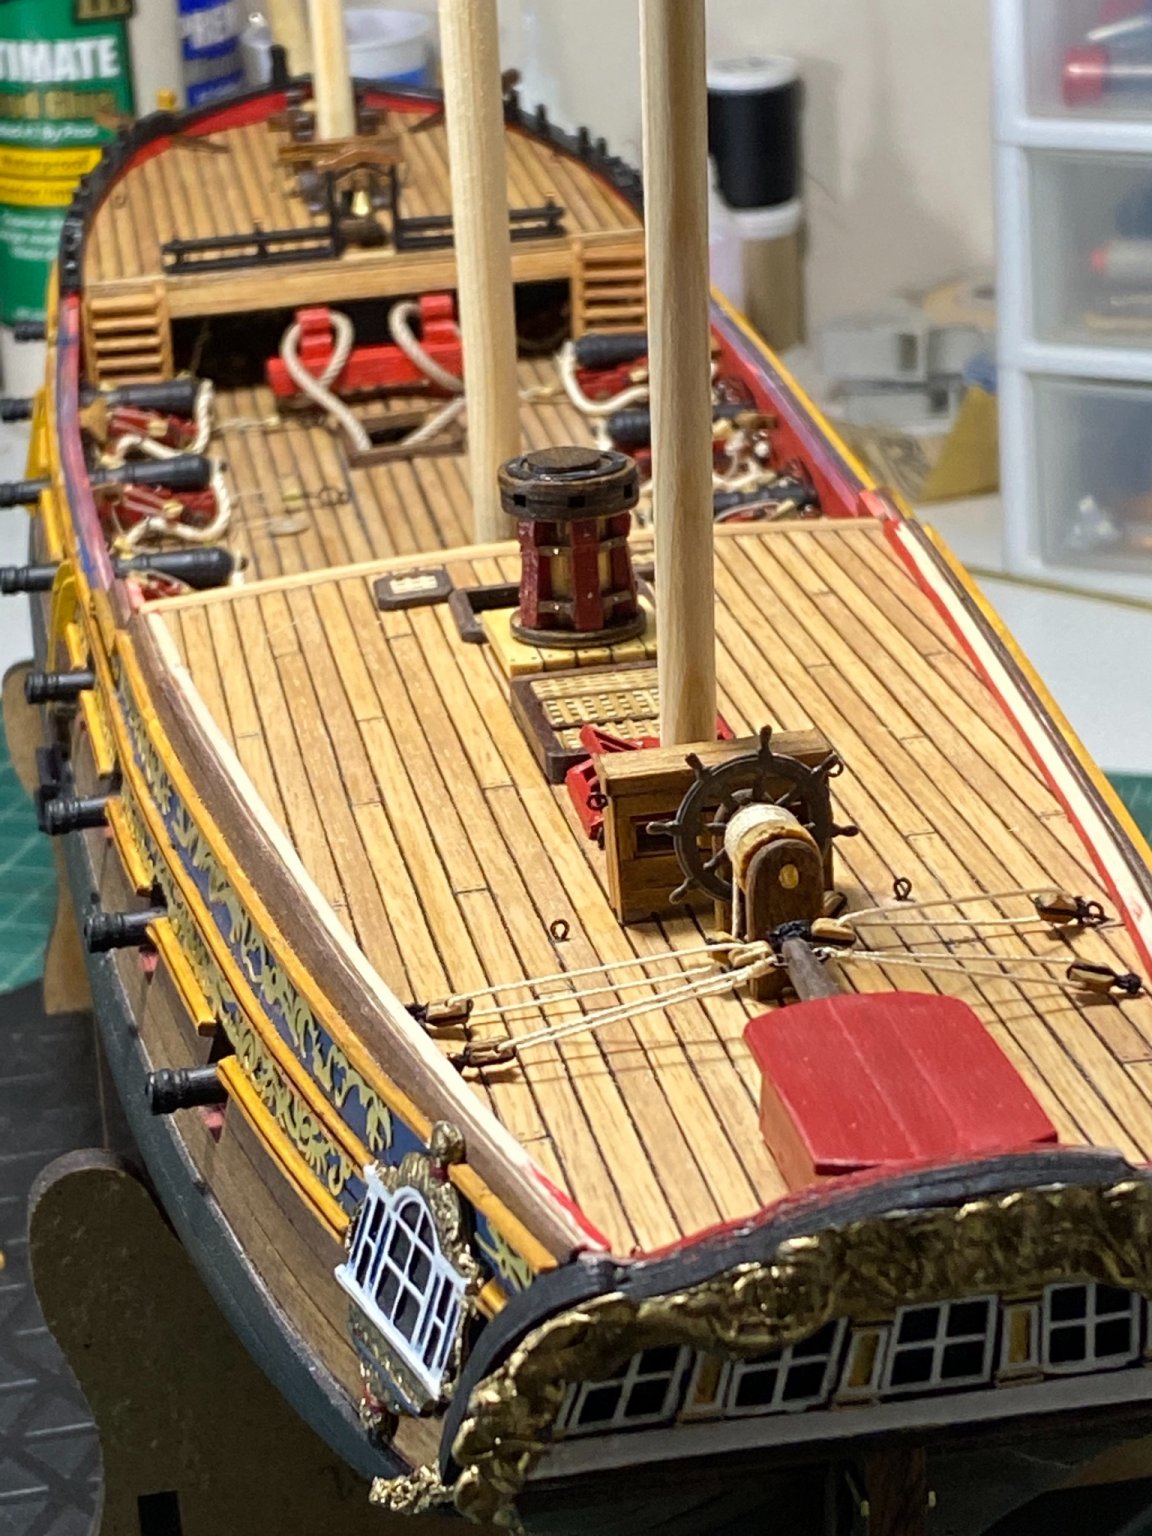
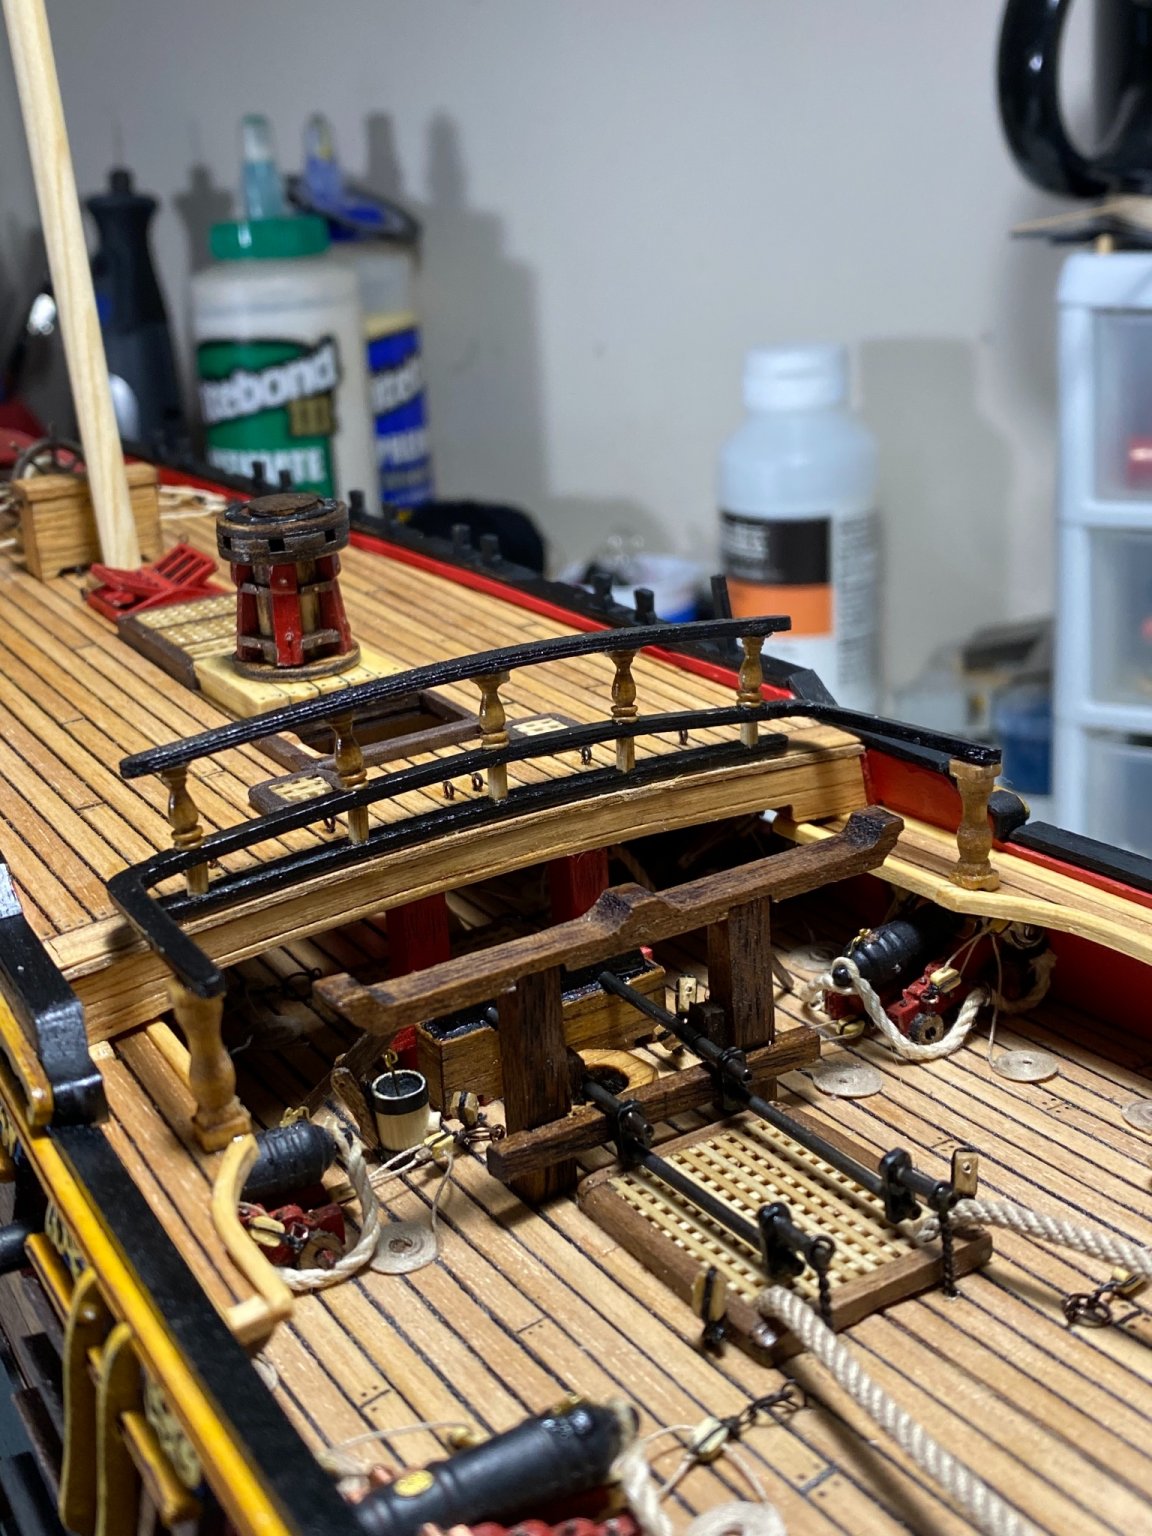
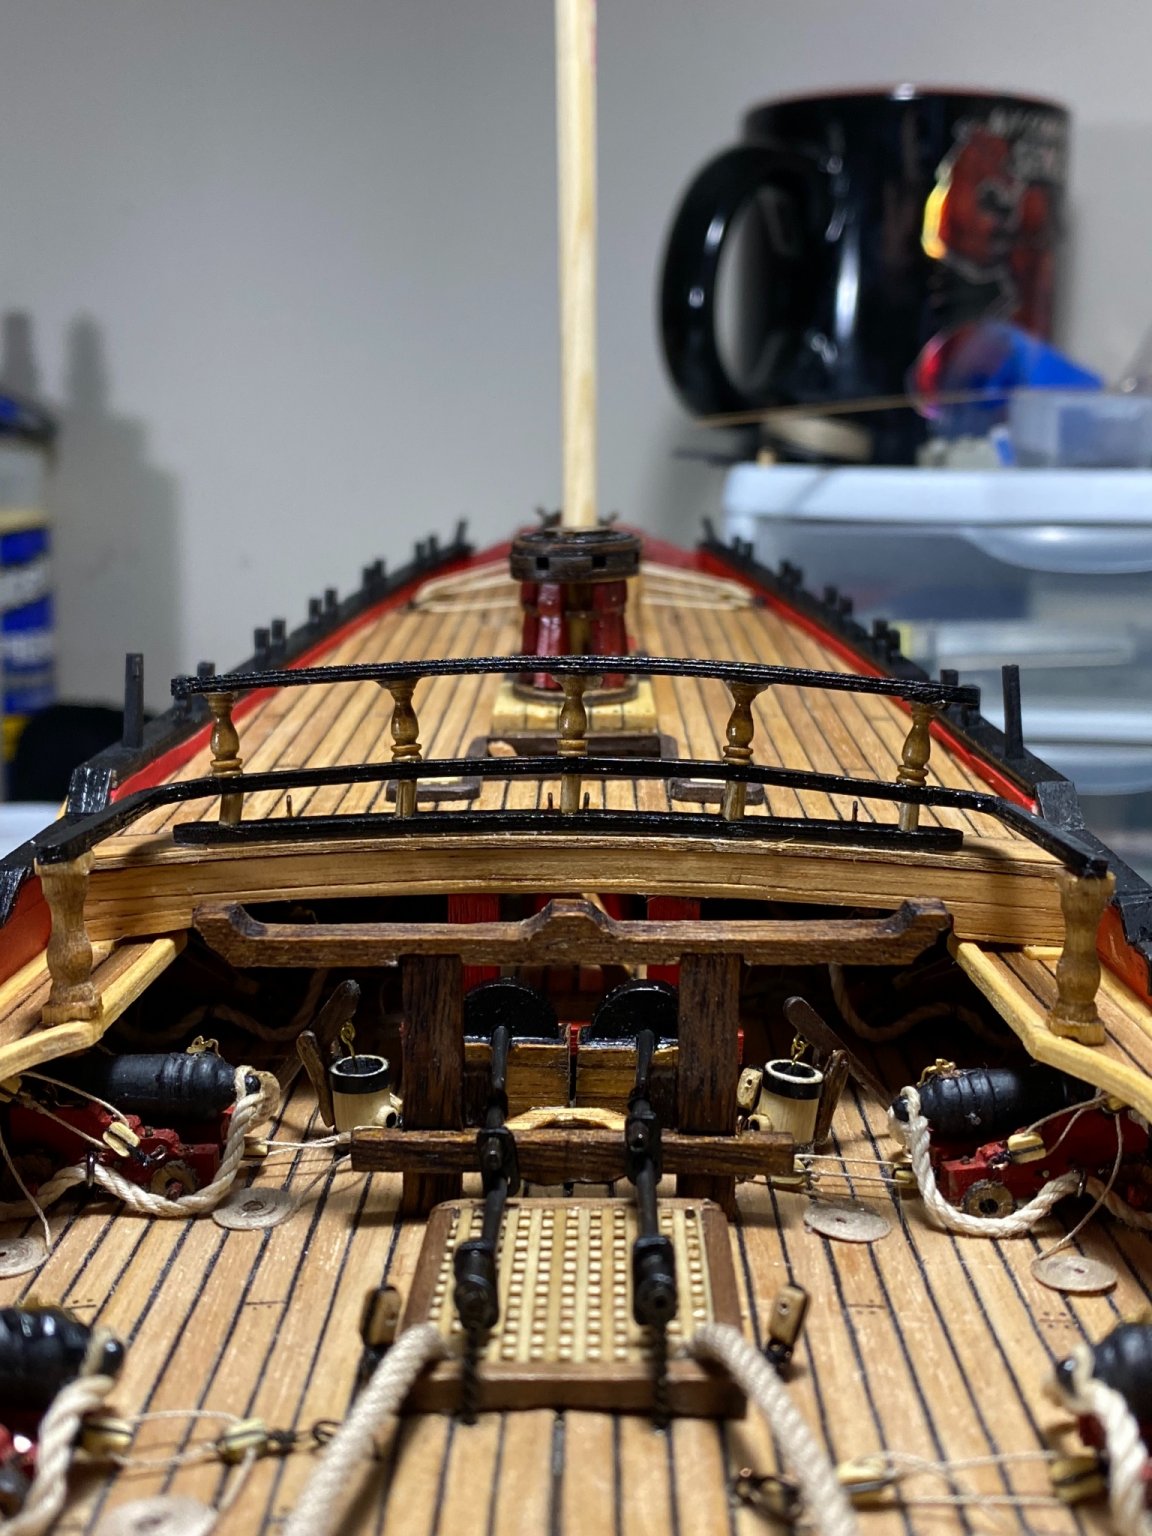
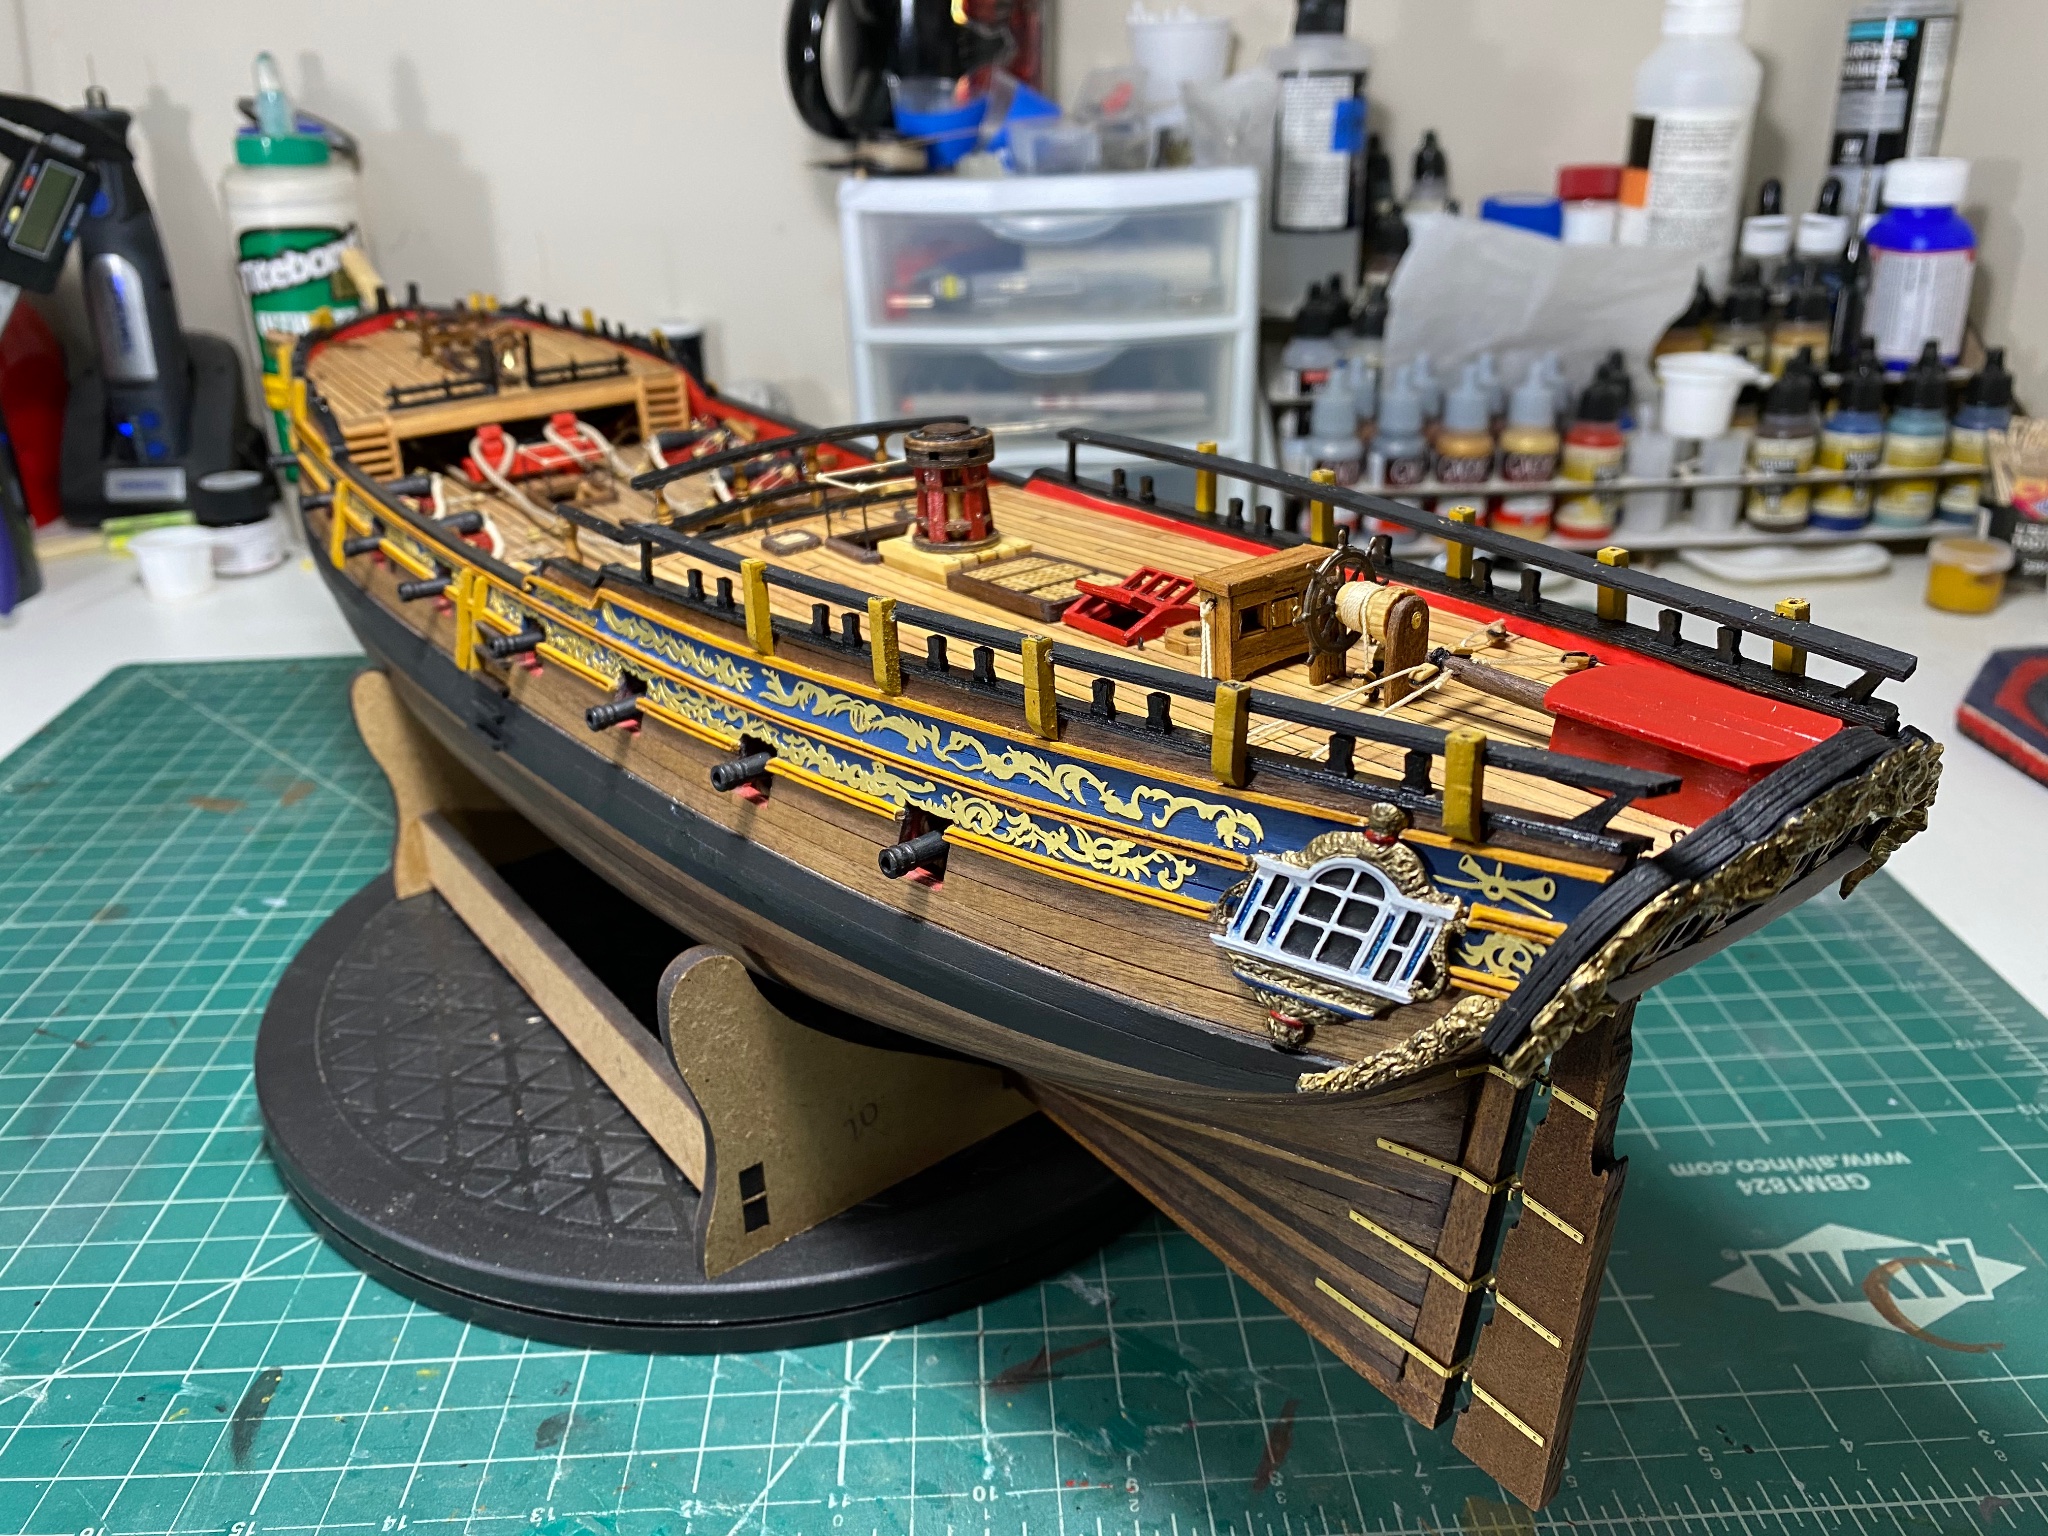
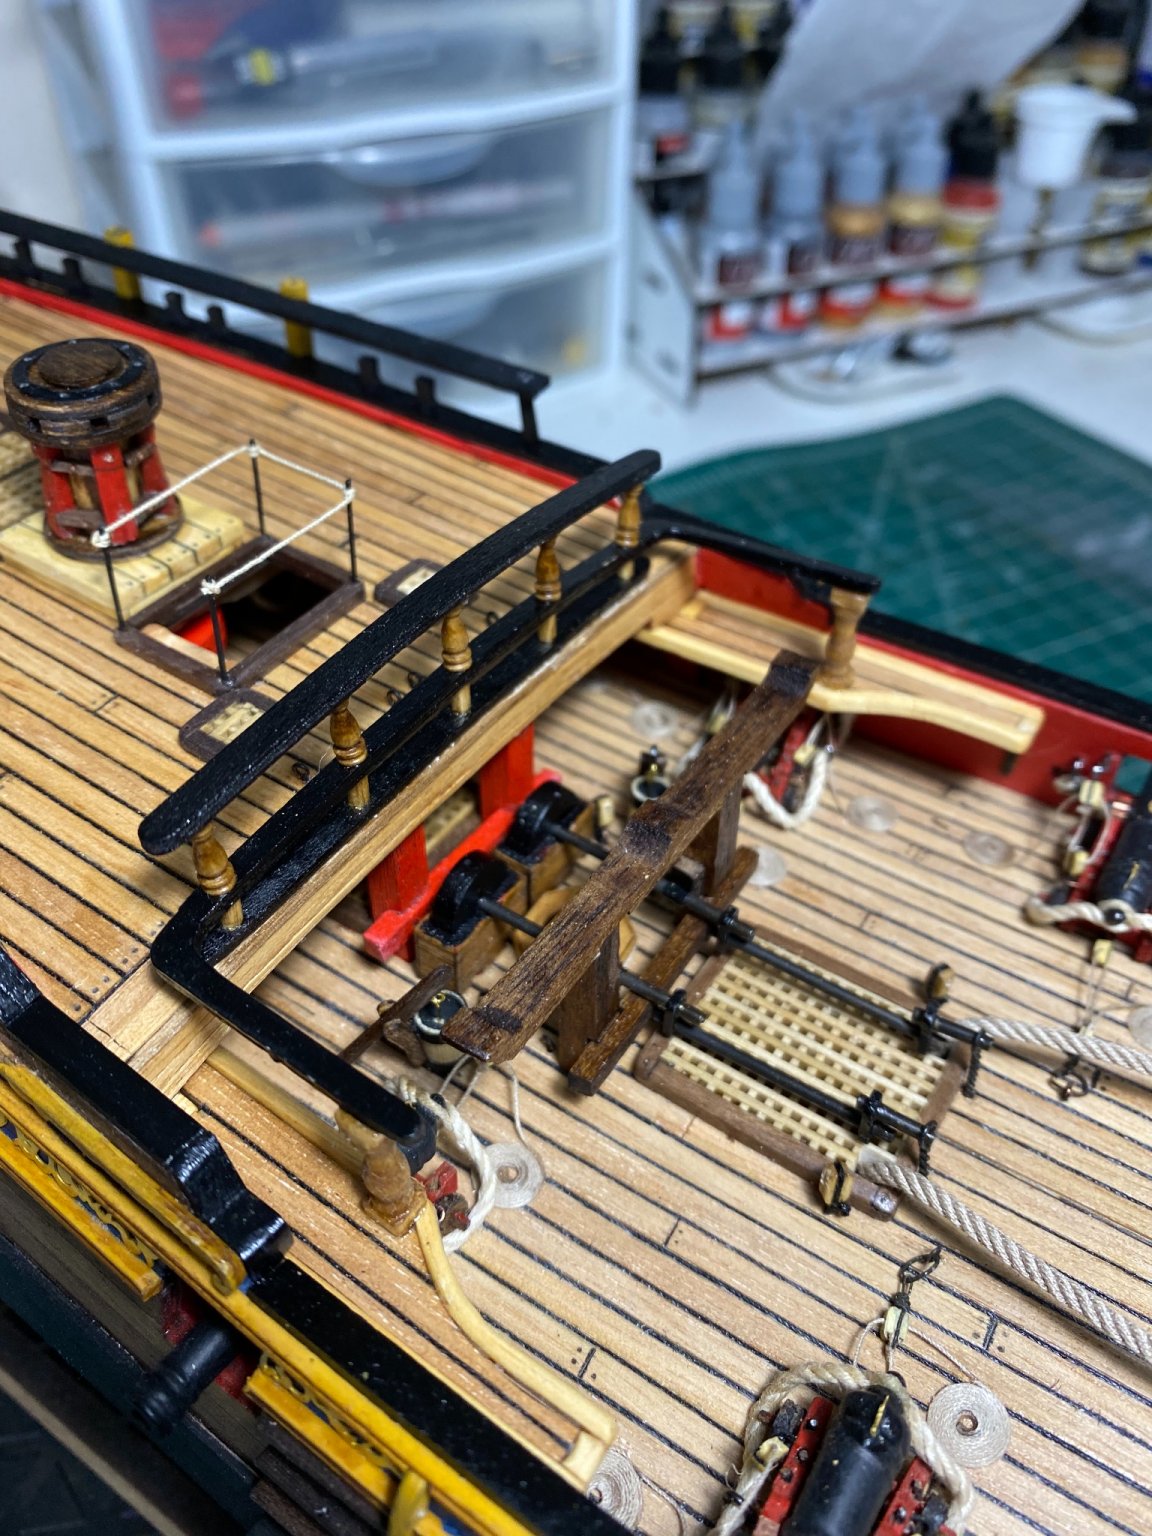
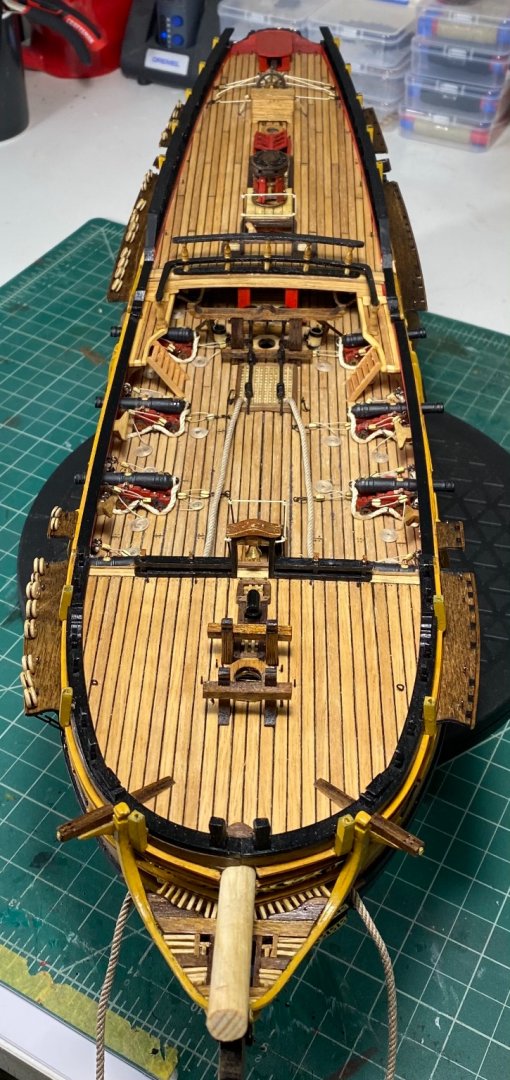
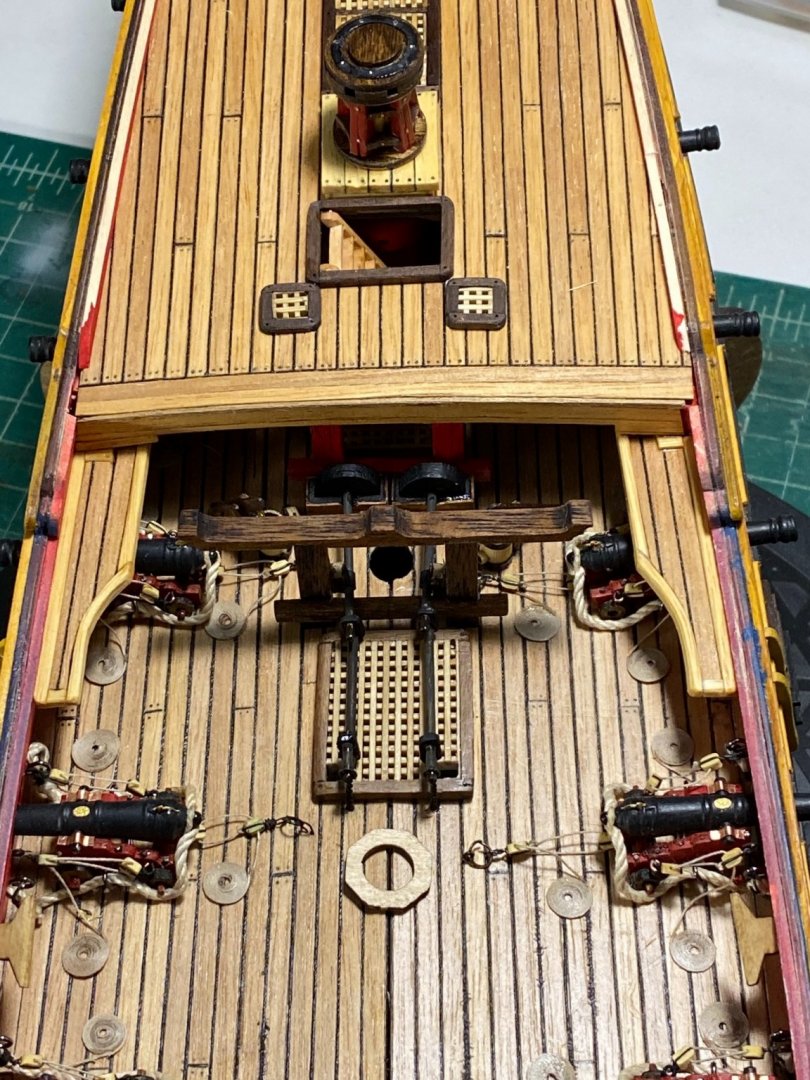
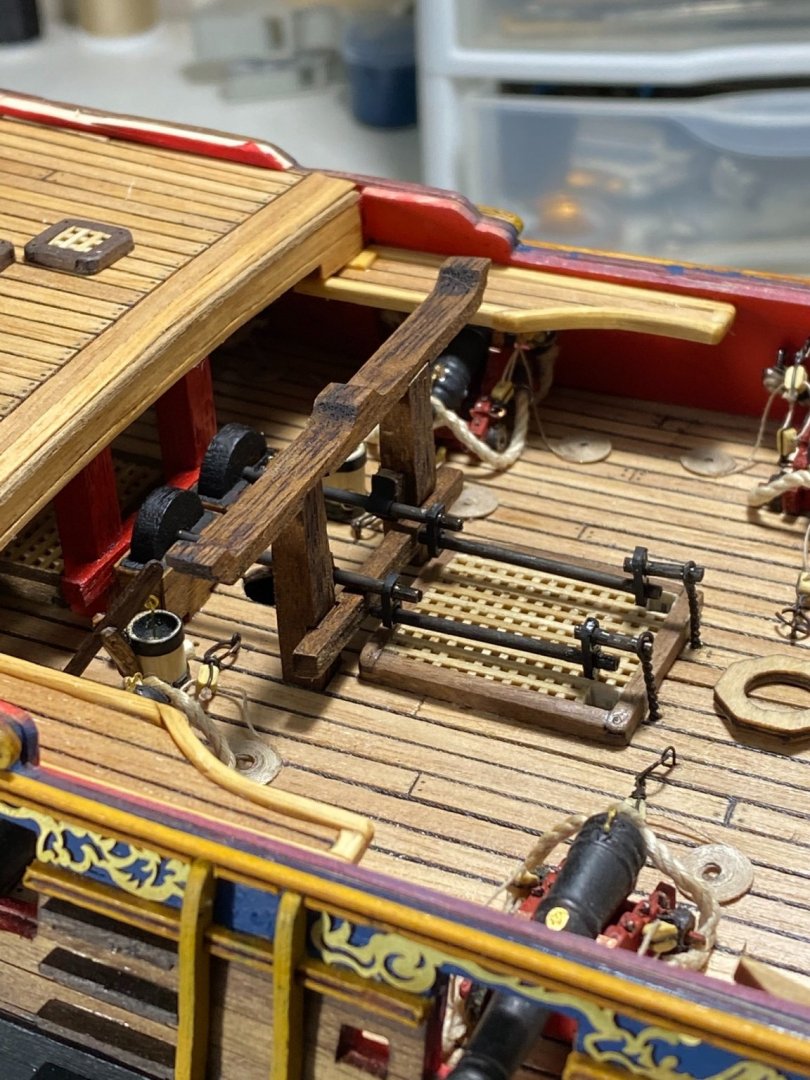
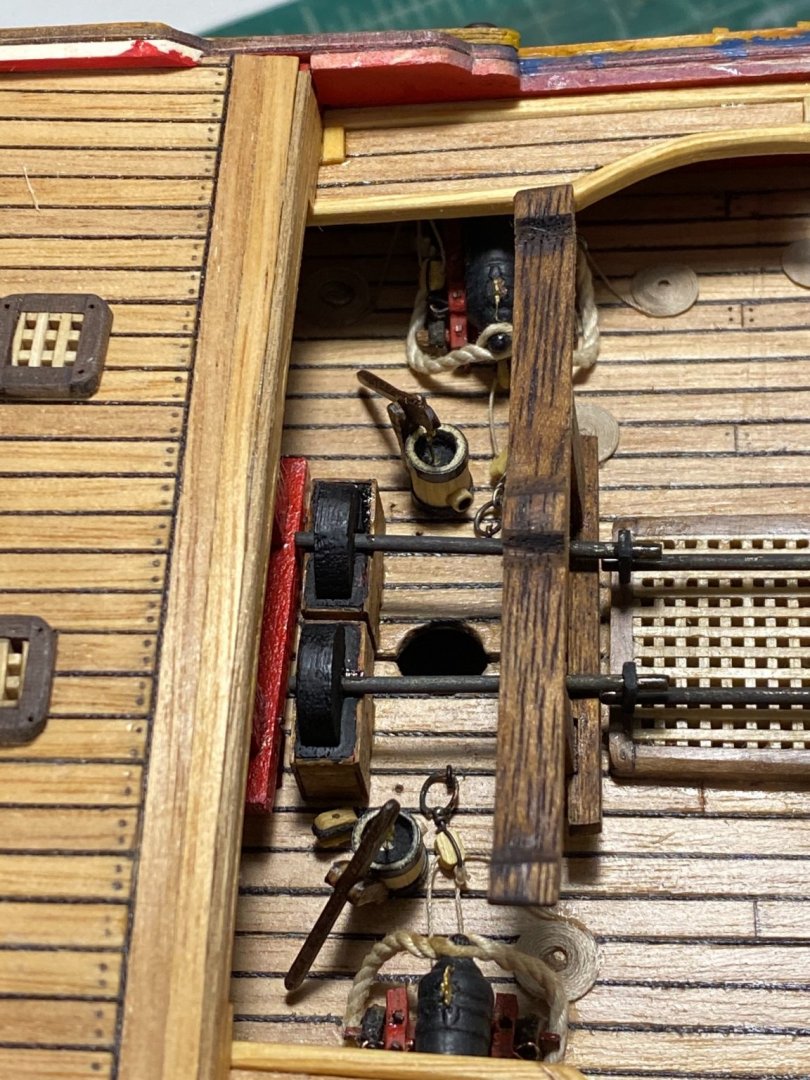
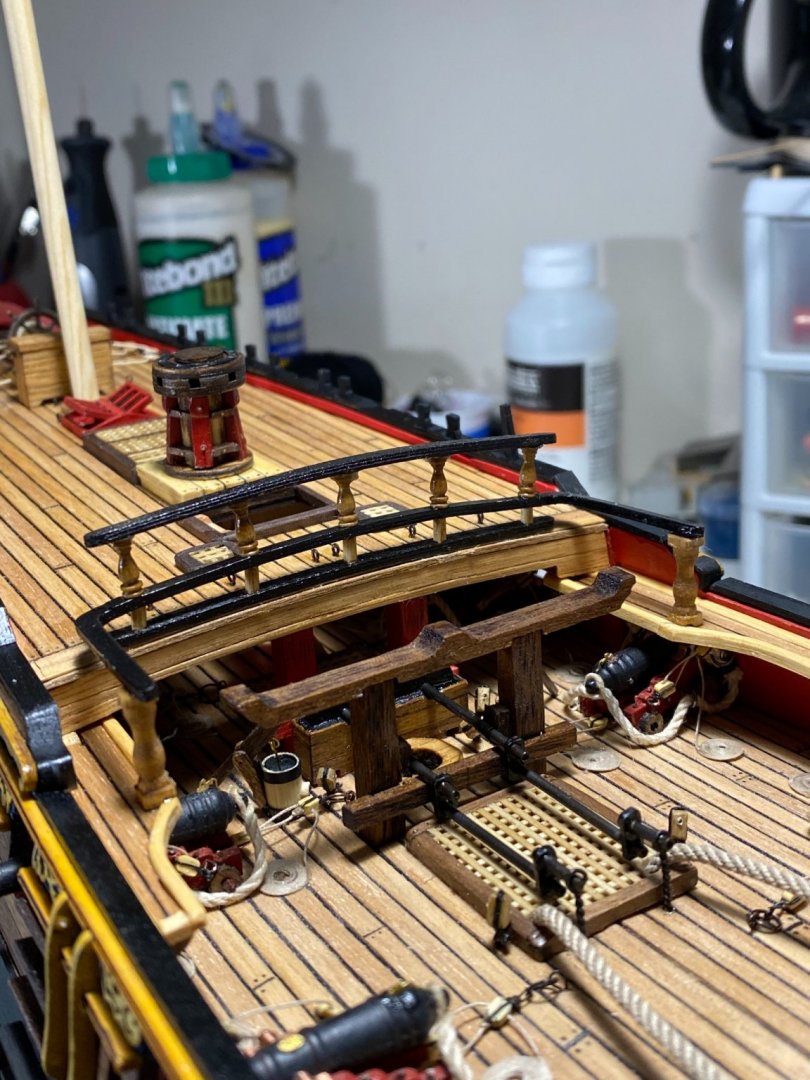
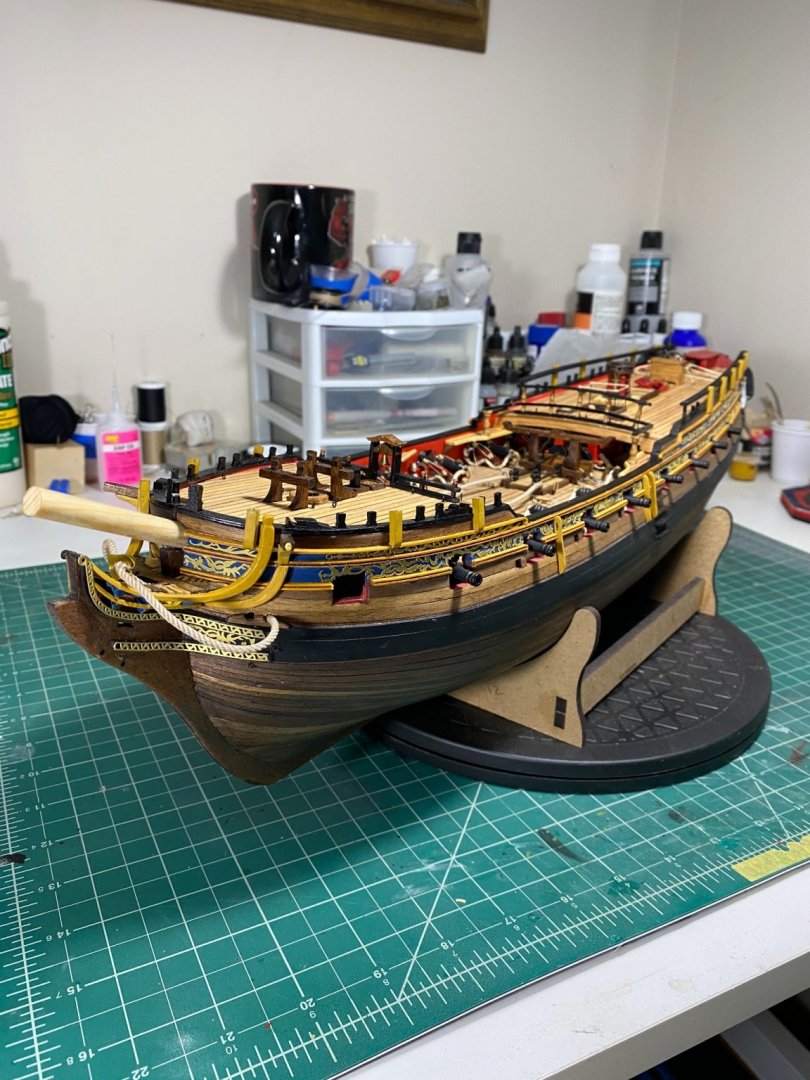
Hi all i was able to make some more progress this last week with adding a bunch of the tiny deck fittings into their respective locations. I was able to complete the midship section that includes the ships pumps, gallows(?), poles and ropes around the stairs, and my addition of elm tree style pumps not sure why, but I have been excited to complete this specific section for quite some time. I was also able to complete the decorative railing in this section as well after I modified the side deck section that still needs ladders. This part was fiddly to get the fit right. I actually had to extend the cross length of the hook section of the rail. Other wise it was not wide enough to meet the side extensions properly. All turned out well though Today I was able to get the rest of the railings and timber heads painted and attached along with the swivel gun posts. Time consuming but pretty easy overalll. unfortunately I have found that I am missing or have lost one of the swivel guns. This may be the push I needed to get replacement guns that are better quality and more suited to the time period as I have seen in other logs. Does anyone have input on a decent replacement and a recommended company that you like? thanks for looking ! Tim


- 164 replies
-
- 6
-
-

-
- fly
- Victory Models
- (and 4 more)