HOLIDAY DONATION DRIVE - SUPPORT MSW - DO YOUR PART TO KEEP THIS GREAT FORUM GOING! (Only 13 donations so far - C'mon guys!)
×


TimC
-
Posts
109 -
Joined
-
Last visited
Content Type
Profiles
Forums
Gallery
Events
Everything posted by TimC
-
Thank you Richard!
-
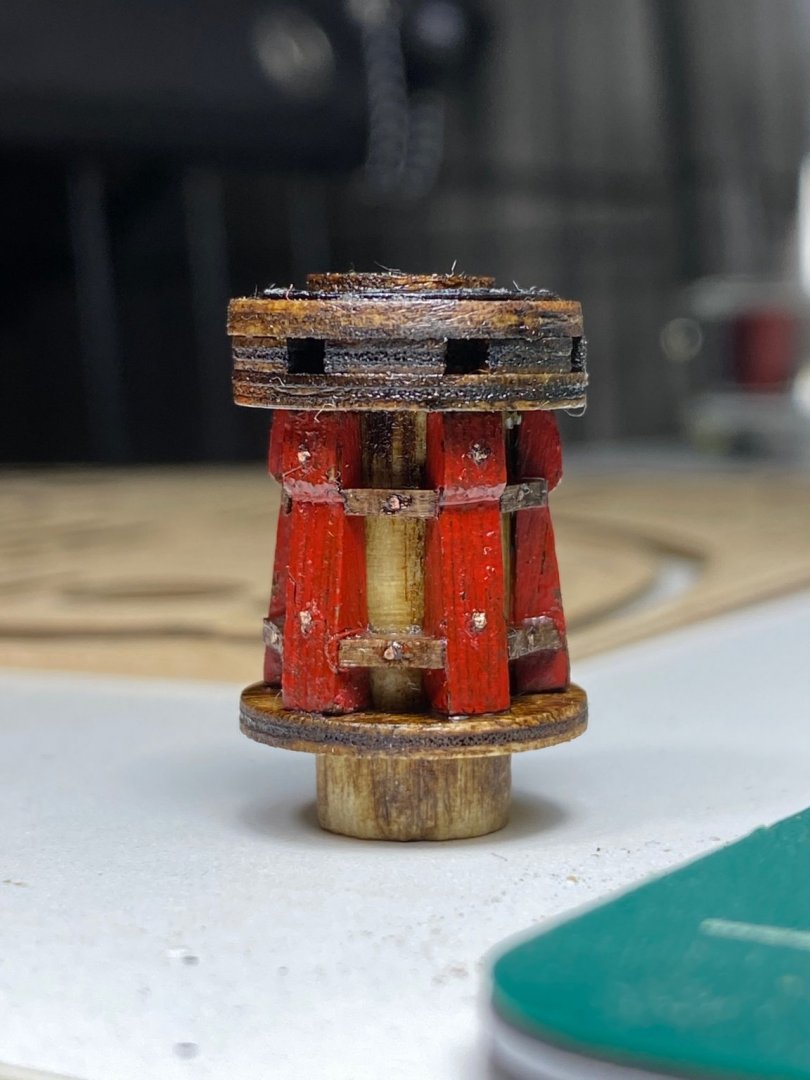
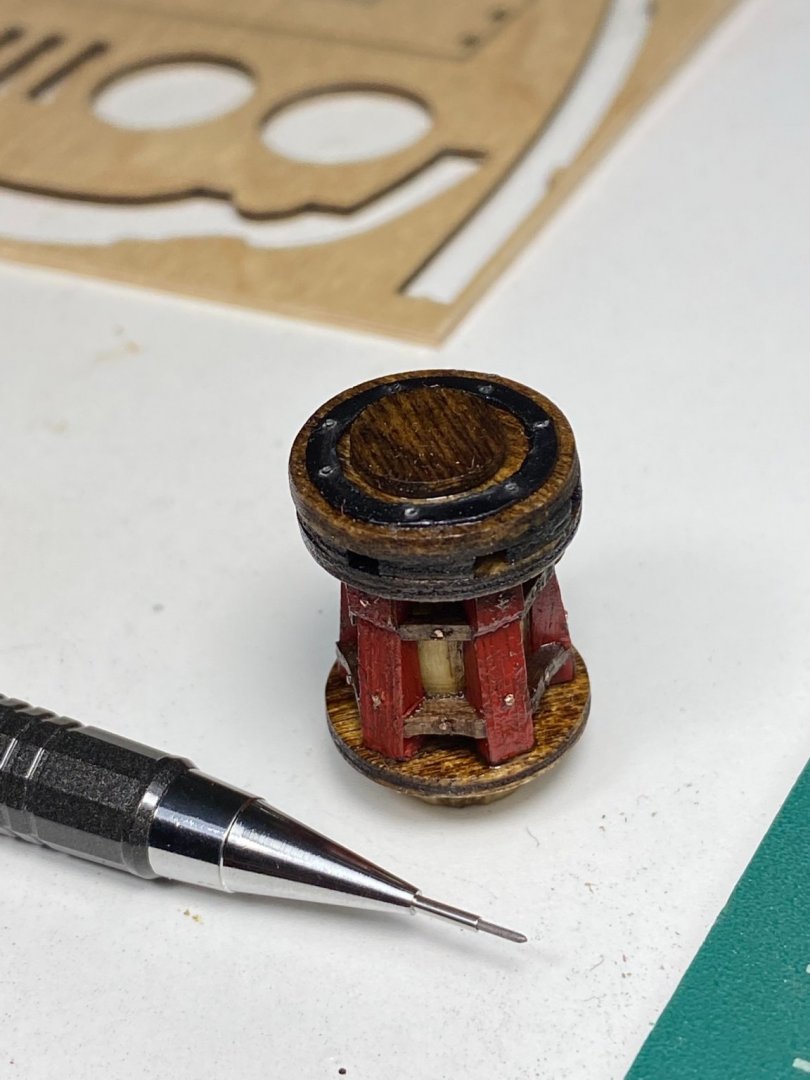
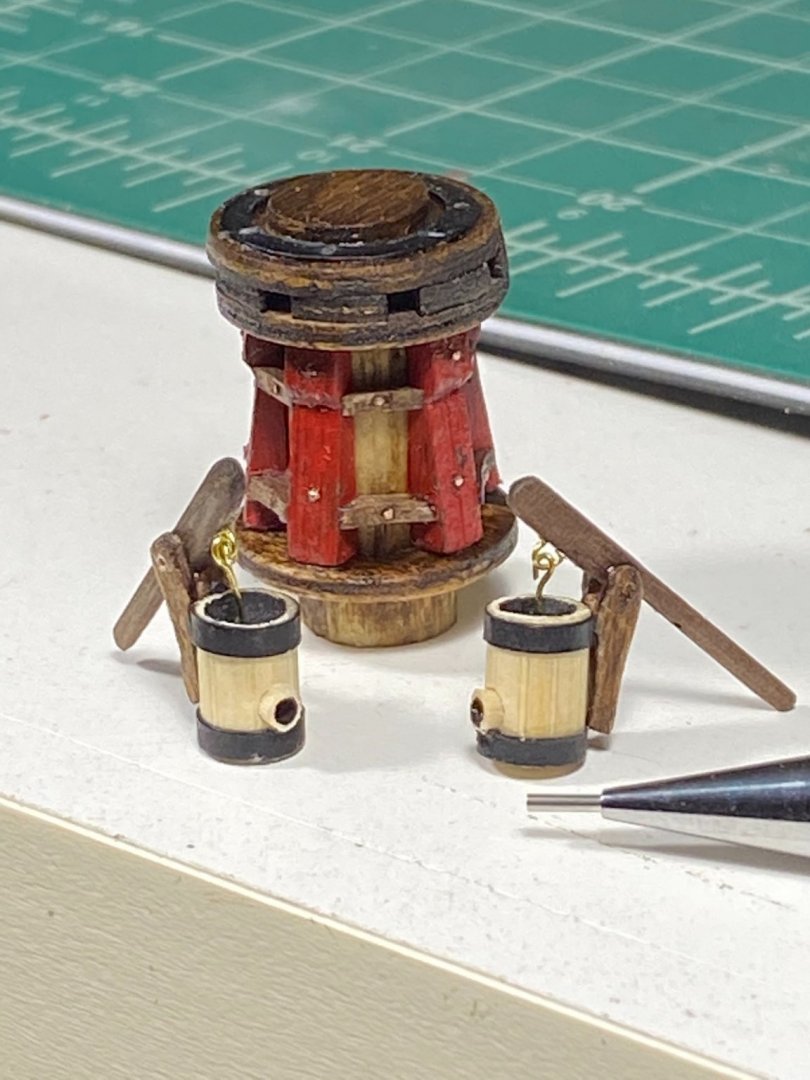
Small update this time. Completed the upper capstan with some mods that I saw in TFFM even though I couldn’t do it nearly as well. also decided that I wanted to add pumps as I’ve seen in other builds. These I made 100% from scratch. The most difficult part was the portion that holds the handle. I’m actually quite happy with the effect I was able to achieve. Feeling much better making my own pieces where I can! cheers all, Tim
- 164 replies
-
- 5
-

-
- fly
- Victory Models
- (and 4 more)
-
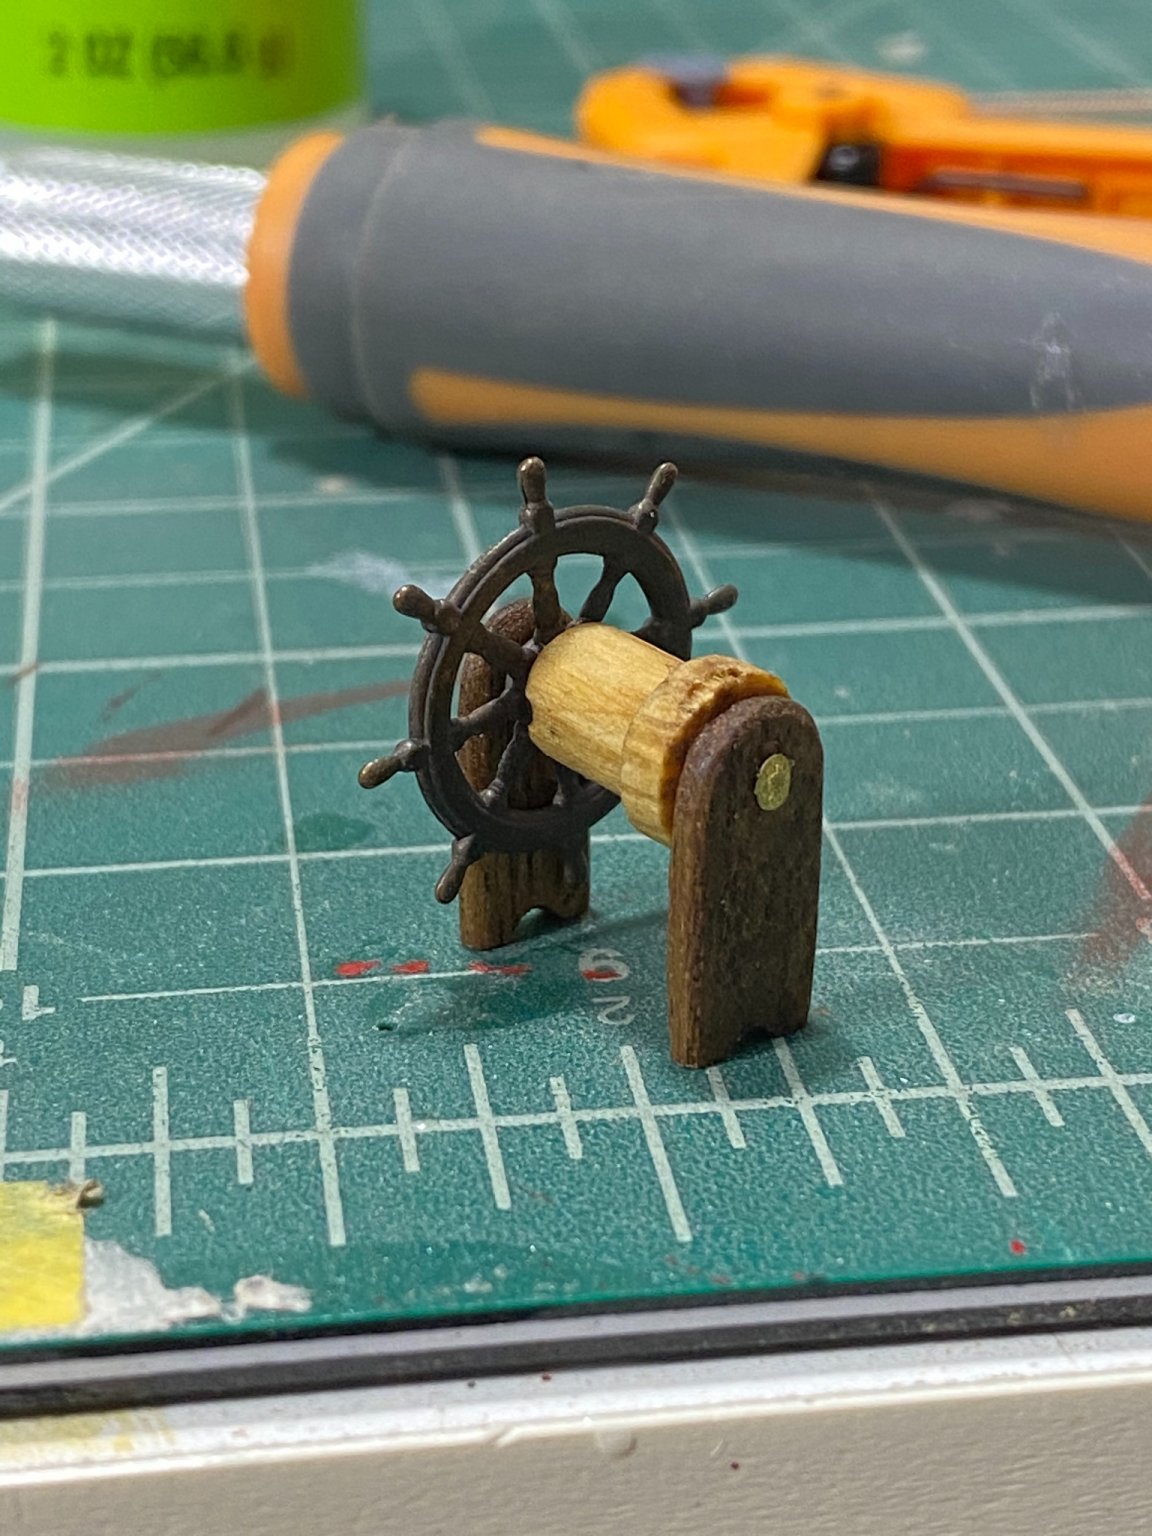
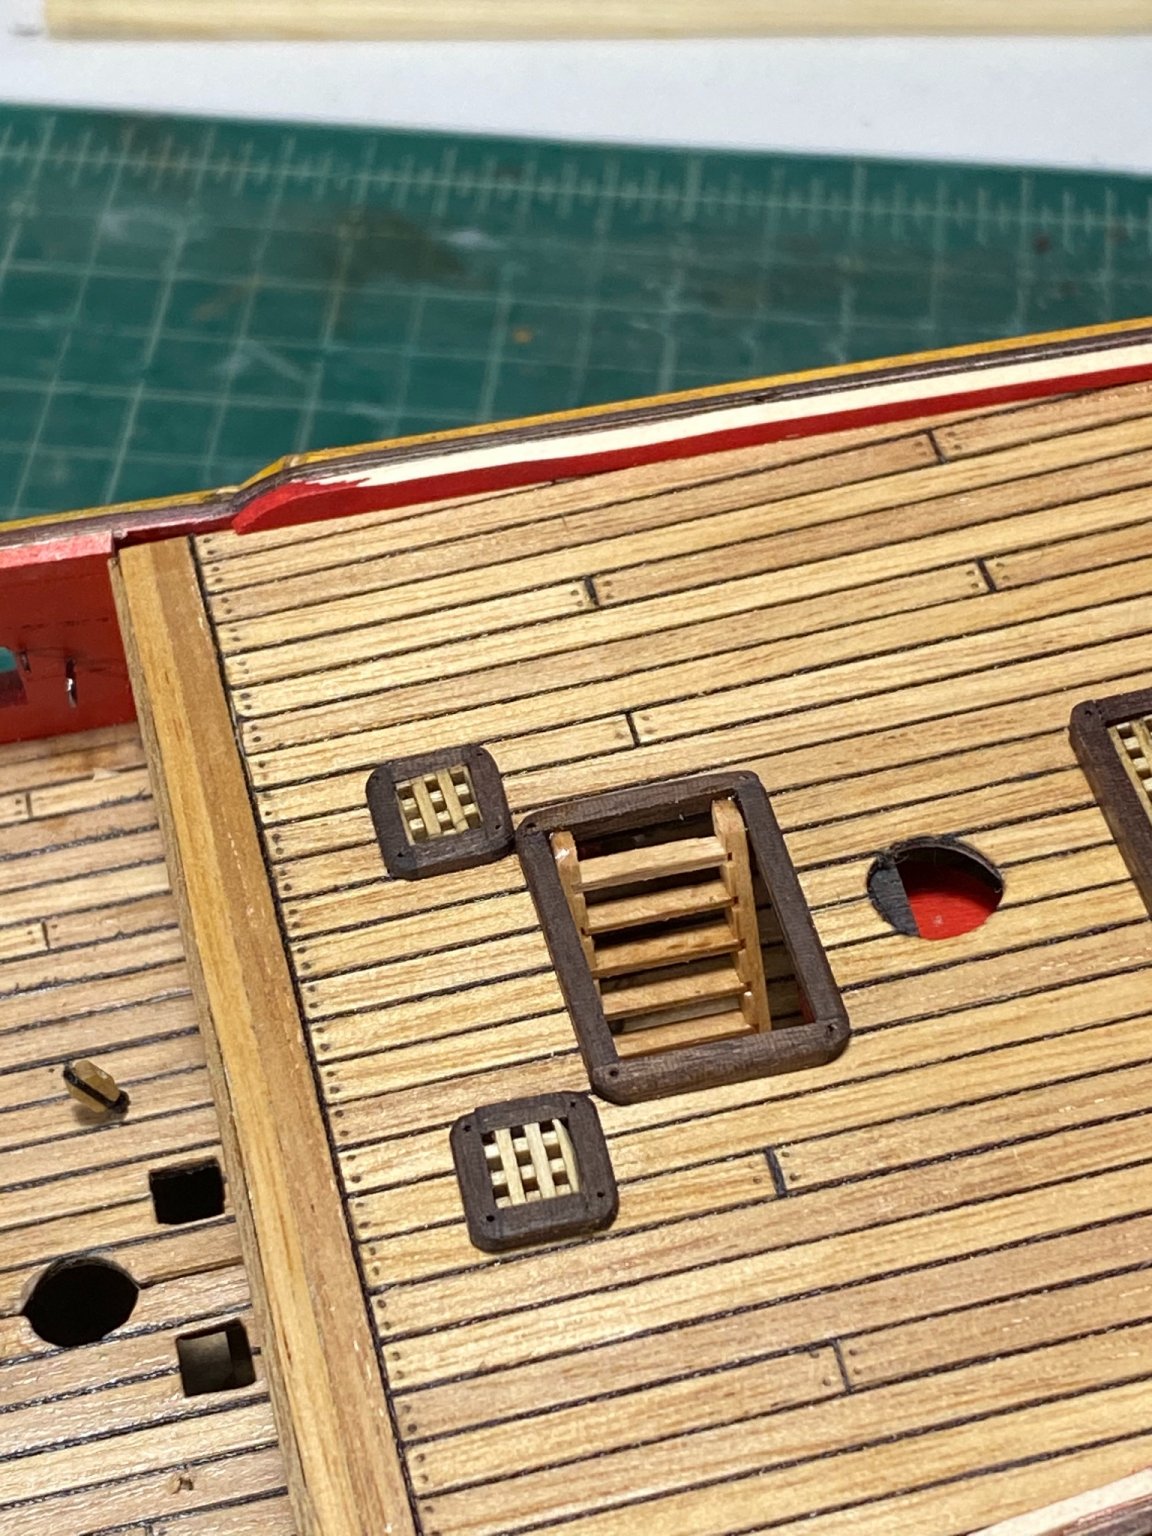
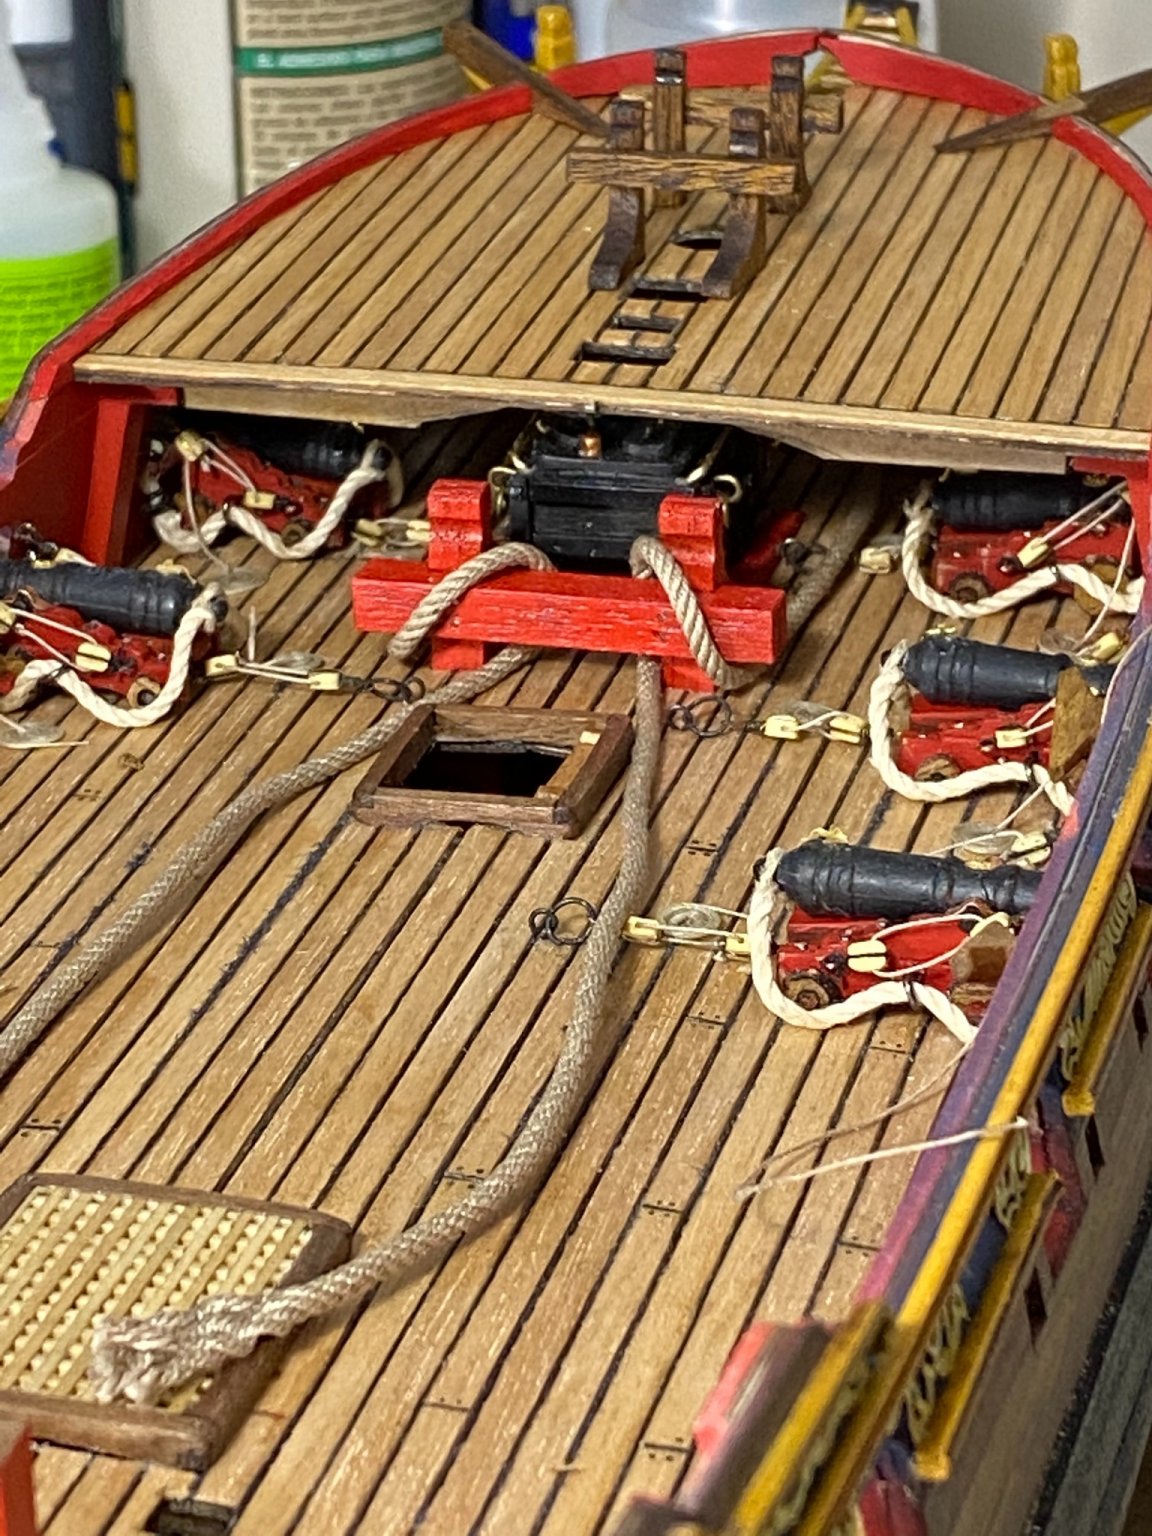
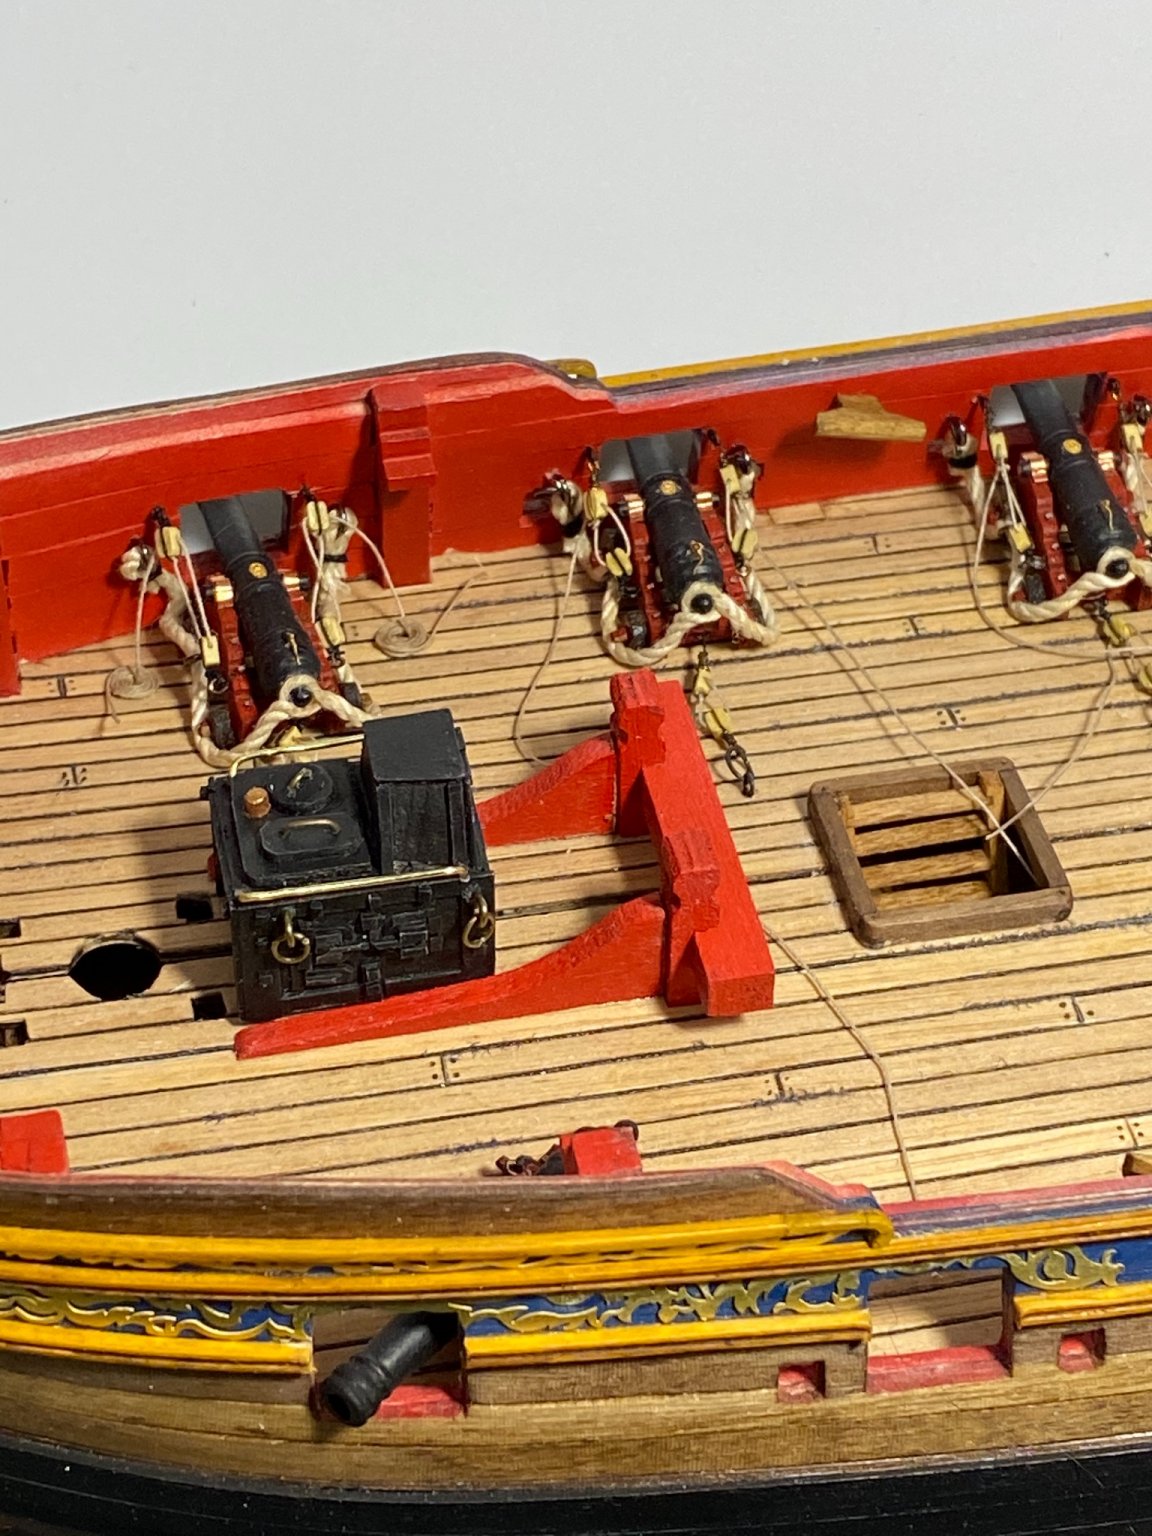
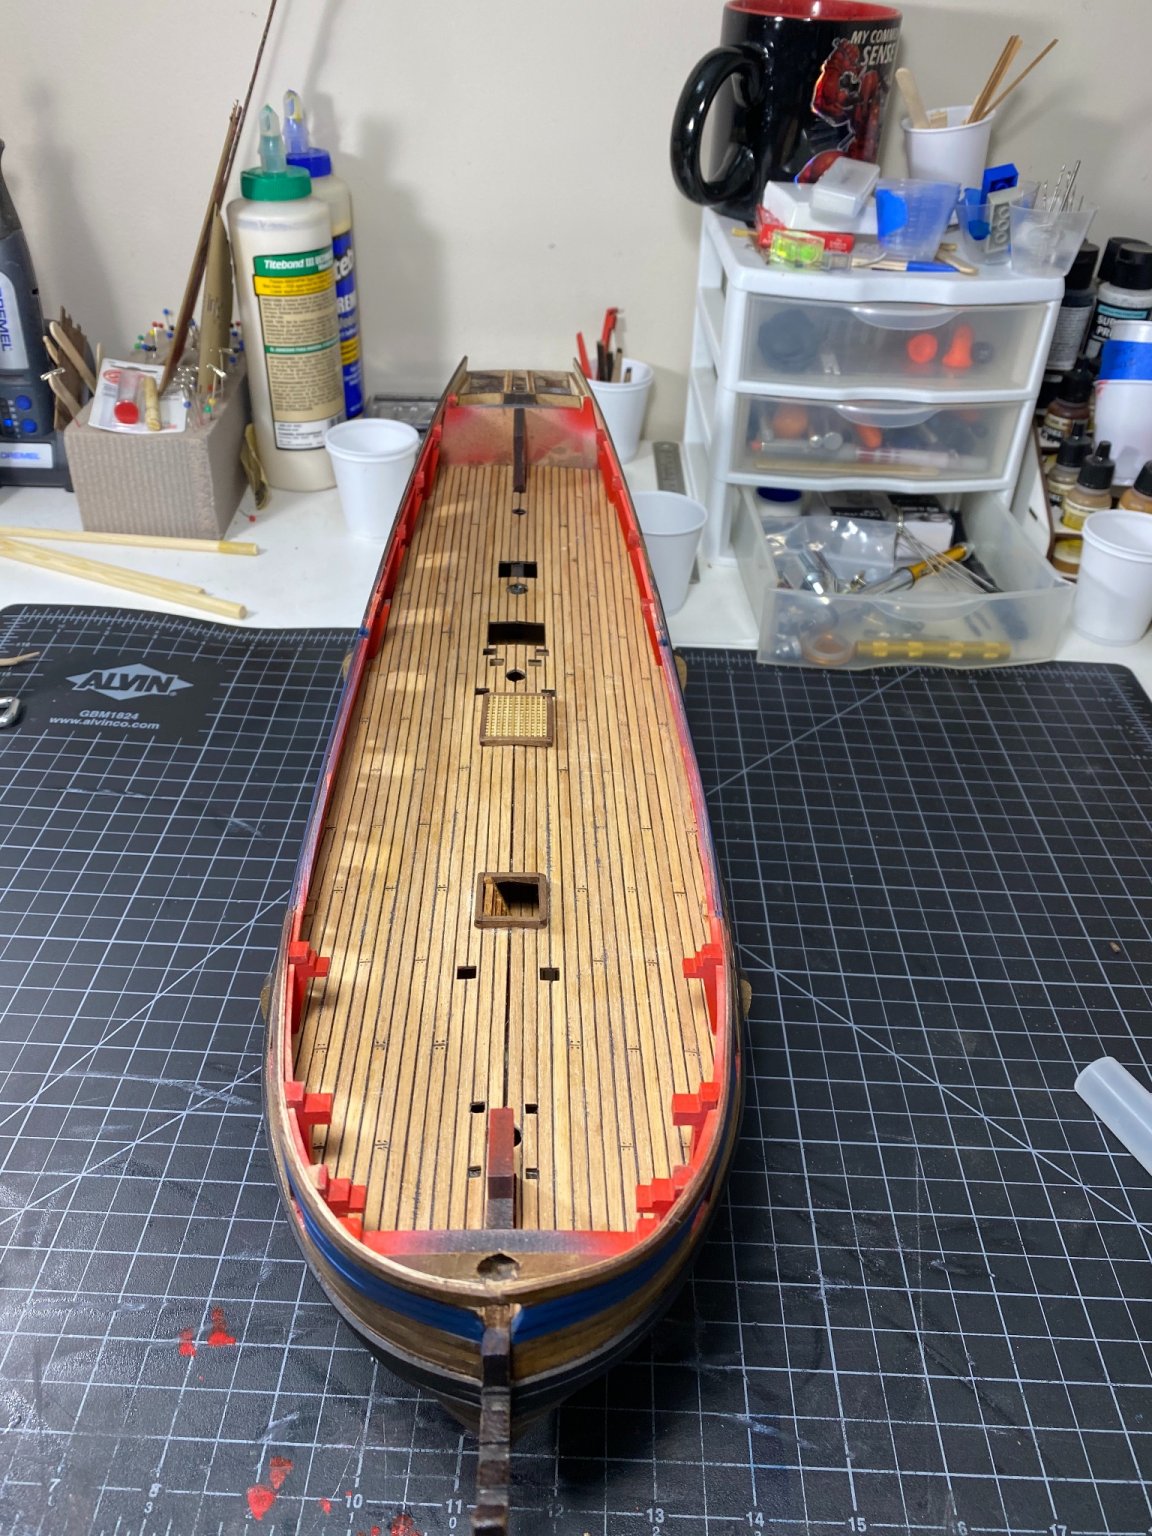
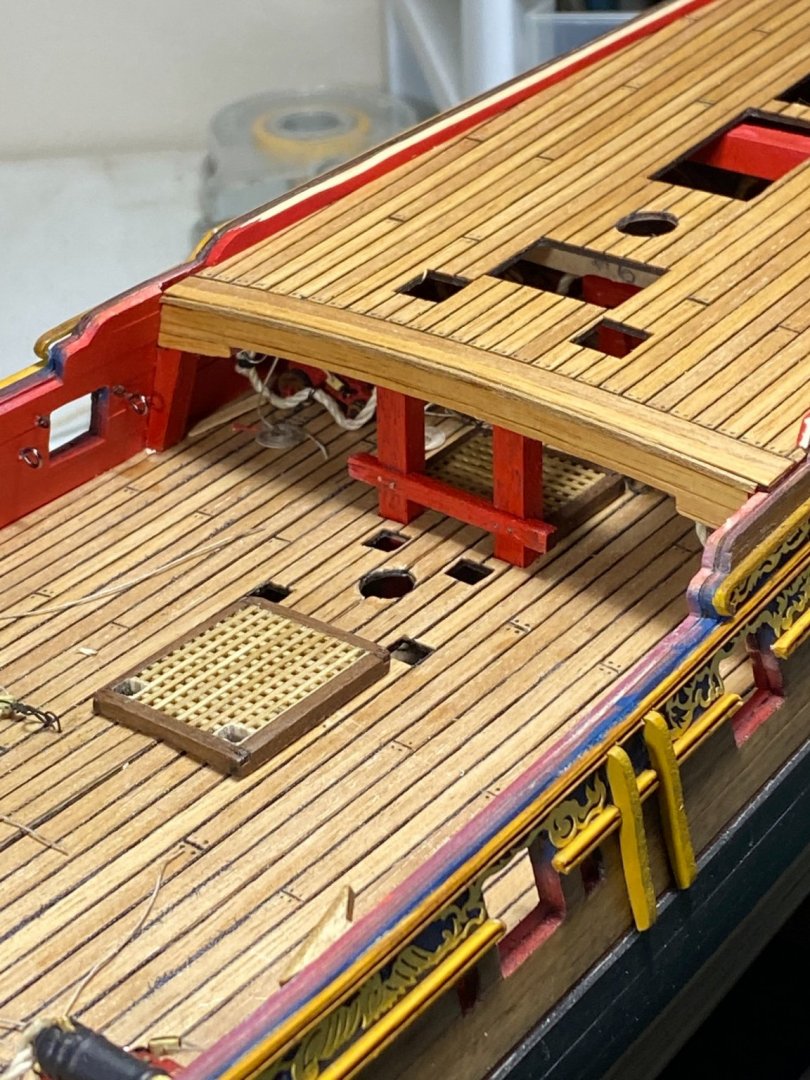
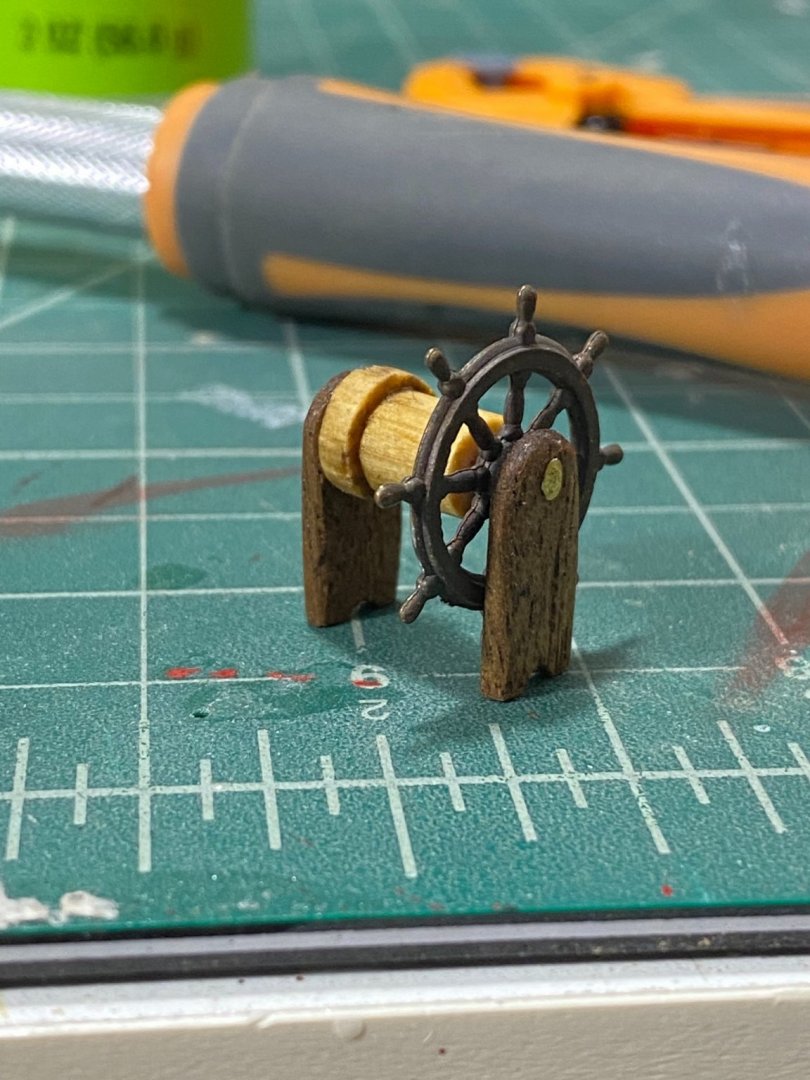
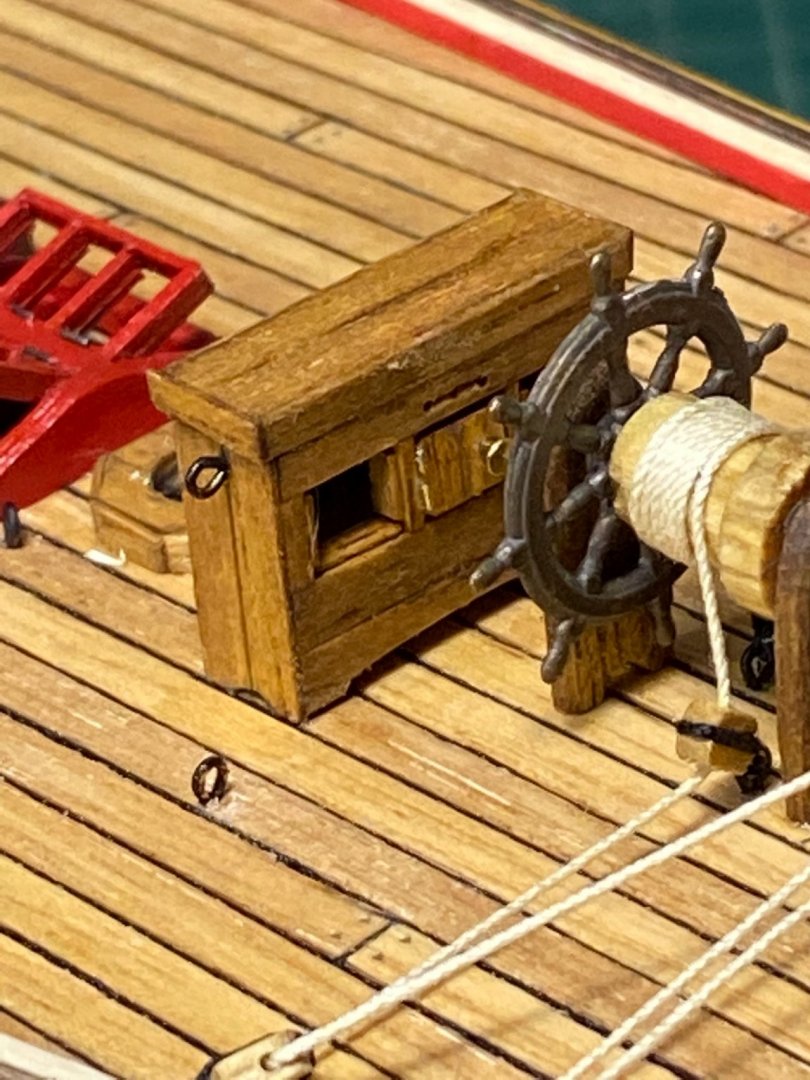
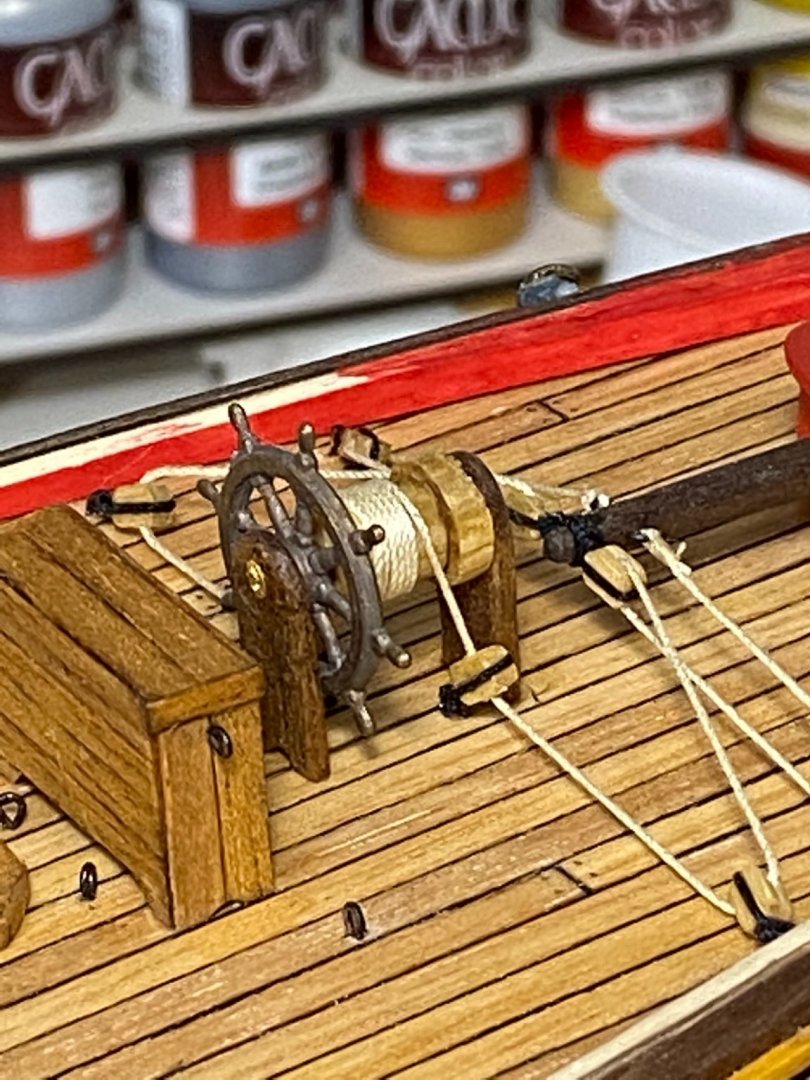
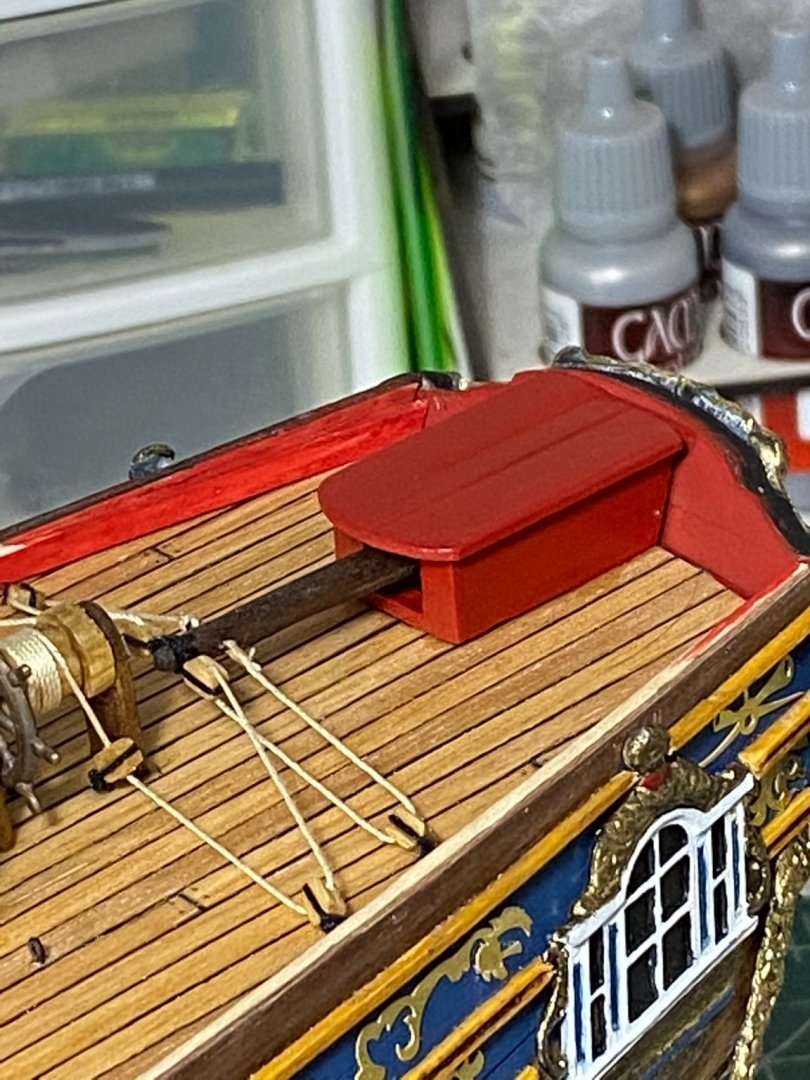
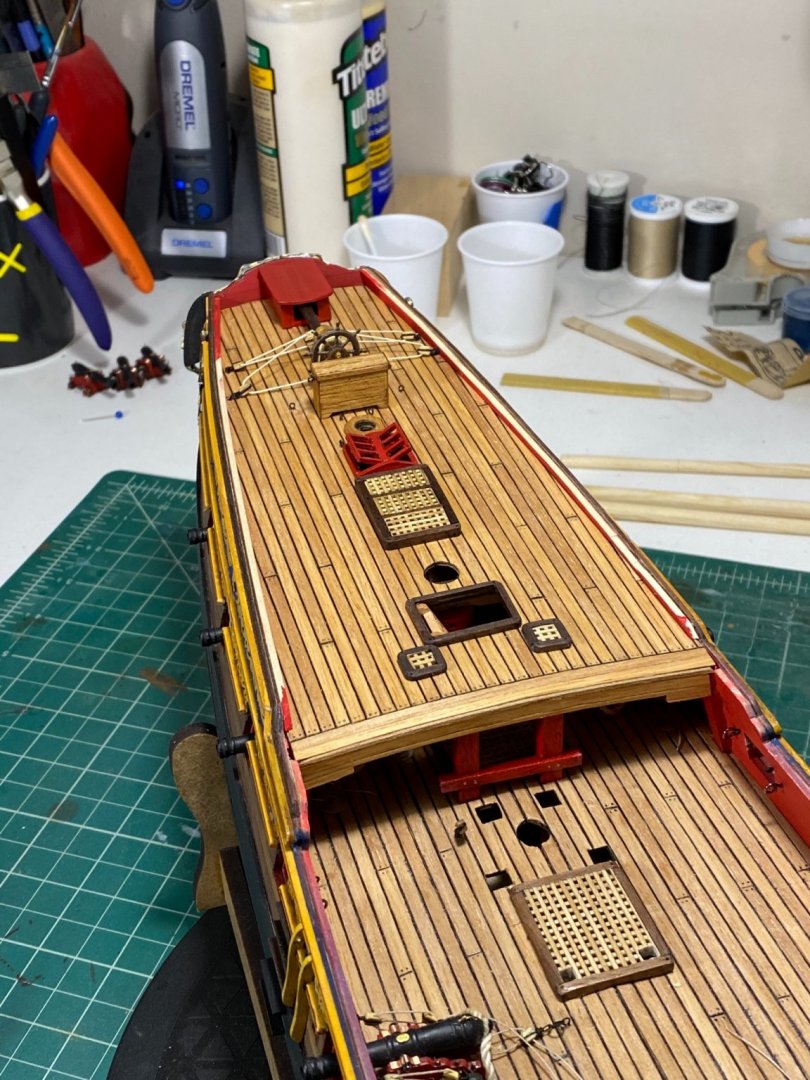
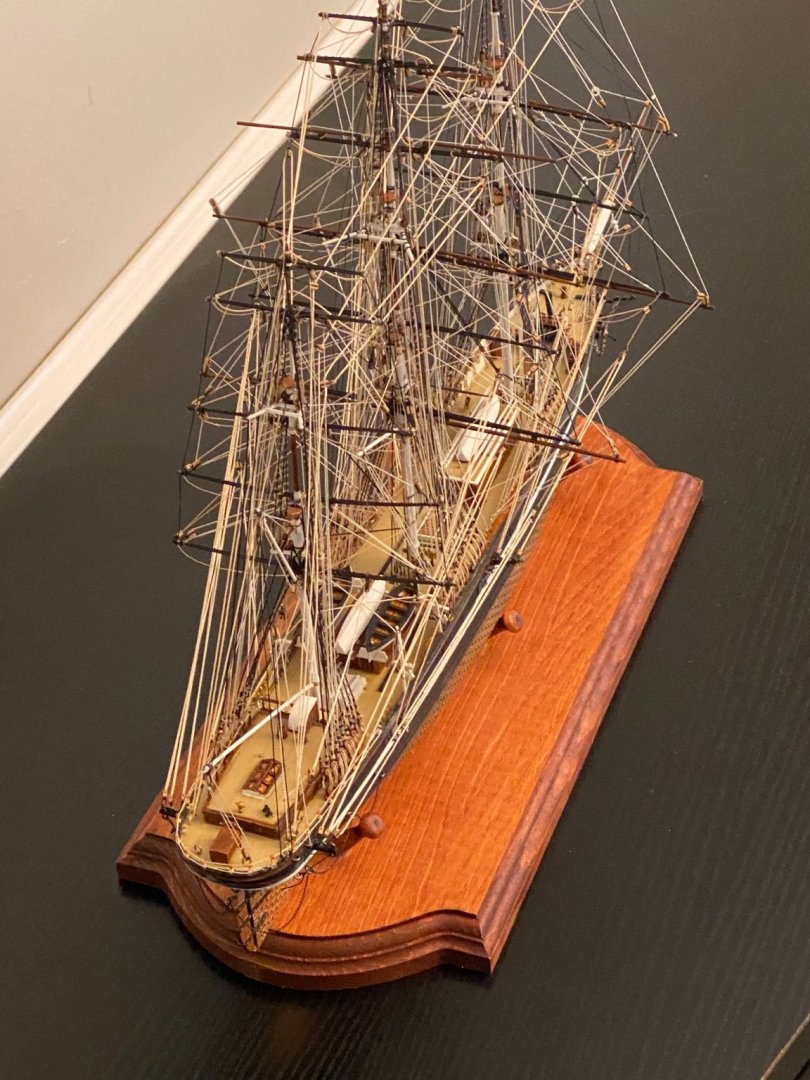
Thank you for the comment Richard. Also thank you for the likes from everyone else I got a bit more accomplished over the last few days, especially with the snow on the east coast here. I was able to get the rear deck planked and glued in place after finishing the guns beneath that section. I left a few unfinished in the middle of the ship, but will finish those last 3 this week. I decided to use decking around the crossbeam above the pumps. I felt like it fit better with how I have chosen to color things. Plus it matched what I had done of on the forward deck i was also able to complete a fair amount of the bits on the rear deck including all of the hatches, ladder, skylight, binnacle, and tiller housing section. I used the frame of the binnacle pieces and added decking to overlay it and create a more complete piece to my eye (taking ideas from BEs log). I attempted to make a more fancy skylight but I couldn’t get the wood to work properly. After 4 failed attempts I went with the kit pieces. I’m happy with it but I would have loved to complete the modification. I’ll have to gain those small detail skills for carving/cutting. I used spare walnut to give the tiller housing a more wooden plank look instead of the plain ply and I used two glued walnut pieces that I carved down to replace the kit tiller arm Lastly, I decided to remake parts of the ships wheel...more to gain the knowledge of custom making pieces that are achievable than anything else, but also because I felt the others didn’t look completely right for the time? I closed the ends with left over cannon PE. The wheel still spins! I think it came out pretty decent and I’m happy with the effect, especially with the rigging installed. I left a block out of each side as I felt it was too cluttered. May not be functional but I think it looks better that’s it for now. I will most likely get more done this weekend thanks for taking the time to look. Have a great night Tim


- 164 replies
-
- 9
-
-
- fly
- Victory Models
- (and 4 more)
-
Looking good! I’ll be following along
-
Stunning work so far!
-
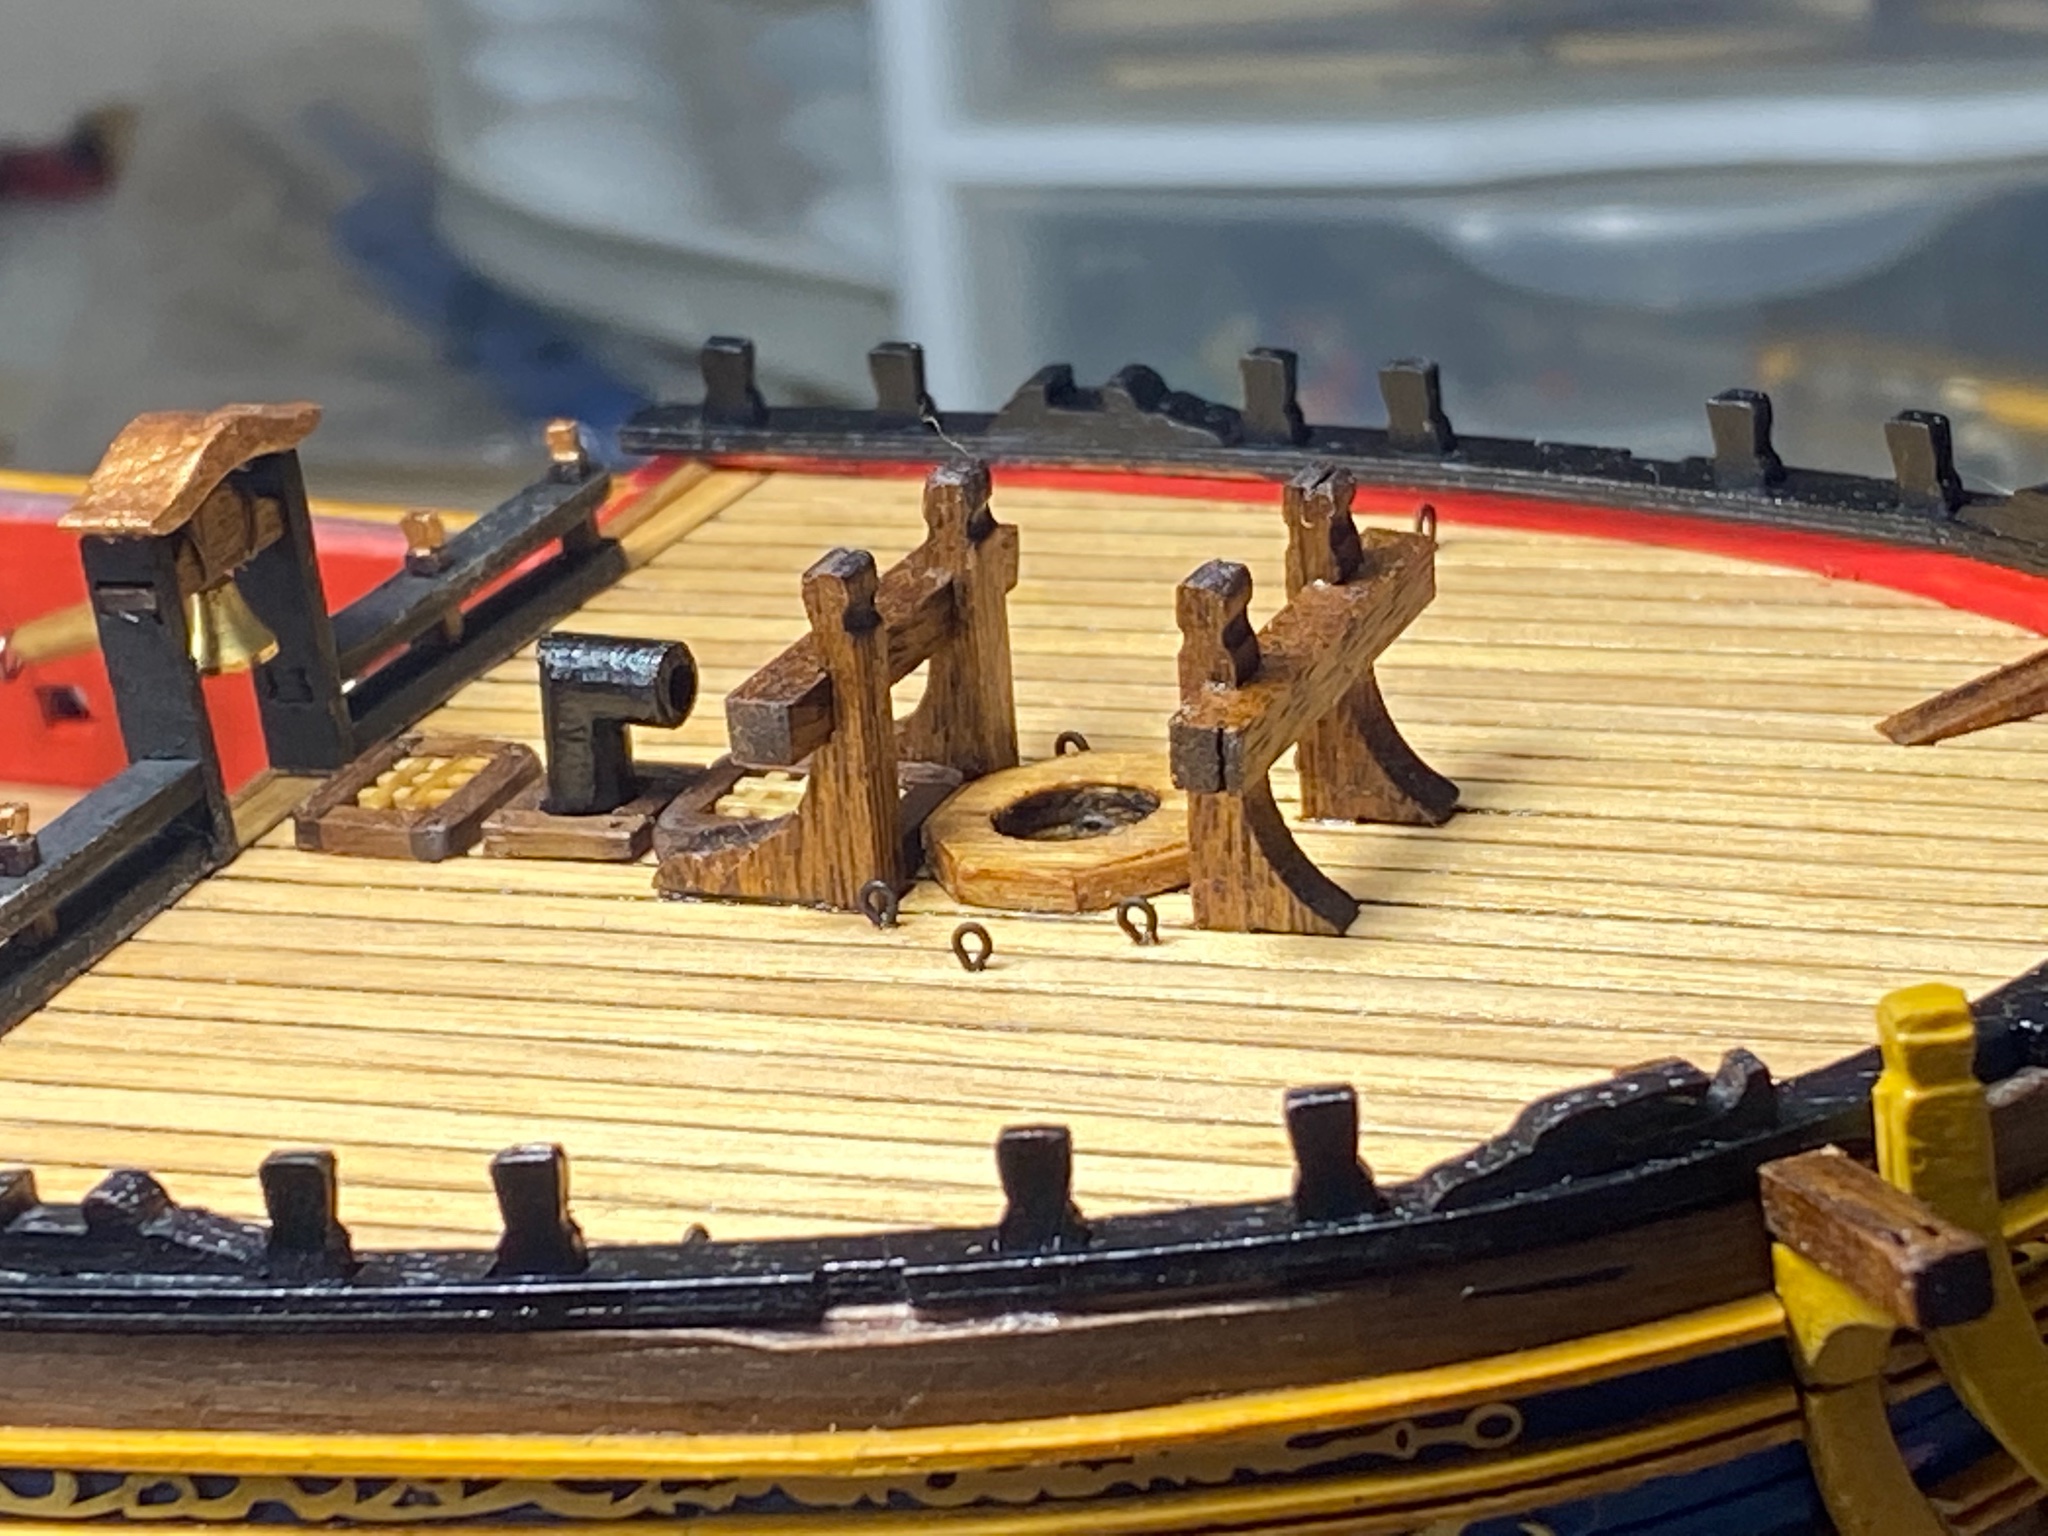
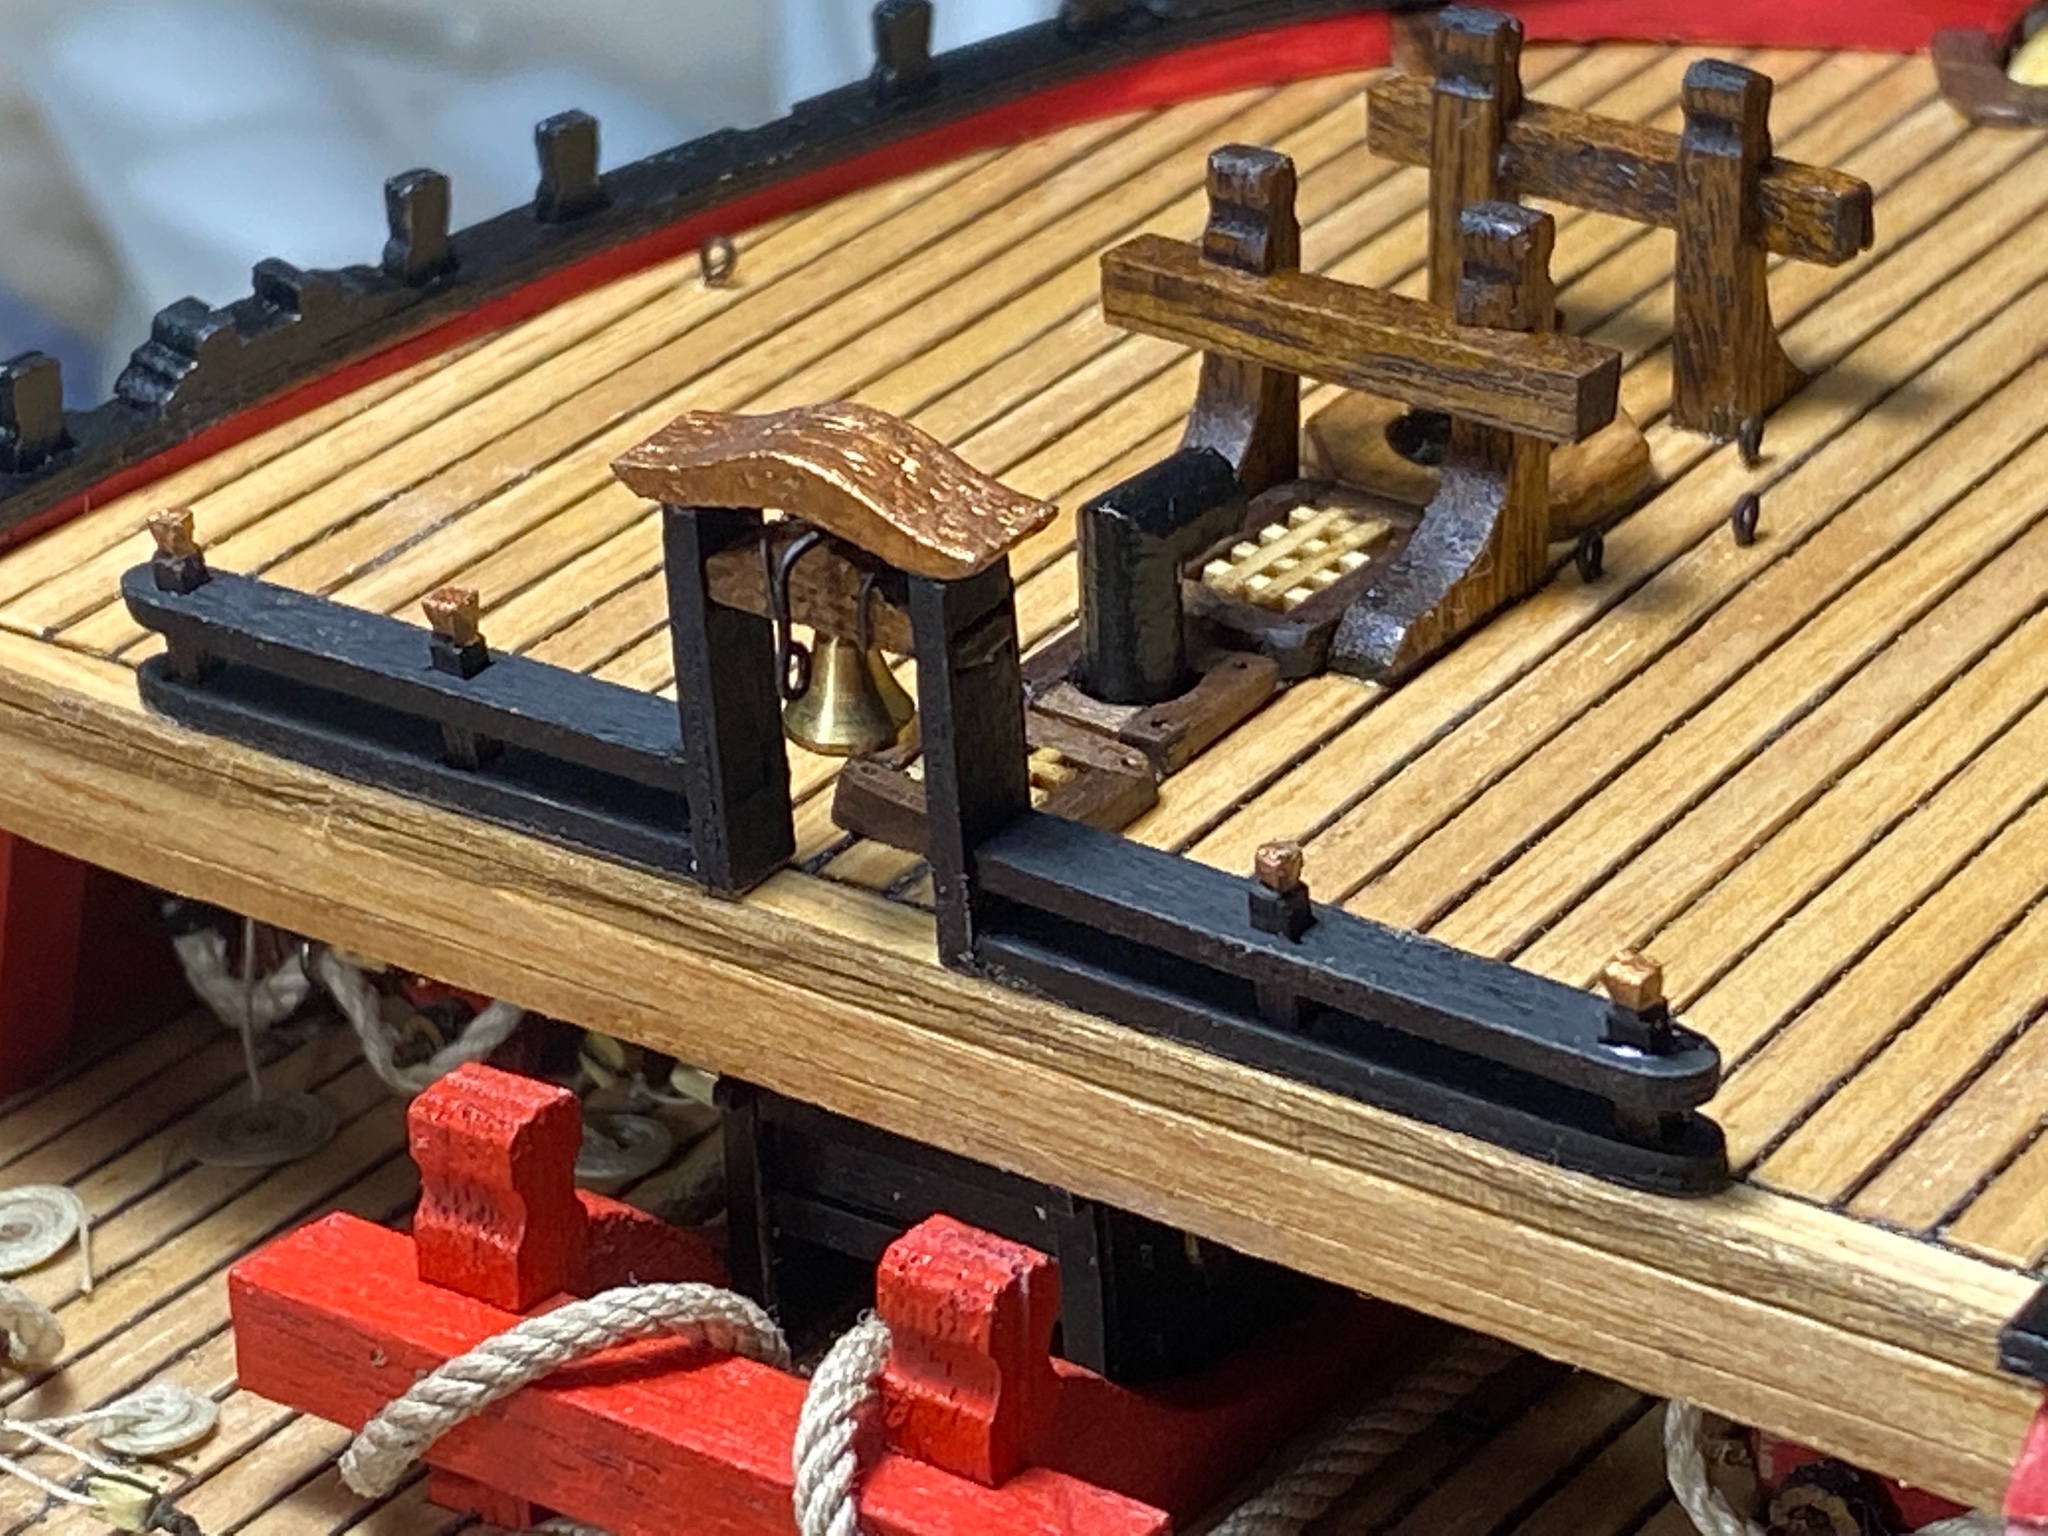
Small bits of progress this week so far with completion of a majority of the bow features. I added the upper rail that rims the bow as well as the main mast bits. I decided to keep them stained instead of red. I find the Puritan pine stain on the walnut to be very nice. I also added the gratings and coamings around the bits. I decided to sand them down to about 1.8mm from the deck. The 3 mm just seemed to be way too tall compared to the other pieces (by my eye anyway). I also added in a simple smoke stack for the stove using spare dowel fit to size. The piece at the base of the mast I tried to carve out of walnut but it kept falling apart, so I ended up using the kit piece and putting the deck planking on/around it for more depth (also lightly stained). next up was the belfry which was decently straight forward. For the upright rails I used walnut strips so that I could add a little offset at the top for finer detail. Not excellent but not horrible. On the bell piece I added some darkened wire around the wood for No other reason than it felt like it belonged there...and I included a piece for a rope to actually rock the bell I’m happy with how she’s coming along. Starting to really come together. Hope to have more later this weekend cheers all tim


- 164 replies
-
- 5
-
-
- fly
- Victory Models
- (and 4 more)
-
I think you’re right and that’s probably what I’ll end up doing now. Thanks for the advice! I think you should just give it a go. Based on your work so far you have nothing to worry about in the skills section. I’d hate to see your work so far go to unfinished
- 164 replies
-
- 1
-
-
- fly
- Victory Models
- (and 4 more)
-
This video was very helpful! Incredibly interesting also. It’s amazing how much work and time that would have taken
-
Thank you Mike! Agreed , Shenandoah was absolutely beautiful...you were lucky to be there so long. I did grad school in Scranton...not nearly as pretty. I appreciate you taking the time to look through. Your log was actually among the first I looked through as I was trying to get my feet wet and figure out how to do things without destroying anything important. You had very helpful posts so thank you for that. If I remember correctly you stopped posting on the Pegasus for a bit, have you re-started? tim
- 164 replies
-
- 1
-
-
- fly
- Victory Models
- (and 4 more)
-
What is a messenger rope? Is that the smaller pieces of line they use to guide the larger ropes?
-
I can only speak for myself but feel free to educate on terms as much as you can! I know almost nothing about nautical/ship terms, but I’m always interested in learning the correct verbiage from those more experienced than myself
-
Thank you Sooty! And I believe you’re right about wrapping differently. I’ll need to do some more research on this for sure,but your reasoning makes sense. I also need to figure out where to have the ropes go...I didn’t think to make an opening in the gratings at the mid ship so I may just add portals for the rope to terminate through the deck just in front of the grates. Might not be accurate but it’ll be functional! tim
-
Looking great! Planking is so smooth...beautifully done Richard
-
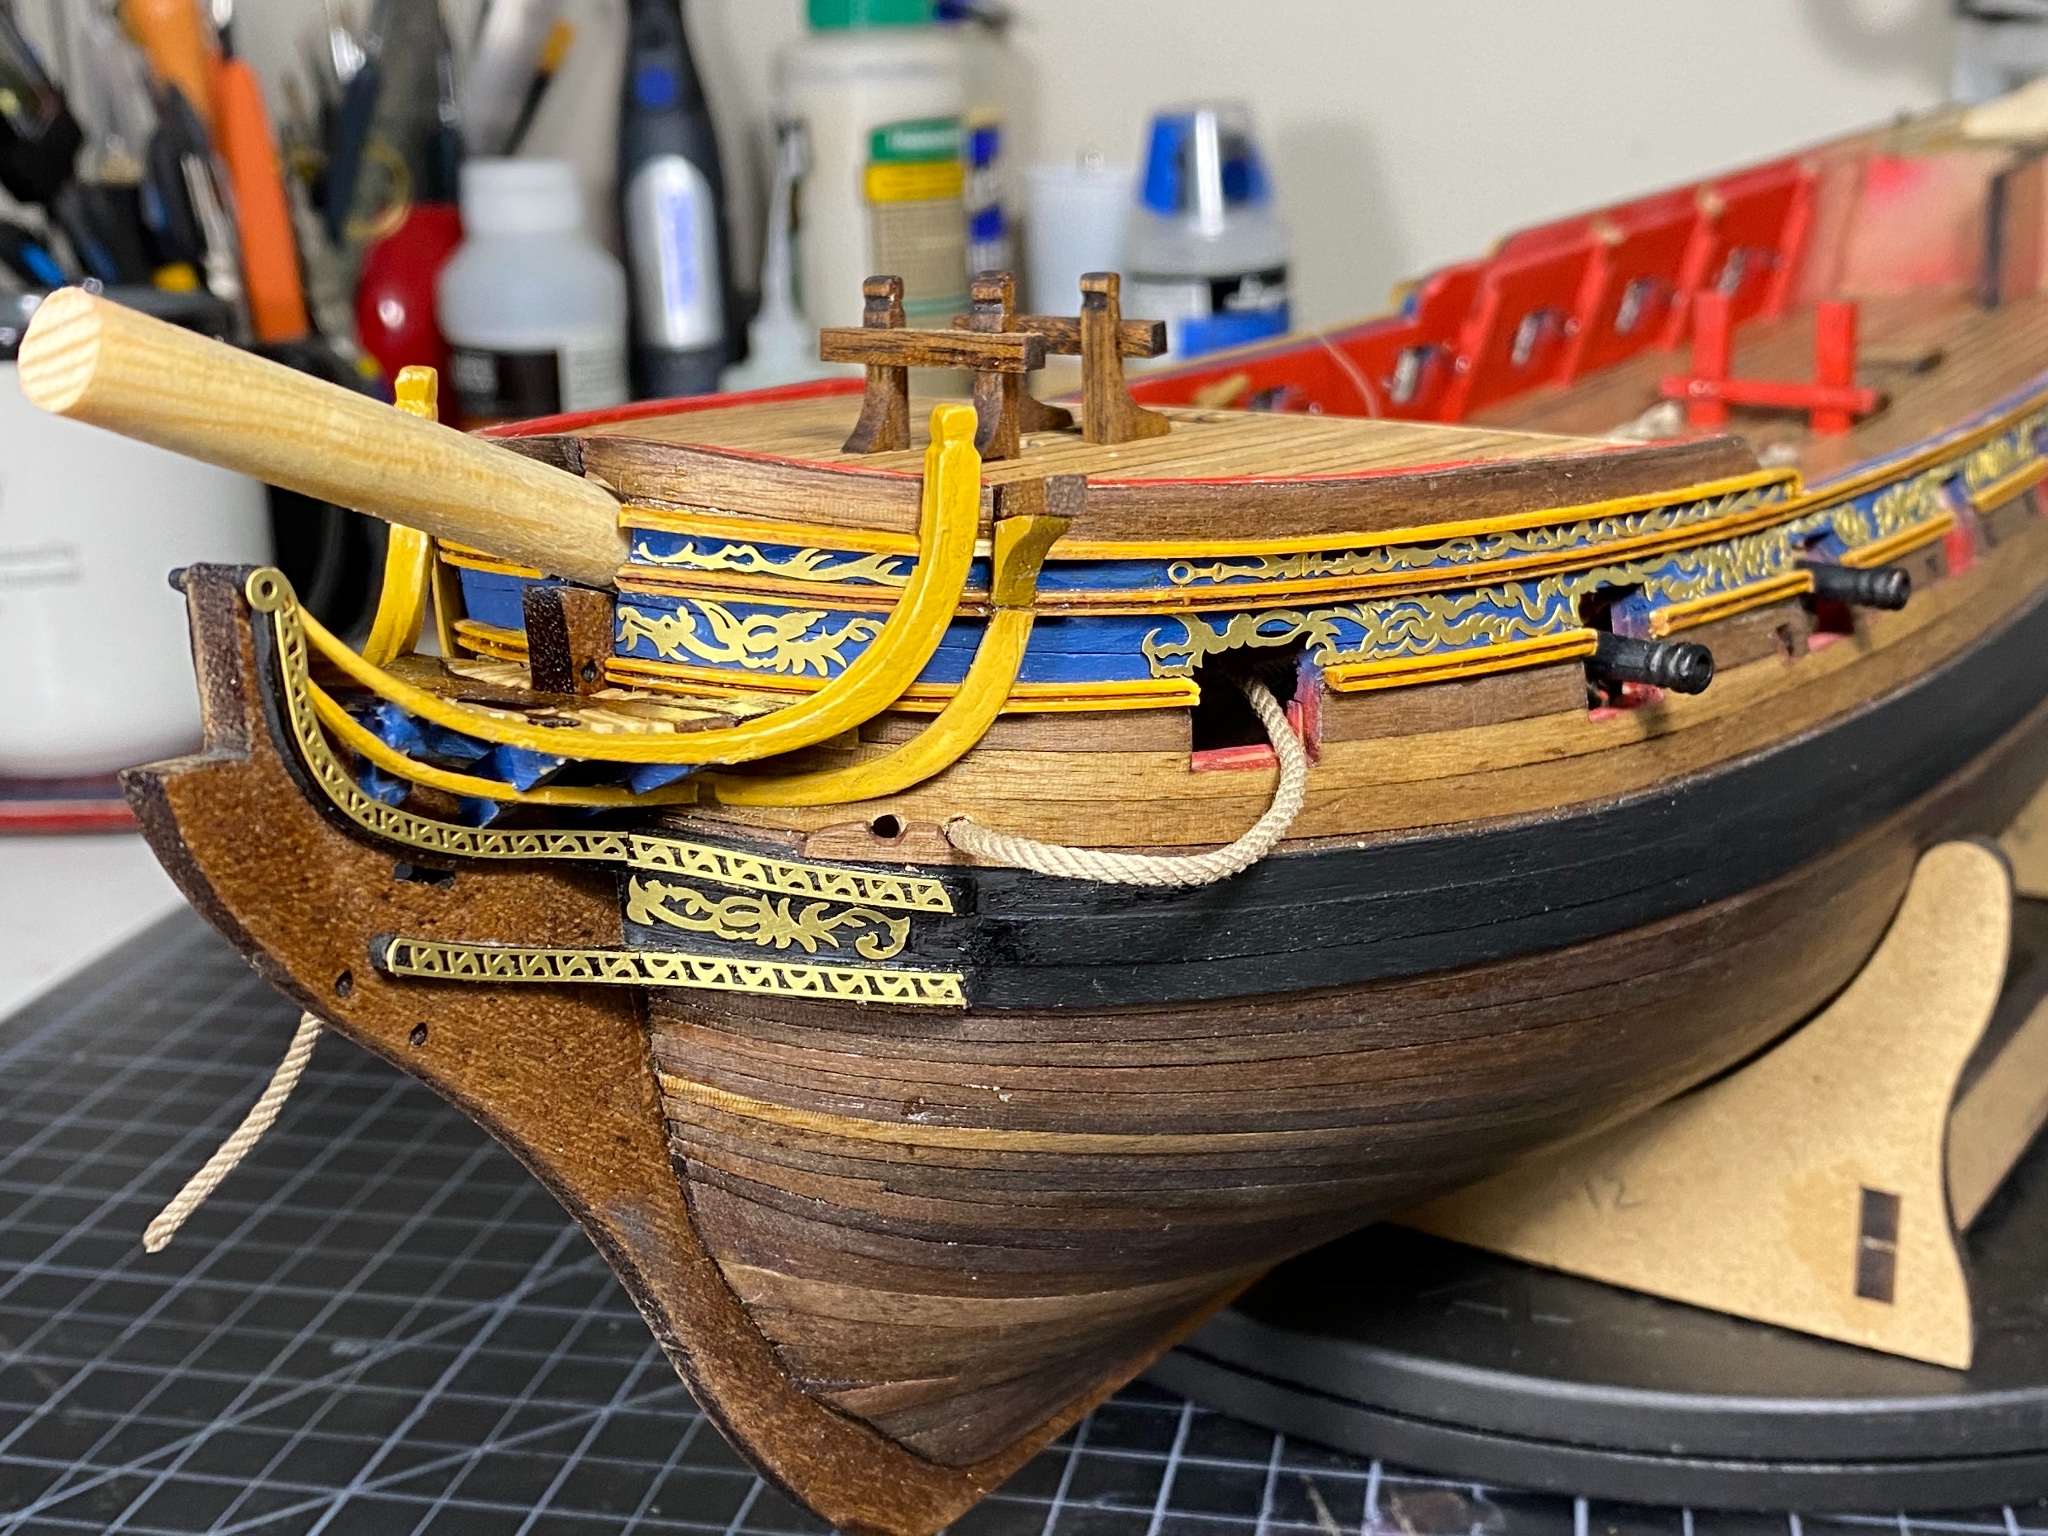
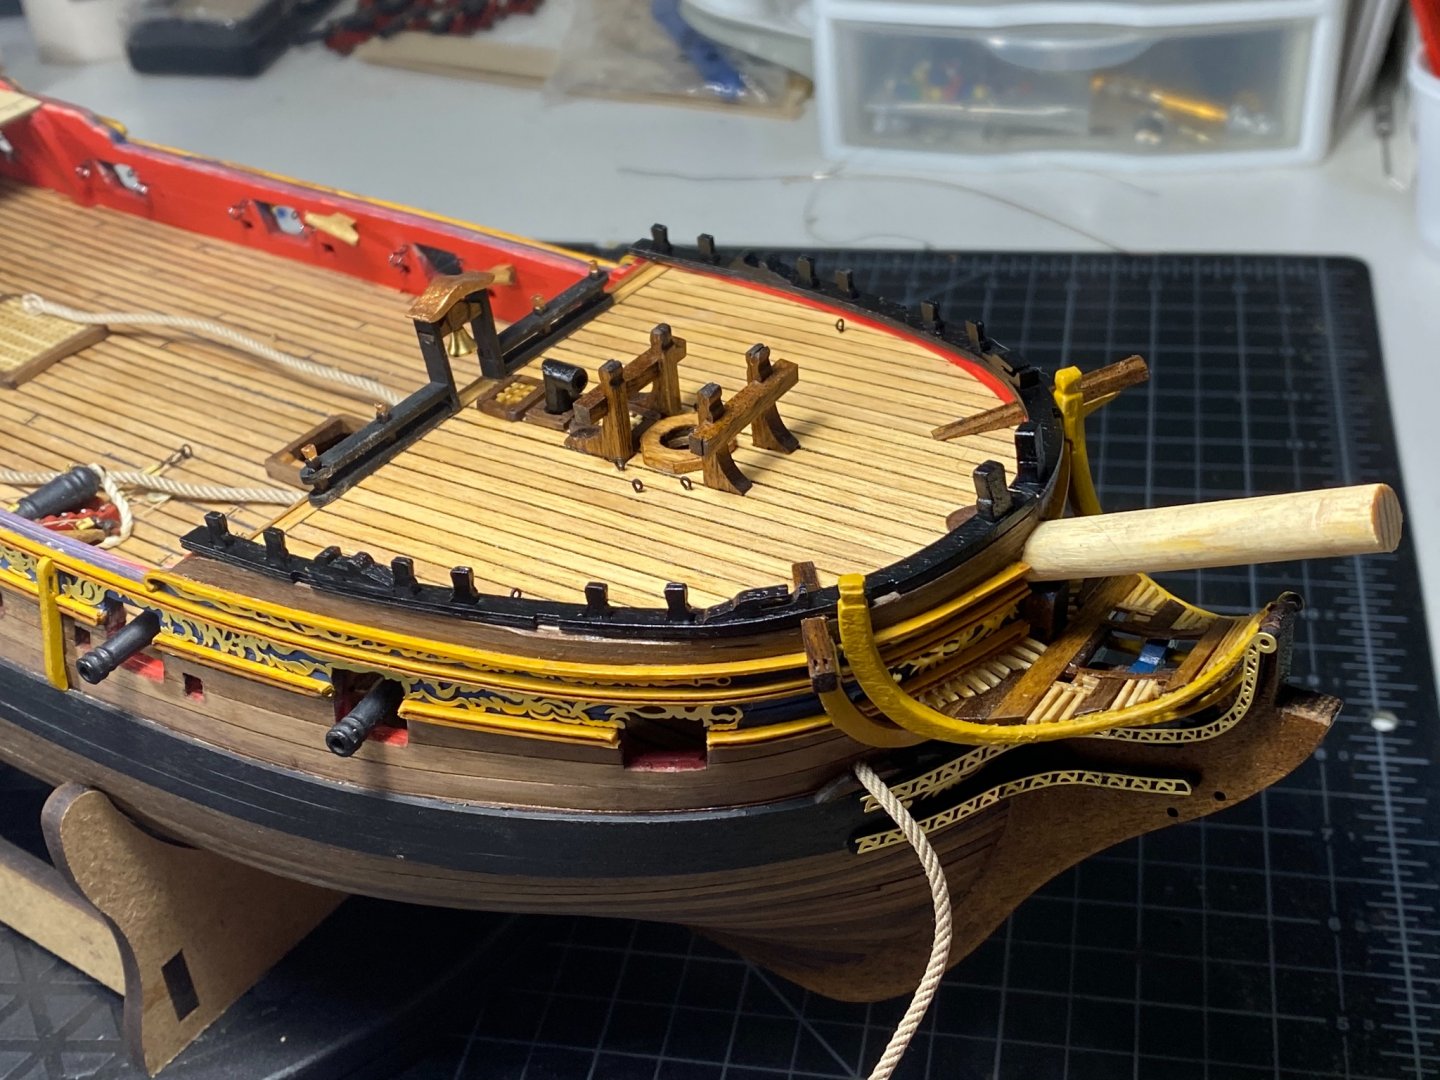
A lot of accomplishments the last few days! I was able to complete the bow portion for the most part with the basic structures. I added some beams to make a more finished and complete look as I have seen others do. on the main rail I felt that it didn’t have enough size to the piece so I cut some spare ply from the supplied sheets and shaped it to fit the back, then taper to the point as it should be. I did the same for the lower rail as well. That whole process was a lot more difficult than I was expecting. The cat heads also took a lot of fiddling to get them even with the top of the ship and able to fit under the railing that I will place shortly. I was also able to fit the rest of the bow PE decorations which I really enjoy the look of. I was not able to fit the one that is flush on the bow, but I felt that would be overkill anyway.. I also have to fiddle with the boomkins at some point which should be interesting with the PE 🤷🏻♂️ I was also able to finally place the quarterdeck (?) and dry fit some of the bits up there as well as run the rope I will use for the anchors. I had to notch the beam to allow the stove to fit but this will be covered with another beam shortly. it finally feels like the boat is coming together and I have less anxiety about mistakes. Wood seems to be very forgiving in that aspect thanks for looking!! Tim


- 164 replies
-
- 3
-
-
- fly
- Victory Models
- (and 4 more)
-
Glad you find it helpful! I understand very little on the history of ships....I more love the beauty and the art aspect of them, but I’m becoming more and more interested in getting things historically accurate. My first boat I’m using to learn the process as much as possible then I’ll get more concerned with period related accuracies on my end. Seems like you know a fair bit on the history as far as the heads, You may be right but I doubt OSHA had a ton of pull back then 🤣😂
-
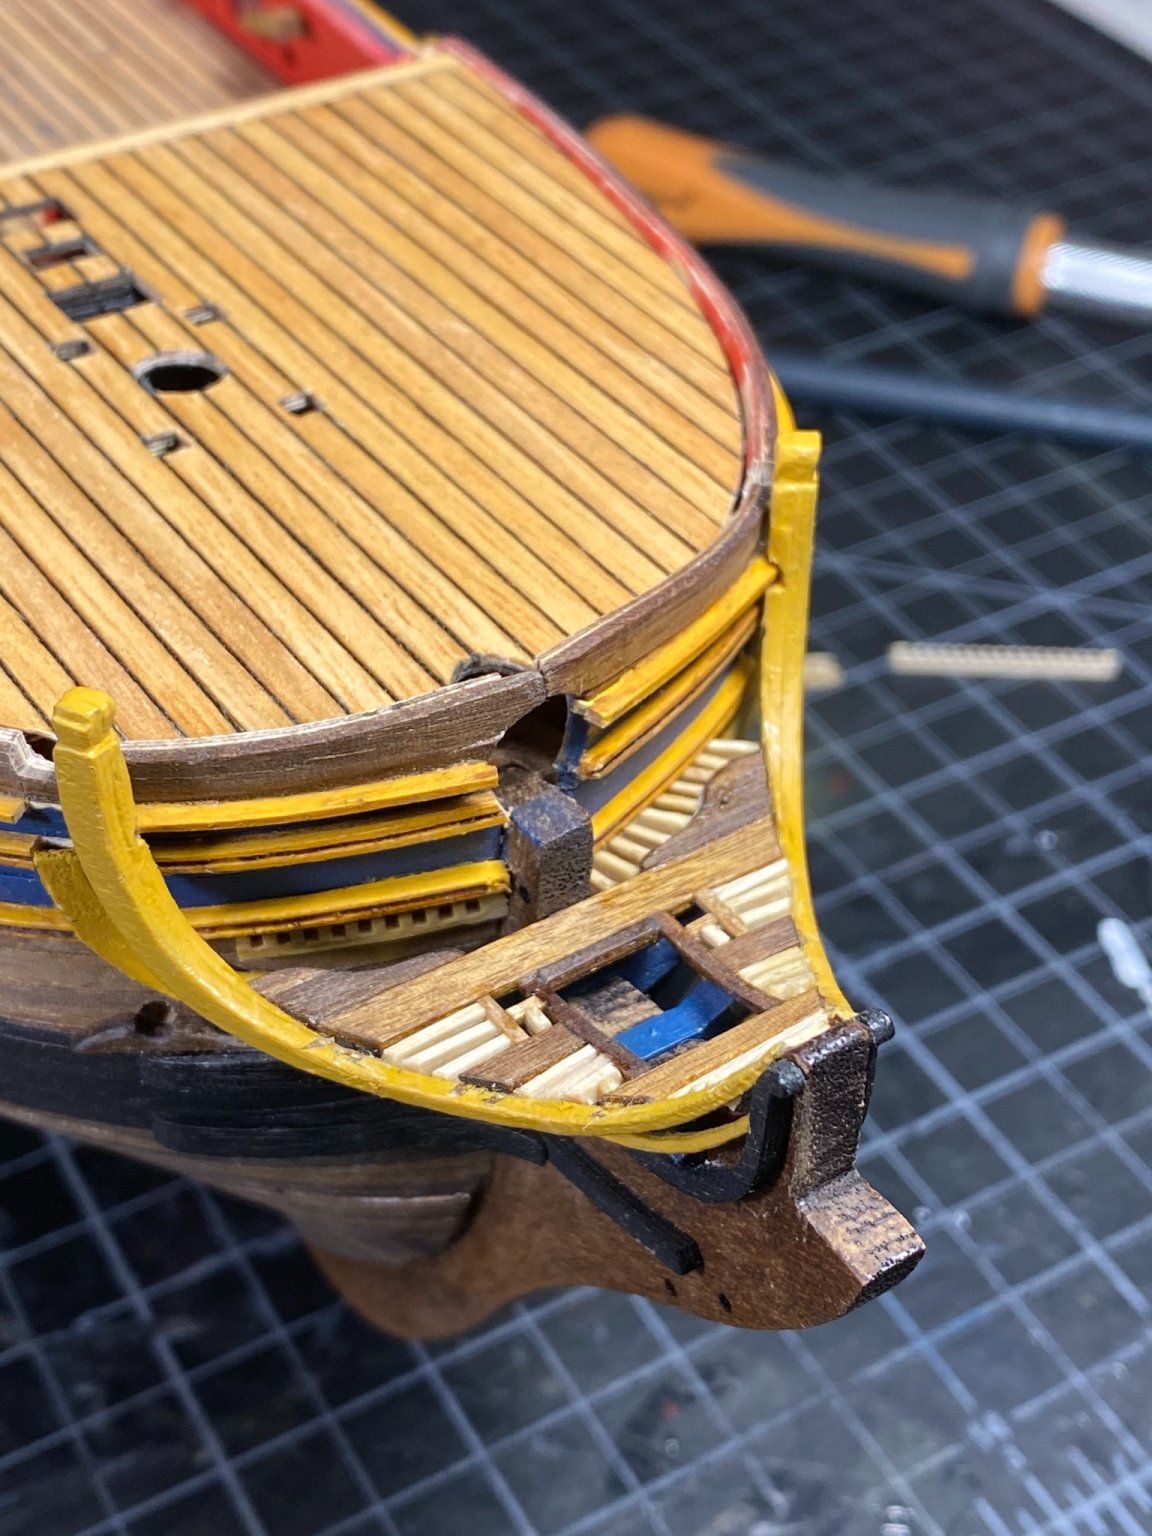
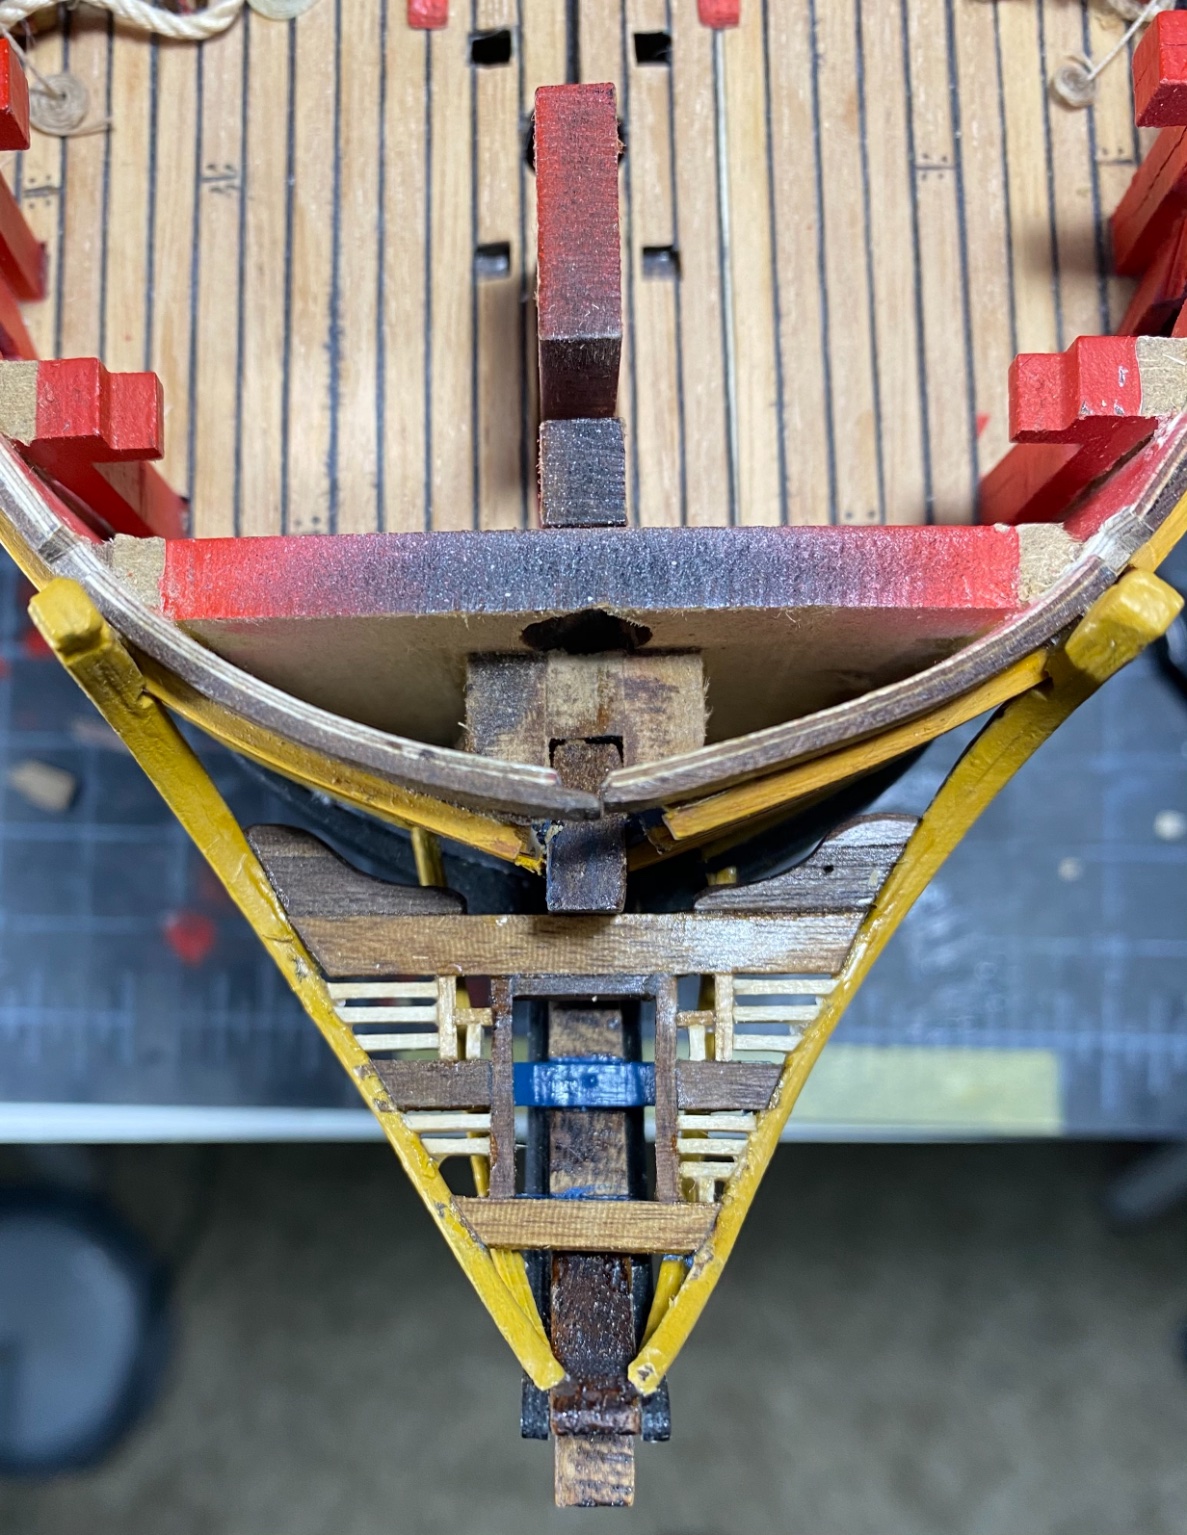
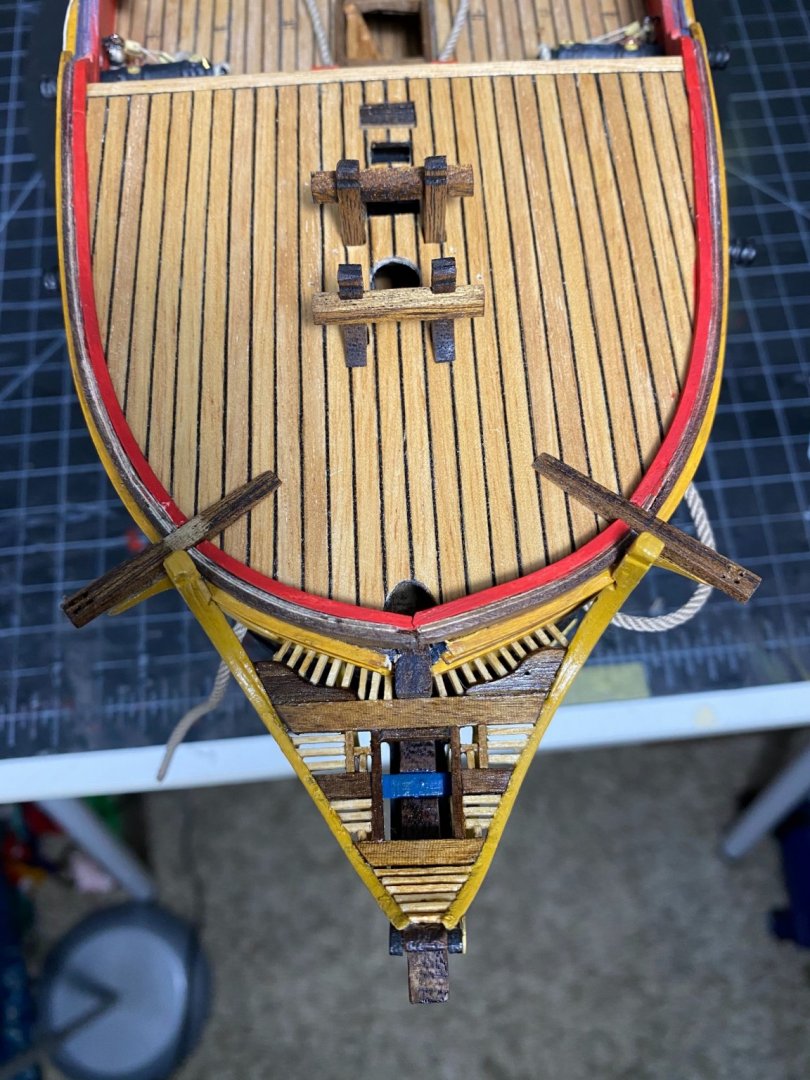
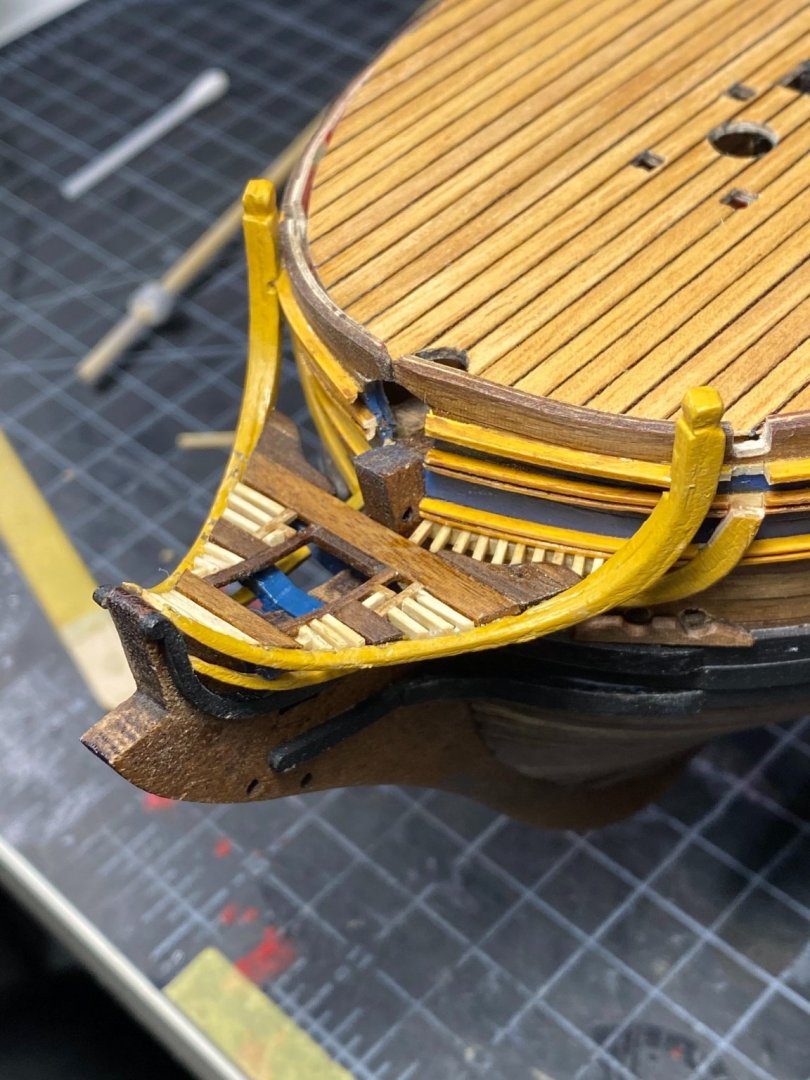
I used the word grating but I’m not doing the grating as it appears on other parts of the ship. I think that would be too small to make with my current tools. I modeled mine off of work by BE and DFel and their build logs. It’s a time consuming process but I think it adds a completeness look to the bow. I’m not quite finished yet but here’s where I am so far I used spare pieces from the grating on the hull part of the bow for even spacing. I decided to use walnut on the cross beams because I wanted a little contrast against the lighter wood. I believe there is a netting or a rail of some sort that should be on the sides but I’m not sure if I will be placing that yet. And I have to work out the position of the boomkins(?) before any of that anyway your template looks good! I can’t see because of the angle but I took care to make sure the ropes that would attach to the bow sprite would be able to pass freely Looking forward to seeing more tim


- 59 replies
-
- 3
-
-
- Fly
- Victory Models
- (and 1 more)
-
Really looking good. You did a great job painting the bow decorations. Took me a few glances to tell what was PE Keep up the good work!! I’m currently putting grating along the bow section. Talk about a test of patience tim
-
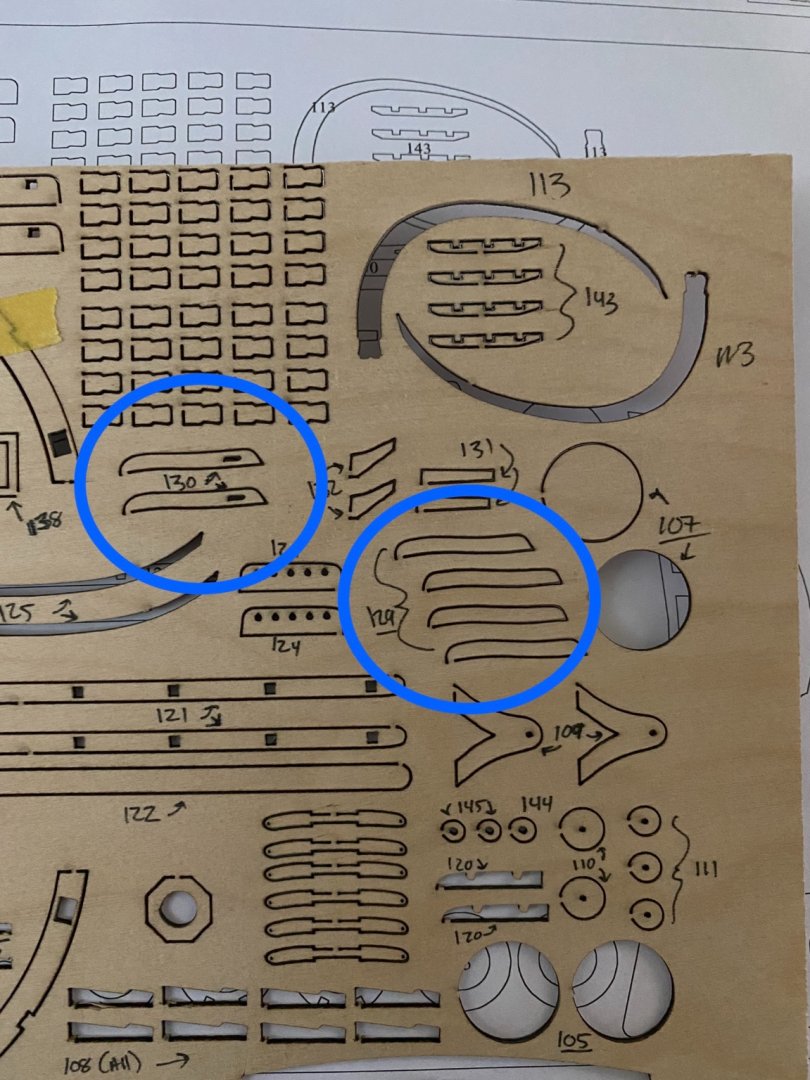
Hey sooty found these on right hand side of the 1.5 sheet above rudder fascia piece tim
-
Thank you Richard! Thank you for looking in BE, I have referenced your build a lot and appreciate the ability to use your photos for reference. The string tip with definitely be used in the future thank you for the kind words sooty, I have be very careful to say the least. I ended up placing the PE parts above the moulding before I put the next moulding on. I couldn’t get around the fear of not leaving enough space or leaving too much. I was looking at yours and I honestly thought it looked good! But I’m sure the correction will look even better. Can’t wait to see the progress happy new year guys!! Tim
-
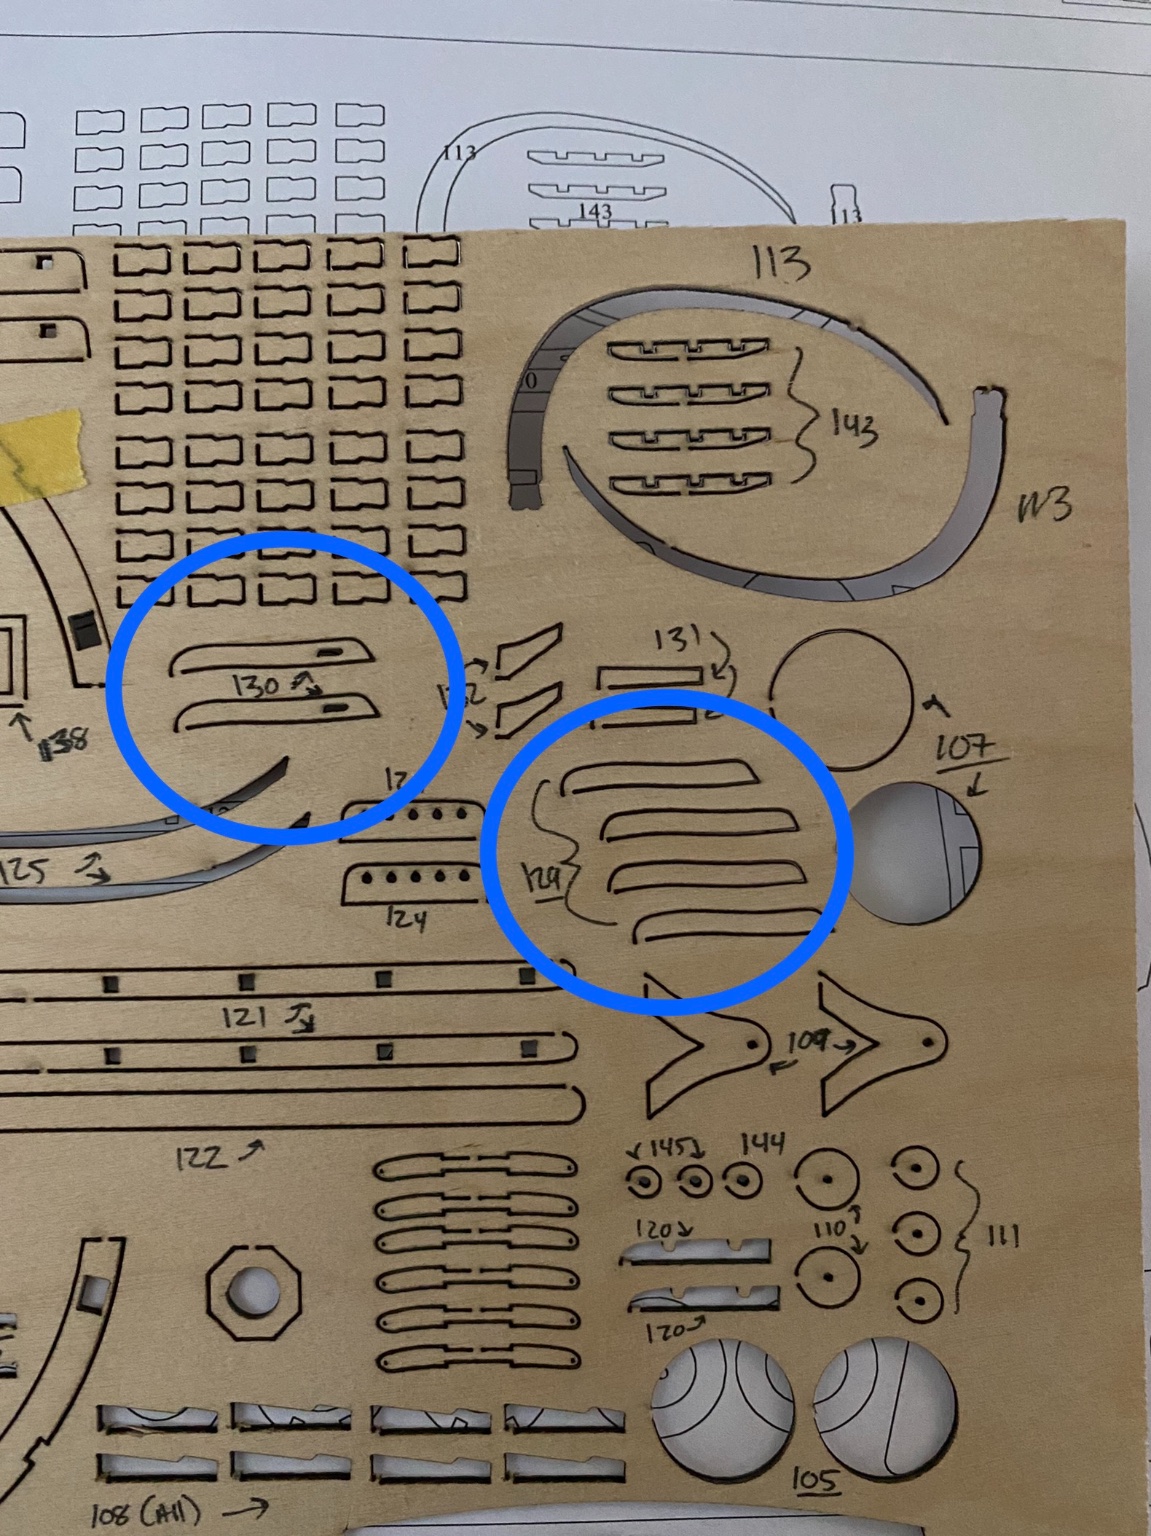
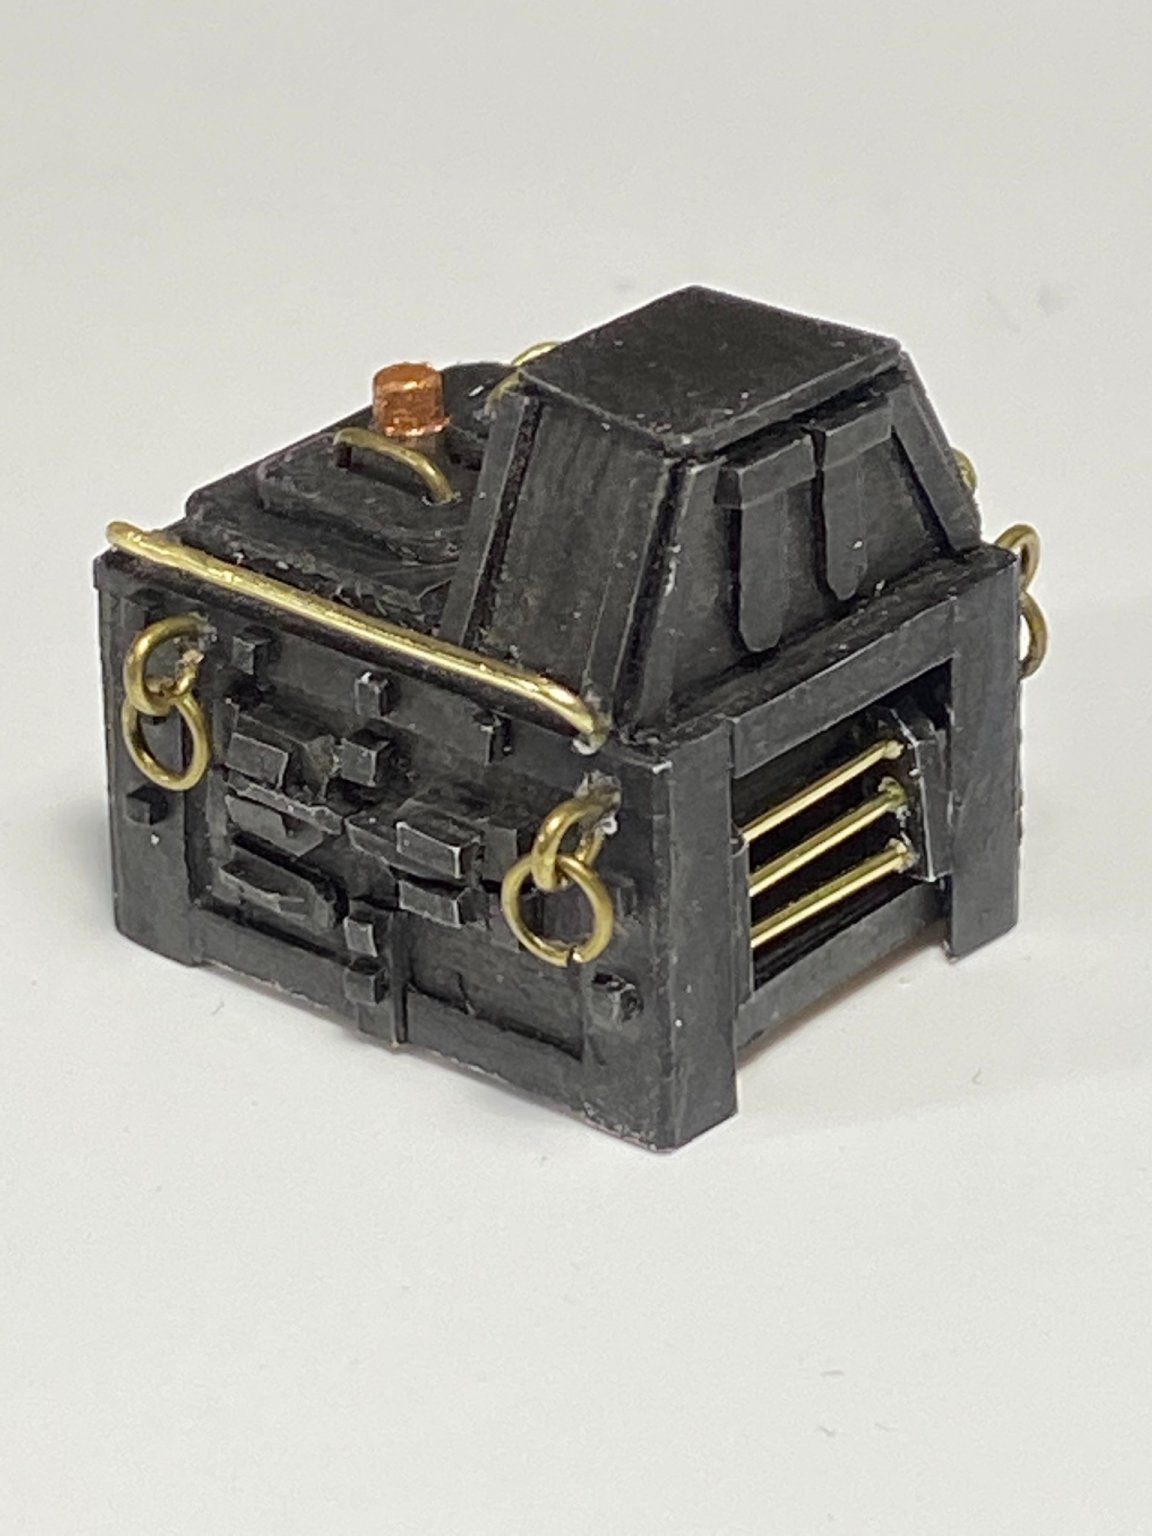
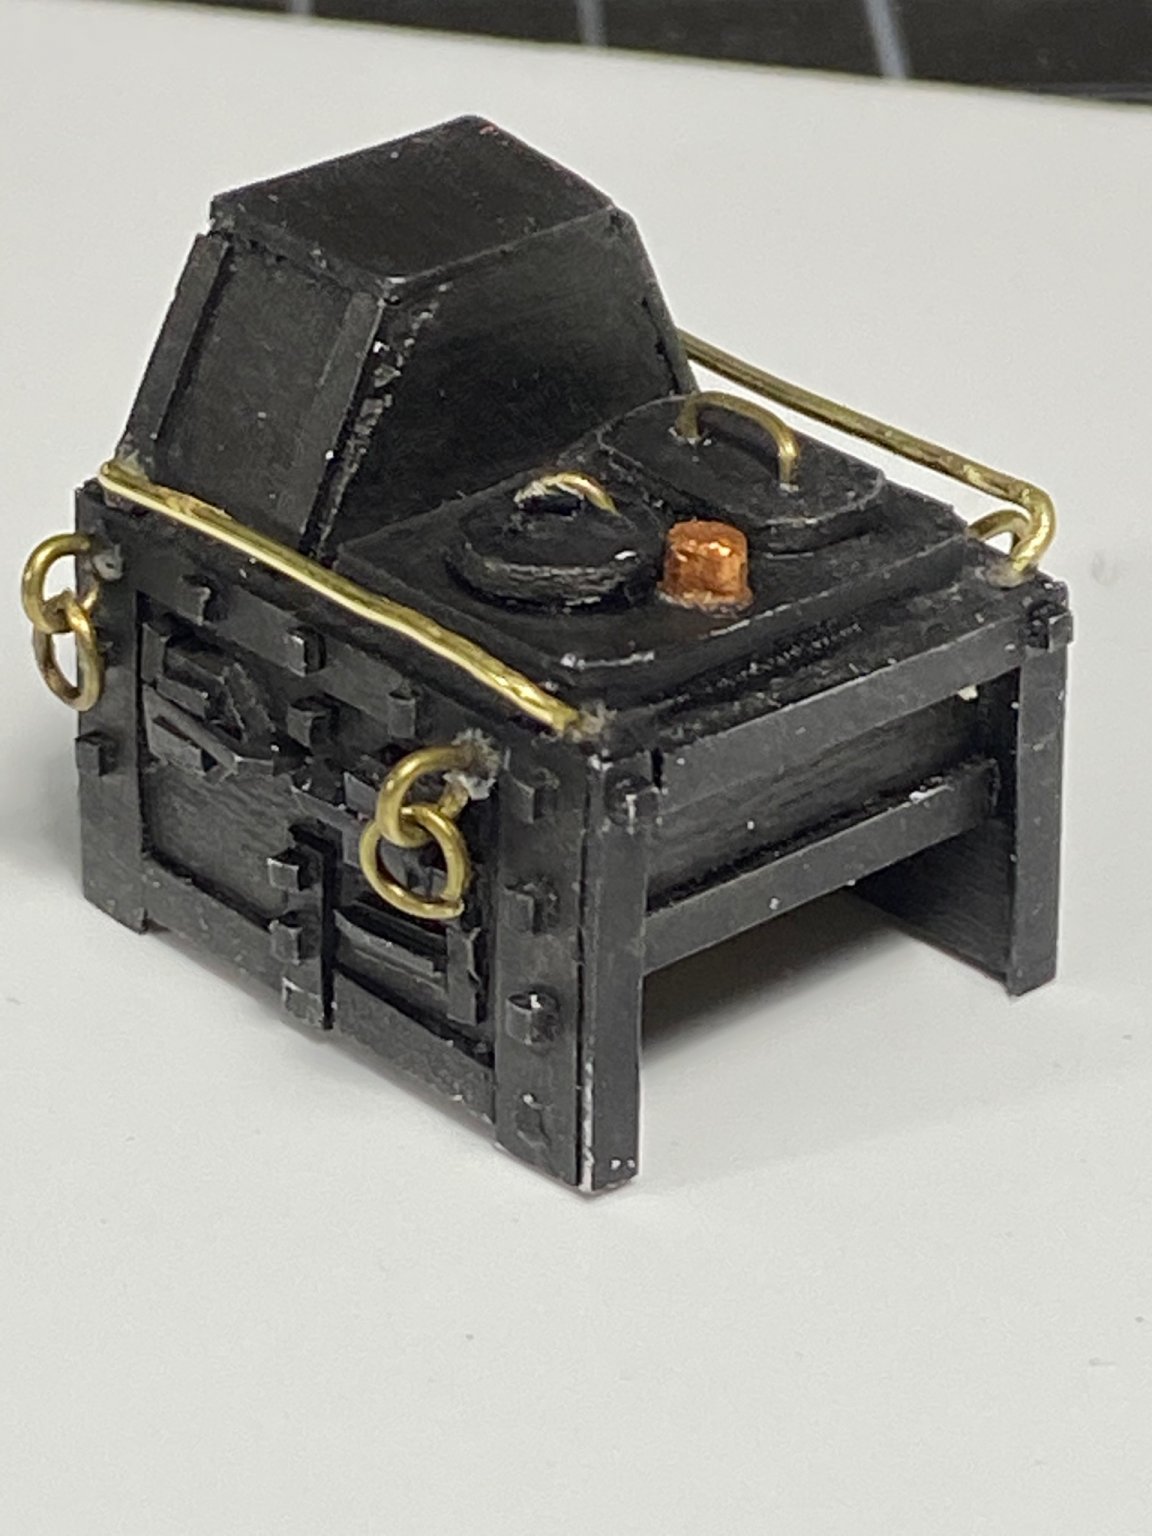
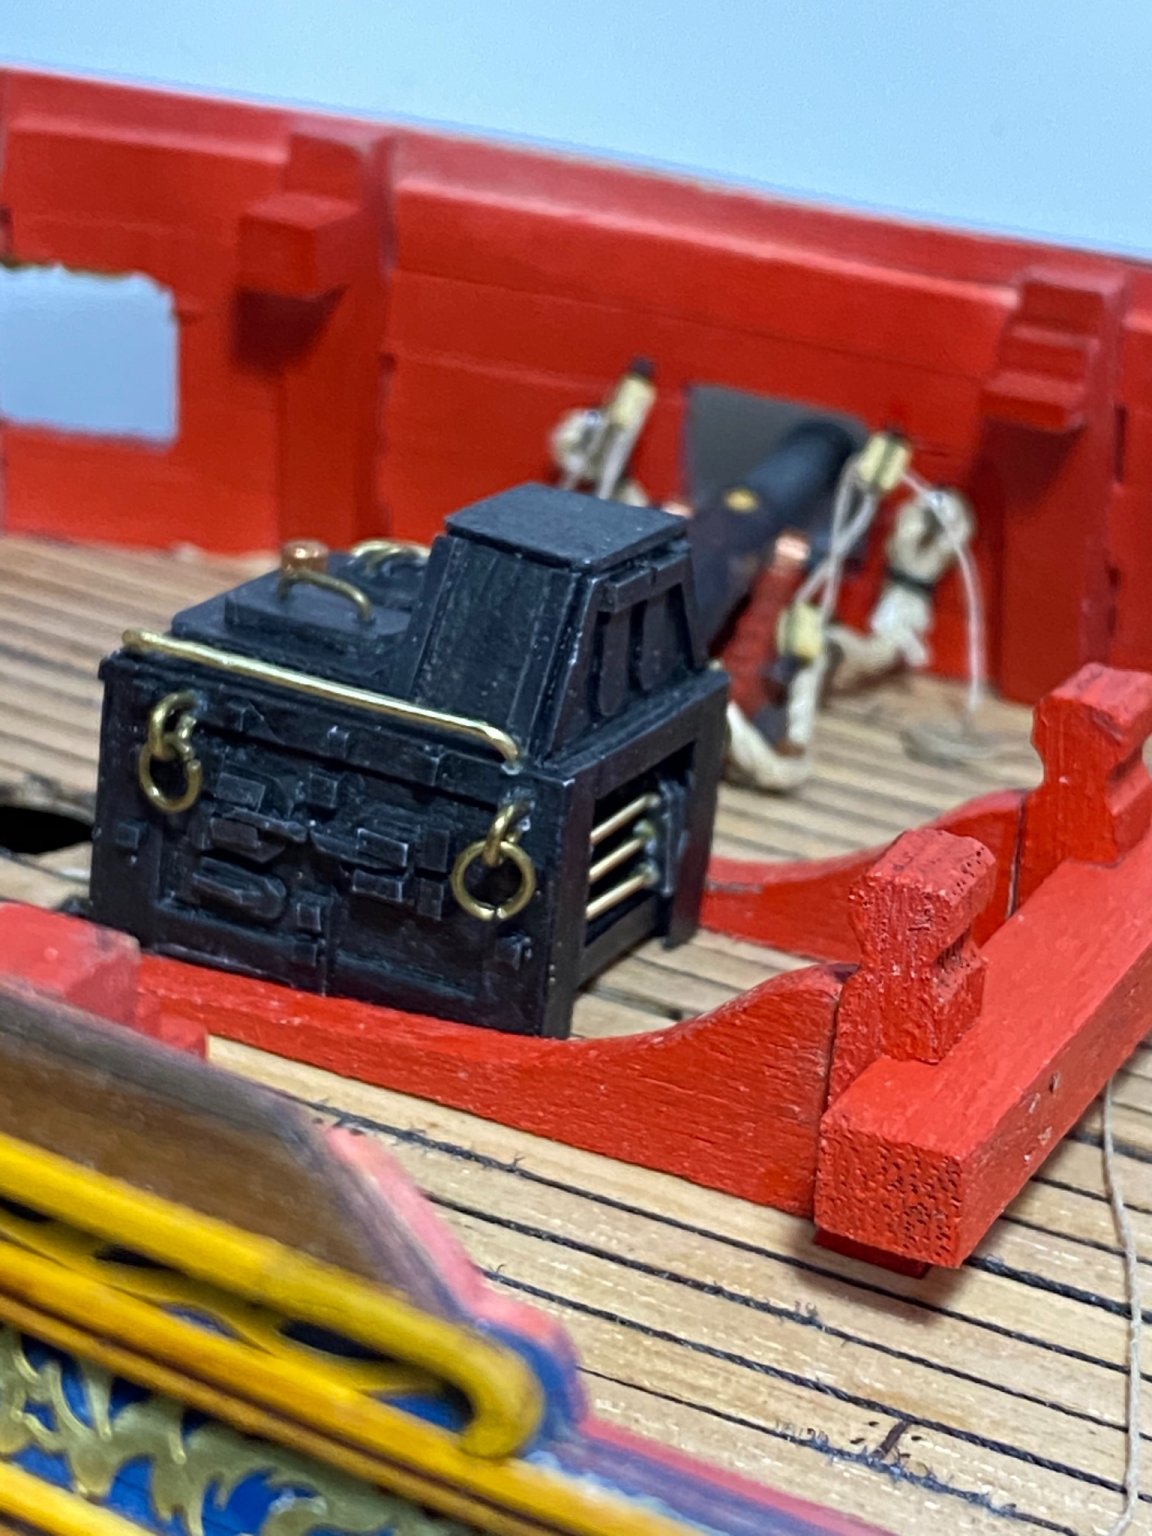
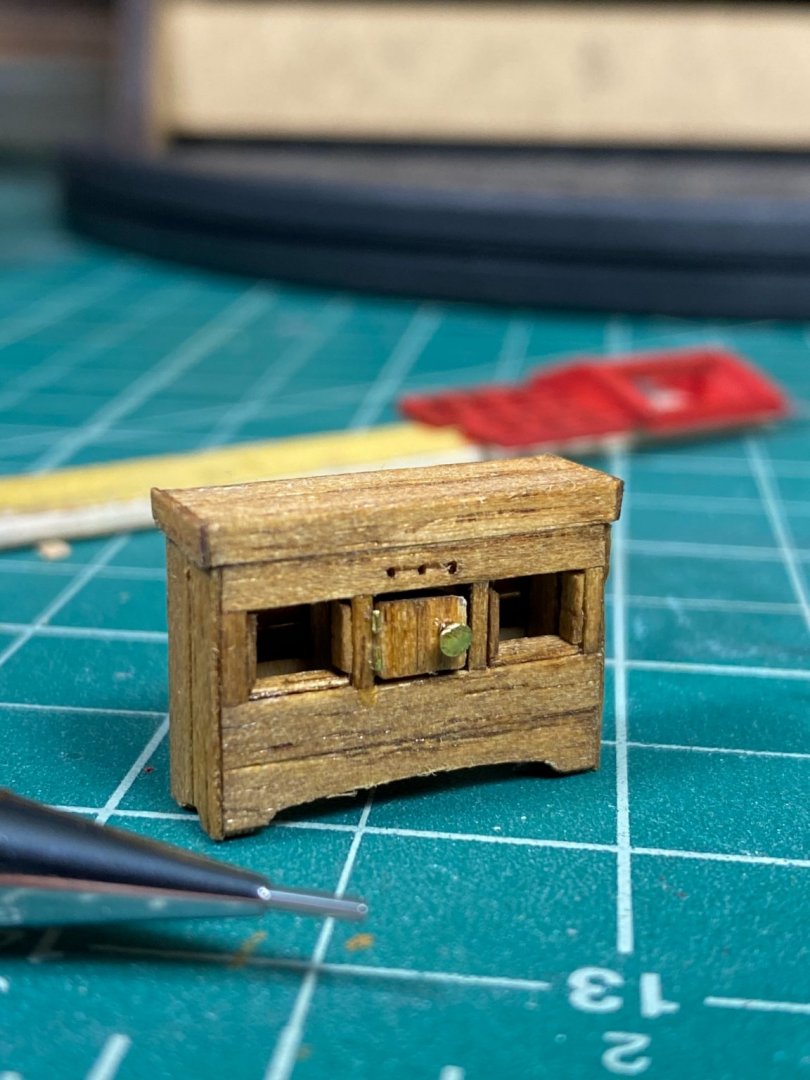
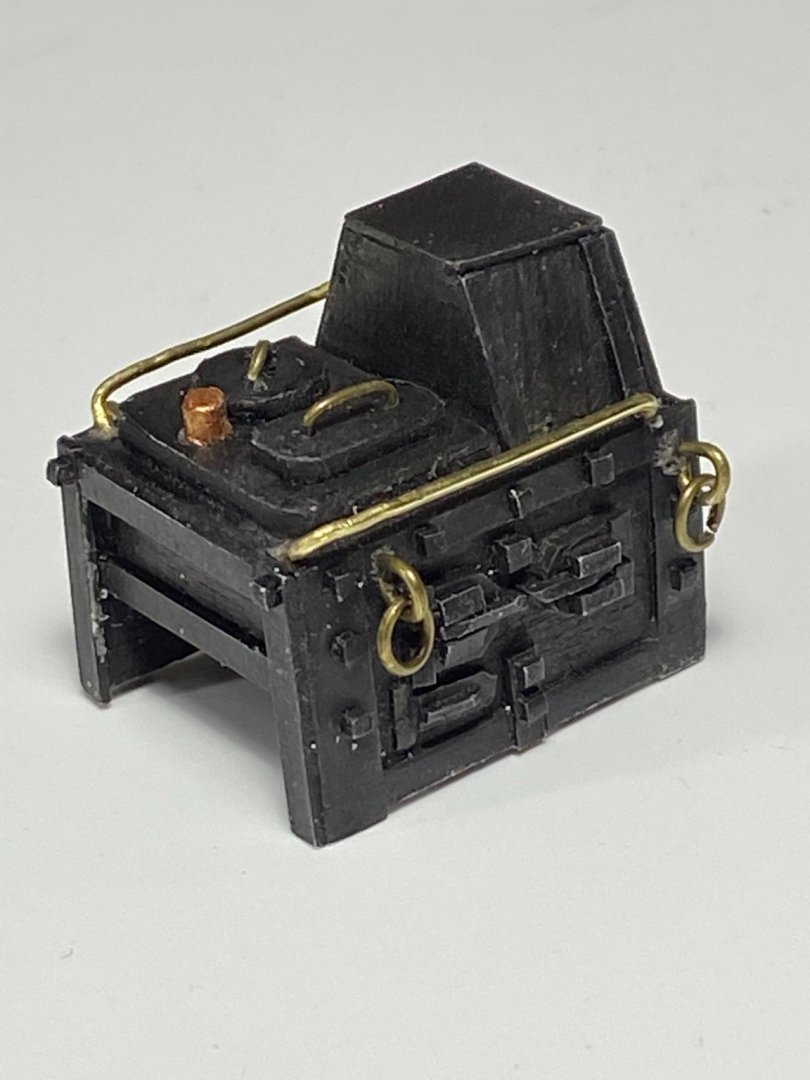
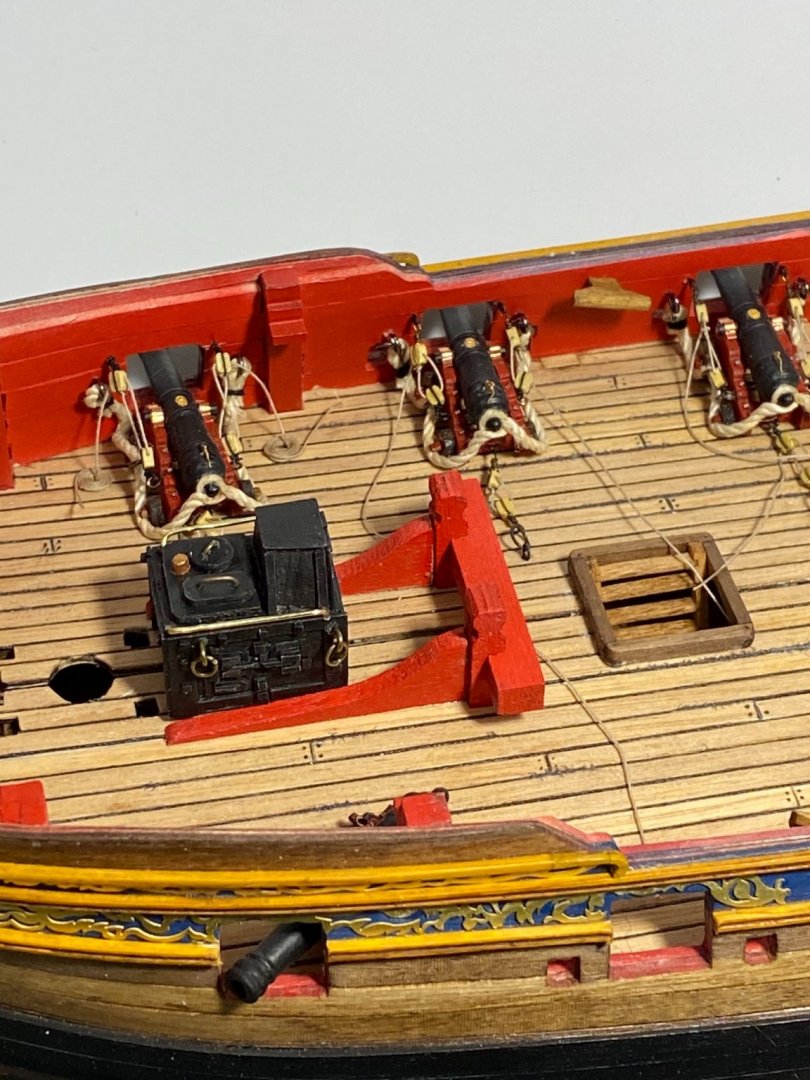
Thank you all for the comments as well as those that liked my last post. I hope everyone had a great Christmas! I’m happy to say I received the Amati Polacca as well as Panarts Royal Caroline 😁 so I’m set for a while now with activities today’s adventure was making a stove for the ship. I wasn’t sure if I was going to do this, but ultimately I want to include details that can be seen (even slightly), as well as use this to practice some scratch building. I compiled a mental list of various builders who had completed stoves on their builds (I stole heavily from Blue Ensign—I hope this is ok) it was a test of patience for sure but I think I did decent for my first totally scratch piece! I used some of the edge scraps from the thin ply sheets for the framing of the stove, then cut and formed the detail pieces from styrene sheets from when I made plastic ships...here’s my Airfix Cutty Sark 1/130 for a glimpse into my past Back to the stove. Here’s what my finished stove came out as. I included a shot with the stove in place with some of the cannons in the background...needed a break from thay hassle. Still need to fiddle with it before final placement but it seems to match up decently with the chimney port as always, thanks for looking in Tim


- 164 replies
-
- 7
-
-
- fly
- Victory Models
- (and 4 more)
-
Looking very good! Well done
-
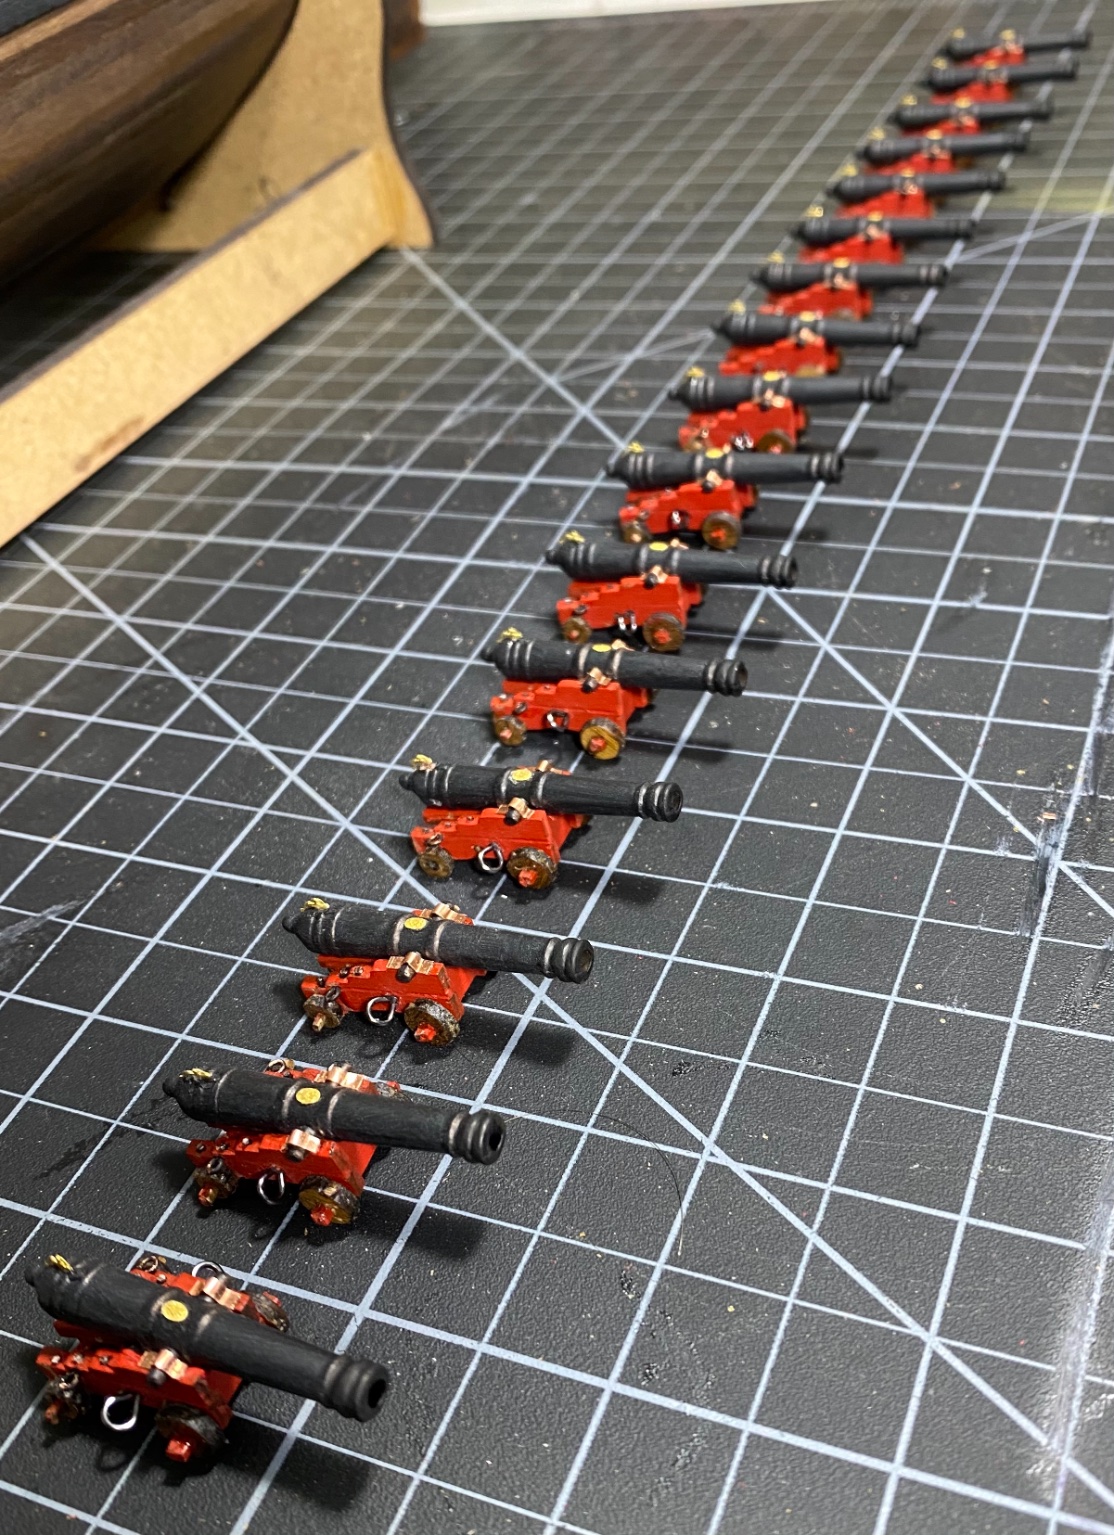
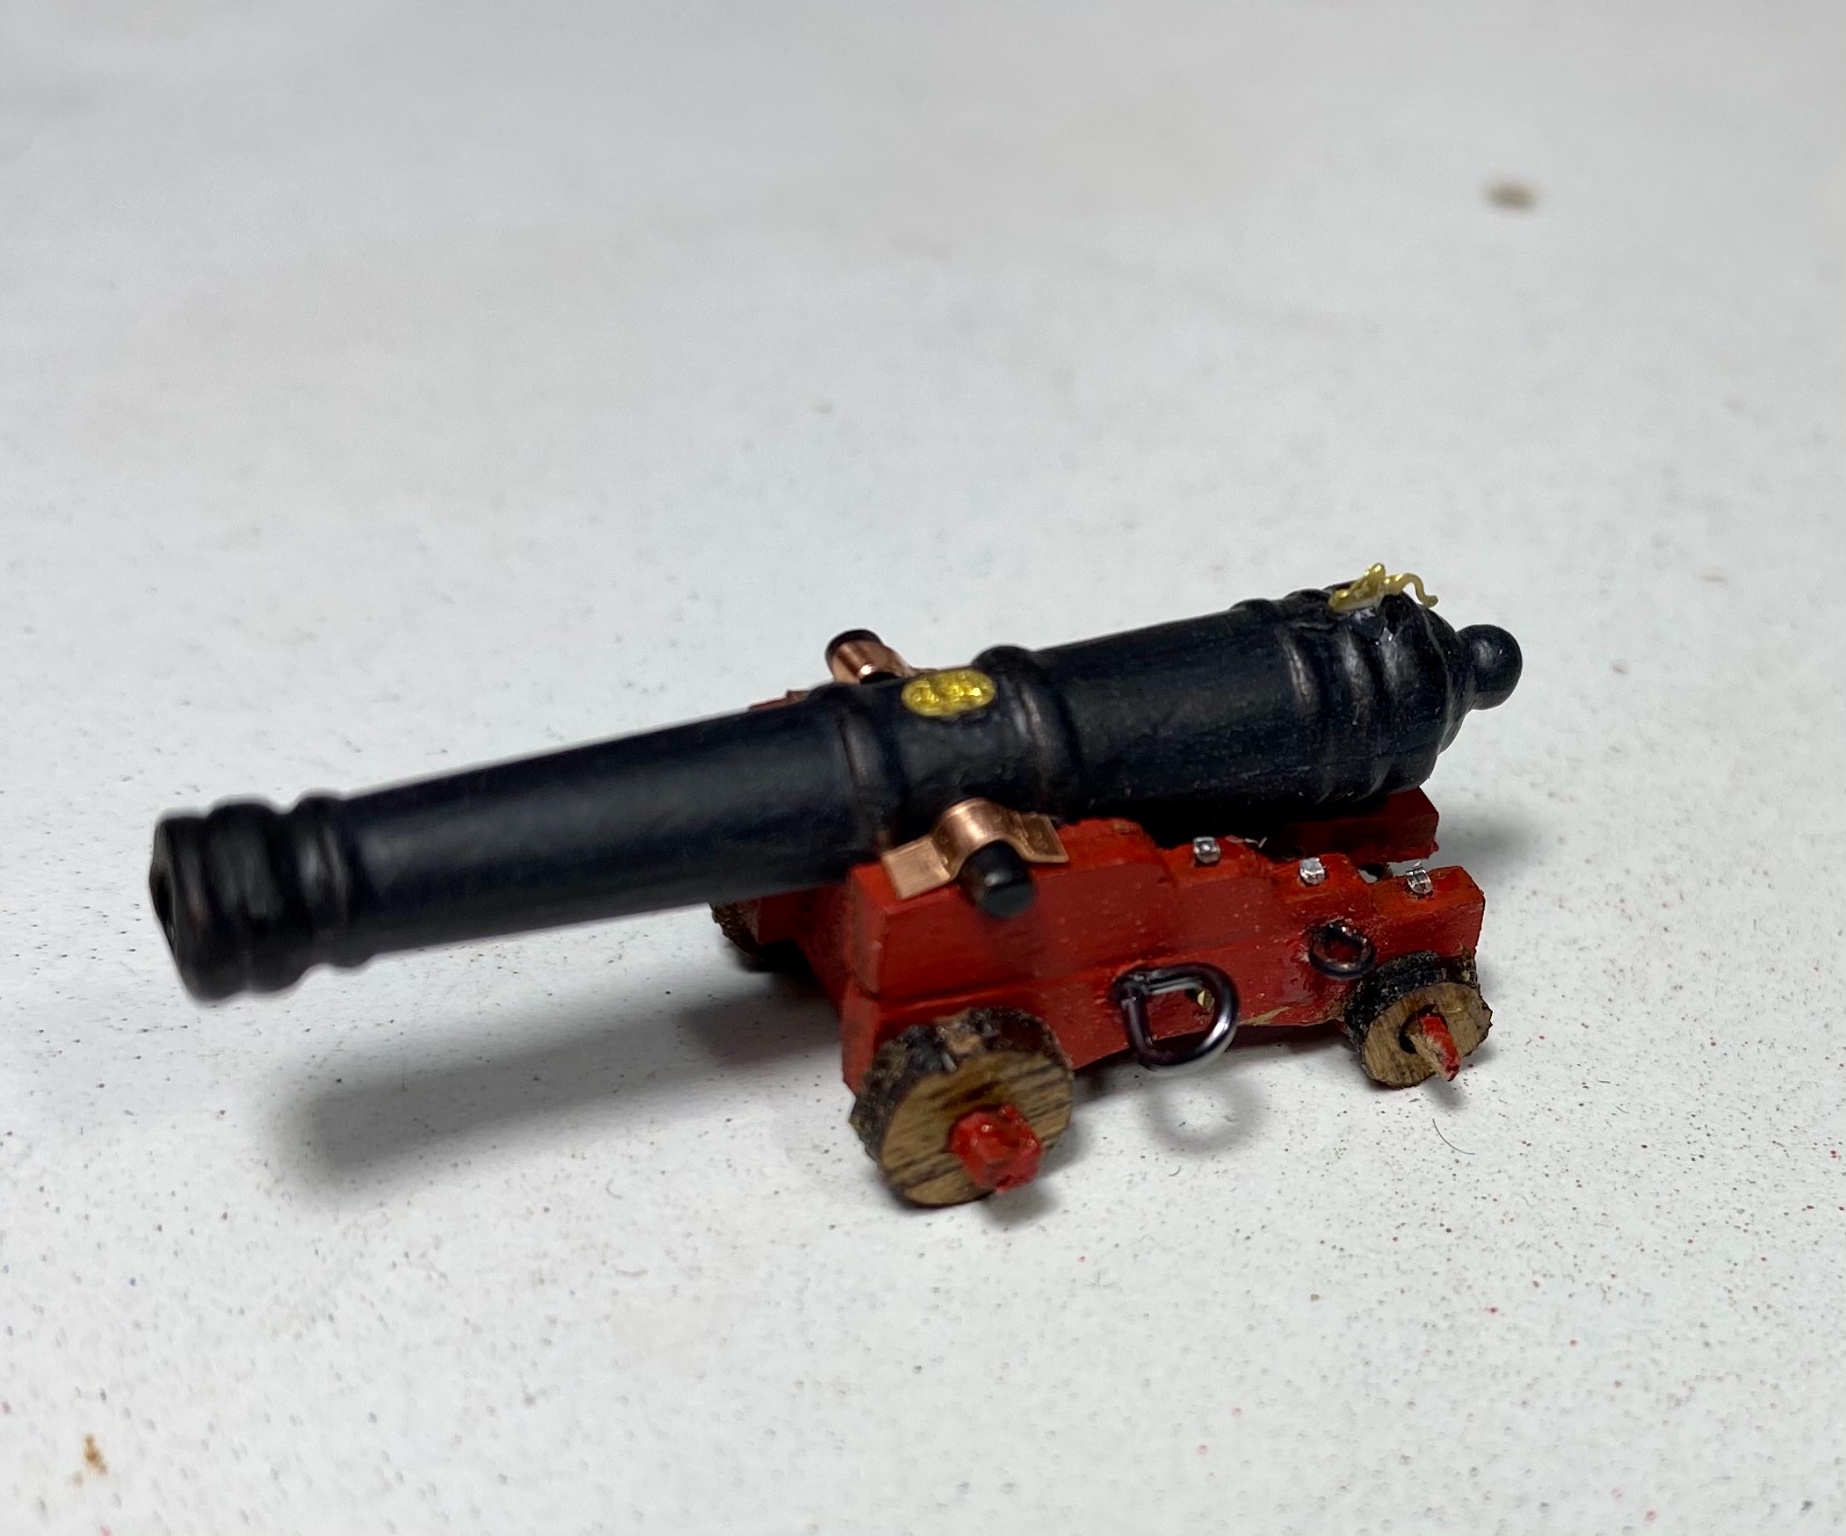
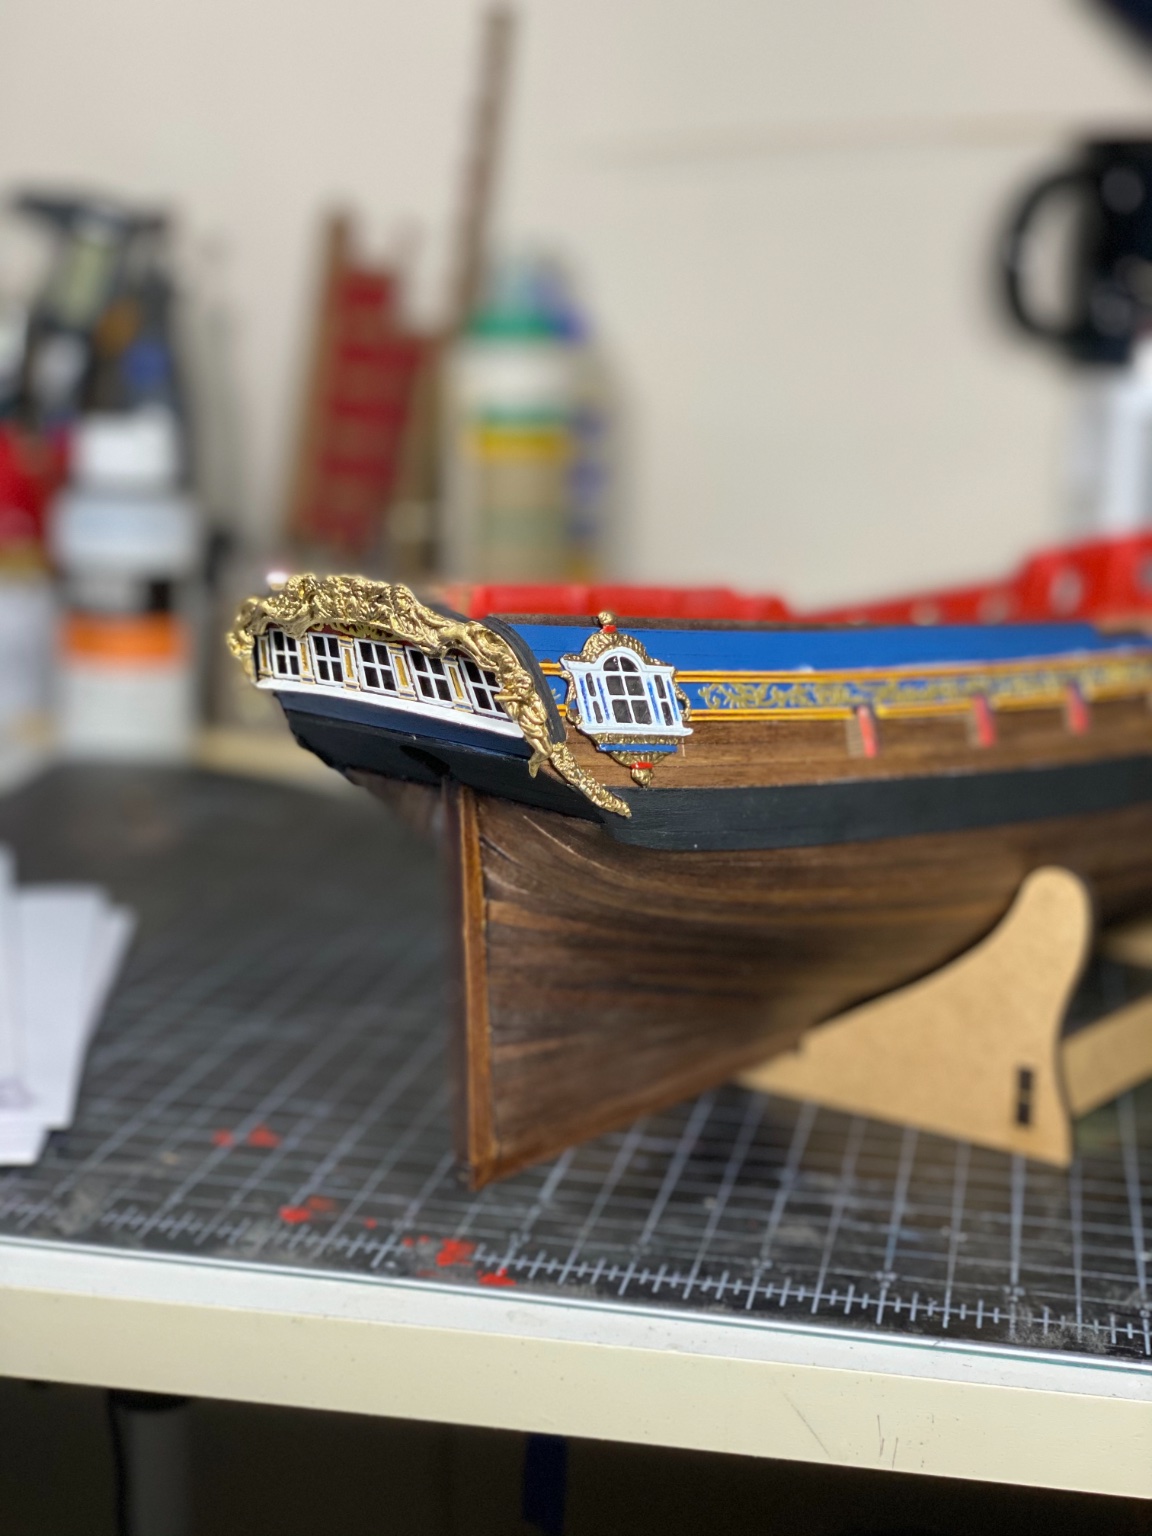
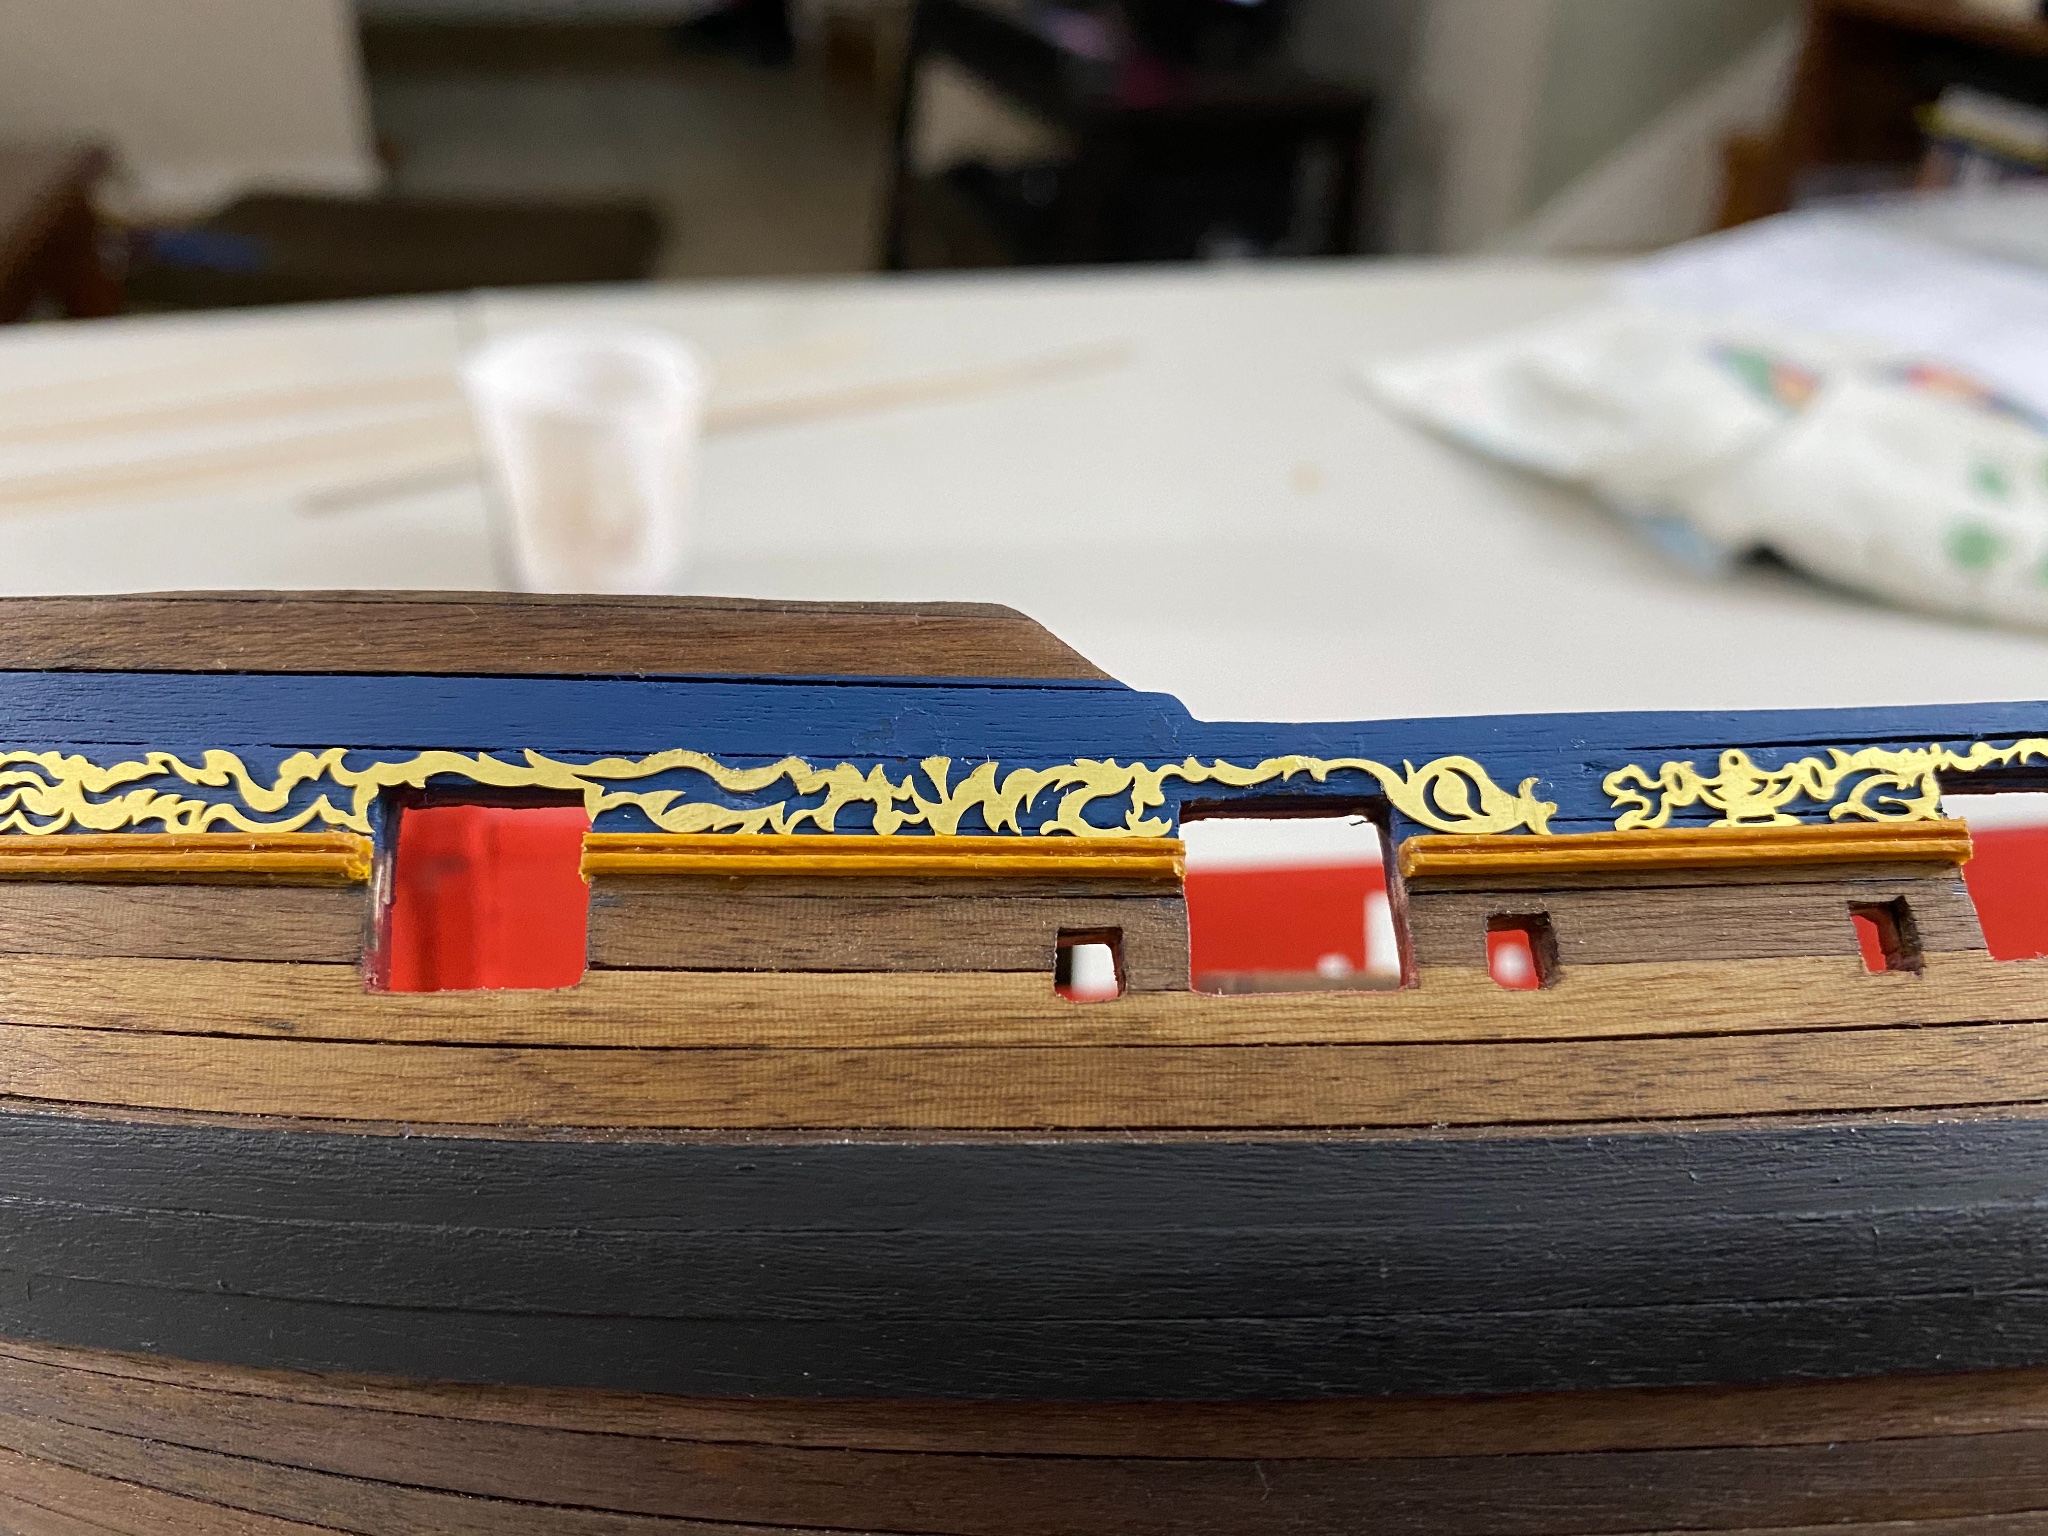
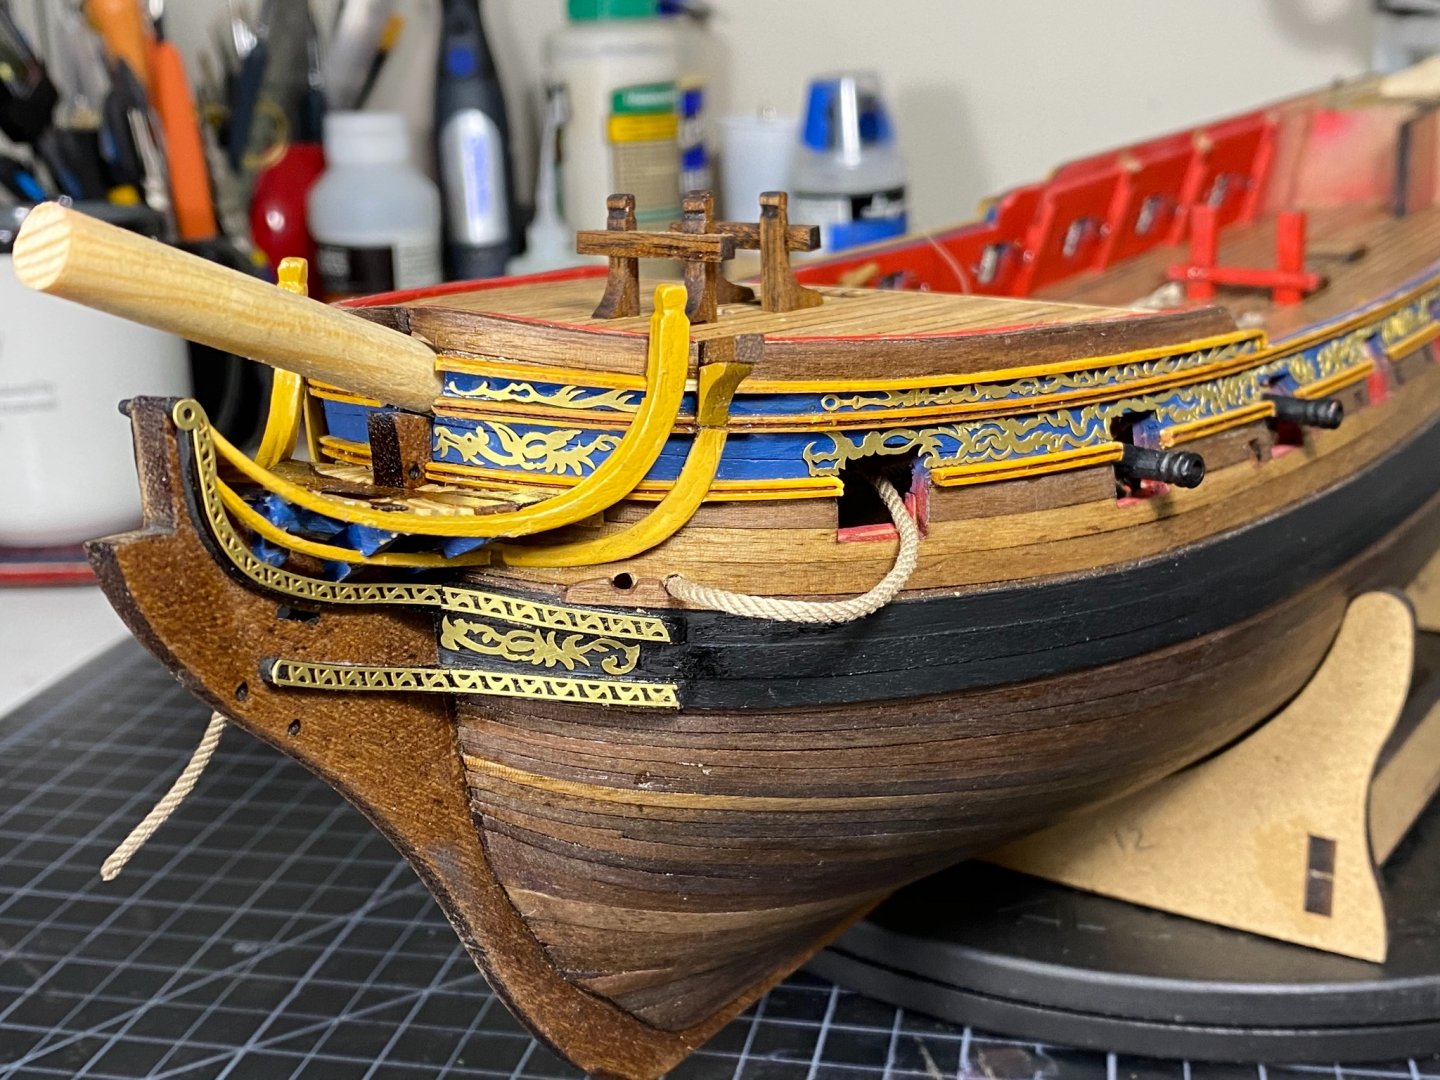
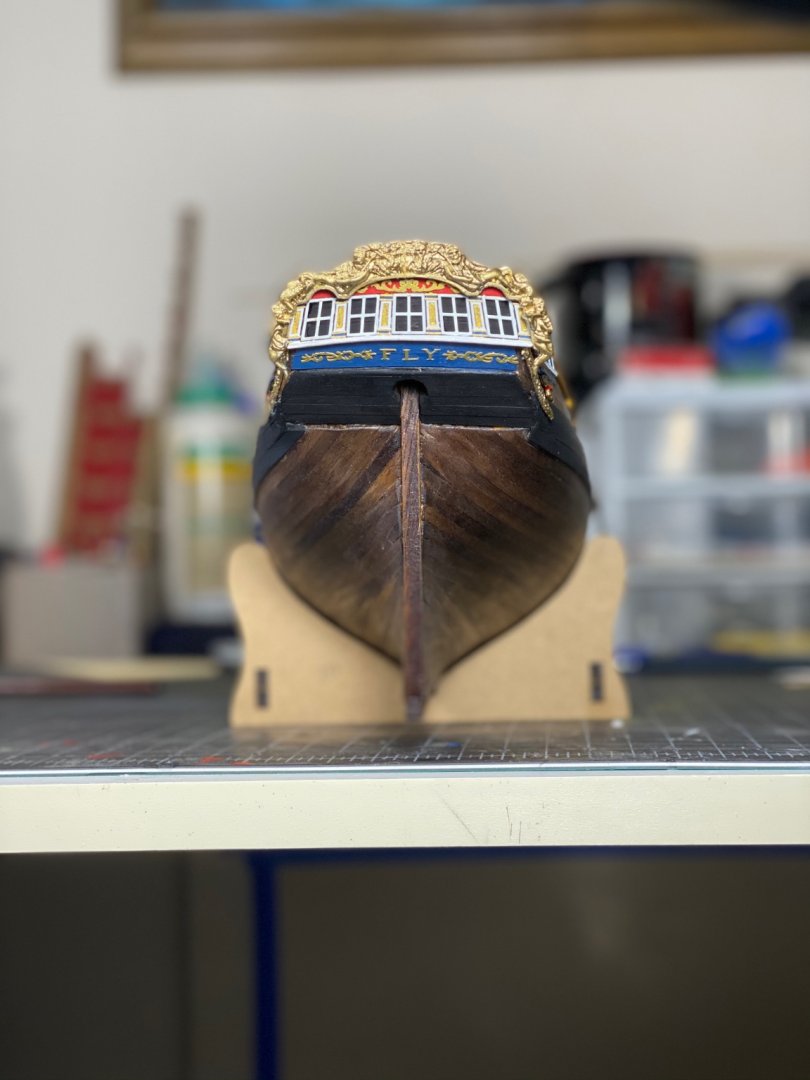
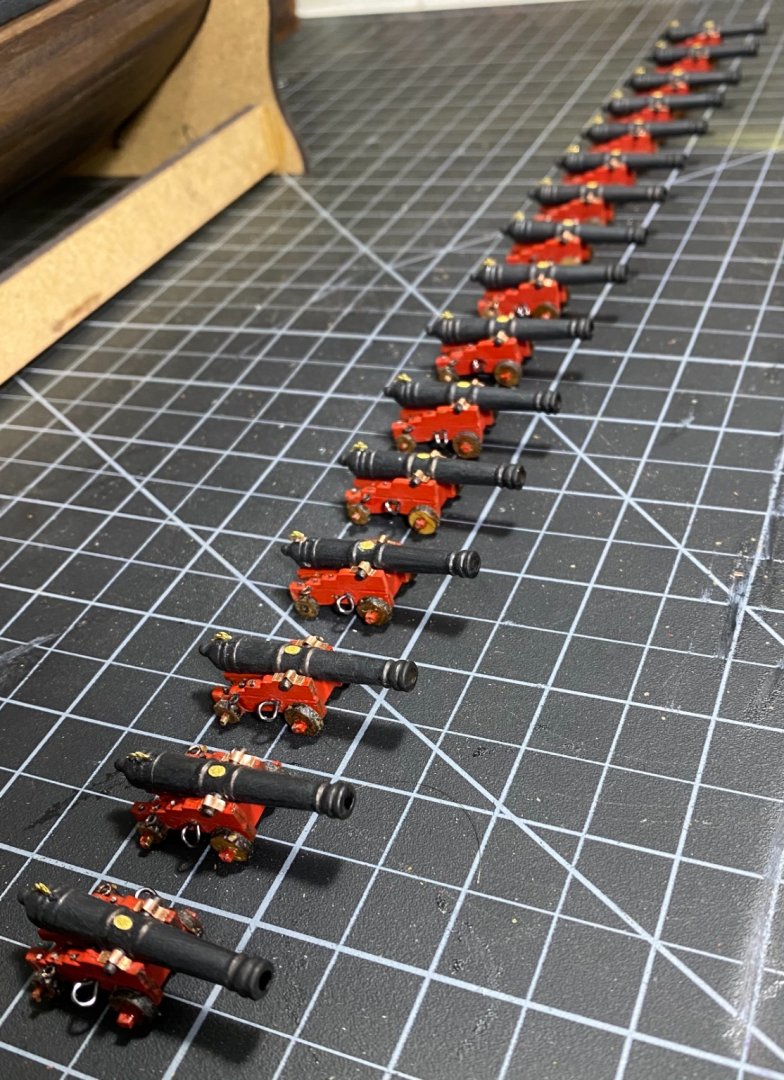
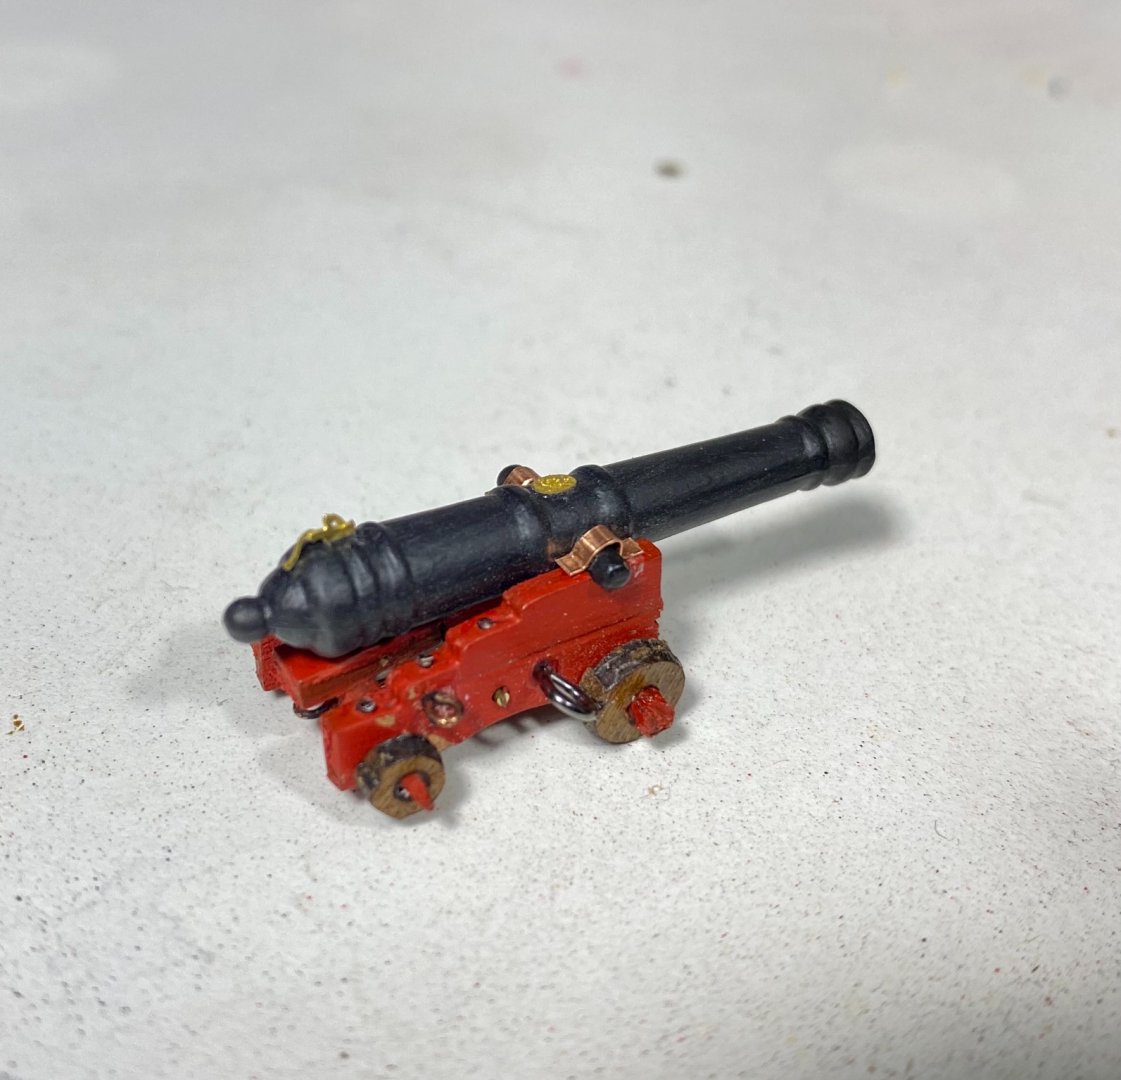
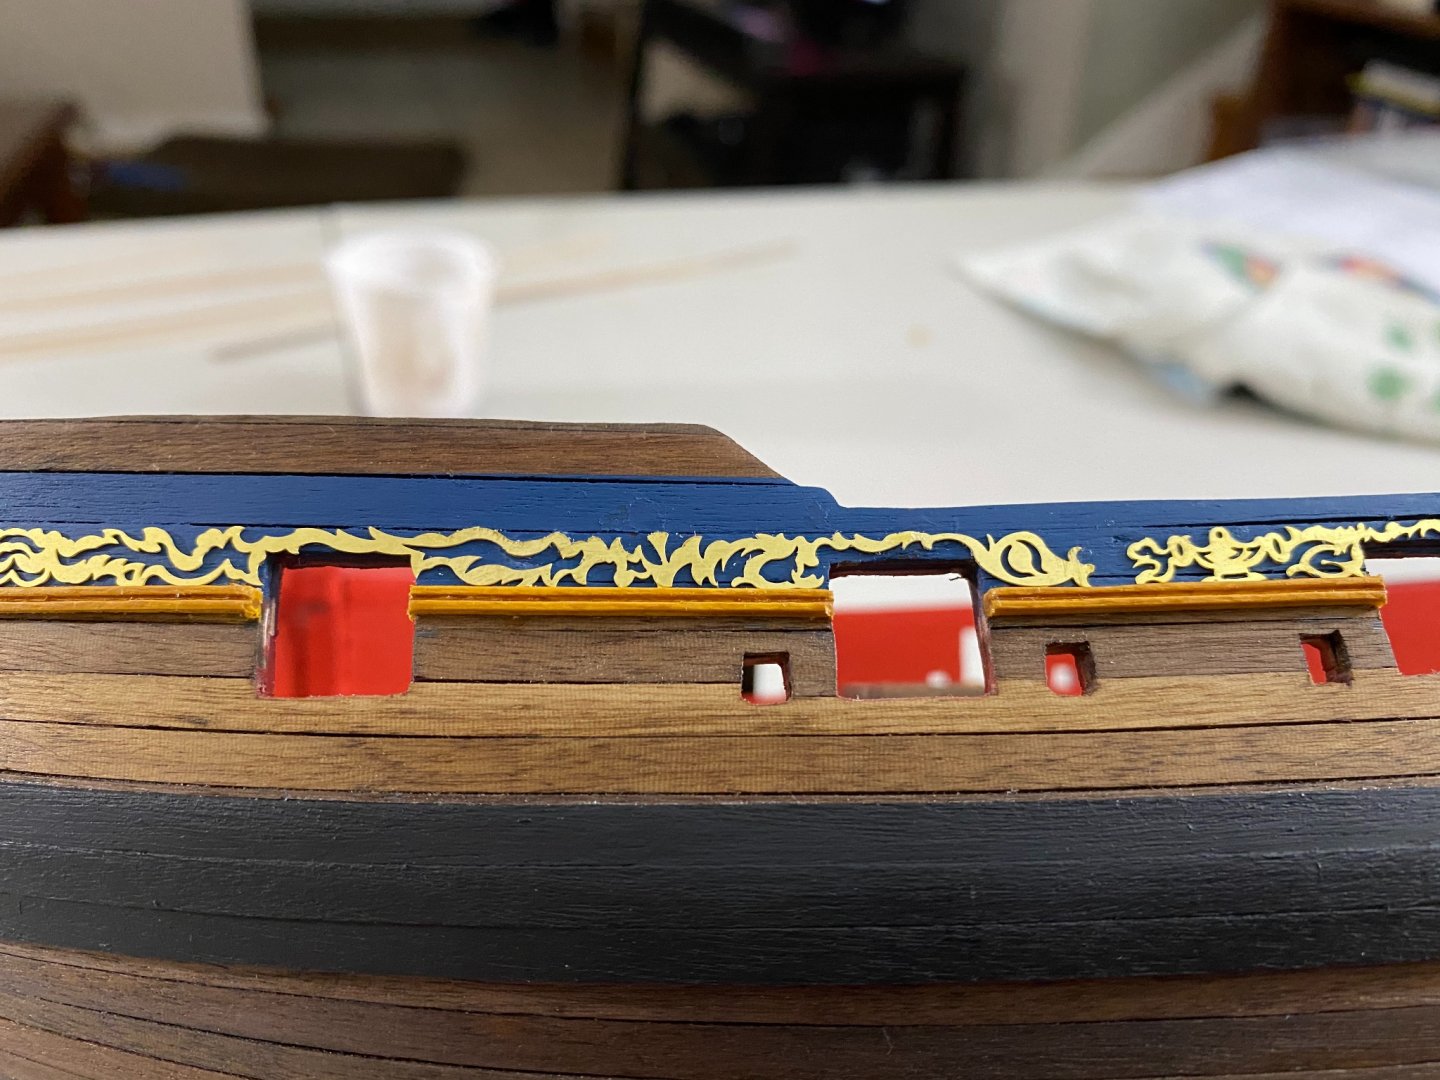
Hi all its been a busy few weeks (as well as hitting 31...a personal best for me 😉) with many bits getting accomplished on the Fly. I was able to place a lot of the PE decorations on the sides as well as the strips that line those decorations. I chose to leave the PE natural as I liked the shine of the gold and how the light catches your eye at different angles. I also used a scribing tool to add a center recess to the small strips running around the friezes which I then filled with a burnt umber wash for contrast. I was also able to complete the stern portion as well as the 2 window stickers. That metal work on the stern was a real bugger to snap in the right area to achieve a very slight curve. Only one heart attack. I added a window Ledge as I have seen others do, which I think frames the windows quite nicely. I will add another below there at some point as well. after this I started work on the guns which were a slow process. I learned to not paint the carriage pieces while not cut out of the wood pallet first. The paint made it quite difficult to cut them out!! But after much cursing it was done. I spent my snow day making the smaller touches and have them set to begin rigging on the inner bulwarks soon. I made the choice to leave the brass as is for the cannons, again because I like the contrast. I also did my best to add nails on each of the ledges on the carriage walls. The look decent from a distance, but up close needs an improved technique. I feel like a lot was accomplished these last few weeks and I am happy with the results. But I’d love constructive criticism as well. I’ll want to improve for my eventual next build. thanks for looking! Tim


- 164 replies
-
- 5
-
-
- fly
- Victory Models
- (and 4 more)
-
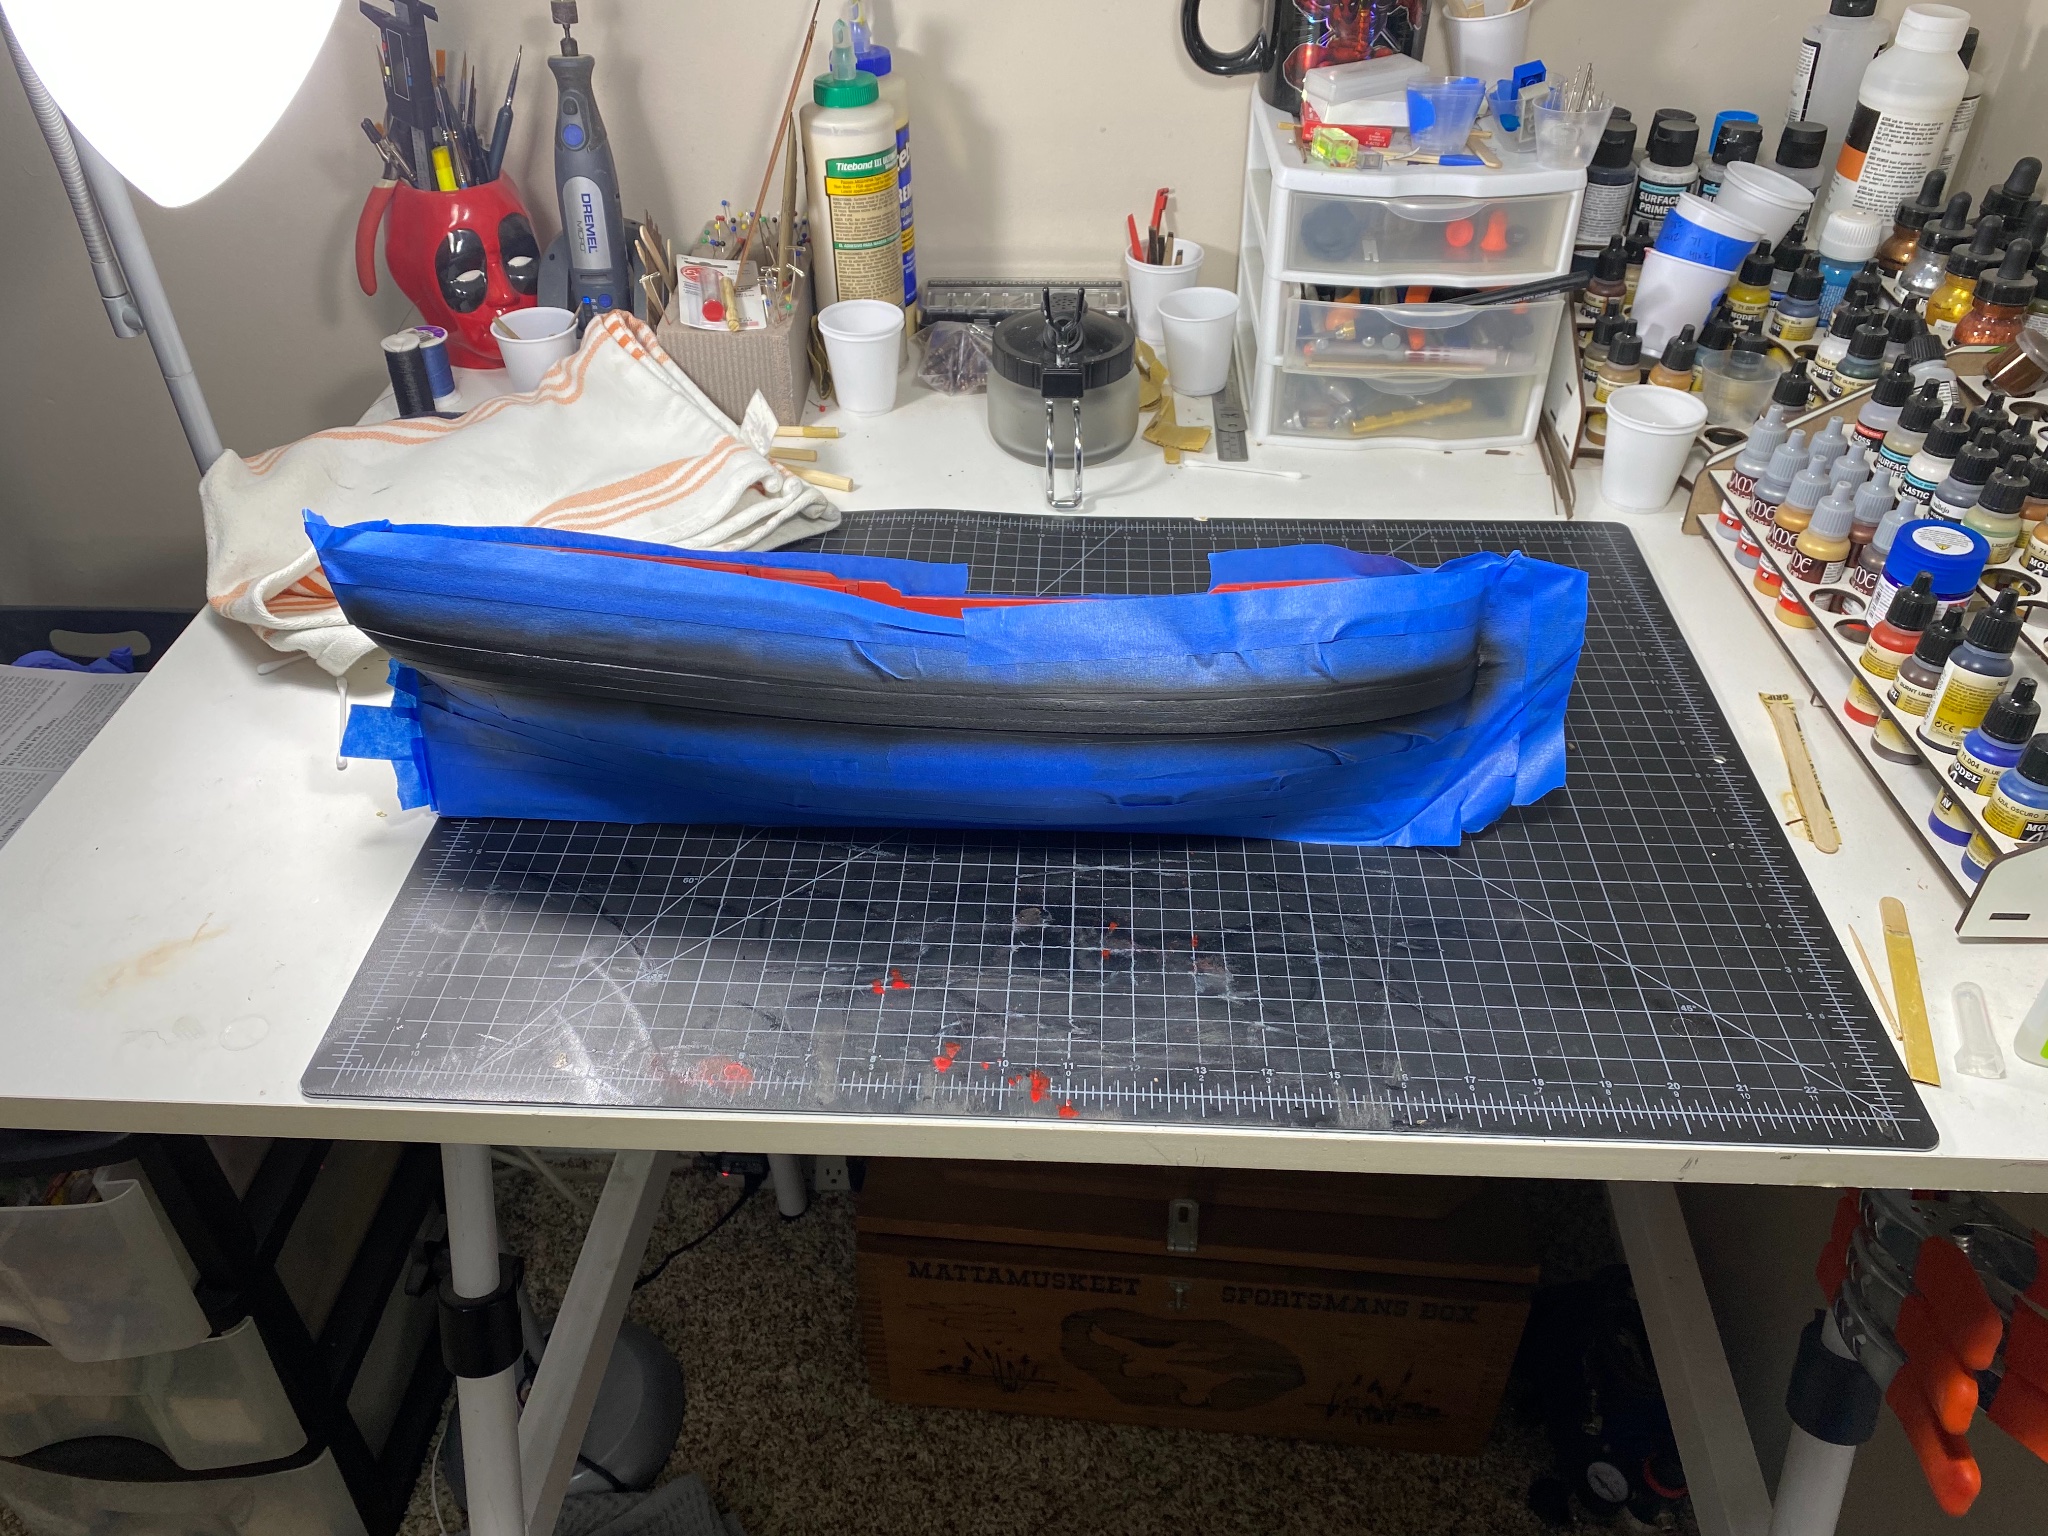
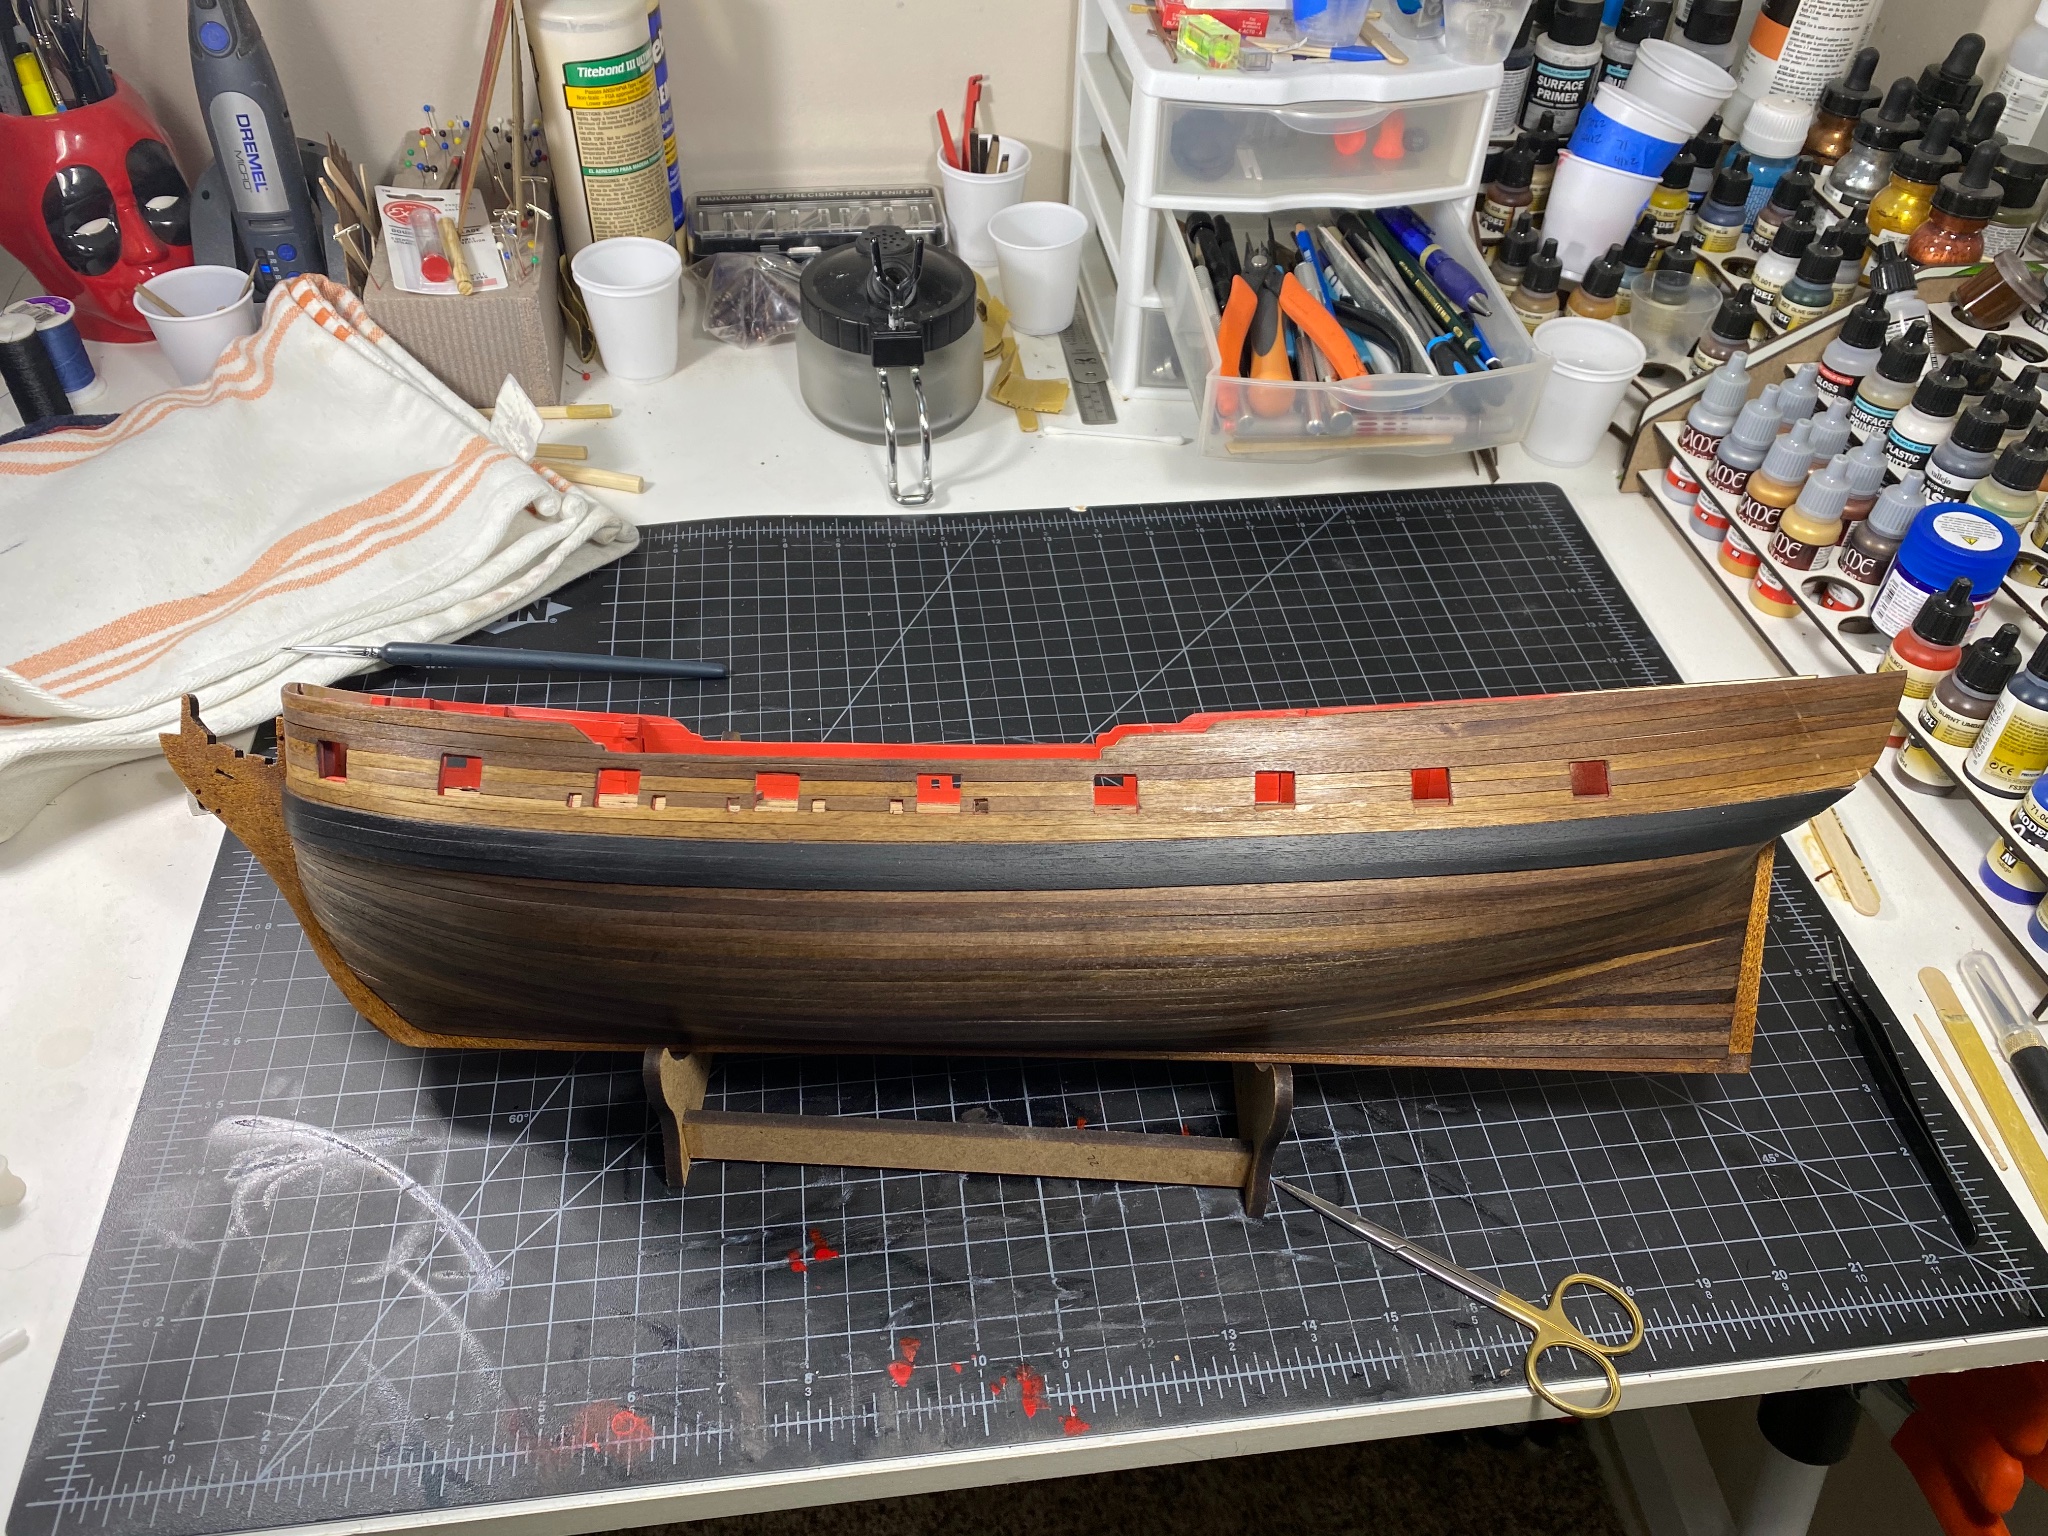
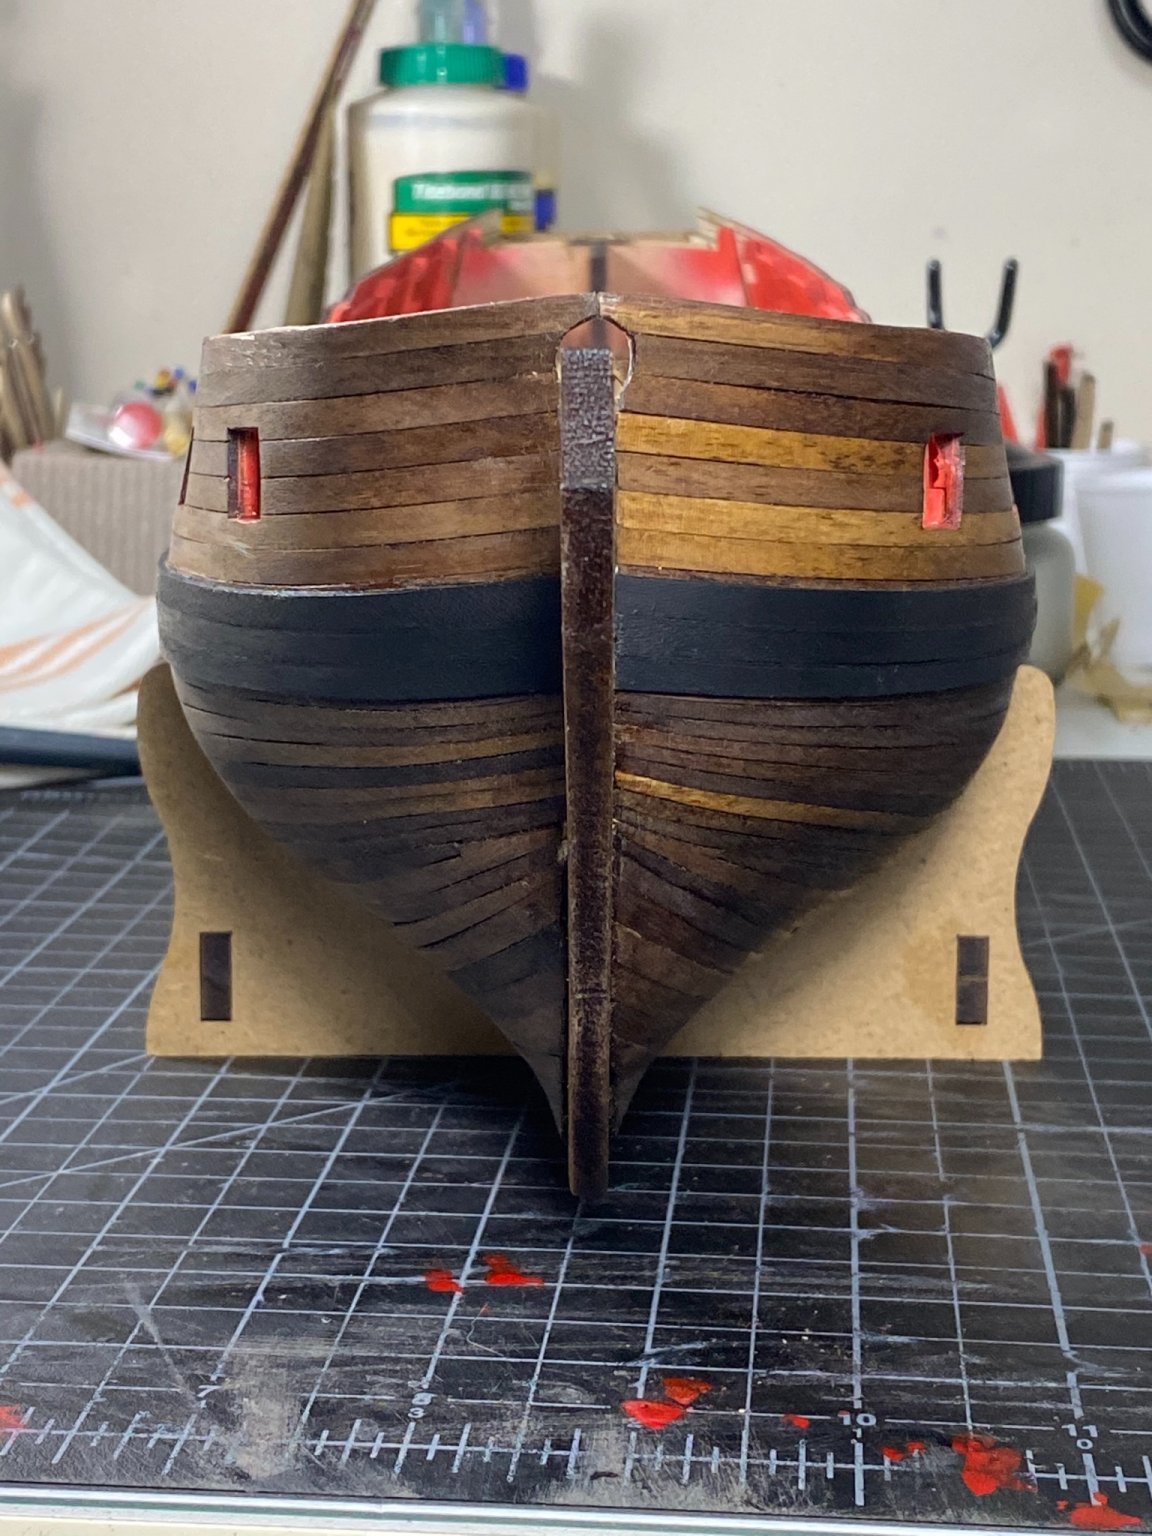
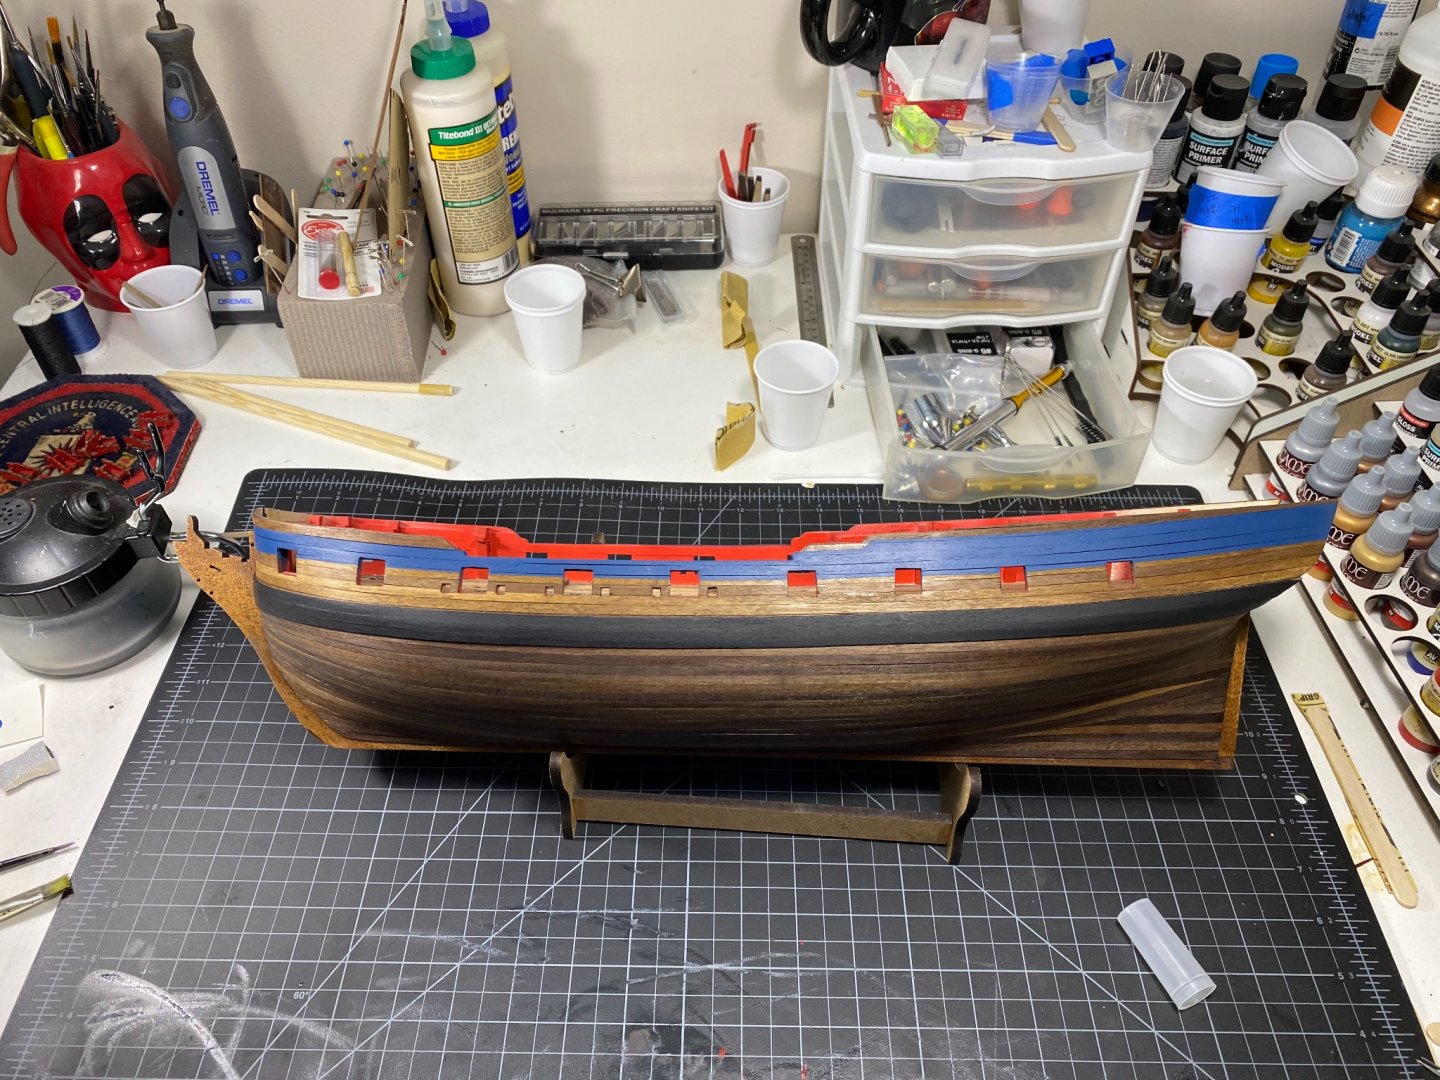
Made a lot of progress this last week. I got one of the grates done as well as the coaming with the ladder at the front of the main deck. The ladder was a bugger but I got it in there. Only dropped it below deck once while dry fitting 🙃. Just a mild heart attack. I applied wipe on poly on Wednesday, allowed it to cure until Thursday night then finally got the main wales on. Today I taped everything up to a degree the CDC should use as an instructional video and painted them black. Next came the blue for under the PE parts. overall I’m very happy with the colors and feel like its a big step for me even though there’s a ton left. This weekend will hopefully allow more of the detail work and possibly the bow parts thanks for looking! Enjoy your weekends -Tim


- 164 replies
-
- 5
-
-
- fly
- Victory Models
- (and 4 more)
-
I have a whole set of test strips sitting as we speak with various combinations of glue/CA with just stain, just varnish, and both combined. Just figured I’d ask since you gave great advice last time. I plan to put poly over all of the stain anyway so I’m sure it’ll work out just fine Thanks !
- 164 replies
-
- 1
-
-
- fly
- Victory Models
- (and 4 more)