jct
-
Posts
1,519 -
Joined
-
Last visited
Content Type
Profiles
Forums
Gallery
Events
Everything posted by jct
-
Hi Steve, I think you made the right decision, the rats look better tarred, same with the pins. Your chooses of woods and finishes have resulted in a really nice looking ship. J
-
Thanks Marty, This little boat has come together pretty quickly, I credit the excellent instructions and materials provided in the kit. THX J
-
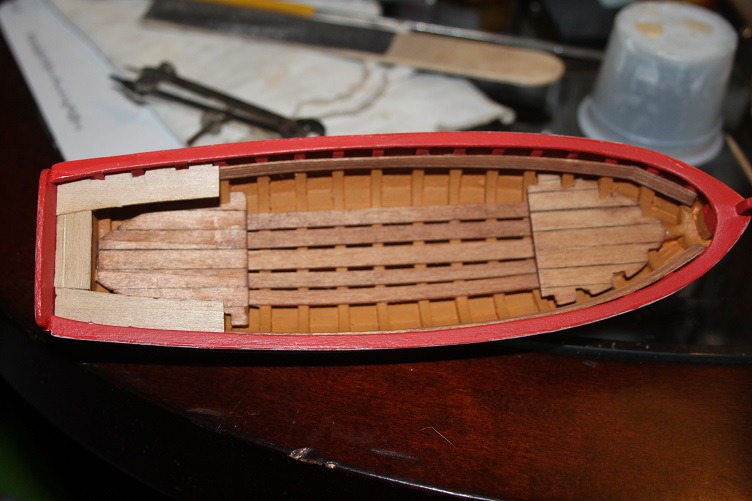
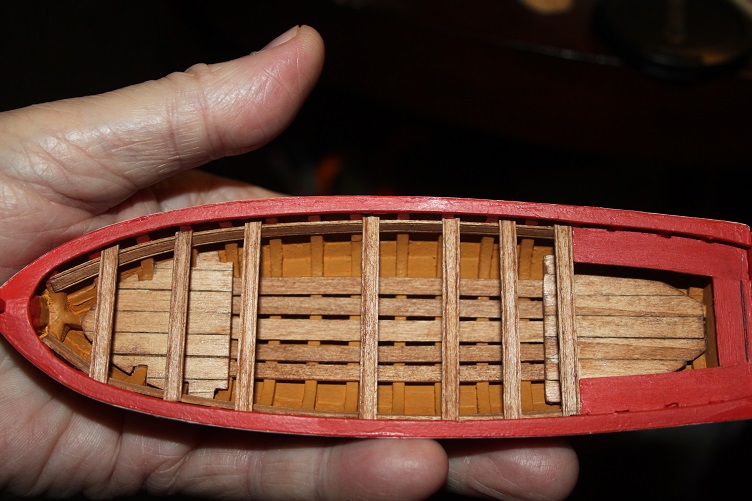
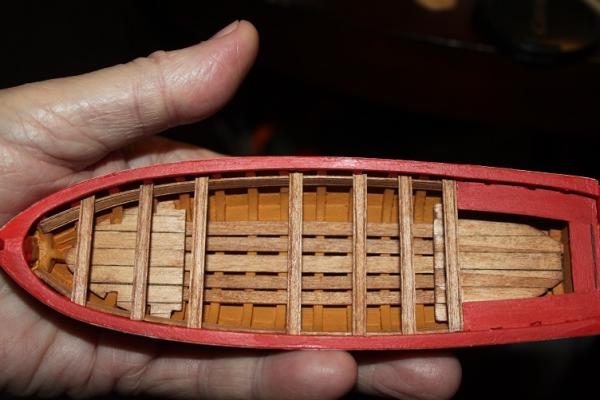
More pics...finishing out the interior


- 52 replies
-
- 13
-

-
- model shipways
- 18th century longboat
- (and 1 more)
-
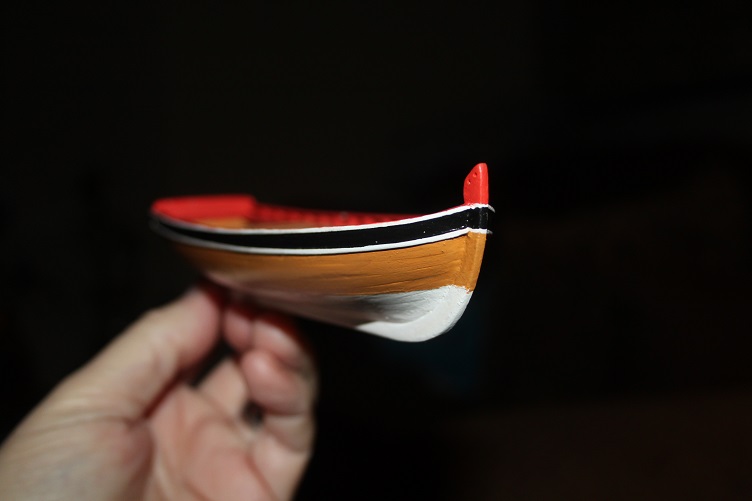
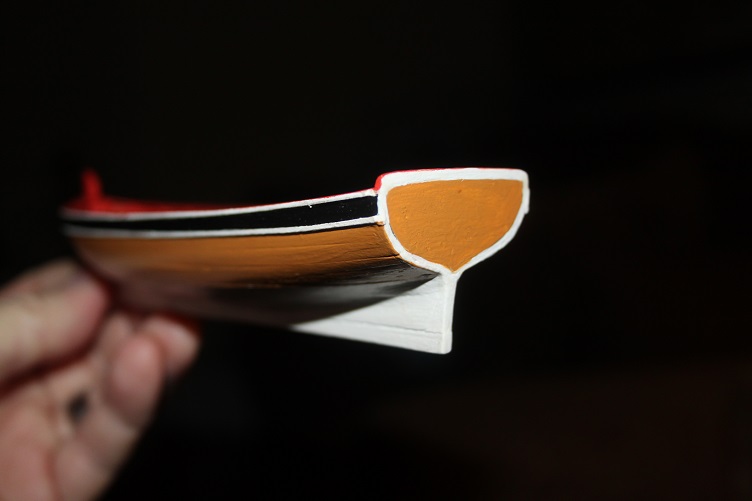
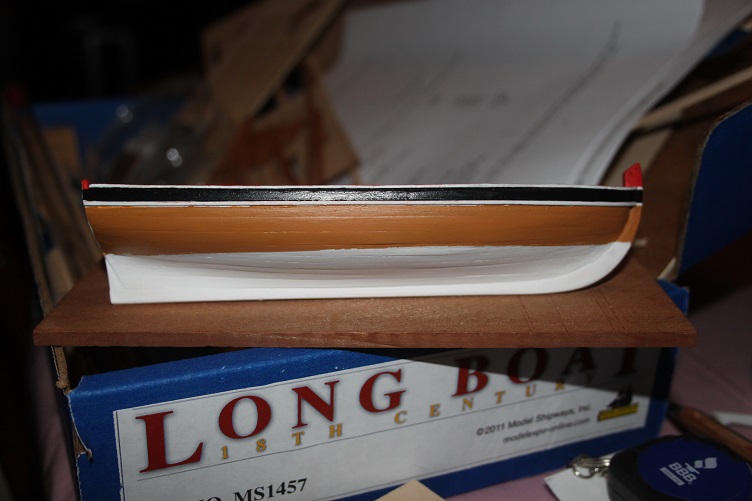
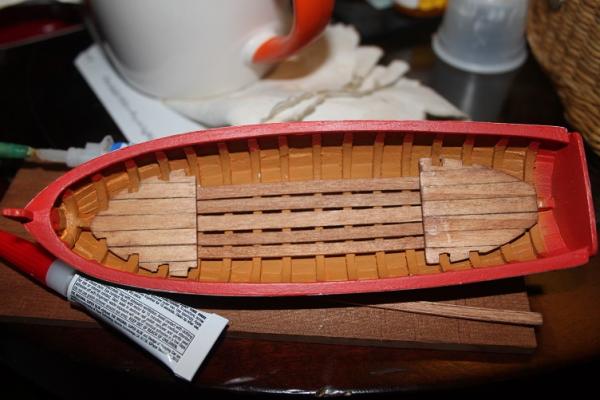
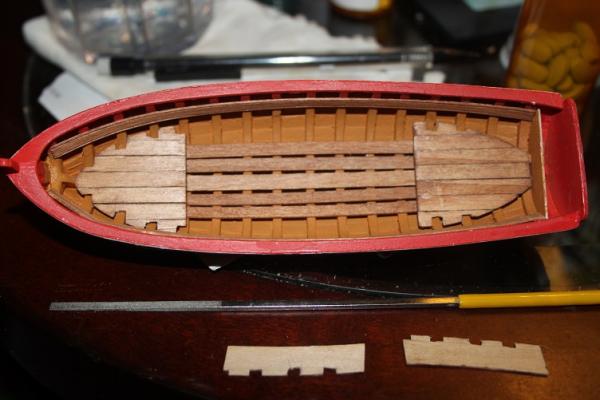
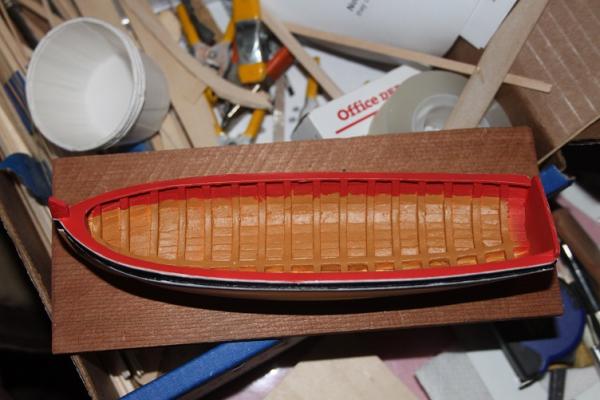
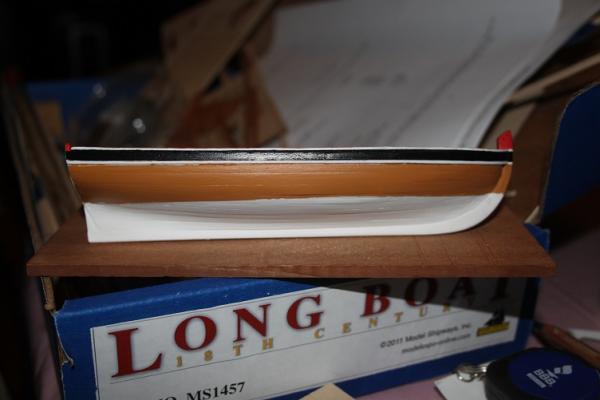
Finally decided on a paint scheme and got it on the hull, yellow ocher, red ocher, black and white. The risers and thwarts, platforms and floorboards are stained a light cherry, though not yet installed, I need to seal the hull yet and wanted the paint to cure for at least 24. Pics follow J
- 52 replies
-
- 10
-
-
- model shipways
- 18th century longboat
- (and 1 more)
-
Hi Mark, I saw your comments over on Steve's build and had to take a peek at yours...I'll follow with interest. Excellent workmanship THX J
- 128 replies
-
- 1
-
-
- artesania latina
- Finished
- (and 2 more)
-
Nice work on the rats Steve...I too am not sure if they should be tared or not...most everybody does them in black...I wonder if it is something that may have changed over time...thus the conflict of opinion? J
- 569 replies
-
- 1
-
-
- shenandoah
- corel
- (and 1 more)
-
Thank you Kevin, the new pieces were made from the remnants of the removed bulkheads as the circumferences matched perfectly, I've got to learn to use a lighter touch!! THX again J
-
Hi Jerry...your cutter looks very nice, definitely a sea worthy little boat A word about the cross trees...the dimensions given in the plan sheet do not allow enough room for any rigging to pass through them, this presented a real problem for me as I had to perform surgery on them after the mast were stepped and the rigging half complete.If I were doing it again I would add 2mm to each fore and aft. Same to be said for the crows nests the hole dimensions are just to small. Take care J
-
Thanks Gerty...and welcome
-
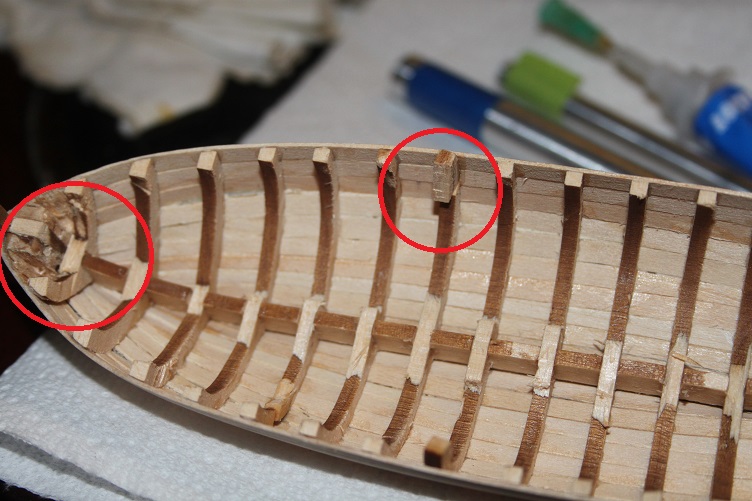
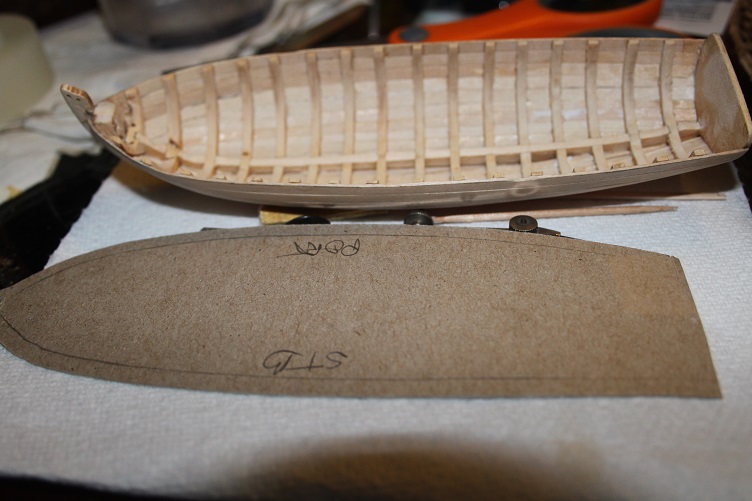
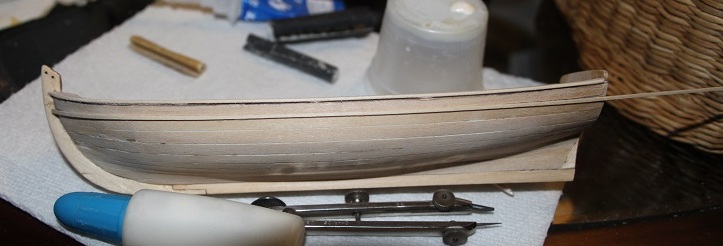
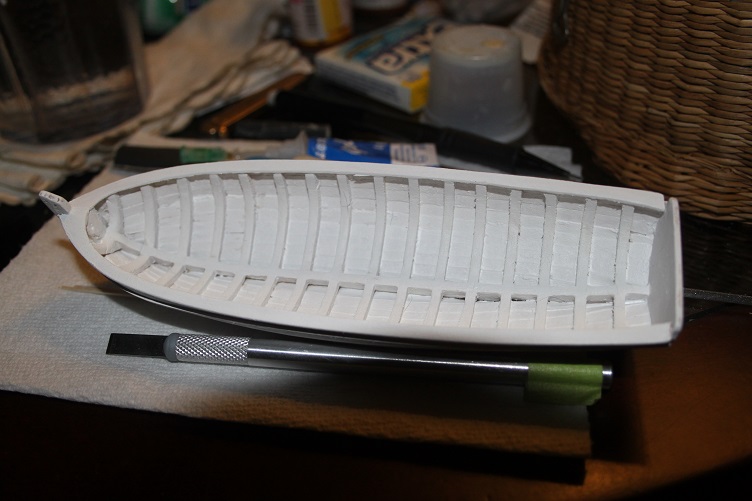
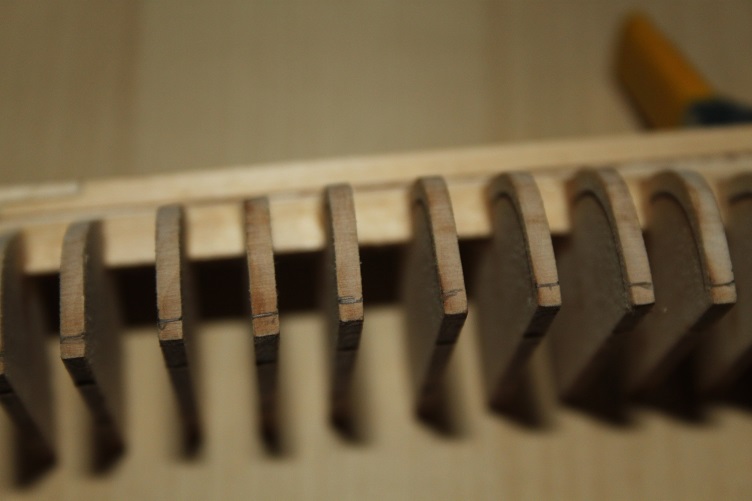
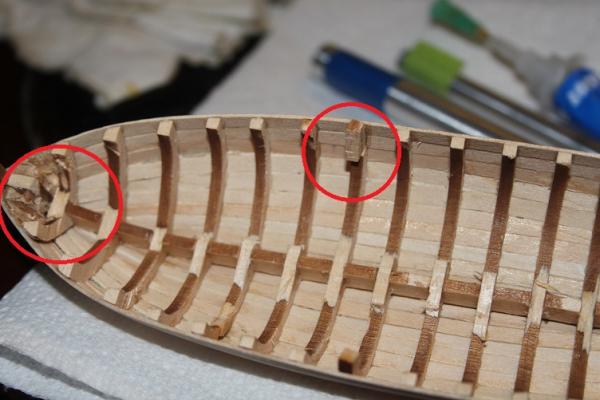
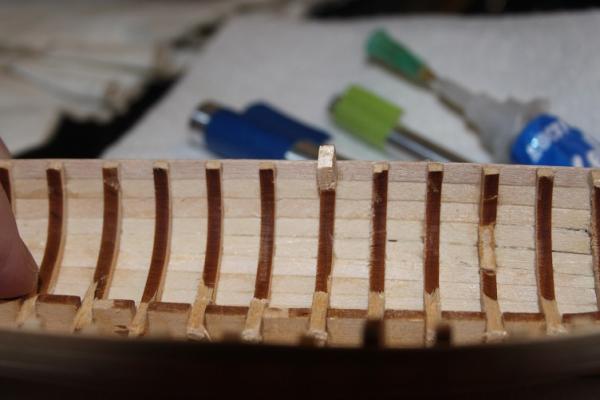
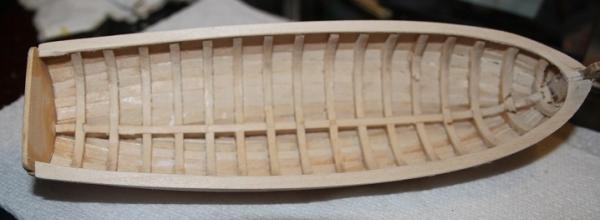
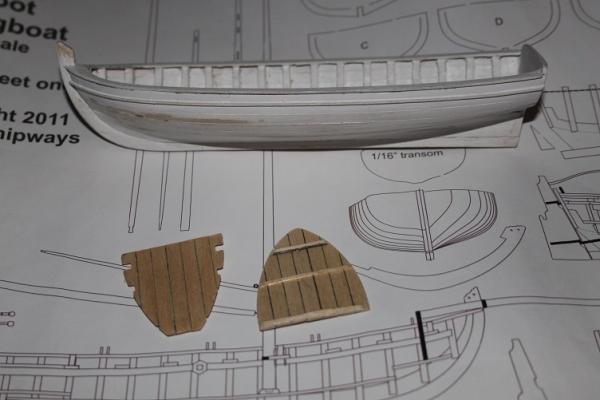
Hello all, Another update on the longboat, got all the bulkheads broken out, you can see the mess in the bow from the extra blocking I had installed and the repair on the busted ribs. Followed this with a good sanding/fairing of the interior of the boat, take care here...to aggressive and you'll break more ribs leading to more repair (yea... I know from experience). Once I was happy with the sanded finish I moved on to the cap rail, here I deviated from the instructions and made the template with card stock instead of directly on the basswood, that way I could trace it out as many times as I needed to get it right and not mess up the kit supplied wood. Glad I did cause it took three tries to get something I was satisfied with. The patterns were then cut out and transferred to the basswood sheet. The rails were cut oversize and applied then sanded to the finished dimensions supplied in the instructions. The 1/32 x 1/32 trim was applied next, I used a compass set to the correct dimension to provide a guideline on the hull. This was followed by more sanding and a coat of primer. The hull was set aside to dry...while waiting I made the fore and aft platforms following the practicum, I added some battens to the undersides though, just to add more strength. These were then sanded and notches filled to fit around the respective ribs. I'm debating whether to stain these pieces or just use an oil finish on them...haven’t decided yet... That's all for now, as always thanks for your time and attention, Pic follow THX J


- 52 replies
-
- 14
-
-
- model shipways
- 18th century longboat
- (and 1 more)
-
Hey Jerry, She's looking good, I think your chose to leave some of the casting gilded goes well with your natural wood finish. One thing though... I think the medallion with the lion on it should be positioned vertically, I believe it is to depict a rampant lion, standing on it's back legs, like the blue ensign for the main mast? Either way nice progress...at this rate you may finish before the end of the month!! J
-
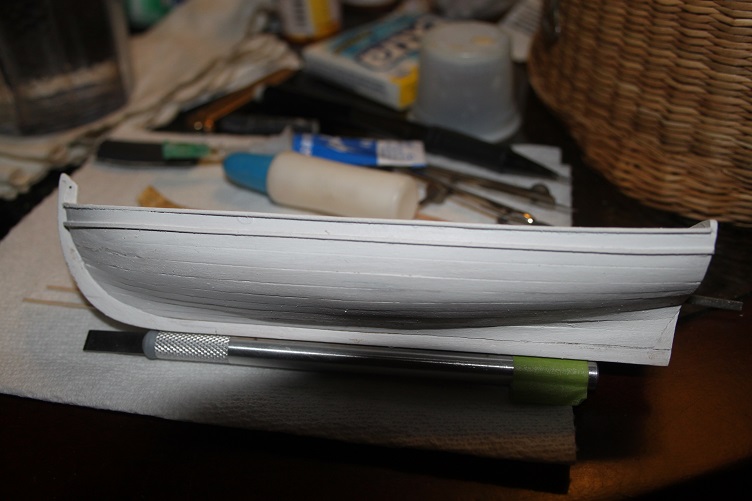
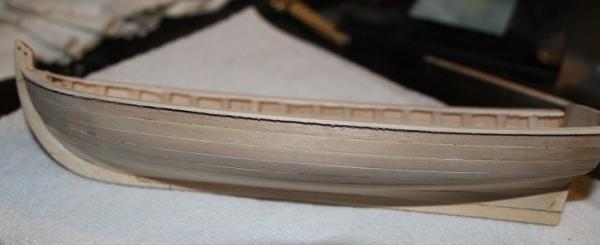
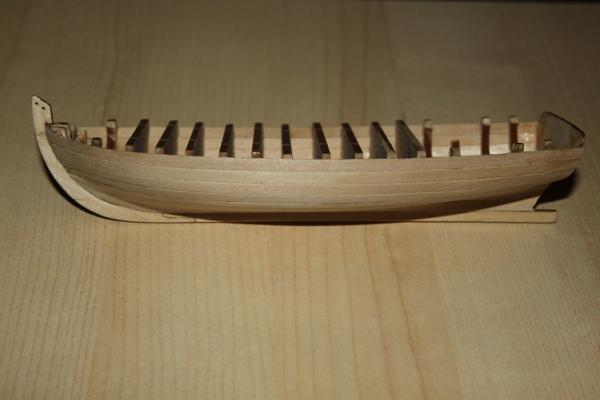
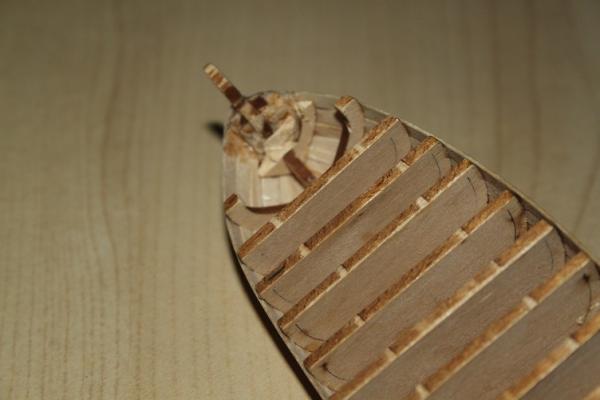
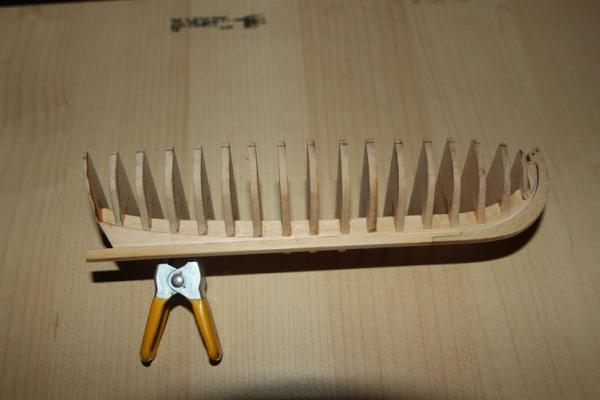
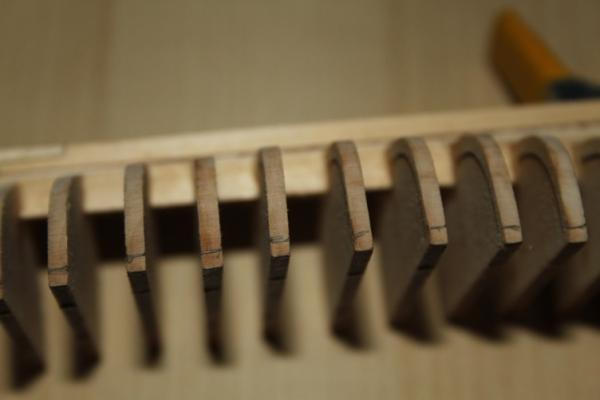
Hi all, Time for another update... The planking of the hull is complete and the bulkheads removed. Like my Half Moon log, I'm planning to share my successes and failures here for the benefit of anyone interested, so with that said...one of the things I did early on was to add some extra blocking to the bow area to help shaping and fairing the hull planks...and it worked great for that, unfortunately I didn't think about this being an open boat!! so now I've alot of cleanup in the bow area to do. Another point to watch is the garboard length, Chuck's instructions call for it to end just beyond the splice in the keel I ran mine a little long and had a bit of an issue with plank crowding at the bow. I manage to get everything in place with tapering and spilling but made it a lot harder then it had to be! Care needs to be taken when your breaking out the bulkheads as they are fragile, I snapped off a few and will need to repair them. The primary cause was glue seepage...I used CA all throughout this process and some had crept into the laser cut lines, I like CA but I do have problems with it, I'm always gluing my fingers to parts or not using enough to hold. I'm debating doing a full painted finish on the longboat...the decorations supplied with the kit are top notch, but I'd like my longboat to be a little different from all the others out there. I'll keep some natural wood finishes on the inside...the thwarts and side-rails at least...still trying to decide on the color scheme, I'll post when I make up my mind...in the interim Pics follow, as always thanks for your time and interest. THX J


- 52 replies
-
- 8
-
-
- model shipways
- 18th century longboat
- (and 1 more)
-
Hey Steve, I'm looking fwd to your sail diy...that old White looks like just the ticket
-
Really shaping up nicely...looking like your nearing the finish?
-
Glad to have you on board Kevin...should be a fun build THX J
- 52 replies
-
- 1
-
-
- model shipways
- 18th century longboat
- (and 1 more)
-
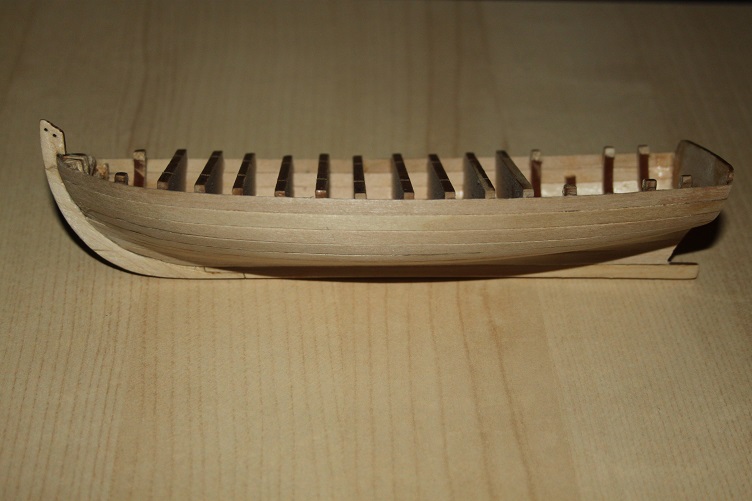
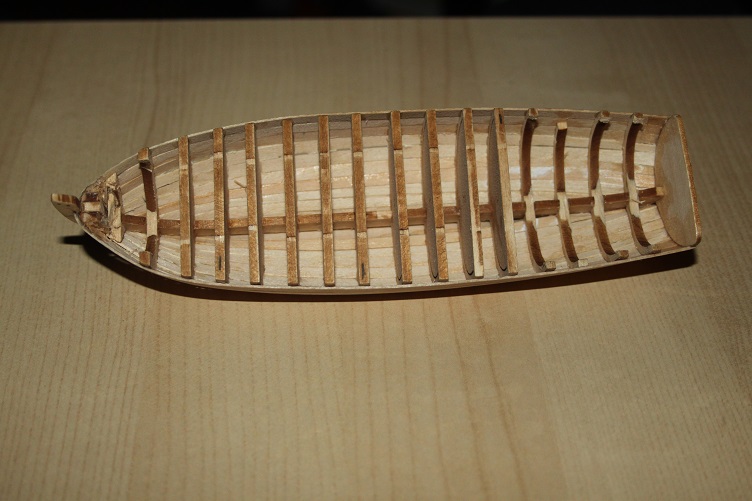
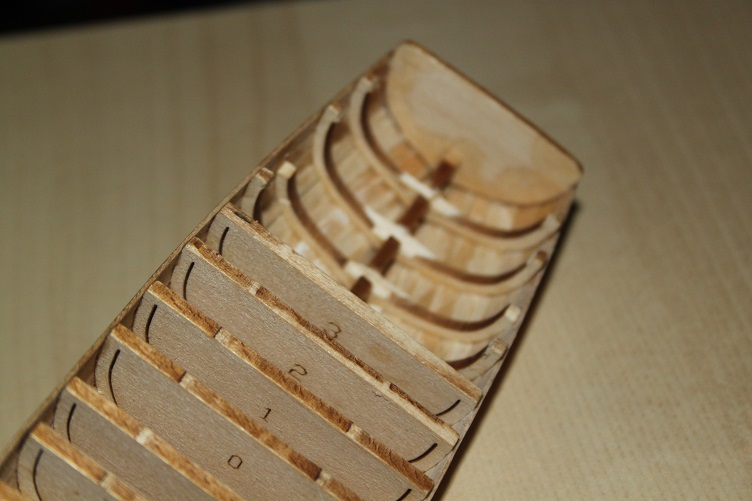
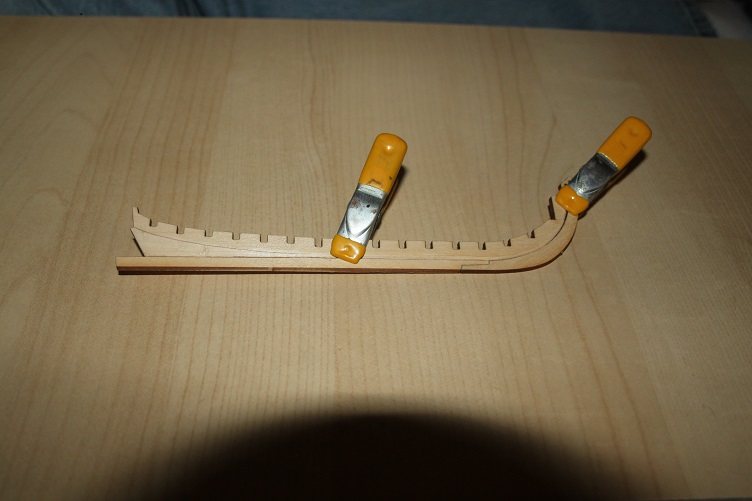
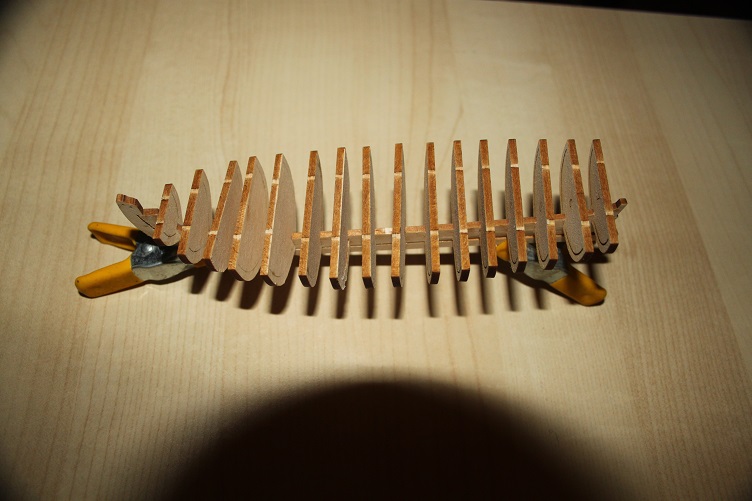
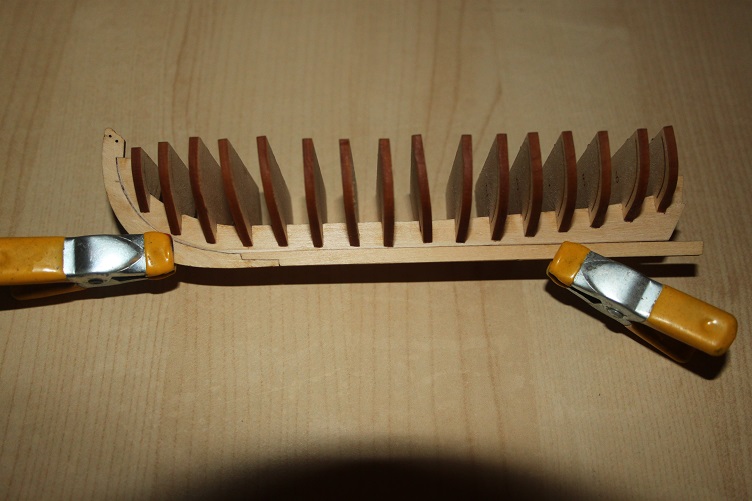
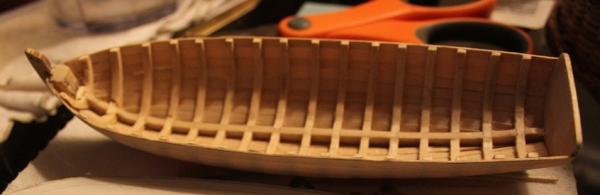
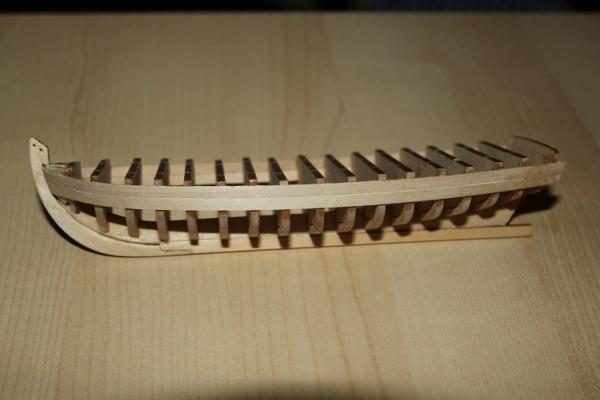
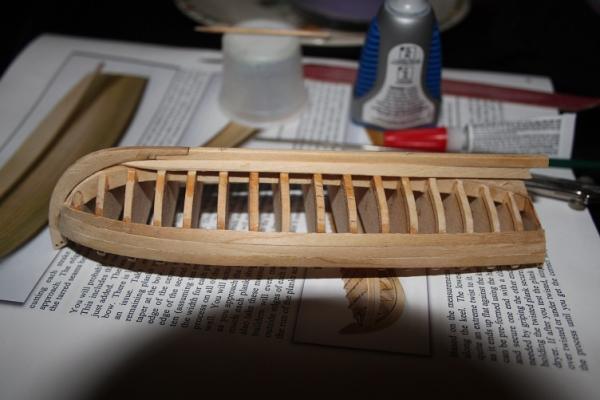
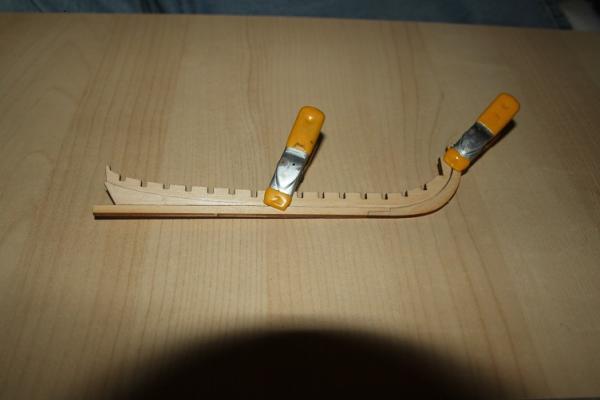
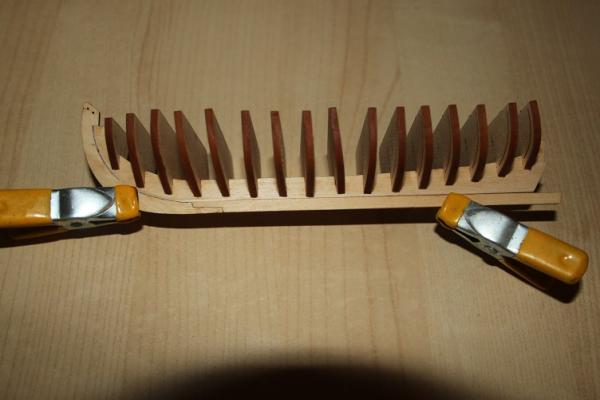
Hey all, This will be my second build log. After spending a little more then a year on my Half Moon I thought I'd do something a little smaller. I had picked up the 18th Century Longboat from Model Shipways last year and thought it would fit the bill, this kit was designed for Model Shipways by our own Chuck Passaro. The kit consists of laser cut basswood parts, basswood planking, dowels and all the fittings and hardware. Also included are some nice printed decorations to apply to the sides and transom, two pages of in scale plans and a excellent practicum written by Chuck. Before I get into the details of the build I'd like to share a recent experience. You may know that Chuck has a business making and selling model ship fittings, Syren Ship Model Company. I recently ordered some brass cannon barrels for a future scratch build project, and looked forward to their arrival. Which never occurred...seems the Post Office lost my order. I contacted Chuck to find out what kind of package was used as I needed that info for a lost package claim, well imagine my surprise when they arrived today...not my original order but a second shipment Chuck had sent, totally unsolicited, to replace my lost order. In this day and age this type of customer service is unheard of...and I believe noteworthy, this gentlemen has earned my future business and I hope my tale will prompt you to visit his site and maybe place an order, excellent product line and as I've stated superb customer service. Give the site a visit. http://www.syrenshipmodelcompany.com/ The Longboat build: I plan this build to be pretty much be out of the box...with the exception of the paint scheme and the supplied decorations. I'm also toying with the idea of adding sails, billowing ones! but we'll see. I started by cutting the rabbit into the false keel and gluing the keel to it, the frames were then separated from their backings and test fit... all of mine had a distinct stbd cant to them...this was easily fixed with some light file work. The frames were then glued up, once dry they were marked with a compass to indicate where the first stark will lay. THX for your time and attention...Pics follow J

- 52 replies
-
- 10
-
-
- model shipways
- 18th century longboat
- (and 1 more)
-
HALF MOON by jct - FINISHED - Corel
jct replied to jct's topic in - Kit build logs for subjects built from 1501 - 1750
Thx Much Pop…I appreciate your continued support throughout the whole process -
Happy to virtually assist
-
Shes really taking shape Jerry, the deck furniture always adds some life to the model
-
HALF MOON by jct - FINISHED - Corel
jct replied to jct's topic in - Kit build logs for subjects built from 1501 - 1750
THX Steve, The saw gets most of the credit...lol...I'd like to see what you could turn out with your skills, I sure it would be amazing' THX again J -
Nice...is she gonna carry any sail?
-
HALF MOON by jct - FINISHED - Corel
jct replied to jct's topic in - Kit build logs for subjects built from 1501 - 1750
Thanks Brian, I've looked in on your Enterprise build and I don't think you'll have any problem surpassing my effort at the HM, but I thank you again for your ind words. J -
HALF MOON by jct - FINISHED - Corel
jct replied to jct's topic in - Kit build logs for subjects built from 1501 - 1750
Tom and Mike...Thanks for the kind words J -
Wow...I can only mirror Andy's comments, beautiful model, excellent workmanship, you've done a superb job...I can't wait to see here finished. Thanks for the info...I'm going to be starting the English long boat soon...I'm guessing she would fair from the same shroud treatment. J