HOLIDAY DONATION DRIVE - SUPPORT MSW - DO YOUR PART TO KEEP THIS GREAT FORUM GOING! (Only 13 donations so far - C'mon guys!)
×


jct
-
Posts
1,519 -
Joined
-
Last visited
Content Type
Profiles
Forums
Gallery
Events
Everything posted by jct
-
Hi Steve, Just checking in, haven't seen any posts on your Shenandoah for awhile, hope all is well. J
-
Nice progress, she looks good
-
Thx much Larry and JimZ,
-
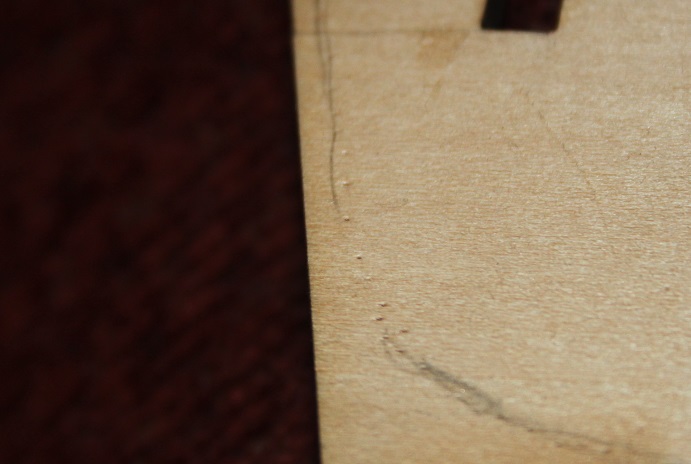
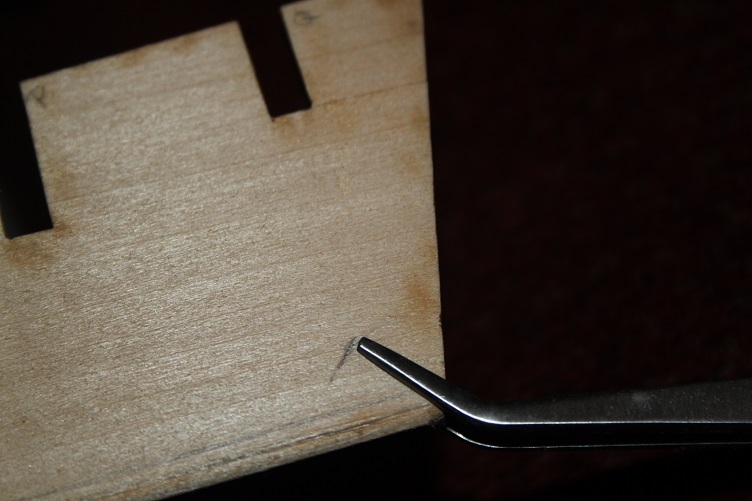
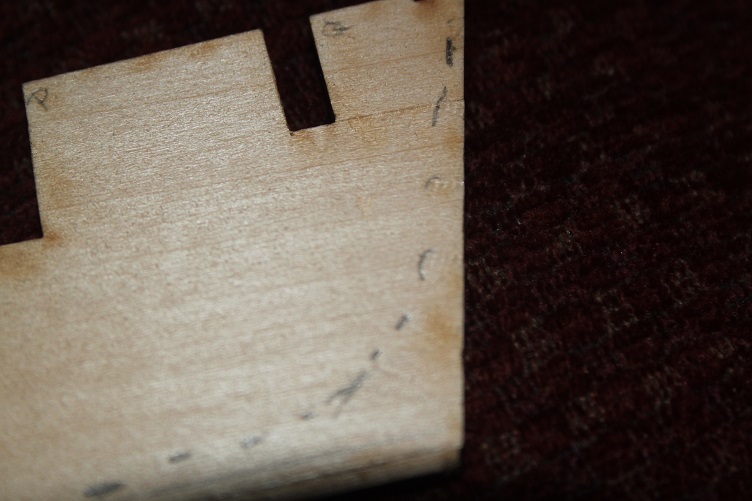
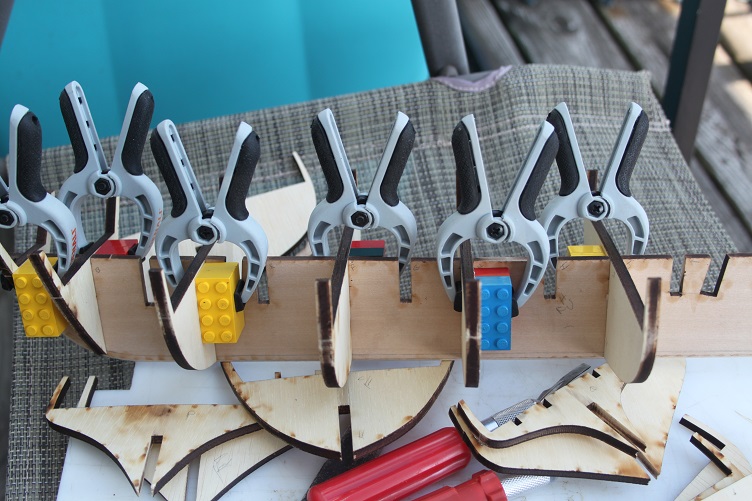
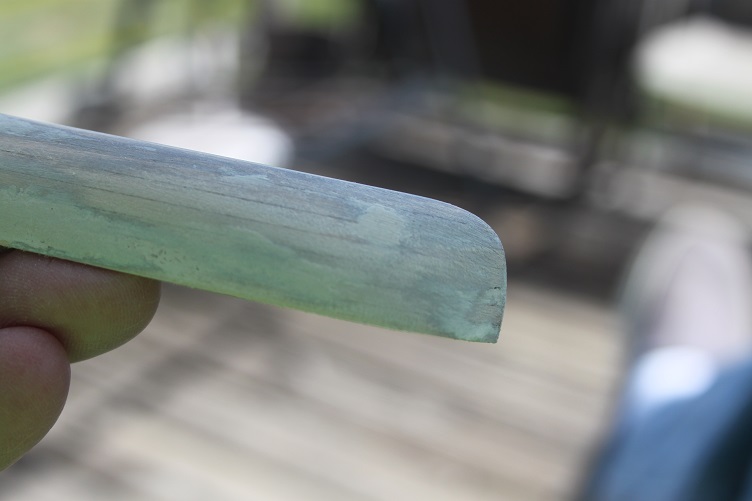
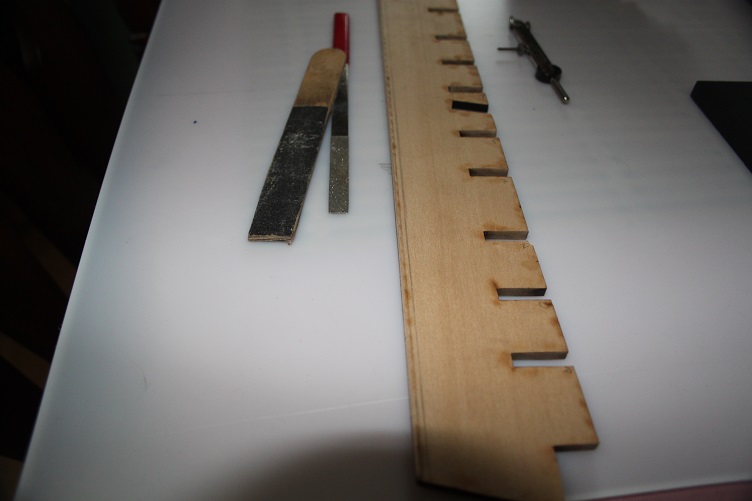
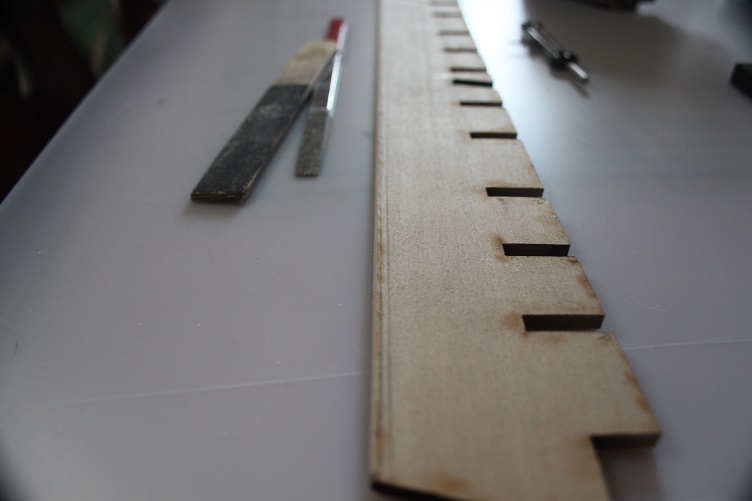
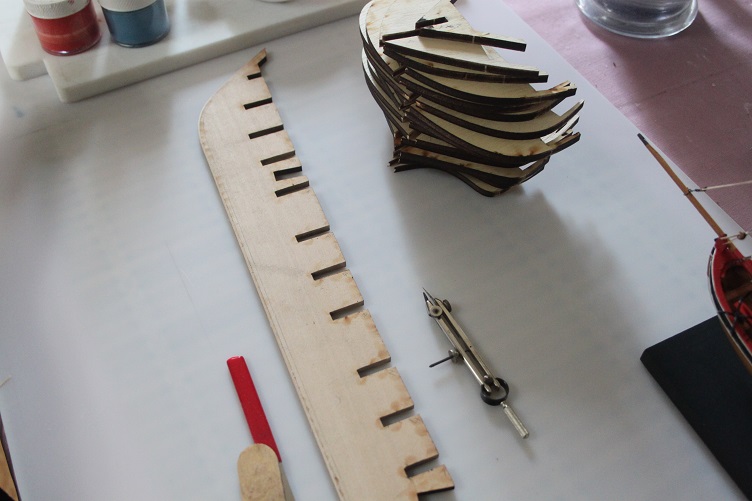
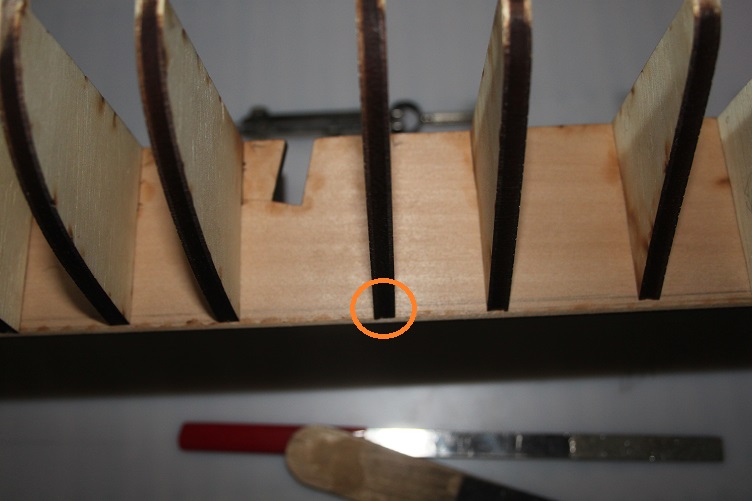
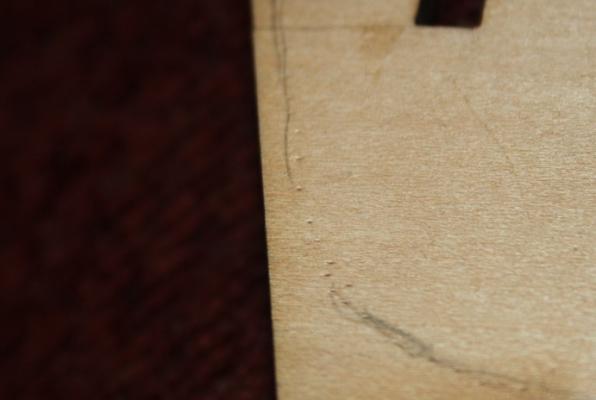
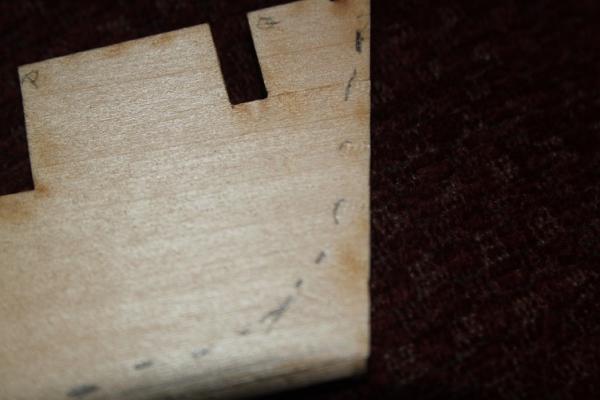
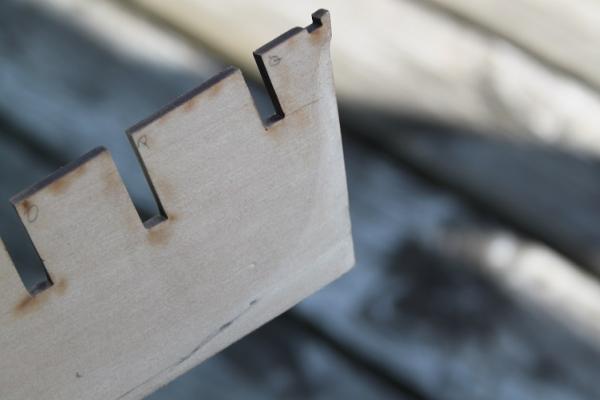
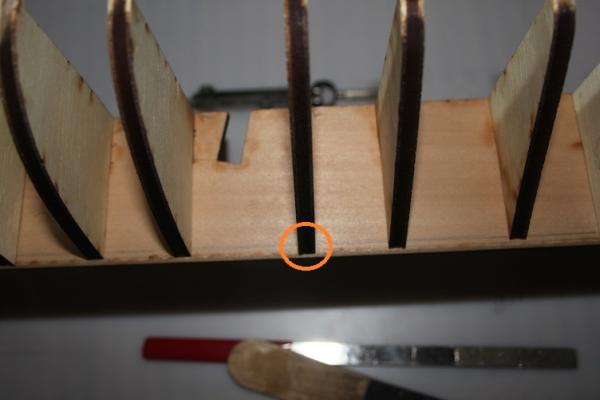
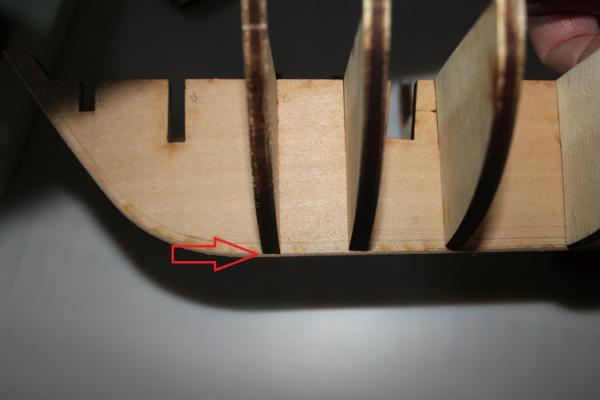
Hi all, Another Niagara update...I decided to move back to the main hull by completing the bearding line and mounting the bulkheads. I'll be jumping back and forth between the main build and the ships launches. I began the bearding line by laying the plans over the false keel and marking the line with the sharp point of a compass. The head scratching began with the port side line, as the plans only show the stbd side...so using a pair of clamping tweezers I transferred the marks from the stbd side to the port...then just connected the dots, worked pretty well. The bearding in was then carved and sanded to the correct taper. The bulkheads in my kit all seemed to have a defined cant to them so to square things as they were glued I'm using a couple Lego's and clamps on each one. Pics follow.


-
Hi Mike, Really nice planking job especially considering this is your first build, keep up the good work, this is a fun little kit J
- 100 replies
-
- 1
-

-
- model shipways
- 18th century longboat
- (and 1 more)
-
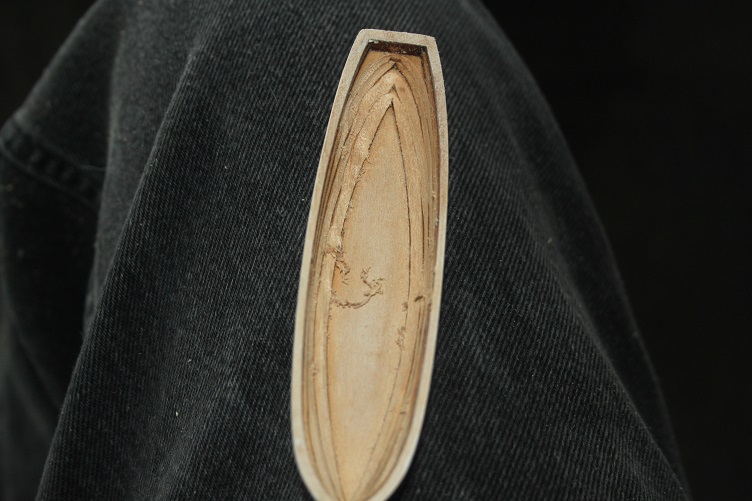
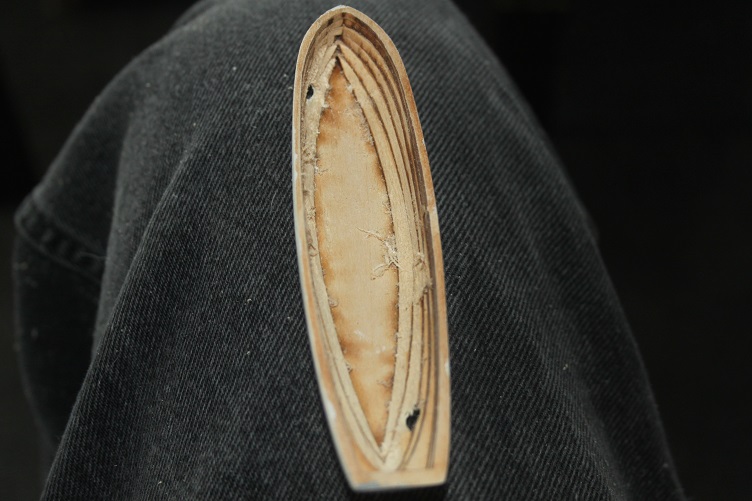
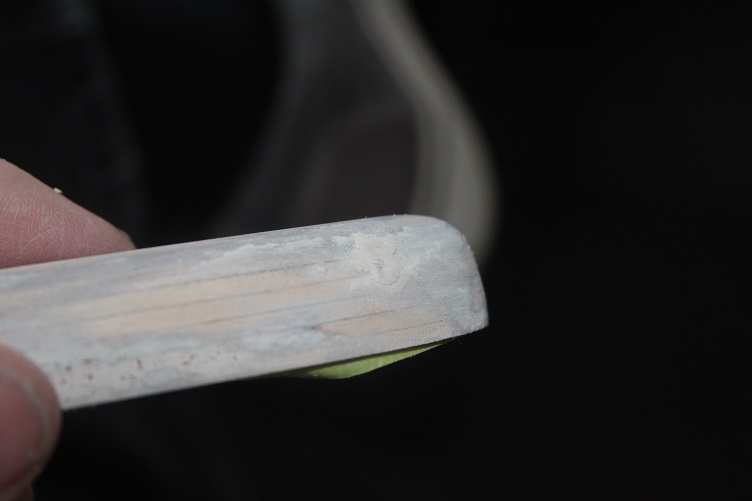
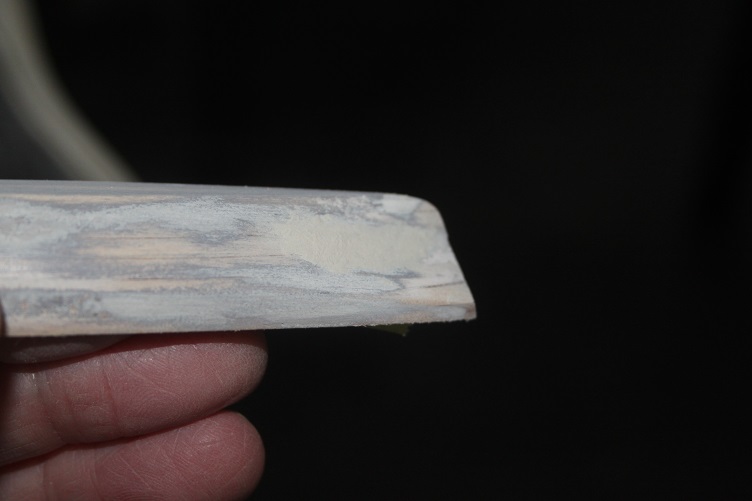
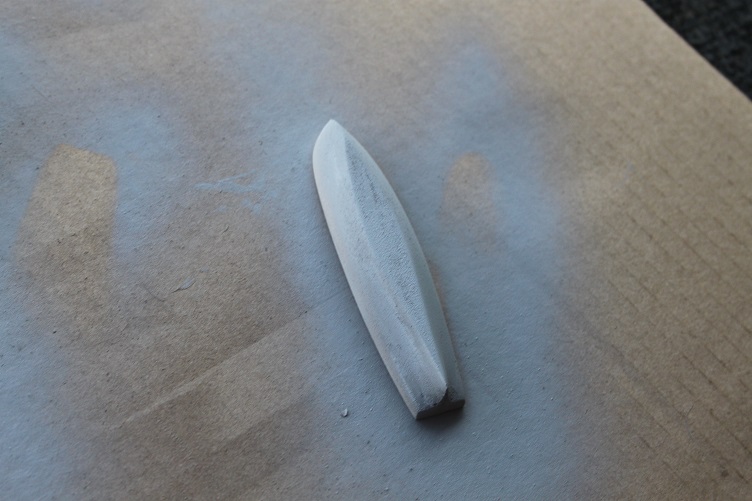
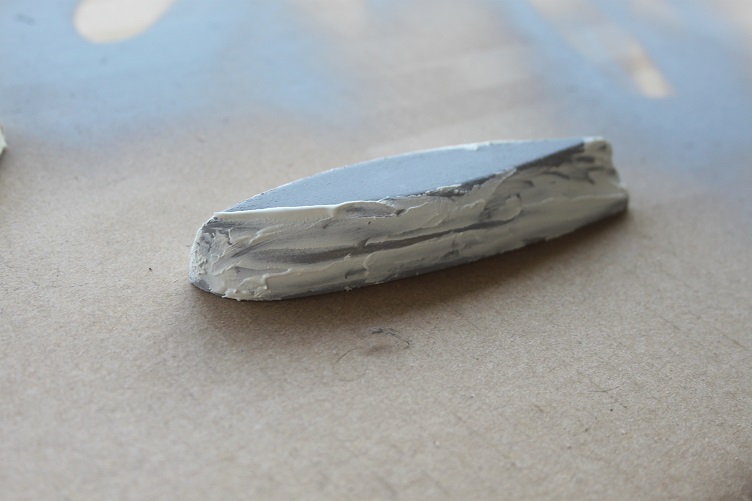
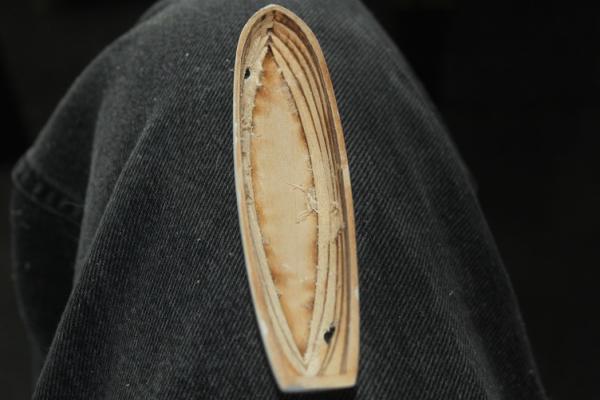
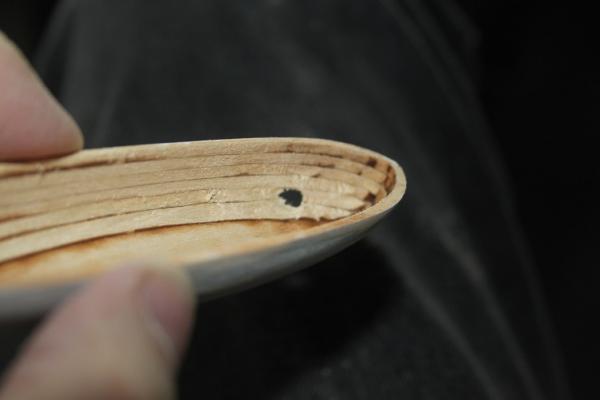
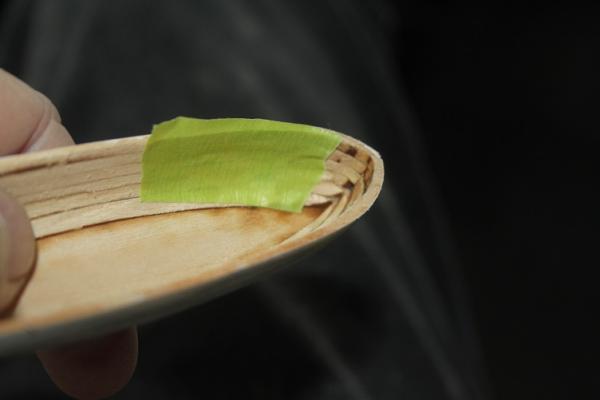
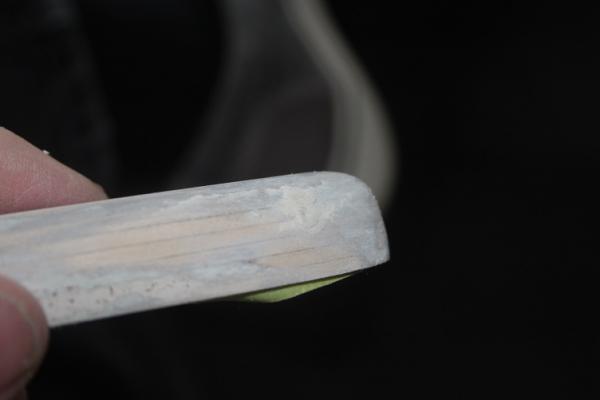
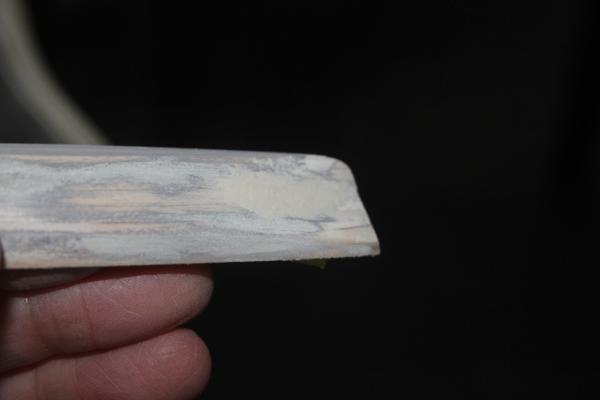
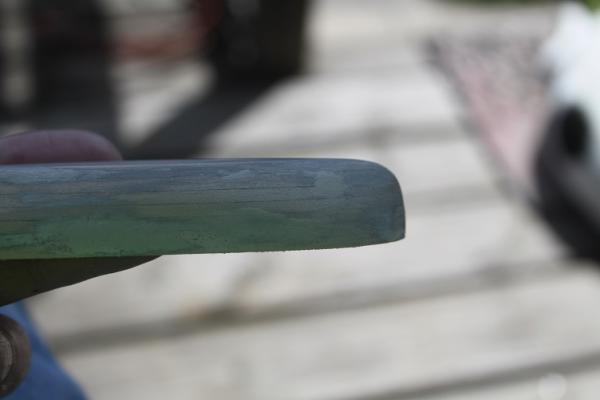
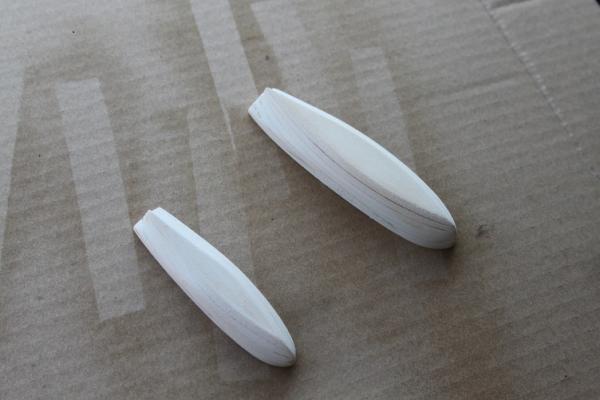
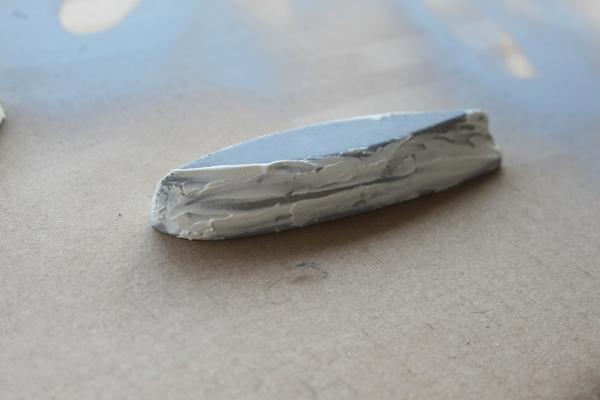
Hello again, Well as I said in my first entry this log will contain the good, bad and the ugly...having all but completed the outside shaping of the ships boats I turned my attention to the inside. To speed things up I decided to us a ball mill in my drumel...which worked very well till I got a little to aggressive and blew right through the side in two spots. After calling myself endless expletives I pondered what to do...Model shipways has an excellent customer service so I could get a new launch...I could display the finished ship with only two boats...I could beat up the rest of the model and claim battle damage...or I could fix the holes! Fix the holes it is...some of you that have modeled in plastic are probably familiar with Squadron green and white putties, they are solvent based and have a very fine texture and work on just about anything. They say white stuff is a bit finer but other then the color I've never seen a difference, both dry fast and sand very well and are easy to obtain a feather edge, you can also thin them with acetone. That's the product I choose to make the repair . I first backed the hole with green tape and then layered in the putty, once dry the inside got the same treatment. 24 hours to dry and then the sanding began again. Pics follow


-
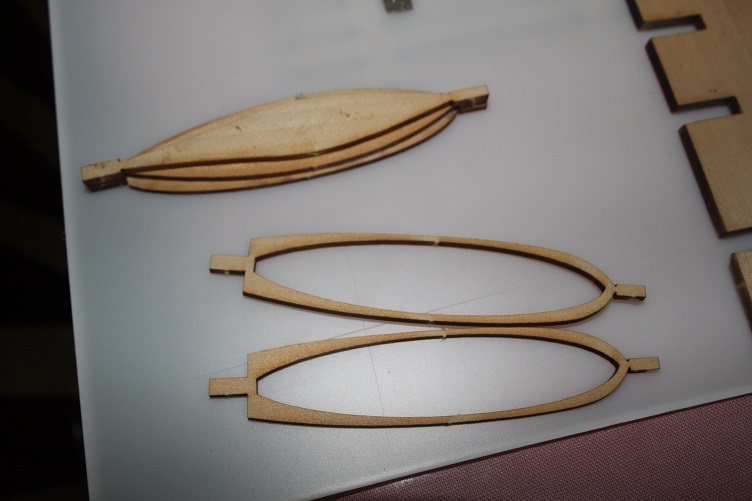
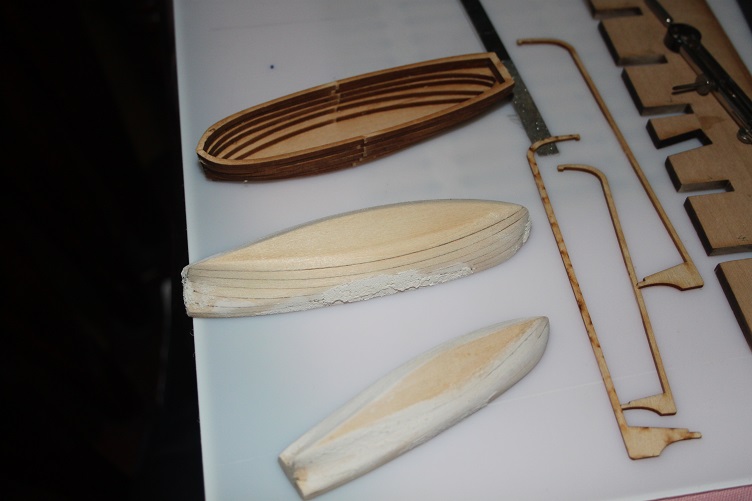
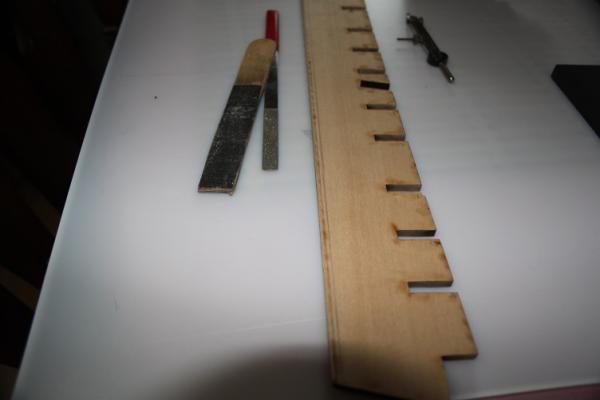
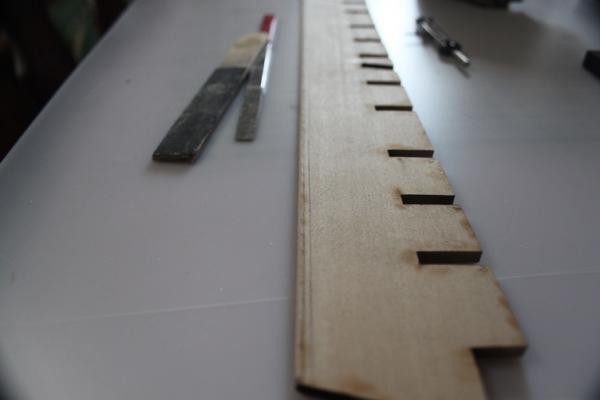
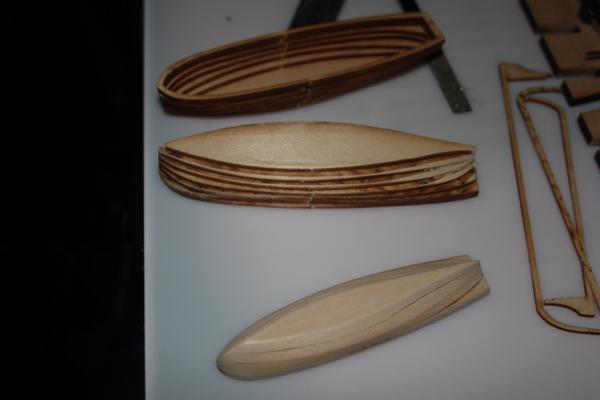
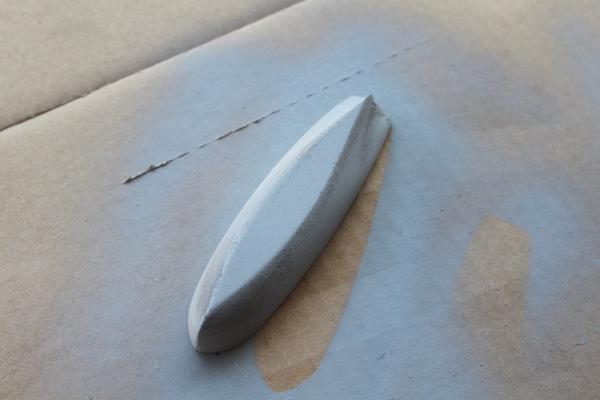
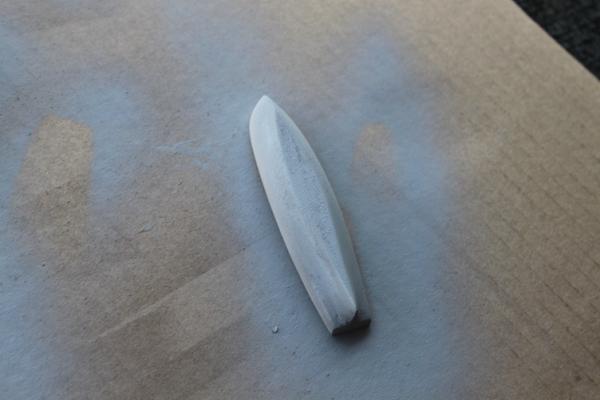
Hello everyone, This will be my third build log here on MSW...the US Brig Niagara, a Model Shipways kit. I acquired the kit awhile back and had it in the queue. I was waiting until I could visit the real vessel in Erie and do some research and get some photos. As in my other logs I plan to post all here the good and the bad, the successes and failures, highs and lows. So without further adieu, welcome to my Niagara build. I started by laying out the rabbit on the false keel by measuring it off the plans with a small compass and transferring the 1/16in dimension to the f-keel. As the plywood supplied was relatively soft instead carving the rabbit I decided to use files and sanders and sand it in. This went very quickly and worked well. Next came sanding and fitting the bulkheads until they fit the f-keel without being forced, once completed they were fitted taking note of which ones will need extended into the rabbit, glad I tested these, there are a few that will need to be fine tuned. At this point I started looking at the sheets that contained all the parts for the ships boats, they are to be built up in lifts using the 'bread and butter' technique, Having never built in this manner before I decided to set the main hull aside and work on the little boats. The parts separated from their carrier frames nicely and the glue up was uneventful, what followed was a lot of sanding, filling, sanding, filling, priming filling and more sanding. If I were doing it again I'd leave the bottom off as i think it would make shaping the insides easier. Still a ways to go on these little guys. Well that's all for now, sorry for being so long winded, pics follow THX J


-
Ditto, don't hesitate to reach out if there i something I can help with
-
Very Nice Dale, Well done she's a beauty. I plan to start my Niagara build soon and will be referring to your log for guidance. J
- 468 replies
-
- 1
-
-
- niagara
- model shipways
- (and 1 more)
-
Nice effect Sam
-
she looks good and that blocking, though it can be a pain, will pay big dividends later...tell the first mate I said congrats on NYR series win. J
-
very nice...the gallery's turned out really well
-
HALF MOON by jct - FINISHED - Corel
jct replied to jct's topic in - Kit build logs for subjects built from 1501 - 1750
Hi Jerry...ya kinda bummed here...not sure what the team will do, last year all kinds of management changes were made to get them deeper into the playoffs...that obviously didn't work, time will tell. Not been up to much, now that spring is kinda here been taking care of alot of stuff around the house, haven't decided yet what my next build will be, I look fwd to following your viking long boat build THX for checking in J -
worked
-
Thanks Frankie...and no problem here with the criticism, I believe these logs should help serve others as well as give us an outlet to share our hobby, if a post can help someone and prevent an error I'm all in favor of it.
- 52 replies
-
- 3
-
-
- model shipways
- 18th century longboat
- (and 1 more)
-
Thanks for your kind words Jerry, was a fun little build
-
Hey Jer, I'm at least hopin the Pens can make a series of it...but I ain't putting any money on it...lol
-
Nice job Jerry, she looks good in your "Hall o Ships" you may want to consider the 18th Century longboat for your next build if your interested in a launch. Nice little kit with a lot of interesting details. Congrats on the finish of your HM J
-
THX David...your right some time stuff happens
-
Hi Frankie, I understand, the aft point on the gaff should be much higher, the error was made when I cut the original fabric for the sail. At this point with it fully rigged and the mast set it would be difficult to correct, I'll have to live with it. Still being somewhat of a novice I appreciate your input and will remember the next time I do any sails. THX J
- 52 replies
-
- 1
-
-
- model shipways
- 18th century longboat
- (and 1 more)
-
Hi Frankie, If I understand the aft most part should be much higher? I cut it so the boom would be fairly level, this is incorrect? THX J
-
almost there
-
Steve and Jack, thanks much for your kind remarks, it did go pretty quick. The stand is Chuck's idea he mentions keeping it simple in the build practicum. This is a fun little kit, the sails proved to be more of a challenge then I had anticipated but all's well that ends well. Thanks again guys J
- 52 replies
-
- 1
-
-
- model shipways
- 18th century longboat
- (and 1 more)
-
Hi Charlene, Your planking a-midships looks good..nice spacing, just a suggestion if you don't mind, you may want to consider adding more reinforcement to the bow? It can really help when it comes time to plank on a bluff bow vessel by giveing more glue area where the plank bend is the most severe. J