jct
-
Posts
1,519 -
Joined
-
Last visited
Content Type
Profiles
Forums
Gallery
Events
Everything posted by jct
-
Looking good Popeye...almost mast time
-
Thanks everyone for the likes...welcome Ken, I agree it is on the brown side, I'm thinking it will receive a black wash prior to and dry brushing once it's glued in the bunkers, thanks for the input
- 105 replies
-
- 1
-

-
- picket boat
- model shipways
- (and 1 more)
-
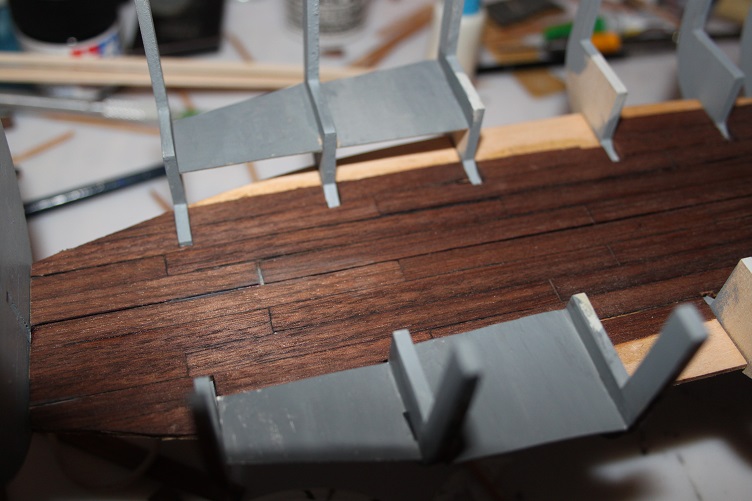
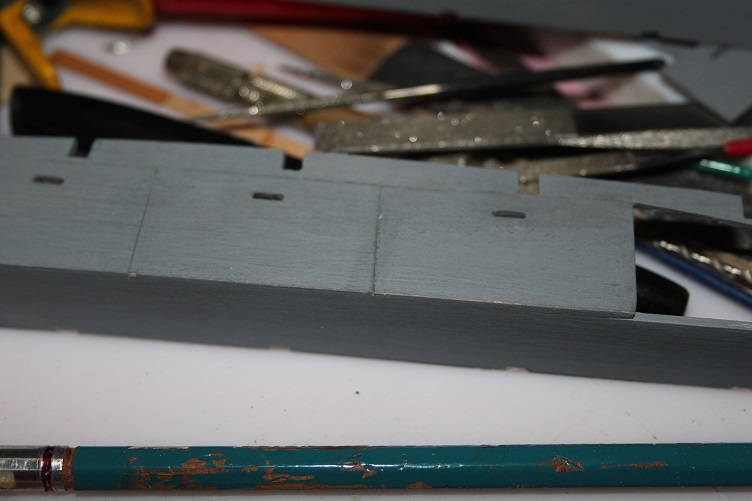
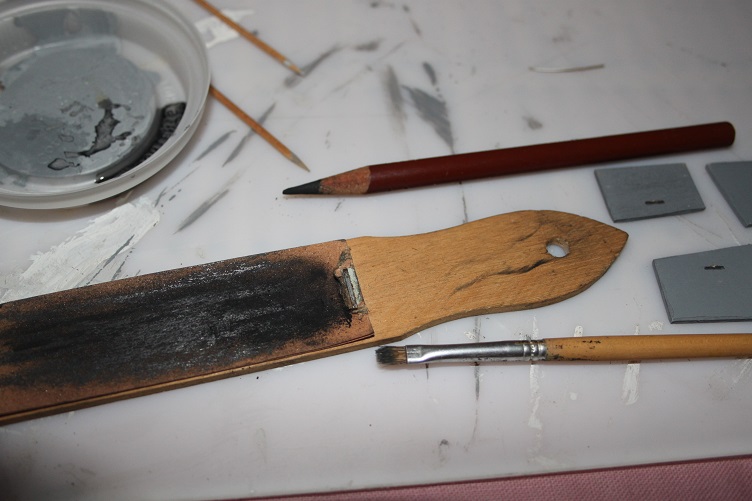
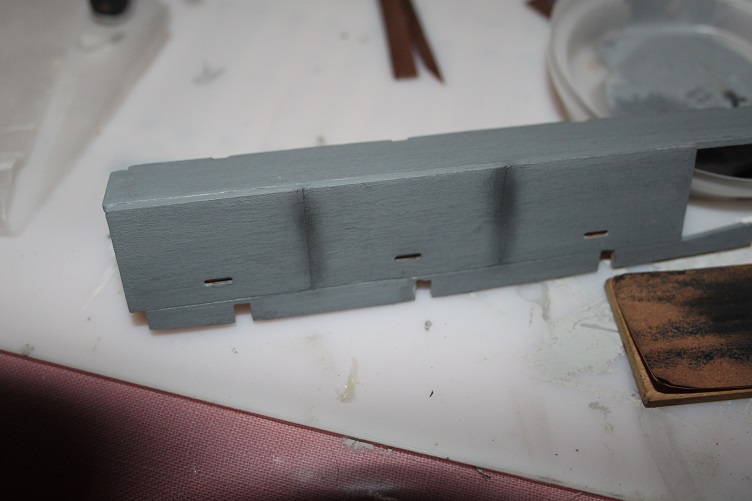
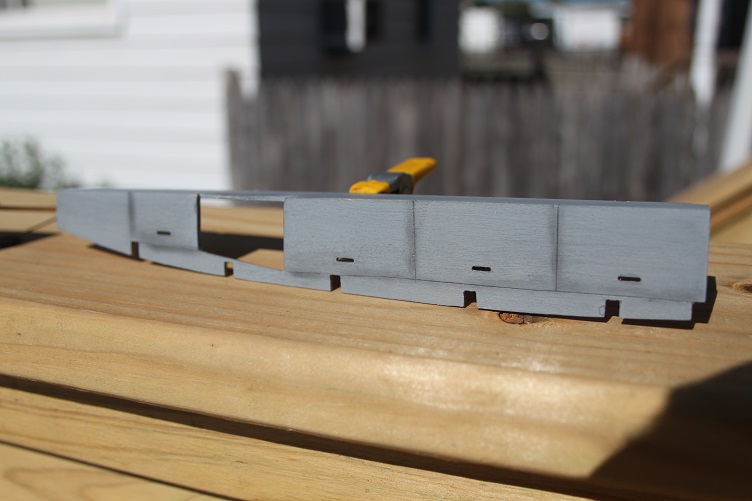
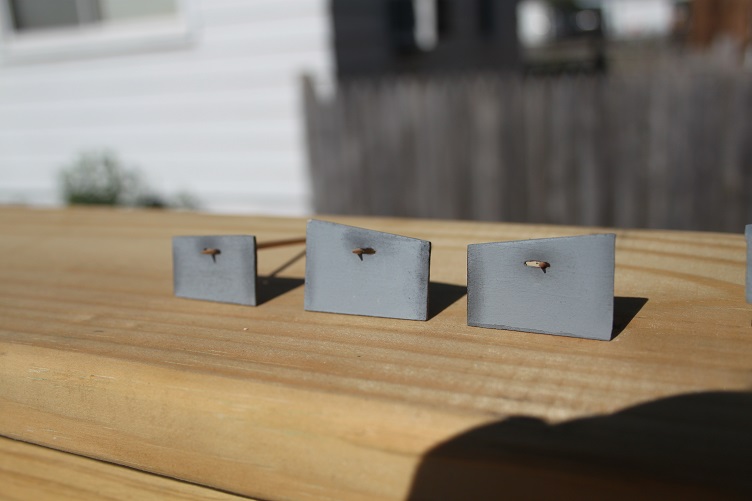
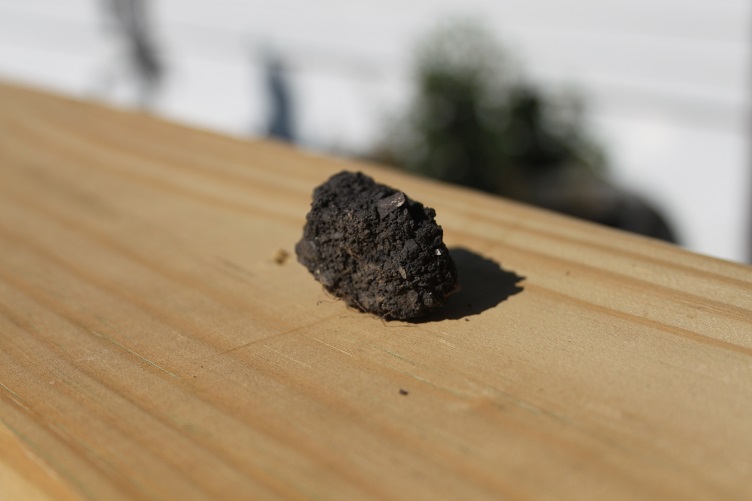
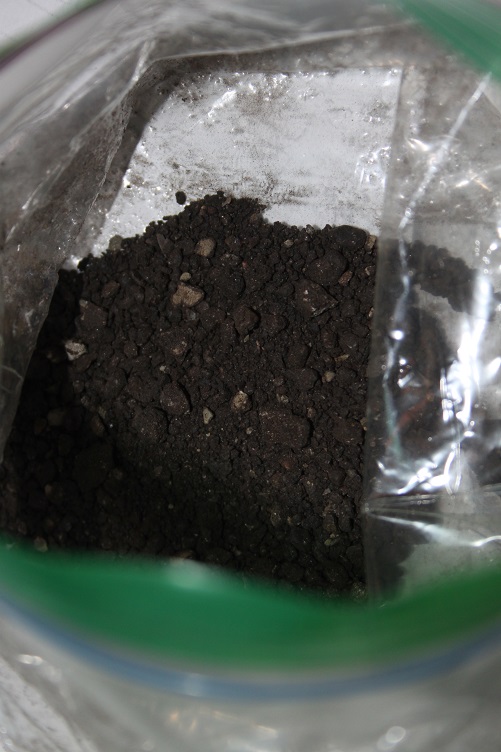
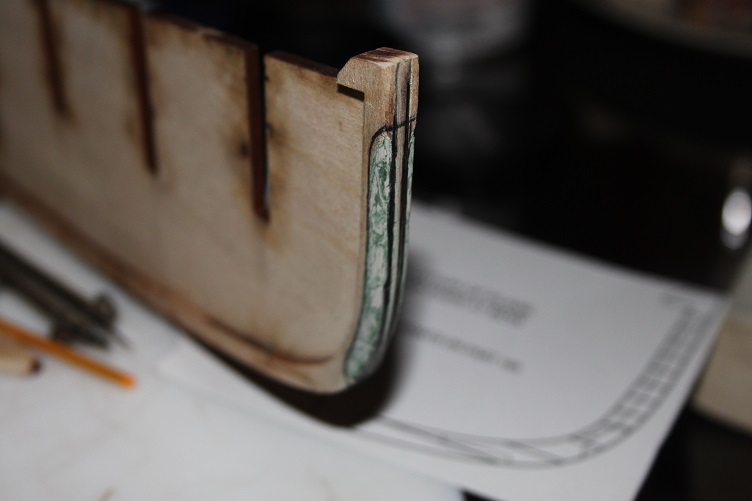
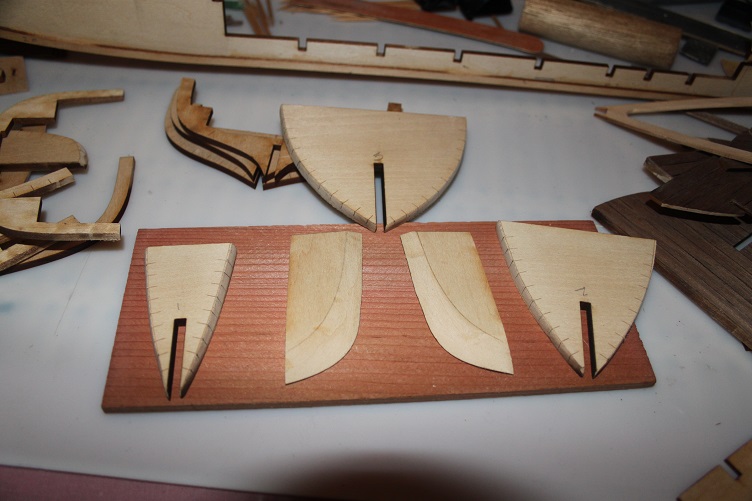
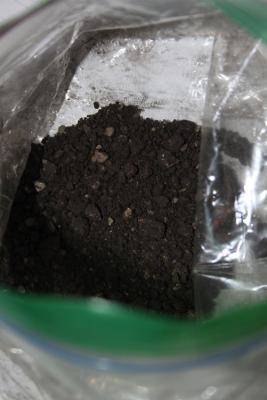
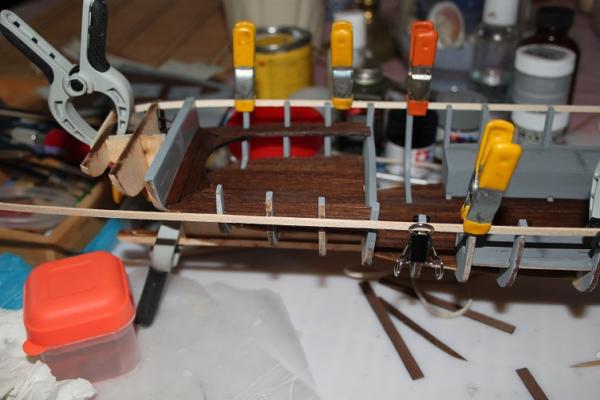
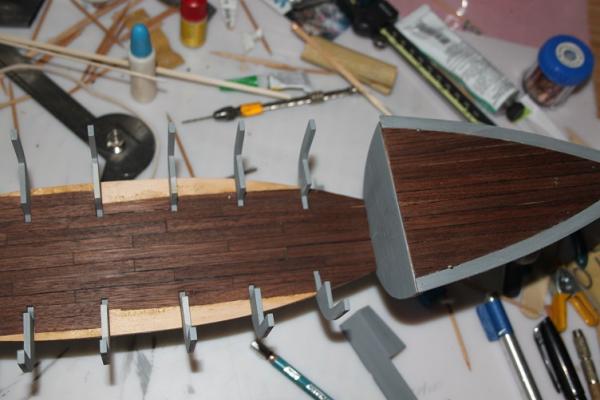
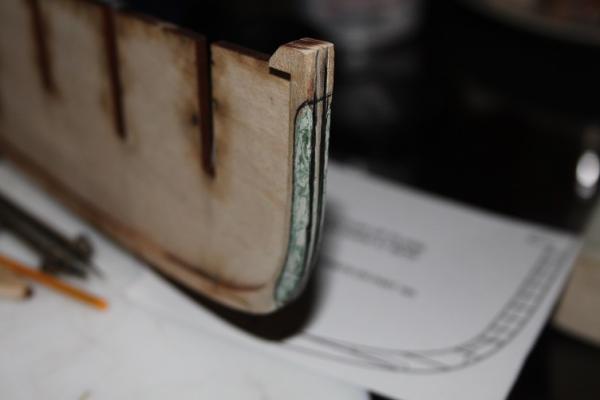
Hello All, An update, since I opened up a few of the coal bunker lids to show the fuel, bottoms had to be added. These were made from card stock and painted a dark gray. This way I wont have to fill each compartment. With open coal bunkers I thought some light weathering would be appropriate, to accomplish this I called on some armor weathering techniques...first the panel lines were darkened with a wash made of thin gray/black. Once the wash was dry charcoal dust was brushed into the surface to simulate coal dust staining. The dust was made by rubbing a soft charcoal pencil over a sanding stick then picked up and applied with a stiff brush. The finished parts were then shot with a coat of flat clear to seal everything. The "coal" had me scratching my head for a while, I wanted to make it as opposed to buying. Inspiration struck one day on a trip out to the garage. I noticed the edge of the asphalt paving in the ally was broken into small pieces and it is black and lumpy! So after placing a piece in a plastic bag and pulverizing with a hammer...instant 'coal'. I may have to pick out the lighter pieces and add some color, haven't decided yet but I'm happy with the overall look. This materiel will be added to the bunkers later in the build. Planking has started... Pics follow


- 105 replies
-
- 10
-
-
- picket boat
- model shipways
- (and 1 more)
-
Hi Tim, Yes it went well thanks for your input...assistance appriceated J
-
THX Joshua
-
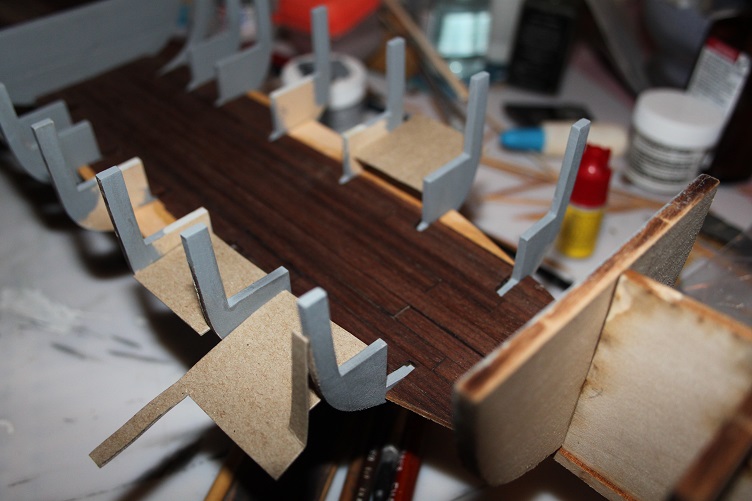
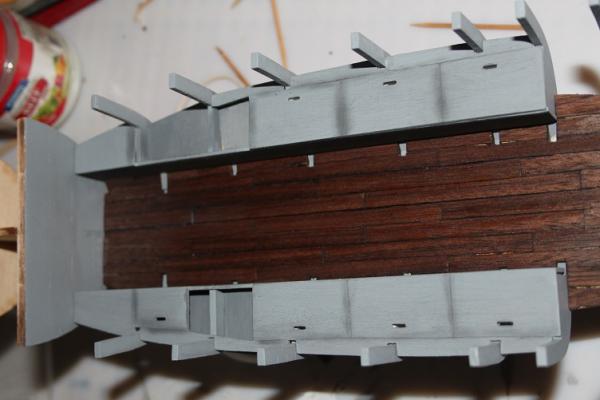
Hi all, Pics of the stern deck and seat and the main deck all straightened and in place, work on the coal bunkers continues...

- 105 replies
-
- 7
-
-
- picket boat
- model shipways
- (and 1 more)
-
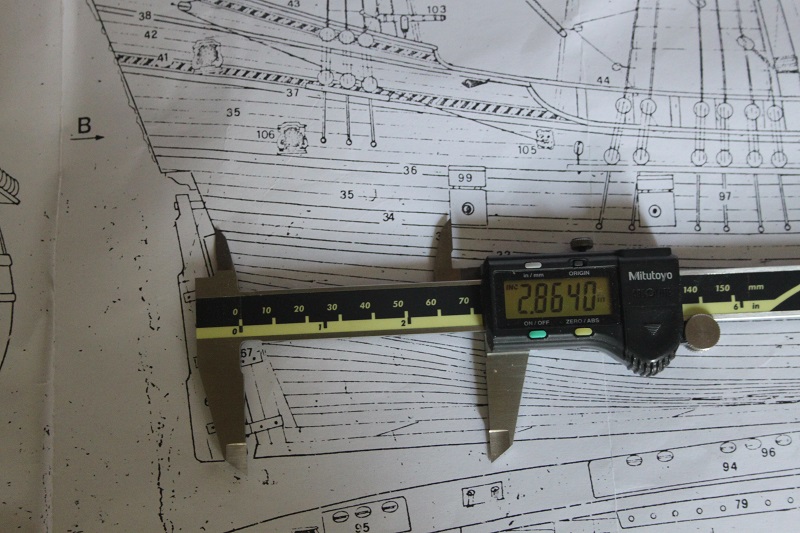
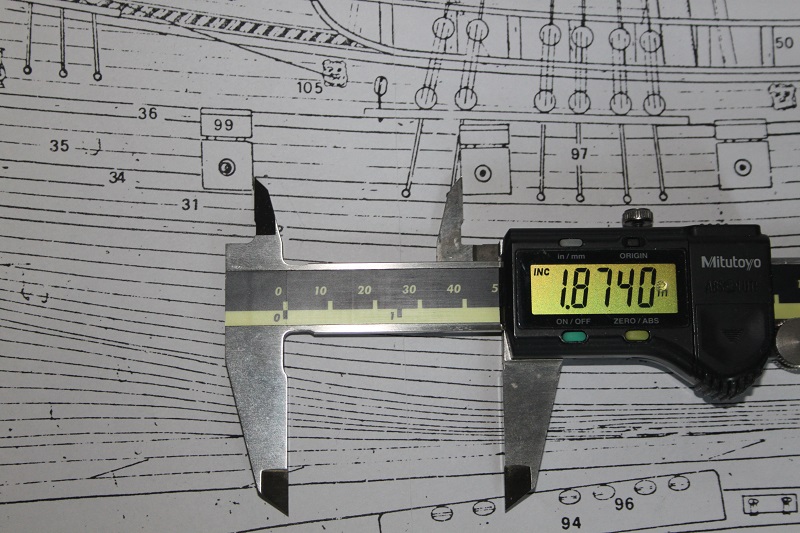
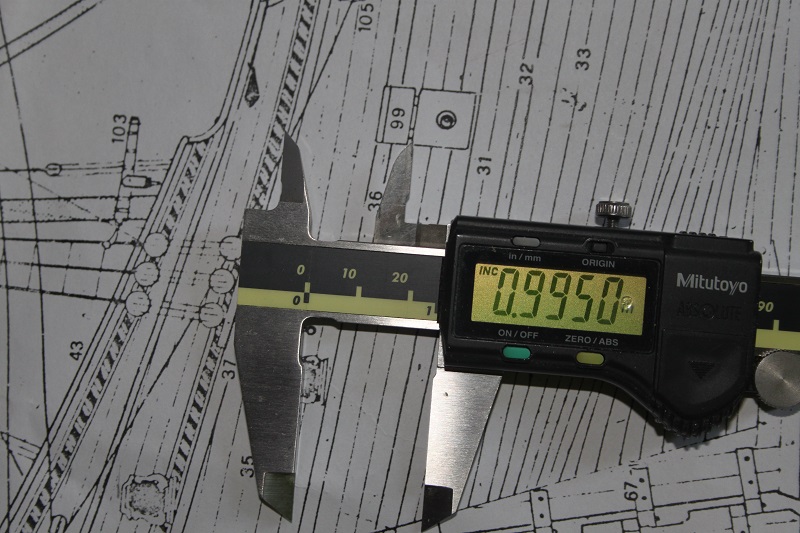
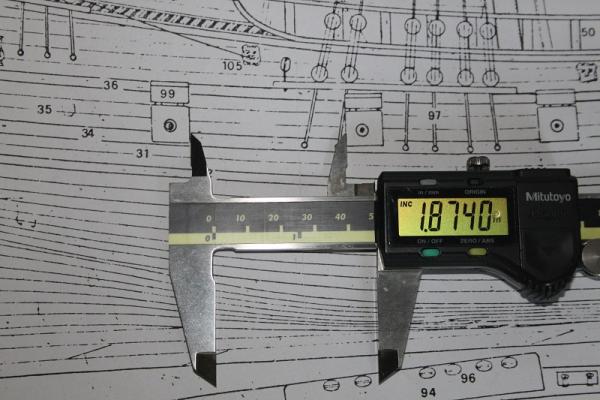
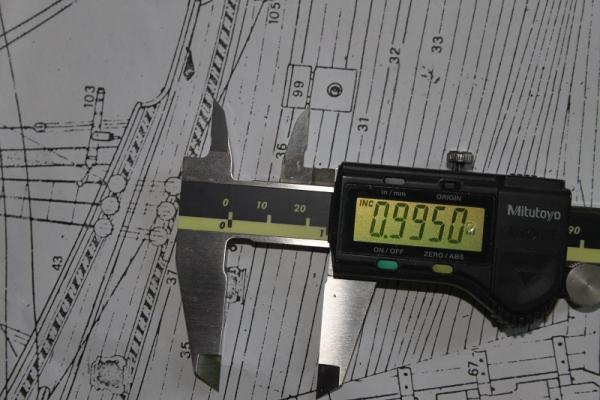
Nice railings Popeye...as Jerry stated no such railings on the Corel kit or plans...I'm guessing their sailors were more sure footed then Billing's Hey attached are the pics with dimensions, the spacing between them are all the same. J

-
Thanks much Tim and Josh... I did have a frame out of place, that and the aft section was off by a couple mm, it had snapped off during test fitting and had been glued back, so between the two there was enough tolerance stack-up to equal what you see in the pics. Got everything where it should be and glued in. no pics yet I'll post some later today, thx for the assist guys, much appriceated J
- 105 replies
-
- 2
-
-
- picket boat
- model shipways
- (and 1 more)
-
Hey Popeye...good to see you back on your HM, love the whip staff..wish I would have thought of it, but mine is cased and will remain as is. Hey give me a heads up if you want me to measure the distance between the gun ports on the Corel plans...they're still in the pile somewhere. Looking fwd to the next installment J
-
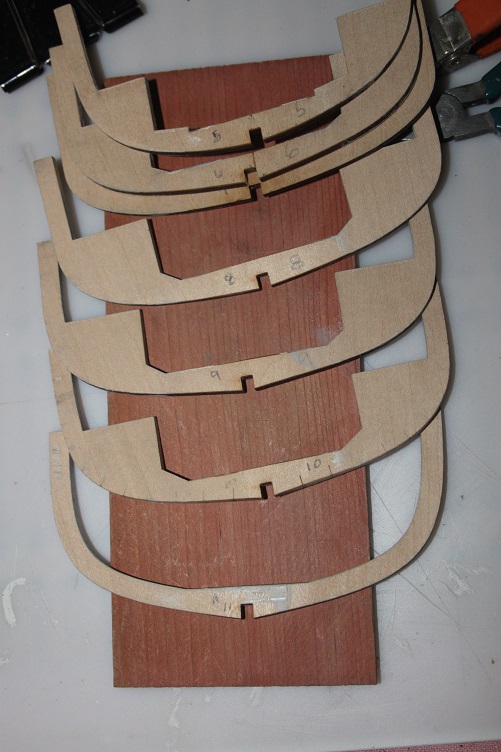
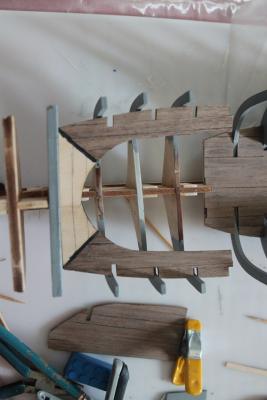
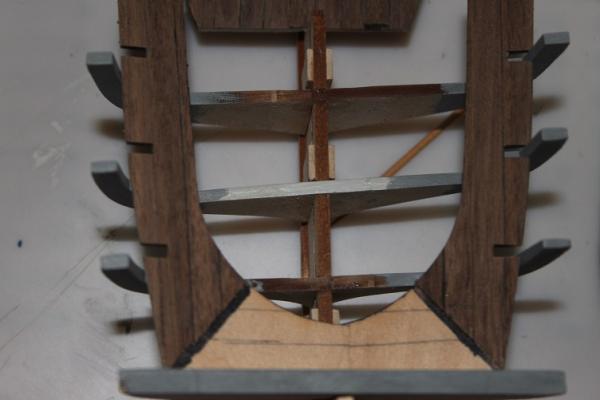
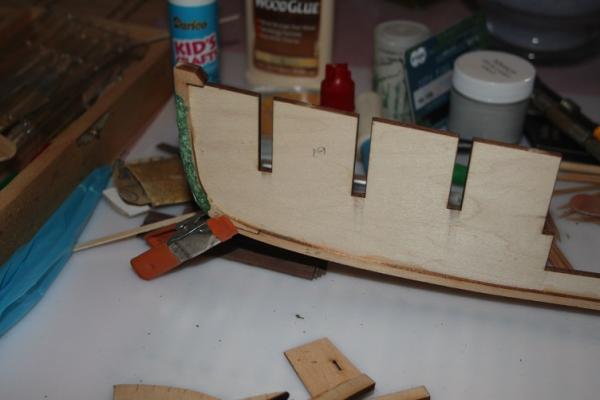
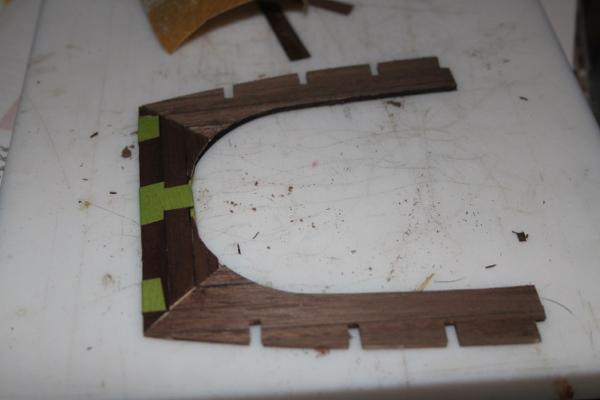
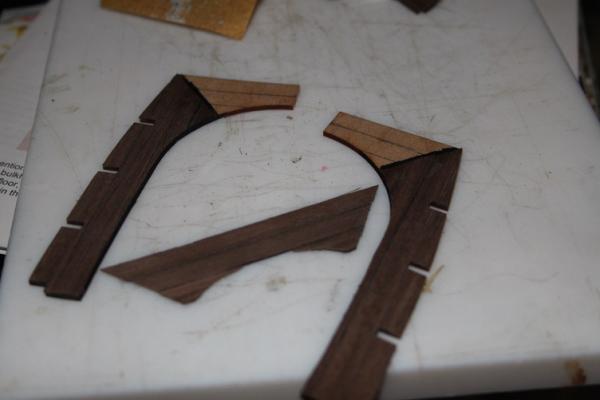
Ran into a bit of a set back when I started assembly...and figured I'd ask the fellow picket boat builders about it before I started cutting an chopping, did anyone have trouble with the fitment of parts 26 between the bulkheads and aligning the ribs? Mine seem way off!! pics follow THX J
- 105 replies
-
- 1
-
-
- picket boat
- model shipways
- (and 1 more)
-
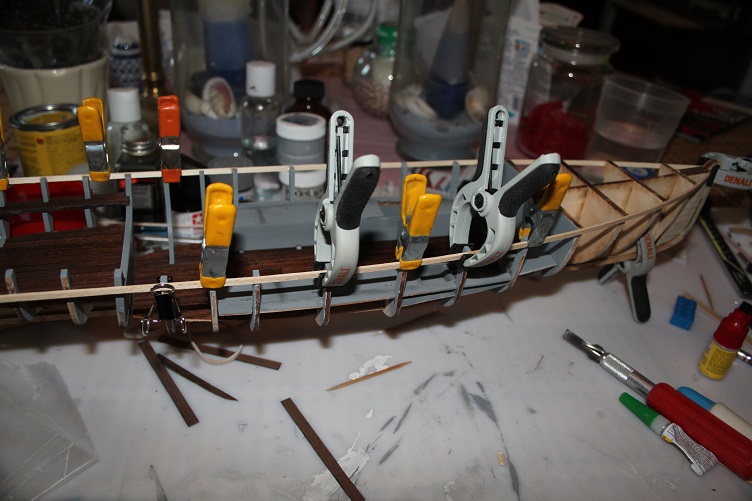
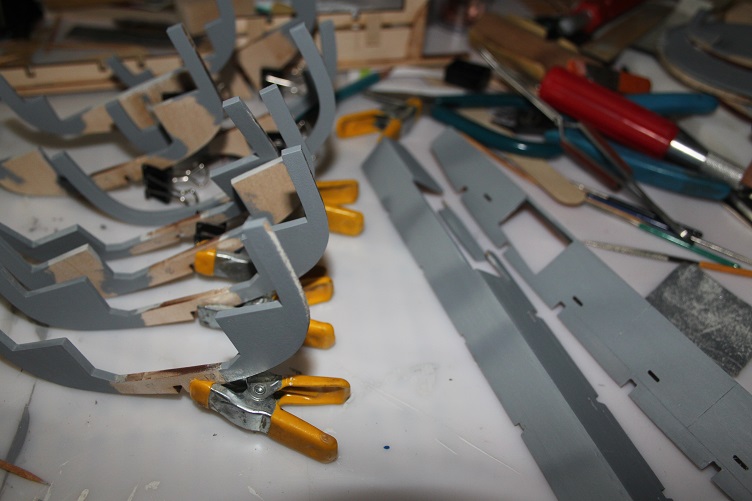
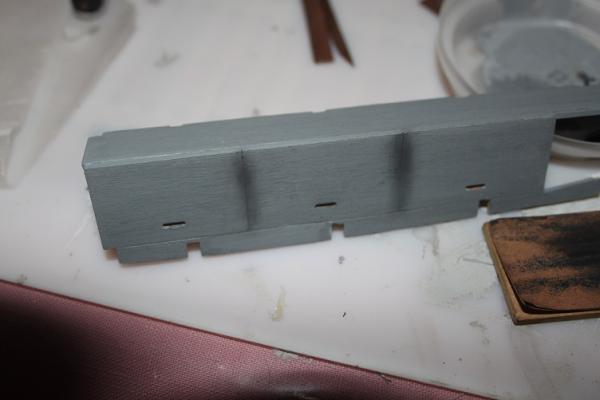
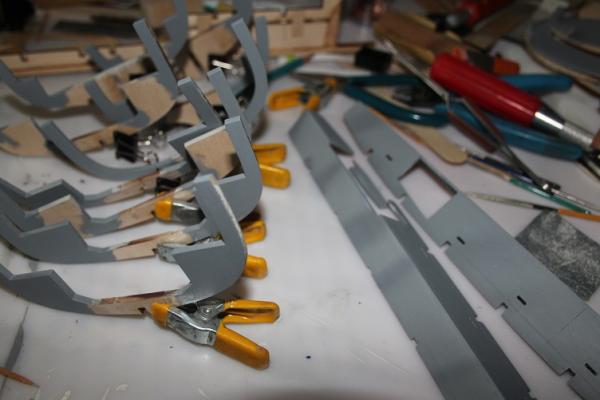
Just a short update… The paint issue has been resolved; I picked up some Tamiya acrylics and have been reworking all the affected parts. First each was sanded down to bare wood then the surface was sealed with two coats of thinned water based urethane, similar to a spit coat with shellac. The grain was then knocked back using a piece of worn 400 grit I keep for just that purpose. The original gray was MS light deck gray; this shade looked very light to me. The Tamiya paint shade out of the bottle is Dark Sea Gray…and it is dark, too dark for my taste, so the mixing began, slowly lightening I finally hit on a shade I liked and proceeded to re-paint all the ribs, aft deck and coal bunkers. This were done with a brush…the outer hull will be airbrushed. Hoping to get to assembly next week Thanks for your time and interest, Pics follow:
- 105 replies
-
- 7
-
-
- picket boat
- model shipways
- (and 1 more)
-
Nice progress...now the fun begins
-
Just a small update...worked on the coal bunkers and the breakwater...decided to find different paint, just not happy with the finish blotchy and streaky, brush strokes...just not working well. Pics follow
- 105 replies
-
- 3
-
-
- picket boat
- model shipways
- (and 1 more)
-
Hi Joshua, I'll defiantly check out your build log, thanks for the kind words and willingness to assist.
- 105 replies
-
- 1
-
-
- picket boat
- model shipways
- (and 1 more)
-
THX Bob...it's a shape that Poly and Floquil are both no longer available Hi Brian...I can agree with the mixed bag...the yellow ochre and red on my Longboat are ME and they brushed out and even airbrushed fairly well...this light gray is a nightmare. I may try Vallejo I need some alternative, short of going back to enamel...trying to avoid as many toxins as I can now that I'm on the back of the hill!! THX for the likes and comments J
- 105 replies
-
- 1
-
-
- picket boat
- model shipways
- (and 1 more)
-
Hi Mike...nice job on the belaying pins...looking good
- 100 replies
-
- 3
-
-
- model shipways
- 18th century longboat
- (and 1 more)
-
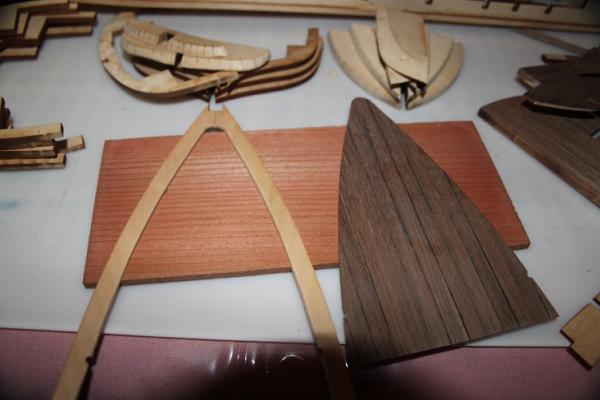
Glad to have you all aboard, Hey Steve...this will be my second MS full build...I completed the 18th Century longboat and started the Brig Niagara but needed a break from her. The walnut planking was done with a compass I've modified with two points, one dull to act as a follower and the other sharpened. Once set to the appropriate width I trace the factory edge with the follower making multiple scores the cut the planks, the edging was done with black sharpie...which you cant see on the bulkheads now cause they have been painted gray, the decks and seats will be oiled. While on the topic of paint, I'm using Model Expos acrylics which I've used in the past with little issue, but am having some trouble here with both coverage and worse part warping, spending a lot of time back painting and weighting parts down. To those planning to build this kit I would recommend a coat of sanding sealer prior to using acrylics. Hi Bob...did you experience any issues when you painted? What paints did you use? I hope to have more pics to post tomorrow, as always thanks for your time and attention.
- 105 replies
-
- 1
-
-
- picket boat
- model shipways
- (and 1 more)
-
THX Gunther...she should be fun, good to have you along
- 105 replies
-
- 1
-
-
- picket boat
- model shipways
- (and 1 more)
-
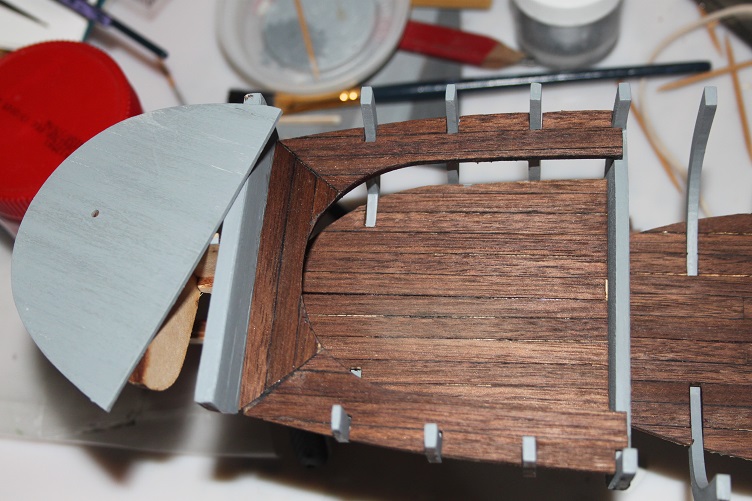
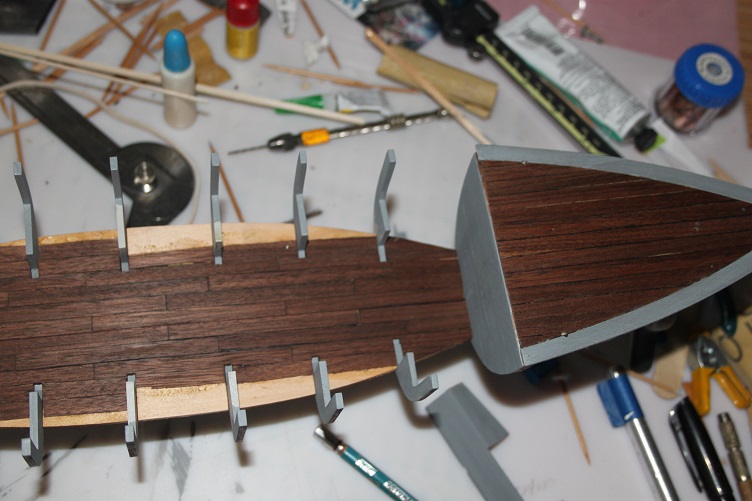
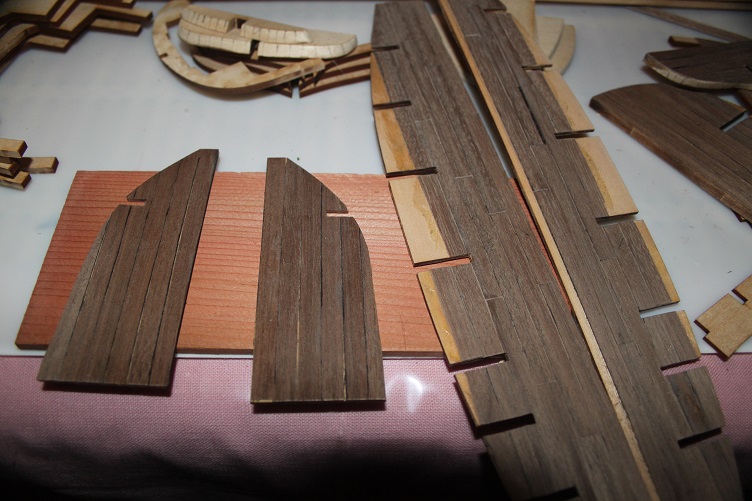
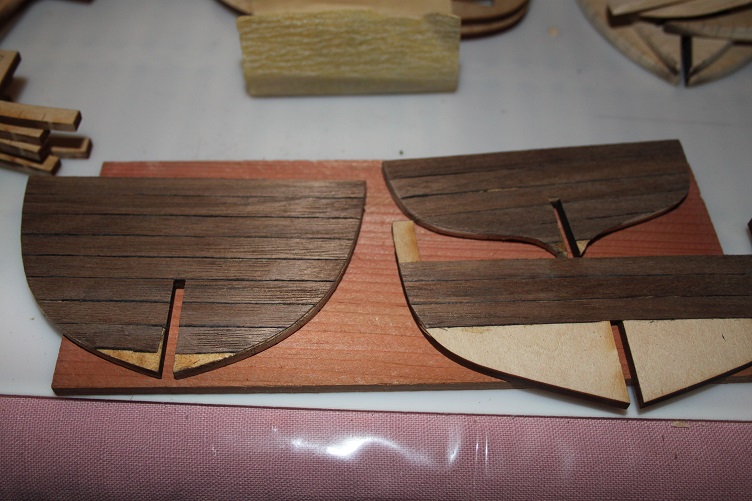
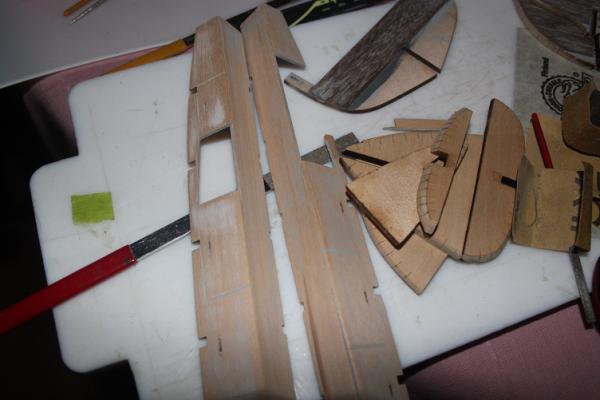
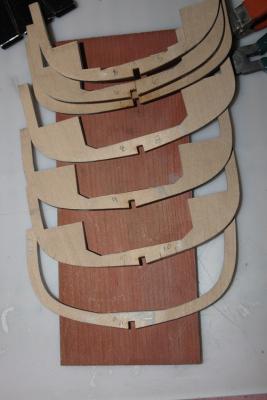
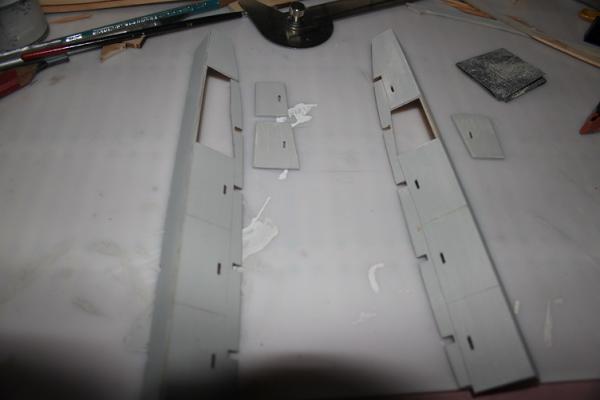
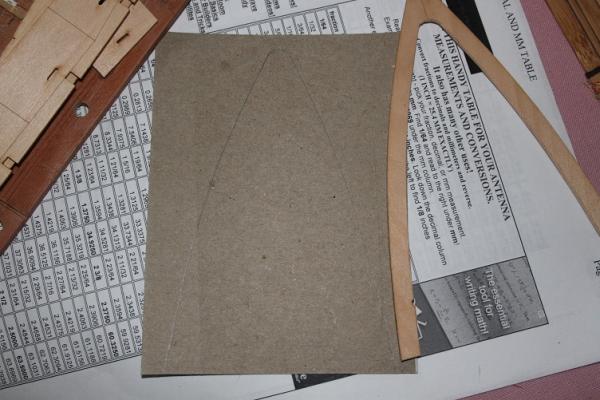
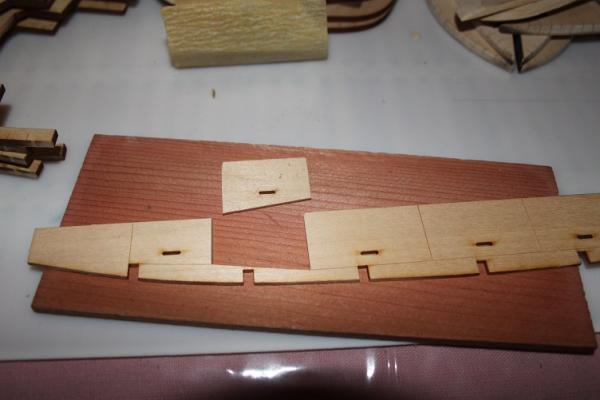
I'm starting my third build log here on MSW, this time Model Shipways rendition of Picket Boat #1. I first must apologize as once I cracked the box, I couldn't contain my enthusiasm and started building right away...so I've no inventory pics. What drew me to this kit was the exposed boiler and steam engine, the kit provides some excellent photo etched detail parts and some white metal castings that I'll photo and index as I add them to the build. The laser cut wood pieces appear to be of the highest quality and those I've worked with have proved to be such. So without further adieu... Model Shipway's Picket Boat #1. The first thing to notice is that the kit deck planking is laser etched into the fwd and aft sections, and no planking is supplied for the decks or bulkheads. The kit instructions recommend staining the decks but my kit had some rather prominent grain on the forward piece that would have been way out of scale so I made the call to use some walnut veneer to make planking and apply this where required. The aft section is to be painted so that is fine as it is, but I wanted wood on the bow and did not want the planking to stand above the trim boards so the center was carefully removed following the laser lines, a new section was made from stiff card which was planked with walnut. All the decks, seats, and exposed bulkheads were covered, the bulkheads may or may not be painted, I haven't made up my mind yet. The keel was built up following the kit instructions, no modifications here, but when I went to carve the water way at the bow it did not go to well, so this has been filled and will be sanded in later. All the frames that required faring have been marked out my Model Shipways, all one has to do is carve and sand to the lines. I plan to add some details to the kit so I've opened some of the coal bunkers with the thoughts of showing off the fuel, not sure yet whether this will be purchased or scratch built, leaning toward the latter. Well that's about all for now, pics follow, thanks for your time and attention. THX J


- 105 replies
-
- 15
-
-
- picket boat
- model shipways
- (and 1 more)
-
Hey Steve...the case turned out great, I know what you mean, I felt the same way when I was closing in on the end of my HM build, don't understand it but I sure felt it. Maybe because there is so much time vested in them?? Your scratch looks like its off to a good start, I'm toying with a scratch idea myself, a single masted sloop...(free plans here http://modelshipbuilder.com/page.php?192 ) In fact I may put my Niagara aside for a bit to start the scratch. I'm struggling to interpret some aspects of the Niagara plans and she will be huge (by my standards) when complete, total length in excess of 40 inches, so I'll need to find a spot where she can be displayed...space is pretty tight here! Still mulling it over...be sure to post a link to your new build log, I'd love to follow along. J
-
Hey Steve...seems you've about finished her, any thoughts on what your next build might be?
-
Beautiful workmanship...almost a shame to cover it with paint! J
- 440 replies
-
- 1
-
-
- niagara
- model shipways
- (and 1 more)
-
ROYAL CAROLINE 1749 by Doris - 1:40 - CARD
jct replied to DORIS's topic in - Build logs for subjects built 1501 - 1750
Hello Doris, Absolutely gorgeous and inspirational, glad your new job is working out better for you. You've been missed J- 883 replies
-
- 1
-
-
- royal caroline
- ship of the line
- (and 1 more)