HOLIDAY DONATION DRIVE - SUPPORT MSW - DO YOUR PART TO KEEP THIS GREAT FORUM GOING! (Only 72 donations so far out of 49,000 members - Can we at least get 100? C'mon guys!)
×


Freebird
-
Posts
334 -
Joined
-
Last visited
Content Type
Profiles
Forums
Gallery
Events
Everything posted by Freebird
-
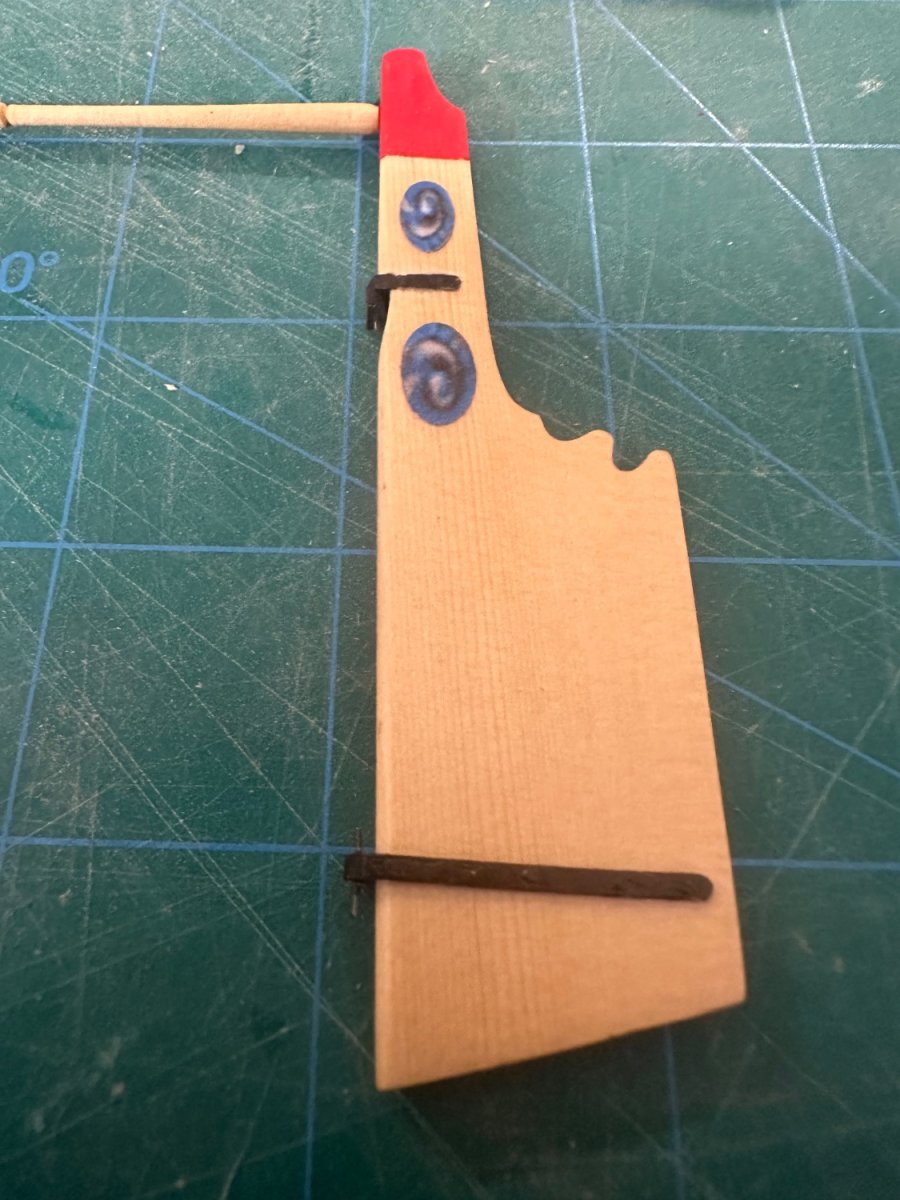
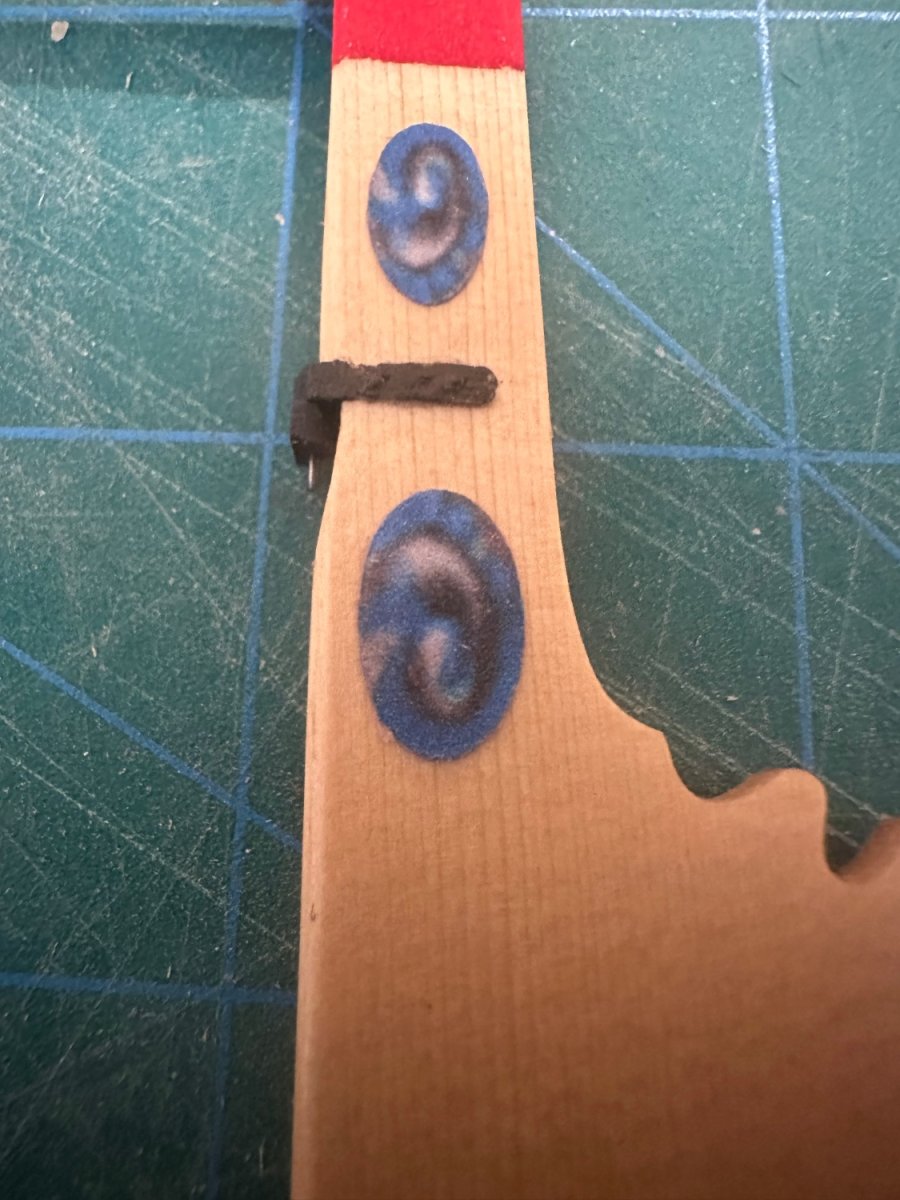
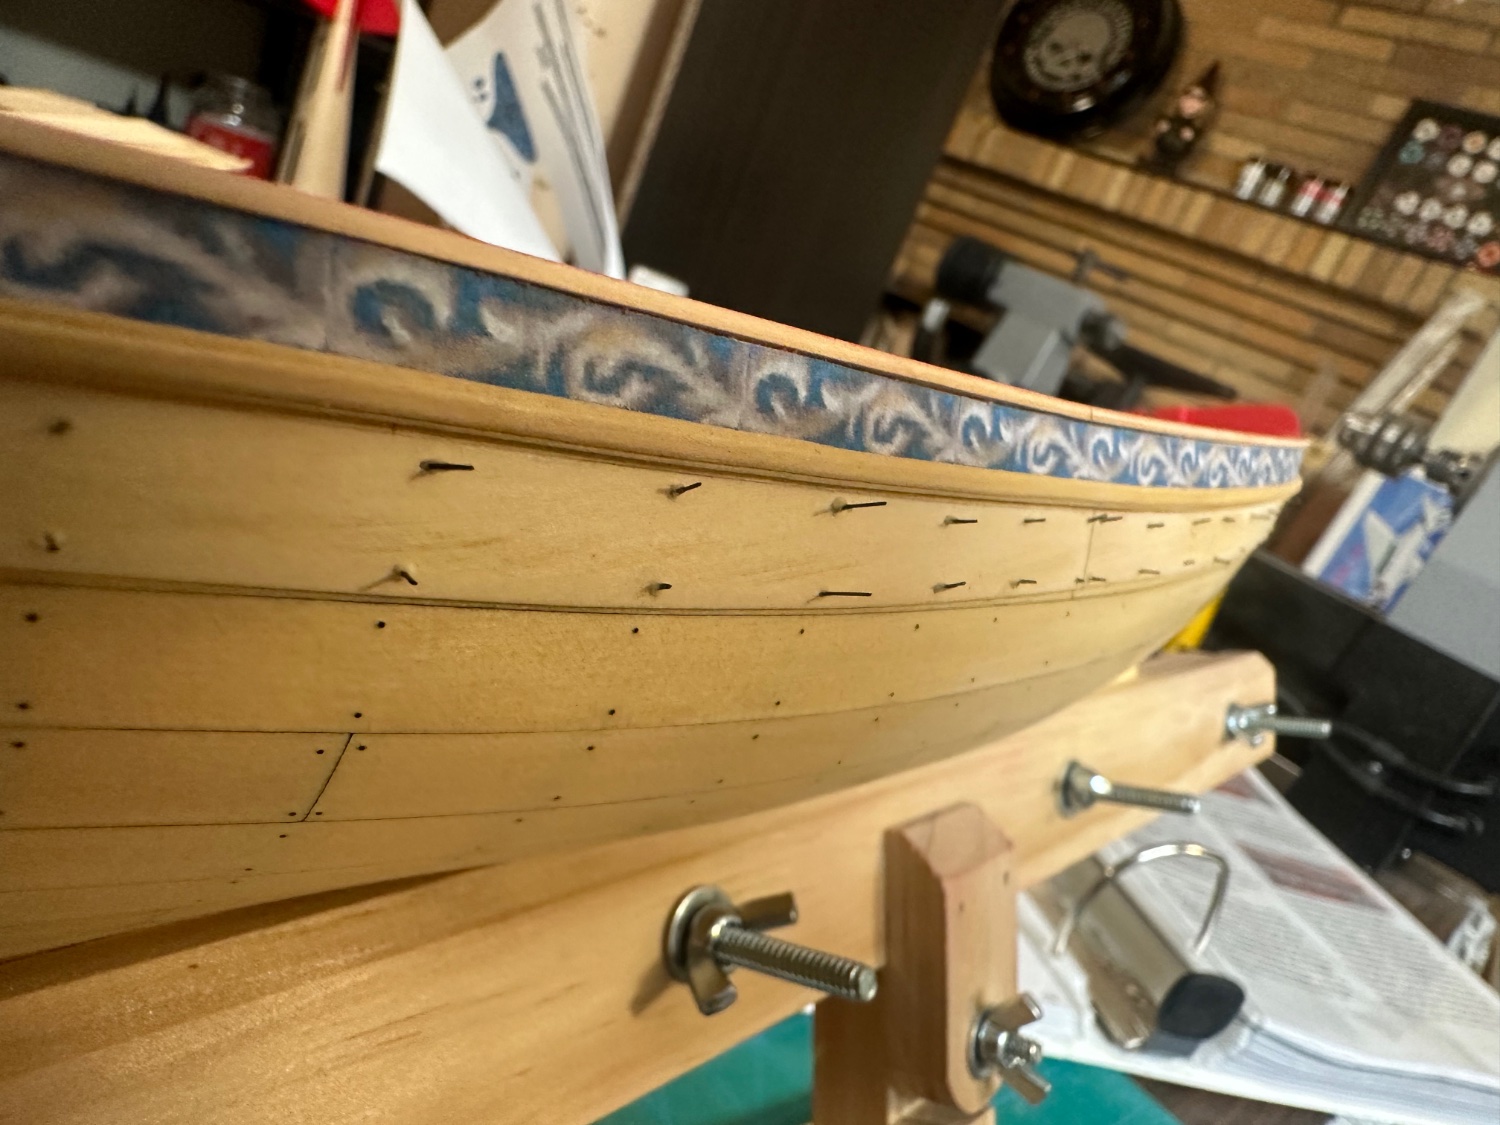
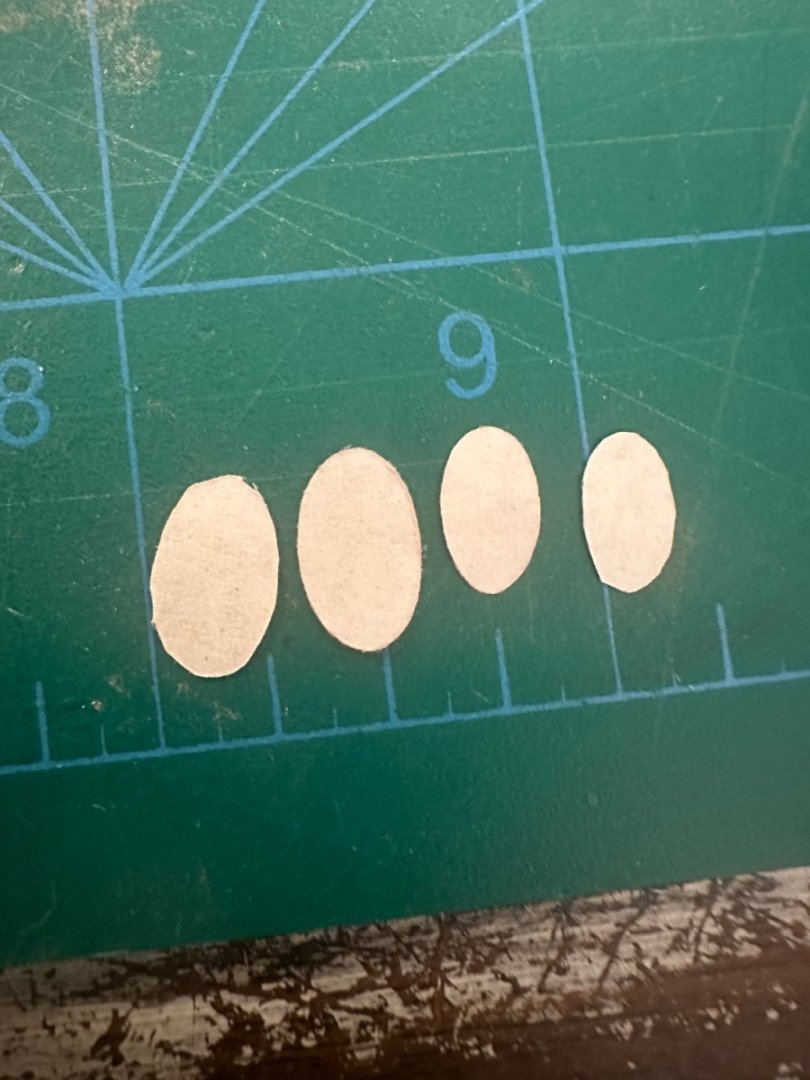
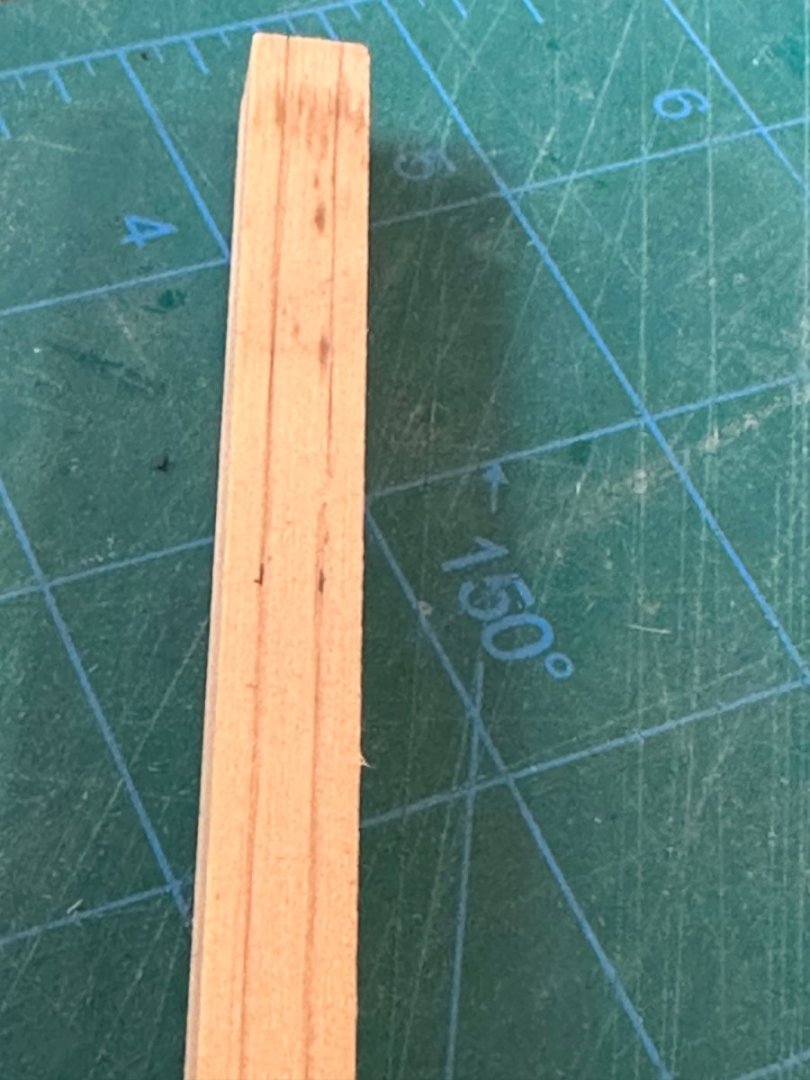
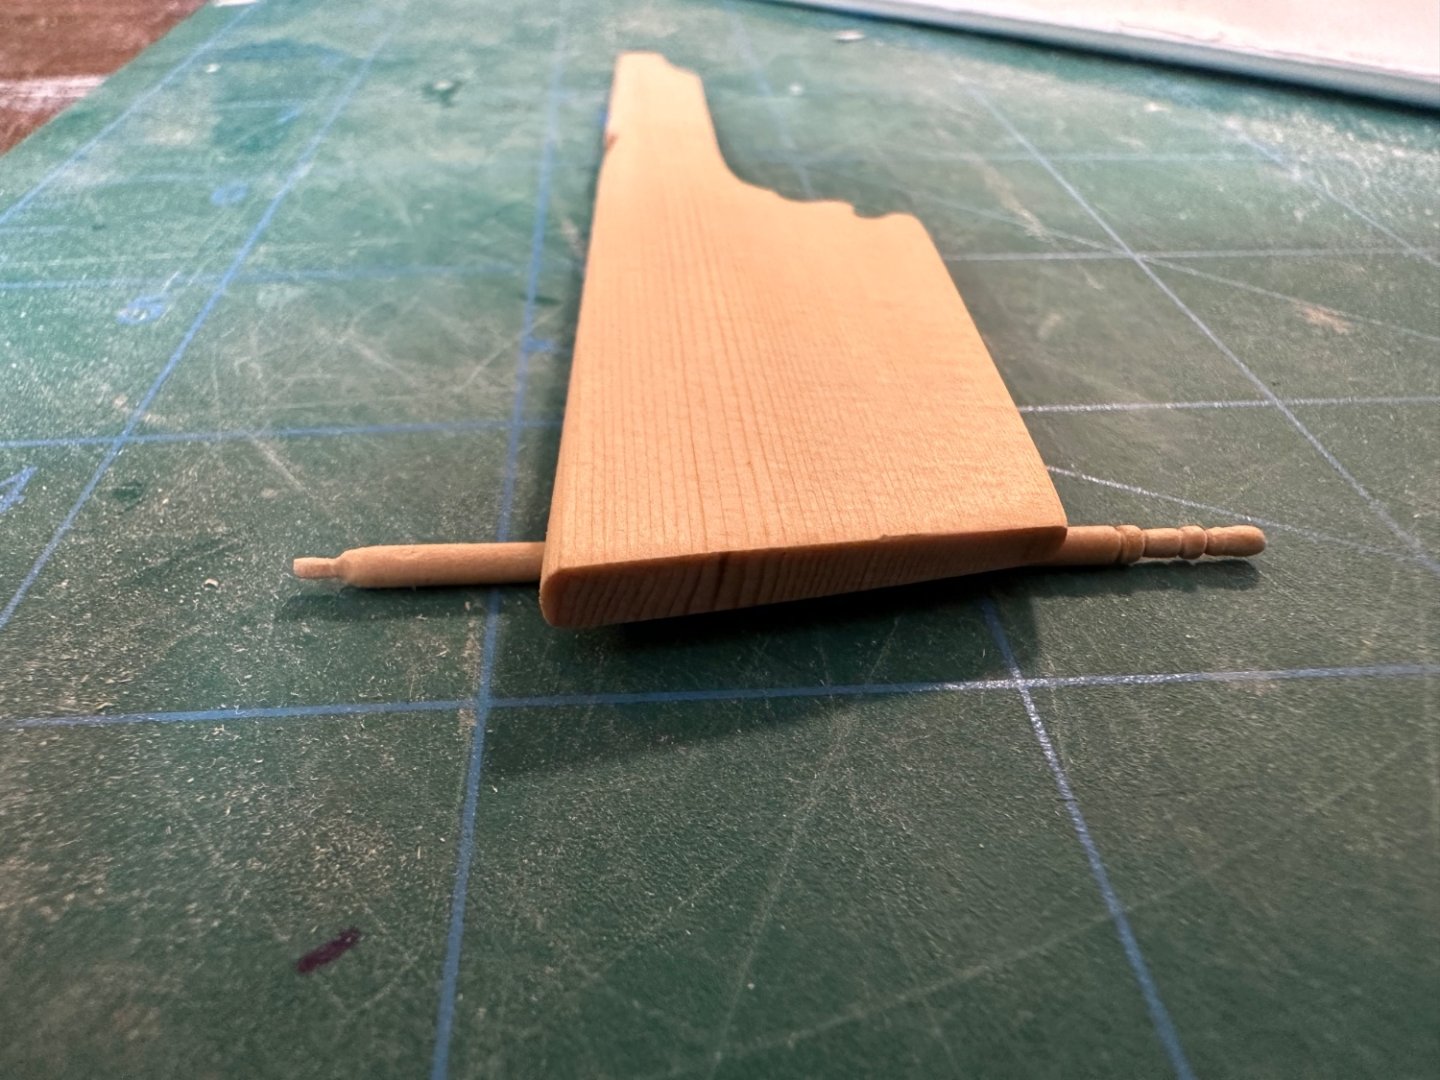
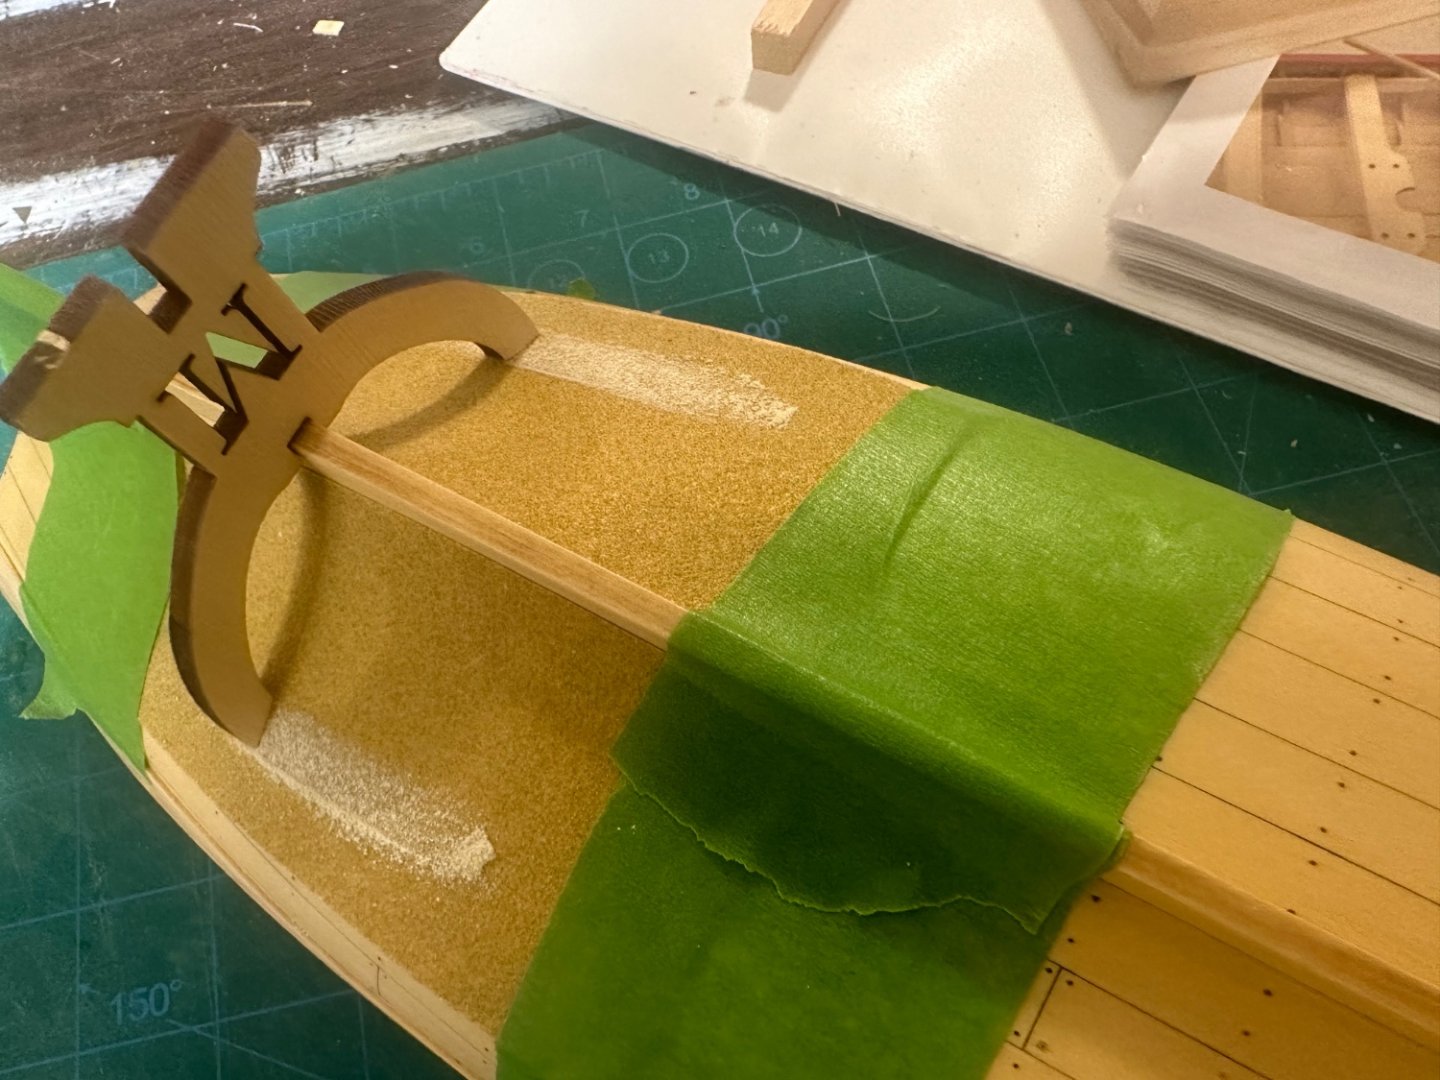
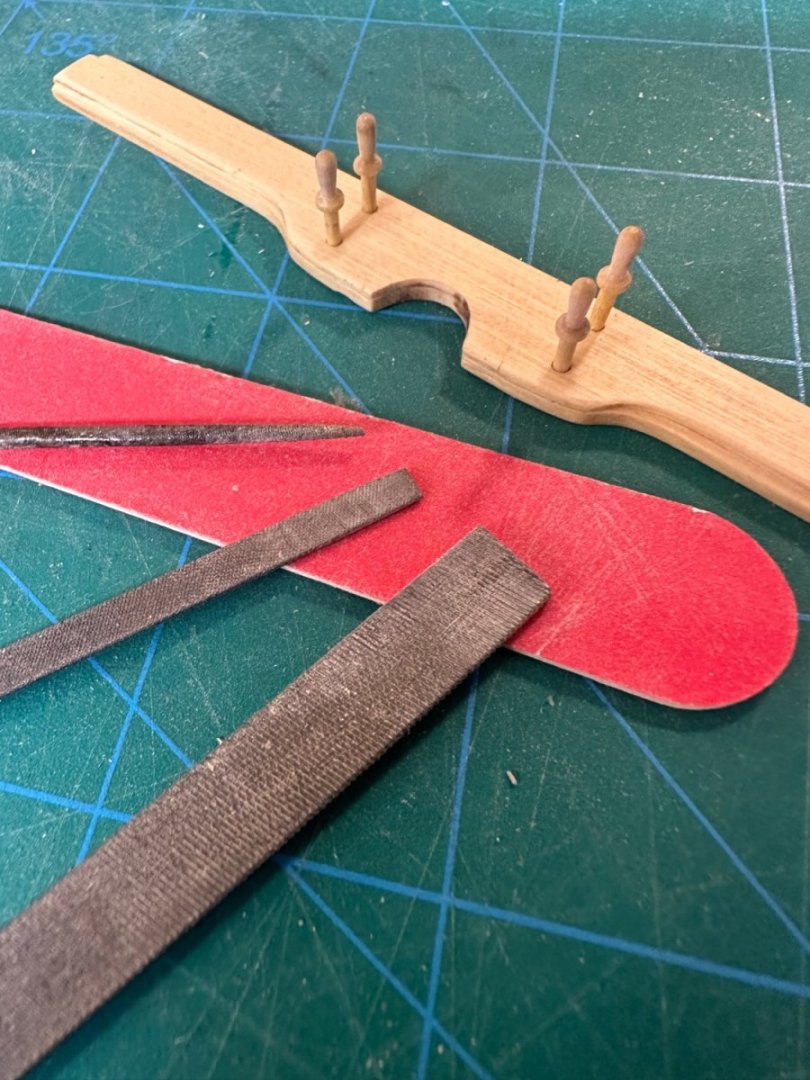
I also decided today to finish the rudder. I painted the red and added the friezes. One thing I know about my skills is that I can’t cut something as small as these designs without having some rough lines. While I managed to cut out some that were satisfactory, I wasn’t entirely happy with them. As I sat and looked at them, I wondered if I could gently sand the edges smooth with some new 400 wet/dry sandpaper. I found it’s possible and the result was totally worth the effort. I held the frieze right near the edge and used a very light touch so the edge wouldn’t roll over. In the pictures below, the 2 middle ones are edge sanded. When done, I used a blue pencil that matched the base color and gently ran it on the exposed white edge. Results were excellent. Amazing what a little effort can accomplish. Best Regards …. Rick

- 155 replies
-
- 8
-

-
- Medway Longboat
- Syren Ship Model Company
- (and 1 more)
-
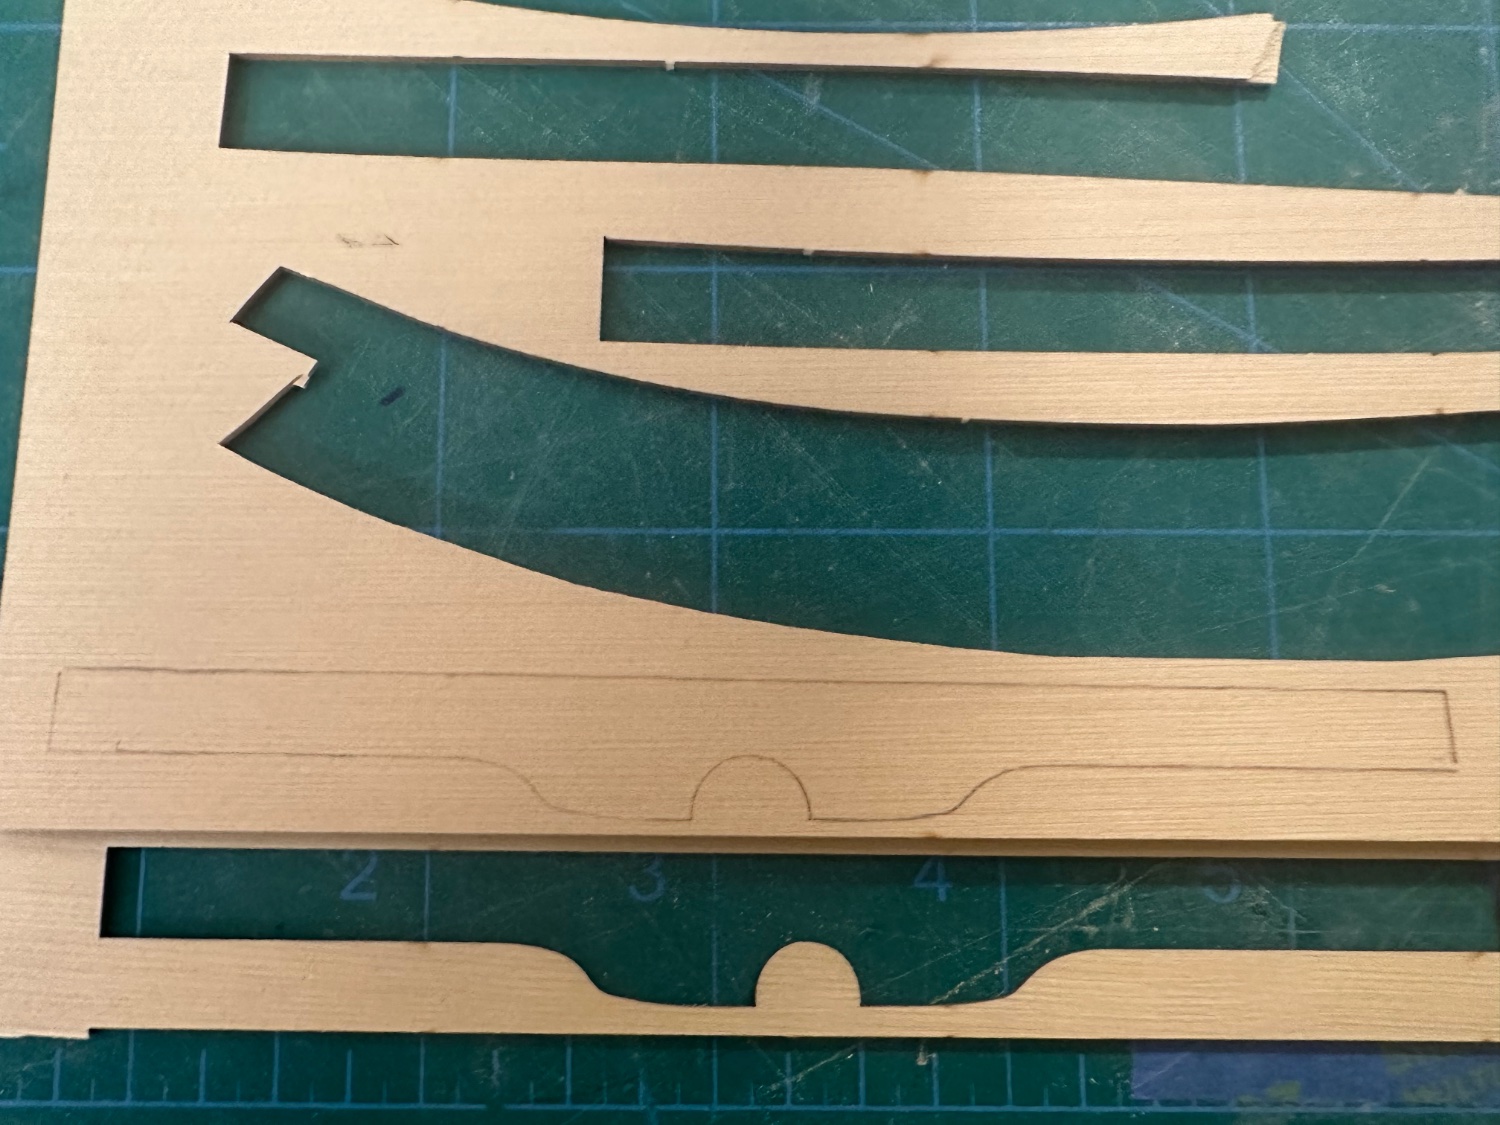
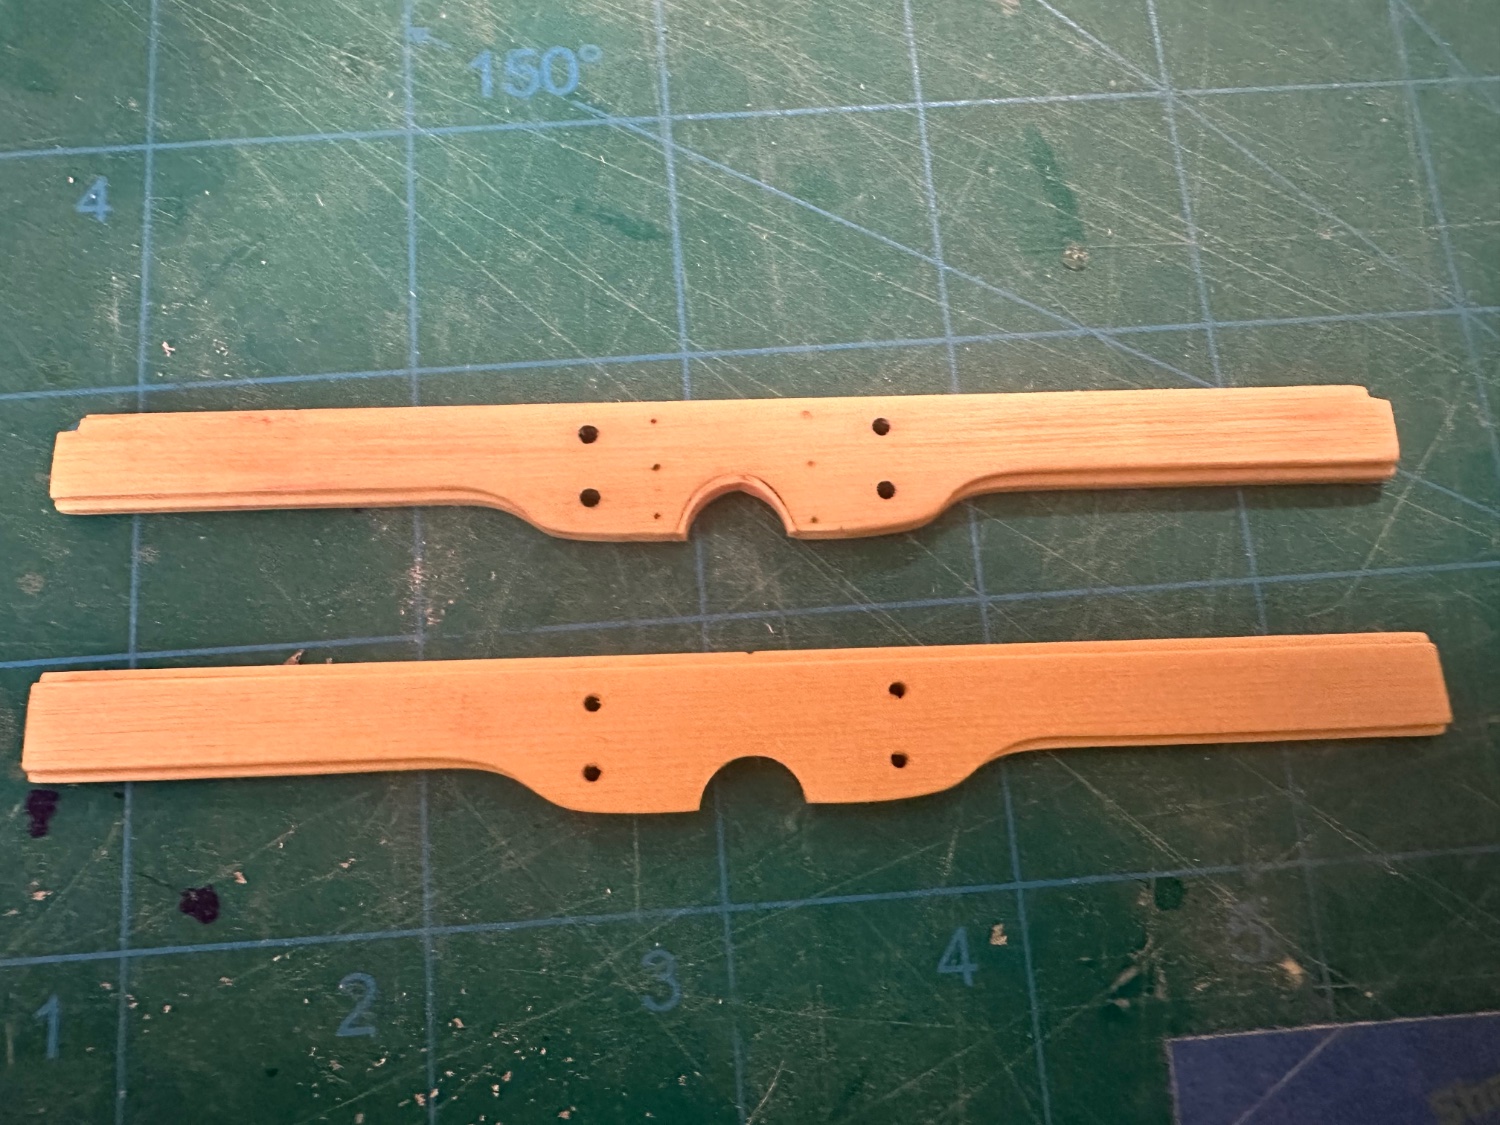
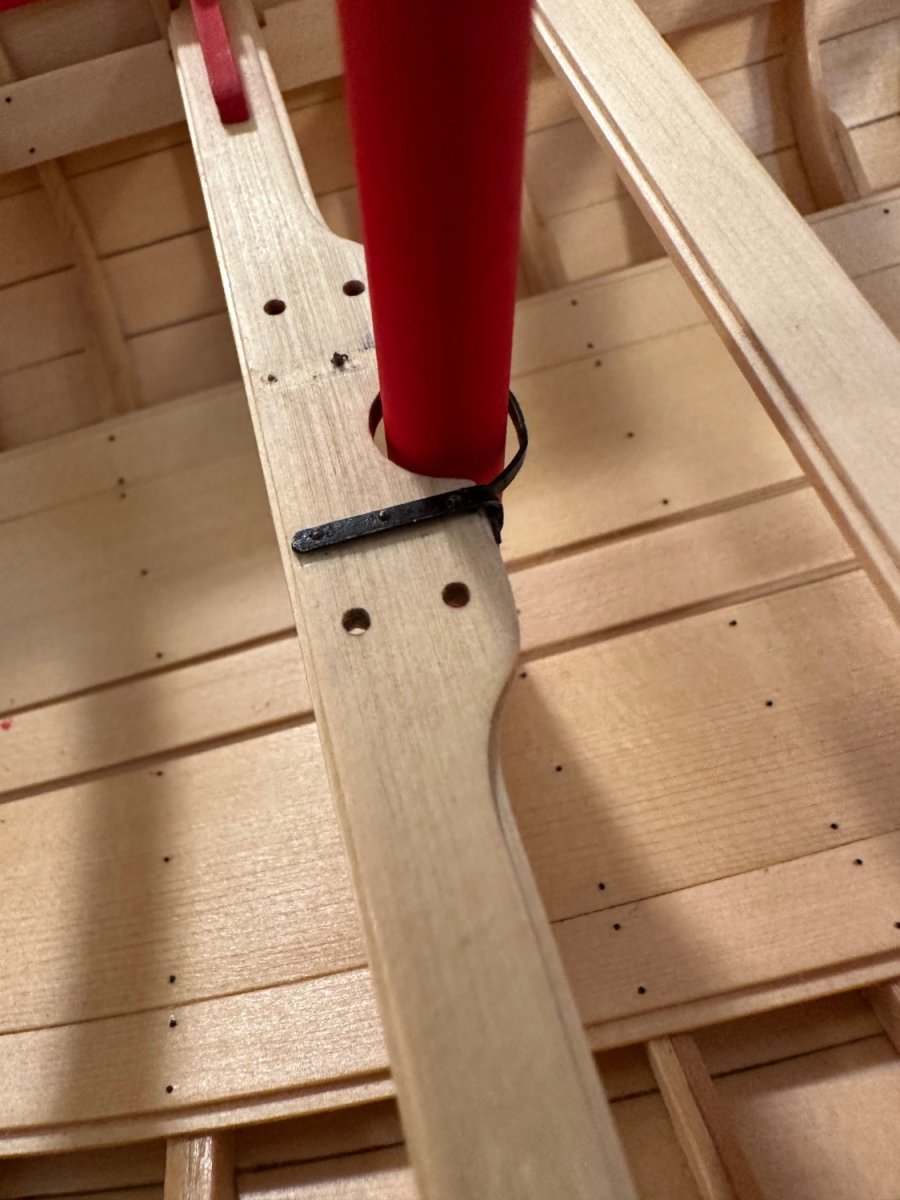
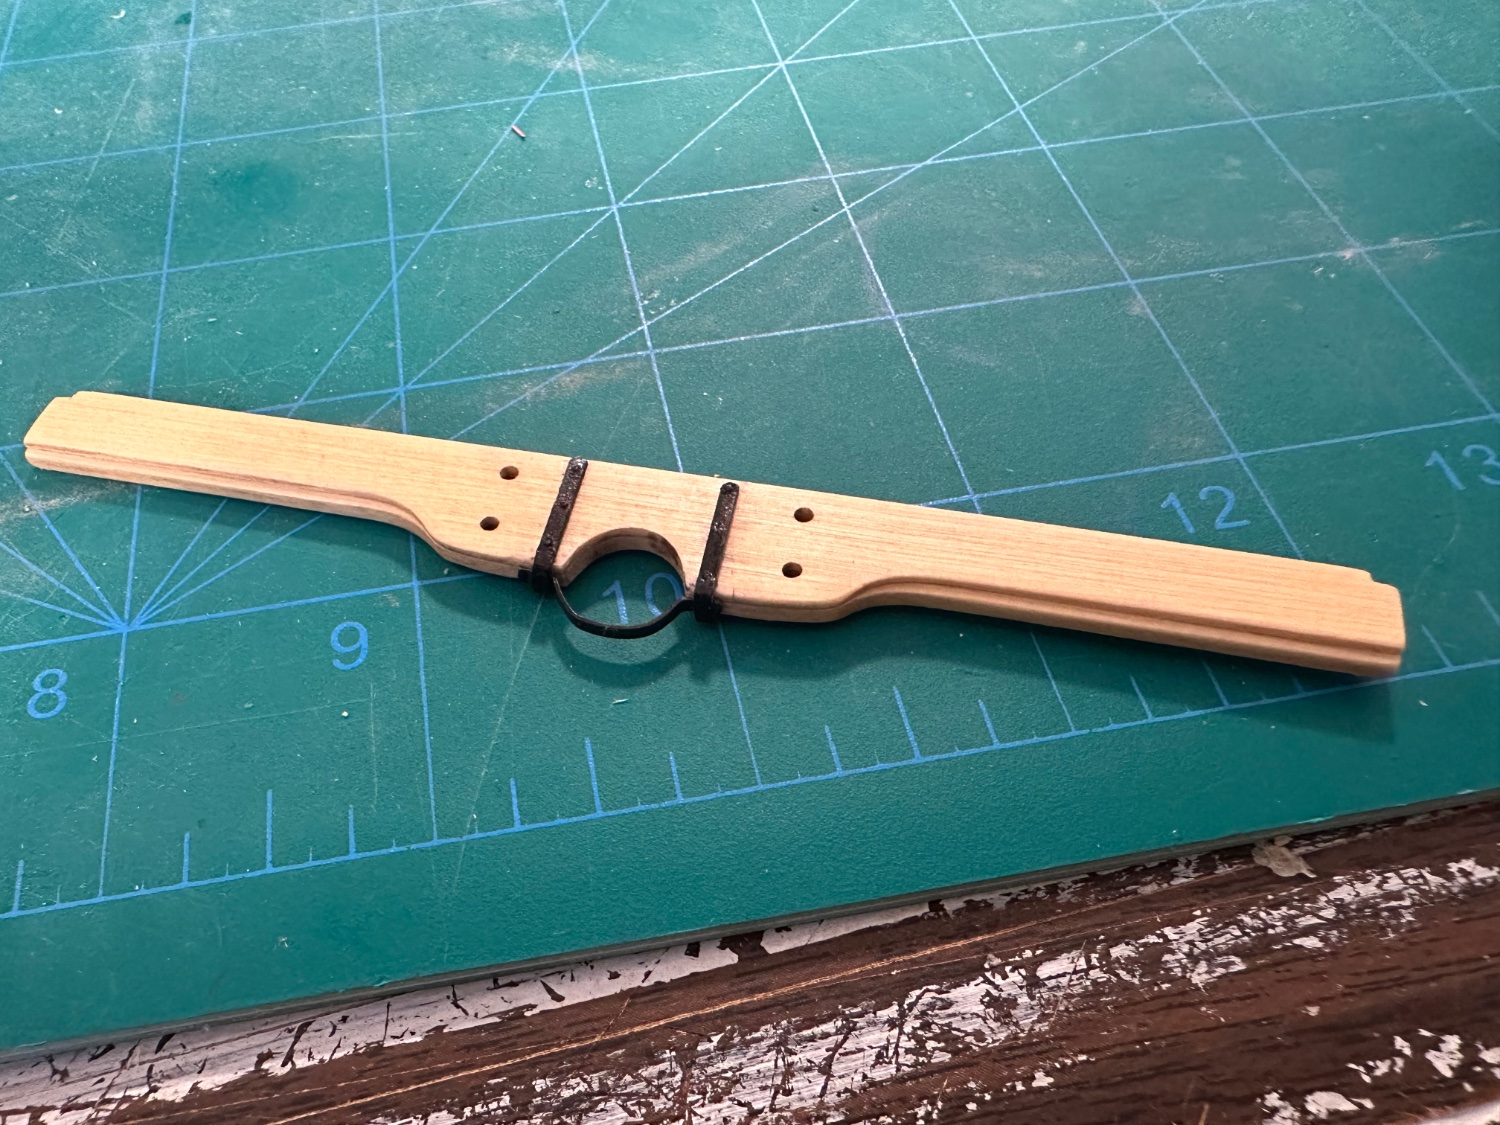
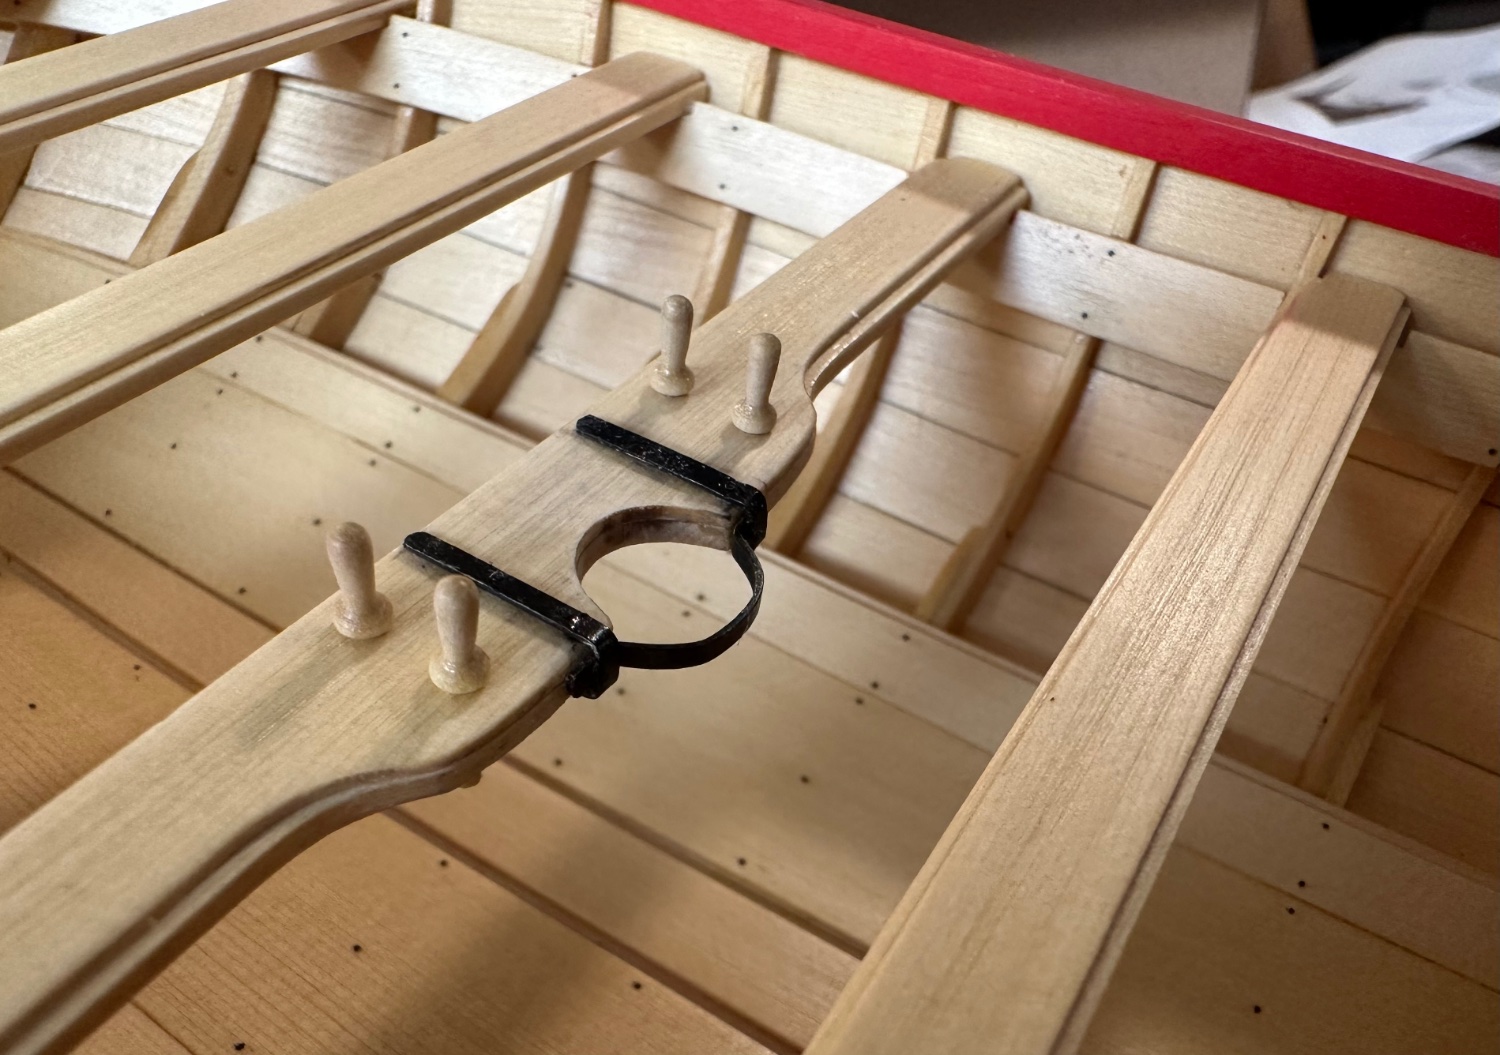
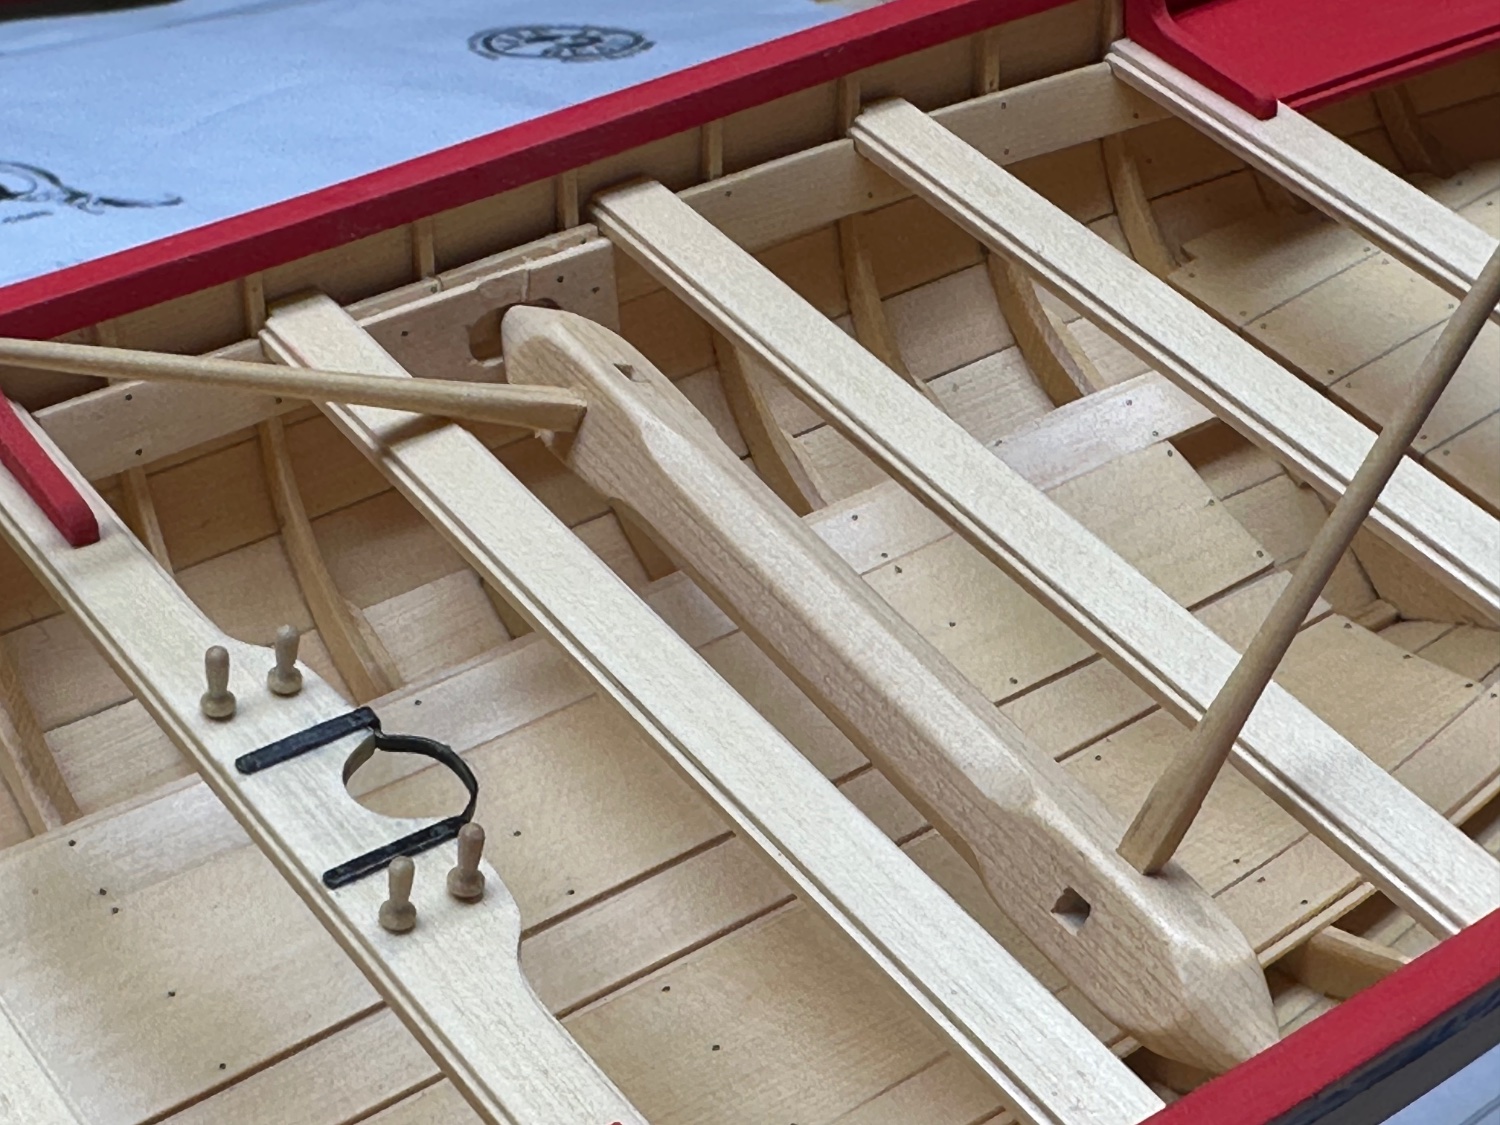
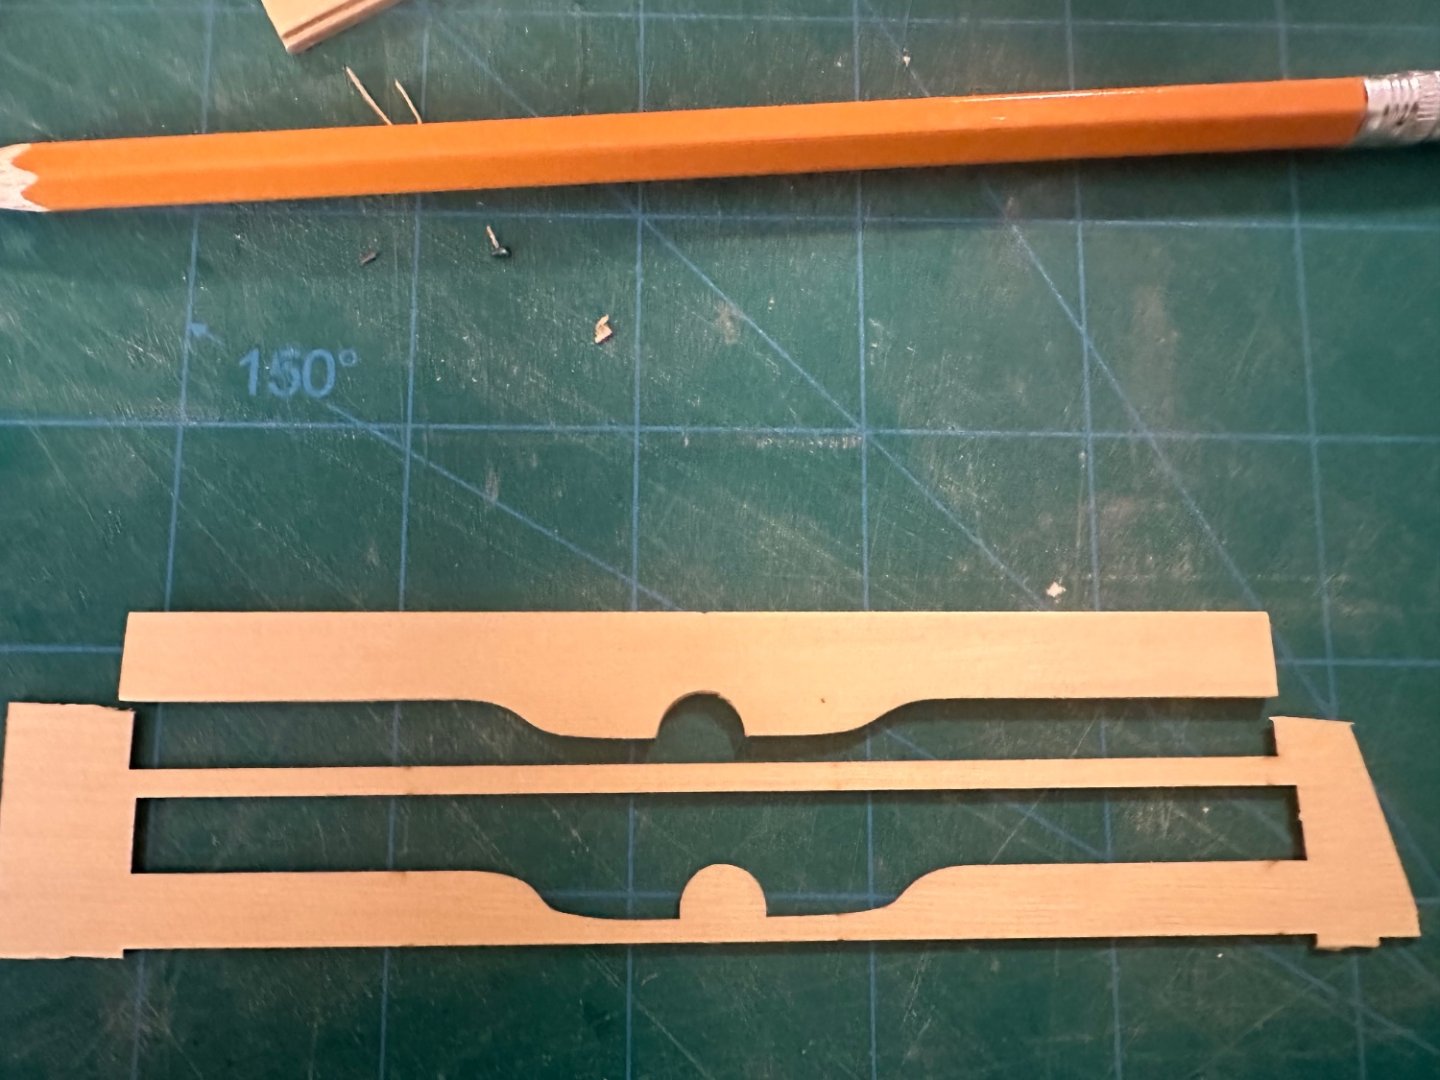
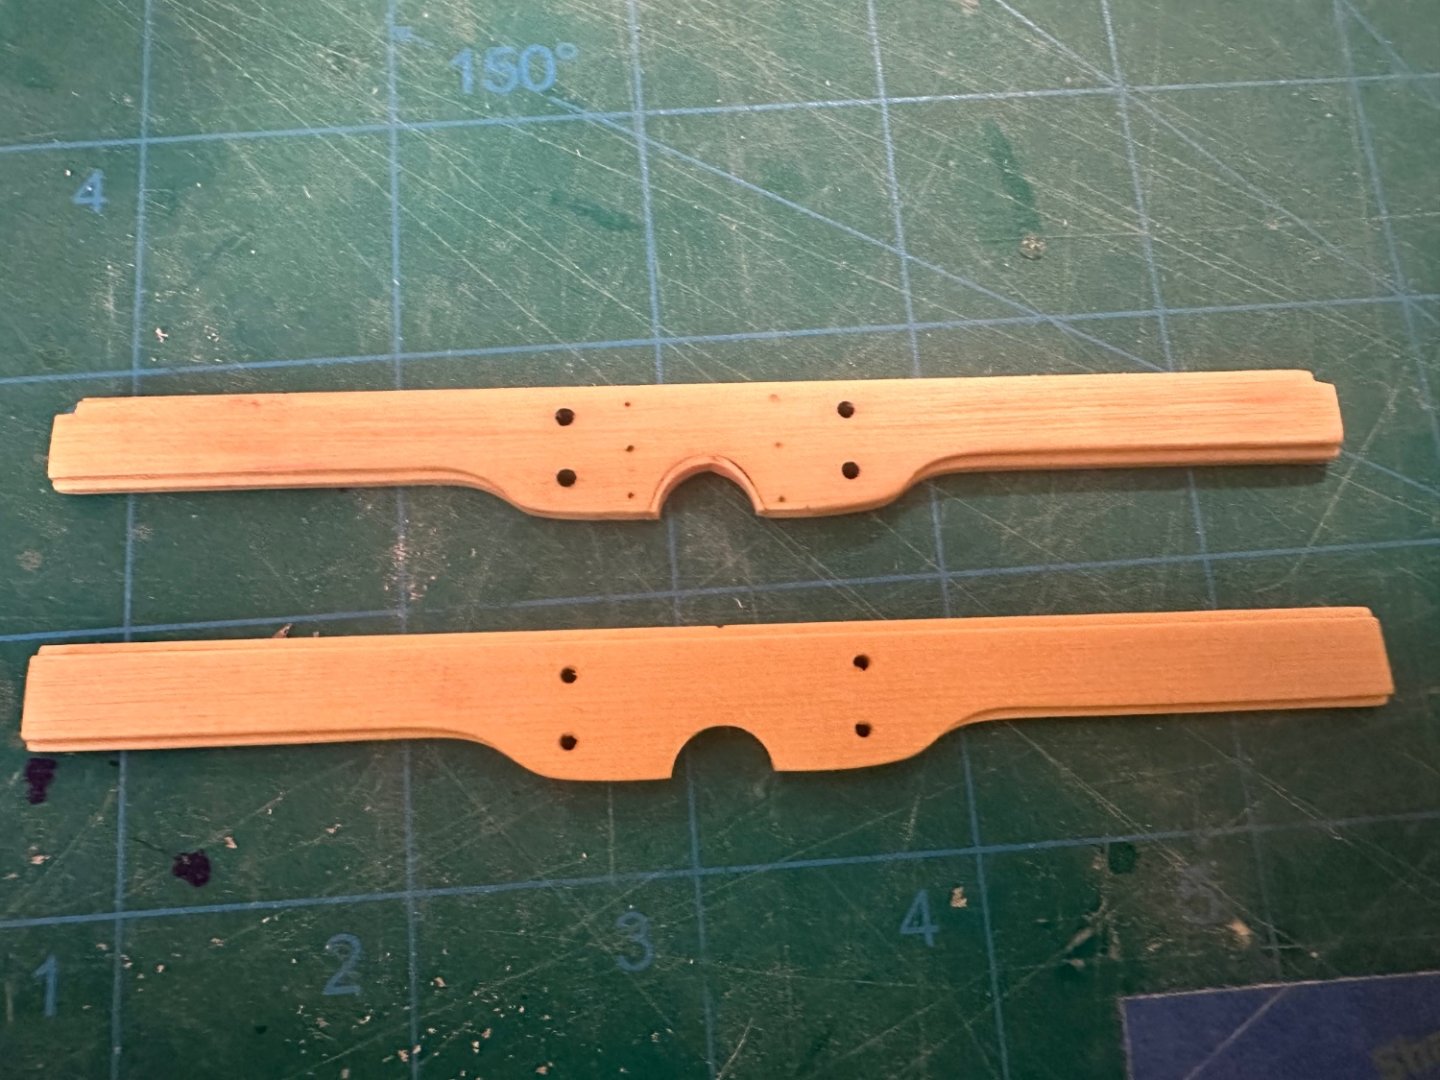
Spent some time seeing what my options were for making the mast cutout smaller in the thwart smaller in diameter so the mast would fit better. I managed to bend some yellow cedar to fit the mast cutout but I didn’t like the way it looked. So I decided to make a new thwart with a smaller cutout. One thing I learned many years ago was to never toss out the die cut sheets the same parts came in just in case you need to make replacement parts. That sage advice served me well today. All I needed was 1/16” and 1/32” sheet to make the parts. Fortunately, Chuck provides some spare wood on his laser-cut sheets. It was a simple exercise to trace the shapes and cut out and sand to shape. Now I just need to remake the iron work again. Best Regards …. Rick


- 155 replies
-
- 6
-
-
- Medway Longboat
- Syren Ship Model Company
- (and 1 more)
-
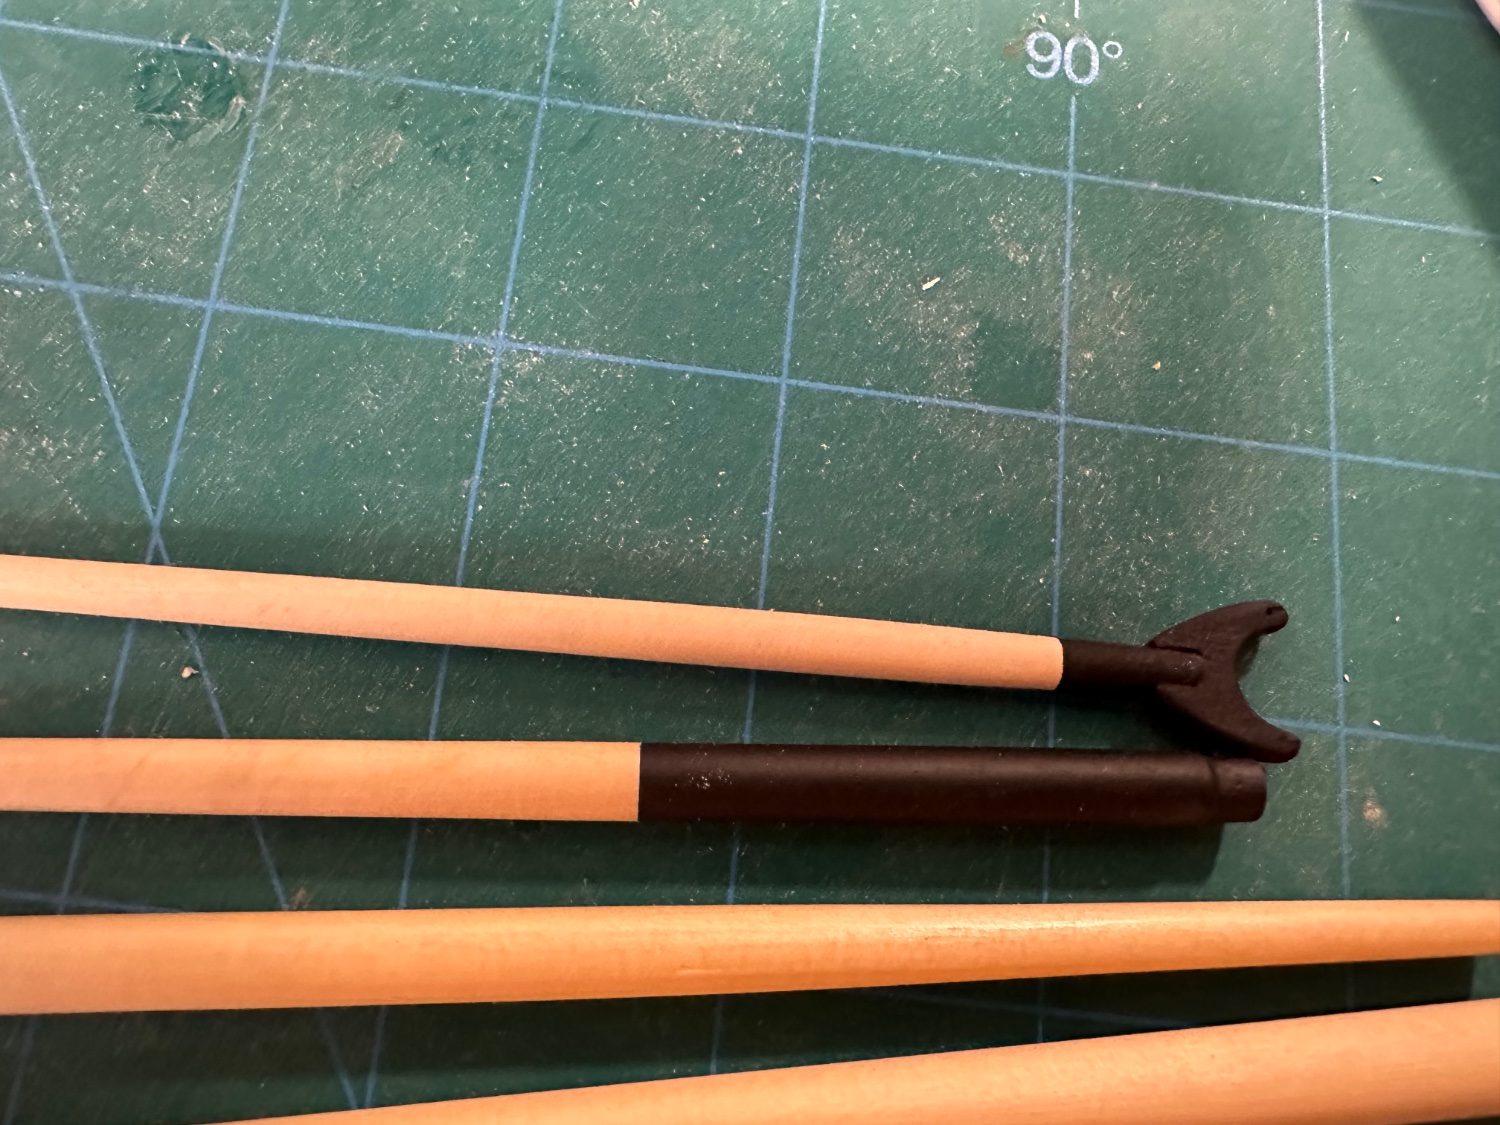
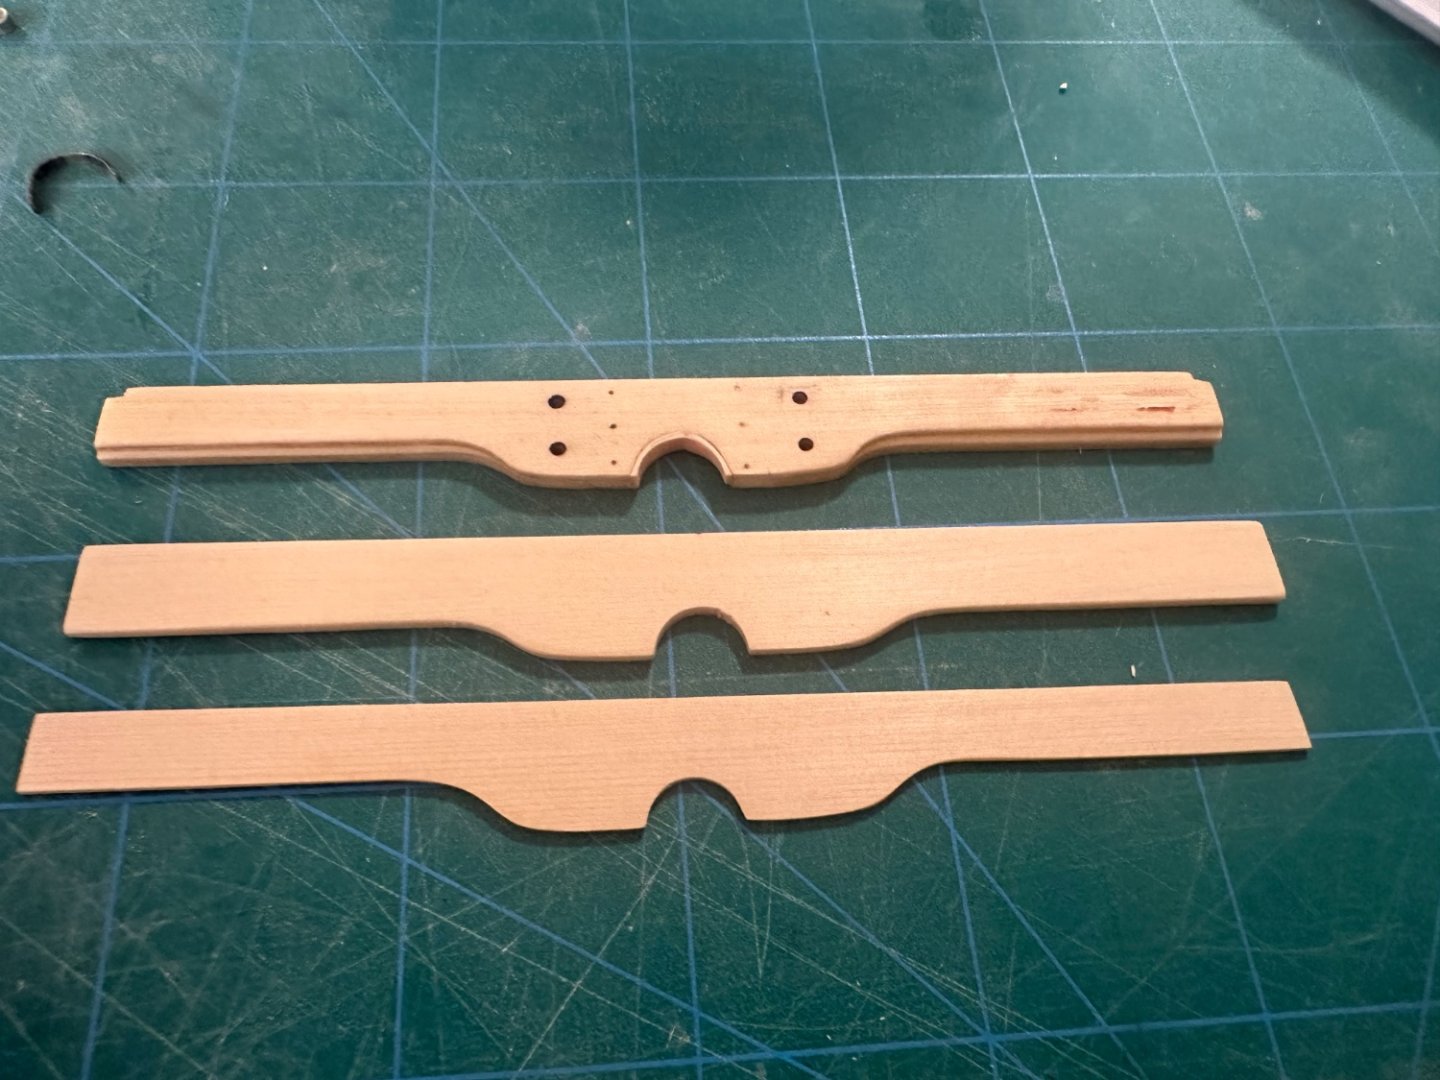
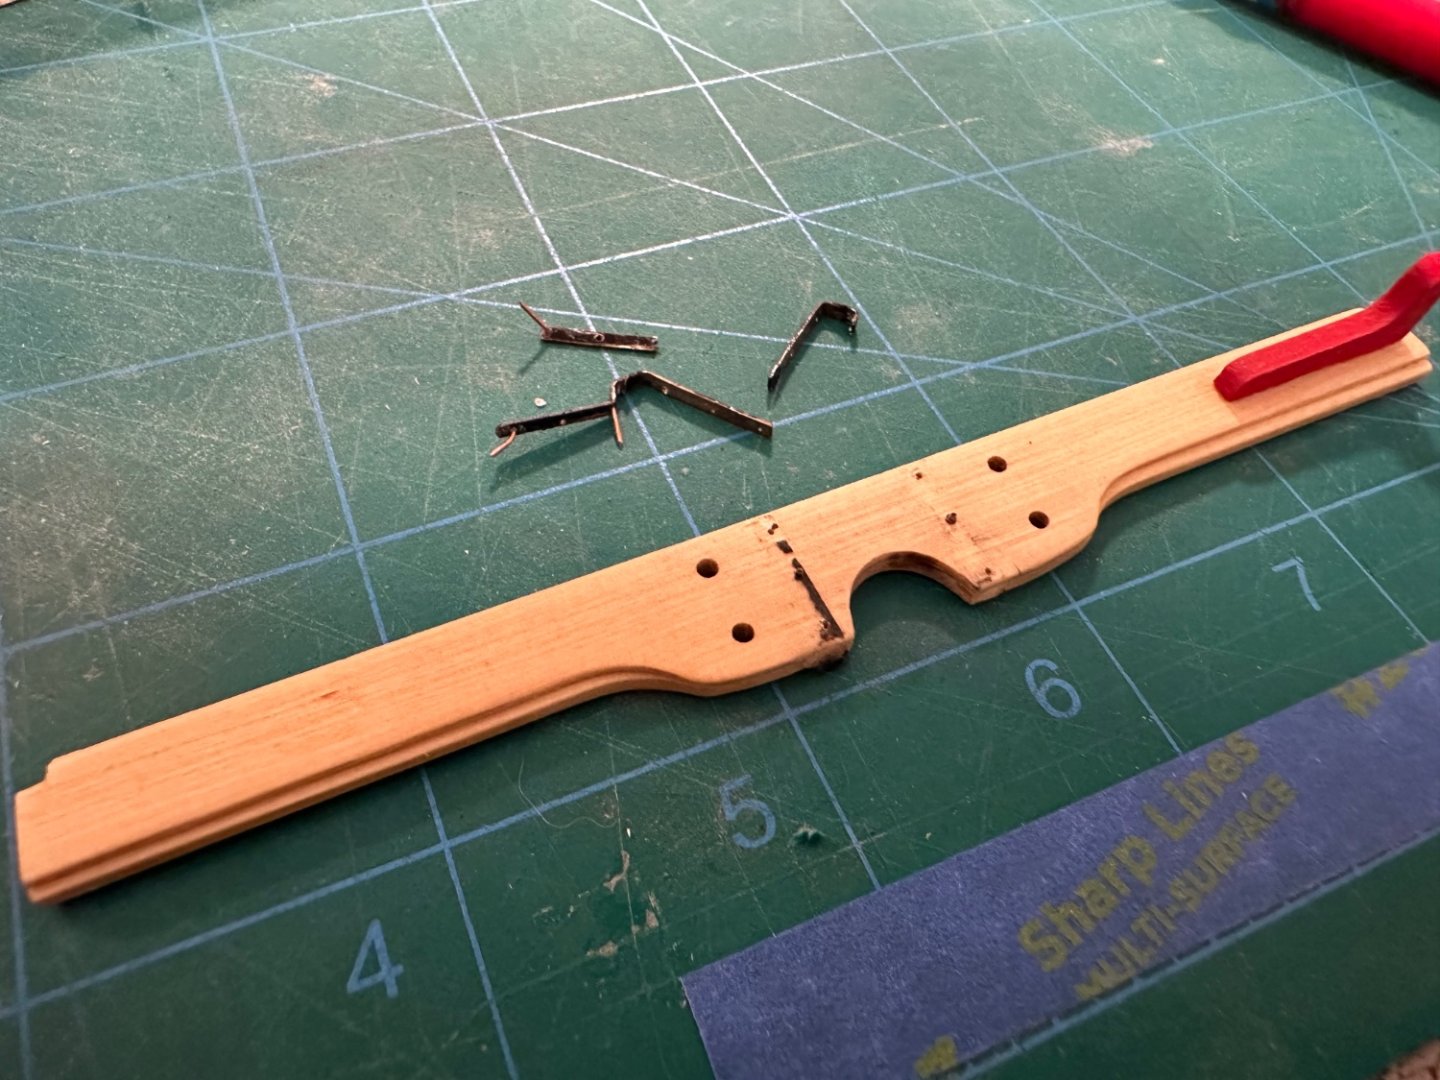
My first deconstruction, I took too much wood off the mast and its diameter is far smaller than the mast strap. After going through options, I decided to remove the thwart and all of the straps and start over. My project for the day. Best Regards …. Rick

- 155 replies
-
- 4
-
-
- Medway Longboat
- Syren Ship Model Company
- (and 1 more)
-
Ryland, thank you for the accolades! I refer to your Medway log often, lots of great info for this newbie. Rigging is again, something I’ve never attempted, but looking forward to learning the ropes (pun intended). I’ve throughly enjoyed this build, Chuck has done an outstanding job designing and explaining how to create a beautiful model. Cheerful is on deck and then Winnie. I think I have a problem…. Best Regards …. Rick
- 155 replies
-
- 3
-
-
- Medway Longboat
- Syren Ship Model Company
- (and 1 more)
-
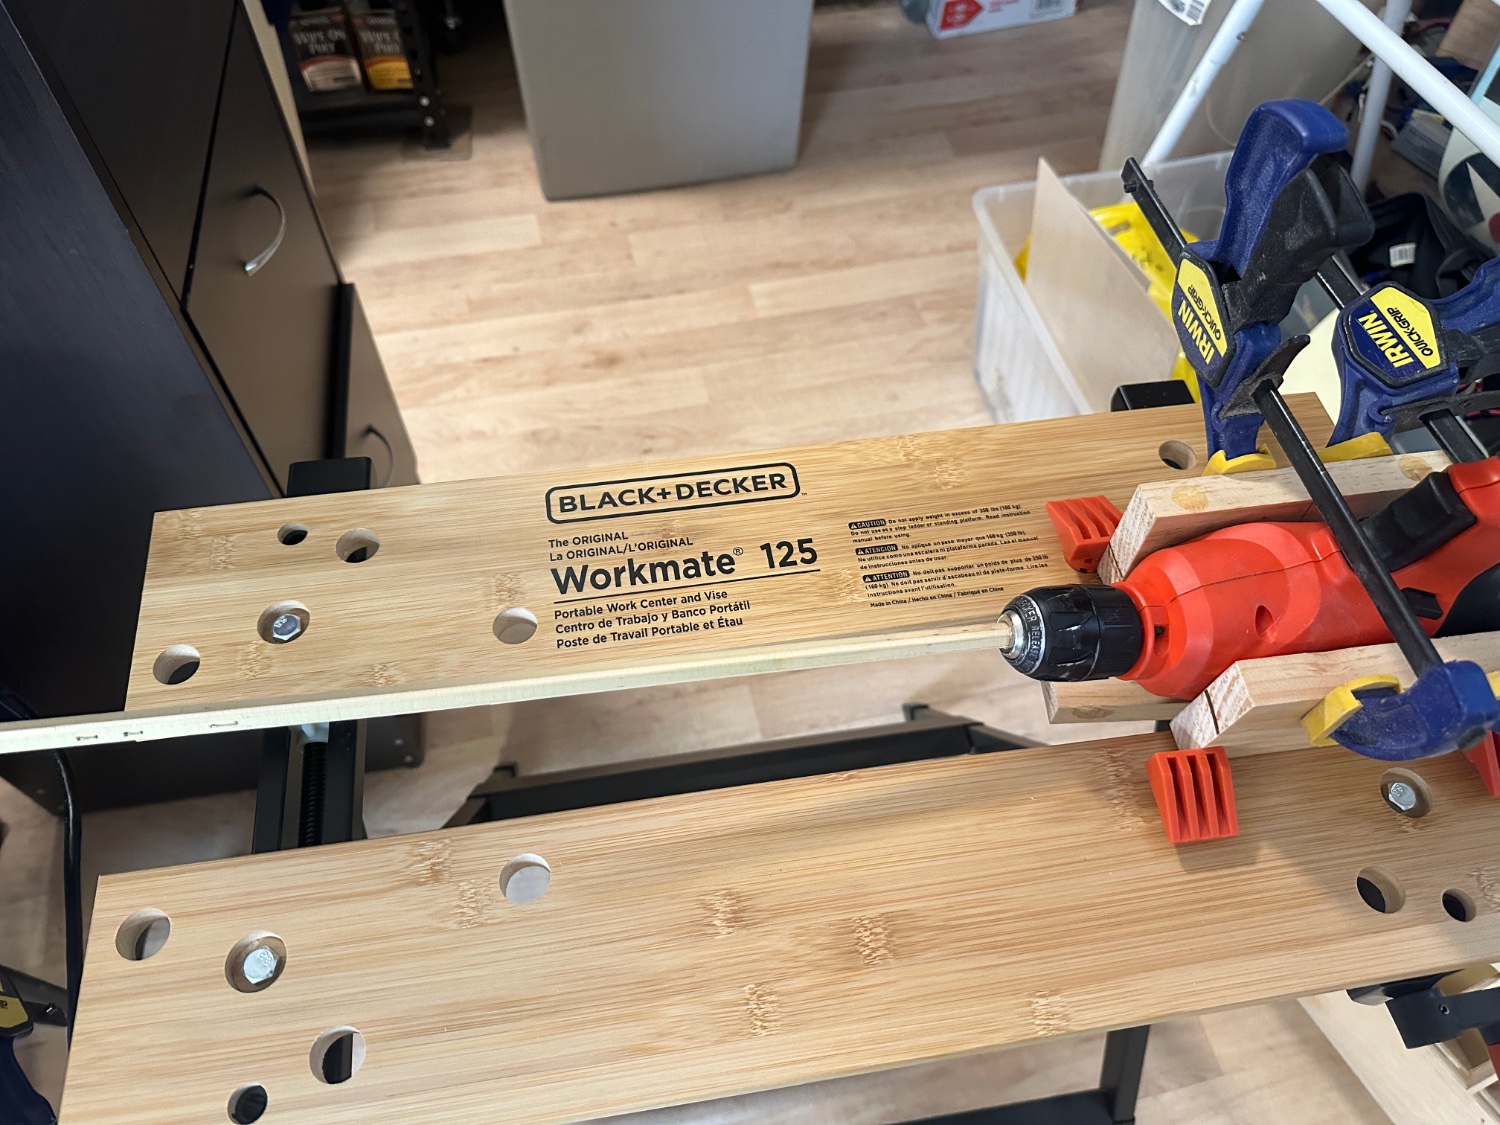
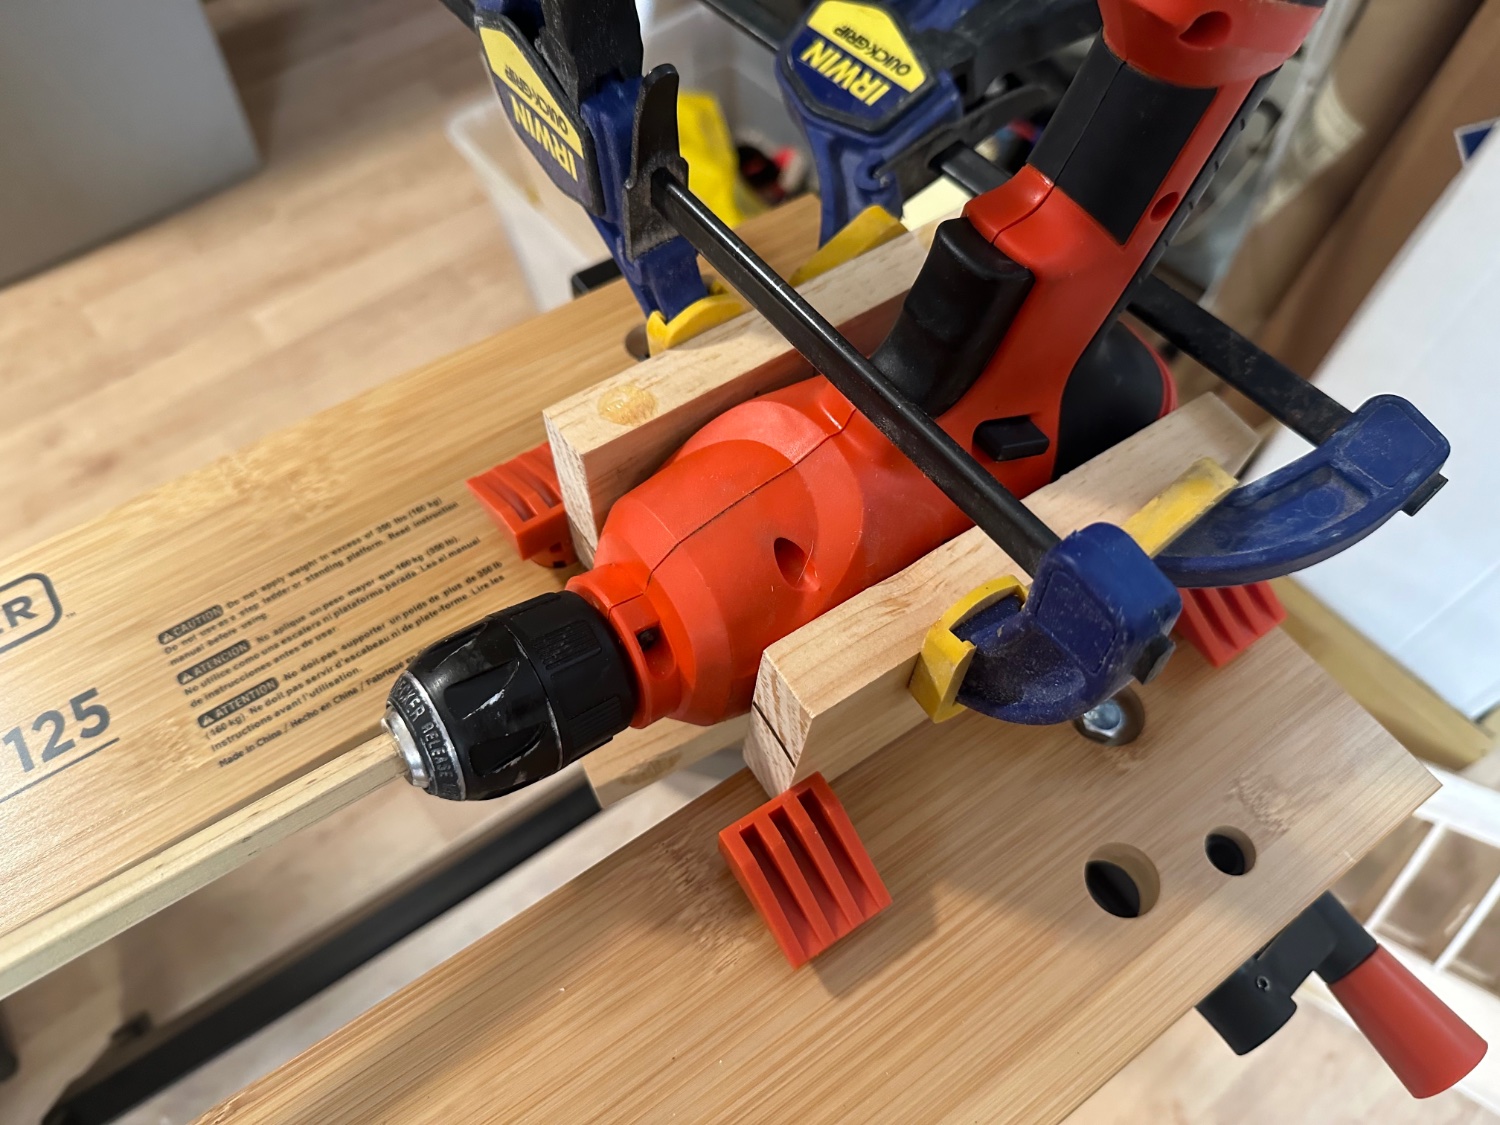
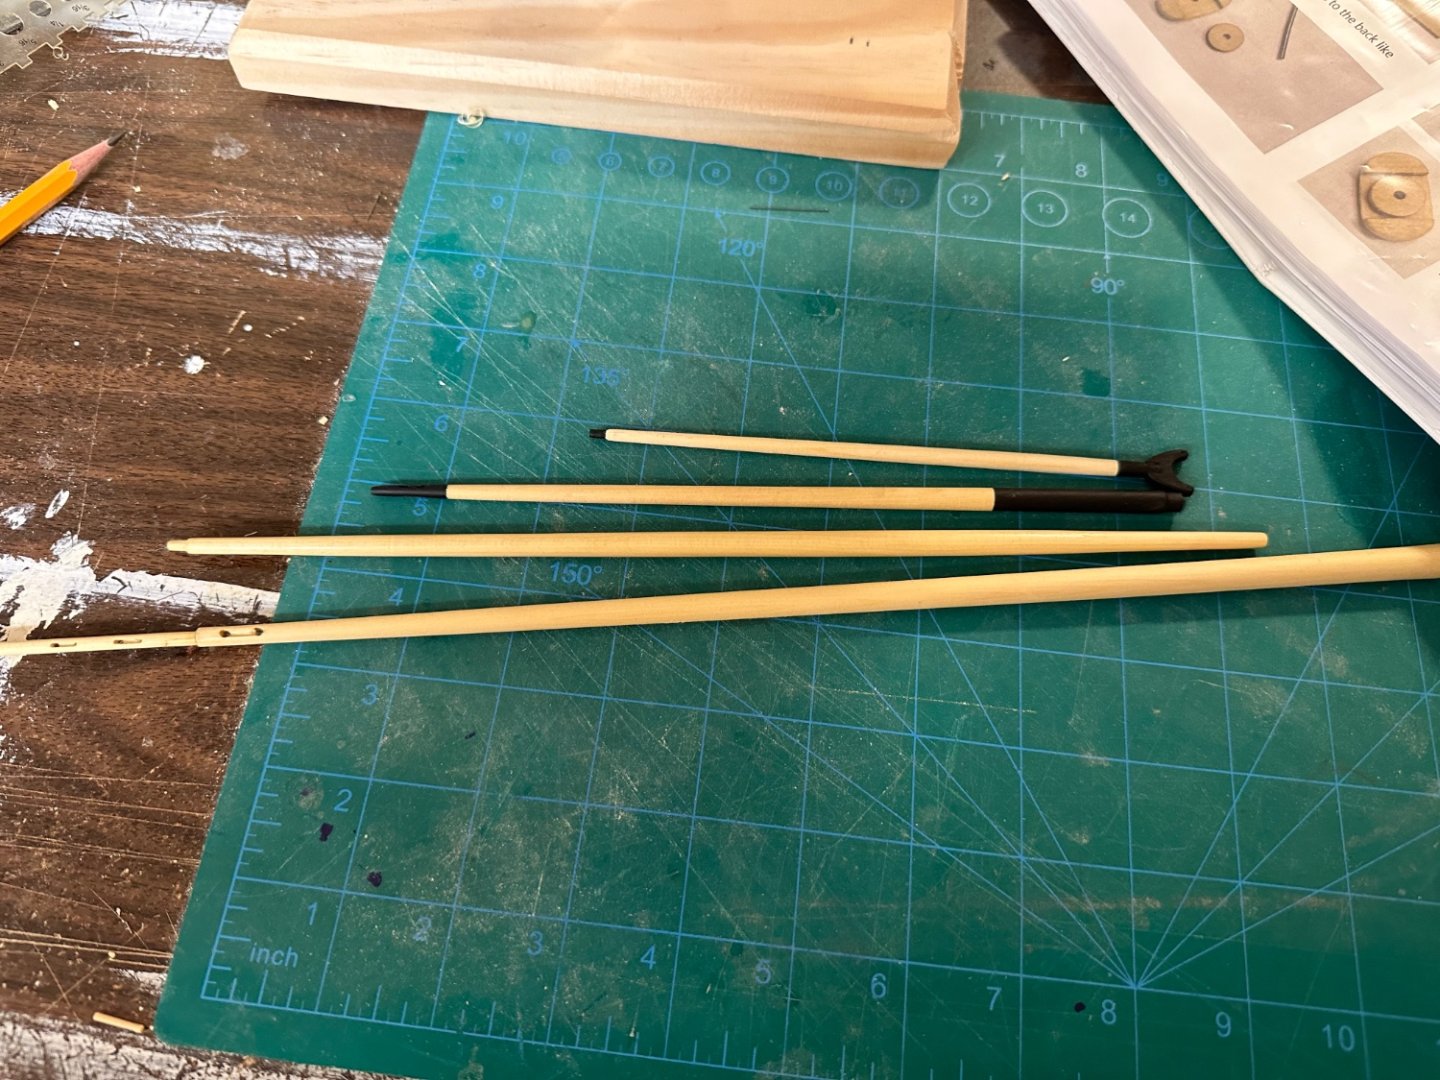
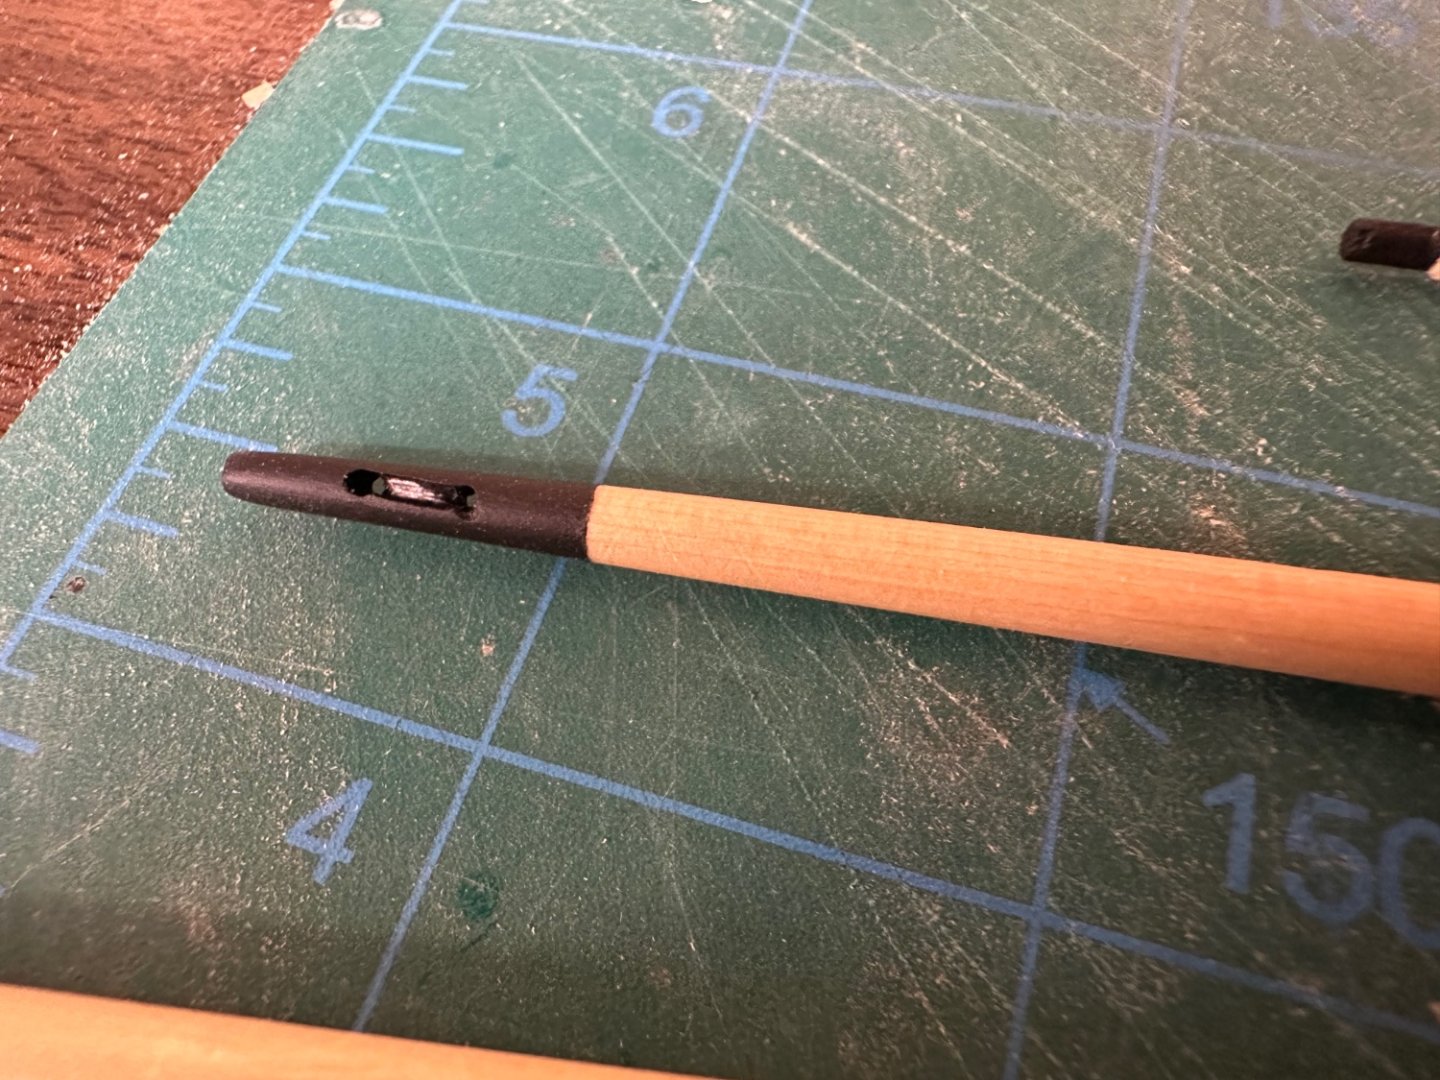
Finally got to spend some quality time in the shipyard today and I again did something I’ve never done before. I made the main mast, bowsprit, the boom and the gaff. I had a lot of apprehension getting started, I followed Chuck’s instructions after some very slow and thoughtful carving and turning on a small lathe, I had 3 of the 4 parts made. They actually came out pretty good. The mast was a different story as the lathe couldn’t accommodate the mast’s length. So it was time look at other logs for ideas and I found a couple that used a clamped hand drill. I have a B&D Workmate to secure the drill with the help of a few blocks of wood I had. To secure the the opposite end of the mast, I removed the tail stock from the lathe and clamped it at an angle to the end of my workbench to match the angle of the drill. The jig setup worked very well. All have a coat of WOP and need to be painted and need to make the various fittings. This model has been a lot of fun and has really built up my skills. Best Regards …. Rick


- 155 replies
-
- 8
-
-
- Medway Longboat
- Syren Ship Model Company
- (and 1 more)
-
Walrusguy, I’ve been closely following your fantastic log and applaud your talents and efforts! Quick question for ya (perhaps Chuck can chime in also). I’m a big fan of Alaskan Yellow Cedar (AYC), because of its wonderful color and workability. The question is, do you think that using thinner 1/32 thick planks instead of 1/16 thick planks is doable? Thanks for your thoughts! Best Regards …. Rick
-
I know this is an order post, but…. does anyone make any replacements for the cast metal parts (mostly the figurehead) that come in the kit? I’m not crazy about the supplied items. TIA! Best Regards …. Rick
-
Thanks Chuck! The hunt is on! Best Regards …. Rick
-
Thank you All, for the likes! Much appreciated! Question for the group. I’m very close to starting the sticks and strings, and I want to serve the shrouds as I have Chuck’s serving machine. What size and color thread have you guys used for serving? I’ve been reading the build logs but haven’t seen much on the subject other the lines being served. Thanks for the help! Best Regards …. Rick
-
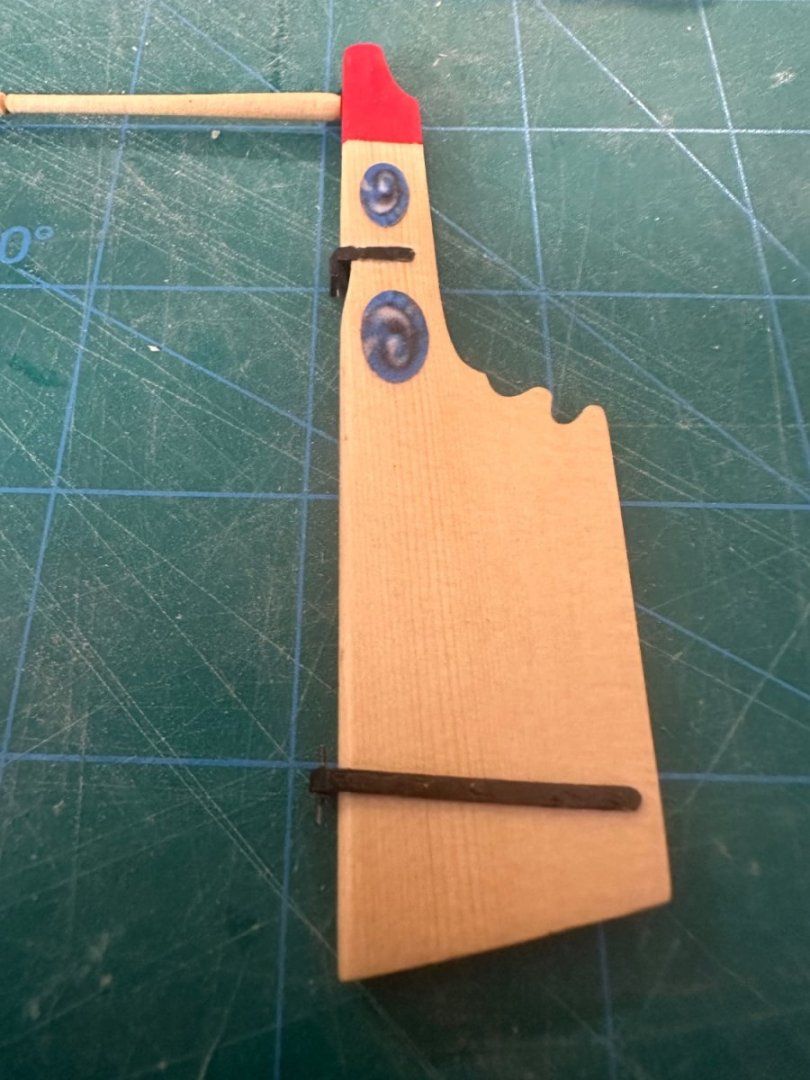
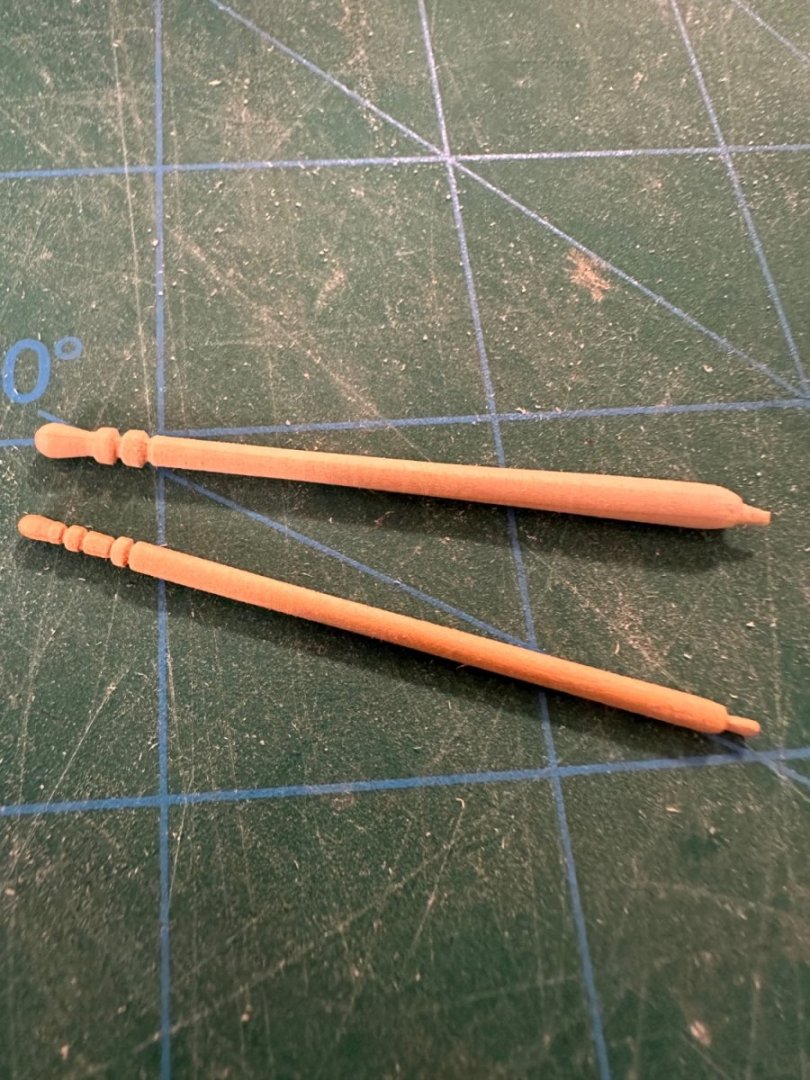
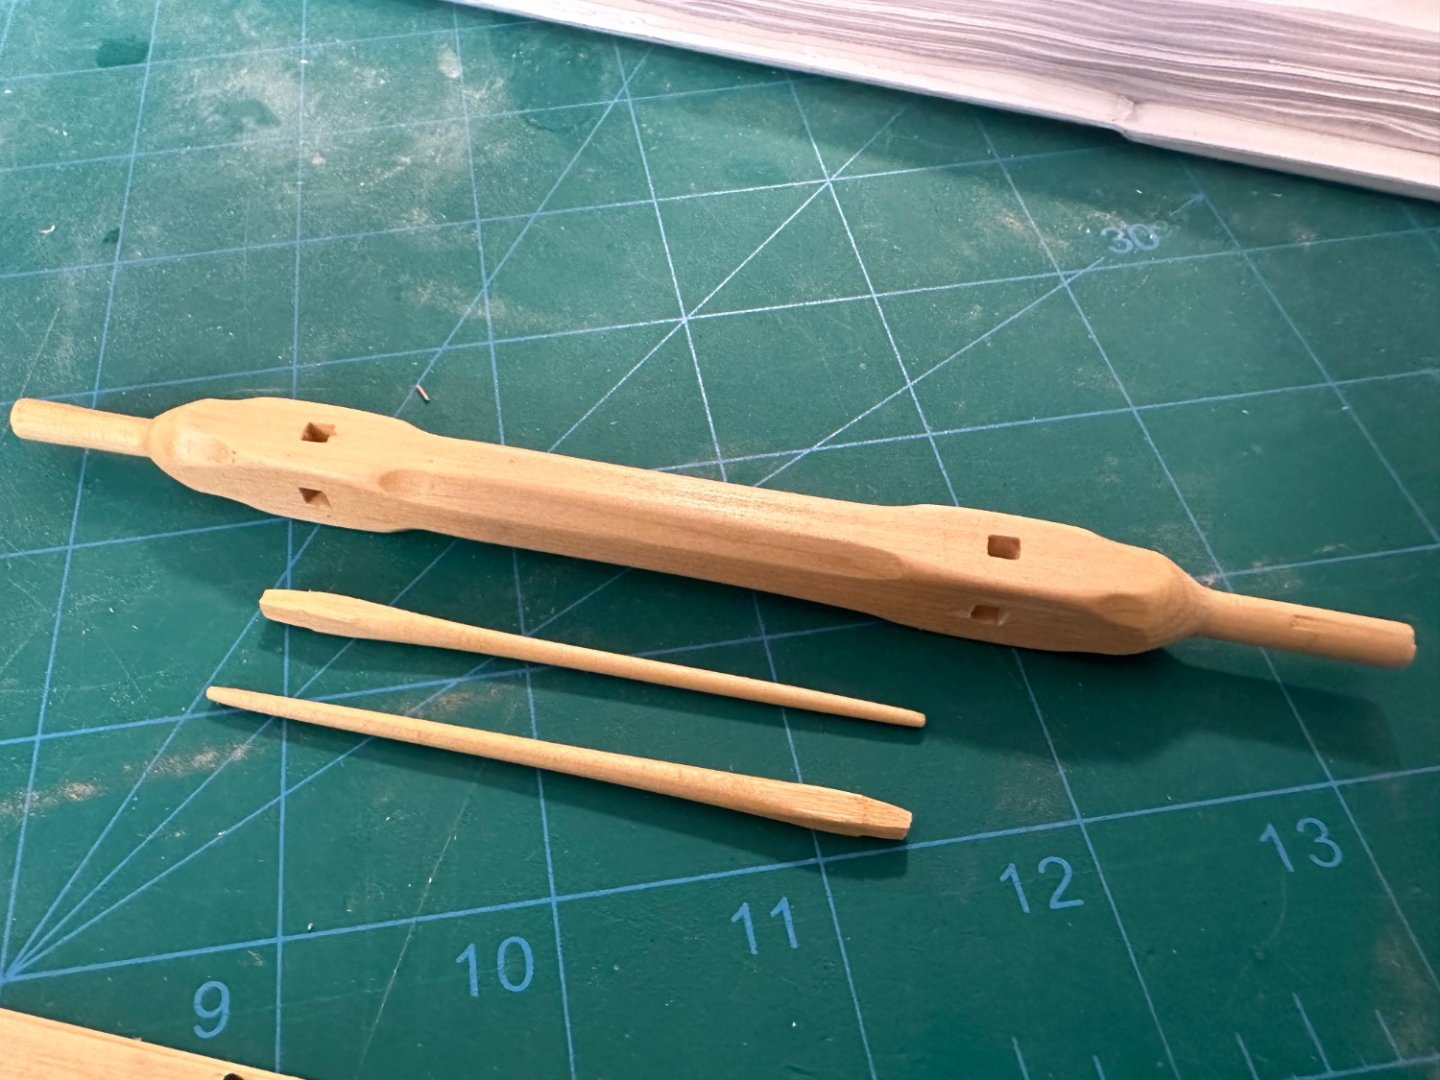
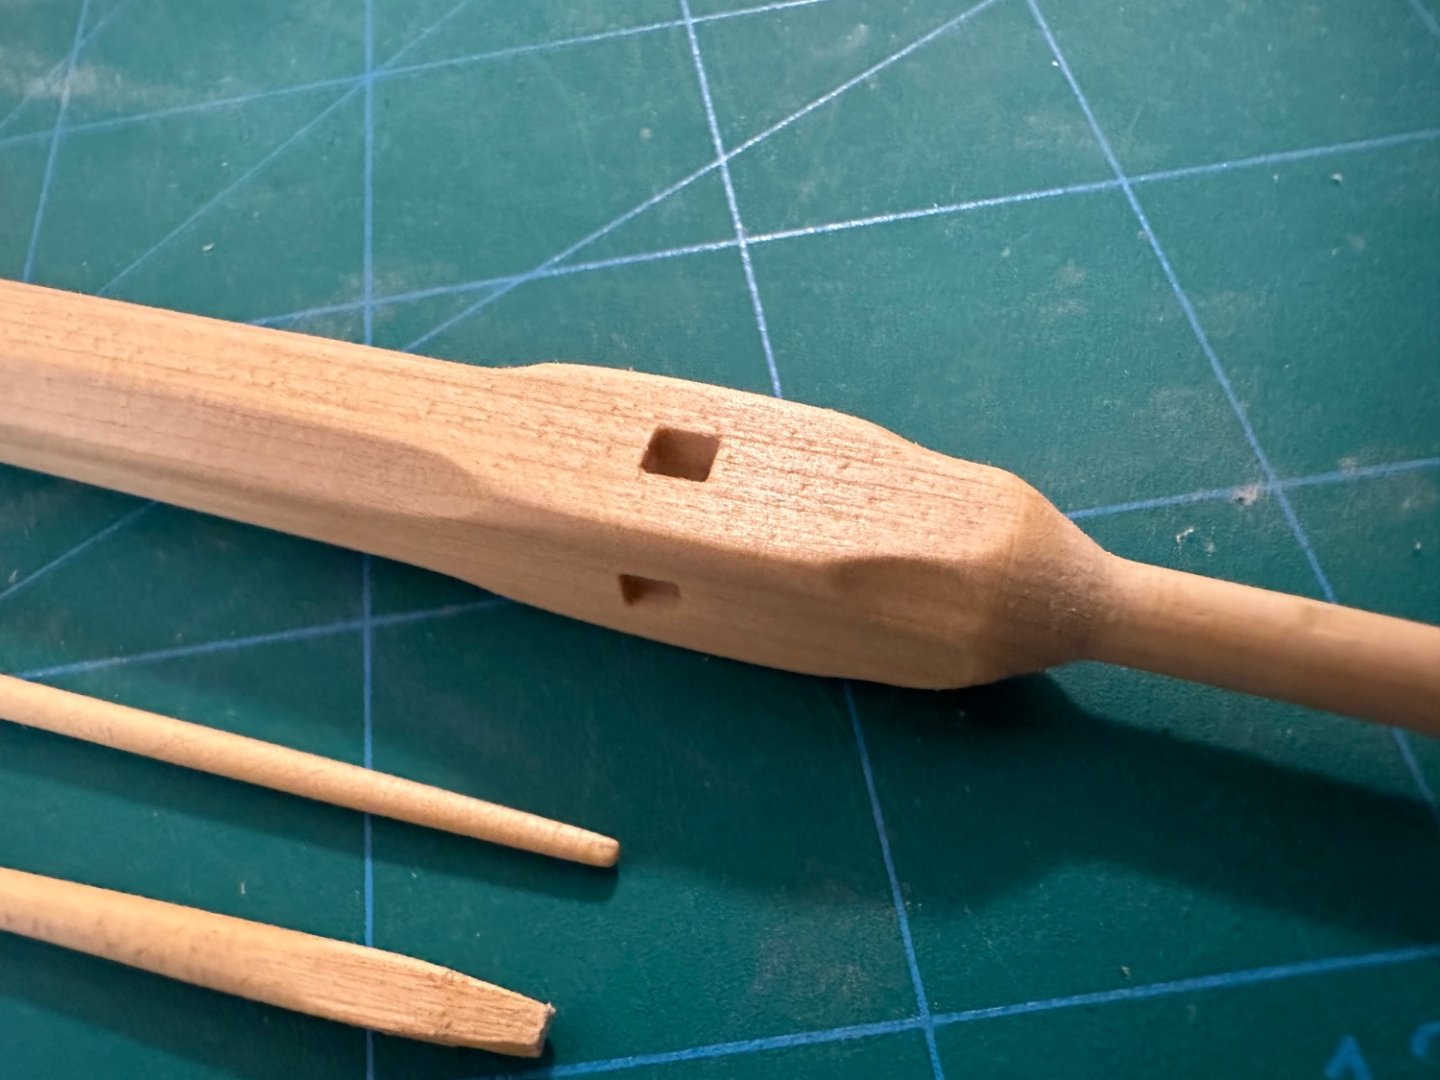
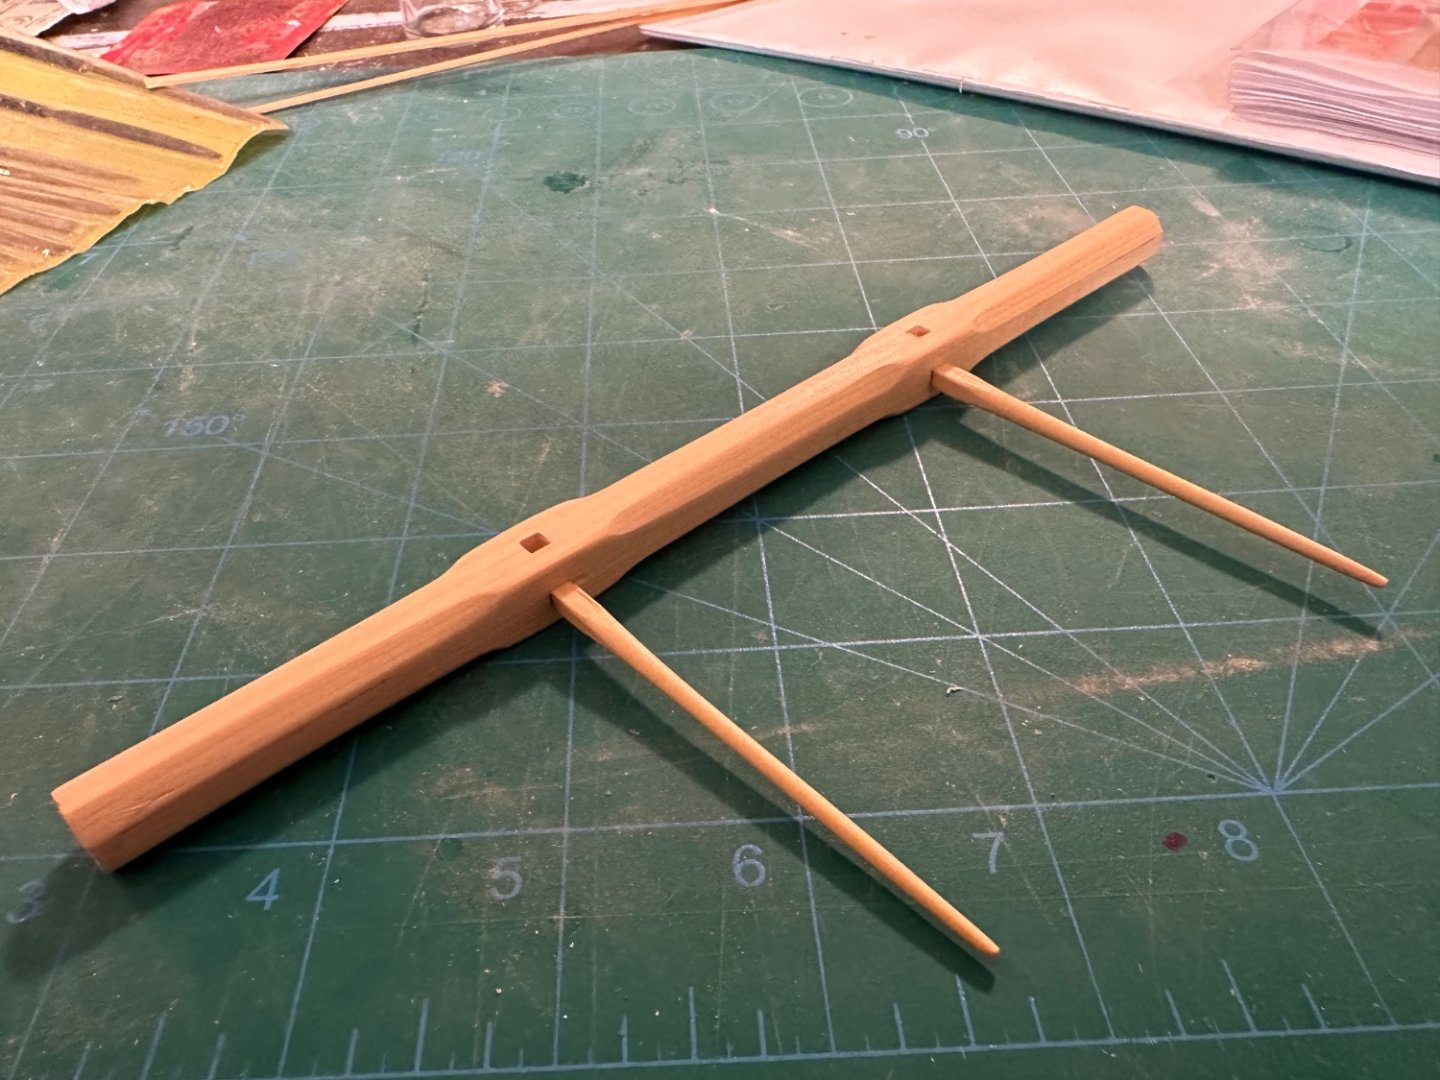
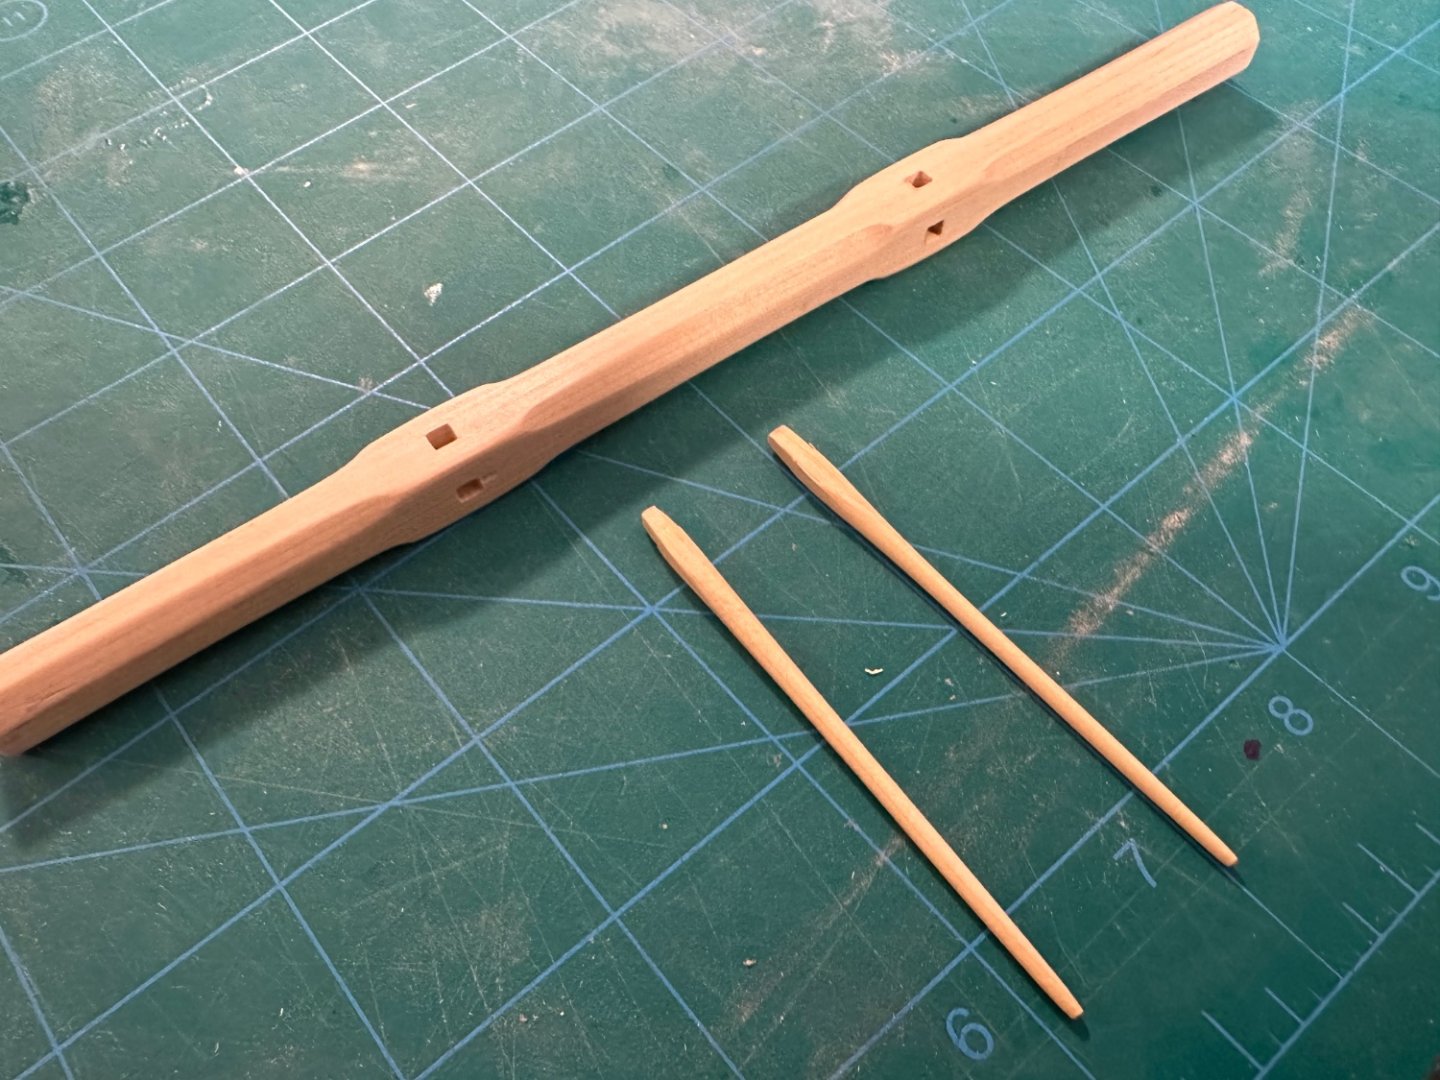
As I mentioned above, I made another tiller. I think this one (one on top), looks much better. Best Regards …. Rick
- 155 replies
-
- 5
-
-
- Medway Longboat
- Syren Ship Model Company
- (and 1 more)
-
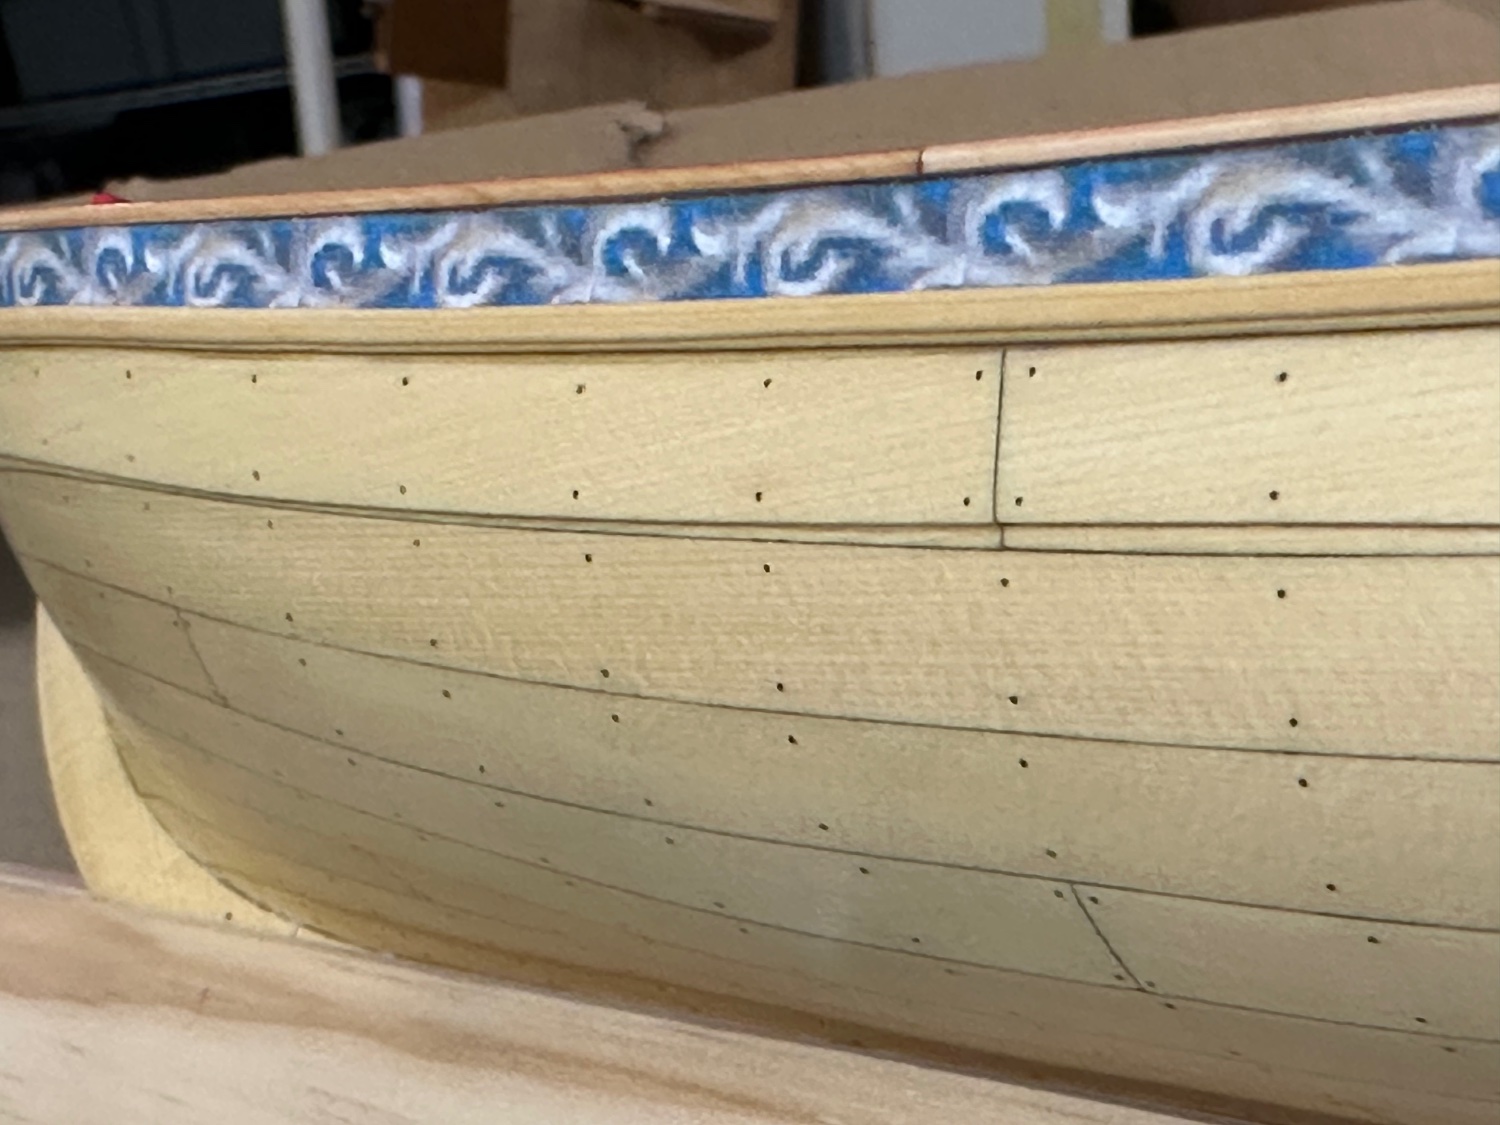
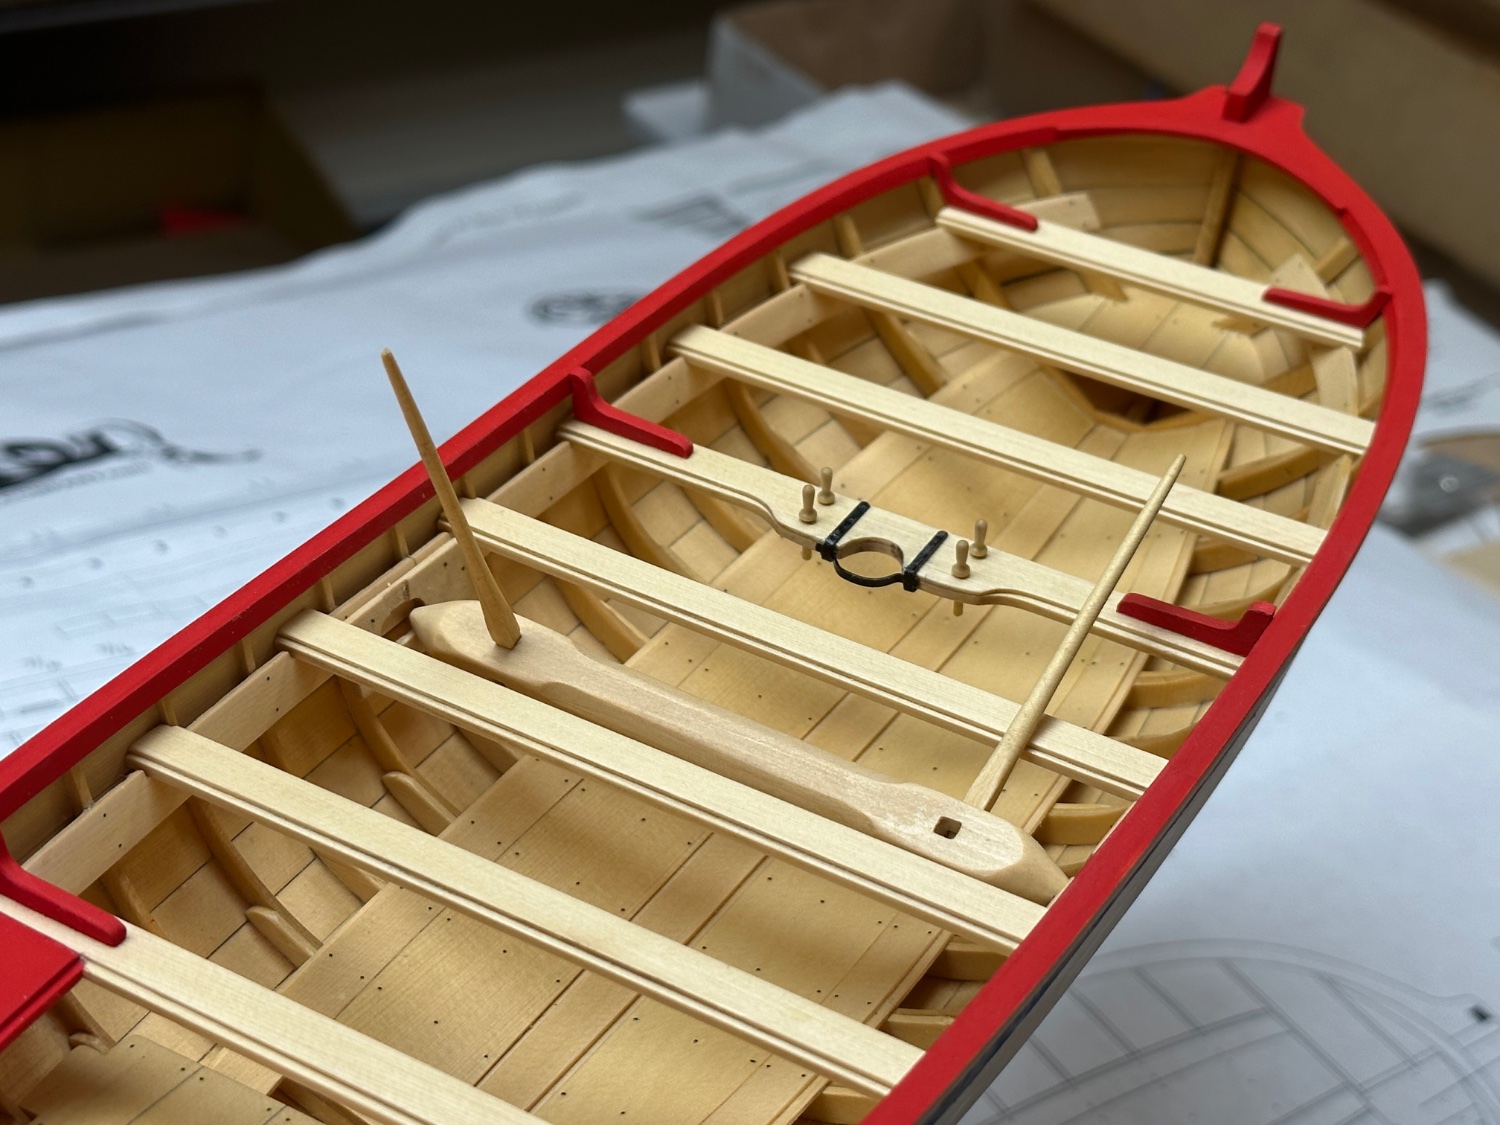
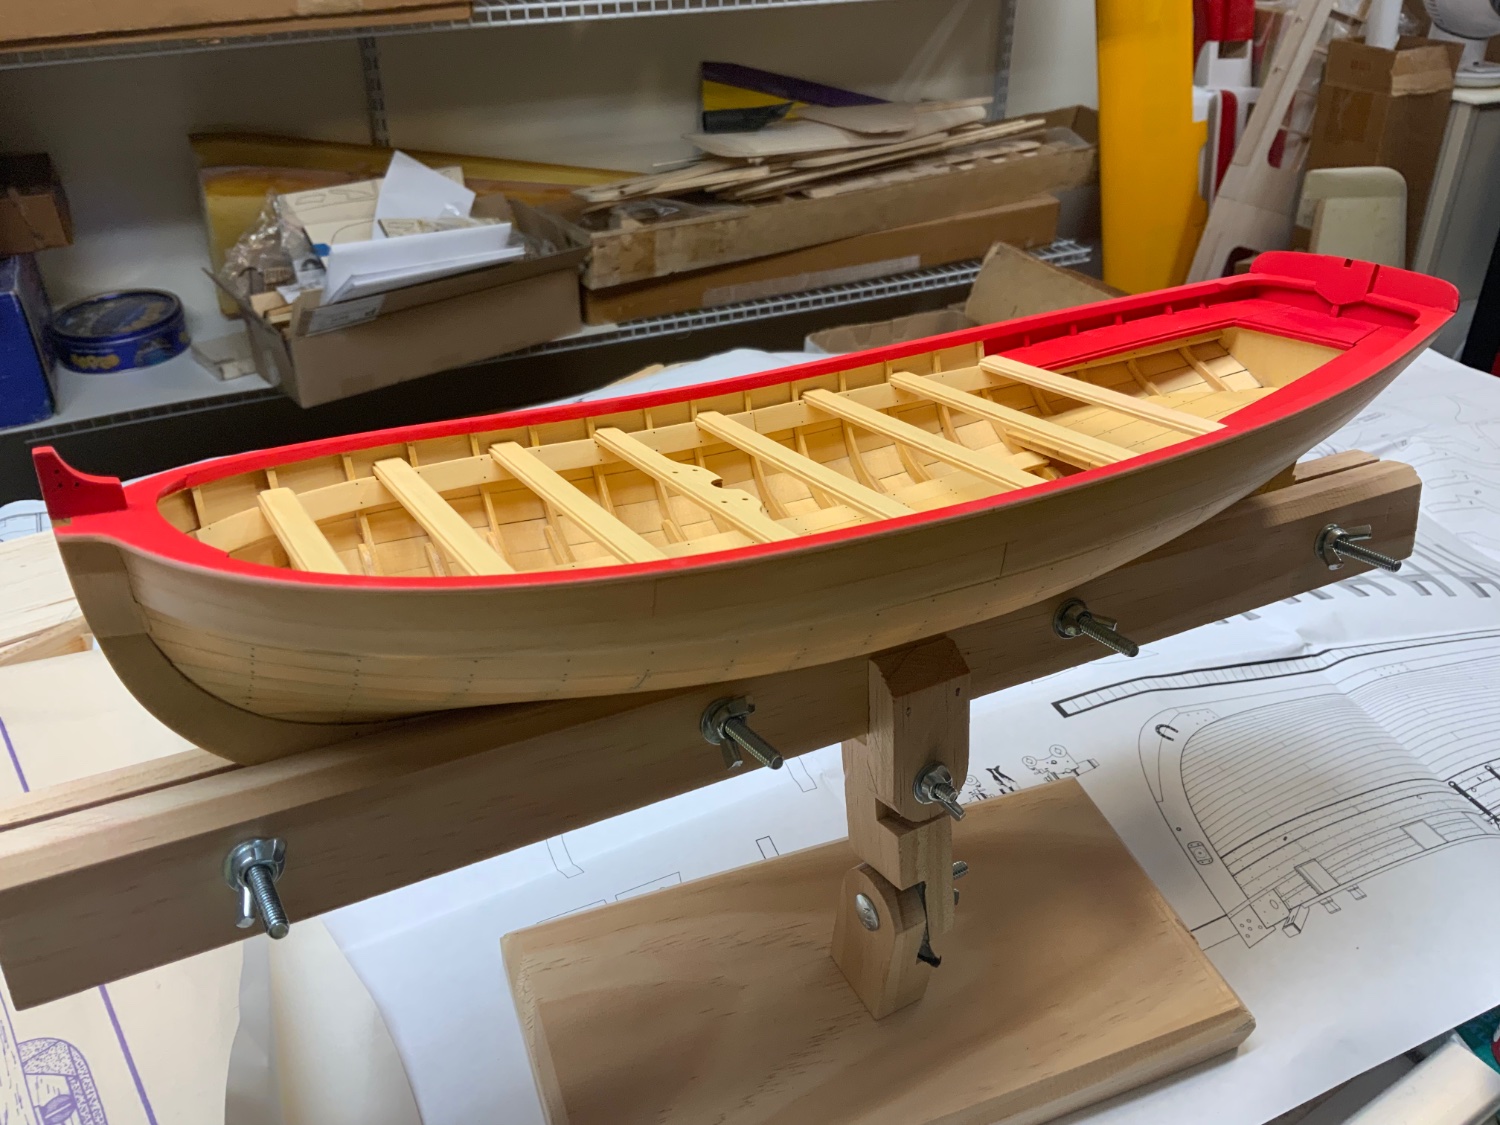
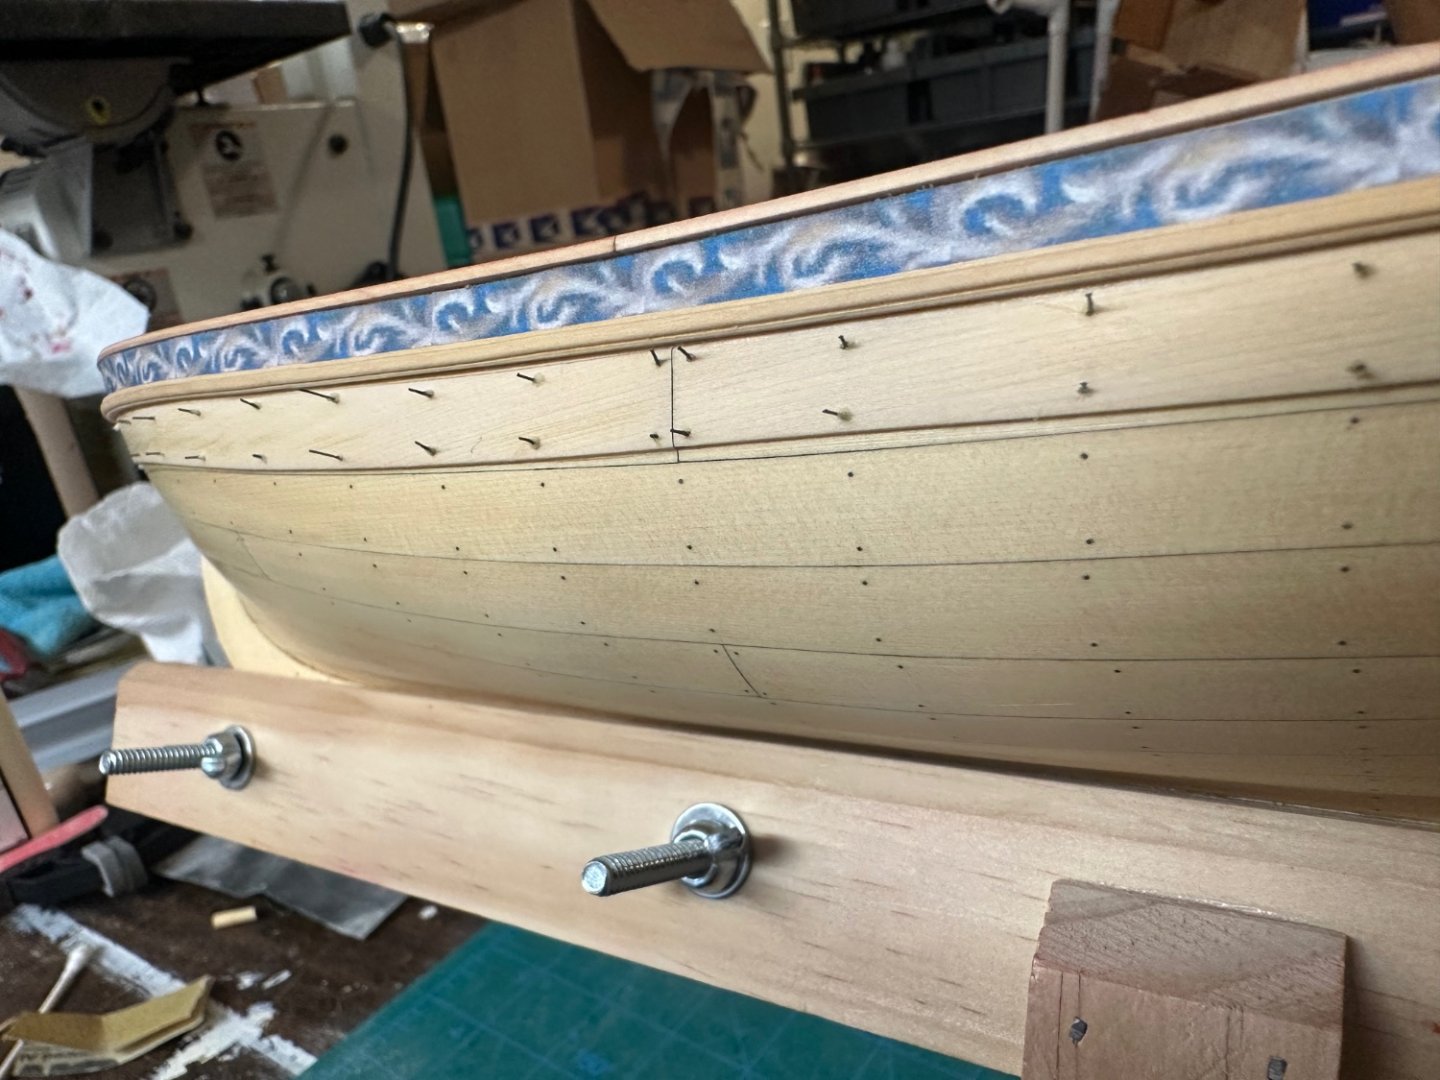
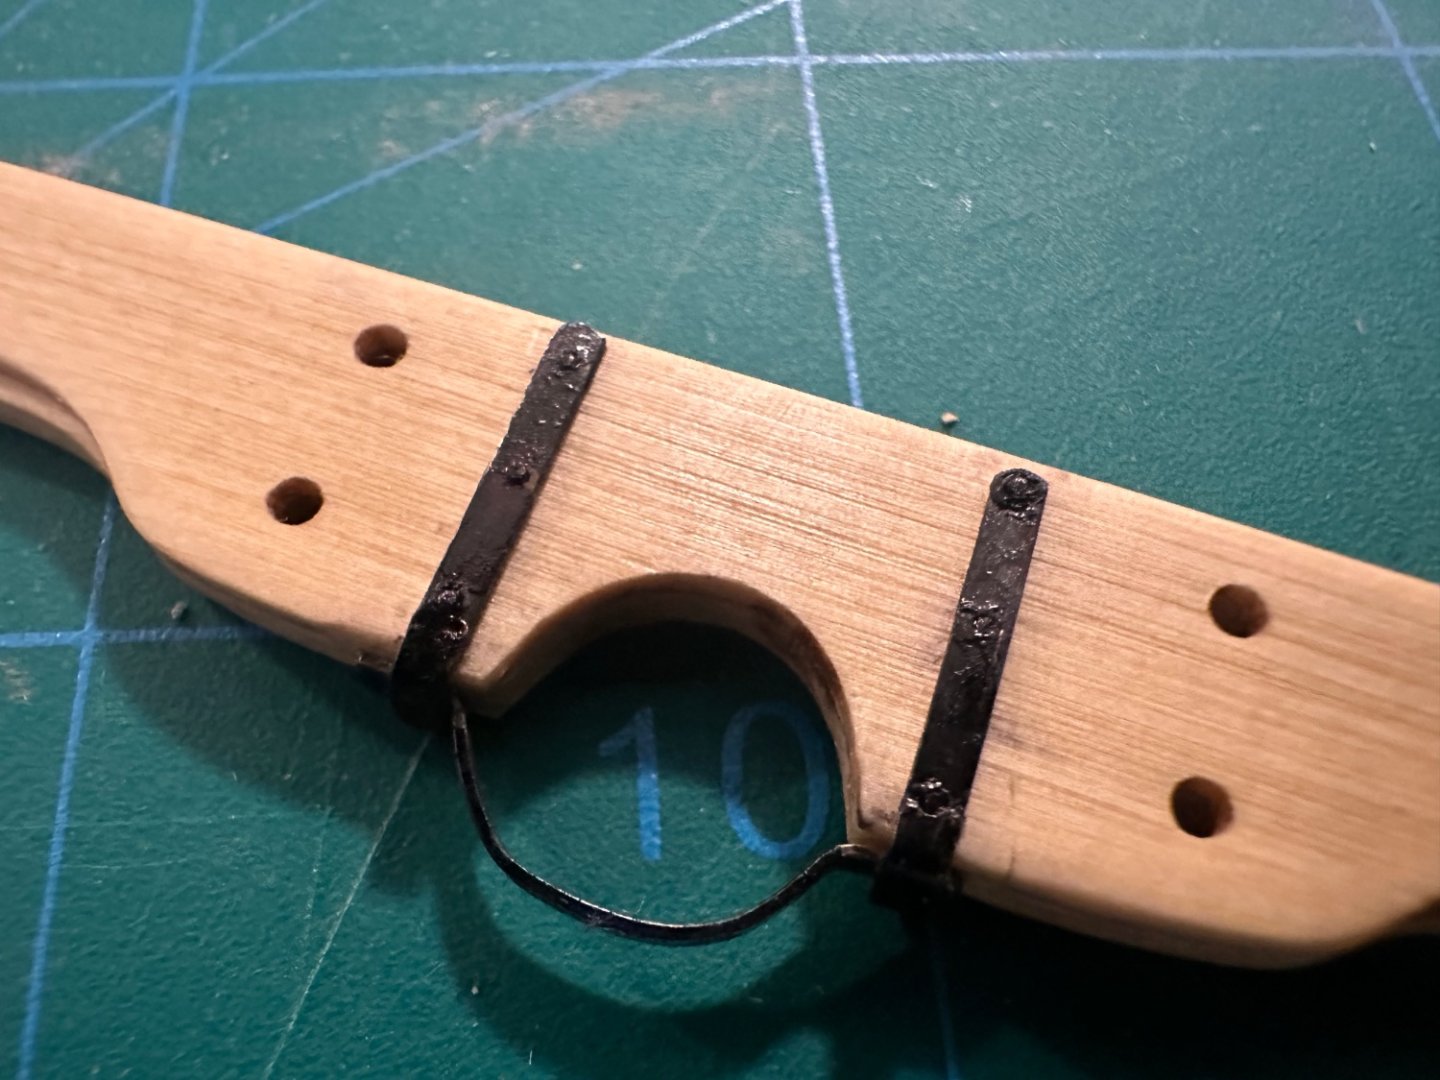
More enjoyable work has been completed. I’ve dressed the nails on the port side and applied a coat of WOP. I also made and attached the fixed block on the stem. And last but not least, the rudder has been shaped and made the tiller. I’m probably going to make another tiller as I’m not happy with this one. Best Regards …. Rick

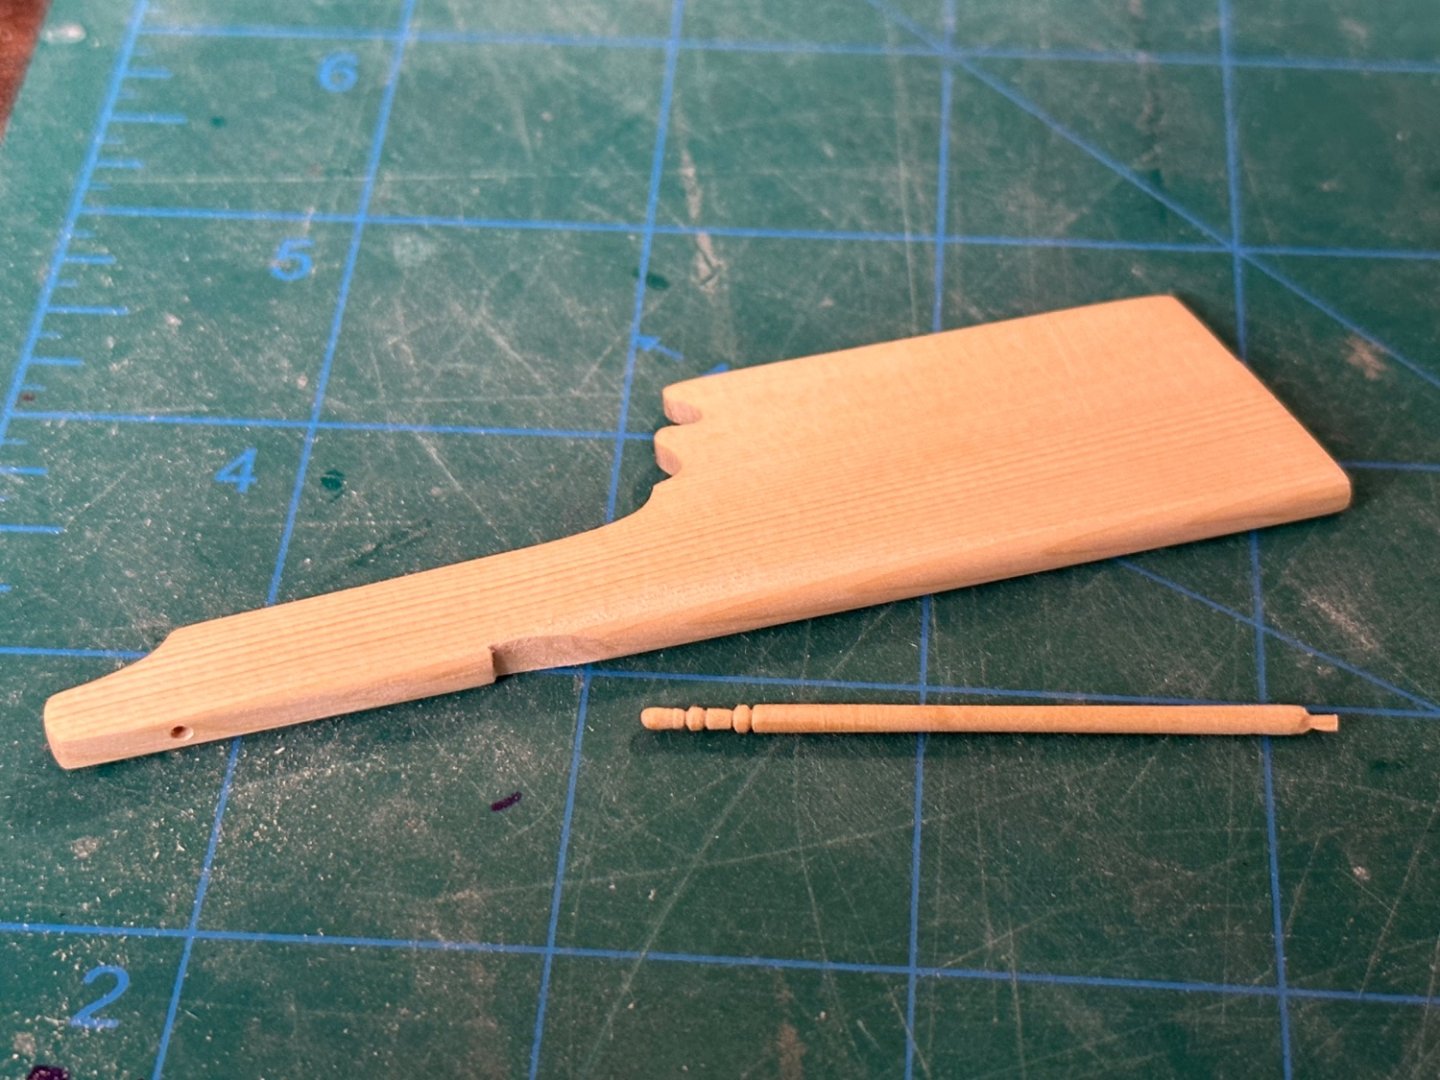
- 155 replies
-
- 8
-
-
- Medway Longboat
- Syren Ship Model Company
- (and 1 more)
-
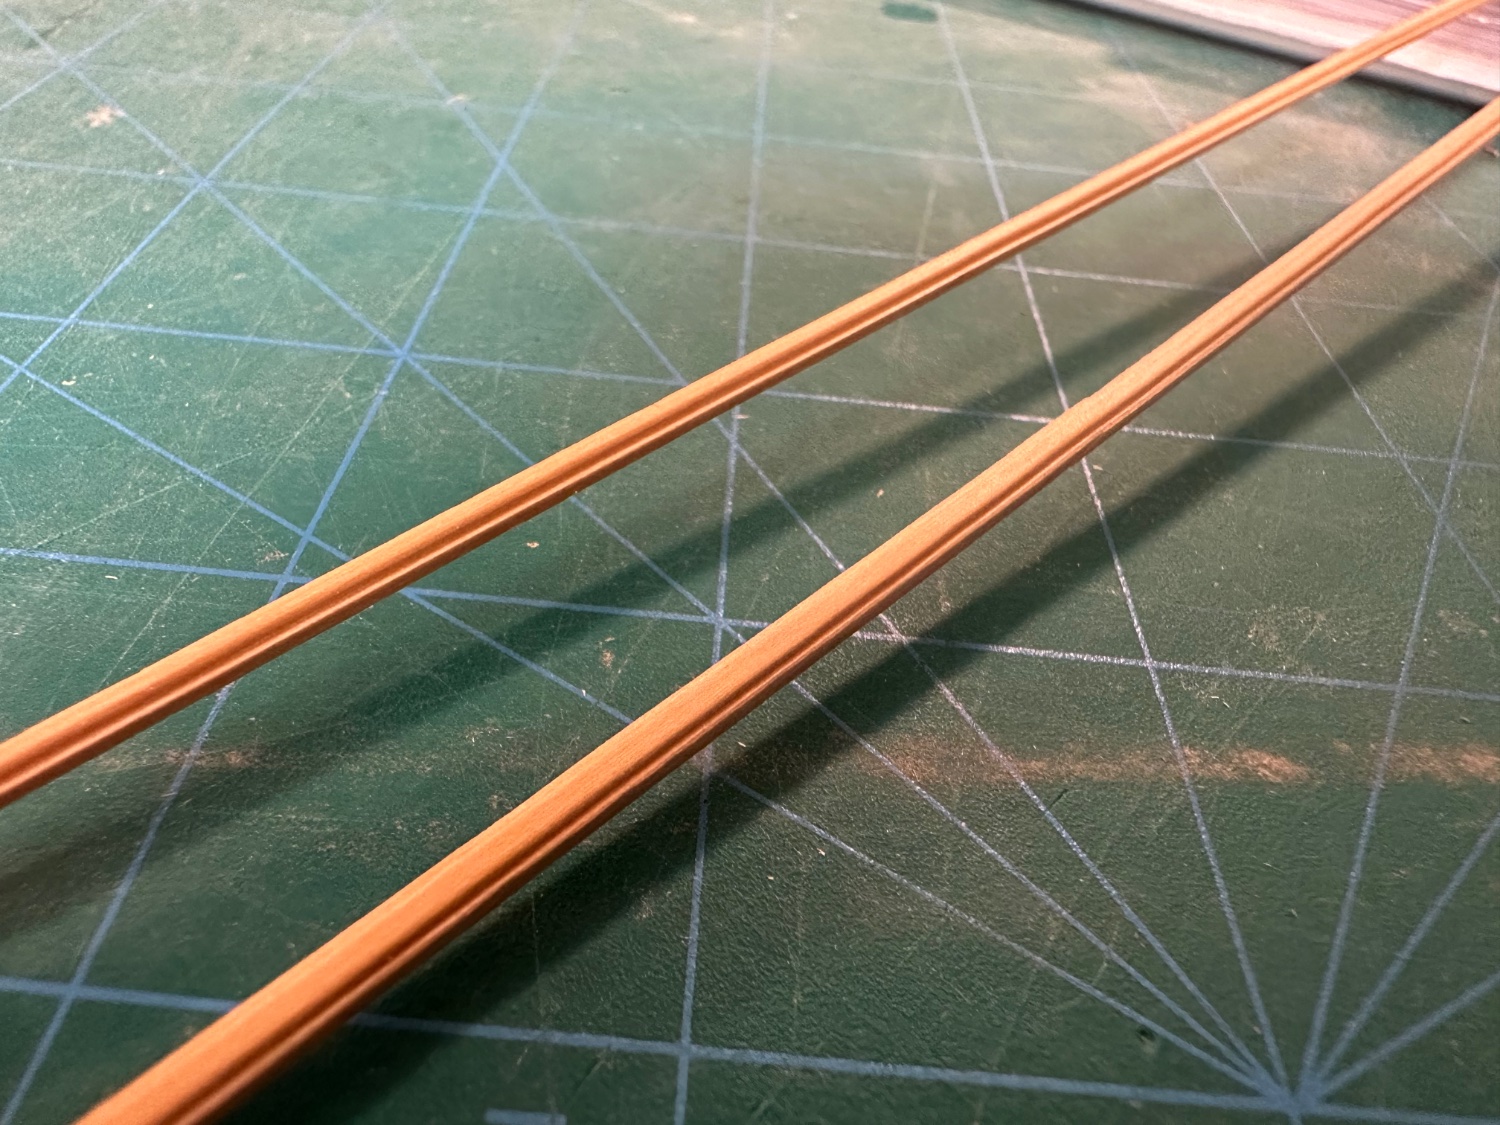
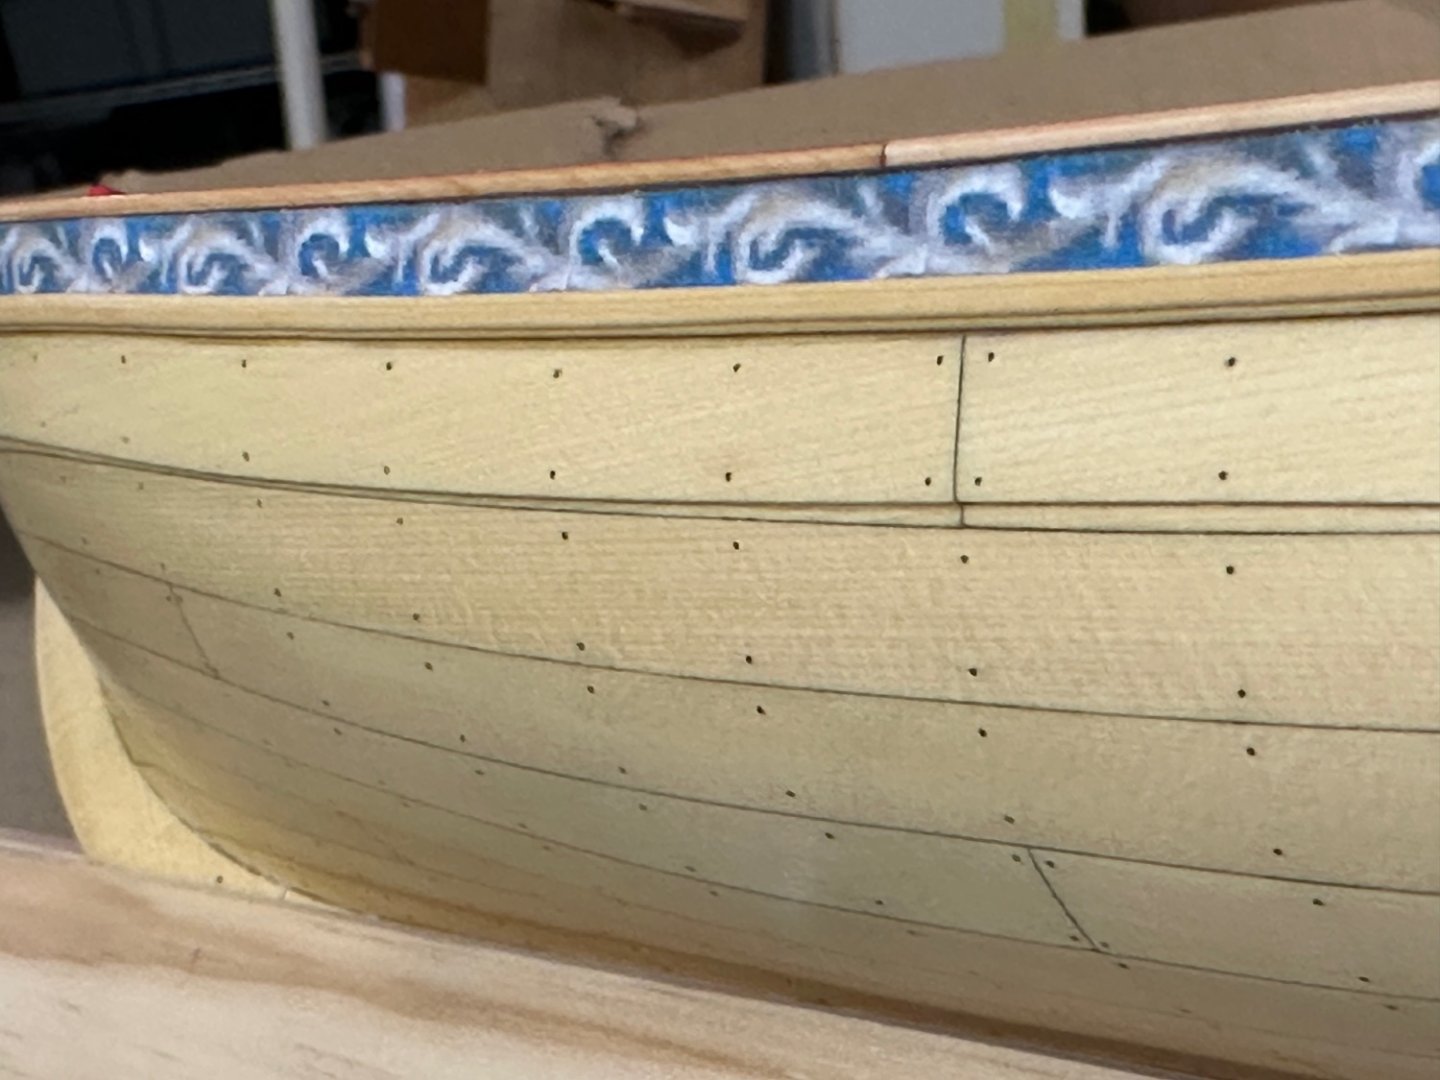
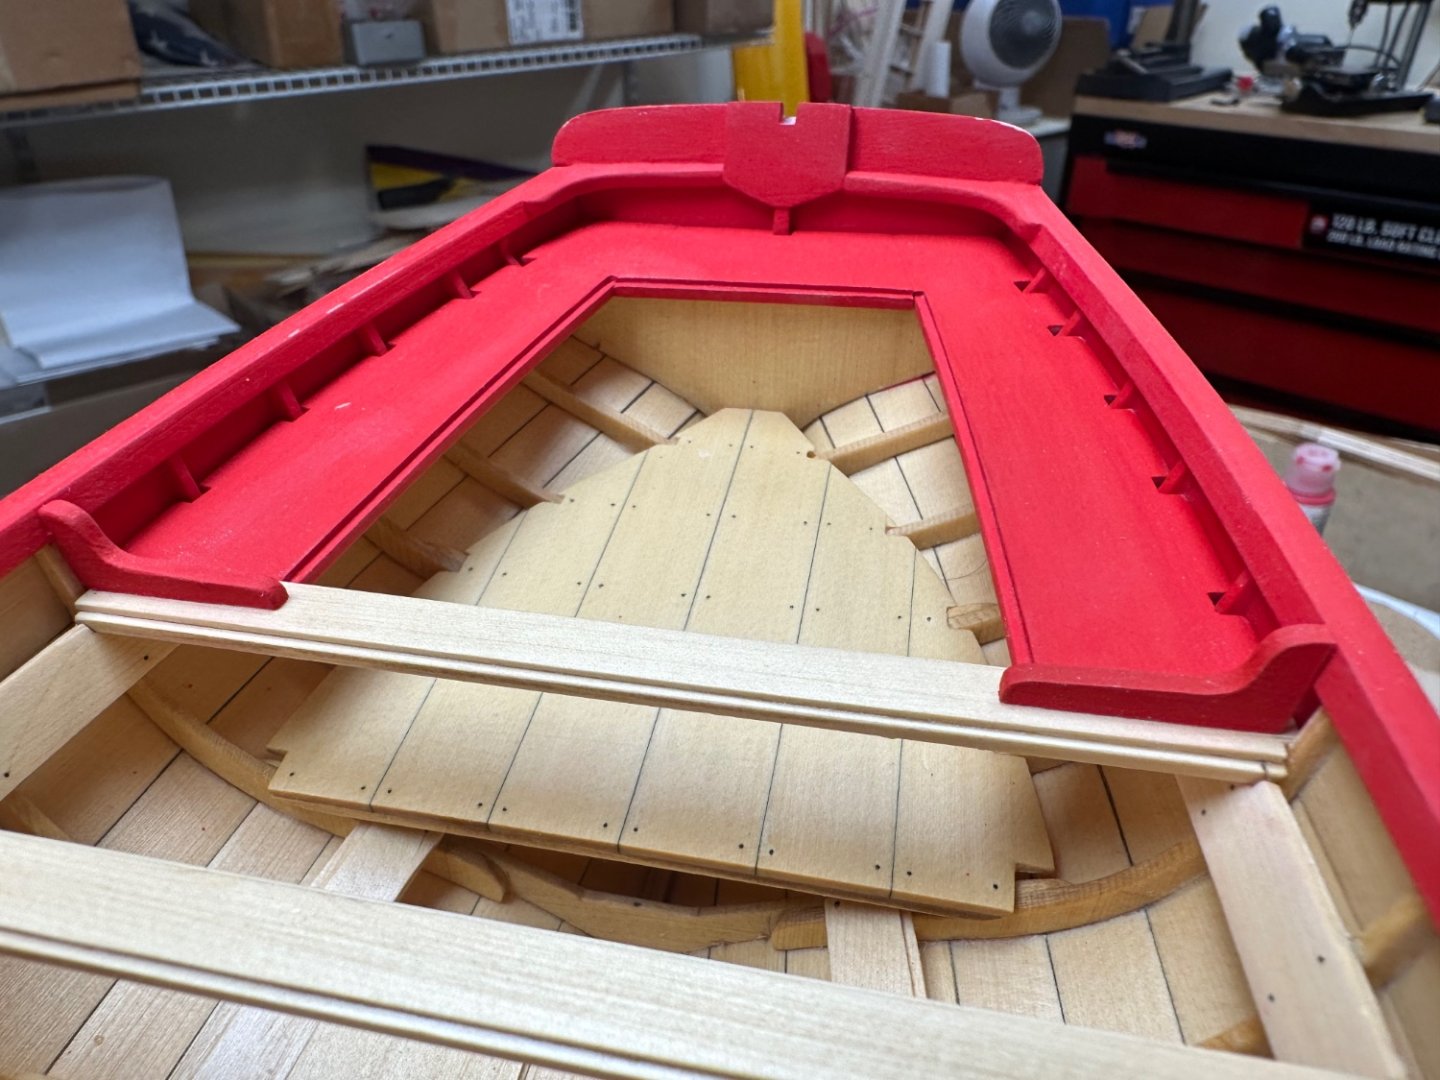
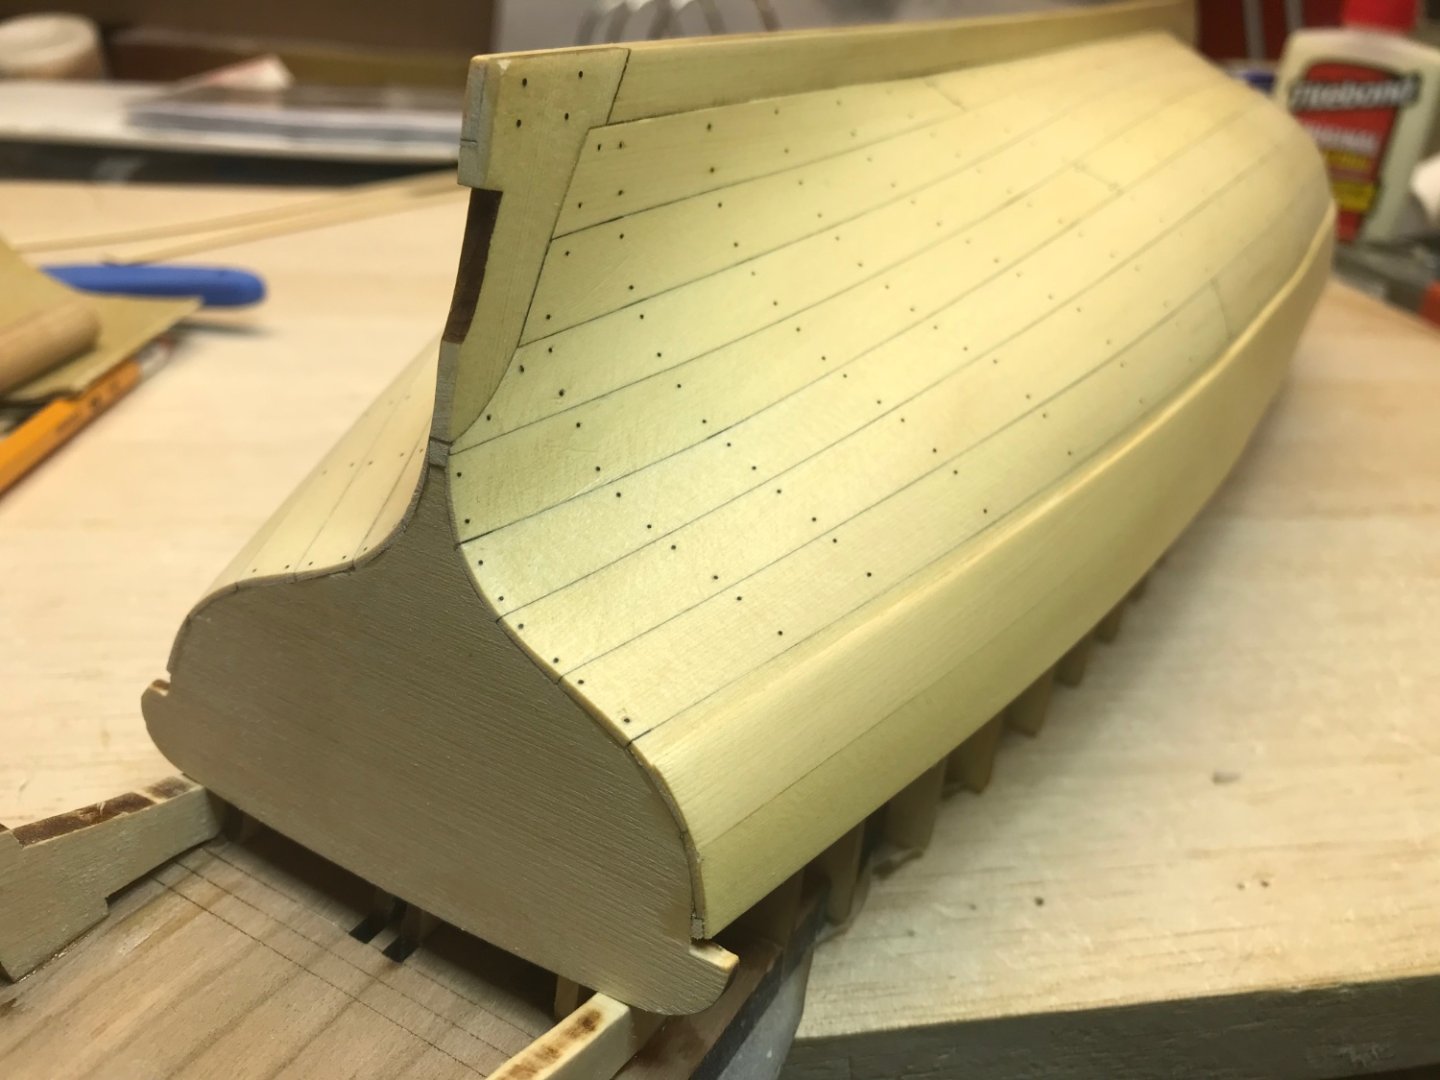
Got the molding glued to the port side. I soaked a few inches in hot water for several minutes, clamped it in place around the bow and dried it with a heat gun. Worked very well. Now that was completed I could finish the treenails on the port side. I’ll clean them up tomorrow and reapply a coat of WOP. Best Regards …. Rick

- 155 replies
-
- 2
-
-
- Medway Longboat
- Syren Ship Model Company
- (and 1 more)
-
Still looking for ideas to bend the boxwood molding before gluing it into place. Any recommendations? Best Regards …. Rick

-
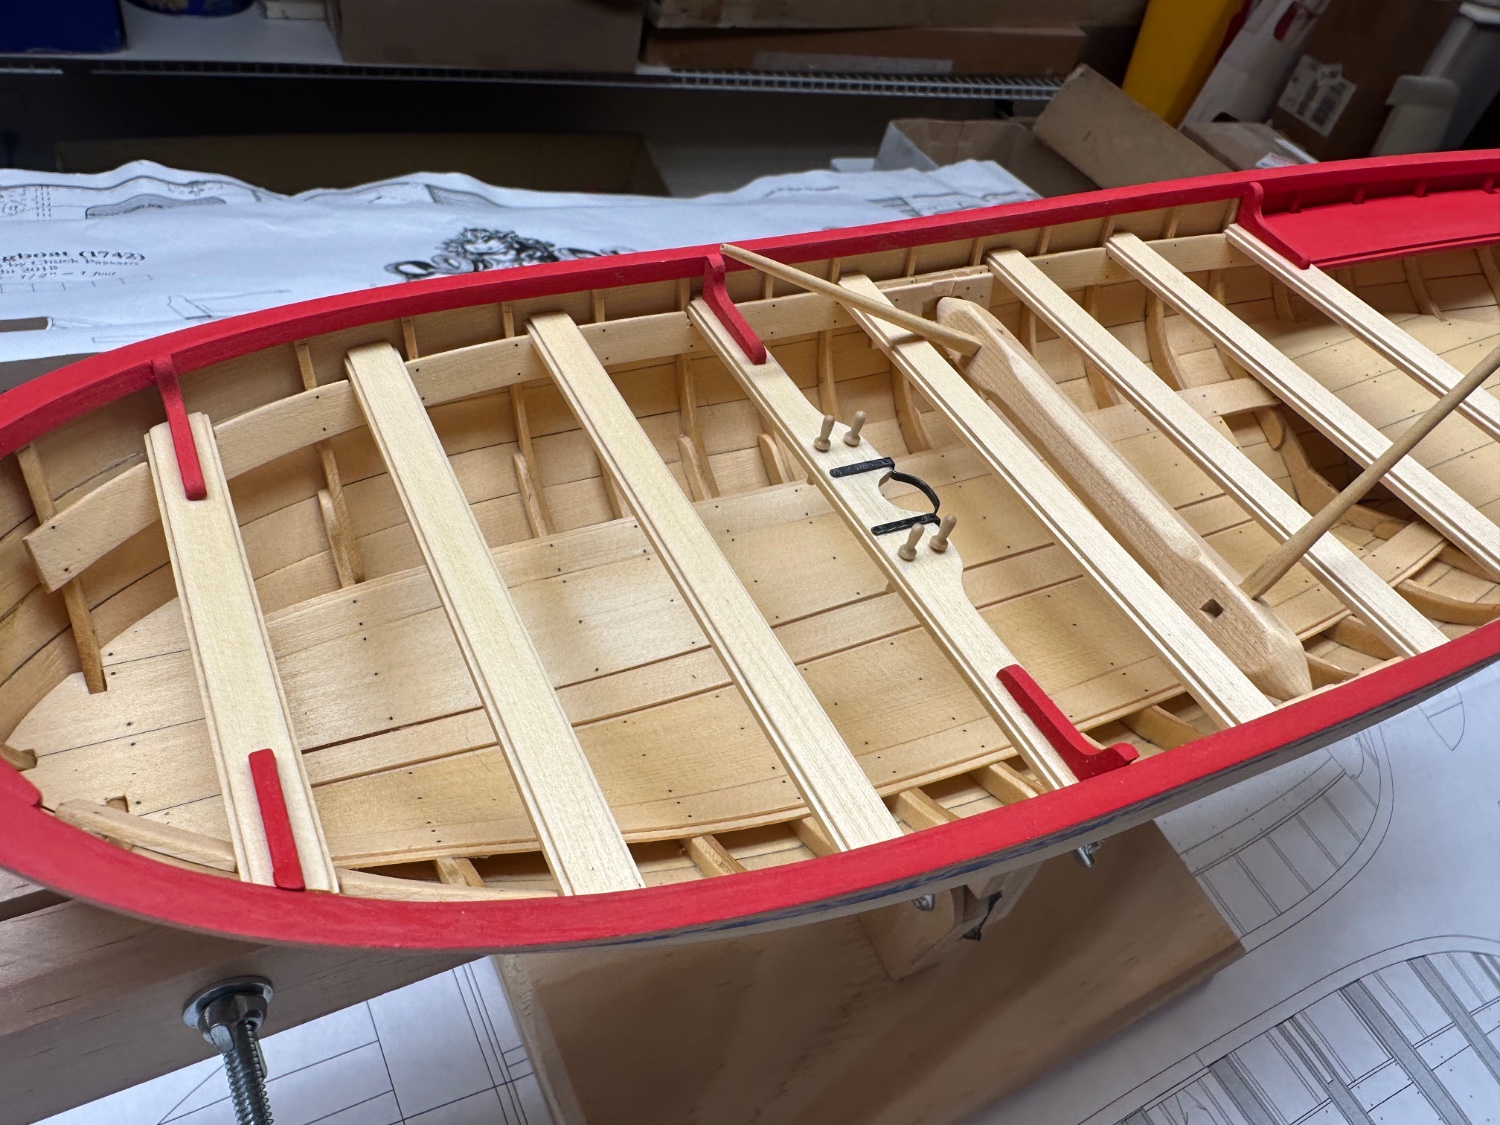
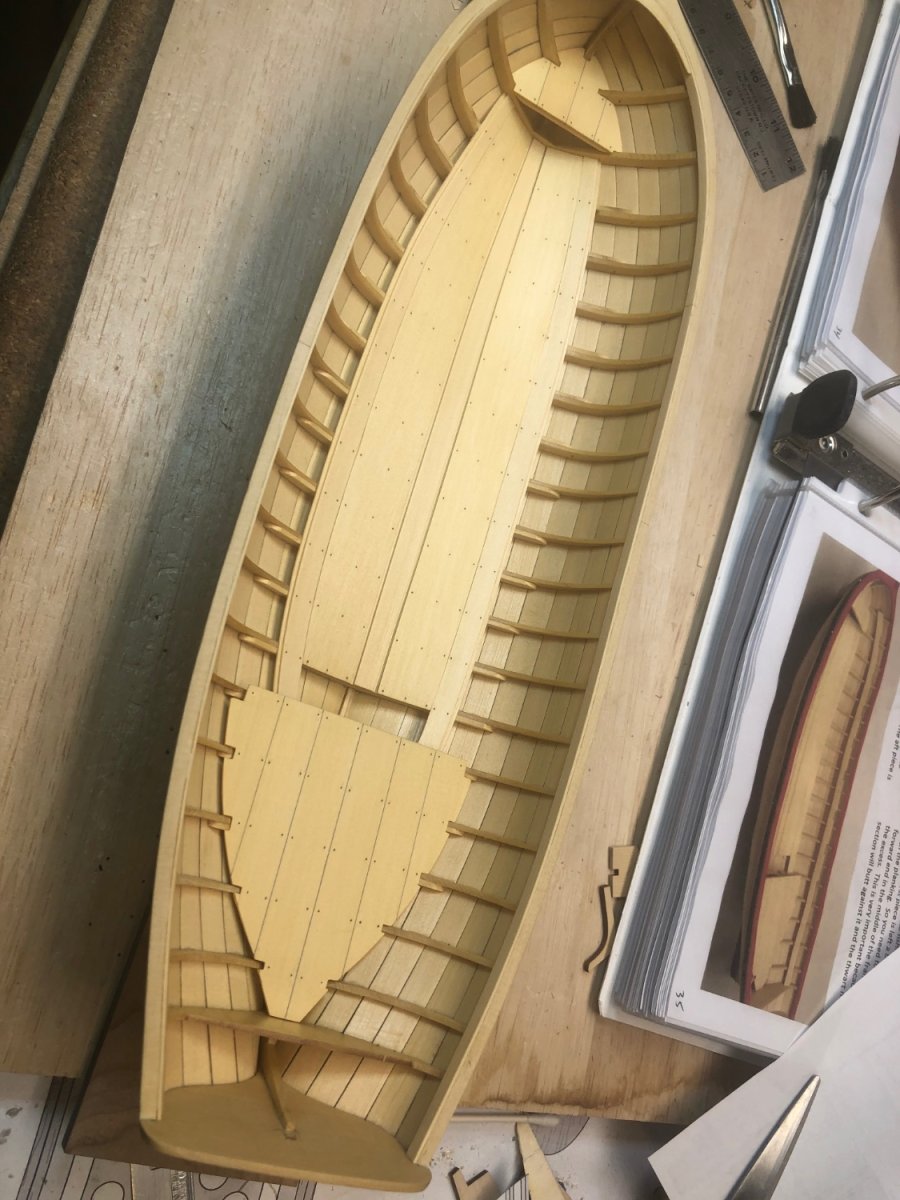
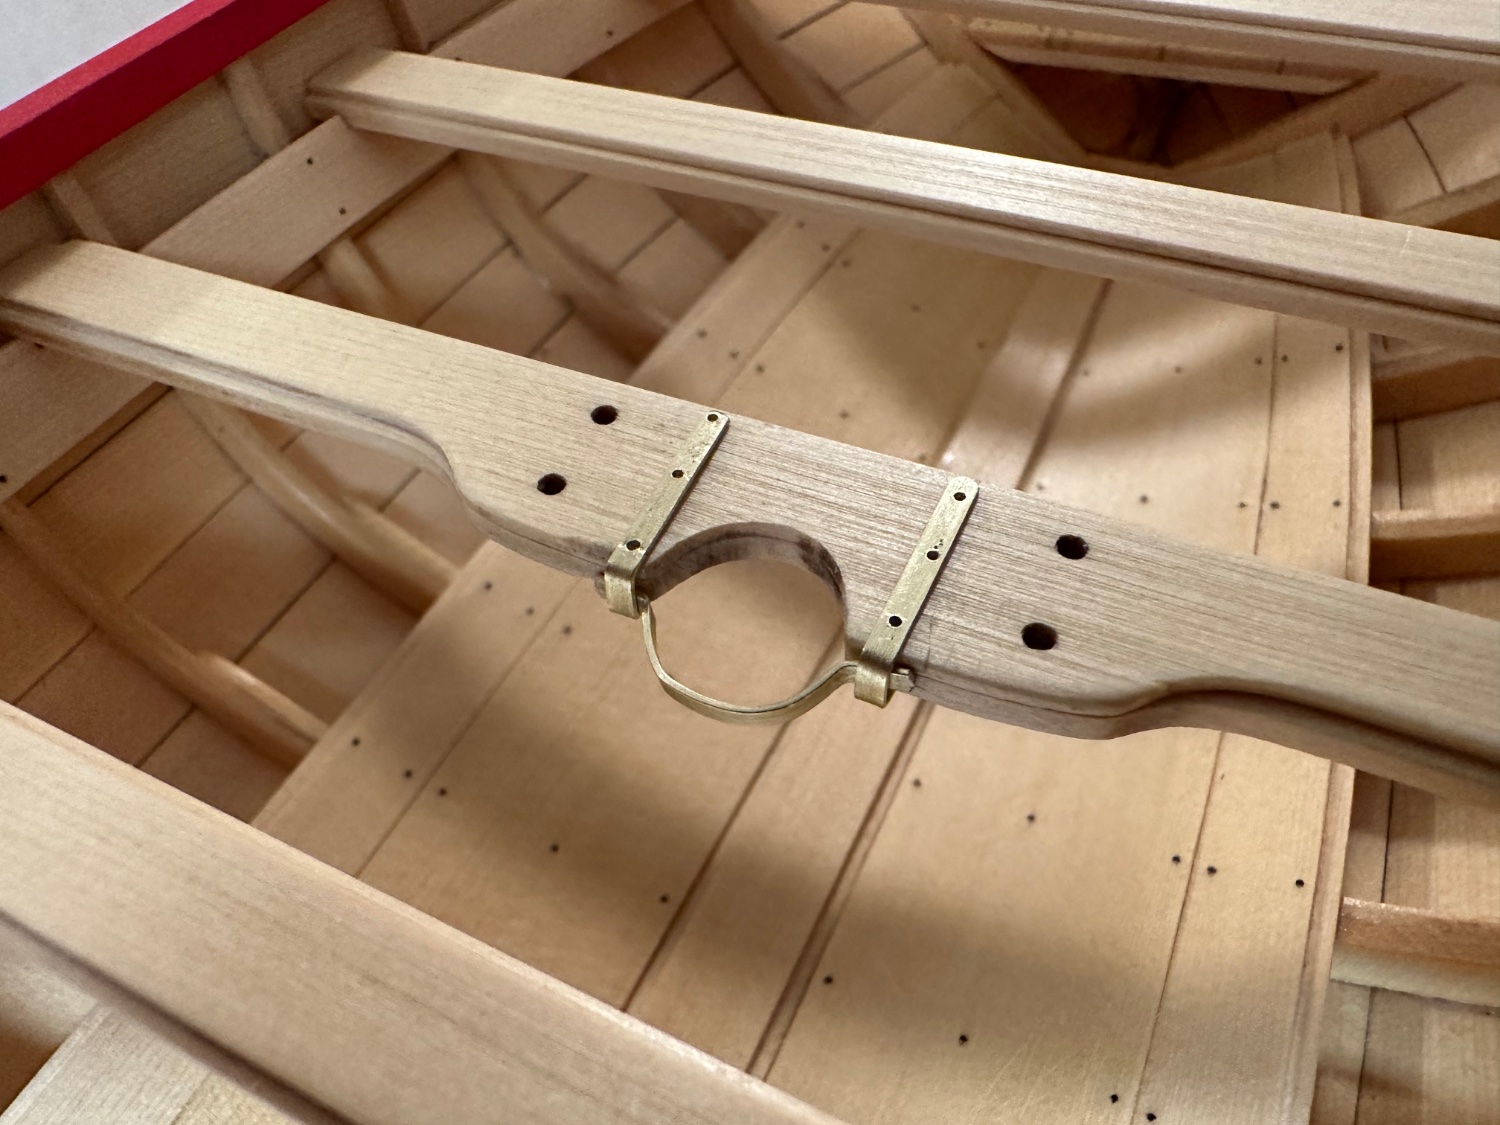
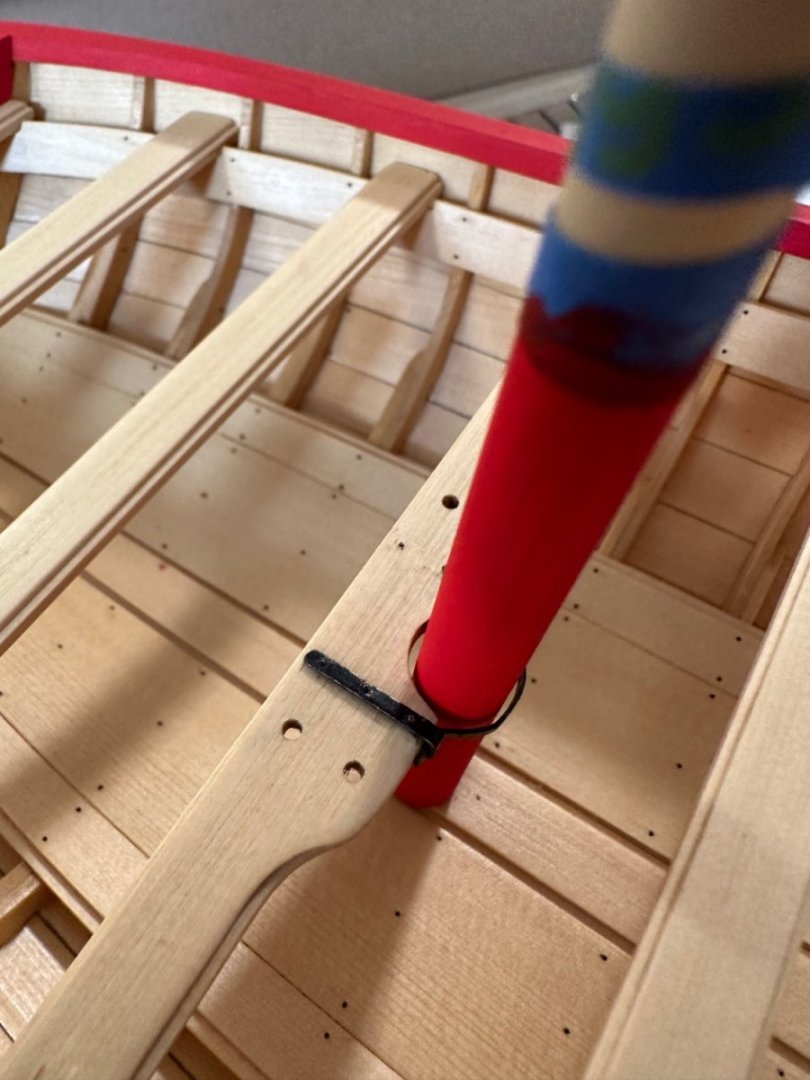
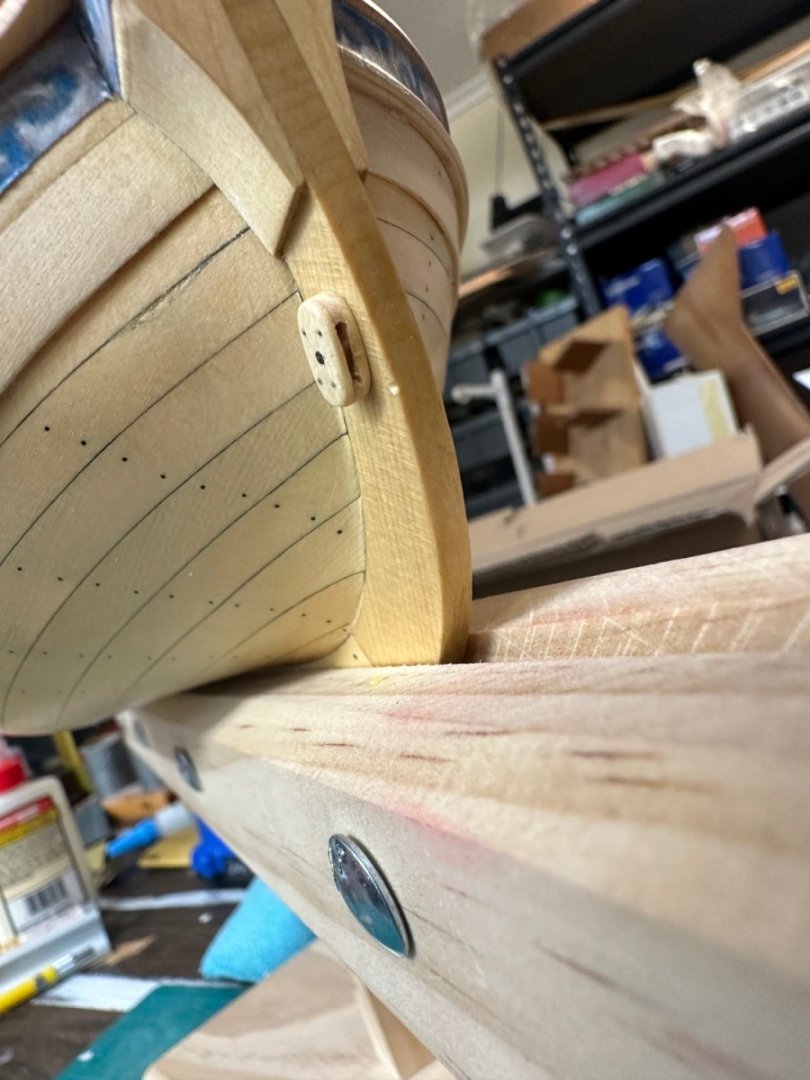
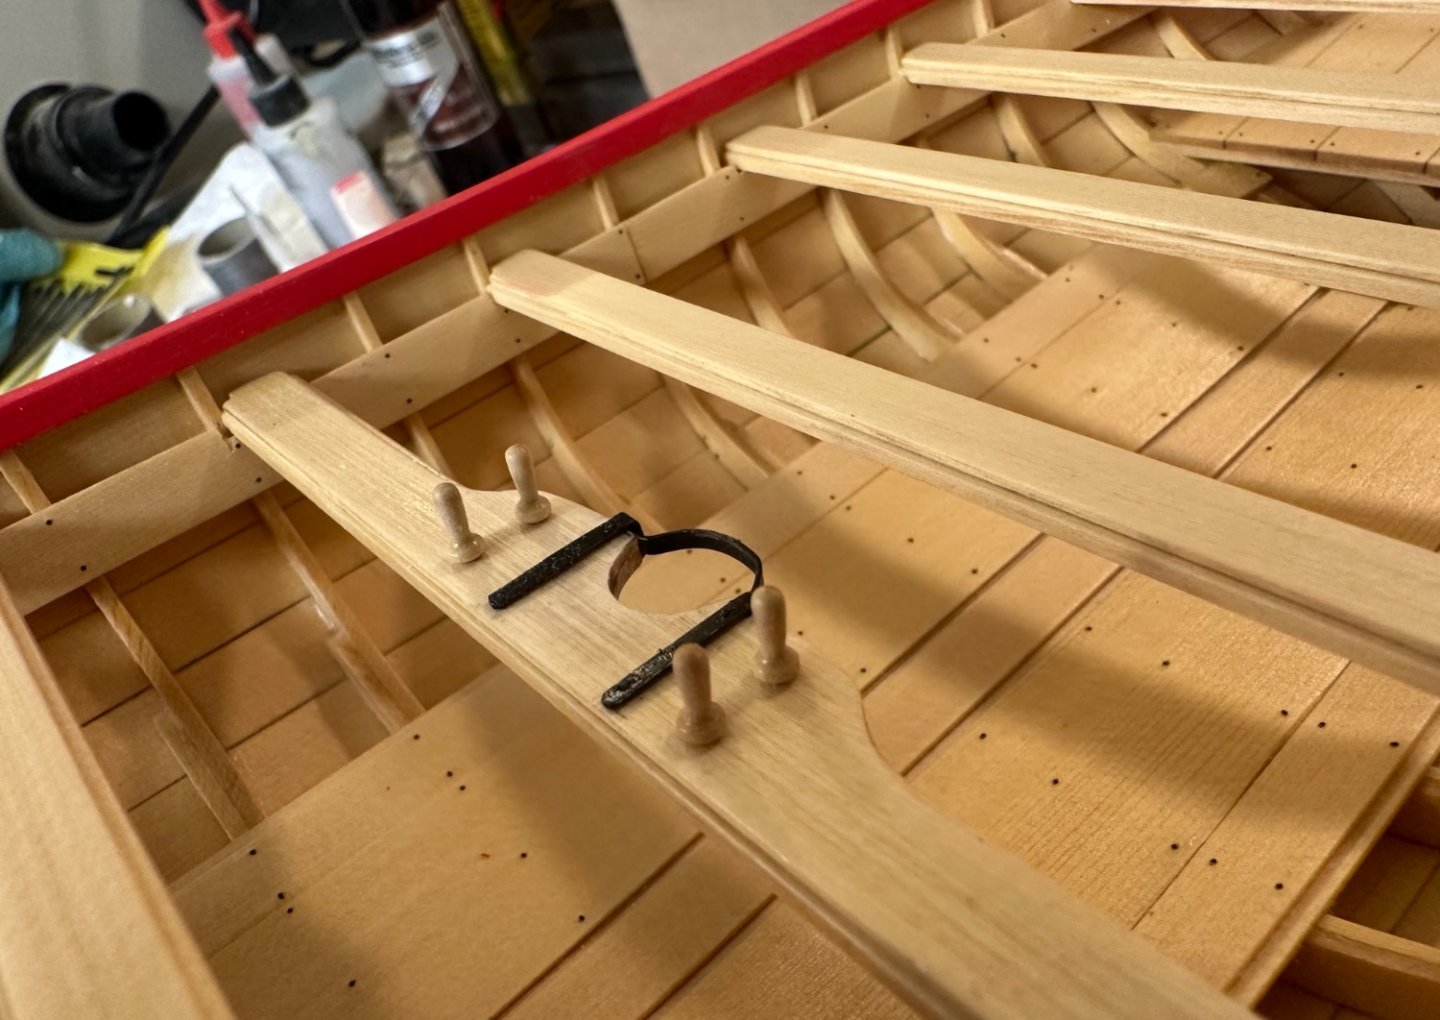
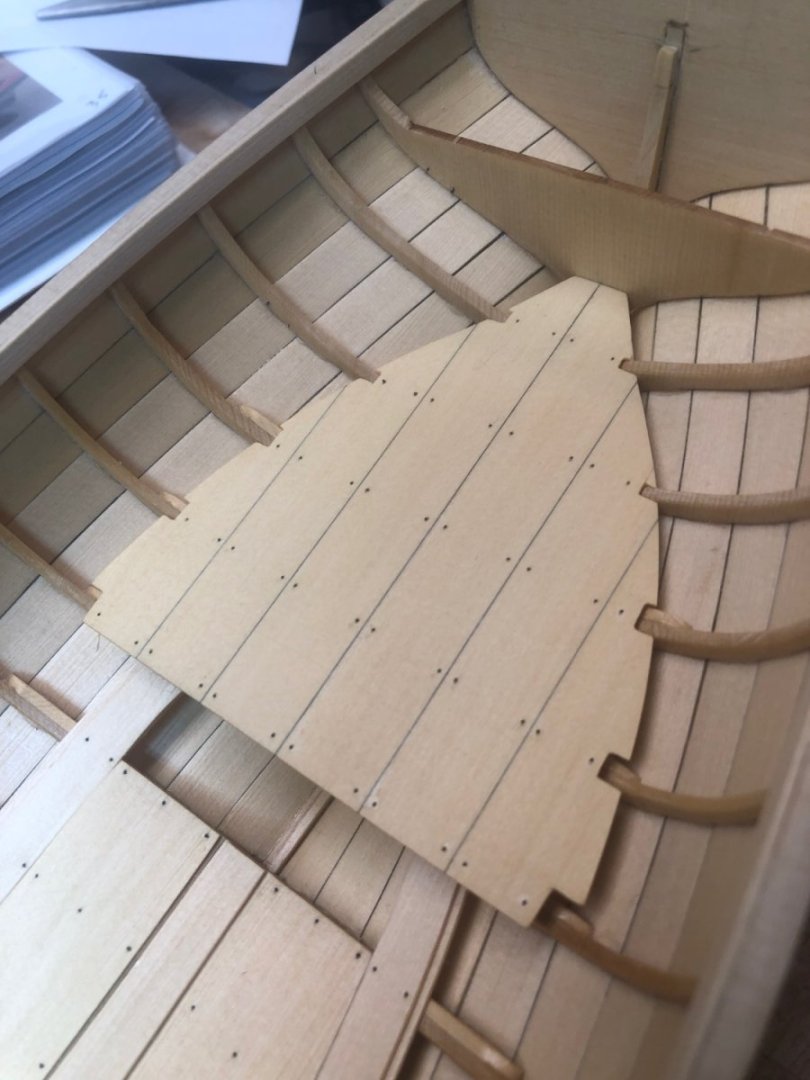
Had some time to spend in the shipyard and accomplished a few tasks. Iron work has been blackened and attached to the thwart and the thwart has been installed and also the last of the thwart knees. Windlass and the bars are also completed and a couple coats of WOP applied. The iron work was a bigger challenge than I expected. So far, so good. Up next is the fixed block on the stem. Best Regards …. Rick


- 155 replies
-
- 2
-
-
- Medway Longboat
- Syren Ship Model Company
- (and 1 more)
-
Thank you Captn! I’ve learned a lot and have really enjoyed the build. Waiting in the dockyard is Cheerful, love the lines on that Cutter! Best Regards …. Rick
- 155 replies
-
- 1
-
-
- Medway Longboat
- Syren Ship Model Company
- (and 1 more)
-
Quick question to those that have gone before me. I'd like to glue the molding in place under the frieze, however the boxwood strip is very stiff and greatly resists bending at the bow. How do I overcome this? Do I set up a jig and soak the wood for a while and clamp in the jig? Or do I soak the wood and then clamp it in place on the hull and let it dry? I don't think that applying heat to the hull is a good idea. Also, what glue should I use? I don't want to make a mess. Need some thoughts here, Thank you! Best Regards .... Rick
-
Thanks guys for all the likes and great comments, much appreciated! This has really been a fun and exciting project! Best Regards …. Rick
- 155 replies
-
- 1
-
-
- Medway Longboat
- Syren Ship Model Company
- (and 1 more)
-
Made the windlass and the bars today, still need to size and round the ends of the windlass. Not sure how to approach this as I don’t want to mess it up. Also added 4 of the 6 knees on the thwarts. I want to complete the mast thwart outside of the hull. As you can see, the paint has taken a beating, no worries though as a couple more coats are needed. Best Regards …. Rick

- 155 replies
-
- 6
-
-
- Medway Longboat
- Syren Ship Model Company
- (and 1 more)
-
This morning I wanted to do something a little different, so I cleaned up the pedestals and glued them to the cross braces. I also taped some sandpaper to the hull and tapered the arms to match the bottom of the hull. Best Regards …. Rick

- 155 replies
-
- 7
-
-
- Medway Longboat
- Syren Ship Model Company
- (and 1 more)
-
Rcmdrvr, I’ve read many of the build logs on this site and one of the themes I’ve noticed is that slow and steady is the path. Trust me, there are several belaying pins in the trash that don’t look anything like belaying pins and some planks didn’t make the grade. Also, don’t settle for substandard work, just about every task to date has taken more than one try. If there’s something I don’t understand, I stop and search other logs for possible solutions. Main thing though is to have fun. Best Regards …. Rick
- 155 replies
-
- 3
-
-
- Medway Longboat
- Syren Ship Model Company
- (and 1 more)
-
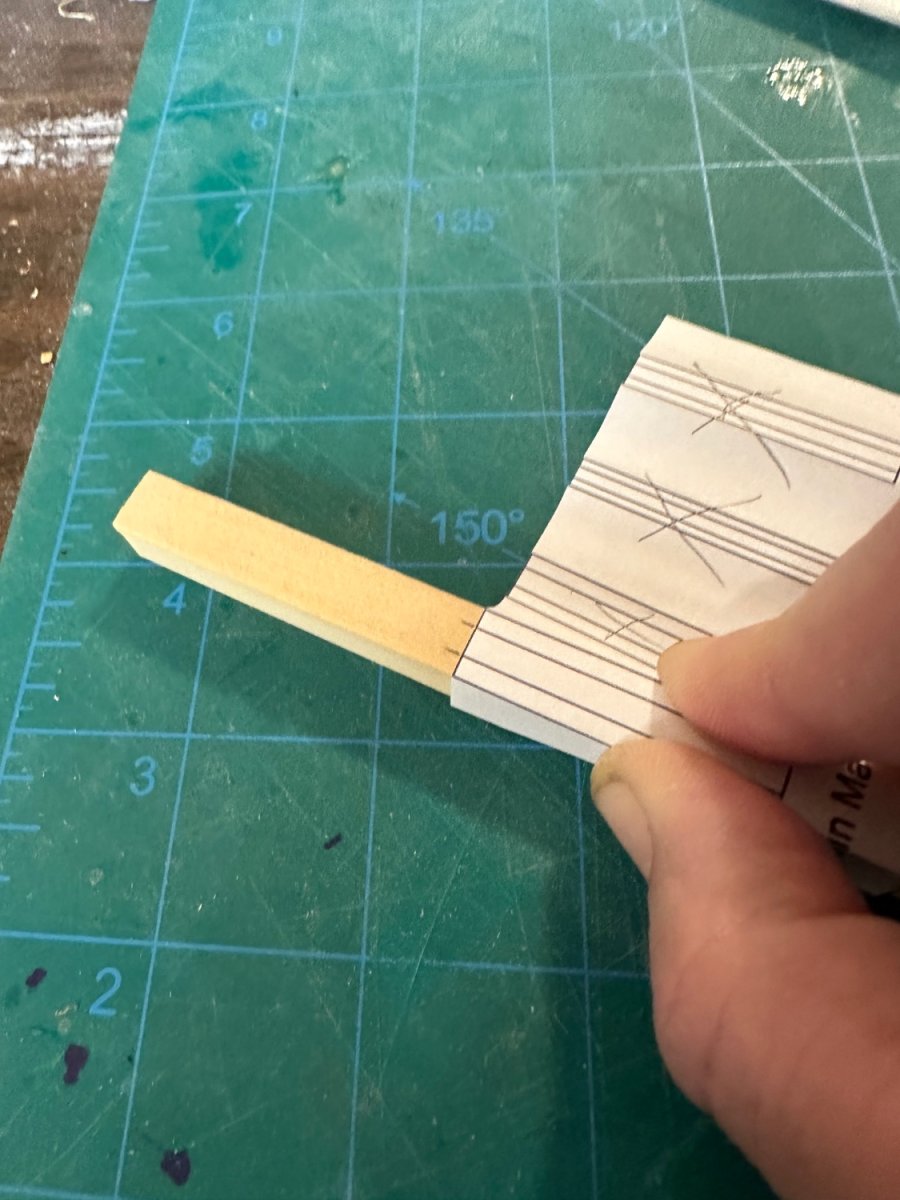
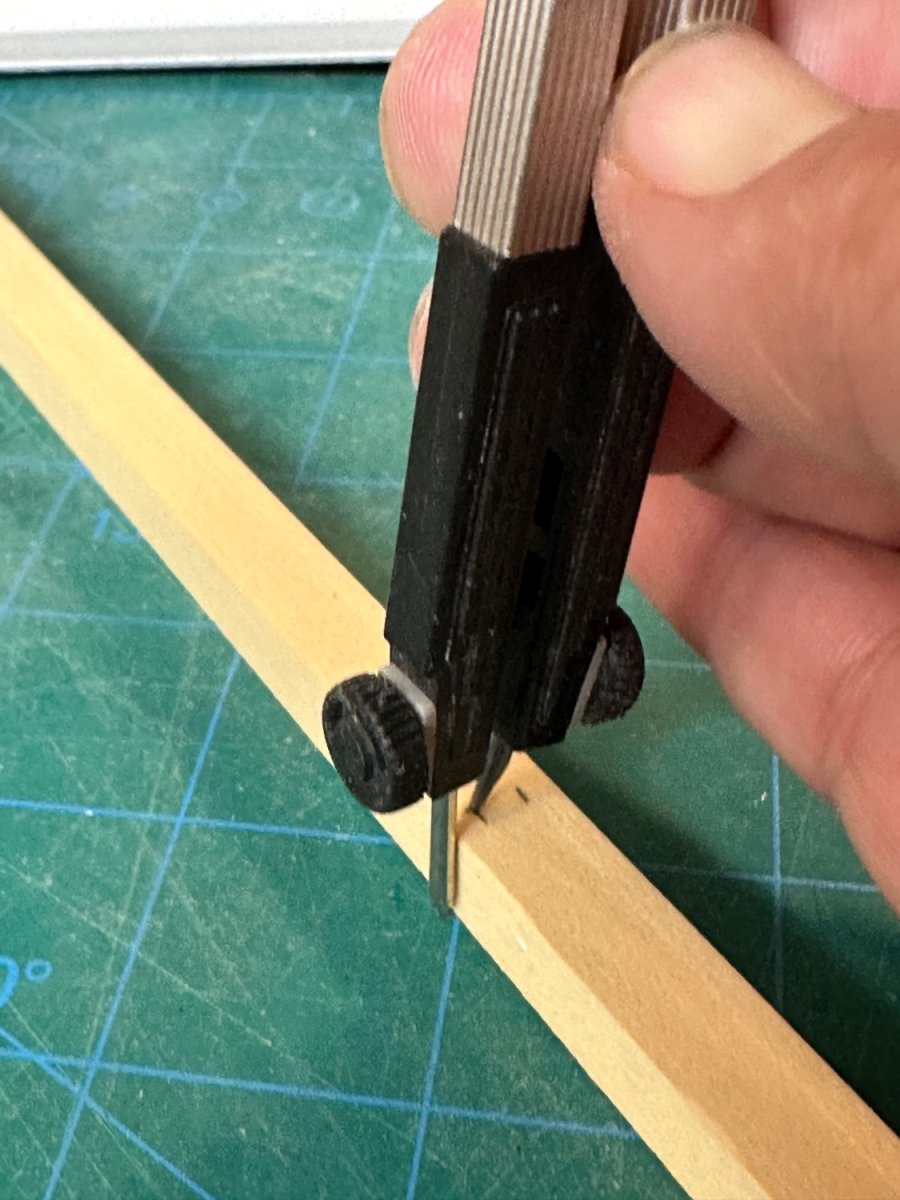
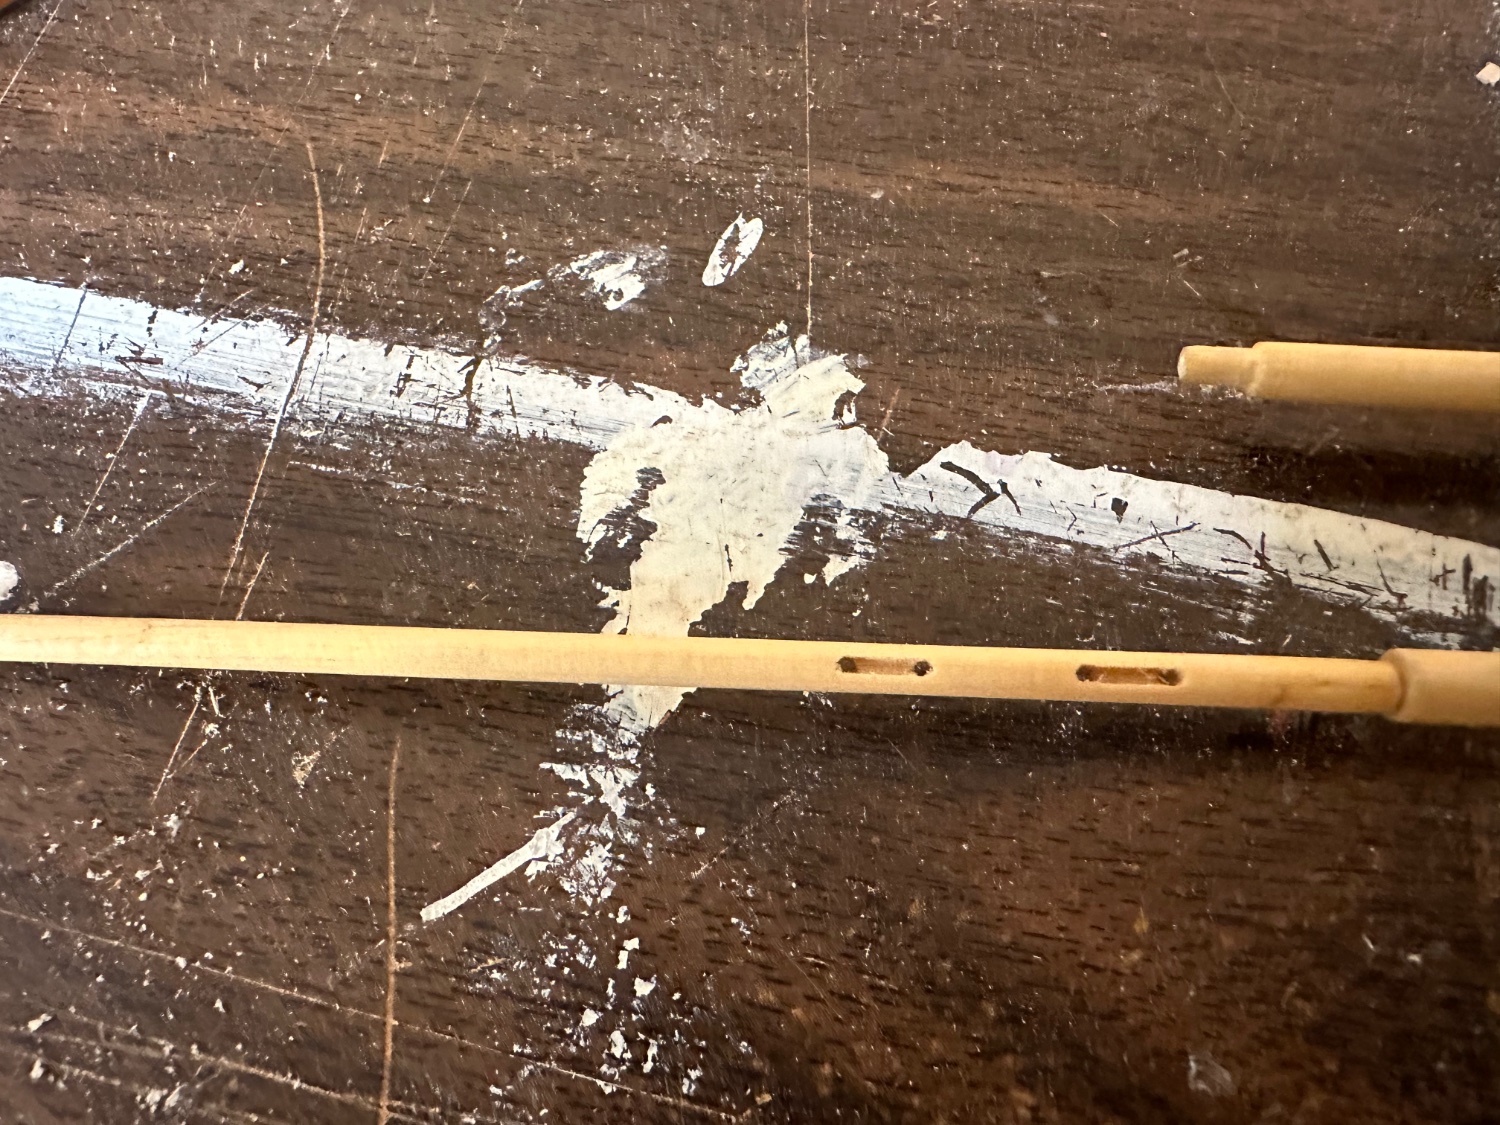
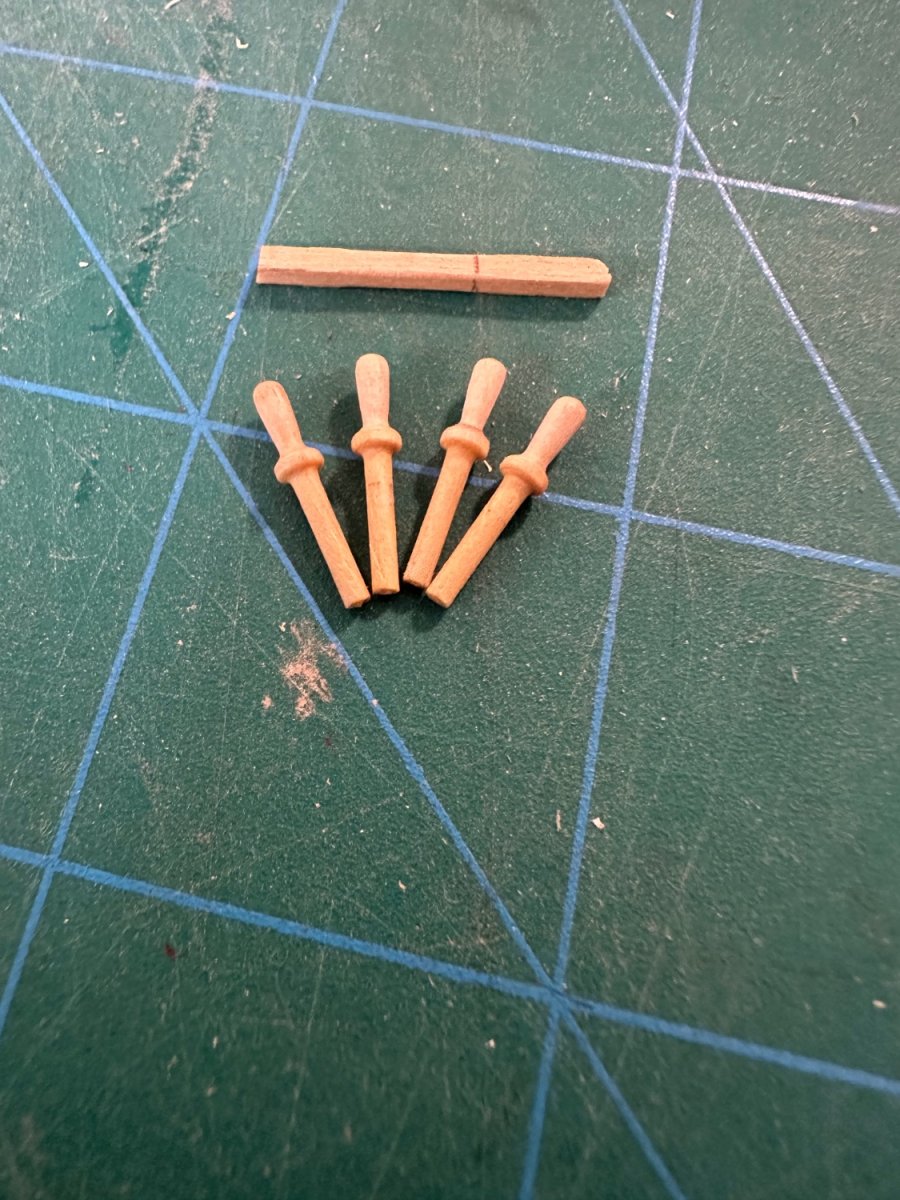
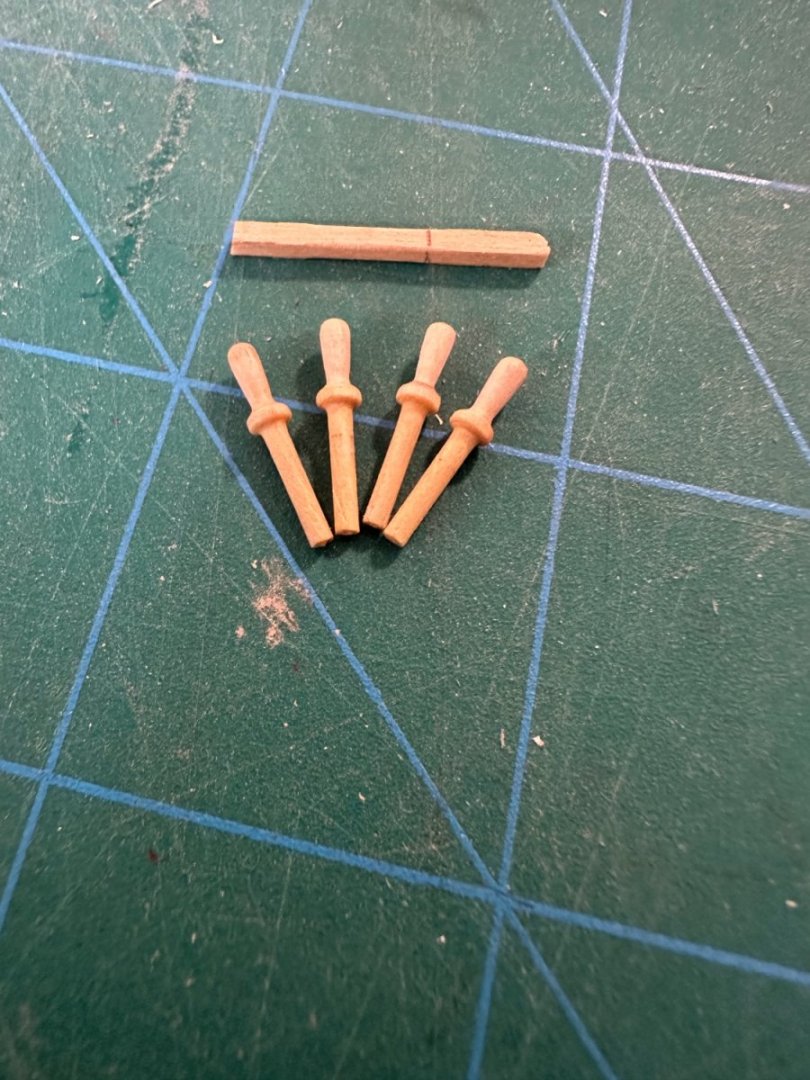
Still more progress. I wanted to get the mast thwart in place, so it was time to tackle the belaying pins. Again, I’ve never made anything like this, but using the photos in Chuck’s practicum, I was able to turn out (pun intended) some pins using my Dremel and 3/32 square boxwood. I know Chuck says to use 1/16 square stock, but I wanted to have a little more wood to work with. Best Regards …. Rick
- 155 replies
-
- 6
-
-
- Medway Longboat
- Syren Ship Model Company
- (and 1 more)
-
New to ship modelling? But what do you build first?
Freebird replied to MSW's topic in Wood ship model kits
Thank you Chris, much appreciated! I have learned so much from this site. One piece of sage advice I believe was from Chuck, take your time and treat each piece/part as its own project. Never thought of modeling in that fashion and it’s making me a much better builder. Best Regards …. Rick -
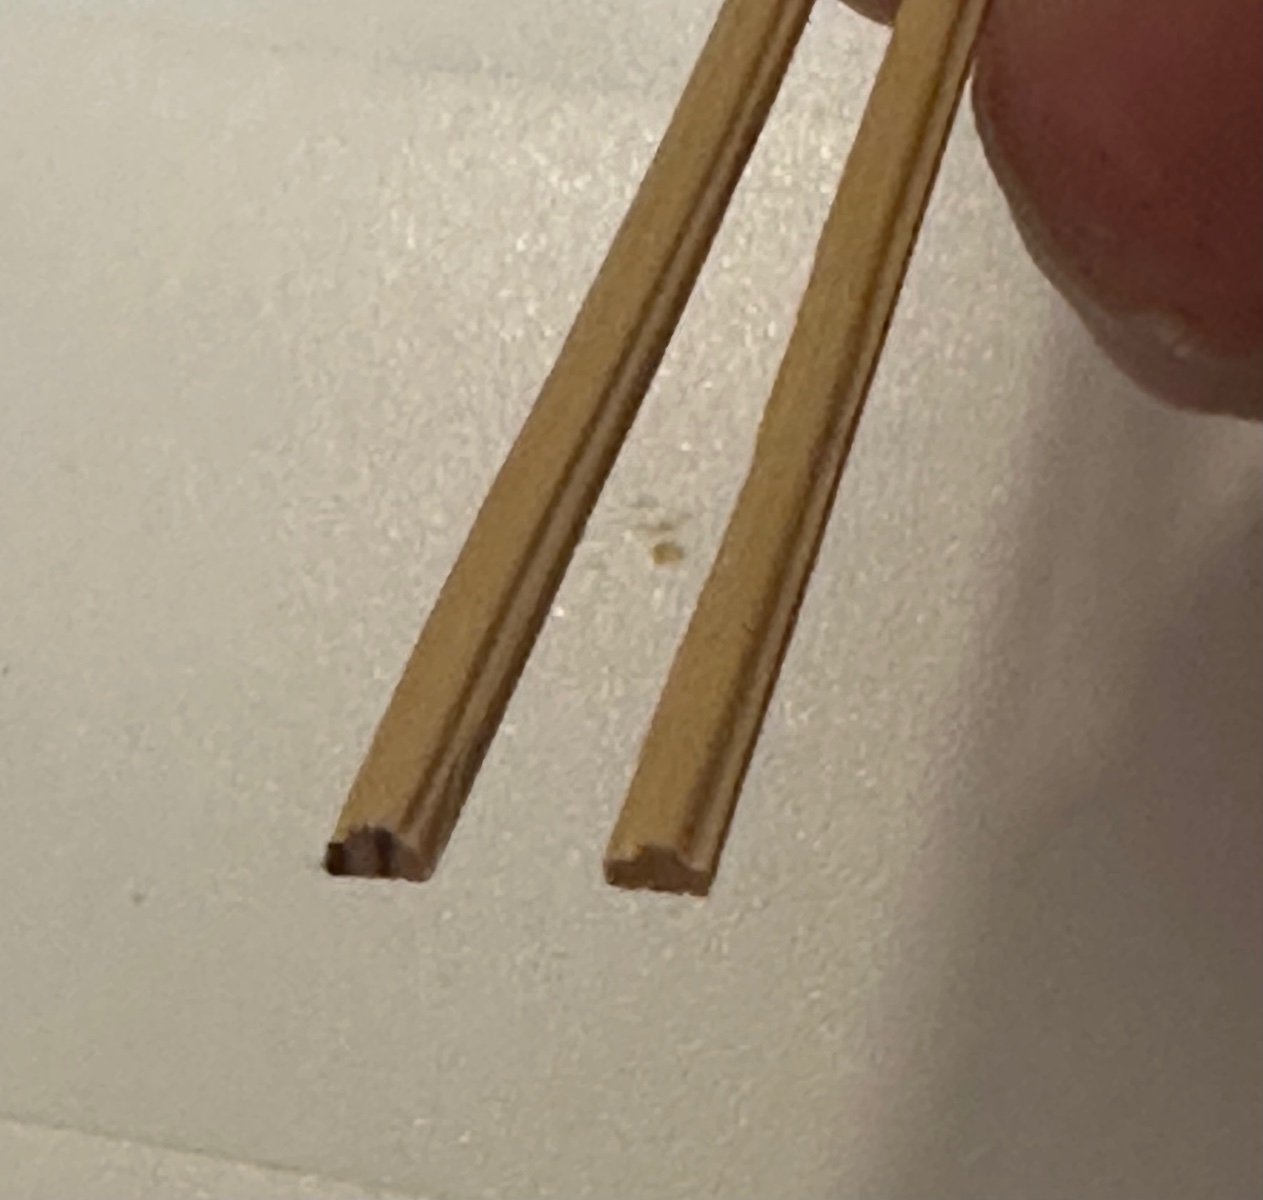
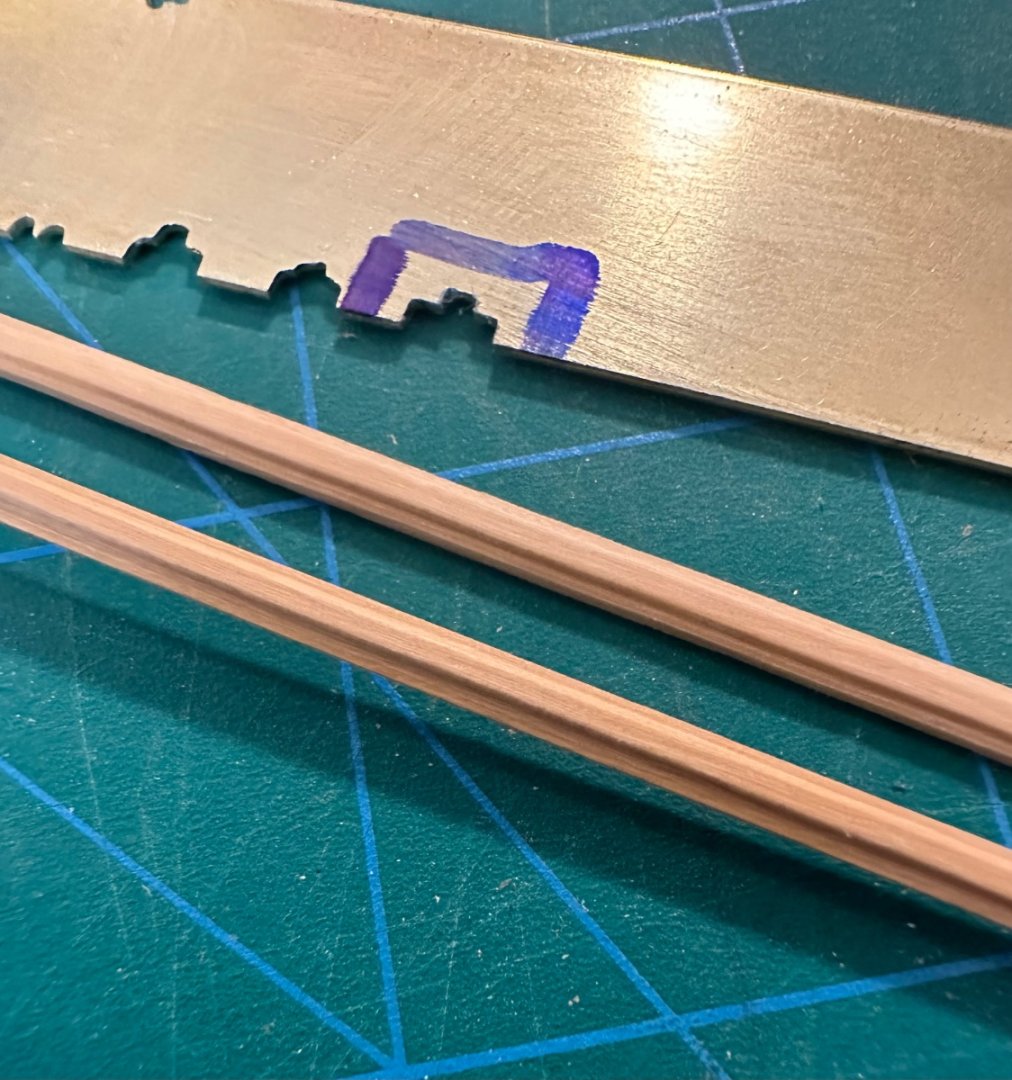
Another first, I made a scraper from 1/32 brass and made the moldings. Looks good to my eye, even though I’d use some thinner brass next time. Best Regards …. Rick

- 155 replies
-
- 3
-
-
- Medway Longboat
- Syren Ship Model Company
- (and 1 more)
-
New to ship modelling? But what do you build first?
Freebird replied to MSW's topic in Wood ship model kits
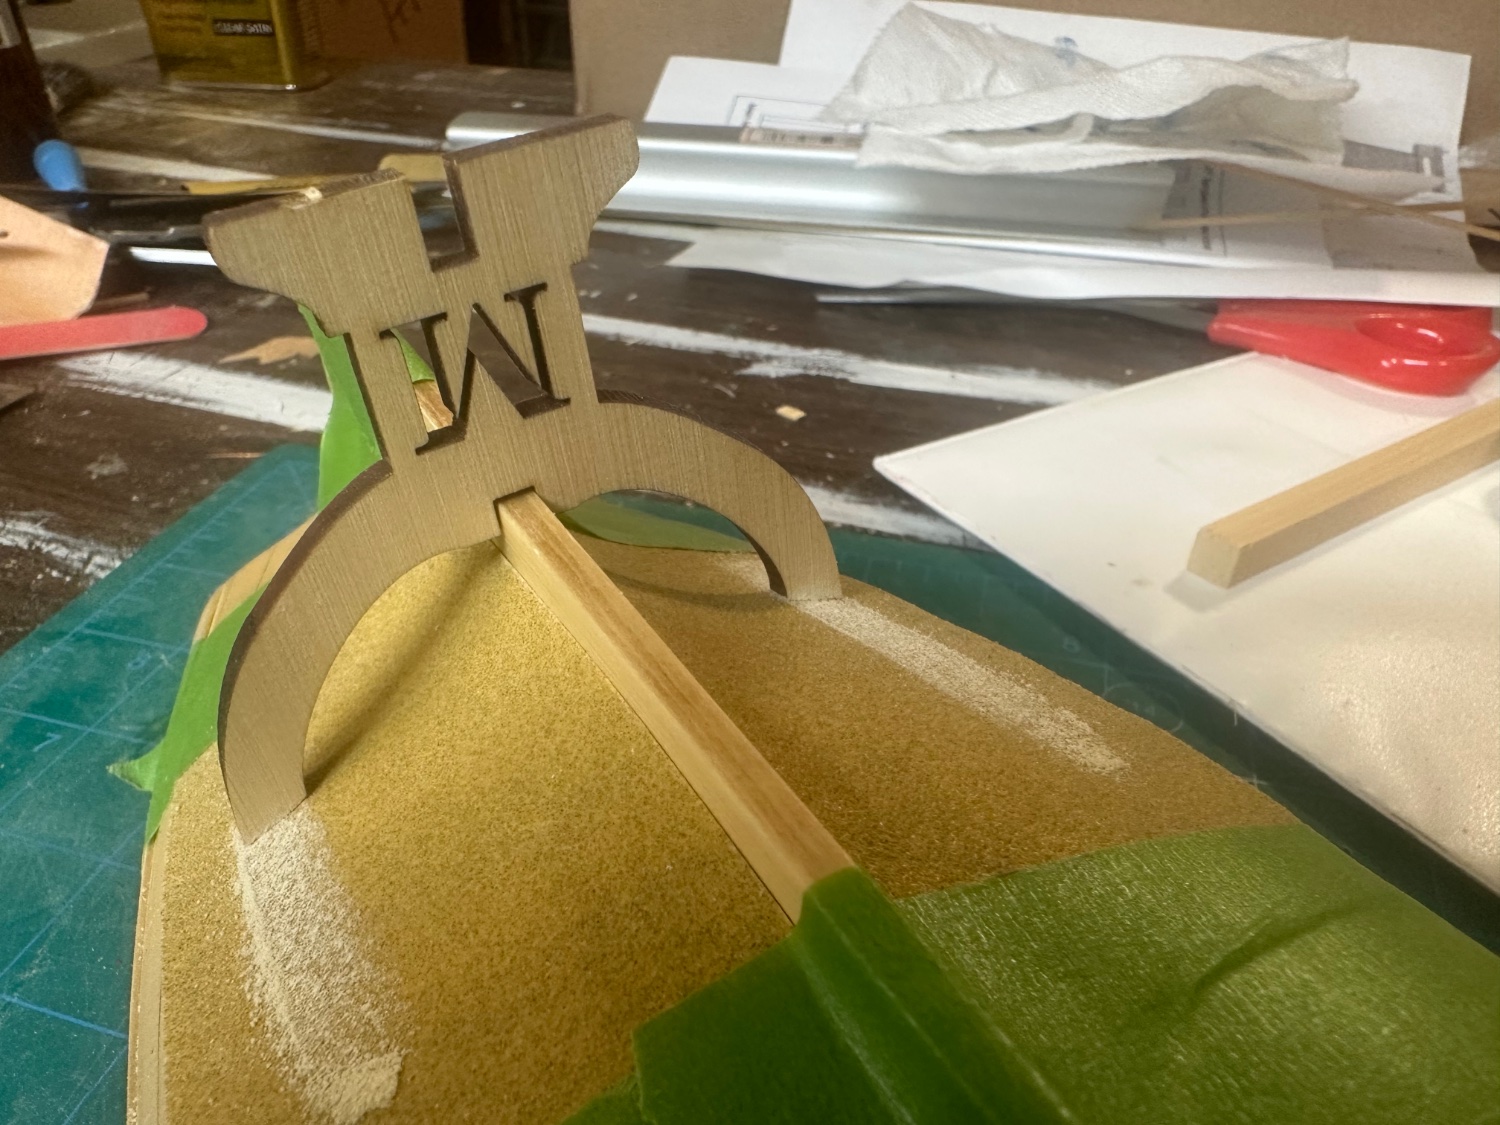
Here’s my story. I have been building plastic and balsa airplanes as far back as I can remember. My father was a true craftsman building R/C planes and I learned a lot from him. Over the years though, I yearned to build a wooden POB or POF ship. Back in the mid 70’s I bought a Cutty Sark (I forget the manufacturer), anyways with my meager and limited skills I tried to build this ship and failed miserably. So I shelved the idea of wood ship models and concentrated on R/C planes. Fast forward to 2020 and I was having a conversation with Nic of Bluejacket fame (he’s been a good friend for quite a few years), and he turned me on to this site. To say I was blown away is an understatement! There are so many talented builders and information and how-to’s, it was mind numbing. After reading so many inspiring build logs, I honed in on Chuck’s offerings (I also have 3 Model Shipways kits, which are Chuck’s designs). After reading about his Medway Longboat, I decided this was the place to start, and I’m not disappointed. I loved the lines and the support that is offered by those who went before me, which is truly amazing and appreciated! So some 40 years later, I started on my desire to build a wooden boat/ship. I’m currently on/off working on a Syren Medway Longboat and I’m just amazed with the results. While I know some skills are needed and more need to be developed, the design also contributes greatly to success. So while I believe there are many very good kits out there, I love Chuck’s approach to make modelers develop skills that greatly improves building skills. I’ve built a lot of kits in my time, but ship modeling building is on a different level that I’m enjoying to the max. So my experiences so far is with Syren Ship Models (I have Cheerful waiting in the wings), and has been my to go source. I also look forward to building my Model Shipways kits. Those are the only 2 vendors at this time I’ve gotten items from, but I’m eyeballing some from Vanguard Models as Chris’s approach are very unique. Attached are a few Medway pictures. Best Regards …. Rick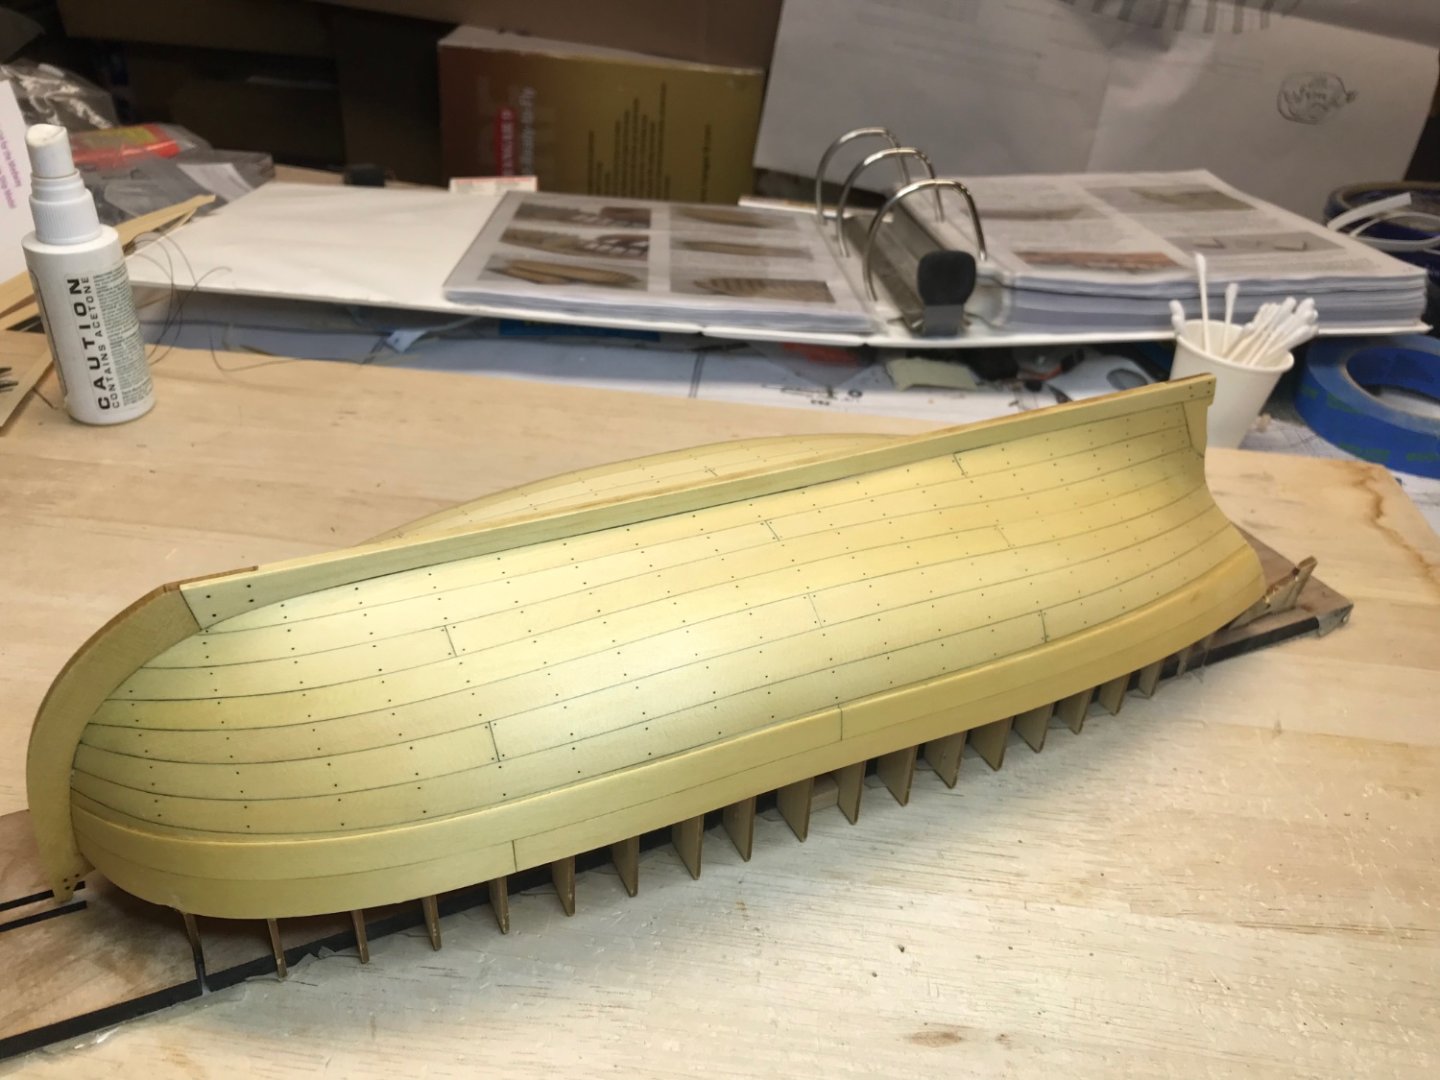


- 94 replies
-
- 21
-
-

-
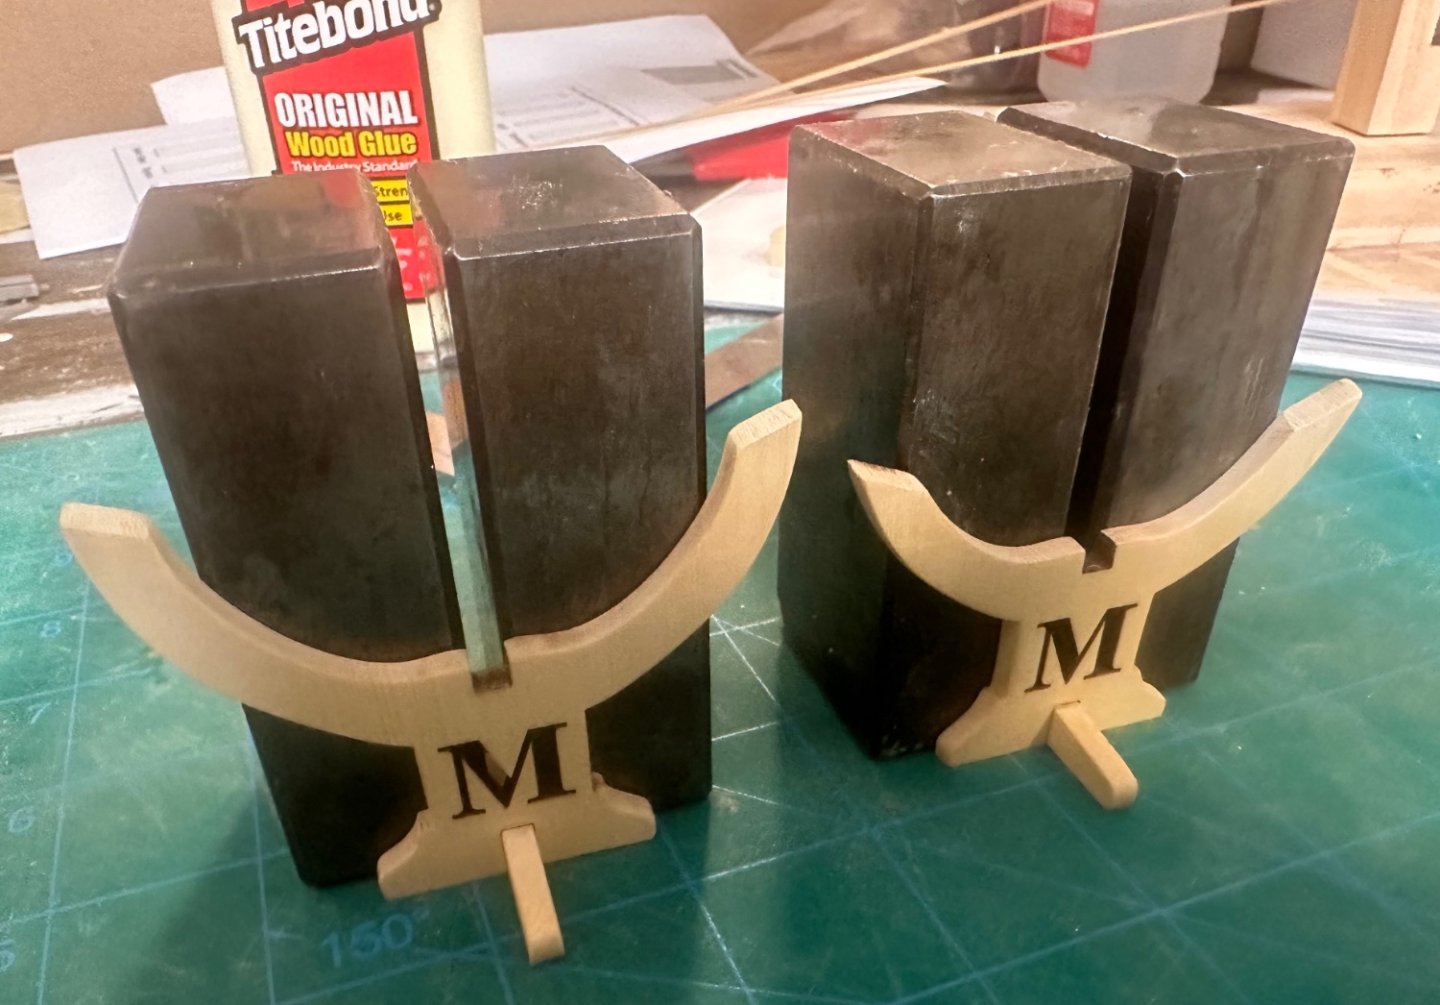
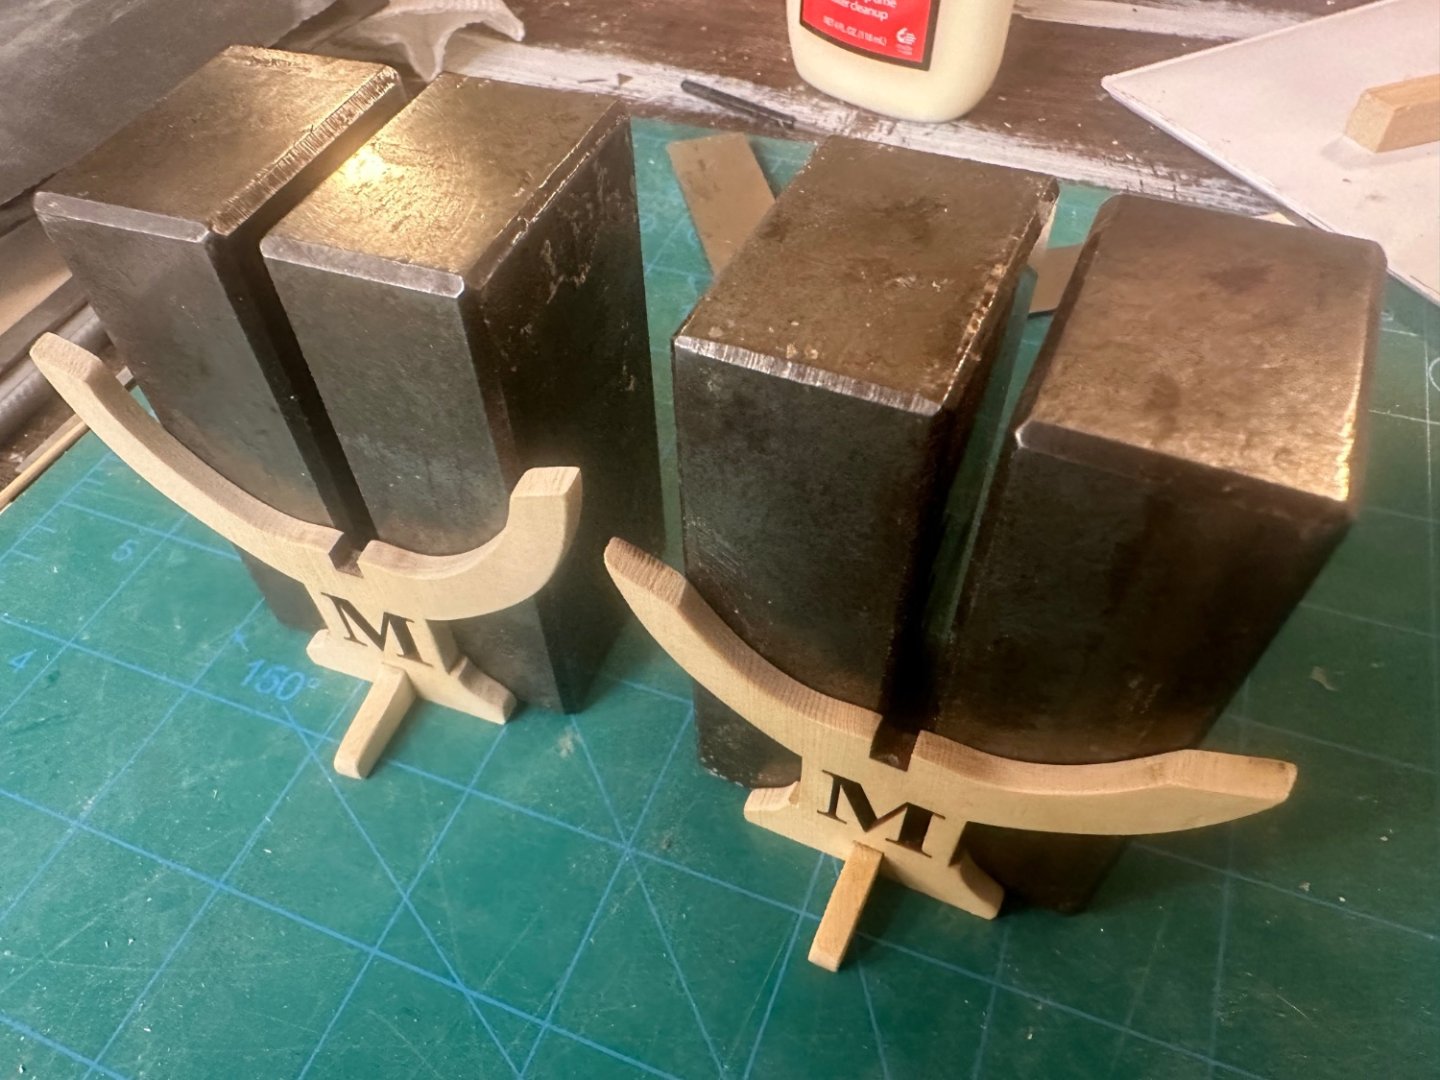
Thank you Chuck, that means a lot to this newbie! Merry Christmas! p.s. My Admiral …. er Santa was very generous with the beginnings of a Winnie! Best Regards …. Rick
- 155 replies
-
- 1
-
-
- Medway Longboat
- Syren Ship Model Company
- (and 1 more)