HOLIDAY DONATION DRIVE - SUPPORT MSW - DO YOUR PART TO KEEP THIS GREAT FORUM GOING! (Only 72 donations so far out of 49,000 members - Can we at least get 100? C'mon guys!)
×


Freebird
-
Posts
334 -
Joined
-
Last visited
Content Type
Profiles
Forums
Gallery
Events
Everything posted by Freebird
-
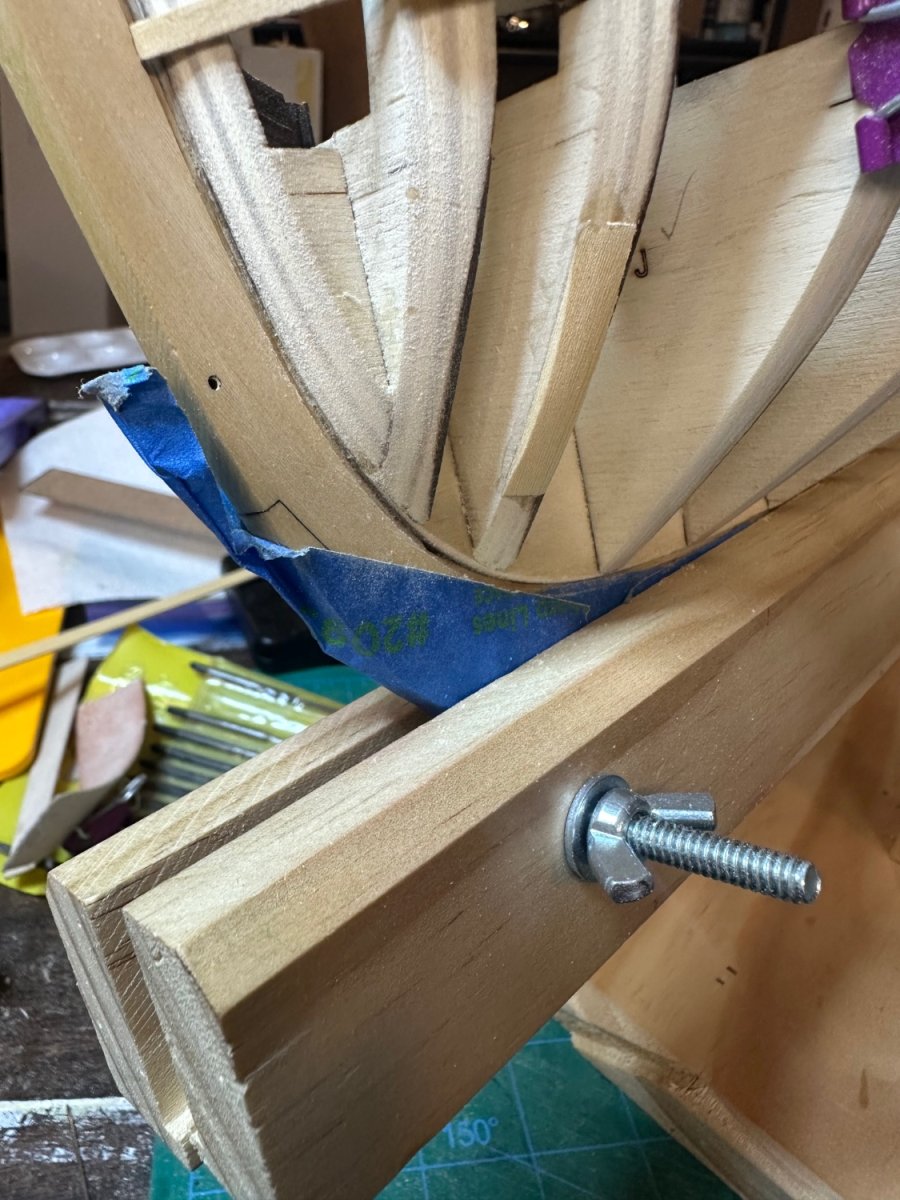
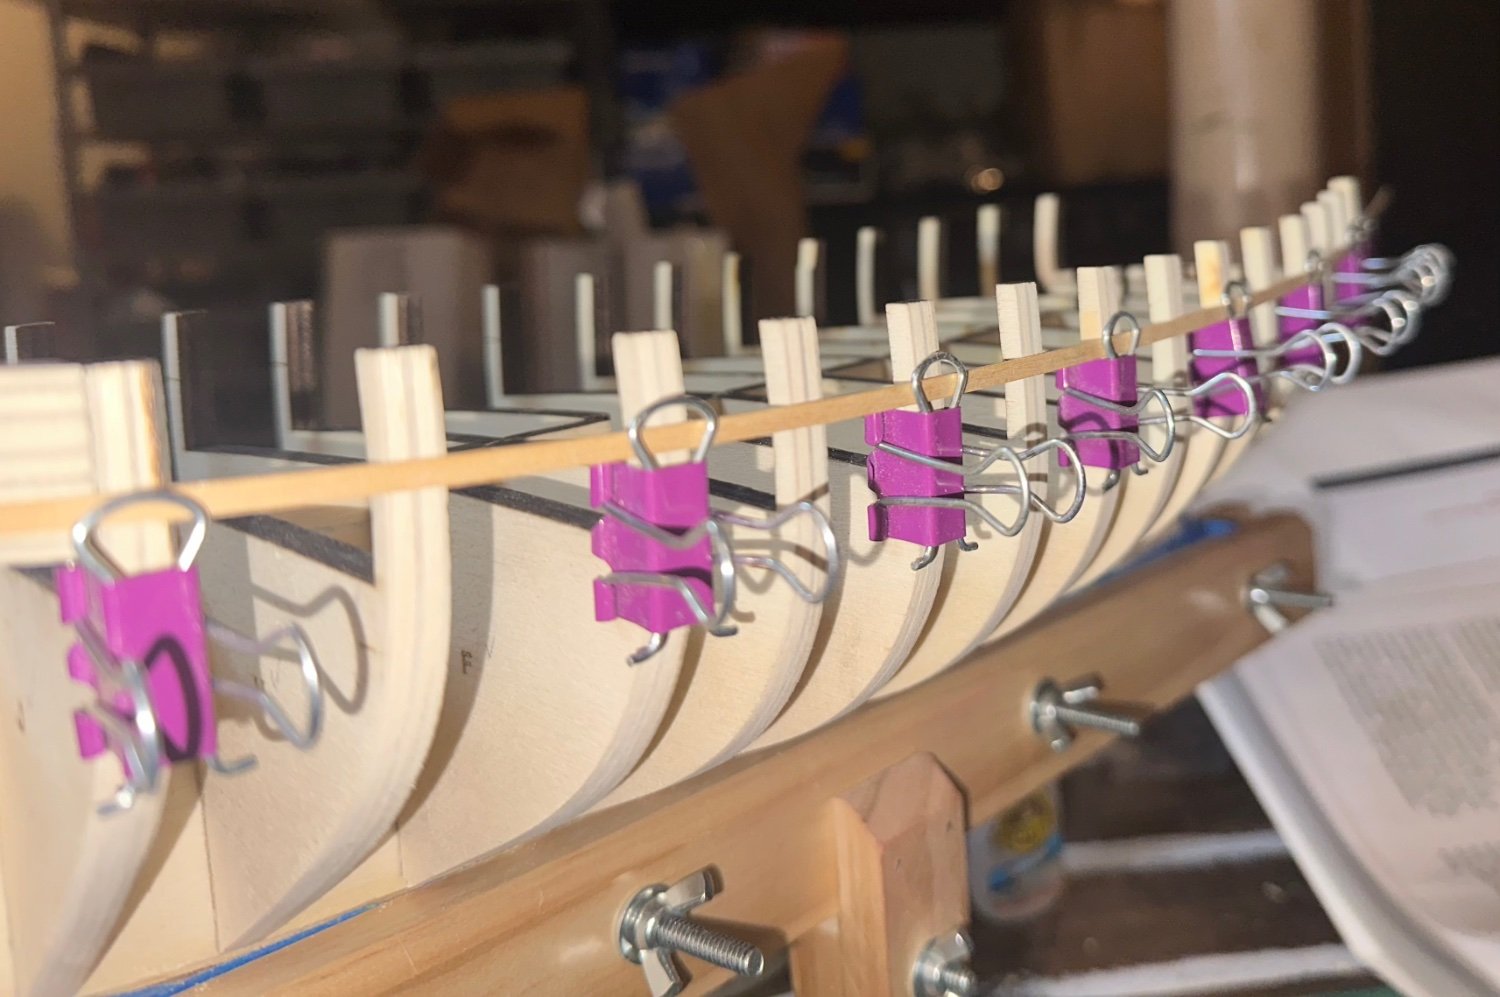
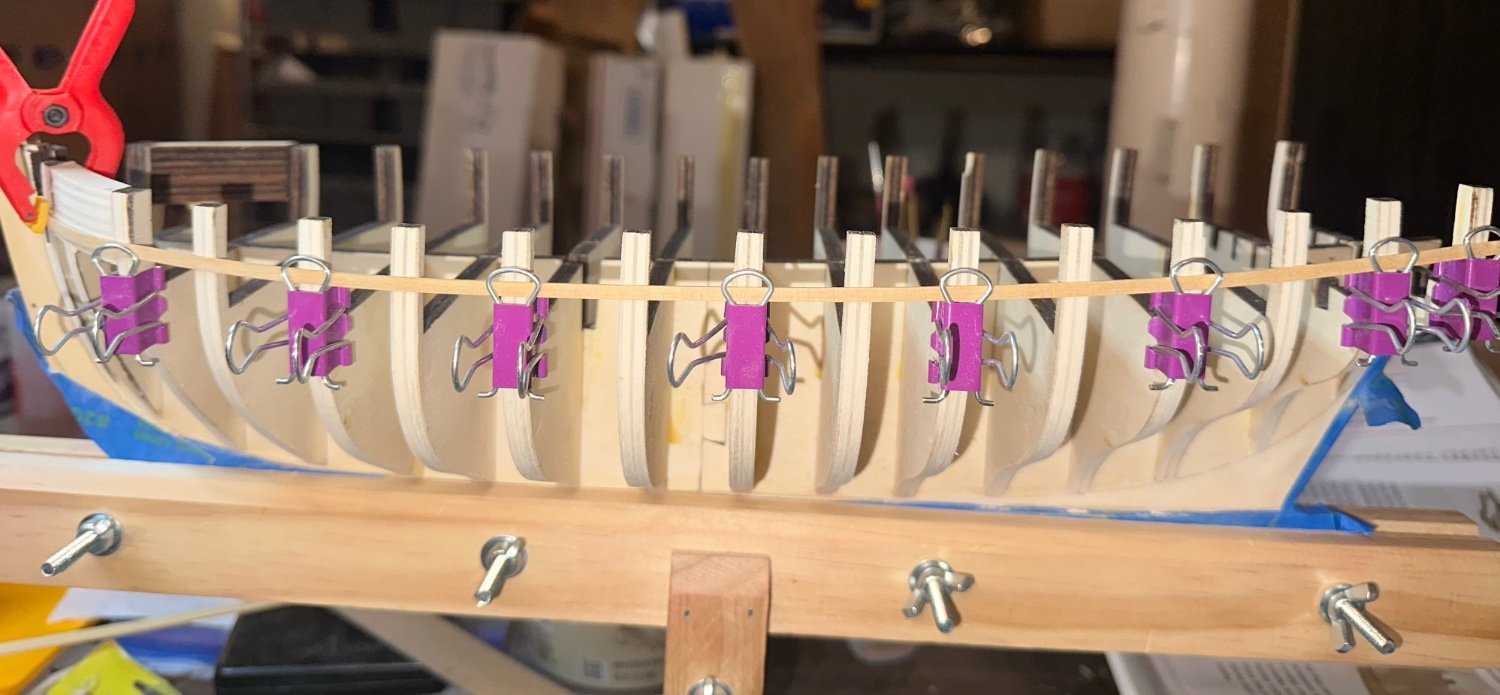
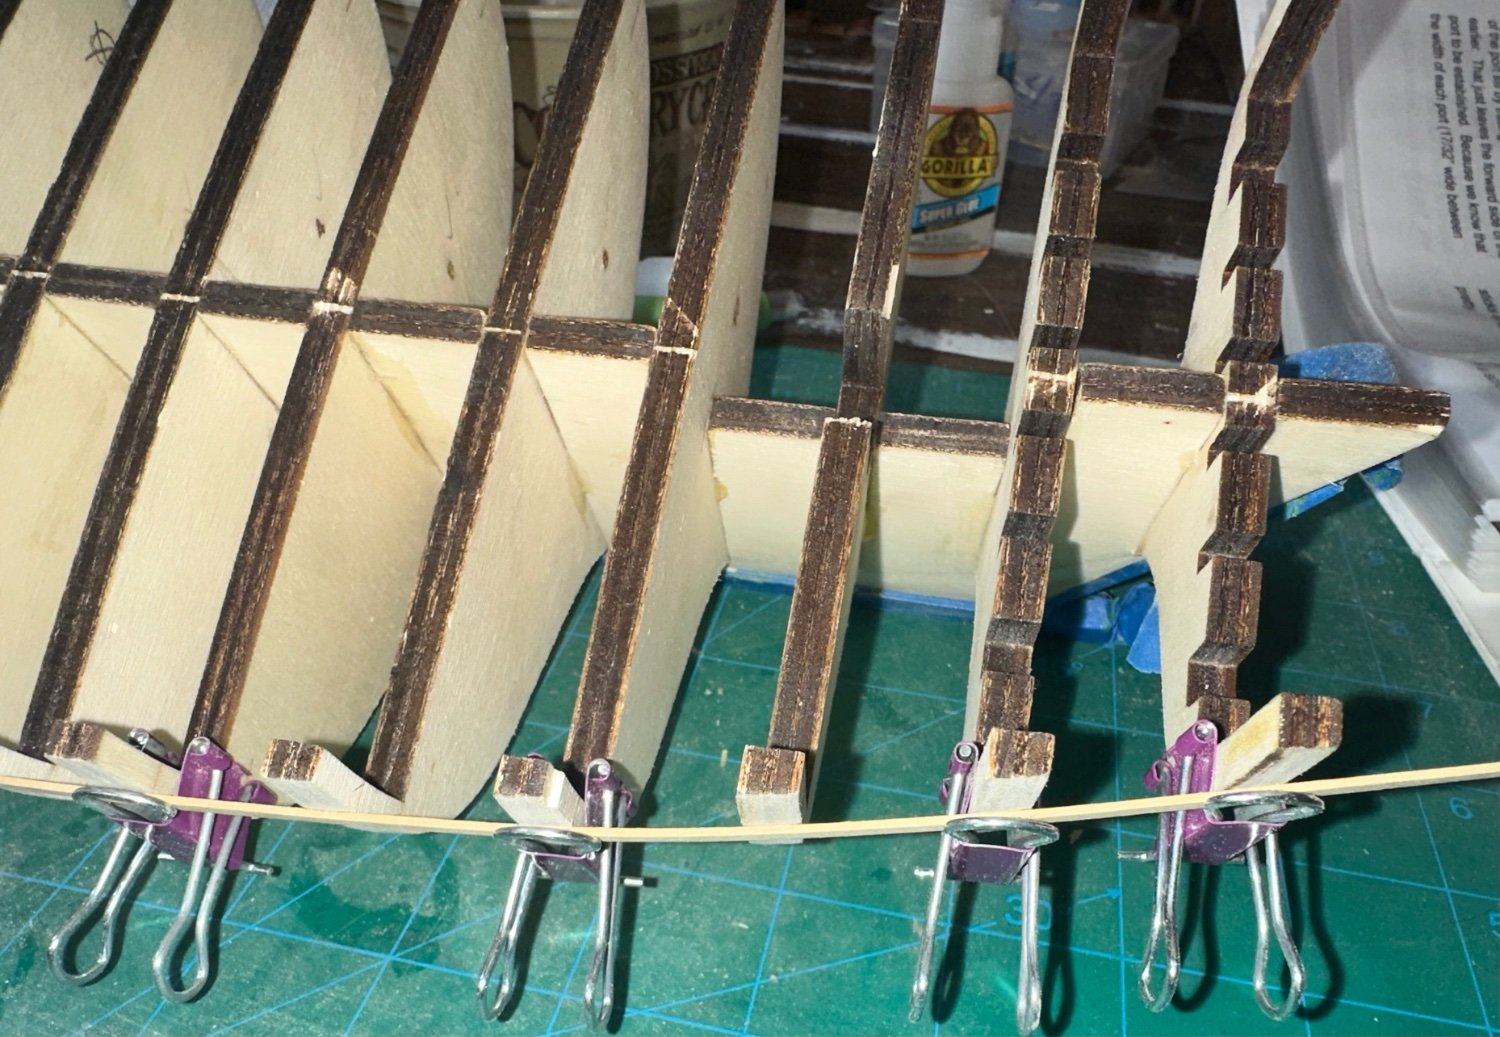
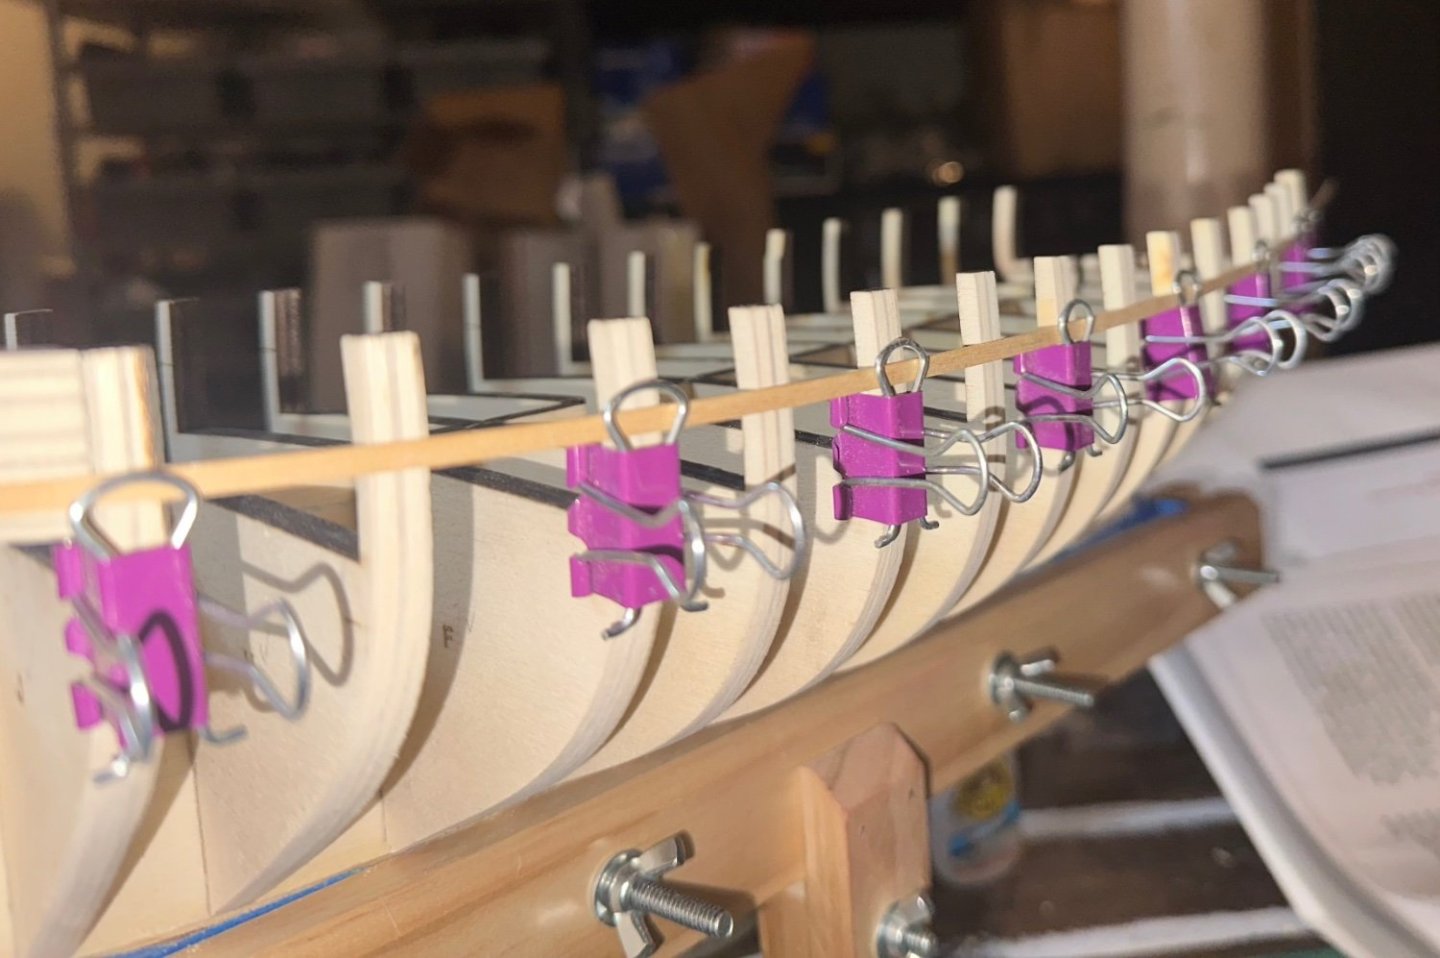
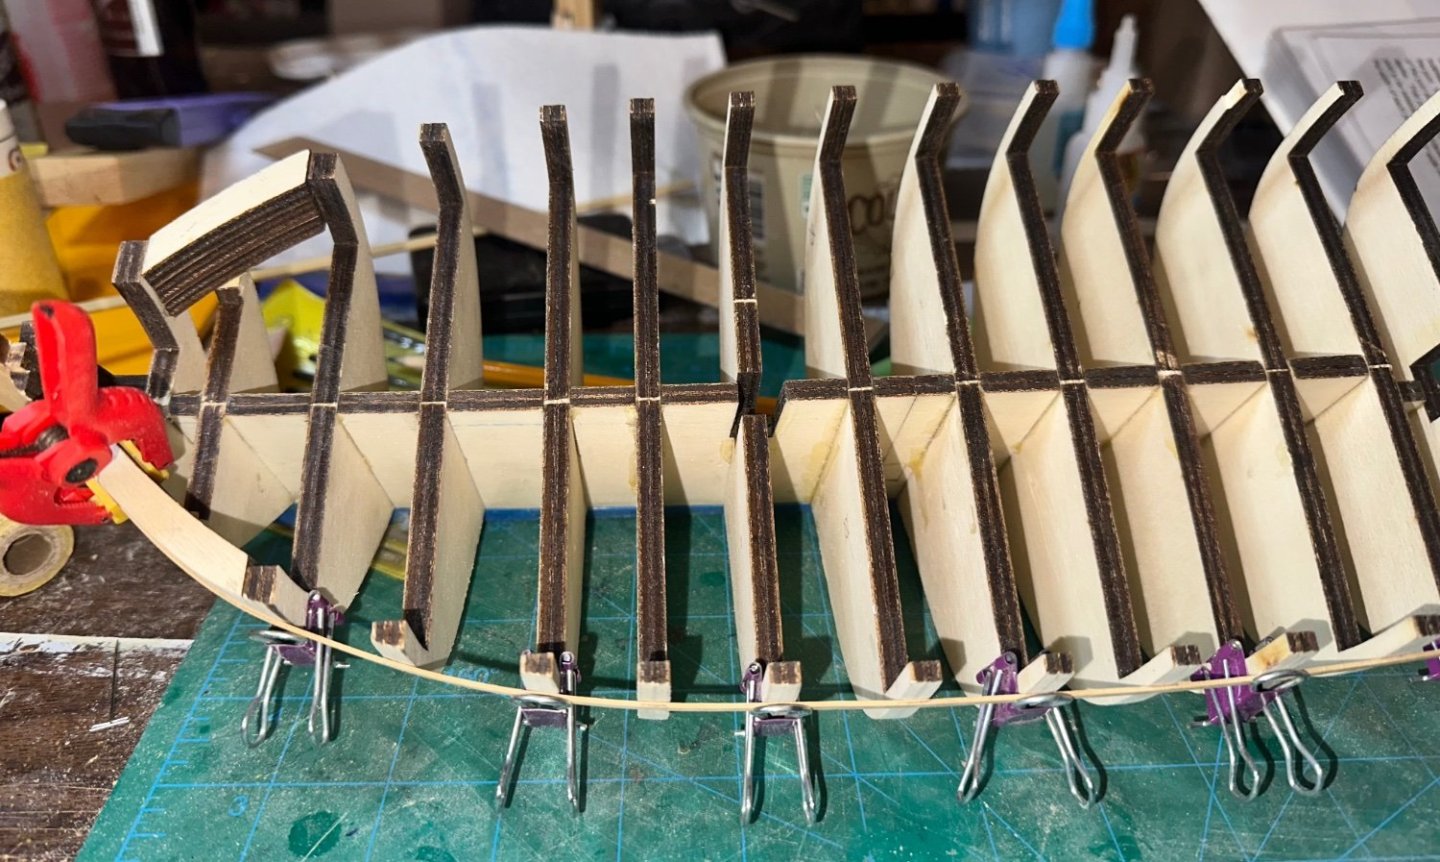
Glenn, that’s exactly what I’m doing. The batten runs very nicely across all bulkheads the length of the hull. I’m actually very impressed that I don’t have any bumps or dips. I’m sure that some tweaking will be needed when I start planking. Thanks for checking in and having my back! Best Regards …. Rick
-
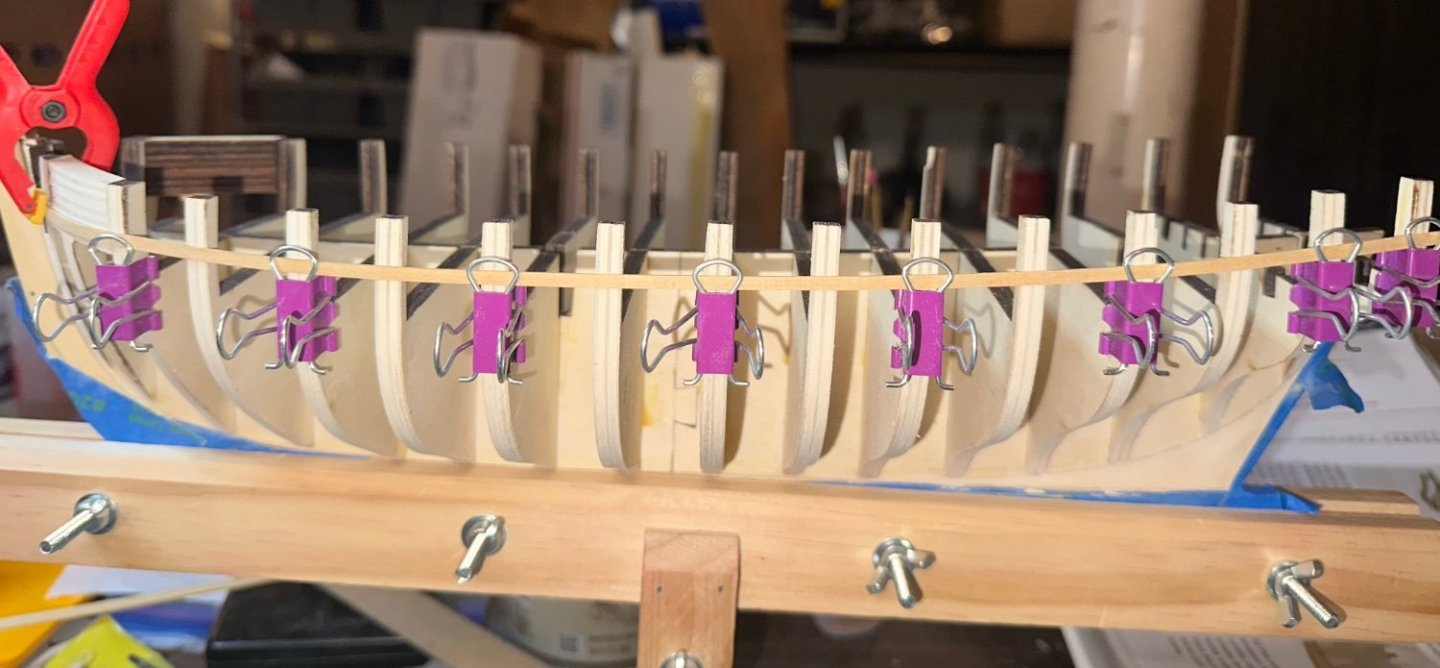
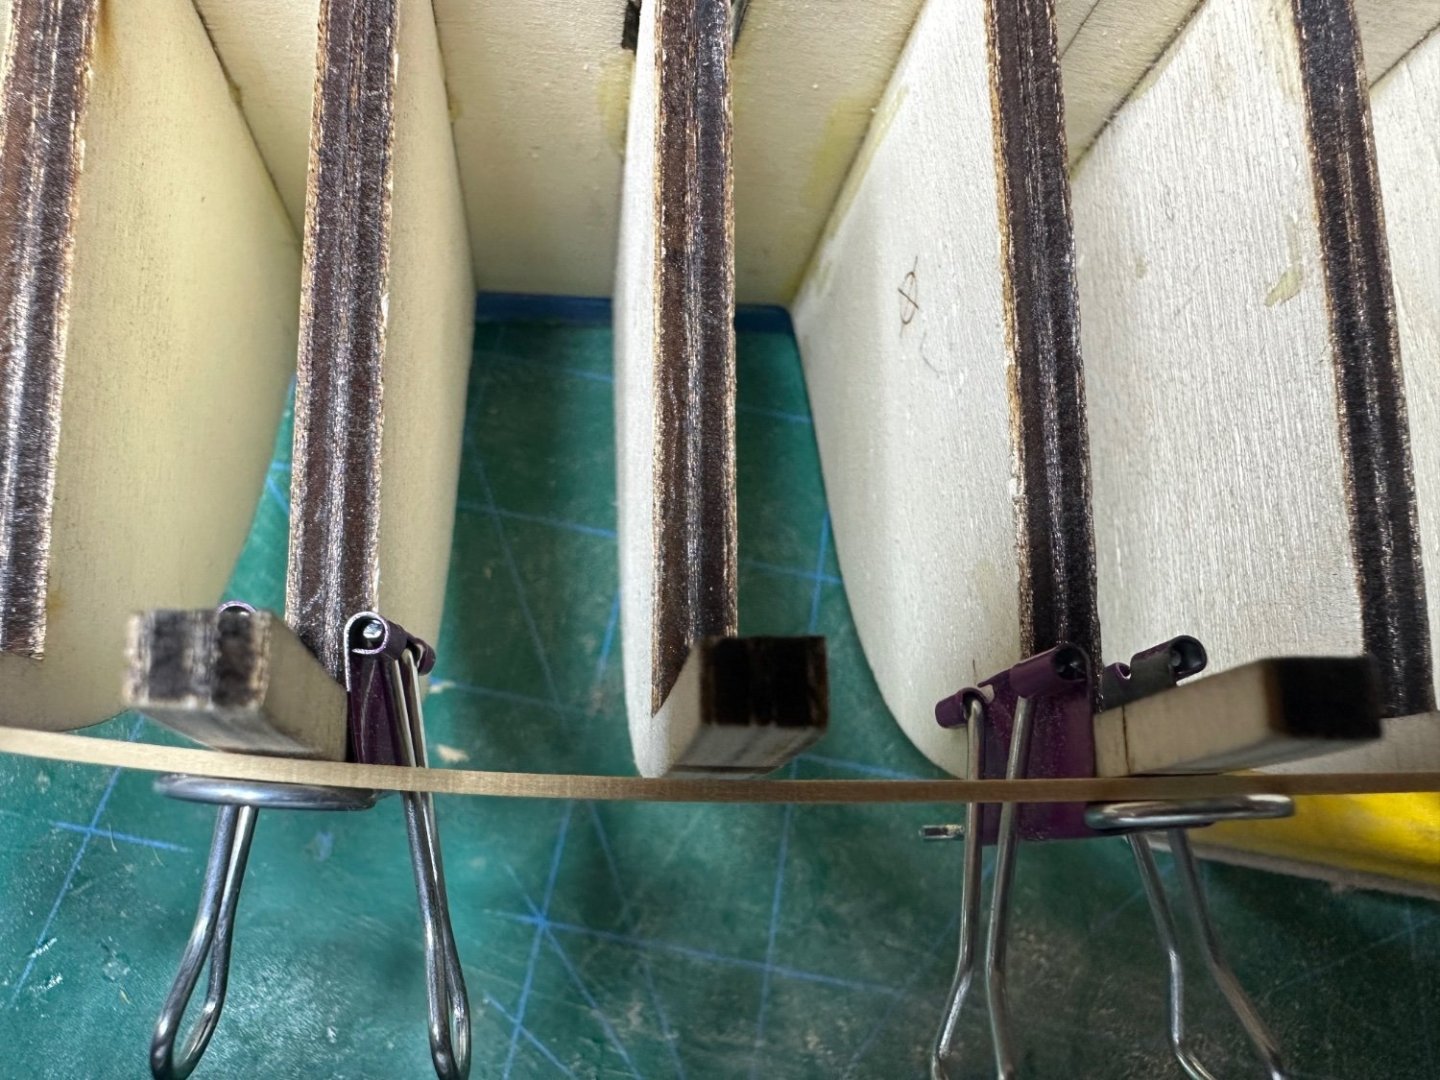
Here’s the batten on the lower marks, looks pretty good. Please ignore what looks like to be a flat spot on bulkhead L, it’s the clamp pushing on the batten behind the bulkhead. Best Regards …. Rick
-
Paul, thank you for the look! As you can see from the pictures above, a lot has changed. Thoughts? Best Regards …. Rick
-
Glenn, thank you for the Zen! I added a shim to bulkhead “L” as there was a flat spot. Good call! Bob, being this is my first effort at this type of hull I have a lot of angst. More sanding at the bow was needed (which I knew), more light sanding was needed along the entire hull was needed and that went a long way. The batten flow looks good but not perfect. Any suggestions! Best Regards …. Rick


-
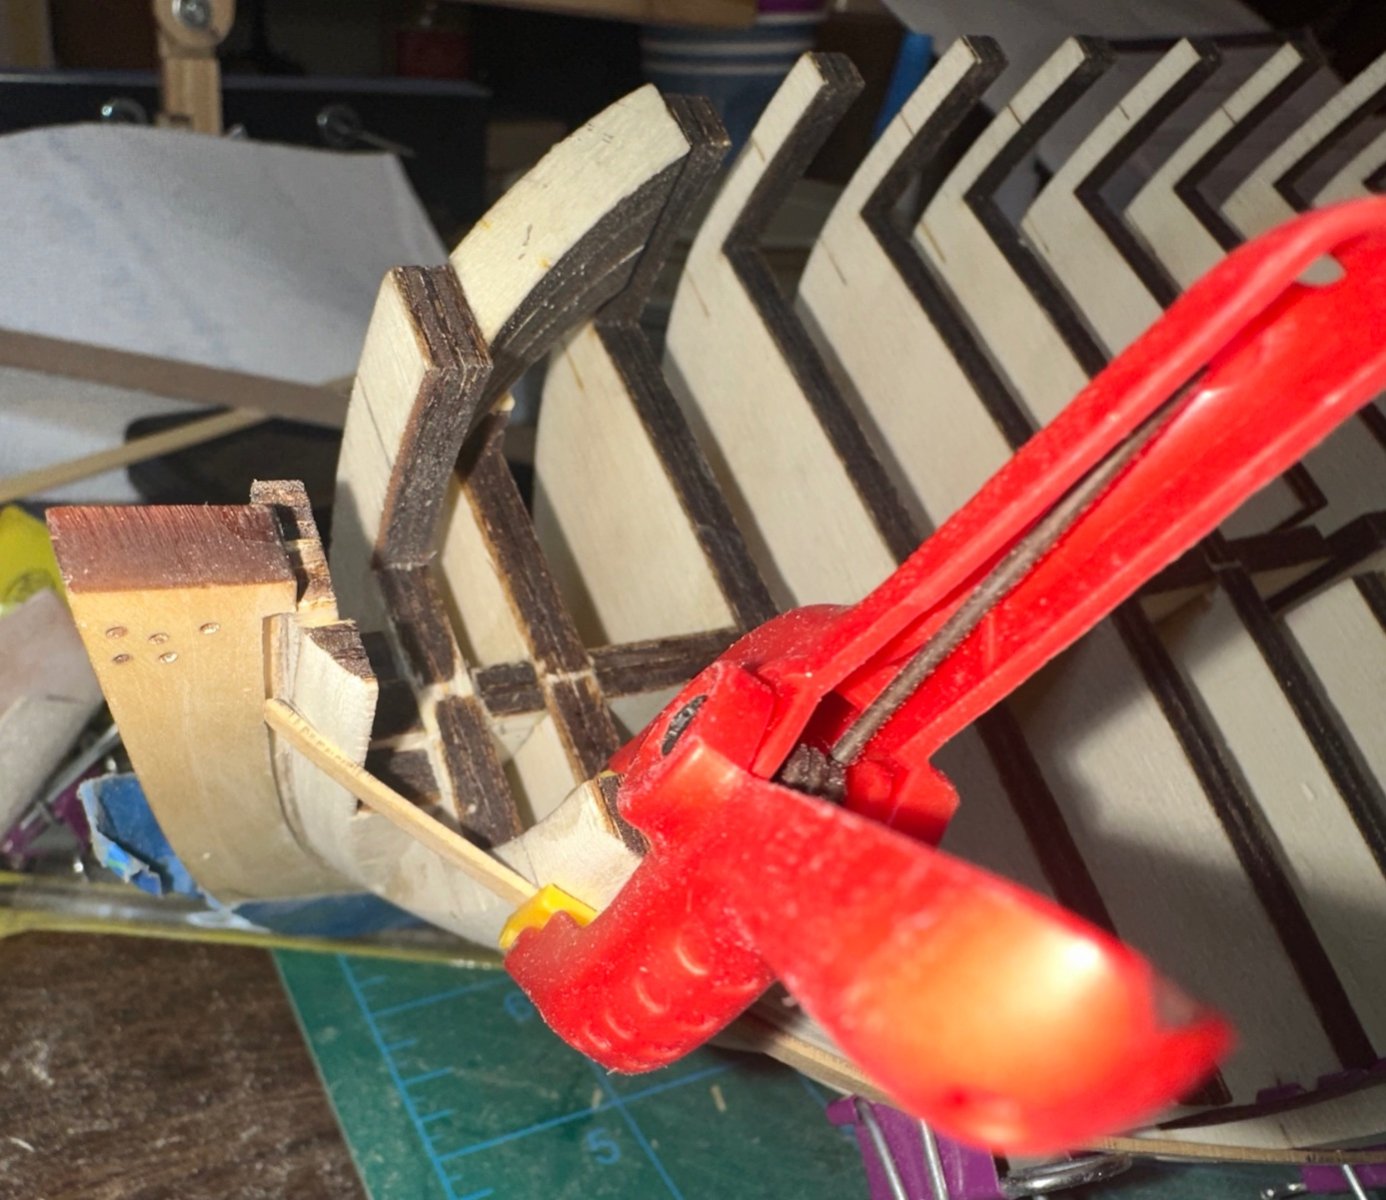
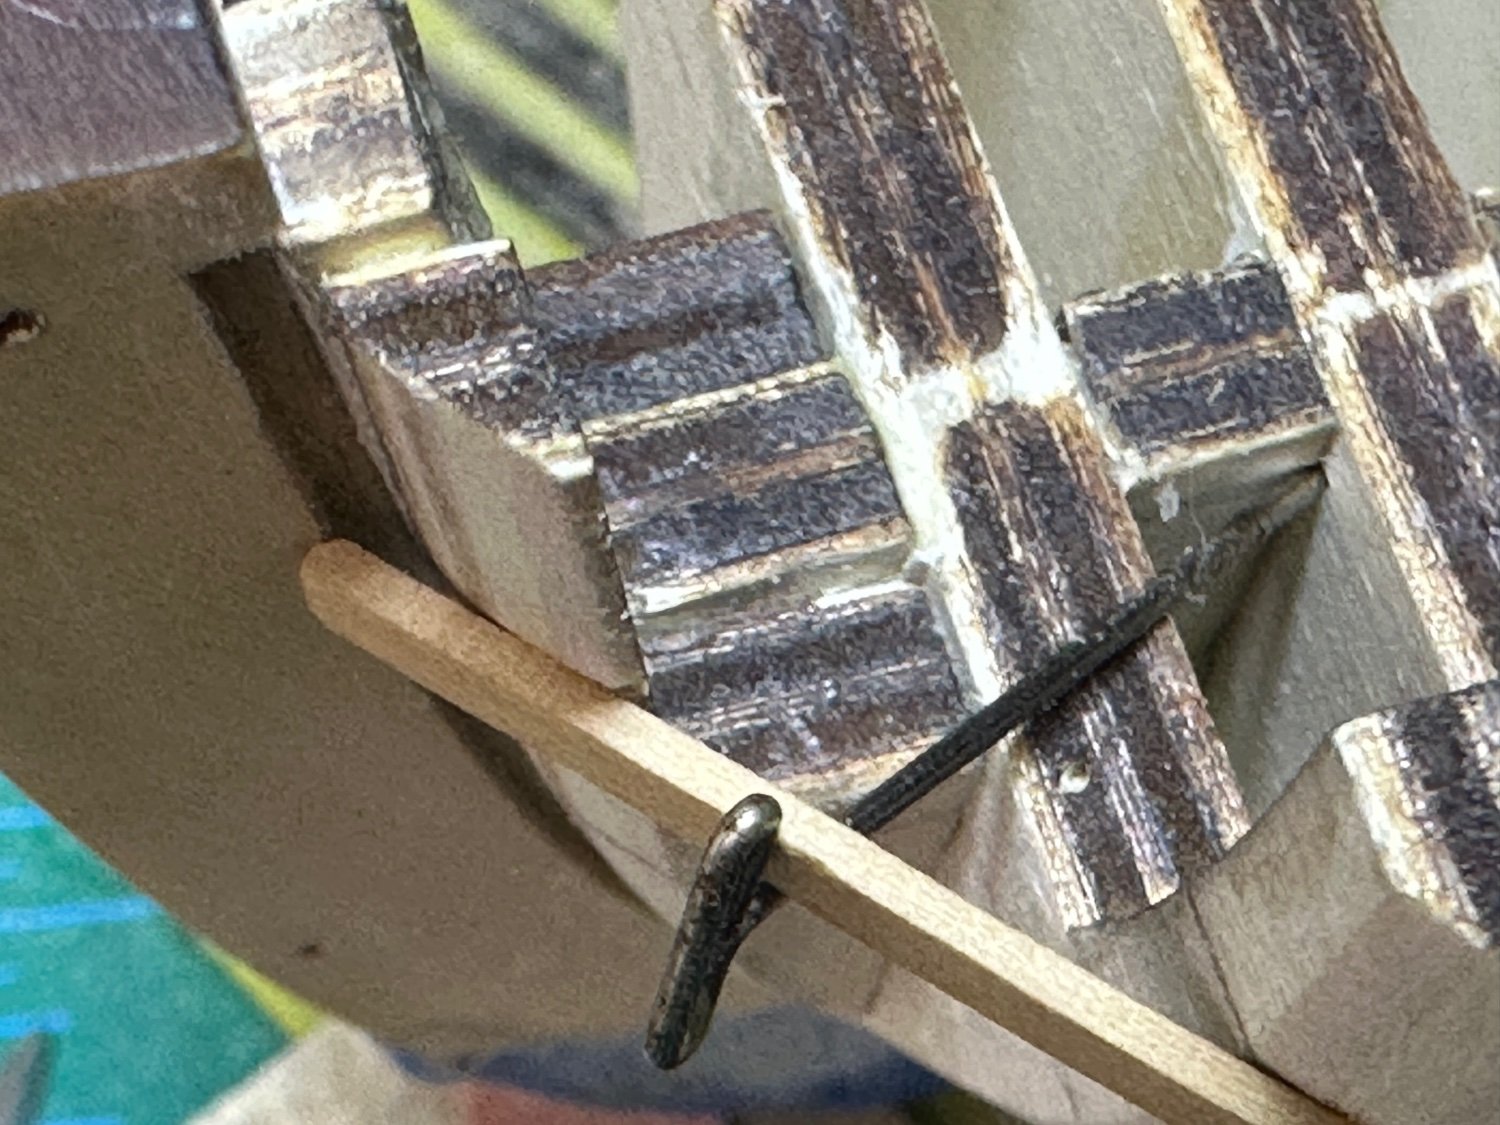
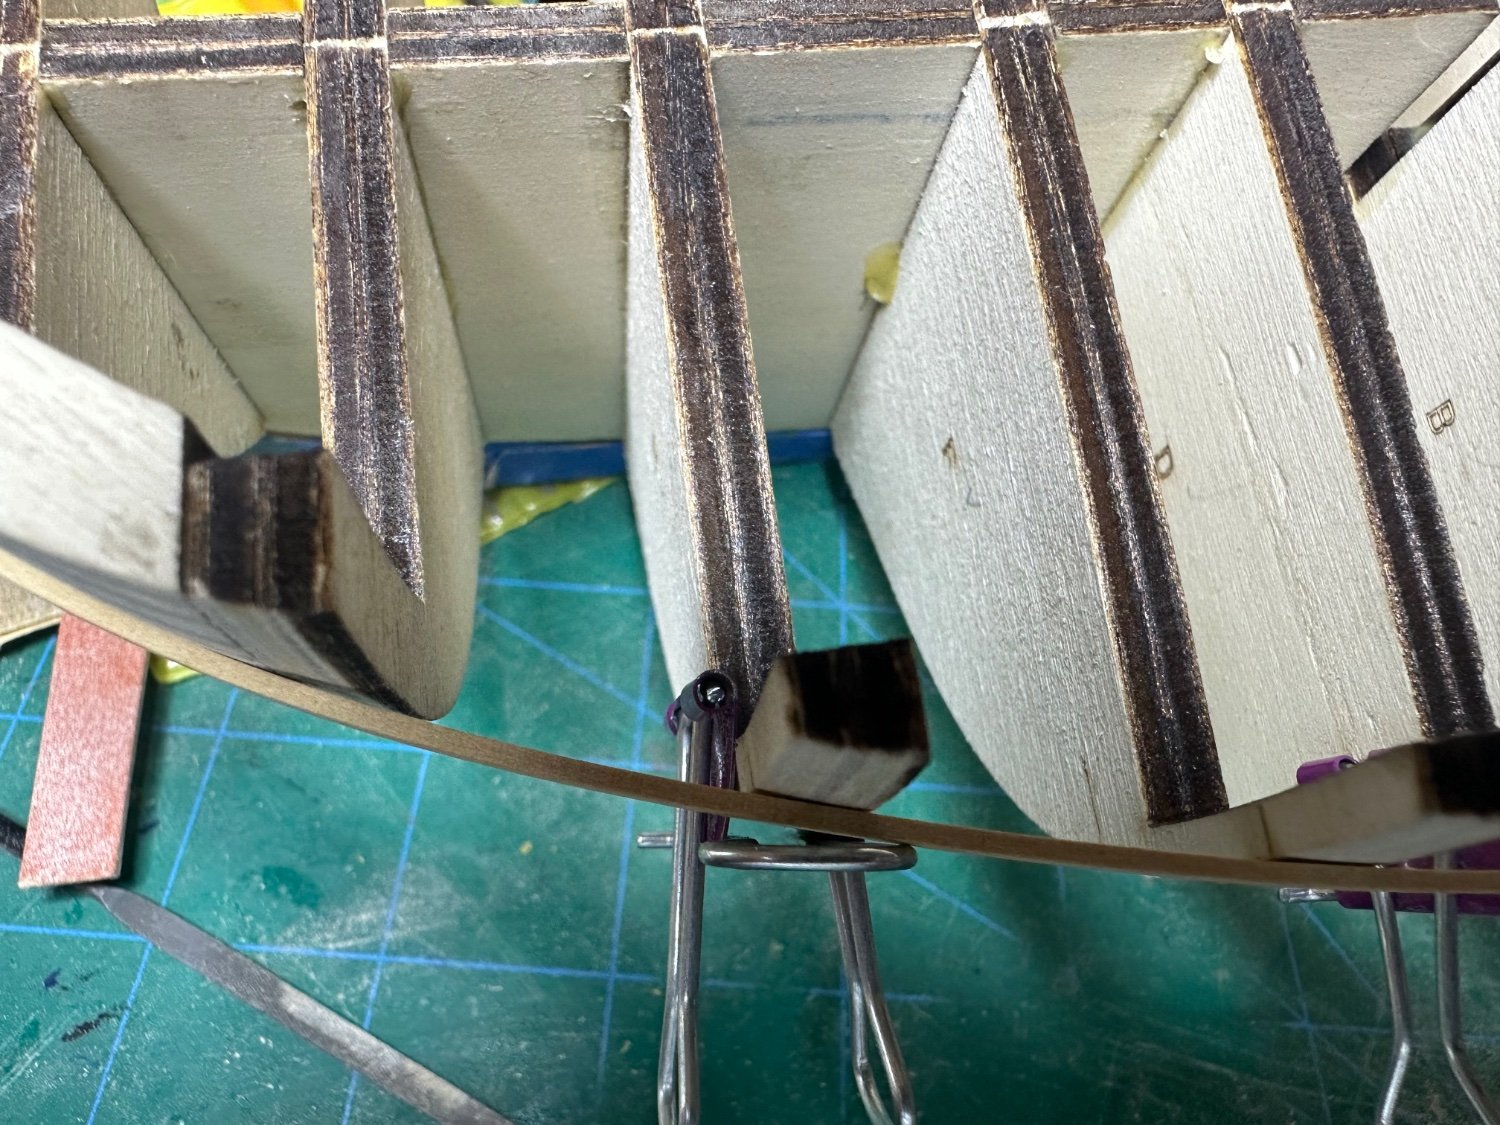
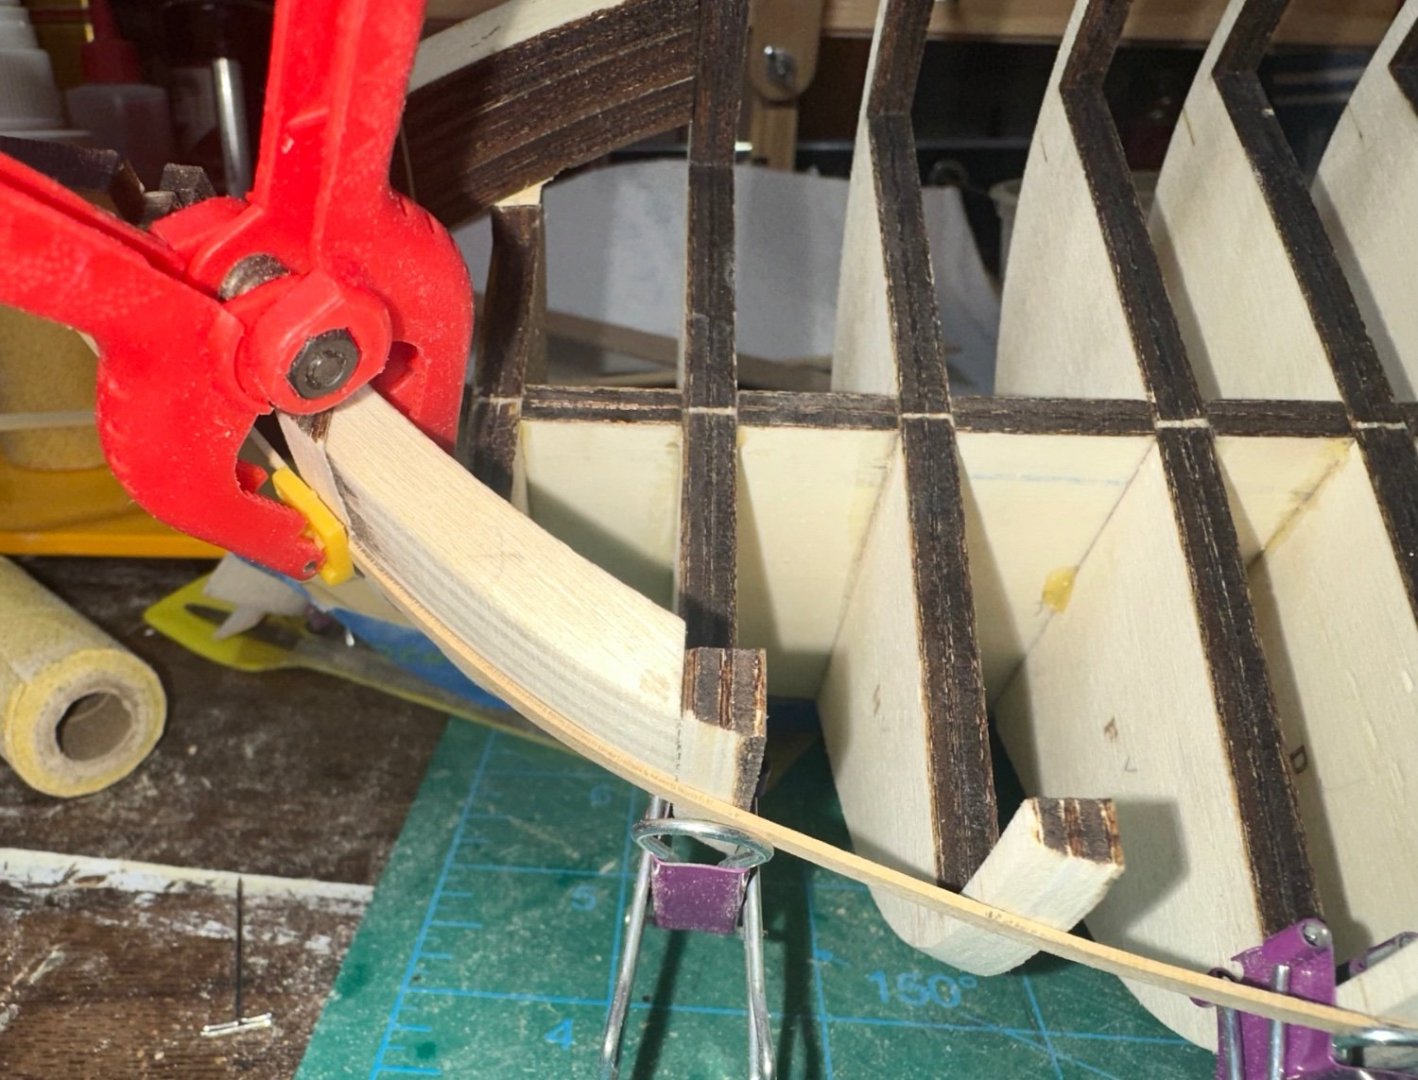
I’ve done some fairing on the port side and here’s the first test with a batten, and here’s what I see. The bow filler needs a lot more sanding to get the batten into to rabbet. It looks like the aft end of the port filler needs to have material removed. The one that concerns me the most, is bulkhead B. There’s a gap at that bulkhead. Did I take too much off, or do the bulkheads on either side need be sanded some more? Need input! Thanks! Best Regards …. Rick


-
Ok, I’ve built the gun carriages and decided that it can’t be put off any longer. Tonight I’m going to start fairing the hull. Quick question first: is it best to start amidship and work towards the stem or the stern? I can see that it wouldn’t take much to really mess up the shape of the bulkheads. Thoughts? Best Regards …. Rick
-
Thanks everyone for the likes, much appreciated! Glenn, thank you for the input. Making the pins is challenging for sure, but very rewarding. I’ve been following your fantastic Winnie build and have seen your process for making eyelets and ring bolts. Will experiment this weekend. Thanks! Best Regards …. Rick
-
No worries Gregory…. Best Regards …. Rick
-
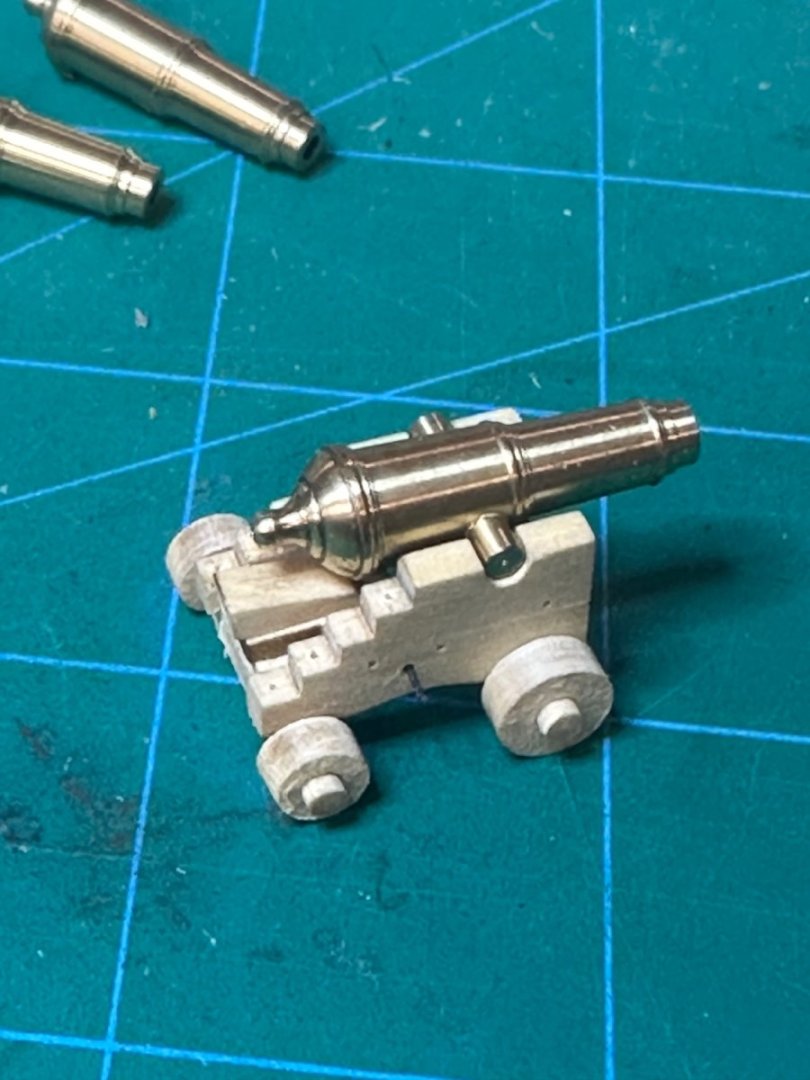
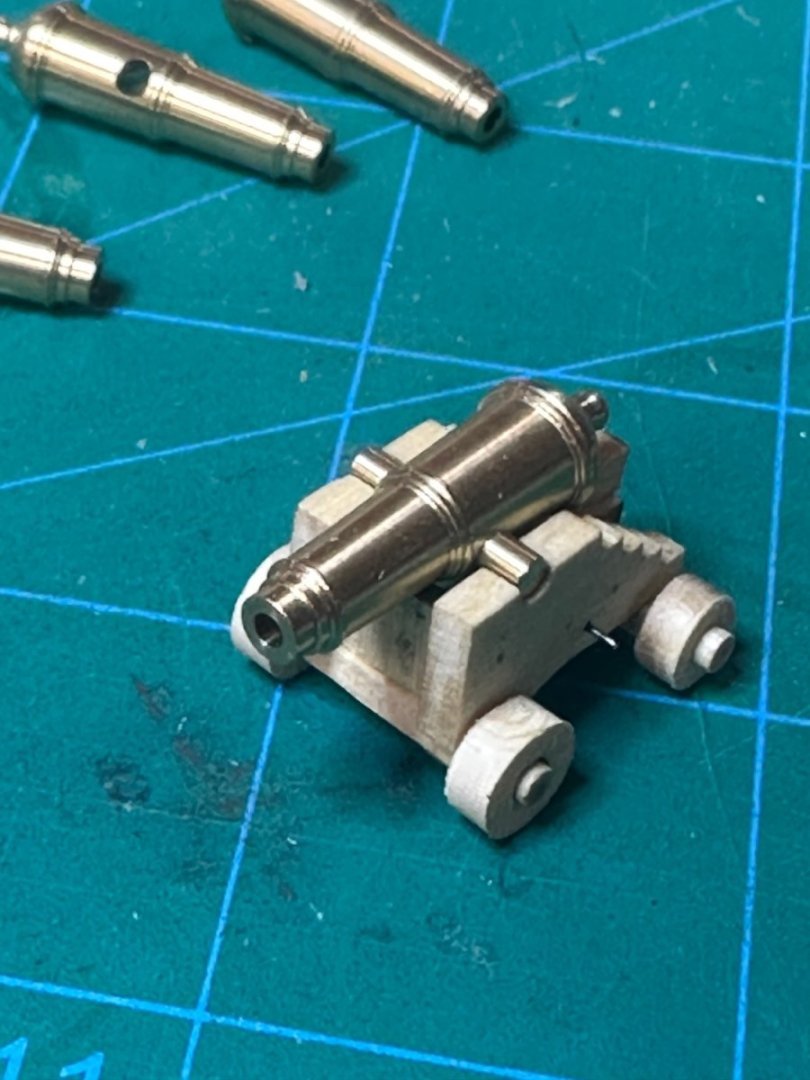
Gregory - no worries about too small, I took it out of the quoin and must have had too much pressure on the tweezers, the handle went flying never to be seen again. Here’s my first carronade. You don’t realize how many parts are in these until you build one. Best Regards …. Rick
-
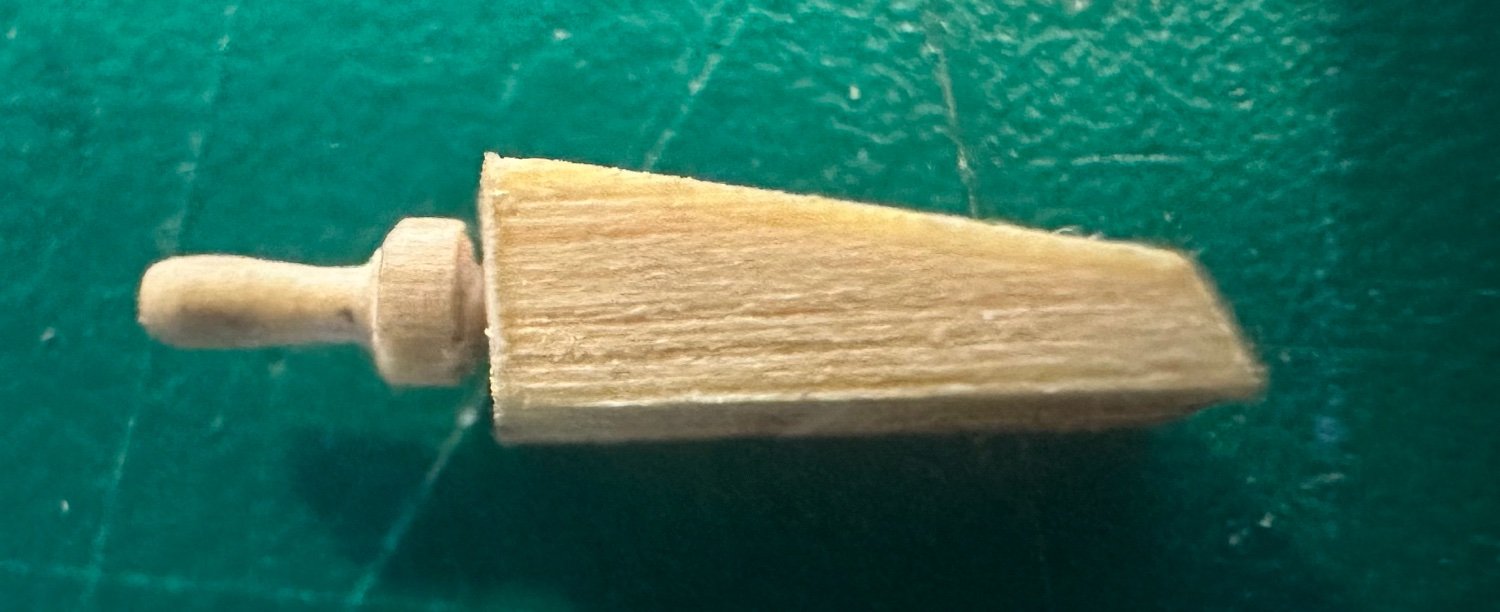
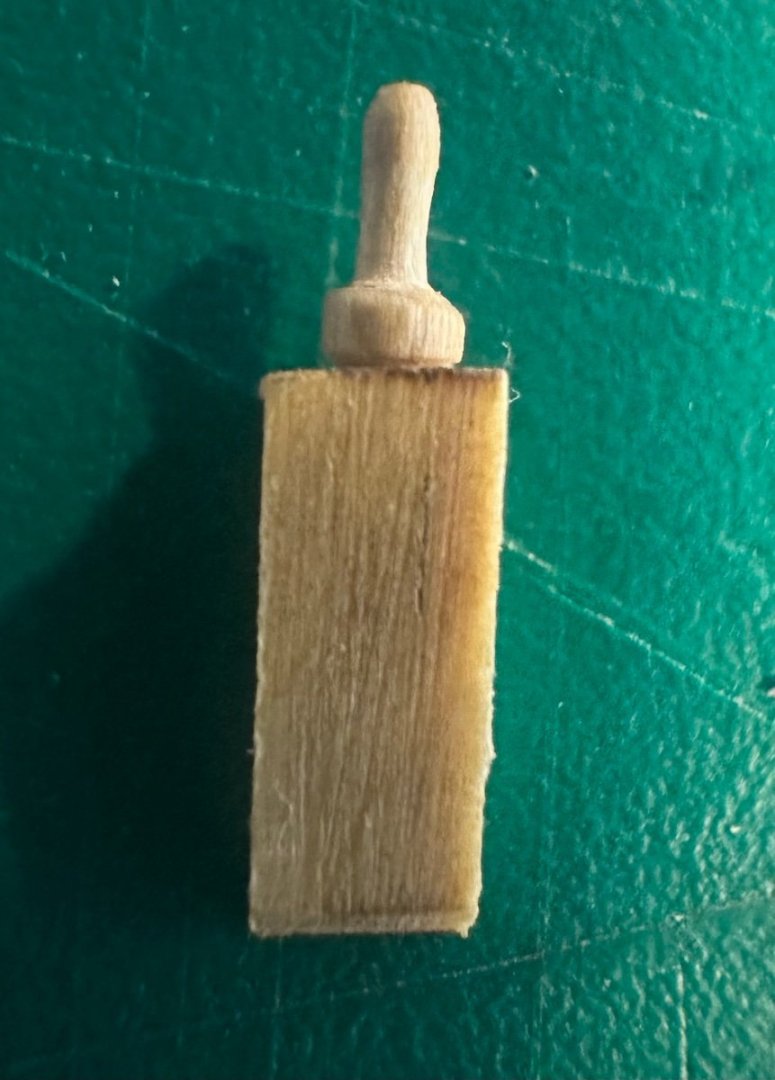
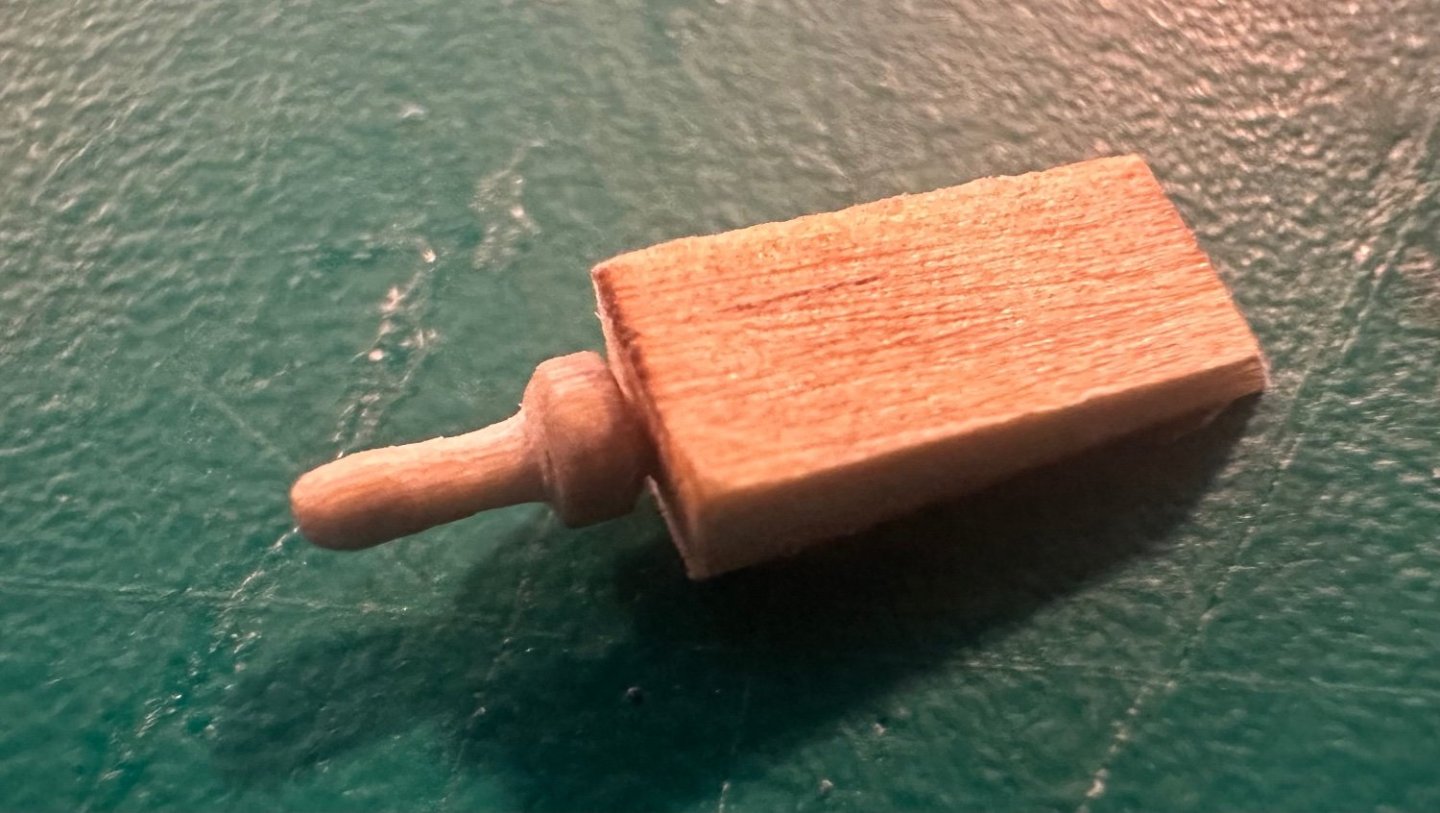
ERS Rich - Thank you! Guys - Thank for all the”Likes”! Now I need an opinion, I made my first quoin handle, does it look too big and how does the shape look? I’ll countersink the hole slightly so it seats better. All comments welcome! Best Regards …. Rick

-
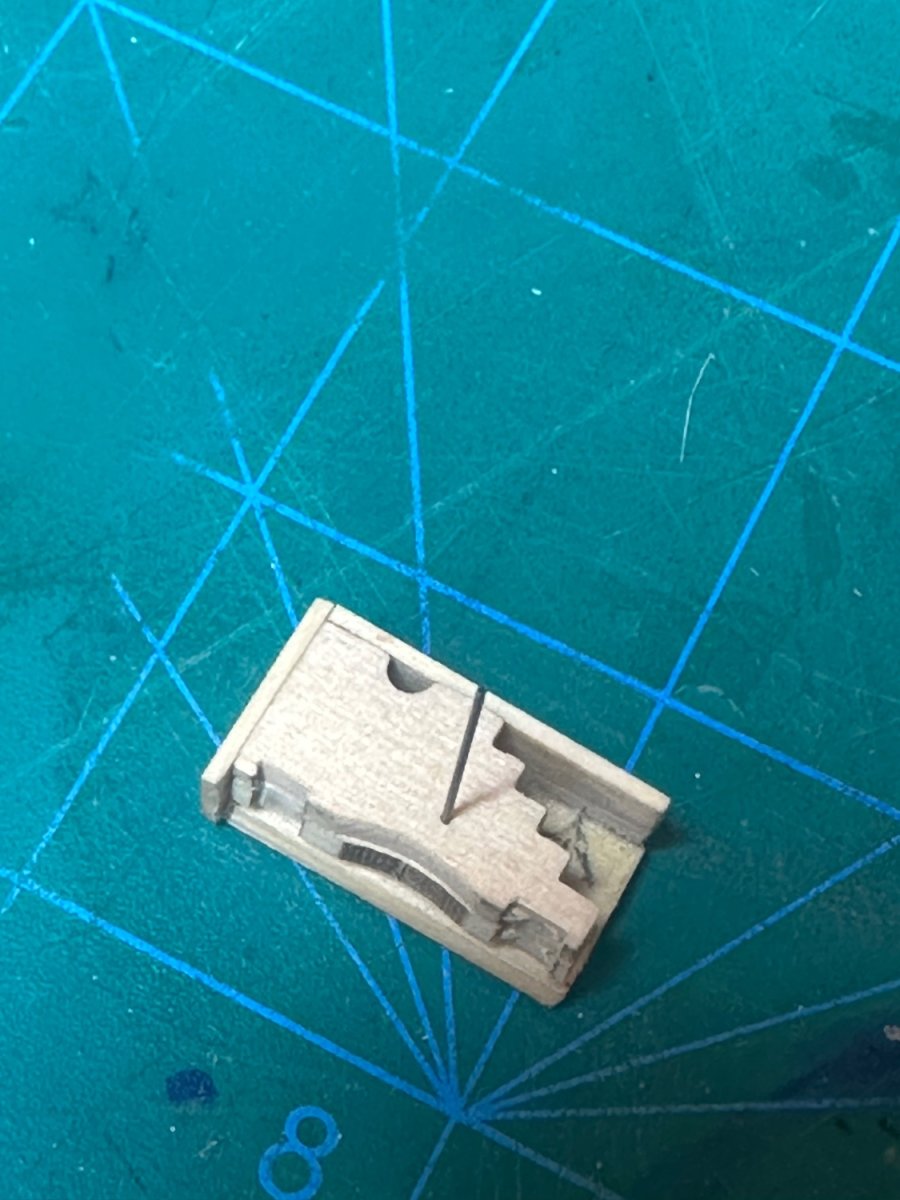
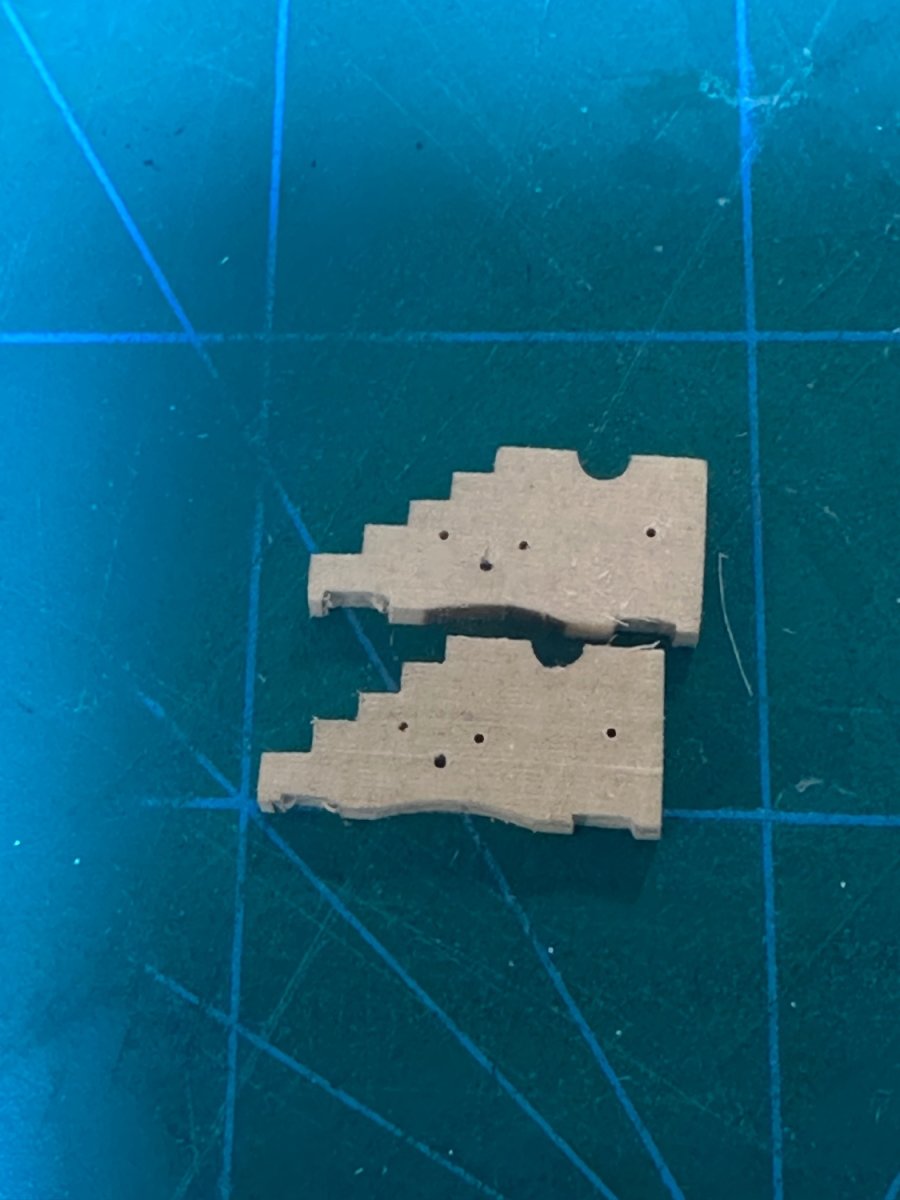
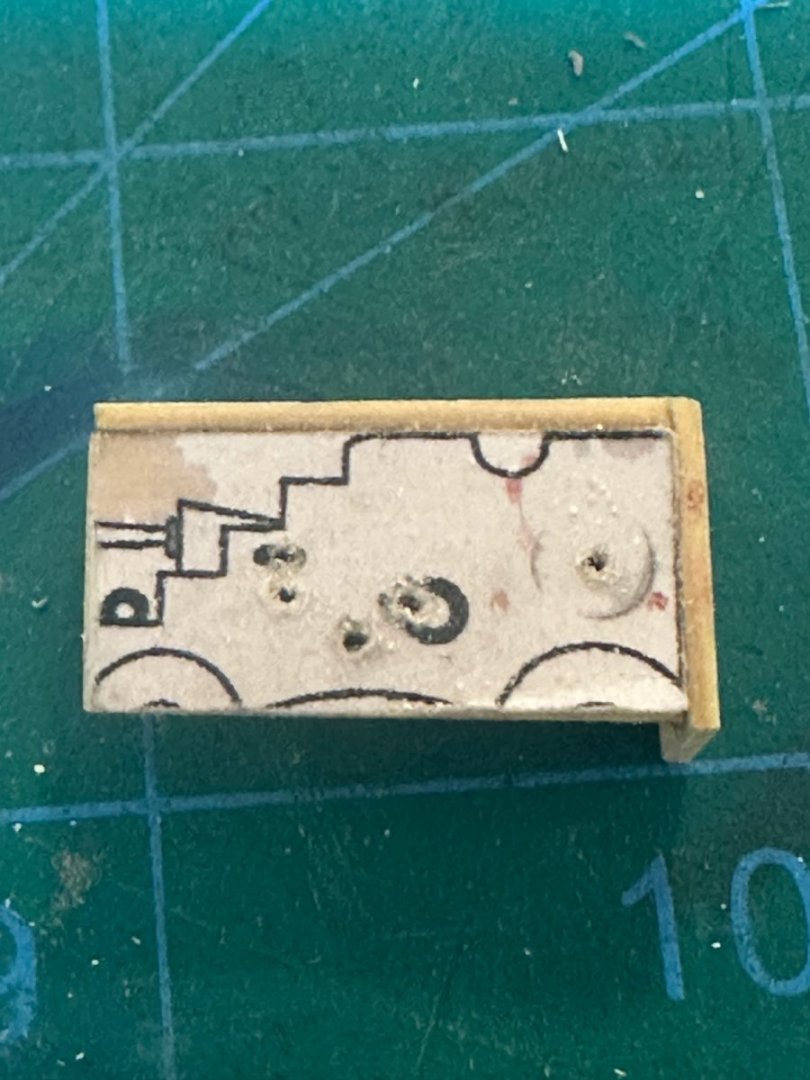
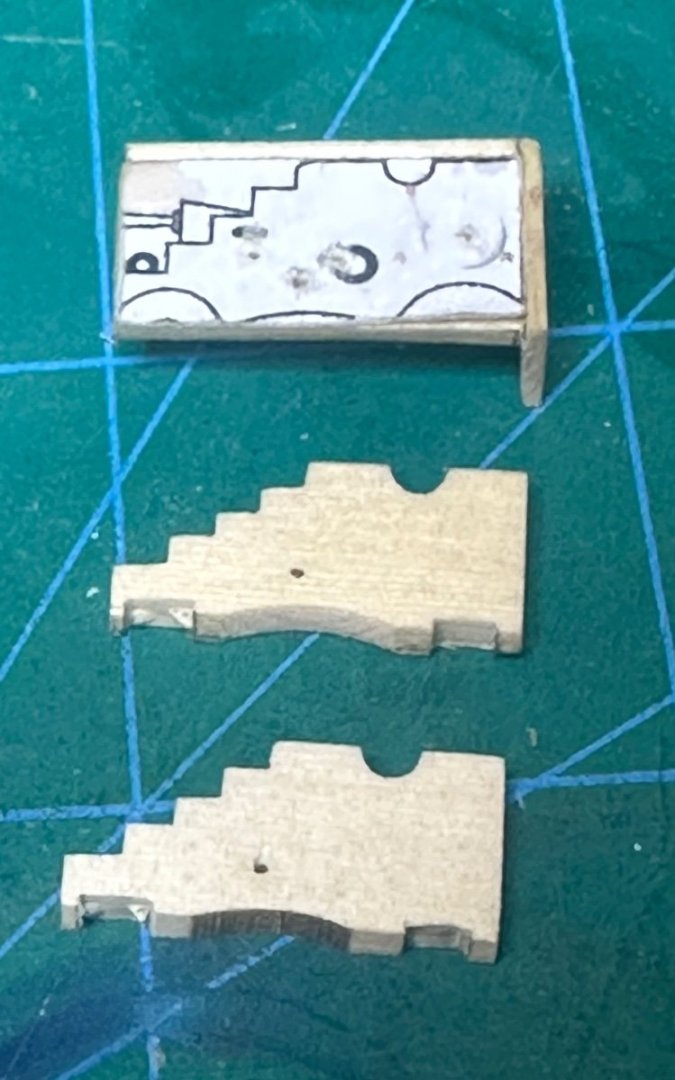
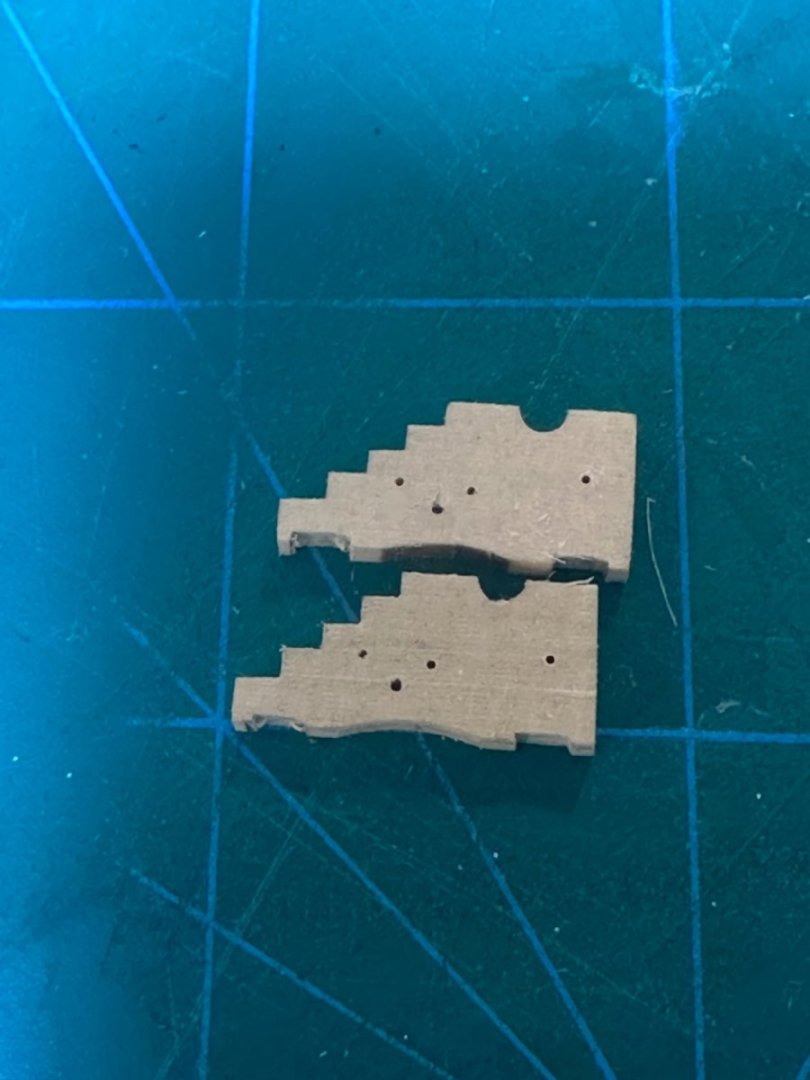
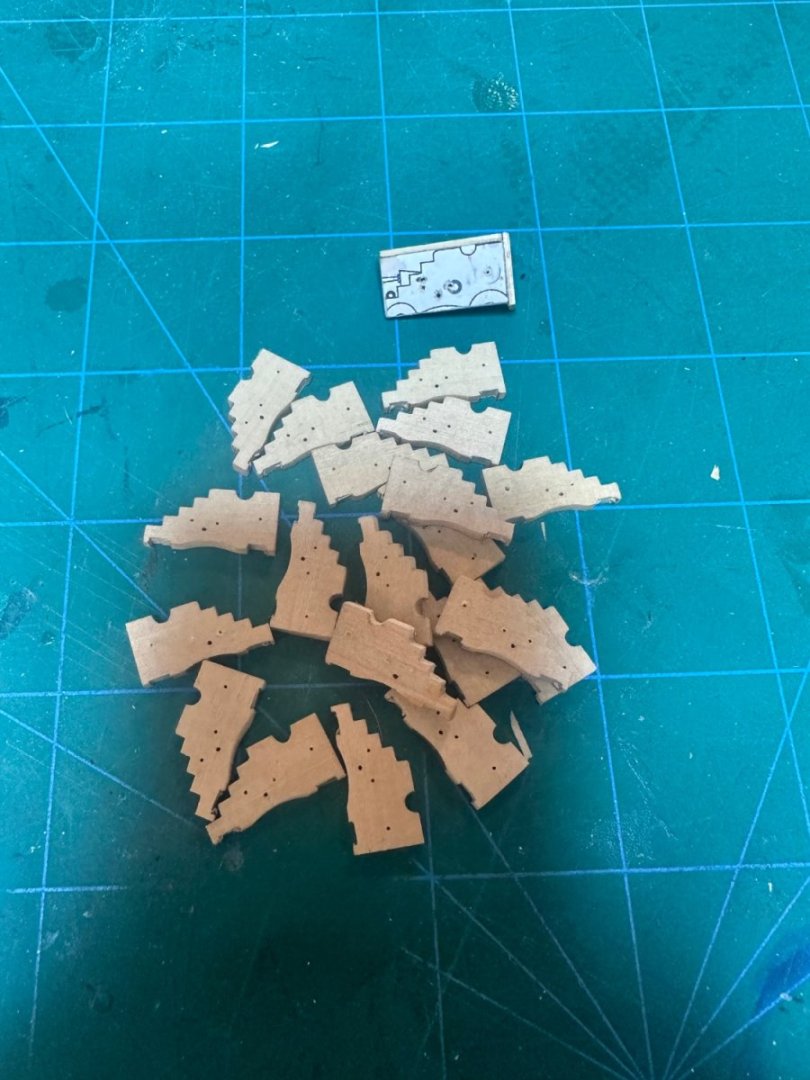
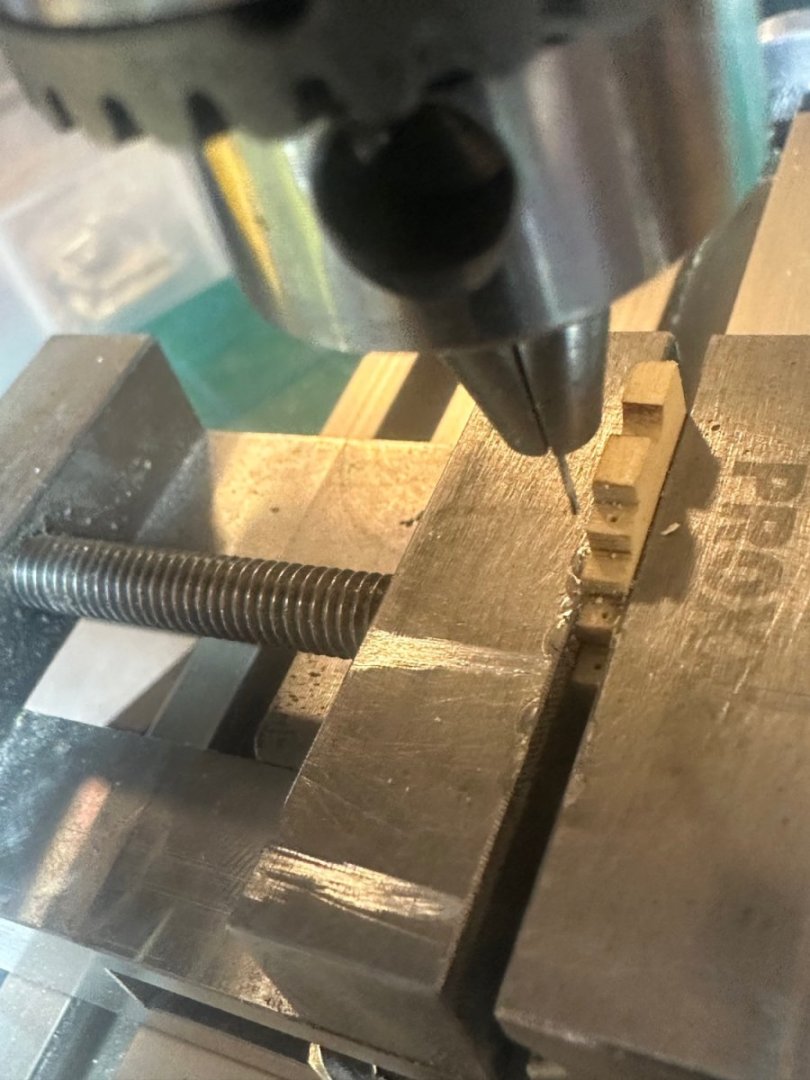
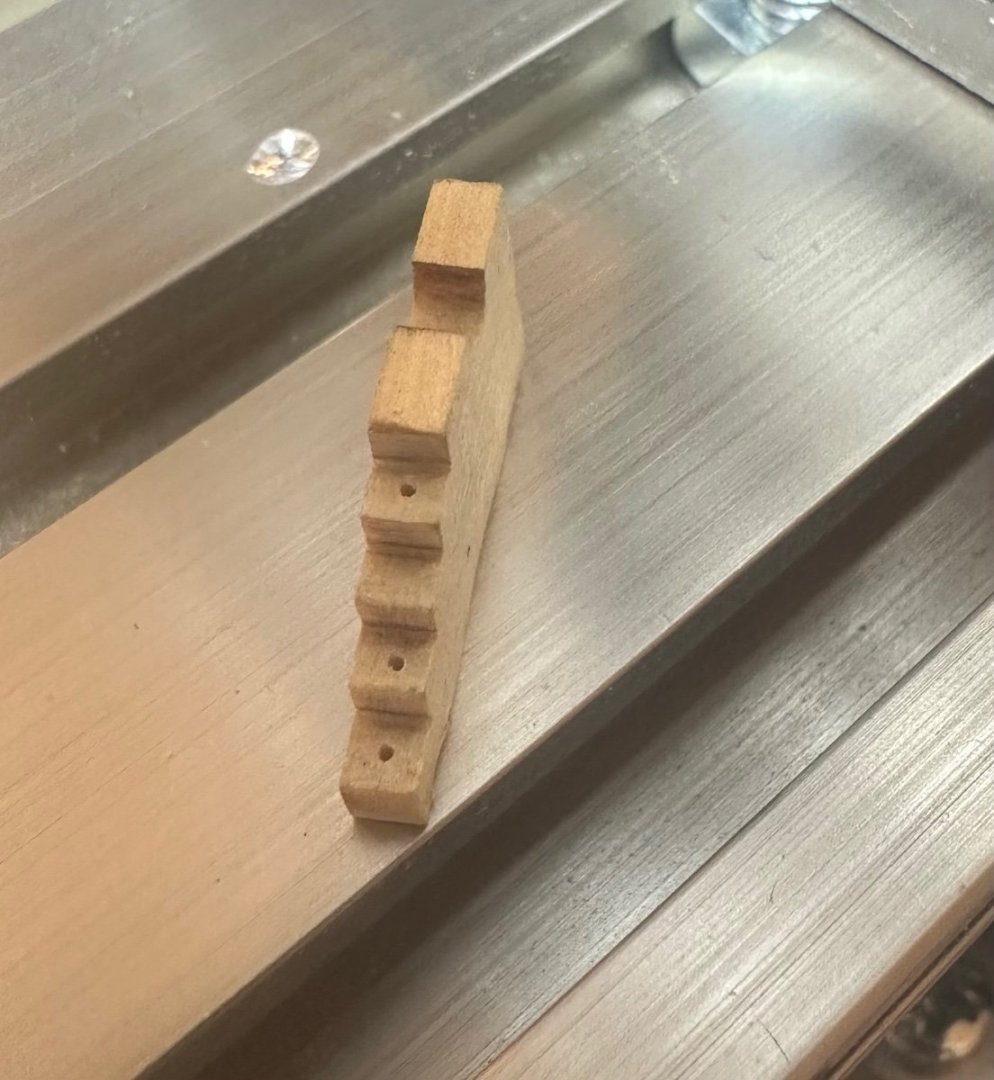
Work continues on the carriages. This time I made a quick jig to drill the holes in the sides. I made a copy of the side and glued it to some scrap wood. I then glued some wood to the top and rear of jig. The wood was deep enough to load 2 parts in the jig. I also used a #76 bit as a guide to align the parts in the jig. Simple finger pressure keeps the parts secure in the jig, that is until you puncture a finger with the drill bit. In a few minutes I had all of the carriage sides drilled. Best Regards …. Rick

-
Glenn, your build logs are extremely helpful! I’ve been following your Winnie, the planking is amazing! I also have the Winnie in my queue. Best Regards …. Rick
- 155 replies
-
- 1
-

-
- Medway Longboat
- Syren Ship Model Company
- (and 1 more)
-
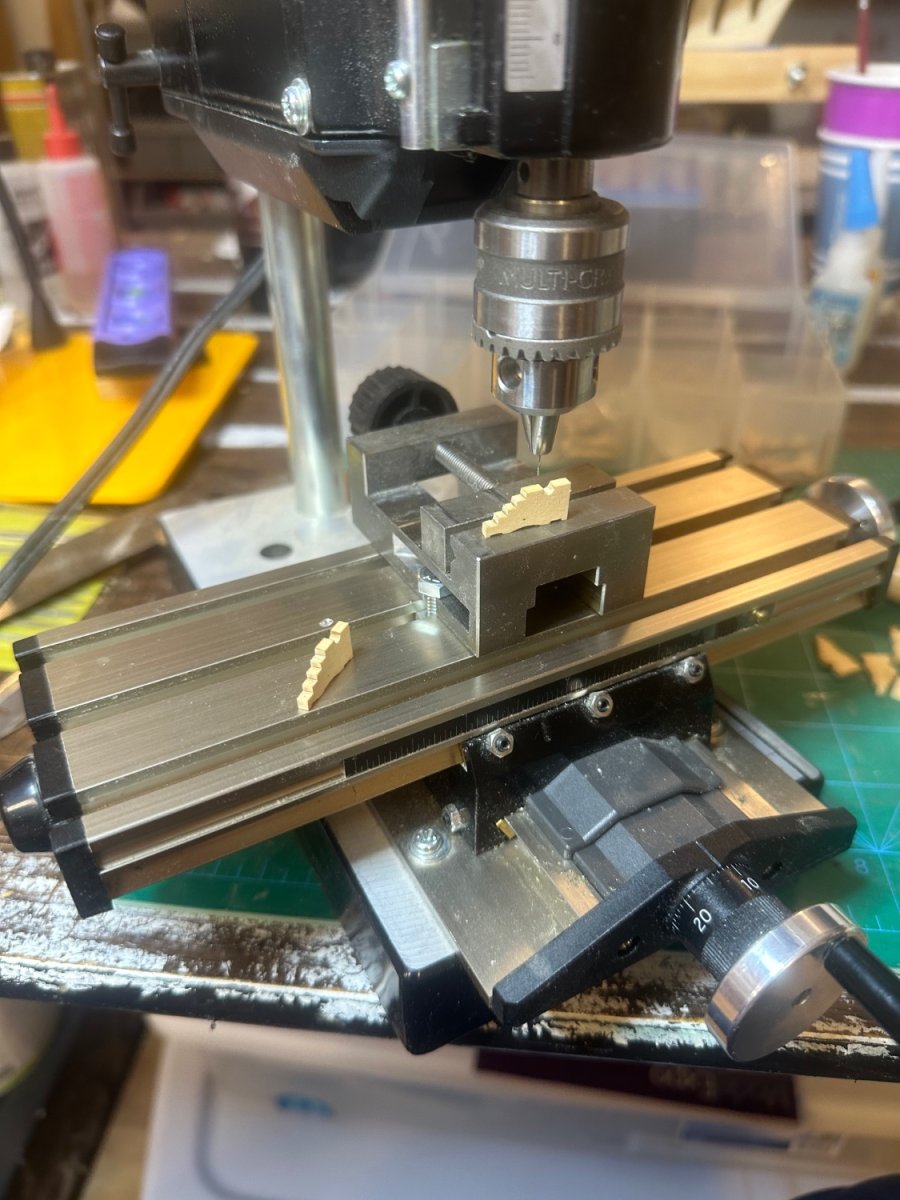
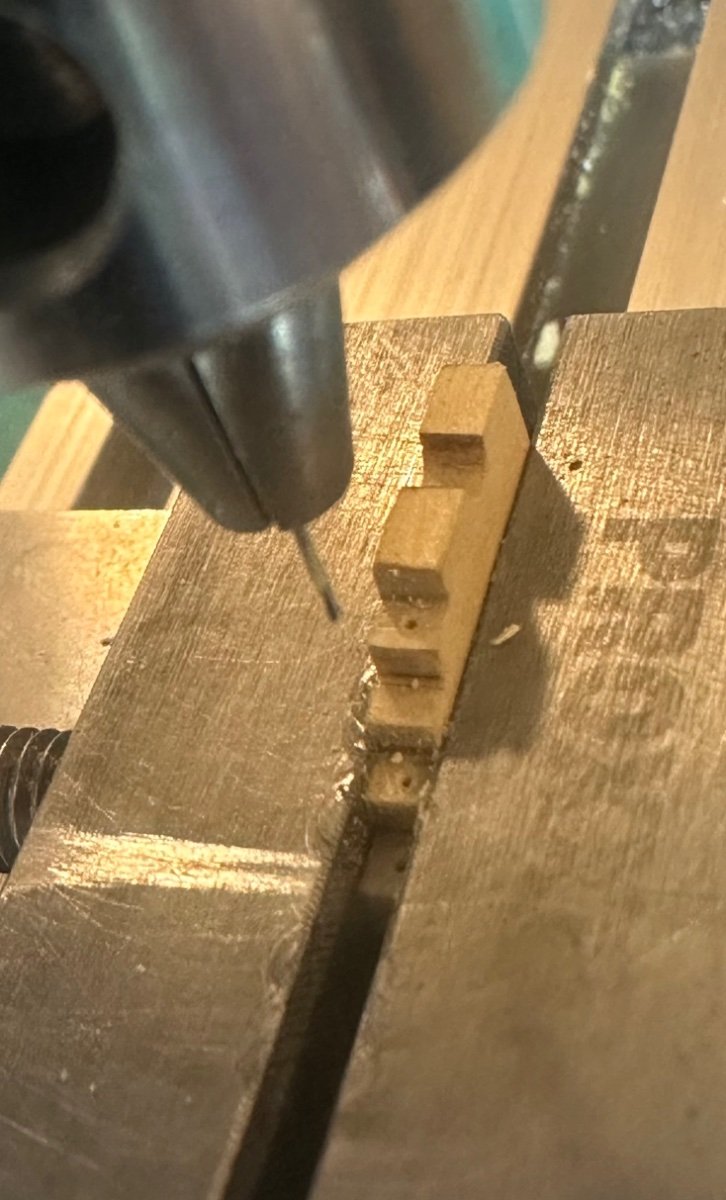
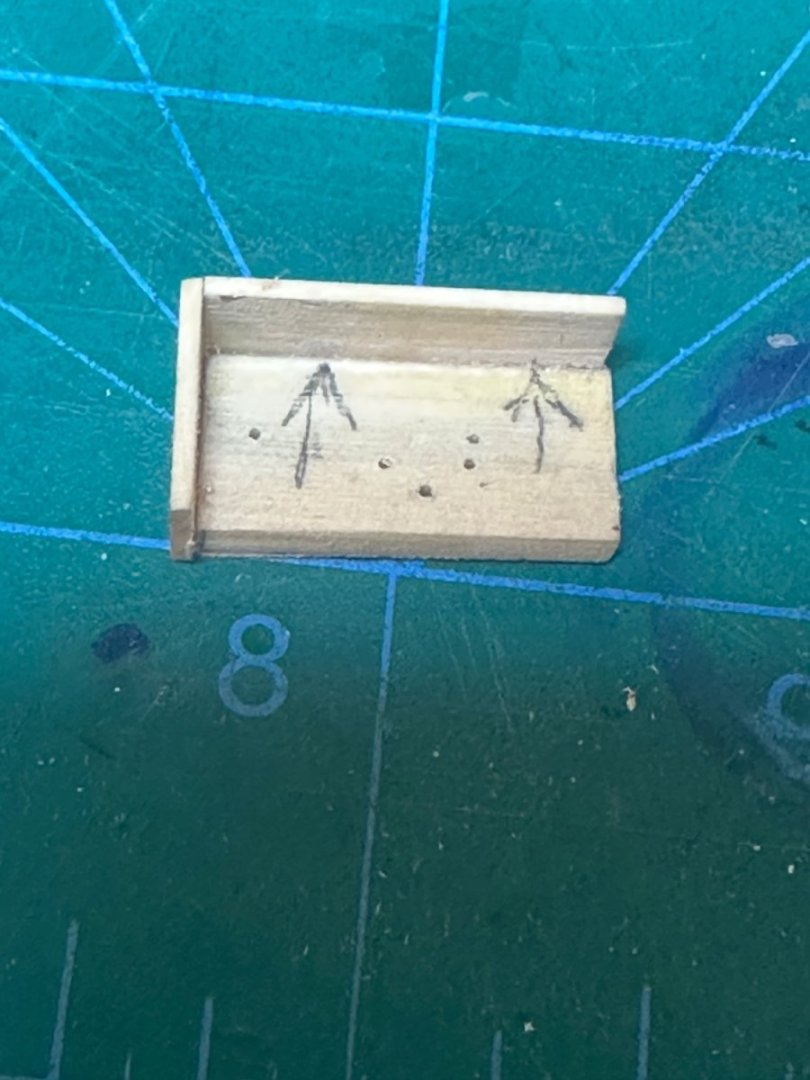
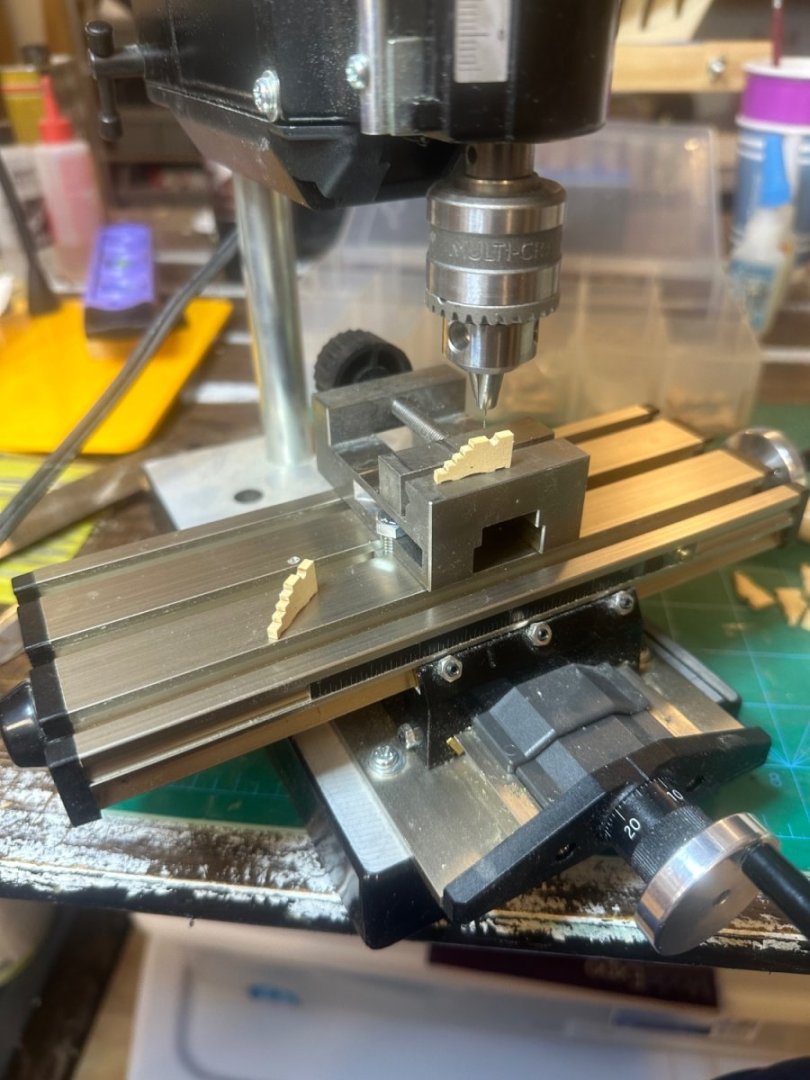
More work on the carriages. I drilled the holes for the bolts on the top with a #77 bit. For consistency and repeatability, I used a X/Y table on my mini drill press, once lined up and centered it was an easy task. I’d never be able to do this accurately freehand. Best Regards …. Rick

-
Thanks Matt! These storage containers were on sale at my local Hobby Lobby for a buck! I bought the only 2 that were left. What’s really nice about them is that the dividers are molded in so they can’t move around. Agree, flow makes the job easier, and I’m glad there are only 12 guns! Best Regards …. Rick
-
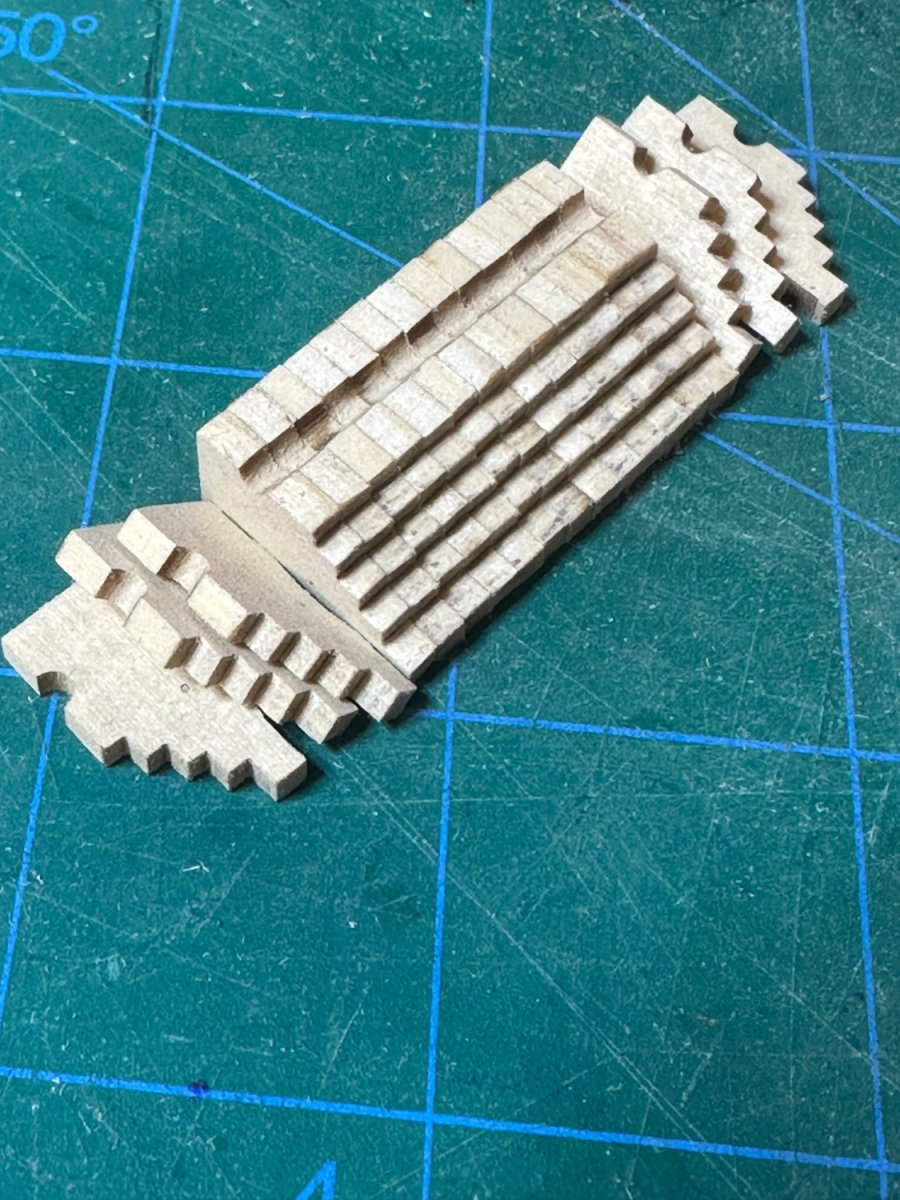
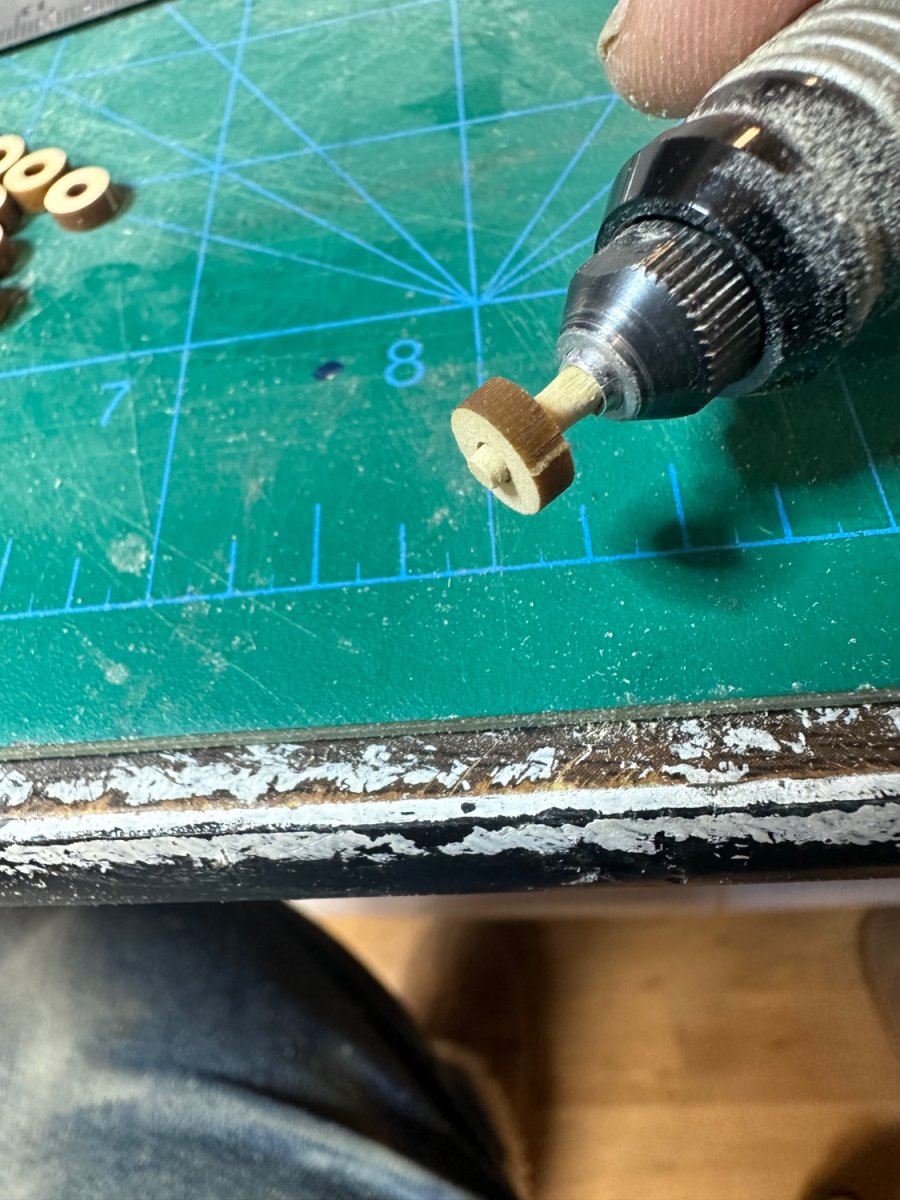
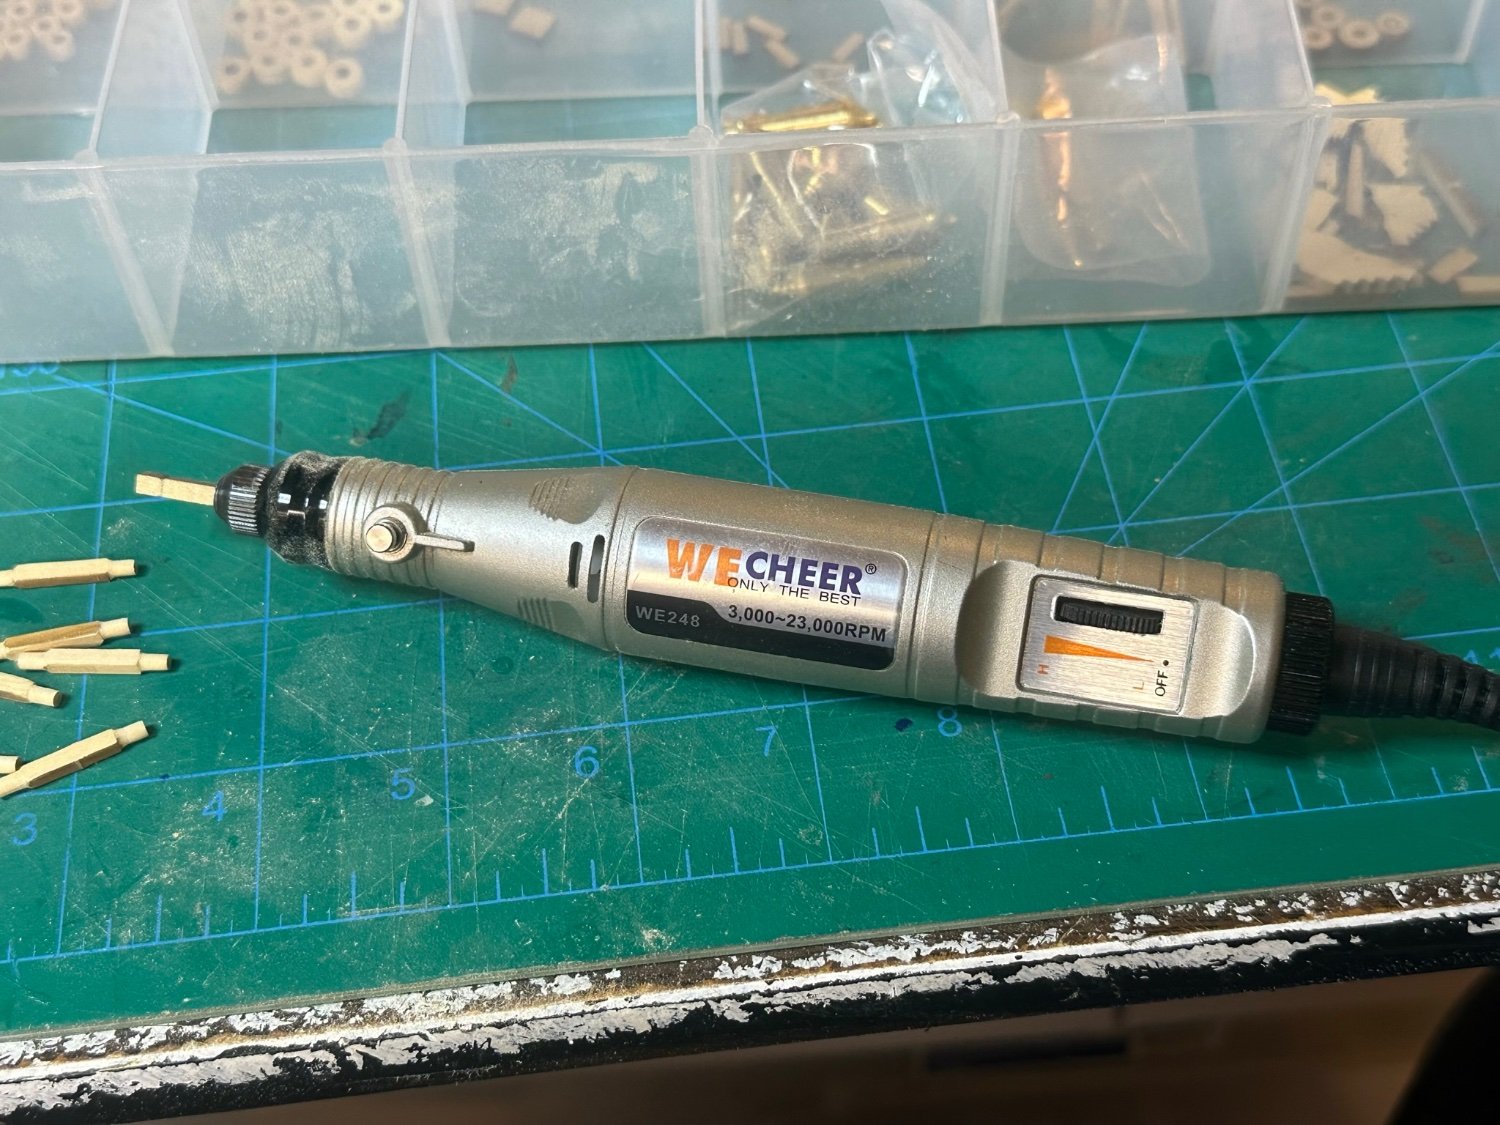
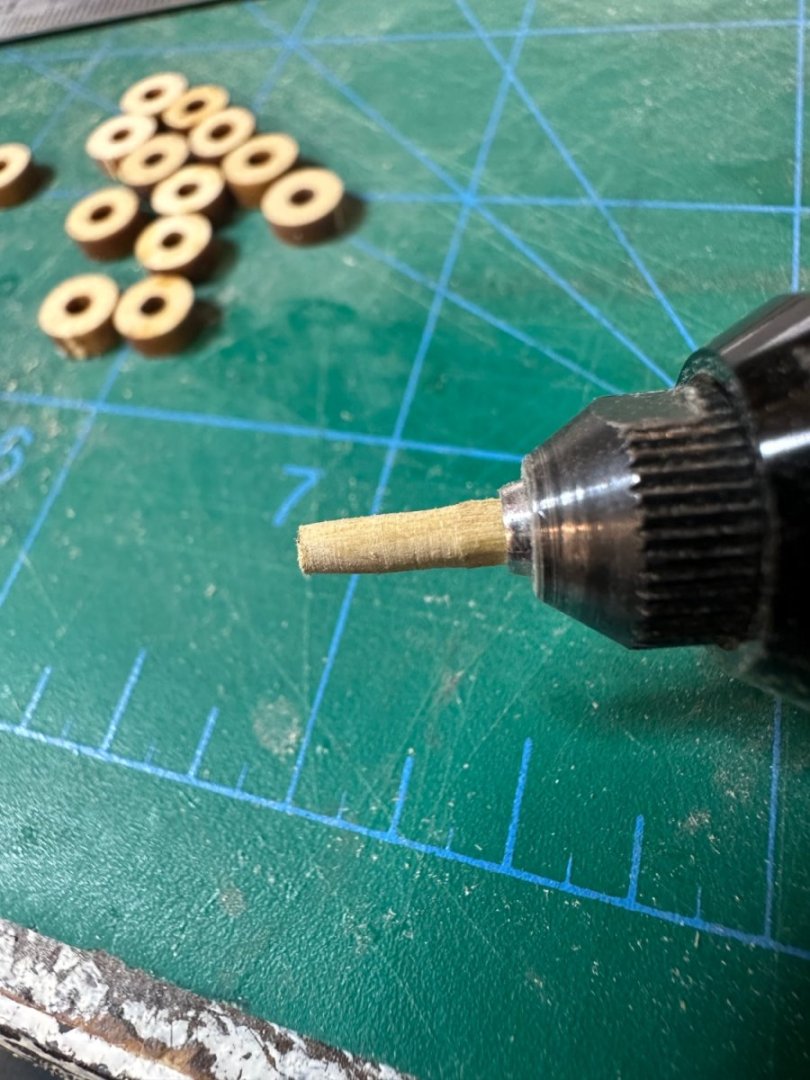
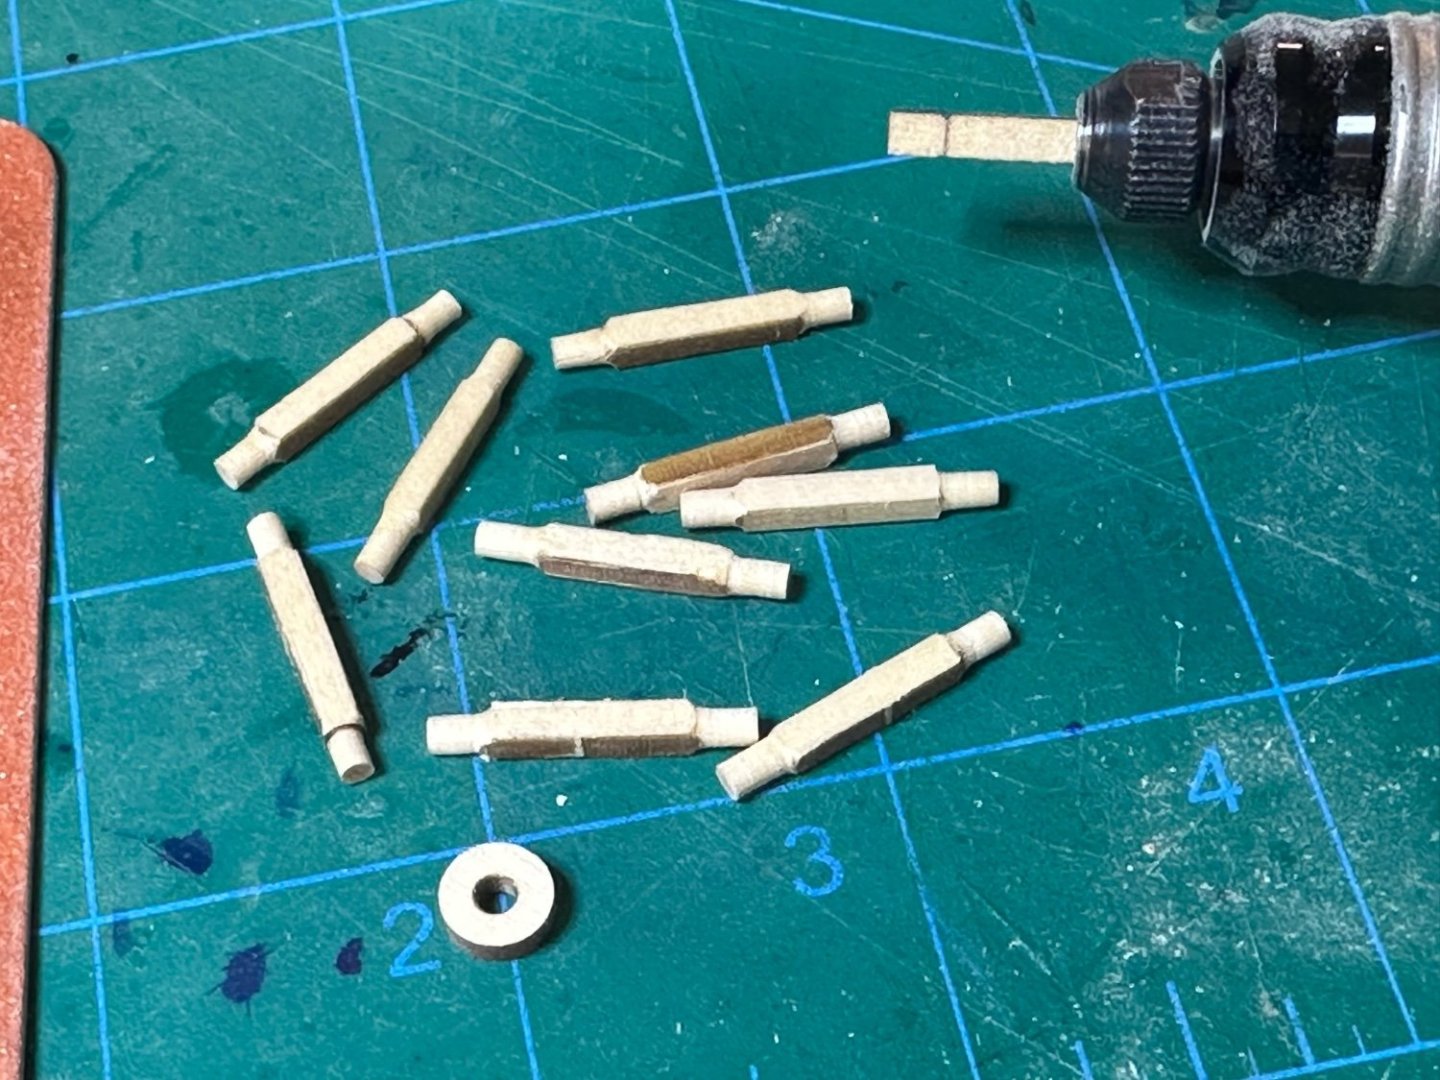
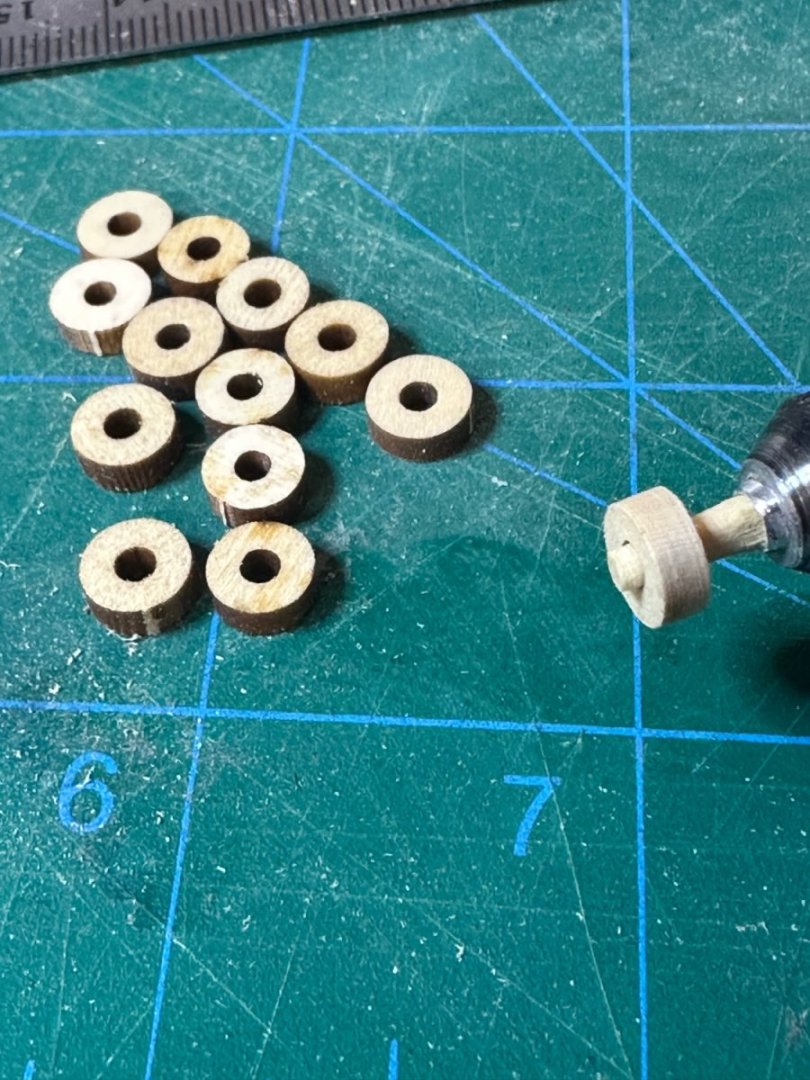
Guys, thank you for the positive comments! I’ve been playing around with the carriages, cleaning up the char and such, I’m not ready to start fairing the hull yet, really need to wrap my head around it first. To clean the trucks, I took a piece of wood and made a taper on it so the trucks could be secured and then cleaned quickly and easily. The axles were chucked and easily rounded off. Best Regards …. Rick


-
B.E. Sorry I missed your comment and compliment! That’s the best praise one could ever receive! Best Regards …. Rick
- 155 replies
-
- 1
-
-
- Medway Longboat
- Syren Ship Model Company
- (and 1 more)
-
Glenn, I’m really looking forward to Cheerful, and your log is going to be my main go to for guidance! If mine is half as good as yours and the other awesome builds, I’ll be a happy camper. Congratulations on the calendar inclusion! When it comes to hyperlinks and other computer “stuff” I’m the original dummy. How would I do this? Best Regards …. Rick
- 155 replies
-
- 1
-
-
- Medway Longboat
- Syren Ship Model Company
- (and 1 more)
-
Thank you guys for all of the compliments! They really mean a lot to me! Here’s some thoughts about my experiences. First off, as someone who has built many r/c planes over 4 decades and having an aerospace background, I can say without hesitation that Chuck’s designs and methodology are superior. While I consider myself an accomplished builder, building Medway was a new challenge that I really enjoyed. Building ship models has a desire I’ve had for many years, and through Chuck and the many awesome builds here on MSW, I’m starting to realize that dream. As you guys know, Medway was my first attempt at this wonderful and sometimes frustrating hobby. After researching what to build first, Medway won out for many reasons. I found the build to be well thought out and in a logical sequence (not that I know what logical ship building is). One of the big lessons learned was patience! As Chuck and others preach, slow and steady is the path to success. The materials (AYC) supplied were great and produced beautiful results. The build pushed my skill base to learn more and develop skills that I didn’t know I had. This build was one of many firsts, and as expected, I made many mistakes, but that’s how we learn. Learning how to fair the hull, lining off the hull, shaping and bending planks with no more than heat was a real eye opening experience. Shaping square wood stock into parts that looked the part was very satisfying and rewarding. A new way of painting to produce brush stroke free results, making hooks and eyes and then blackening them was again, very satisfying. Making the mast, boom and other round parts was a process that I didn’t know about. While I made the mast too small in diameter and had to take a few steps backwards, in the end it worked out well. Making scrapers to shape moldings was fun and easy. But the most difficult part is the details needed for rigging. One of the reasons for choosing Medway was the limited rigging. There was just enough to learn some more skills and show me that I have a long way to go in this area. I’m glad that I choose the Medway for my first build and I’m impressed that I finished it. I’d like to thank Chuck for his efforts to help guys like me and for his input when needed. Rusty, Bobg, Ryland and a few others (whose names escape me), also provided help when needed, your build logs are very helpful (as all build logs are), amazing and inspiring! If you couldn’t tell, I’m hooked on this aspect of modeling and in particular, Chuck’s offerings. To that end, Cheerful is now in the shipyard and will be a slow build as I tend not to spend much time in the workshop during warm weather. I’ve started a build log for those interested, and as always, all comments and suggestions are very welcomed. Now to study those spectacular Cheerful logs! Best Regards …. Rick
- 155 replies
-
- 7
-

-
-
- Medway Longboat
- Syren Ship Model Company
- (and 1 more)
-
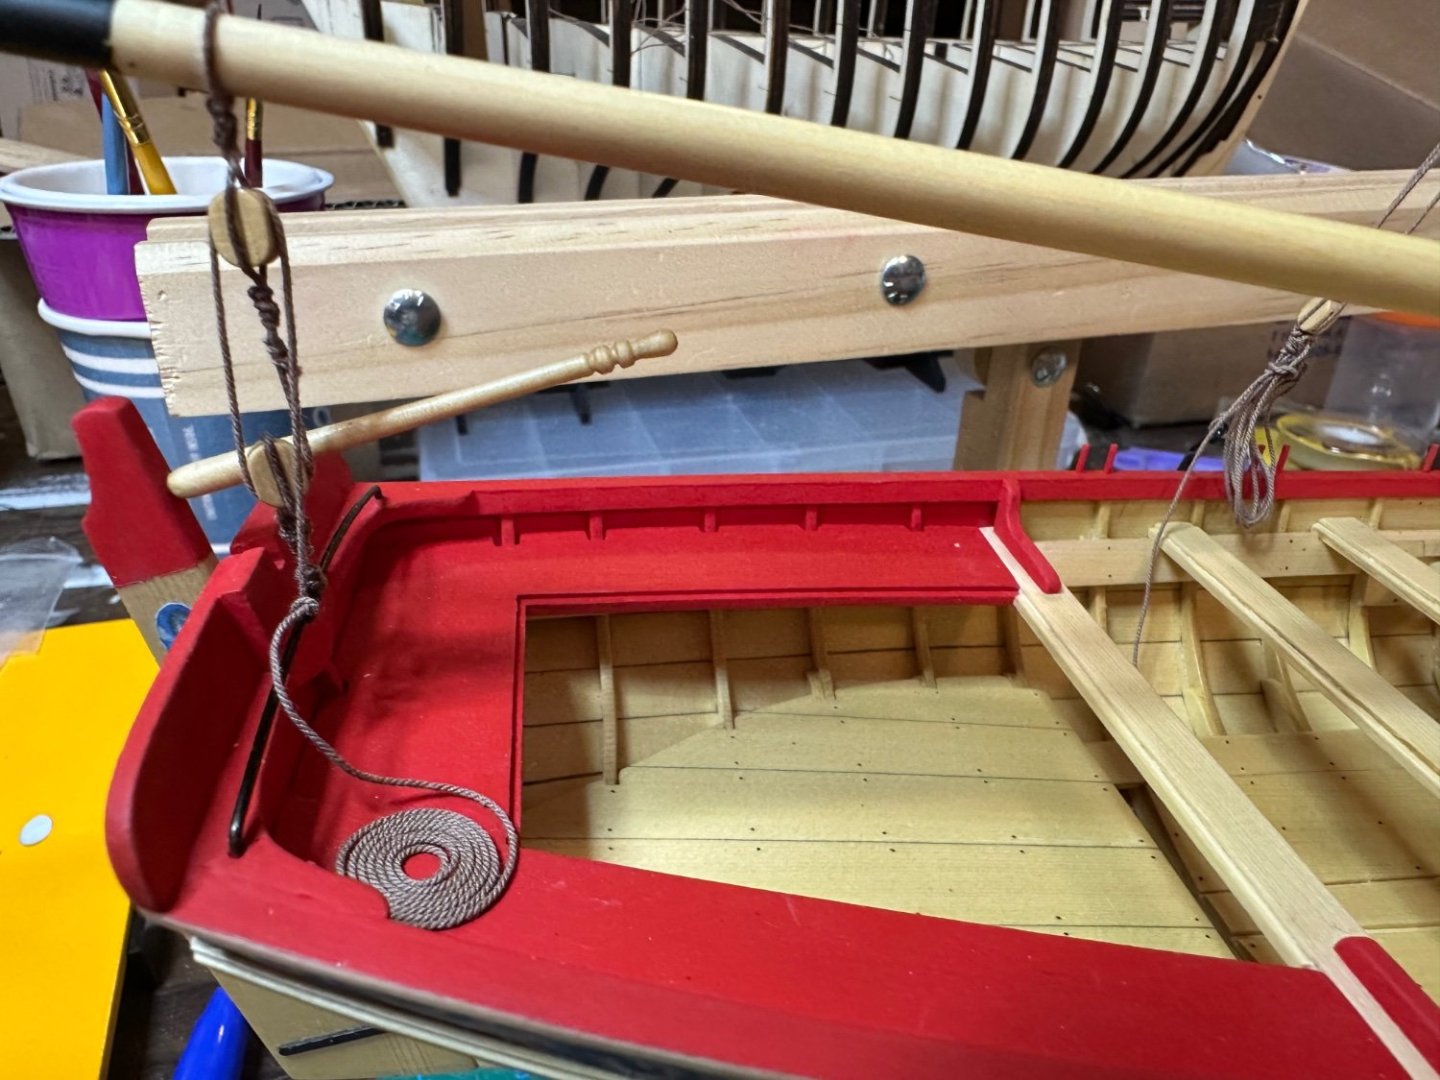
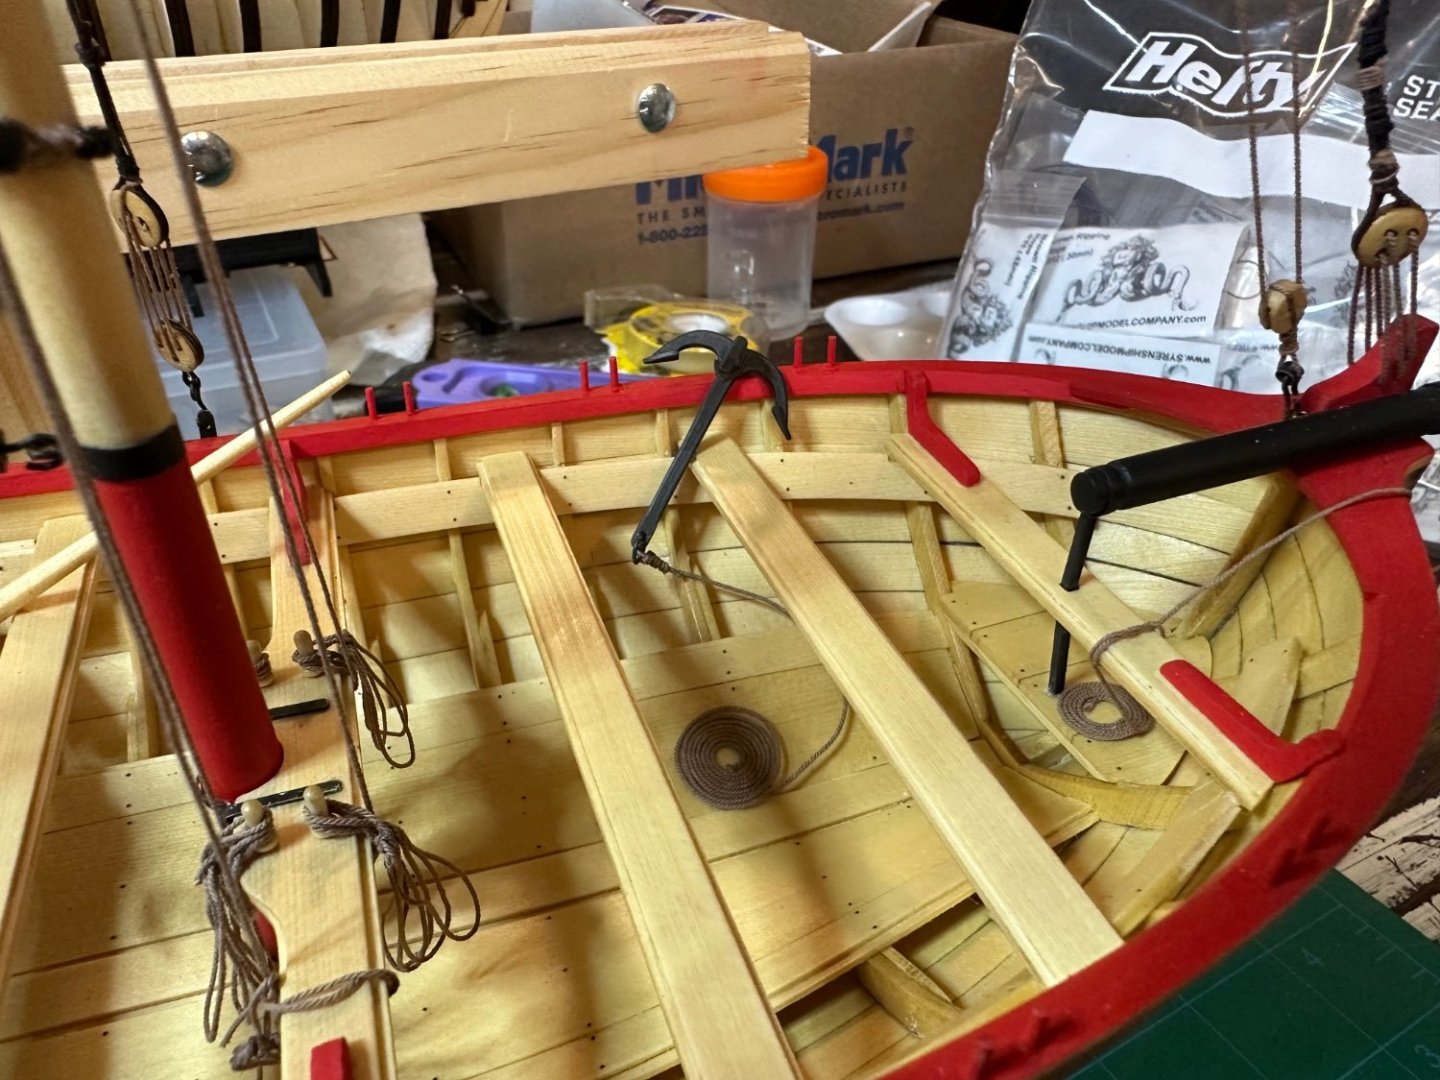
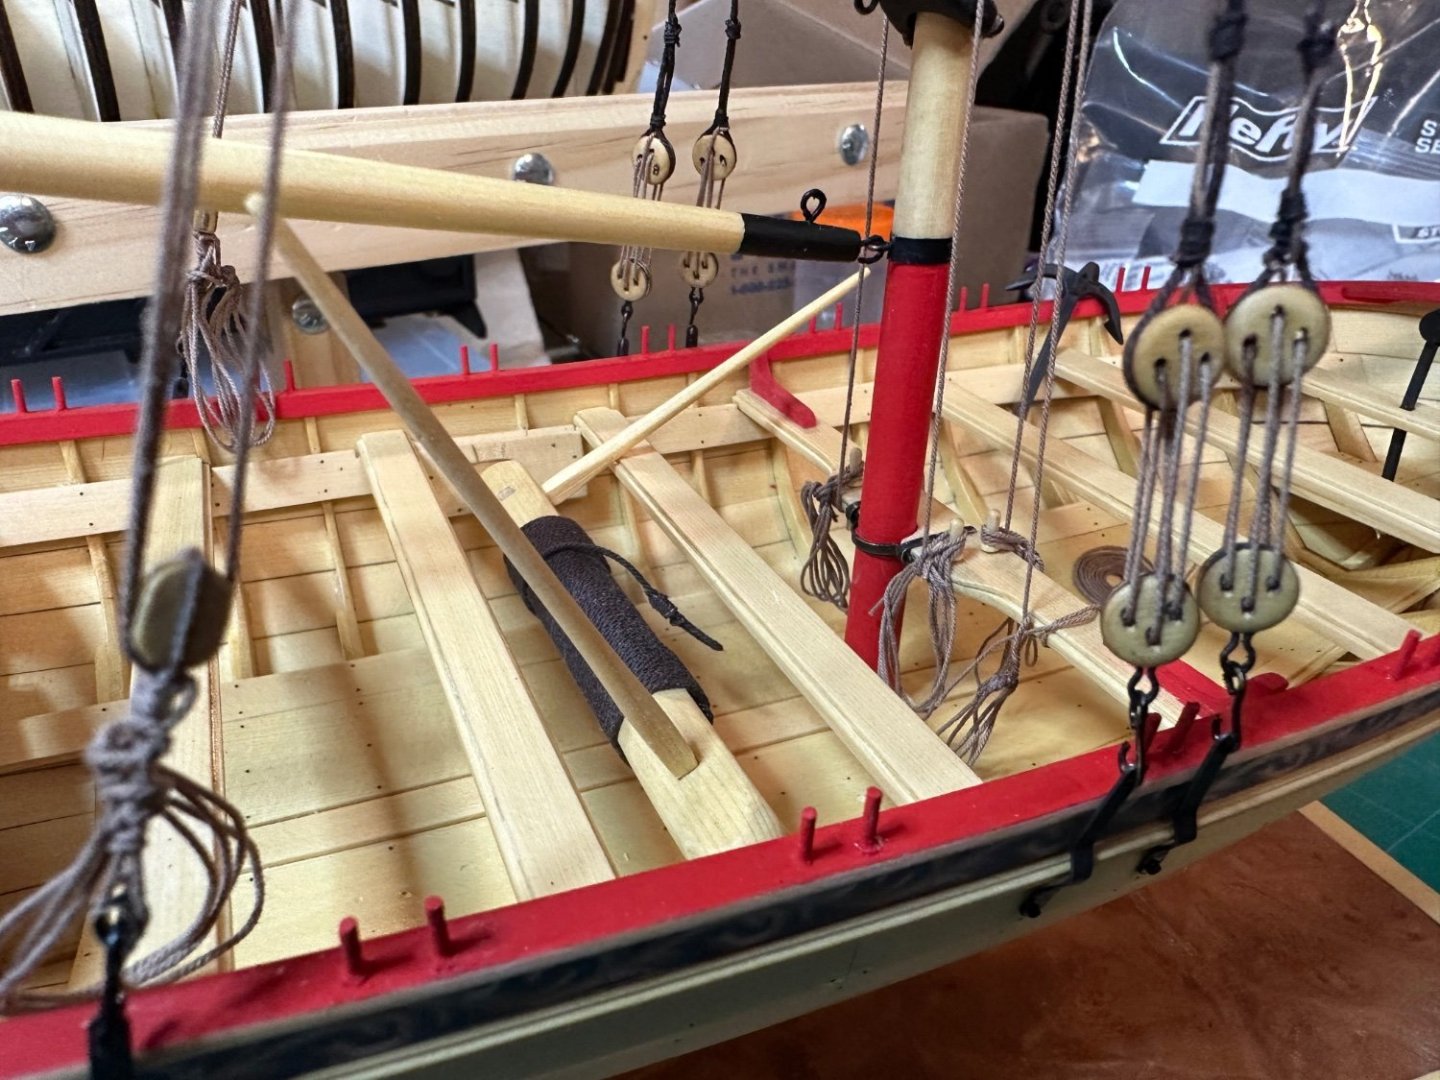
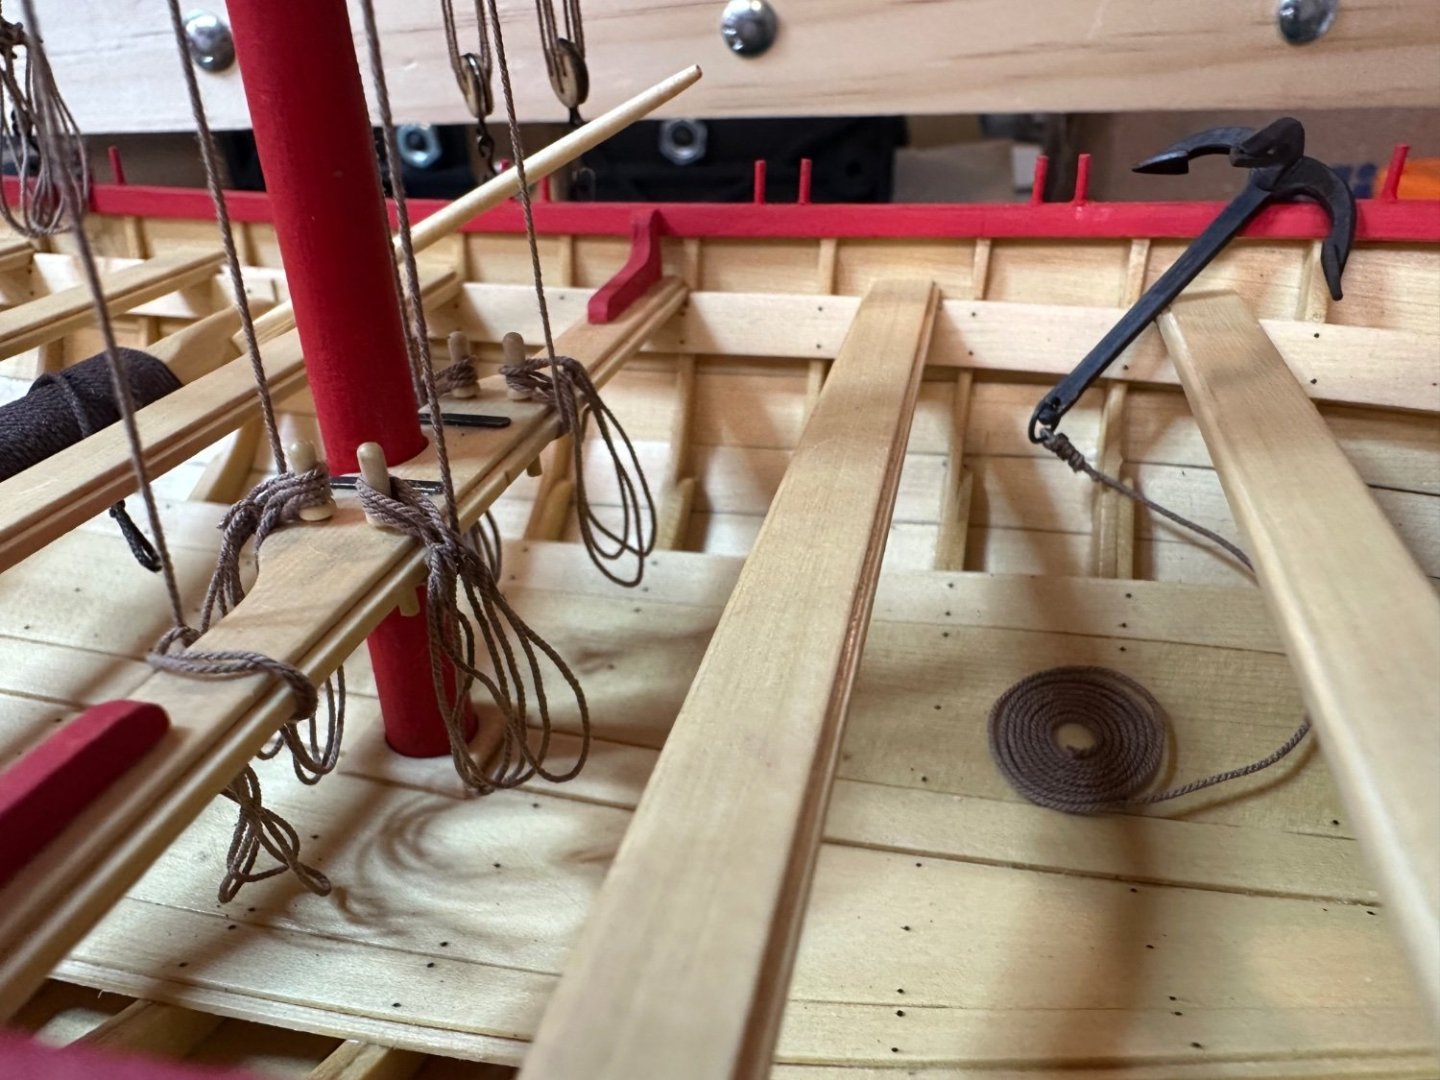
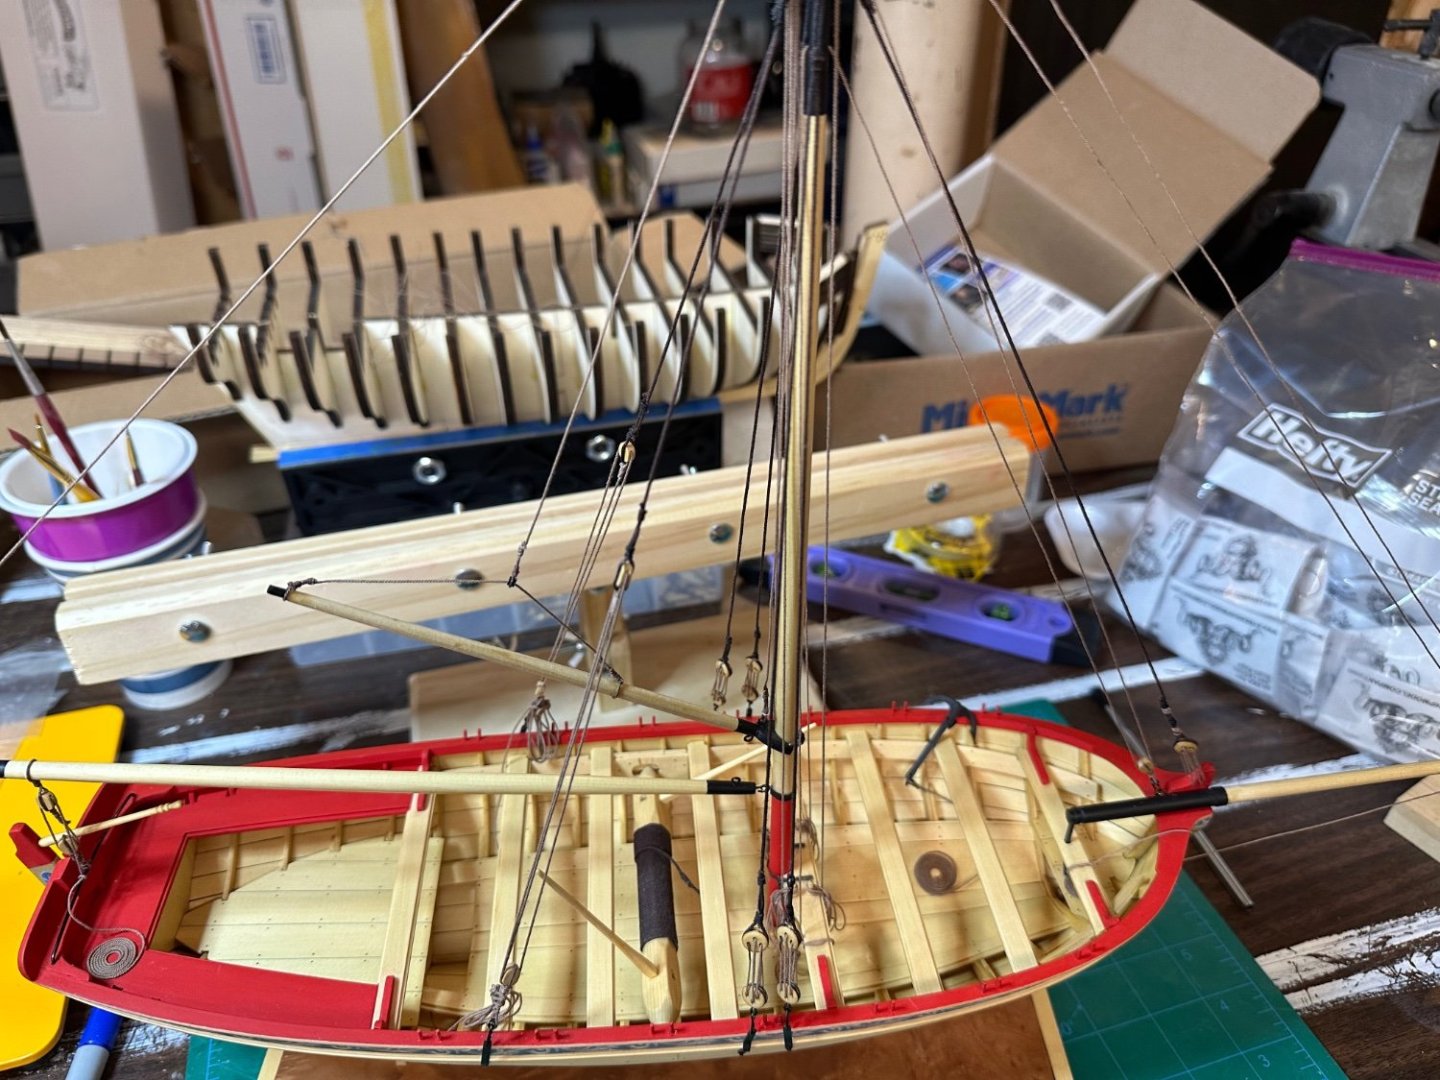
Ahoy! Haven’t had much time to spend in the shipyard, but I’ve managed to continue on Medway. With exception of the flag halliard and making the oars, Medway is completed! Coiling the ropes drove me nuts, but a first effort, I’ll take it. I’ll have a summary on the build in a few days. Best Regards …. Rick
- 155 replies
-
- 12
-
-
-
- Medway Longboat
- Syren Ship Model Company
- (and 1 more)
-
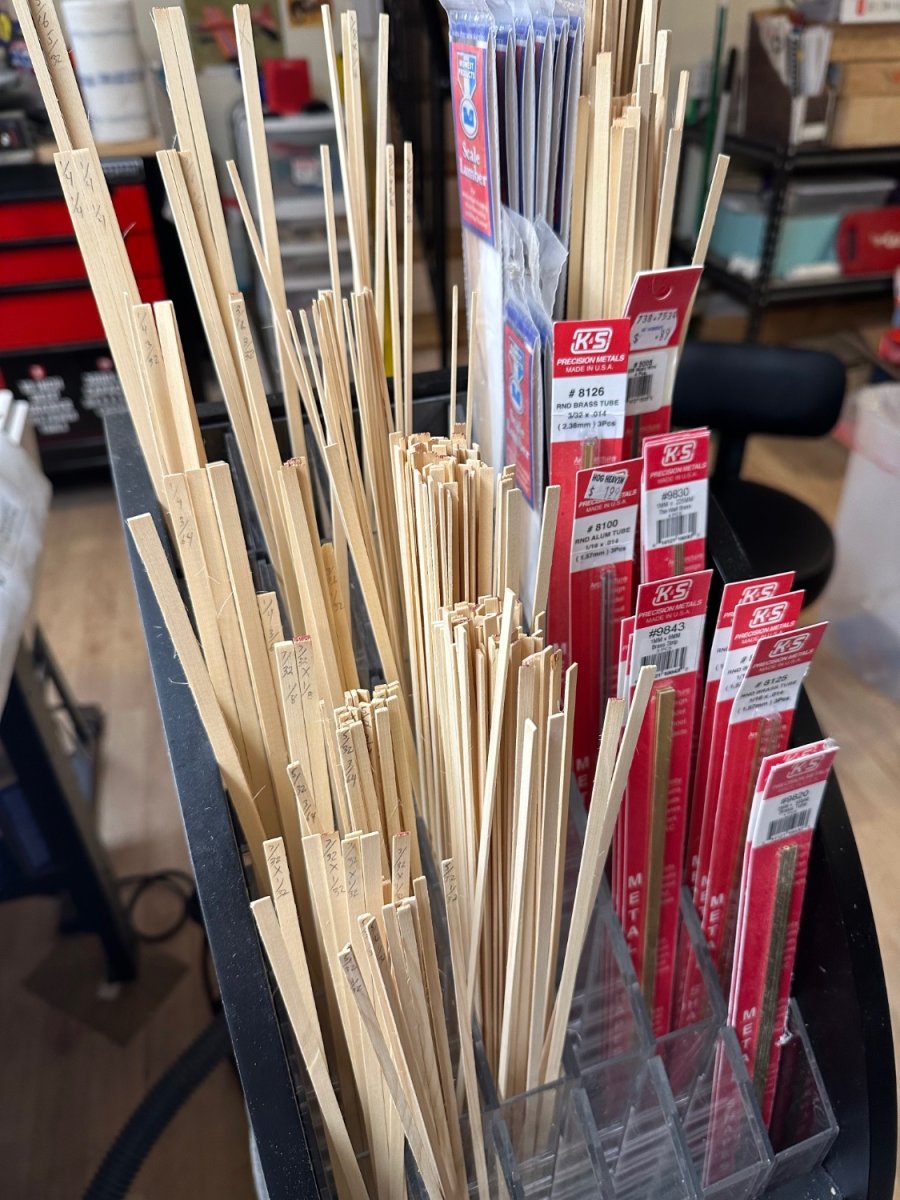
Thanks for the sorting ideas. When I get to the planking I’ll sort the wood. I’m planning on doing the deck in Holly, I have a hunk to cut up. I bought this display rack a few years ago from a place that went out of business. Makes a great storage rack, wood is sorted by size for convenience. Best Regards …. Rick


-
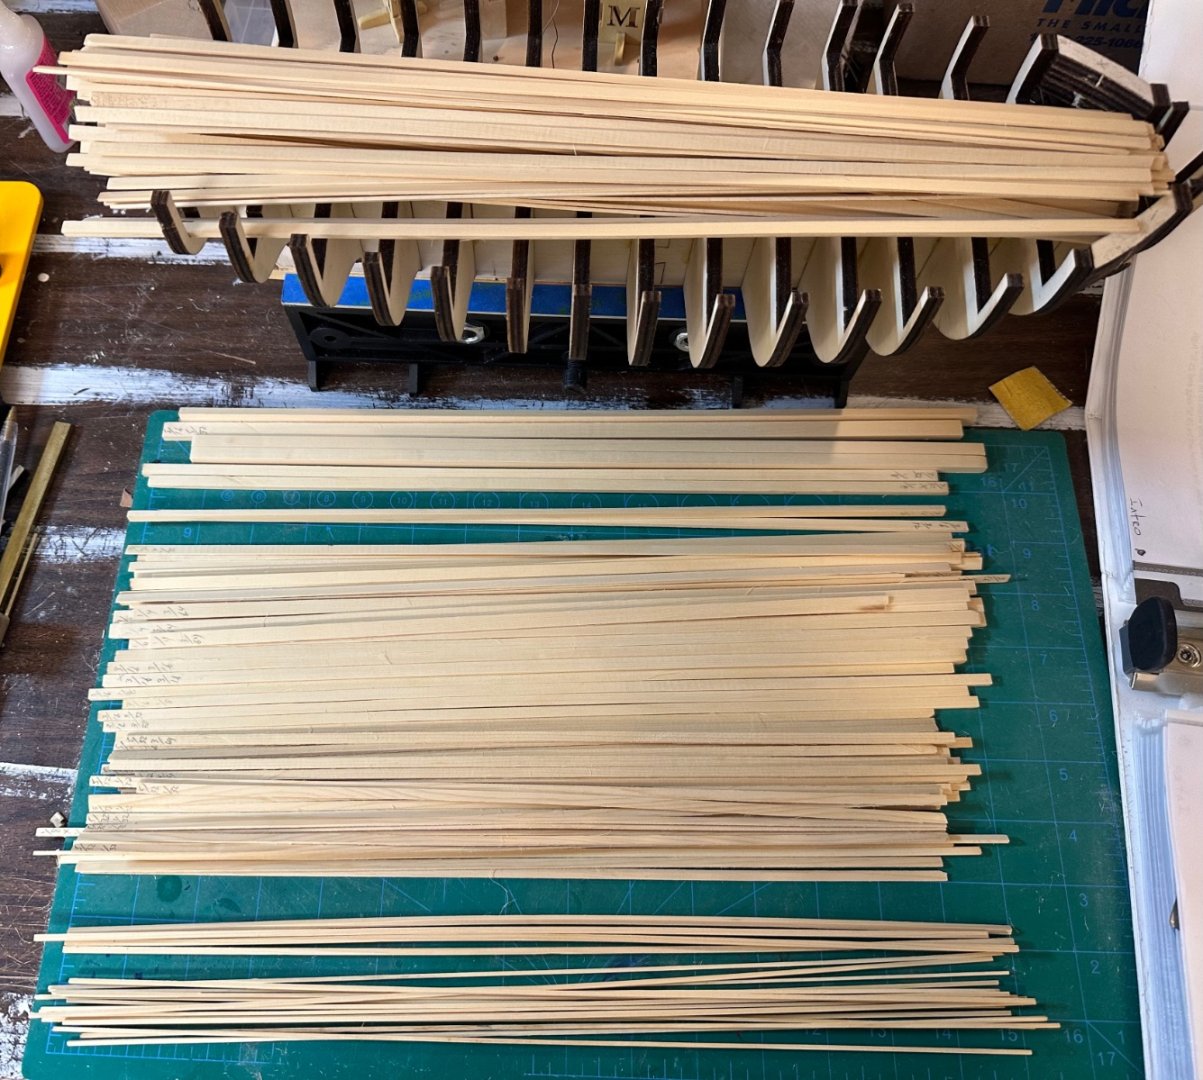
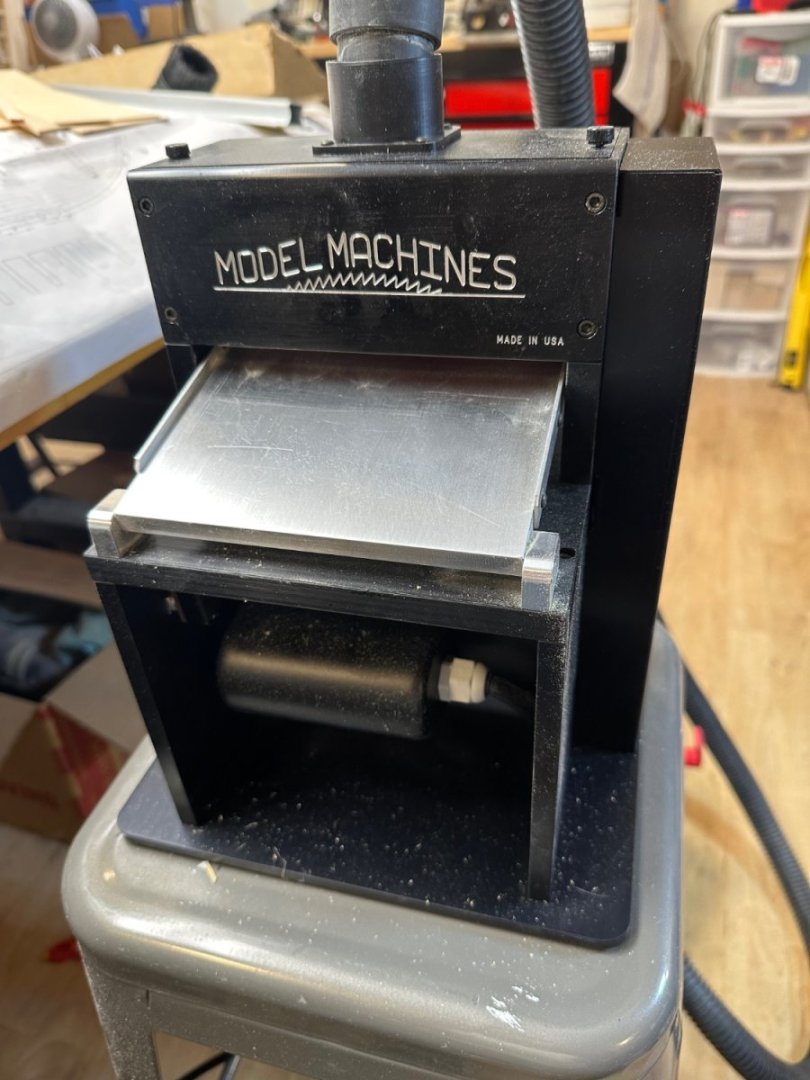
Been busy the past few days milling wood. Per Chuck’s list, I now have 200+ strips of AYC. I definitely need a Byrnes table saw, as the Micro-Mart can’t cut a straight line, I tried a lot of techniques recommended on MSW with mediocre results. Thank goodness for the Byrnes thickness sander. Now I know why strip wood is so expensive. 😏
-
Glenn, I checked out your photography page, beautiful work! Just like your Winnie! Best Regards …. Rick
- 840 replies
-
- 3
-
-
-
- winchelsea
- Syren Ship Model Company
- (and 1 more)
-
Thanks to All for stopping by and all of the likes. I haven’t done any work to the hull, I’ve been busily (not happily) ripping the wood into useable planks. I’ve been using the Micro Mart table saw. I’ve had it for several years and used it for different cuts, but never for ripping planks, it’s been a challenge for sure. I think it’s time to invest in a Byrnes table saw. I have his thickness sander and it’s been a Godsend as I’ve been using it to bring the planks to size. Biggest issue with the saw is the blade wandering making the plank thick/thin at points during the cut, that’s with a .03 kerf slitting blade. When it works it great, it makes really nice cuts, but when it doesn’t, well you can guess the results. Best Regards …. Rick
-
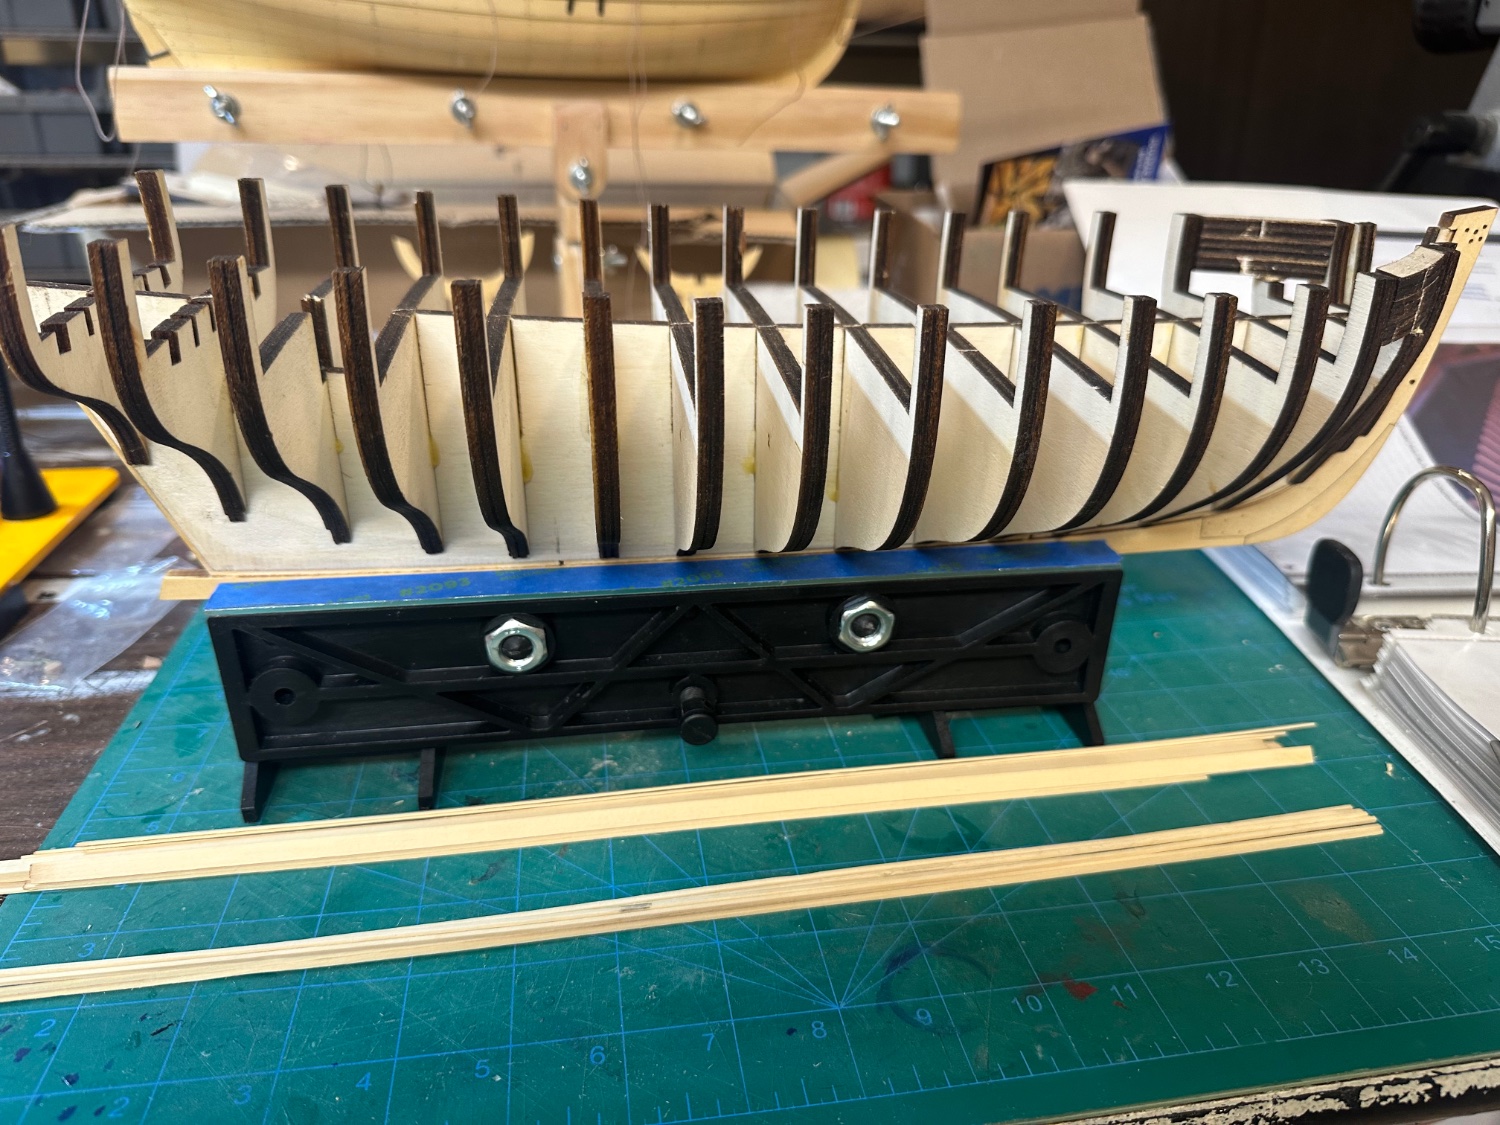
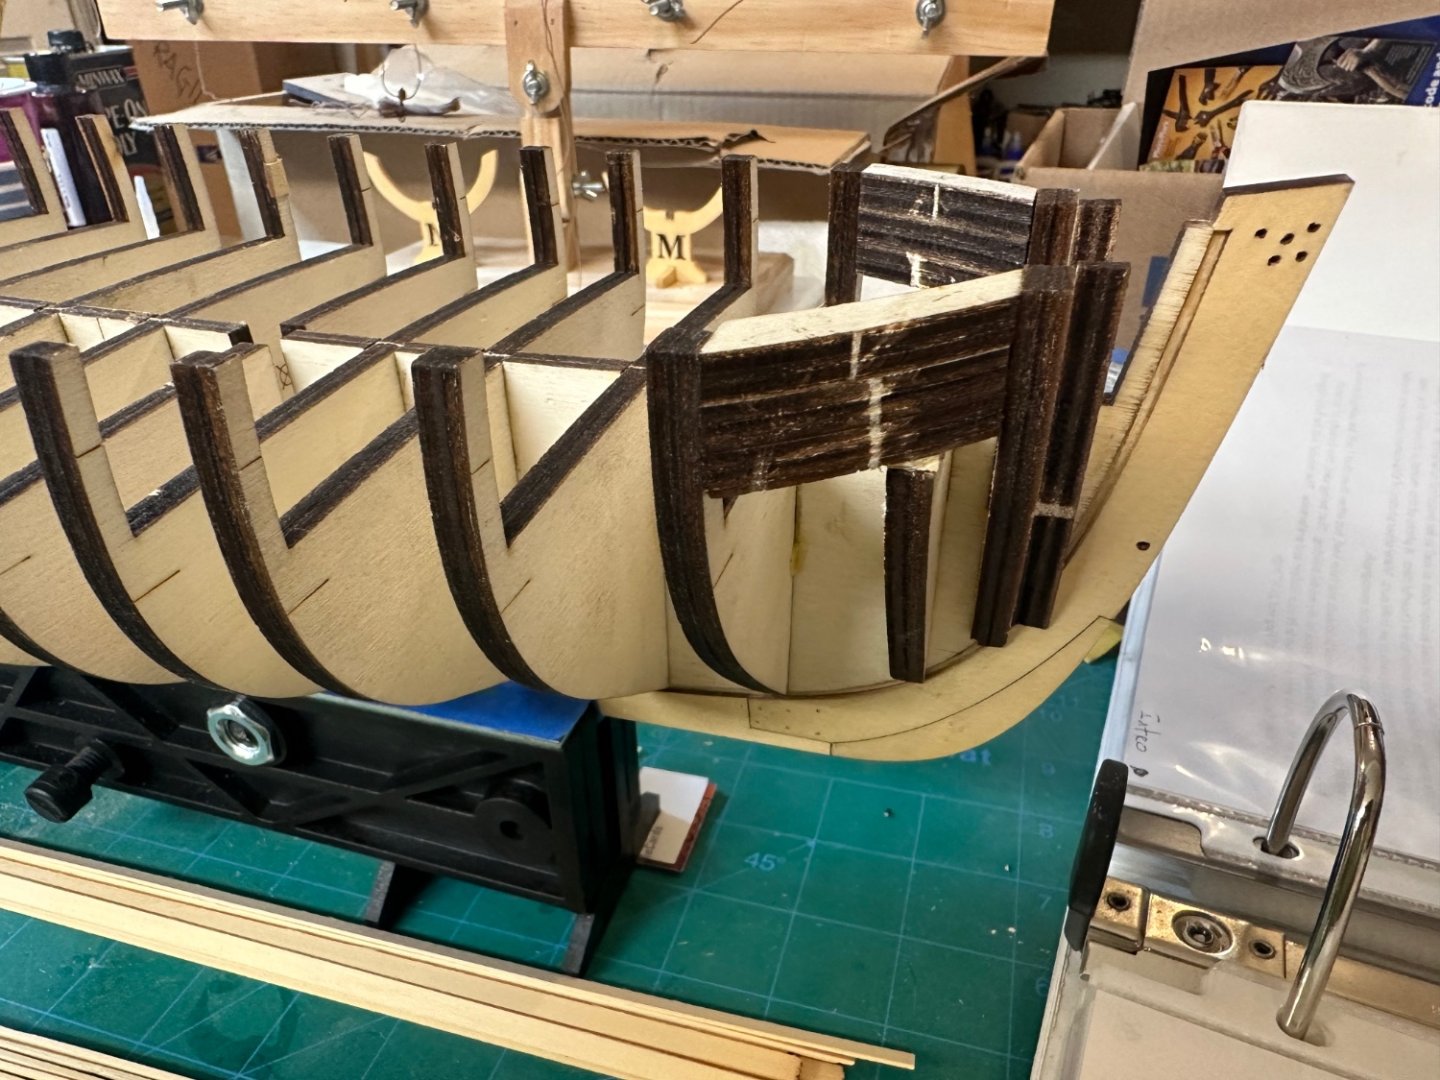
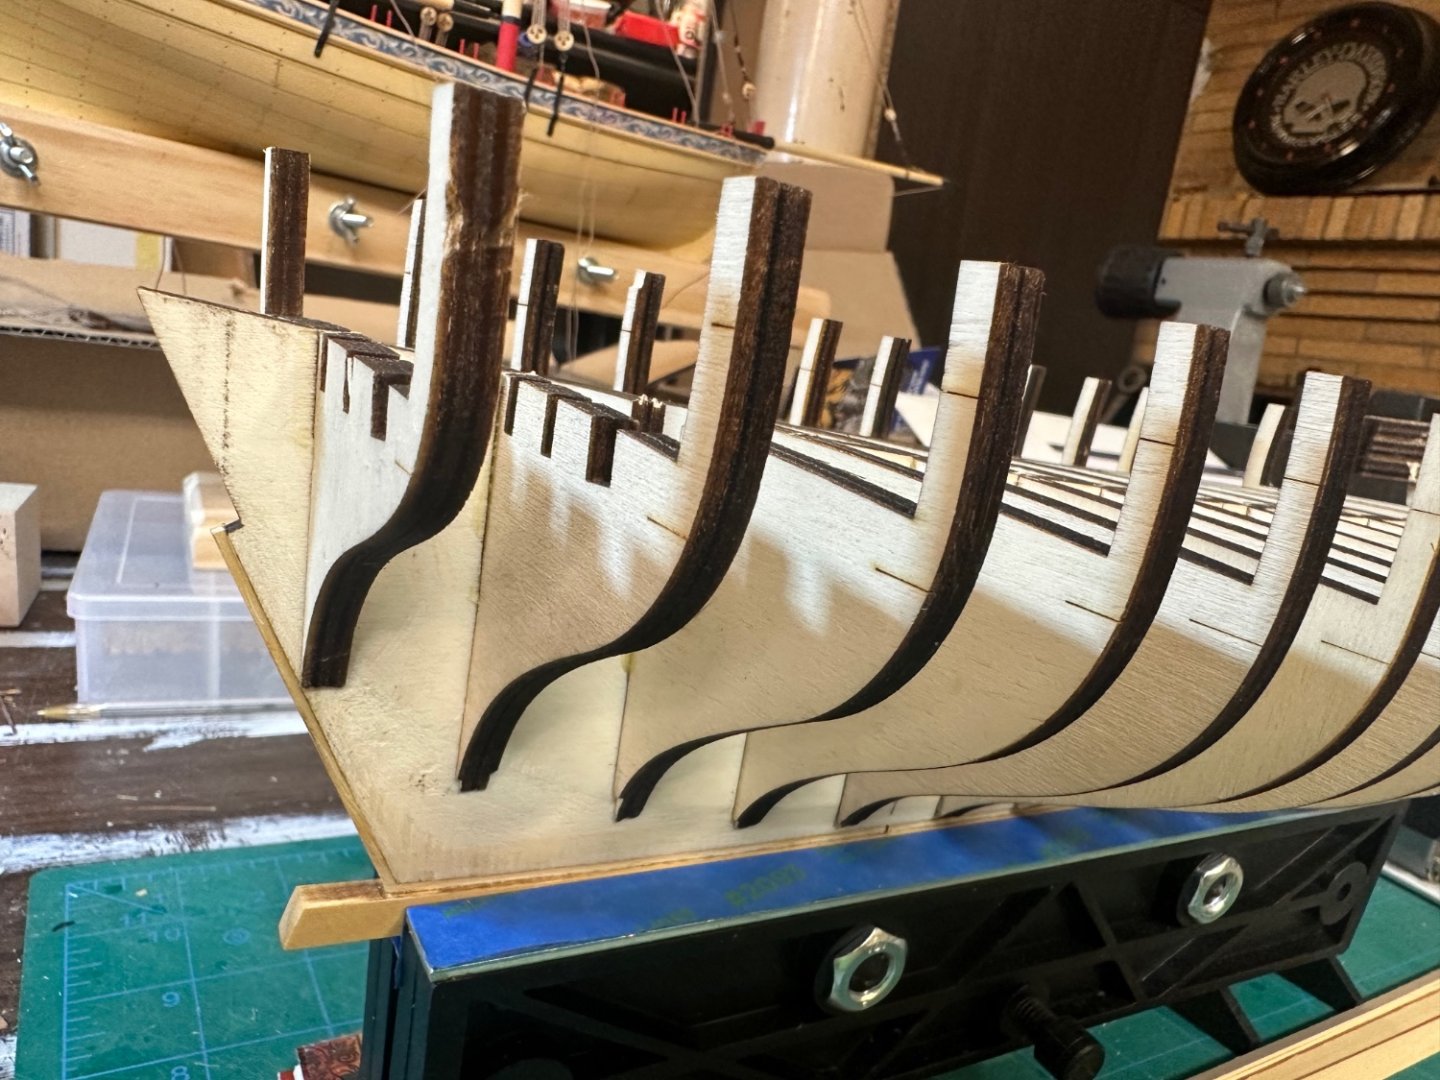
Hey All! This will mark the beginning of my Cheerful build. Actually, I started it on 3/1. Anyway, being my Syren Medway Longboat is just about finished, I thought I’d get a jump on my next build while there’s still some winter. This will be my second and more complex build. Medway, my first build, has taught me a lot and developed some skills. It was a delightful build that came out pretty good. Yes, there are mistakes, but that’s how we learn. After building the Syren Medway, I’m absolutely sold on the kits/parts and push for more scratch building that Chuck provides. Coming from an aerospace background, Chuck’s designs are very well researched, his kit designs are very well thought out and implemented. Plus his methodology is focused and easy to follow. An added bonus is all of the great and incredible build logs! So I’m really late to this party, but that’s ok as I only found out about MSW 2 years ago after retiring. Some of my goals for building this neat little vessel is to add more skills to my toolbox, learn more about planking, scratch building more of the details. Oh yeah, I’m also milling all of my planking from AYC and boxwood where appropriate. All wood was bought from Modeler’s Sawmill - very good service! The build will probably be stretched out because as warm weather arrives I spend most of my time outdoors. Thanks for stopping by and we’ll see you on deck! Here’s a few pictures of where I’m at. We all love to get the keel built and bulkheads installed to see the basic shape of what we’re going to create, and I’m no exception. So she’s framed up and ready for fairing. I’ve also started to mill some of the planks. I’m starting with billets, then to blanks and to strips. I also like to skip around and take small bites so things don’t become too repetitive. Best Regards …. Rick

-
Bob: I agree. This piece of veneer is very narley (industry term), and is a very nice contrast to the smooth AYC. Tossedman: Thank you for the compliment. She’s been a fun project that has taught me a lot. Best Regards …. Rick
- 155 replies
-
- 3
-
-
- Medway Longboat
- Syren Ship Model Company
- (and 1 more)