HOLIDAY DONATION DRIVE - SUPPORT MSW - DO YOUR PART TO KEEP THIS GREAT FORUM GOING! (Only 72 donations so far out of 49,000 members - Can we at least get 100? C'mon guys!)
×


Freebird
-
Posts
334 -
Joined
-
Last visited
Content Type
Profiles
Forums
Gallery
Events
Everything posted by Freebird
-
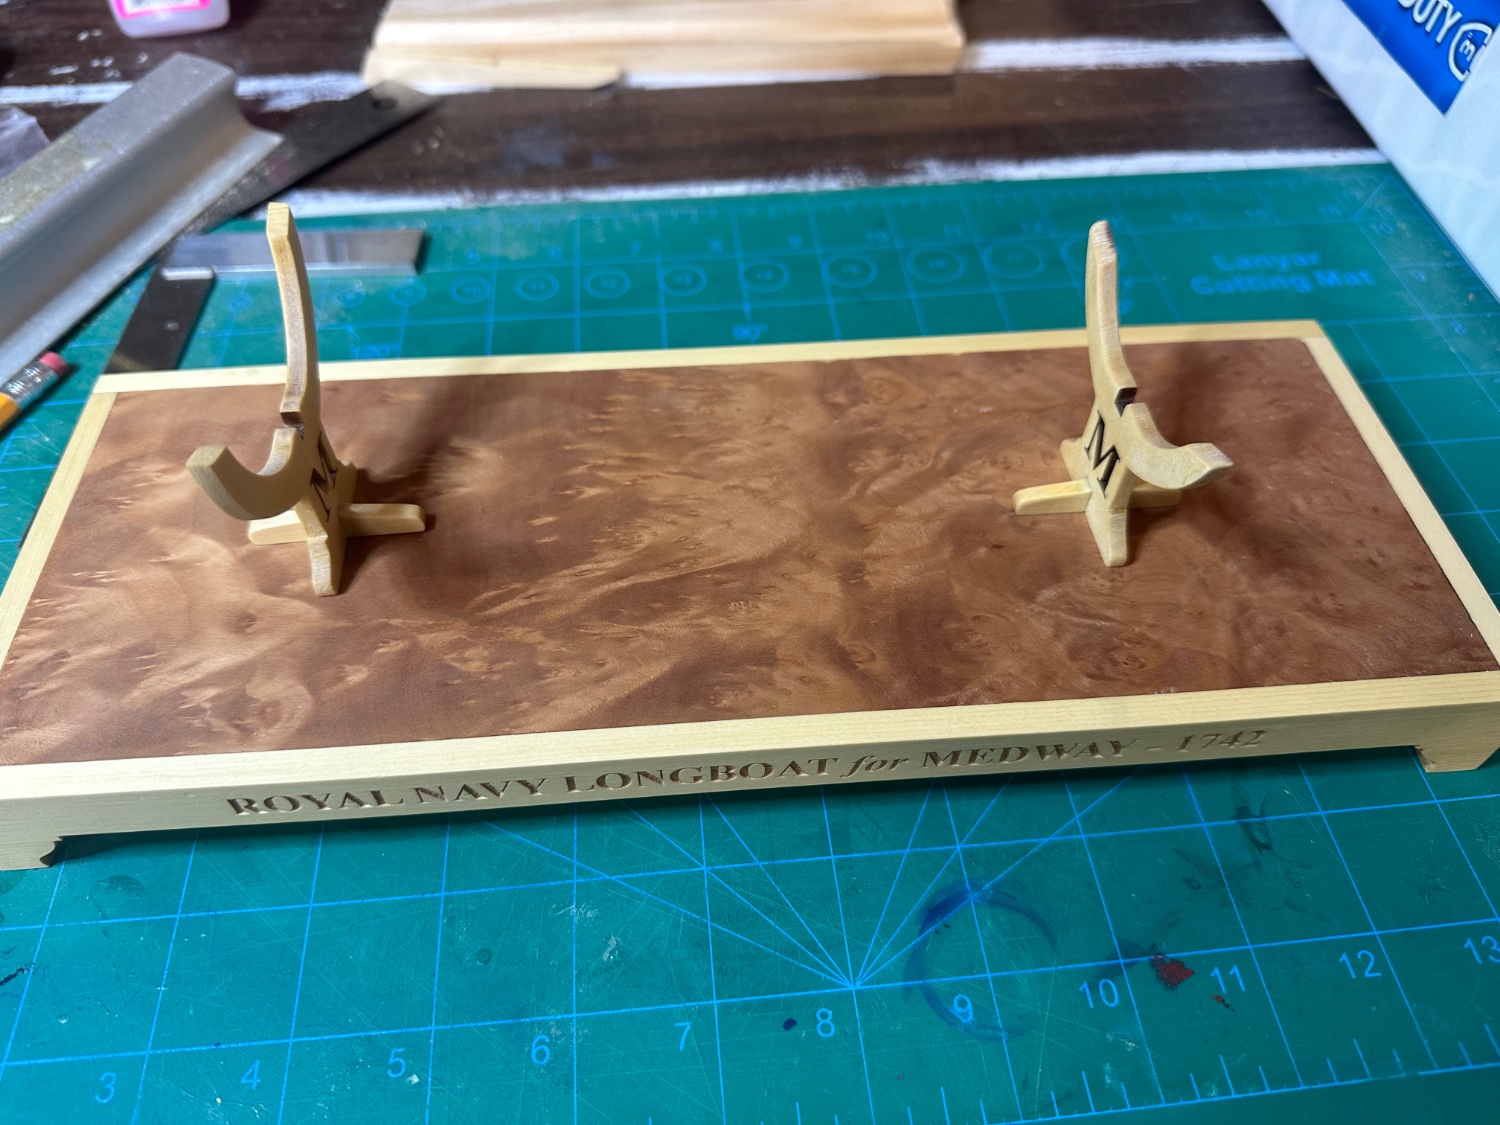
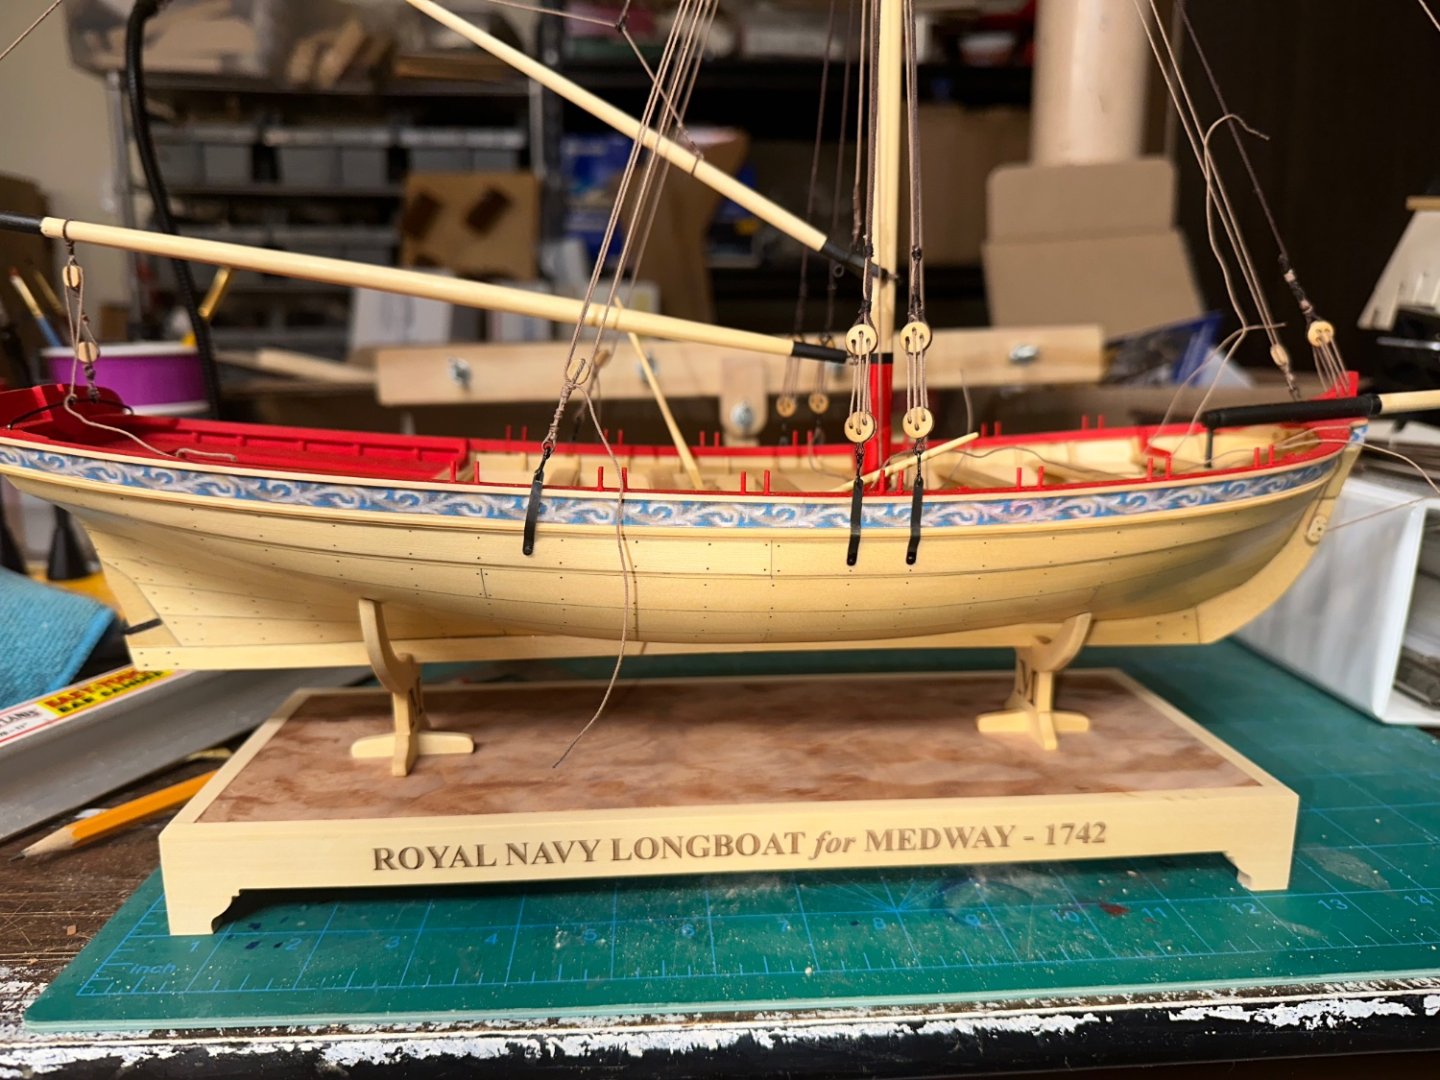
Display base underway waiting for a couple coats of WOP. Best Regards …. Rick

- 155 replies
-
- 7
-

-

-
- Medway Longboat
- Syren Ship Model Company
- (and 1 more)
-
Ok, just got back from dinner with the Admiral and looked at your pictures, and how it’s done popped! Thank you Bob! Best Regards …. Rick
- 155 replies
-
- 1
-
-
- Medway Longboat
- Syren Ship Model Company
- (and 1 more)
-
Hey Bob! Thank you for the compliment! Great info for the halliard, did you use the forward or aft shrouds? Also, the truck has the means for using either the port or starboard side. Being you went with the starboard side, is the port side rigged the same? Sorry for all the questions and thank you for the help! Best Regards …. Rick
-
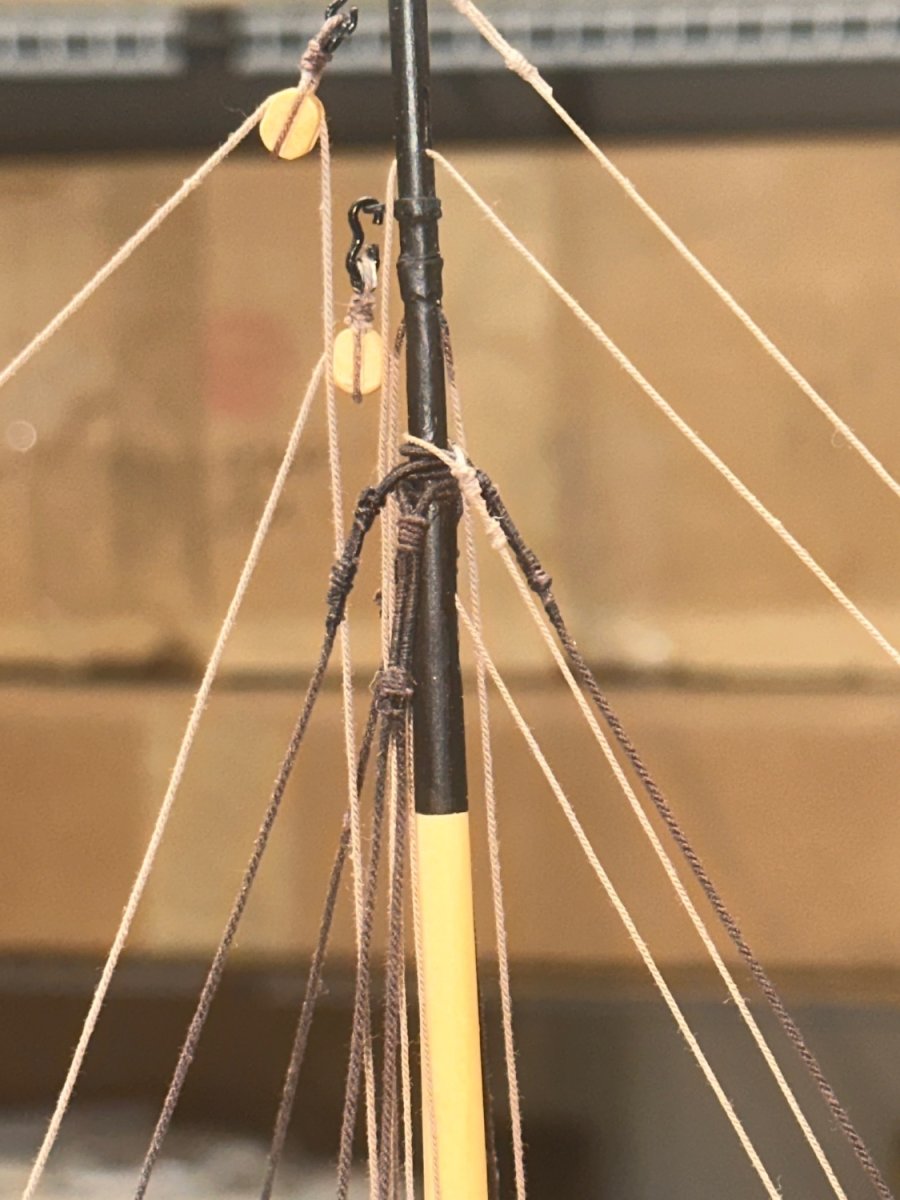
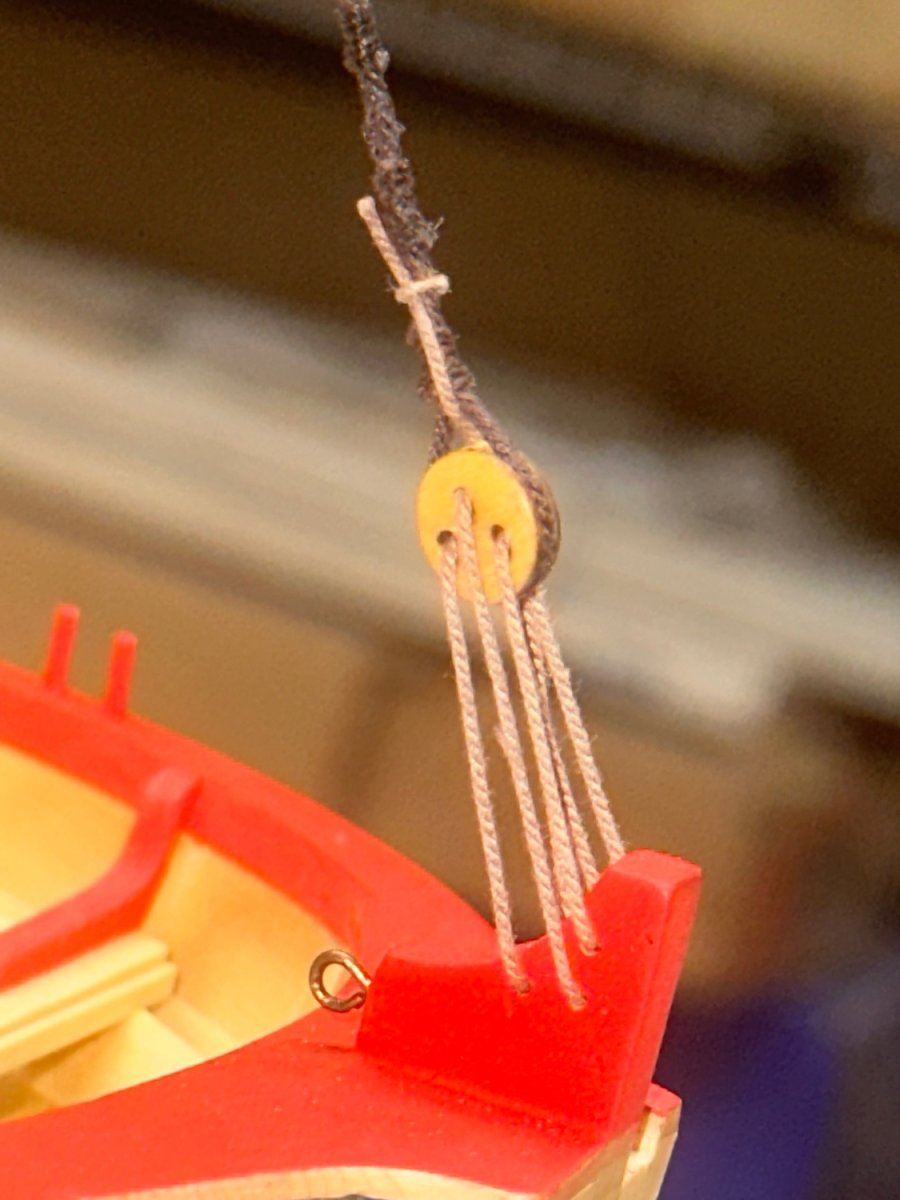
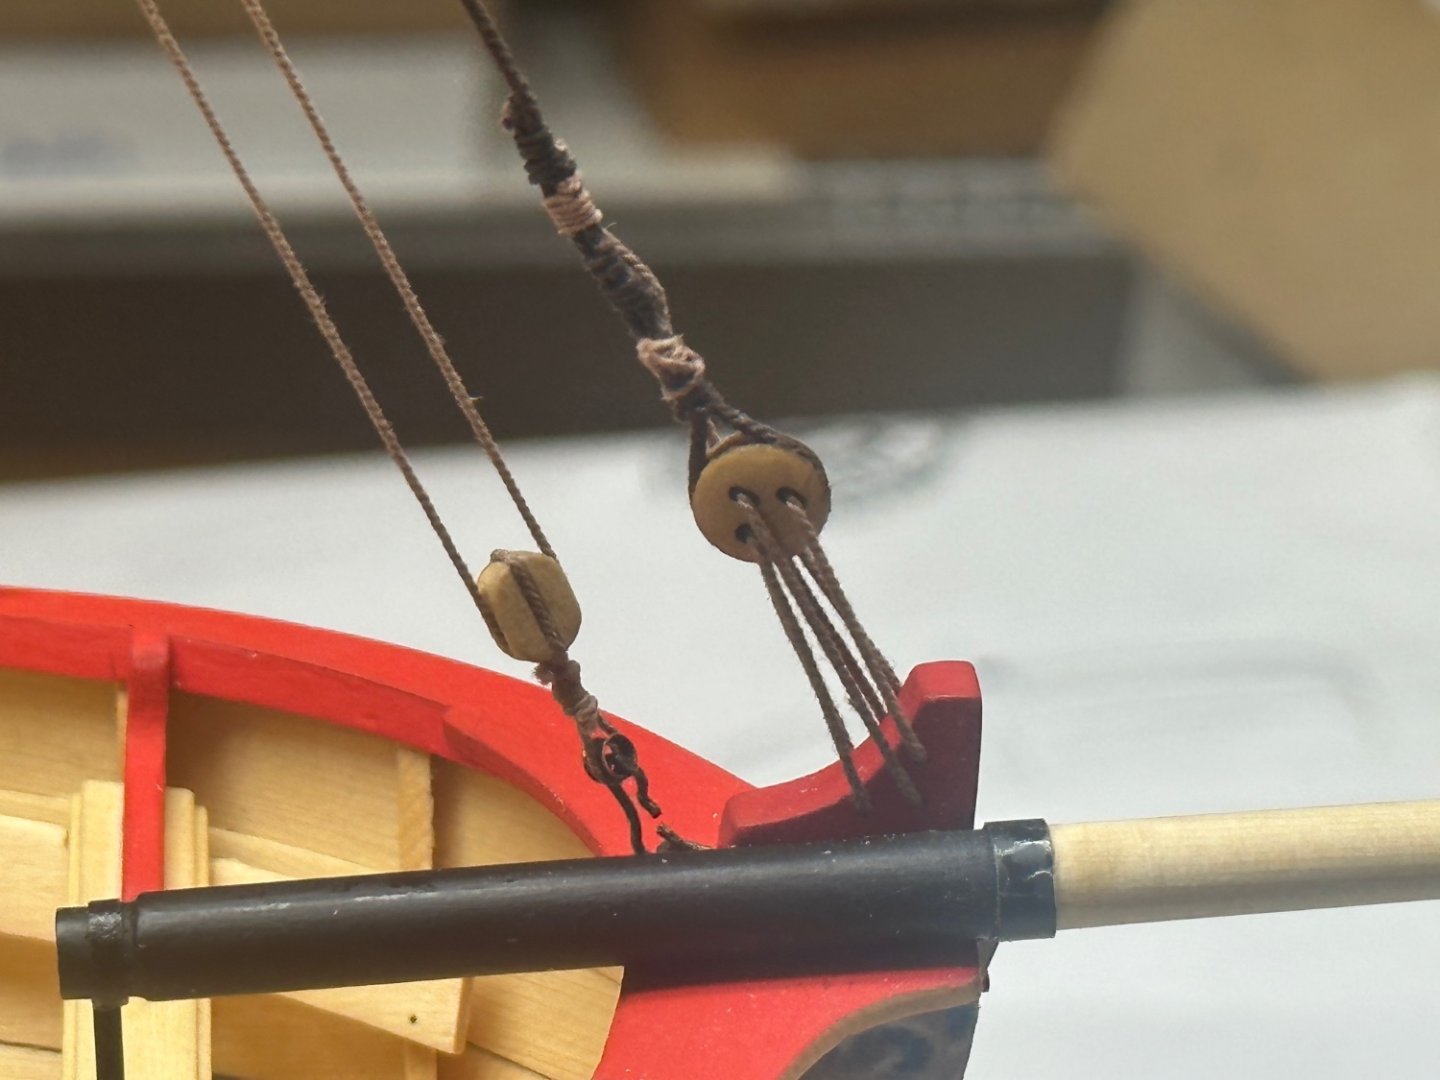
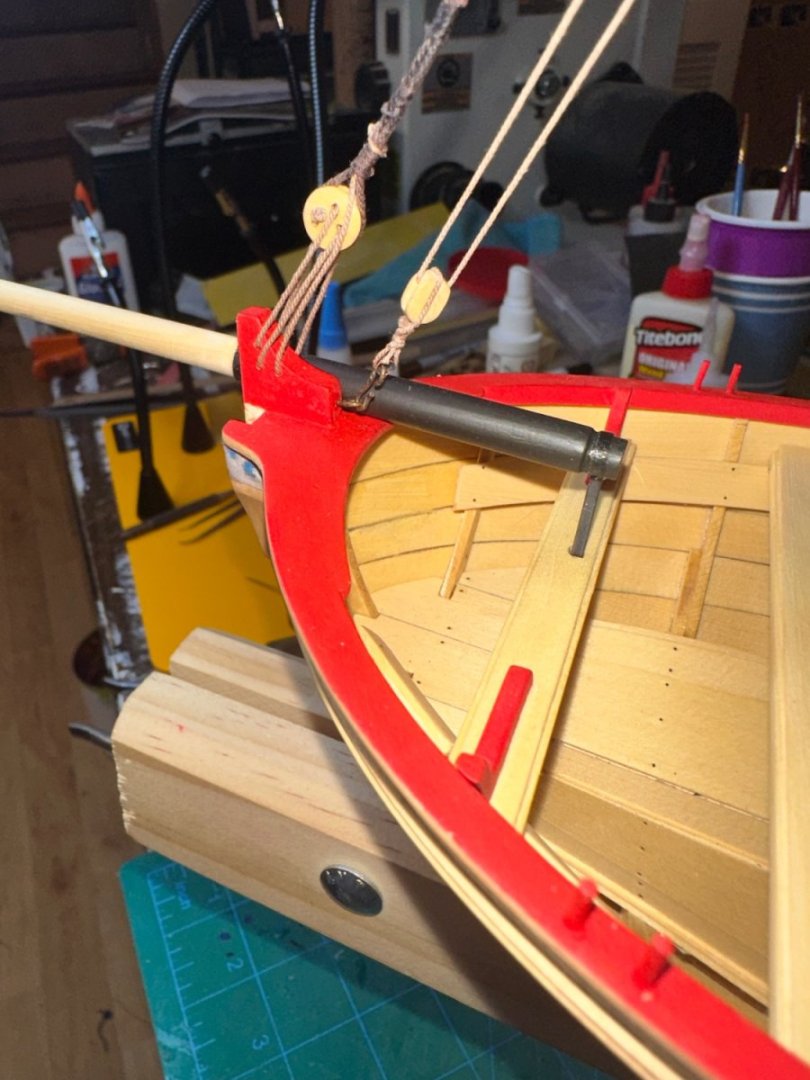
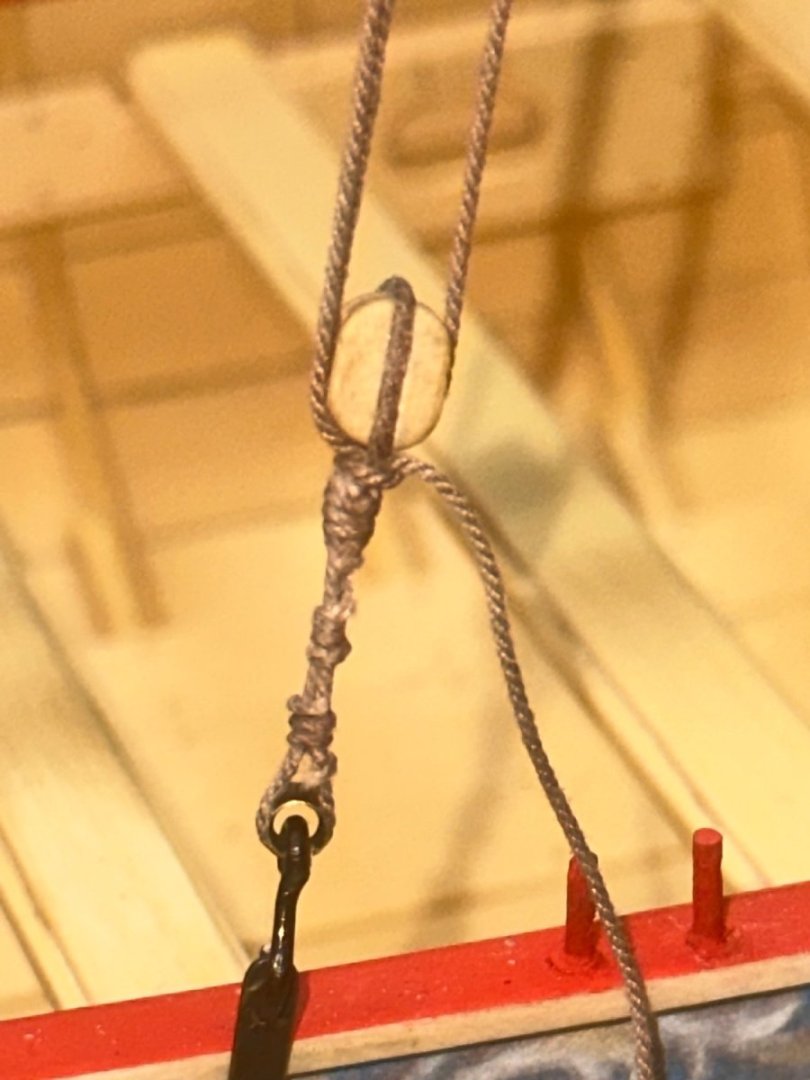
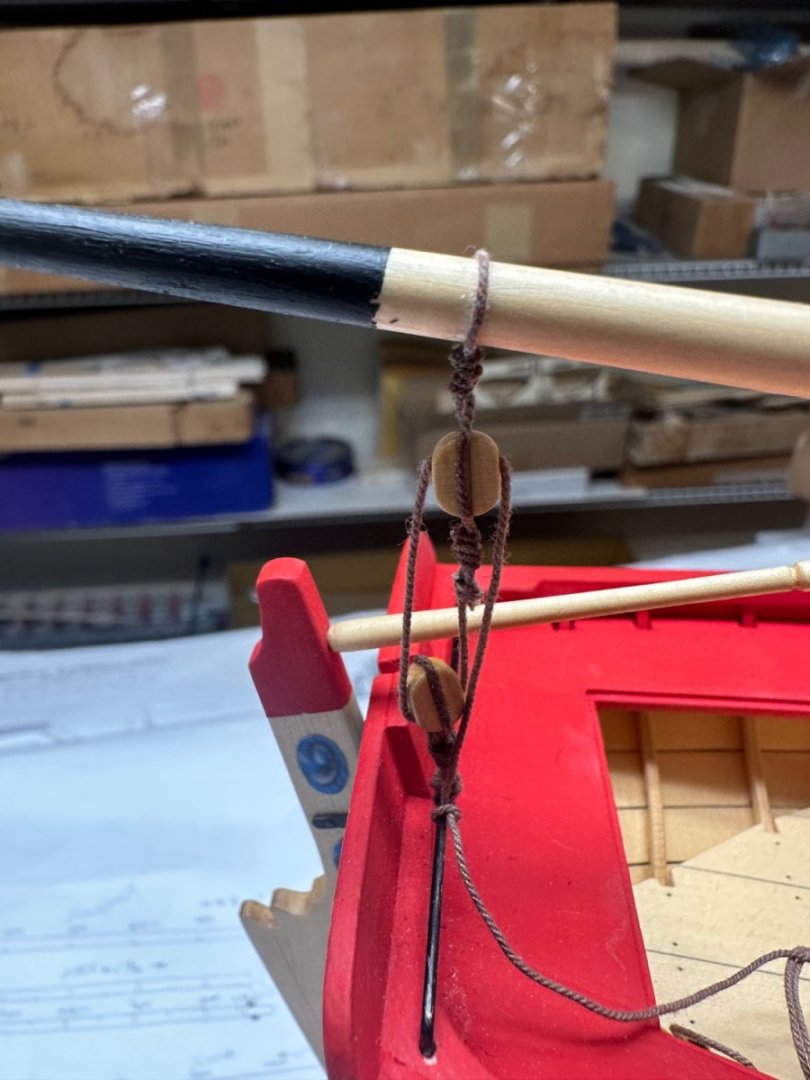
Spent time rigging the bowsprit today, came out pretty good. Just need to rig the flag halliards. Quick question, where do they tie off? I’ve looked at finished build logs and really don’t see anything. Do they tie off on the mast thwart? Any help would be appreciated! Also on deck is the display base, the pedestals are already finished. Thanks for stopping by. Anybody care to guess what is on deck next? Best Regards …. Rick


- 155 replies
-
- 6
-
-
-
- Medway Longboat
- Syren Ship Model Company
- (and 1 more)
-
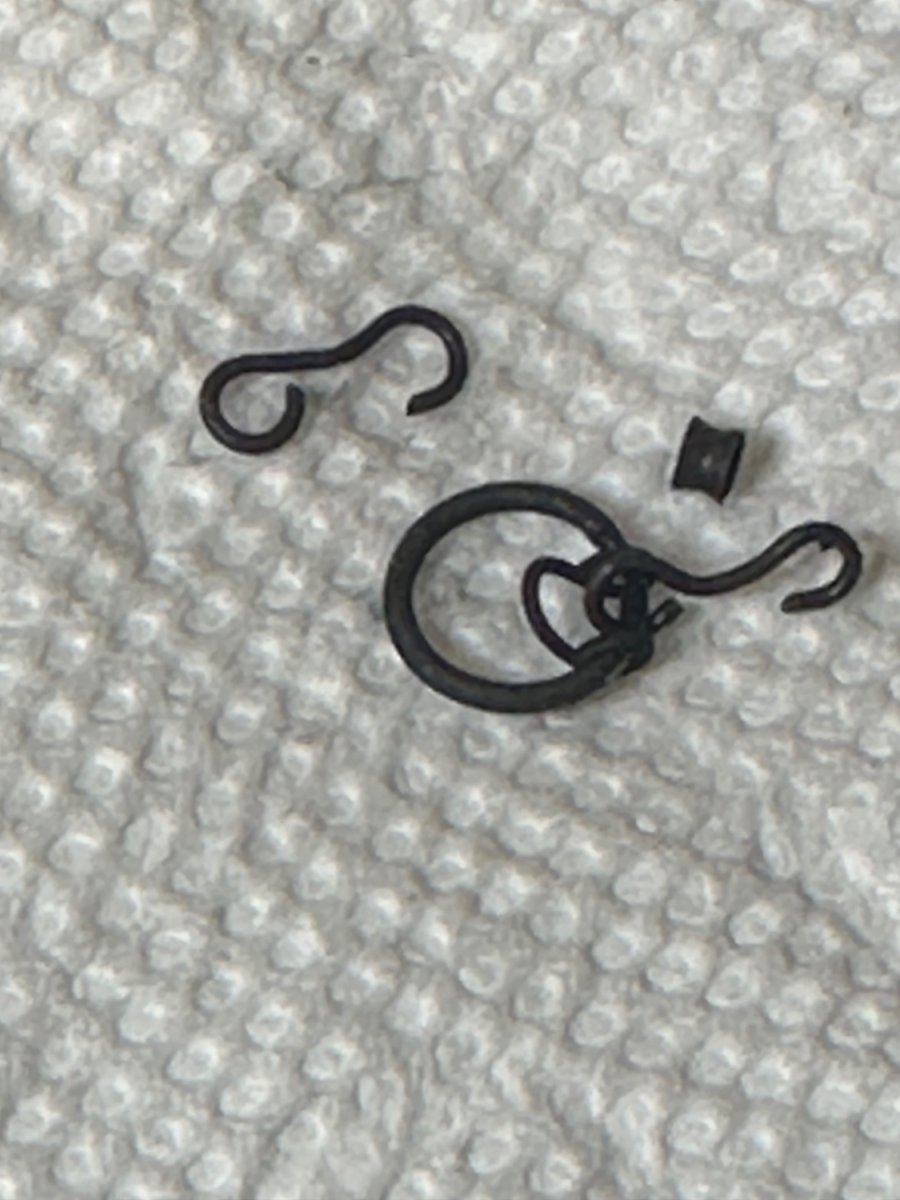
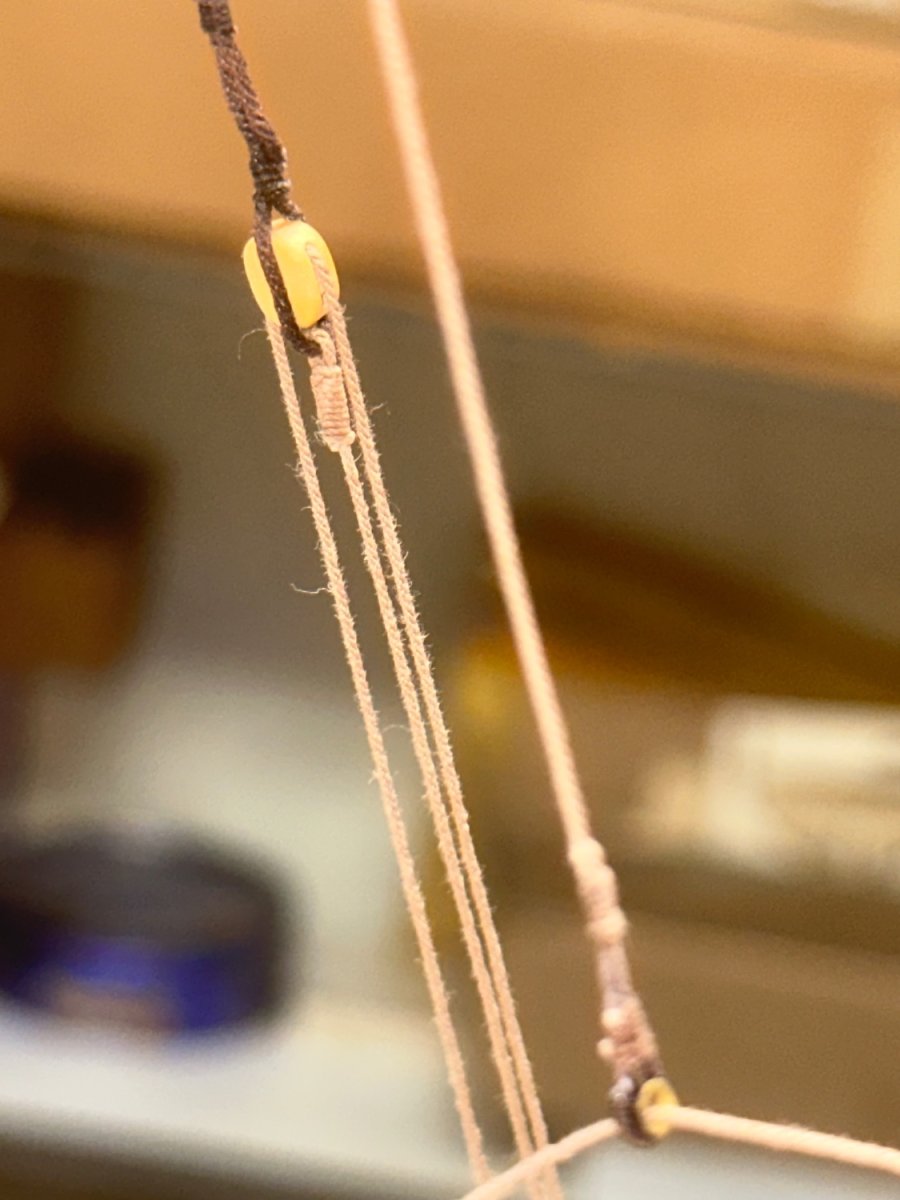
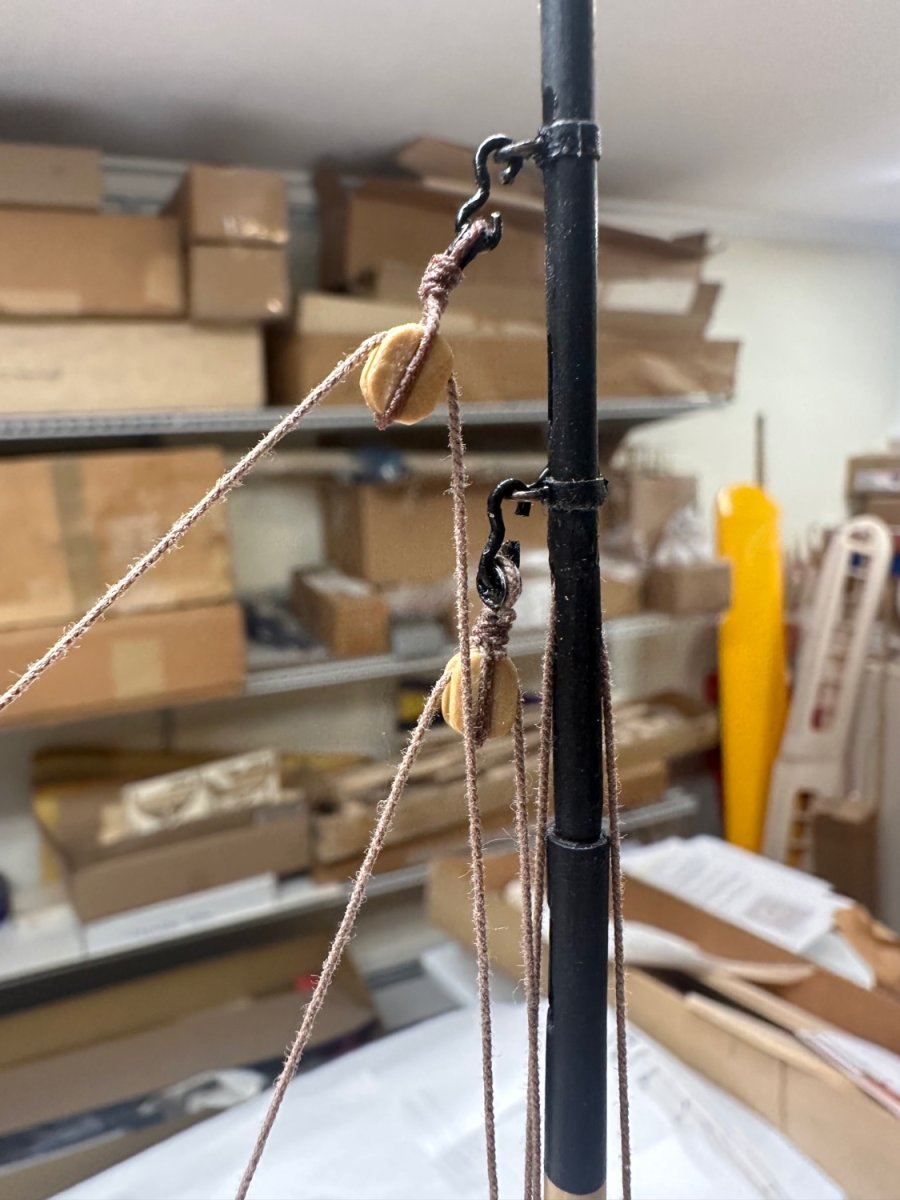
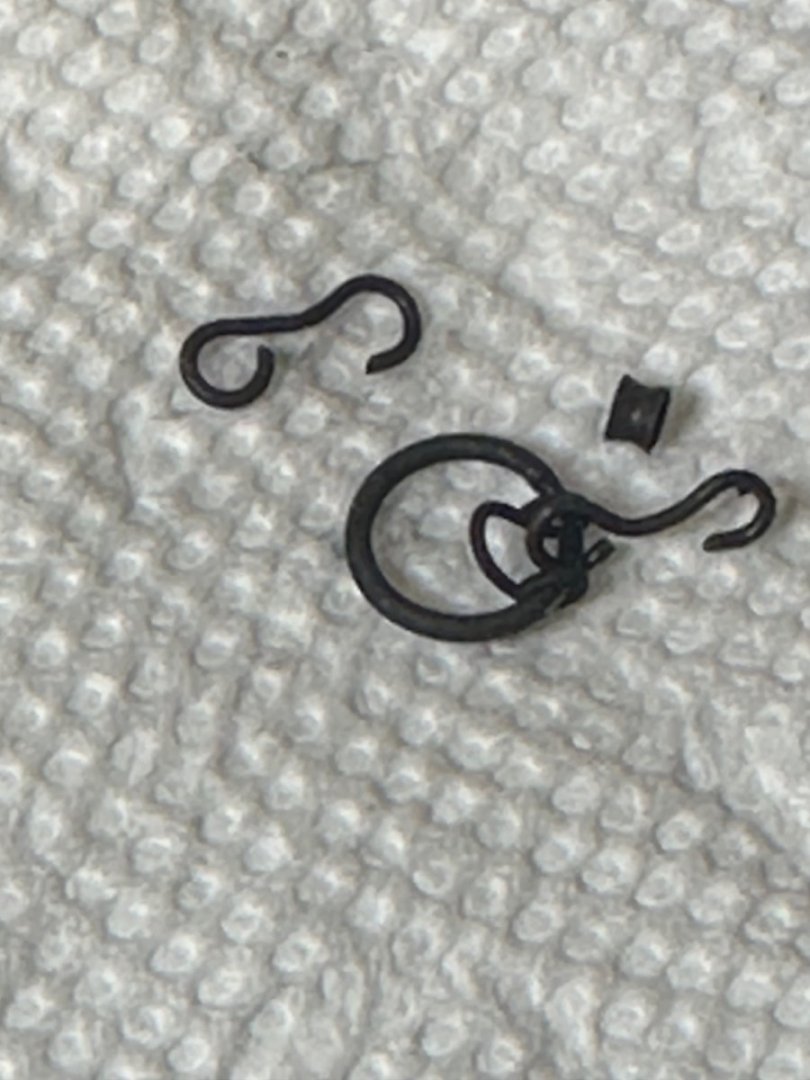
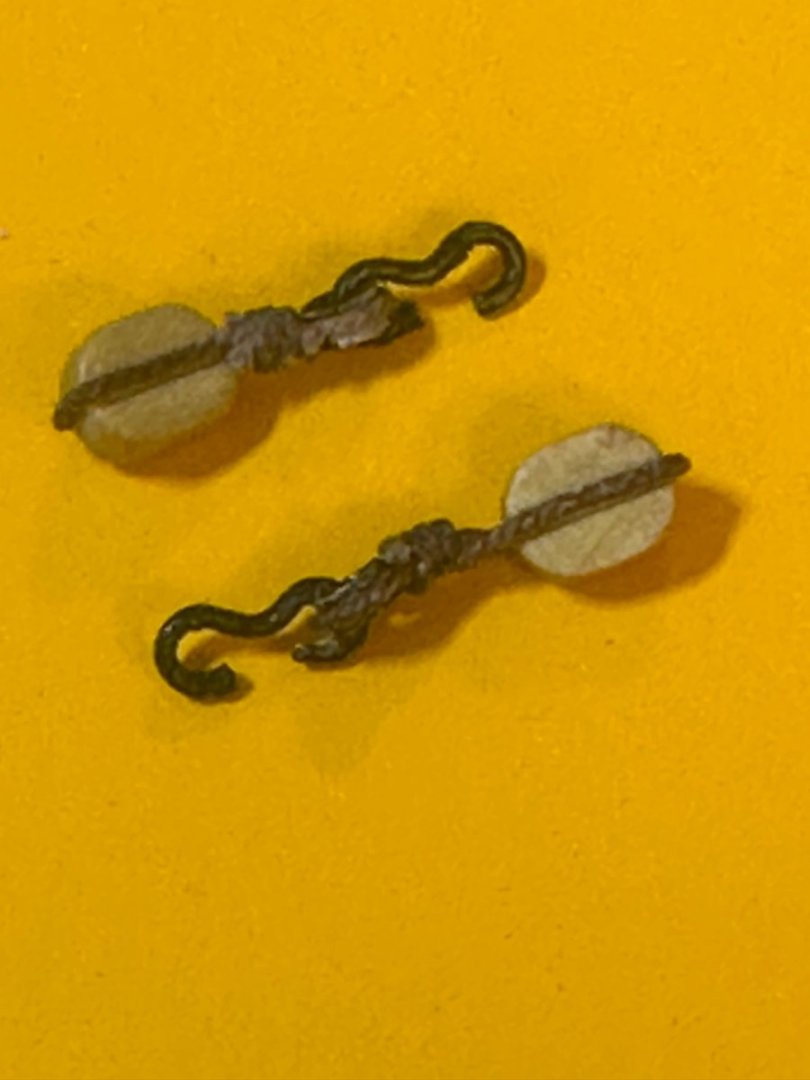
Bob, this is my first attempt at rigging also. I find this part somewhat frustrating, but when completed very satisfying. I still have a lot to learn, but that’s what makes this hobby so much fun. I appreciate all of the informative and amazing skills and builds being very helpful and inspiring! The journey continues - traveler ring, shackle and hook made and blackened. Once the bowsprit is rigged, it’ll be time for the flag halliard and research how to make rope coils. Best Regards …. Rick
- 155 replies
-
- 5
-
-
- Medway Longboat
- Syren Ship Model Company
- (and 1 more)
-
Hi Bob! Thank you for the compliments! Yup, lots of mistakes have been made along the way, some were fixed, others, well, you know. I have referred to your build log many times for the rigging, it has been very helpful! Your Medway is a fantastic build and has been an inspiration! Medway has been an extremely fun build and I have learned a lot of new skills. For my first build, I’m pretty pleased on how she’s coming out. My hat is off to Chuck for his awesome design and endless help. I’ve been building models as far back as I can remember, and I’ve never come across a mentor and designer like Chuck who so freely shares his knowledge. Because of him and the many talented builders on MSW, like yourself, I’ve been able to pursue something I’ve wanted to do for many years. Thanks again Bob! And a big thank you to All for stopping by and all the likes! Best Regards …. Rick
- 155 replies
-
- 3
-
-
- Medway Longboat
- Syren Ship Model Company
- (and 1 more)
-
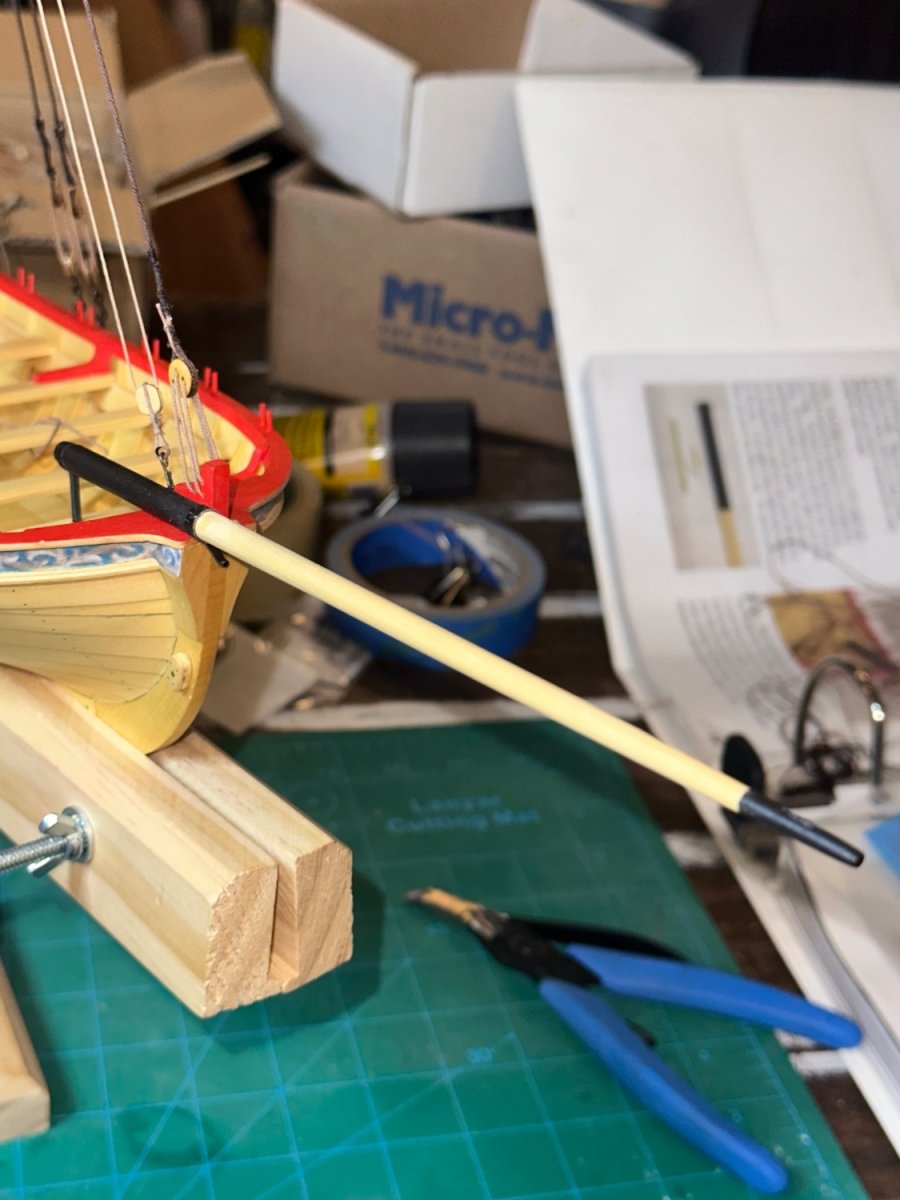
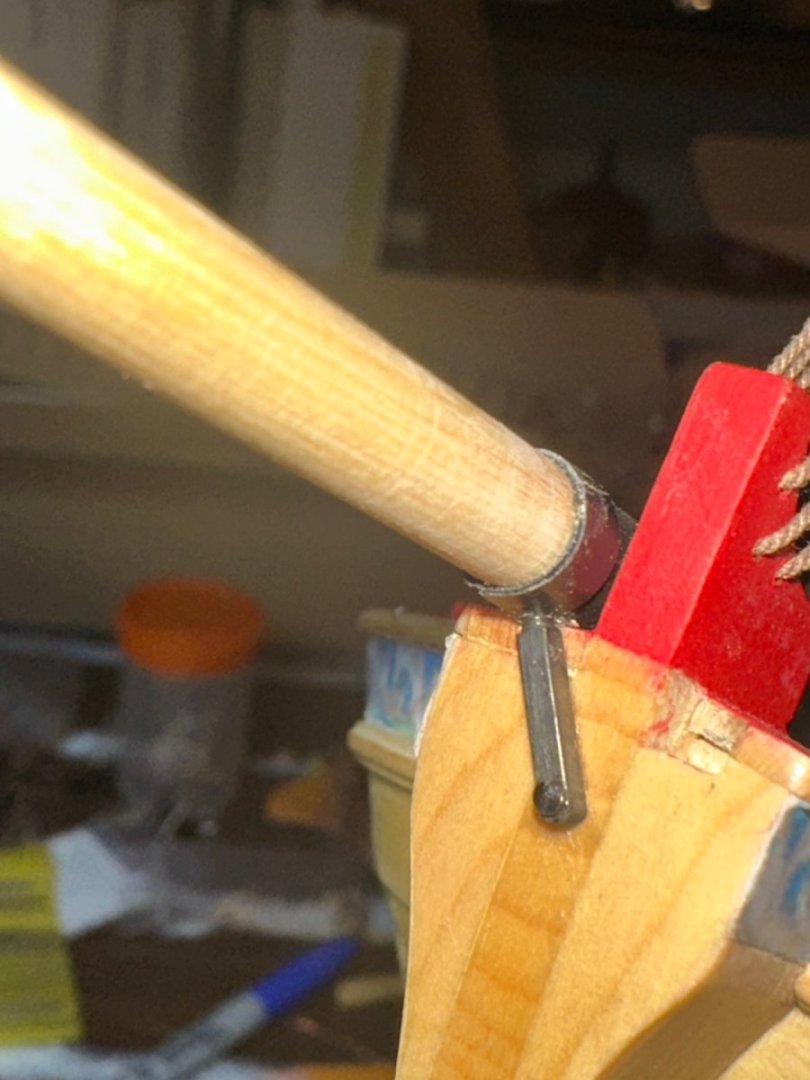
Bowsprit is now in place. Time to make the shackle and hook for the traveler ring. Best Regards …. Rick

- 155 replies
-
- 7
-
-
- Medway Longboat
- Syren Ship Model Company
- (and 1 more)
-
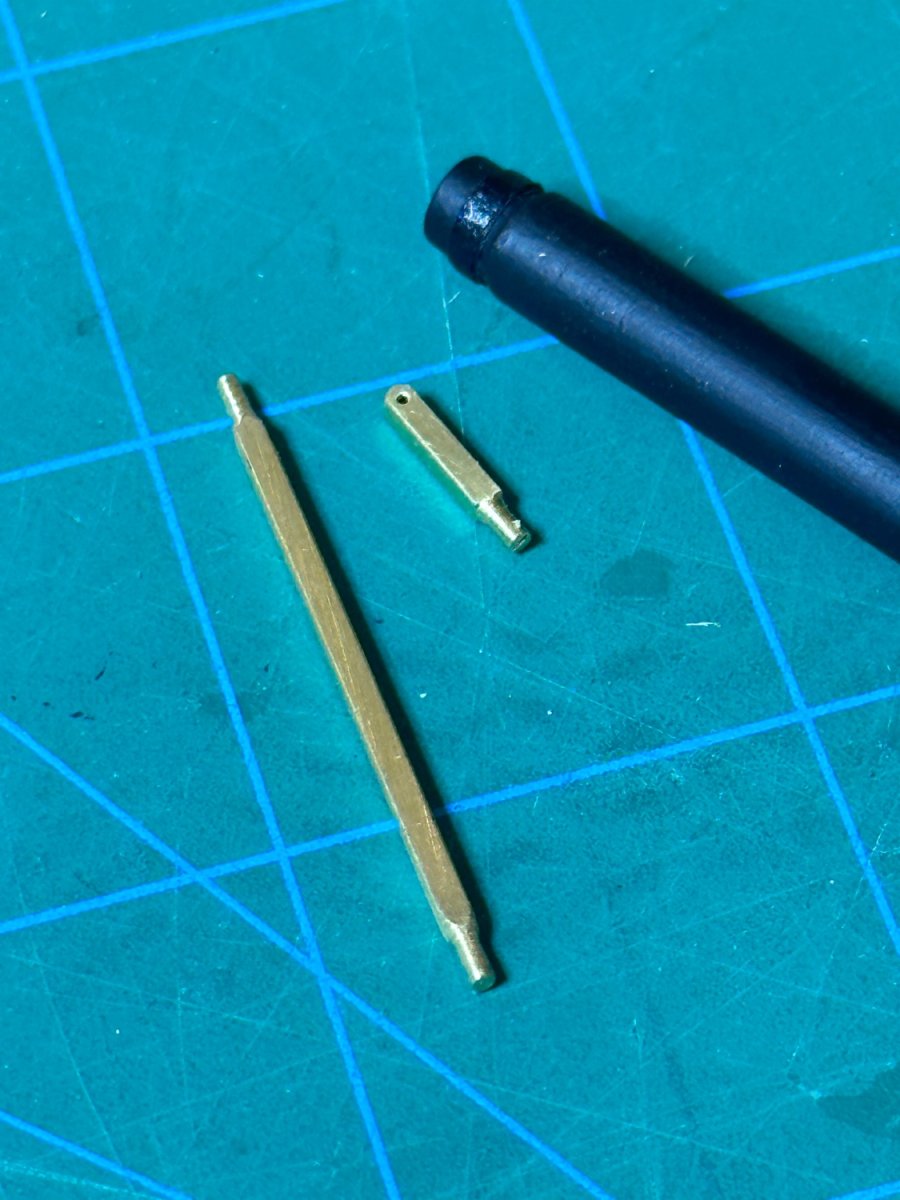
Thank you Chuck! And thank you All for all the likes! Today is install the bowsprit day. The brass has been cut to size and the pins filed to shape. Best Regards …. Rick

- 155 replies
-
- 3
-
-
- Medway Longboat
- Syren Ship Model Company
- (and 1 more)
-
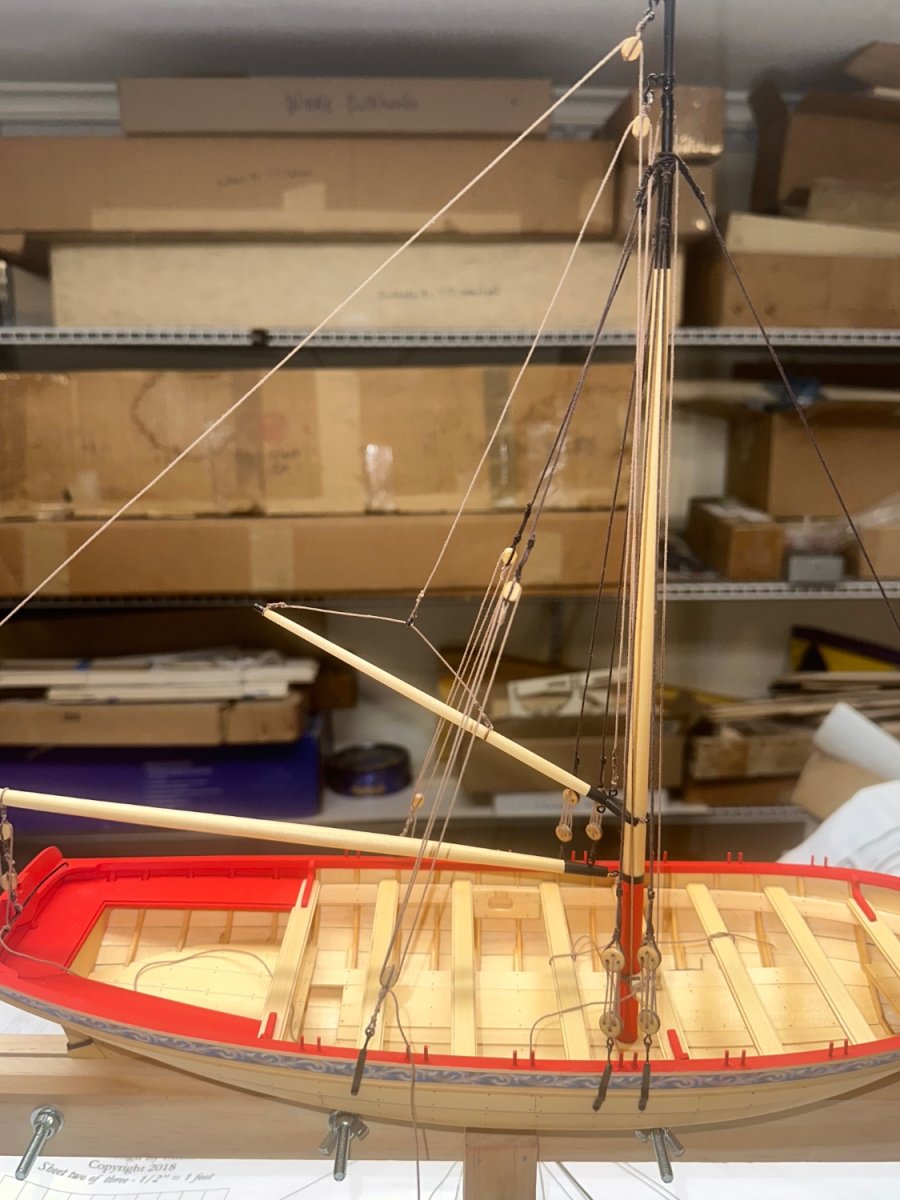
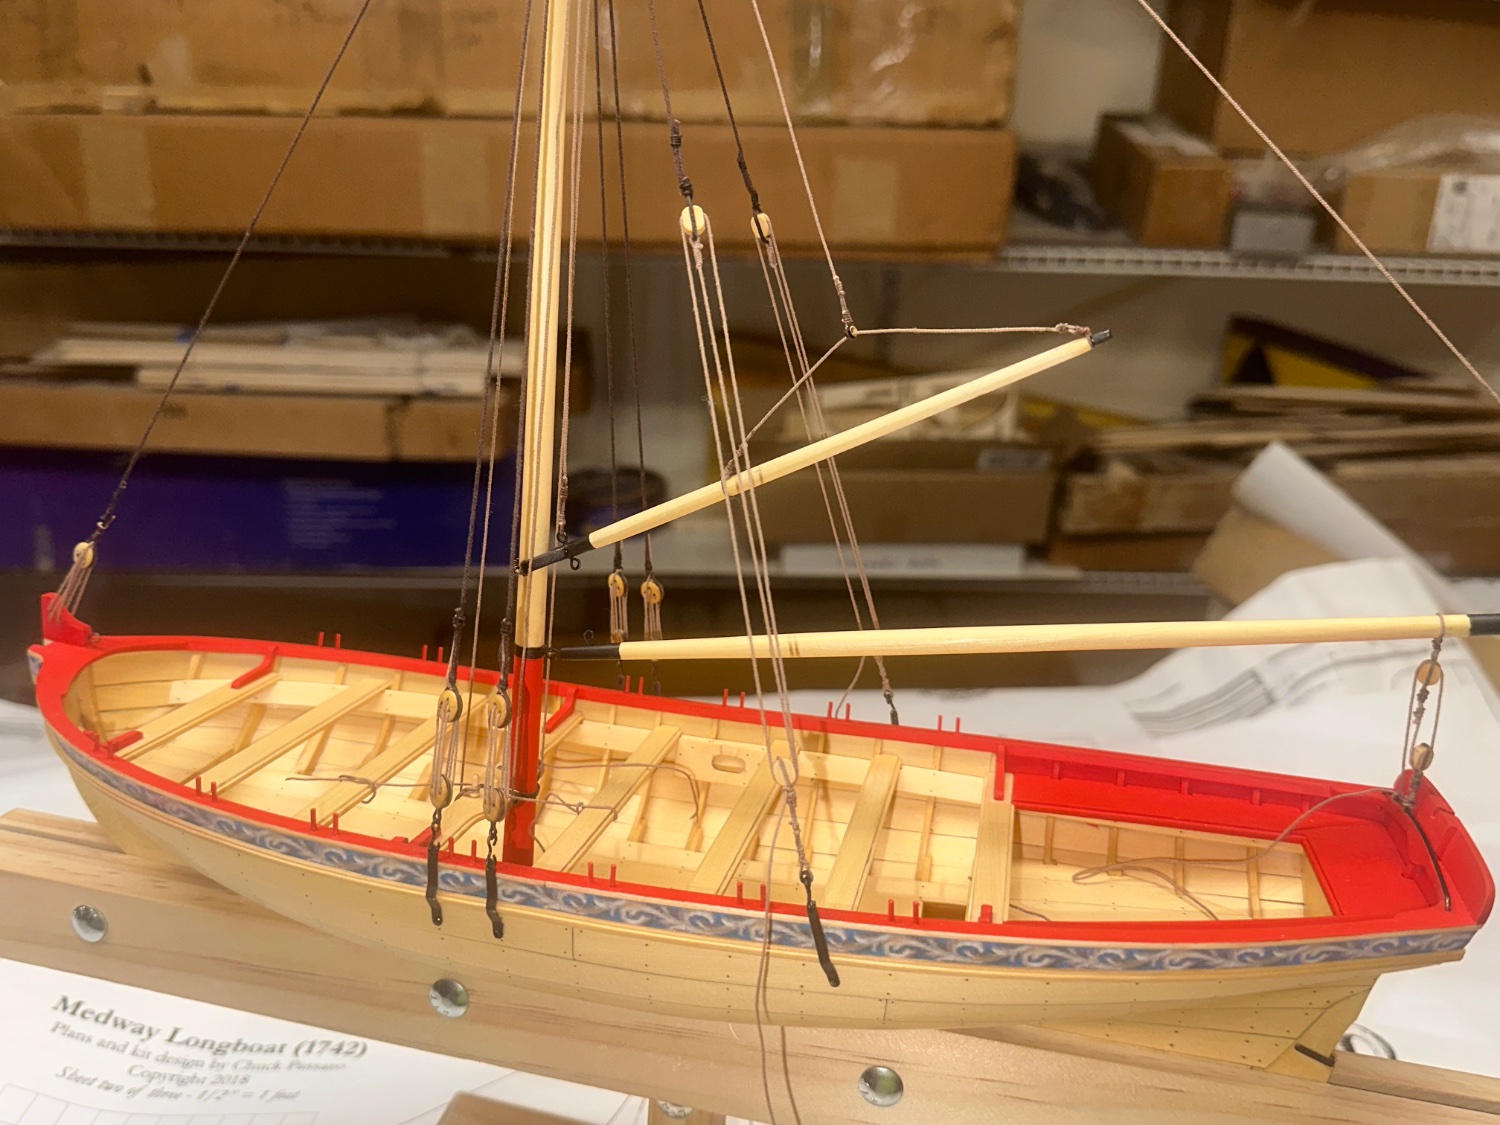
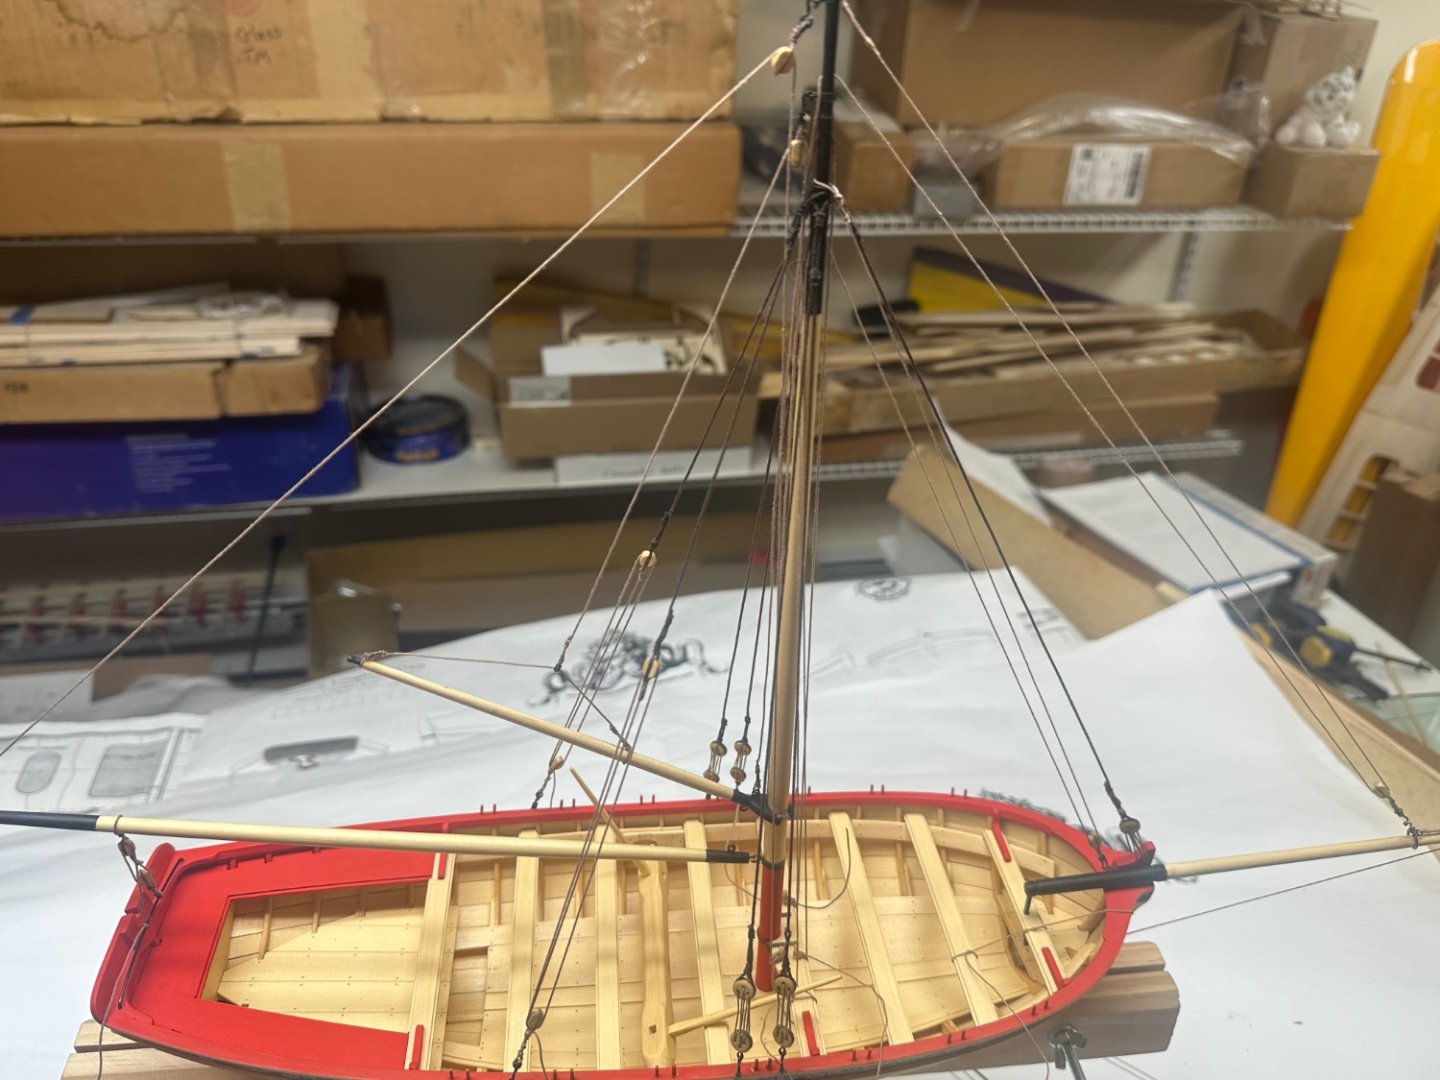
With the exception of the bowsprit and its rigging and rope coils, the rigging is complete. Again, first time attempting rigging. Lots of lessons learned, I even made thimbles and served the lines as appropriate. All skills that I will need for Cheerful. Hardest part for me was seizing, I have a long way to go. With that said, any and all comments are welcome! Best Regards …. Rick


- 155 replies
-
- 8
-
-
- Medway Longboat
- Syren Ship Model Company
- (and 1 more)
-
Wow! Just wow! Best Regards …. Rick
-
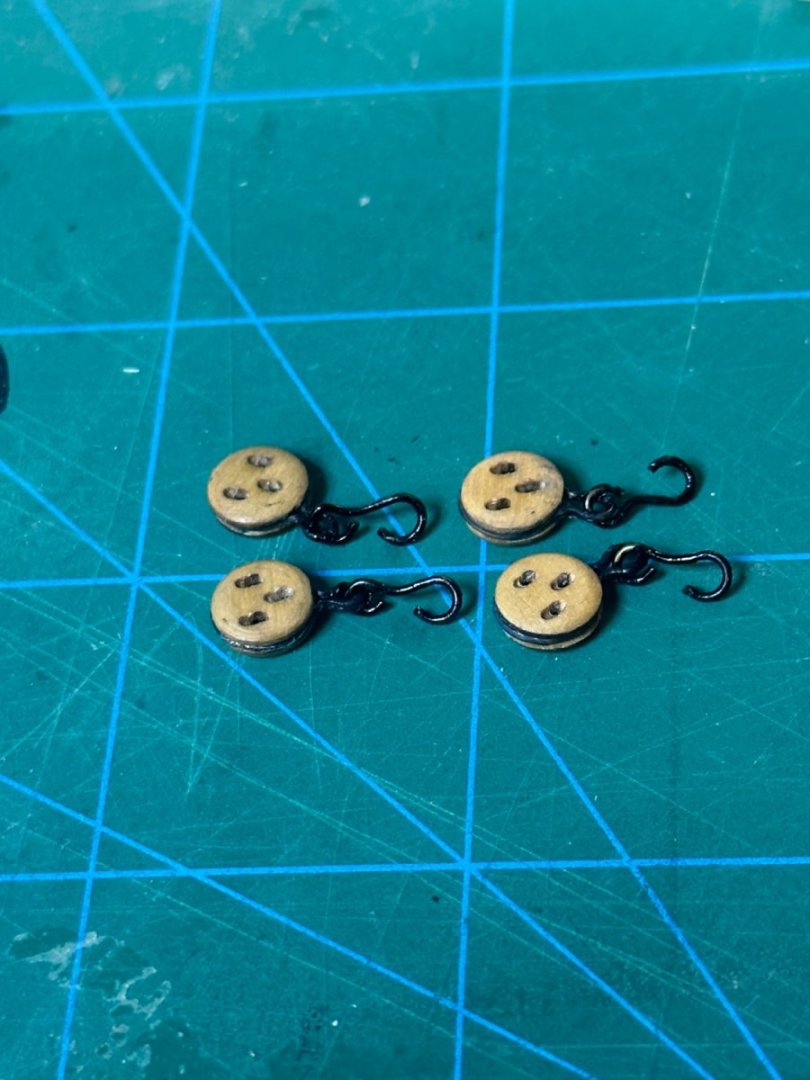
First time stropping deadeyes and making hooks. Took about a dozen tries before I got 4 strops where the solder joint didn’t break as I was shaping them around the deadeye. Best Regards …. Rick
- 155 replies
-
- 4
-
-
- Medway Longboat
- Syren Ship Model Company
- (and 1 more)
-
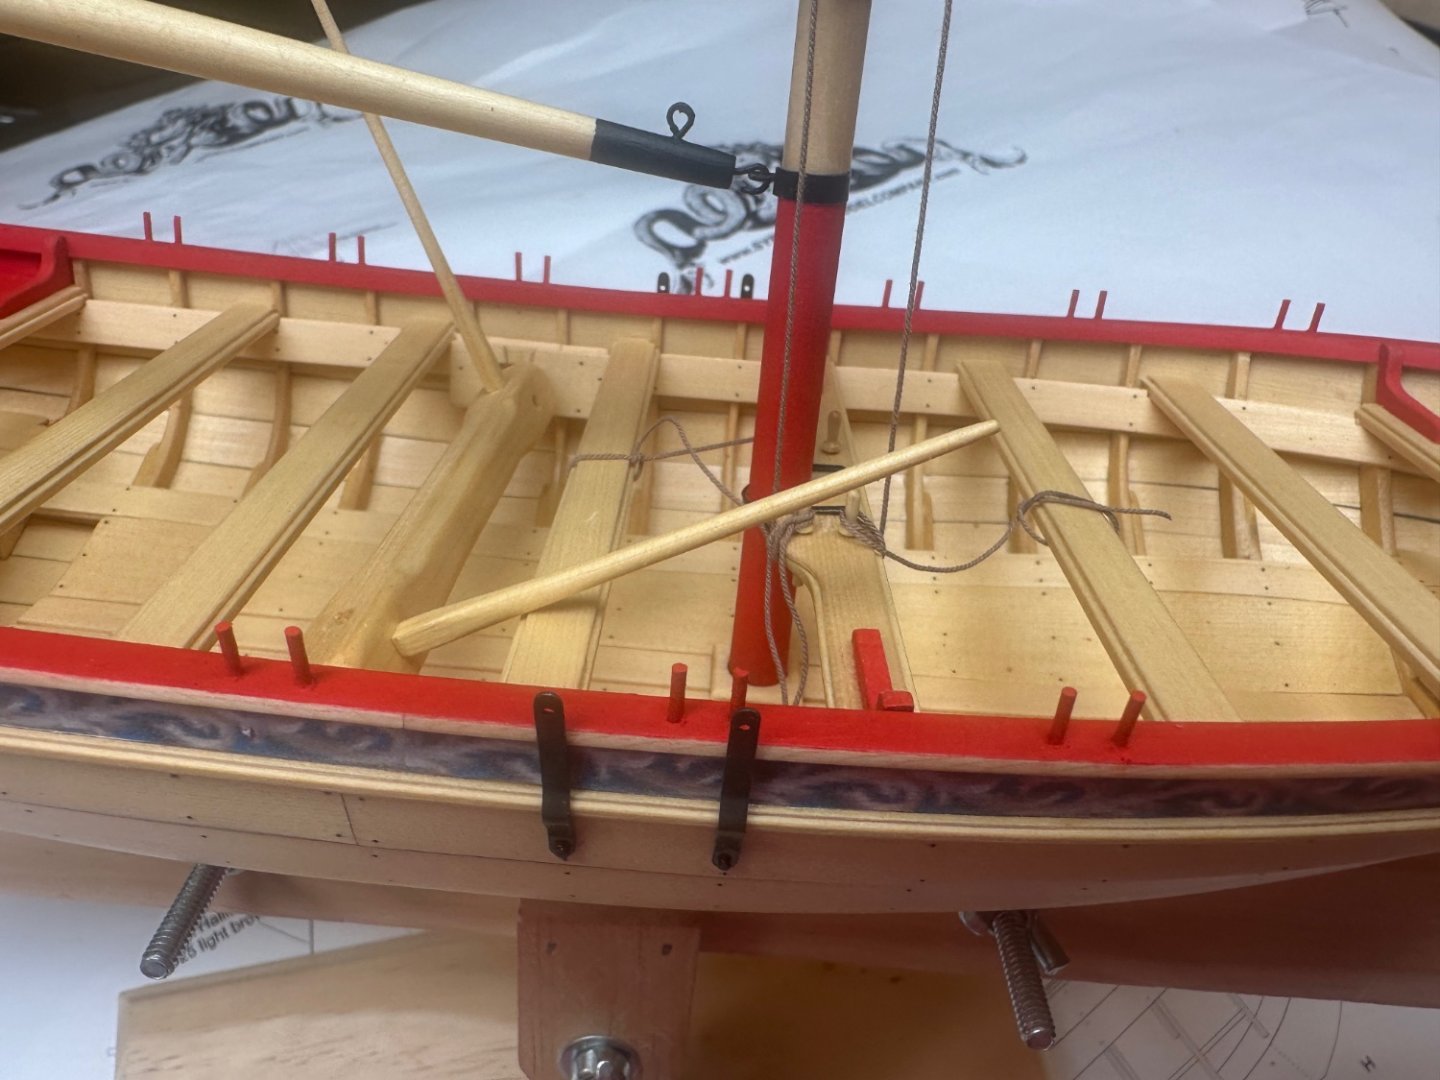
Repair completed…. Best Regards …. Rick
- 155 replies
-
- 3
-
-
- Medway Longboat
- Syren Ship Model Company
- (and 1 more)
-
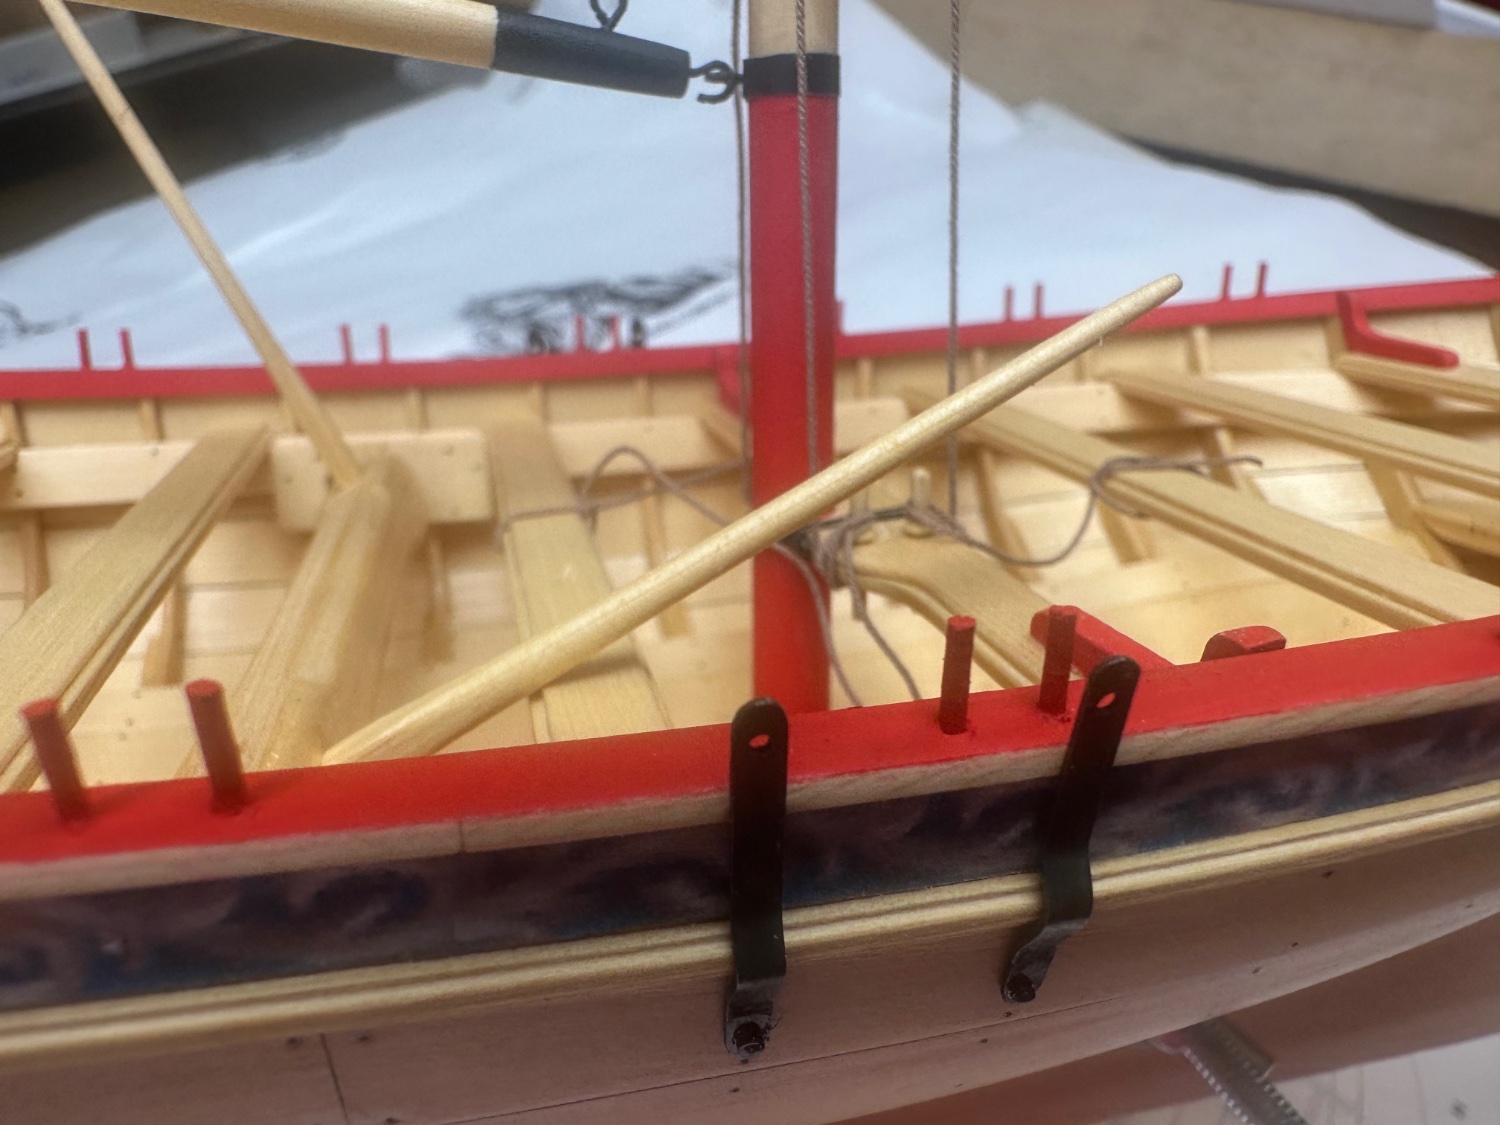
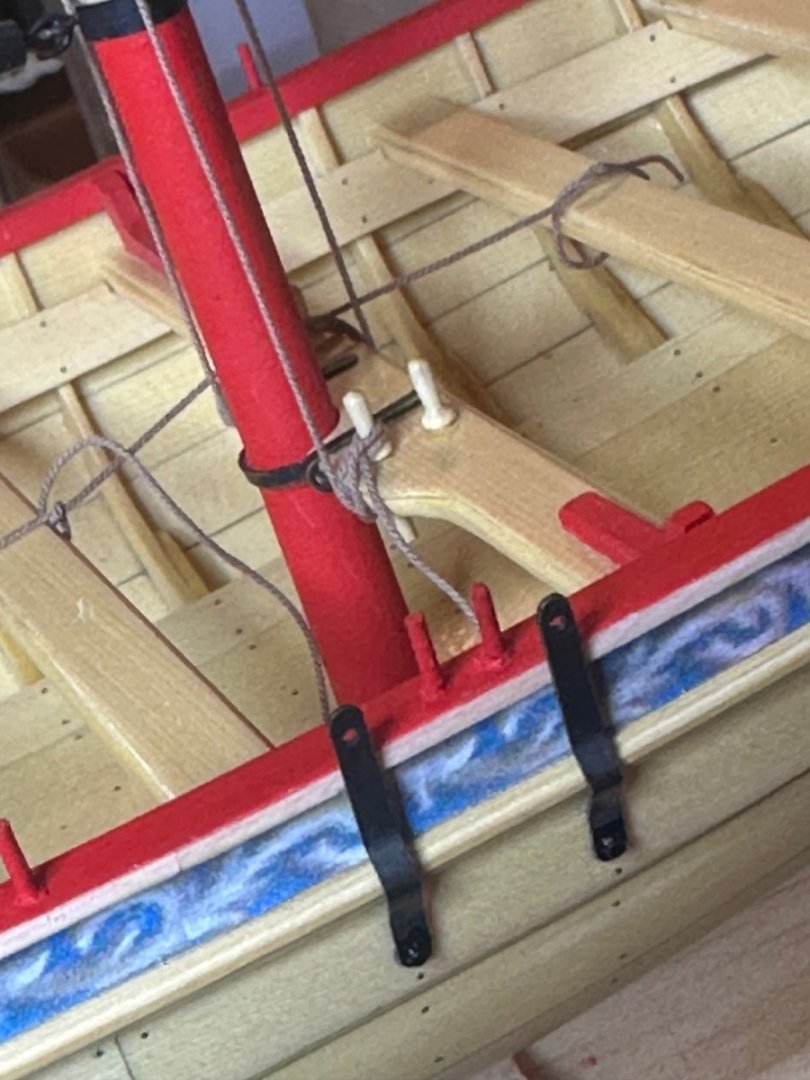
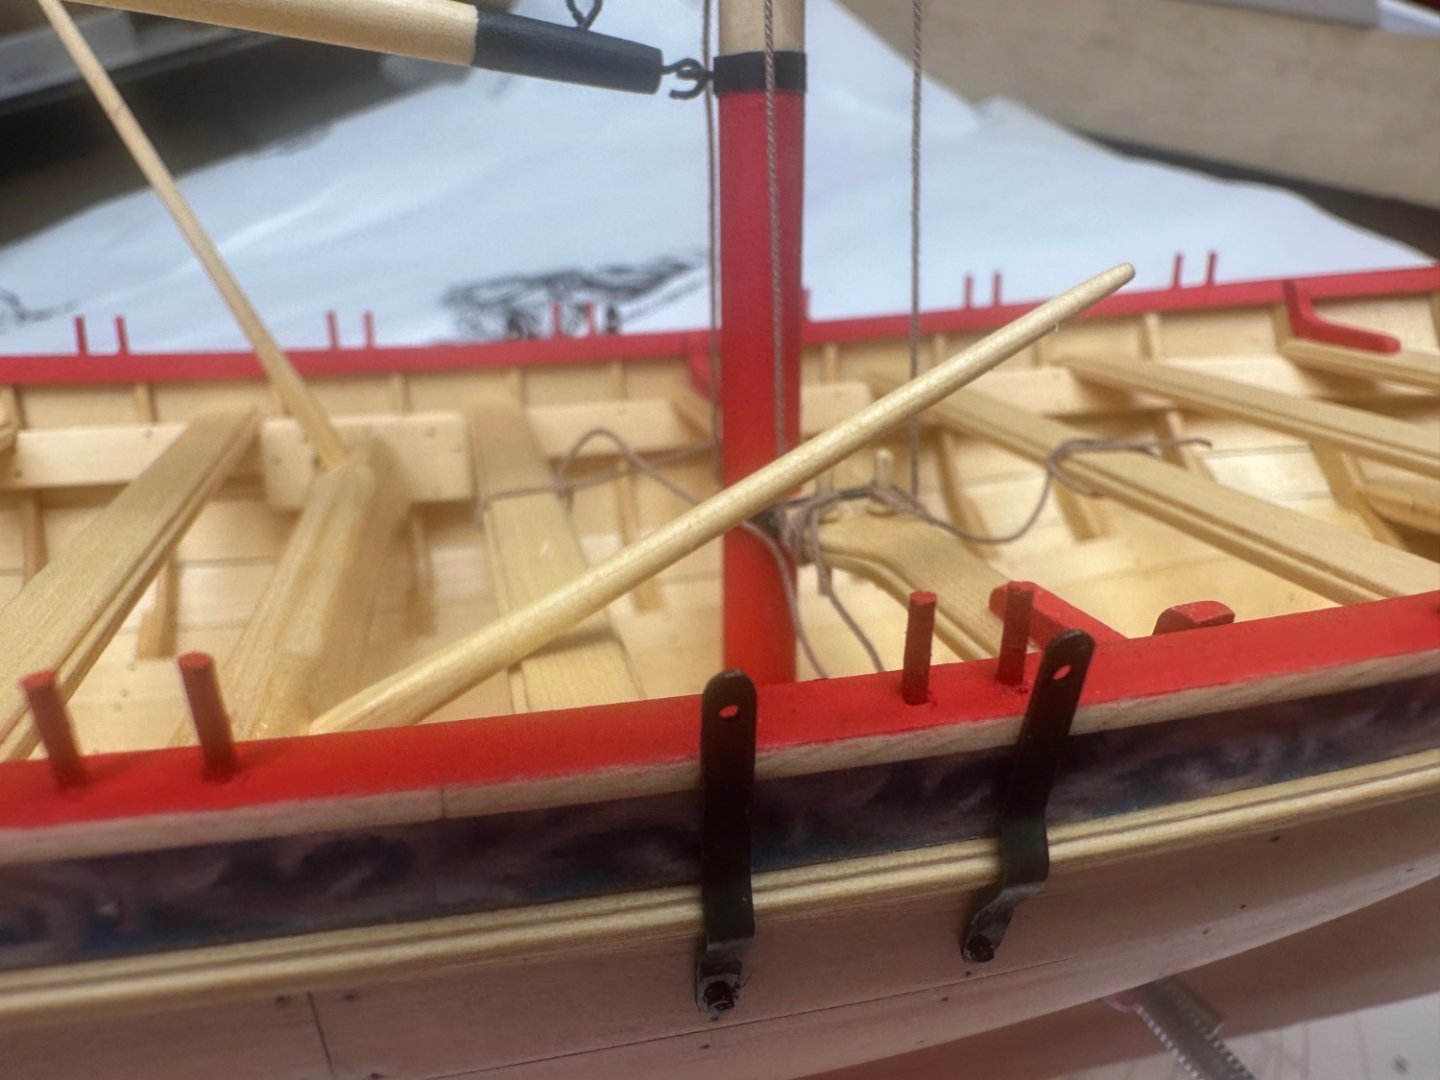
Here’s a picture after relocating the thole pins. Just need to touch up the paint. Best Regards …. Rick
- 155 replies
-
- 3
-
-
- Medway Longboat
- Syren Ship Model Company
- (and 1 more)
-
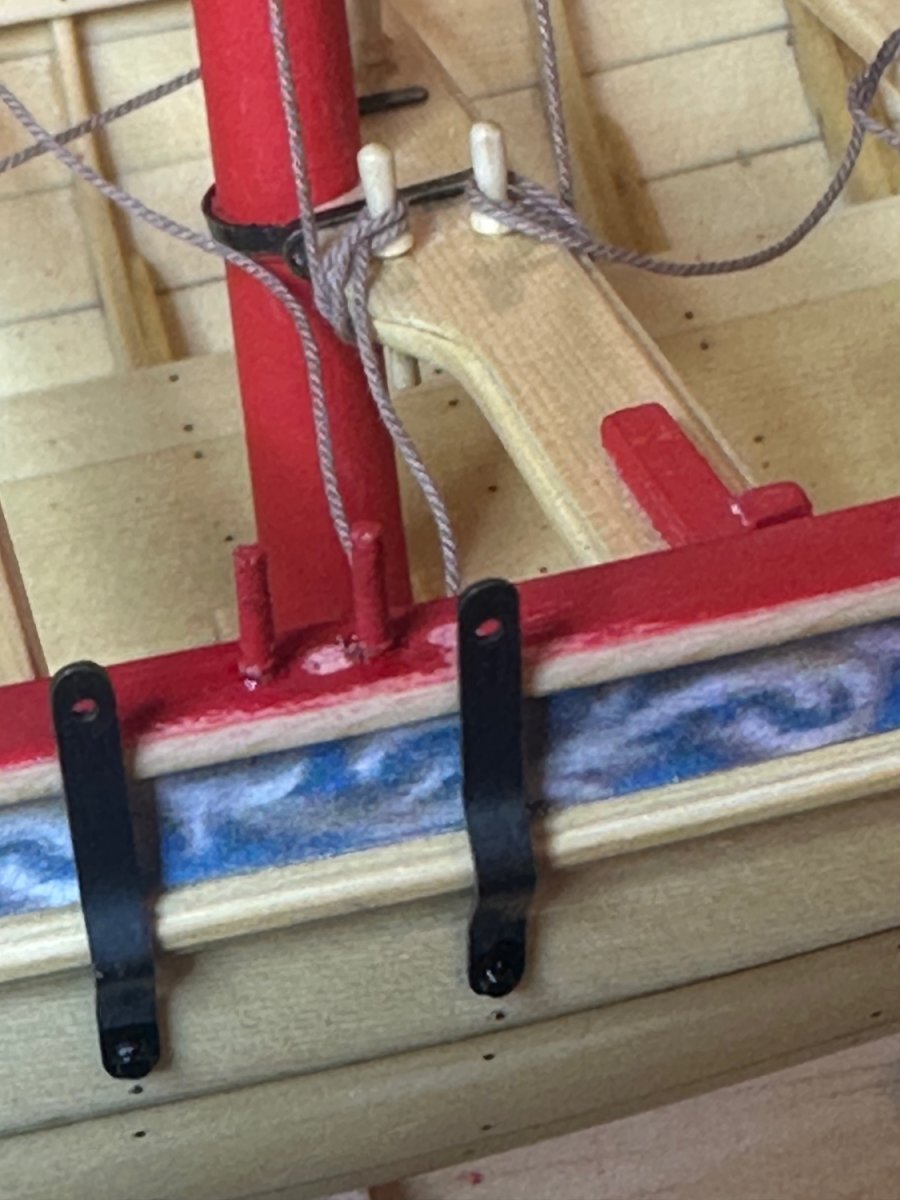
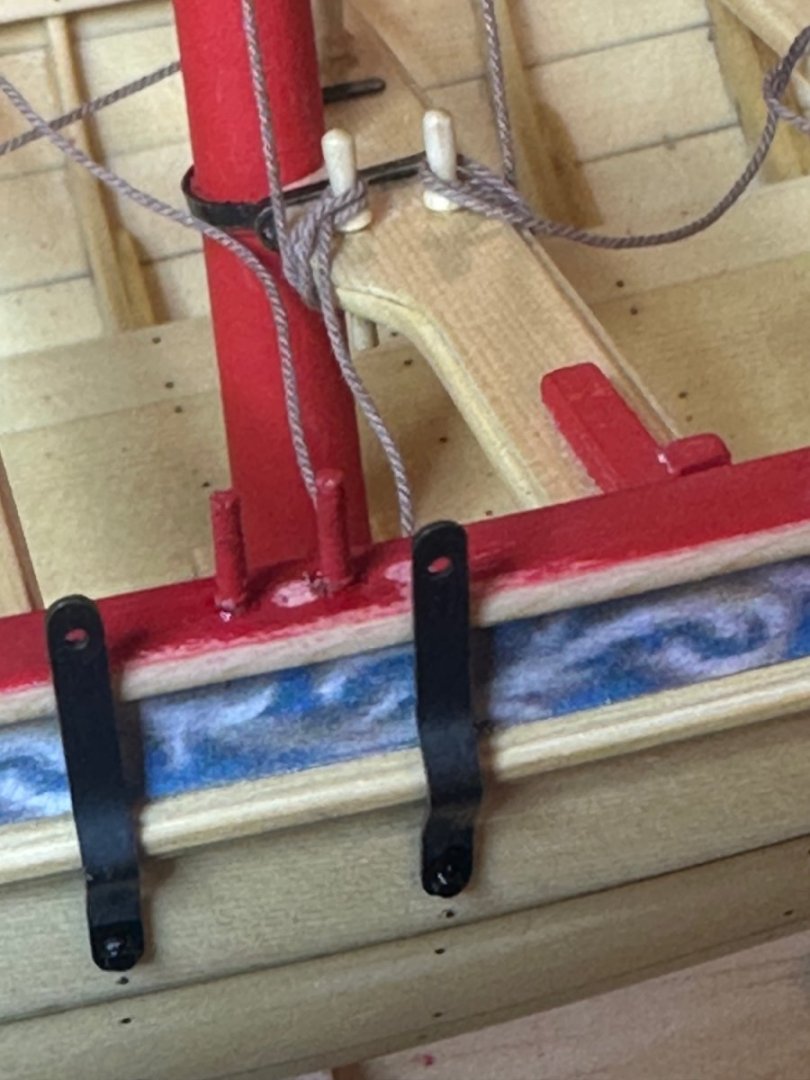
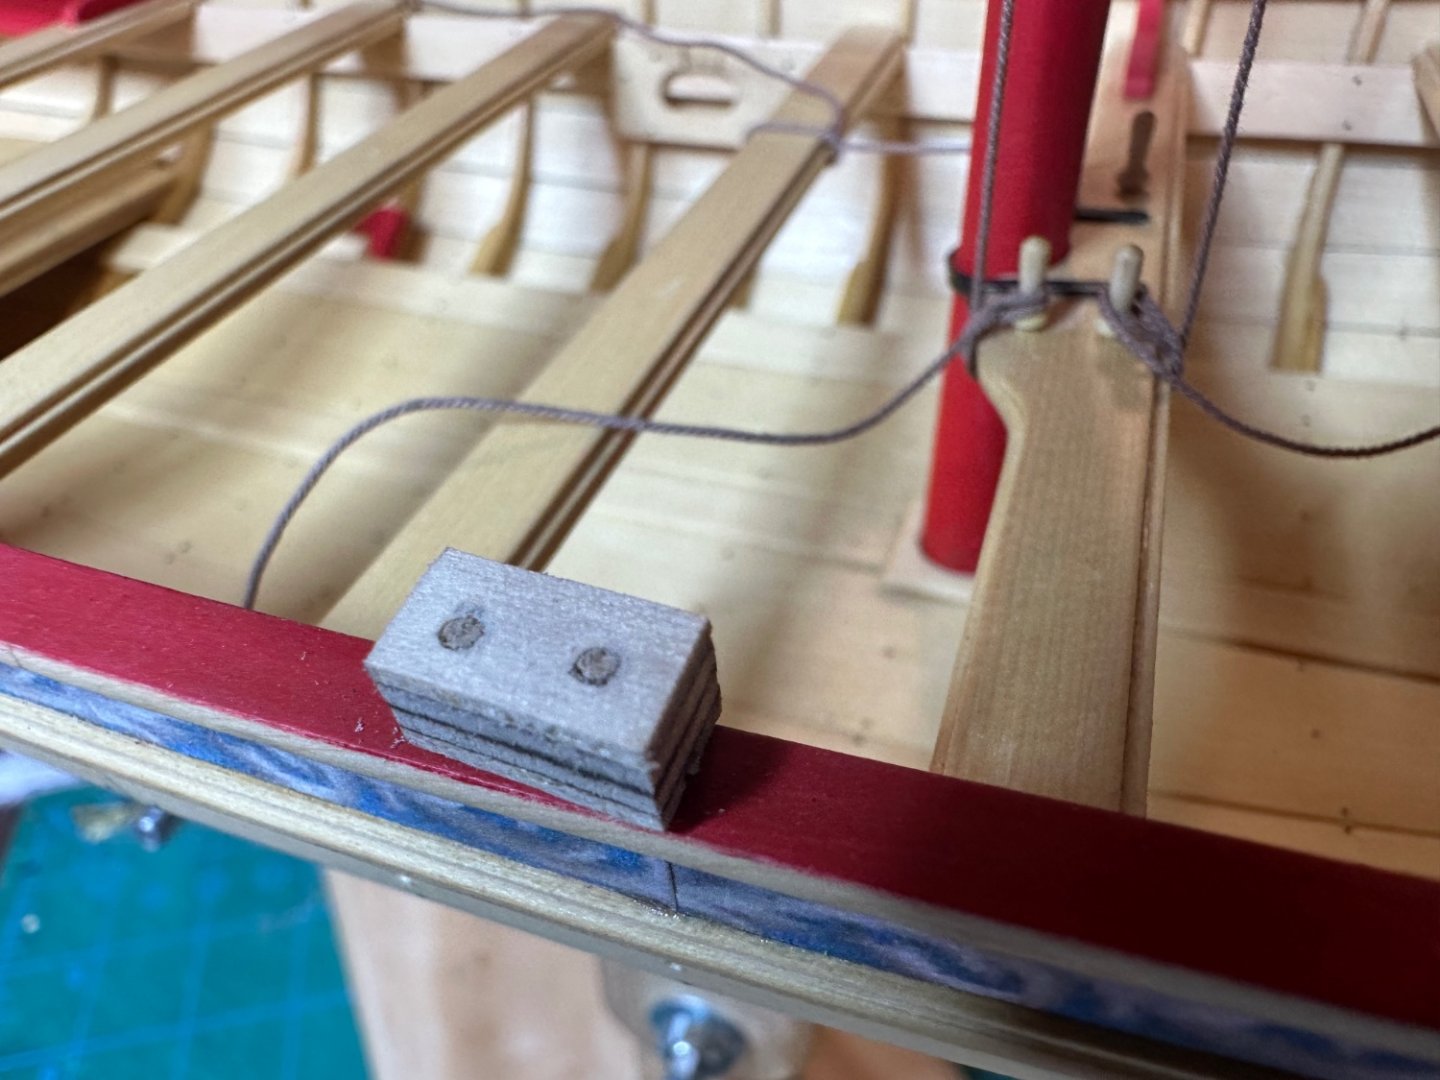
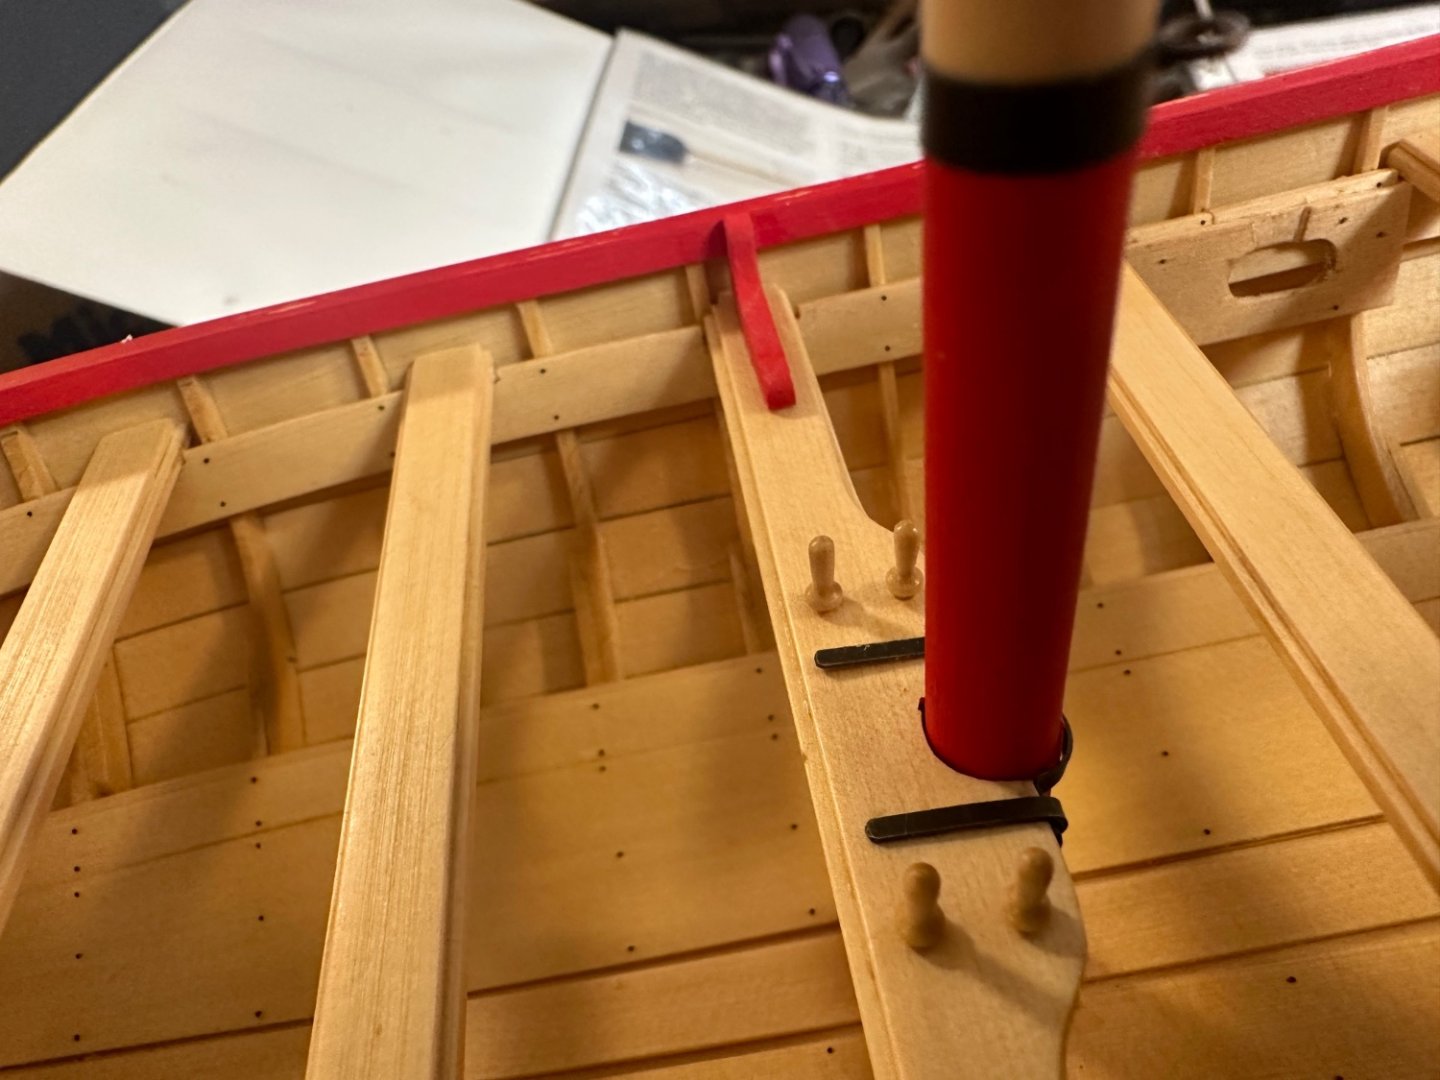
Here’s another oops that I need to fix. One set of thole pins on the starboard side are out of position. The strap covers the forward pin, an oar wouldn’t be able to be used. So the front pin will need to be removed and placed behind the rear pin. Best Regards …. Rick
- 155 replies
-
- 3
-
-
- Medway Longboat
- Syren Ship Model Company
- (and 1 more)
-
Diver, You can use isopropyl alcohol. Just dab alcohol around the joint and let it soak in for a few minutes. It’ll soften the glue. It may take several tries. Best Regards …. Rick
-
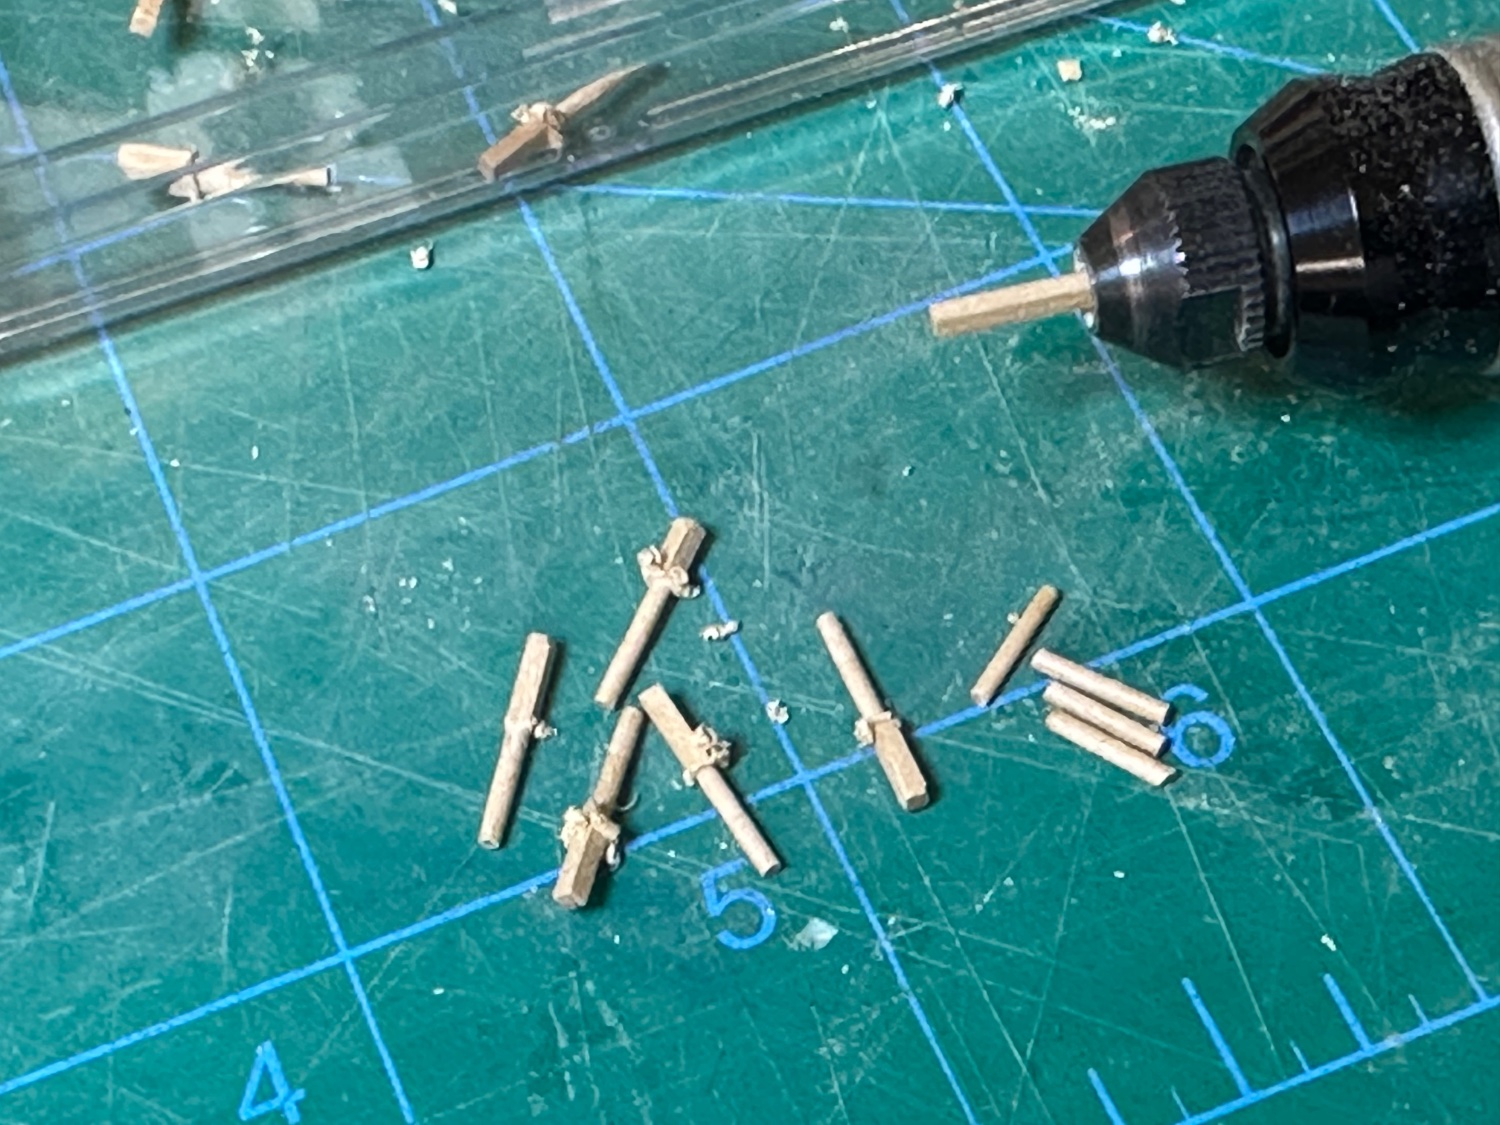
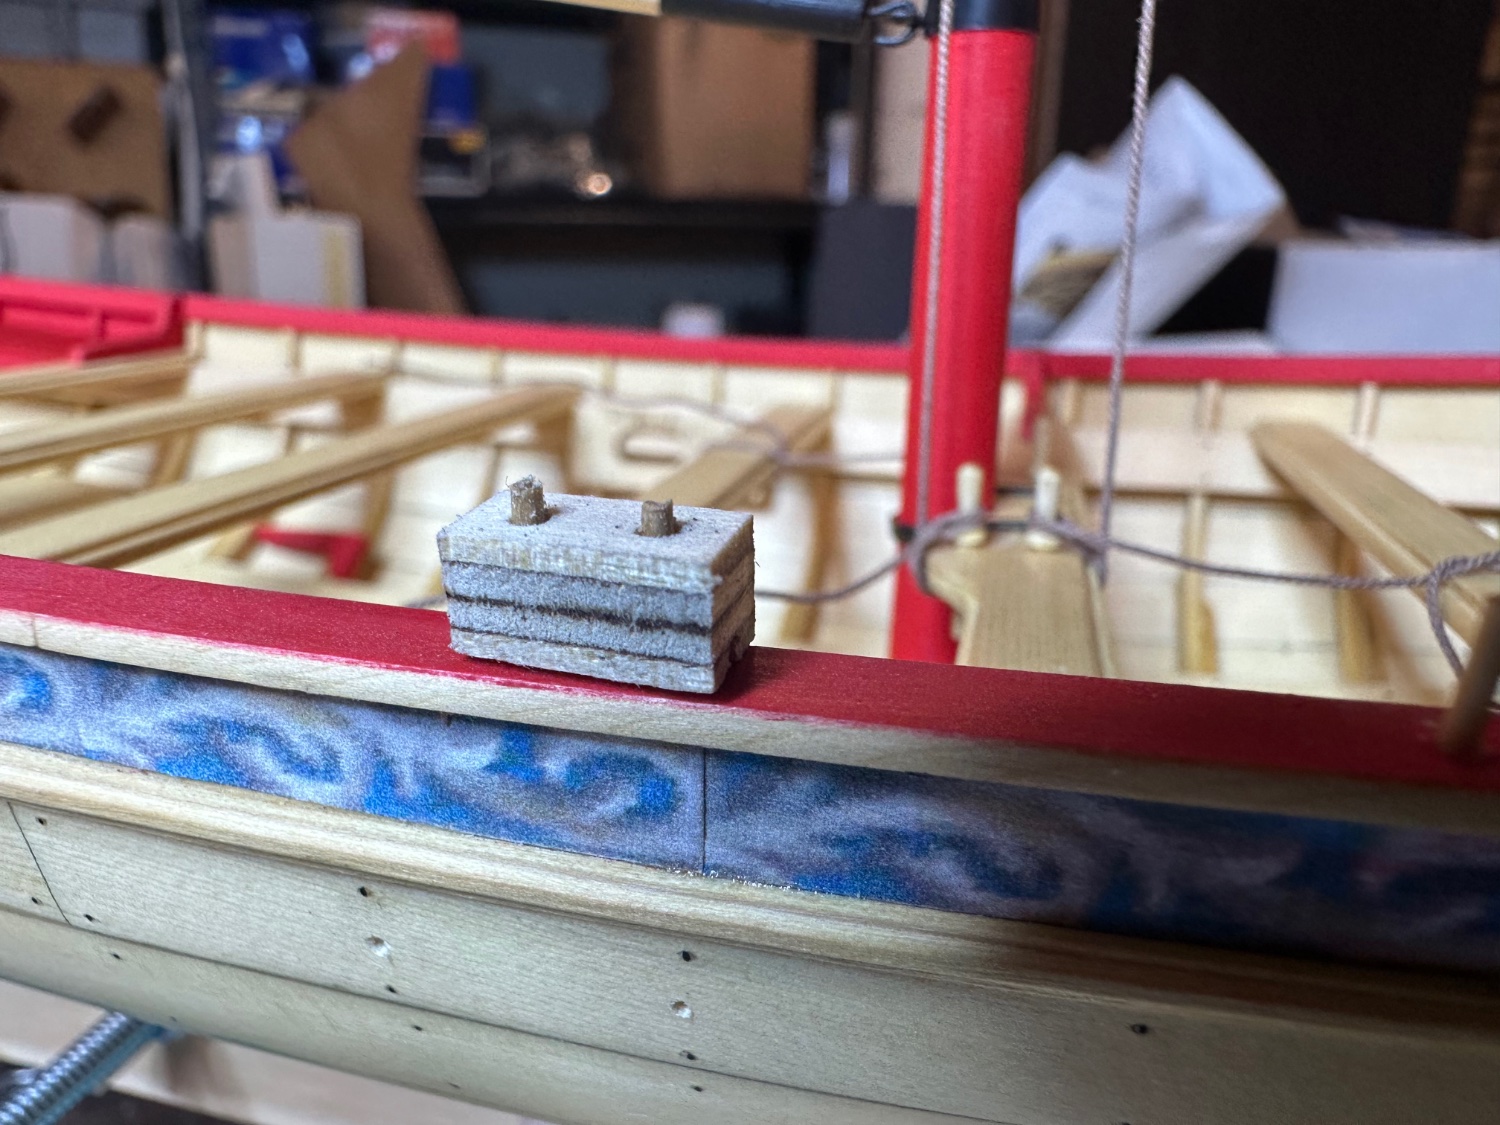
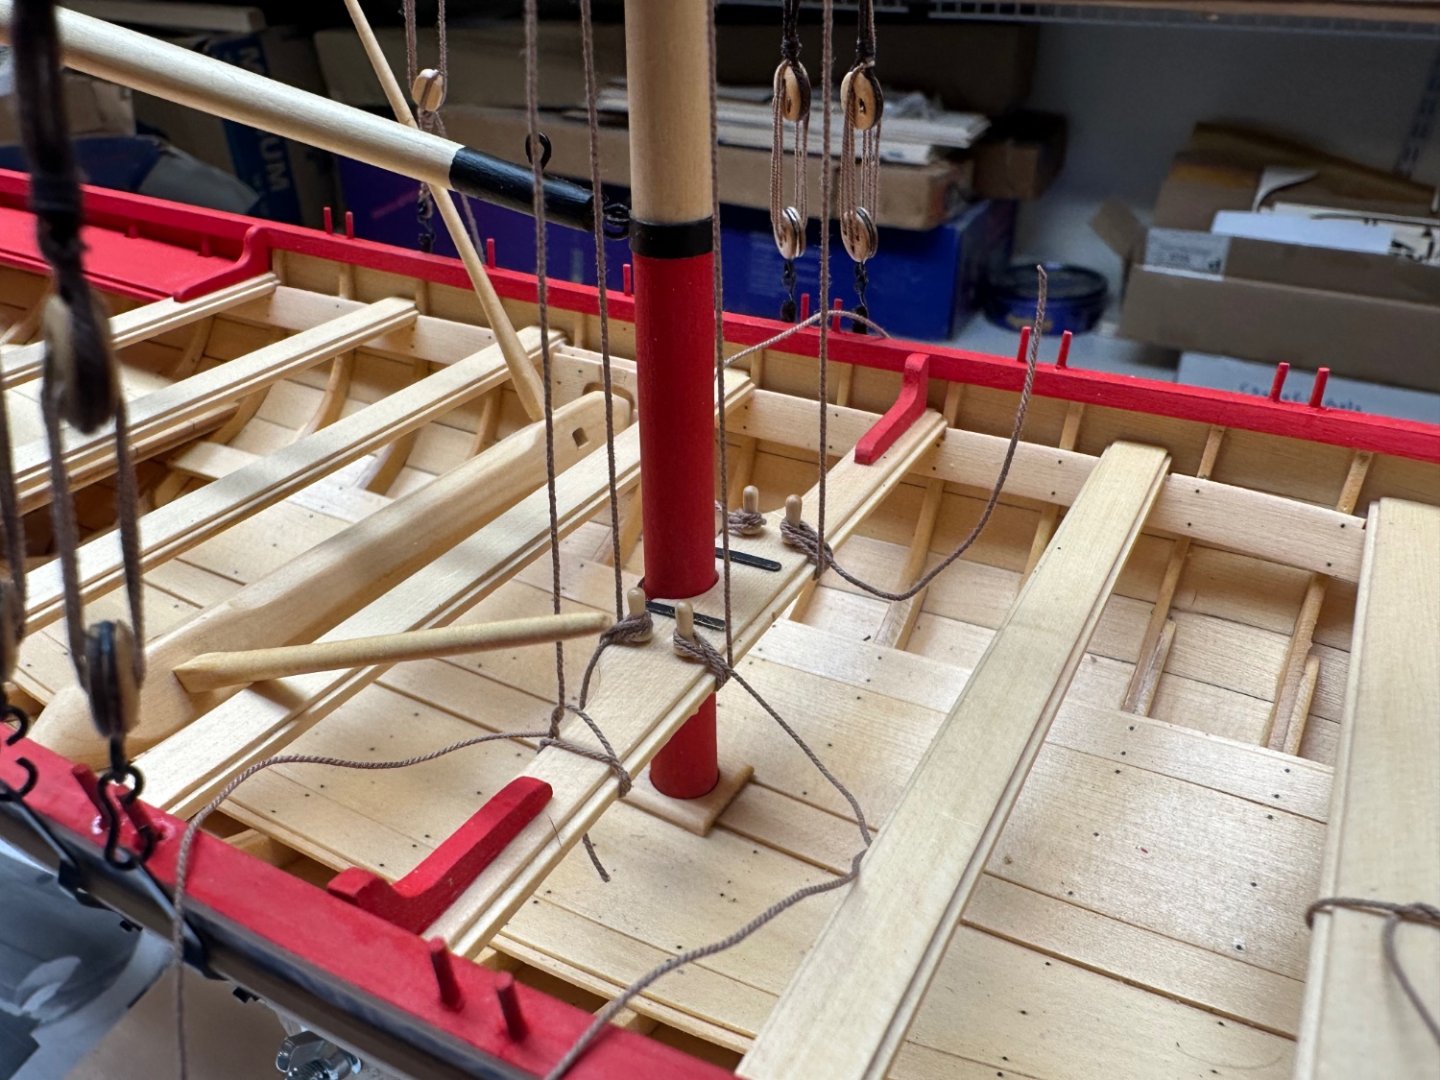
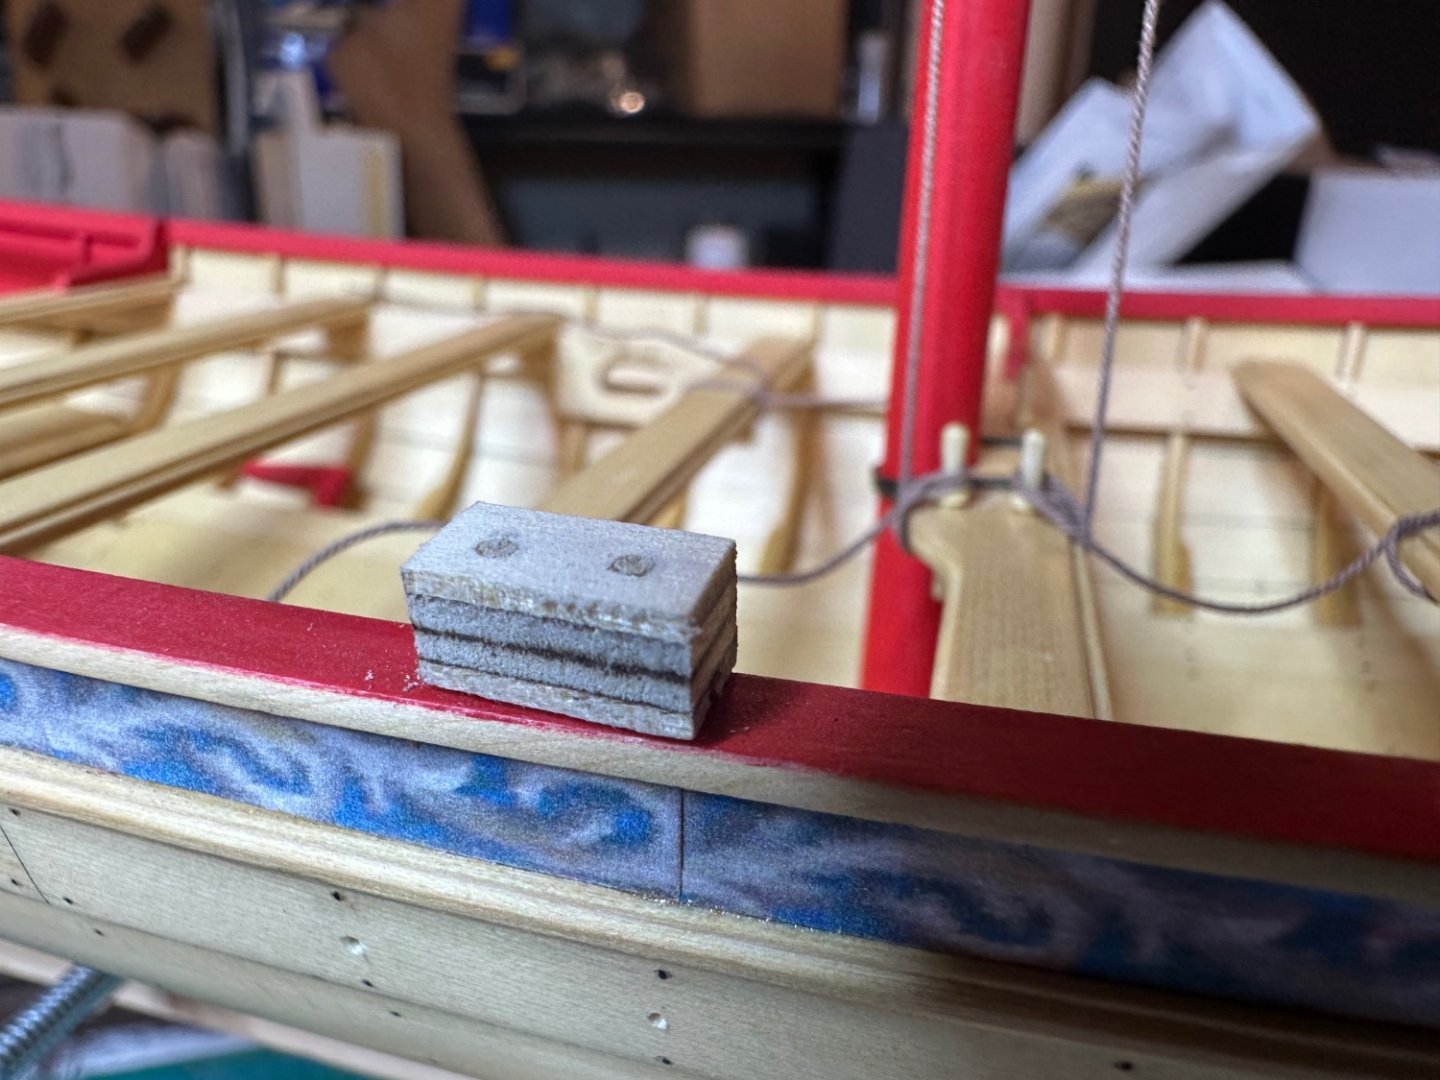
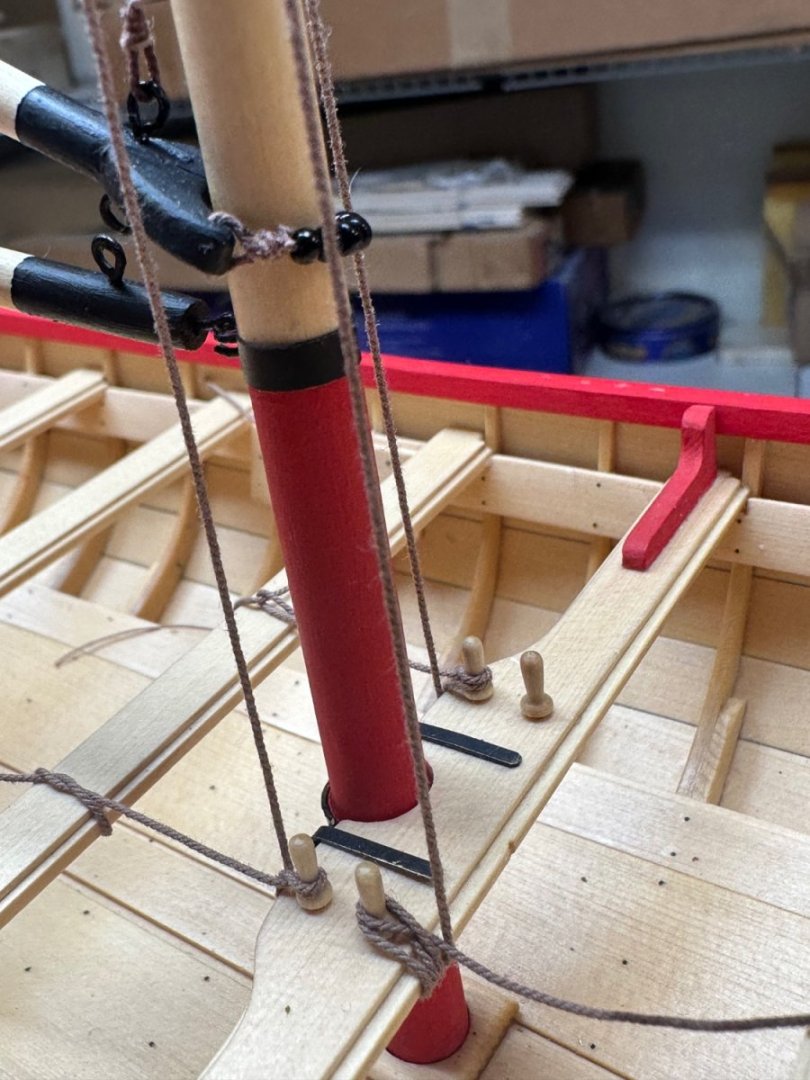
This morning I wanted to start on the shrouds, however I realized that installing the Thole pins would become problematic with the shrouds installed. So this morning became thole pin morning. I turned more than I needed and used the best from the batch. I remember in Ryland’s log that he made a little guide for consistent spacing for drilling the holes in the cap rail. It is a great idea and made for an easier task. Thanks Ryland! I also made a small guide to go over the pins to get a consistent height. It is no more than a piece of 3/16” thick ply with the pin spacing. I left the pins a little on the long side so I could clip them and then sand them flush with the top of the guide. It worked really well. Thanks to All for stopping by and all the likes, I really appreciate it! Best Regards …. Rick


- 155 replies
-
- 6
-
-
- Medway Longboat
- Syren Ship Model Company
- (and 1 more)
-
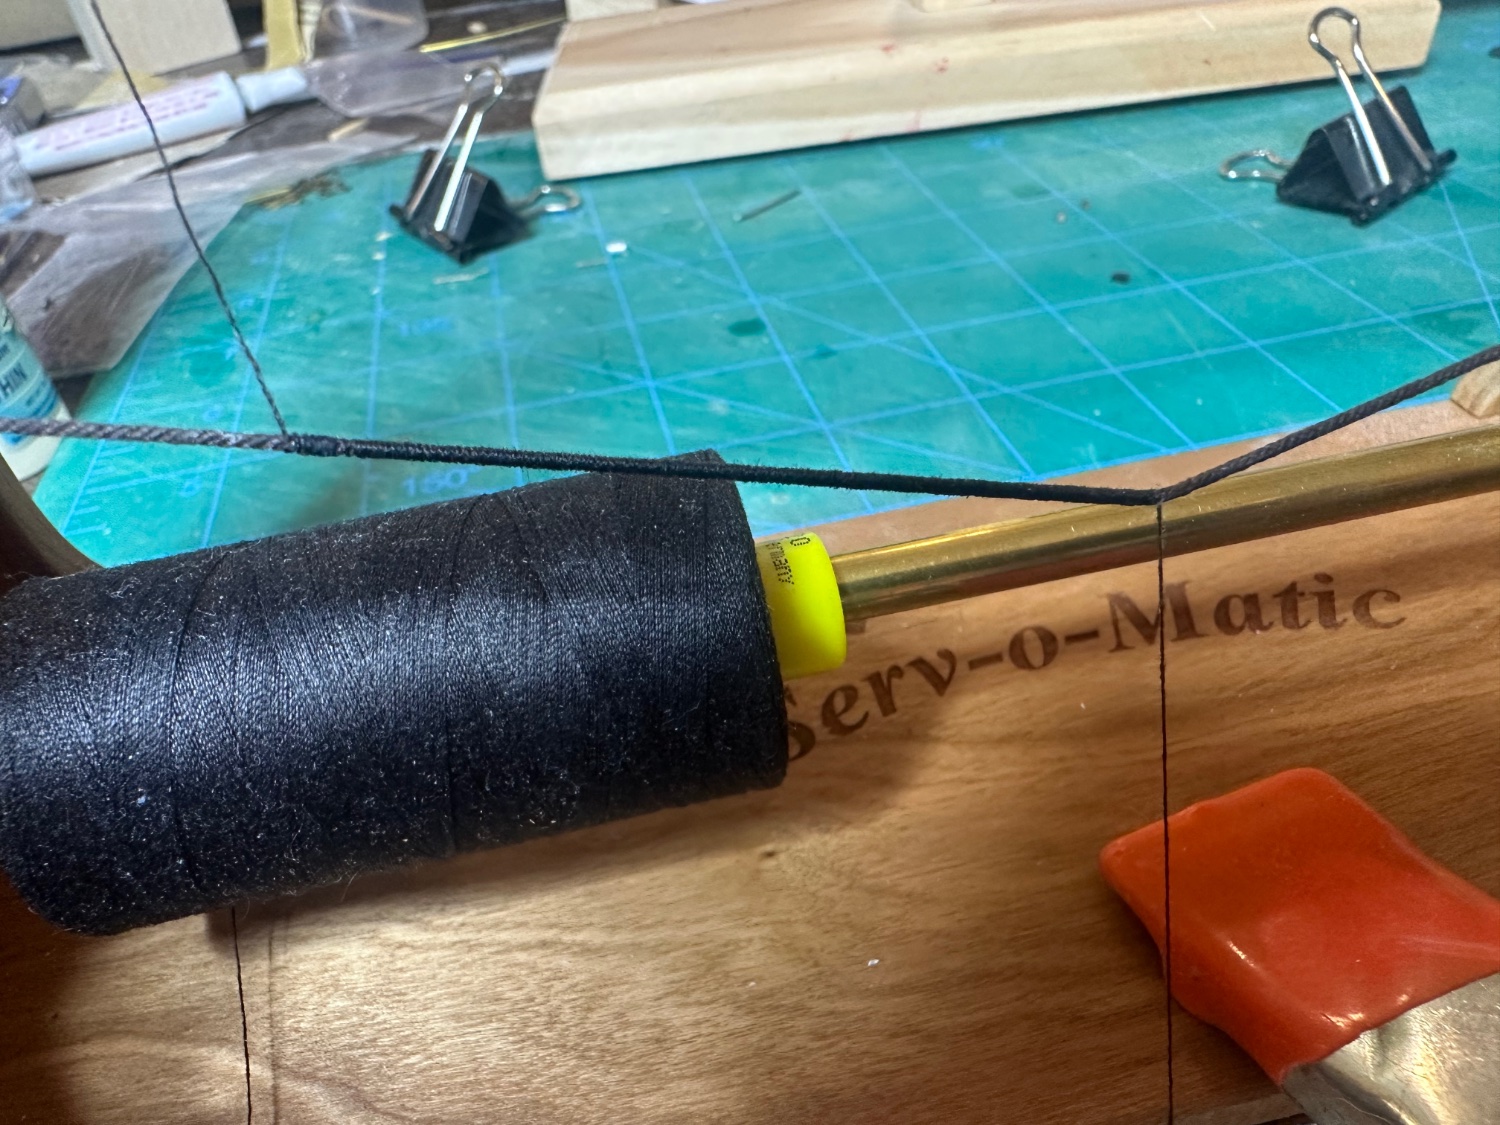
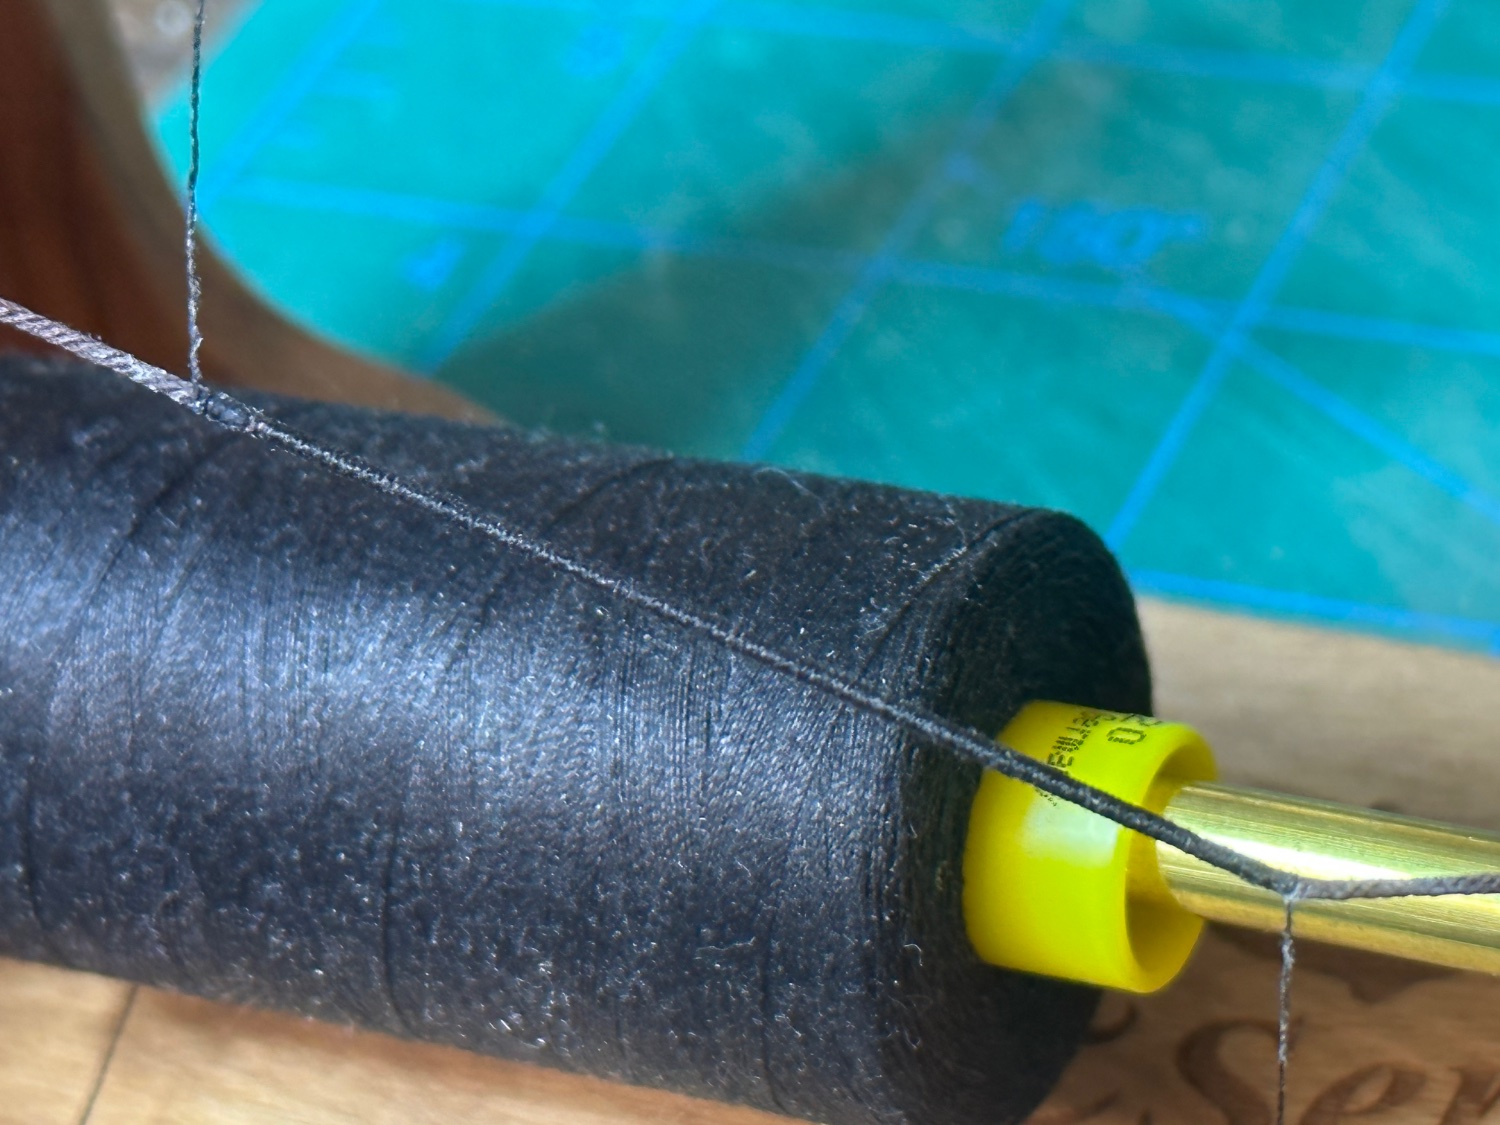
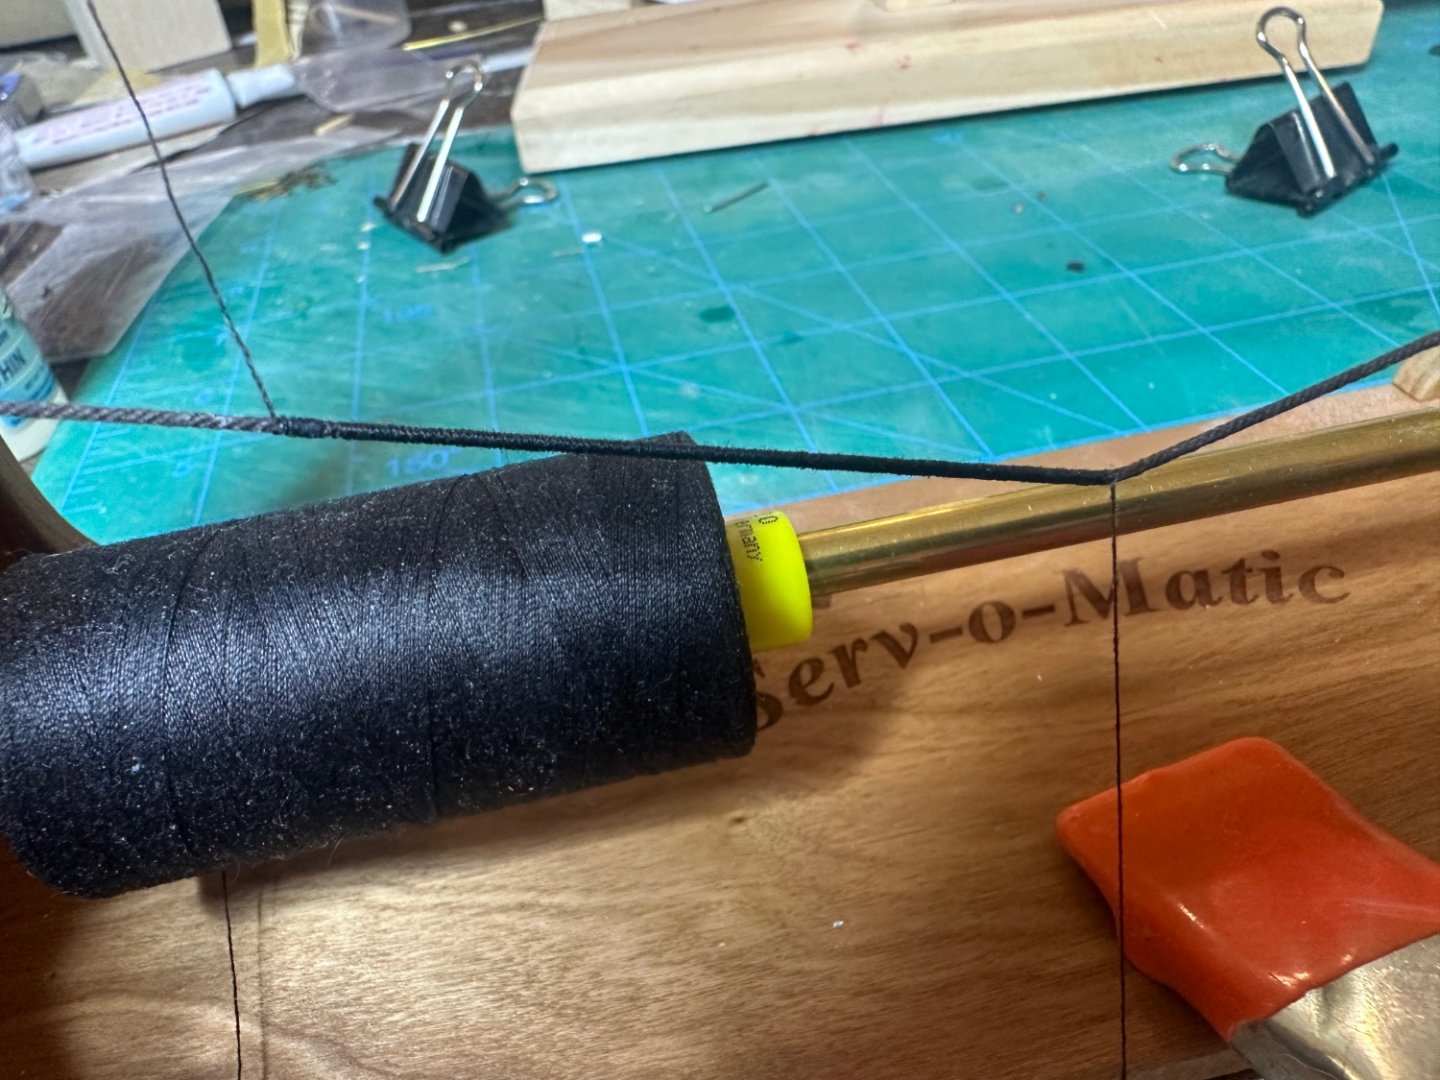
Been jumping around a little and this morning I tried my Servo-o-Matic. I served one of the shrouds and I was surprised how easy it was. One problem was that the excess line got very tangled. How do you get around this issue? Sorry, no pictures of the mess. Best Regards …. Rick

- 155 replies
-
- 1
-
-
- Medway Longboat
- Syren Ship Model Company
- (and 1 more)
-
Thank you Chuck, means a lot to me! Best Regards …. Rick
-
Chuck, thank you for the info! I’ll give that a try. Does the rigging look correct so far? Winnie, yup! But first I’ll build (and start a log), Cheerful. I need to build more skills before tackling her, I have to do her justice! Best Regards …. Rick
- 155 replies
-
- 1
-
-
- Medway Longboat
- Syren Ship Model Company
- (and 1 more)
-
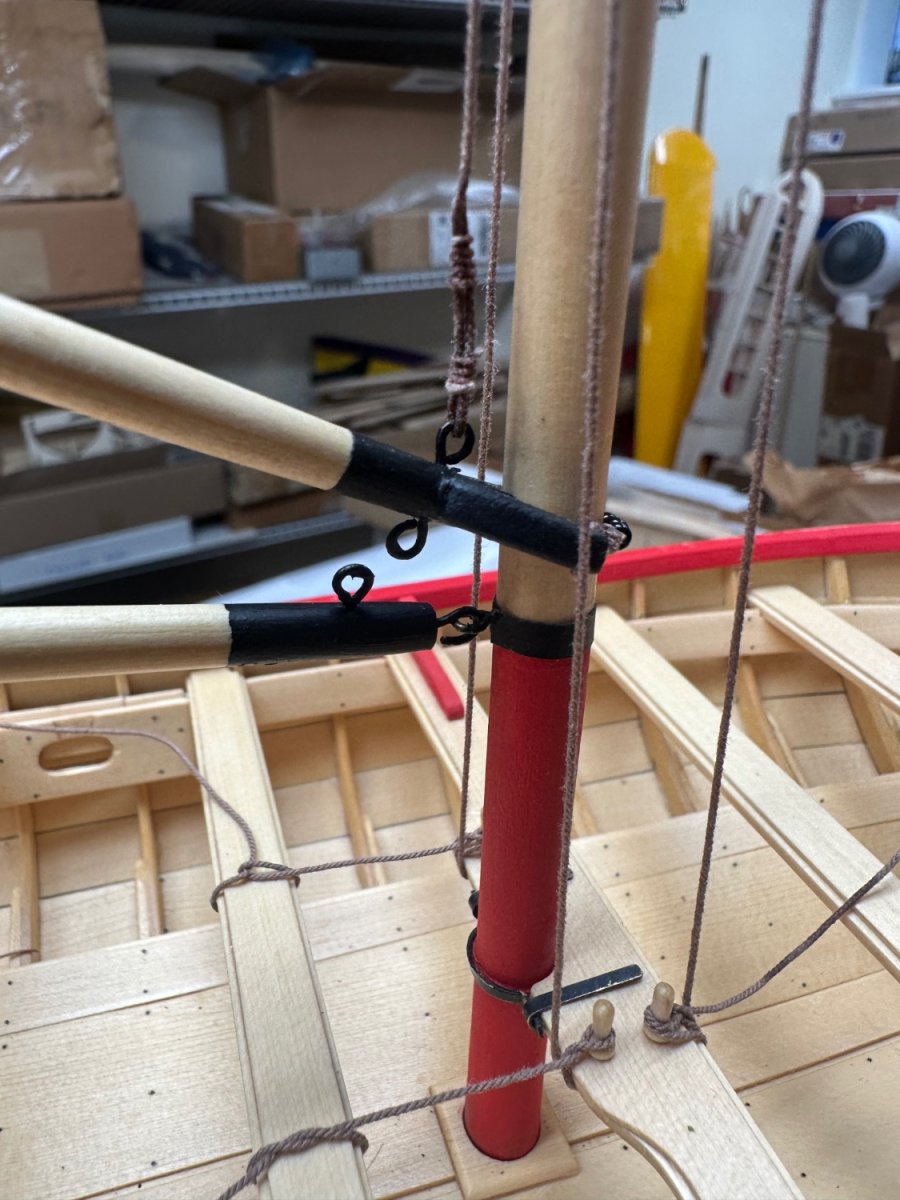
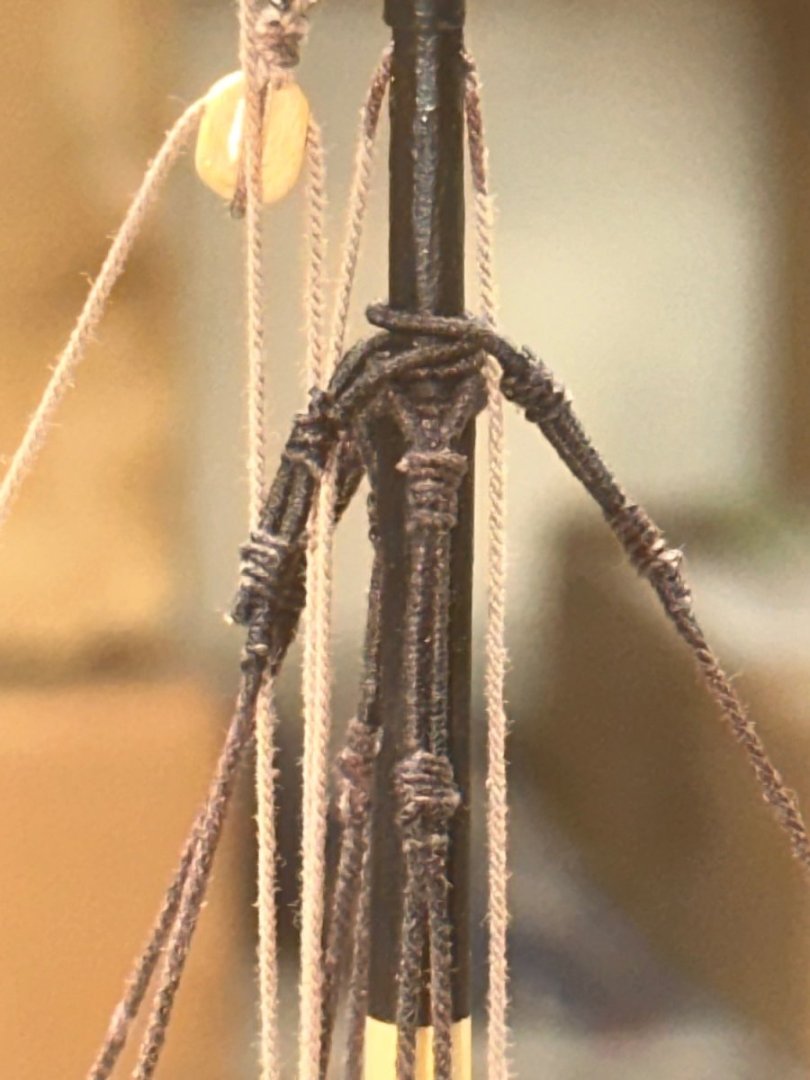
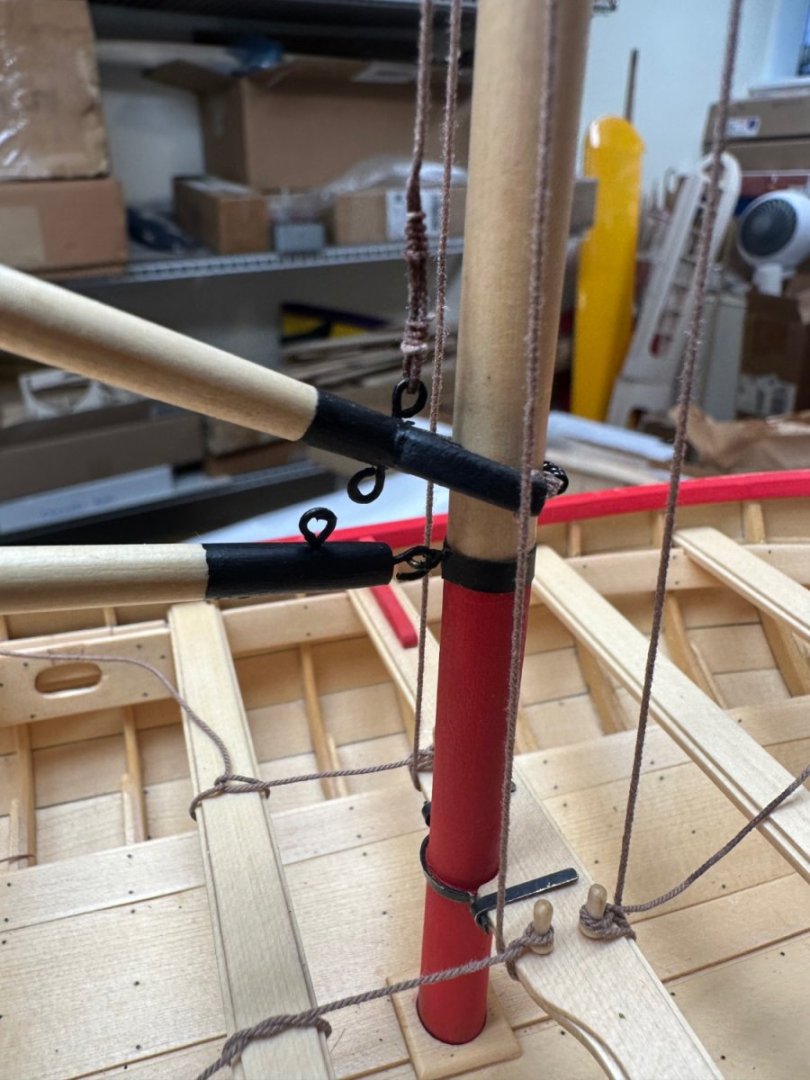
Finished up the boom and gaff rigging. Overall, not too bad, l’m pleased. Question though, what glue do you guys use to secure knots and seizings? I’m not happy with using CA as it darkens the tan and how it makes the rigging so hard. Any and all comments and suggestions are welcome! Best Regards …. Rick


- 155 replies
-
- 5
-
-
- Medway Longboat
- Syren Ship Model Company
- (and 1 more)
-
Thanks guys, much appreciate the encouragement! Glenn, Cheerful is next on deck and I have studied your build extensively, lots of great info in your log. And as you know, there’s a lot of other great Cheerful build logs, I can’t wait to get started! Like you, my Cheerful build is a stepping stone to to my Winnie patiently waiting. Best Regards …. Rick
-
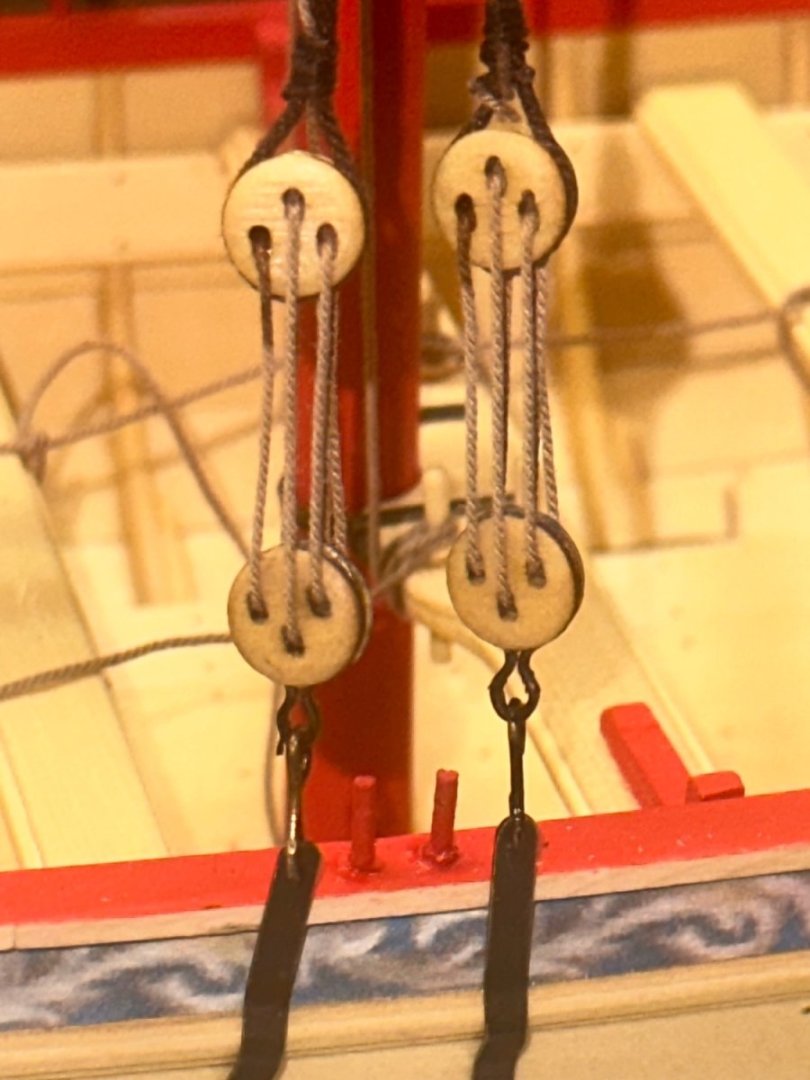
Spent a lot of time yesterday stropping 2 blocks. Not the greatest, but not to bad for first efforts. Best Regards …. Rick
- 155 replies
-
- 5
-
-
- Medway Longboat
- Syren Ship Model Company
- (and 1 more)
-
This build for me has been a journey of many firsts, and I’ve enjoyed every step of the way. I’m almost ready to start with the rigging, another path I’ve never been down. I’d like to start with stropping the blocks, and I’ve made some acceptable hooks and a couple of thimbles. Can anybody point me to a good tutorial on how to strop these blocks? As always, thanks for the likes and help! Best Regards …. Rick
- 155 replies
-
- 1
-
-
- Medway Longboat
- Syren Ship Model Company
- (and 1 more)
-
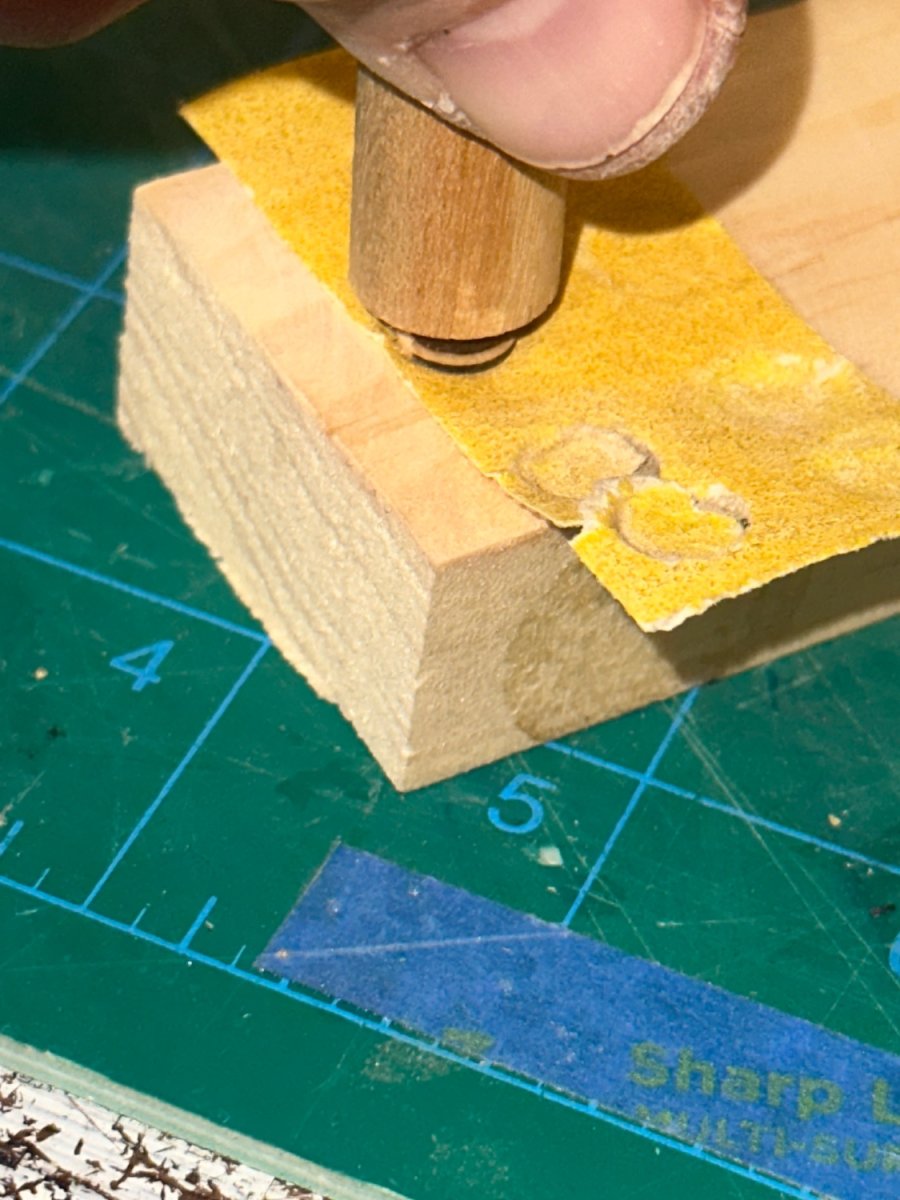
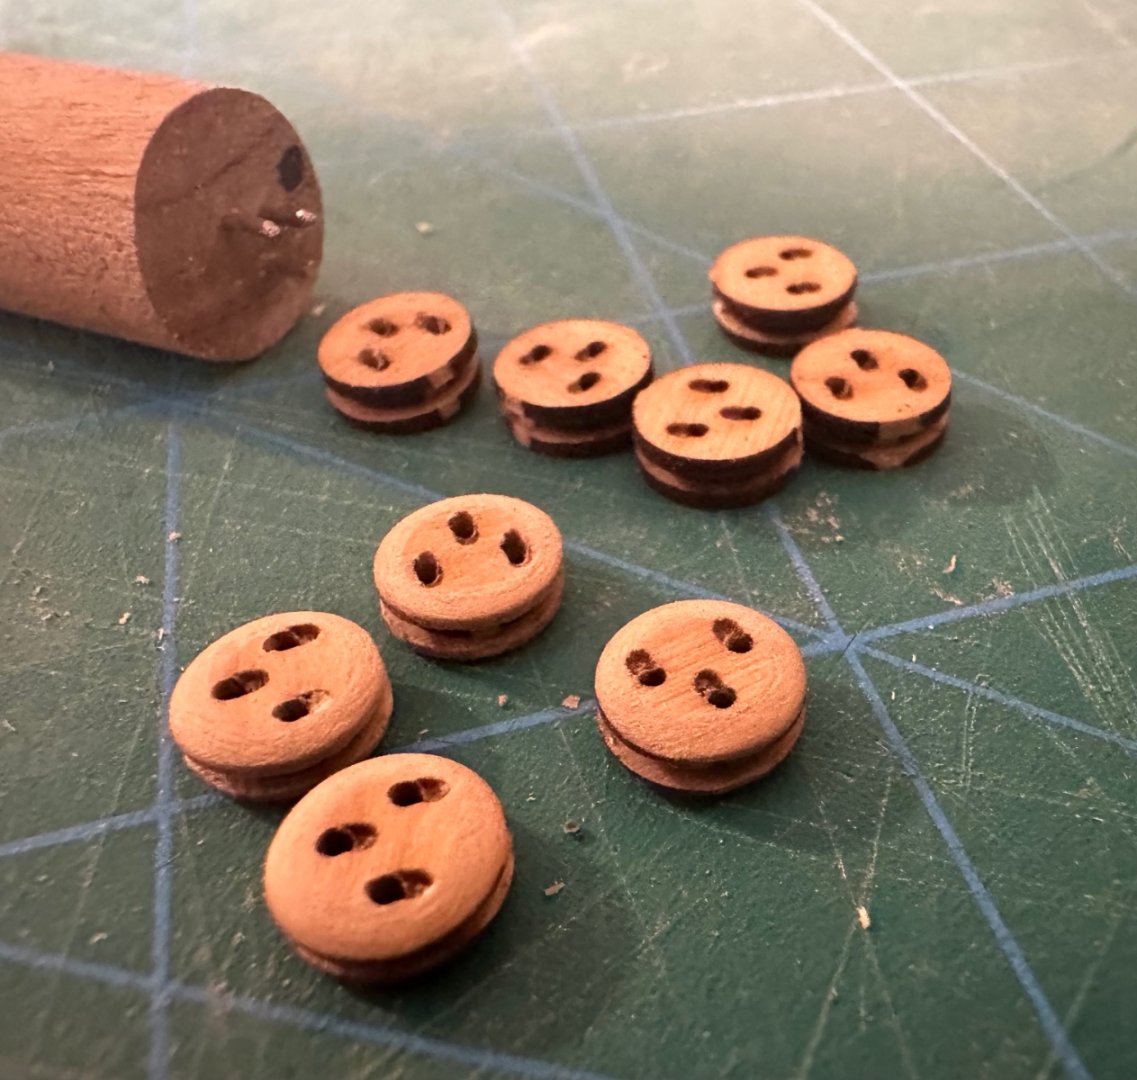
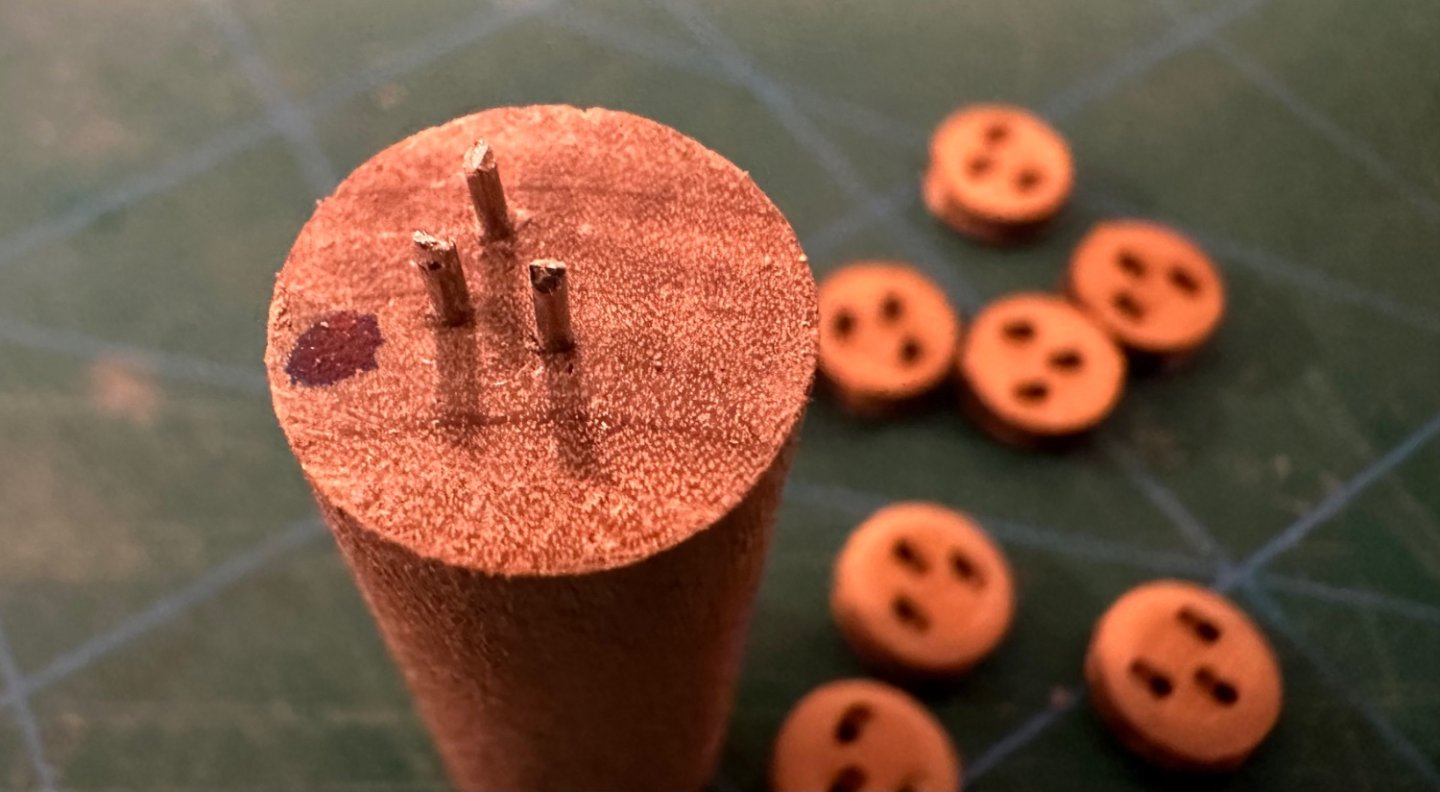
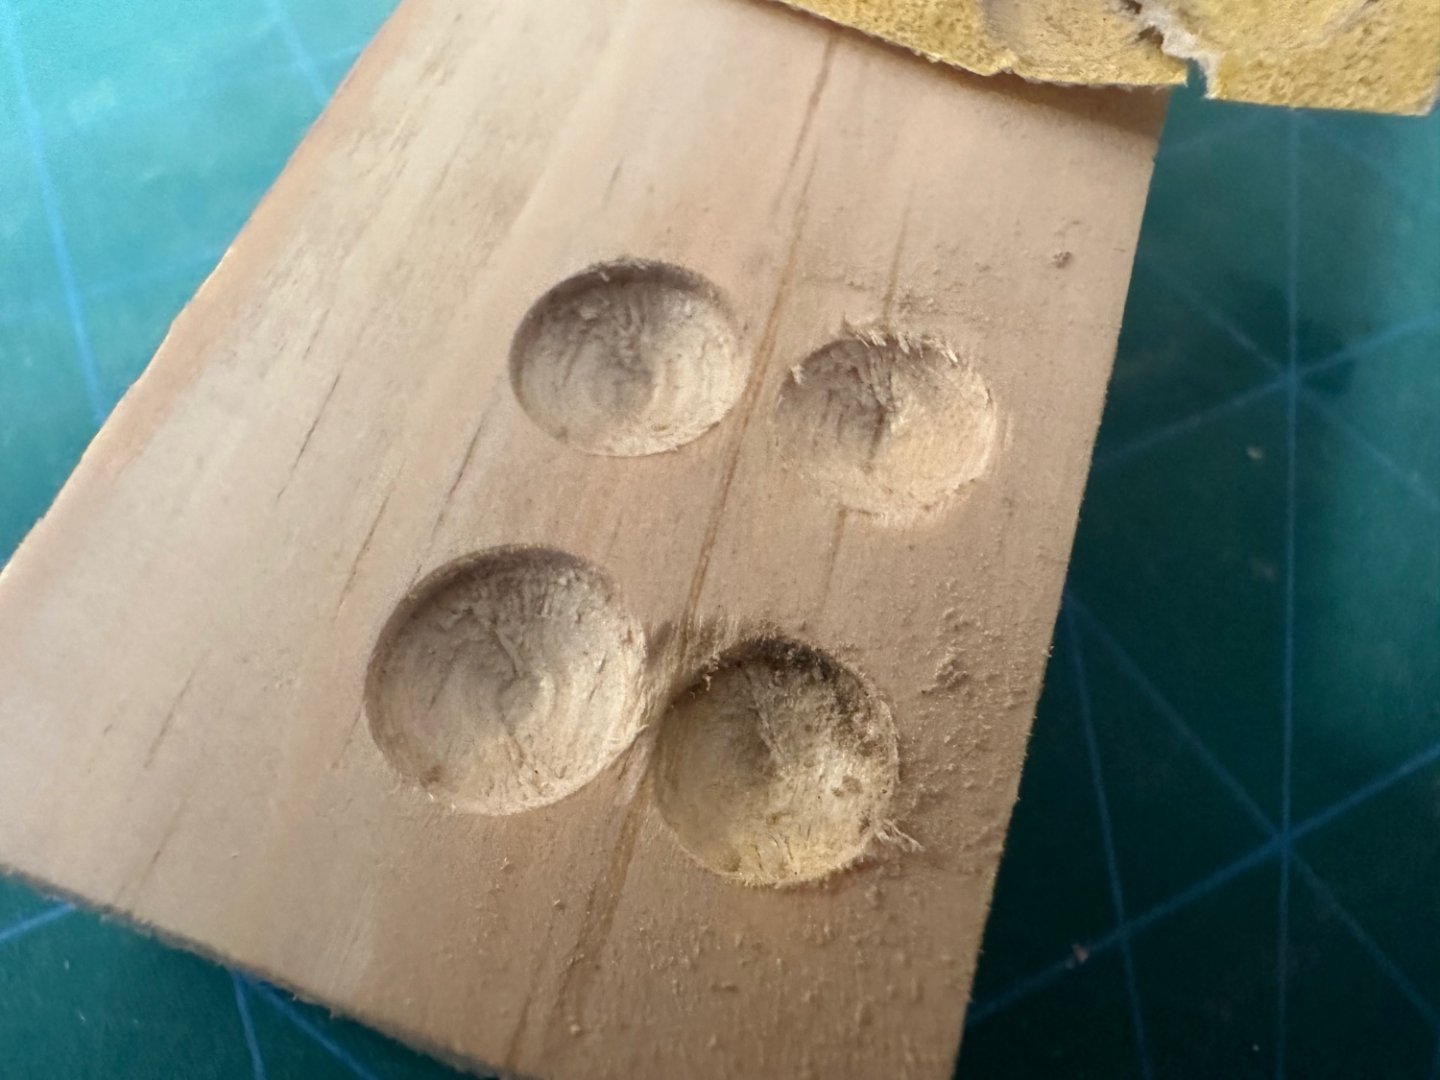
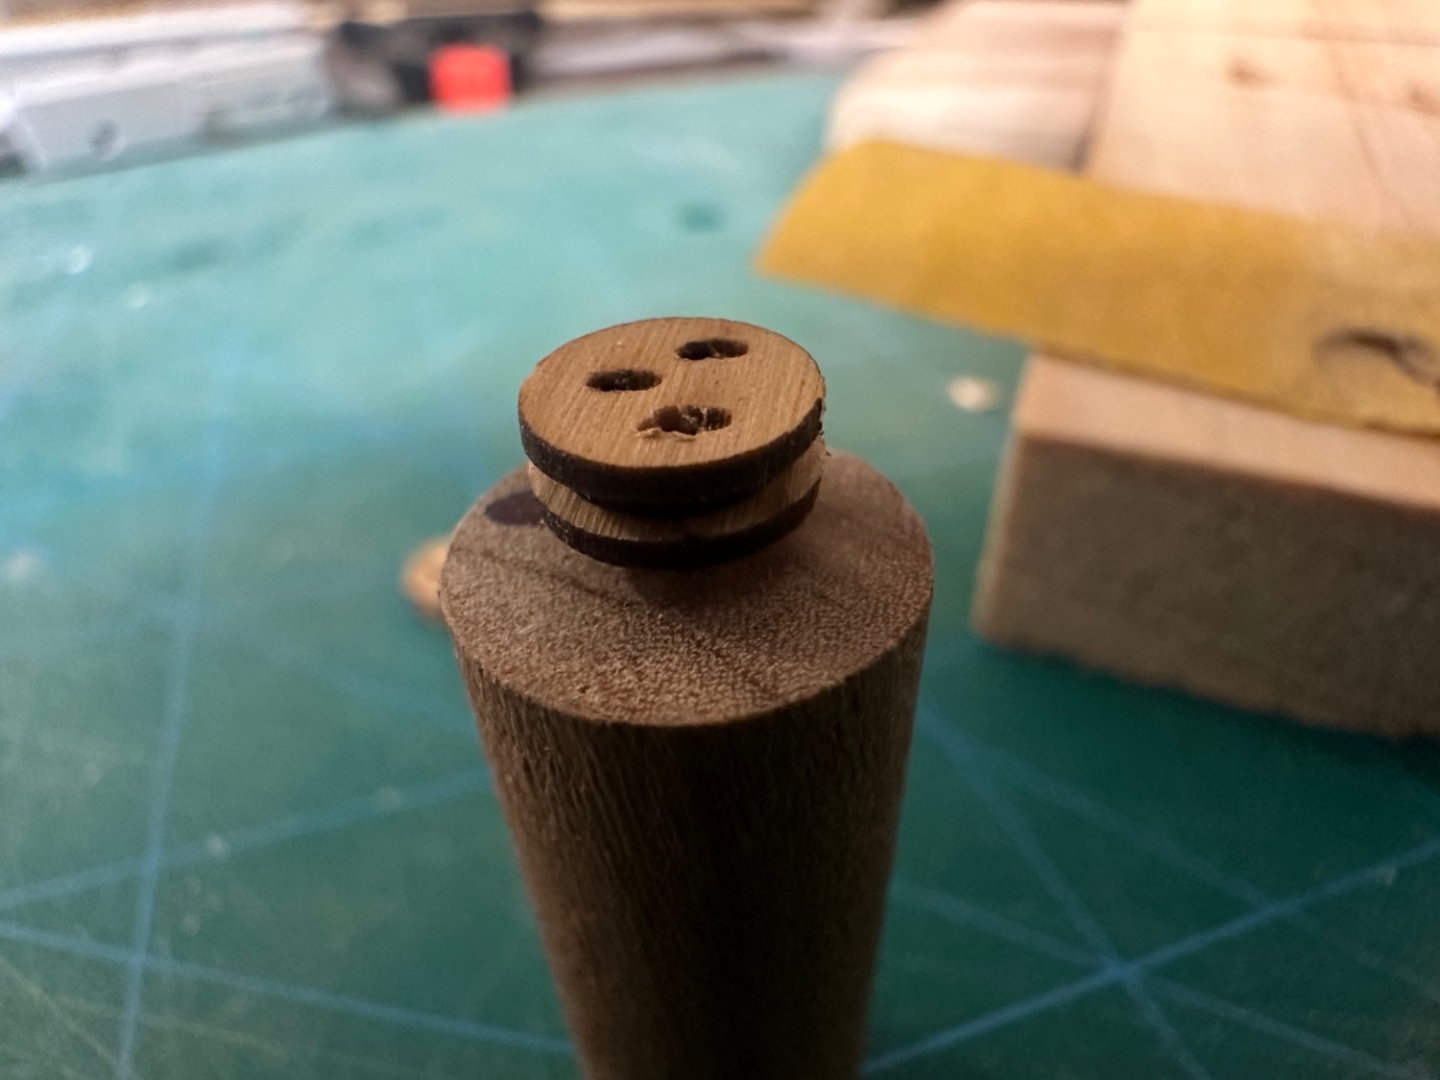
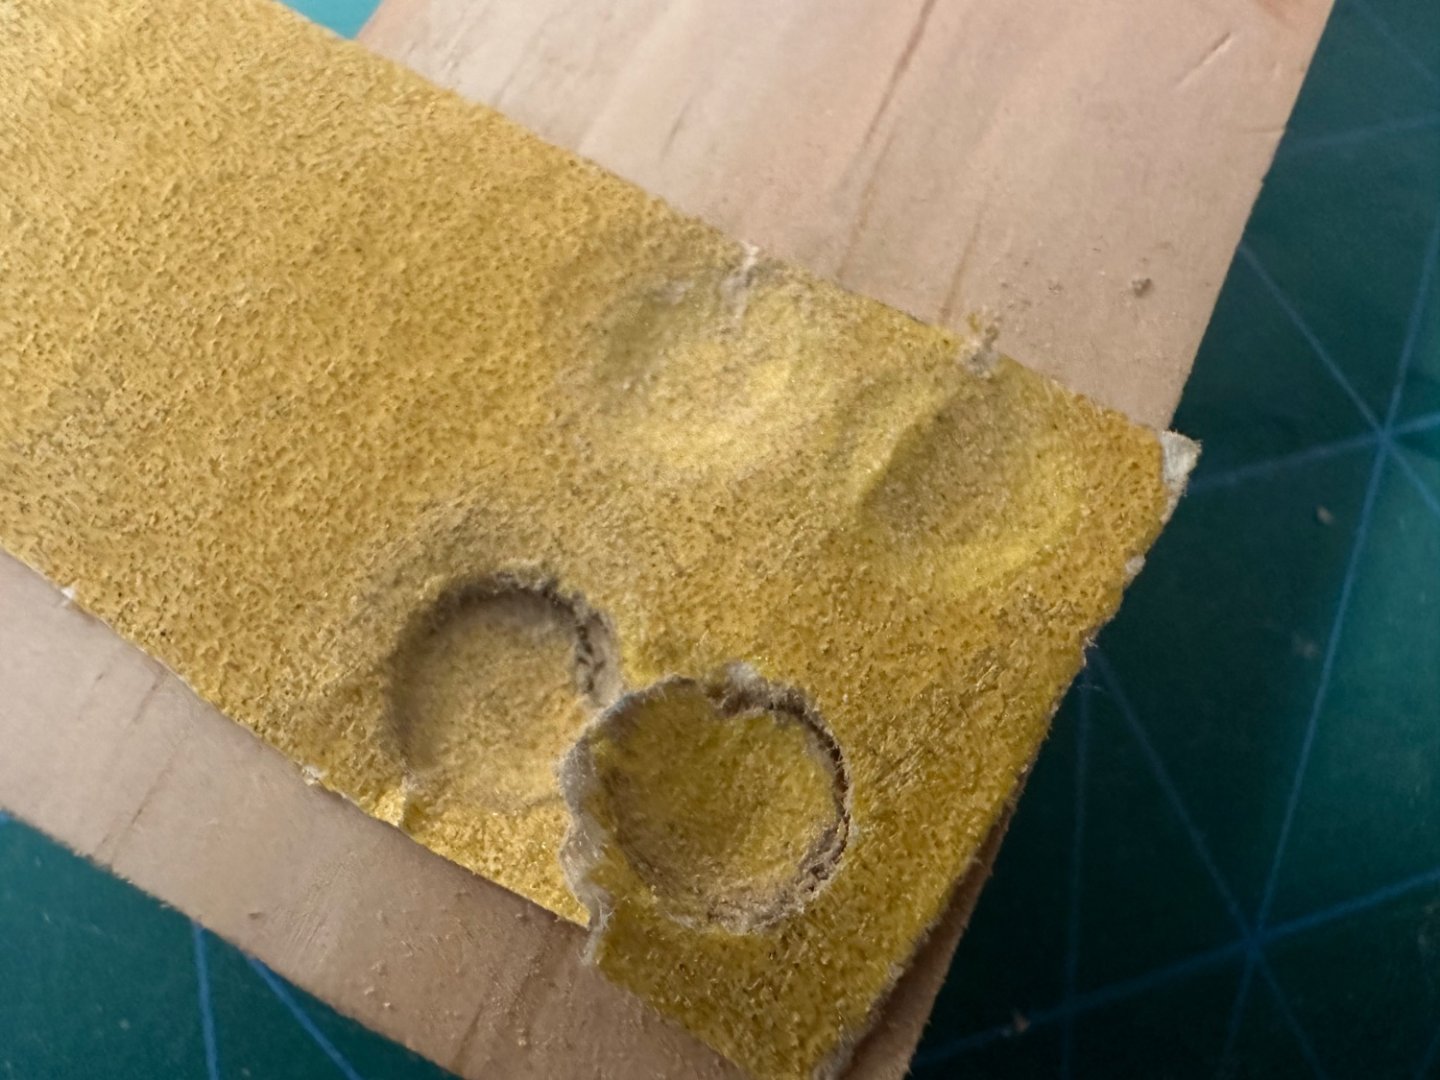
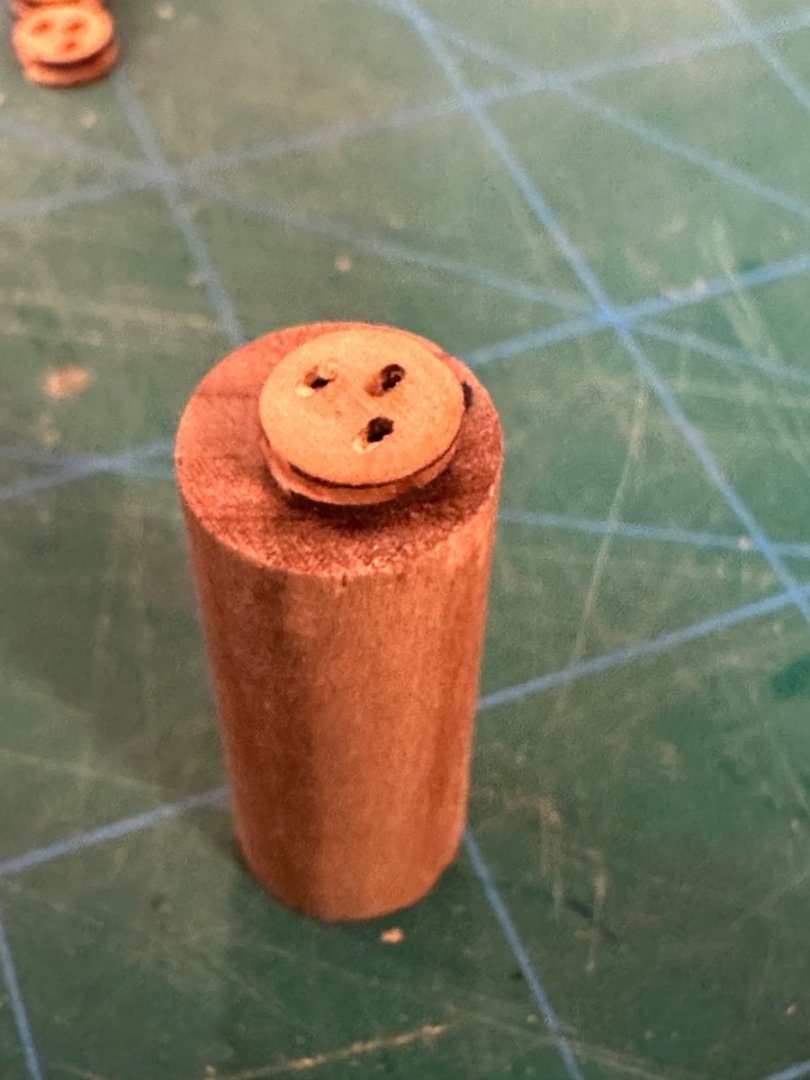
When working on a project, I like to have everything possible ready to go. So today, I made the deadeyes using Chuck’s kit. They were easy to glue together and to shape. I remember seeing a post from a MSW build log (sorry I don’t remember who’s idea it was), on how to shape the deadeyes. It worked pretty well. You need a dowel, self adhesive sandpaper, a scrap block of wood and some T-pins. I drilled some shallow indents in the wood that were a little larger in diameter than the deadeye. The deadeye is secured to the dowel using 3 pins that are pushed into the end of the dowel. The pins reside just below the surface of the deadeye. I marked one pin for the bottom hole in the deadeye so the deadeye is always positioned the same. Now place the self-adhesive sandpaper over the indent and push it into the indent. With the deadeye secured on the dowel, twist the dowel and being the sandpaper has a radius from the indent, you get a pretty good rounded deadeye. See pictures. Best Regards …. Rick

- 155 replies
-
- 7
-
-
- Medway Longboat
- Syren Ship Model Company
- (and 1 more)
-
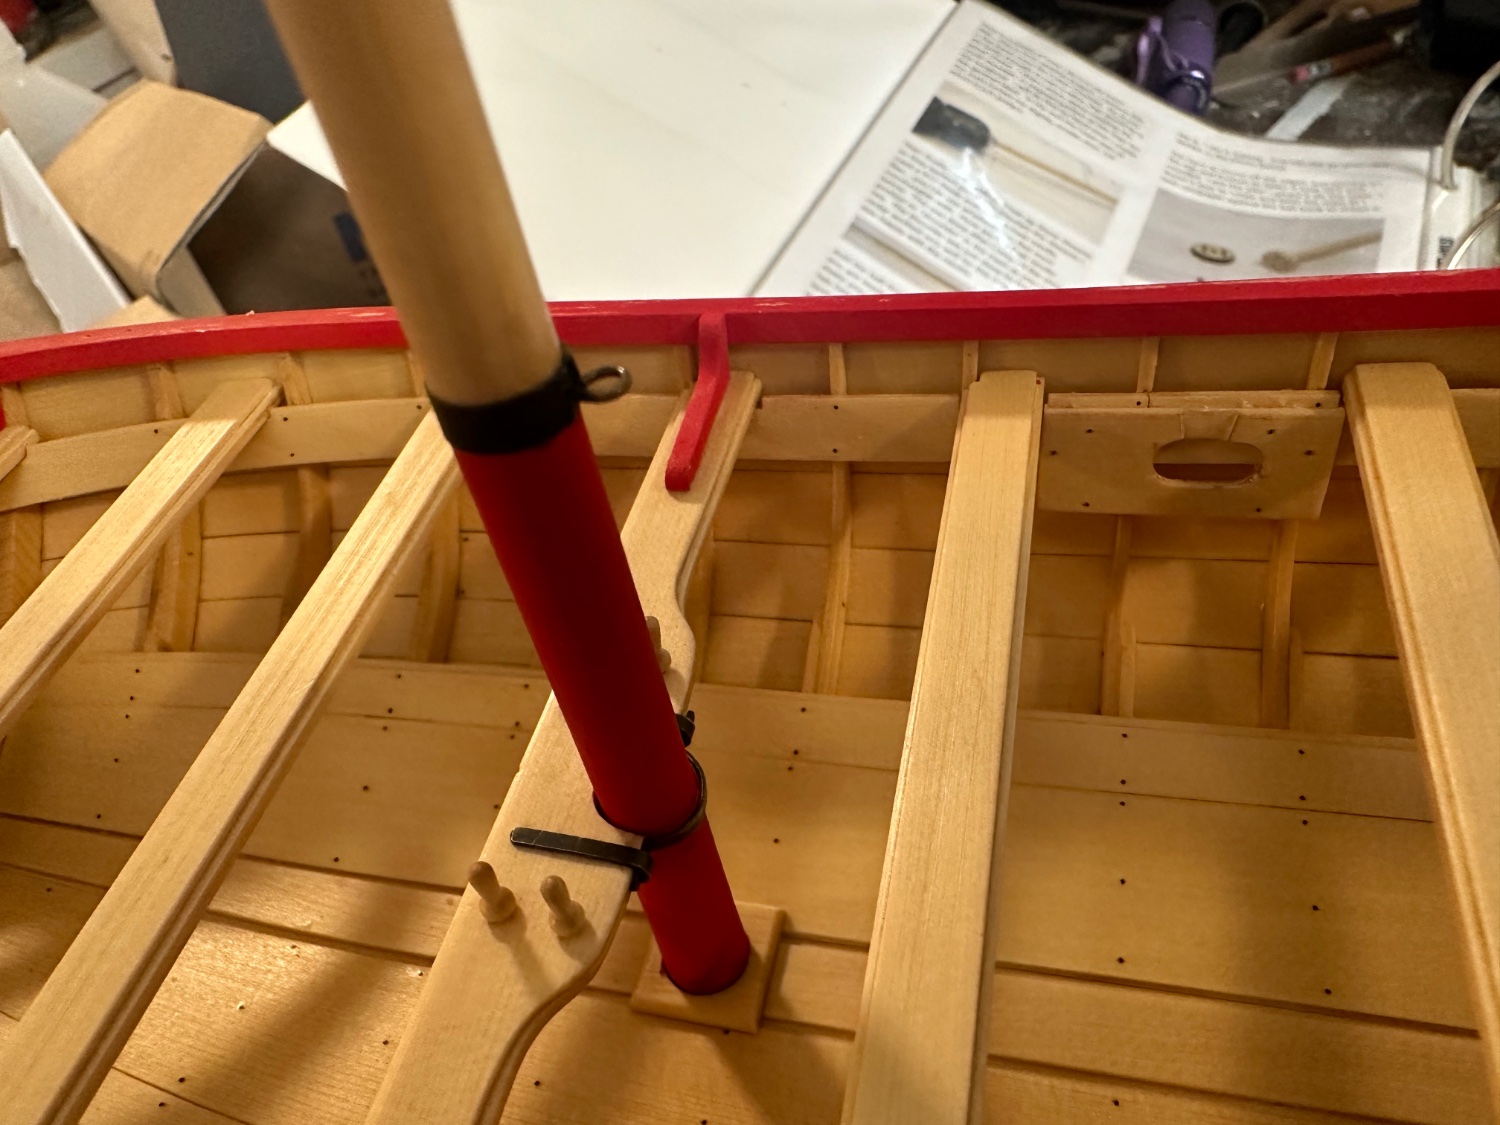
Deconstruction, and reconstruction has been completed. Mast thwart and iron work had to be remade to accommodate the thinner diameter mast. Many Thanks Chuck for the brass, much appreciated! Best Regards …. Rick

- 155 replies
-
- 2
-
-
- Medway Longboat
- Syren Ship Model Company
- (and 1 more)