
HOLIDAY DONATION DRIVE - SUPPORT MSW - DO YOUR PART TO KEEP THIS GREAT FORUM GOING! (Only 51 donations so far out of 49,000 members - C'mon guys!)
×

GGibson
-
Posts
1,042 -
Joined
-
Last visited
Content Type
Profiles
Forums
Gallery
Events
Everything posted by GGibson
-
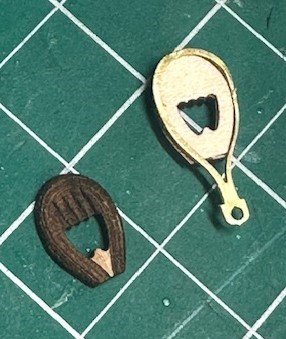
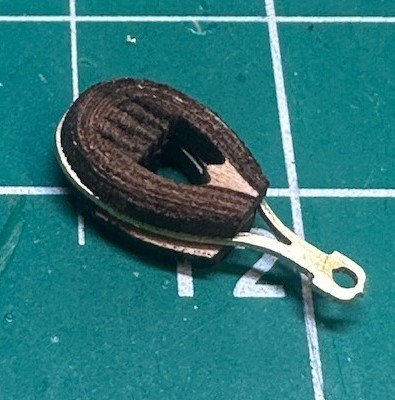
 Bingo... After I finished my Santa Maria and before I start the Constitution, I gave my shipyard a deep clean... took everything off of shelves and tables and wiped everything down, vacuumed, dusted, etc. Can't tell you how many times I said to myself "So that's where that ended up...!" 🤷♂️😅 OK, Peter, on this issue I am going to side with Mustafa and Jon on the twist. I just received another addition to my Constitution library, Olaf A. Eriksen's "Constitution - All Sails Up and Flying", which appears to be an awesome study of how the Constitution was rigged in 1815. Here's a page from his "Strapping of Blocks" section. Sorry for the poor attempt at taking a picture. In these diagrams, the hook appears to be turned 90 degrees from the eyebolt.
-
Thanks, Jon! You have truly been one of my inspirations, watching your Constitution build and appreciating the research you have done and that you share with others. 👍
-
If you want a new page, I think all you need to do is ask one of the moderators... they are happy to send you one... 🤷♂️🤣🤣 Seriously, I have no clue, but as a non-IT/website guy, I'm guessing it has something to do with the "bytes per page" with a combination of text and pictures and the size of pictures that folks post. As far as most pages in a build log, you might think that the more difficult or challenging the ship, perhaps the more posts and ultimately more pages. But, if the Constitution falls under that category, some of the best completed build logs I have been researching are barely even 50 total pages. There is a USF Confederacy build log that hit 74 pages. When I was building my HM Schooner Ballahoo, there was another builder who seemed to post an update after every eyebolt and nail he attached, but in looking back at it now, his was only 35 pages, albeit a smaller ship and a much less complex build. If you hit 100 pages, Peter, we'll throw a party... probably just a "virtual" party, but a party, nonetheless... 👍🏆🥳🎉
-
Bulwark Posts
GGibson replied to Jackie's topic in Building, Framing, Planking and plating a ships hull and deck
What are you using to sand them down? A sandpaper block may have too much back & forth force that it is breaking the glue adhesion. Do you have a Dremel or similar tool that has the round sanding discs? That always worked well for me to knock down post heights. And, sand down to the top plank on the installed bulwarks. -
Thank you, sir! From reviewing everyone else's build log, it's definitely going to be long. My current plan is for me to outlast the build! 🤷♂️😅
-
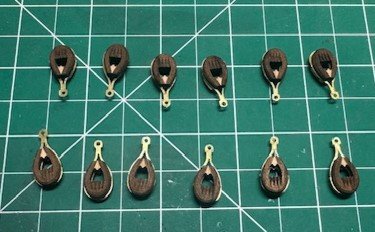
I do pretty much the same as what Mustafa does. Put just a dab of CA or nail polish on the rope in the channel on either side of the block. Give it a bit to set, then tie the knot on the back side. I will also use my "3rd hand" apparatus to hold the block and rope in its place while I secure.
-
Thank you, Mustafa! Your build has been a great inspiration for me. I appreciate your work and your advice. Thank you, Jim! Likewise looking forward to watching your build, as well, sir!
-
I, too, watched the Stanley Cup game last night... through both overtime periods... in my shipyard... but didn't get any busy work done... and today I am tired from lack of sleep. Go figure! 🤷♂️ Ingenious way to create those hooked blocks, Peter! What size/length are those hooks you created? Syren does sell some 3mm, 4mm & 5mm-sized hooks, as well. In my previous builds, I have frequently been a "if I can find it somewhere rather than create it, I'll buy it" kind of guy. I am sure I will have to change that attitude once I get deep into this Constitution. Good work, sir! Carry on!
-
Hey Jim... I just found your build recently, as well. I will just be beginning my Constitution build in the coming weeks but have been following Jon and some other awesome Model Shipways and scratch-build 1:76-ish build logs for quite some time in order to get educated. And, you are correct, at some point in our collective builds, no matter the company source or scale, a lot of similarities in "hoops to jump thru" become apparent. Although I am also building the Model Shipways 1:76 version, I have the BlueJacket Bicentennial Edition instruction manual as a resource. Looking forward to watching your progress, sir. Looking great so far! Carry on! 👍
-
Will be interested in hearing your opinion. 👍
-
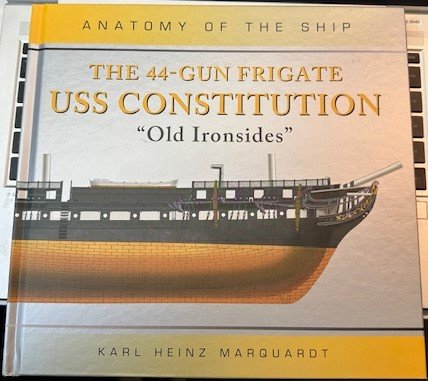
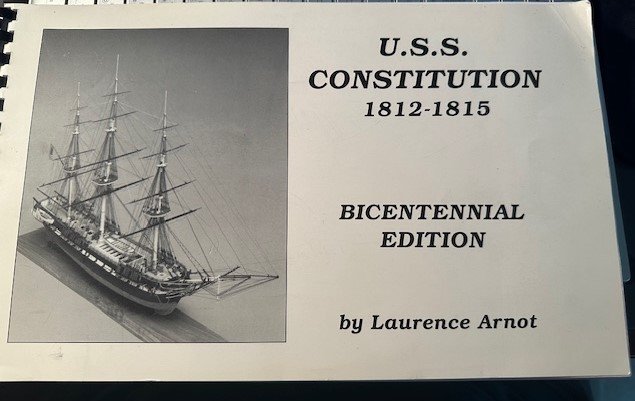
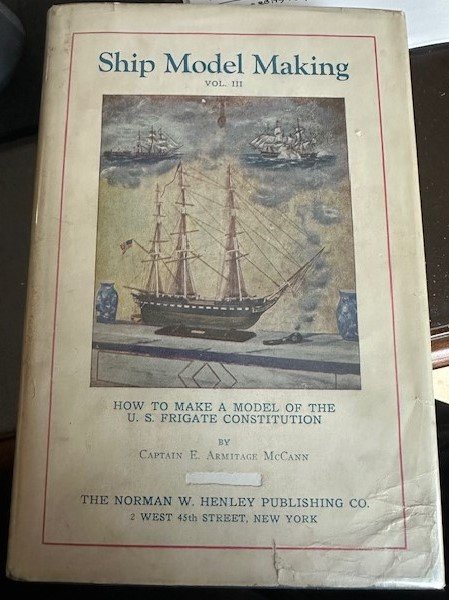
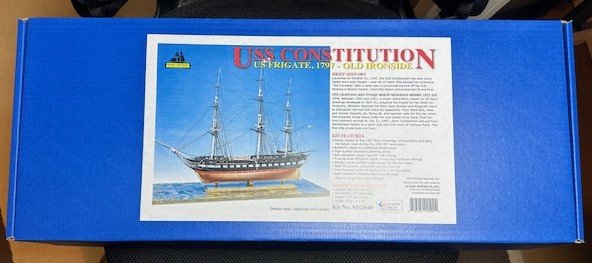
Yep, sorry, gang… Another Constitution build log… Those that have read any of my posts on my recently-completed Santa Maria build log or seen comments that I have made on some other’s current Constitution build logs are probably aware that the Model Shipways’ USS Constitution was next on my shipyard list. I am excited to get this one started! I purchased this Model Shipways kit back in March 2024 when Model Expo had a huge discount sale so, along with a store credit I had with Model Expo, I was able to buy the kit for cheap cheap and could not resist adding this historic ship to my shipyard. So, since that March date, I have been trying to do as much research as possible, jumping in, taking notes and asking questions on several of the current Constitution build logs. In that research, I have acquired numerous books and documents that everyone is familiar with and that I am sure I will continue to use as resources during this build: Anatomy of the Ship: The 44-Gun Frigate USS Constitution – Karl Heinz Marquardt USS Constitution 1812-1815 (Blue Jacket) – Laurence Arnot Ship Model Making, Volume III, U.S. Frigate Constitution – Captain E. Armitage McCann Constitution Close Up: Minutiae for the Modeler and Artist – Cmdr. Tyrone G. Martin As I was preparing for this build after I bought the Model Shipways kit, I also purchased Bob Hunt's complete Constitution practicum and, as others have done, will use it as an additional resource during the build process. I was fortunate when I began this model shipbuilding hobby a few years back to find this Model Ship World website, where we can share ideas, ask and answer questions, receive praise in our triumphs and receive comfort in our tribulations. Active Constitution builders that I have been following and that have been invaluable in my preparation include @JSGerson, @mtbediz, @Der Alte Rentner, @Unegawahya, @kmart and @Geoff Matson. I have also reviewed some amazing completed build logs by @xken, @usedtosail, @Modeler12 and others. Thank you to all! You are all to be commended for your model shipbuilding skills and your ability to find solutions in difficult situations. Even though I am sure to stumble often, your collective display of perseverance will hopefully carry me through to a magnificent completion… however long it takes! 😅 With all that said, the $64,000 question is… what version of this iconic Constitution will I be building? Well, you could probably conclude from my reading list above that I have really wanted to concentrate on the 1812 version. But there have been countless times where I have changed my mind to its present-day version. I never really considered the original 1797 ship version, or the 1927 and 2015 major revisions. I’ll do my best to stay as close as I can to that 1812 Captain Issac Hull model. If I can steal the term that Tom ( @usedtosail ) used several times in his awesome build log, my Constitution will strive to be “1812-ish”. And, as several others have done, I will do some kit bashing, and I will have a detailed gun deck and some form of exposed spar deck. I’m even taking a trip to Boston this fall and, of course, both a Fenway Park ballgame and a Constitution tour are on the itinerary. Let’s just say right now, though, this will not be a historically accurate museum piece, but rather I will enjoy building it as mine. I am guaranteed to get frustrated multiple times in the build process, but I will definitely have fun. And that’s what it’s all about… So… the month of June is going to be a busy “family time” month with grandkids visiting, so I probably won’t get much done in the coming weeks, but I’m looking forward to this journey. I will encourage and I appreciate all the comments, advice and criticism fellow builders have to offer. Y’all are awesome. Carry on. Thanks…
-
I have always had great success with Ropes of Scale with my rope purchases and, like I mentioned with the blocks and using Syren exclusively, I haven't used kit-supplied rope in several of my past ship builds. Although I hear great reports about Chuck's rope at Syren, I have stuck with Ben at Ropes of Scale. Chuck will always get my rigging blocks and deadeyes business, though. With that said, do take into consideration that Ropes of Scale is a Canadian-based company, so not sure how the current tariff situation might affect pricing and shipping. If that might become an issue, I wouldn't hesitate to go with Syren.
-
Will be interesting to hear others more knowledgeable than me chime in on actual rope sizes being used on the Constitution's carronades, but... Ropes of Scale, which is my favorite model rope vendor, has their smallest ropes at 0.25mm (0.009") and 0.35mm (0.013"), which are generally the sizes I use for rigging... The 0.35mm for the running rigging and the smaller 0.25mm to tie or strop the ropes at the blocks. So, If I'm doing my scale conversions correctly, 0.013" x 76.8 scale = 0.9984", or just short of a 1" diameter rope. That seems about the right scale, doesn't it?
-
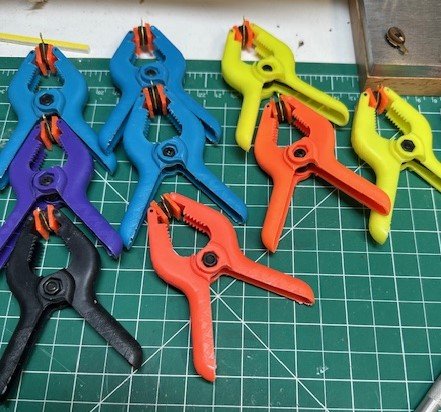
I need to find some slightly "weaker" hemostats, as many of the smaller blocks on my Santa Maria rigging were getting crushed by the hemostat I have, so I was just using the clips on my helping hand to hold the blocks while stropping.
-
I haven't used Model Shipways' kit-supplied blocks since... my first Norwegian Sailing Pram and then I learned better. I love Syren for their blocks, and have already forewarned Chuck that, whenever I get to my Constitution carronades and rigging (haha, seriously?!?), I'll be placing an order. Attaching hooks to the blocks should be an easy task, Peter. And there are plenty of posts here on MSW regarding stropping techniques.
-
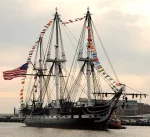
Fascinating work, Captain Henry! I am anxious to see this all on display when I visit the Constitution this September! 👍
-
Thanks for the kind words, Mustafa! I have to admit I am happy to be done with this build and recognize that I did not post progress updates as regularly as I should have. This Pavel Nikitin version was not my favorite. If I had it all to do again and really wanted to do a Santa Maria ship, I probably should have done one of the more recognized and tested Mantua, Amati or Artensia Latina kits. But I also had two other ships waiting on the shelf to build, as well, and put this Pavel Nikitin kit ahead of them both, as I was intrigued by the unique design of Columbus' flagship. Ehhh, live and learn. So, yes, after a brief break, I will begin the Constitution, and I promise to post regular build updates to that log. I have a handful (or more) of Constitution modeler mentors that I have been reading and following who have provided amazing insights and nuances based on whatever version of the Constitution you each were doing. I must continue that process! Thanks again for your support and inspiration, Mustafa. Enjoy your summer break!
- 58 replies
-
- 1
-

-
- Santa Maria
- Ships of Pavel Nikitin
- (and 1 more)
-
Thank you, Peter! Now I am really going to be following y'all's collective progress on your Constitutions! 🤷♂️😅
- 58 replies
-
- 2
-
-
- Santa Maria
- Ships of Pavel Nikitin
- (and 1 more)
-
Wow, those carriages look sharp, Peter. Nice work! As to my completed Santa Maria, I had a much shorter leap to completion on it than you have on this beauty. Thanks for the look-in on mine. As I said in my post, give me a few weeks to clean up and reorganize my shipyard and spend some "grandkids time" away from the shipyard, and I'll be back in no time working on the Constitution's keel and bulkheads. 👍
-
Thank you, Chris! You beat me to the title change. That was on my to-do list for this afternoon. Appreciate your assistance, sir!
- 58 replies
-
- 2
-
-
- Santa Maria
- Ships of Pavel Nikitin
- (and 1 more)
-
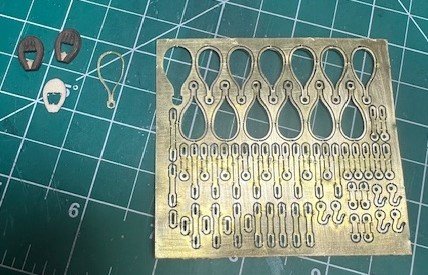
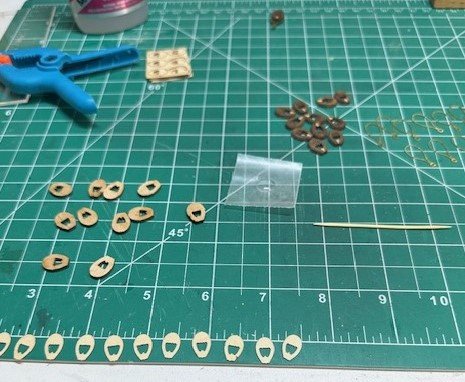
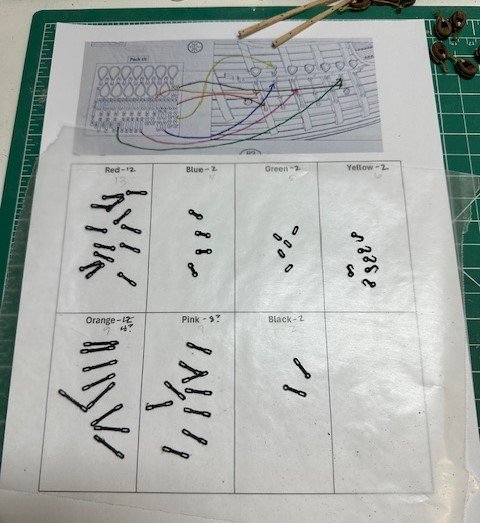
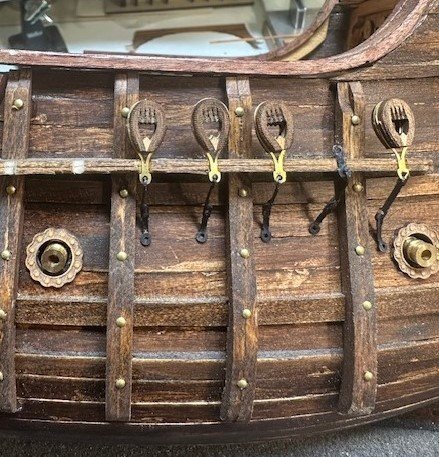
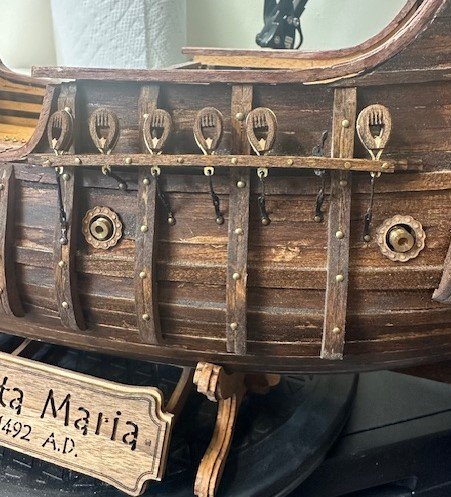
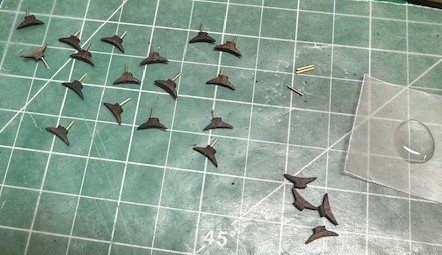
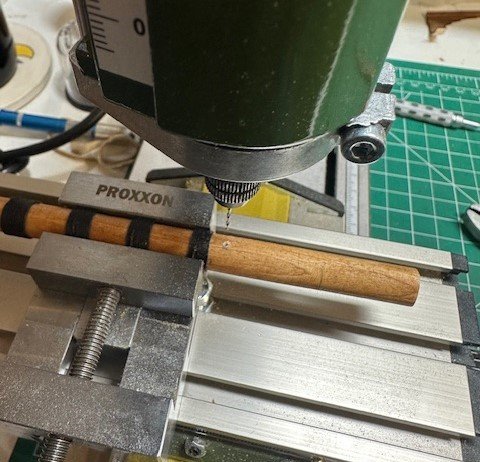
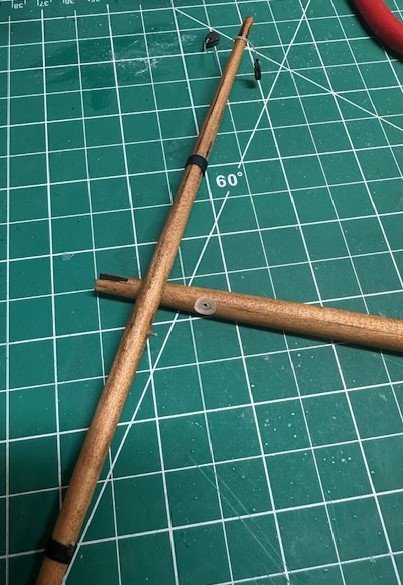
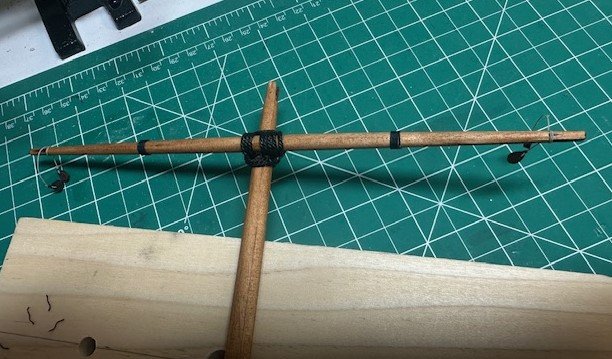
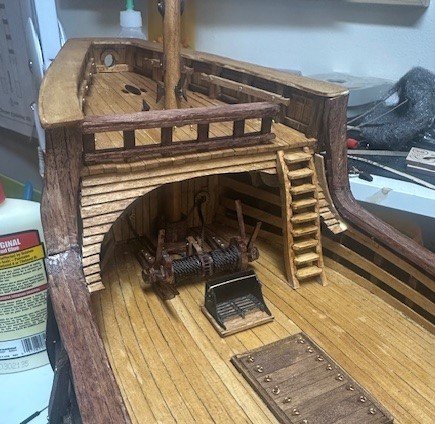
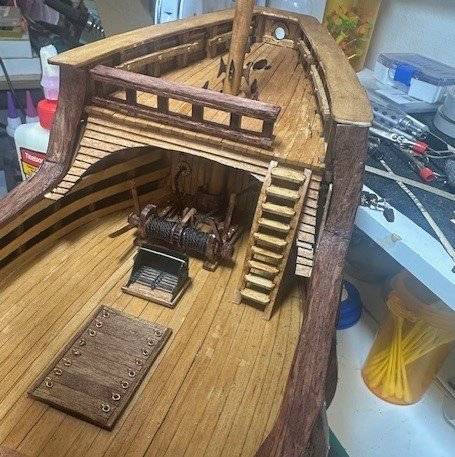
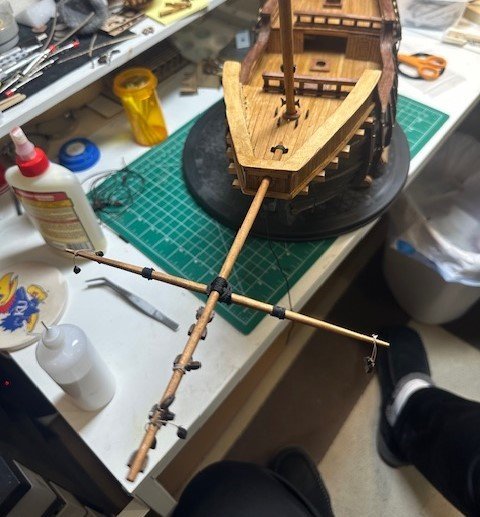
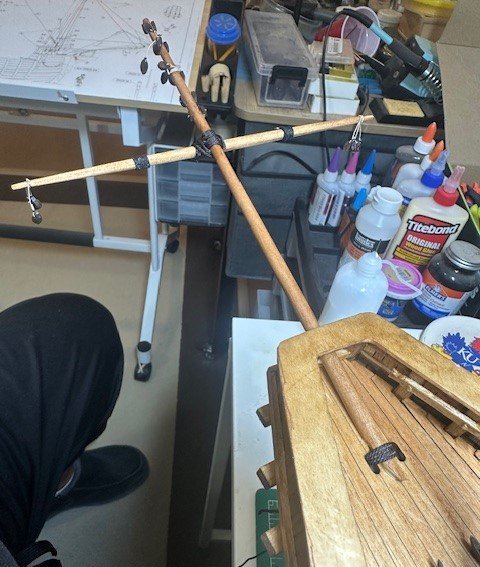
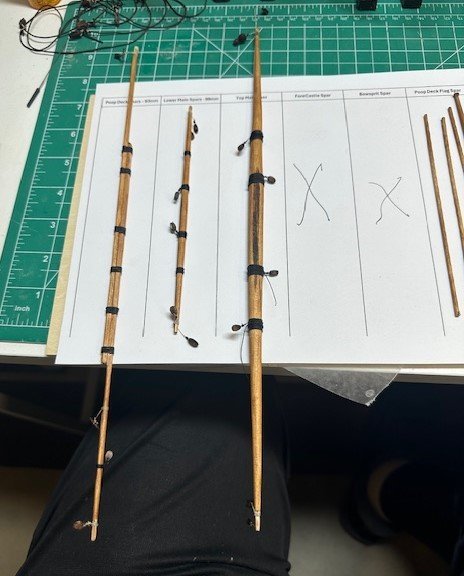
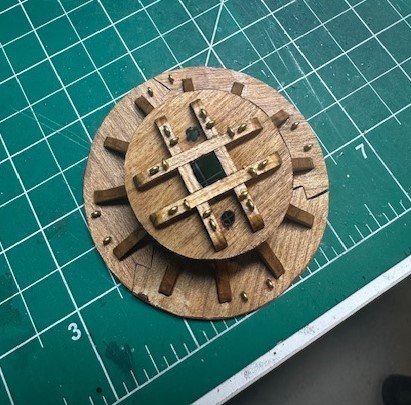
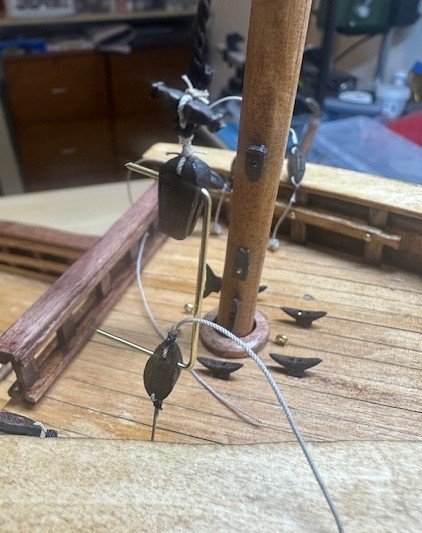
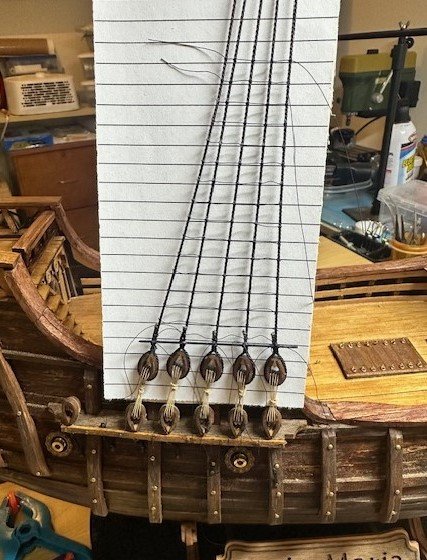
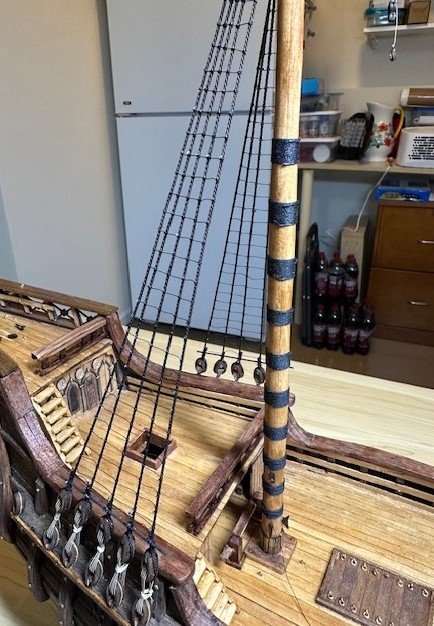
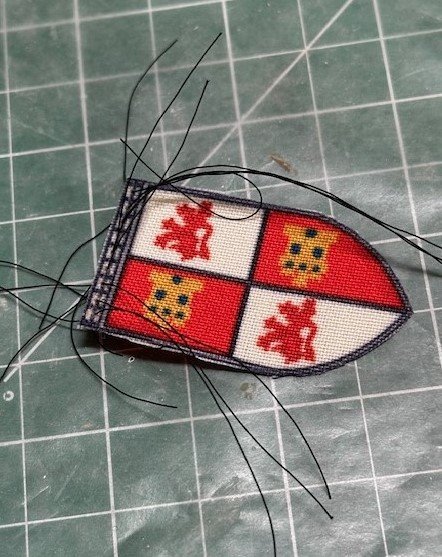
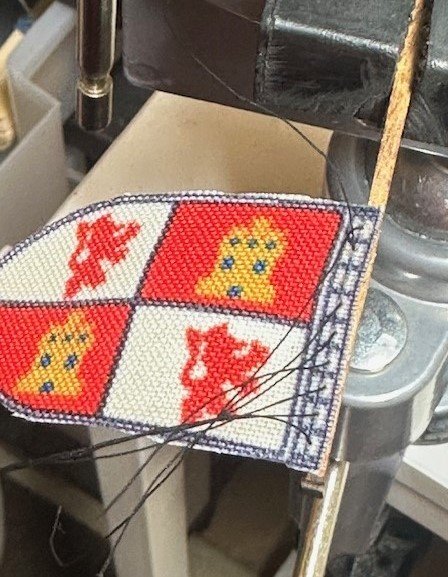
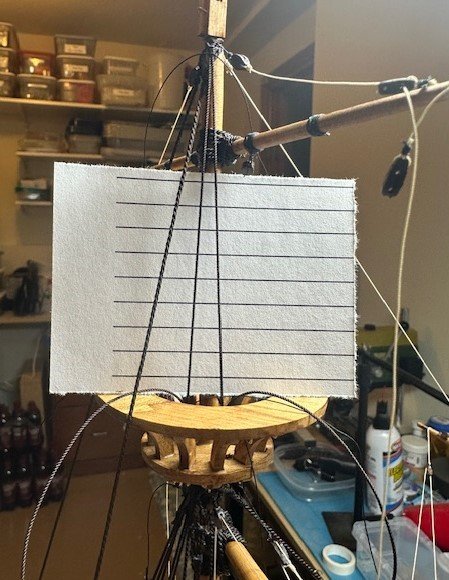
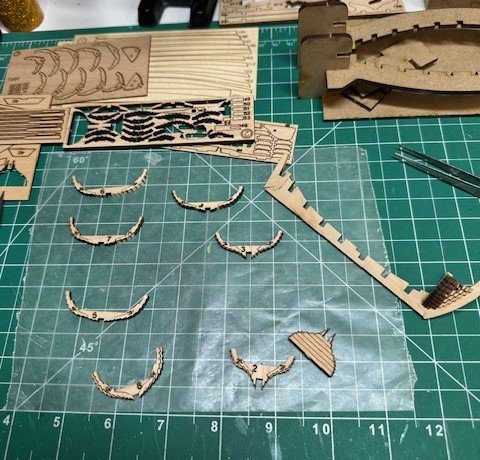
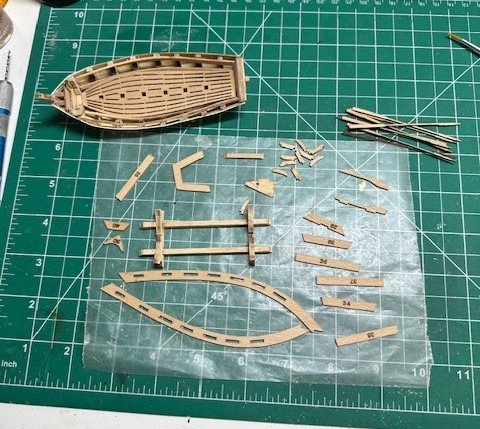
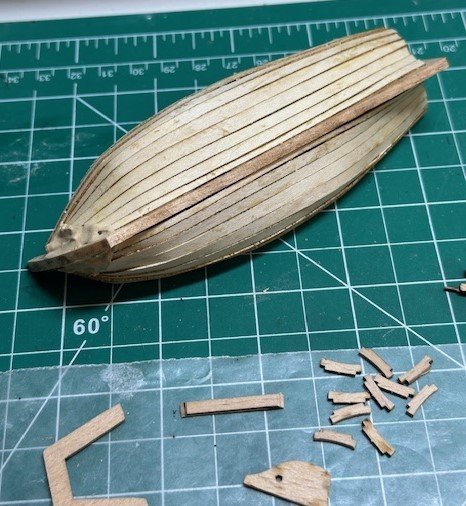
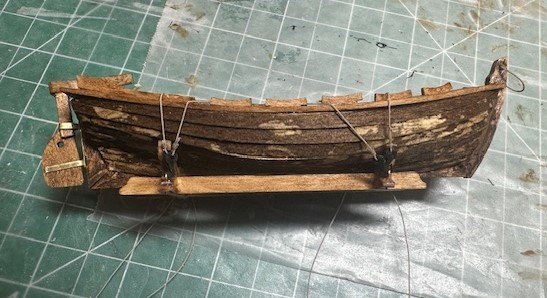
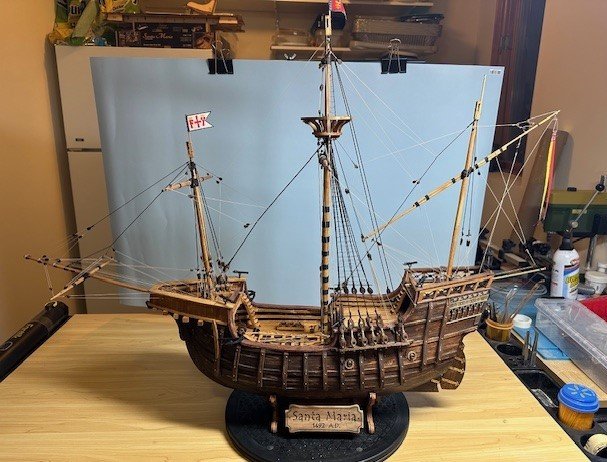
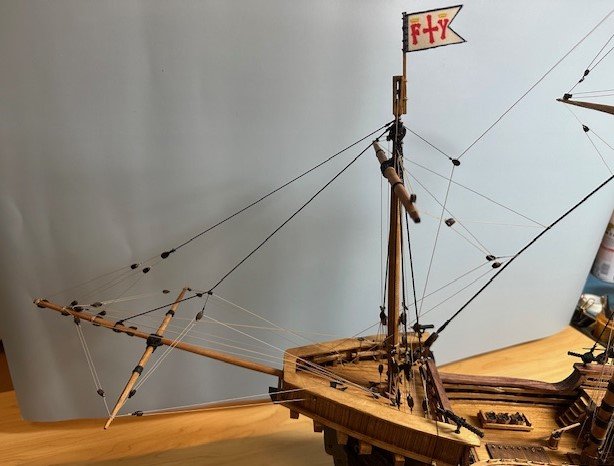
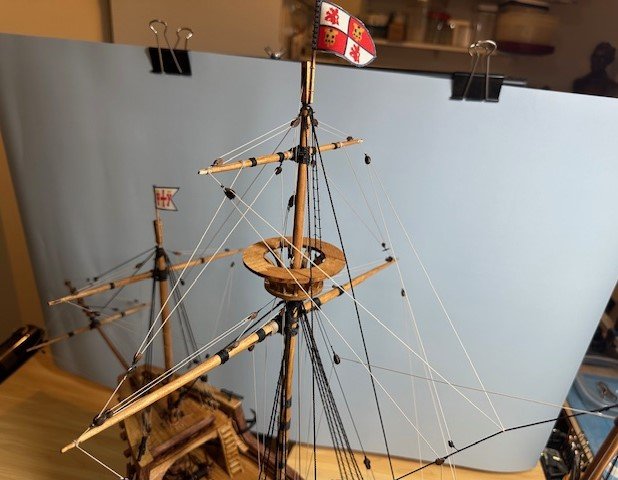
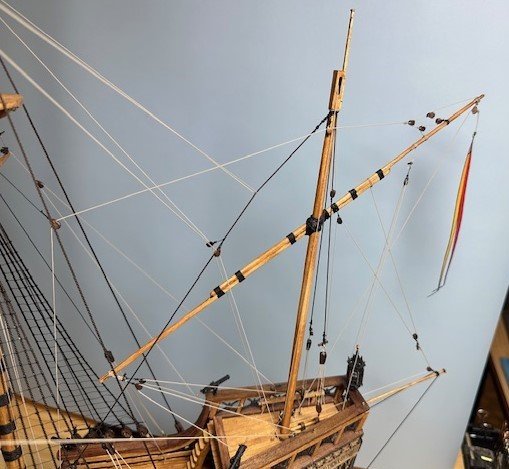
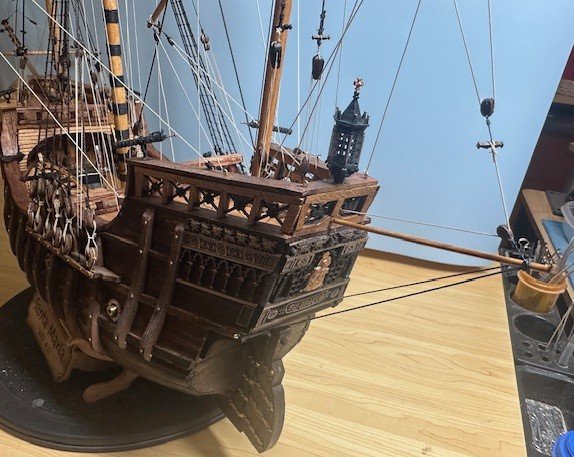
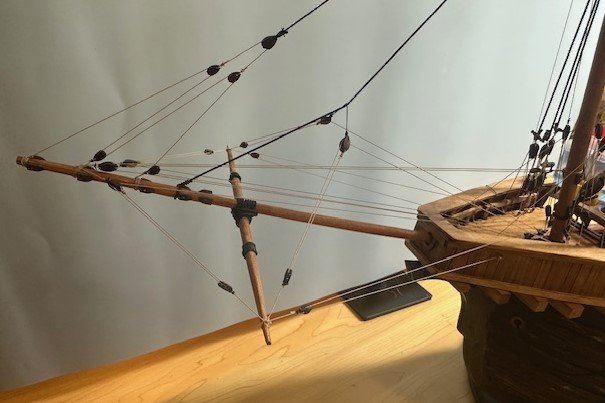
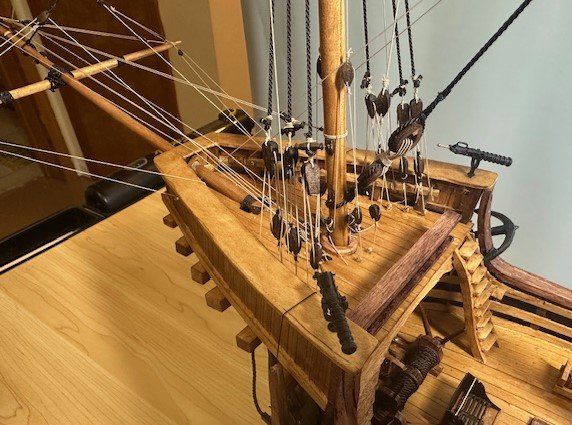
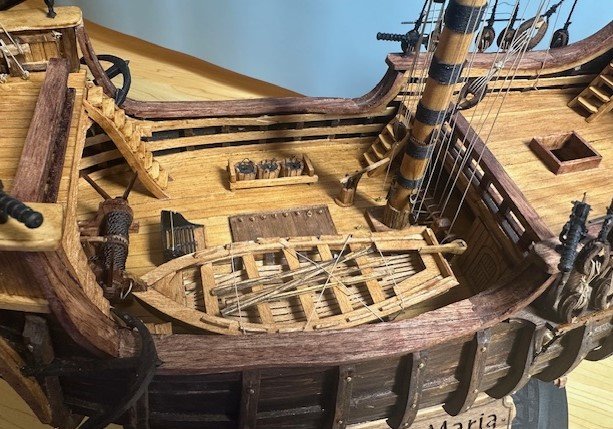
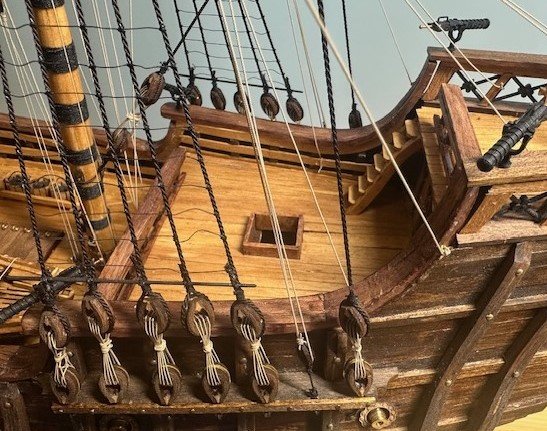
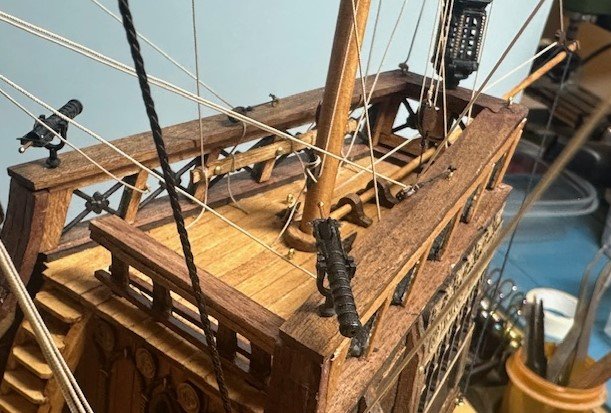
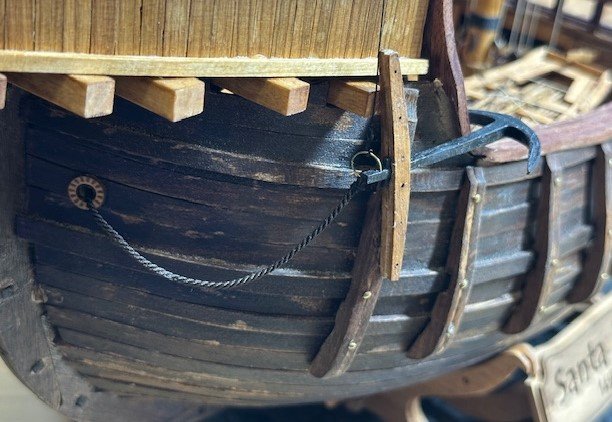
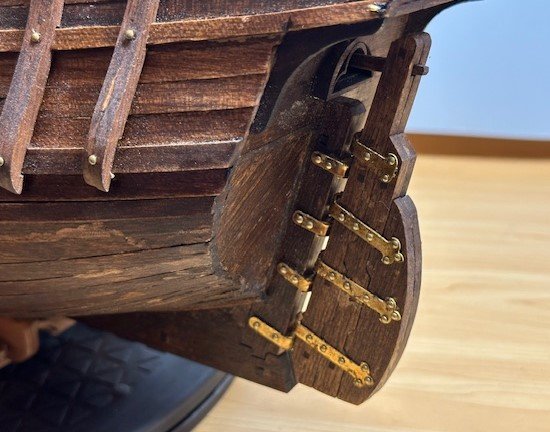
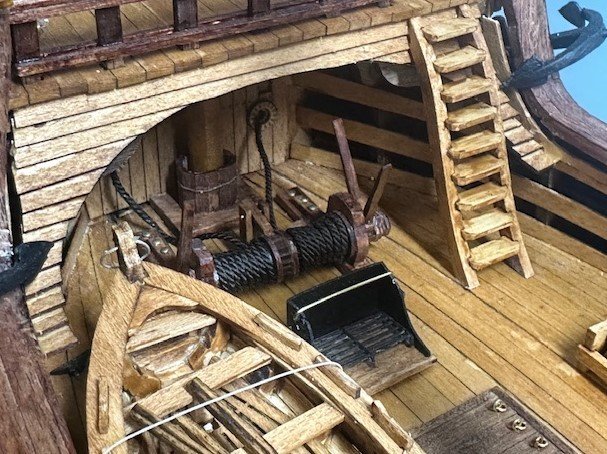
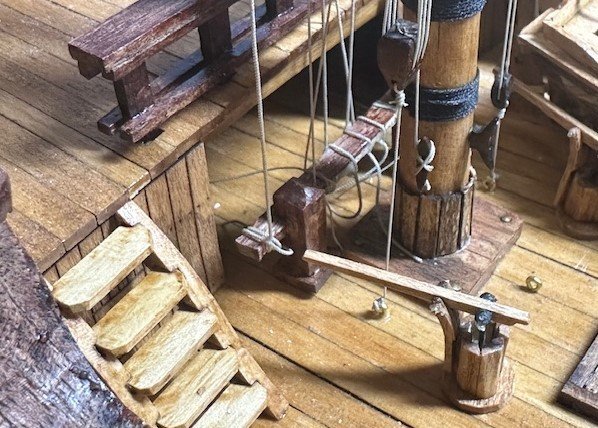
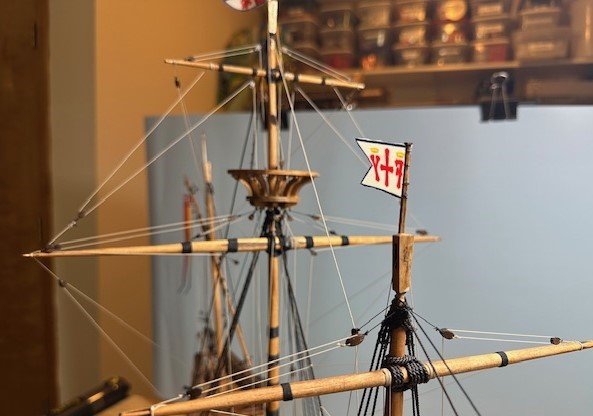
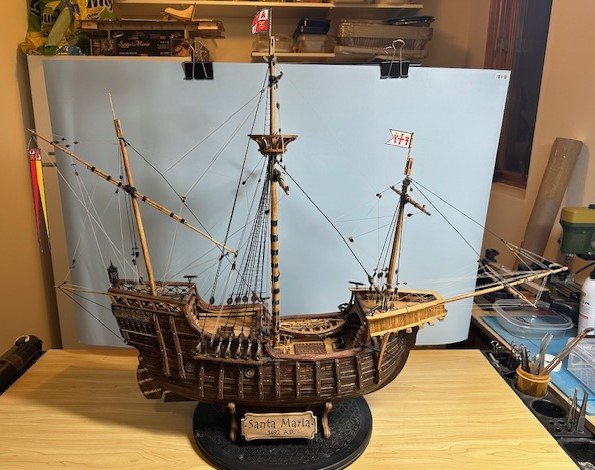
Well, it’s been several months since my last update, as I have been concentrating more on working on (and completing) this Santa Maria build than on posting status reports. With that said, here’s what I have accomplished… We left off back in March beginning to prep as much of the mast and yard spars as we can, placing ropes, blocks and eyebolts wherever we can prior to setting the masts in place. So, I began that work, as well as began preparing for the shrouds placement, which included the building and placement of the kit-provided heart blocks to be attached to the chain plates. The following are pictures of that build process. As I stated earlier, trying to get as much placed on the masts and yards as possible before each of the masts are secured on the ship. In order to have the cleats hold well on the masts (or wherever they are placed on the ship), the “well-known secret” (it isn’t much of a secret then, is it?) is to place a small piece of brass rod on the back of the cleat and a place to insert the rod in the mast (or wherever it’s going). So, we did that, as shown. One note, the brass rod pieces I inserted, as you can see, were longer than I really needed, so the rods on each cleat were ultimately cut down, accordingly, as they were placed. For the mast and rigging work on this ship, I decided to work from the foremast and bowsprit back. And, in order to attach the yard arms to the masts, I again used small brass rod pieces to help secure and hold the spars together. I also simulated a rope lashing on each of the spar connections, although realistically, these would not be lashed in order for the yards to be raised and lowered but would be connected by some type of pendant or parrel. Once the foremast was fitted and placed, I was also able to permanently place the windlass, the stove and the ladder going from the main deck to the forecastle deck. Next task was to set the bowsprit and its yard in place. One thing I found helpful to me in working on this Pavel Nikitin kit, because there were so many pre-made or pre-assigned pieces that, once they were removed from their sheets were either hard to identify of hard to keep track of, was to make up some type of on-the-fly placement mat as a placeholder until the item was placed on the ship. I even did that for the yard spars. In looking at the rigging plans and also reviewing another builder’s YouTube build log, I tried to determine how many eyebolts were going to be necessary on the bottom of the crow’s nest to complete the rigging. Ultimately, I ended up having more than I needed, but much better to do it now then to find out later You need to add another eyebolt after the crow’s nest is in place. The following pictures show the work done in securing the foremast shrouds. The following pictures show the main mast shrouds and… oh joy… tying the RATLINES!! As almost everyone does, I placed a lined sheet behind the shrouds to assist with the ratline spacing. I don’t recall now what spacing length I set up but it was equivalent to a ladder step spacing. I will also take the time here to relay an interesting email conversation that I had with Olha Batchvarov. As I noted earlier, I had previously prepared and installed a set of kit-supplied lower heart blocks on the channels. In preparing to tie the shrouds to the chain plates, I was unsure how to initiate the rope ties between the upper and lower heart blocks. I tried to research the issue here on MSW and other internet sites but was not finding anything. I have been following some of Olha Batchvarov’s YouTube videos and had some previous personal communications with her, so decided to reach out and ask her advice. She responded fairly quickly, stating that to her knowledge, heart blocks were never used for shrouds. In the Carrack’s era, triangular deadeyes were used instead. My options were, if I wanted to keep historical accuracy, remove and replace or… follow the author’s design and do whatever I want. Replacing the lower heart blocks in the channels and connected to the chain plates would have been a mess. And having heart blocks lower and triangular deadeyes upper would have looked a bit odd. So, I figured out a way to tie the blocks securely and moved on. I do appreciate Olha’s response, though! I also started doing some prep work on attaching the kit-provided flags to the flag masts which are then attached to the mast toppers. I threaded a row of 0.025” rope thru the flag edges so that they could be tied around the flag masts, as well as secured by a little CA glue. That all worked pretty well. I also ran a smaller set of shrouds (and ratlines!) from the upper mast top down to the crow’s nest, using another spacing guide slid behind the shrouds to help with the ratline spacing. So…..!!! It’s time to actually do some rigging! This task was probably my favorite part of my Bluenose build and I was definitely looking forward to the rigging on the Santa Maria! Bad news is, though, that for my build log purposes, I took hardly zero notes and no pictures during any of the rigging… until the end. There are no instructions in Pavel Nikitin’s manual pertaining to the rigging or the sails. All that is provided are two large sheets of plans. One of the sheets is primarily depicting what the standing rigging consists of, the other sheet shows the running rigging and placement of sails. Although a more experienced sailor or modeler may have been able to determine what 100% of the rigging plans were to end up looking like, I landed at about an 85-90% level from what I could determine on how lines were run, how they were terminated at cleats or around side supports, etc. Thanks to Vance McCarthy (VanMac on his YouTube build log) for answering a few rigging questions that I could not decipher from the plans. As I said earlier, although no step-by-step accounts for the rigging, you will be able to see much of the rigging work in my final pictures below. And, as I did on my Bluenose, as well, the Santa Maria will not have sails. I understand it’s rather difficult for Columbus to have “sailed the ocean blue in fourteen-hundred and ninety-two” without sails, but mine won’t have them for a few reasons, but biggest reason is I just like the look of these majestic ships with all of the rigging exposed and the ability to see more of the ship details without the sails. And mine would look crappy anyways. So, there’s that, too. The Pavel Nikitin kit included a separate kit for the boat that sits on the deck that they would have used to go ashore, etc. I decided to give it a go, as well, since there was the empty space on the main deck. Like the main Santa Maria kit, this boat was designed to be fit together practically like puzzle pieces. Well, except that it didn’t. The planks that were provided did not fit the length of the sides, inside frames did not fit as well as they were probably intended, and the seats did not fit perfectly. In fact, because of that, I didn’t put two of the seats in the boat. We made the best of it that we could and, all in all, the boat looked ok after it was completed and placed on the deck. I tried to stain the small boat hull the same darker color the Santa Maria had, but it came out a bit blotchy. I would like to at some point put some coiled rope hanks up on the belay pins and other rope terminations. But, at this time, I believe I am calling this Pavel Nikitin Santa Maria complete. Here are some final pictures. I tried using a background sheet to hide some of “other things” in my shipyard like shelving and a refrigerator, but… I didn’t do so well, sorry! I am going to take some time off before I pull the next ship kit from my shelf in order to give the shipyard a bit of good cleaning, restocking and reorganizing. We also have grandkids making their usual summer stay with us for a few weeks coming up. But around the first of July, I should be back with a new build log. Thank you to all of those fellow model ship builders who have at one time or another followed, commented and/or liked any of the content of this Santa Maria build log. You are truly appreciated. This Model Ship World forum is really something special and there is no doubt that I would not have now completed my FIFTH model ship without the support and wisdom provided through this website and its participants. I wish continued success to the NRG and its support of this website.


- 58 replies
-
- 9
-
-

-
- Santa Maria
- Ships of Pavel Nikitin
- (and 1 more)
-
New deck and stanchions are looking great, Jim! Excited to have you in the local KC Square Riggers club! And, yes, a wealth of information is available from many of our "seasoned" fellas. 👍👍
-
I give your transom work a 6-star rating review! 👍🏆
-
Received my email today regarding availability, but when attempting to download, all it does is spin (and tried it on different PCs). Any issues? Thanks!
- 1 reply
-
- 1
-

-
Well, there is a pea green hue, but not a.... 🤷♂️🤣

