


GGibson
-
Posts
1,086 -
Joined
-
Last visited
Content Type
Profiles
Forums
Gallery
Events
Everything posted by GGibson
-
 Of course, you know that I'm nowhere near this point (ha!), but I did check my inventory and have all three chain links in my kit. I'm happy to share if you need the smallest size.
 -
Hi Mustafa! Thank you so much for peeking in with your advice and recommendations. I cannot adequately express how much veteran advice from gentlemen like you mean to me in this build process. We are so lucky to have you guys around. With that said, yes, my plan is to expose the gun deck similarly to what you and Jon have so successfully done. You had given me the reminder about the spar deck beam replacement concern back in October on Post #73, and I have not forgotten that reminder! When I cut those old beams, I cut them back to a point where, whether new beams are attached back directly to them or if they are just left as stumps because of new beam positioning, the old stump portions would be "hidden" under the spar deck edge decking that will be in place for the carronade guns and carriages. I am wondering now if accurate placement of the gun deck knees (directly under the spar deck) will be affected by any of these stubs. Perhaps those stubs affected will need to be cut back farther against the bulwarks. Since yours was a complete scratch build, of course, you didn't have the old beam stubs to be concerned about. I will, though, look back and see again how Jon handled all of this in his kit-bashing. In your reminder post on Post #73, you provided a build log location on Jon's log where he raised his concerns. Time to go back and study this all in greater detail and, as you stated above, Mustafa, plan my approach in advance! Once again, I appreciate ALL of you gentlemen that preceded us in these early steps!
-
Hey Terry! The Bluenose looks really nice. Very interesting color on the lower hull. I love its uniqueness! And the launch ways looks sharp, as well! I had seriously thought about a launch way for my Bluenose but then bailed and did a standard pedestal base. Now that I see yours, it's tempting to go back and do one for it! 👍🏆
-
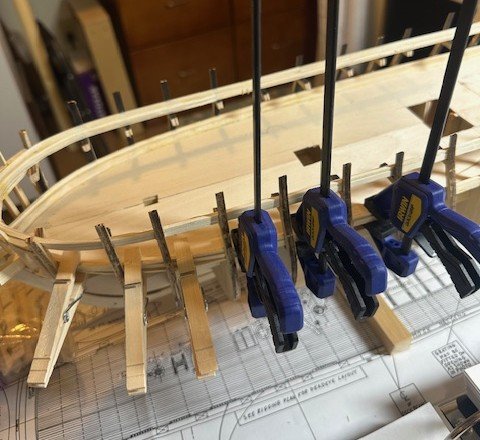
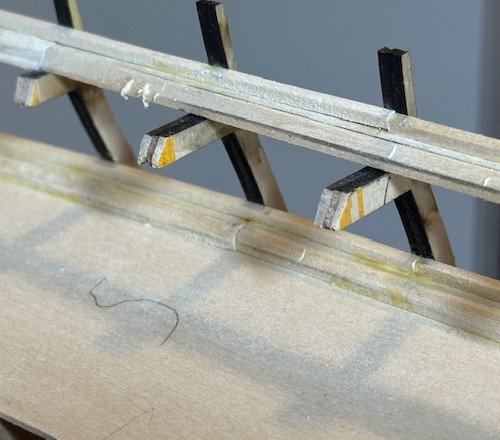
Completed a few other things, so another quick update. The gun deck waterways and planksheers placement didn’t take too long to complete. It was pretty much and “rinse & repeat” process from what I had done previously for the spar deck waterways and planksheer. For the gun deck waterways, I did not have any 5/16” x 5/32” strips handy, so that gave me an opportunity to cut a few strips on my Byrnes saw from a 5/32” sheet. I then used the same process I did on the spar deck waterways, trimming a 45-degree bevel into one side 3/32” deep using my disk sander. Longer strips were placed from the stern bulkheads up to Bulkhead F. A curved waterway piece was then measured and cut for the sharper bend from Bulkhead F up to the bow. The planksheer joint was made at Bulkhead G and, again as I did with the spar deck pieces, I was able to bend the forward planksheer strips by simply holding them under running hot water for a minute or so. All in all, no issues, especially since I had done the same process earlier for the spar deck. The closeup pictures of the waterways and planksheers also reminded me that I need to give everything a nice bit of sanding, too, before painting them! I’ve been wavering a bit on what to do next… either the gun port framing on the gun deck or the planking on the gun deck. I believe the gun port framing will be next, though. I also need to do some more work back in the Commodore’s Cabin area, which will affect the planking, as well, so… onward to lots of gun port framing! Appreciate the quick peek, comments, advice and criticism.
-
Your Pram is looking great, sir. Excellent work! And no visible blood stains from your culinary injury! I'm a big fan of Tamiya White Putty. It is advertised primarily for plastic models but can also be used for wood application. It has worked well for me.
-
Your rudder work at the stern looks awesome, Peter! Excellent! And... as we have all said at one time or another on each other's build logs... while we all strive for perfection and see the "little oops" in our own work, no one is going to be taking a magnifying glass to your work once it's completed and in the display case. The picture view you are sharing with us is what everyone will see once completed. I'm not saying don't fix what you are seeing, but... ok, nevermind... we're all going to fix our "little oops", anyways. CARRY ON, SIR! 🤷♂️🤣🏆
-
These look great, Chuck! Have you seen any 3D printing plans for the 32-pound carronades with the elevating screws? I have seen one other company that has created those, but always curious to see options.
-
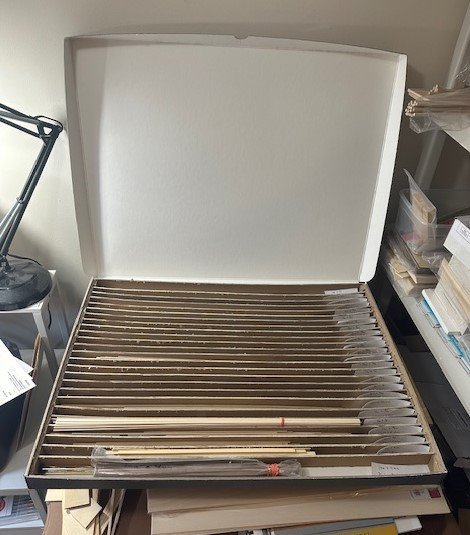
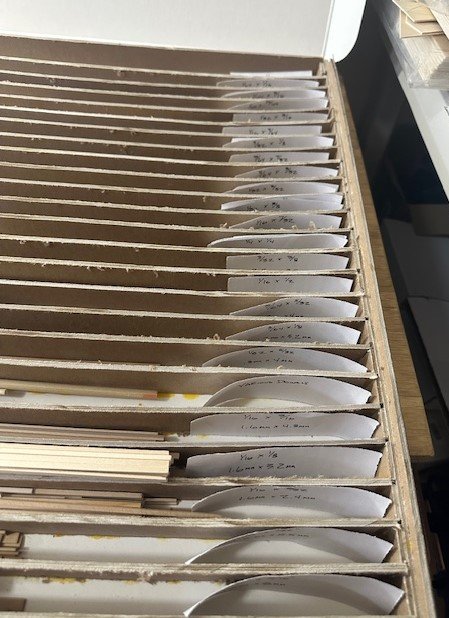
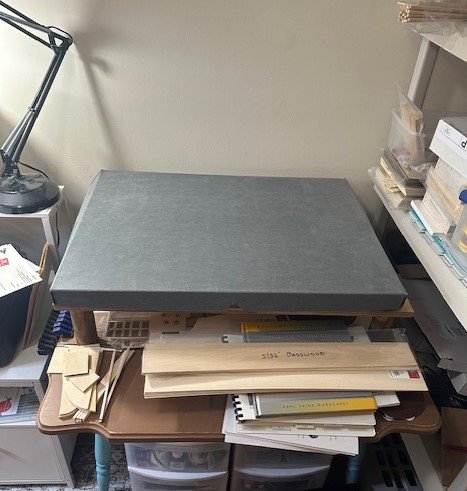
I am a bit late to the conversation, but a few years ago, I purchased from Blick Art Materials a 22" x 30" x 1-3/4" archival storage box and a few sheets of chipboard for the dividers and made a storage box for my various wood strips.
-
Peter, in a shipbuilding zoom meeting I participated in yesterday, a gentleman suggested using 3M Marine Adhesive Sealant 5200 for adhering copper plates to the hull of a model ship. It sounds like that would work well with brass to wood, perhaps, as well. Several others chimed in and said they've used it successfully, too. Perhaps worth a go?
-
Both excellent suggestions/reminders! Thank you, gentlemen! Much appreciated!
-
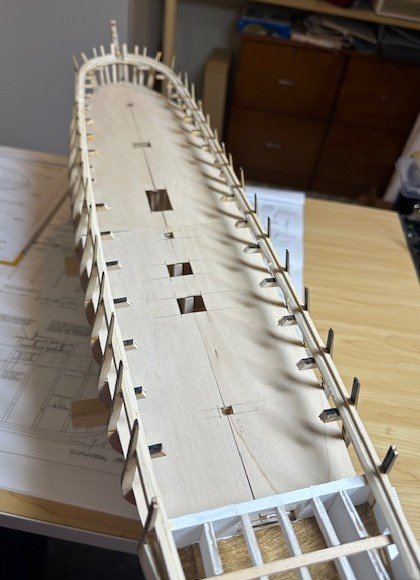
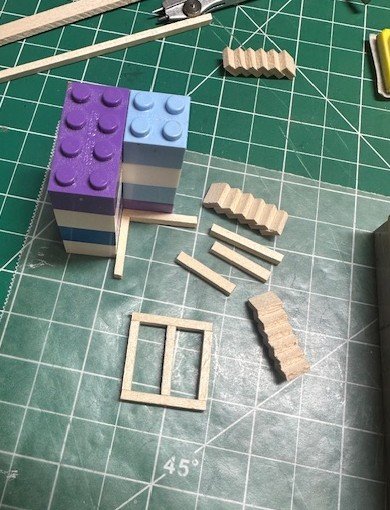
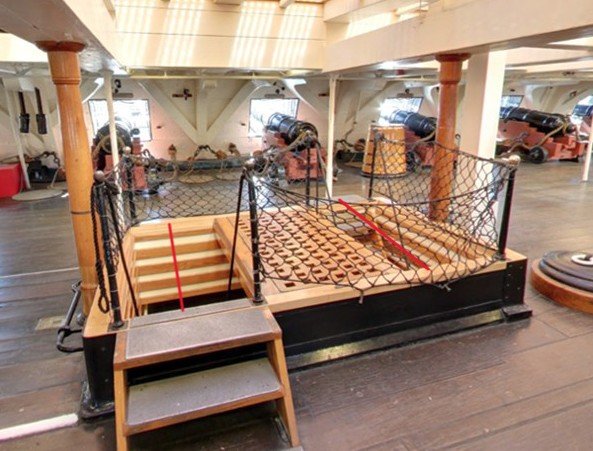
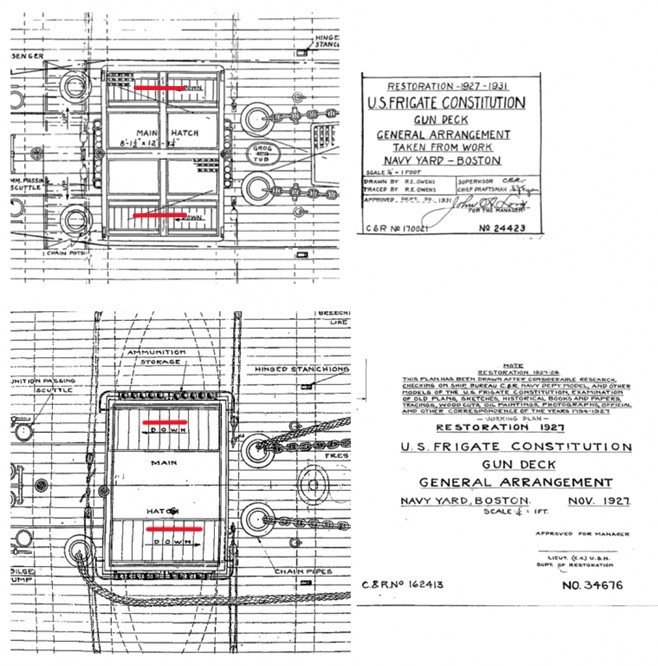
Well, I completed two of the three steps that I intended. My shipyard work this past month has had its share of interruptions, with a trip to Iowa for one extended weekend plus with the Thanksgiving holiday, but I did get some work done on my Constitution, albeit at my slow and deliberate pace. After making the changes in the main hatch position, I was now ready to secure the false gun deck to the bulkheads before beginning the additional work on the gun deck itself. A fairly easy and straight-forward process of gluing each of the four individual false deck pieces in place and, using some spare square dowels and longer rubber bands to hold the false deck in place while the glue dried, the false deck was secured. The pair of aft hatches that are located on either side of the capstan were the simplest to build, as there was no grating involved. Simply two sets of stairways with the ladders facing athwartship (I learned a new nautical term!). With all of these hatchways, I am using 3/32” x 1/4” basswood stock for the frames. In a previous post, I described how I built the lower ladders that go from the gun deck down to the berth deck. Since these will be difficult to see details, these stairs are simply small blocks glued together in a stairstep fashion. The lower railing stanchions are blackened 0.81mm brass rods. I used a different process this time to blacken the rods. After dipping them in white distilled vinegar to clean them, I painted them with the JAX Pewter Black product using a Q-tip cotton swab, then rinsing in clean tap water. I have been really happy with the results! For these lower “berth deck” level stanchions, I used a spot of CA glue to secure the 0.25mm rope for the rope railing. I am, of course, leaving lengths of railing rope loose at this time to eventually place the gun deck level stanchions at the appropriate time. In my last build log post, I mentioned how I was switching, or pivoting, the position of the main hatch so that the ladders were in a forward/aft direction rather than side/side direction (or athwartship, as I learned a new nautical term!). As others have previously indicated, there are several plan interpretations of how the main hatch looked. One configuration that I recall Jon mentioning is the US Navy’s 1927 restoration work Plan #24423. But… is that the way the main hatch looked back in its 1812-1815 days? The plans from Bluejacket Shipcrafters are presented based on Larry Arnot’s research during this 1812-1815 period. What the heck, let’s use that configuration. They look pretty close to one another. I had also mentioned in my last build log post that I was going to use Mustafa’s process in creating the criss-cross hatch grating work. After that comment, I found some flat pearwood grating strips on Dry-Dock Model’s website. They were advertised as being 1:72 scale, so they are close in scale to our 1:76.8 scale. Their grating slat spaces are only 1mm in size, which is closer than what I was planning on doing on the mill at 1.4mm. A 1mm opening converts at our 1:76.8 scale to just a smidge above 3 inches, which is probably a more accurate hatch grating size, anyways. So, I went with these grating strips. Using the aforementioned Bluejacket plans, I wrote up a sizing plan for my Constitution’s gun deck main hatch, which helped me keep things organized while cutting each of the grating pieces to their accurate size, along with the stairs in each corner. And, of course, I have to include a couple of my magnetic box and Lego building pictures… Although none of these hatches have been firmly secured yet to the false gun deck, I placed them all in position to see how they were going to look. First, a quick peek at how the ladders look under the false gun deck (noted with the drawn red line)… And a shot of the full false gun deck with each hatch in place… A close-up of the forward gun deck hatch… A close-up of the main mid-ship gun deck hatch… And, finally, a close-up of the aft gun deck hatch, where the capstan will be placed in between… I am happy with how the hatches (and gratings) came out on this gun deck. I’ll decide in due time whether to use these same Dry-Dock gratings on the spar deck or attempt to make my own. What I need to work on now, though, are the gun deck waterways. Oh, one more thing. Before it gets too late and I forget, I made the necessary cuts and notches in each of the mast dowels so that they fit properly and snuggly in their respective spots on the gun deck. Of course, once the spar deck is built, we want to be able to slide these masts down into their respective gun deck positions and secure them. The notches done now will assist in that endeavor. Appreciate the peek-ins, the comments, and the criticisms. Thanks for your support.


-
USS Constitution by mtbediz - 1:76
GGibson replied to mtbediz's topic in - Build logs for subjects built 1751 - 1800
Excellent work, Mustafa! Nice use of the jig. What is the distance between upper and lower deadeyes that you were achieving? -
That's the exact brand and Alizarin Crimson Hue color I used on my lower hull, with the Liquitex Basics Acrylic Mars Black as my choice for the black portion. I am not a good spray painter, and these colors brushed on really nice for me. Also, if you haven't already prepared for it, I highly recommend using Tamiya masking tape to help create the sharp lines between colors. Nice hull work on your Bluenose, Terry! Carry on, sir!
-
Have fun with this little boat, Jasennord! It was a nice ship to continue to learn skills on. Although I don't recall the exact issue now, I'd have to look back at my build log to hopefully jog my memory, but be cautious when you get to the point of trimming the transom, as I don't think the kit's measurements were exactly accurate to what you really needed to do. It looks like you have a great start on the planking! Enjoy!
-
And keep reminding yourself... "It's a journey, not a race to finish." Best wishes and have fun!
-
USS Constitution by mtbediz - 1:76
GGibson replied to mtbediz's topic in - Build logs for subjects built 1751 - 1800
Great to see you starting on the rigging, Mustafa! Will be an entertaining and informative following. And I appreciate your decision on the non-sails. I recall you were on the fence as I read your early posts. Not having sails will allow your family and friends to see your magnificent work even clearer. We all aspire to build a "Mustafa-quality" Constitution. Congrats on achieving this crossroad, my friend! -
USS Constitution by mtbediz - 1:76
GGibson replied to mtbediz's topic in - Build logs for subjects built 1751 - 1800
The day that I was there in Boston in September it had rained overnight and was misty that morning, so much of the spar deck details were covered. And I was also unable to get anywhere near the bowsprit area that Jon was requesting, too. There was a port-a-potty in the way! 🤷♂️🤣 -
Thanks, Jon! I've been looking back at your build log multiple times for guidance. Thanks, Peter! This is where I say "hold my beer", though, as I'm confident I'll screw it up somewhere along the way. Thanks, Mustafa! And a great reminder on the wood grain. I thought I had the right size mill bit, but... so it's on order and working on a couple other areas.
-
Very creative and successful way to make the double eyebolts, Frank! Nice work! Will need to remember this when the time comes. 👍
-
Getting Started: From Dollhouses to the USS Constitution
GGibson replied to Jasennord's topic in New member Introductions
Welcome to Model Ship World, sir! You will love the support and resources you will find here. I have absolutely enjoyed my time here. With no prior model building experience to speak of, I quickly learned that I needed to start small and build confidence before I built ships. So, I built two of the Model Shipways combo series boats, and then three more ships before I felt I had the confidence and experience to tackle the Constitution. I have recently begun that journey. With your prior model building experience, you will undoubtedly do well with whatever ship you choose next. Best wishes and be sure to begin a build log. As I said earlier, the available support and resources here on MSW are endless. Have fun! -
USS Constitution by mtbediz - 1:76
GGibson replied to mtbediz's topic in - Build logs for subjects built 1751 - 1800
Looks like a fascinating trip, Mustafa. Amazing history in that region! And a great looking family! Curious what do your grandchildren call you? In the USA, we have several variations of what our grandchildren call us, anything from Grandpa to Papa to Gramps, and others. In our family, I am Papa to my 5 grandkids, and I love hearing that word every time it is uttered! -
Carronades with the screw elevation look good!
-
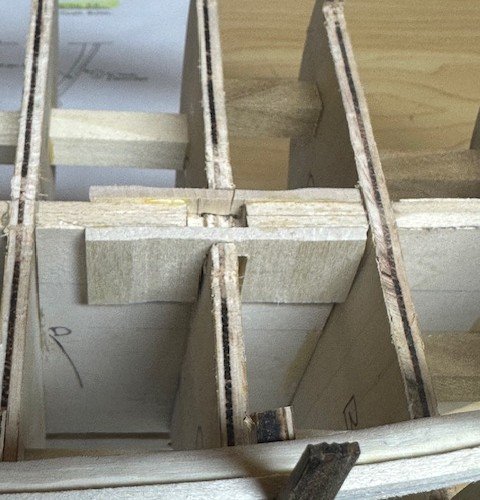
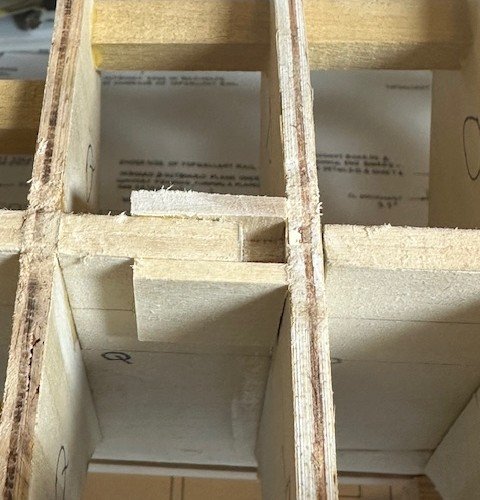
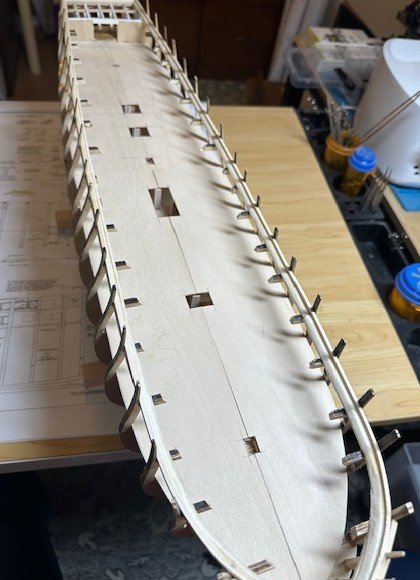
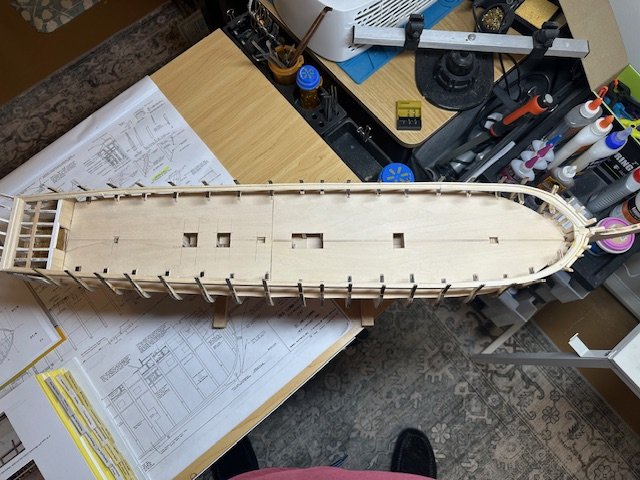
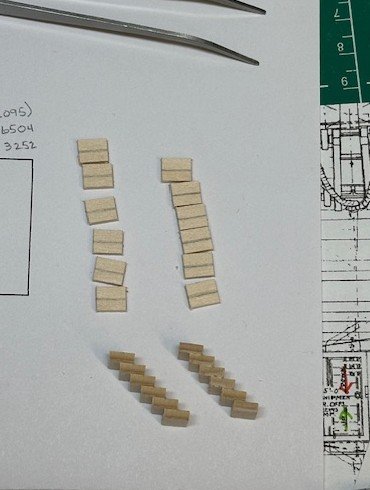
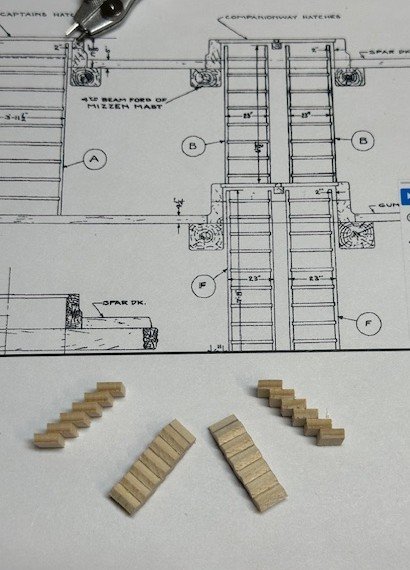
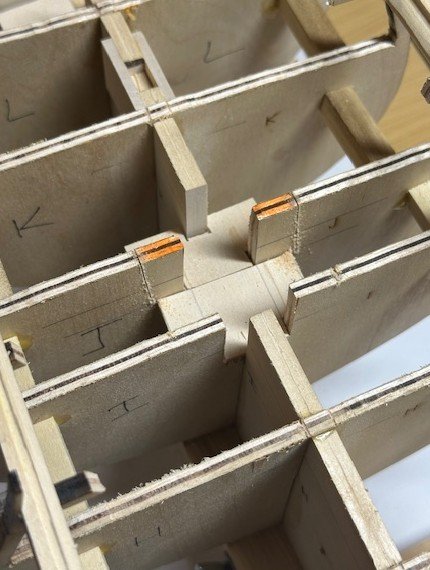
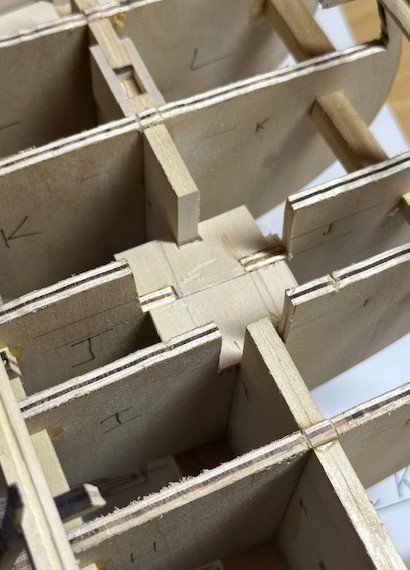
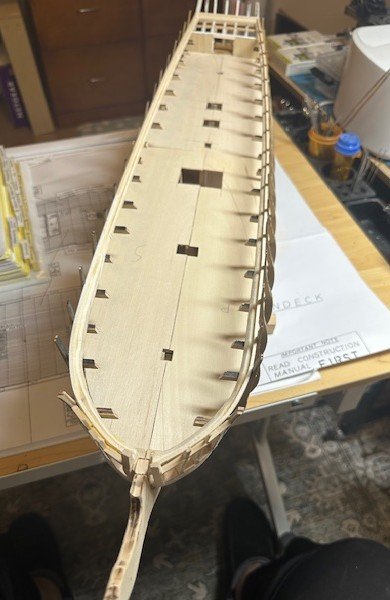
A little report on what I’ve been working on… and what I’ve been thinking about. Before I firmly secure the false gun deck, I need to provide some additional support or reinforcement for the masts, as others have done at this stage. For the mizzen mast and main mast reinforcements, it was simply a matter of placing some small 1/8” thick stock on either side of the bulkhead former. Since the foremast location is right at where a bulkhead crosses, that reinforcement piece had to be notched in order to fit. Took a few sanding efforts for it to slide in securely on either side. Next task was to make the false gun deck using the gun deck template. As I mentioned in my earlier post, I made these panels in four pieces in order to fit down on the gun deck level and get past what’s left of the spar deck support beams that were trimmed. As you can see from the pictures above, I made the cuts in the false gun deck at the mast locations, as well as where the faux stairs going down to the berth deck will be located. As I am writing up this build log after-the-fact, I do not recall which plans I was using to mark the necessary openings, but you will notice that the center stairs hatch opening is the same width (port to starboard) as the fore and aft hatches. More on that in a bit. To replicate the stairs going from the gun deck to the berth deck, I used a simple technique that Mustafa used for these stairs. Since they will not be able to be seen in intricate detail but just need to give a simple impression of stairs going to a lower level, I thought this was a great solution. According to the USN plans, these stairs are 23” wide, which converts to 0.33” scale. After creating the stairs, I began work on the gun deck hatches that these stairs will be attached to. These hatches were 1/8” tall, which converts to a “real” height of 9.6”. However, after I made one complete hatch, I reviewed plans and pictures again, and I am going to redo the hatches using 1/4” high edges, which I think will look better. They will have a step-up on the outside of the hatch stairs, as well, which is how the current hatches appear. So, back to the center stairs issue. As I have stated already several times in this build log, my intent is to replicate, as close as I can, the 1812-ish Commander Hull version of the Constitution. As Jon Gerson so aptly described back in his Post #197 in March 2018, the gun deck’s center hatch configuration has changed multiple times, including the 1927 and 1931 restorations and its current appearance. What I noted as differences between the above plans and how the Constitution currently looks is the direction of the ladders going from the gun deck to the berth deck. While the current configuration has the ladders positioned “east-west” or port to starboard, the older plans show these ladders positioned “north-south” or bow to stern. Interesting! And I also learned that the Bluejacket plans, which are focused on the War of 1812 era configuration, have these ladders in the “north-south” position, as well. So, that’s what I am going to do. To do this, that center area needs to be widened to accommodate the stair repositioning. So, the cuts I had initially made in Bulkhead J need to be made bigger. One of my Zona saws made quick work of that and the Dremel cleaned up the bottom. I then re-cut the two forward false gun deck panels with the larger center hatch area. Everything seemed to fit well and looked good. So, I think my next steps are going to be securing this false gun deck to the bulkheads, installing the gun deck waterways and work more on the various hatches. Using another one of Mustafa’s techniques, I am going to attempt making the gratings, rather than using the kit-supplied gratings. Once again, Mustafa showed his technique that he saw on another person’s build log. I will try that. One thing I quickly learned, though… in making these hatches that will have gratings in them, make the gratings first. We’ll see how things go. On to the next set of challenges! Appreciate the likes, comments and criticisms.


-
Nice work, Peter. Your ship looks great! Quick question, though, to show my ignorance. How are the belay pins getting in the way of the chain plates and channels? I'm not visualizing the concern. Wouldn't the work for each be on either sides of the rail? I can see, though, having the belay pins in before working on the shrouds so they are easier to secure in their place without the rope lines in the way. Just a curious question...
-
USS Constitution by mtbediz - 1:76
GGibson replied to mtbediz's topic in - Build logs for subjects built 1751 - 1800
Well, there is a distinct difference between having the luxury of soldering and the luxury of doing soldering well ! You have the latter ability, Mustafa! I'll have plenty of practice, though, as I get deeper into my own build. Not to get ahead of your discussion in what you are probably about to work on, but what are you going to use for the netting in these stanchions? I've seen others use tulle, which I was unfamiliar with until I saw others using it for purposes like this. I saw that Jon used it on one of his last builds, as well. Exciting to see you moving forward with all of this!


