GGibson
-
Posts
1,087 -
Joined
-
Last visited
Content Type
Profiles
Forums
Gallery
Events
Everything posted by GGibson
-
 That's the plan! Which is why I've been following each of your Constitution builds with fervor and admiration. Great question, Peter. But I'm still not sure where I will land on which Constitution version/year. It will be "bashed", though, in the respect that it will have a completed gun deck. As I said above, and as most of you know, I have been following each of your current build logs, as well as researched some awesome completed builds from guys like xken and usedtosail, and... to Jon's point earlier, almost every one of your builds has some type of nuanced differences. So, we'll see where I land on it. Anxious to get to it... but need to finish the rigging on this Santa Maria first!
 -
Don't be afraid to ask Vanguard if they can replace the lost/missing blocks. Many of these quality ship model companies will replace parts at no cost if you bought the kit from them. Otherwise, my best recommendation is to look at Syren Ship Model Company for your blocks. Rigging Blocks for ship models - scale boxwood blocks- swiss pear-2mm scale rigging blocks|3/32" scale rigging blocks and pulleys
-
I purchased Bob Hunt's Constitution course in preparation of my build, have reviewed much of it and am sure I will refer to it periodically during the build process, but will honestly look more at each of your processes (both the successes and struggles). For that, I continue to be grateful!
-
Gee, thanks a lot, guys..!?! 🤷♂️🤣🤣 And... nice solution to your issue, Peter. Looking forward to seeing how it all looks. 👍
-
USS Constitution by mtbediz - 1:76
GGibson replied to mtbediz's topic in - Build logs for subjects built 1751 - 1800
Nice solution, Mustafa! And I've got plenty of 0.51mm brass rod around here (and know where to get more)! And something that small probably doesn't need much primer, does it? The paint itself adheres satisfactorily? The added primer would probably make it too thick and gunky, too. Continued awesome work, sir! -
In looking at the search history on the discussion of forceps, I did not see anything specifically related to my query, so thought I would throw it out for discussion. I have a couple of locking forceps that, as memory serves, I probably picked up through Amazon. I use them regularly to hold my blocks when prepping them for rigging. I am finding, though, that when working with the smaller 5&6mm sized blocks, the forceps sometimes crush the block, as the squeeze is so tight when locked. What are others using to hold their blocks? If using forceps, have you found ways to "loosen" them just enough to not be crushing? Are there certain designed forceps that work better? I would assume the length between the forcep hinge and the tip where the block is held would have something to do with the force strength. Any recommendations on what type has worked best is appreciated.
-
USS Constitution by mtbediz - 1:76
GGibson replied to mtbediz's topic in - Build logs for subjects built 1751 - 1800
Sea steps look nice, Mustafa. Well done, sir! Since you are gluing those to a painted surface, did you have any problems with adherence? At this scale, would it help to use some brass rods to assist in securing the steps to the hull, or would that be a bit of overkill? Looking great, Mustafa! Sorry for always interrupting your build log with silly questions and comments. 🏆👍 EDIT: Oops! Based on your response below, I just realized I missed your picture you posted above with the brass rod support. My apologies! -
USS Constitution by mtbediz - 1:76
GGibson replied to mtbediz's topic in - Build logs for subjects built 1751 - 1800
I think it was this post (Post #488) by Jon on Peter's build log quoting the USS Constitution Museum's info. -
USS Constitution by mtbediz - 1:76
GGibson replied to mtbediz's topic in - Build logs for subjects built 1751 - 1800
Hello gentlemen! I was interested in Mustafa's post regarding the bow rail, as well, as the current "version" of the Constitution does not have a bow rail, but was waiting on you experts to have the discussion before I weighed in. Peter, I have referred to the Constitution's online guided tour a million times. The issues you may be having in opening the guided tour completely (they ask if you are a teacher, student or simply an adult history fan) is what browser you are using. After using Microsoft Edge as my preferred browser for years, I decided recently to switch to DuckDuckGo and I was having problems opening this guided tour using that browser (as well as some other issues), so I've switched back to Microsoft Edge. I can't speak to the reliability with other browsers, but that may very well be your issues with not being able to open properly. With all that said, the current guided tour does not show a bow rail. Just another question for me to resolve on which restoration period I will shoot for once I get to my own build. As always, though, gentlemen, I appreciate the wealth of information y'all provide me. Looking awesome, Mustafa!! -
Hello, Benjamin. Sorry to hear of your packaging issues with Model Shipways! That would definitely be disconcerting to receive the plans folded like that. The issue has to be with the staff person that prepared your shipment. I don't think that is their normal process. More than a year ago, I purchased the Model Shipways USS Constitution for a future build, as they were offering a special discount on purchases that I could not pass up. Fast forward to just a few weeks ago when, in preparation for that build as soon as I am done with the current one, I ordered another set of USS Constitution plans from Model Shipways in order to have an extra original set (granted I purchased these extra plans rather than having them send a free copy). But, to your point about shipping. they sent me the plans rolled and in a hard tube, rather than folded multiple times to fit in a box. Why they would not have done that with any plans like that is upsetting. Perhaps contact them again and express your concerns? I've always been impressed with how Marc Mosko (company president) handles customer service. And, best wishes on your Bluenose! It was a beautiful ship to build!
-
Appreciate the kind words, Peter, and no worries on your following. I'm just really anxious to get this Santa Maria done (working on rigging now), so that I can "catch up" with you guys on the Constitution... in five or six years... 🤷♀️🤣
- 58 replies
-
- 1
-

-
- Santa Maria
- Ships of Pavel Nikitin
- (and 1 more)
-
USS Constitution by mtbediz - 1:76
GGibson replied to mtbediz's topic in - Build logs for subjects built 1751 - 1800
We can all concur with Jon's summation, Mustafa! Awesome work! Will definitely be referring back to your process here when it comes to my Constitution's capstan. 🏆🏆 -
Double eyebolts you made look great, Peter! And always interested in seeing other variations of pin vises. Will keep in mind.
-
USS Constitution by mtbediz - 1:76
GGibson replied to mtbediz's topic in - Build logs for subjects built 1751 - 1800
Great work on the binnacles, Mustafa! Showing me all sorts of ways to use that mill! 👍🏆 I find it interesting that Model Shipways' USS Constitution Instruction Manual discusses the binnacle on page 23 and I'm assuming addresses it in the plans (although mt plans are still neatly folded in the Model Shipways book on the shelf), yet the binnacle is not on display in the online USSC Virtual Tour (actually you don't see the ship's wheel either, so maybe both were under repair when the virtual tour video was created) and you don't see the binnacle placed in the Spar Deck General Arrangement plans on the museum's Modeler Resources page. 🤷♀️ Love seeing all your spar deck details, Mustafa! -
USS Constitution by mtbediz - 1:76
GGibson replied to mtbediz's topic in - Build logs for subjects built 1751 - 1800
Why do I hear the Jeopardy theme in the background?!? 🤷♀️🤣 Awesome work by both of you gentlemen! Inspiring! -
Question re: Rigging Multiple Blocks at One Location
GGibson replied to GGibson's topic in Masting, rigging and sails
And here I thought all I needed to say was "Arrrrrrrr..." 🤷♀️🤷♀️🤷♀️🤣 Thanks, Phil! -
Question re: Rigging Multiple Blocks at One Location
GGibson replied to GGibson's topic in Masting, rigging and sails
Thank you, Rich, for the additional explanation! And thank you, Henry, for your information. The order in which each fitting should be placed on the yardarms is great info that I was not aware of previously. This is all the exact info I was looking for. Appreciate your help, gentlemen! The bowsprit does have multiple cleats for which various lines are resting against them. This spar/yardarm attached to the bowsprit, though, did not have any cleats shown in the plans. The ends, however, are tapered such as to create its own cleat (don't know that technical nautical term, either), although it may be hard to tell in the drawing. Again, guys, appreciate your input and guidance. Y'all are awesome! -
Question re: Rigging Multiple Blocks at One Location
GGibson replied to GGibson's topic in Masting, rigging and sails
Thanks, Rich. Thanks, Phil. Appreciate the input from both of you! Phil, thanks for directing me to your post with diagrams. Helps to visually see the differences. Appreciate the guidance, gentlemen! Gives me confidence in moving forward. 👍🏆 -
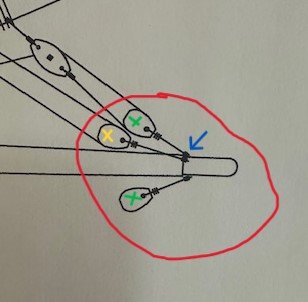
Anyone have any advice or recommendations on the best way to rig multiple block lines to a single location on a spar or mast? In the plans for my Santa Maria shown below, there are a couple locations like that depicted where this situation occurs. My best solution is to rig the two blocks noted with the green X's with one line and wrapping the line a few times around the spar. The line for the yellow X'd block would then be slipped under the wrapped green line so that when the green blocks line was tied securely with perhaps something like a rolling hitch, the yellow block line (probably with its own knot, as well) would hold. Any different recommendations on how to best secure these lines? Thanks...
-
USS Constitution by mtbediz - 1:76
GGibson replied to mtbediz's topic in - Build logs for subjects built 1751 - 1800
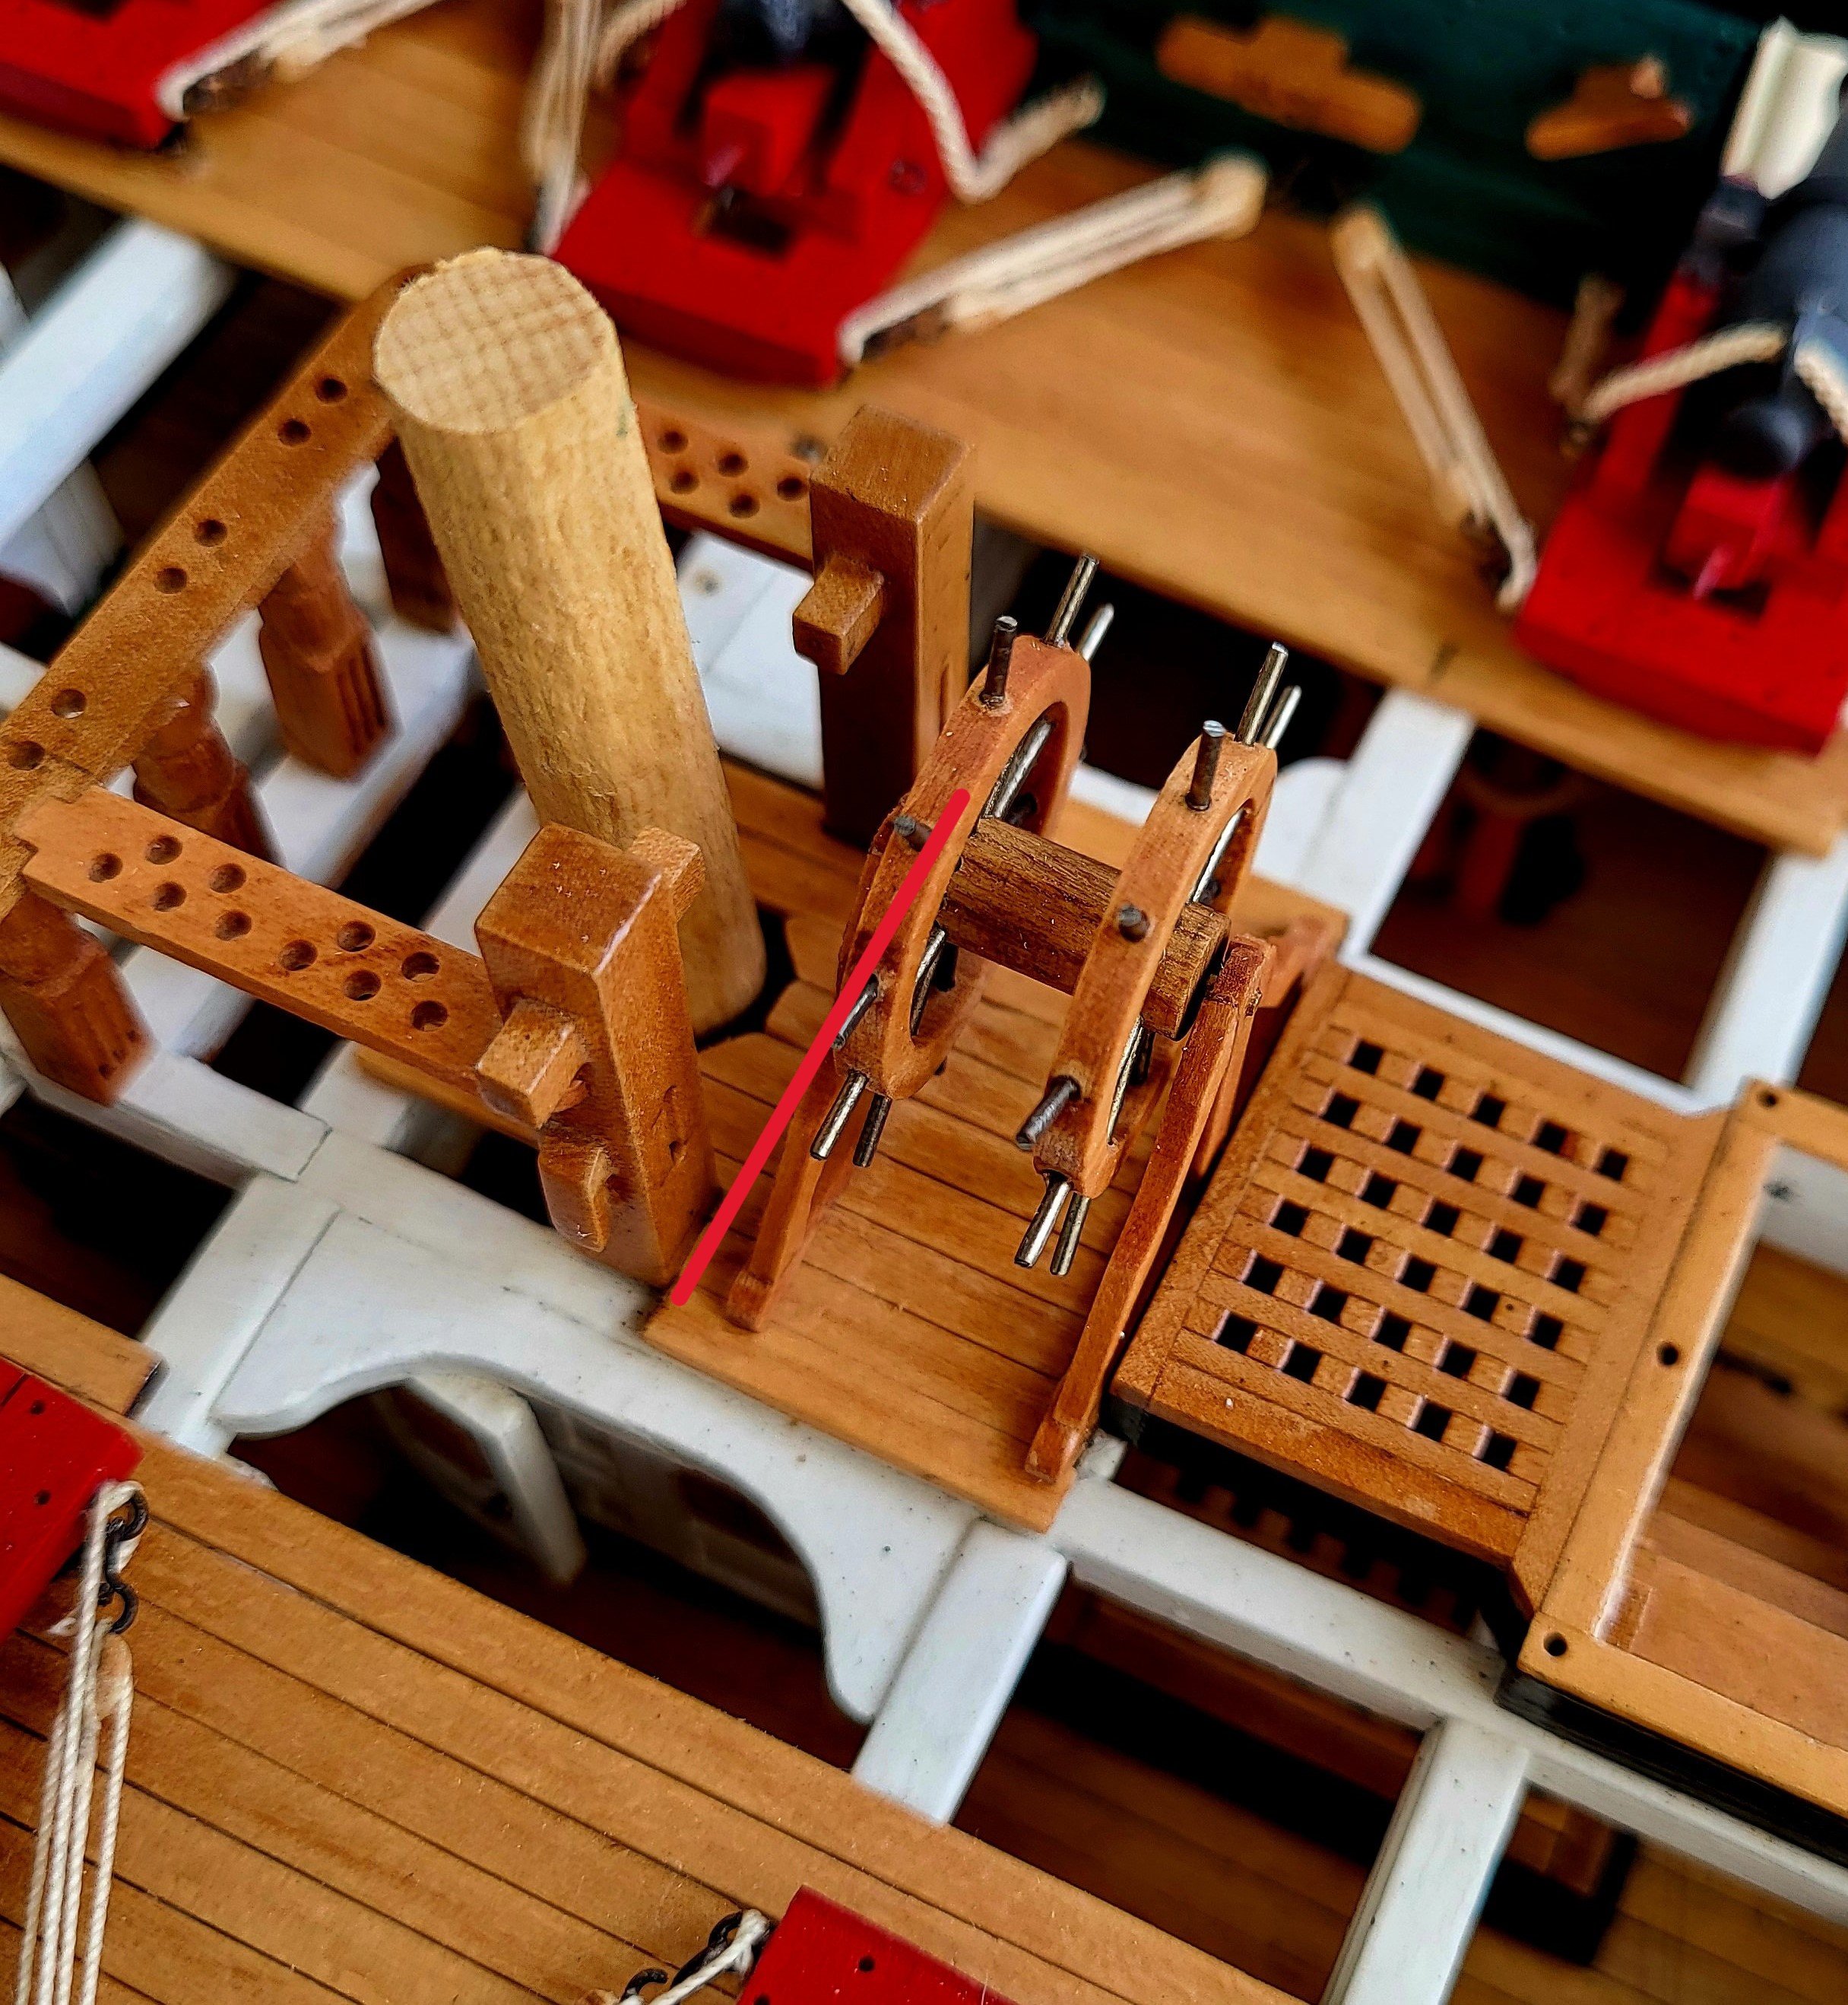
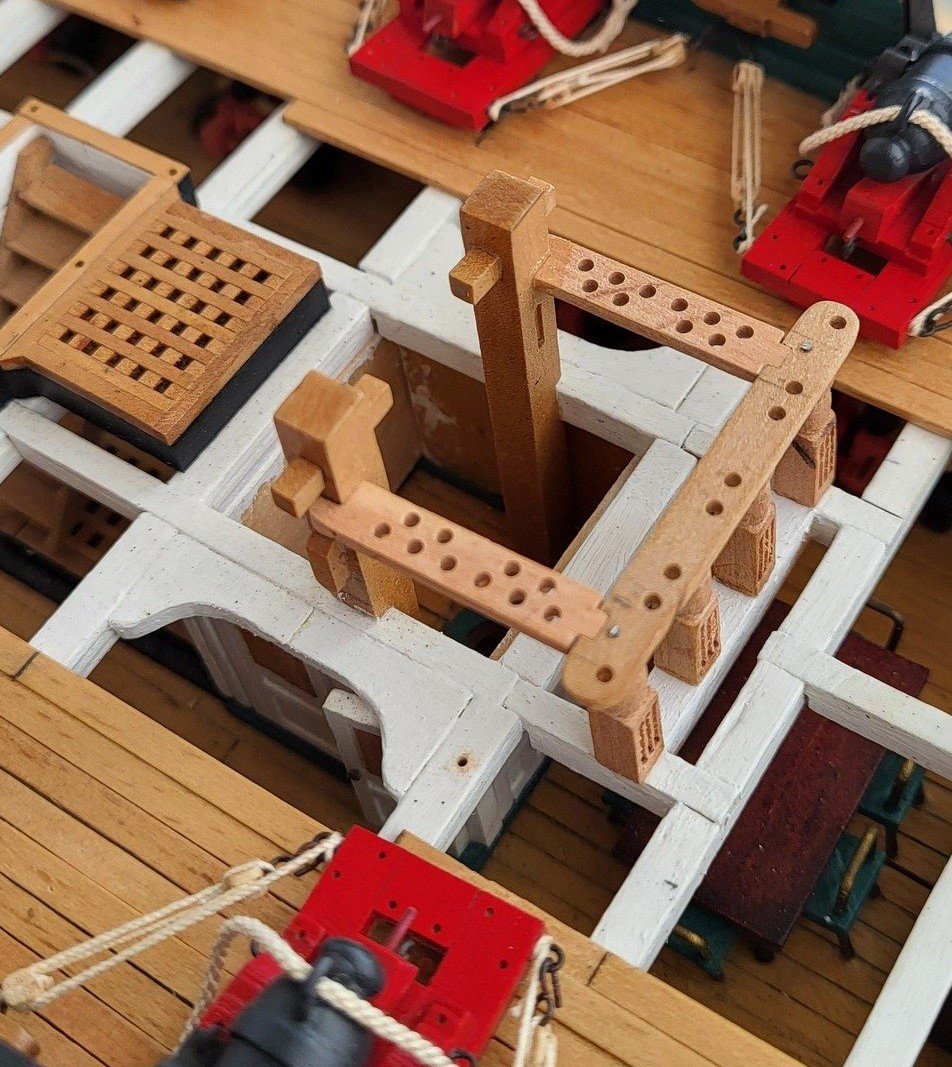
One more silly, stupid question before the end of my day, Mustafa. Just so I understand how you are doing your awesome work. You placed the decking under the ship's wheel and brought it back so it begins to surround the mizzen mast. In order to do that, to have the decking rest solidly, I'm assuming you placed some type of "dummy" support beam between the fife rail and where the ship's wheel sits, somewhat like where I drew the red line in your picture below? I will also assume you will also place decking, then, on the aft side of the mizzen mast, as well, to help support the mast and to have the mast base (can't think of its proper name now) sit on. Again, apologize for taking up space on your build log, but I love to see how you are doing things with this exposed deck. Thank you, sir! Carry on!
-
No idea which "batch" my order fell under, but received my Ship Modeler's Handbook in the mail today! Even with the unreliability of the USPS! 🤷♀️😆 Thanks, Mary! Will be excellent plane reading material during my upcoming weekend trip.
-
USS Constitution by mtbediz - 1:76
GGibson replied to mtbediz's topic in - Build logs for subjects built 1751 - 1800
OK, so this was very interesting to me. My apologies, Mustafa, for taking up this space in your build log. Your ship's wheel looks awesome in its place on the deck! Great pictures, Jon. So, I wondered where do those ropes wrapped around the drum go after they go through the spar deck?!? Should we be able to see them somewhere on the gun deck, then? Well, I did my own research (I've learned so much from you guys!), and found the plans on the USS Constitution Museum website related to the steering. I saved these files as pdf's, and can't figure out how to show them as a picture here, but hopefully the pdf will open up ok. It appears the cables go through the gun deck and then travel along the ceiling of the berth deck where they attach to the tiller and the rudder. Very interesting! It appears that on the gun deck, they are going through some sort of conduit located in the Commodore's pantry (circled in red on the PDF), which is why we don't see it on the Museum's virtual tour website. Jon may have been able to get in that area during his actual visit to the ship. Anyways, I thought that was interesting, and thanks to Jon for pointing out the cable on the ship's wheel drum. Again, this all looks fantastic on your Constitution, Mustafa! Steering_Cables.pdf -
I'm a little late to the discussion, but I am just starting to rig the Pavel Nikitin Santa Maria, and in my first few cuts of his 0.45mm beige rope, the strands are unraveling on me as they are cut. Not happy about that. I previously used his thicker 1.3mm black rope and it was ok. So, looks like I might be relying on my supply of Syren and Ropes of Scale inventories, as I have used them in the past with great success.
-
USS Constitution by mtbediz - 1:76
GGibson replied to mtbediz's topic in - Build logs for subjects built 1751 - 1800
Absolutely excellent work, Mustafa! You really do make it look simple. Getting those drill holes spaced such that each of the rods fit perfectly. Impressive, sir! And, yes, the proper tools certainly help! I have the dividing attachment, as well, for my drill press and mill but have not used it yet. Dividing Attachment for MF 70 – PROXXON Inc Nice to see how it can be used for making these measured cuts. -
USS Constitution by mtbediz - 1:76
GGibson replied to mtbediz's topic in - Build logs for subjects built 1751 - 1800
Watching and (hopefully) learning from the challenges and successes that each of you gentlemen have faced in your individual builds has truly been instructional and inspirational. You all will still be hanging around here in the next five or so years (plus or minus) to be entertained by my Constitution challenges, right?!? 🤷♂️🤔🤣