
HOLIDAY DONATION DRIVE - SUPPORT MSW - DO YOUR PART TO KEEP THIS GREAT FORUM GOING! (Only 51 donations so far out of 49,000 members - C'mon guys!)
×

GGibson
-
Posts
1,042 -
Joined
-
Last visited
Content Type
Profiles
Forums
Gallery
Events
Everything posted by GGibson
-
 If you fill the gap on the stern side, the seat that is placed there should hide it well. Looking good, sir. 👍
 -
Ken Foran's brass work was amazing to see in his Constitution build log. So much so, that I purchased his book, although I'll probably never be good enough to use half of the techniques he described! 🤷♂️🤣 Sounds like a lengthy to-do list, Peter! Will be fun to watch you continue your progress! 👍
-
Looks great! Nice work! 👍
-
Absolutely exquisite work, TBE! Appreciate your background historical explanation and interpretation.
- 233 replies
-
- 2
-

-

-
- Model Shipways
- constitution
- (and 5 more)
-
USS Constitution by mtbediz - 1:76
GGibson replied to mtbediz's topic in - Build logs for subjects built 1751 - 1800
Awesome work, Mustafa! Did you paint and stripe these last planks off-ship before gluing to the top head rails? I know your summer break is coming up quickly. Enjoy your vacation! 🏆👍 -
Your anchors and anchor rigging all looks really good, Unegawahya! Sharp construction! Ironically, Easy Dope used to be my nickname back in college in the 70's... 🤷♂️🤫🤣 (j/k!!)
-
Based on how Henry phrased his question, I am assuming he is referring to PDF files that are attached to posts. For testing purposes, I looked at the following post (found using "pdf" in the Search box), where EdT has numerous PDF files in his post. I am using Microsoft Edge, not Chrome, but I had no issues opening and/or downloading a handful of the files in that post.
-
CA (cyanoacrylate) "super glue"
GGibson replied to Dr PR's topic in Modeling tools and Workshop Equipment
Here's my "everything glue" picture. Previously, whenever I needed to use CA, I grabbed the Gorilla Super Glue with the Micro-precision nozzle. But, for the past few years, I have been using the Bob Smith Industries cyanoacrylate products, and have the extra thick, the gap filling medium and the super thin. To be honest, the super thin is really hard for me to control, so don't use it as much, but need to keep using it. They are great CA solutions, when needed. To apply, I grab a small wax paper square out of my stock (held with the clothes pin) and place a dab or so on the wax paper and use a thin toothpick. For my diluted glue supply, I have a bottle of PH Neutral PVA that I keep diluted in a small squeeze bottle with a needle applicator. That works really well, and I always have a Q-tip handy to soak up any excess (if needed) . In my current rigging of the Santa Maria, I have begun using the Sally Hansen Hard As Nails polish, which has come in super handy and convenient for the rigging knots. The built-in applicator brush makes it super easy to place a small drop on the rigging where needed, and it has a decent dry time to keep the job moving. And, of course, finally, the Titebond Original for all my wood gluing. I'm liking the Original better than the Premium. Anyways, back to Phil's original query, I am not familiar with the Locktite product but have seen it in the store. I had no issues with the Gorilla drying up, and have had no issues with the BSI products (although I do recap continuously when using.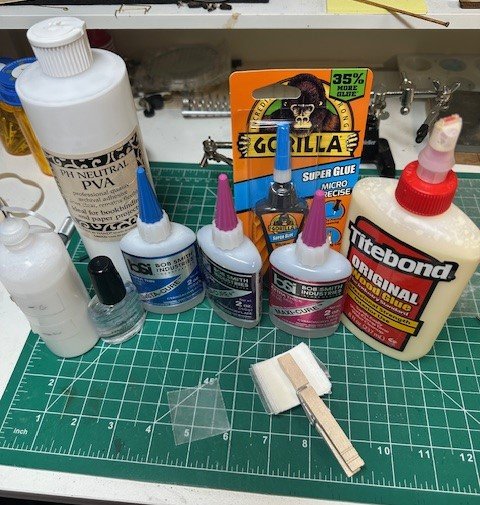
-
I'm hoping that a few of you at least do the rigging on your Constitution! Although I still haven't decided what Constitution era or version I will do whenever I get to mine, it was an easy decision to not do sails, but to do as much of the standing and running rigging as I can on it.
-
Looks good, Peter! And also remember what has been mentioned on countless other build logs... You are noticing things, as the artist, using a zoomed-in camera. Back up 2-3 feet with the naked eye and it's never noticed. 🤷♂️👍 Over the side somewhere! With one hand hanging onto a rope and the other hand... well, nevermind.... 🫢🤣
-
Canopy frames look really sharp, Jon. Your perseverance paid off. Carry on, sir!
-
I really enjoyed working on Caldercraft's Ballahoo.
-
Nah... what's the old saying about skinning a cat? Yours are looking nice, Peter! Love how the grates are looking. Grate work, sir!
-
USS Constitution by mtbediz - 1:76
GGibson replied to mtbediz's topic in - Build logs for subjects built 1751 - 1800
Yeah, I assumed, after you measured where the notches should be and milled them, you slid the supports in a bit sideways so they clear the rails and then pivot them into position. Excellent work. Another winner I need to remember! -
USS Constitution by mtbediz - 1:76
GGibson replied to mtbediz's topic in - Build logs for subjects built 1751 - 1800
Looks like you made a wise decision, Mustafa! Your supports are fitting between those rails like hands inside a glove. Especially interesting how you made the notches in the supports for those lower rails. Anxious to see how you finish this area up. Great work, as usual, sir! -
Best White Wood Glue For Ship Building
GGibson replied to OldeManToad's topic in Modeling tools and Workshop Equipment
Hey Phil! A great, comprehensive response to many of the "gluing solutions"! I have read a lot here on MSW regarding the advantages of using shellac in securing our rigging. My question with that, though, is... what does someone use to transfer the quart or gallon-sized can of shellac you purchase at the hardware store to something you can use at your shipyard bench in order to place a drop on your rigging knot? Can the shellac be placed in the same type of small plastic needle tip applicators that we use for our diluted glue? Or are we just pouring small portions of shellac into a shallow cup or bowl and use from there? Some type of applicator would be great and would probably create less waste. Appreciate anyone's input! -
Best White Wood Glue For Ship Building
GGibson replied to OldeManToad's topic in Modeling tools and Workshop Equipment
Maybe a bit late to the responses, but awhile back someone here recommended using diluted PH Neutral PVA glue (I put the mixture in a needle tip squeeze bottle) for gluing rigging, which works well for me, but I do use the Titebond Original for my wood-to-wood gluing. To undo it, apply some heat using something like a soldering tip. For wood filler, I have had good recent success with DAP Plastic Wood-X. If the container dries out fast, the DAP folks told me to add a drop or so of water to soften it up. 🤷♂️👍 -
Thanks for this info, Chuck! I had not heard about this. I was a first-time customer of Malco back around Christmas time, when I purchased $200 worth of blades for my Byrnes saw. The blades I have used so far have worked very well. Hope the quality stays high.
-
And good luck with THAT! 🤷♀️🤣👍 Honestly, Peter, speaking as the odd man out from where all you guys are currently that I'm following on your respective Constitution builds, but... your bow area has looked awesome to me. Keep doing well, sir! I'm anxious and excited to get anywhere near this point. Carry on! 🏆
-
You can make them yourself, as both Desertanimal and CPDDET suggest (I've done the wrap-around solution a few times, and cut them with some flush cutters or snippers), or... I have had great success ordering from this small business multiple times - Creating Unkamen. Perhaps a dealbreaker, but FWIW, they aren't terribly fast in shipping. May take a few weeks as I think she told me they only make orders as they receive them, not a big inventory. But their quality is top-notch.
-
These all look great, Chuck! More "stuff" to add to my Syren shopping list once I get to my Constitution build. 👍🏆 I am curious, though, what are the specific purpose of the toggles? The Pavel Nikitin version of the Santa Maria that I am currently finishing has toggles in various locations on the running rigging and at the end corners of sails. I assume they were placed on these ships in order for the crew to pull down on as they secured the various lines to make them as taut as possible. Any other reasons/purpose? Continued success on your Syren operations, Chuck!
-
I've had recent success with Malco saw blades for my Byrnes saw as an alternative to the Thurston blades. Home - Malco Saw Company
-
Welcome back, Chuck! Everyone knows how great your blocks and deadeyes are, so... whoosh! They're gone! 👍🏆 I was going to ask if you've ever done triangular deadeyes?
-
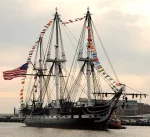
That's a beautiful ship, Peter! Awesome memories, I am sure! But, no! You'll have your Constitution completed (at least in the next 5 years, as you say 😆). The "someone in the future" I was referring to was me. Wondering what everyone thinks of doing an "open hull" version of the Constitution, displaying not only a detailed gun deck but also at least portions of the berth and orlop decks. Might be interesting! But yes, would add considerable time to an already lengthy build. Probably shouldn't plan something like that at the age of 70! 🤣🤣
-
There is a post in the "How to Use..." section - - that discussed how to create a PDF document from a build log. At the time I first saw this, back in November 2024, I tried it and it did work and I commented on it working well, but after-the-fact there was something about it that I didn't like and, of course, for the life of me, I cannot remember now what the issue was. It was either a size issue or a search issue or... whatever. So, this is what I have been doing, instead... and I stand corrected... I've been doing what Jon said he's doing. Copying and pasting to Word, pages at a time, cleaning up/deleting whatever gets copied that's not necessary such as signature entries, user profile pictures, etc. And, THEN, on the completed build logs, I have saved those to a good PDF file from the Word doc. All of your build logs that are still ongoing are still in Word format and I update and clean up pages periodically. So, I apologize for my mis-speak and, yes, Jon, it is VERY laborious, but it is an excellent way for me to read every bit that's been posted on y'all's logs from Day 1! 👍😄 OK, as long as I am already interrupting Peter's build log, did you gentlemen receive the email notice from Artesania Latina regarding their new HMS Victory? They have the starboard side of the ship exposed so one can see the details of each deck. HMS Victory 1:84 Wooden Ship Model Anatomy of English Vessel What are your collective thoughts about "someone in the future" doing a kit bash of the USS Constitution like this? I have always loved the idea of doing a detailed gun deck but have wondered how much of it would be truly visible once the spar deck and all of its "stuff" was properly placed, especially if placed in a glass case upon completion. Thoughts? Again, sorry, Peter, for clogging up your build log! 🏆
